Hey, can any of you offer any advice on installing the matt gecko led kit (upper & lower) onto a v2? I can’t picture how to route the wiring for the upper section down from the tent. The instructions describe running the wires outside on the v1, but only say that the v2 is inside, no suggestion on how to run the wires through the floor. Any help would be much appreciated.
I ran mine through the gap in the metal frame that the front floor tile sits on. On mine there’s probably 1/4” gap there, plenty of room for the small gauge wires.
2 Likes
I ran into this same issue. I tried to return the kit as the website states you can return anything even if you’ve installed it but he absolutely did not live up to that. Told me they would only accept uninstalled kits.
For the price I think the kit is sub par. The wiring is poorly designed and the red lights are too bright and should come with a dimmer. Super disappointed.
1 Like
I spliced the two “upstairs” Strips together, wired the switch per the included diagram( buy some smaller connectors the pink ones included were not appropriate for the small gauge led wires.)
I ended up drilling a small Hole into the front bed panel and dropping the wires “downstairs” after the switch.
Hope this helps.
1 Like
Yeah, I ended up finding a way to do it but I’m not entirely satisfied with it. I expect to play around with the wiring a bit more in a few places. Drilling a hole might be a better solution there.
I was afraid if I ran it between the two panels that the wire would end up getting cut. I has hesitant on the hole, but it seemed like a better option.
You don’t need to drill a hole, the panels have enough of a gap you can fit a 8 gauge wire through much less a 14 or whatever it is.
In fact I am able to send my solar wires and my lower level gecko led wire down below through the gap and wrap them with a sheath to protect them even more.
1 Like
I used some mastic tape to cover up the sharp edges so it doesn’t damage the wires.
2 Likes
You guys have any pictures of where you ran the wires. Thanks.
As soon as I have some time I plan on making a post about this. I’ll take some pictures and do a bit of a write up.
Okay, project report time. Overall, I am very glad to have the lighting as it looks great and will be very useful when it starts getting dark again. Here are some photos of how the lights are wired up.
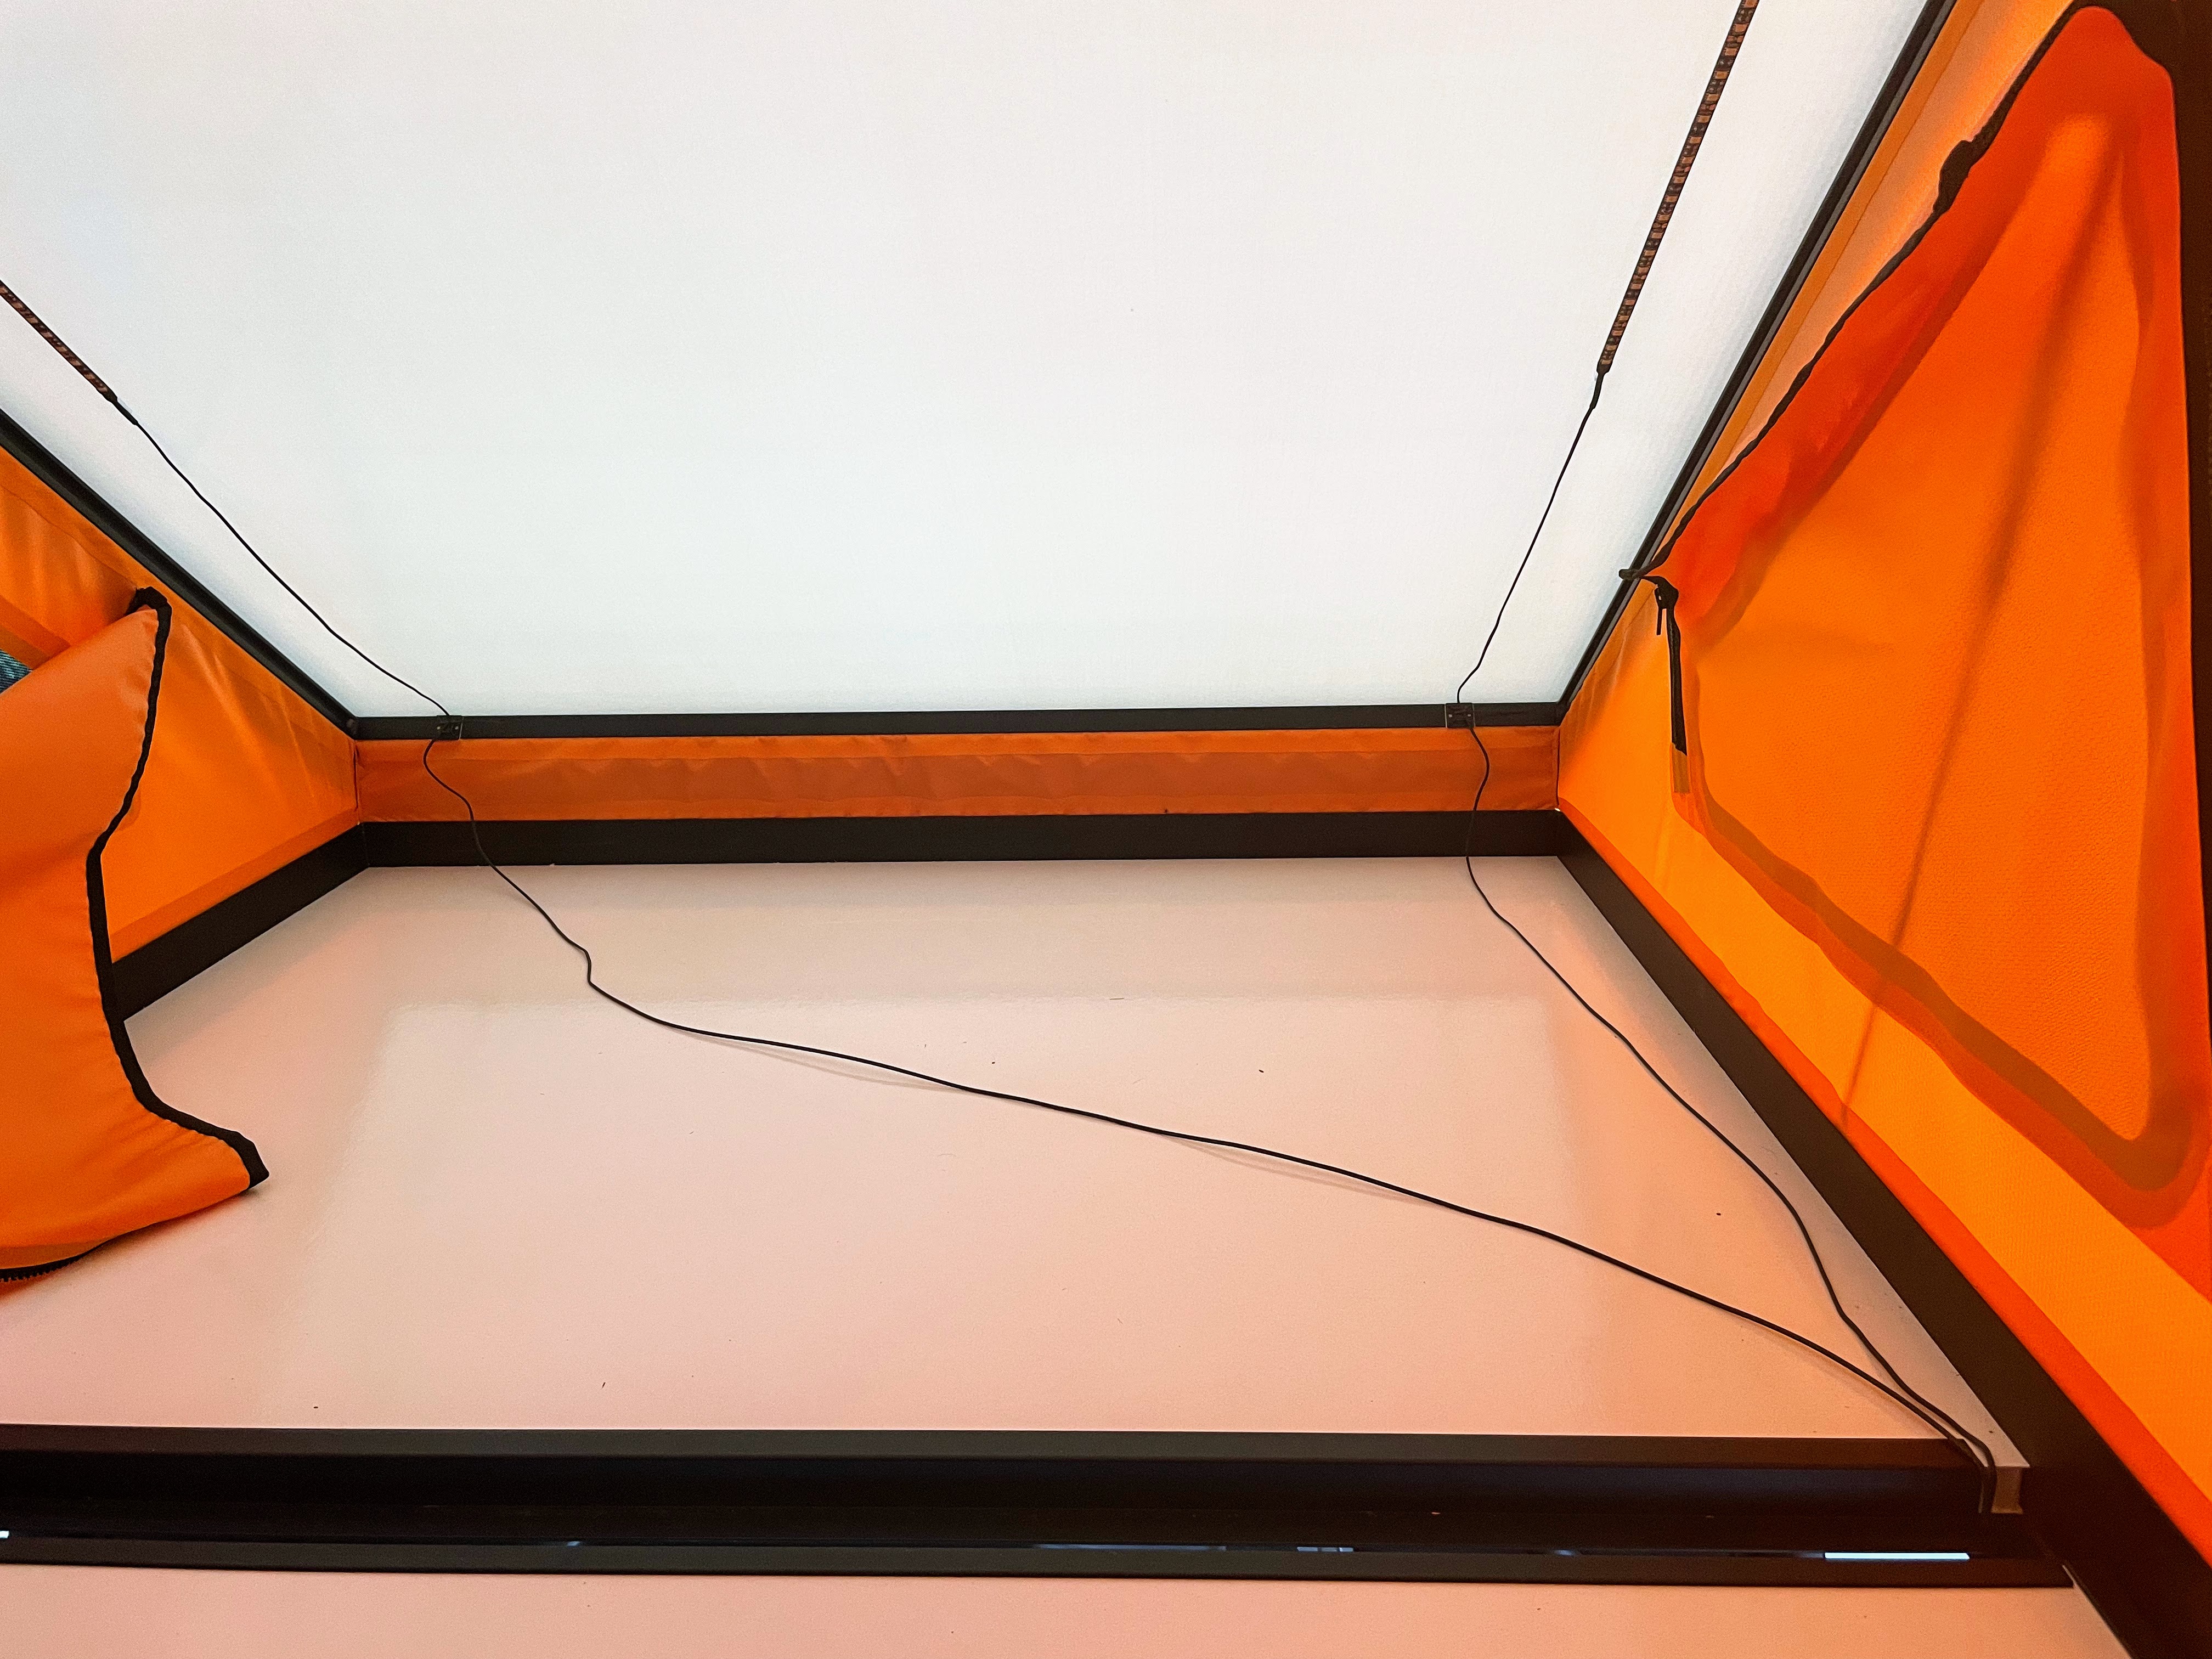
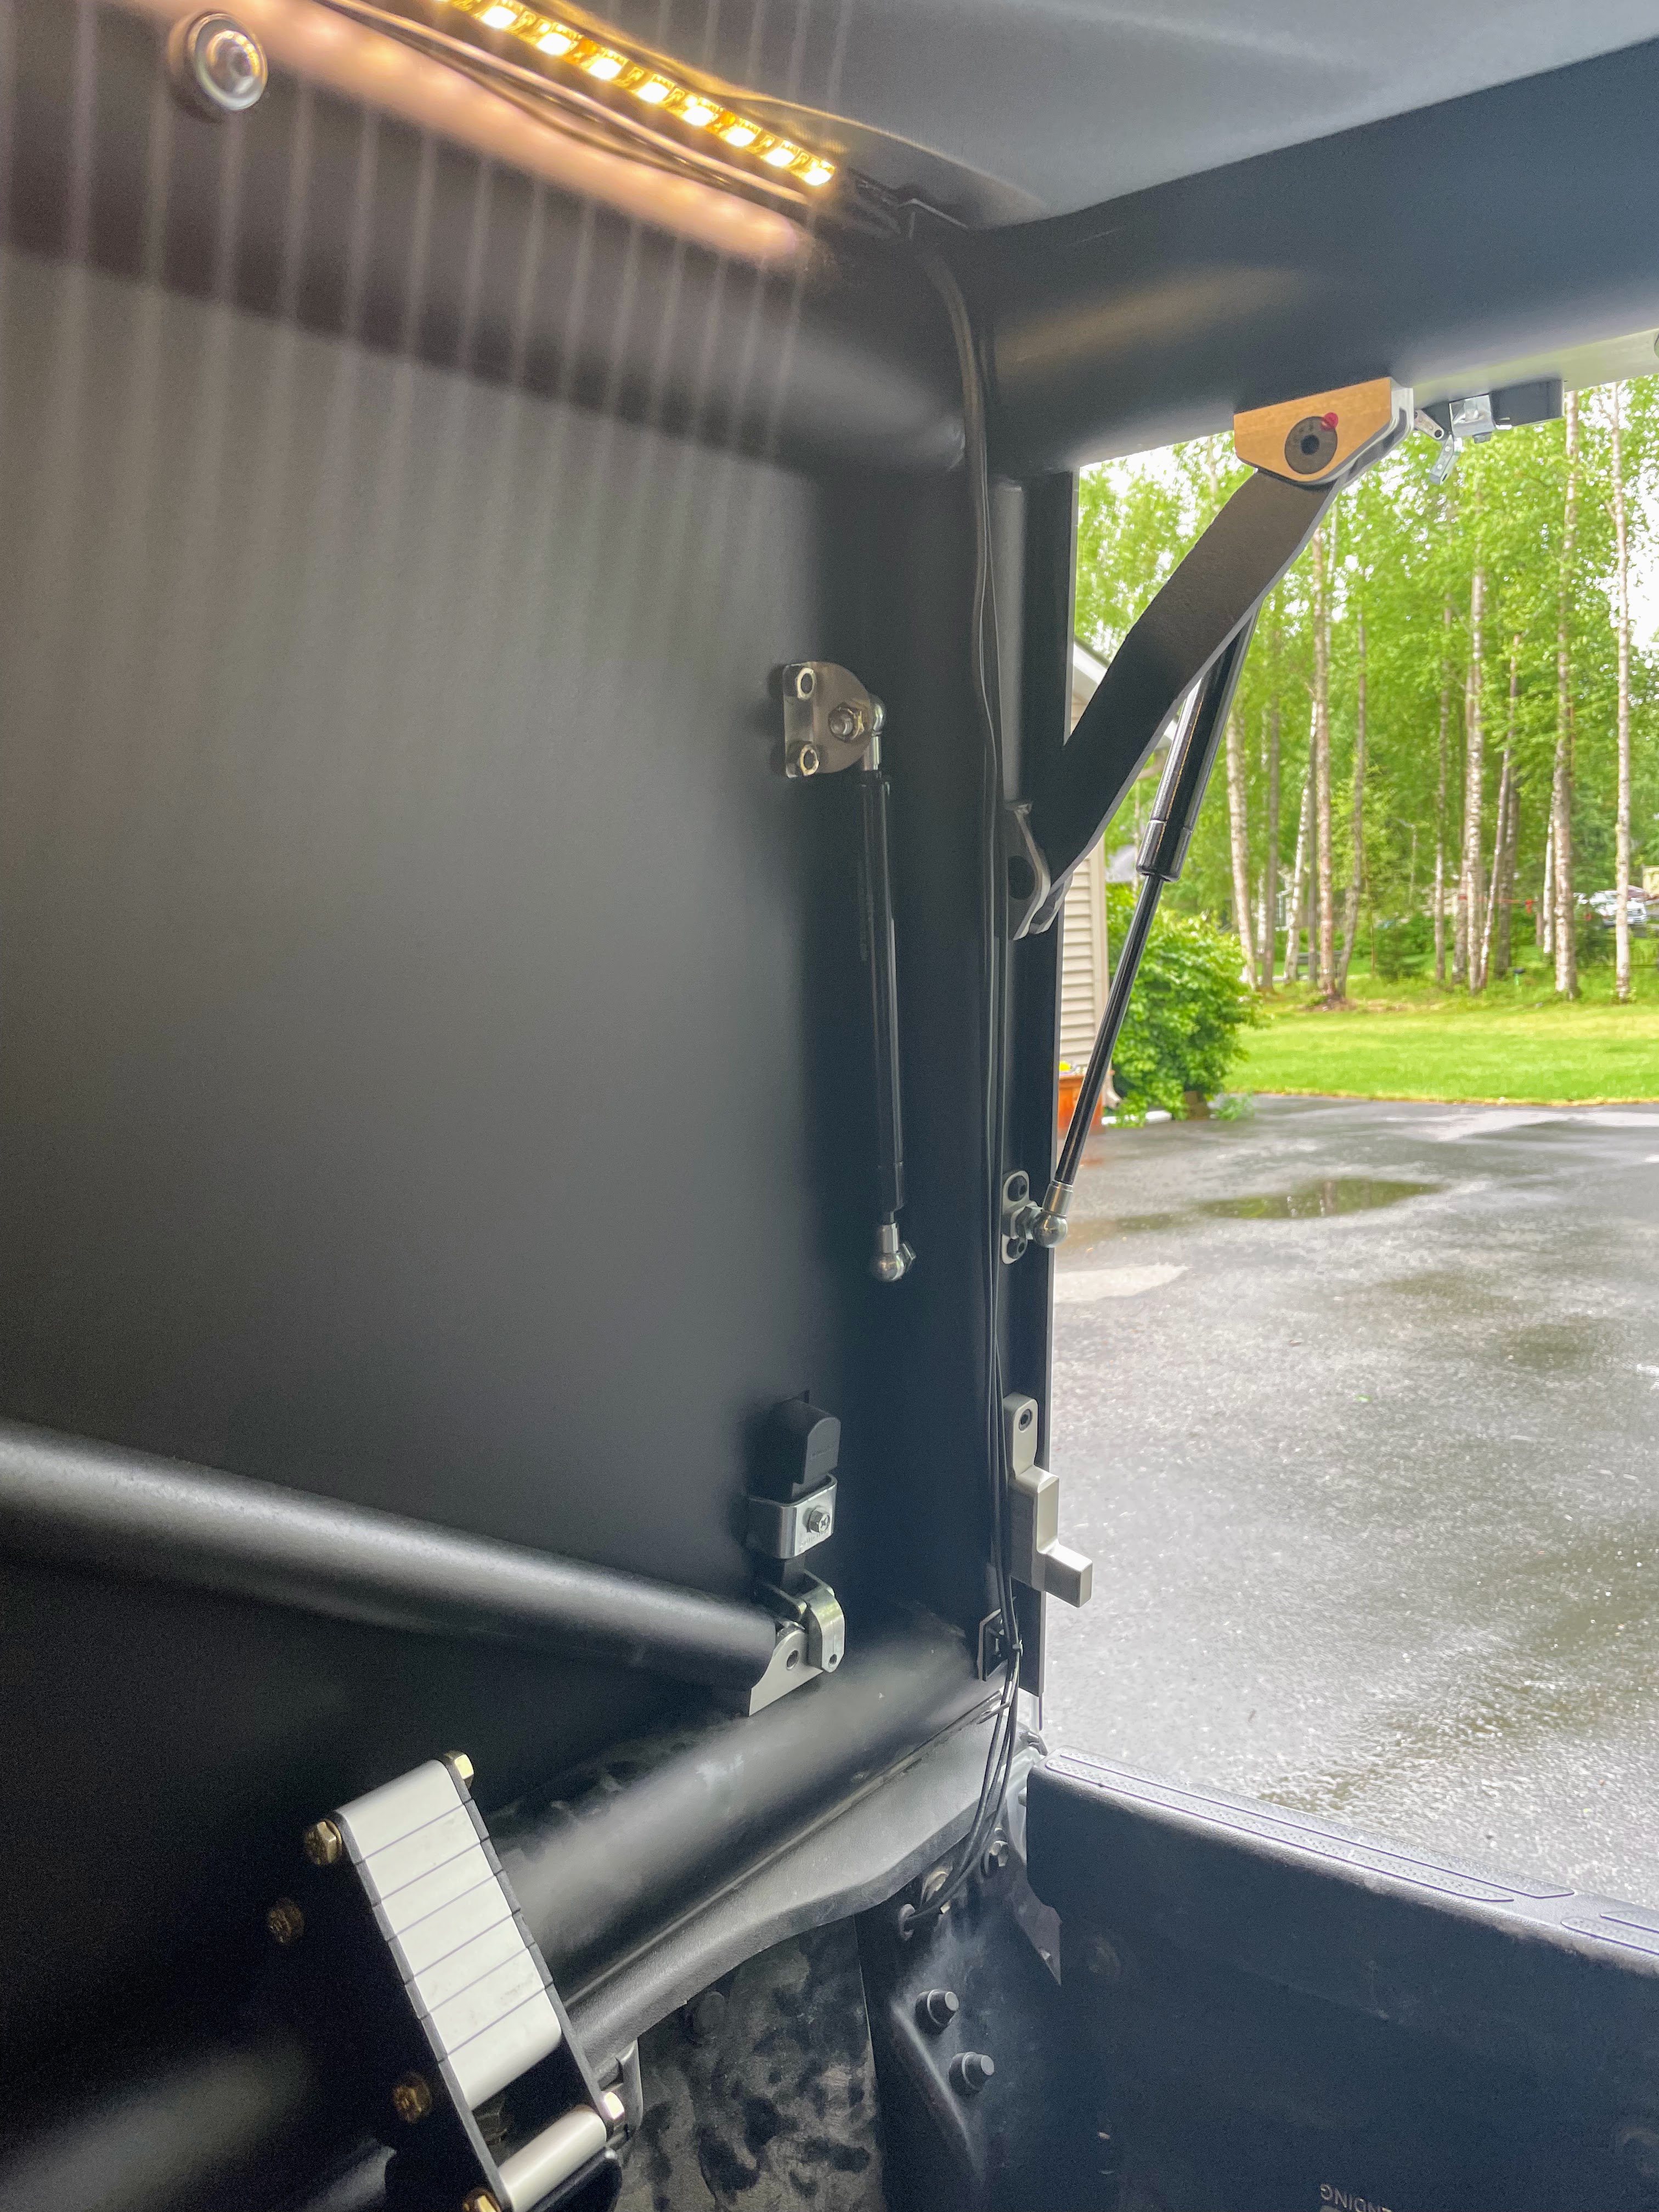
Here’s what the upstairs looks like without the pads. I originally was going to run both wires along the front and then down the side. In the end, I ran the driver side wire diagonally across the panel since I didn’t really think it would make a difference and I was worried about running out of wire. This leads me to my first complaint about the kit, which is that I didn’t have enough of the adhesive squares to properly stick all the wiring down. Not a big deal, but now I have to get something separate for a supposedly “all in one” kit. Soon I’ll get some more and clean this up a bit.
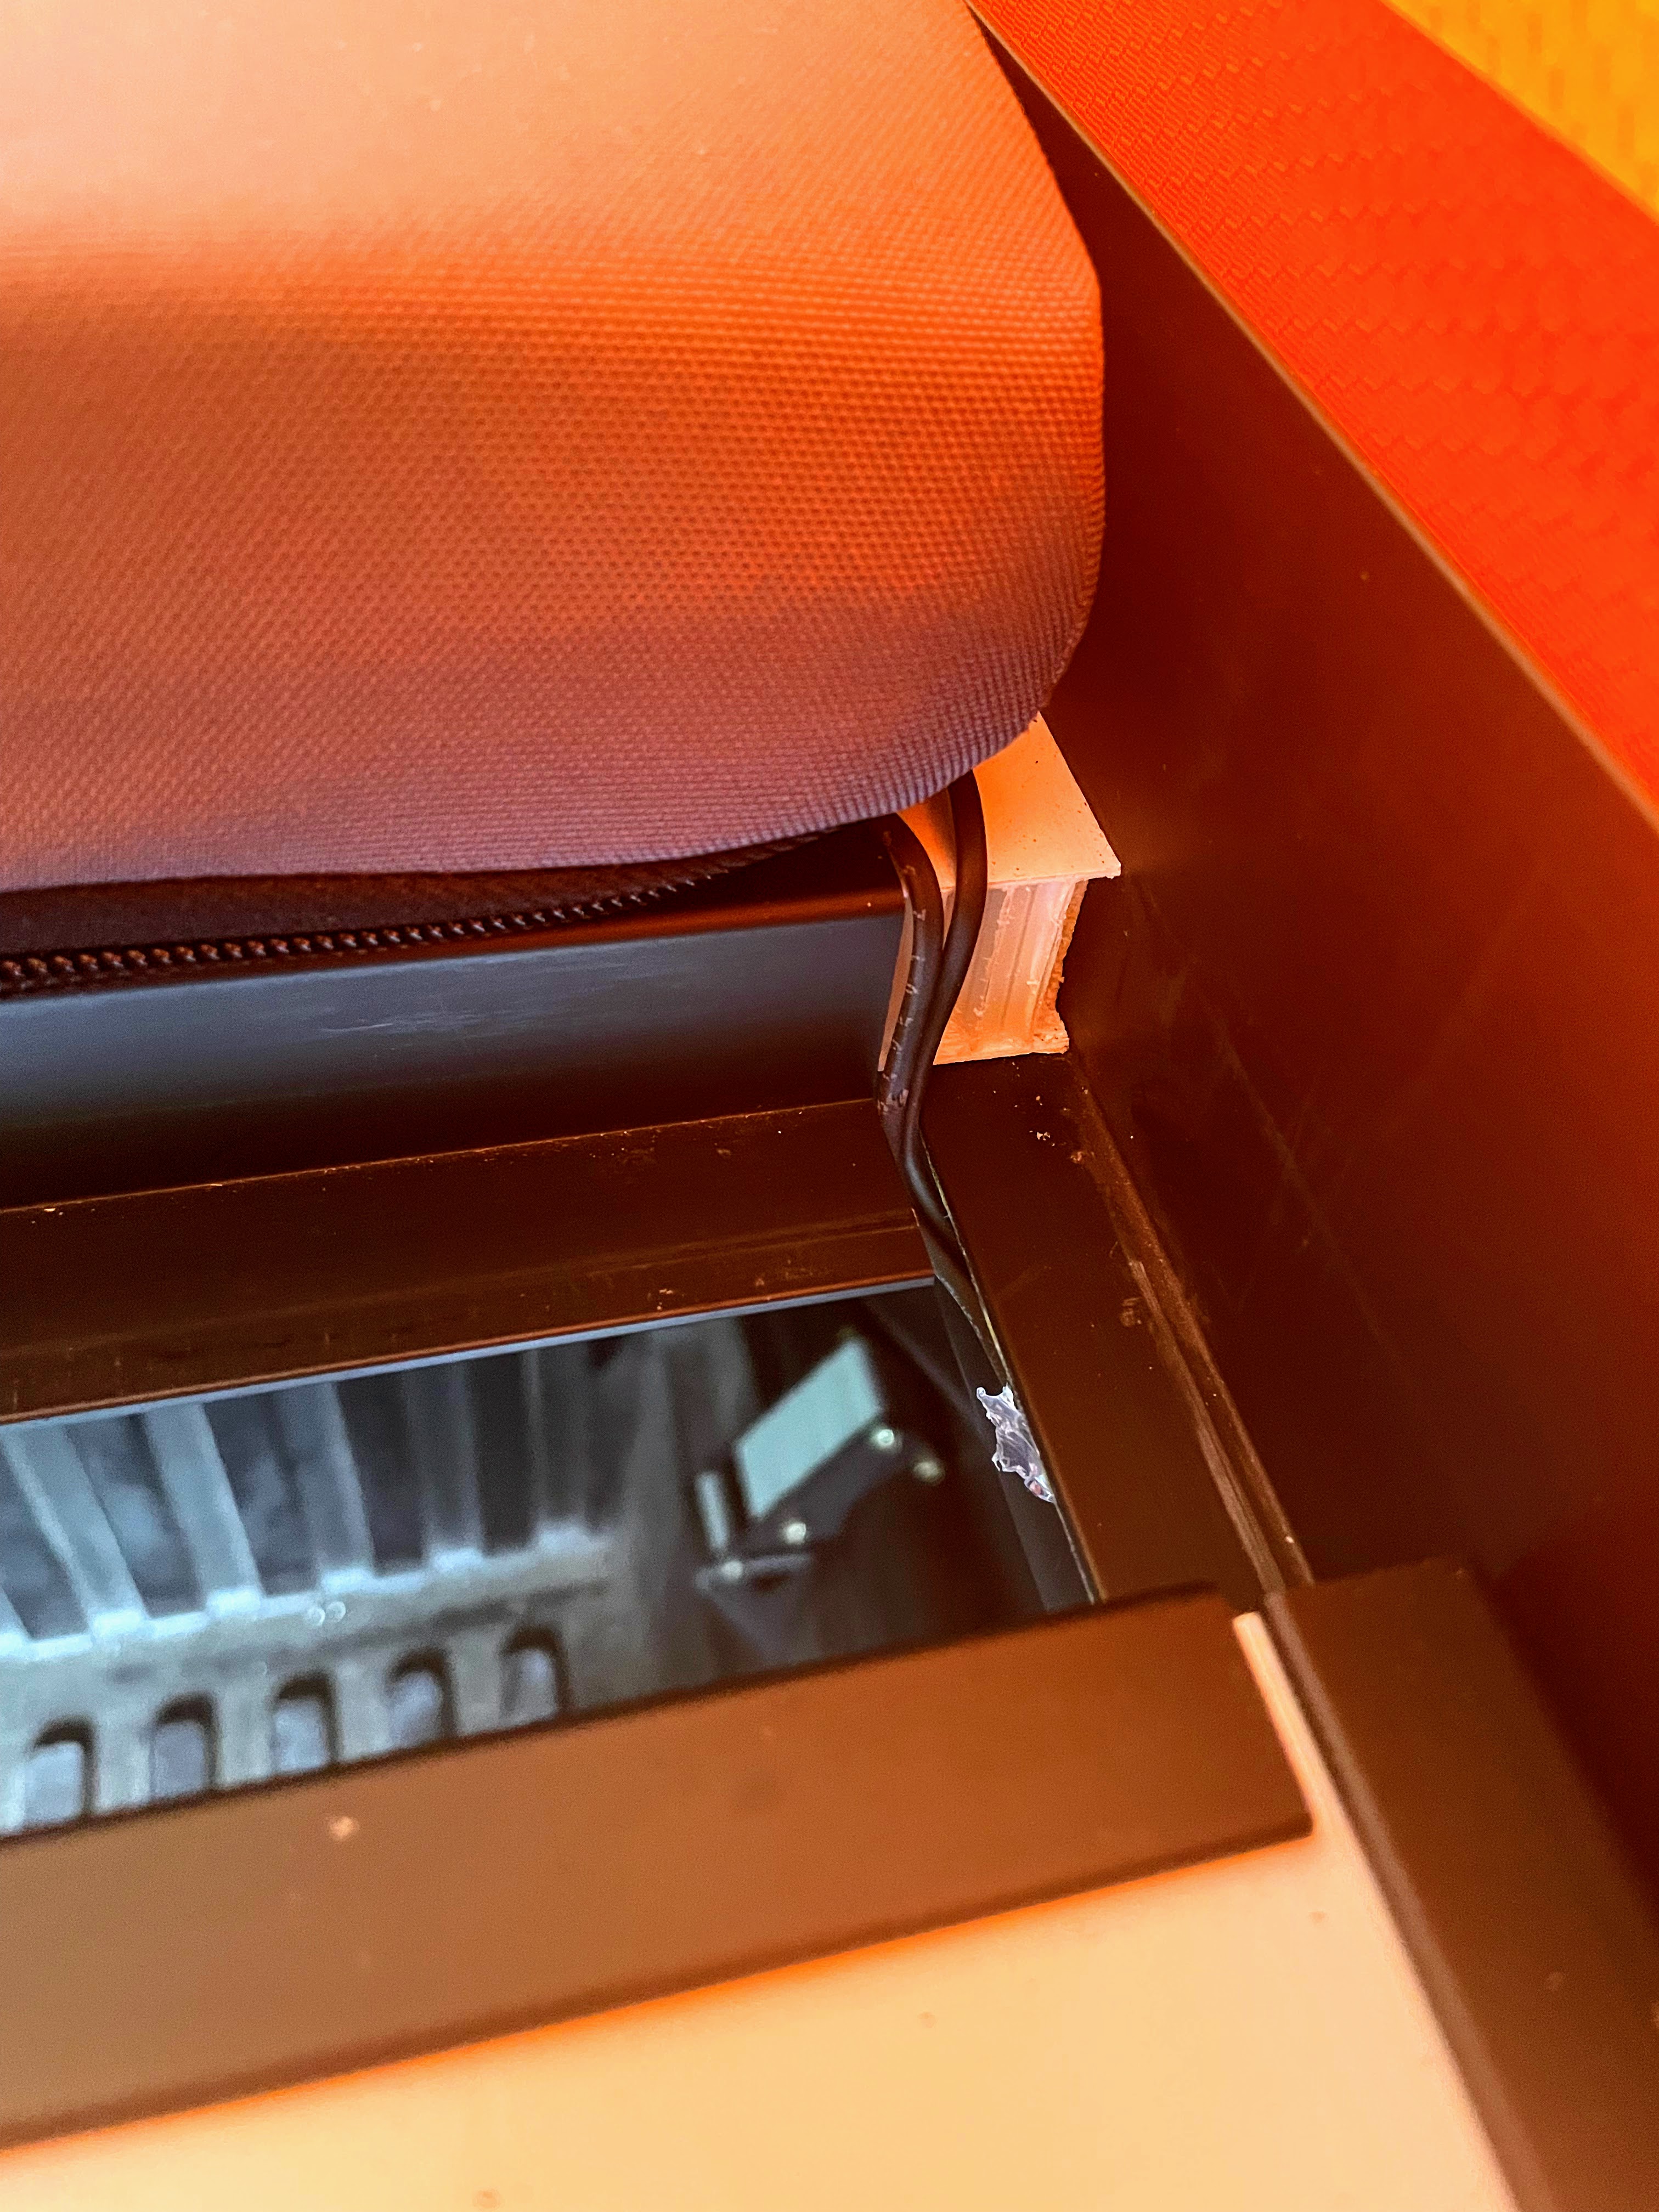
This is where I ran the wires downstairs. Unless I’m way off, this is the hole in the panels that everyone is referring to. As you can see, the gap there is plenty wide for the wires to run downstairs. When the panels are all together, the wires are not pinched. However, as you can see in the photo they do stick out towards the camera and are pushed back into the hole every time the panels go into place. This doesn’t really make me feel good, so I’m still thinking of ways to address that. Wrap the wires with tape? Take a dremel and cut the plascore back a bit to make the hole bigger? Find a way to hold the wires back so they don’t stick out and get pushed back in every time? Maybe a combination of these? The kit was designed for the V1, so there are no specifics in the instructions for us V2 owners. No big deal, but it would have been nice to see it on a V2 first.
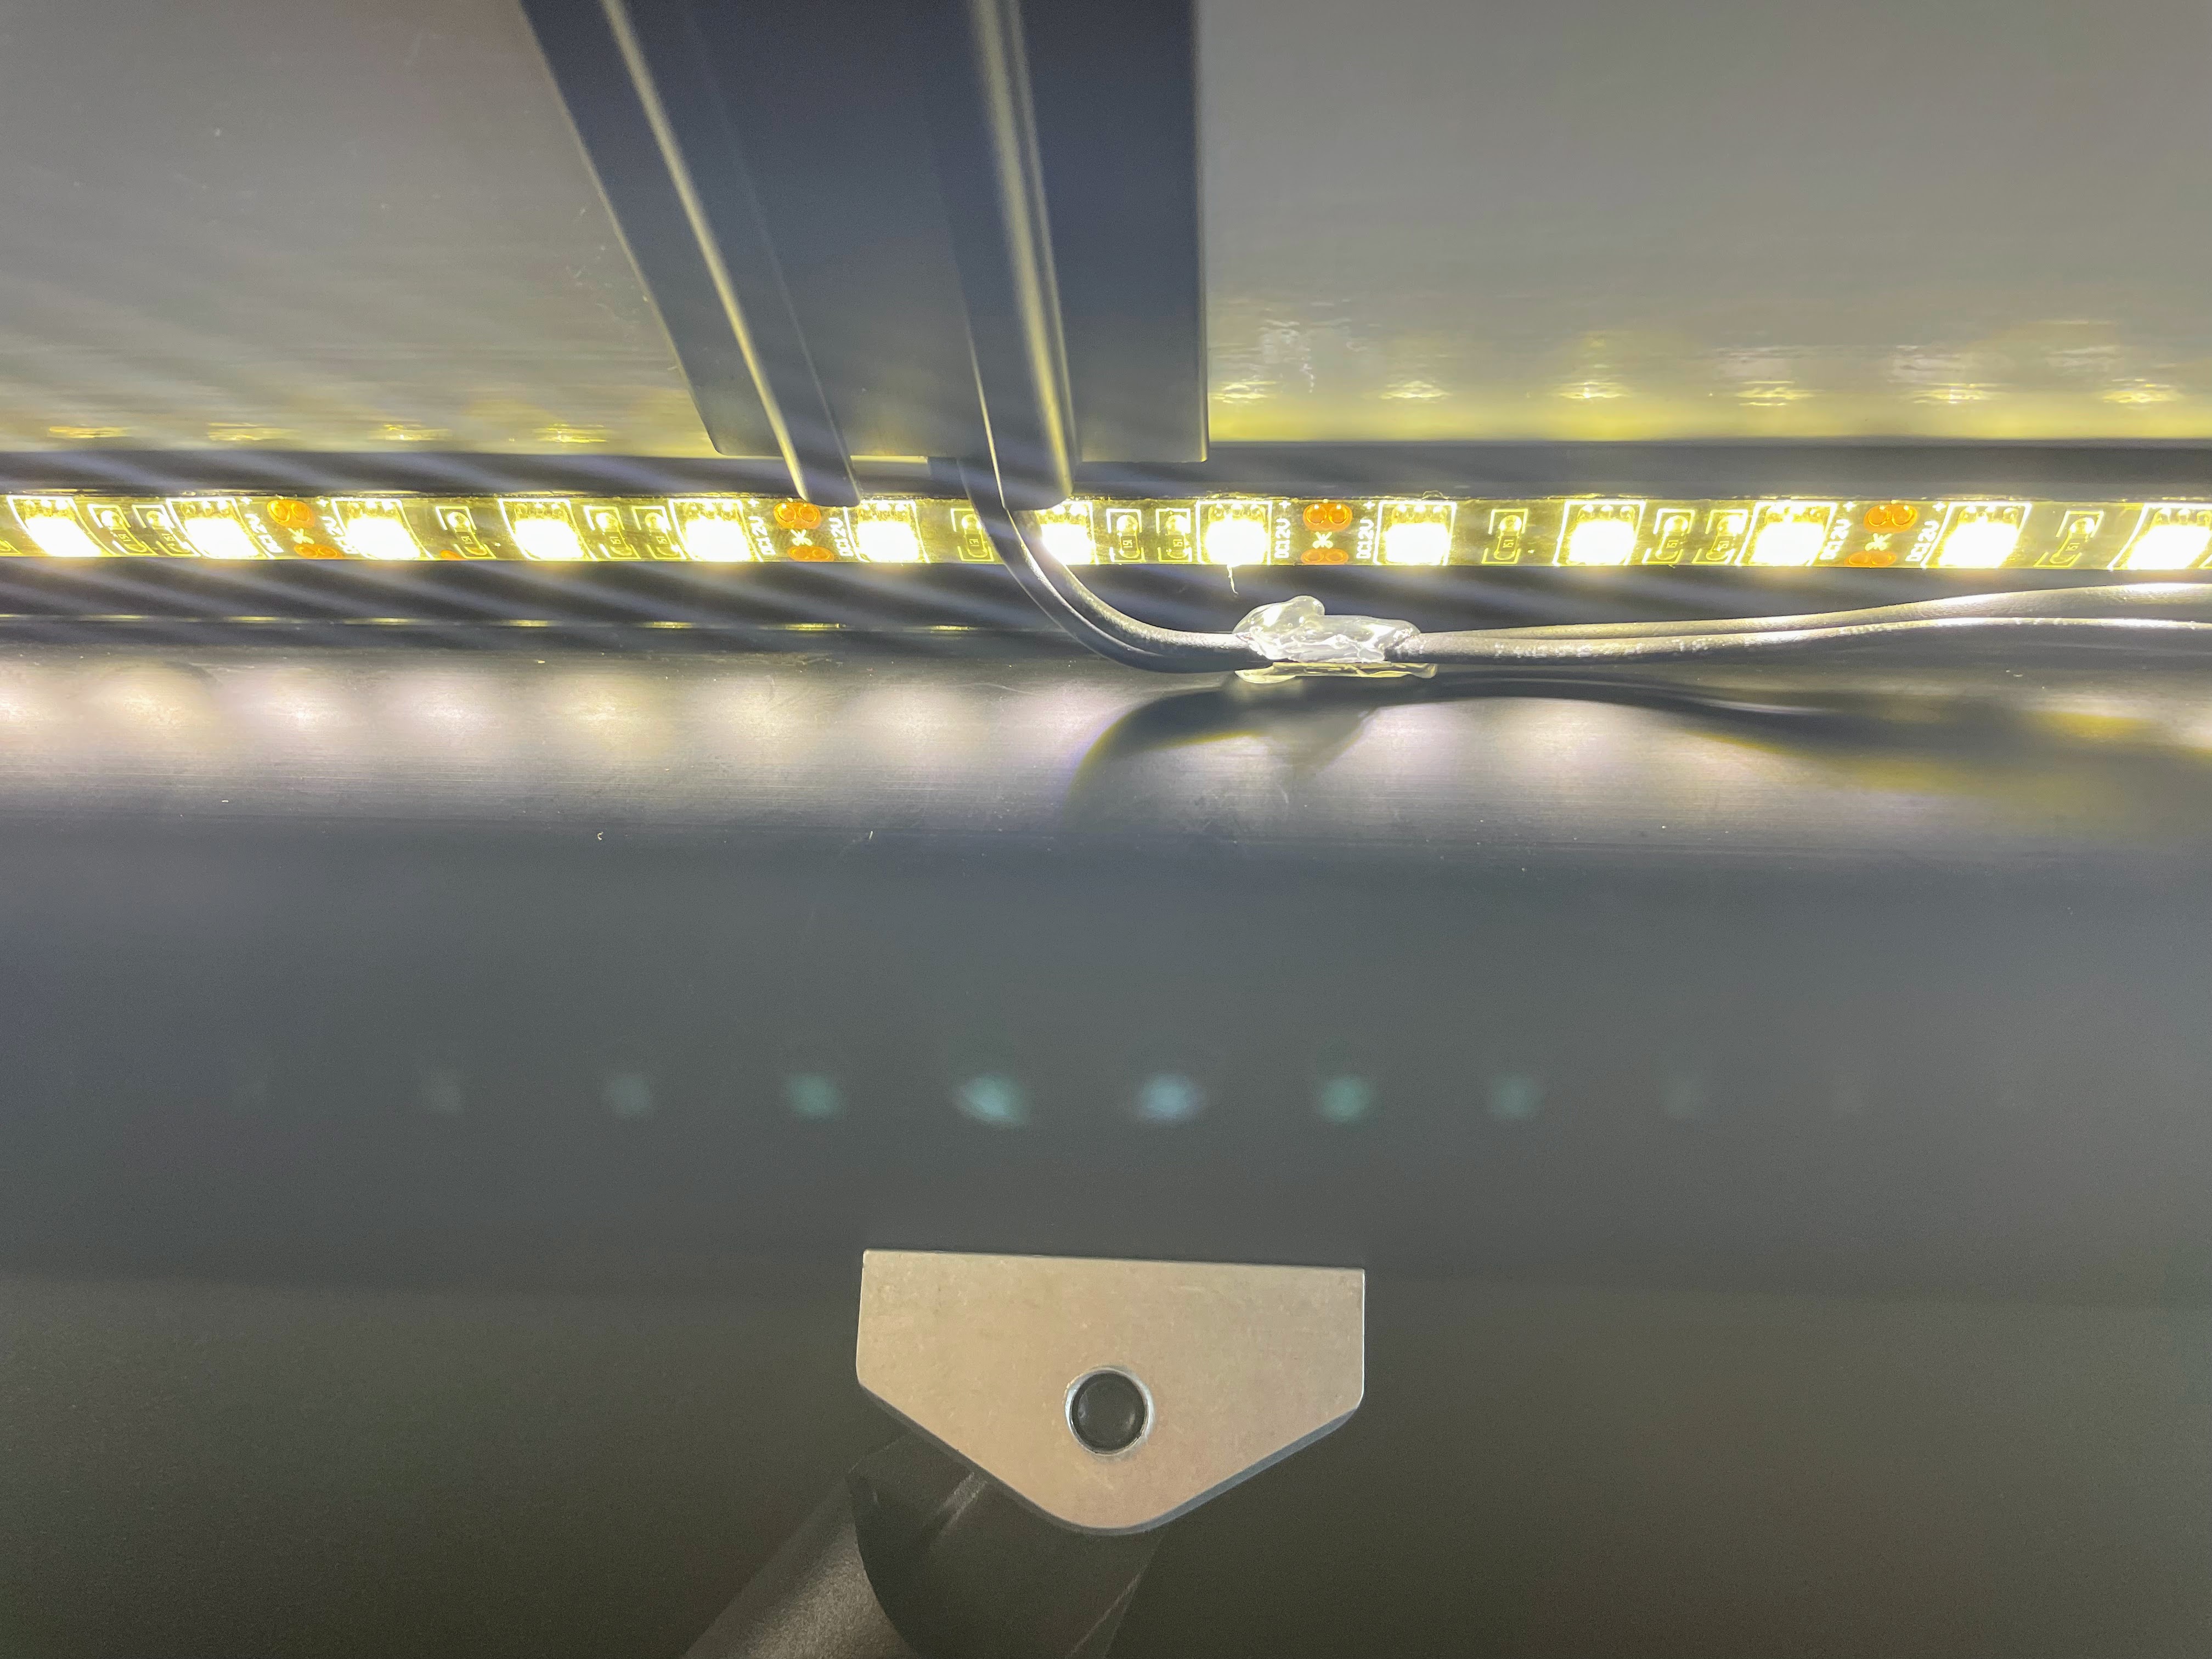
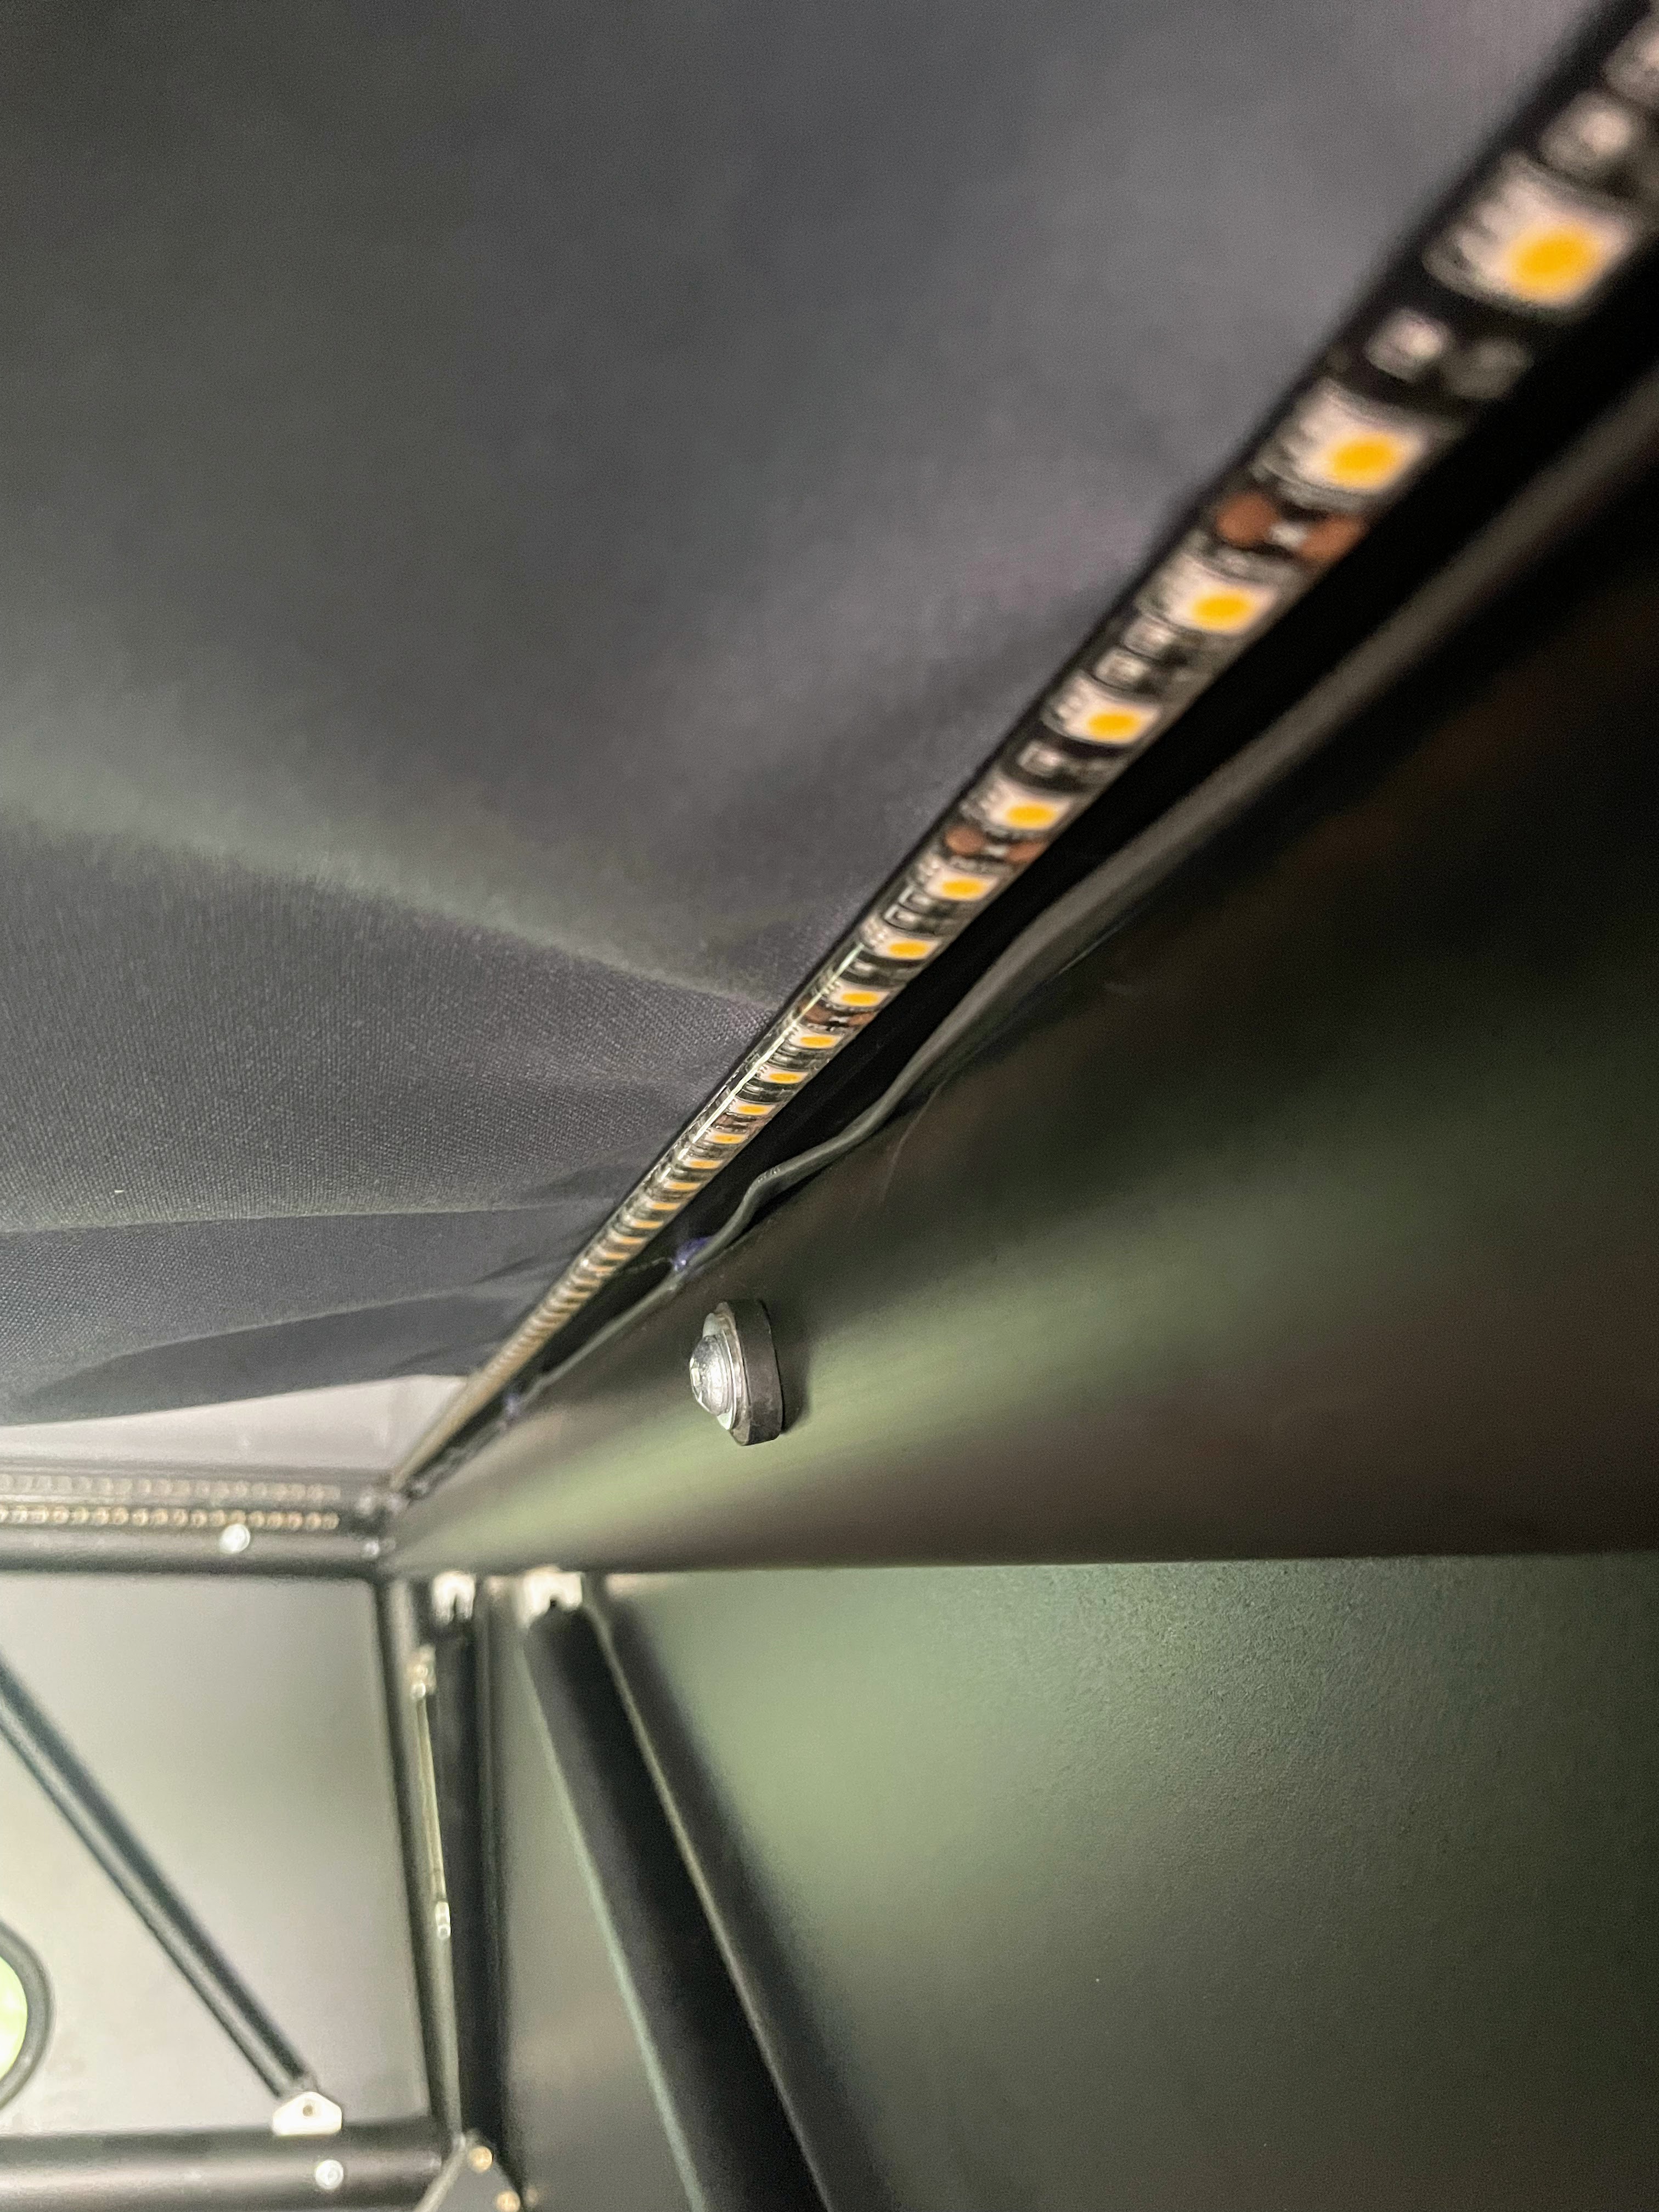
Here’s how the wires come out underneath. I ran the light strip along the lip that the panels sit on. I think that was a good way to go, and since I put the lights on the outside edge of that, there is a good gap for the wires to run up in the corner behind the lights without interfering. The one spot where they first come down I tried to make sure the wire didn’t cross a diode. However, I don’t have a good way of securing the wires up there. As you can see in the photos, I tried hot glue but it wouldn’t stick well to the powder coat. Another thing I can improve in the future.
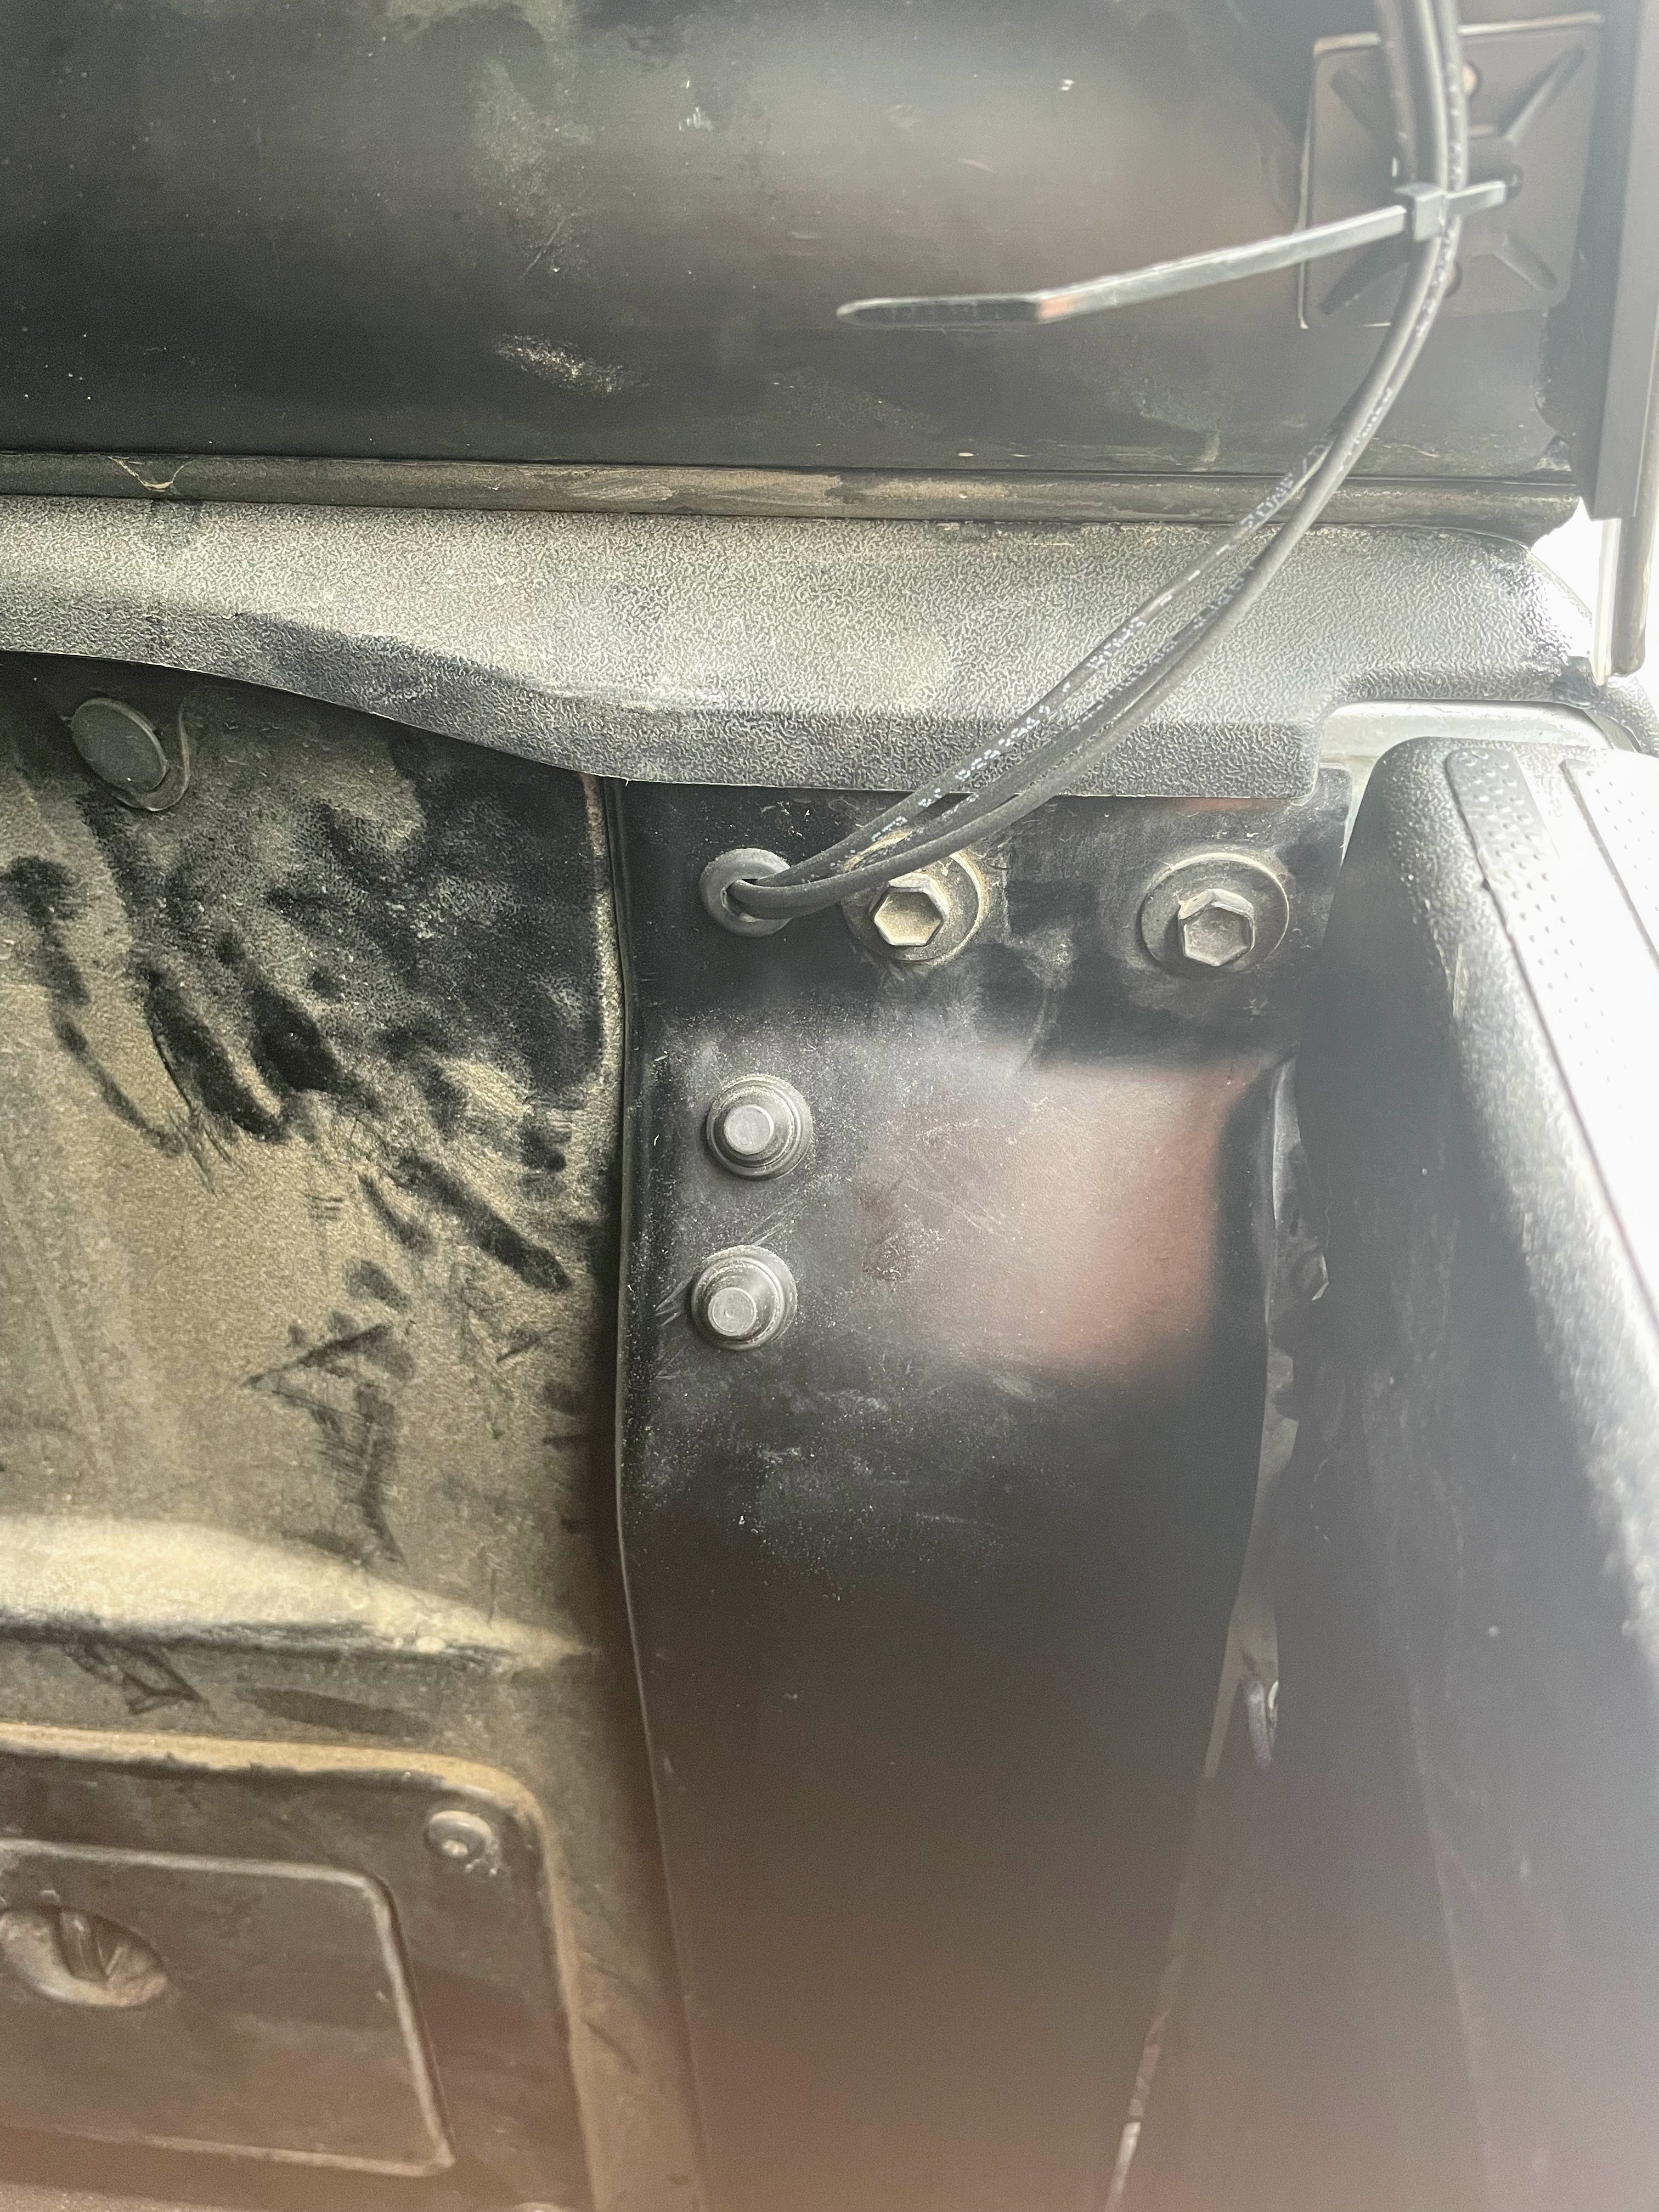
The wires run down along the passenger side into the space behind the taillight. I just drilled all the holes in the same area so I could hide all the connections in an easy place. The rubber grommet at the hole where the wires go in is a nice touch. I also need to use some wire covering and more adhesive squares and zipties here as they feel pretty exposed. I have seen people put the buttons around the corner to the left of where I have them, maybe so they’ll be more hidden and less likely to get hit accidentally. I put the buttons where they are for two reasons. First, they are more visible if you’re trying to turn the lights on in the dark. Second, they should be out of the way of the bed stiffeners I’ll probably add.
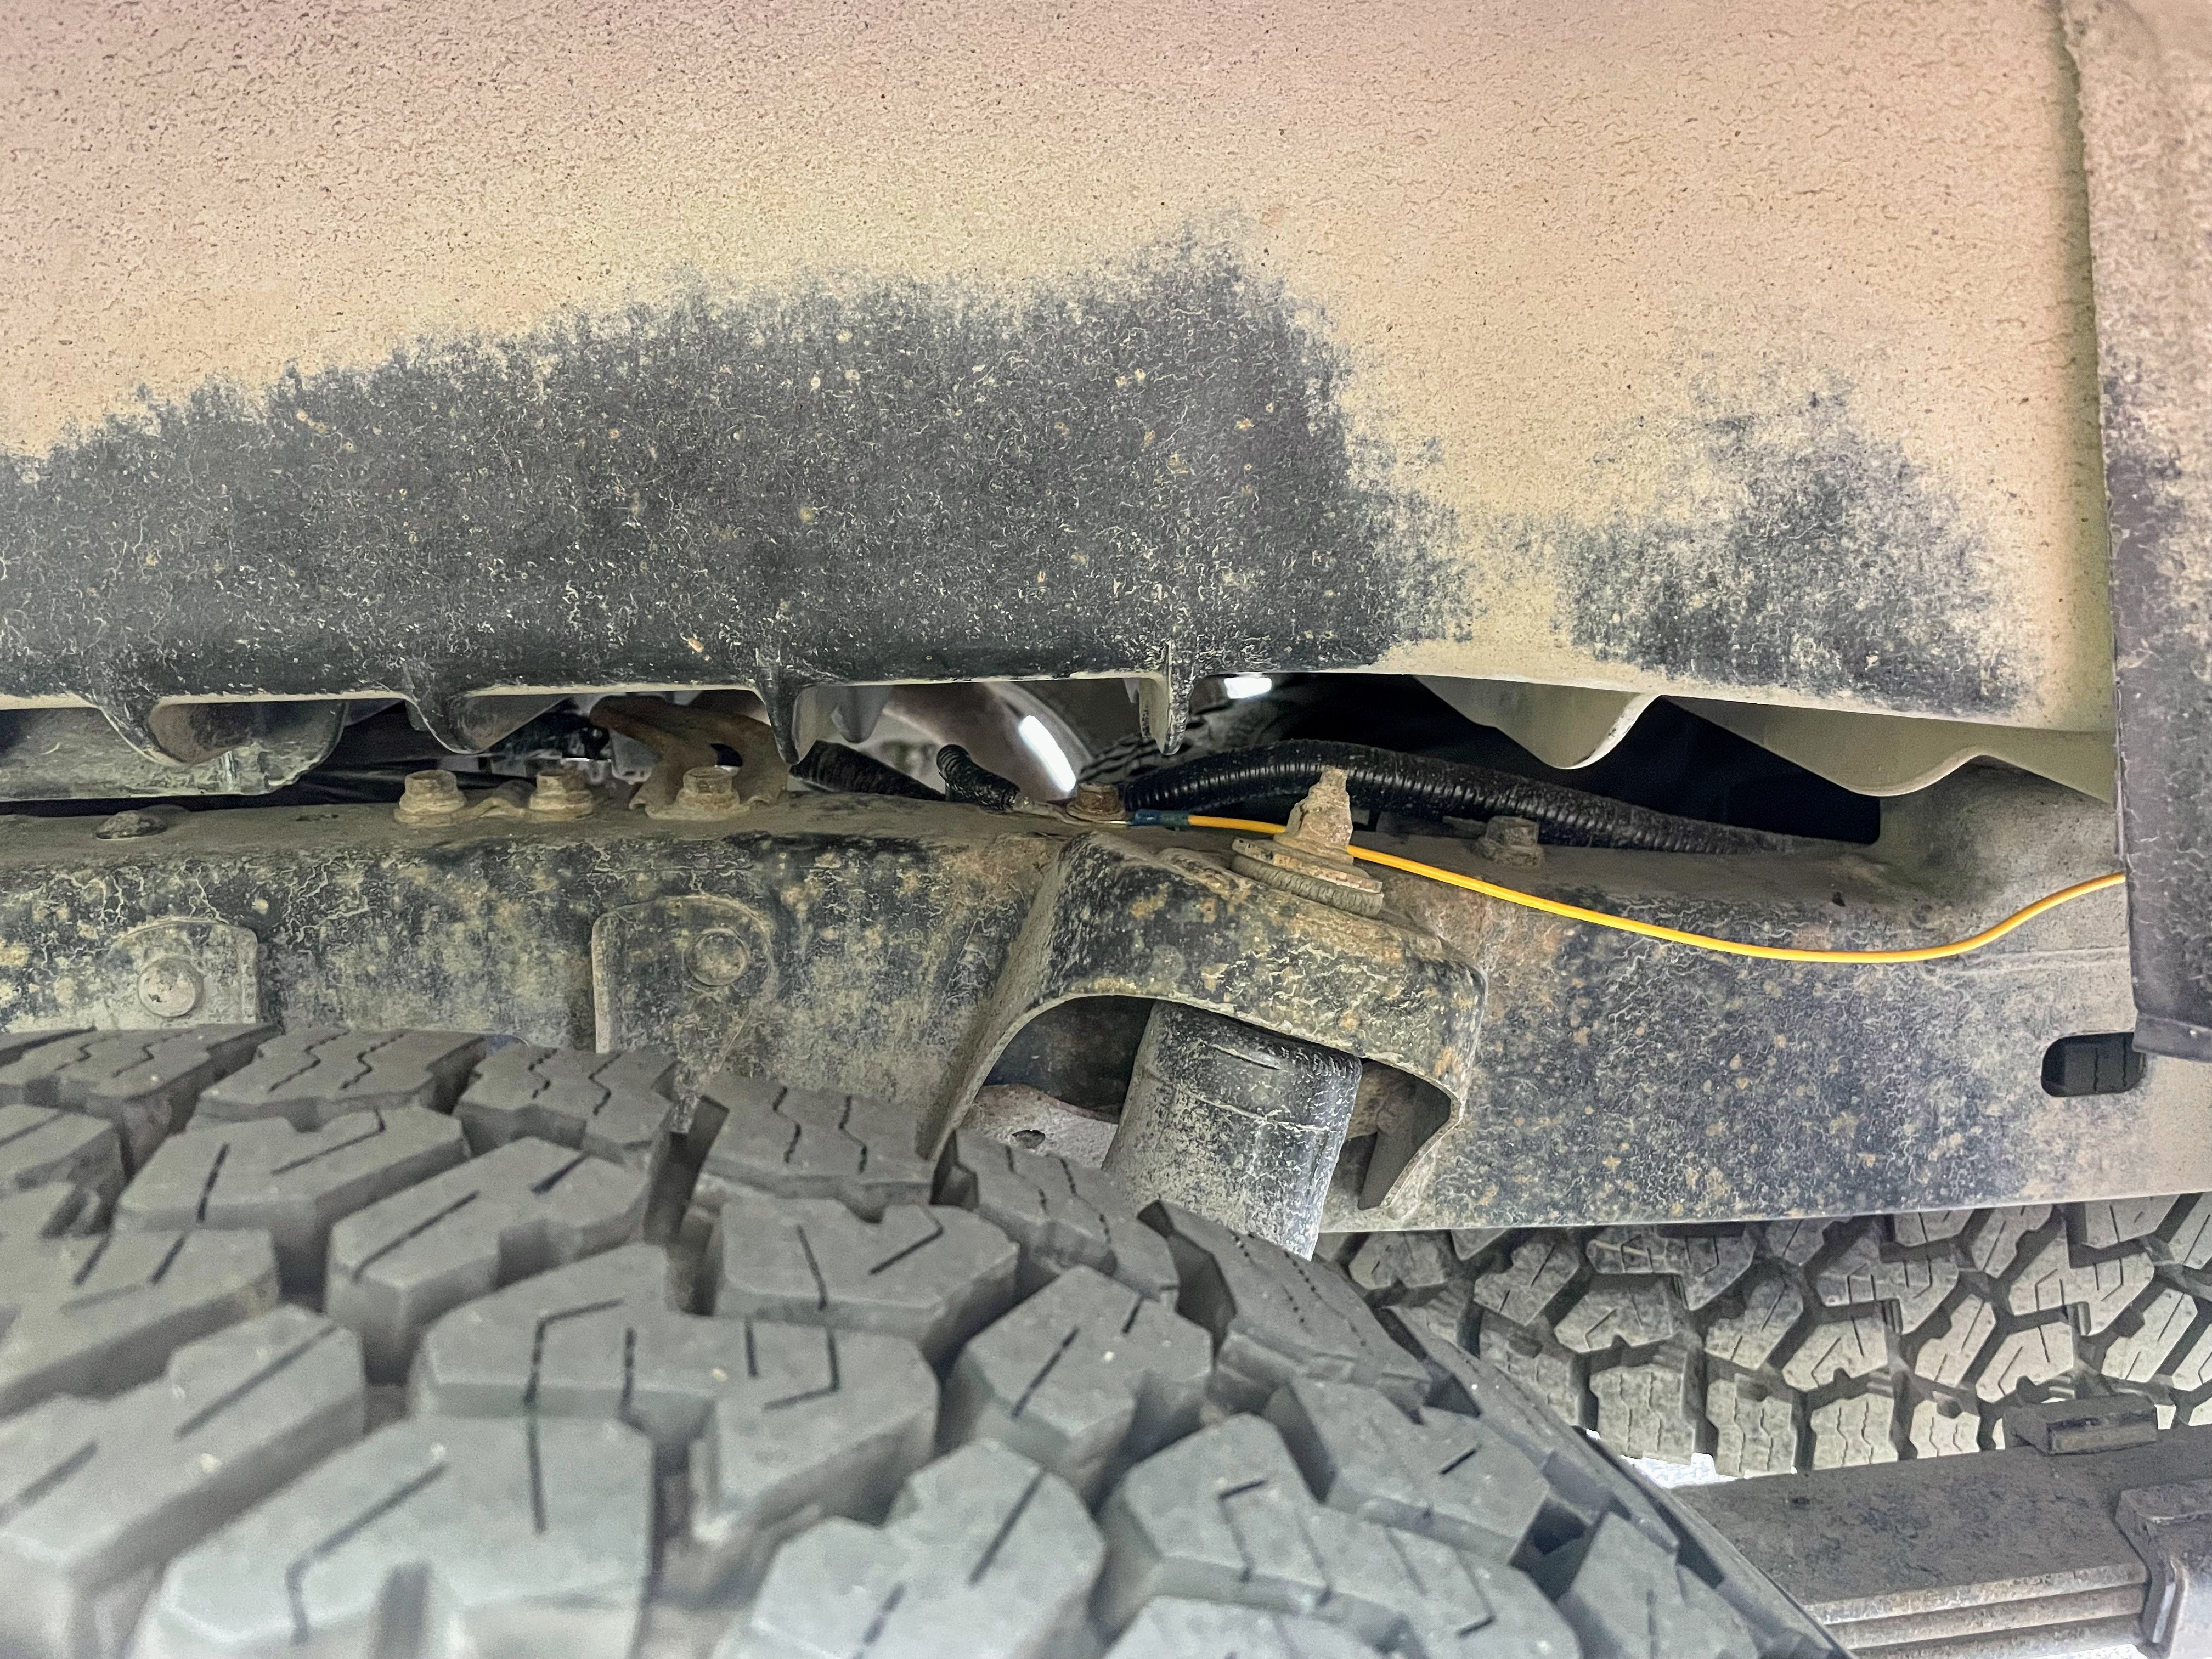
Lastly, here is where I put the ground. The self-tapping screw included in the kit is not enough to drill into the frame, and even with a pilot hole mine broke. So I ran it to the factory ground in the driver’s side wheel well. Also, my kit didn’t seem to come with a ground wire. I don’t have a photo of the contents of the kit, and I wish I did. When I was done with all the wiring except the ground, I was left with only a 6in section of wire with a butt connector on one end. I don’t know what that was supposed to be for, since it’s obviously not long enough for the ground. Maybe I totally missed something and one of you can enlighten me, but I just used some spare wire for the ground instead.
I also used some braided wire covering for the section where it runs under the truck to the engine bay.
All in all, the kit looks and works great once finished, there were just quite a few things that I had to (or still have to in the future) source myself in order to complete the job to my satisfaction, and I think others would agree on that. The parts list that I used that didn’t come with the kit are as follows:
Wire covering (I used 15-20 feet to run under the truck, and will add a few more feet inside the bed)
More adhesive squares
1 rubber grommet for the hole where the wires exit the bed
Extra butt connectors
Larger end terminal connector for the ground bolt
A few feet of spare wire for the ground
Of course much of this is stuff many of us might have lying around, but it still factors in. I’m very glad I did this addition, but if you’re thinking about this kit, think of it as $200 or a bit more rather than $150, minus anything you’re lucky enough to have lying around the house. Here’s the finished product in action:

7 Likes
You did great, I’d clean up the wiring from the left to the right so it follows the front extrusion, then down the gap to the bottom floor. I also bought wire sheath at Amazon for like $10
Yeah, I’d like to do that but I don’t seem to have enough wire. Also, I’m embarrassed to say that 20’ of wire sheath was $45 at my auto parts store.
1 Like
Gonna try and tackle this in a few days. I appreciate the pics. They are super helpful👊🏼
Harbor Freight. Or as my friend refers to it: The Chinese Hardware store. https://www.harborfreight.com/search?q=wire%20loom
This light set up is garbage. I ripped it out today and threw it in the trash. Save your time, money and frustration. Go with madcap’s or hardkorr.
Any context to this?
It’s clunky and cheaply put together. It’s not made to fit a V2. The wiring is not well thought out especially when it comes to bringing the upper to the lower, and when set up to look nice and clean there’s not enough wire length to reach the End point. The 22g wires from the led strips don’t pair well with the larger gauge wires they have to tie into. The “grey” wire that connects the power to the upper lights was cheap plastic coated wire that when you try to strip it the copper strips with the plastic. The red LEDs are so bright they don’t work to preserve night vision and require a dimmer that is not included in the kit.
I spent half of my day Sunday rewiring to add a dimmer, but again with the 22g wires being difficult to work with and limited length I decided to scrap the whole kit rather then continue frustrating myself.
I’m no electrician by any means, but I’ve wired enough things that this isn’t simply user error.
1 Like
I can back all of this up. Except for the issue with the red lights, since I got the plain white kit, all of this happened to me. V2 fitment is annoying and since I believe there are more V2s out there, there’s no excuse to not include that in the instructions at least. I had the issue with the wire not being able to strip which was very frustrating. Also just make the wires a bit longer! I think its fair to assume most of us want to run the upper wires all along the edge instead of cutting across the panel, and go all the way into the taillight hole, that way all the connections are out of the way and the final product looks clean.
That said, I’m glad I have them and I’ll just say that it was an annoying process over a couple days. Oh well, but I’ll definitely be keeping them. Like with most projects I’ll hopefully forget about how frustrating they were in the moment and enjoy the finished product.
2 Likes