This post has been a long time coming. I am nearing the ‘end’ of my build (or so I tell my partner ![]() ) and I thought I’d share what I have so far here. Most of what I have done here I have seen elsewhere on the forums, but I hope there are some tidbits that I can add. I will come back and update as I build more.
) and I thought I’d share what I have so far here. Most of what I have done here I have seen elsewhere on the forums, but I hope there are some tidbits that I can add. I will come back and update as I build more.
I was really focused on cheap, simple, light for this build out. I also wanted to make sure whatever I got I could remove easily so that if I needed to use my truck as a truck it was not a problem. The go fast camper is pretty much the perfect platform for those priorities. When I found a like new v1 on here in October that would fit my existing truck and I jumped on it.
The truck
I have an old (2006) 4x4 v6 ford ranger. I bought it in 2018 as a tow vehicle when I first started to get into campers and it has been a super versatile platform for various incarnations of adventure rigs. All I have done in terms of mods to the truck are: bedrug (awesome upgrade), light bar, front tow hitch, upgraded shocks, airbags, 10 ply tires, and stereo head unit. There are lots of things I love about this truck:- Being so simple makes it ridiculously reliable and easy to fix.
- There are four of them in every junk yard so if I need anything for it, it’s pretty much free.
- The fuel economy is essentially unbeatable for a 4x4 high clearance vehicle.
Platfrom

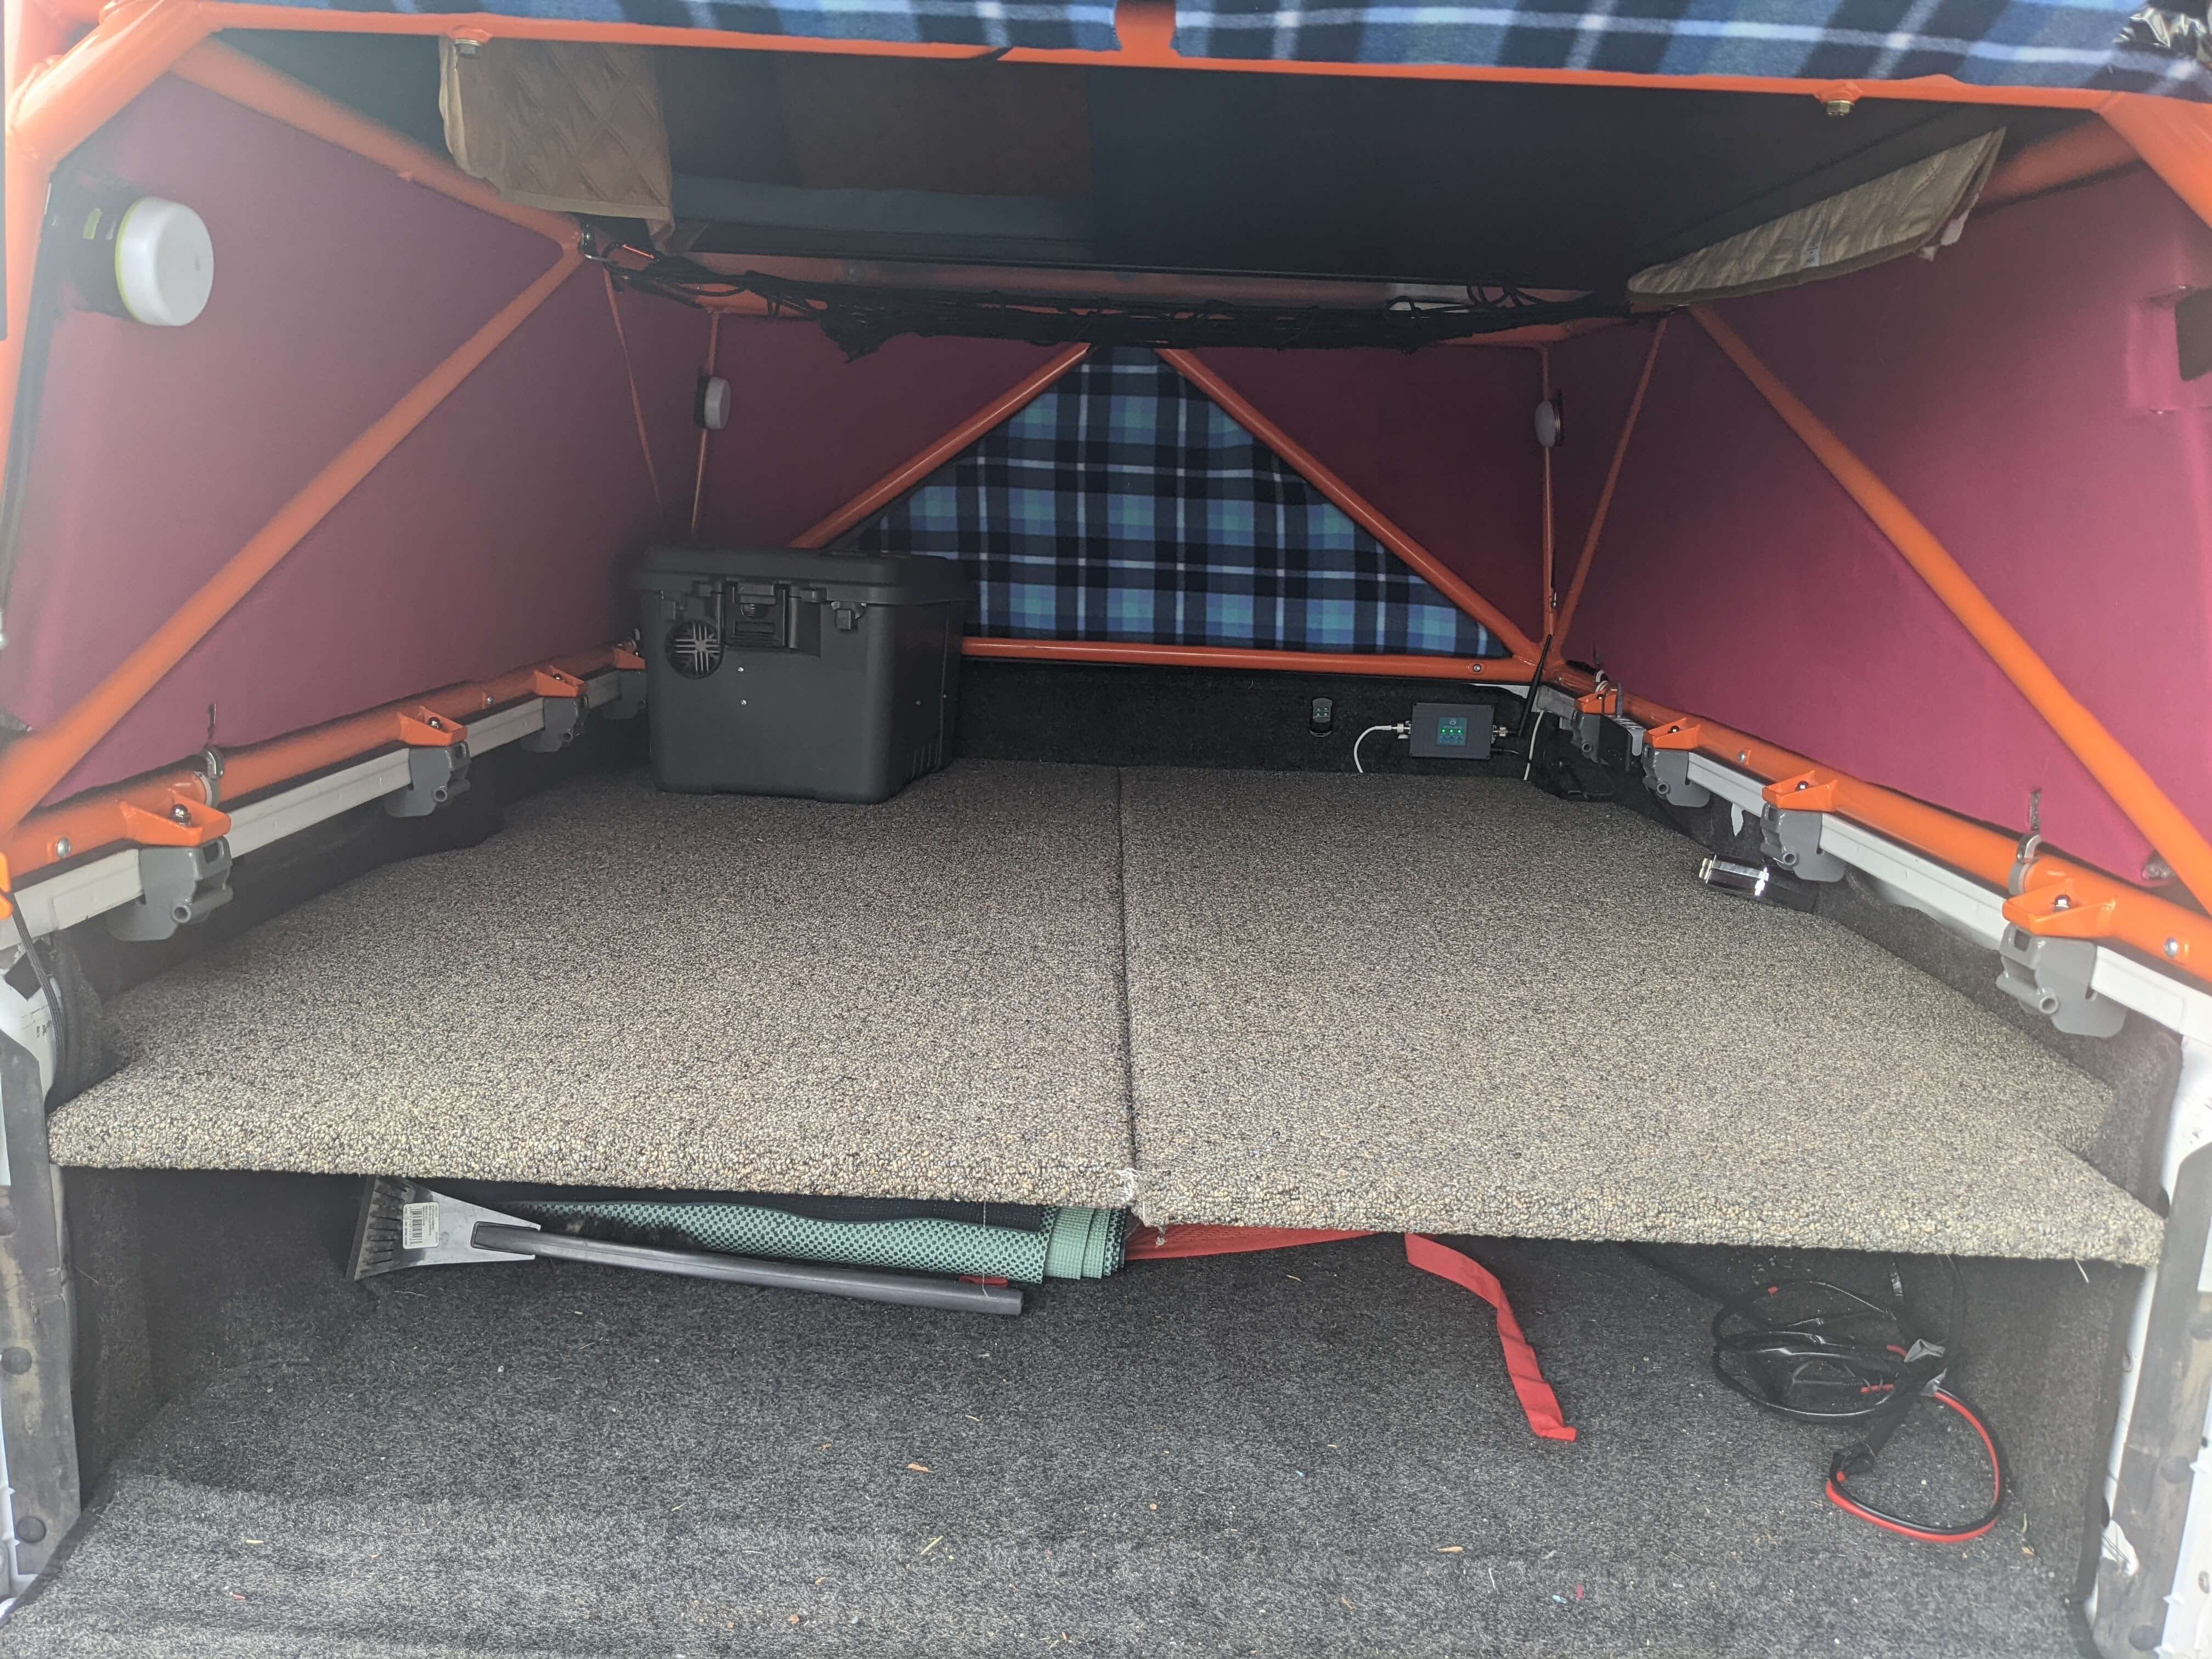
The platform actually came with the camper, the previous owner built it. I was unconvinced that I needed it, but it turns out that it is super nice to have. It is just a pair of 2X4s that run east west across the truck bed and hold up a carpeted sheet of plywood (cut to contour to the shape of the truck-bed). Given that I have a 6’ bed, tons of gear fits under the platform and still have a nice uncluttered living space. I have cheap plastic ‘under bed’ box that I can slide under the platform that holds all of my camping gear, tire chains, tools, etc; basically everything you don’t want to think about grabbing every trip. Even with that box, my ladder, skis, and the battery under the platform, I can still fit two large duffle bags under there before I start to clutter my living space.
Obviously platforms are nice for camping but what I really like about the way this guy built this one is that it takes less than a minute to remove. One of the major benefits of a gfc is that you still have a truck, and I wanted to make sure that I preserved that. This platform is awesome for that.
Electrical
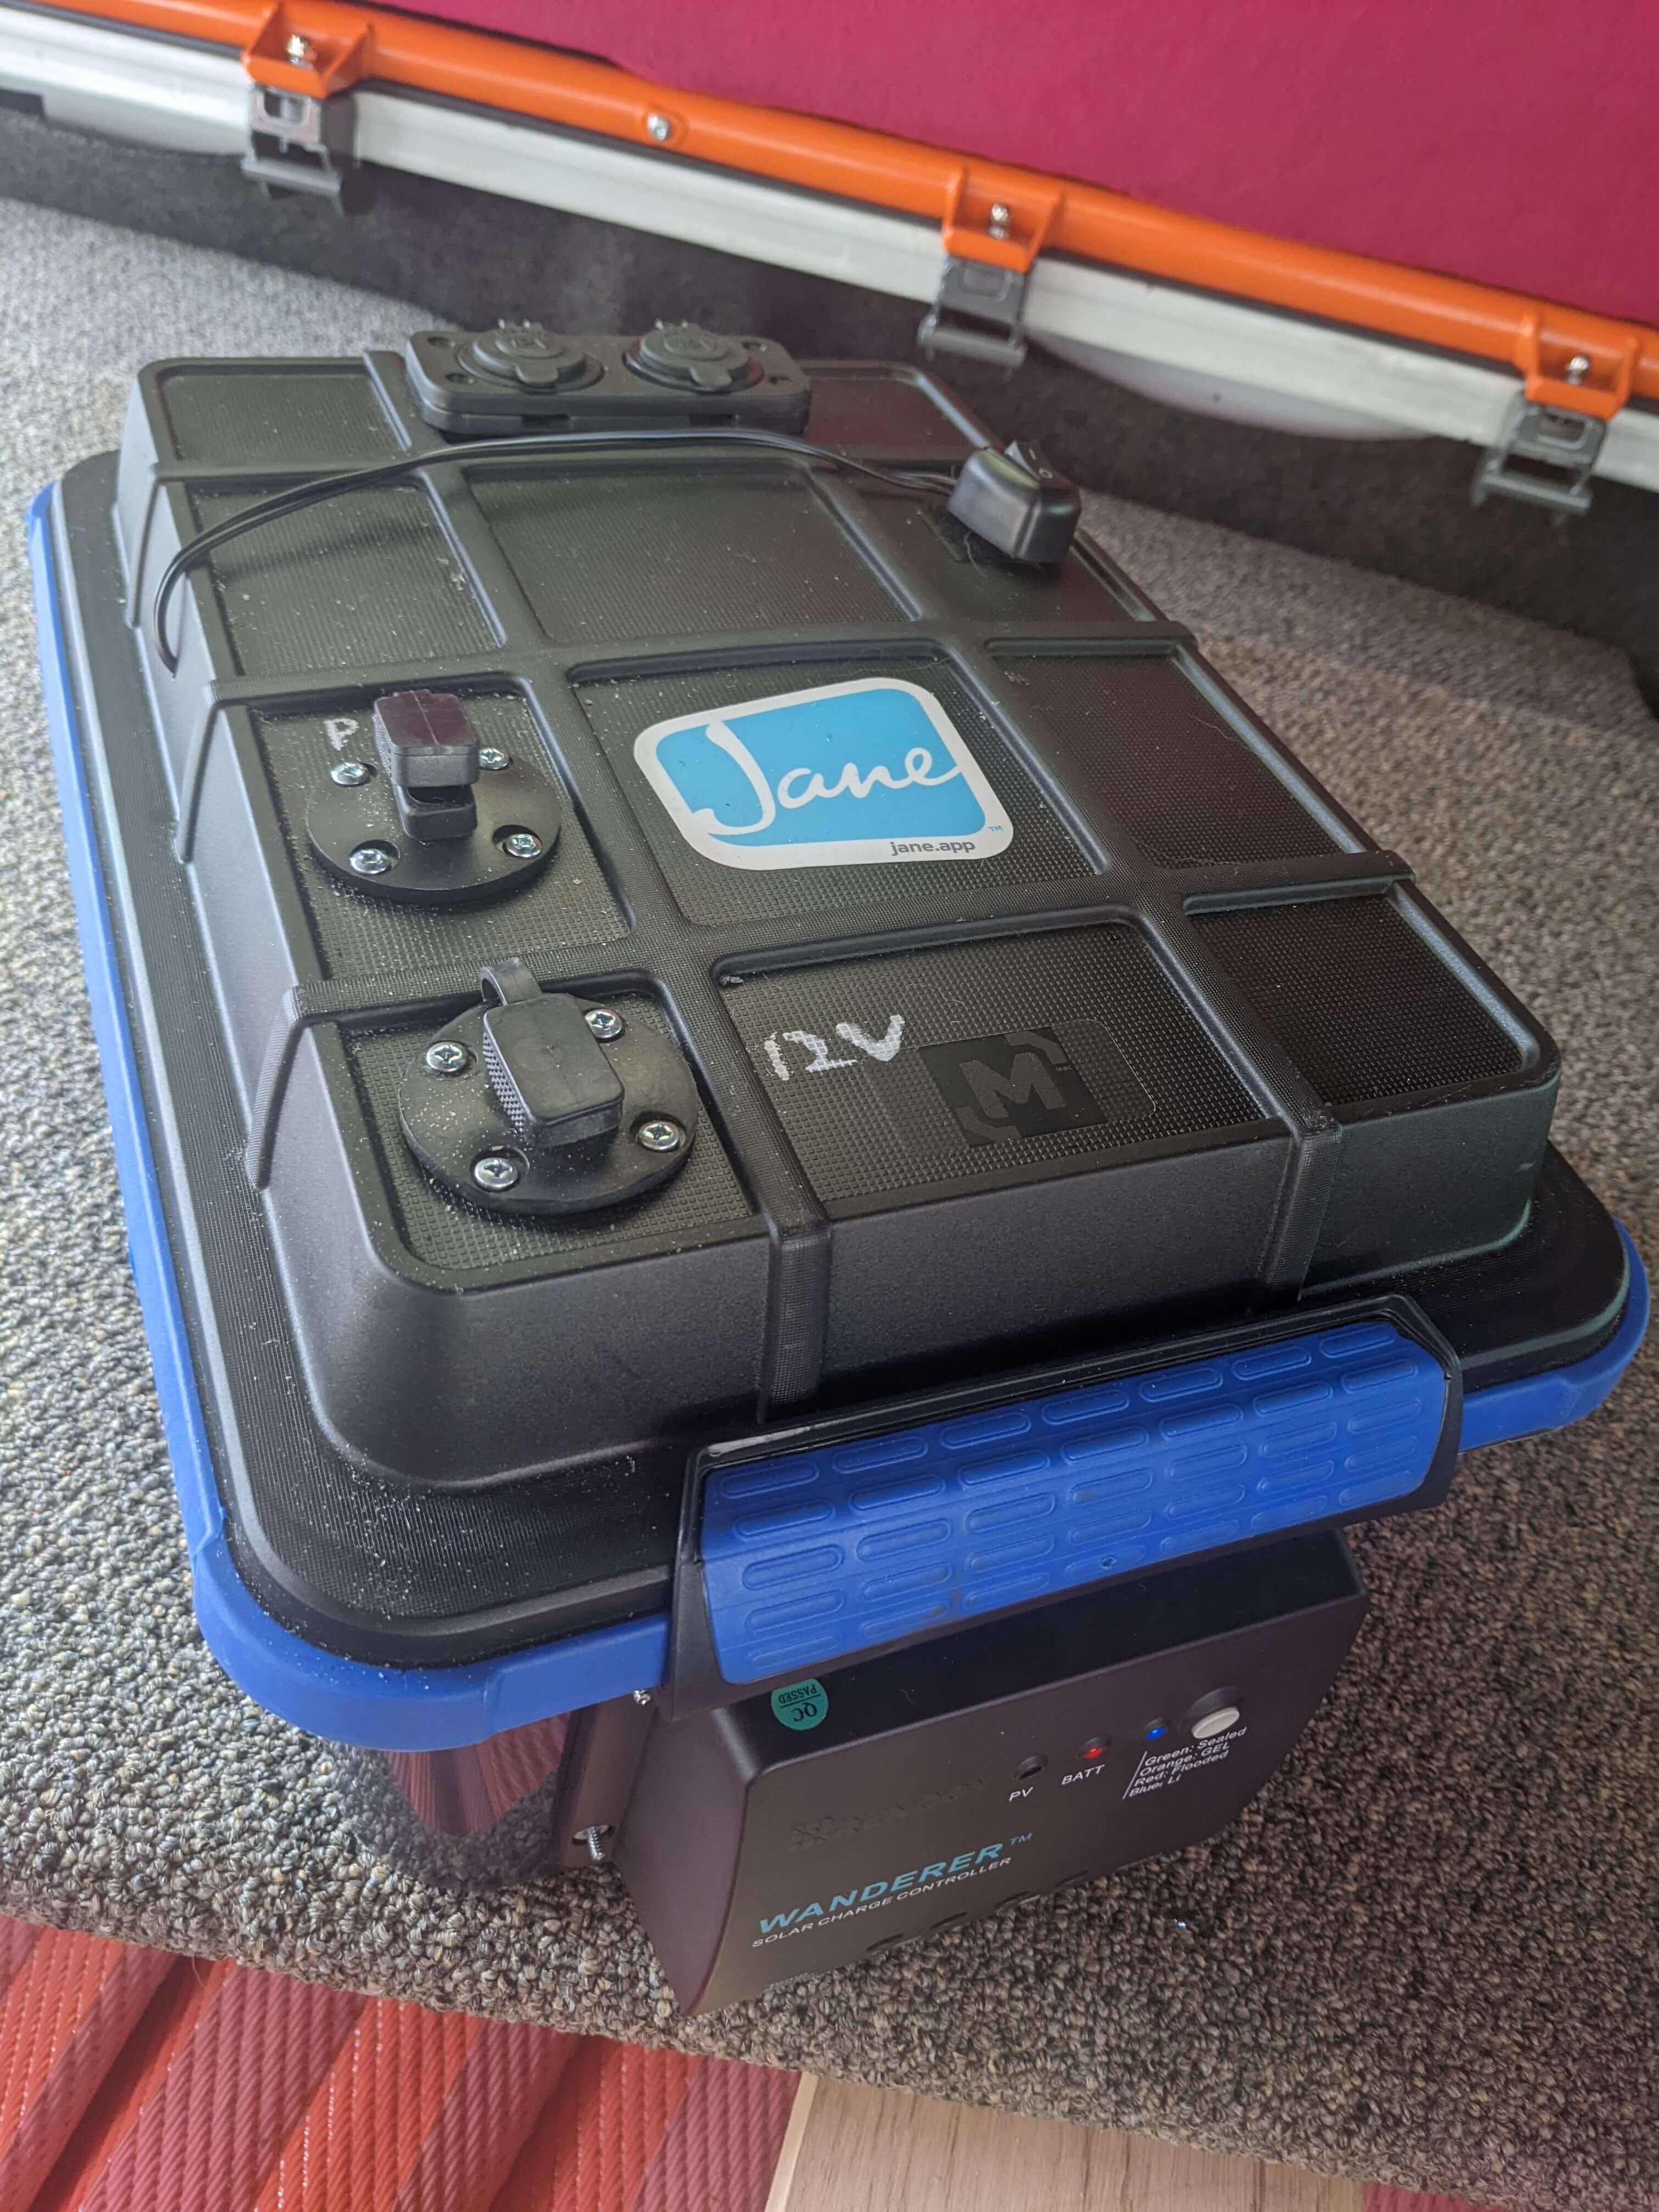
I had built this little battery in a box while I using a standard truck shell setup for camping, and it slots super well into this camper. It fits really nicely under the platform in the front passenger side corner and can be taken out if I want to power something outside the truck, or (far more commonly) bring it inside to charge. It’s got a 100ah lion battery, with a renogy wanderer 30ah charge controller and bluetooth module.

I also wanted to make sure that I could charge this thing in the field. I added a 175 w renogy panel to the roof. I just snaked the wires along the edge of the camper and through the stake pocket into the bed. It makes for a really easy install. I used some of these round bar mounts to hold the panel to the yakima round bars. I was planning to mount more like eric’s build but just mounting to the round bars was so much simpler to start with. I may upgrade in the future.
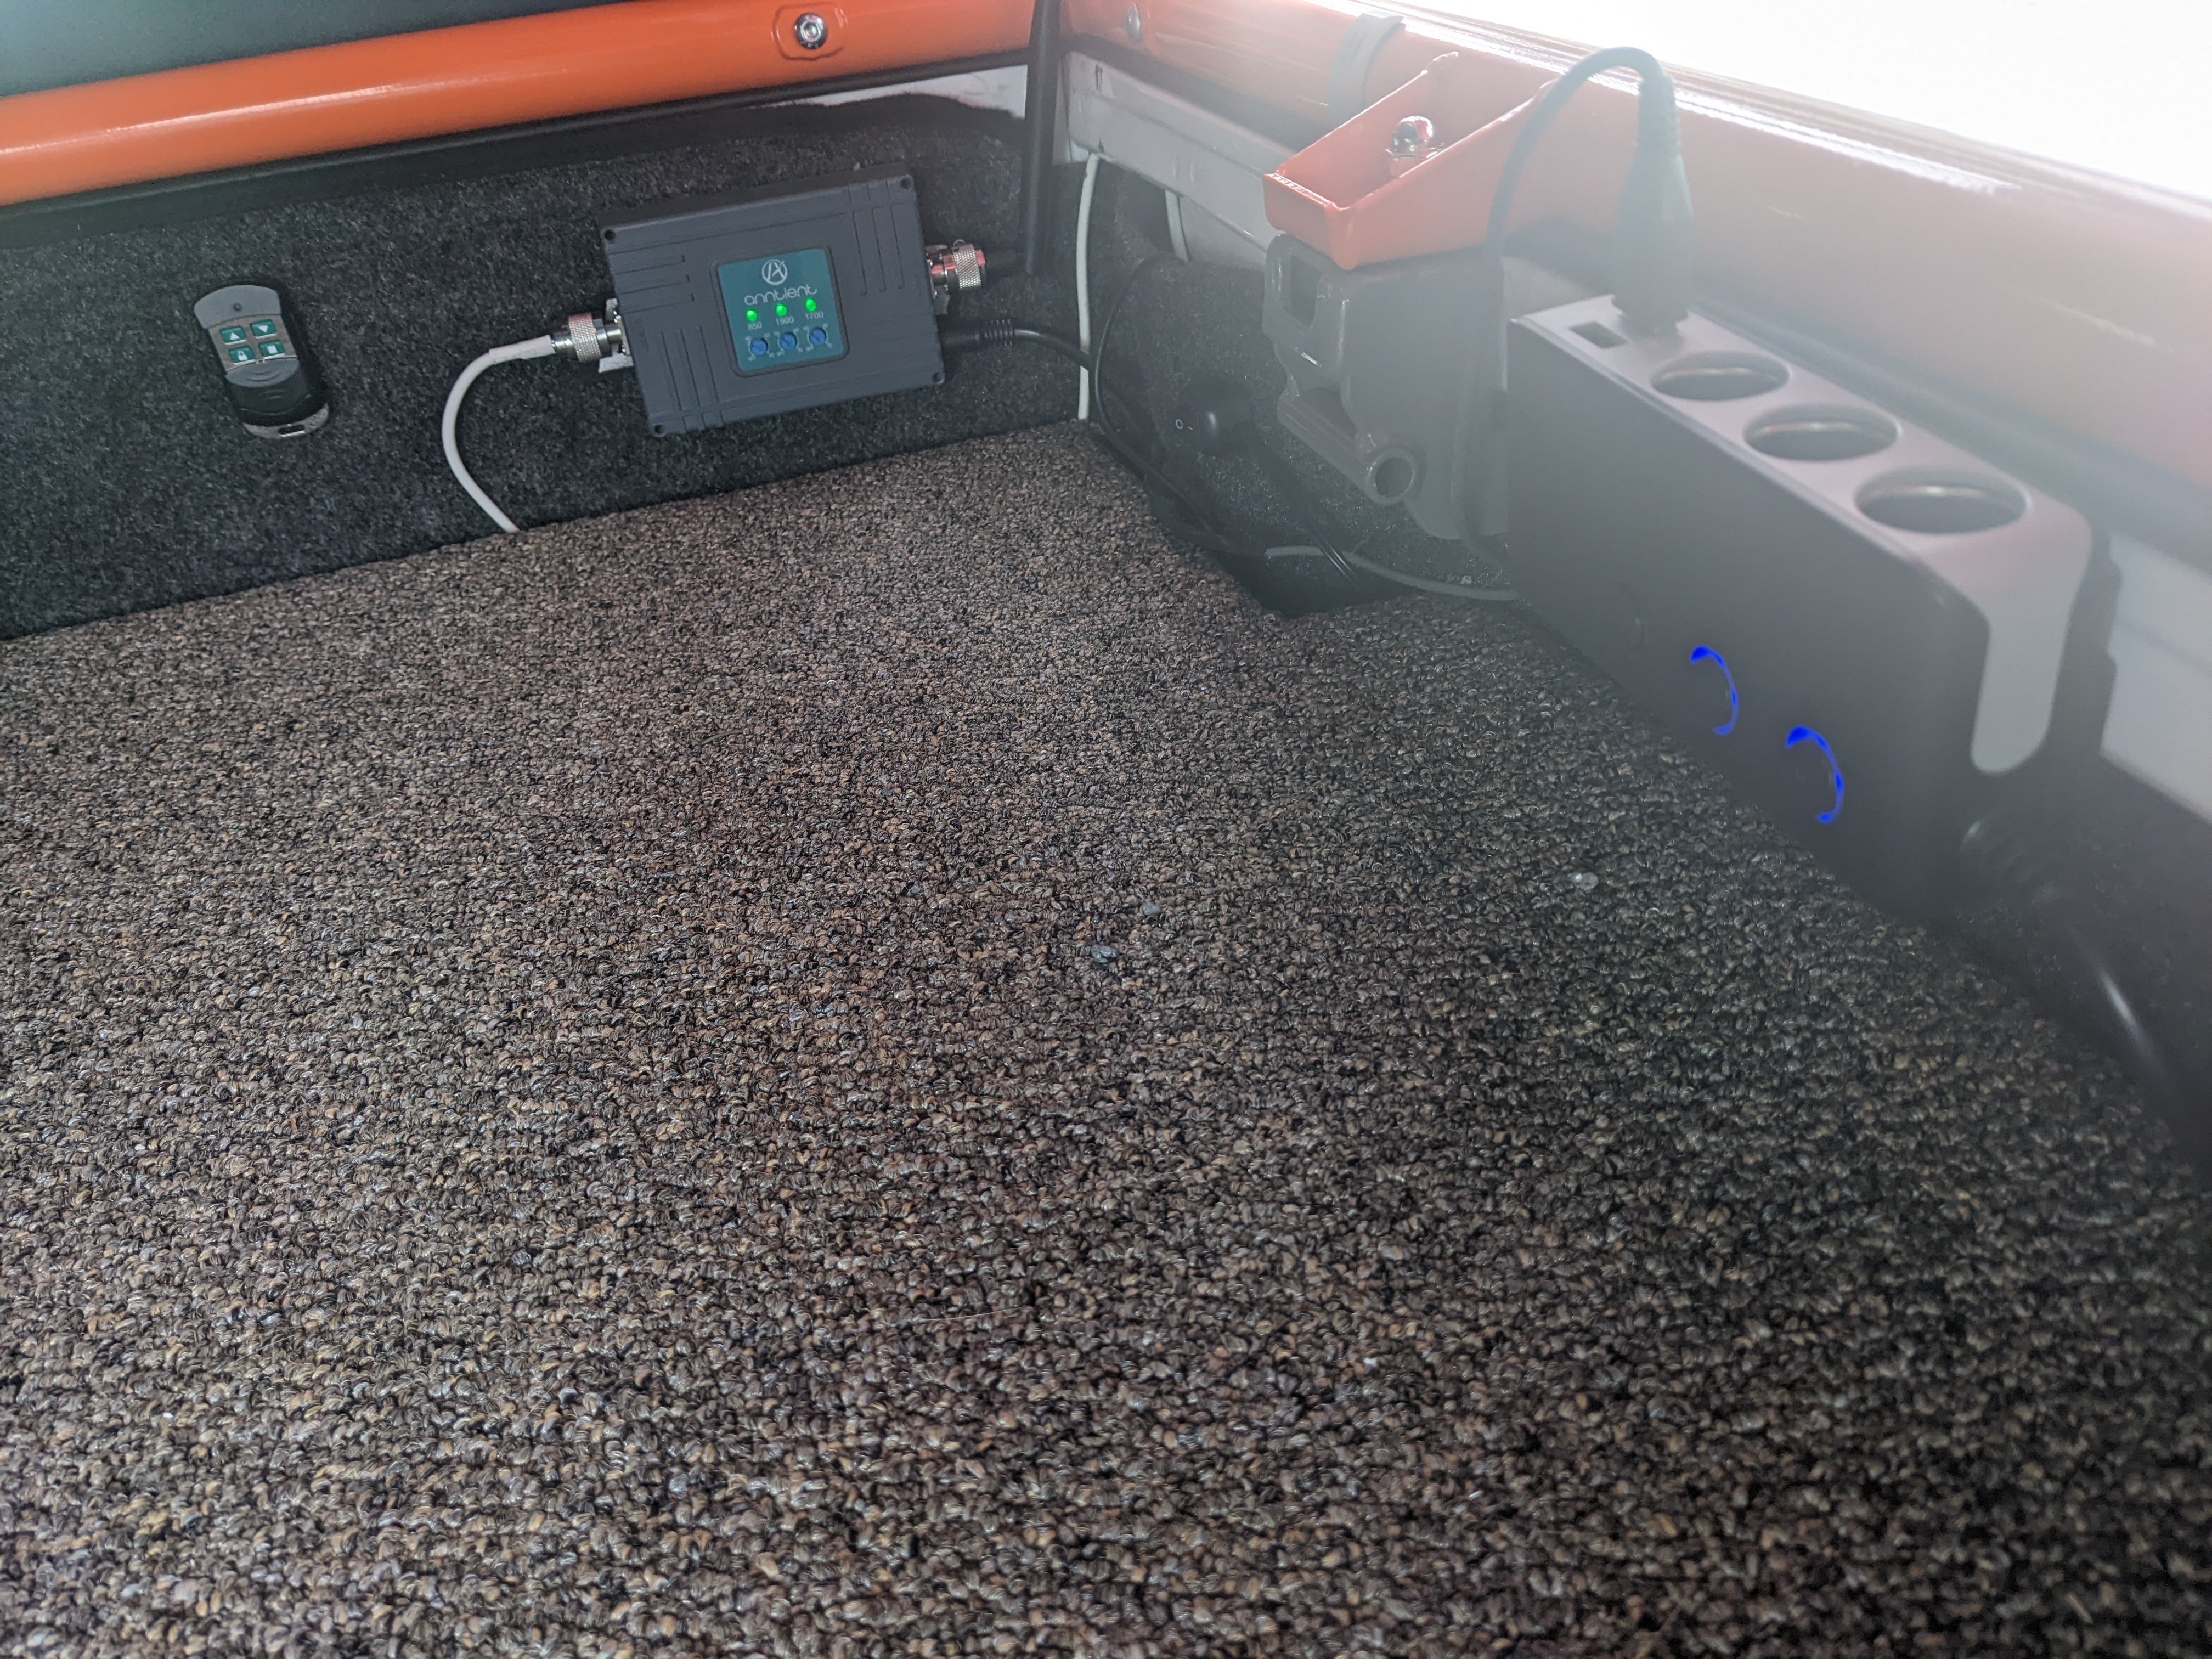
I have a few little electrical goodies mounted above the platform. I have a cell signal booster and a power hub. It’s all just mounted with some industrial strength velcro.
Insulation
As for the lower portion, I just cut some foam board to size, glued felt to it and Velcro it to the panels. I have seen this idea a few places on here so I definitely can’t take credit for the idea, but it sure does make the camper feel cozy. It’s time consuming, but given my use case (ski access) I needed insulation. I decided to use foil coated paneling. I can’t tell you if it’s actually better but the theory makes sense.
Insulating the tent is a little more complicated. I spent a lot of time thinking about how to do this. You have probably seen this thread where everyone is brainstorming on how to do this. My partner is ridiculously crafty and was willing to help me try and sew something. We worked together to put together a pattern that would work. Essentially it is a 3d blanket that my partner lovingly cut and sewed together for me. We installed velcro on the ceiling of the camper and sewed it on to the blanket. The blanket essentially just drapes down the sides and back of the tent. It feels really cozy in there!
I bought these blankets as material for this project. They are very cheap and seem quite waterproof. The waterproofing is a double edged sword. On one hand it needs to be water resistant given that it will be in contact with the tent and it will definitely have some condensation form on the inside of it. On the other you want water vapor to be able to leave the tent. I will definitely need to do a good job venting this camper given the lack of permeability, but at least it is controllable now. The insulation is relatively thin but I think it will be quite helpful in holding in the heat on cold Canadian nights. I will probably upgrade to a commercial unit when one is available for purchase, but for now I think this is a pretty major upgrade. And yes, I can close the tent with these in place.
Heat

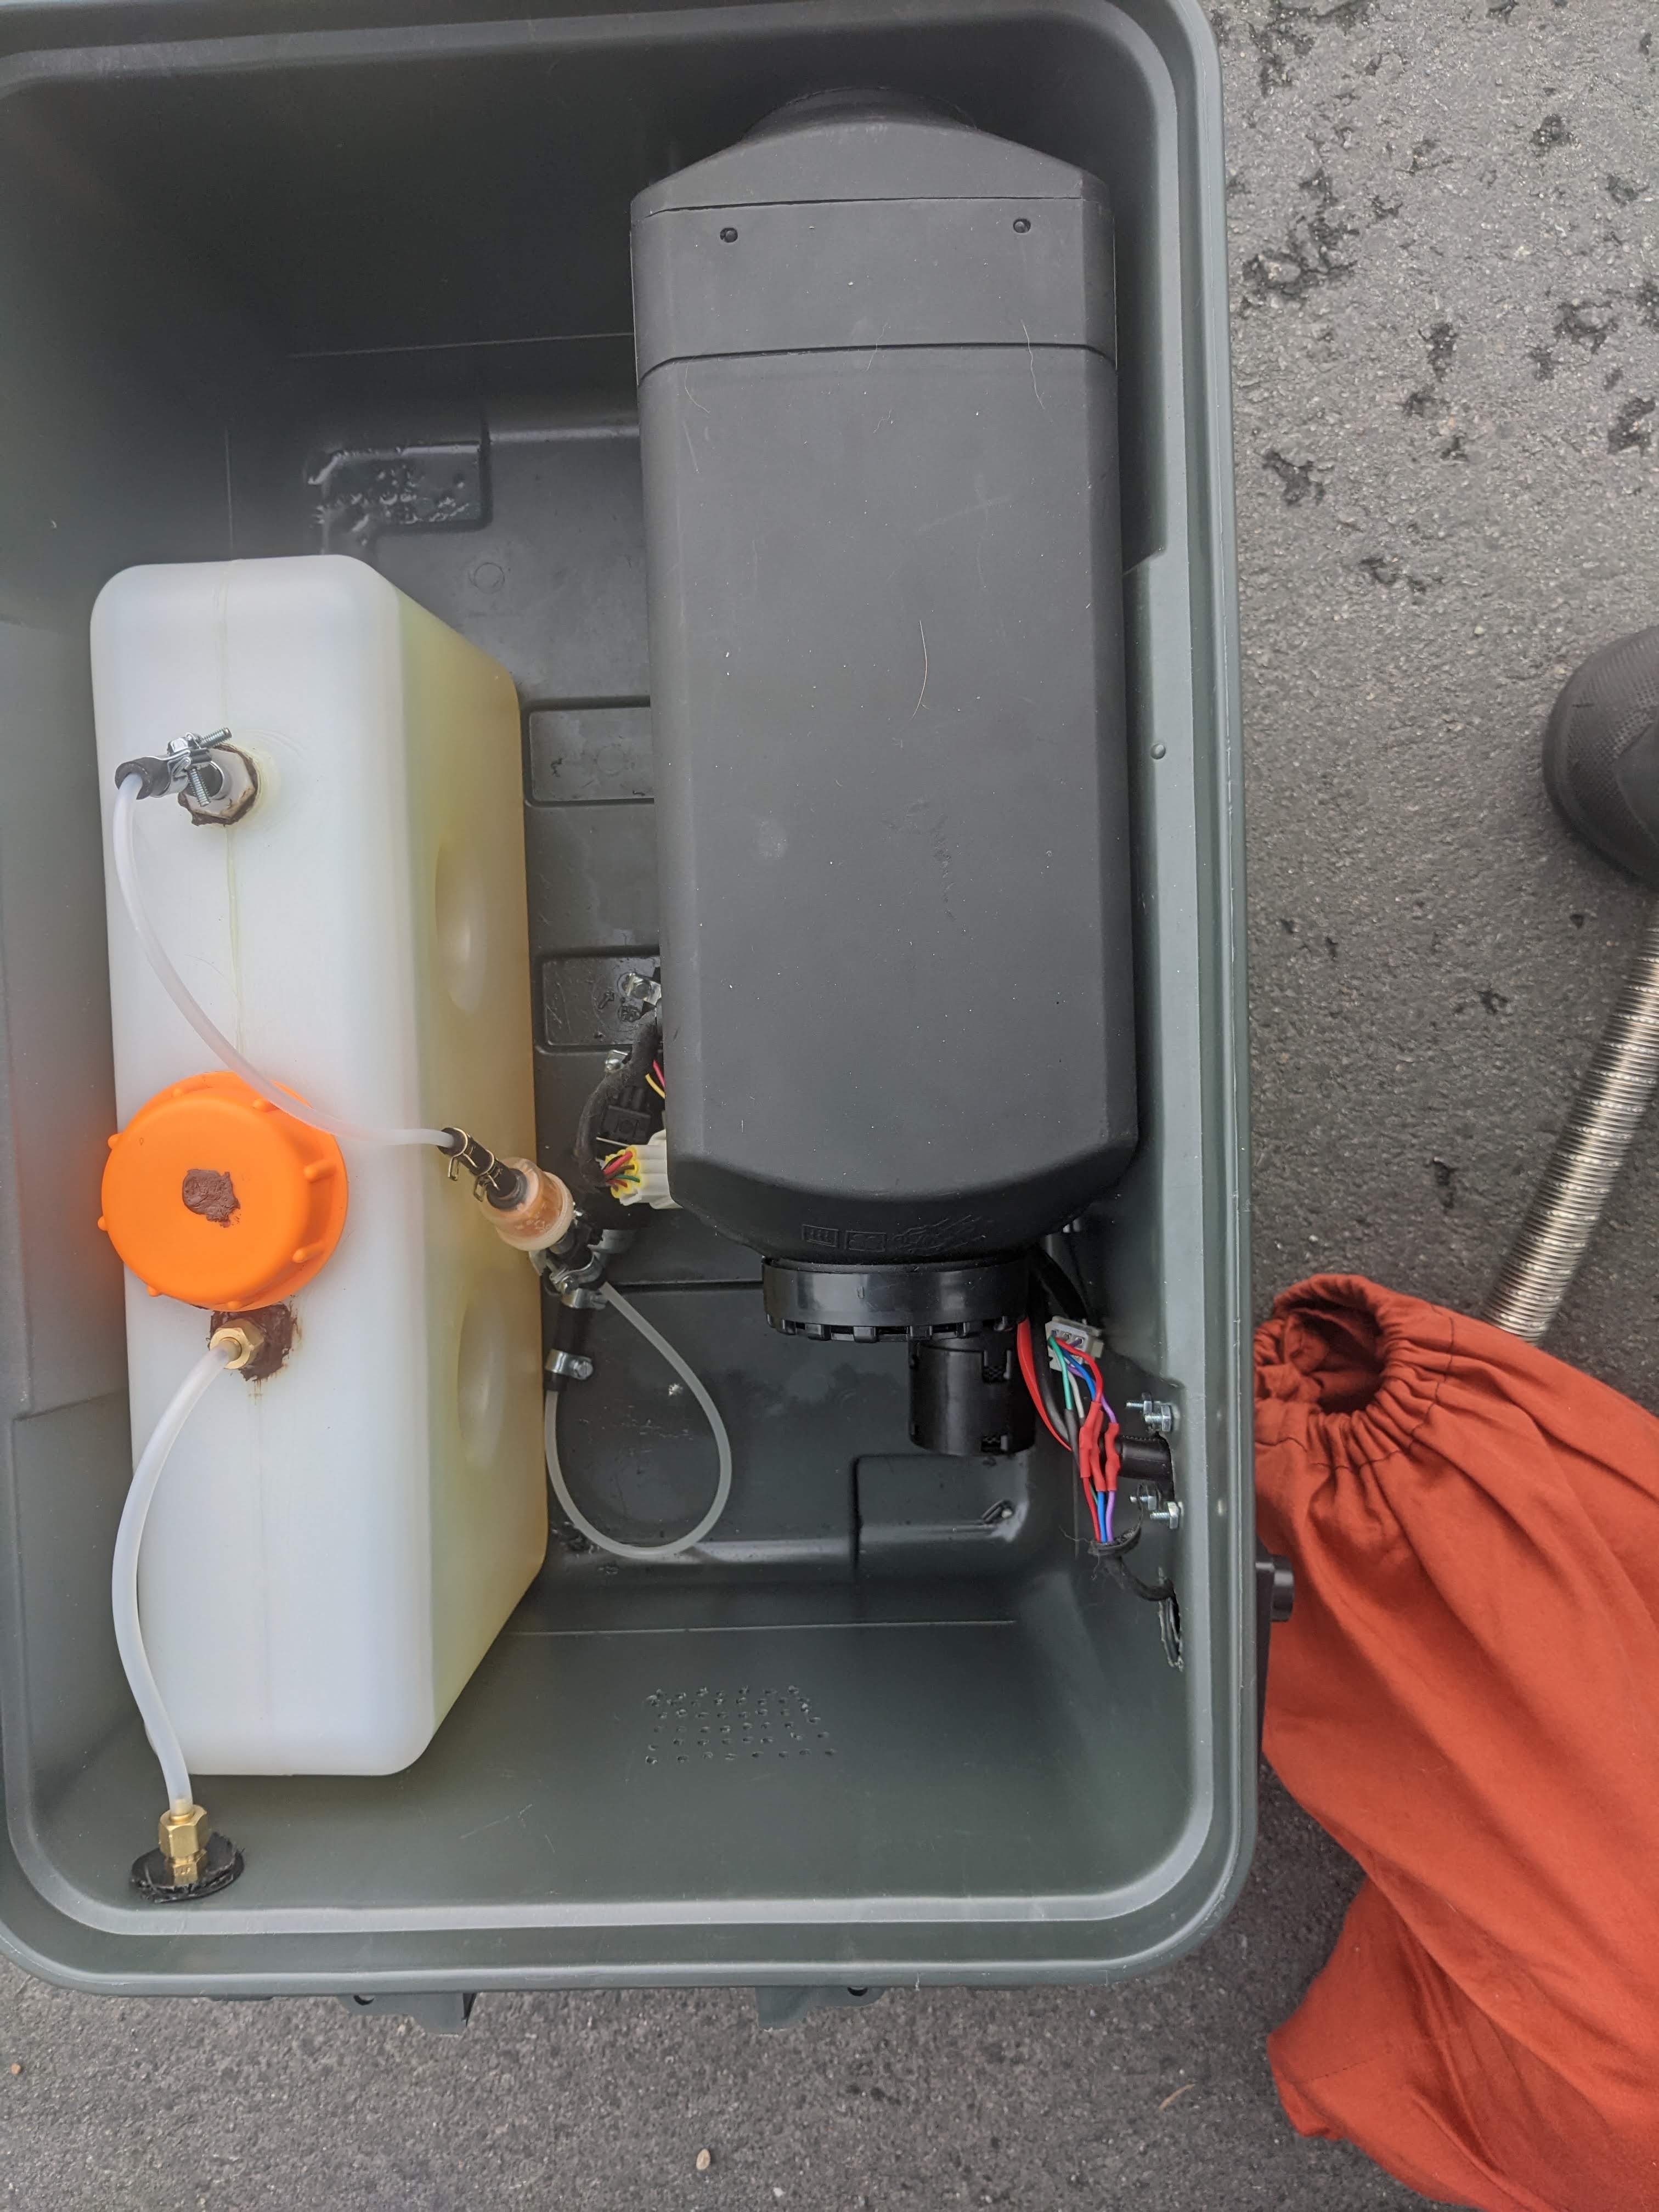
I have a simple little diesel heater in a box that I put together to keep this camper nice and warm. The one ‘different’ thing I added that I haven’t seen on countless other posts about these was the fuel tank breather tube. In theory, a fuel tank cap should have a one way valve to allow air in as fuel is used, but keep the tank from venting fumes. Most of the cheap ones from china simply have a hole in the top that has a tendency to leak fuel. I added a breather tube outside the box with a sealing cap and covered the whole in the tank fill cap with some form a gasket. That way when the heater is in the truck the fuel tank is completely sealed, and when it is in use any fumes are vented away from the air intake. That was the idea at least, I have no idea how well it actually works.
Misc
This post would not be complete without a shout out to [J Edgar designs.](http://jedf.us/) I have his mag spots, hatch latches, and tent locks. All of these things were out of production when I bought my camper. I contacted Josh to see if he could help me build my own (because he wasn't making them any more) and he made some special order for me with ridiculously fast shipping to Canada! I will definitely be hunting that guy down to buy him a beer the next time I am in bend.Less of an upgrade more of a preference. When I am by myself I like to run the camper in ‘bunk mode’ and leave the square panels at home. When I go out with my partner I leave the mattress home and run a megamat duo. Both options make closing the top significantly less fiddly and leave a bunch of extra living space in the camper.
Happy camping y’all!