Drilling into side panel, mounting Expedition Essentials/MaxTrax - tips/tricks?

About to endeavor mounting the (Recovery Board Quick Mount (Maxtrax Mount) for Maxtrax MKII - Expedition Essentials) and maxtrax to the side of the camper.

Anyone have any tips/tricks? Use something like a center punch hole (https://www.amazon.com/gp/product/B008DXYOLC/ref=ppx_yo_dt_b_search_asin_title?ie=UTF8&psc=1) and any standard drill bit after? Seal with Sika (Amazon.com)?

For those interested, I did get upgraded struts to try, the first one was recommended and used by someone in the awning thread, to lower the clearance a bit, but also is upgraded to 50lbs lift, from 40lbs stock (Suspa C16-12104 Multi Purpose Lift SupportLift Support) so I know 100% they will fit.

The second one I figured I’d try is around the same size, but with 70lbs of lift (Lift Supports Depot 4511M10 for the Universal Applications) don’t know if it will fit, but looks very similar in size (holding them next to each other right now).

FYI The mount is 10lbs and each maxtrax is around 8-9lbs and there is 2 of them. I hope the hinges hold up lol not worried about the struts. If Shaun from the story till now can run this while wheeling like crazy (


), I have hope for the hinges…

2 Likes

I love those mounts and want one for mine badly but they also need to be about 200 dollars cheaper!!

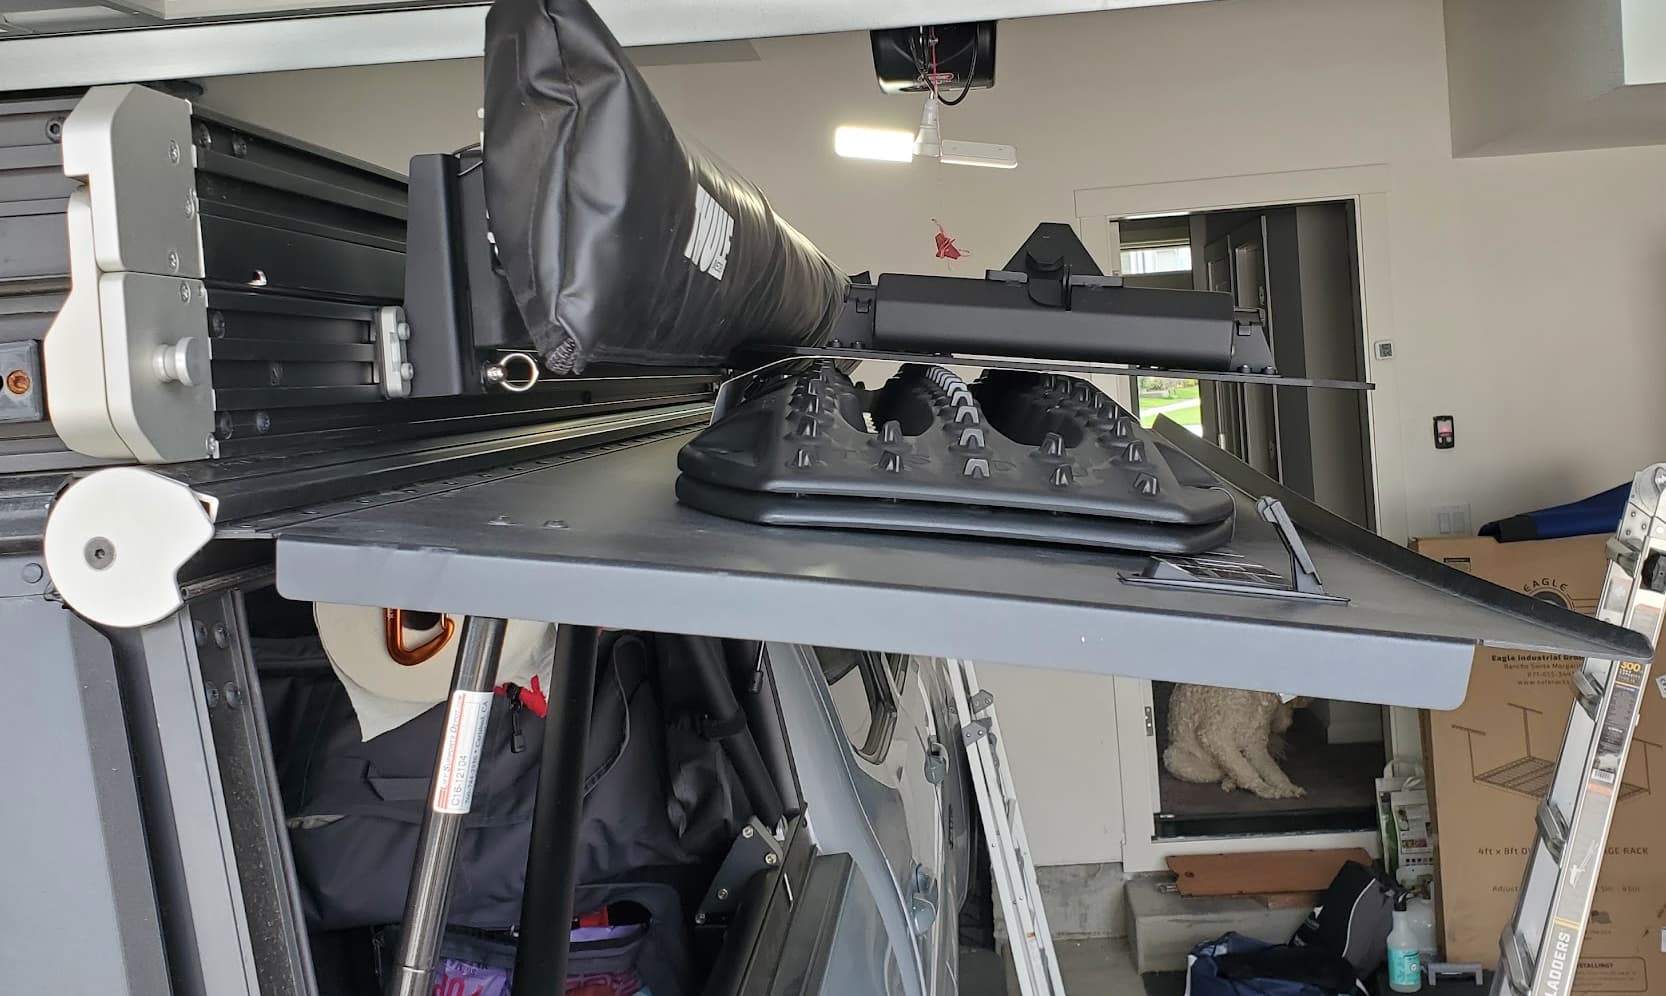
FYI did a test fit today and it looks like the 70lbs strut is a NO GO. This is just my opinion, but I would be very weary of going anymore than 50lbs, as when I put on both 70lb struts and pulled down the panels, the place where it is riveted felt like it was flexing as well as the hinge felt like it was flexing. Hard to explain it, but the force needed to push down the 70lbs strut looked like it was flexing everything and “pushing” out the panel from the hinge as well as the rivets. I immediately took them off and would not recommend.

The 50lb struts were perfect. I needed to get some for my awning anyways, and the way that they held the maxtraxs + mount, I could live with, esp mounted further up on the panels.

Re-ordered 4x more 50lbs struts to go all around, as it will be able to hold what I need as well as be perfectly aligned with my incoming FSR 270.

Doesn’t look like many people have opinion on this process, so when I actually do the drilling and mounting, i’ll document.

4 Likes

So I still haven’t had time to fully do this yet, but wanted to update with the limited time I had this weekend to prep. Should be able to do the drilling and mount soon.

Measure twice, cut once they say…

First, gotta line out where the support beams are first. Used super strong rare earth magnets to line them out. Super recommended.


All lined up.

Measured and found the middle


Marked all the holes so I know which ones to pick to drill.

Will update in the next few days of the drilling process - that should be the easiest part, the measuring took a while to get perfect.

3 Likes

@babyyota - Way to measure at least twice and marking things off for success. :pinched_fingers: The breakdown regarding the struts is SUPER helpful, and those 70 pounders are definitely a bit much. We would recommend struts rated for 45-50 lbs as well. You might have mentioned this, but are you mounting to the panel so you can still fit the taco into your garage?

In case others are looking to follow suit I do have to mention, any alterations made to a panel will void the warranty for that specific panel.

2 Likes

One year later lol:

Mark again just to make sure:

Use a center hole punch to make the initial hole drilling a bit easier

Drill

Hole

Mount up with a the first bolt to hold it up and tape it around to secure it

Make sure everything is measured so it’s leveled

Drill into the holes (worked actually really well)

Get out your Sika

Sika the holes from the outside

Mount and sika the holes from the inside

Profit

Placeholder for notes:
Again, these will require at least the 50lb strut

Bolts
https://www.amazon.com/gp/product/B07TJN6L2J/ref=ppx_yo_dt_b_asin_title_o03_s01?ie=UTF8&psc=1

Nuts:
https://www.amazon.com/gp/product/B078NMHM8Q/ref=ppx_yo_dt_b_asin_title_o03_s00?ie=UTF8&psc=1

Washers:
https://www.amazon.com/gp/product/B08KZYQP9W/ref=ppx_yo_dt_b_asin_title_o03_s01?ie=UTF8&psc=1

The setup was BOLT > WASHER > EXPEDITION MOUNT > SIKA > GFC PANEL > SIKA> WASHER > NUT

Drill 7 holes total. Top 3, Middle, Bottom 3.

Coming back from the Alvord trip, no leaks, no rattles, no nuts loose. I’d say this was a success.

2 Likes

You make it look easy - thanks for the step-by-step pics.

looks good!
i may want to do this before August.

My #1 tip is, don’t be afraid (even if it voids the warranty on the panels, lol).

Having this stuff mounted externally and the gridwall internal has made access so much easier and freed up tons of space in the bed. #2 tip is observe all the obvious stuff like use lube, go slow, and triple-check your measurements.

I used 13" 100lbs struts on the side and 12" 65lbs struts on the rear.

Here are some pics from a recent trip. Adding gridwall to the inside of the rear panel helped a lot.