Heaters in the camper

This looks awesome! And very similar to the case I have but WAY cleaner! You may want to consider adding some venting to the case. You’ll be surprised how hot the ambient heat off the heater and exhaust will create. You don’t want the unit to overheat or you’ll burn out the motherboard.

The Bluetooth is clutch; I’m using the same heater in my Toy Hauler it’s been working great!

1 Like

I have a pair of computer fans on the way for venting and I think I’m going to fabricate a metal plate where the exhaust exits so I don’t melt the Plano box…maybe a small sheet of aluminum riveted to the box.

Here’s the finished interior shot. The Y fitting, a 16ft heater duct, and the exhaust fit with room to spare. I’ll add another 10ft length of duct in there as well to heat both truck and trailer.

I also rerouted the exhaust to get it further from the air intake.

Anderson on the outside to get power to it. I may drop a lithium in it at some point and have a fully self contained unit.

1 Like


So these days we empty the bed less between trips… but it’s still really clean and modular. We could tear down 90% of this in a few minutes.

1 Like

which fire extinguisher and mount is that?

It’s a quick fist mount for a full sized extinguisher, a Colorado sock made into a sleeve, and a standard red extinguisher.


1 Like

thanks!!

NO worries!

I’m on the 60mm duct search as well - did you ever find something flexible and compact for this size?

Just thinking out loud has anyone tried using a more available off the shelf size/ feature combination and just fabricated/ 3d printed an adapter?

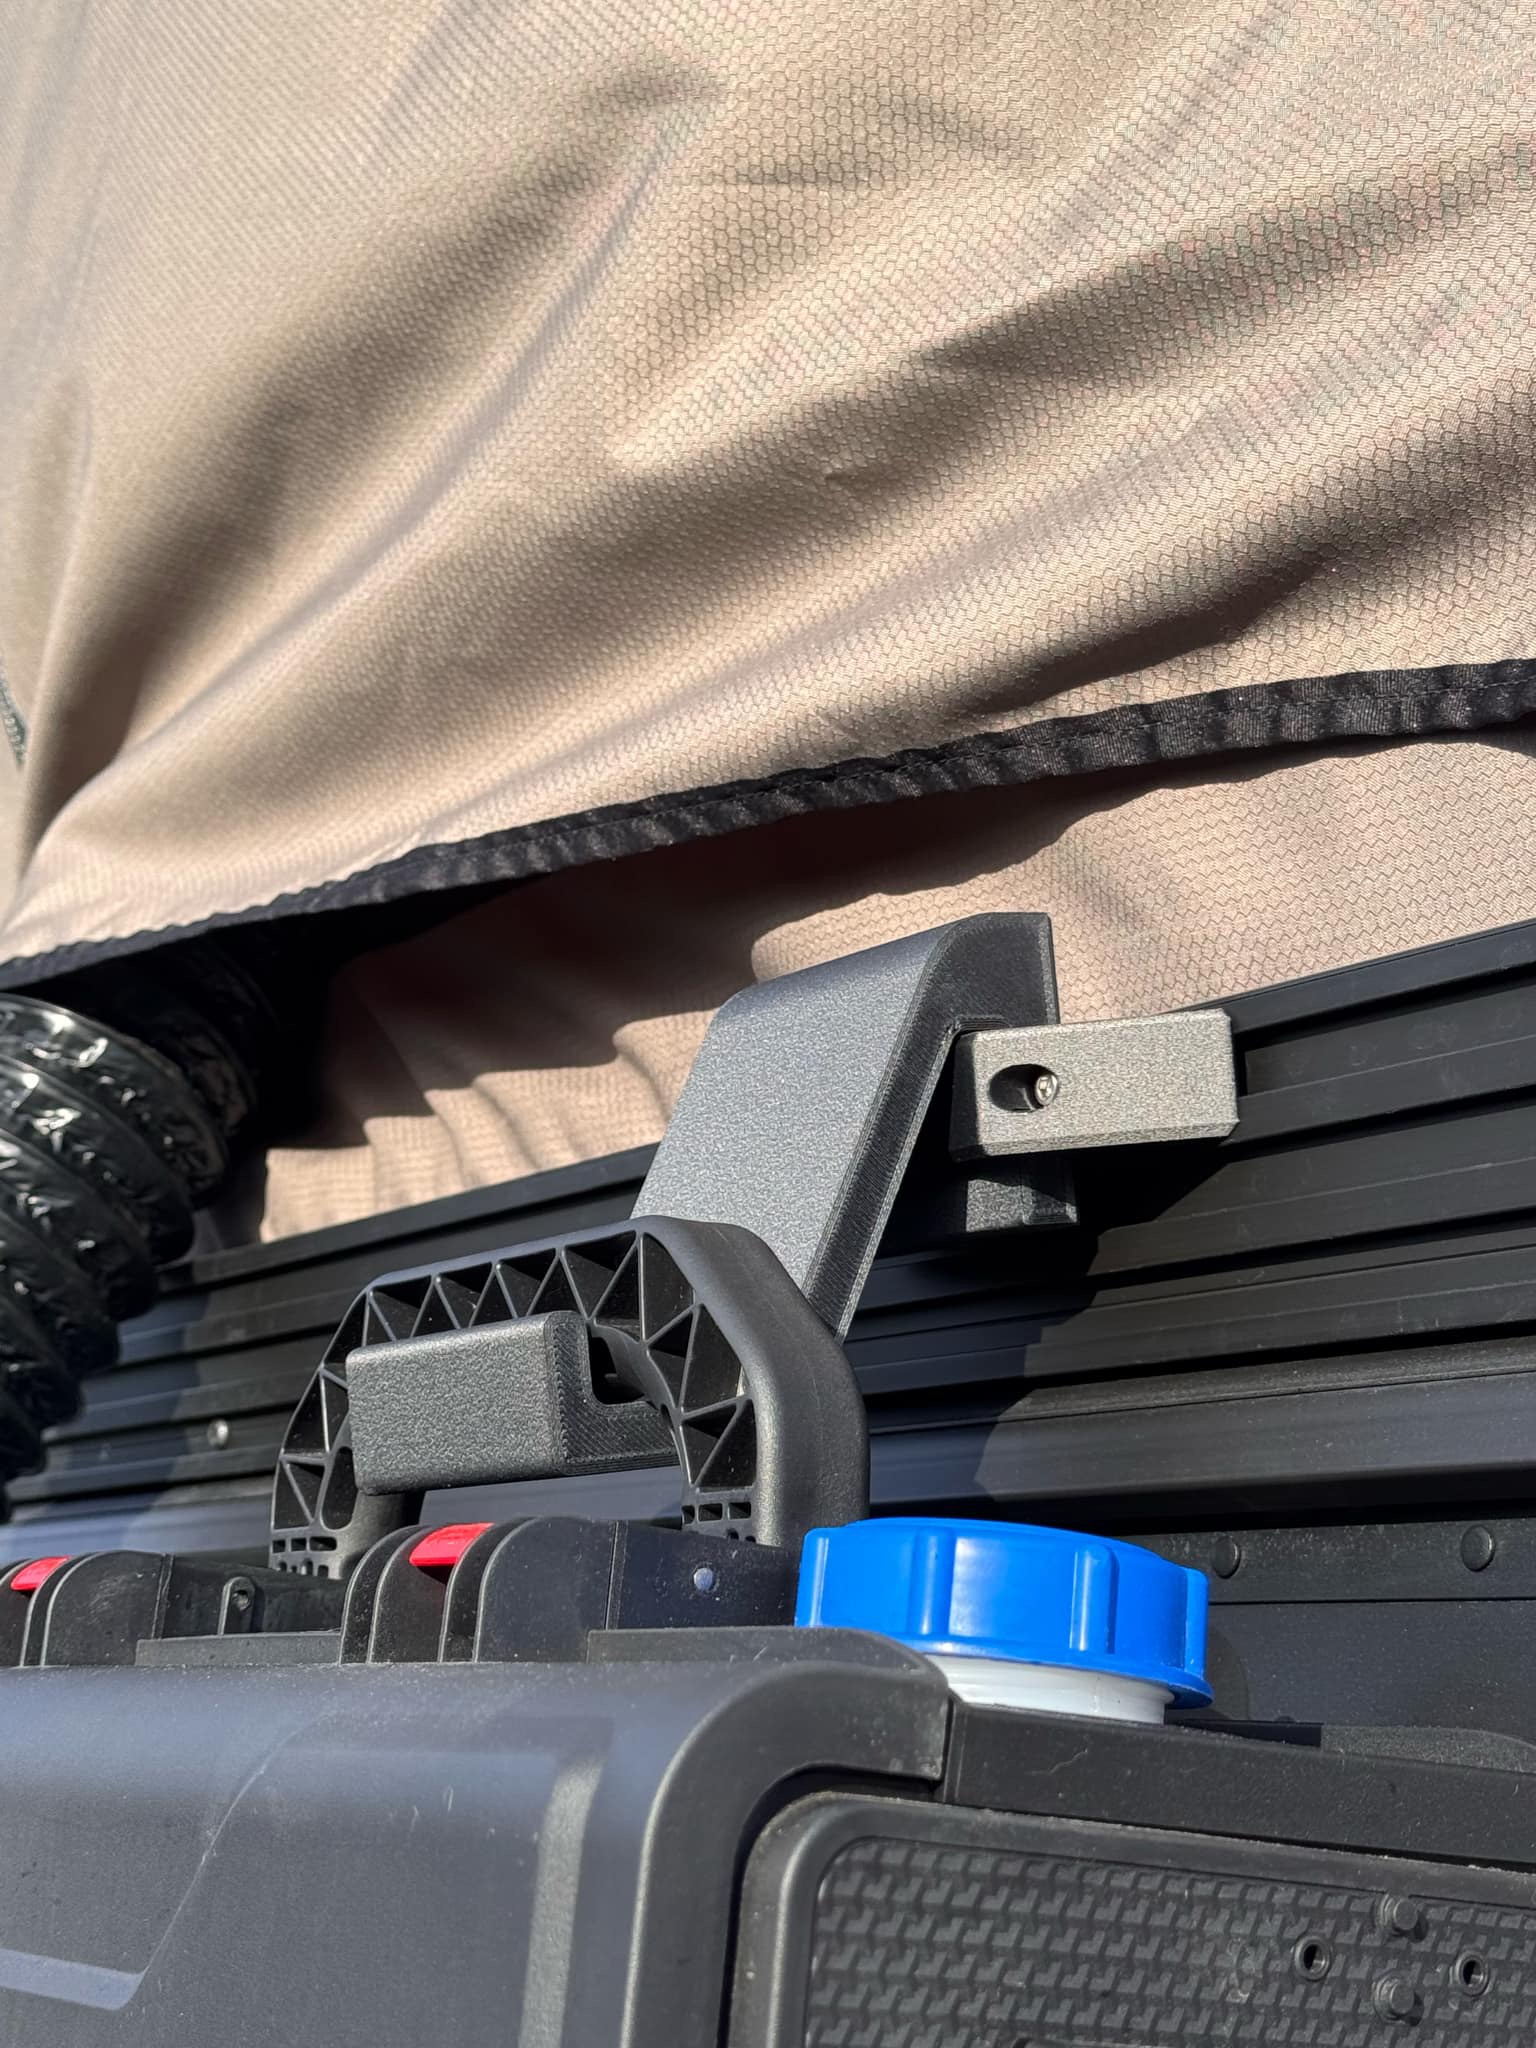
Scrolling through and seeing some of the setups. This might be of interest for some of you if you’re wanting to find a mounting solution and/or shorten your heater hose.

1 Like

Nope. I just use a 60 → 75mm adapter right at the outlet of my heater and then run the easier to find 75mm hose from there.

1 Like

Just got my heater installed on a tire step! 2kW Vevor heater. Wish it was a little hotter, but I’ll test it this weekend and see how it does. I also used a 60 → 75mm adapter right at the heater output, then attached a 75mm aluminum foil hose I got from Home Depot to run up to the tent. No bad smells from it like ones I’ve read the Amazon hoses can emit. Spent some time searching for 60mm hoses, but couldn’t find any good cheap options. Plus apparently the wider hose can help prevent back pressure

Anyone here using one of these? I really like the idea of no diesel.

I run a propex HS2211 mounted outside, so very similar. I sold my Planar diesel heater after a few uses due to the headache and stink of diesel. I have been very happy with it. Super efficient and zero issues, plus you can get away with a less powerful battery because there is no initial big draw. Diesel heaters are cheap, but if you can swing the cost of the propex it is hard to beat in my opinion.

2 Likes

Thanks. That’s what I figured. The PS2000 is fairly new but I expect it will be fine.

In continuation of the heater evolution I just installed a Propex HS2211. I keeping with my design ethic of being able to have the bed fully usable outside of camping/short term residence I am really stoked on this solution.

My previous build, detailed here, I used a diesel heater kit that I found on amazon to test, see how much we actually use a heater, and if it is worth it to us to invest in a longer term solution. (If anyone is interested in purchasing the components of this kit, please DM me. The cubby is a custom one 1 of 1 for a 3rd gen Tacoma.)

I was able to use what I learned from the diesel kit to find unused space within the envelope of the truck between the fender and the bed to mount a Propex HS 2211 (since it is out of a sealed environment going with the waterproof upgrade made a lot of sense). If you have any questions about the build, I’m happy to answer them.

I am still waiting for my propane bottle mount, and needed a few parts to clean up the regulator mounting. I will post additional photos once that is complete.

Build Process:

Final test fitting and marking holes.

It is tight up there and this 90deg adapter was crucial.

Mounted and starting plumbing. The spacer we used for the lip that the bed has is 18mm baltic birch ply that has been sealed with polyurethane. Then it was adhered to the side of the bed to prevent rattling, and for fine tuning fitment some super custom spacers (washers, and a random nut were used. To help isolate any potential noise, neoprene washers were placed against the bed/wood on both the outside and inside.

To make this project easier the tire and fender liner were removed. I used some pipe insulation to protect the heat out and cold air return ducting from the sharp edges of the fender liner support.

The location of the hot air inlet, I used the existing vent location from my diesel heater.

Continuing back along the bed, the pipe in the foreground is the combustion air inlet that will be above the fender liner to keep most of the water and dirt out. For my cold air return I drilled a hole in the side of the bed storage box. The blue thing is the back of my power panel you will see in the last two photos.

Plumbing completed. The exhaust runs to a through hull fitting in my driver side fender. We spend most of our time on the passenger side of the truck (it’s also where the awning is) and we wanted to be able to spend time outside without having to worry about exhaust being vented onto us. In the background is the propane line, I placed pipe insulation on it to protect it from rubbing.

View of the inside of the bed. You can see the five bolts and fender washers (with a neoprene washer under each one) that are supporting the heater. Also if you look carefully above the right side of the regulator you will see the hole for the propane line (I have a gland coming to seal that). The hot air inlet is just out of frame above the wheel well.

Power panel for 12v and USB, also it acts as the power isolation switch for the heater. Also the thermostat showing where the wires exit to the bed. After wiring I sealed this hole from the back with electronic grade silicone to prevent water intrusion.

View with the thermostat in its final location.

Wheel well post install, the only real visible thing is the silver exhaust pipe running to the drivers side.

6 Likes

Tested the 2kW heater this weekend up on the north shore of superior. First night it was down to almost 0°F. Heater wasn’t strong enough to heat my whole bed + tent with the tent floor removed, but for sleeping it heated just the tent enough to make it comfortable (but still a little chilly). The next night was closer to 20°F and the heater kept the tent super warm and toasty. The fuel tank on my heater is about 2L, and it was enough to run on high for around 7 hours. Absolutely no condensation in the morning! Overall I’m pretty happy with it, and it will be great for the remainder of the winter camping season. Next year I’m hoping to do longer ski trips out of my GFC, so I’ll probably upgrade to a 5kW to make it more comfortable for hanging out in my truck bed for extended periods of time. Seems like it’d be cool to do a keegan builds heater like @GainzGFC and hang it from the meat hook @Eisenheim just posted above. The tire step is nice but it does take up more space than I like and requires a lot more hose to run into the tent. More heat and a larger tank will make this perfect!

1 Like

I have determined that after using my integrated 2kw heater that it’s only good down to about ~10ºF. Of course that is only sleeping with something like the aeronaut/light clothes. That is with also having the floor of the SP open on one side. Downstairs still stays about 65-70º. I am thinking of making a magnetic mount to route the heat upstairs and split it between top and bottom. 5kw would likely be better but I love how little fuel the 2kw heater sips!

Edit: mine also dumps directly into the bed of my truck - I am not losing heat running a hose into the truck.

2 Likes

make sure you bring a small pin with you in case you have to reset the controller. Any stick you can find that fits in isn’t stiff enough to depress the button. Have needed to do it when i didn’t turn on the propane first, and once just randomly.

1 Like

Thanks for the key detail. Always great to learn from others experiences.