@jedgar Interesting… Love this idea — I always assumed charging my Macbook would require an inverter, even with USB-C but I guess not. Do you have a suggestion for a usb-c socket that I could permanently mount on the cover here? Not sure if Blue Sea makes one.
I have this one which is awesome as it can pull 72w. Not sure about a permanent mounting solution.
https://satechi.net/products/72w-type-c-pd-car-charger-adapter
1 Like
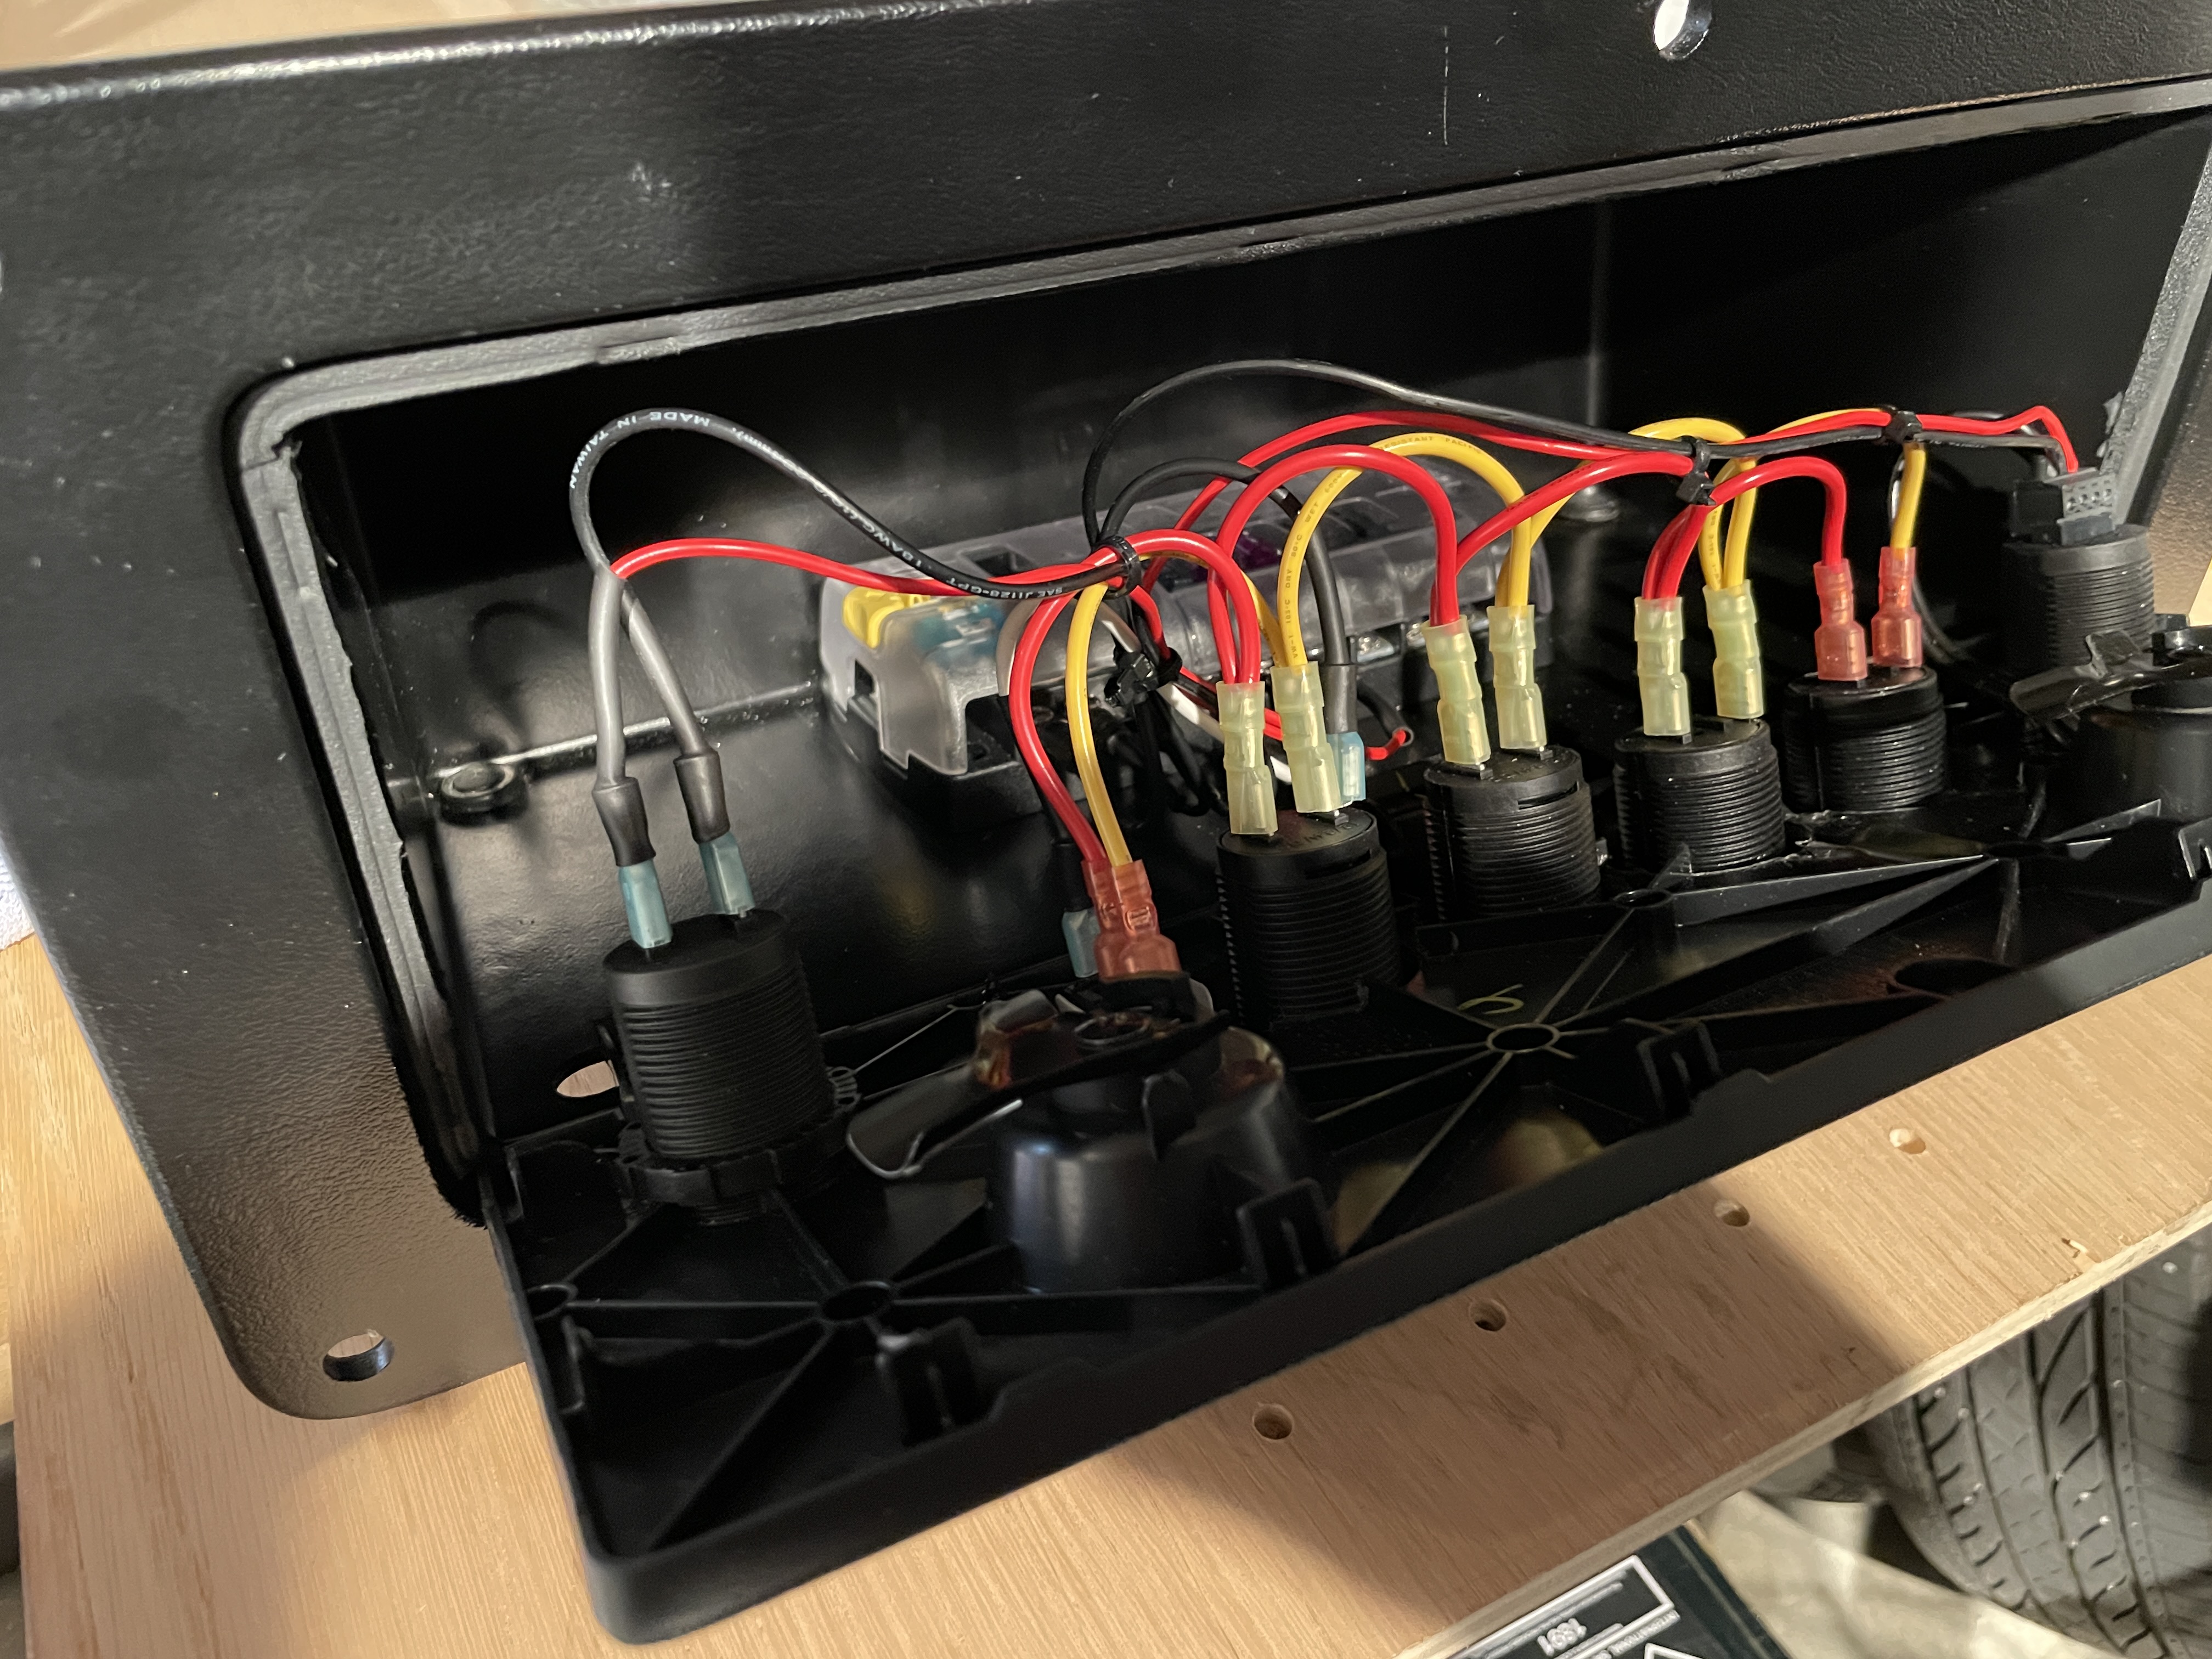
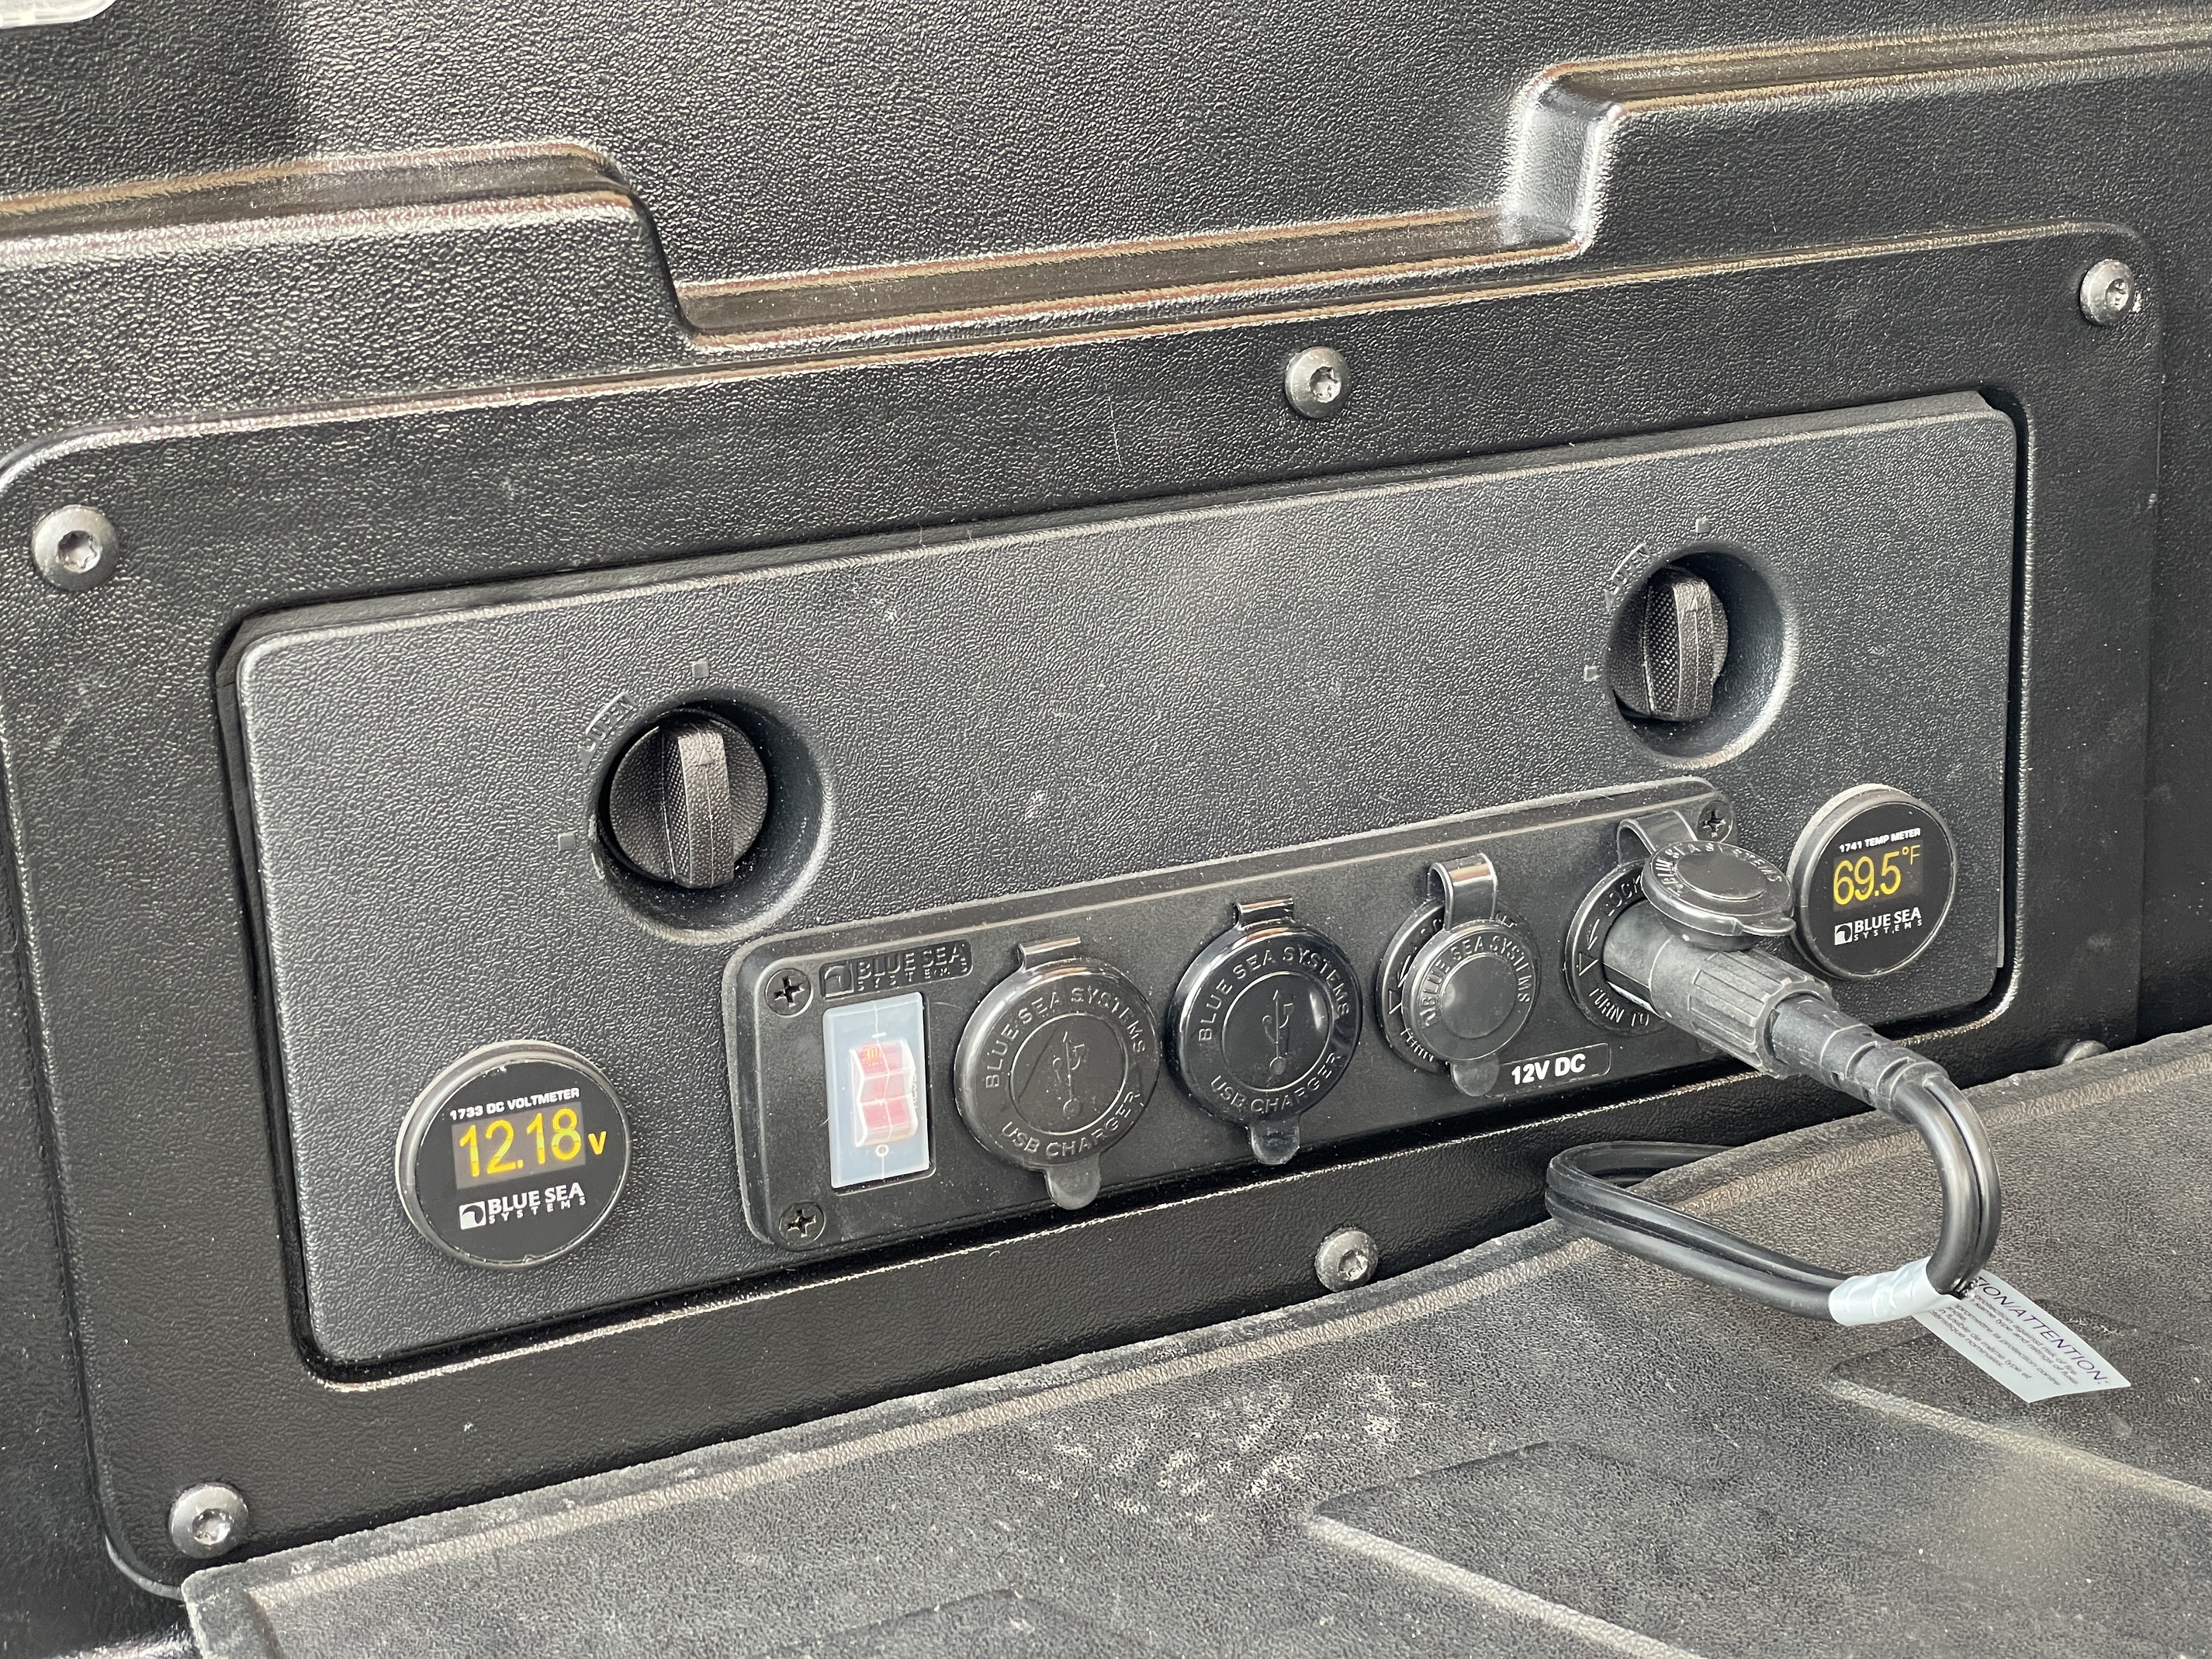
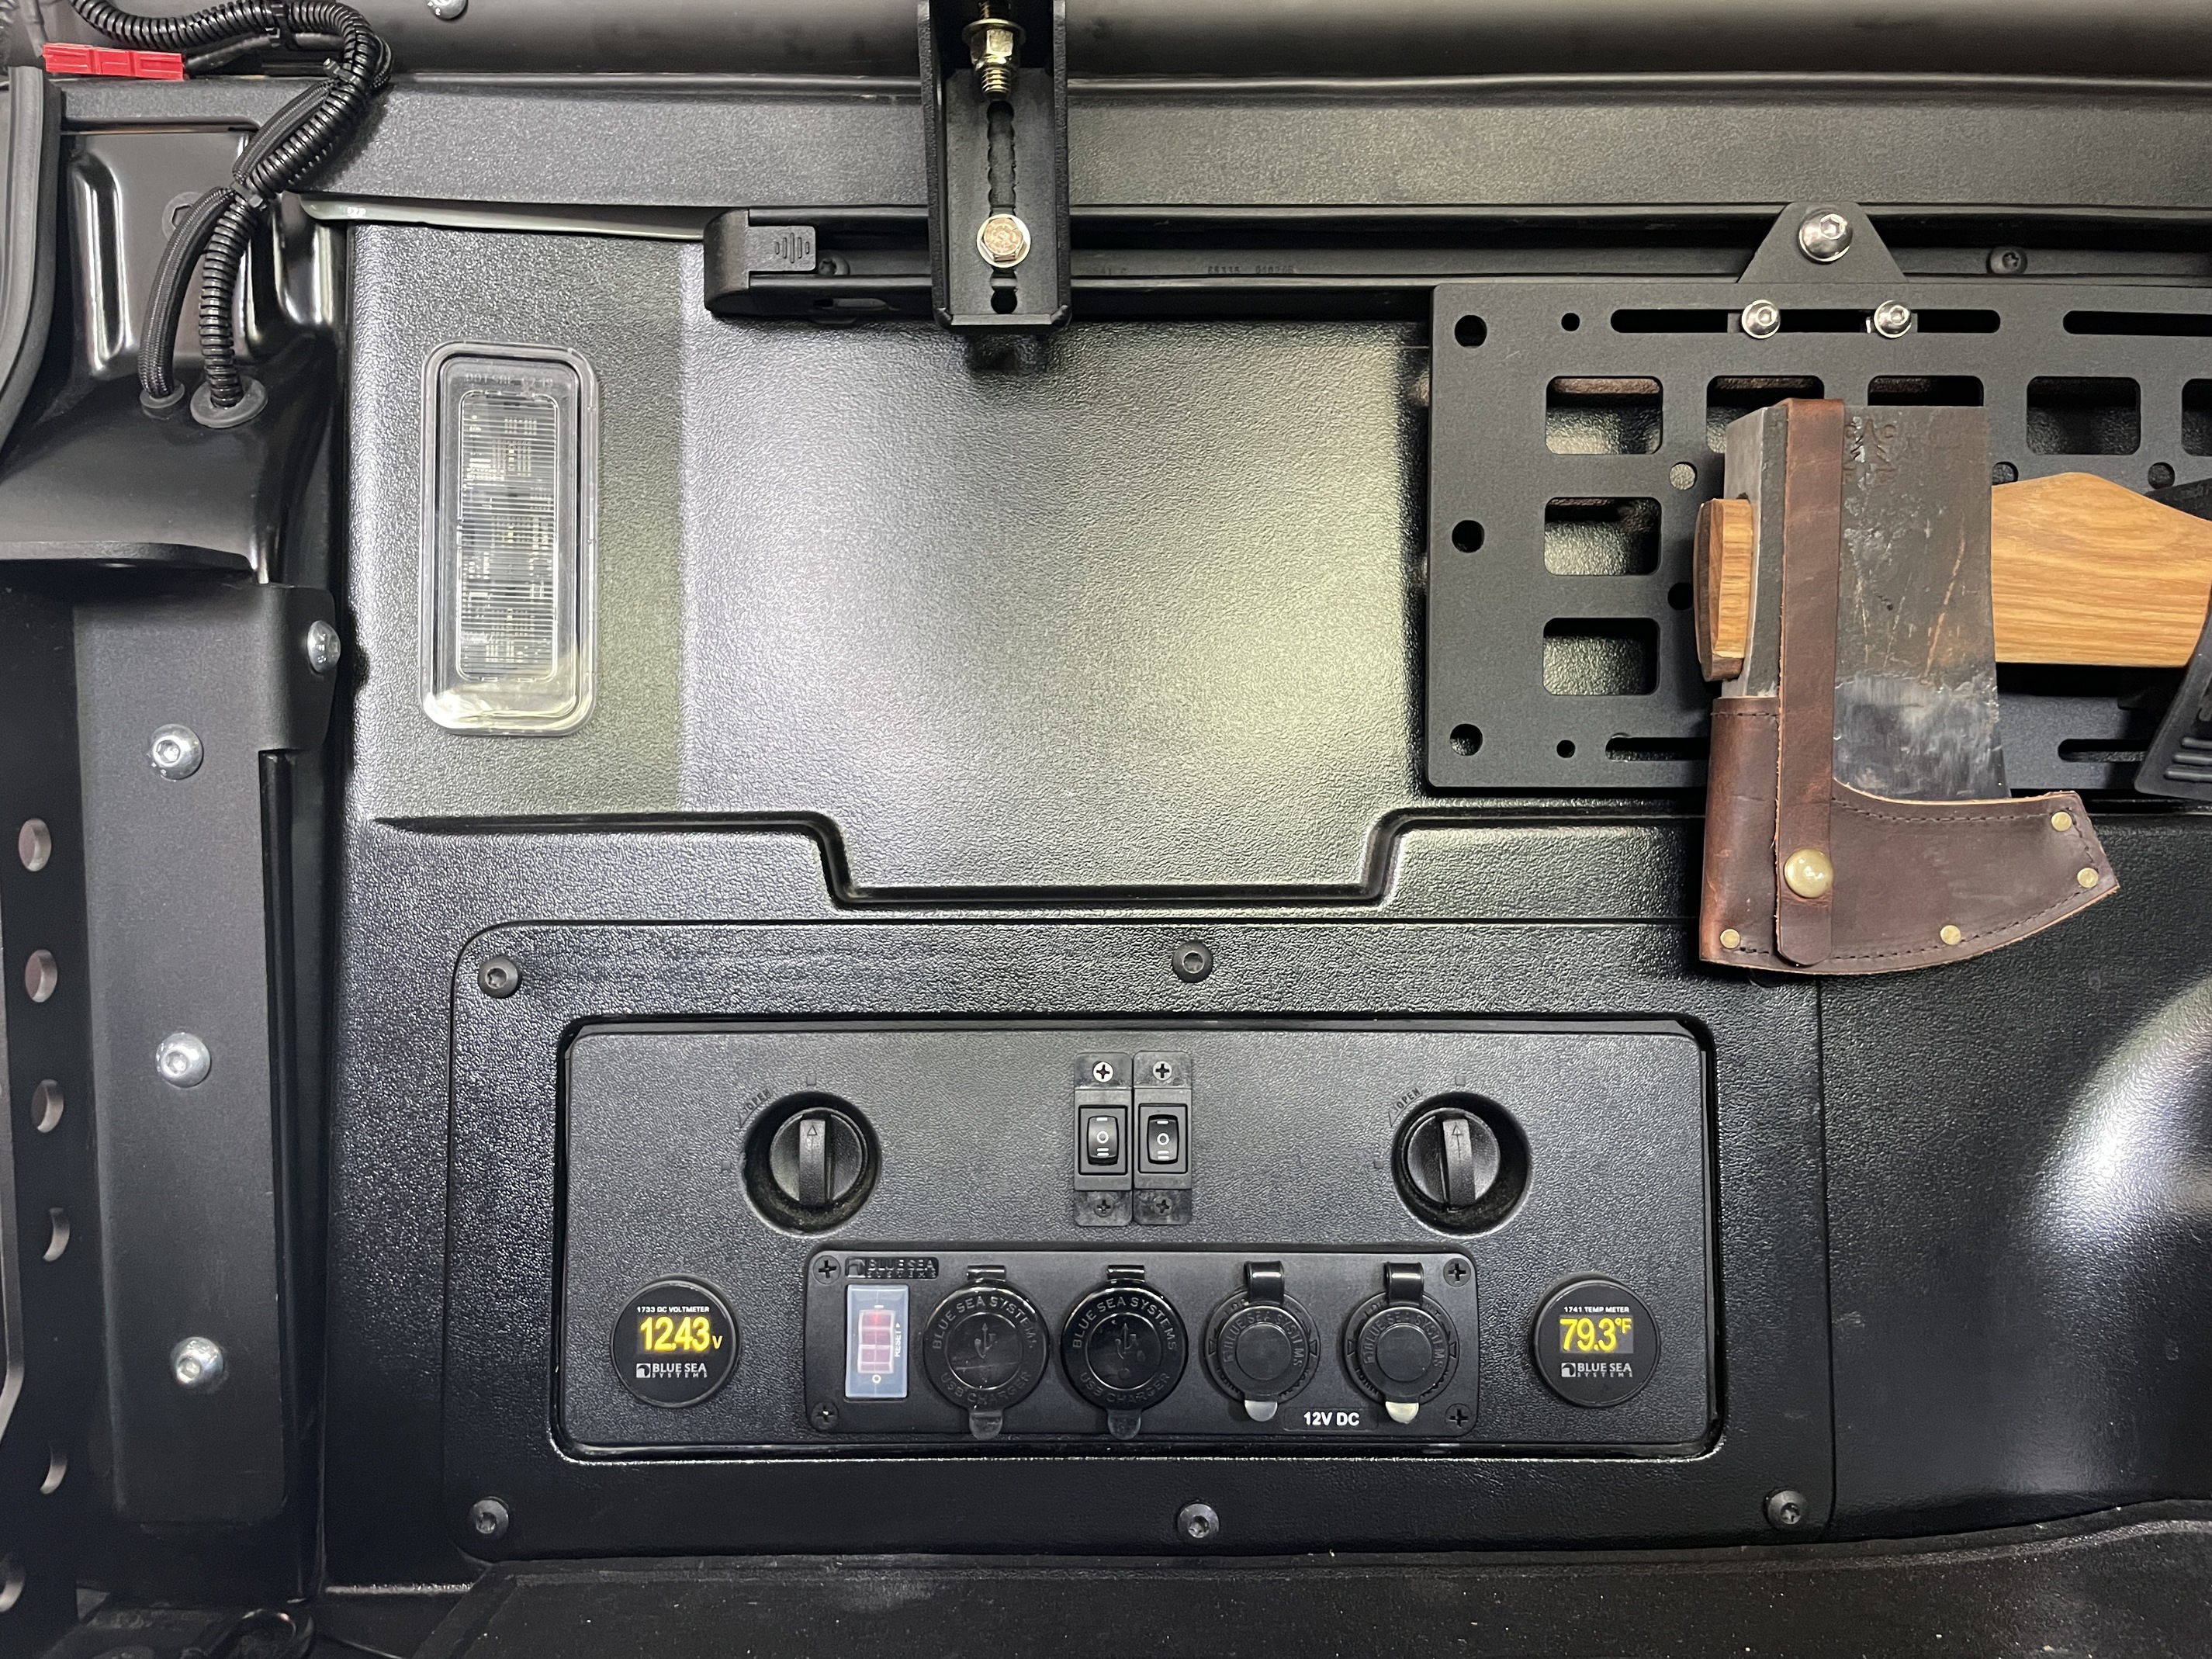
Build Update 04/11/21 — Electrical cubby Phase II
Small improvements to the electrical cubby:
• Moved the Voltmeter Monitor to the left of the 4 socket panel.
• Dropped in an additional Dual USB outlet into the panel.
• Added weatherproofing seal/gasket to the cubby opening.
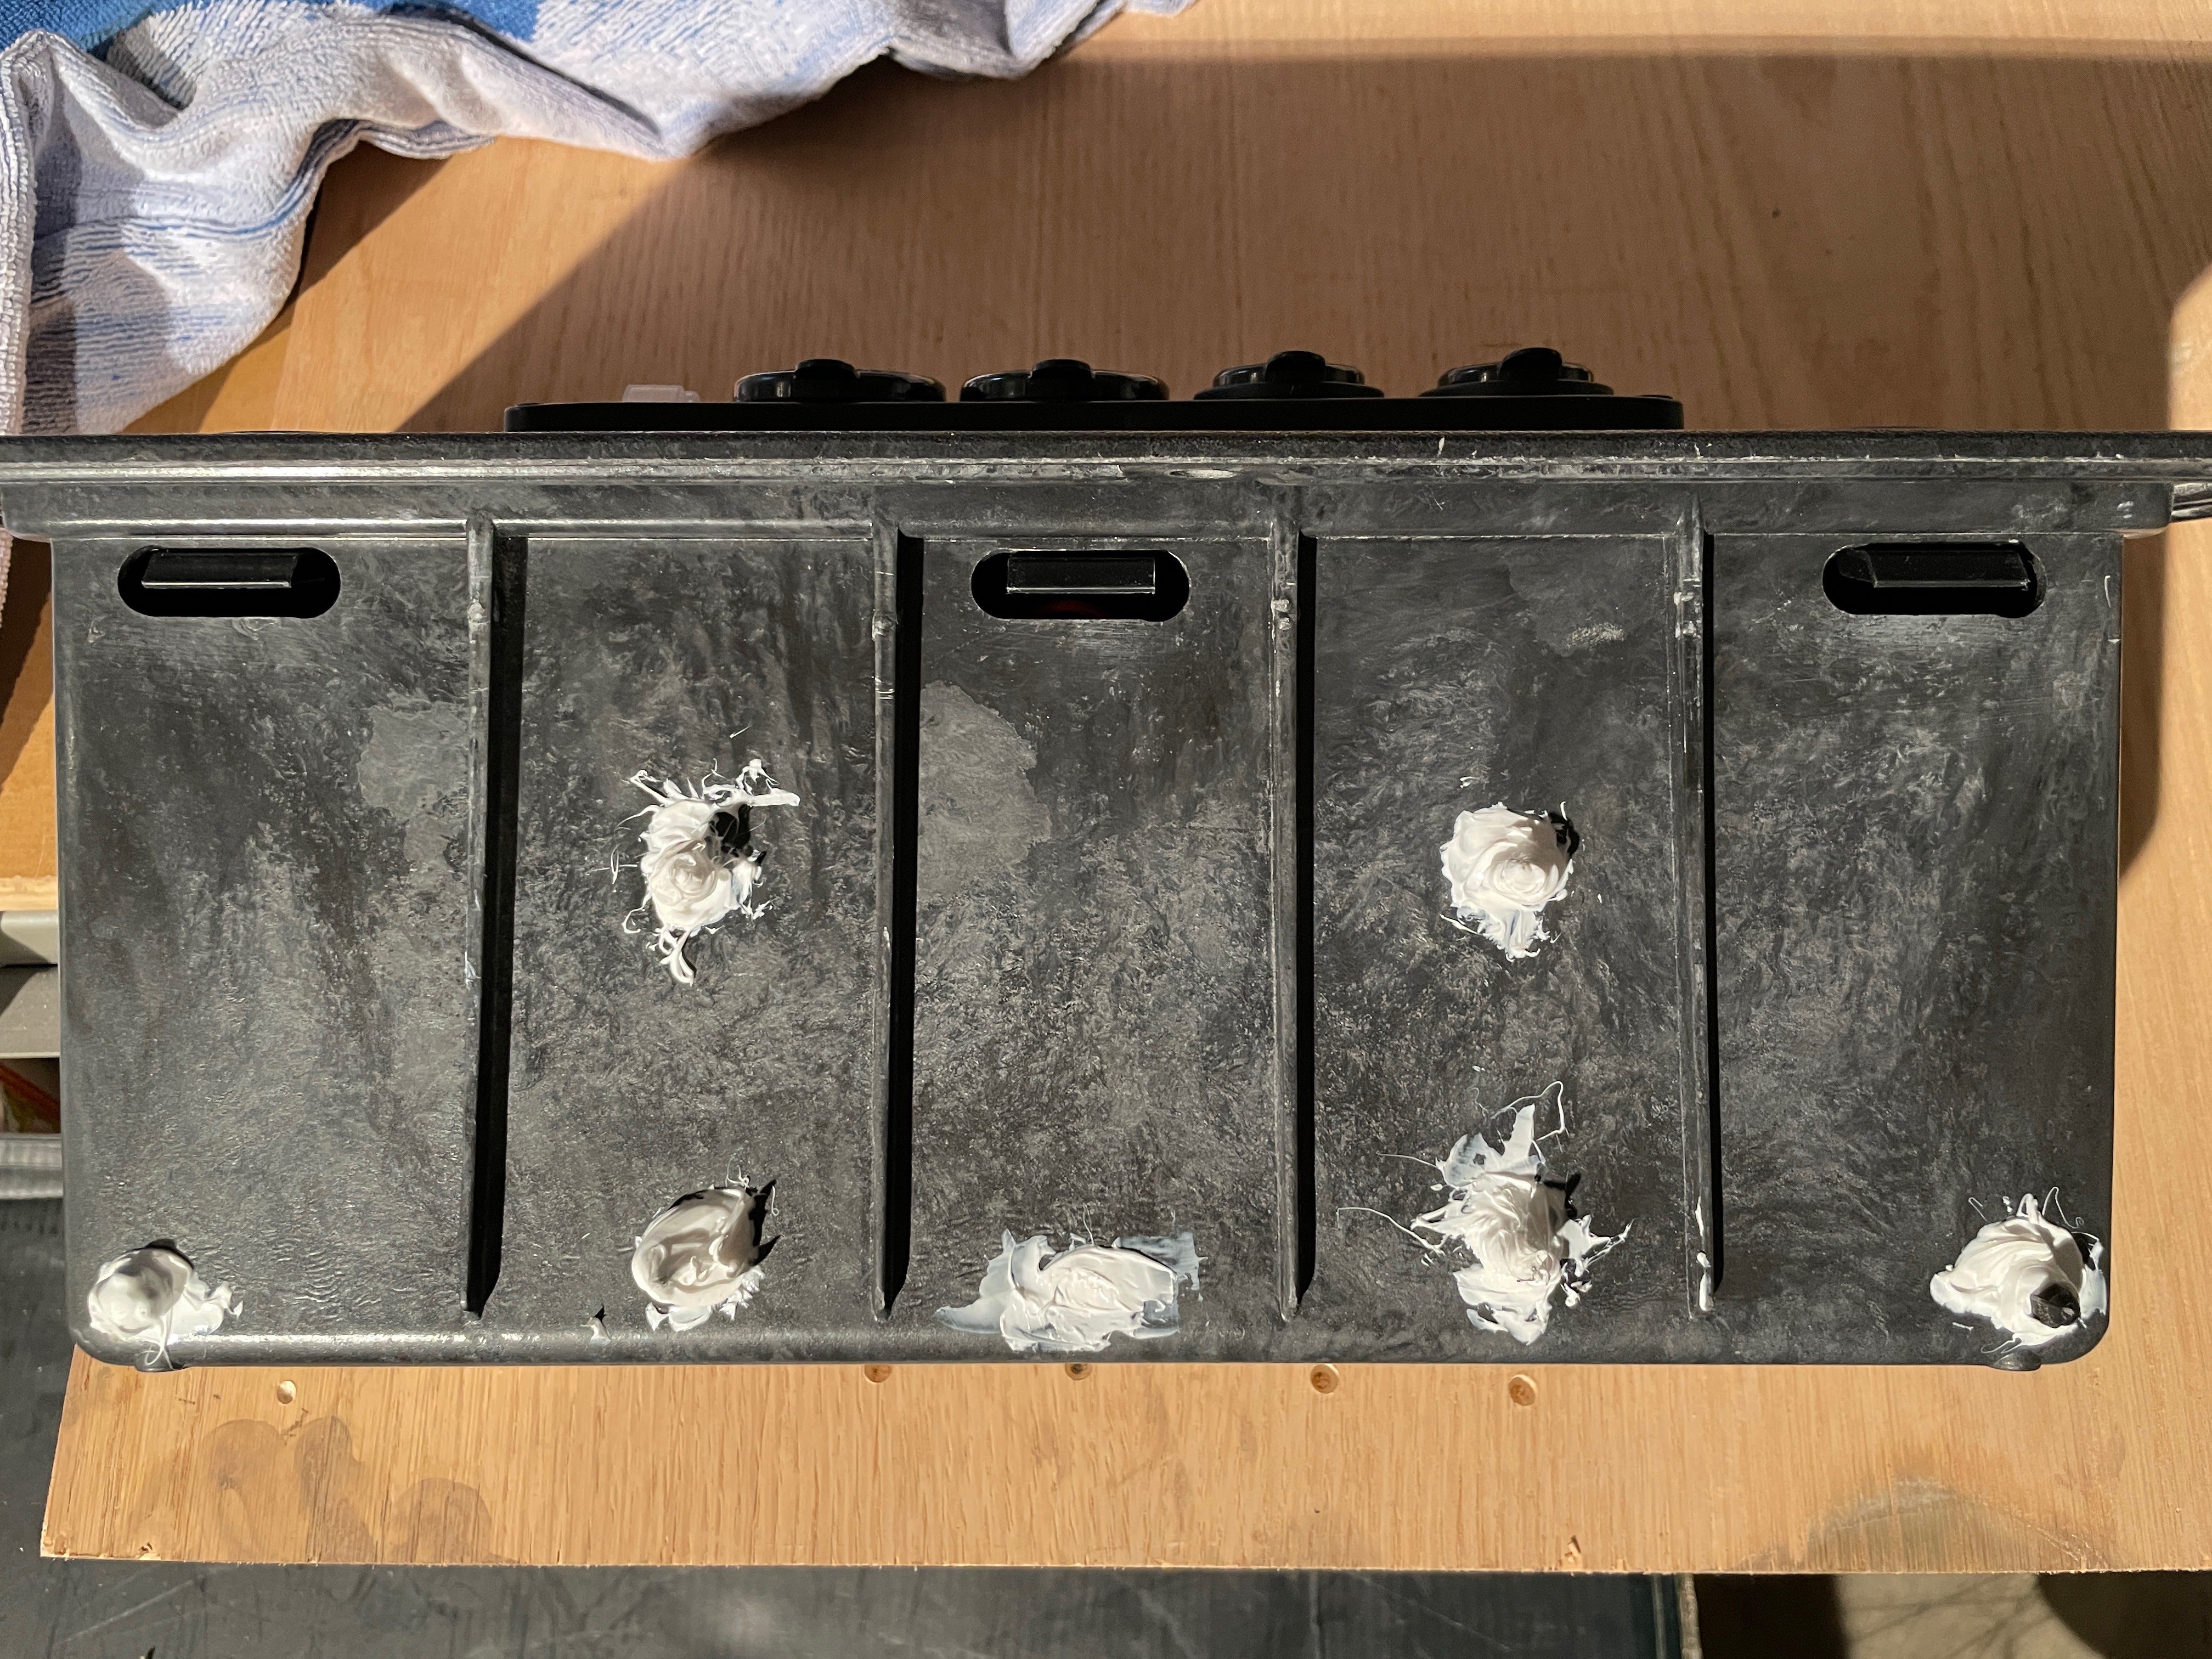
• Sealed the rear drain holes with locking fasteners and a ton of silicone.
• Sealed the self tapping screws that I used to mount the fuse block with a ton silicone.
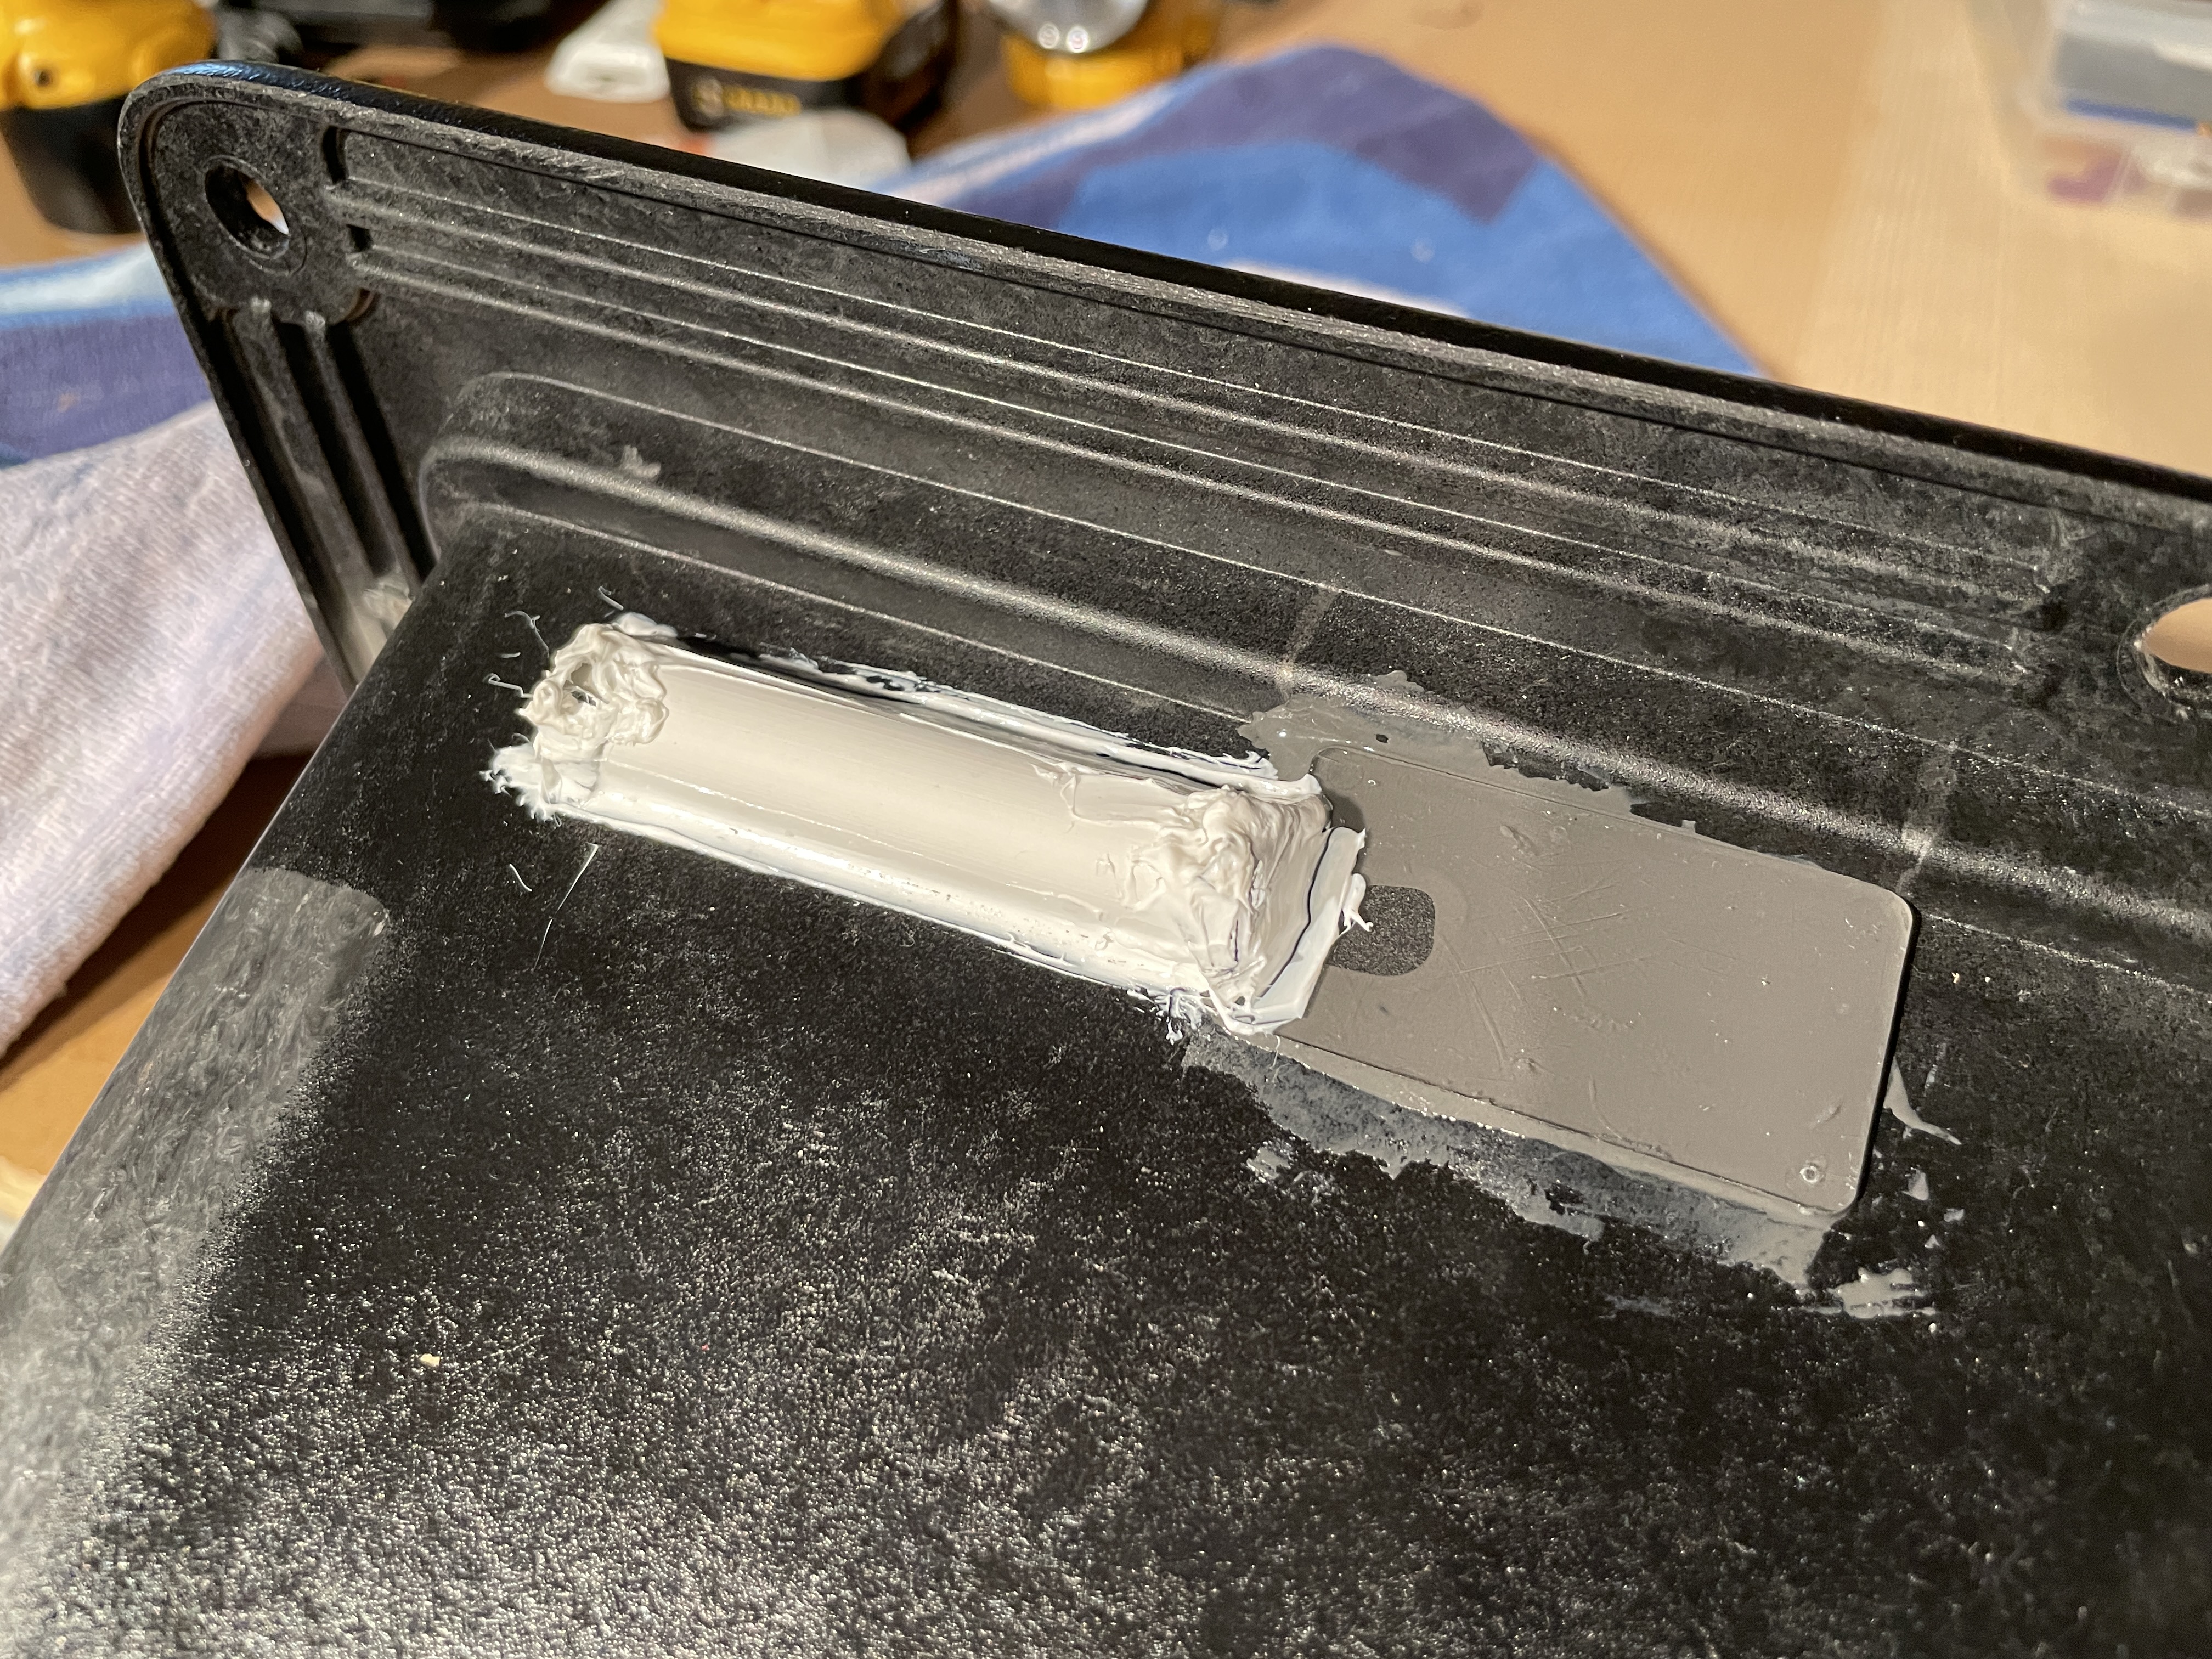
• Used some conduit, scrap plastic, and silicone to create a dome and seal the hole where the cover’s two upper locks latch. Fully sealed and still fully functional. Pretty nifty!
• Ordered 3D Printed caps from a TW user to seal the three latch holes on the bottom. These will only be mounted after the cubby is permanently mounted. I’ll slap some more silicone down there as a redundancy as well. No water will be getting into this thing!


7 Likes
Build Update 04/17/21 — Electrical cubby Phase III — Install day
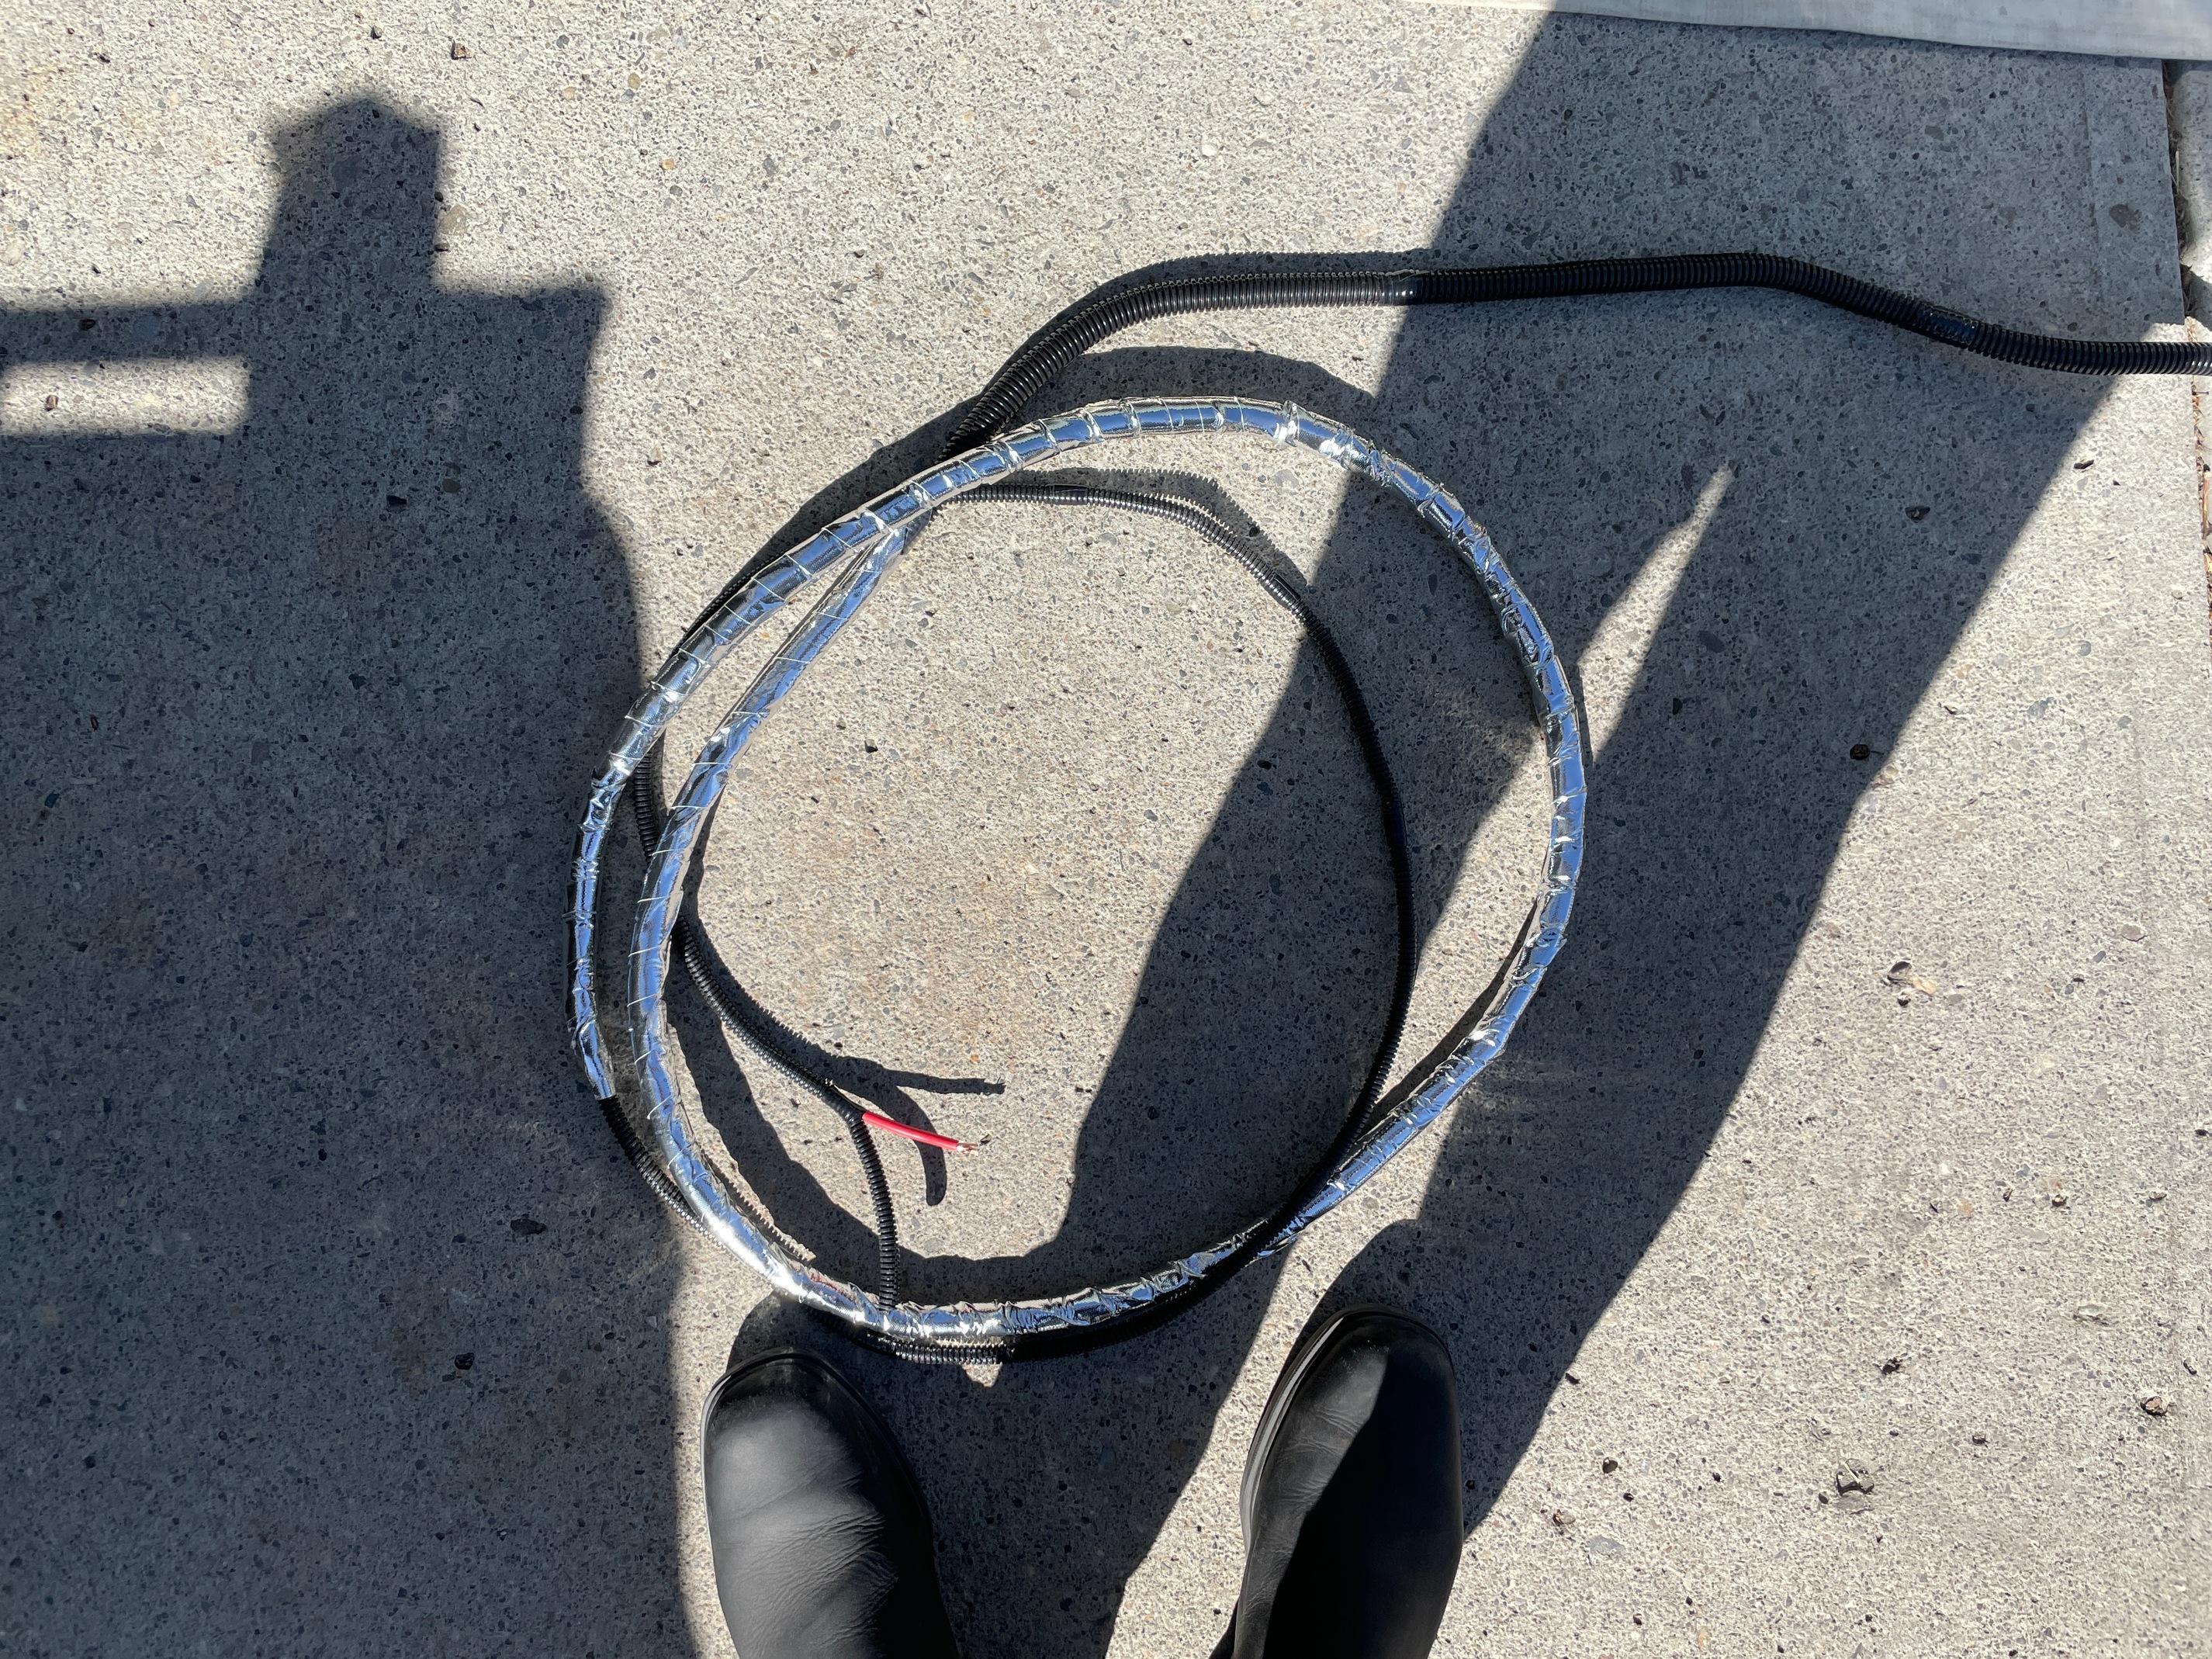
Preparing to run power to the bed – Creating the harness
I started with 35ft of insulated automative 8AWG wire and wrapped the entire length of it in 1/4" automotive plastic loom. From there I measured where the harness would start to pass down through the engine bay from my second battery and wrapped the entire length from that point in 1/2" plastic loom. Finally I wrapped heat reflective automative tape to the portion of the harness that goes down pass the engine, pass the exhaust, and takes a short trip on the exterior side of chassis. This took some time but worth the peace of mind since this harness will be exposed to elements. It’s now quadruple sealed in the most exposed areas.
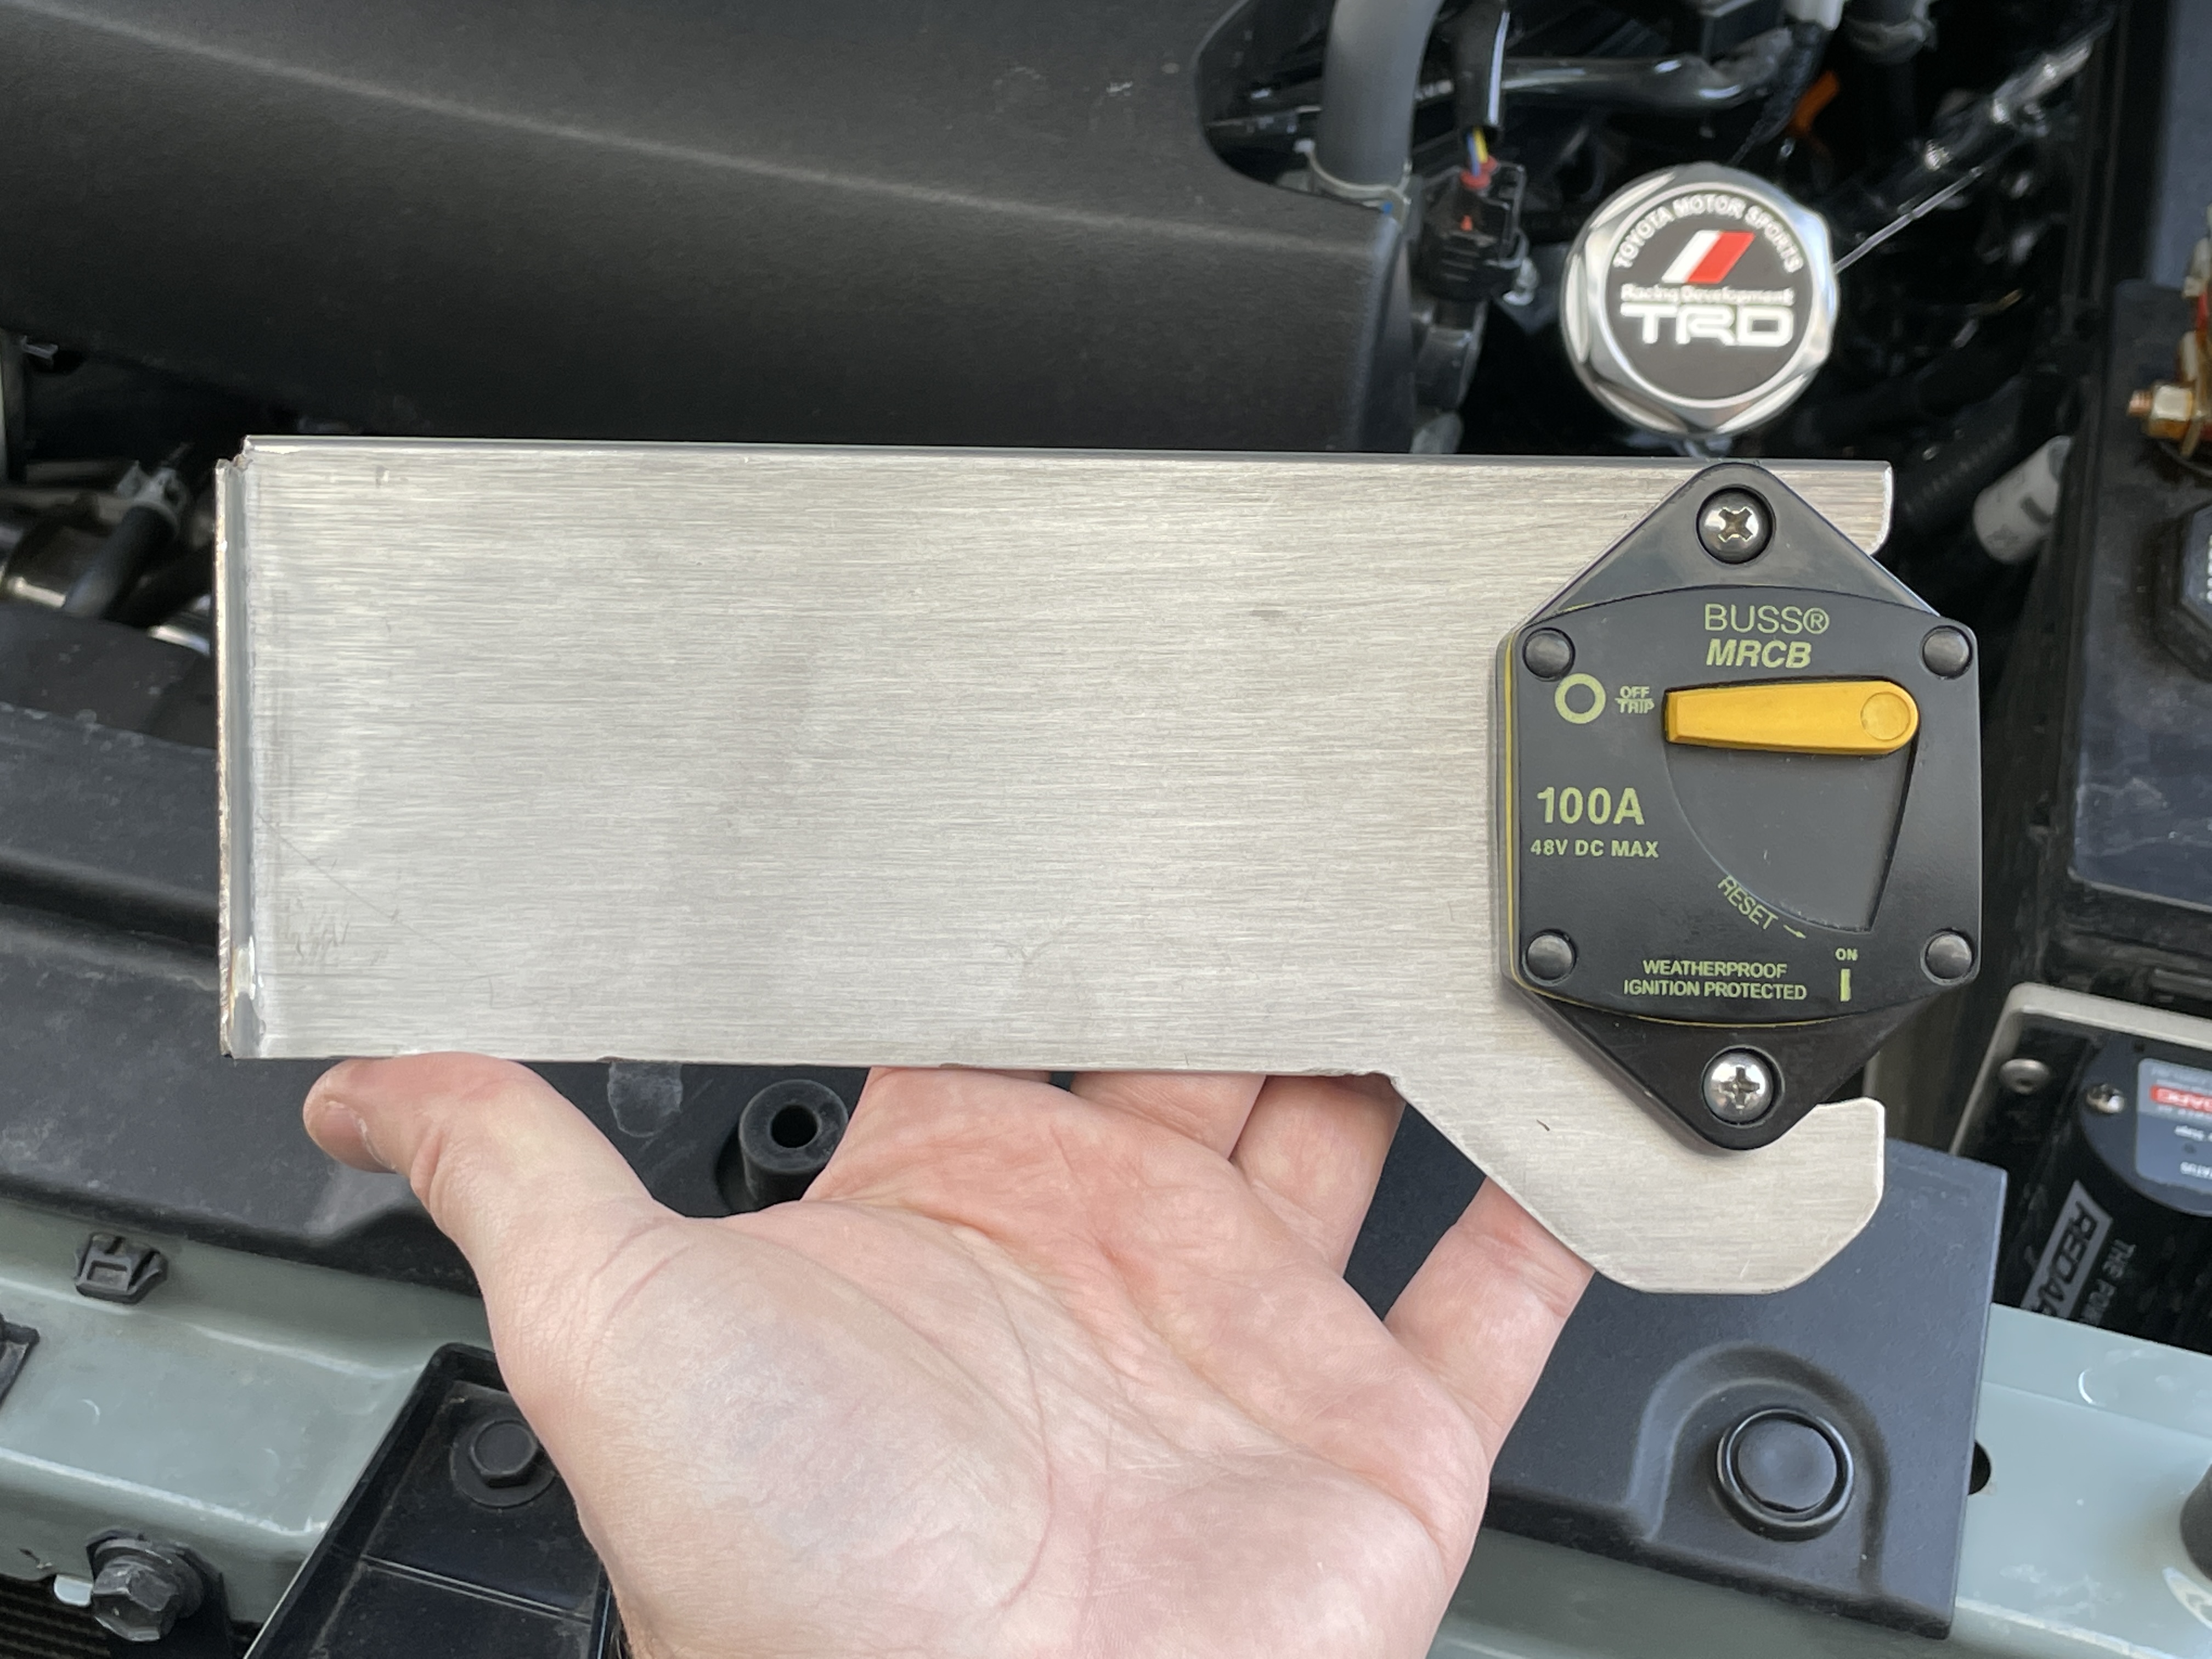
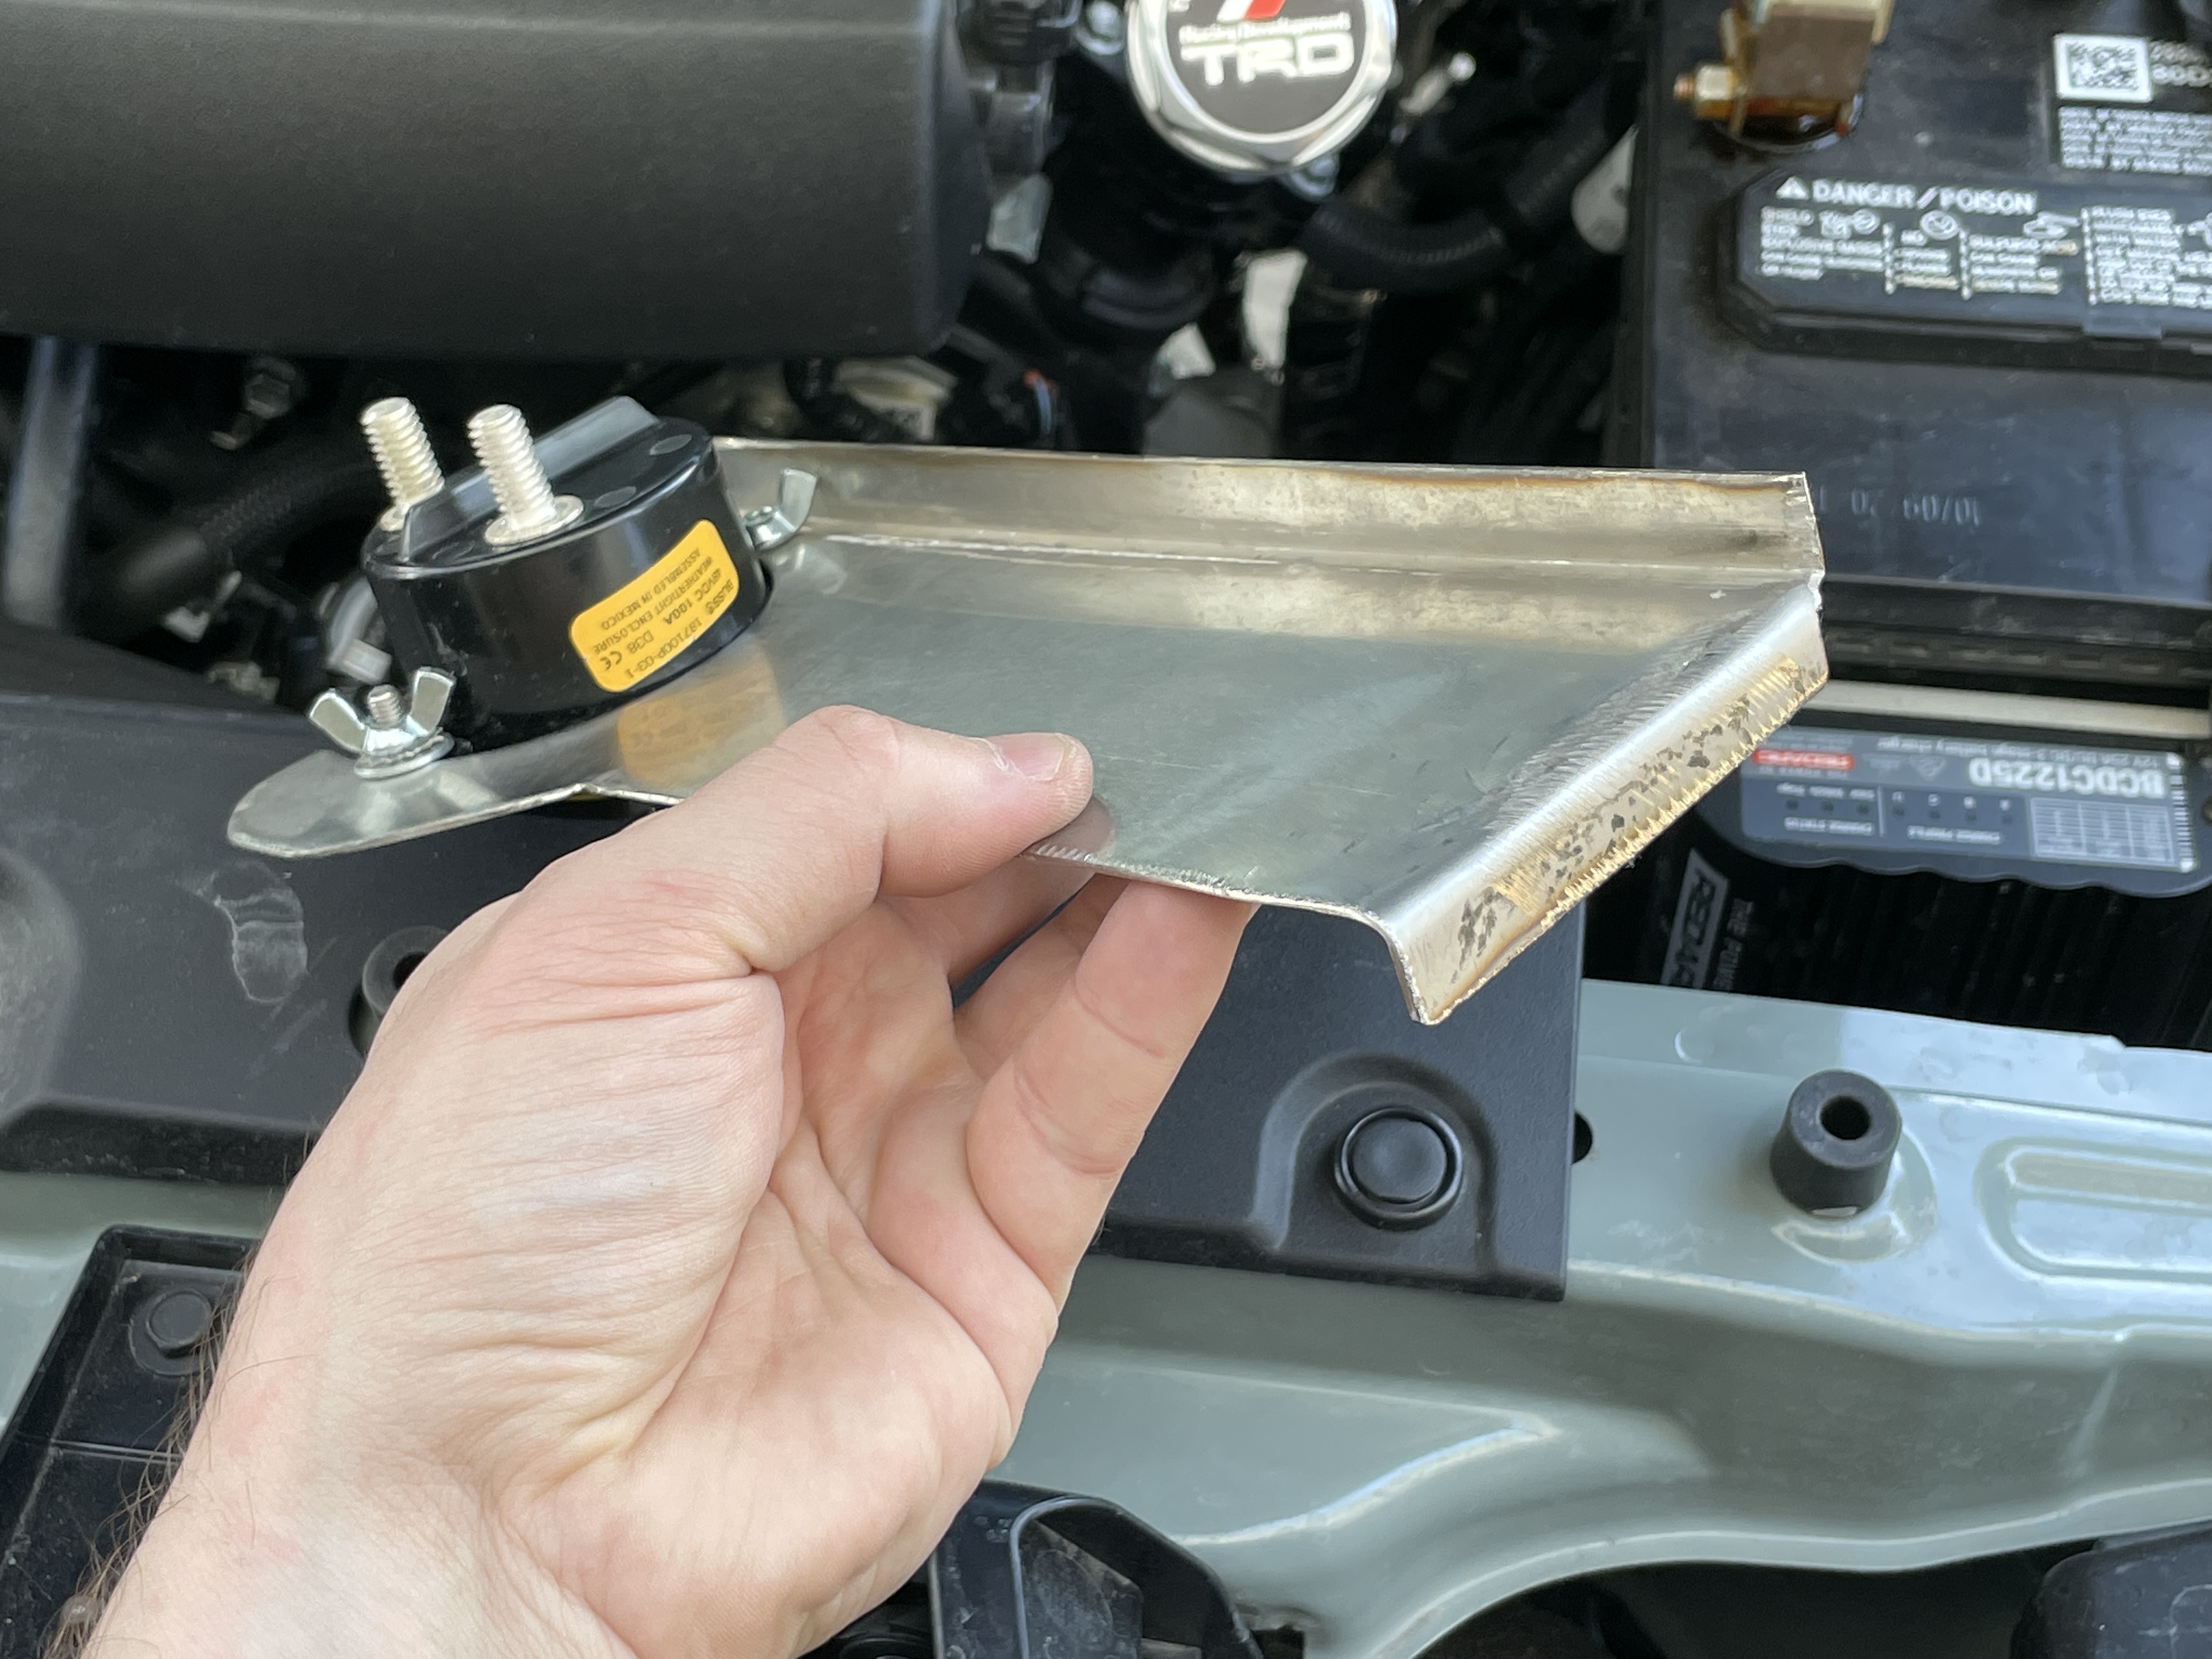
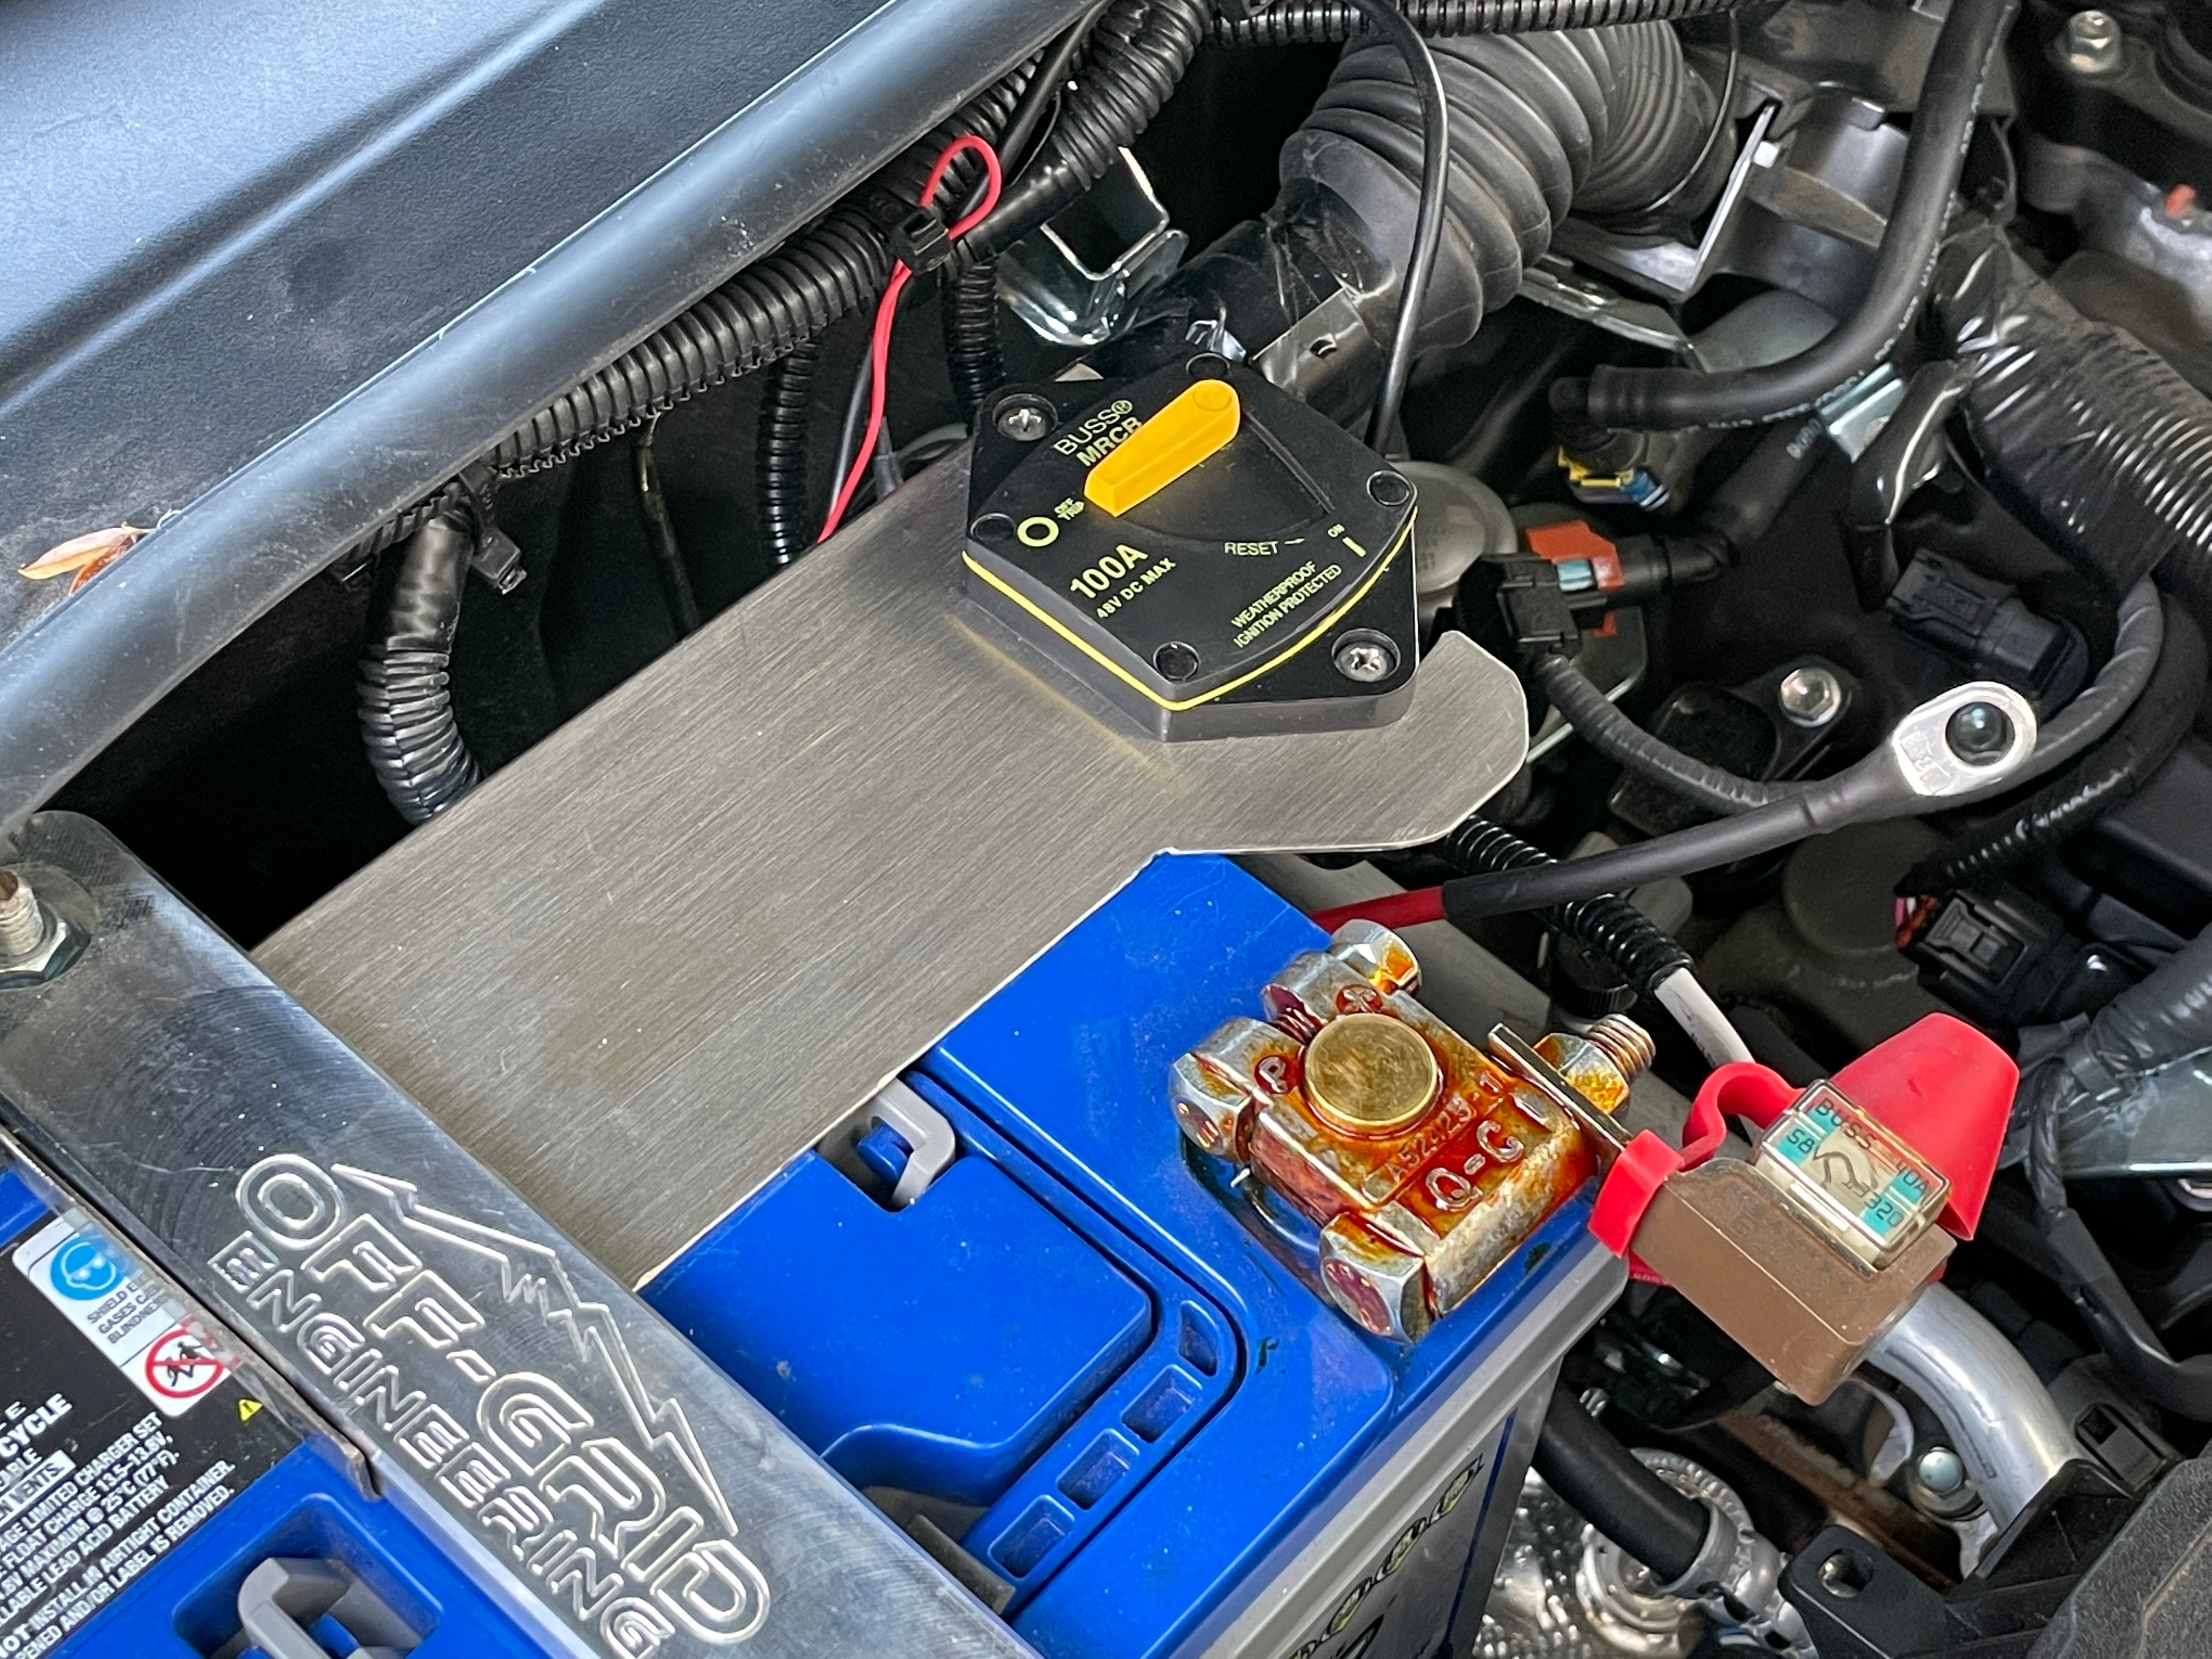
Preparing the second battery — Circuit Breaker install
My dad fashioned up a nifty bracket from some scrap metal to wrap around the battery and Off-Grid Engineering tie down to cleanly and securely mount my Blue Sea Systems Circuit Breaker. I can use this to kill all power to the bed with a flip of a switch. (eg. when in daily driver mode and not in camp mode)
Running the harness
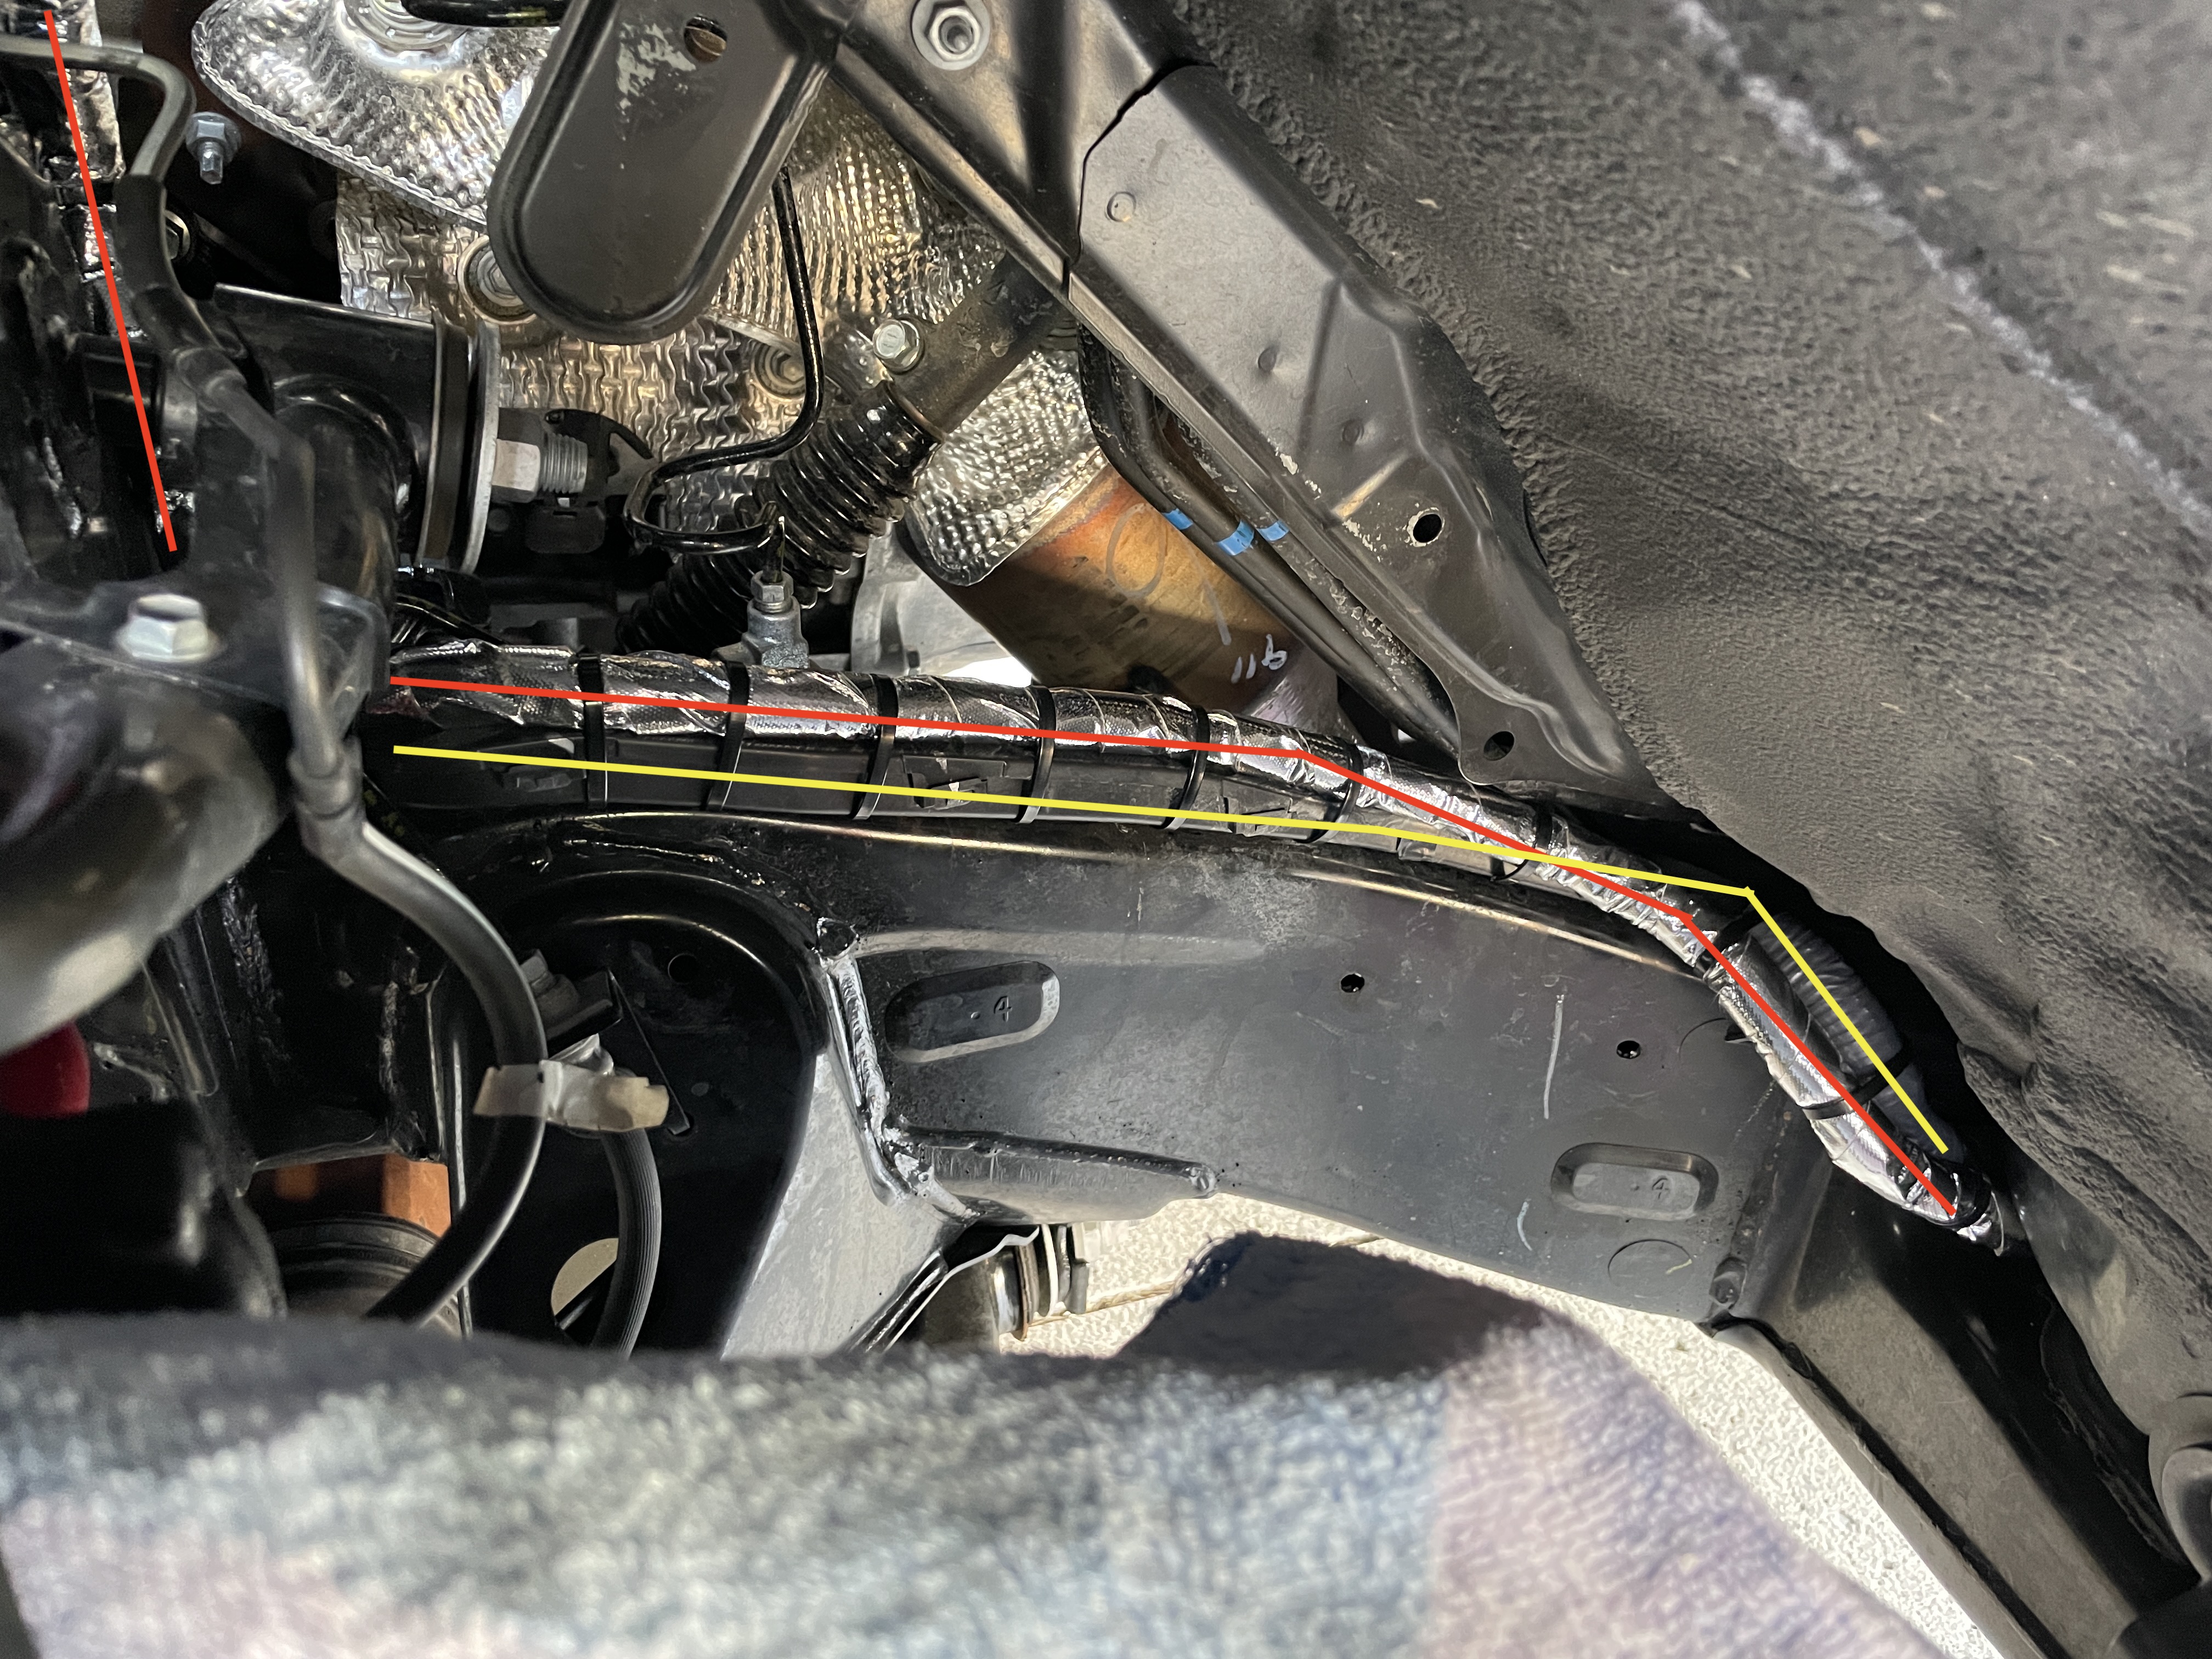
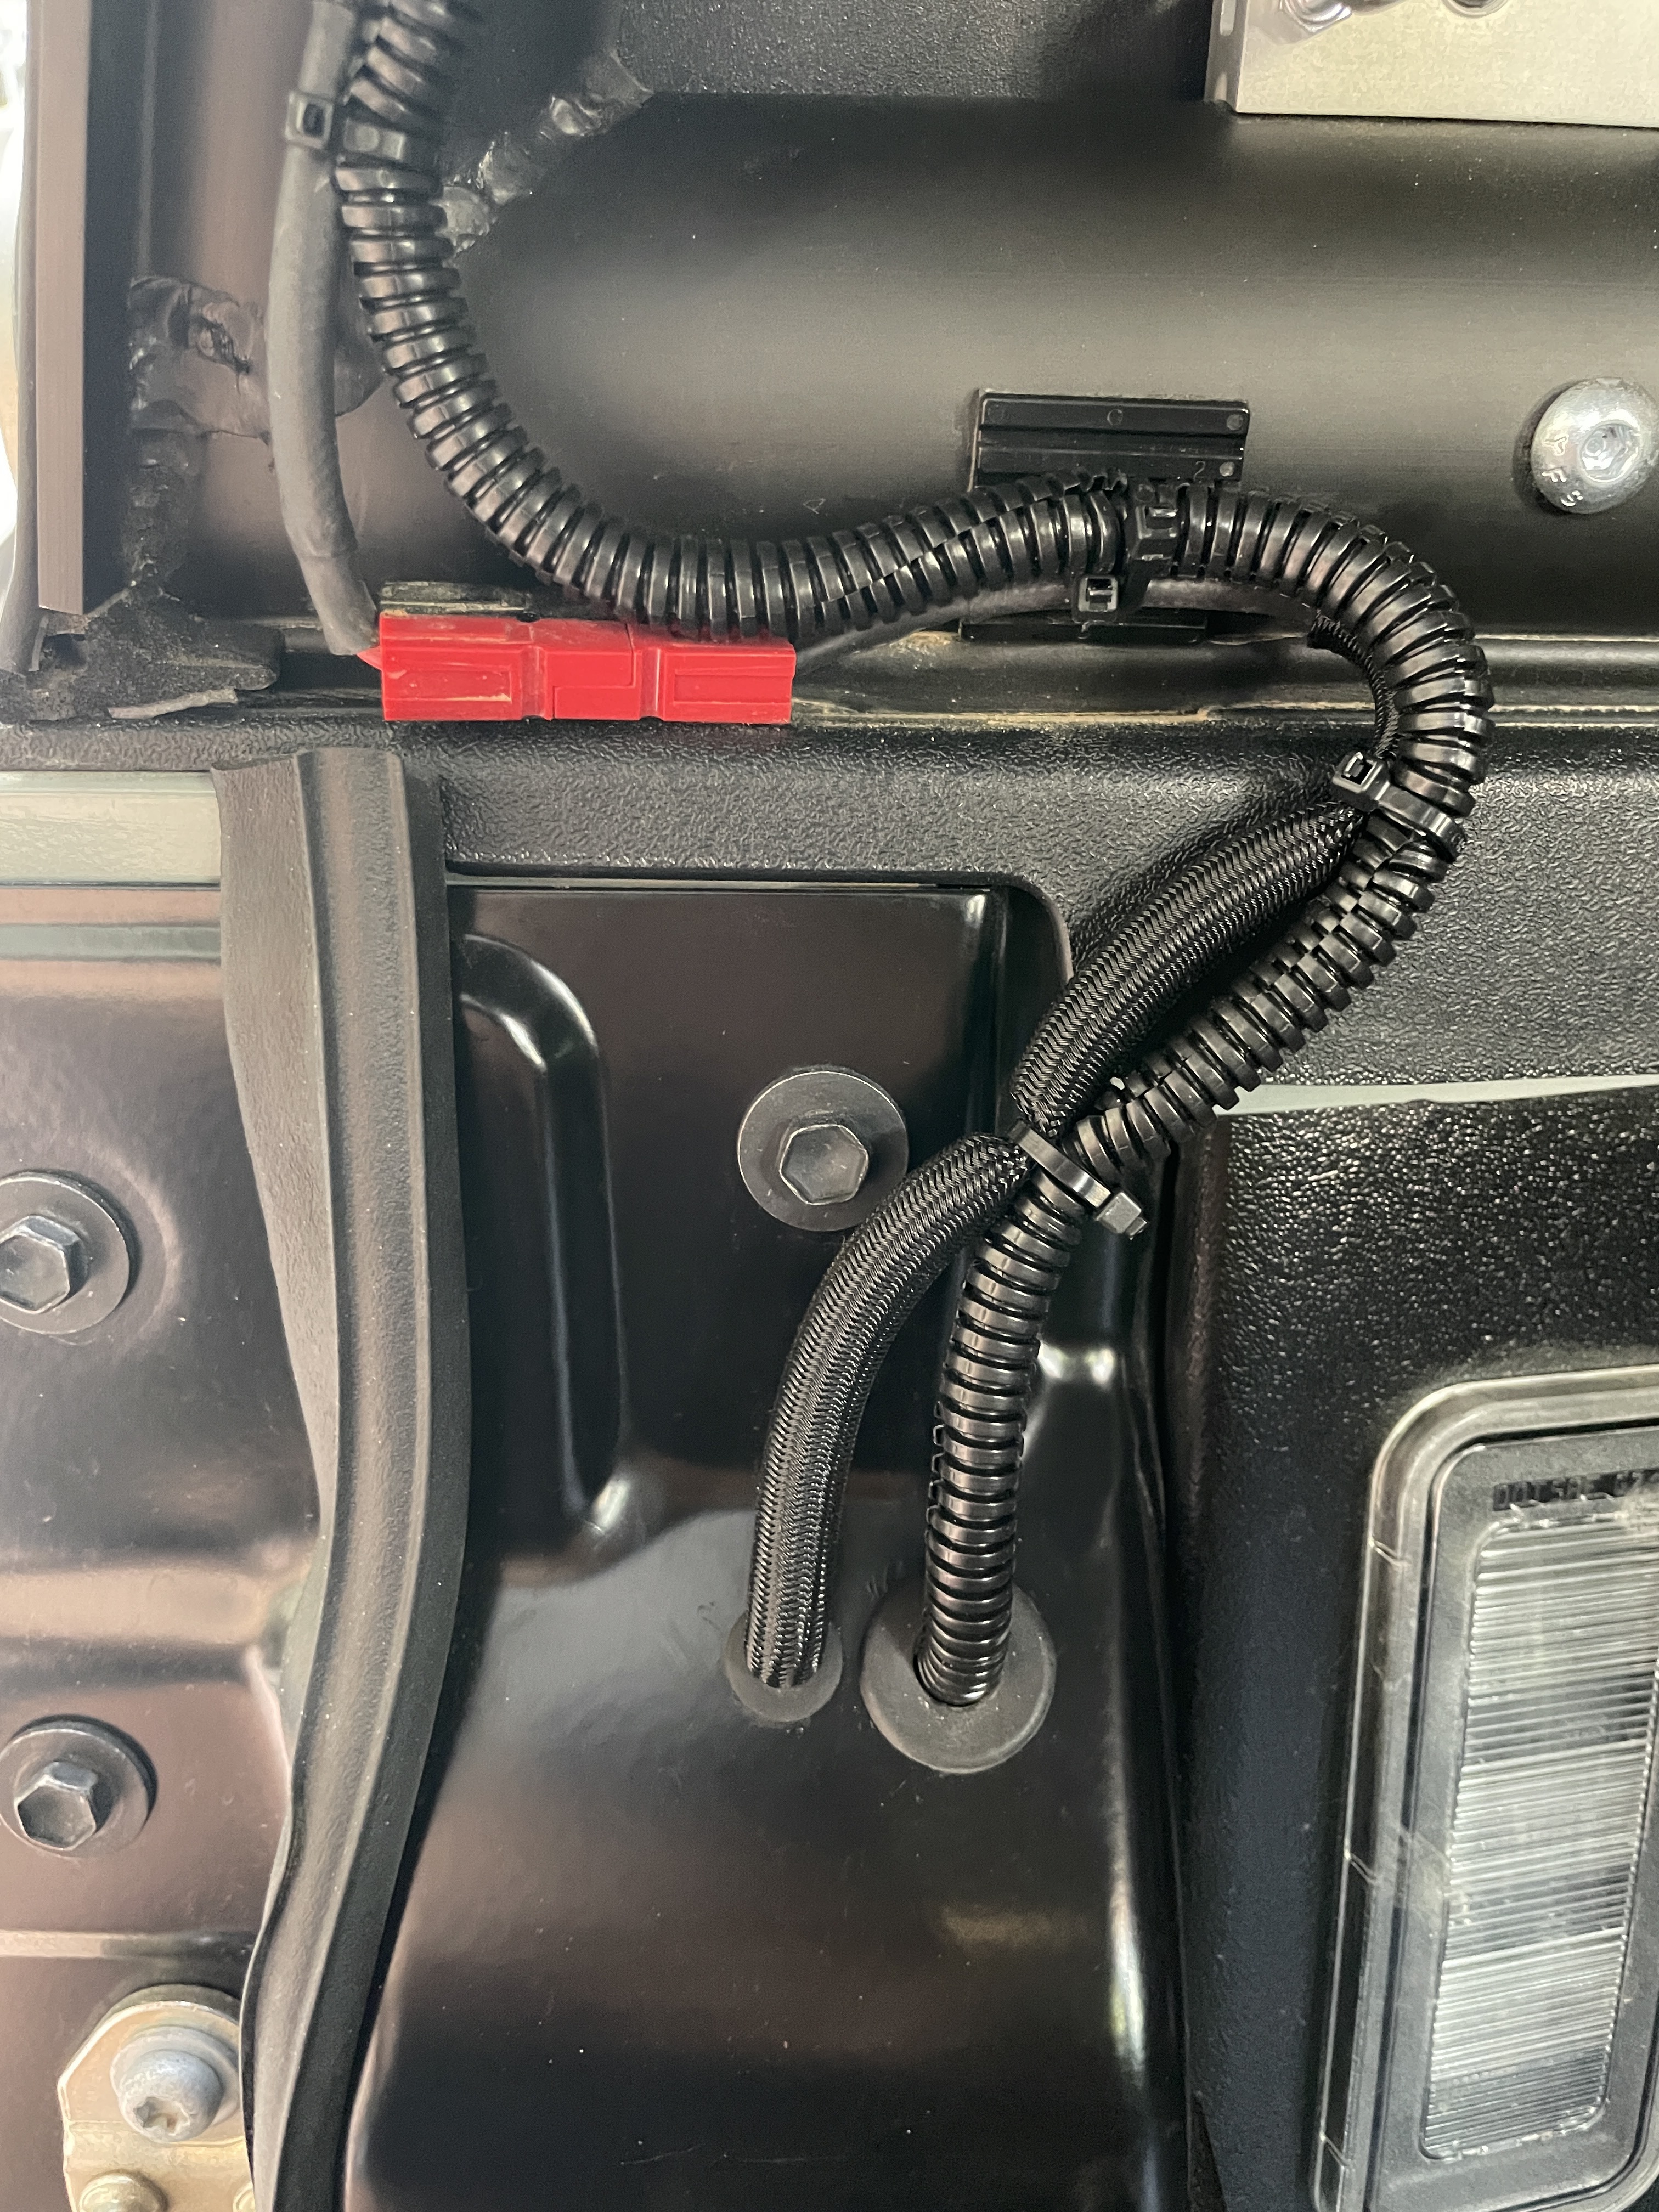
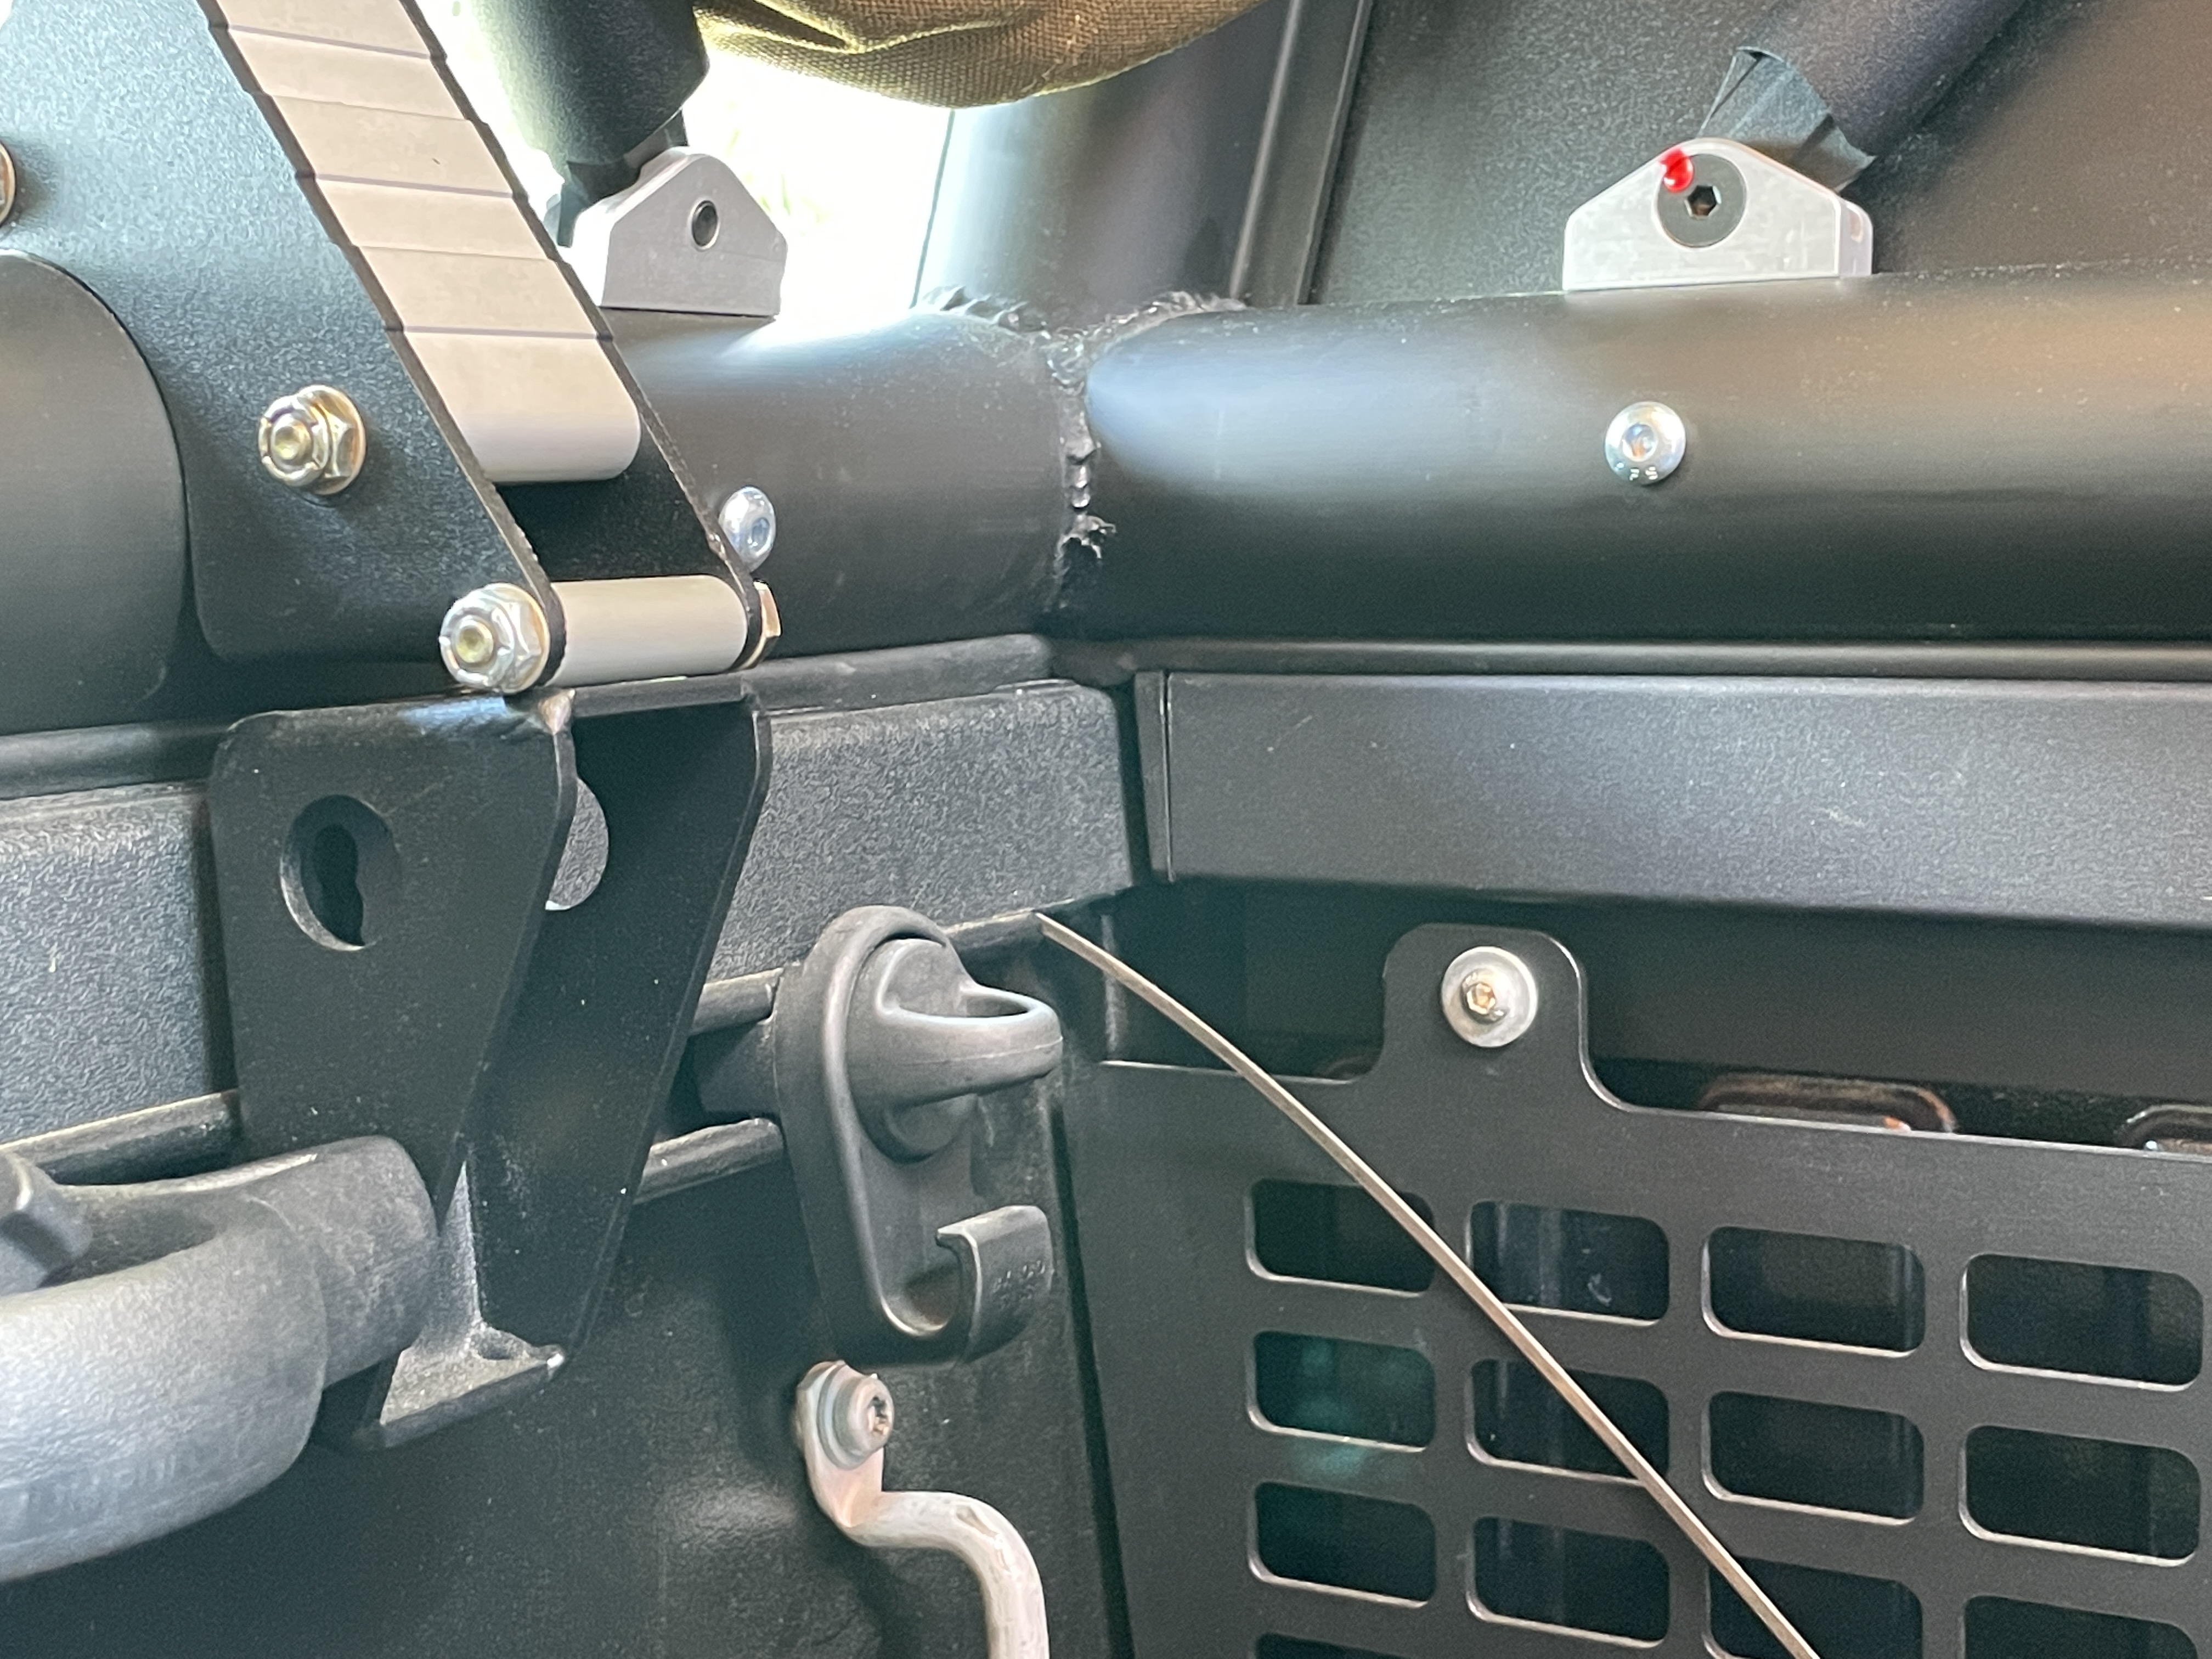
I ran my harness across the engine bay to the driver side, wrapped around the brake fluid reservoir, passed the fuse box and started to make my way down from there. I followed an OEM harness that makes its way through the front driver side wheel well, makes a slight detour to exterior of chassis (I assume to clear the exhaust) and continues along the inside of chassis all the way to the rear driver side taillight. This was all straight forward other than passing by the fuel tank / rear wheel as you loose visibility on the OEM harness here. We used a clothes hanger as a fish and after a few attempts of locating the path got it through, zip tied it taut on either end and continued along to the tail light.
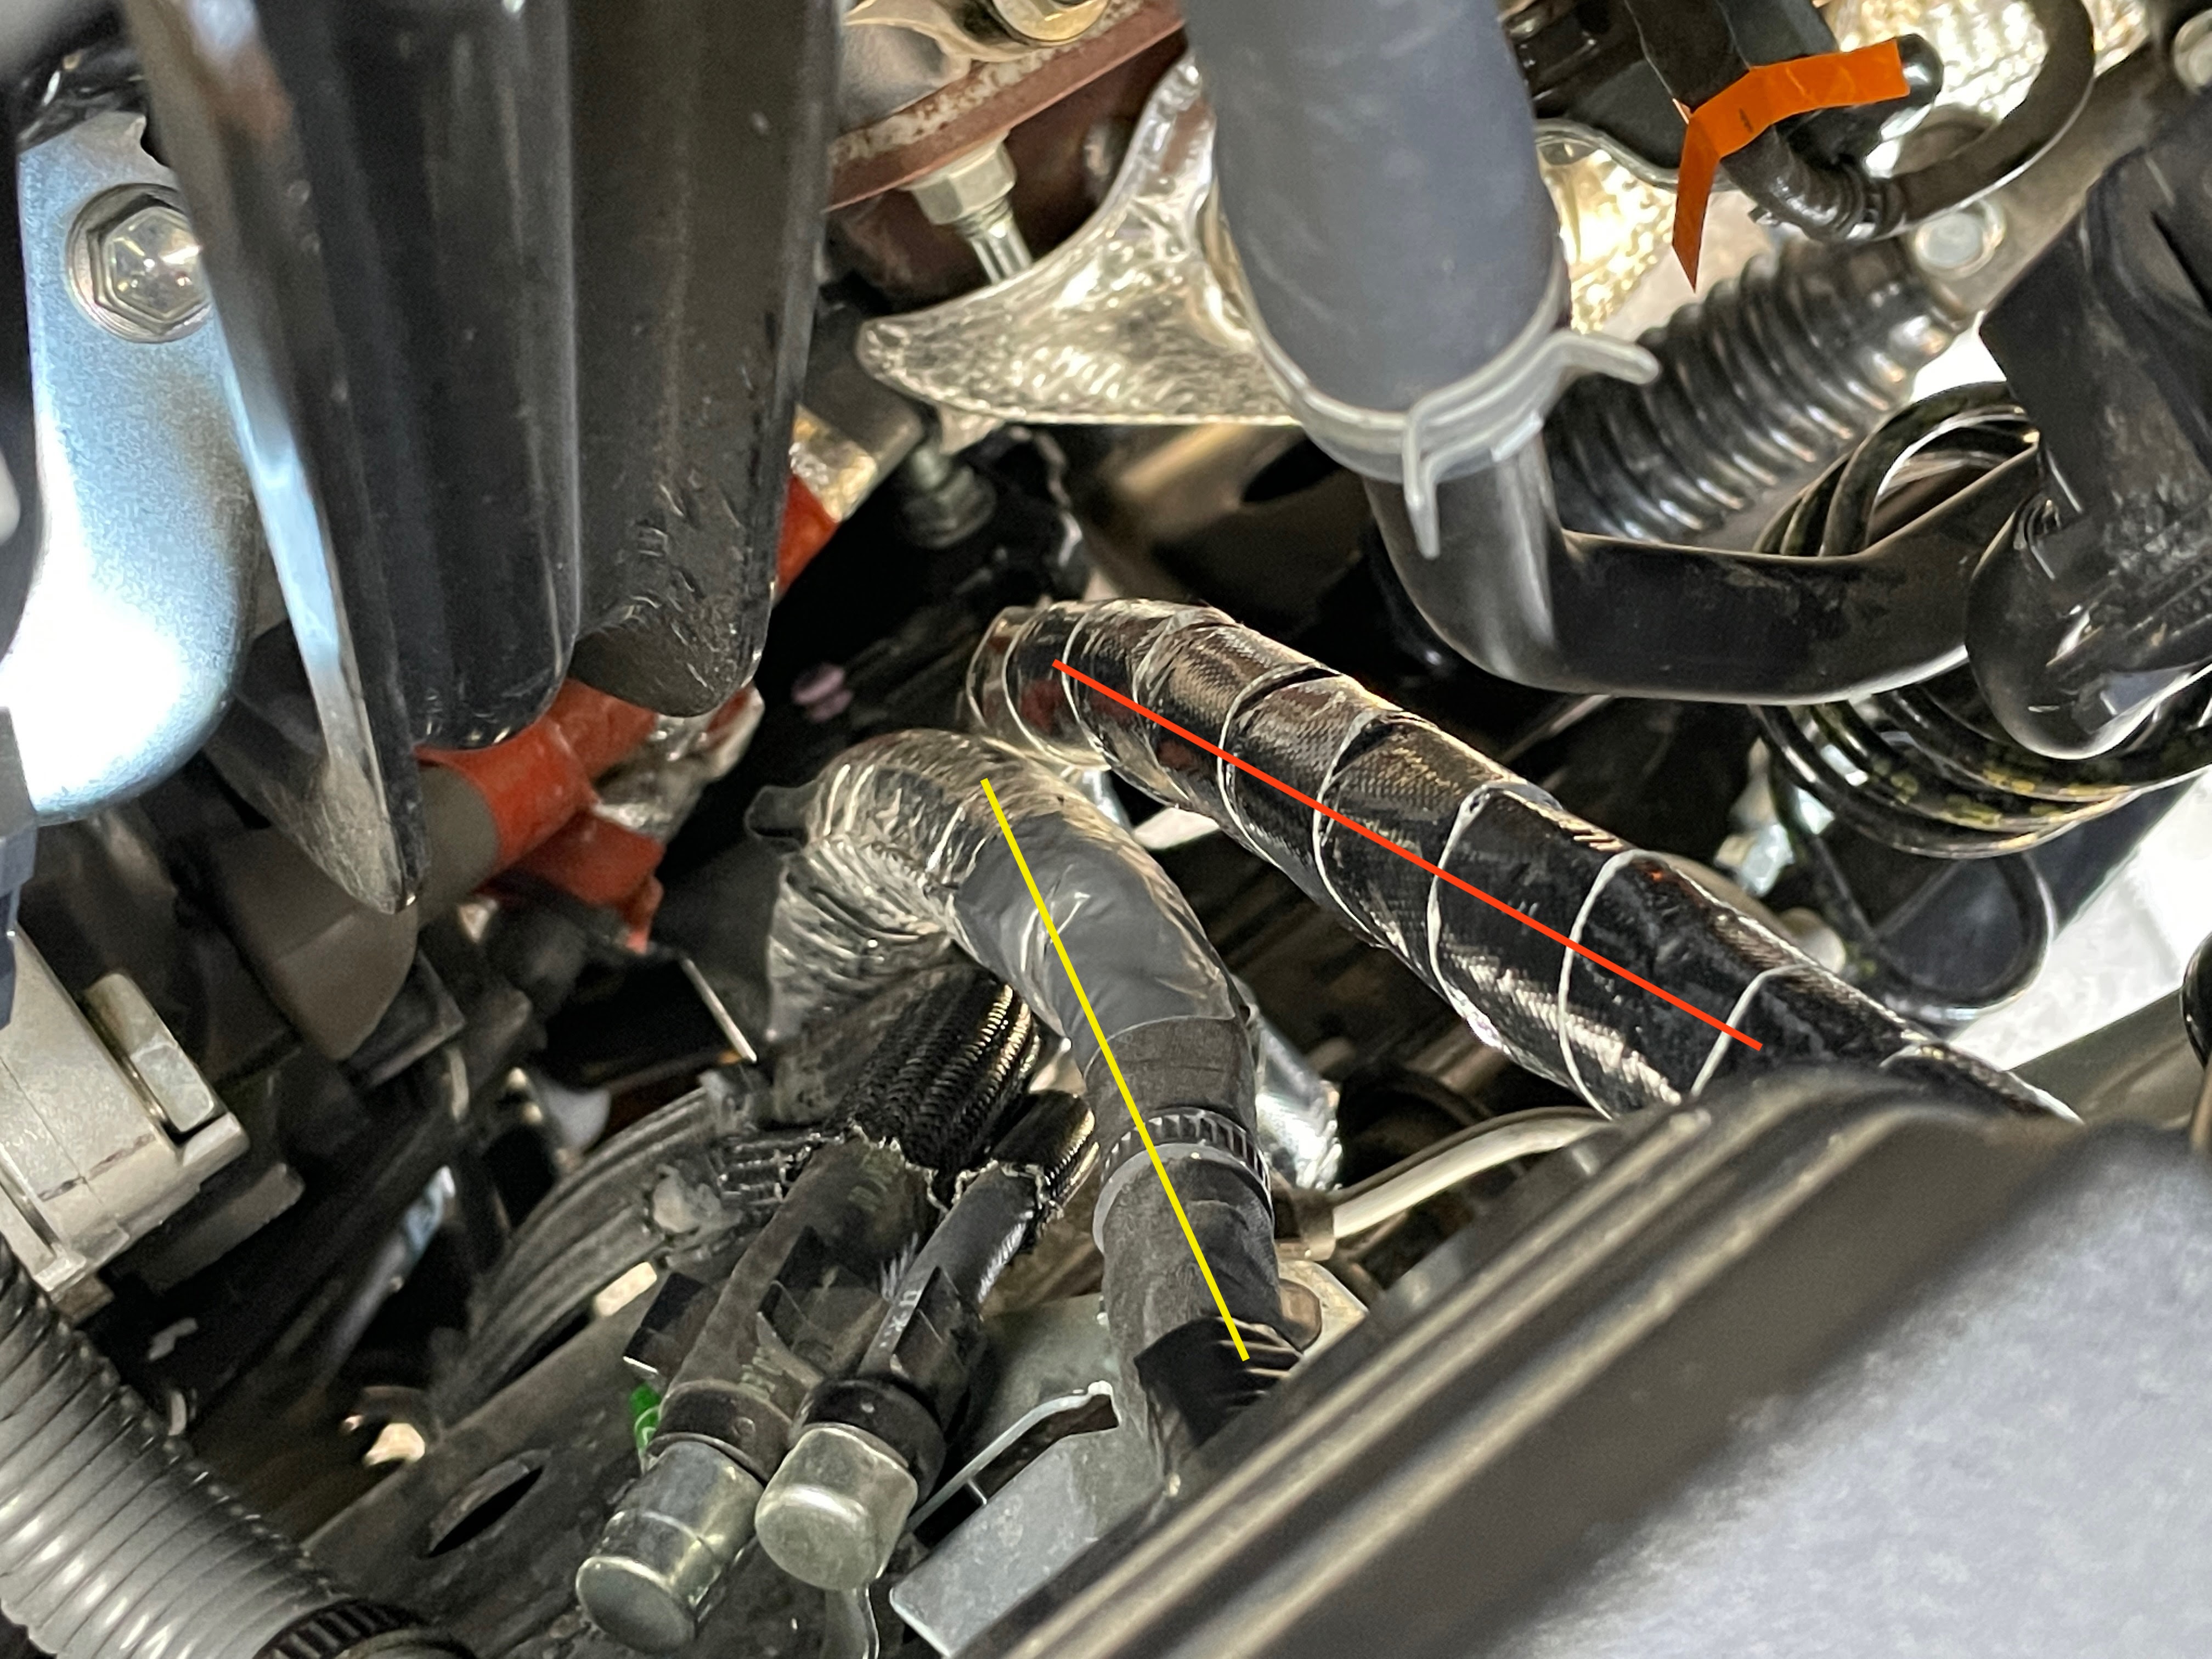
Harness making its way down under the fuse box
• Red line is my harness (Prior to zip-typing it down in first photo)
• Yellow line is the OEM harness that I followed.
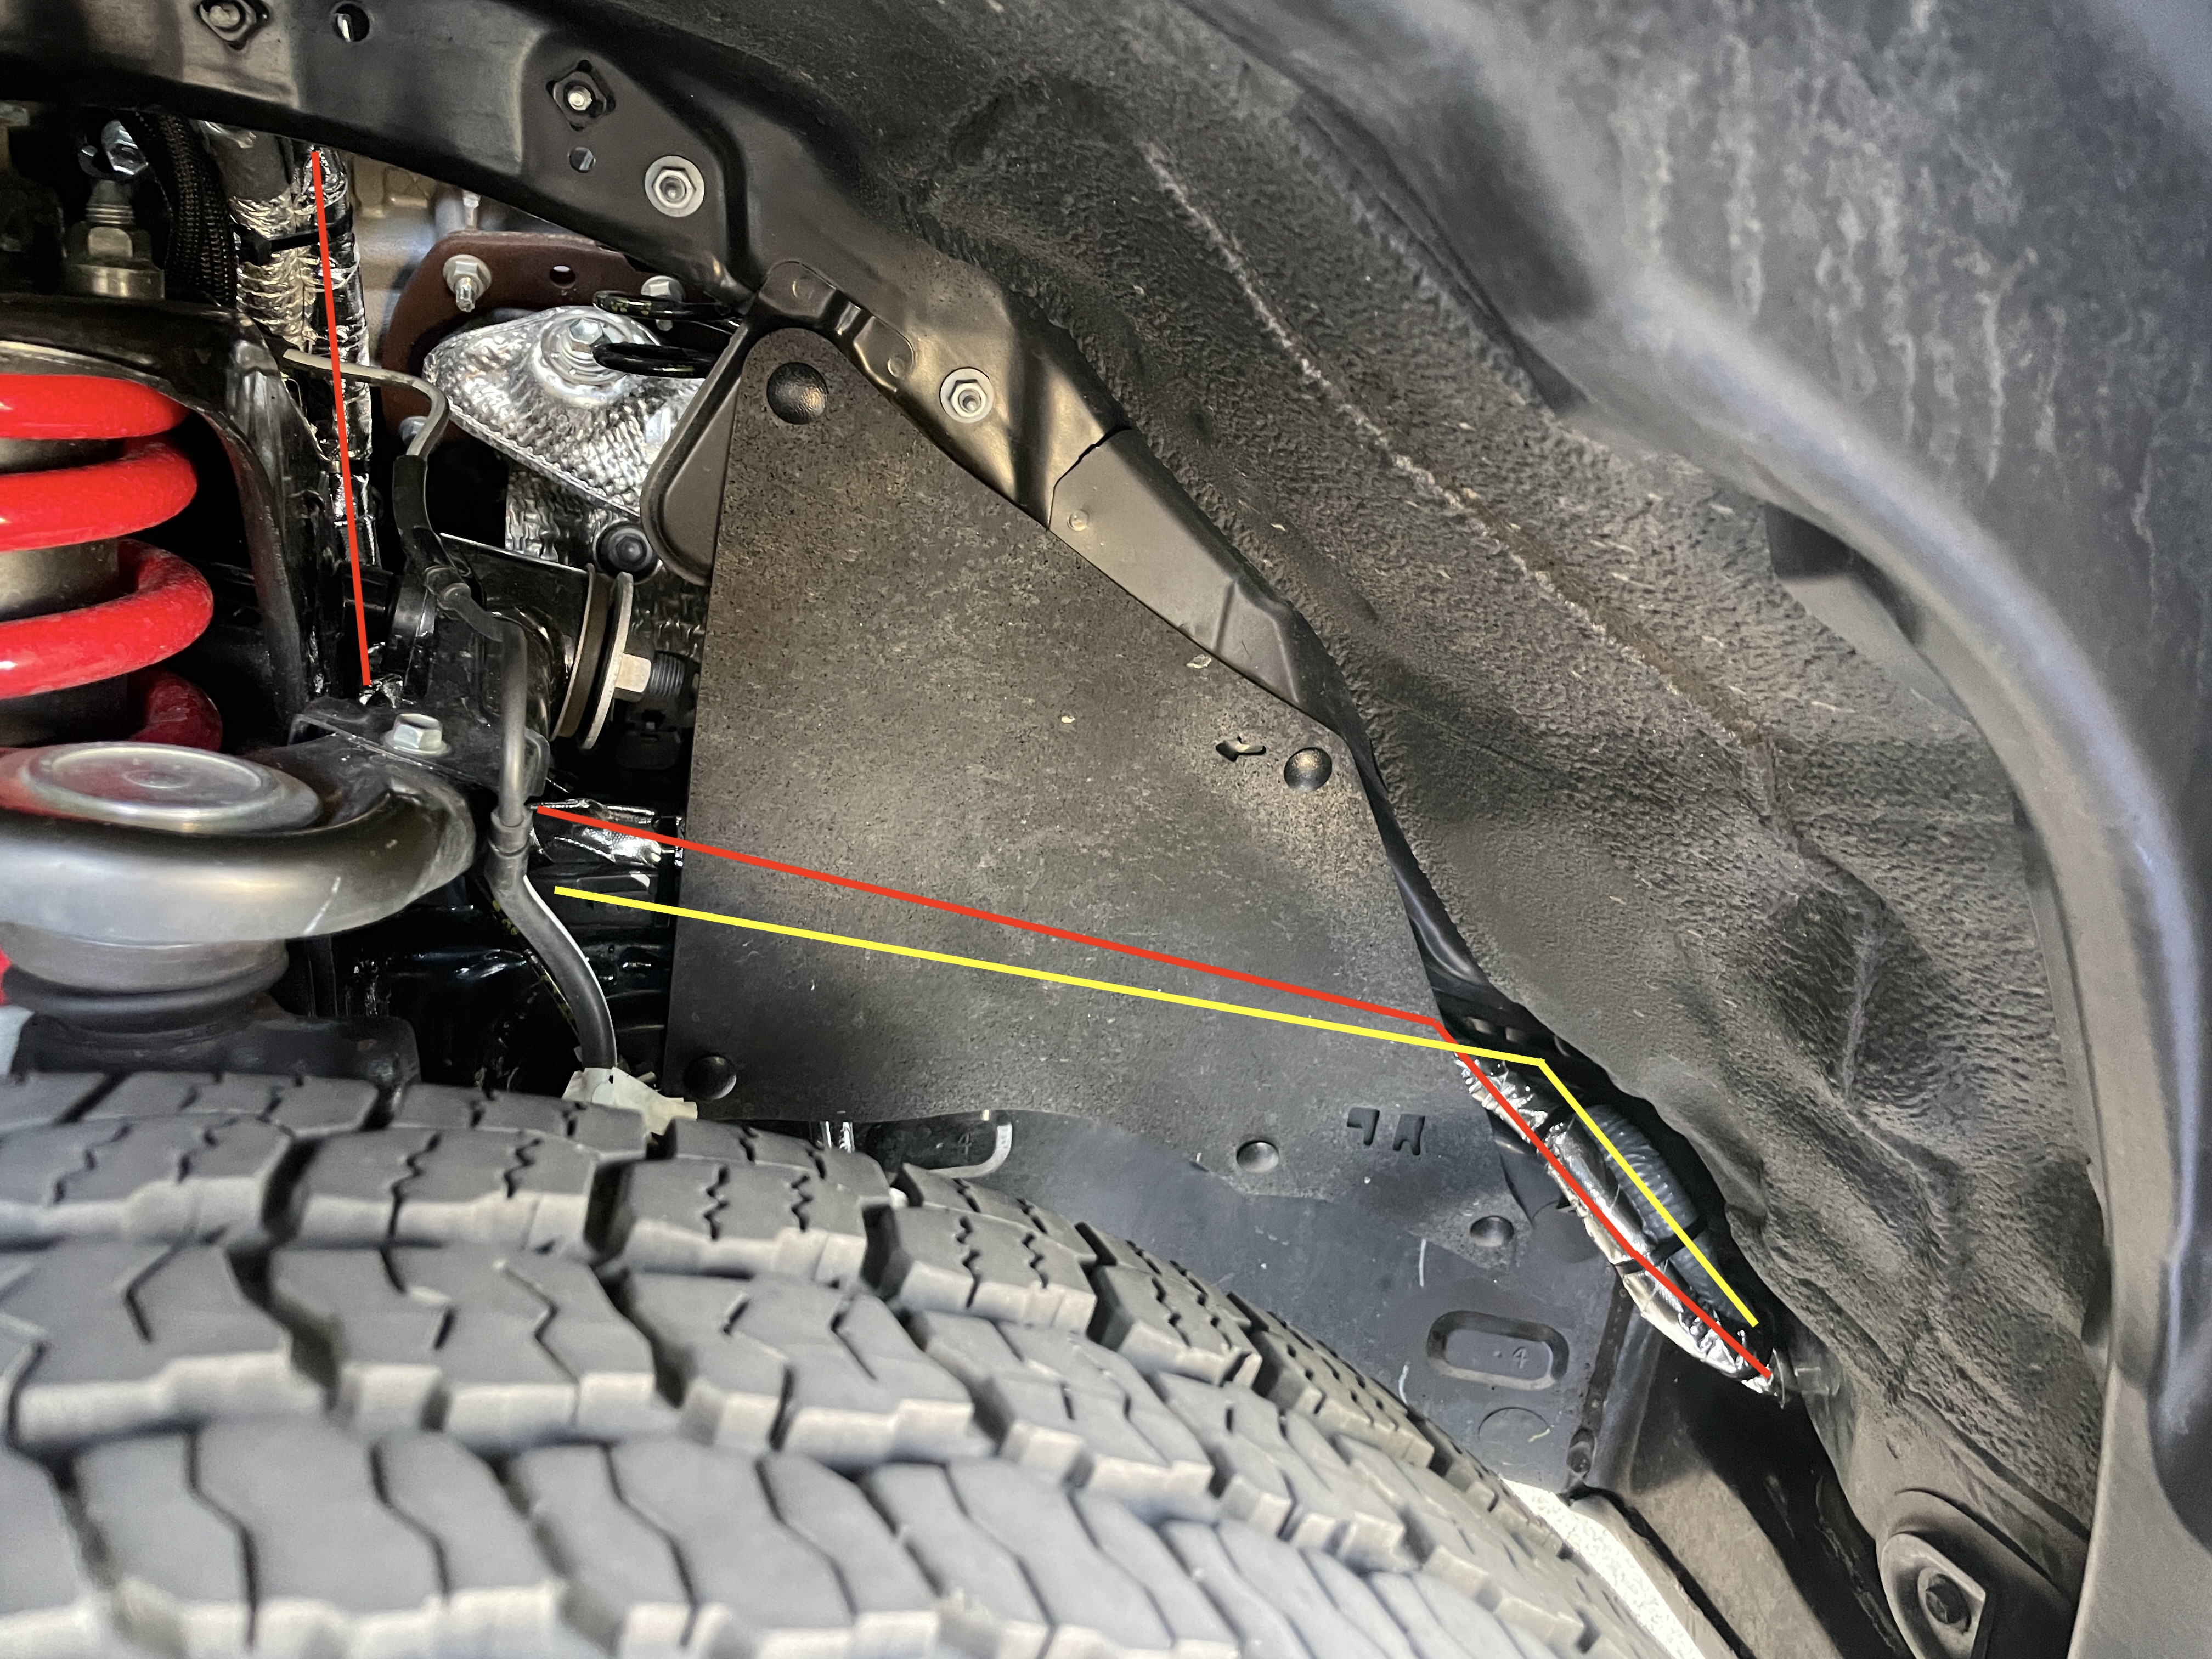
Path in wheel well (With splash guard removed)
Path in wheel well (With splash guard installed)
** No photos under the truck, the path is obvious once you’re down there, and nothing to photograph around fuel tank **
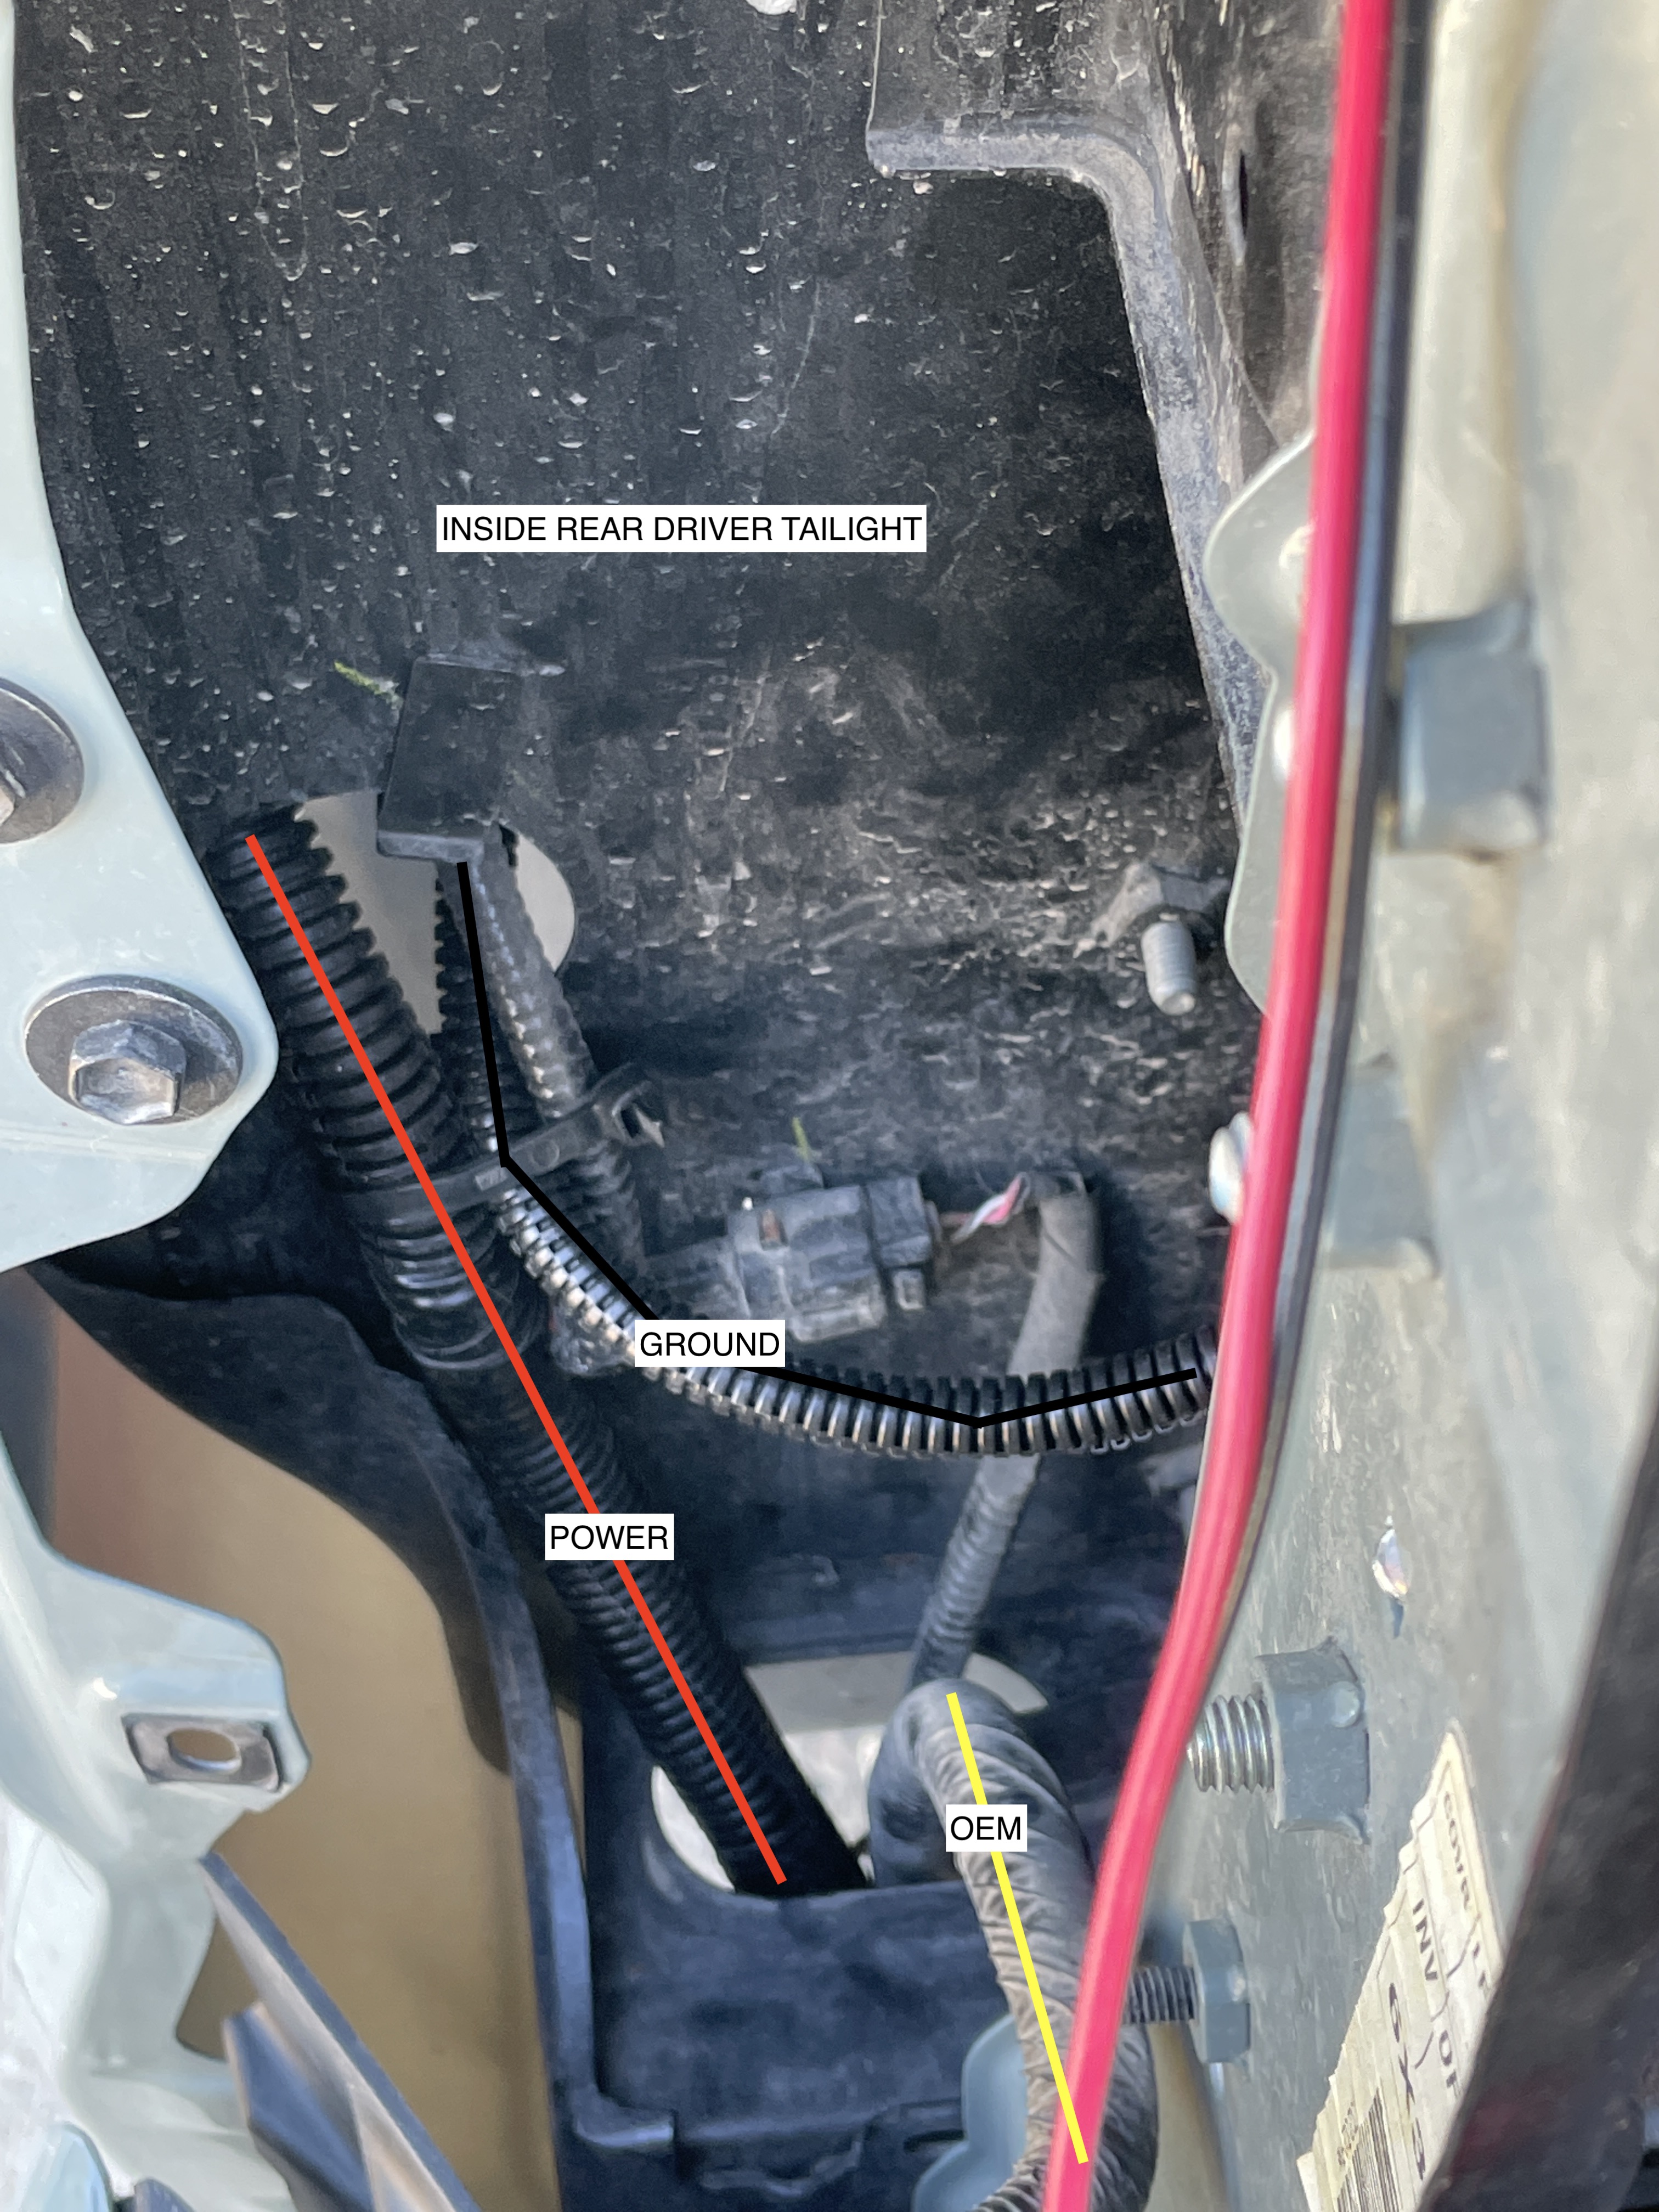
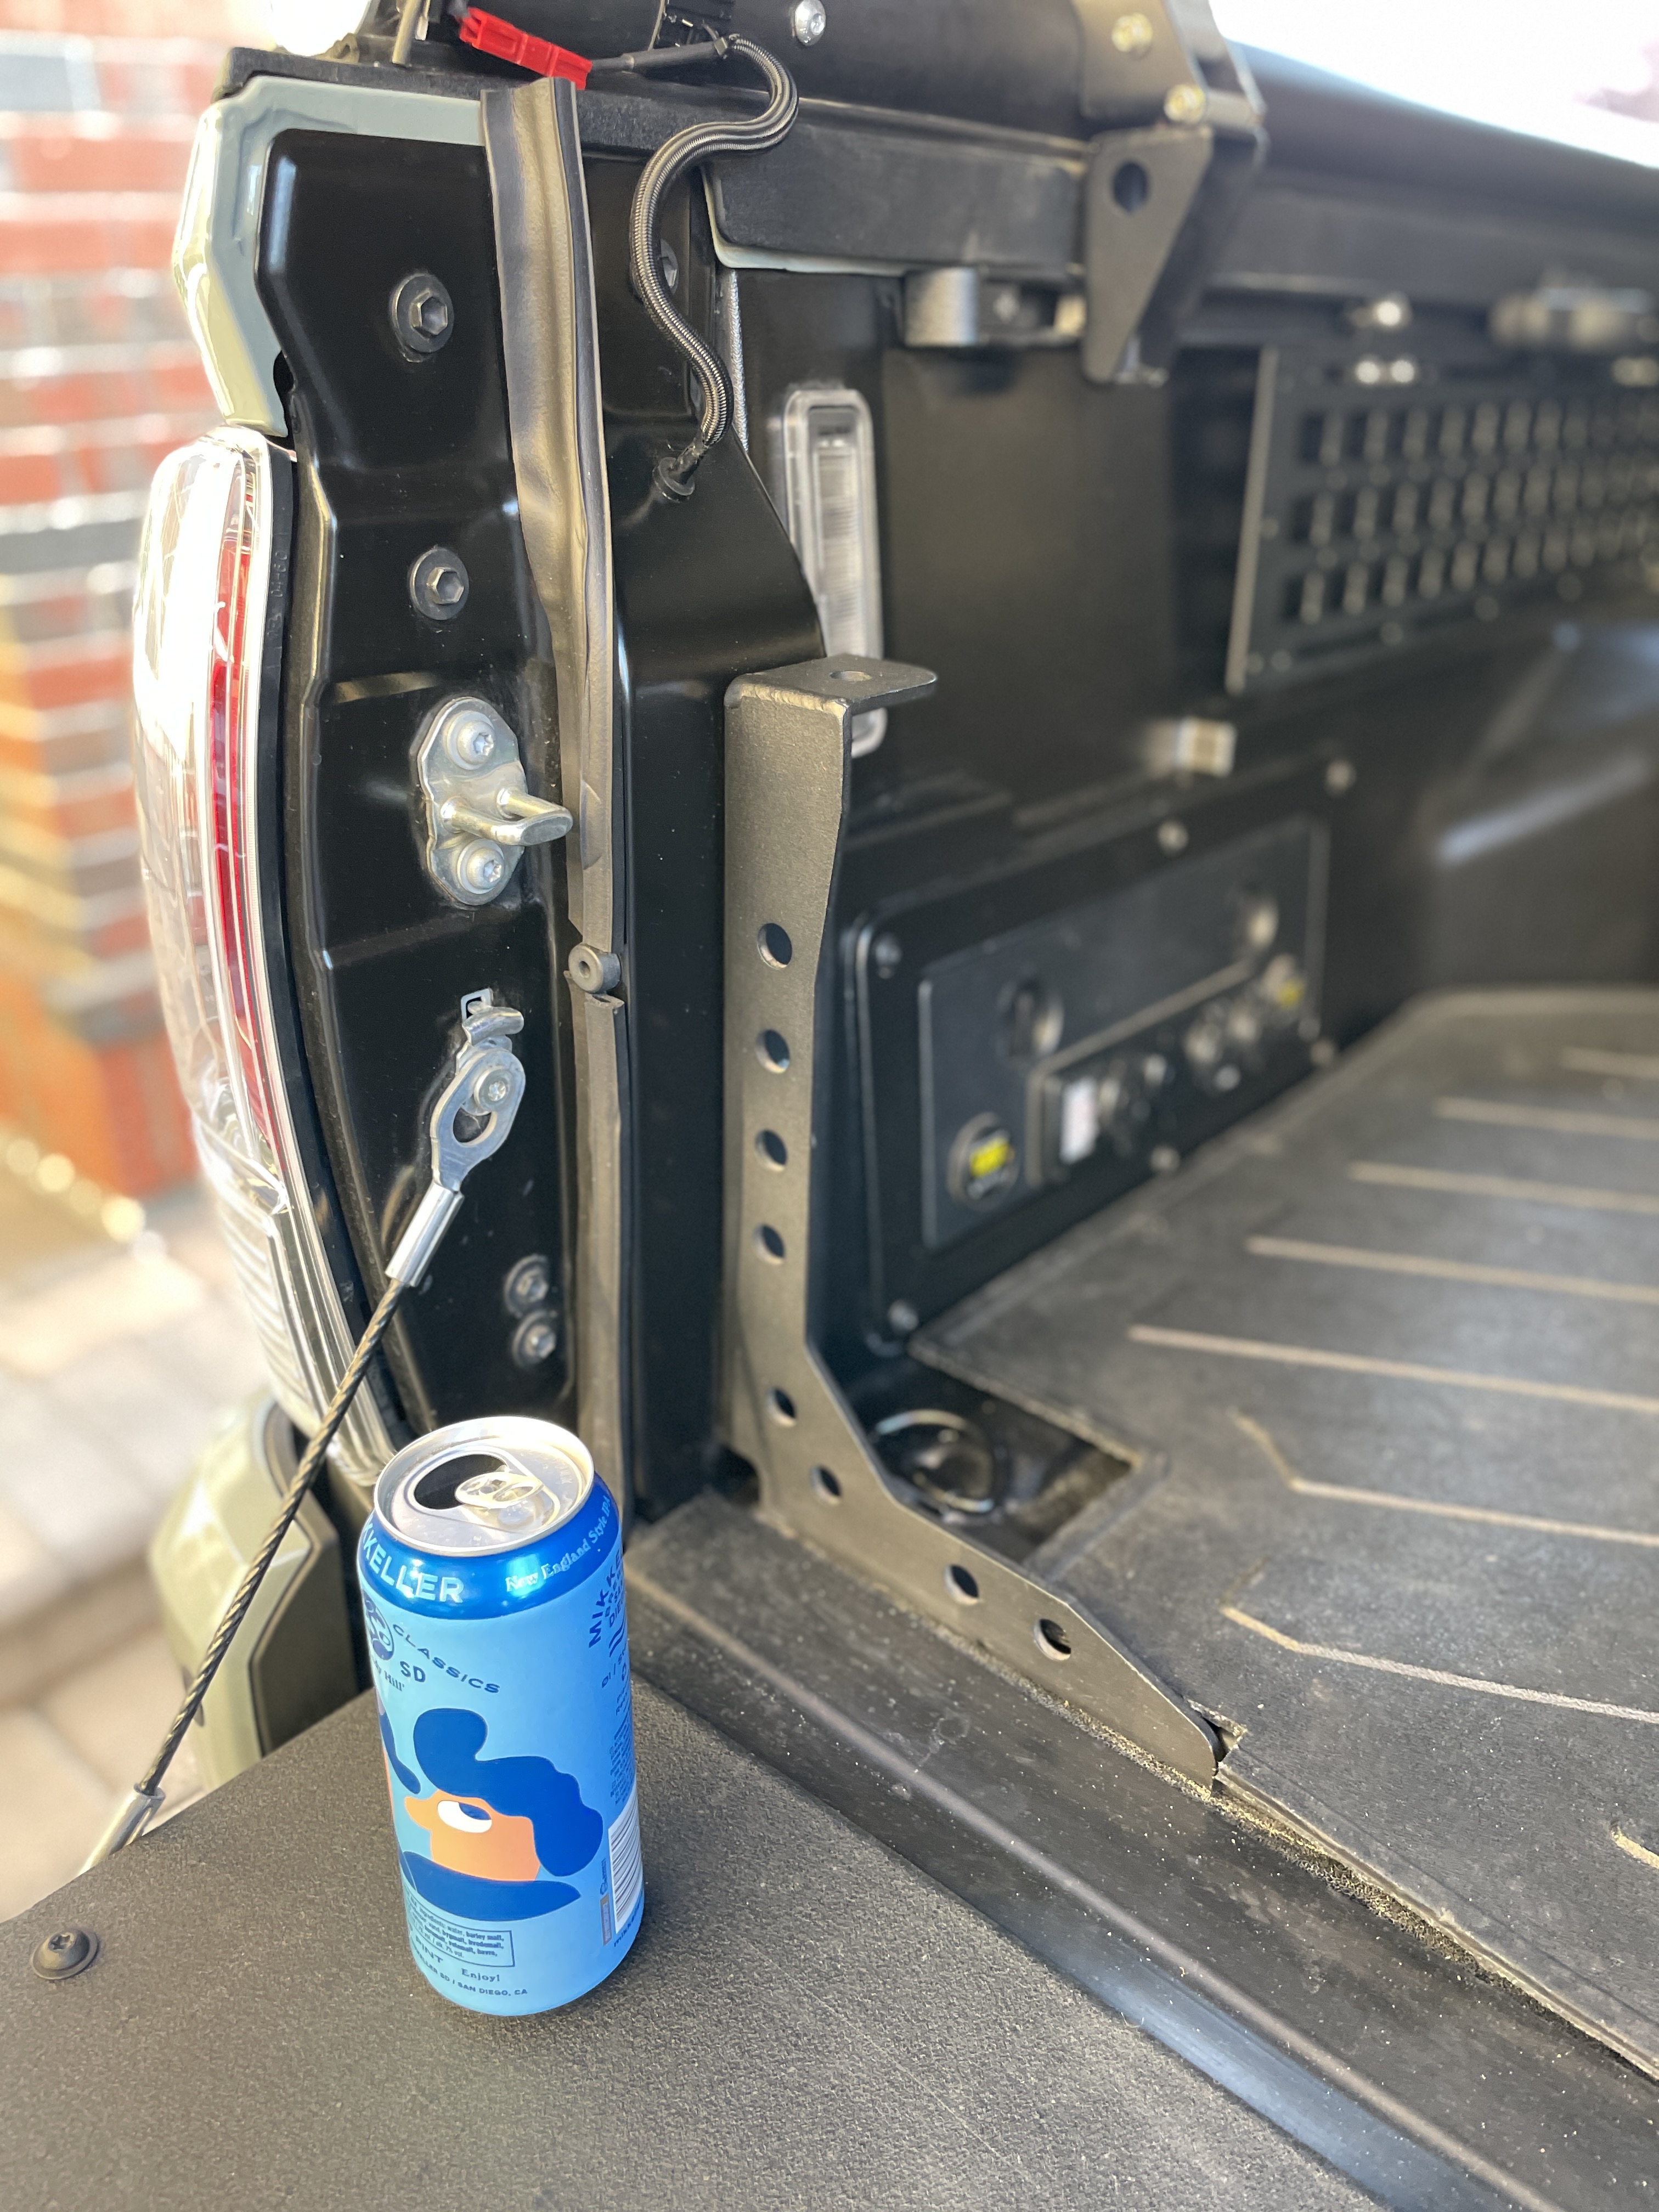
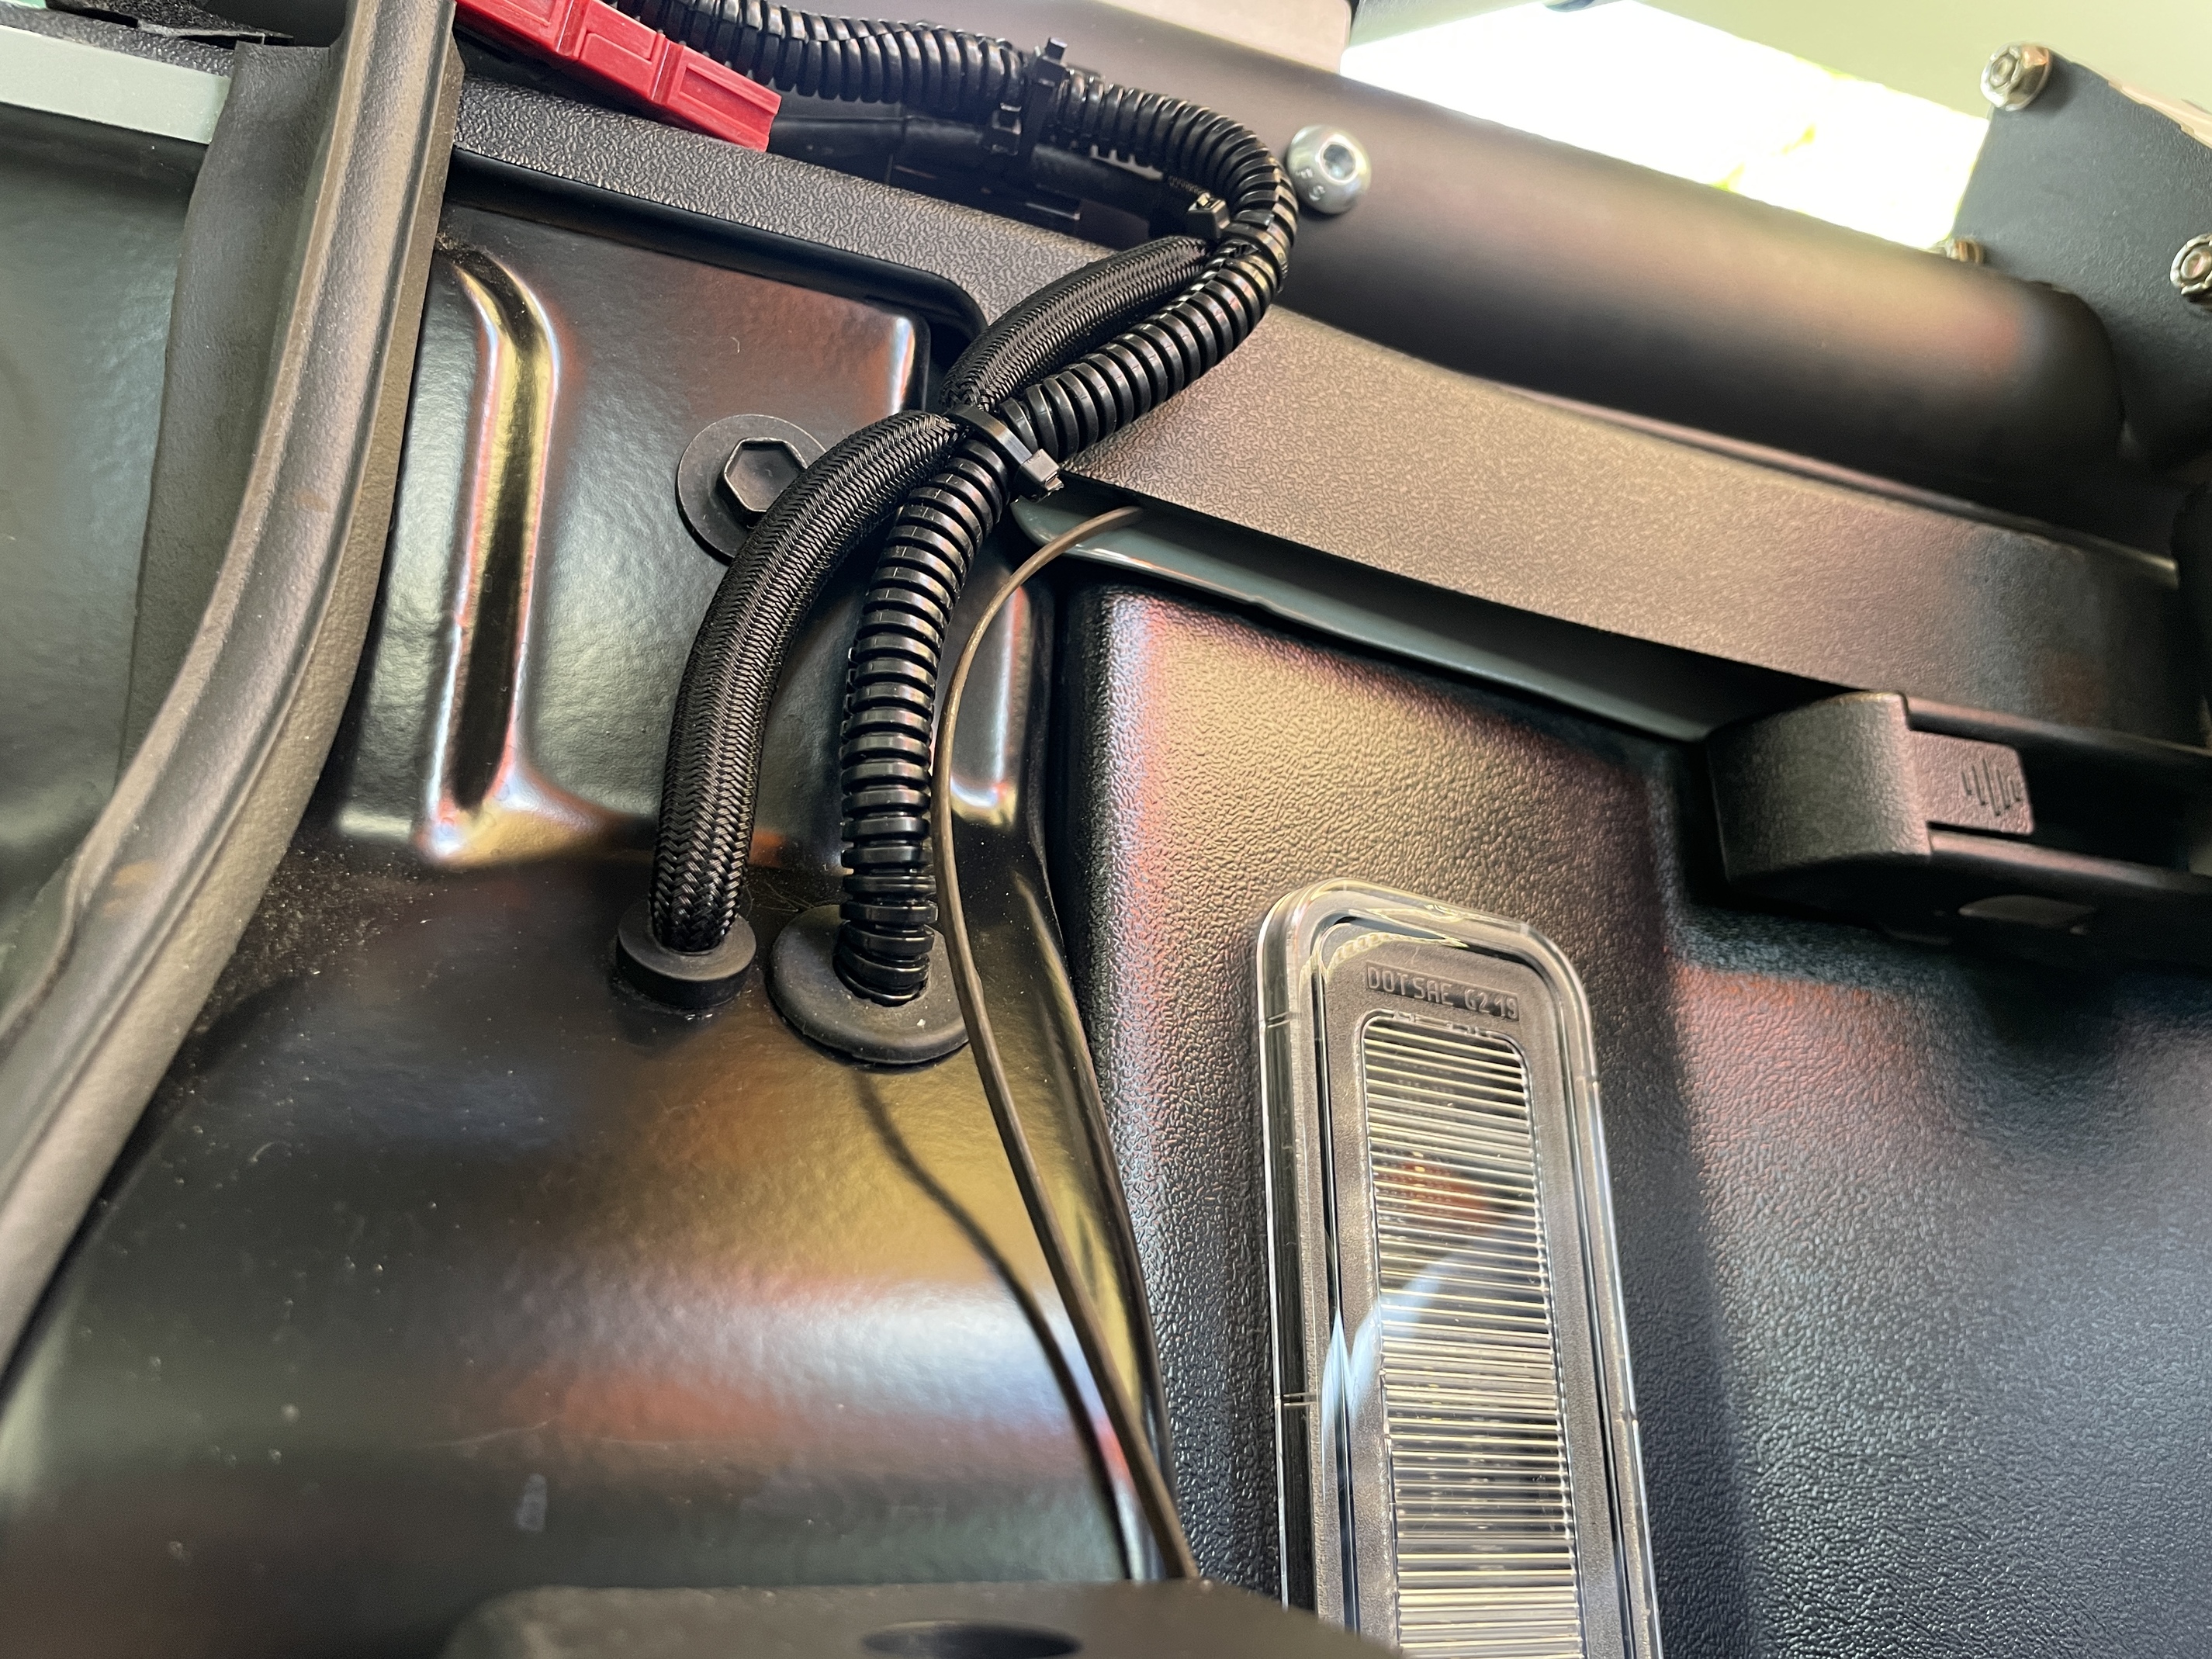
Path coming into the taillight from under the truck
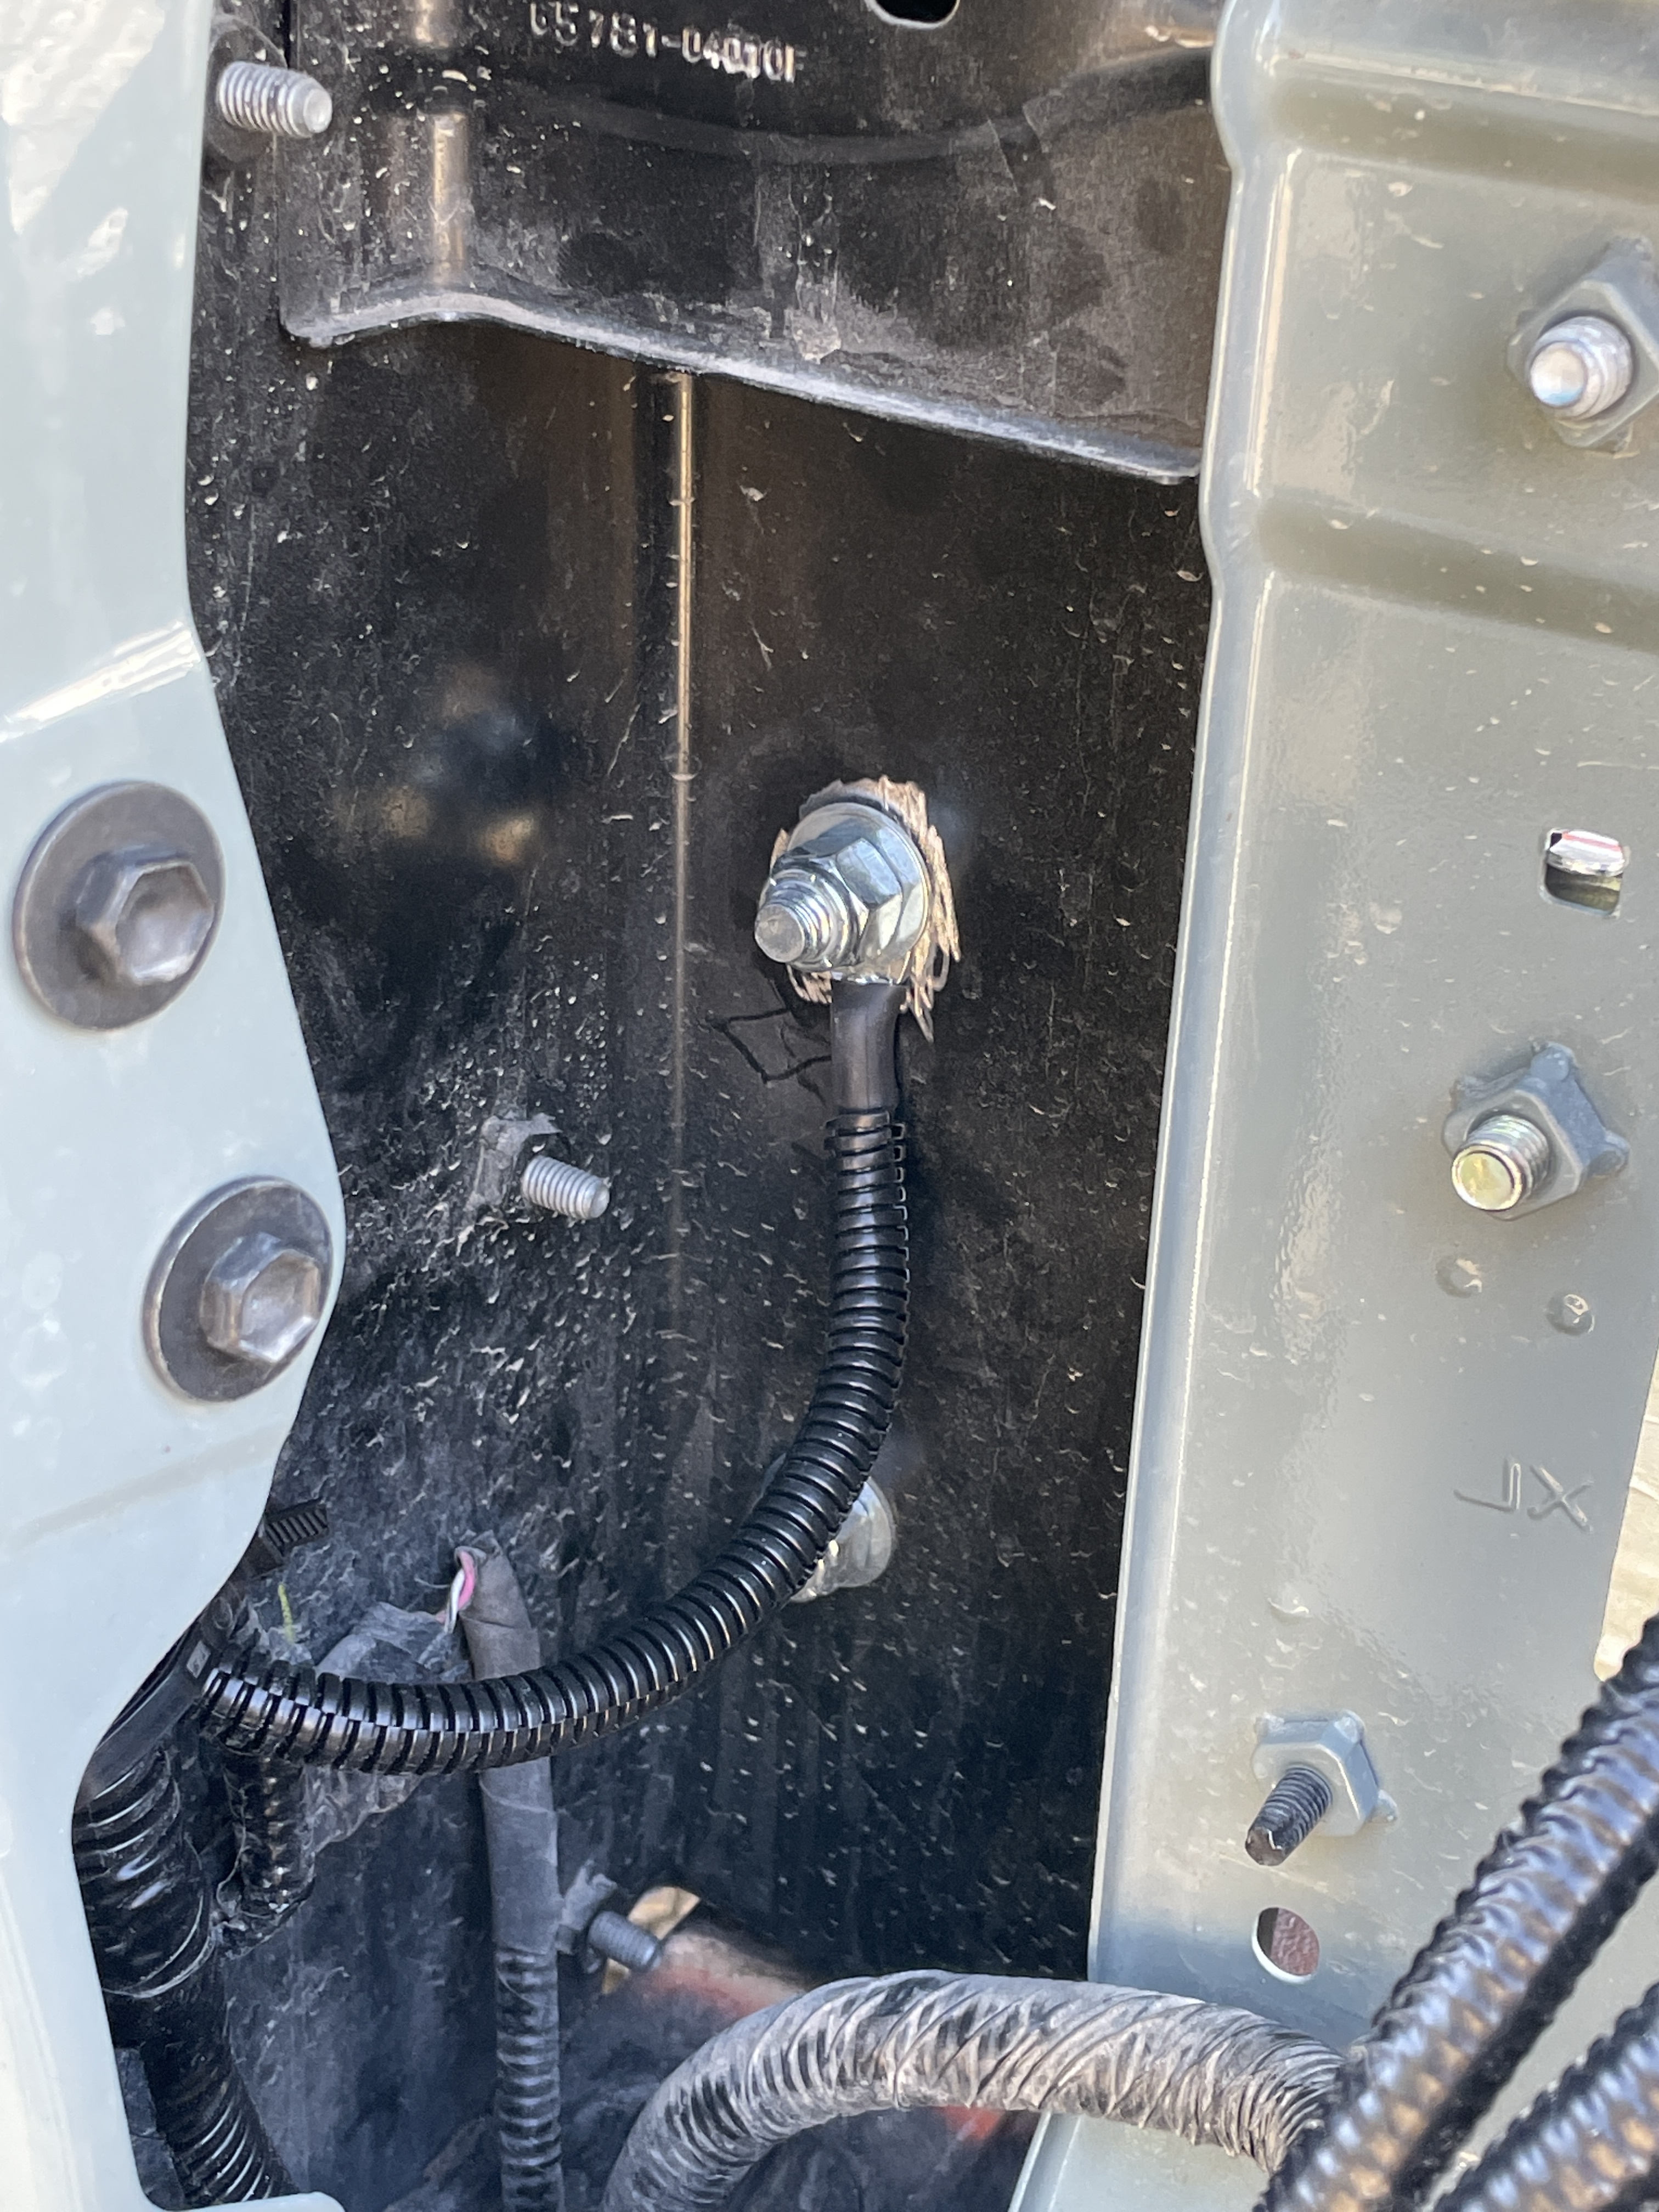
The fuse box ground is also visible here. We stripped away some paint from frame and used one of the Cali Raised LED bed stiffener bolts inside the taillight as our grounding point.
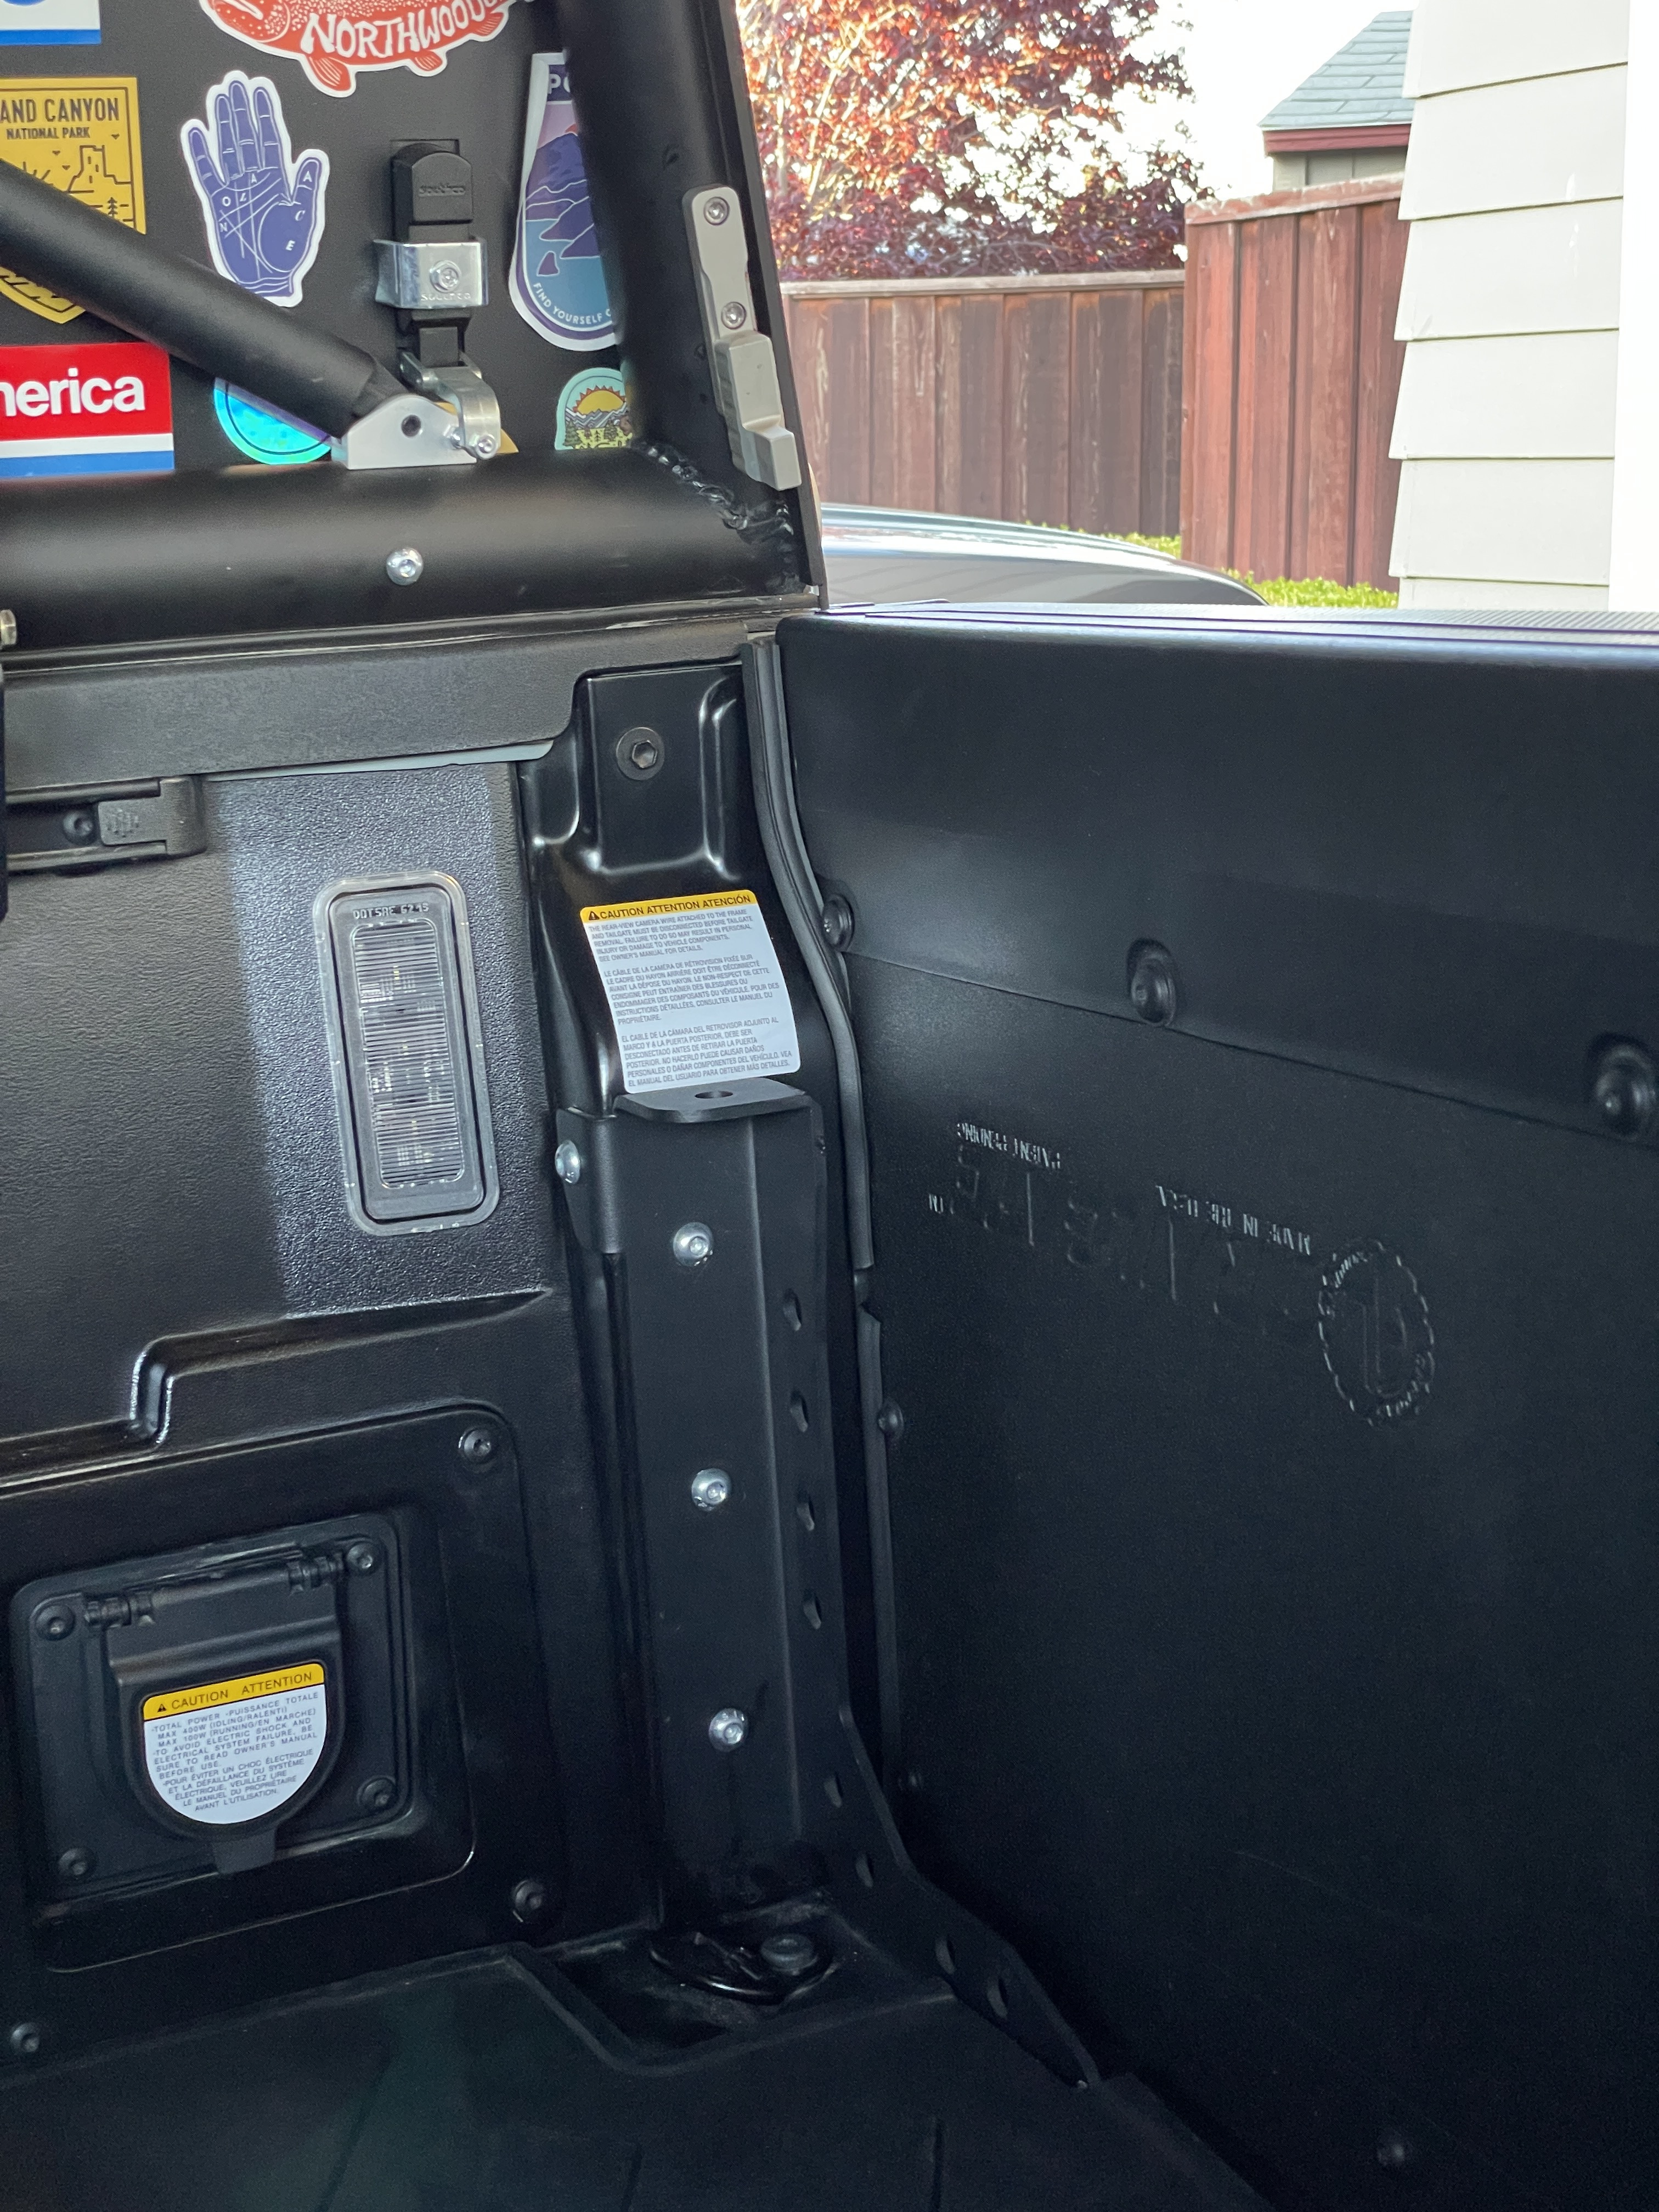
Mounting the box
The hole and grommet where the power runs into the cubby and the ground runs out is visible at the top here. (Which was also heavily siliconed.)
This was pretty painless with the exception of securing the cubby’s top middle bolt. Threading the nut completely blind in the most awkward angle was a royal PITA but with luck got it.
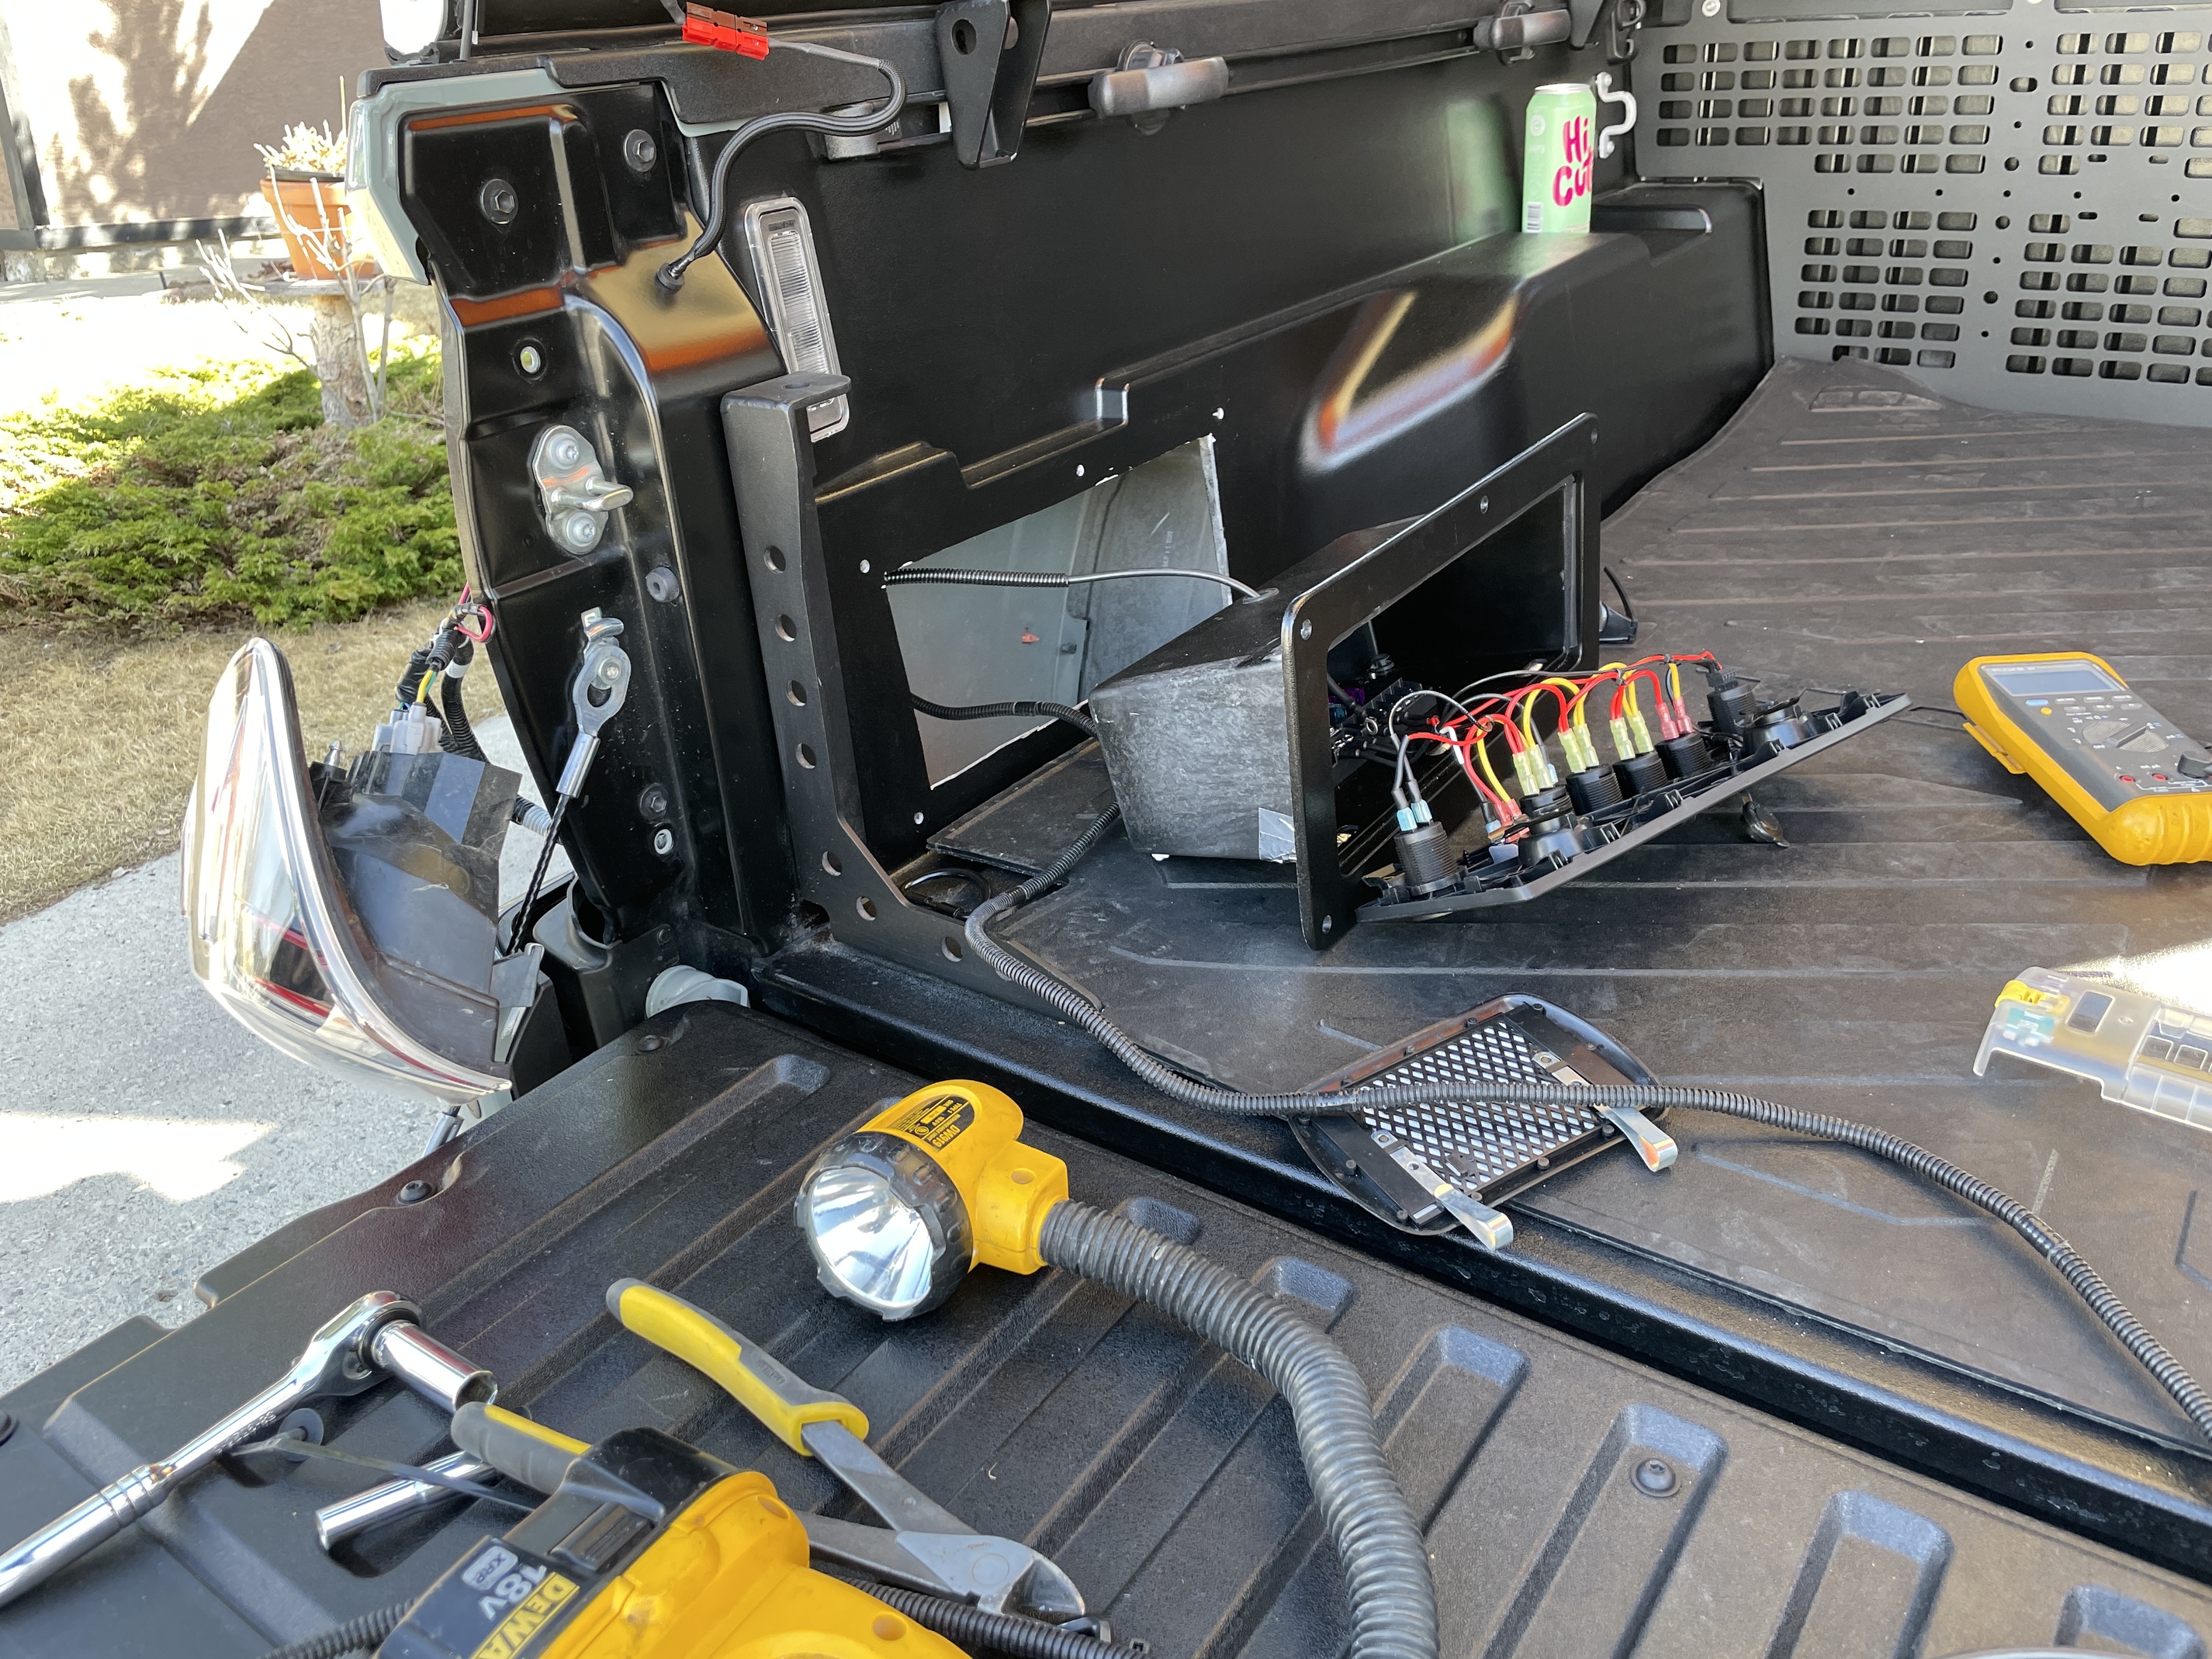

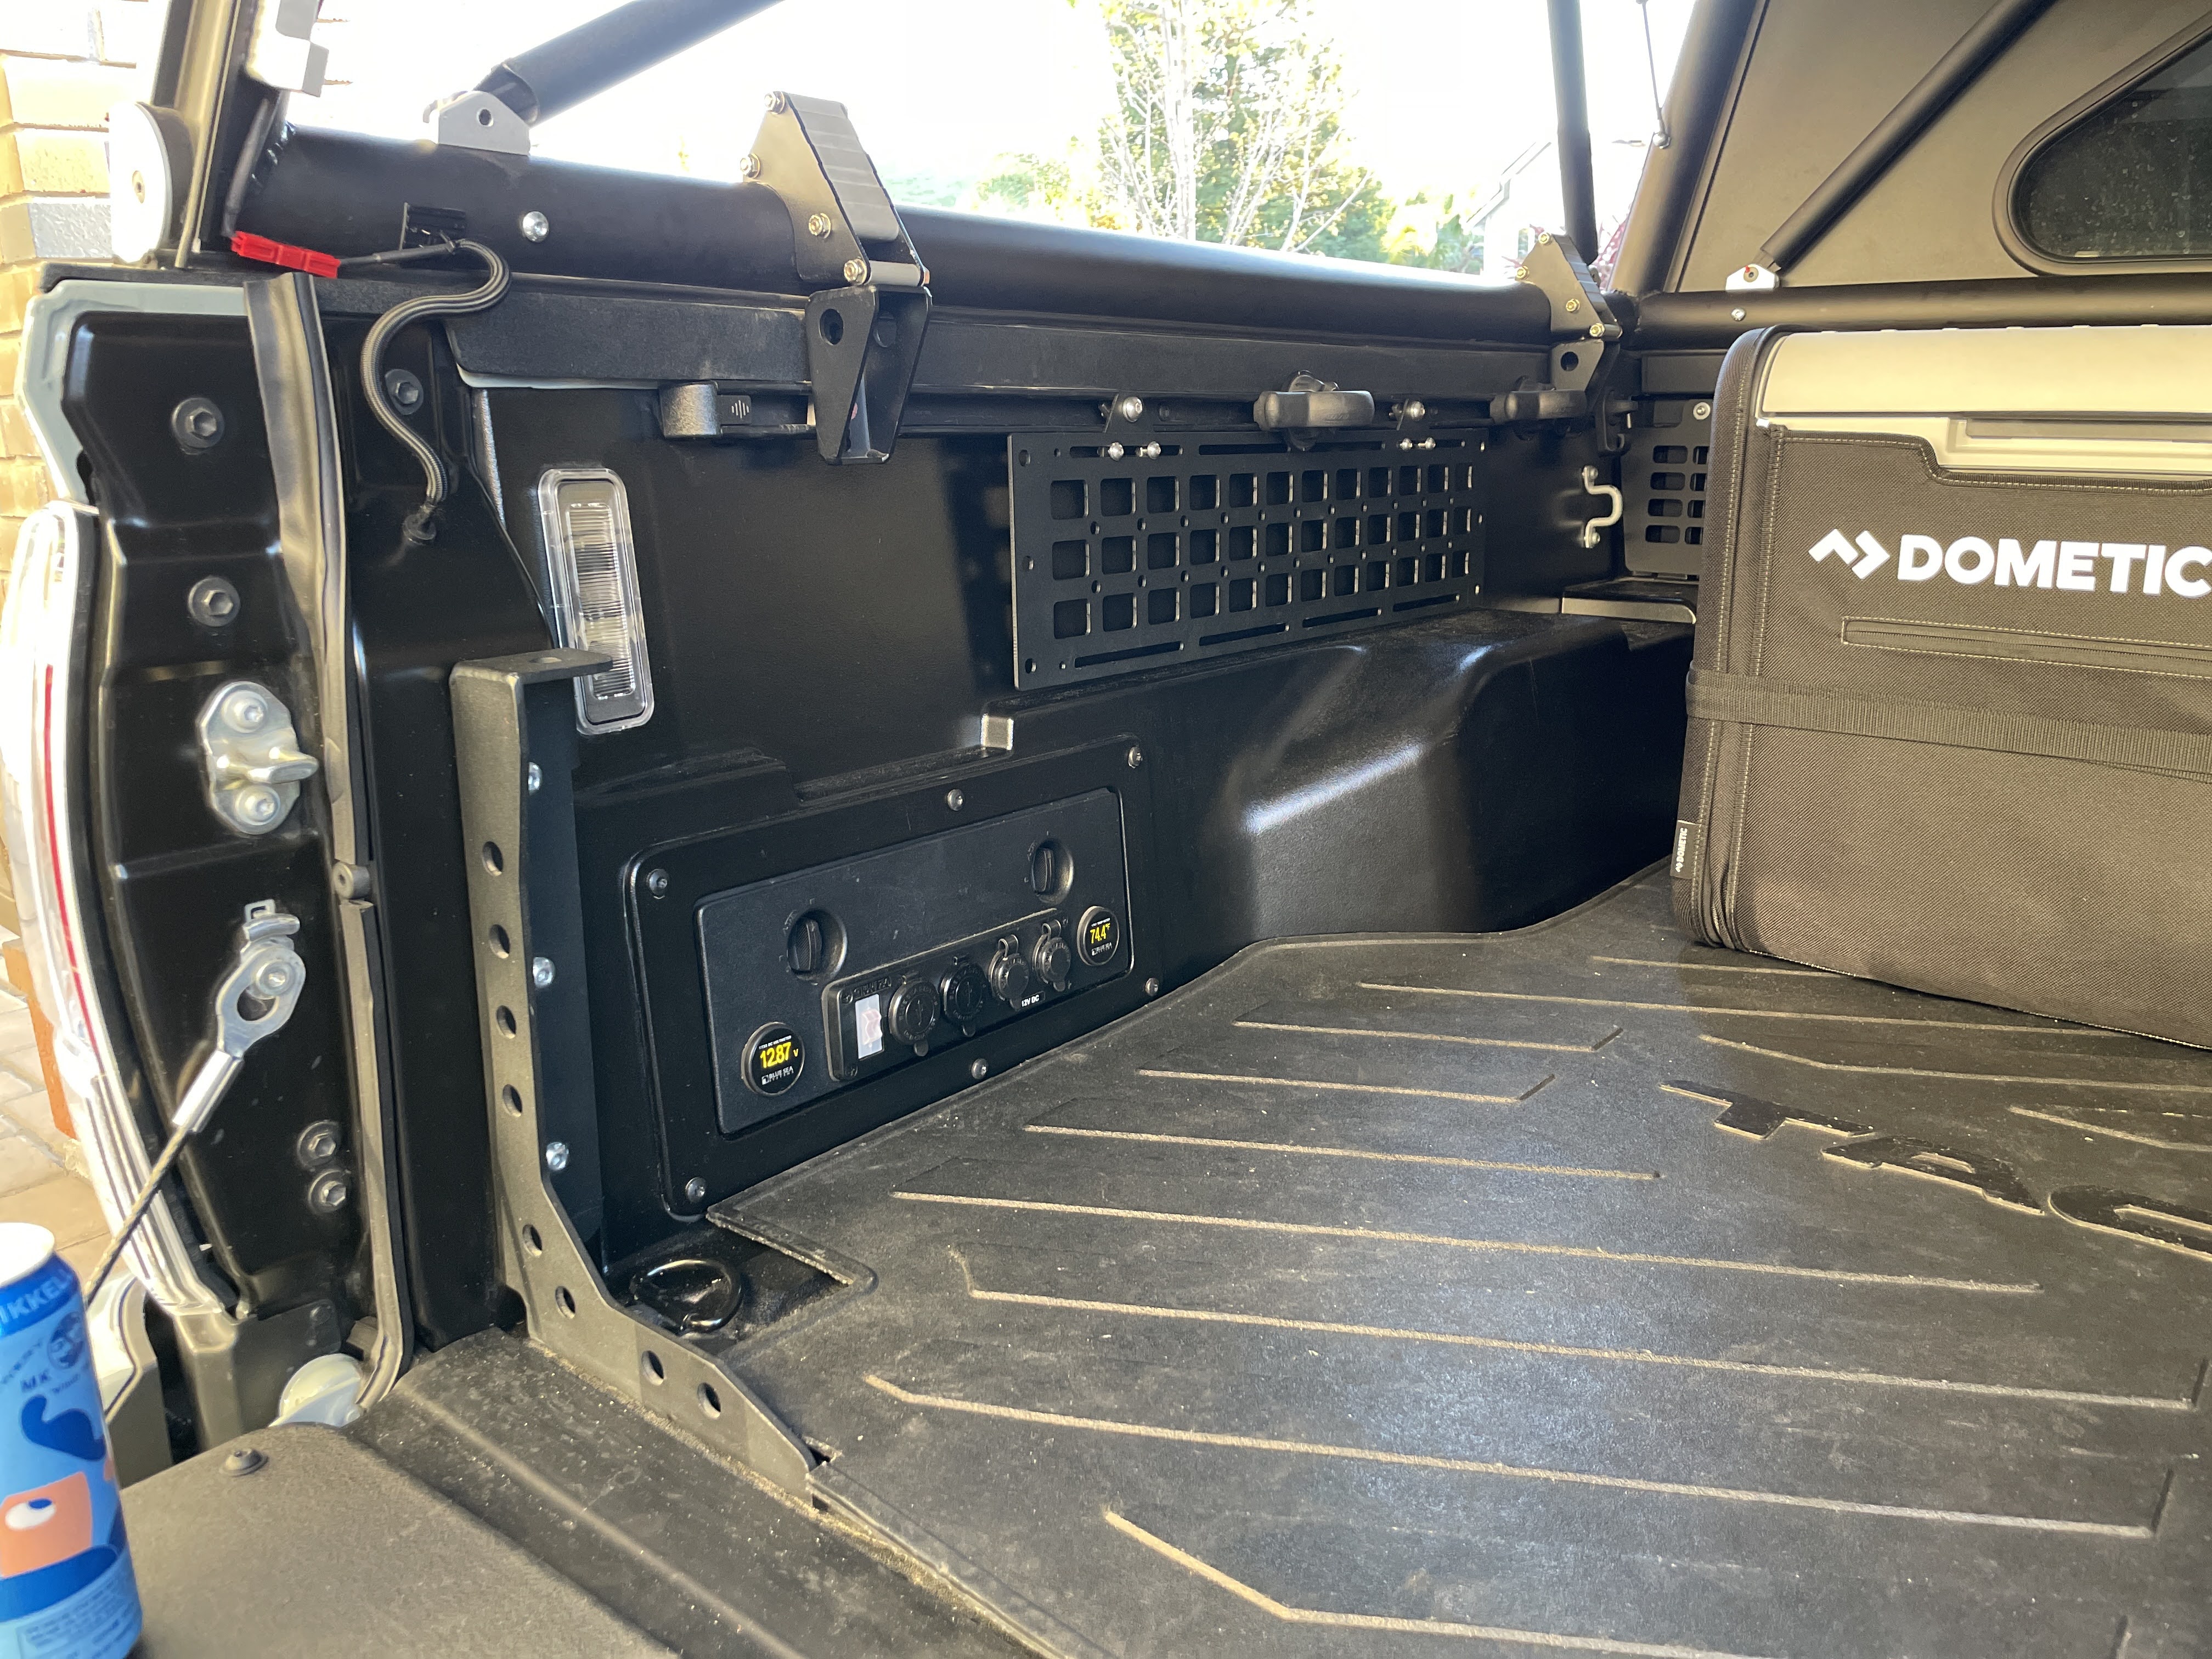
We have power!
Voltmeter, Temperature Sensor, USB Sockets and 12V Sockets are all functioning as expected. The REDARC Monitor in cab is accurately showing battery levels and charging too! Very excited about all of this coming together!
Next steps on electrical work
• Clean up wiring, lugs, shrink tubing, in-line fuses, and zip ties under the hood where needed.
• Mount Sunflare Xplor Adventure Solar Panel to the roof of the GFC and connect to REDARC battery charger as additional charging source.
• Install Matt Gecko LED lights and install Blue Sea Rocker switches in electrical cubby.
• Install Dometic Fanstatic Fan in roof of GFC.
• Intall ARB Twin Compressor under passenger seat.
• Cut hole in bed mat and run conduit underneath for fridge wiring.
Will probably get to most of this electrical work next month, as for now, time to go camping
11 Likes
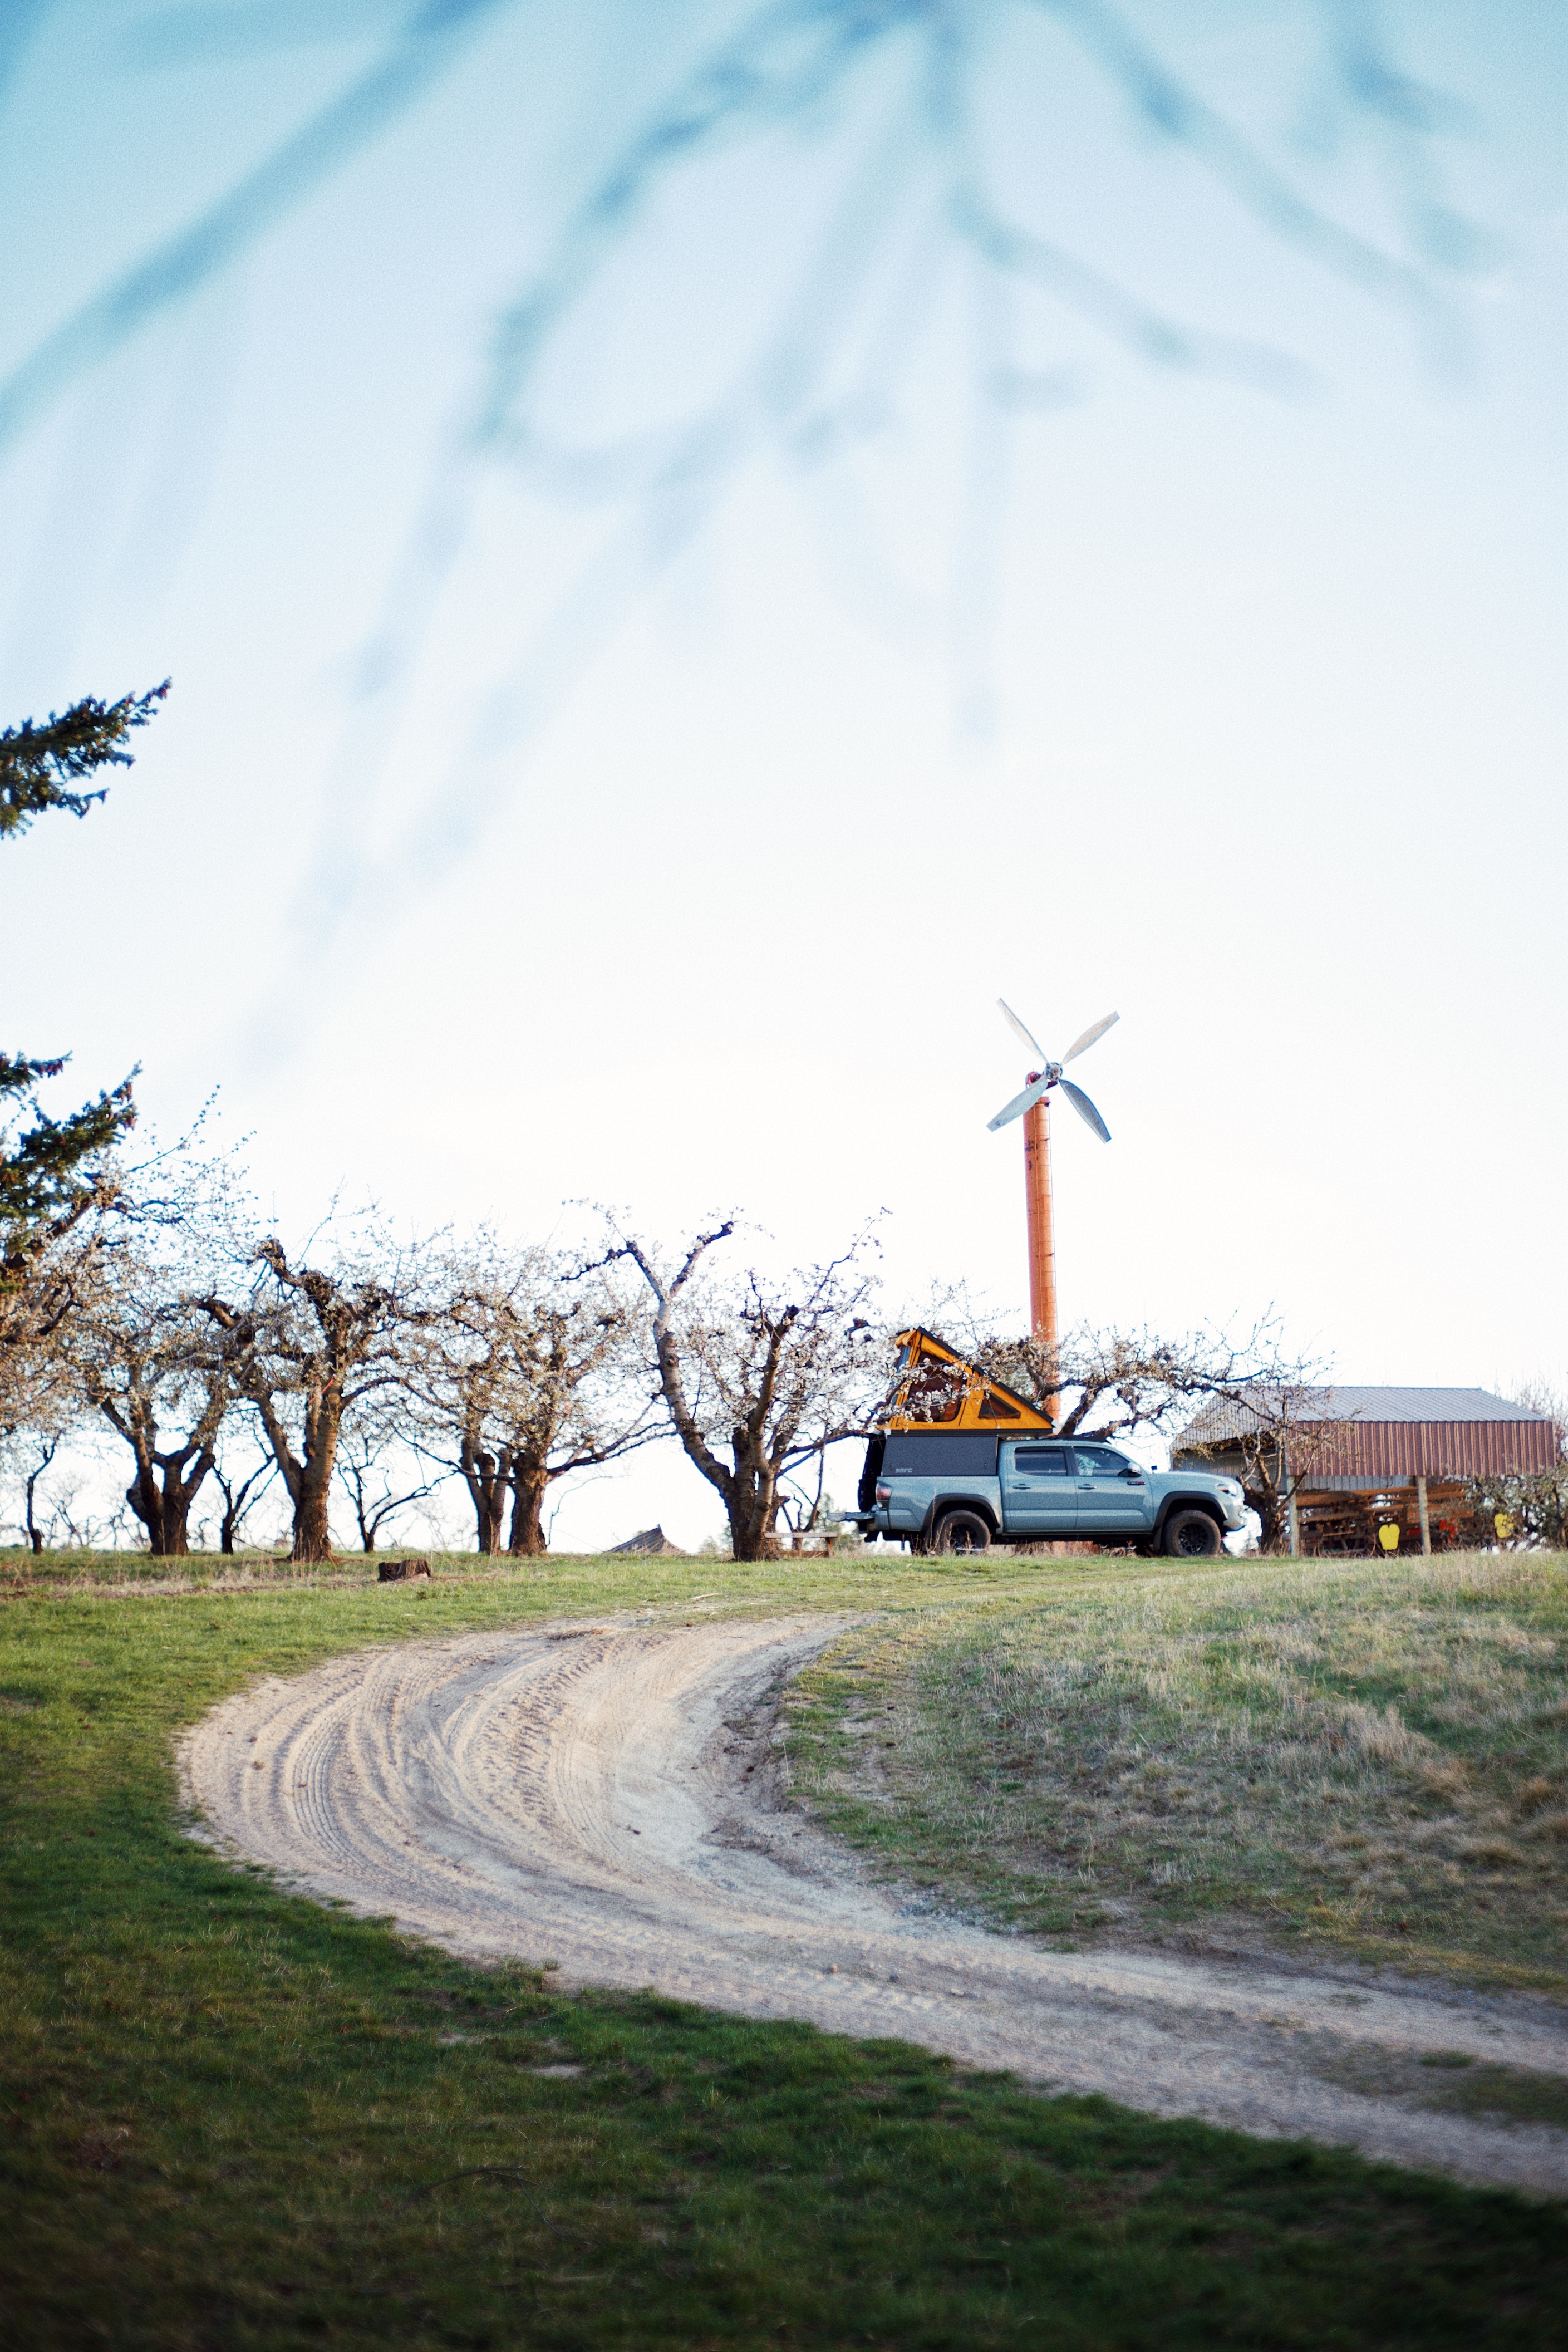
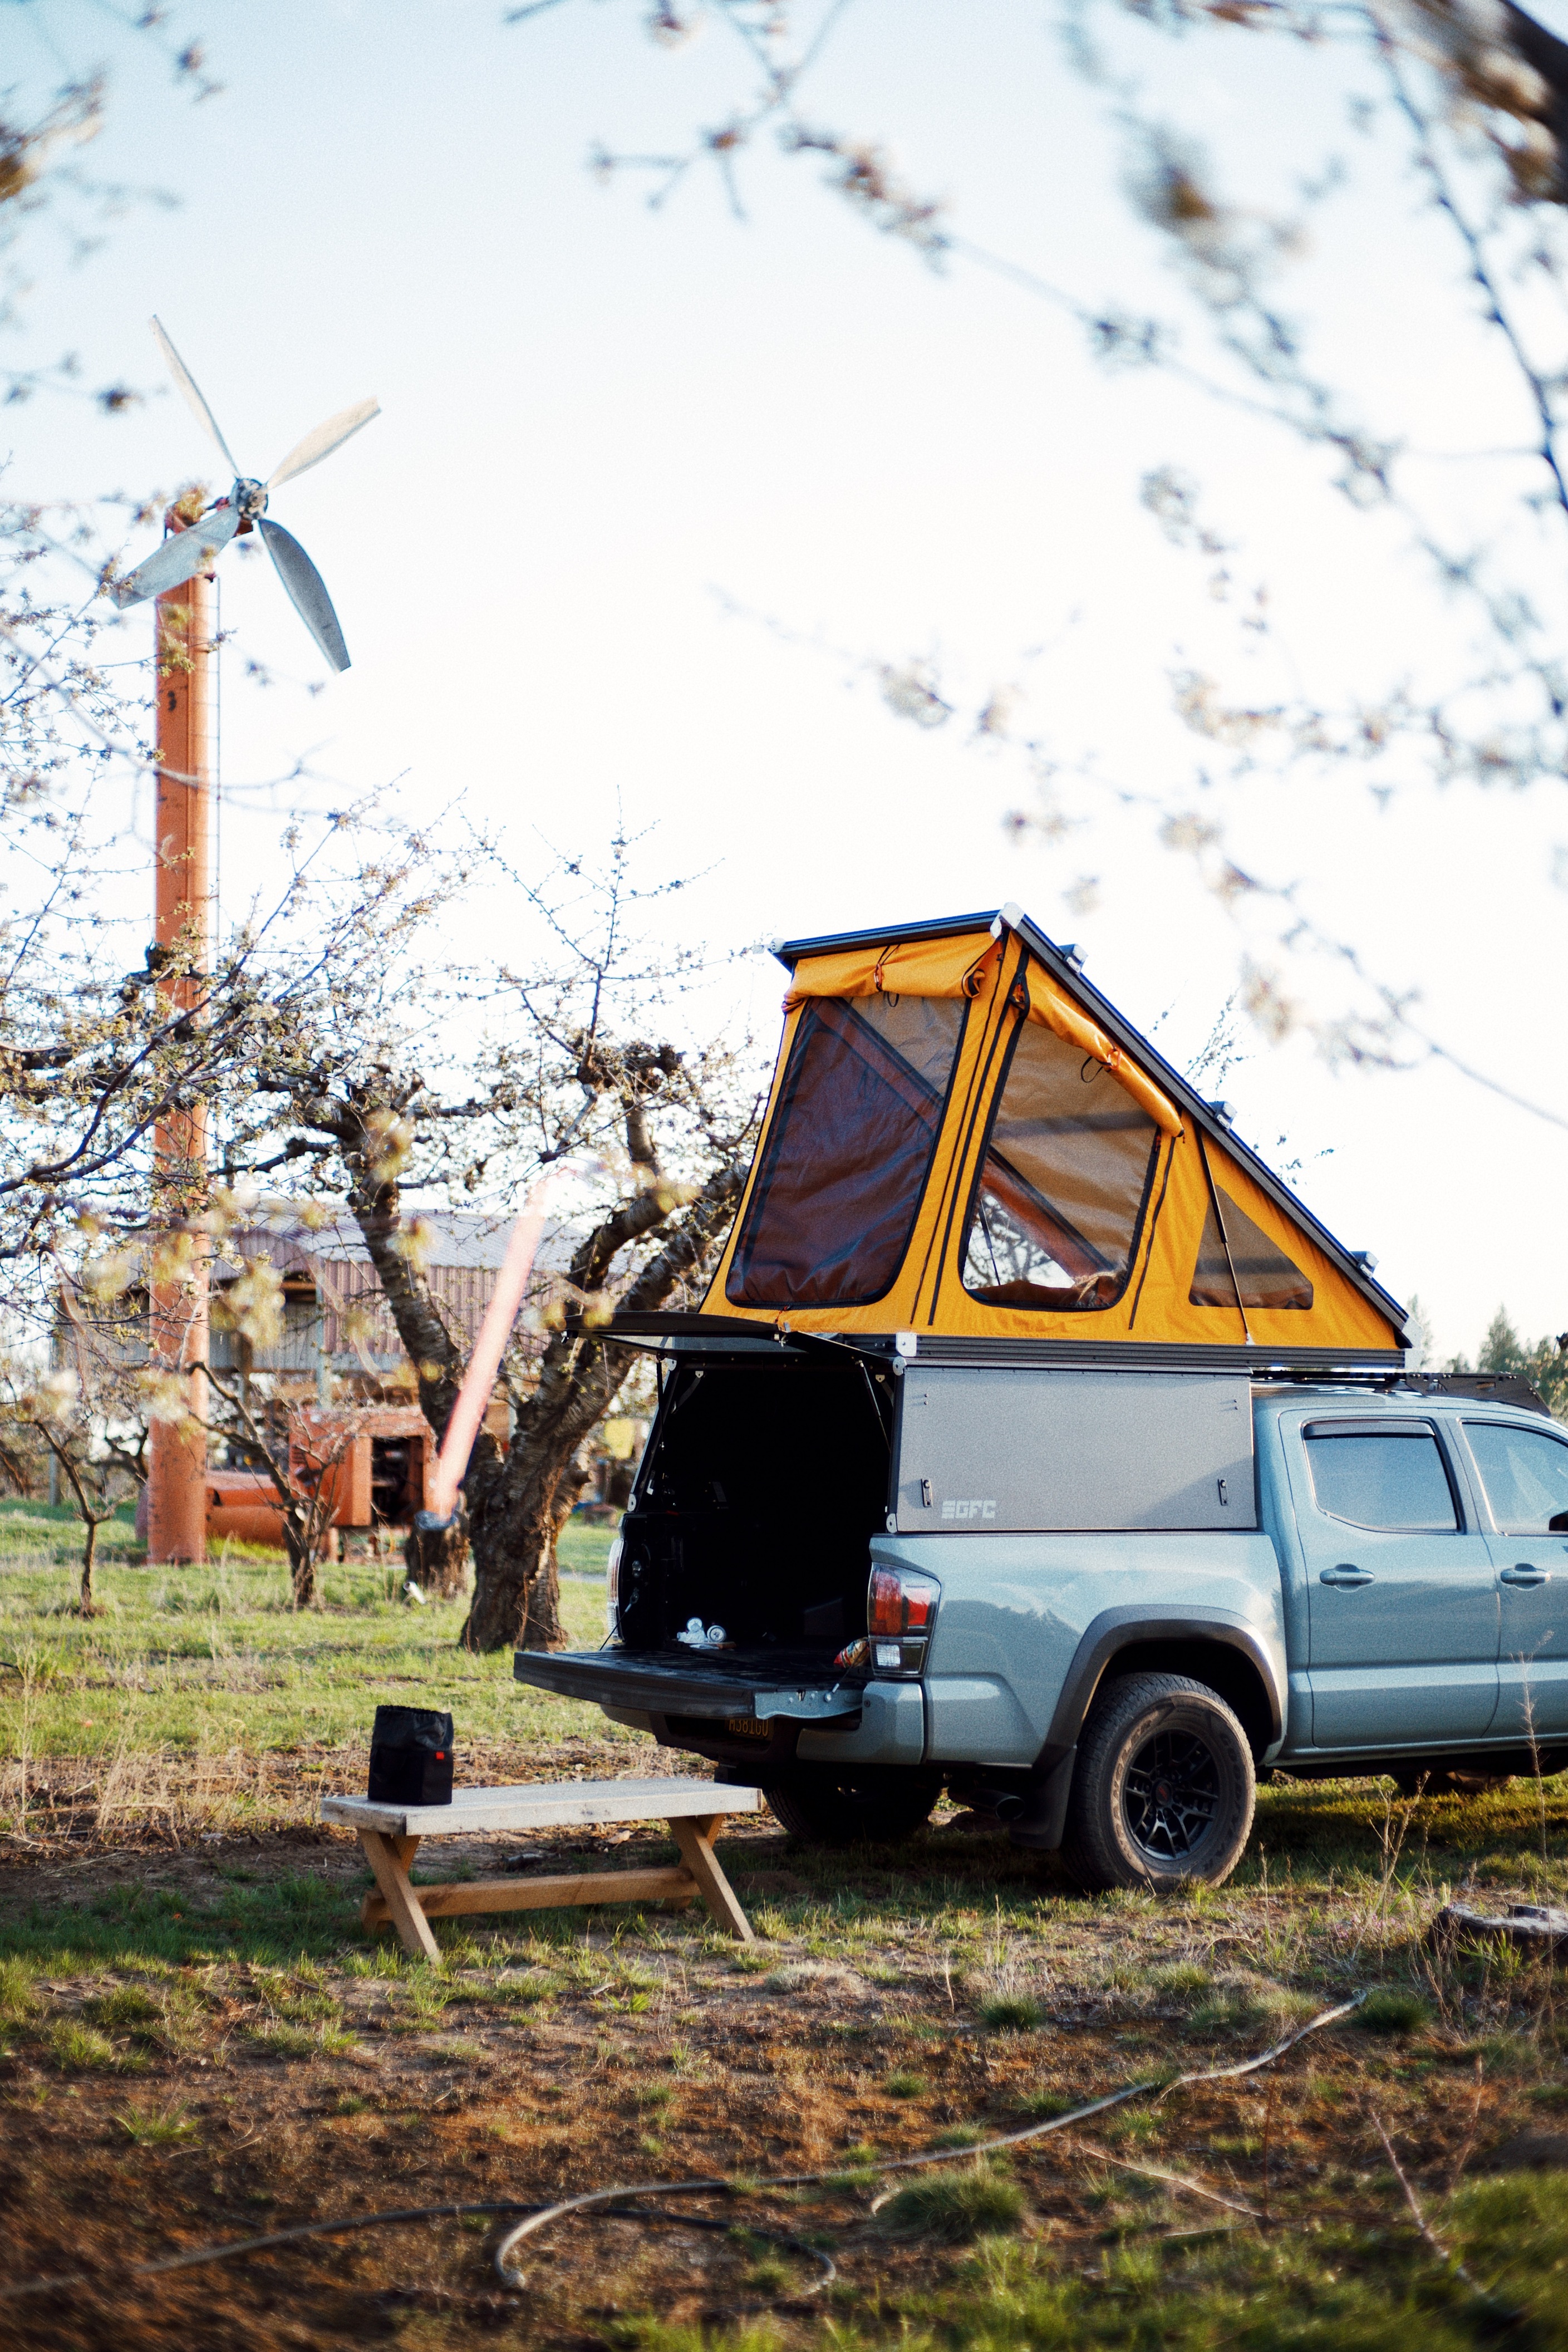
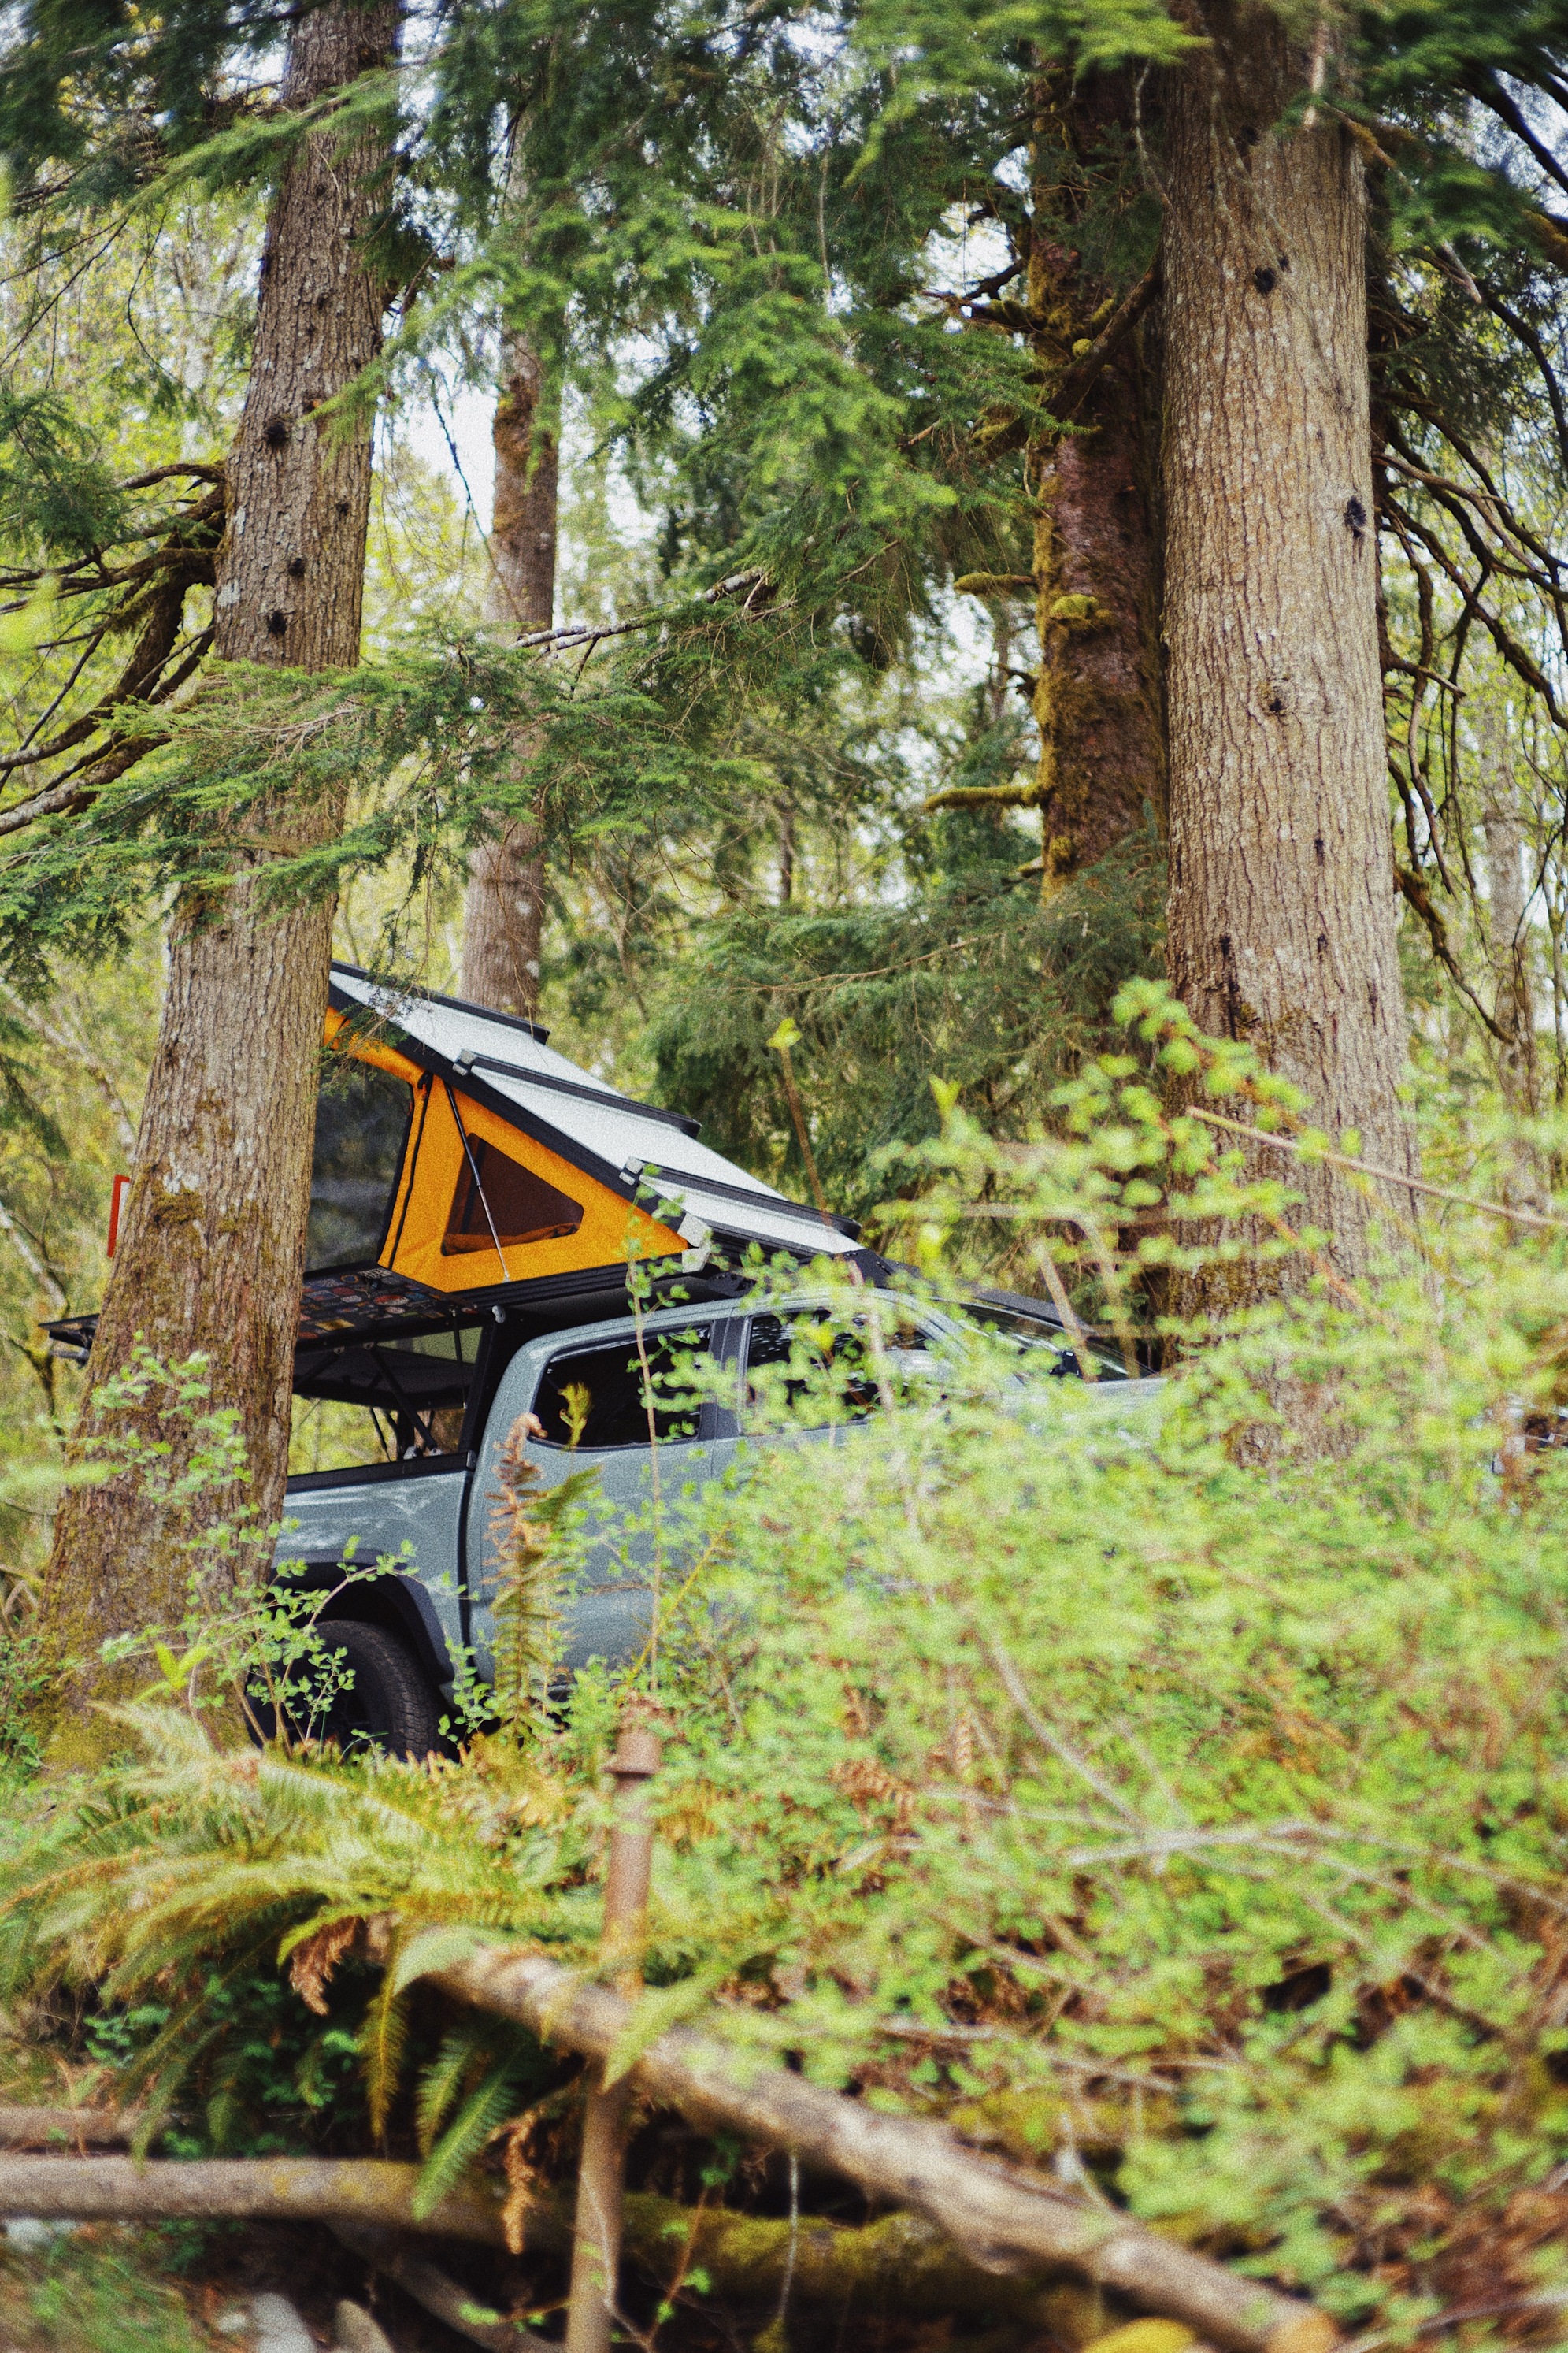
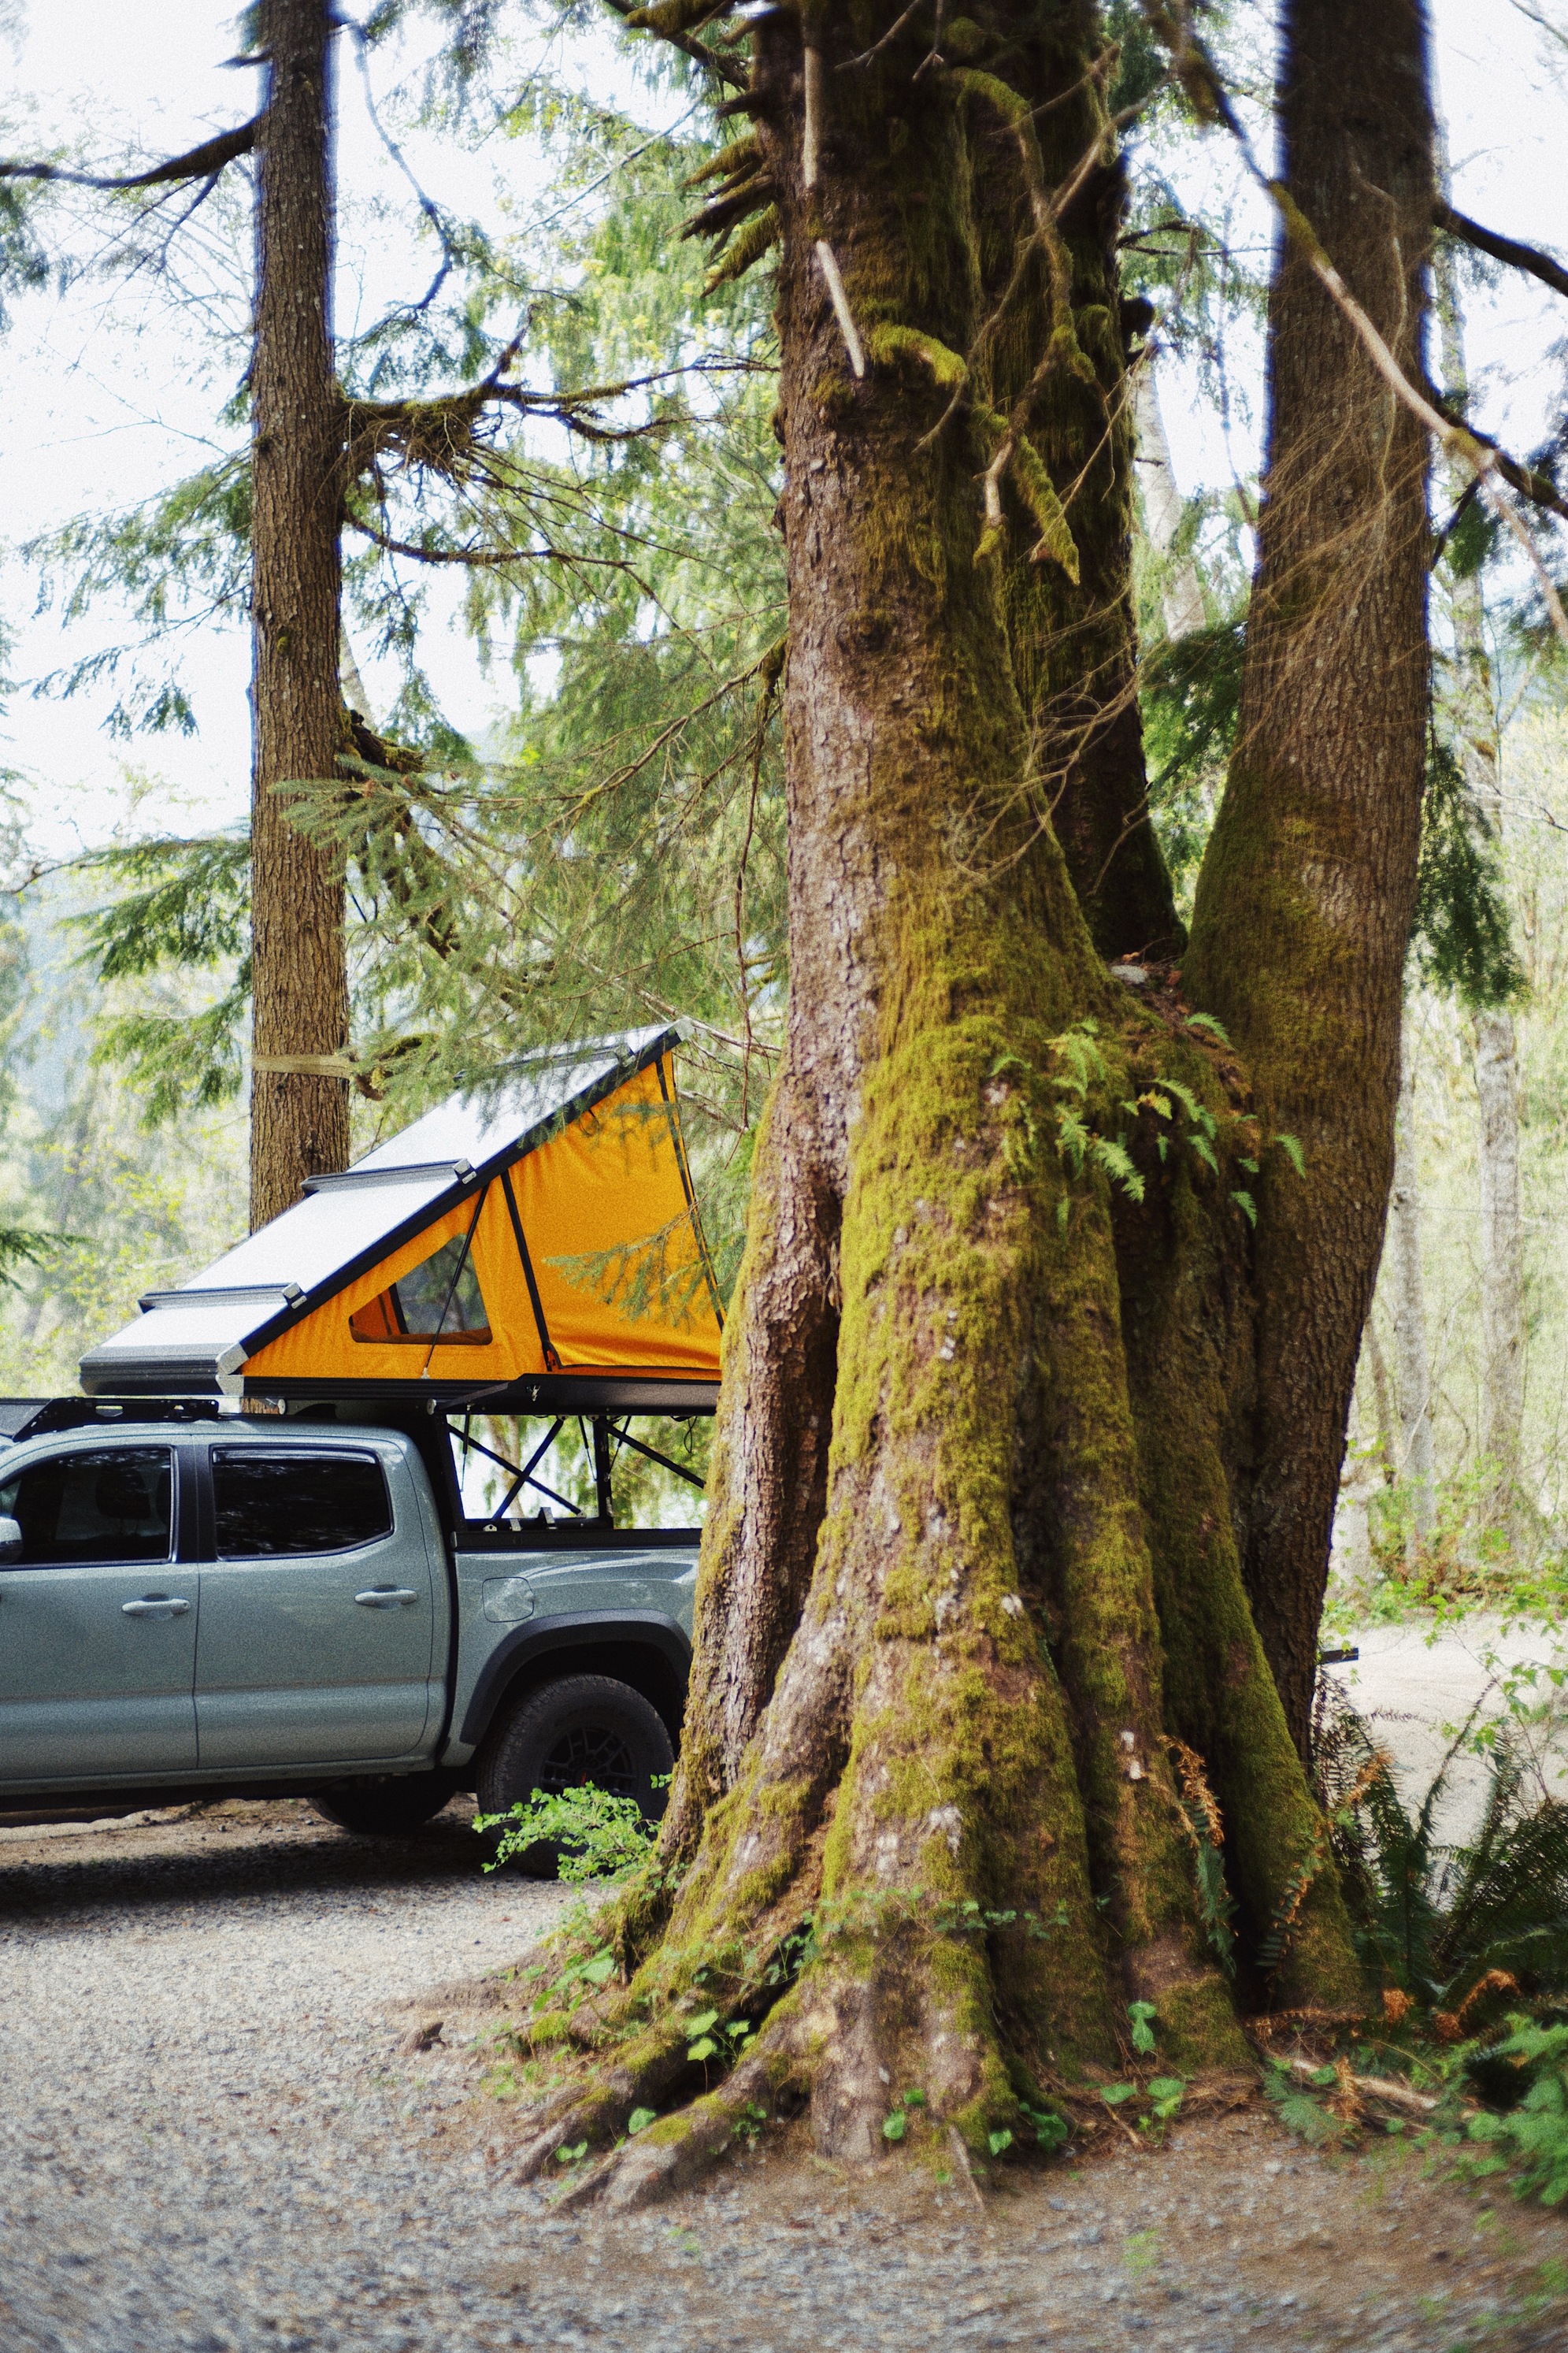
Build Update 04/24/21 — Gone camping!
Quick overnights in WA, OR, and CA as I roll back down to the Bay from Alberta.
Was also able to quickly meet up with @jedgar as I passed through Bend so he could test fit his DripRail prototype on a V2! 
10 Likes
Build Update 04/27/21 — Few Easy Additions
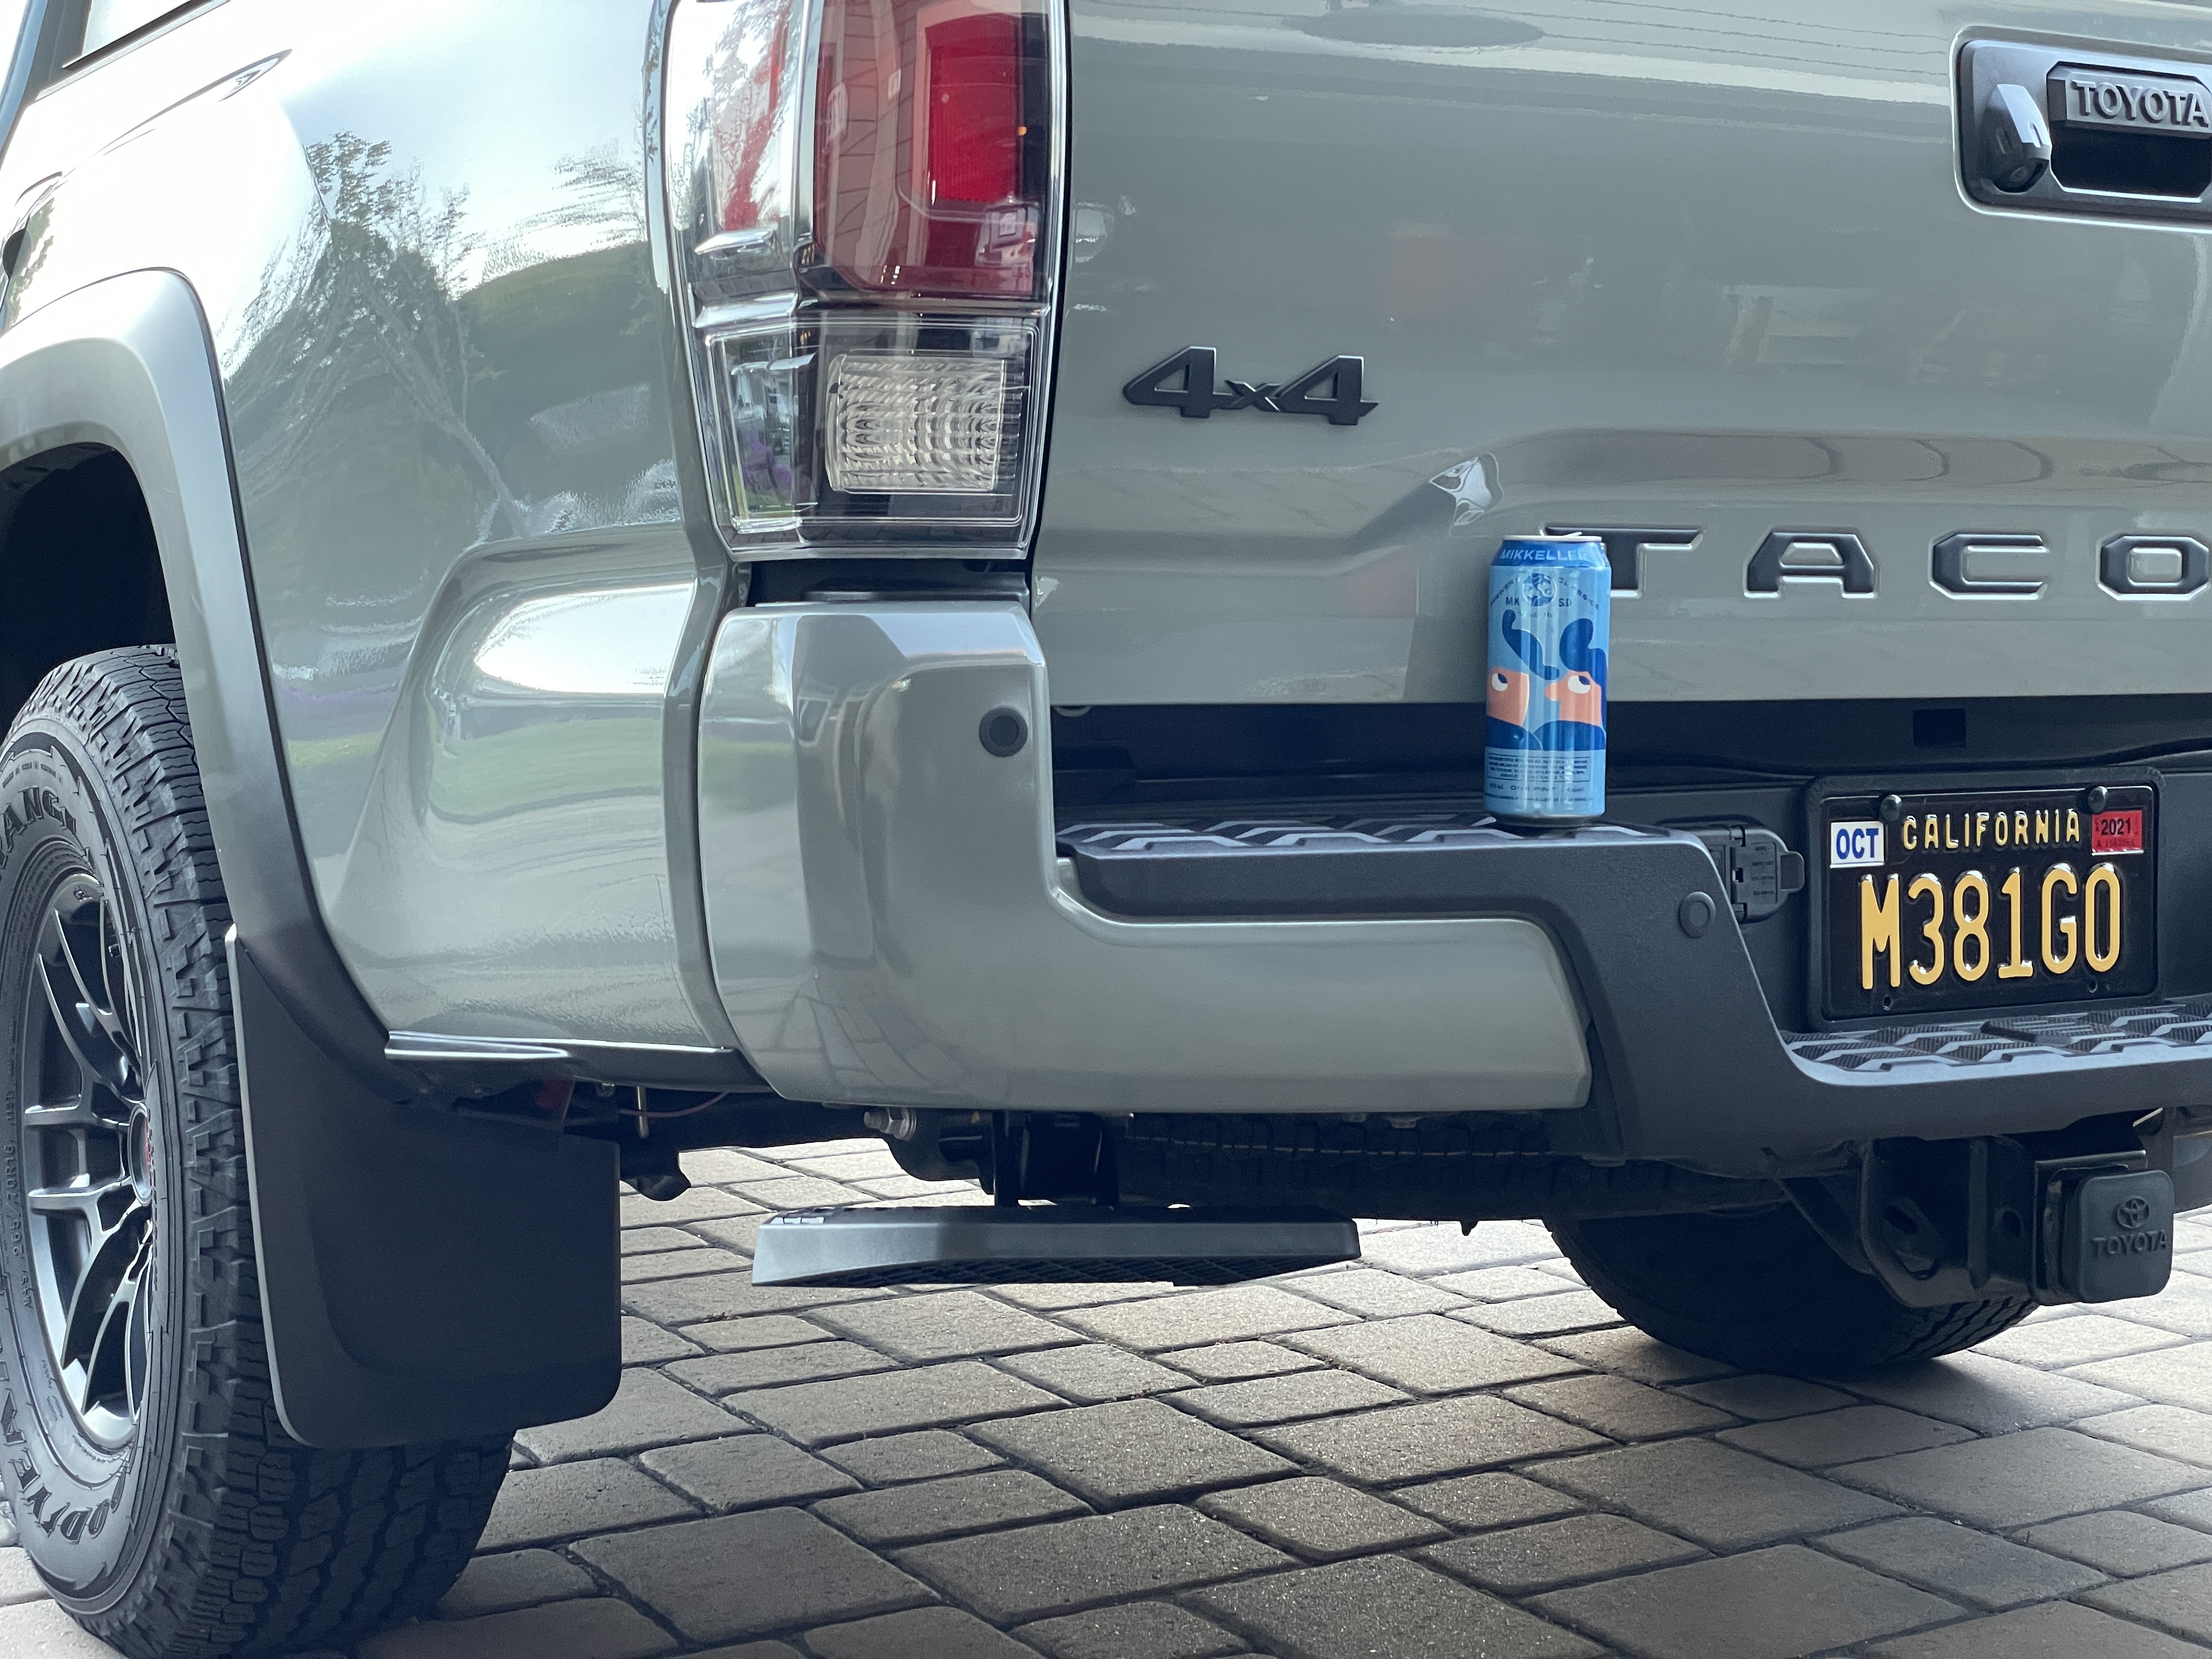
Toyota OEM Bed Step
I always wanted the OEM Bed Step to make quickly jumping in and out of bed a little easier. Easy install, tucks away tight to the bumper, and looks good—would recommend.

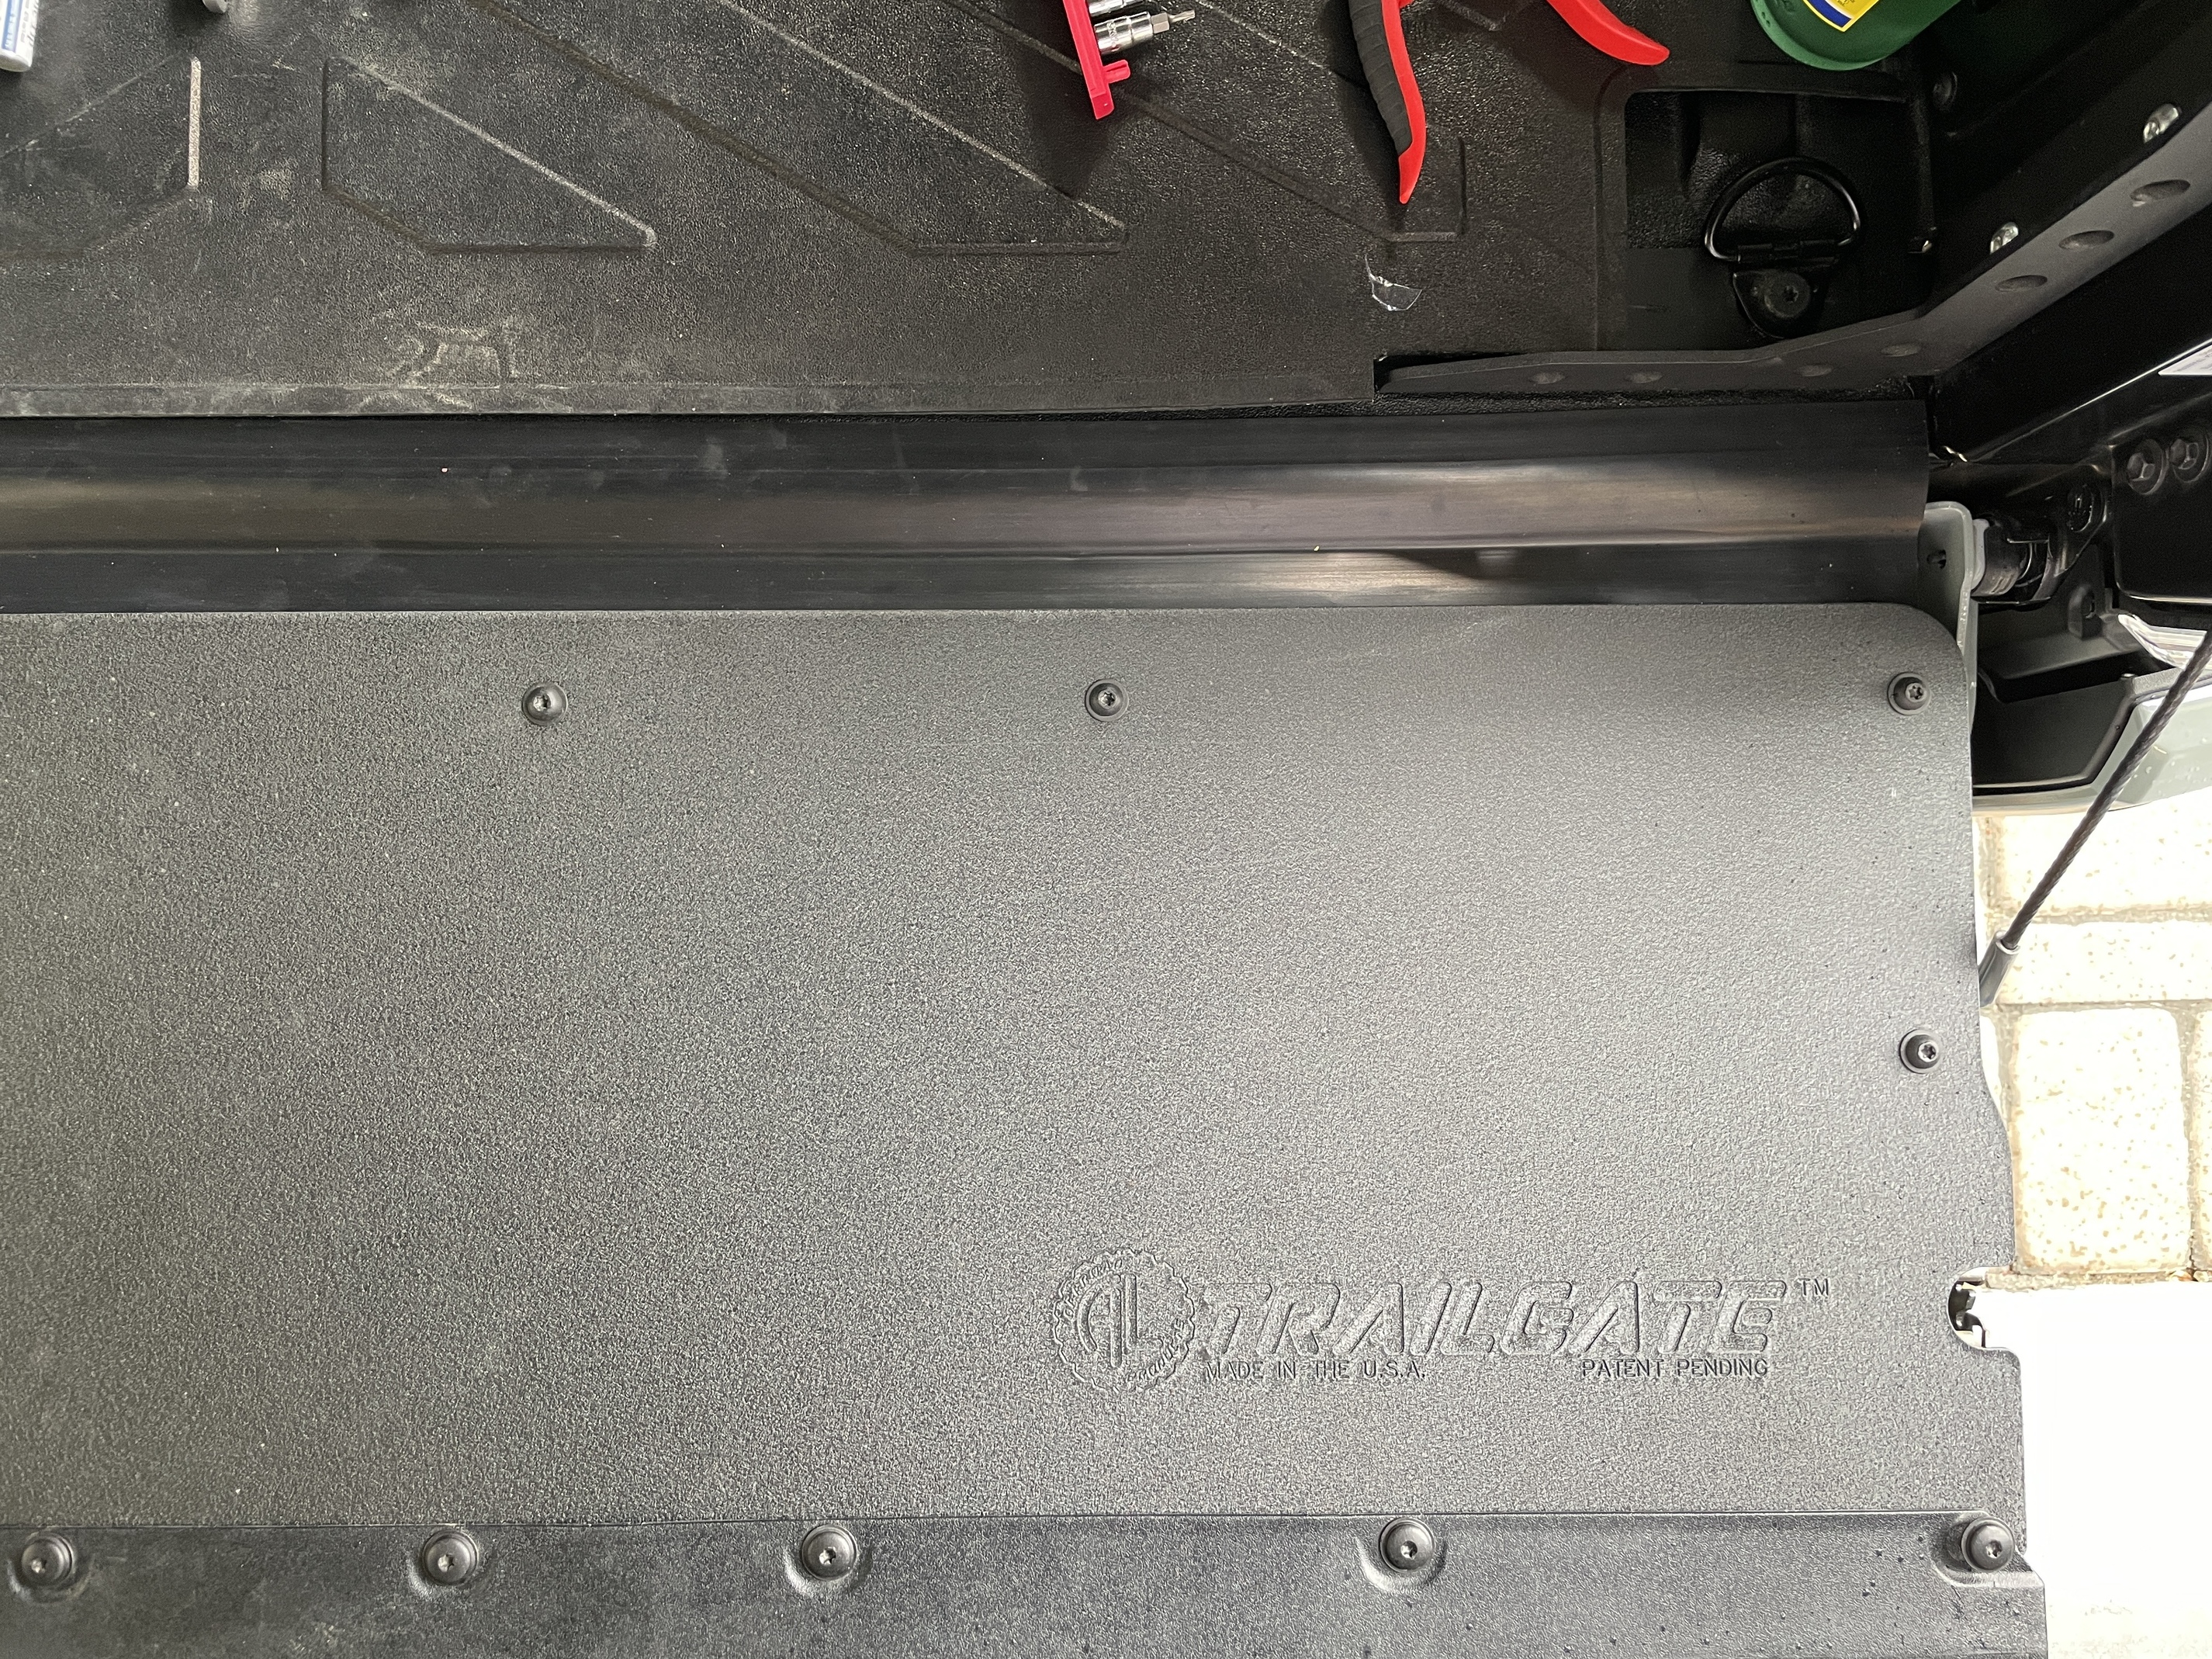
AL Offroad Trailgate Panel
Hated how hard the OEM tailgate panel was on the knees (and how difficult it was to balance anything on the ridges.) All of those problems are gone with the AL Offroad Trailgate Panel. (w/o cupholders)
Tailgate Weatherproofing + AOD Fabrication Bed Mount Panel
I dropped in ESI’s Rok Block and Ultimate Tailgate Seal to minimize the amount of dust that gets into the bed of the truck. (Crazy amount of dust and water got in on my last camping trip driving on ranch and forest roads.) Has been raining here in Bay and seemed to help driving around town! Will stress test when camping this weekend.
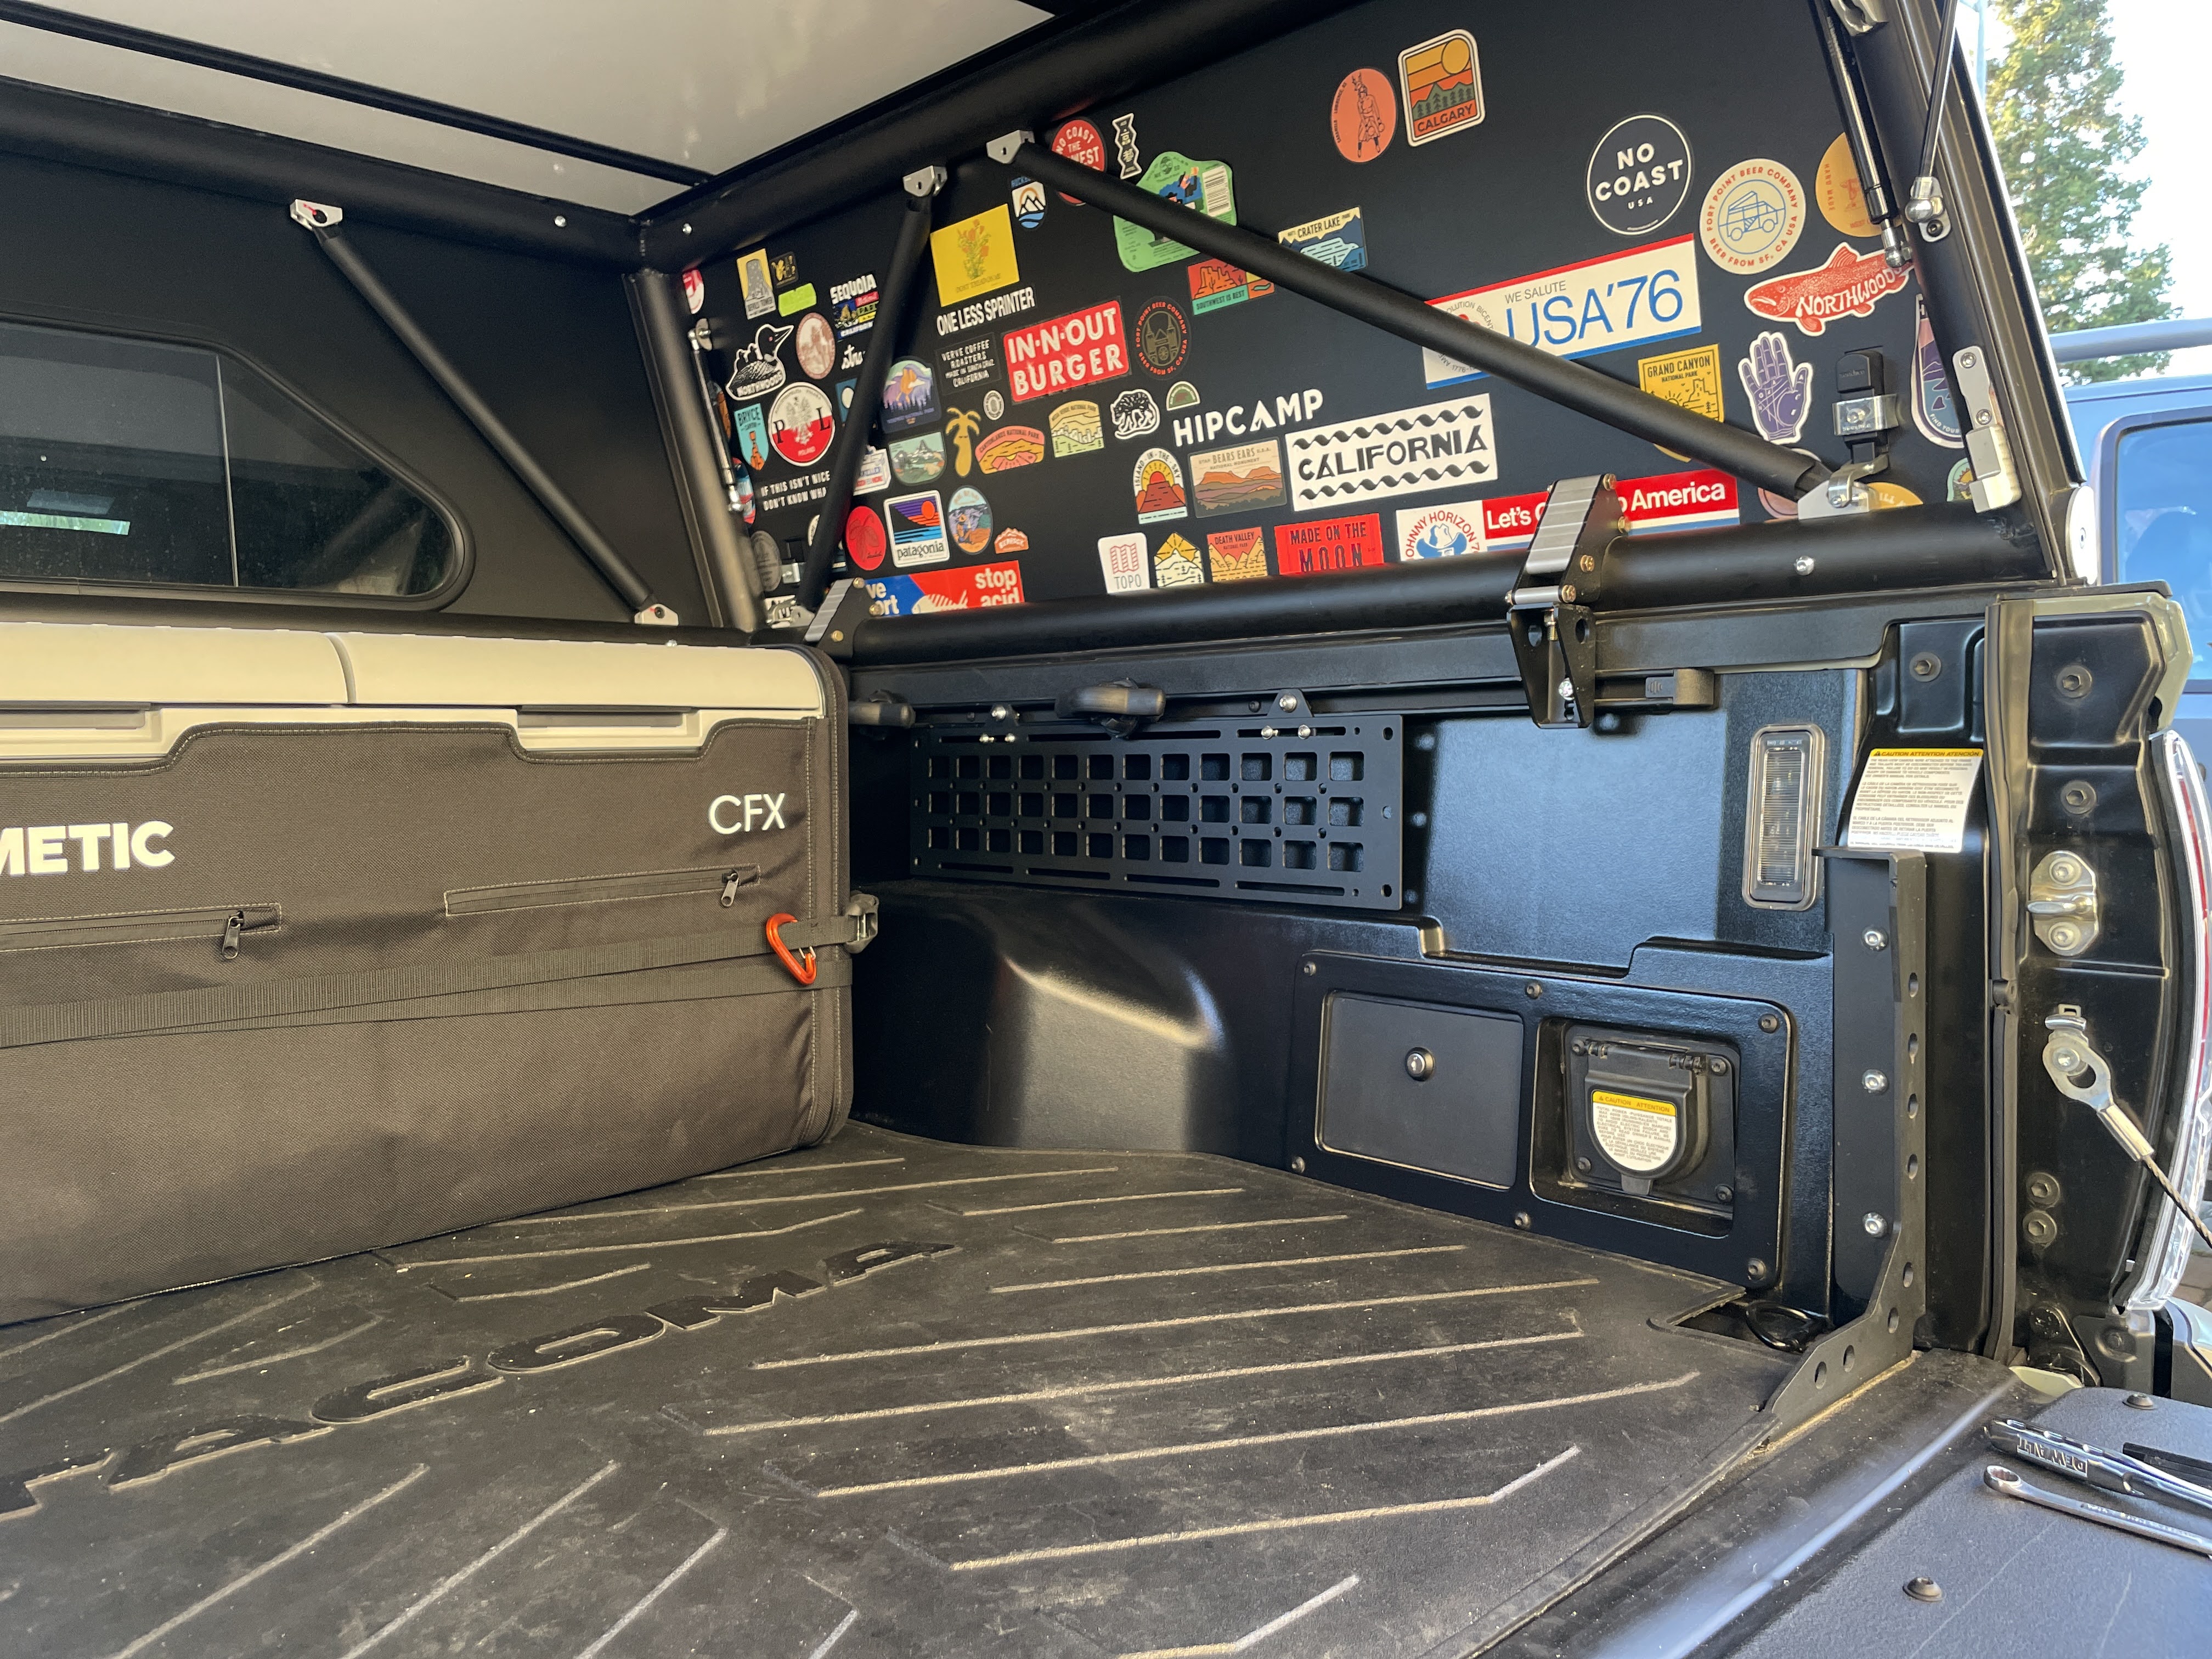
I also dropped in AOD Fabrication’s Bed Mount Panel. I opted to install only half the panel as I don’t require the full length of the bed to be set up with molle.
6 Likes
I have the Sherpa rack on my truck as well and found that the rear cab mounts were leaking in heavy rain because the foot is slotted. I filled the slot with silicone and have not had any issues since. Figured I’d give you the heads up!

1 Like
@julian Been looking to get an Animas for my truck as well. Do you guys feel it helps with MPG at all? Any wind noise? How about interference/annoyance with the sunroof?
1 Like
Hey Julian, I’ve got a V1 camper and my V2 should be arriving in July, so, yeah, another reason to drive from Baltimore to Bozeman. I am following your build (and shamelessly stealing ideas…).
Two Questions:
- I’m also going to install a RedArc 1225D charger and a 200amp Lithium battery in a custom box in the bed. I have a 2019 TRD off road and I’m pretty sure we have the same alternator. I’ve gone back and forth with folks on Tacomaworld as to whether or not we have to install the blue wire on the RedArc. But you seem to have things more dialed in than any of them.
So, did you install the blue wire to your ignition and if so, where did you connect it?
- This one might require measuring. There are two clamps on each side of the V2 that hold the camper in via the Tacoma bed rails. What is the distance between the two outer faces (clamp face closest to the tailgate and face closest to the cab window of the camper) and what is the width of the clamp? Clamp width within .5 inch is fine. With that info, I’m hoping fabricate a drop in 18 inch wide laptop table. Crazy, yes. But I’m planning on taking my job mobile and I’ll need a table I can put up on those days when the weather requires me to be in a closed camper. The table will end up higher than the clamps, but having those dimensions will give me a good idea of what I have to work with. Use them as some kind of support perhaps.
Should we ever meet IRL, I’ll gladly stand you two cold pints.
Cheers,
Lance
2 Likes
Love seeing your build! Super clean, and your Google spreadsheet compilation of parts/add-ons is pretty dope.
1 Like
@DoubleDown My Animas was installed prior to the GFC so I can’t compare how it impacted noise and MPG. I can tell you that wind noise has been minimal and I’m still averaging 20 – 21mpg on long freeway hauls with GFC + Animas. These results are inline with my expectation for what the TRD Pro can do. The Animas does not interfere with the sunroof.
@artieTwelve Love it! Congrats on the V2!
-
My REDARC BCDC charger is wired to the starter battery (fused), second battery (fused), ground (OEM ground point), and ready to accept solar (coming soon). I have not connected (the blue wire) to an ignition source. The unit is “smart” enough to recognize when the engine is running and the alternator is sending amps through.
-
I can DM you these measurements in the coming days.
@docdave15 Happy to hear this thread and sheet have been helpful! I need to add a few new items to the spreadsheet which I’ll also do in the coming days.
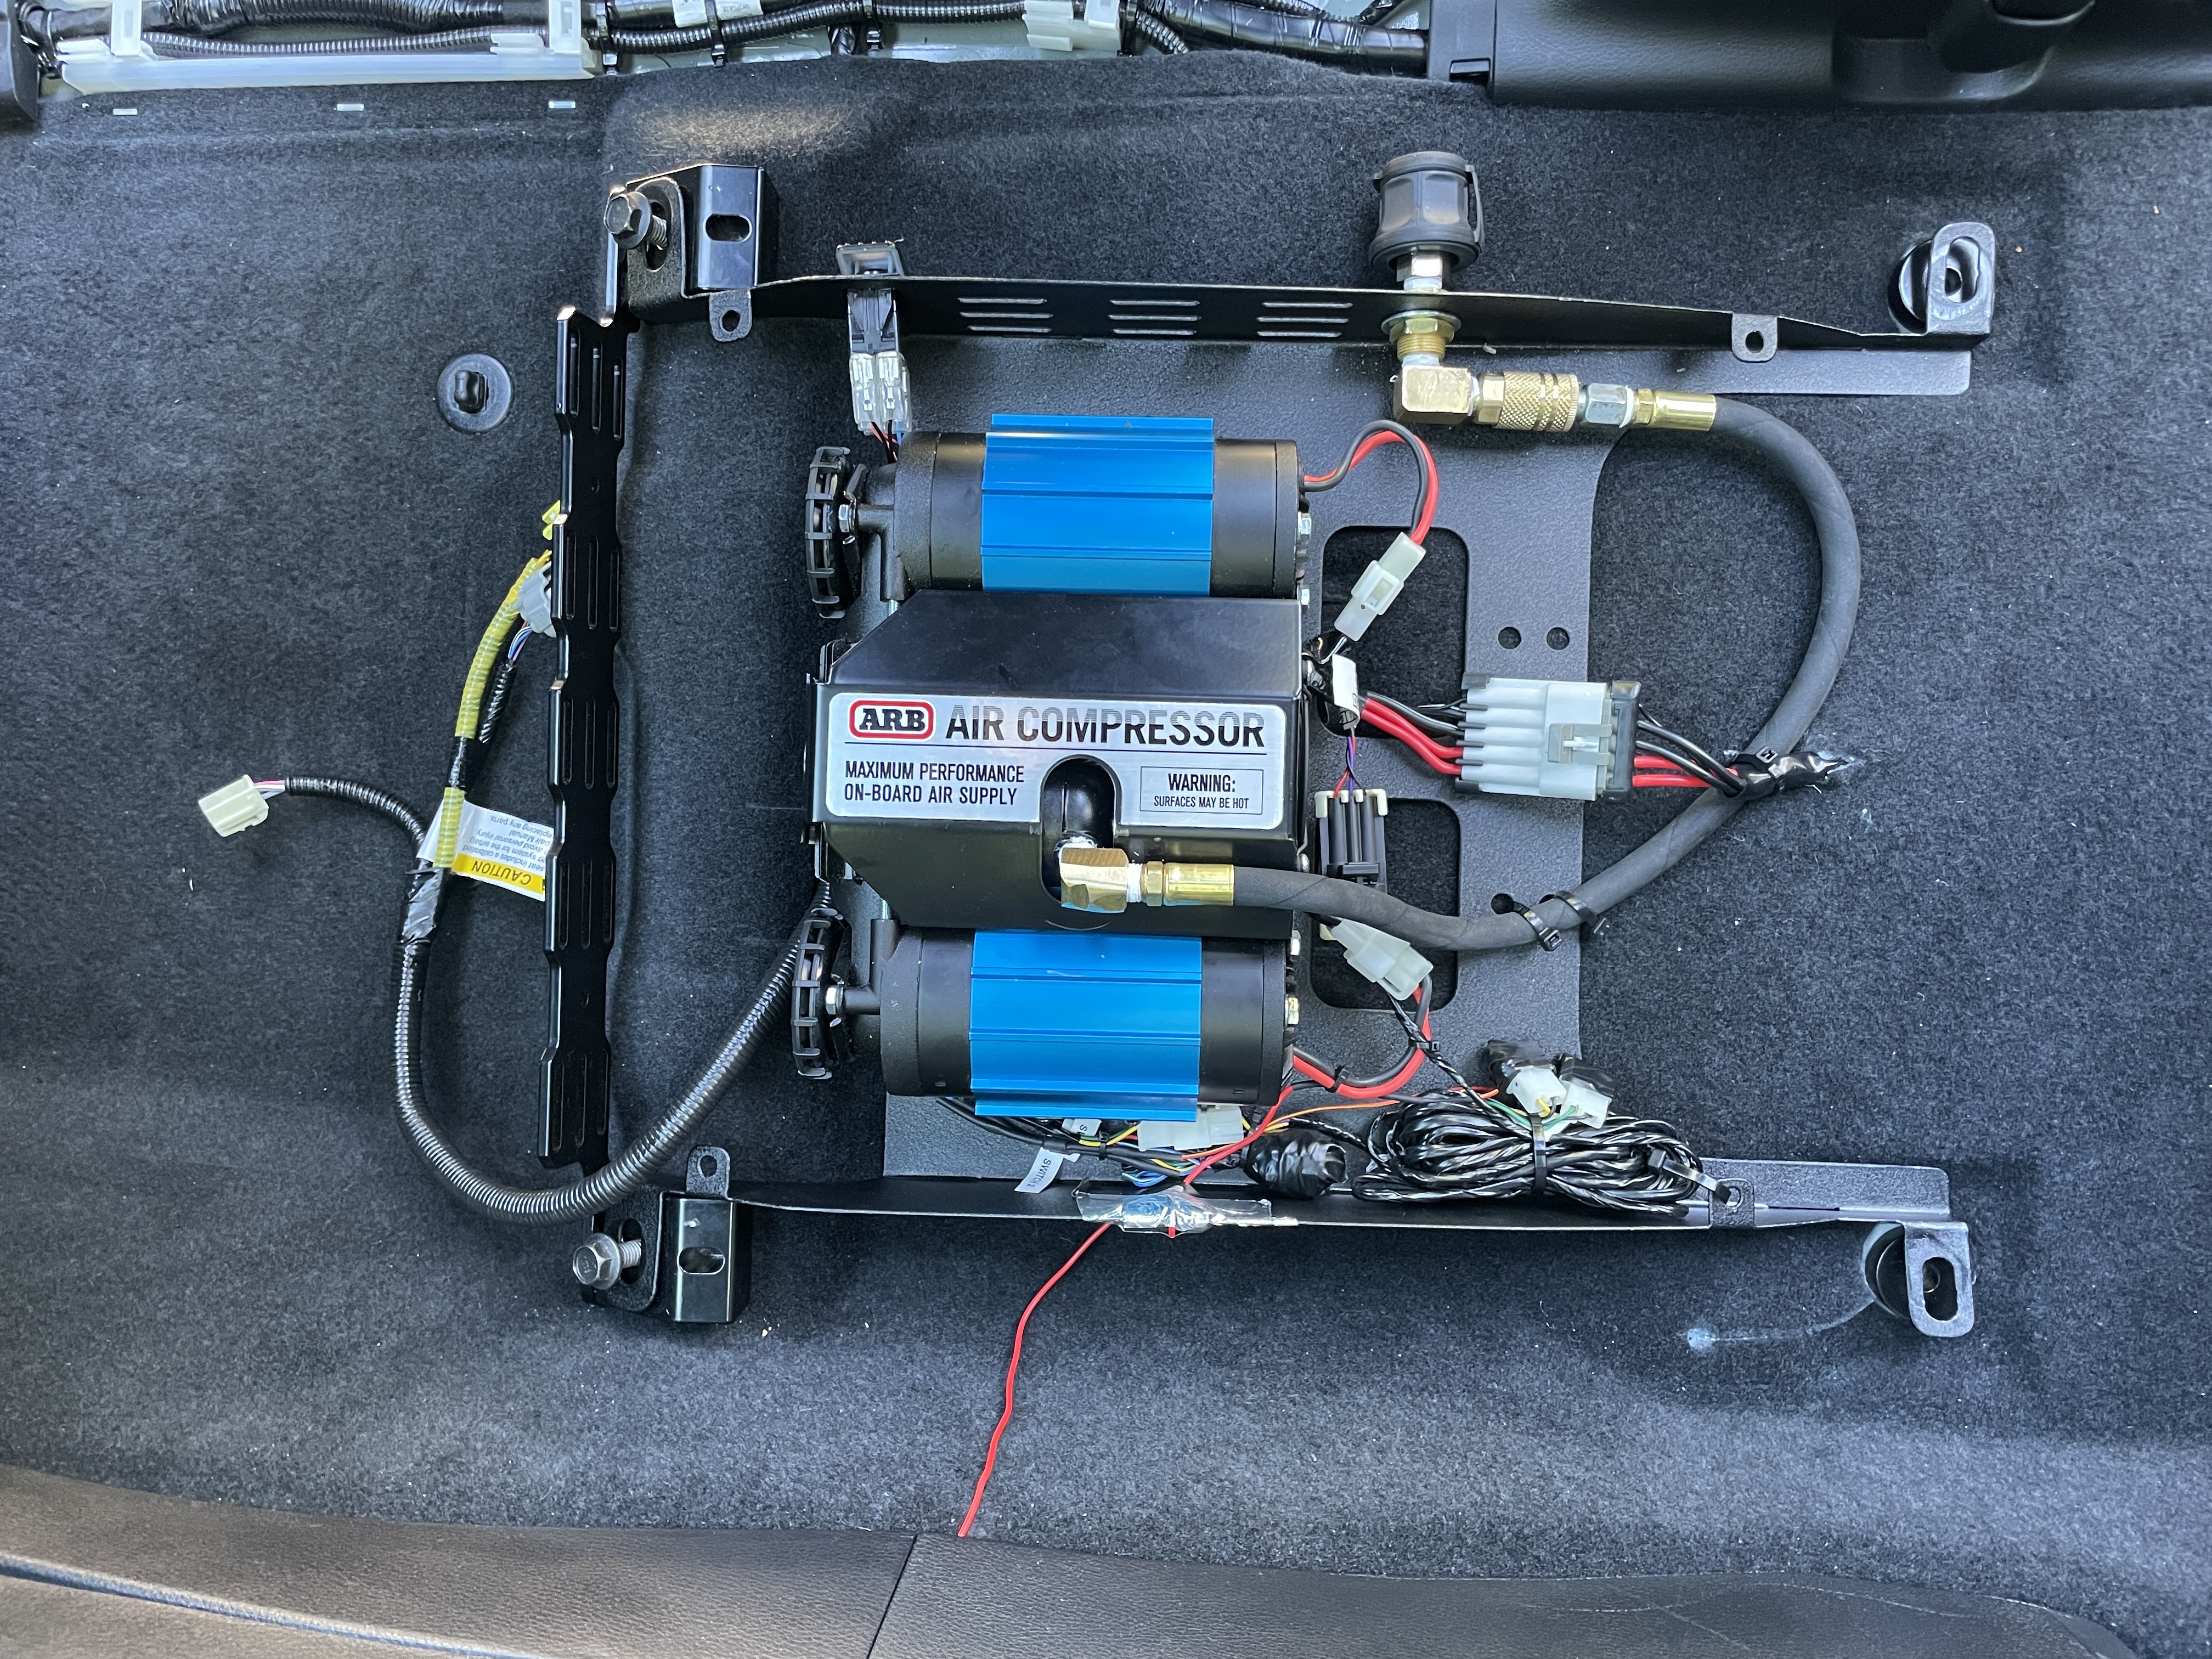
Build Update 06/16/21 — On-Board Air Compressor Install
ARB On-Board Twin Air Compressor Kit (CKMTA12)
Been a minute since the last update! Been busy camping.
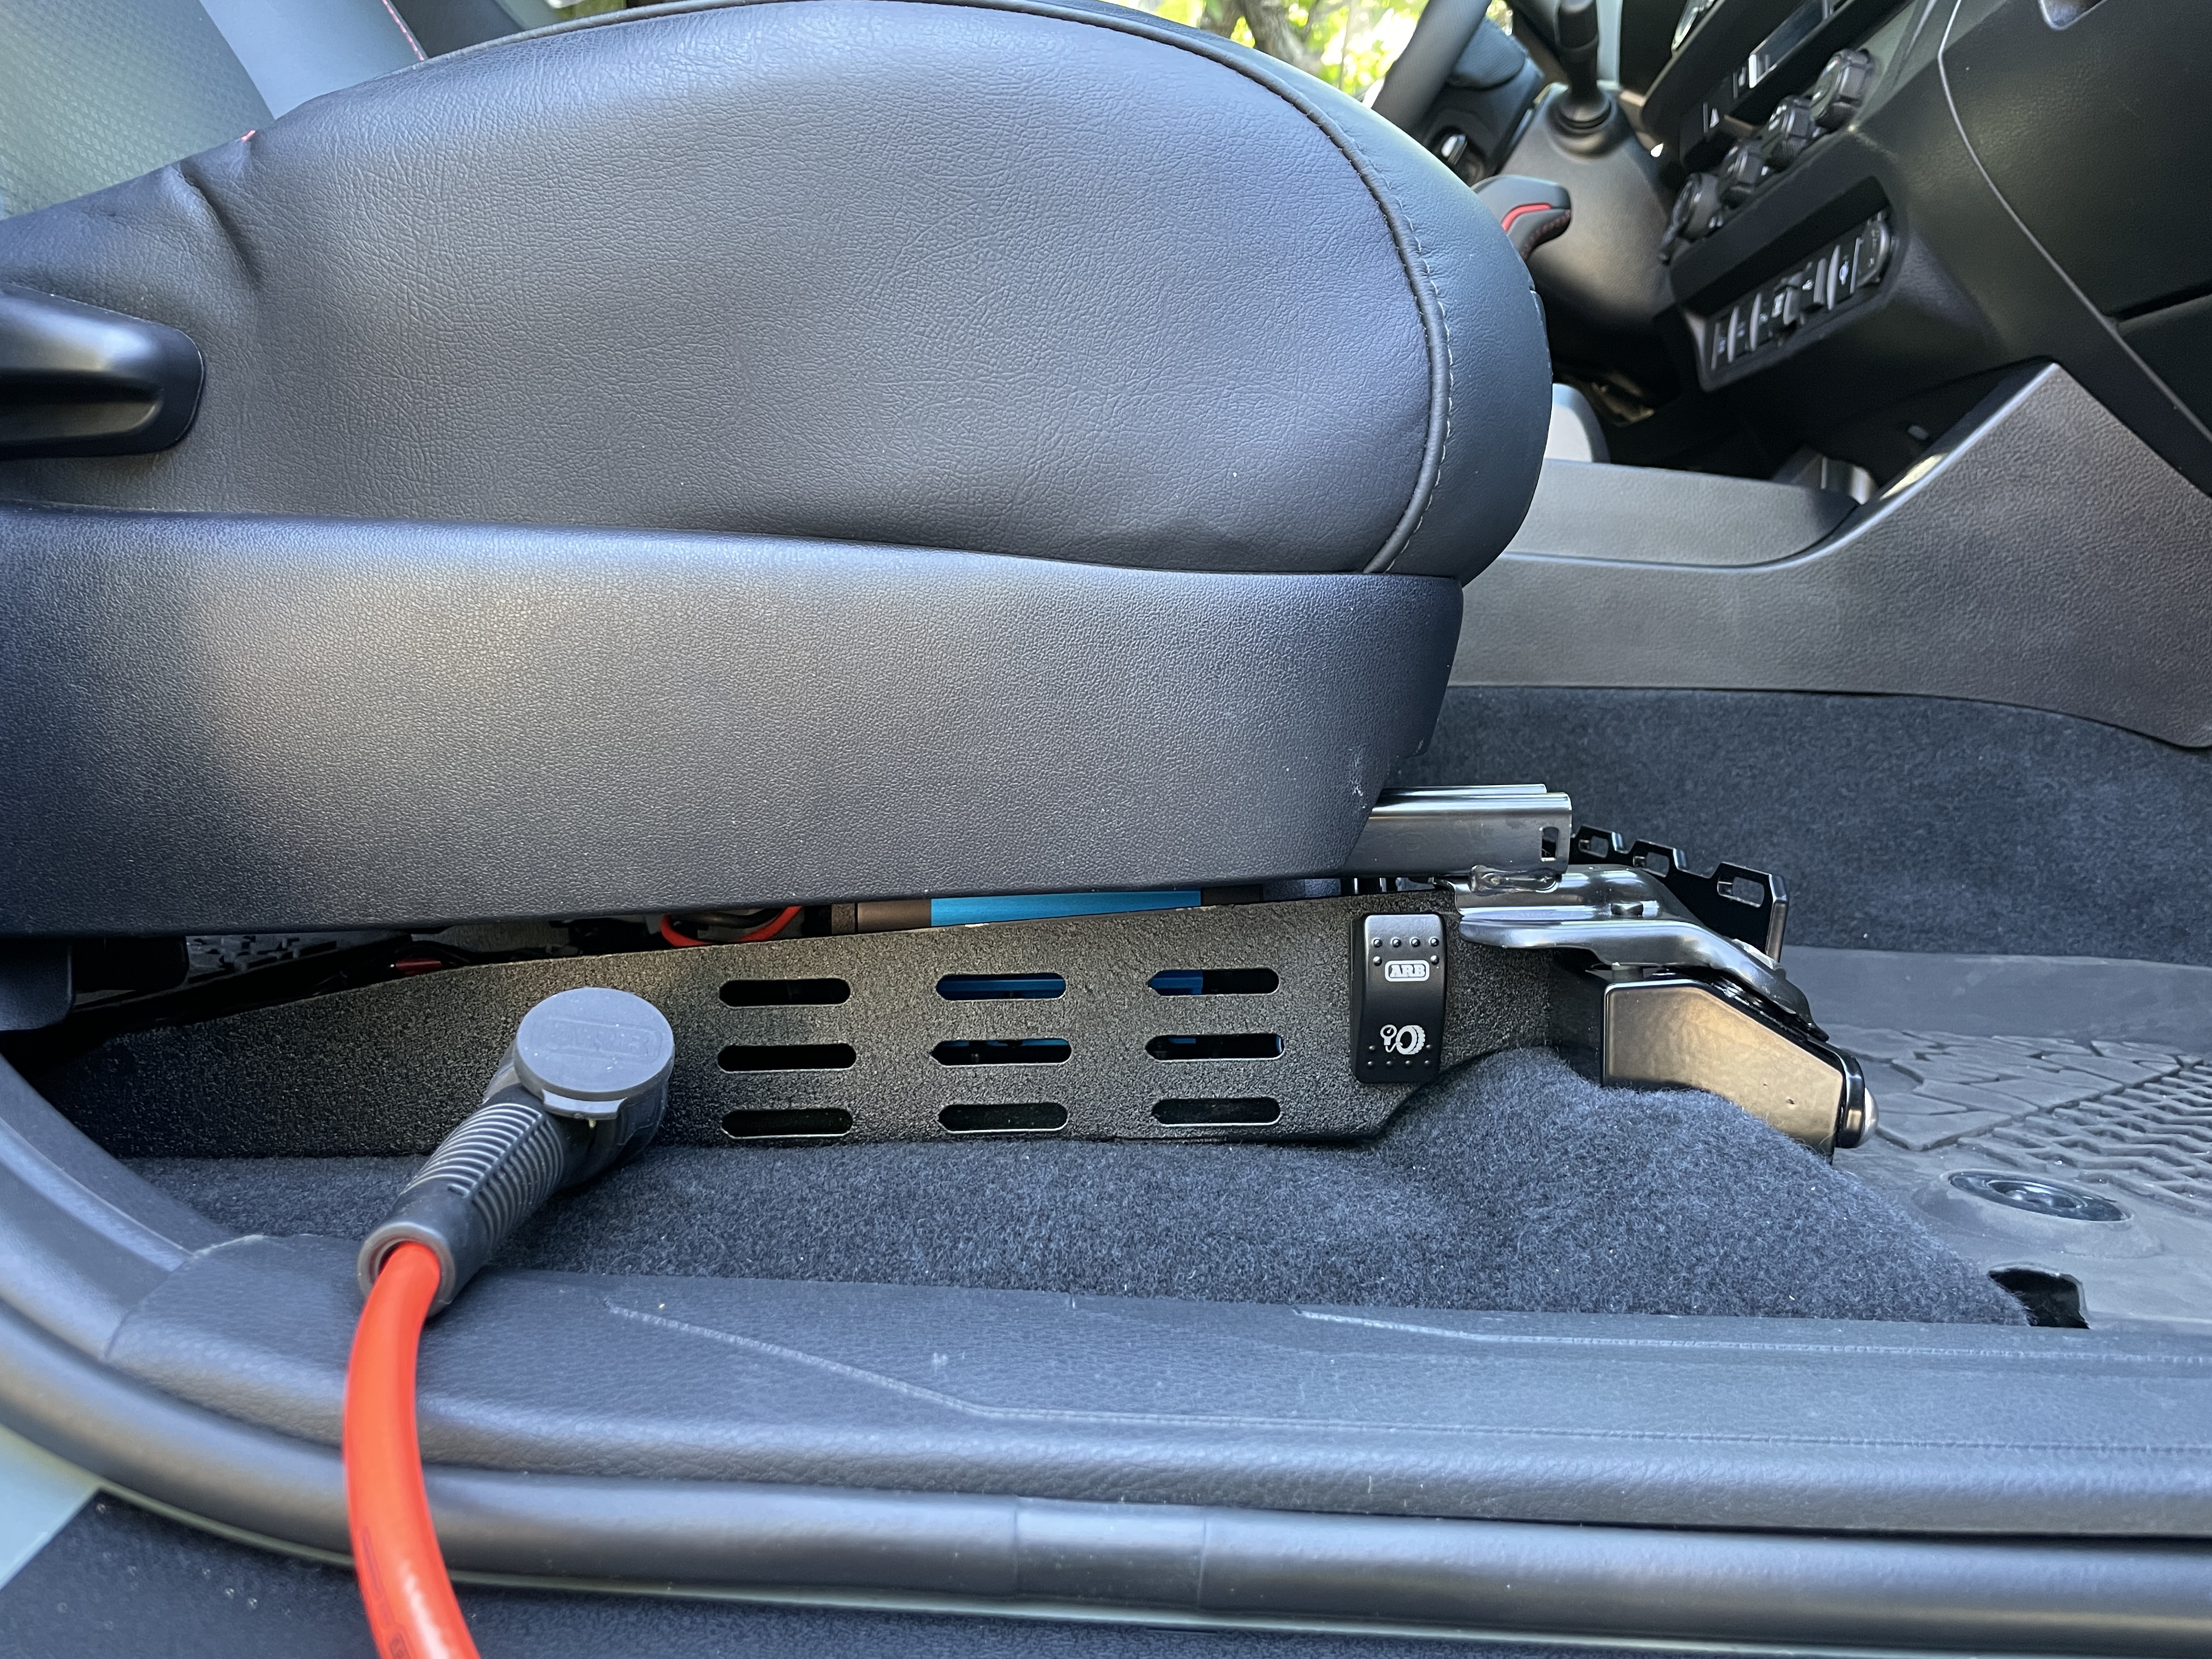
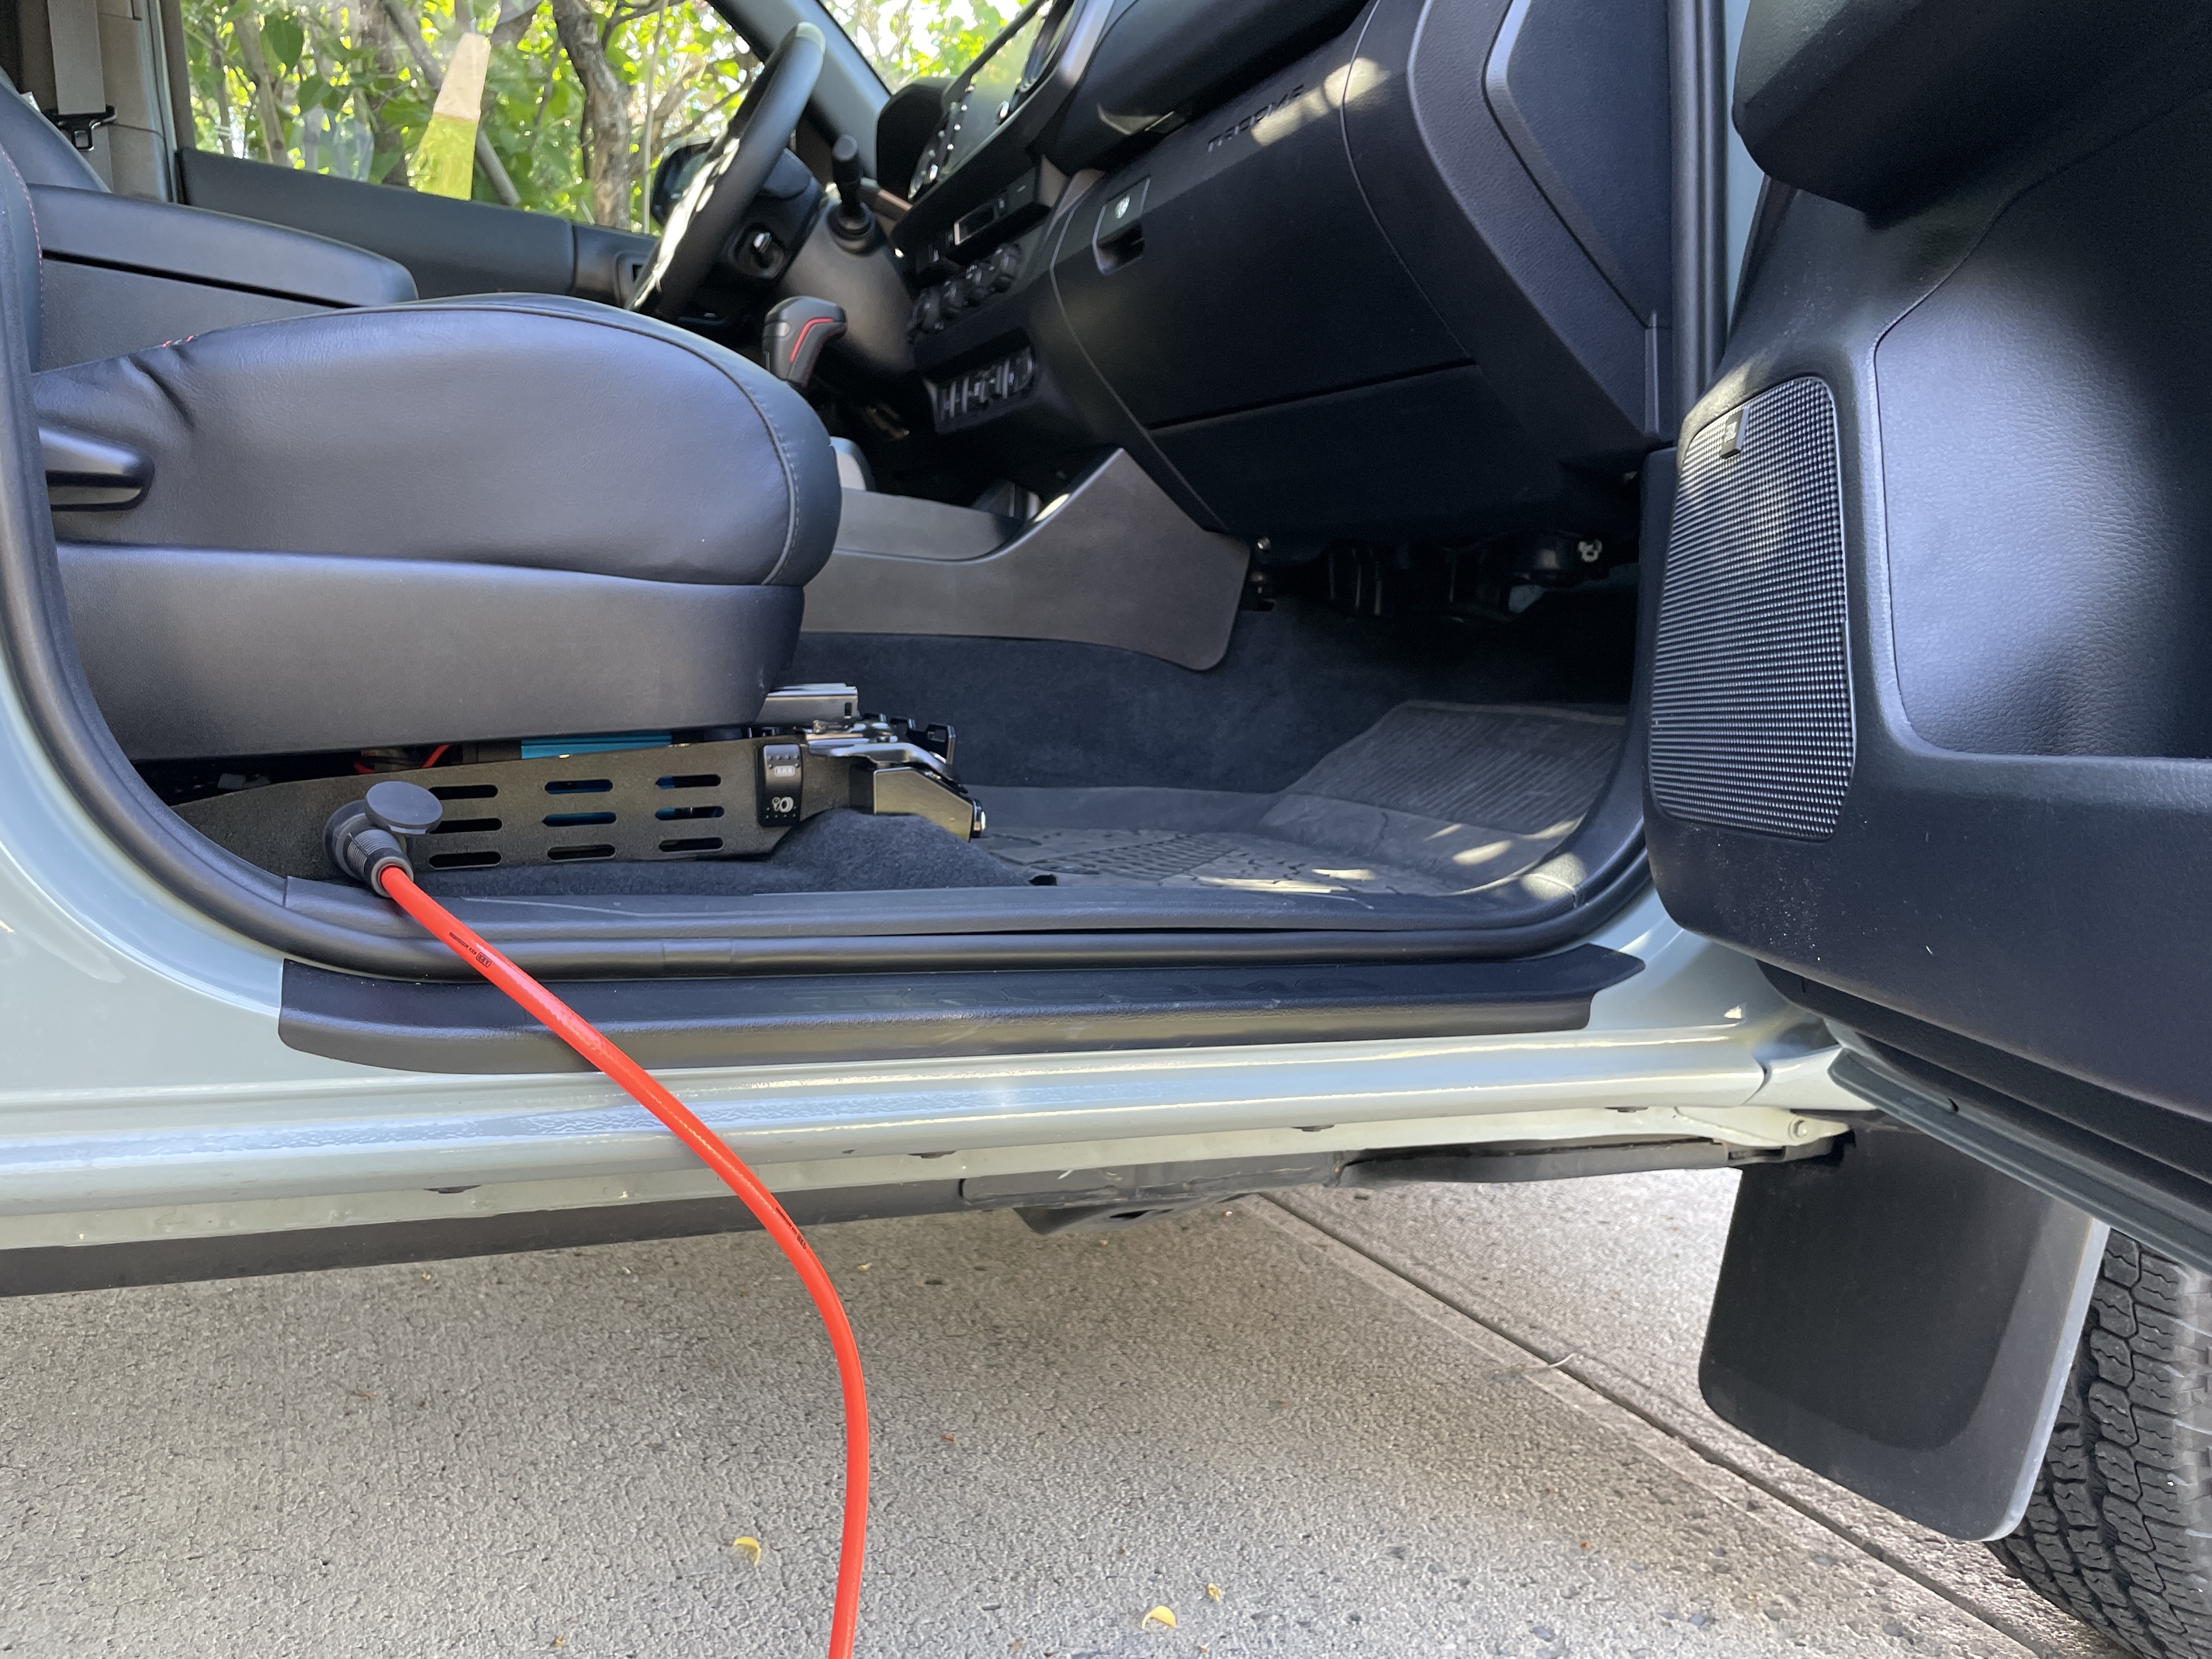
I finally got around to mounting a new ARB Twin Air Compressor under the passenger seat thanks to the DDI Under Seat Compressor Mount. Install for this is pretty straight forward. I’ll include some details below:
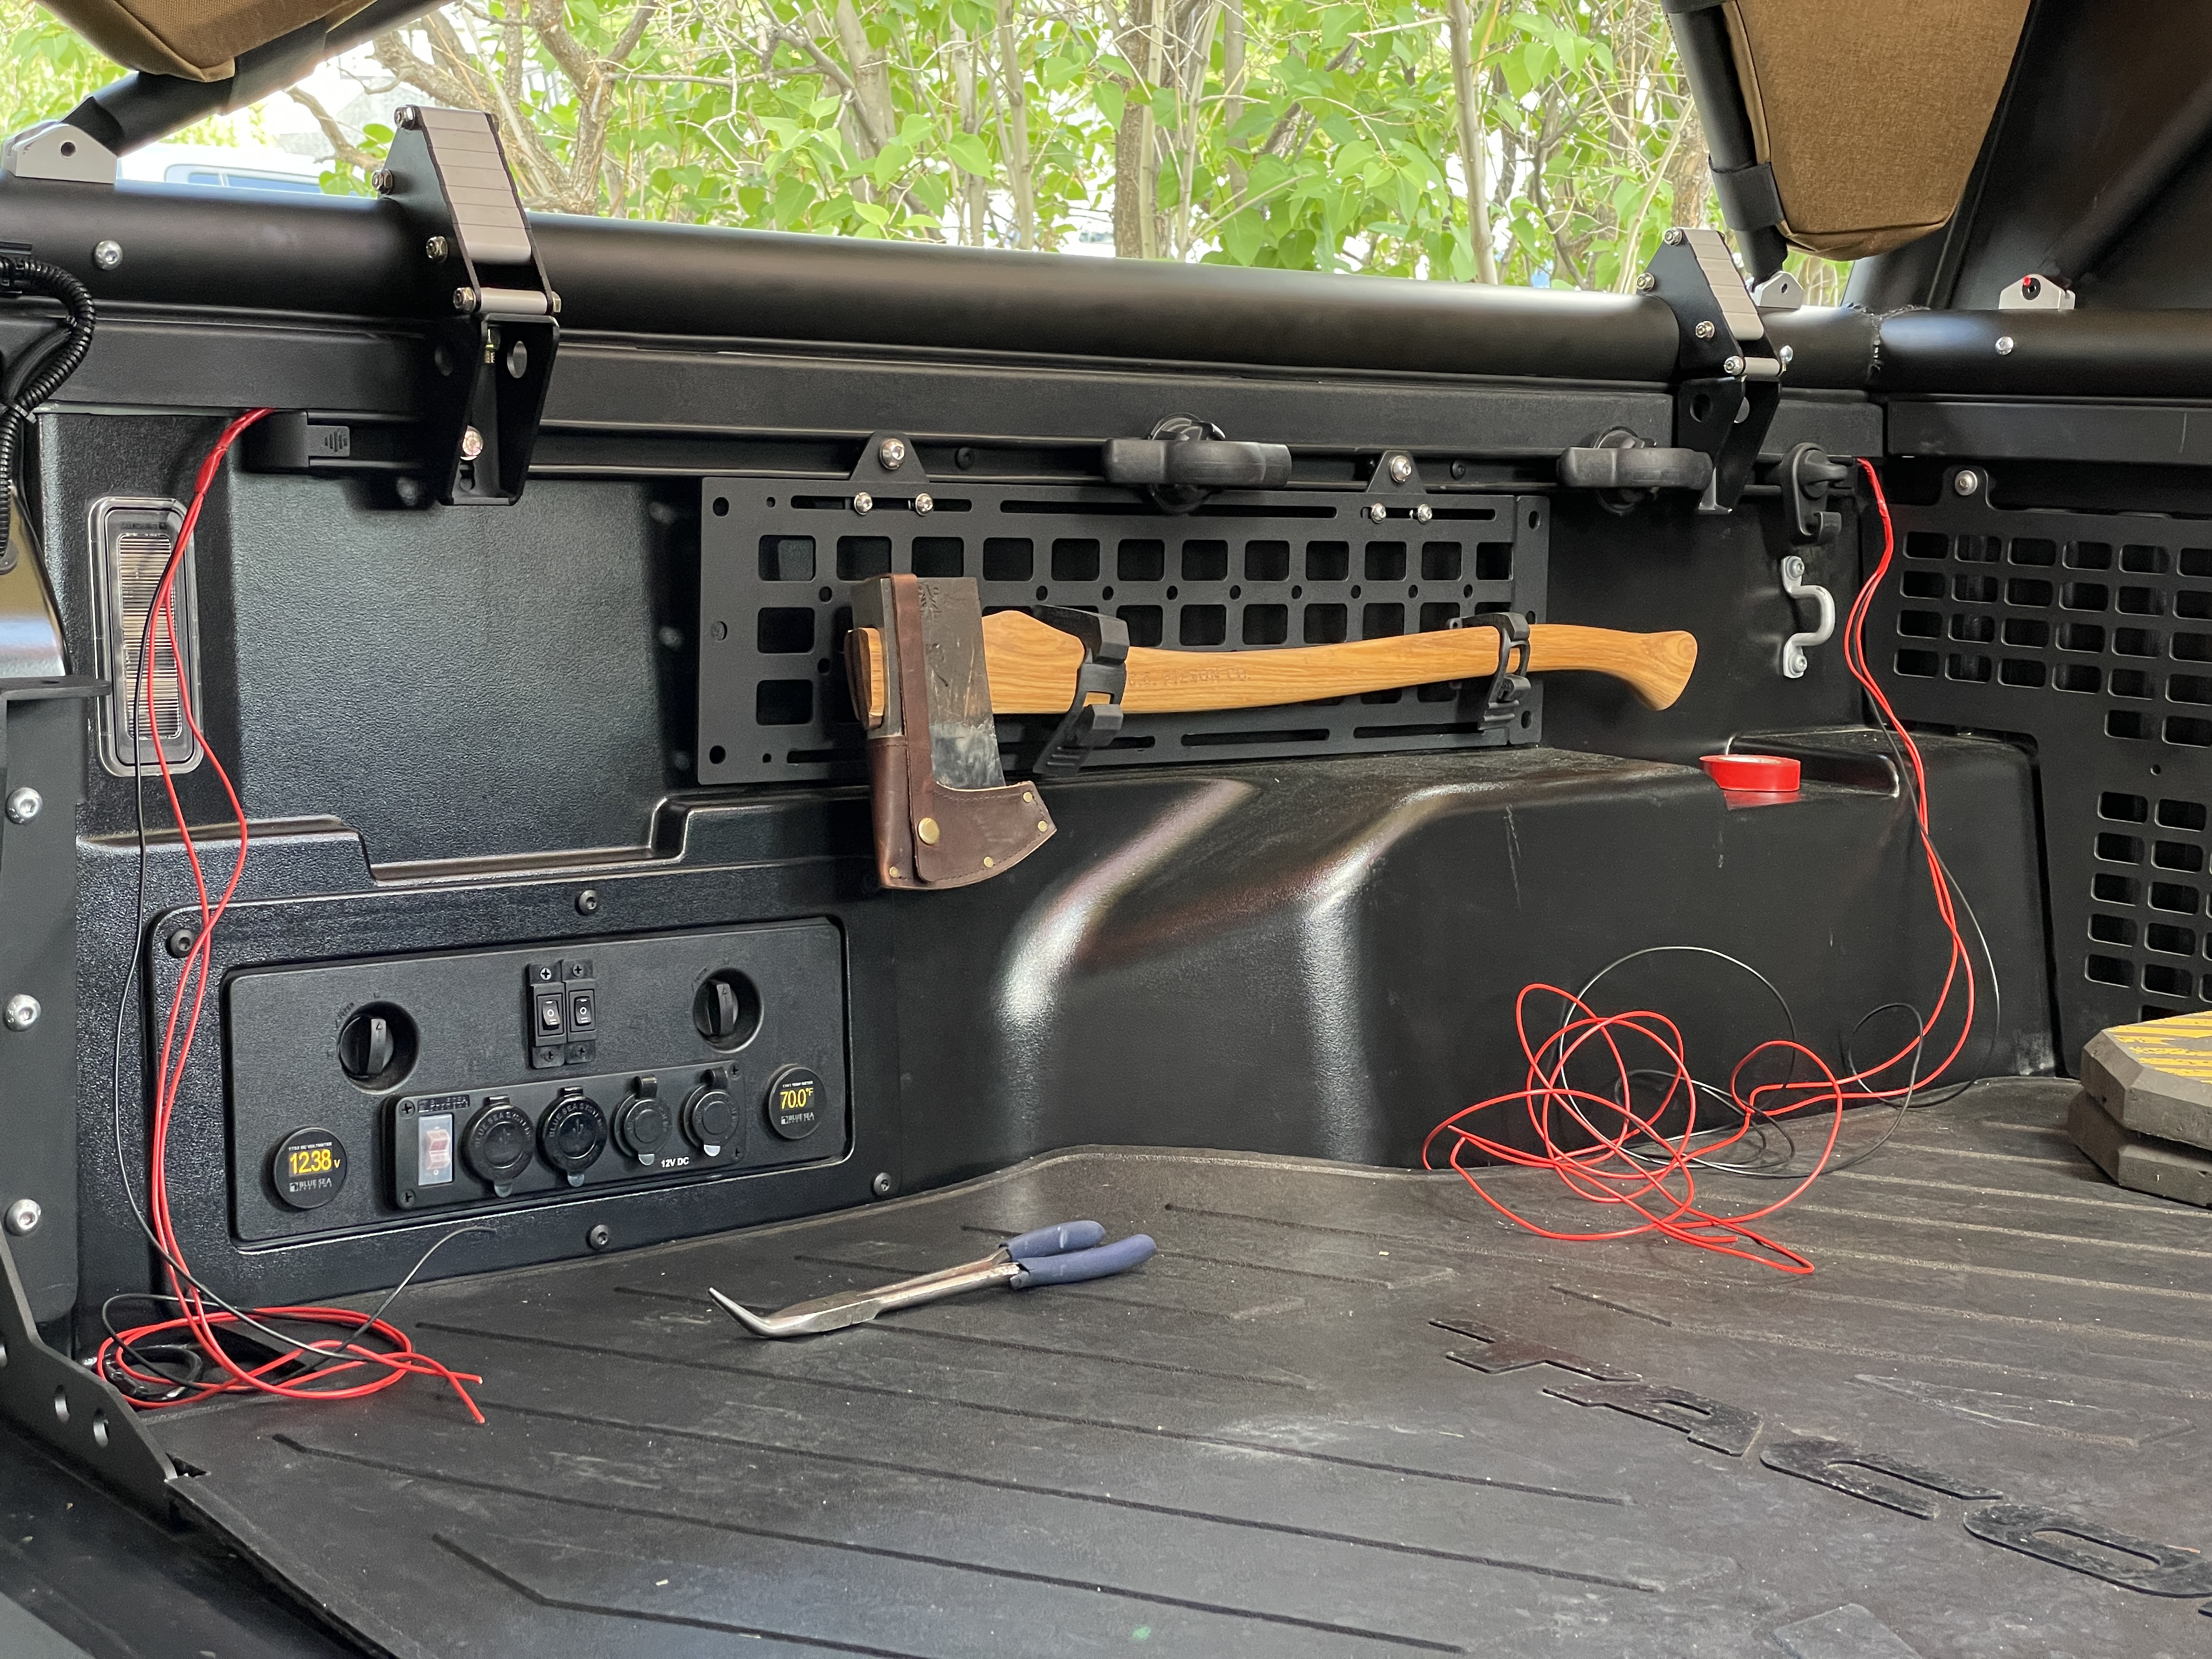
• I tapped into the middle console USB port for ignition/switch power (The loose red wire in photo)
• I ran the ARB Up Down Air Extension Harness under the truck into the engine bay to power the compressor itself.
• There’s an unused grommet under the carpet near the rear of the passenger seat that you can pass the extension harness through. Once you’re under truck there is an exisiting wiring harness right there to follow on the inside of the frame all the way into the engine bay (I think it’s the backup camera harness? Not sure.) I followed the same protocol as the under truck harness I ran on the driver side. Insulated wire, fully wrapped in automative loom, then fully wrapped in heat reflective automative tape.
• Everything else I just taped and zipped tied up off to the side since I’m not running air lockers.
Really happy with how clean (and factory looking) this setup is!
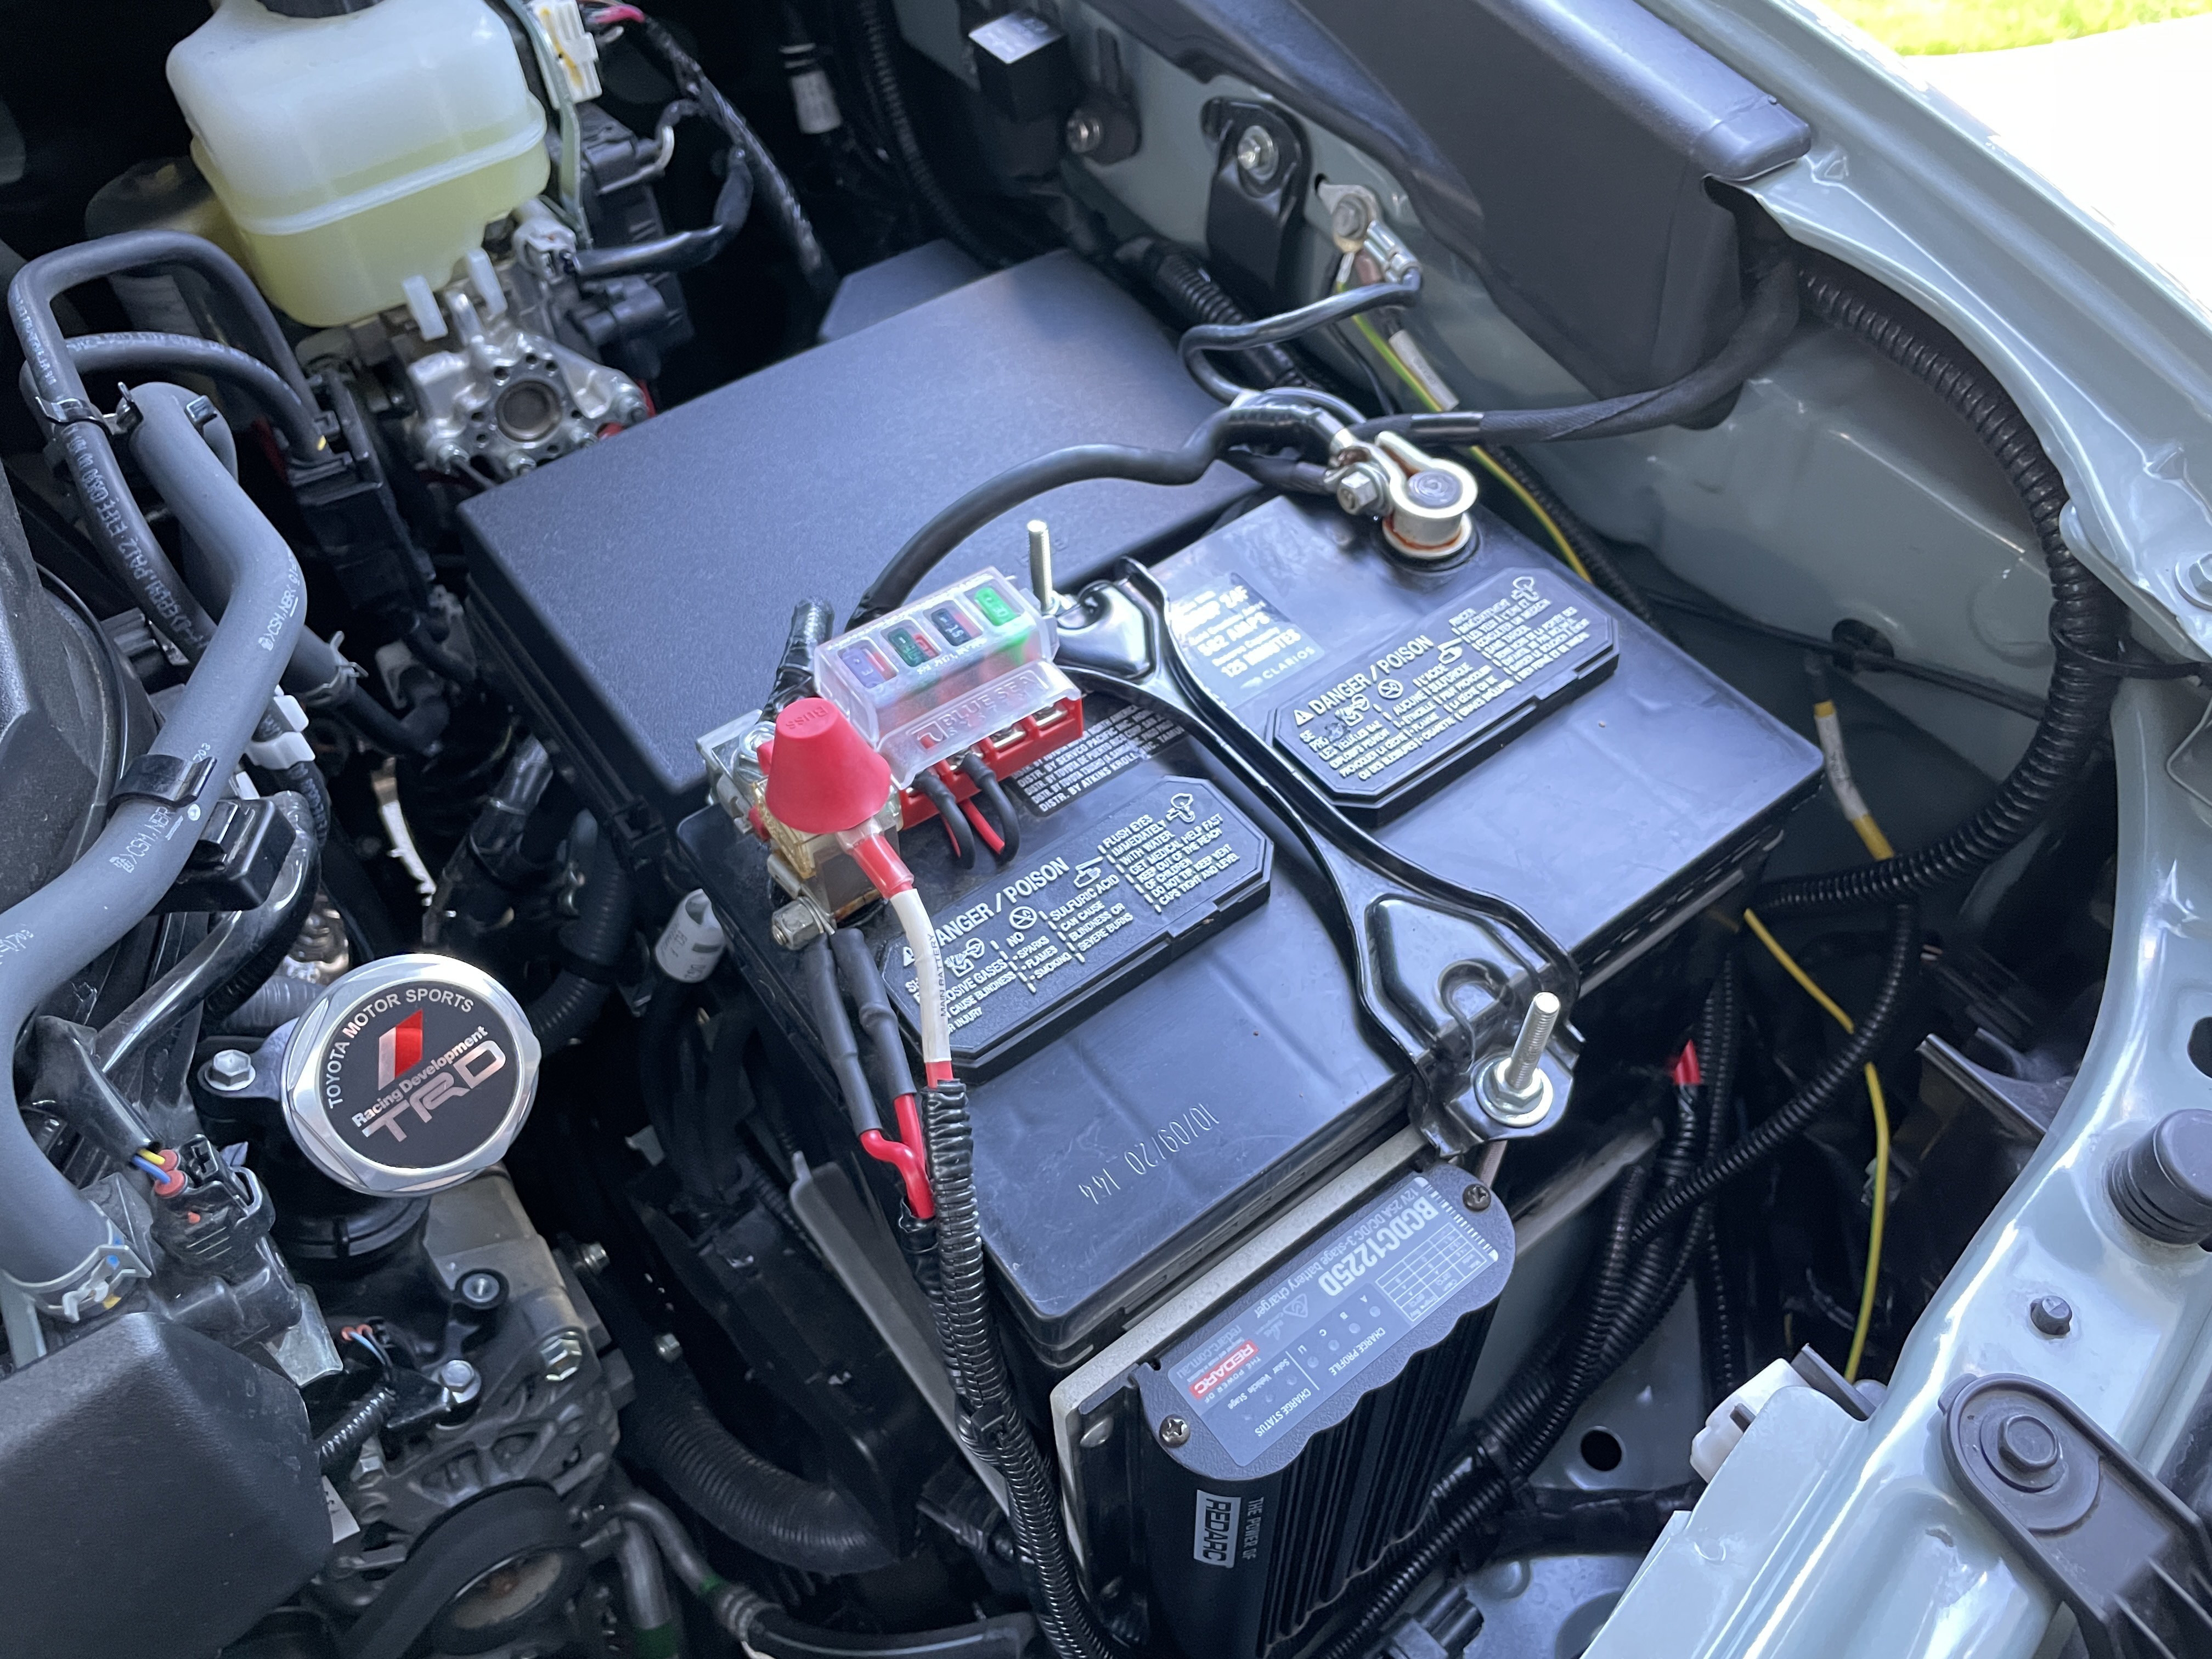
Starter Battery Cleanup
I also took this opportunity to (somewhat) cleanup the wiring on my starter battery by dropping in a Blue Sea Systems Fuse Block. Allowed me to cut out the in-line fuses that were dangling on my ditch light and REDARC monitor wiring. Looks * somewhat * cleaner.
5 Likes
Surely that’s kinda noisy down there? Or am I missing something. I guess if it’s a mass produced product then it can’t be that unbearable?
Great question! I don’t see a time in which the compressor would be running with someone sitting in the cab—so not worried about noise—it is a compressor after all. Was more important to me to keep it out of the elements for longevity!
1 Like
Gotcha. I was thinking more along the lines of running air lockers with said compressor, but I guess if you’re only using it for airing up then I definitely understand the location 
1 Like
I had one internally mounted under the passenger seat in a jeep with air lockers and it really only comes on for a split second when the locker is engaged so it isn’t too bad. Fun to surprise your passenger with too!
2 Likes
Build Update 06/18/21 — Downstairs LED Lights + VRNCLR V2 Frame Bags
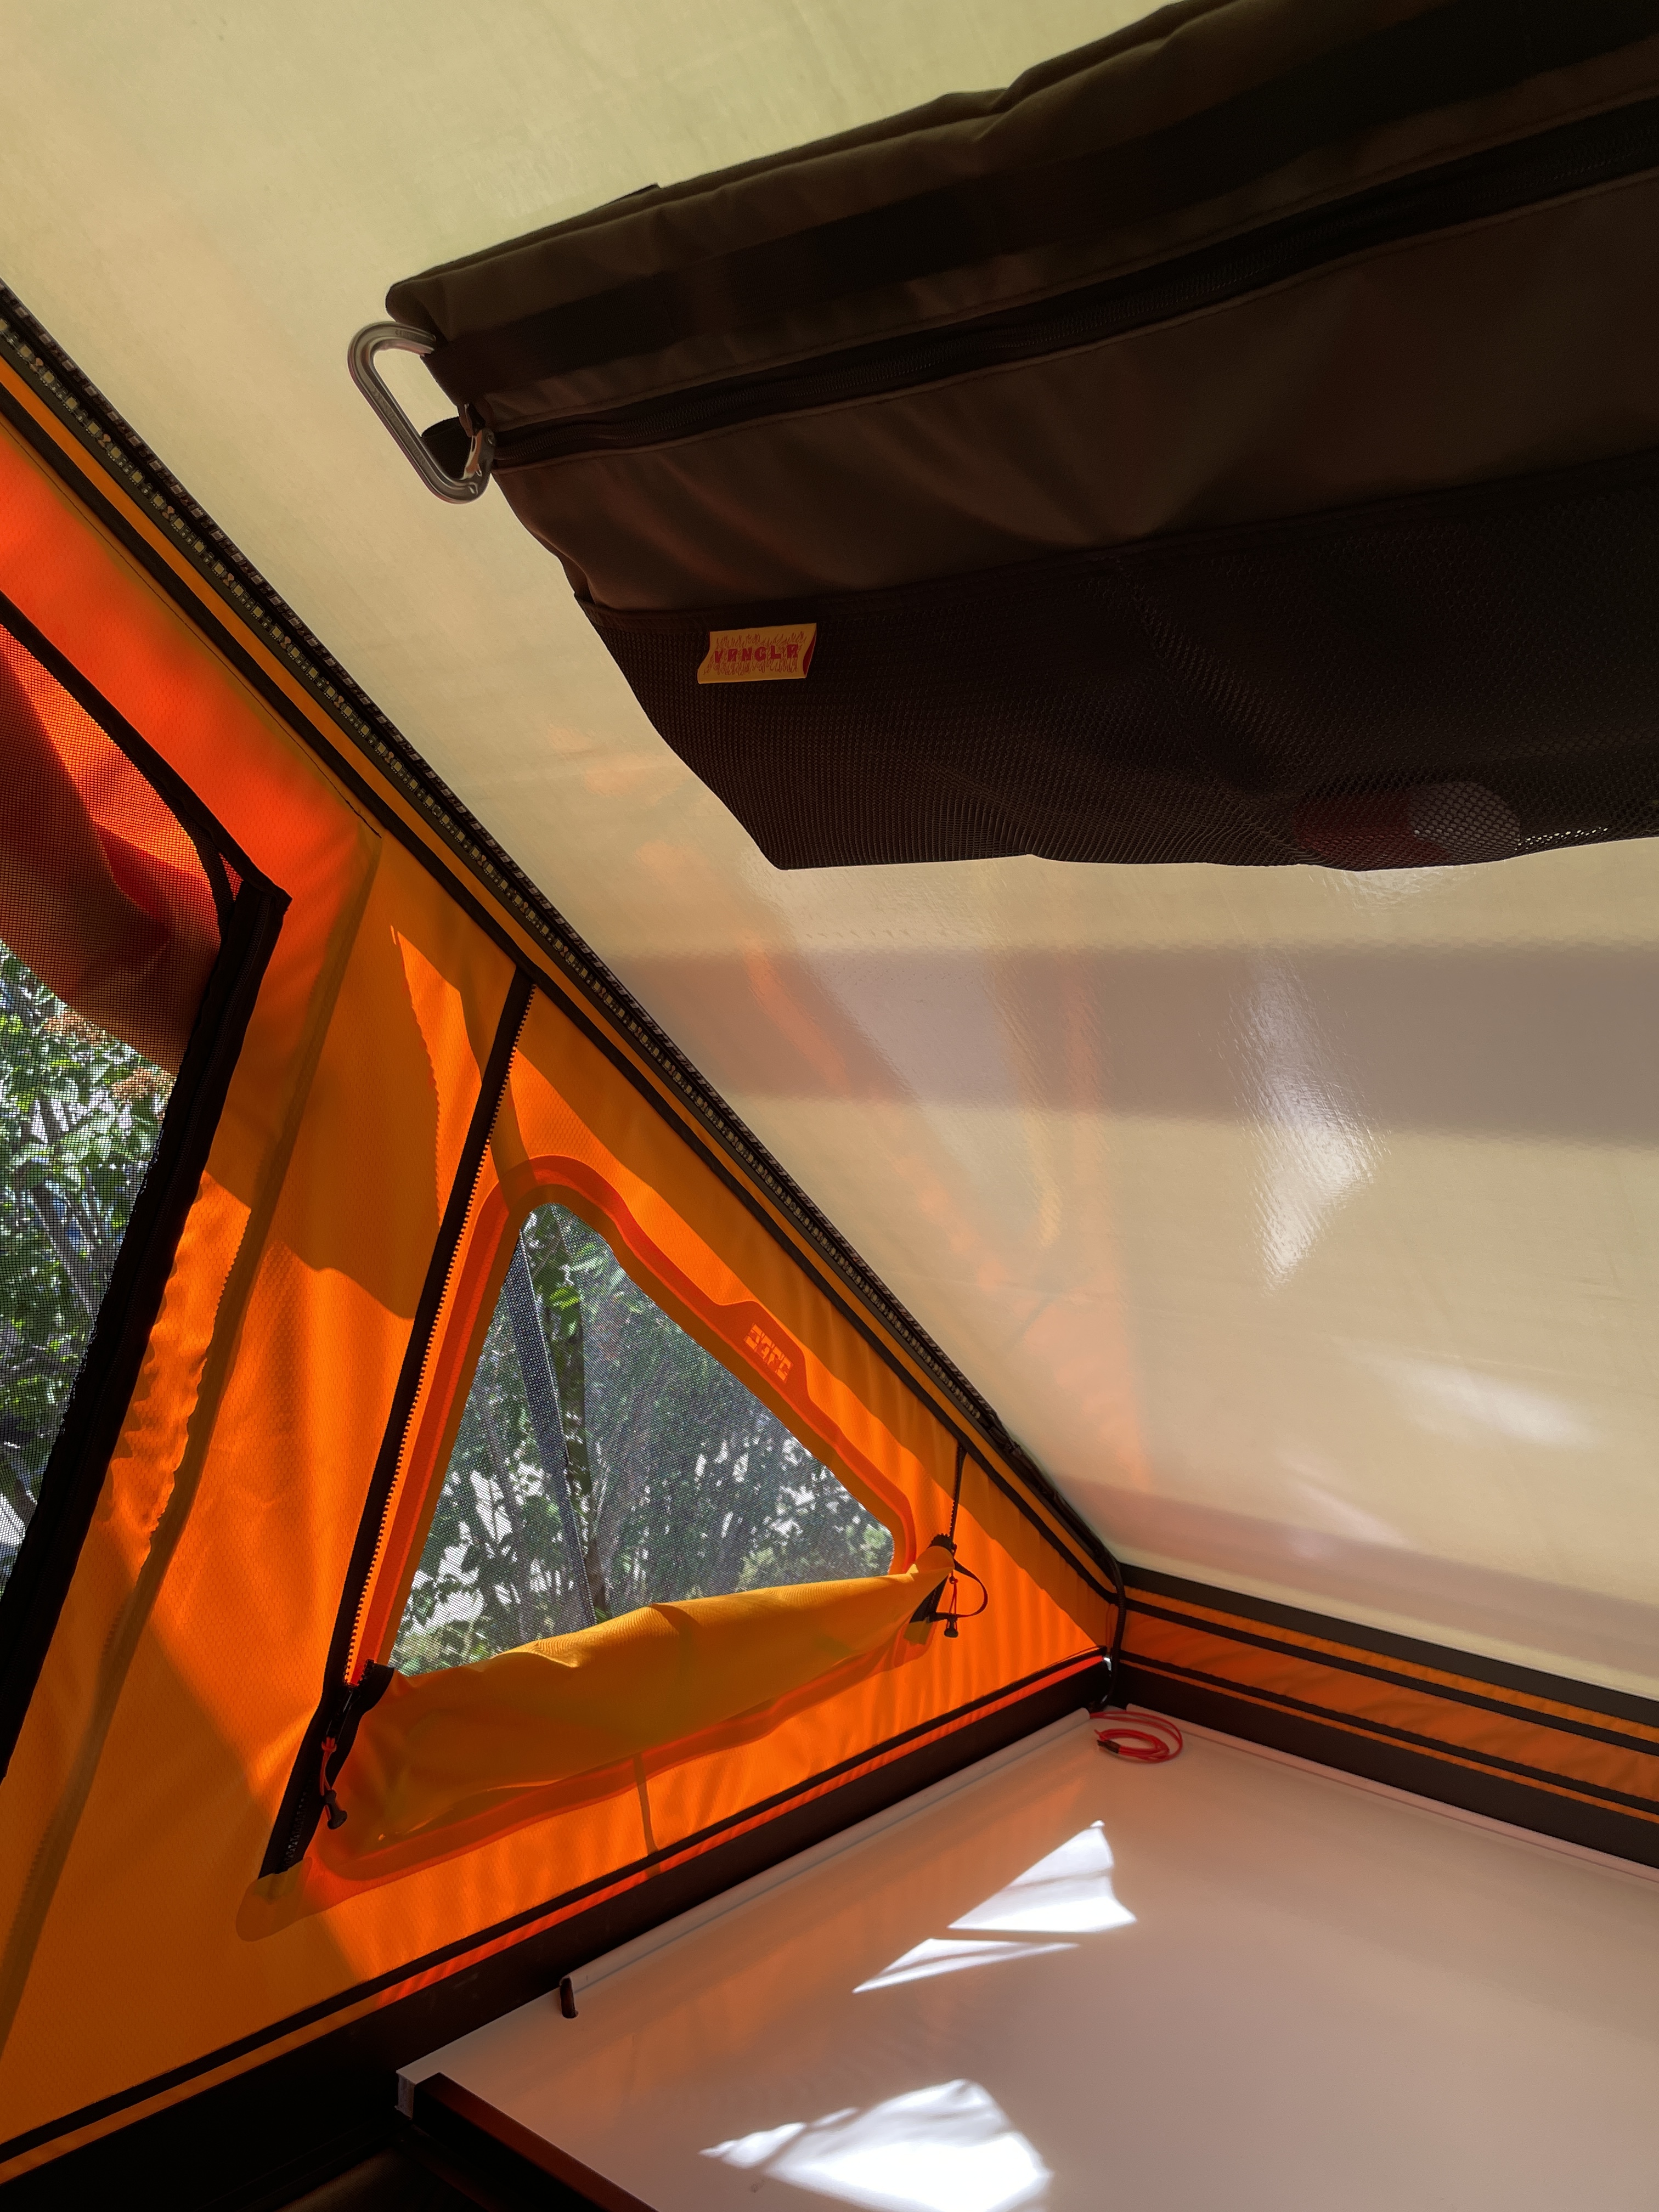
Matt Gecko LED Light Kit
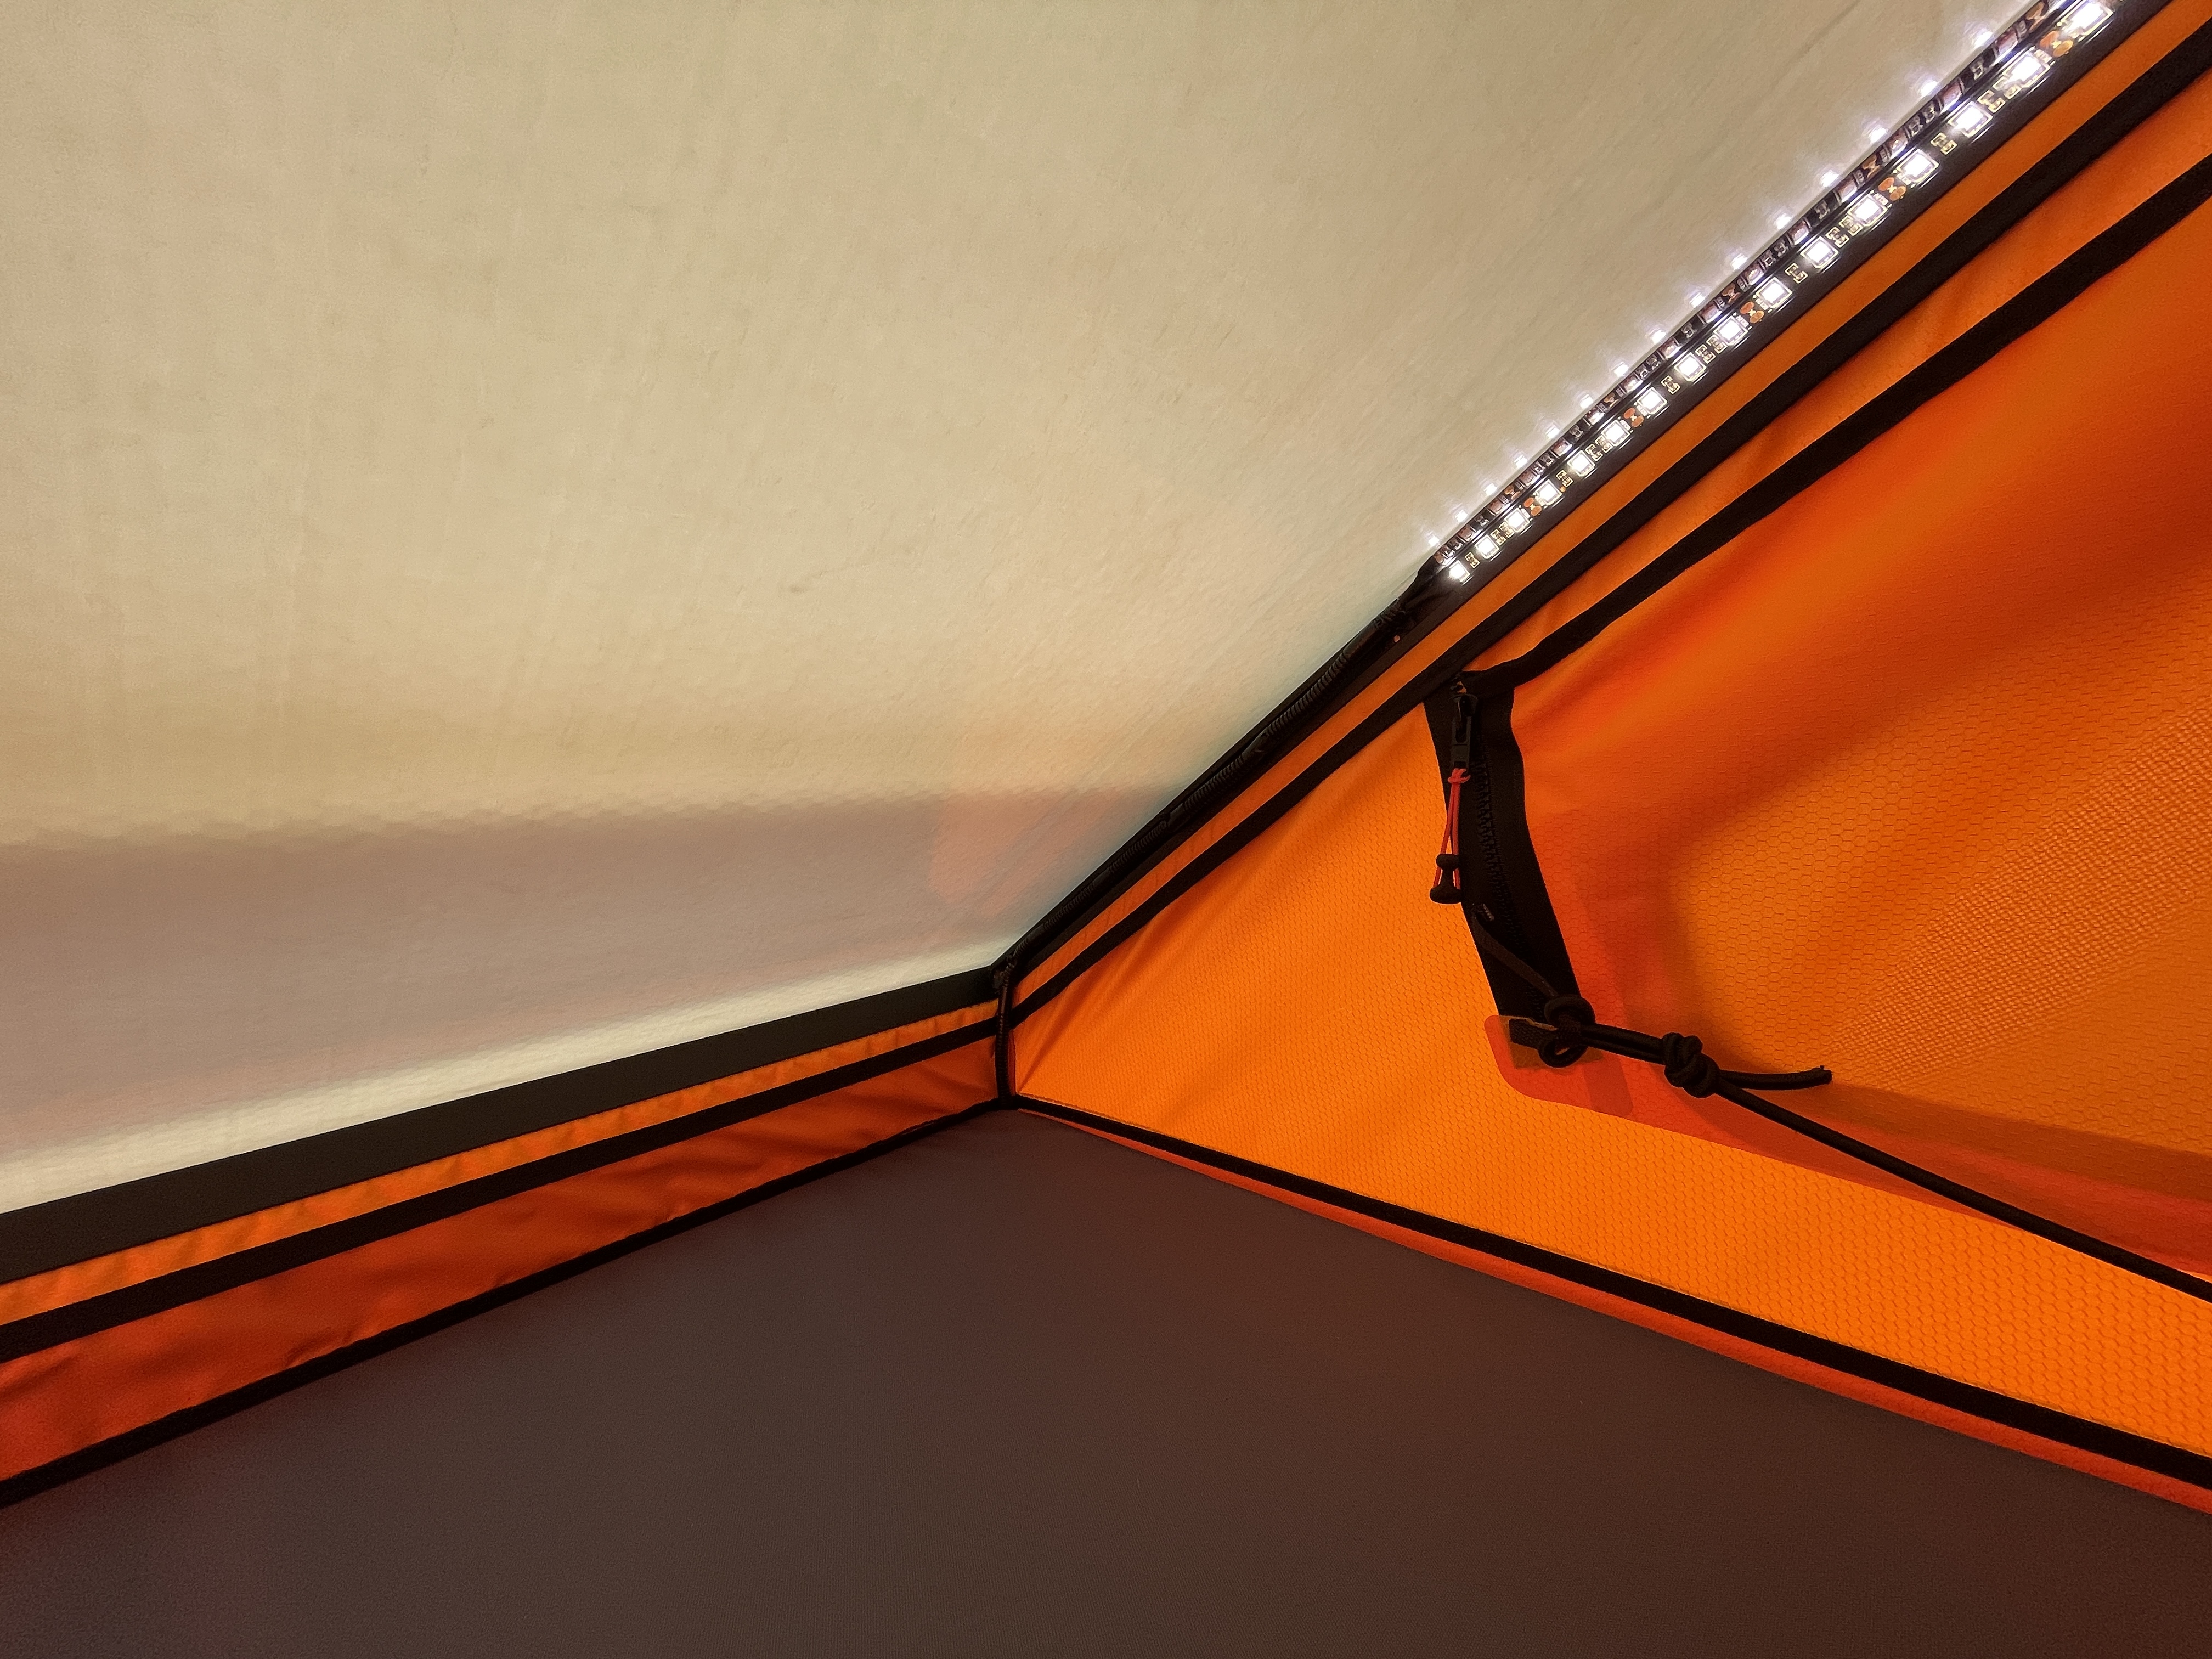
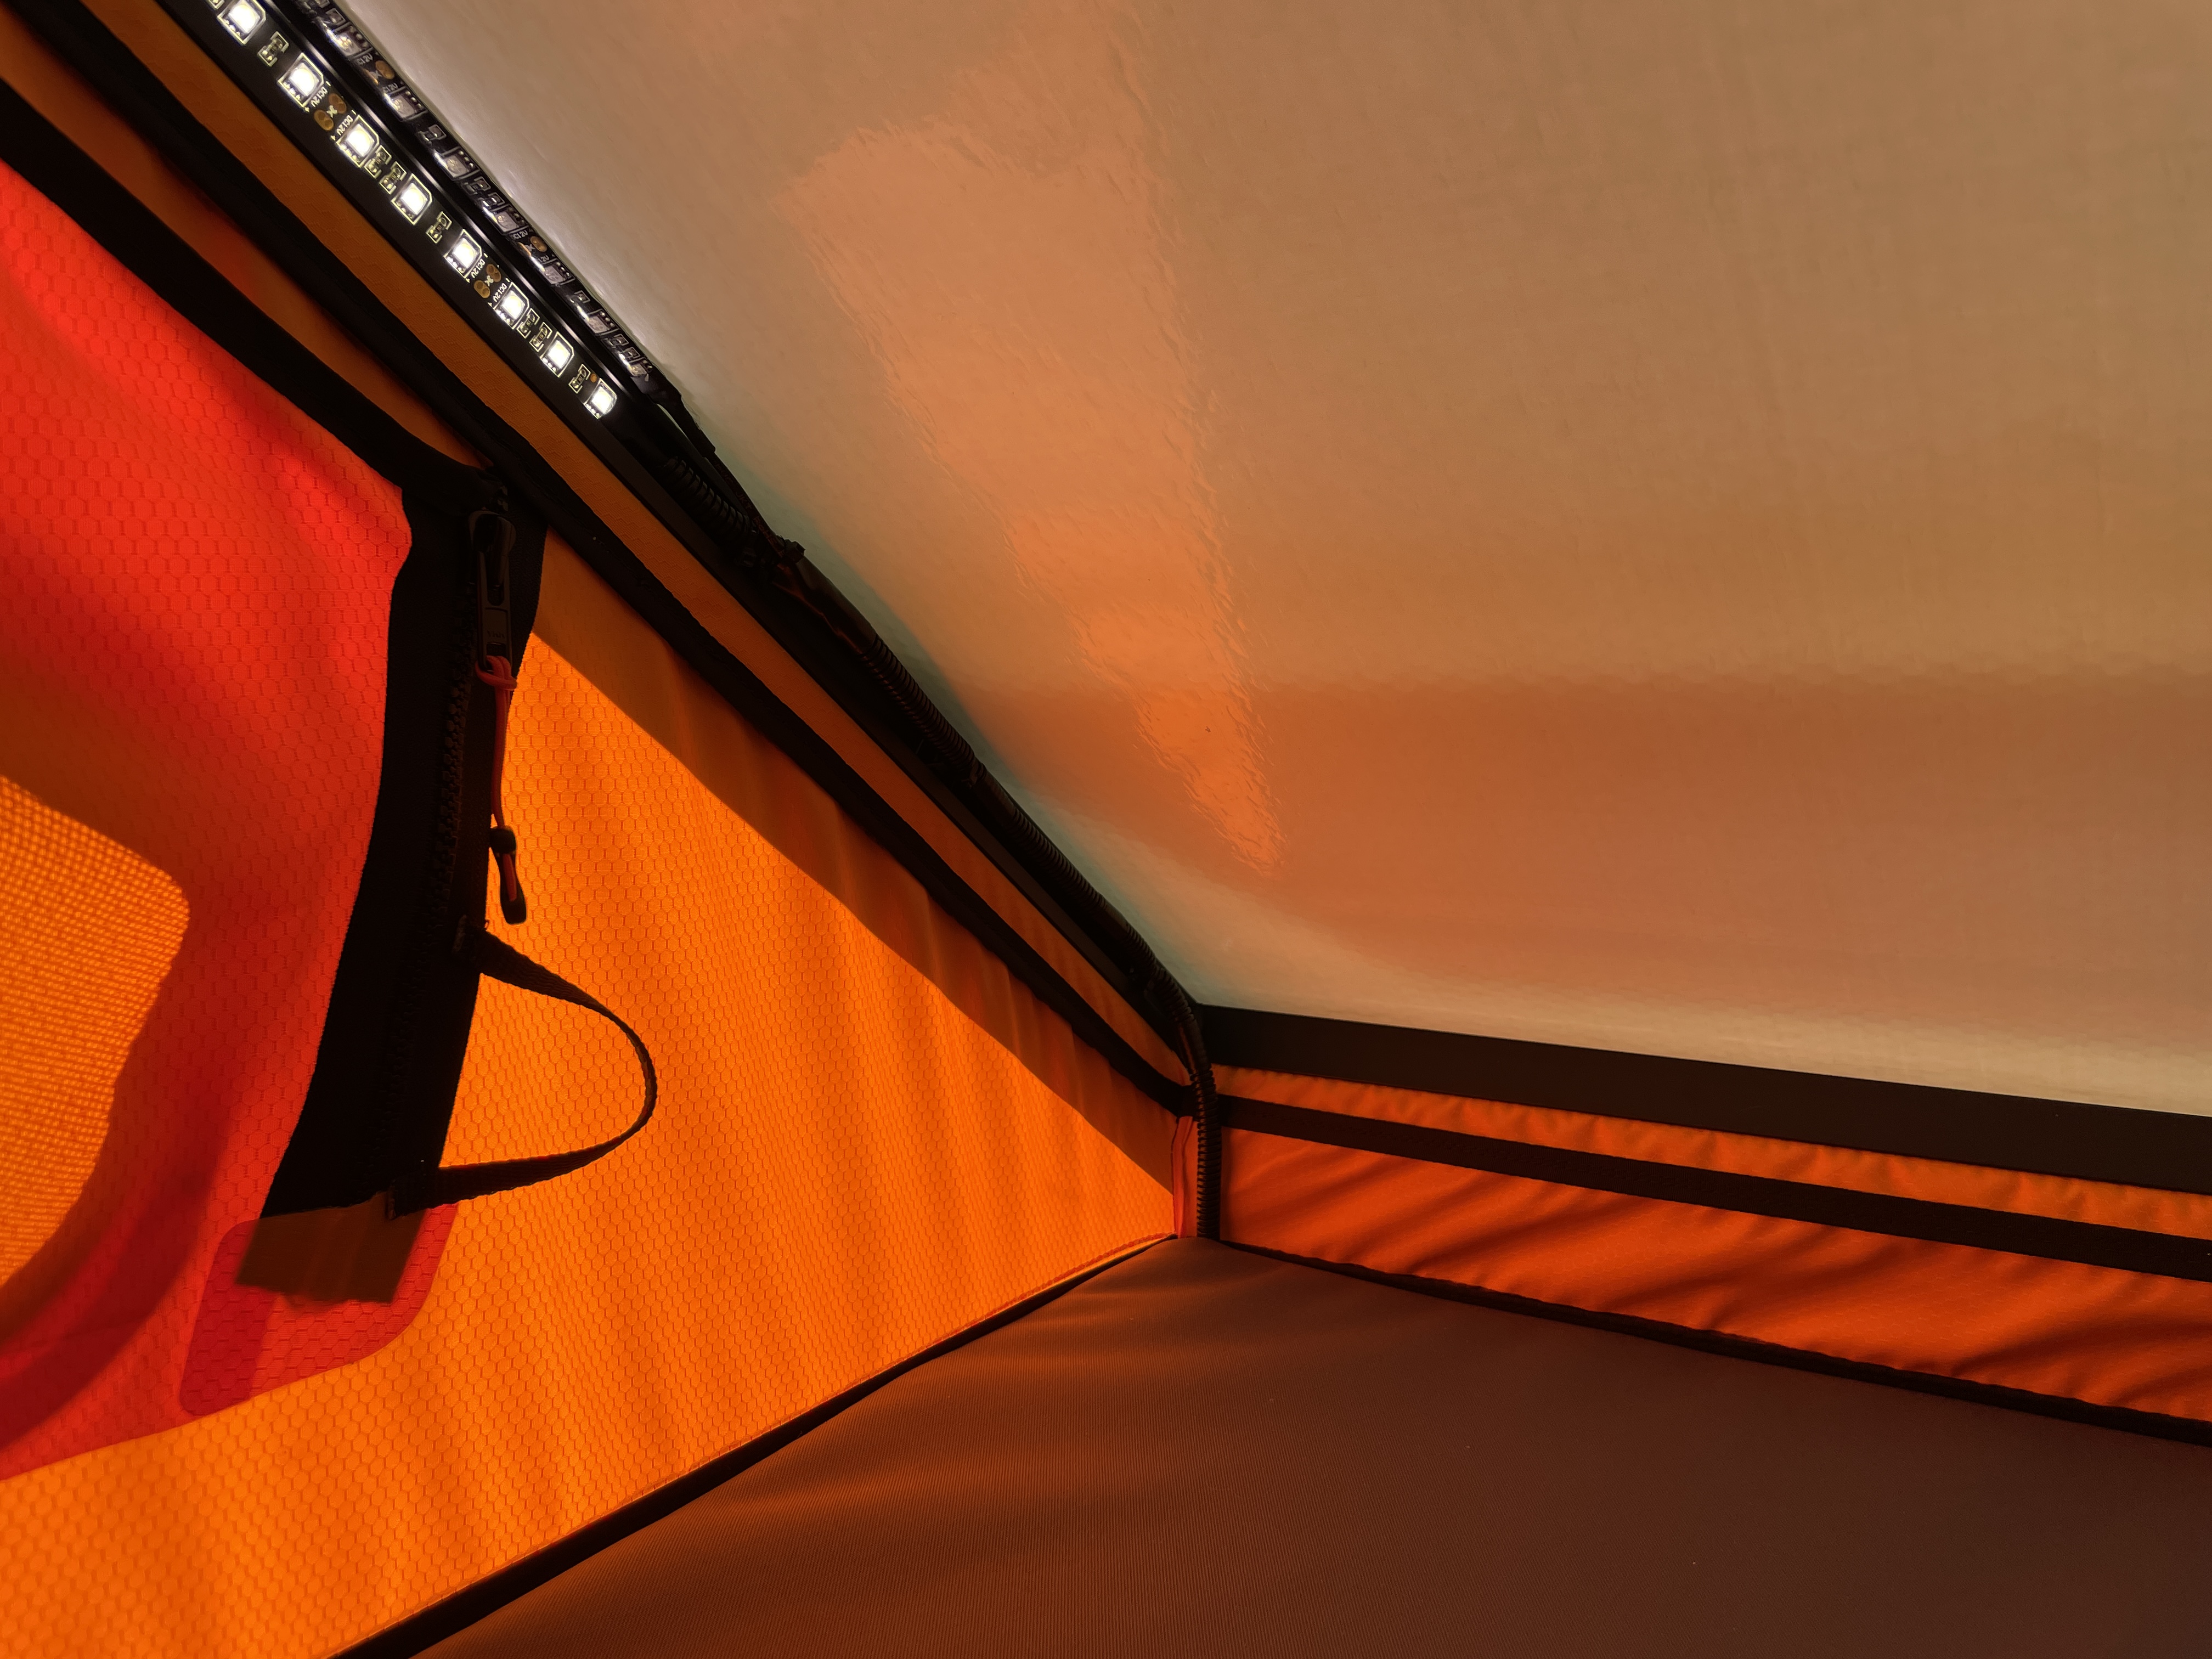
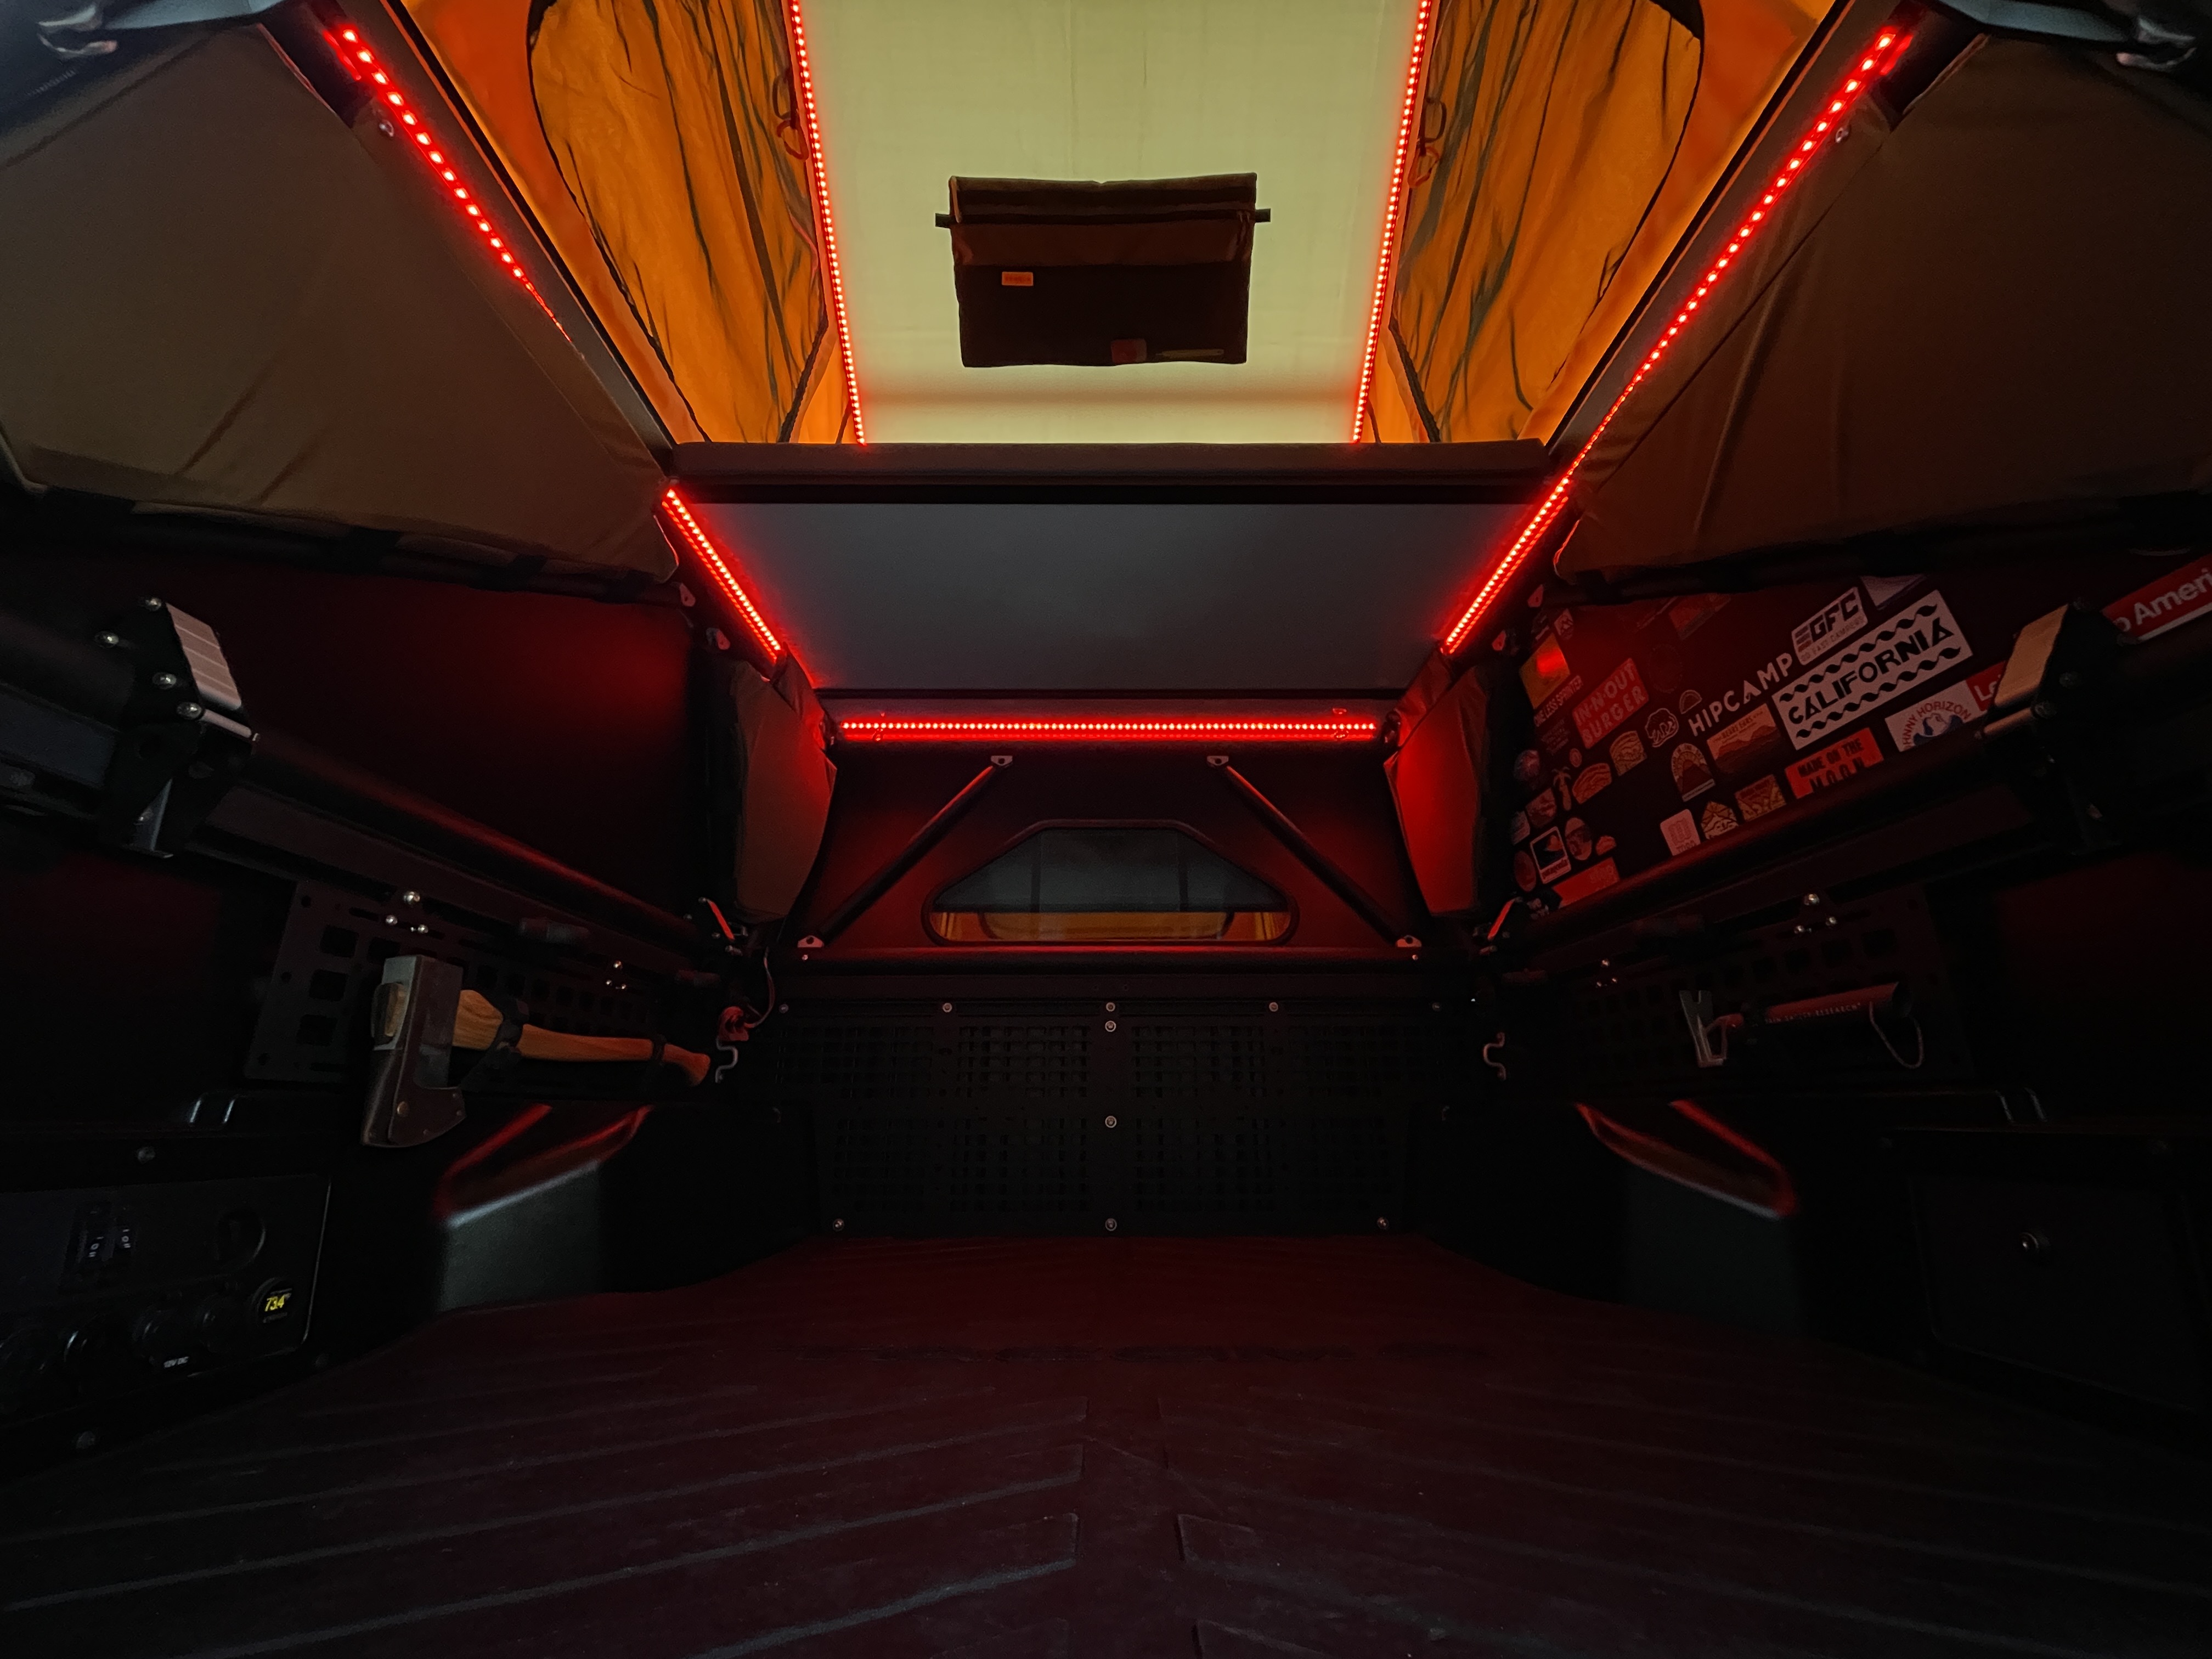
I installed the “Downstairs” portion of my Matt Gecko LED Light Kit today. I ran both the white and red LED strips along the perimeter of the lower deck. Worth noting that these fit the V2 rail perfectly albeit being designed for the V1. (Aside: I’m going to tinker with my VRNCLR bags to try to expose more of the LEDs that are blocked by them.)

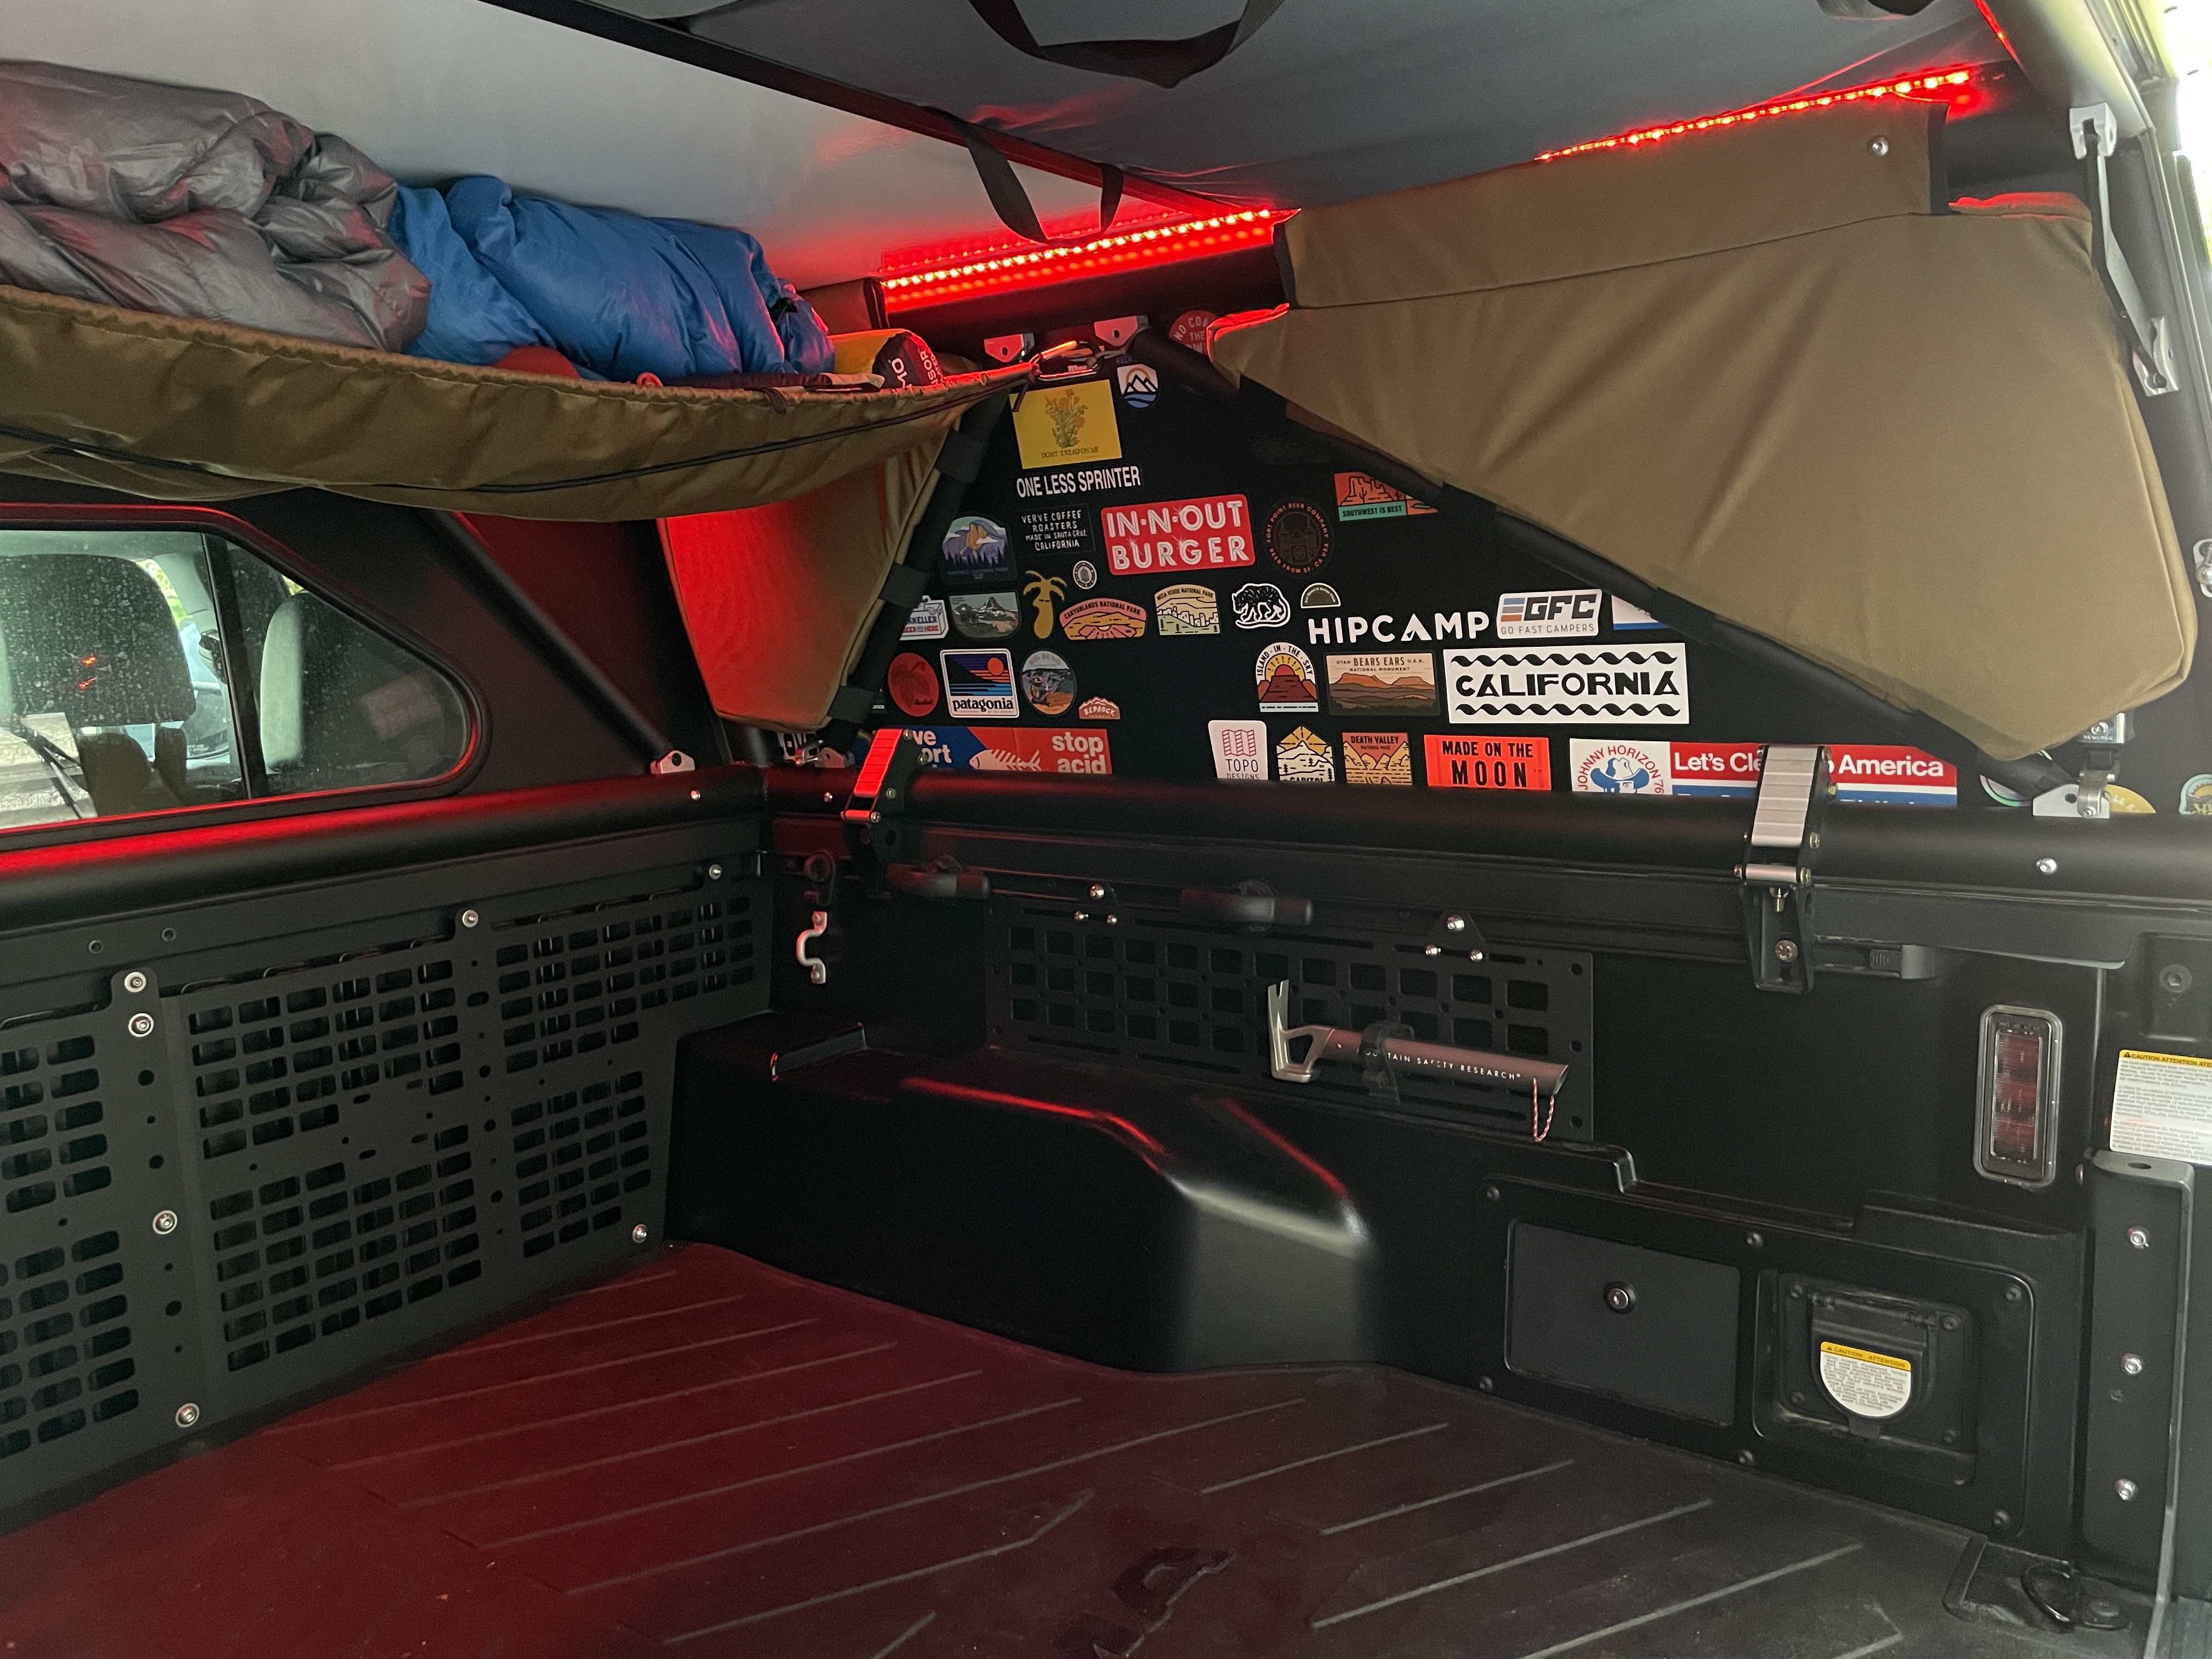
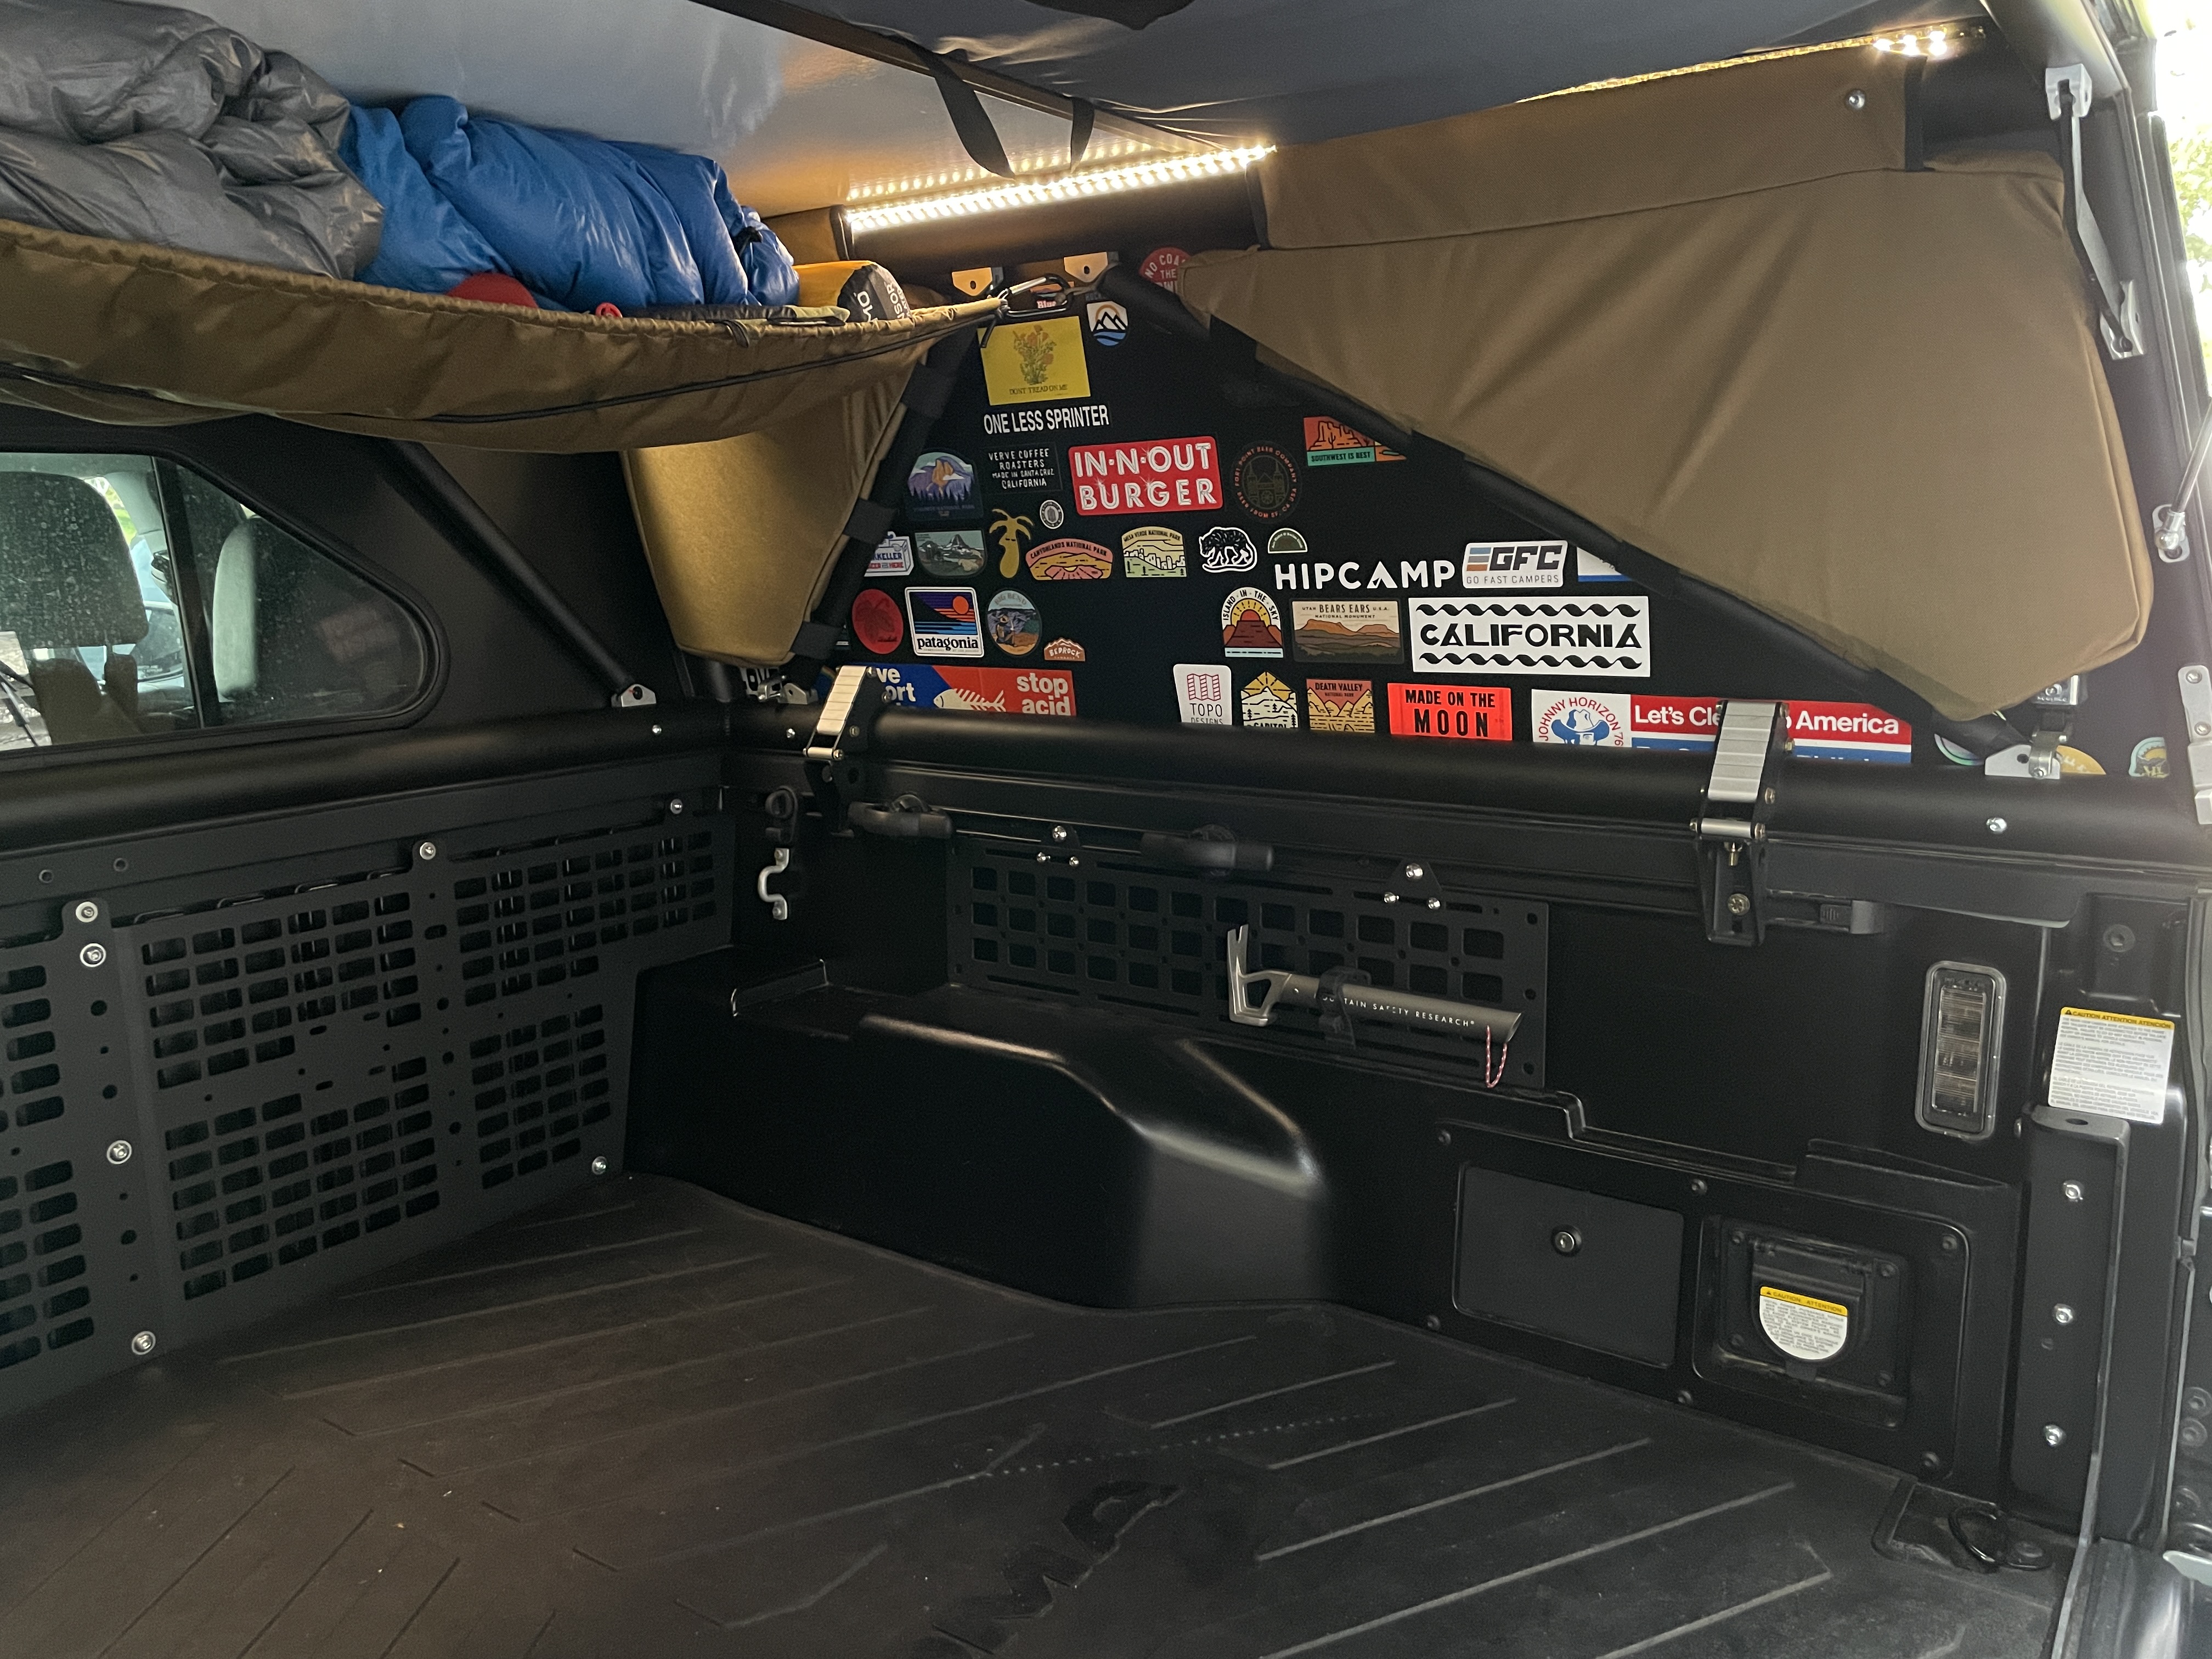
I ran all the wiring through the Driver Side tail light (following my path for the GFC brake light) and continued into the “Electrical cubby” (Required a new hole). I opt’d to swap out Matt’s single switches with Blue Sea Systems Rocker Switches to bring the four individual switches down to two. I wired one rocker for the “downstairs” white and red LEDS and prepared the second rocker for the “upstairs”. Really happy with how clean and “factory-esque” this install looks!
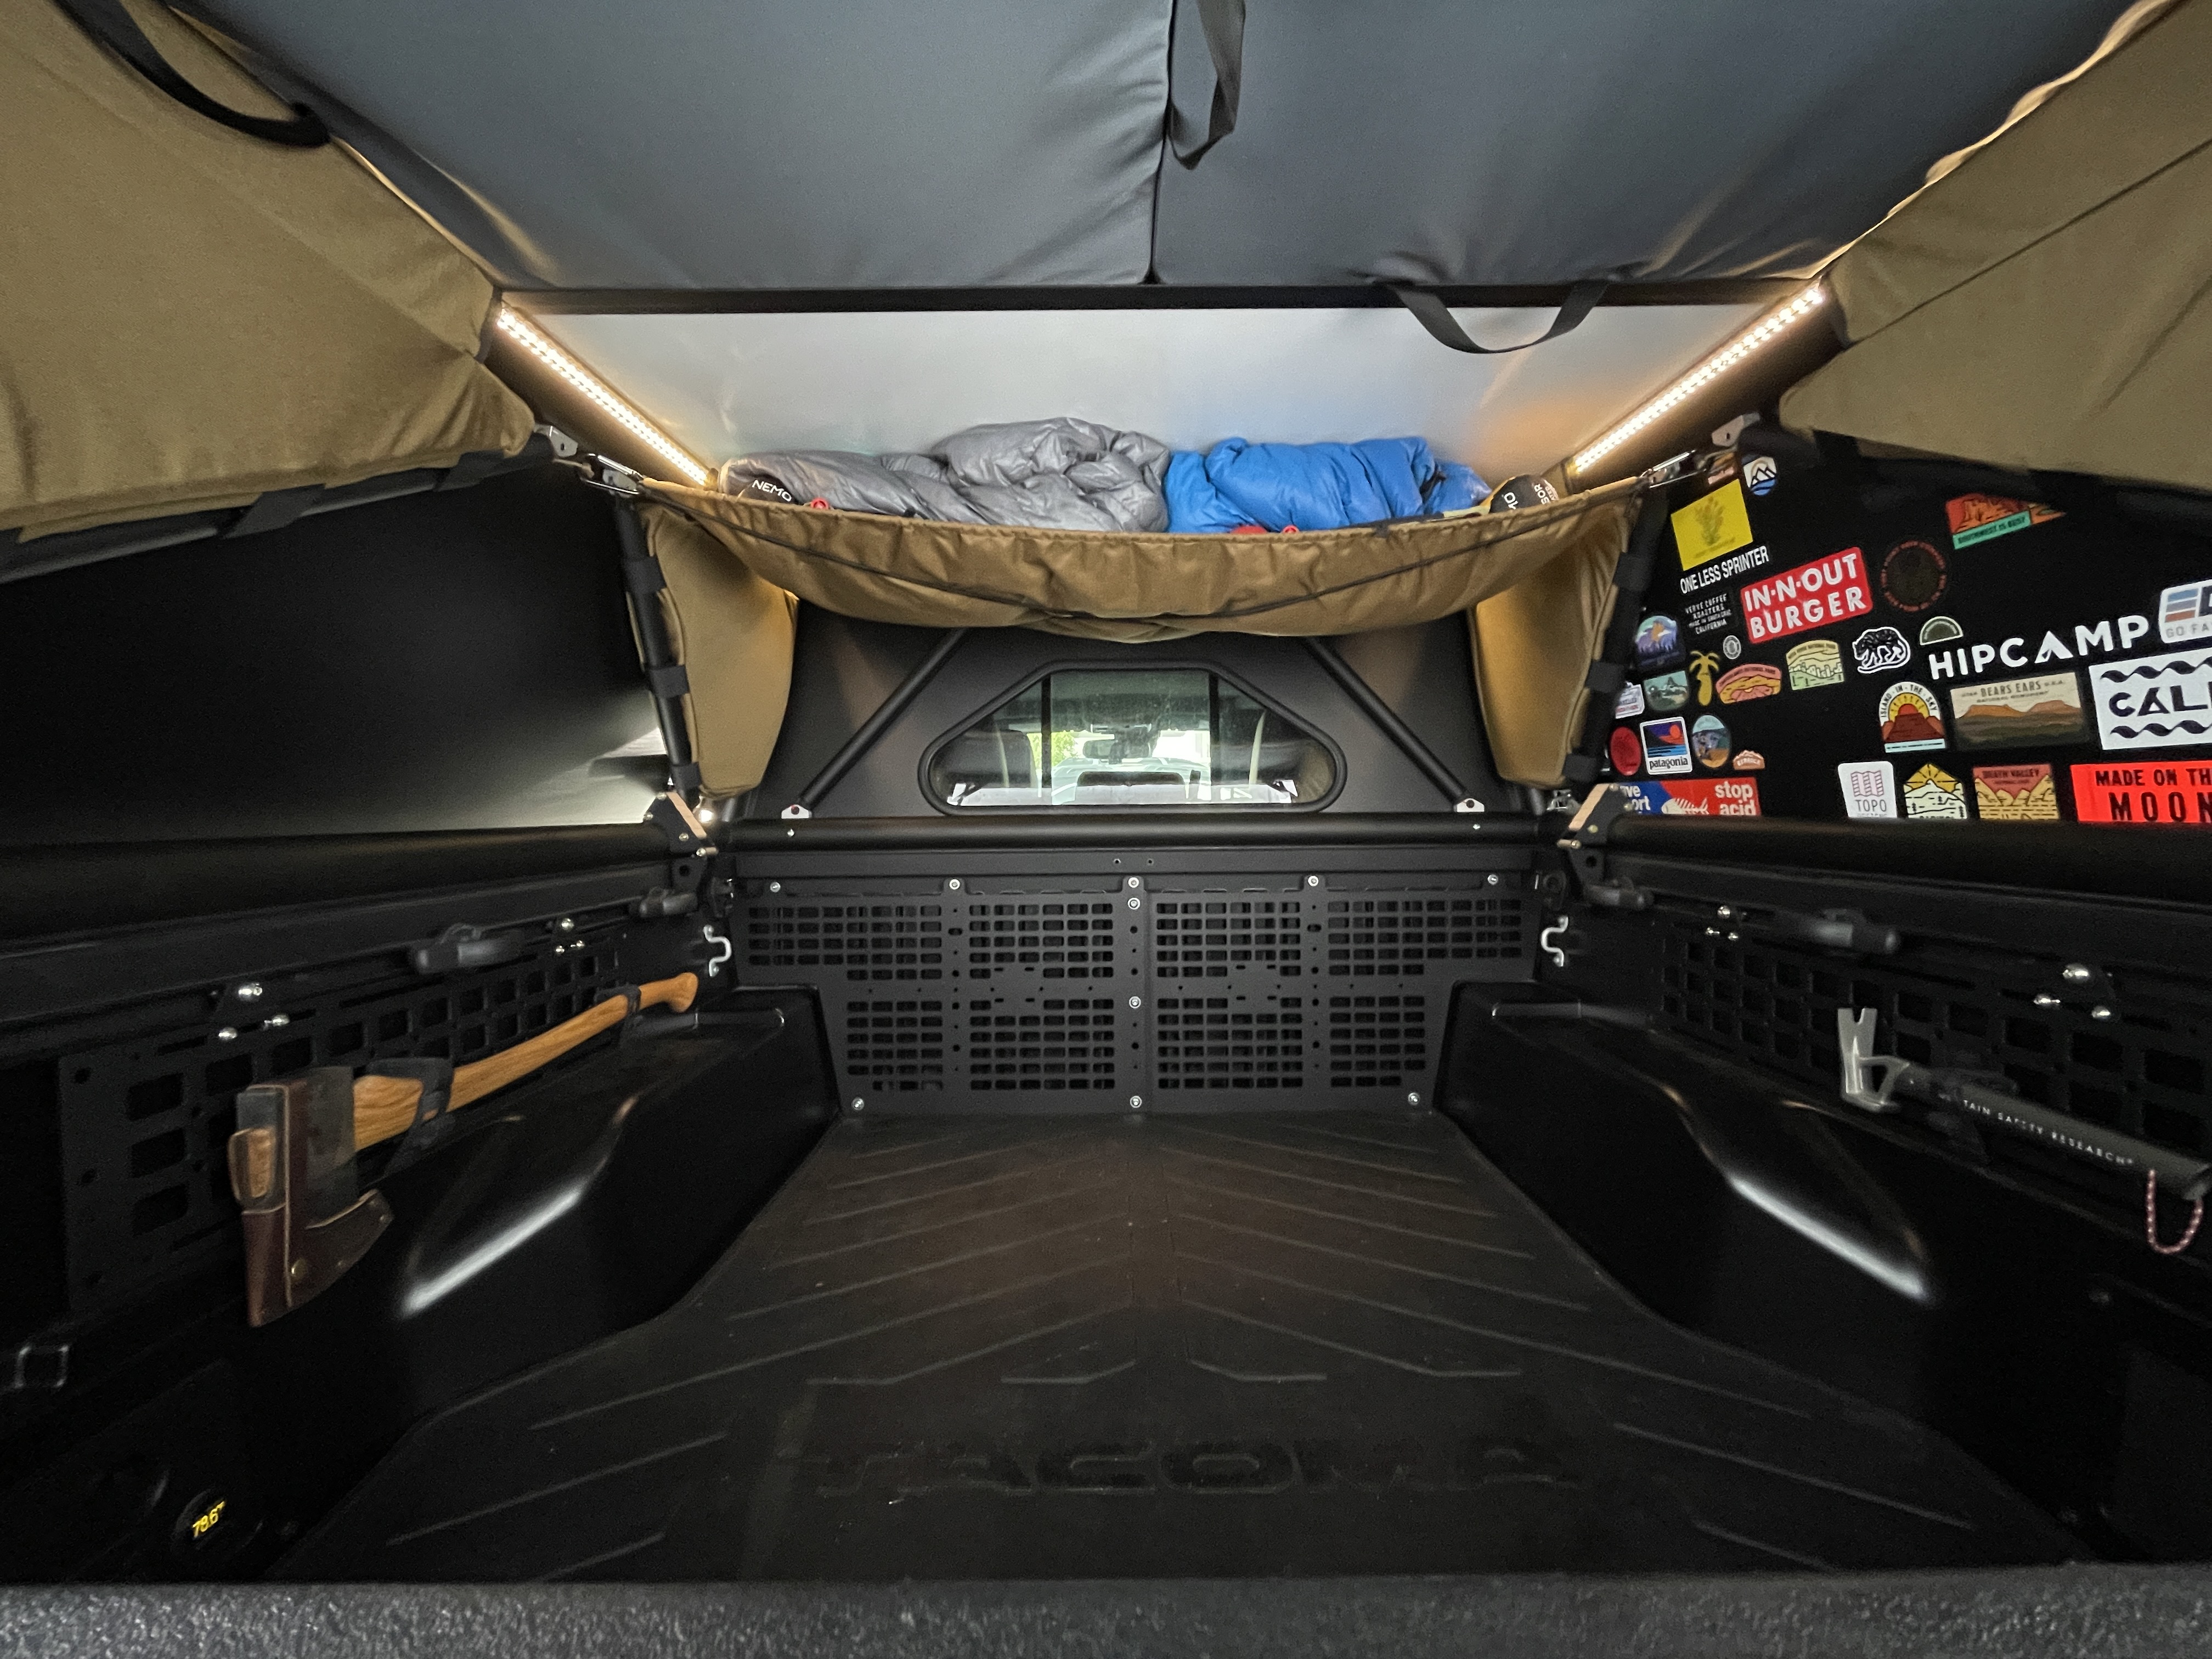
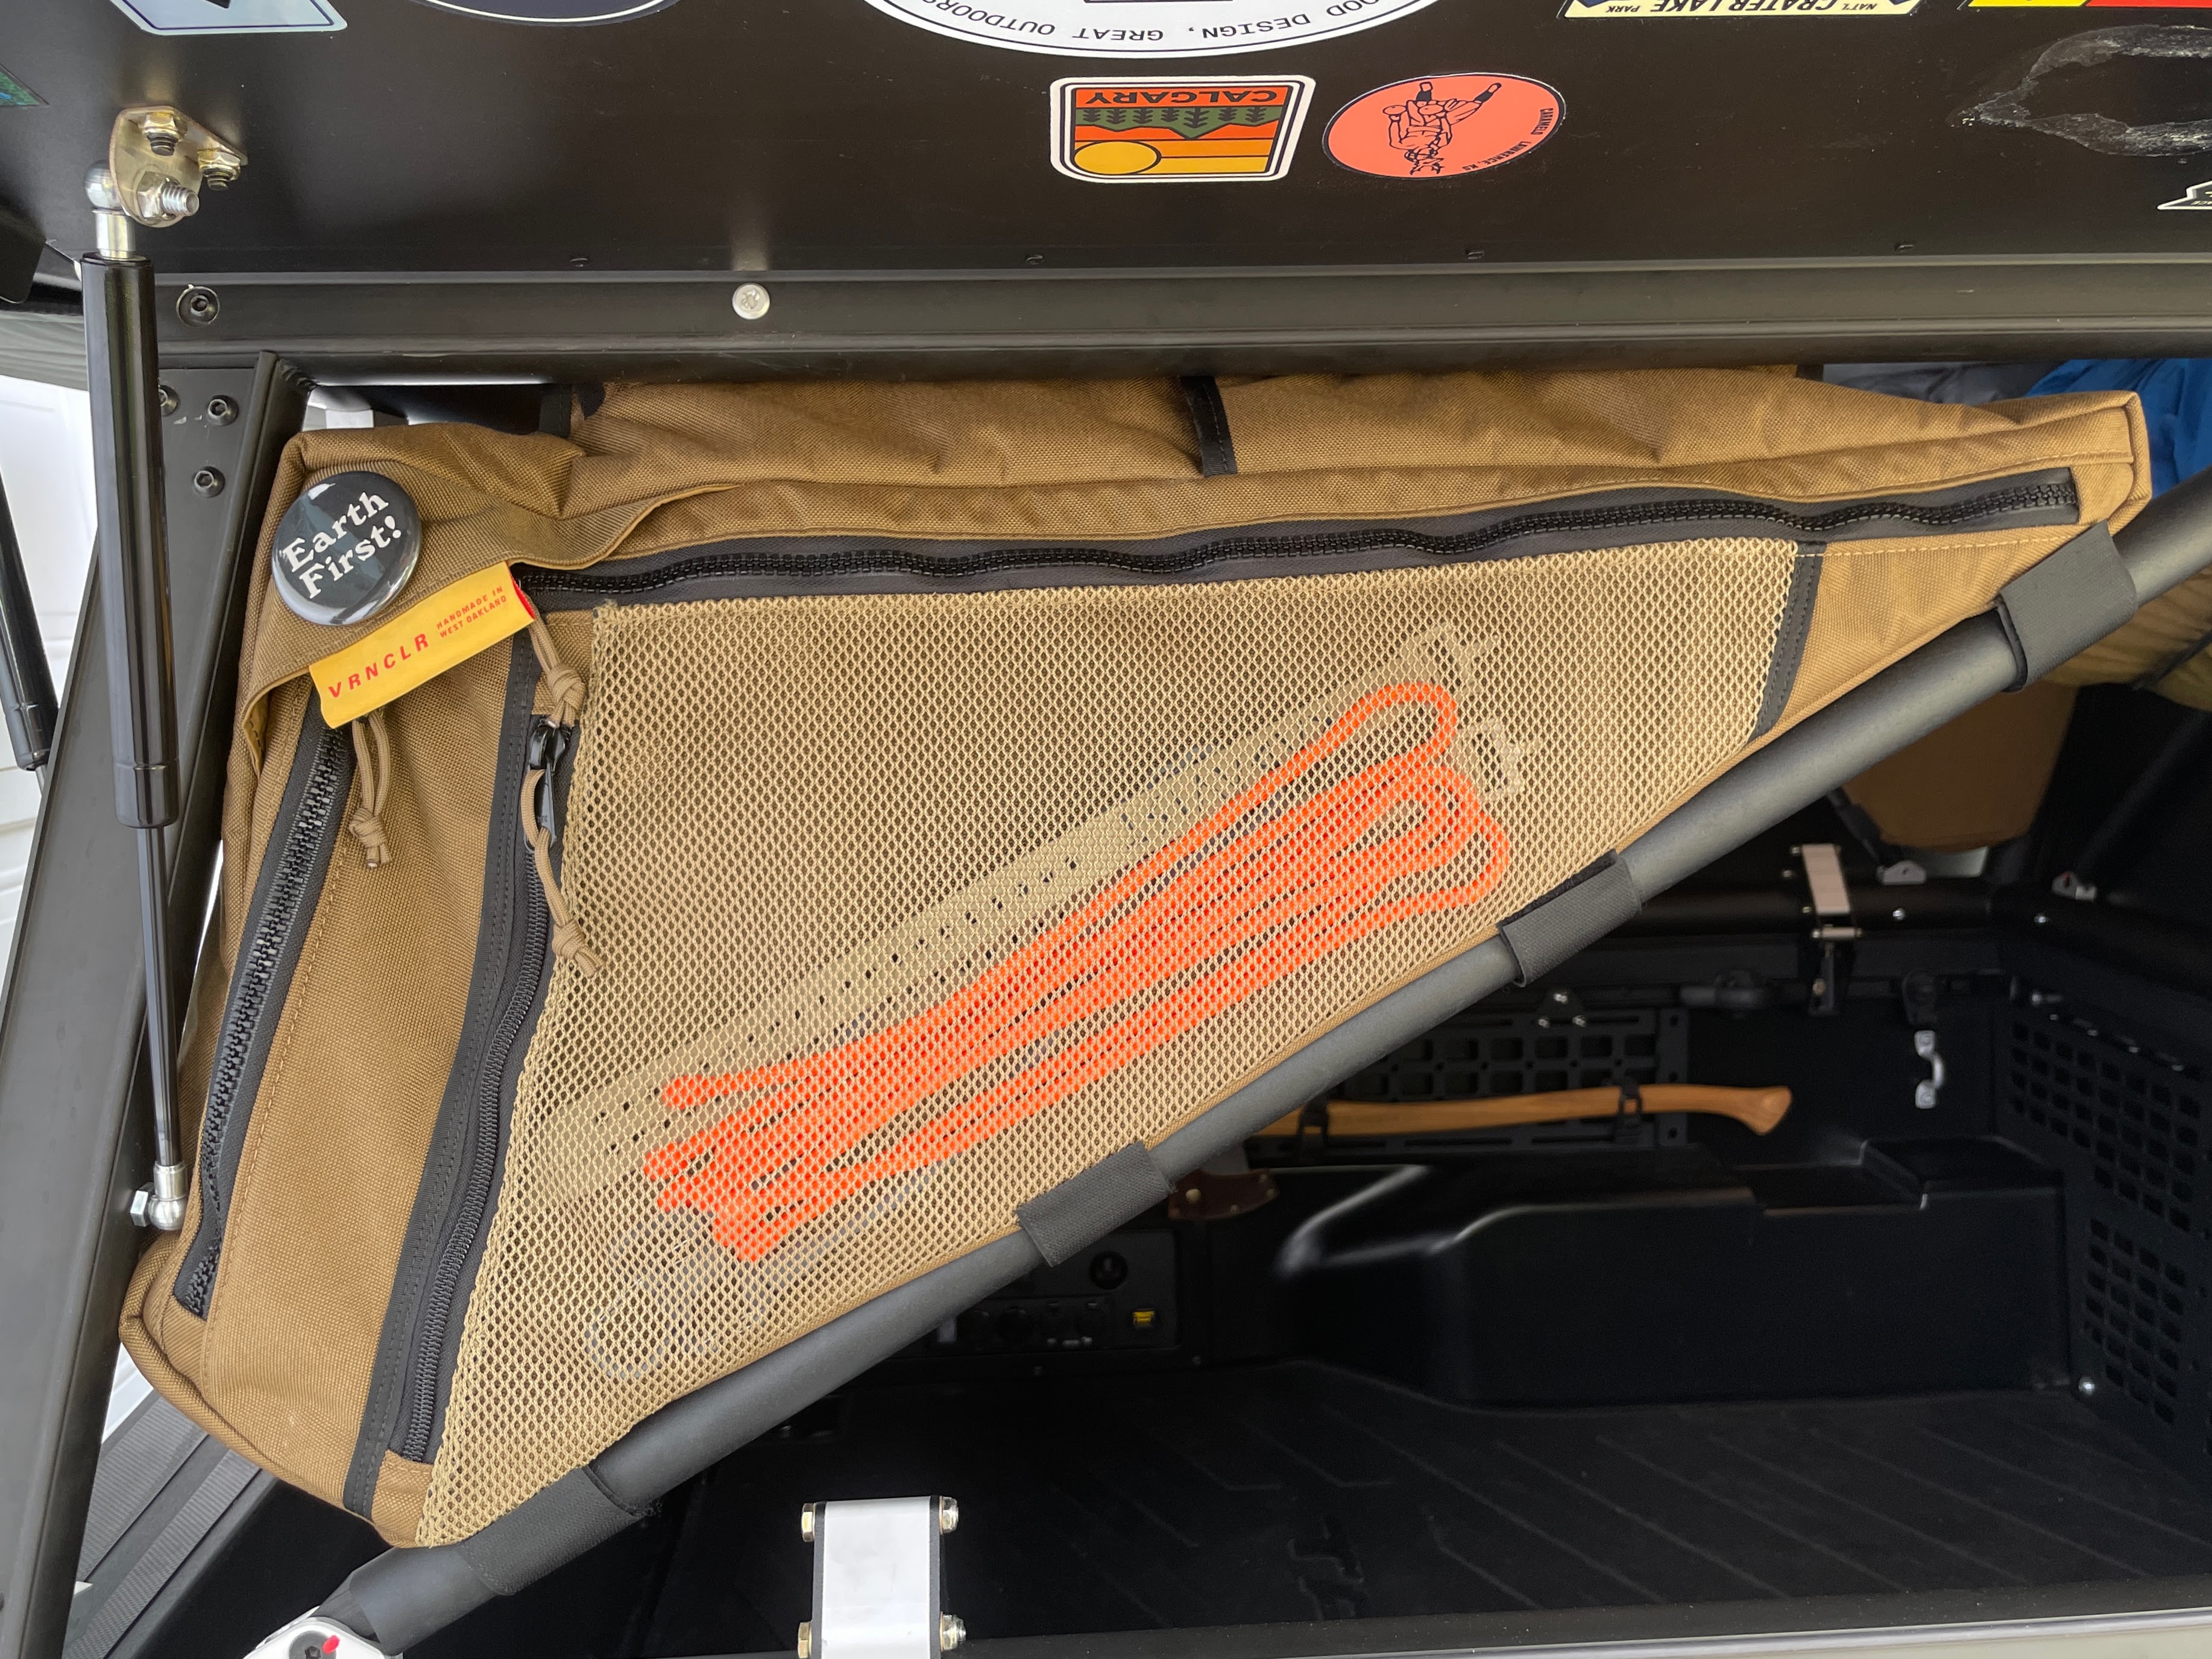
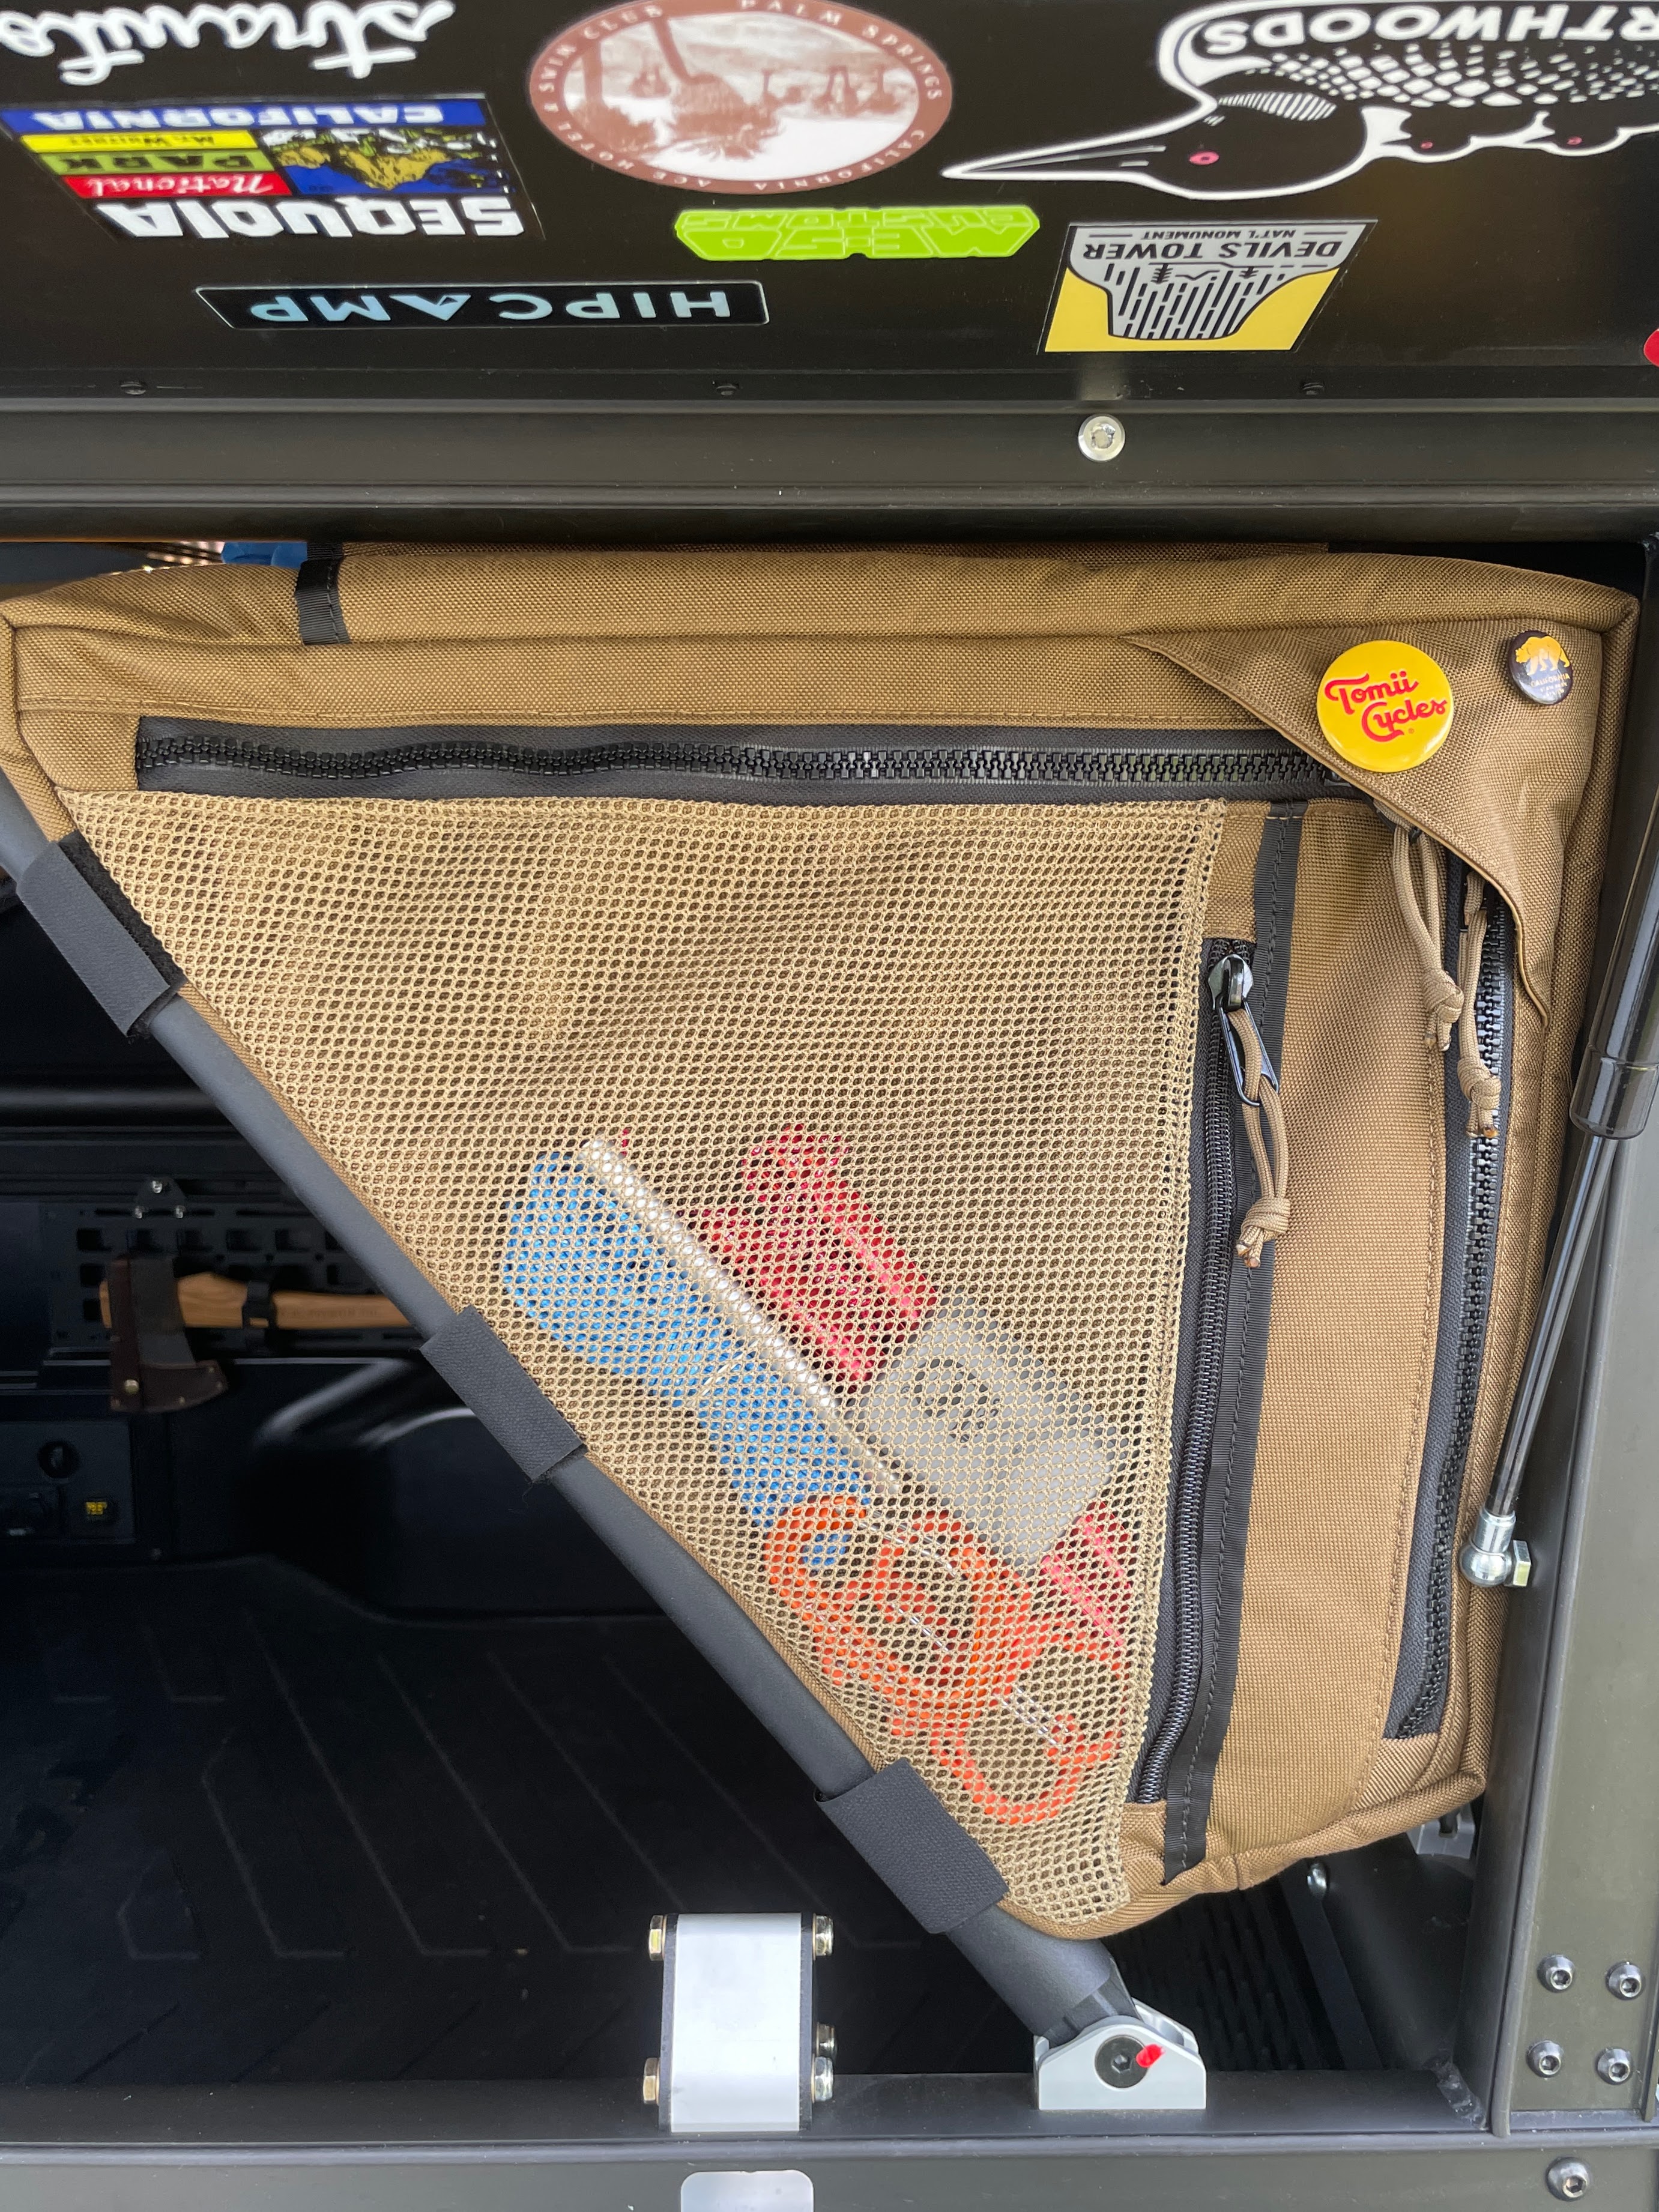
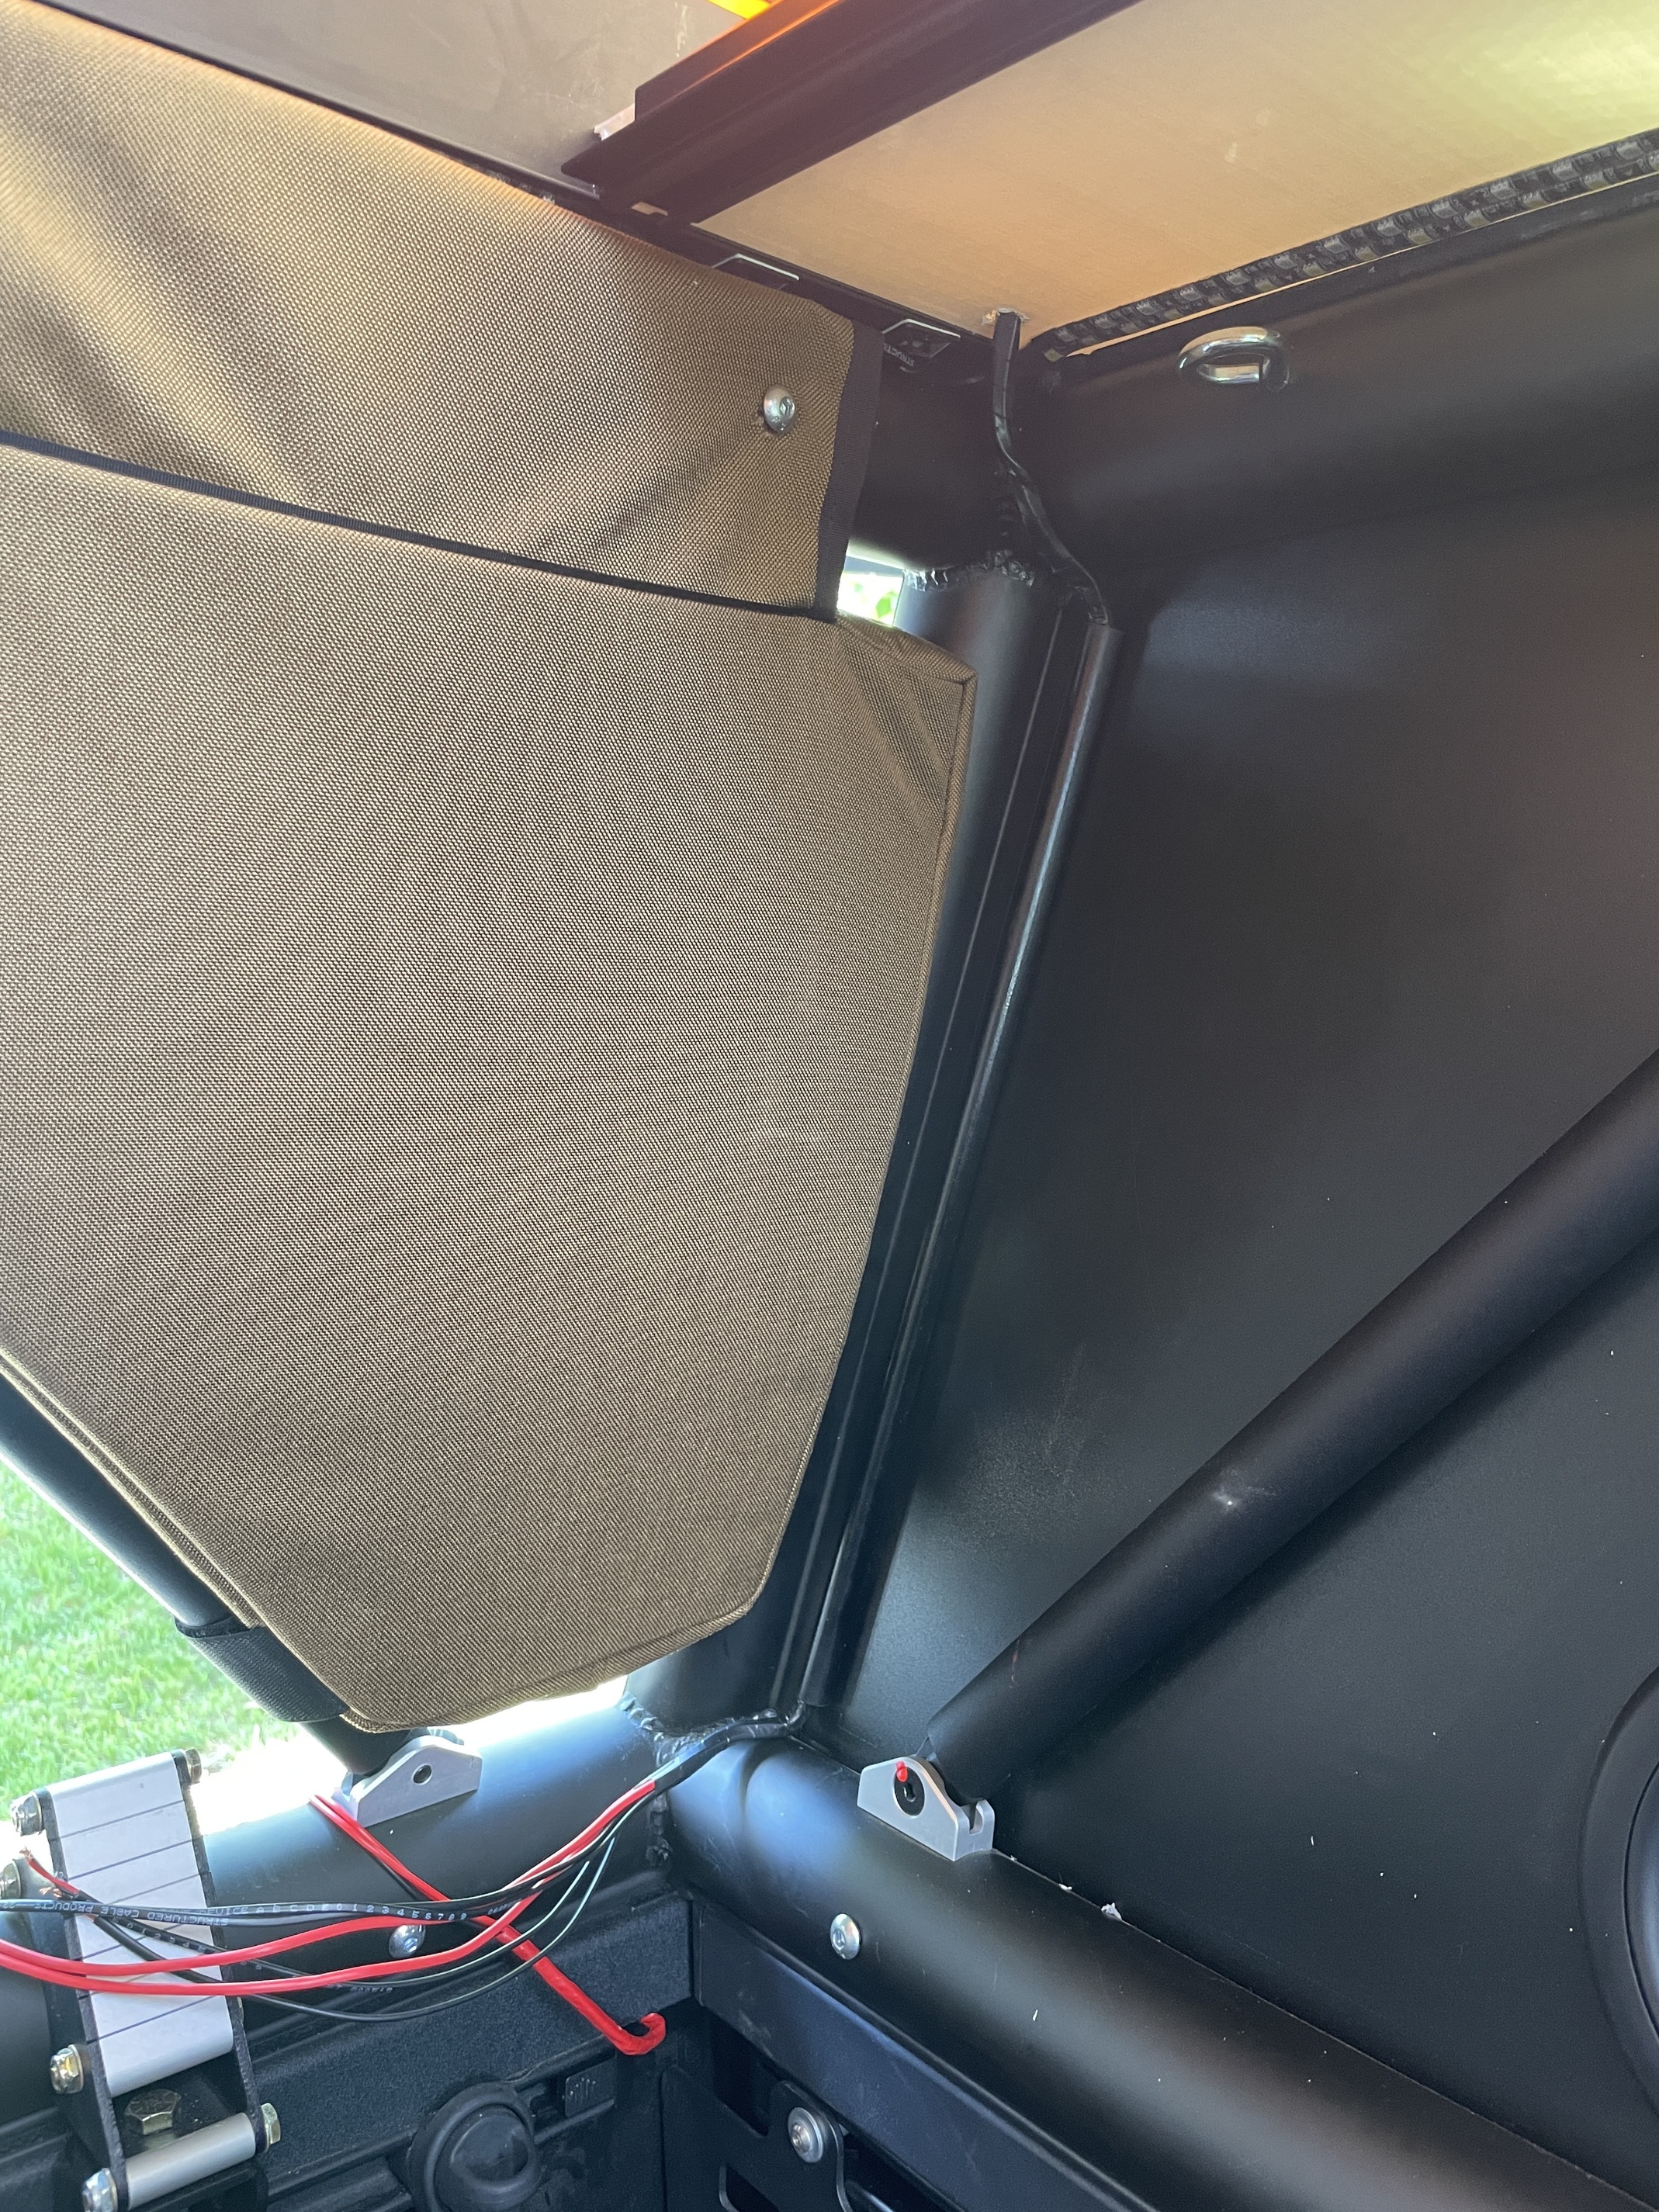
VRNCLR Sewn Storage V2 Goods
I also dropped in my VRNCLR Sewn Storage V2 Frame Bags, V2 Bedding Catch, and Top Shelf (Not pictured) a few weeks back. Absolutely love all of these — Tom crushed them. I love how they account for ~75% of the gear I travel with and the bed is still empty! …I need to get some better photos of all of these (In the coming days.)
Next up:
• Running the “Upstairs” LED lights.
• Mounting the Dometic Fantastic Fan.
• Mounting the Sunflare Xplor Solar Panel.
• Designing and building a “shelf” for my Dometic Fridge. (Which is why it was removed)
5 Likes
This is definitely one of my favorite builds. Top quality gear and clean installs. Nice work!
1 Like
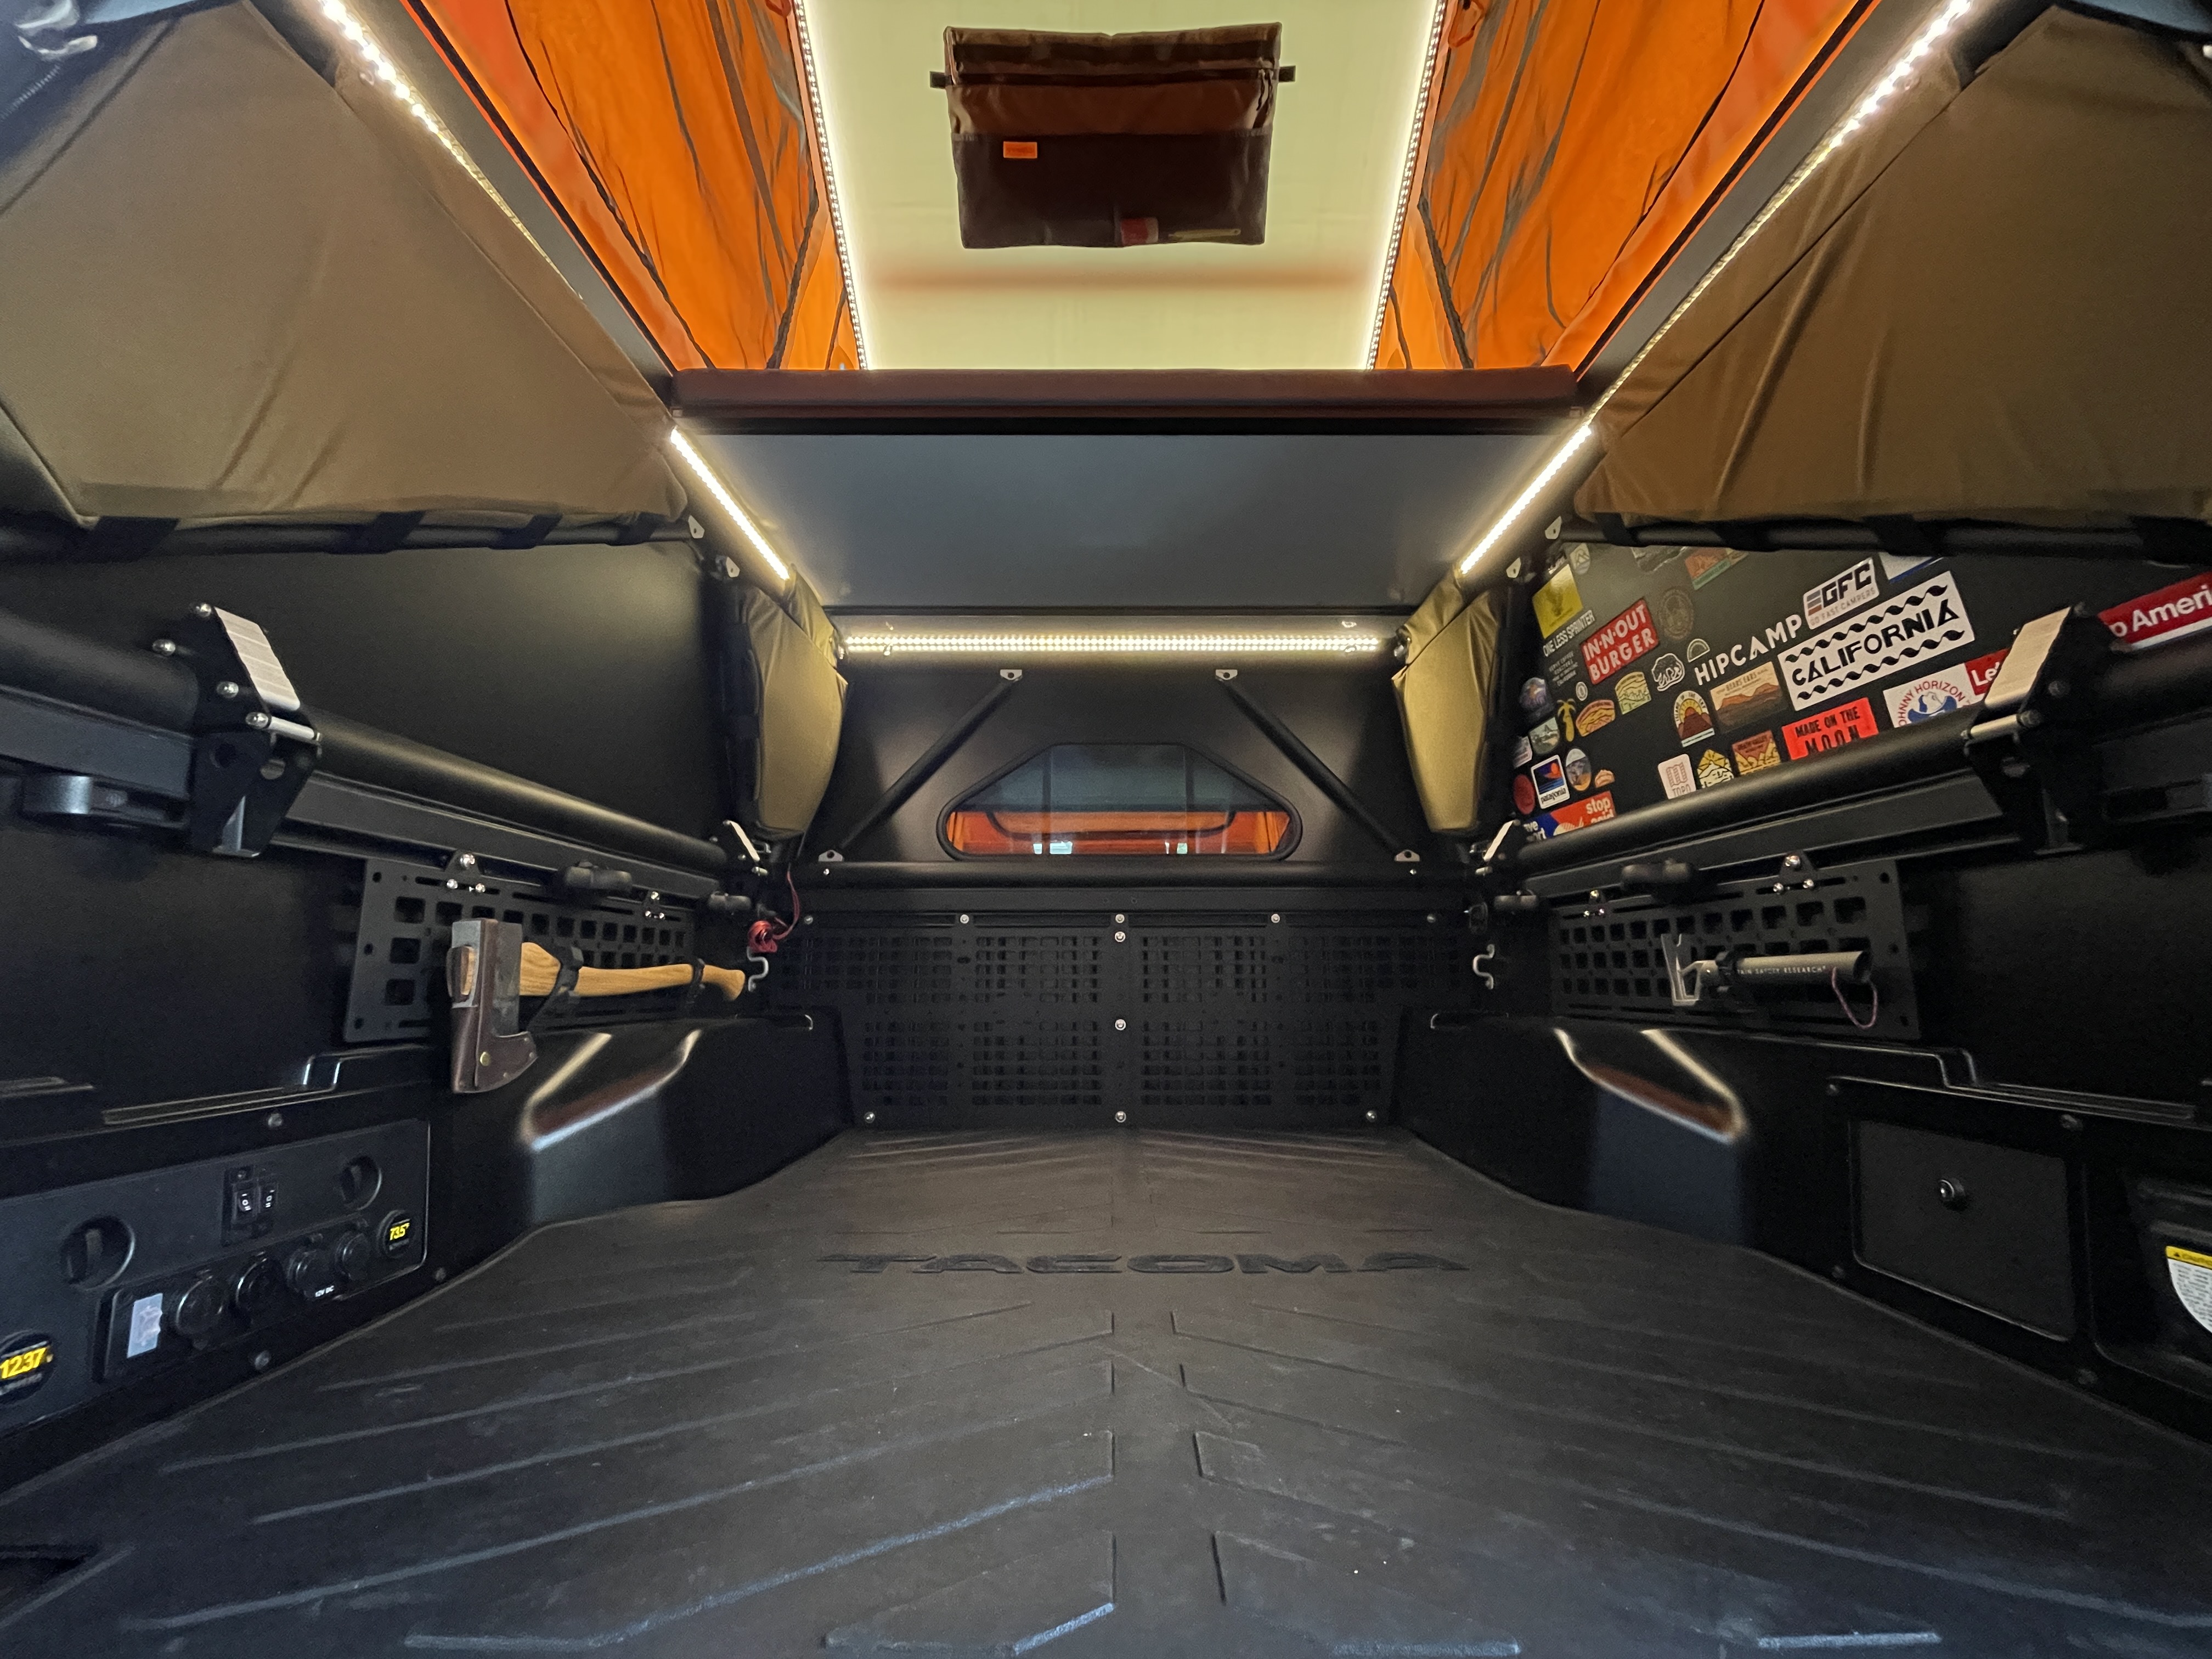
Build Update 06/20/21 — Upstairs LED Lights & Wiring
Running power to the "upstairs"
Today’s goal was to answer the question “how might we run power to the upstairs” for lights, ceiling fan, and any future modifications in the most inconspicuous way possible… Here’s where we my father and I landed.
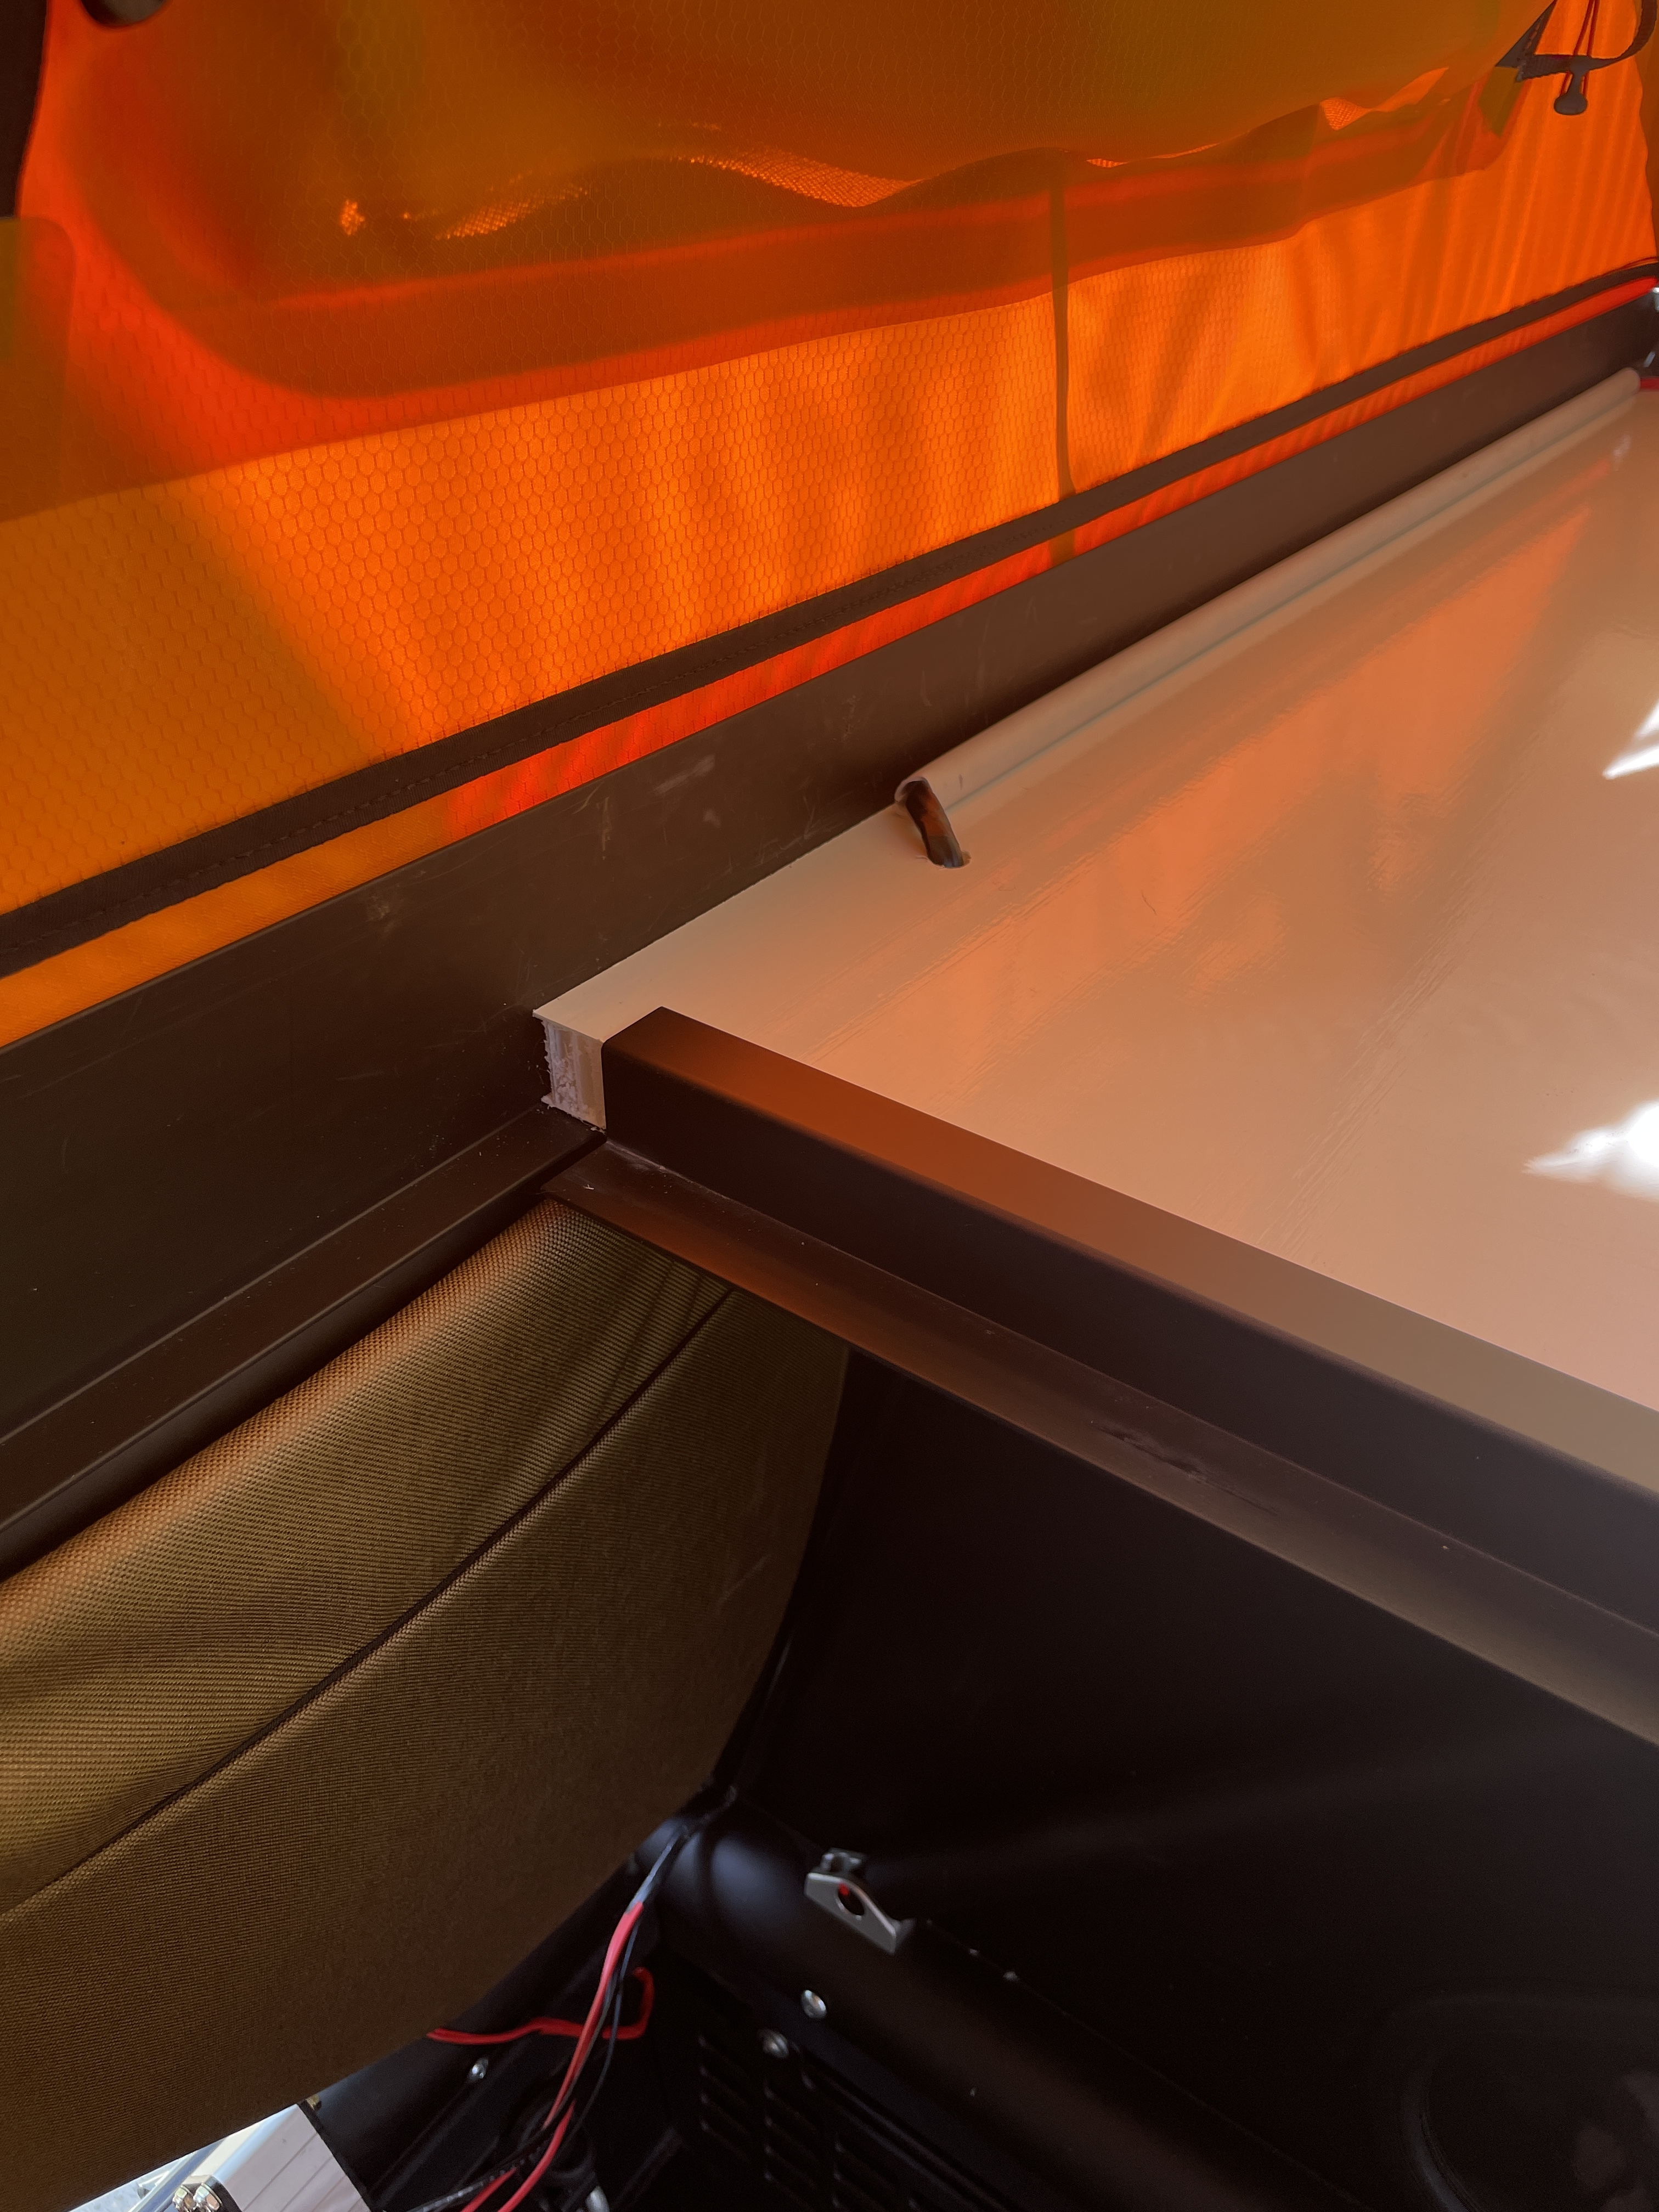
The first step was to run insulated wiring from the electrical cubby to the front of the bed (bulkhead). We opt’d to fish the wiring under the (side) bed rail cap. This was rather painless with proper fish tape but if you’re still waiting on your GFC and interested in doing this I’d recommend passing the wire while you can still easily pop the bed rail cap off!
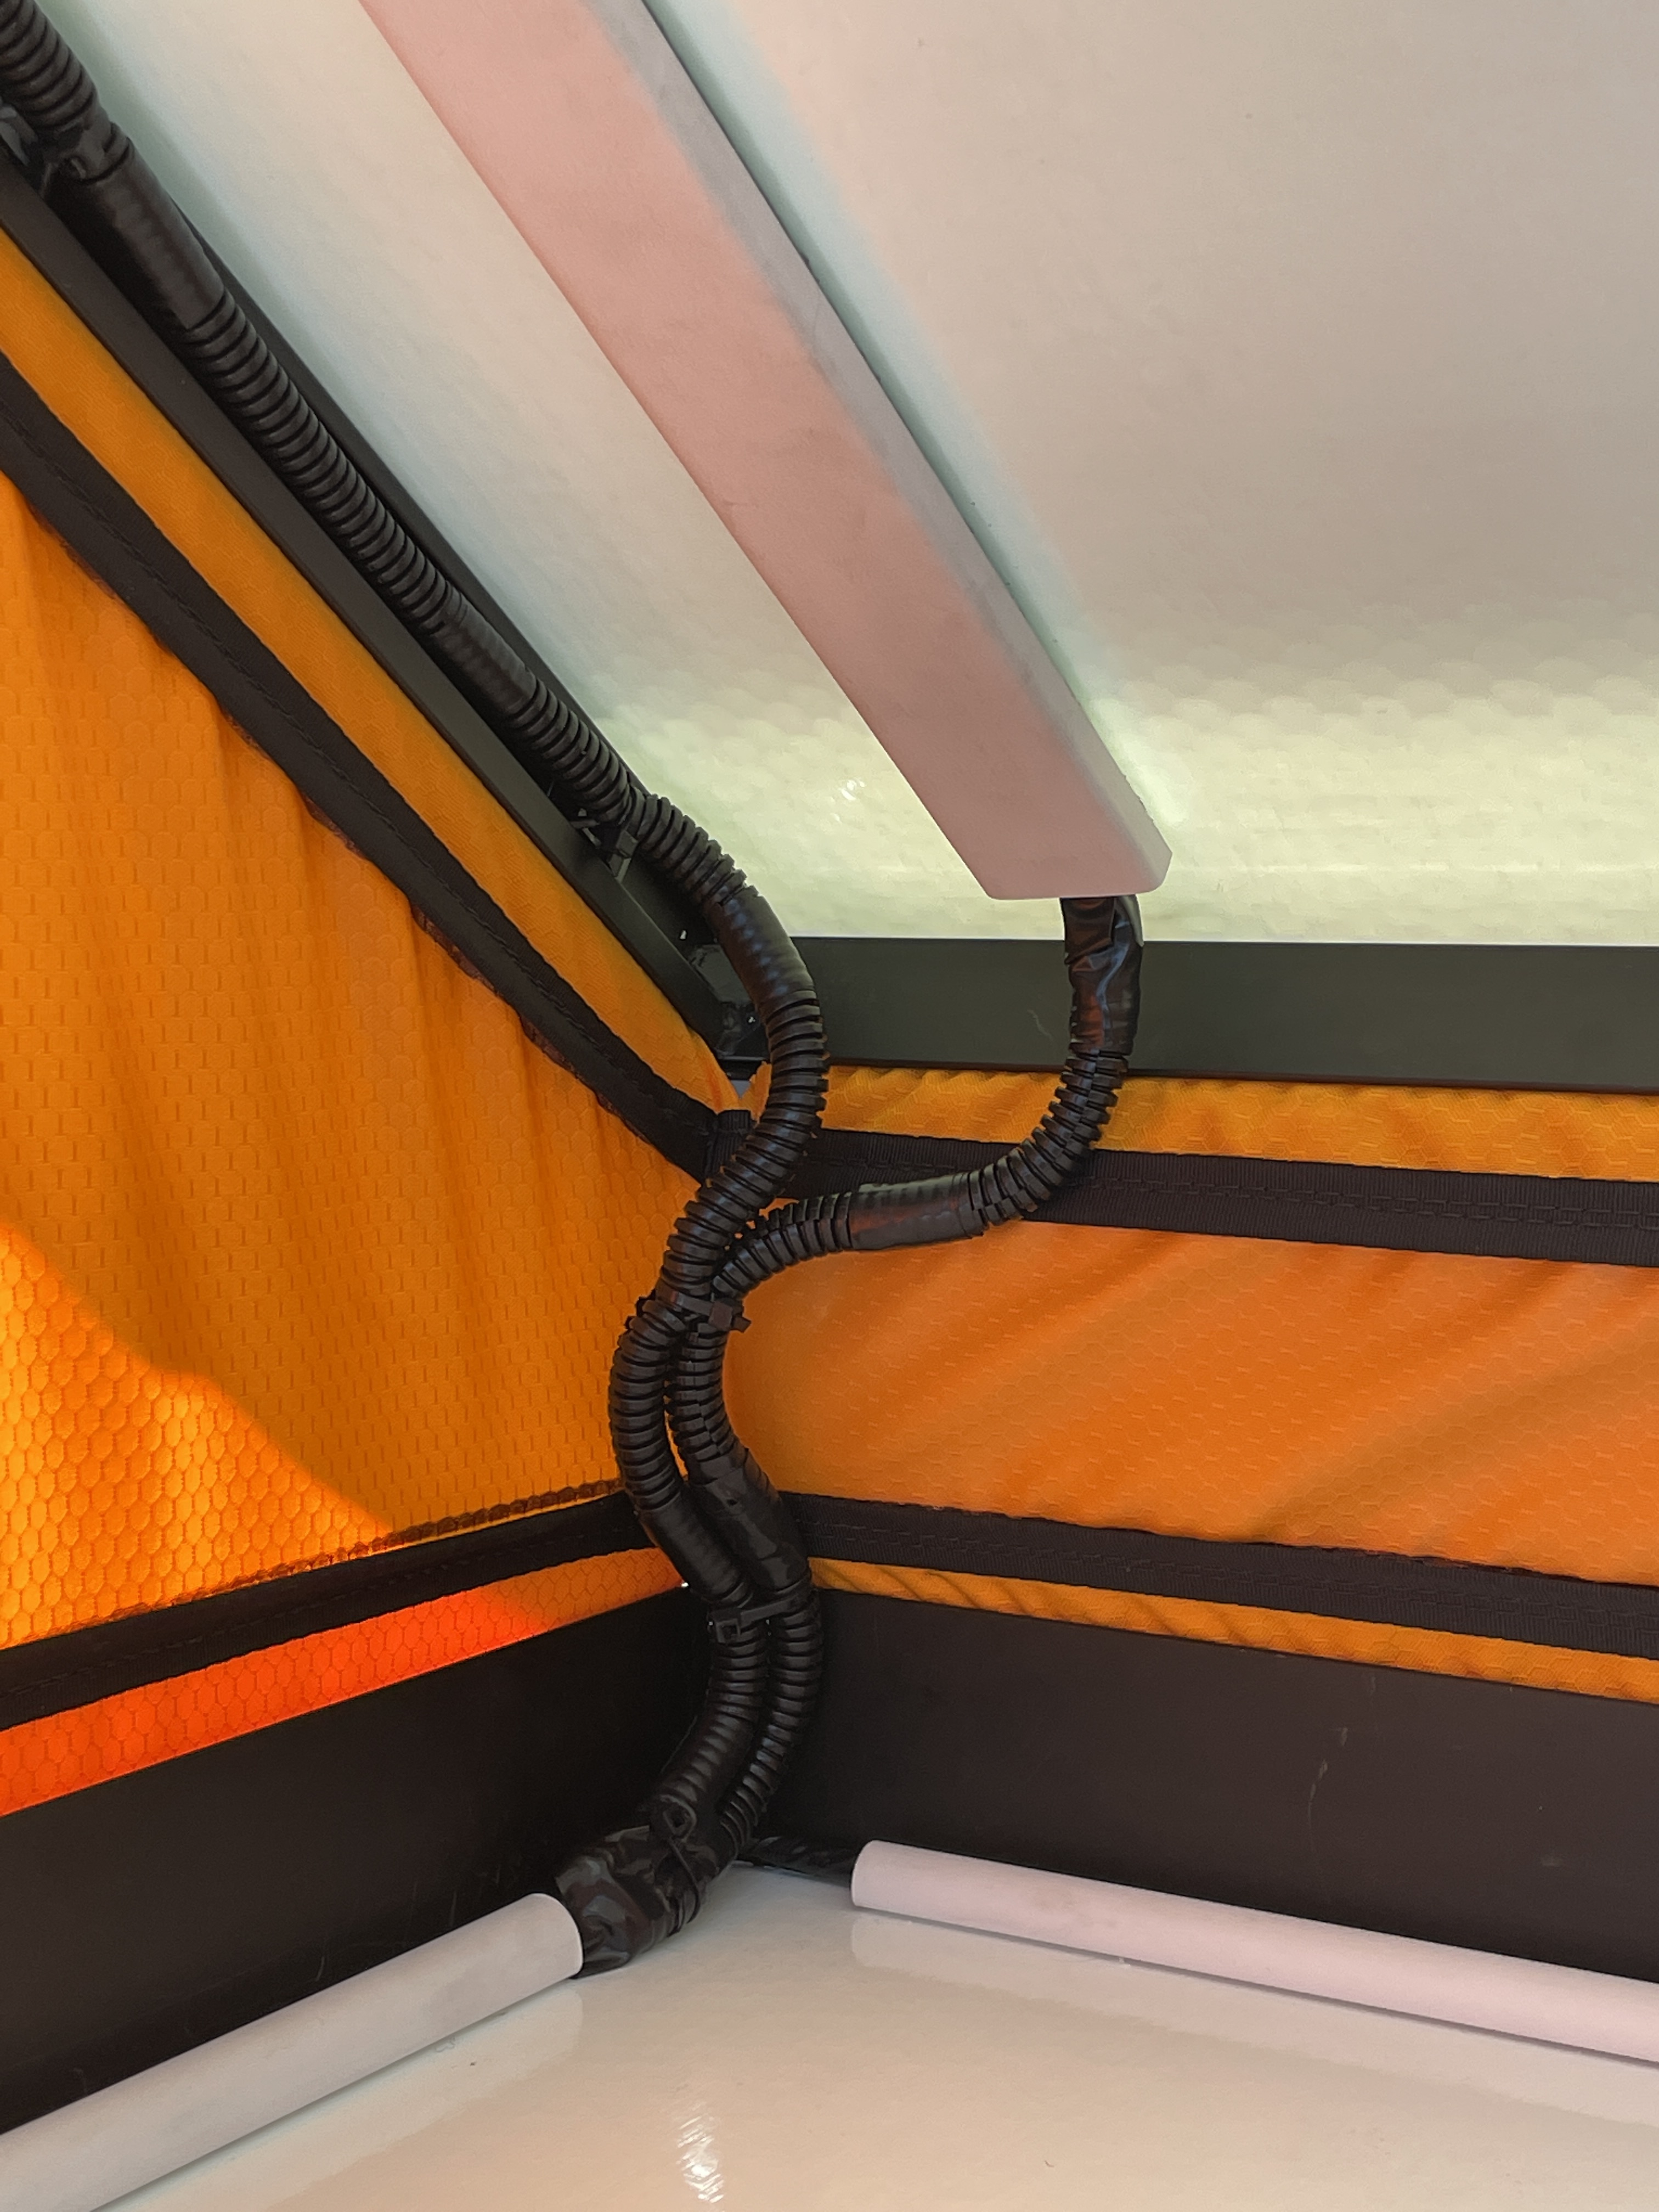
From here we moved upstairs to drop the Matt Gecko LED Light Kit into the GFC extrusion and wrap/zip tie/tape the exposed wiring in electrical loom. We also started working on passing the wiring along the fixed platform panel. We used some plastic conduit/channels that we had laying around to help guide/protect the wiring under the mattress.
(I love how the short potion of exposed loom blends right into the extrusion. You’d almost miss it if you weren’t looking for it!)
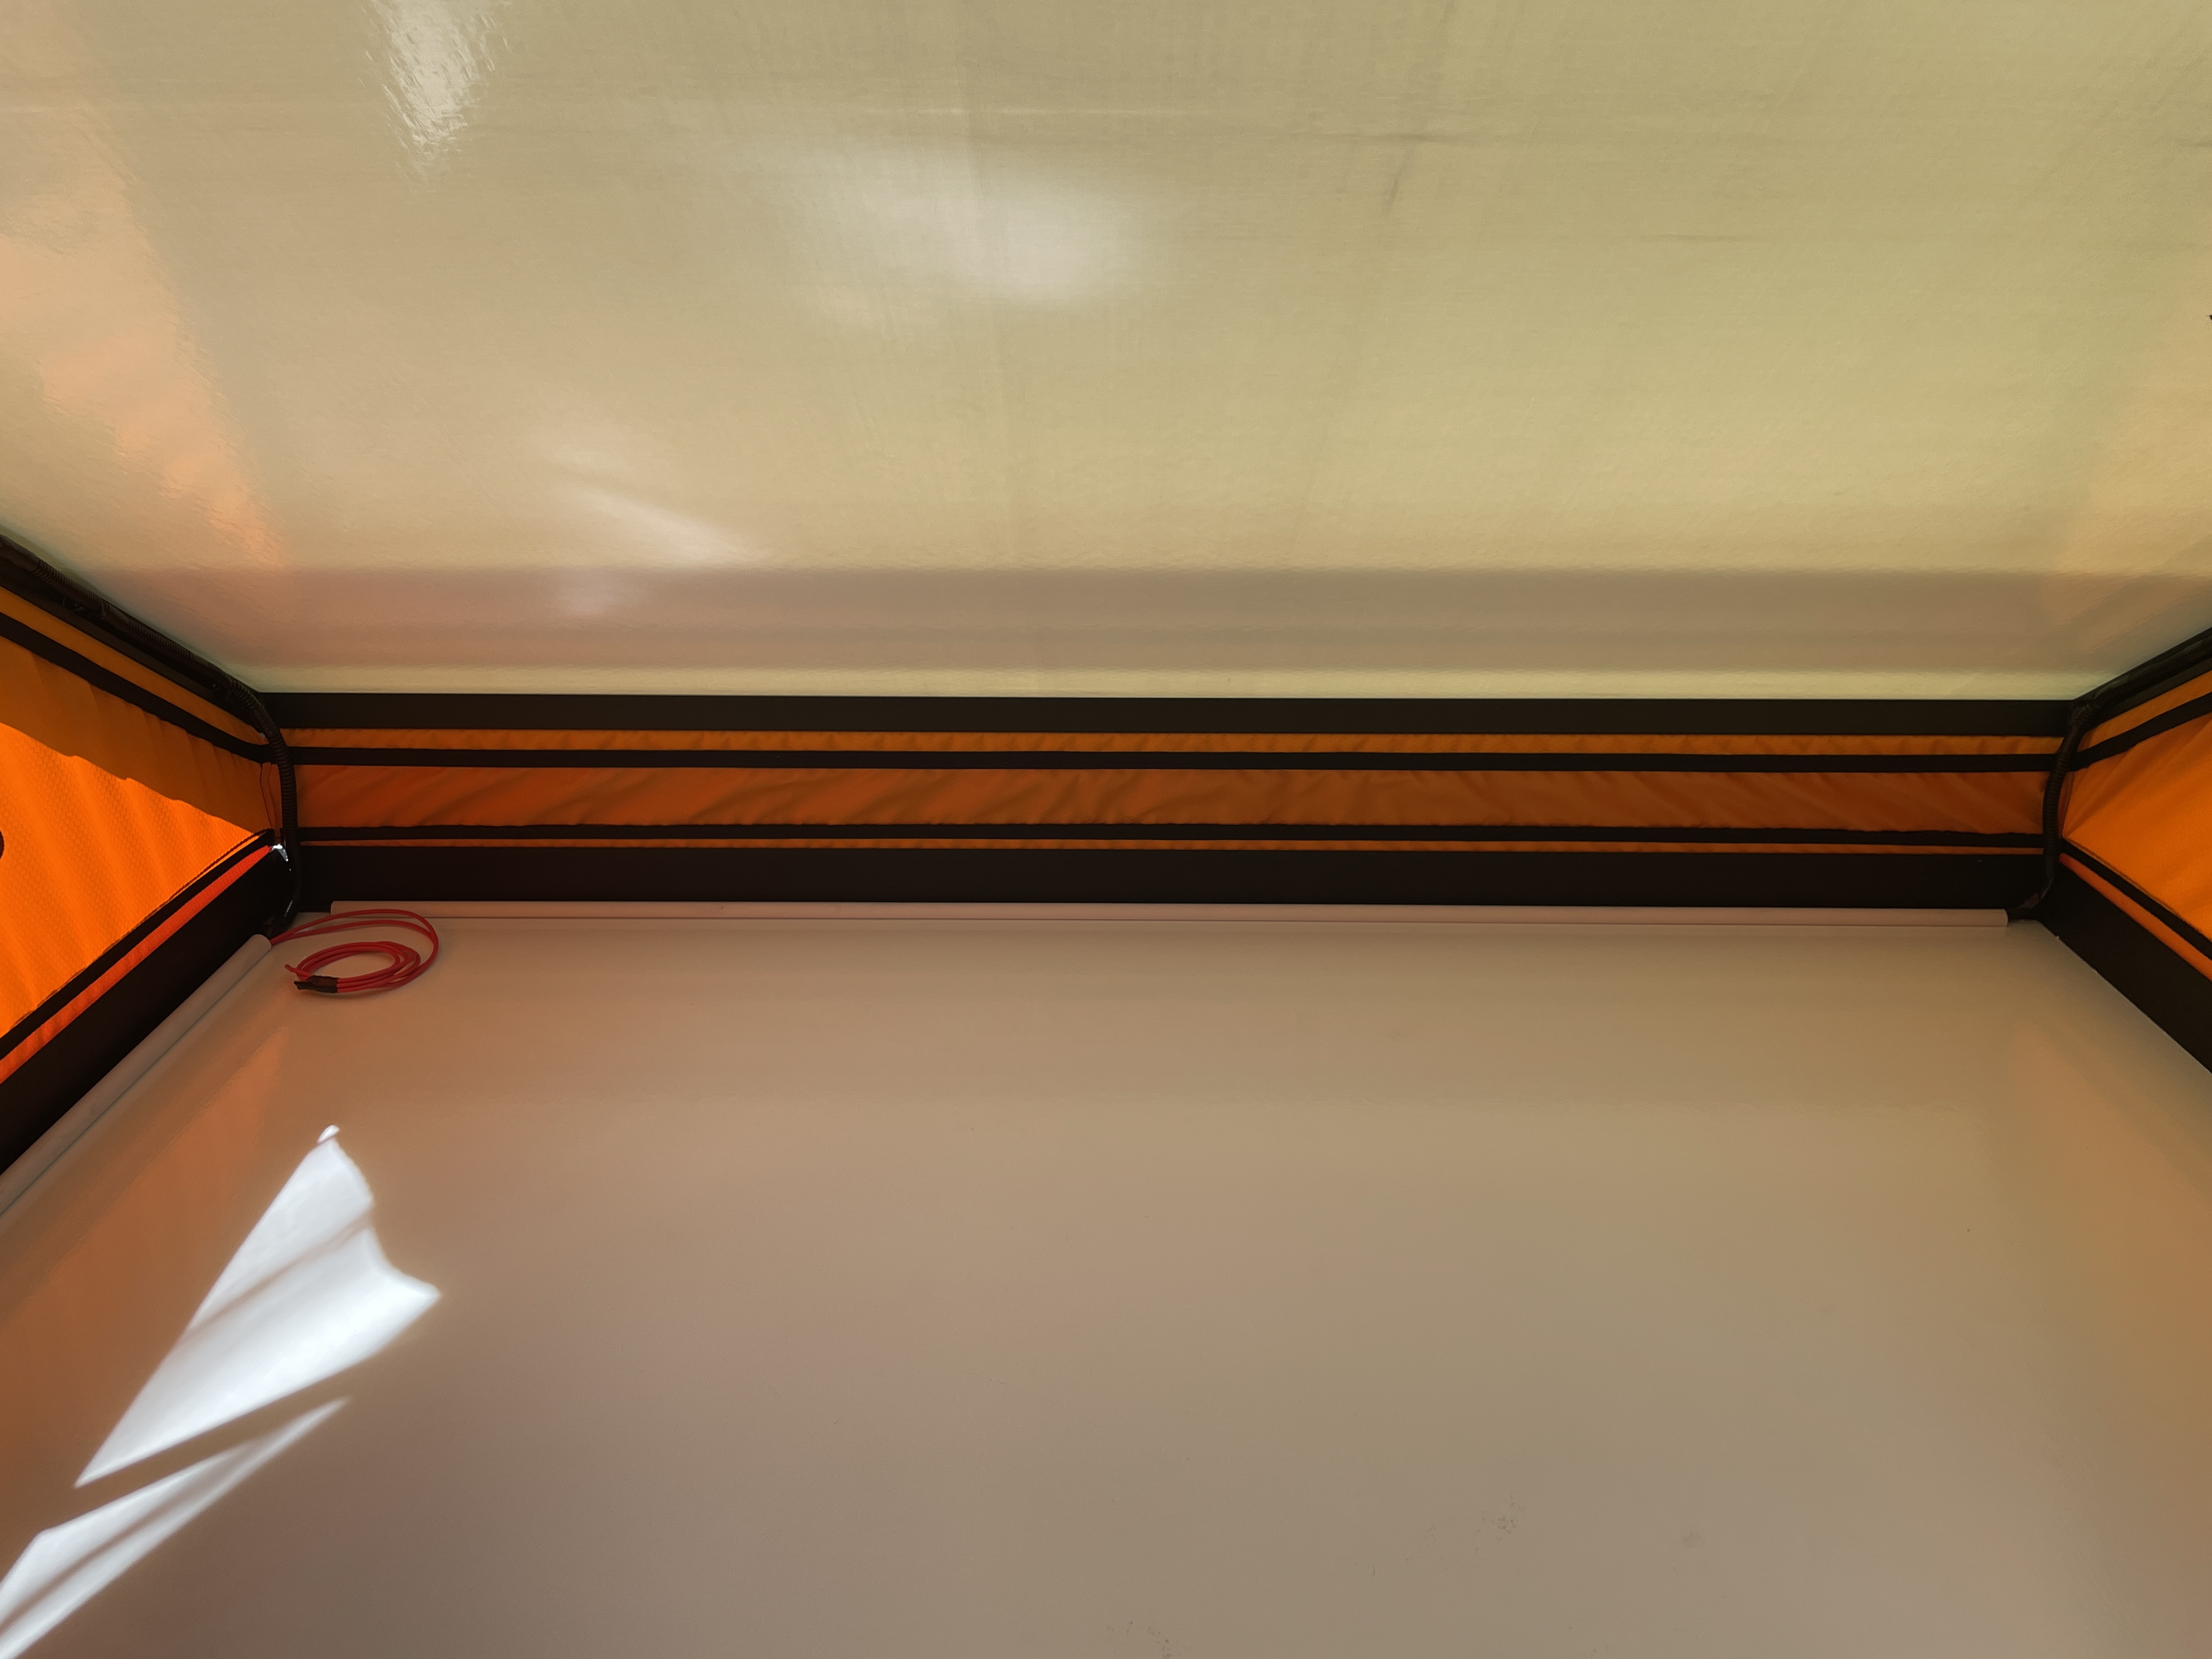
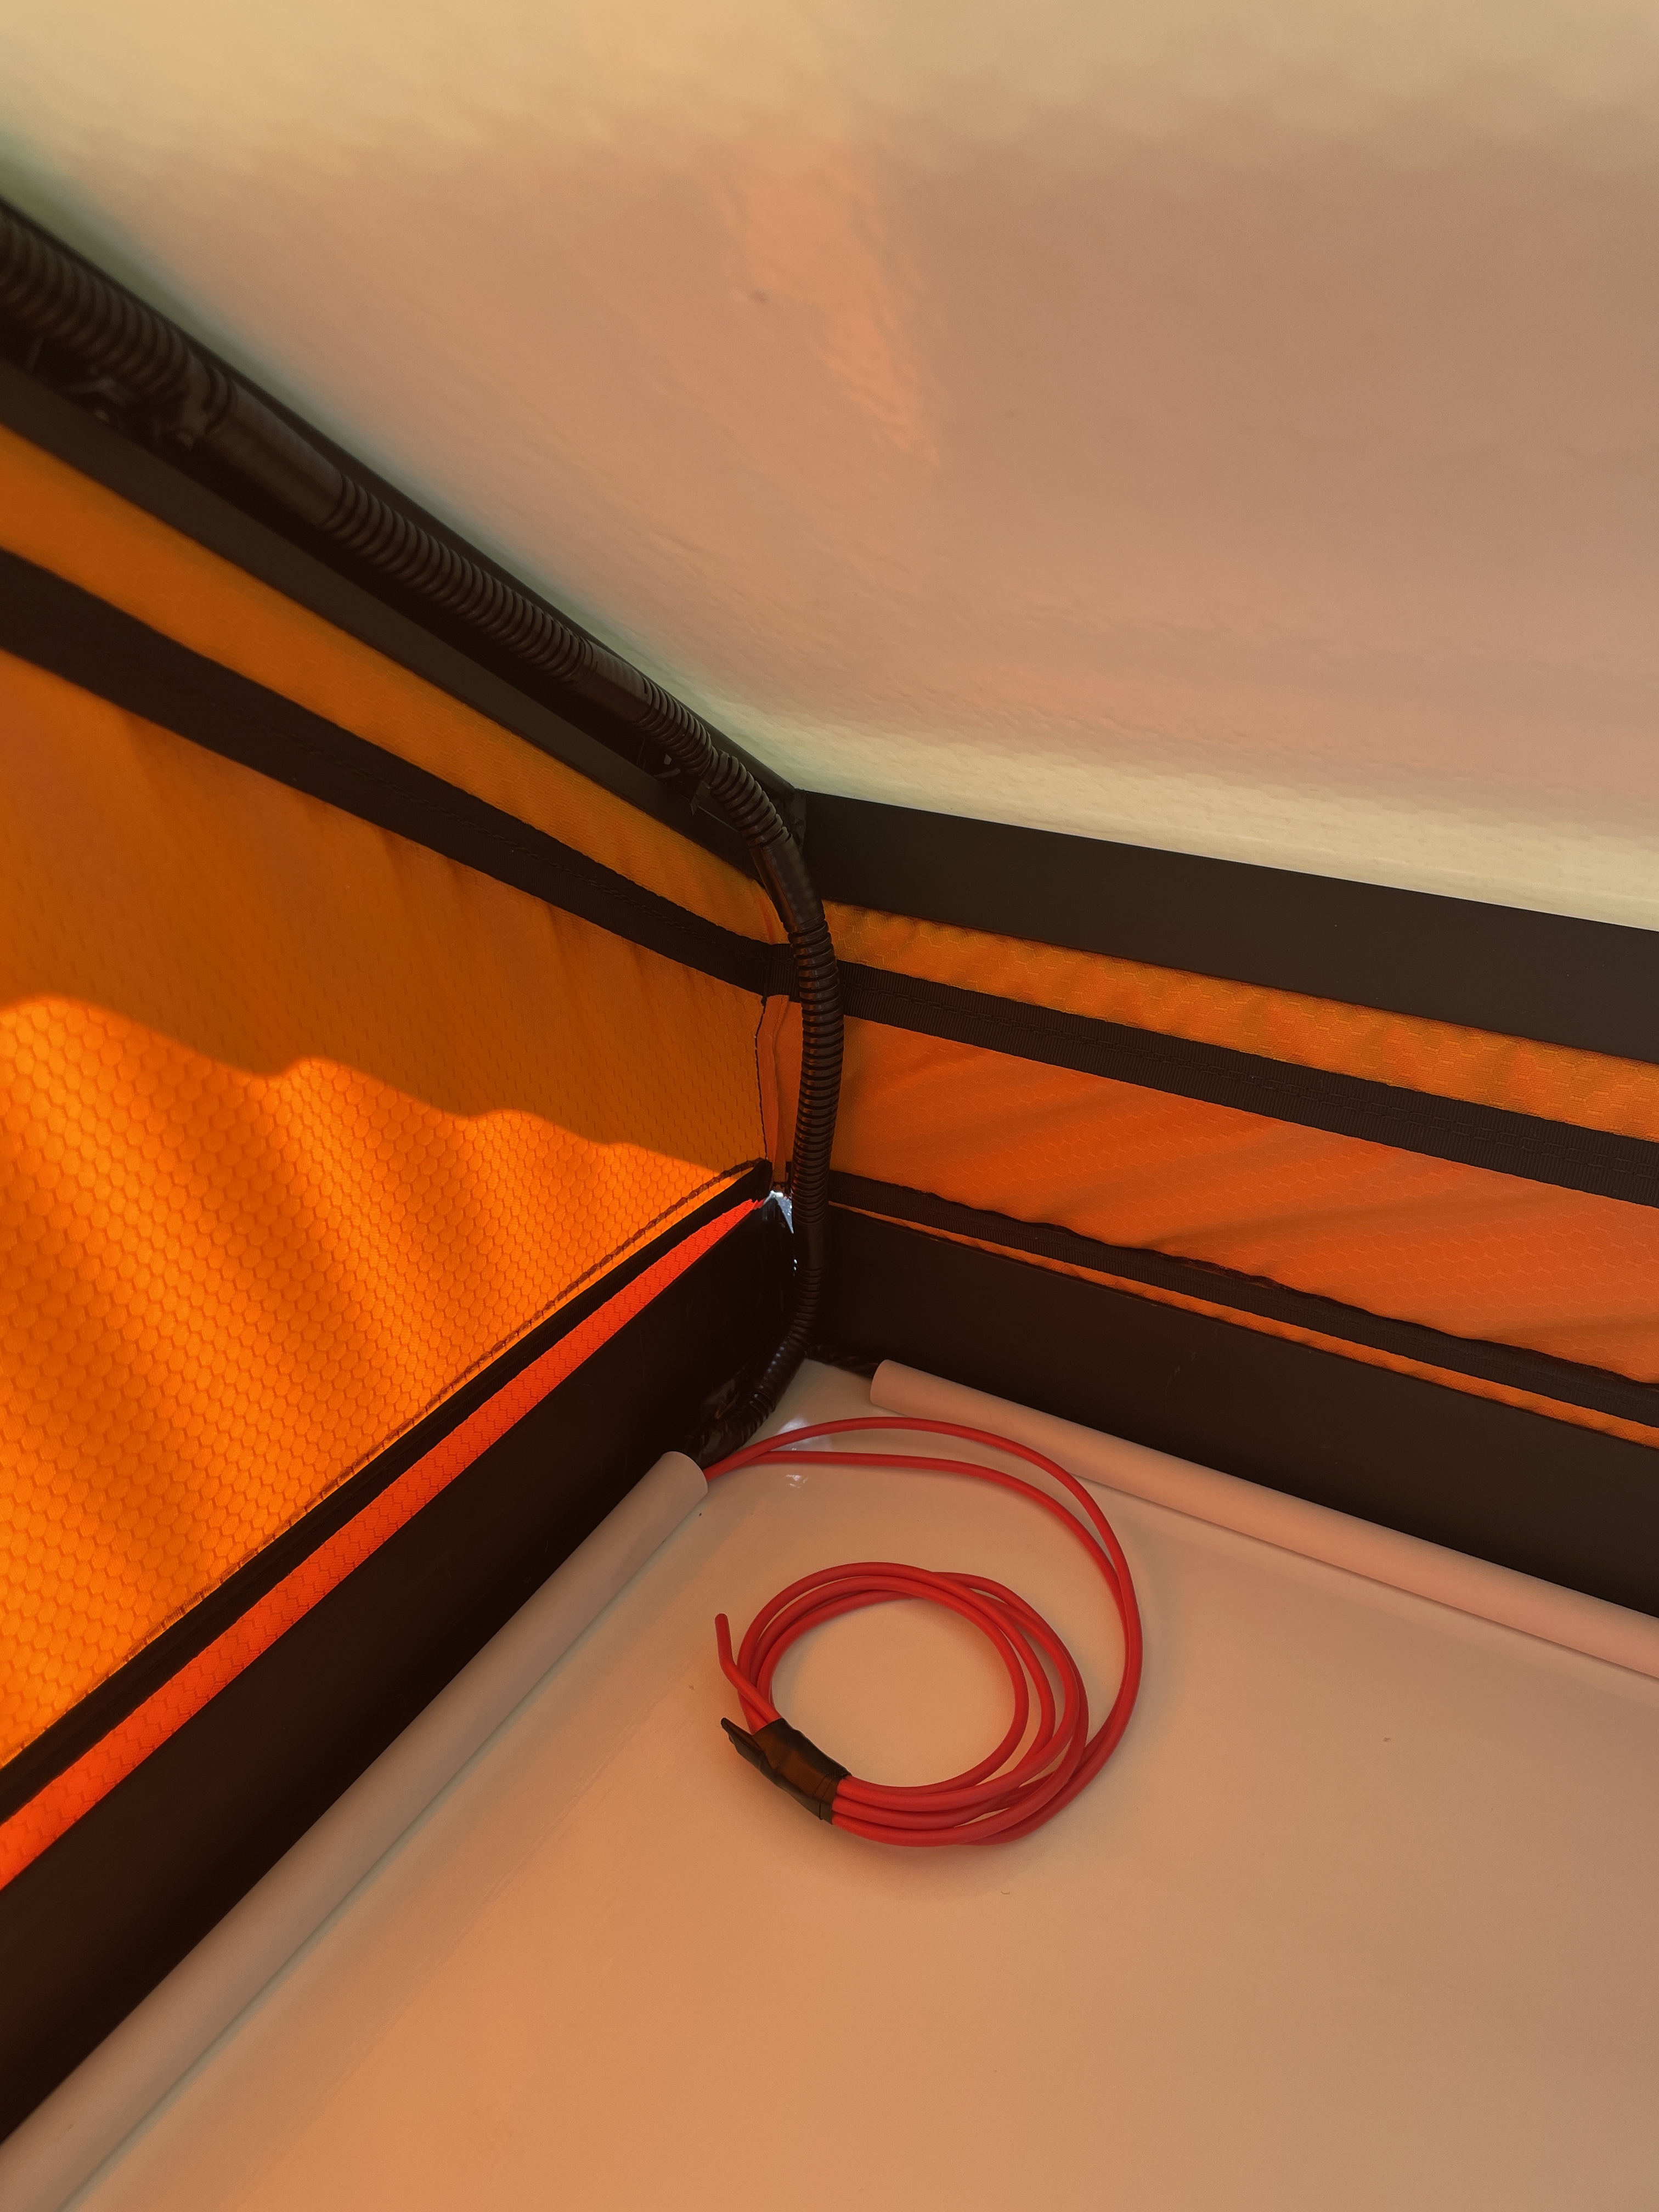
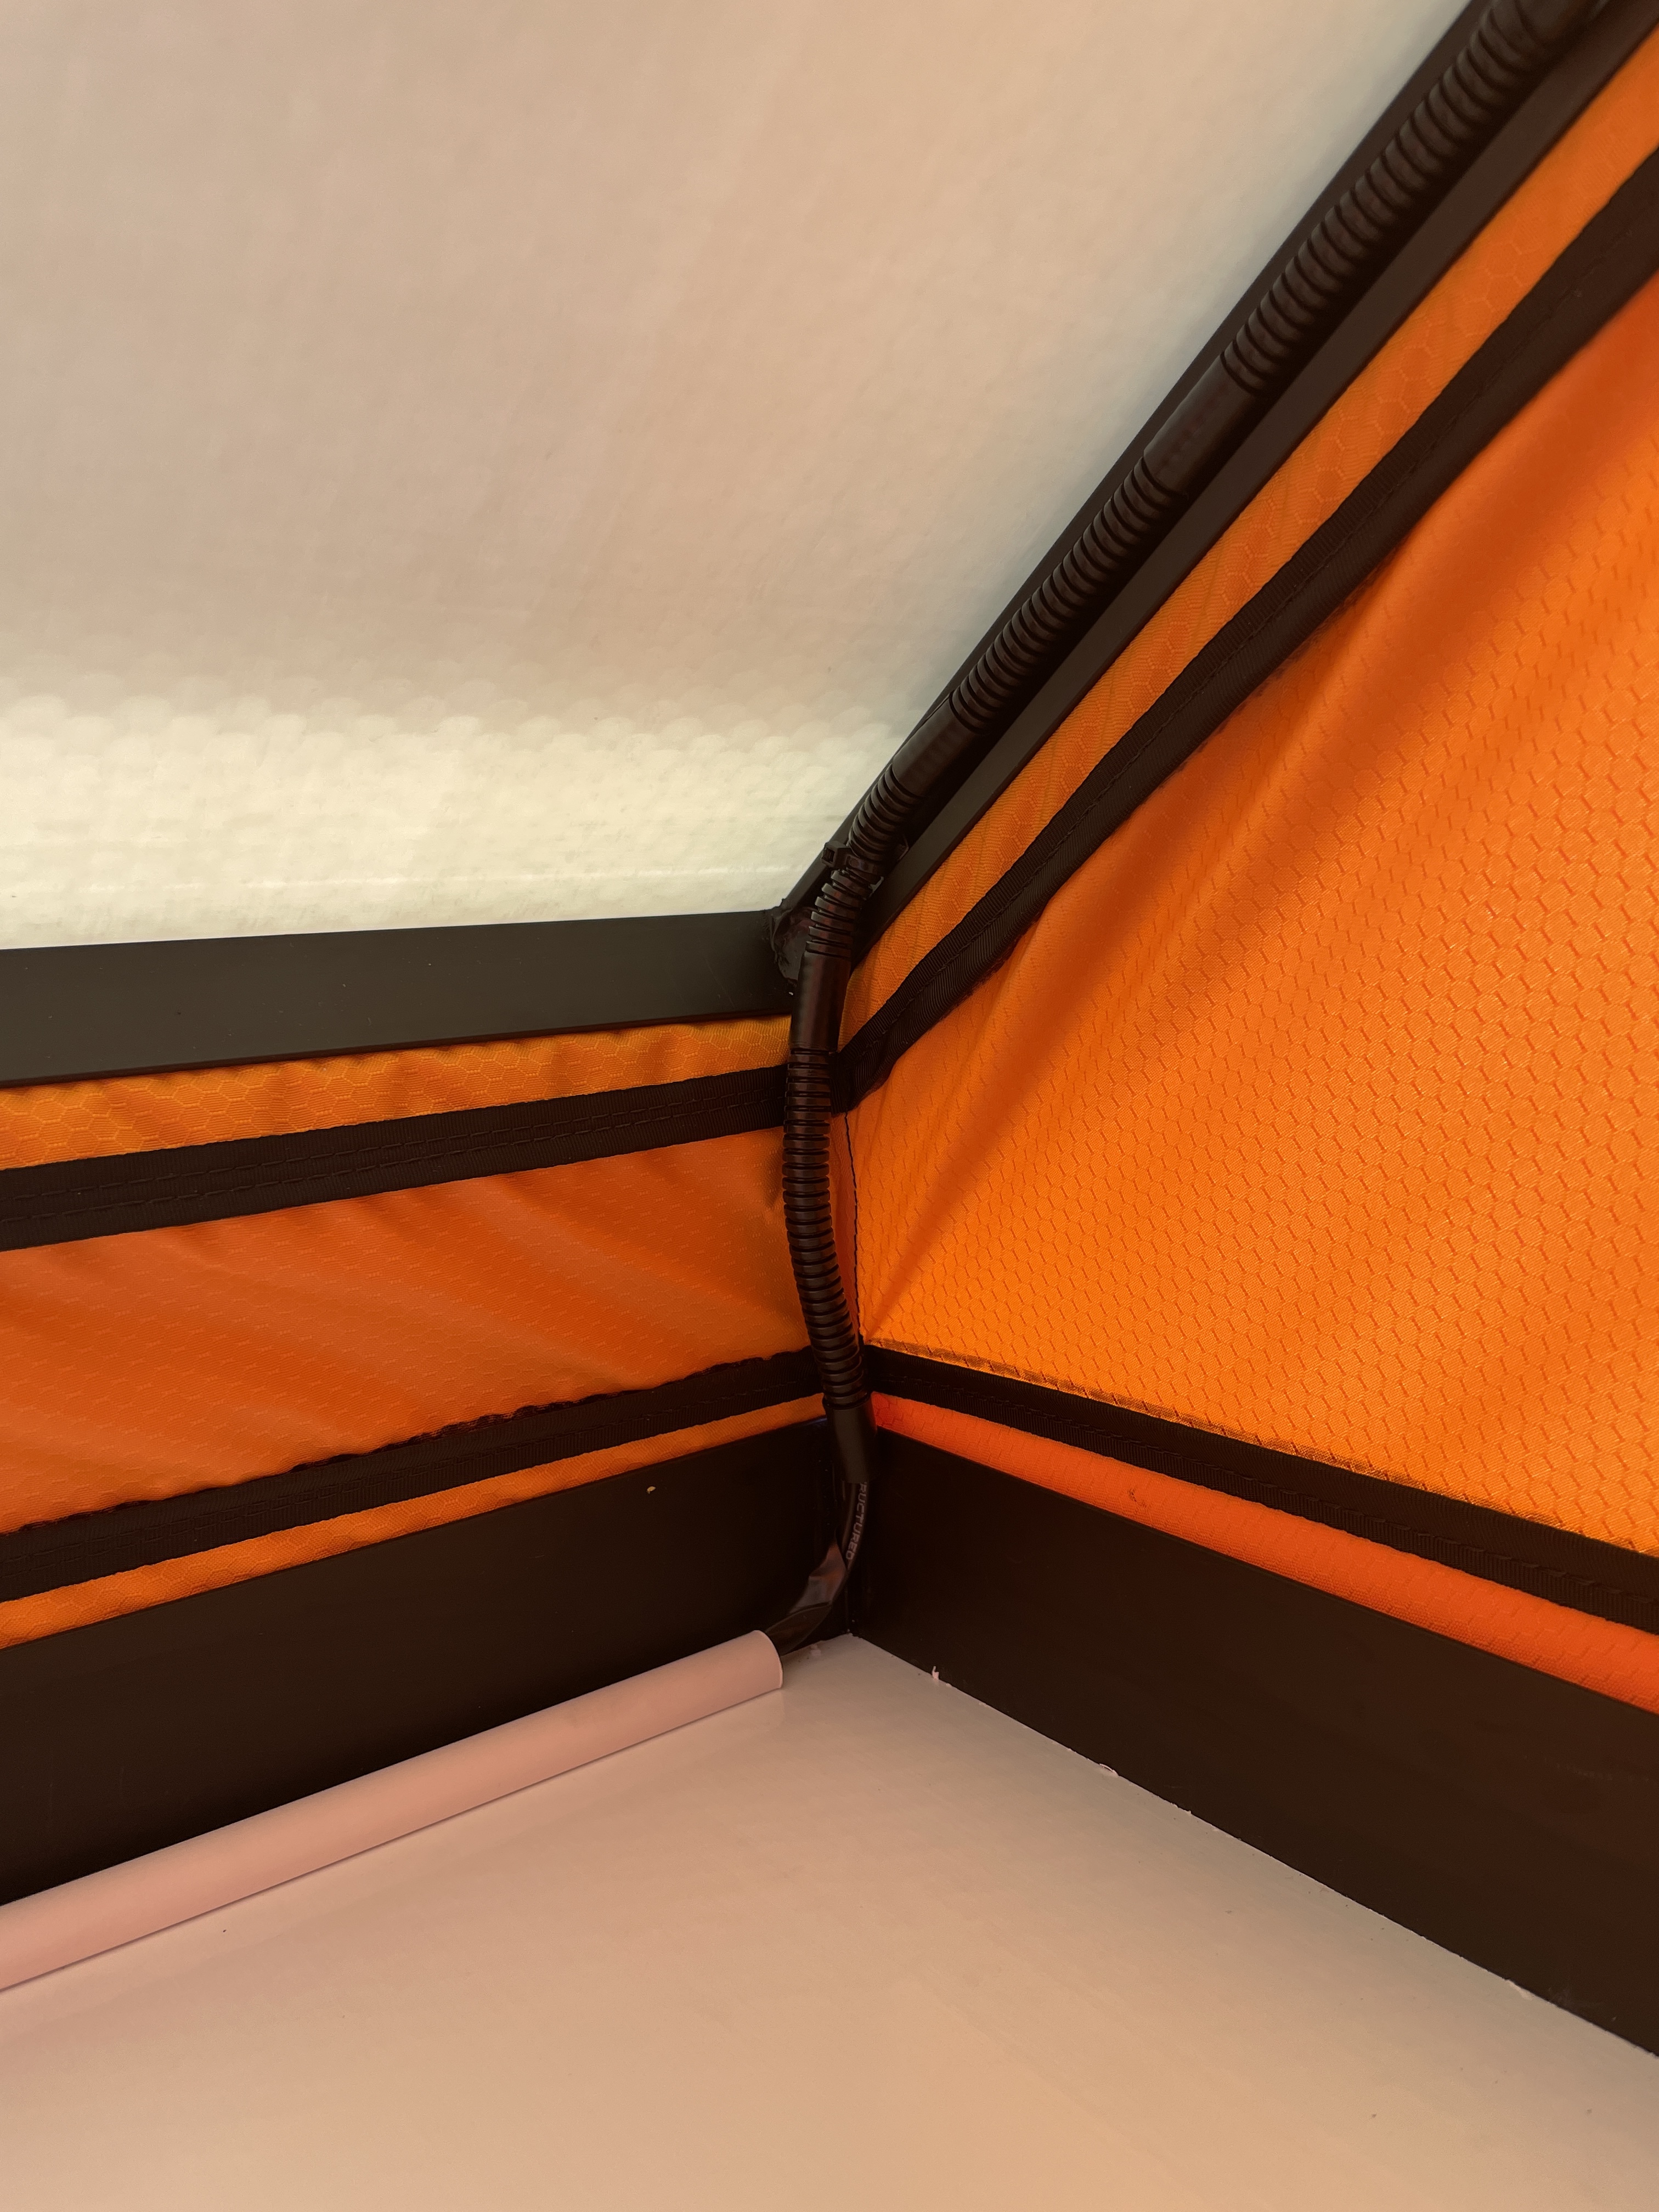
*ps. The visible excess red wire is in preparation of the fan install that will be tackled at a later date.
The next step was to drill a small hole in the fixed platform panel to pass the wiring downstairs and continue through another plastic conduit channel (that we spray painted black) along the GFC frame to meet up with the harness that we had previously fished under the bed rail. All that was left from here was soldering, wrapping, and zip-tying on either end of our harness.
That’s it! The GFC is now fully wired without a single exposed cable! (Not counting the in-progress fan wiring.)
Other work:
• I decided to trim down about half of an inch of the internal plastic frame on my larger (rear) VRNCLR frame bags to expose more of the downstairs LED lights. This was super easy, did not not ruin the integrity of the bag and fully exposes the strip. (You’ll see the LEDs were obstructed previously in my last post)
• I also quickly dropped in the OEM Toyota Bed Header Rail behind my Cali Raised Panel. I have no idea why but Toyota deleted this part from my model of truck (Another cost saving measure I guess  )
)
8 Likes
Build Update 06/26/21 – Dometic Fan Install
Dropping in Dometic’s Fan-Tastic Fan (7350 Model)
Today’s project was to drop in Dometic’s 7350 Fan-Tastic Fan that I picked up a few months back. If you read my last post you know the power harness for the fan was pre-wired as I tackled the LED lights so we’re going to jump right into cutting and mounting.
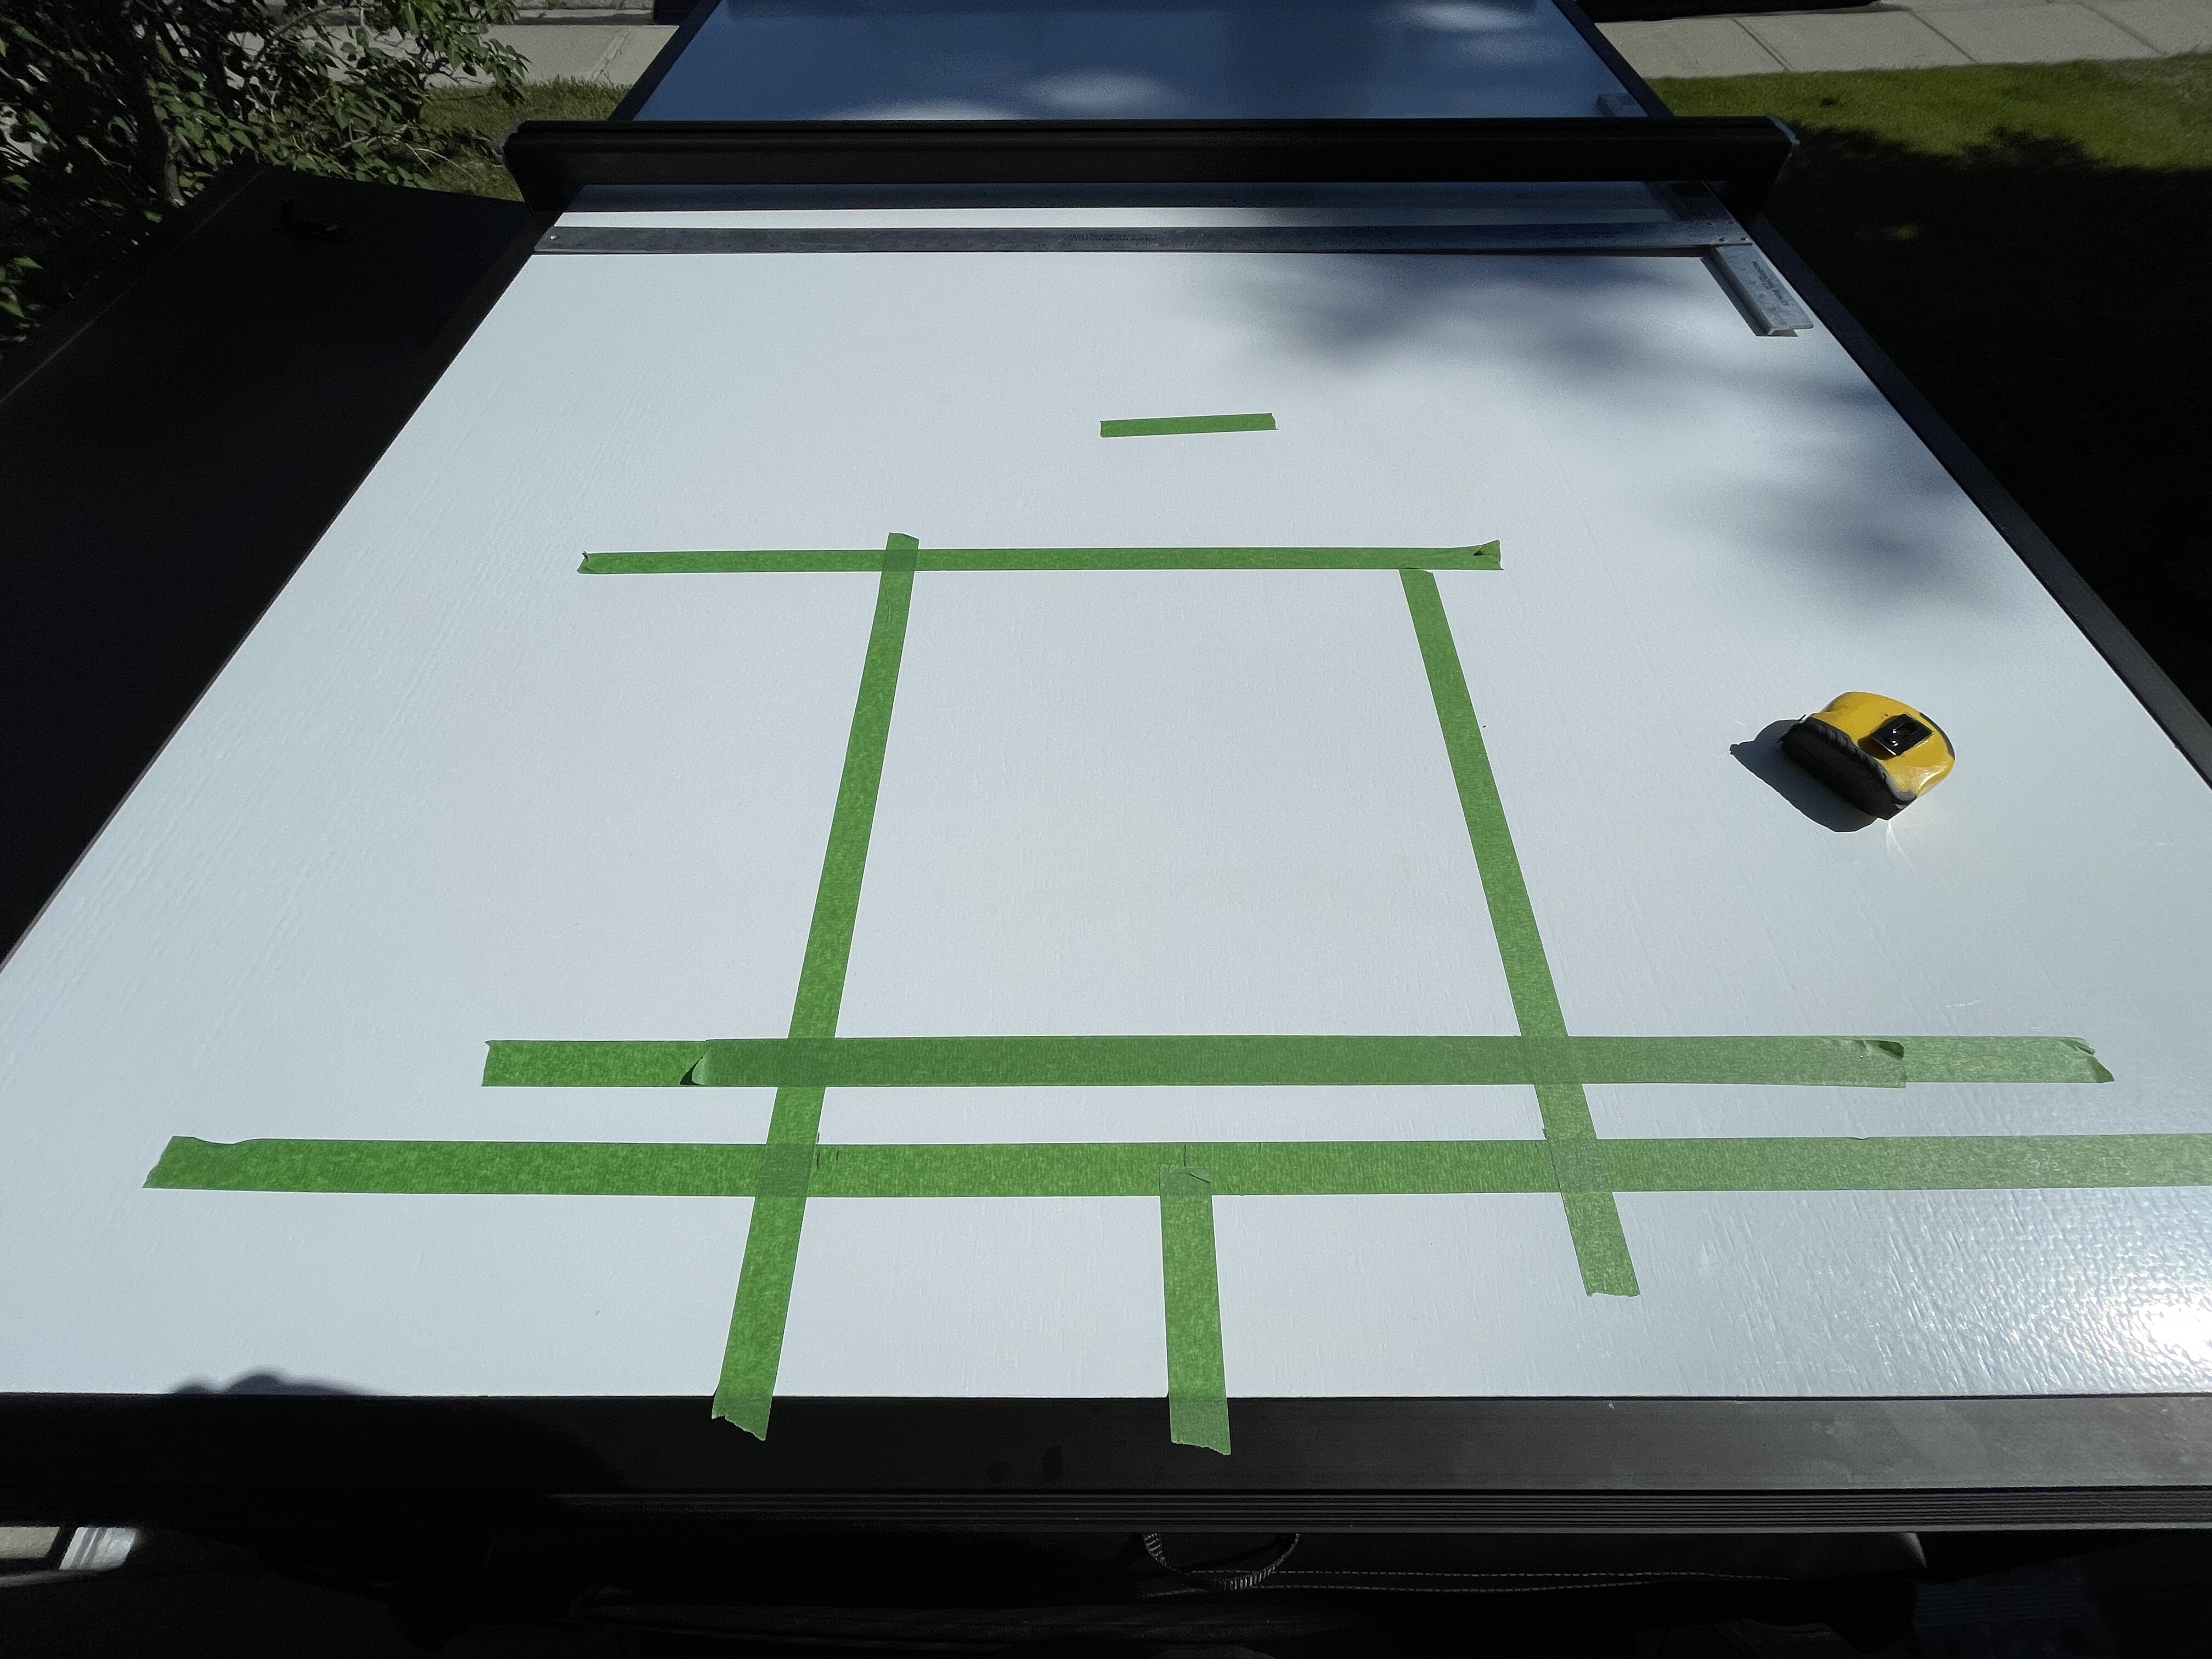
First step was to measure and find a solid spot to drop in the fan so a Beef Bar could still fit behind it. We measured (like four times) dropped down the tape and started cutting. (Started w/ pilot holes w/ drill followed by jig saw).
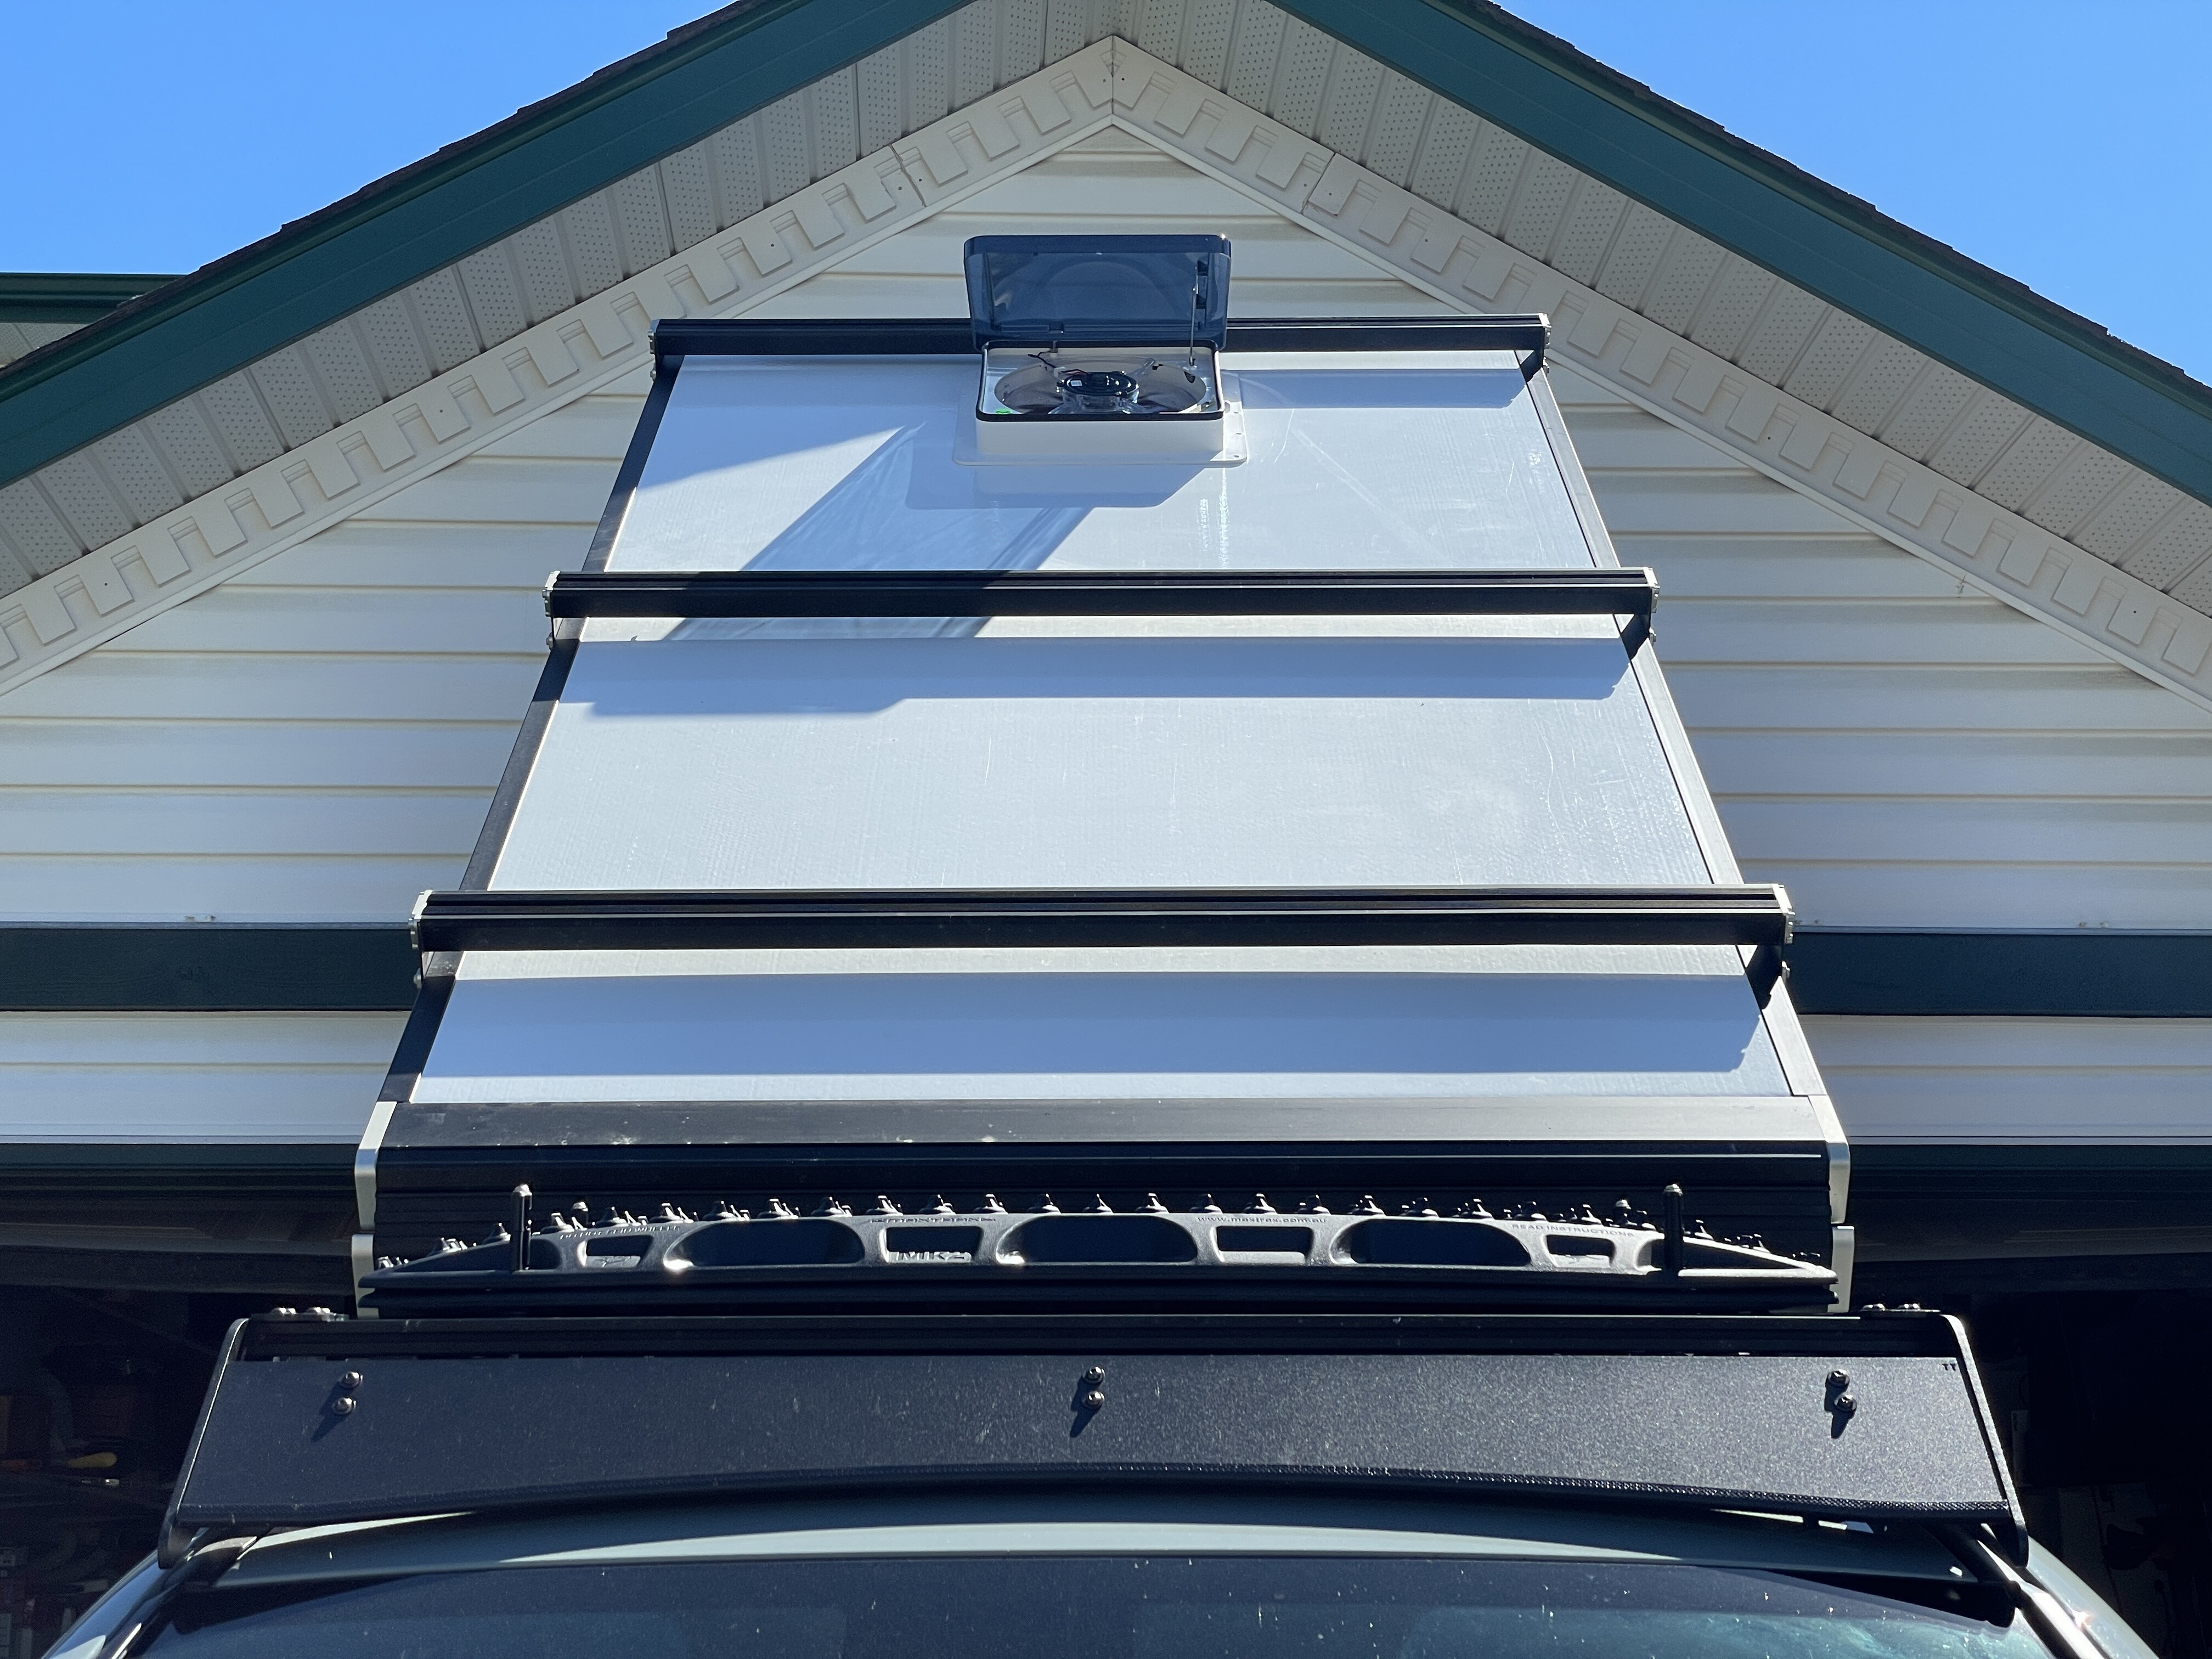
The roof of the GFC is incredibly thin — not even a full inch so cutting was super easy.
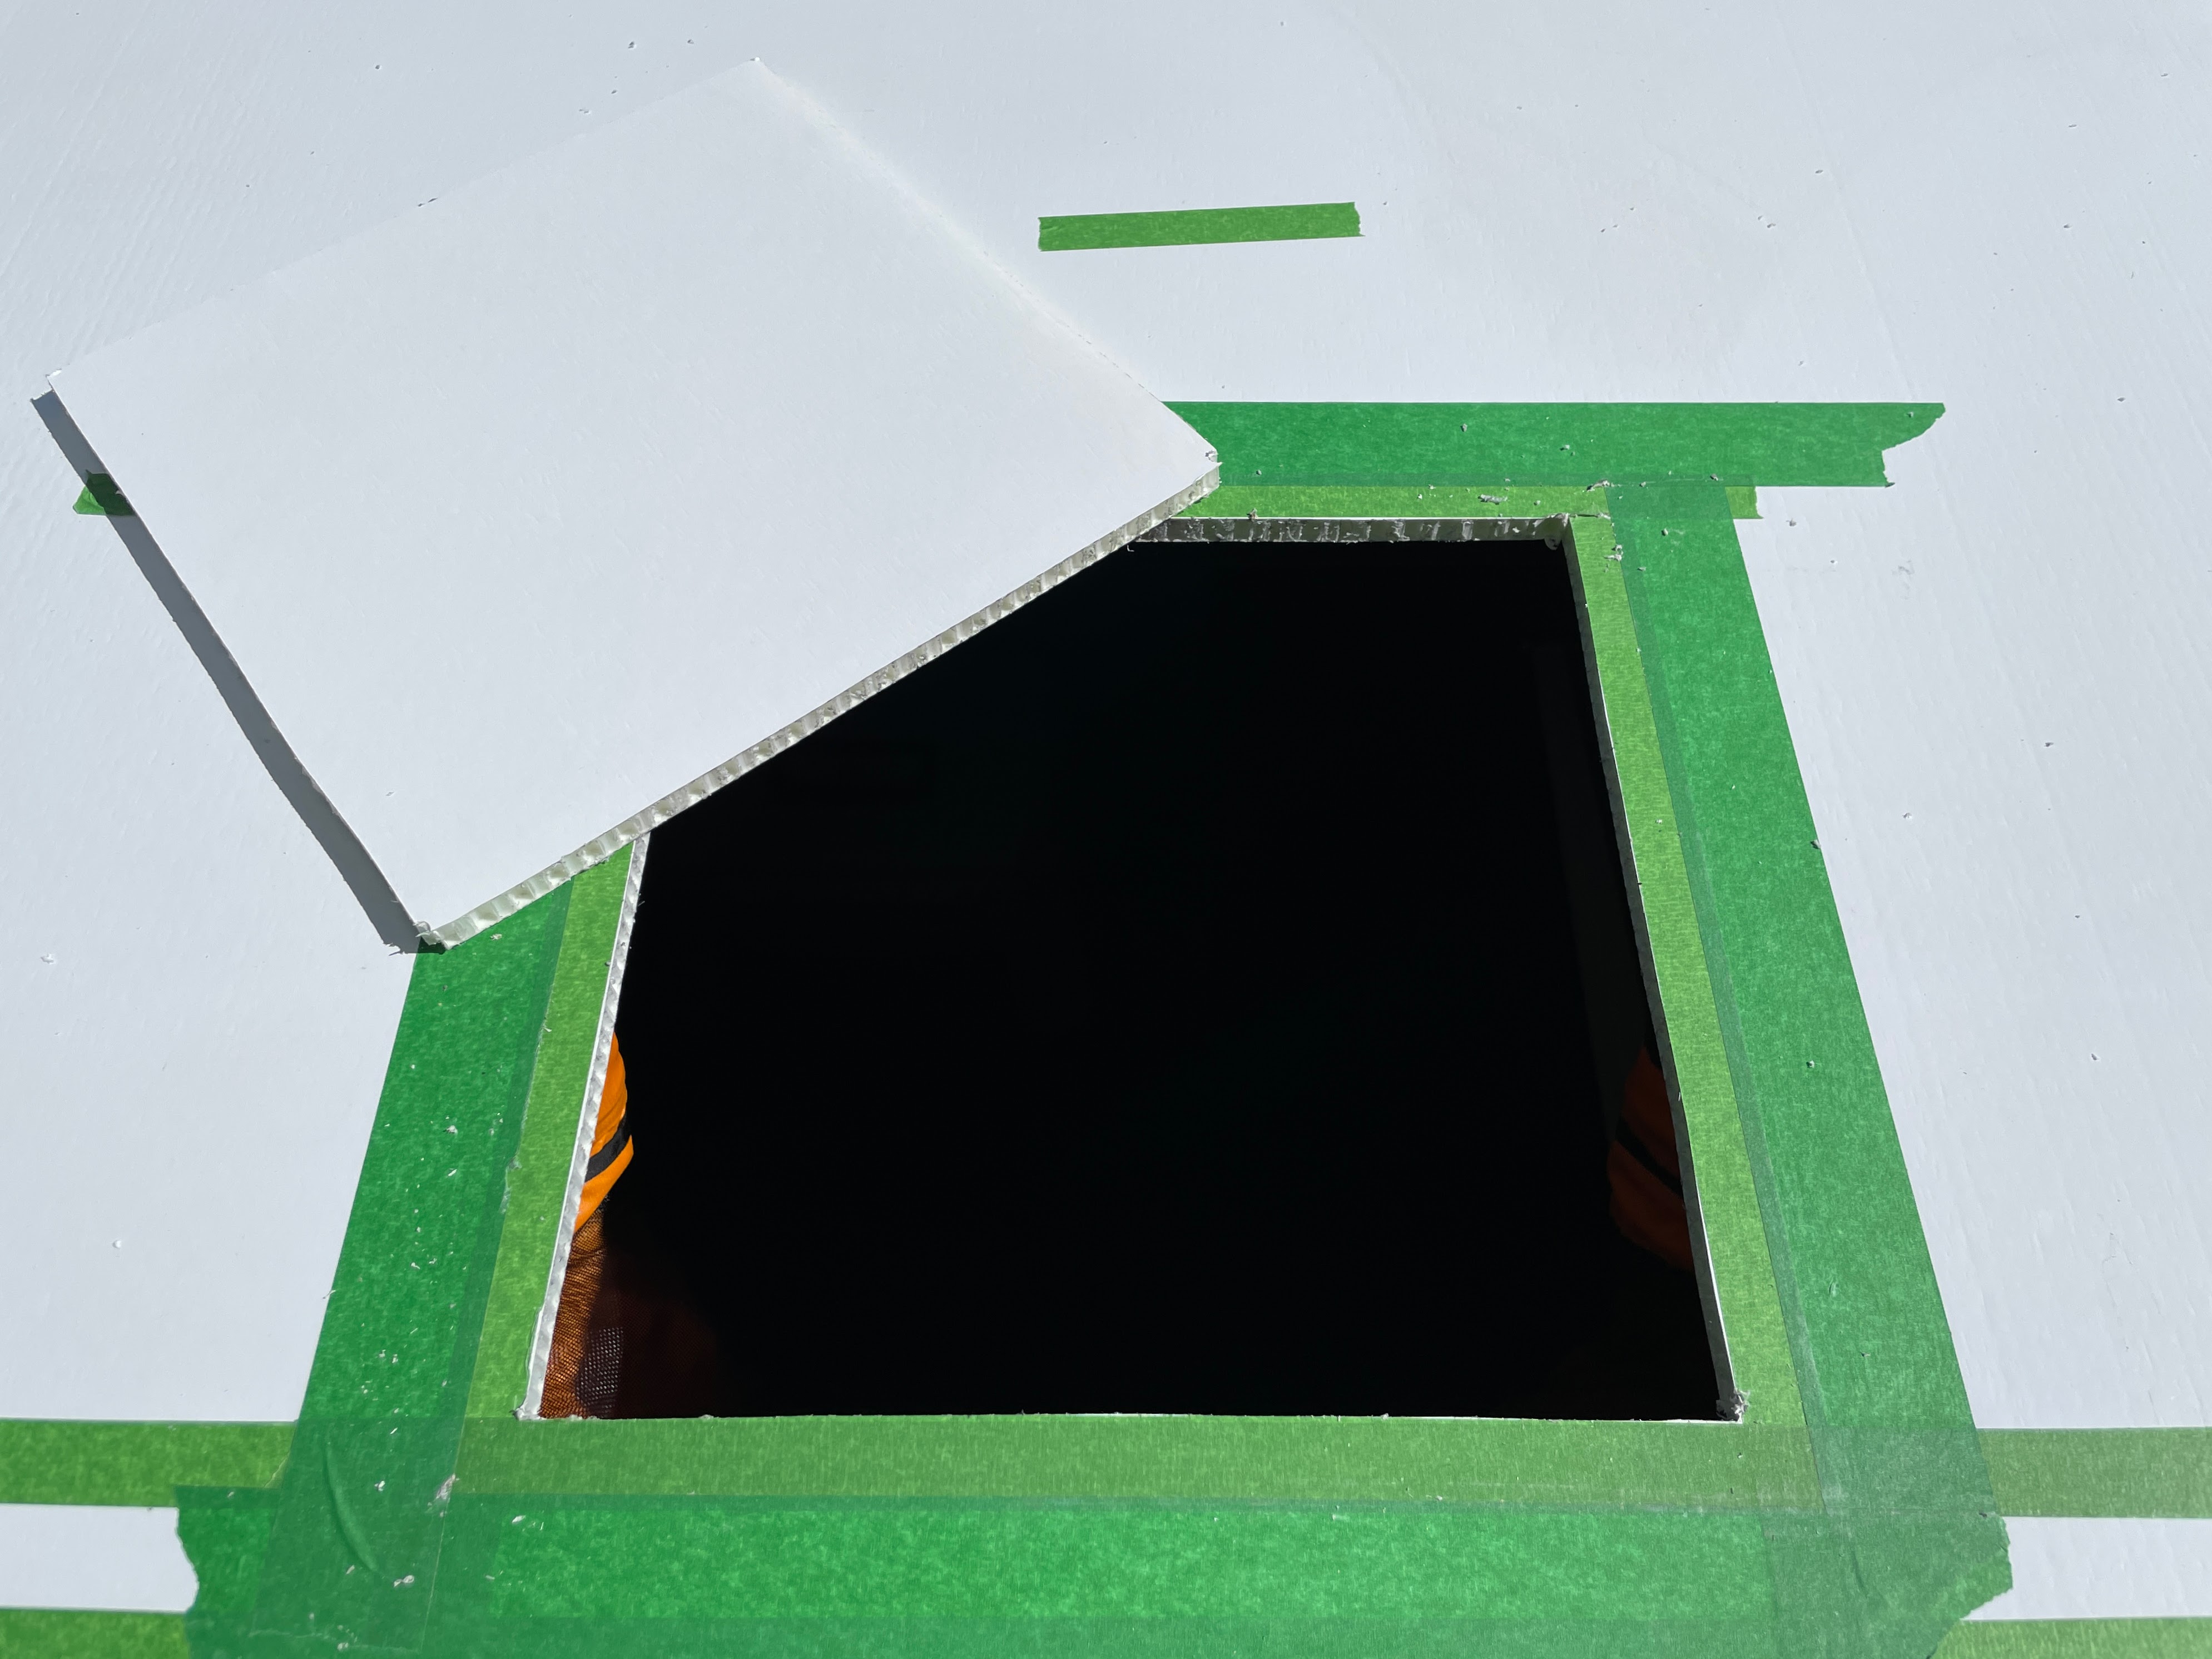
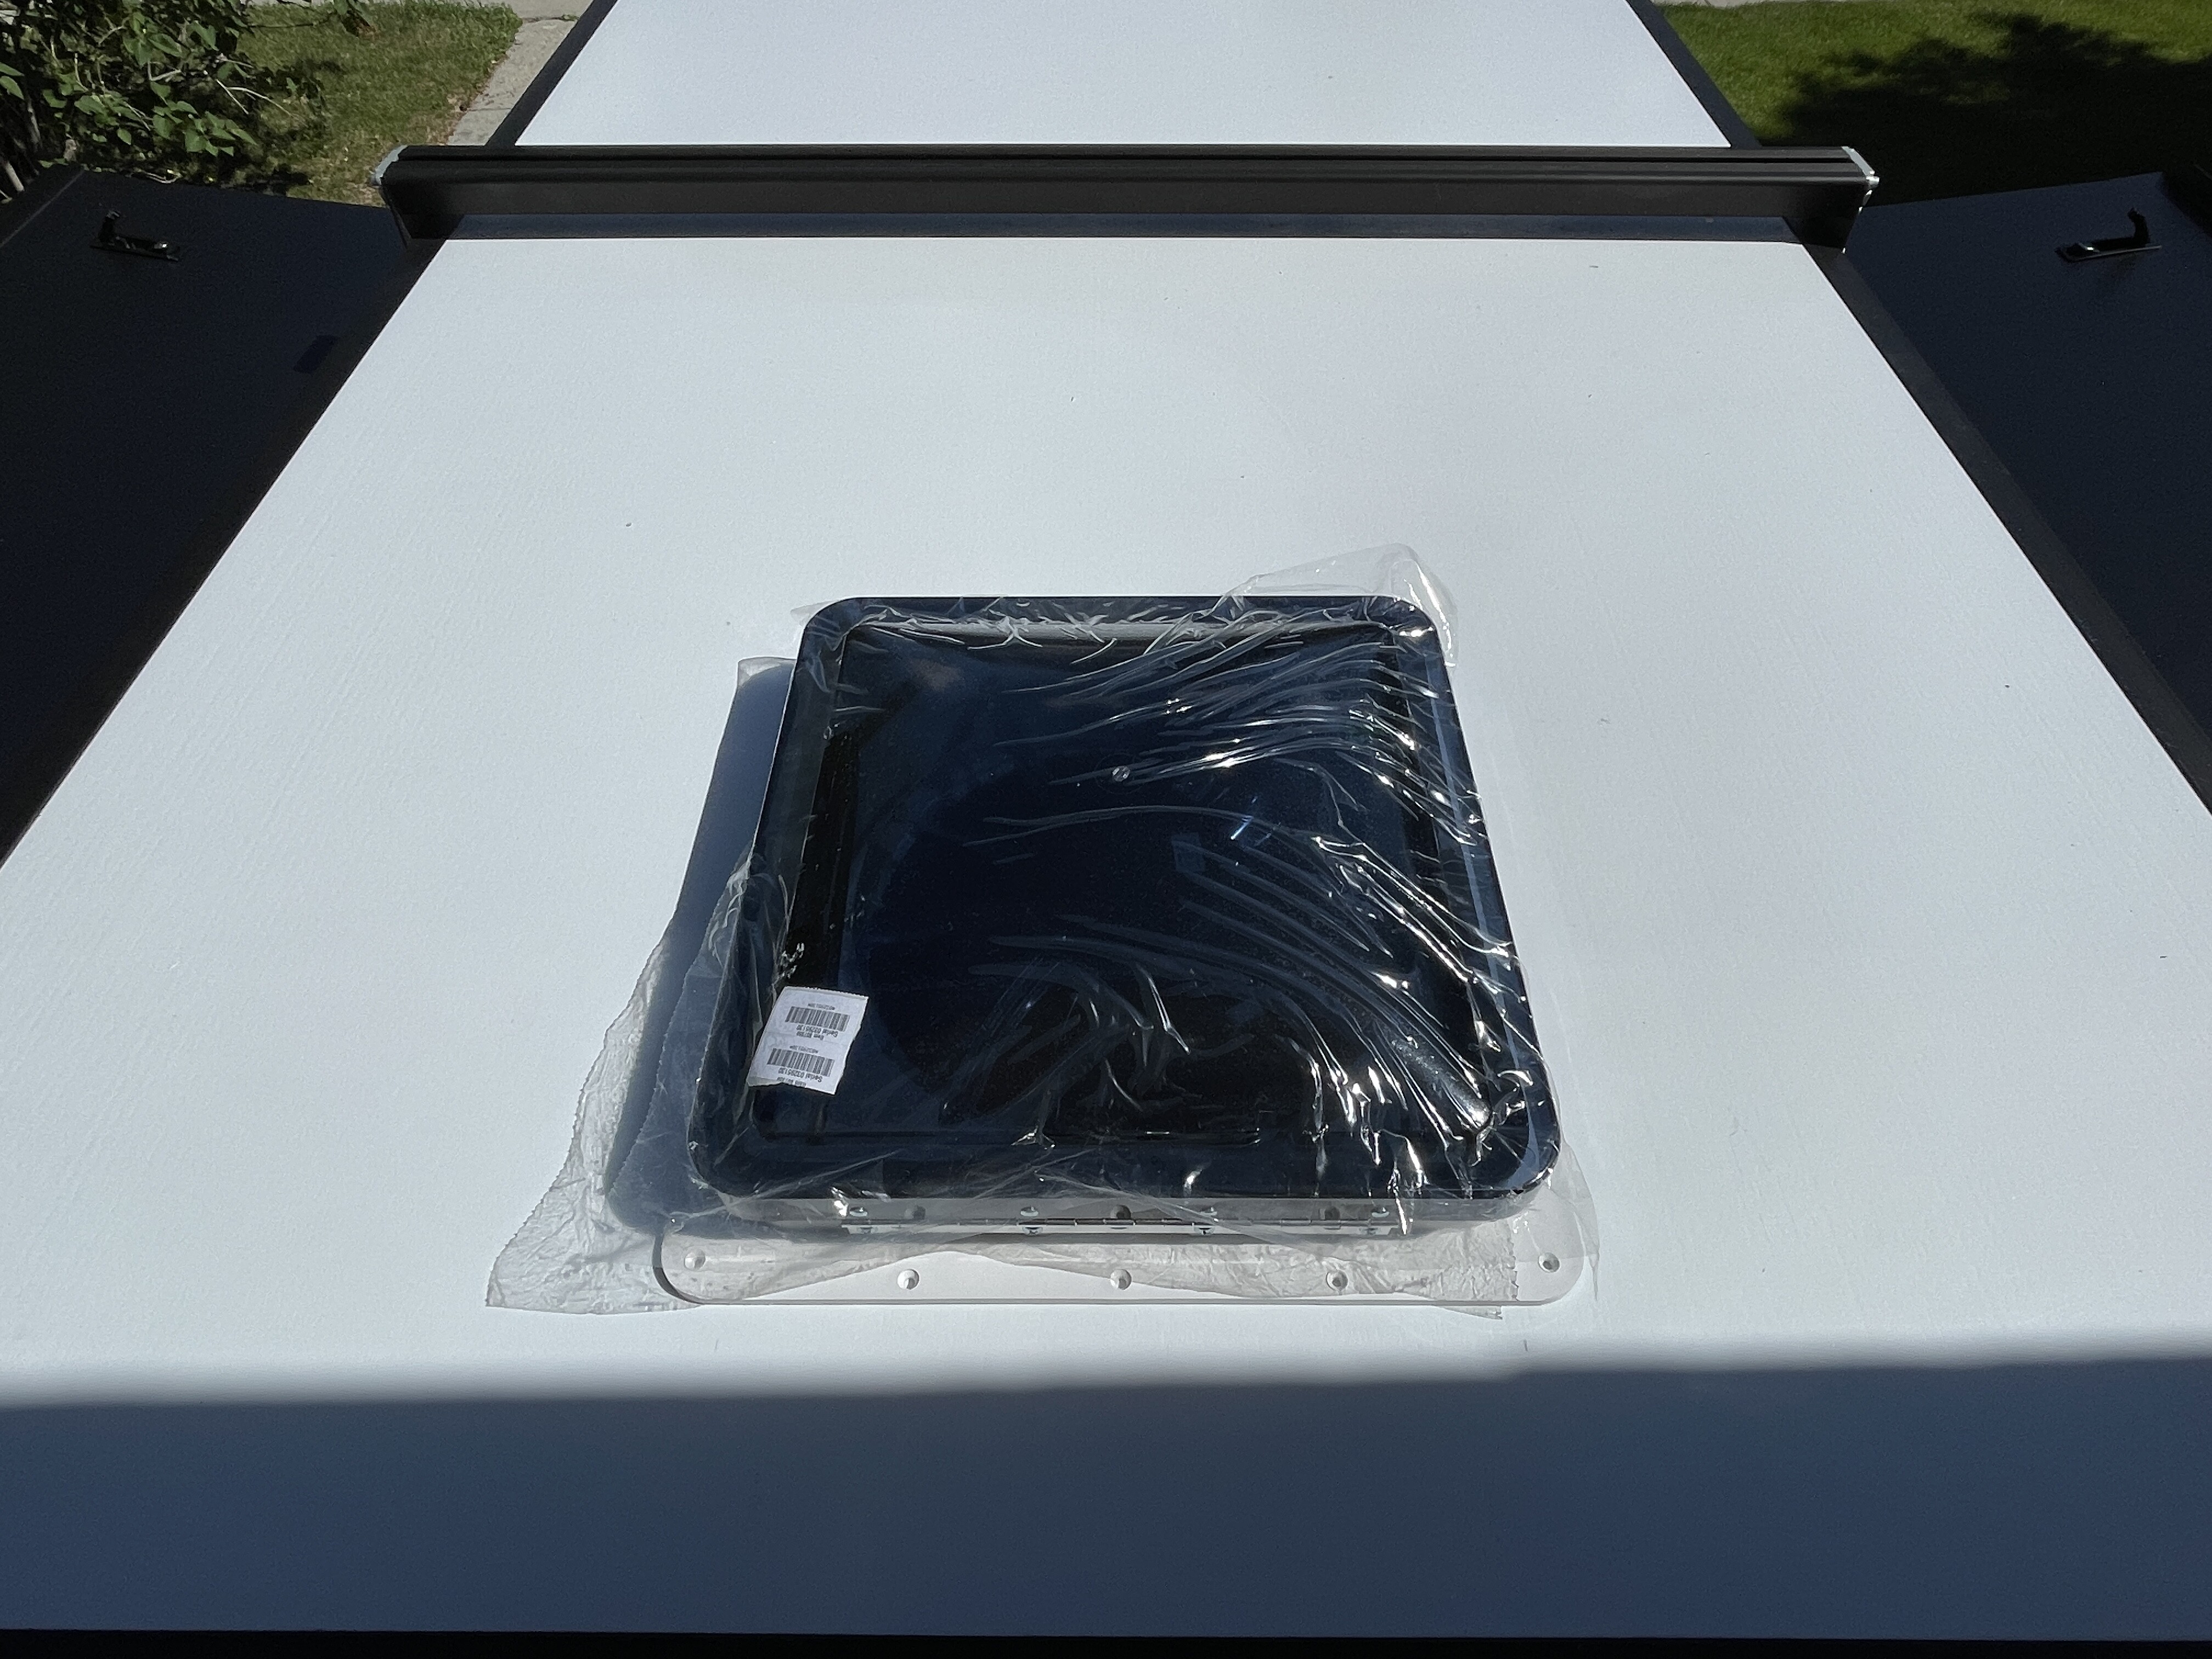
Next step was to apply a ton of marine/rv grade silicone to create a solid seal between the fan and roof of the GFC. Self tapping screws were also siliconed. No water is going to be finding it’s way in here.
(Note: We had to cut down interior trim that comes with the Fan to accommodate the incredibly thin GFC roof. We just used a hack saw to bring it down to the appropriate height.)
Once the fan was properly seated we moved onto completing and running the harness. Once again we used some plastic conduit/channel that we had available to guide the cable down to the top of the camper to meet up with our previously installed harness.
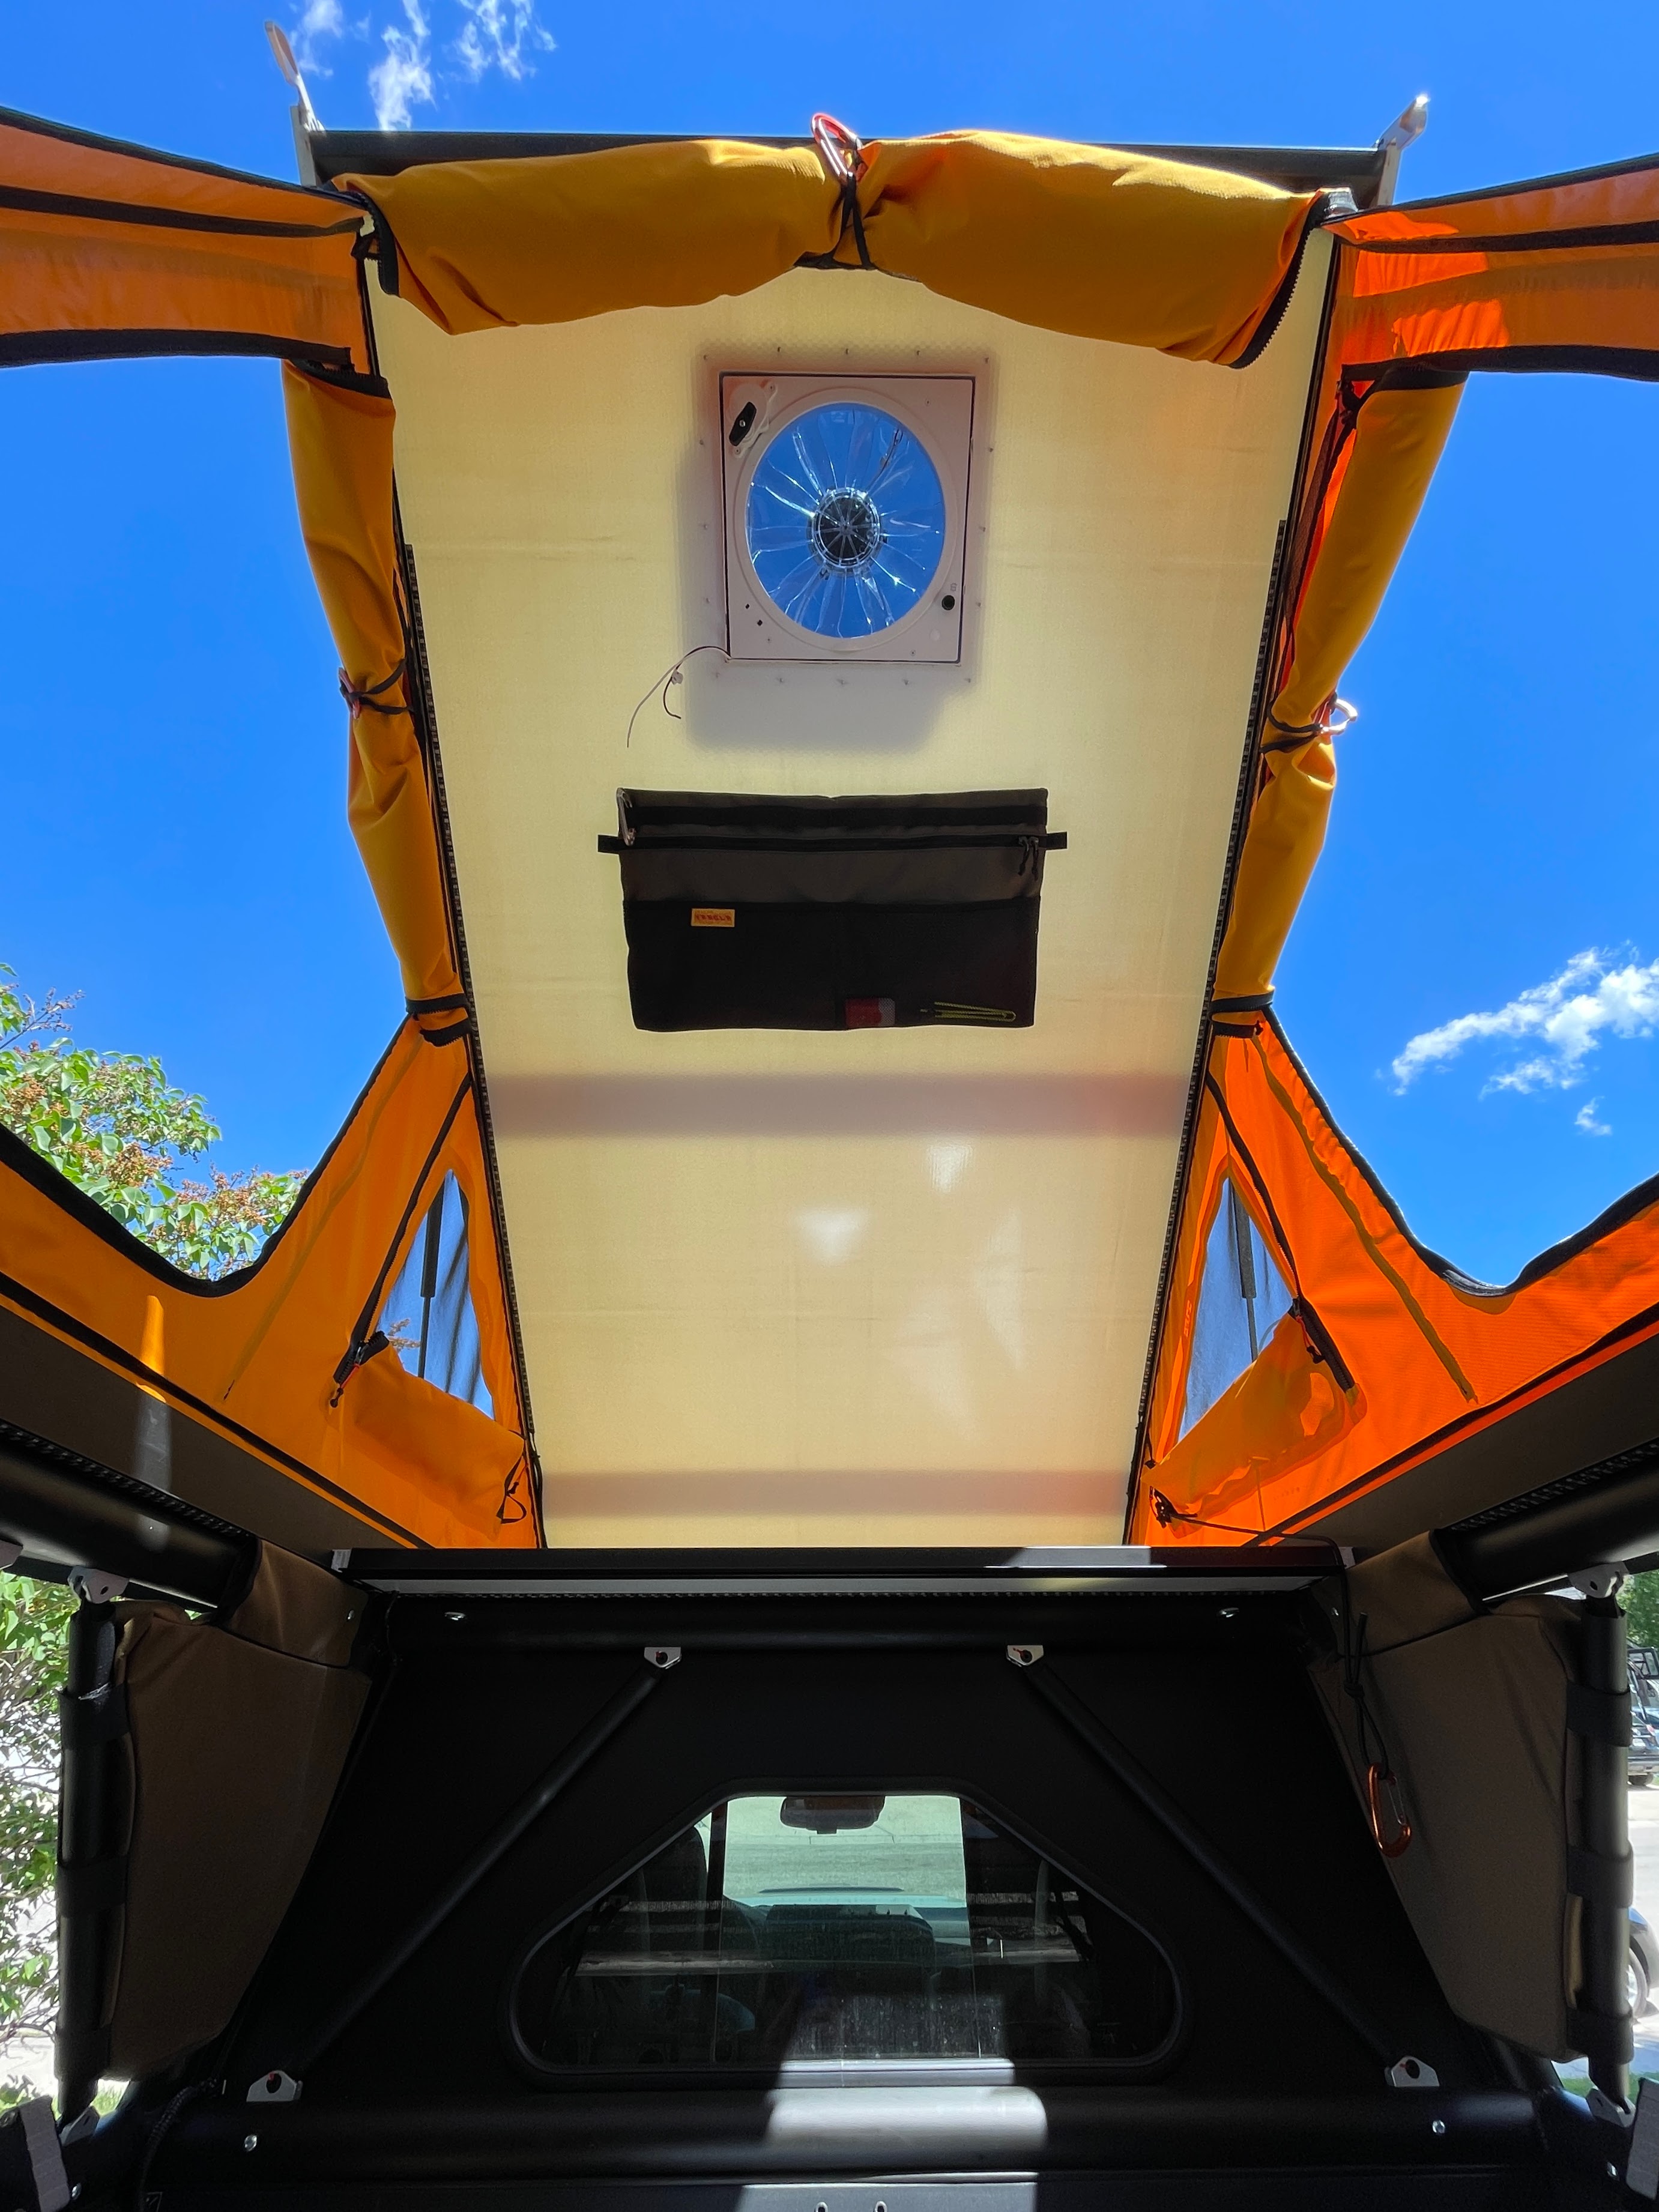
And that’s it! I was honestly most worried about this install but it ended up being rather simple thanks to our pre-planning.
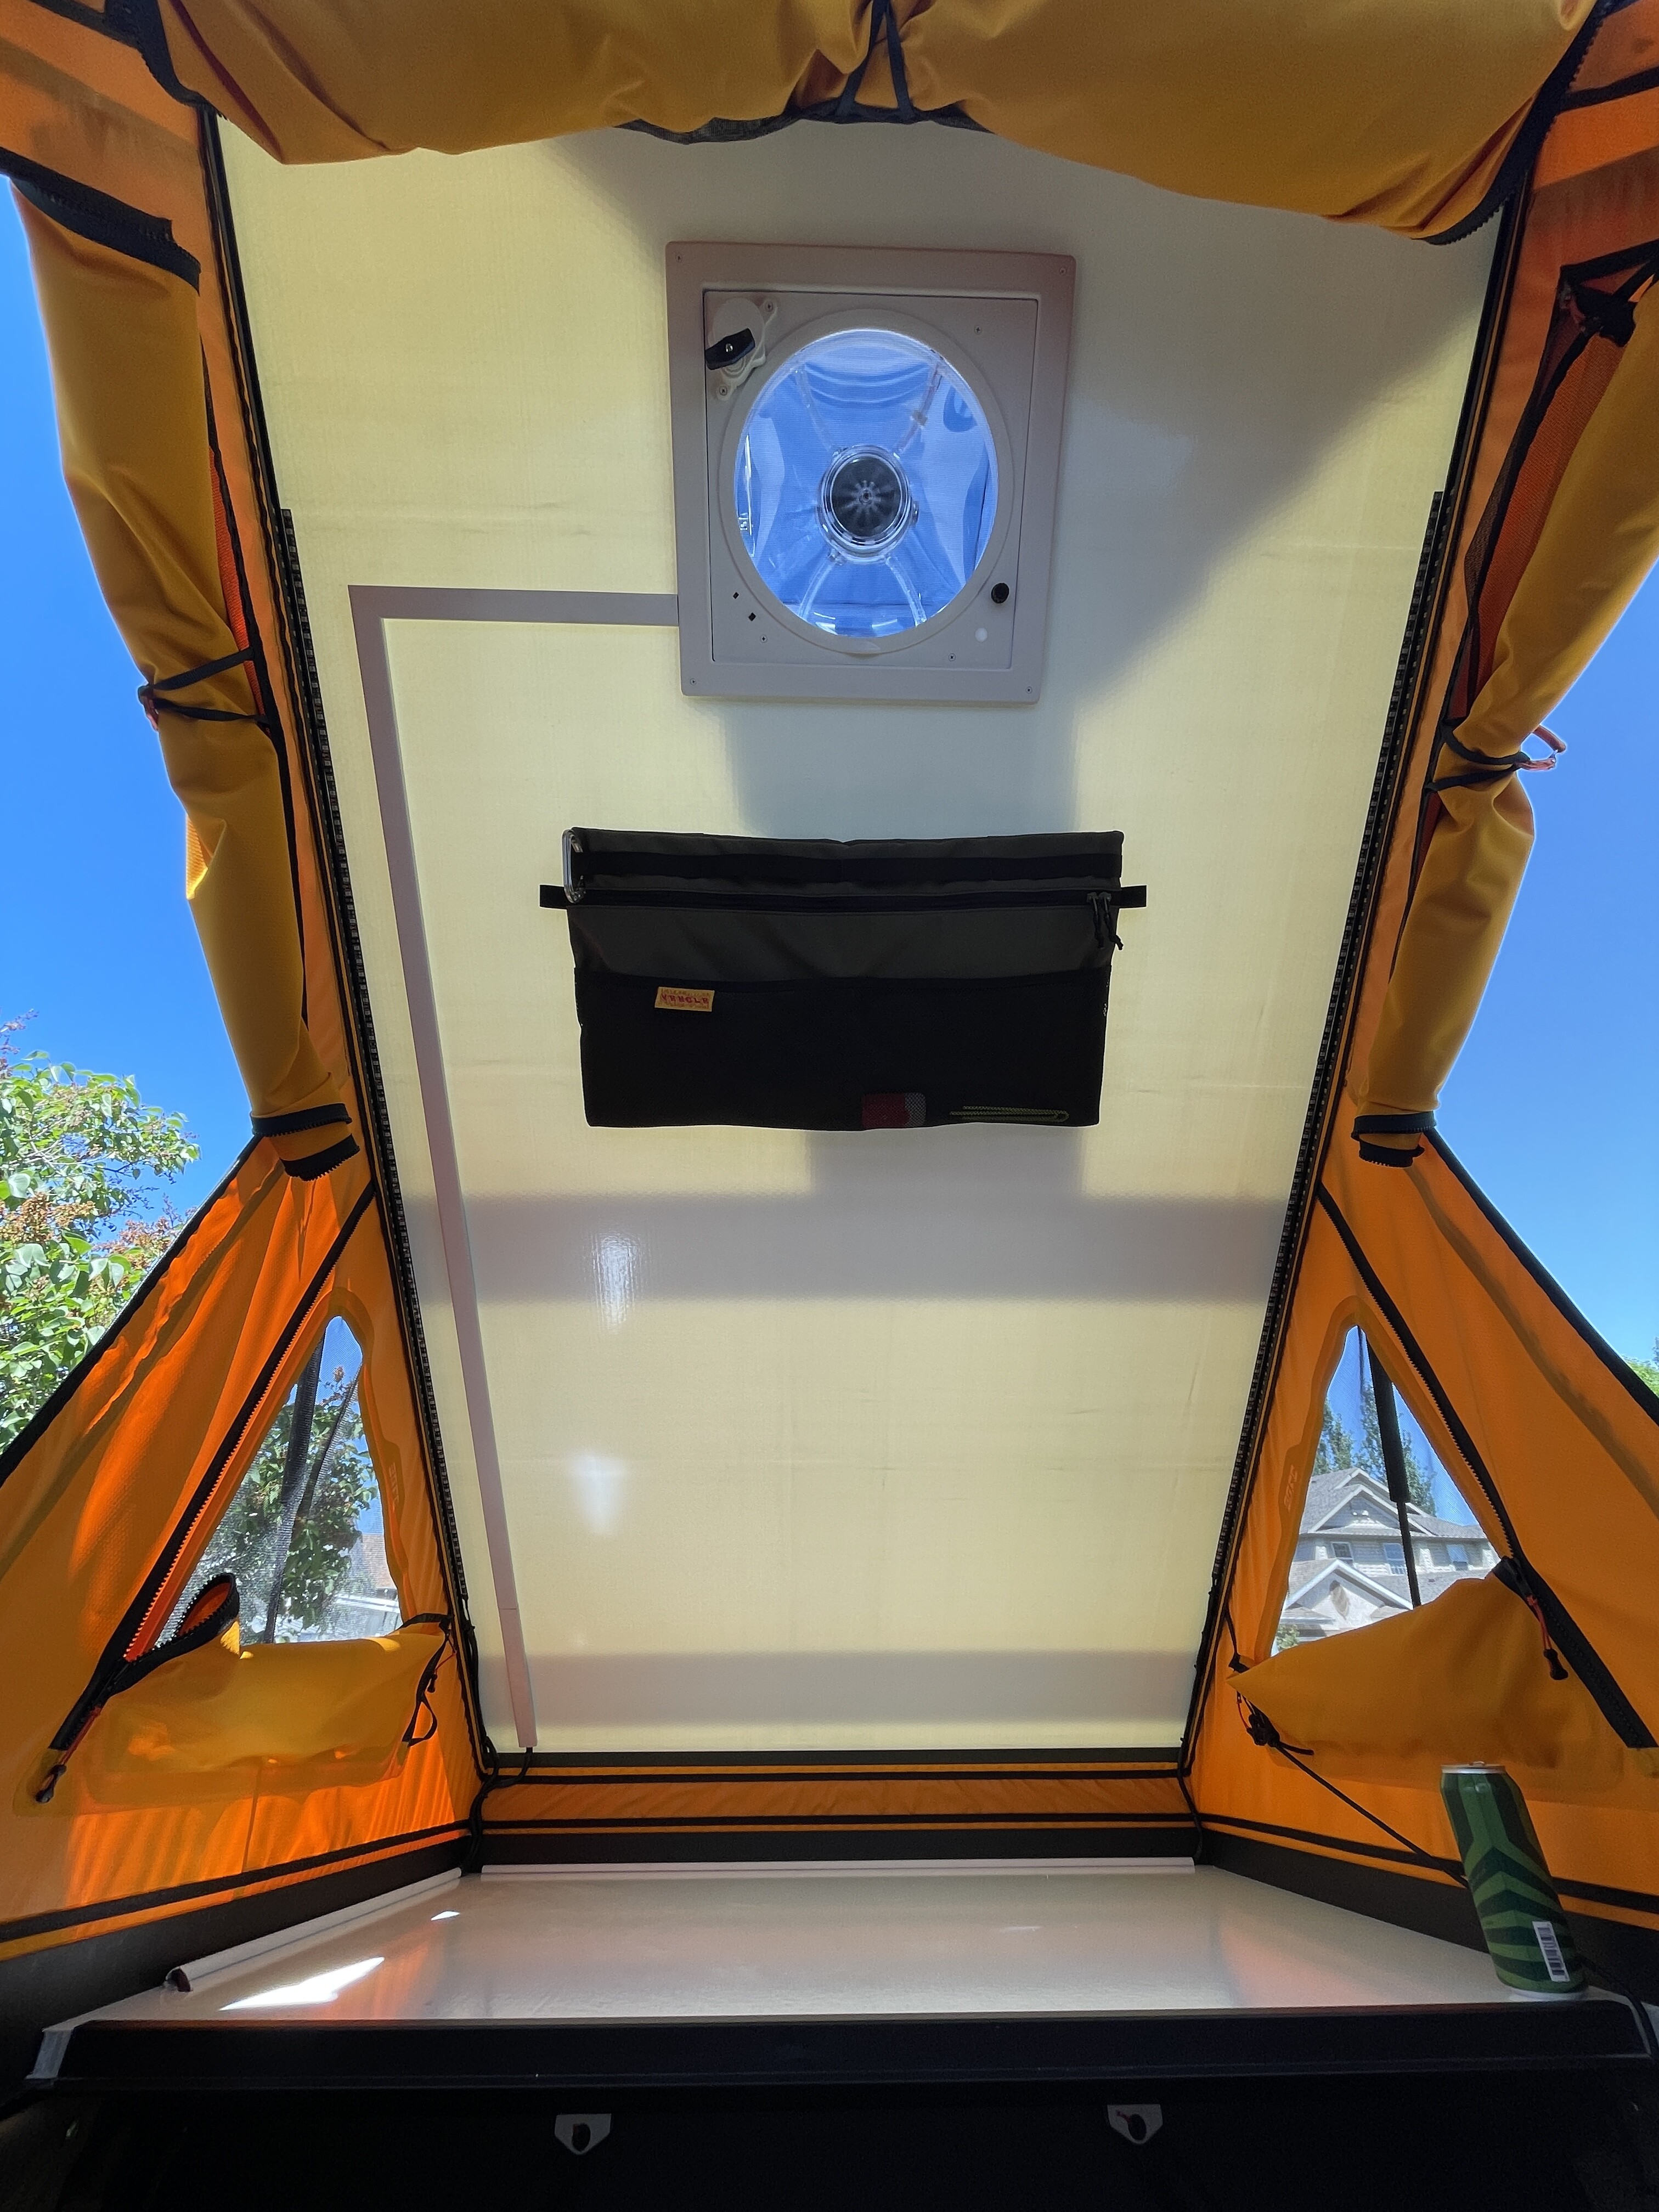
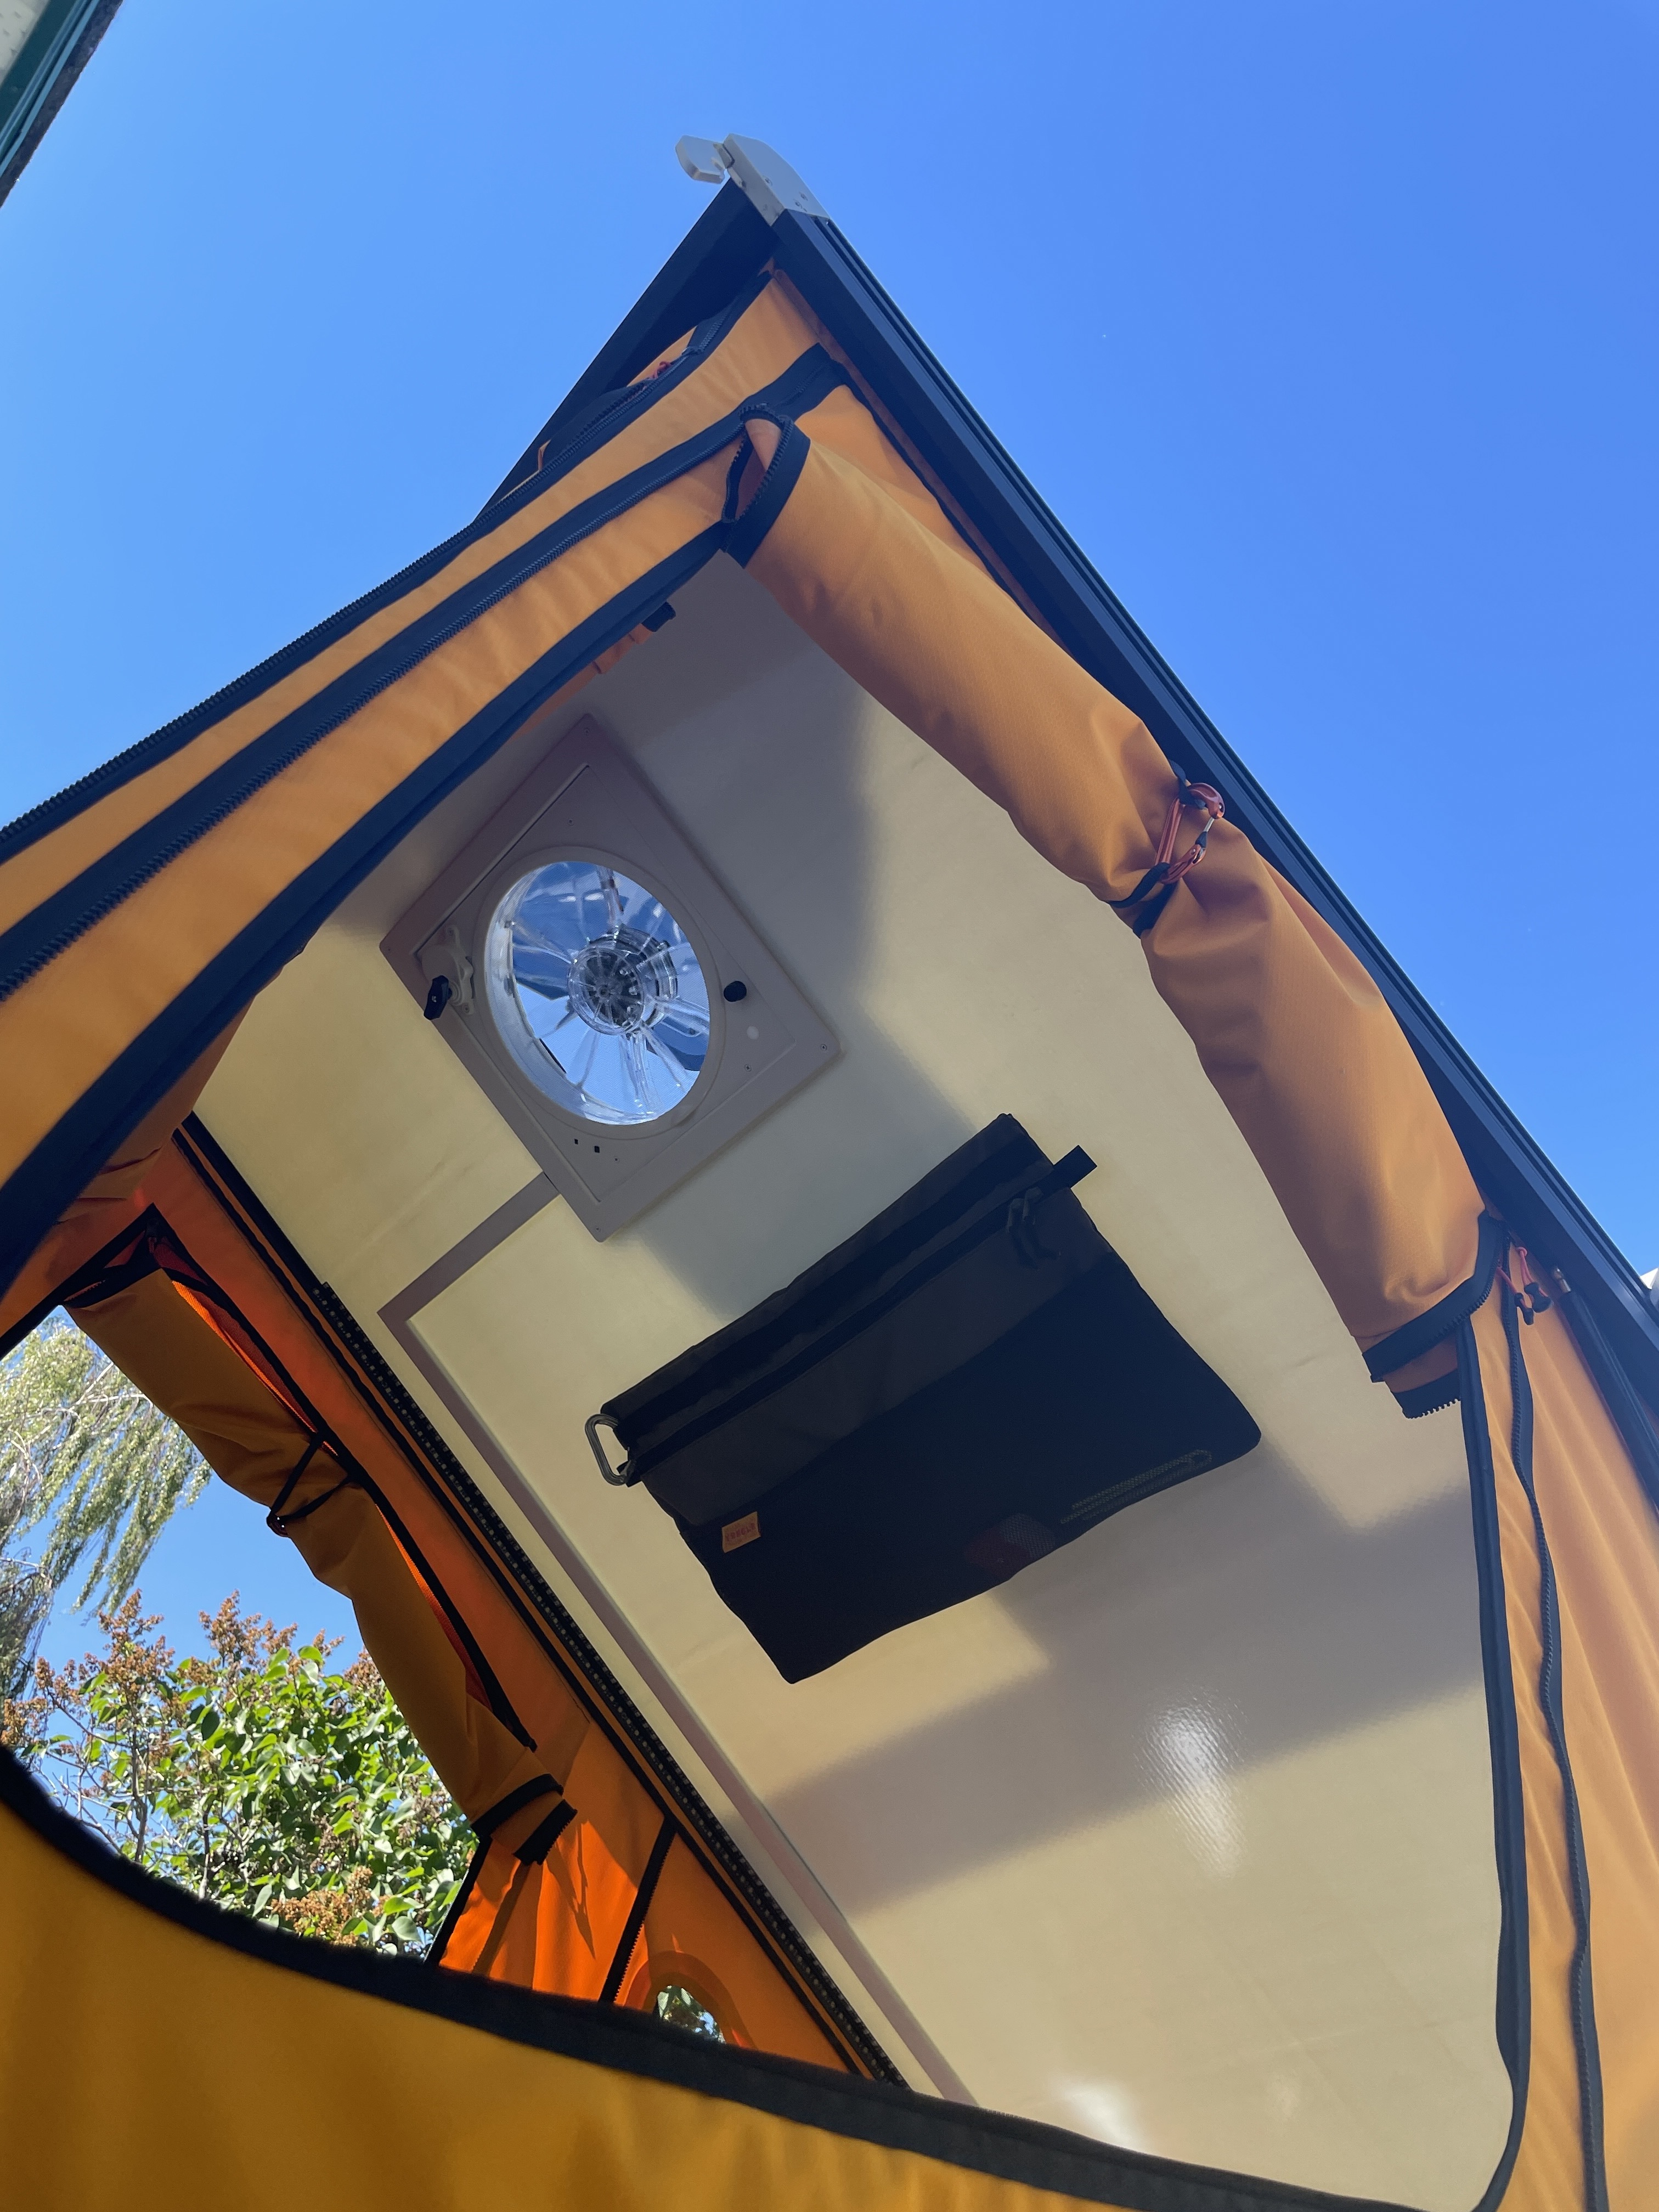
The 7350 model fan is controlled with a remote control and even has a built in motor to raise and lower the fan lid. Pretty cool!
Other work:
• I dropped in Sherpa Equipment’s Traction Board Mounts and Maxtrax’s Mounting Pin Set to store my Maxtrax MKII Recovery Boards on Sherpa’s Animas Rack
13 Likes