@AdventureTim: How has your solar power set up, held up? Im considering the same set up, myself.
It’s still rock solid! No regrets at all, I’d do it the same if I had my time over again.
1 Like
Didn’t think this warranted another thread, so I’ll leave it here in response to the OP.
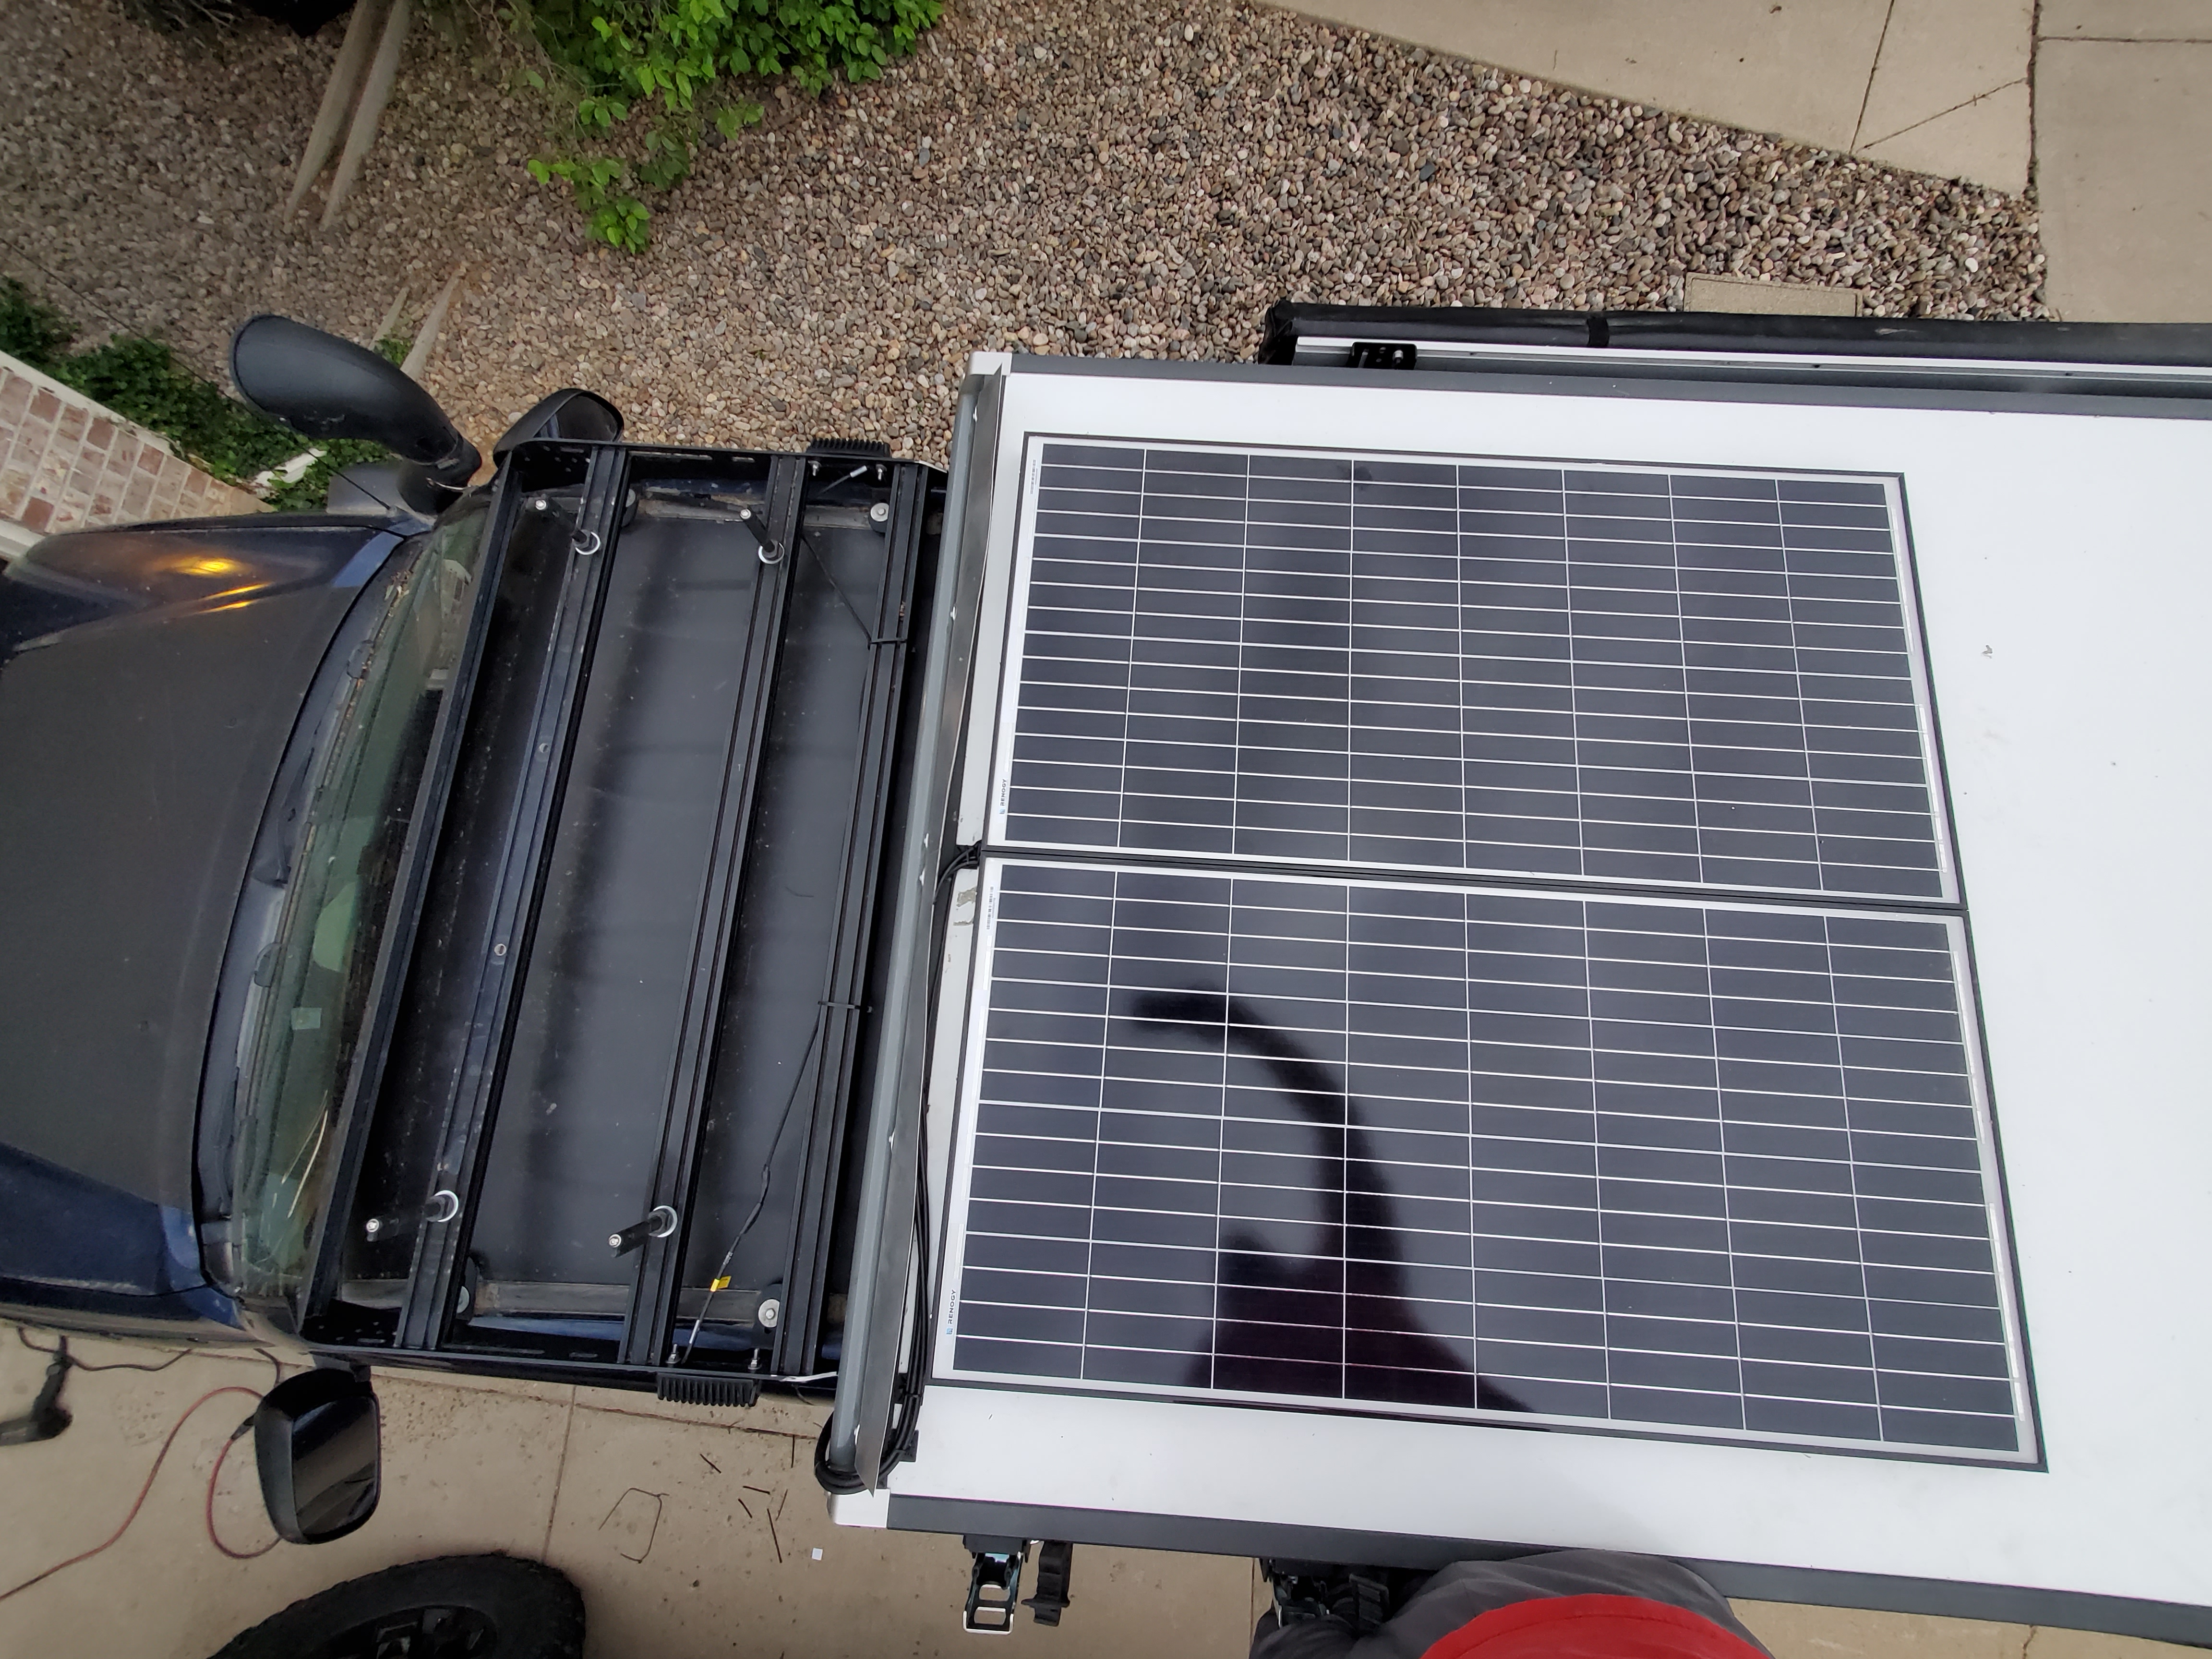
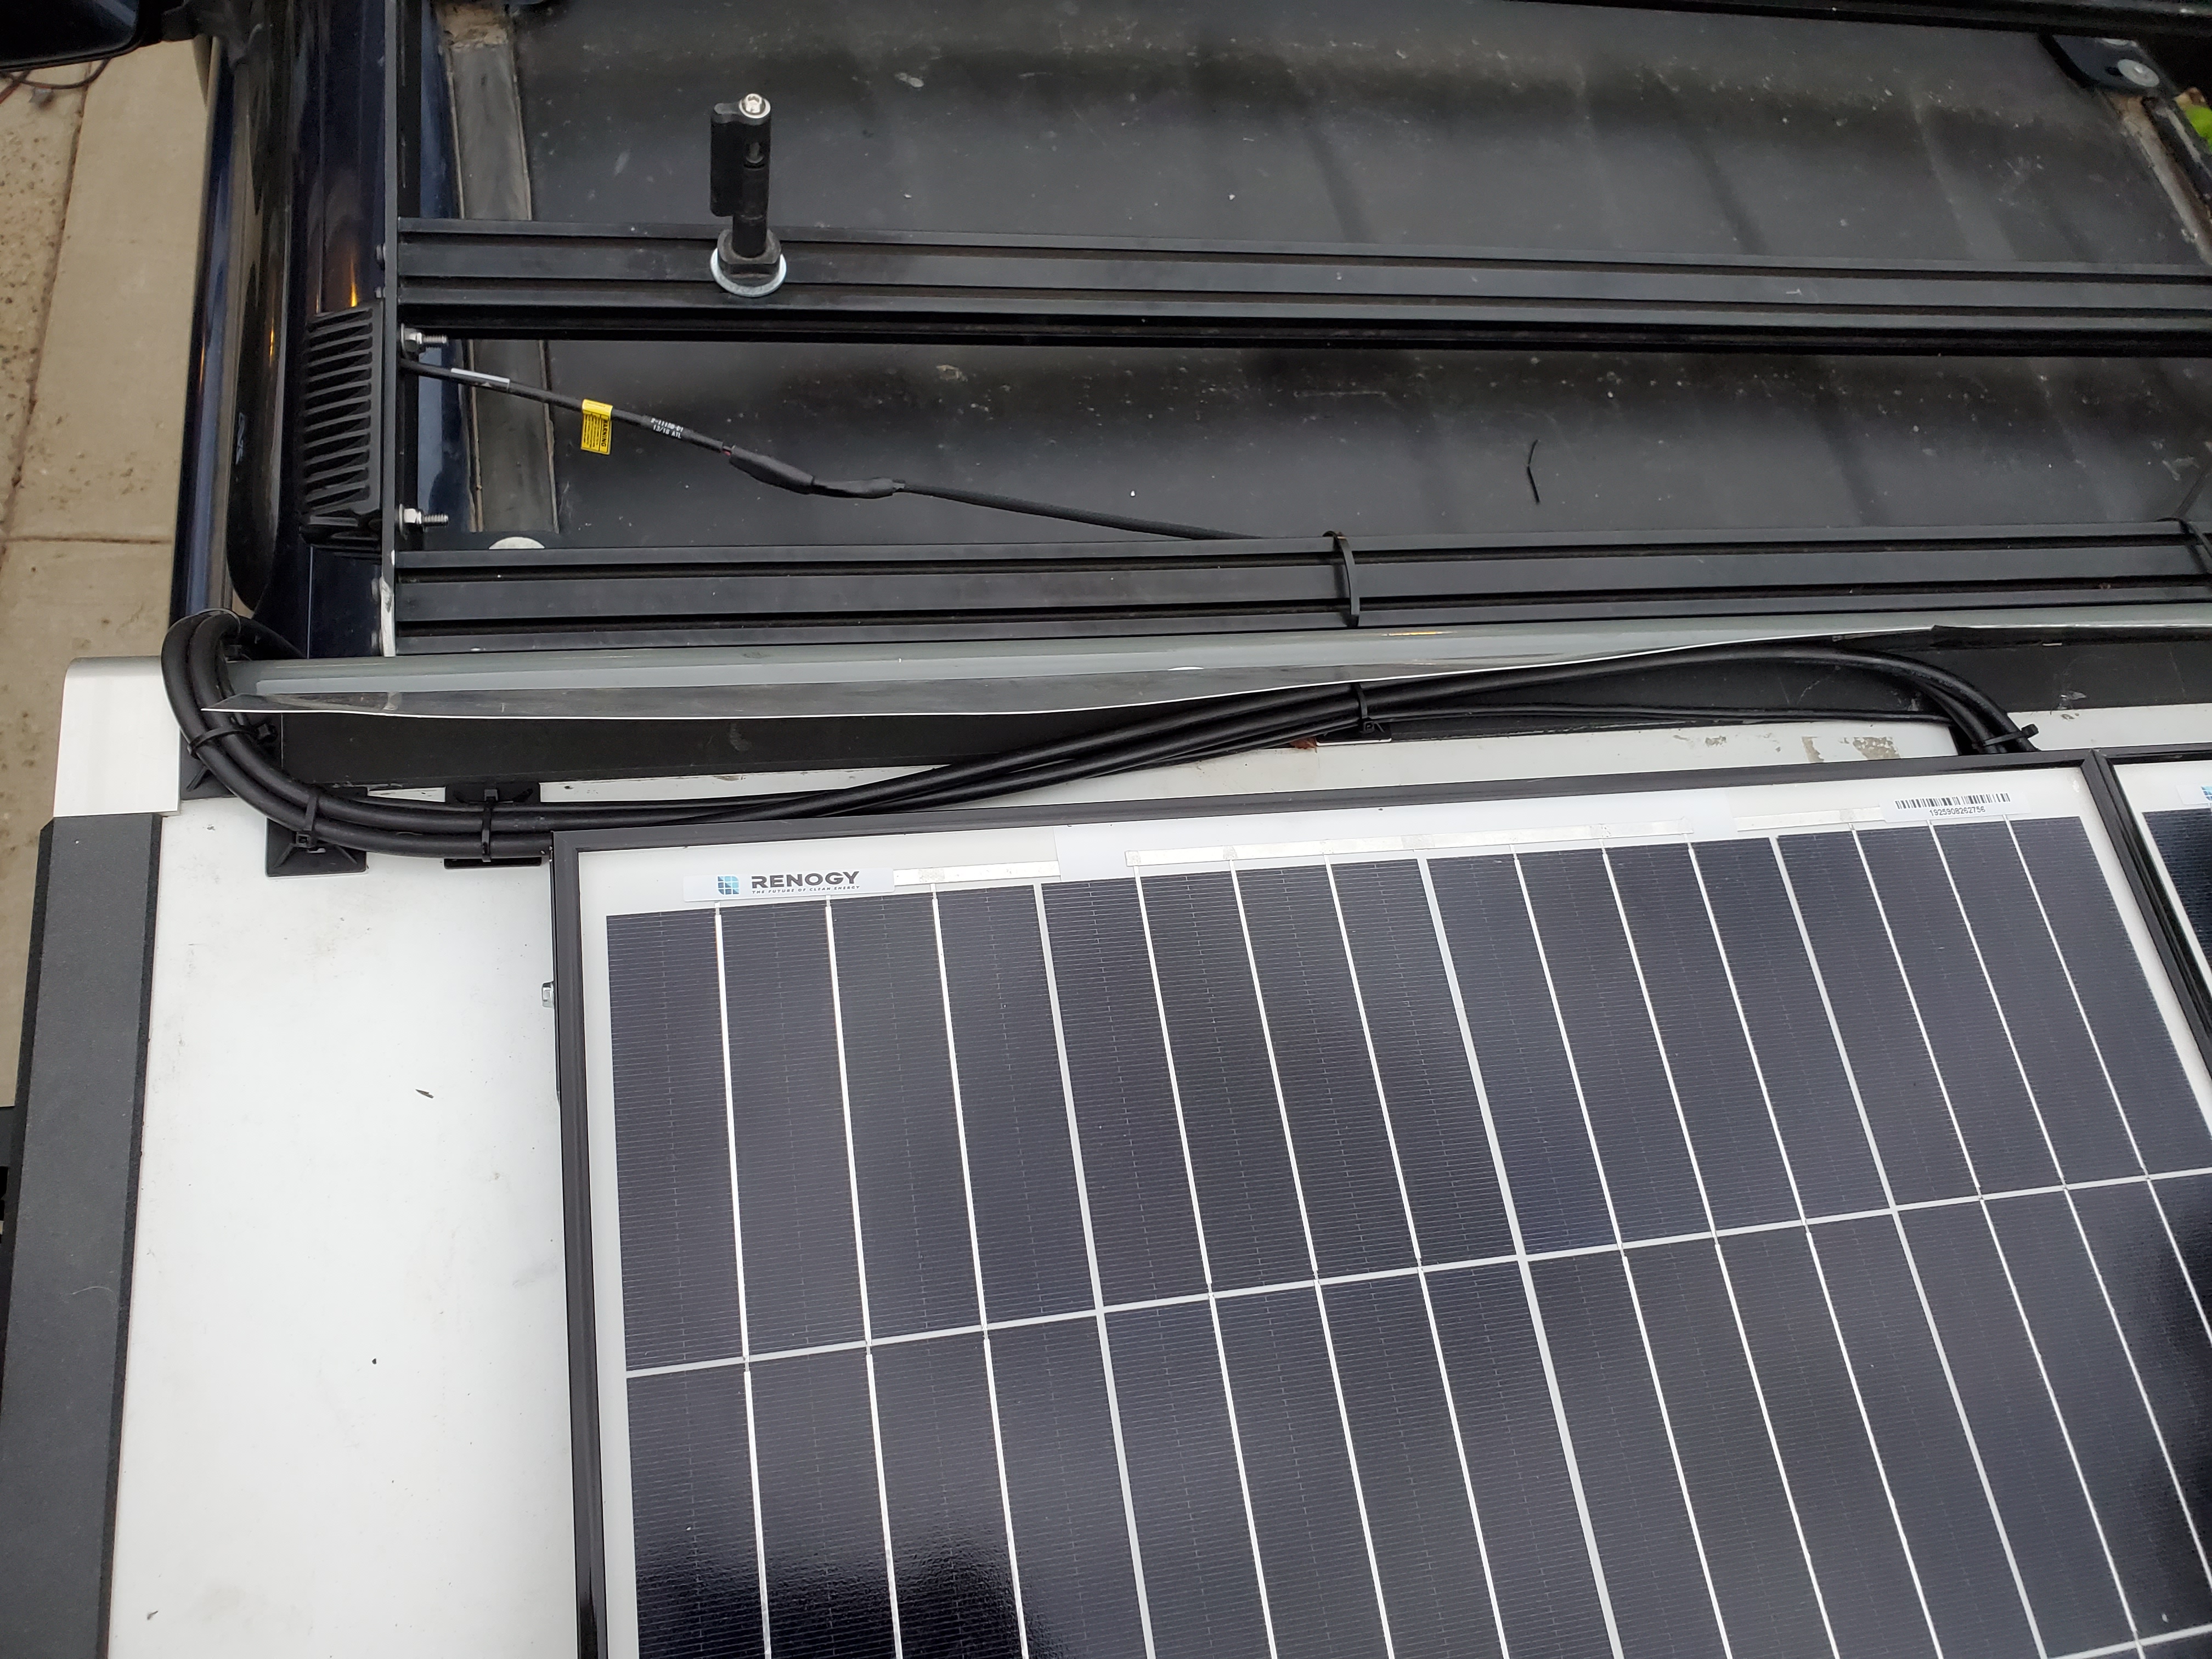
Just finished installing a Renogy 100w panel using beef racks and the GFC solar tray. I decided to bolt the panel to the tray instead of rely on the “squeeze fit” and 3M tape. Took a bit of measuring, but worked out pretty good. Didn’t take any pics of that and it all ended up on the bottom, so I can’t take them now.
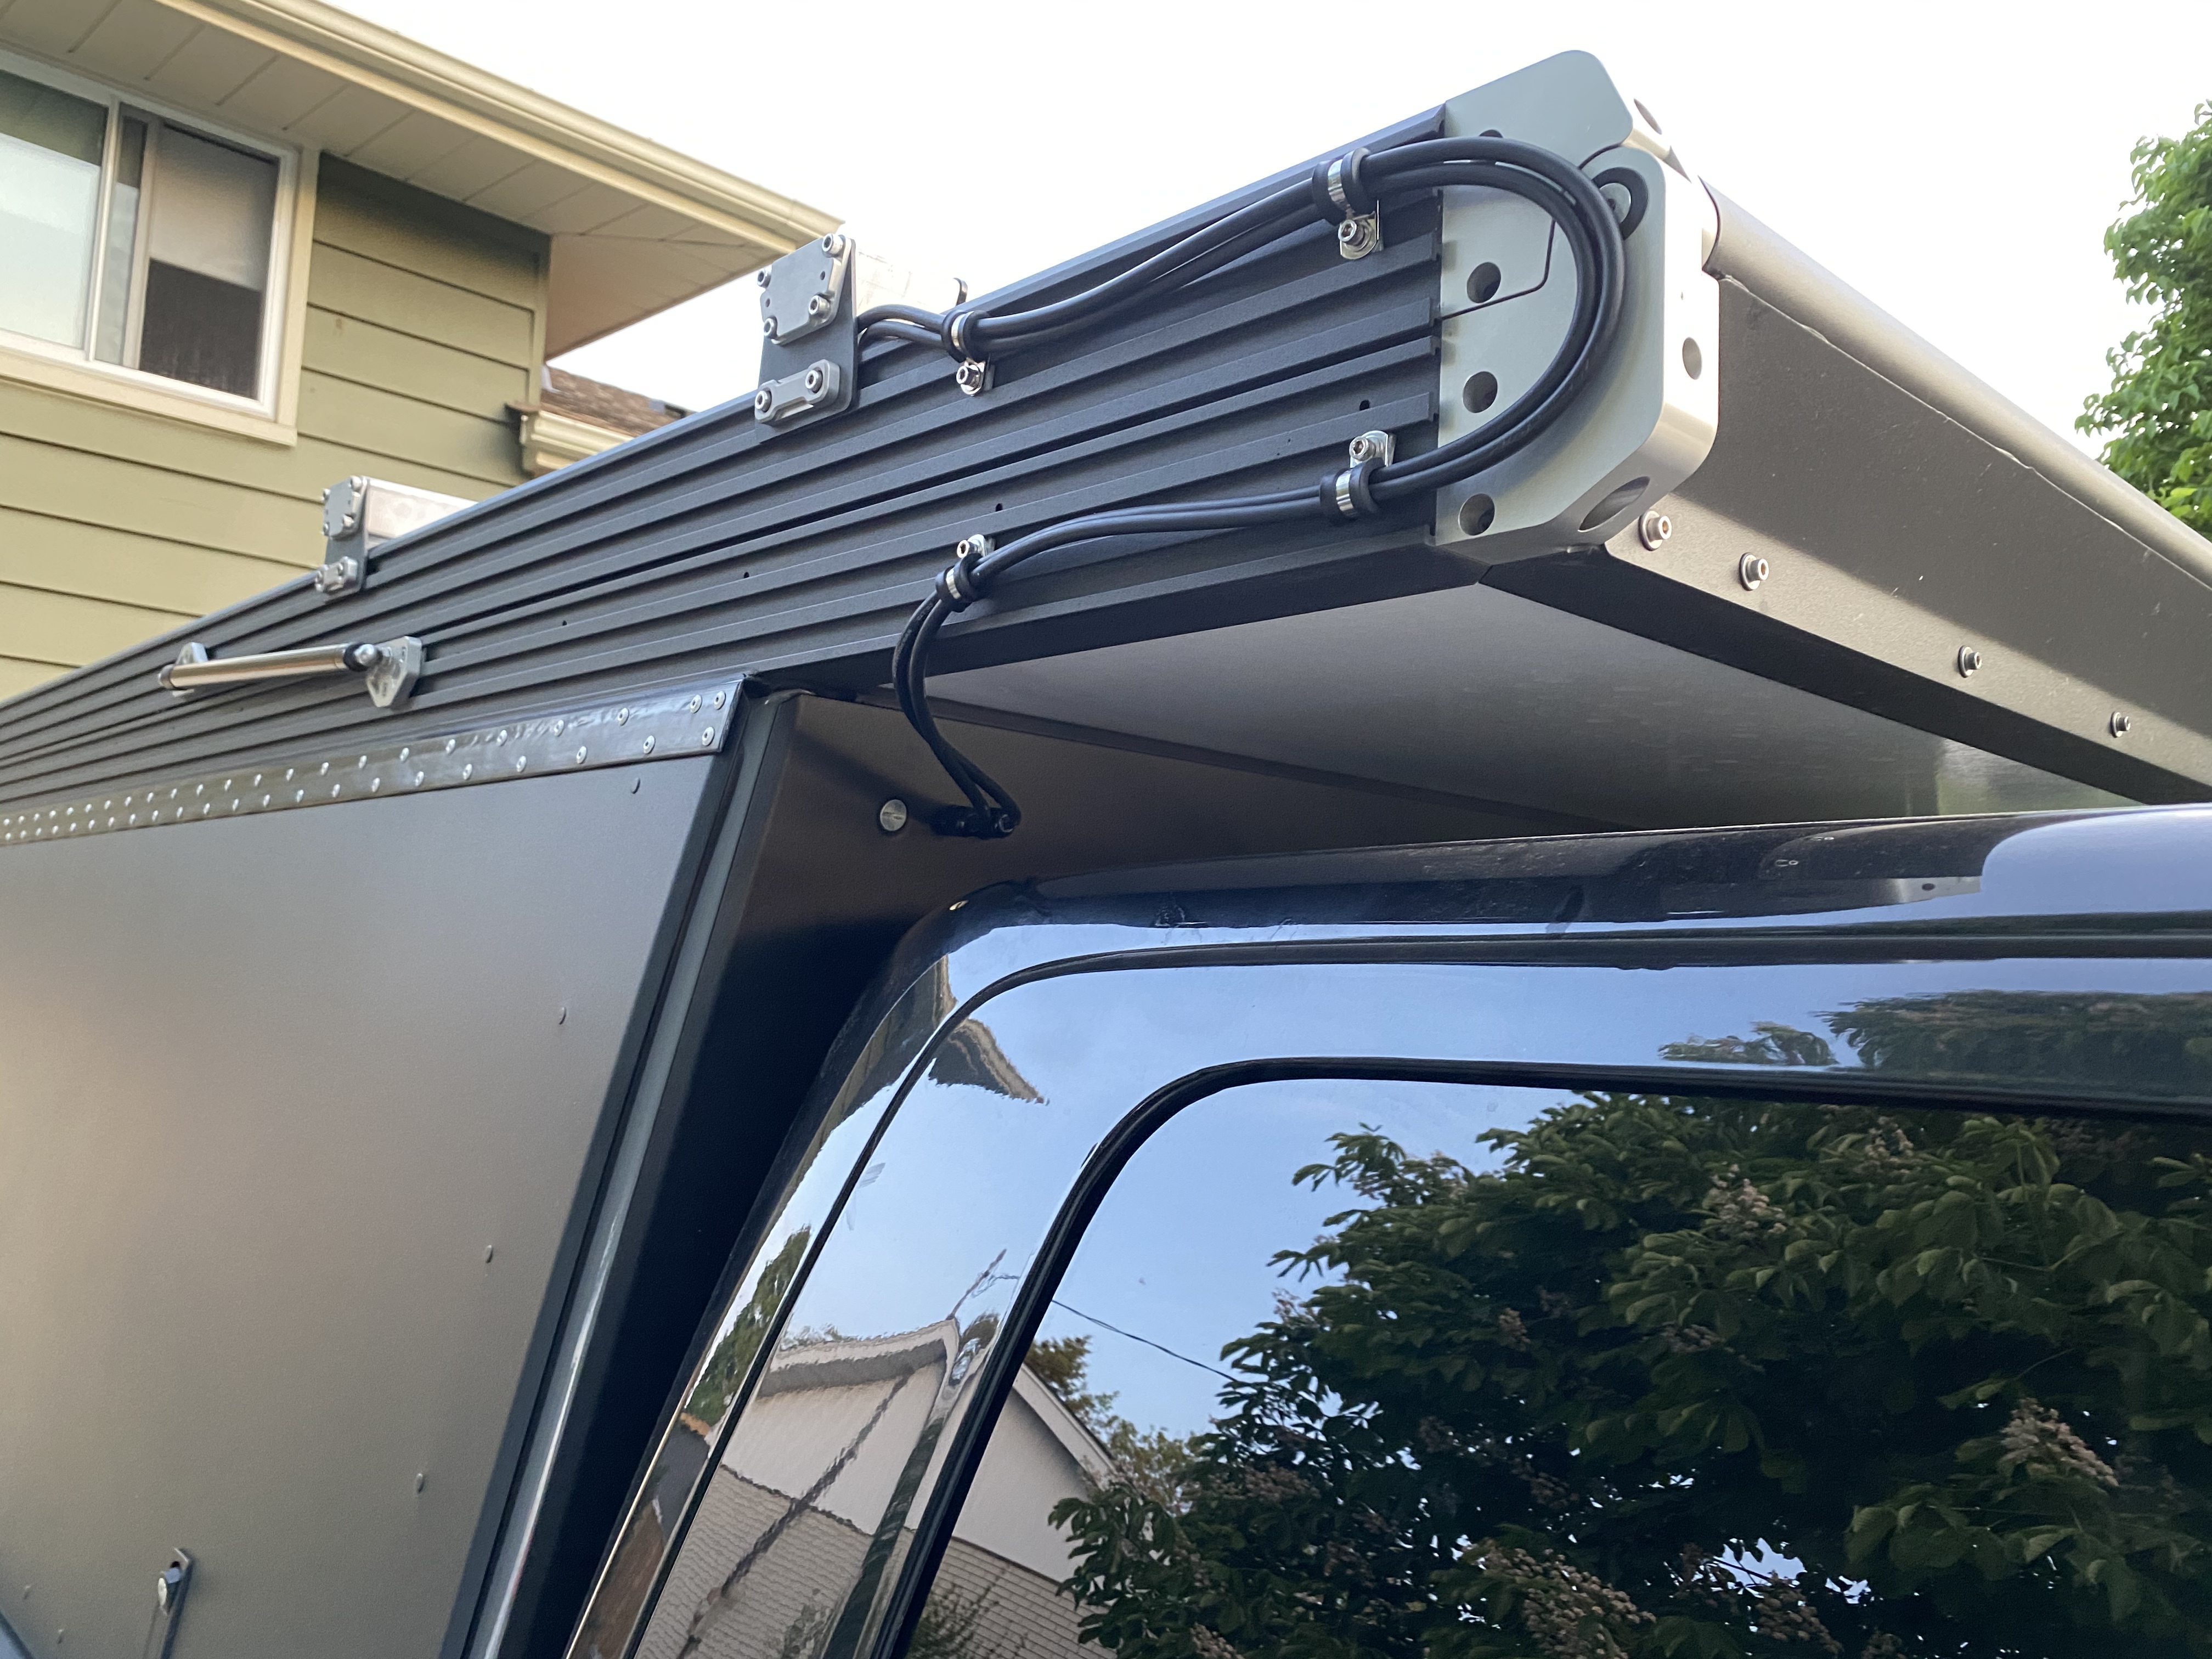
I used the Renogy 10 AWG extension cables which have a pretty solid jacket on them, so I figured I was safe not using additional wire loom.
I decided to drill two holes for wire glands on the front panel. Didn’t want to go through the roof and couldn’t sort out a good way to secure the cables if I routed all the way down to the bottom and back up into the bed. Cable glands seem solid and well sealed, so we will see how it goes.
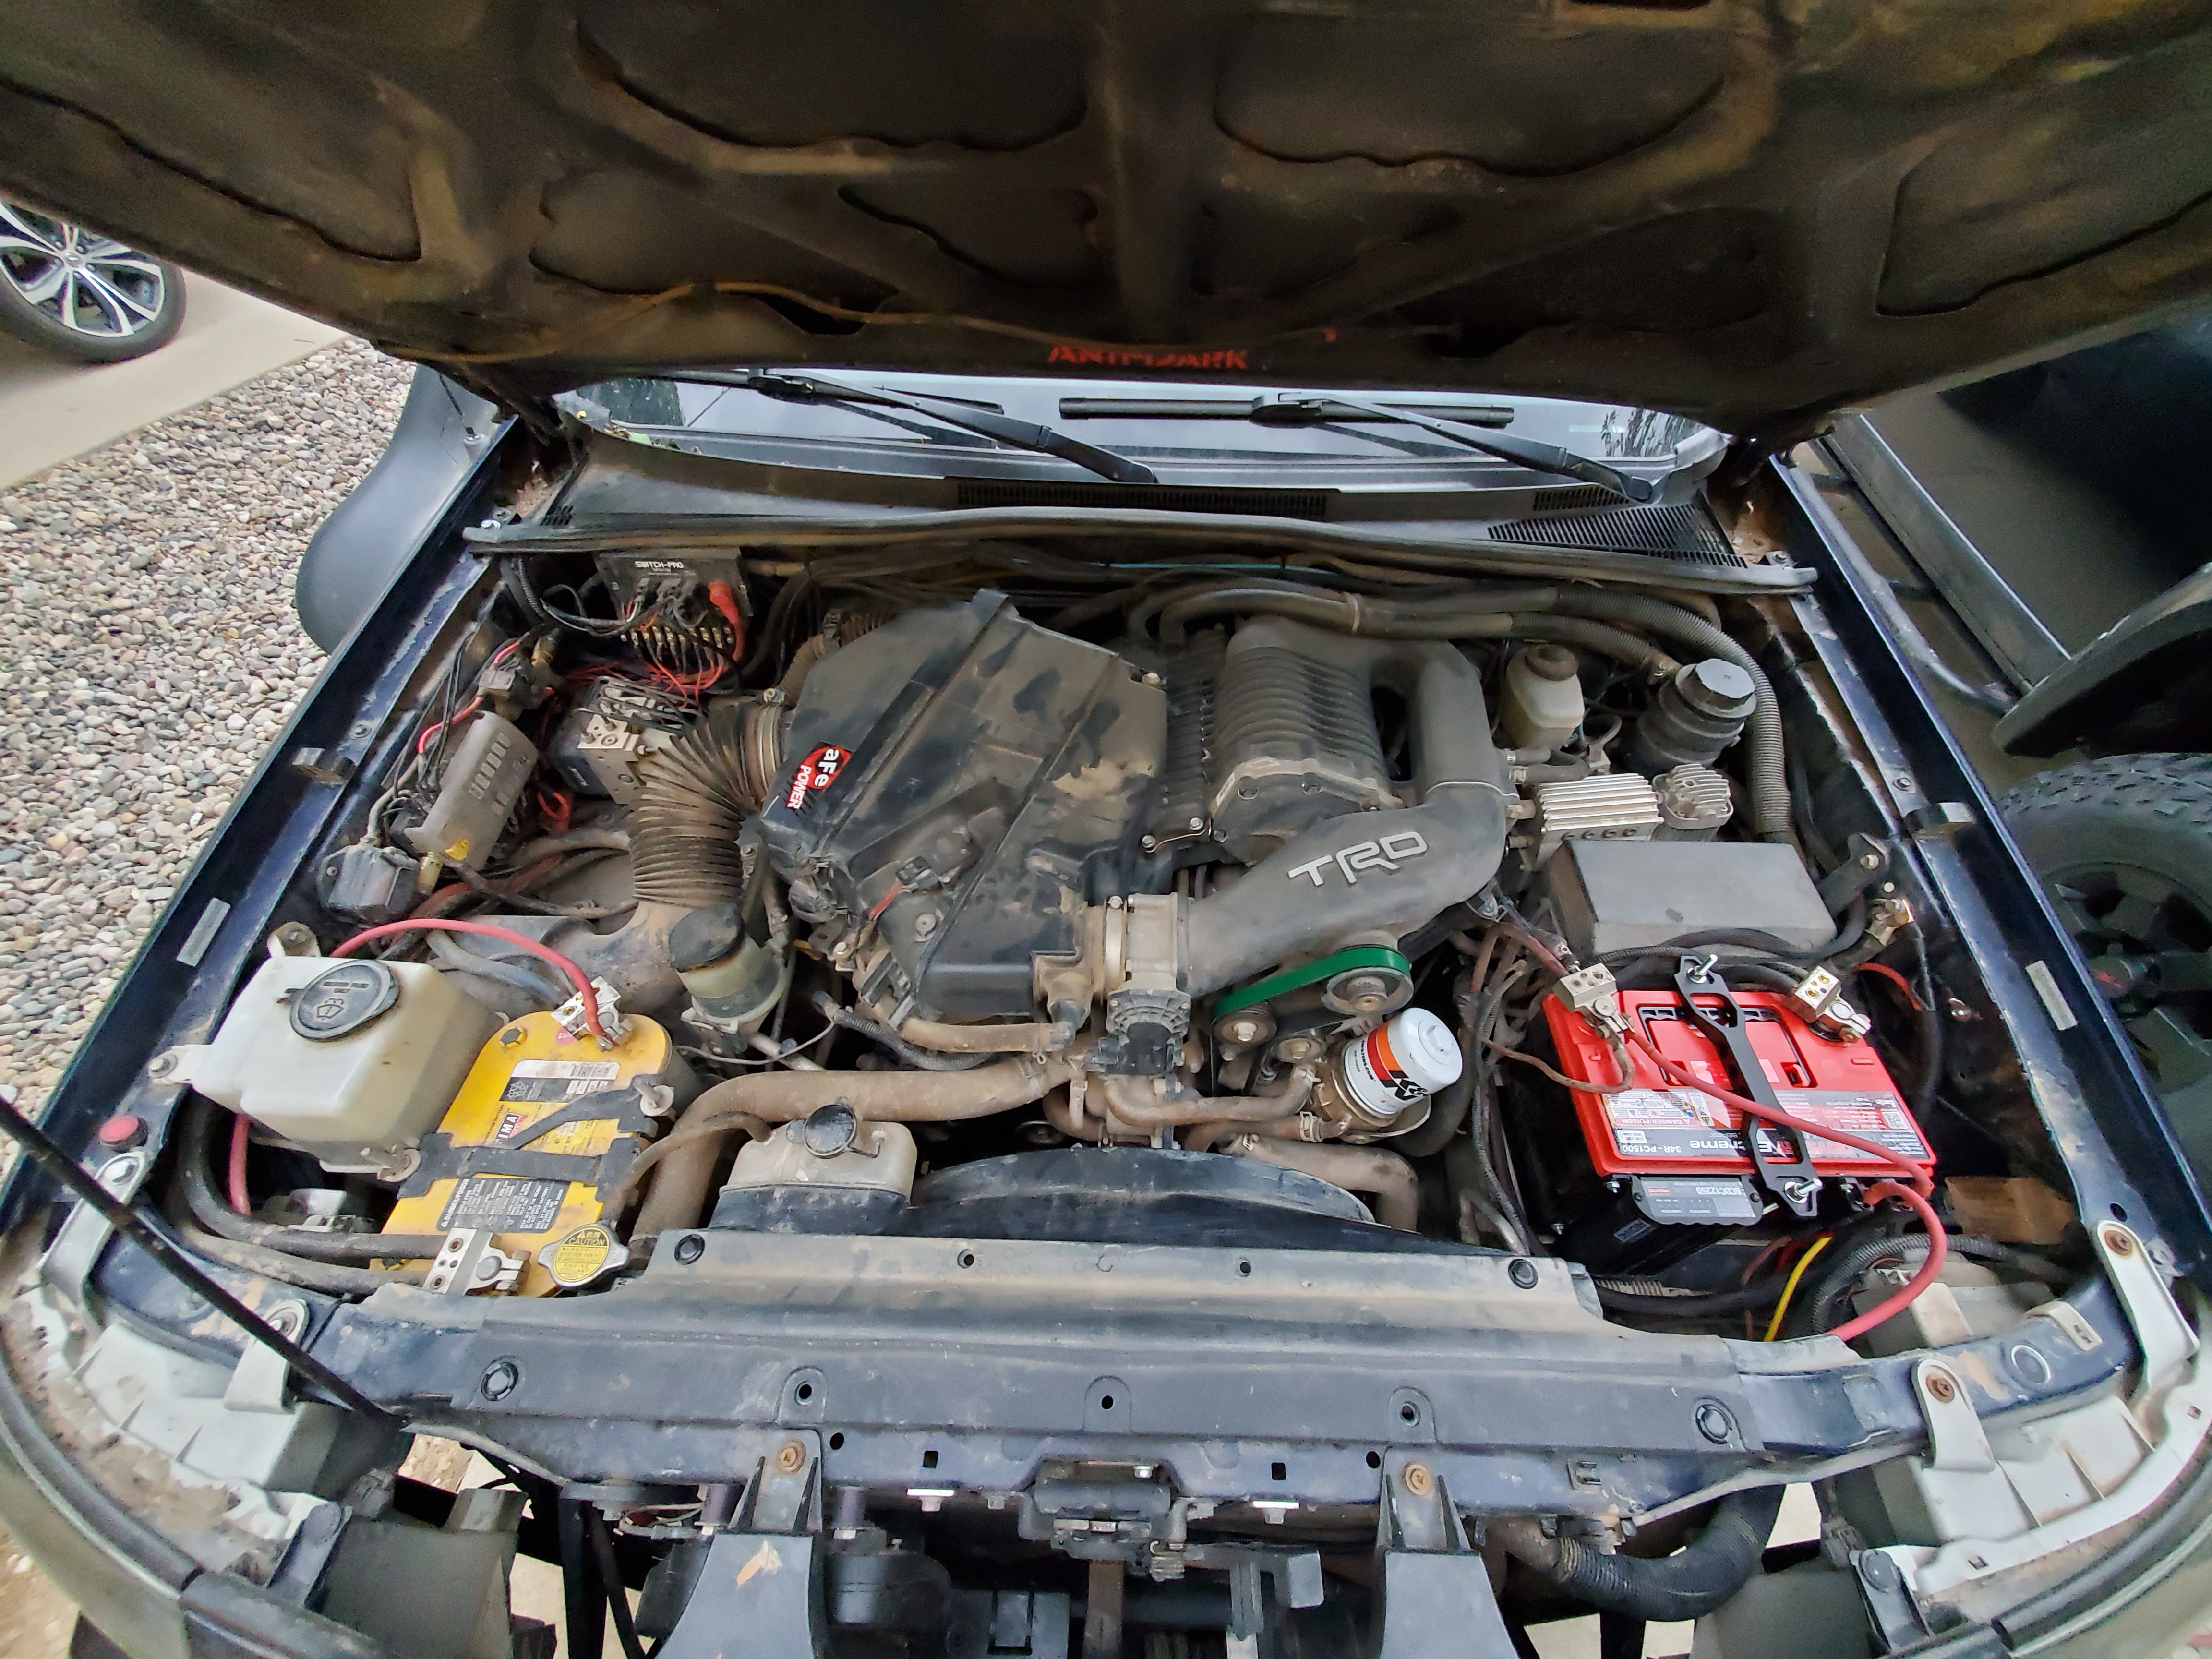
Haven’t completed the wire routing inside the camper. Just added some Anderson Power Pole connectors and plugged it into a West Mountain Radio Epic PWRGate to charge a LiFePO4 battery and run the fridge. Was getting a bit of a charge at 7pm, so should work ok. PWRGate has another input for a power source, so I may wire that to the starter battery.
I’ll probably pull the whole thing off when winter comes around to make clearing snow a little easier.

6 Likes
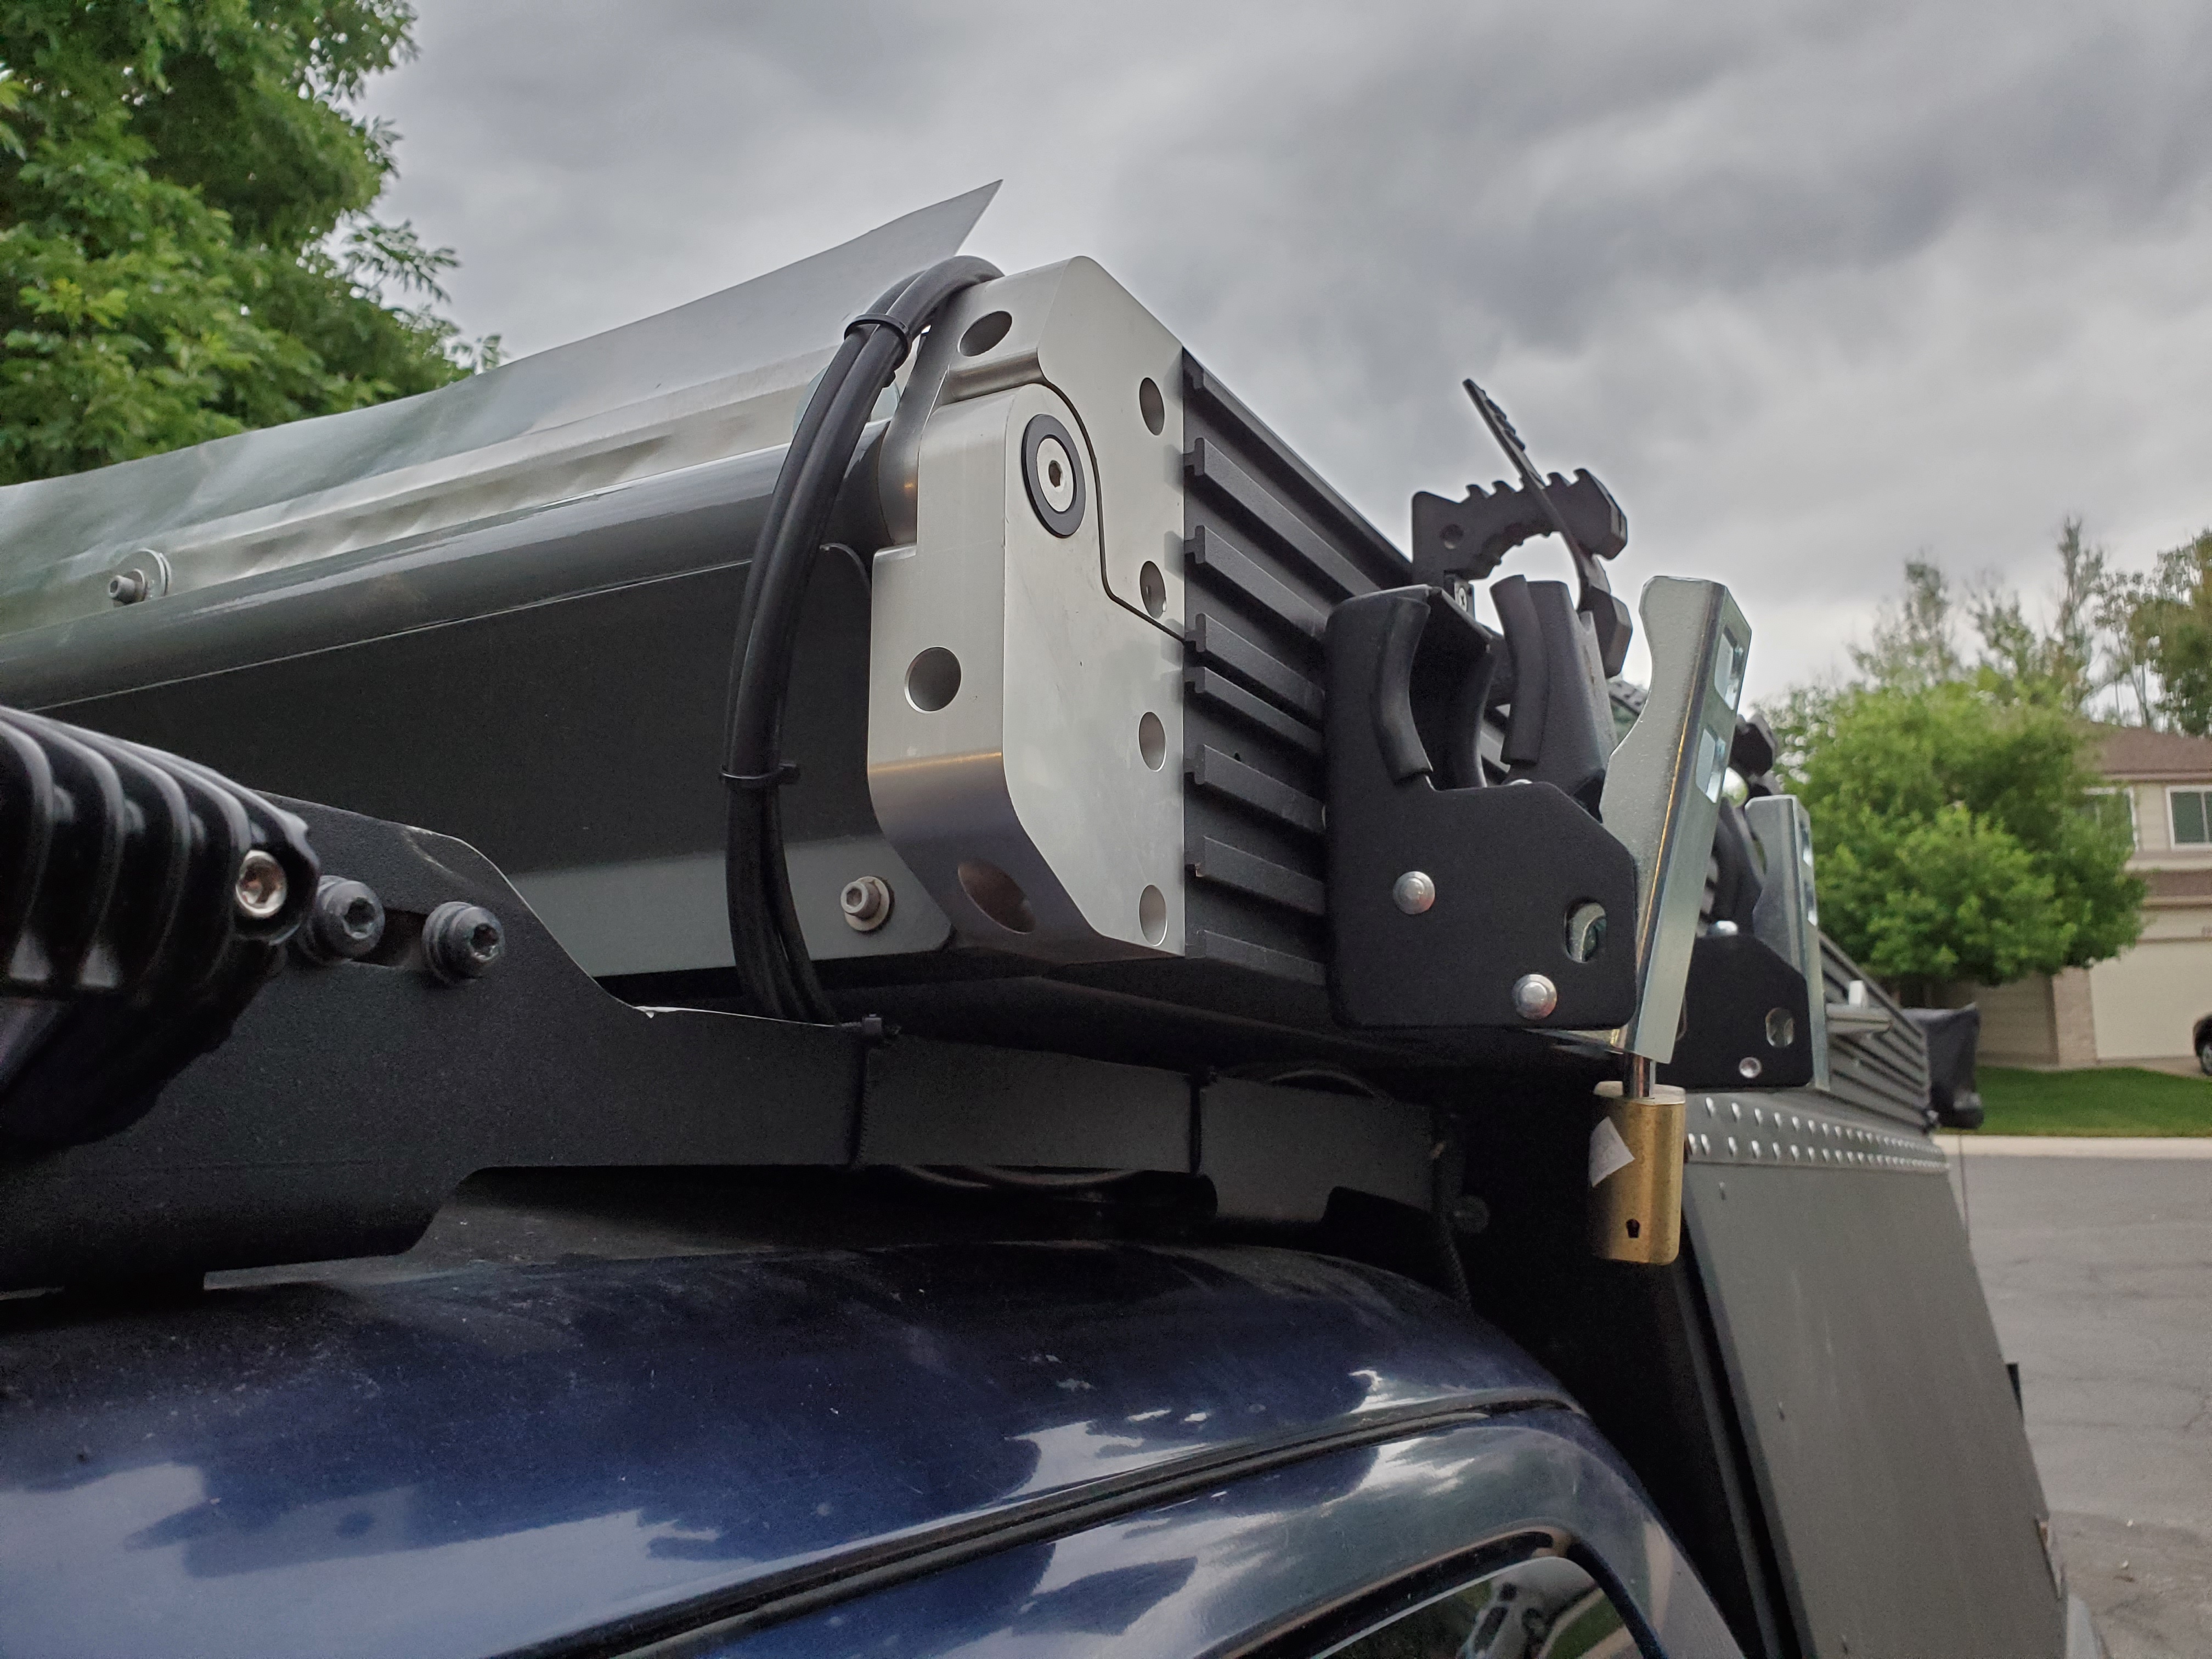
You got a link for the clamps that you used to secure the wiring on the side of the extrusion? I am about to wire up some lighting and I like how your wiring looks.
@anon72572904 This was the link. They had a 12mm (1/2”) option when I ordered. Worked perfect with a double run of the 10 AWG Renogy wire.
Keadic 20Pcs 1-3/4" (45mm) Cable Clamp Rubber Wire Clamps Stainless Steel Rubber Cushioned Insulated Clamps https://www.amazon.ca/dp/B07GZ1D2M1/ref=cm_sw_r_cp_api_i_8TJ2EbDCM0BF8
2 Likes
almost done with mine… finishing up the wiring this afternoon.
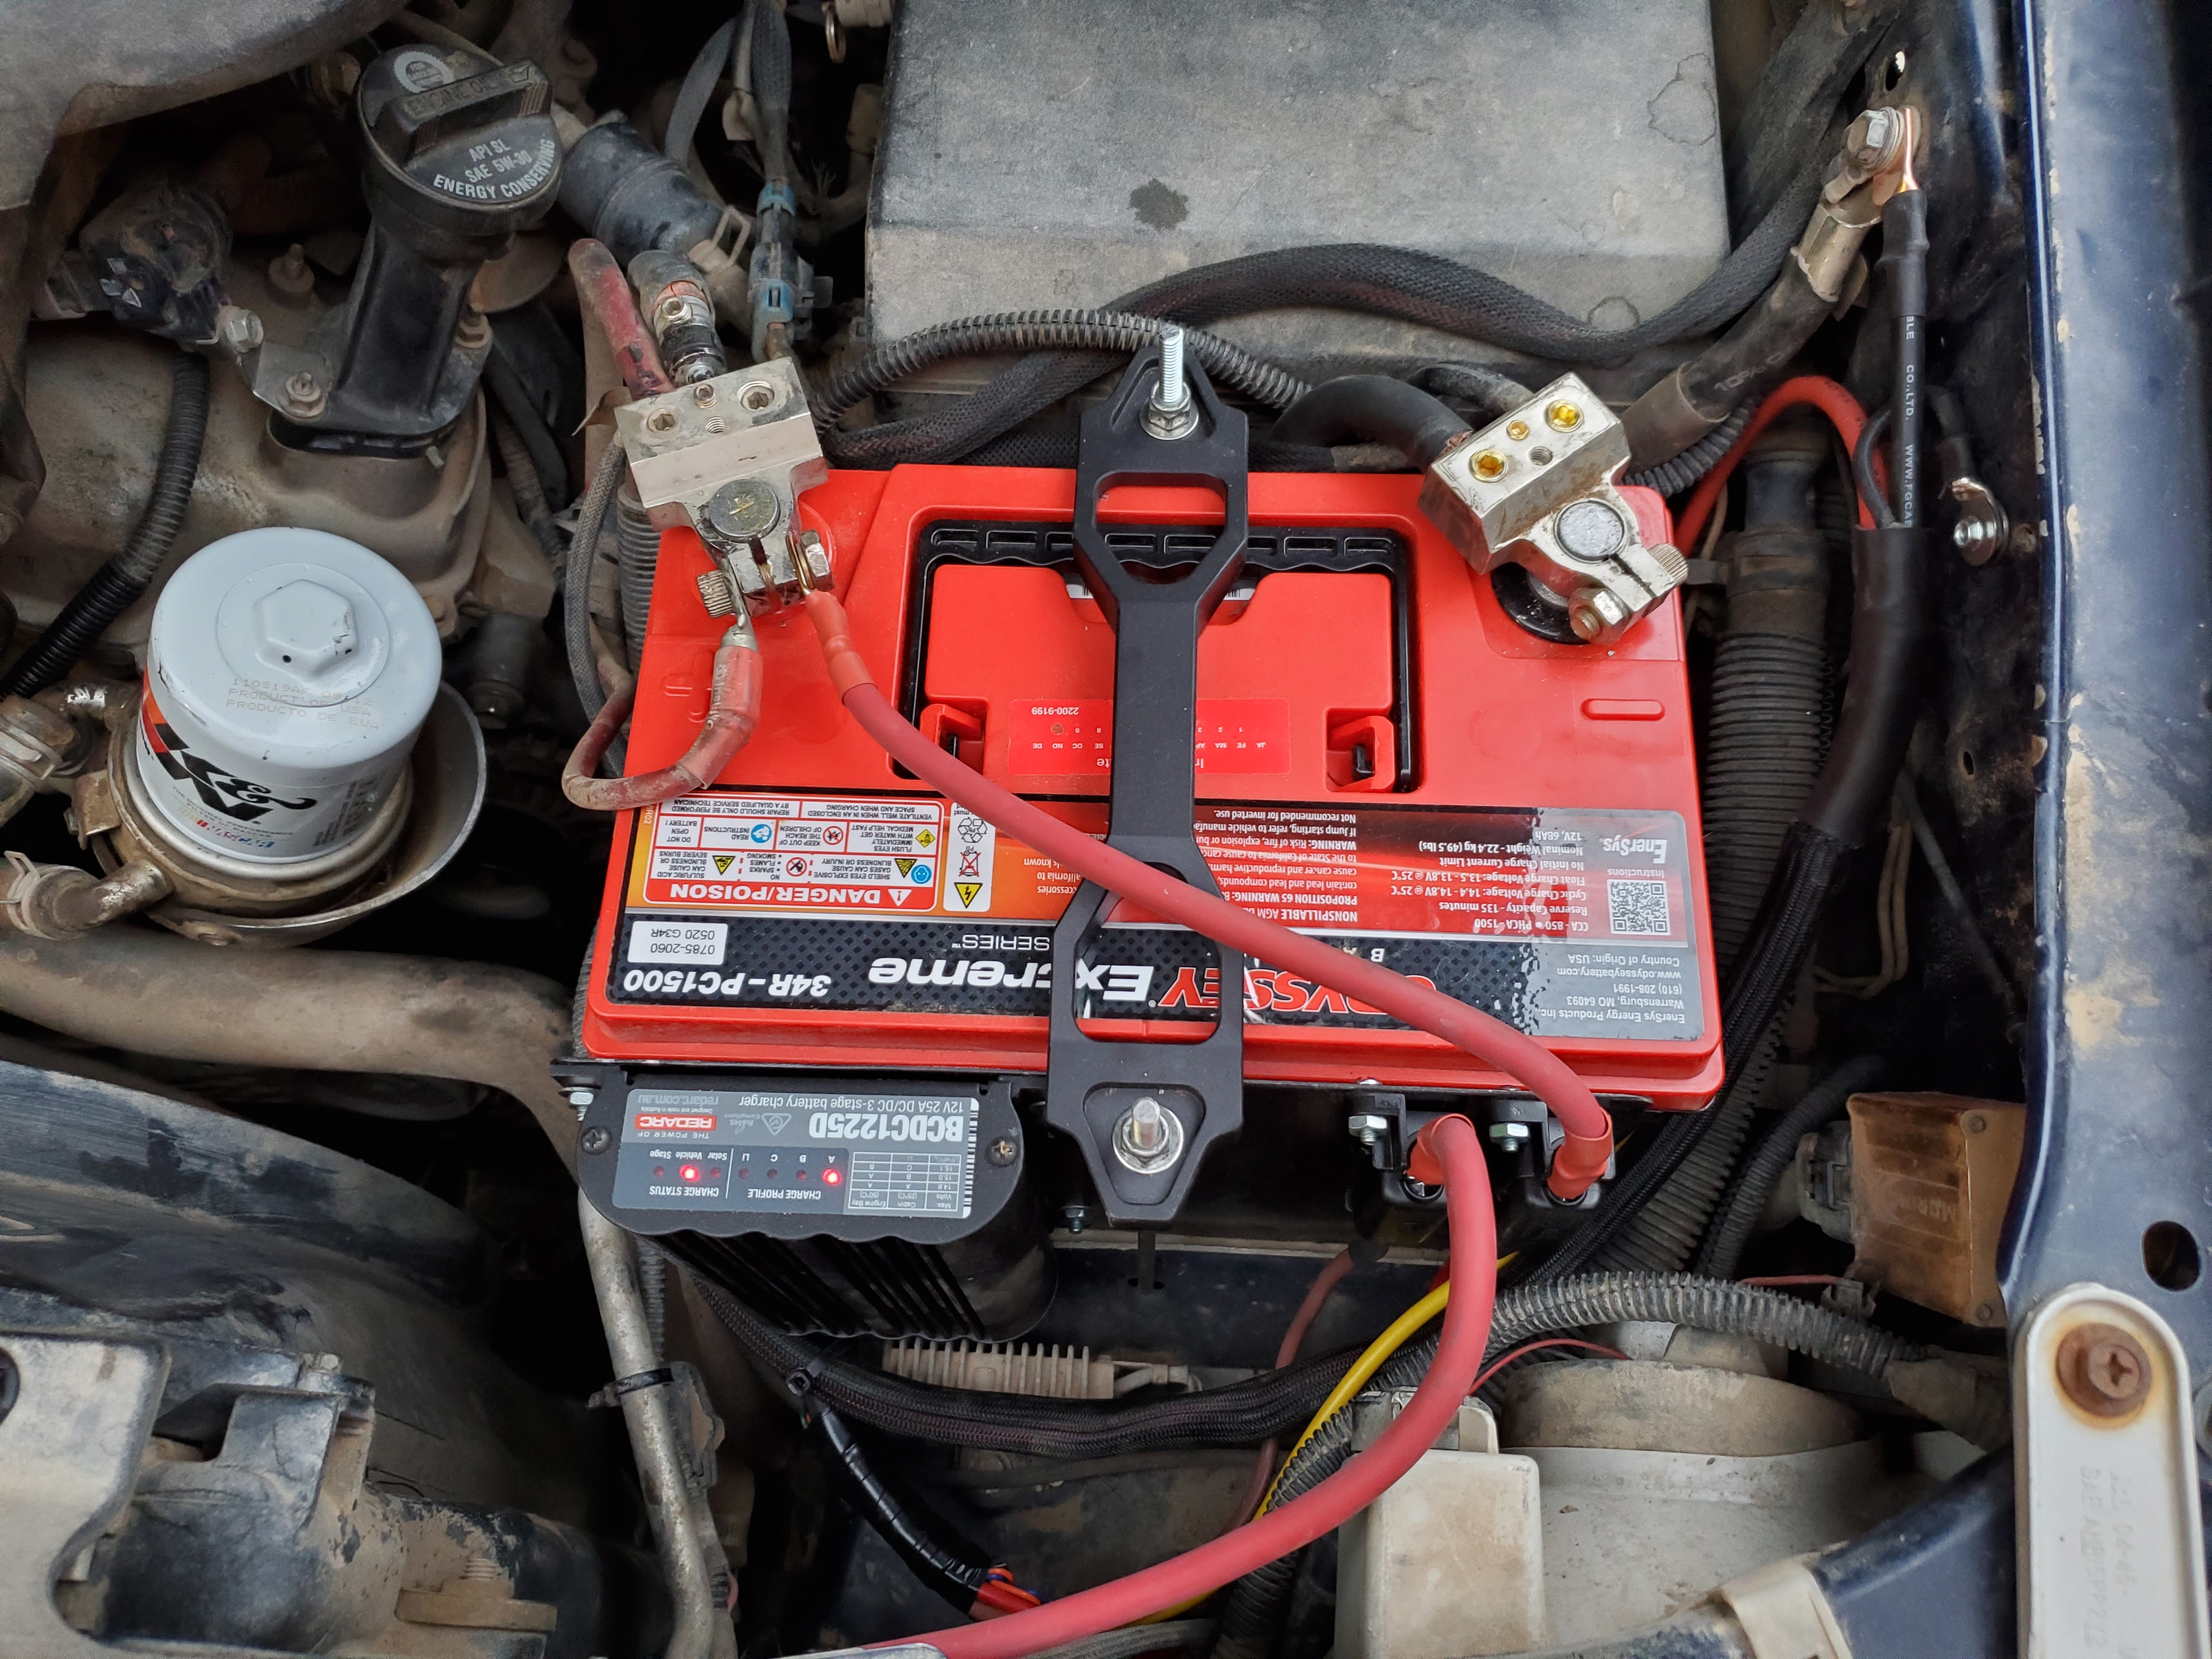
2- 100W Renogy rigids feeding into a Redarc BCDC1225d. homemade mounts using VHB tape and a homemade faring to cut down on the force against the panels. After we get back from an upcoming trip i’ll be doing a backfeed from the aux battery to the main using an isolator so when the aux is full, it’ll trickle back to the starting battery, but only when the ignition is off.
2 Likes
@NYCO Do you have your setup documented in a build somewhere? I am researching dual battery setups with solar supplement as the group 31 is no longer cutting it. Also I’m just down the road in COS and would love to have a look at your setup sometime.
i usually keep my build updated over on TW, https://www.tacomaworld.com/threads/nycos-06-boosted-blue-betty.157700/
i’ve been getting lazier on full documentation… if i’m producing an article about the project, i’ll have in depth how-to, otherwise i’ll just grab pics along the way.
Renogy has a nice looking option that offers the battery isolation feature, ties in solar, MPPT function and also has a built in trickle back to the starting battery… cons are: not waterproof/dust proof, larger casing, and needs to be shielded from heat. https://www.renogy.com/dcc50s-12v-50a-dc-dc-on-board-battery-charger-with-mppt/
The Redarc has the isolation, solar tie in, MPPT function, waterproof/dust proof, and able to withstand heat better so mounting in the engine bay is an option. To get the trickle back to the start battery, you have to hook up an isolator, like a blue seas or the redarc isolator, but in reverse and a relay in place to ground the unit (turn it on) when the ignition is off. then when the solar charges the aux battery over 14V, it will then send charge over to the starting battery until both are topped off. https://redarcelectronics.com/products/dual-input-25a-in-vehicle-dc-battery-charger
Both will draw power from solar first, then from the start battery/alternator.
1 Like
How is the 3m tape holding up for the panels??
Looks clean man. I like this a lot
@RbrettM. This was the link. They had a 12mm (1/2”) option when I ordered. Worked perfect with a double run of the 10 AWG Renogy wire.
Keadic 20Pcs 1-3/4" (45mm) Cable Clamp Rubber Wire Clamps Stainless Steel Rubber Cushioned Insulated Clamps https://www.amazon.ca/dp/B07GZ1D2M1/ref=cm_sw_r_cp_api_i_8TJ2EbDCM0BF8
Still going strong! No issues at all. I’ve been parked out on hot summer days and gone through tons of pouring rain.
2 Likes
Looks like it doesn’t come with any additional hardware to bolt directly to the camper
1 Like
Correct. You need t-nuts from GFC or GZila.
1 Like
how you like that west mtn radio for power? Is it really necessary? Was doing some research on them and look handy
Anyone have tips for mounting a goal zero Boulder 100 on beef racks?
I bought the roof rack mounting brackets from goalzero but didnt like the fit. They have a tray that the panel fits in that can squeeze the panel together. Unfortunately with the beef racks, this made the panel sit too low that it would have to be below the roof, or way too high that it was ridiculous. I even tried mounting to the top and bottom of the beef racks. I actually ended up using the mounts sideways, not as intended by goalzero and they fit much better that way.
Its raining pretty good now but I can go take a picture of it when it stops. Im actually going to sell the panel and mounting brackets too if you wanted them. Instead I just bought 2 flexible solar panels and hoping the install goes smoothly. The reason for the switch is I usually have a few surfboards/snowboards on the roof. Ive had problems getting the camper shut (especially on my right side) that I think is related to the weight on the roof, maybe even more weight on one side than the other as sometimes I load up a bunch of boards on the left to keep the solar panel on the right. Sometimes to even out the weight i’ll put boards on both sides which covers the solar panel. After a day or two that becomes a problem since i’m constantly charging stuff and mostly live out of the camper and not having energy/lights at night sucks! The other problem is im probaly at the max weight that the shocks can handle and need to drop some roof weight. Since I’d rather not sacrifice on a surfboard i’m hoping to drop the weight by switching to the flexible panels. They are 4lbs each and can 3m directly to the roof!
I have the goal zero mounting brackets as well, but hate how high they sit. I like your idea using the brackets sideways, do you mind sending I photo when you get a chance, I am going to give it a try.