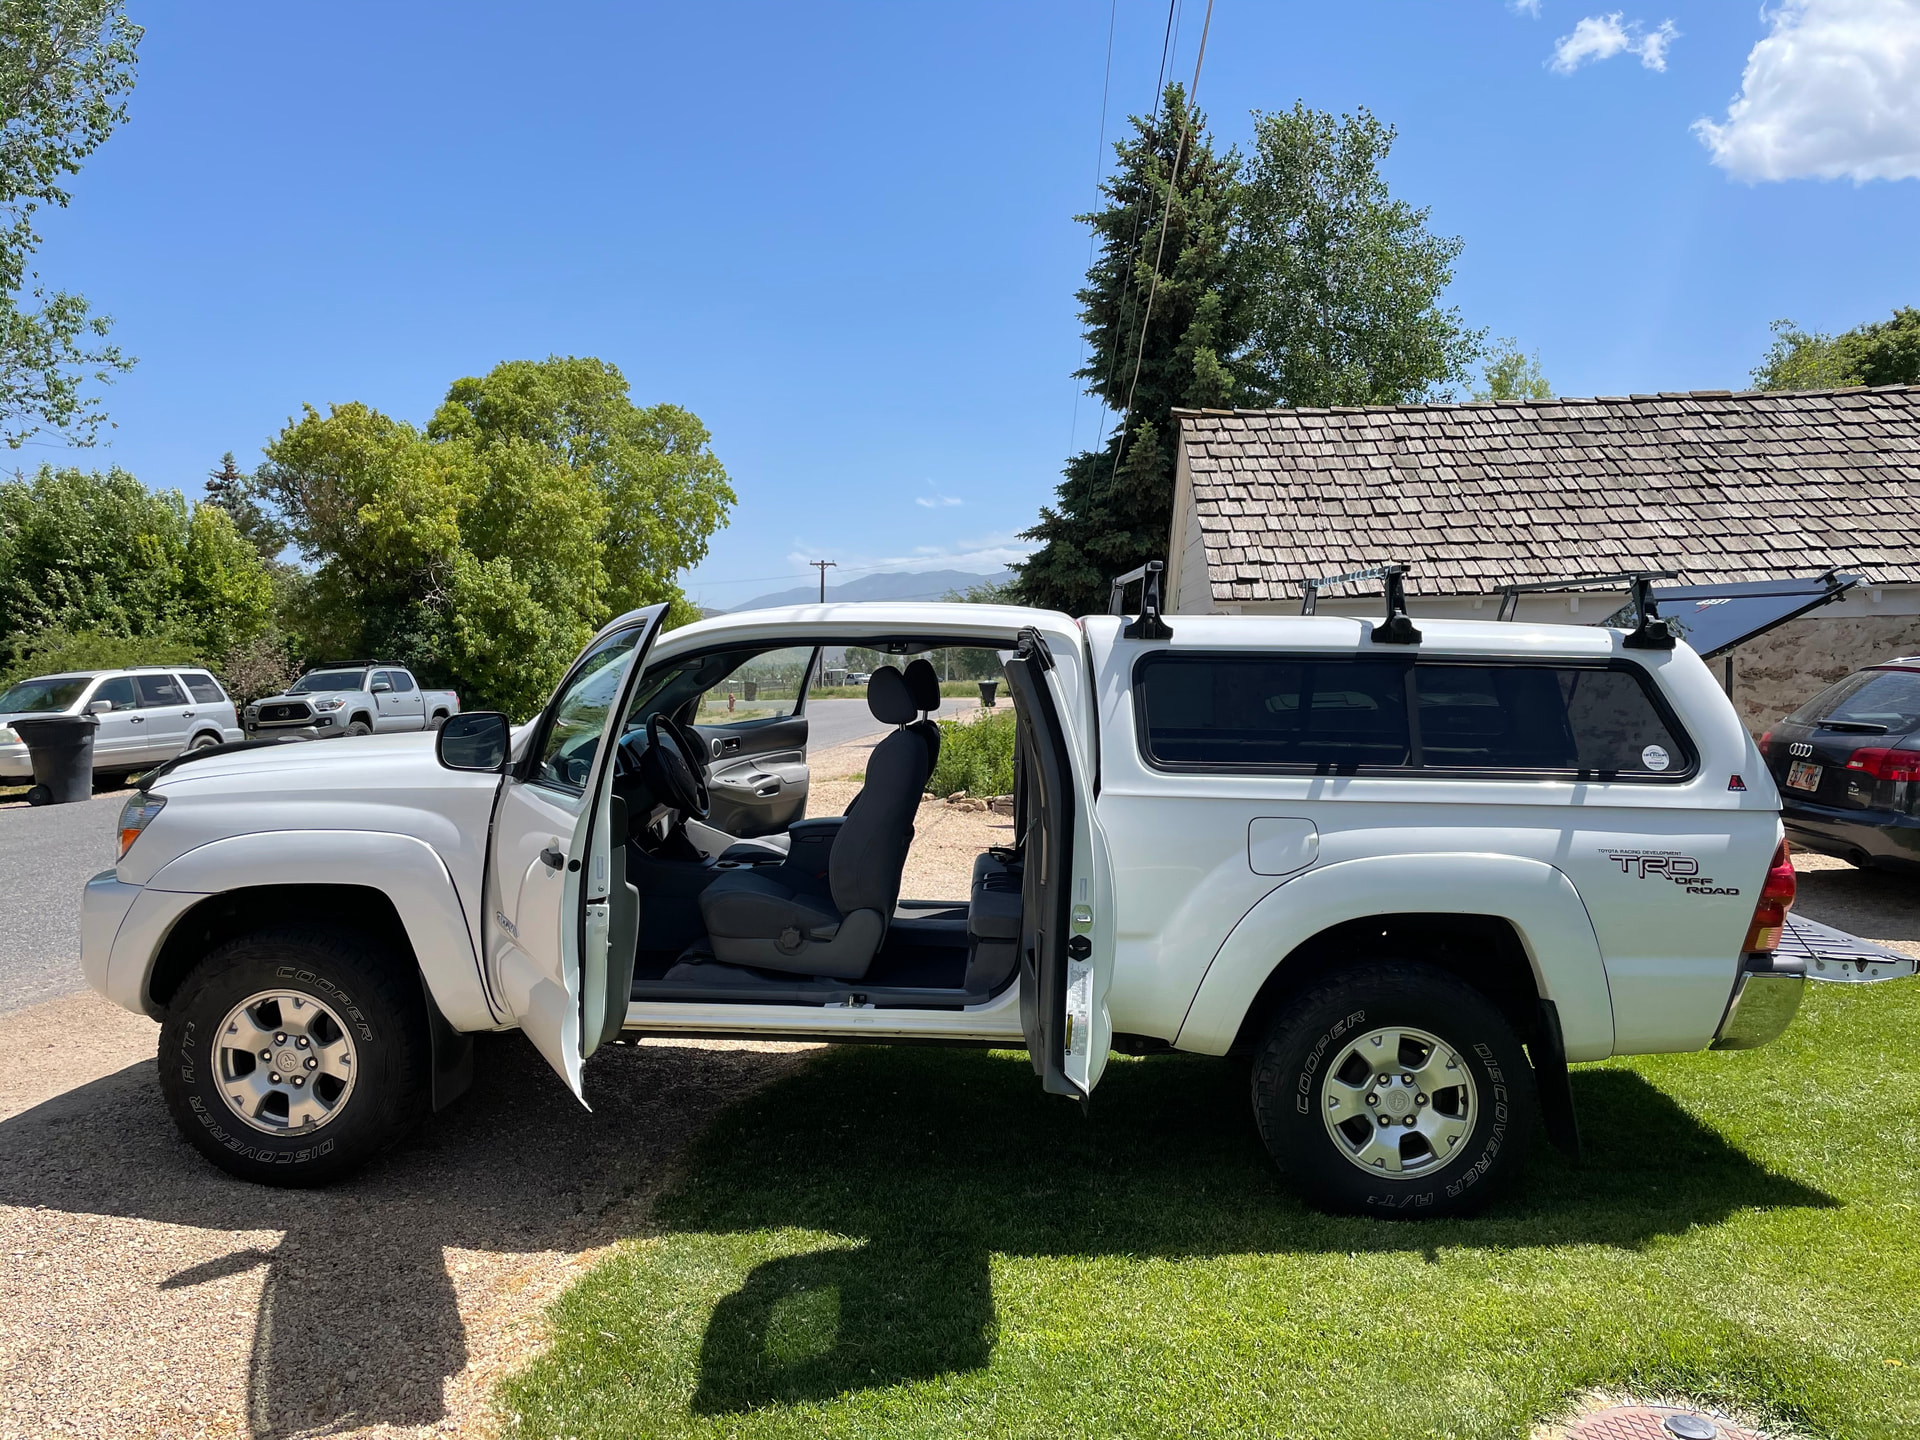
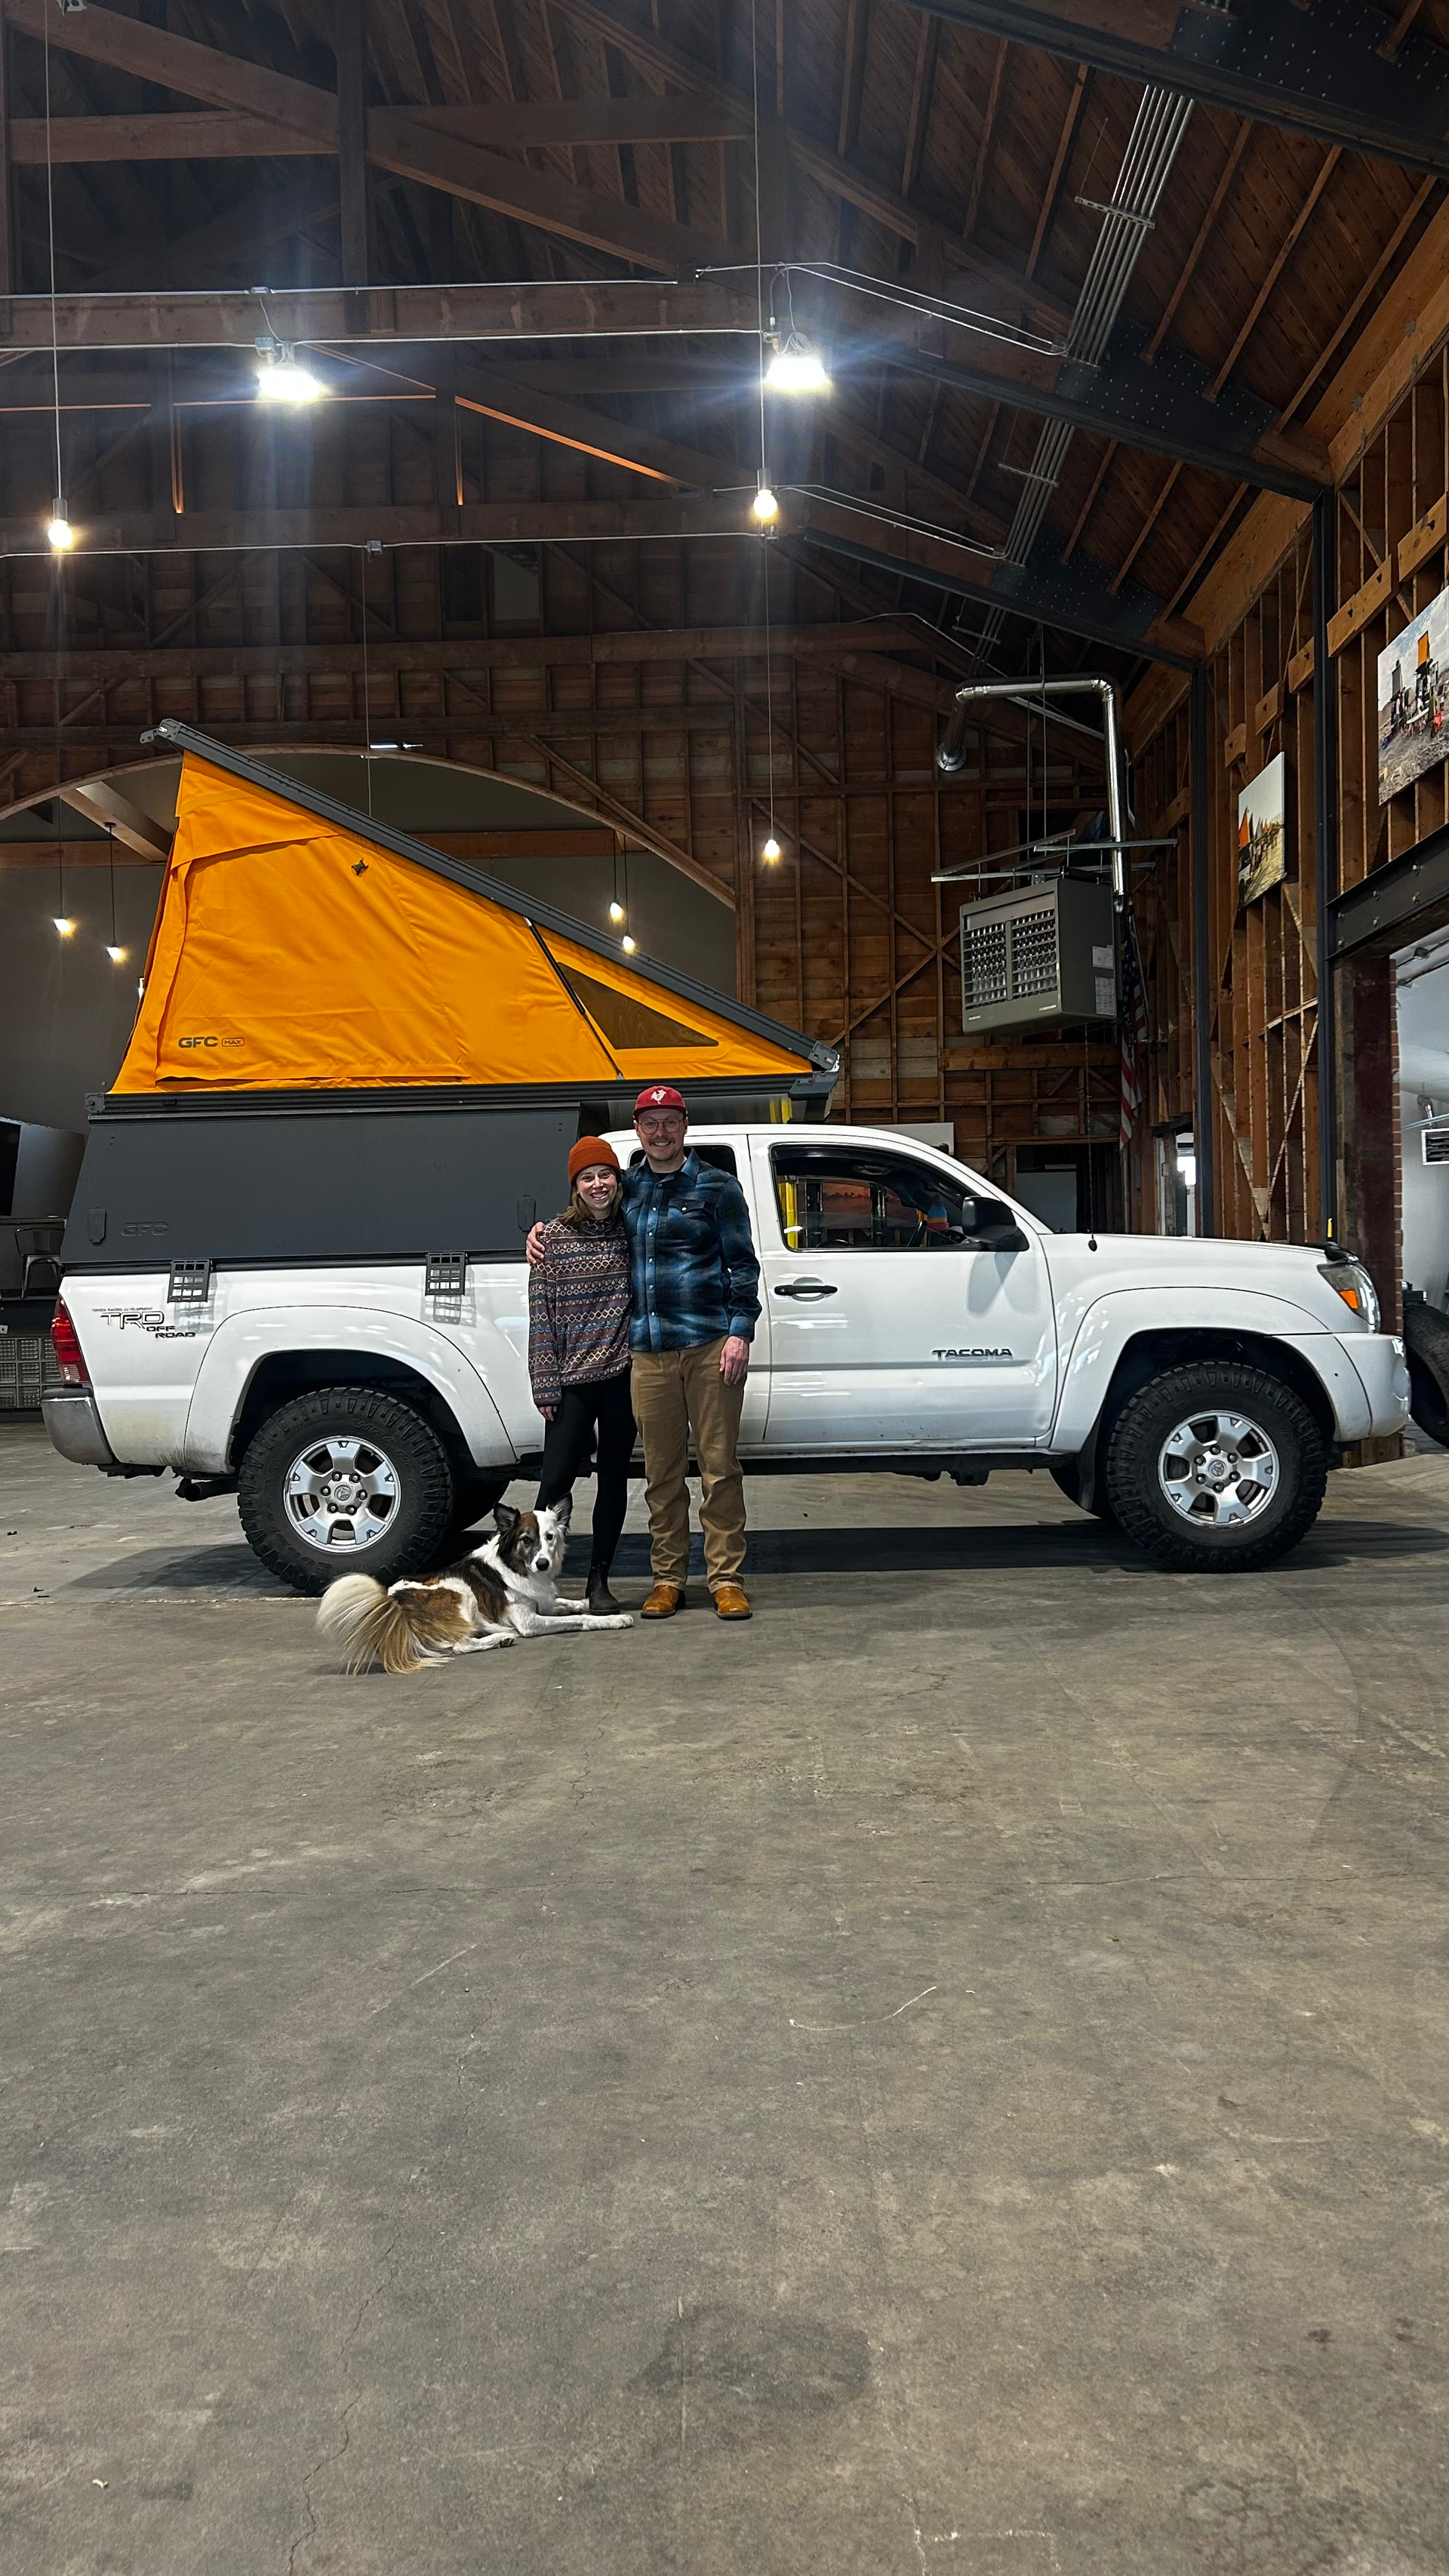
Pickle here. I figured I’d share my build and progress on my ’07 Tacoma. I bought this truck about five years ago, and it was—and still is—my dream truck. It’s a 6-speed manual with 176k miles on it.
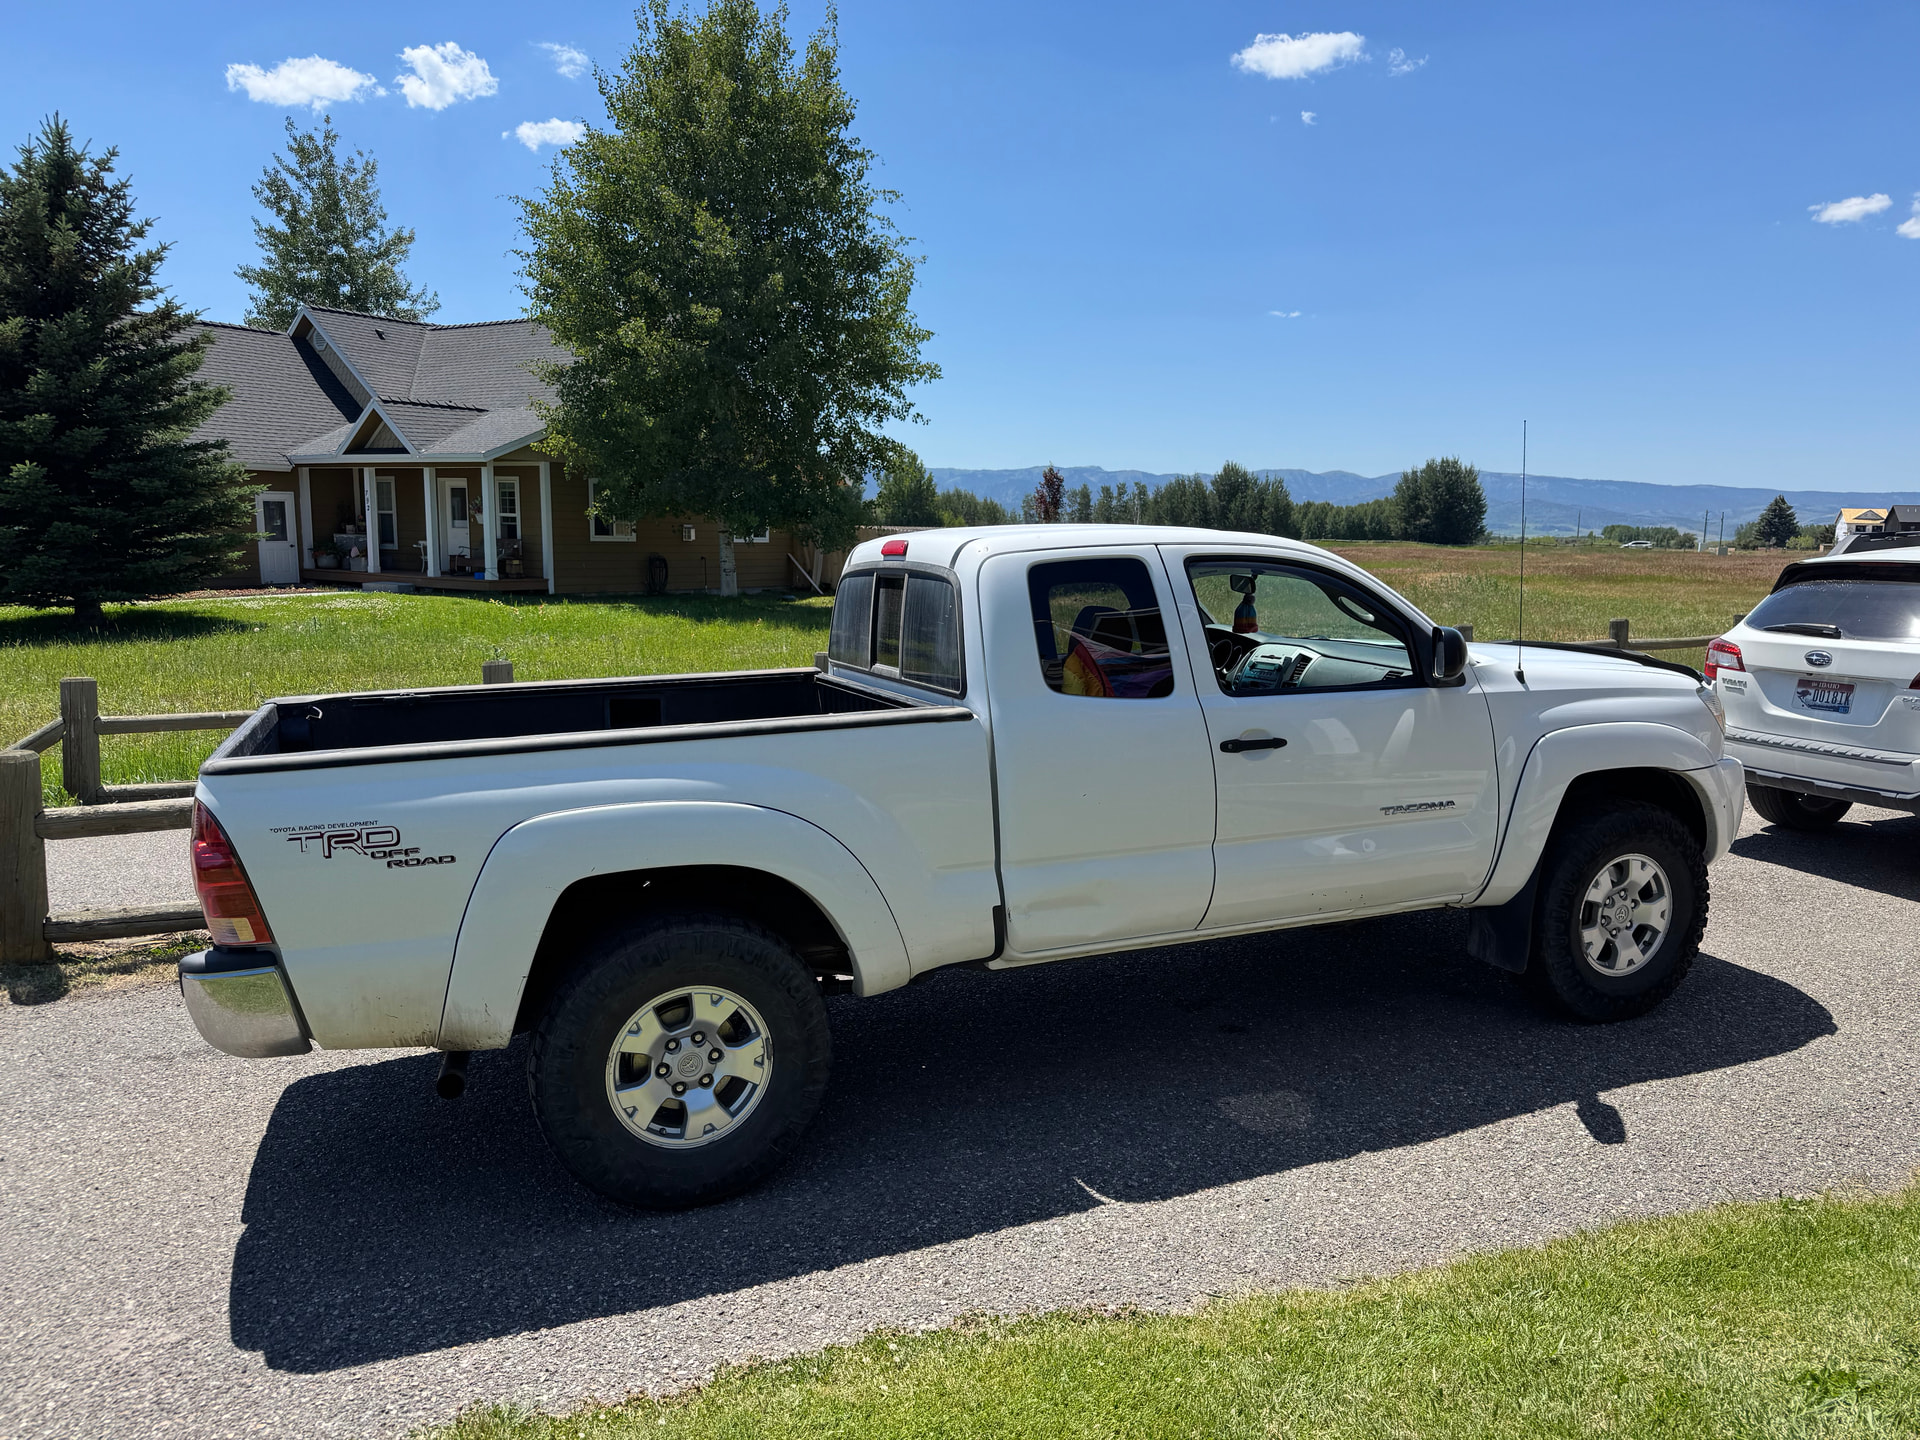
Initially, our plan (my fiancé and I) was to throw a GFC on it and up our camping game for the few trips we’d take each year. After some big life changes—and with the release of the MAX—we decided to pivot and build a rig we could live out of for months at a time.
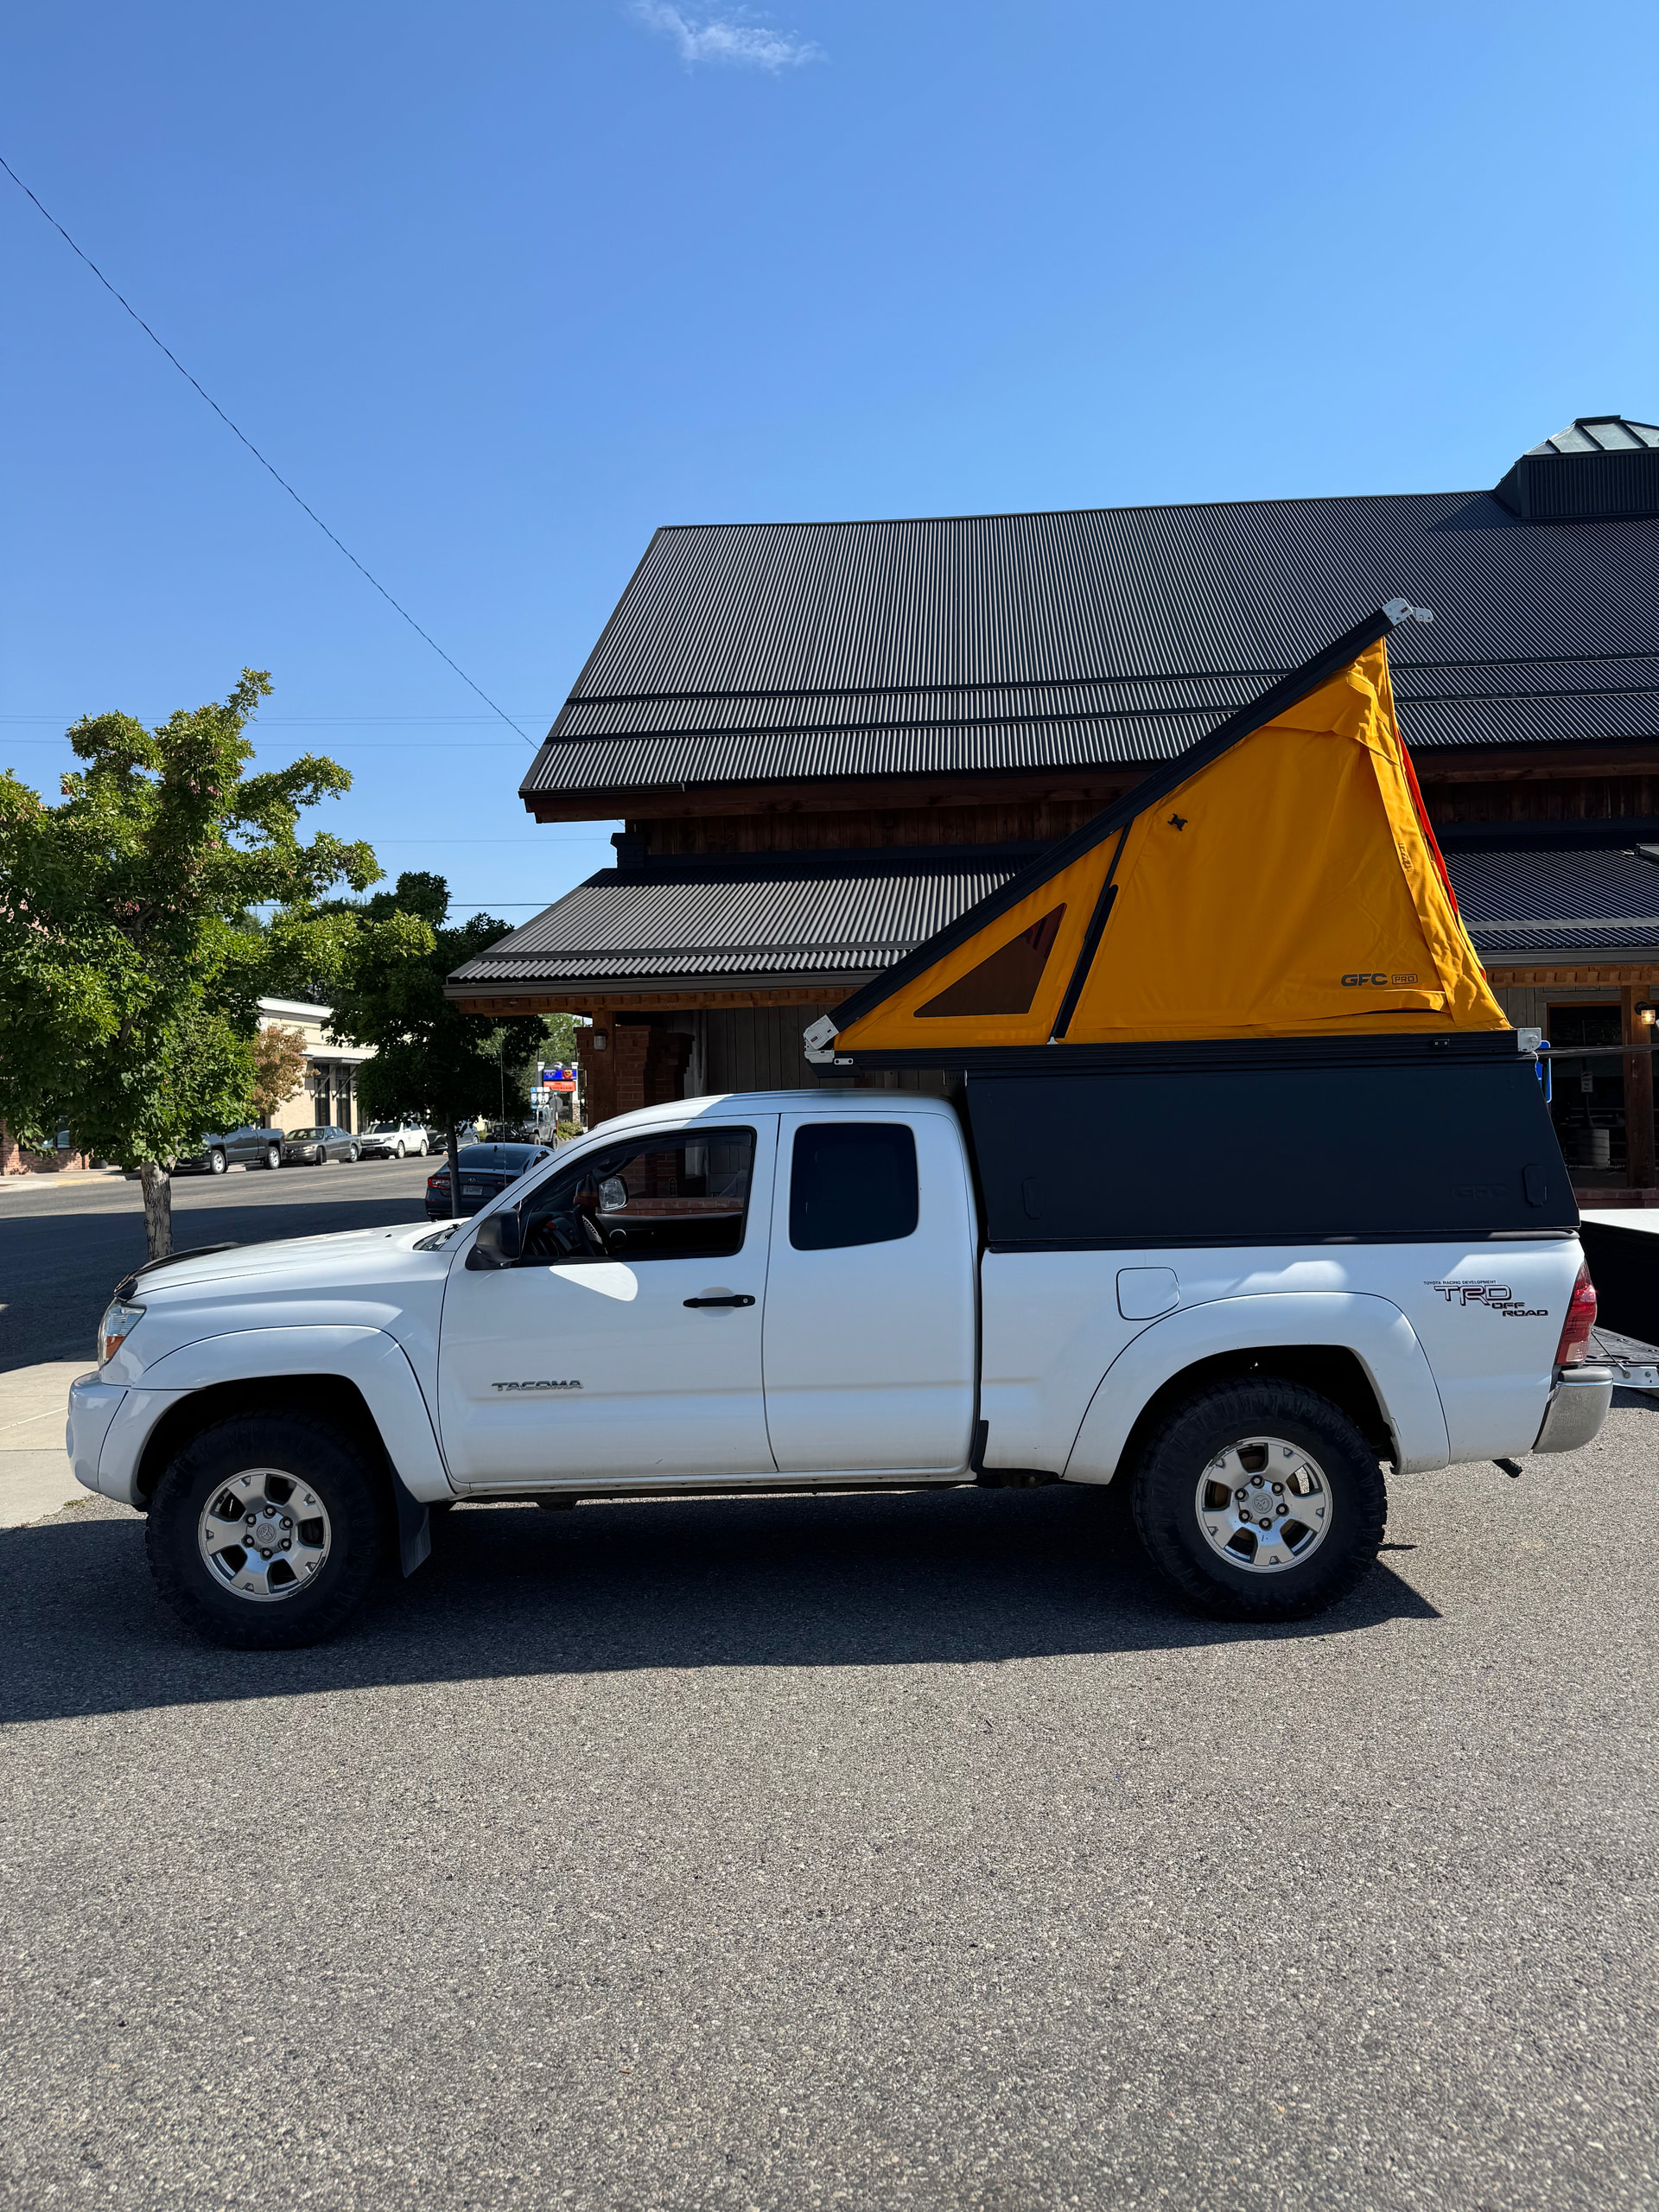
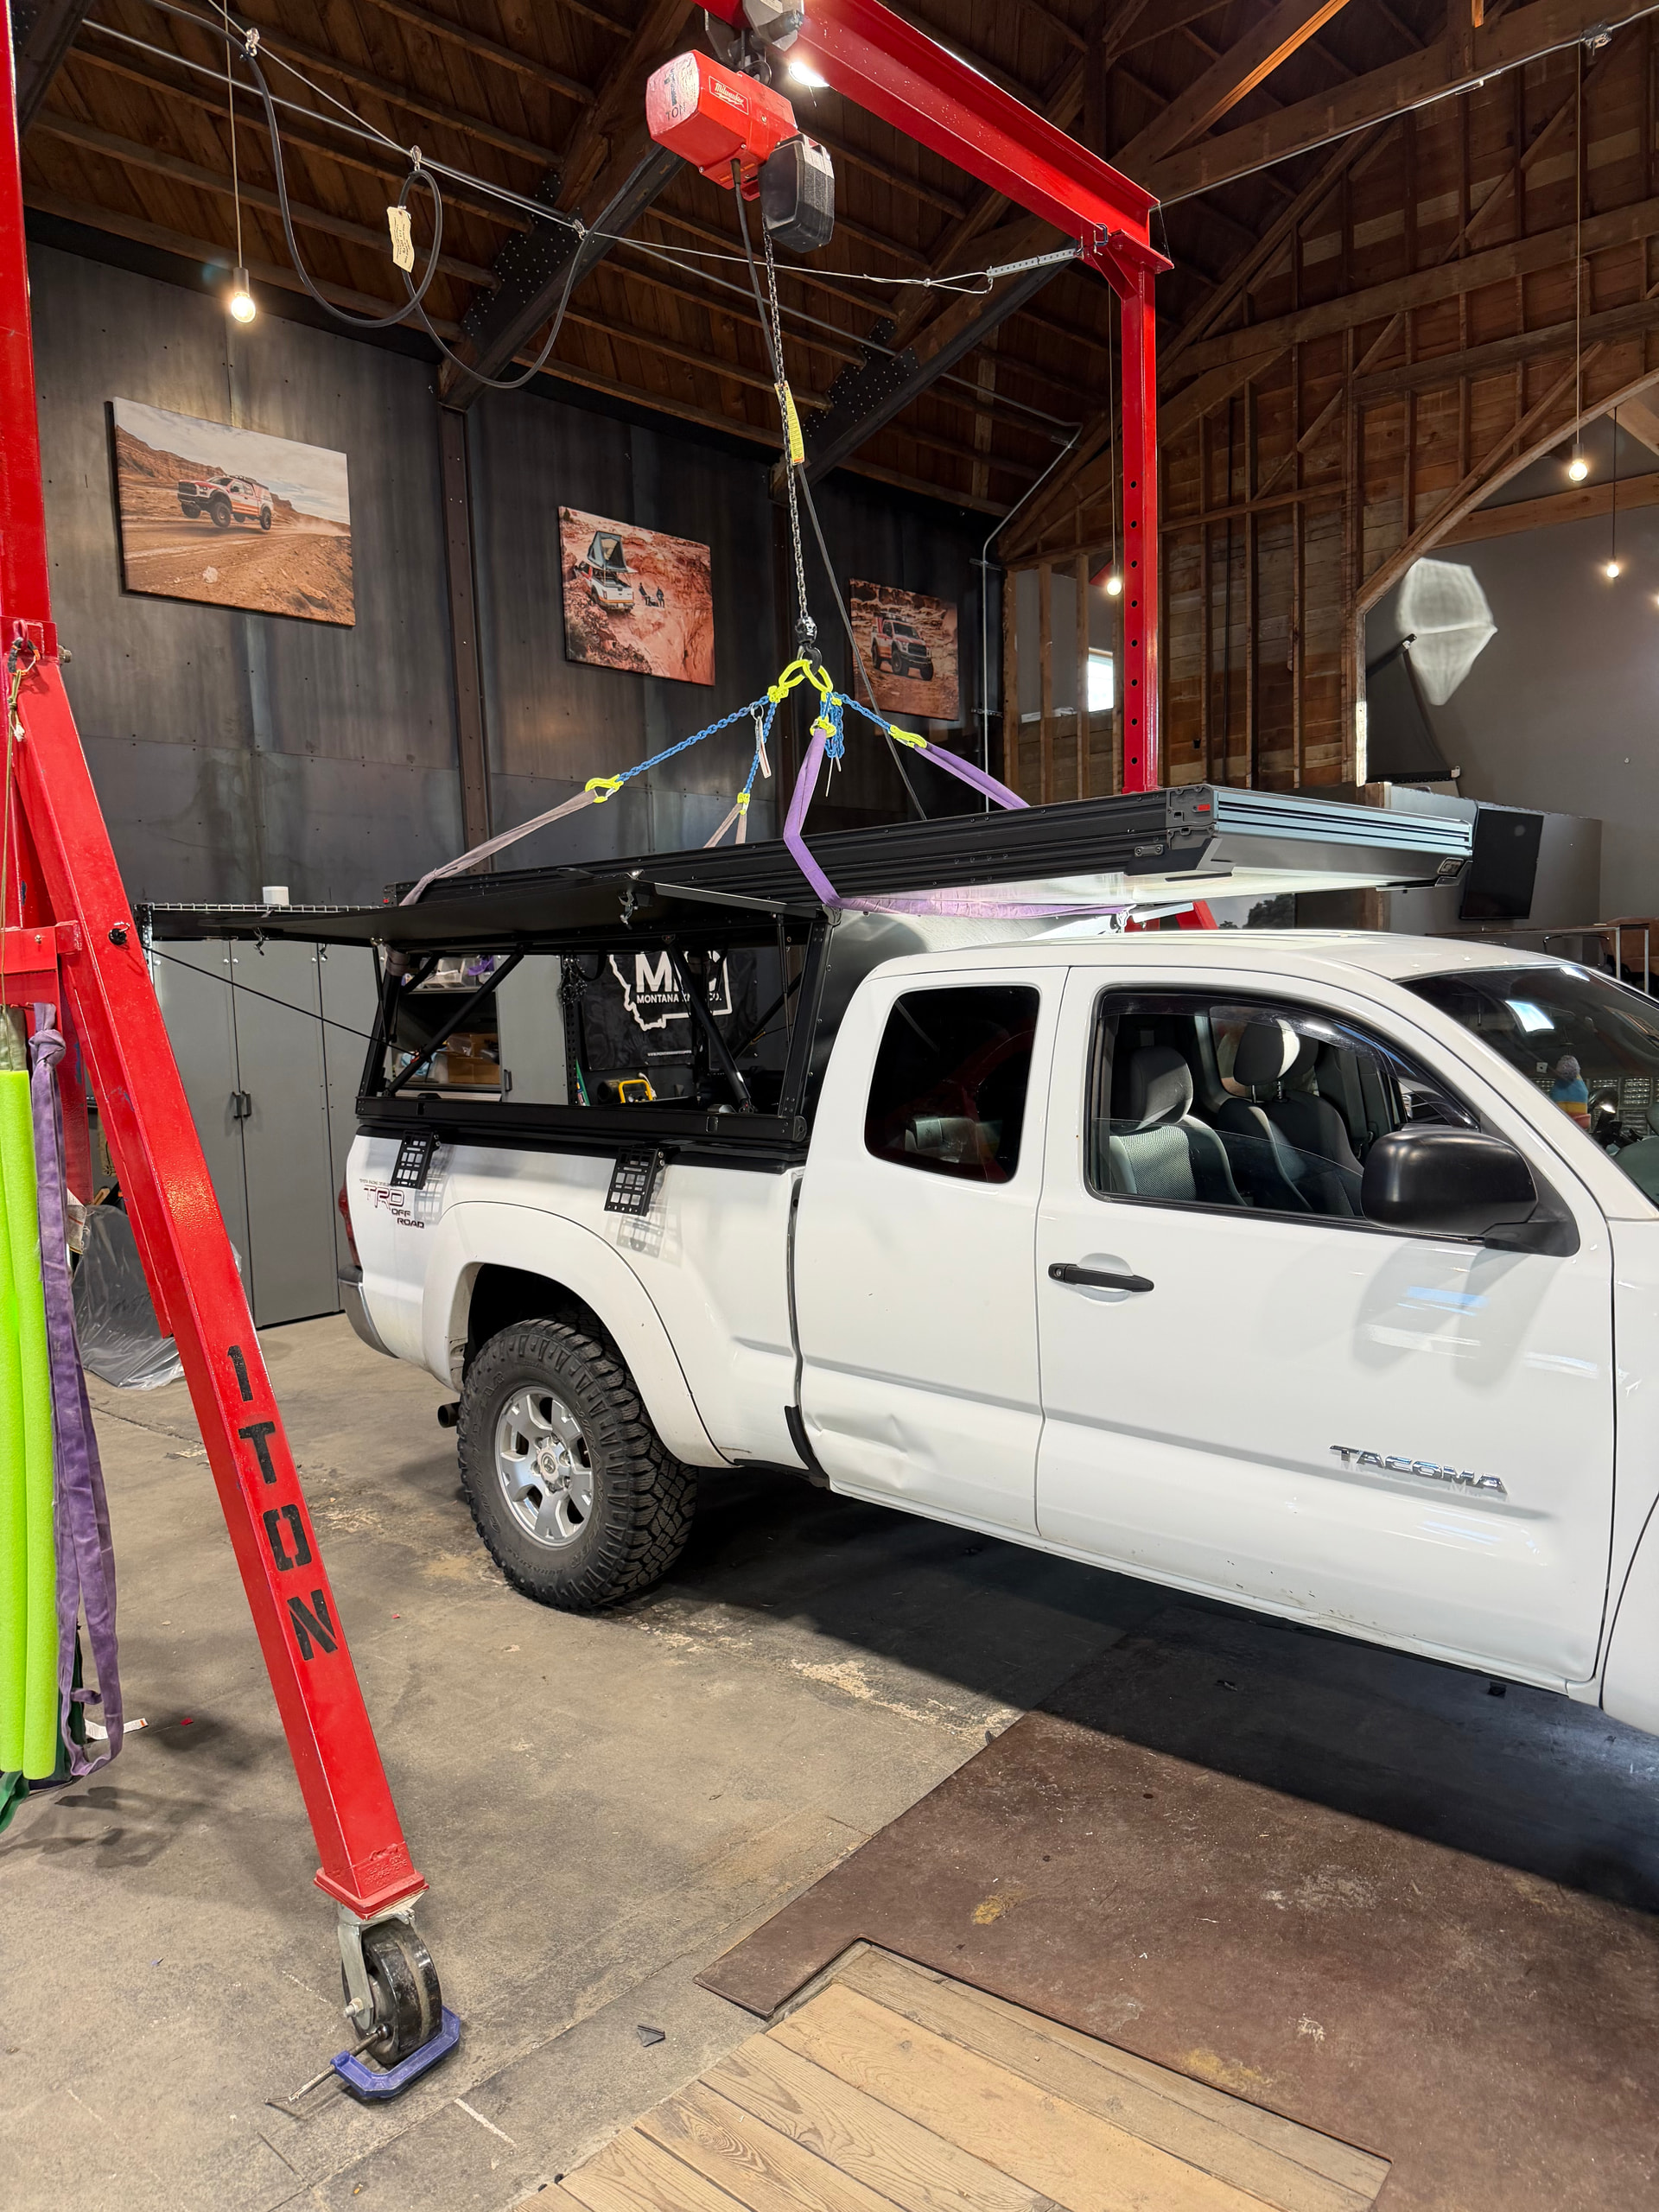
We bought our GFC Pro in spring 2025, had it installed in August, and ended up selling it in December. We were lucky enough to secure an early install slot for the MAX and had that installed in December as well.
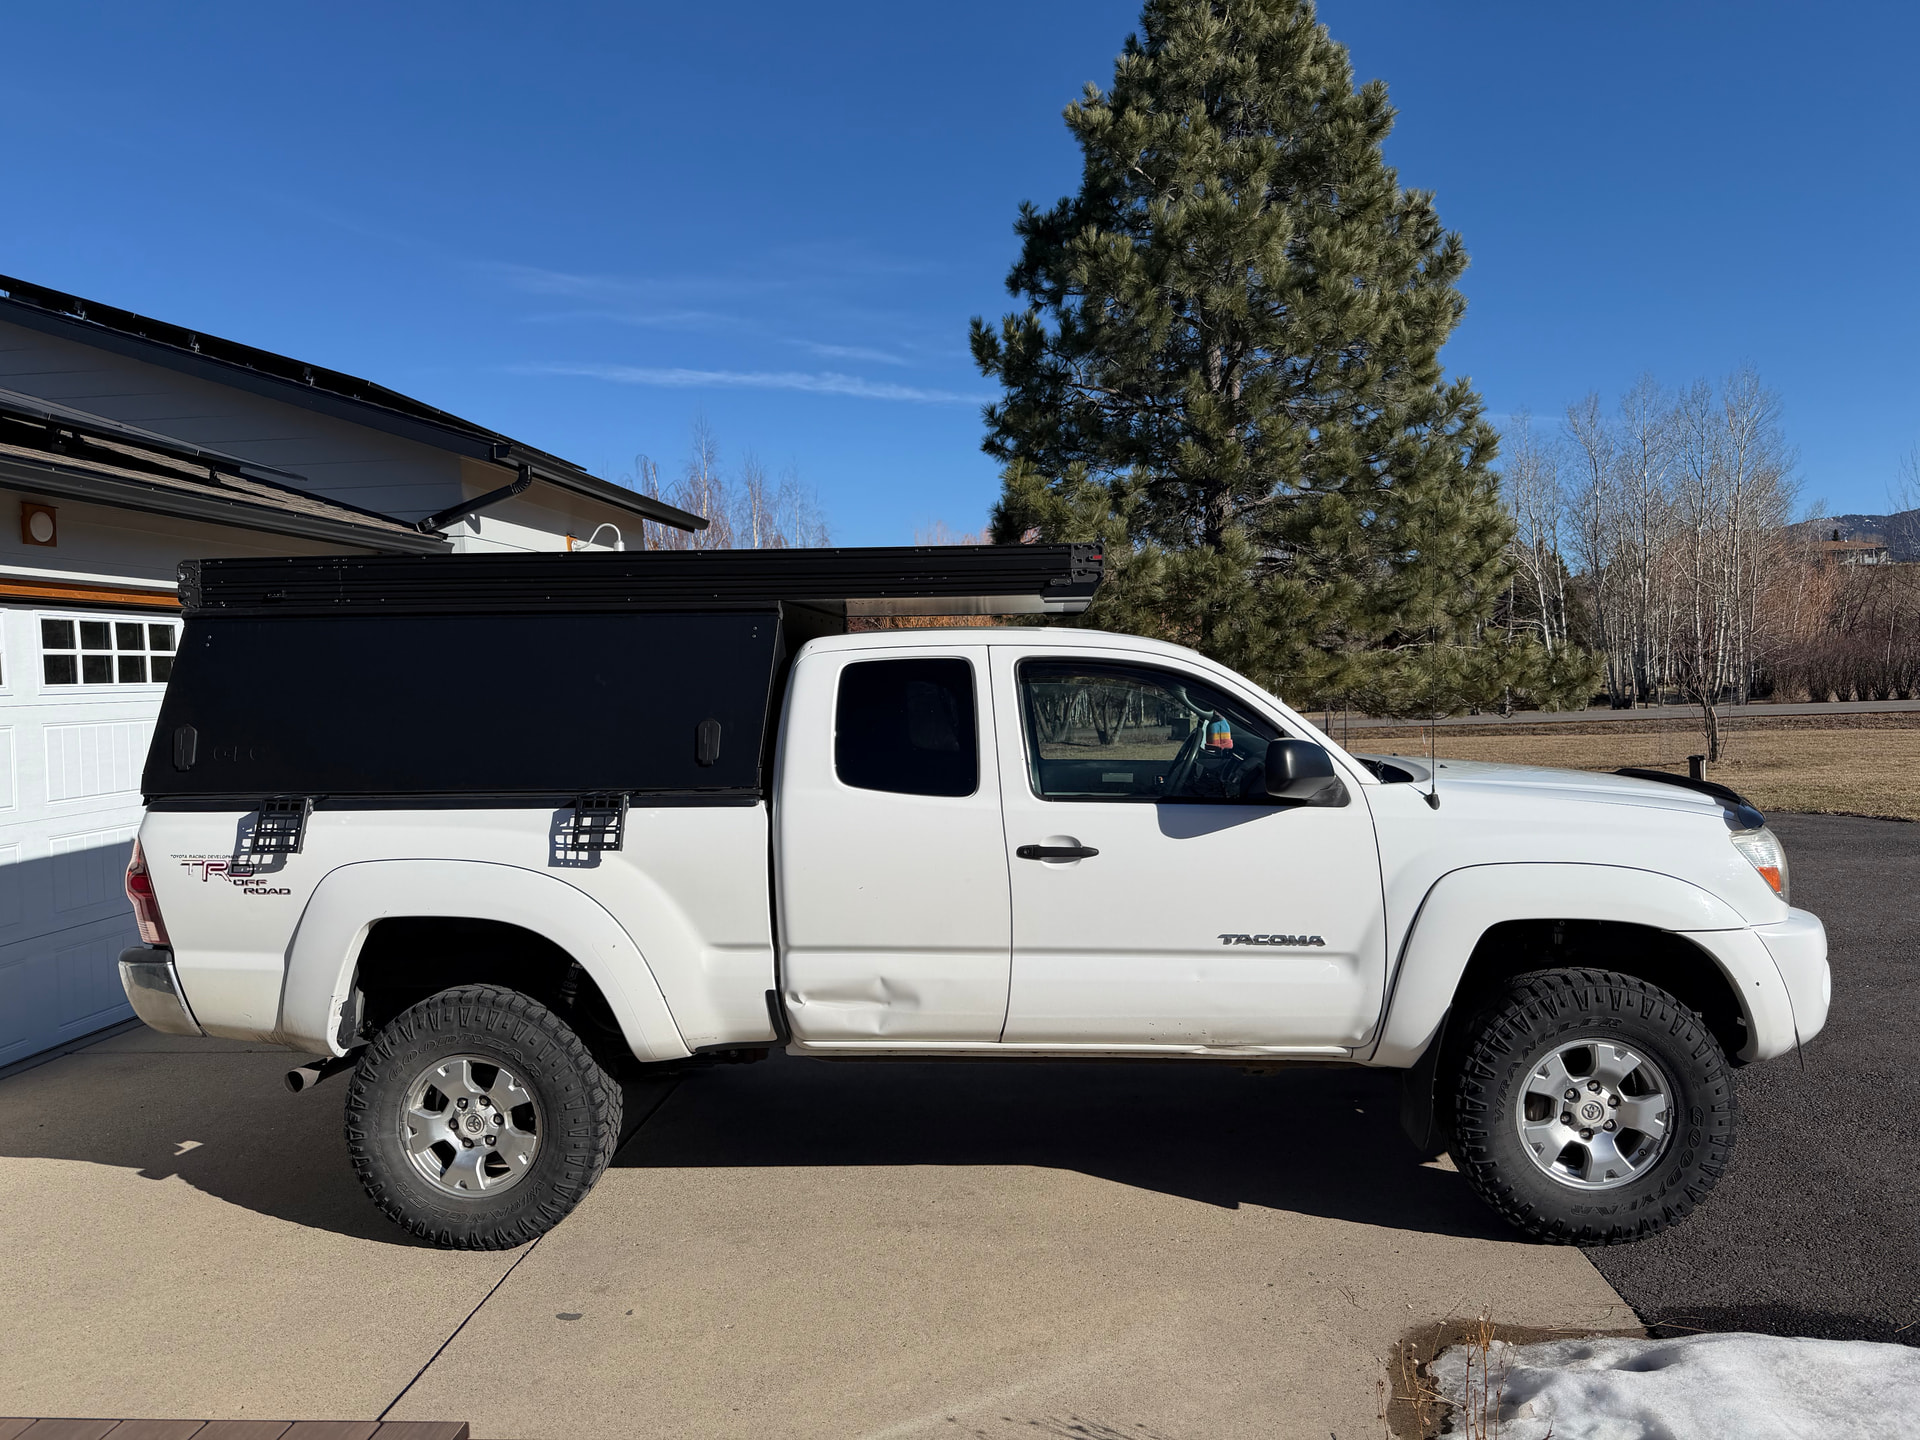
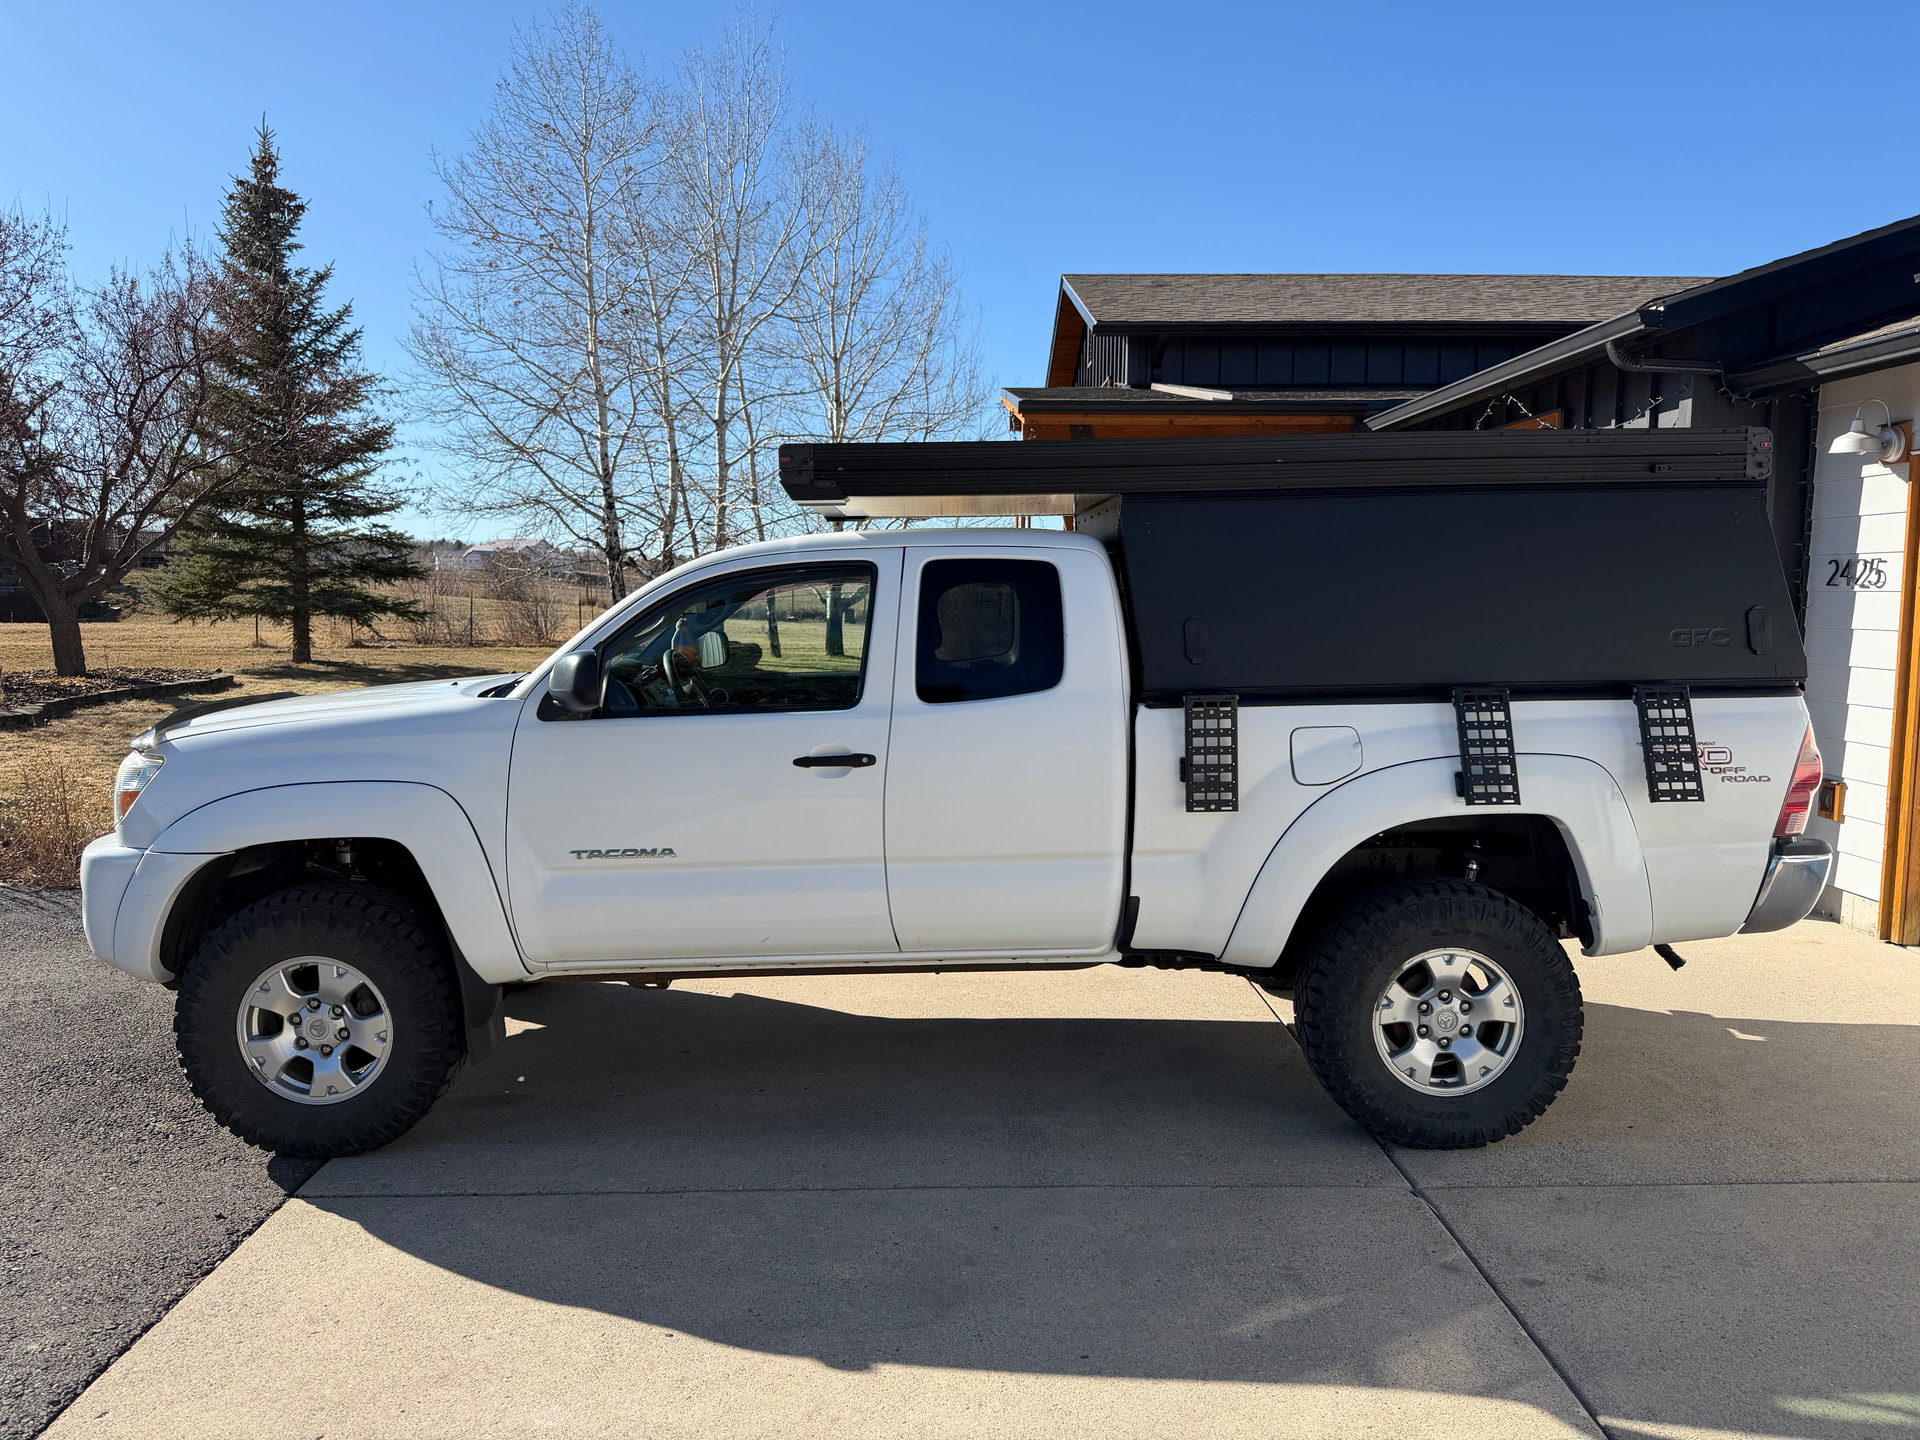
Check out the photos below to see how the truck has evolved since day one. I’ll post more specifics later about what’s going on in the bed, fender racks, and the new suspension. Happy to answer any questions about the Pro-to-MAX change or anything else that comes to mind.
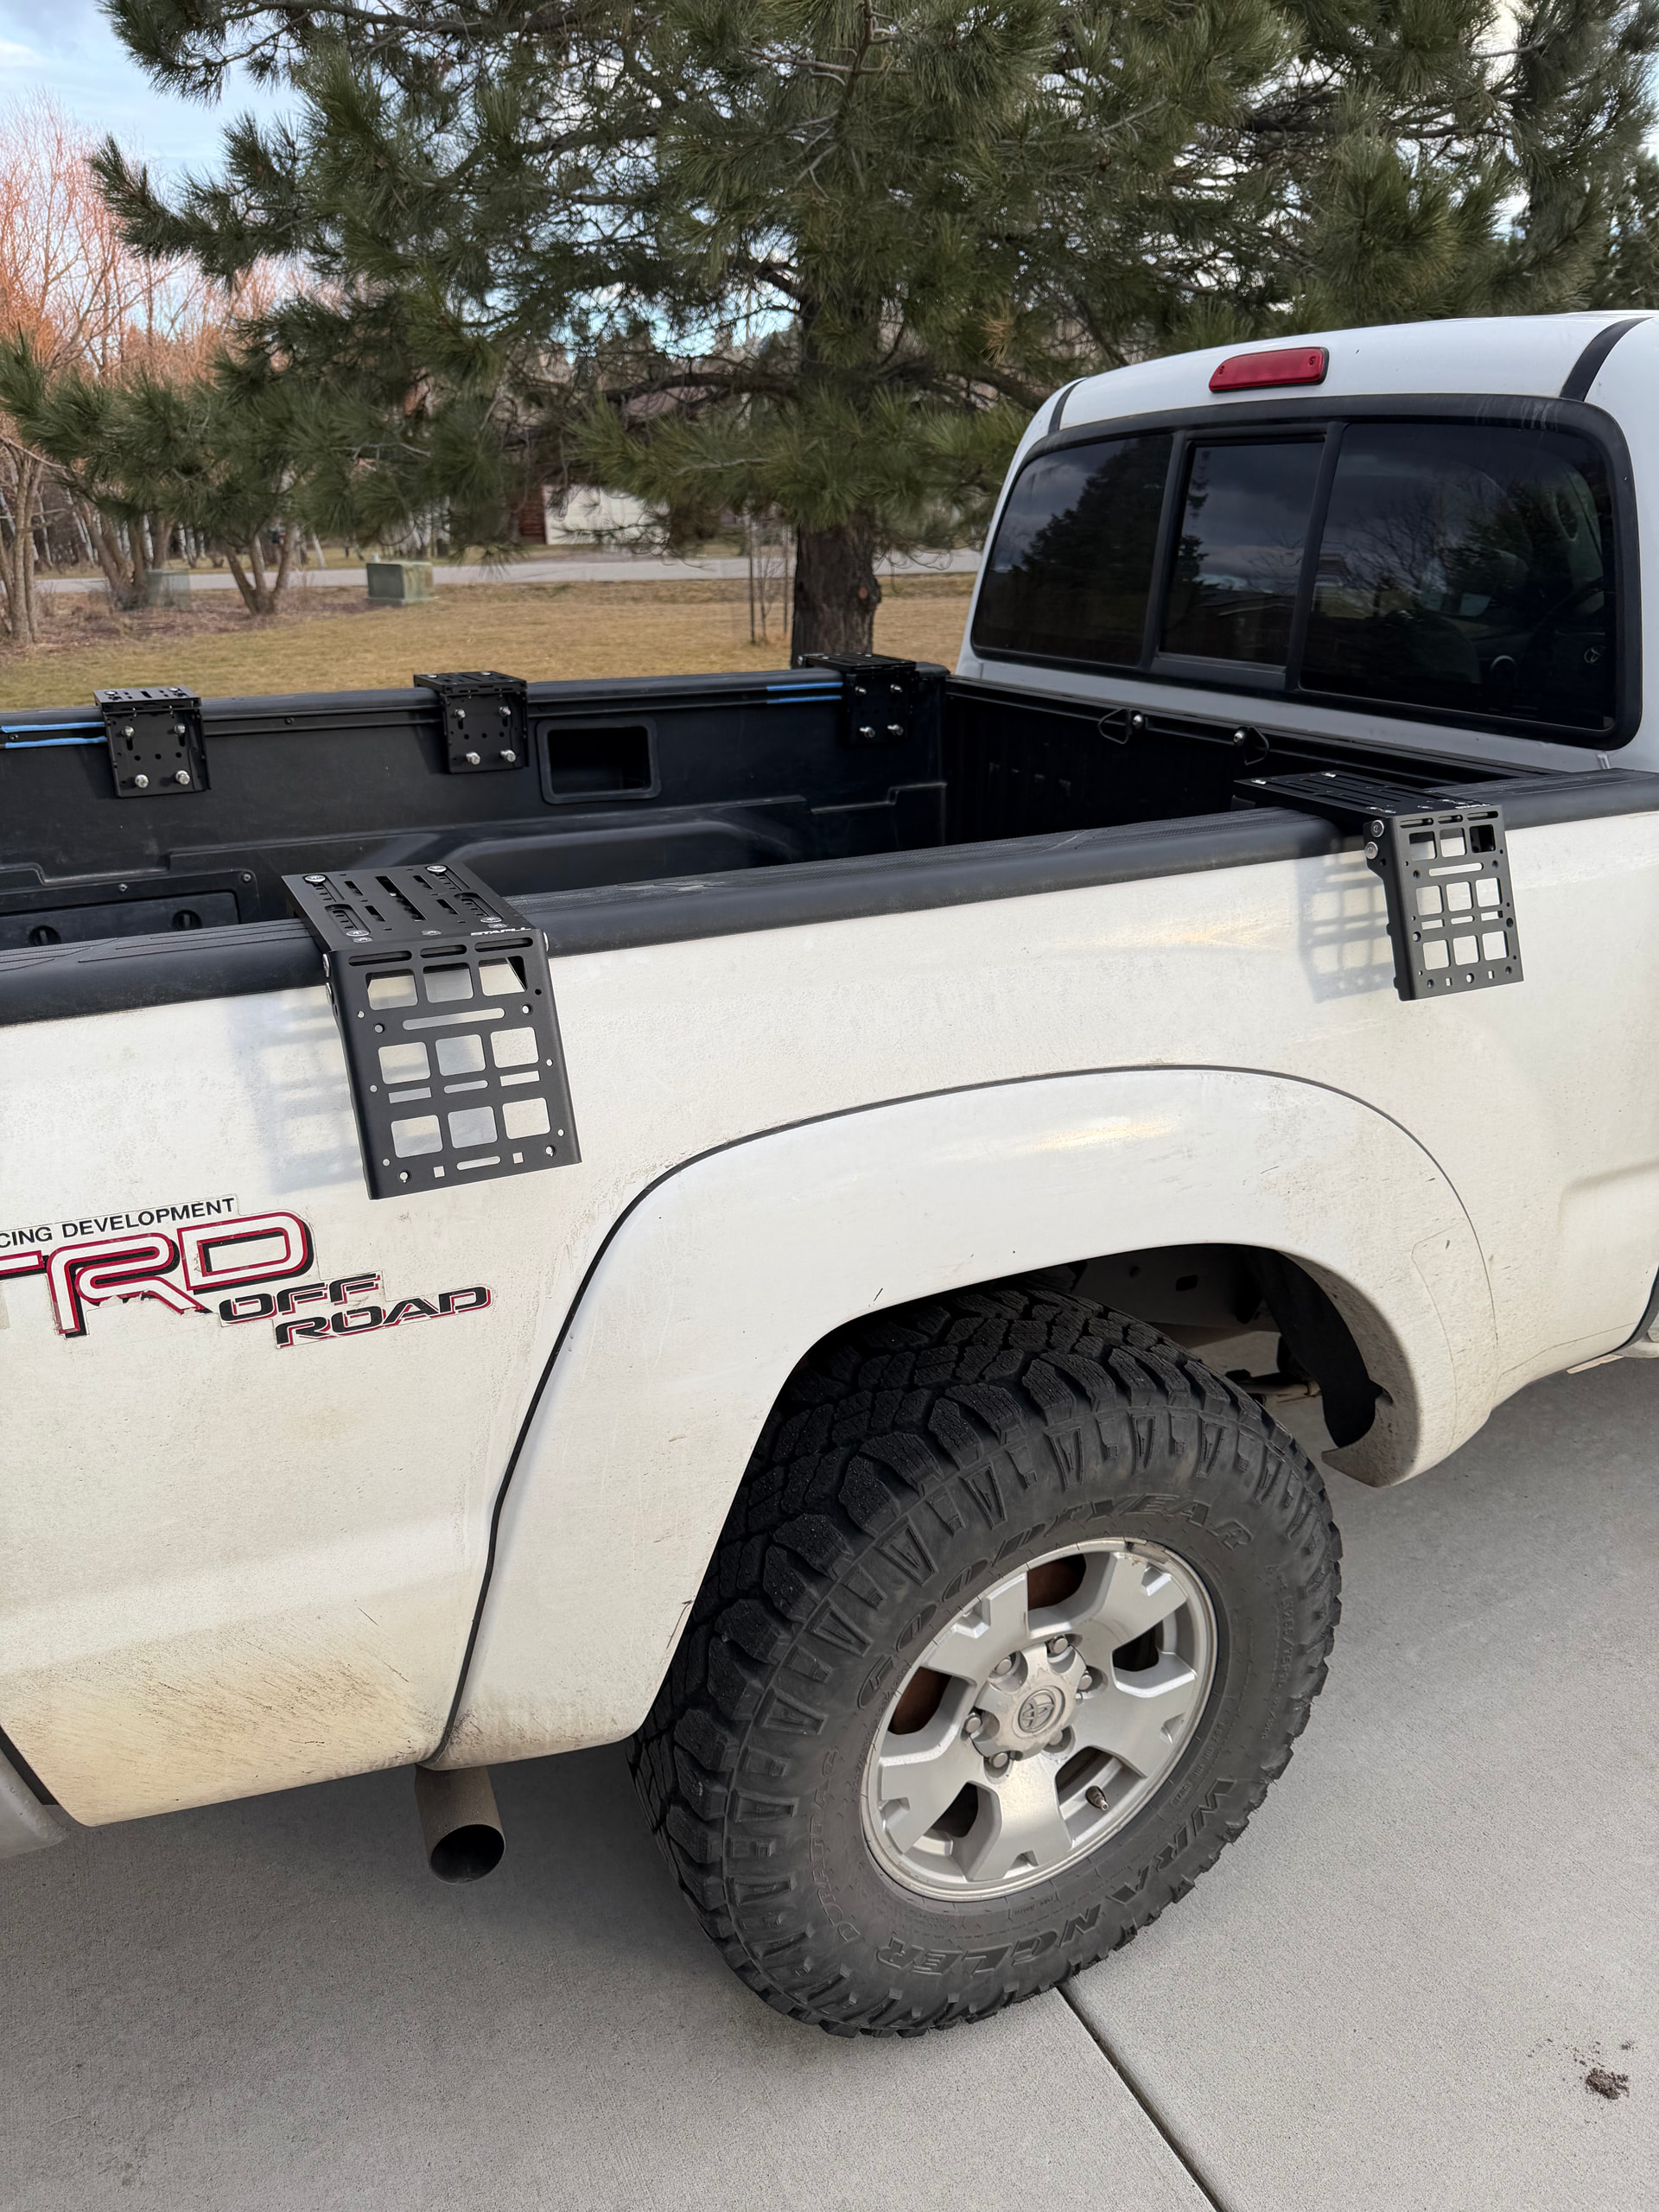
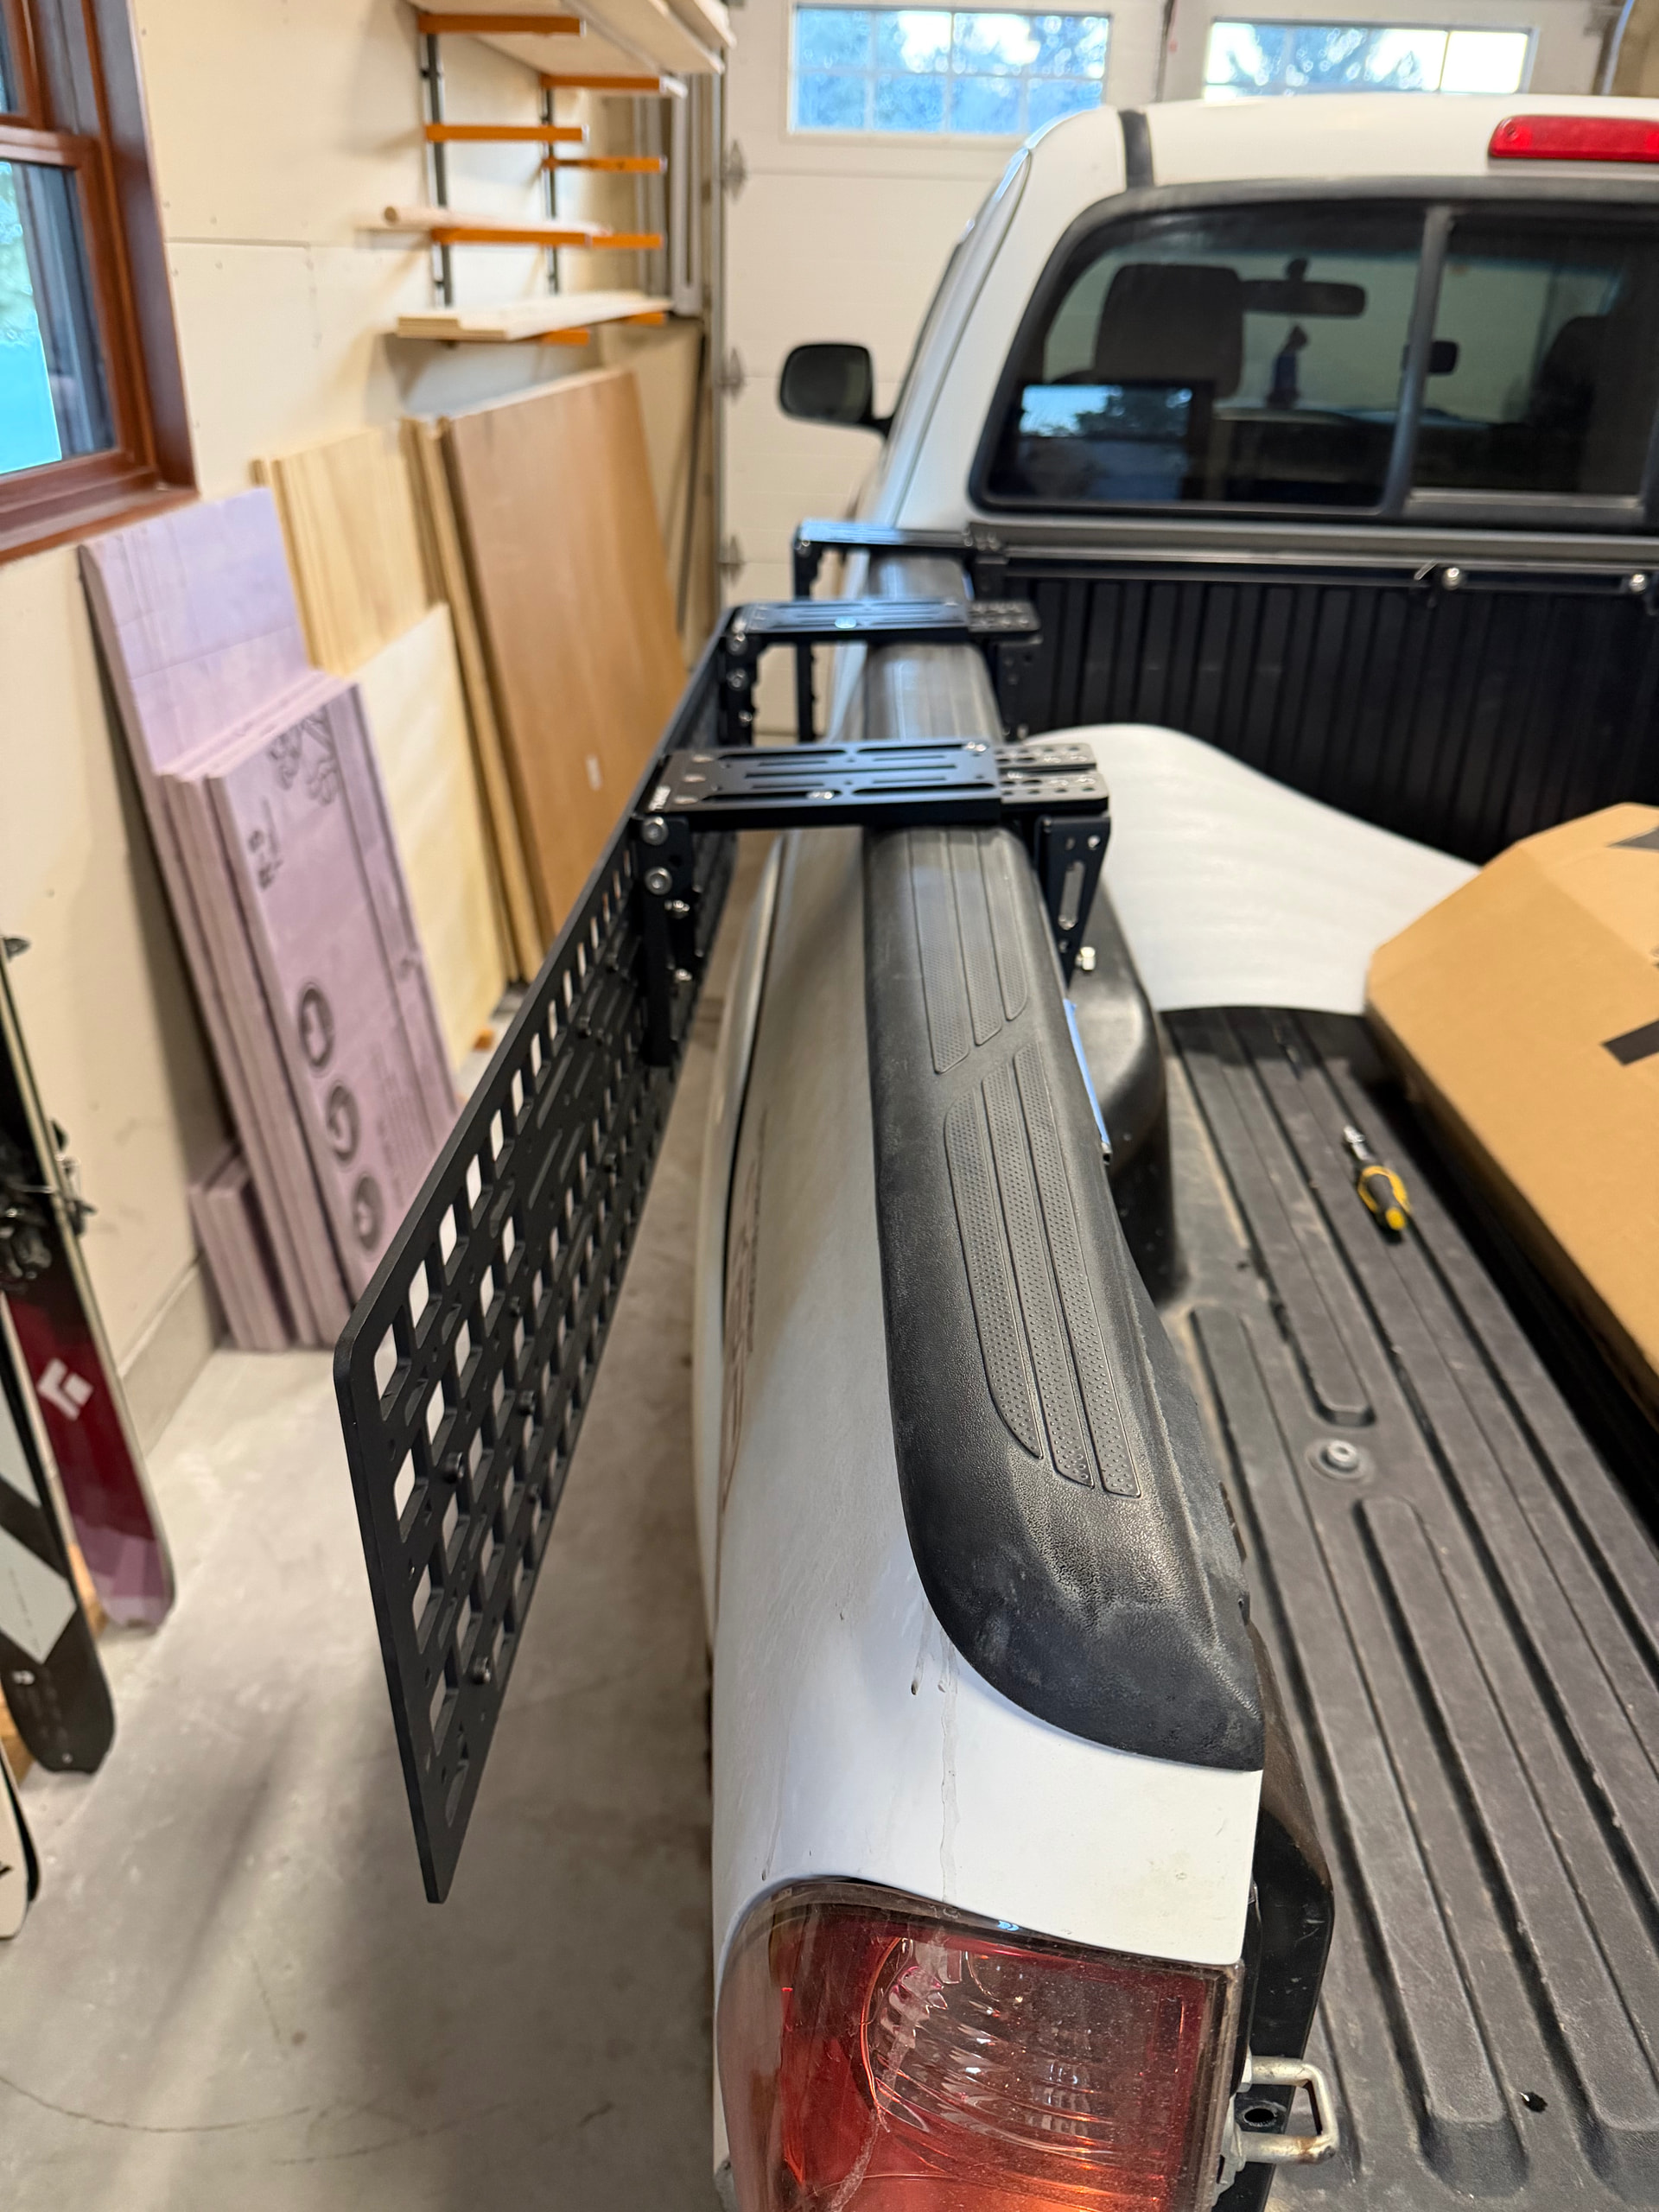
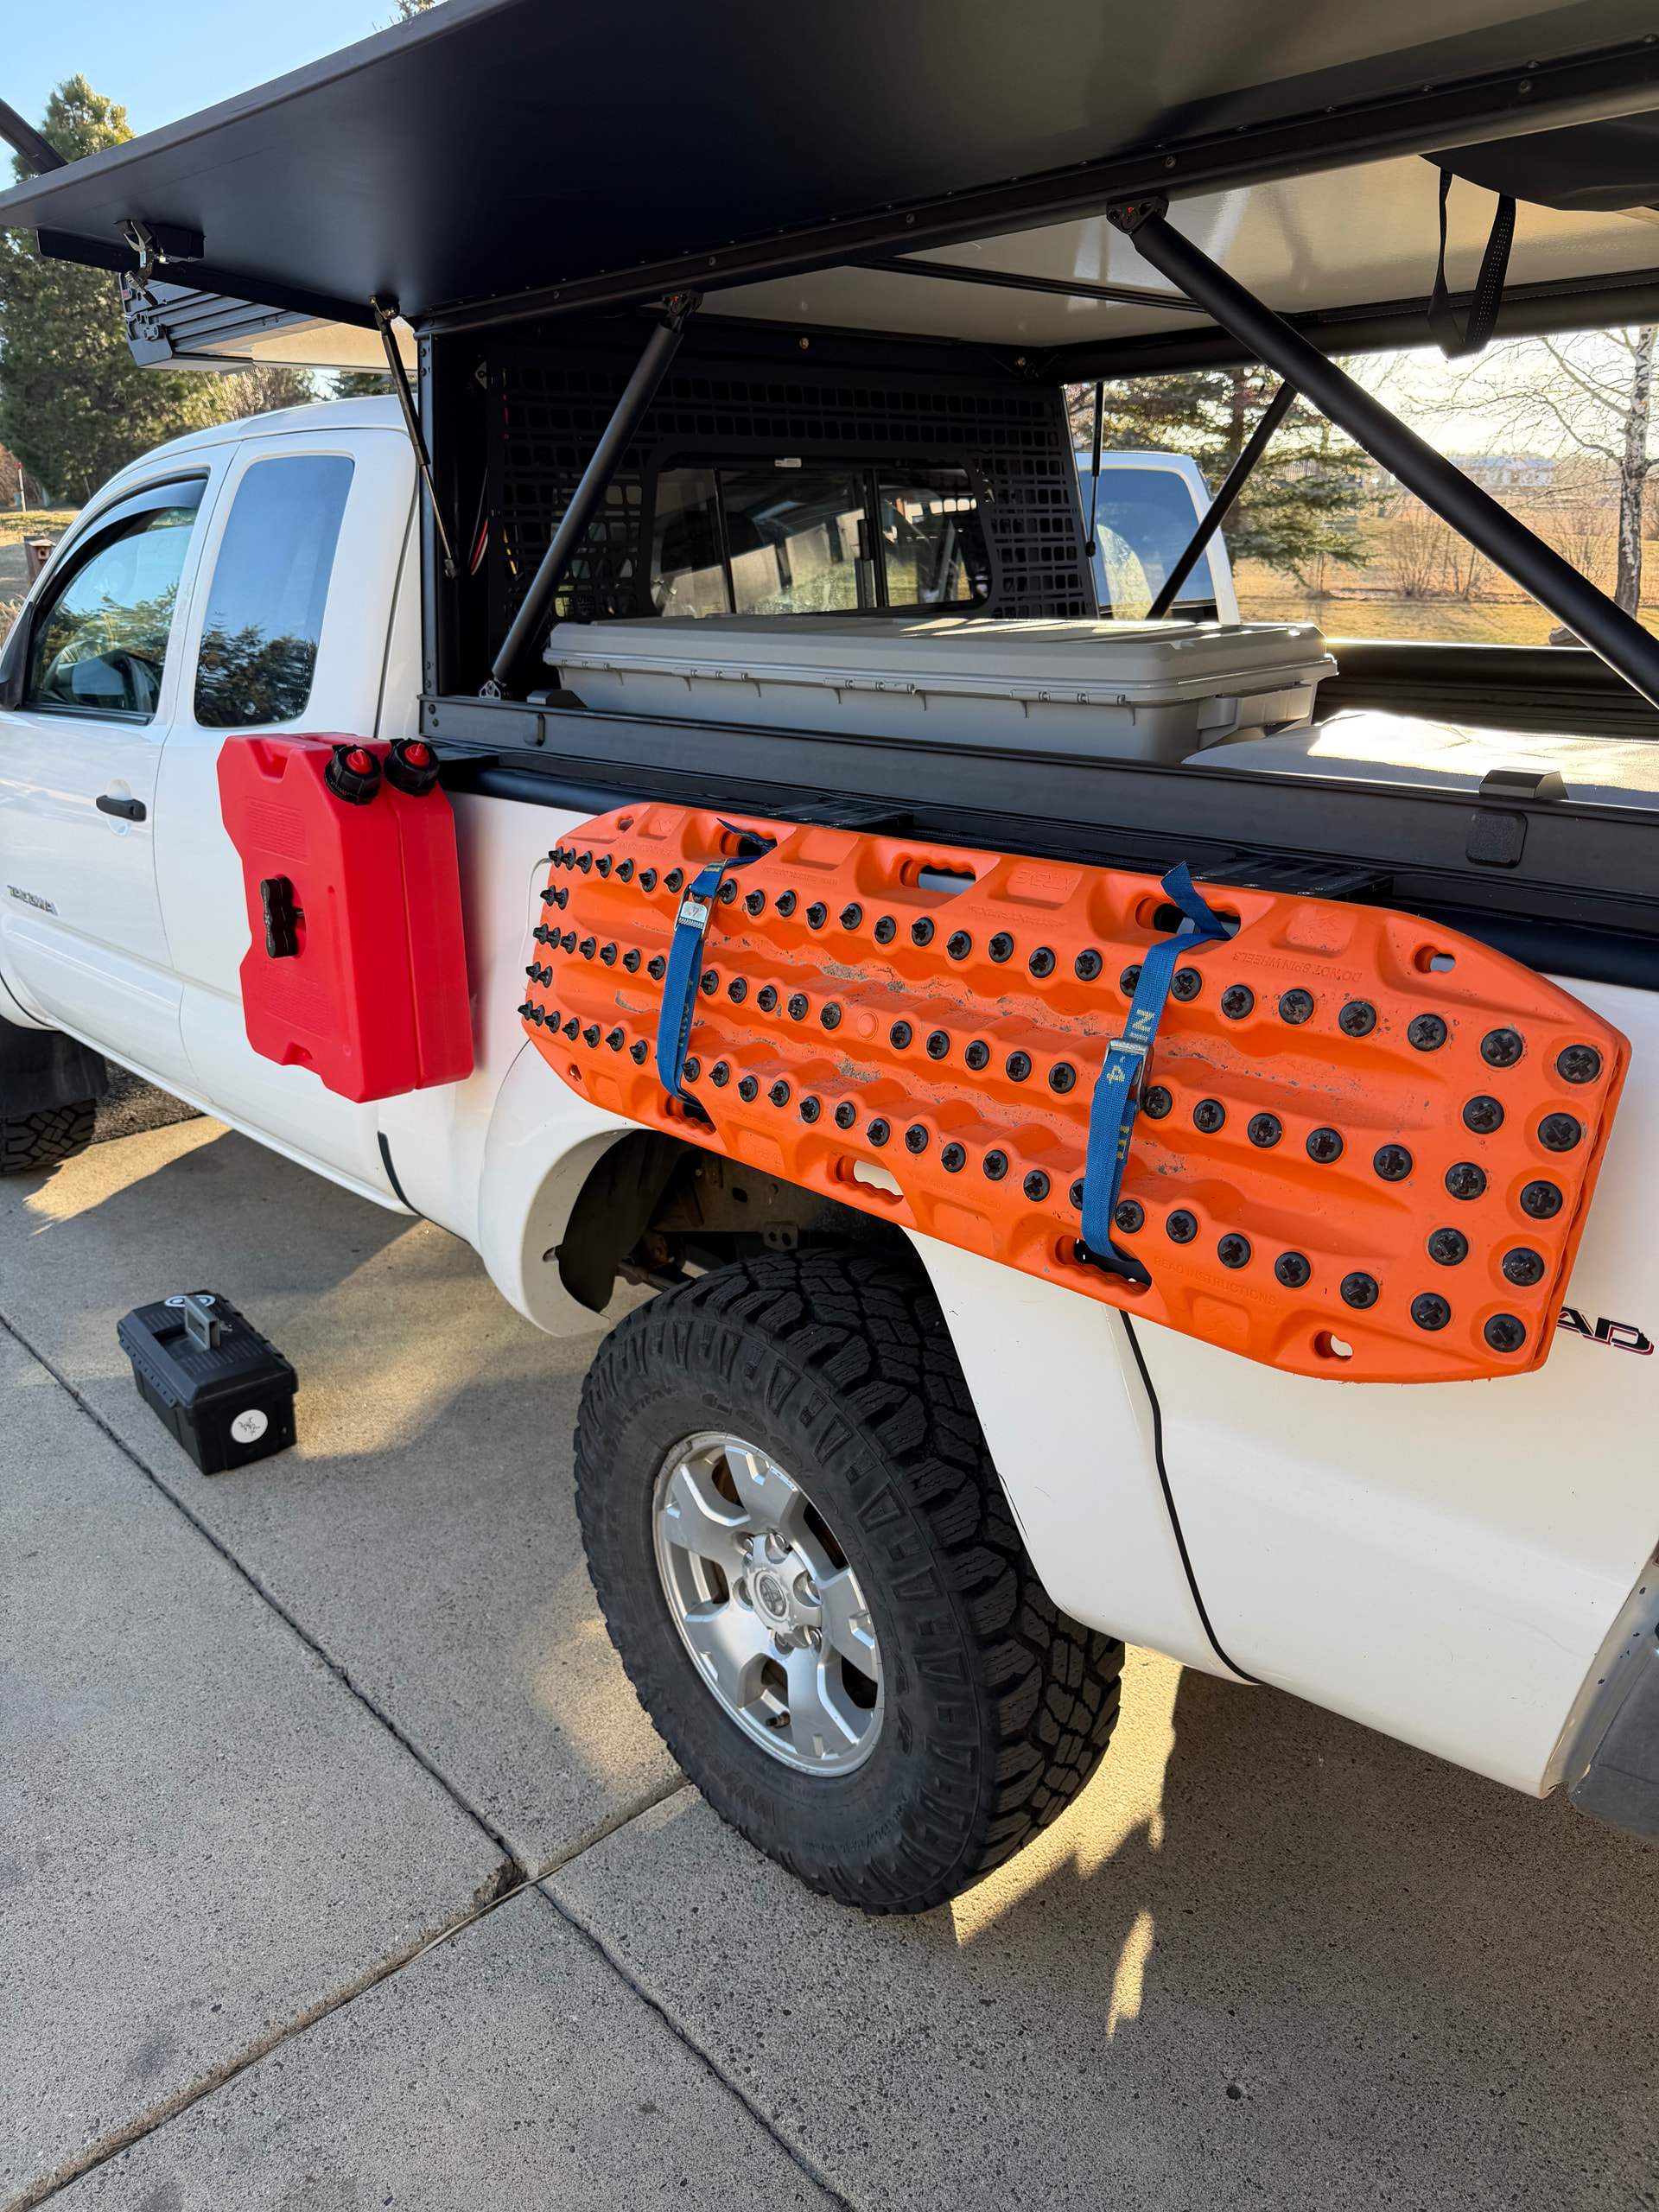
One problem that needed some sort of solution was storage space. The Tacoma is small enough as it is. Add two people and their dog, the space gets even smaller. I had looked into some rooftop storage but because of the added length of the MAX, those weren’t going to work. I ended up going with some fender racks from a small company in Colorado, STAPLL.
They offer a few different options for render storage. I knew I wanted a box for extra storage or maybe my camp kitchen as the lid creates another flat area to cook away from the tailgate. I also wanted their 48x10” MOLLE panel but that didn’t work as planned due to the placement of GFC brackets and the location of the gas tank.
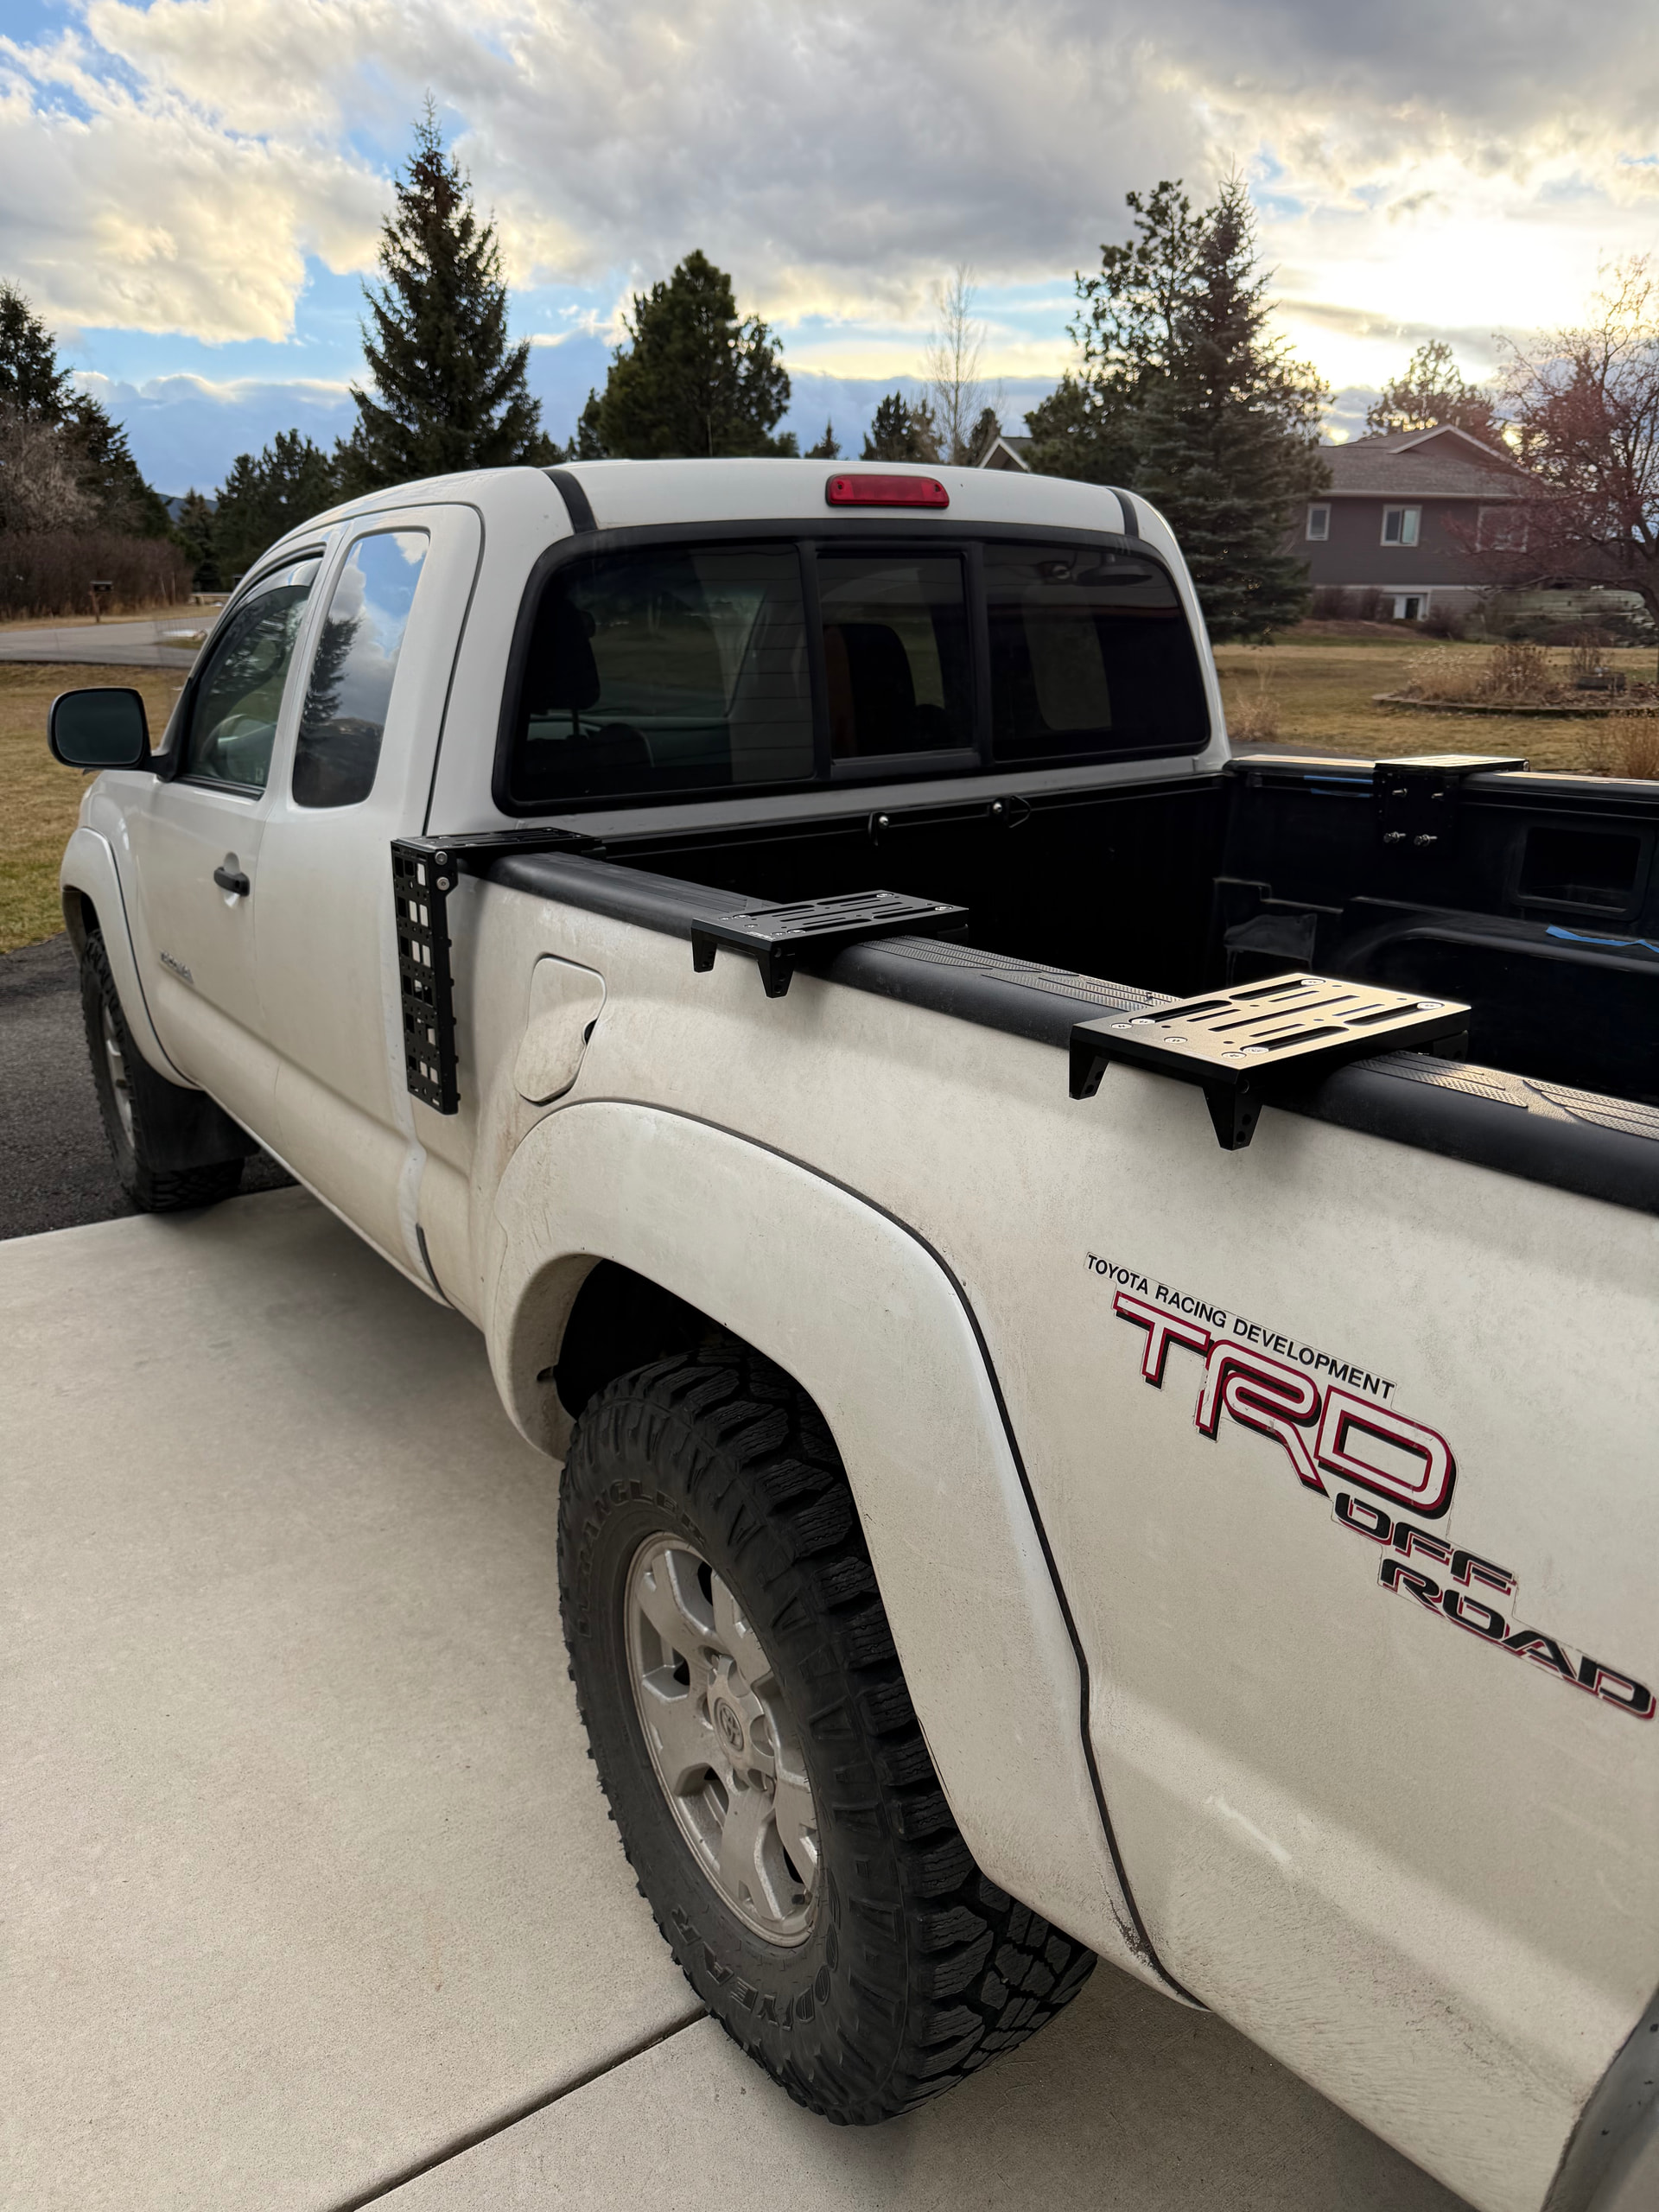
Drivers side is a work in progress. The front 6x13” panel is destined for extra fuel. Still trying to figure out what is gonna work behind the gas tank.
It ended up looking super silly and after reaching out to STAPLL we decided it would be fully load bearing. So it was decided to replace it with two more 6x13” panels.
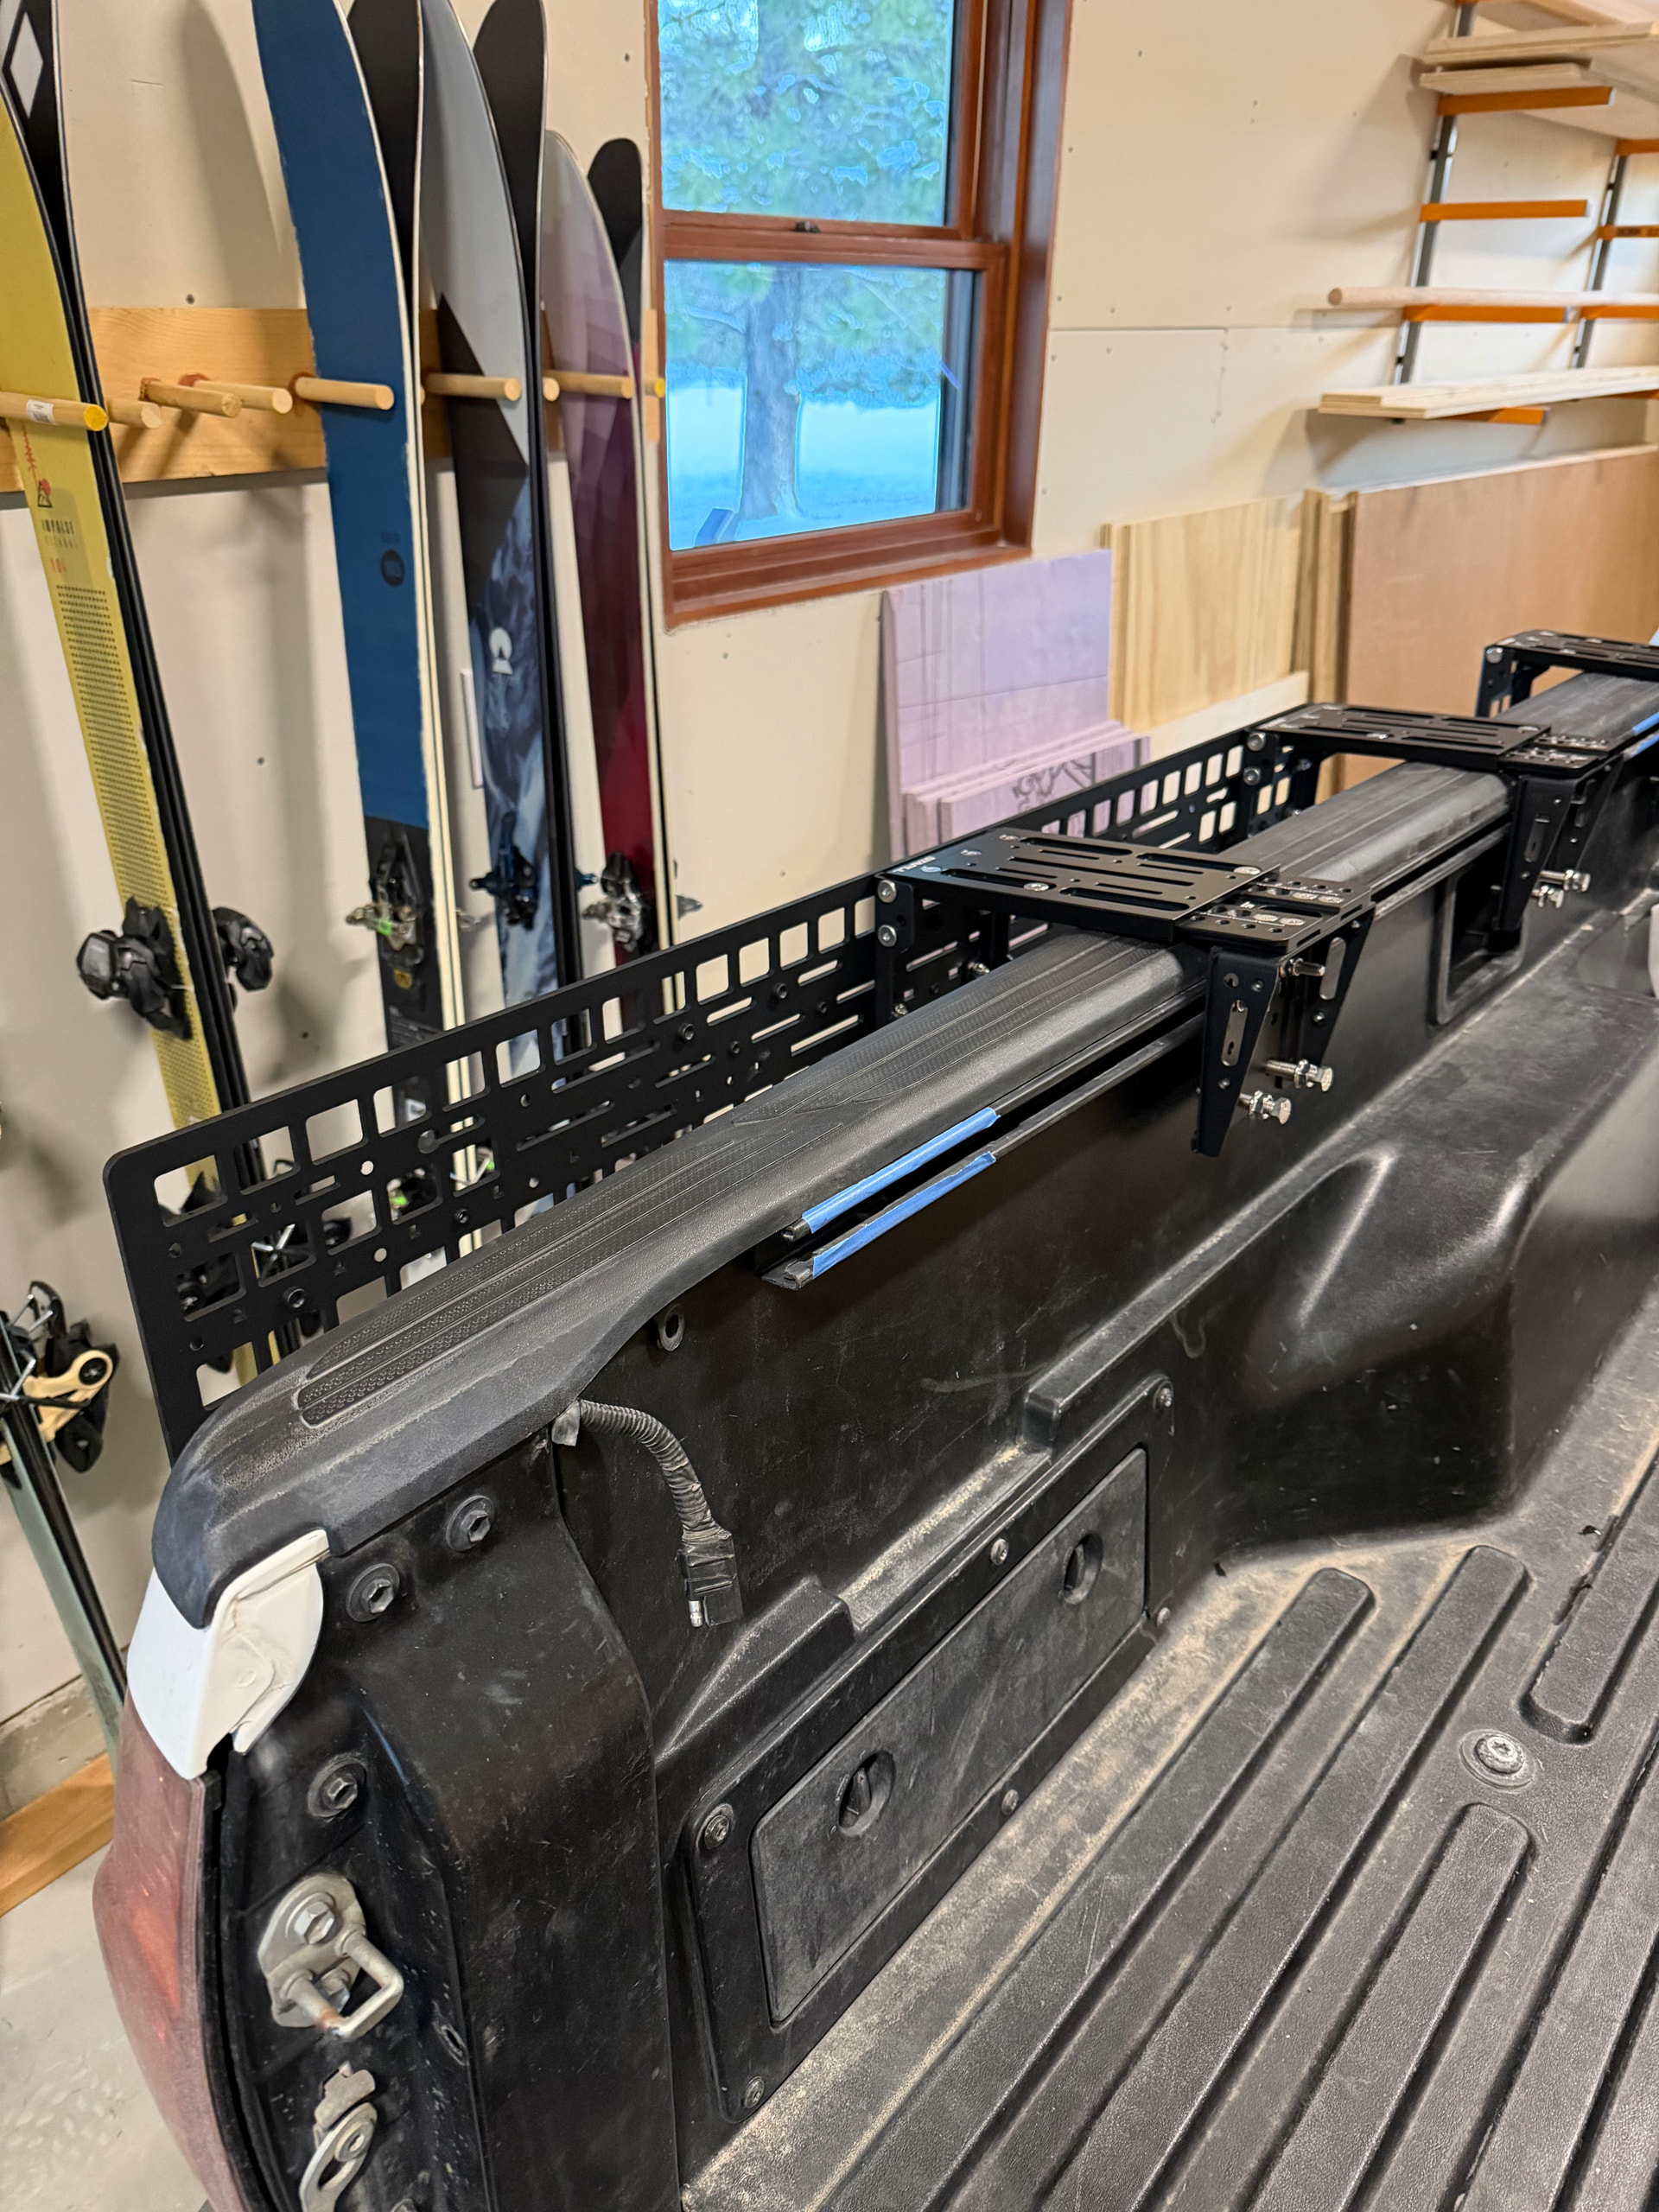
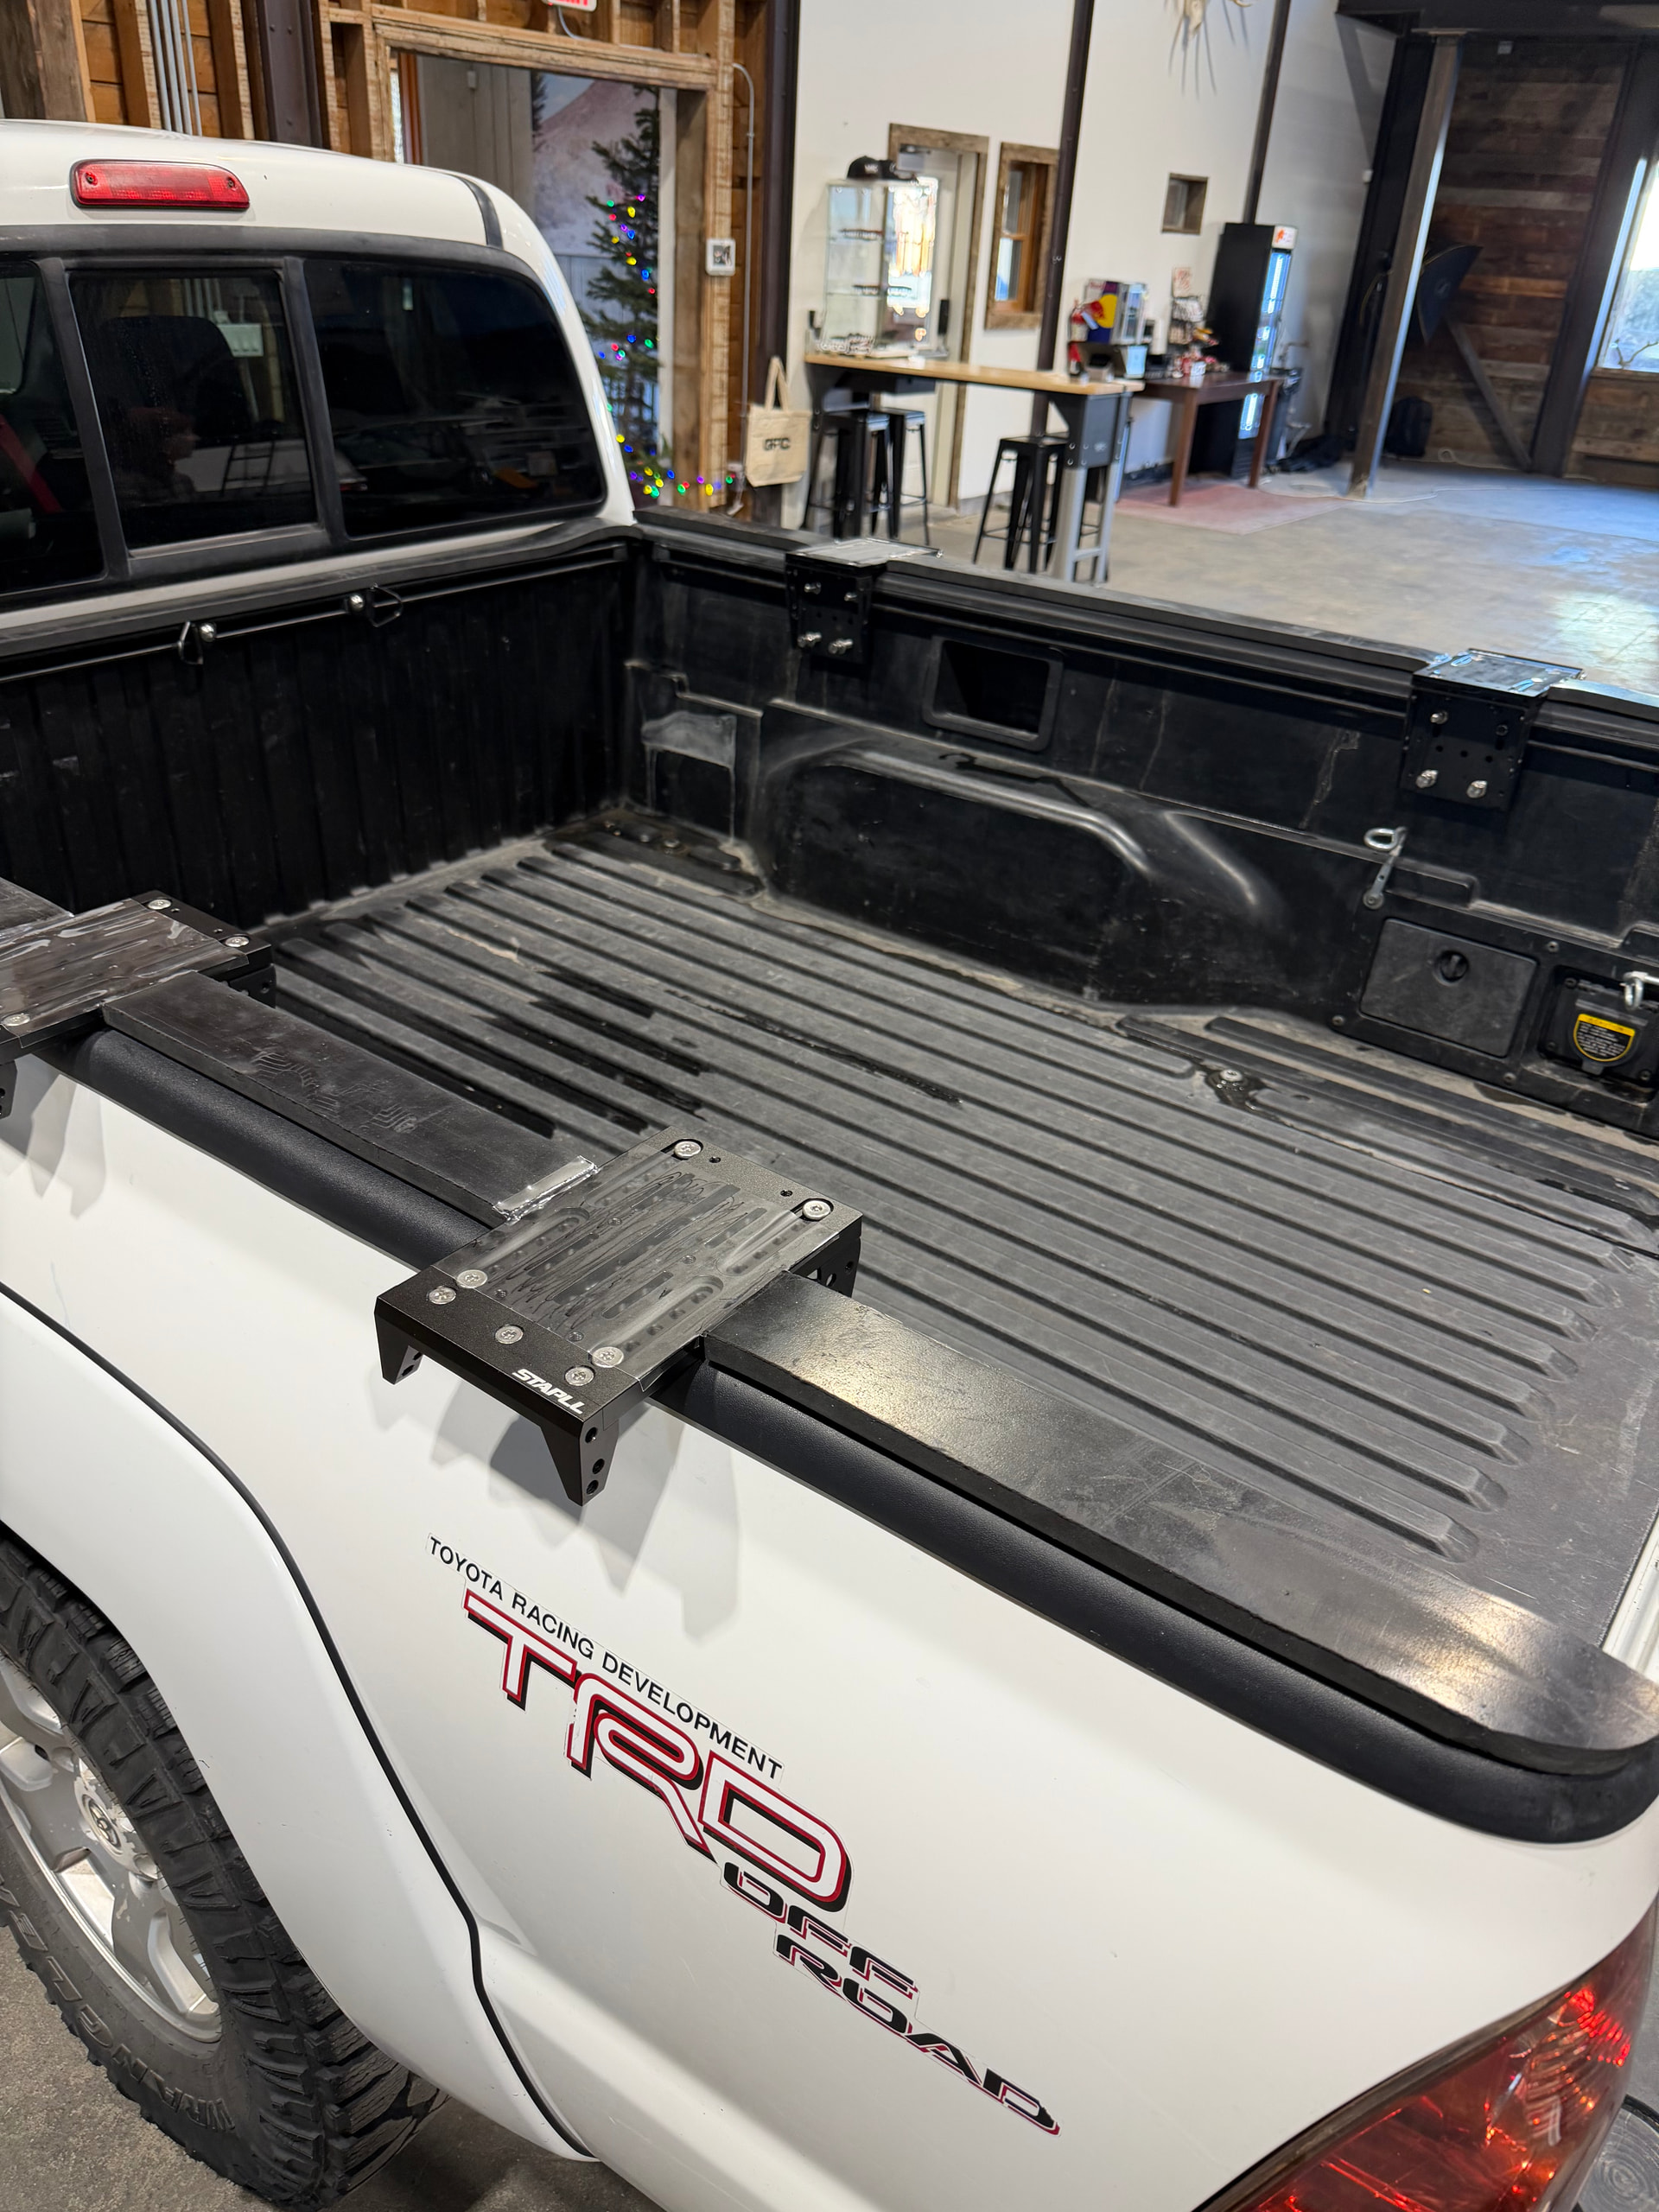
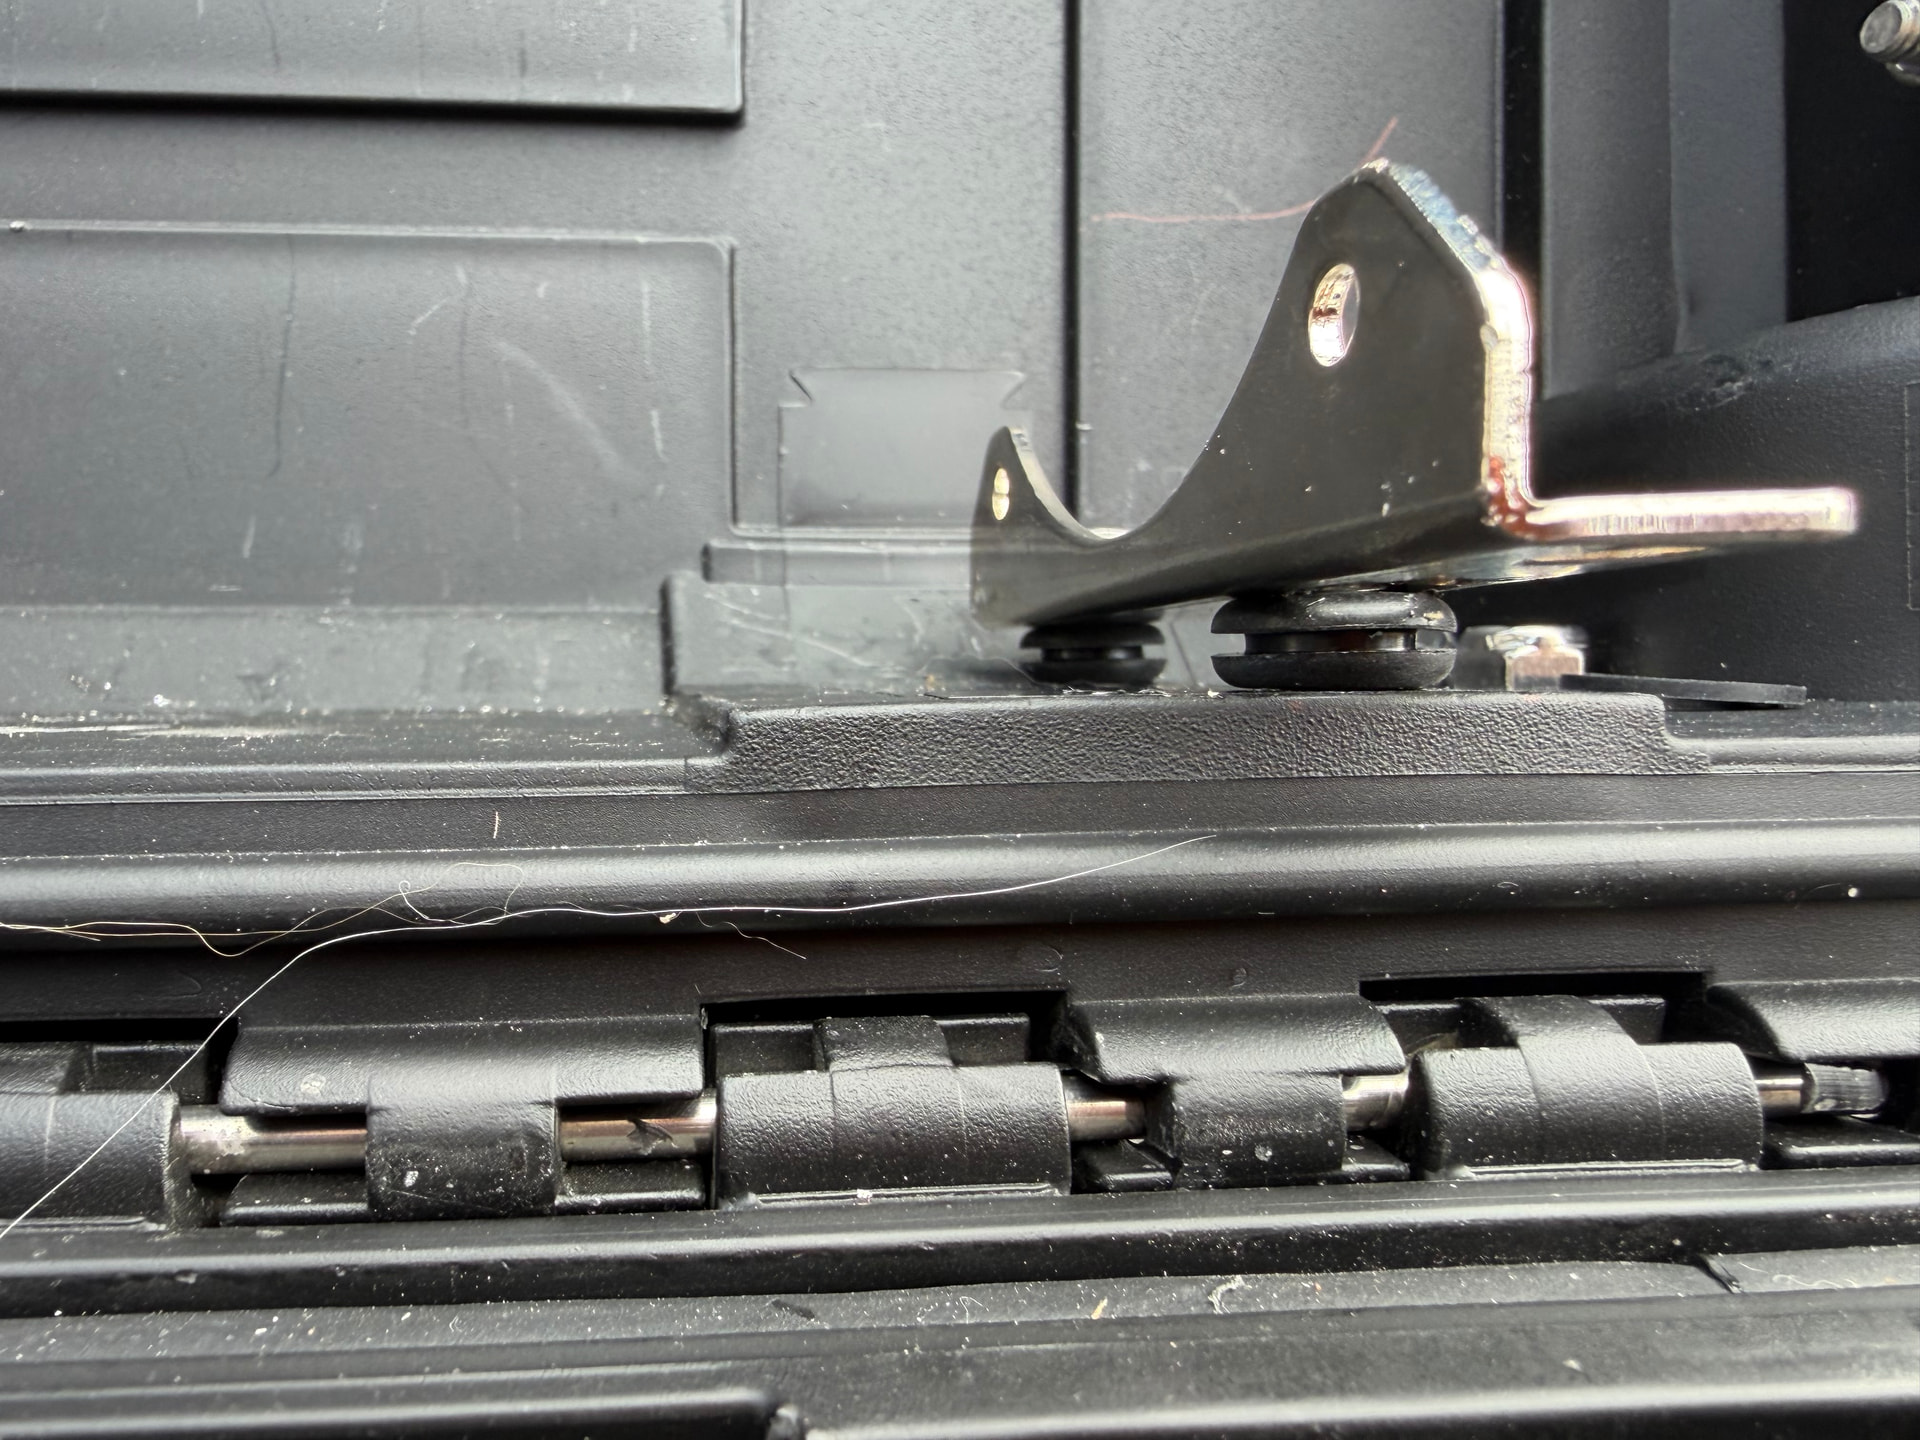
Here we are at GFC for my camper instal. STAPLL sends these rubber strips you lay down between the brackets on the bed rail to make sure whatever you mount on top is level. Go Fast was accommodating installing the camper onto of these even though they are not their product.
Here is the drivers side with our current plan for storing extra fuel and recovery boards. We may switch this up and have the two additional 6x13” panels hold extra water in RotoPax containers. We’ll see how it goes.
They seal pretty well. The rubber leveling material is 2.5” think and secured with butyl tape. The pressure from the camper on top helps make those seals nice and tight. However, some water leaked in after I hosed down the truck at a car wash. Working on finding the best solution for that. Overall I’m happy with how it’s sealed.
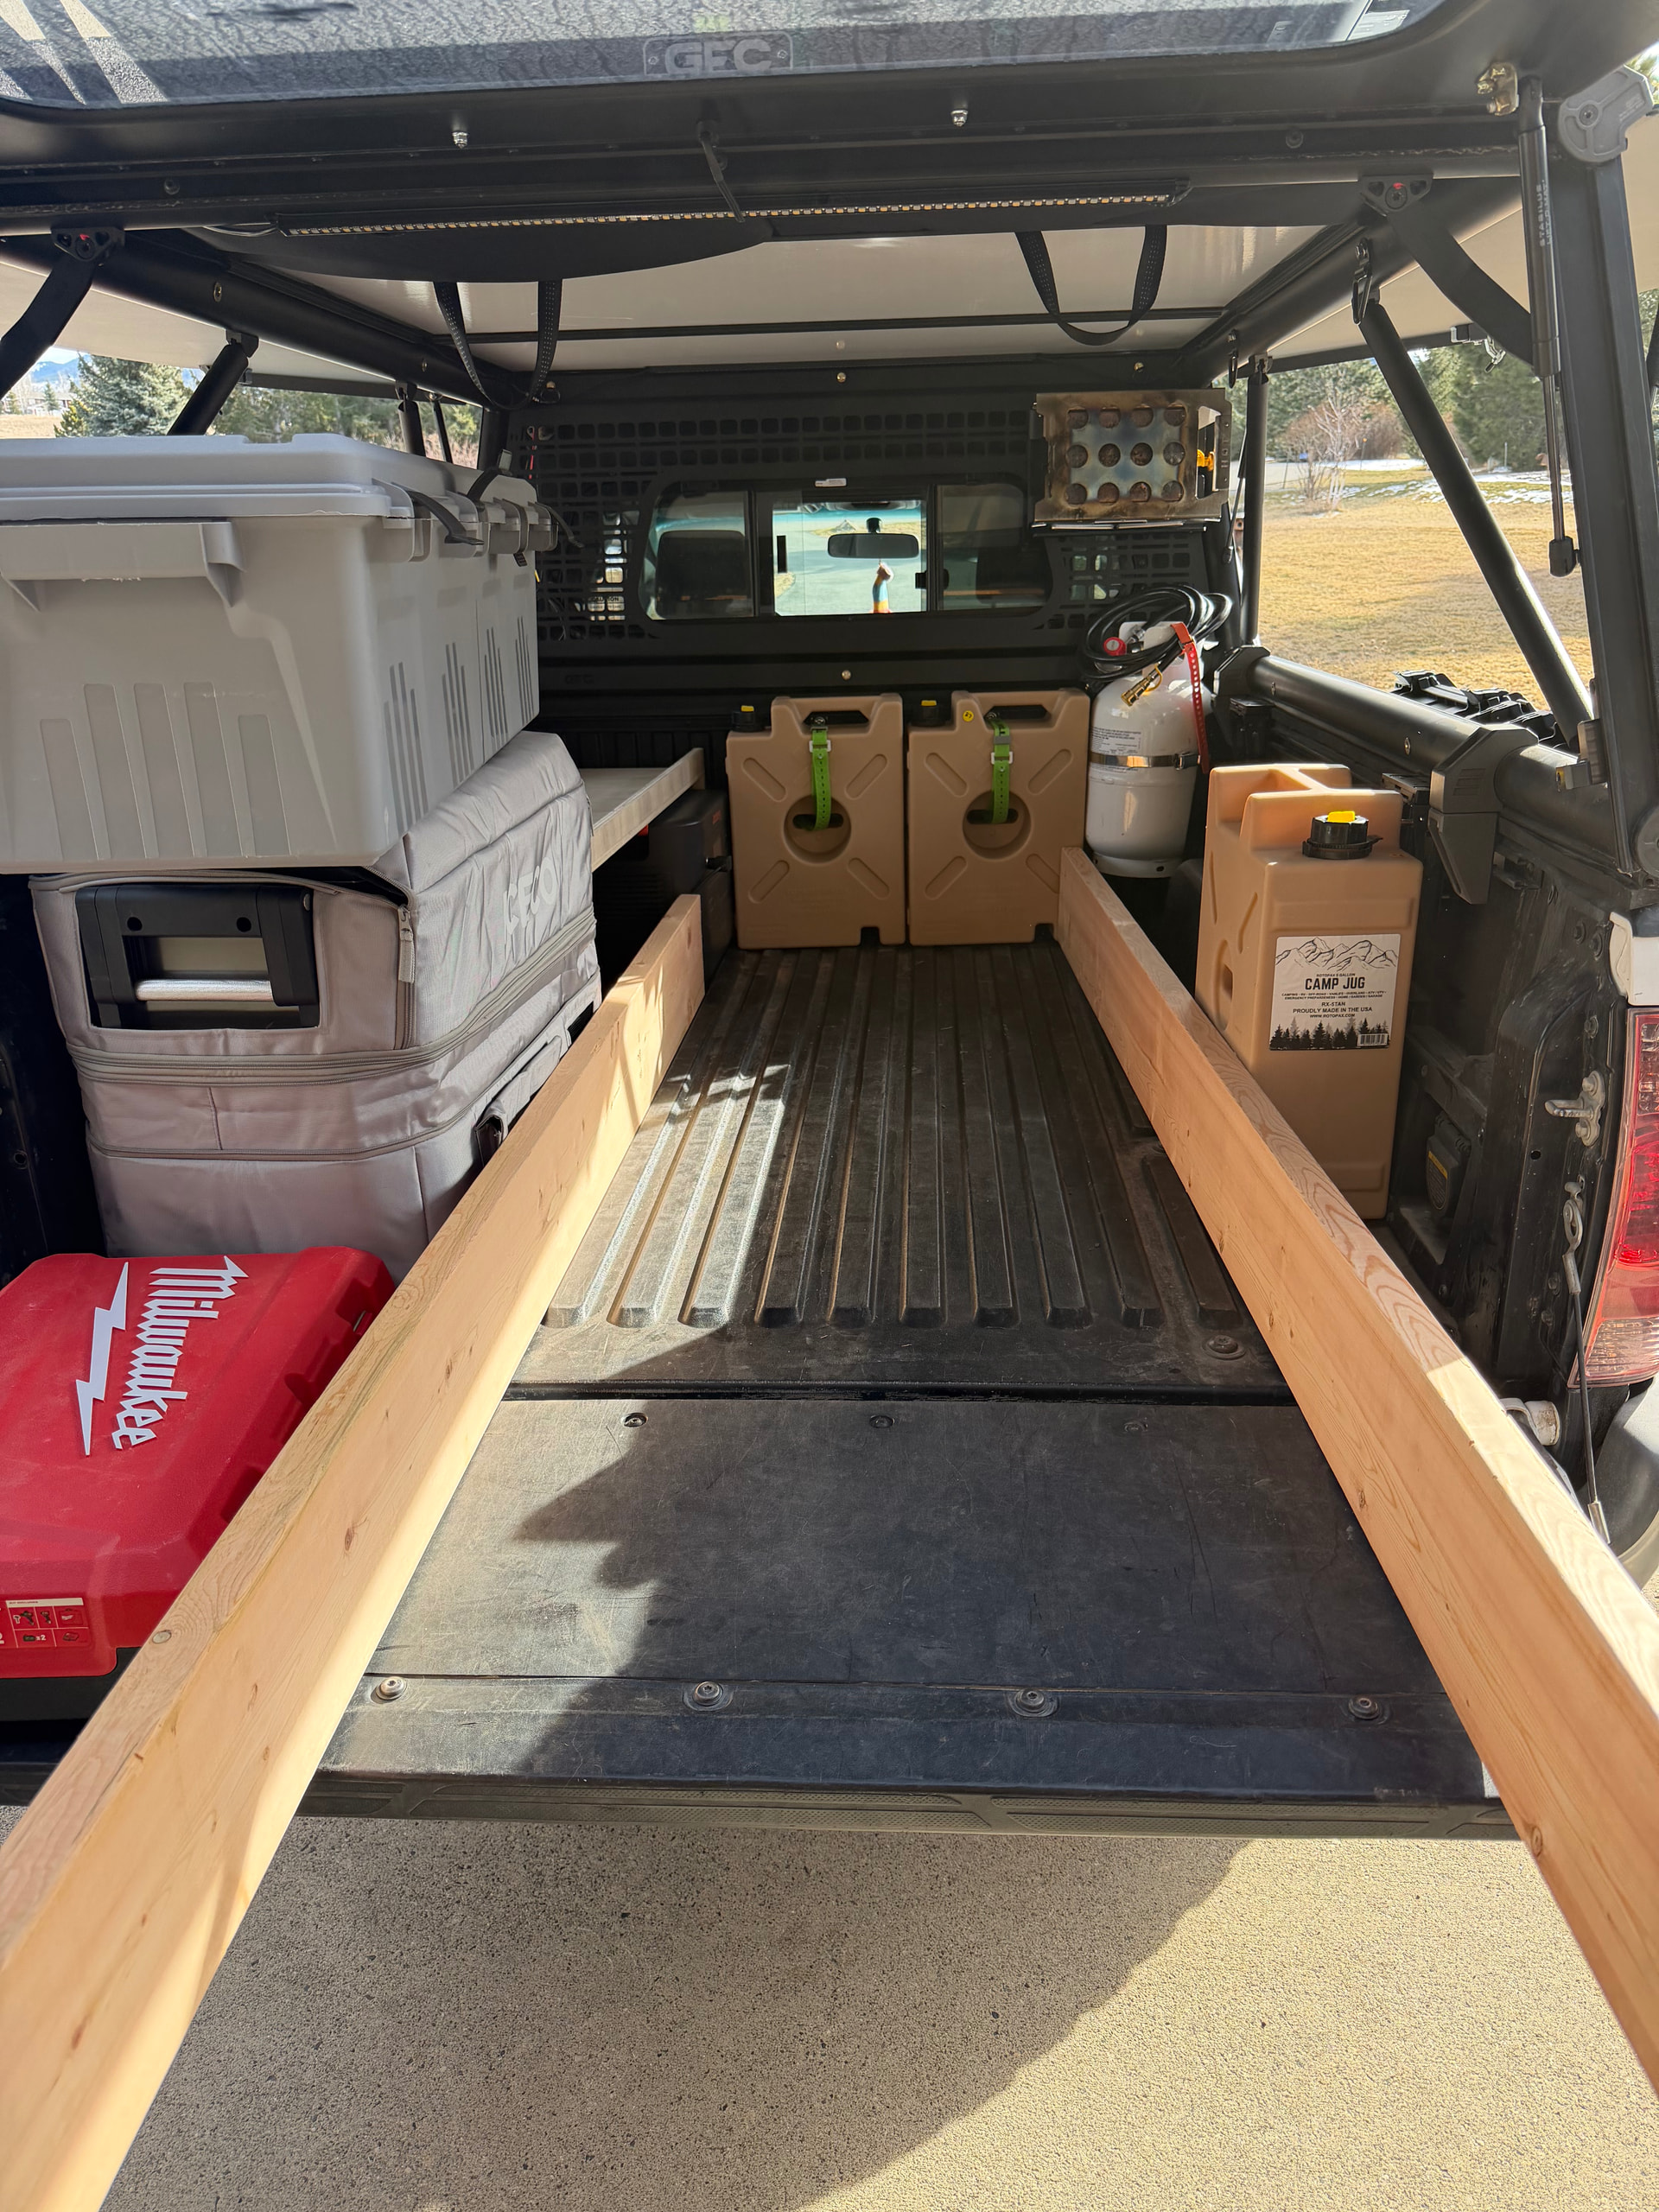
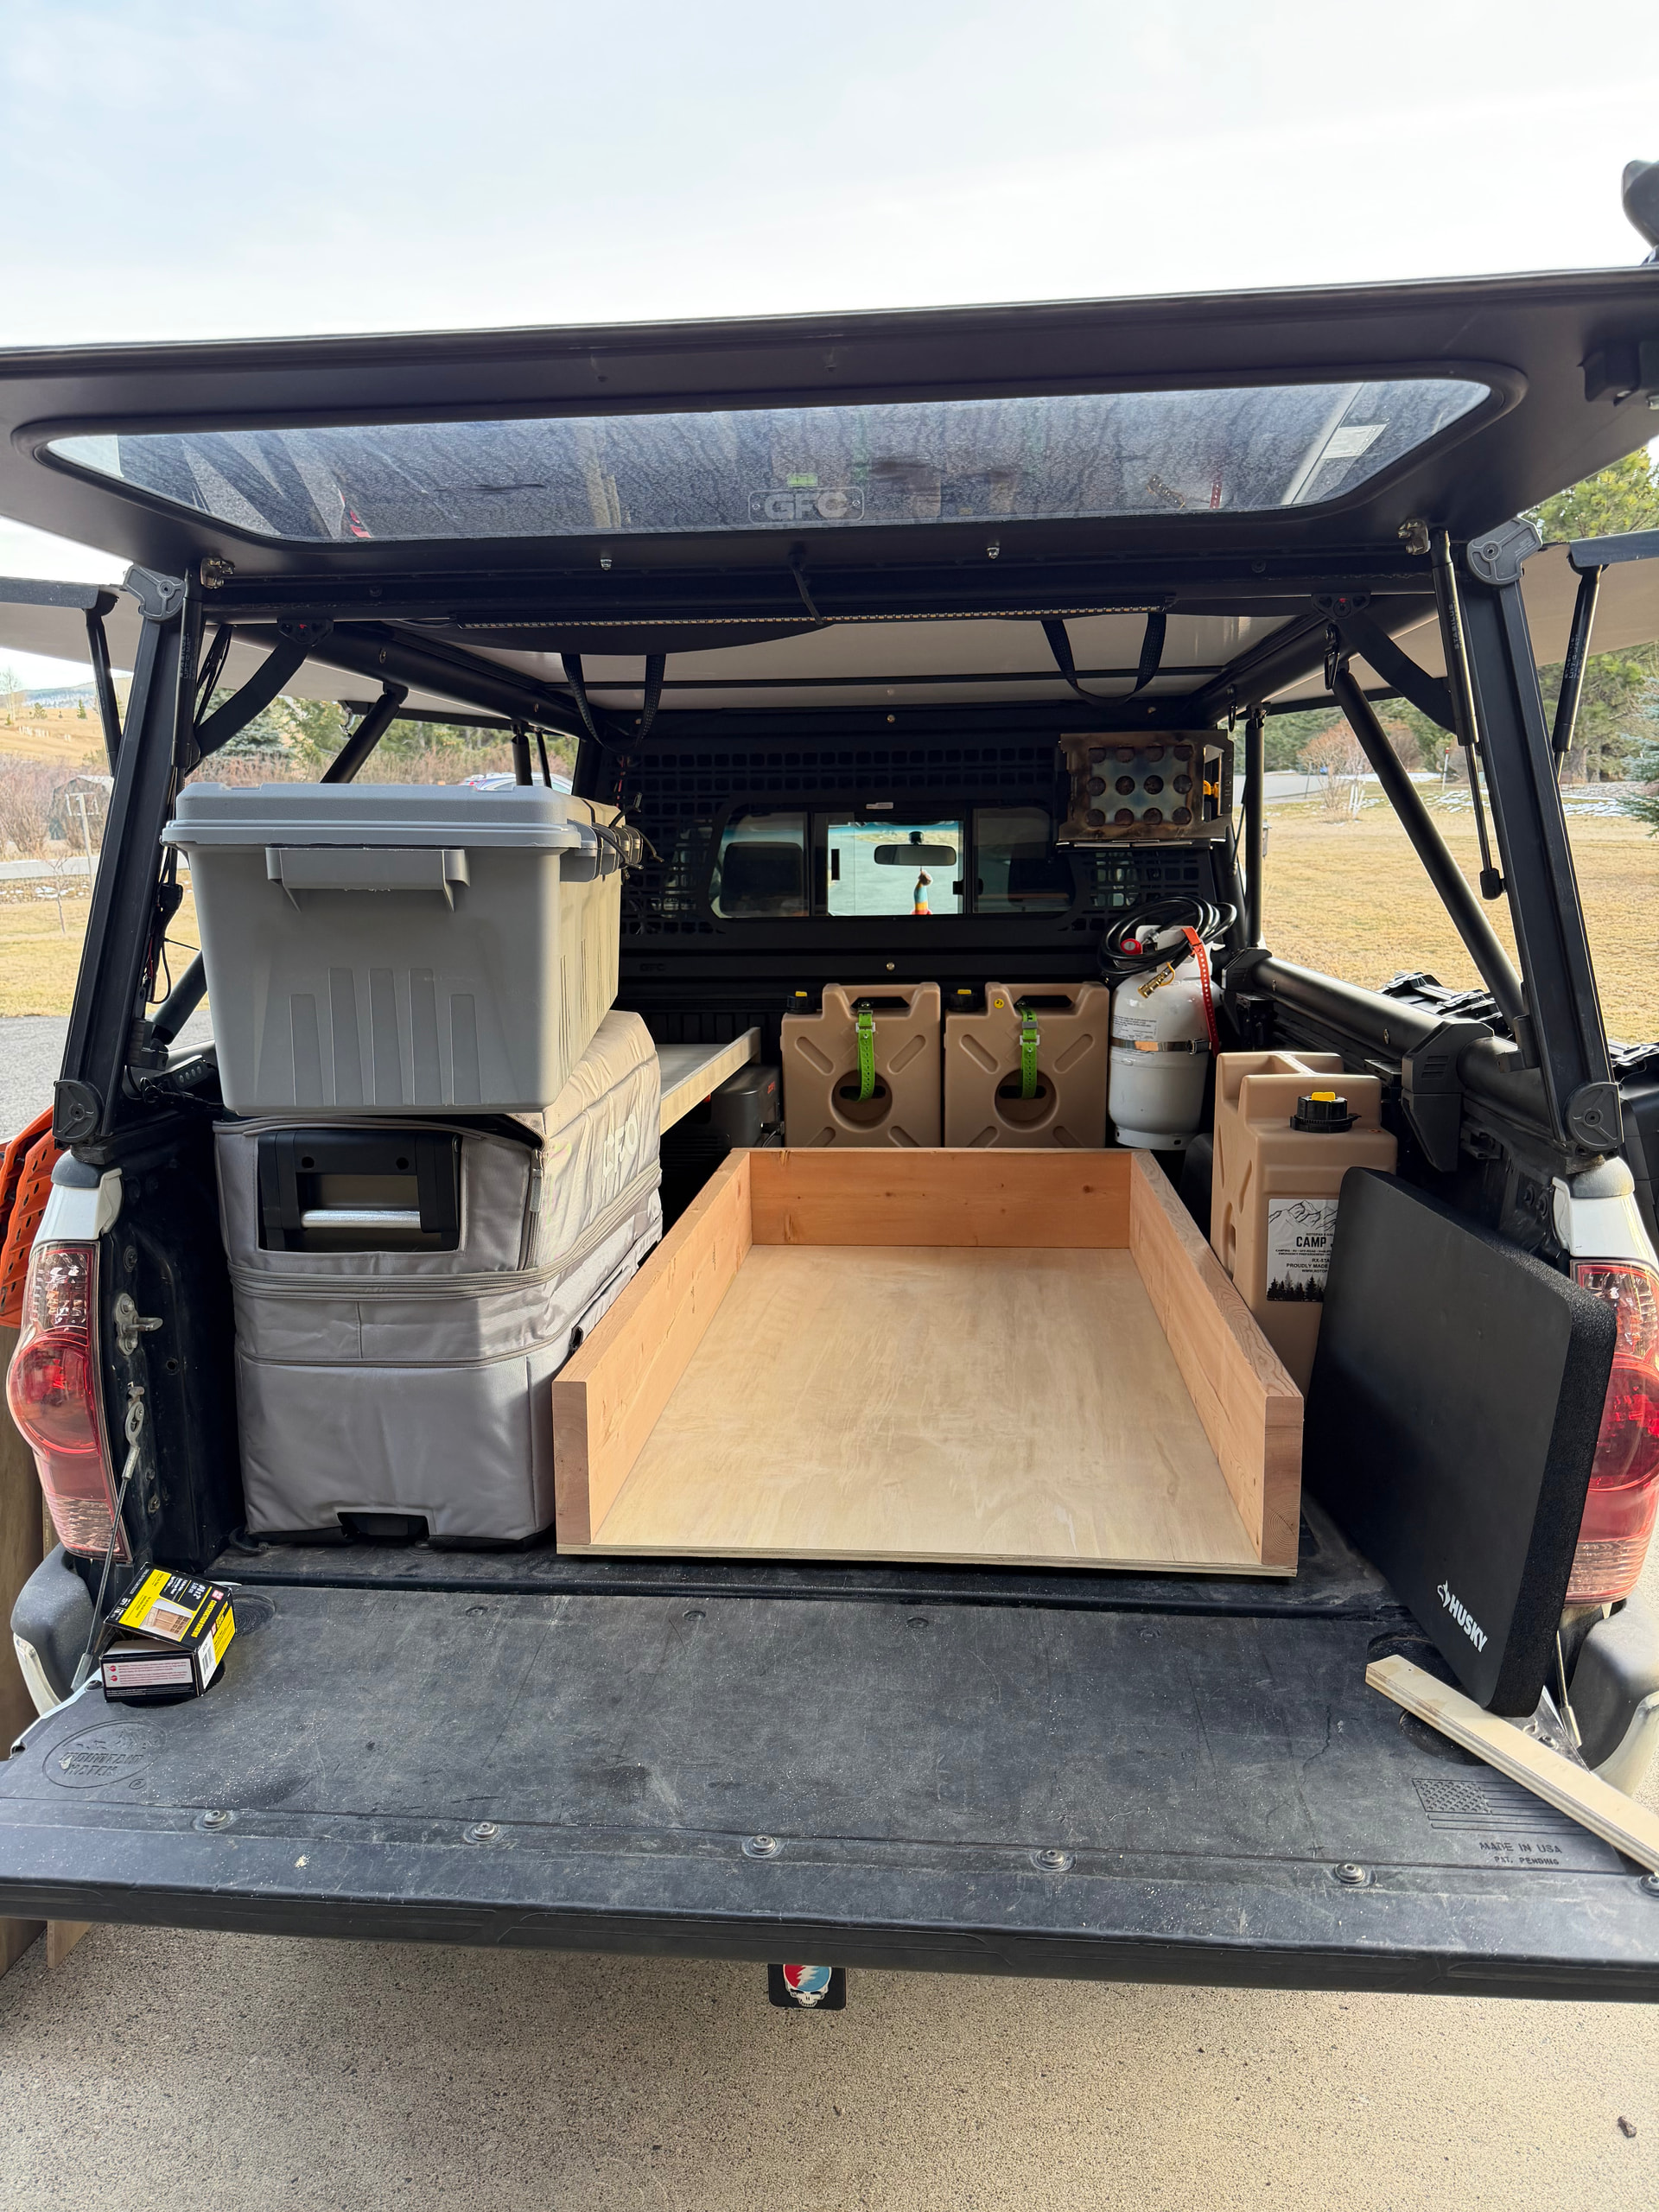
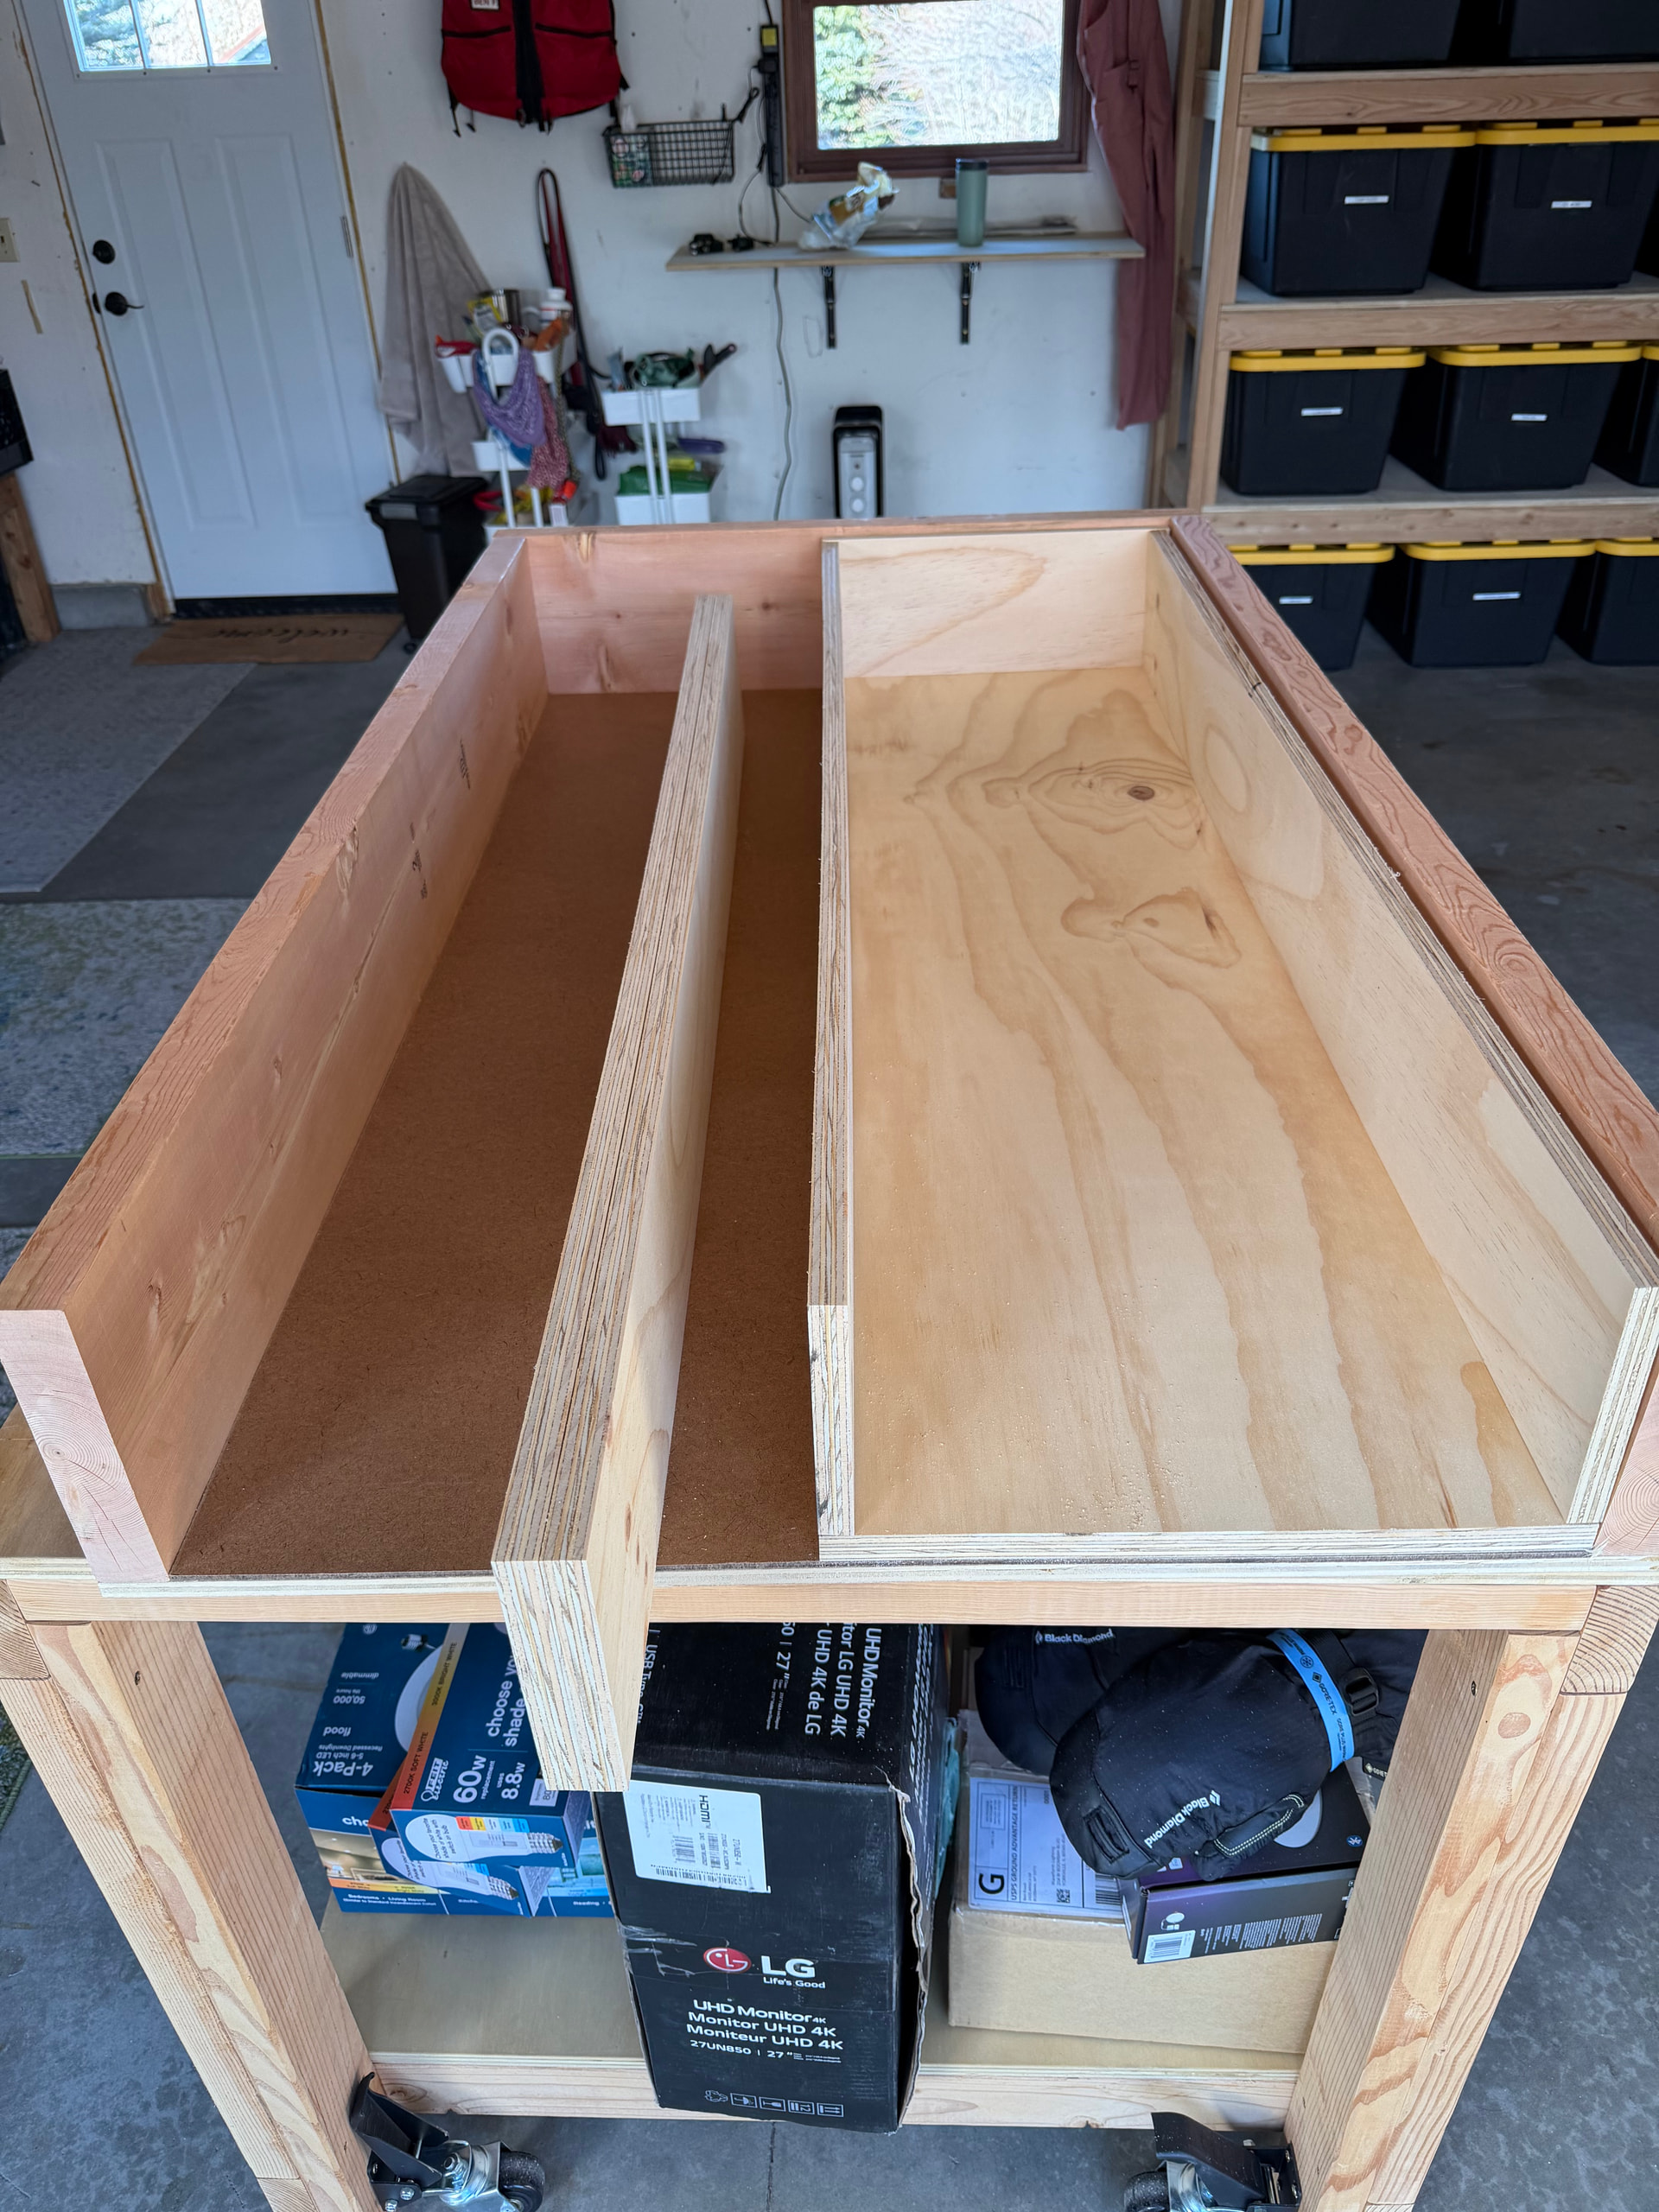
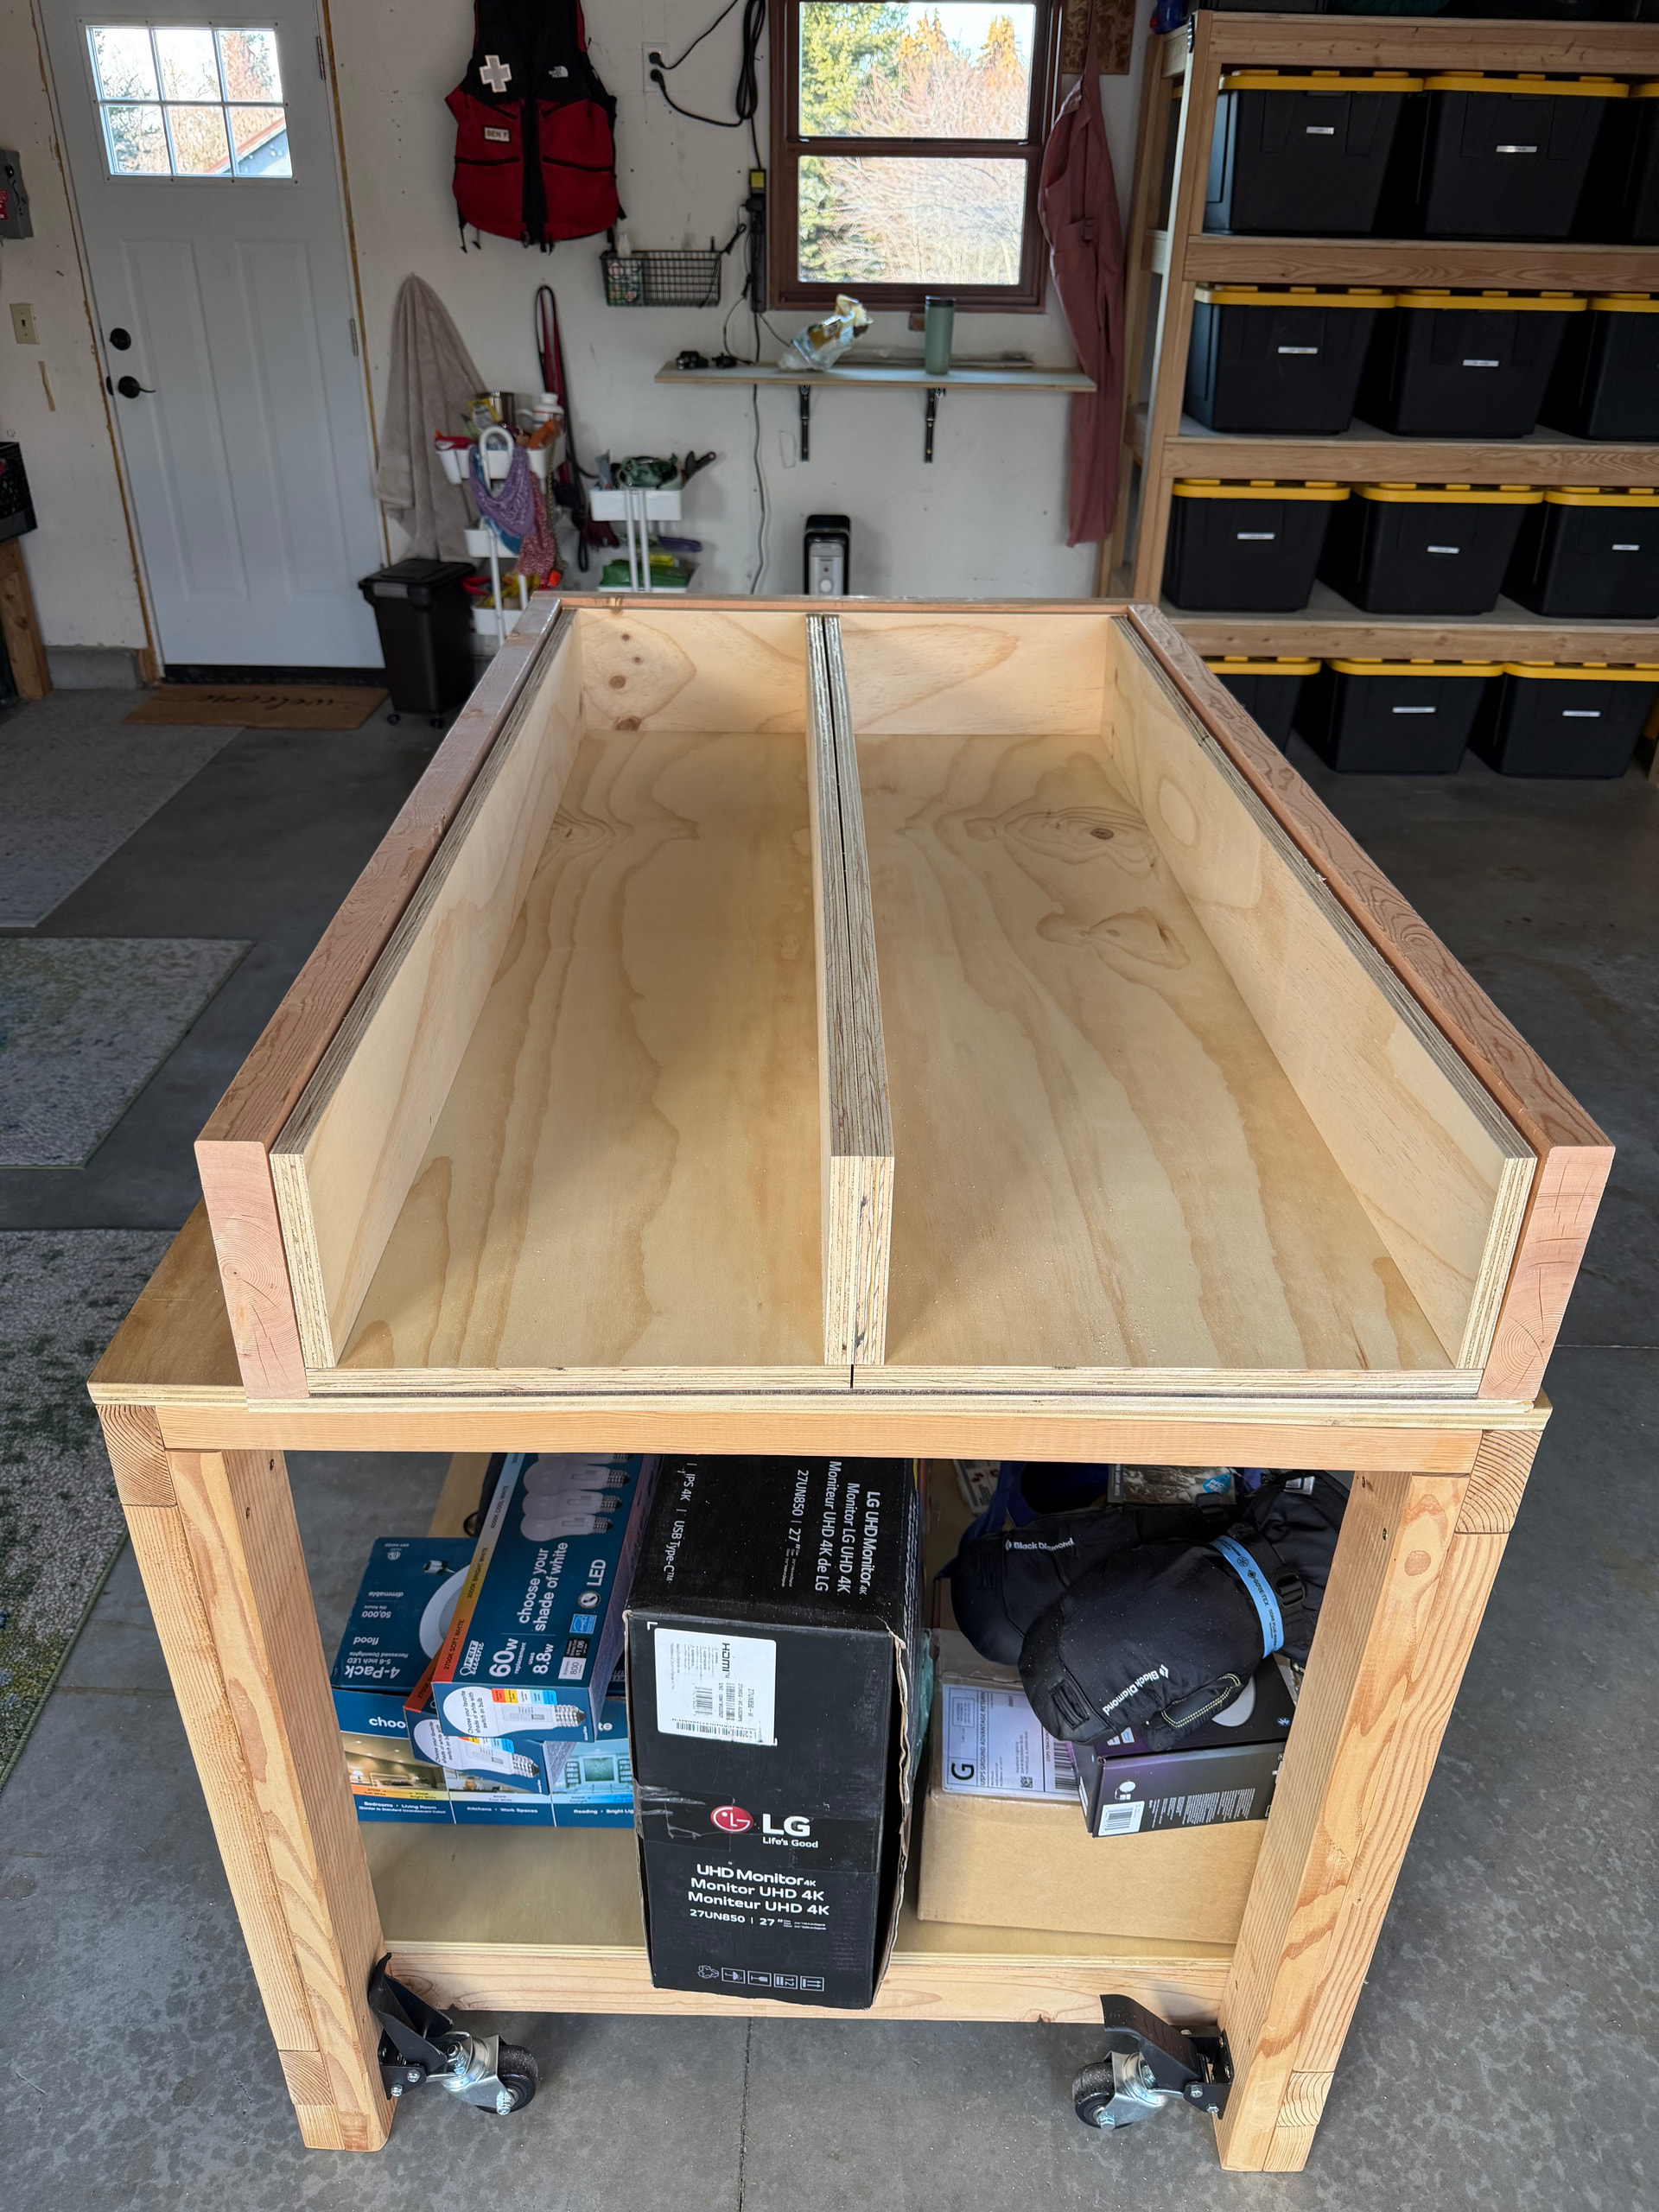
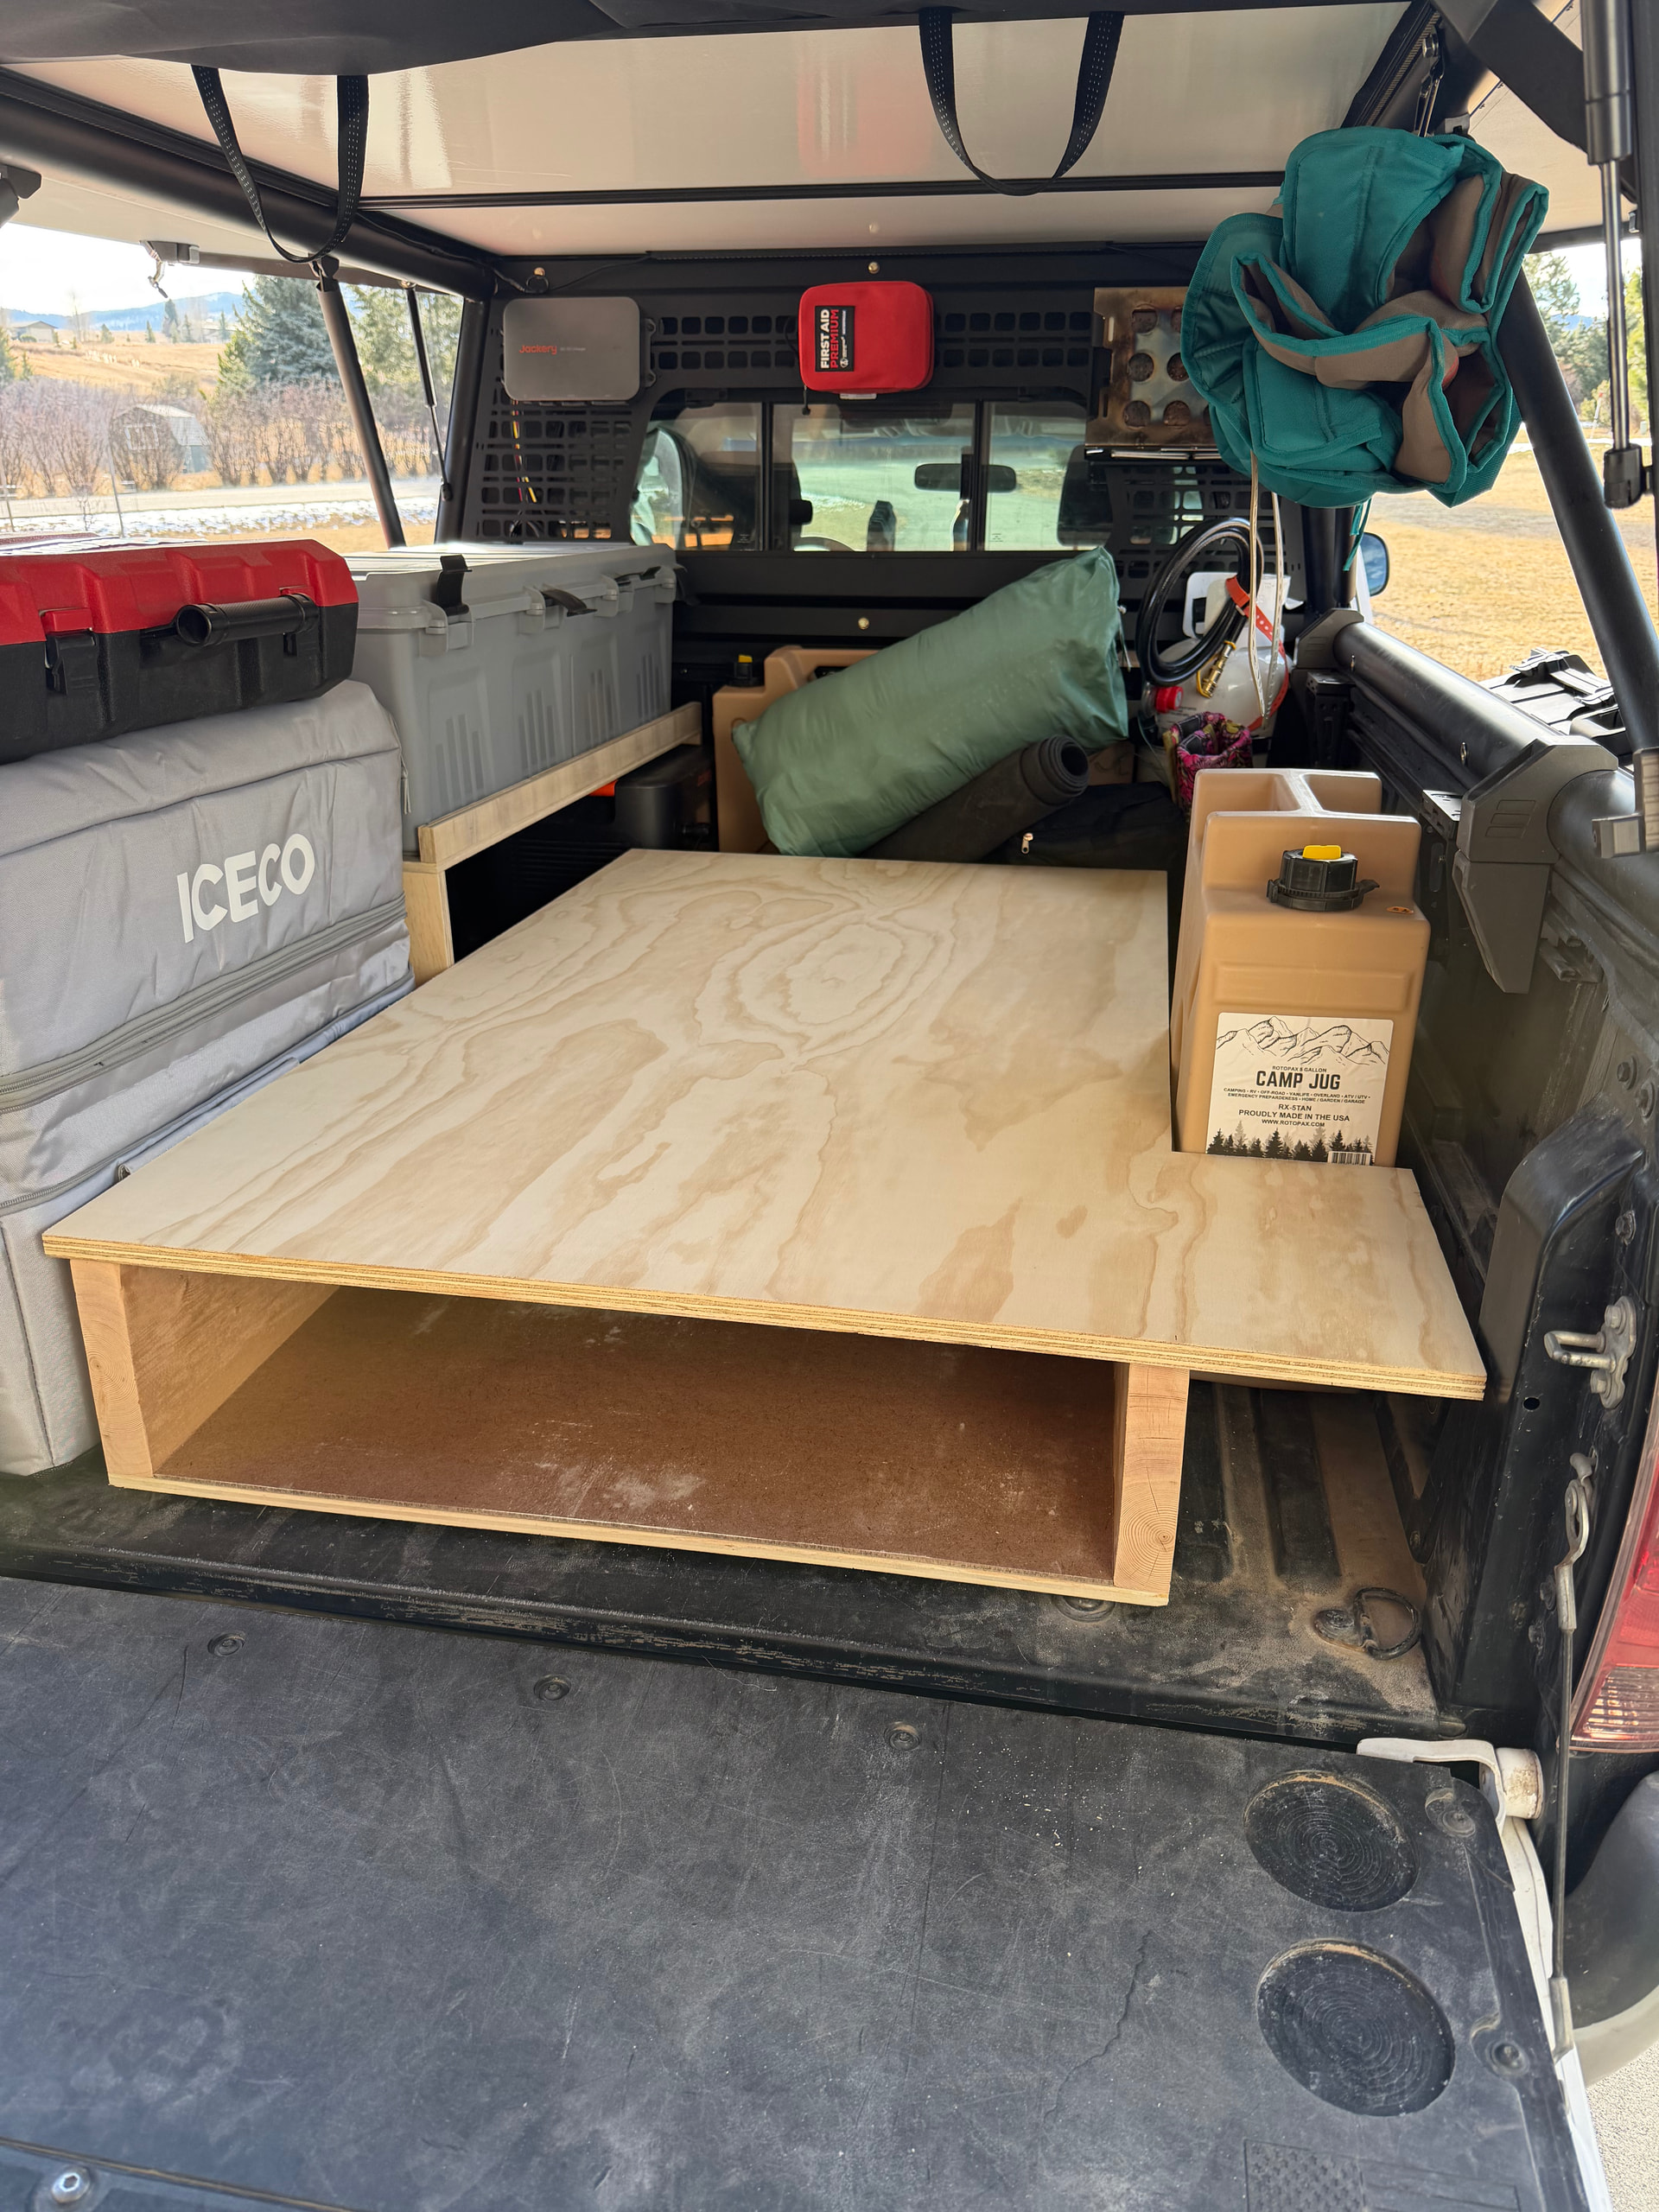
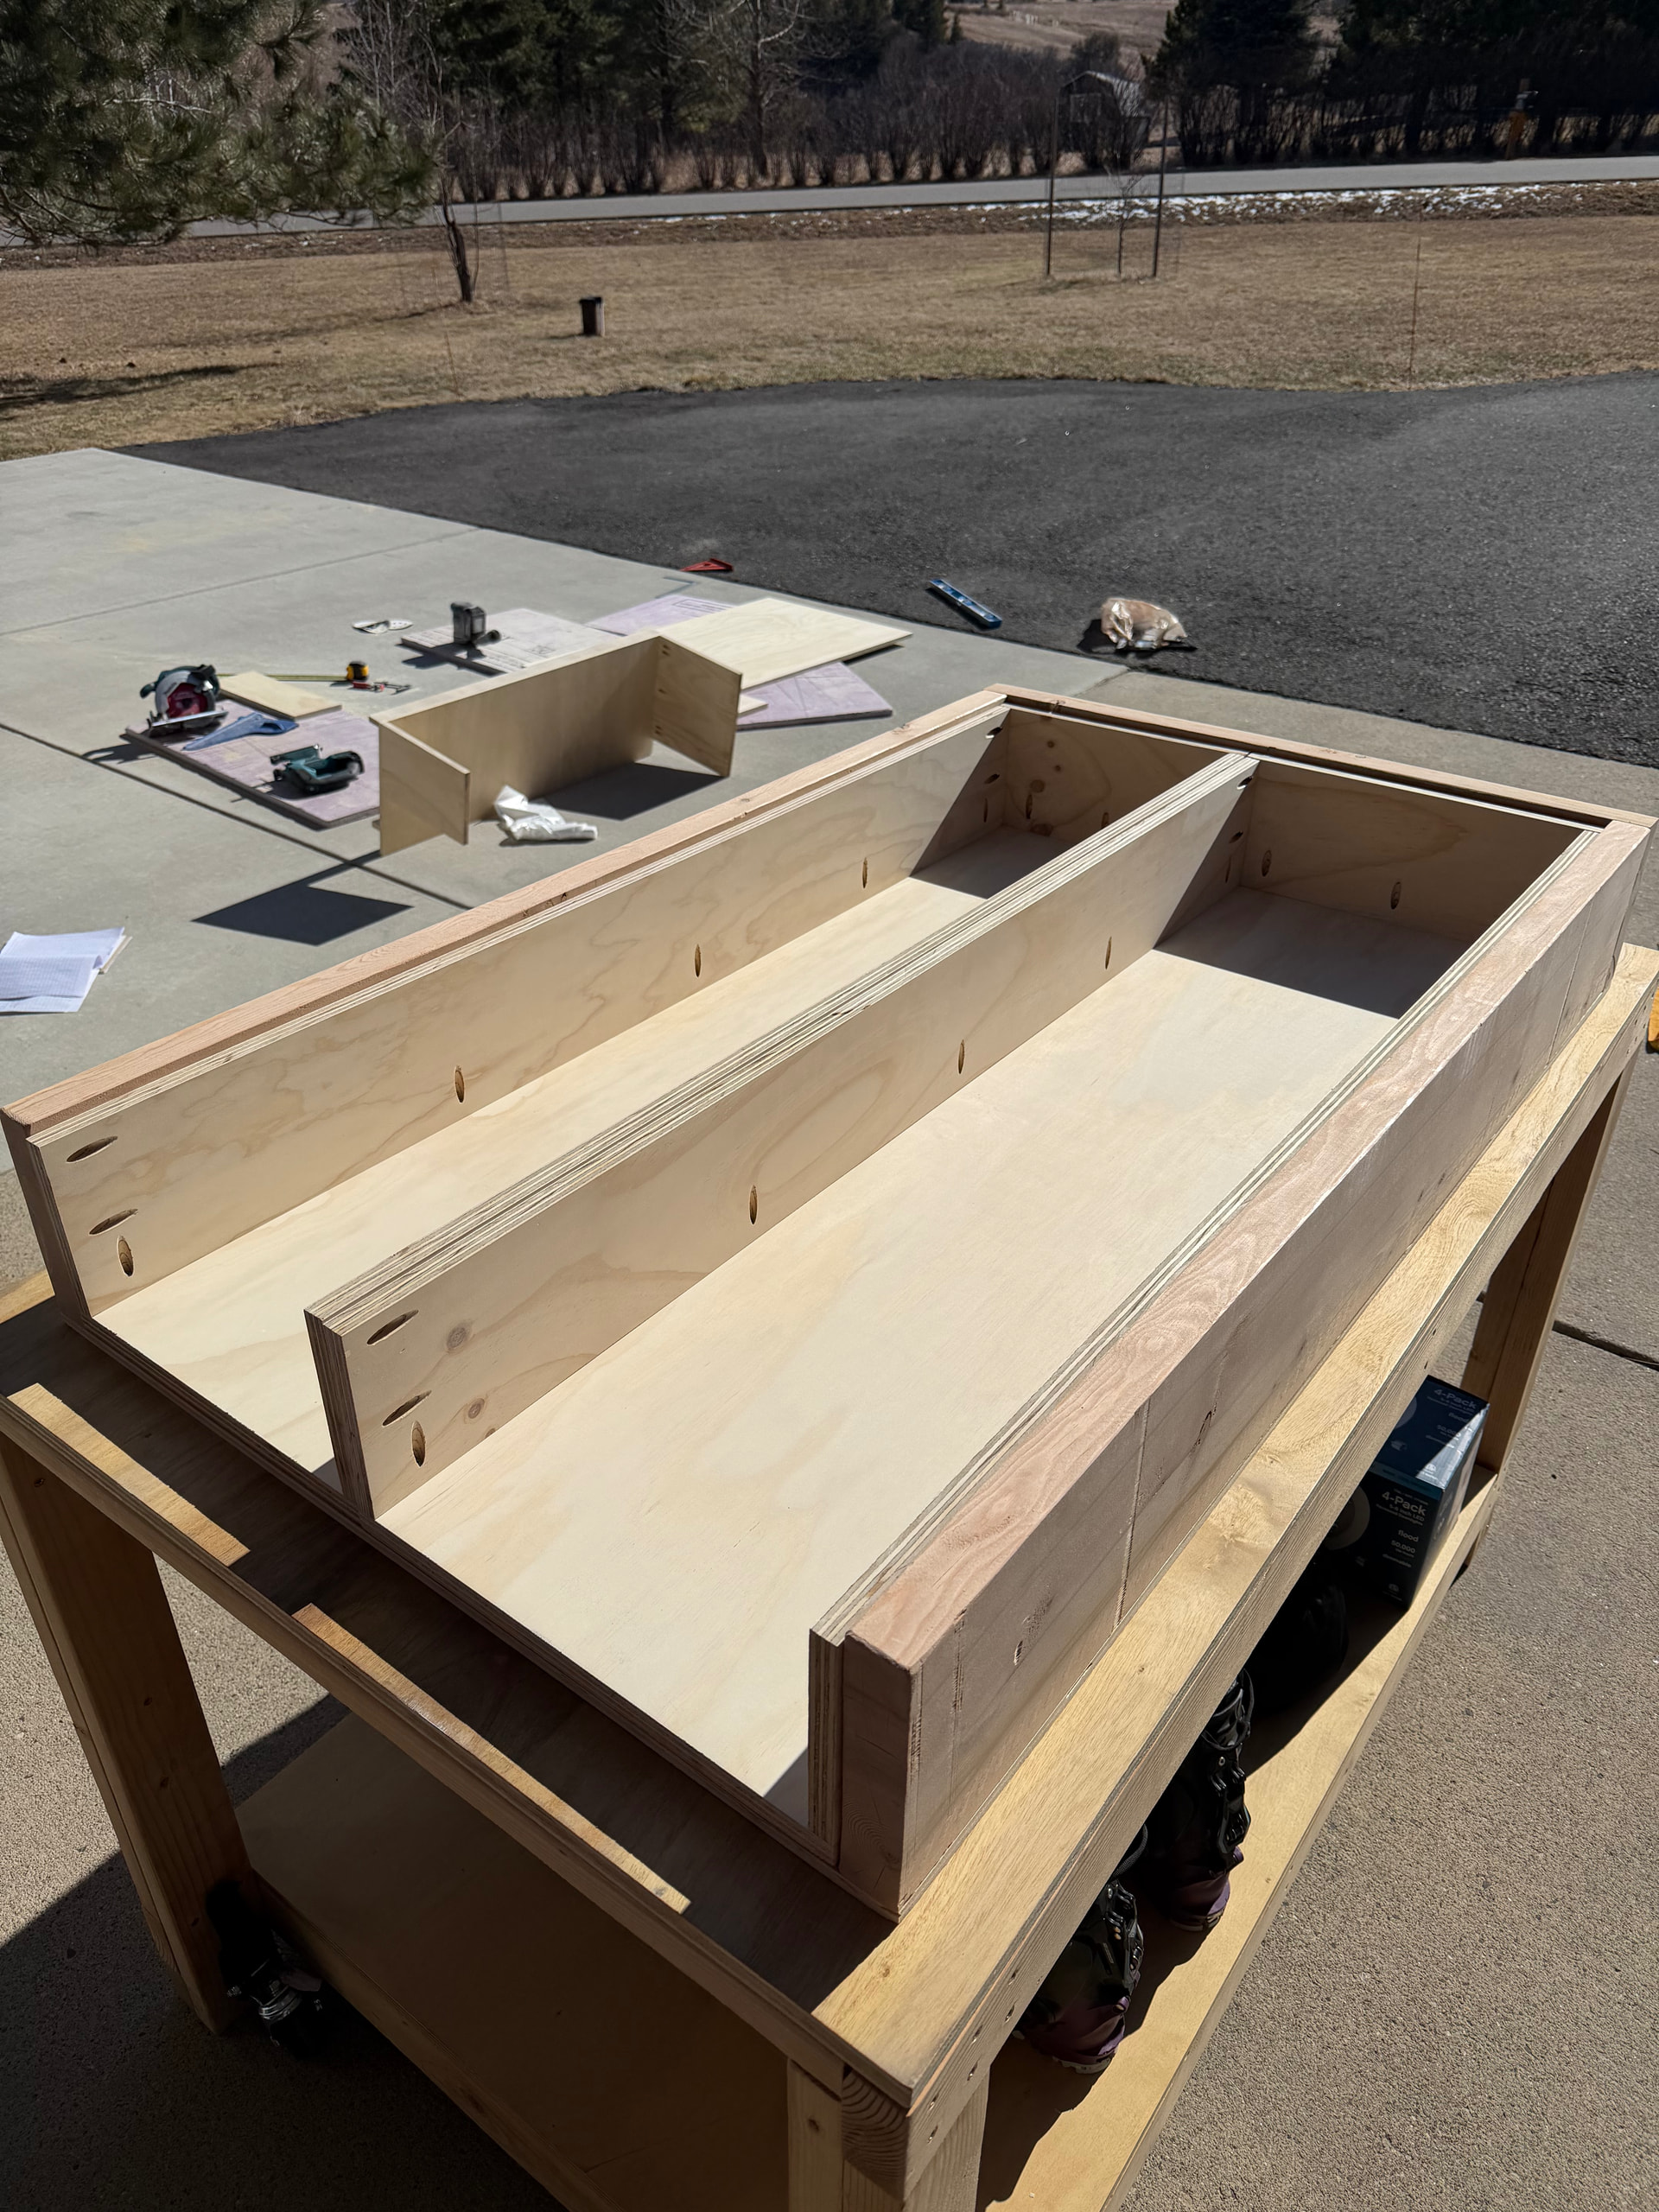
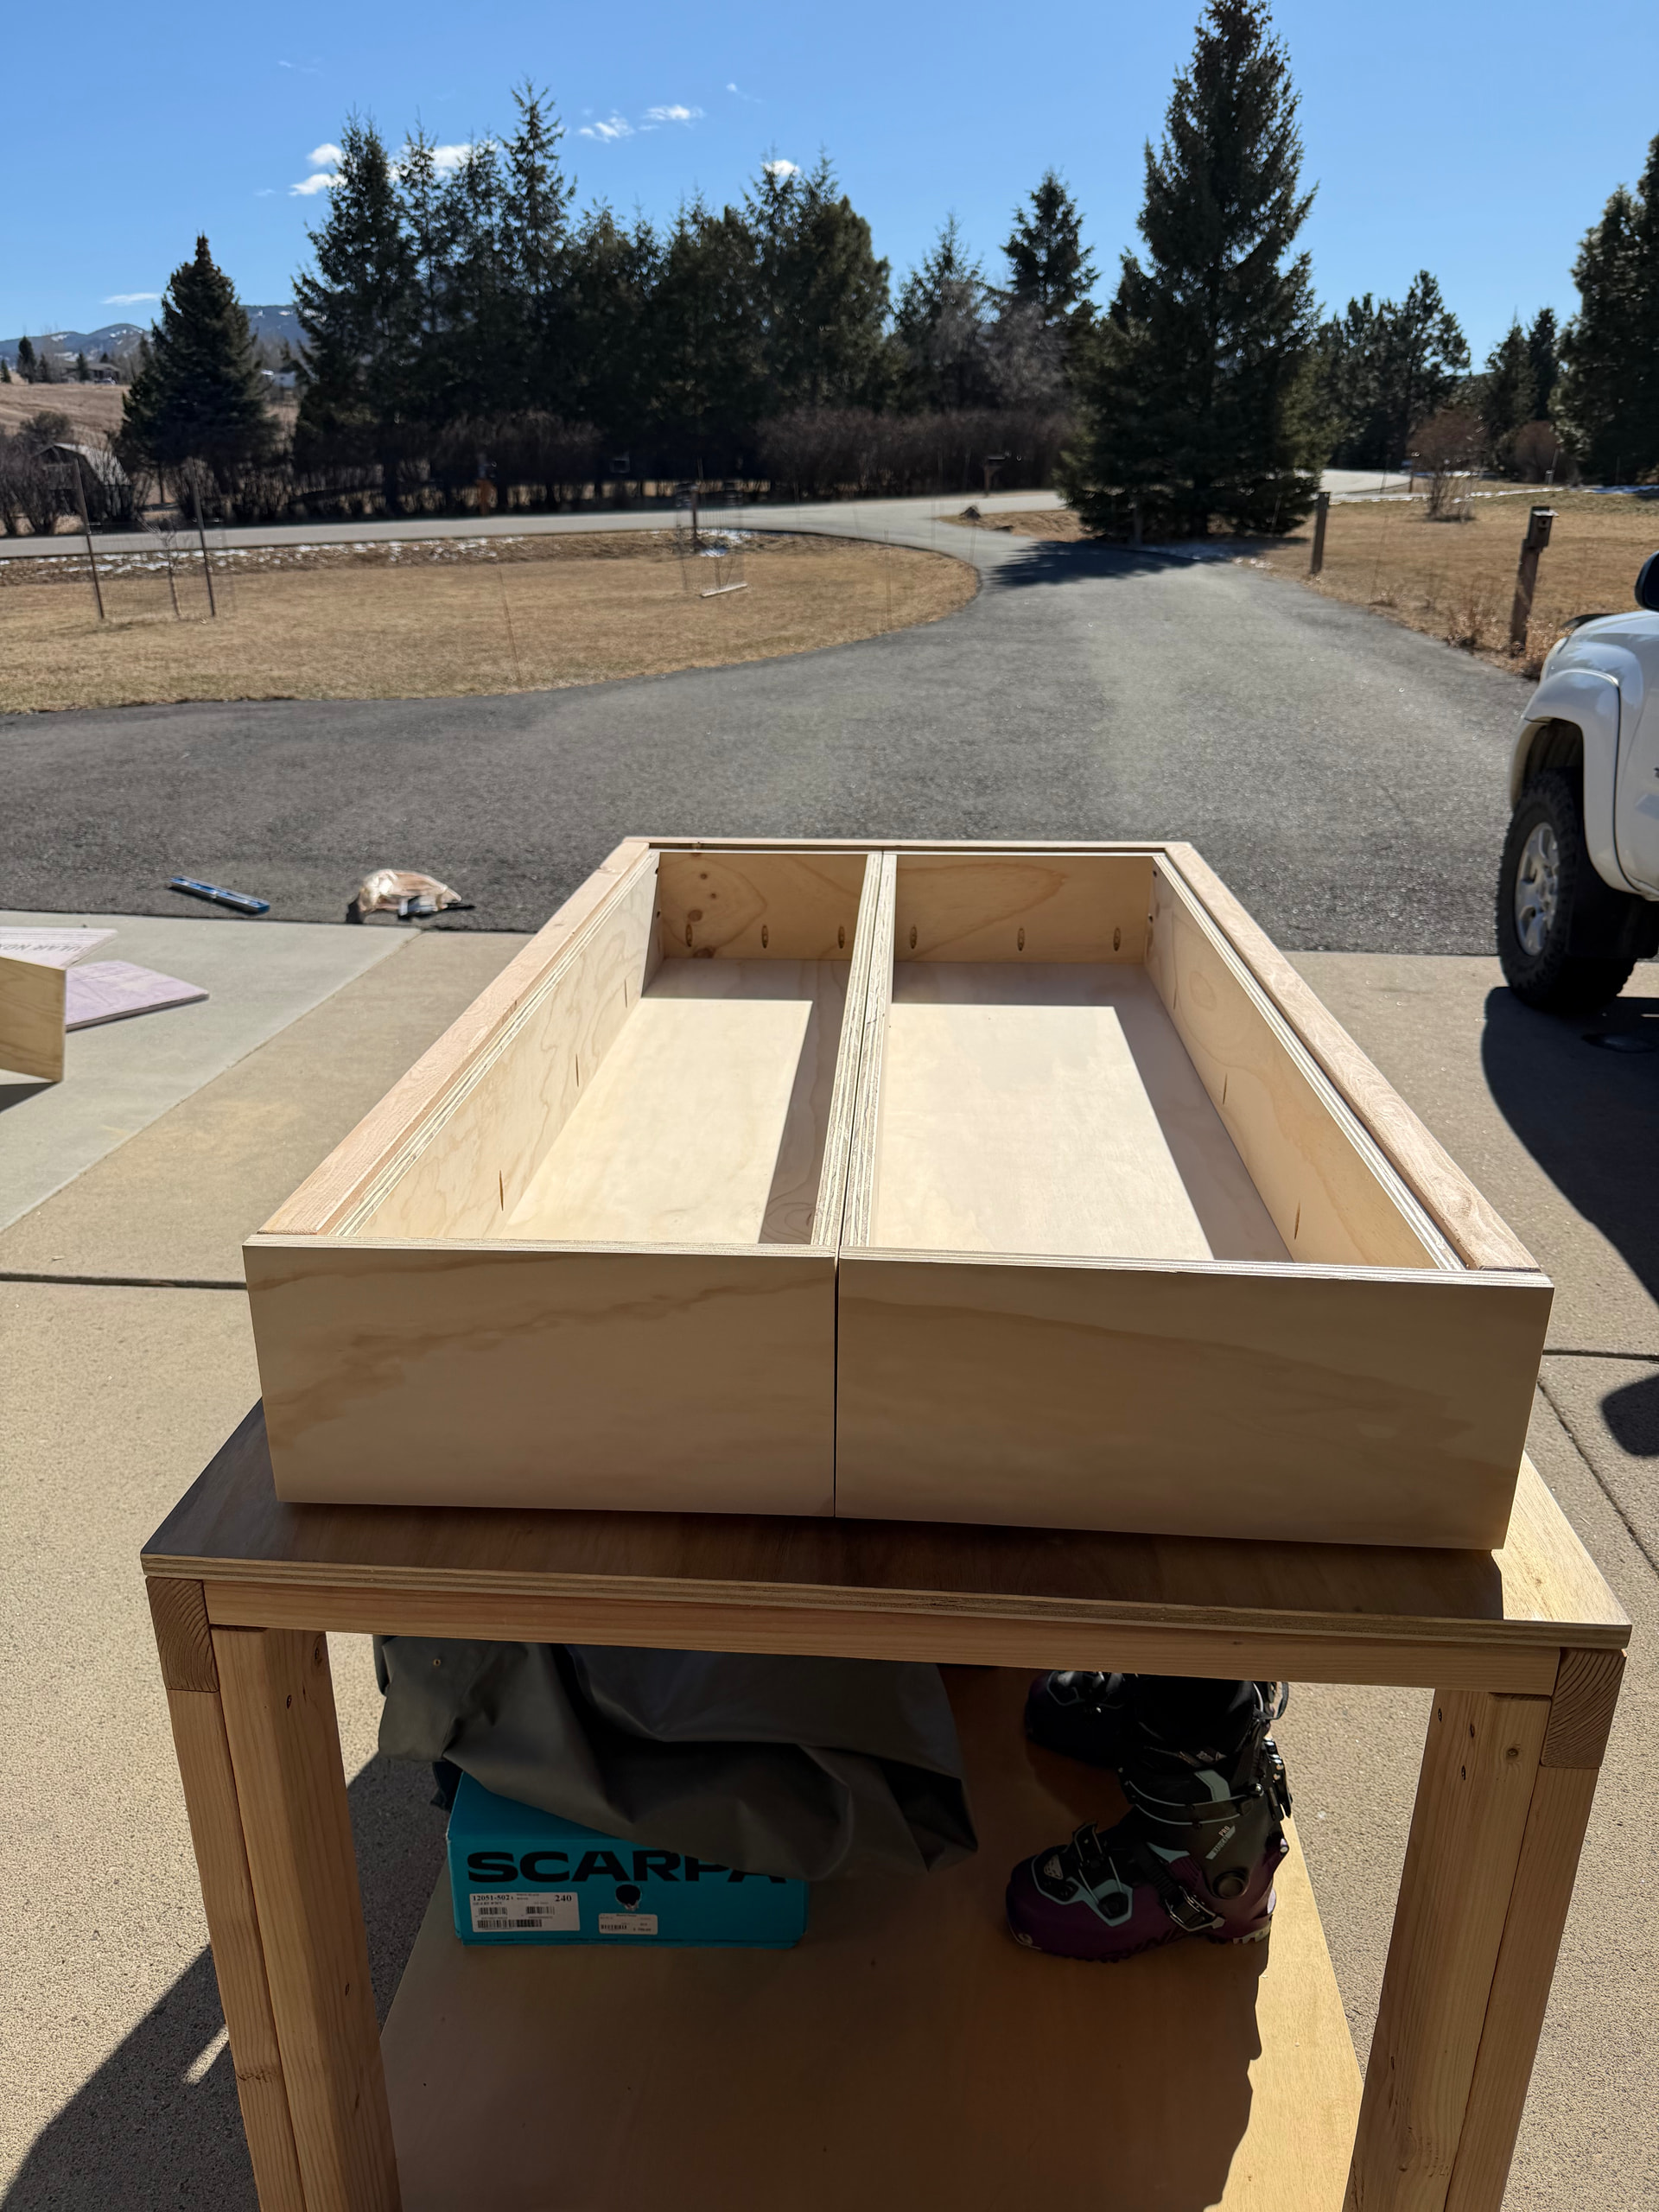
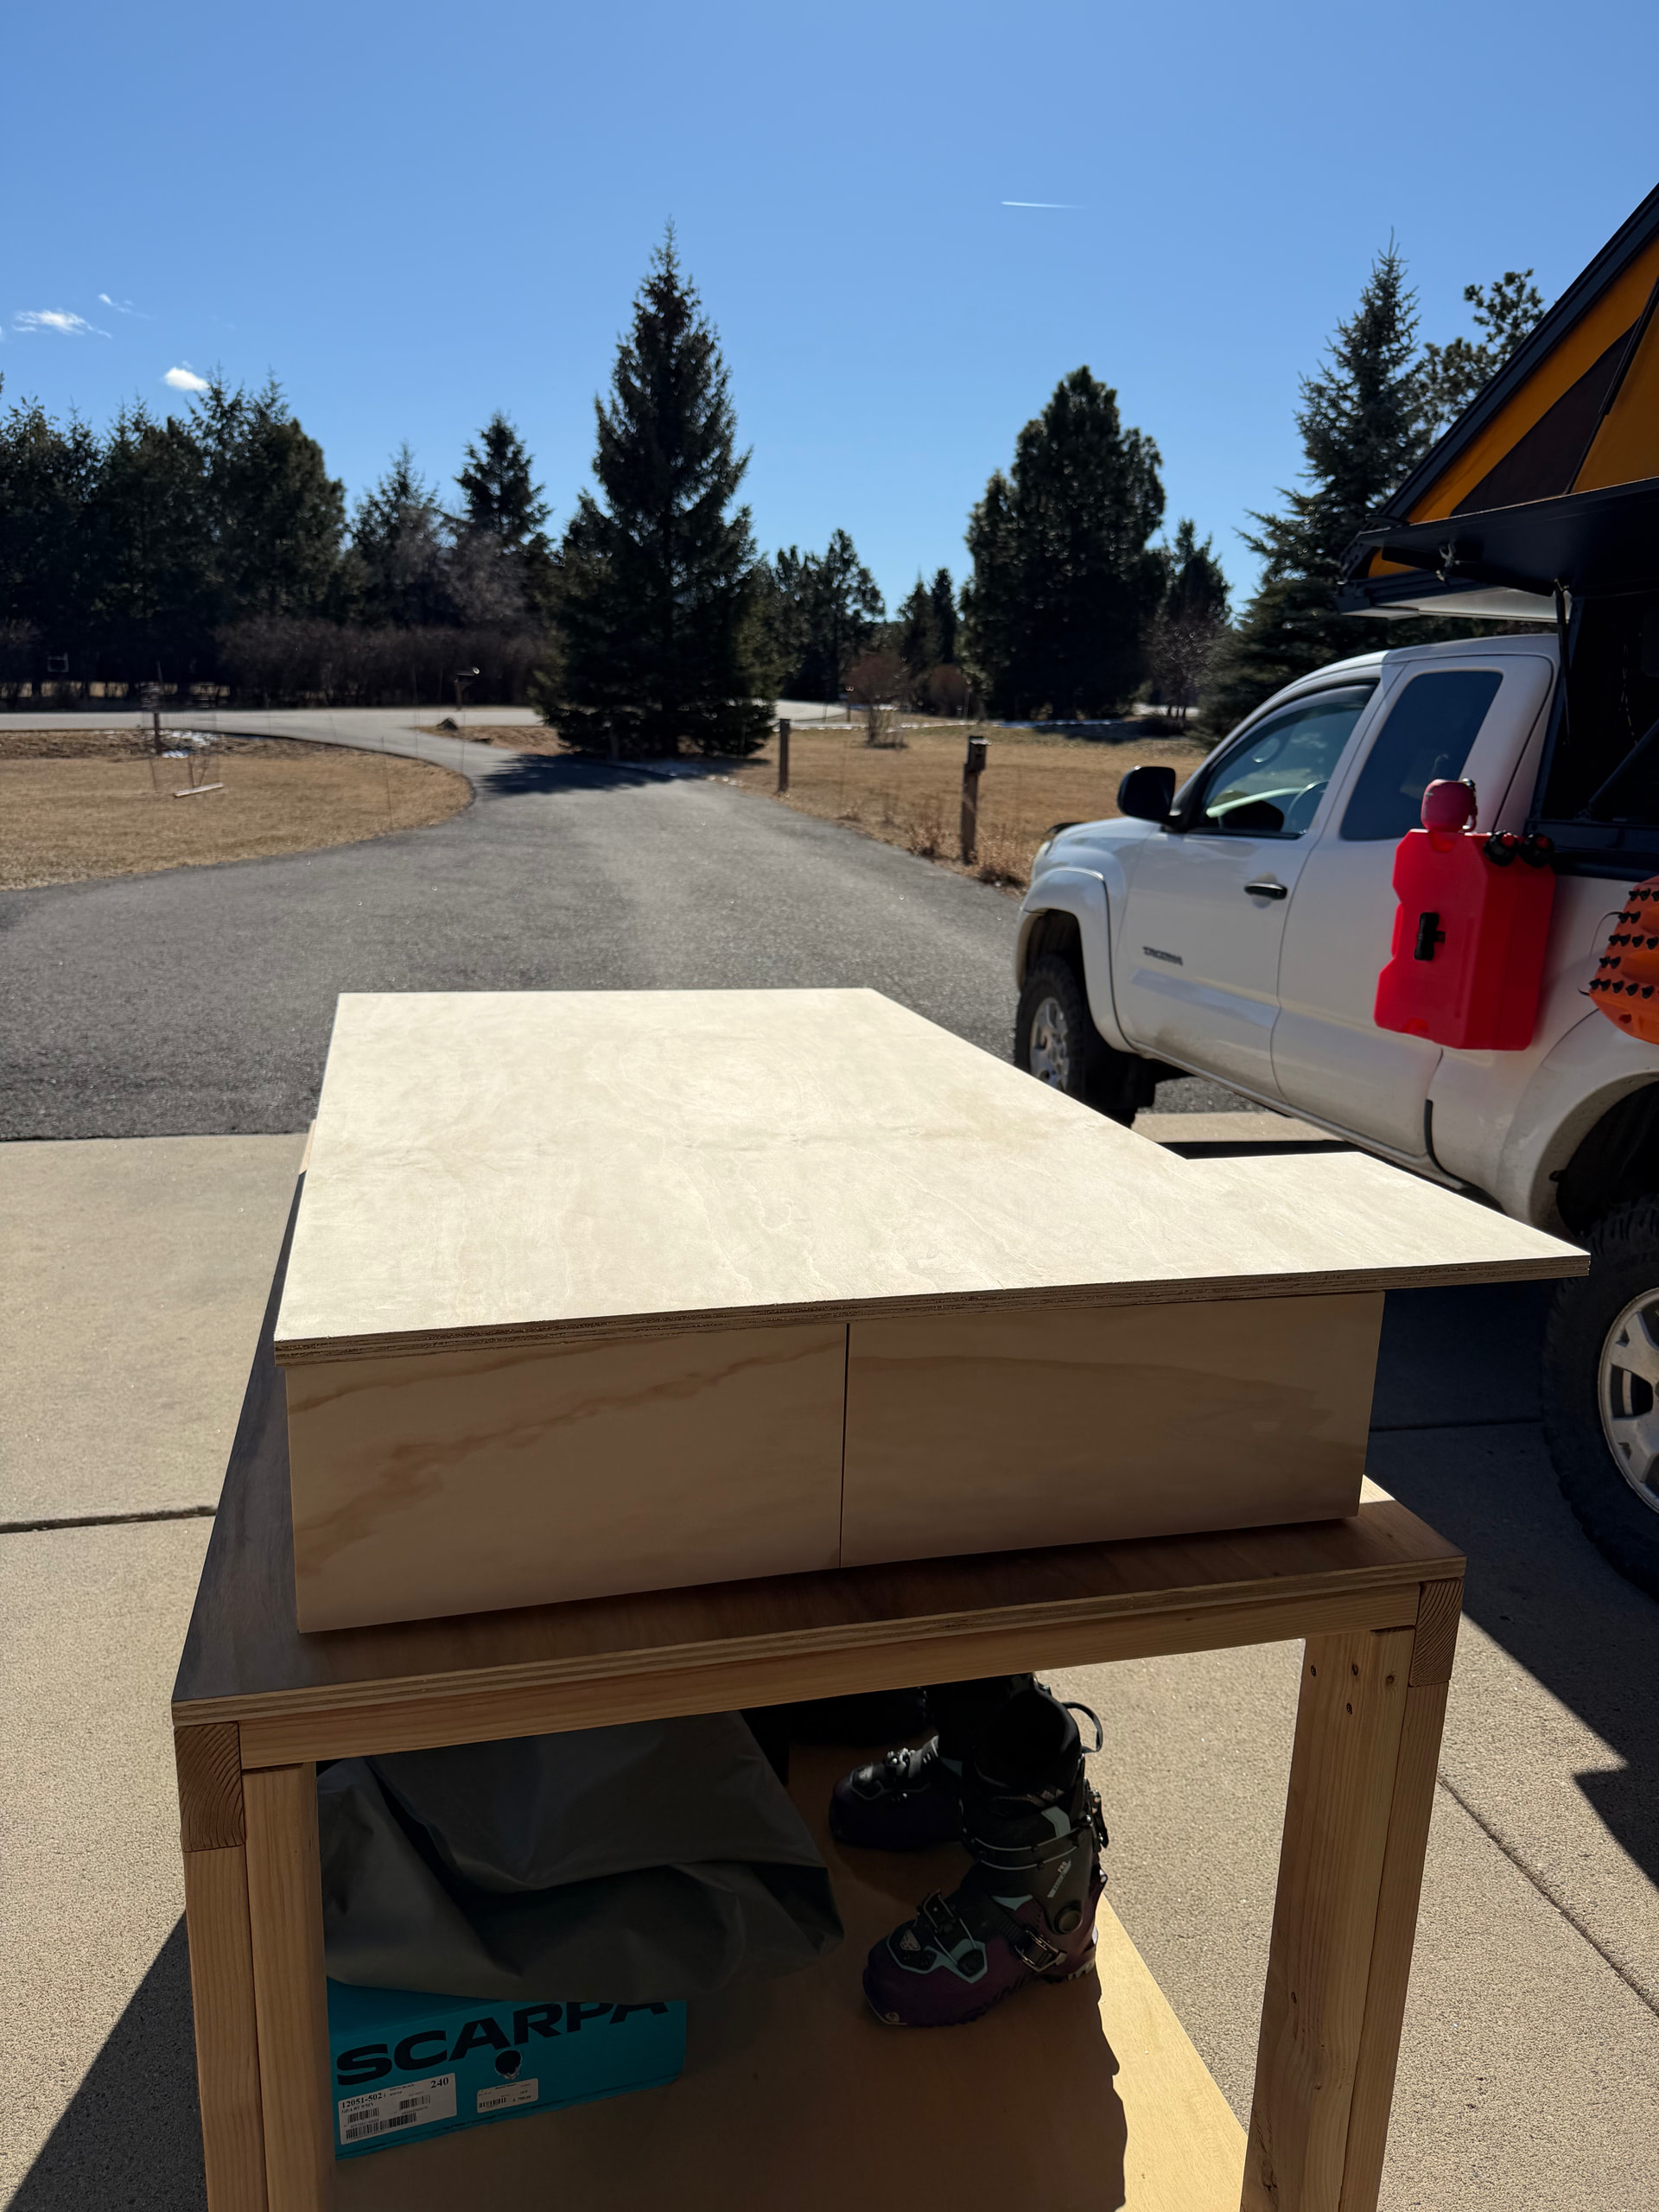
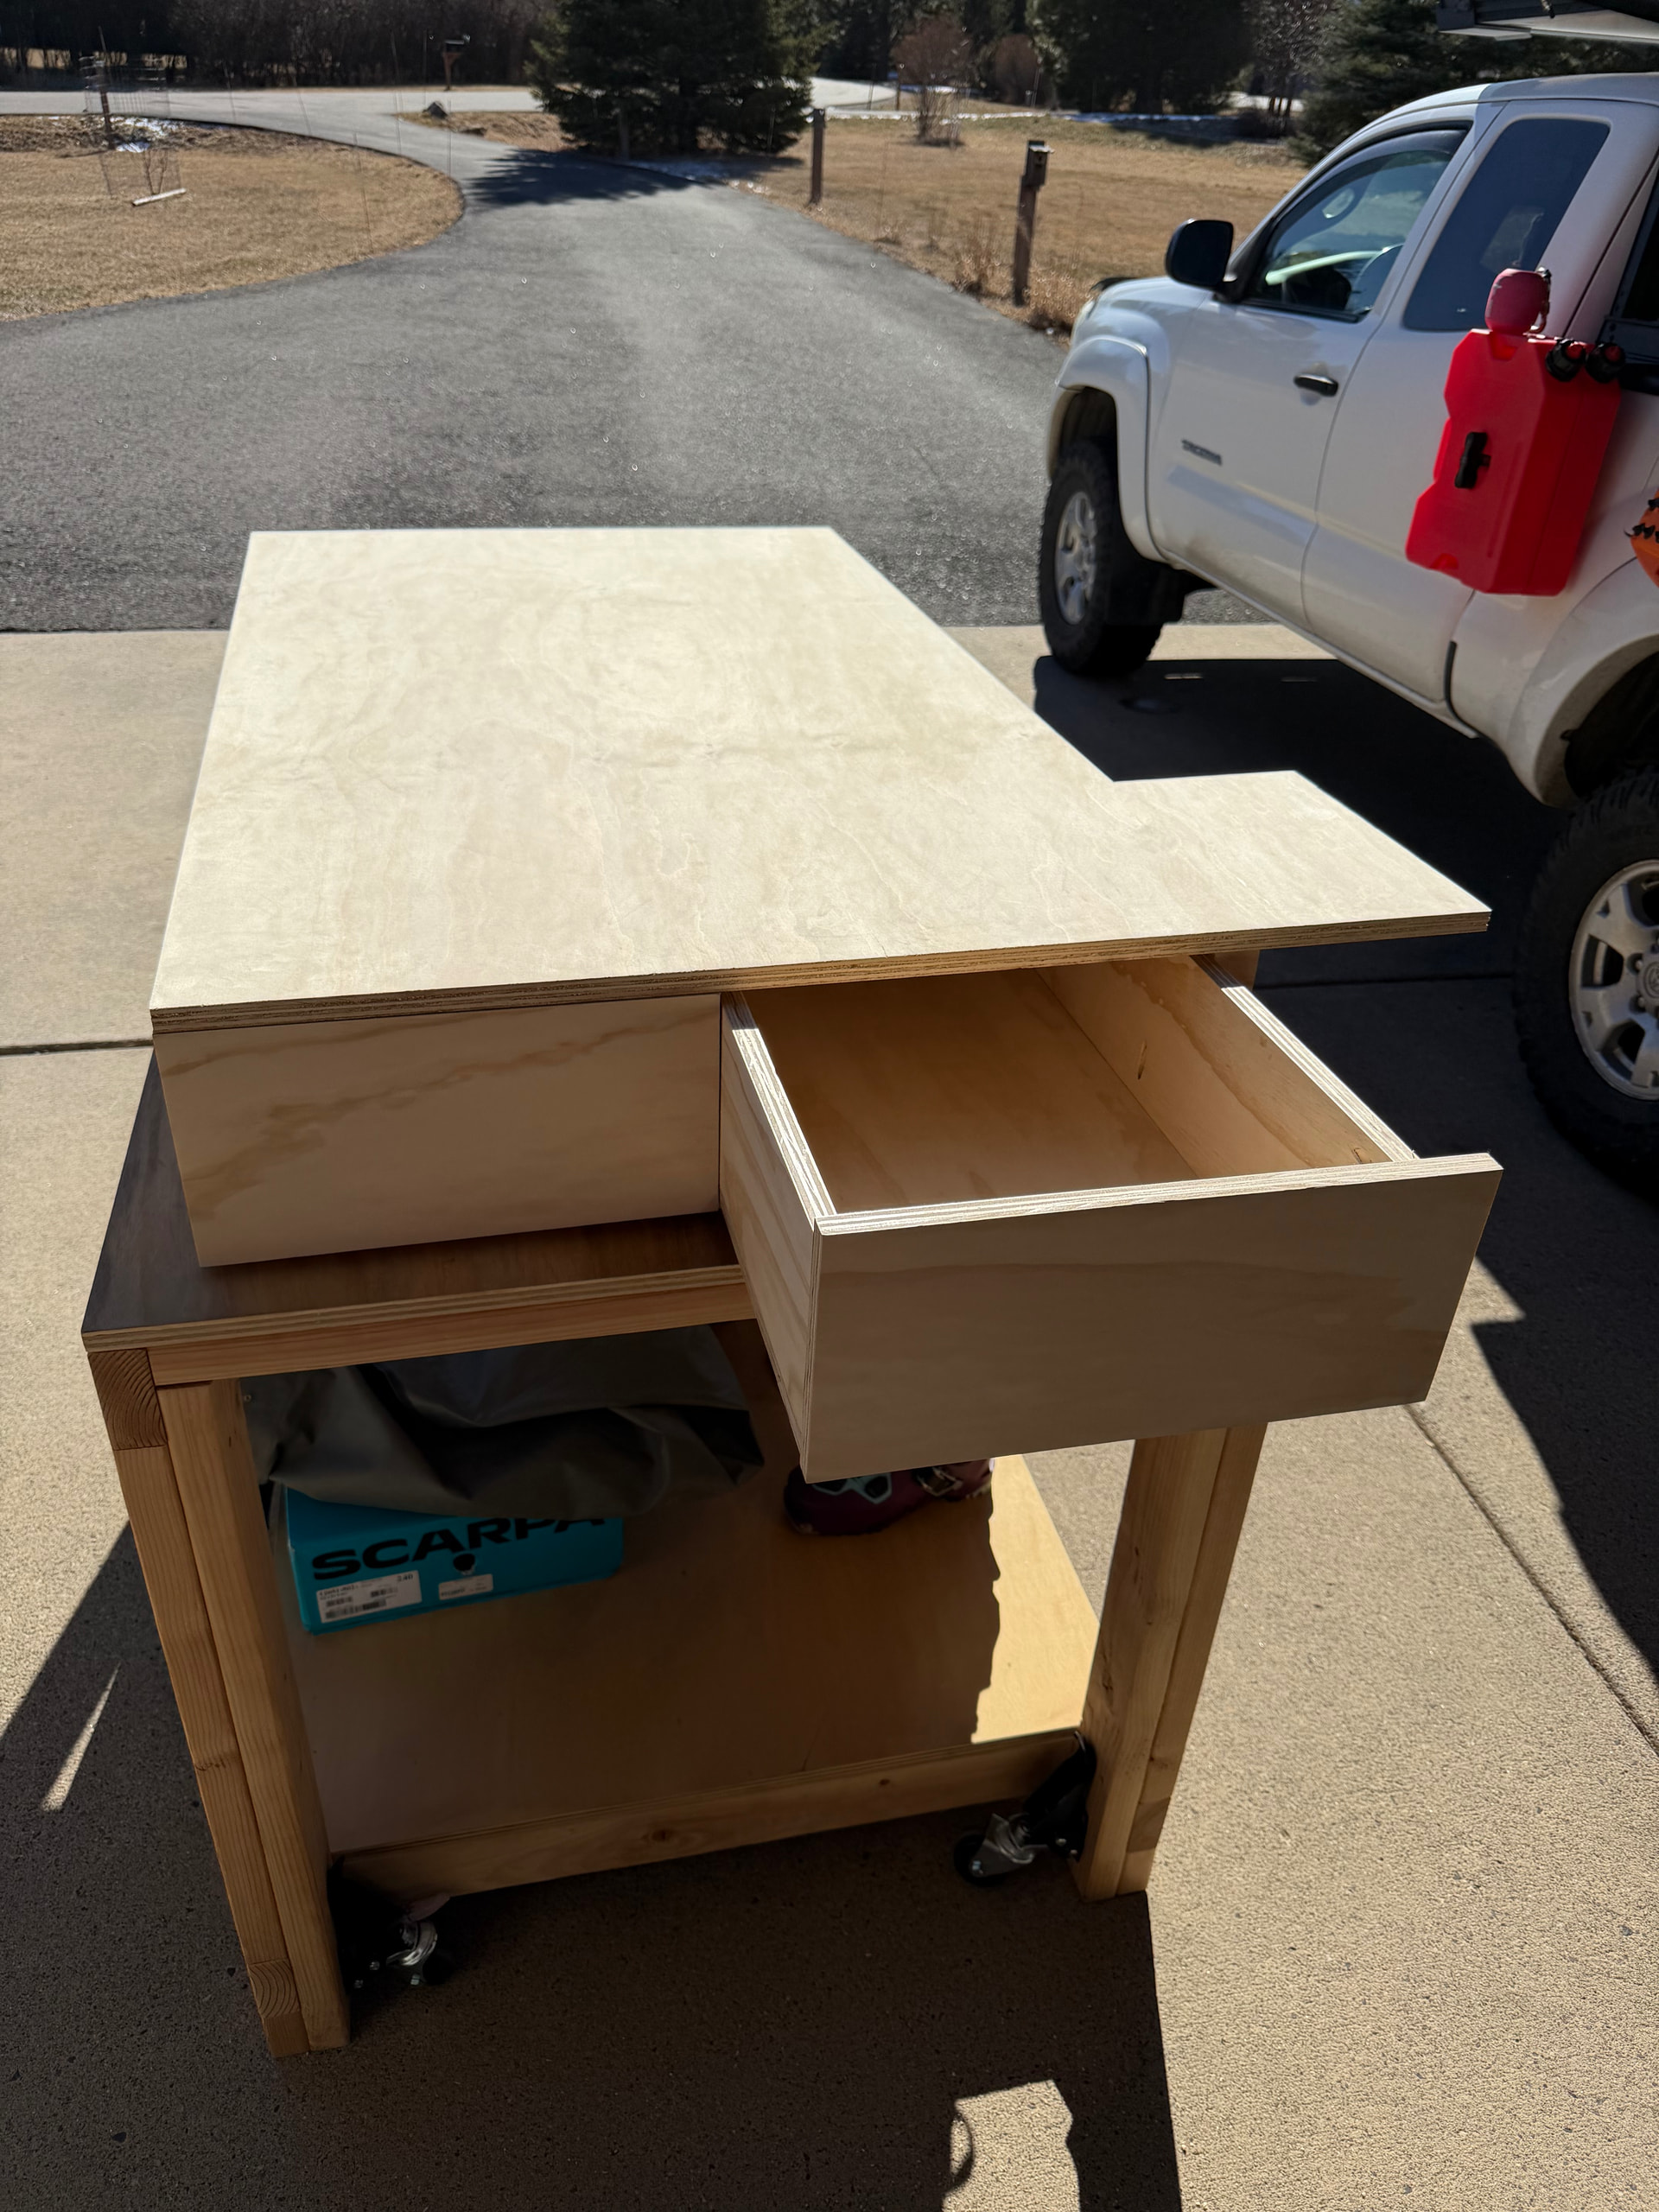
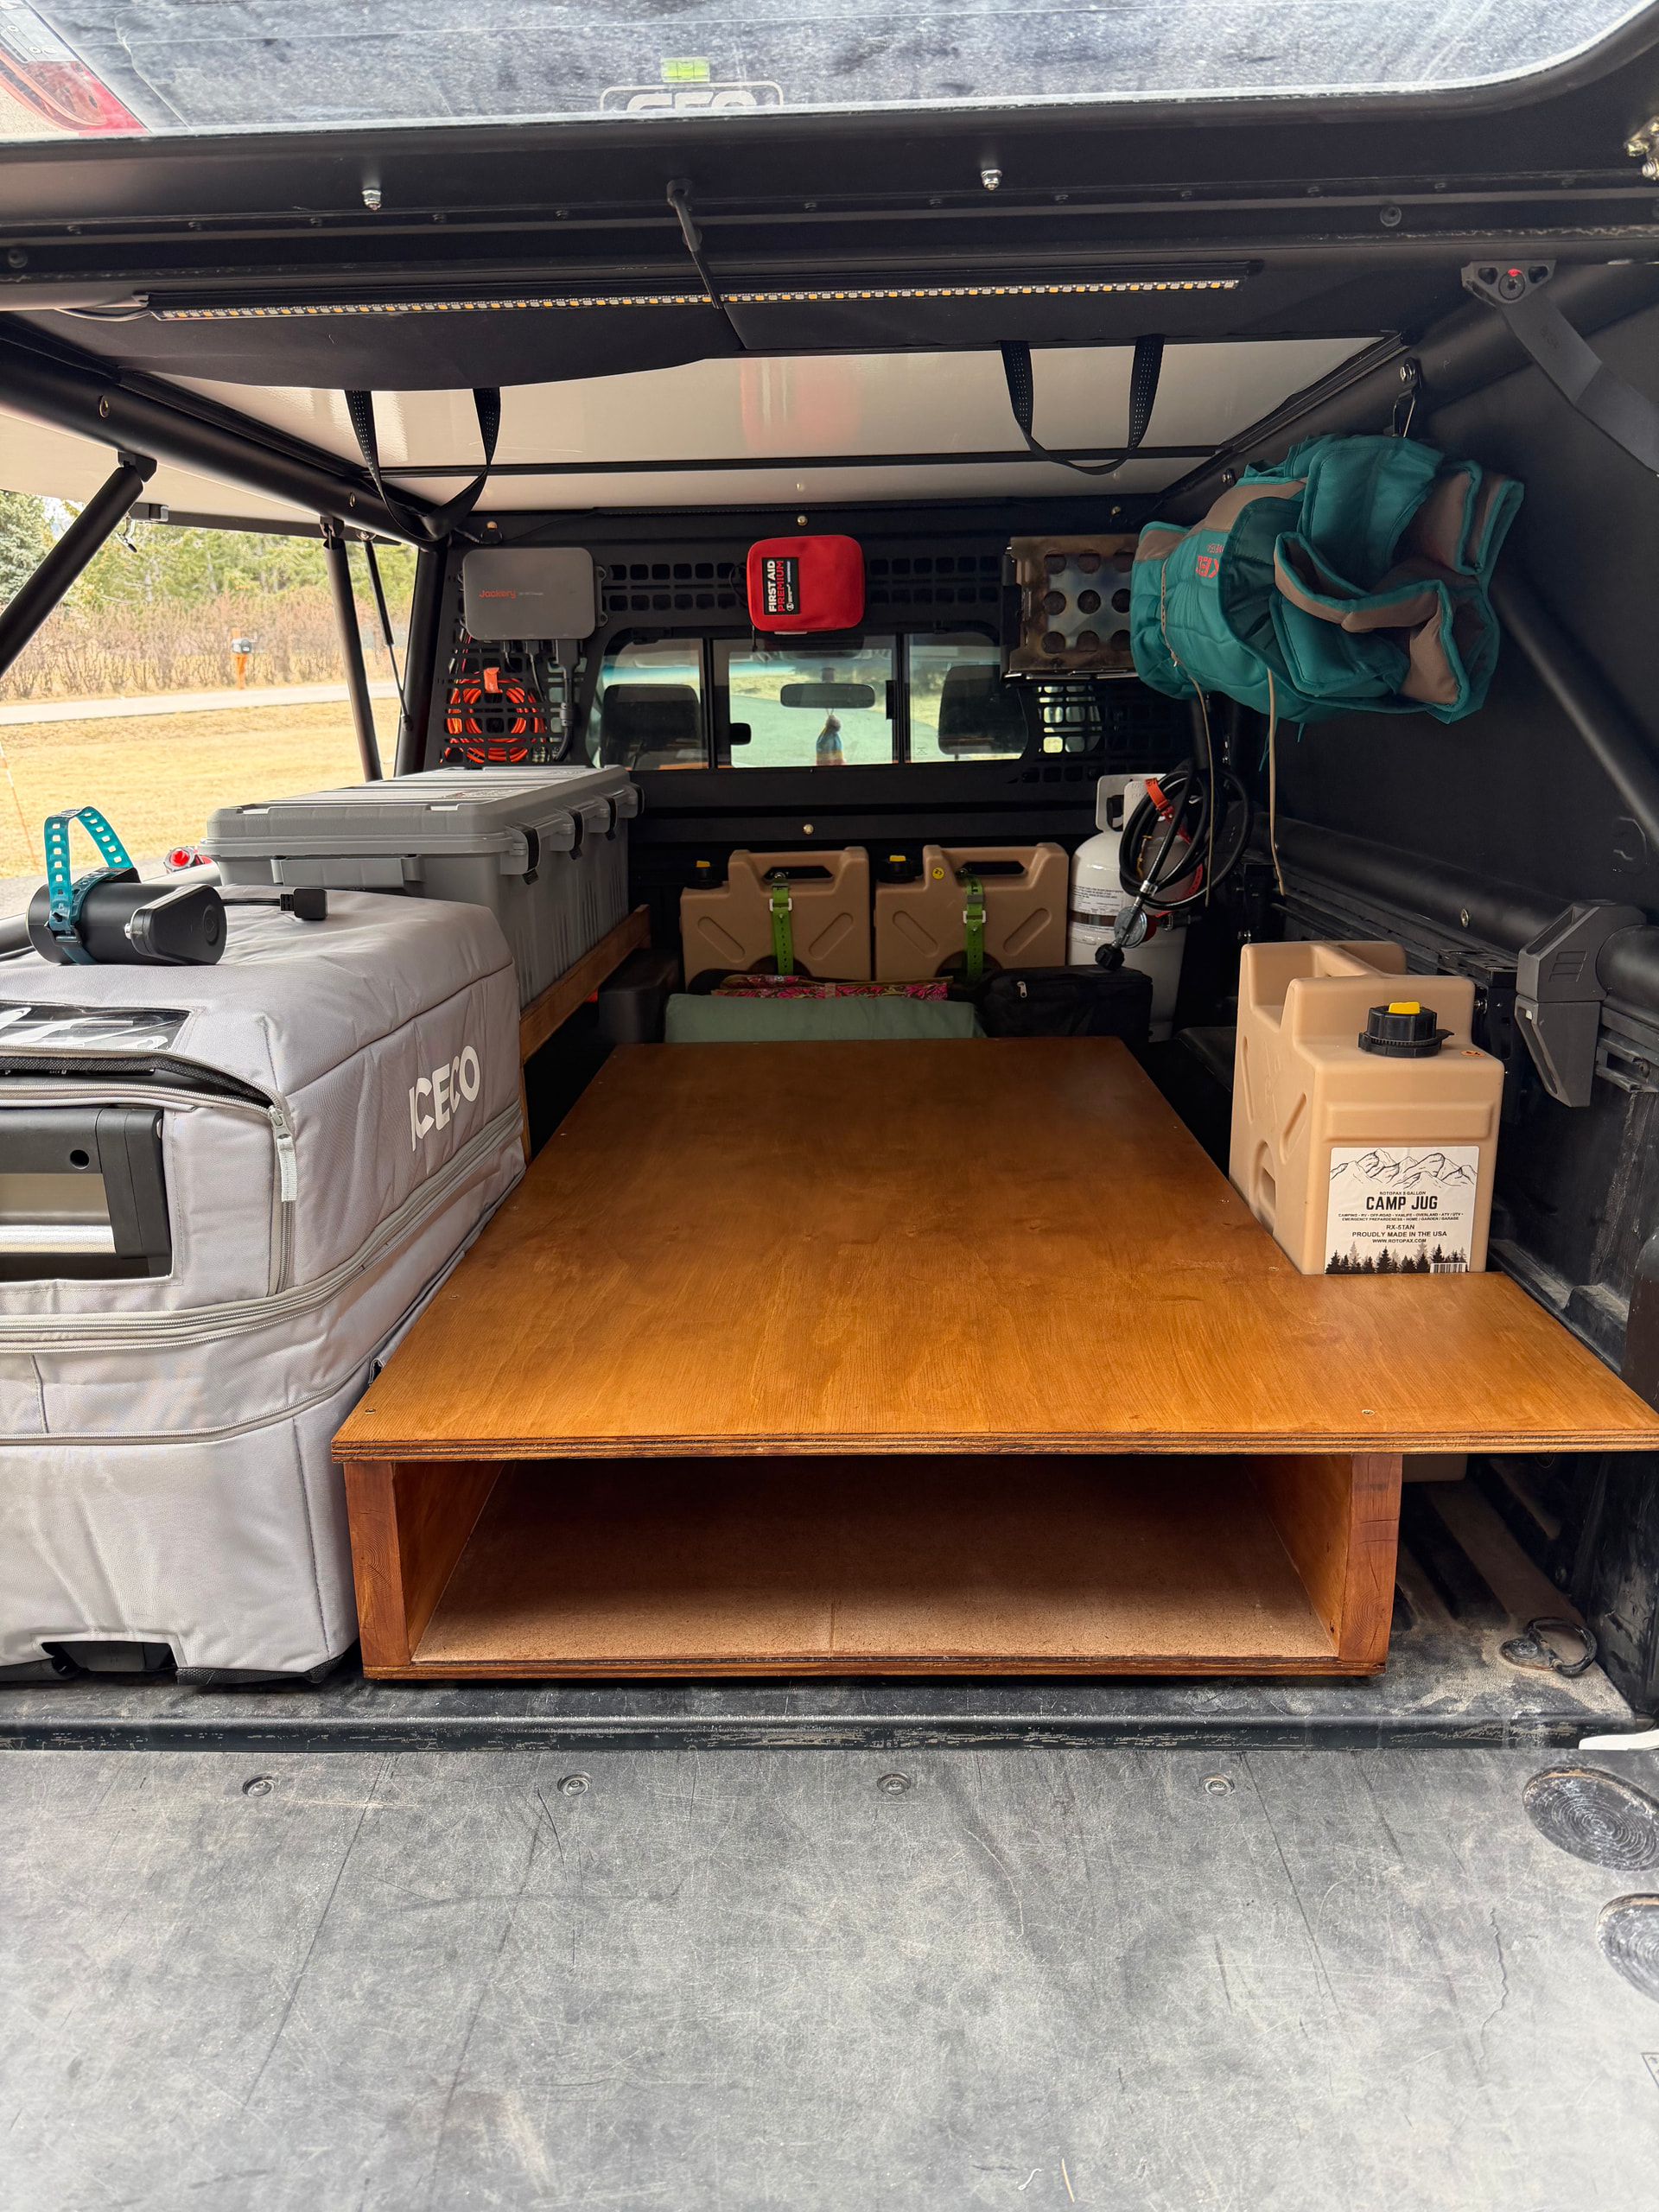
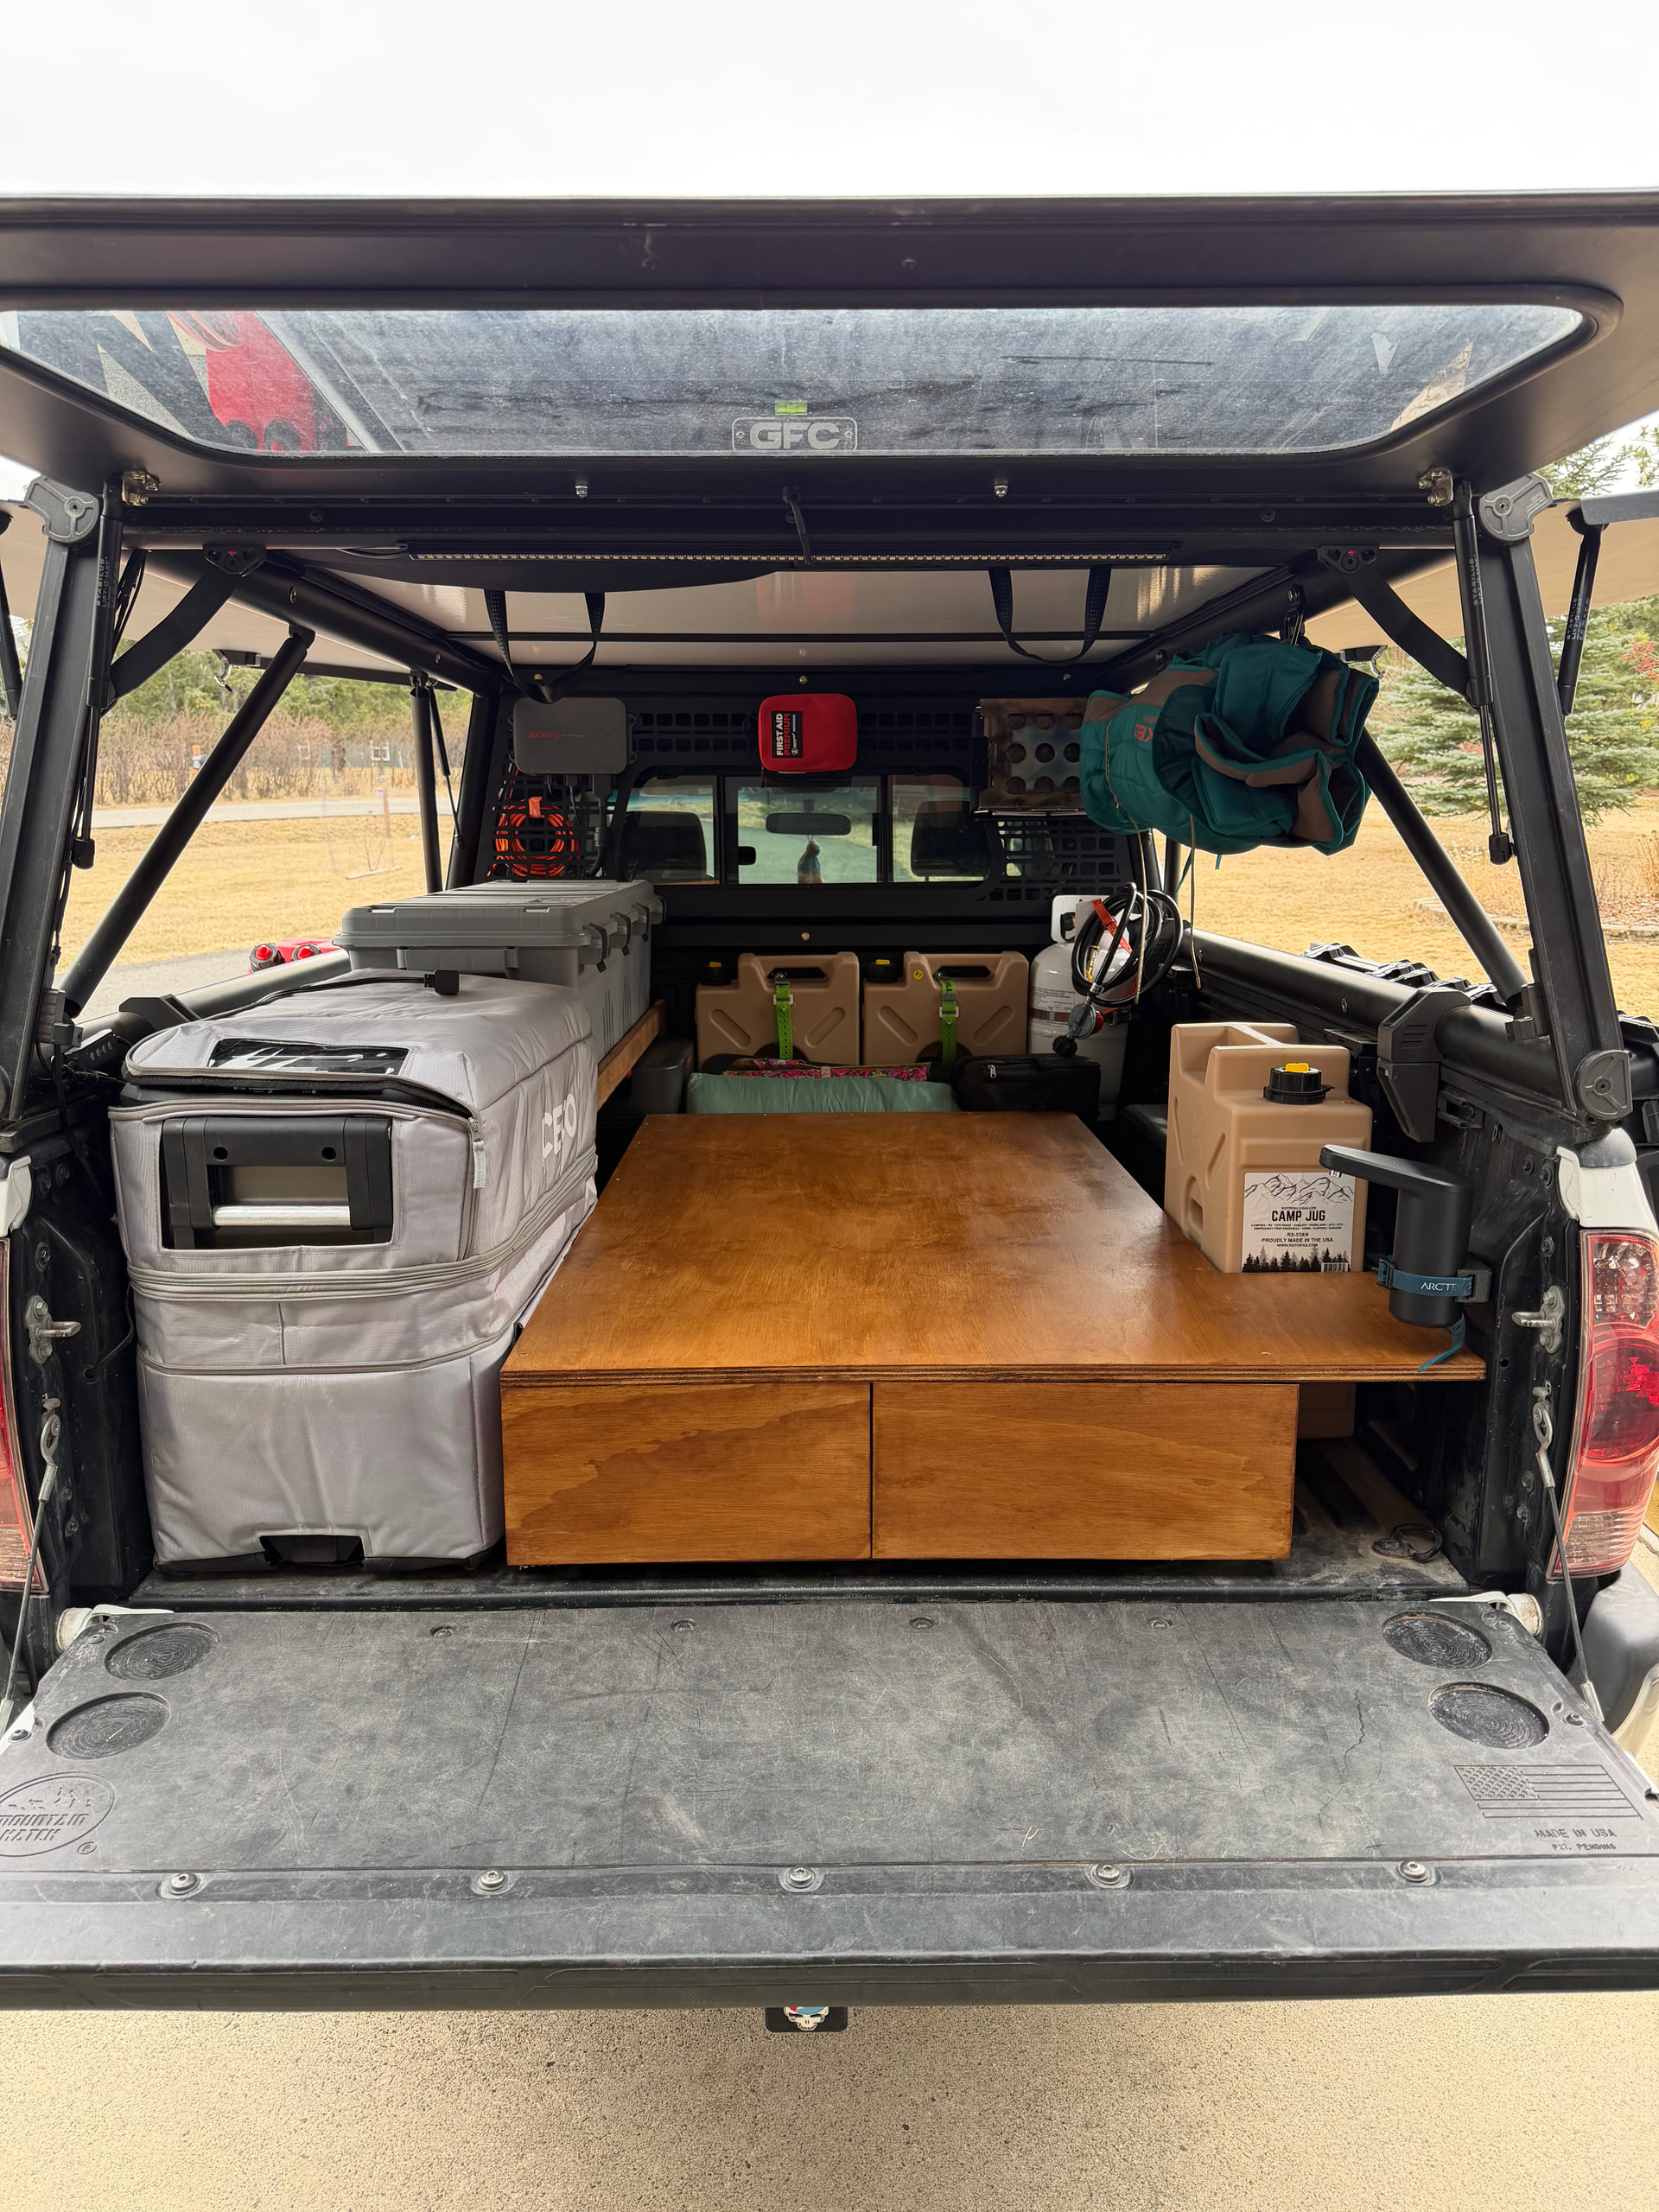
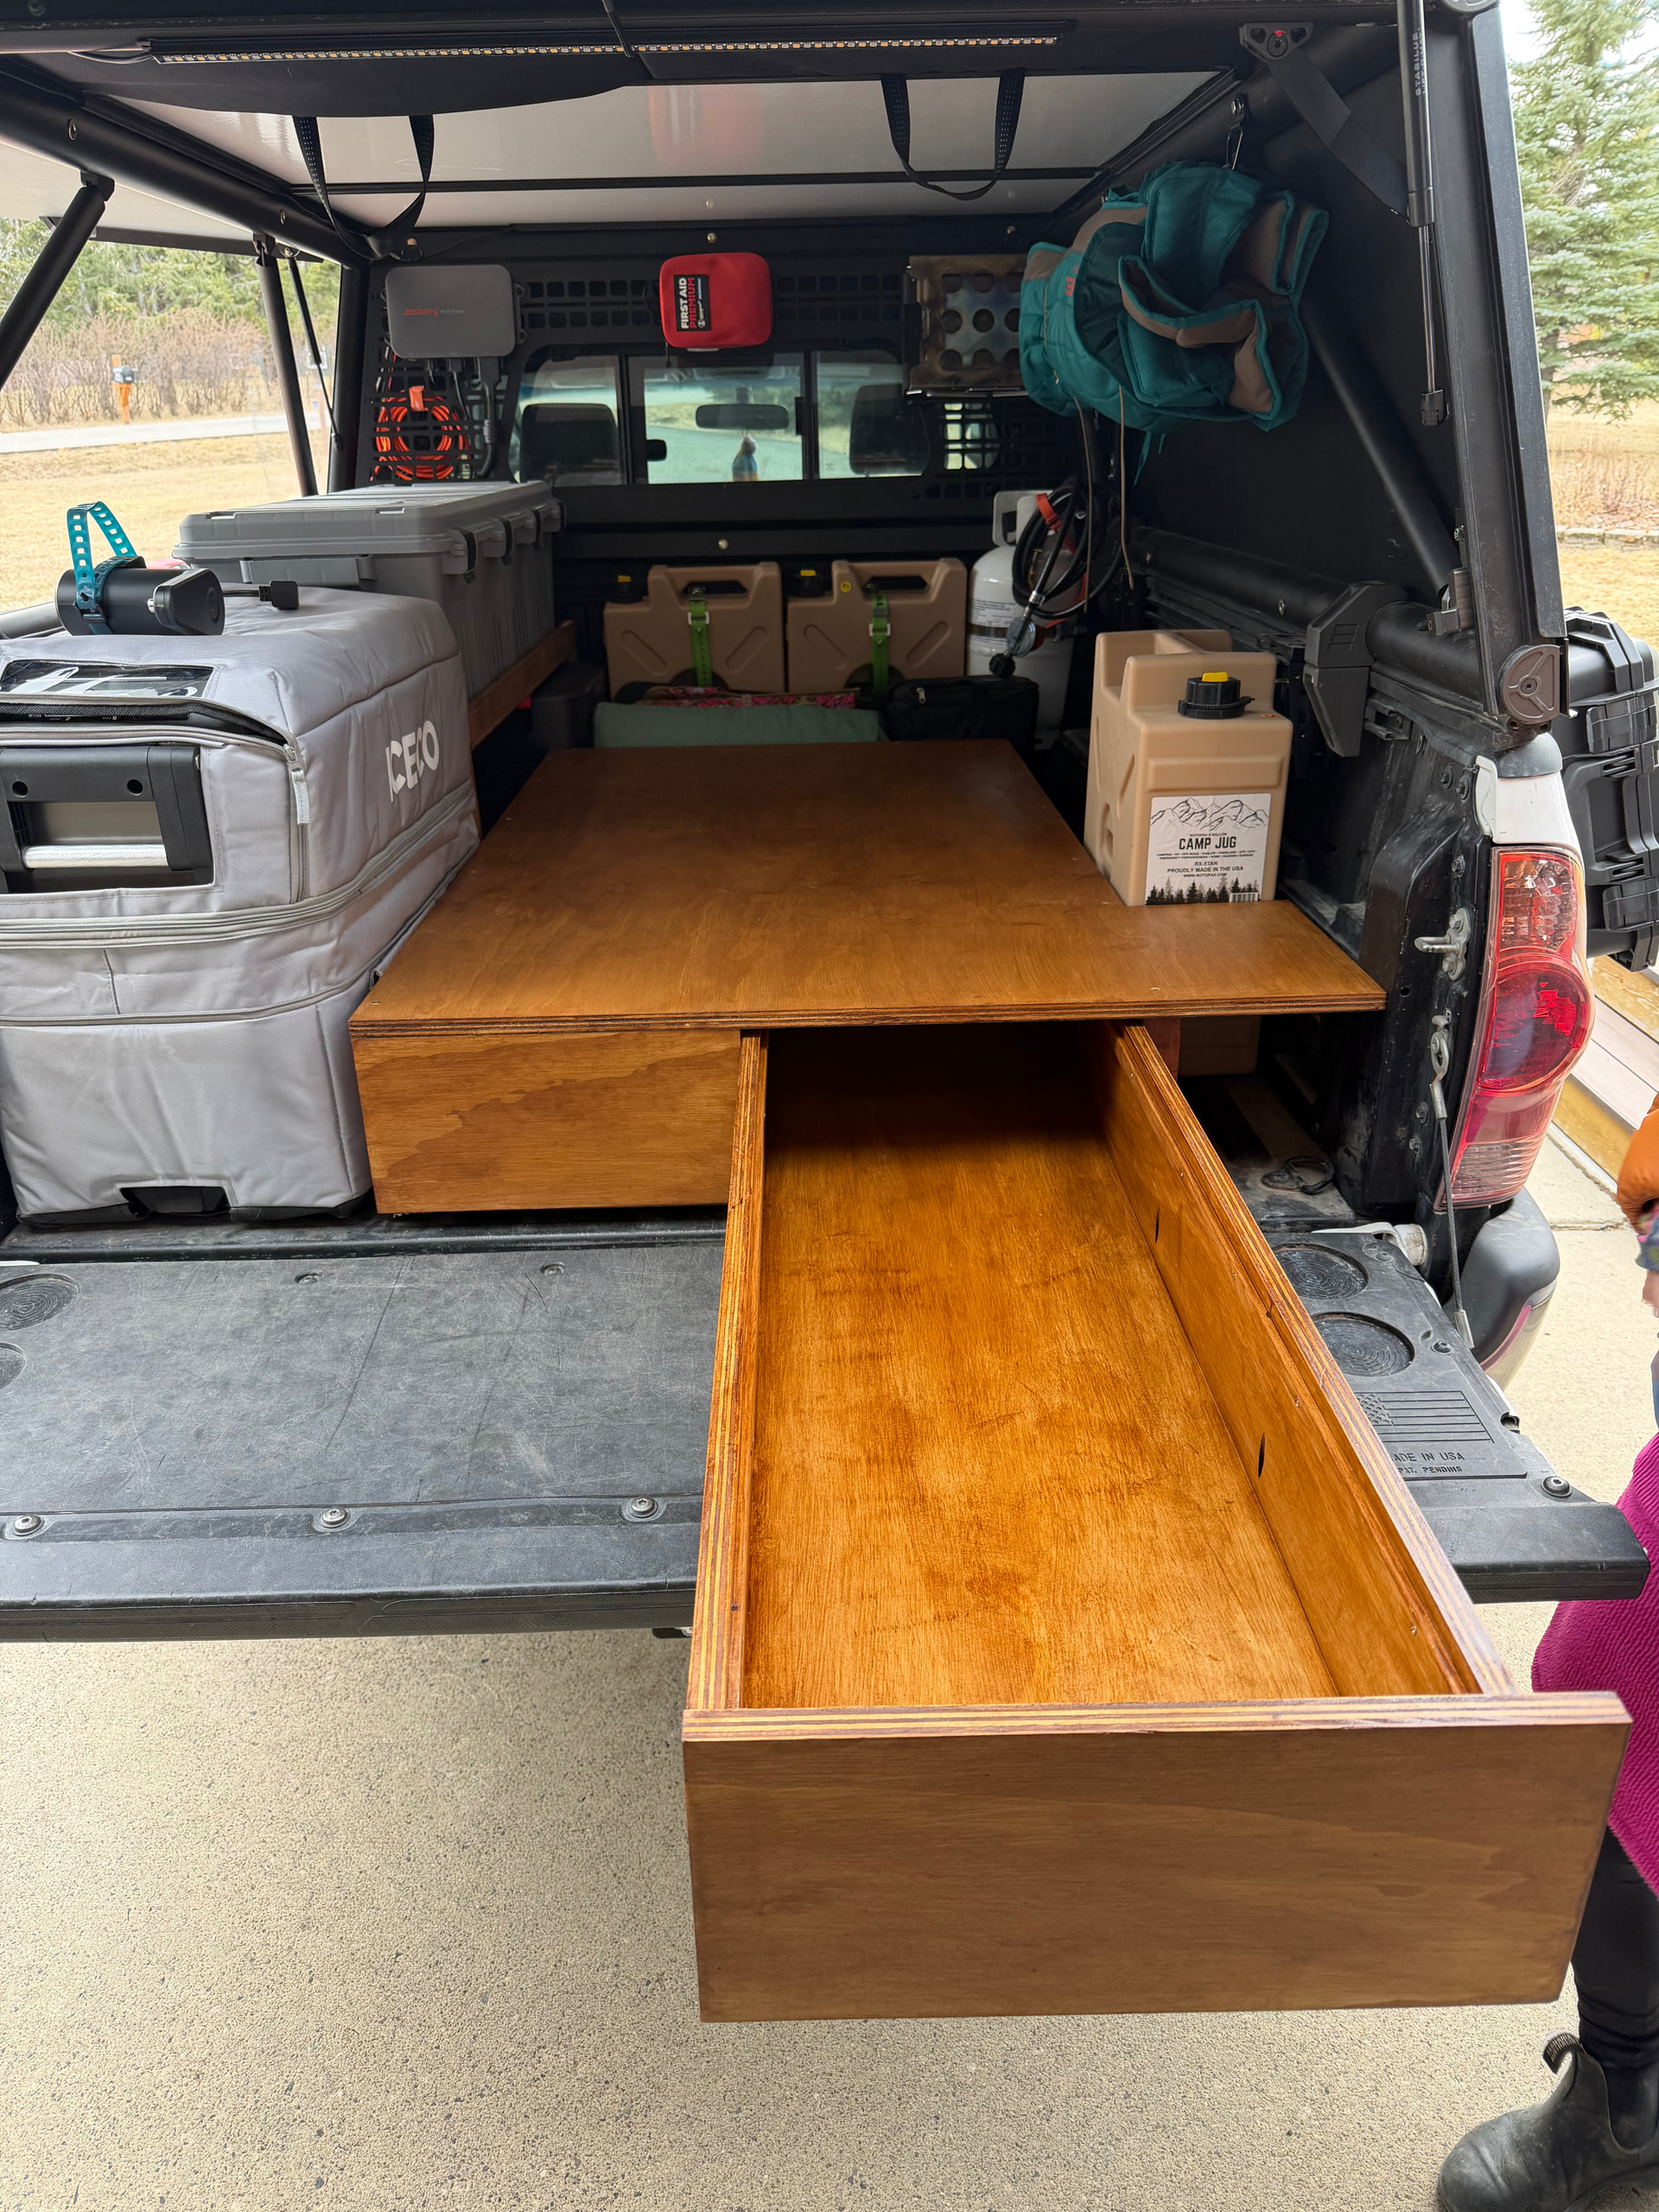
There’s a lot going on in the following photos. It looks like our build as really taken off, which it has. The main focus here is the drawers that we built out. Anyone who has an access cab knows how precious space can be. I guess any Tacoma owner can sympathize.
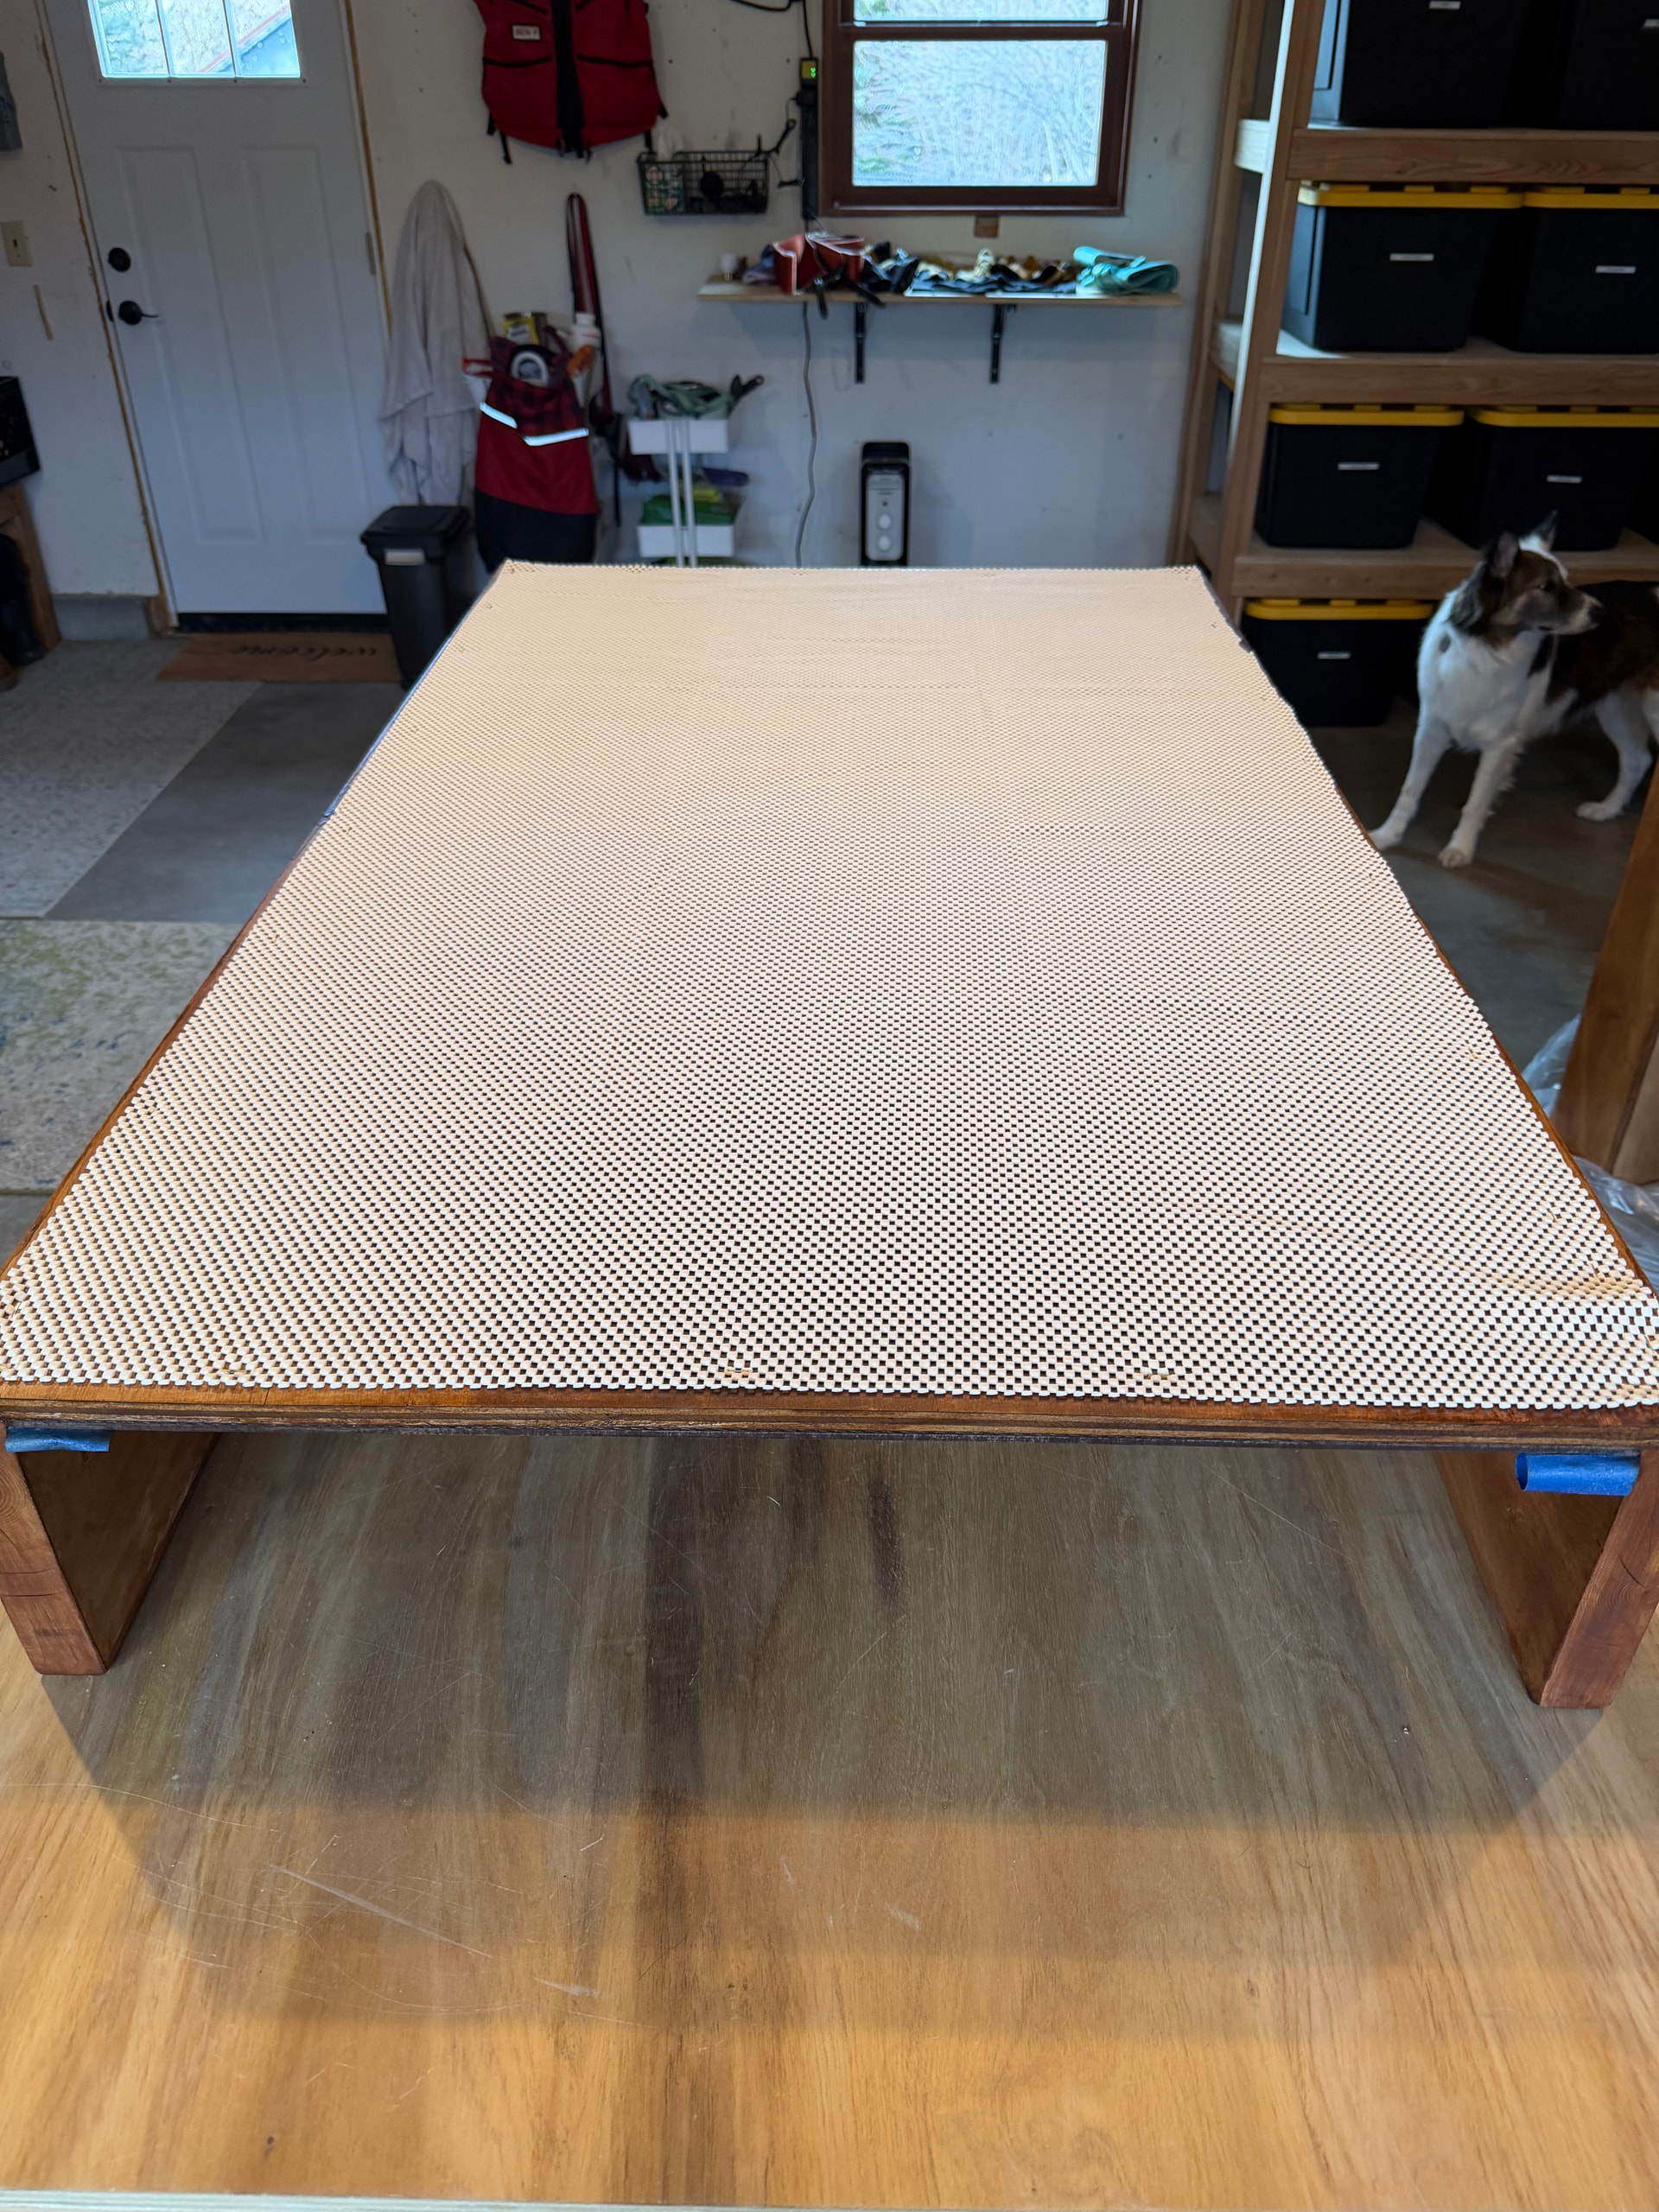
We built to drawers. One will primarily be our pantry and other kitchen essentials while the other will be more recreation gear storage. Thanks to @DirtTrailsWanted we elected not to use drawer slides to save on space. The base the drawers slide on are 1/4” hardwood and waxed on the sides with bees wax. We built them so they fit pretty snug against our ICECO fridge and 5gal Rotopax water jug. They are not secured to the truck bed right now and maybe will never be. We’ll see how they do on future trips. We did staple an anti-slide rug mat to the bottom to things don’t slide around.
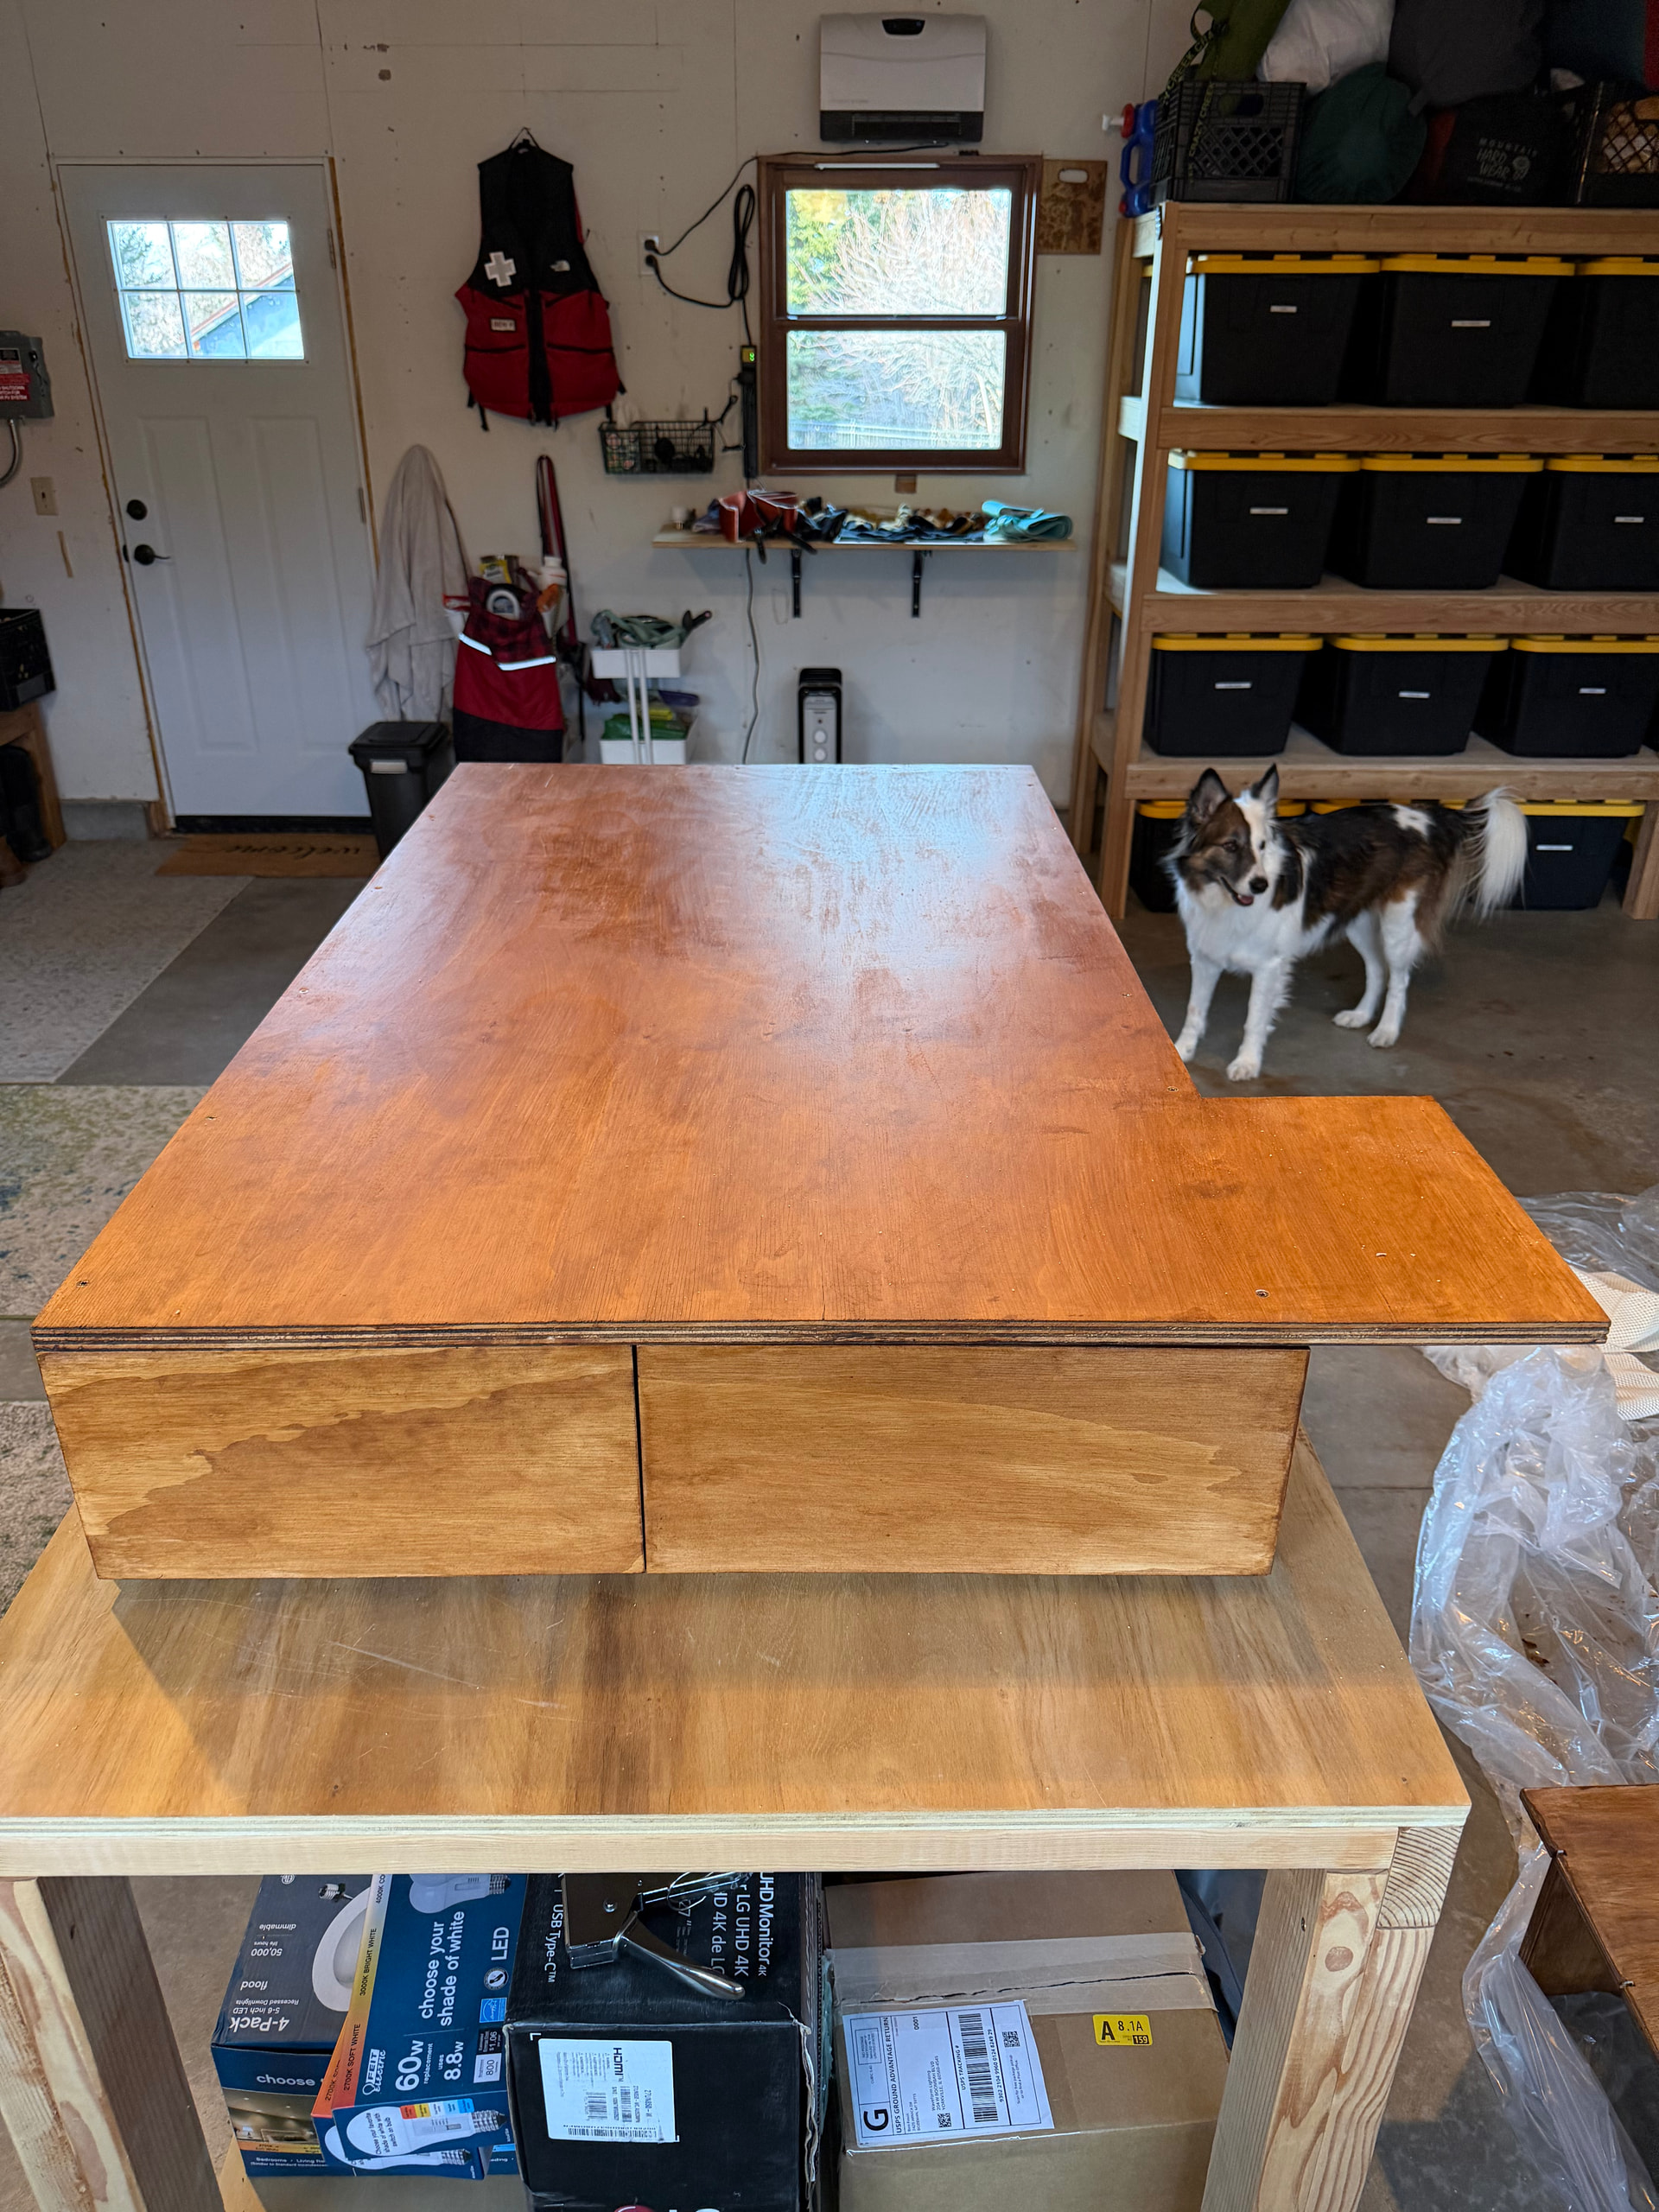
We did add a trim piece with the plan of adding a tabletop to cook, eat or chop stuff on. We also added leather handles up front. Anyway, hope y’all enjoy! Any feedback is appreciated!
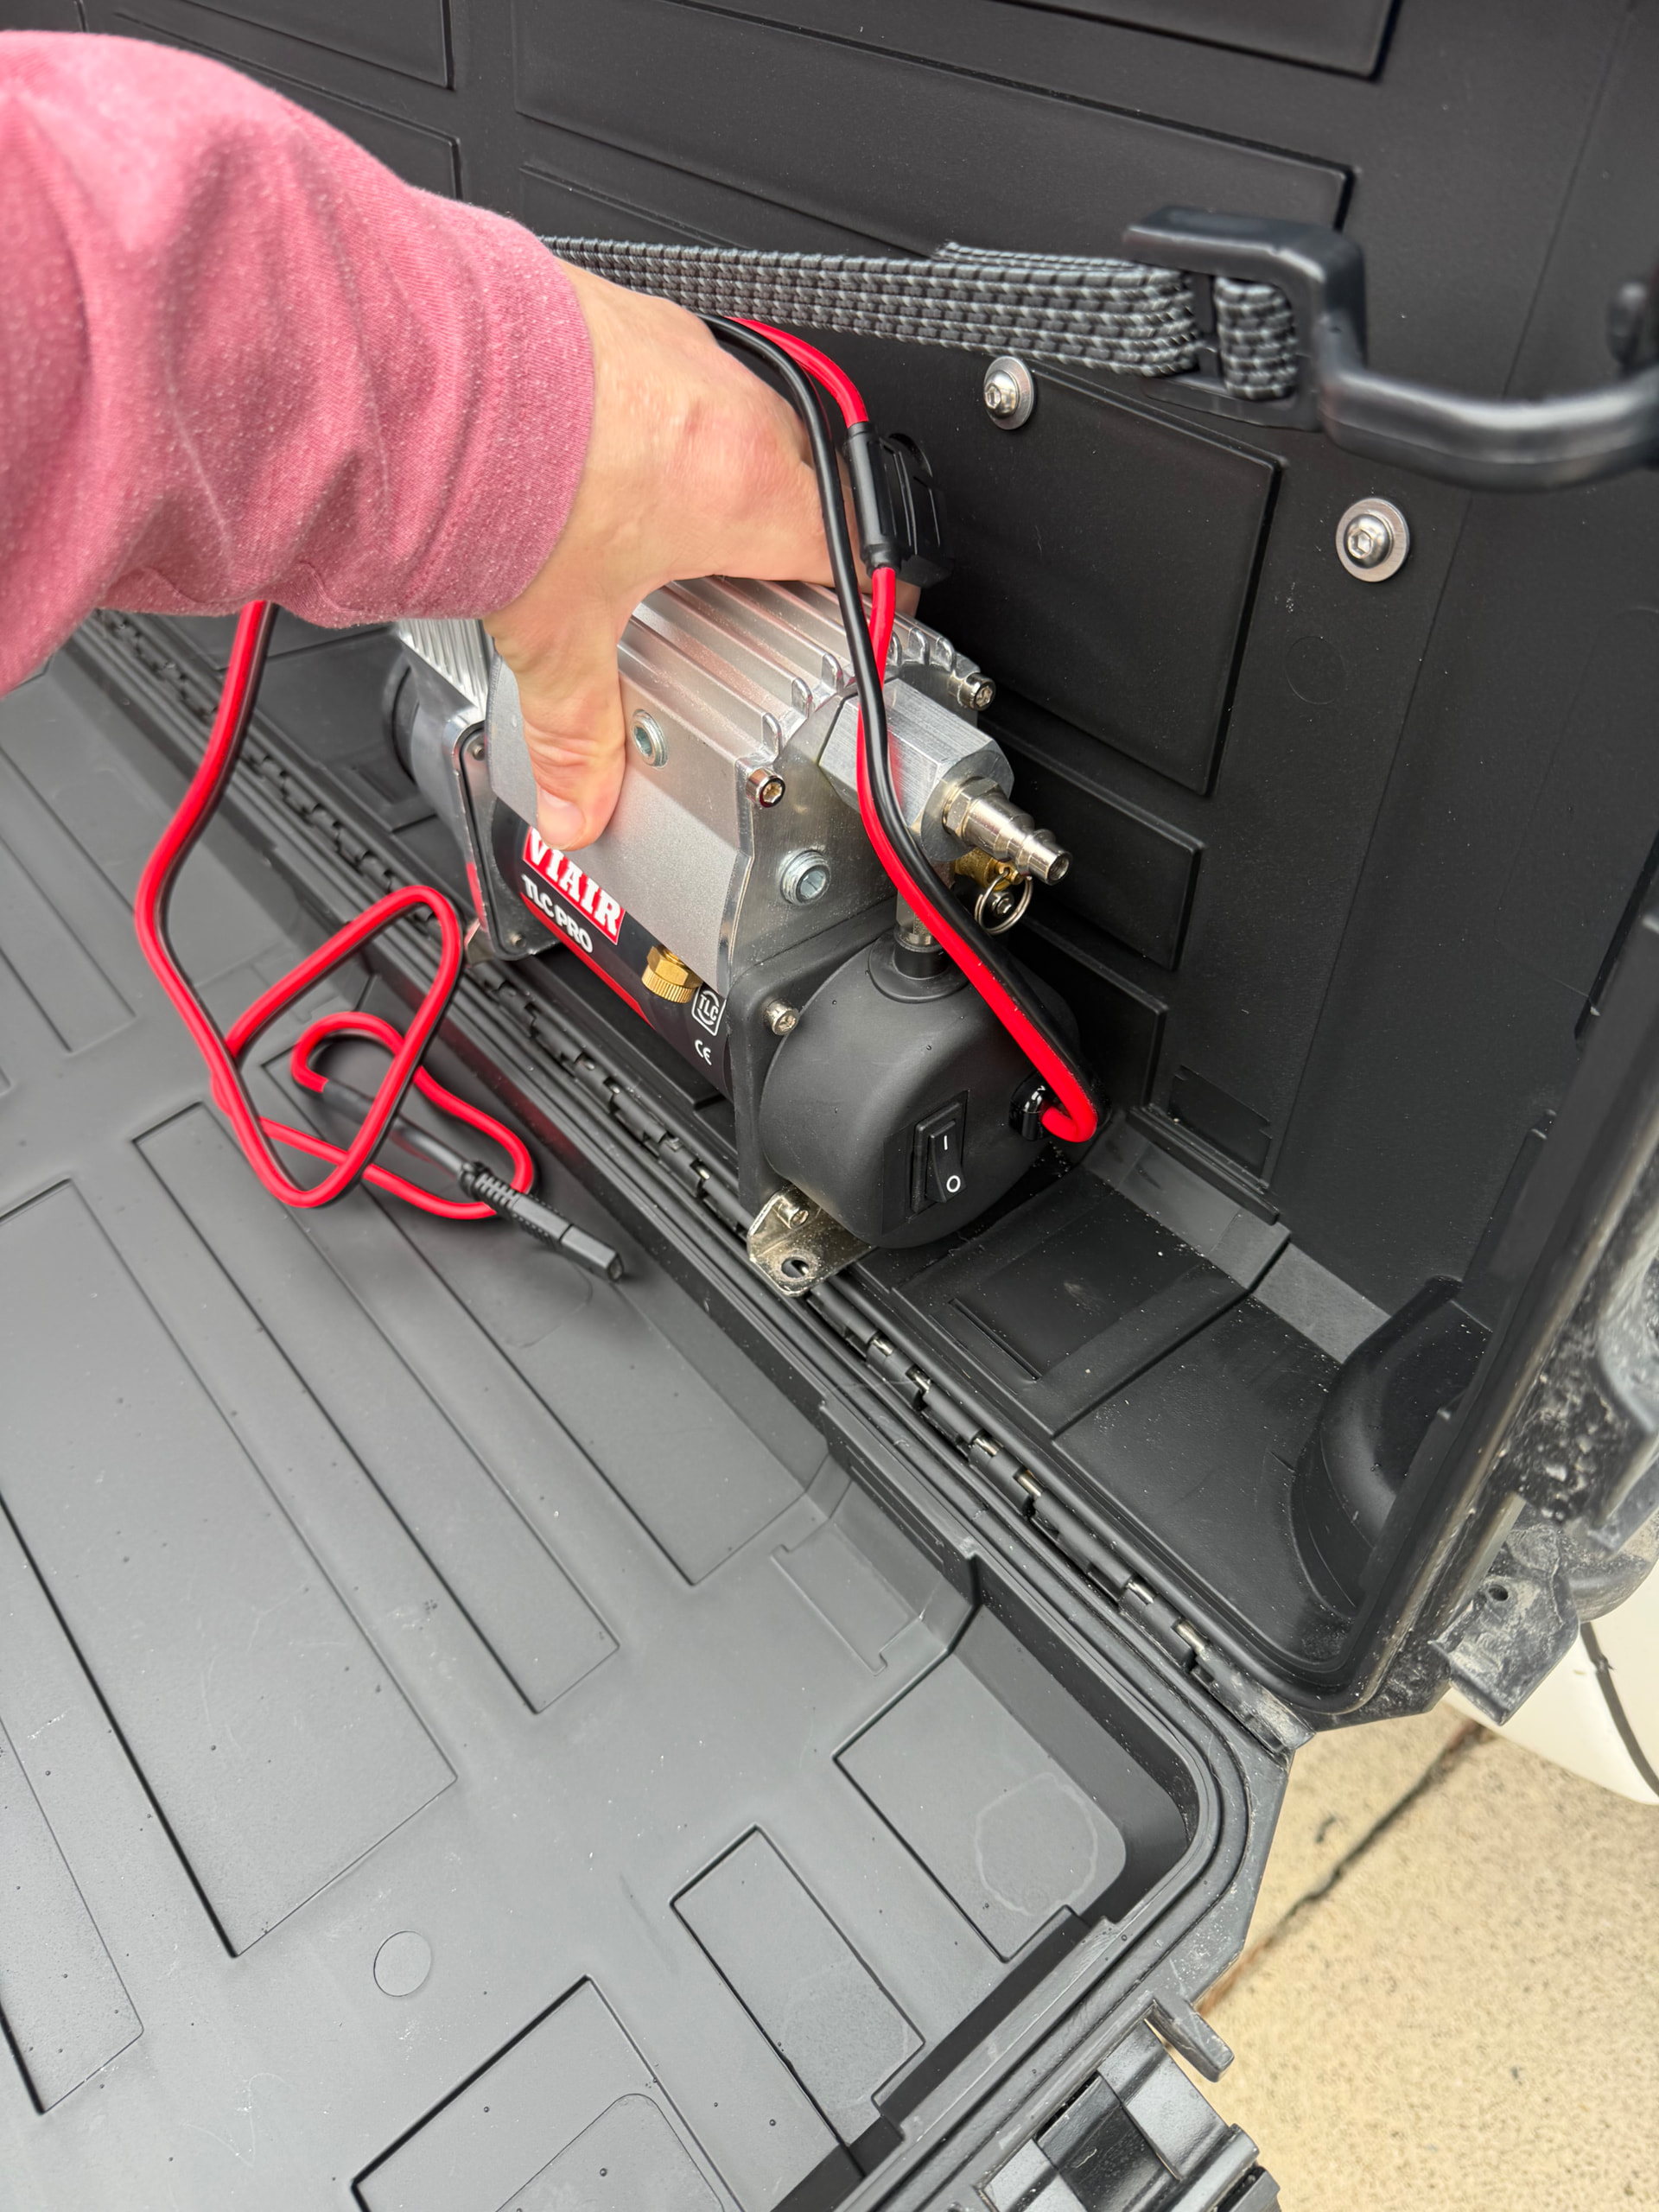
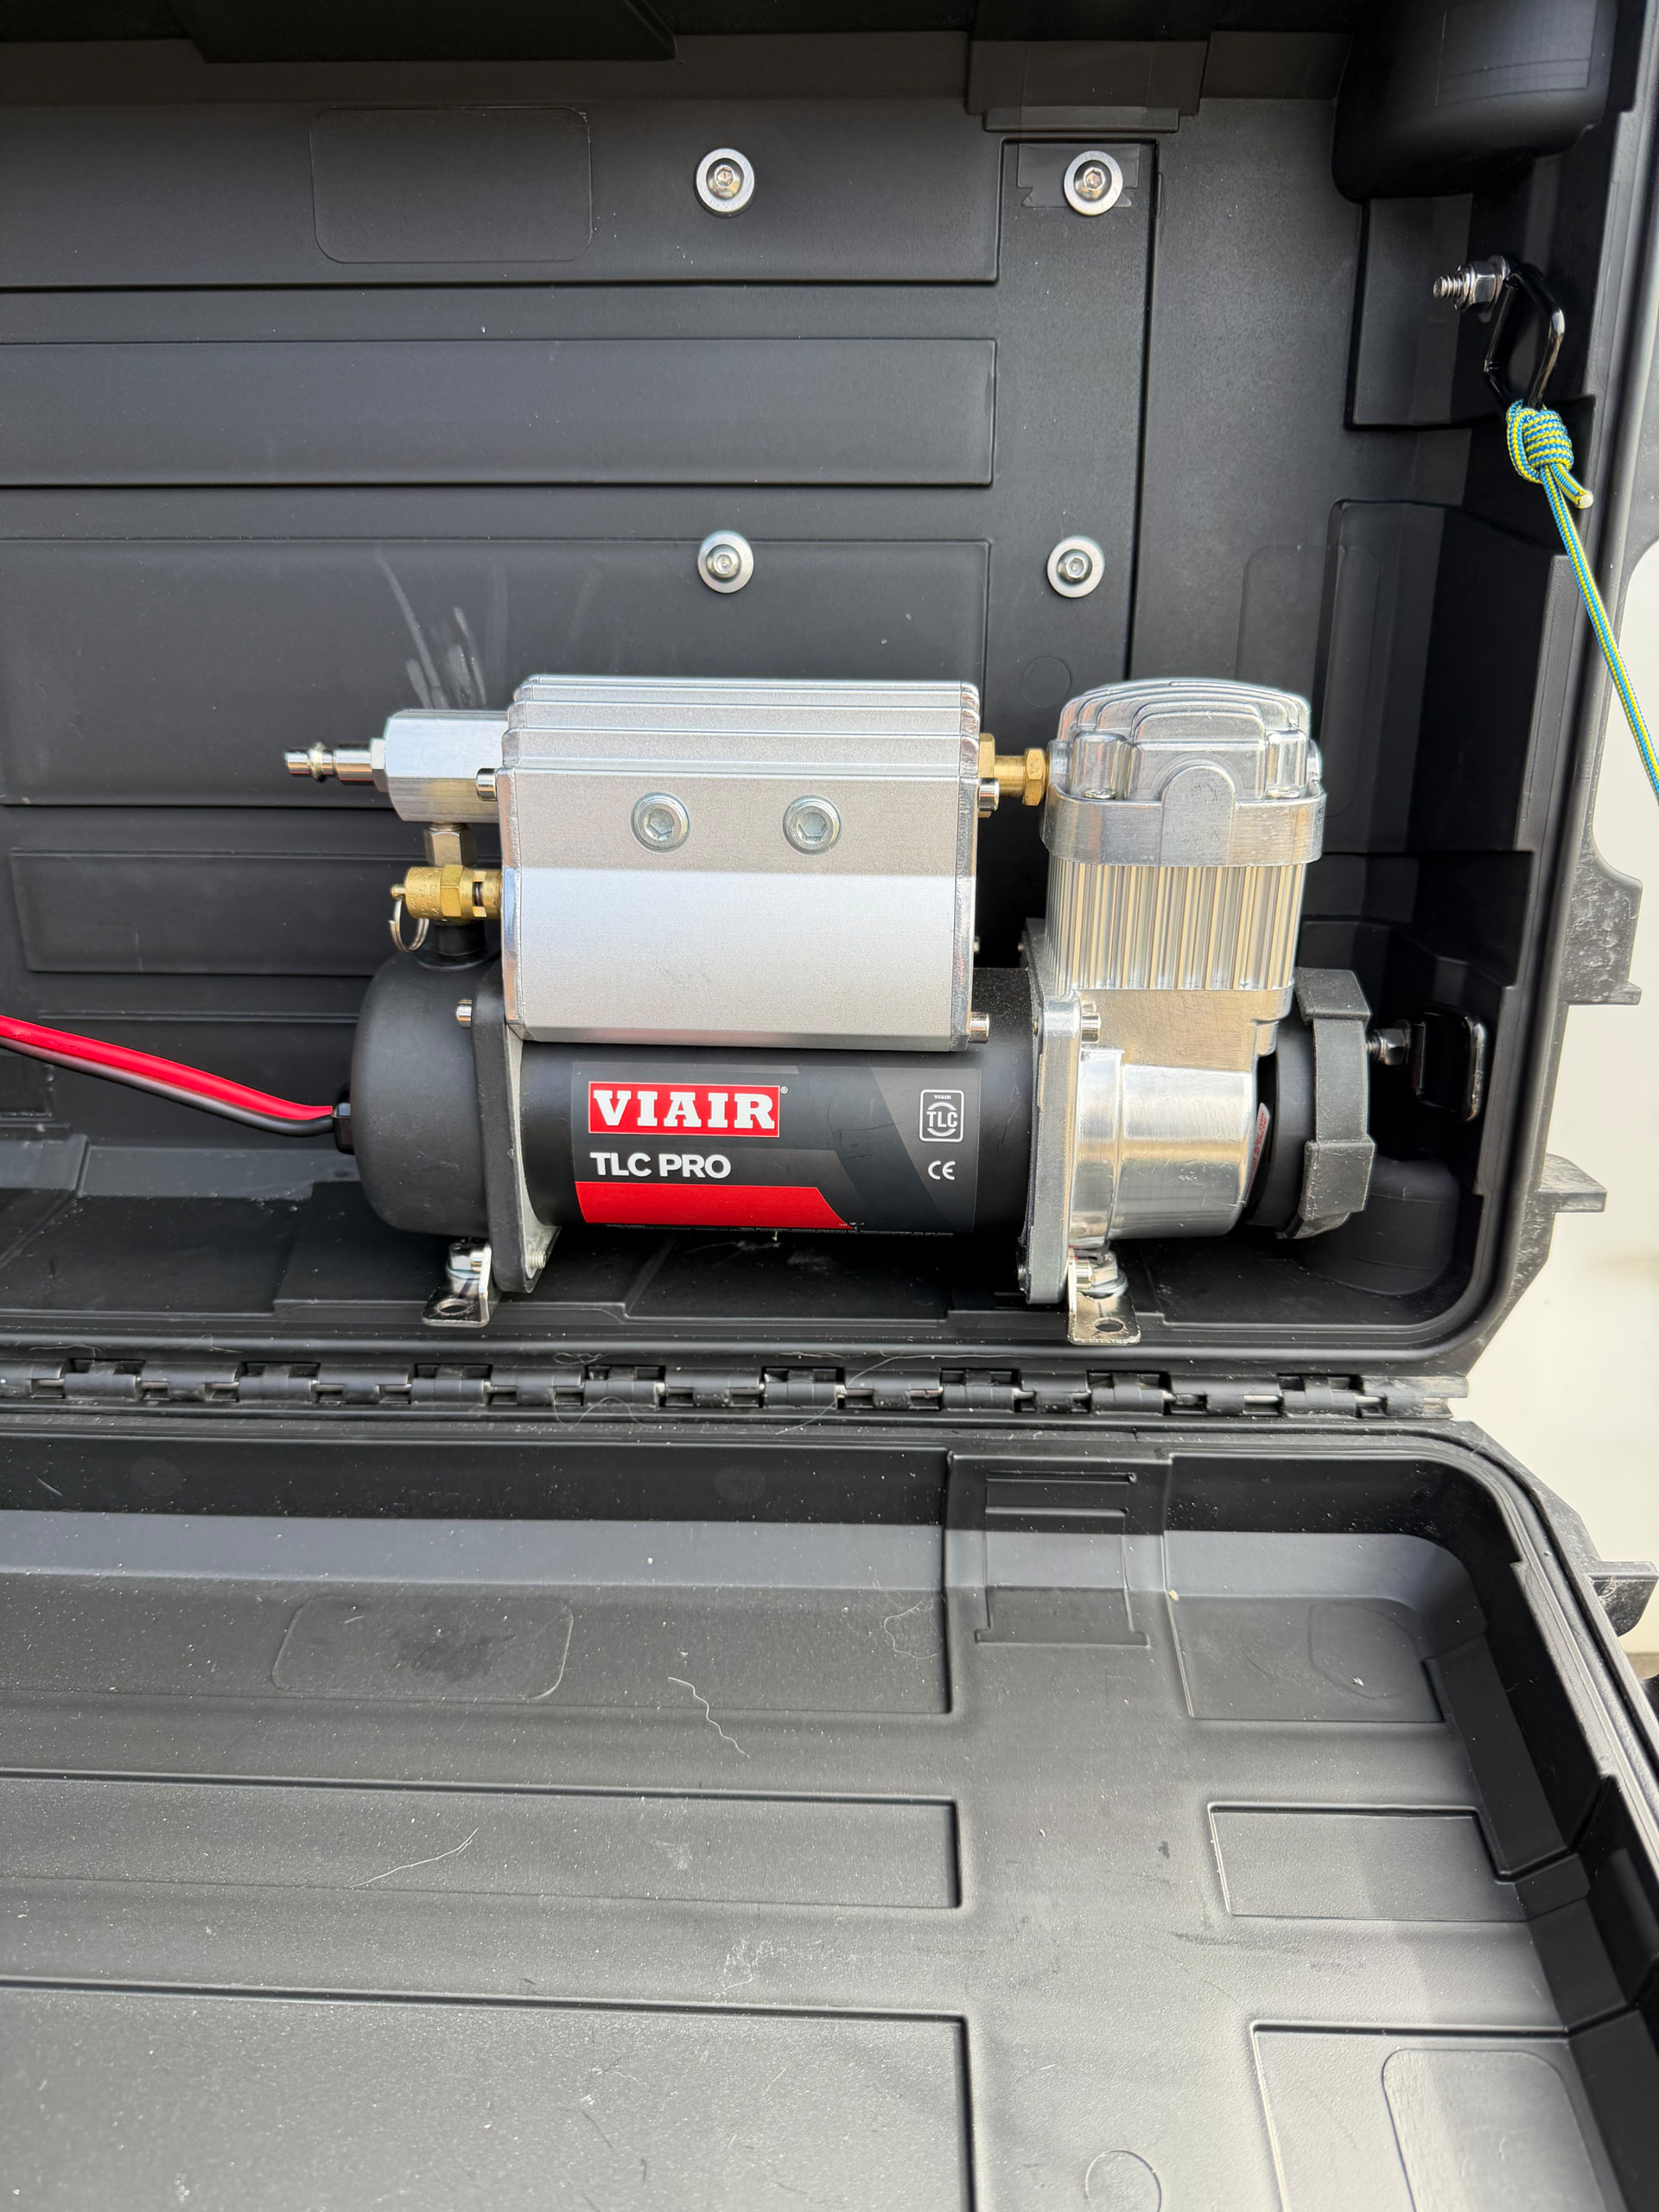
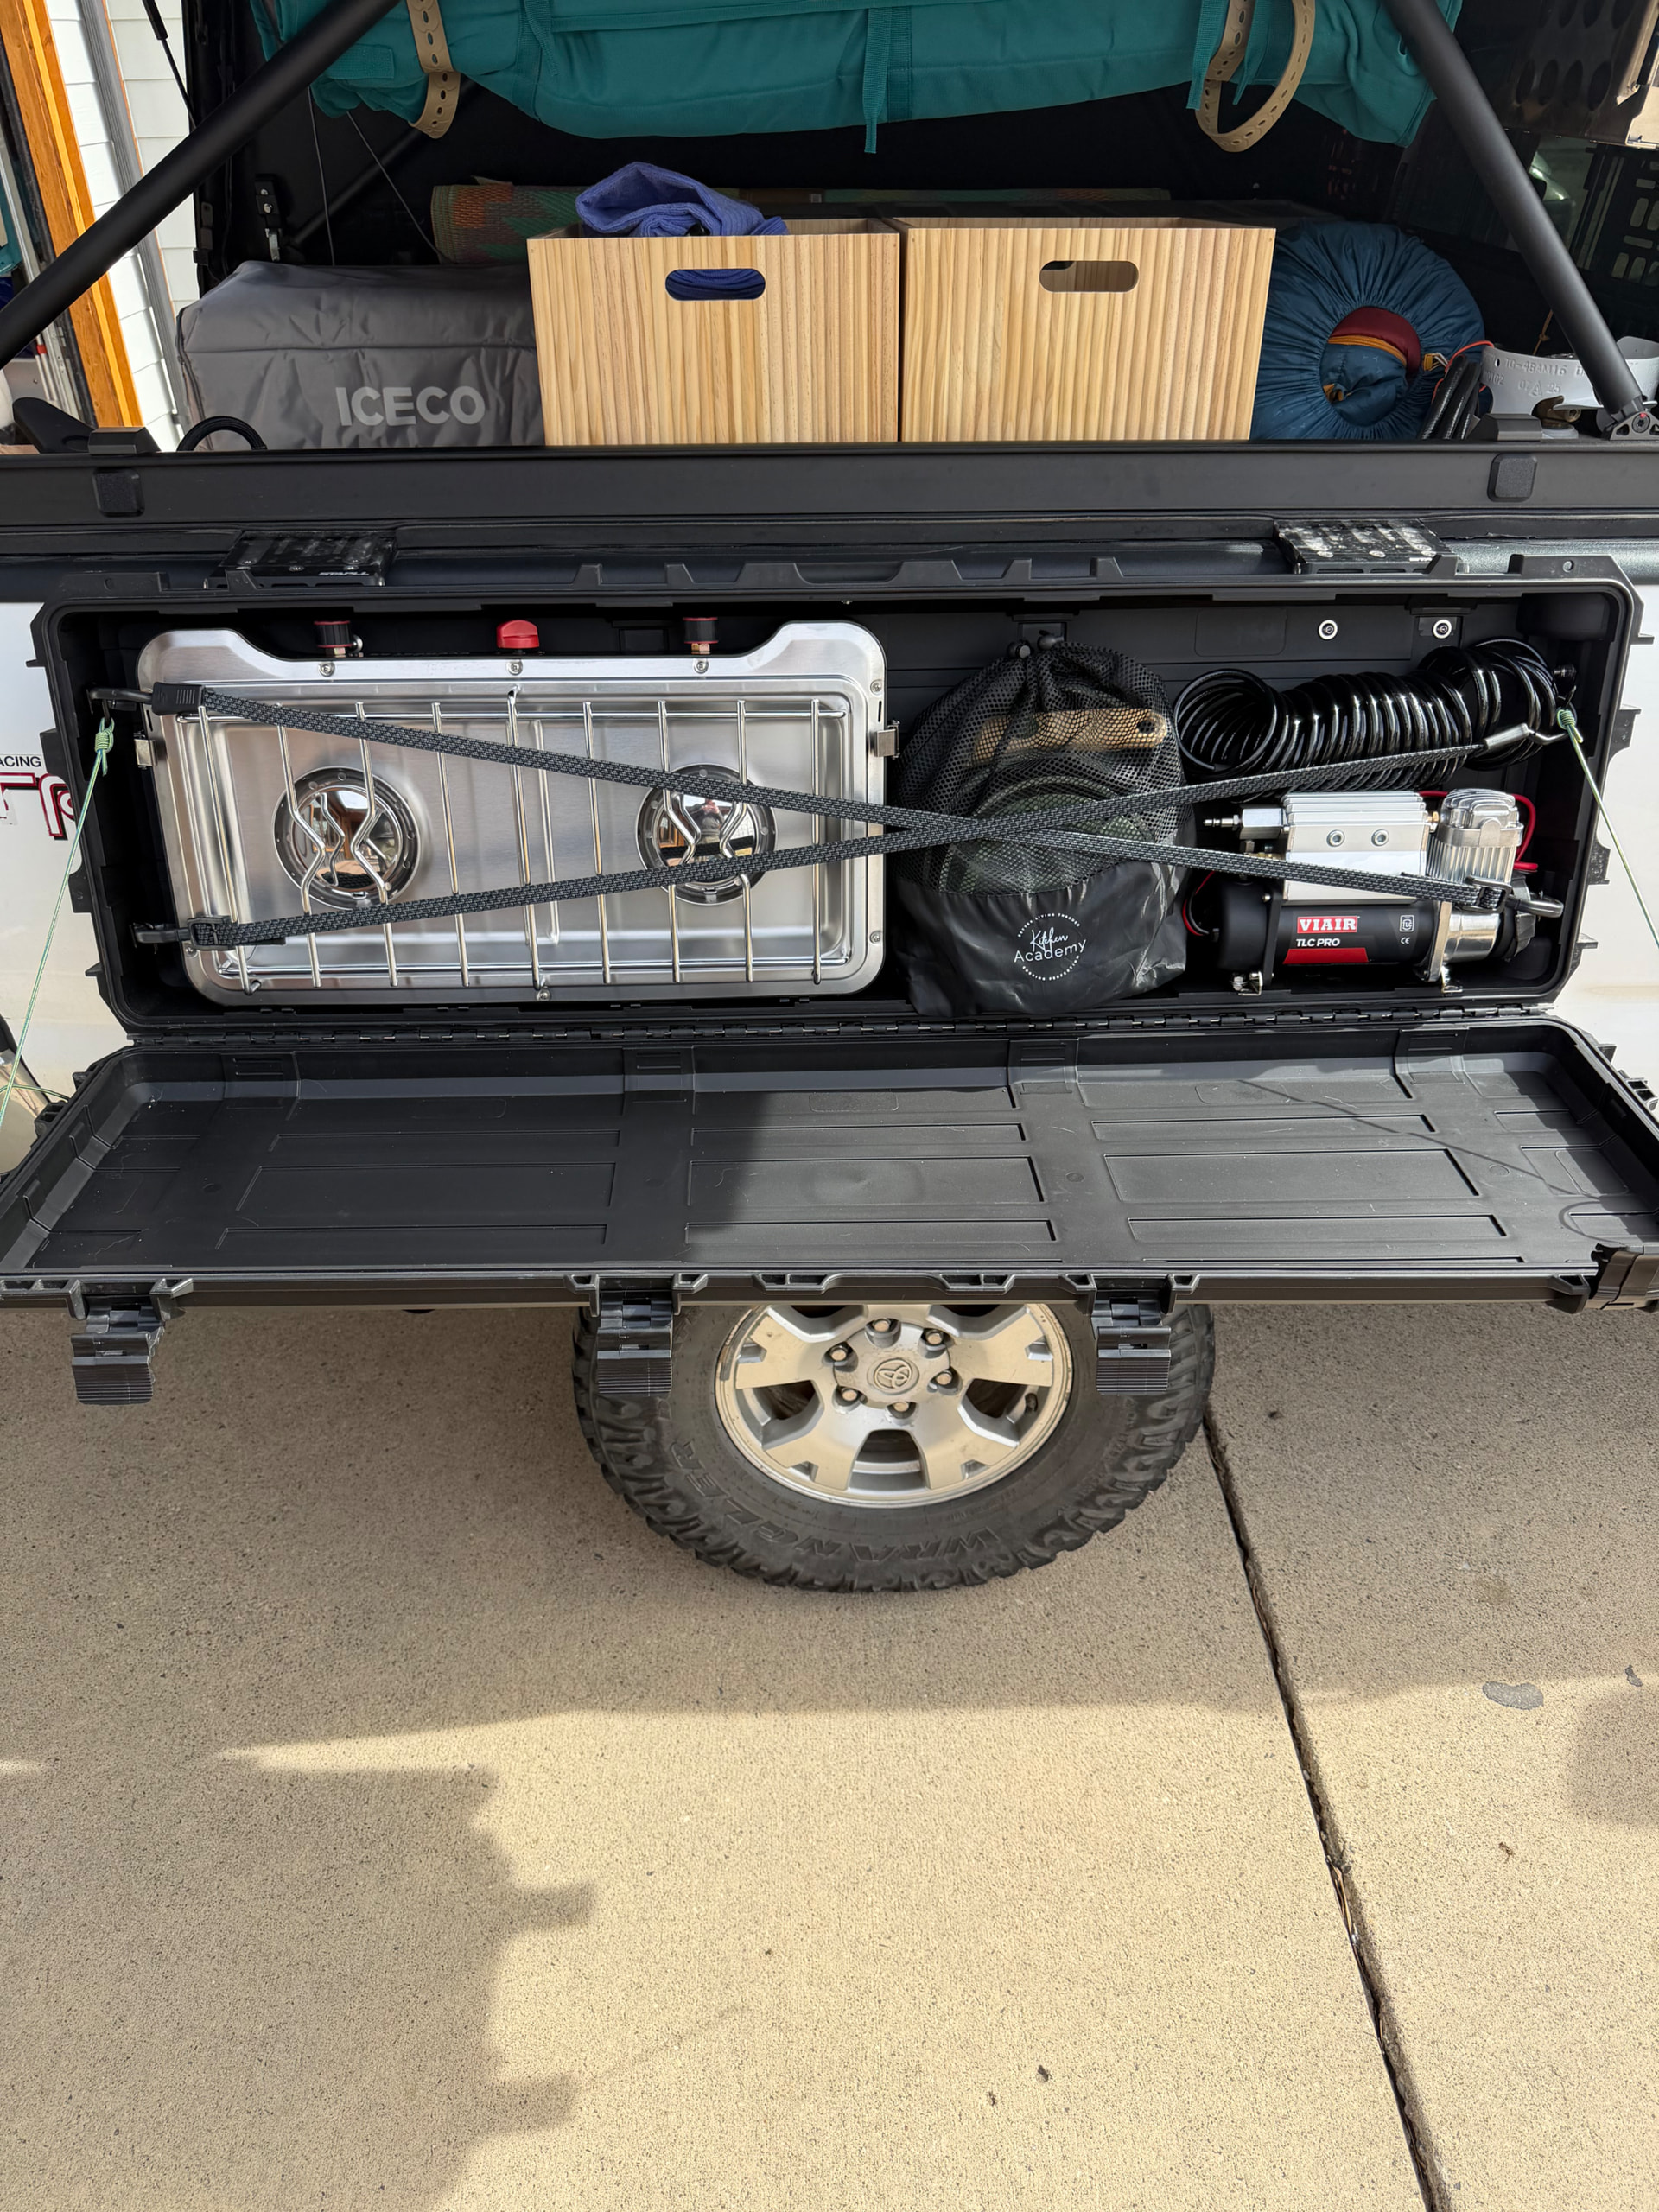
This isn’t anything crazy but I’m proud of how this turned out. Before heading out on a month+ long trip from Montana to Baja, I knew I wanted to have my compressor pretty accessible. This Stapll fender box was initially gonna be most of our kitchen set up. But I discovered the compressor once taken off its base plate fits inside our box…. with a little modifications
Had to drill some new bolt holes in the compressor brackets that you can kind of see here. Connected the compressor back to the brackets and we were in business.
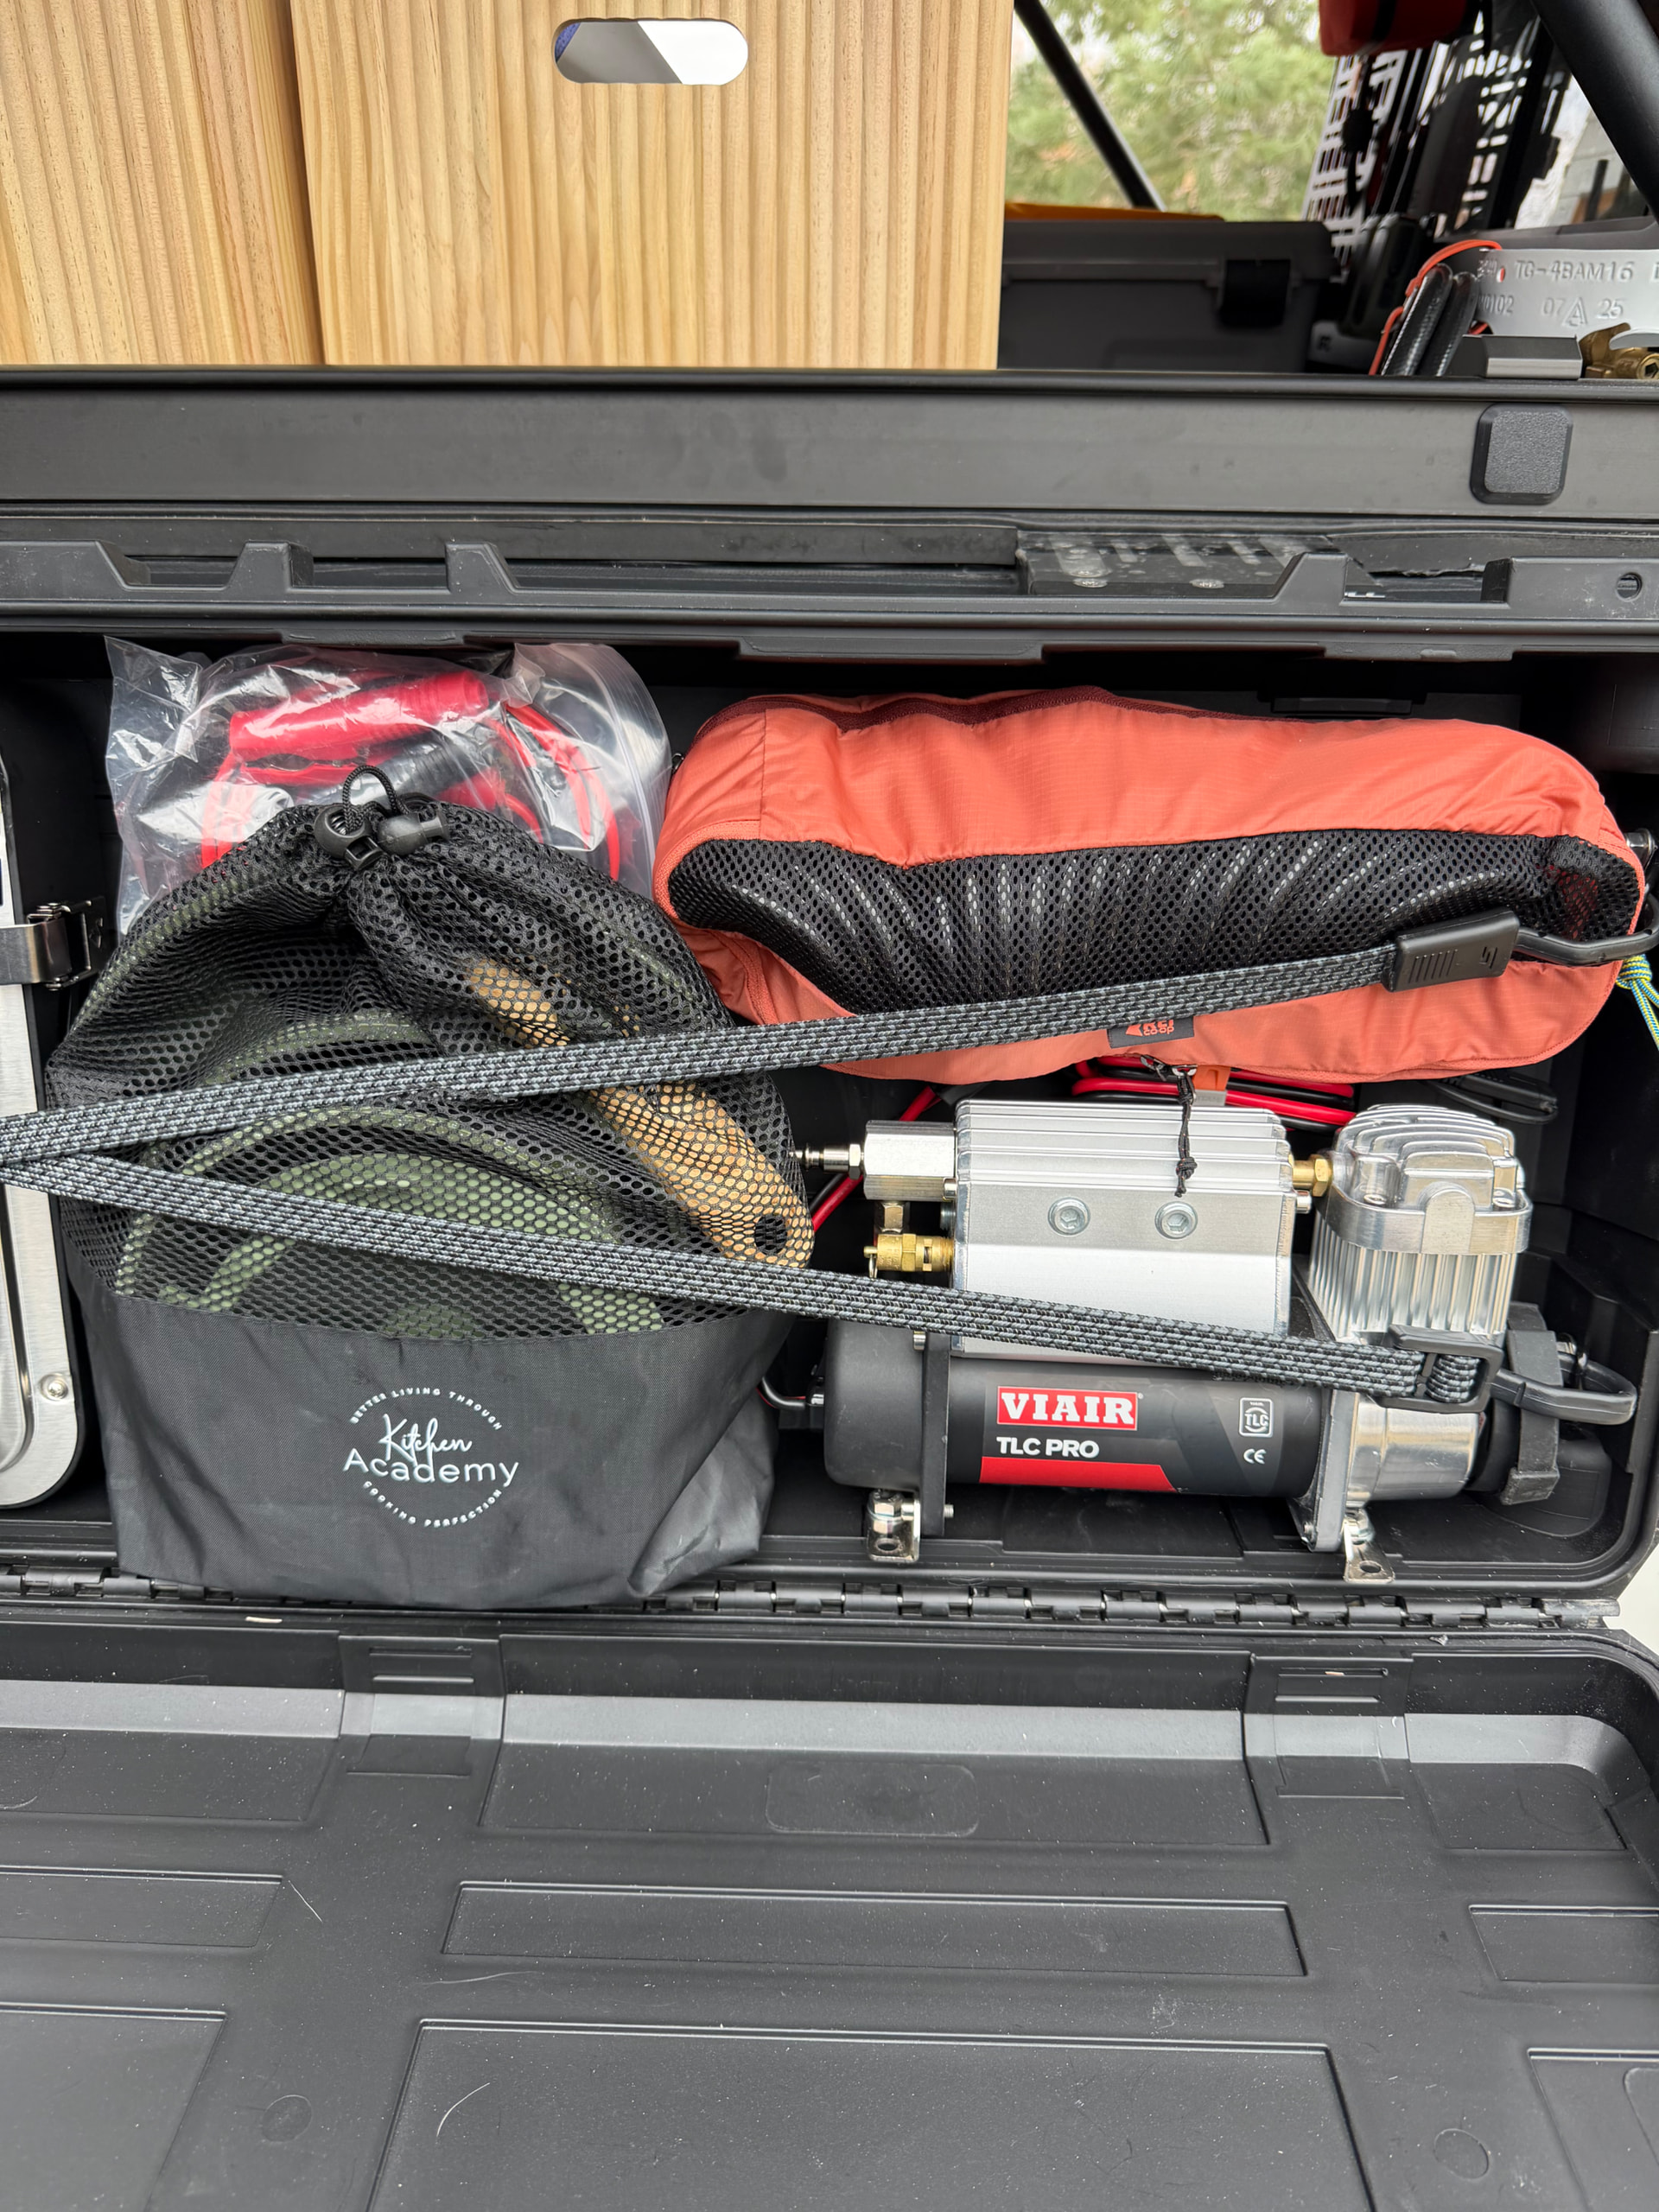
Got everything back in our Stapll fender box. May seem silly to have a stove and compressor in the same area. Cause it is. But oh well, that’s how we do it in the wild west.