Been busy making Mods to the Max. Coming soon, I’ll be posting pics, descriptions and Links. Here are a couple pics of what I’m starting with. Picked it up in Manhattan 18 Nov 25.


I love the color of your truck, Toyota has some really cool colors in their pallet
1 Like
Thanks. Iconic Red is the color
1 Like
So I’ve been making improvements on the rig. See Pics Below. Here is a list.
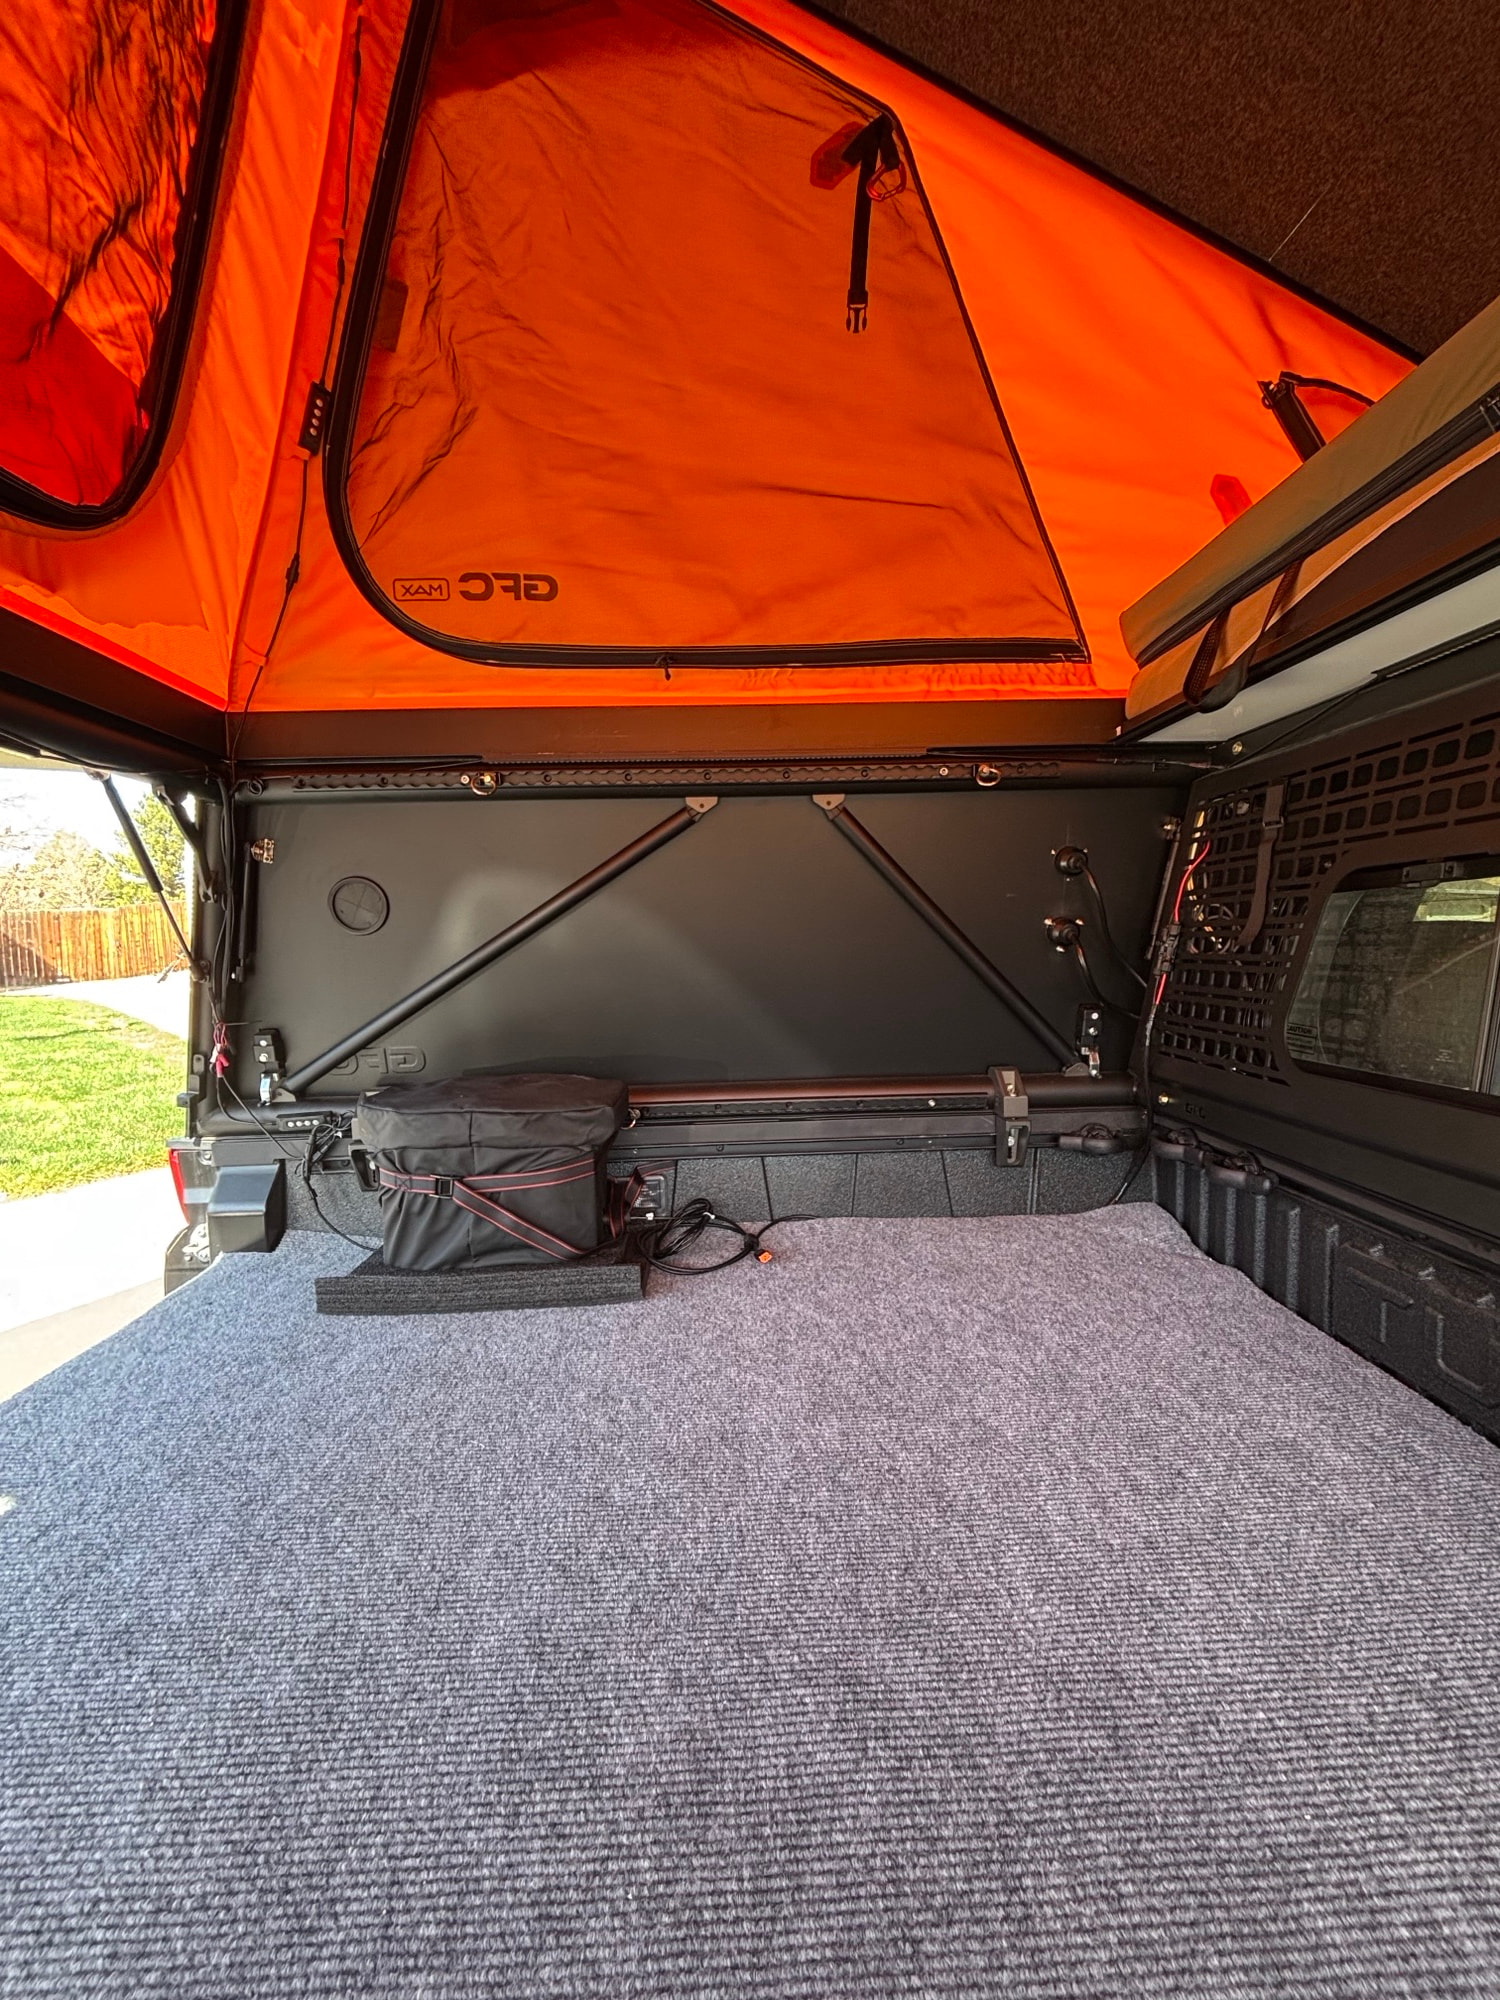
- Started with the Decked System just before picking up the Truck. After wards I used leftover foam tiles from my gym floor to pad the deck and tailgate. Then added the indoor/outdoor carpet. Very comfy on the knees. All mounted via velcro so I still have access to the storage compartments along the sides of the deck.
- Installed the OpenRoad 270 Awning. Used three GFC mounts, very strong install. Don’t foresee any issues down the trail.
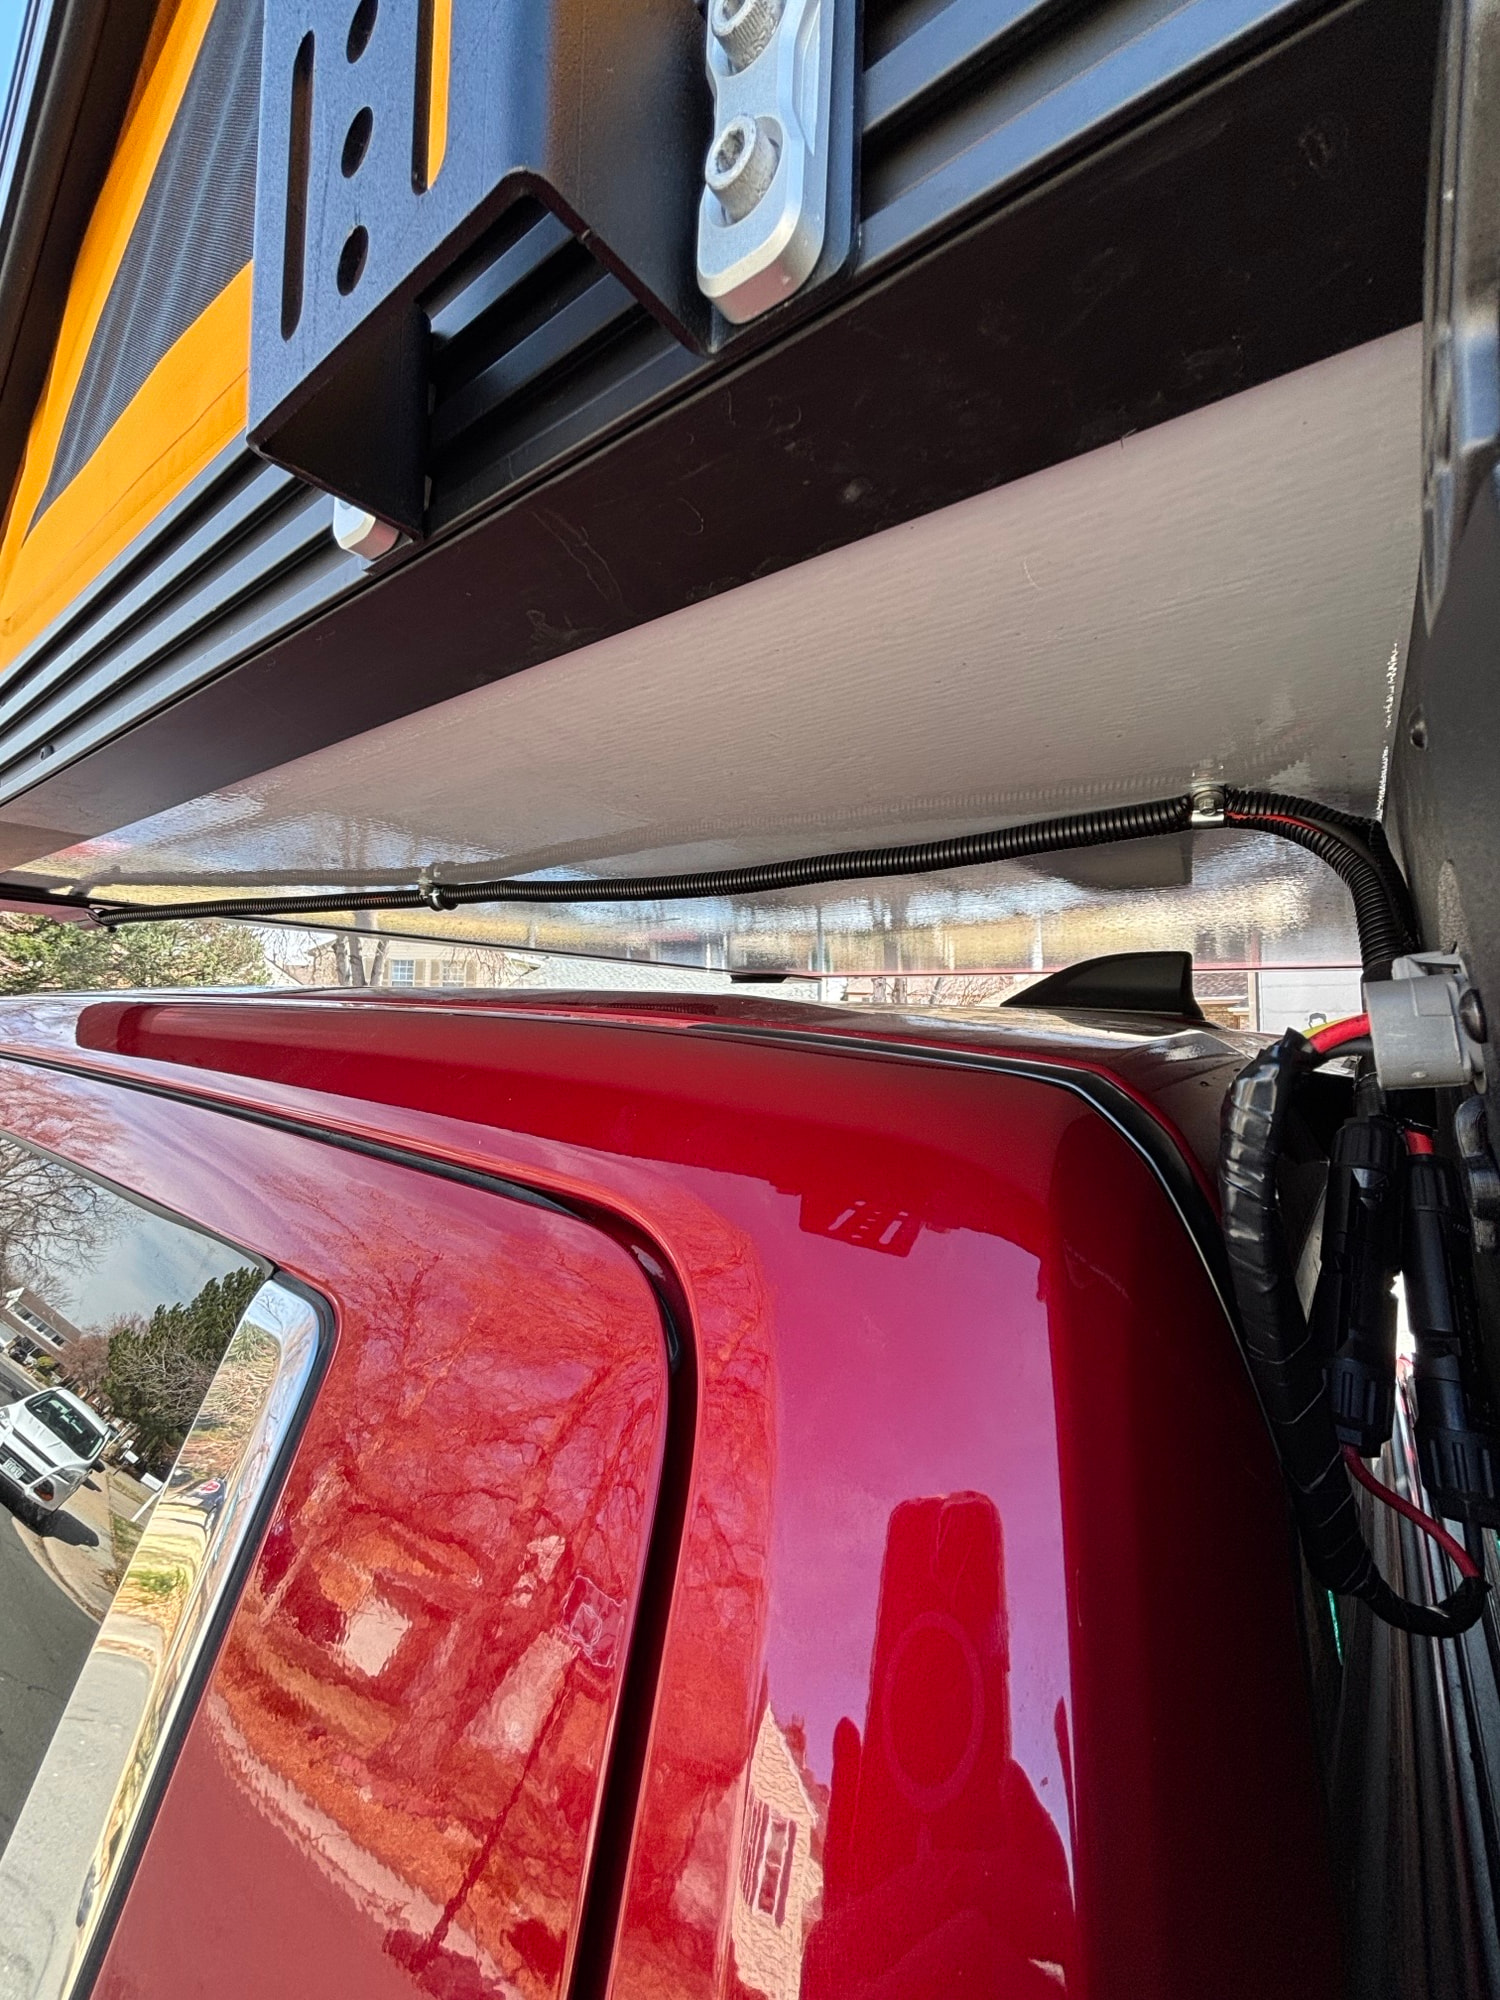
- Bought the HCalory TB MAX Diesel Heater and installed that. You can see the 3 1/2 inch port I made for the intake in the upper right of the drivers side panel. Went with it here because this is a V2 Max, and with the pass through now, the intake from the heater is right there where the heat will circulate and heat the upstairs and downstairs perfectly. The rubber grommet makes it weatherproof when not being used for the intake louvered manifold. Tested on a very cold day. At level 2 of10 it keeps the house warm as can be. But there is also a thermostat built into the remote FOB to set a temp and forget it. Supposedly, the 7-liter tank is supposed to last approx. 62 hours on a mid-setting. URL: Amazon.com : hcalory diesel heater 8k
- l already had an ECO Flow solar generator (2K Watt) so that’s my power source for everything. You can see where I wired in the Solar cables just above through the new port provided in the V2 Max.
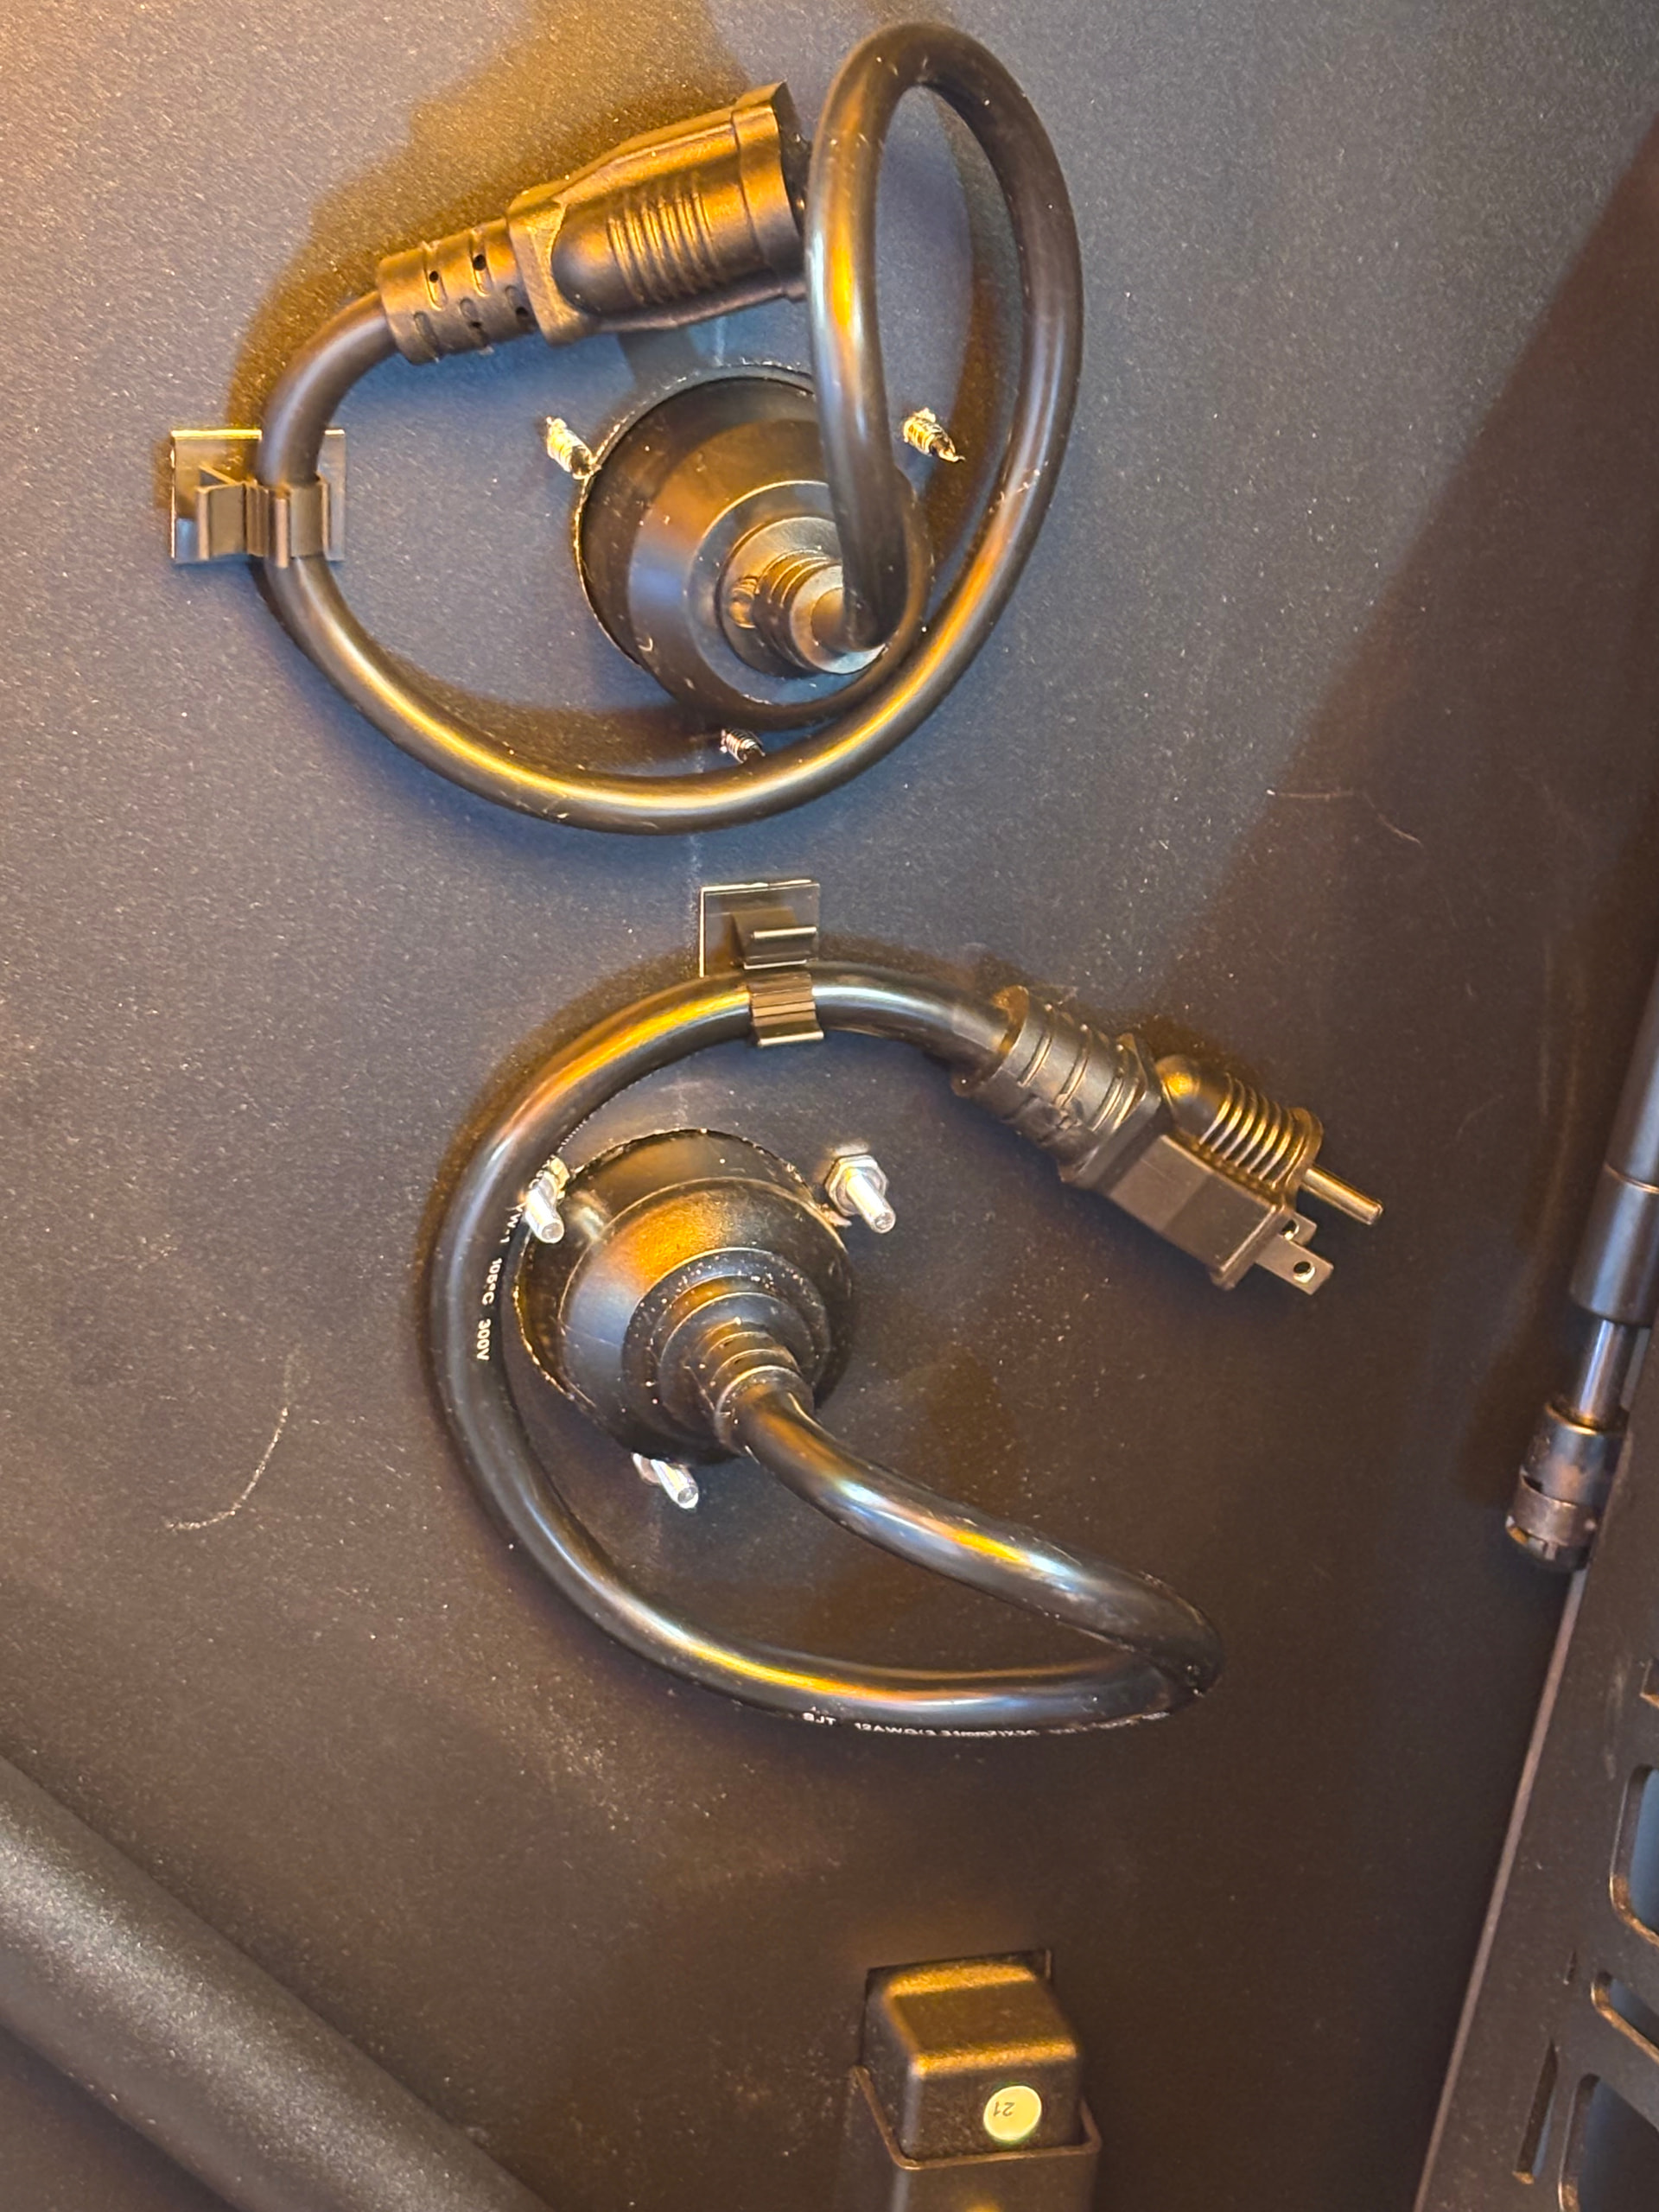
- Sunday, I installed the two Ship-to-shore ports you see on the left side of the driver’s side panel. One is Male, the other Female. My wife is more of a “Glamper” so I figure I will be having to stay at a campground every few days when traveling for showers. This way I have the male end for hooking up an extension to the campsite power outlet. Then with the female outlet, I can plug the heater or anything else into the camper which is then plugged inside to the generator. No need to fish any wires through a panel opening. Everything stays nice and tightly closed up.
- I have a 57-liter electric cooler/fridge that takes very little power which plugs into the generator.
- I’m still debating on solar mounted on the roof. Seems less flexible for the many different sunlight scenarios and parking. So, in the meantime, I have a 400W Solar Blanket by Renology. Most everything shown was bought on Amazon, so easy to find.
Here are pics of everything. Hope it helps with ideas for your setup.


4 Likes
Awesome! How do you like that solar blanket? I actually have it sitting in my cart. I read somewhere that when you pick up the Max, if you ordered the solar, it will be shipped to your house to install yourself. Since I’ll be heading to Idaho for a month or so after I pick up my Max, I was eyeing this solar blanket. I was going to put 2 hooks on the rear corners of the GFC roof, and just hang the solar blanket from them (and park the truck facing west)
I like how its coming together! What kind of bit did you use to make those “Ship-to-shore“ pass-through holes?
A word of caution on the solar: I believe the N-type silicon is indeed among of the most efficient solar technologies on the market (~25%); however, their efficiency is drastically (90%+) reduced by partial shading, which will be an issue with the beef rack crossbars, definitely if you are hauling anything on the roof, camping in the woods, etc. If you only plan to lay out the solar blanket in direct sunlight when you stop, rather than mounting it on the roof, maybe that’s not an issue.
The CIGS panels (like the one GFC is offering or these panels that I got BougeRV Yuma CIGS 200W), are naturally shade tolerant from the CIGS “monolithic integration” circuit fabrication process; additionally, the GFC and BougeRV panels use bypass diodes, so they are almost “immune” to partial shading – you can actually put bullet holes in these and they will continue functioning. The downside is CIGS panels are a less efficient than N-type silicon at around 17-19%, but due to the partial shading issues inherent to a pop-up camper, they will greatly outperform them on average.
1 Like
Hi gulo, Both the bit and the fittings are from Amazon. They take a 2” Tungston hole saw. It cuts threw like butter. I believe it was under $20.
The whole partial shading was the thought process., The plan is to only charge while camped. If that can’t keep up, I already have 4 x 100 hard panels for home backup. I will mount 2 on top.
Awesome! Good to know I’ll be able to make clean holes through the panels without too much effort.
Cool – good strategy. Well, it looks beautiful, jabironman. Keep updating with pics as you go so I can live vicariously while I wait on mine haha.
Consider the 3.5” hole saw (or whatever your hose would be) for the Heater intake also if you start thinking about a diesel heater. I think it’s one of the easiest/good looking options for this.
1 Like
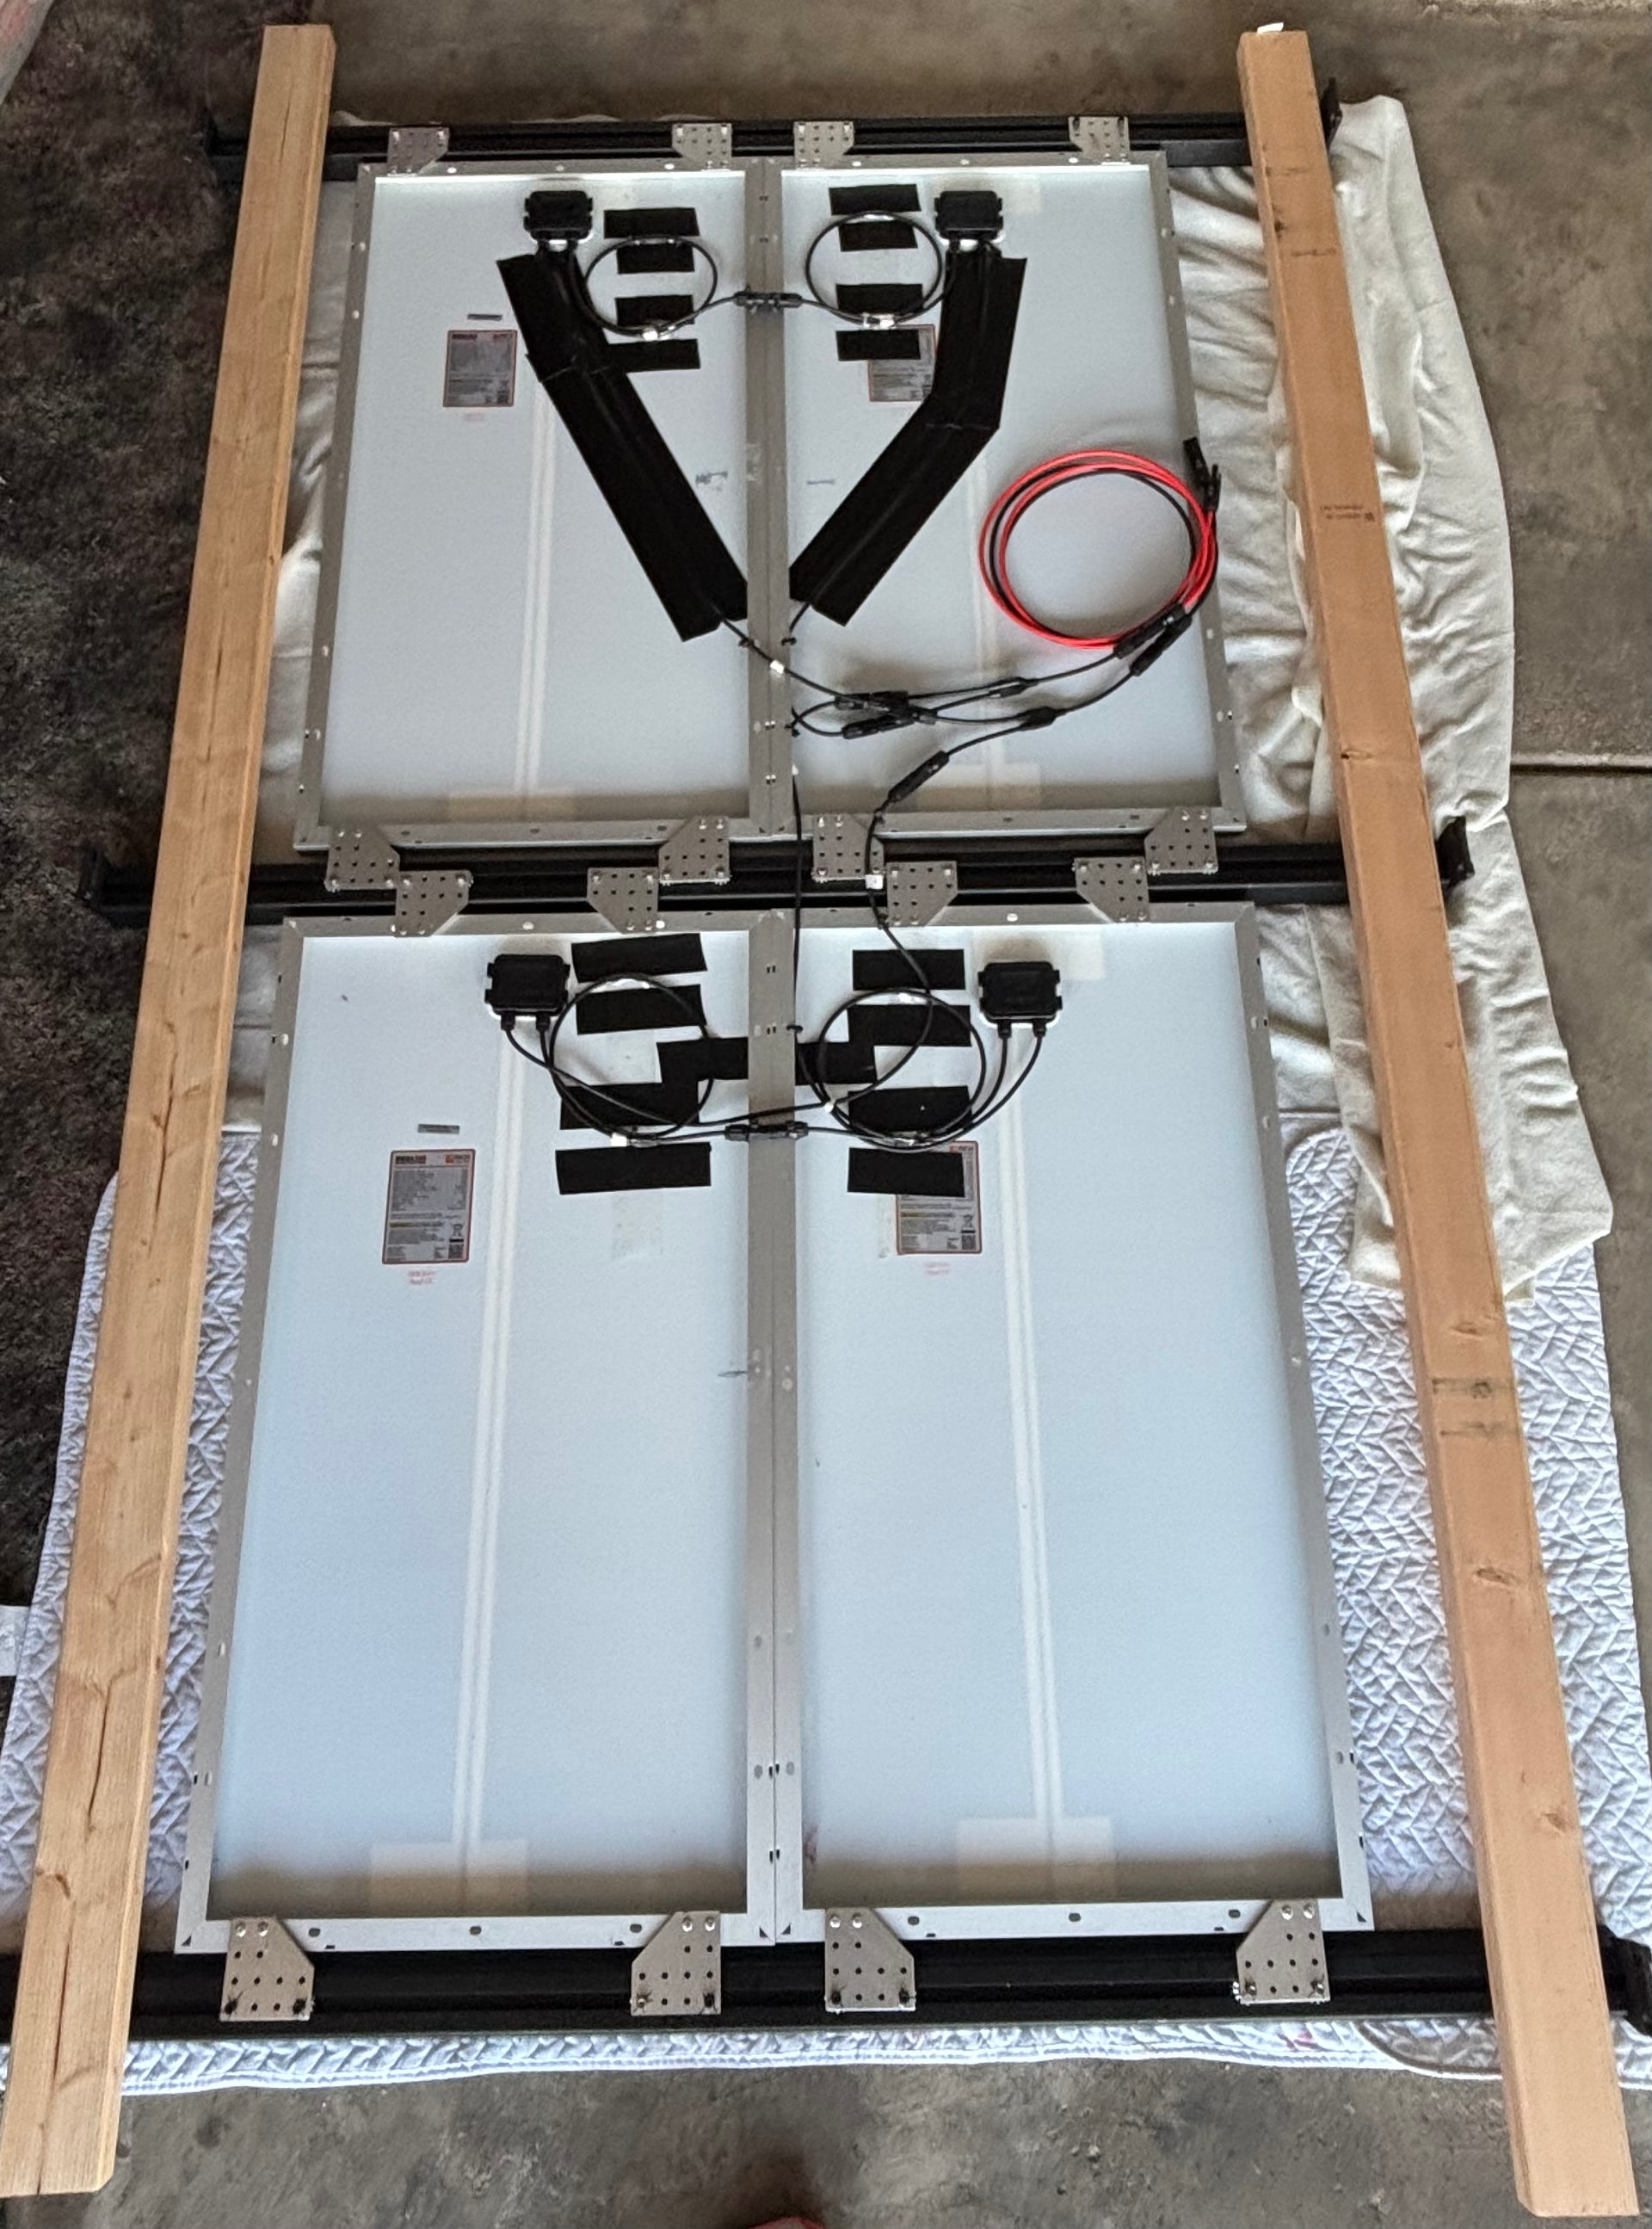
Decided to go with the rooftop solar array as well as the solar blanket. This way I’m covered for just about every sun scenario. 4 X 100 panels, so I can charge at the same time as using power.
This is my array. Wires are secured with 3M VHB as well as Gorilla Tape and zip ties. Locked down pretty tight. Configured in series-parallel . Gonna try to mount it this weekend. Will show final install at that time.
1 Like
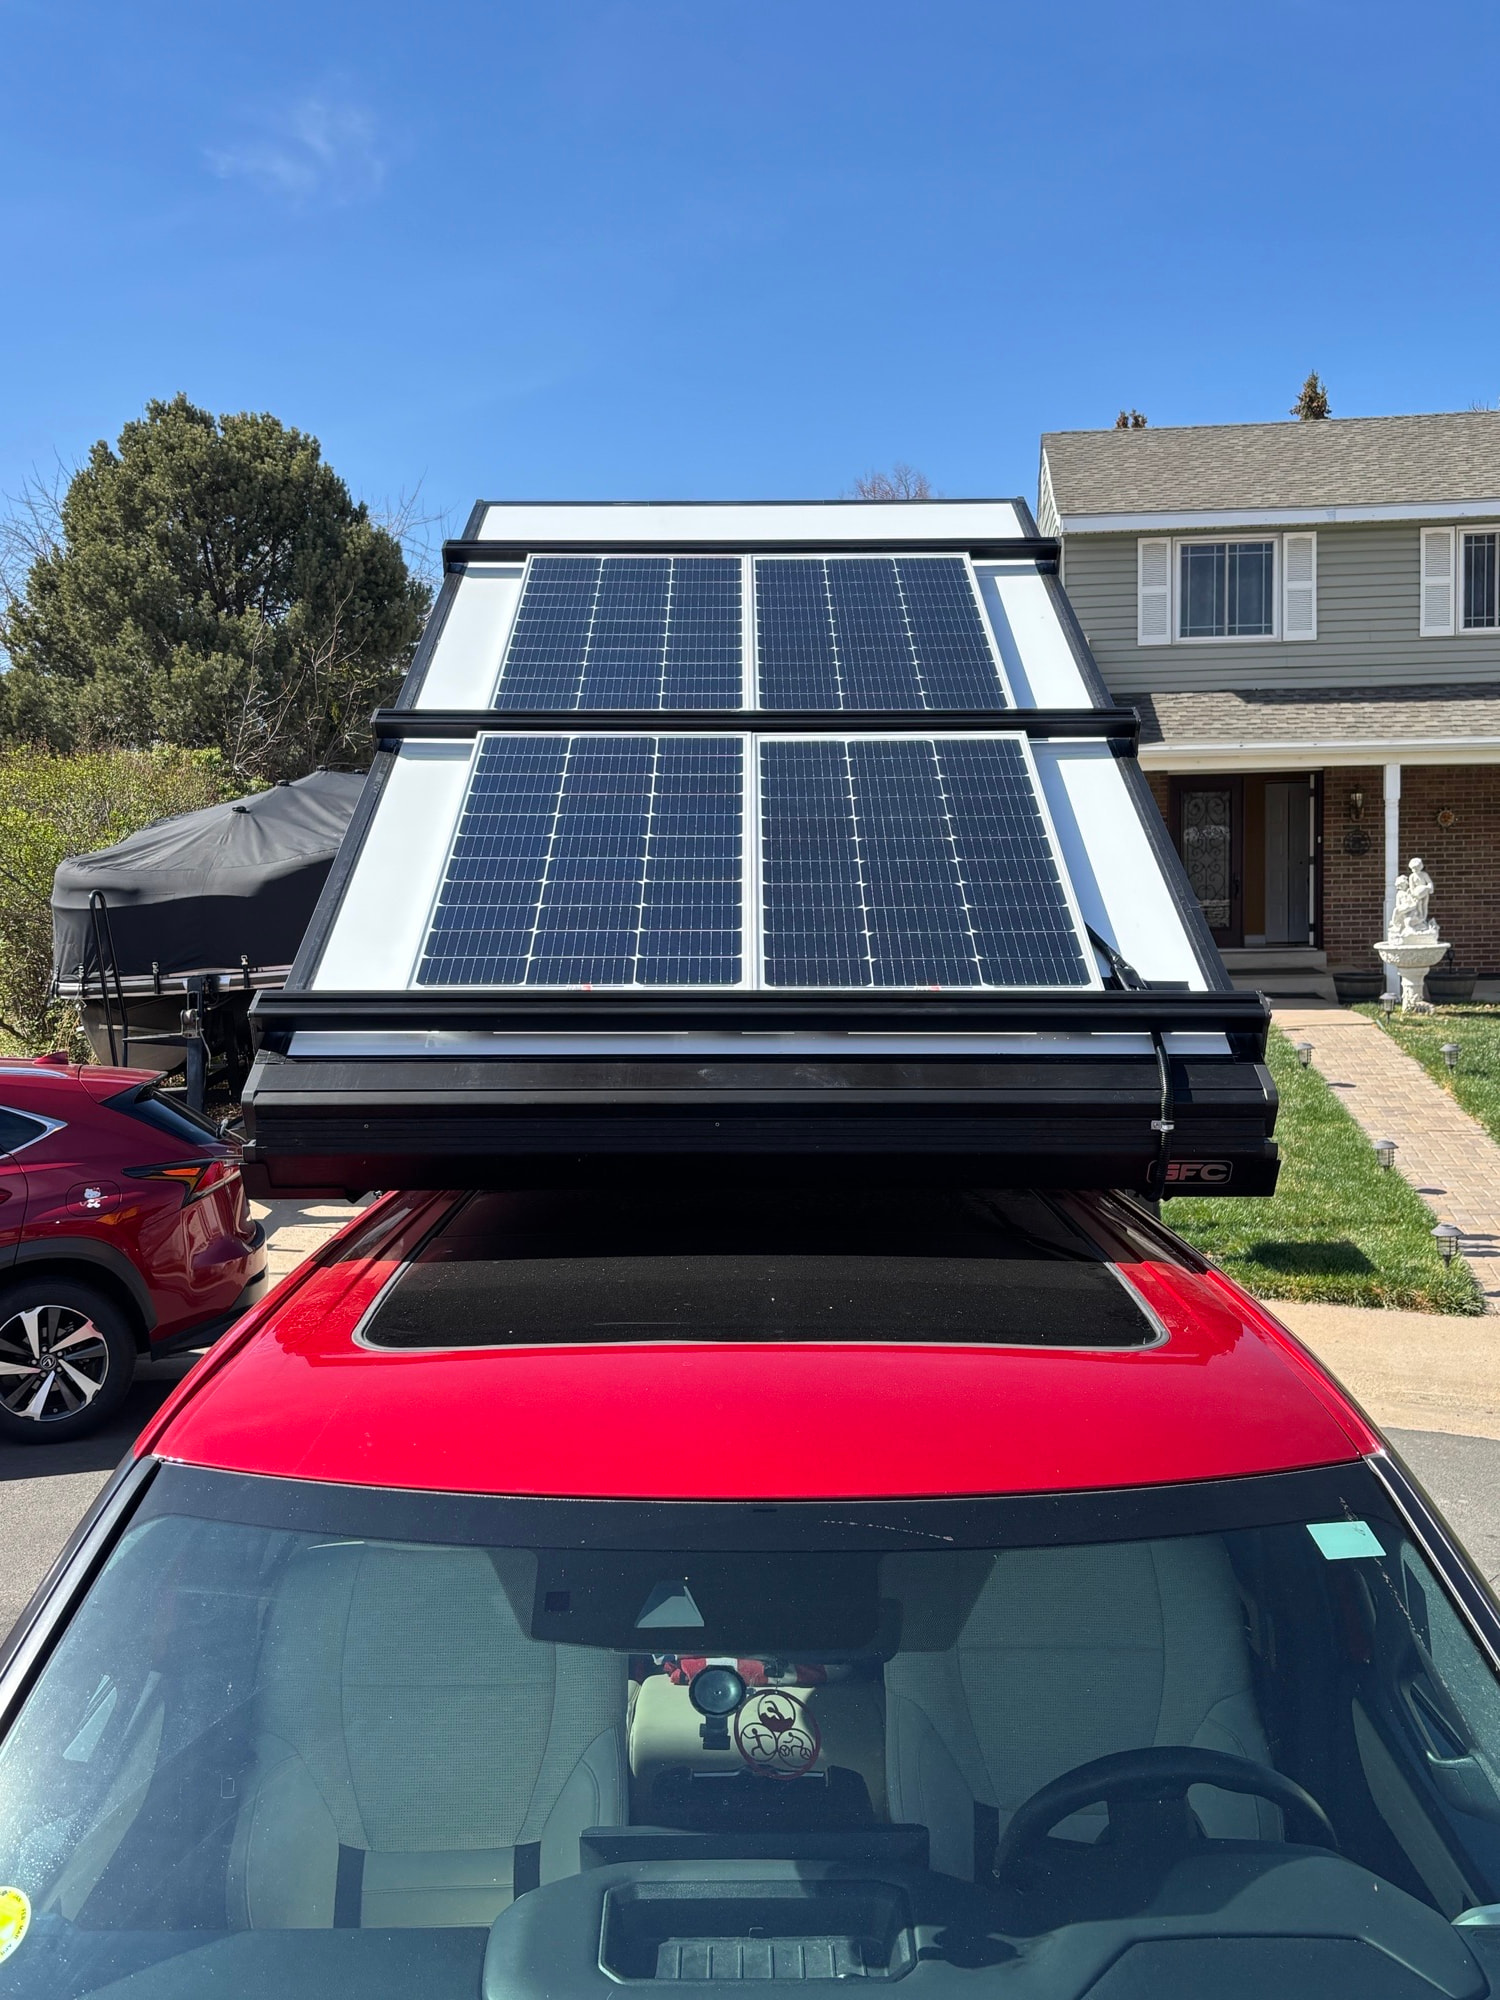
WOW! Busy weekend. I got my 4x100 solar array mounted. Locked down so tight. No wires exposed to shake and vibrate going down the road. All in all, the array weighs about 65-70 lbs. The tent is a little heavier to get started up, but when the struts take over it goes up fine. No sag. I’ve seen posts where people have had the struts sag after some time. If I have that start down the road, I’ll swap them out for 100lb struts. Note: Just after connecting the array to my Generator at sunrise, I was getting about 325 Watts input. Not too shabby.
I also mounted my Max Trax to the right side panel. And there is no affect on the panel at all with handling the weight. The panel springs up the same as before the mounting.
Mounted 4 L-Tracks inside on the upper and lower main support beams. Got these 4 foot tracks off of Amazon. Amazingly the holes for mounting lined up with the 4 mounting points on the frame. Just had to cut a little off for the two lower tracks.
See pics below. If you have any questions, hit me up. I think I am ready to hit the road May 2nd, the day after I retire, on my 5K plus mile trip around the country.


2 Likes
Coming together really nice! Love the L track mod. Mind linking the Amazon link?
Here ya go Ben
So handy. Basically an anchor spot about every inch. Very easy to cut too.
1 Like
Sweet! Thanks!
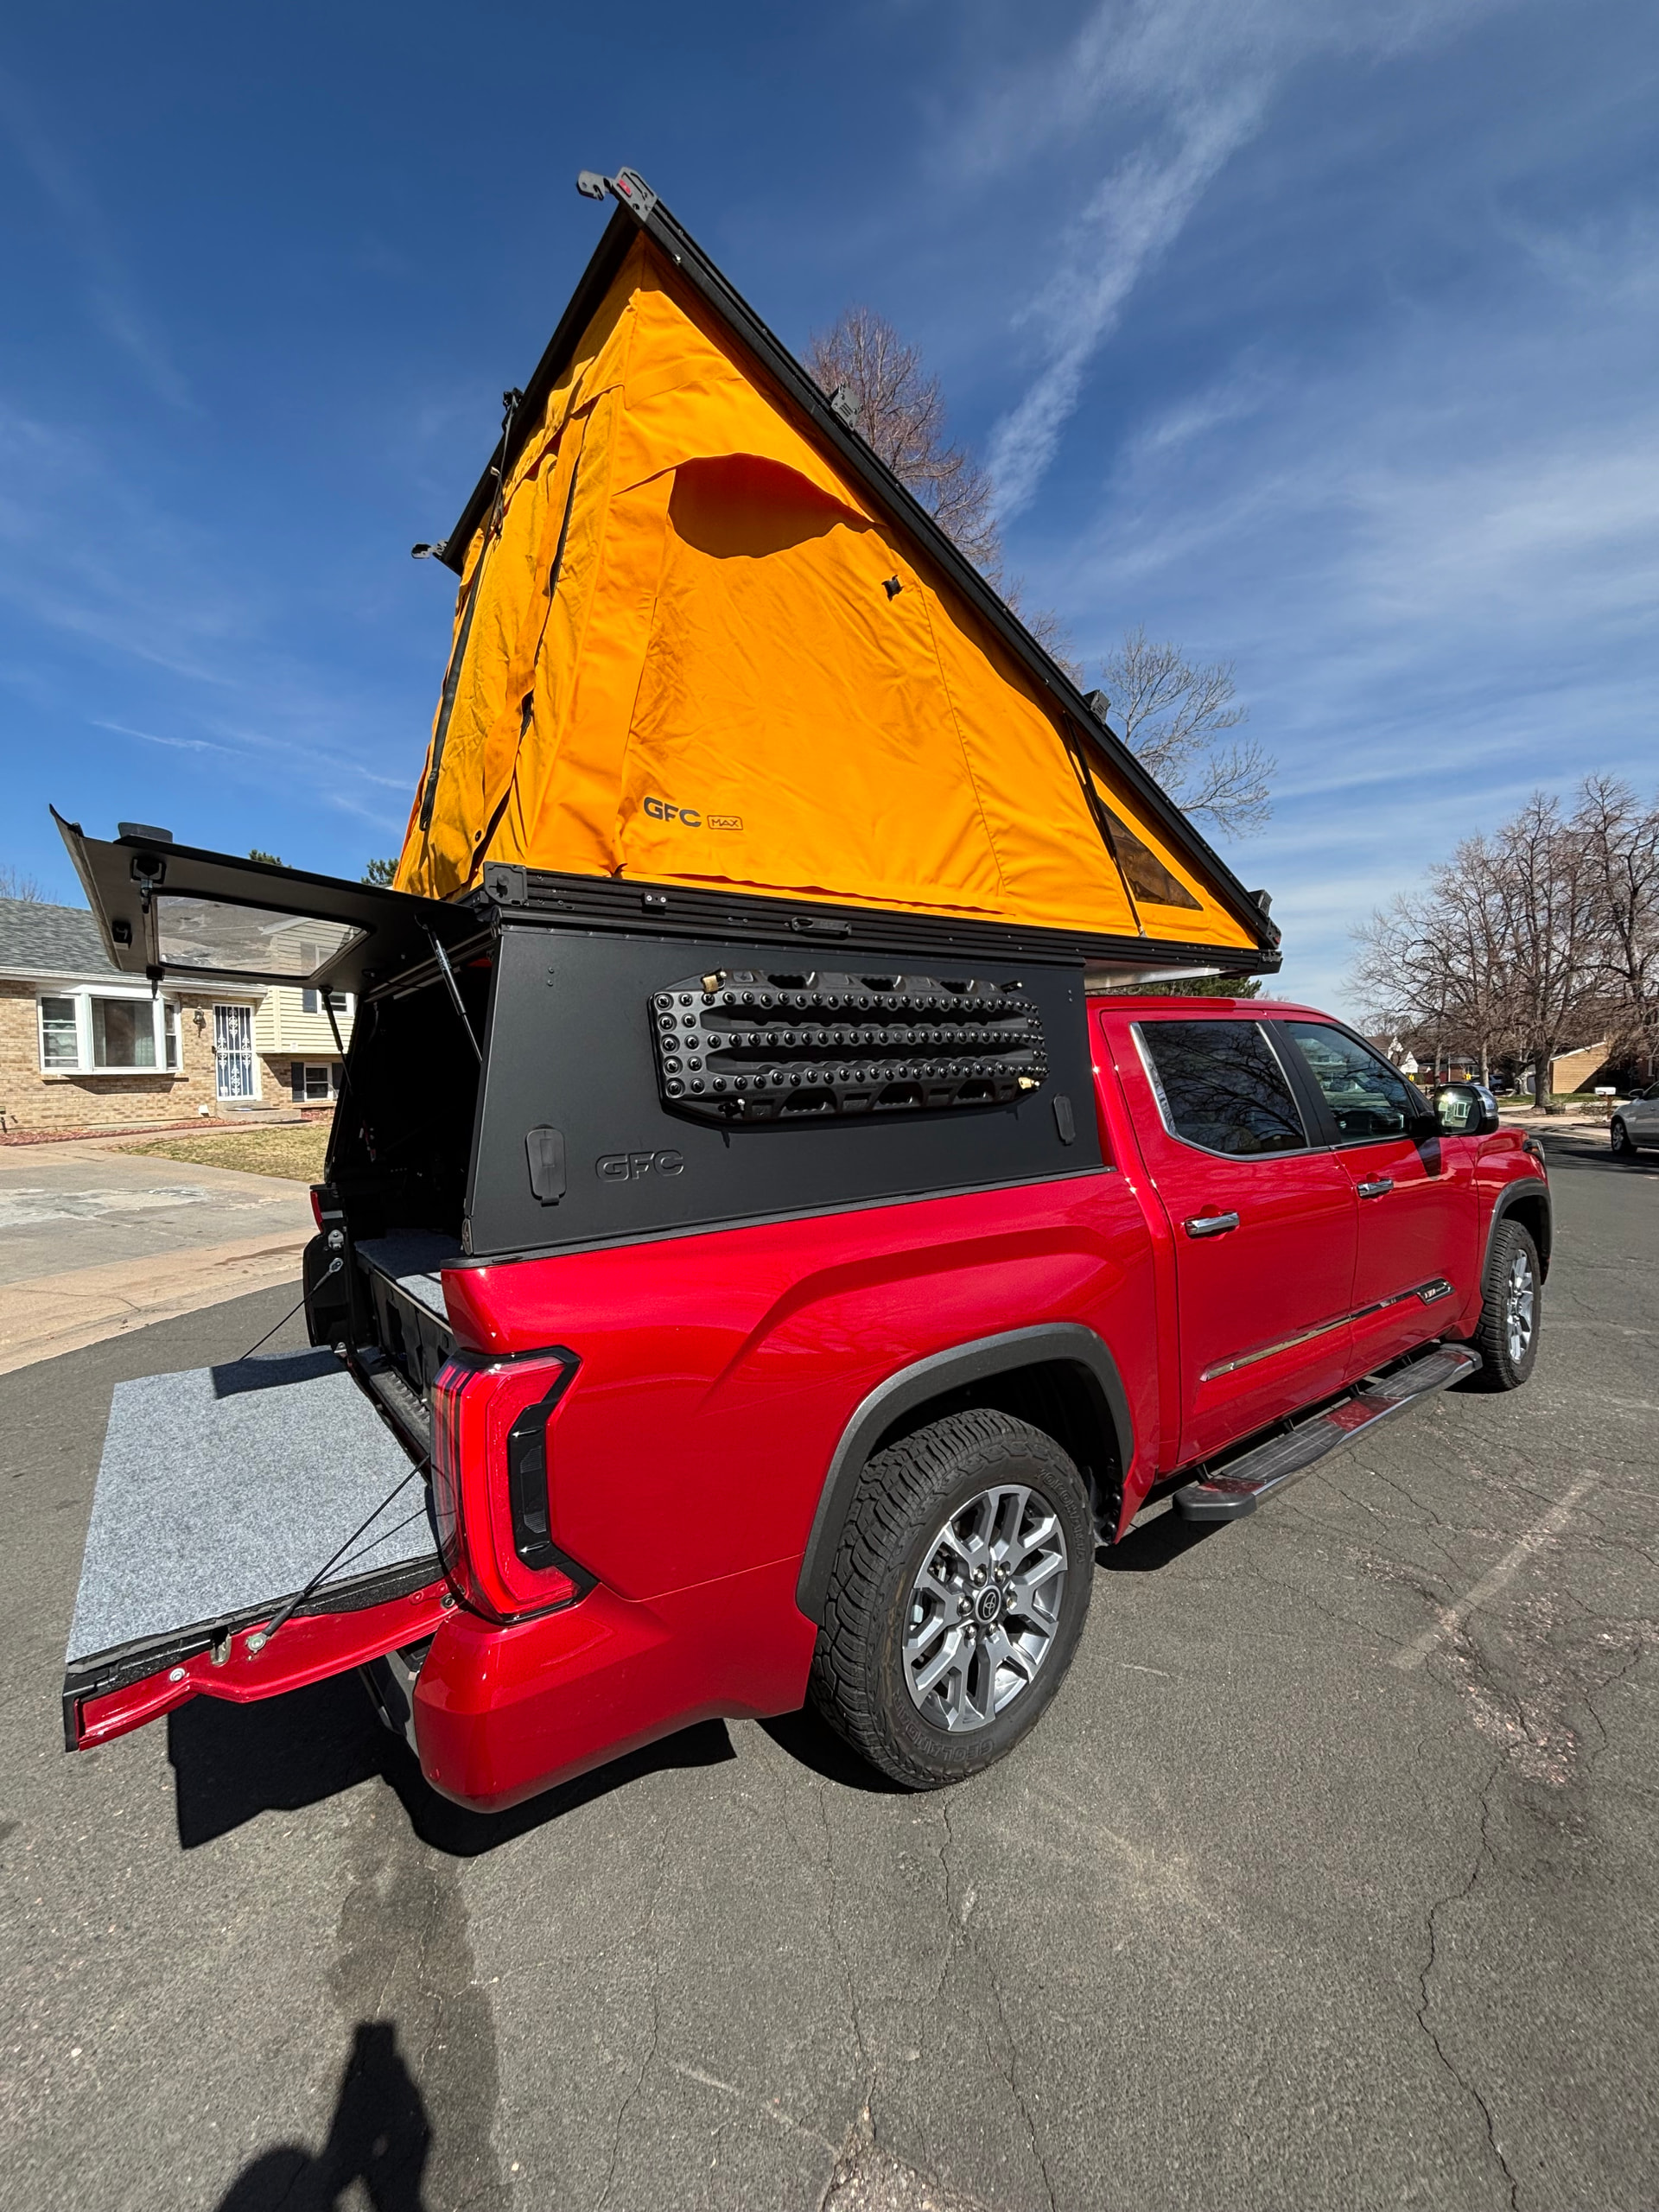
If you are considering a wind fairing for your GFC check out Colorado Fairing Company located in the Denver area. I picked mine up yesterday and installed it in about 45 minutes. They have many designs to choose from, or you can pretty much design anything and they’ll make a customized one like mine.

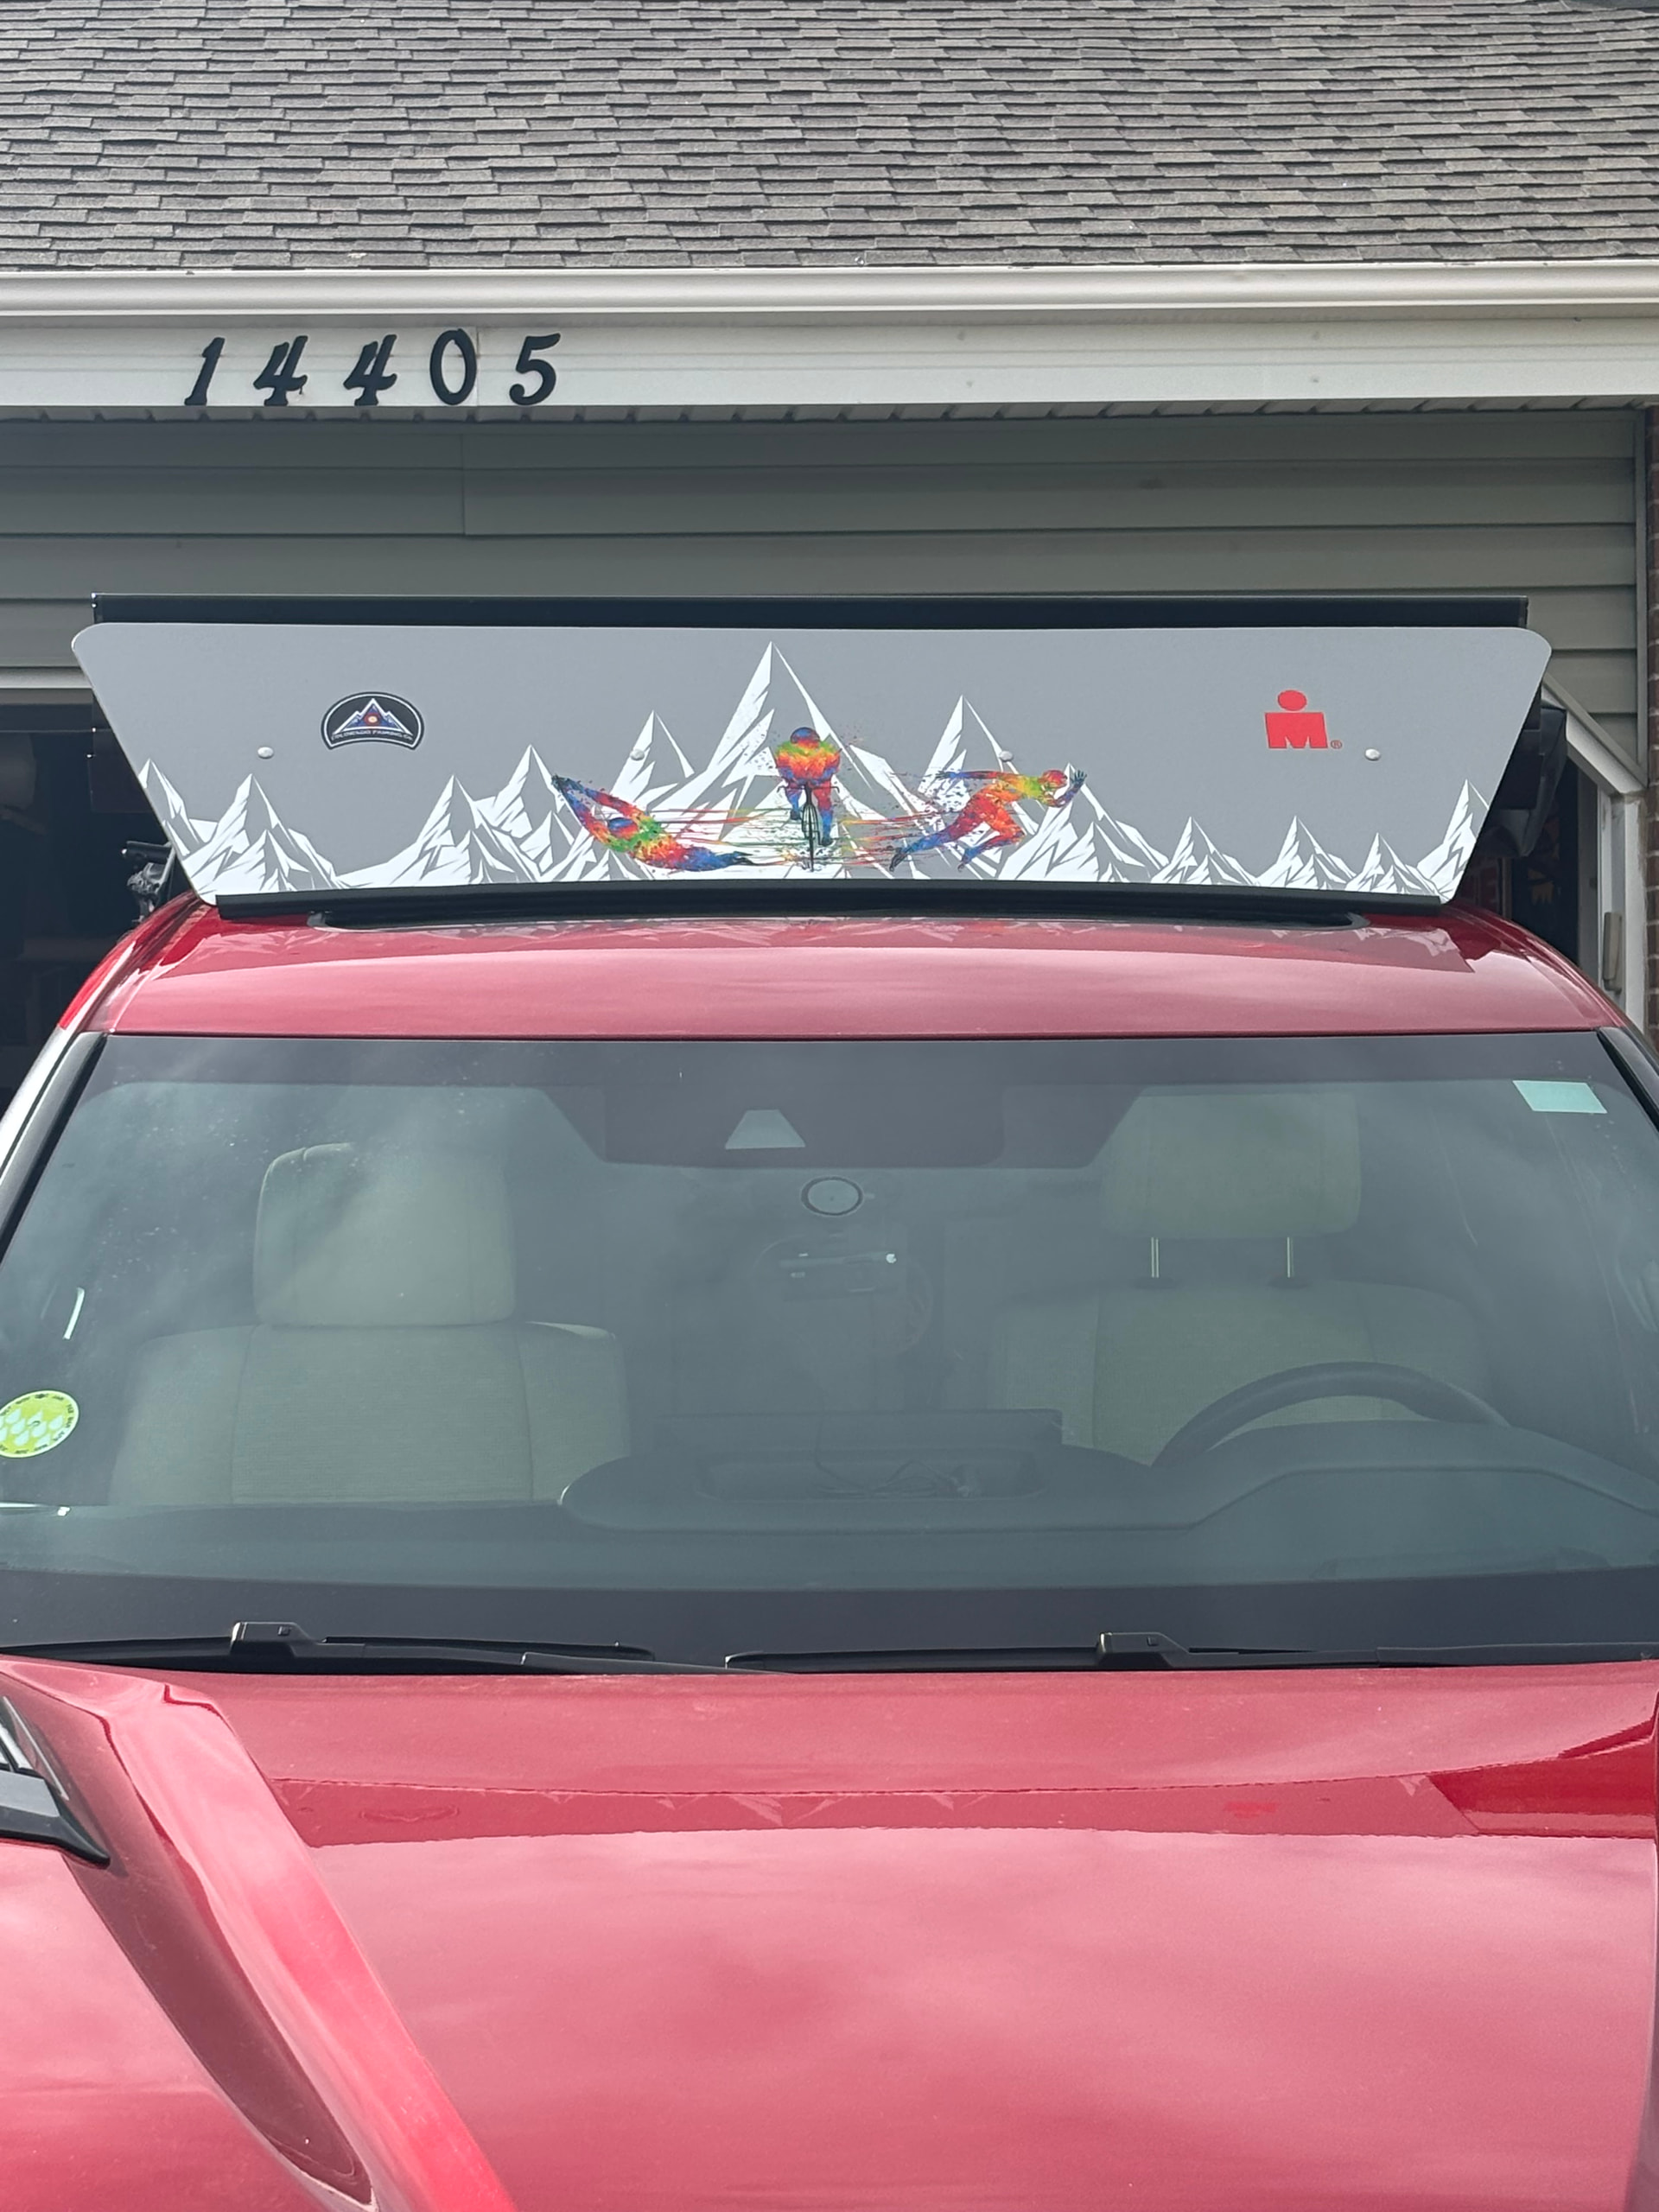
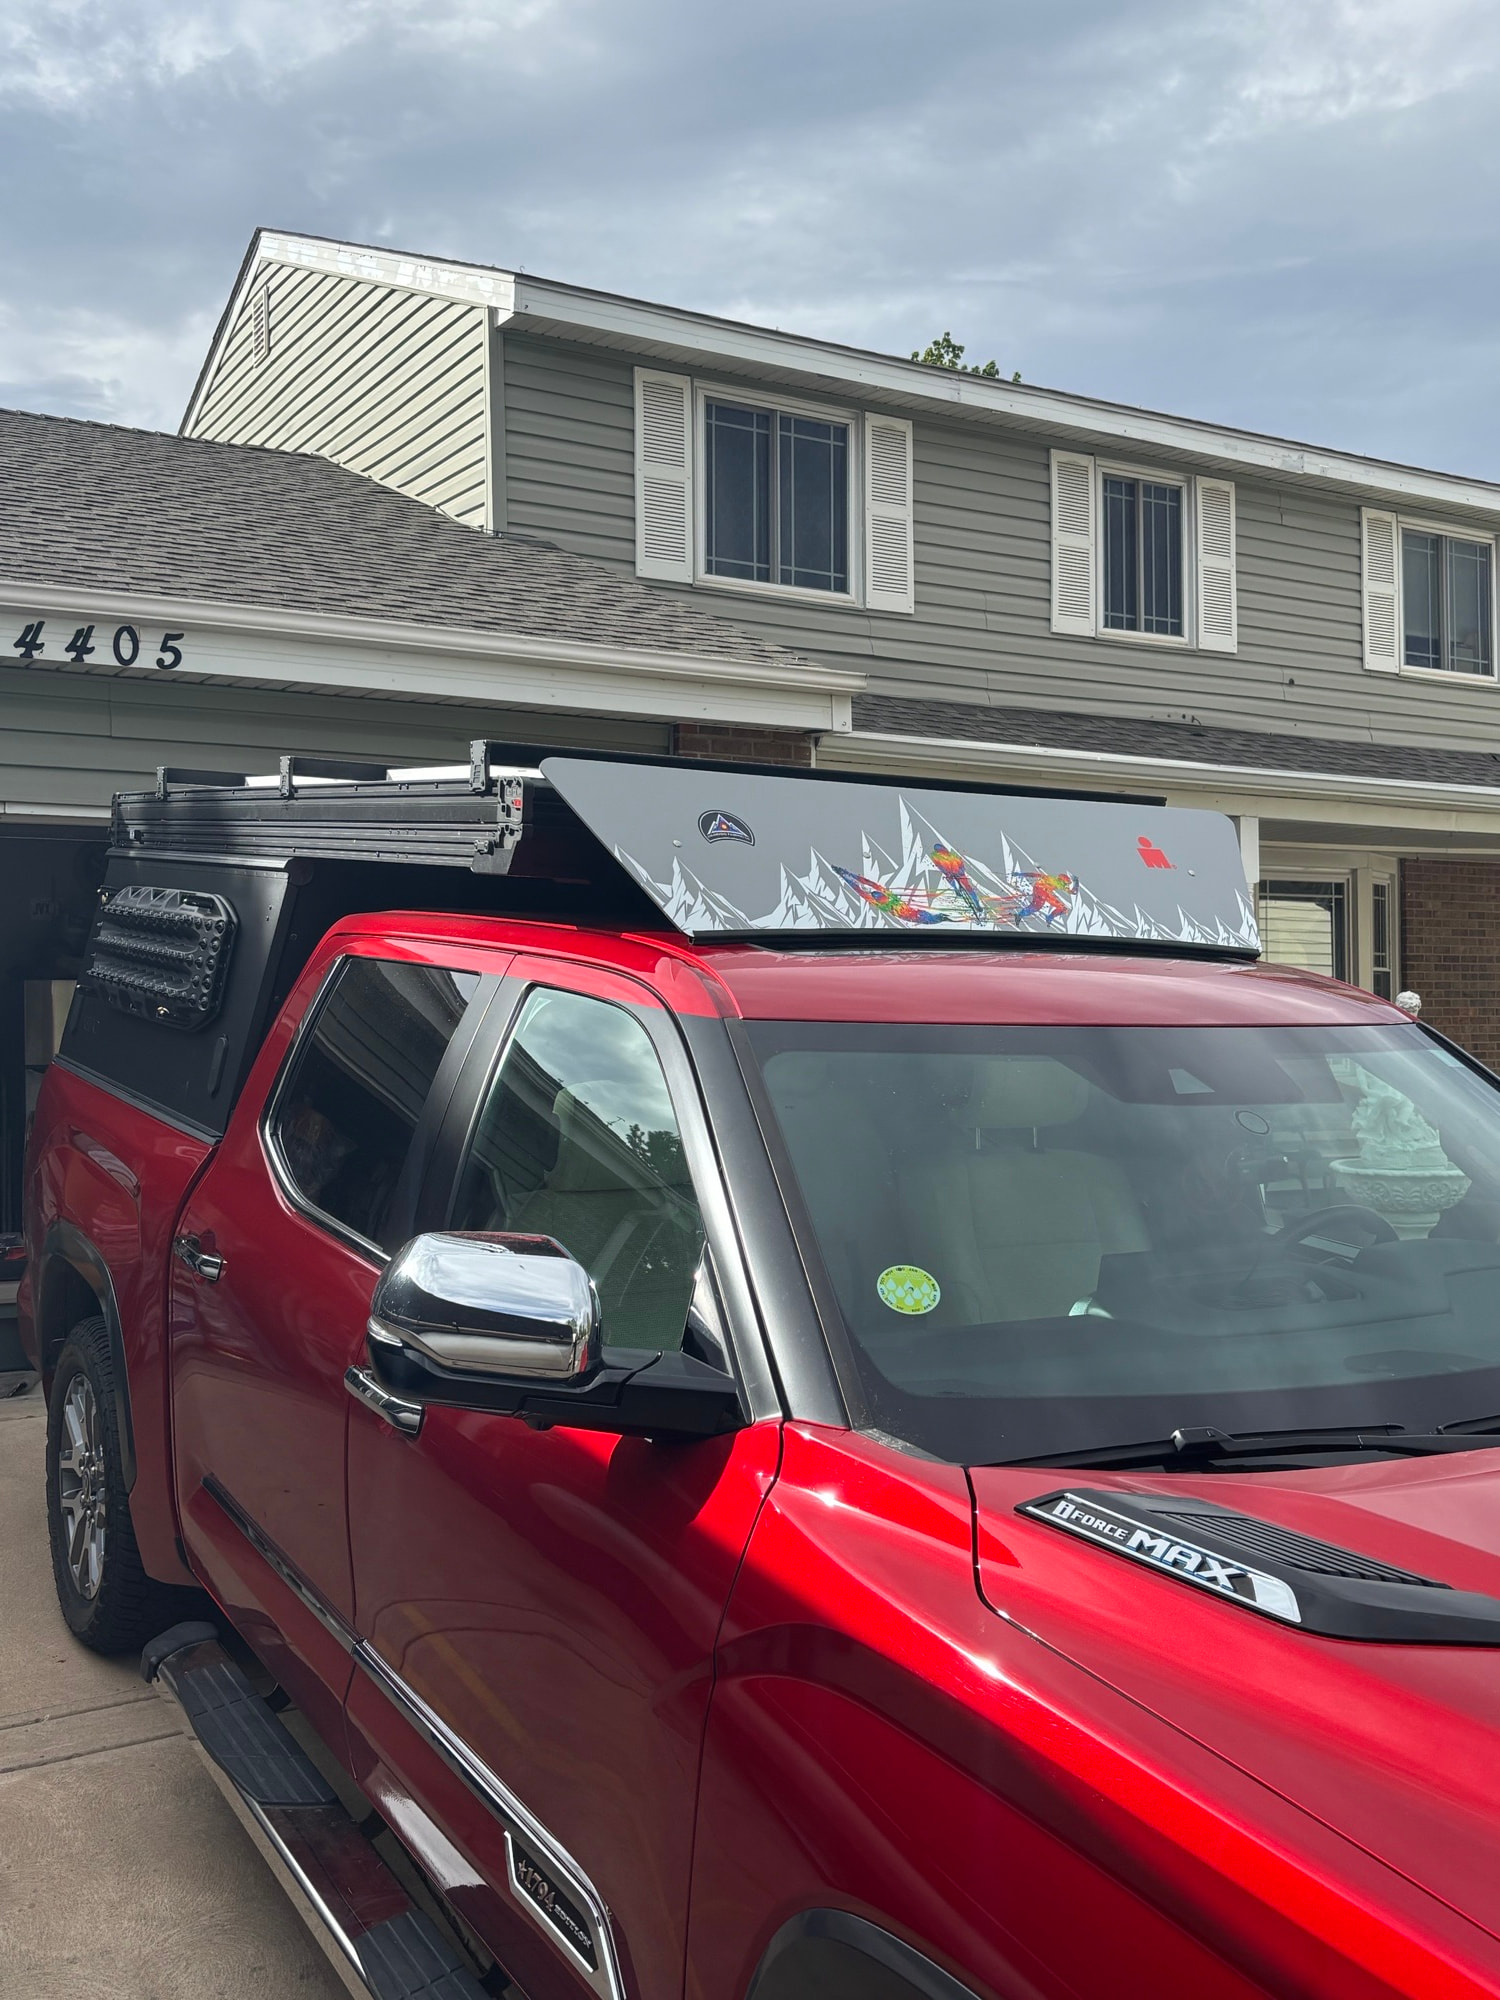
2 Likes
That’s awesome. Way cool!
I wonder how much that will improve mileage…
I’m gonna track it a bit and I’ll post the results back here . Probably a City driving result in a week, then a highway one in a few weeks.
1 Like
How do you like the DECKED system? Getting my V2 Max on my 22 Tundra in 2 weeks. I plan on getting a ~55L Iceco/Dometic 2-zone fridge. Do you think it’d be hard to access it with it sitting on top of the DECKED?
Have you seen the new diesel heater port that GFC can custom install on the side? Wondering if I have them put that on and if I could leverage that for my own diesel heater (instead of buying theirs).
The jury is still out on the decked system. I may do the mod of removing one side. More for the ease of getting in and out. But I hate to lose the flat bed and storage. I have a 57 liter fridge. Pretty tall. But I can lift the lid enough to access drinks and things on the road when the tent is buttoned up no problem.
the heater port is a 5 minute job I did myself. Look at it again above. All you need is a tungston drill from Amazon the size of your intake fitting that should come with your heater. Then you see the grommet I plug in when not being used. Also from Amazon. They have many sizes.