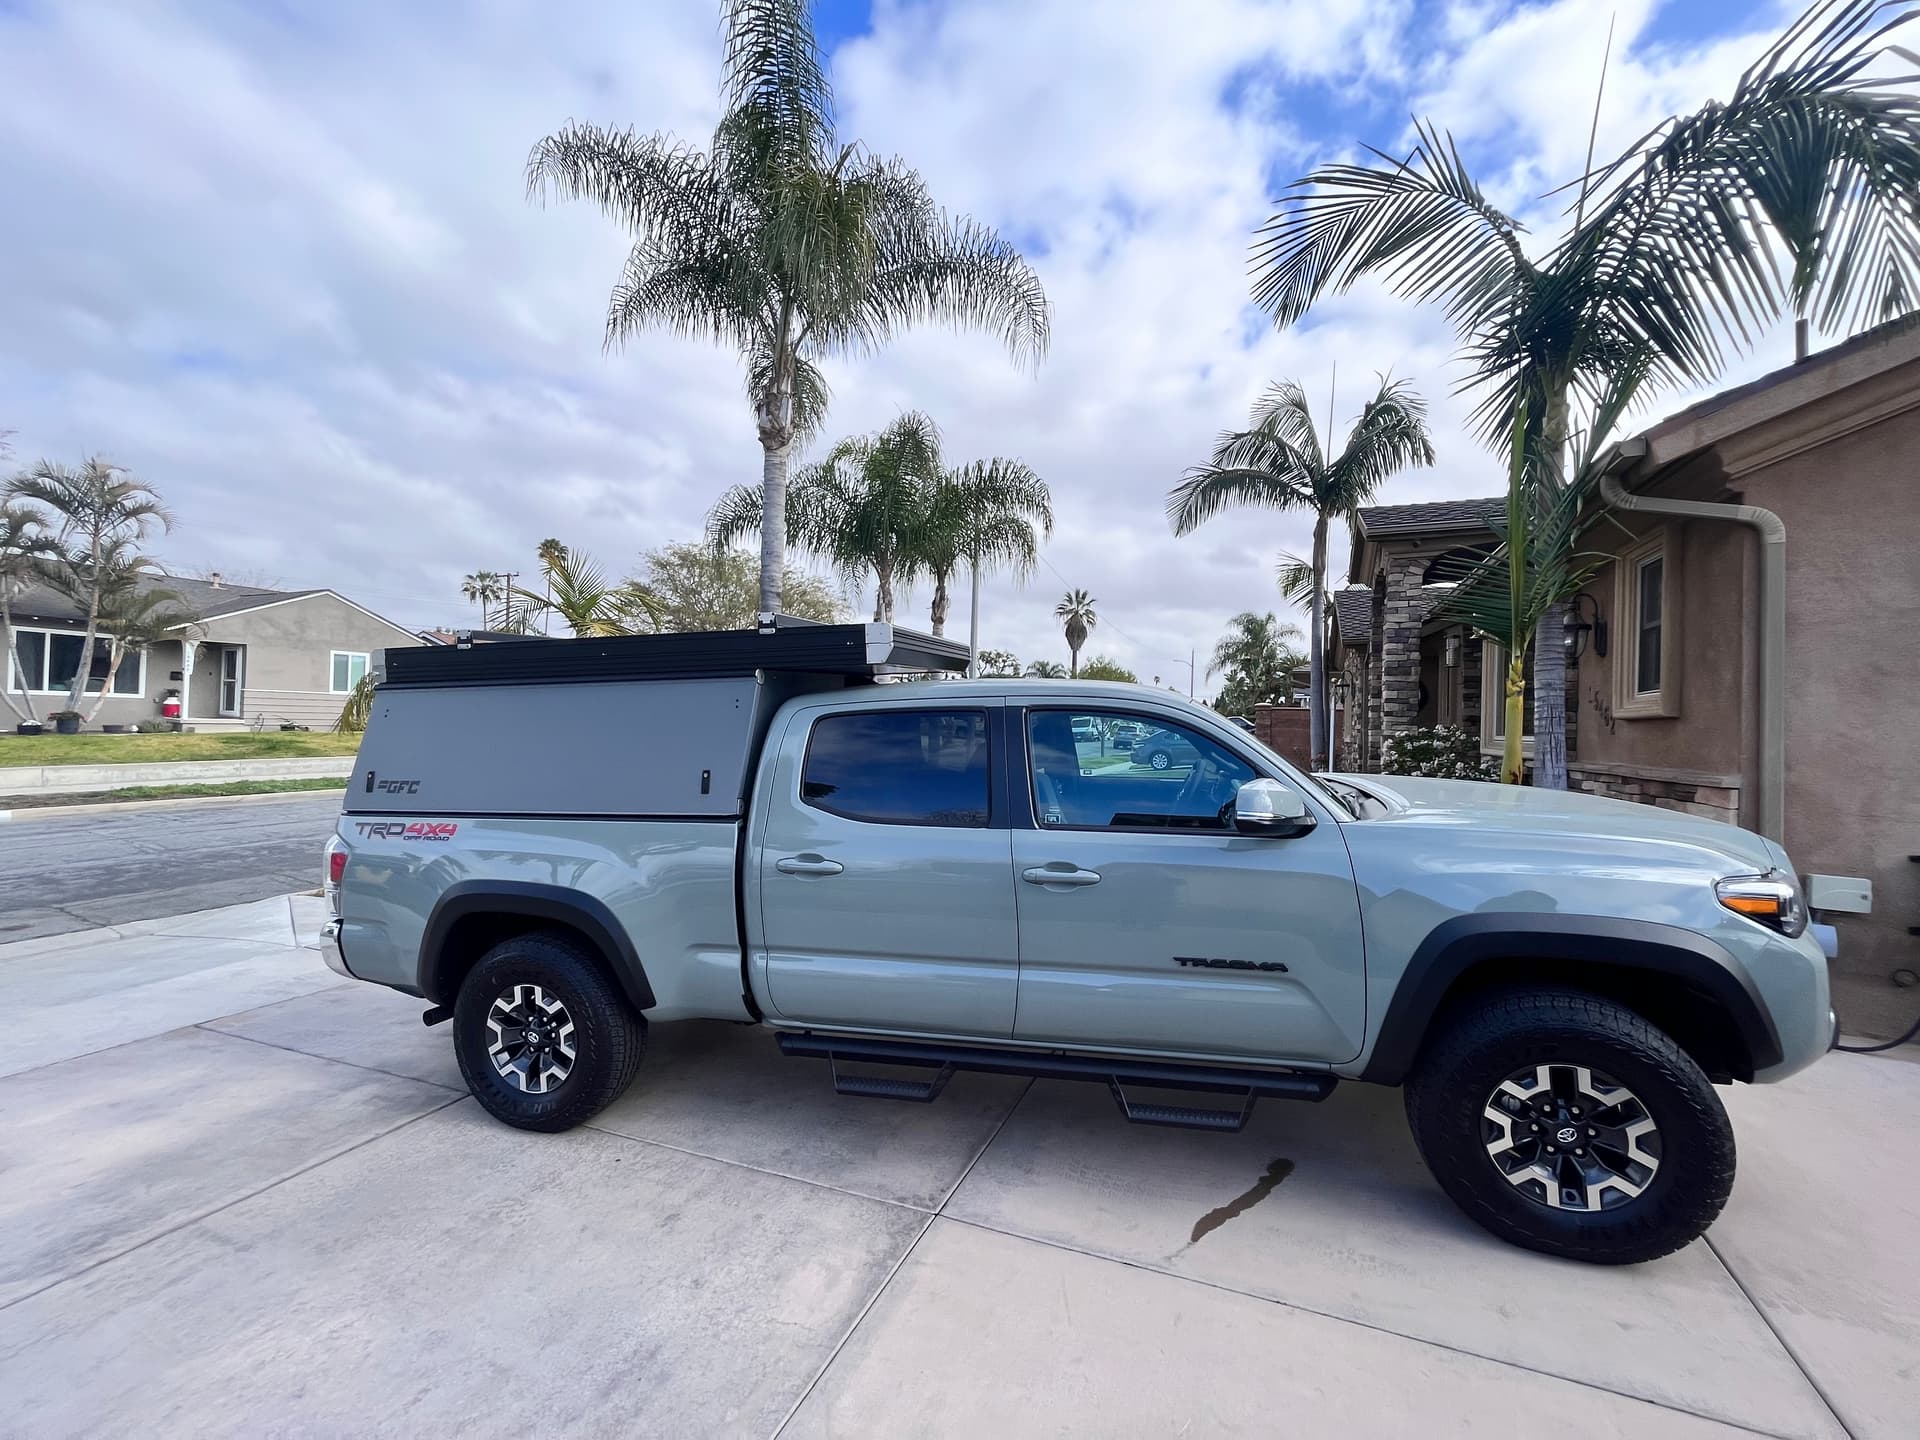
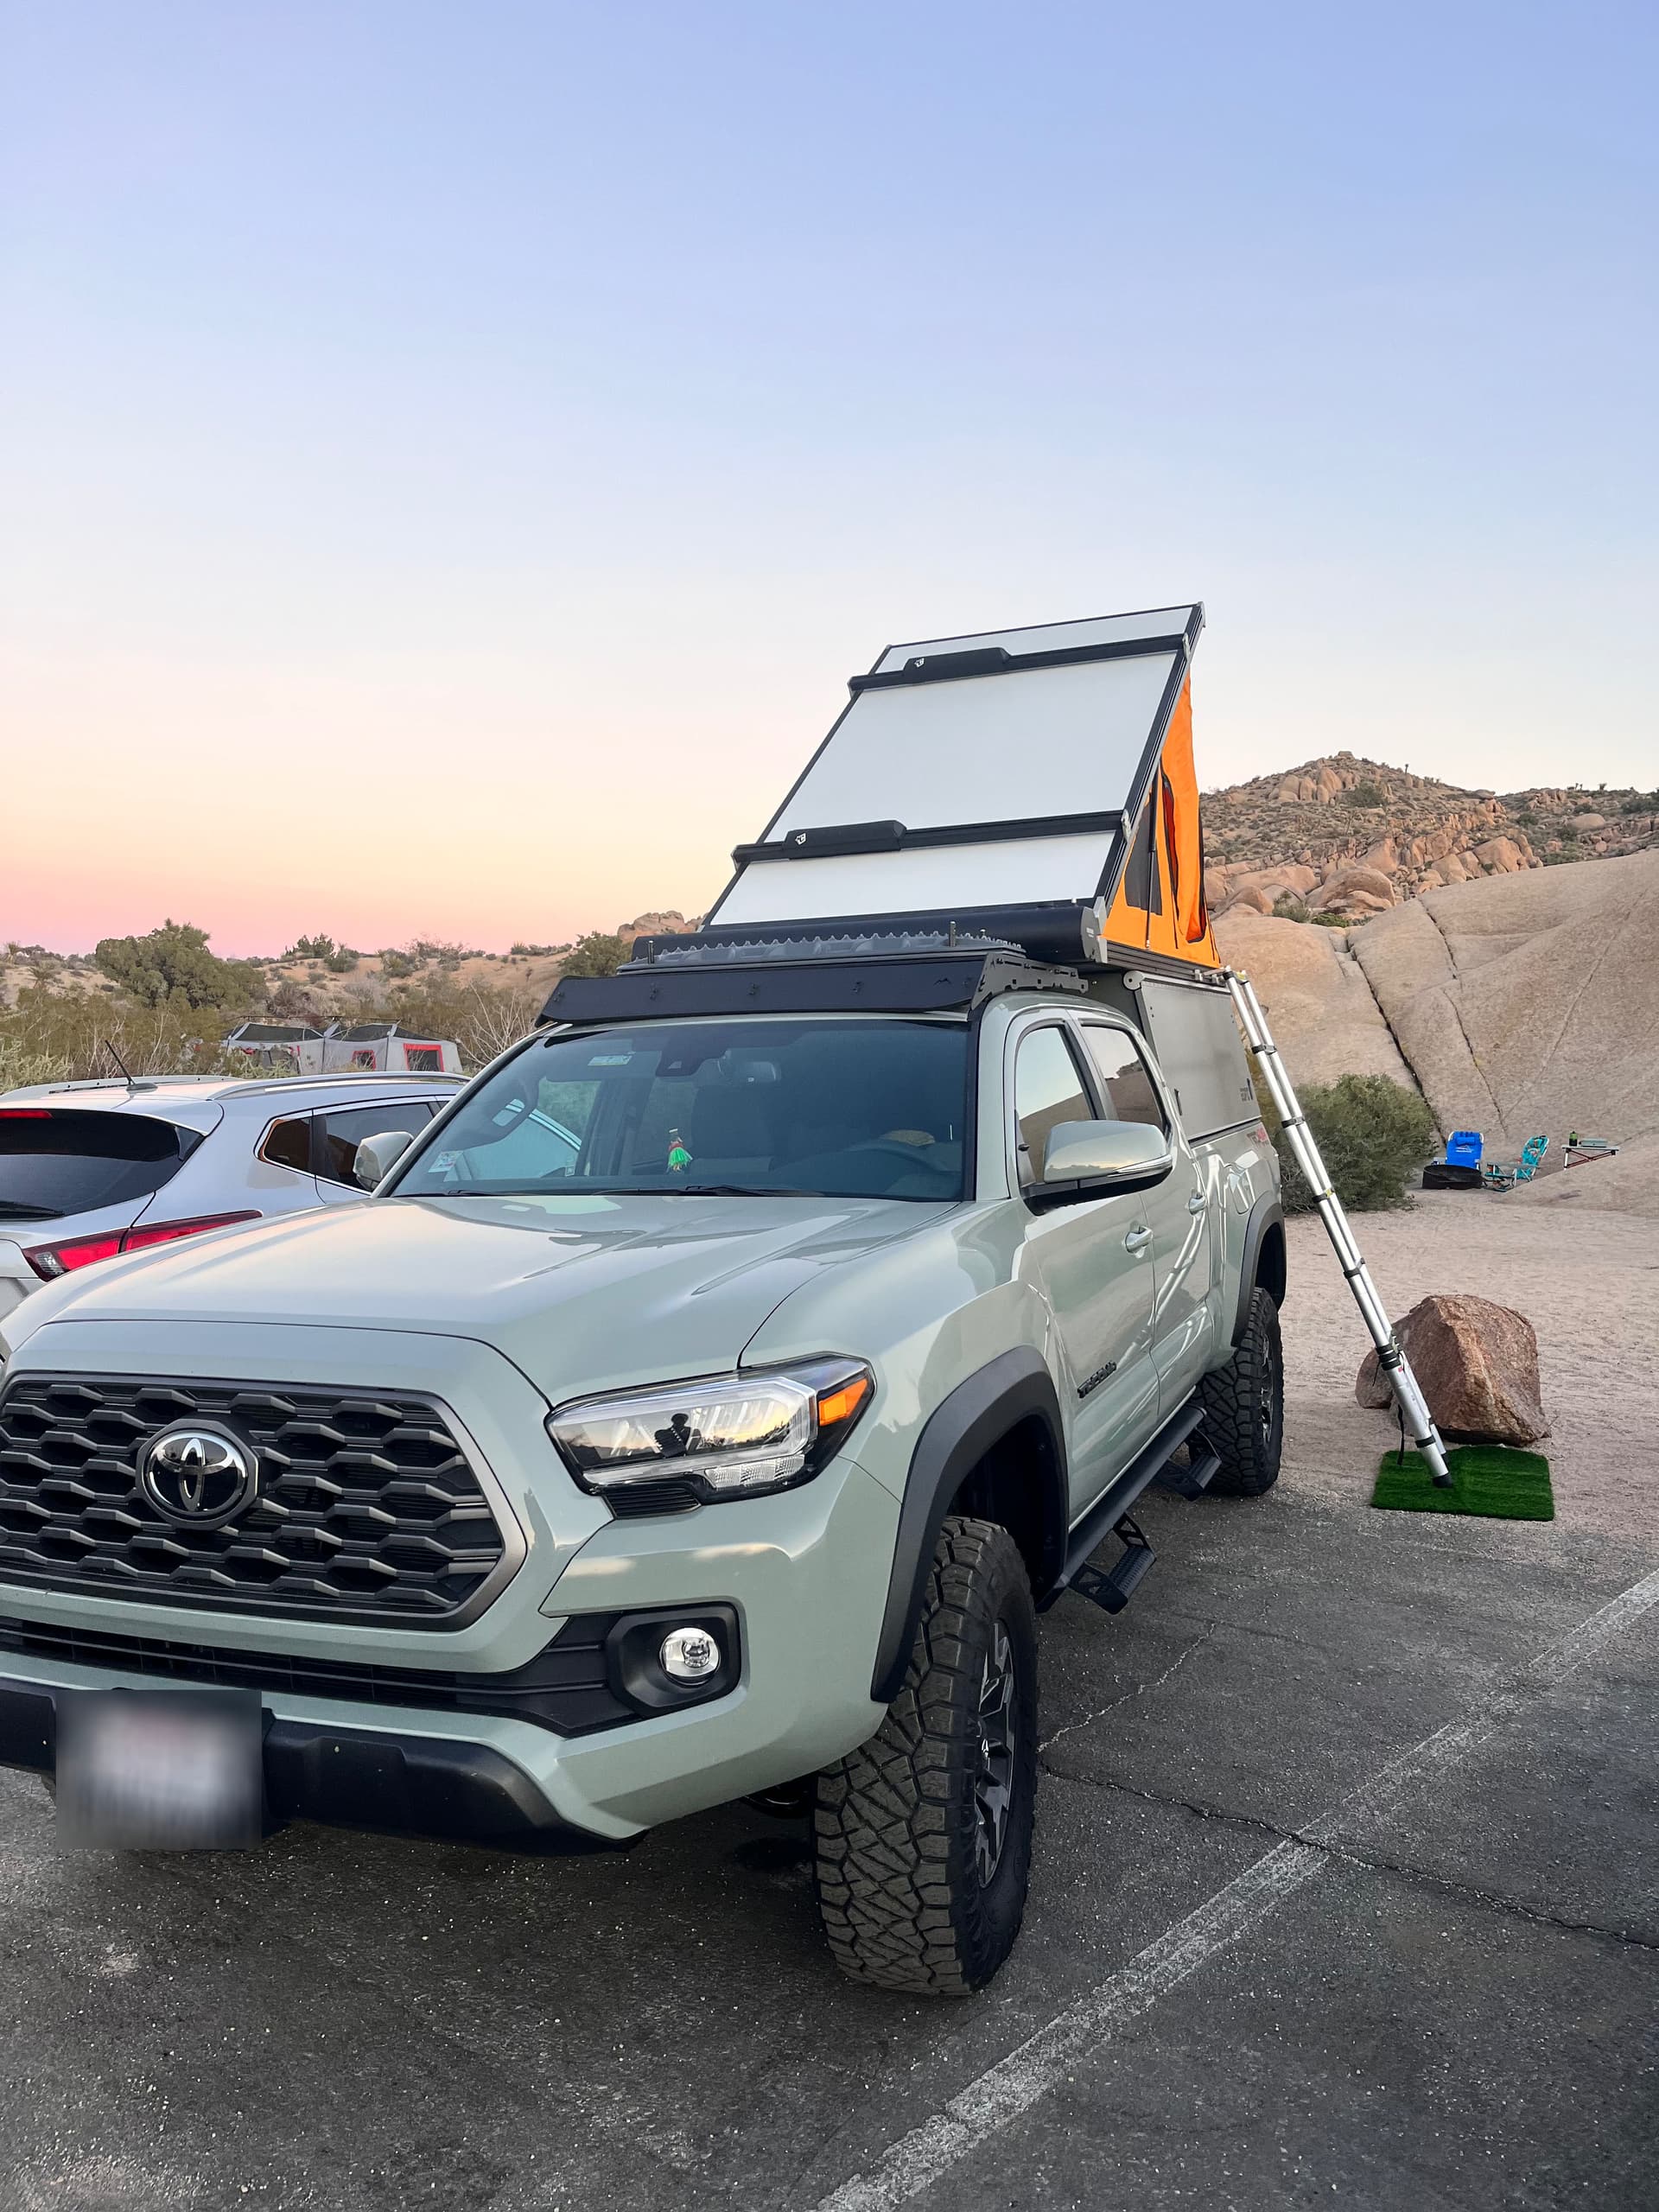
Wanted to join everyone and share the progress of my build. I originally started with the idea of building out a van and through that became aware of truck campers and the GFC. So when the time came for me to buy a new car I went with a DCLB Tacoma TRD Off Road. I didn’t wait long to get a GFC and found a barely used one in the area. Transferred it over and voila I had a camper ready!
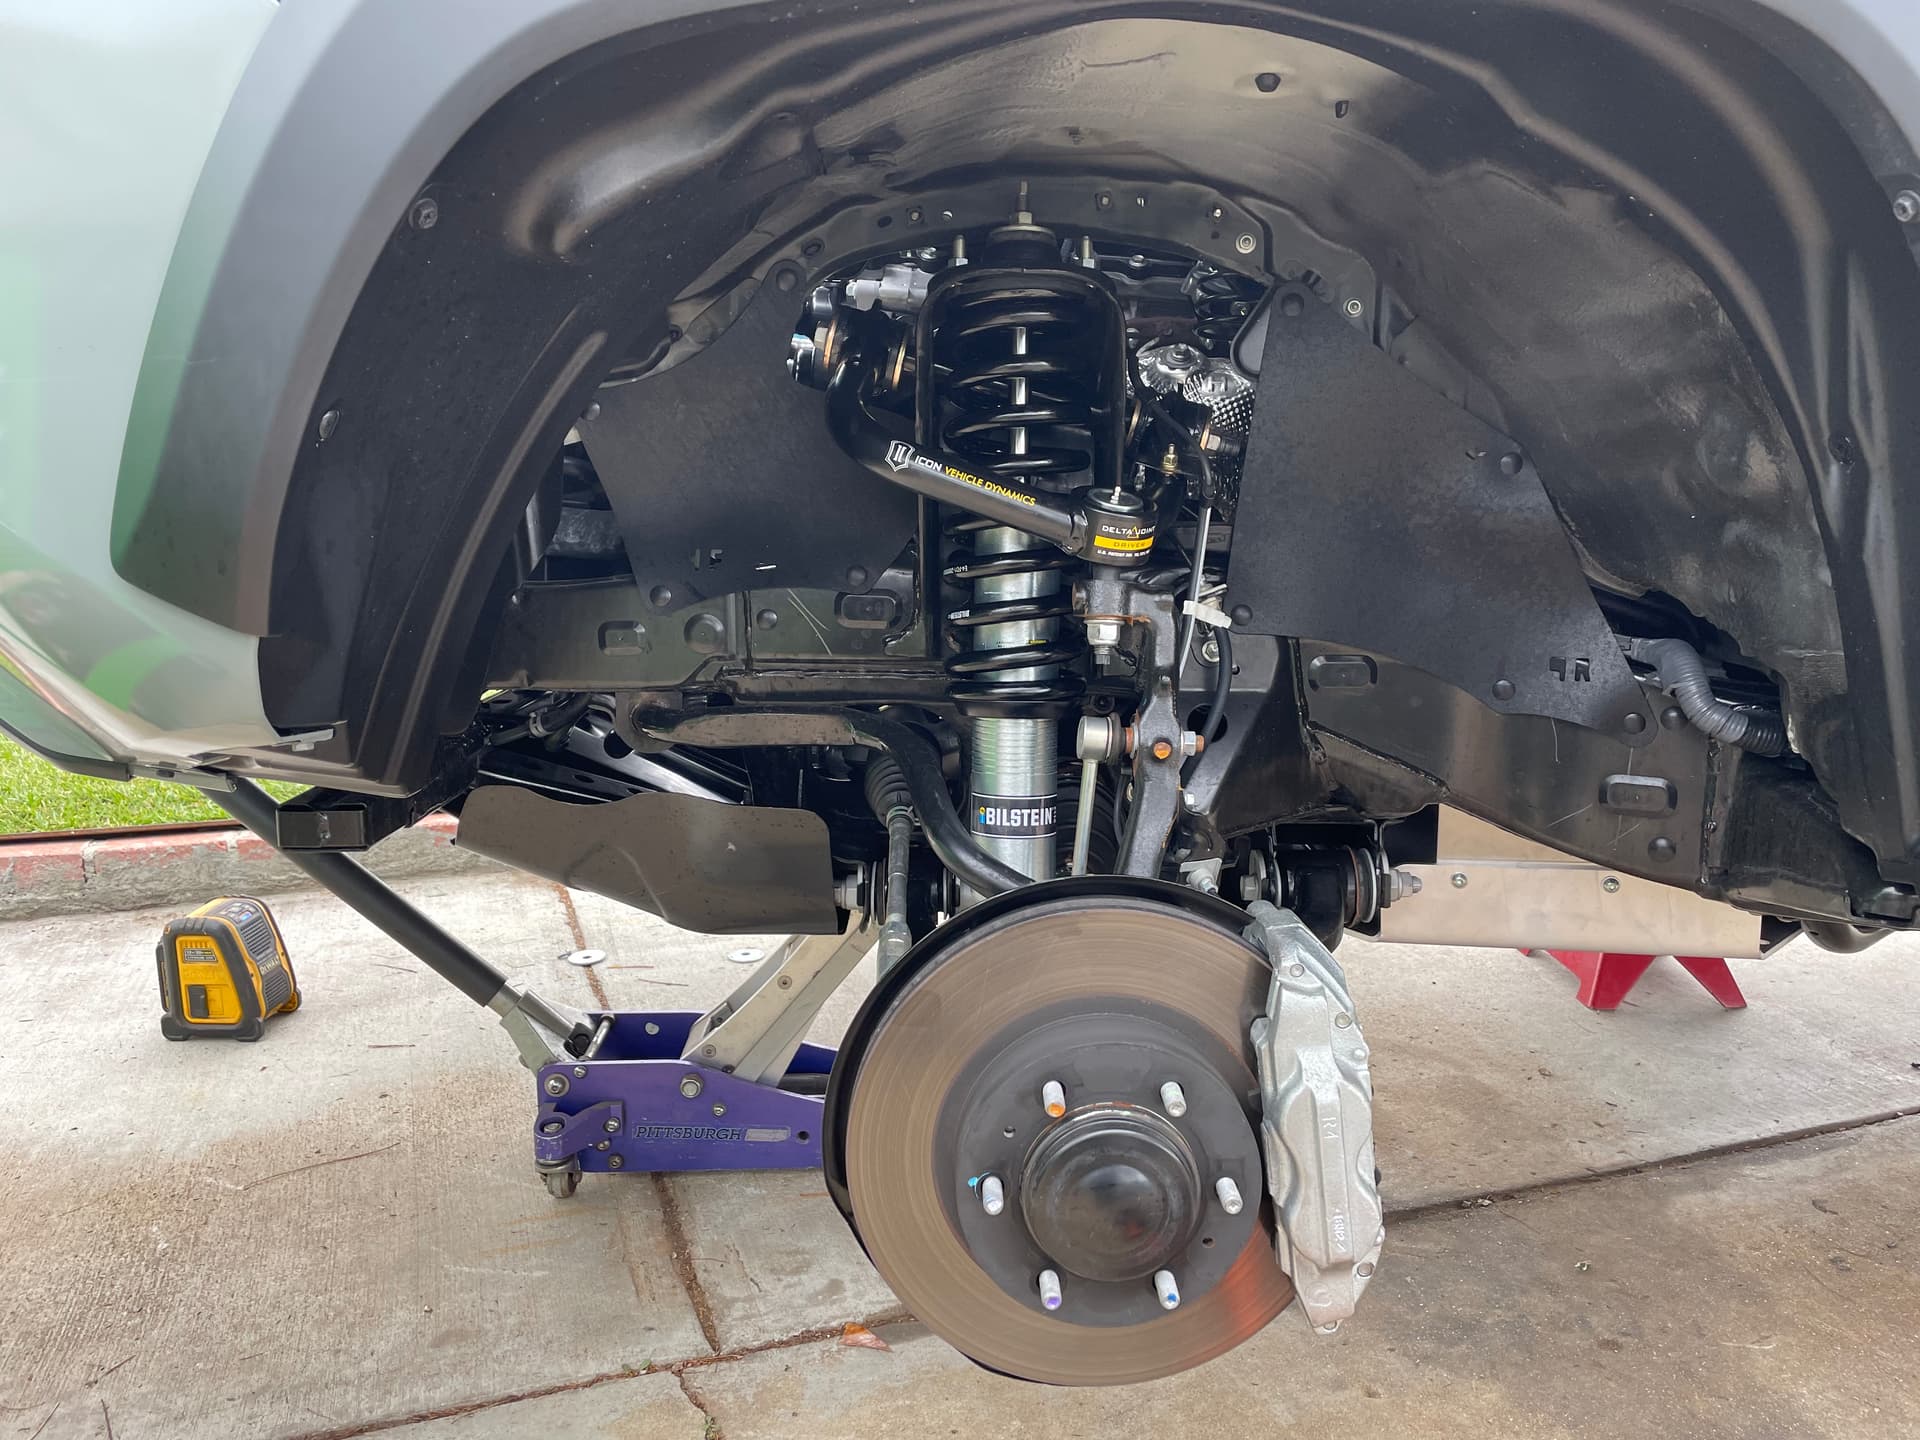
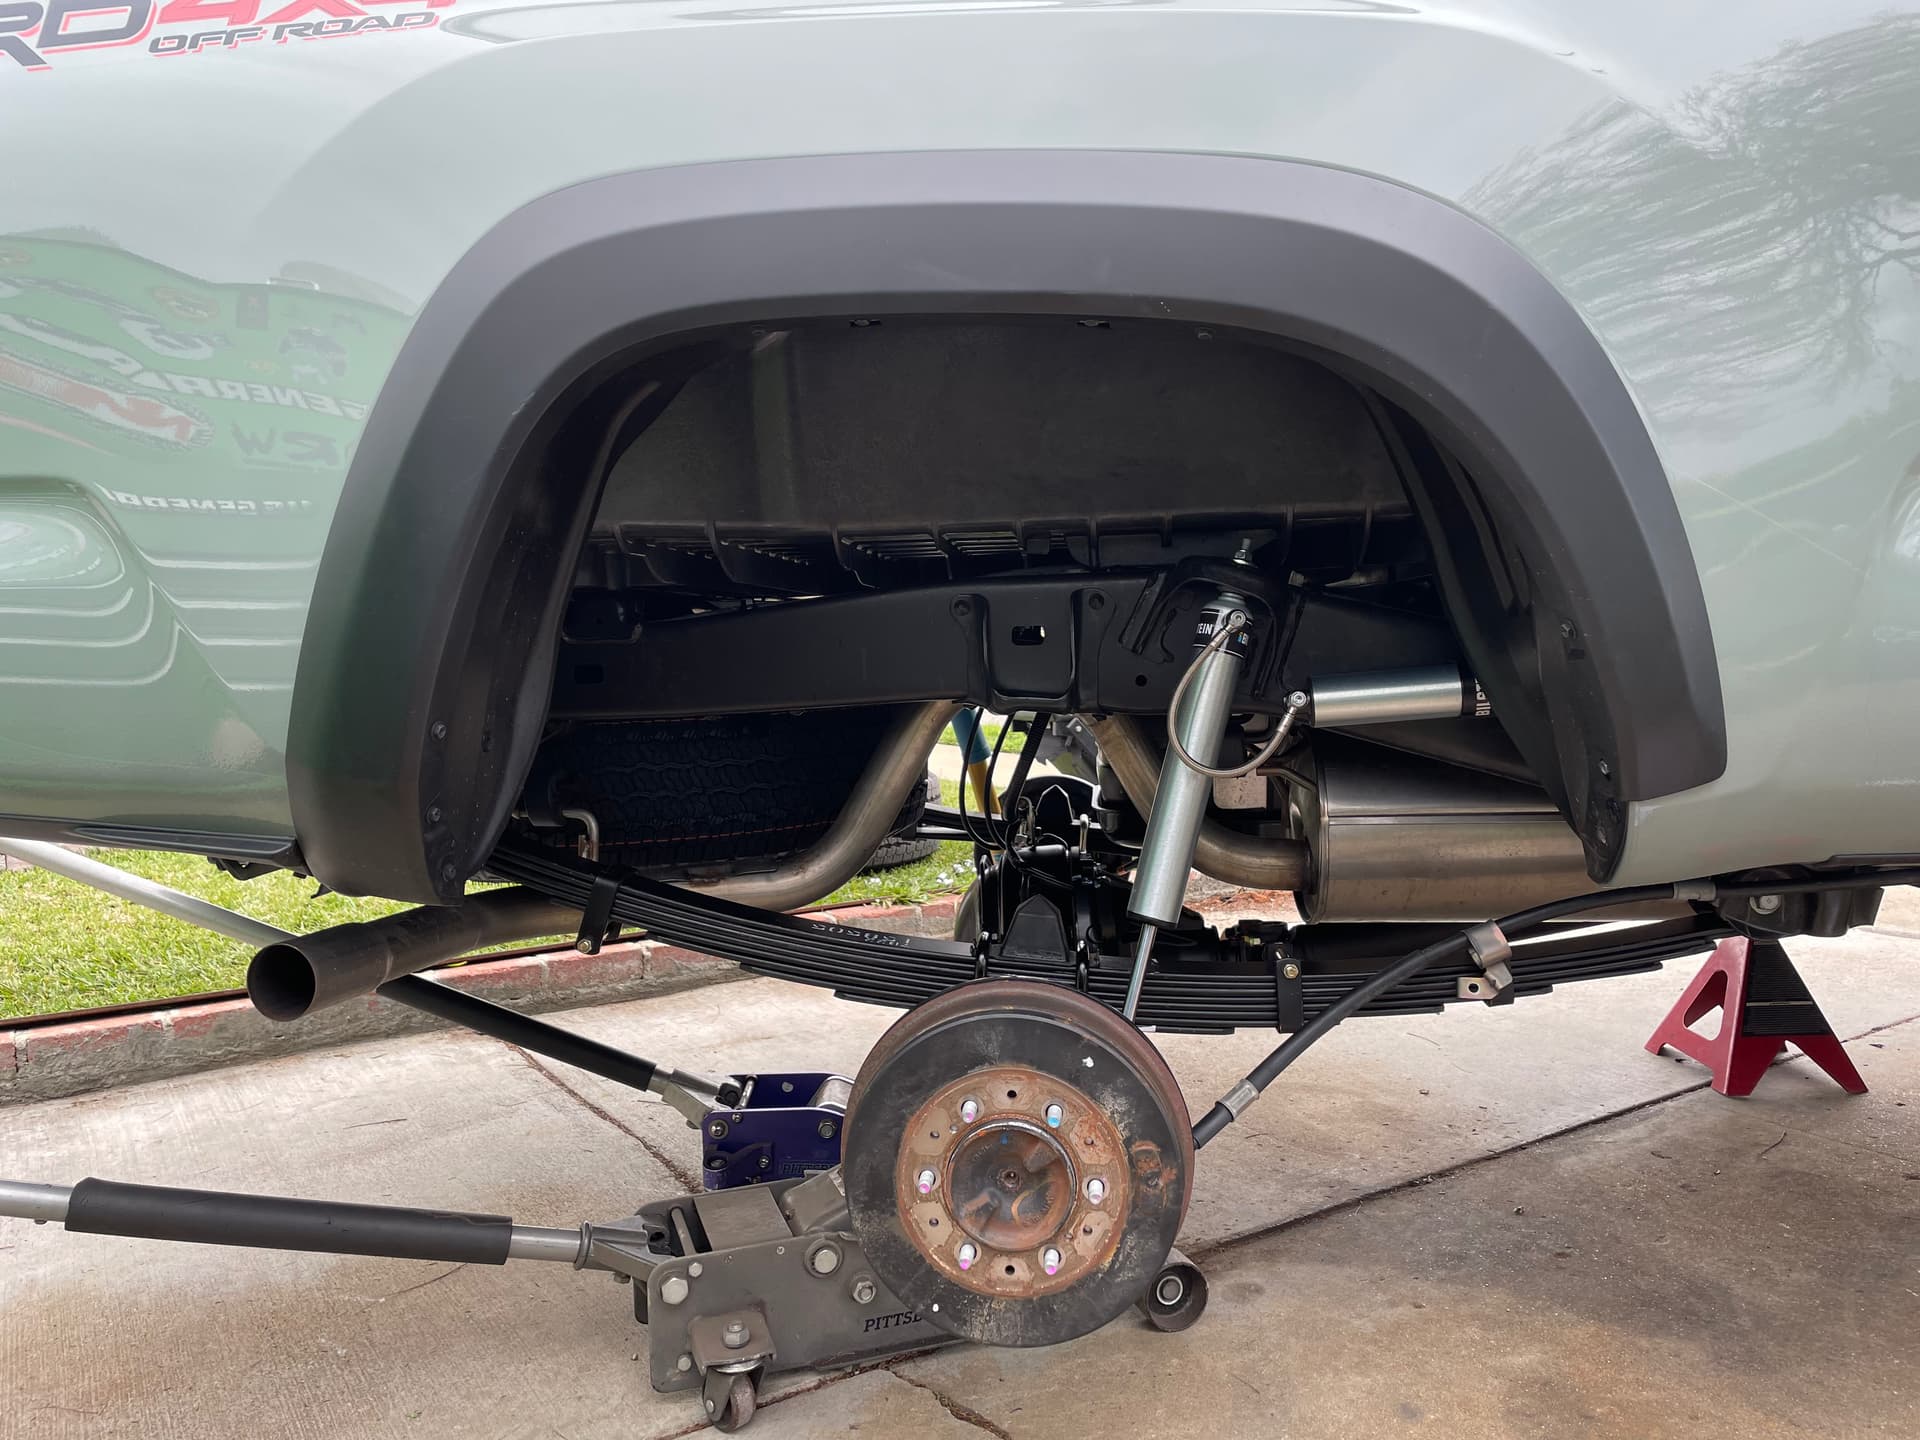
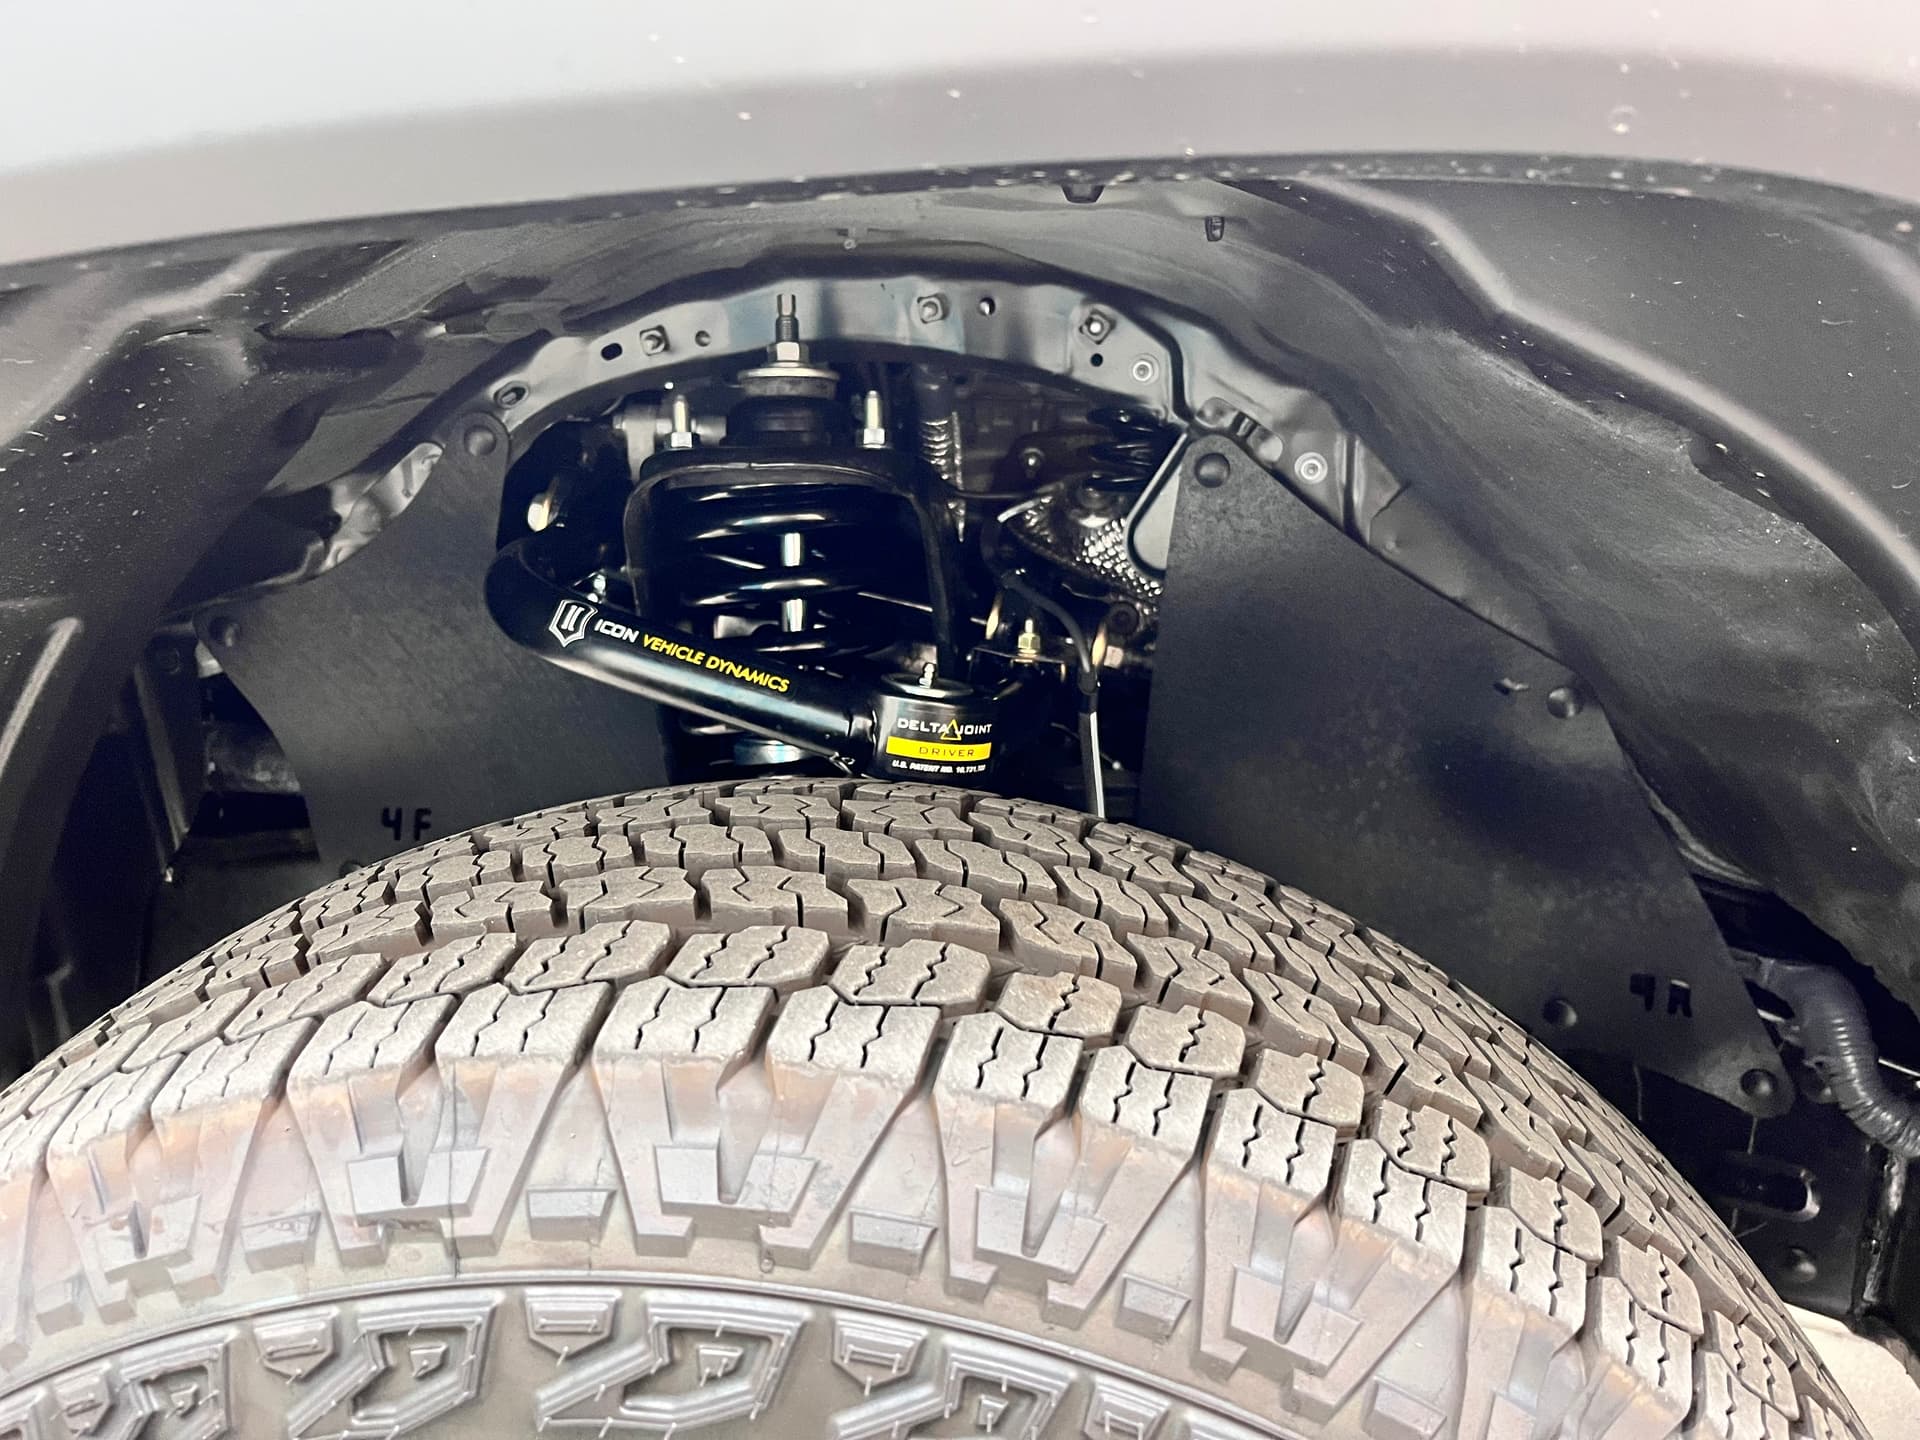
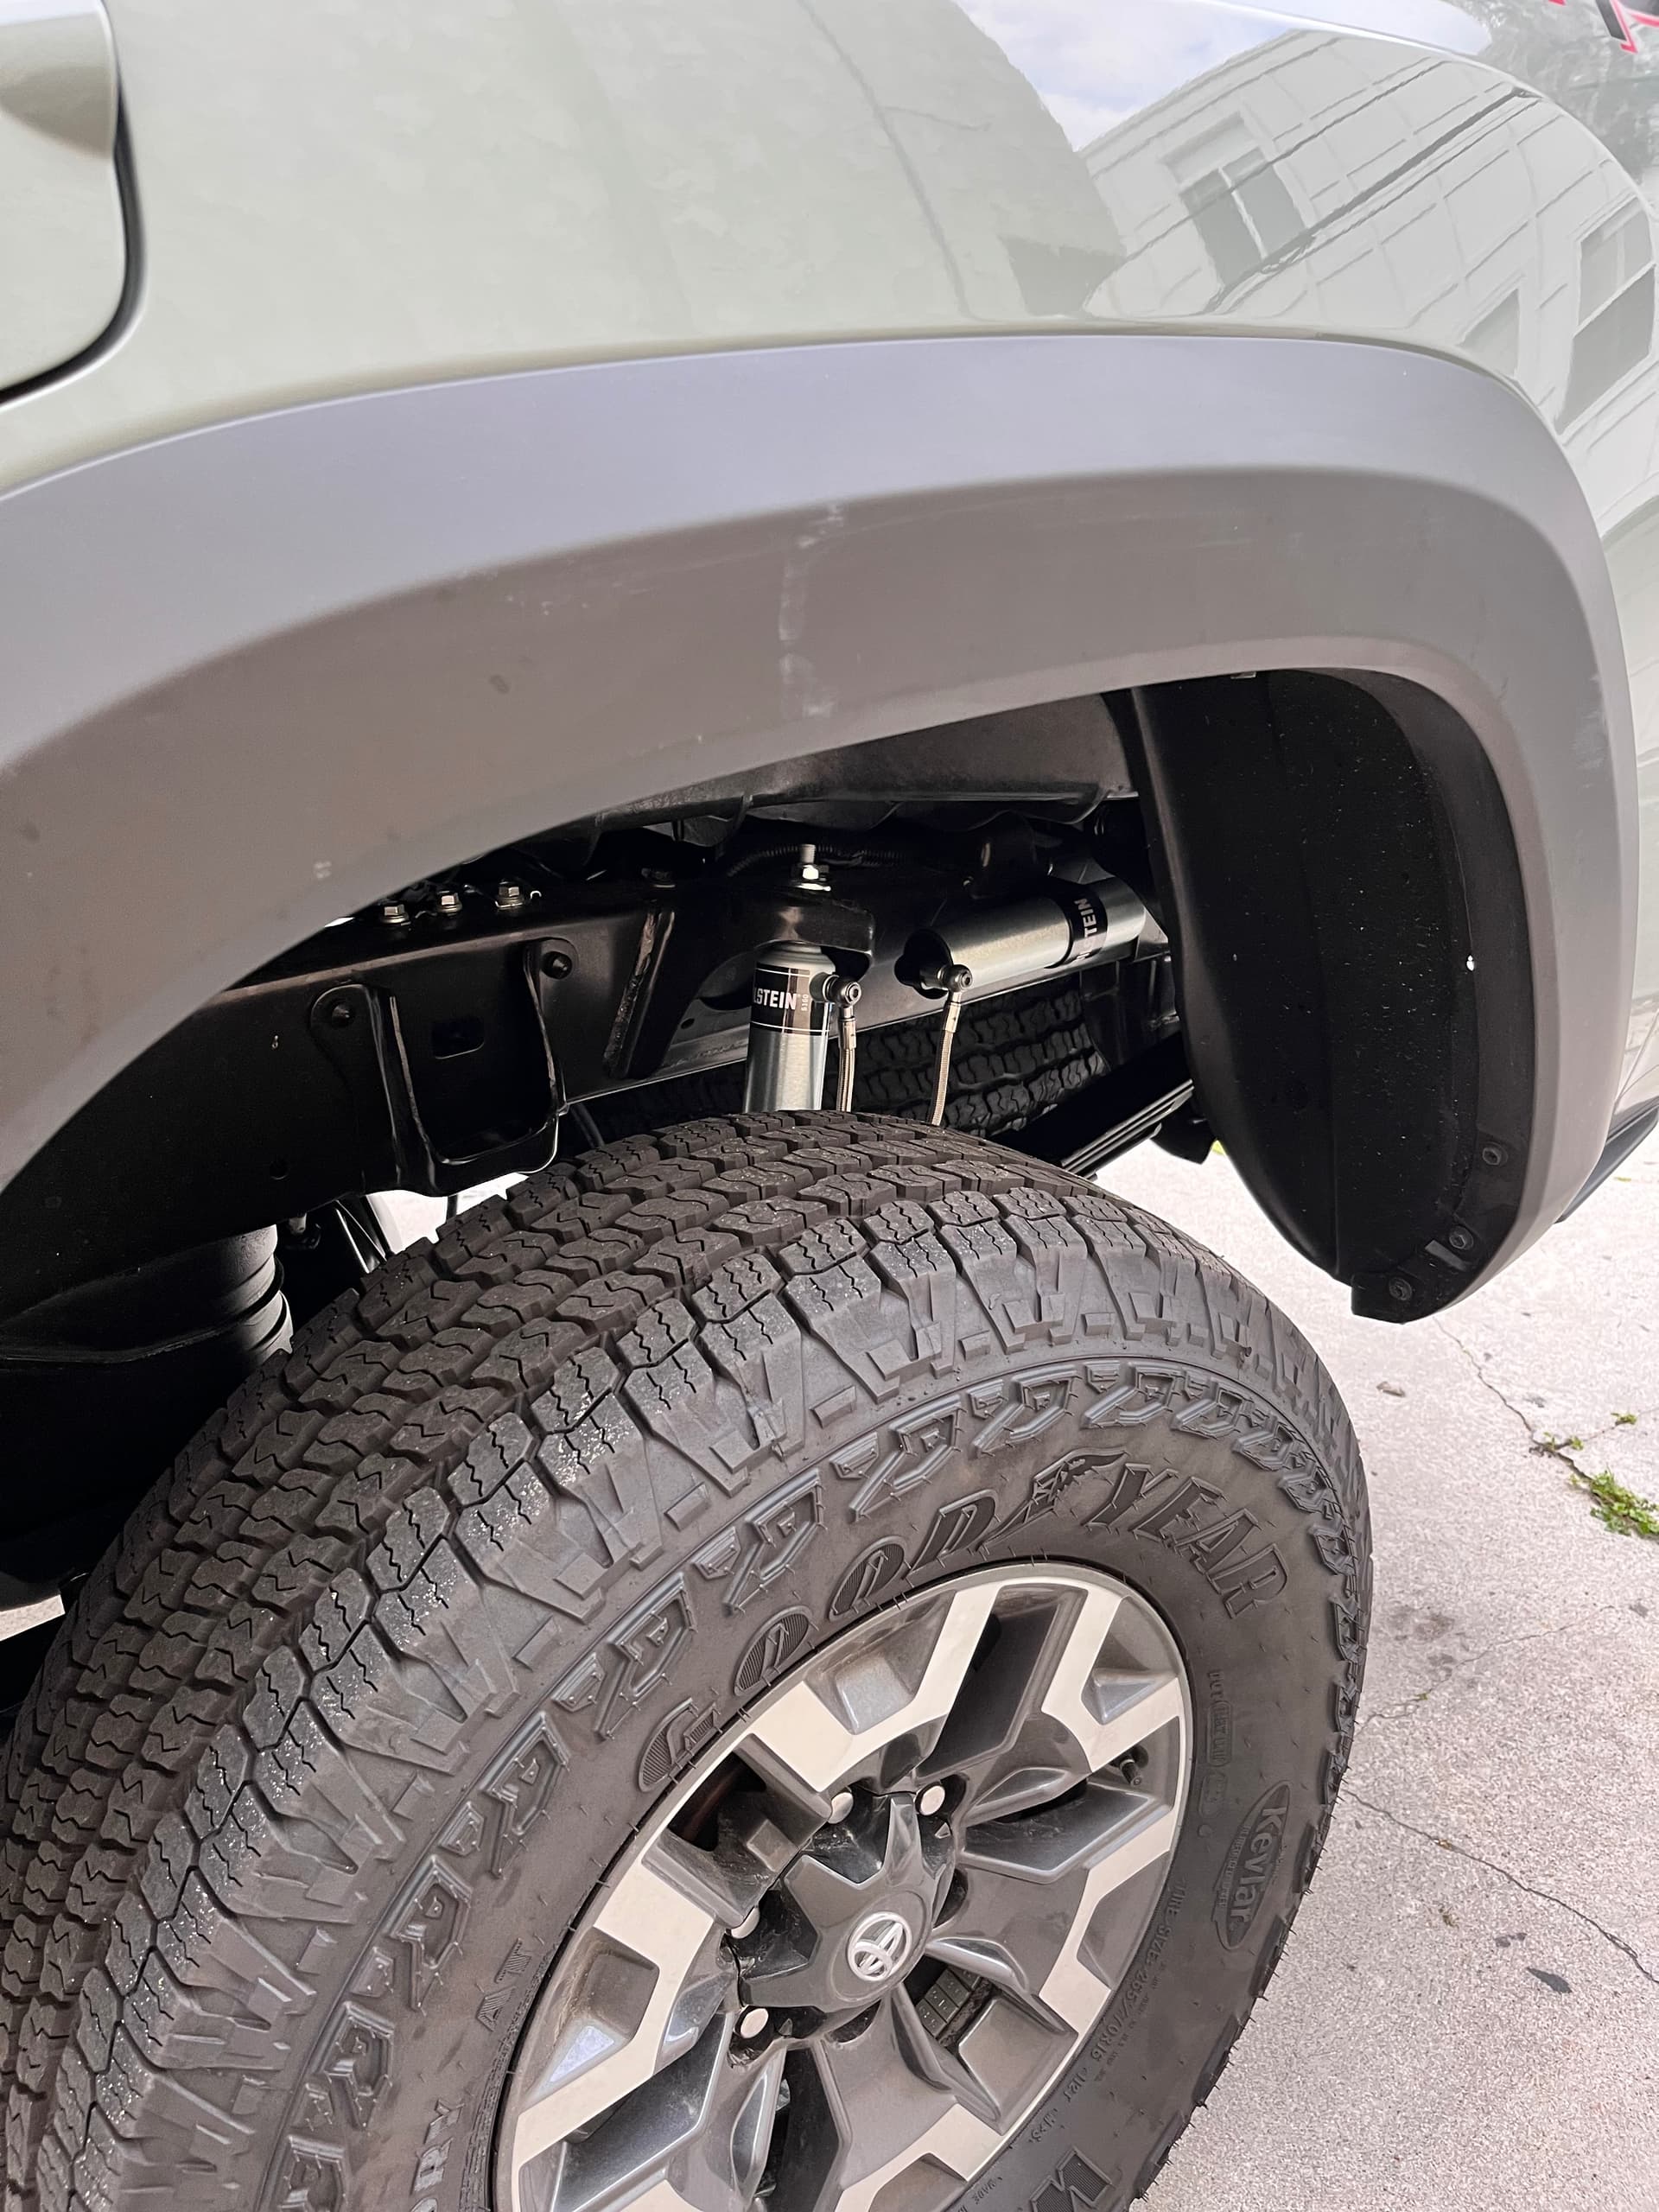
We did one trip with the camper on and started thinking it would be a safe upgrade to get a better suspension for it. With all our stuff in the bed it seemed like the back was starting to sag a bit and over time it likely would continue. Plus it’s easier to get a bit more money if you’re selling stock suspension with less than 1k miles on it. So pulled the trigger on a Bilstein 6112/5160 kit. Along with it I added an Icon Stage 3 leaf spring kit and Icon Delta joint UCAs. But this would have been too much for me to do since I haven’t really messed with cars that much prior to this, so I had this taken care of by a pro. If you’re in the SoCal/LA area check out IronRyno on Tacomaworld - he did a fantastic job with all of this for me.
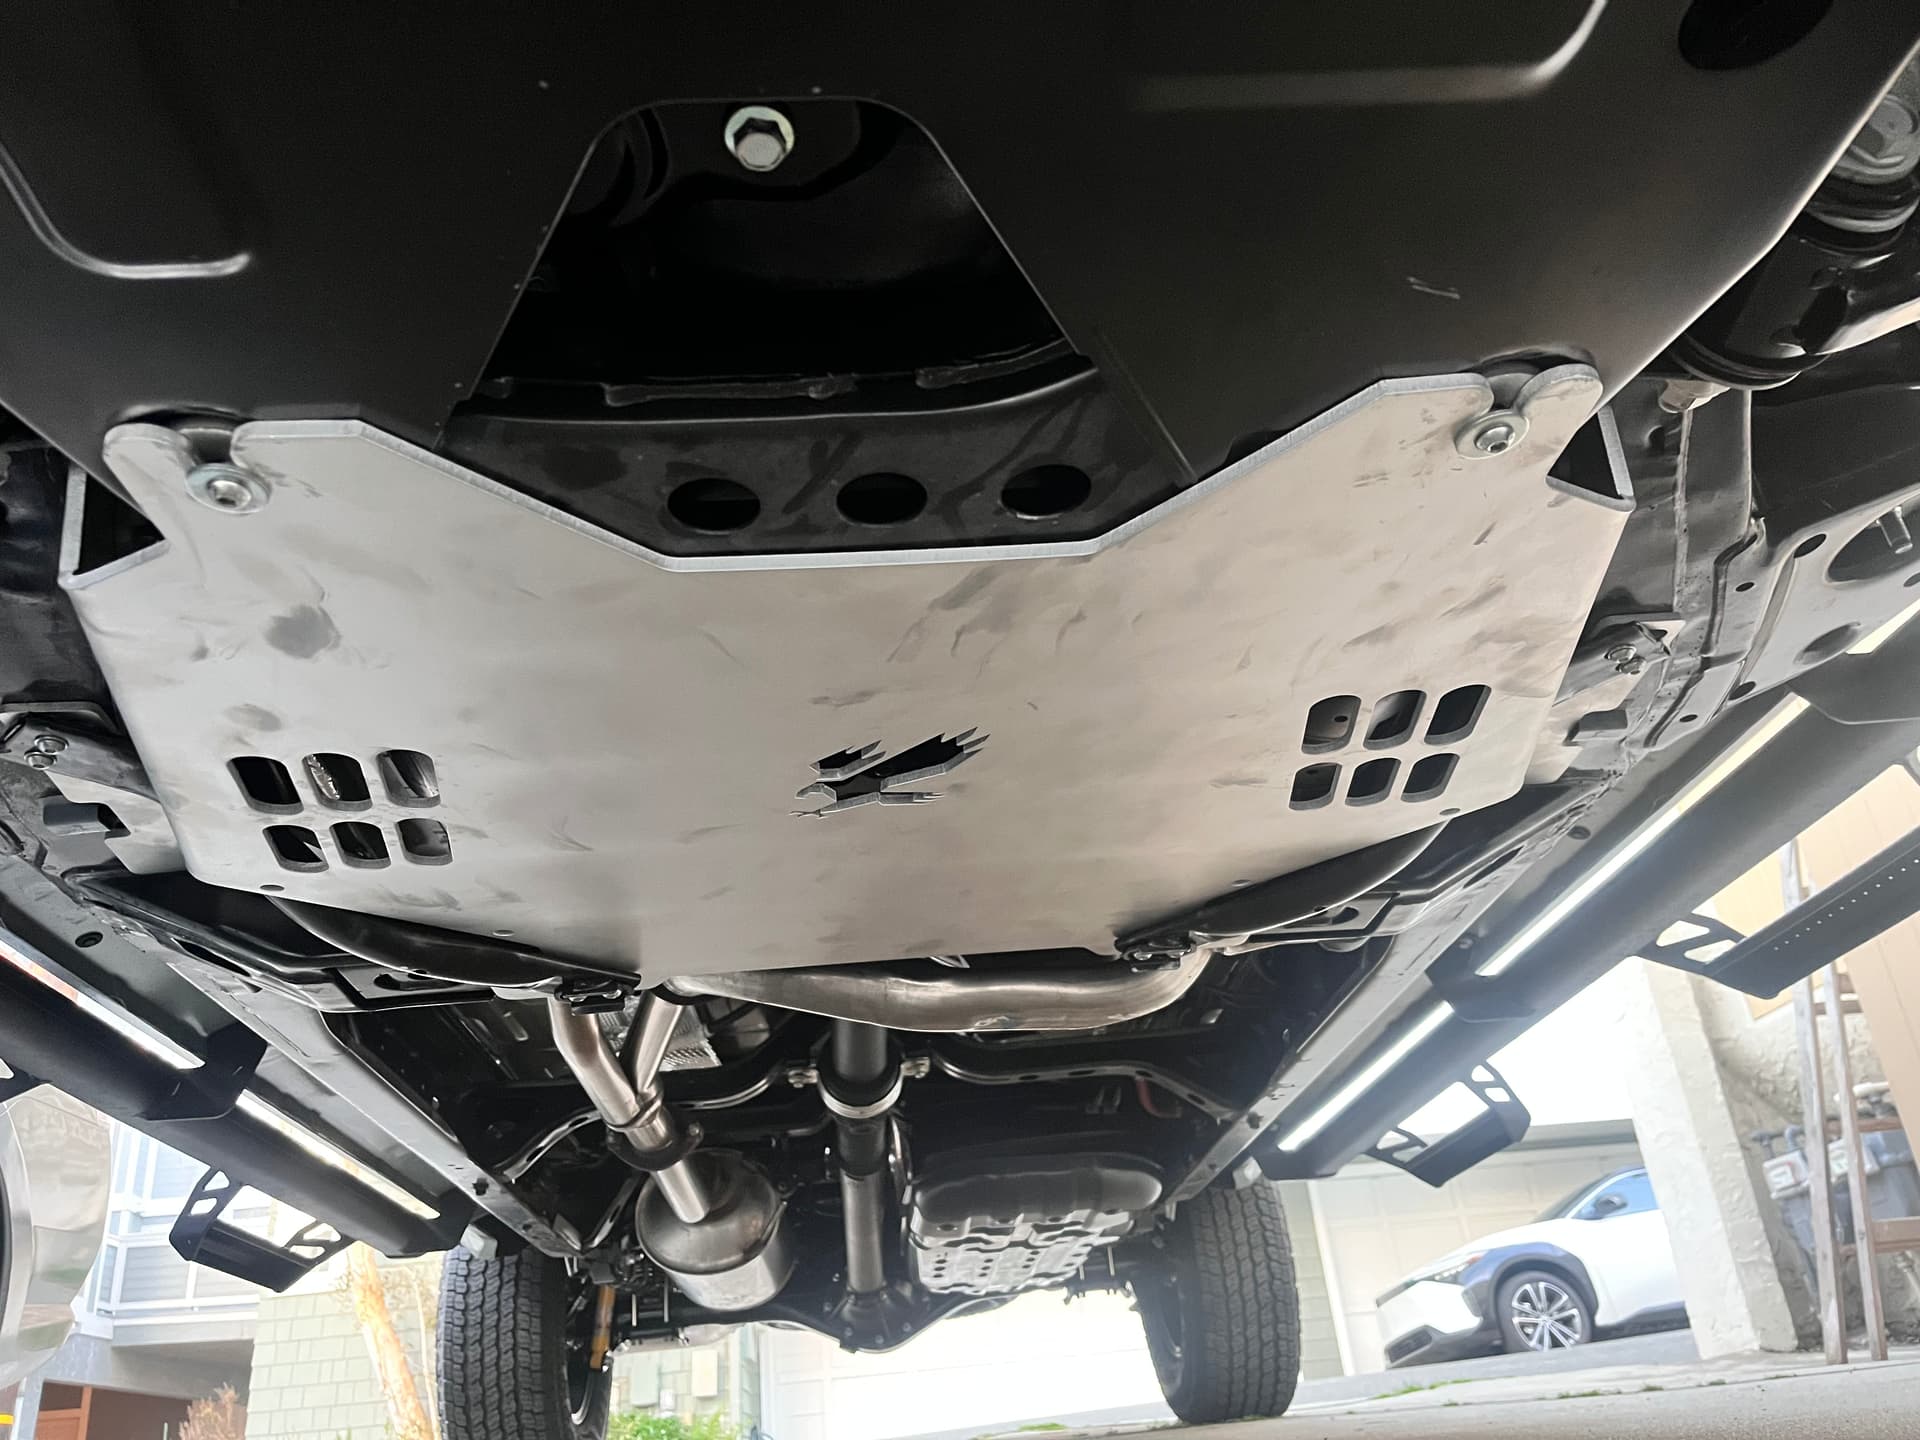
I then added on a Talon’s Garage cat cage because thefts were picking up in my area. This was an easy one for me, compared to what the suspension upgrade would have been.
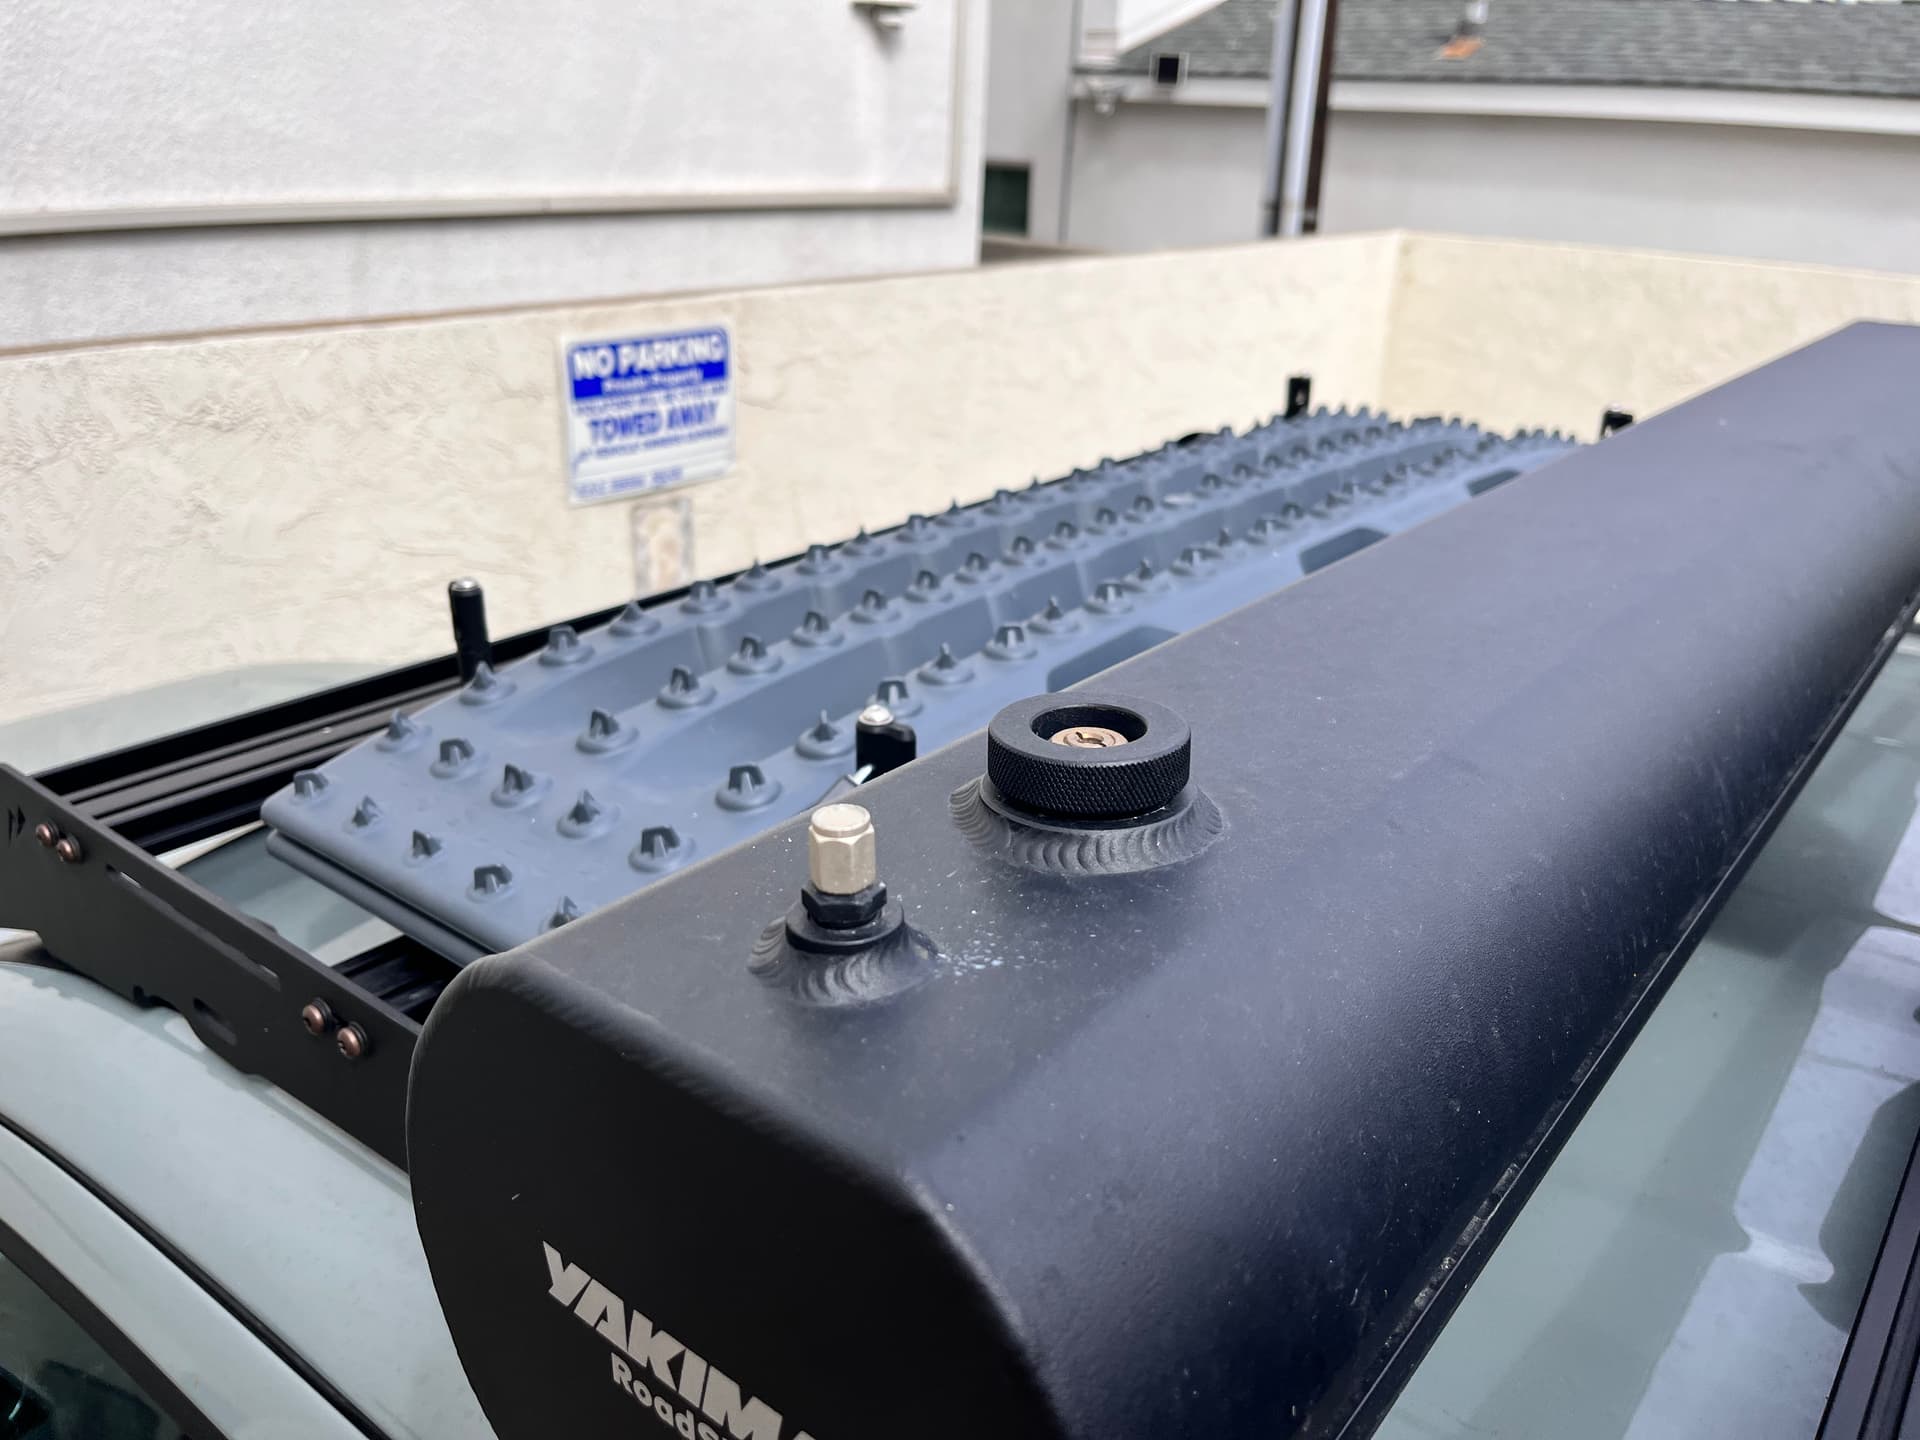
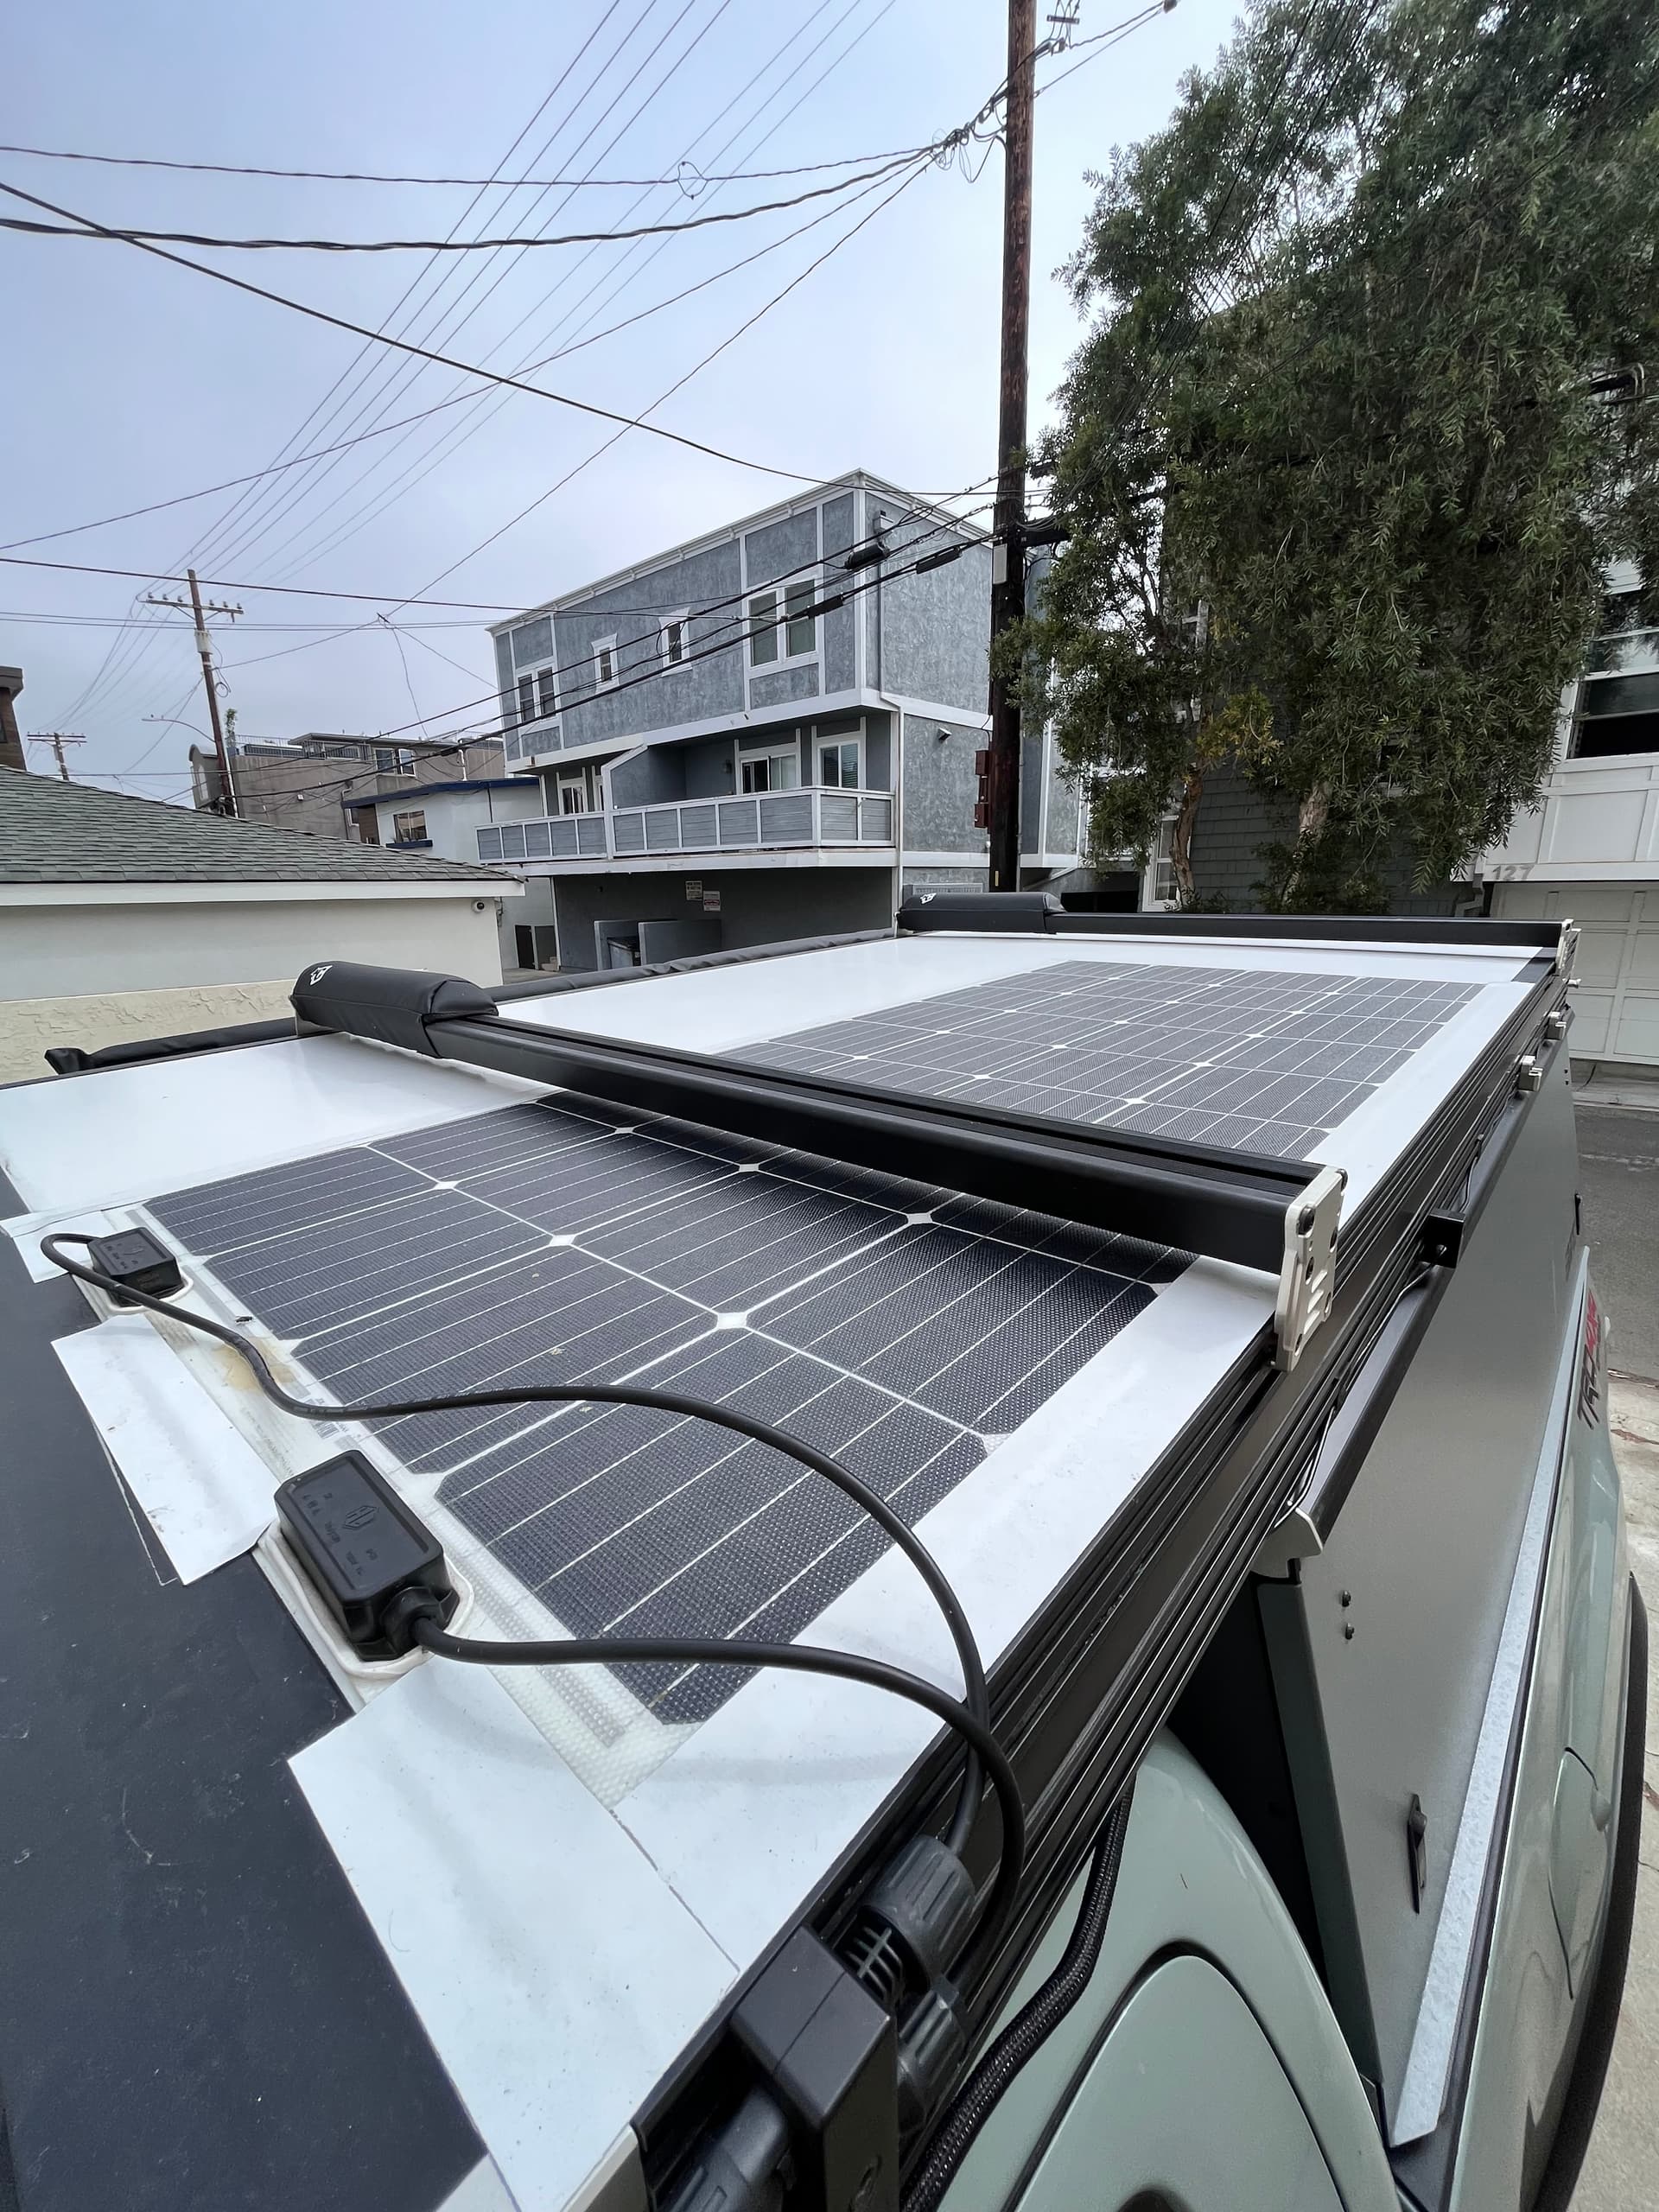
I also added on a Martin OR roof rack. I originally only added MaxTrax and a 7 gallon Yakima Road Shower to it. The Roadshower was the biggest pain to get on there horizontally. The mounts that come with it are only for it to be installed vertically but when I go surfing I want to be able to shower on both sides of the car, depending on how I parked. Easiest solution for me was just drilling some holes into the crossbar and putting spacers below it so that it wouldn’t hit up against the rest of the roof rack.
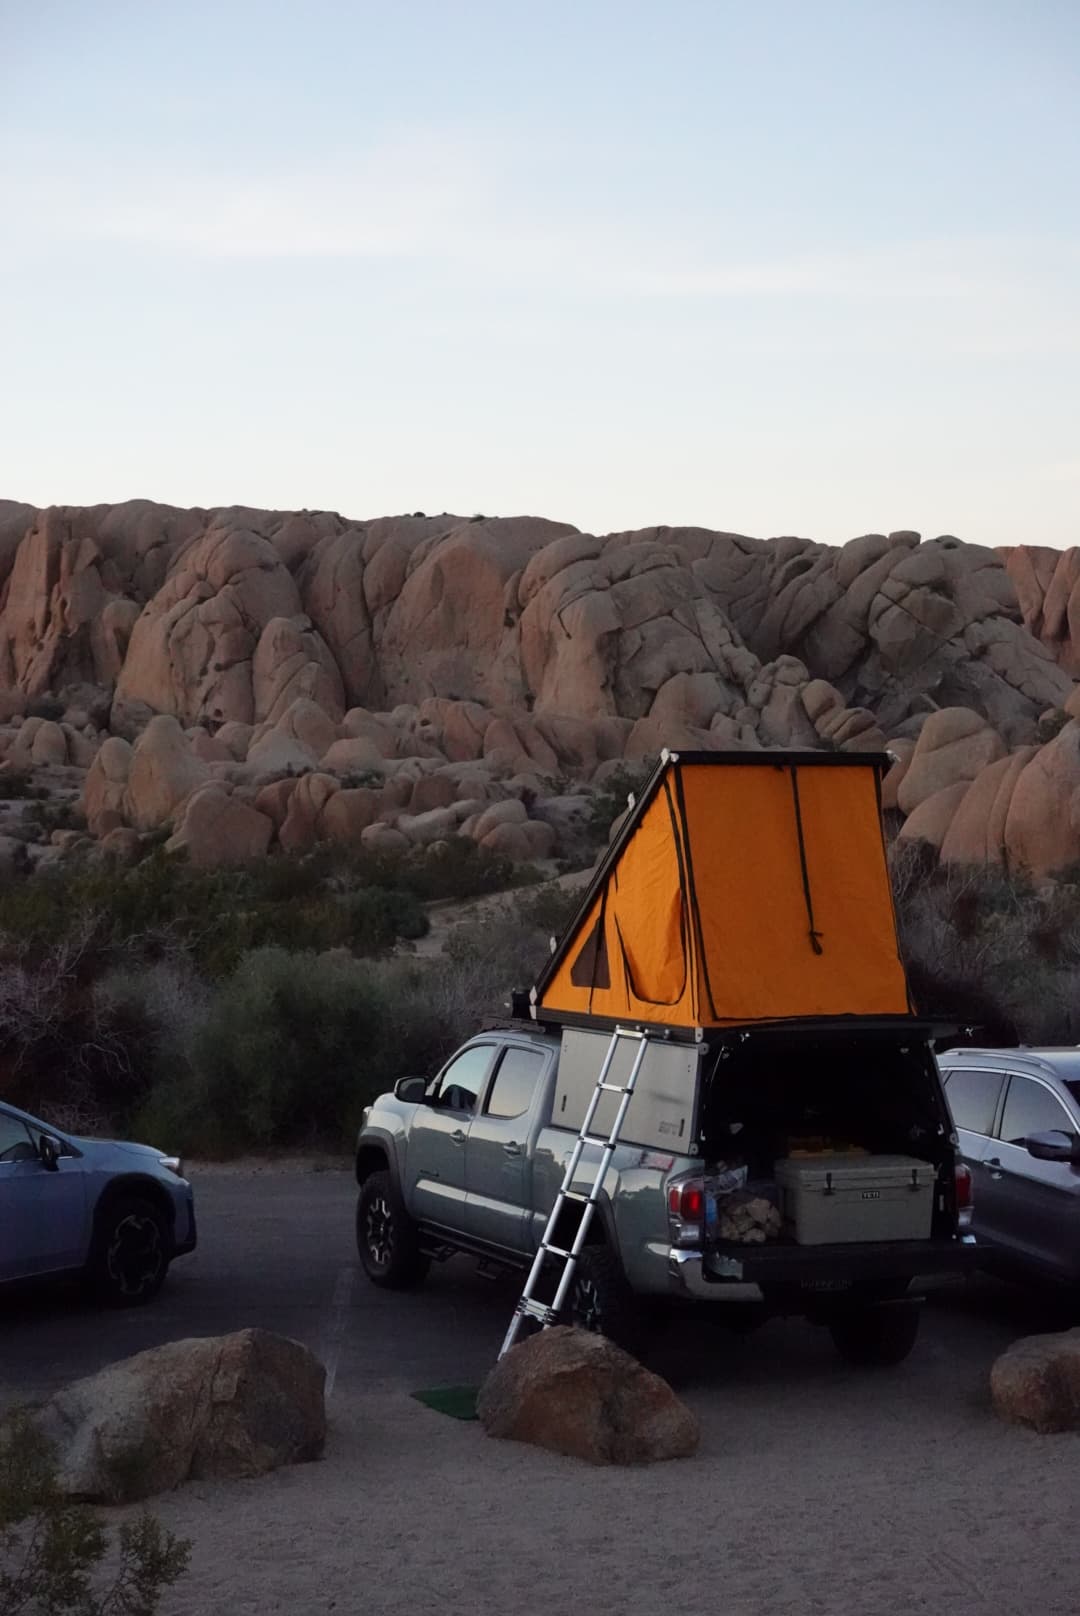
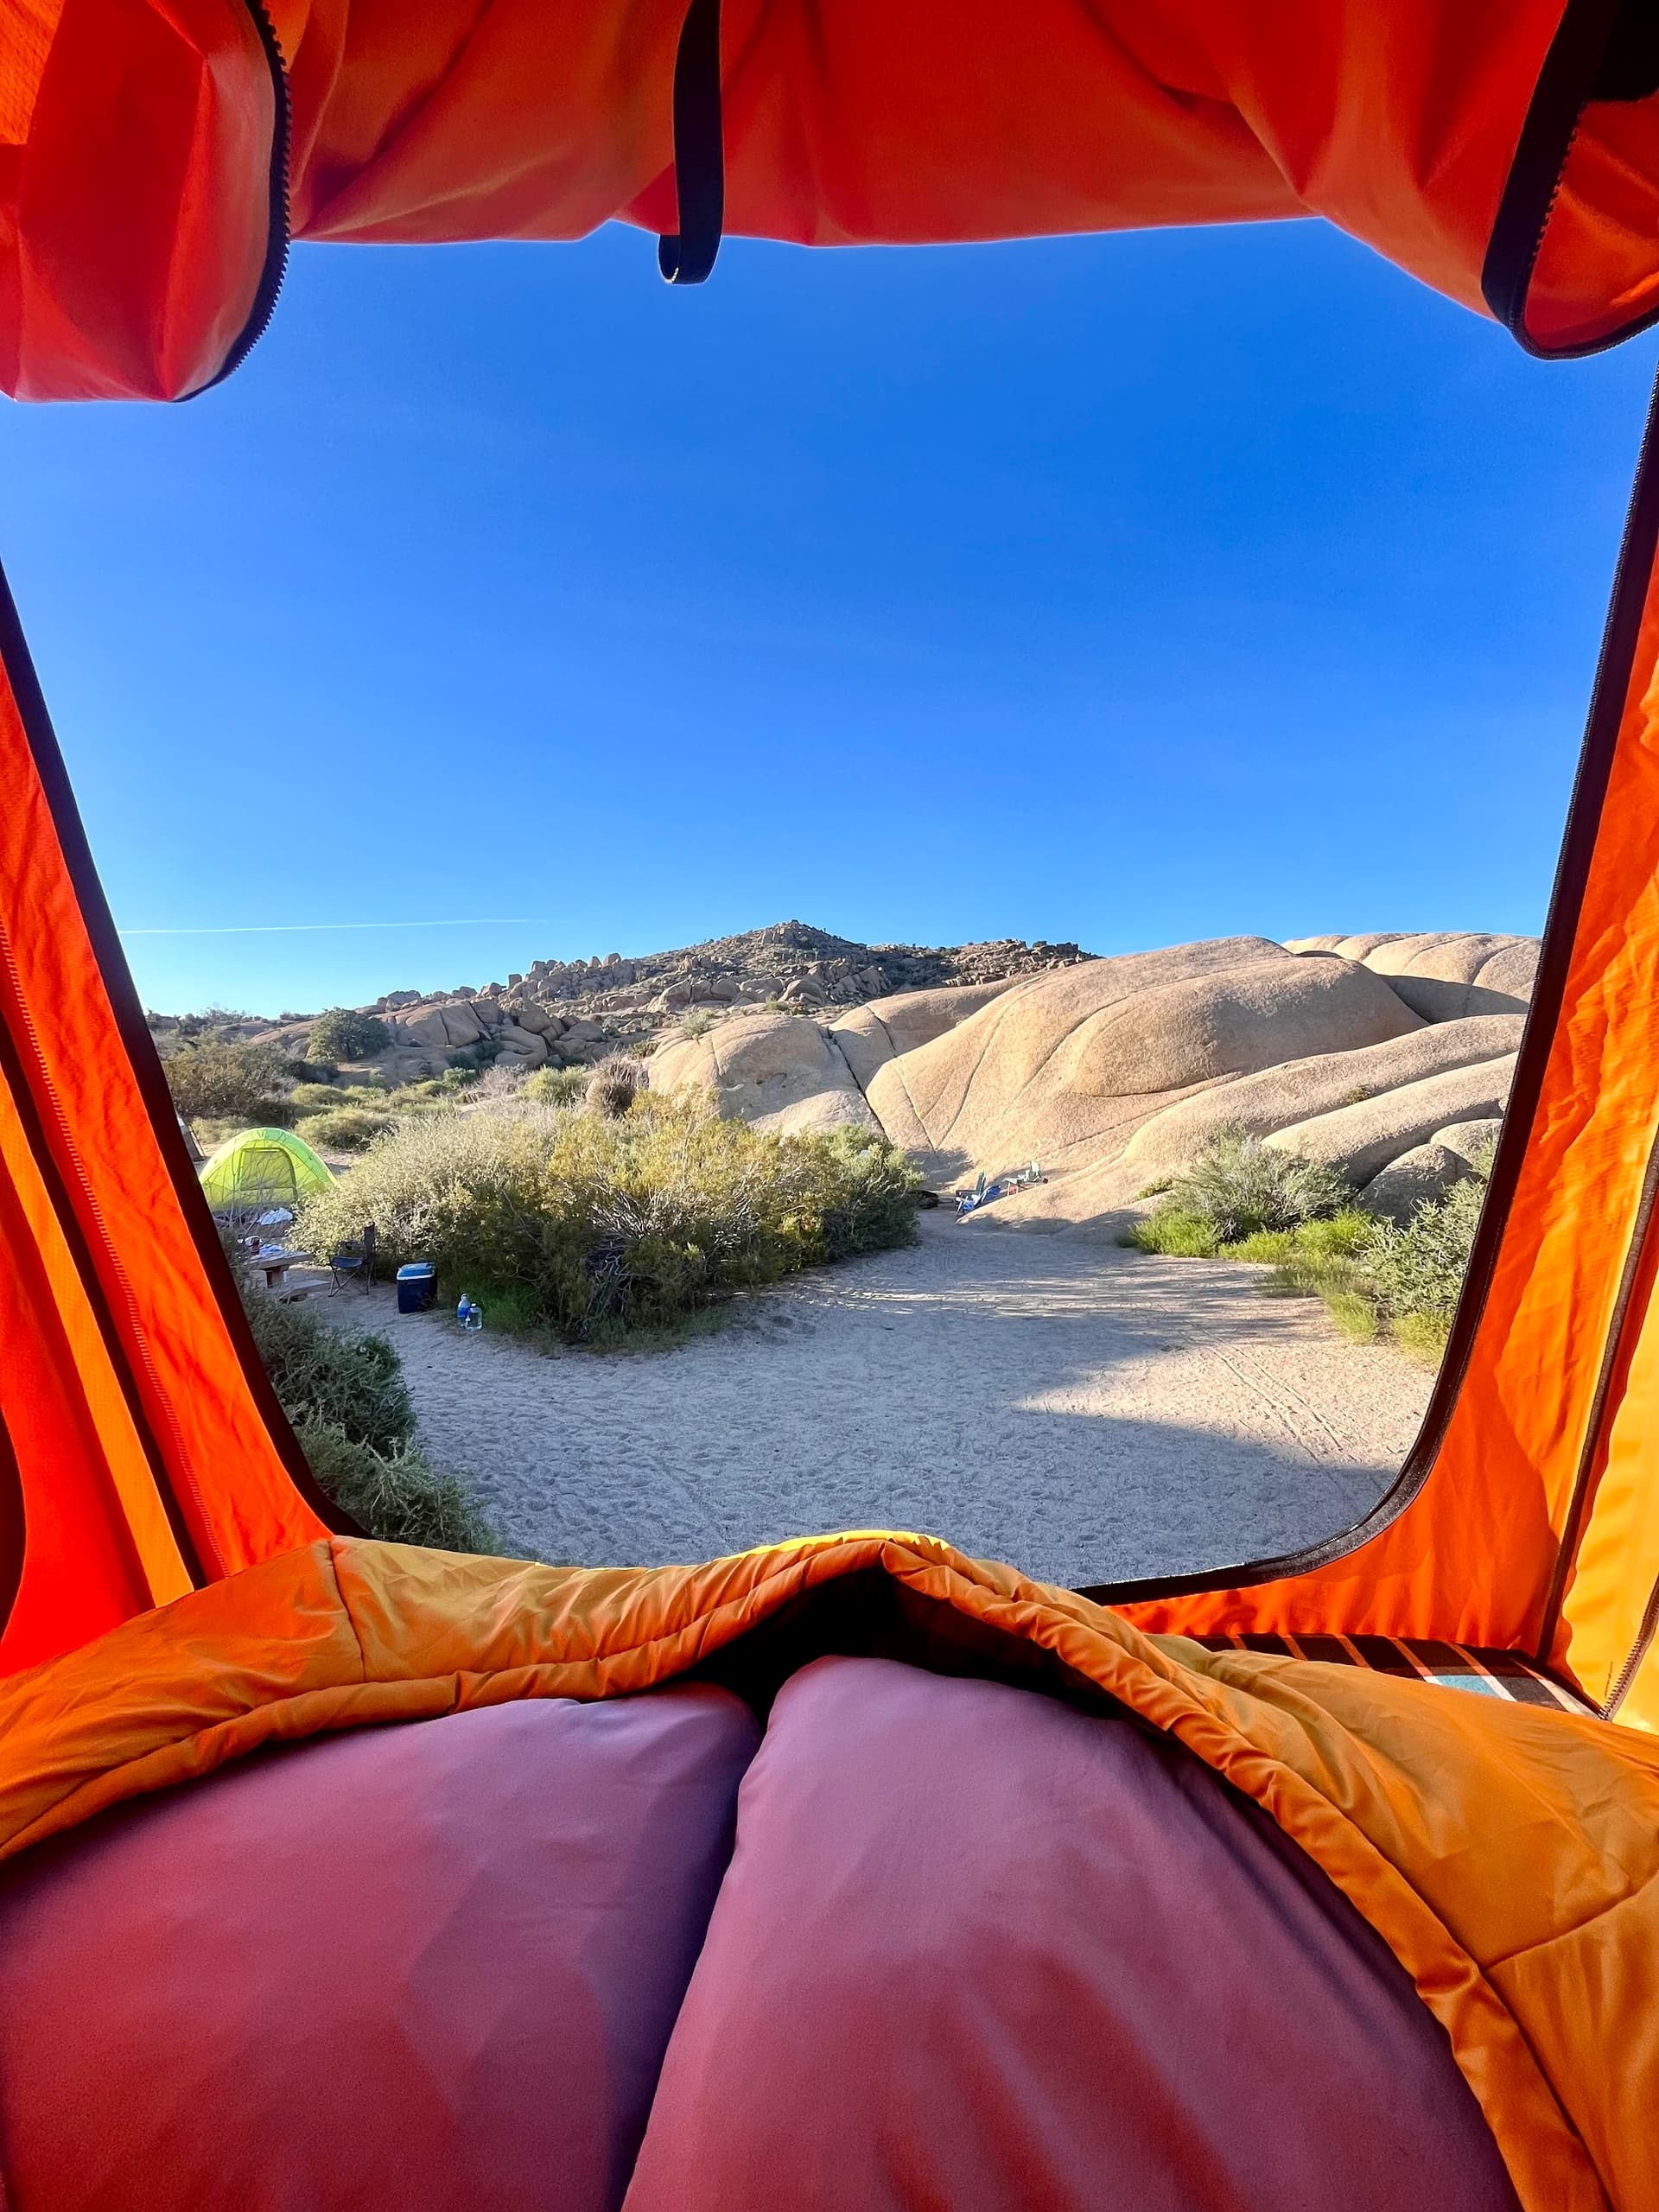
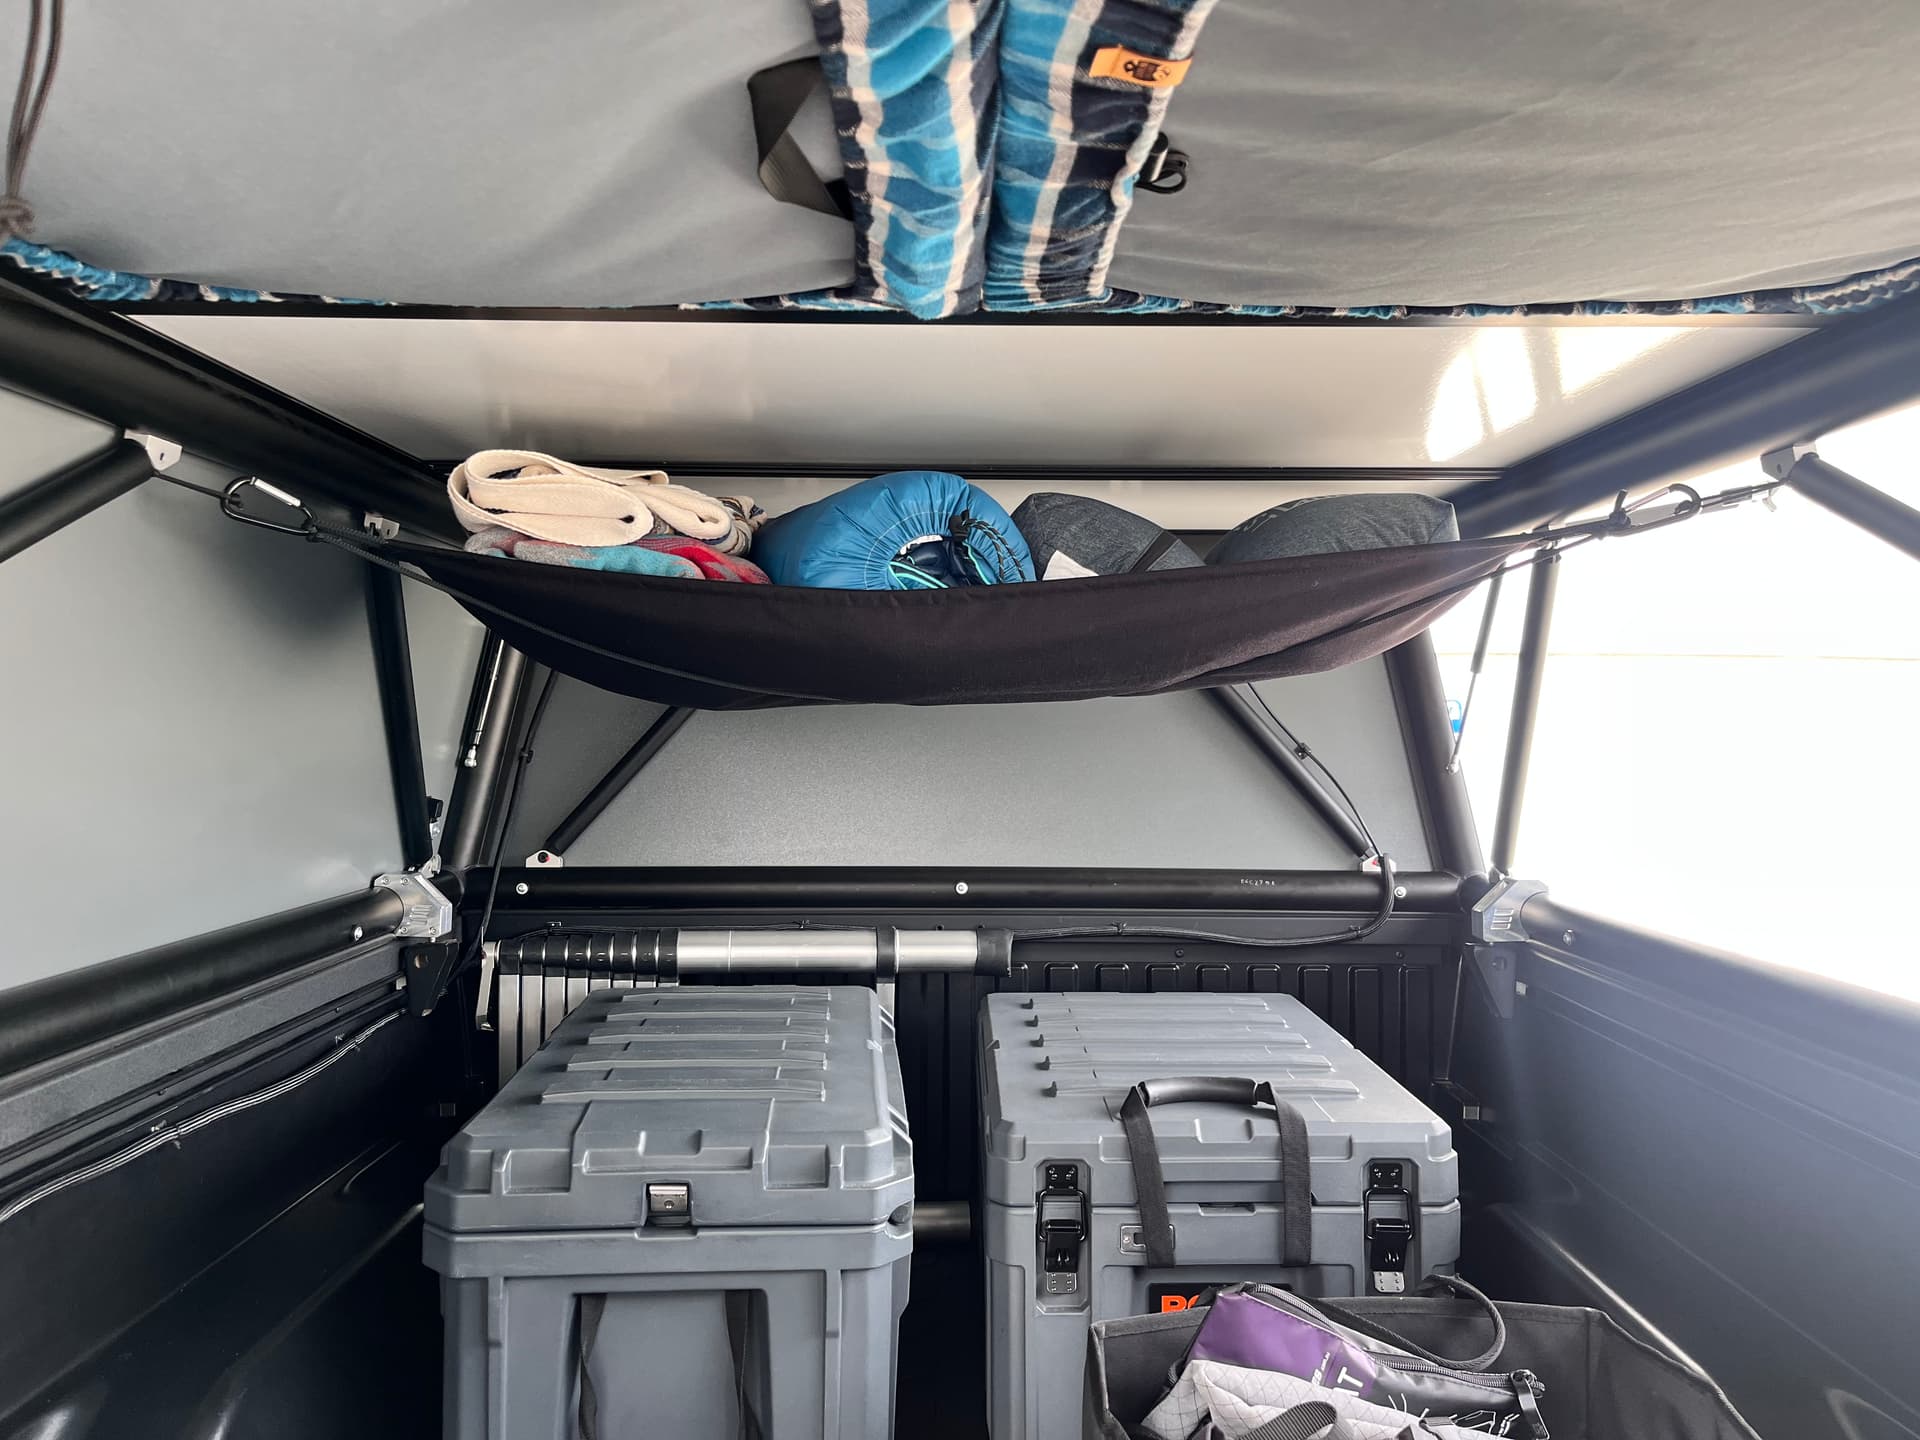
With all that done my focus turned to the camper itself. I added Overland Softgoods sheets and foam, Hest pillows and a Lumbering Bear pull down strap (which I really wish GFC had baked into the tent). We took it out on some new adventures to Joshua Tree and various SoCal beaches. I saw a fair few of you with GFCs driving around in that time.
Made some more smaller additions to it like VRNCLR top shelf and the bedding catch to just be able to leave stuff in the bed when I’m not planning to go camping.
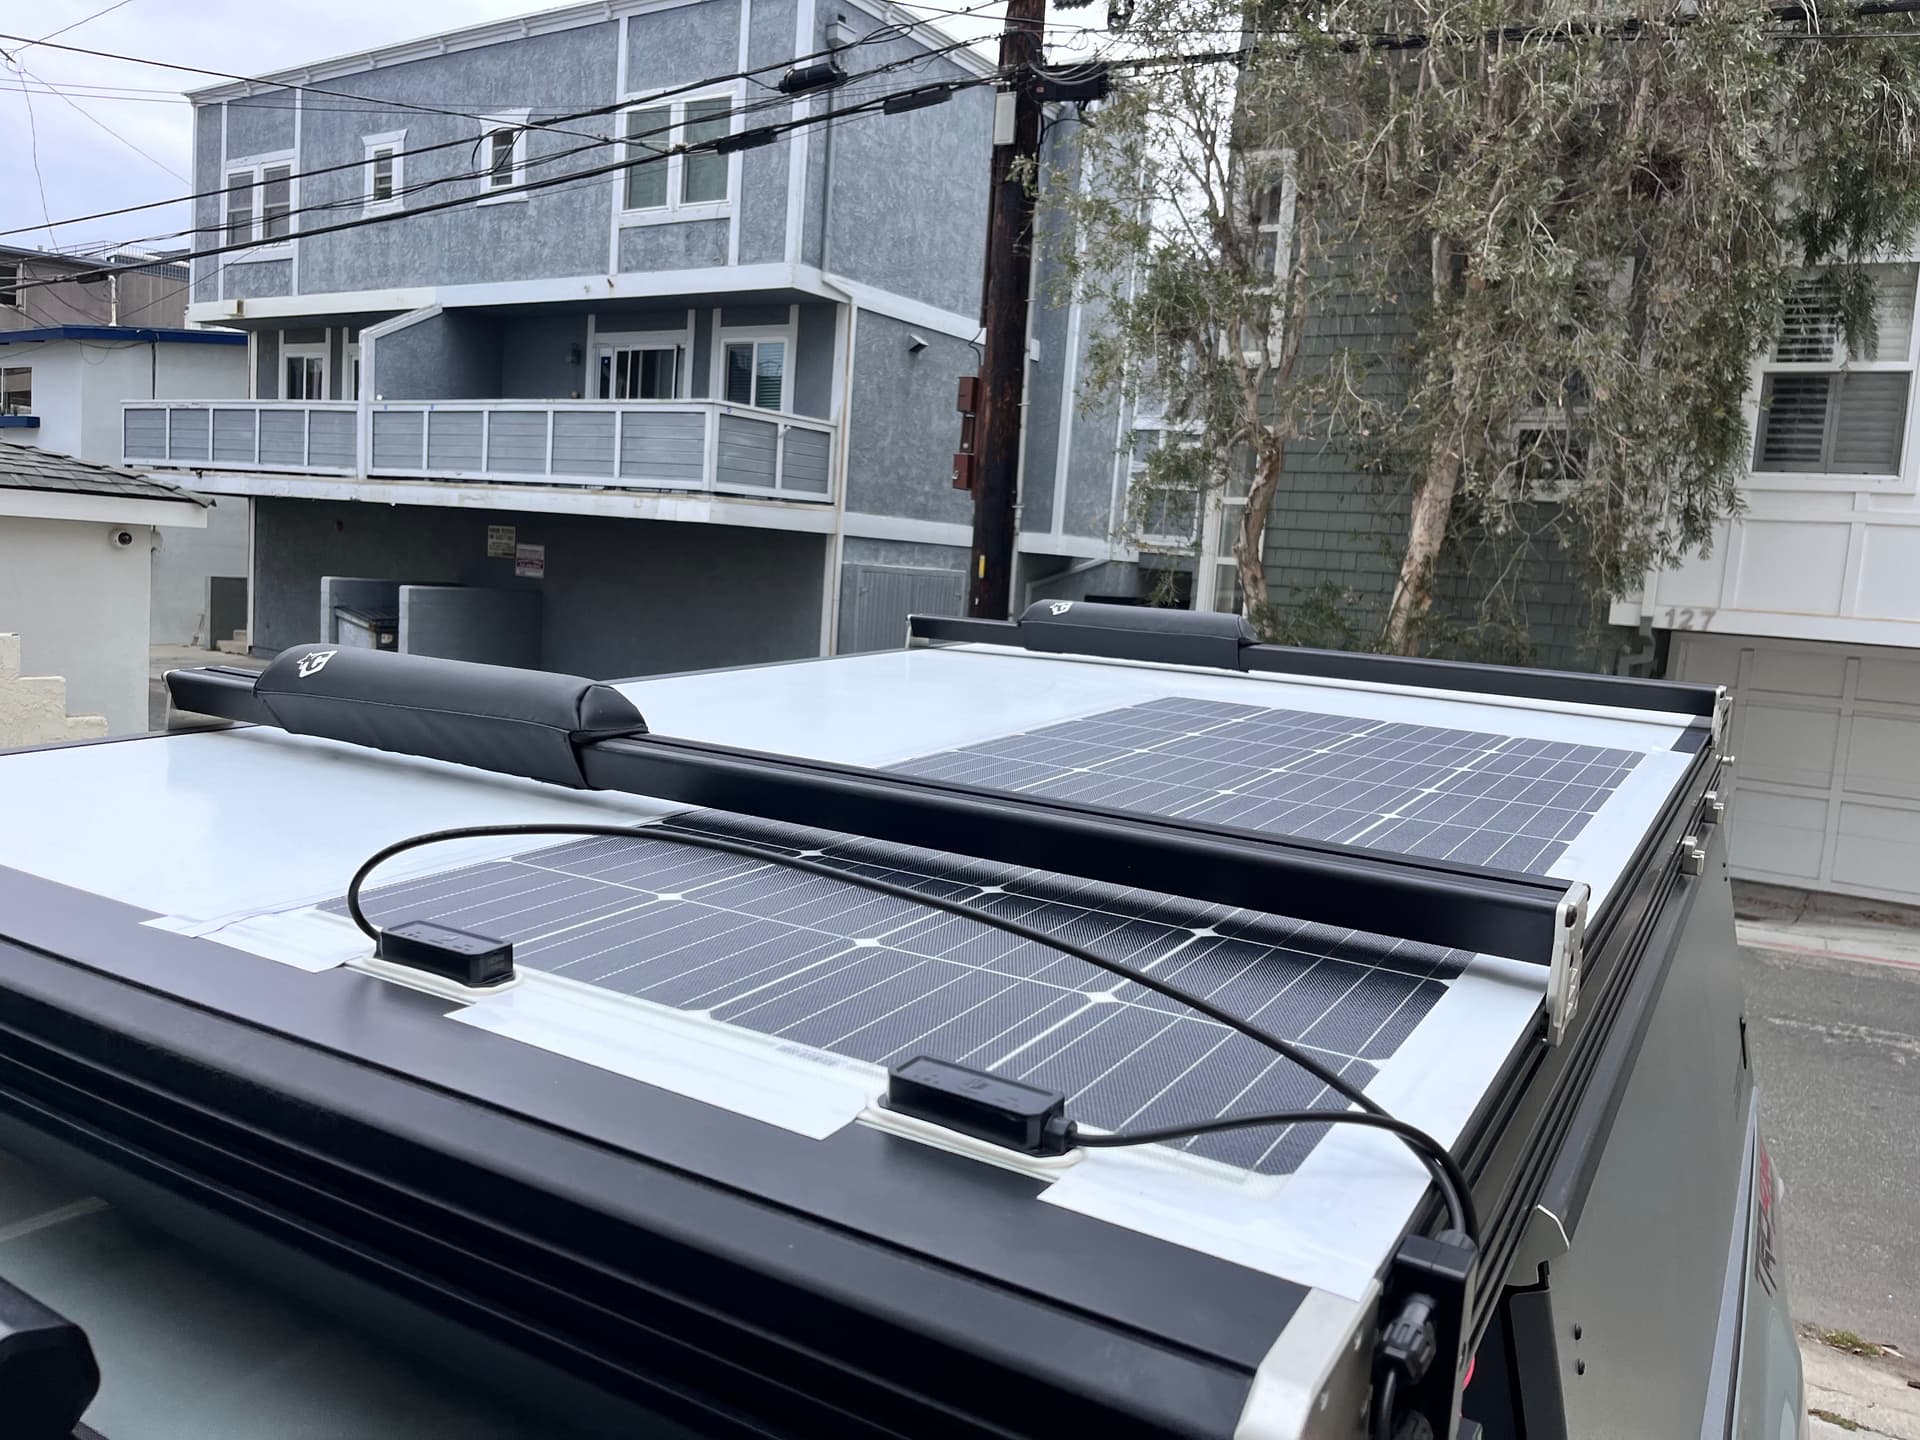
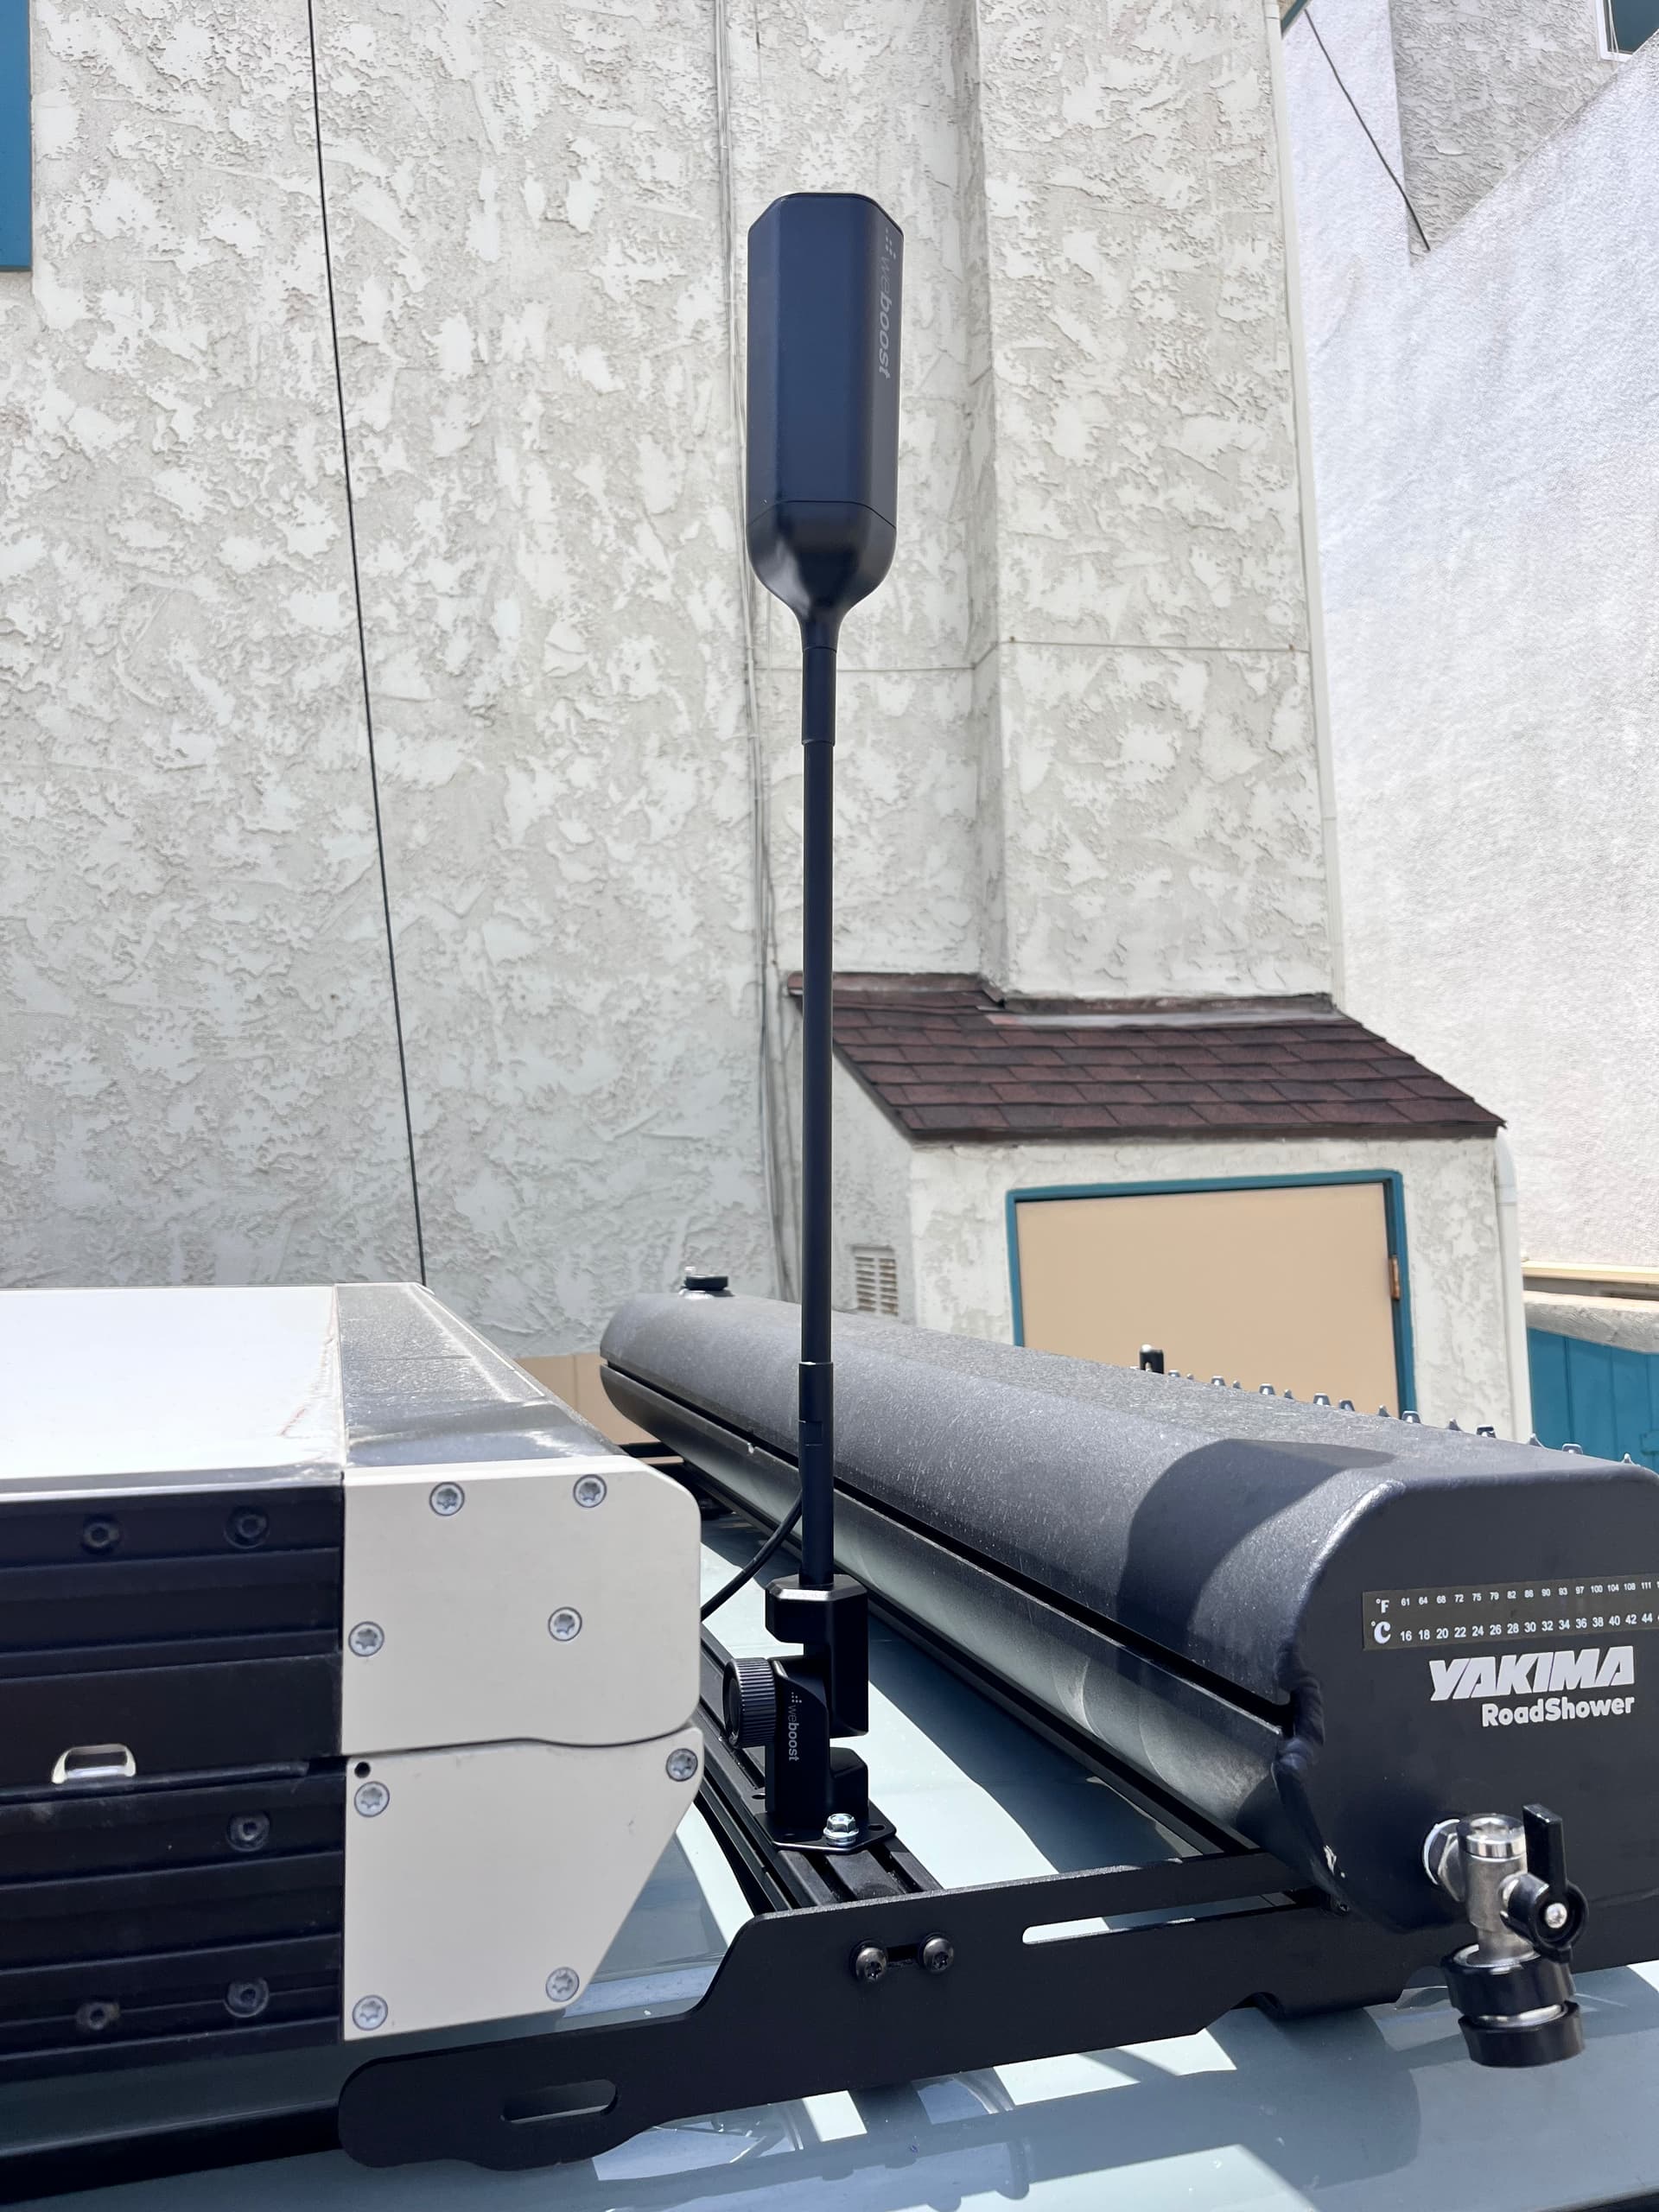
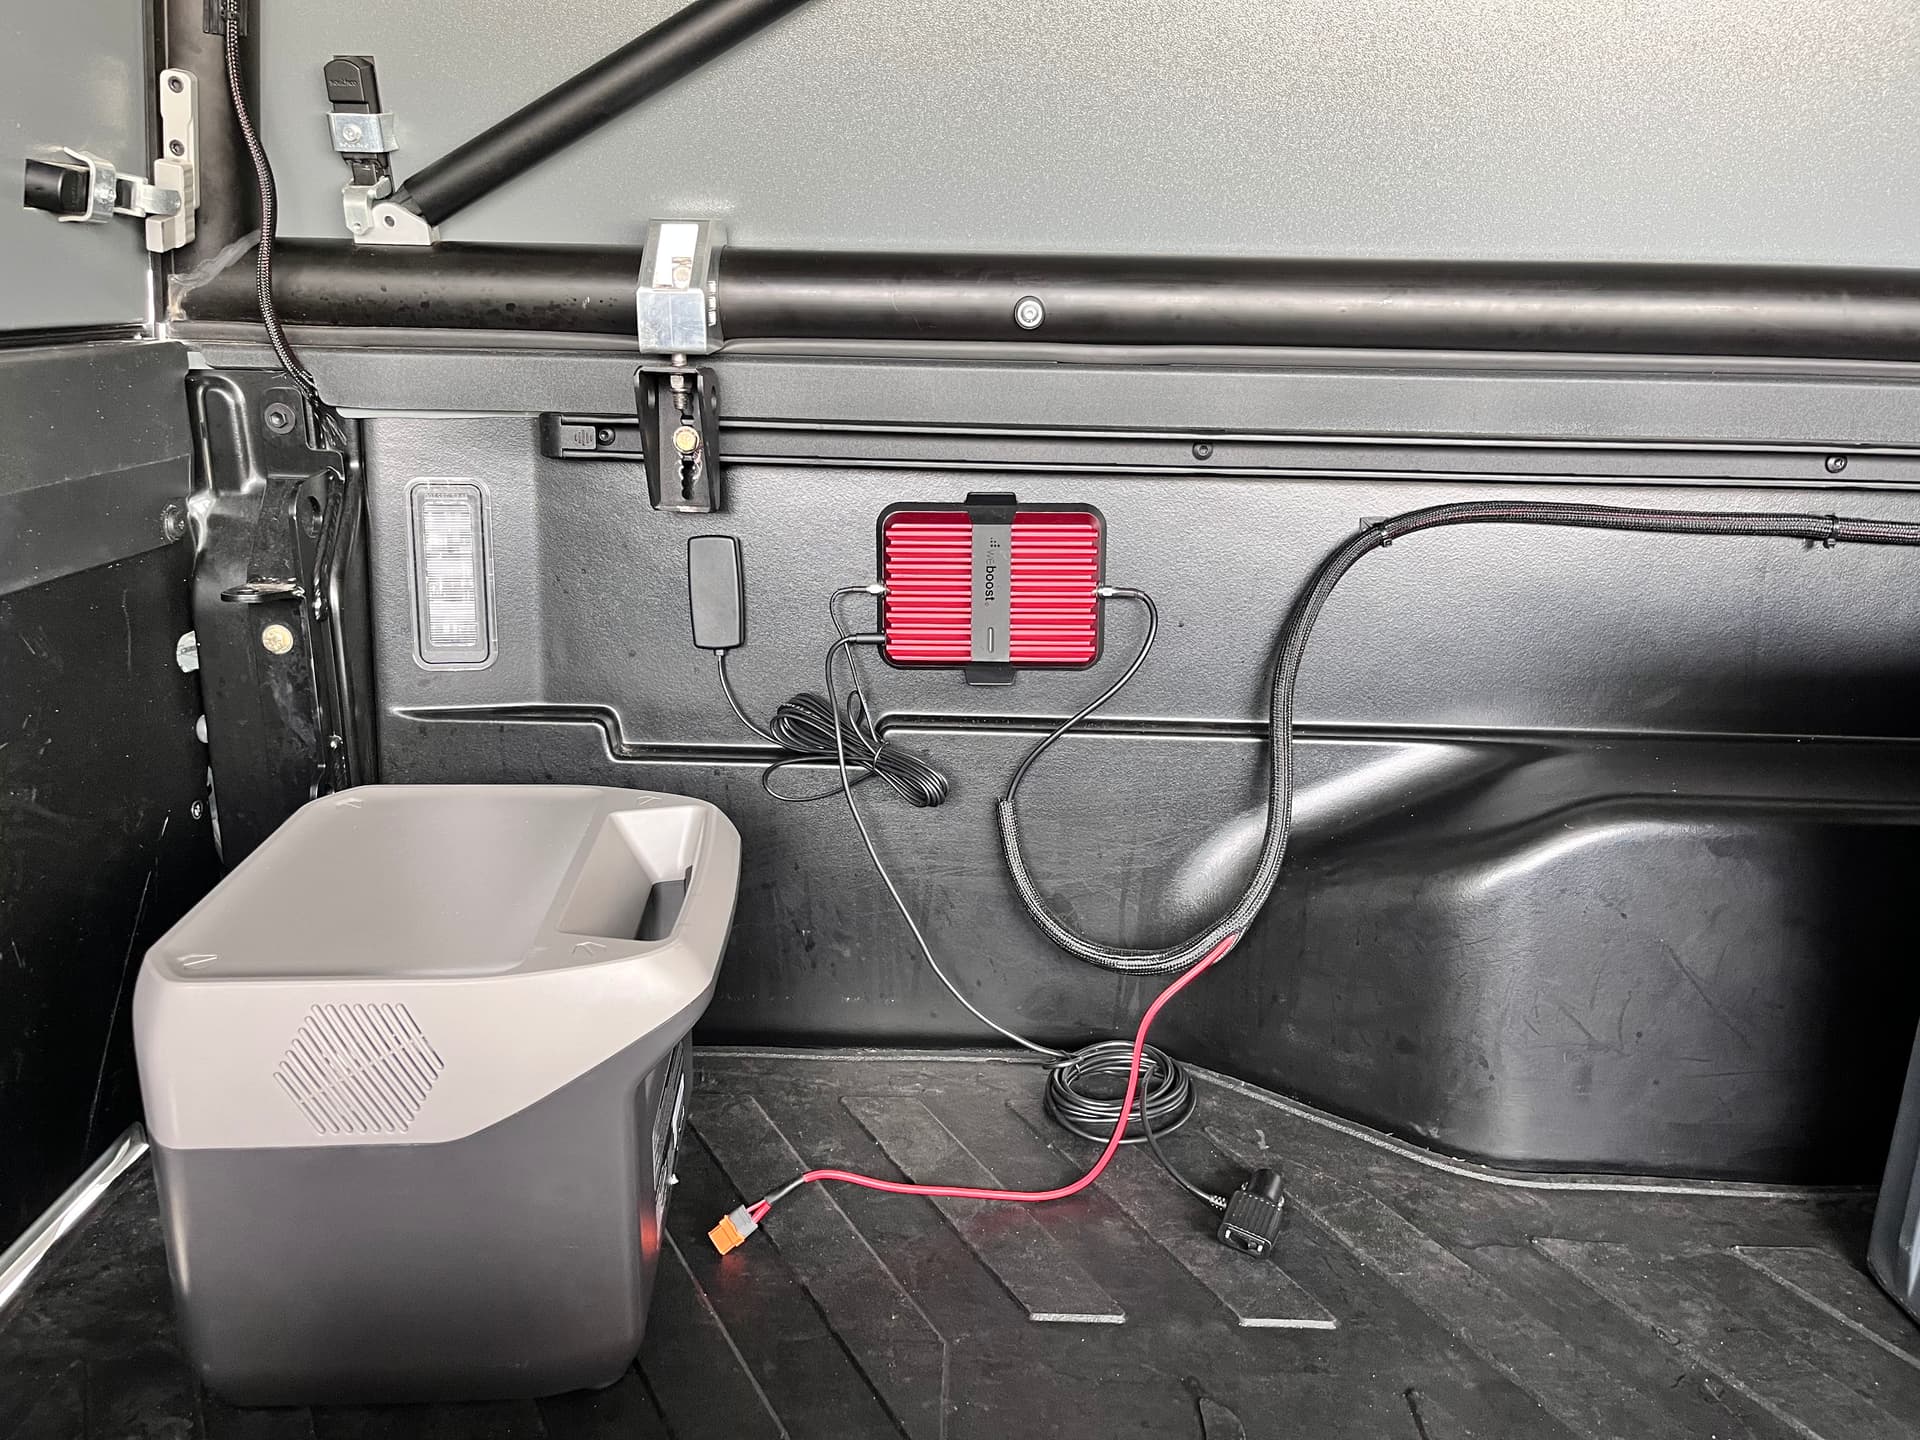
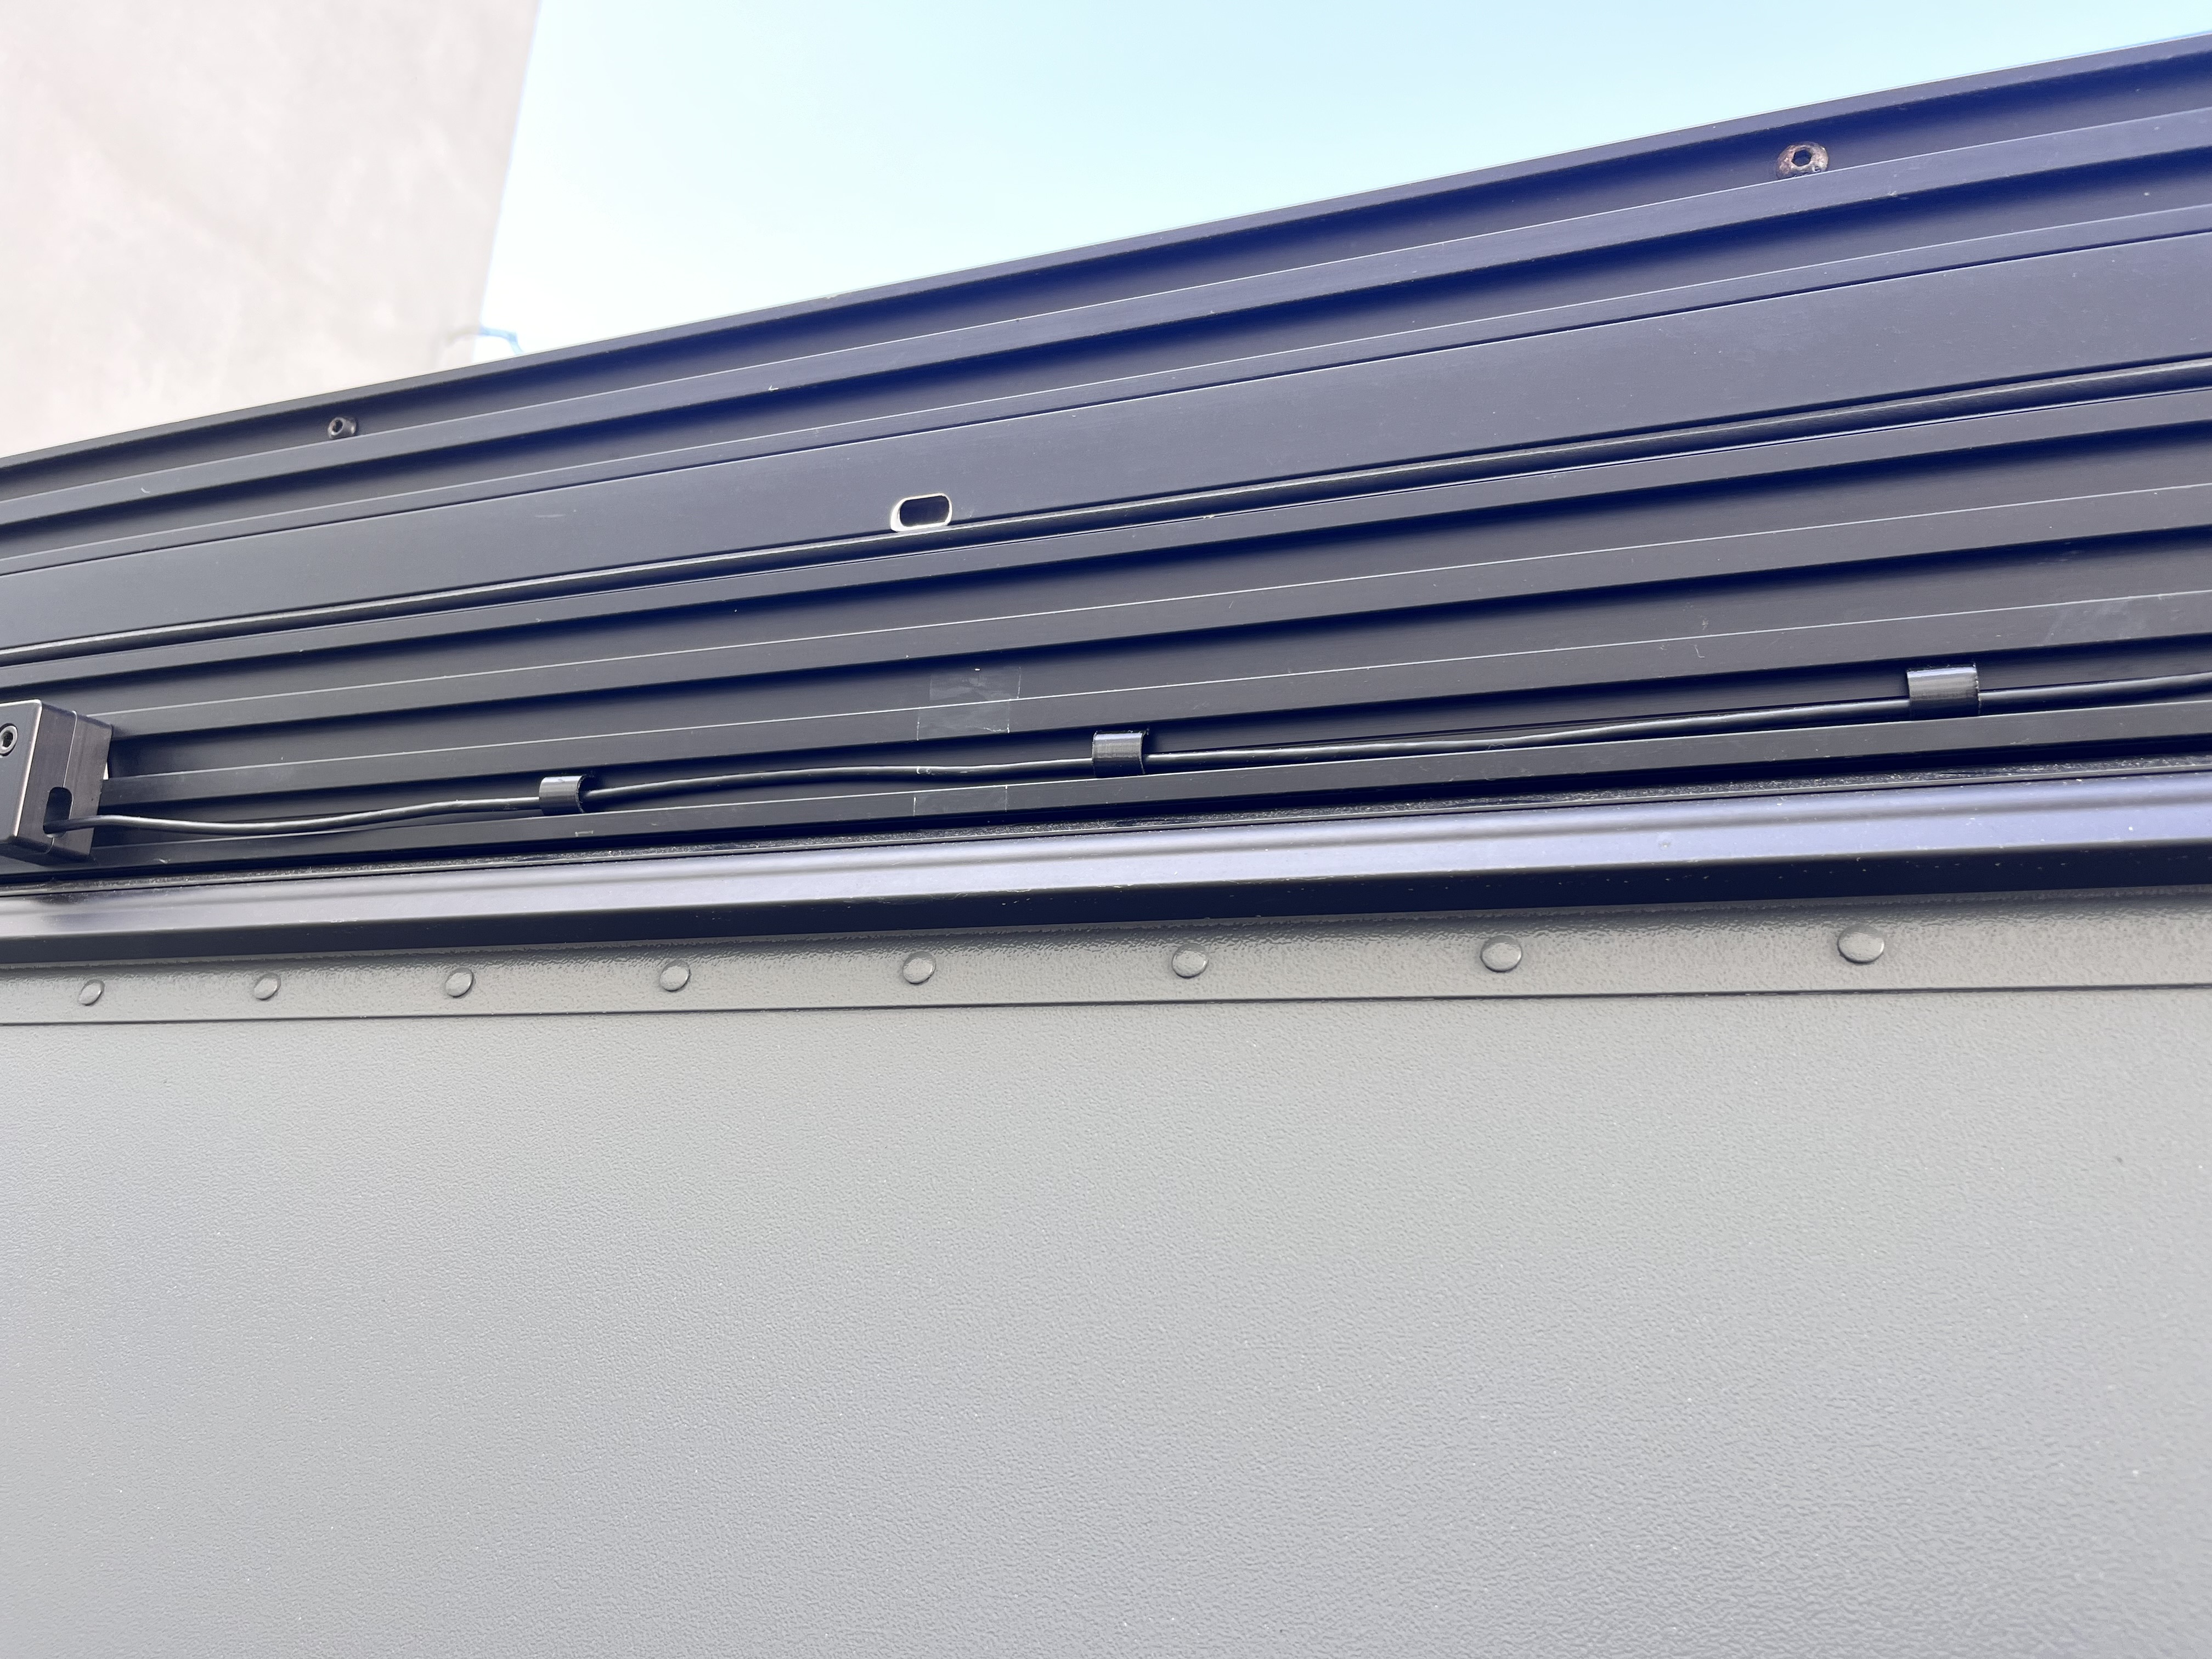
The projects never stop and the next thing I got in my mind was adding solar power. I already had a Ecoflow River 2 Pro power station and had tried the portable solar panel as well for it but again, when your tent is always there, loading and unloading the car is just annoying. So I got a 175w flexible Renogy panel and used VHB tape to put it on top of the camper. I sealed it off with some EternaBond tape and then… I noticed how the cable come out at opposite ends - I hadn’t thought this through and just thought it would be like my portable solar panel which just had both cables on one end. Shortened one of the cables, crimped it and used the ShittBrix to hold everything in place. The cable on the far end I just epoxied down on the panel. To run the cables into the camper I drilled a small hole into the back panel and ran the cables through a small grommet. Has stayed water tight ever since I put it on so I’m hopeful that continues. Now that I had power I wanted to add a cell booster, since we’ve had a few incidents working while camping and our cell phone hotspots resulting in dropped zoom calls. Did essentially the same thing to mount a WeBoost Overland and route the cables into the GFC. The antenna is on the Martin OR rack and the booster is in the truck bed since that’s mostly where we’ll be working from or we leave our phone in the truck bed and use the hotspot from the phone when we’re sitting outside. Each time it’s been used so far it has been a significant improvement over just using the phone hotspot unboosted.
No problems with the solar panels. Might pull in just a little bit less but it’s more than enough for me. I also one have one of the beef bars covering it.
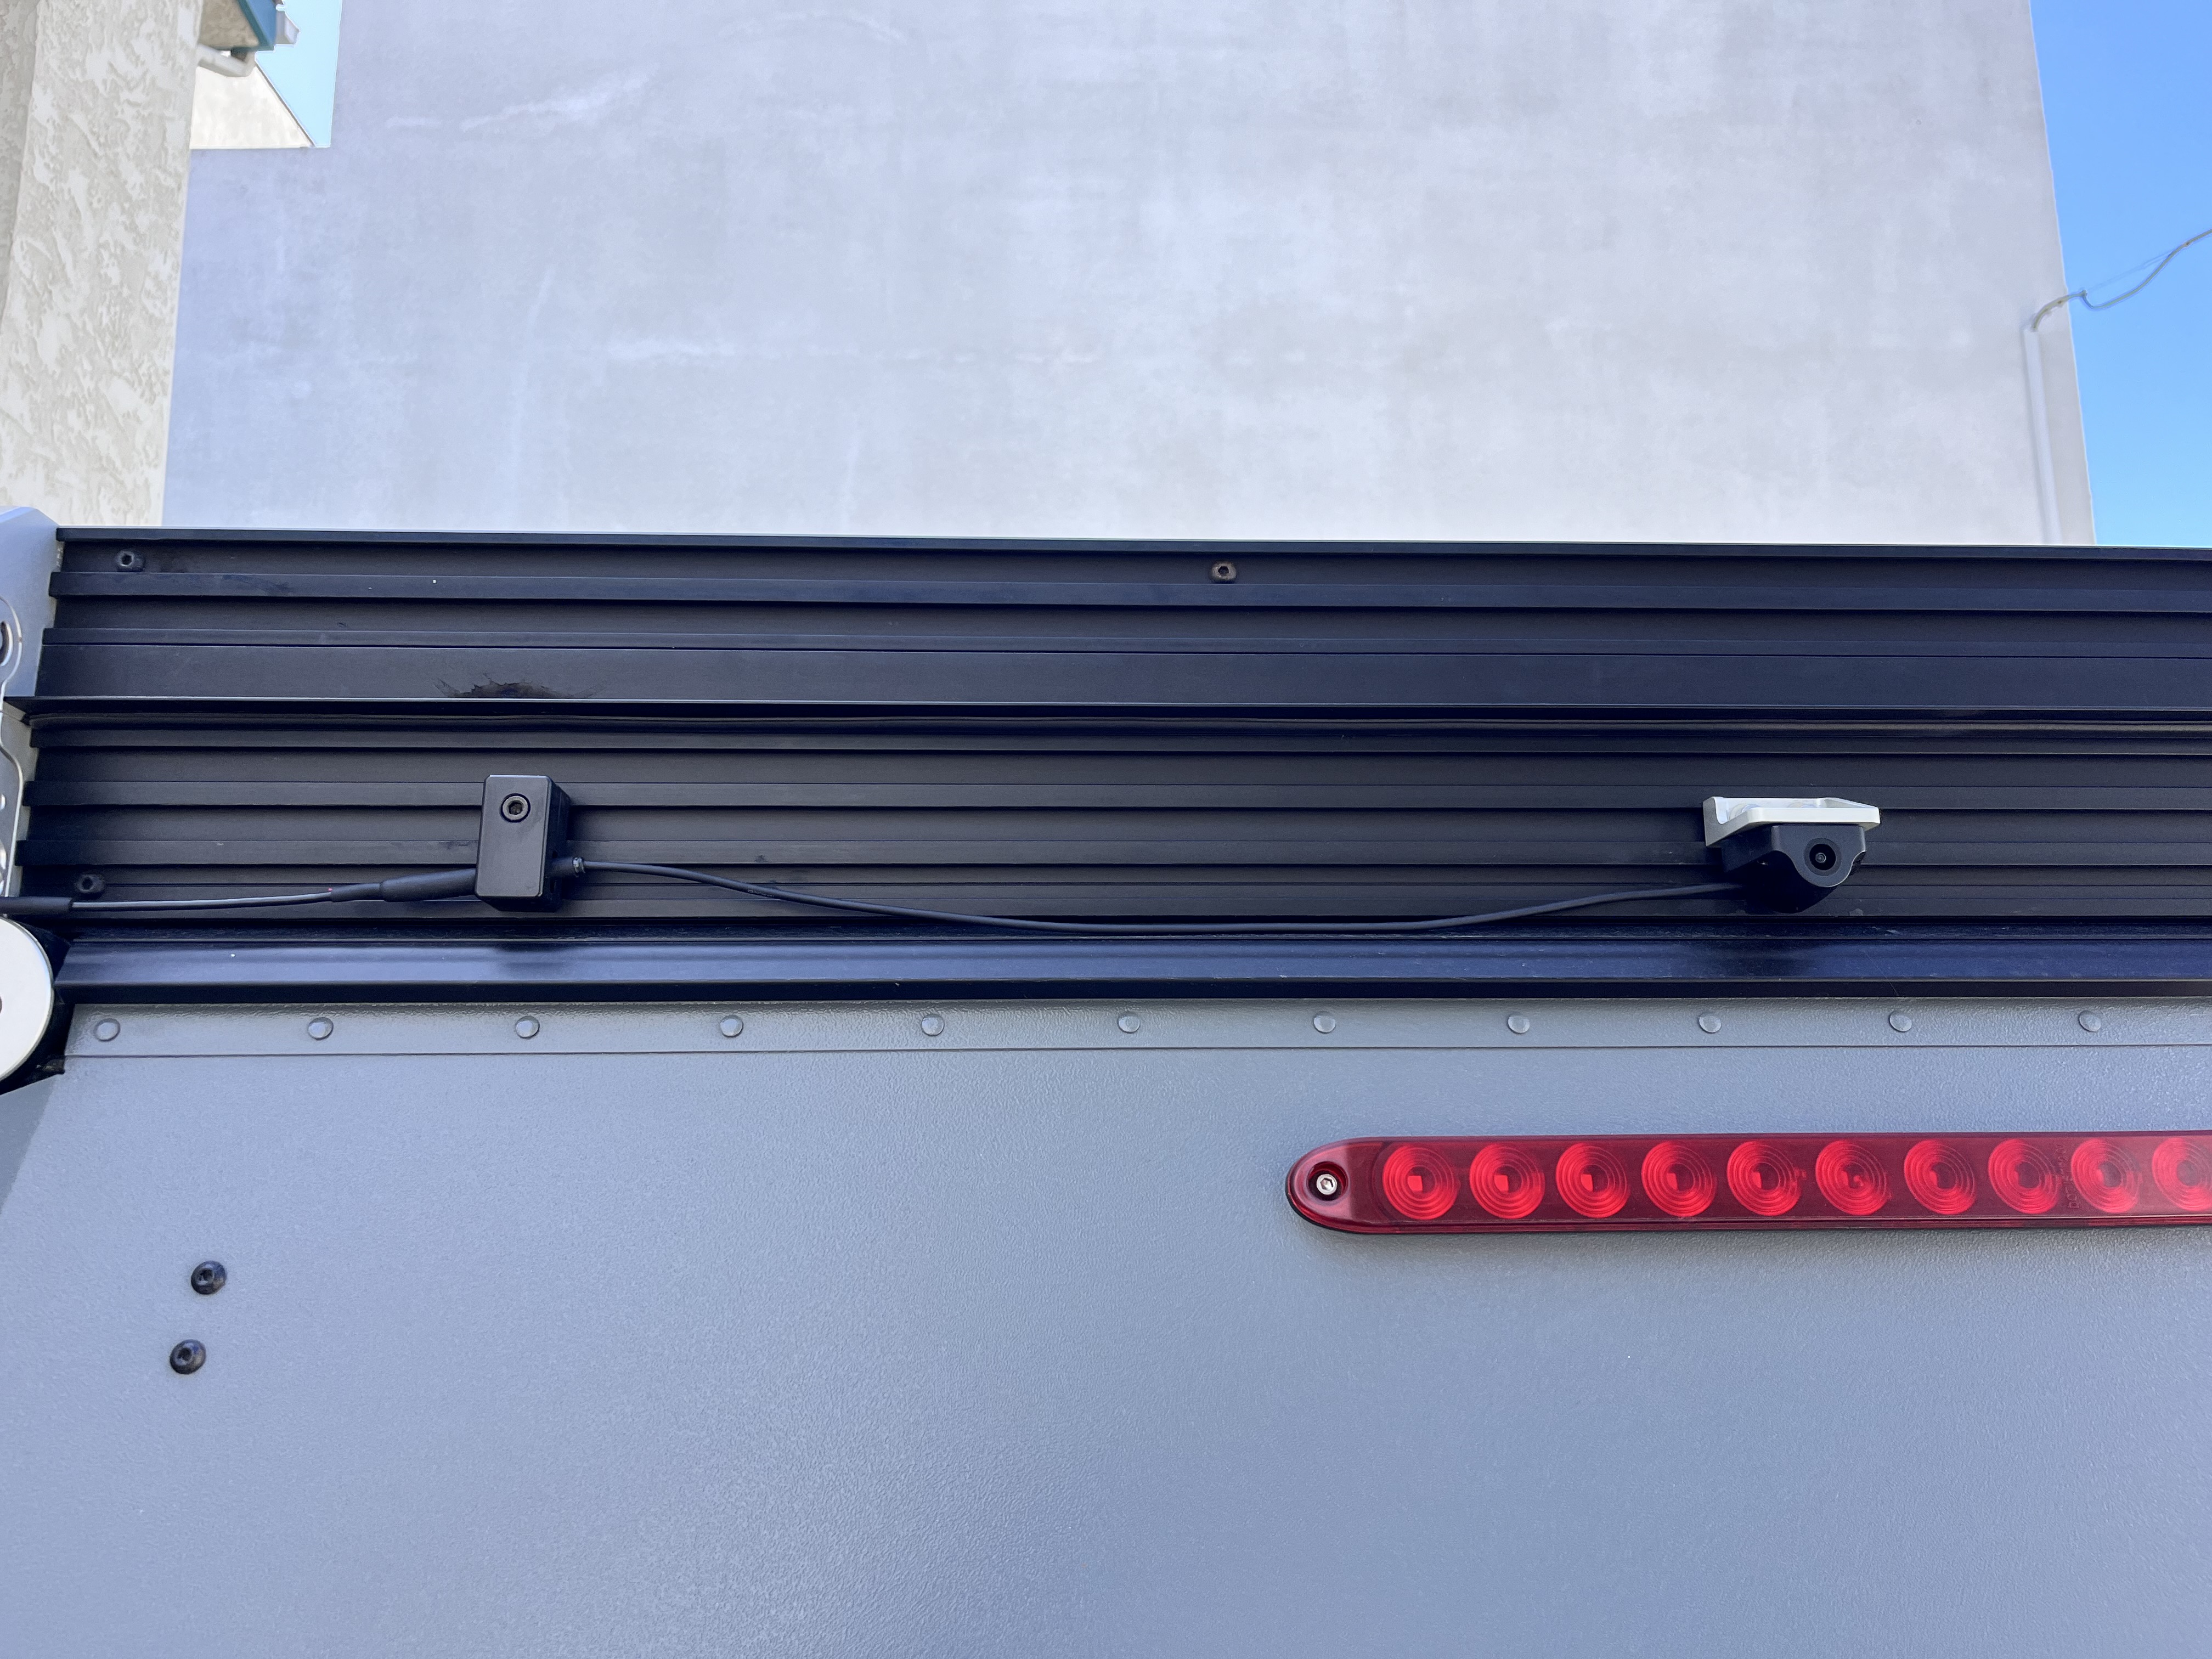
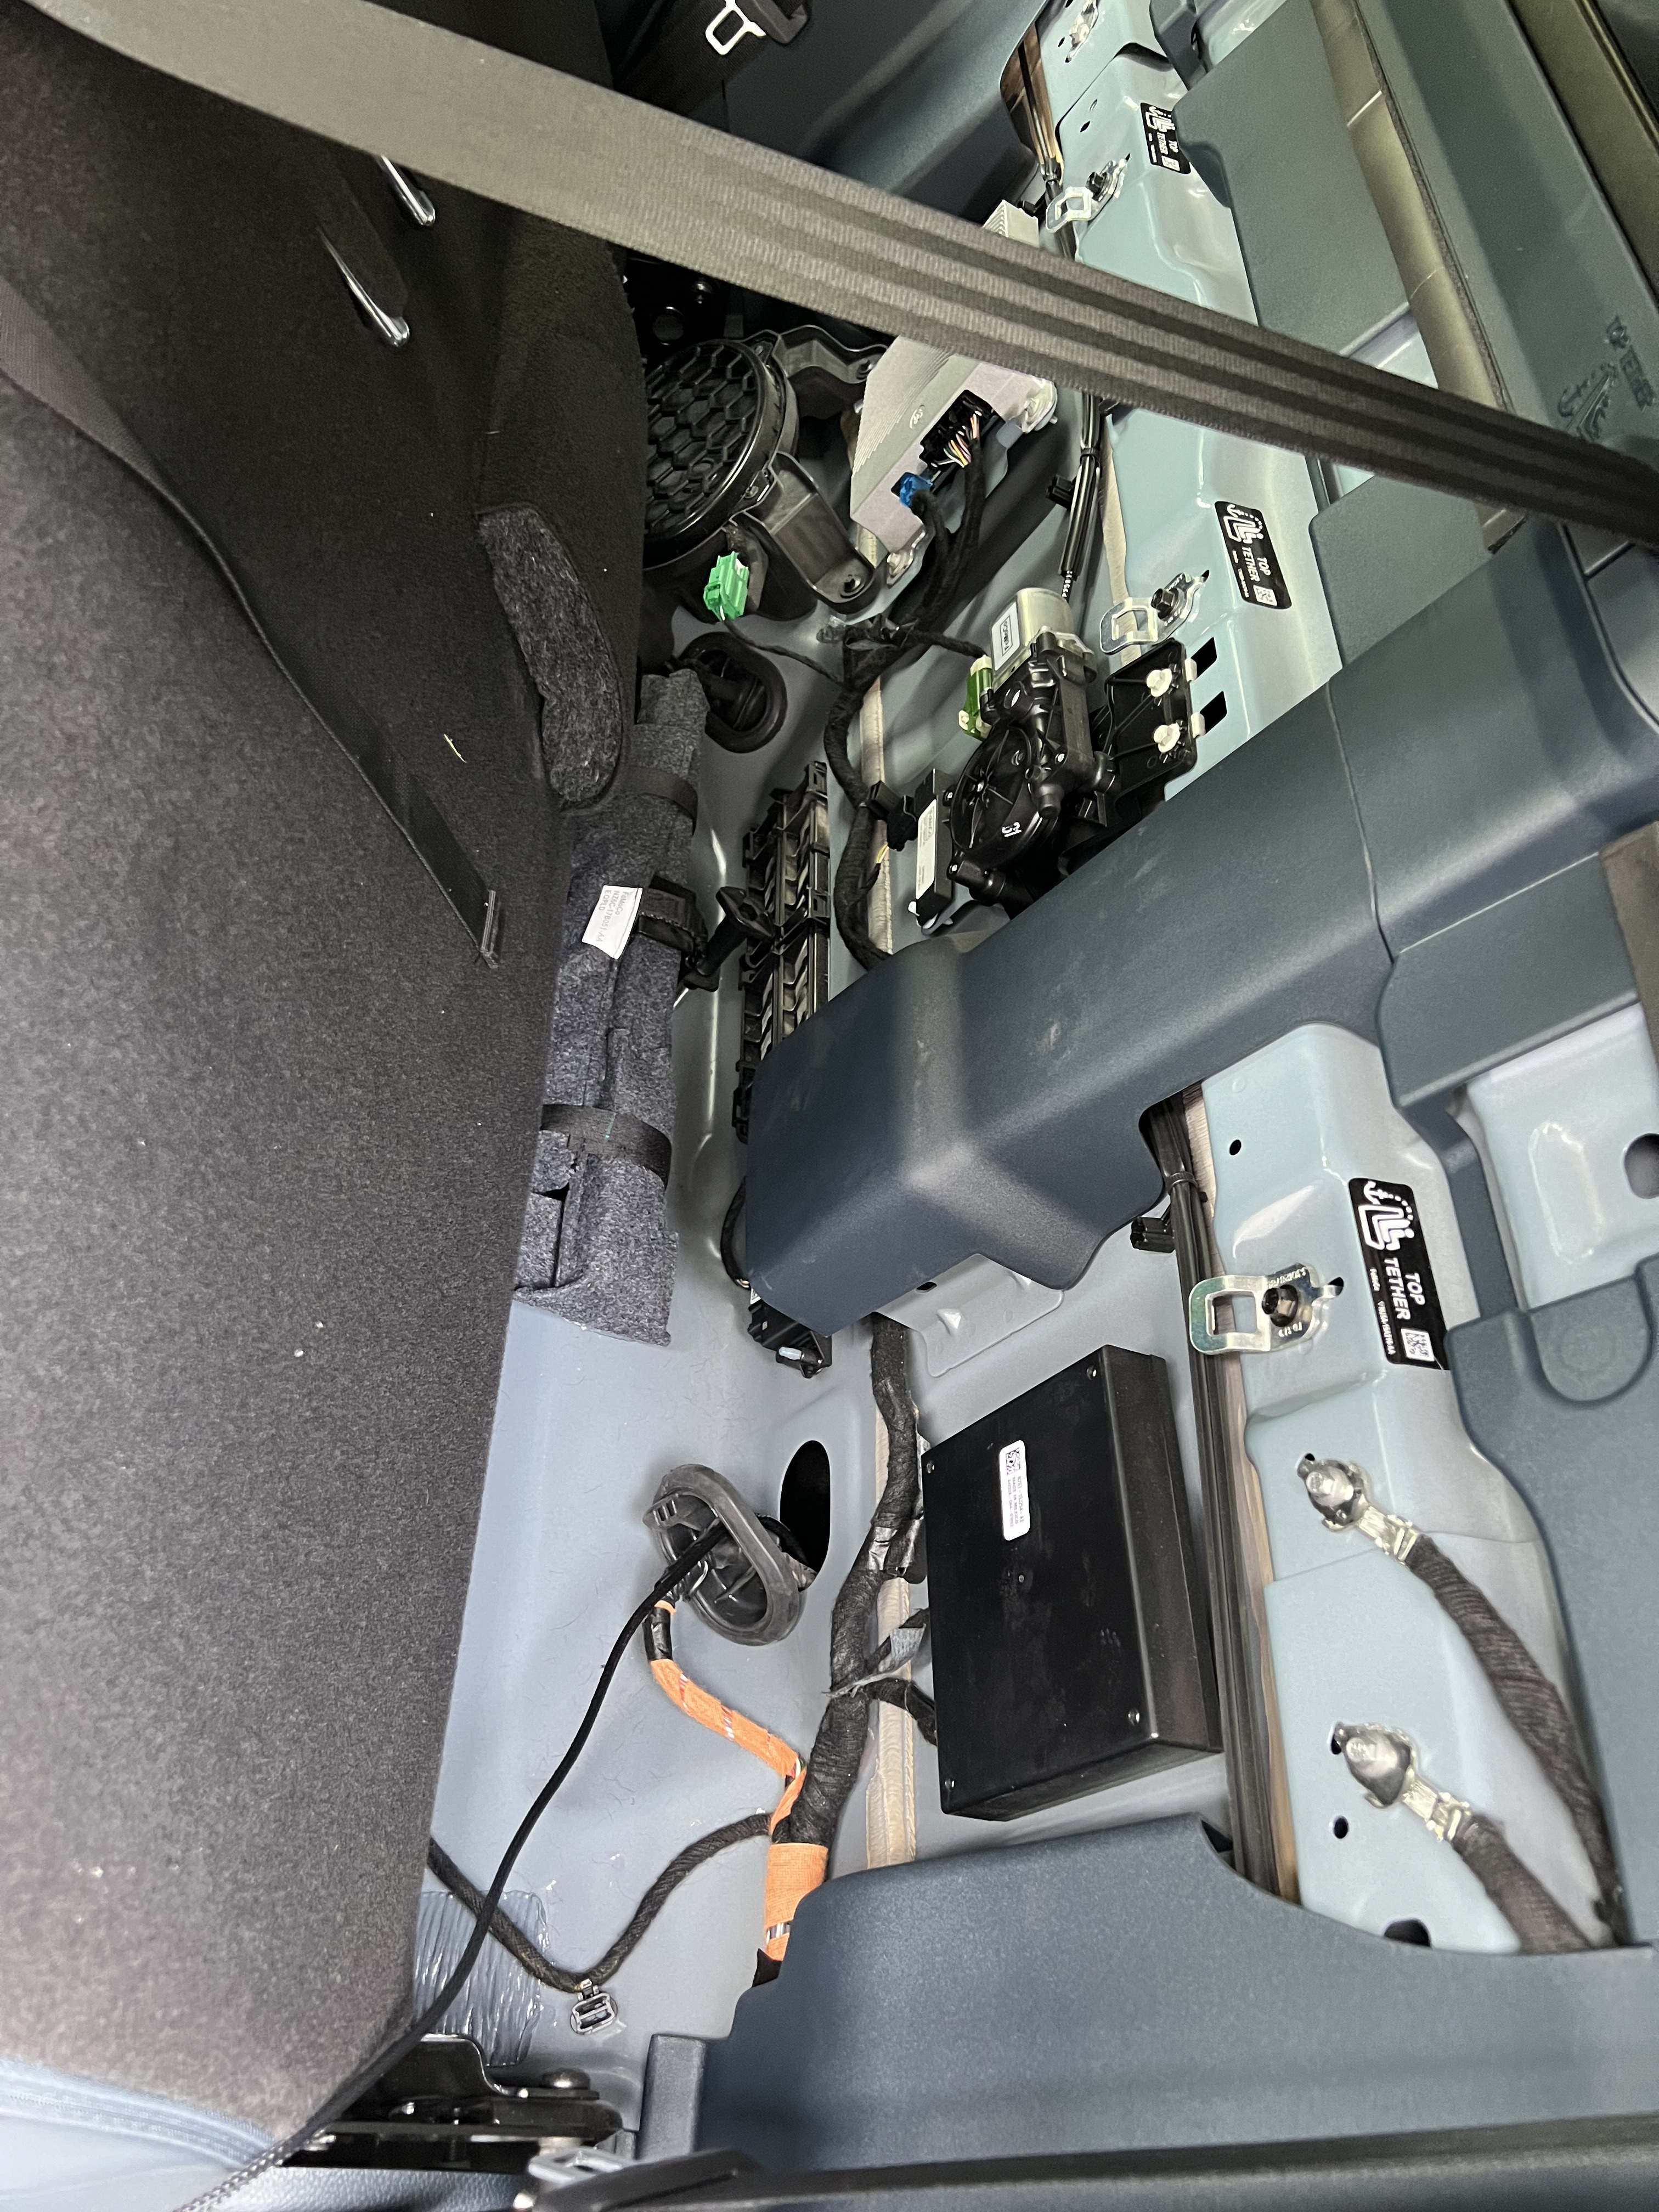
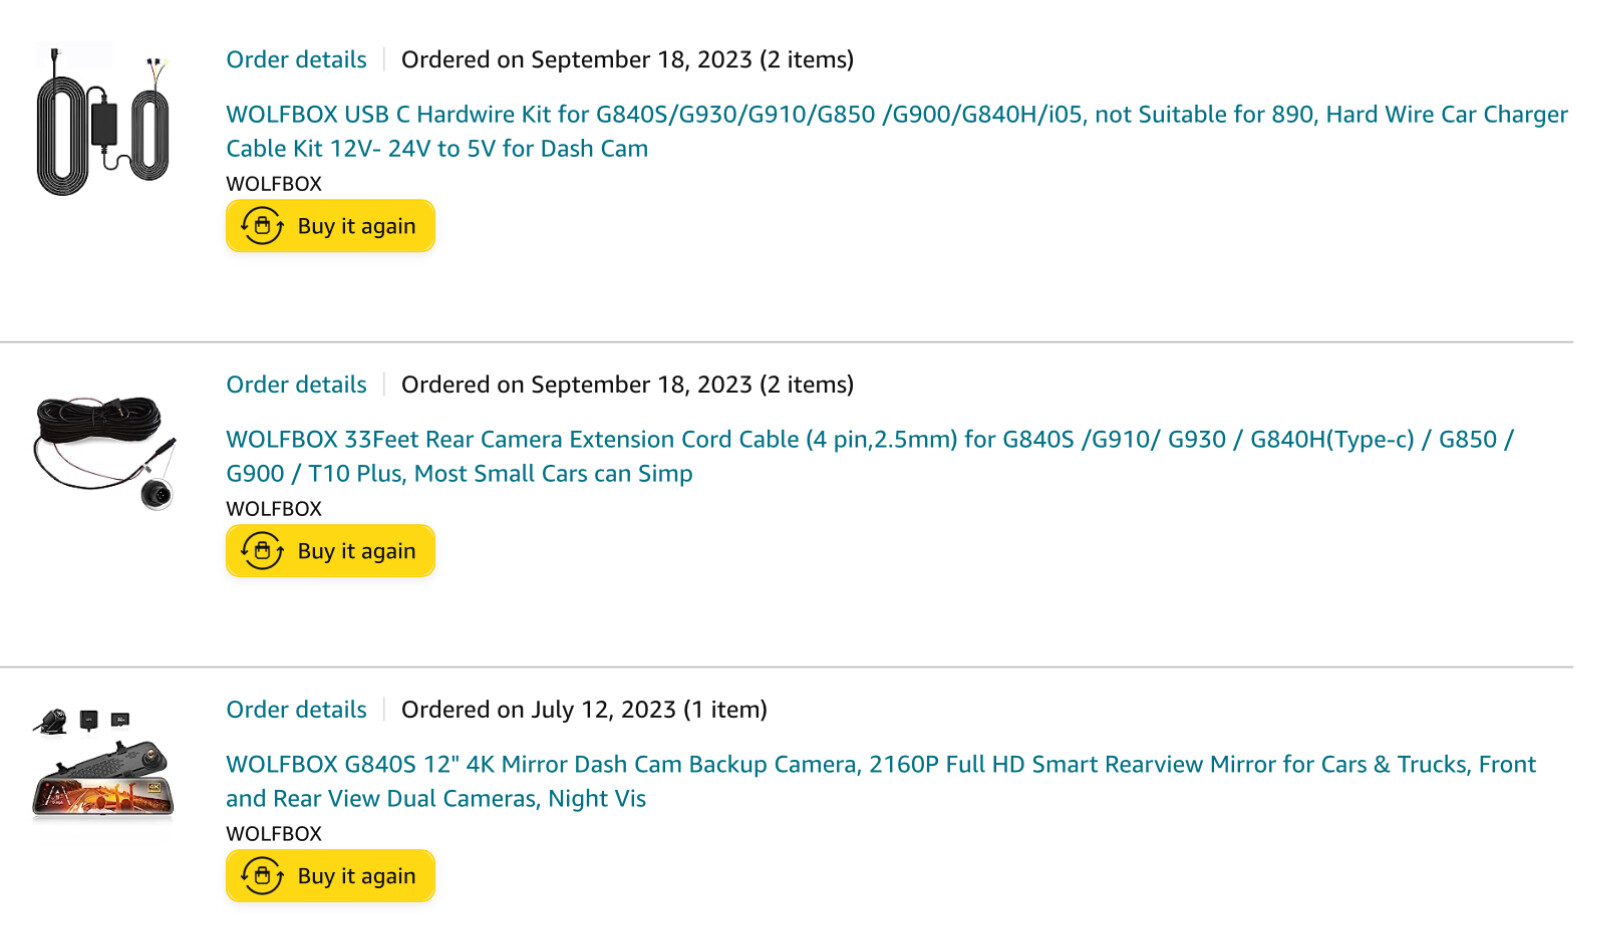
Added a Wolfbox backup camera a few weeks ago to be able to see. After a while of driving with only rear view mirrors especially in the LA area I wanted to be able to see what was happening behind me. Didn’t have much of an idea how to route the cables though and hold them in place so used a combo of Shittco cable blocks and gaffer tape. The cable then goes into the bed through the same hole I drilled for the solar panel and then into the cab through one of the holes underneath the front seat - zip tied everywhere there.
Still struggling with how to get the cable around the corner - so if anybody has any ideas, I’ll happily take them. For now I’m using a heat shrink and the cable has enough flex to be able to pull it back when I open the tent.
I don’t have any wiring ideas for you, but which wolfbox did you get, and is the field of view wide enough for you? I have a much cheaper backup cam installed, and very often I still feel blind when backing up here in LA.
I also put in a Wolfbox (G840S) but ran the wires through the backseat thruhull (not sure what non-boat/truck version is called), under the bed, then up. I don’t have great pix right now but will snag some this weekend when I move it up since I put the camera too low.
Got the G900. Here’s a photo of what I see when I back out of my parking spot so you can compare, next time I’m on the freeway I’ll send you another. The camera sits a good bit higher up so I have a more birdseye kind of view. It was awkward at first but now I’m used to it. I have the Tacoma’s backup cam for when I need to park.
Absolutely love it. I actually bought the GFC 2nd hand because I wasn’t willing to wait a few months so I didn’t have much of a say in what color it was - this was the closest available in my area. I originally wanted the simple black but then put this one on and absolutely love it.
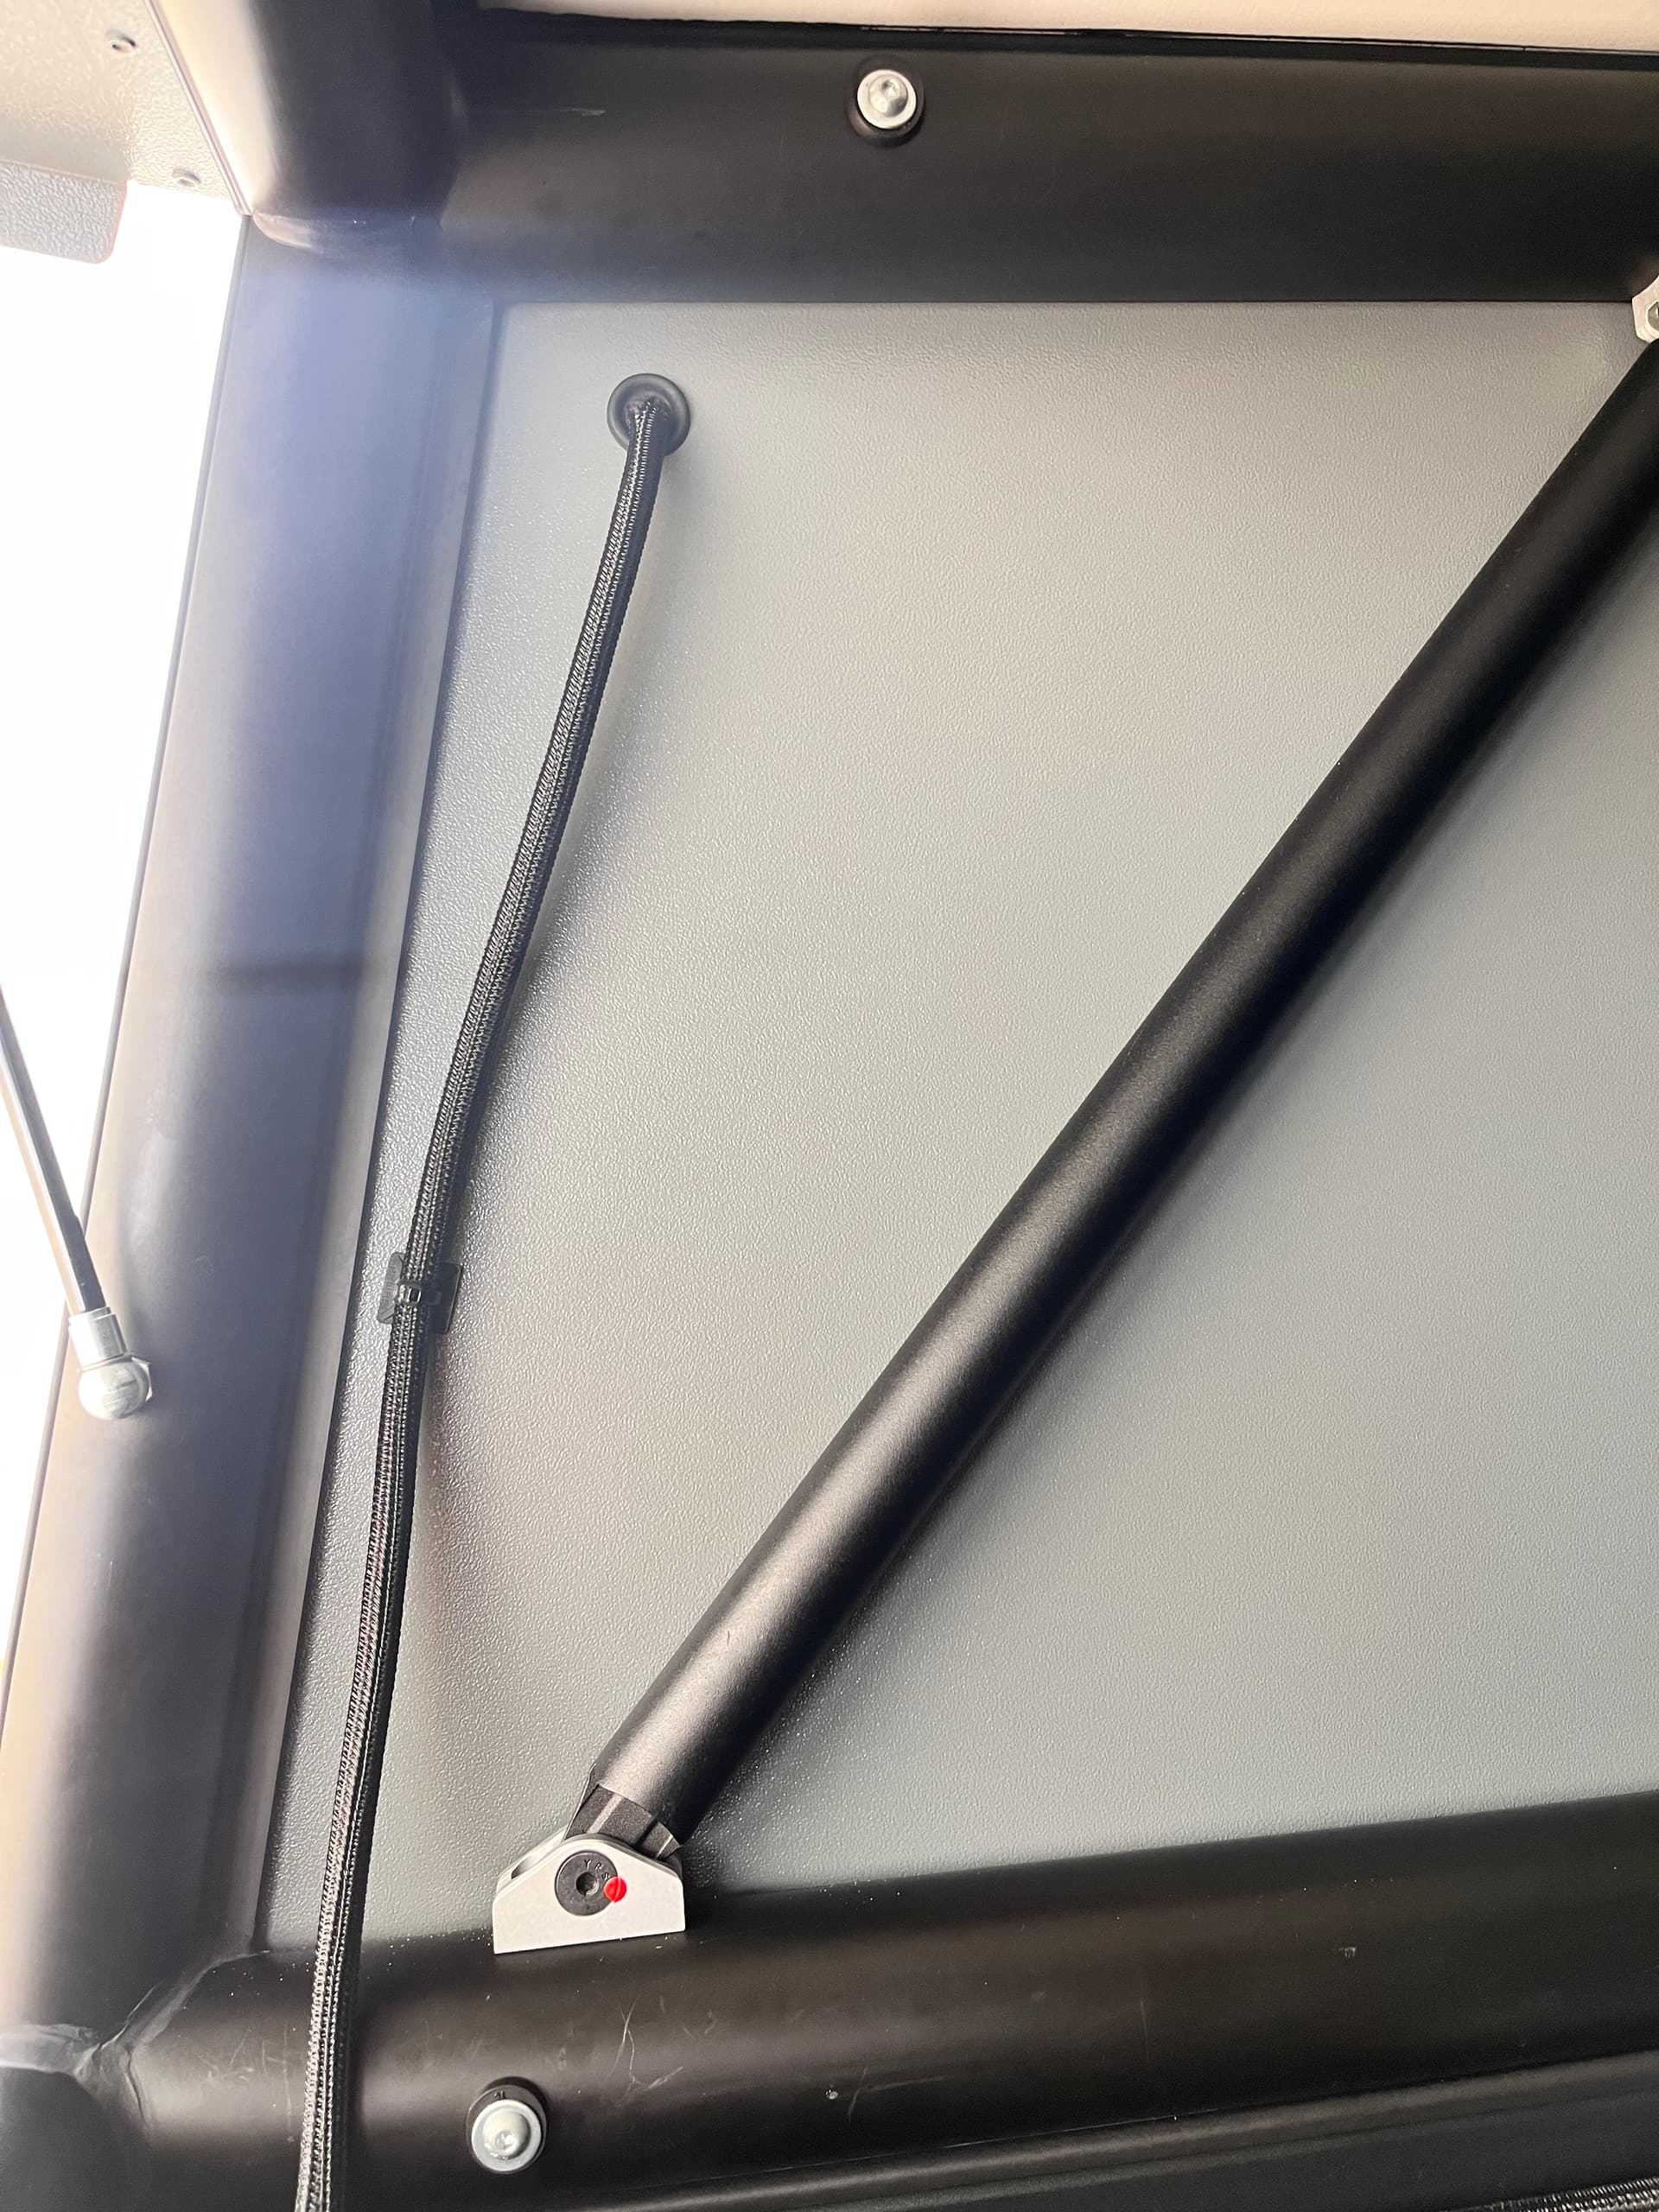
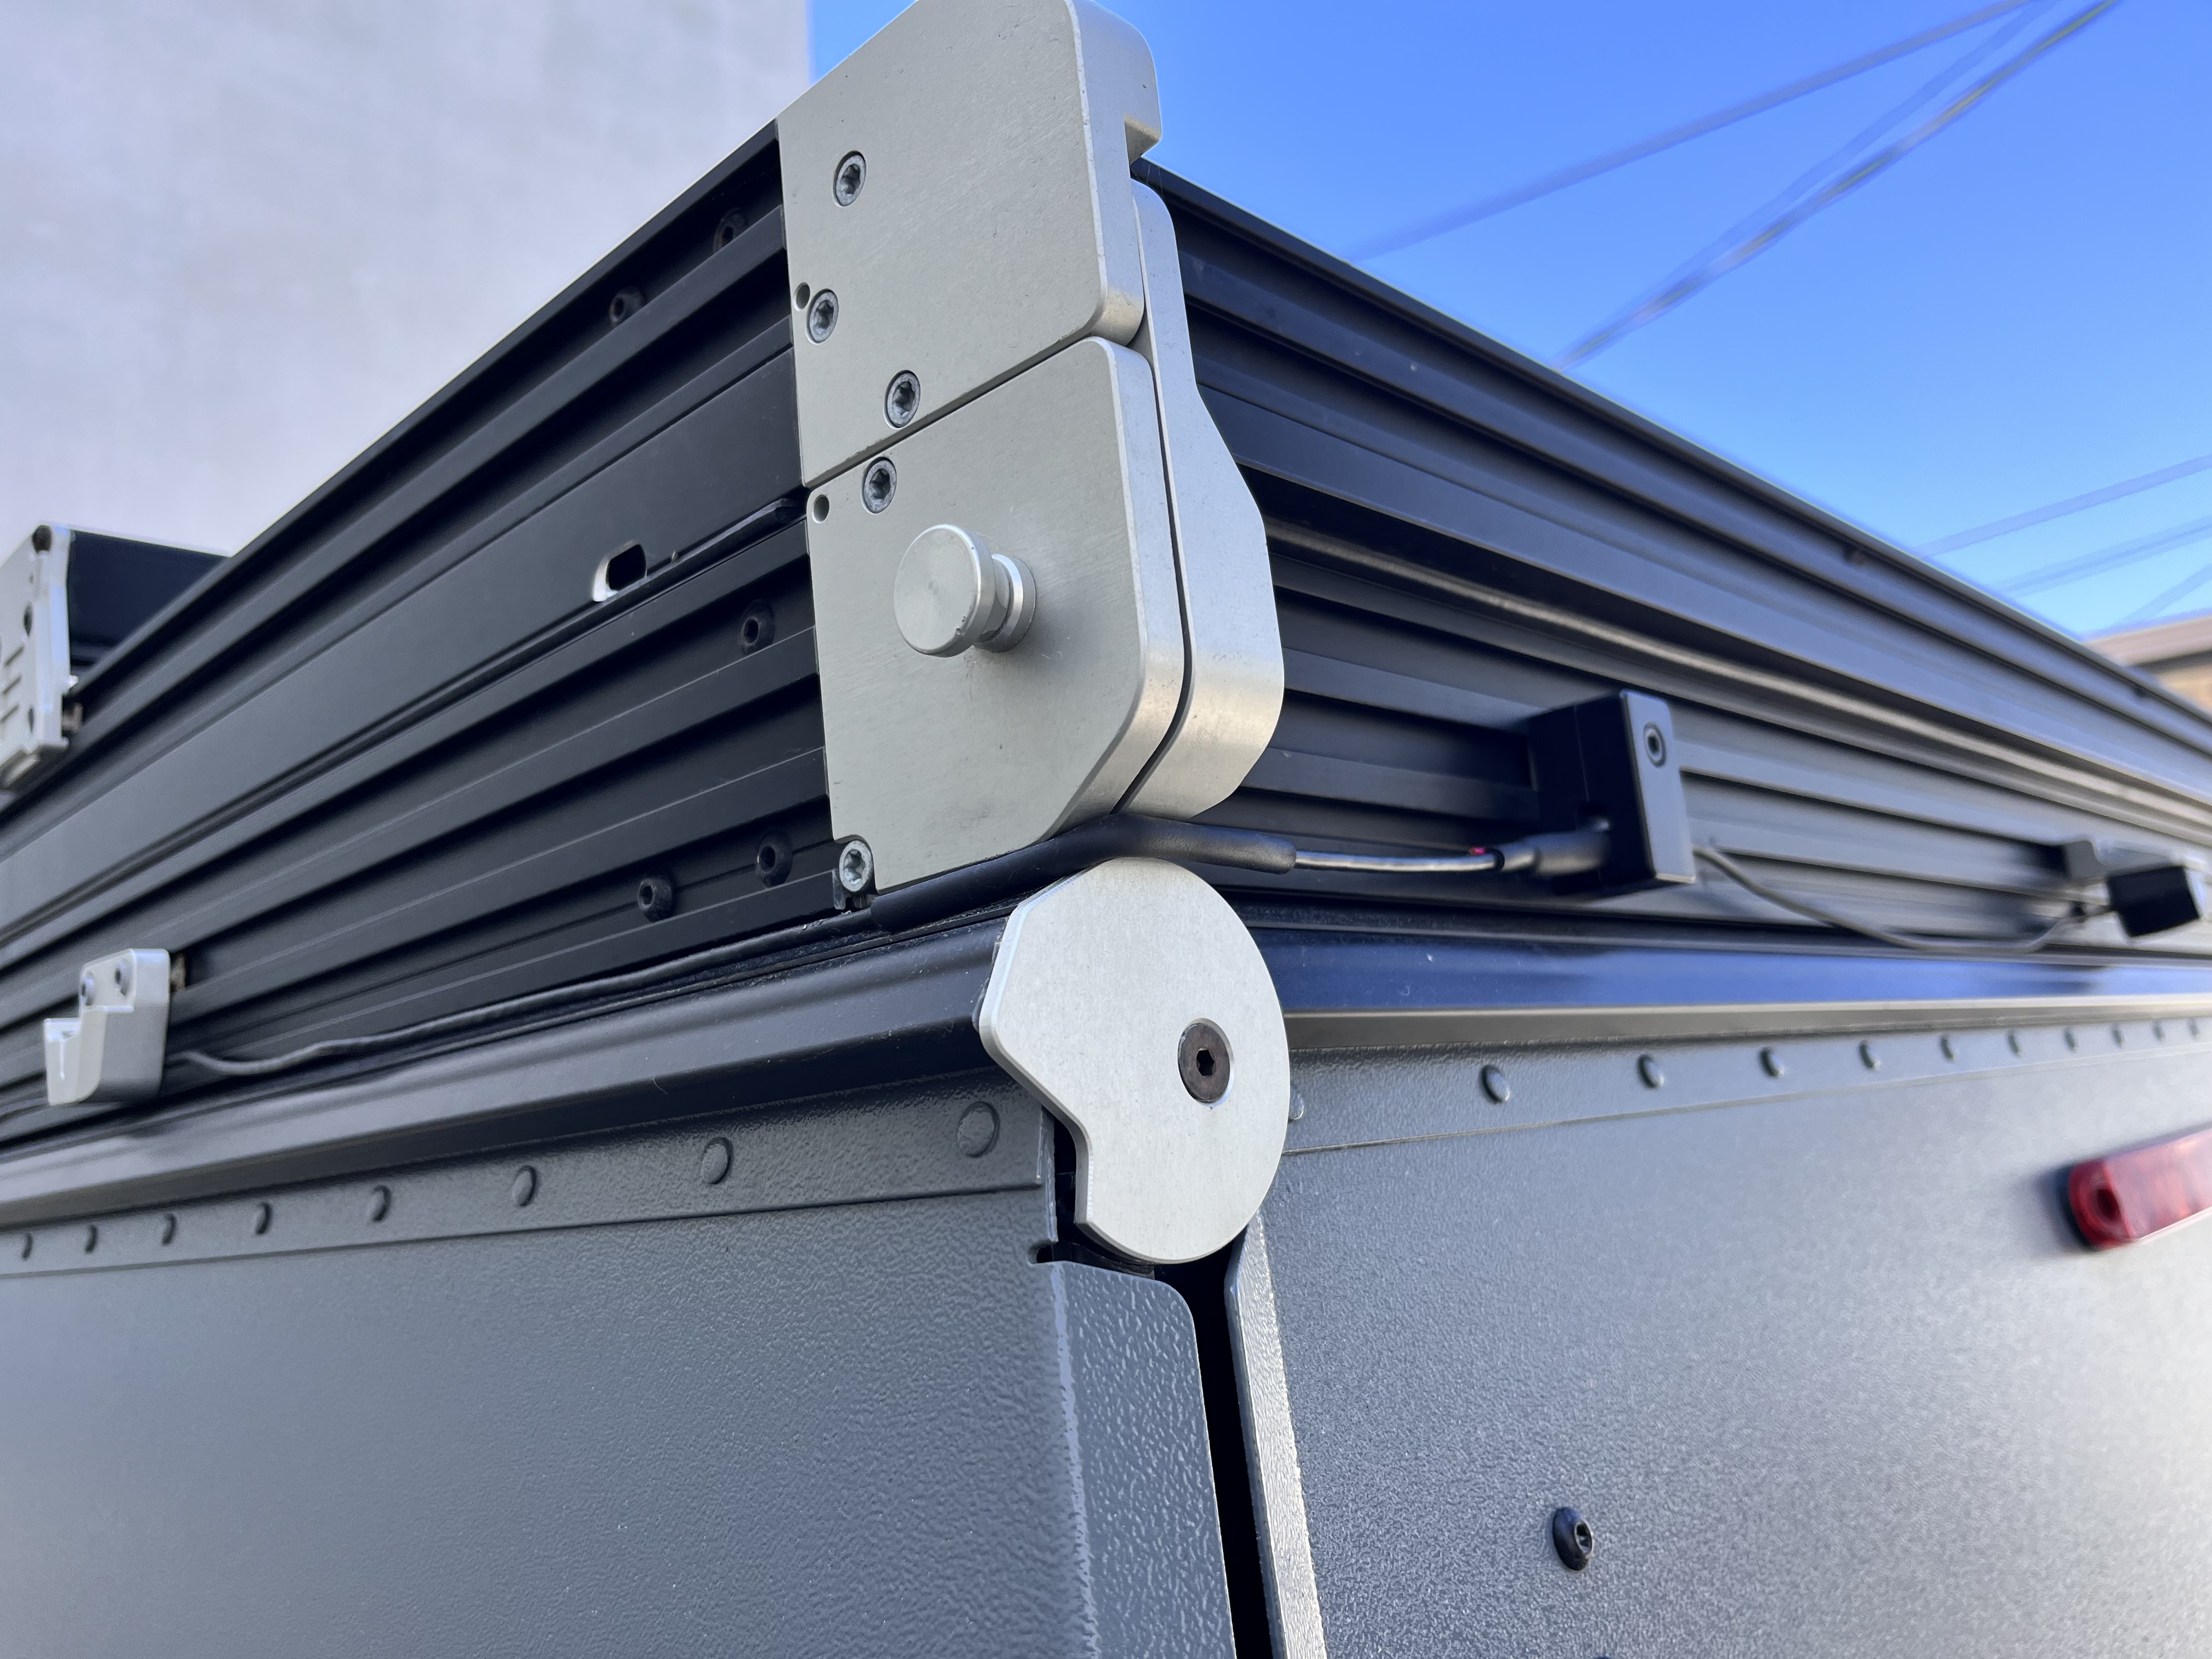
That’s the GFC 90 degree mount, can use them for everything. Routing cables is actually pretty easy on a taco, just takes a bit of patience. There’s pretty logical places to run the cable and then hold it down for zip ties. Feel free to DM me if you have any specific questions.
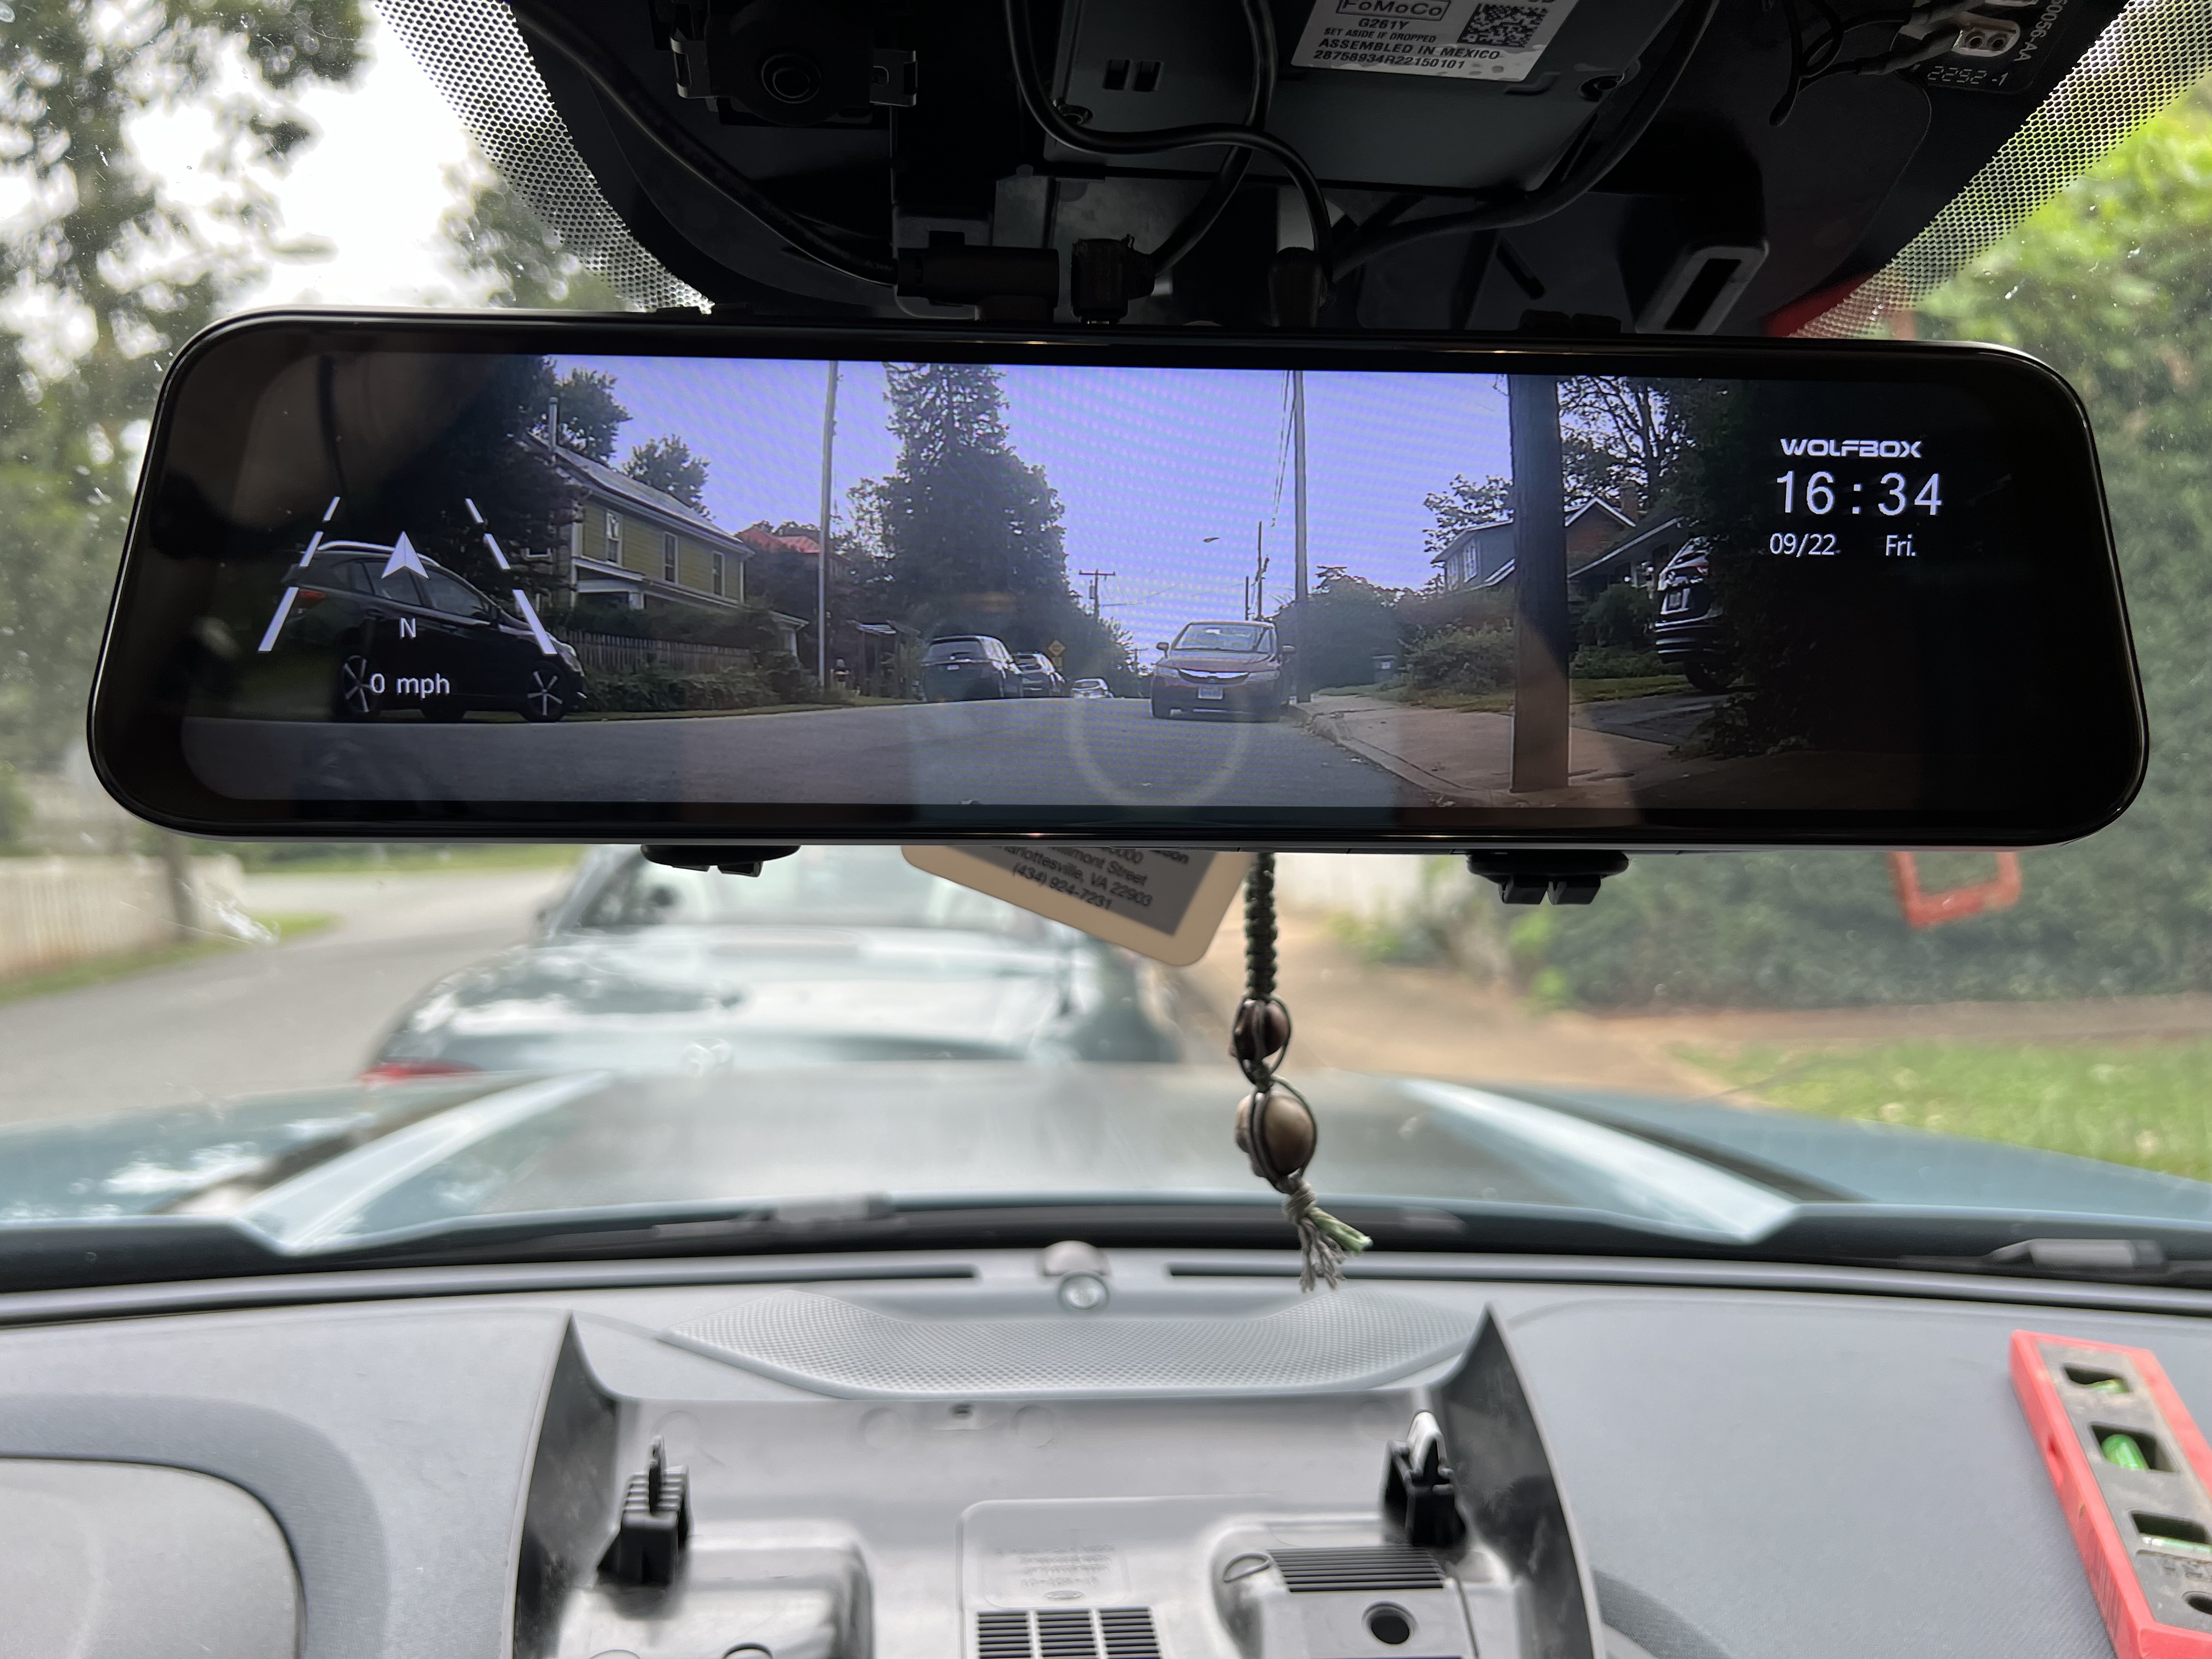
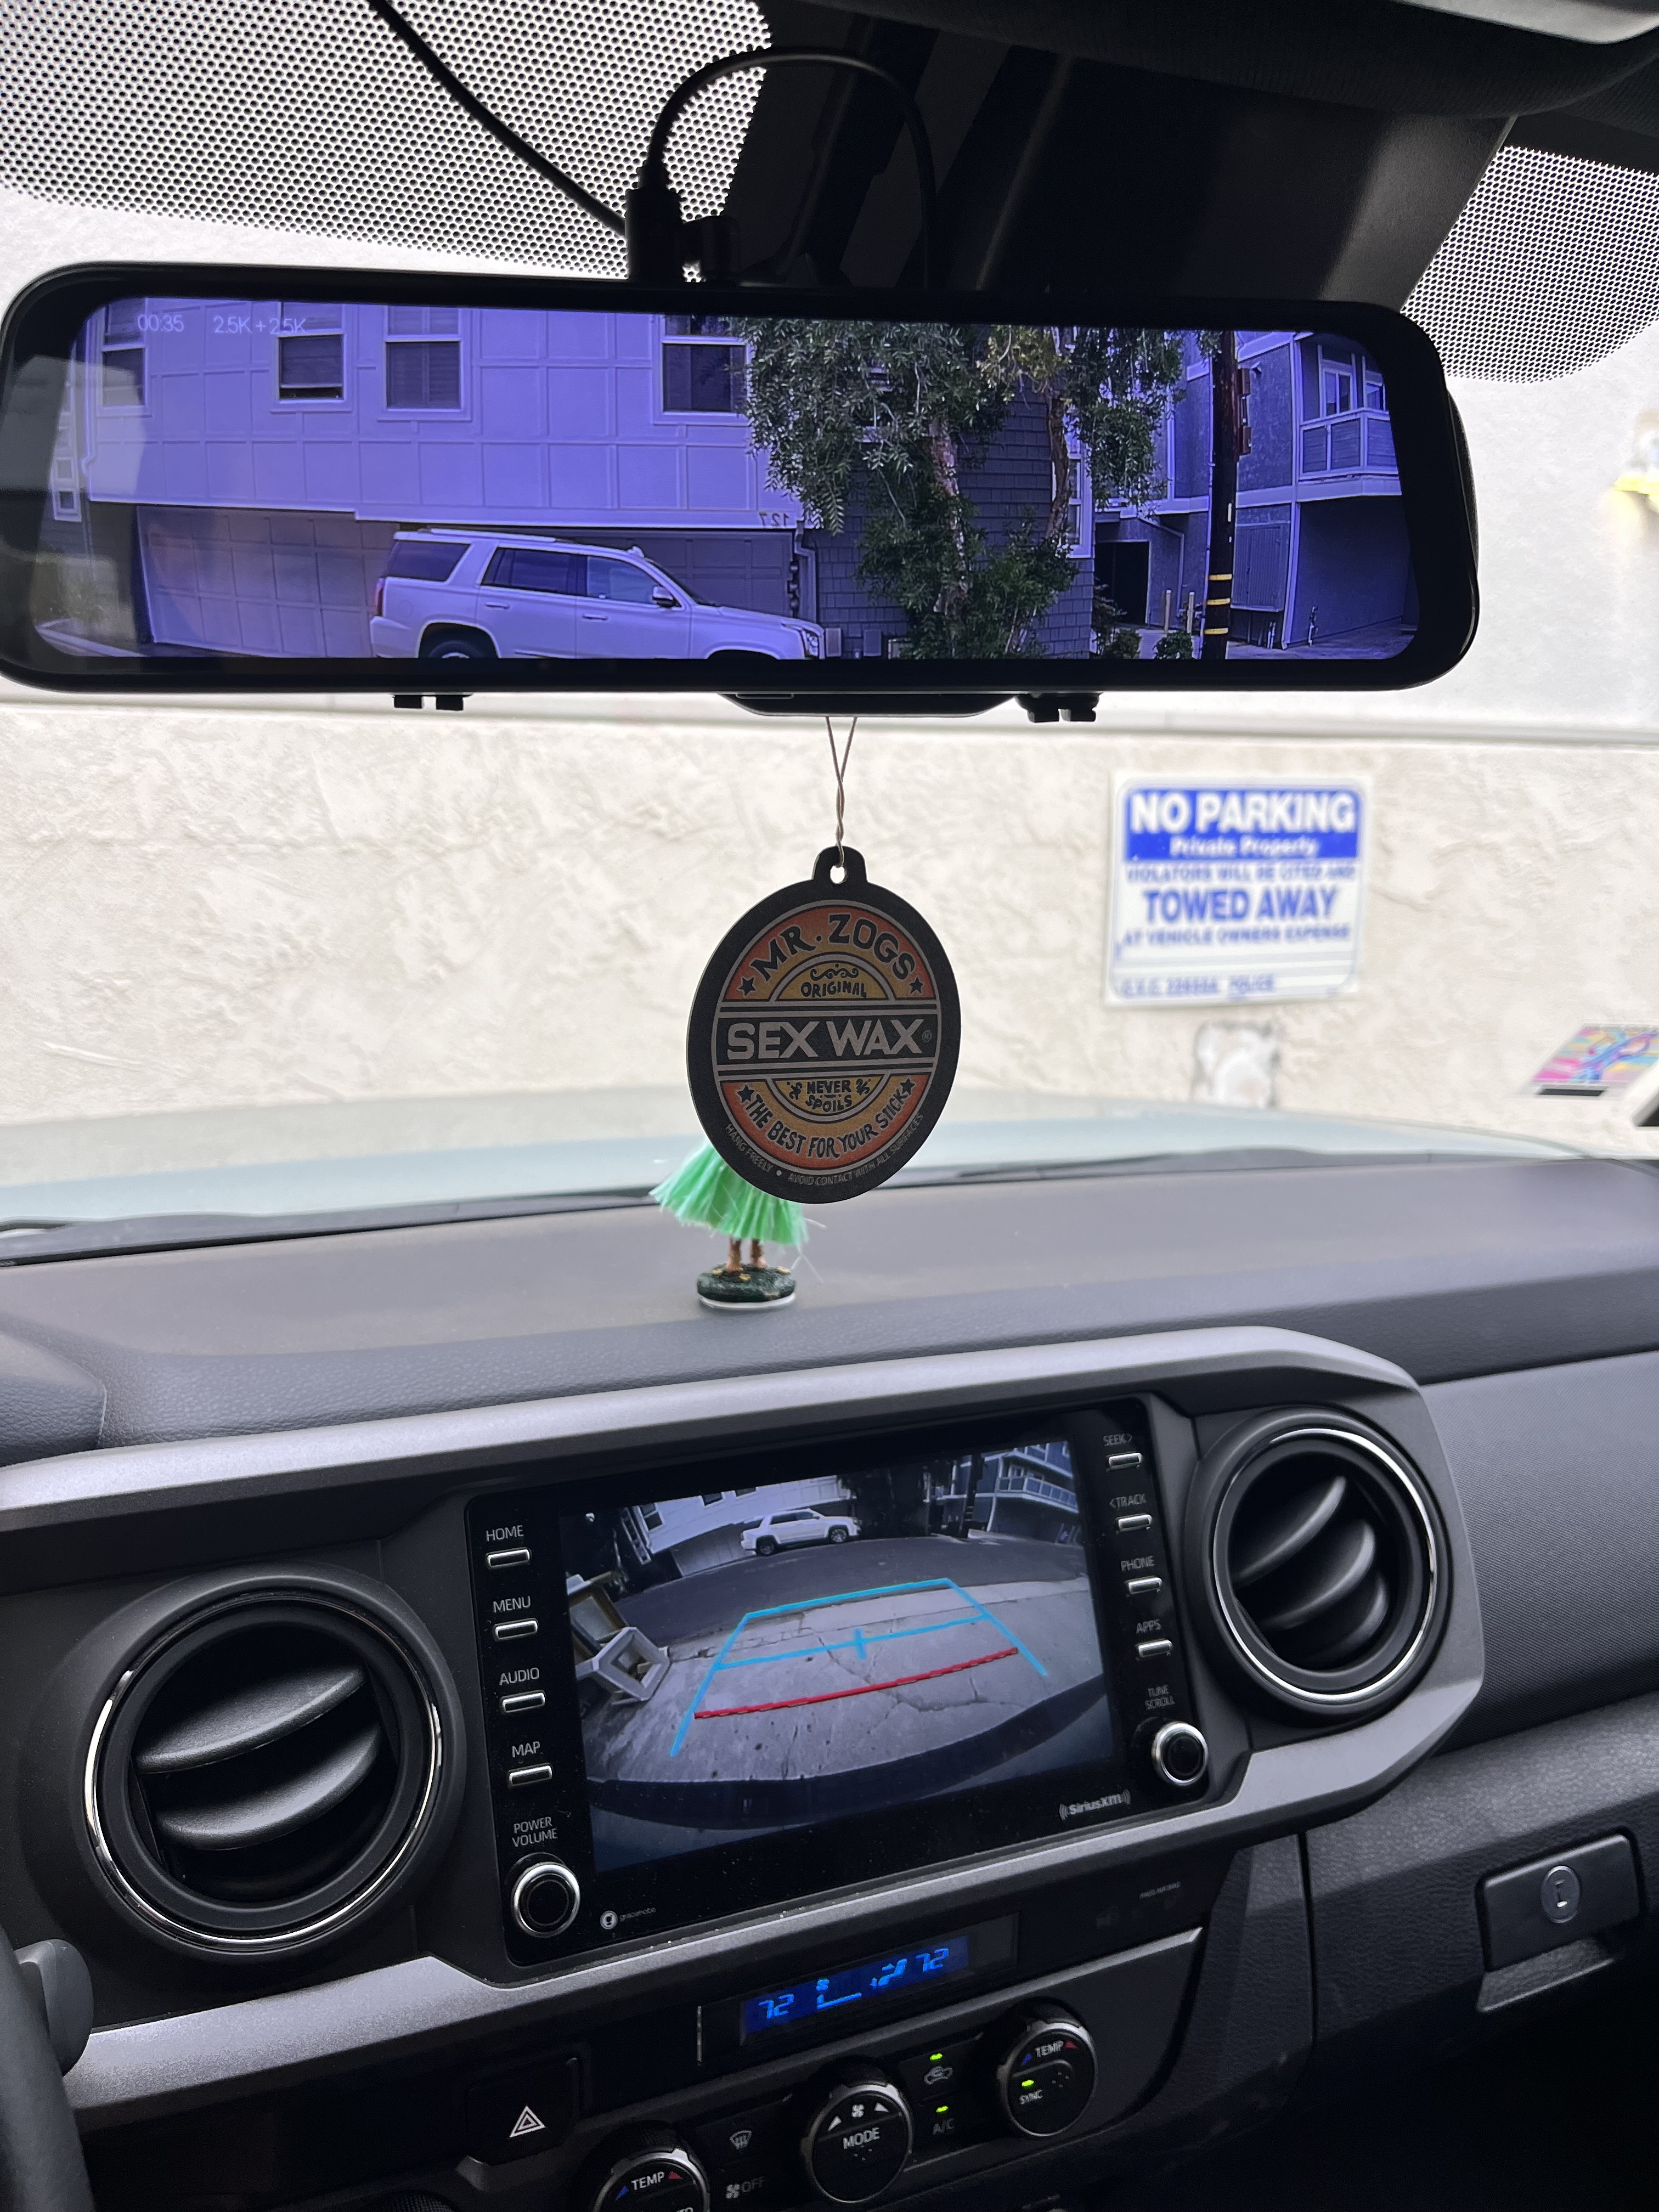
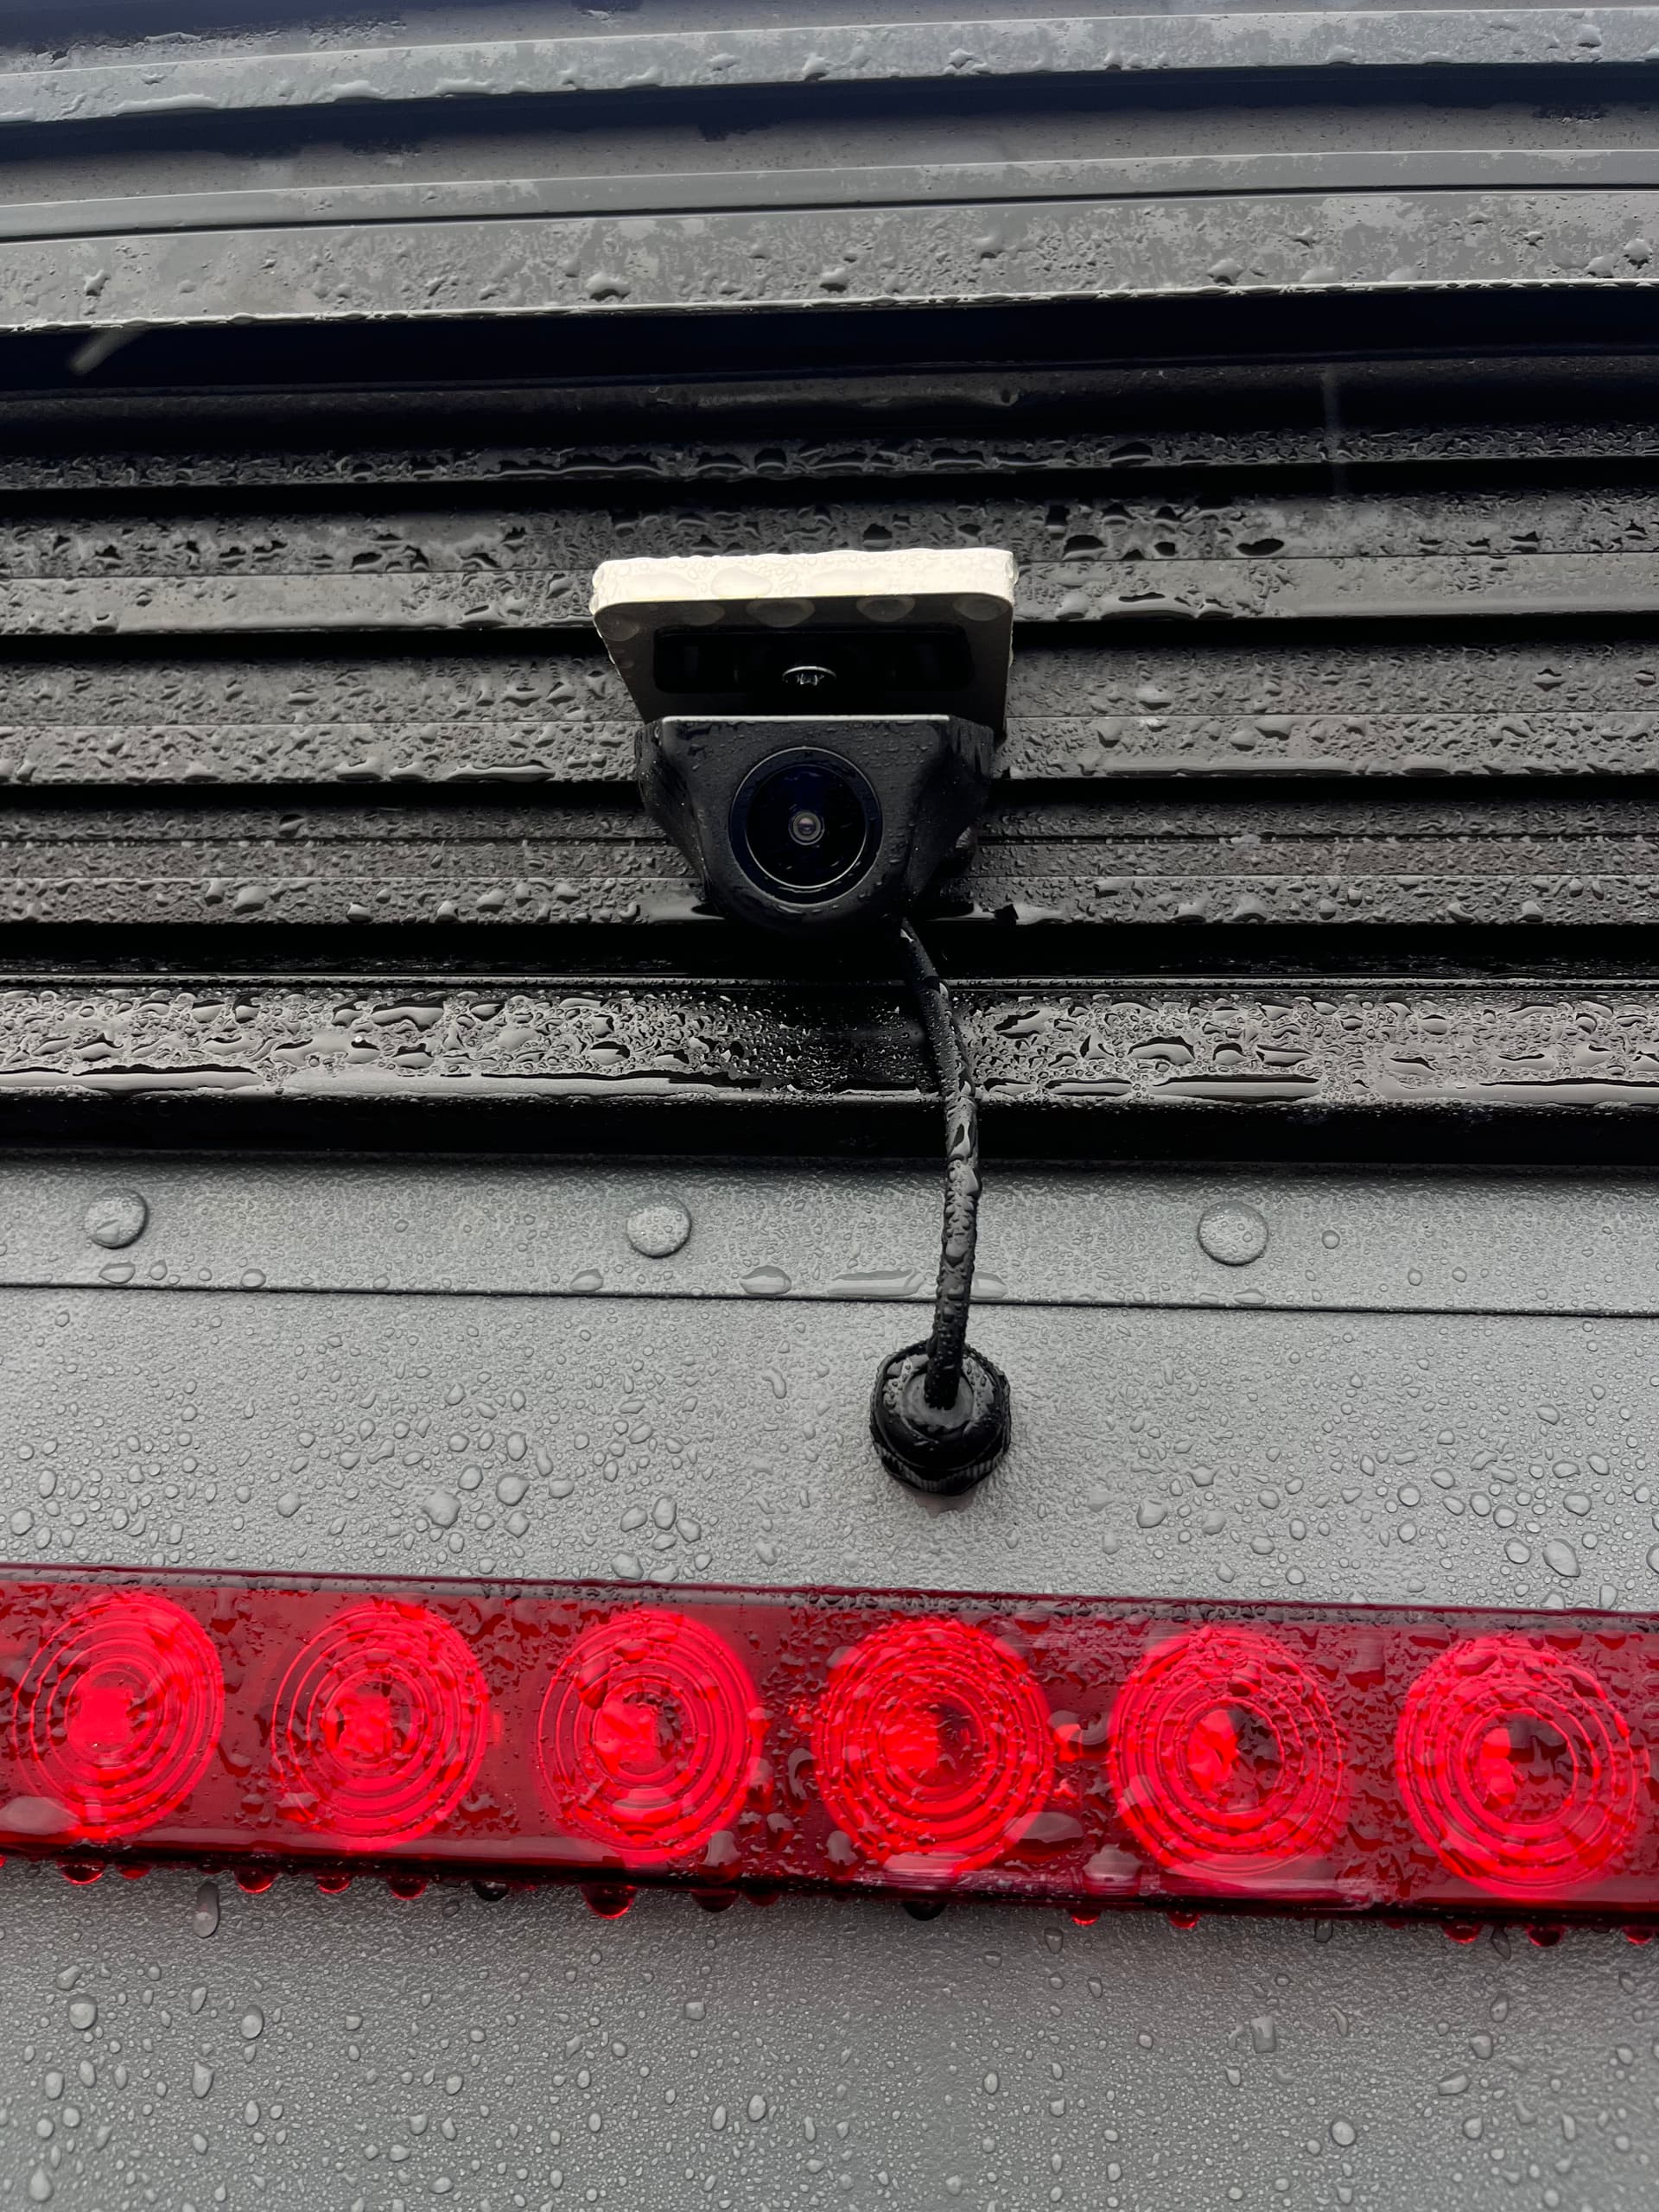
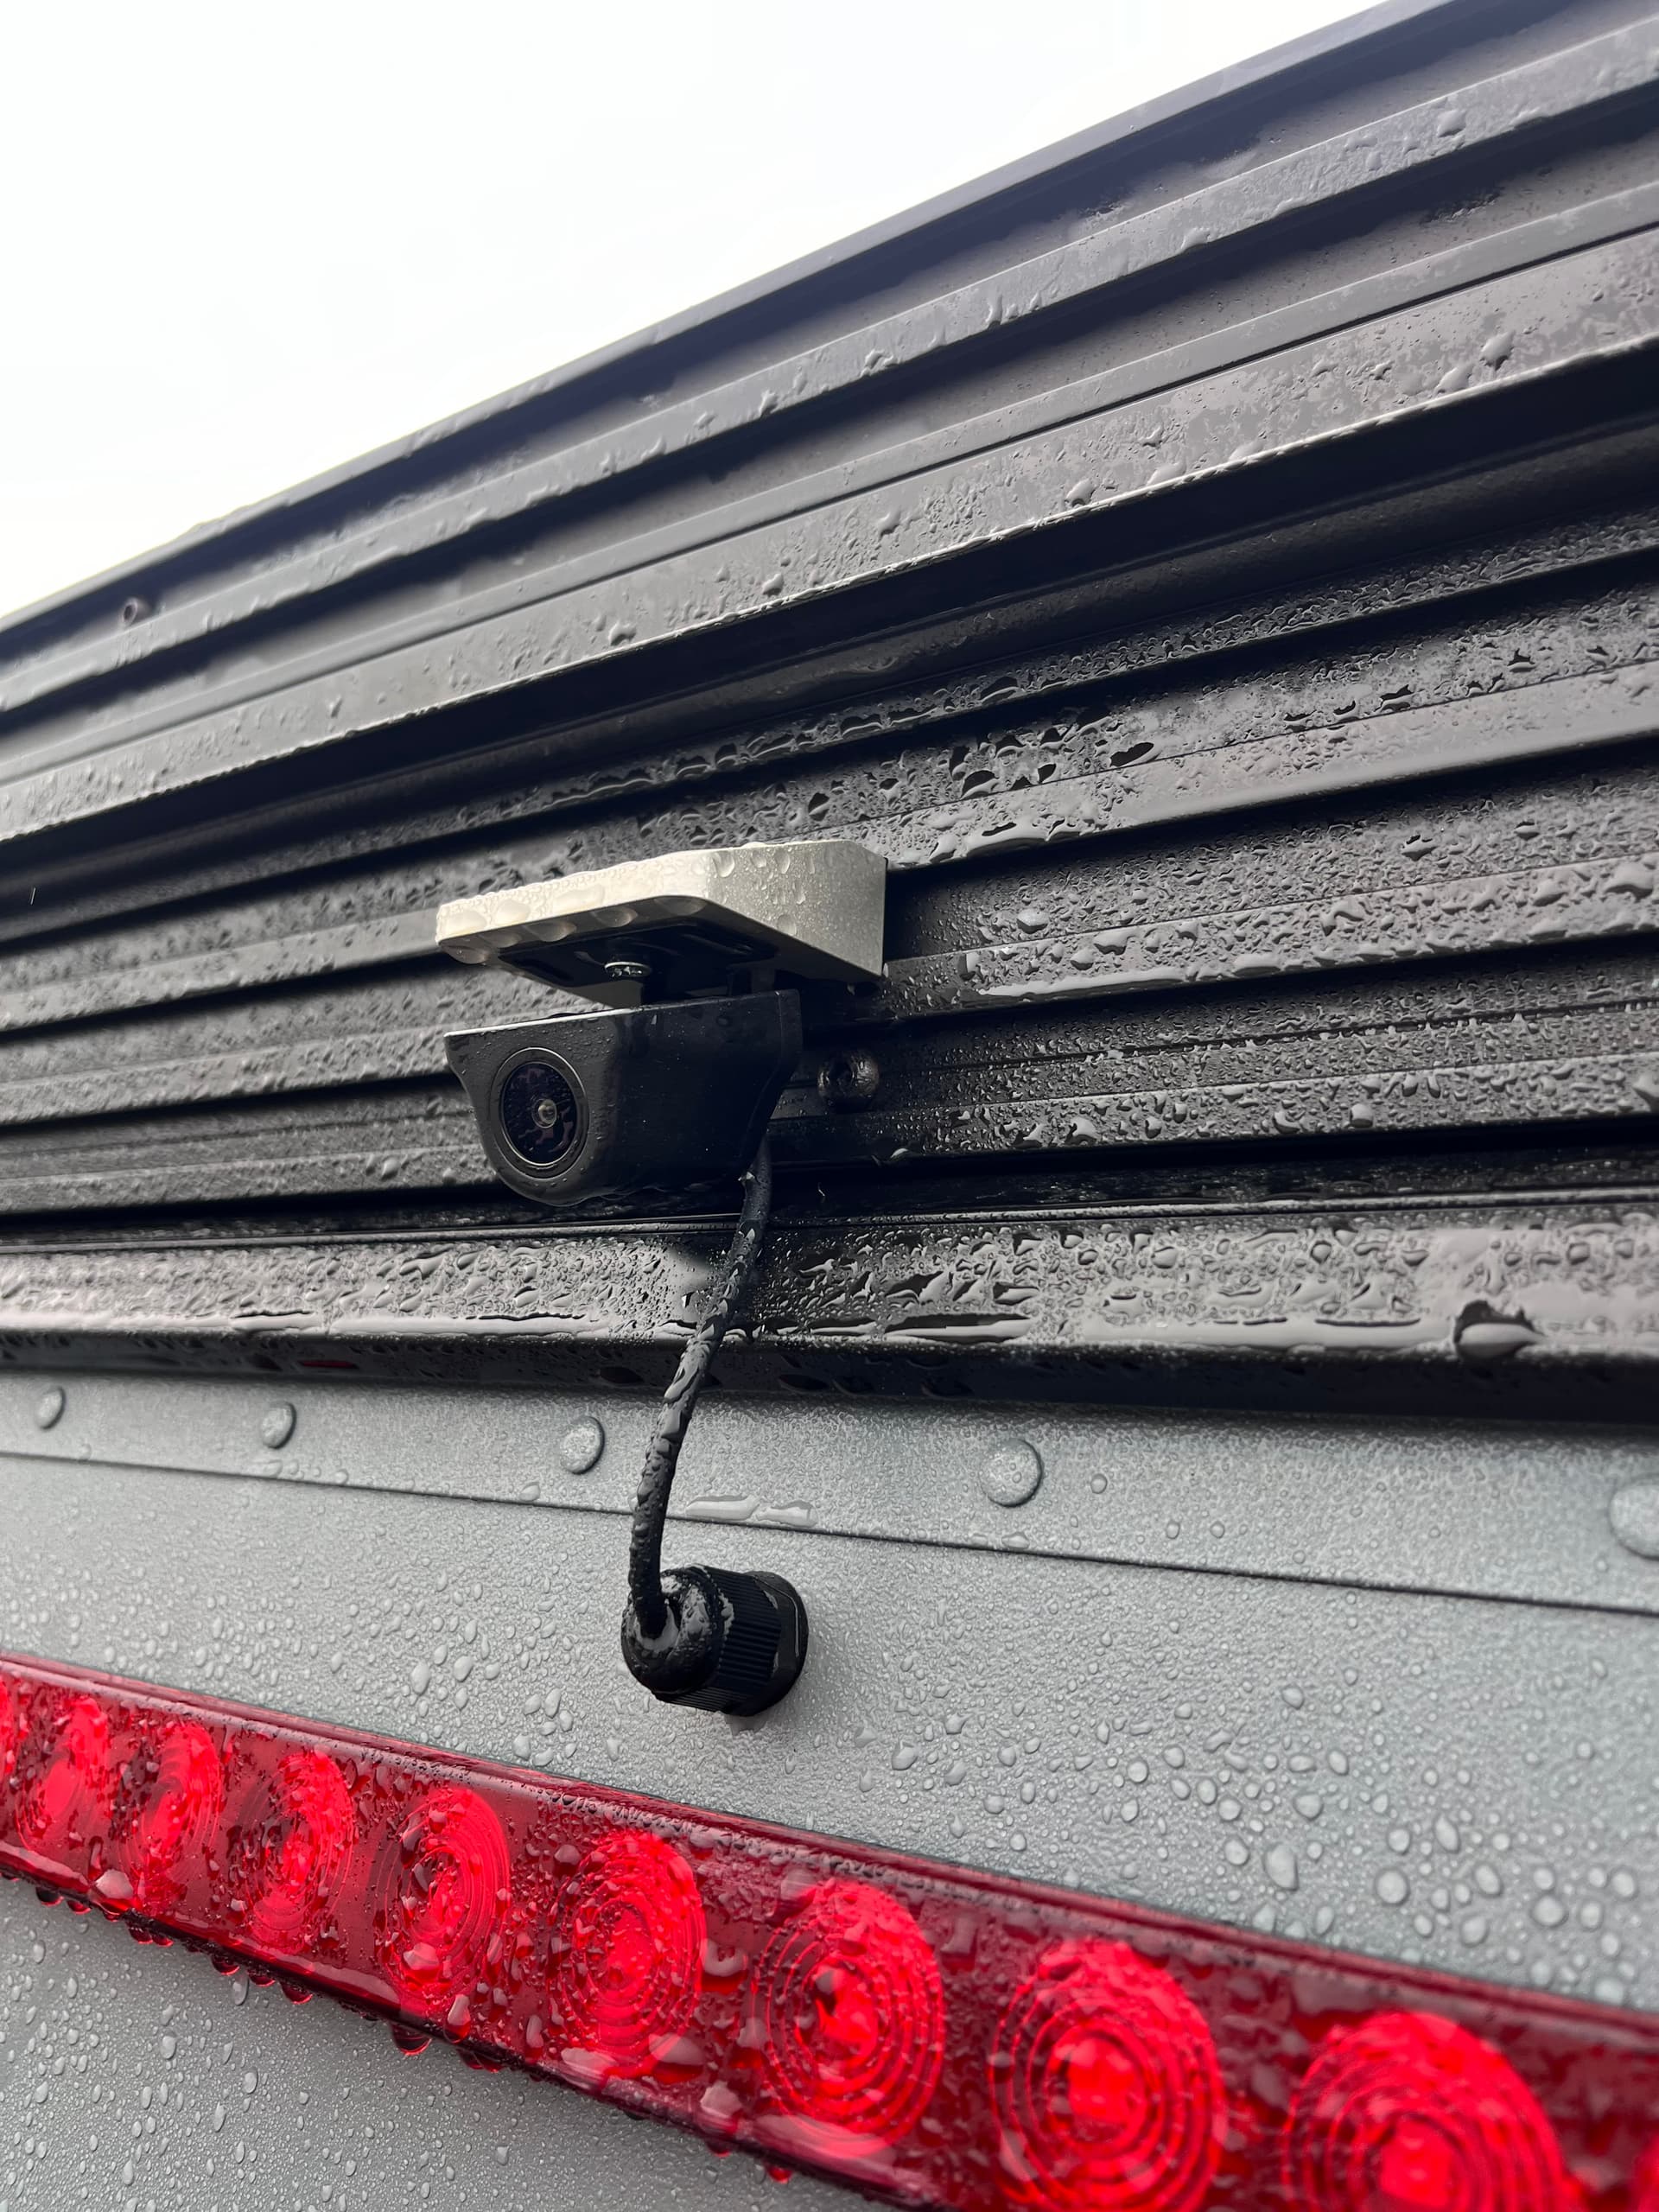
Updated my rear view camera last weekend. Got the Wolfbox upgraded camera, not sure if the video quality is much better but it has the advantage that I can angle the camera so now I can use the full view on the mirror and see better with it. I also drilled a hole in my back panel and used a PG7 cable gland to route the cable into the camper and no longer have it going around the outside. It now just runs along with the third brake light cable in the camper and then into the cable shroud with my solar cables. To get it into the cab I still ran it along the cables and then up through the grommet below the driver’s seat. Much cleaner install and a couple of days into the Southern California rain and it’s definitely watertight.
One minor mistake I made it drilling the hole centered in the panel and then having the camera right above it. With a cable gland to run the cable the camera was then hitting the cable gland and wouldn’t fully open the panel. So I just moved the camera over an inch and all was good.
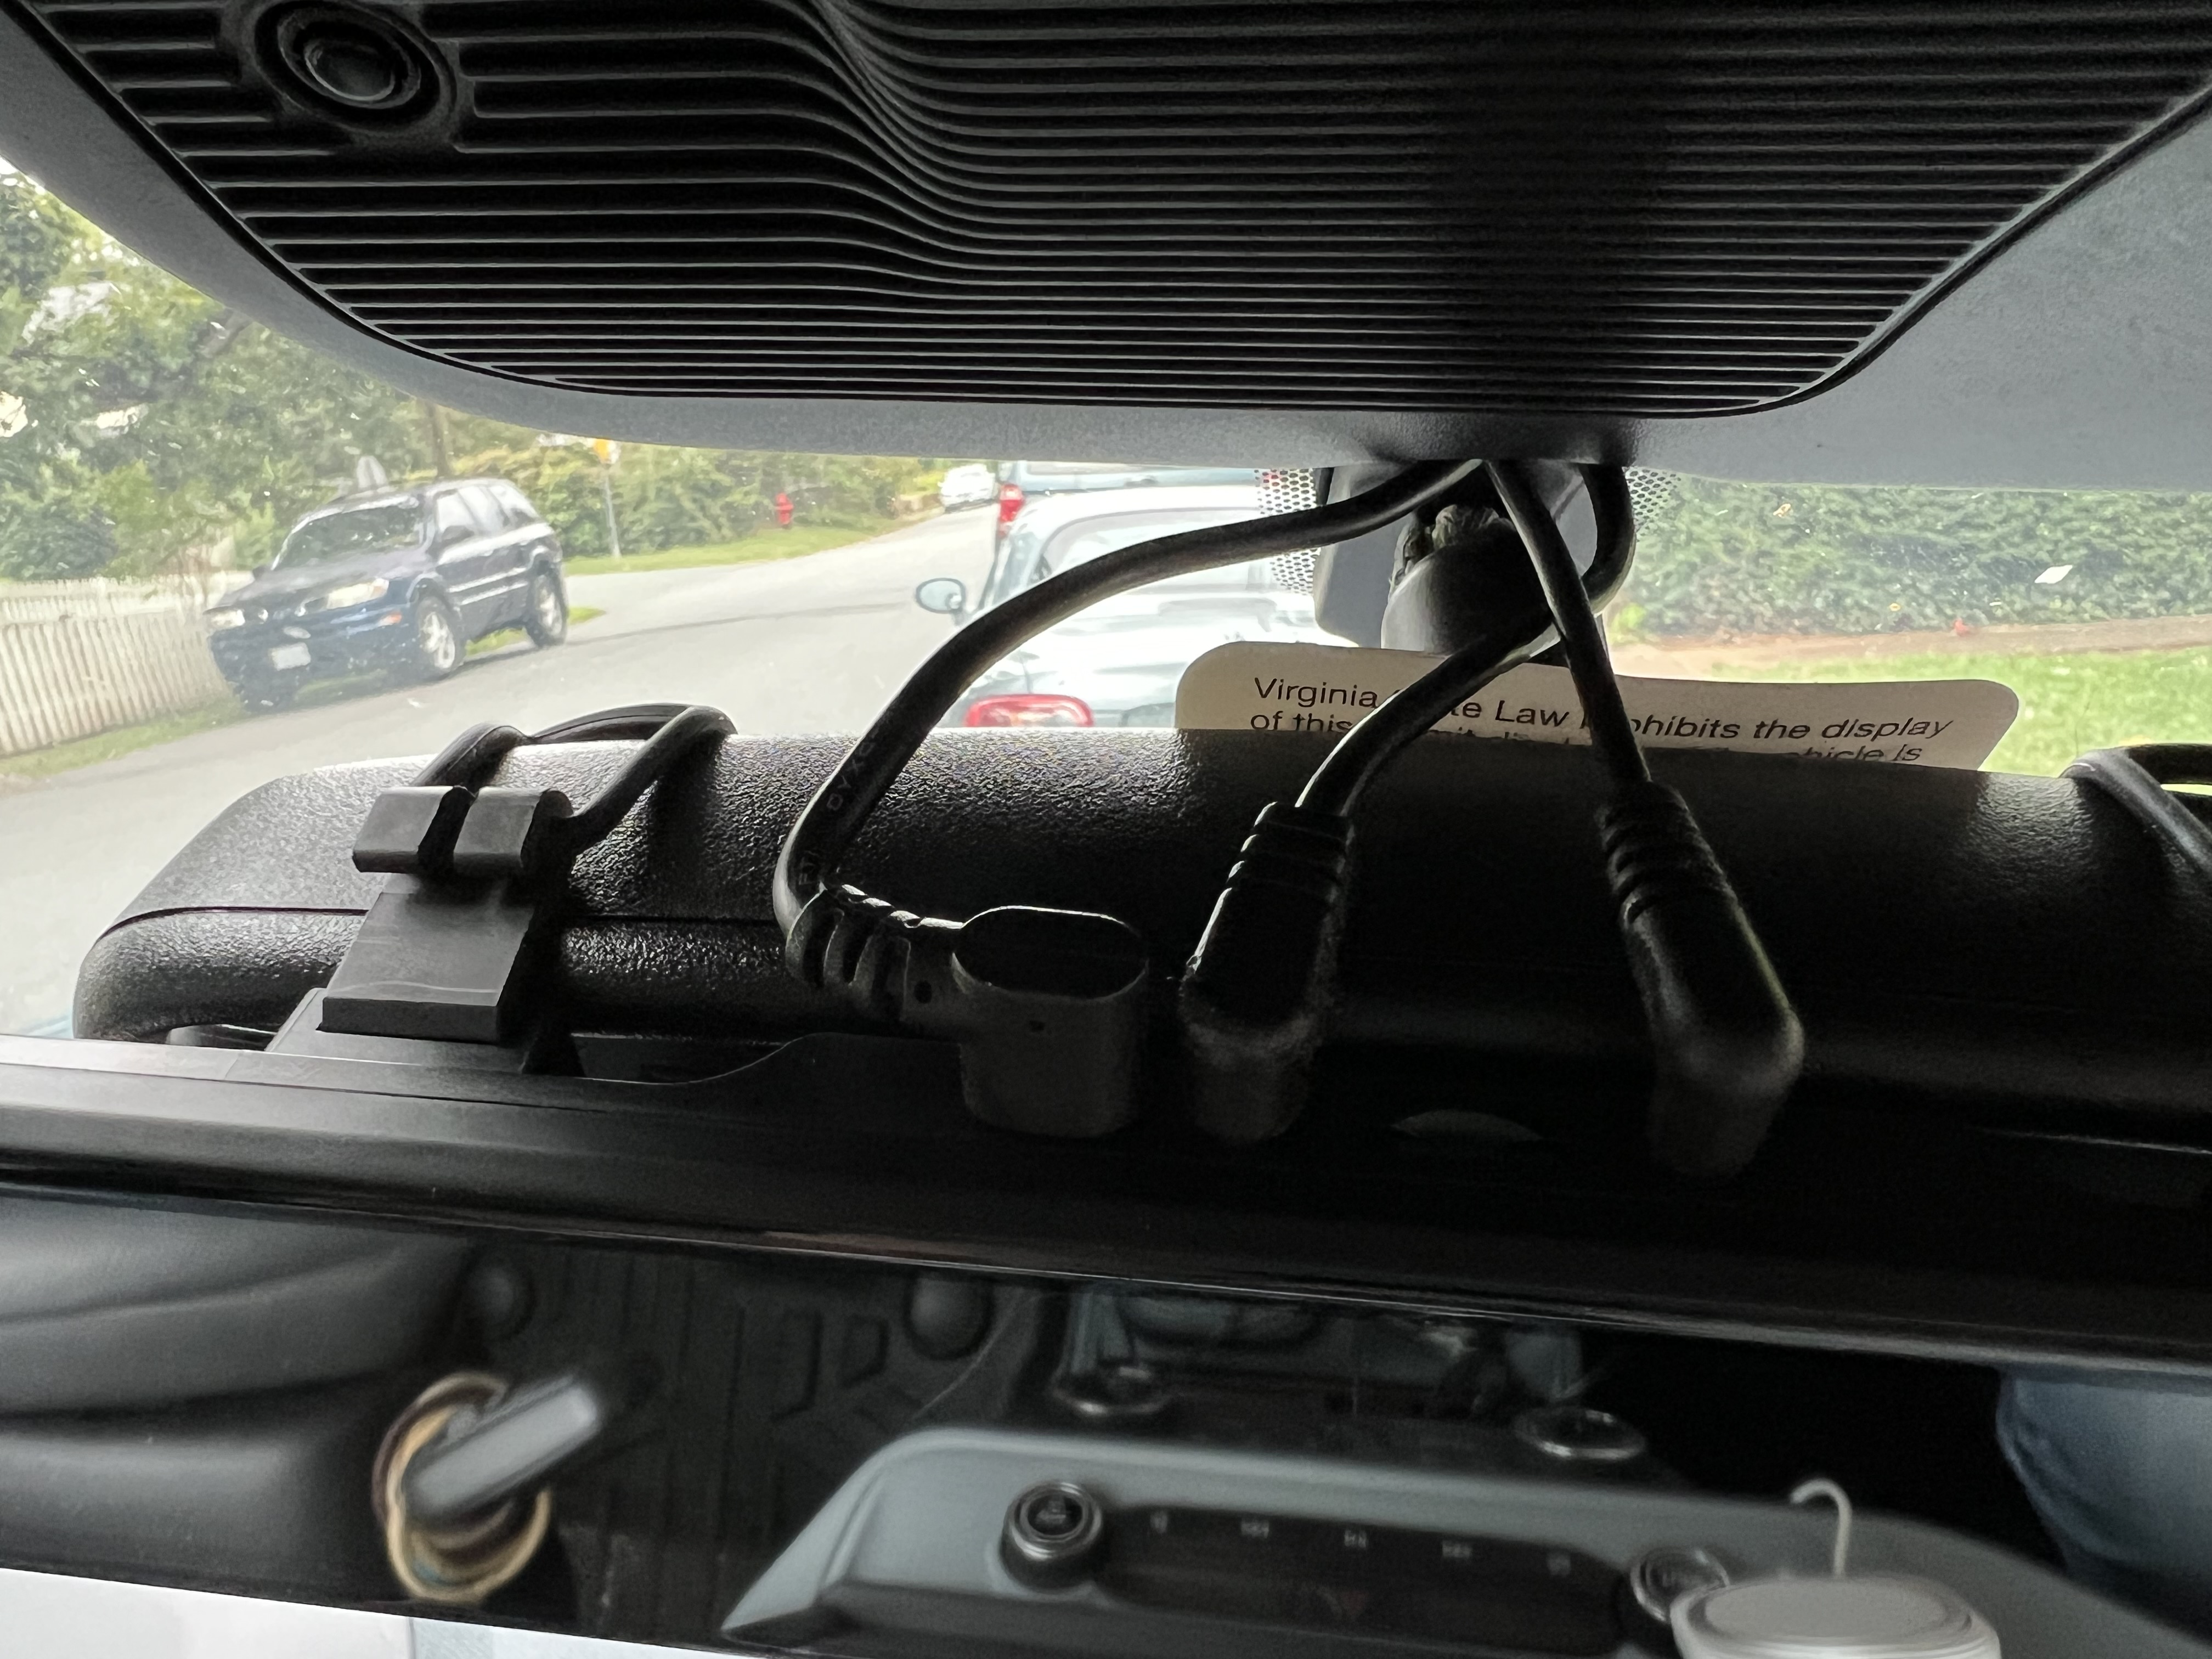
Also replaced the Tacoma mirror with the Wolfbox mirror using their OEM bracket which is also much cleaner in the cab than having the Wolfbox mirror on top of the OEM. Wouldn’t recommend Wolfbox’s anti-glare screen protector though, that thing is pretty much useless
Excellent thank you for that update. That’s a bummer on not being able to center the camera and the cable pass through with my OCD but I feel the camera offset slightly would be less noticeable then the cable.
Can you share some more photos if you don’t mind. Routing (not in depth more so just the rear section) and the new OEM mirror mount?