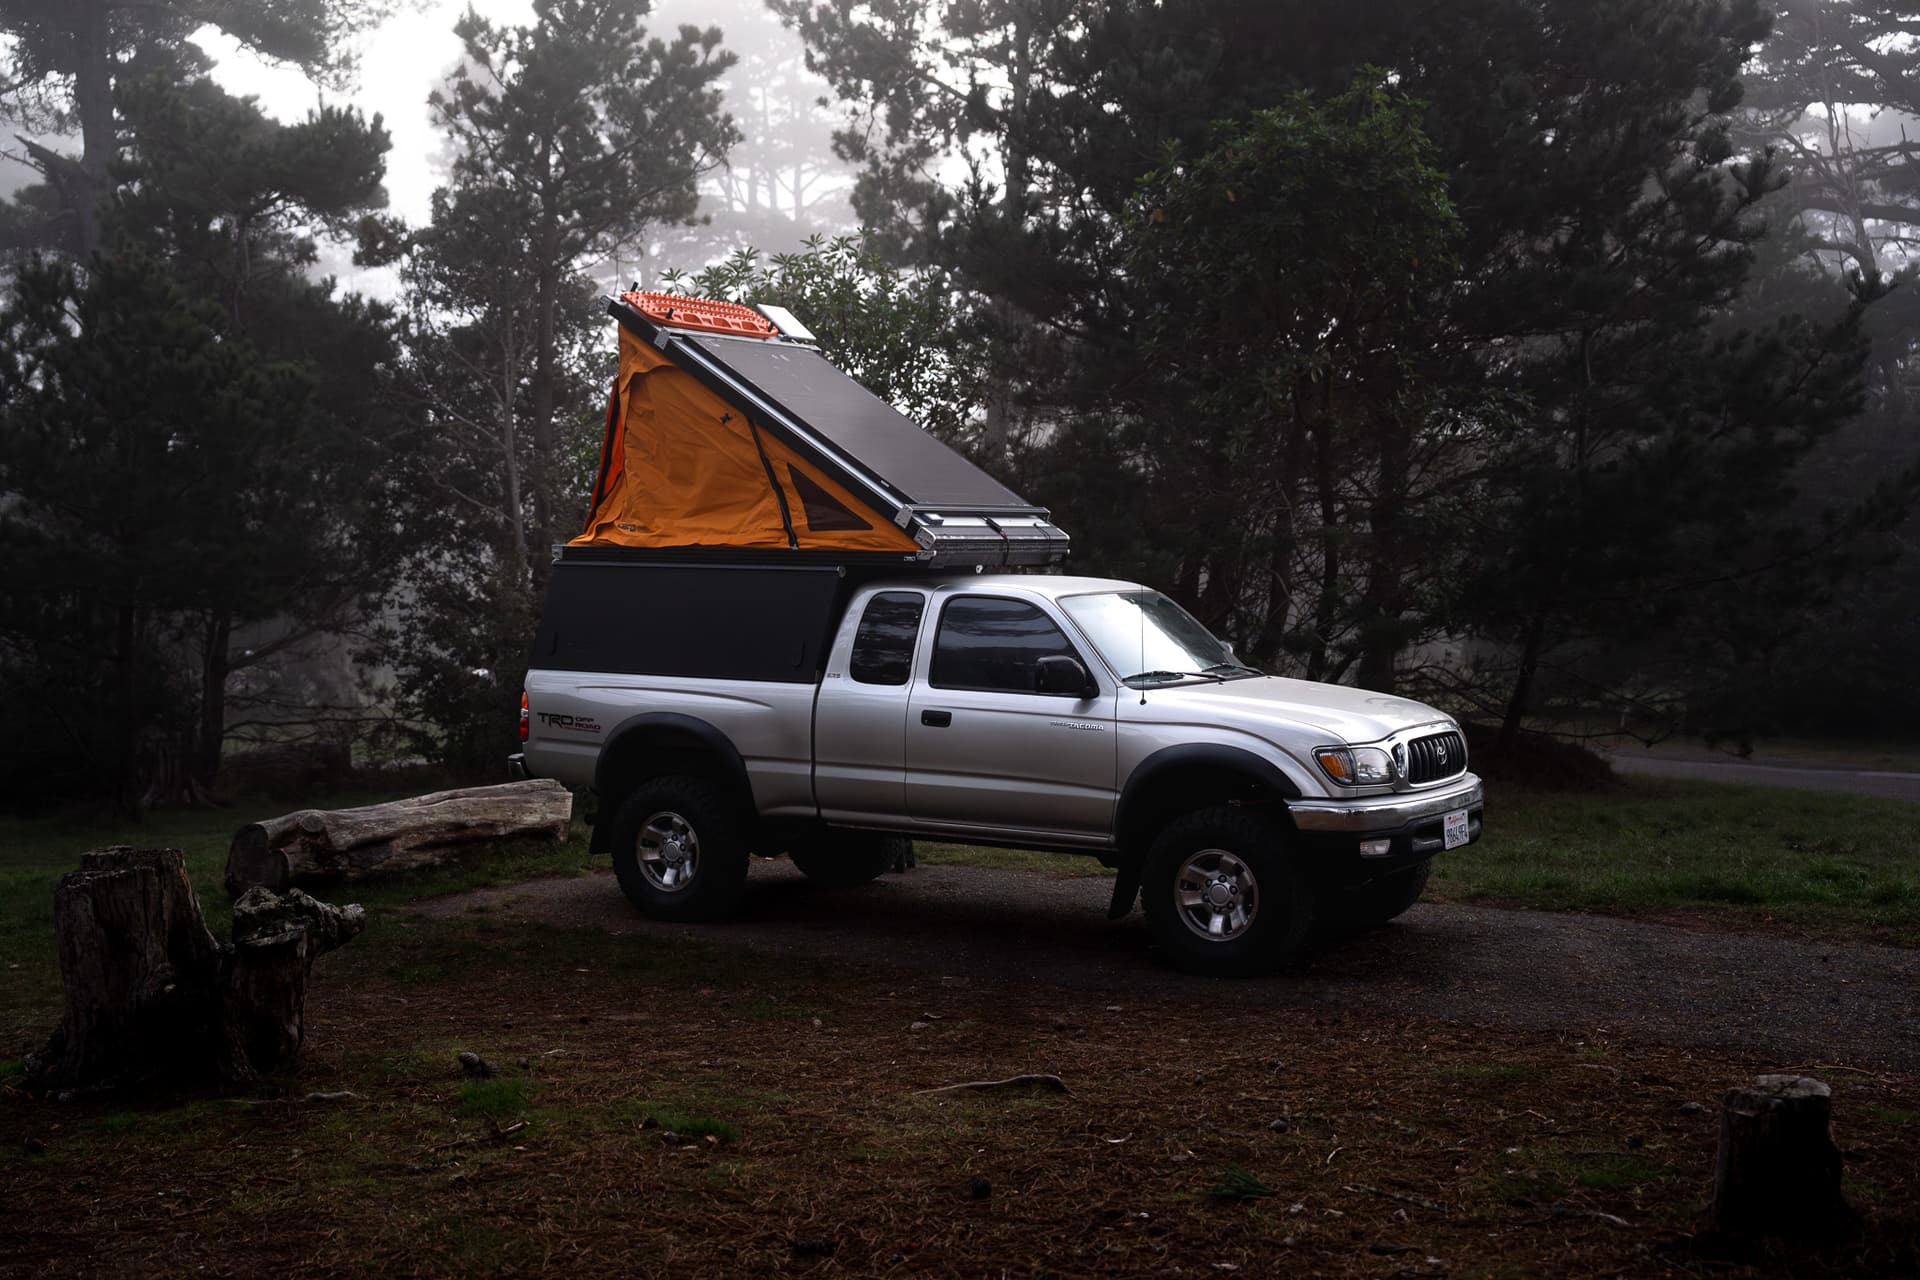
Shasta — 2003 Tacoma TRD Build
Hey all! I recently picked up my GFC and have been hard at work turning it into a little home on wheels. I’ve been meaning to start a build thread to track the work so here goes nothing.
Background
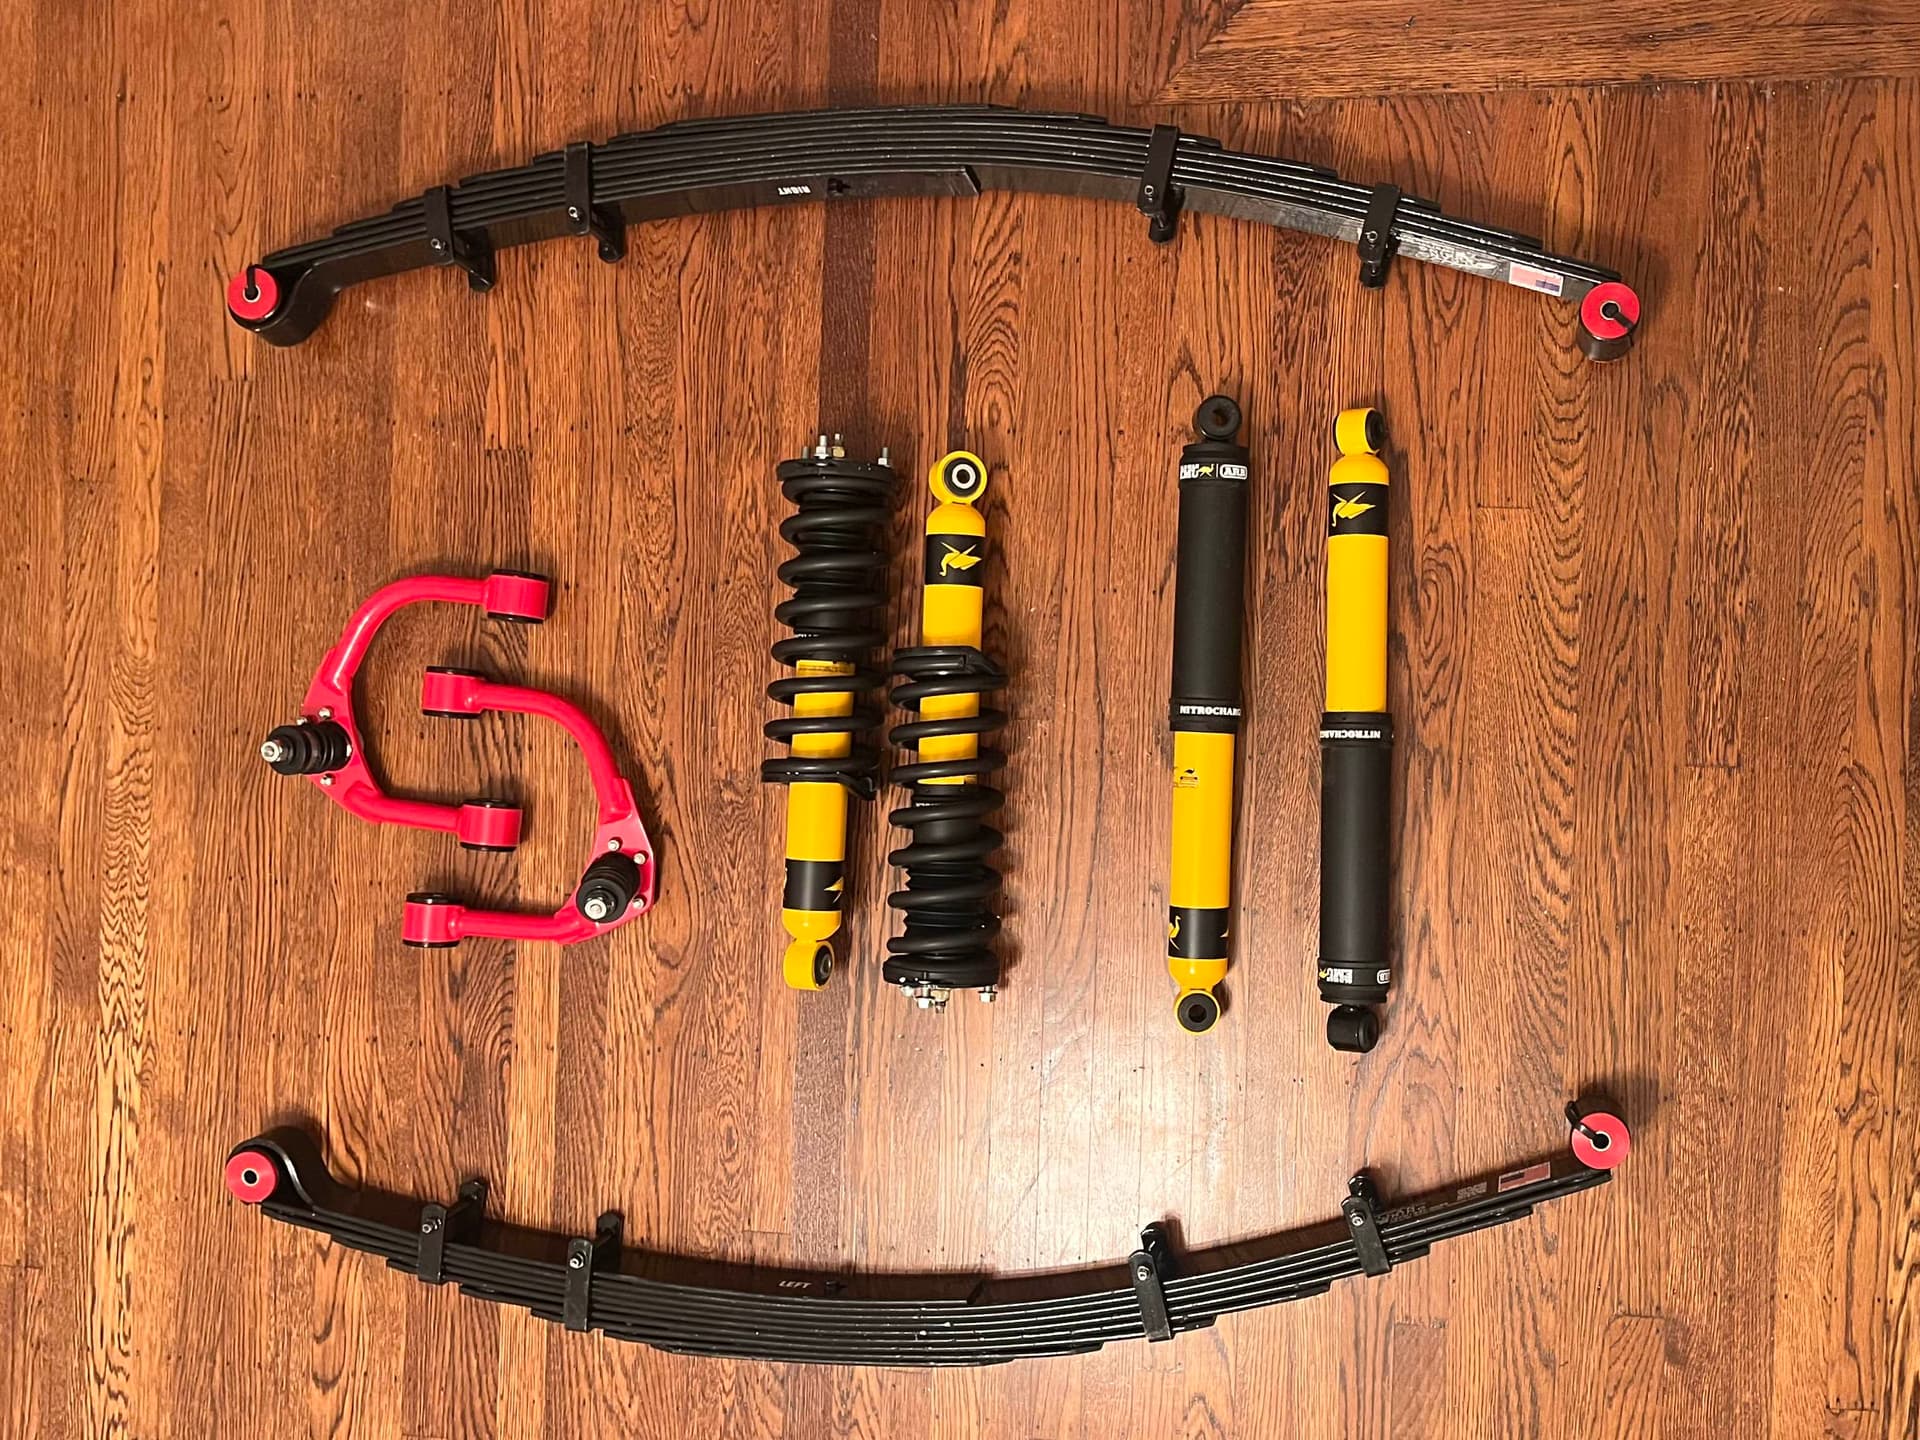
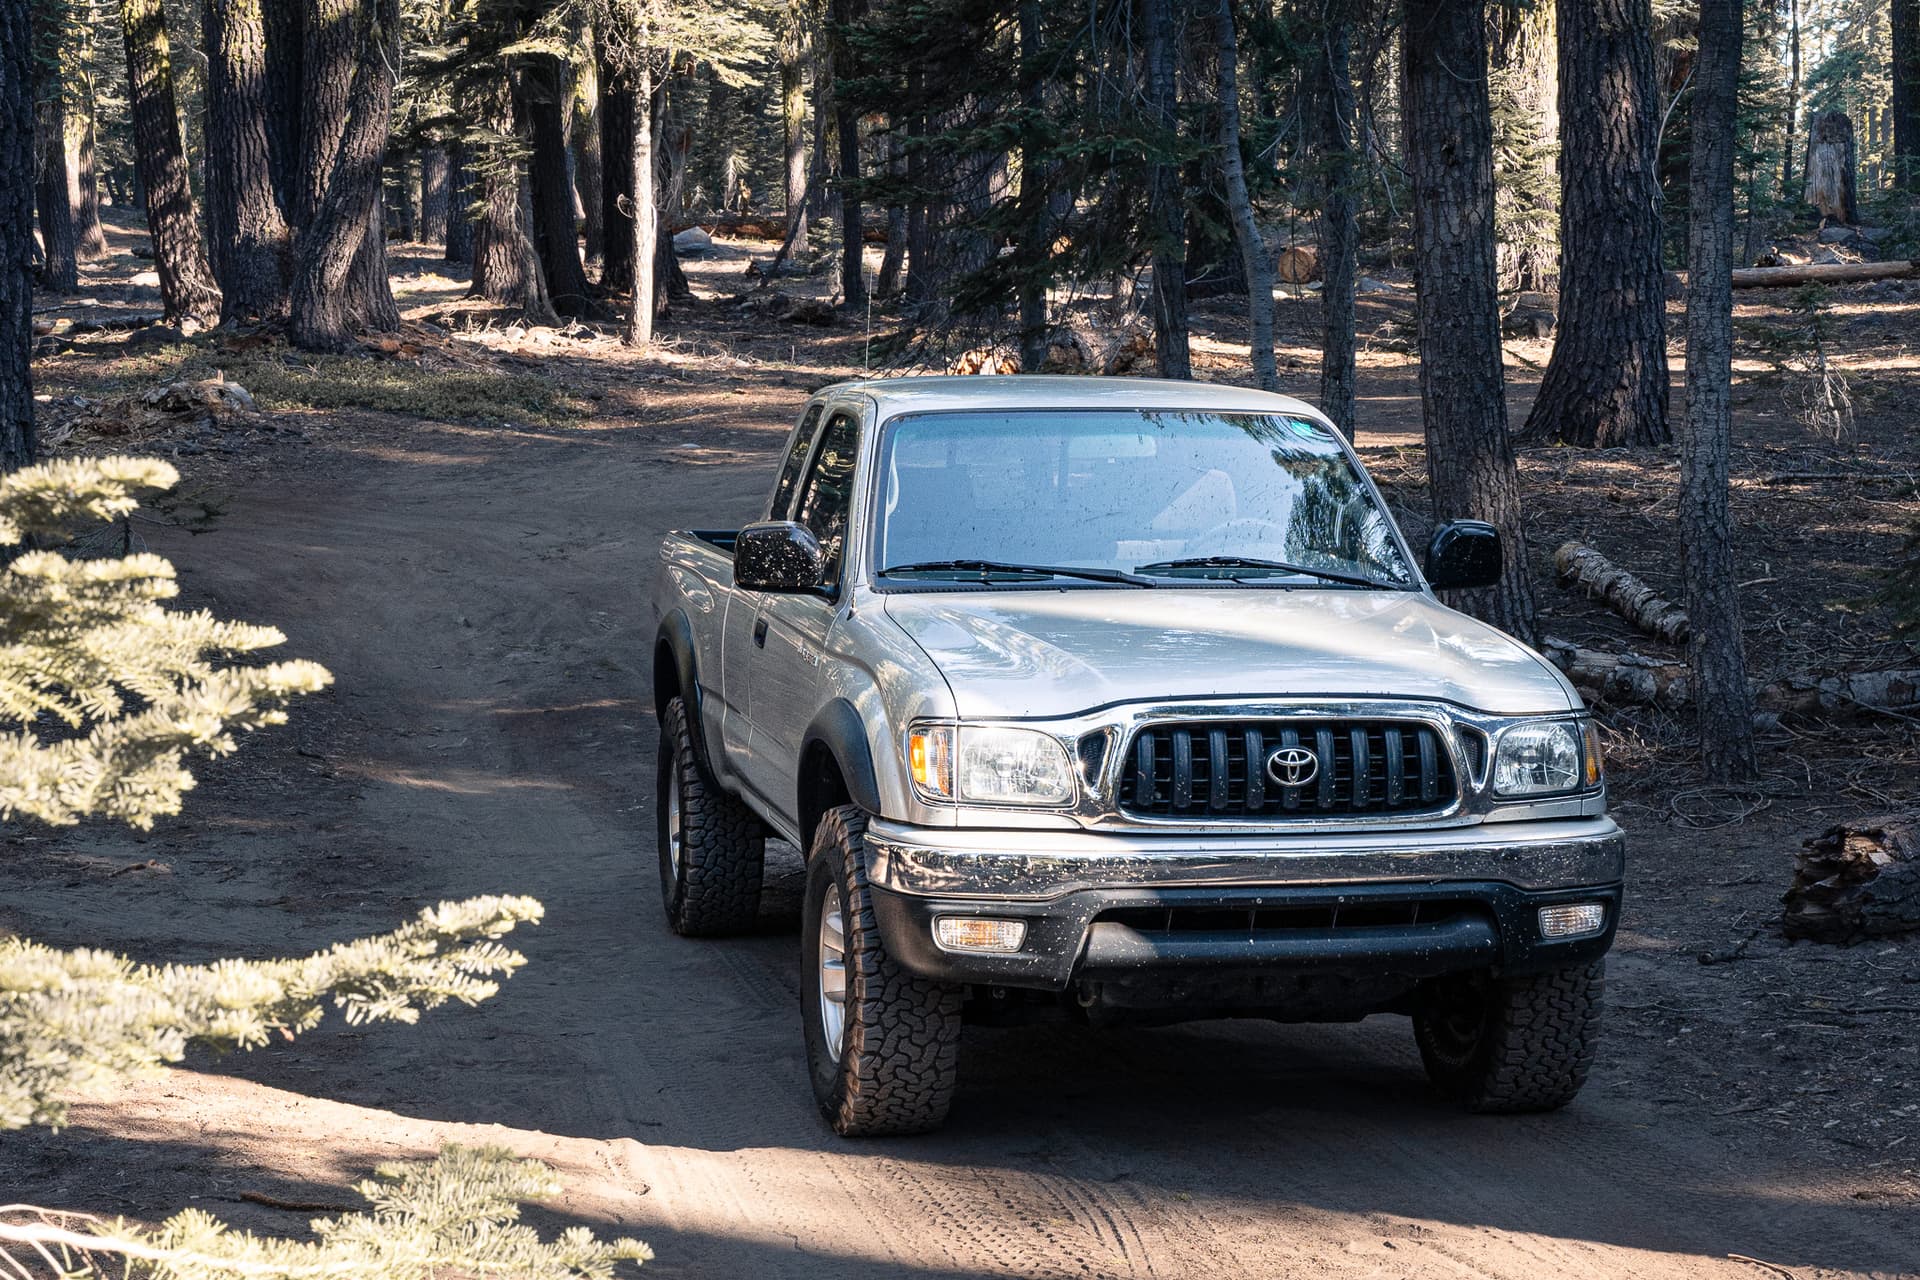
I converted and lived out of a RAM ProMaster cargo van full-time for a couple years but had somewhat grown out of it. If you’re curious you can see that build here. While unintended, I pushed that vehicle to its off-roading limit so it was time for something new. After selling my van, I purchased a 2003 Toyota Tacoma TRD and ordered a GFC V2 Pro which provides a great base for a more capable adventure vehicle.
Goals
I no longer live in a vehicle full-time but still plan to use this rig for weeks to months at a time to explore remote areas of North America. My goal is to be able to comfortable support two people fully off-grid for up to a week or one person up to two weeks at a time. I’m also a remote worker so I’ll need a beefy enough power setup to allow me to work while on the road.
Planning
I happened to run into @DirtTrailsWanted earlier this year in Baja so was able to get an up close look at their build (huge shout out to them!). Their setup is pretty dialed in and I love their layout so I plan to take their Tundra build and use that as heavy inspiration for this Tacoma build.
Build Updates
Build Start — 8/26/25
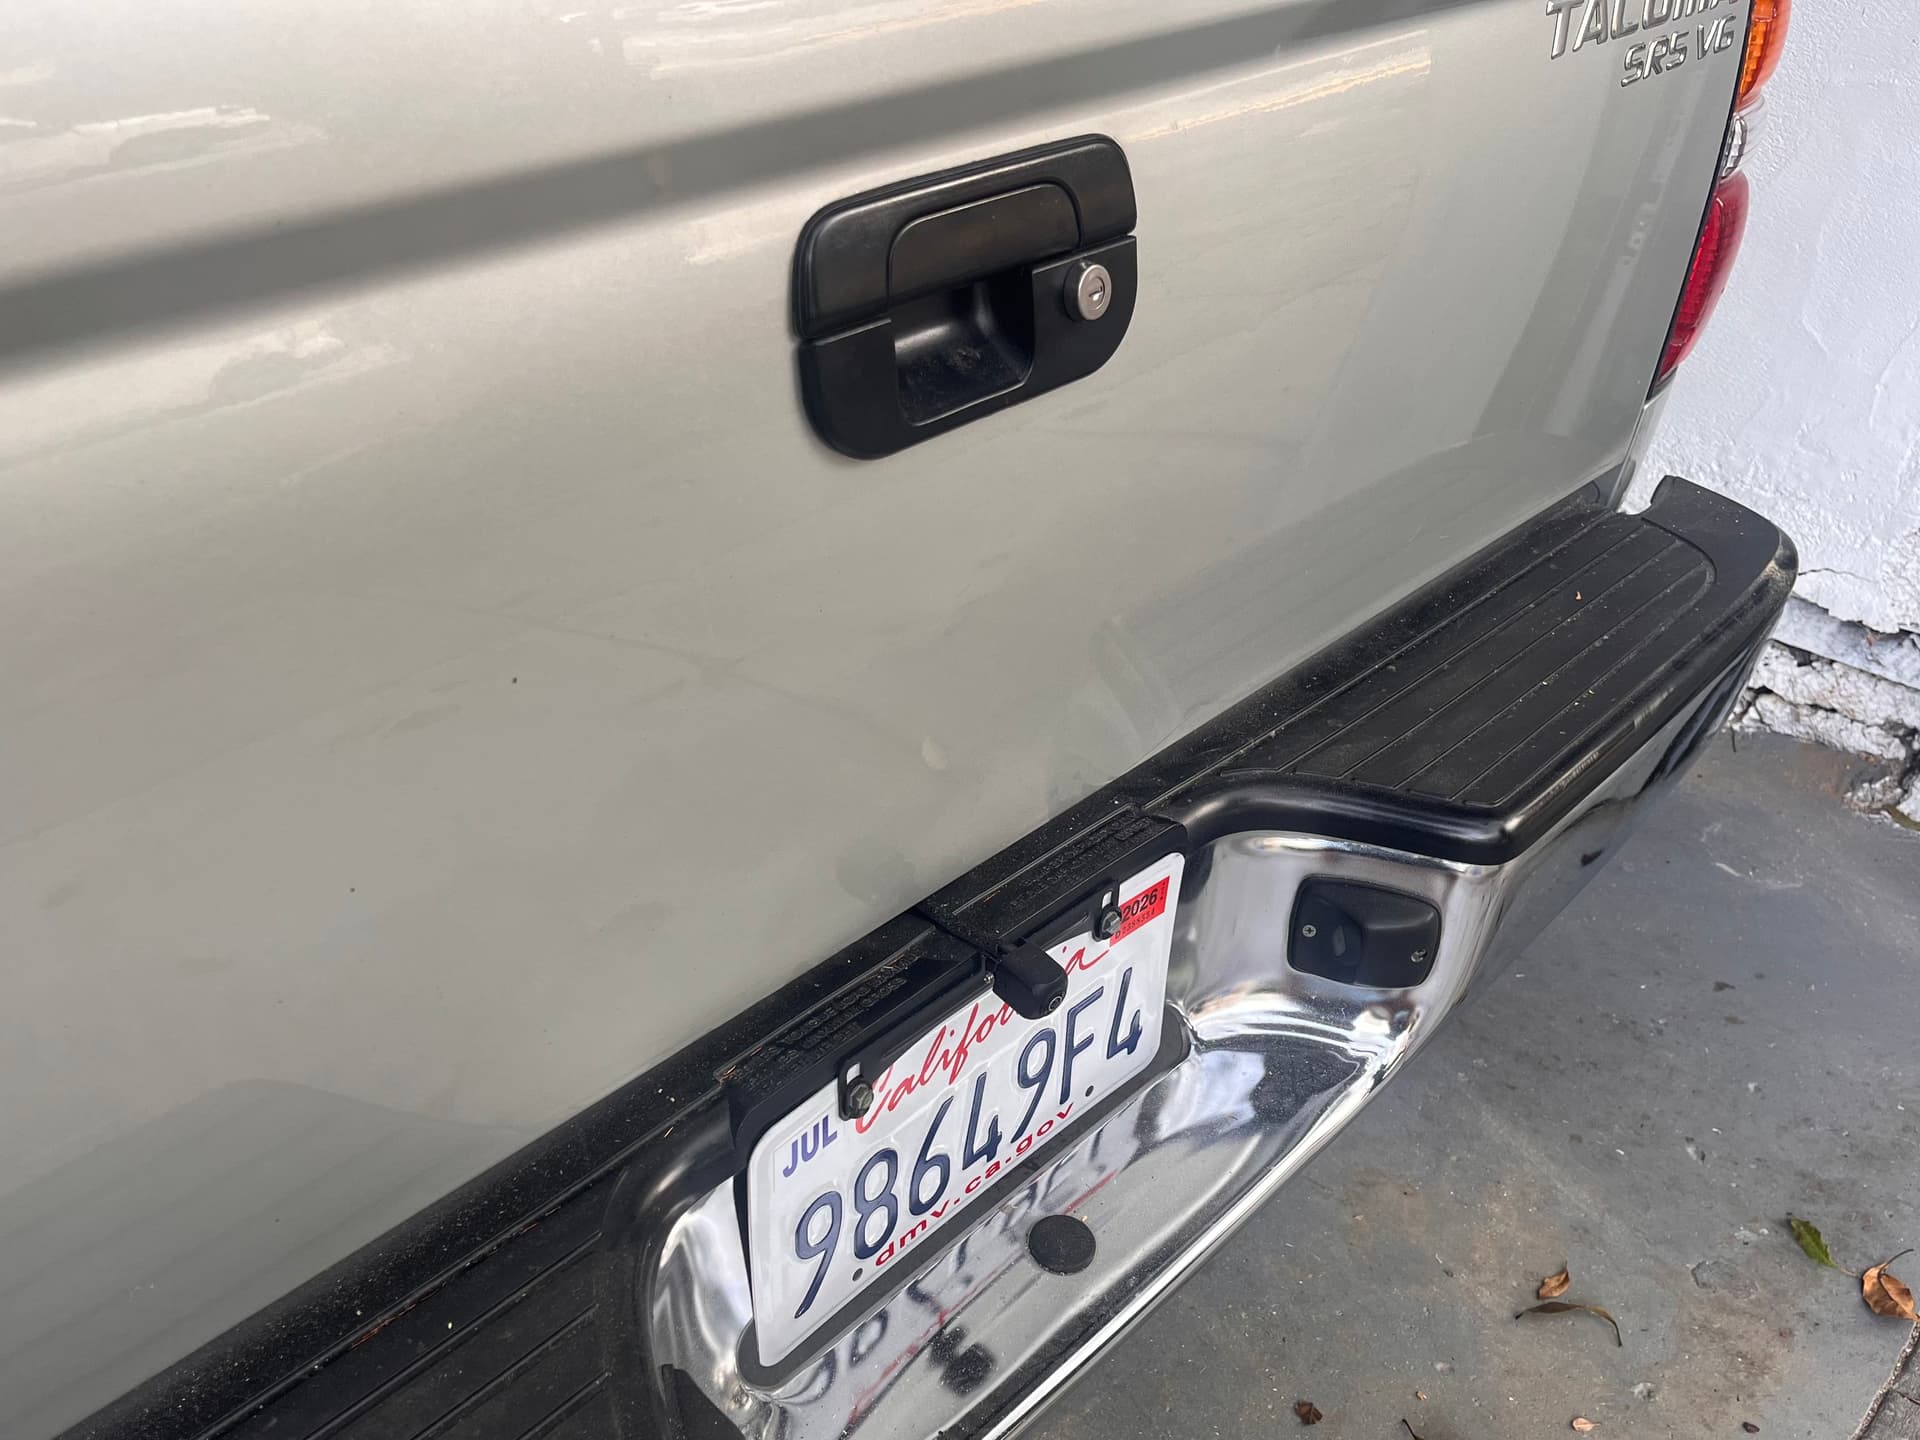
While I didn’t have my GFC installed at this point, I wanted to start this build ASAP as I’d like to have it completed by the end of December so that I can make it down to Baja for the winter season. I began by installing a tailgate lock as well as a backup camera.
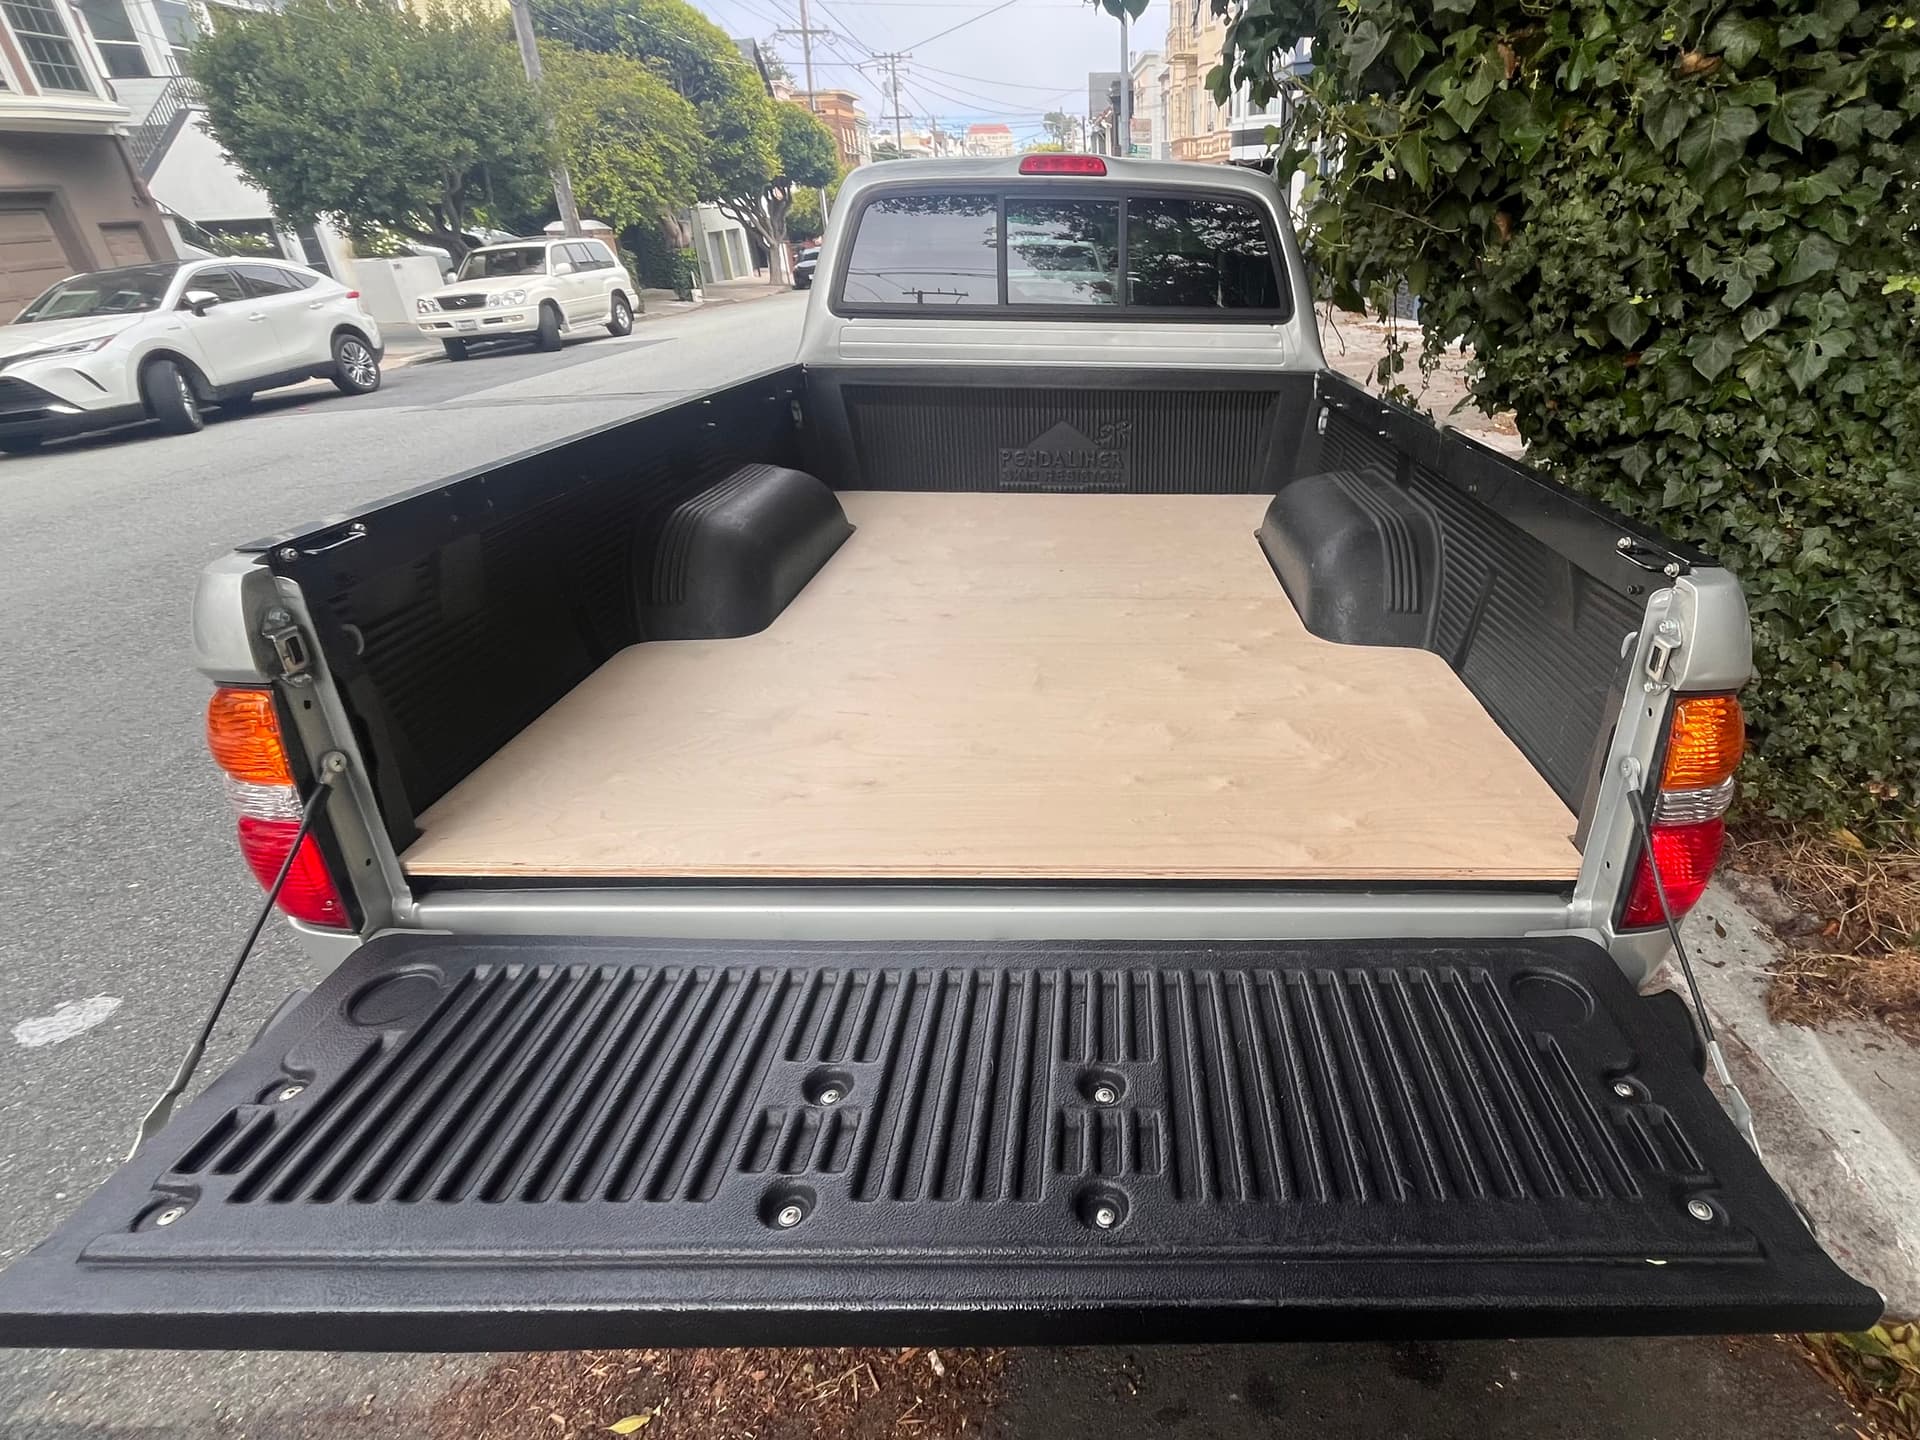
Flooring — 9/9/25
Using two large pieces of 3/4" 4"x8" birch plywood, I cut what would become the floor of the camper.
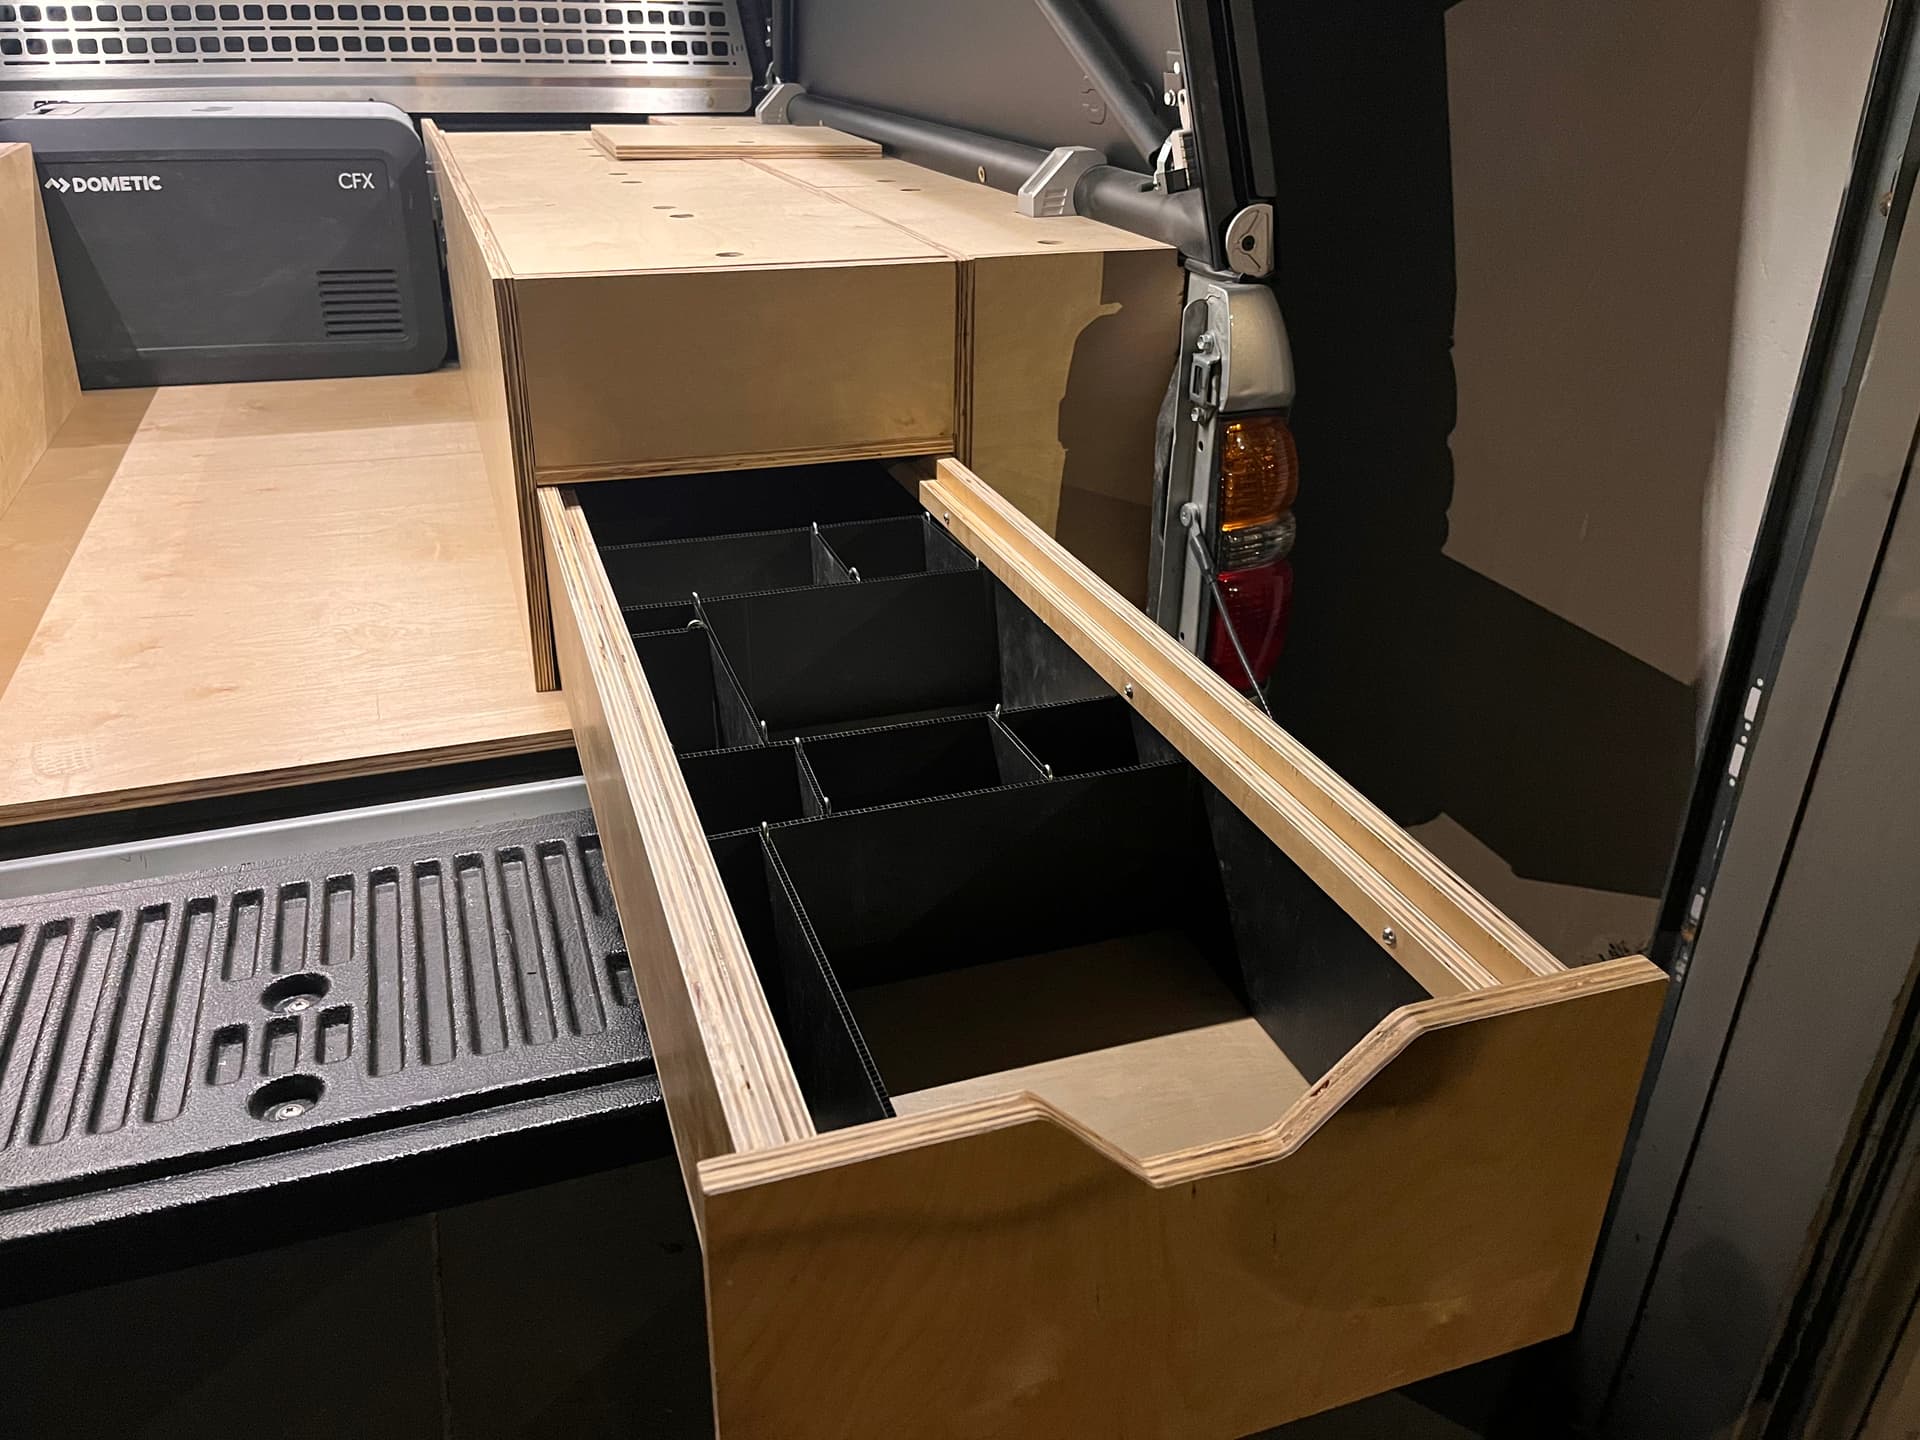
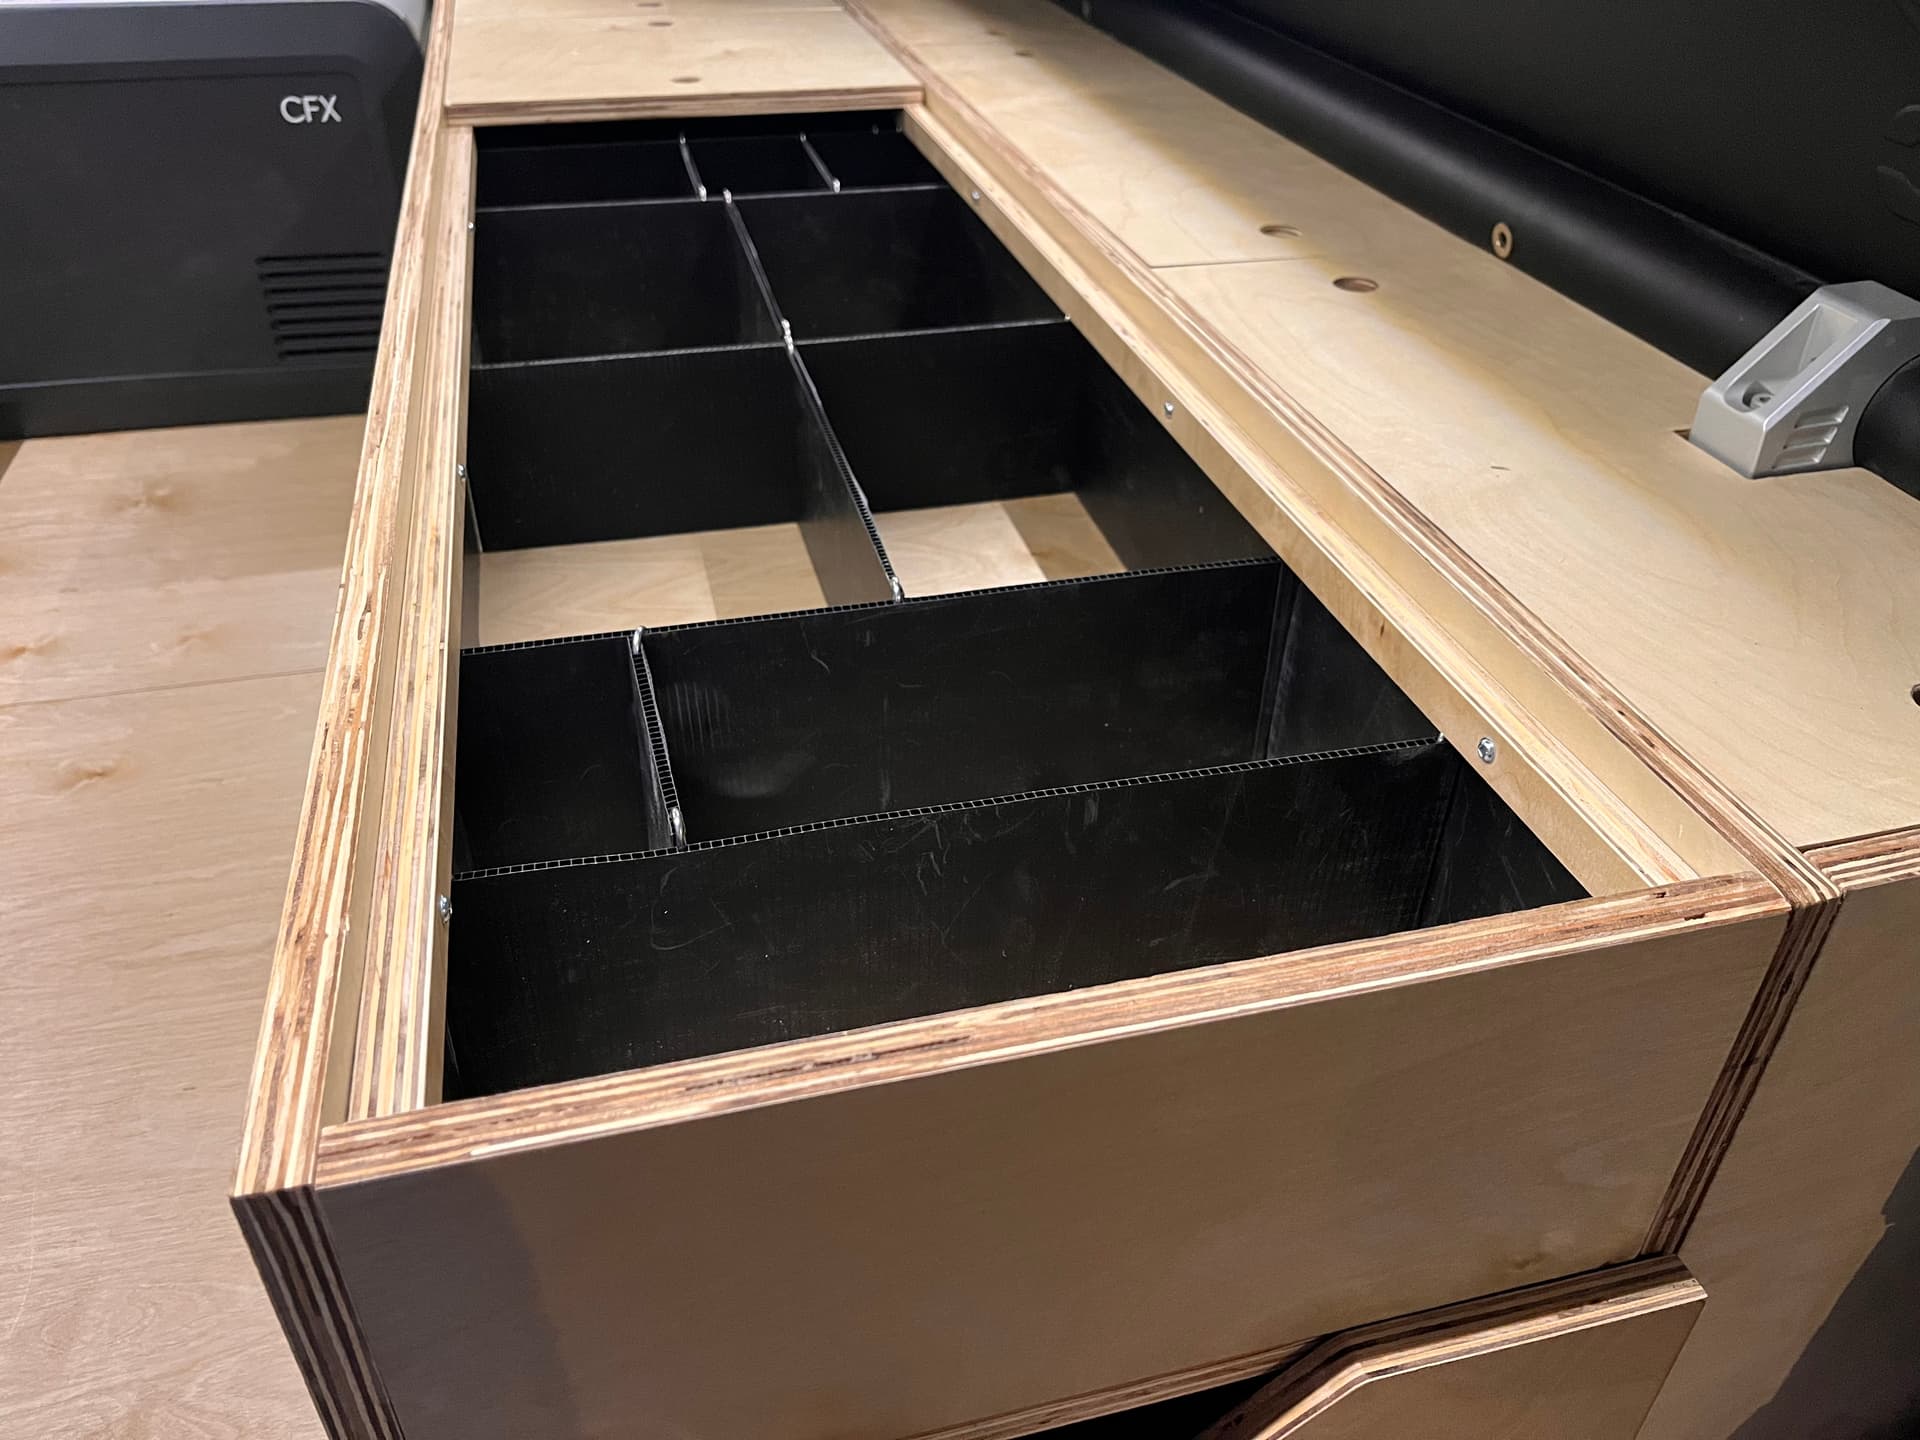
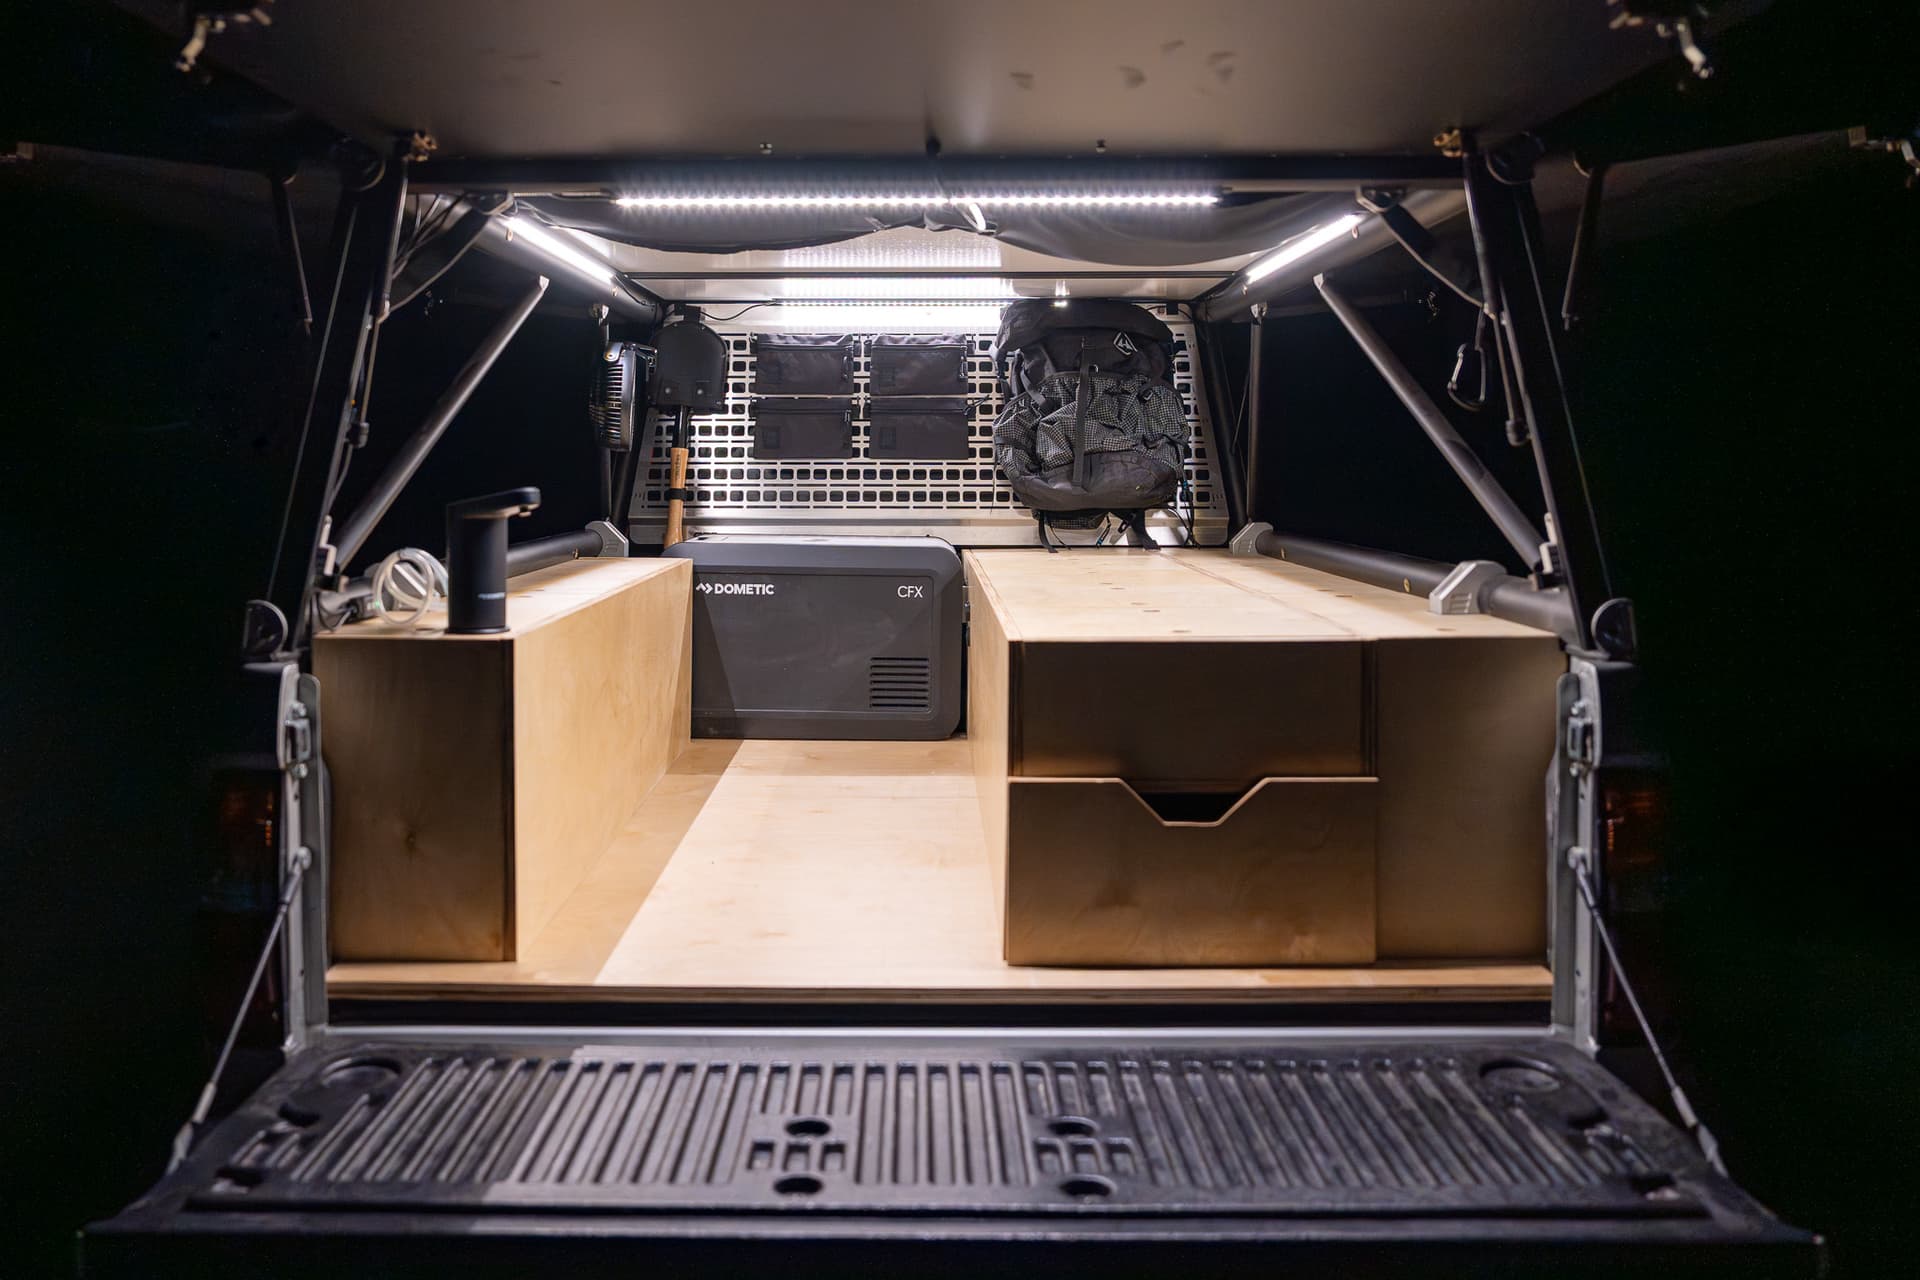
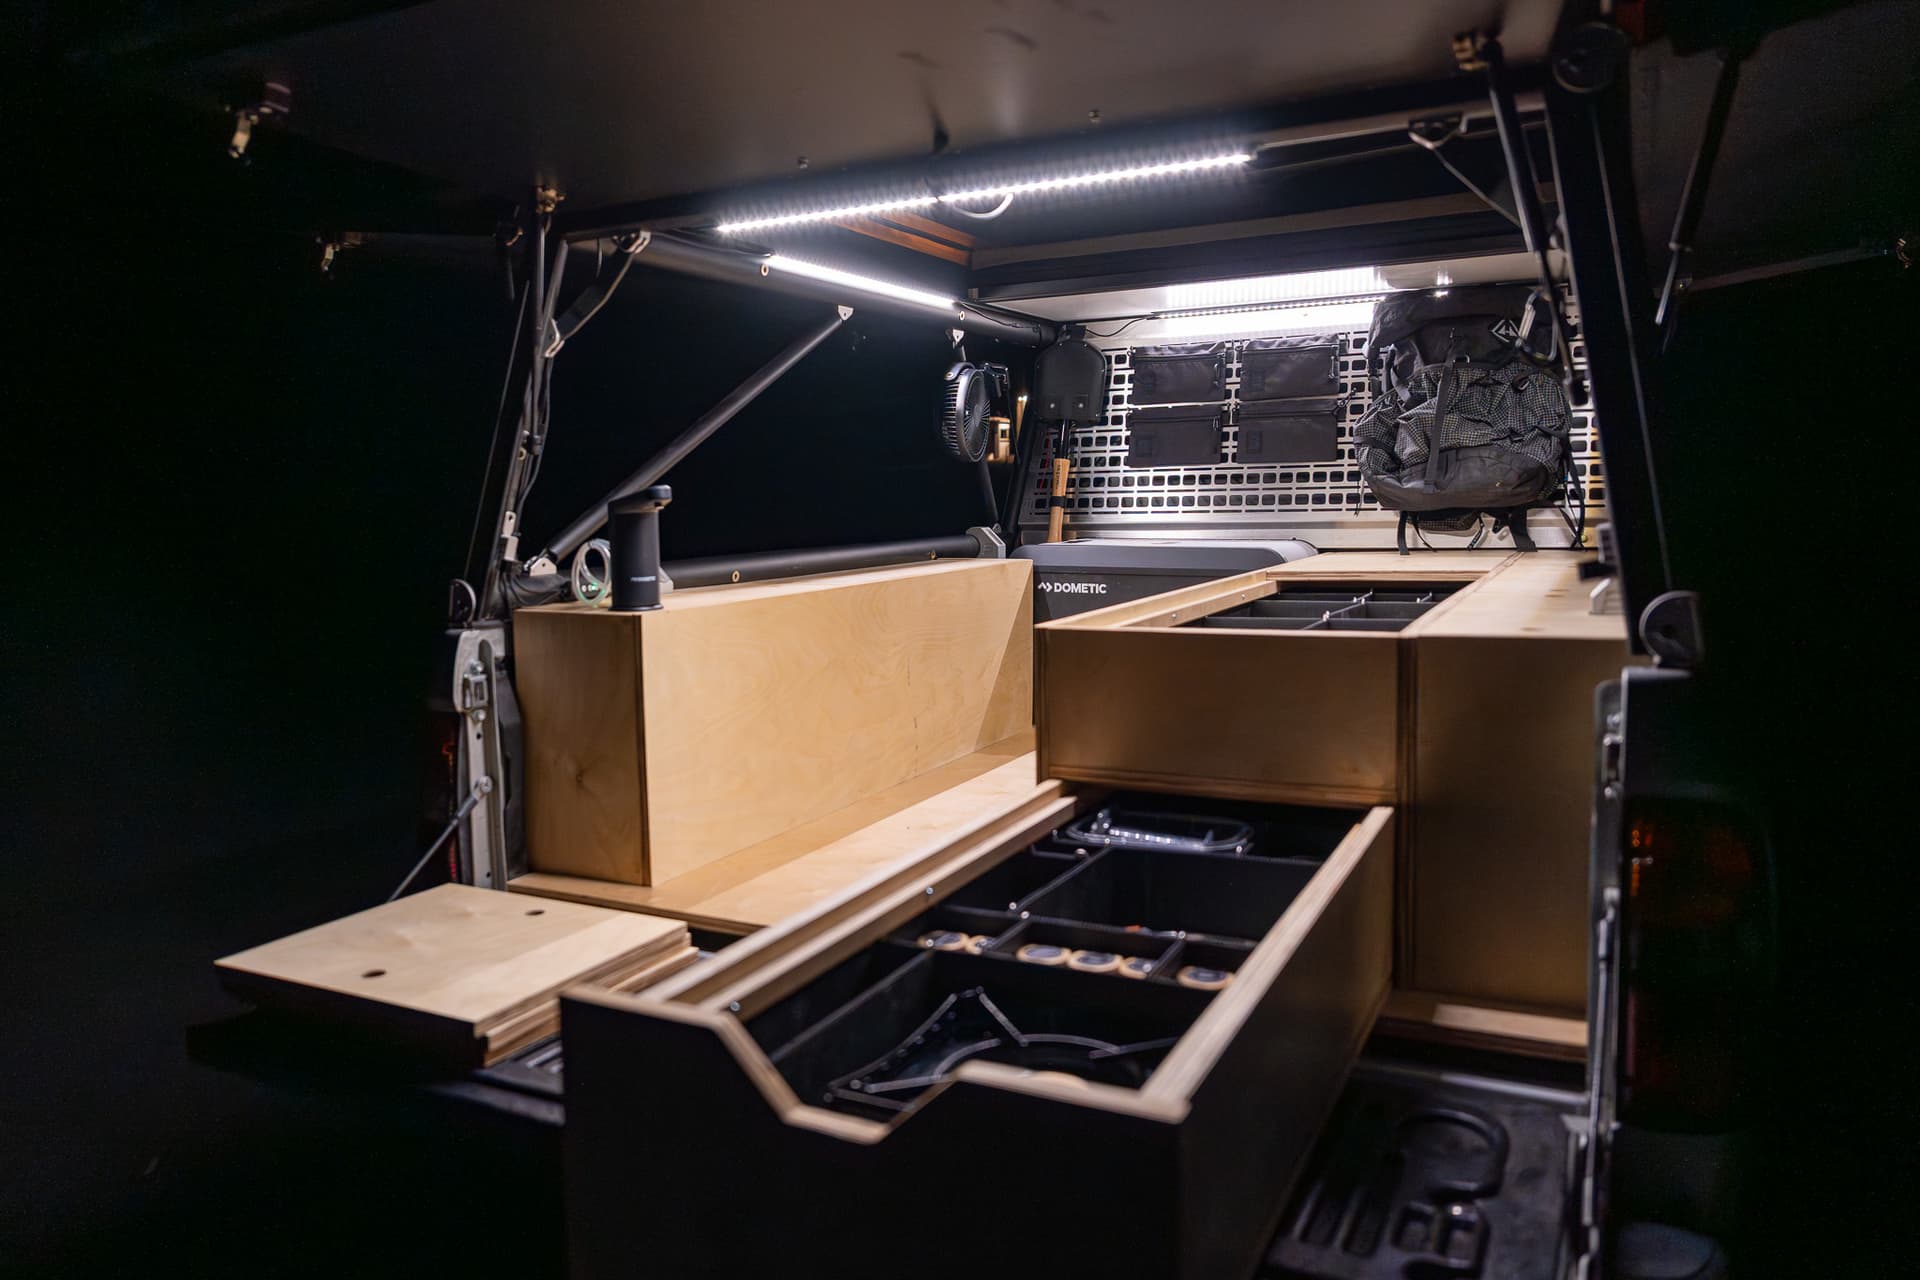
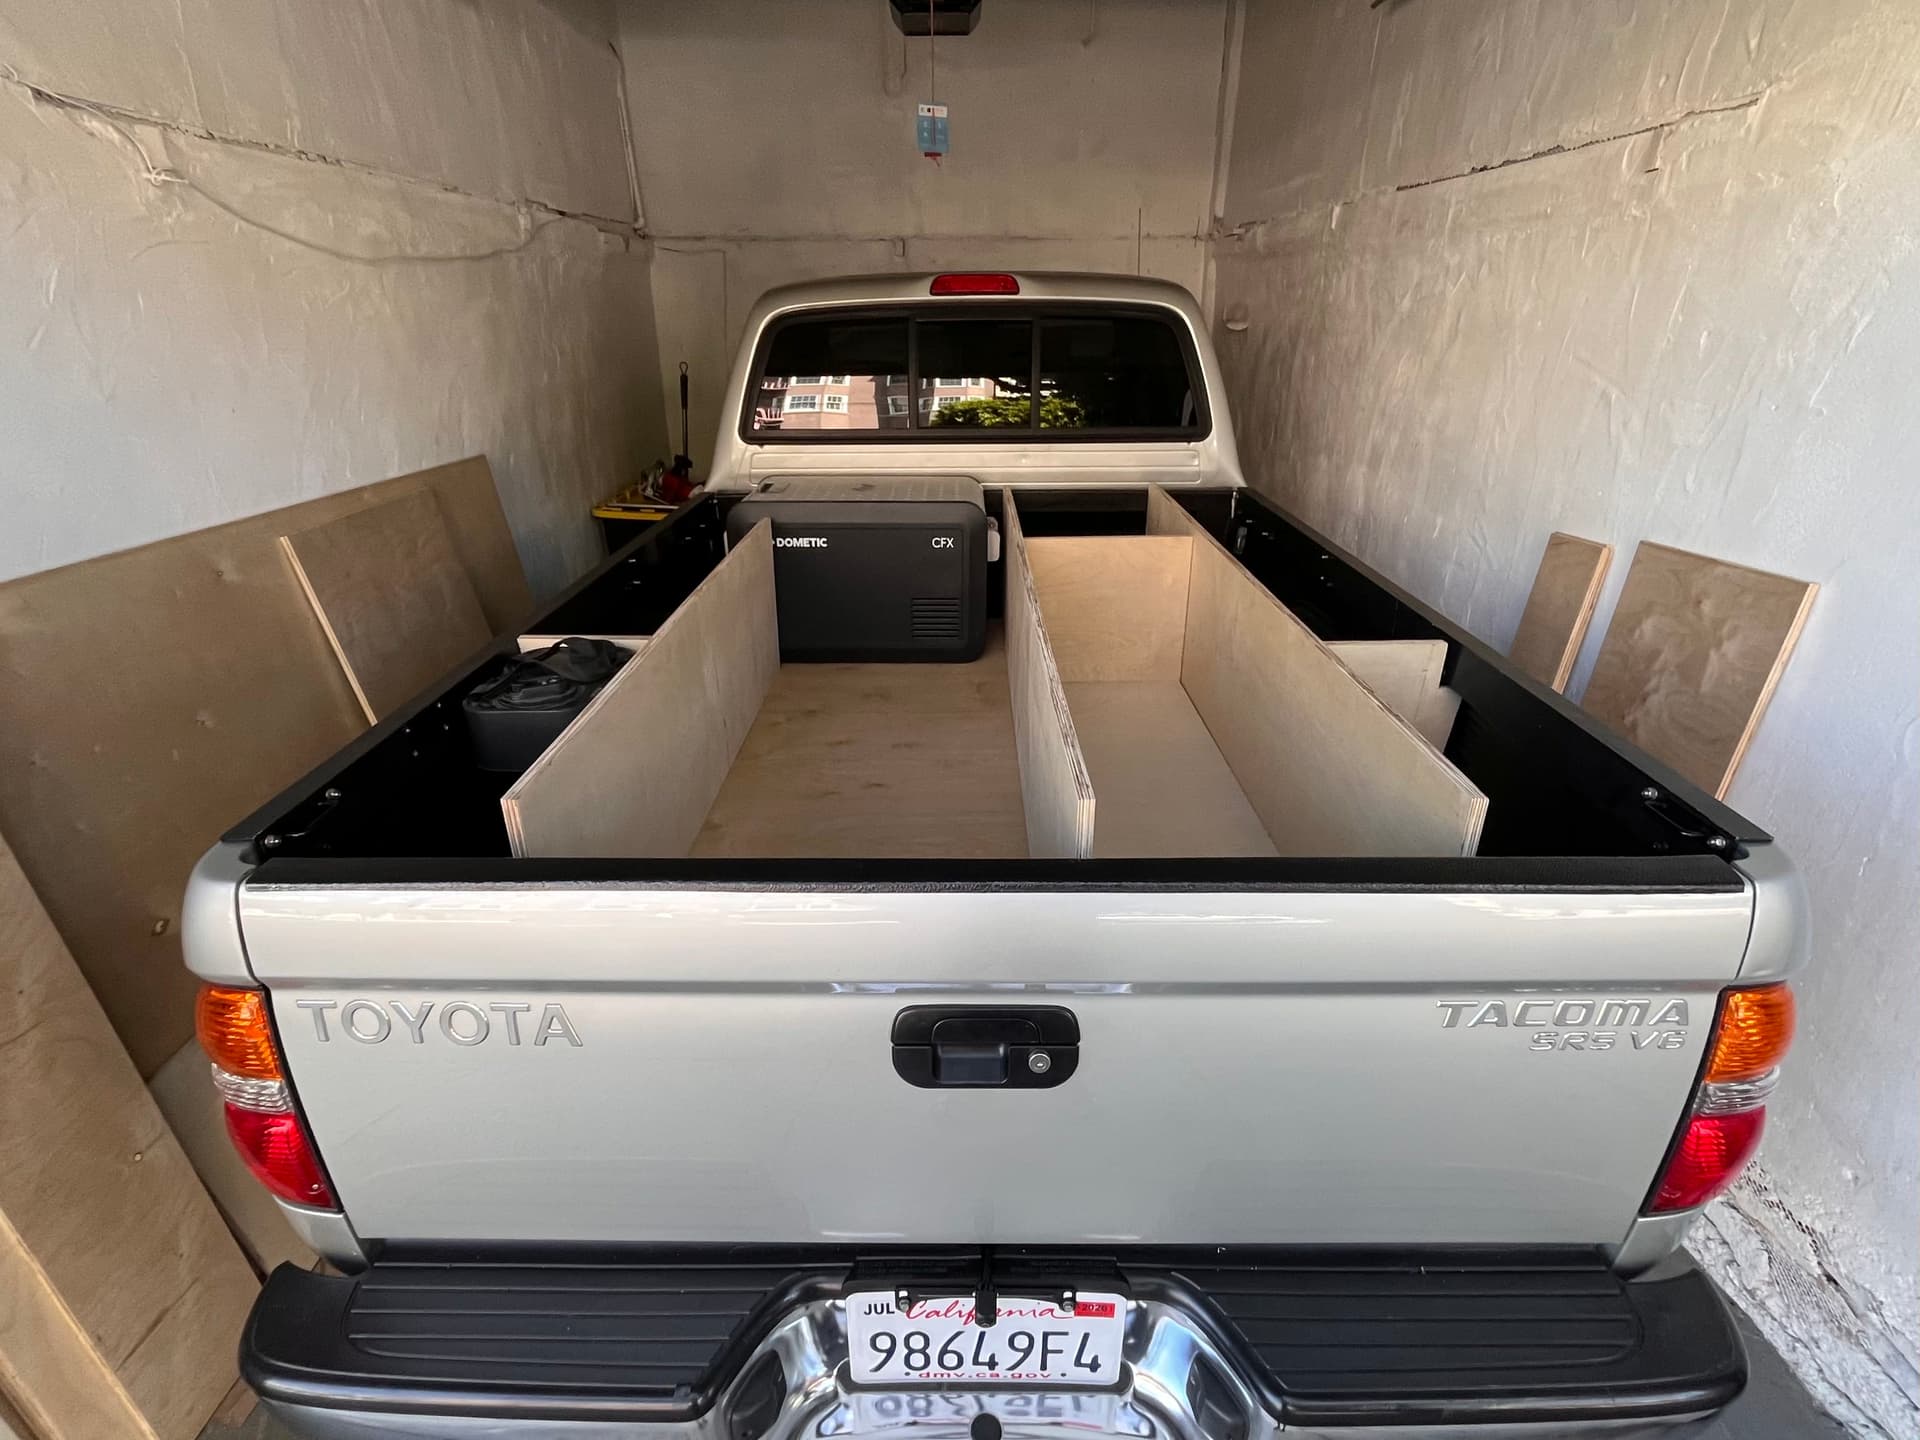
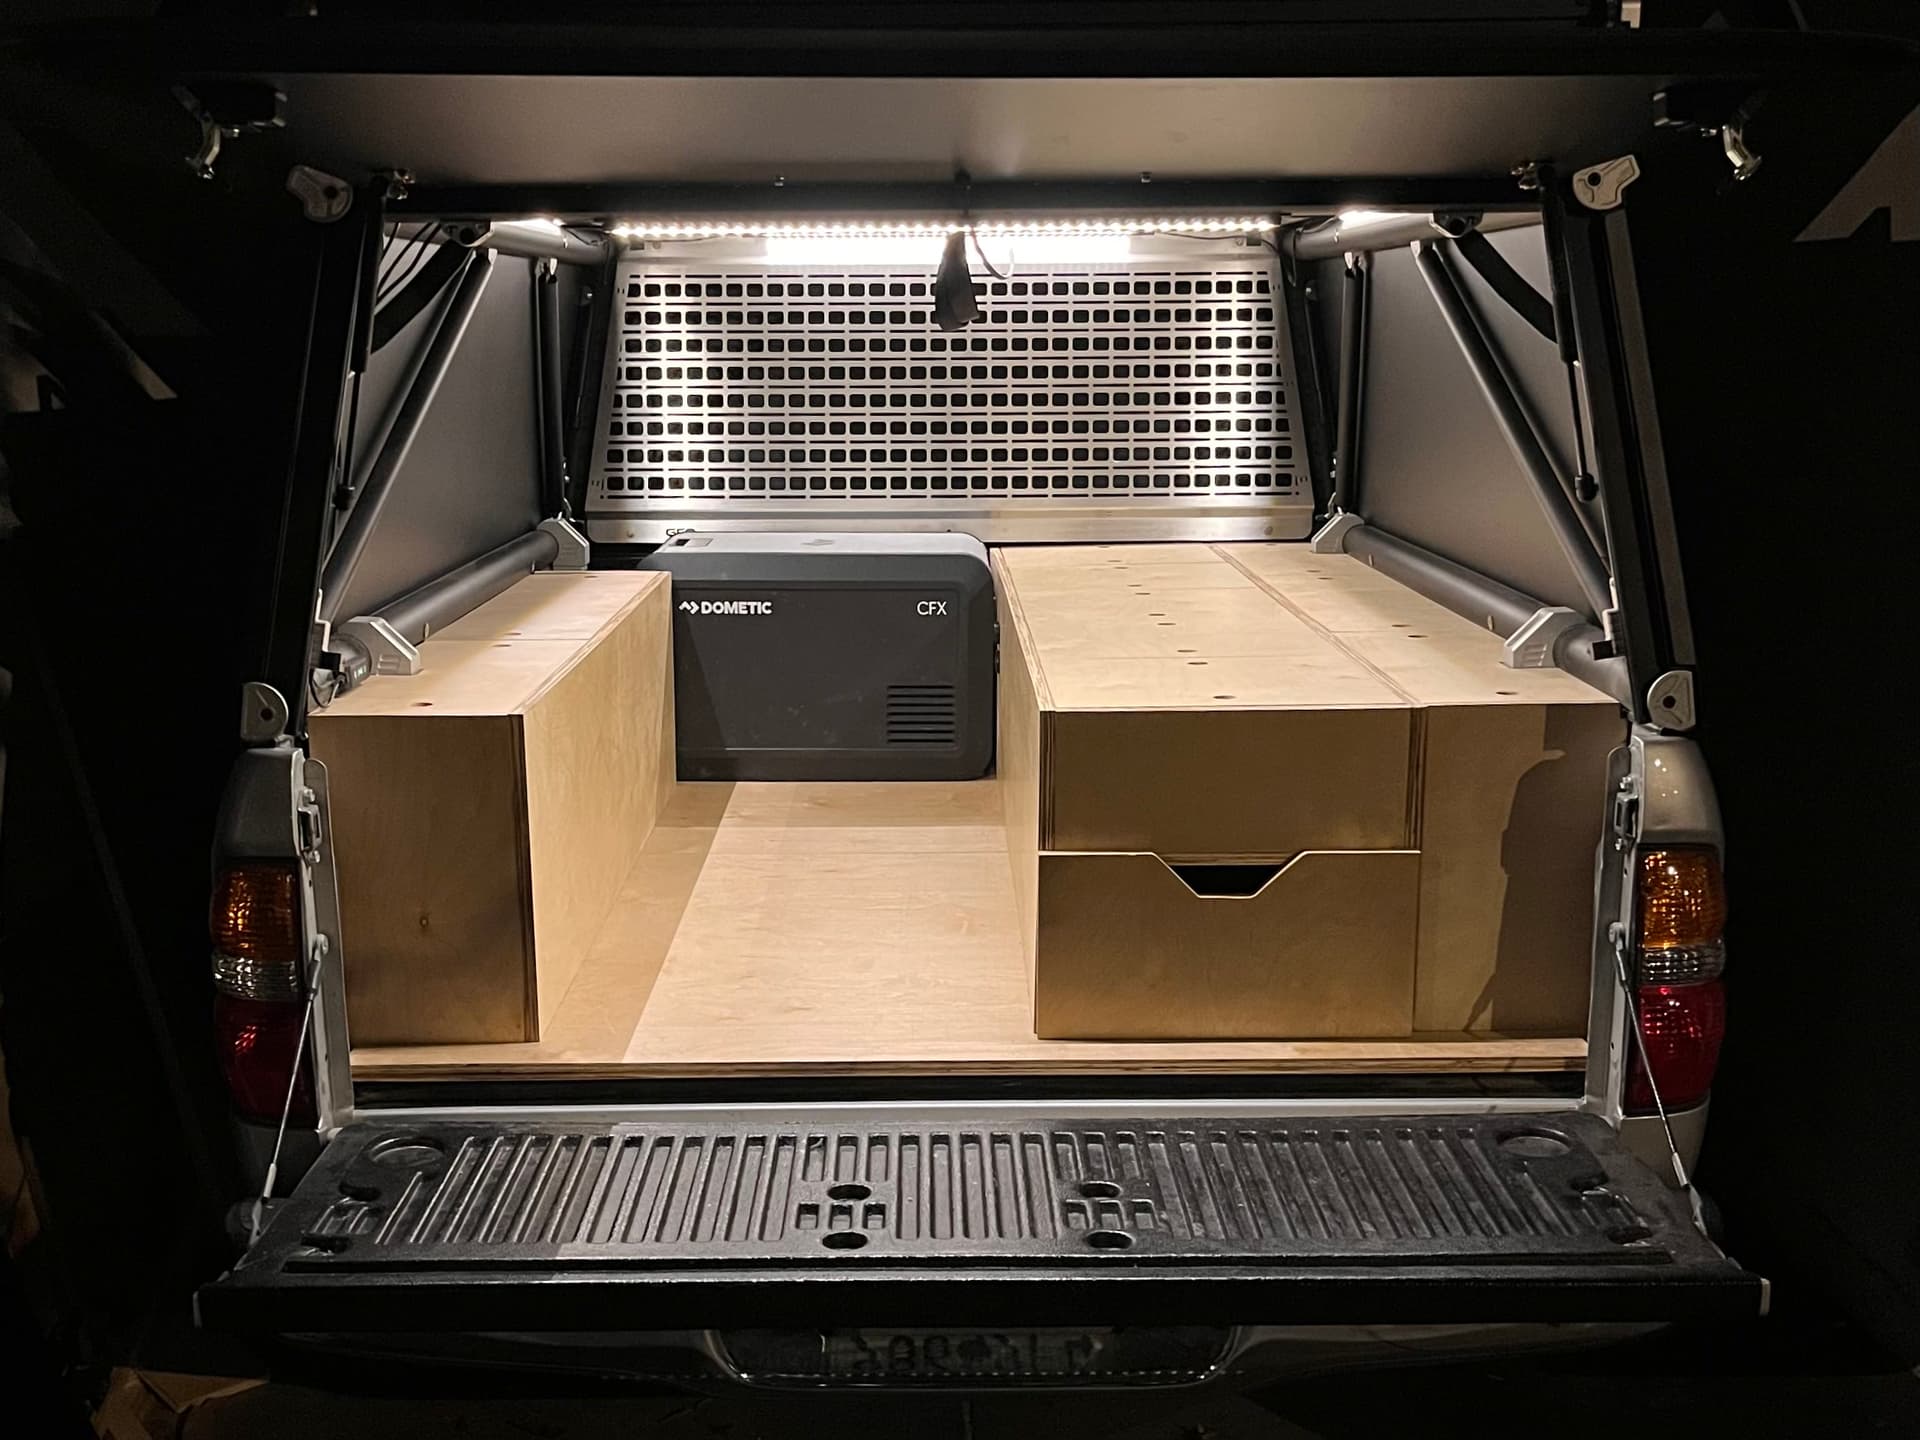
Cabinets — 9/19/25
I planned out all the cabinet dimensions by measuring the truck bed about a thousand times and creating templates in Illustrator. Once I was happy with my plans I cut out the pieces I’d need to size. Even without the GFC, I was able to roughly frame out the different components.
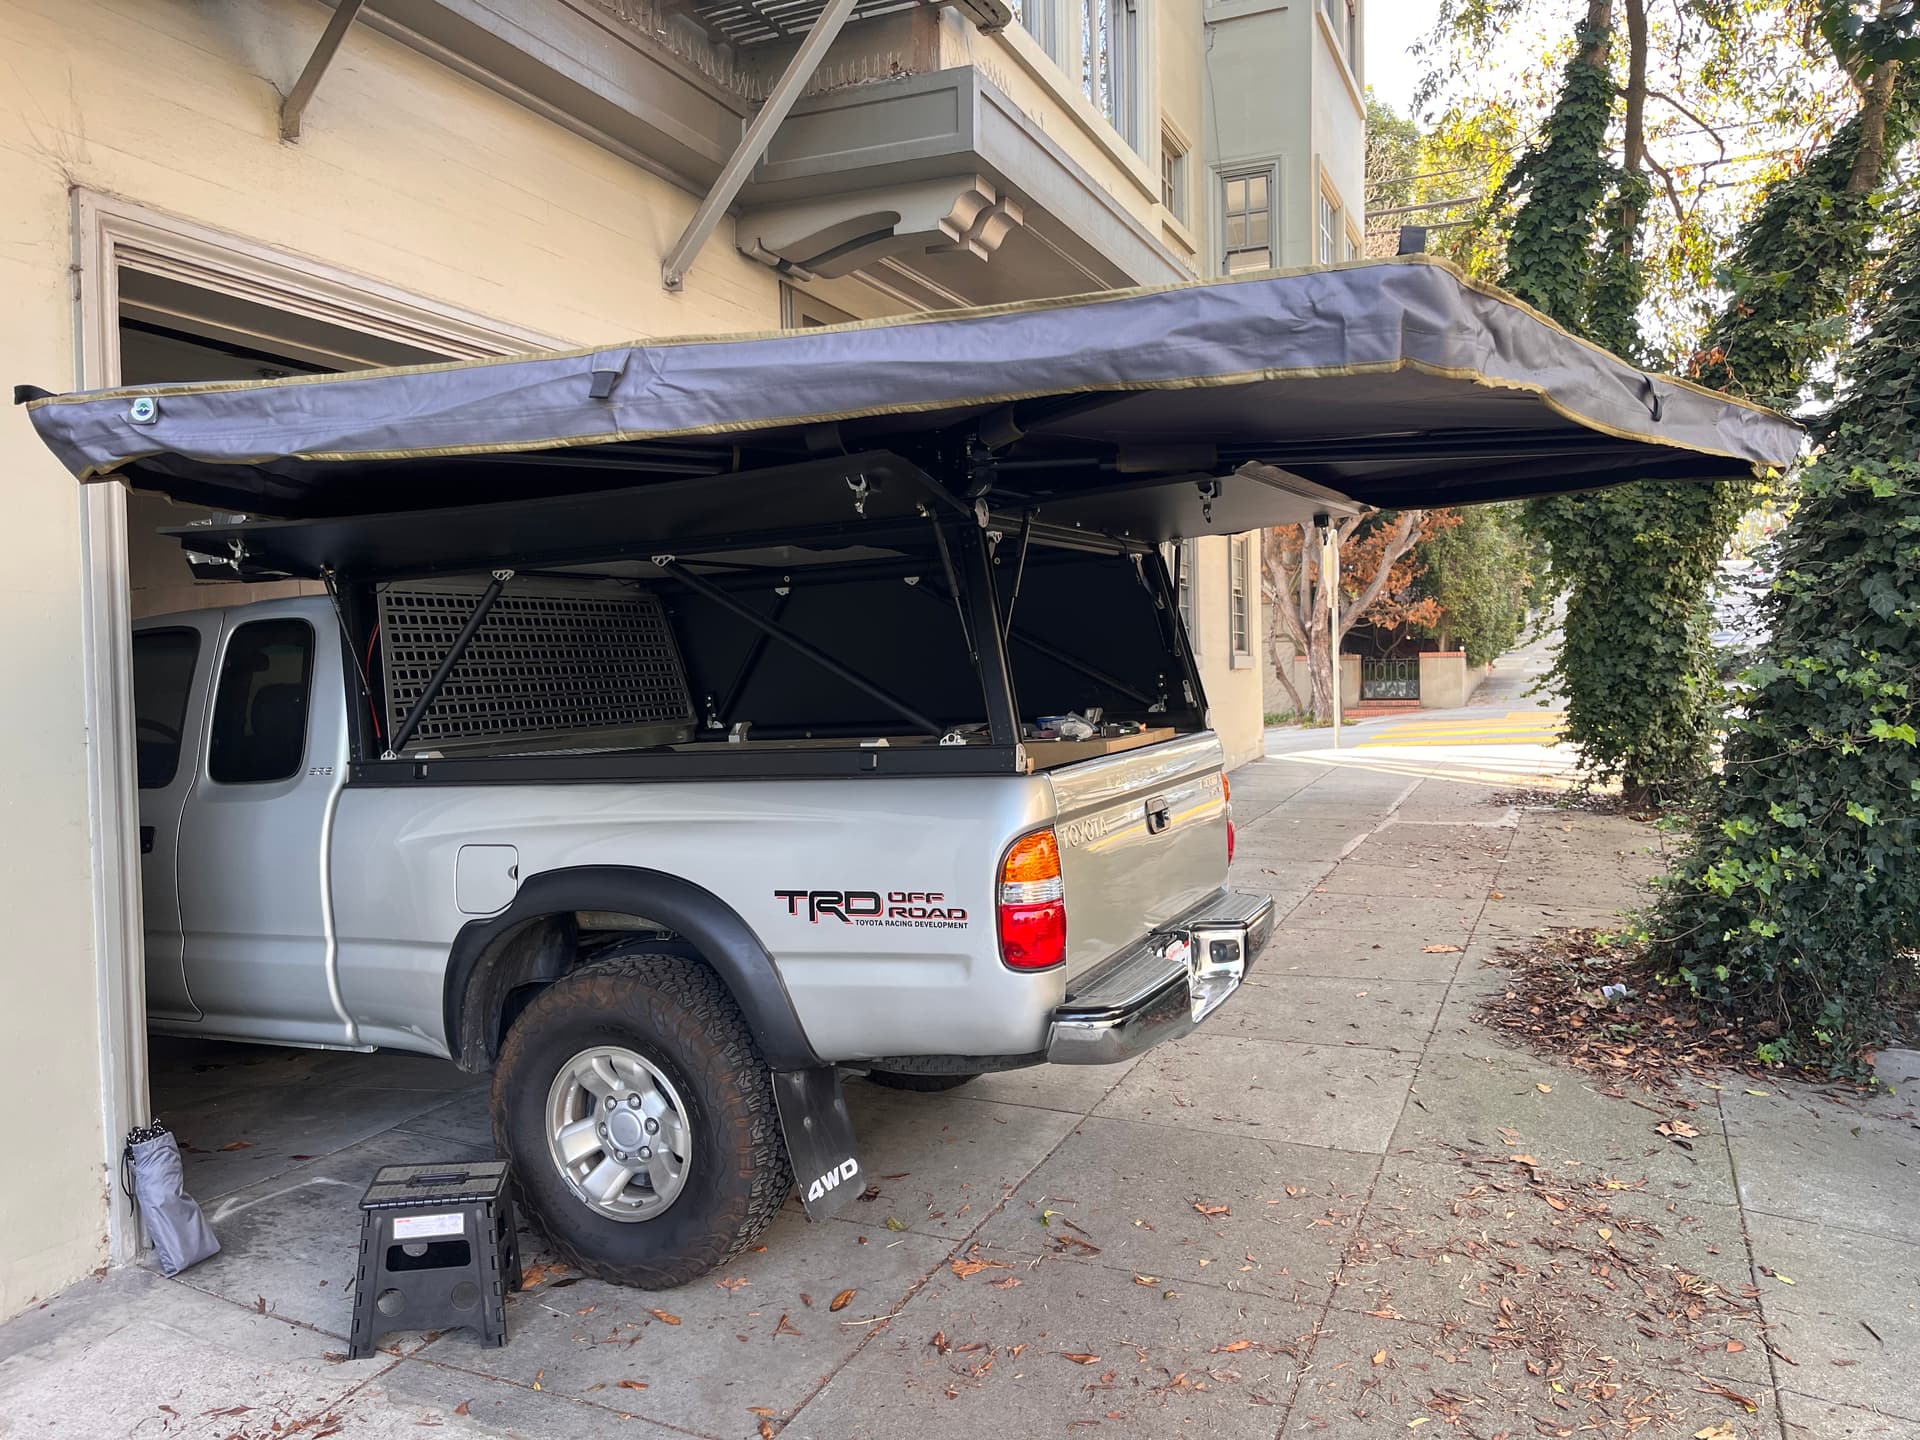
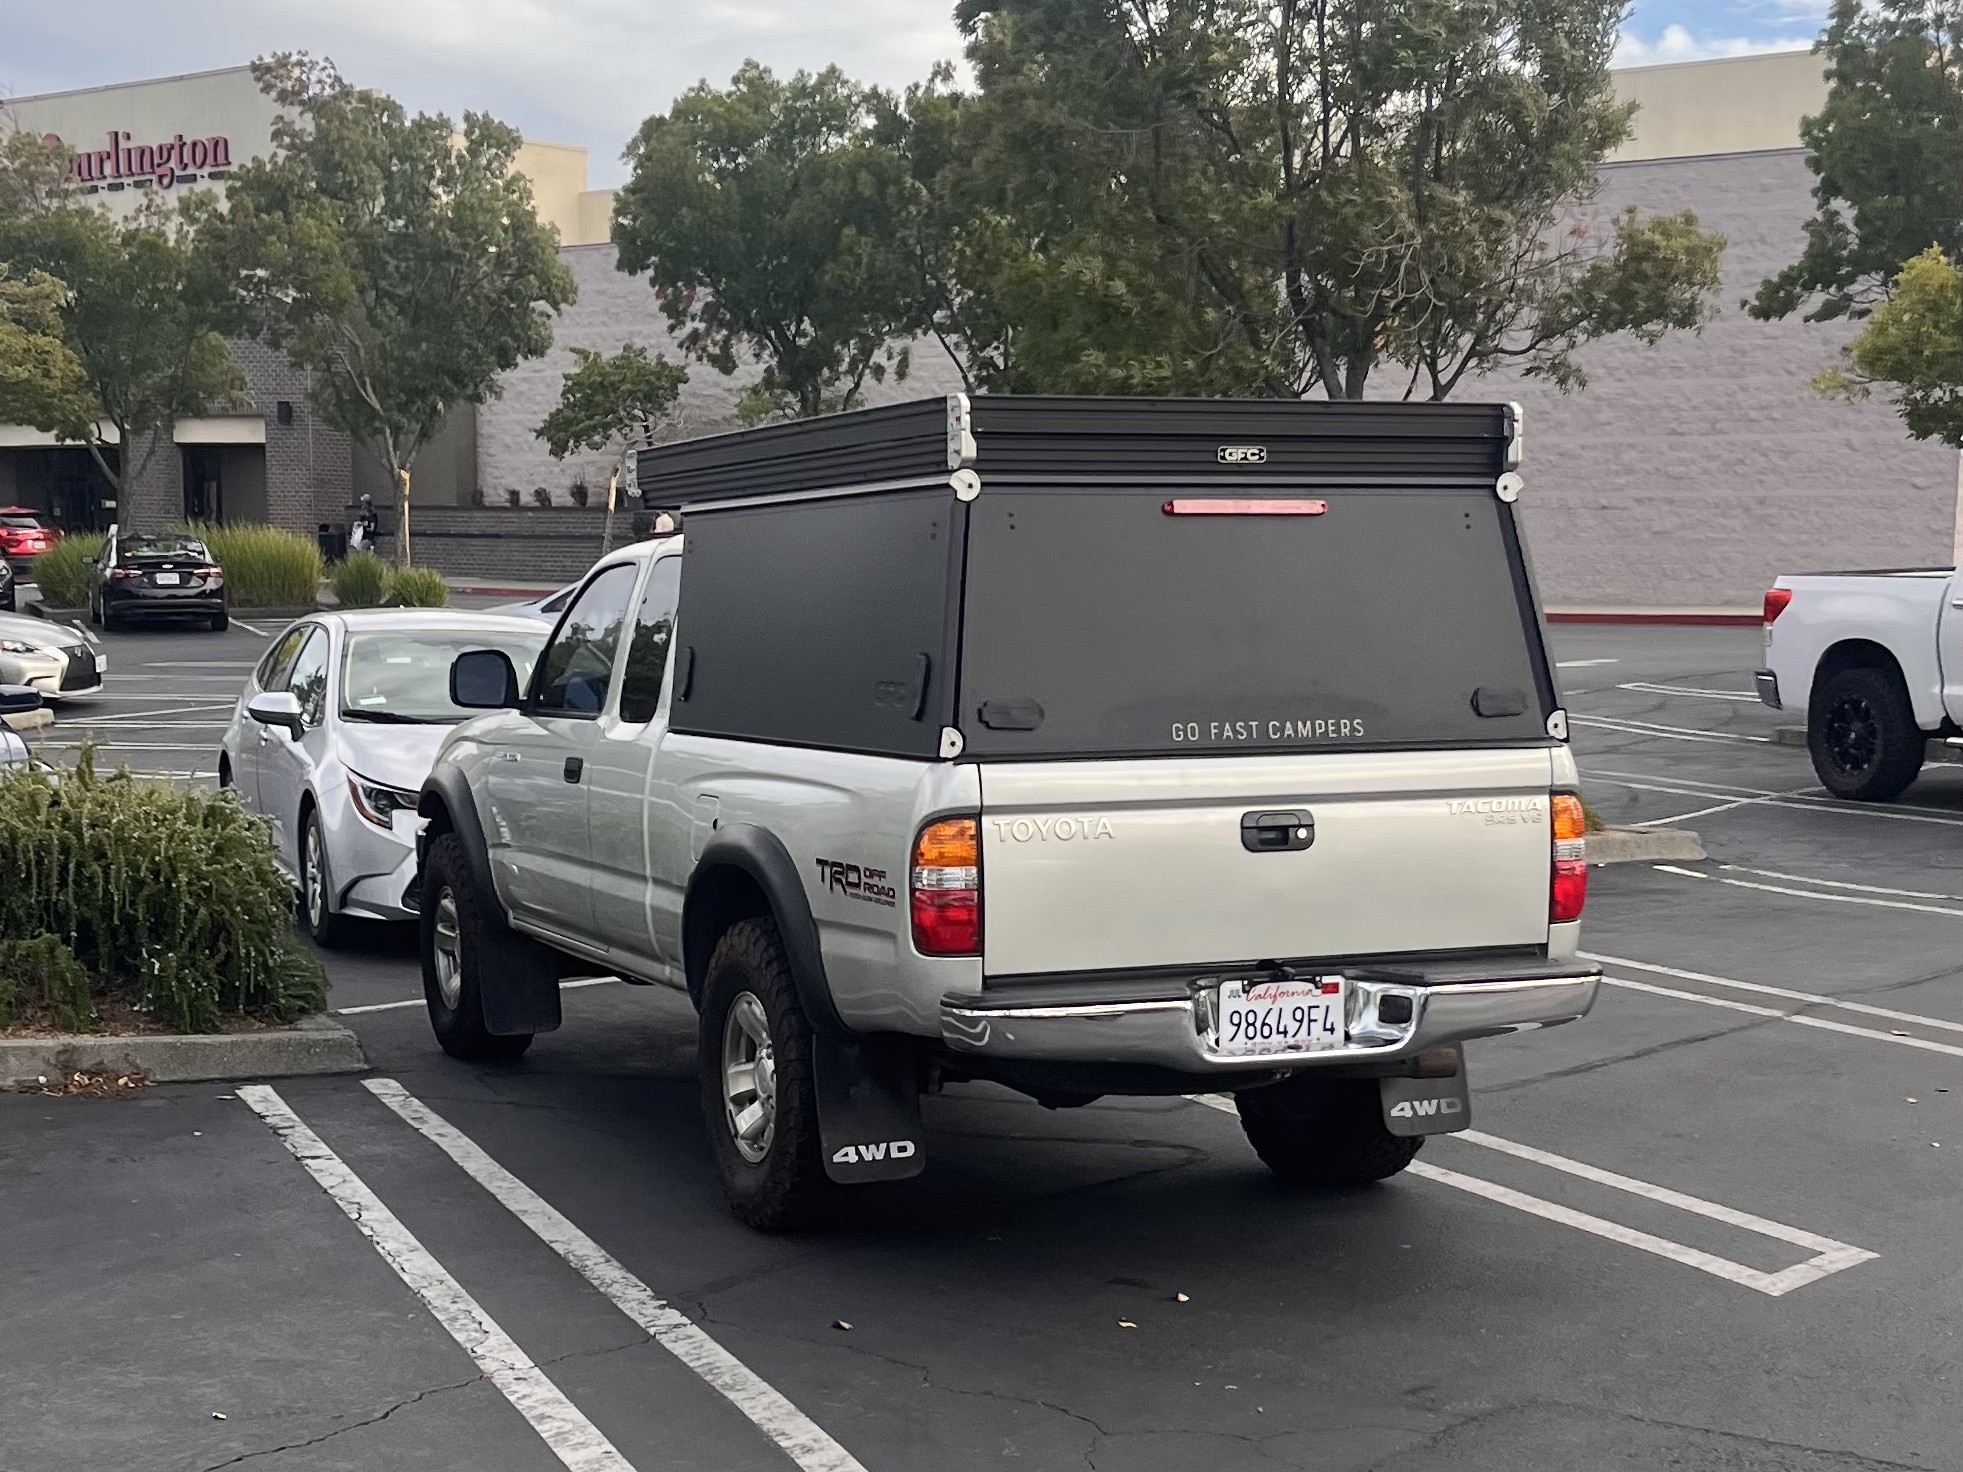
GFC Installed — 10/2/25
Stellar Built Off-Road in Sacramento did a great job with the install so huge shout out to them.
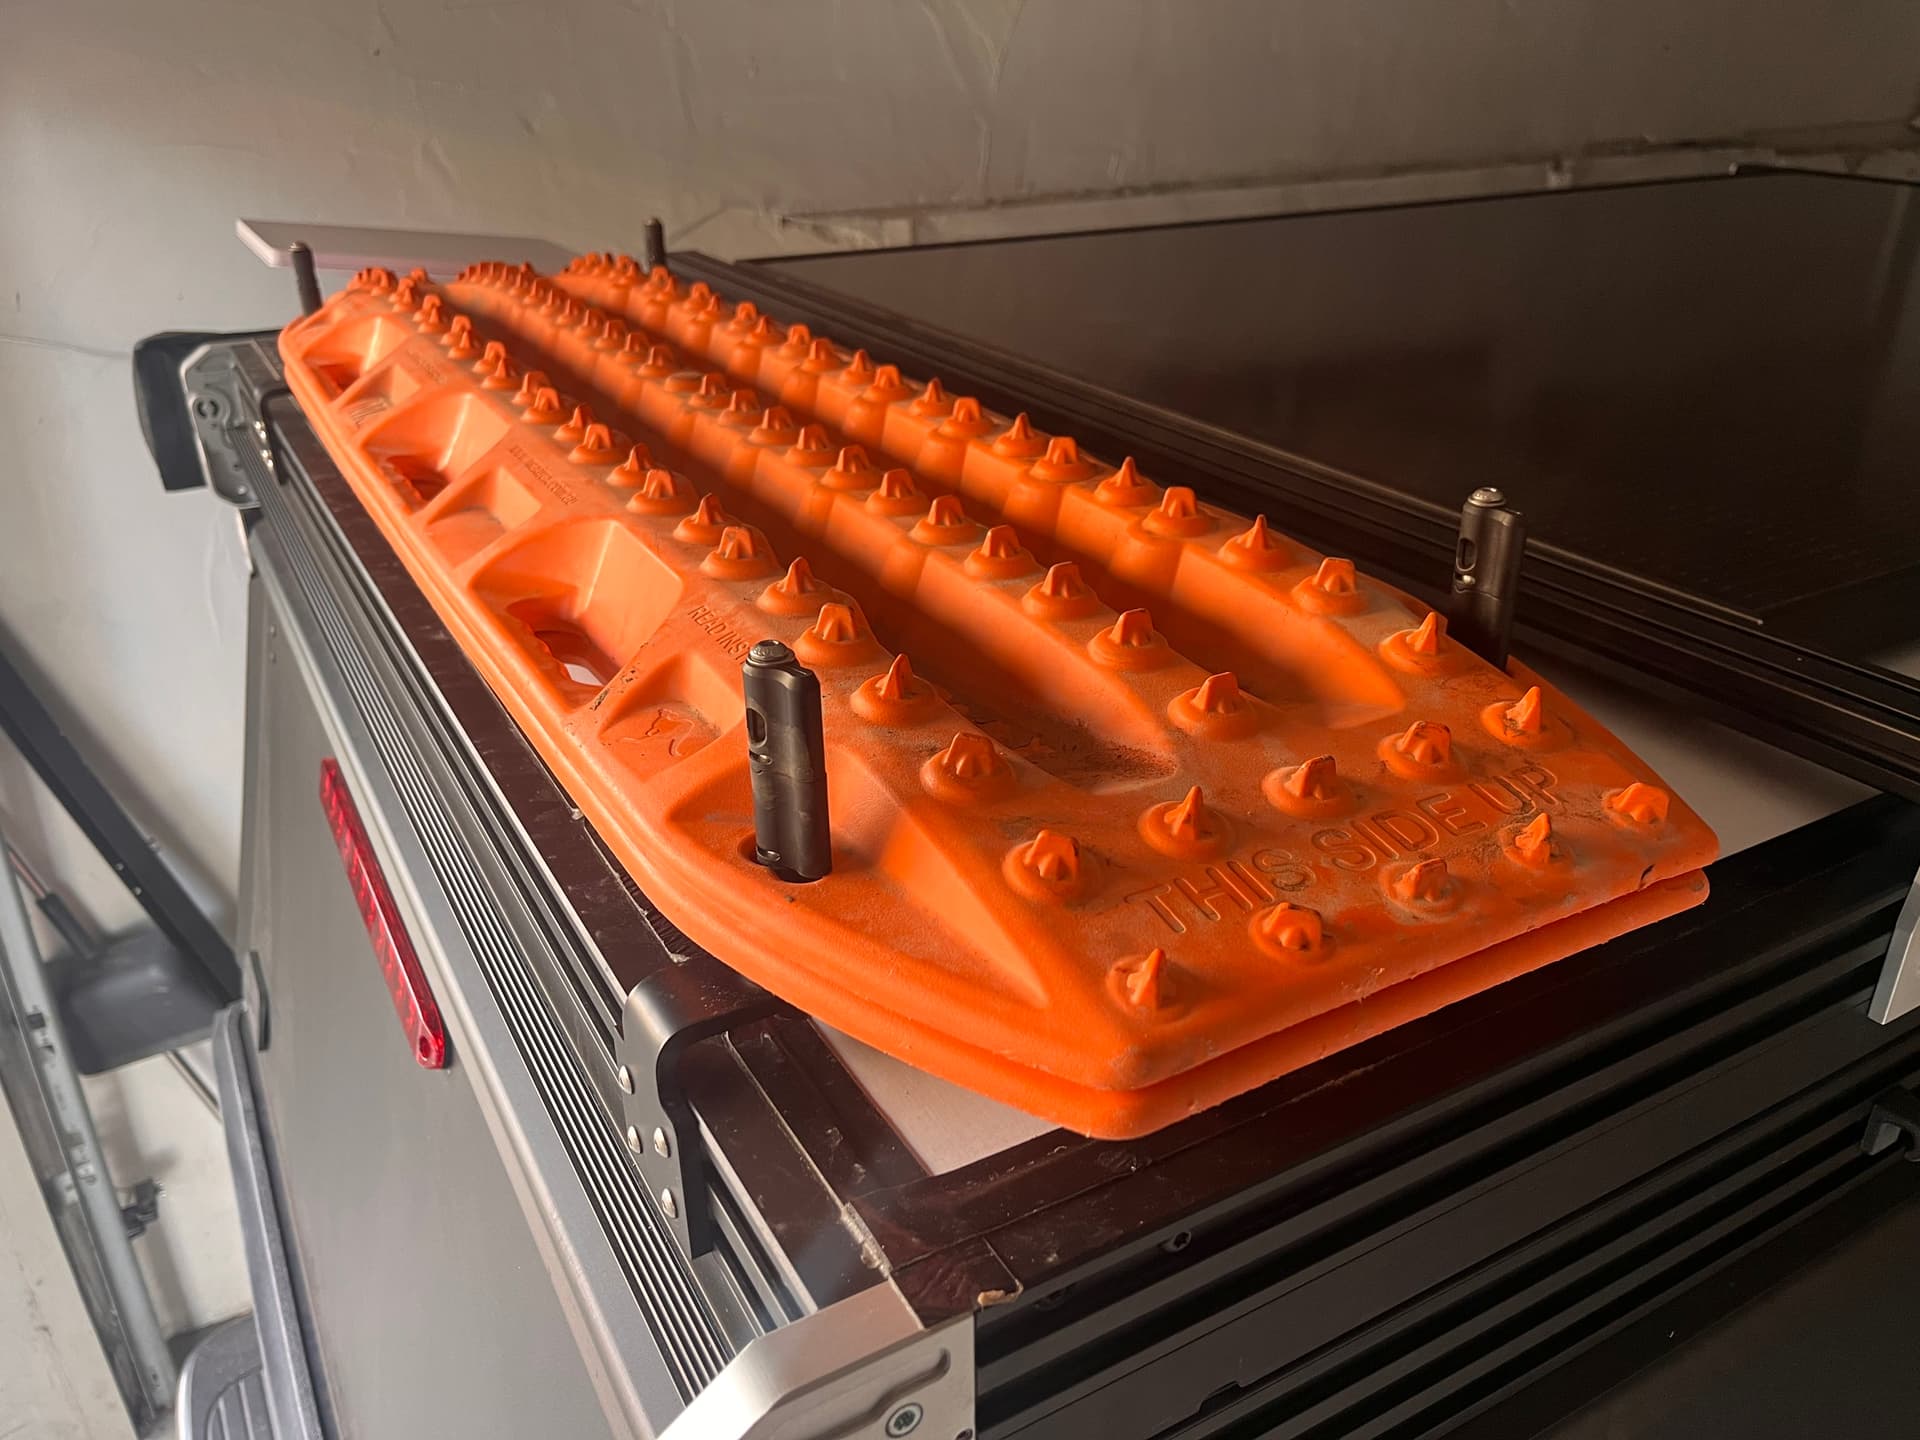
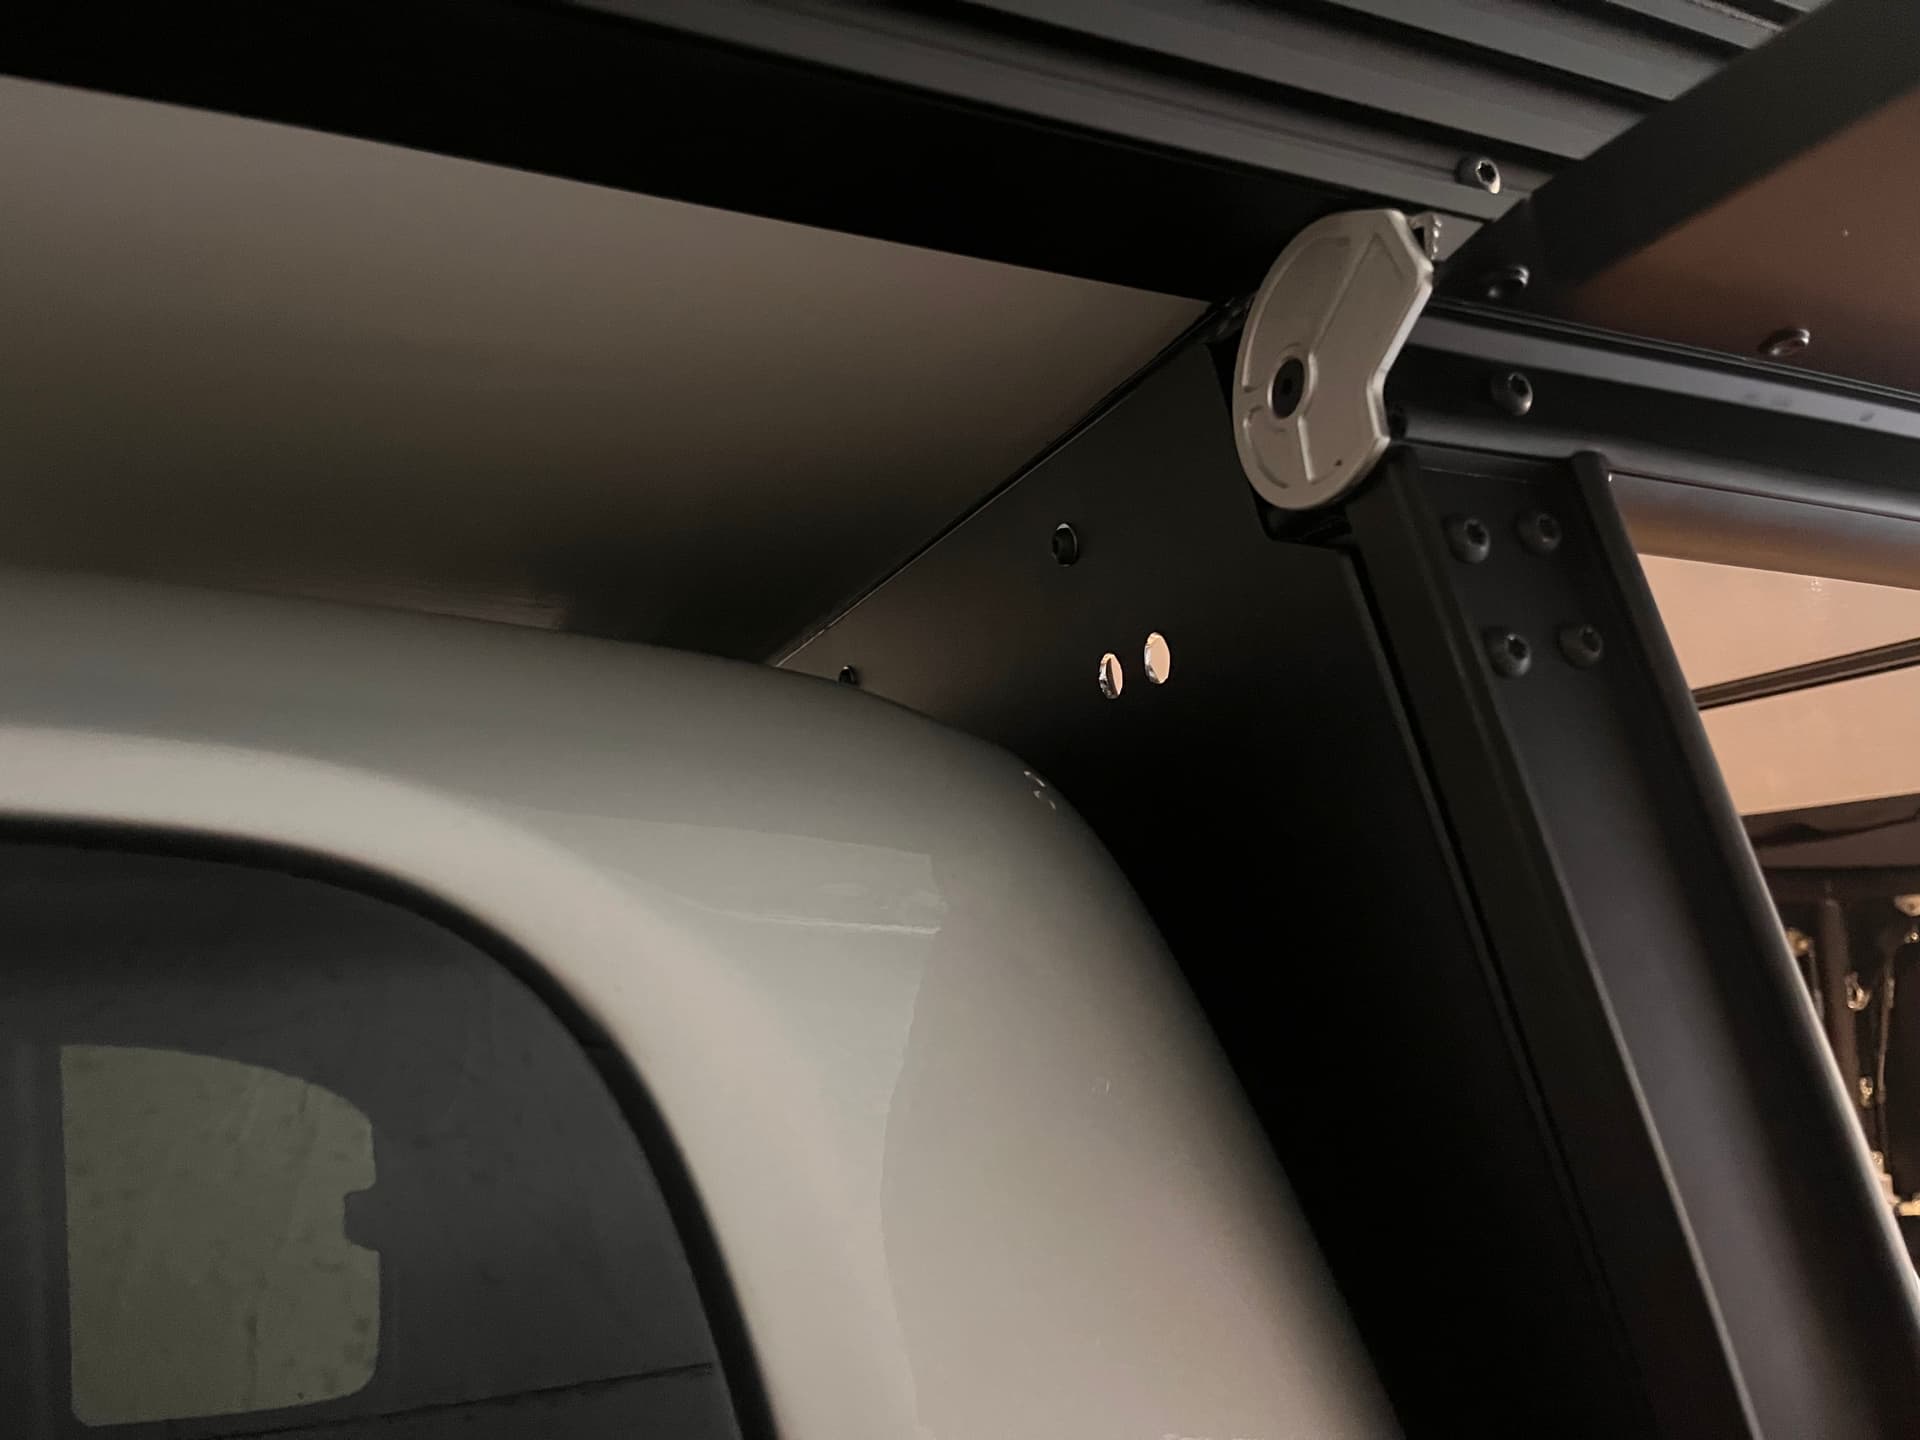
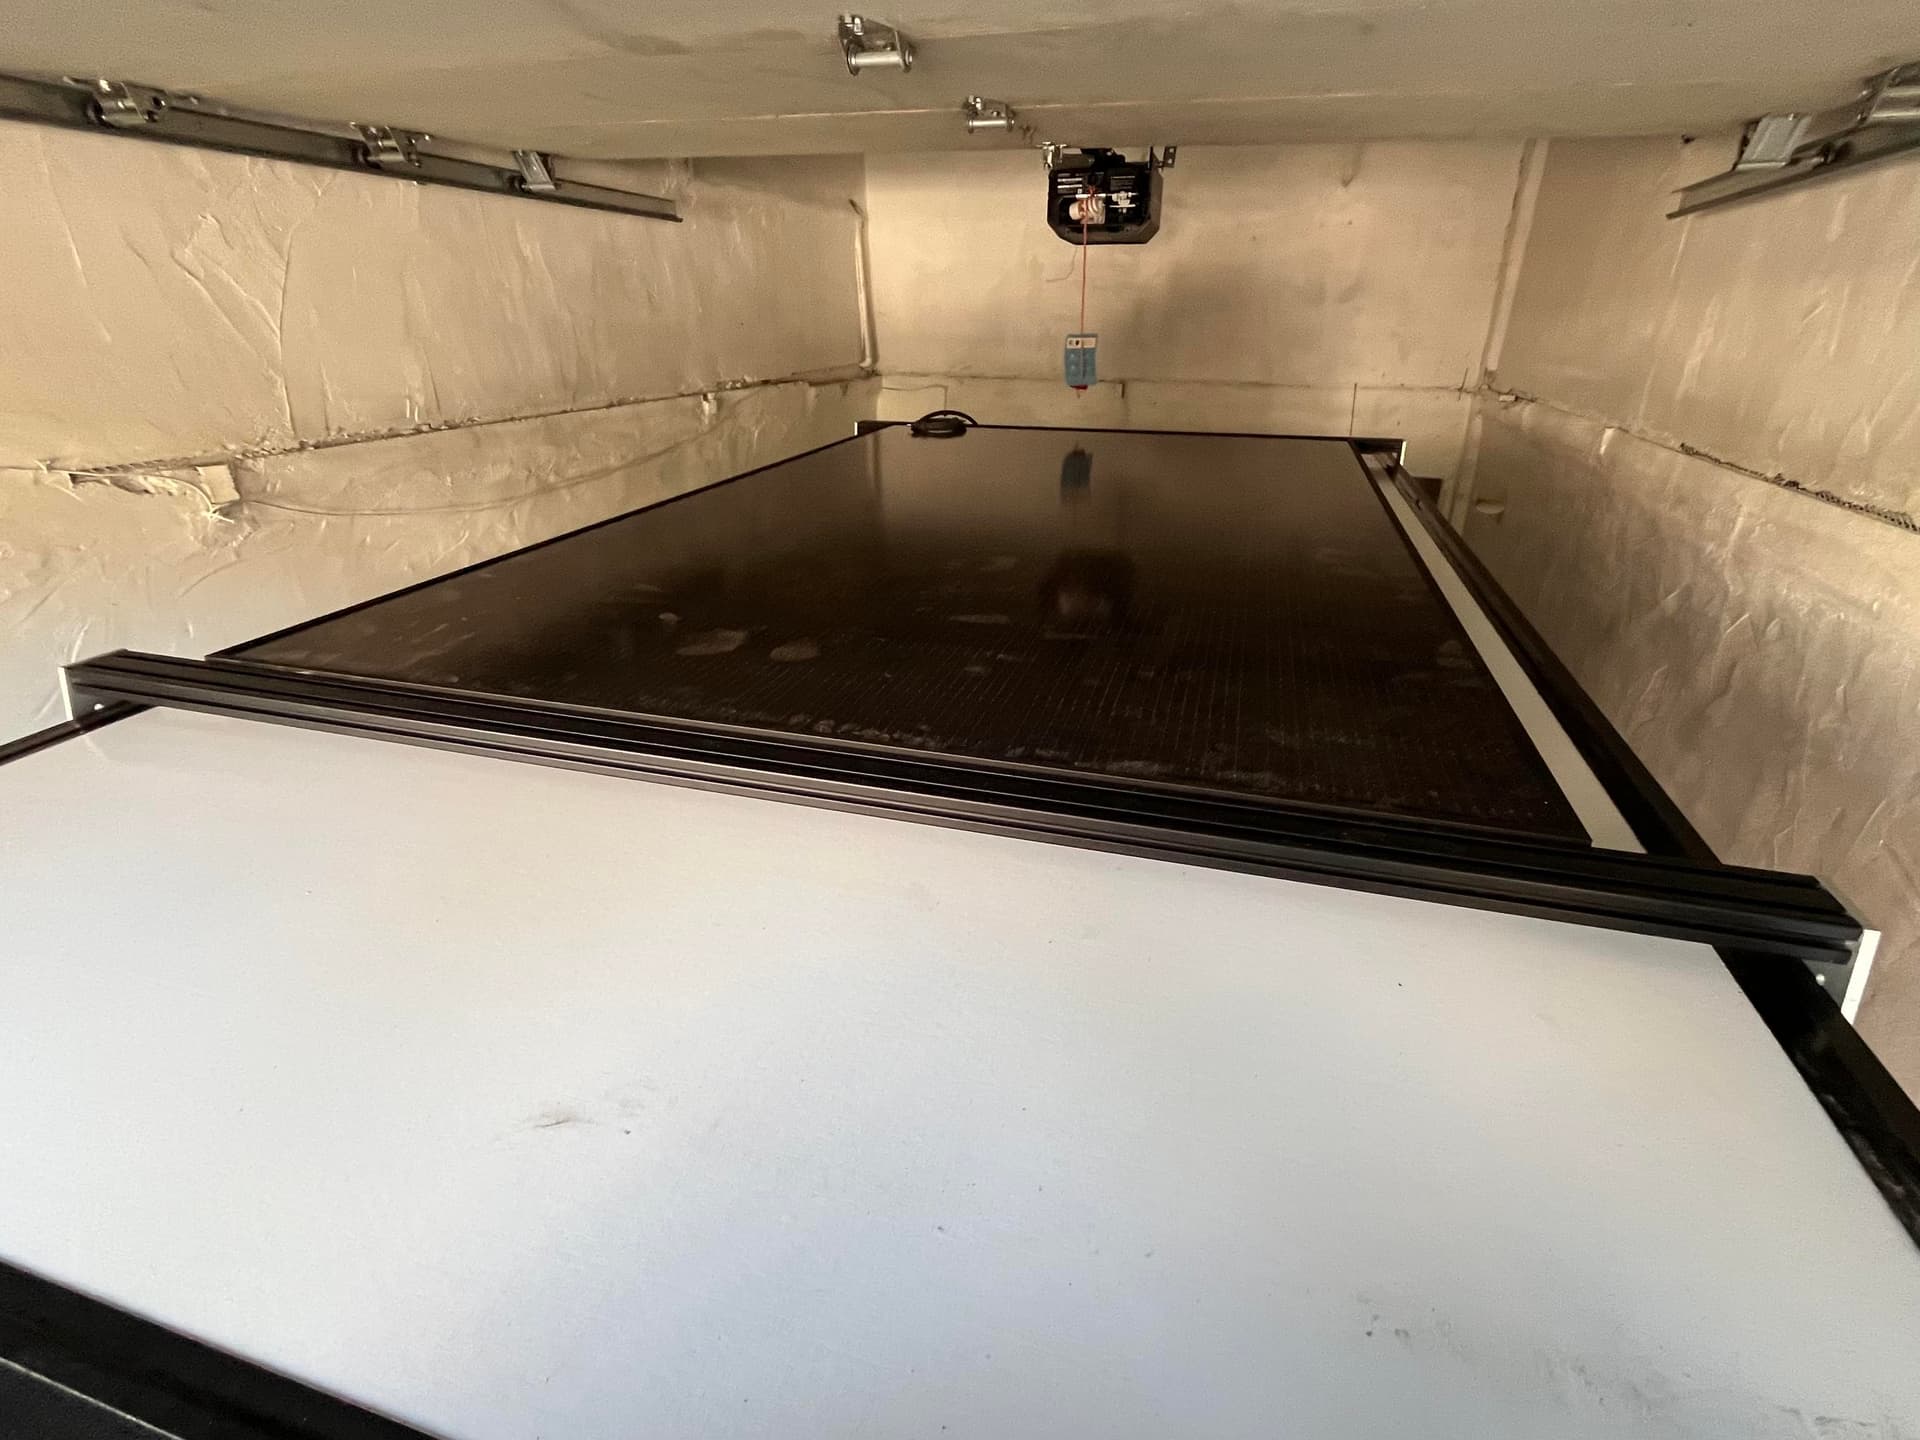
Solar — 10/6/25
With the GFC installed I took a break from the interior and focused on installing a 425W solar panel I picked up in Sacramento the same day I picked up the GFC. I first drilled two holes into the camper for wire pass through and then followed this post to create a DIY roof rack that would hold the panel and attach to the GFC.

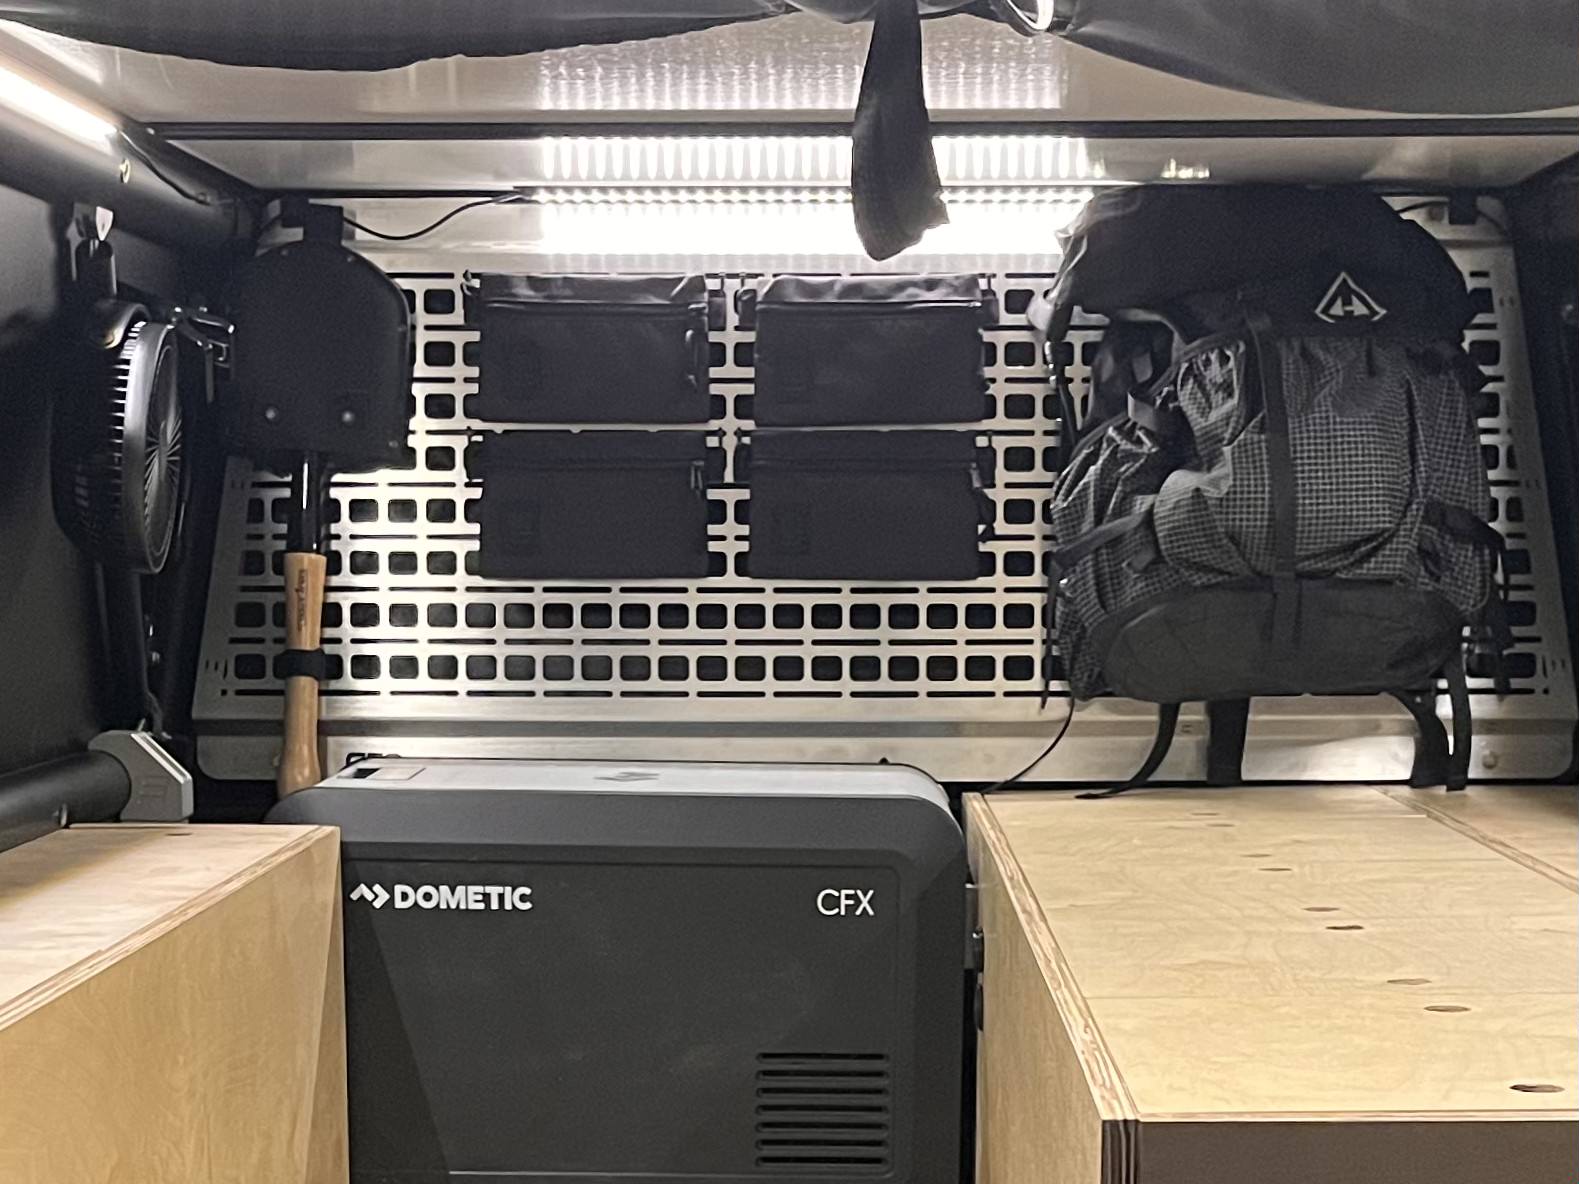
Cabinets — 10/8/25
With most of the cabinets pre-cut, I was able to install the right side cabinets relatively quickly. To ensure a tight fit, I cut the lids at the end so that I had more exact measurements. I also added a few coats of wipe on polyurethane to help protect the wood.

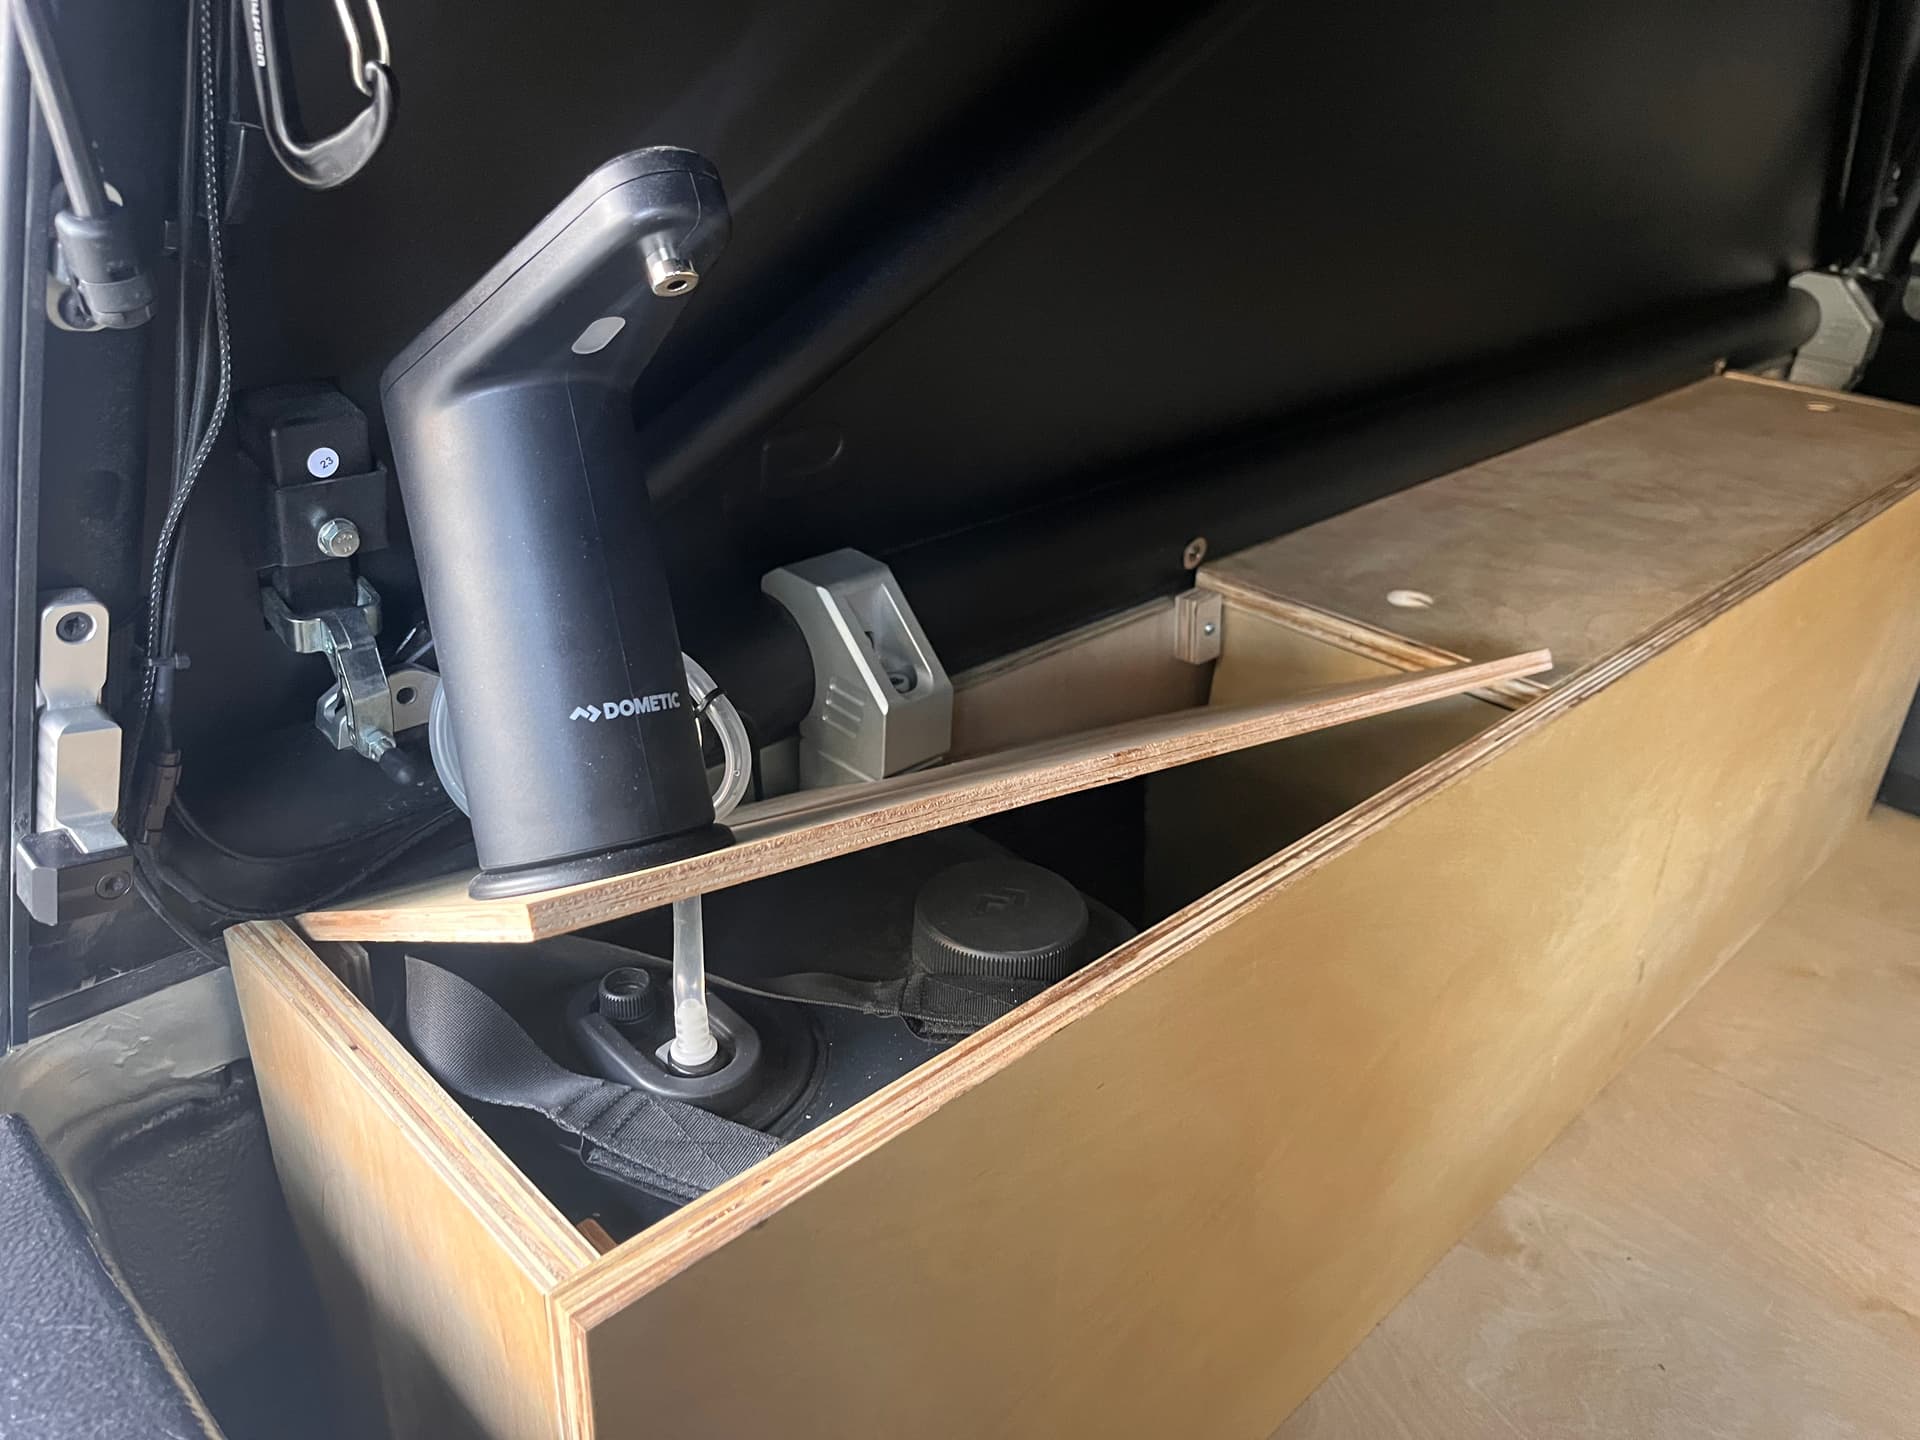
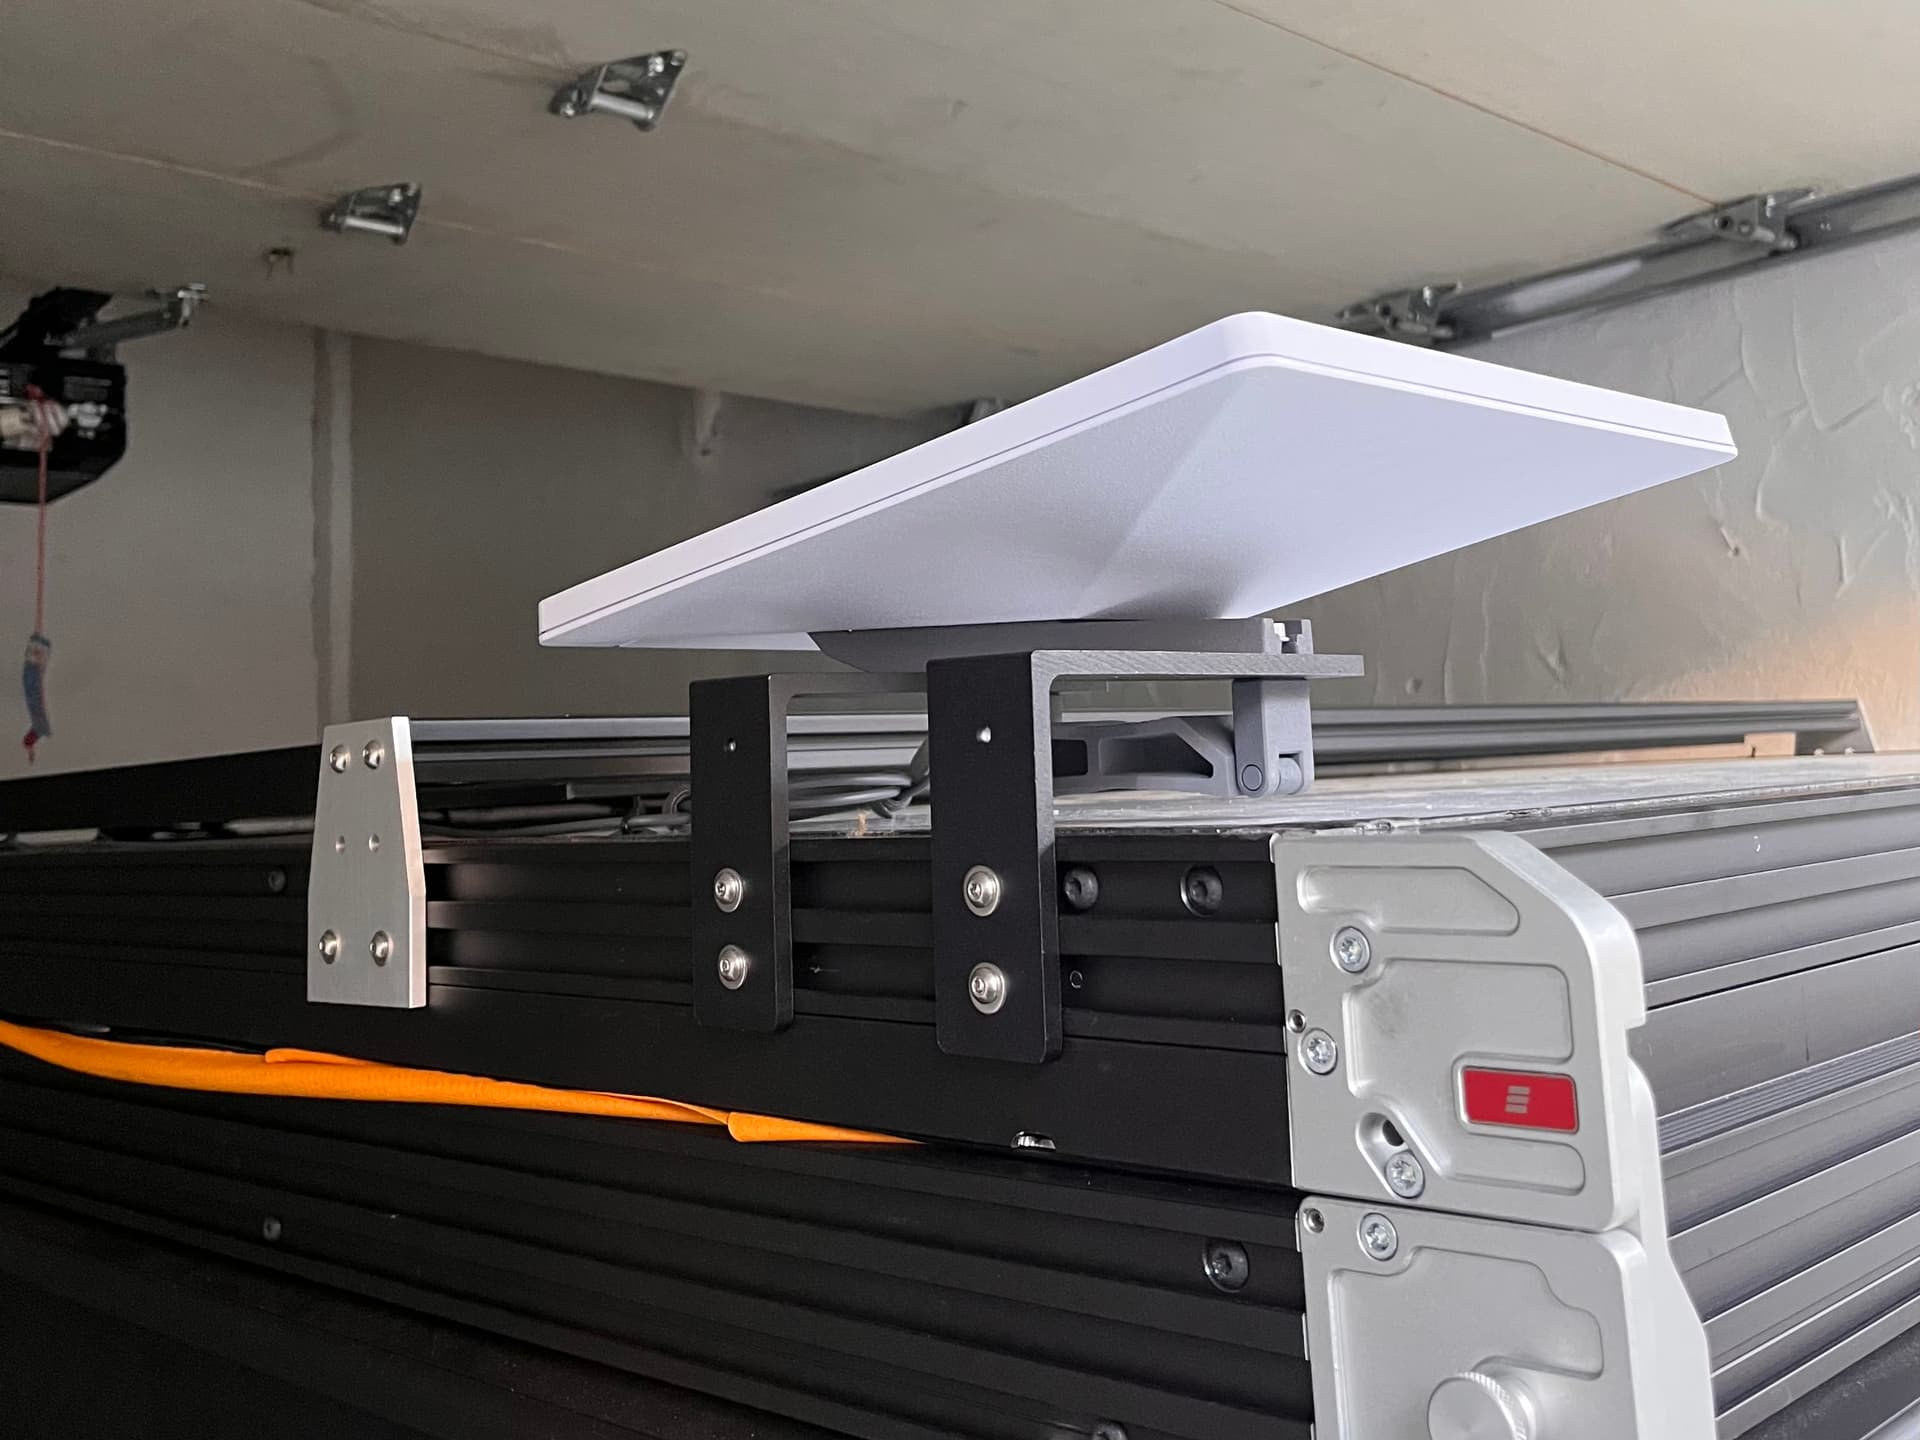
Starlink — 10/20/25
I wanted Starlink to be permanently mounted to my roof so that it could be used in motion. I had intended to mount the dish to the roof rack but after mounting the solar panel, I was afraid the dish would partially shade the panel. So instead, I found some L brackets on Amazon that I was able to attach to the GFC and then mount the dish onto. It’s not my favorite setup but it’s good enough for now.
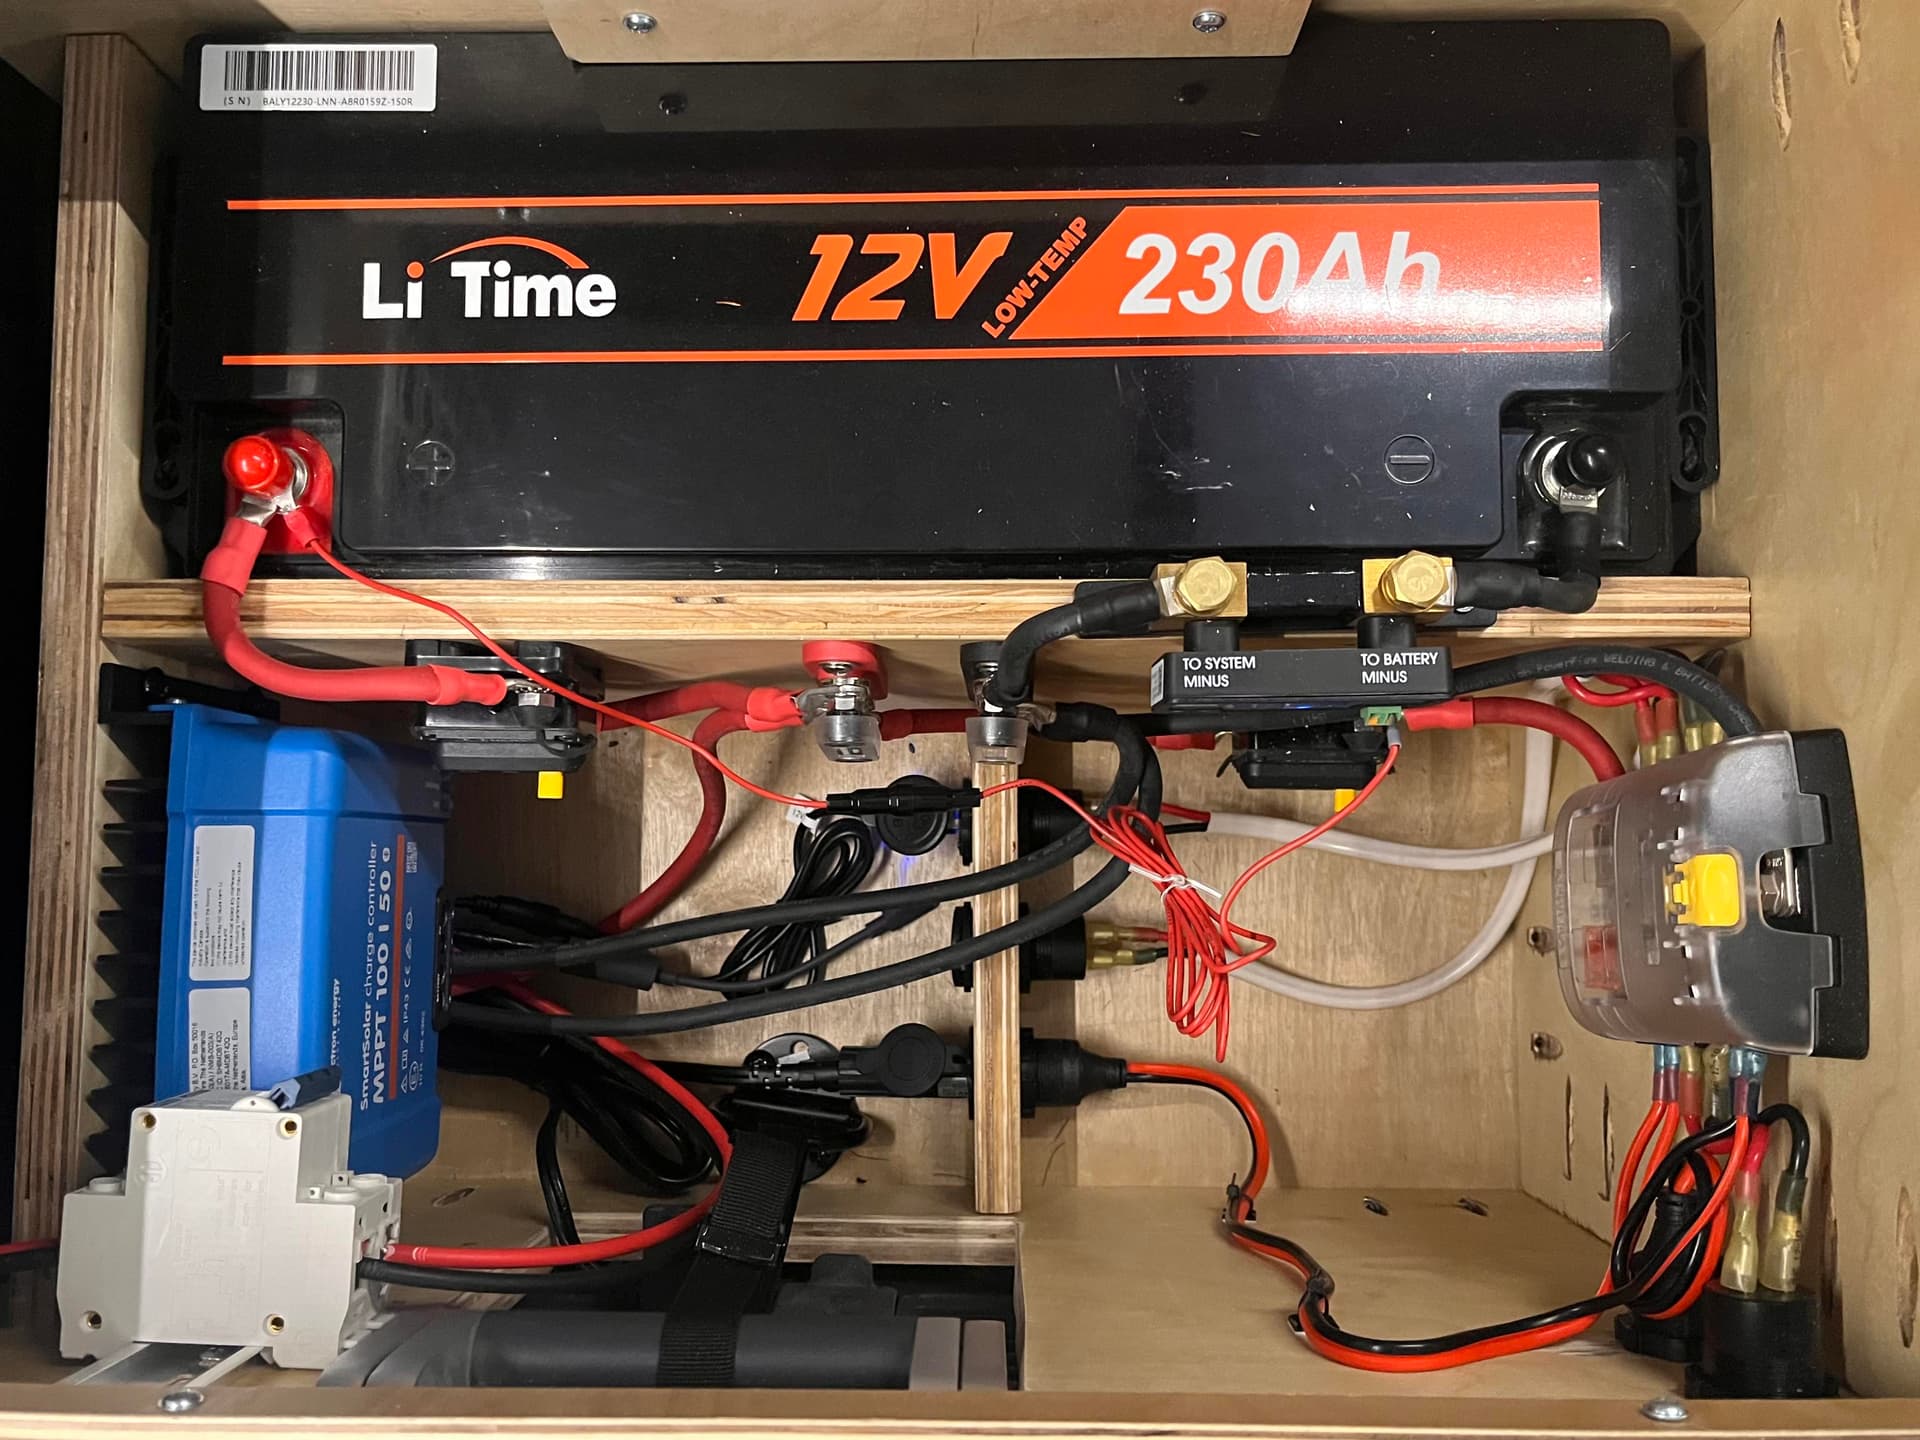
Electrical — 11/2/25
While pre-build power stations are a nice drop in solution, I want a lot of power and customizability so I decided to build my own system. I’m not going to go into too much detail but I installed an all 12V system with a 230AH battery bank. This should be more than enough power to run the fridge, starlink, computer, phone and any other devices I might need.
Cabinets Cont. — 11/14/25
I followed the same process I followed on the right to complete the cabinets on the left hand side.
That’s all for now but I’ll continue to post updates as they come. Thanks for reading!