Pre-planning my solar set up so it will be ready when I receive my camper. Would like to see your set up on the top of the camper, as well as your wiring!

I don’t have a picture handy, but I have this panel:
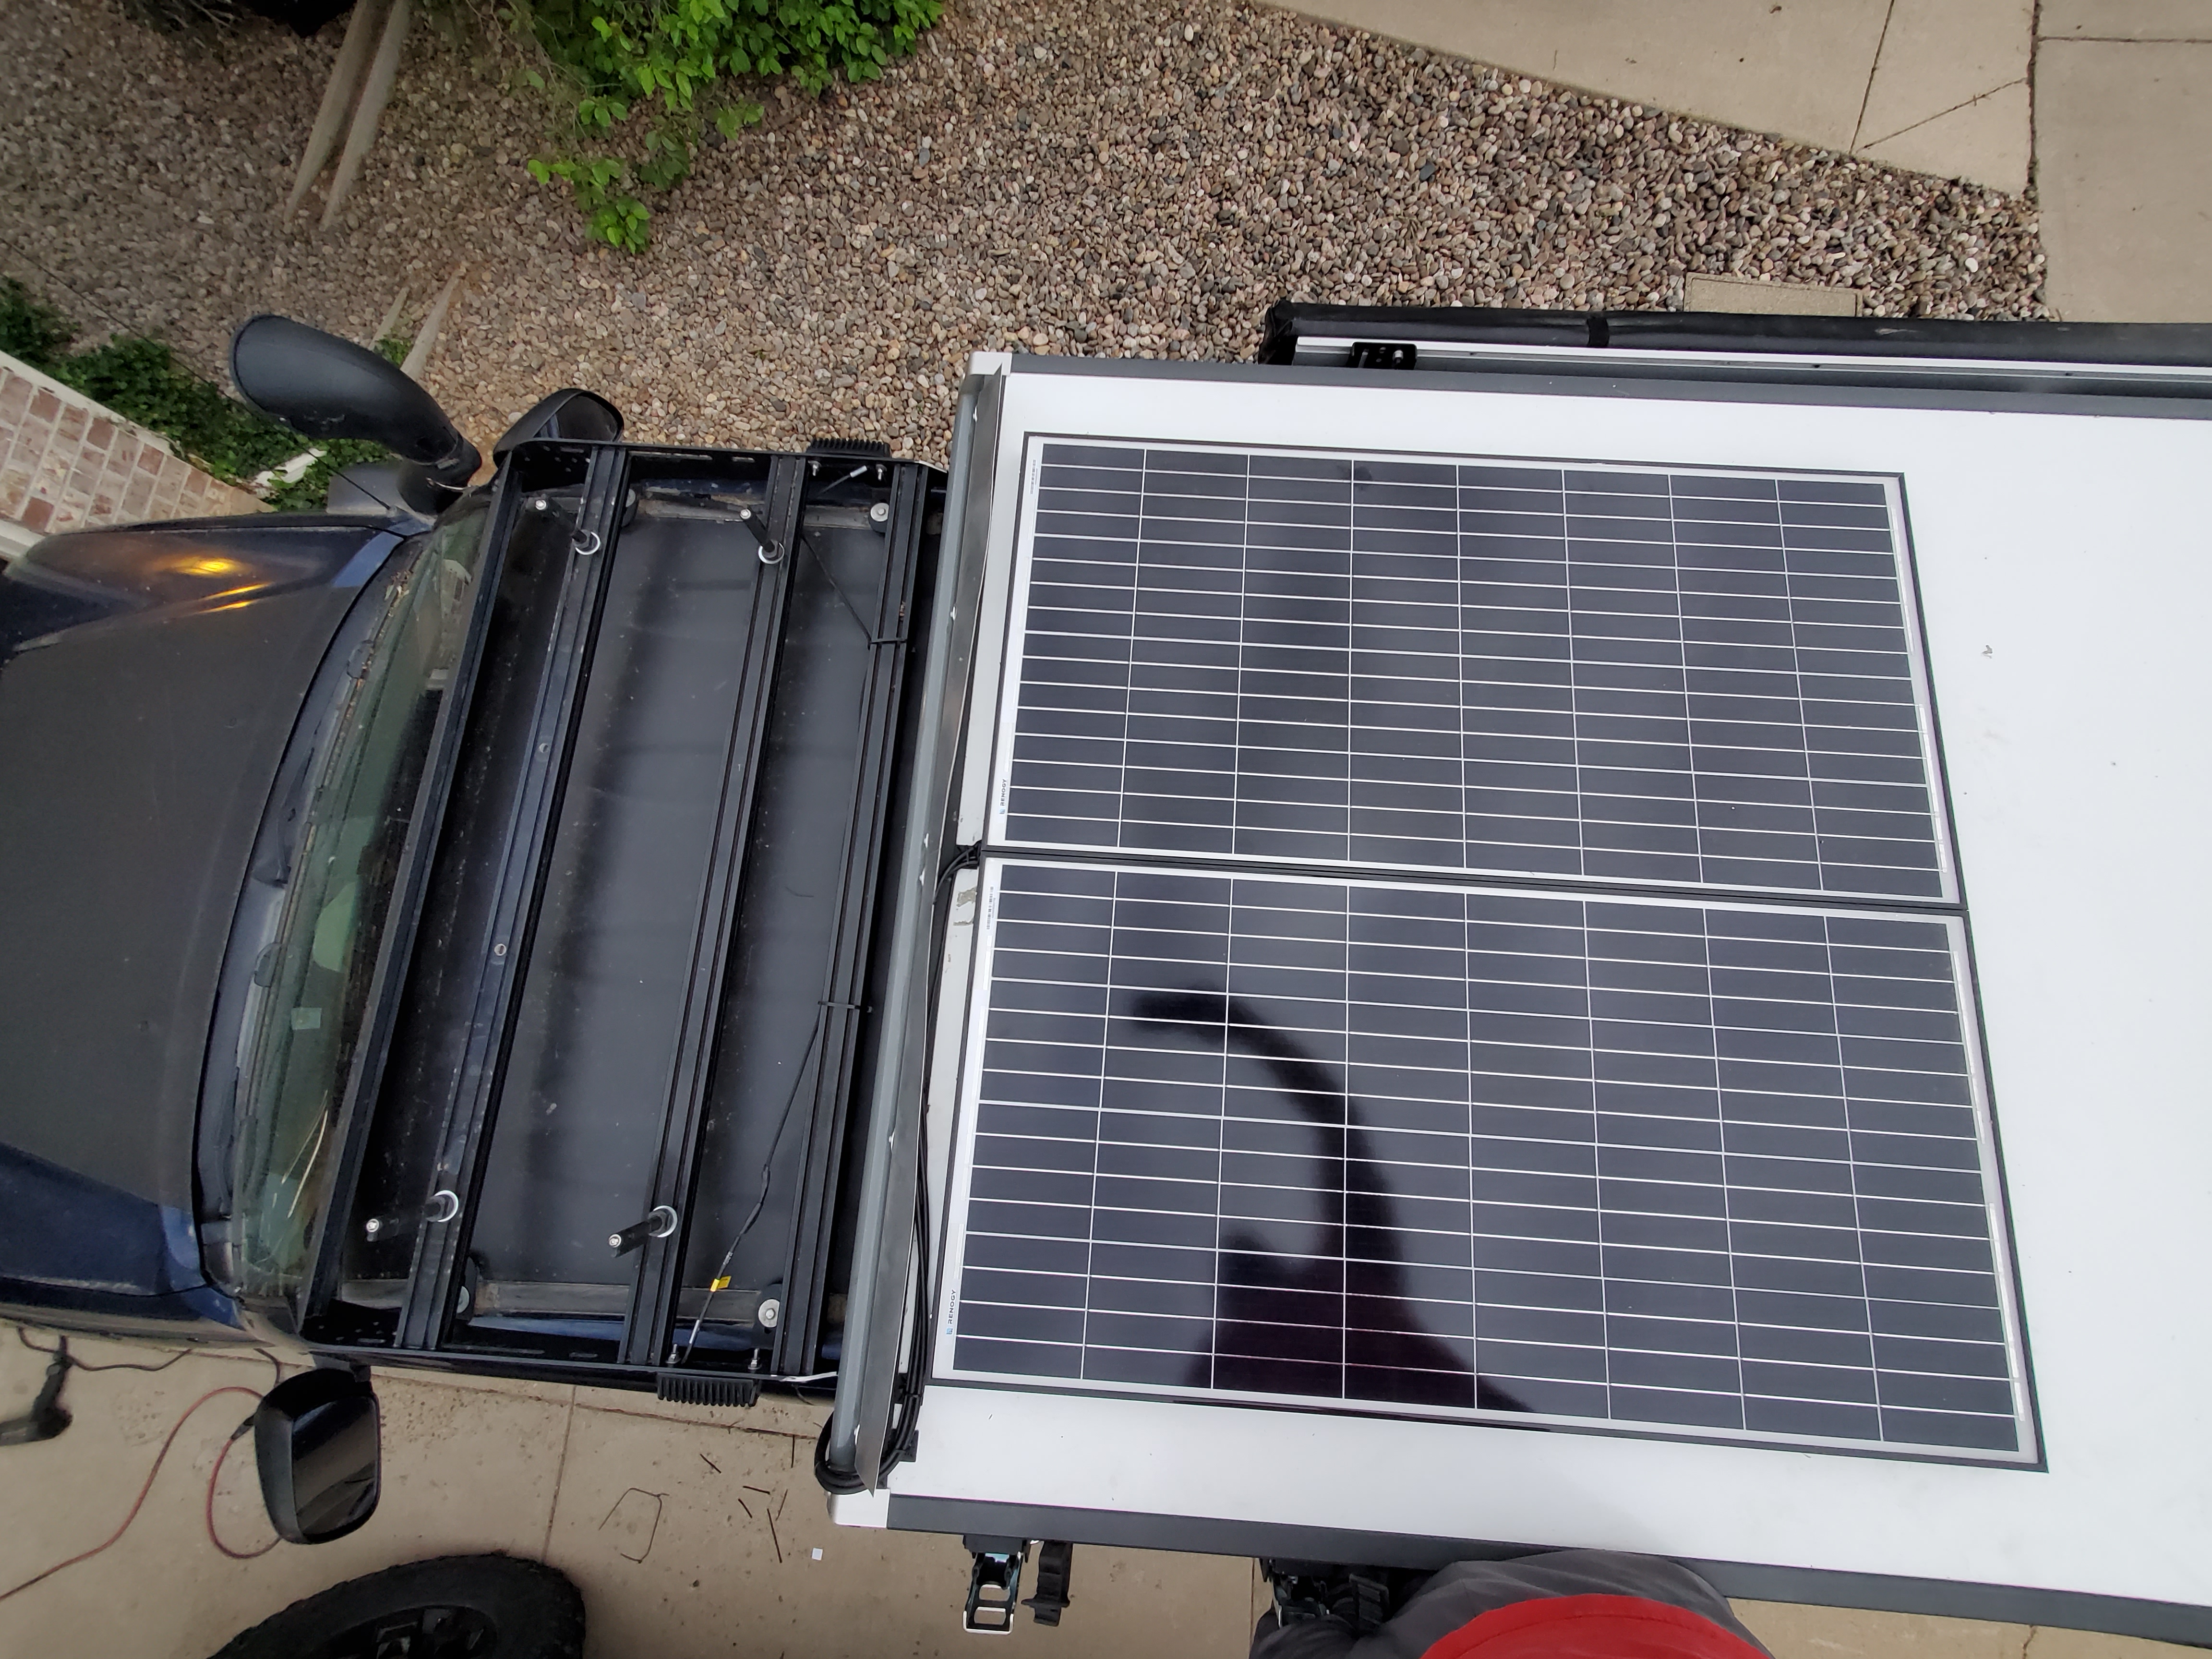
I chose the above panel since its length is close to the width of the gfc roof allowing me to mount it to the extrusions by just slightly modifying these (just slotted the holes to allow the panel to line up):
While I think the beef bars look nice, I couldn’t justify the cost just to mount a solar panel, vs less than $30 for the above brackets + some additional hardware. So far they’ve worked great.
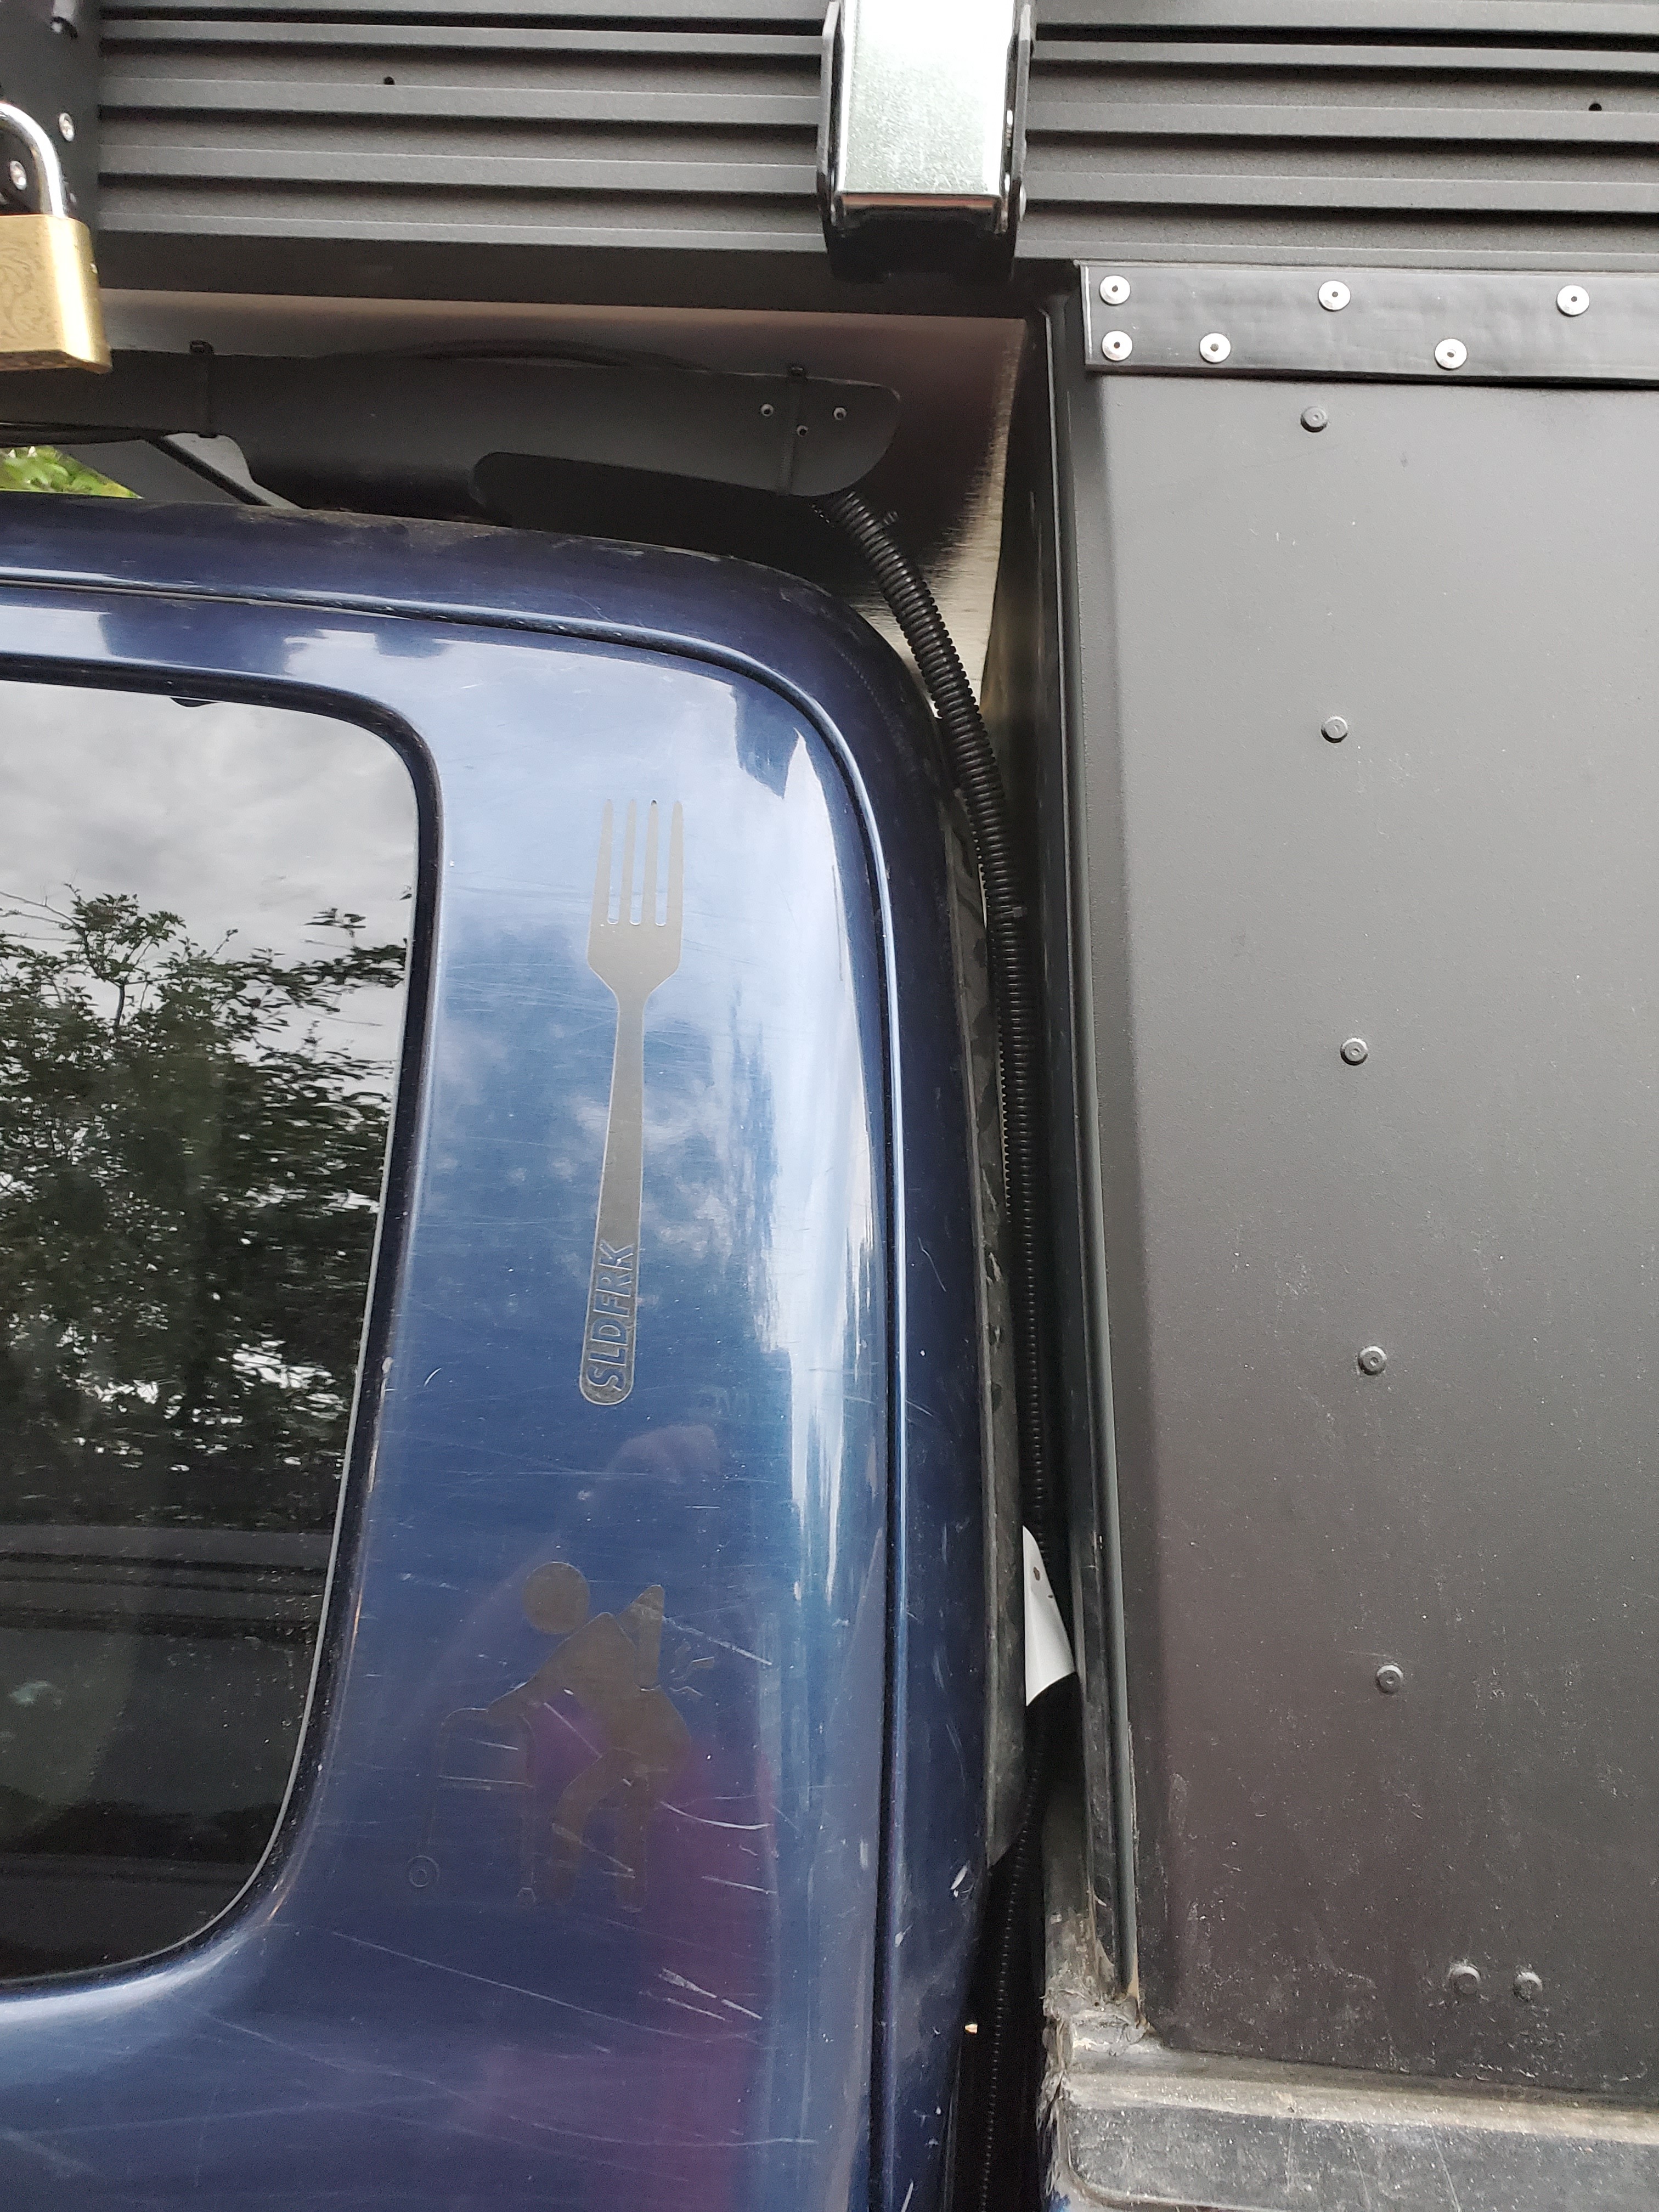
As for the wiring, I just ran the wires between the cab and the camper, with a couple cable clamps mounted to lower extrusion, then up through a hole in the bed, with a couple rubber washers to keep the elements out, to my house battery.
3 Likes
@GFC_Mike what’s the max width the solar tray allows for a panel?
@GFC_Mike Another words would this fit https://www.renogy.com/100-watt-12-volt-monocrystalline-solar-panel-black-frame/
2 Likes
Hey there, that solar tray will definitely fit! It basically can be as wide as the beef rack, and then you’ll just slide the beef rack in the extrusion to hold the solar tray in place, and the pressure applied will hold the solar tray in.
1 Like
Awesome thanks @GFC_Mike!
1 Like
@AdventureTim: How has your solar power set up, held up? Im considering the same set up, myself.
It’s still rock solid! No regrets at all, I’d do it the same if I had my time over again.
1 Like
Didn’t think this warranted another thread, so I’ll leave it here in response to the OP.
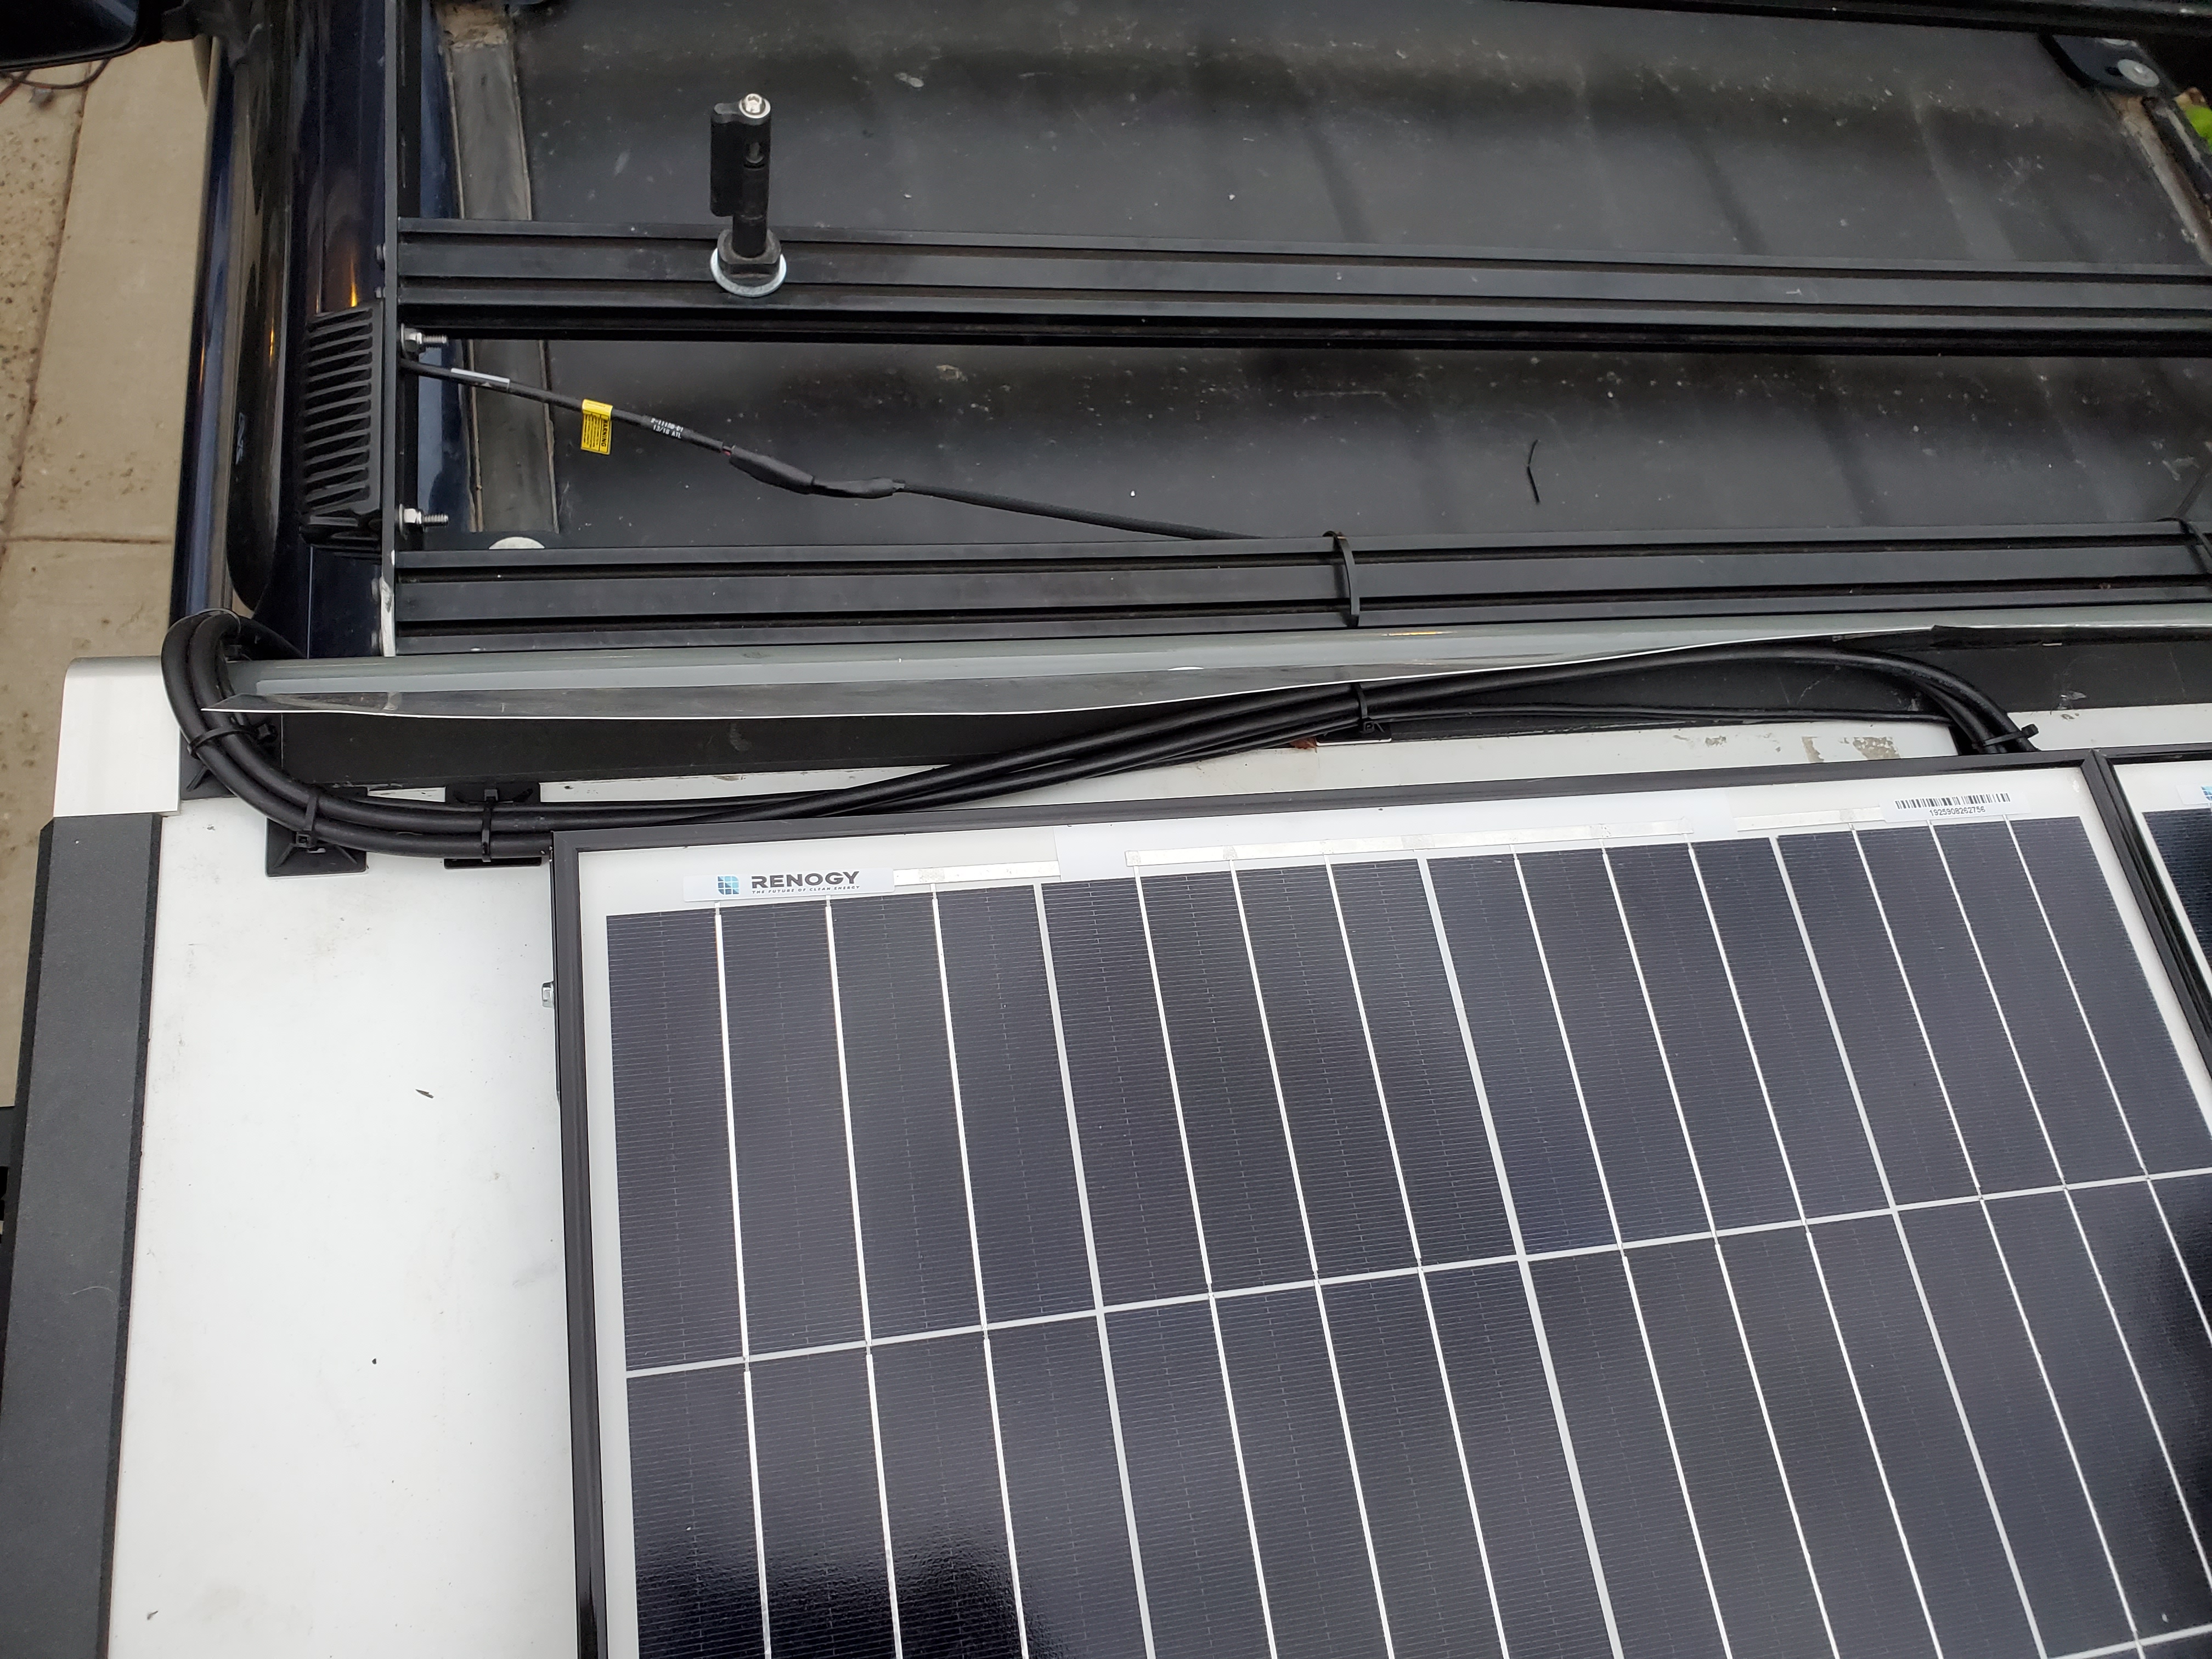
Just finished installing a Renogy 100w panel using beef racks and the GFC solar tray. I decided to bolt the panel to the tray instead of rely on the “squeeze fit” and 3M tape. Took a bit of measuring, but worked out pretty good. Didn’t take any pics of that and it all ended up on the bottom, so I can’t take them now.
I used the Renogy 10 AWG extension cables which have a pretty solid jacket on them, so I figured I was safe not using additional wire loom.
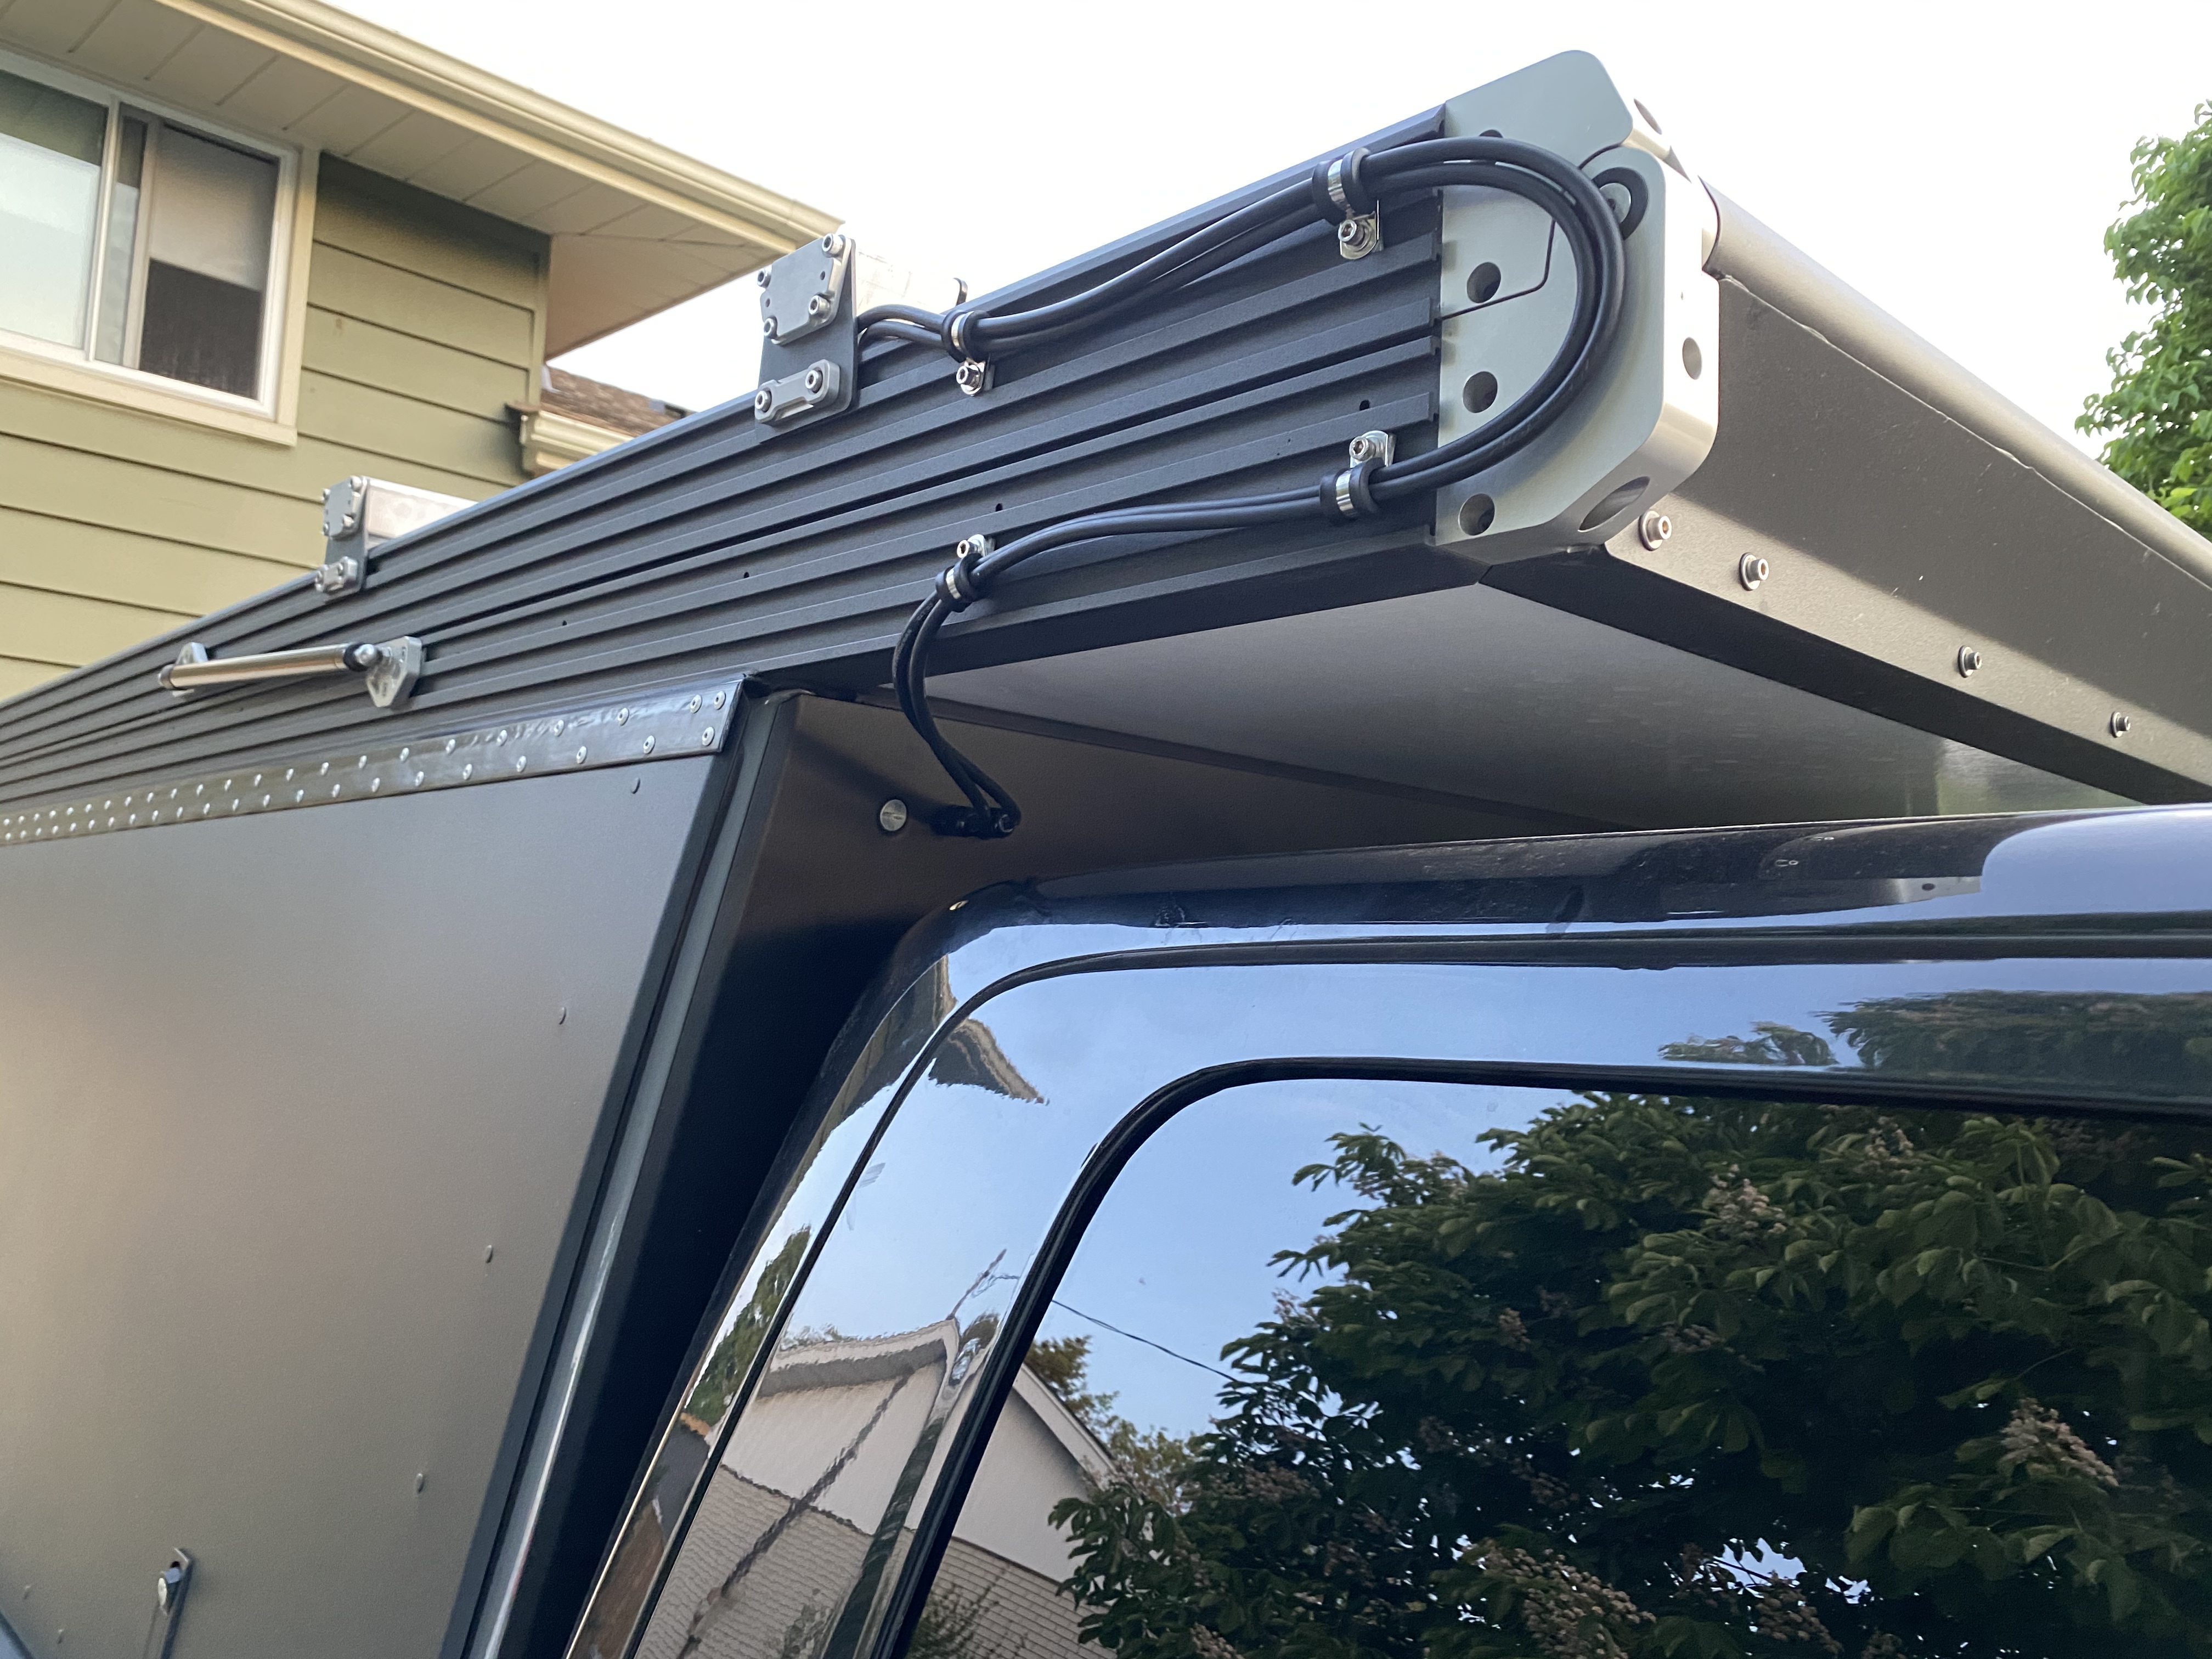
I decided to drill two holes for wire glands on the front panel. Didn’t want to go through the roof and couldn’t sort out a good way to secure the cables if I routed all the way down to the bottom and back up into the bed. Cable glands seem solid and well sealed, so we will see how it goes.
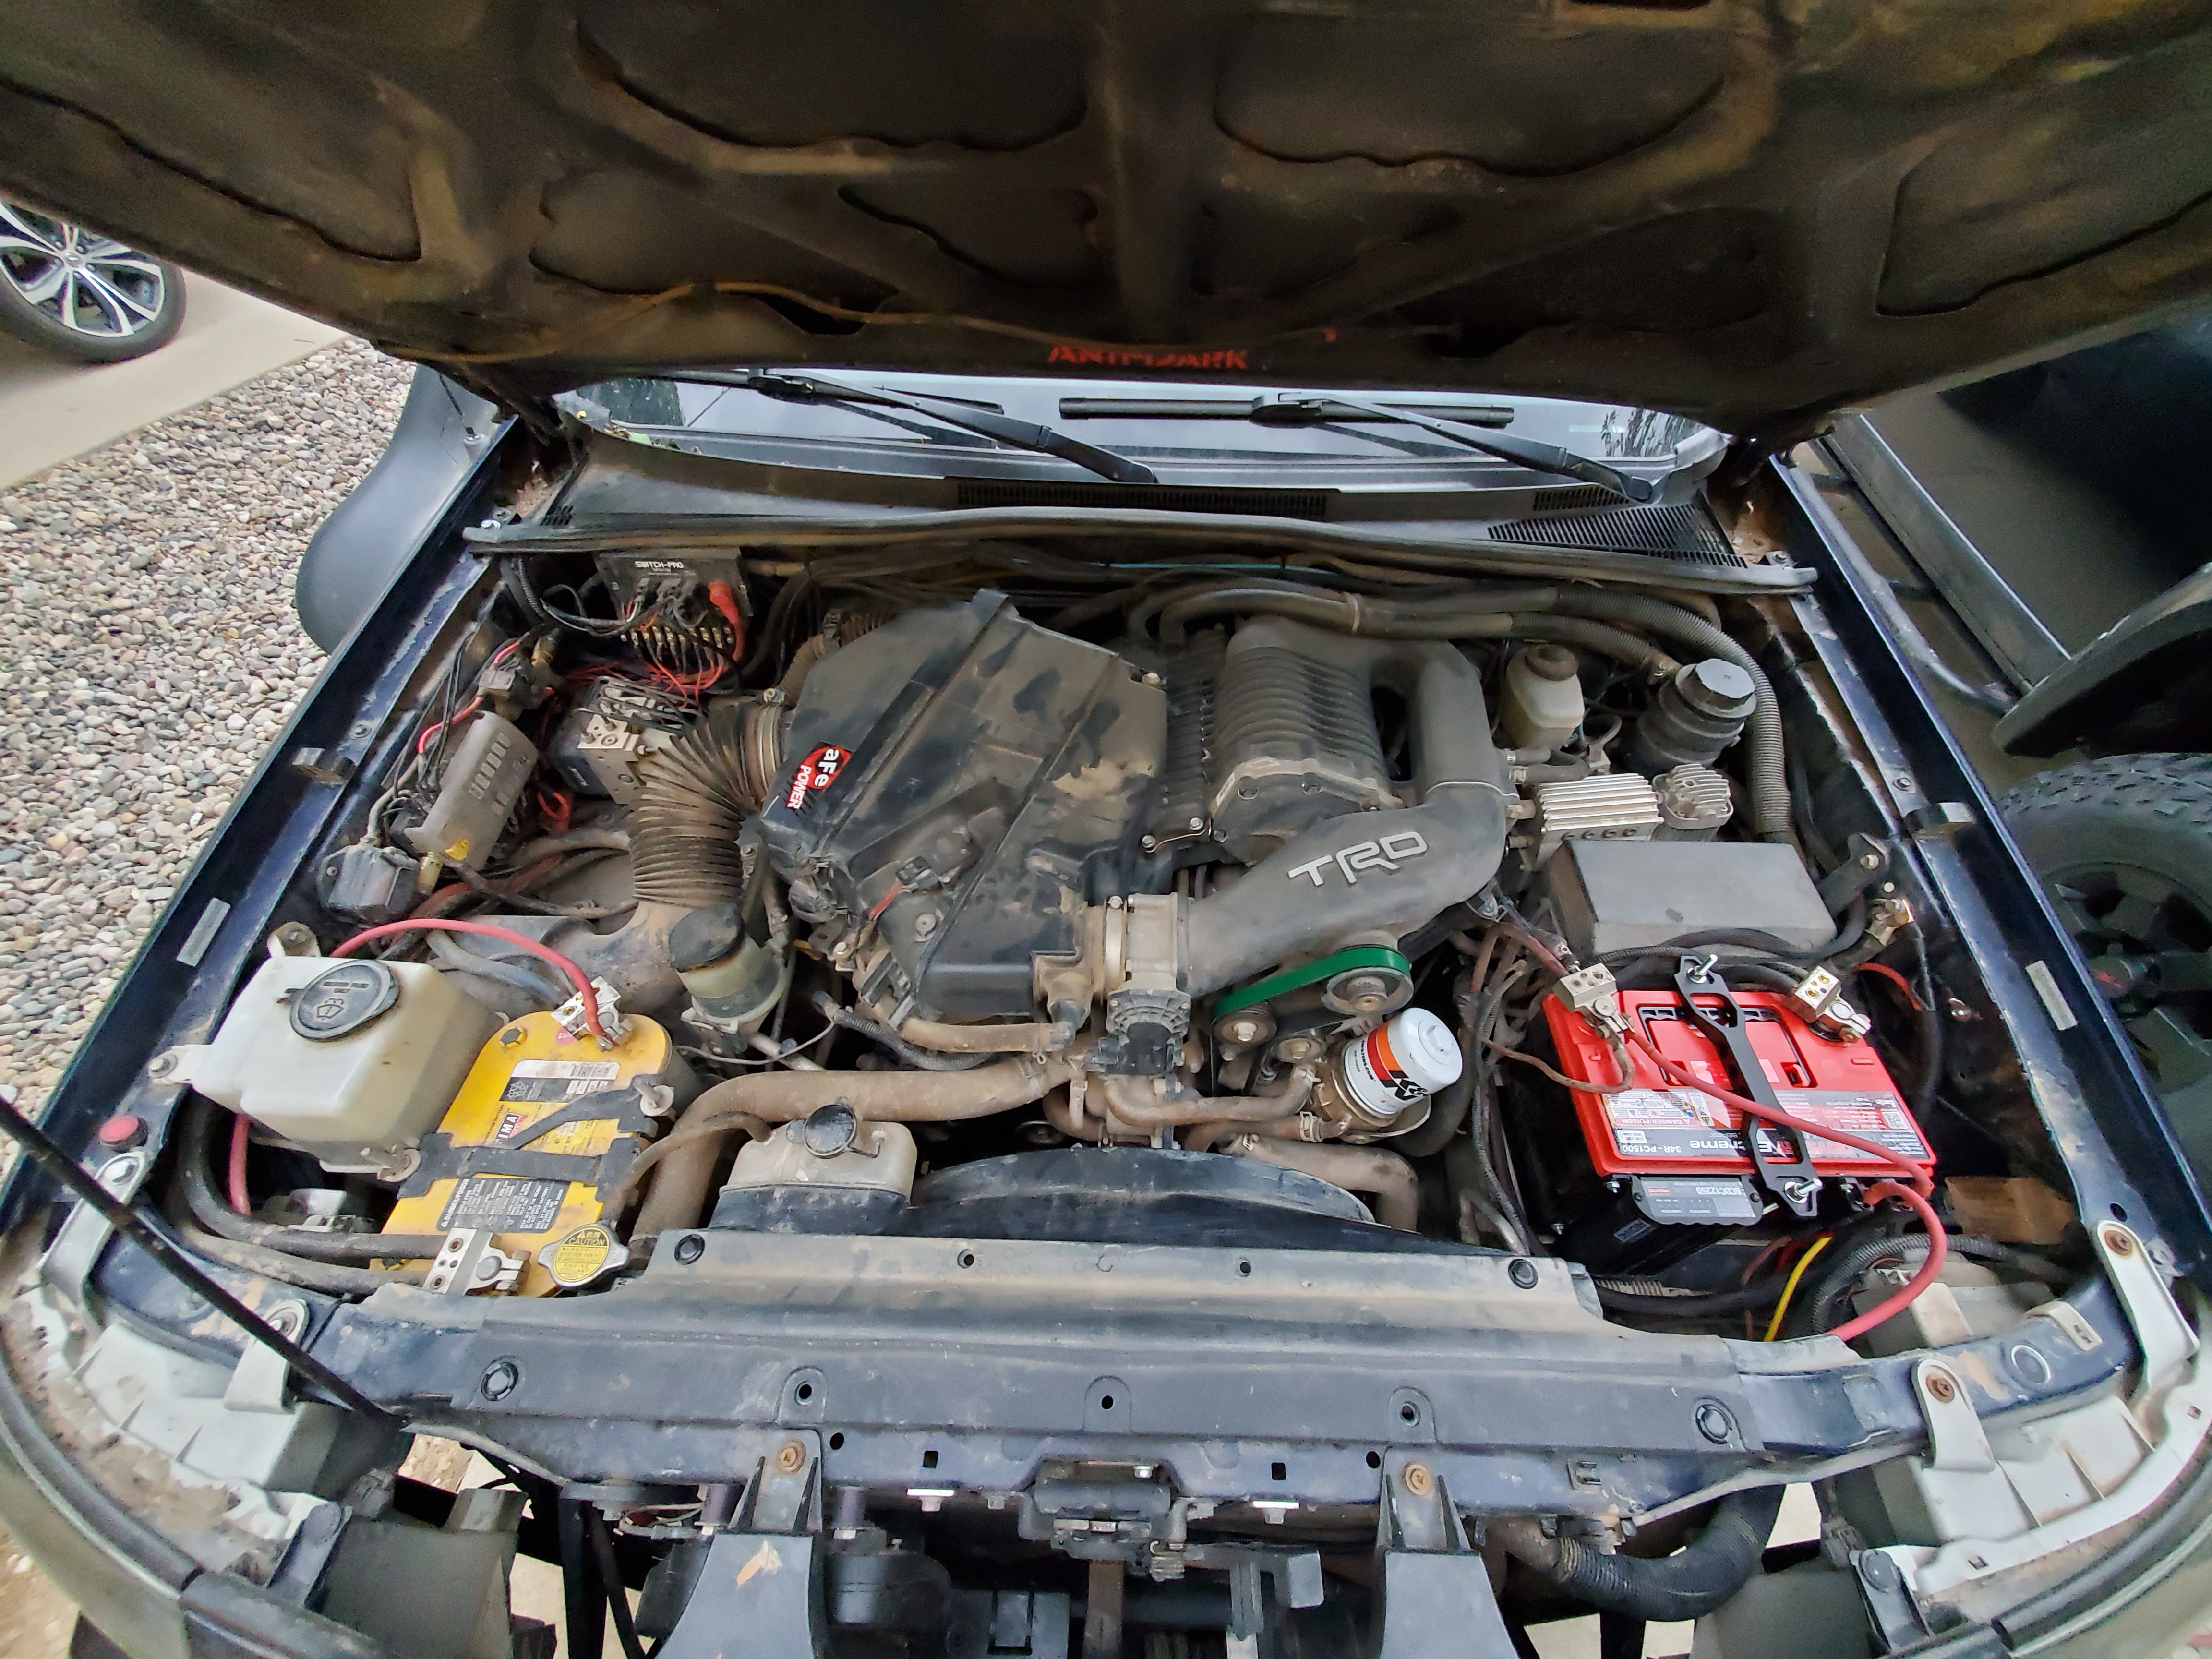
Haven’t completed the wire routing inside the camper. Just added some Anderson Power Pole connectors and plugged it into a West Mountain Radio Epic PWRGate to charge a LiFePO4 battery and run the fridge. Was getting a bit of a charge at 7pm, so should work ok. PWRGate has another input for a power source, so I may wire that to the starter battery.
I’ll probably pull the whole thing off when winter comes around to make clearing snow a little easier.

7 Likes
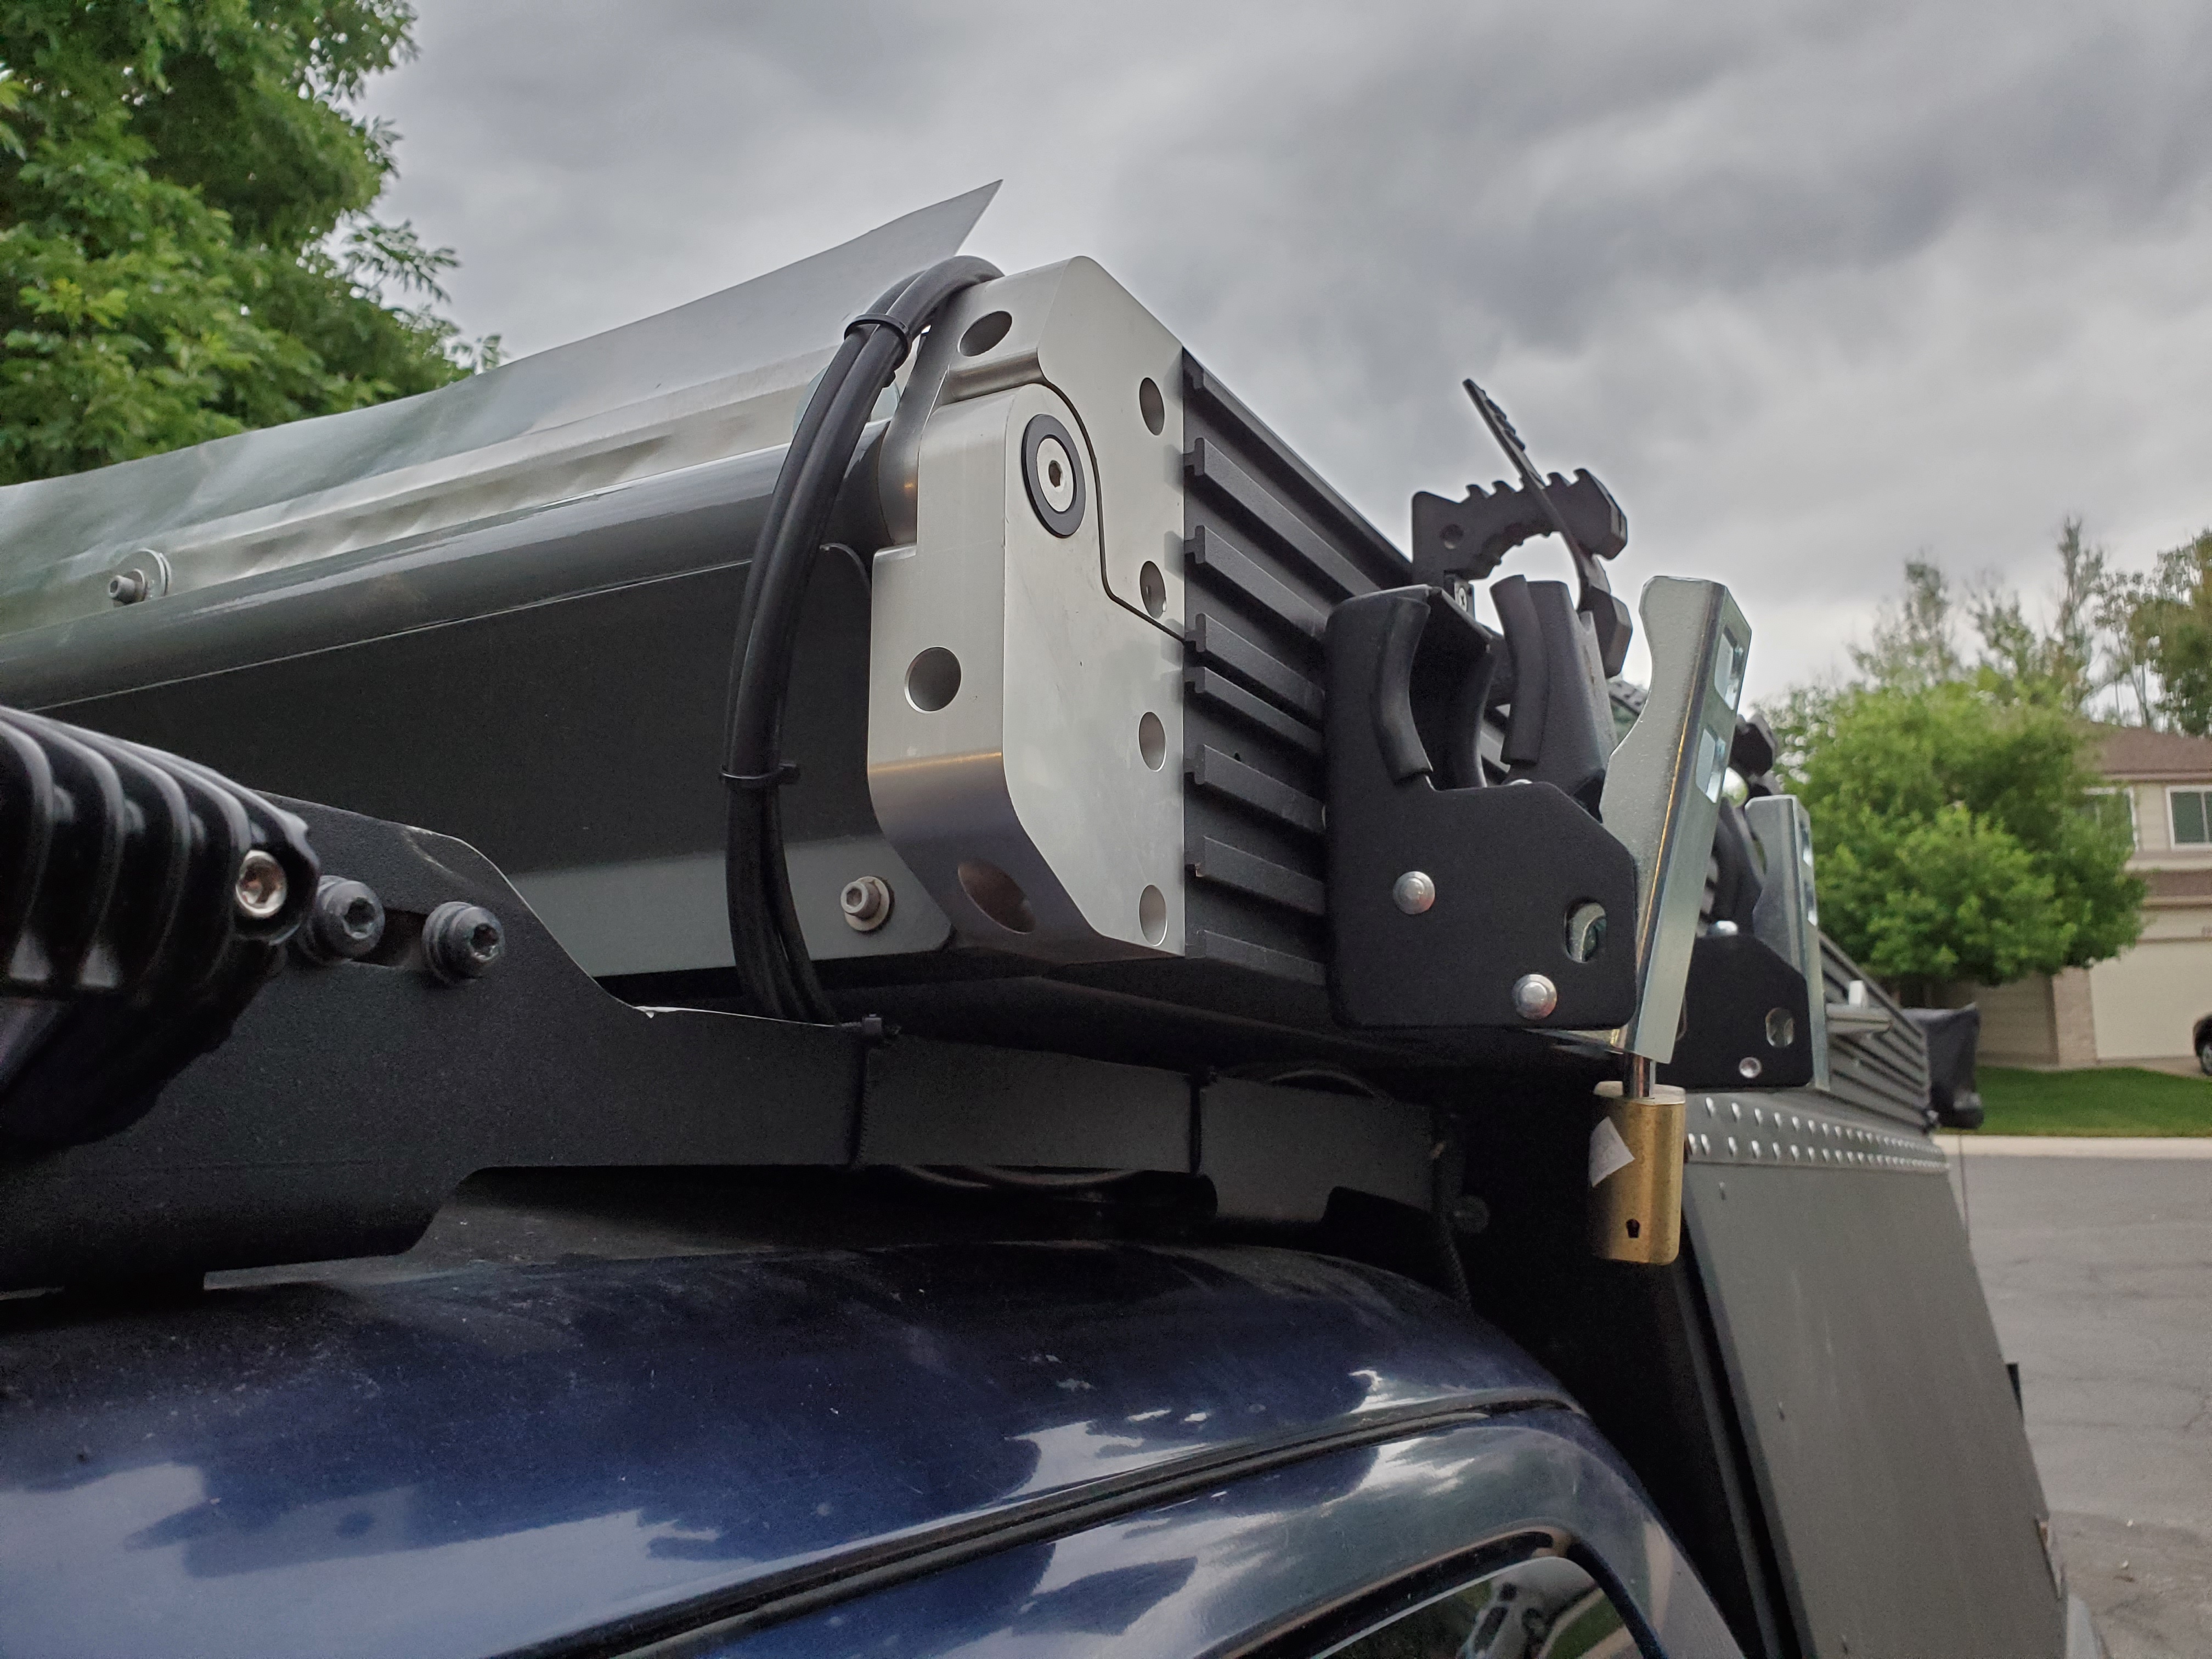
You got a link for the clamps that you used to secure the wiring on the side of the extrusion? I am about to wire up some lighting and I like how your wiring looks.
@anon72572904 This was the link. They had a 12mm (1/2”) option when I ordered. Worked perfect with a double run of the 10 AWG Renogy wire.
Keadic 20Pcs 1-3/4" (45mm) Cable Clamp Rubber Wire Clamps Stainless Steel Rubber Cushioned Insulated Clamps https://www.amazon.ca/dp/B07GZ1D2M1/ref=cm_sw_r_cp_api_i_8TJ2EbDCM0BF8
2 Likes
almost done with mine… finishing up the wiring this afternoon.
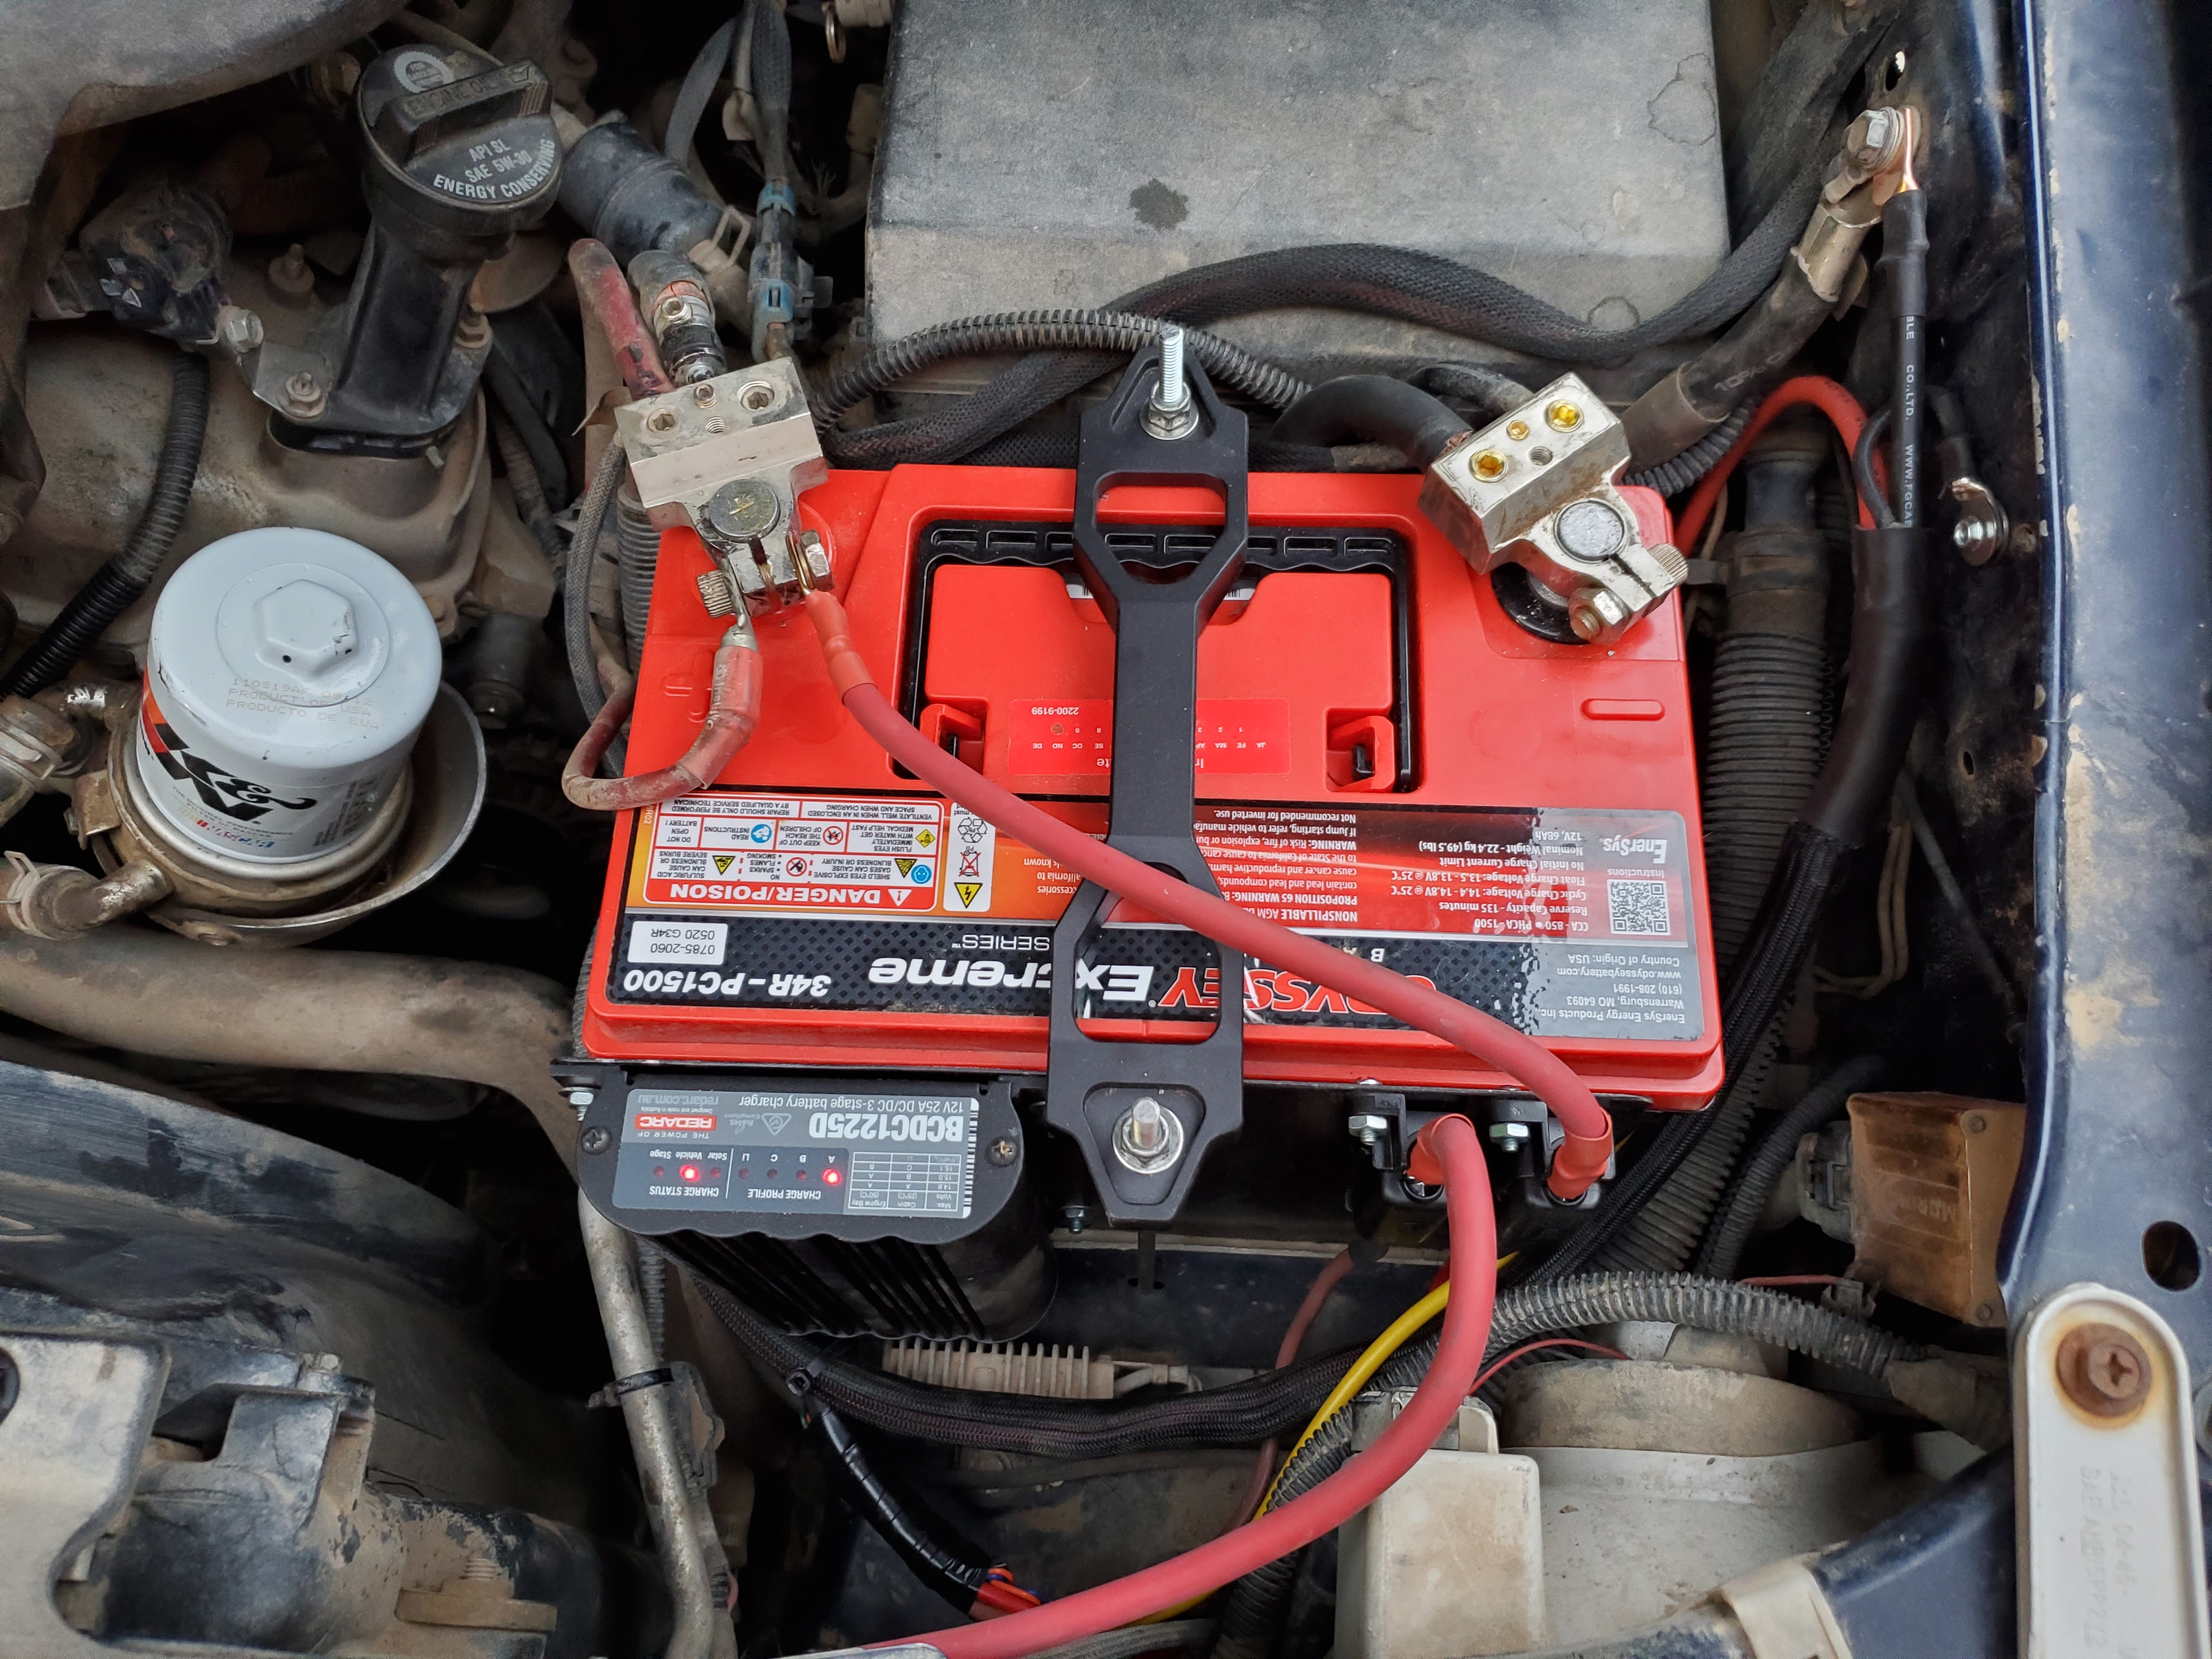
2- 100W Renogy rigids feeding into a Redarc BCDC1225d. homemade mounts using VHB tape and a homemade faring to cut down on the force against the panels. After we get back from an upcoming trip i’ll be doing a backfeed from the aux battery to the main using an isolator so when the aux is full, it’ll trickle back to the starting battery, but only when the ignition is off.
2 Likes
@NYCO Do you have your setup documented in a build somewhere? I am researching dual battery setups with solar supplement as the group 31 is no longer cutting it. Also I’m just down the road in COS and would love to have a look at your setup sometime.
i usually keep my build updated over on TW, https://www.tacomaworld.com/threads/nycos-06-boosted-blue-betty.157700/
i’ve been getting lazier on full documentation… if i’m producing an article about the project, i’ll have in depth how-to, otherwise i’ll just grab pics along the way.
Renogy has a nice looking option that offers the battery isolation feature, ties in solar, MPPT function and also has a built in trickle back to the starting battery… cons are: not waterproof/dust proof, larger casing, and needs to be shielded from heat. https://www.renogy.com/dcc50s-12v-50a-dc-dc-on-board-battery-charger-with-mppt/
The Redarc has the isolation, solar tie in, MPPT function, waterproof/dust proof, and able to withstand heat better so mounting in the engine bay is an option. To get the trickle back to the start battery, you have to hook up an isolator, like a blue seas or the redarc isolator, but in reverse and a relay in place to ground the unit (turn it on) when the ignition is off. then when the solar charges the aux battery over 14V, it will then send charge over to the starting battery until both are topped off. https://redarcelectronics.com/products/dual-input-25a-in-vehicle-dc-battery-charger
Both will draw power from solar first, then from the start battery/alternator.
1 Like
How is the 3m tape holding up for the panels??
Looks clean man. I like this a lot
Hey @Hardcharger How did you bolt the 4 wiring harnesses to the exterior of the camper?
@RbrettM. This was the link. They had a 12mm (1/2”) option when I ordered. Worked perfect with a double run of the 10 AWG Renogy wire.
Keadic 20Pcs 1-3/4" (45mm) Cable Clamp Rubber Wire Clamps Stainless Steel Rubber Cushioned Insulated Clamps https://www.amazon.ca/dp/B07GZ1D2M1/ref=cm_sw_r_cp_api_i_8TJ2EbDCM0BF8