Show me your solar set up

So far it’s been perfect! No issues at all. The panels are very easy to clean and are showing no signs of detaching. I used the 1" wide VHB, applied it to the perimeter of the panels and an X in the middle. I’ve got through significant climate changes (~0 degree weather up to 110).

2 Likes

So you didn’t have to cut a hole in the camper?

So I recently purchased a redarch RedVision with the manager 30 set up.


I’m looking to run my fridge and GFC lights off my group 31 in the back and charge it off the solar panel on the roof. I also have 2 group 35s under the hood that are wired together with a smart relay. Would I be correct in thinking I can directly tie in my rear group 31 to the main starting group 35 up front or do I need to add a relay there as well. Keep in mind the manager 30 should act as a relay so both batteries go through this before each other.

3 Likes

7 Likes

Super excited to see how that turns out! I just posted on your post on FB and then just saw this haha!

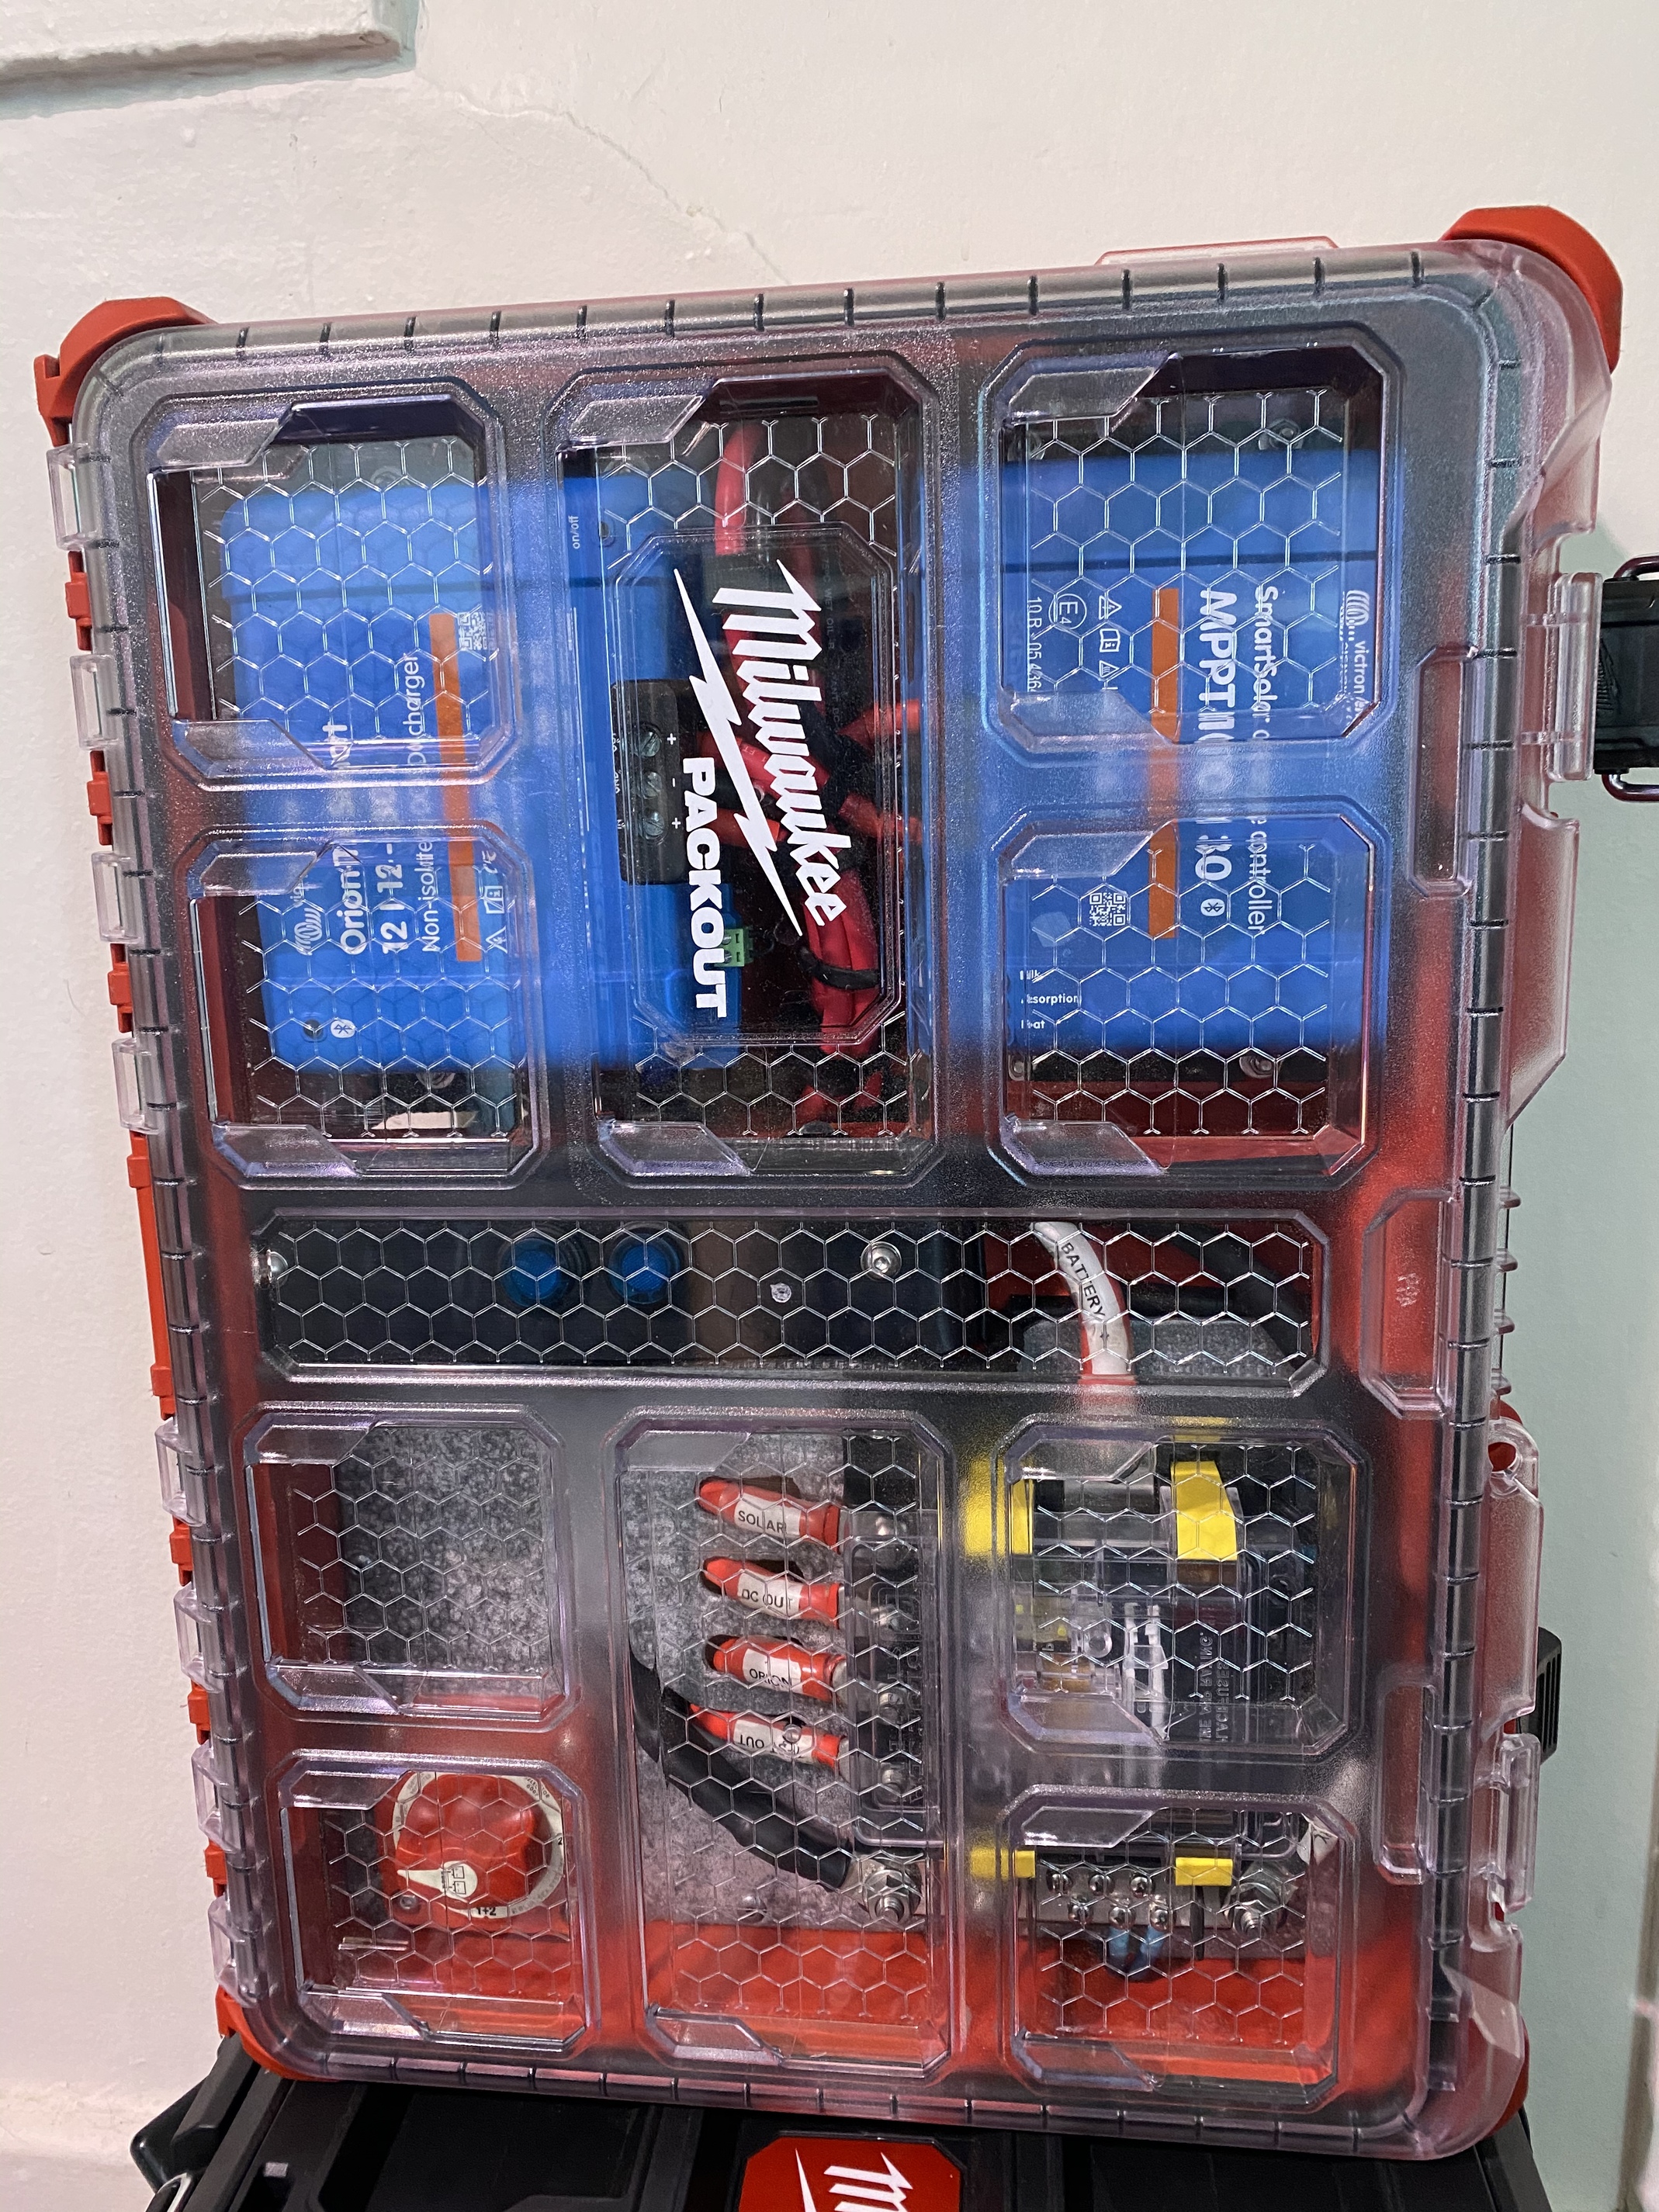
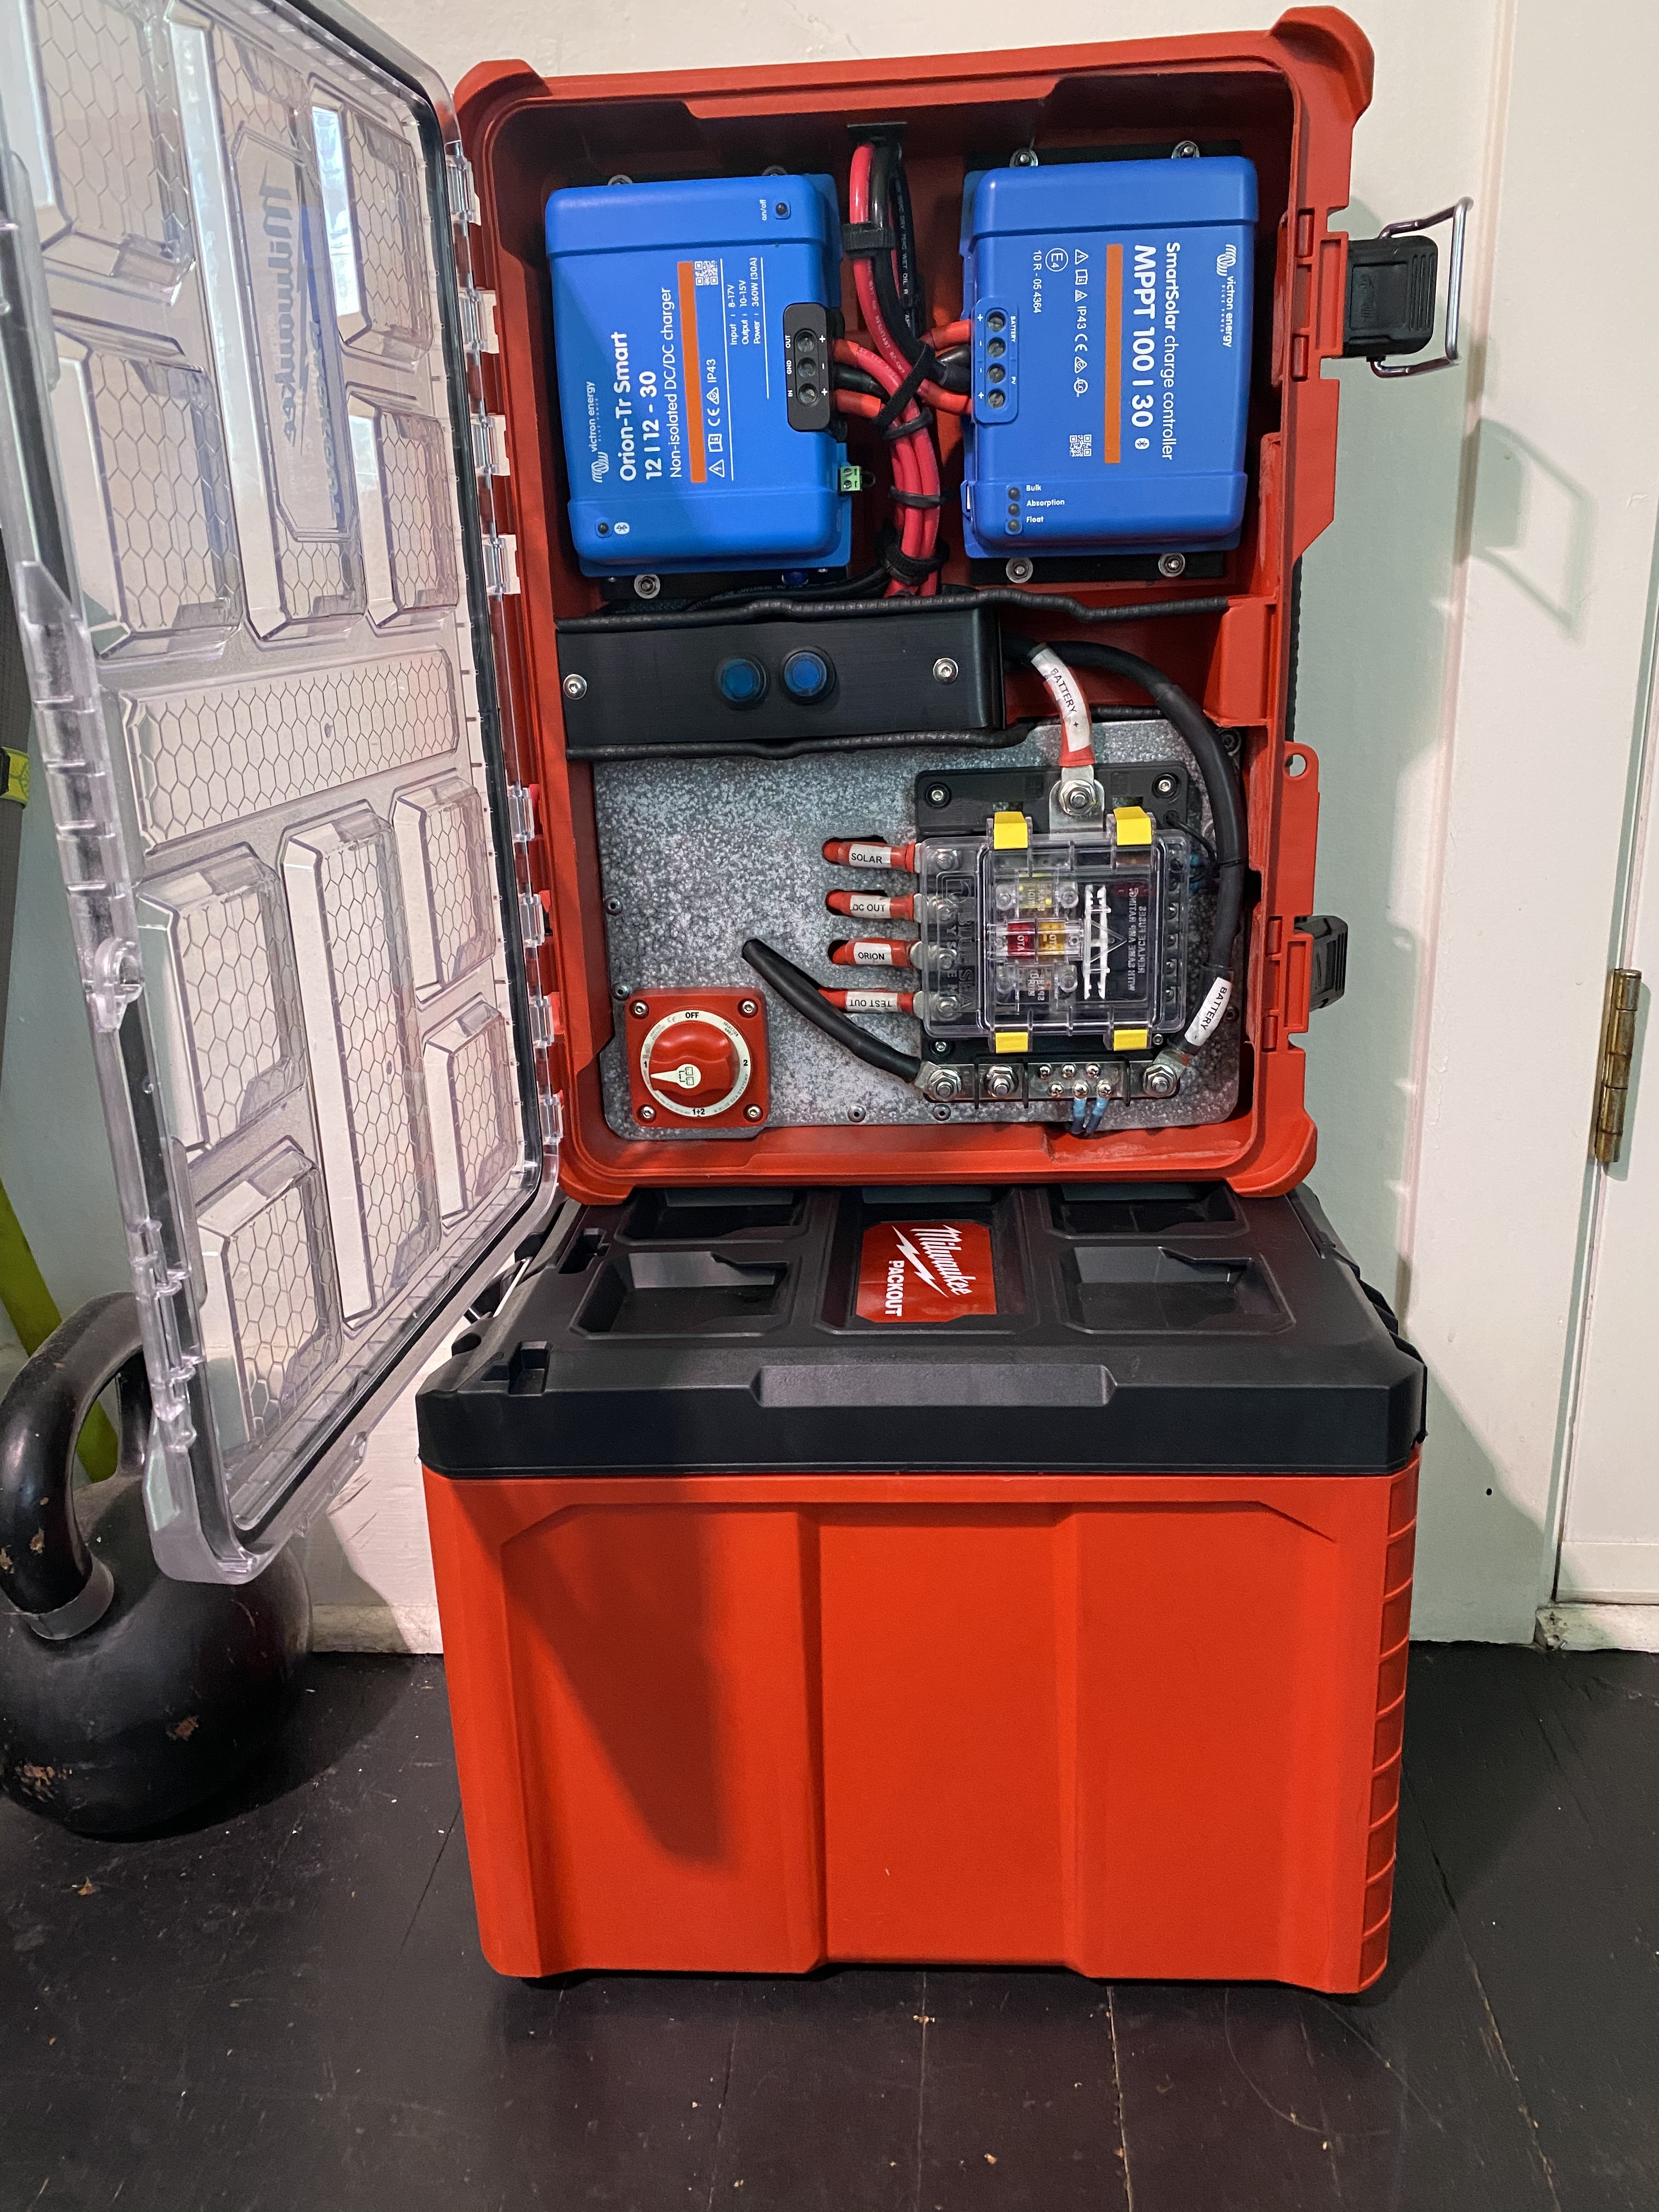
Here is my latest modular setup. The DC-DC charger, Solar controller and main fuse panel is housed in a pack-out. This will mount against the back of my box or behind my rear seats using the new pack-out racking. This can accept DC from my under hood batters, 2x group 31 as well as a 25amp 120v battery charger mounted in the engine bay for “shore power”. For solar it will take up for a 500 watts or so. It has quick connect plugs for the connections. It also has a USB and 12v plugs / lighting and a fan if needed for the DC-DC.

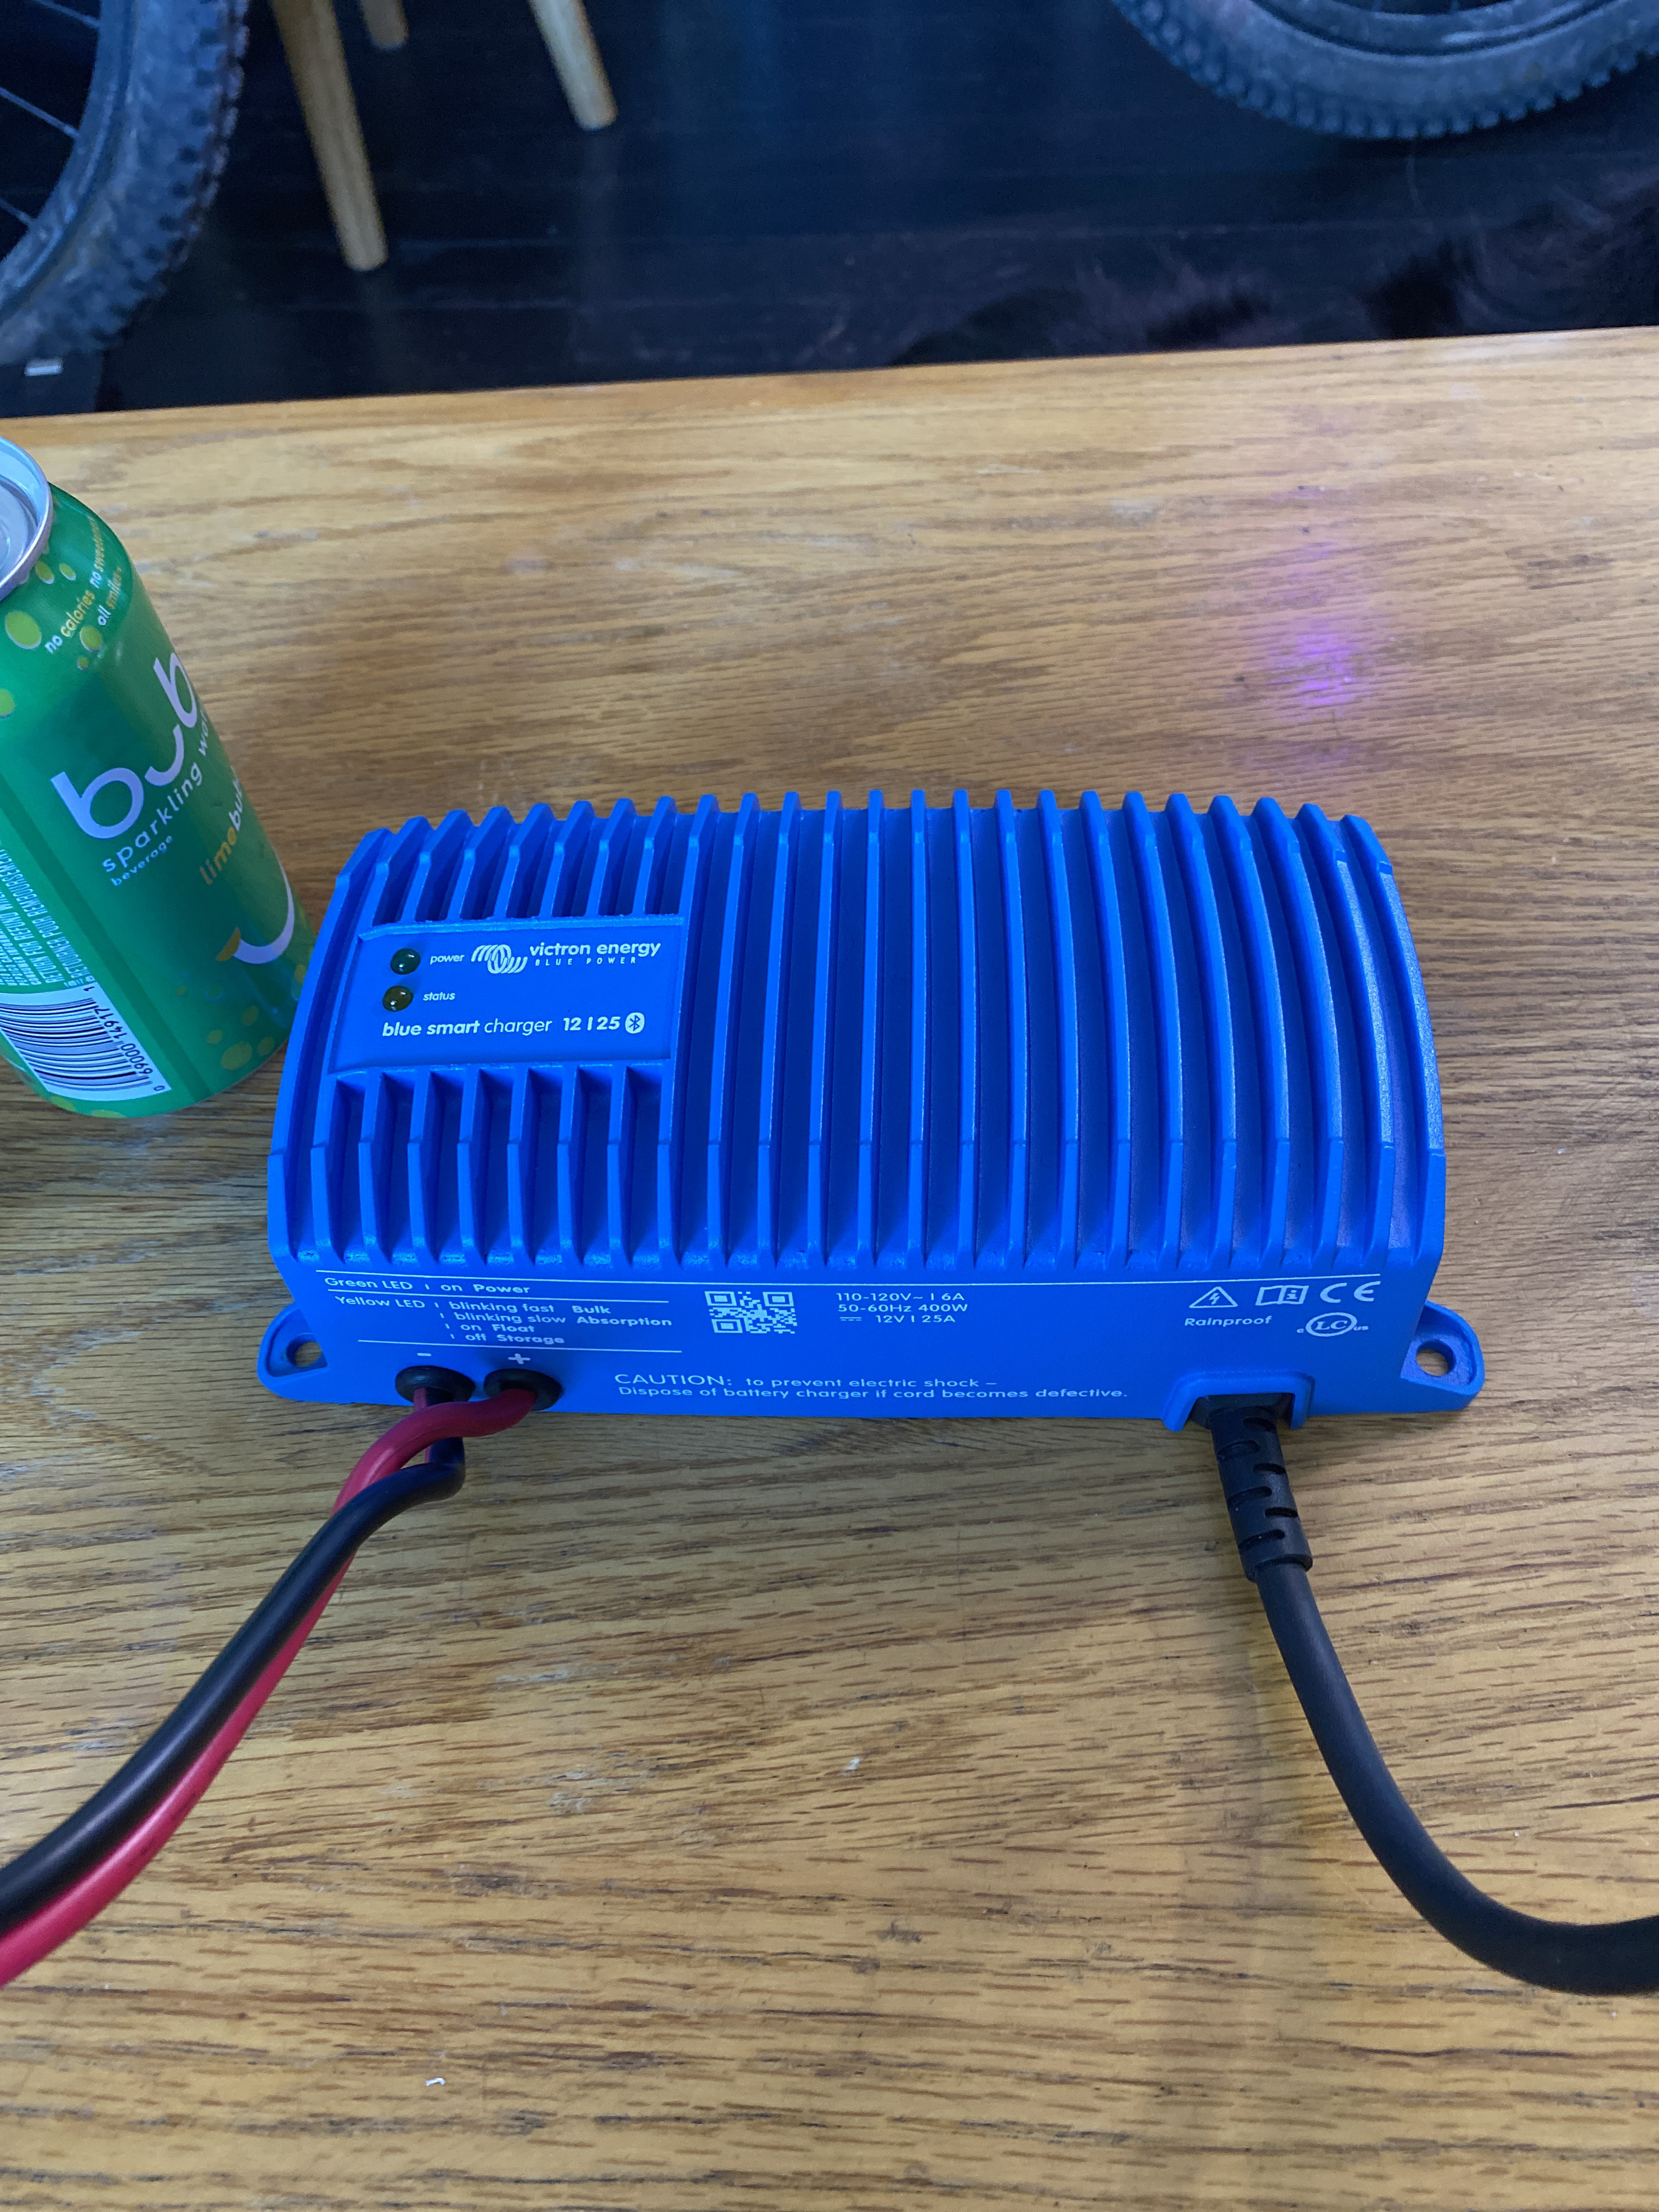
Shore power box (12v 25a) this will go in the engine bay.

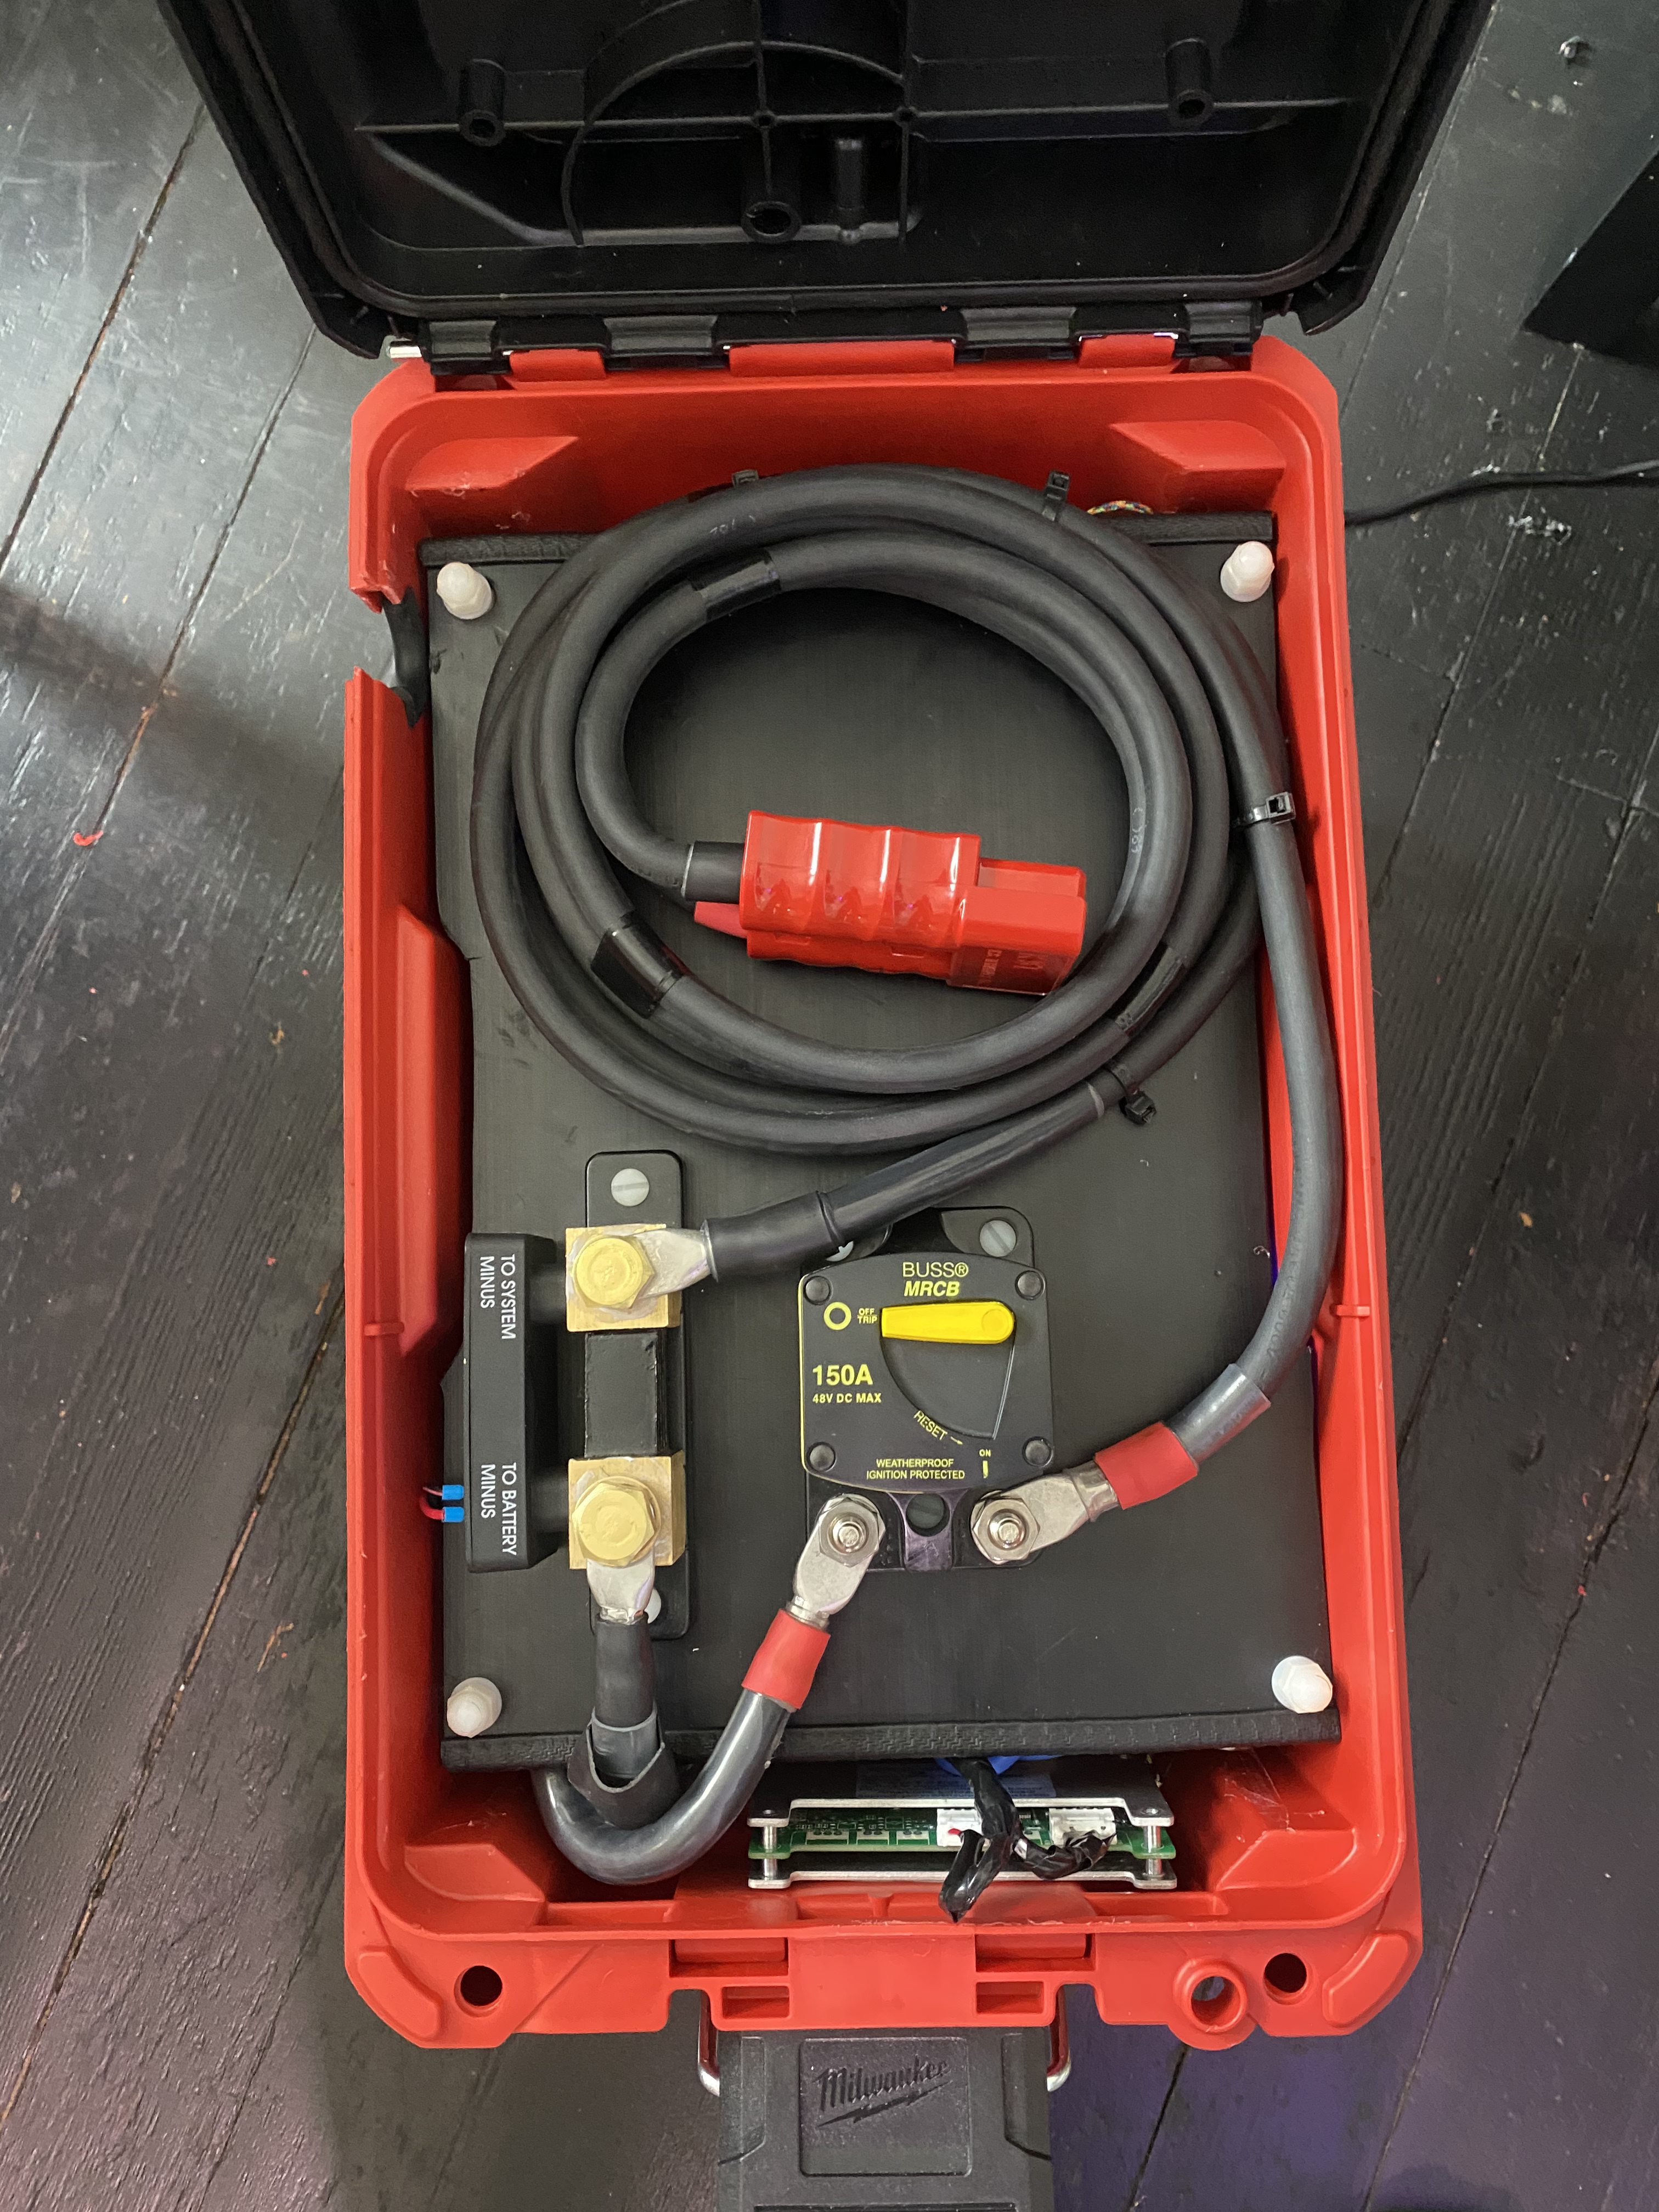
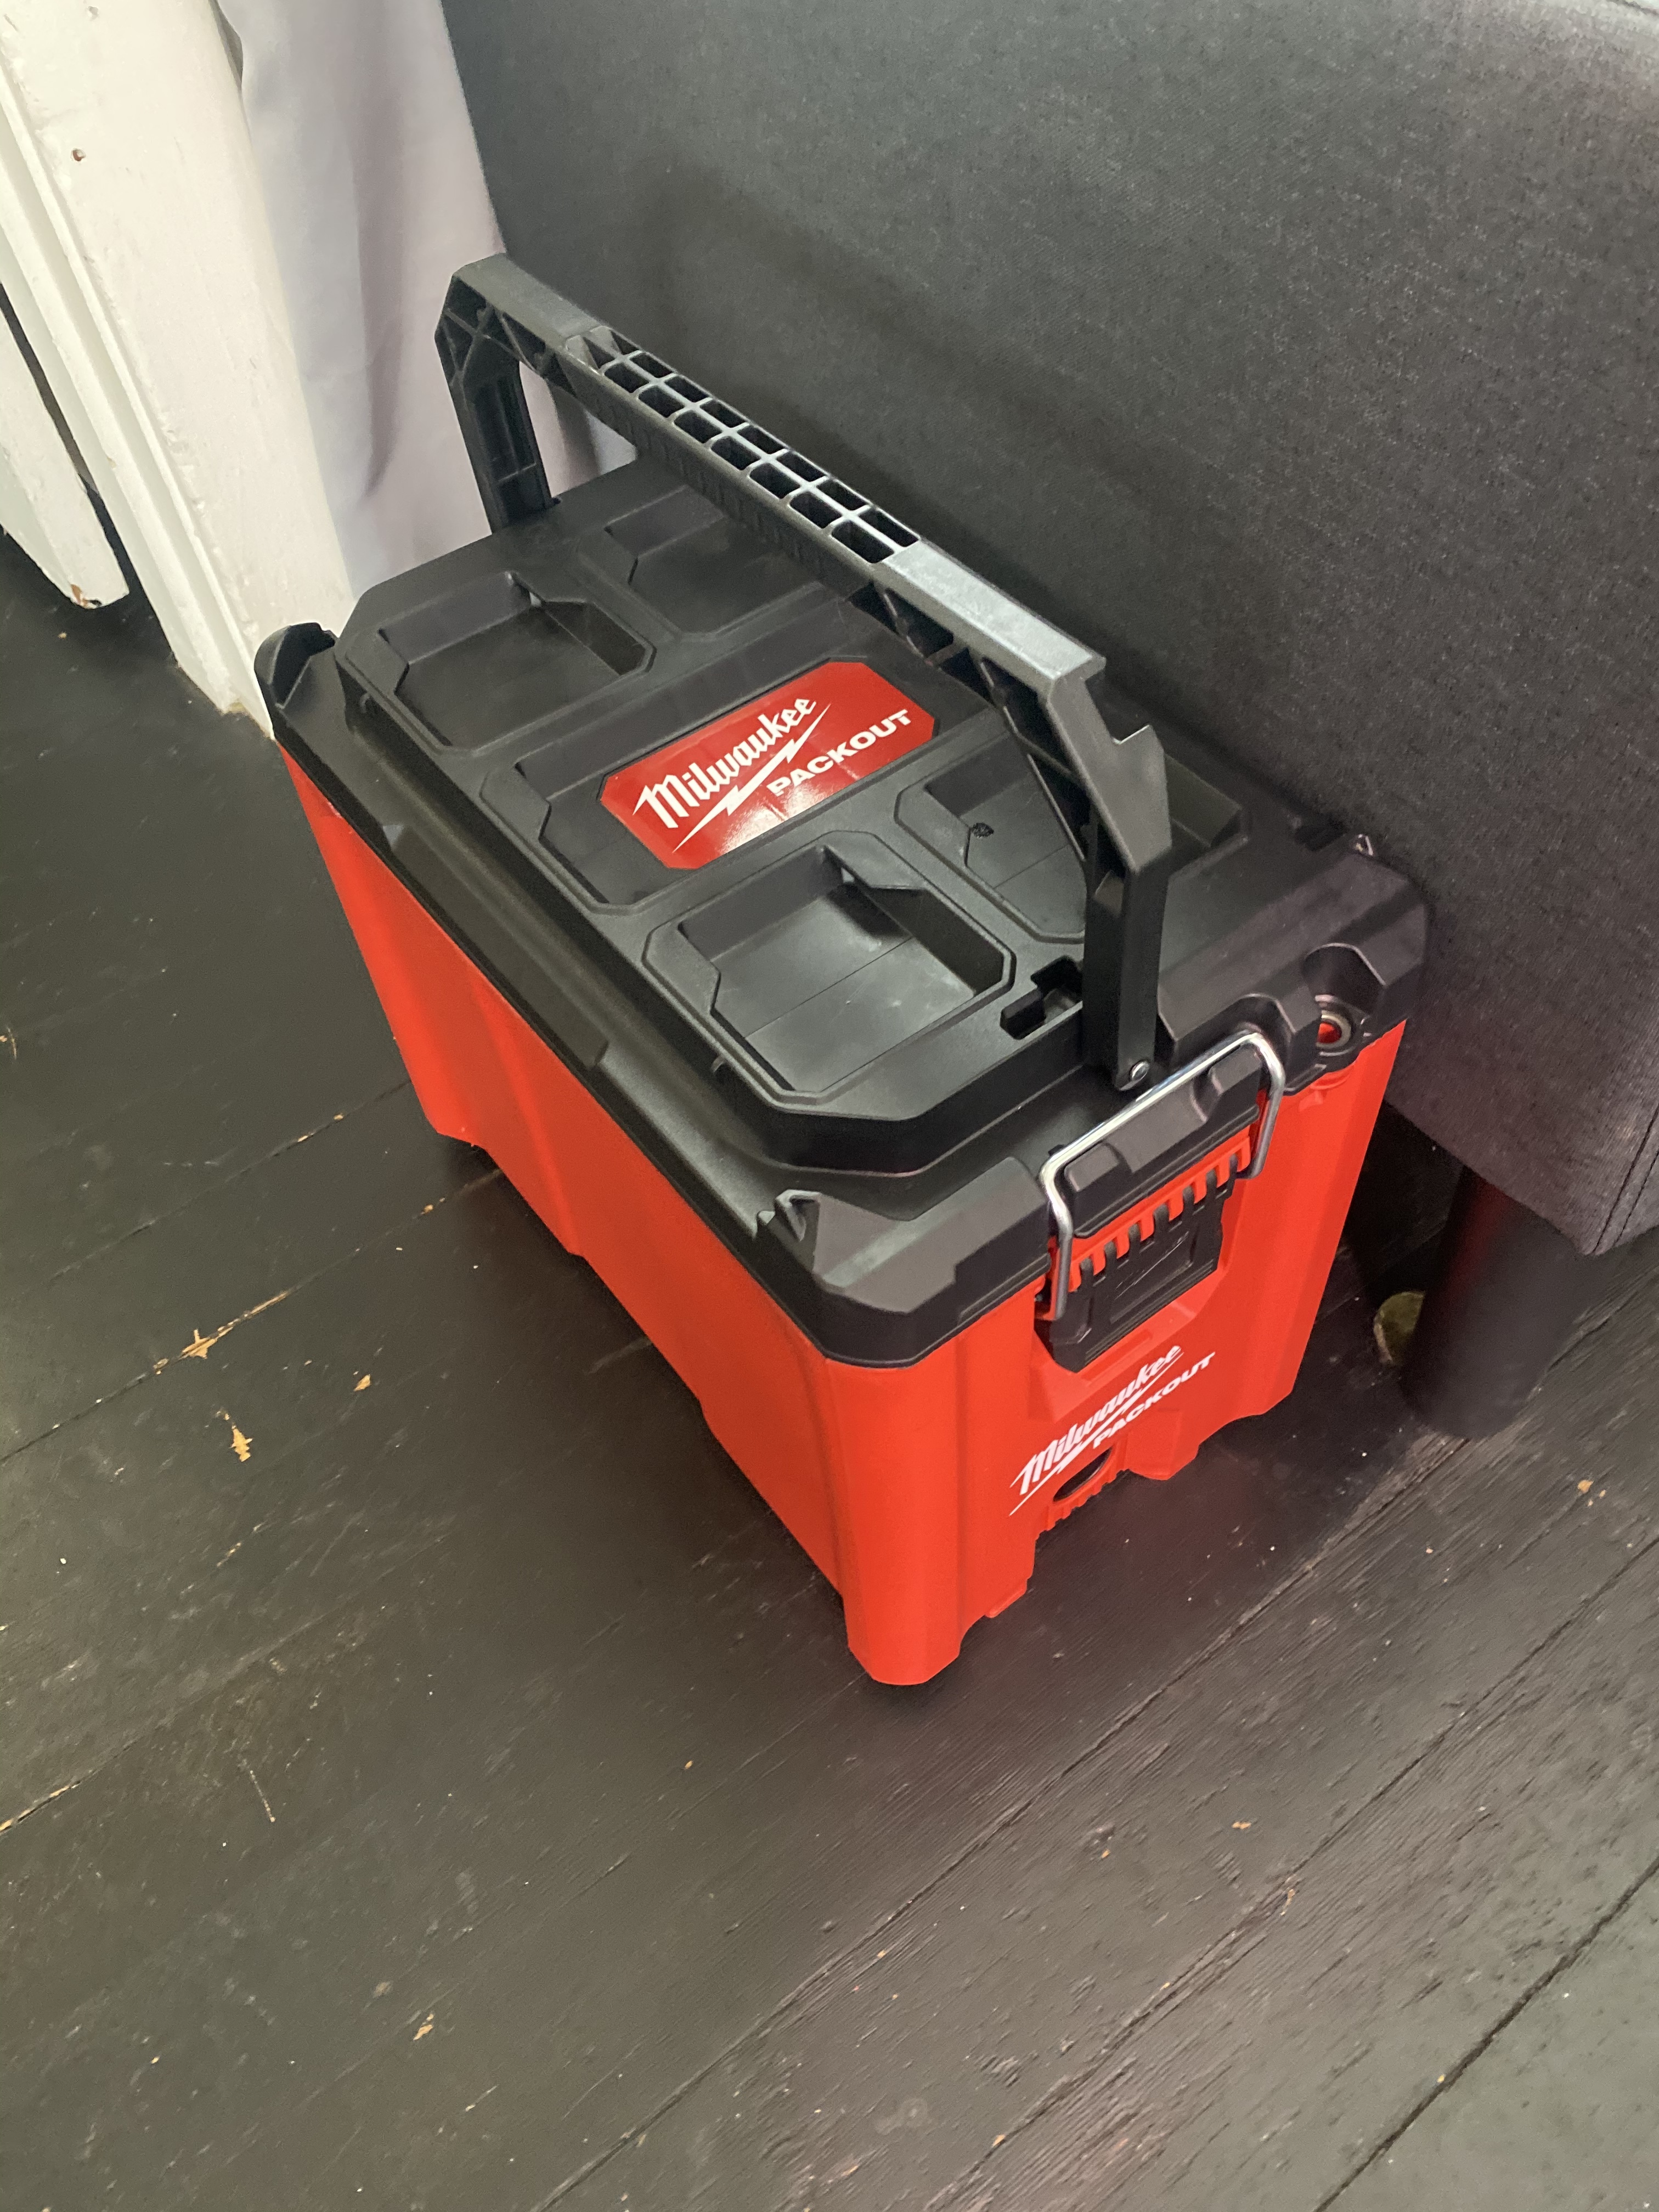
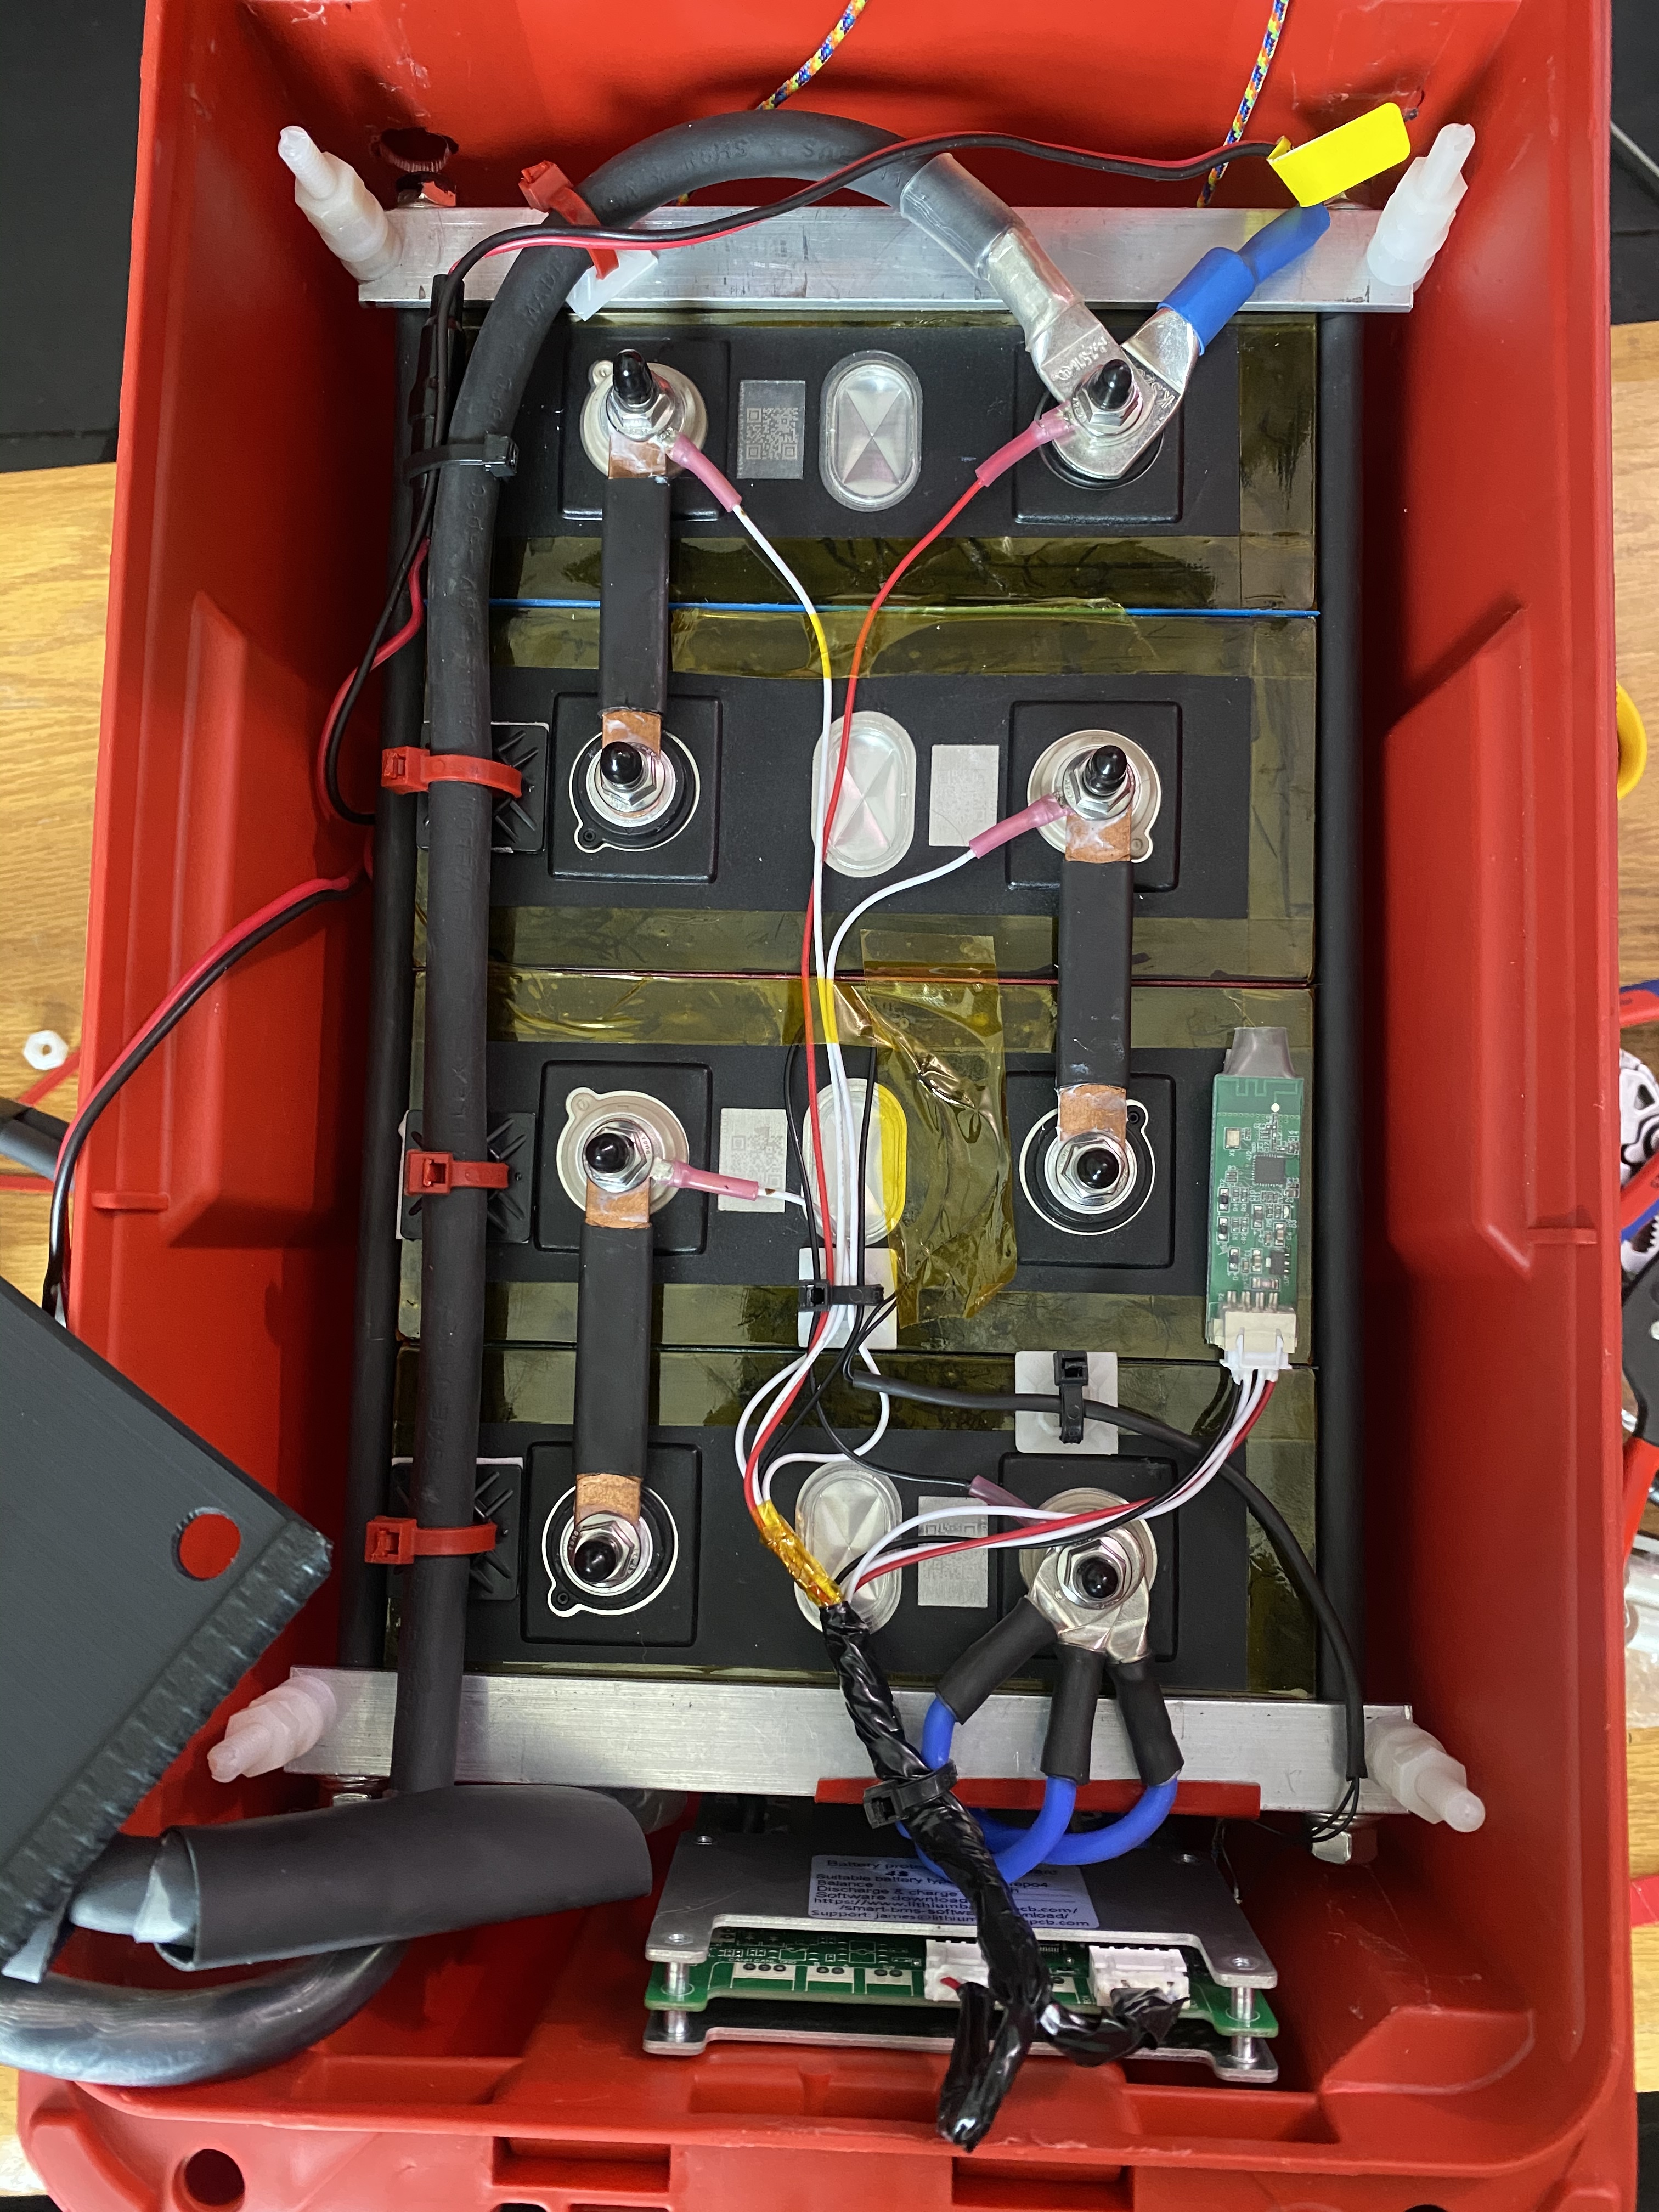
For my “house” battery I made my own from 280ah Lithium cells. I managed to fit this in a smaller Pack-out. This will power my setup from about a week without using the engine batteries. It contains a smart-shunt and the BMS. This can be used stand alone or hooked up to the main unit to charge. It has 2x 12v plugs to run my Dometic GFX3 75DZ fridge/freezer as a stand alone setup. It was super easy to make and about 1/3 the cost per Ah vs. buying a complete battery. Not to mention I know how to service it and can replace the cells if needed for cheap. I do not use a inverter or any high loads so it’s 120a only. The large amp loads will go to the engine batteries. This can hard mount via the pack-out locking trays.

I really like the Victron stuff. I went with it because you can always re-use it for a van build or sell it someday. It is all Bluetooth so you save wiring and can monitor anywhere from your phone. I still do not have my camper (paid a ways back and waiting for information) so the final distribution and switch panel is still in the prototype stage. It will be fed 12v from the main power box or the battery. Something like the photo below.

I just could have got a goal zero and saved all this work but I like to build my own stuff if possible. It’s fun to learn new things and I would recommend building a battery. There is tons of help online.

-Chuck

22 Likes

This is the Martin Off-road GFC rack with Renogy 100 watt panel. They were made for each other it seems.

29 Likes

Dude! that is such a killer setup!! You mind if I pick your brain on some of the victron components? I have the mppt controller from them but would love to learn more about dc/dc and shore powering.

2 Likes

Ya. Message me on here and I’ll drop you my # to text

1 Like

Appreciate that. Sent!

Just mounted two HQST 100watt panels. I bolted the two panels together, and then directly to some extrusion from tnutz. I went with 3 sided extrusion so the visible front and back parts are smooth. It mounts to the GFC with some simple brackets I welded up out of 1x1/4" flat bar and some tnuts from Gzilla. Seems very solid but we’ll see how it holds up. Feeds a Renogy DC-DC charger w/MPPT and an AGM in the bed.

12 Likes

Without solar, I only had about 1" of clearance between the camper and the roof of where I park the truck, so a thin setup was a must. I wired a flexible 100W Renogy panel to a CTEK 250se, mounted using 1" VHB tape. Works perfectly to charge my 50ah LiPo battery along with the alternator. I used some wire clamps and t-nuts to mount the wires to the extrusion and ran them under the panel. No water leaks and no holes drilled in the camper. Helicopter tape to protect the space frame and all wire was covered in some cable wrap to make things look a little more finished.

9 Likes

what’s the battery set up and could a Goal Zero Boulder 100 fit the same?

also, how is the Solar pannel mounted to the rack?

The inside width of the Martin rack is 47.1 inches. That is a Renogy 100 watt panel and it is bolted to the side rails of the rack only. Current battery setup is a goal zero yeti 500 lithium which is working well. I didn’t want the panel on the camper mostly because I carry whitewater kayaks and canoes on top and it was in the way.

1 Like

Nice set up! Does your door panel/frame not crush the wiring that is sandwiched in-between them when closed?

The foam strip on the inside of the panel conforms to the wiring. Keeps everything waterproof and housing around the wires keeps things from rubbing raw. I also put some helicopter tape on the space frame to keep paint from rubbing off. A proper way to do it would have been some waterproof bulkhead fittings through the panel facing the cab, but I didn’t want to drill any holes in the camper.

This weekend I managed to do some commissioning and testing of my system prior to installing on my GFC (when it’s ready) I will try to use a Solaria 400w residential panel . This shape should work well between beef bars to avoid shading. The cost per watt was way below any “overland” or thin panel and my truck can handle the 40lbs. The other reason Is the panel will block some of the translucent roof to keep it slightly darker up top.

My only concern is the durability as the frame may require some additional bracing. But I can get that sorted when it’s installed on the truck.

It was charging the 270ah battery at nearly 30 amps even being partly cloudy.

3 Likes

Installed a couple Renogy 100W panels along with a custom rack I built out of 3060 extrusion. The rack is fairly low profile (~3/4" above honeycomb) & very strong. Can handle me walking up there without deflection and I’m sure at least as strong as the beef bars. Both panels in parallel are giving fairly consistent power (averaging 90-120W) in the CA sun, which keeps my goal zero topped off while running the dometic fridge behind my drivers seat.

3 Likes

hey @slopes925 what are you using to attach the solar panel to your DIY rack?

Also for the holes going from the brackets to the gfc, did you need to drill them out more?

1 Like

Hey folks! We make custom carbon fibre solar panels that are 1/4 the weight and profile of standard glass panels and 30% more efficient than thin-film (we use 23% efficiency cells from Sun Power, which are near the top of the market). Our mounting hardware is designed to allow the panels to be removable, so you can get ideal charging throughout the day, regardless of where/how you are parked. We are predominately operating the teardrop market , as we can mold them to a custom radius, but see an ideal application for folks like yourselves due to the weight, durability, efficiency and multi-use case. To be clear, you could suspend this panel on either end and stand on it with no issues. It is completely structural. If you have any questions, let me know!

8 Likes