Here’s mine.
3 Likes
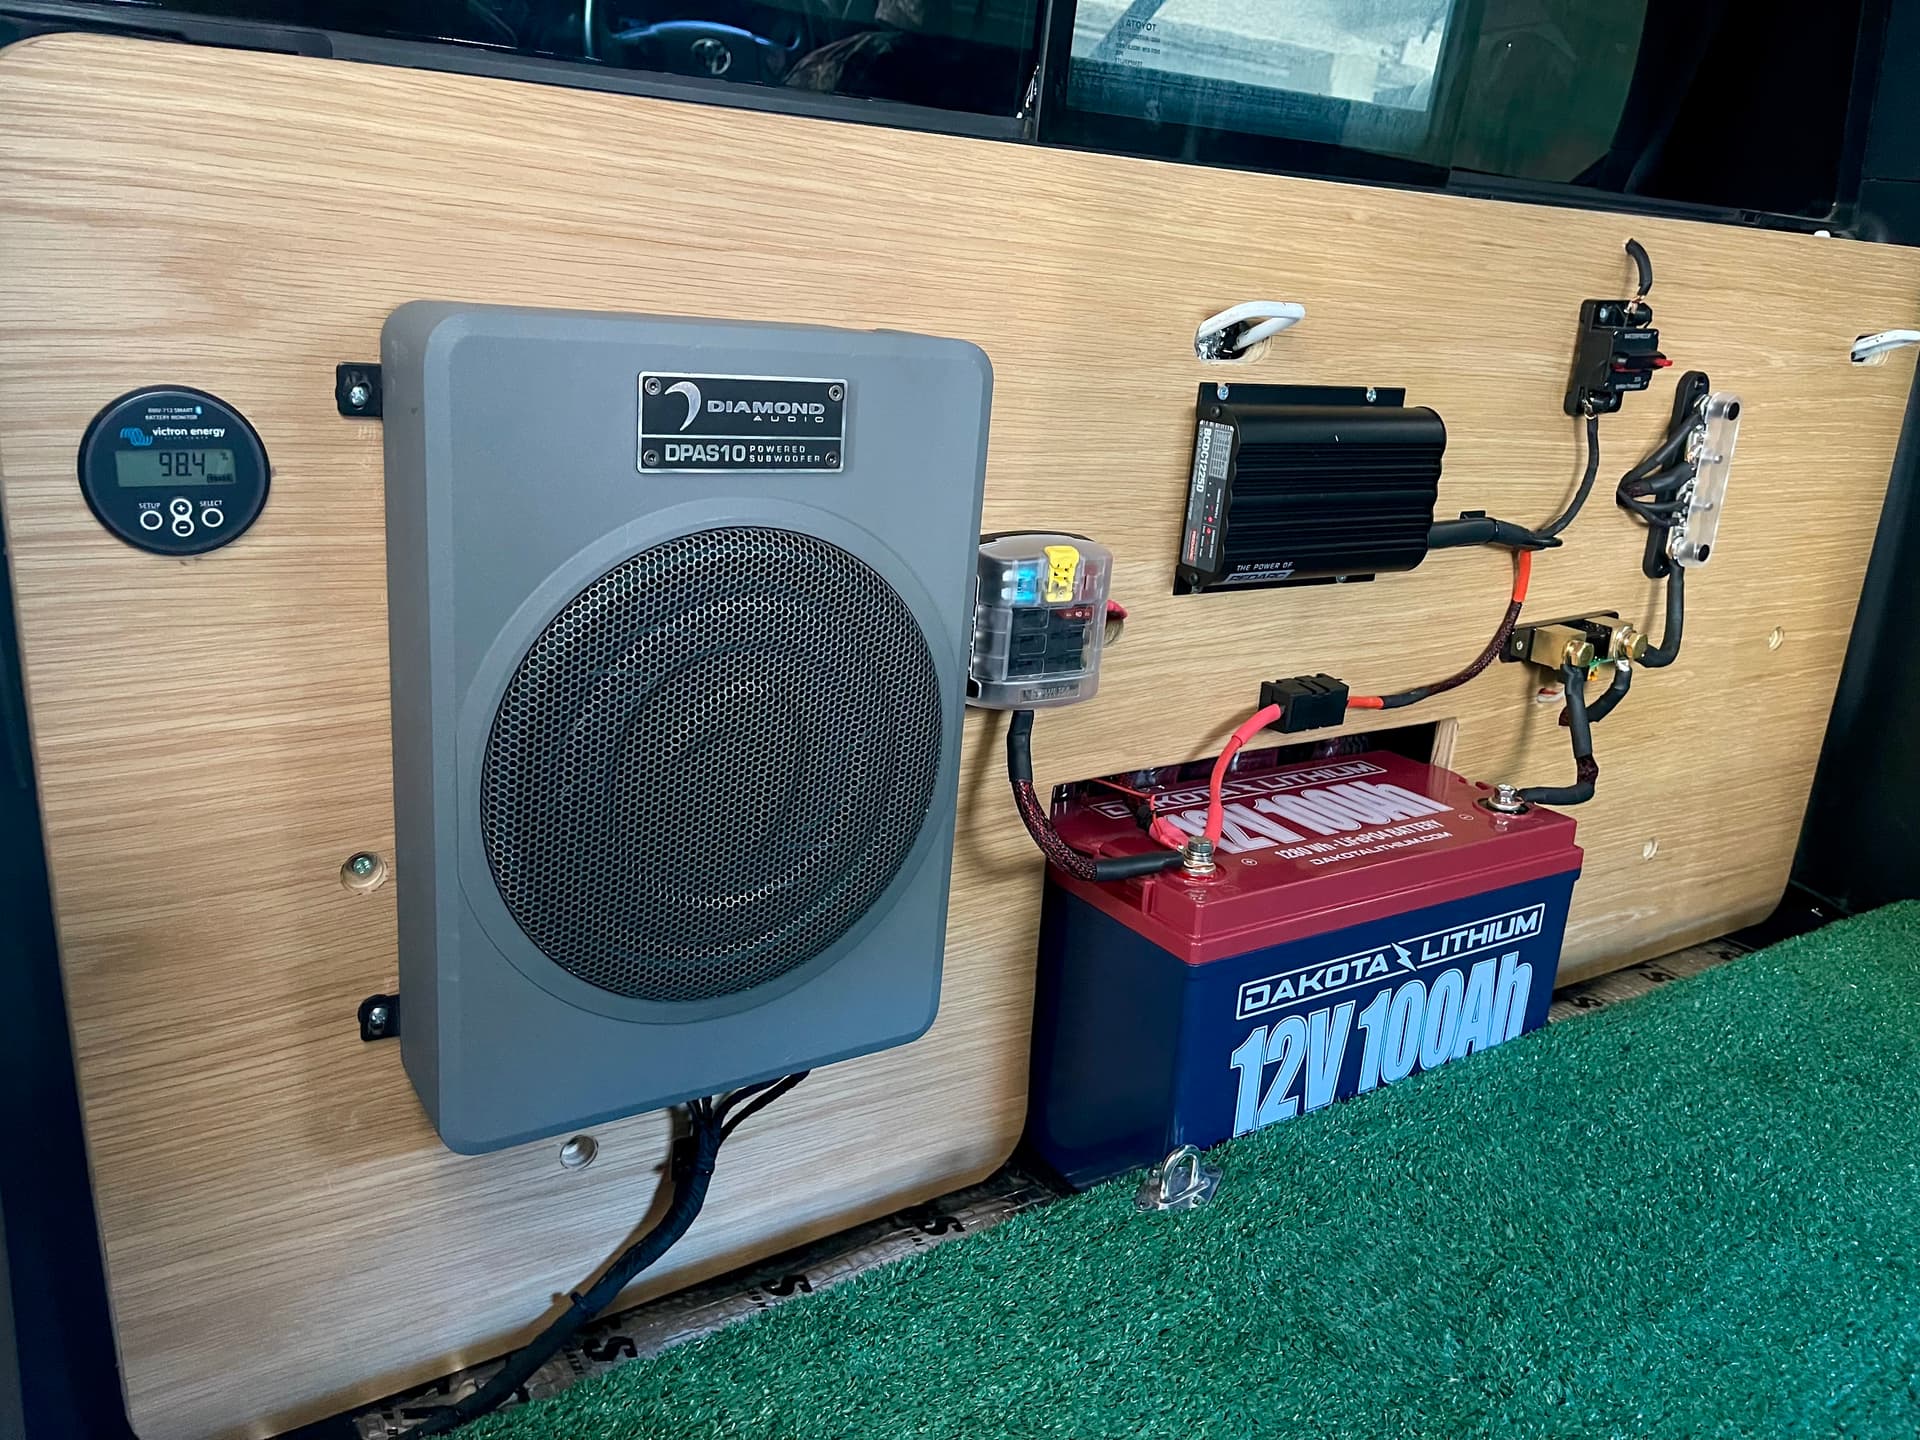
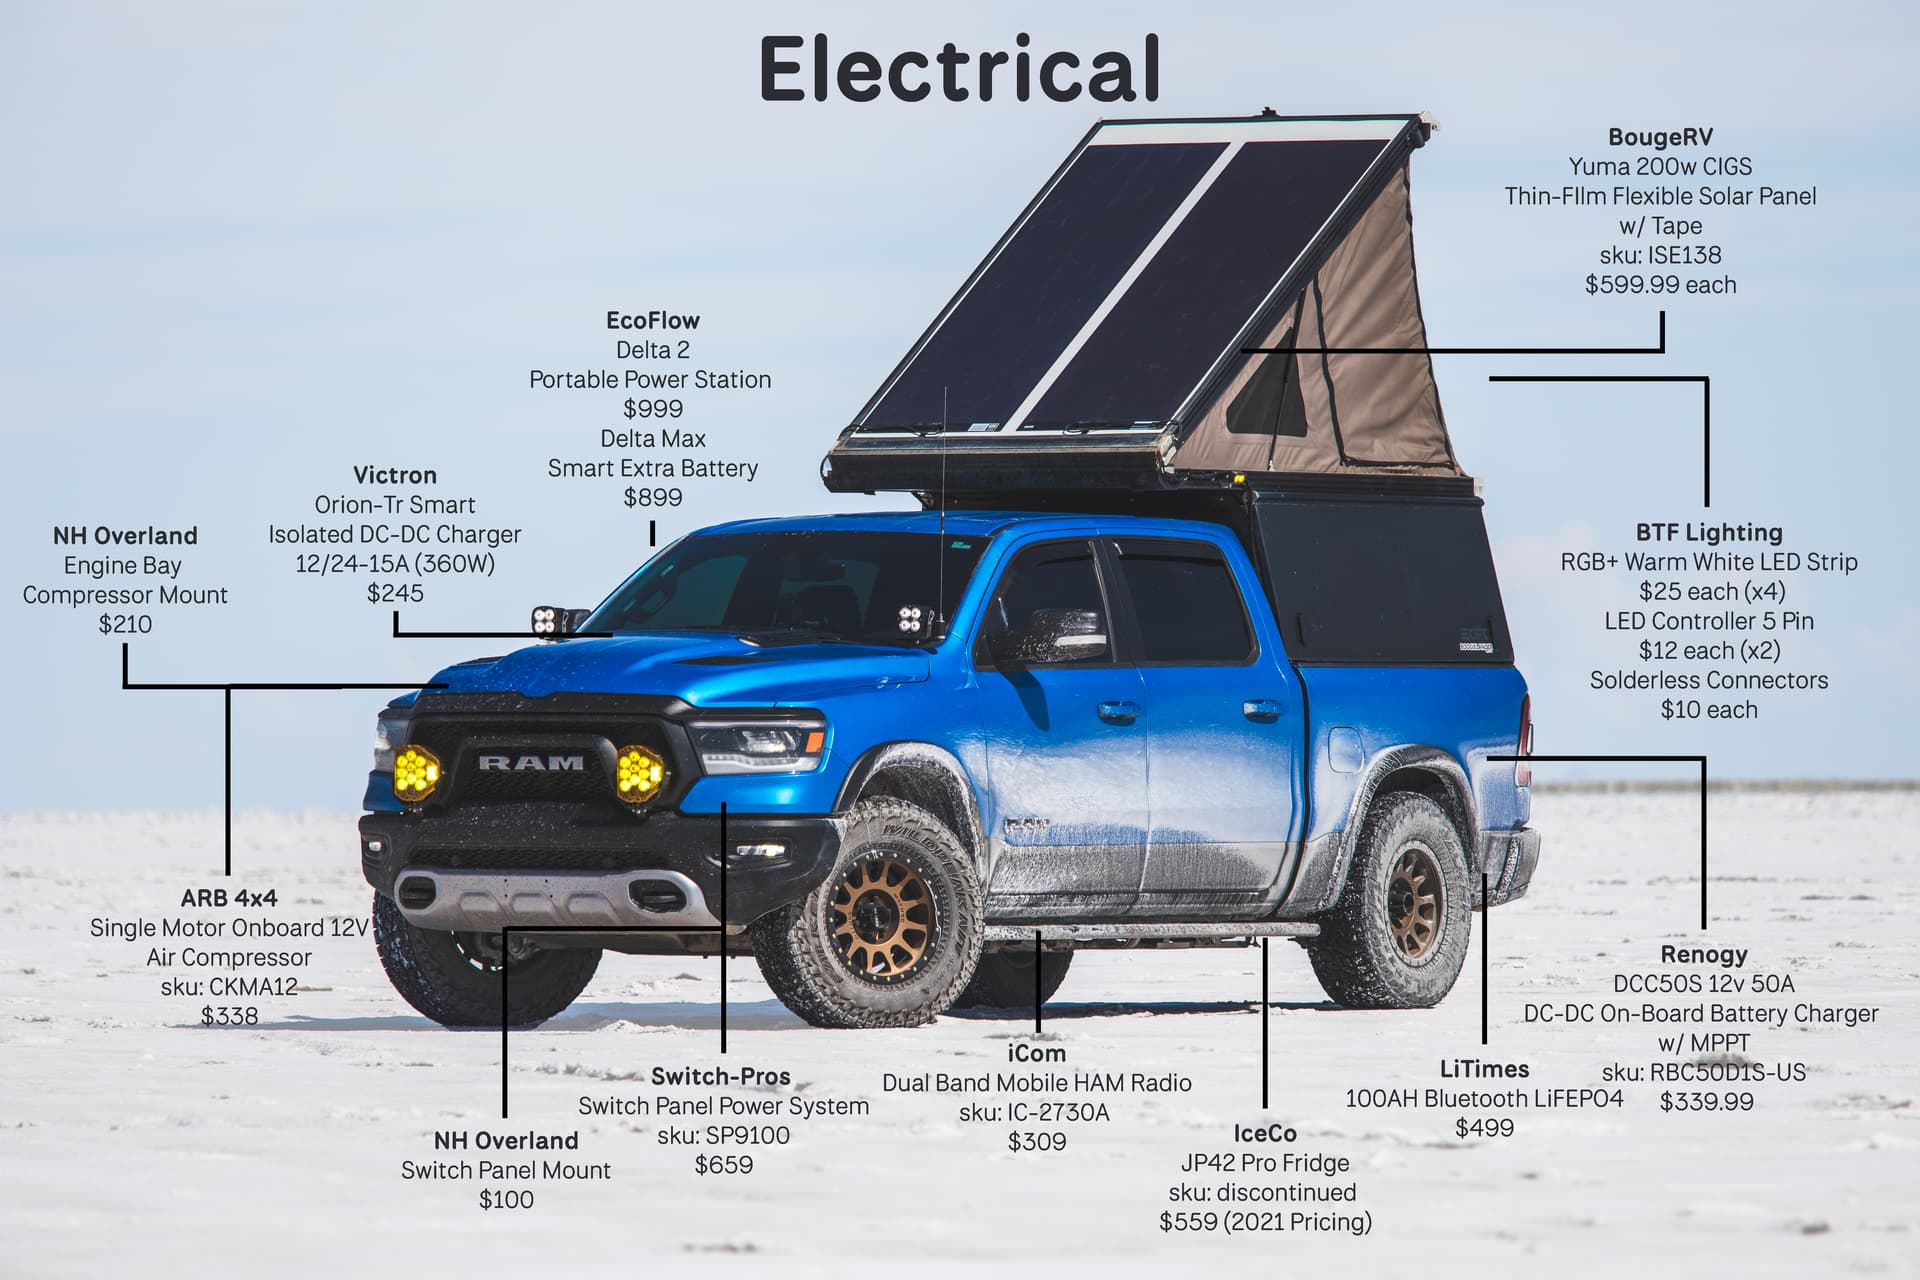
My current solar / power setup. 120 watt solar panel mounted on the roof that charges up the DL 100 AH battery. BCDC 25A controlling solar and alternator charging. Inside the GFC power is controlled by Auxbeam 6 gang. Had the set up for 2 years so far, no issues everything works great. Plenty of power.
(Subwoofer is just mounted in the location it is not wired off the DL battery.)
Unrelated to topic but how’s that subwoofer? Been looking at it or similar for under my seat so it doesn’t take space but haven’t seen anyone with it til now.
It works good definitely has a nice sound. It isn’t as powerful as a stand alone sub, but its perfect for mid size truck cab
1 Like
Got my install date of mid-Oct for the camper on my R1T, so will have to post pix of my intended setup then. But here’s how I simplified everything as much as I could during “the planning phase.” I’d welcome any helpful suggestions!
- Got the Rich Solar CIGS panels (3x80w), as they don’t get as hot and so don’t need a plastic-cardboard spacer (also helpful to fit under my low garage door); plus they last far longer than the semi-flexible panels. And they’re super-cheap now–just $99/ea (sales are final, as they’re pushing their 160w panels…but I wanted 3x80w as they will fit and be more symmetrical…plus there is still the 1-yr warranty). Plan to arrange the panels in series, positioned so the cables feed to the front edge, and can be tucked behind the aerodynamic fairing that comes with the R1T camper. Plan to secure the perimeter of the panels with butyl tape, and plan to secure the wires with 4” white eternabond tape.
- Already have a portable Zendure SuperBase Pro 2000 battery, and will secure it in the bed when looking to capture energy from the rooftop PV system. It came standard with a 3-meter 12-AWG cable that has an MC4 connector on one end and an XT60 connector on the other. This seems like it will be long enough to route from the panels’ MC4 connector, under the front edge of the tent, into the camper, and down to the battery’s XT60 port. Am hoping to route into the camper via a side-panel gap (XT cable is pretty skinny), but if I must drill a hole, then it would only need to be as big as the XT60 connector so I can thread it through. For better and worse, this means no mounting brackets, no SAE adapters, etc. If I do end up drilling, would need to seal the hole with an oval rubber grommet and silicone or similar waterproofing. Would also likely tie the cable down to the included molle panel inside the camper, both for good organization and for preventing the cable from moving in/out of the drilled hole/grommet (already have a bunch of ties, grommets, and silicone).
- I don’t have a fridge or stove to power, but I do need to power phones/laptops, and maybe a fan on hot nights and a space heater on chilly nights…and who knows, maybe a Starlink one day. However, “vampire drain” on the R1T is a real issue (esp for Gen 1s like mine), especially when going far off-grid for a few days. Fortunately, the 2kwh Zendure is enough to add maybe 4 miles of range, more than enough to offset the vampire drain on all but the hottest/coldest days (when I don’t usually camp anyway). So the more energy I can harvest from the sun to avoid draining the vehicle power pack, the better.
- I also already have a 100w portable solar panel, and can supplement the rooftop PV system via a separate input port on the Zendure (so, 240w when driving, 340w when camped).
All in all, the only additional stuff I’ve had to buy is the 3 CIGS panels, butyl tape, and eternabond tape. So only ~$350 add’l out-of-pocket, though admittedly the Zendure and the portable solar panel cost close to $2K when I bought them a few years ago.
1 Like