It’s just this single panel.
That actually wouldn’t change the total watts coming in would it? It would just change the voltage and amps but watts would stay the same.
Yes you’re right. It swaps with the parallel or series from my understanding but he’s running a single panel so now it’s something else.
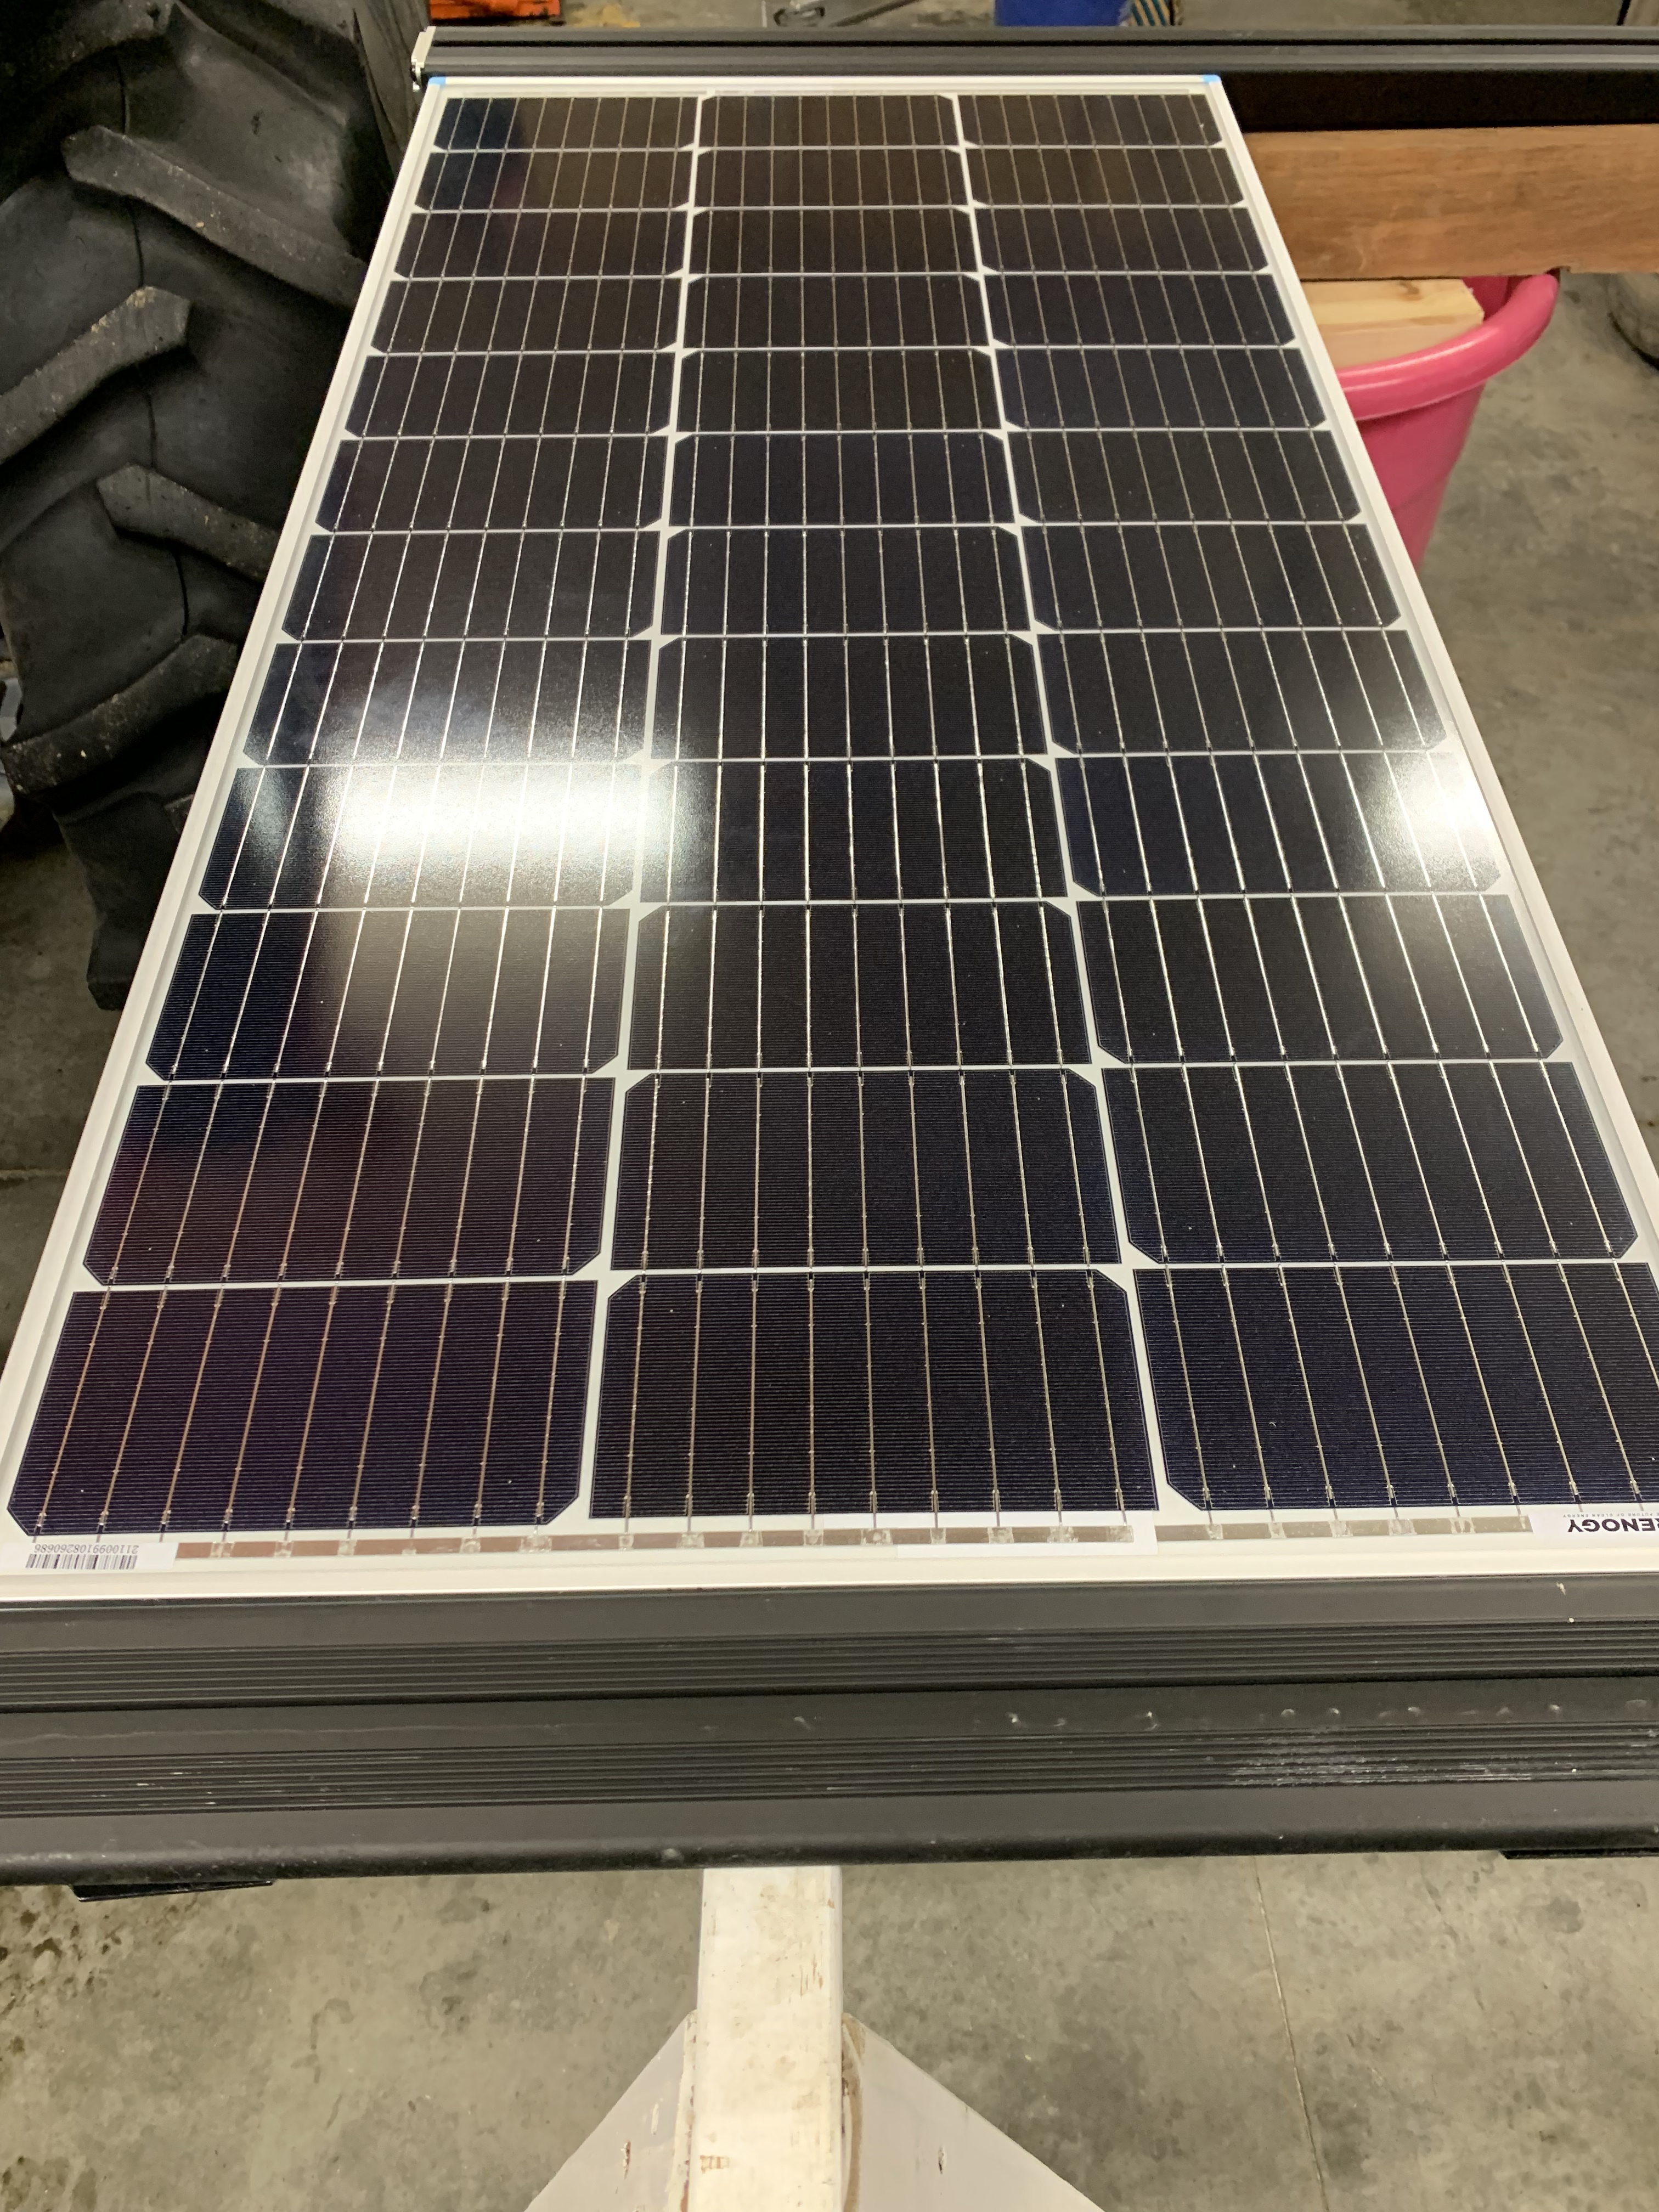
This is a great thread! I bought the GFC solar sleds/mounts when I got my topper… but only just got around to buying panels. Somewhere along the way, I strayed from reading threads to other threads to other threads (non-GFC)… and bought these Renogy 175 panels (2 of them). I have 3 beef bars.
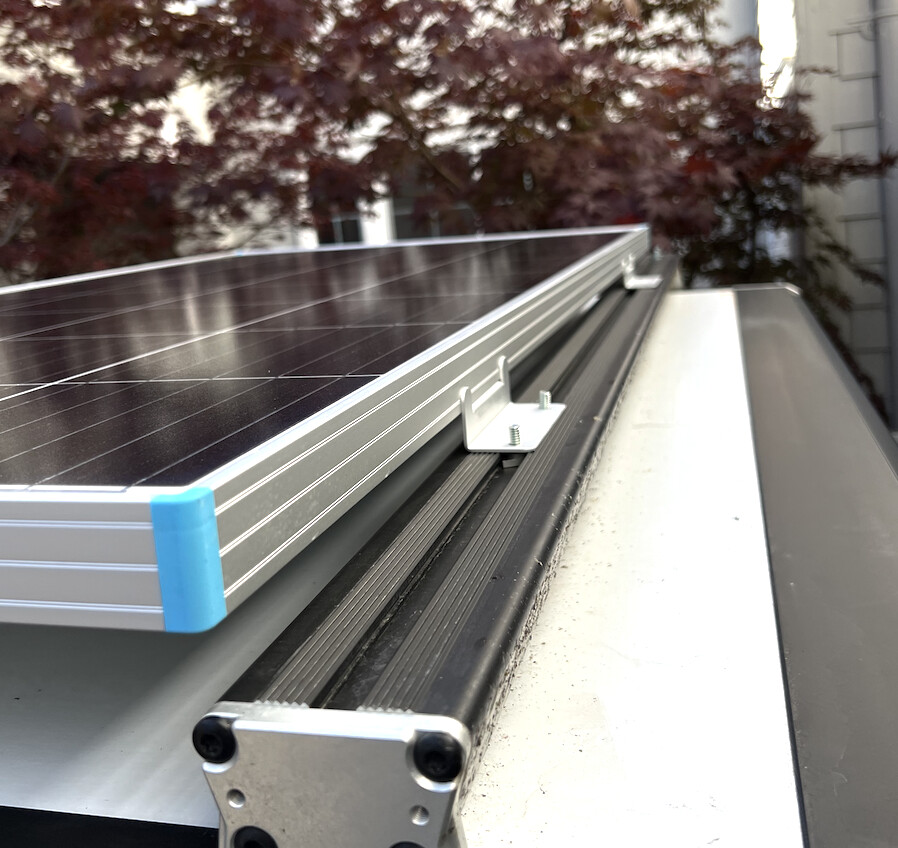
So, turns out… the panels are too wide for the GFC solar mounts by maybe 3 inches. I also bought the Renogy mounts also. The Renogy mounts can work on top of the beef bars, but it puts the panels above the beef bars and a vast void of space under them, which I really don’t want.
I thought about flipping the Renogy mounts over, which would recess the panel… but then they aren’t wide enough to fit to the slots on top (or bottom) of the beef bar.
I really dig these panels for my setup, they’re light, high power… and would fit perfectly if the GFC mount was a couple inches longer.
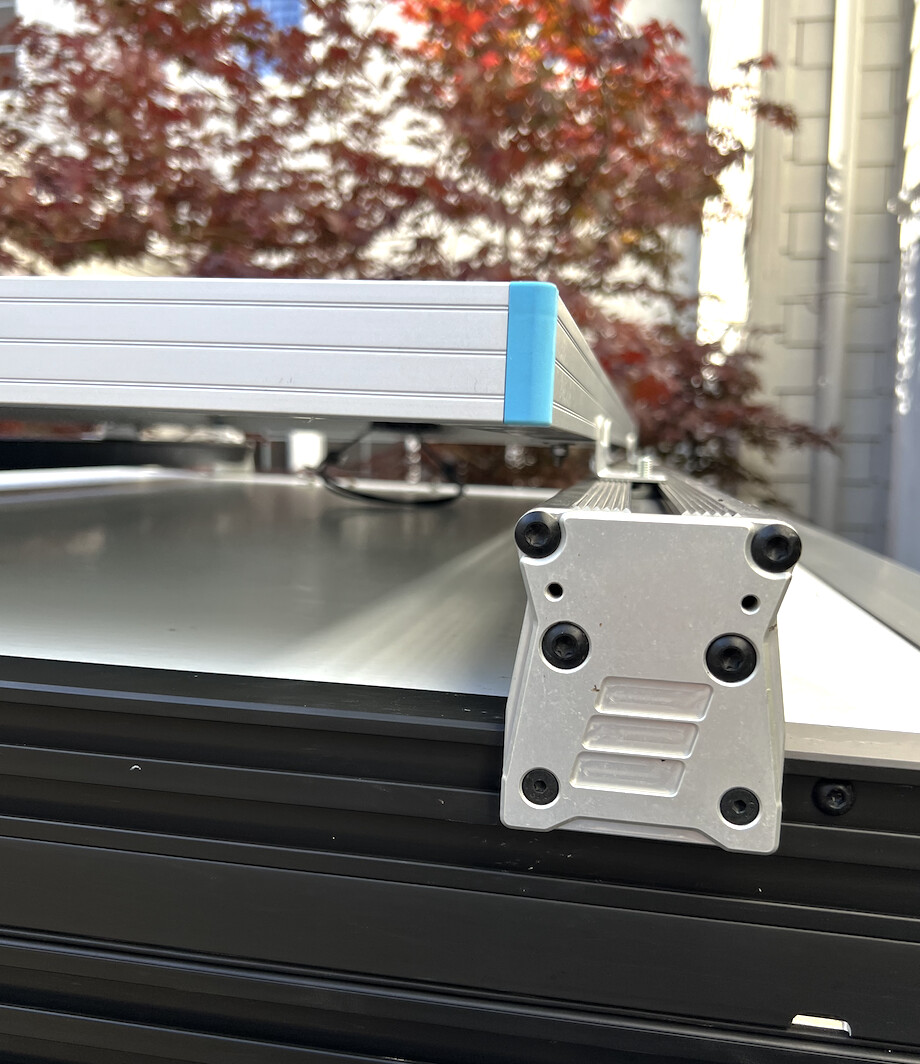
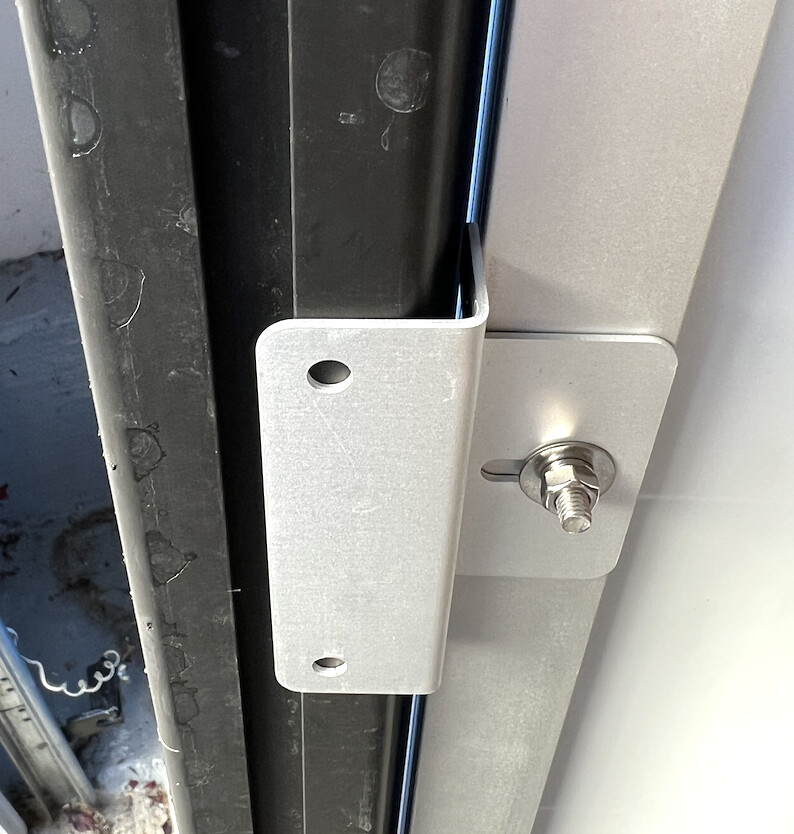
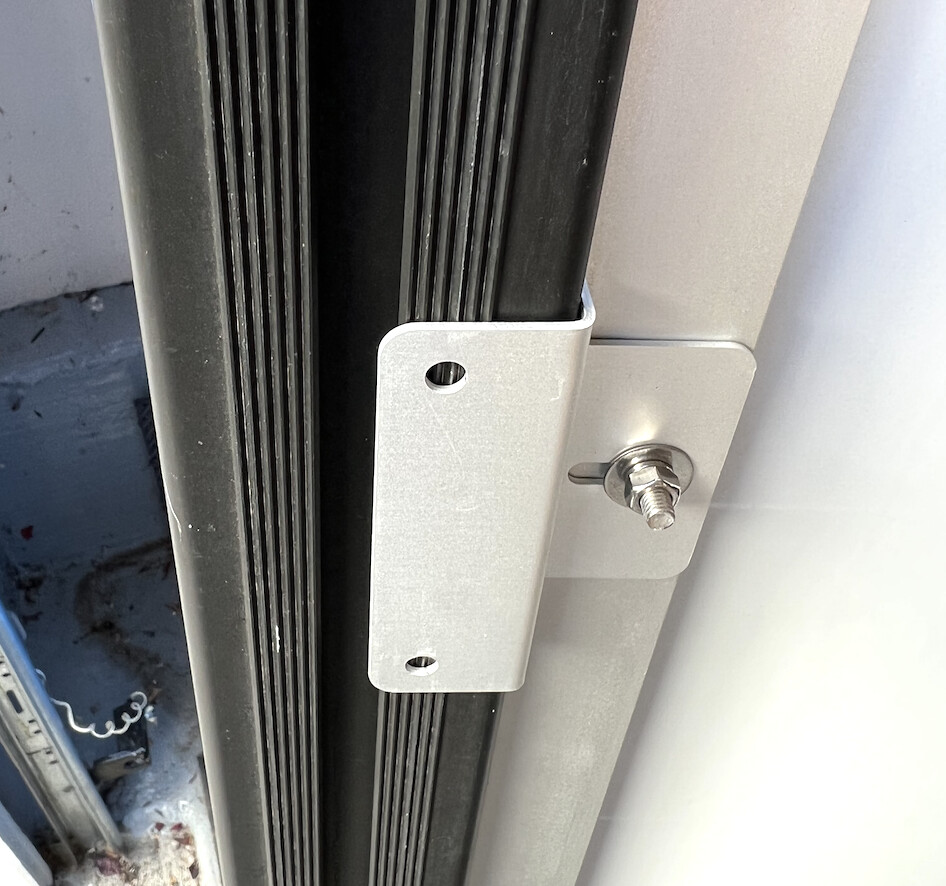
I’m thinking maybe taking a piece of steel maybe 4" x 6", and using that on the middle beef bar… put two bolts through the 4x6 into the beef bar, and drill a hole on either side and bolt/nut the GFC solar mount to that… I think it’ll extend those out enough to support the panels and shouldn’t structurally mess it up…
I envy all the folks who are happy to dive into 80/20 and custom mounts… Those projects take me forever and I’m never happy with the results of my own work. 
1 Like
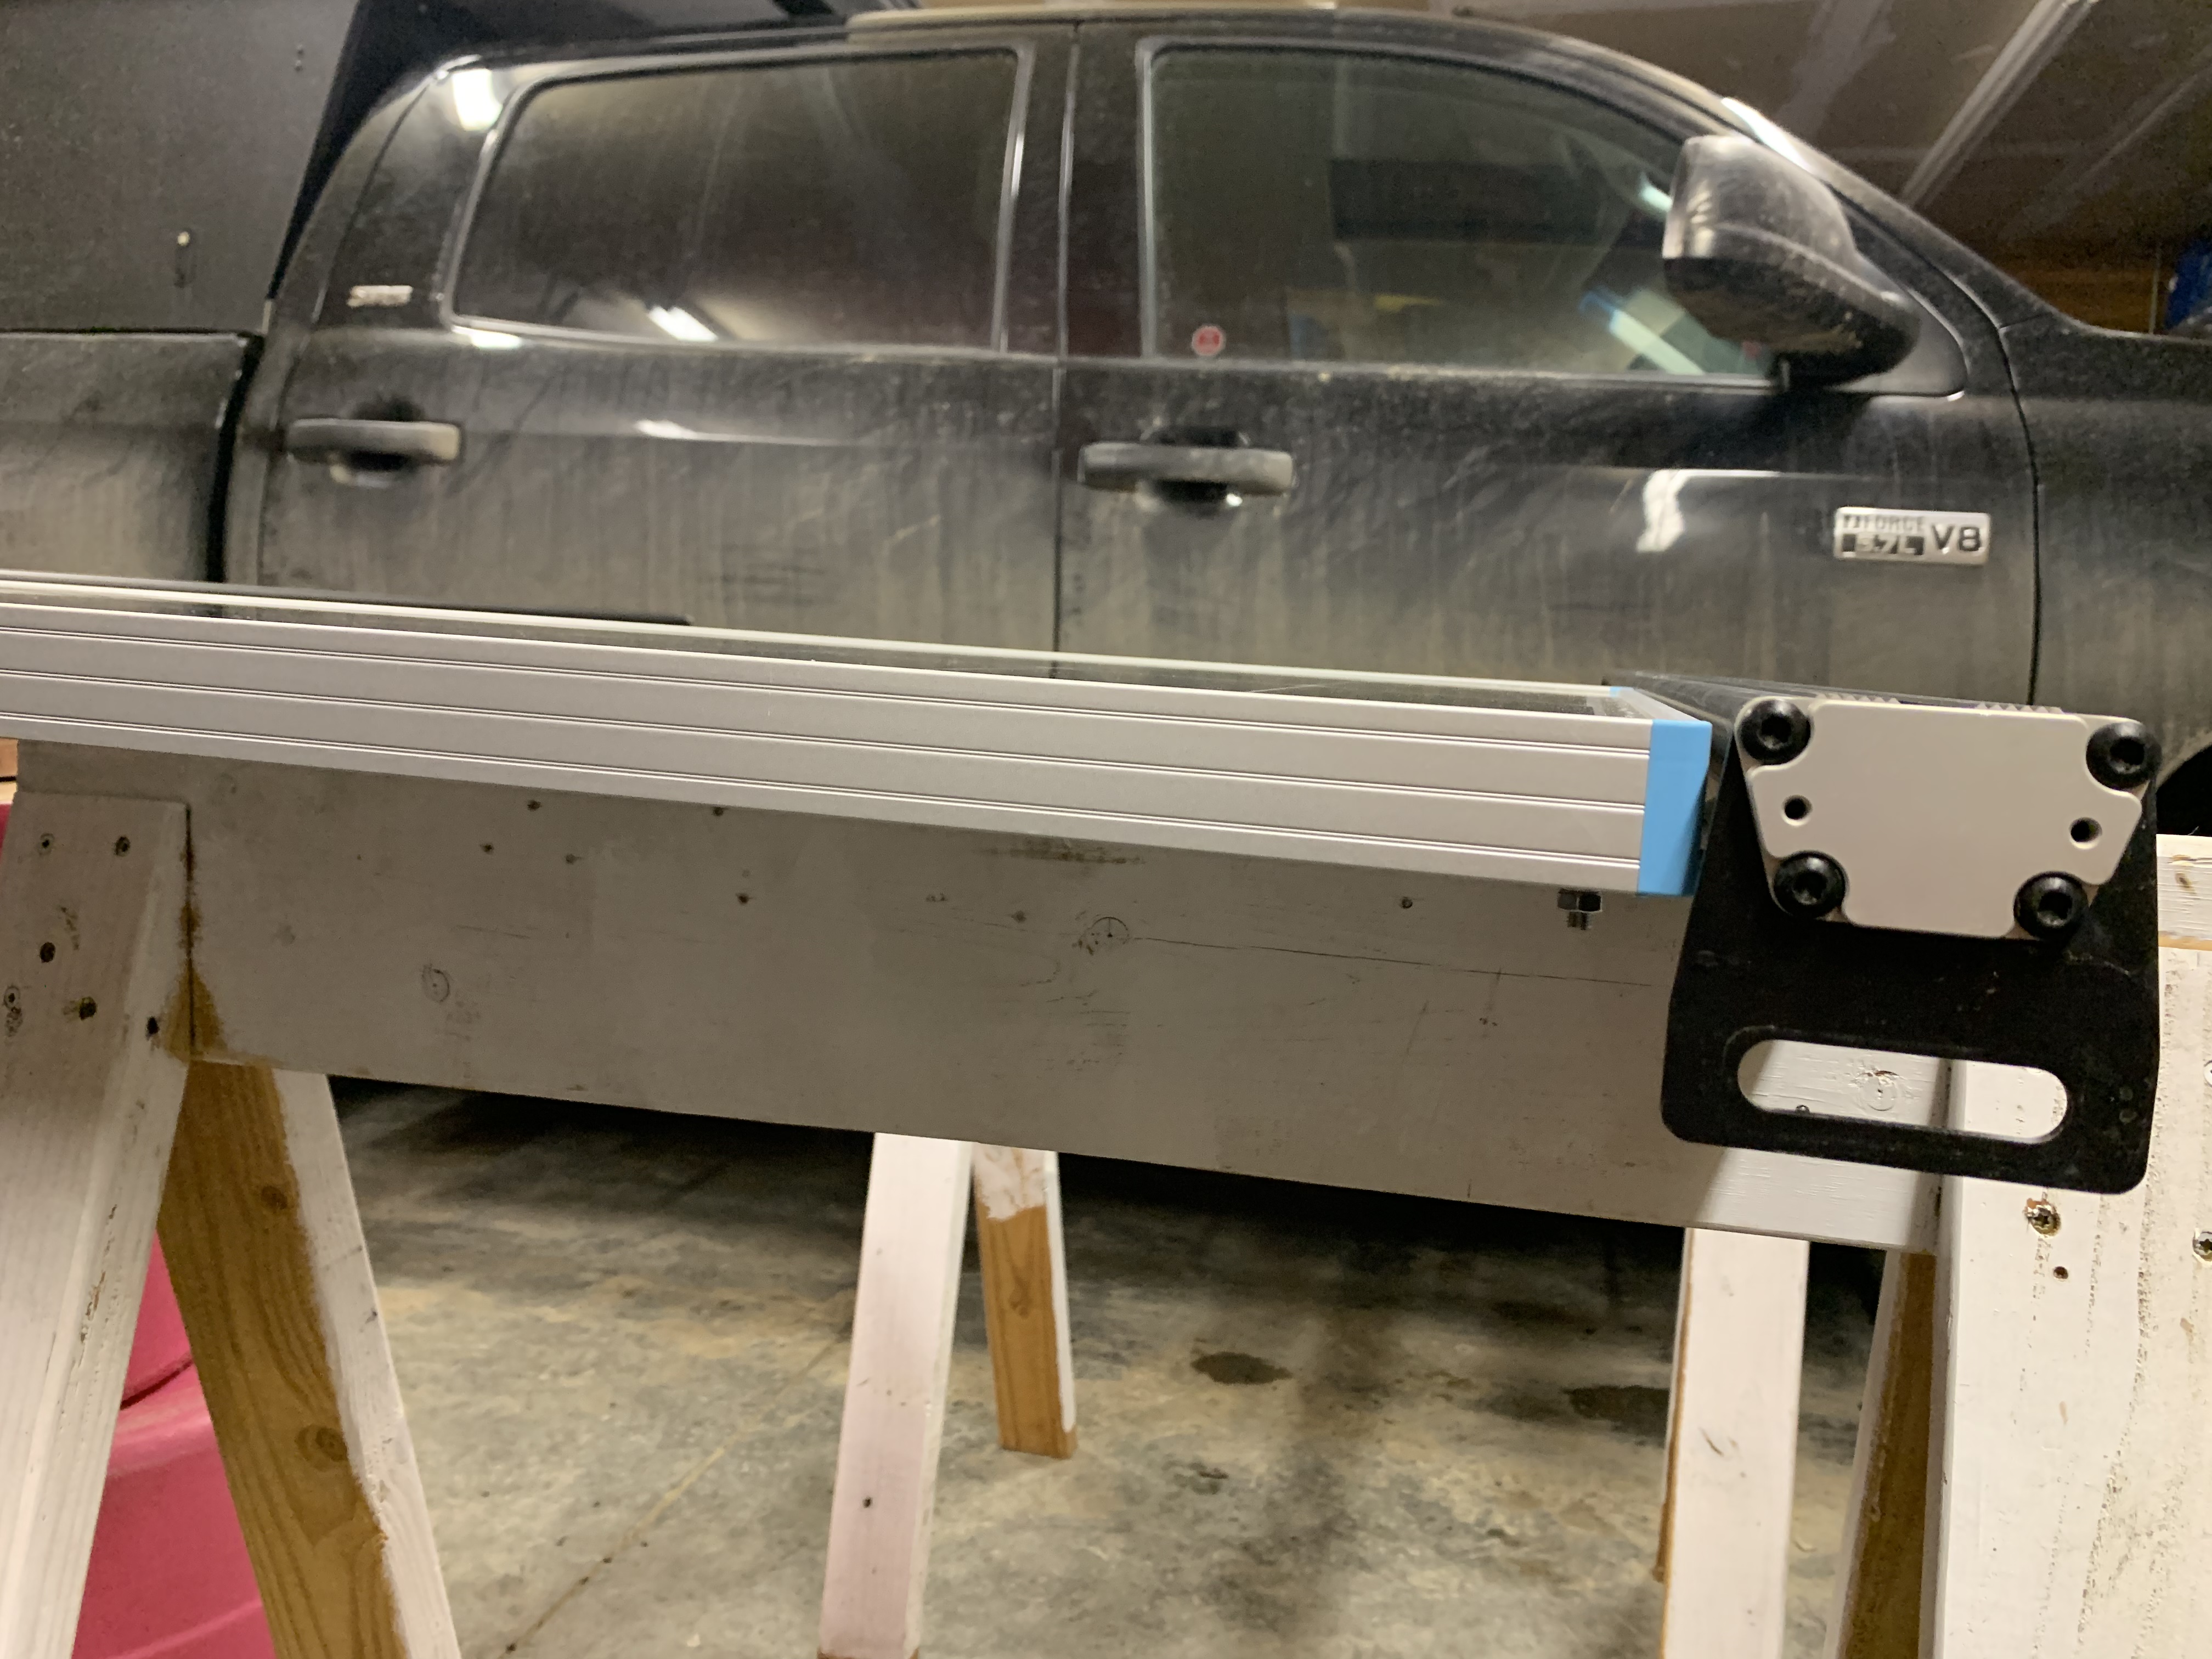
Also have some Renogy panels and wanted to create a low cost flush mount to allow me to still place things over the beef bars. I elected for these simple steel mounts that are bolted to the Renogy panels in all four corners. They are bolted into the Renogy panel and then into the bottom slots of the beef bars. Got them at local hardware store for cheap.
Waiting to put them on top of the truck until I finalize the dual battery system with DC/DC/MPPT and n the coming weeks.

3 Likes
Will see how they hold up over time but figure that’s the advantage of low cost Renogy panel. If it doesn’t work just try and try again
I’m partial to the mount that puts the panel below the top of the beef bar. Are you going with the Renogy DCC30S?
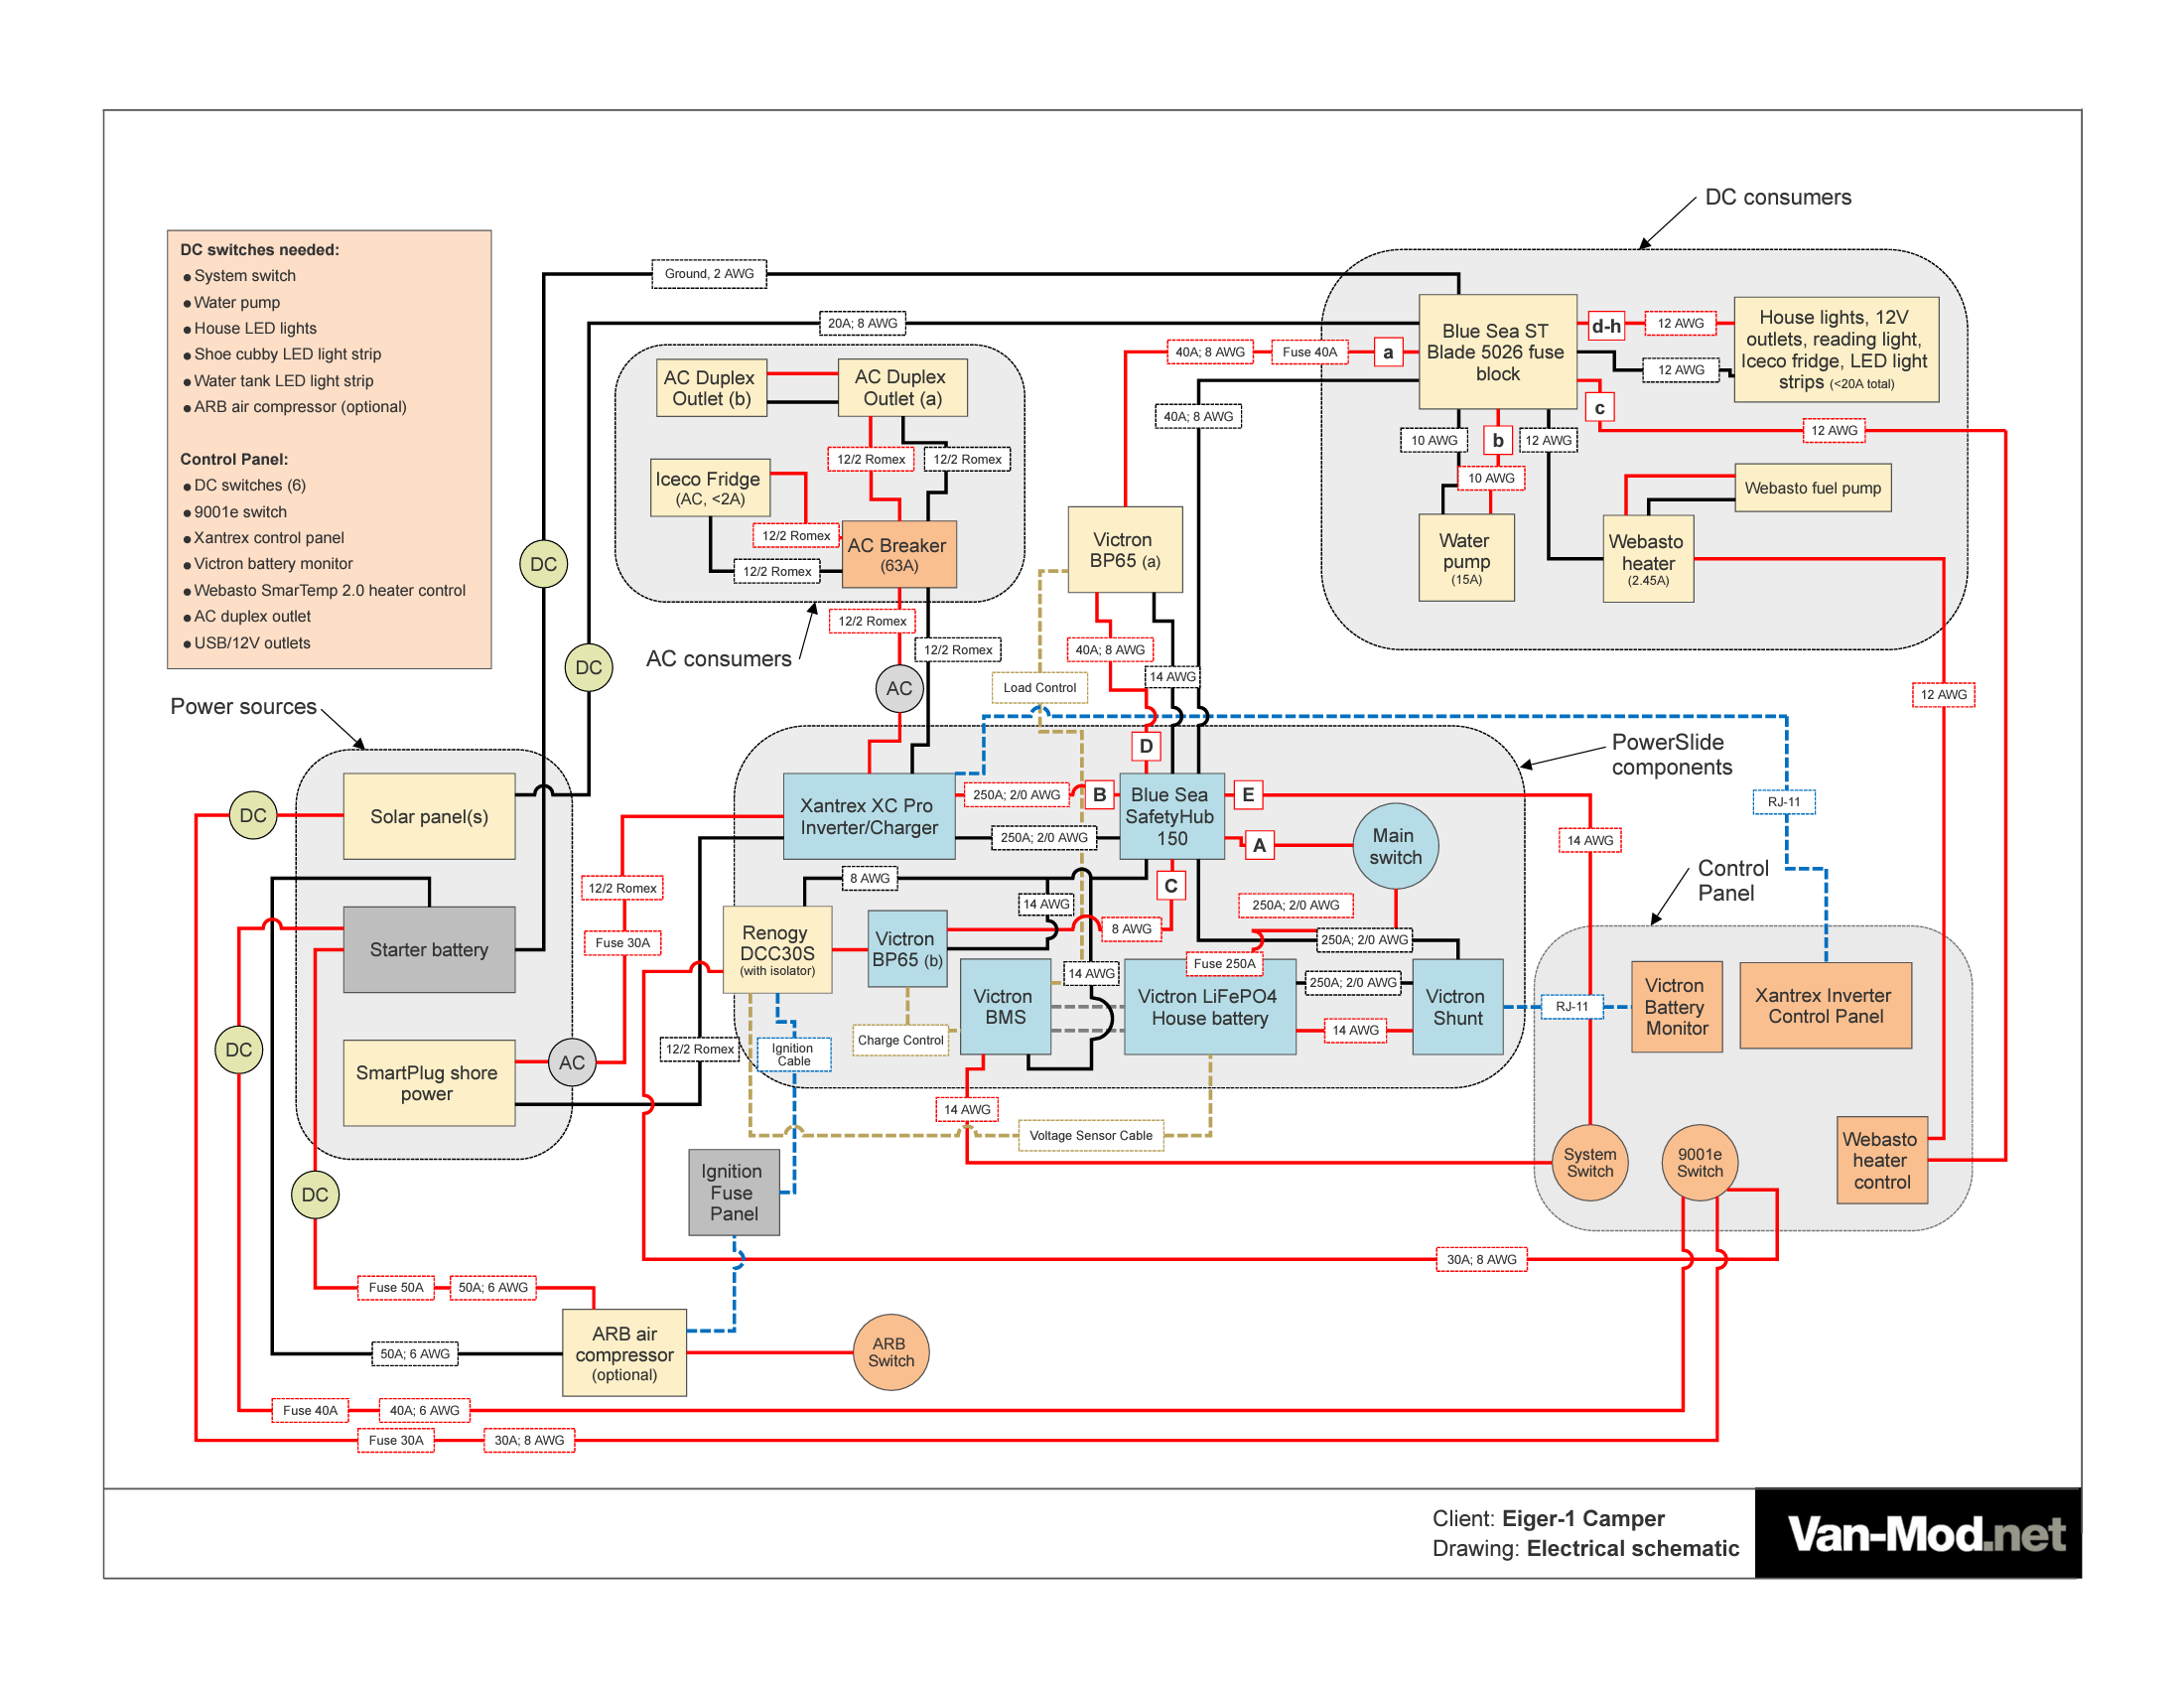
Here’s a wiring schematic we did for a Metris build. For the GFC Camper, we plan on using a simpler design but still use most of the components (just no water pump or built in heater).
1 Like
Really fantastic plan and layout. Super impressive. Correct on the DCC30S.
1 Like
nice… simple. did you order those online somewhere? id be fine with those… with the protection of the beef bars on either side and being hugged by them, that should be just fine.
Just got them at our local hardware store but the bar code has the dimensions and thickness so I am sure you could find something similar on Amazon. 4.7x3x1/8”

1 Like
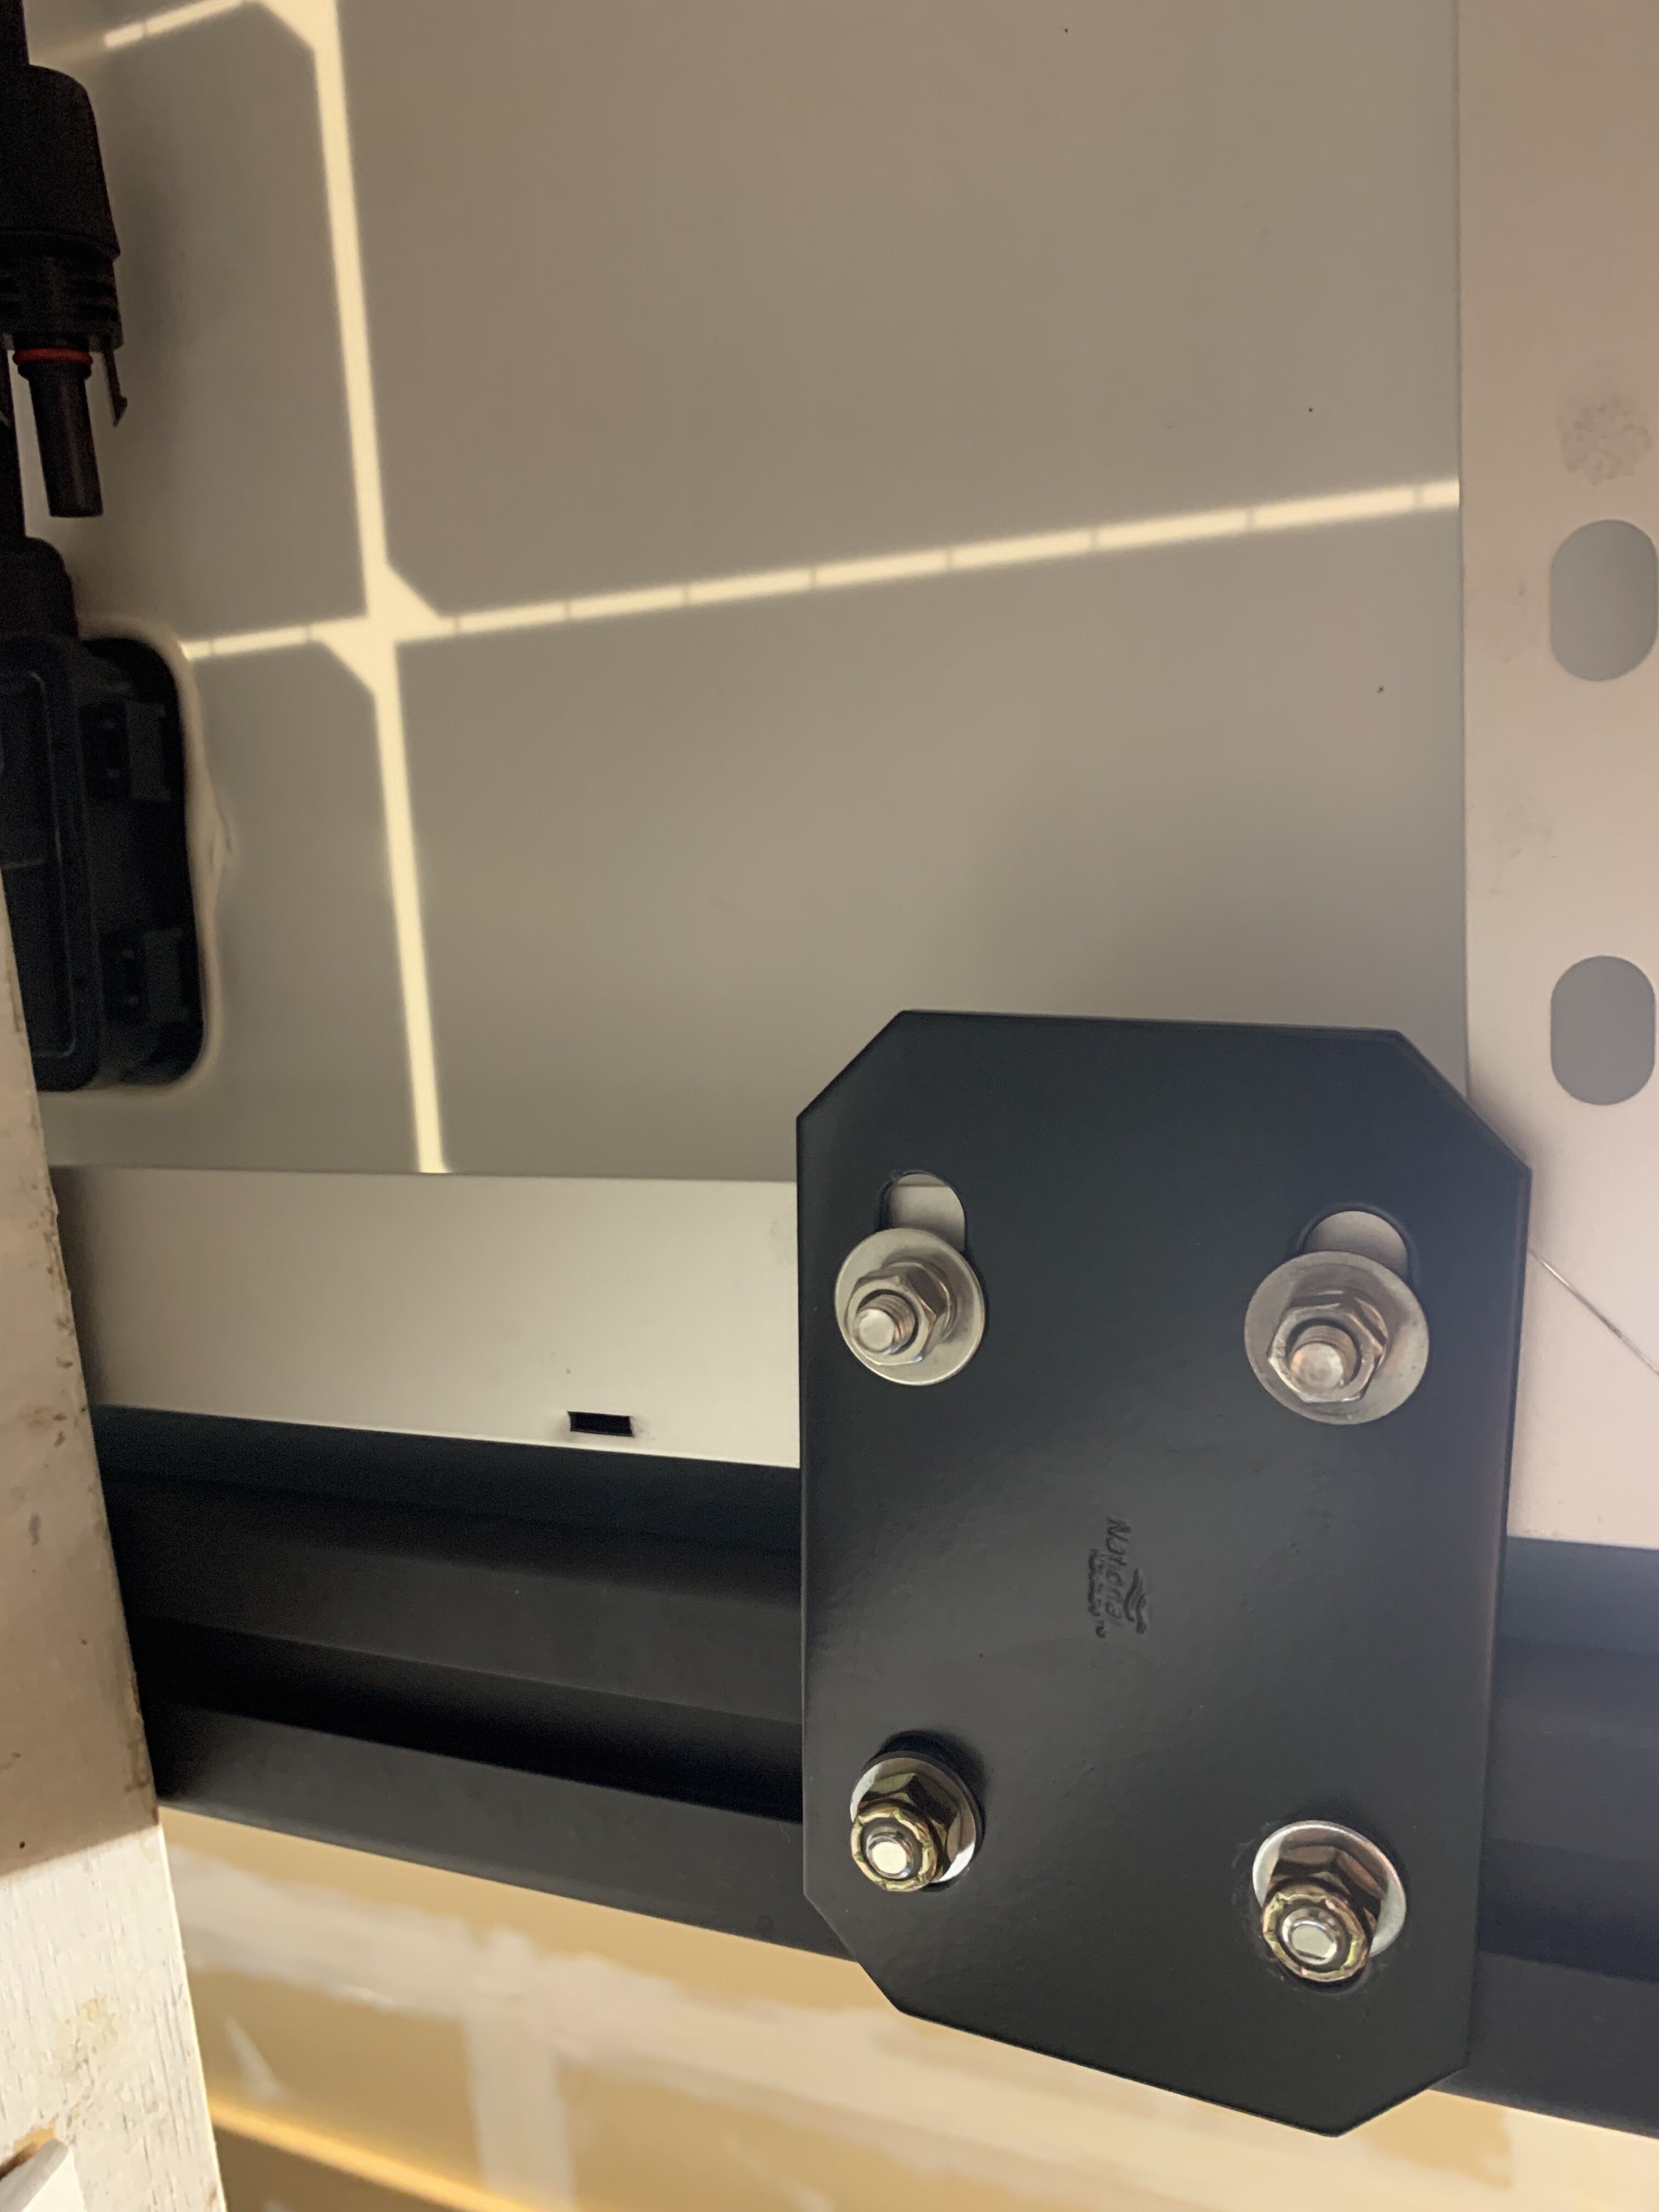
Thank you! Everything in blue marked for our “PowerSlide” gets installed in a drawer with an IGUS chain for wire movement management.
Here’s the Metris custom control panel design. We have a source that specializes in panels for boats but they also work well for vehicles given enough room for mounting. Something like this (although not as tall) would go on the face of the GFC Camper Mod bench front.

1 Like
Thanks! Looks like I can order same one from true value. Appreciate it.
Did you think about going to 1x 160w and leaving room for another 160w instead of 2x 80 + potential 80?
They didn’t have 160W panels when I bought my 80w but needed to send it back (defective) and they sent me a 160 as a replacement. There might be room for two 160W panels up there now.
Man not the first or second time I’m hearing about these defective panels. Really want to pull the trigger on the 160w, but dont want to deal with the hassle of pulling it off if things were to go wrong.
Was it hard getting the 80’s off?
20 mins as long as you don’t try to seal the edges with butyl sealant like I did (not doing that again). I wouldn’t let it hold you back. They’ll eventually get the formula right.
Im amazed at the patience i have with this project. Still not done yet, but making everything custom takes time.
CTEK D250SE dual input dcdc charger, 2x 100w solar panels on the roof, 100ah lithium battery, all mounted as clean as i can onto a piece of 6061 1/8" aluminum to the front of my bed. All wires made by me.


7 Likes
For those interested in a relatively inexpensive power inverter, I came across this on my travels on the inter webs…
https://tools.woot.com/offers/gowise-power-gowise-power-1000w-pure-sine-wave-invert

Finally im almost finished. 97% complete, with just having to connect the alternator wires and add a tap to an ignition fuse.
The test run was this weekend, and it performs awesome! Cant wait to get alternator connected so ill have 2 power inputs.
Ill try to get a price breakdown too, but this is a time when DIY came out better than buying a package.


1 Like