After months of wanting to convert Starlink to 12-volt, we finally had time to get all the parts ordered and assembled.
Thankfully in that time, some new products have come out that made converting Starlink to 12-volt without cutting any cables much easier and simpler!
Below is a parts diagram and list for the conversion, and how we did it.

It would be easy enough to install all these components as they come, however, I wanted to extend the wires on the 12-volt to 48-volt conversion so I used some heat shrink butt connections, I like these since they have some glue in them to help strongly hold the connection. I extended the wires with some 14 gauge wire and covered them with some Alex Tech wire loom. By doing this I was able to achieve a slightly cleaner install and get the parts installed exactly where I wanted them. The 12-volt to 48-volt adapter is wired to one of the switches on our Blue Sea Panel so that all we have to do is set up the dish and flip a switch. If you’re curious about our whole solar / battery and electrical setup, those details can be found here, it’s too much to cover in this post.

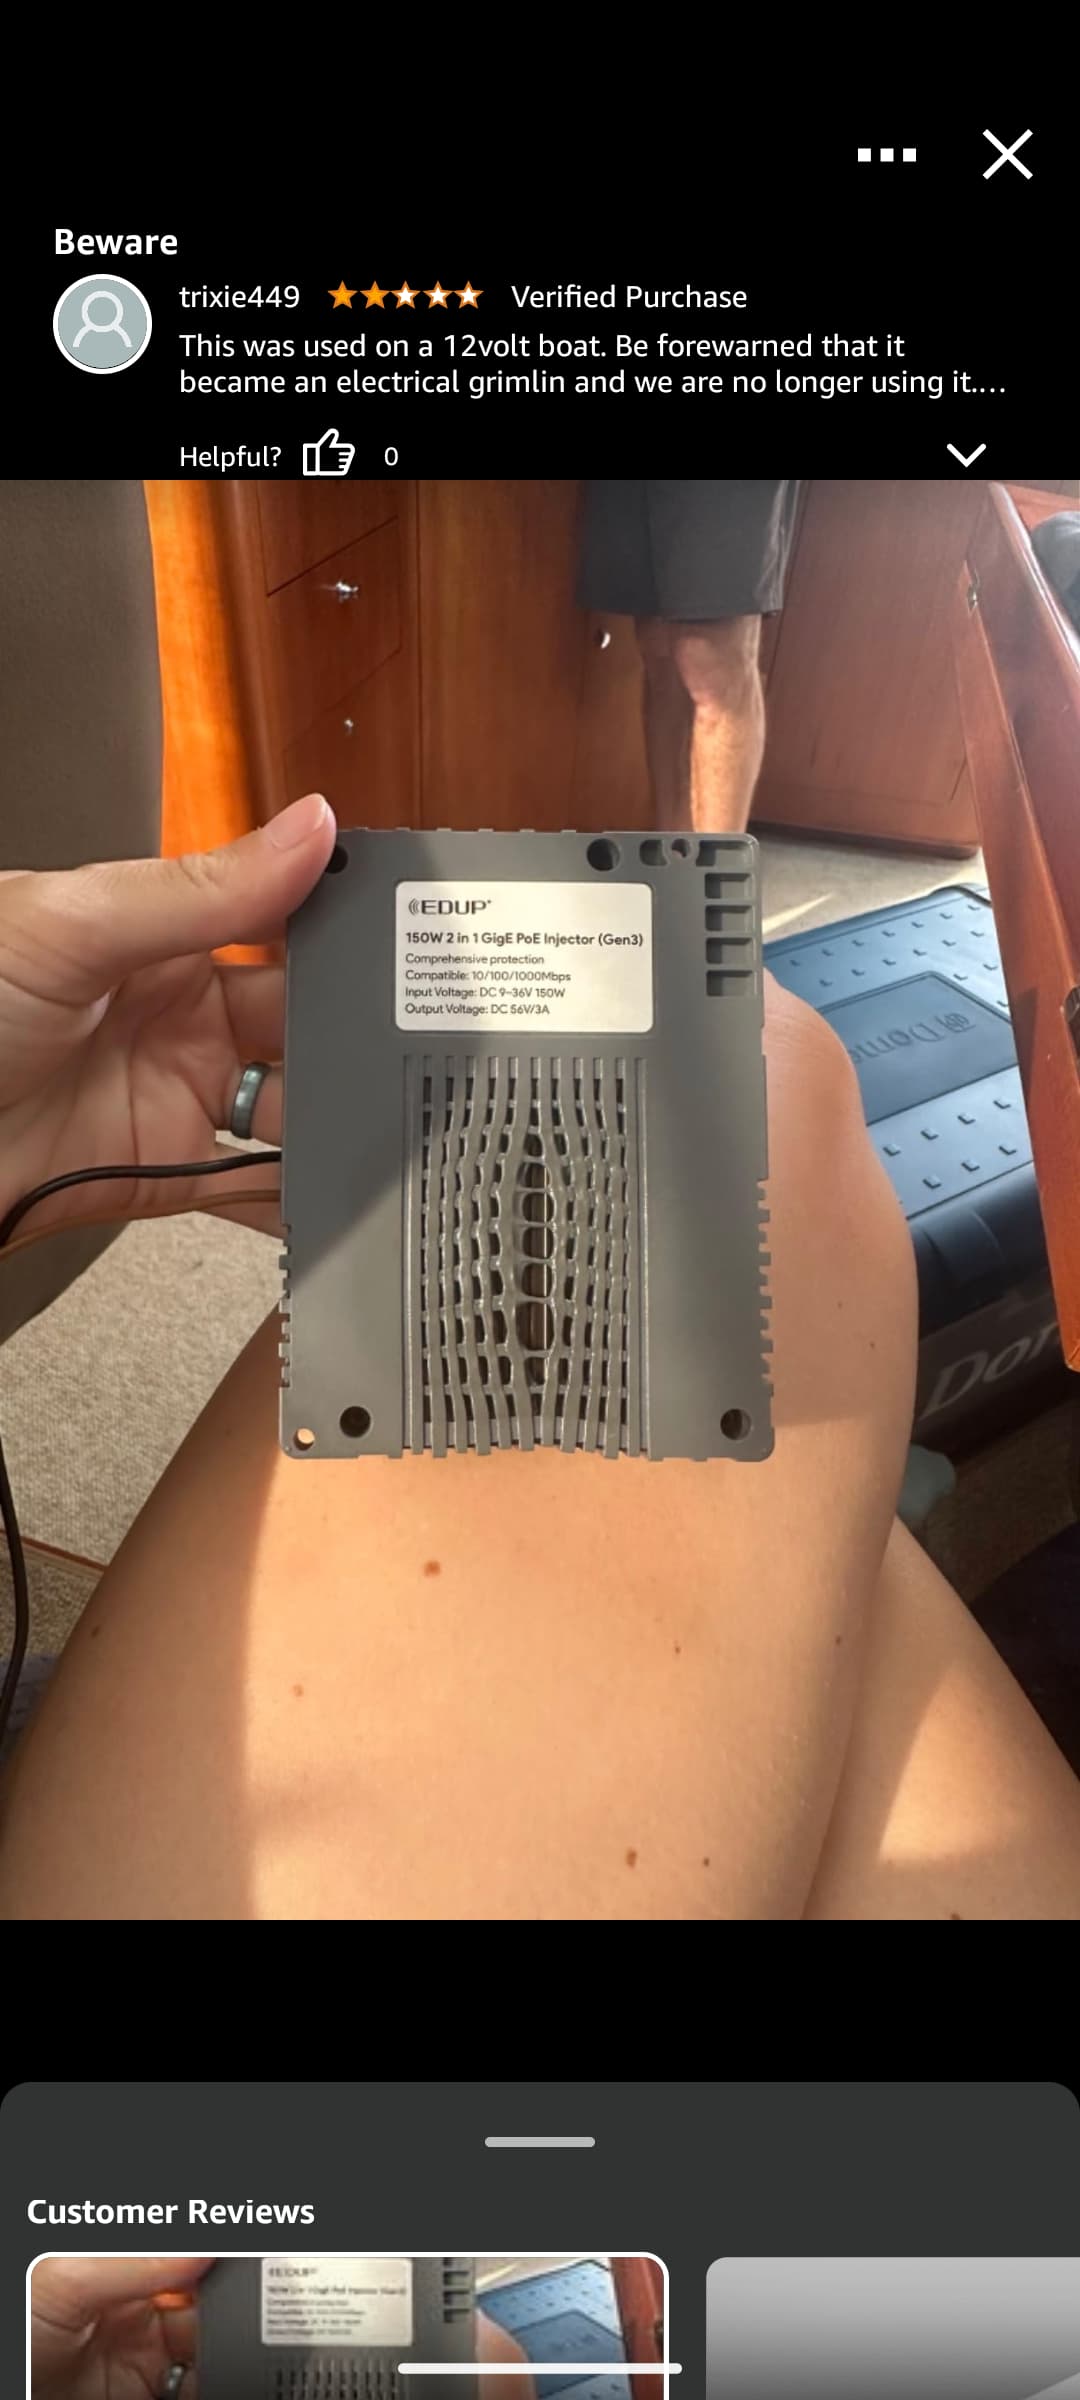
To save space and potentially some efficiency I ordered a shorter Starlink cable that connects the dish to the power over ethernet (PoE) injector. We chose this particular PoE injector since it also serves as an adapter to the ethernet cable, eliminating the need for an additional separate adapter or for cutting the Starlink cable. The PoE injector is mounted with two small screws, and the router I mounted using velcro so that it’s easier to remove if ever we need to reset it. I don’t want to get into customizing the settings on the router in this post but with this model, it’s very easy to do, or you could just run the router as it comes with the factory SSID and Password.
To power the router I ran a USB power cable straight from one of the USB ports on our Yeti 1500x battery and plugged it into the router. Alternatively, you could also use a direct wire to USB-C power adapter that would direct wire to the 48v terminals on the PoE injector and then plug that into the route. We may make this change in the future.

The main advantage of doing this conversion is so that we no longer need to run our inverter to power the Starlink through the original router. This immediately saves us 9 watts of power, which is just what the inverter pulls as it sits idle. Once loaded with the draw of the starlink we would see it pull as high as 60-78 watts. Currently, on 12volt we are seeing loads fluctuate between 35-55watts. Honestly, by itself, this doesn’t seem like a huge savings but over the course of several cloudy days, this is a huge energy saving on our battery additionally this conversion helped to save us some much-needed space and weight by shortening some cables and switching to a smaller router.


Tools we used to complete this job: