Hey y’all! Before heading down to Baja this winter, we made some changes to our Starlink setup. We switched over from the previous Gen 2 Starlink to the mini, and I wanted to drop some info on how we are powering it, and also how we mounted it and what we considered for our use case.
Starting with powering:
- Starlink mini - Pretty critical to this whole setup. We decided to switch from the previous second-gen primarily for space and the ability to run Starlink while driving.
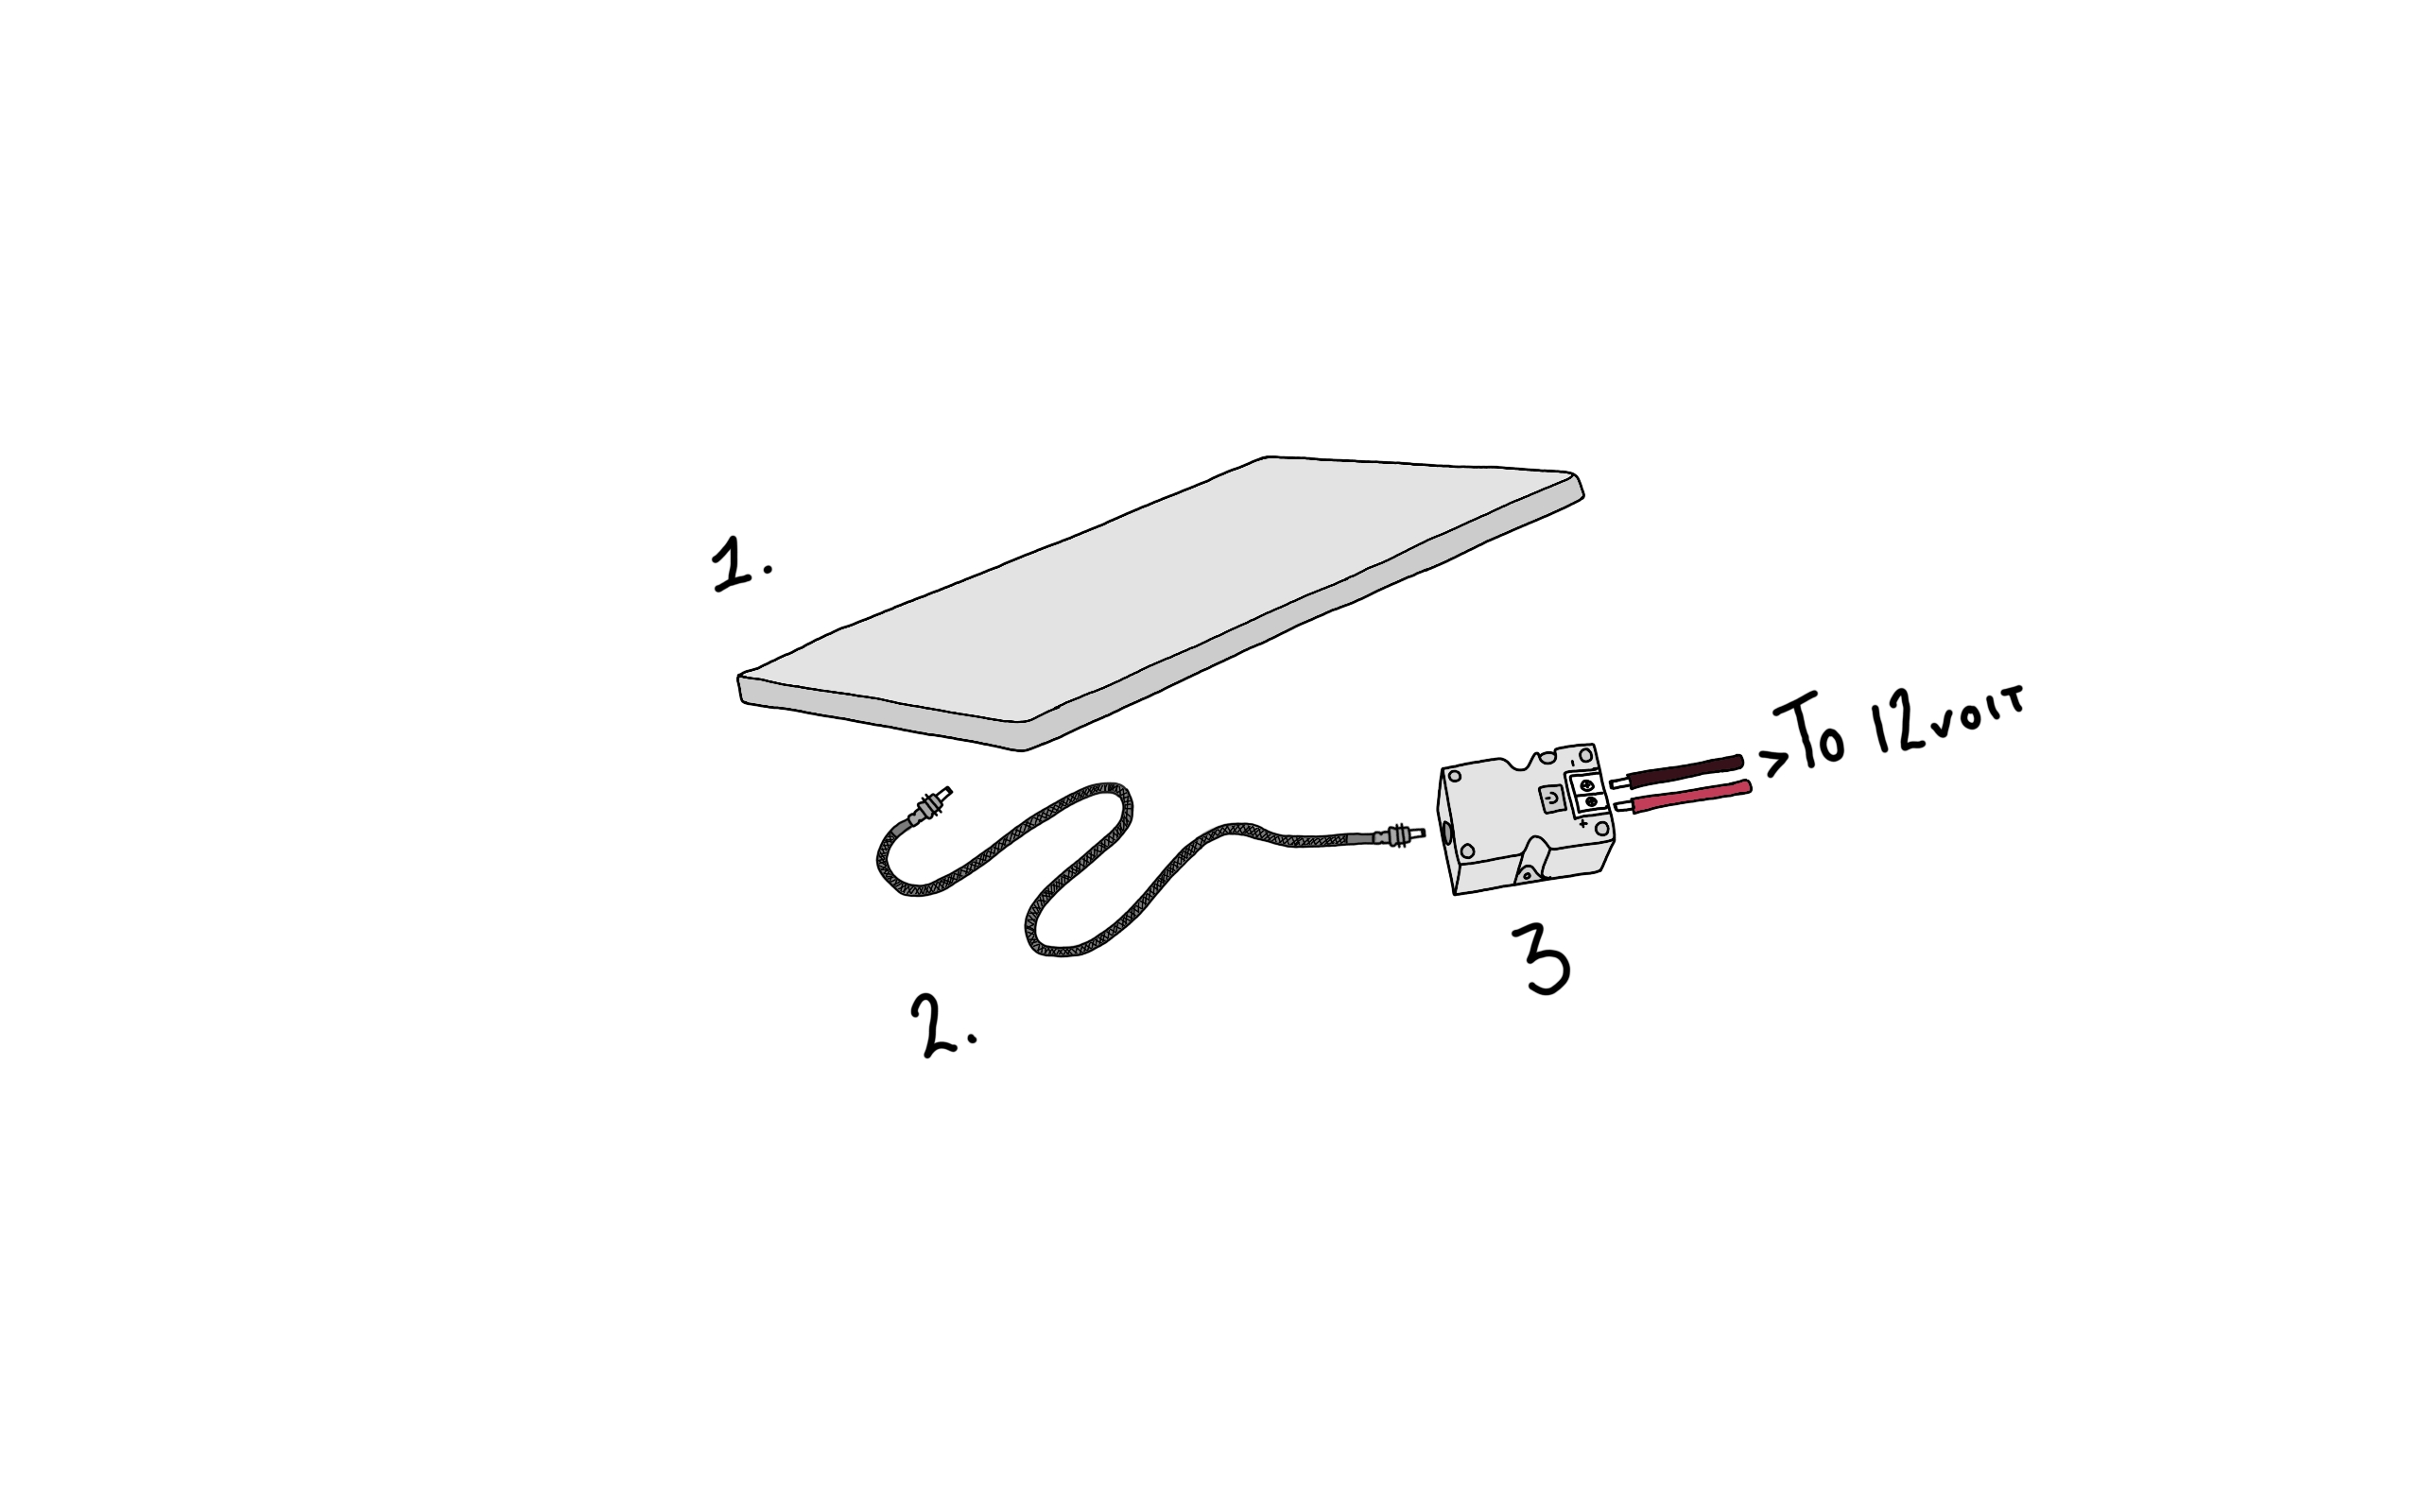
- Alex Tech Wire loom. We took the supplied 50’ Cable and wrapped it in this wire loom; it’s something we do to all of our cables to protect them.
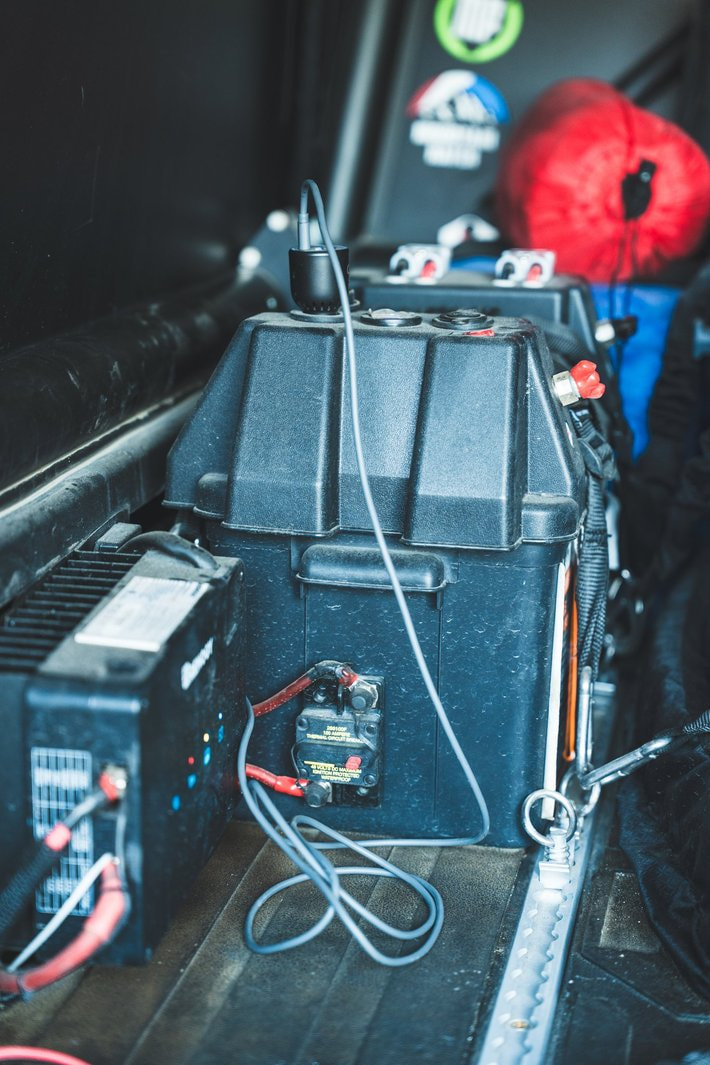
- Stargear Starlink Mini 12volt Adapter: We chose to use this to power the Starlink over using the supplied 120V wall adapter in order to reduce power consumption. This is directly hardwired into our power system.
Mounting Starlink:
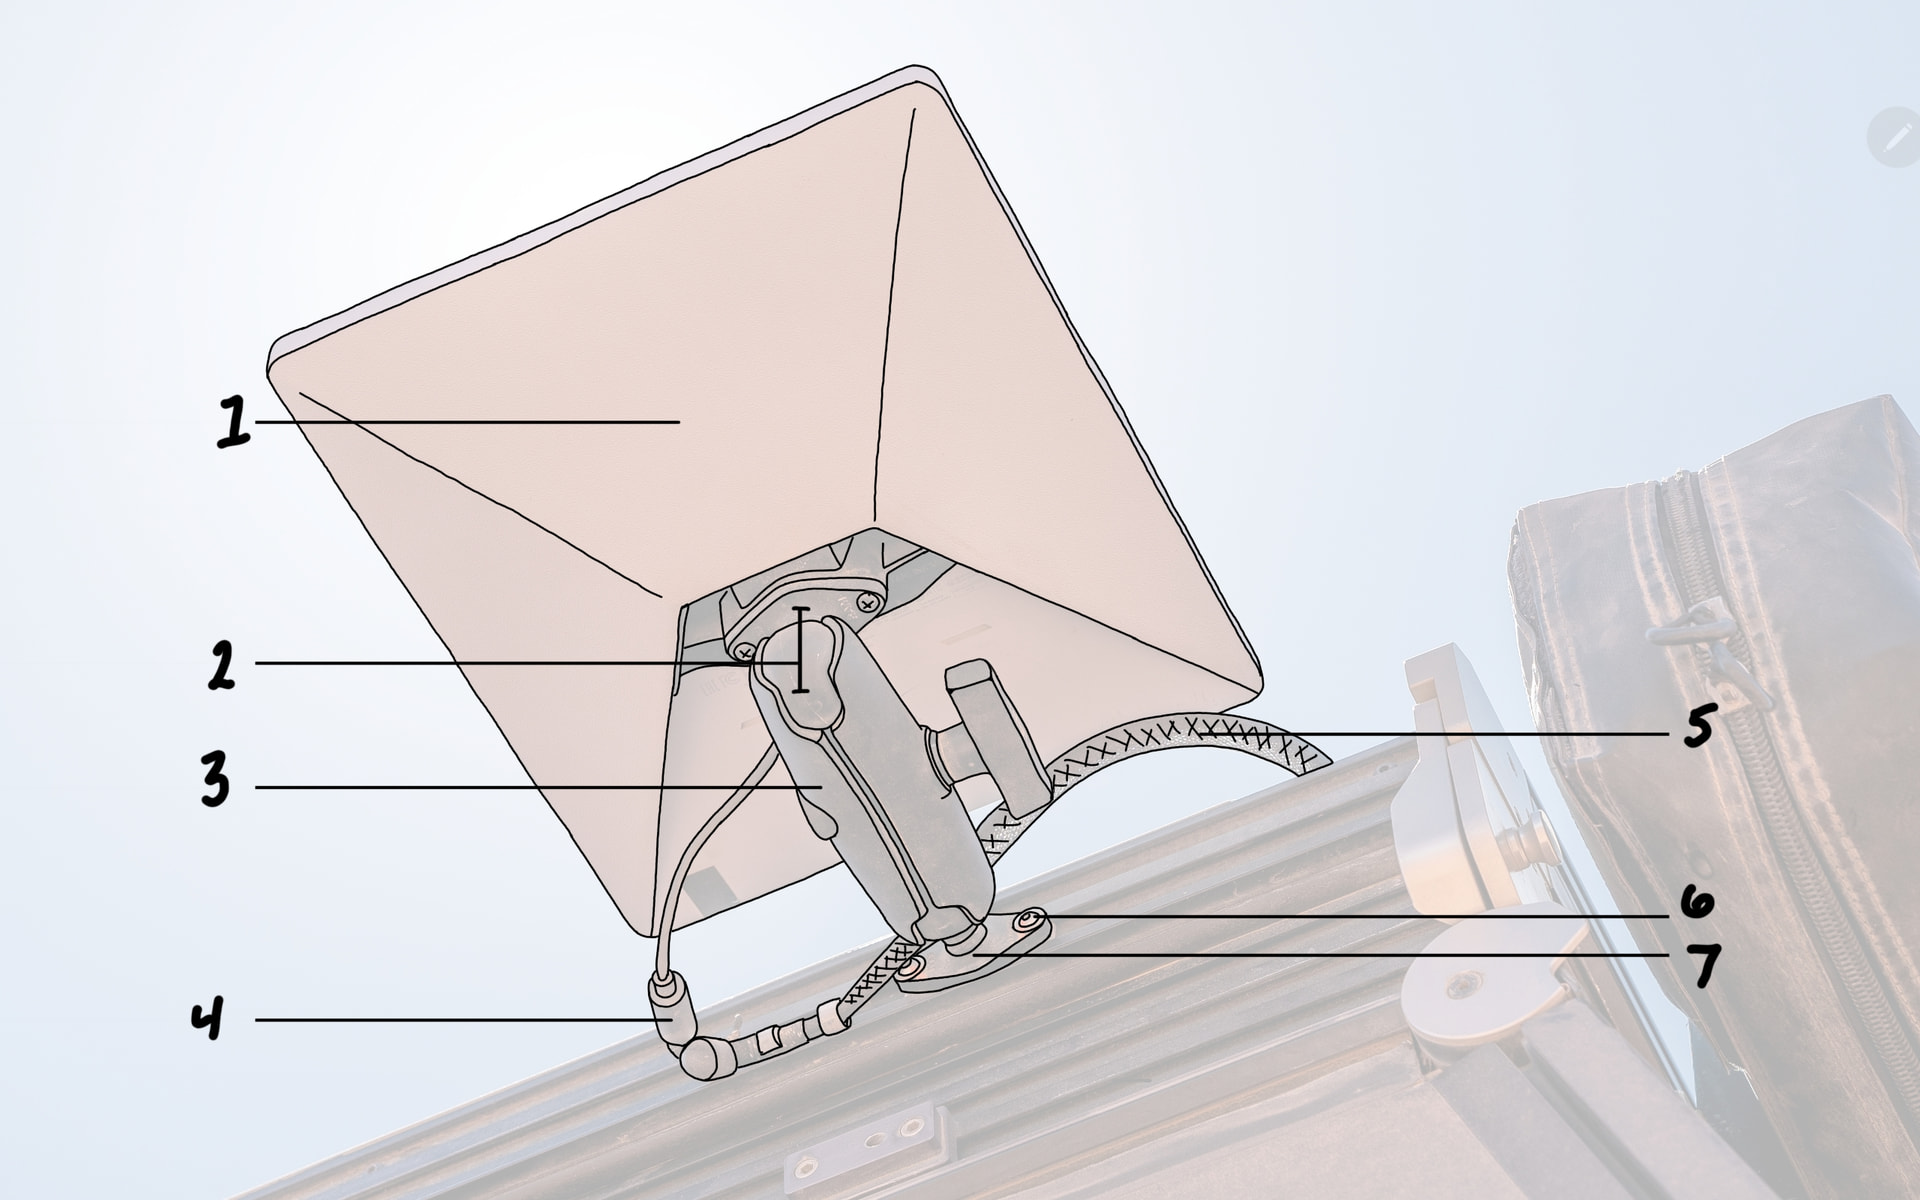
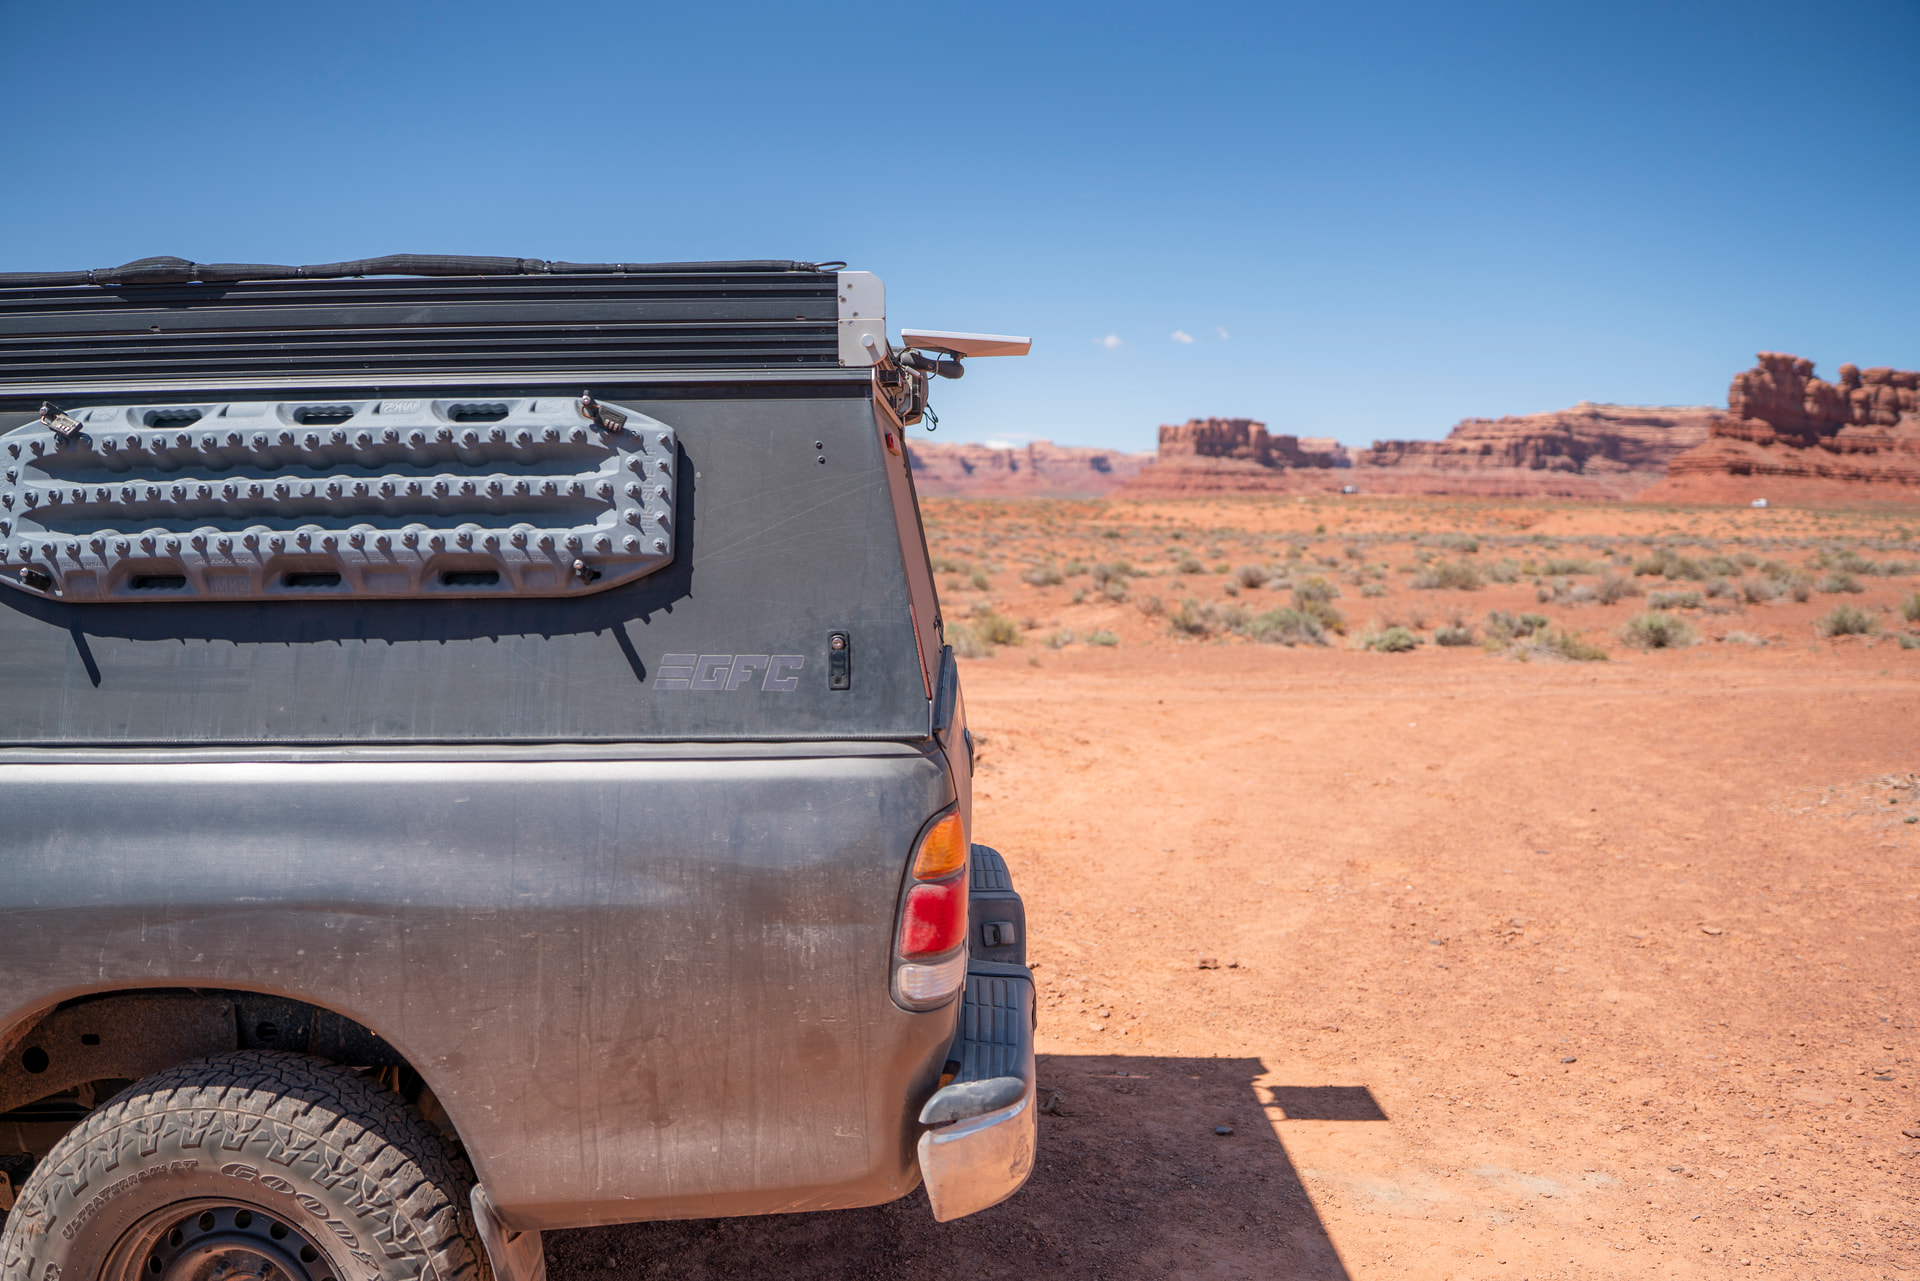
- Starlink Mini. Pretty obvious part of this whole setup.
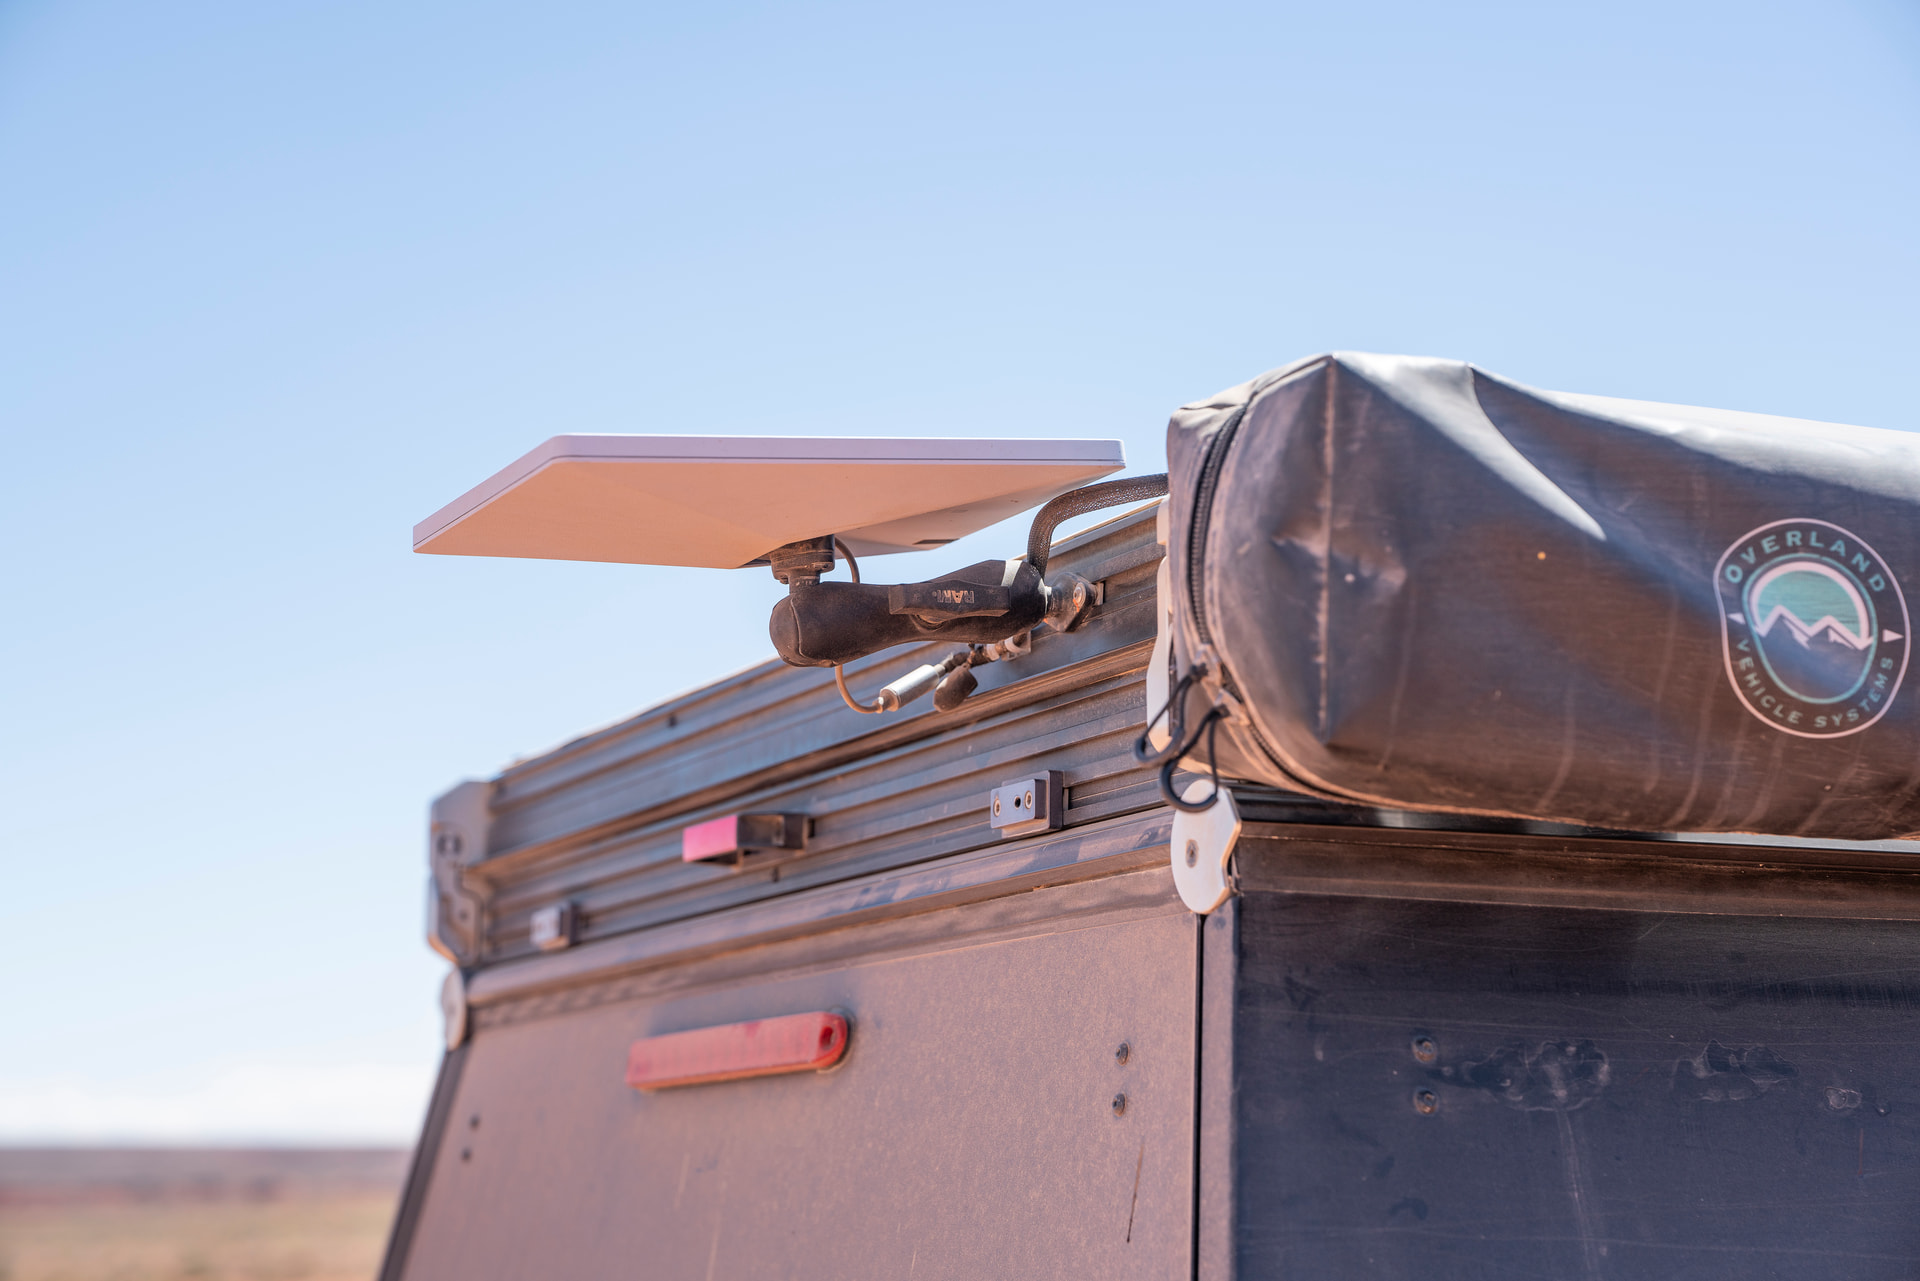
- Starlink Mini Ram Ball Mount
- Ram 1.5” Medium Arm
- Starlink Cable Extension - We are running this so that we don’t have to remove the mount (Item 2) from the dish to access where the cable plugs into the dish. Making it much easier to unplug the dish and to put it away if we are worried about it getting stolen while we are away from the truck.
- Alex Tech Loom protected Starlink cable. Again, we did this to protect the cable since it’s running along the roof of the camper.
- 1/4 - 20 Hardware & T Nuts - Stainless - This hardware allows us to bolt # 7 to the extrusions.
- Ram 1.5” Ball This is mounted to the extrusions using the hardware listed above. Whenever we want to remove the Starlink, this, the cable, and a small cable anchor are all that are left in place.
After 3 months of running this nonstop 24/7 on our truck during our travels to and from Baja, I can fully say that the Starlink setup has surpassed expectations. It has allowed us to have a consistent, reliable, and FAST signal while driving. Once at camp, we no longer have any process of setting up or taking down the Starlink since it’s just been in place the whole time. Whenever we do take it down, it now takes up so much less space than the previous one did.
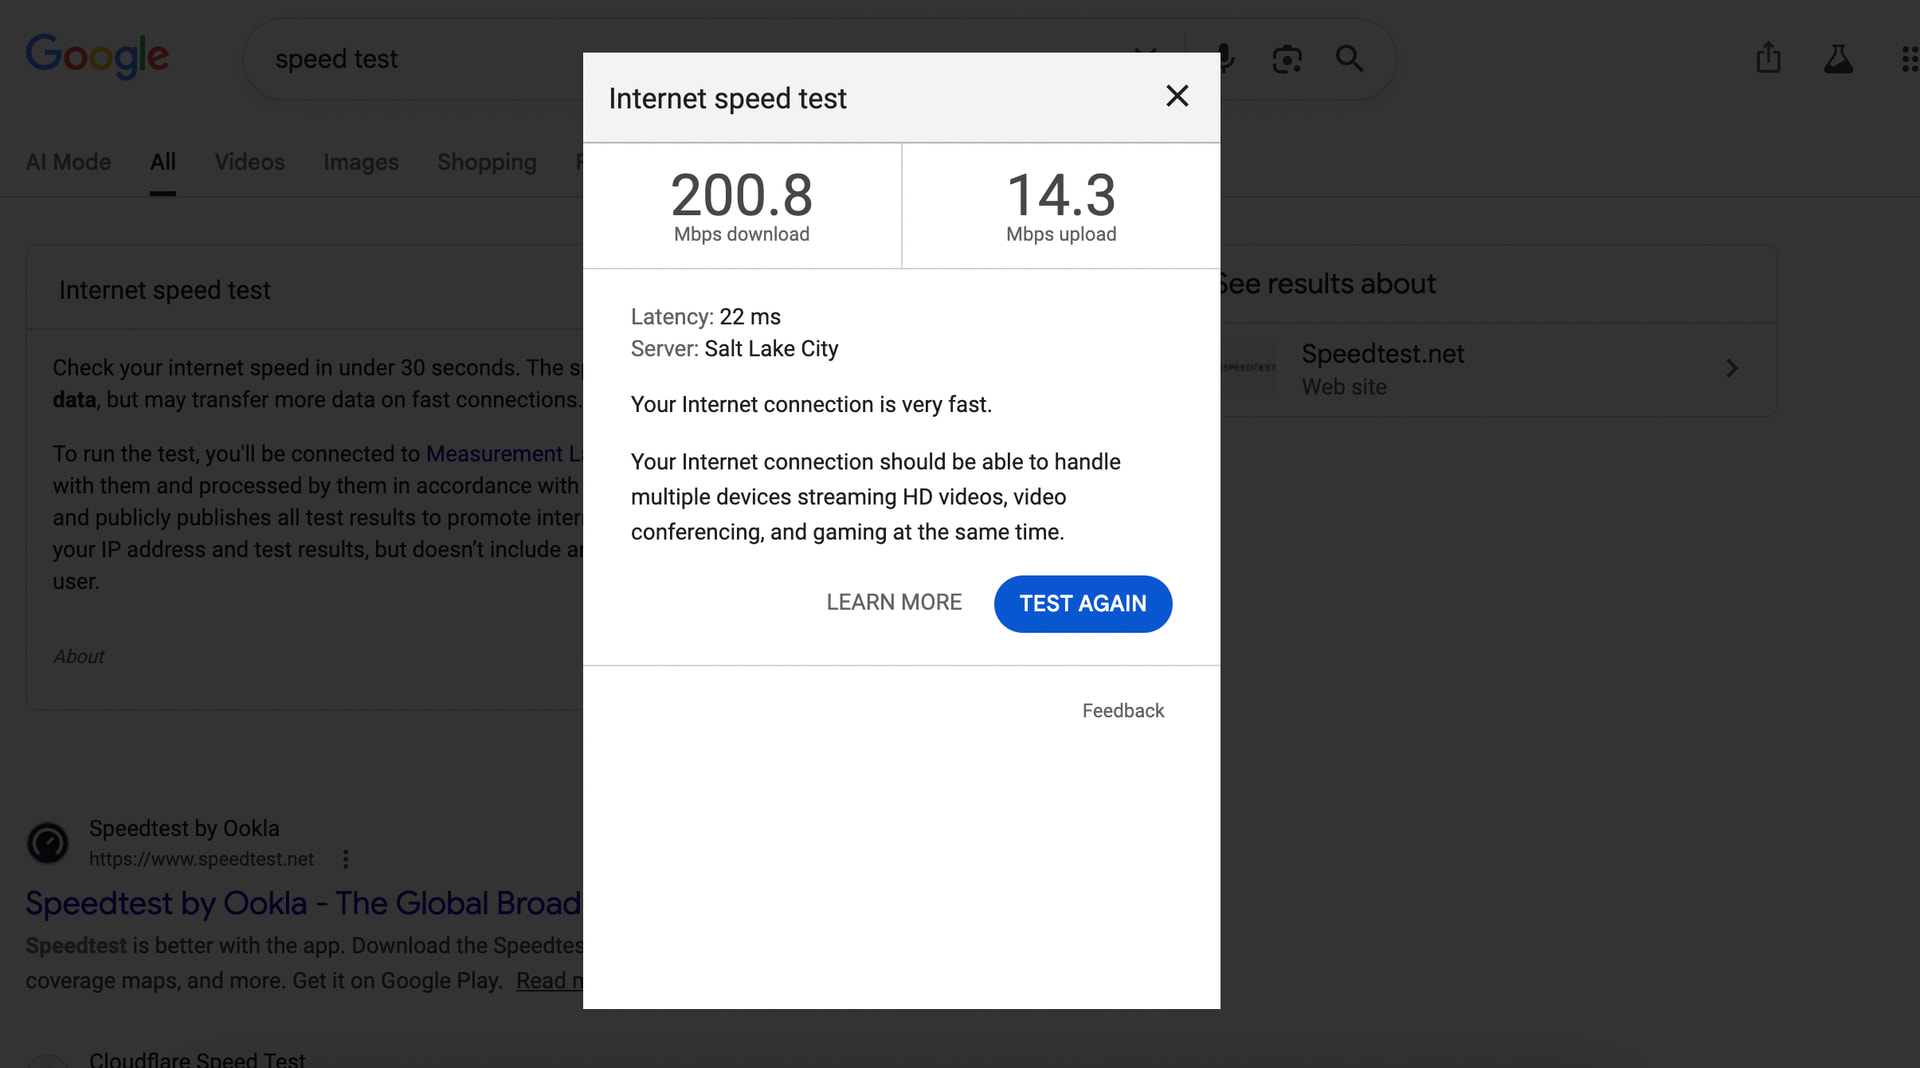
Below are some screenshots of a speed test that I just conducted while at camp, as well as showing how the alignment is off, which doesn’t seem to affect the speed much. Overal the speed has been more than fast enough to allow us both to stream video calls, upload massive photo files, and listen to music all at the same time, it’s truly impressed us!
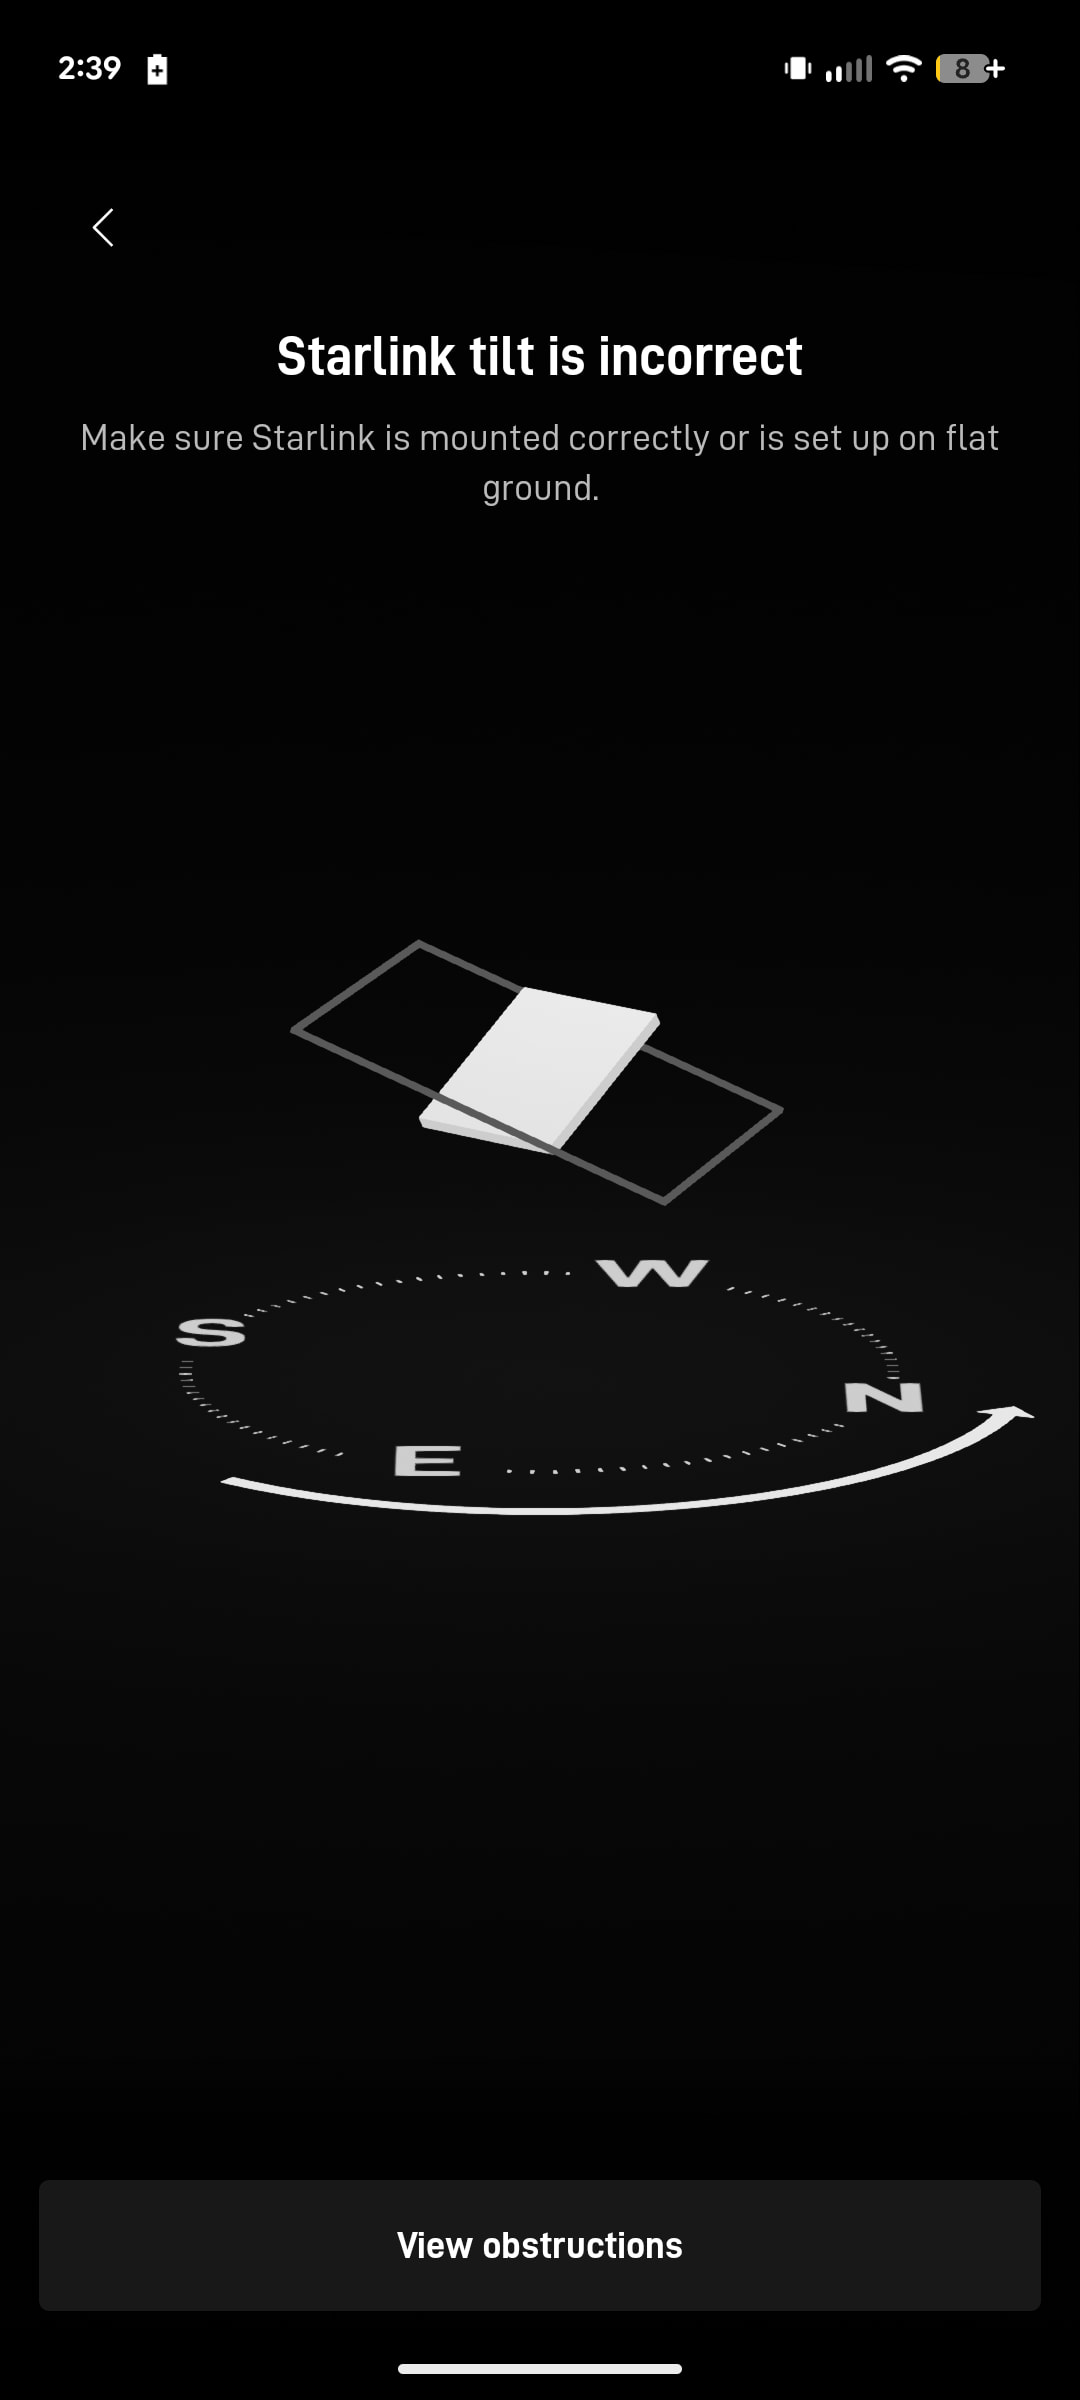
A note on positioning and alignment.
Because we rely so heavily on having solar power to support all of our electrical needs for full-time life and work on the road, we always point the truck south to catch the sun all day long. Starlink typically wants the dish aligned to point north, until you are very far north, then they want it pointed south again. We have had no problems at all with keeping the truck pointed south, except in the very southern end of the Baja Peninsula. It seemed like, at that point, we were starting to get spotty coverage. At those times i would point the dishes face directly flat; however, keeping its orientation south and that solved any spotty coverage. We will continue to play with this as we travel this summer, but i suspect in the continental US the direction of the dish will make little or no difference, even facing 180º in the wrong direction.
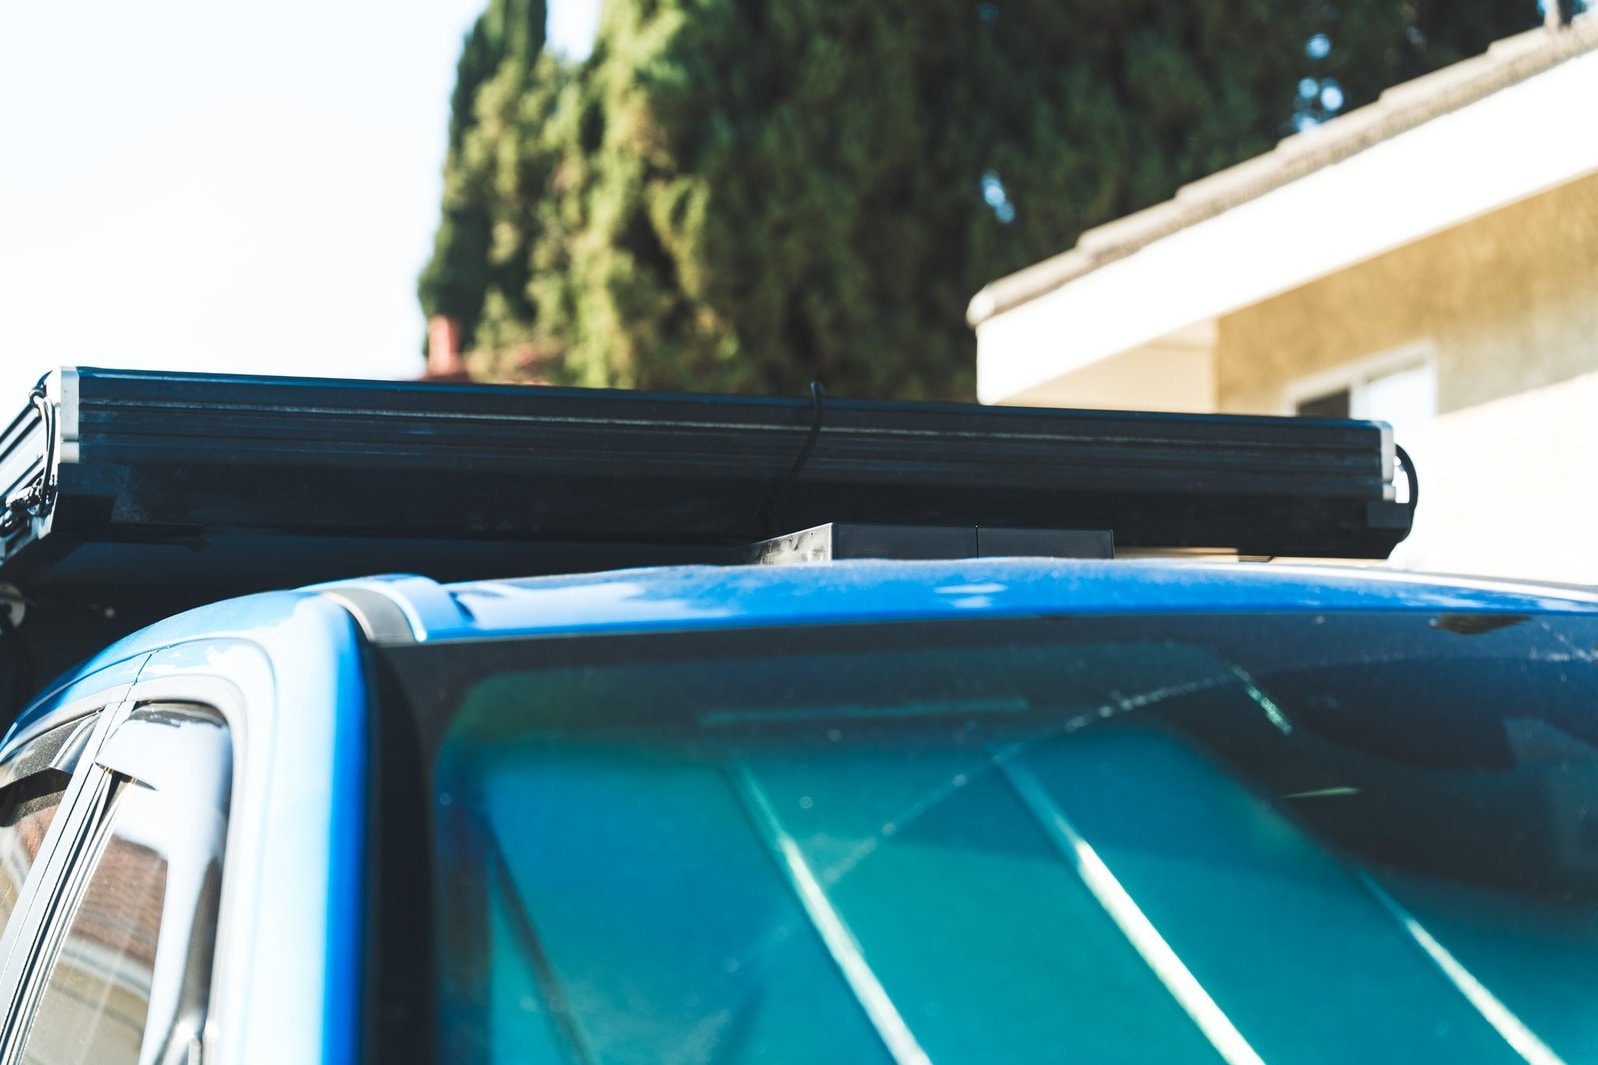
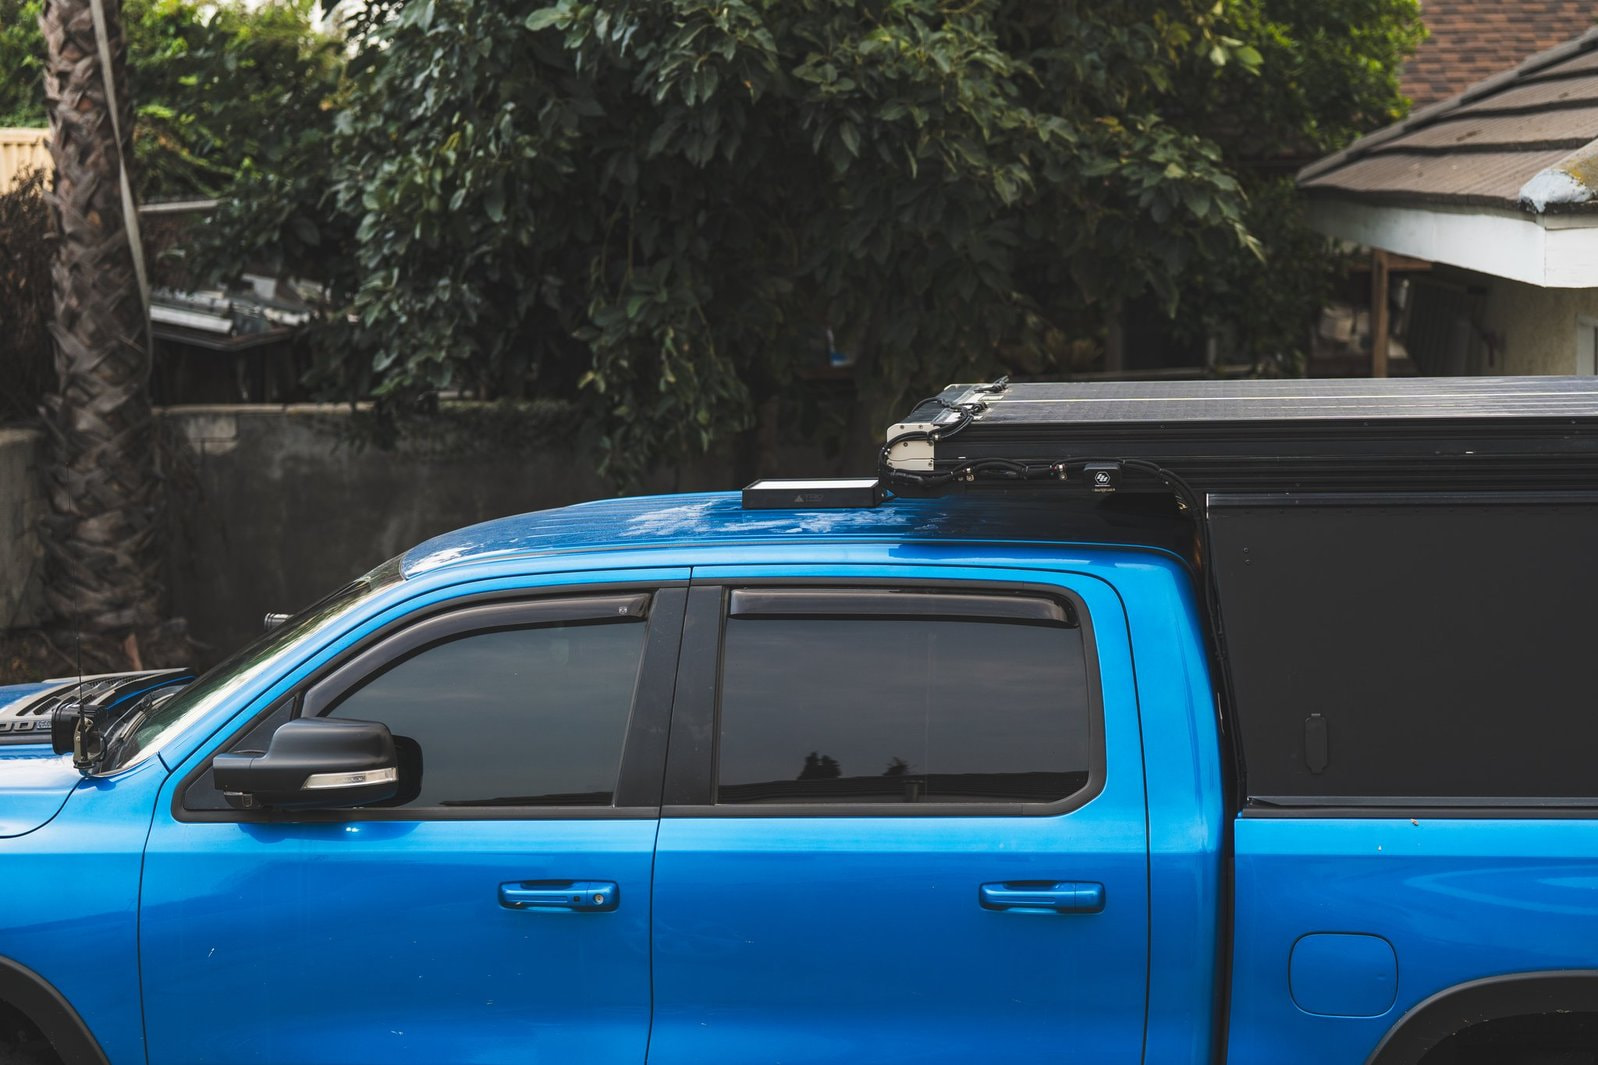
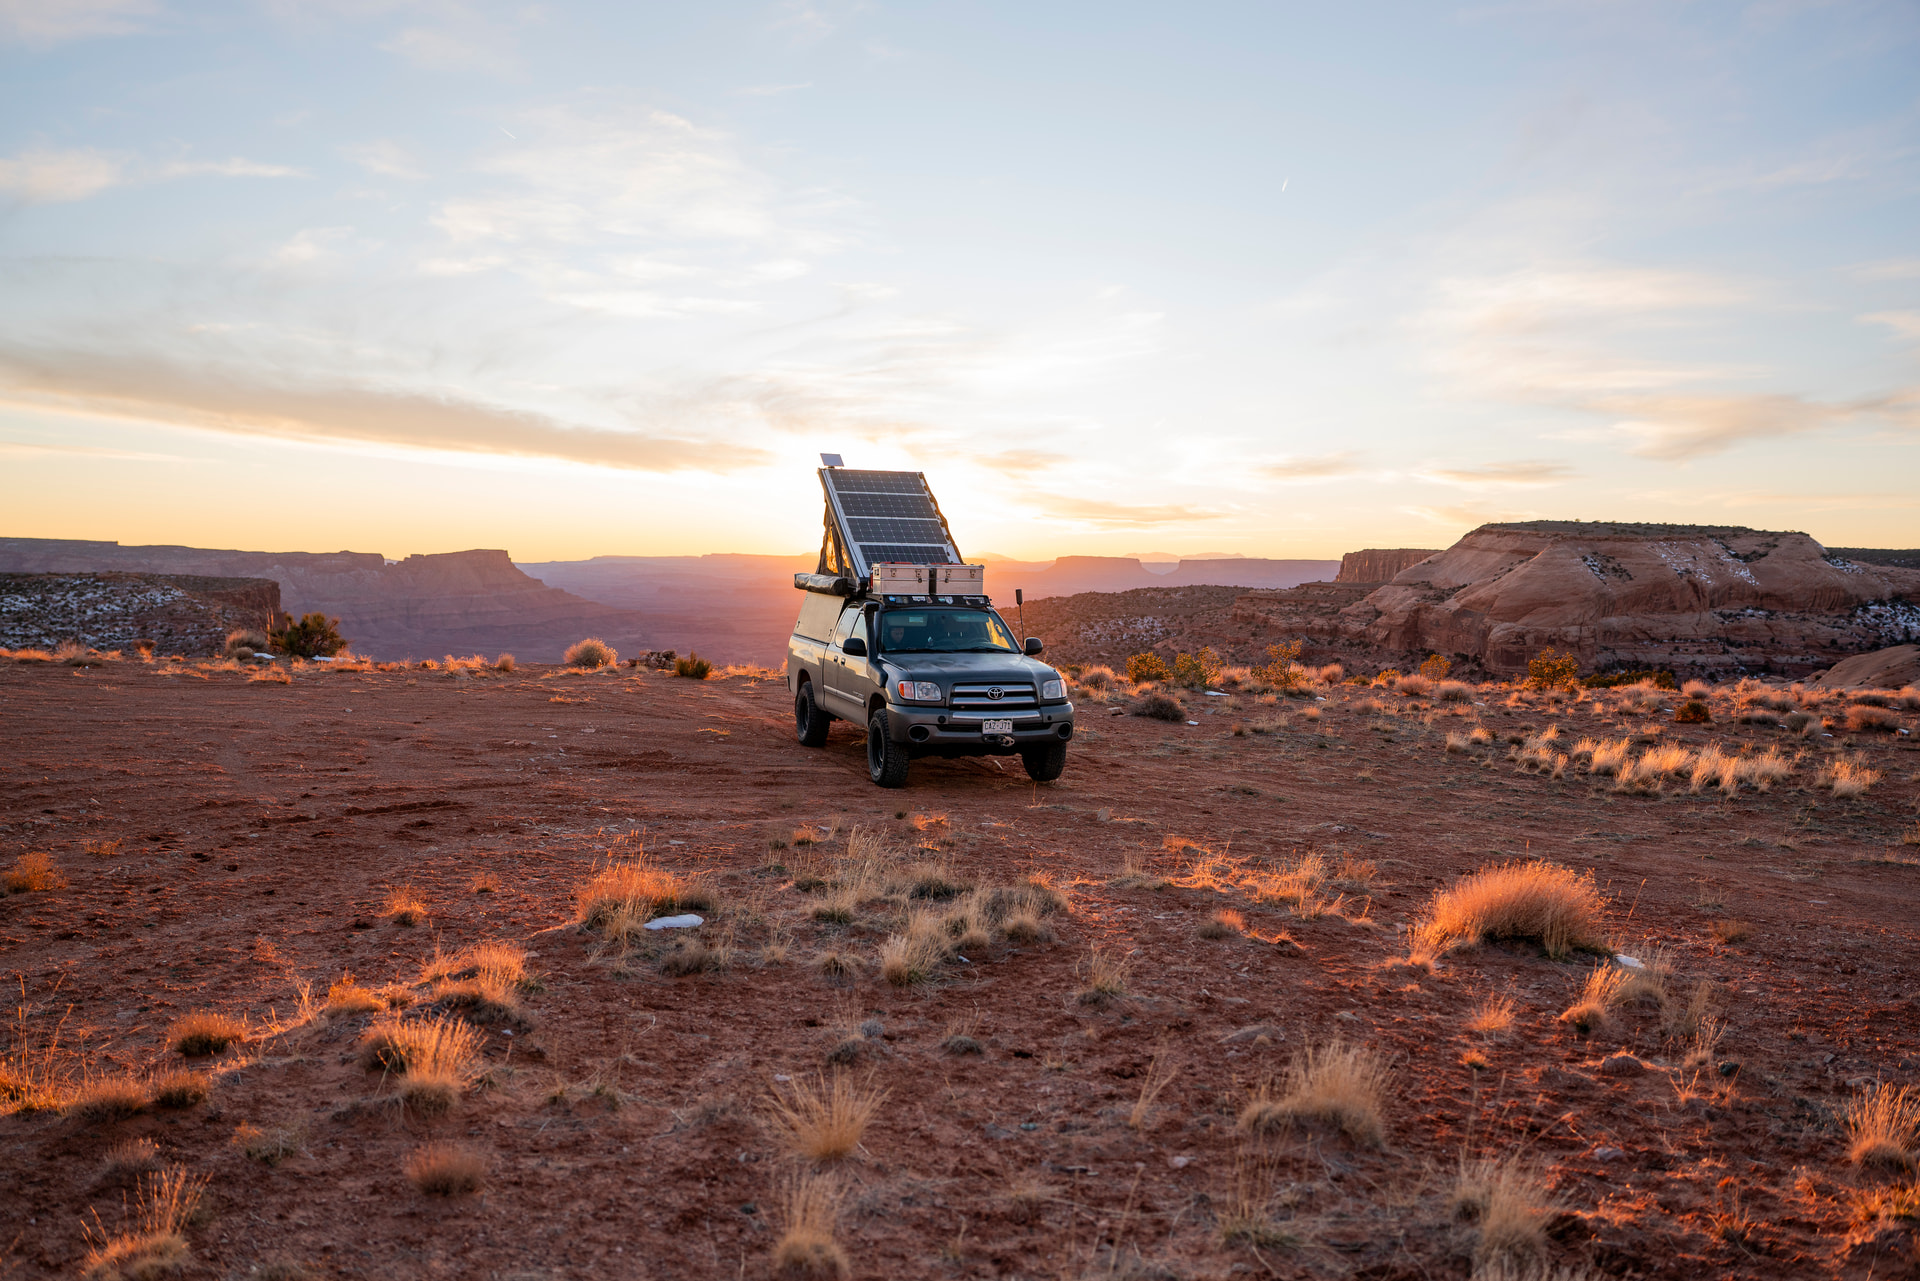
Some additional photos of how the mount looks on the truck.
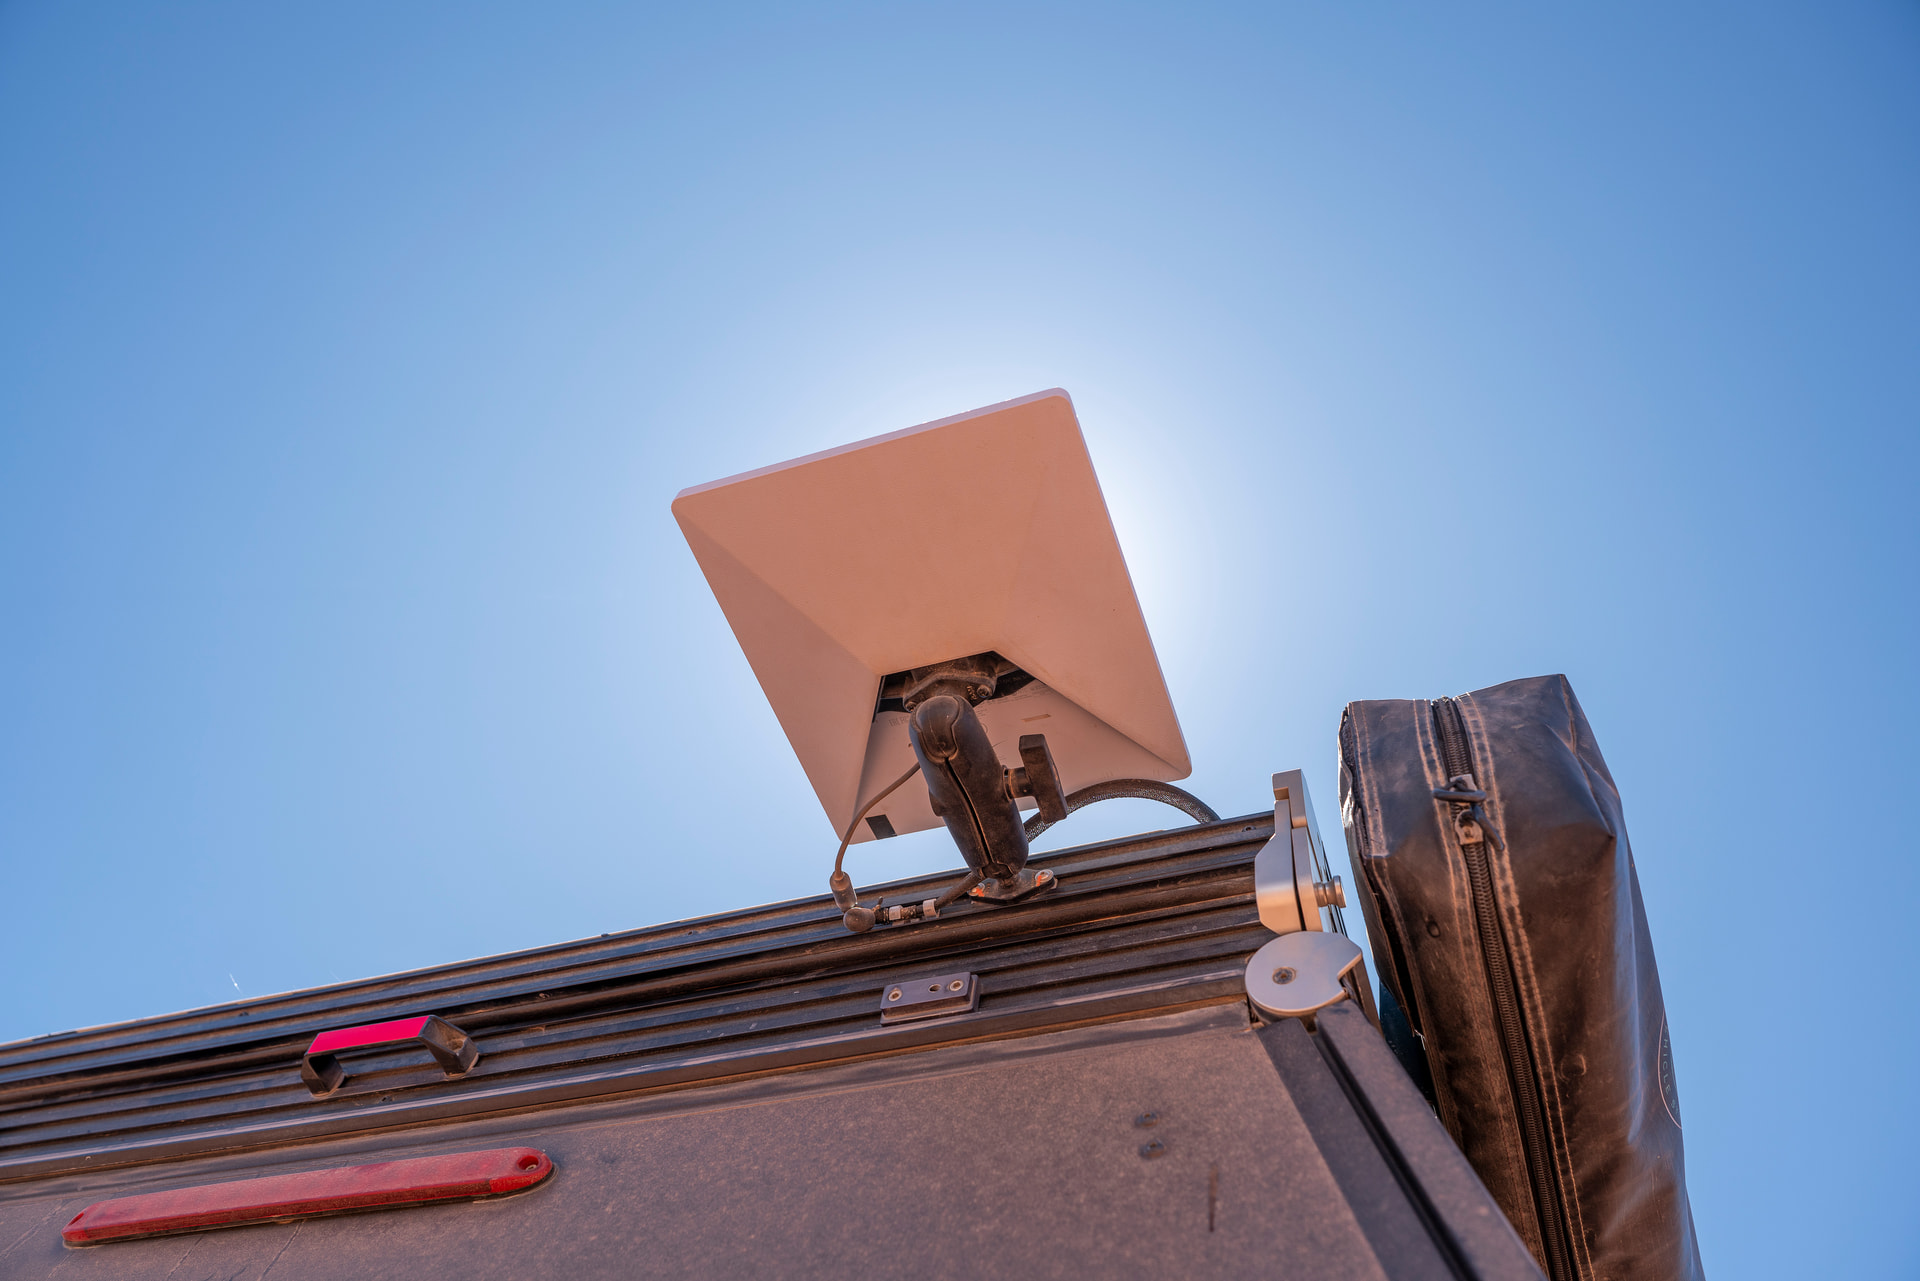
I still need to address the cable run a little better. We were running short on time, and I had run out of my normal ziptie cable anchors.
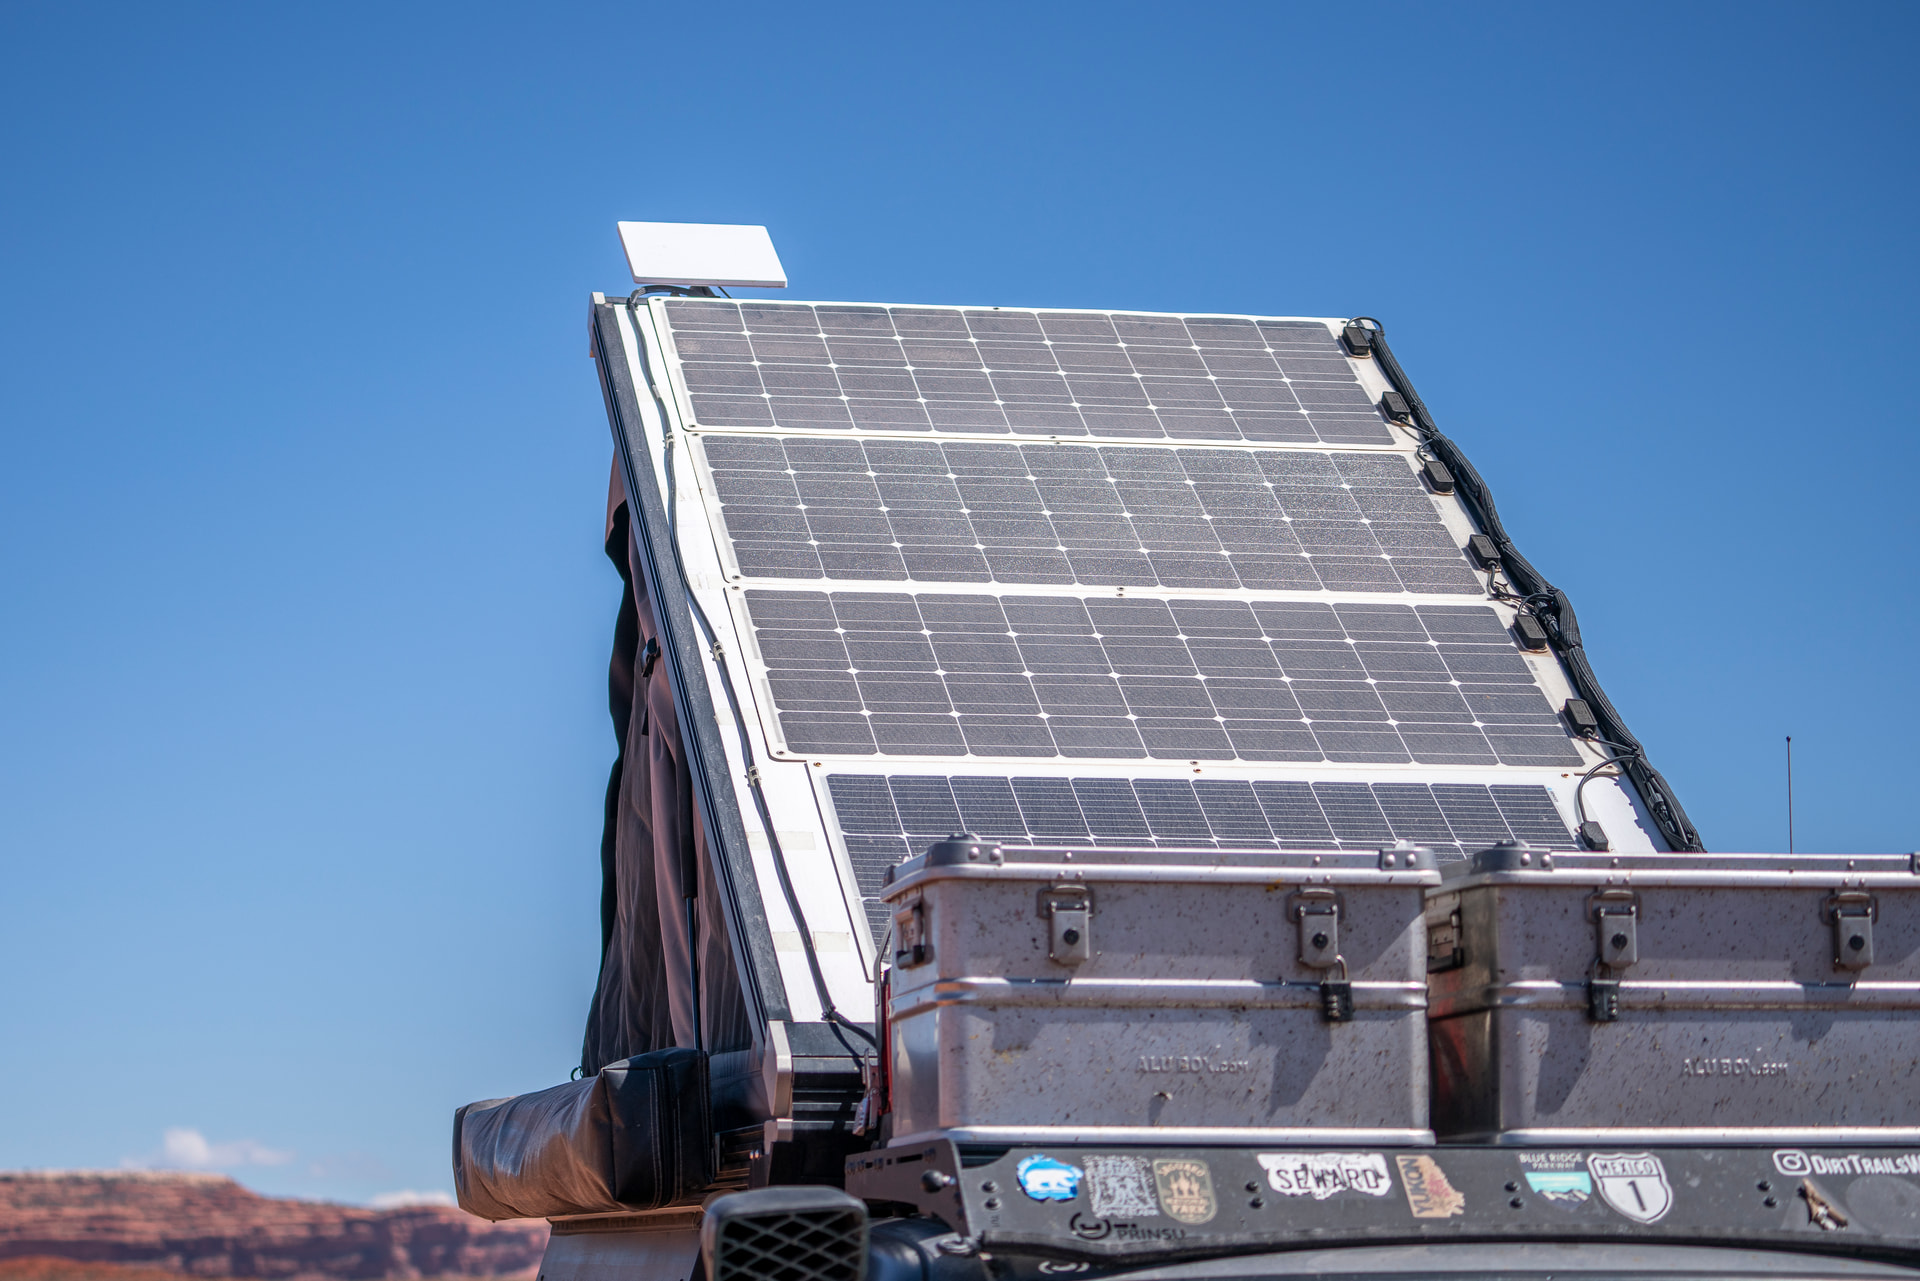
Some things that we considered with this. We really still would like a much lower-profile mounting option than this. However, our solar panels and the headliner in the camper have prevented us from either mounting the dish inside under the roof material or on any portion of the roof on the exterior.
We have a friend who is making some great 3D printed mounts, and as badly as I wanted to run one of his, all of his options interfered with our solar panel placement. I think these are great options if you don’t already have things on your roof.
Anywho thats how we did. Let me know if you have any questions!