What made you decide to remove all passenger seats and build out the cab rather than building out the bed of the truck?
The problem I’m trying to solve is one I ran into a lot when I was living in MK1. I like sleeping in the tent, but on days when I’m roaming in town, I would much rather keep a low profile and not attract attention by popping the GFC tent. When it gets nasty out (high winds, snow), sleeping in the cab is more comfortable.
I’m leaving the option for both, and the benefits are pretty nice - lower base weight and more volume to build with. And your passenger can give you a back massage while driving.
1 Like
My baby is back! First things first, I installed the Prinsu Habitat rack. The fit was very tight (1/4" gap), and I ended up removing the rear-most extrusion because it got tucked under the GFC. I think I may need to get in there with a hacksaw later and chop out some more clearance between the side rails and the bottom of the GFC for times when the frame flexes.


100% agree for sure. I’m actually really excited to see this build out especially inside.
1 Like
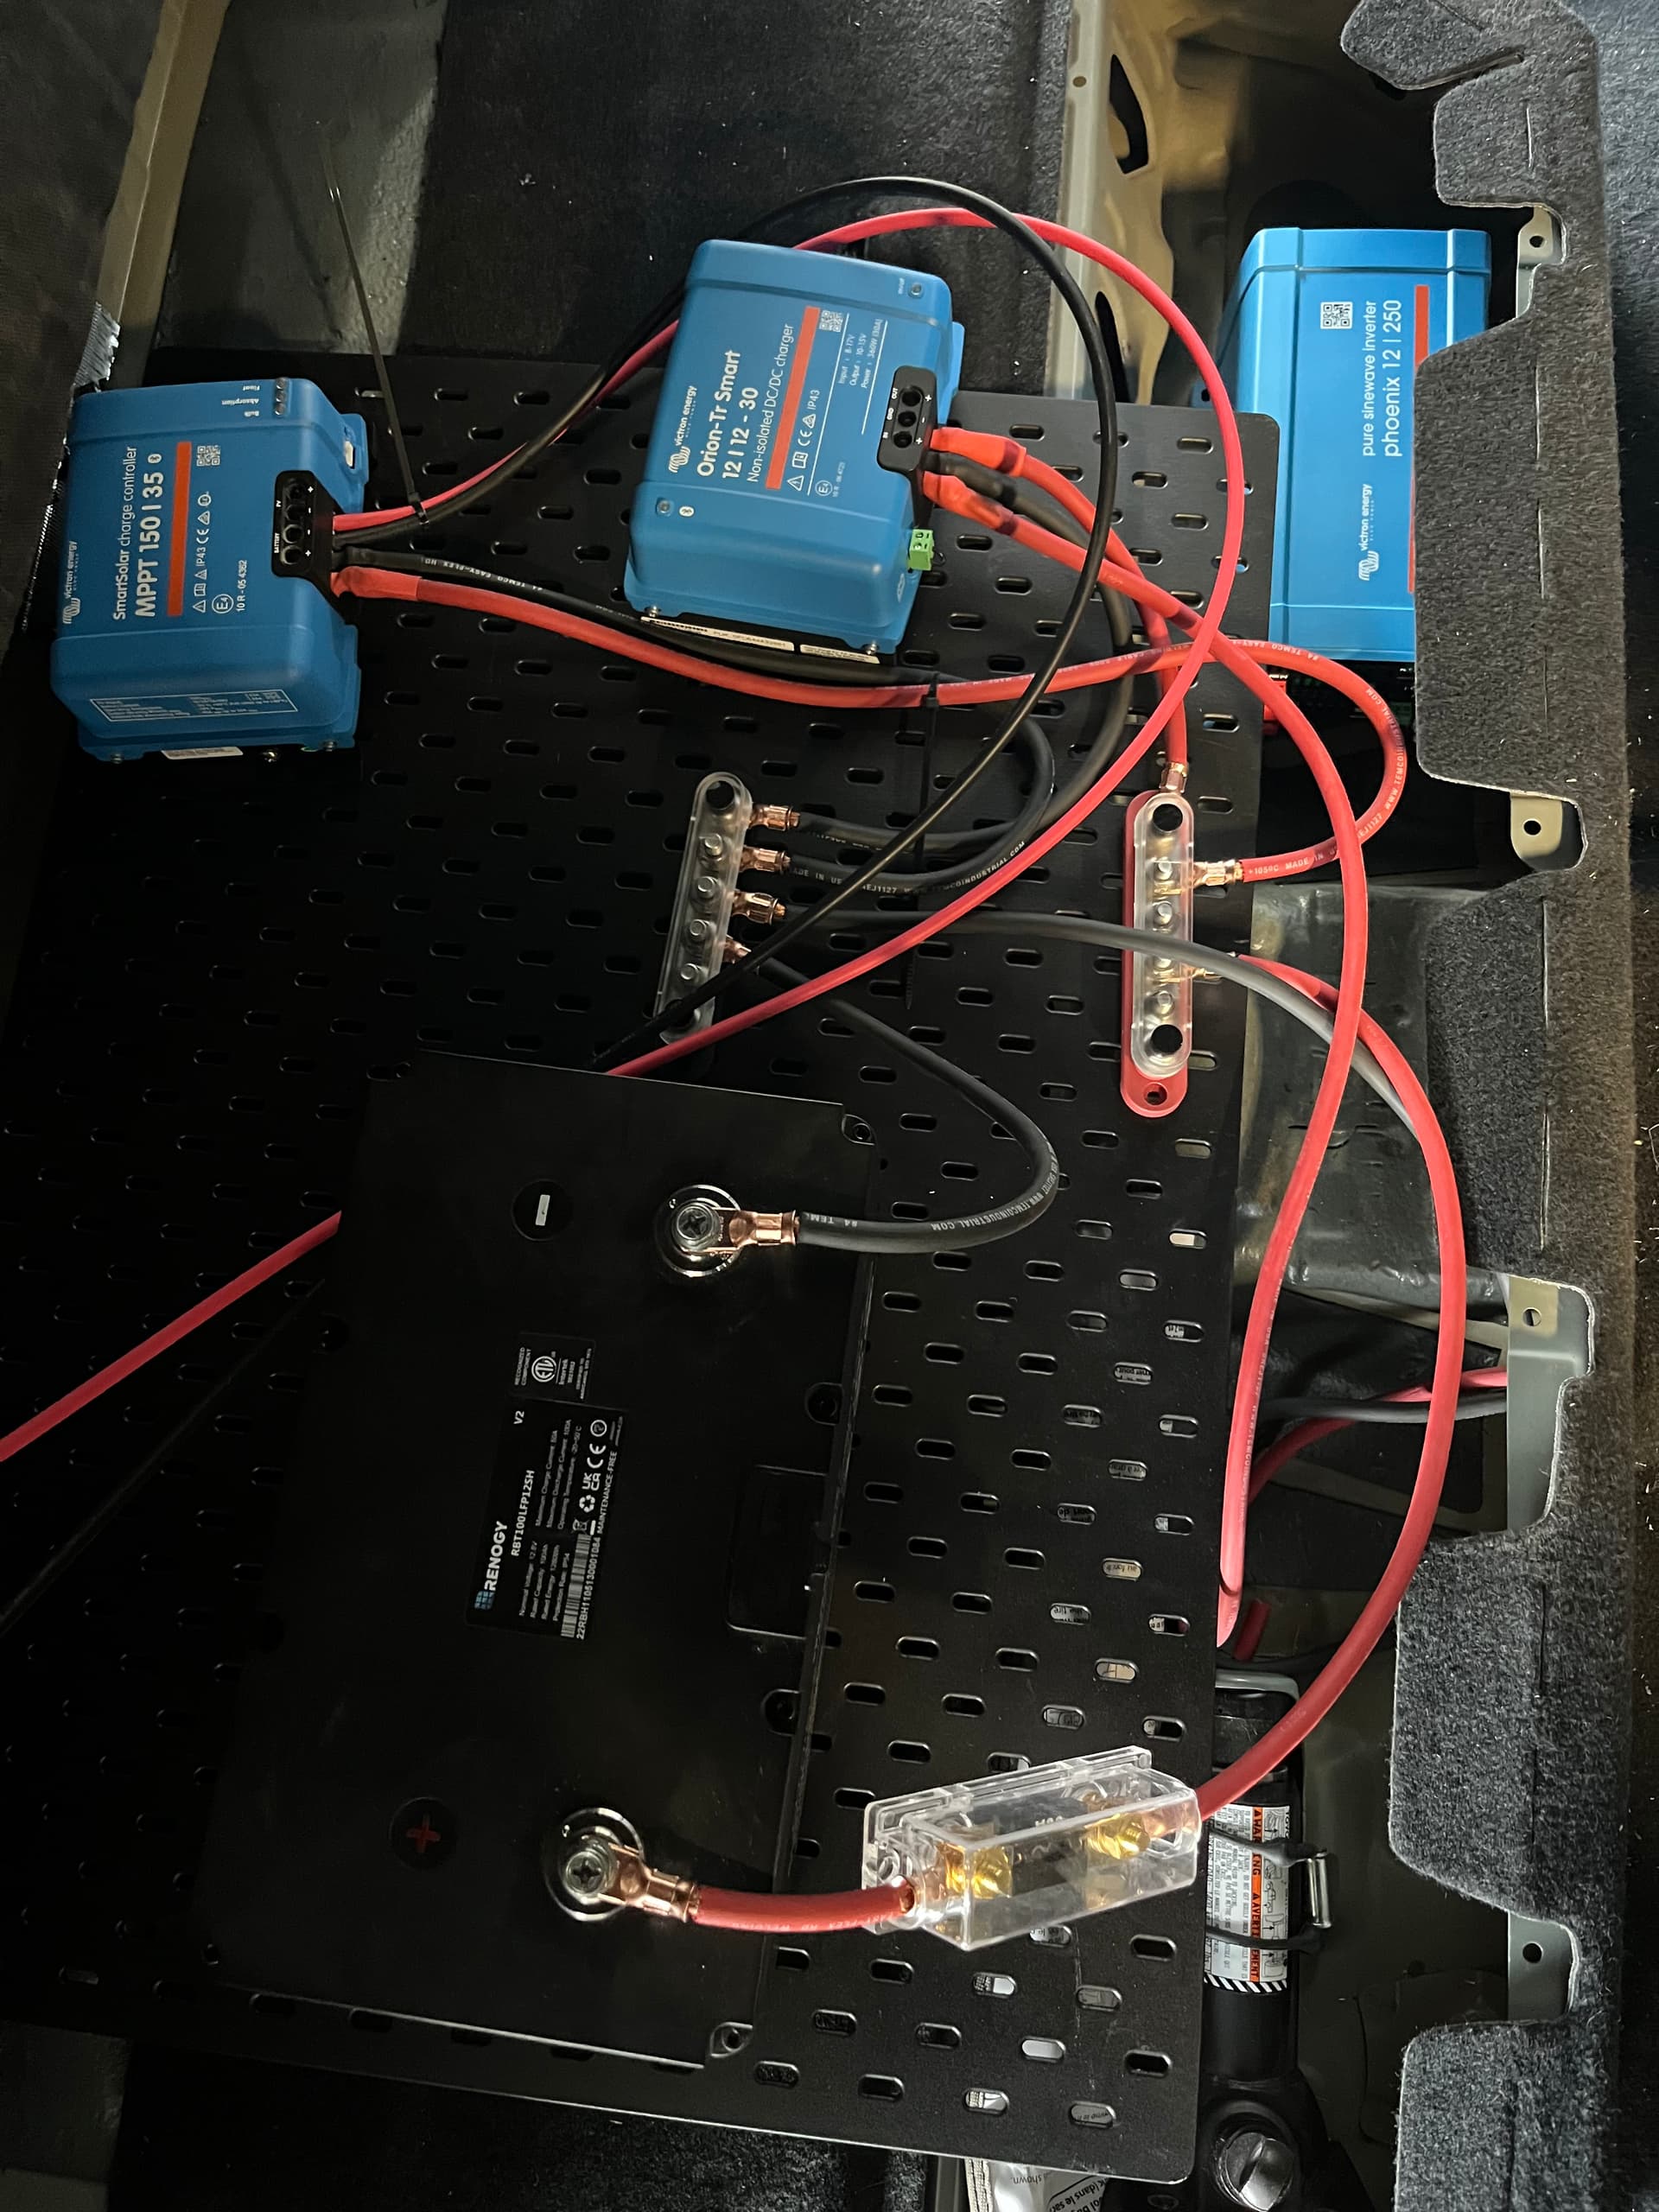
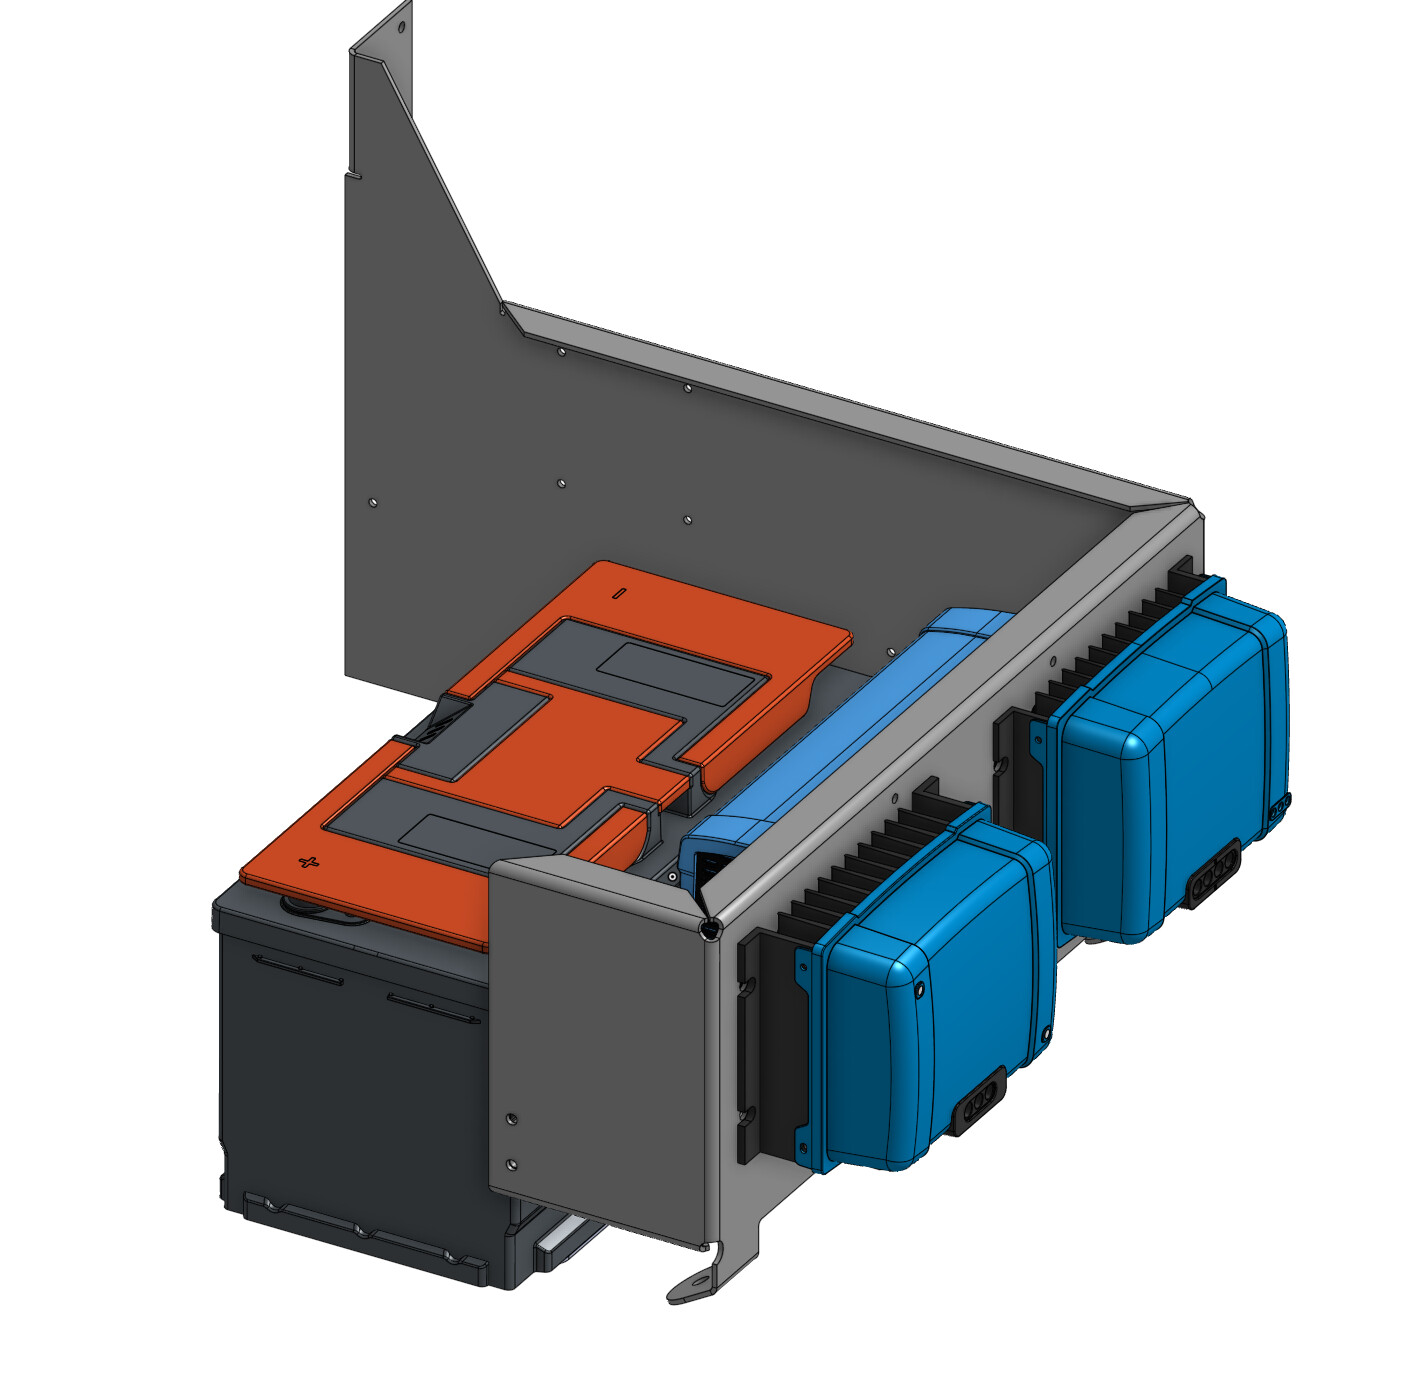
Electrical Changeup

Some changes to my electrical system. I want to use the passenger seat area for storage since access is so good, and the Victron chargers need to be mounted on a wall (per the instructions at least) so I want to put those on the back wall.
I’m completely removing the factory inverter today to make space in my weight budget for a smaller Victron inverter to power starlink. This is also nice because there is already an 80A fused circuit that runs from the starter battery to the back of the center console for the inverter. I can extend the wiring and not have to run a wire from the battery (which I did in MK1, but wasn’t ever happy with looking at).
I also moved the starlink equipment to the back wall, though I’m not sure about placement just yet because I don’t have the DishyDualie board and am just using the stock router for now.
End-of-Weekend Update
Made some solid progress today, but it took way longer than expected to do the wiring because I was being more careful to make solid connections that will stand the test of time.
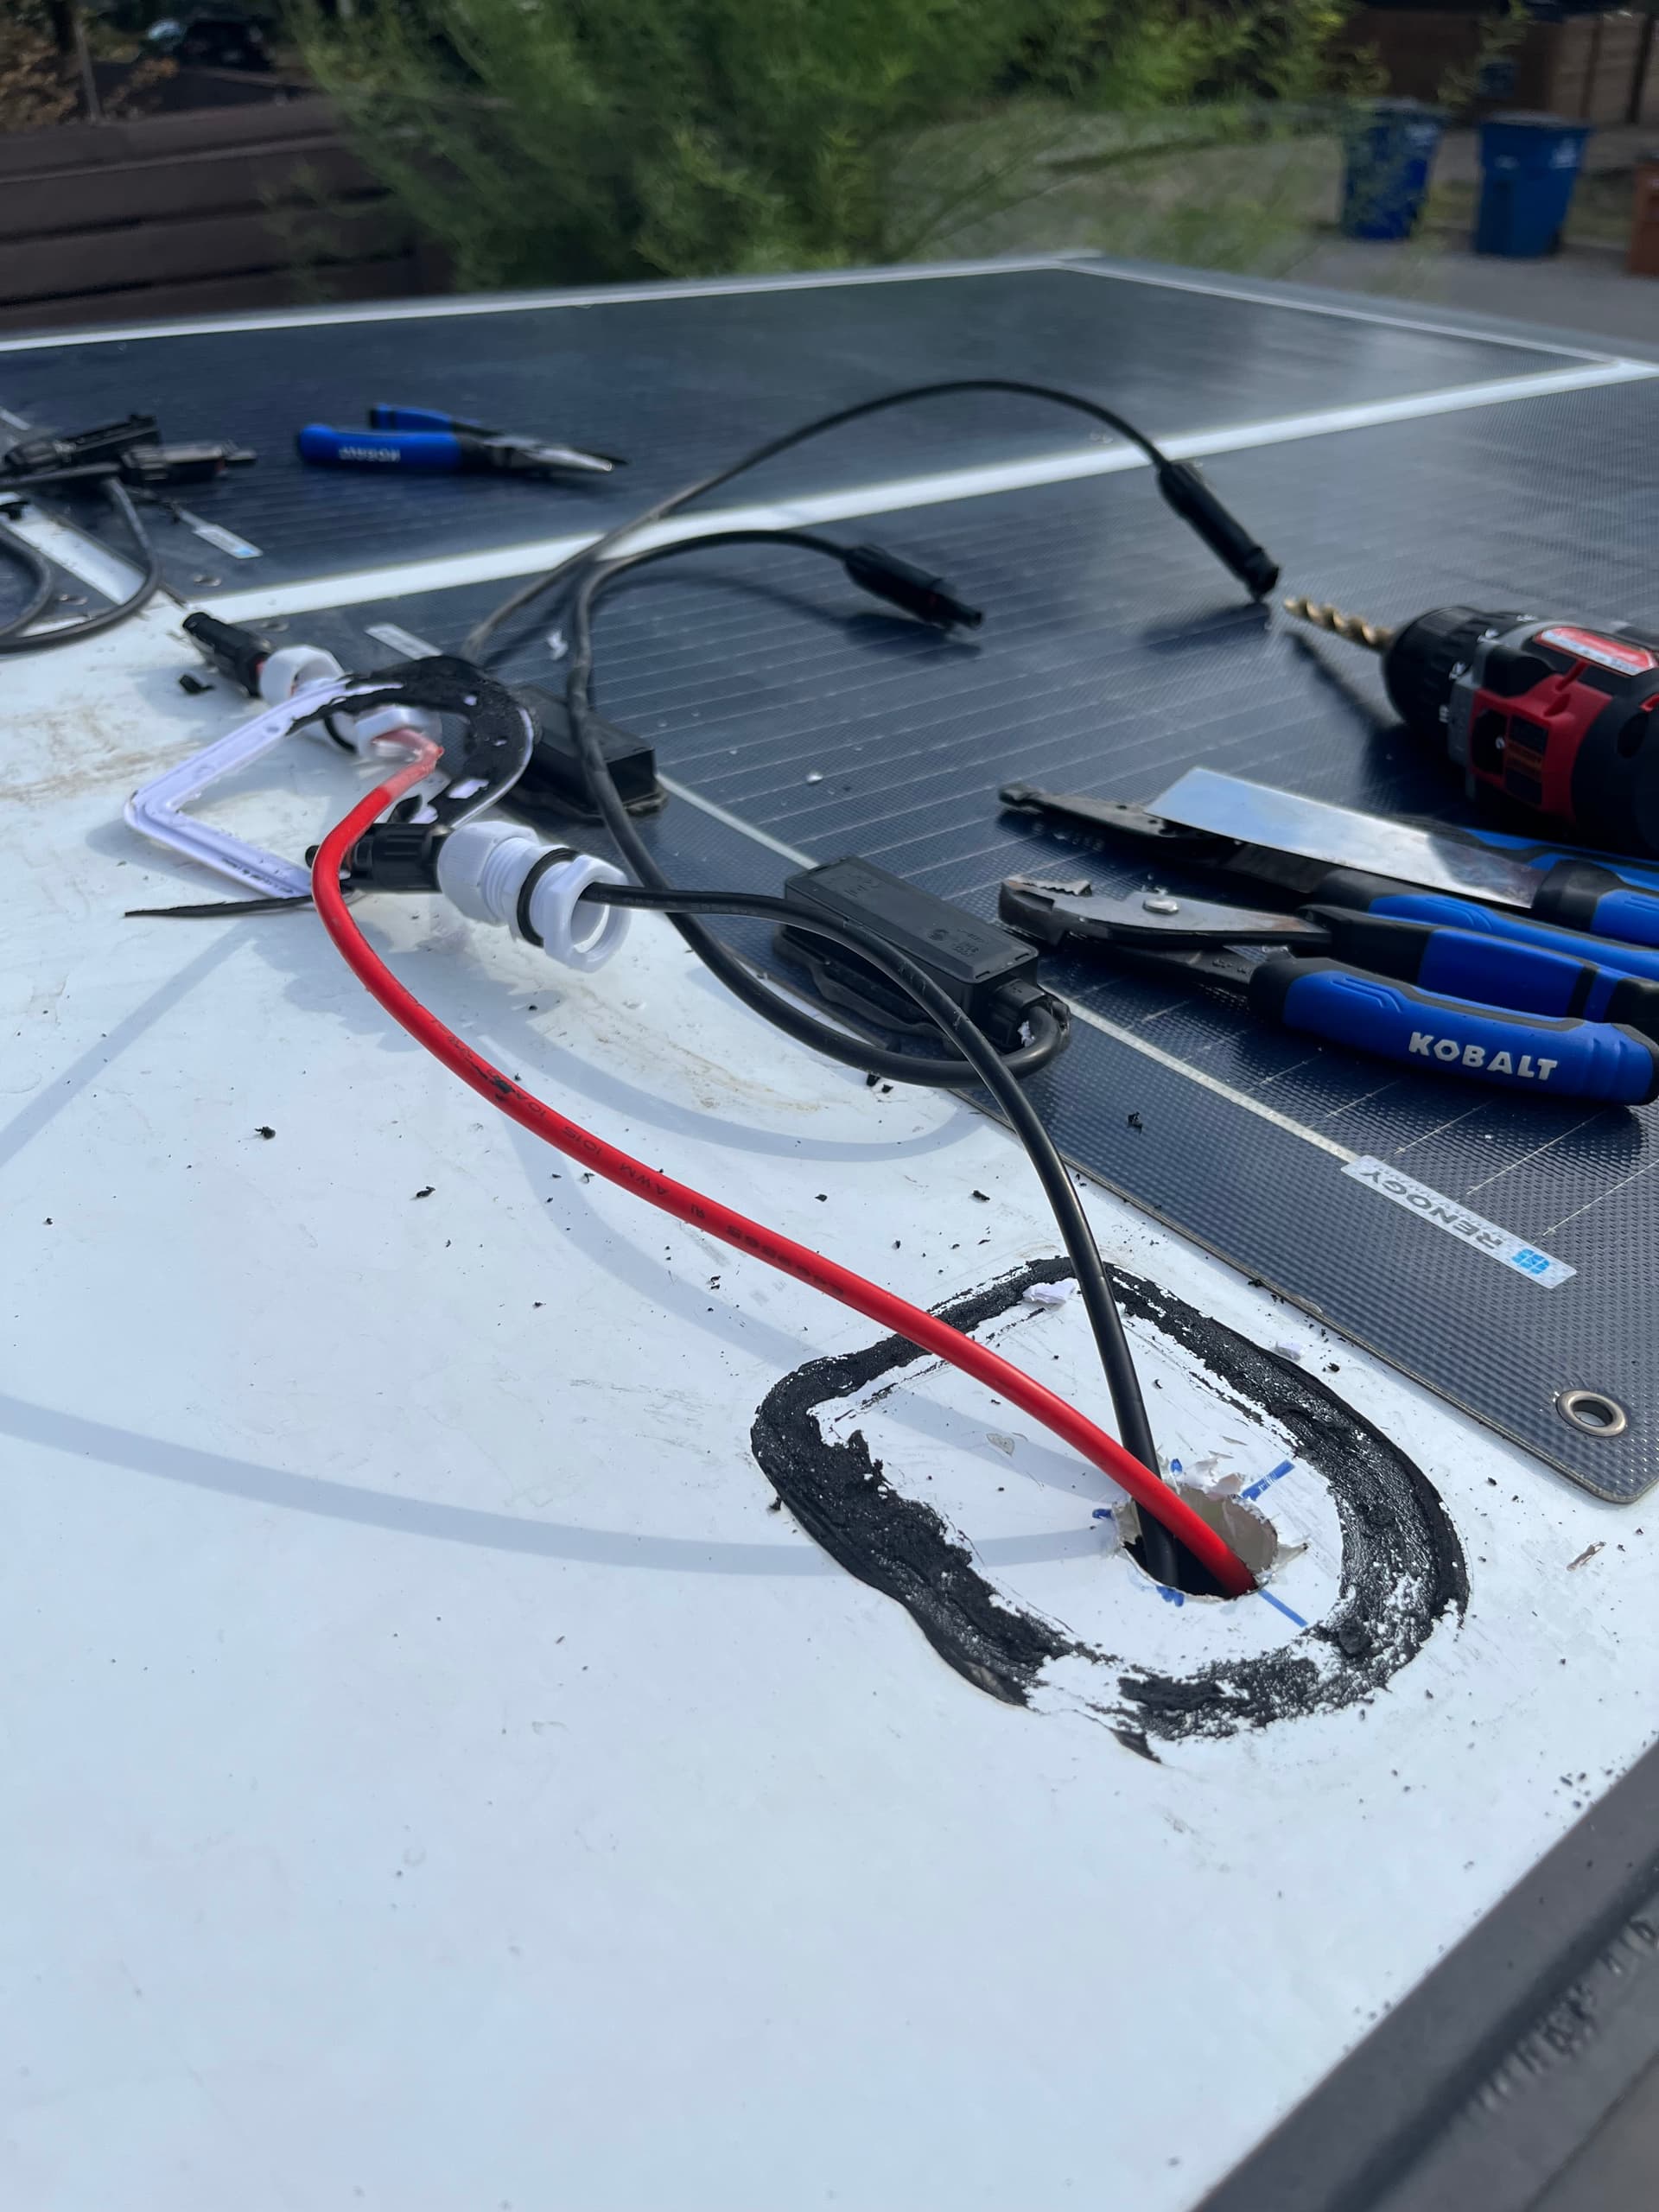
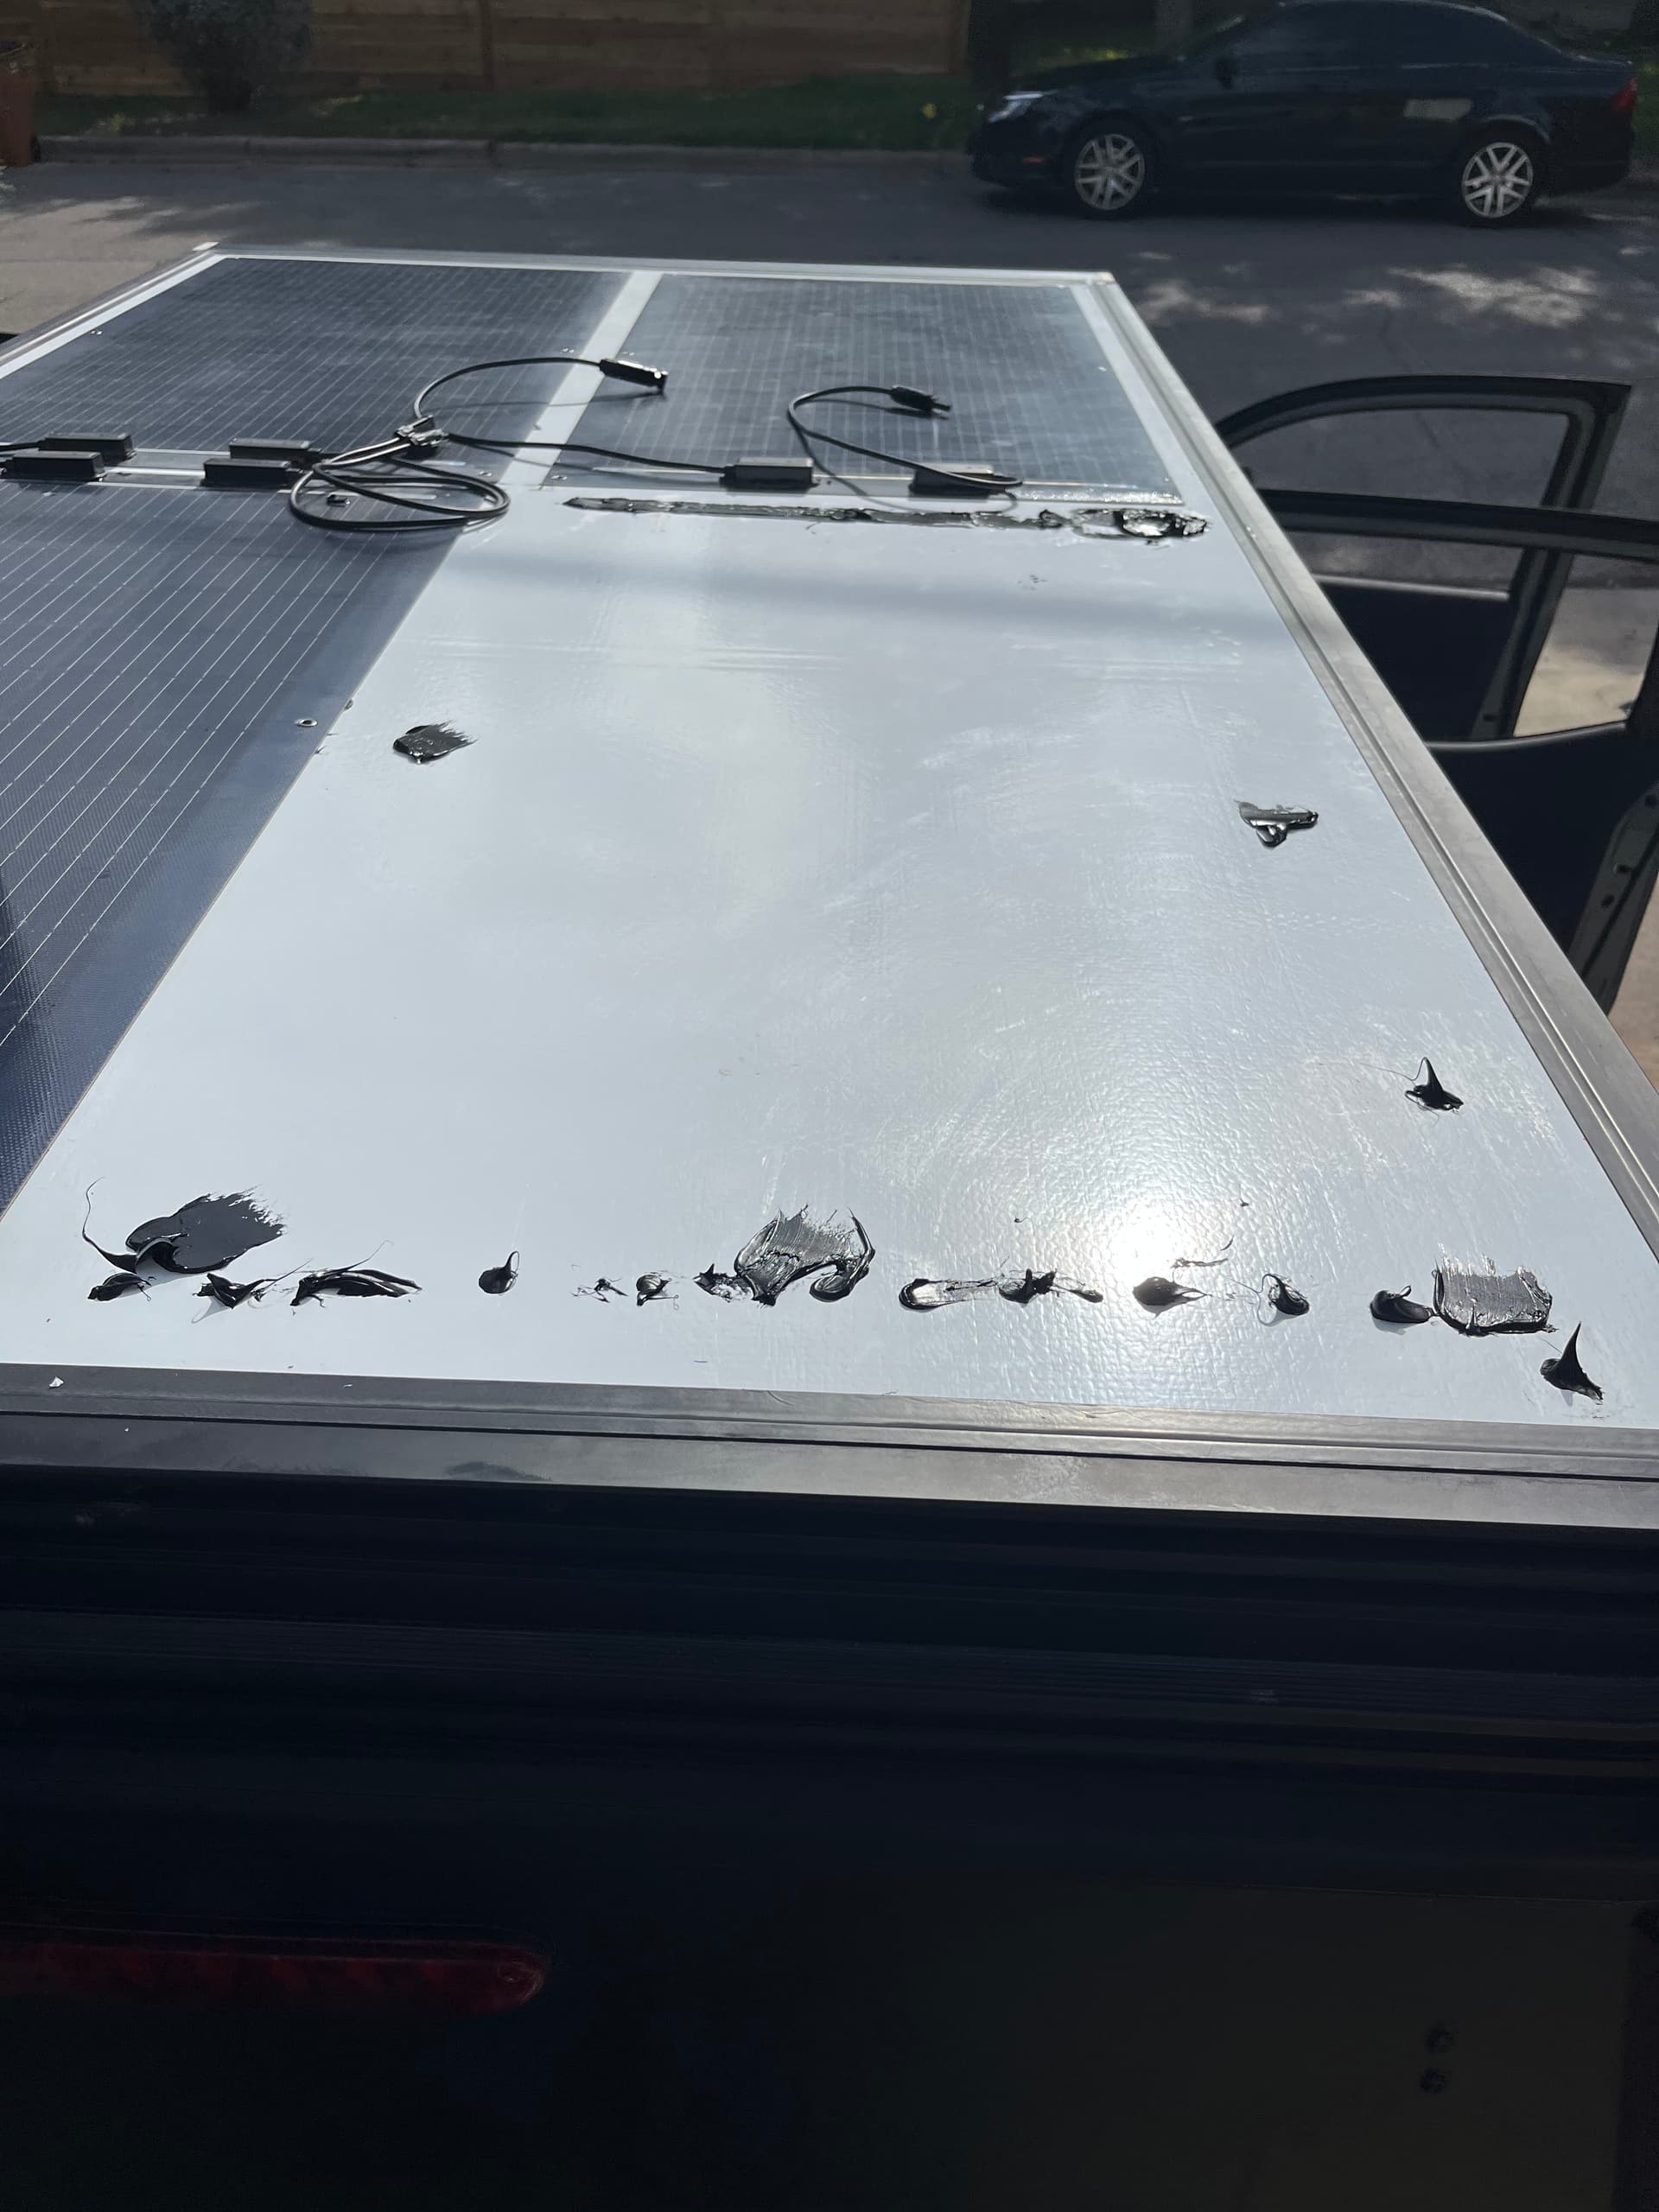
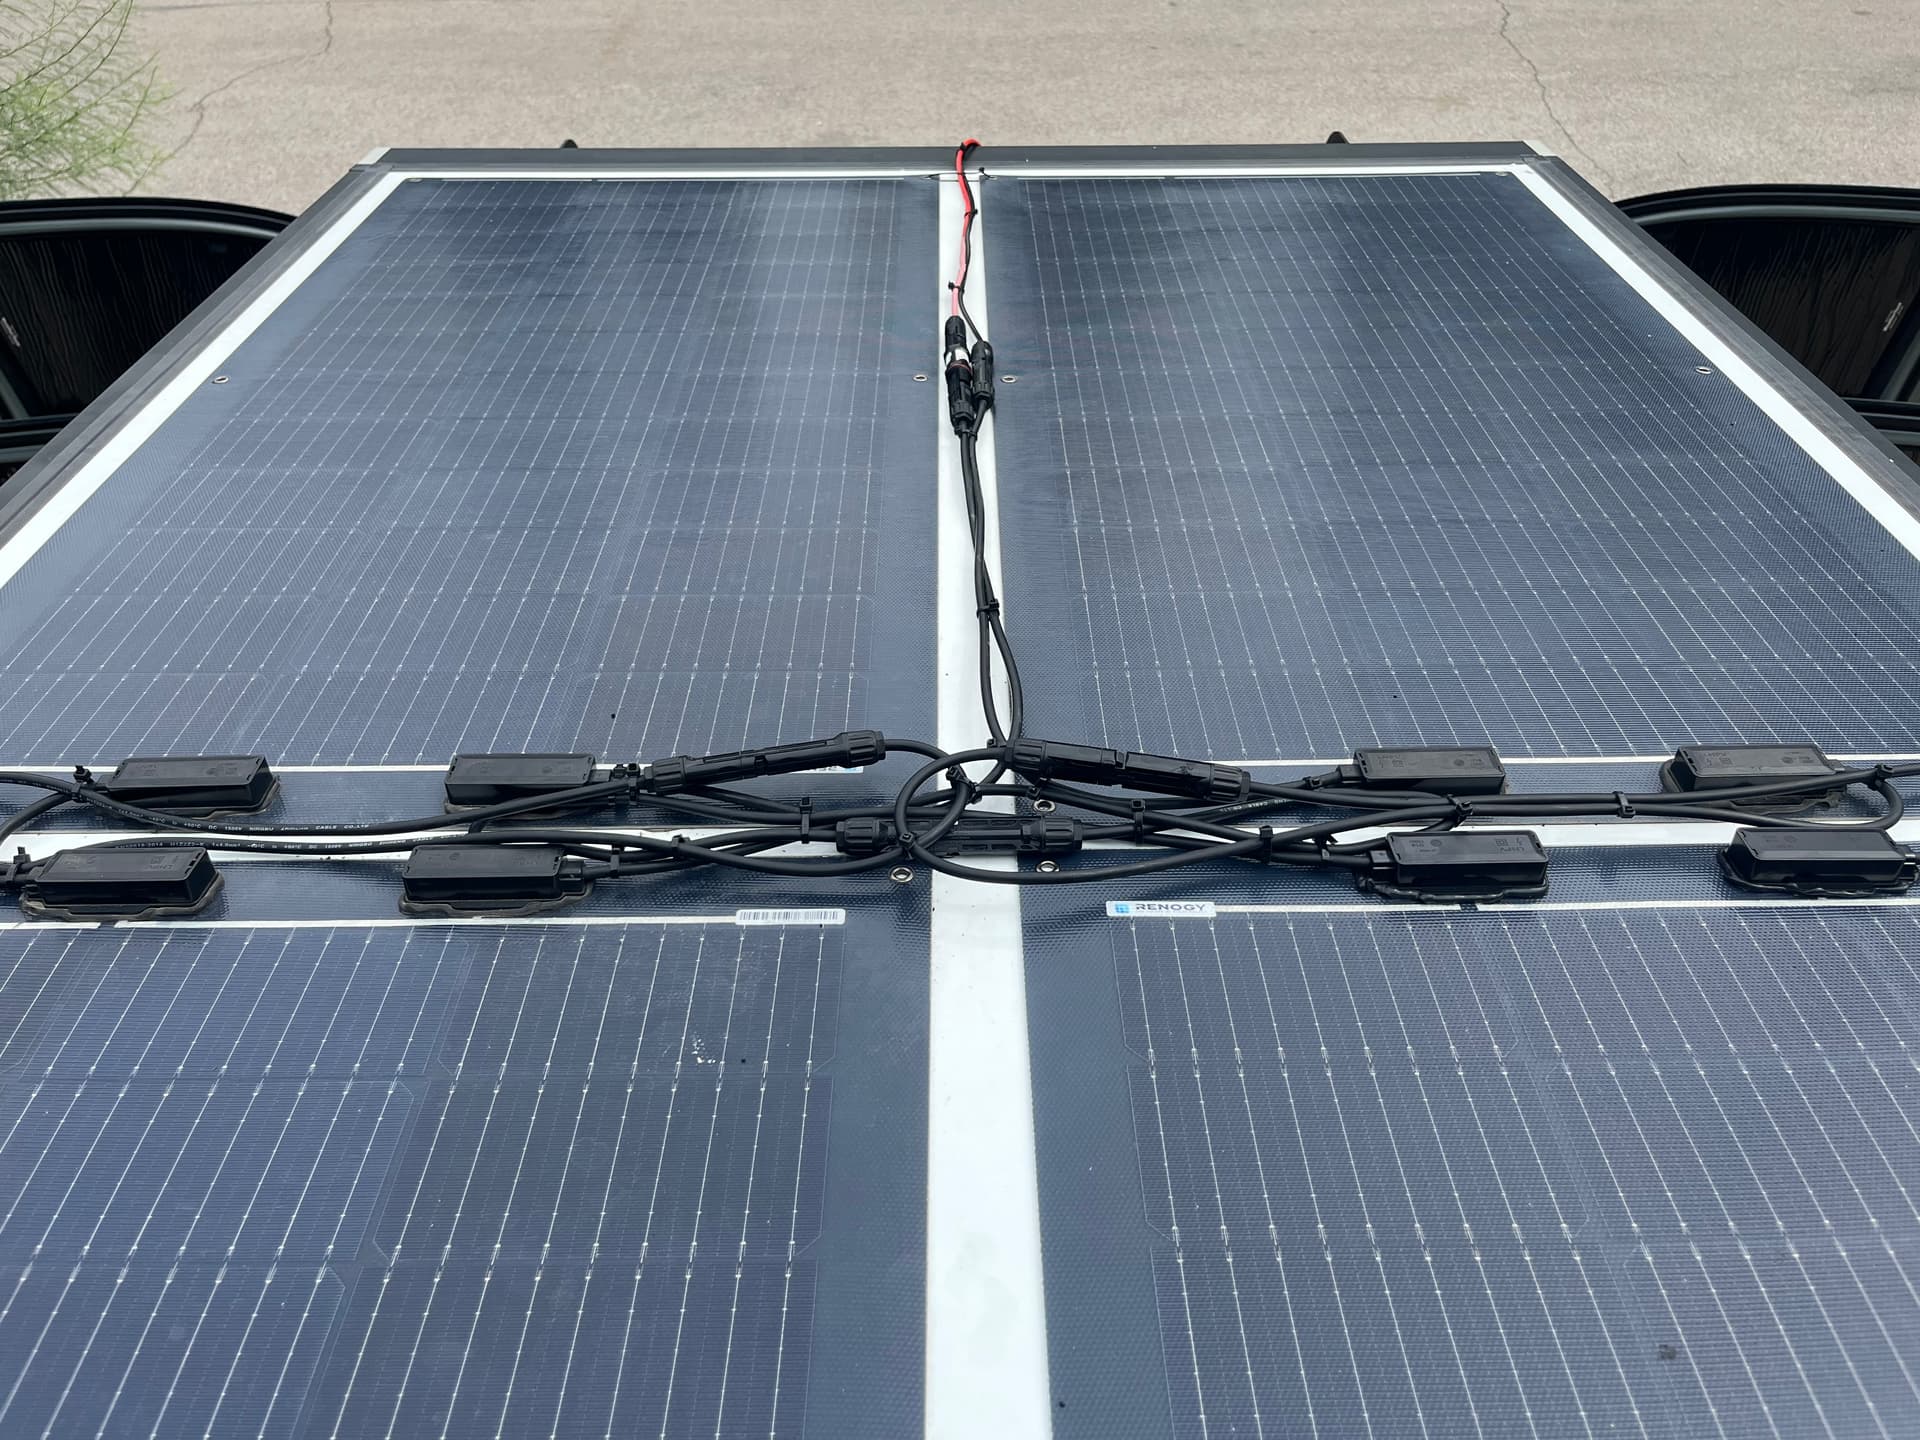
Solar upgrade
I installed one more solar panel on the roof. I had to remove a gland that was already brittle from a few months in the sun. Cheap amazon sh!t. I applied more Sikaflex 252 and made sure to put a liberal amount around the hole from the gland and my starlink mount to seal them up. Panels are wired in series in a ring, and the wires wrap around the front of the camper. I’m thinking there might be a guard for the wires with internal routing in my future, but this is good enough for now. The red wire bugs me though. The wires are routed into the cab through the vent ports on the back of the cab, no holes required.
Fixing RH audio
I removed my Telematics module last week since I don’t use any features that it provides. I’d rather not have Toyota tracking me. The RH speakers as well as the factory microphone pass through it (black box recorder sort of thing). I pulled the box 2 weeks ago and finally got around to splicing the speaker wires back together. Microphone doesn’t work, but it was a terrible mic to begin with and I have other plans for the entertainment system.

Stop tracking me!
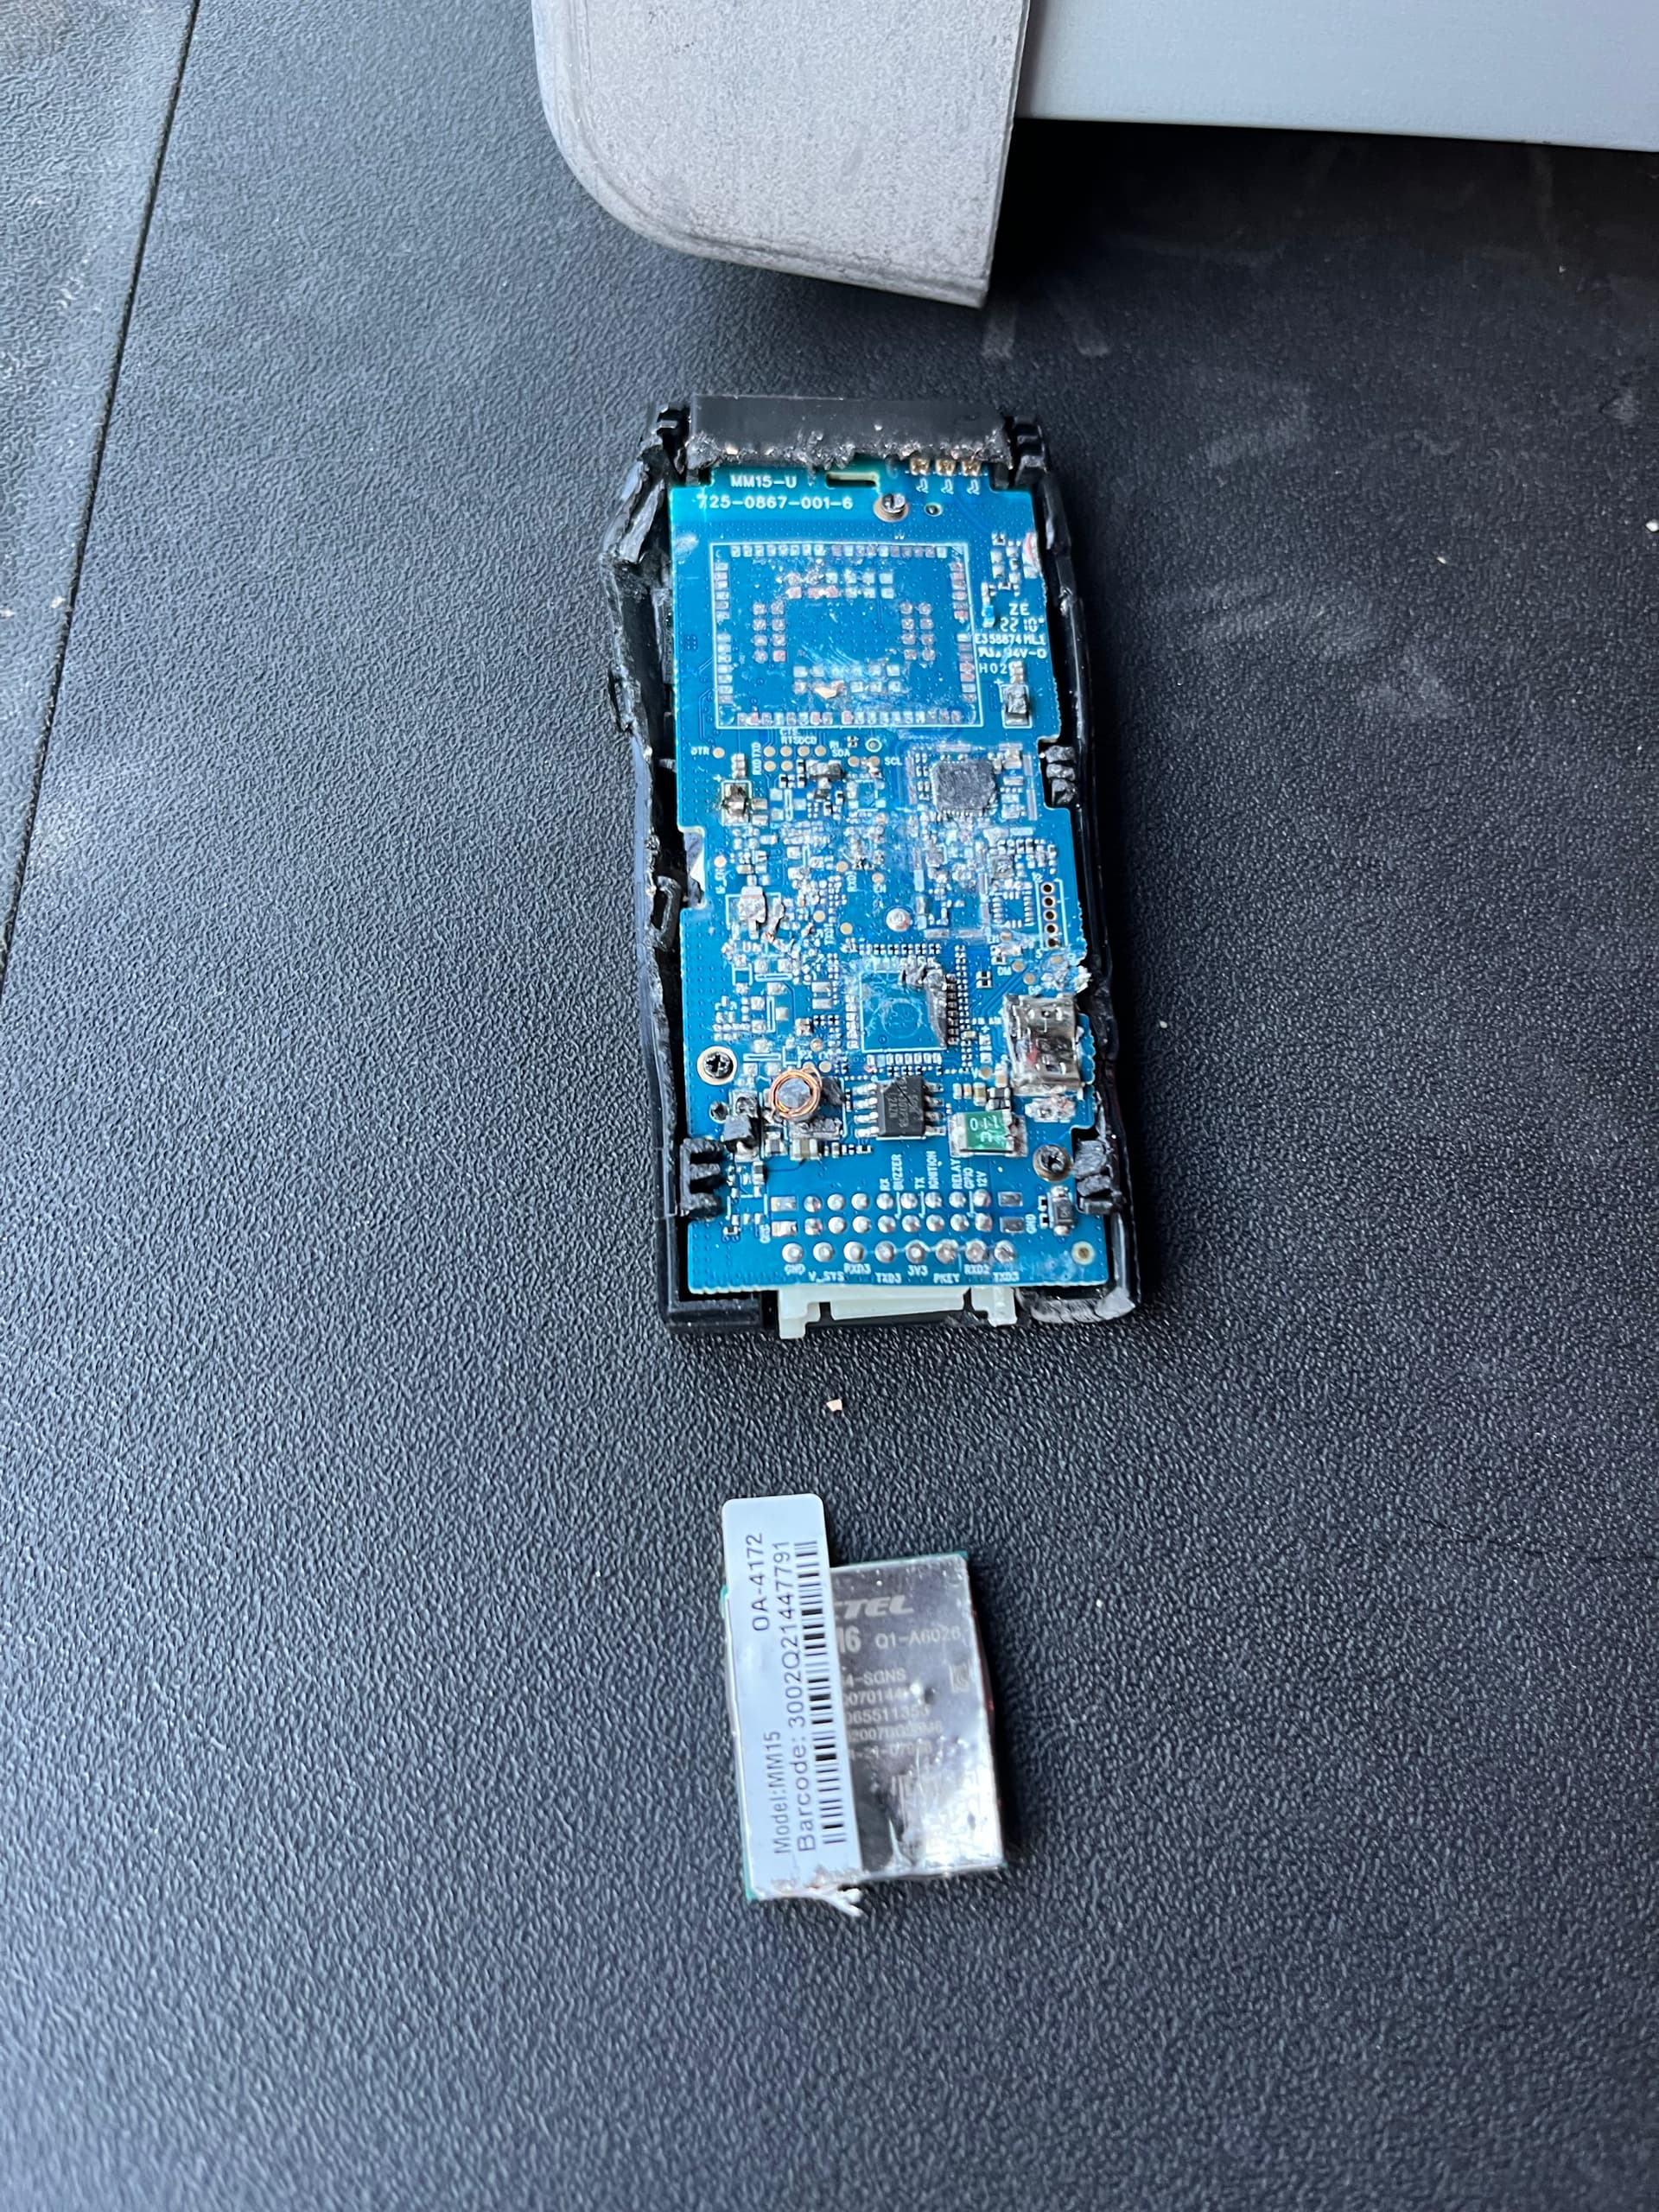
The Telematics unit was a good start but I also needed to remove the tracker that the dealer installed. I’ve got a system of my own that has better privacy than this. I smashed it with a hammer and felt vindicated. Insane how they install these to keep track of their fleet, then turn around and sell it to you at 10x markup saying it will “save” your vehicle. I’m an EE, and to my eyes this board probably costs them $25-50 to manufacture.
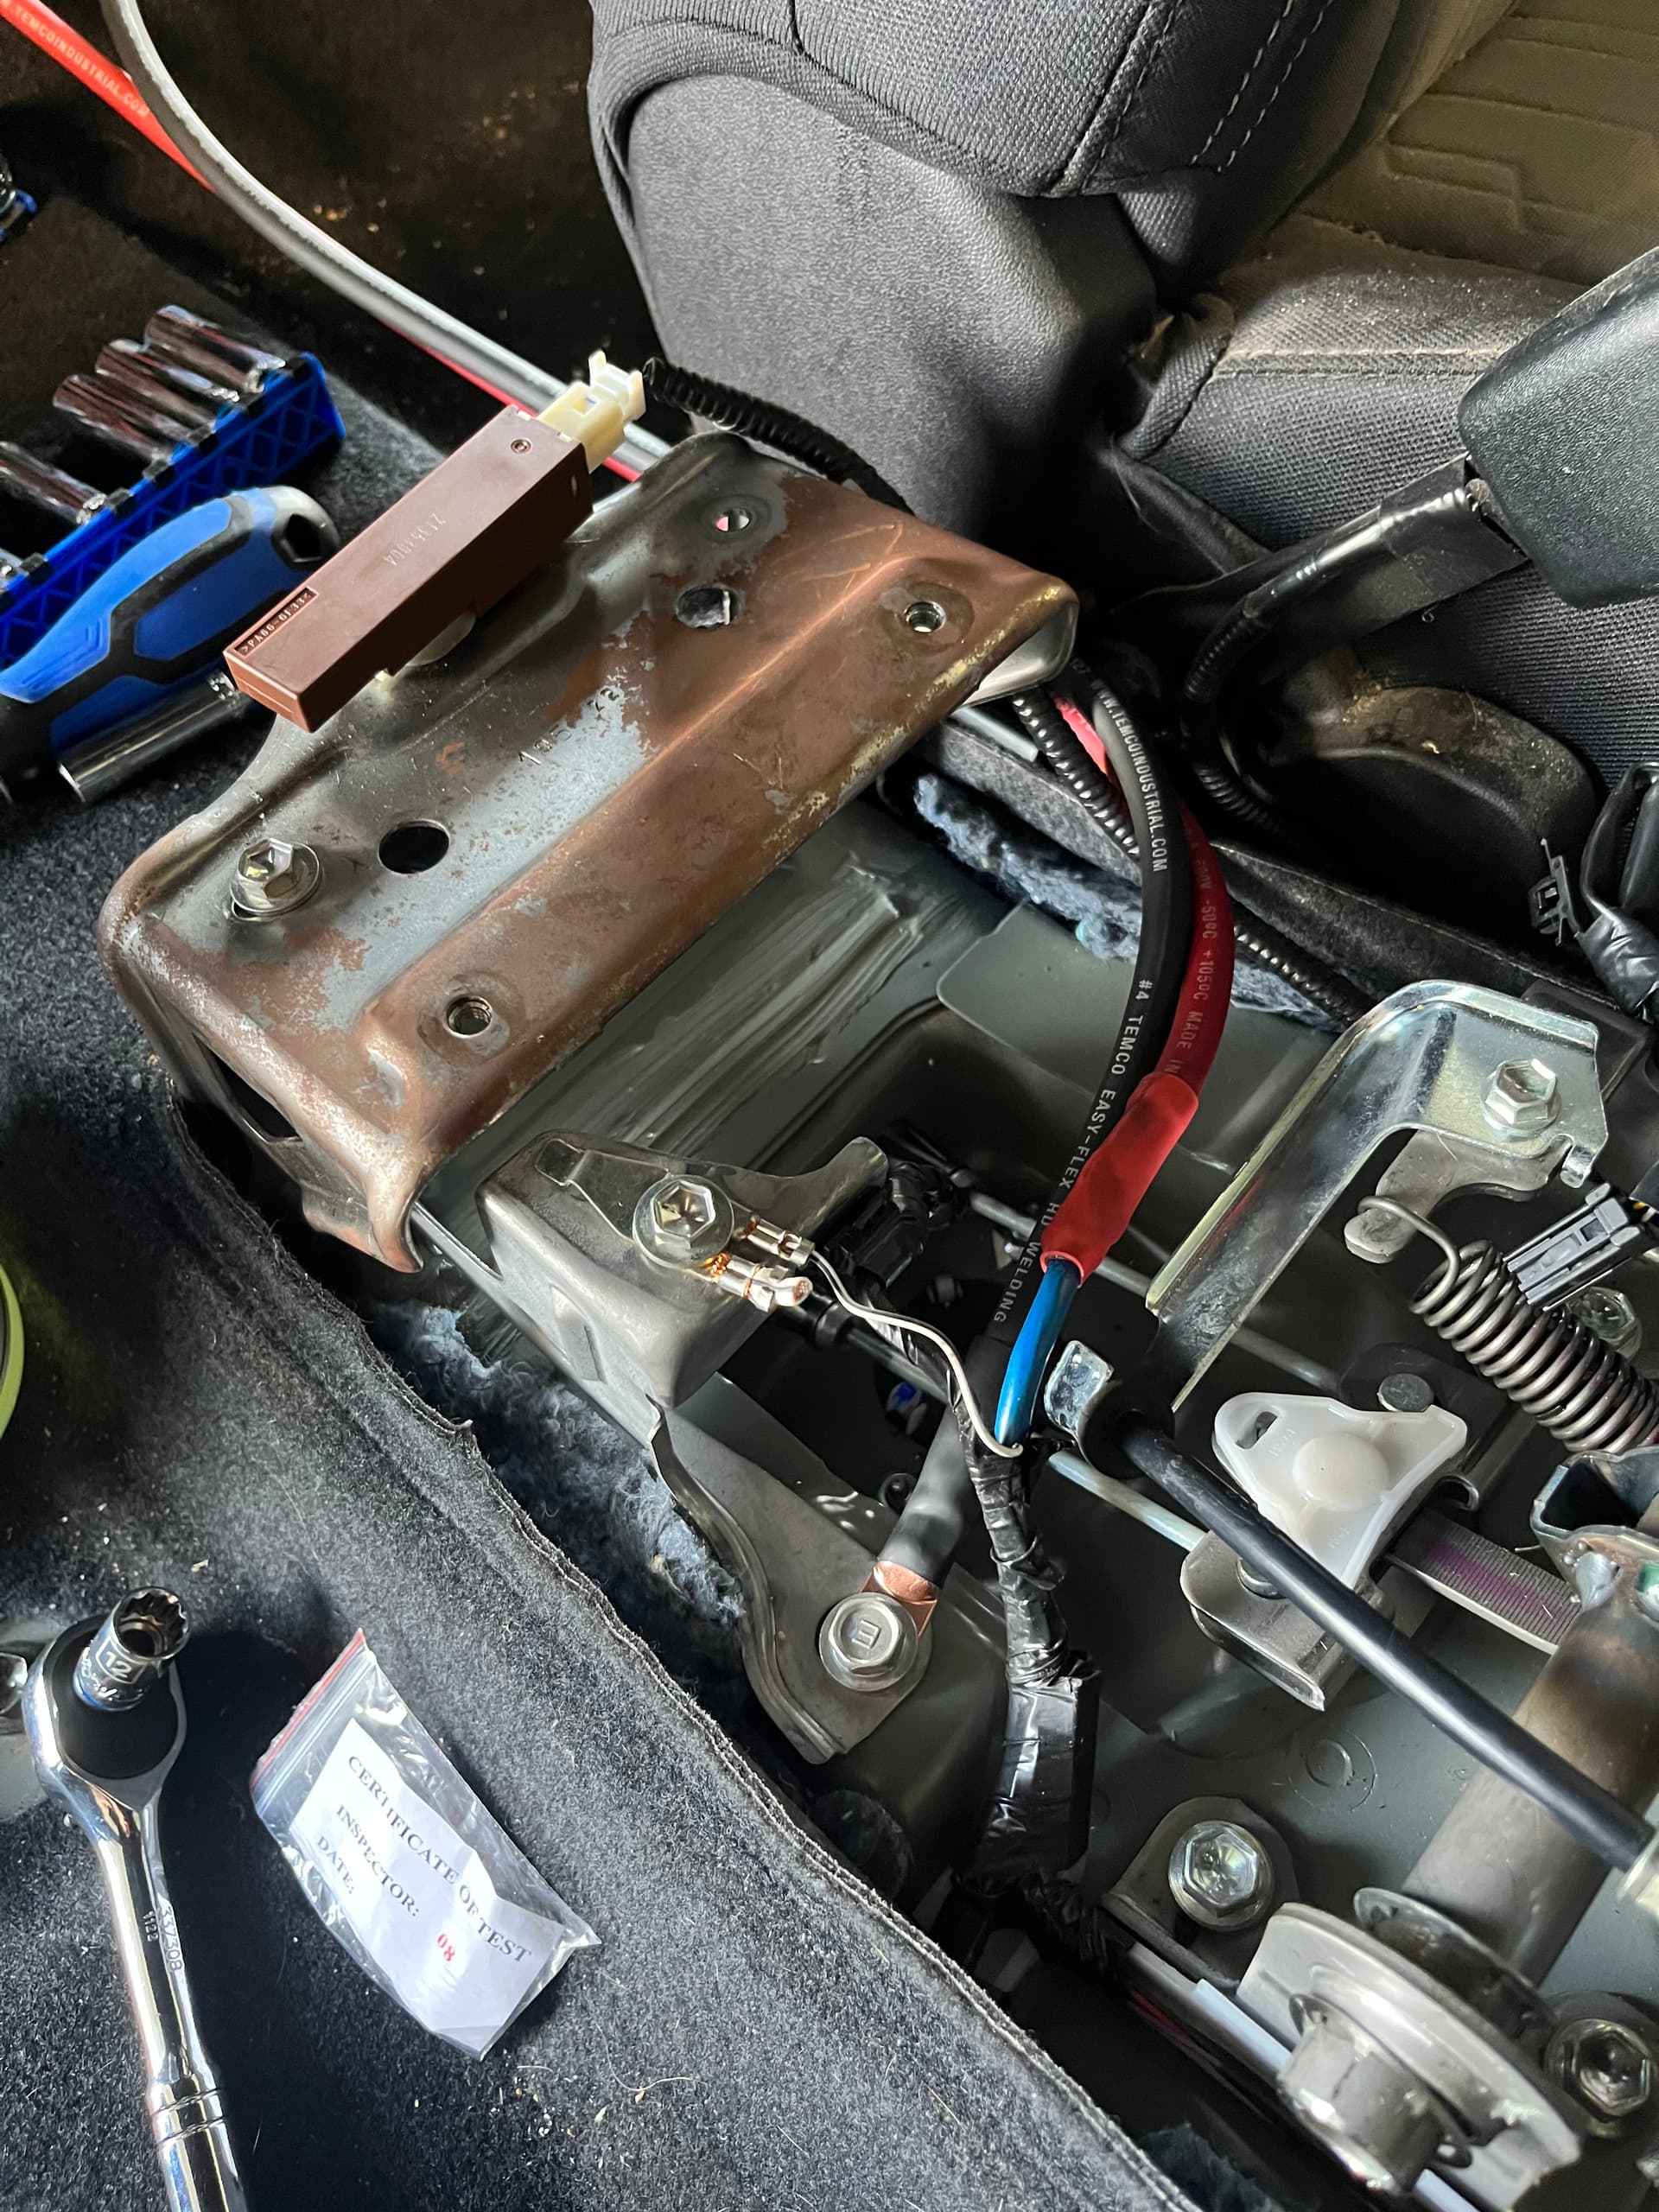
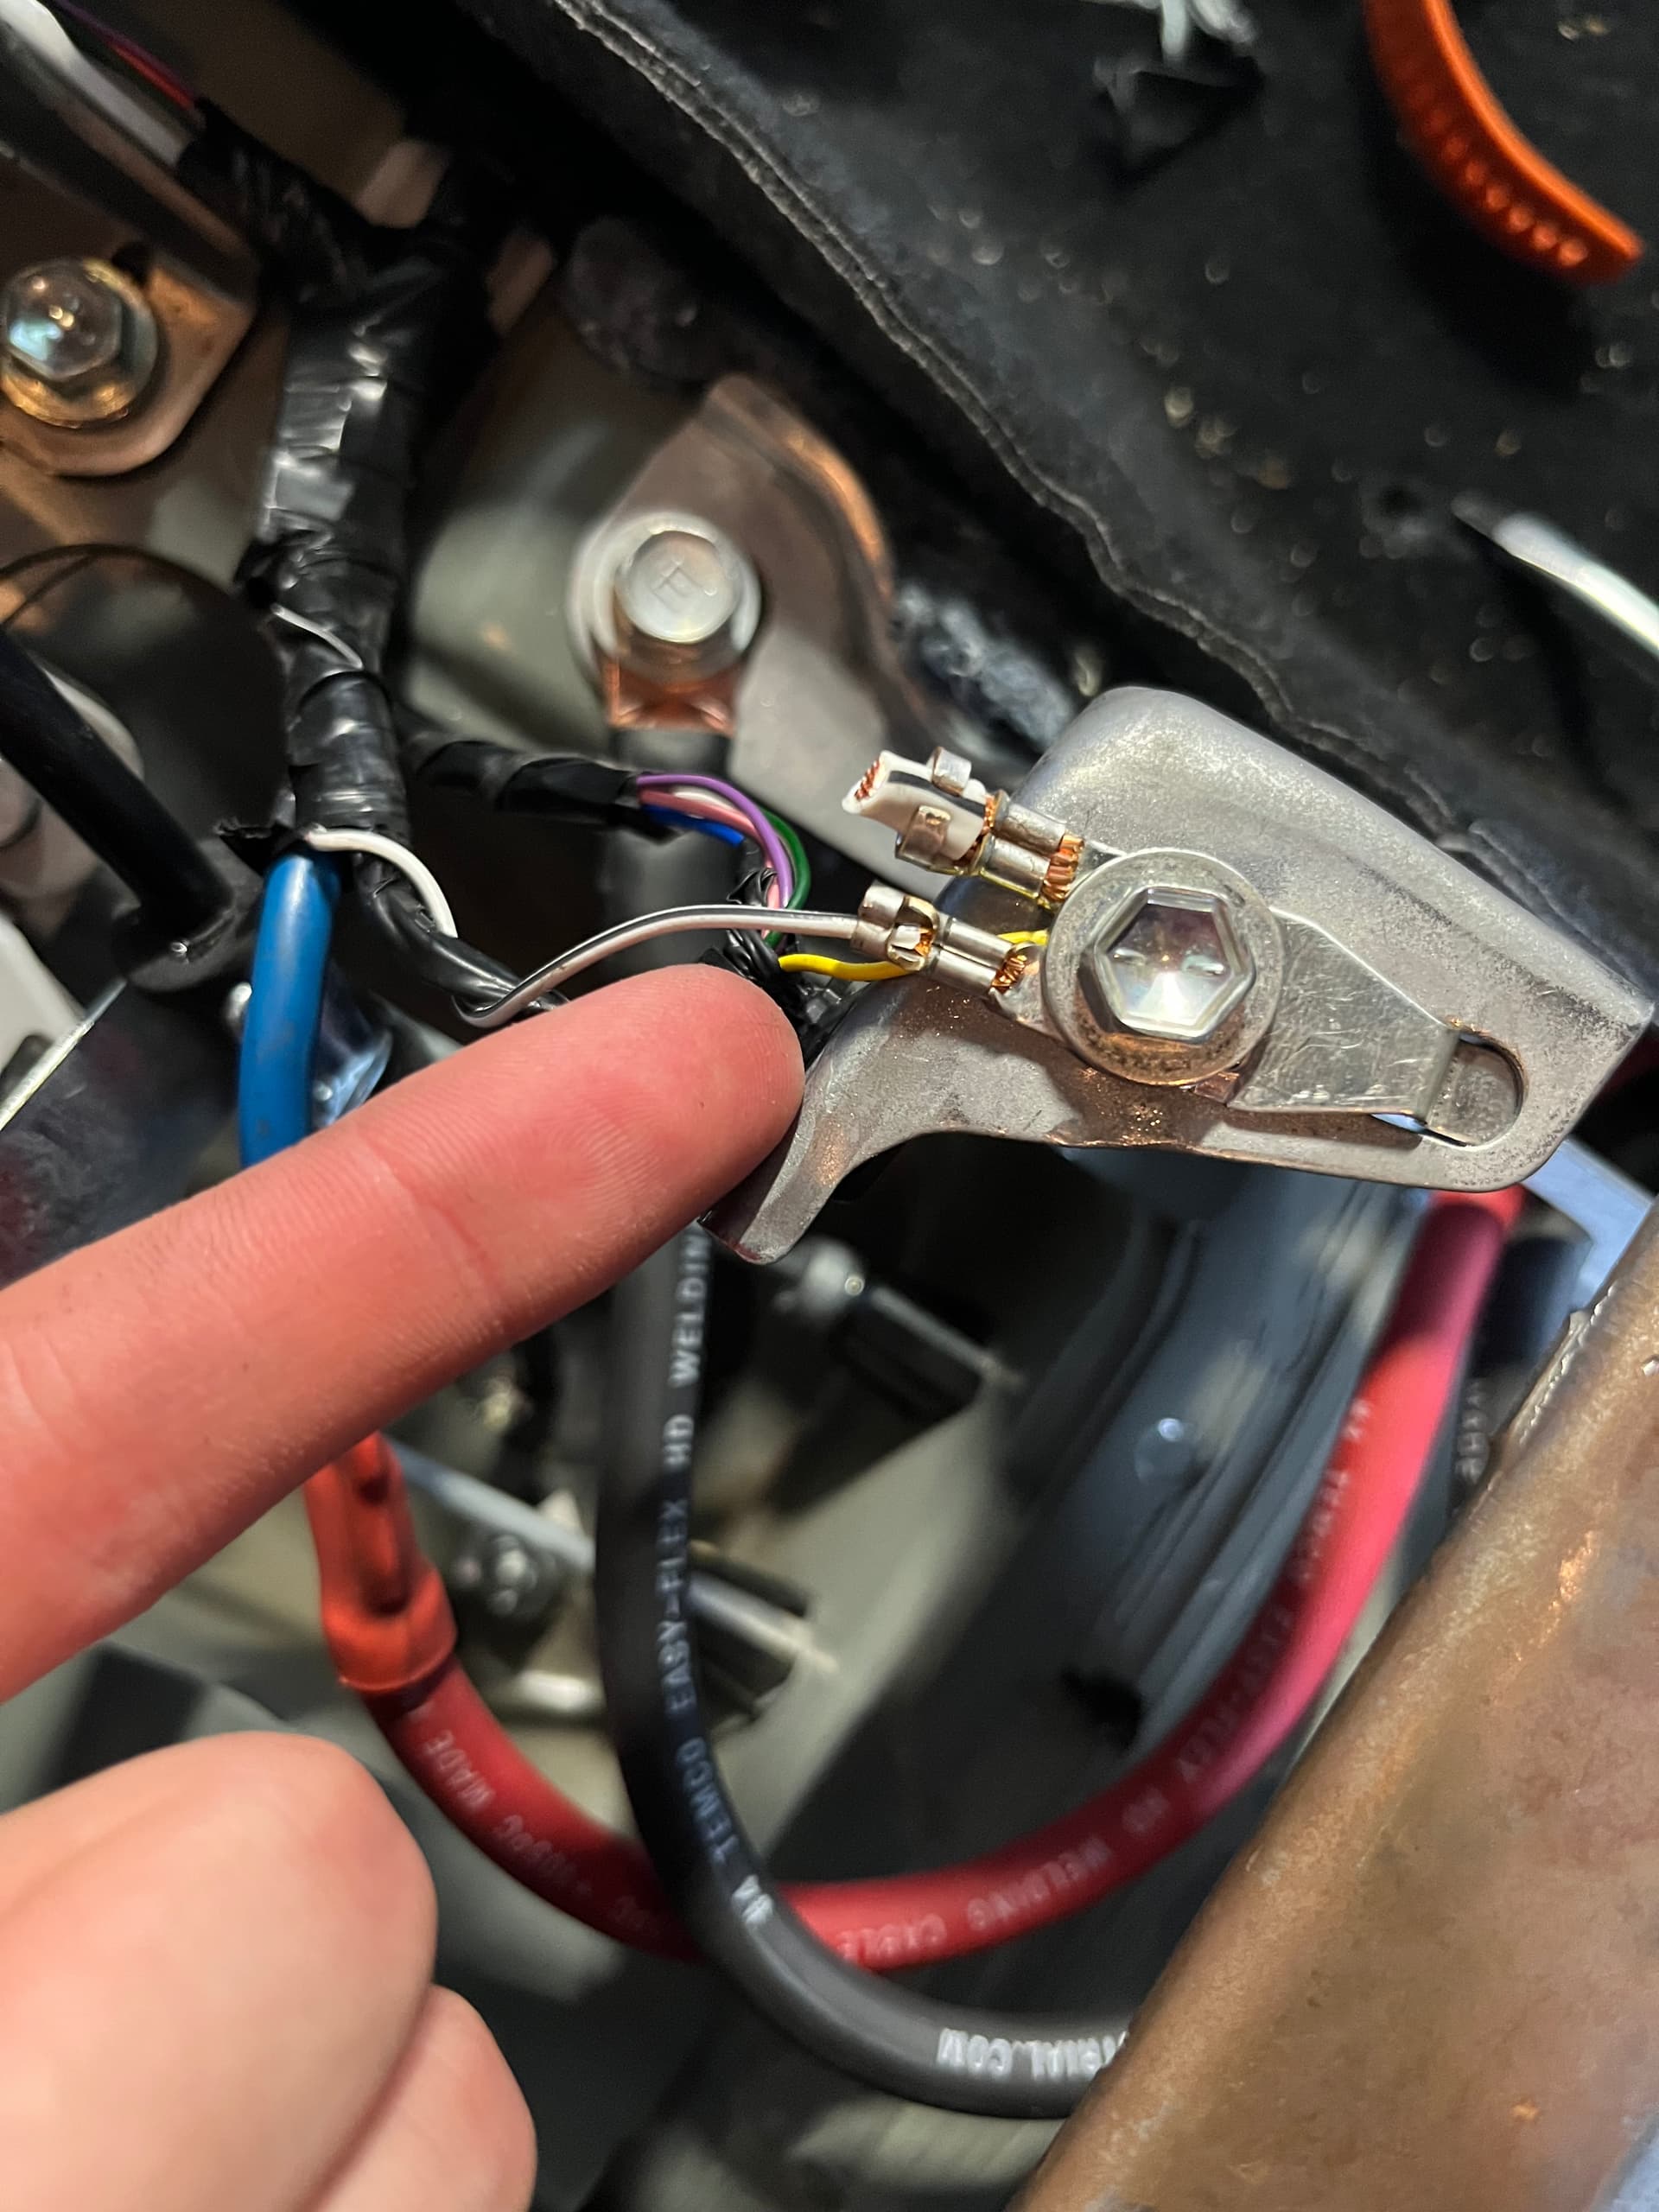
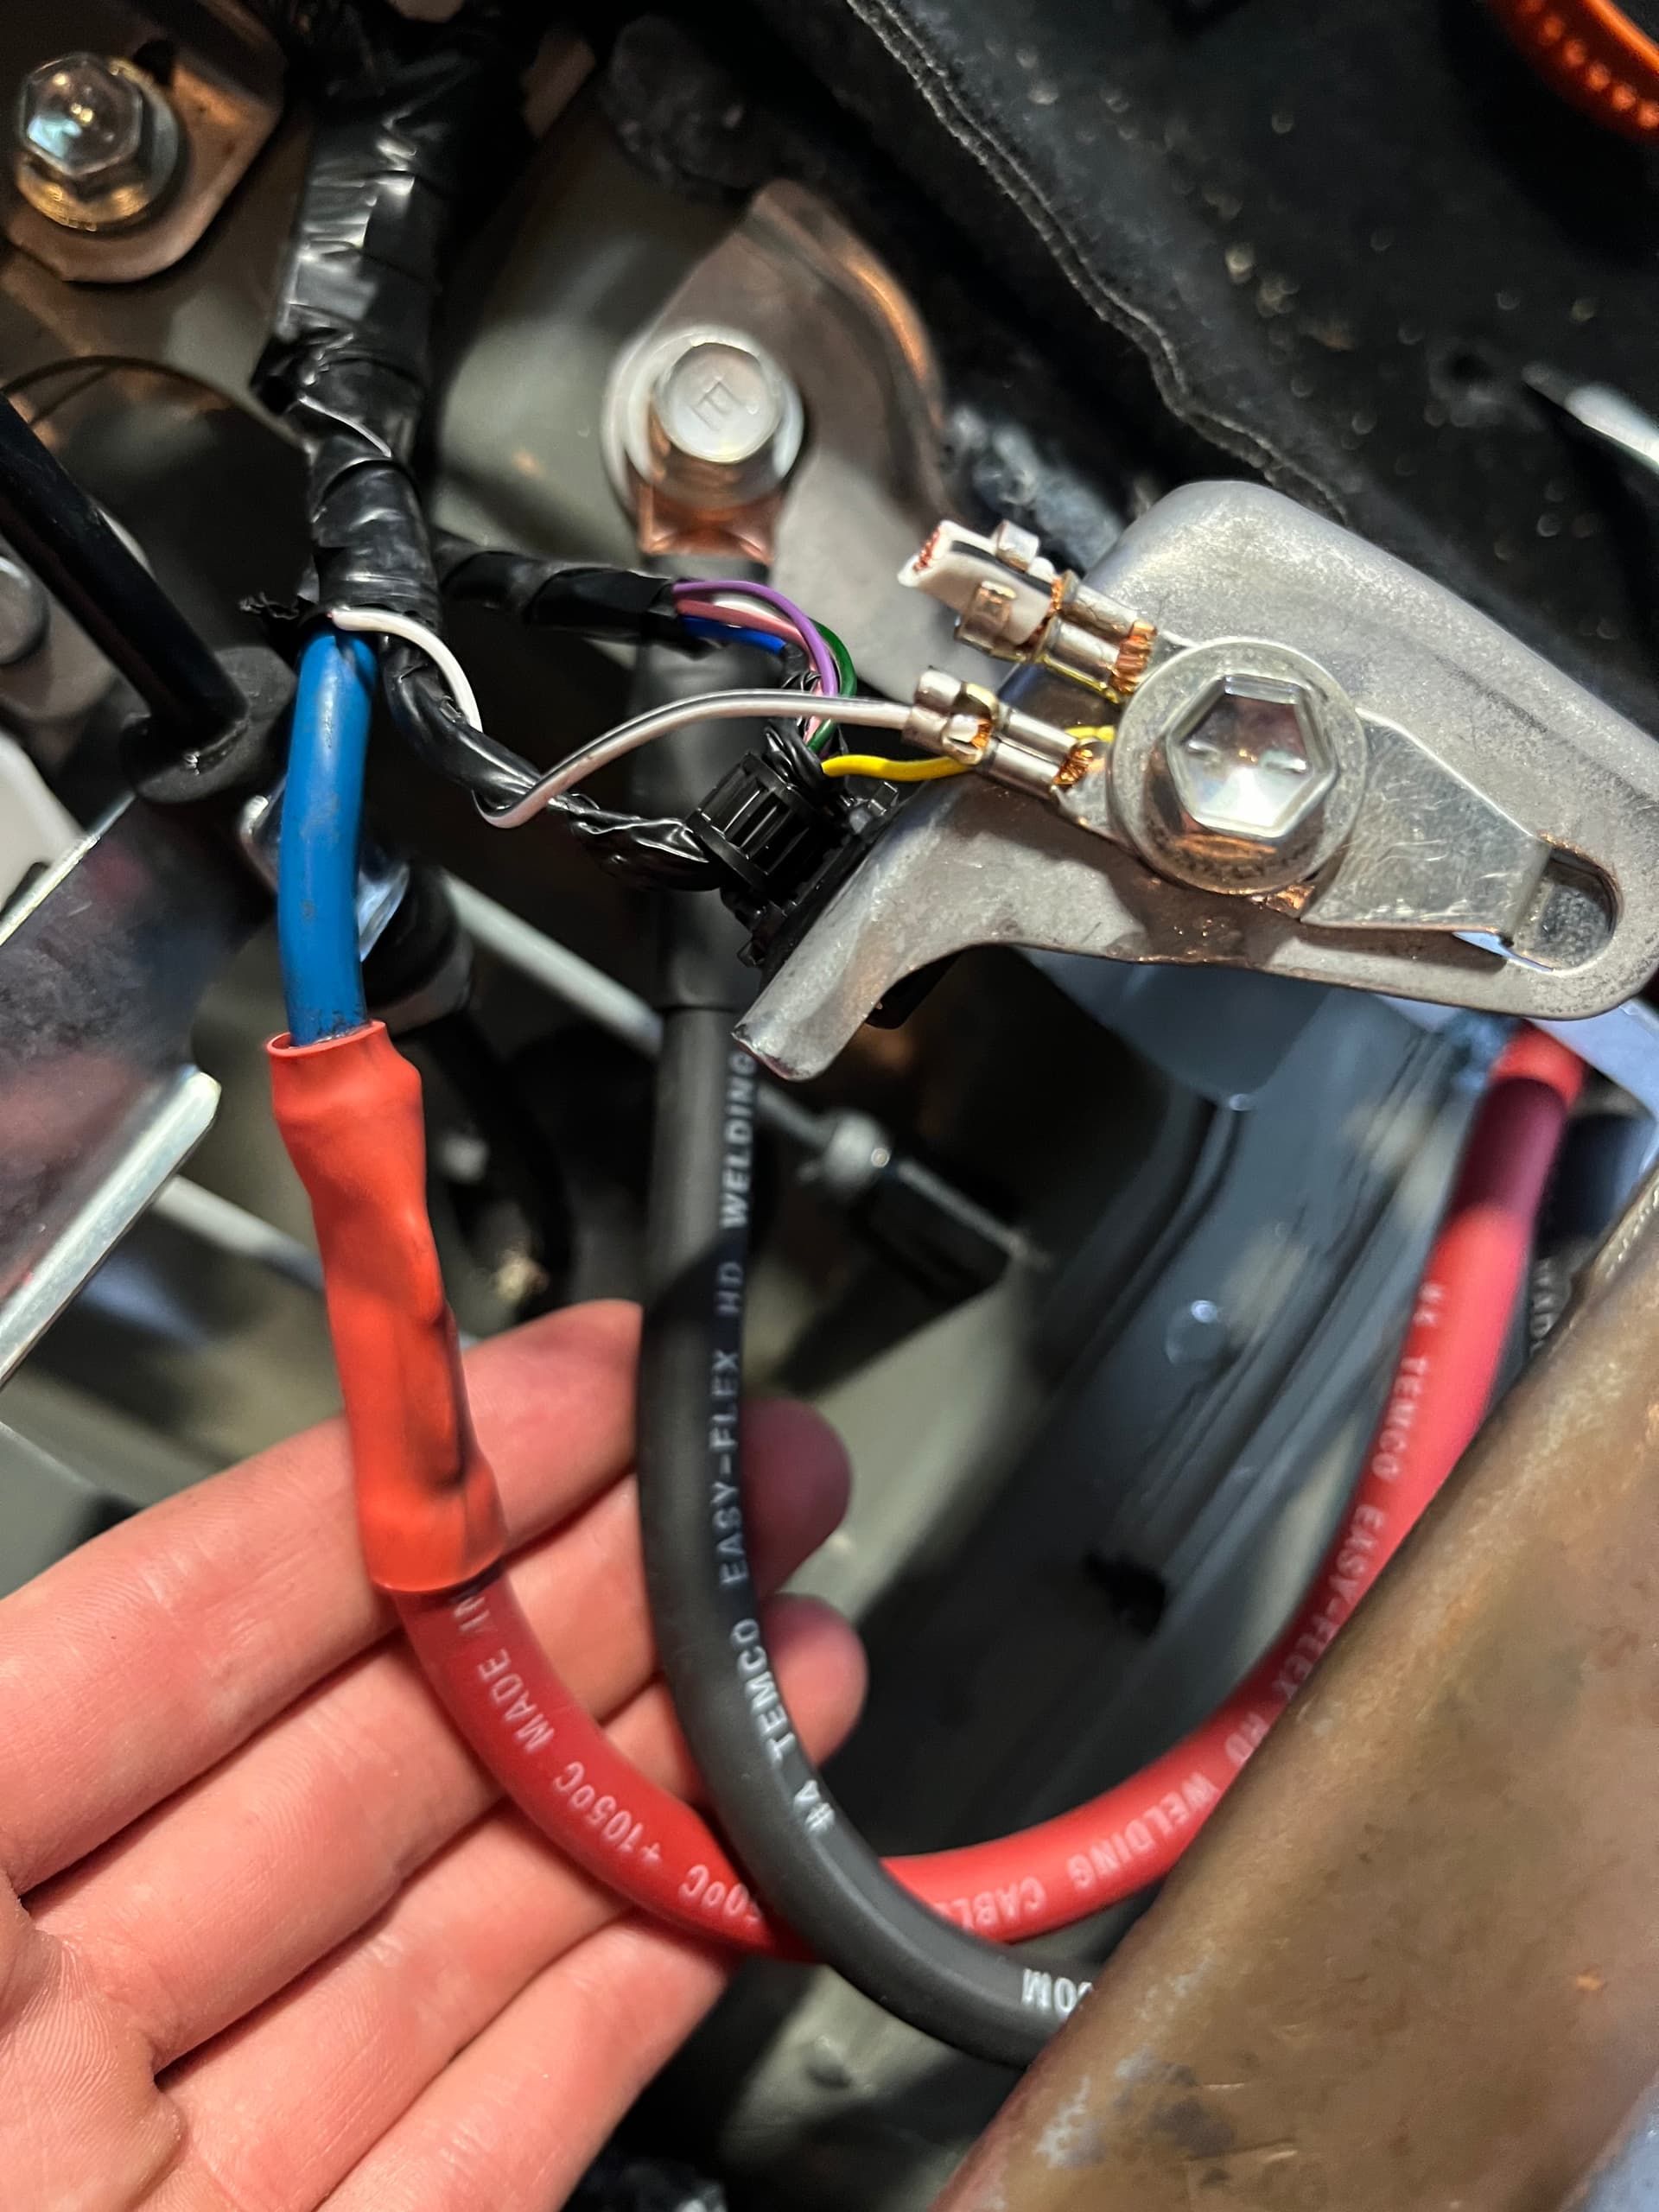
Center console wiring
I pulled the center console and removed the factory inverter (which I hacked in MK1 to run off the house battery but wasn’t ever happy with - it’s a whole story). I’m going to use the 80A fused circuit to charge my house battery from the alternator, and use my own inverter. I already pulled the 120V outlet in the baed since the heater will go through that hole.
The thick blue wire is 12V coming from the starter/alternator. To turn on the relay that powers the blue line, you have to ground the yellow wire coming out of the same harness. I can’t test this just yet because I was missing the fuse and relay (I wonder who took those out last time we were messing around in the center console? ![]() ) but I’ll have replacements tomorrow.
) but I’ll have replacements tomorrow.
Btw, the tacoma service diagrams are all behind a paywall, but $25 gives you 2 days of access. I’ve done it twice, and grabbed all the downloads of the wiring diagrams that I could.

Electrical panel
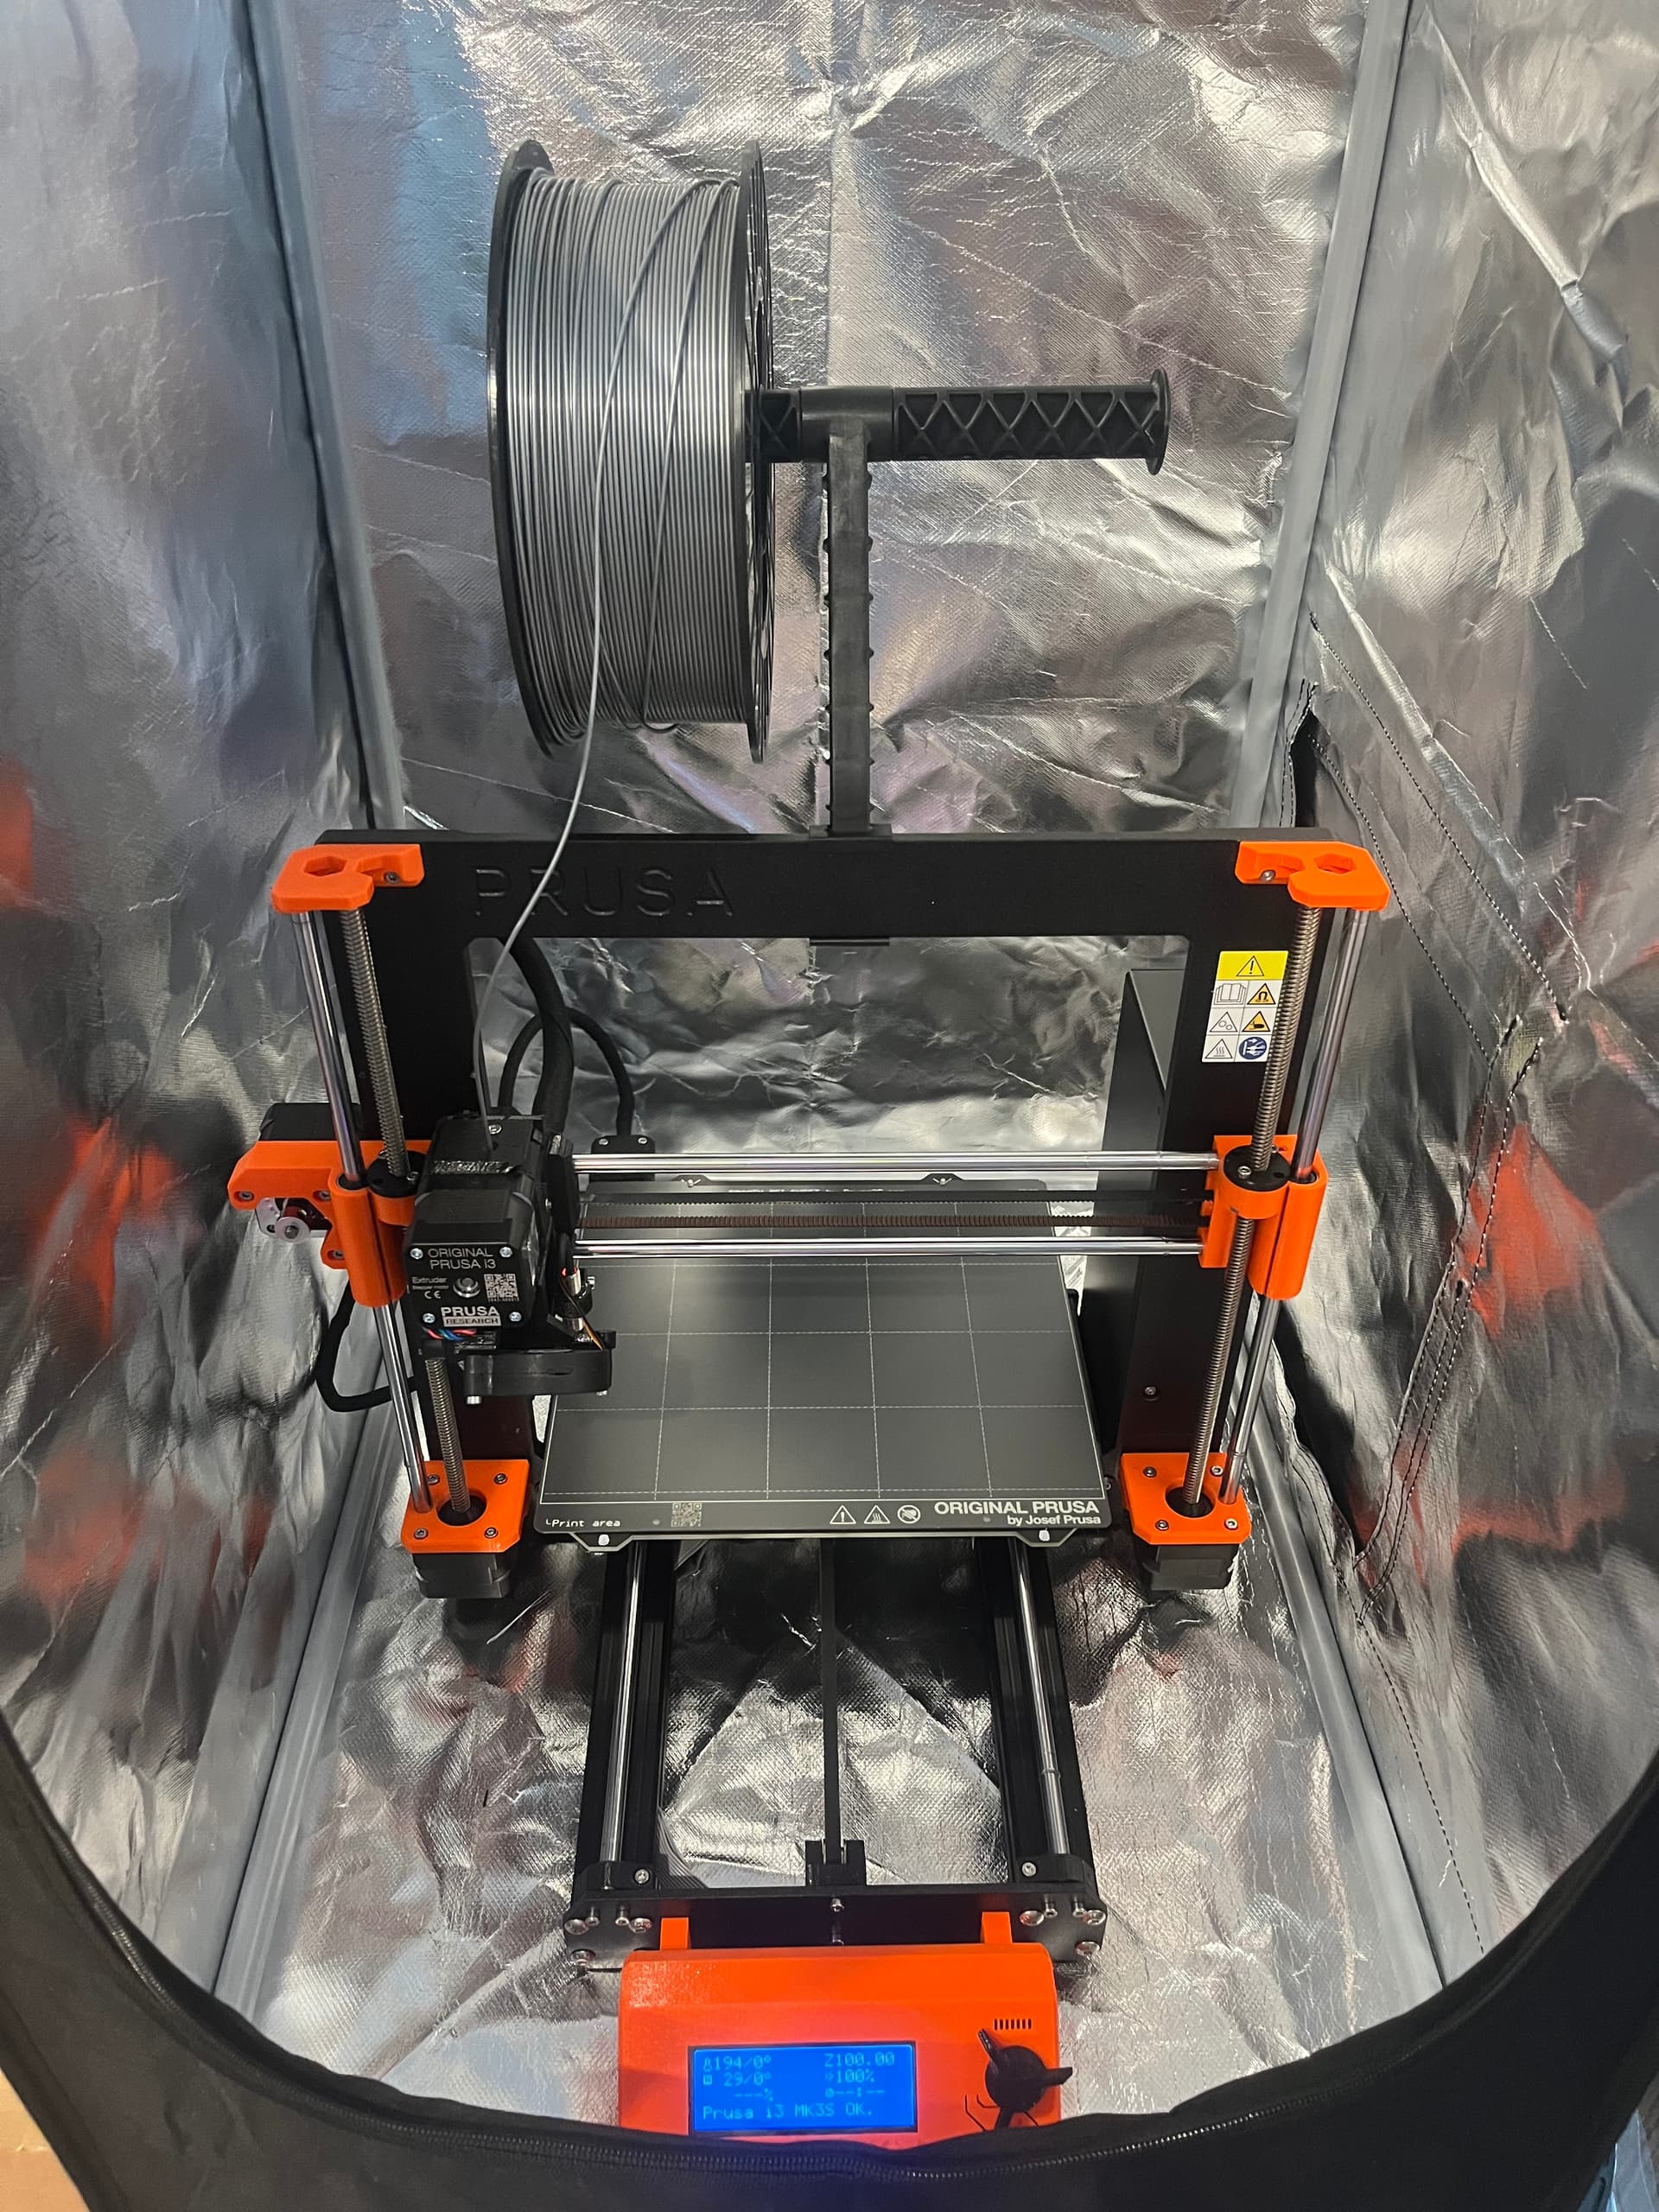
I found a piece of IKEA Skadis pegboard in my apartment that is the exact size I need for the back wall since I plan to put the 40% seats back. Only problem is, I need a 3D printer to make some various blocks to mount it on the back wall. Tuesday should change that, so for today I got all the wiring set up.
Testing solar this morning:
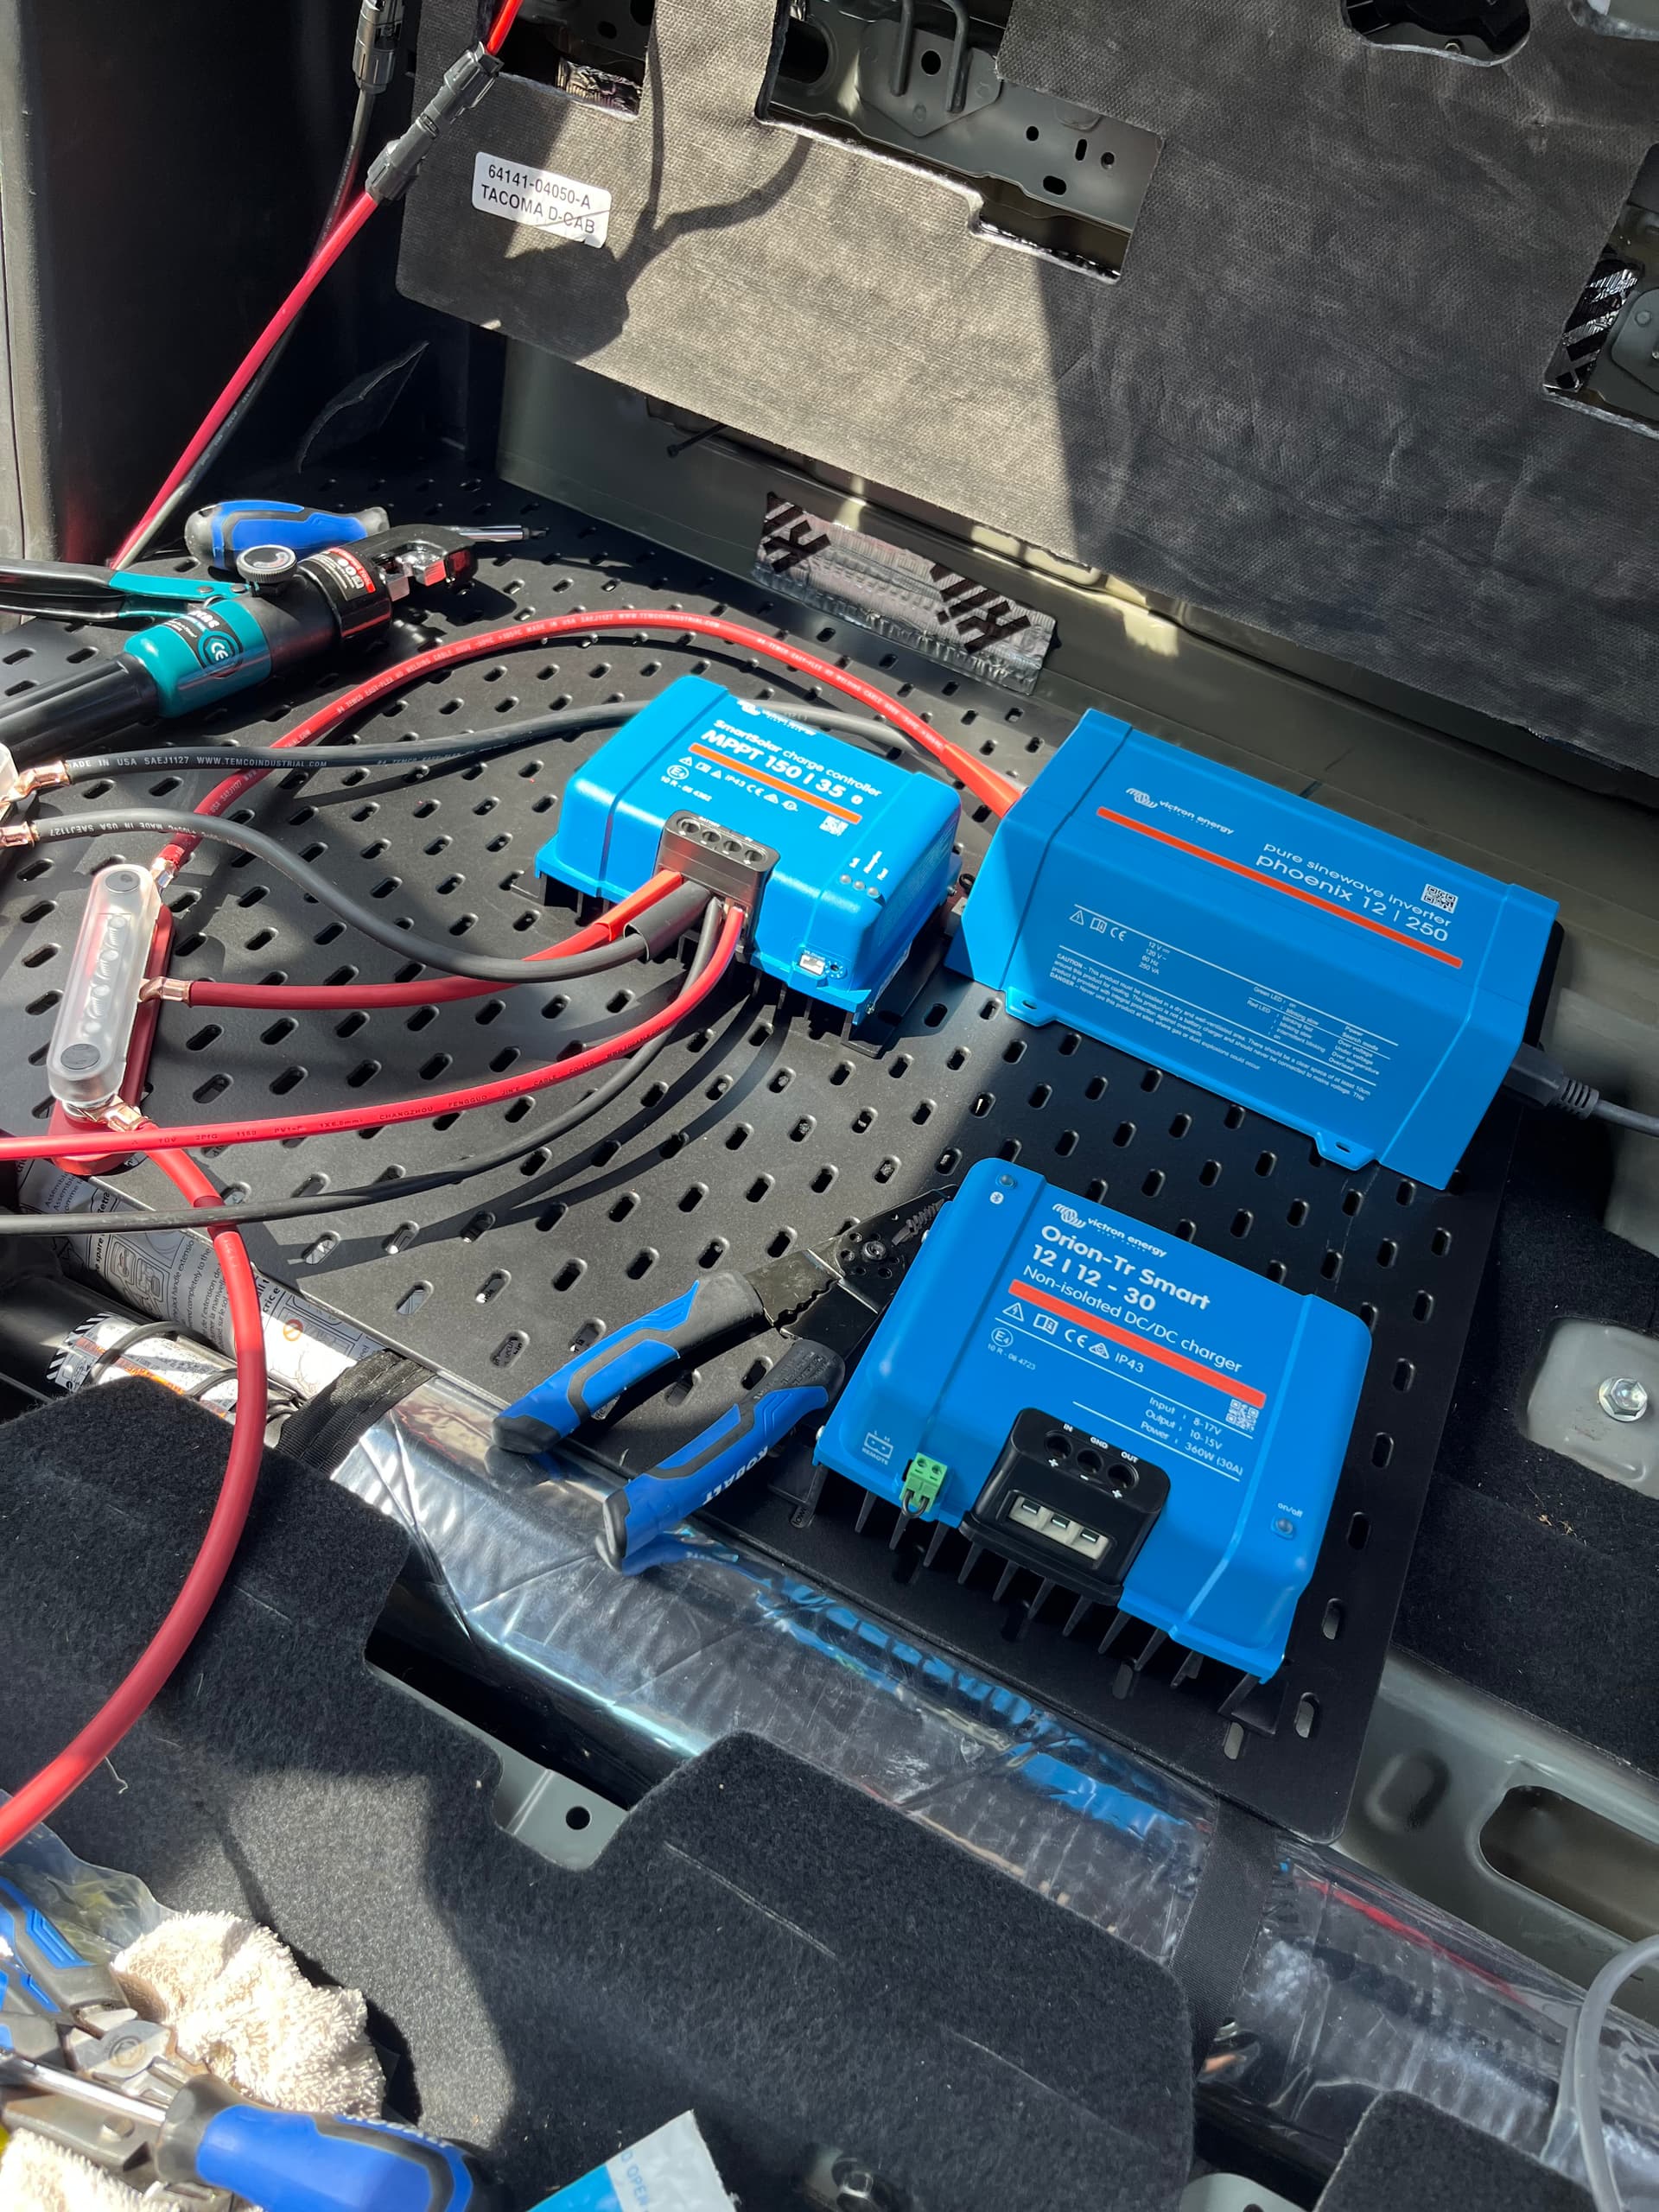

Where I finished this evening - a bit of a rats nest but it’ll be obvious once the pegboard gets mounted vertical.
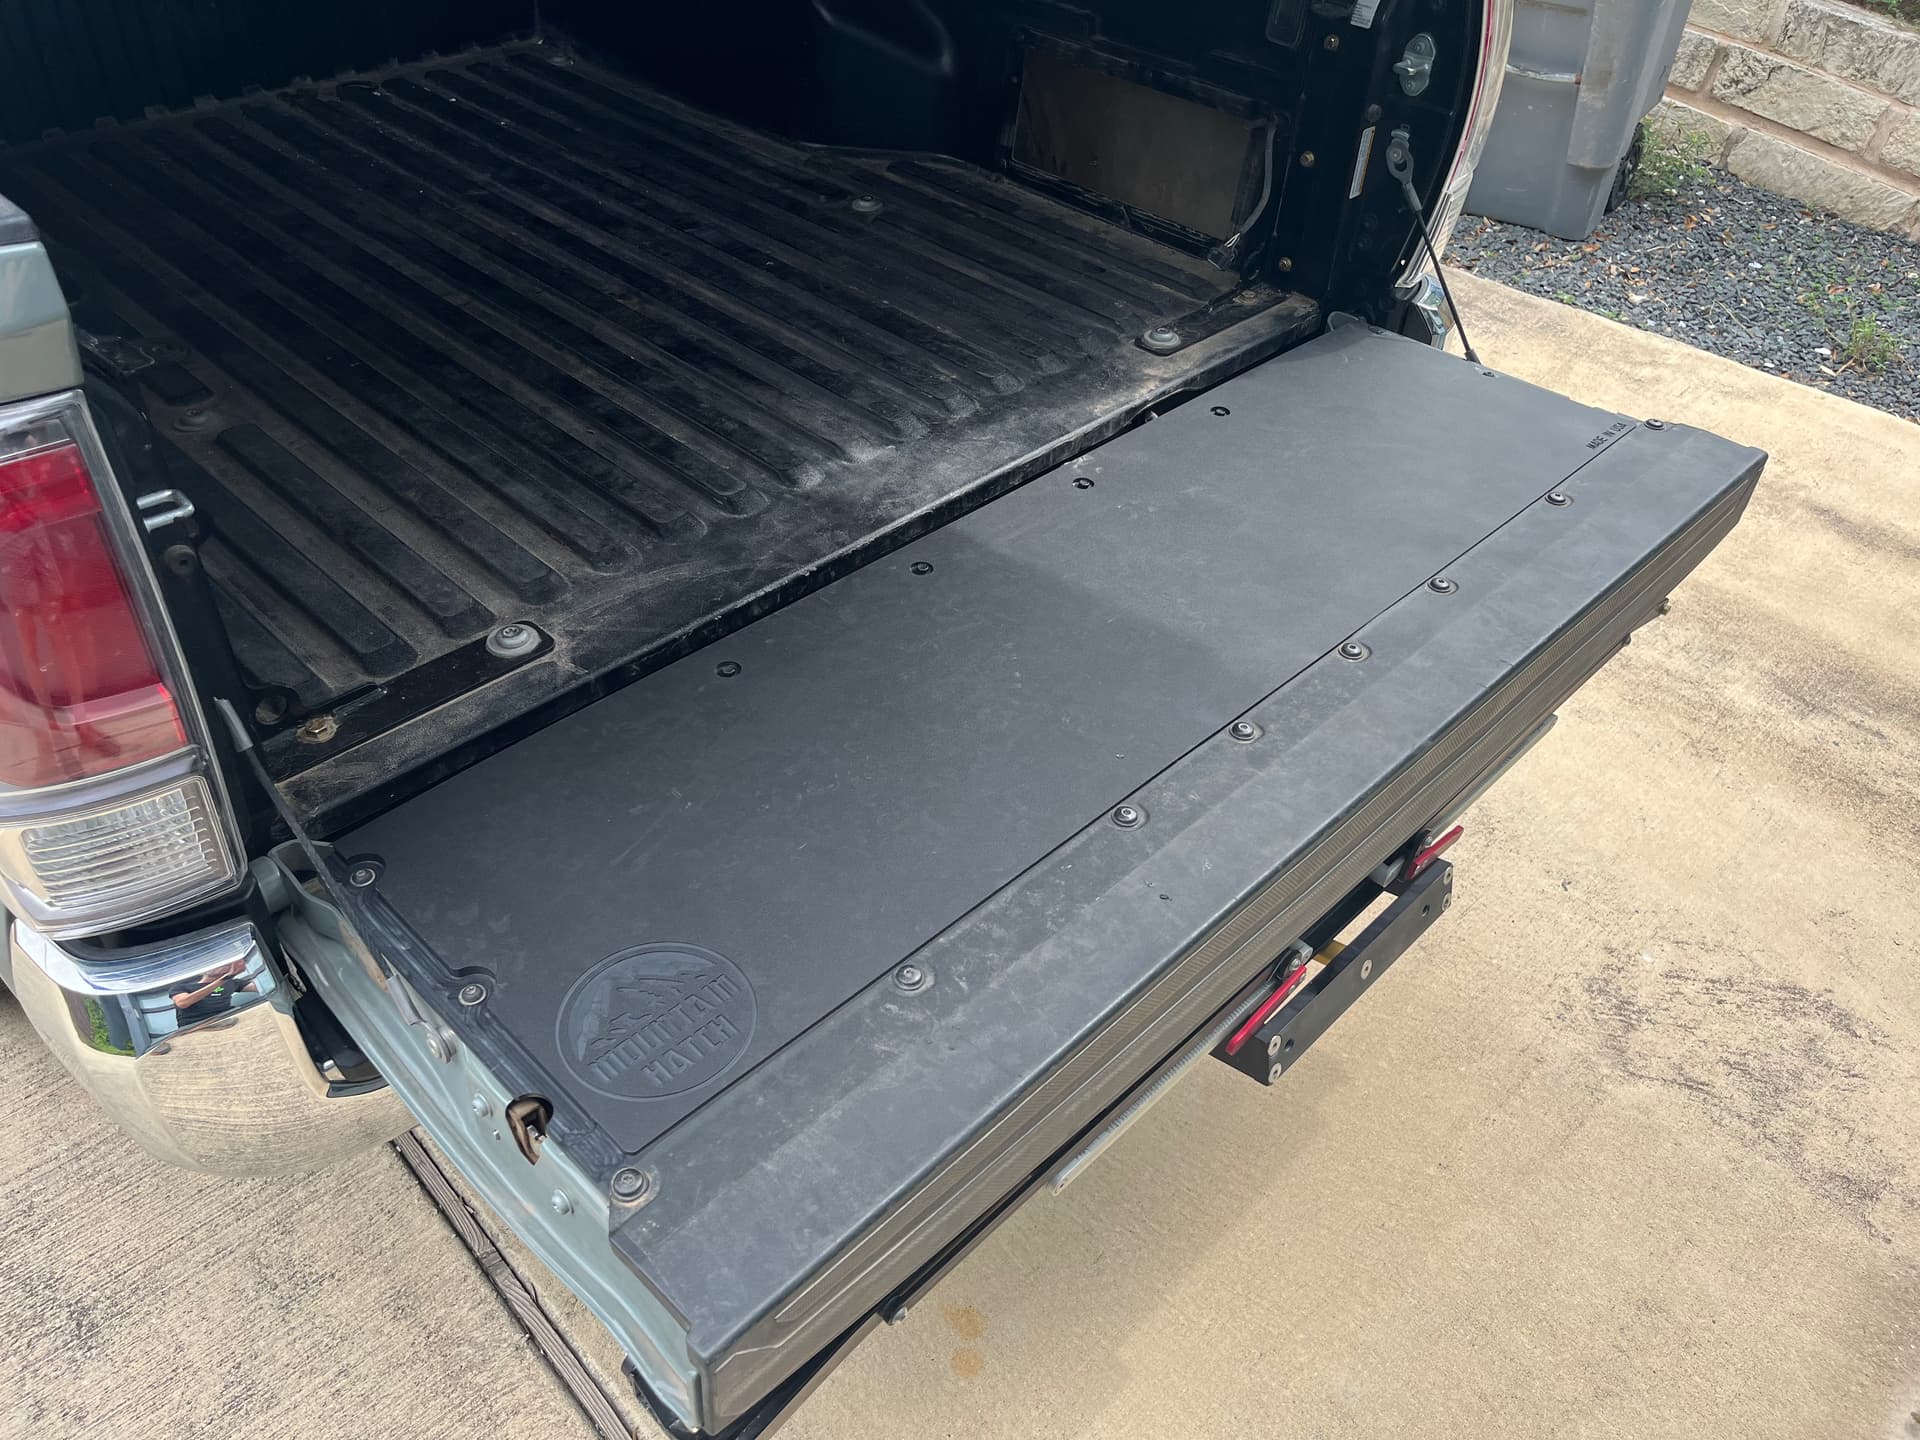
Mountain hatch tailgate
This thing rocks. That’s all. I was surprised that it wasn’t much heavier than the composite tailgate inside it replaced.
Starlink test
I wired up the inverter for a quick test. It still works!

Next up
- Waiting for 3D printer to arrive on Tuesday. That’ll let me mount everything in place.
- Need some ferrules, a fuse, and a relay to finish and clean up wiring job and test the DC/DC charger.
2 Likes
Better use some ventilation or filtration. Styrene, unlike chicken noodle soup, is not good for the soul. ![]()
2 Likes
No joke! Yeah, I was running ASA last night and had the whole apartment opened up and fans on. I’m going to keep using ASA for exterior parts that are going to cook in the sun, but for interior parts I am getting a roll of PETG since it’s a bit easier to print and way less toxic.
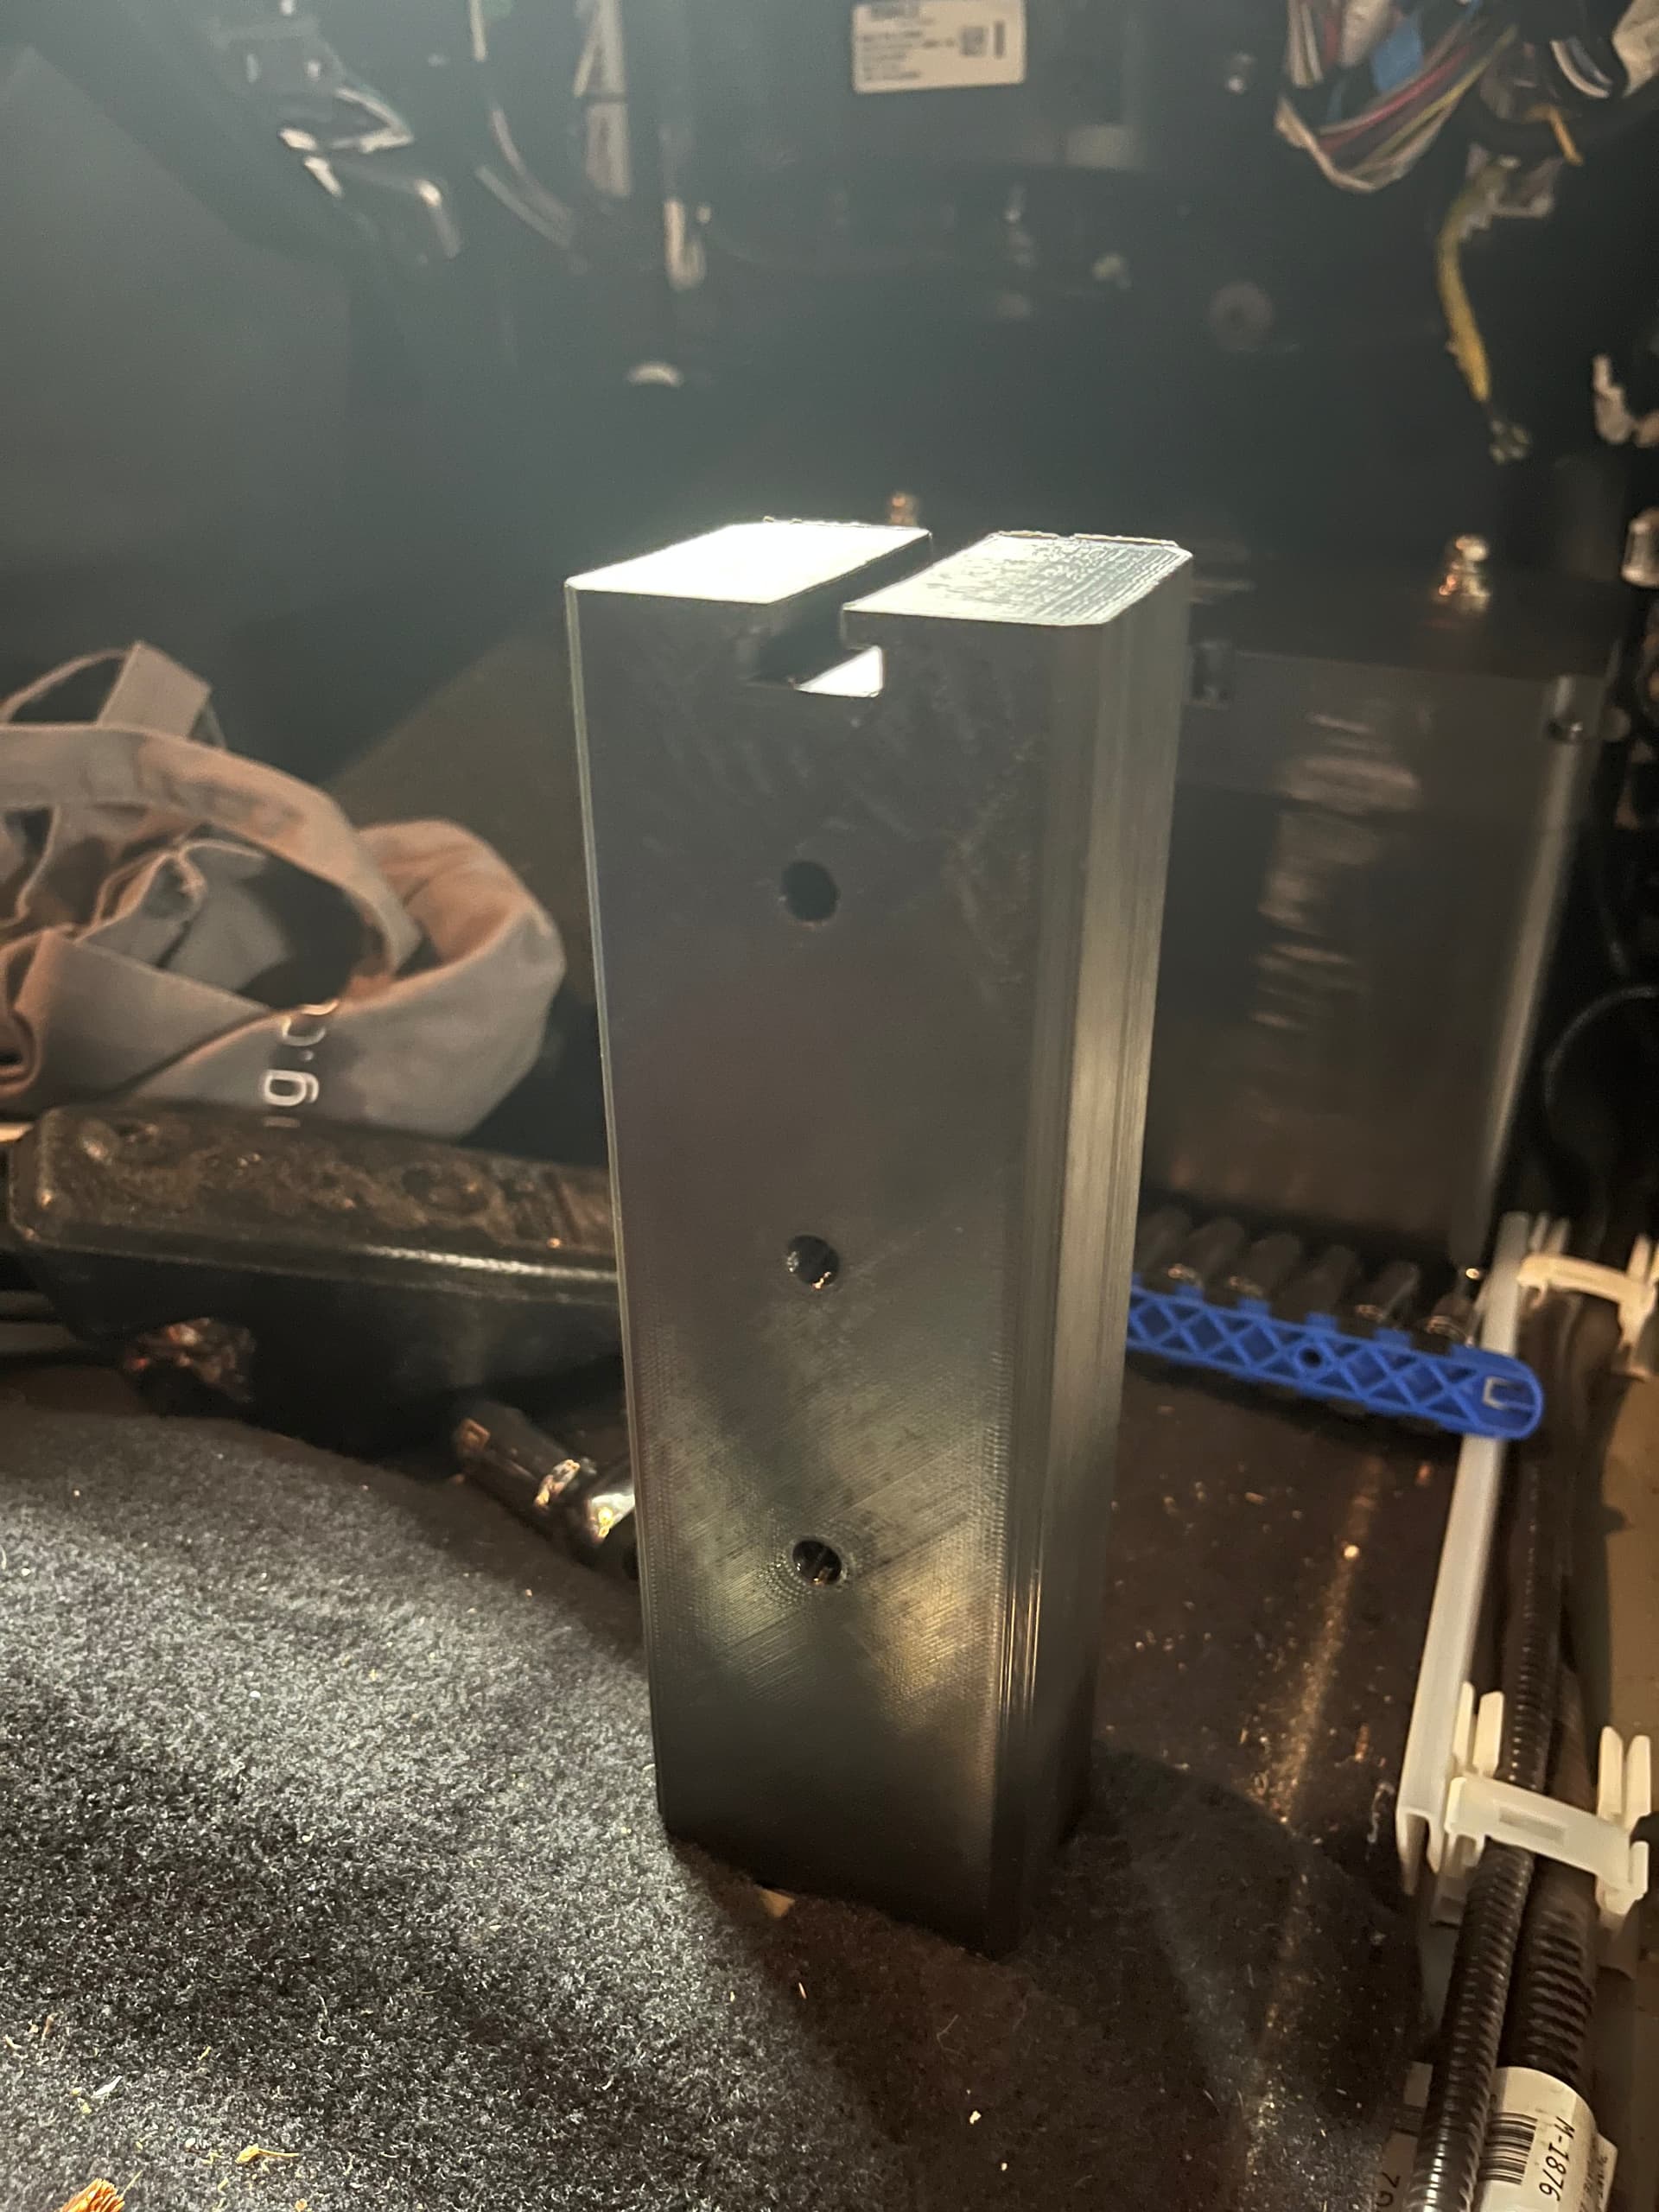
Here’s some poor photos of a test part in ASA. I discovered that my Y axis pulley was loose, hence the misalignment in a few of the layers. I need to change the orientation too for better strength where it counts. Overall though, I’m very happy with how this part turned out. I added some holes for heat-set fasteners to attach the electrical panel, which I’m moving from the back wall of the cab to what used to be the passenger side footwell. More pics later this week.

4 Likes
What are the extruder profile and infill settings for that?
1 Like
Mostly stock settings. 0.4mm nozzle. I think I added one extra perimeter. This was mostly a test part to make sure I could print ASA. 0.2mm layer height
That’s pretty solid for such a large part in ASA without any noticeable warping. Not sure what filament you’re using, but I exclusively print with Polymaker ASA at this point, and the VOCs aren’t too bad. I do use carbon pellet recirculating filters (would highly recommend adding one for high temp filaments), but I can sit and work right next to my printer while it’s running, and don’t notice any odor unless I stick my nose right next to the door of the enclosure.
I didn’t realize that I had committed such a feat until y’all started asking questions. I think the secret is the enclosure. I’ve got a cheap creality tent from Amazon, but I’ll be upgrading in the next few weeks to the official Prusa enclosure that moves the PSU outside the printer. I’m using Flashforge ASA from Amazon.
Electrical Box
I decided that 3D printing wasn’t going to be good enough for the electrical box, so I designed a laser cut aluminum solution for mounting all of my electrical equipment in the passenger footwell area. This is still a WIP, but the bracket plus 80/20 should weigh in at around 6lbs when done. The “ear” extending upwards will bolt into the Tacoma cab (near the door hinge on the inside) to prevent the front end from flopping around.
Still planning on 3D printing for most other brackets, but this one seems worth the effort to make a “real” bracket.


4 Likes
I moved back to Utah and I’ve been busy getting this thing ready for winter.
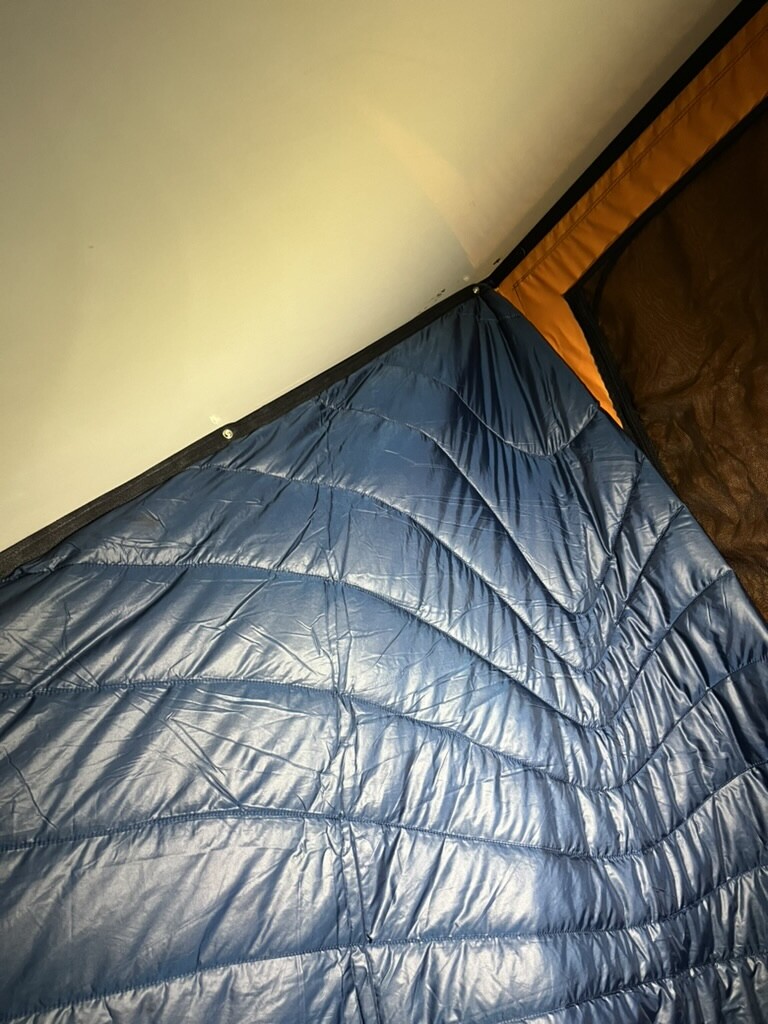
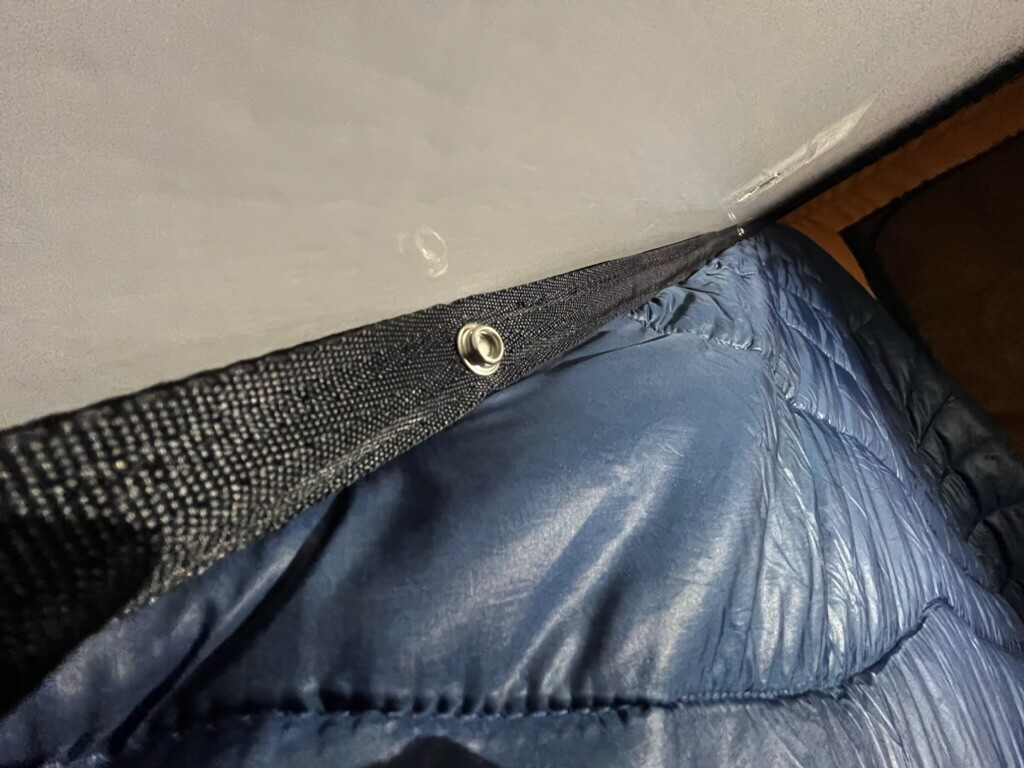
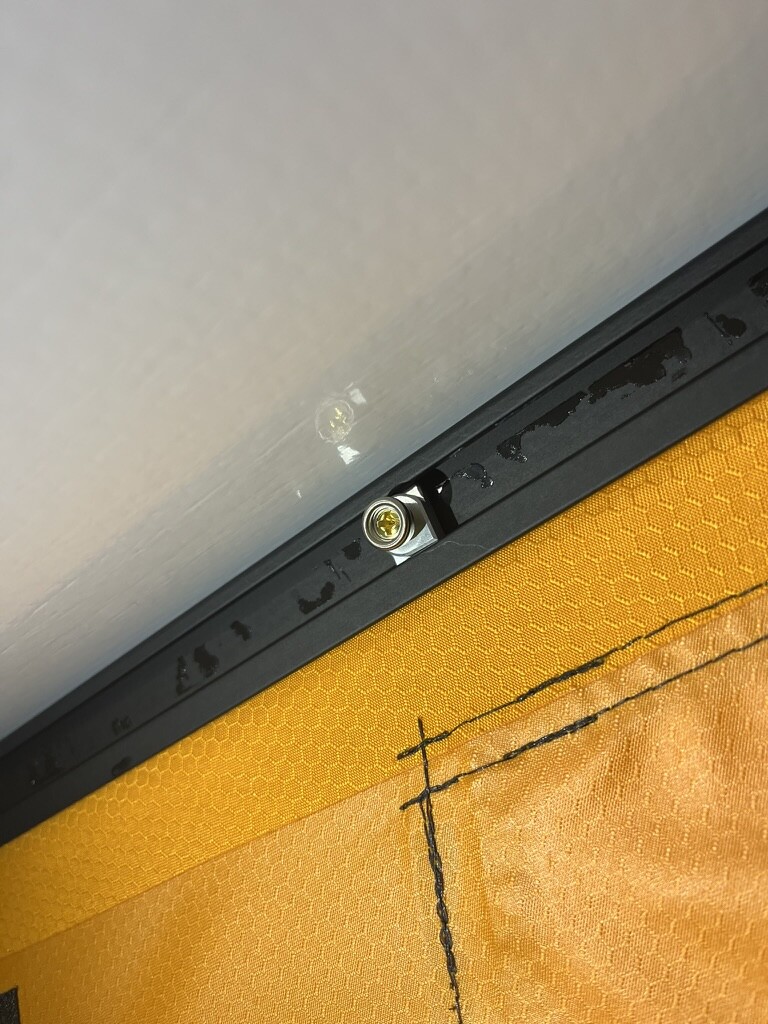
Finished the first wall of insulation last night. I decided to go with rumpl blankets on all 4 walls to keep it toasty up top. It just takes two blankets - a one-person and a two-person. I’ll chop both in half and use fabric snaps and webbing to keep them all in place on the roof. They will be held on the sides to each other with magnets.
Snap list:
Studded snap
Adhesive snap
Male/female snap
I chose the male/female snaps so I can snap LED strips on top of the webbing. GZila tee-nuts for mounting the 10-32 studded snaps. Adhesive snaps for the short ends of the GFC that don’t have the t-slot.
3 Likes
This is a great idea. I’ve considered trying to retrofit a Crua insulated tent on the inside of the GFC, but I think your idea might work better and look better.
Unrelated, I just moved to SLC. Where in UT are you? Any camping, hiking, mtn biking, or skiing recs? Always down for a meetup as well.
It has worked out cleaner than I could have ever hoped. I’m thinking about offering these as a product sometime down the road.
I’m in the Logan area. I’ll DM you.
2 Likes
Here’s my latest system upgrade:
Decided that my Highlander alternator swap wasn’t going to cut it, so I went for broke (literally) and now I’m running 4 battle born self-heated batteries, 4 chargers, and an even bugger alternator pushing 120A into the bank. Running the truck for 3 hours and change would put a full charge on the bank, and that could last me 2 or 3 days with starlink and all my other loads running. Epic.
2 Likes
The blankets have been working so well that I now have 5 Rumpl blanked hanging around the tent and bed. Found some on discount at a local store.
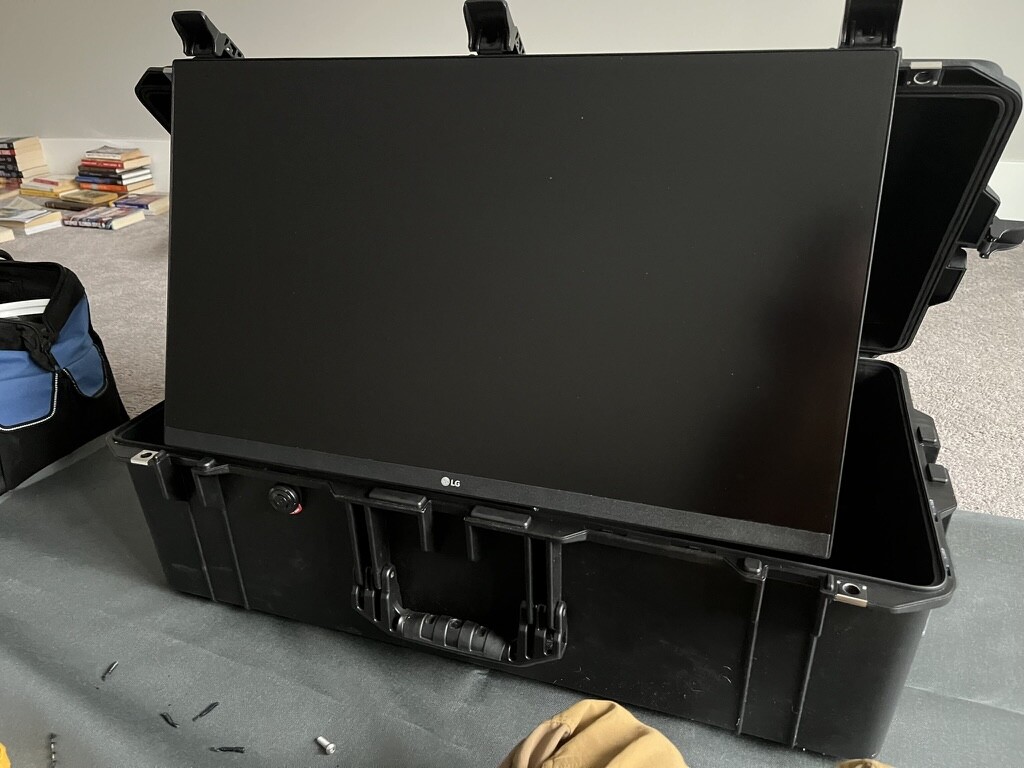
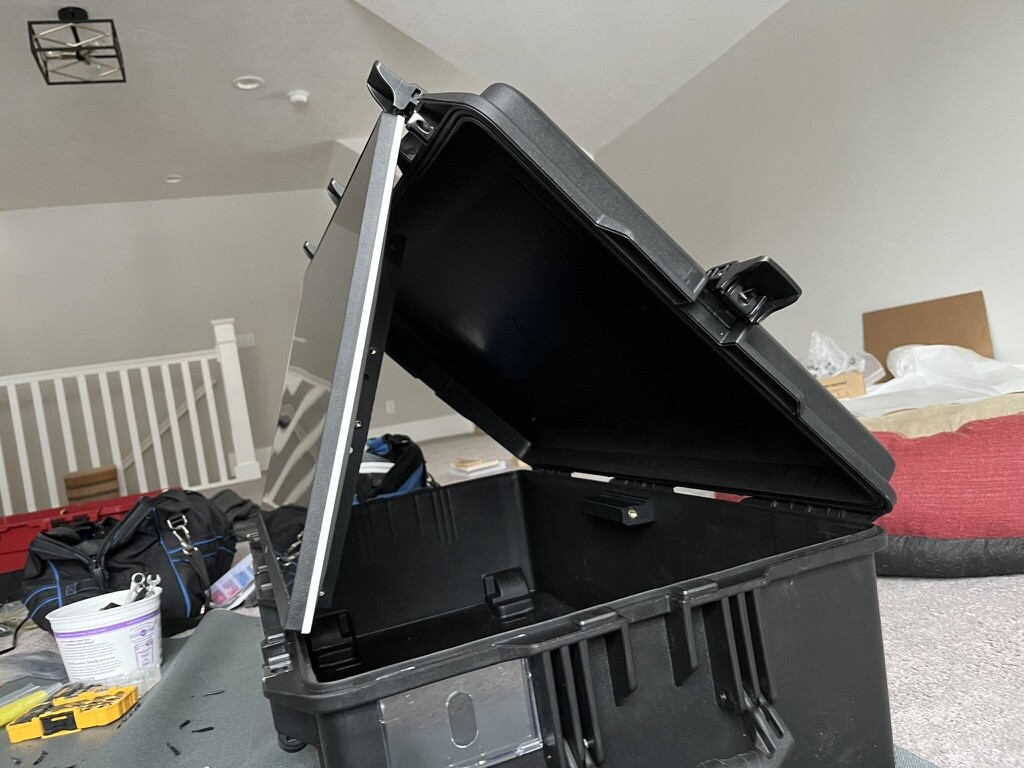
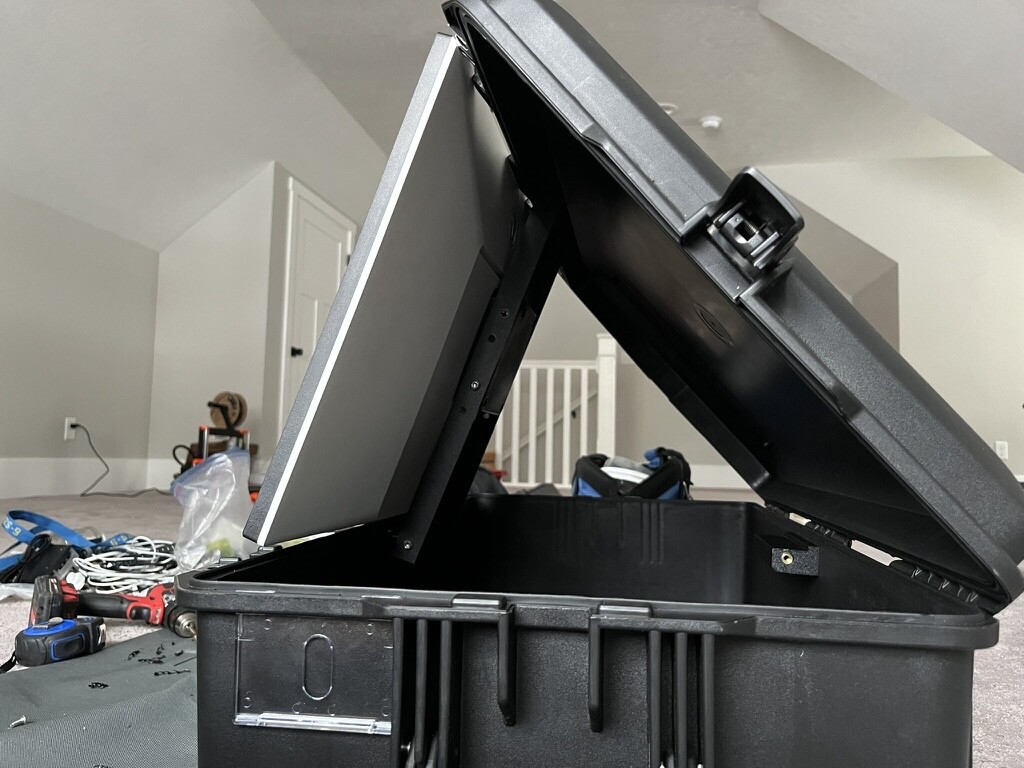
Also been working on a monitor in a box - 27" 4K screen that runs on 12V (19V with converter). Computer and chargers + cables fit in the bottom.
3 Likes