Wolfbox rear view mirror

Tired of not being able to see in your rear-view mirror?

Here is the complete guide of parts I used to install the wolfbox G900 that looks almost OEM

(Installed in a 2018 Toyota Tacoma)

Parts:

Wolfbox G900 Pro: Amazon.com: WOLFBOX G900 PRO Mirror Dash Cam with STARVIS 2 IMX678, 12 inches Rear View Mirror Camera with Front 4K and Rear 2.5K, Included 128GB Card, Voice Control, 5.8GHz WiFi, Loop Recording, G-Sensor & GPS : Electronics

Wolfbox OEM Bracket: Amazon.com: WOLFBOX OEM Bracket for USB C G900 Tripro/G900PRO/G850PRO/G840S/G840H/G850/G900 Mirror Dash cam : Electronics

Wolfbox Hardwire kit: Amazon.com: WOLFBOX USB C Hardwire Kit for G850PRO/G840S/G930/G850/G900/G840H/i07/i17/X5/X3 Dash Cam, not Suitable for G890/G900 PRO/G900 Tripro, Parking Monitor with Multiple Size connectors : Electronics

Wolfbox Rear Camera Extension: Amazon.com : WOLFBOX 50 Feet Rear Camera Longer Replacement Cable for i17 / i07 / G840S / G840H / G900 / G930 / G850 / G850PRO / G900PRO Version with 2.5mm Jack (4-Pin) Mirror Dash Cam : Electronics

SanDisk 128GB micro-SD: Amazon.com: SanDisk 128GB Extreme microSDXC UHS-I Memory Card with Adapter - Up to 190MB/s, C10, U3, V30, 4K, 5K, A2, Micro SD Card - SDSQXAA-128G-GN6MA : Electronics

NPT Cable Glands (I used the ¼): MAKERELE NPT Cable Glands Kit Waterproof Adjustable Nylon 1/4” 3/8” 1/2” 3/4” Plastic Strain Relief Cord Connectors 38pcs Black With Gaskets - Amazon.com

Grommet kit: Amazon.com: ISPINNER 190pcs Rubber Grommet Assortment Kit, 9 Sizes Eyelet Ring Gasket 1/4" 5/16" 3/8" 7/16" 1/2" 5/8" 3/4" 7/8" 1" (Black) : Industrial & Scientific

GFC 90 Degree bracket (to mount rear camera on camper): Machined 90° Bracket – GoFastCampers

Another good camera mounting bracket is from Use More Force: Camera mount for Wolfbox G900 Pro, TriPro, and G930 with WDR/Wide Angl – USE MORE FORCE

Please feel free to ask any questions on the install.

Follow me on IG: OverlandXplr


6 Likes

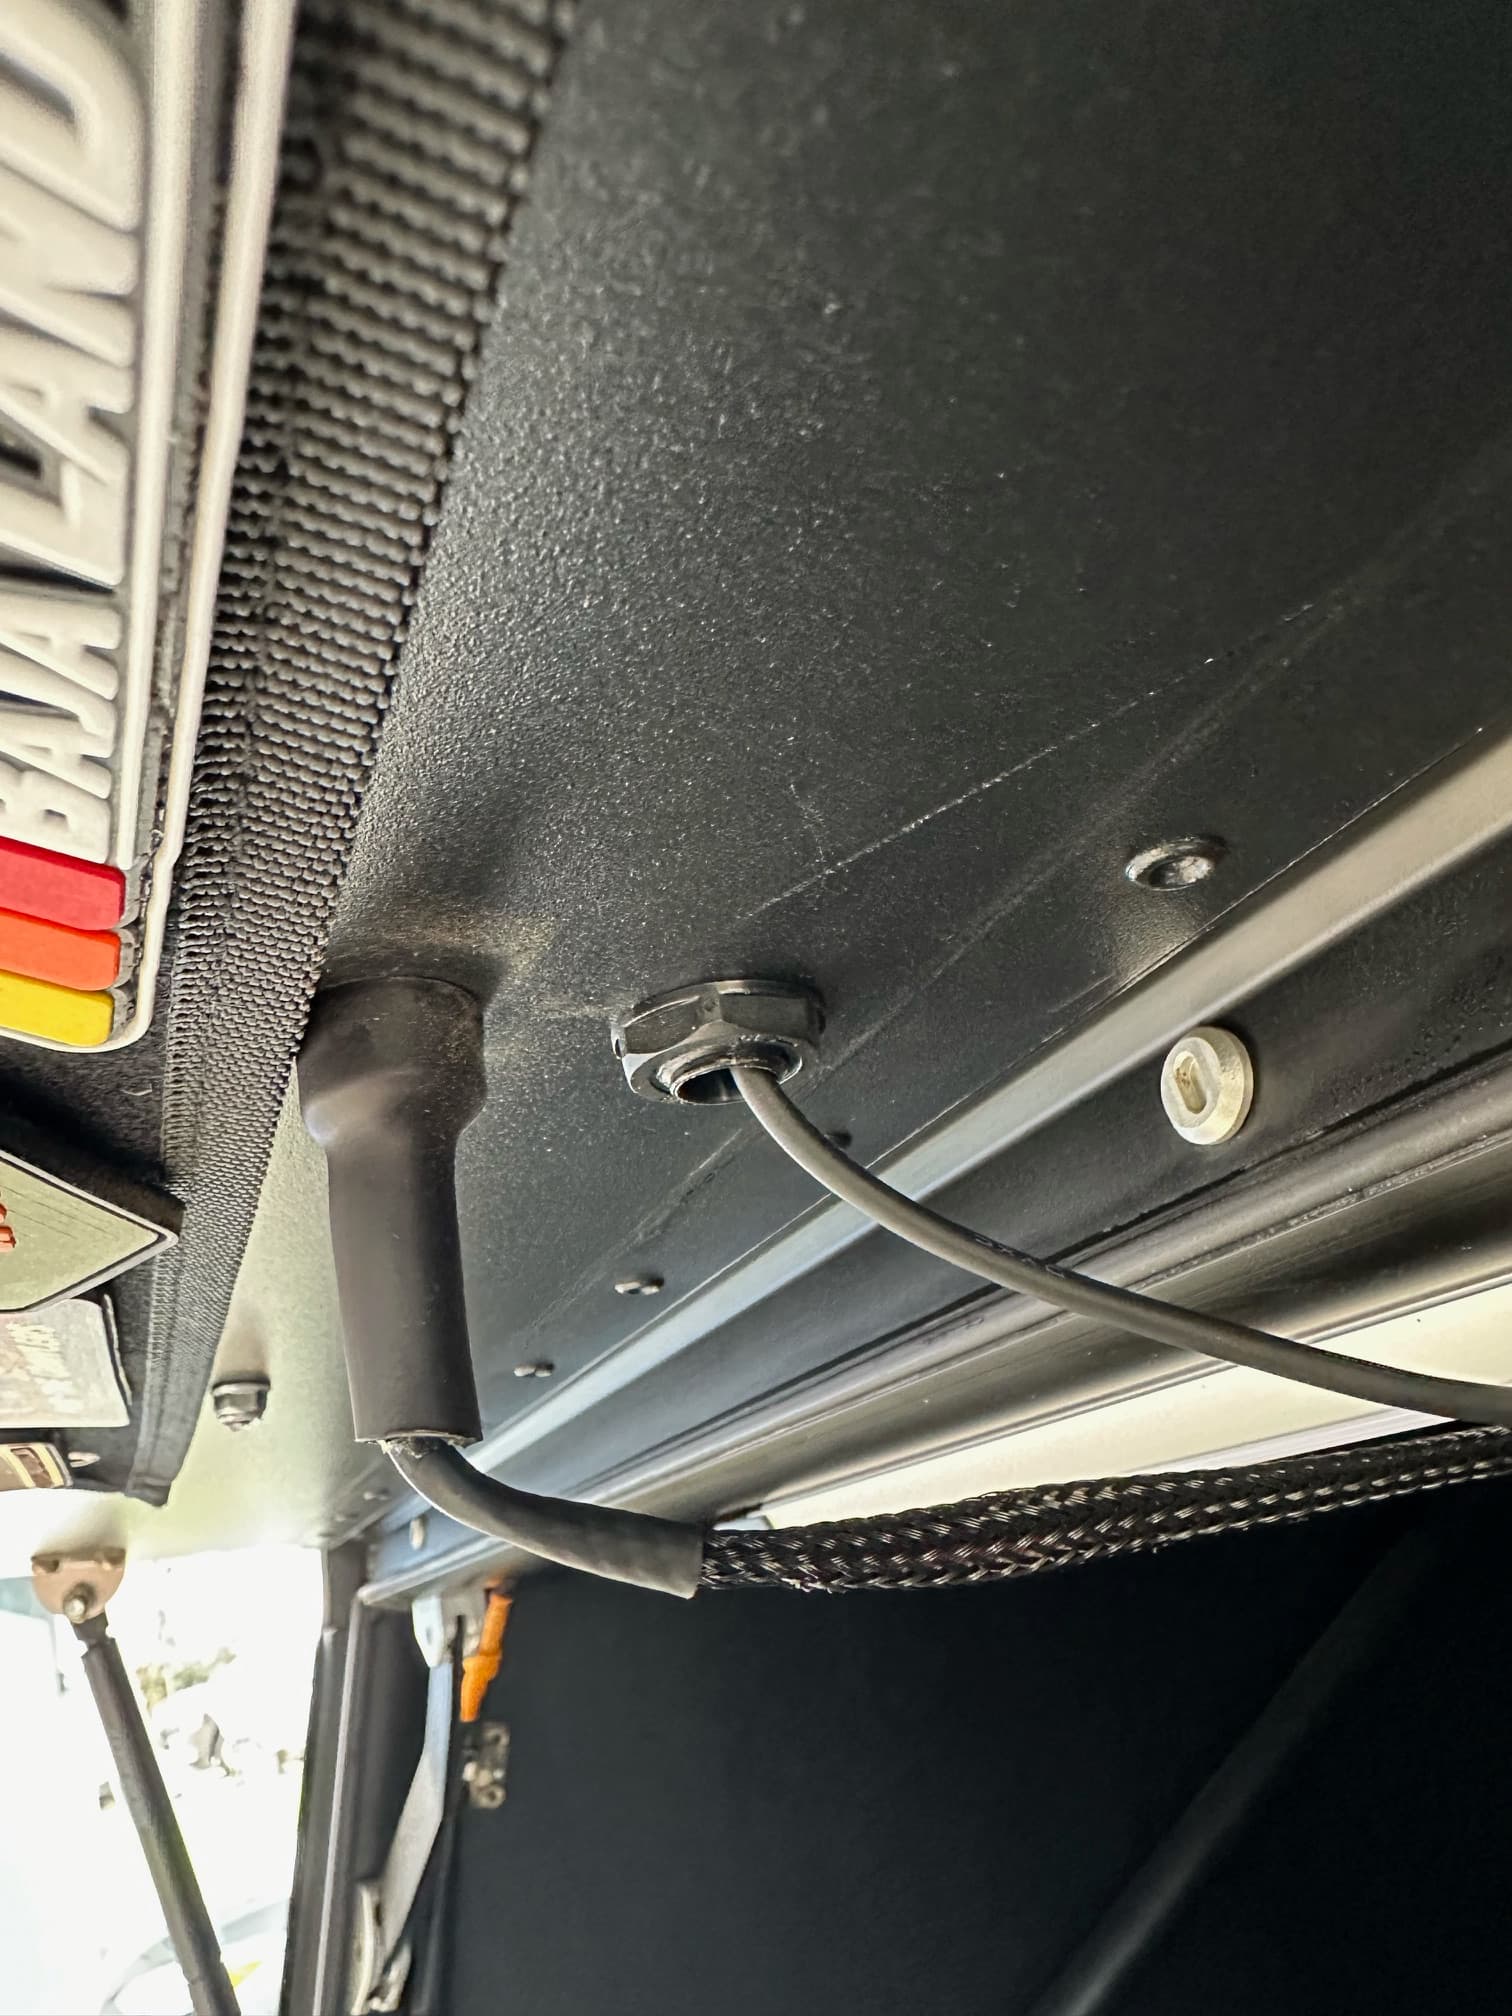
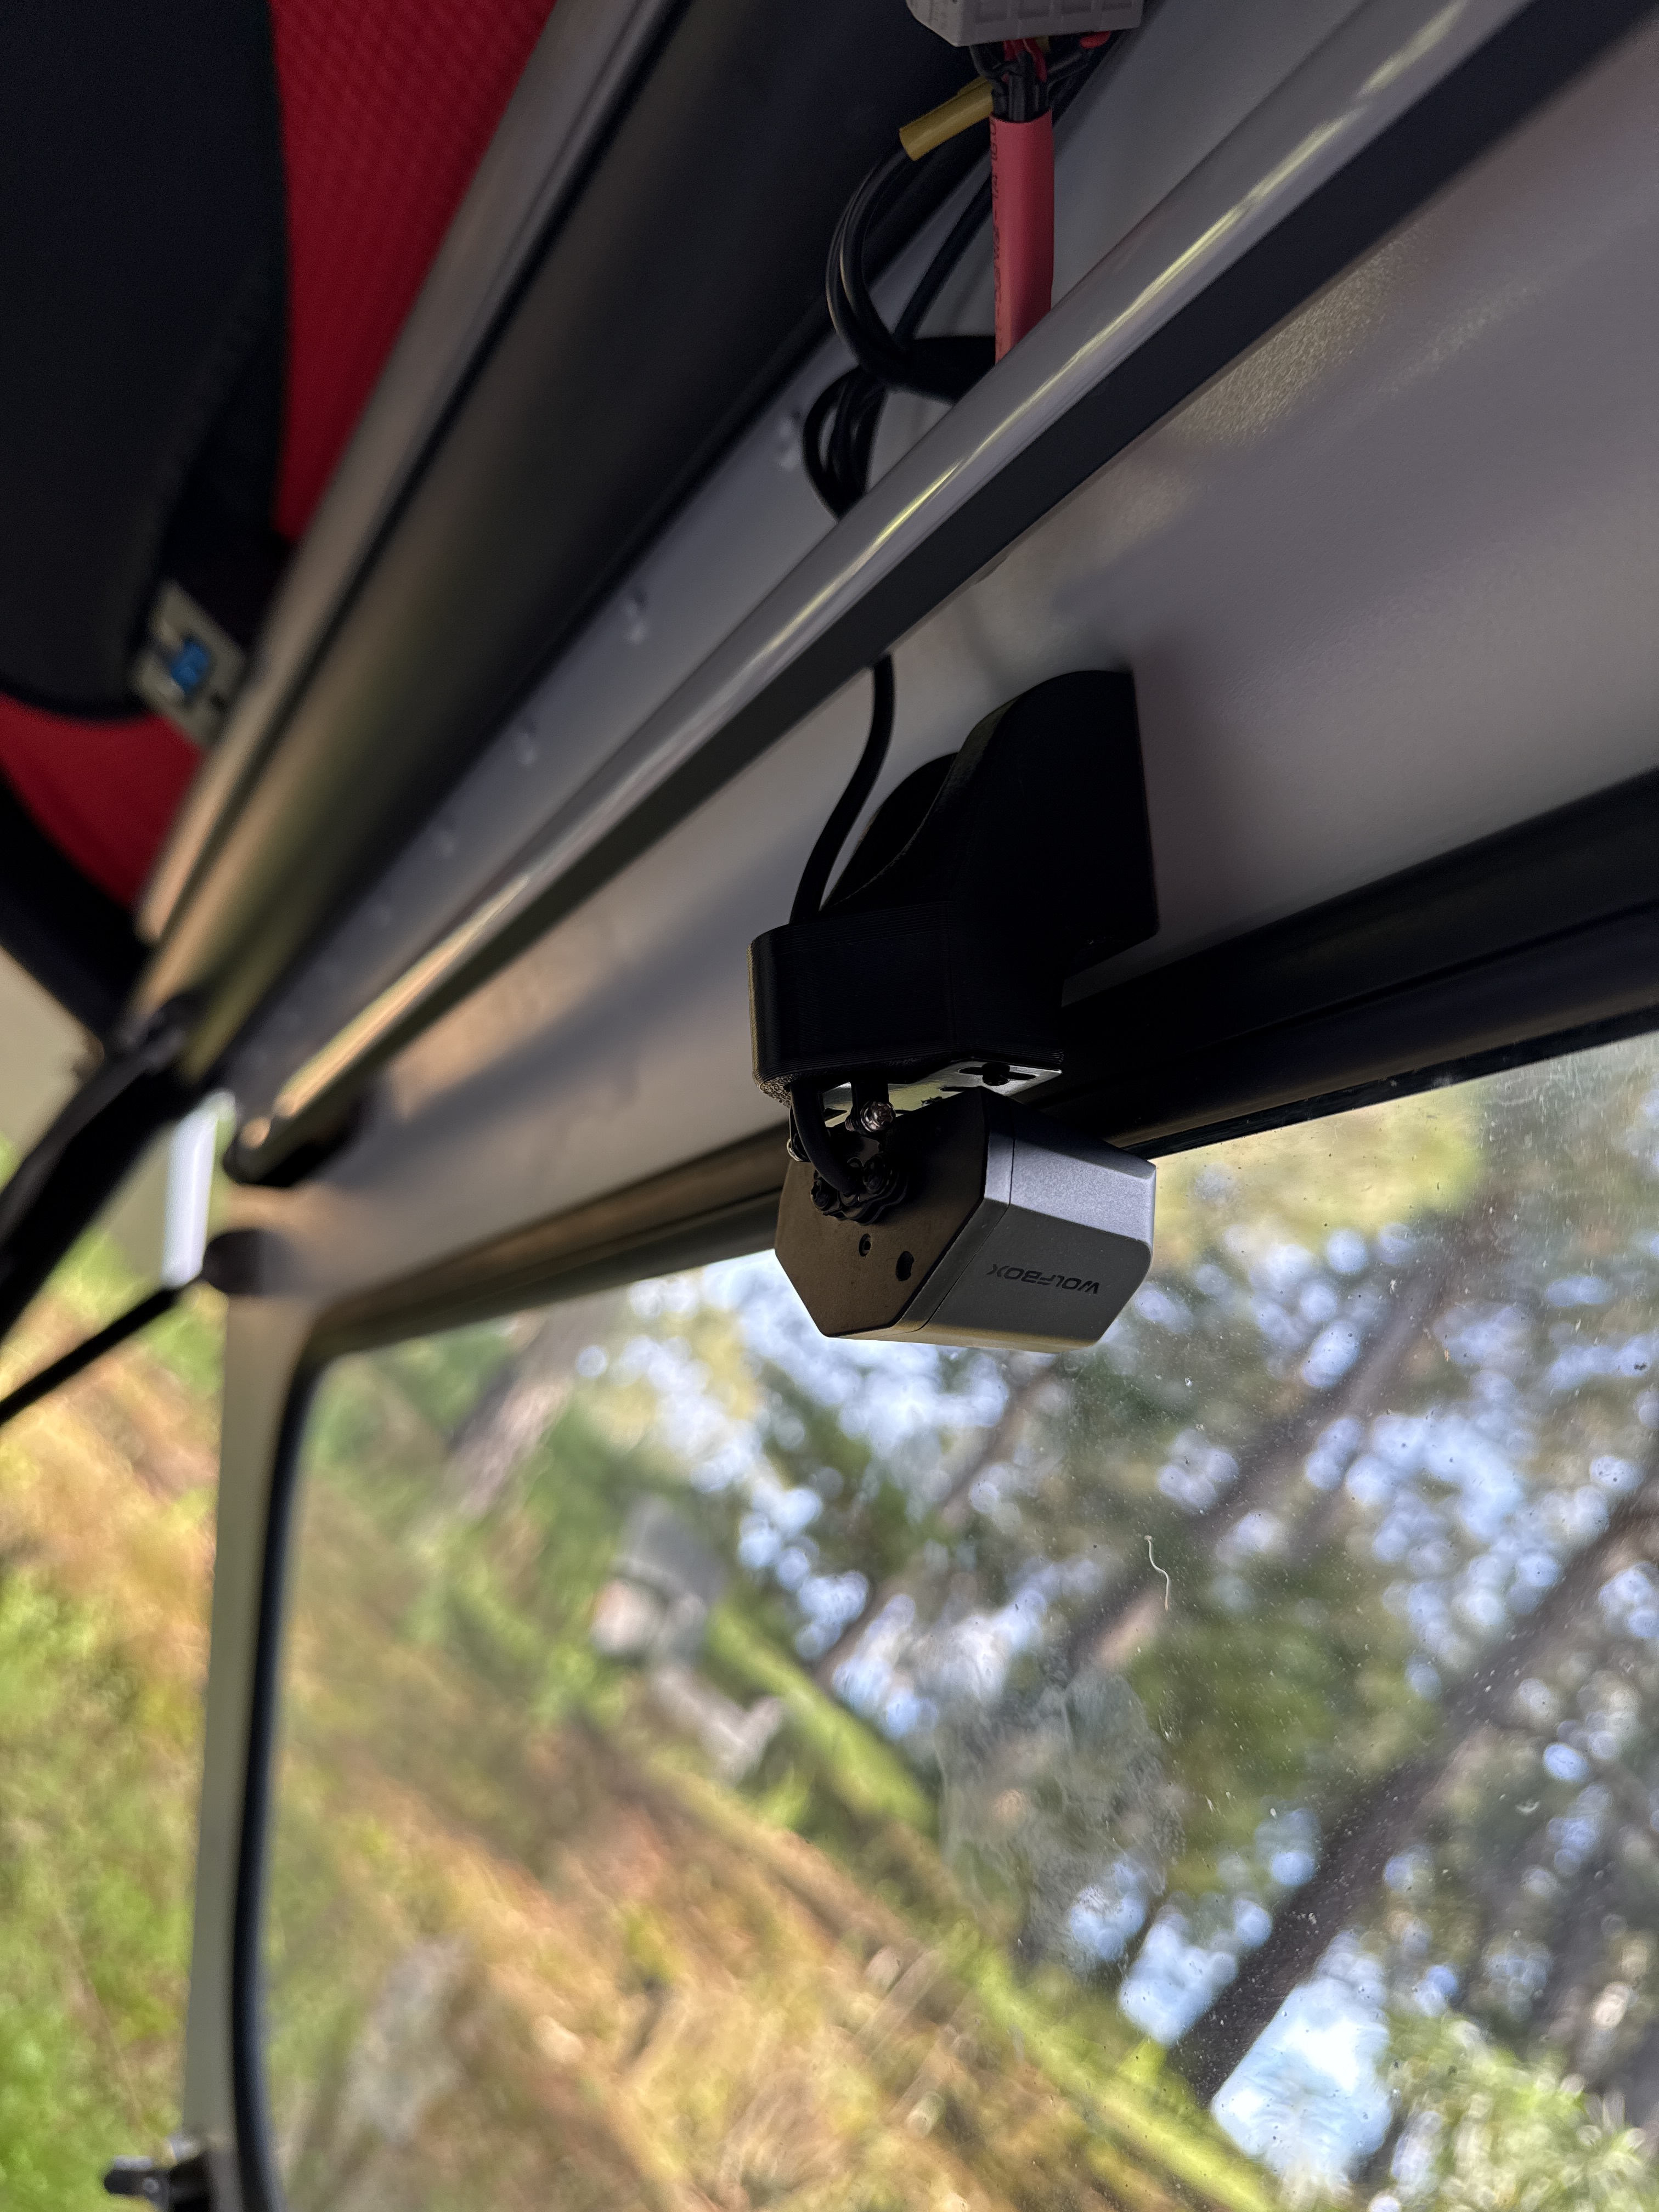
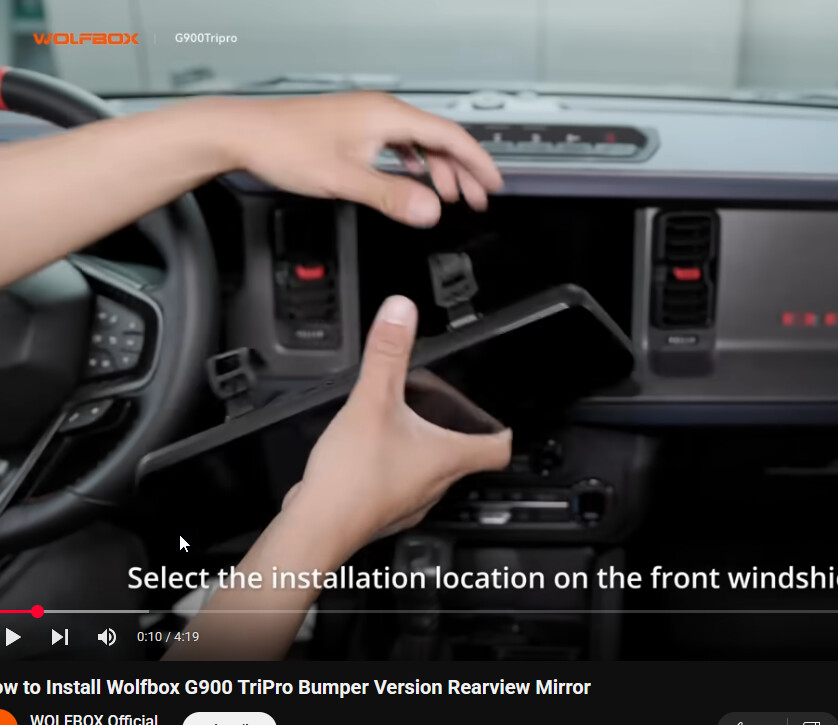
For those of you who don’t want to drill any holes, I have an option I can show you how it is done.

Inside the glass, protects the camera, works perfectly. I didn’t do it to avoid holes, honestly, but just didn’t like the looks of having that tiny camera and exposed wiring on the outside. Everything is tucked in, protected, and I actually have an option to install a small Marin windshield wiper if needed to keep it clean, something you can’t do if it’s on the outside.

The mount is a 3-D printed part I found on Etsy, marketed for lone Peak campers but works perfect perfectly on go fast. Honestly, I think it may be better on GFC.

1 Like

if you have a window that’s a good option as well

UMF makes a 3d printed rear mount - Camera mount for Wolfbox G900 Pro and G930 with WDR/Wide Angle camera – USE MORE FORCE

It’s what I used for my Wolfbox g900 pro install.


4 Likes

Interesting - link?

I have a WolfBox pre-ordered.
My rear window is Limo Tinted.

I’m wondering how well the camera would preform through the tint…idk if WolfBox has exposure control settings built in.

I might be interested in the inner mount you mentioned if you have a direct link to the maker.

…and anymore info about the windshield wiper set up you mentioned too.

Thx :metal:t3:

I’ve got one mounted the same way on a smart cap that’s on my work vehicle. That window is tinted pretty dark as well. Camera seems to function just fine, and I actually think it helps quite a bit at night cutting some of the glare down. That said, if I got my GFC rear window tinted as I plan to, I’m going to ask the tinter to leave a cut out for the camera.

1 Like

Here’s the Etsy link for the Wolff box interior mount:

Look what I found on Etsy: https://www.etsy.com/listing/1752741168/lone-peak-camper-wolfbox-camera-mount?gpla=1&gao=1&&utm_source=google&utm_medium=cpc&utm_campaign=shopping_us_-toys_and_games_d&utm_custom1=_k_CjwKCAjw7pO_BhAlEiwA4pMQvBBxlY-RXJYAU0OQRCl8UMSvuLN1OwmautOZ1GvCB8AwGgQ_RqmmIRoC5rkQAvD_BwE_k_&utm_content=go_21500569332_164907277083_707558291651_pla-826632015498_m__1752741168_12768591&utm_custom2=21500569332&gad_source=1&gbraid=0AAAAADtcfRIphNCWJTnNd_bgu4I5ynOsh&gclid=CjwKCAjw7pO_BhAlEiwA4pMQvBBxlY-RXJYAU0OQRCl8UMSvuLN1OwmautOZ1GvCB8AwGgQ_RqmmIRoC5rkQAvD_BwE

1 Like

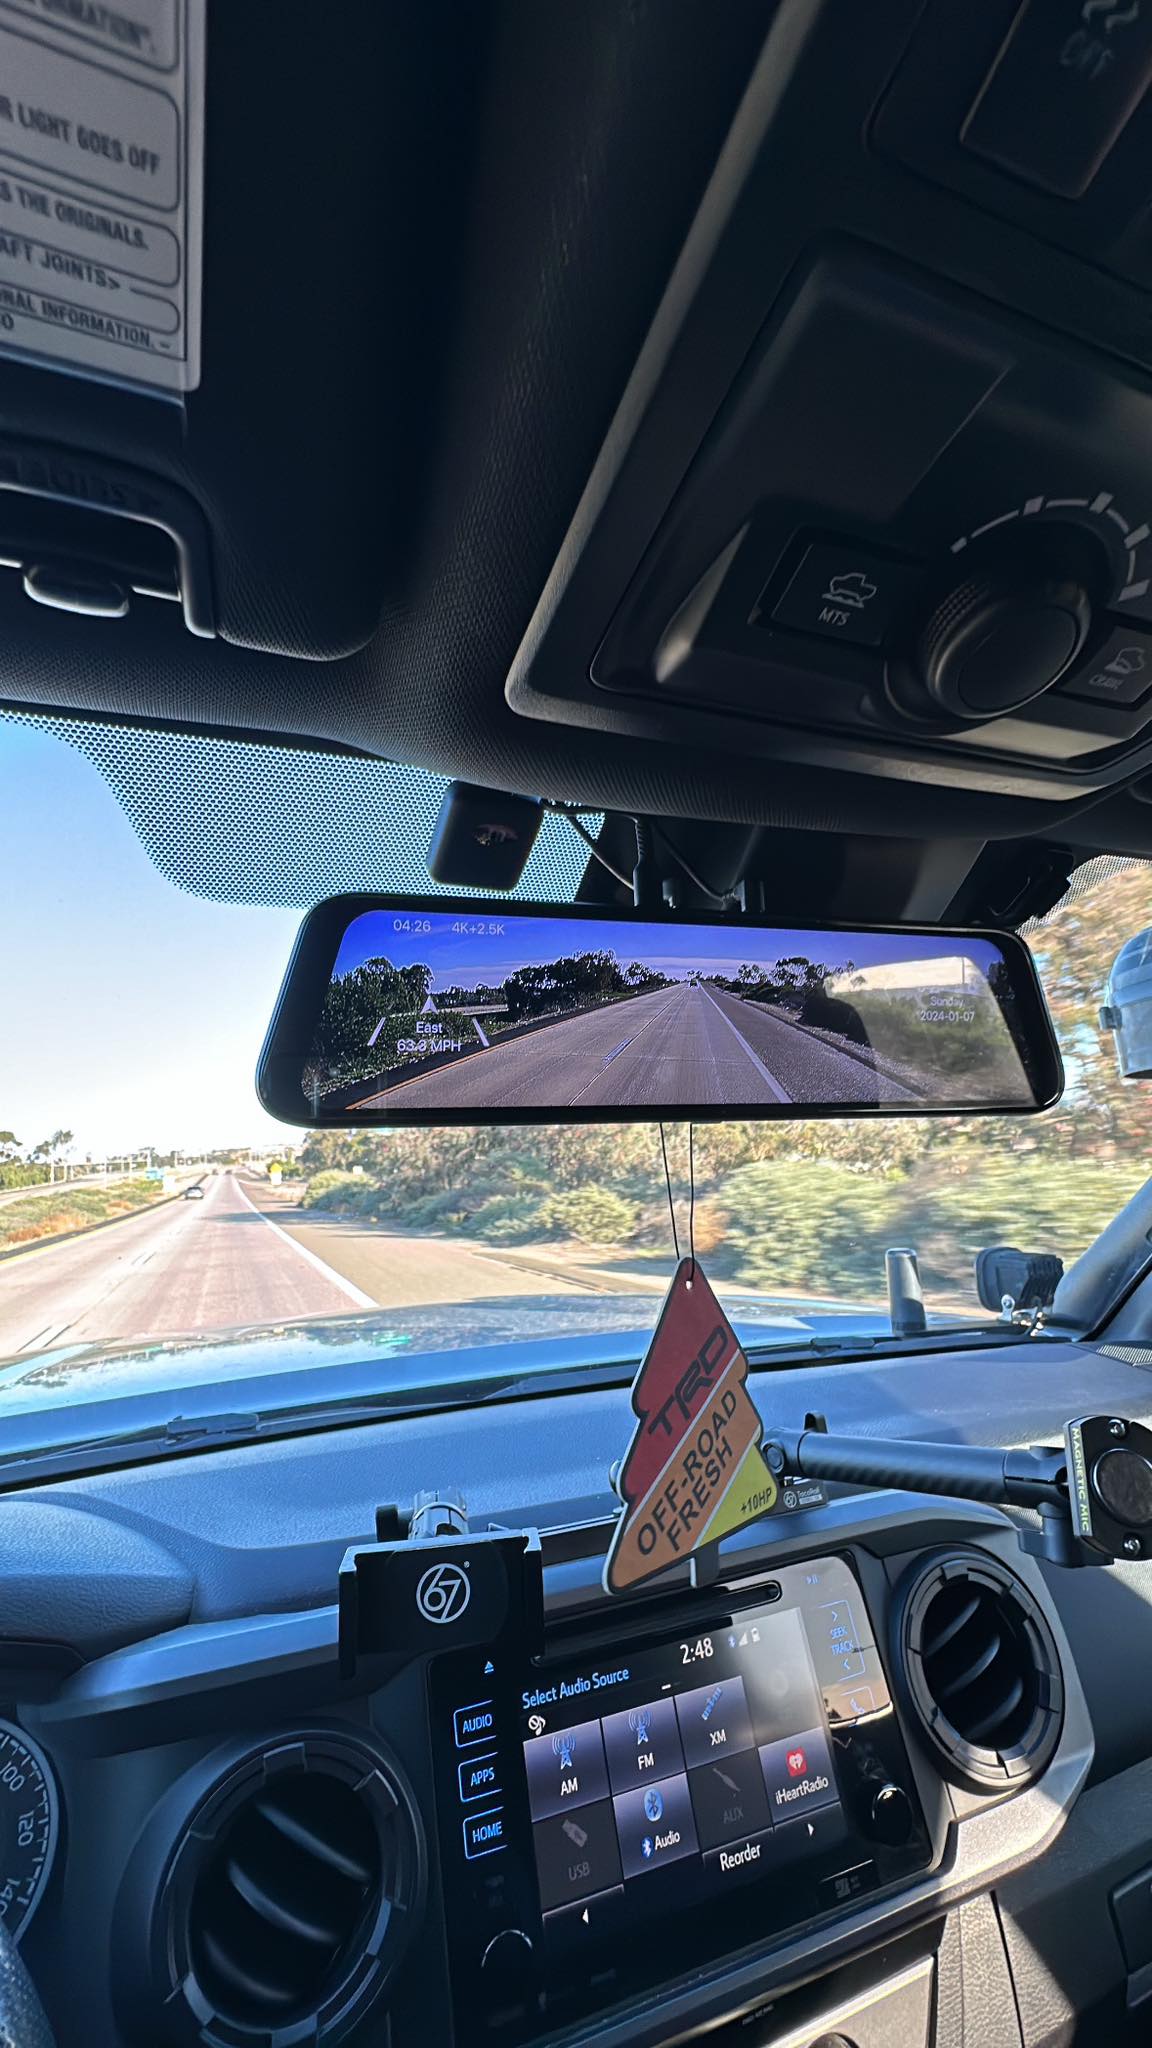
I plan on ordering one of these mirrors. Does anyone know which bracket is needed to mount on a 2016 taco? All the mirror mount’s I see are for 2018 and newer with the updated rear view mirror?

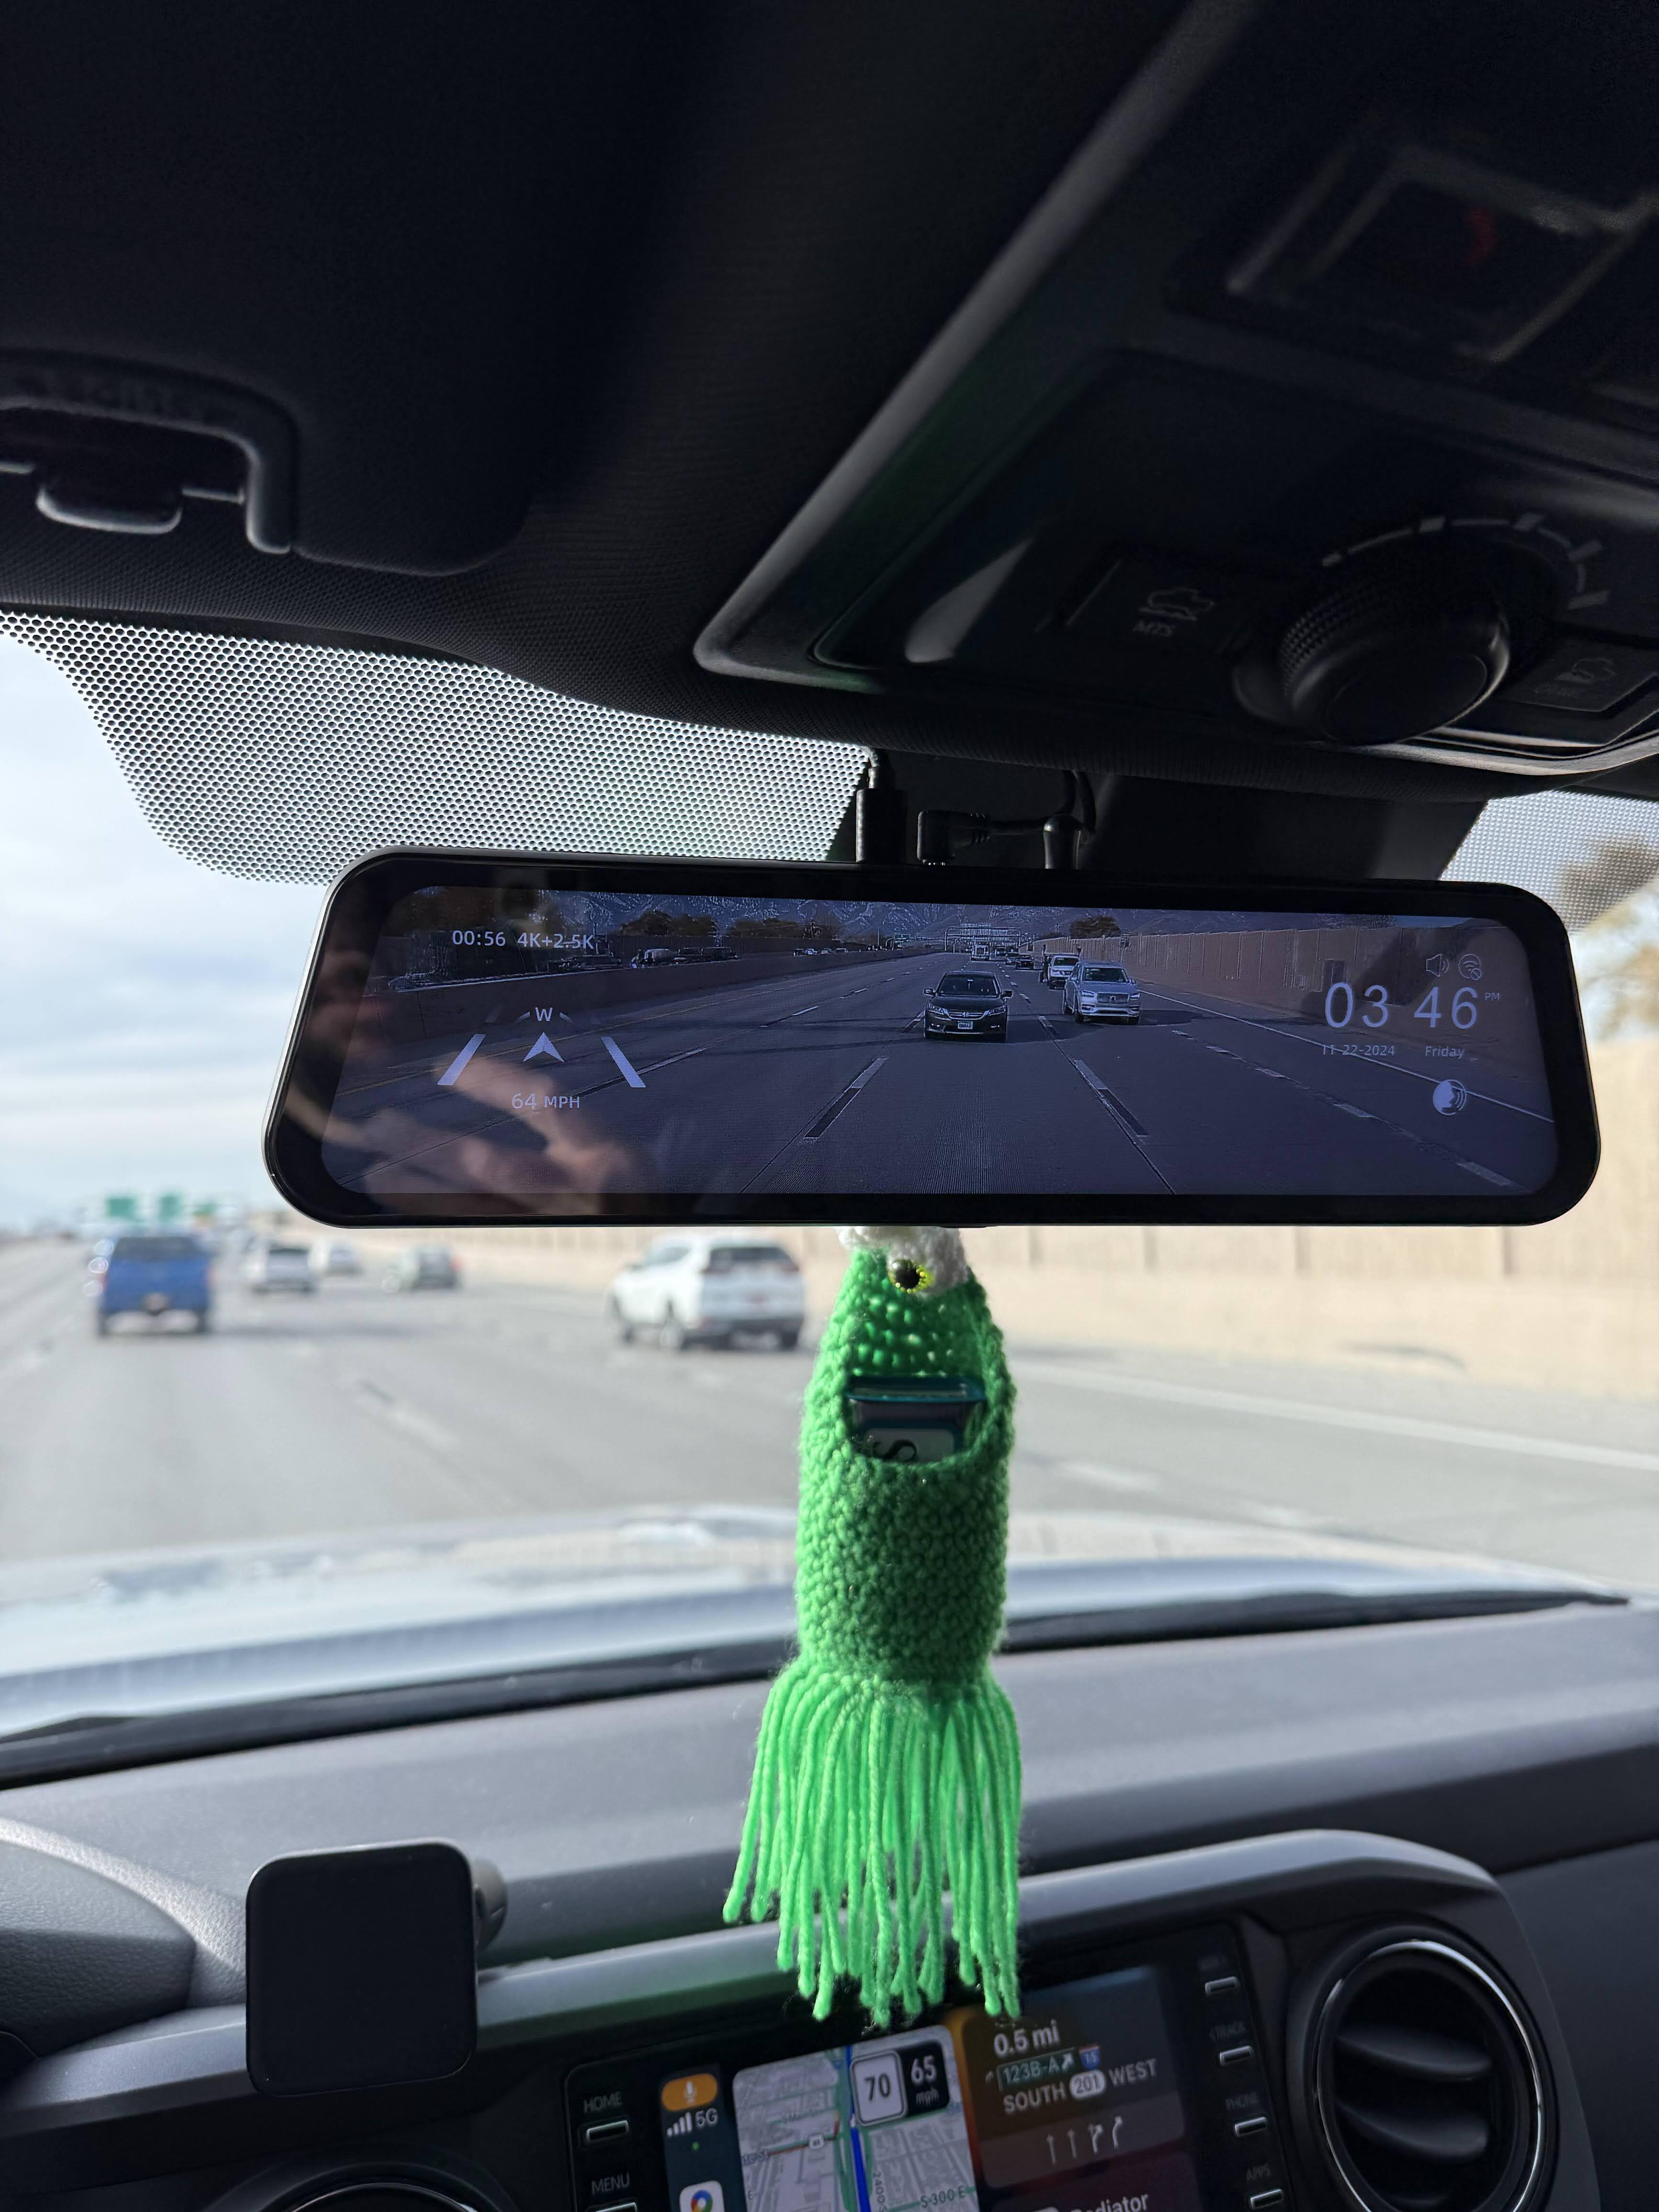
For what it’s worth, they usually ship these things with large rubber stretch bands that attach it to your rearview mirror. So in principle you don’t need a mount - it just straps on. You can kinda see the straps in this thumbnail. Install video.

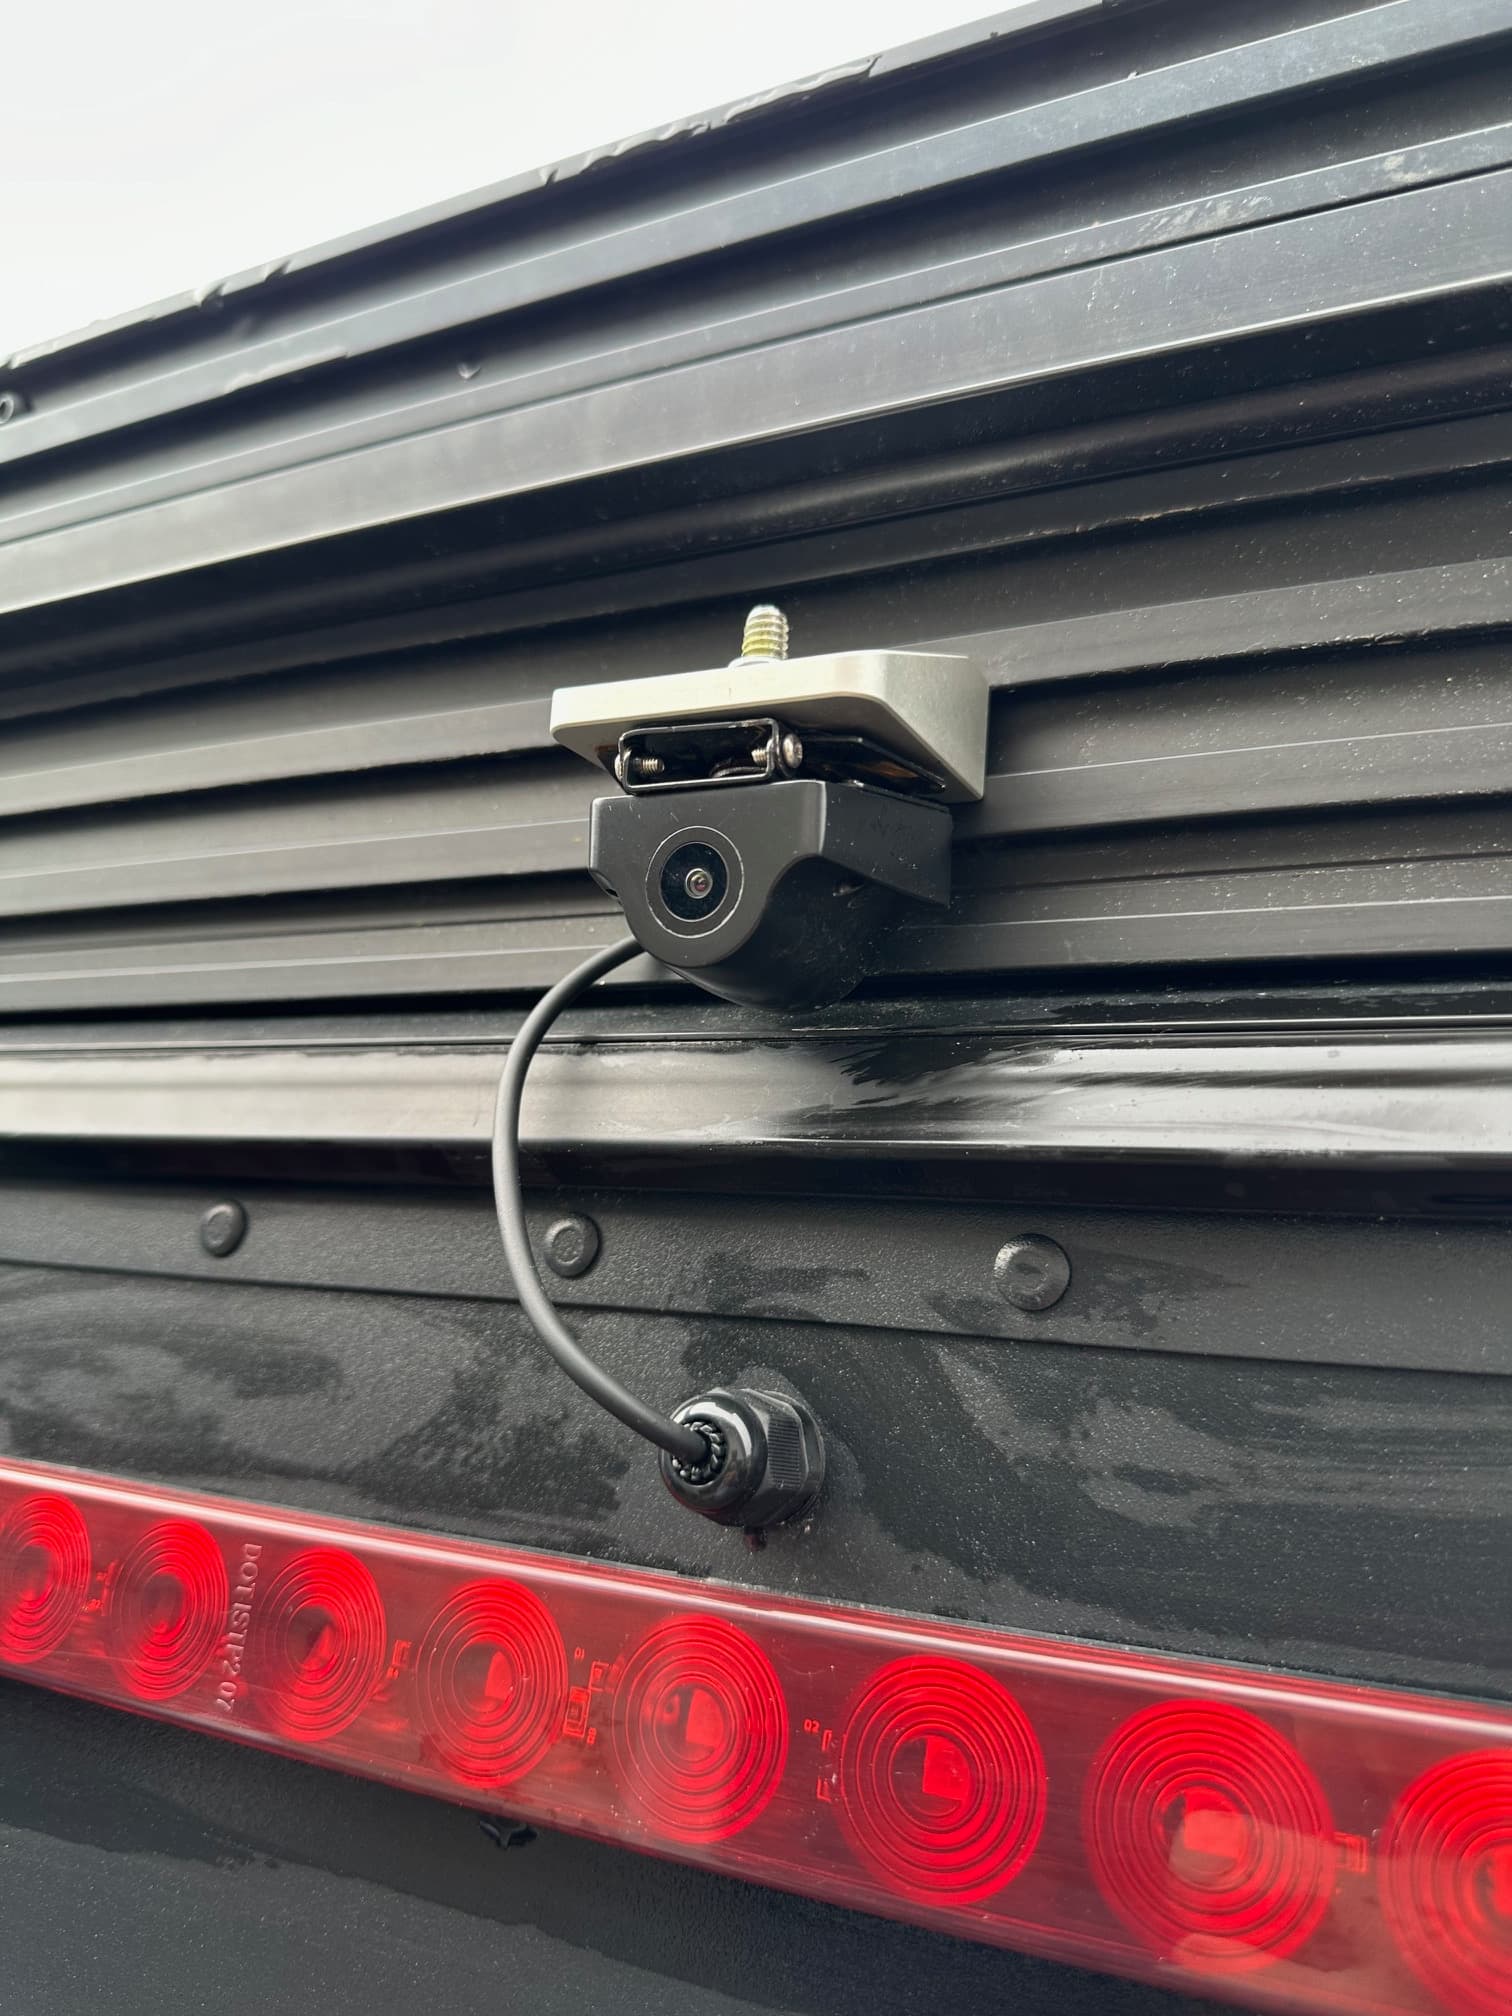
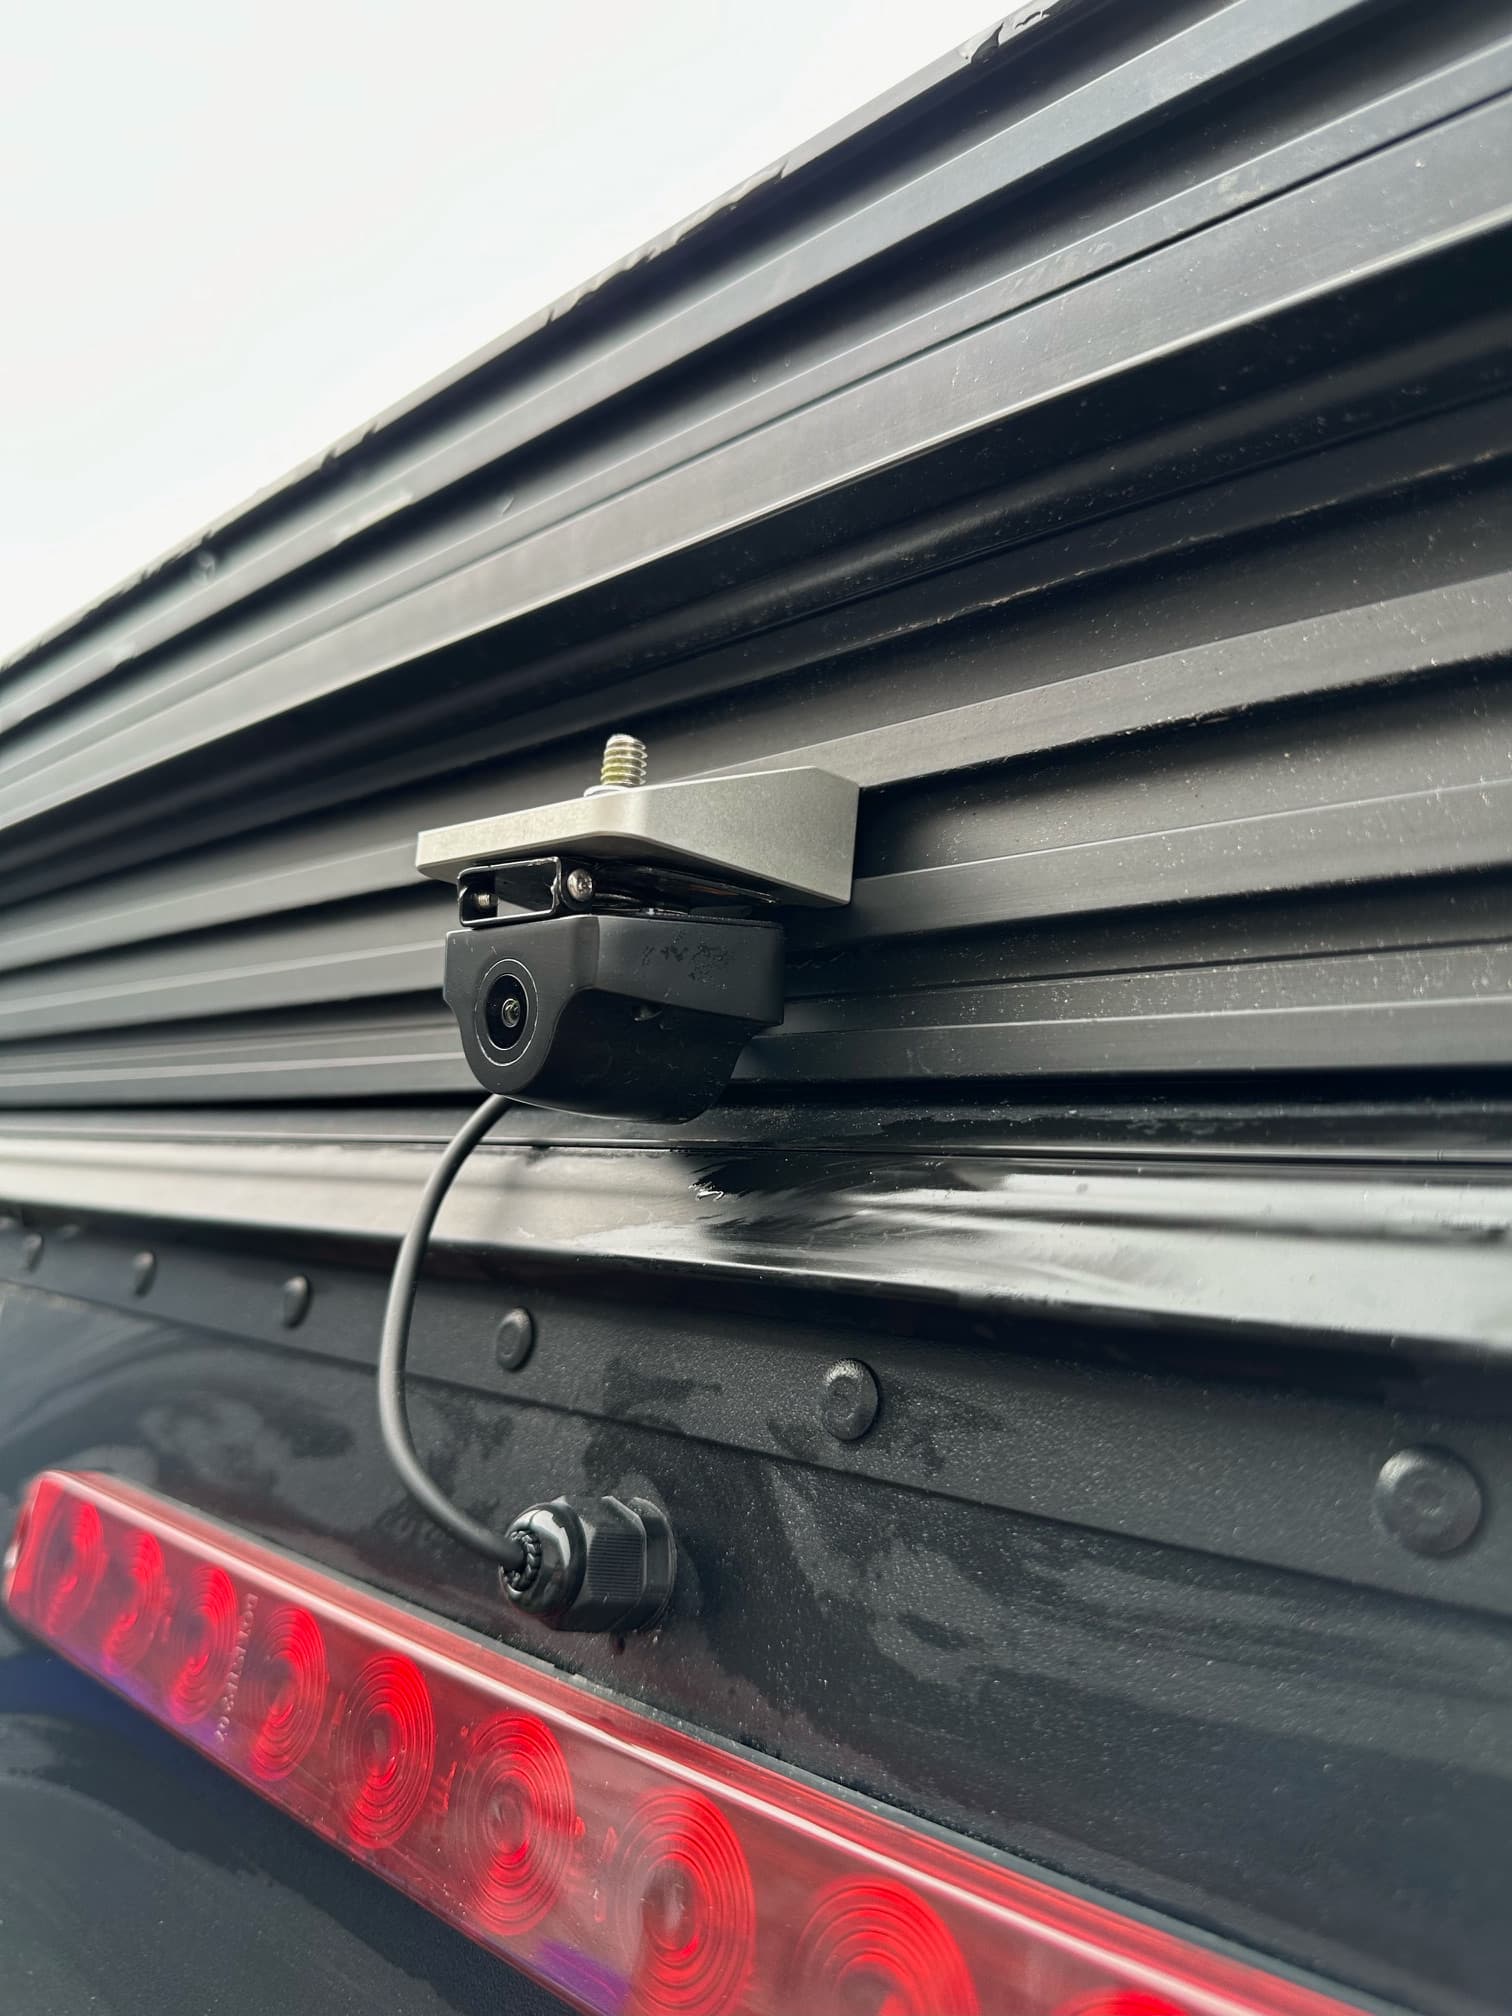
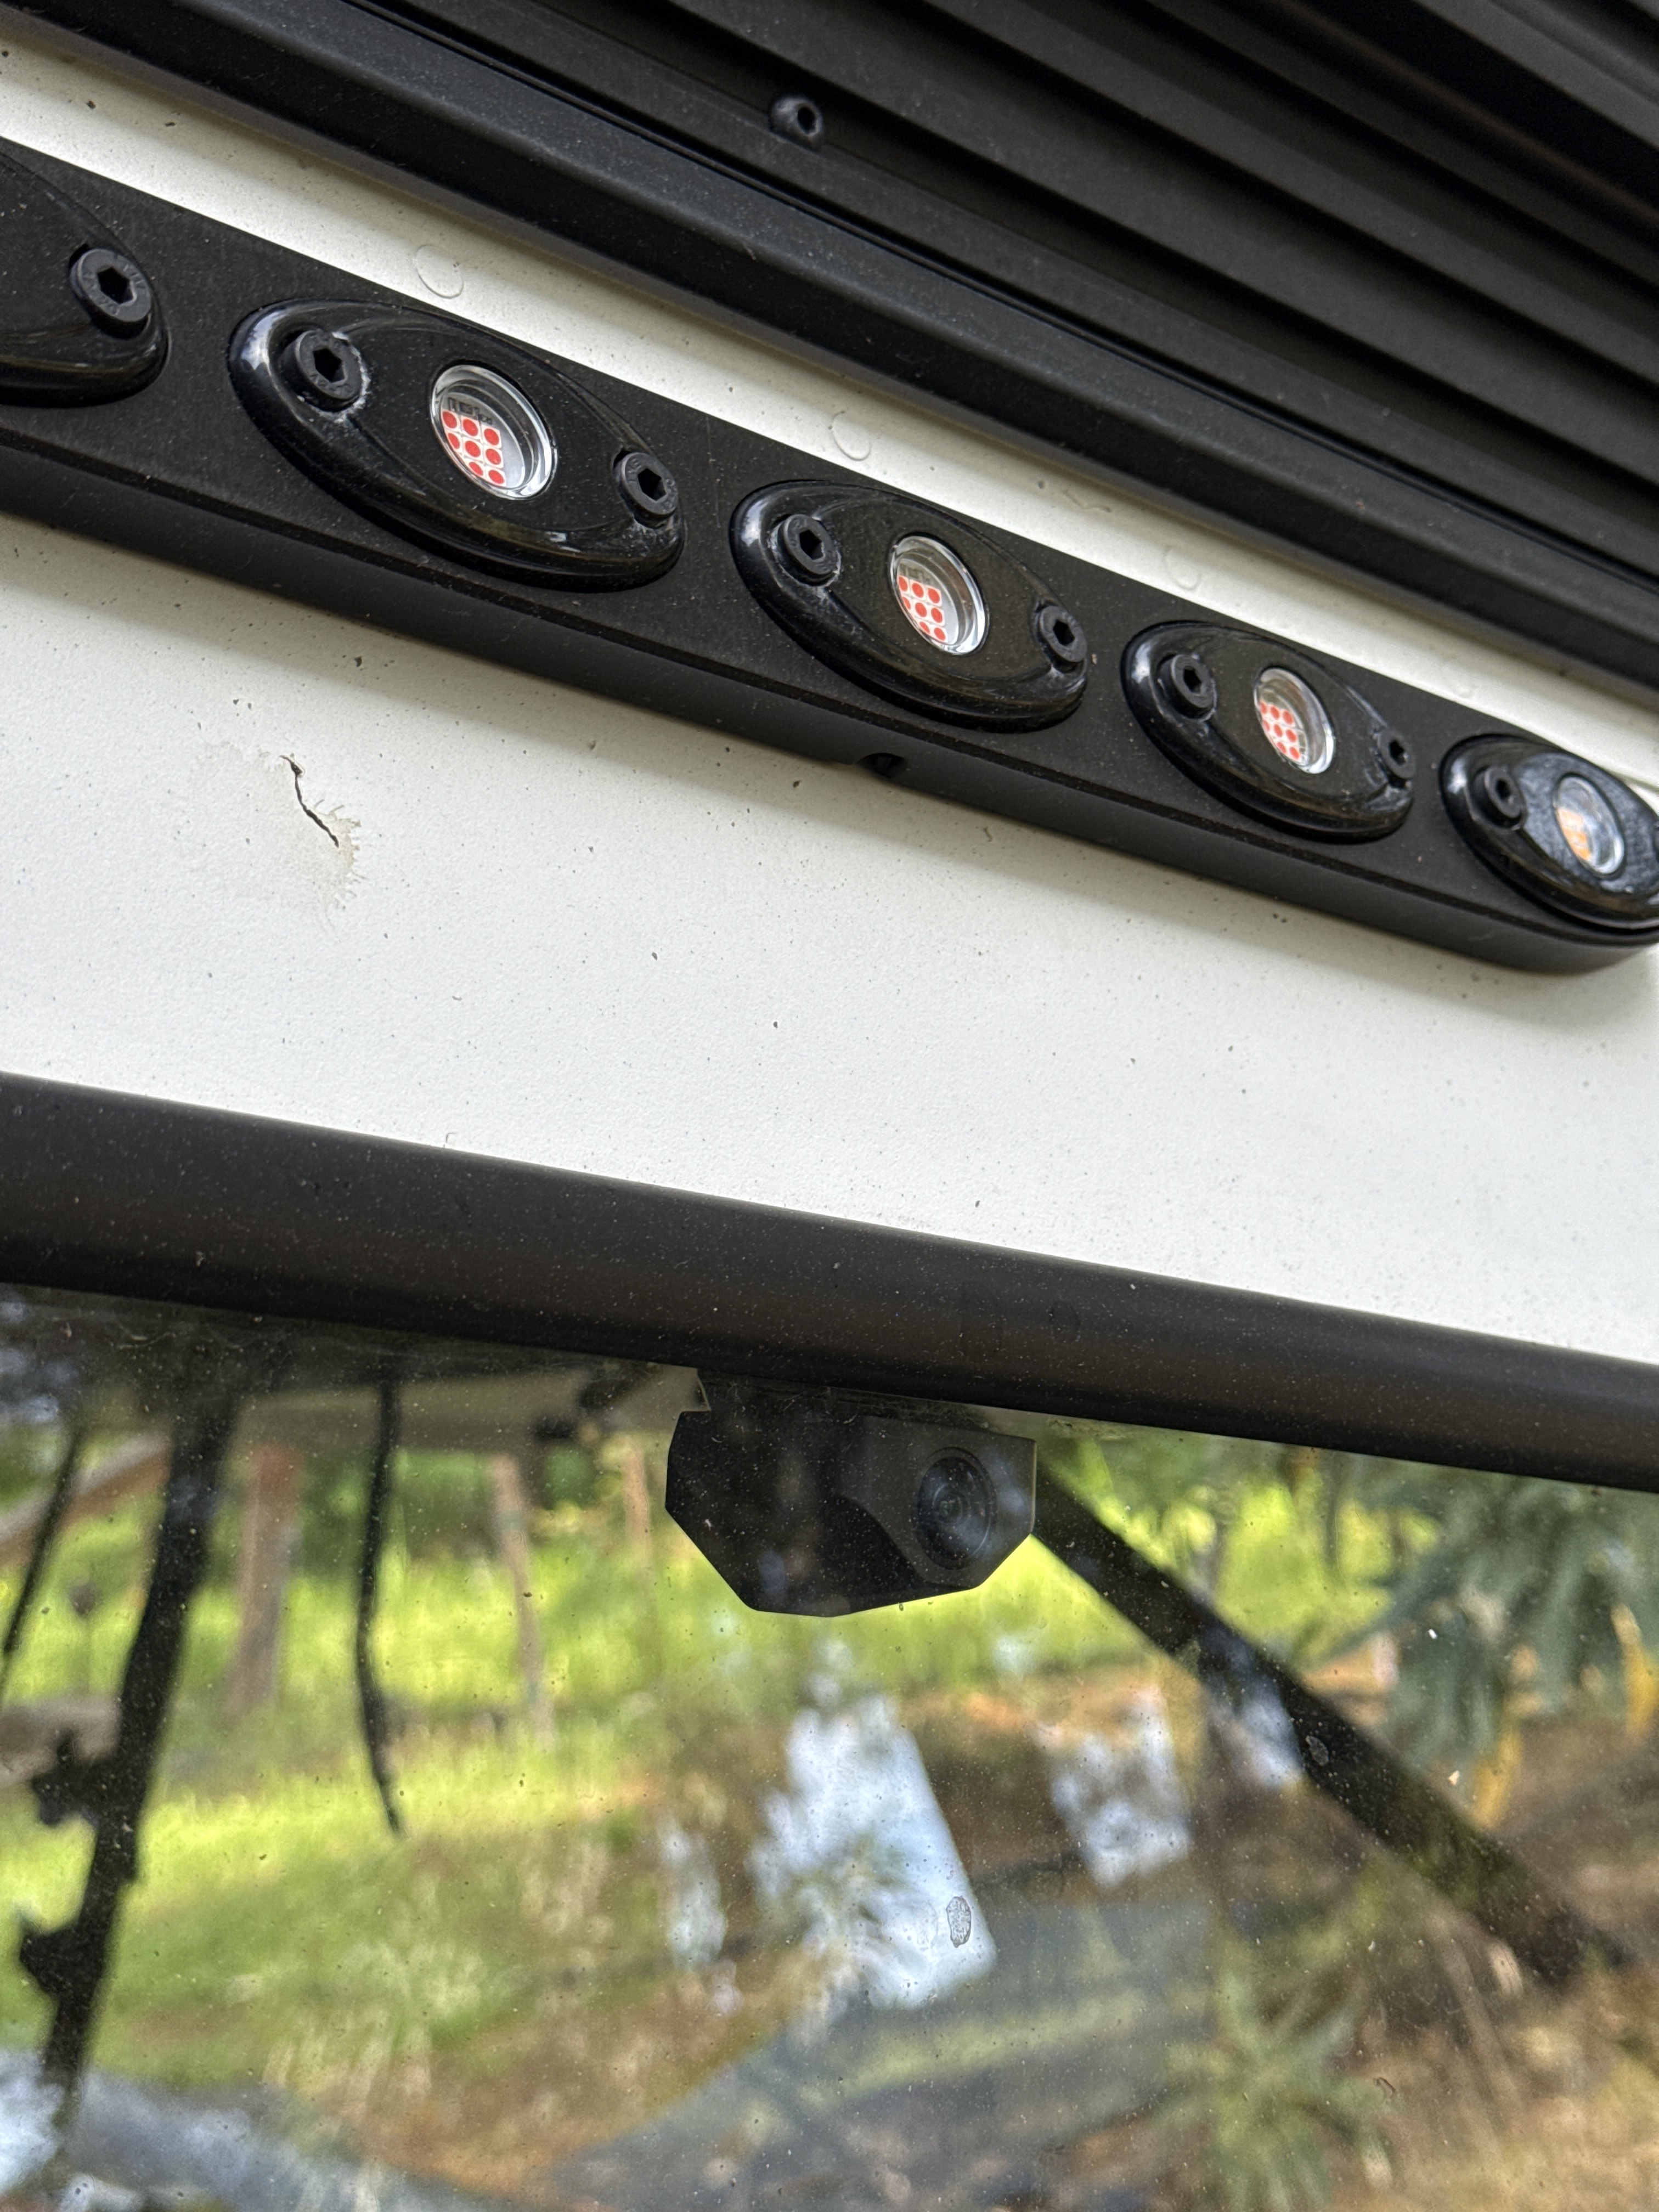
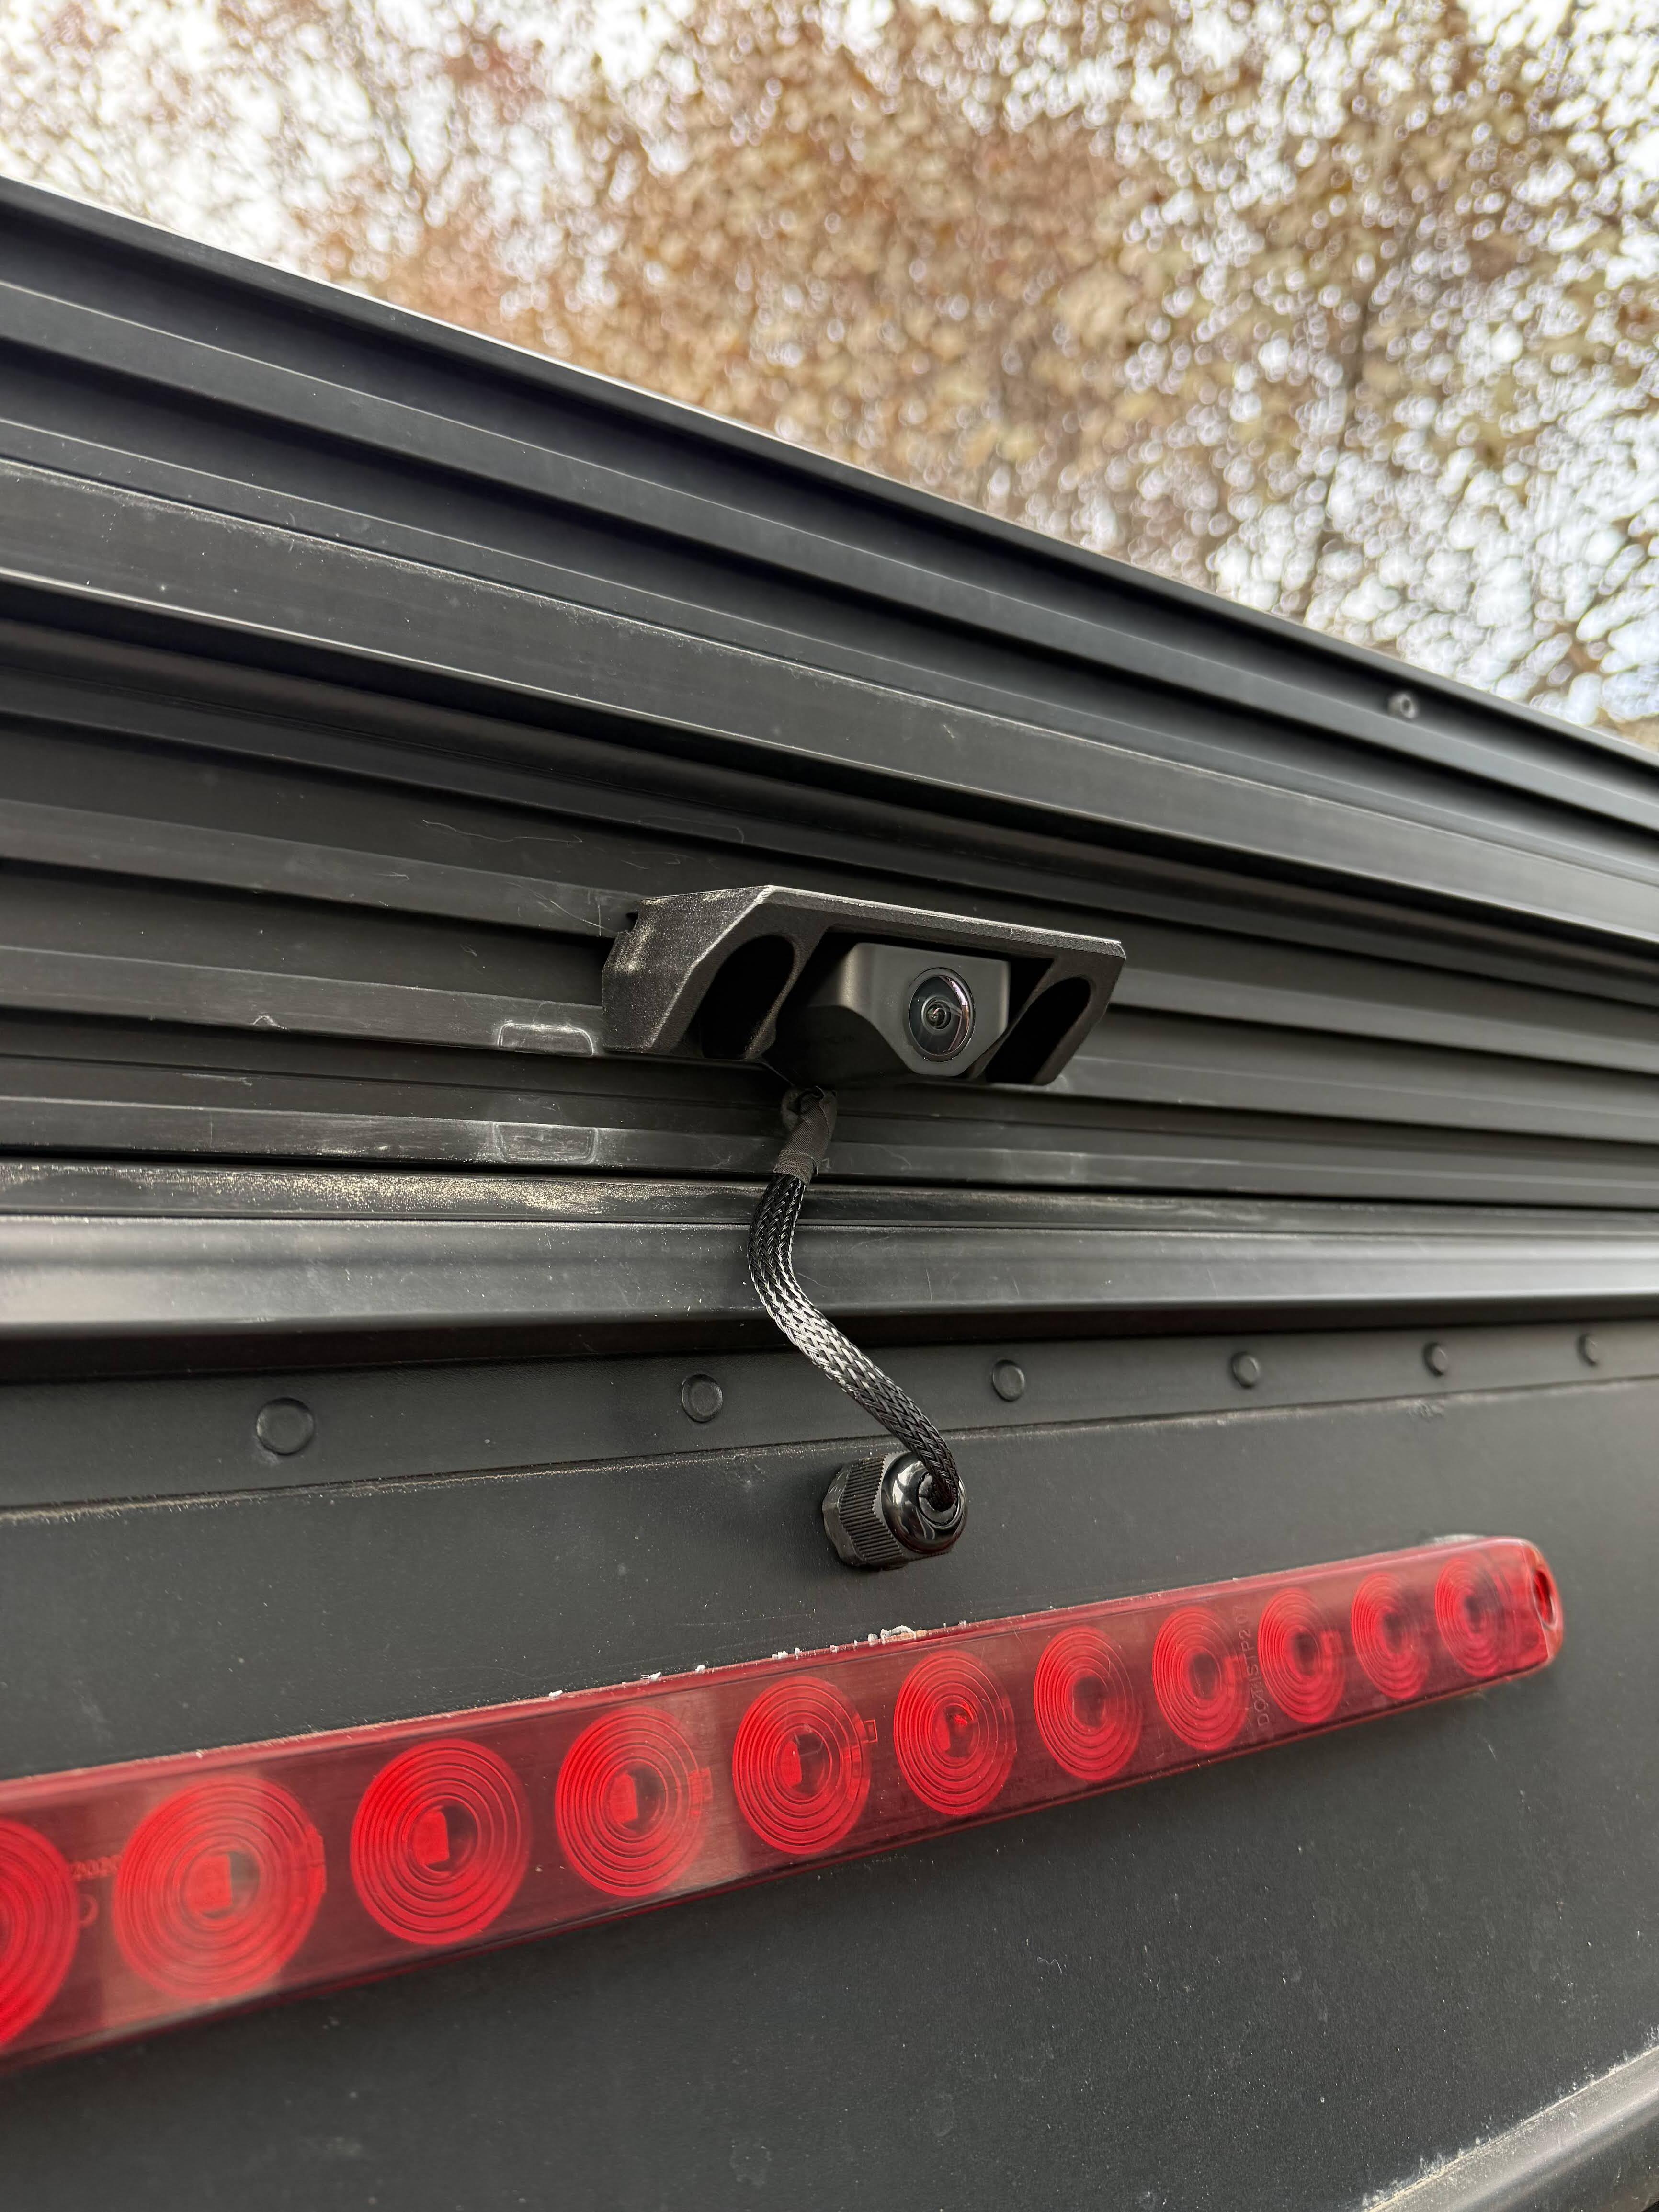
For mounting on the camper, I make a GFC mount for the Wolfbox rear camera. There are actually quite a few different mounts to choose from these days from other community members, too.

1 Like

Get the Dongar Type A 12 Pin adapter for the mirror and you can power it from your stock wiring… That’s what I did

1 Like

I second what shadesbro said. Get the dongar adapter for power, it works great and makes for a clean and easy install. I used the UMF mount for the rear camera on my GFC.

And the Wolfbox OEM mirror adapter works great for mounting it in the truck, and you don’t have to just rubber band it to your existing mirror, which sucks and can interfere with the forward facing camera. Here’s the adapter - Amazon.com: WOLFBOX OEM Bracket for USB C G900 Tripro/G900PRO/G850PRO/G840S/G840H/G850/G900 Mirror Dash cam : Electronics

2 Likes

@high_desert_rex how is the Dongar Type A 12 Pin adapter different than using the provided wolf box add a fuse

I have used the wolf box add a fuse, the Dongar is just a more plug and play option for folks with a auto dimming rearview that uses pre-existing wiring for power

Ok thank you. So with the add a fuse it does not auto dim correct. For that feature I would need to do the dongar ?

Not quite sure what you mean but maybe it will help if I clarify,

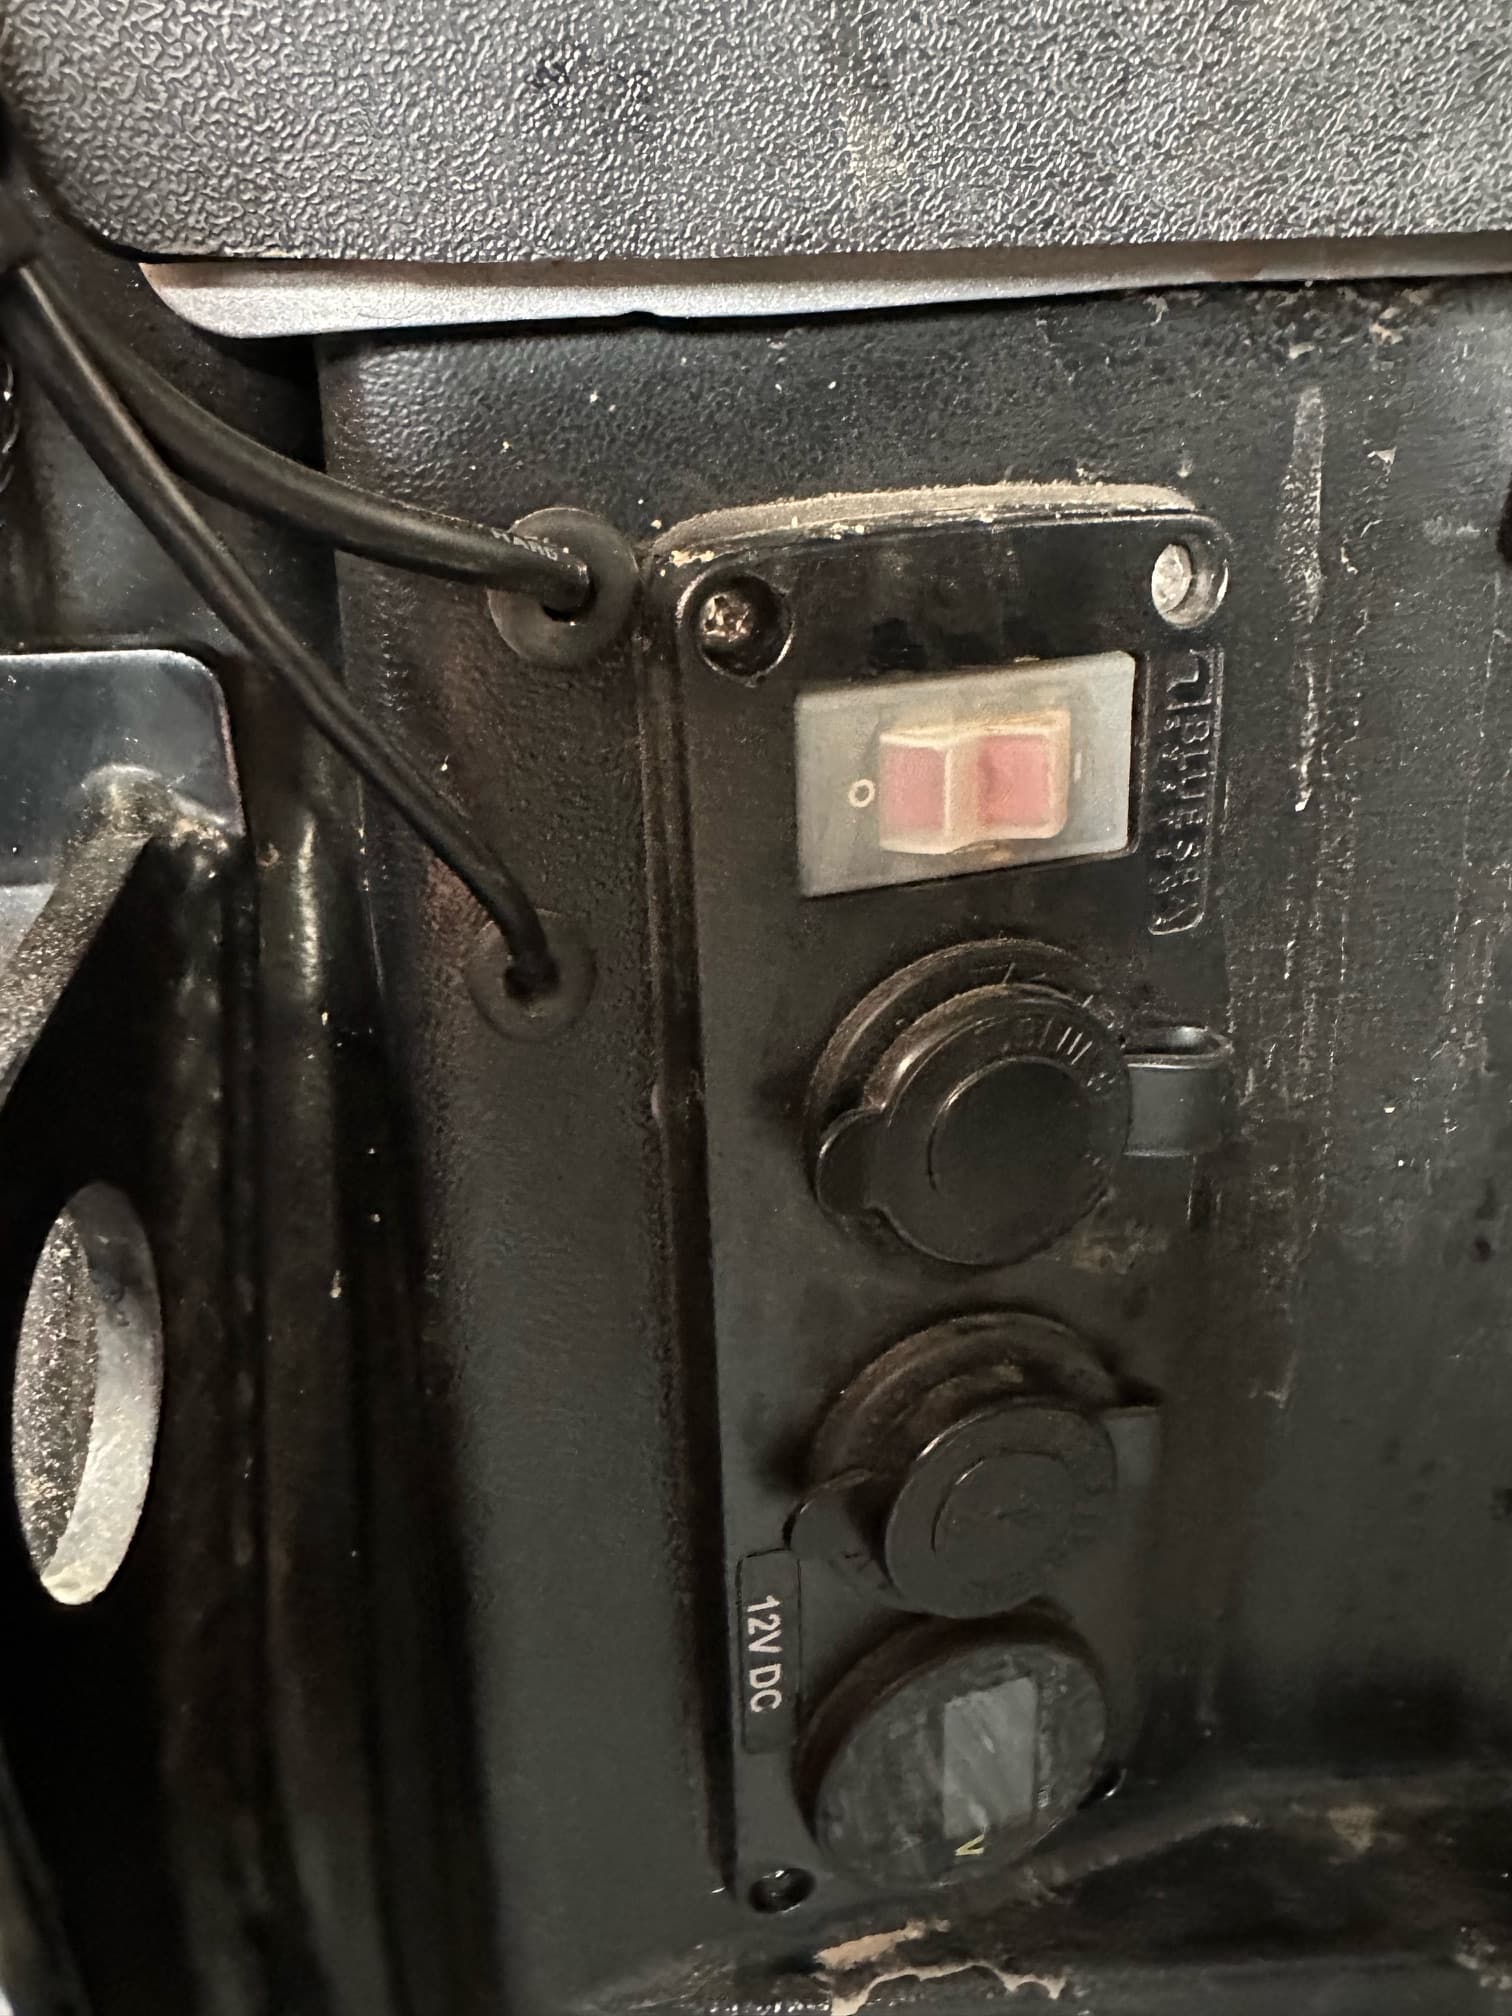
The add a fuse kit is so you can have the wolf box on a keyed circuit, so it allows for the wolf box to not be always on ( although there is an always on/ security/dashcam wiring option if you want that functionality)

the add a fuse would not interact with a rearview circuit in any way

The dongar adapter uses the wiring that exists on some vehicles that have 12v running to the rearview mirror to enable photochromic auto tinting

their website states it is limited to Toyotas, some Hondas and some Subarus

The benefit is that you don’t have to run additional wire from the dash/ fuse box location up a pillar and into the the headliner

Still happy with this set up? Debating mounting interior/exterior..

I am best setup hands down

the dongar adapter crapped out on me after a while that was were i first had it plugged in and just one random day the camera started rebooting itself so i switched to hardwire.

Sorry for the late reply.

I’ve been powering my Wolfbox with the dongar adapter for over a year now and it’s still working great. Easiest way to power a Wolfbox by far. I’d recommend it.

The difference between it and the Wolfbox power kit is that the Wolfbox kit requires you to run a power wire from the fuse box to the mirror. The dongar adapter taps (plug & play) into the wiring for the stock mirror and adds a usb port to power the Wolfbox or other dash cam. Easy peasy for installation. Also have one in my wife’s car for her Garmin dash cam.