2013 Tacoma Buildout w/ sink in modular panels

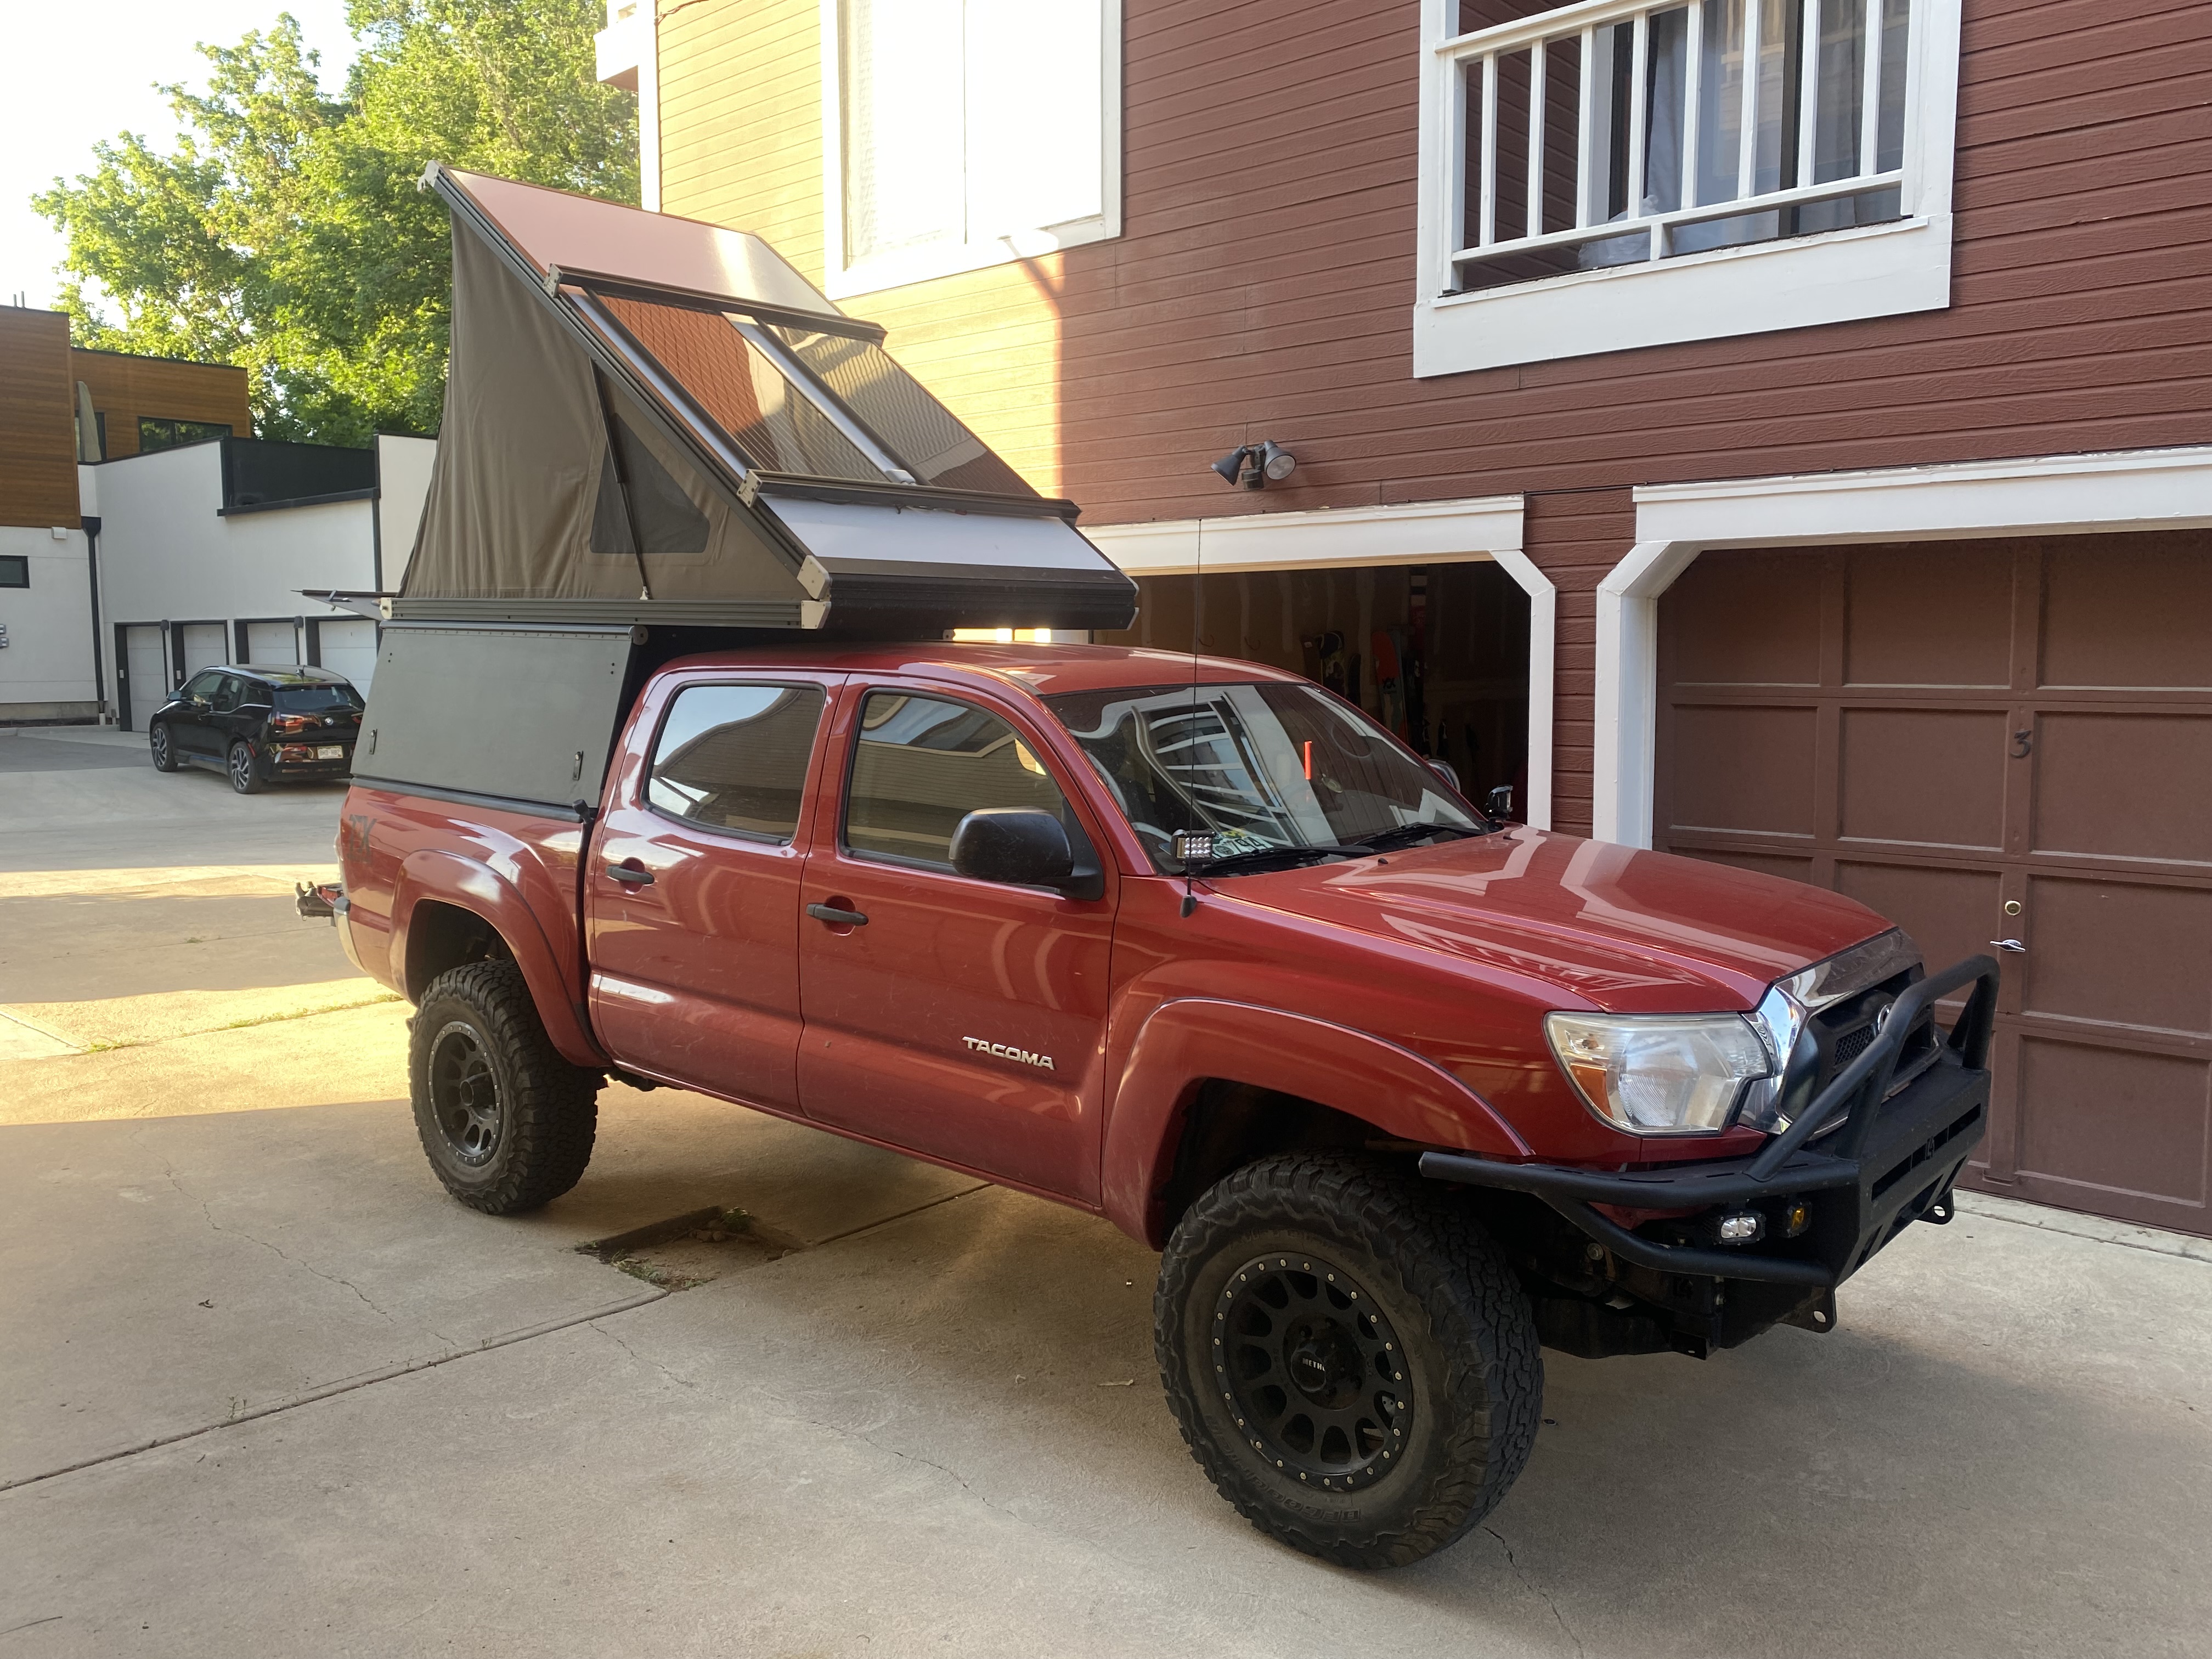
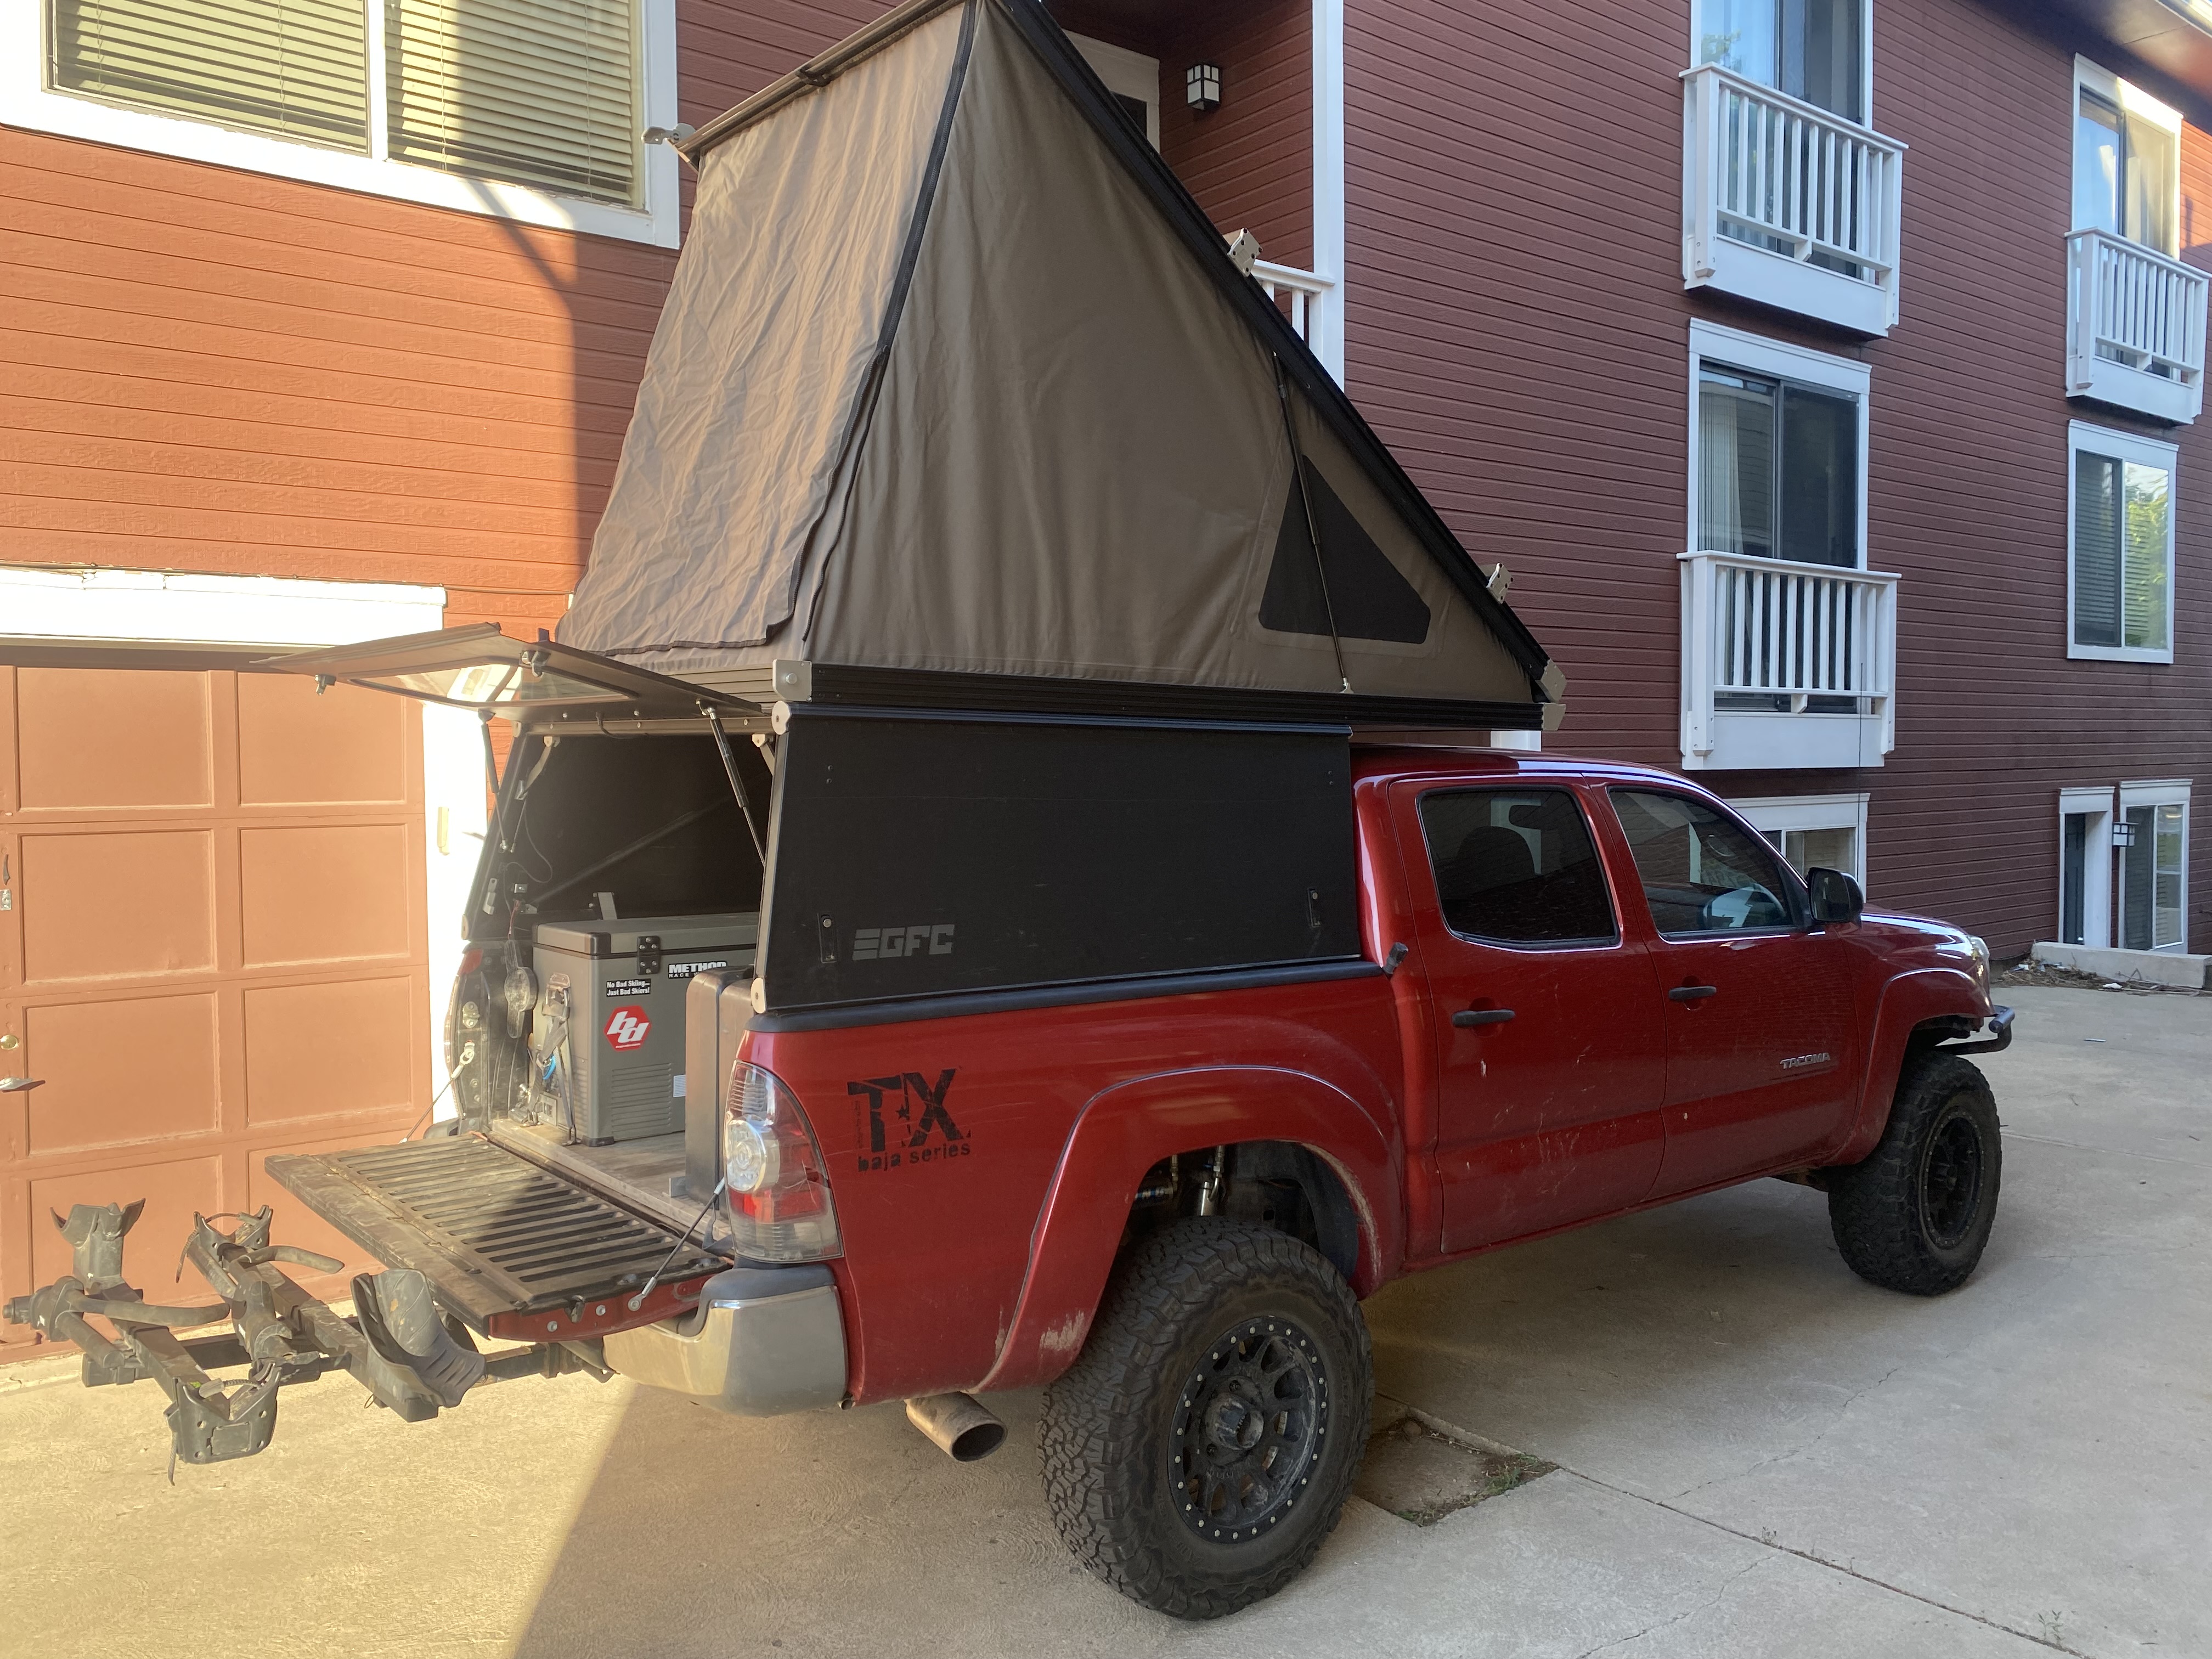
Hey guys! I’m roughly 90% done with my interior buildout and I figured i’d share some of the modifications done to make it happen. My goal was to build the living space inside the truck bed, so all cooking and sleeping would happen indoors. The reason for this is I like to do ski touring trips in the winter. That being said, I haven’t fully tested it in the winter yet as I just finished the build so there may be some future modifications happening. It’s a 5 foot bed tacoma, and the entire build was done in my driveway.

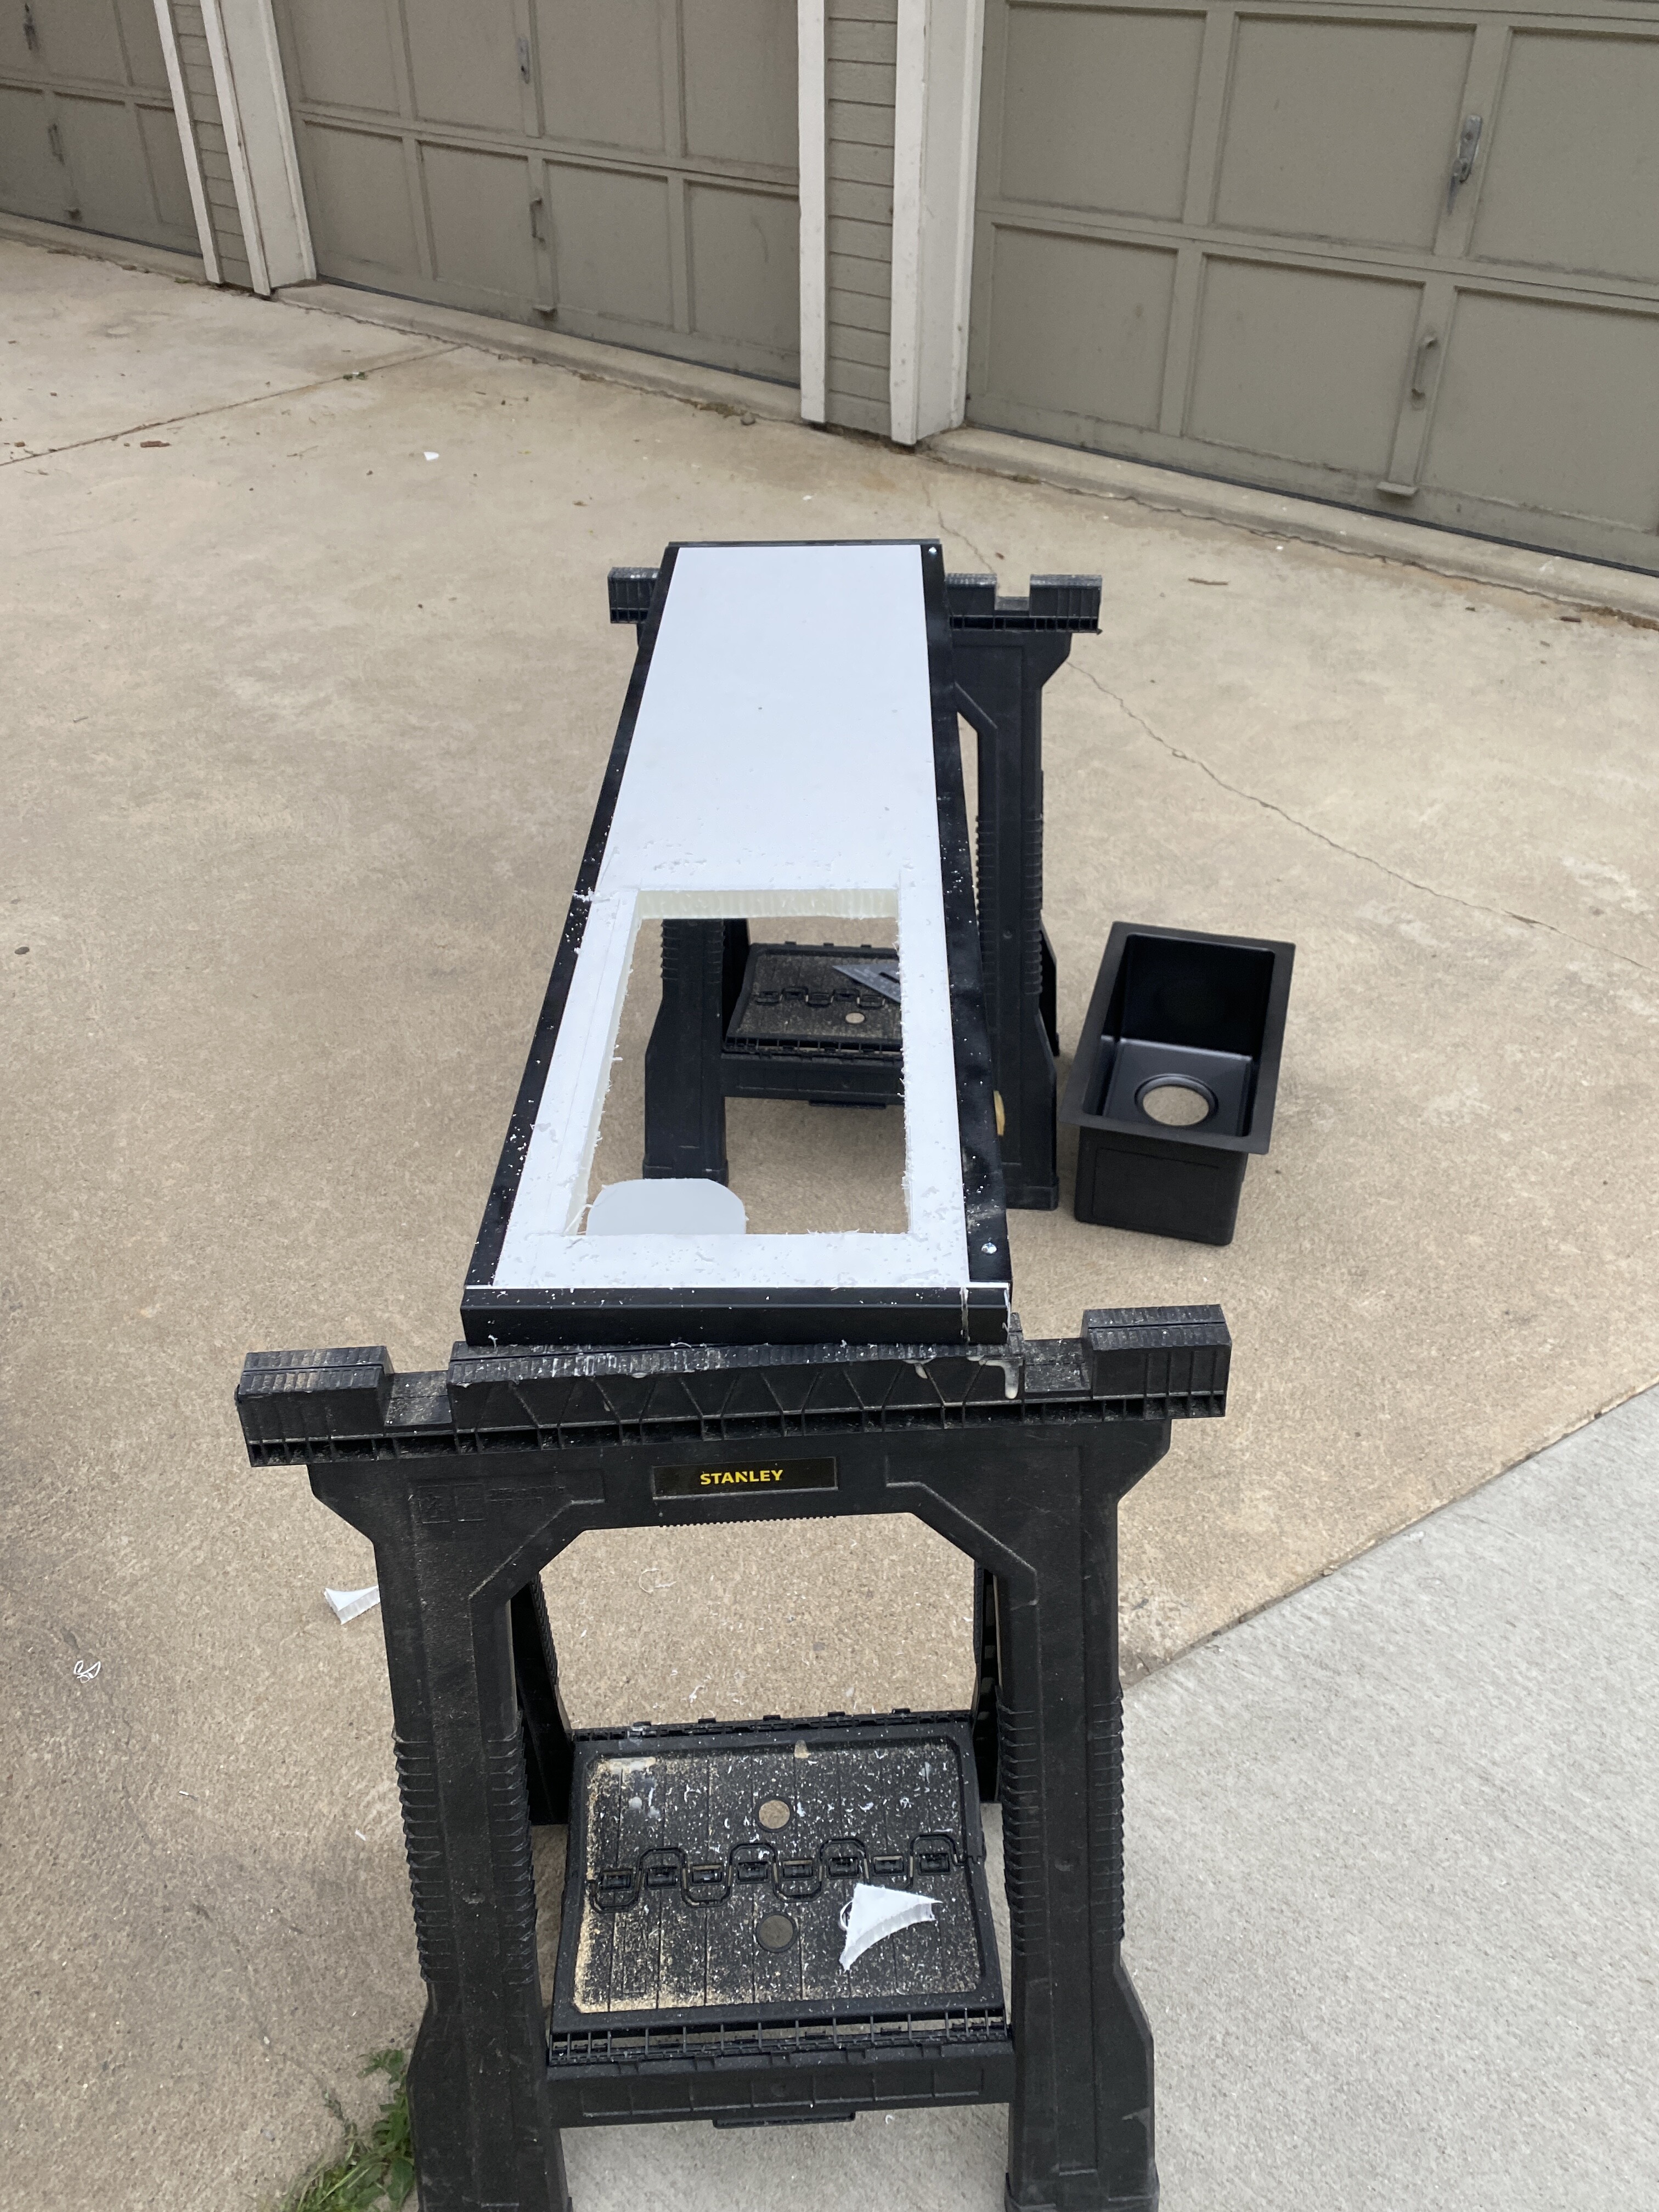
The first major thing you’ll notice is I cut the large modular panel in half. I used a black spray painted 1x1 inch angle trim piece from home depot to cover the cut, and sealed it with adhesive silicon.

I then took one of the panels and cut a hole to fit a drop in sink! I attached the sink with industrial strength adhesive and a silicon seal around the edge.

This created countertops that are at waist height!

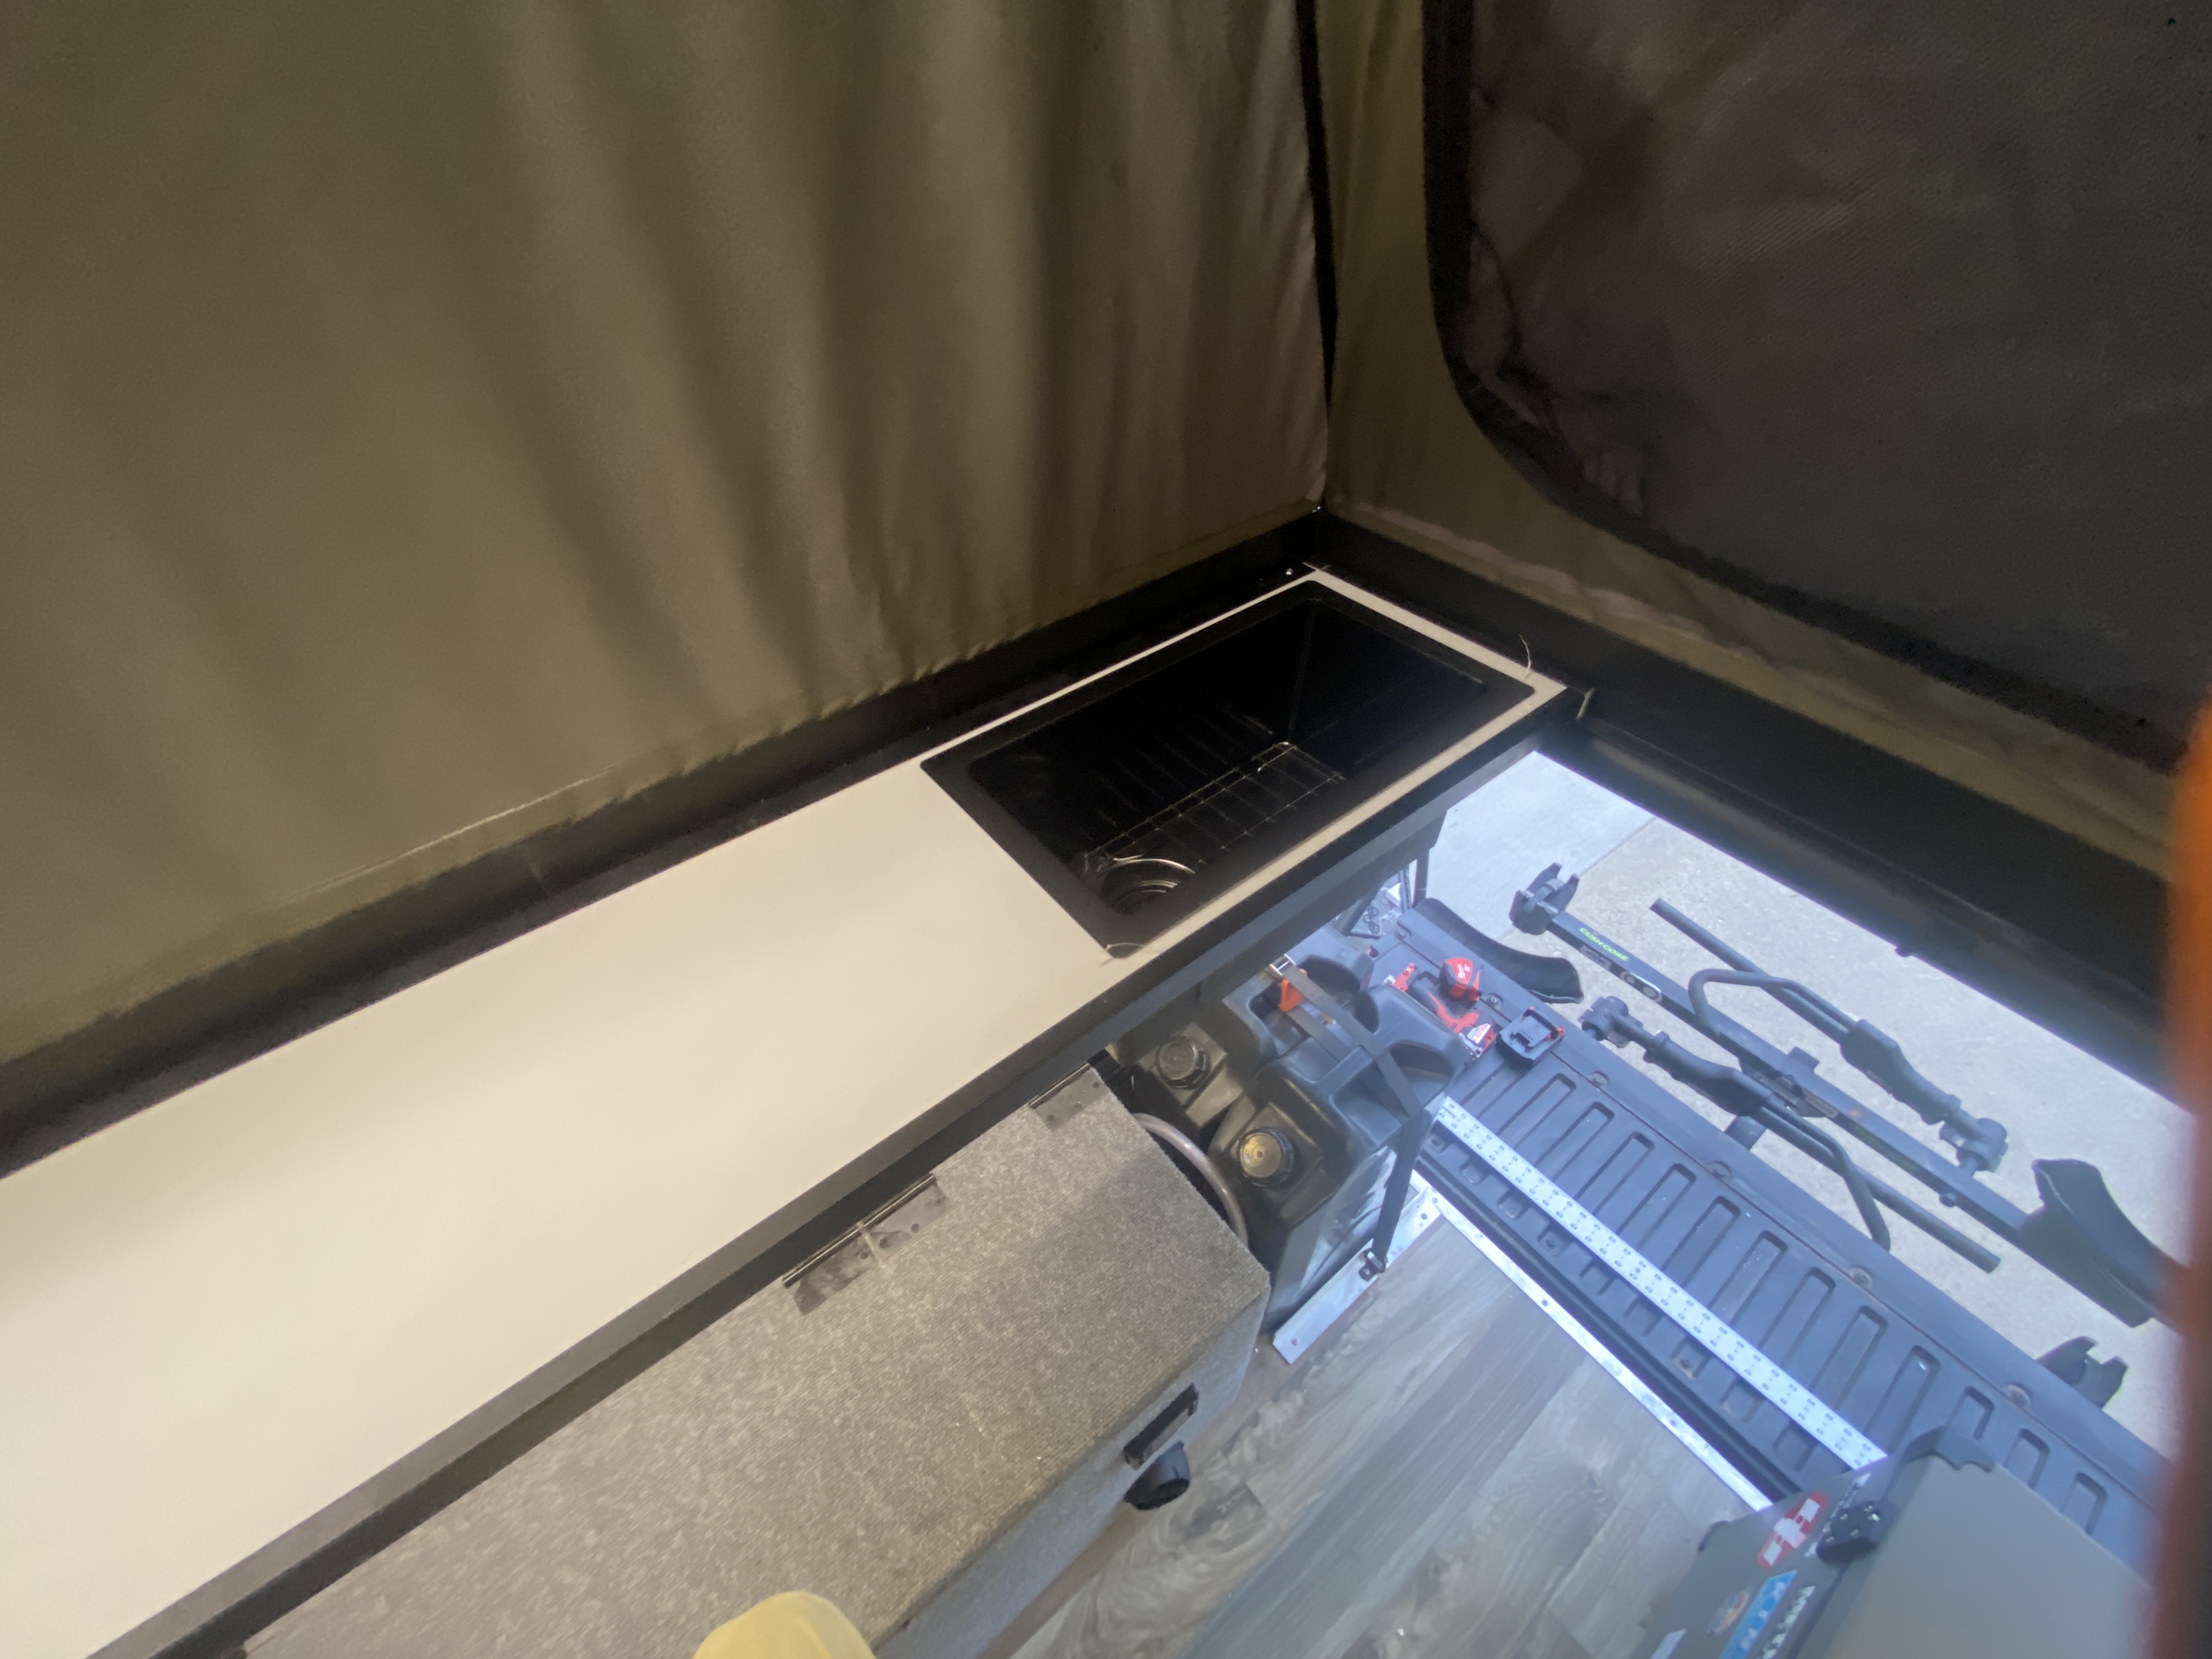
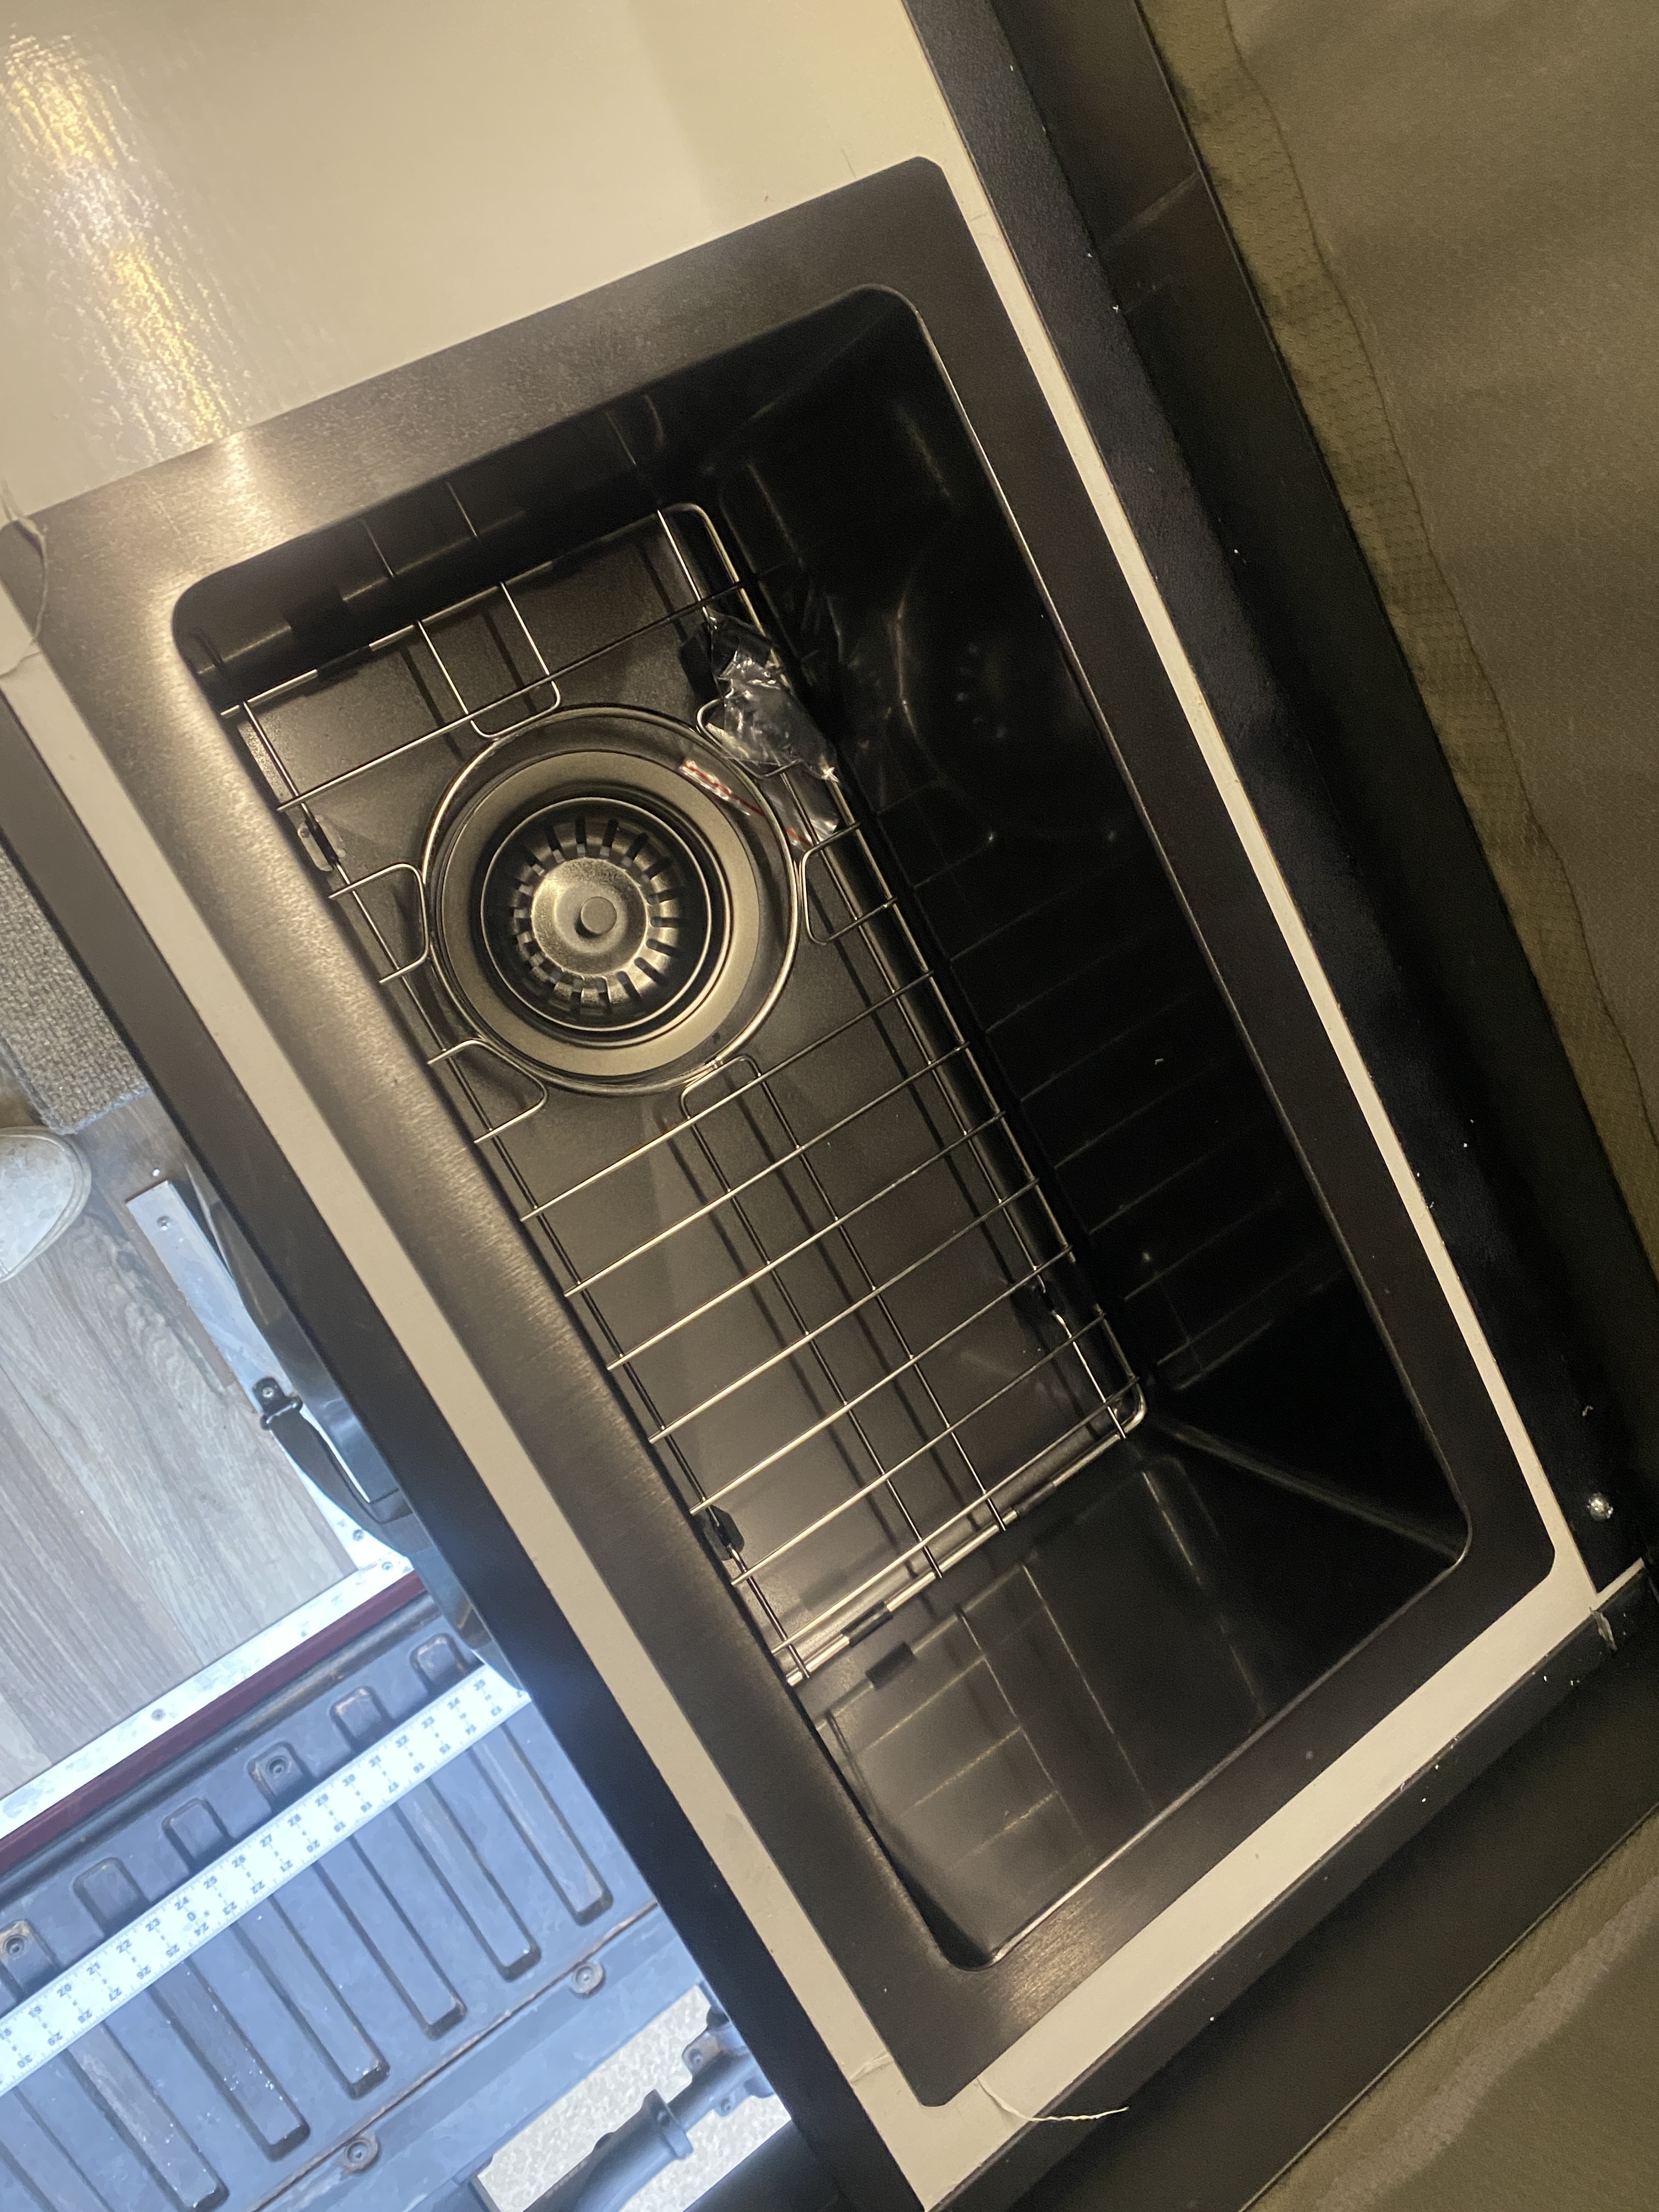
The sink is currently just piped outside through the side cubby.

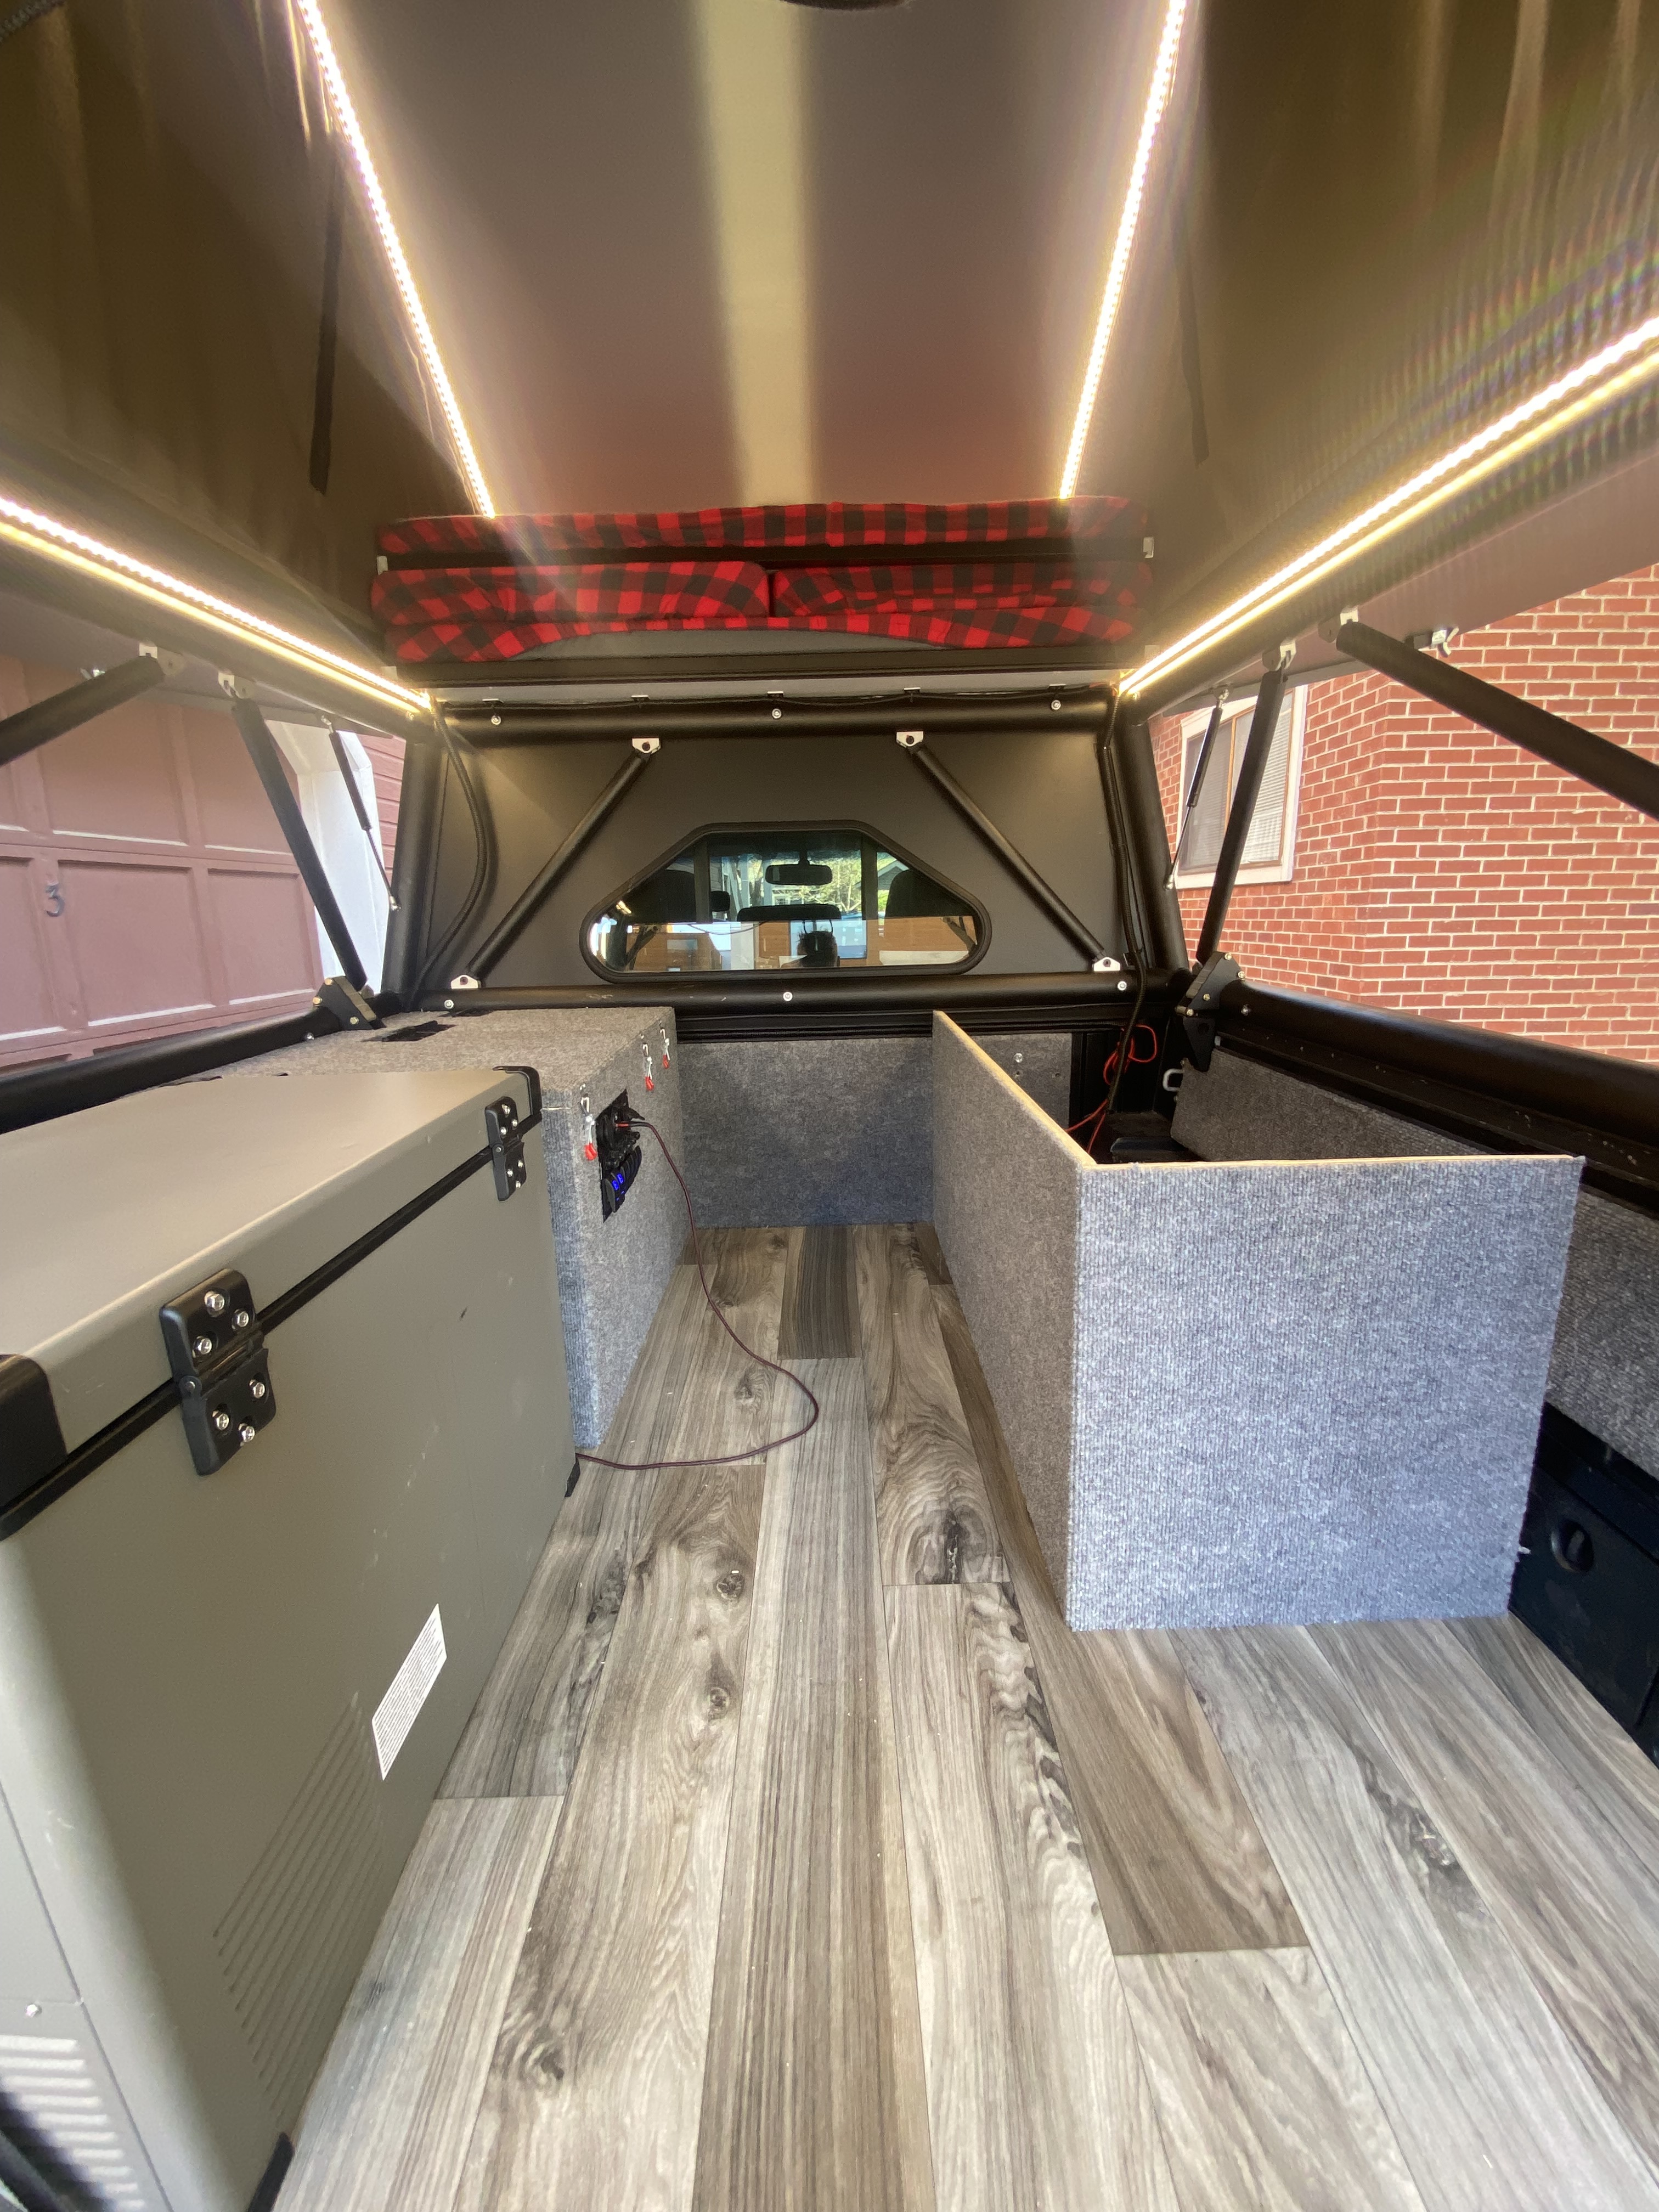
Other than that, this truck has a fridge, a 12v water pump with 10gal capacity, a chinese diesel heater, and LED strip lights all powered by a 100ah lithium phosphate battery. The battery charges with a 20ah DCDC charger and two 100w solar panels.

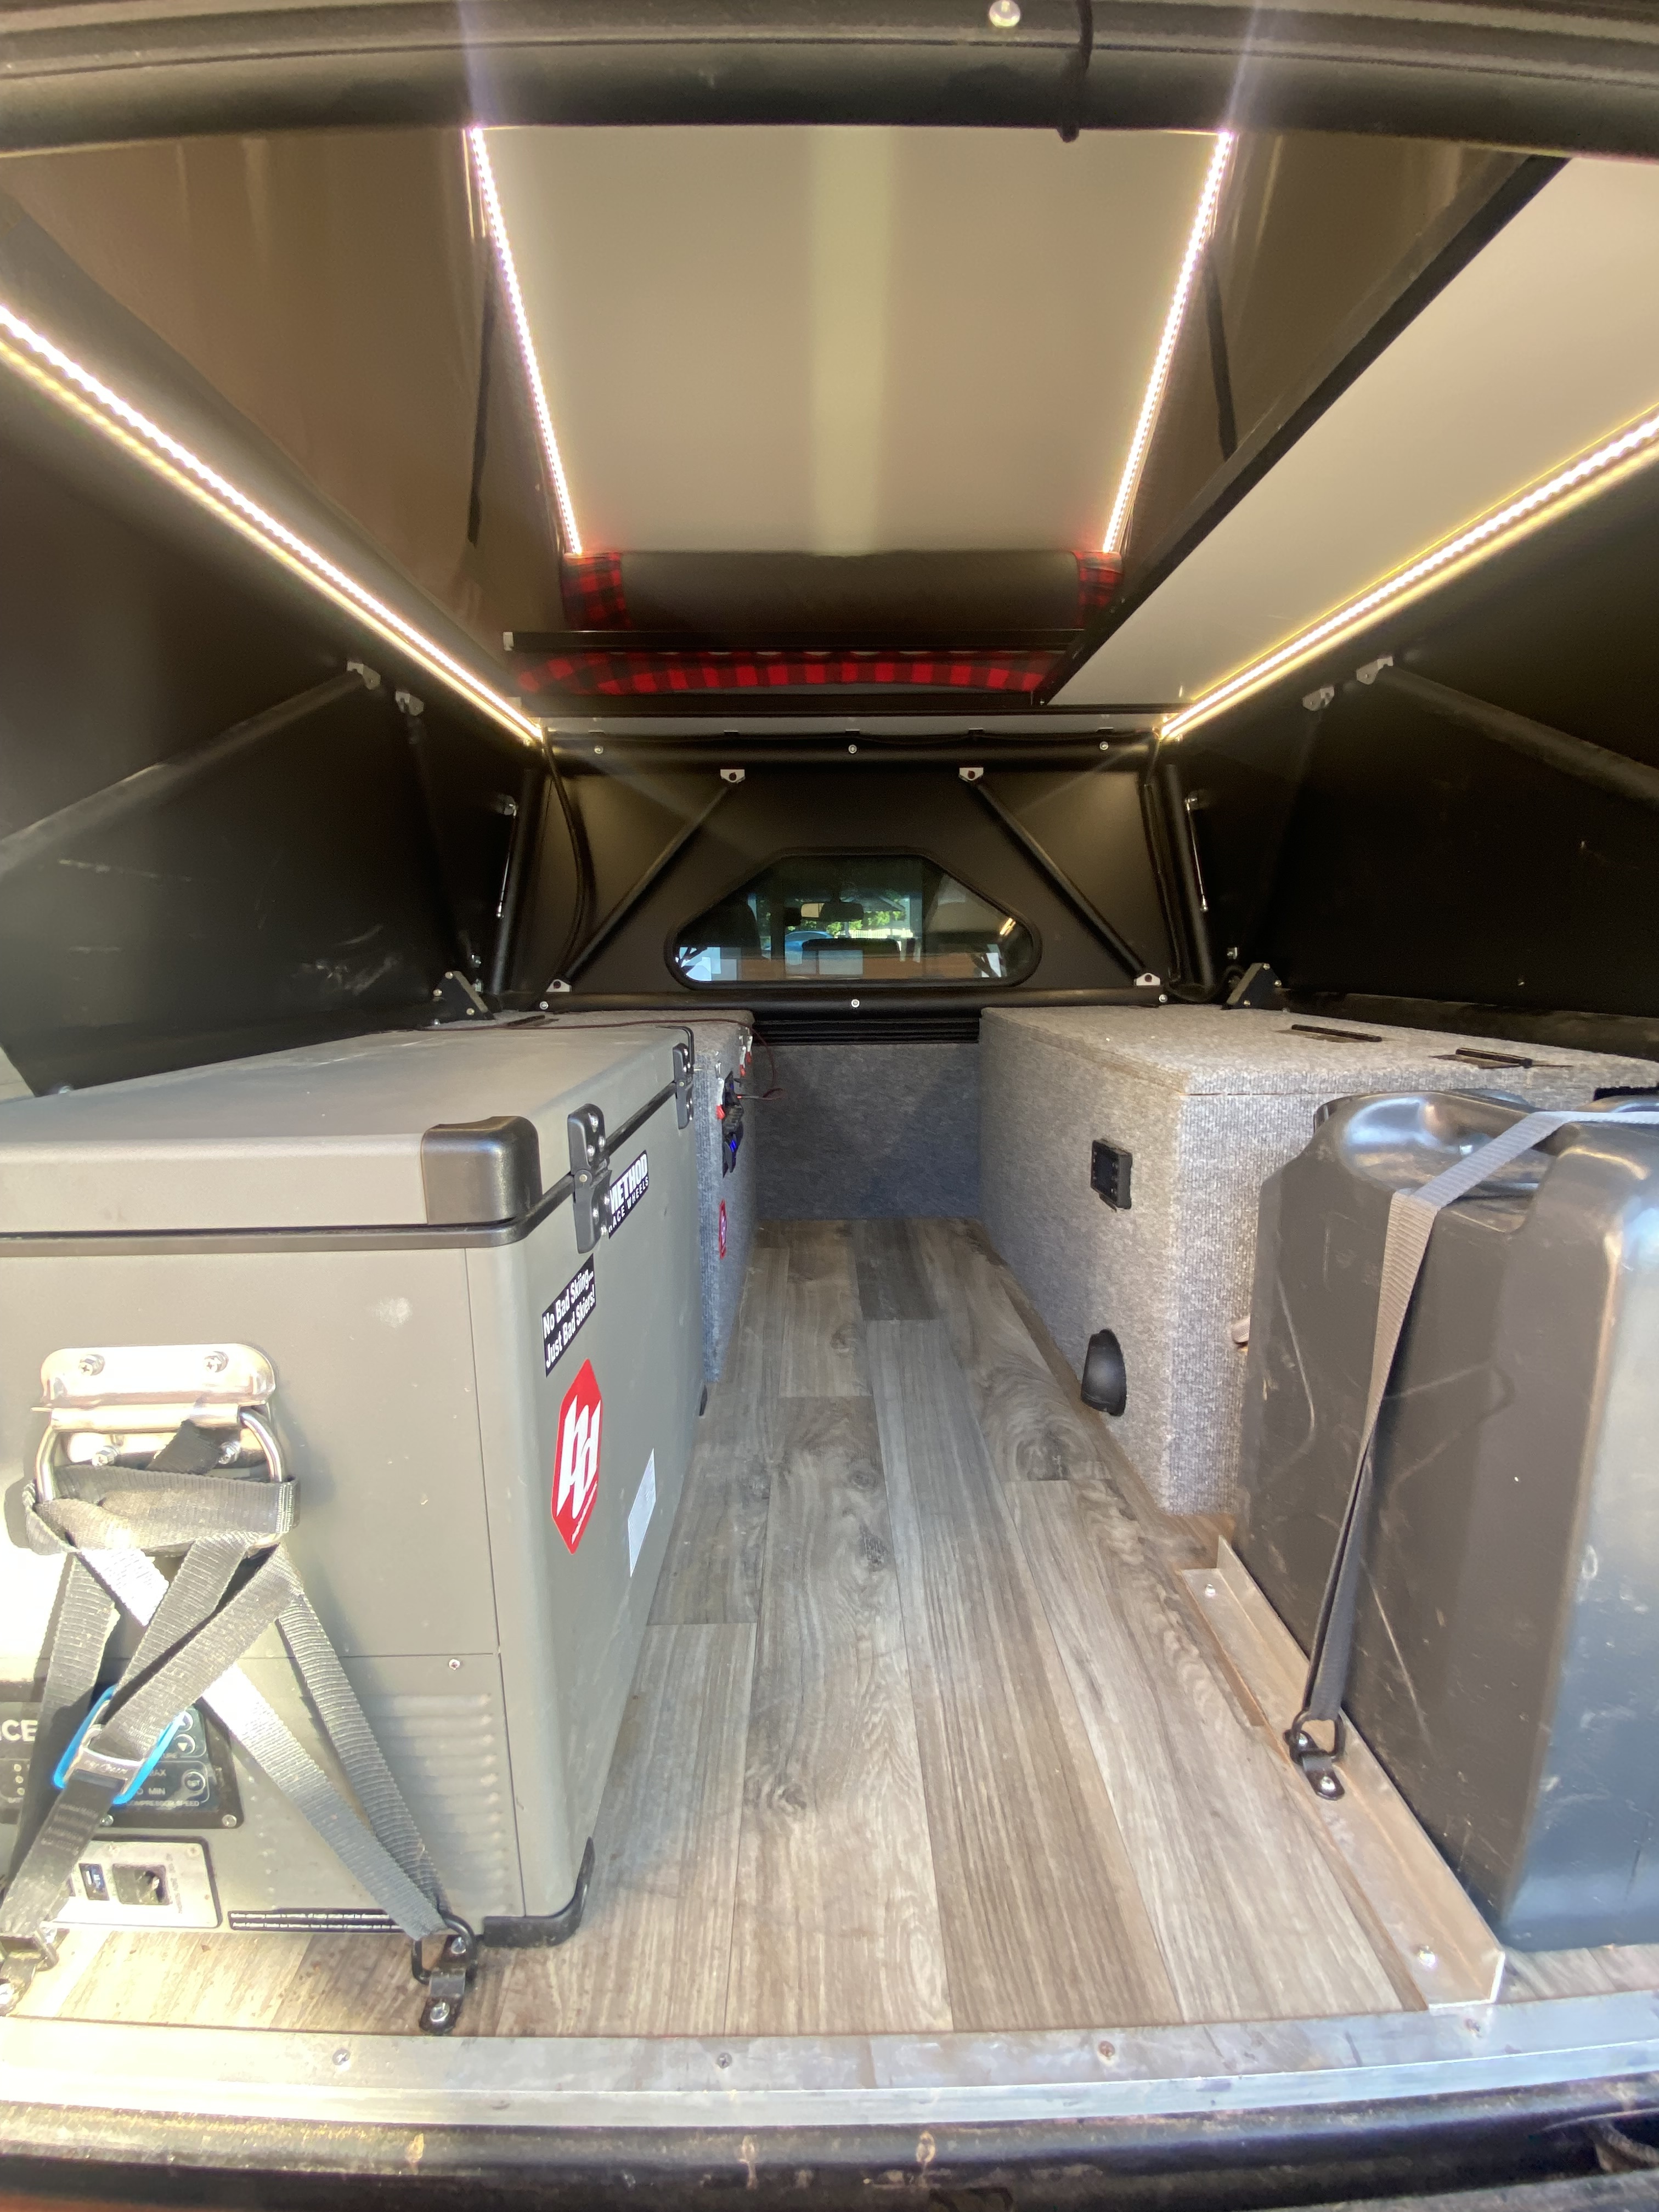
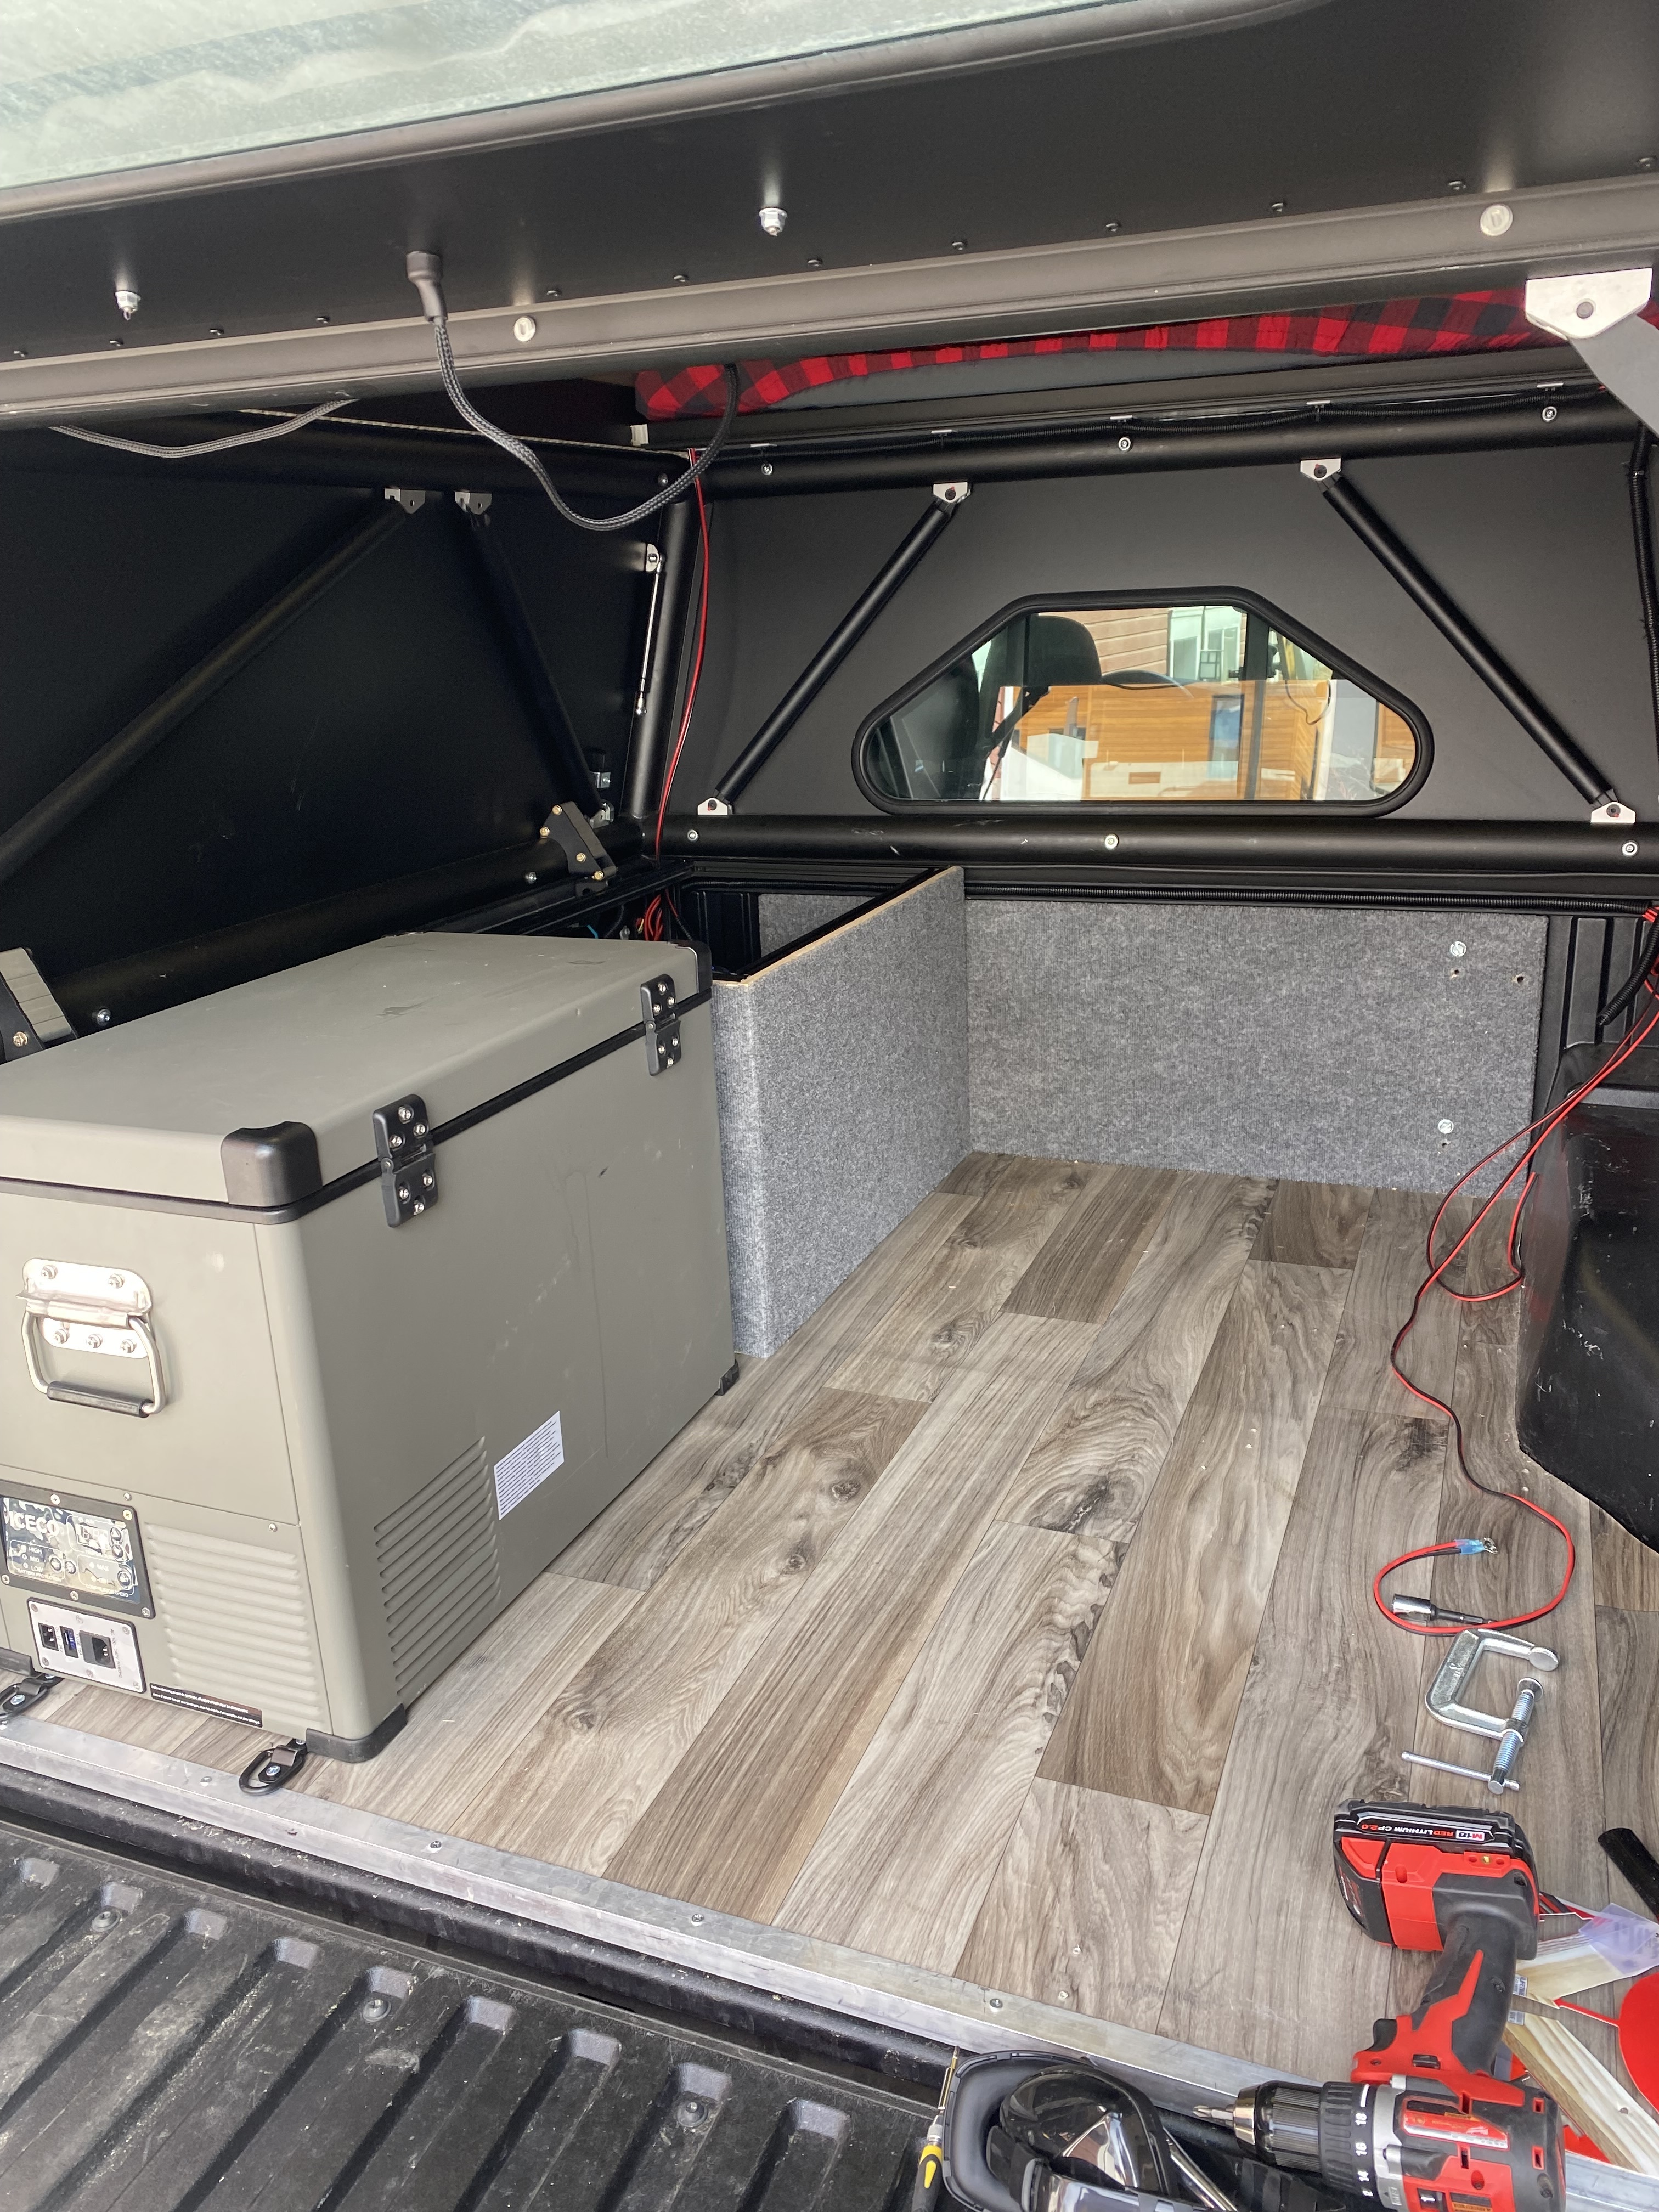
First step of this build was the baseboard, which is 3/4 inch plywood with sheet vinyl on it. For the edge I used that same 1x1 inch aluminum trimming. I then put the fridge in using straps, and framed the benches using 8020 aluminum.

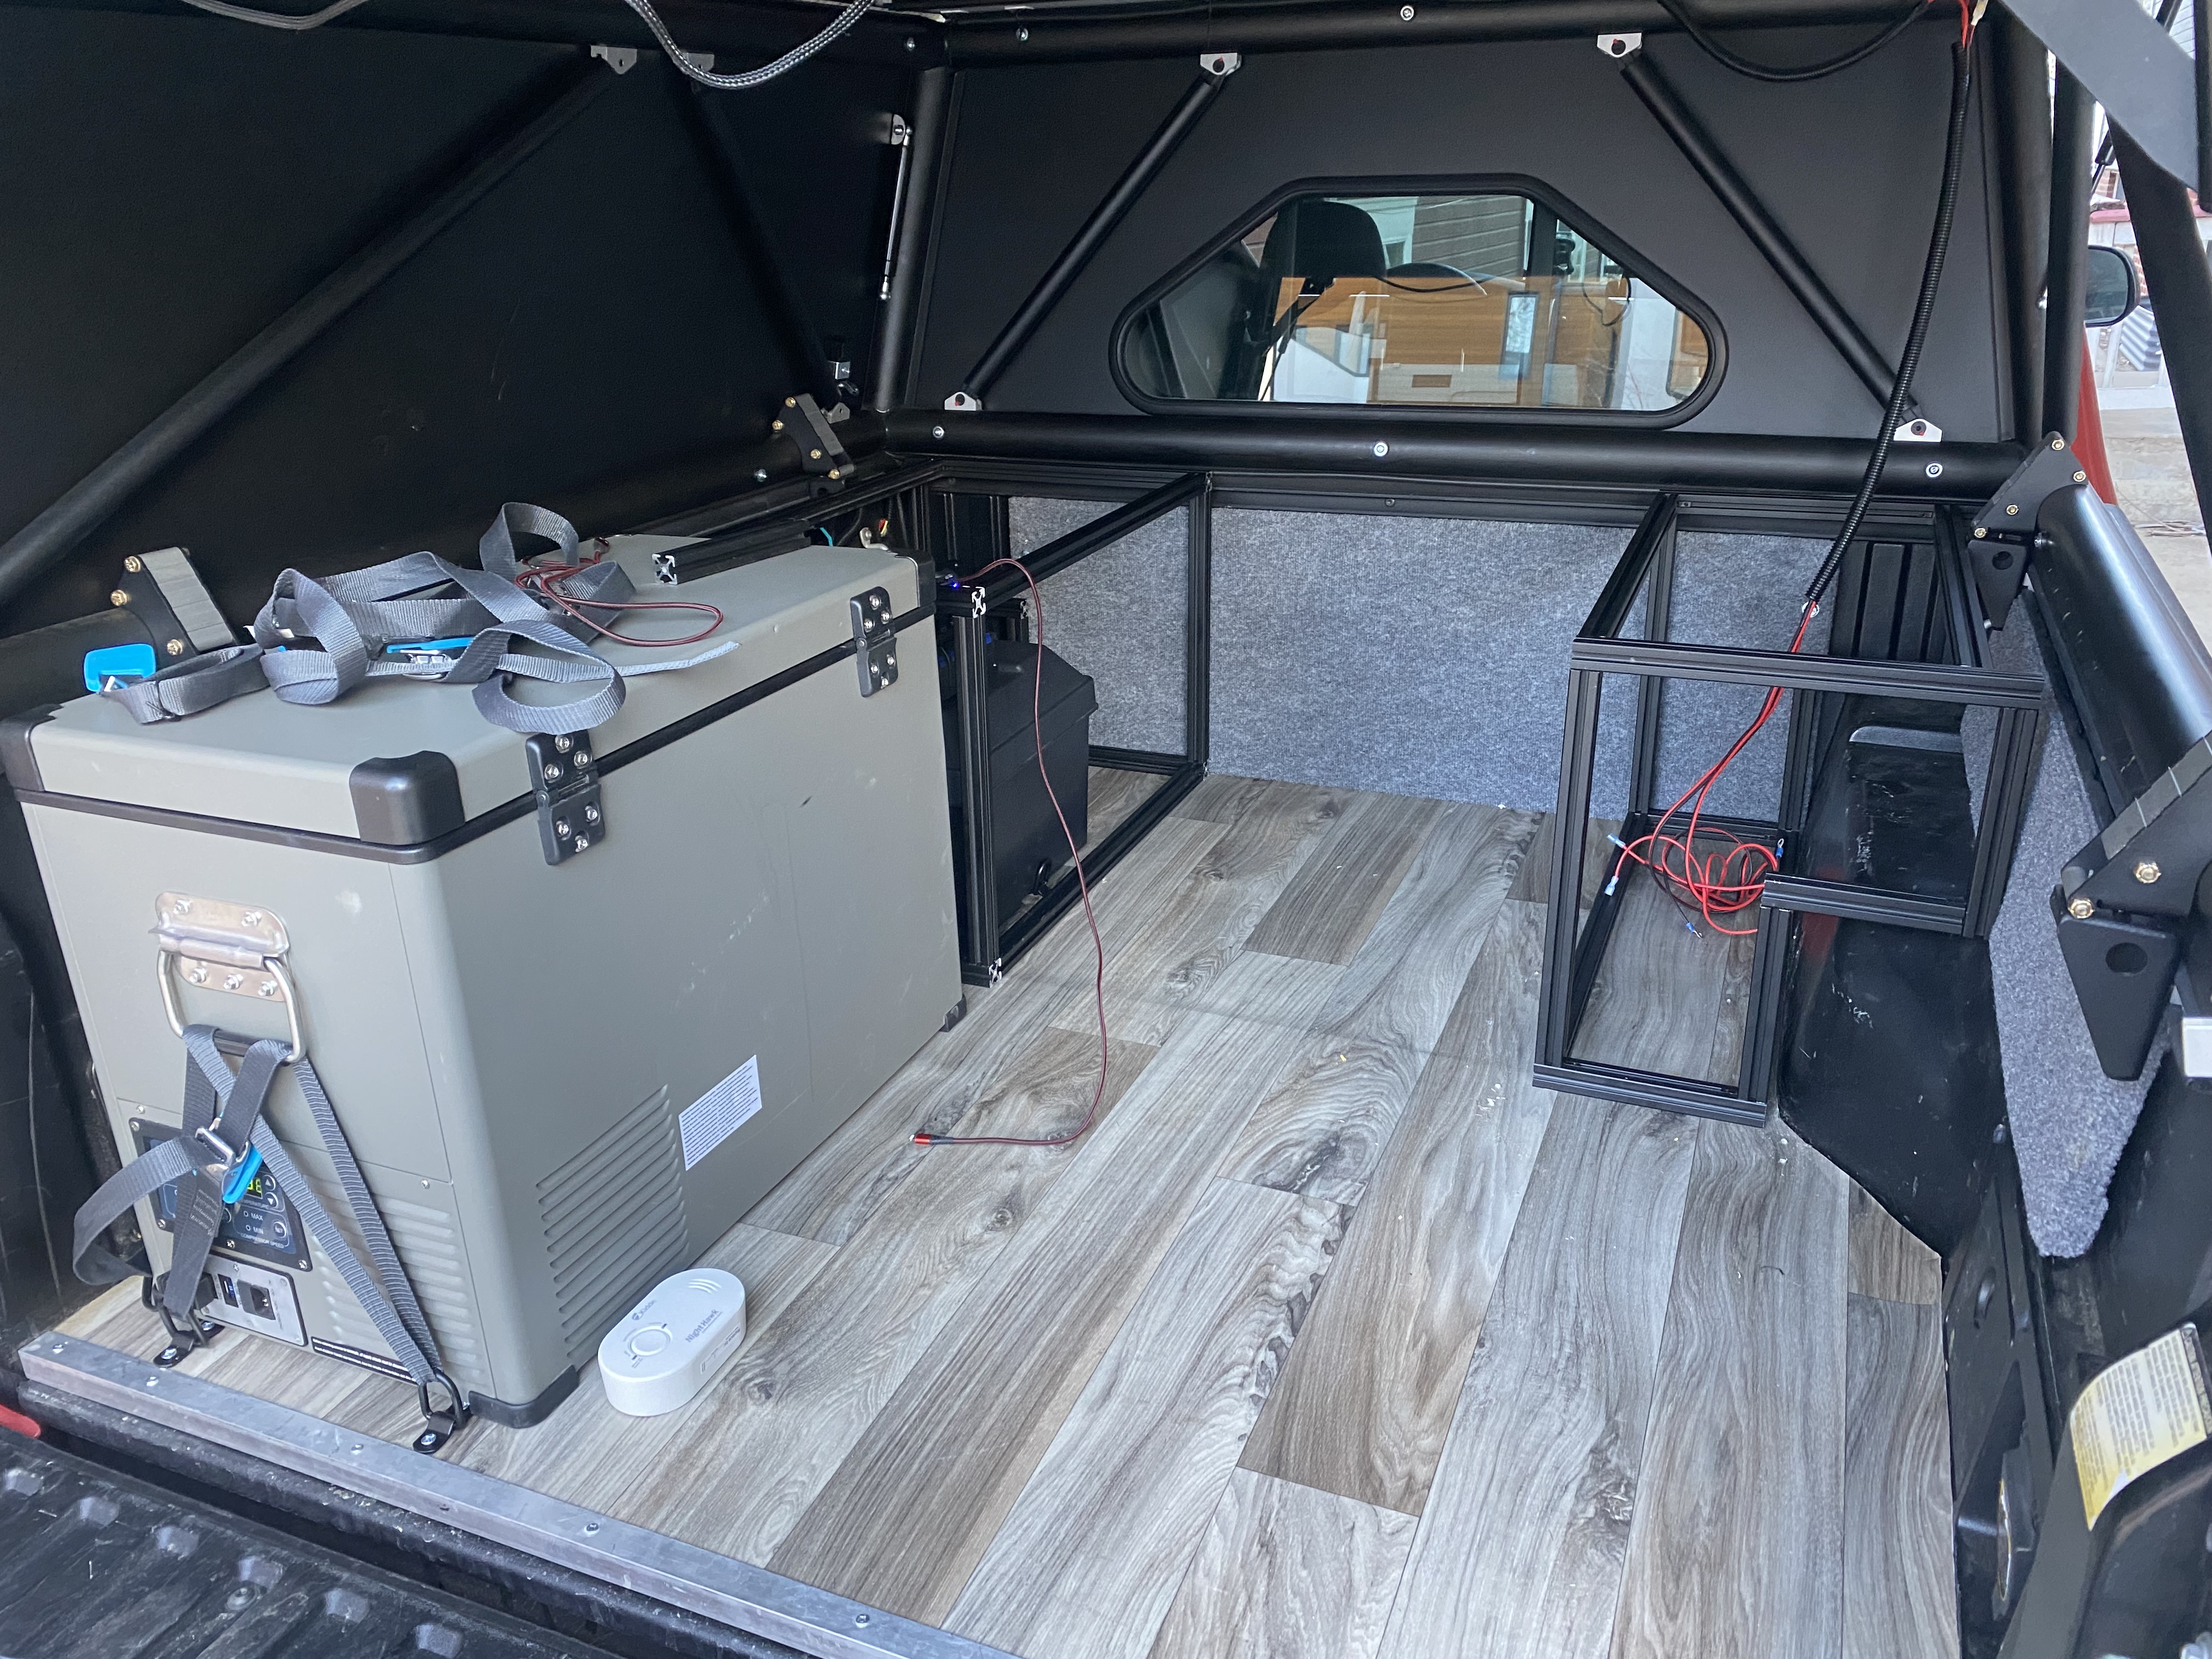
1/2 inch plywood and carpet added to the benches

Diesel heater was probably the toughest part of the build. I originally bought one of the all in one Happybuy amazon heaters and tried to pipe the exhaust out the side cubby. Was noisy and I wasn’t comfortable with the exhaust.

So instead I bought one of the van floor passthrough mounts and drilled a 3 inch hole in the bottom of my truckbed. Much safer and quieter!

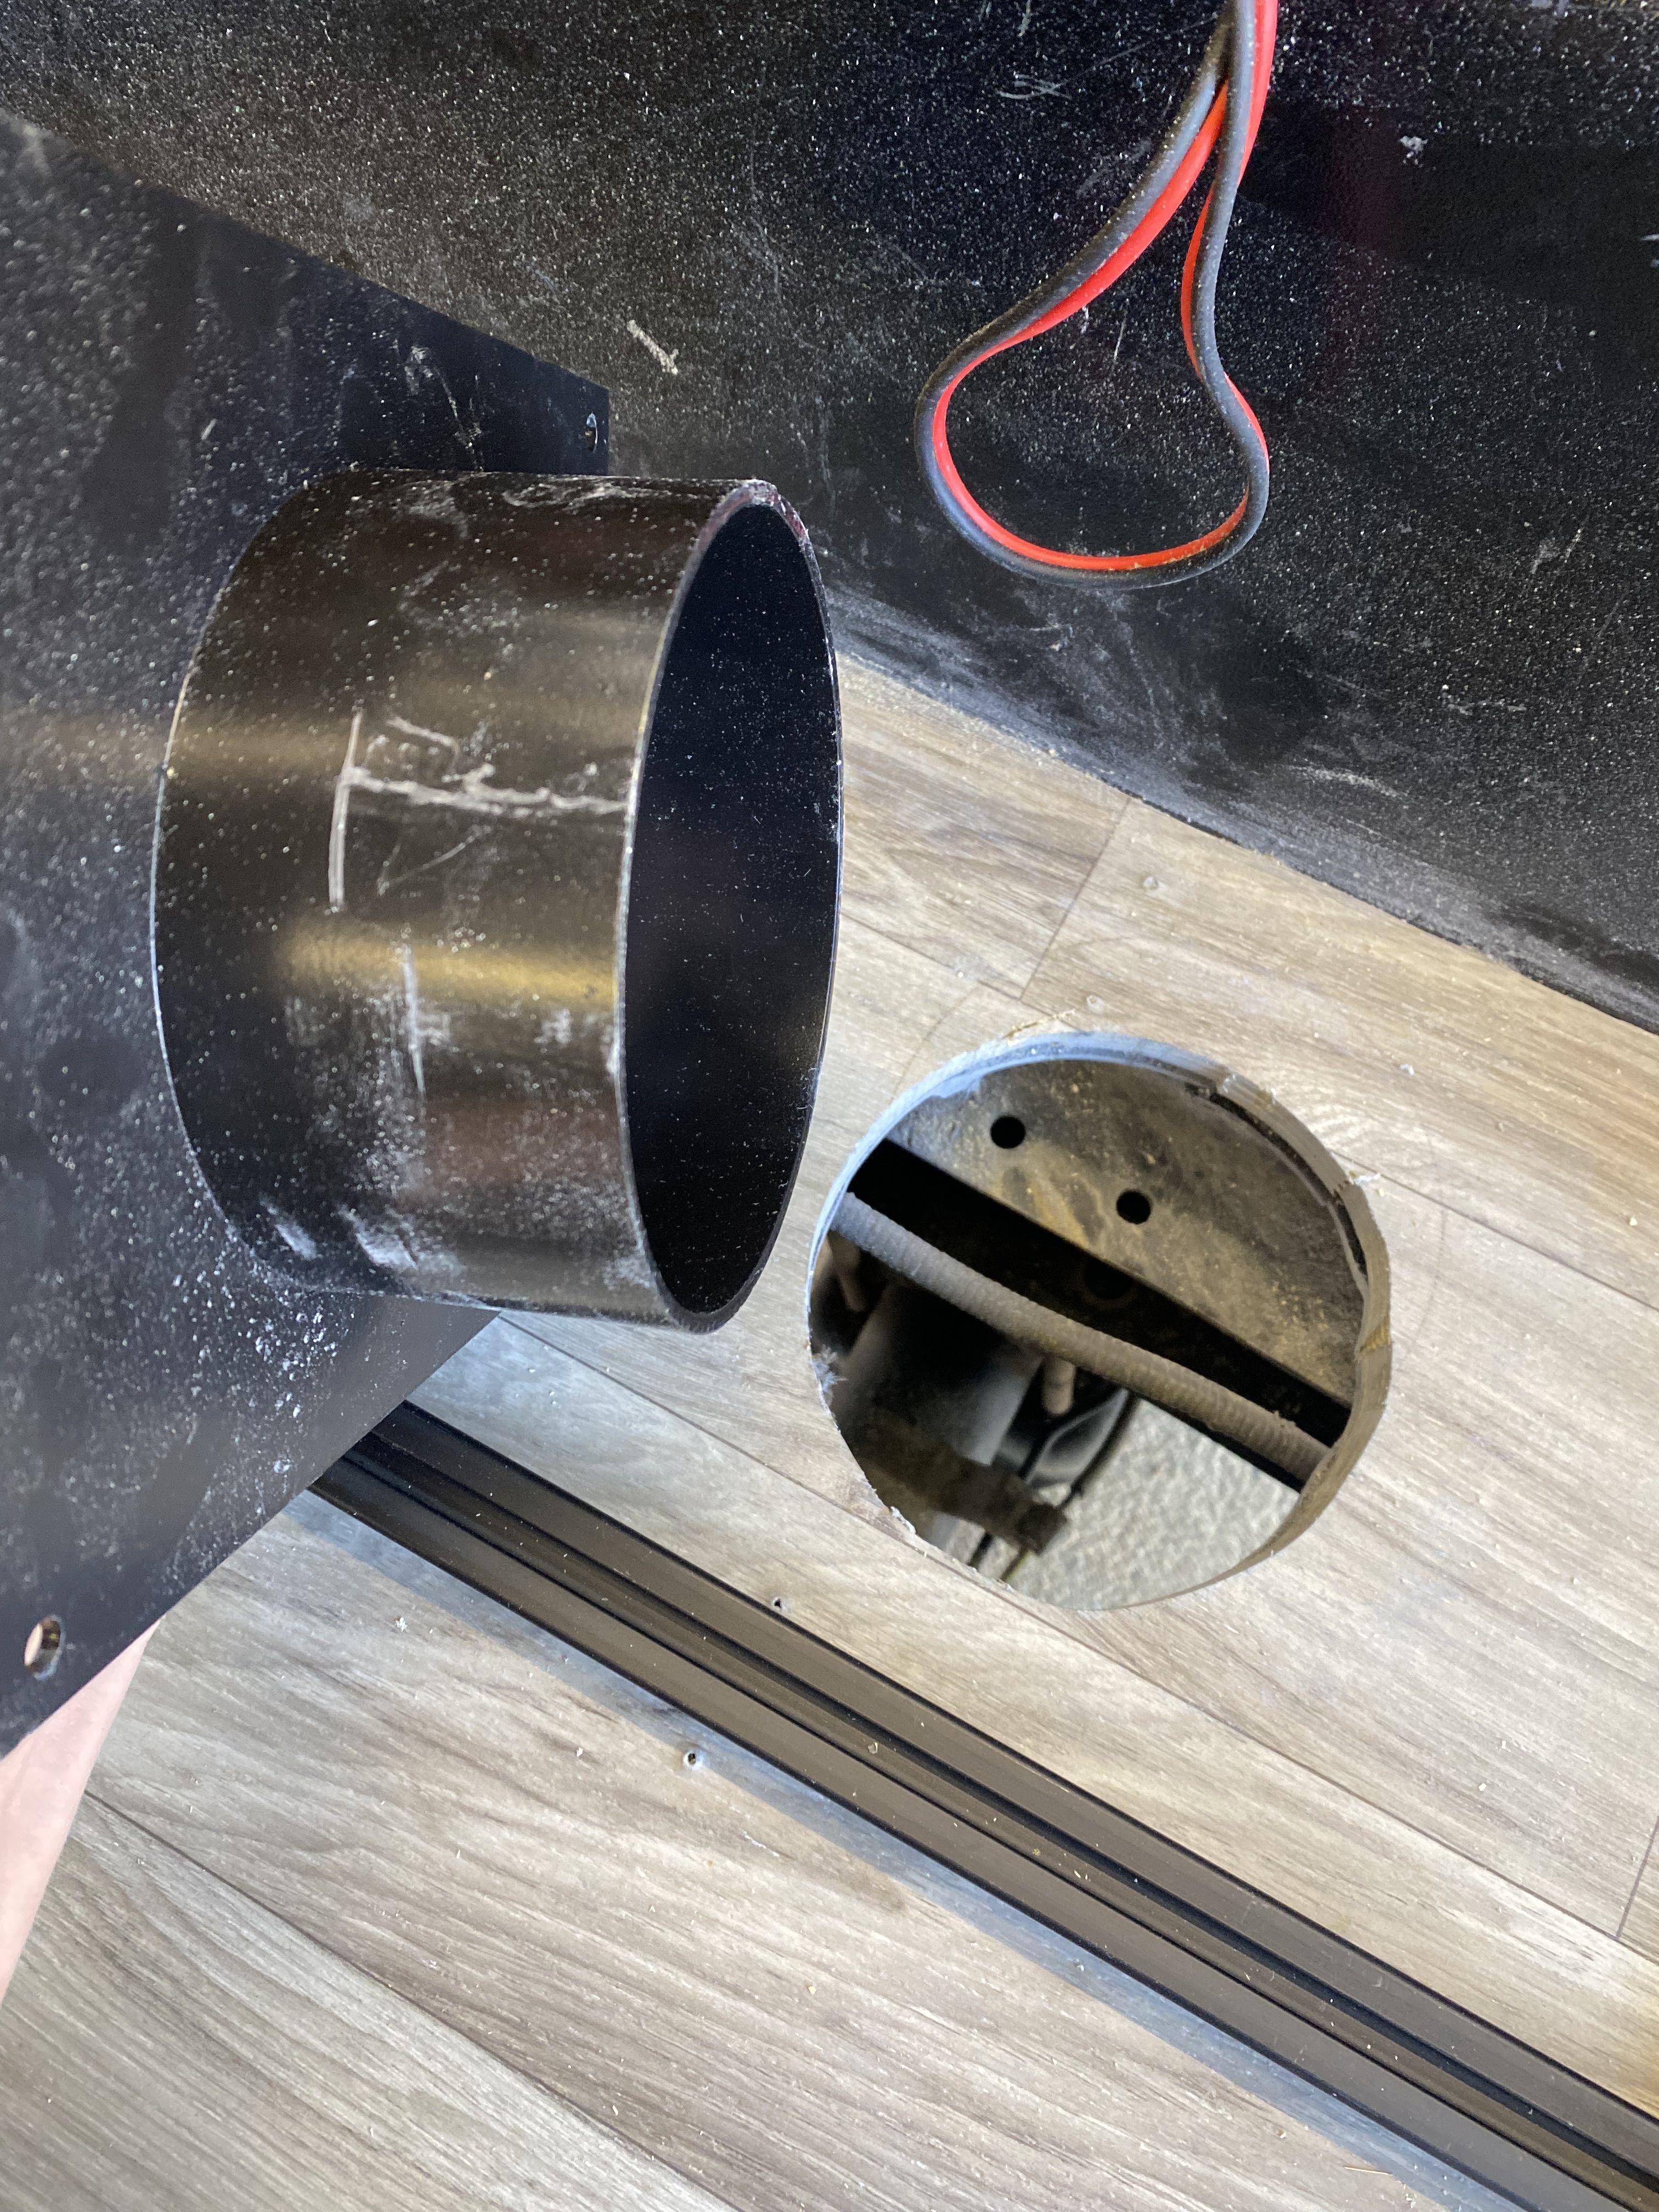
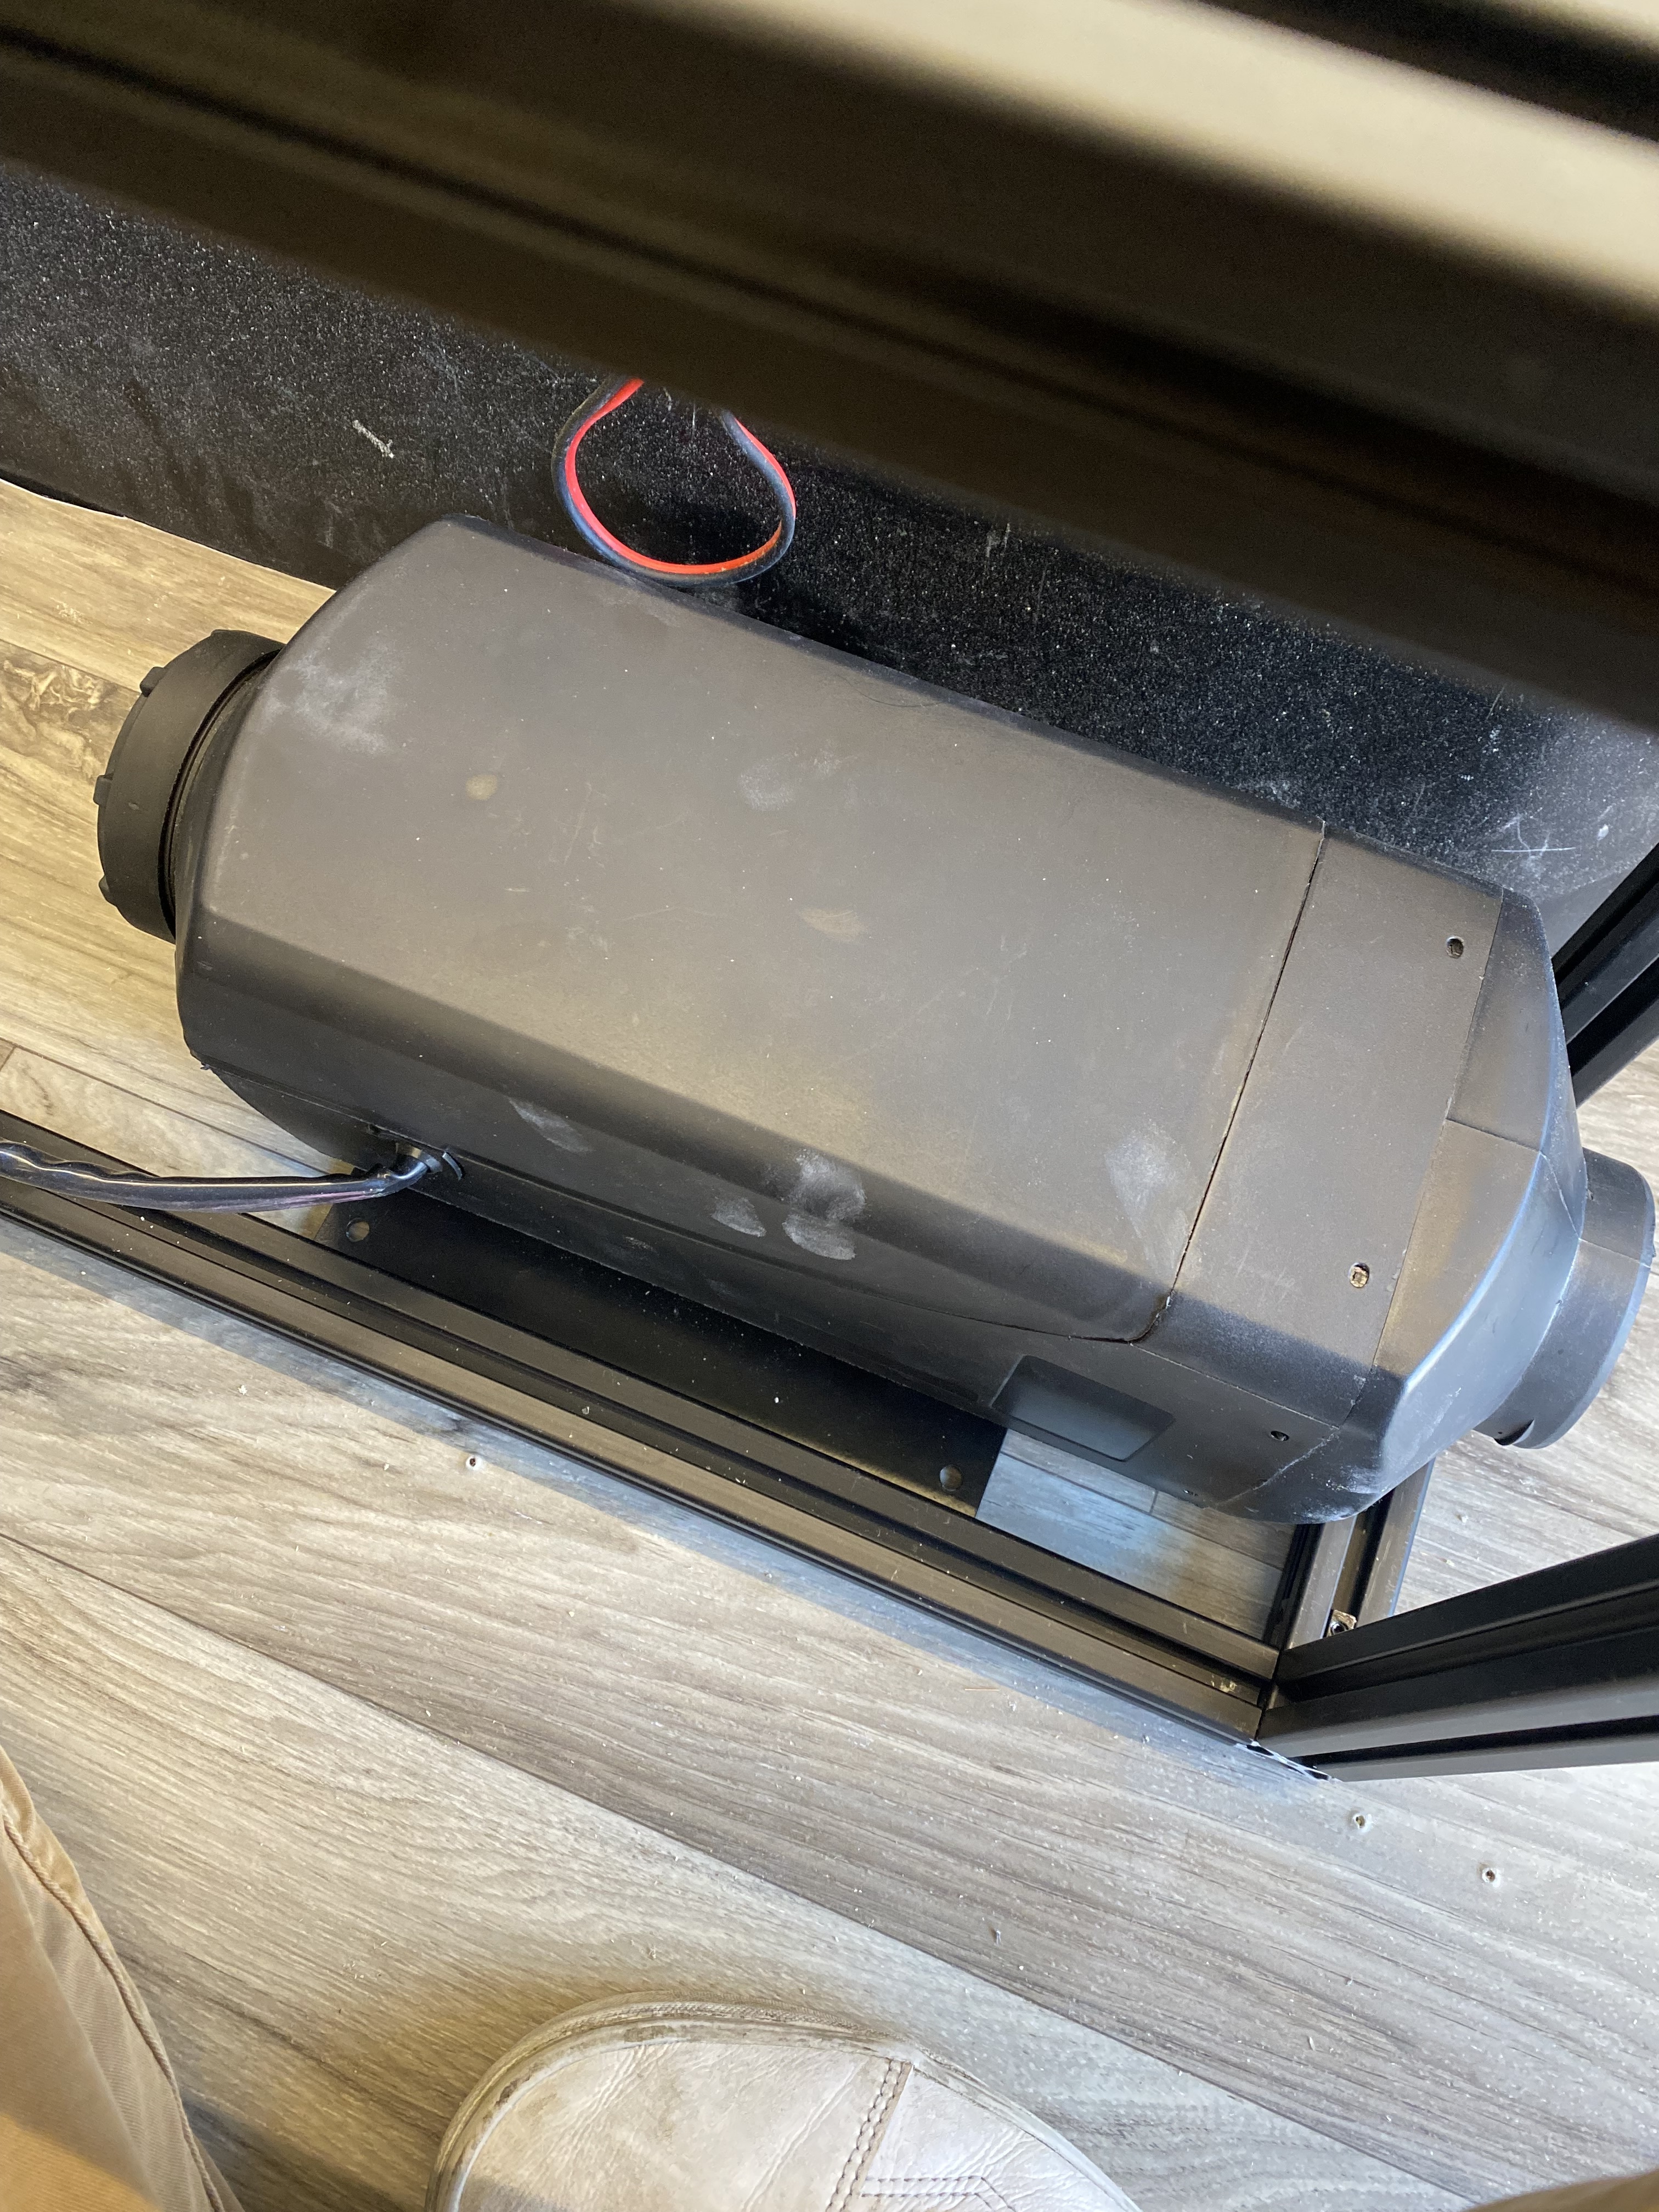
Fuel pump is under the truckbed too so I don’t hear that clicking noise!

About 10 nights in it so far and its a dream come true!


I’ll post some more updates I plan on putting a roof fan in, and two small computer fans to bring hot air from below up into the bedding area.

Let me know if you guys want more detailed documentation on this stuff!

35 Likes

Love it! Should be a great skiing rig and love the sink setup.

2 Likes

Sweet ideas!!! Good job on the mods.

1 Like

Amazing setup!!! I’ll tell you from experience having built my truck out for the exact same purpose. It’s going to change your life! Every time I use it I have a moment of bliss when I am reminded that getting this setup was the best investment I’ve done since buying a house!

If you’re ever in the cariboo region of BC in the winter hit me up and we’ll go on a GFC/Ski dork mission :metal:

2 Likes

Did you cut one of the floor panels in half lengthwise? Or is that the original? The panel that the sink is mounted in seems skinny.

2 Likes

Yep! I cut the main 50x25 inch panel in half lengthwise. I now have two smaller panels that are both 50x12.5.
Here is an older photo from below where you can see both of these cut panels put together to make the original panel for the bed platform.

1 Like

wow this build is very well thought out. what is you floor made of? / how is it made?

Sweet! Way to make the most of the space

Thanks!

Floor is a 5x5 sheet of 3/4inch plywood that I cut with a jigsaw to fit the bed shape. I coated it with an oil-based polyurethane and wrapped the top with sheet vinyl flooring from home depot that gives it the “wood flooring” look. On the edge that faces the tailgate I put a piece of metal trimming to hide the wood and the sheet vinyl.

Biggest things I learned from this is that you can buy 5x5 sheets of plywood at lumberyards, and to not use the “spreadable” vinyl glue but the sprayable one instead just because it is easier to work with.

2 Likes

I love your build-out! Well thought-out plan, well executed.
I bought a sheet of baltic birch plywood for my floor and painted it with Herculiner (?, a black, rubbery, gooey paint). The fridge will slide out–in this pic, just the camp stove was out for cooking.

2 Likes

Man this rig is my dream rig! I’m getting ready to transform my GFC into a winter ski tour rig this fall. I’m a travel nurse living out of my 2021 Tacoma GFC. I’d really love some additional details on this built! Mainly a bit more insight on the heater. That’s my first mission this fall once I’m done with my contract.

Also, do you have any insulation siding up top? Wondering about those aluminum cabinets & your water supply too! I’ve got a lot of work to do this winter to prep & your rig vibe & lifestyle seems very similar to me. Is there a way I could start a direct message to you via another platform? Instagram or FB?

3 Likes

My two cents, the diesel heater pumps a lot of heat. I’ve found that you don’t ‘really’ need to insulate. But…insulation would likely make the heater more efficient then constantly ramped up when it’s really cold (like -30C) But even in those temps a 5kW can keep a full size at bout 16C in -37C.

1 Like

Thanks man, very appreciated! I’m wondering what size fuel tank I’d want to get. Since I’ll be mostly using the heater overnight for 6-8hrs any clue how long 10 gal (37 L) would last?

1 Like

Make it a reality!! It’s really not that hard I didn’t have much building experience before this, and it doesn’t cost too much either.

I don’t currently have much insulation in yet that’s part of what I’m gonna figure out this winter. Like @Dignon said that heater pumps out a ton of heat!! And for fuel consumption it consumes about a gallon of kerosene each night, so really not much at all!

DM me on Instagram @benawheelr

Nice!!! Thanks man! Ill hit you up over there. Could post any relevant info back here to the forum afterword!

Yeah depending what fuel you use, I don’t think I can use kerosene in my heater. That would be nice because diesel is the worst!!! It stinks, it stains and it costs a fortune these days.

I have my heater rigged up with a 10Gal jerry and it’ll usually last 3 nights before I get nervous and top it up. I carry an extra 10Gal jerry to top things up if I’m out for an extended period.

The big thing is the battery draw. Every time you start or stop the unit the glow plugs come on which draws about 9A DC, so depending where you are in the world the sun isn’t high enough to charge with solar. I had to install a DC/DC charger to ensure I always have enough juice to run the heater.

Wow, this gorgeous. How did you undermount your solar like that?

I mounted 3/8inch metal brackets on the bottom of the solar panels and connected it to the bottom of the beef racks which have a tslot underneath them. I got the solar panels secondhand and they already had those brackets on it. It was a bit of a struggle fitting the wires underneath the solar panels because they are so low.

I’ll take some pictures when I’m back in town!

2 Likes

Dope build bro! Just purchased my GFC and will have in September.

Any thing you would’ve done differently on the build? Going to build out my 14 DCLB and need any advice I can get

The one I recently purchased consumes 0.1-0.35 (liters per hour) The 3kw kit came with a 3 L tank. 10-30 hours of run time depending on your settings. Not to mention you can always refill it a separate can.