That’s mint! Which one would that be?
really like the simplicity of this build, I like your bench/seats designs. what kind of extrusion are you using? where you buy them from
Thanks! I bought them from TNUTZ. Super easy to work with its the 10 series extrusions with a bunch of L brackets holding it together.
2 Likes
Wow this is a great build out! Just picked up our gfc and both my wife and i use it on single trips so trying to figure out a nice set up we could both use. Im in here so i can show my wife this and save the build. Awesome work dude!
1 Like
beautiful work mang. How does it all work? Things you love, things you would change if you could?
You could also make a panel to cover the sink when not in use to utilize the full sleeping platform? Nice build!! Well thought out
Could I get a little more info on how you installed your heater? Particularly curious on the electrical, exhaust, fuel pump mount, and that pass through mount. Thanks man!
I’m also interested in more detail on the heater as well as the DC to DC battery chargers I have seen referenced by some people on this thread.
Yup! The heater was the most work but I got it dialed now. Here is a better picture of the heater where it installed. It’s completely hidden normally had to pull of some panels to access it.
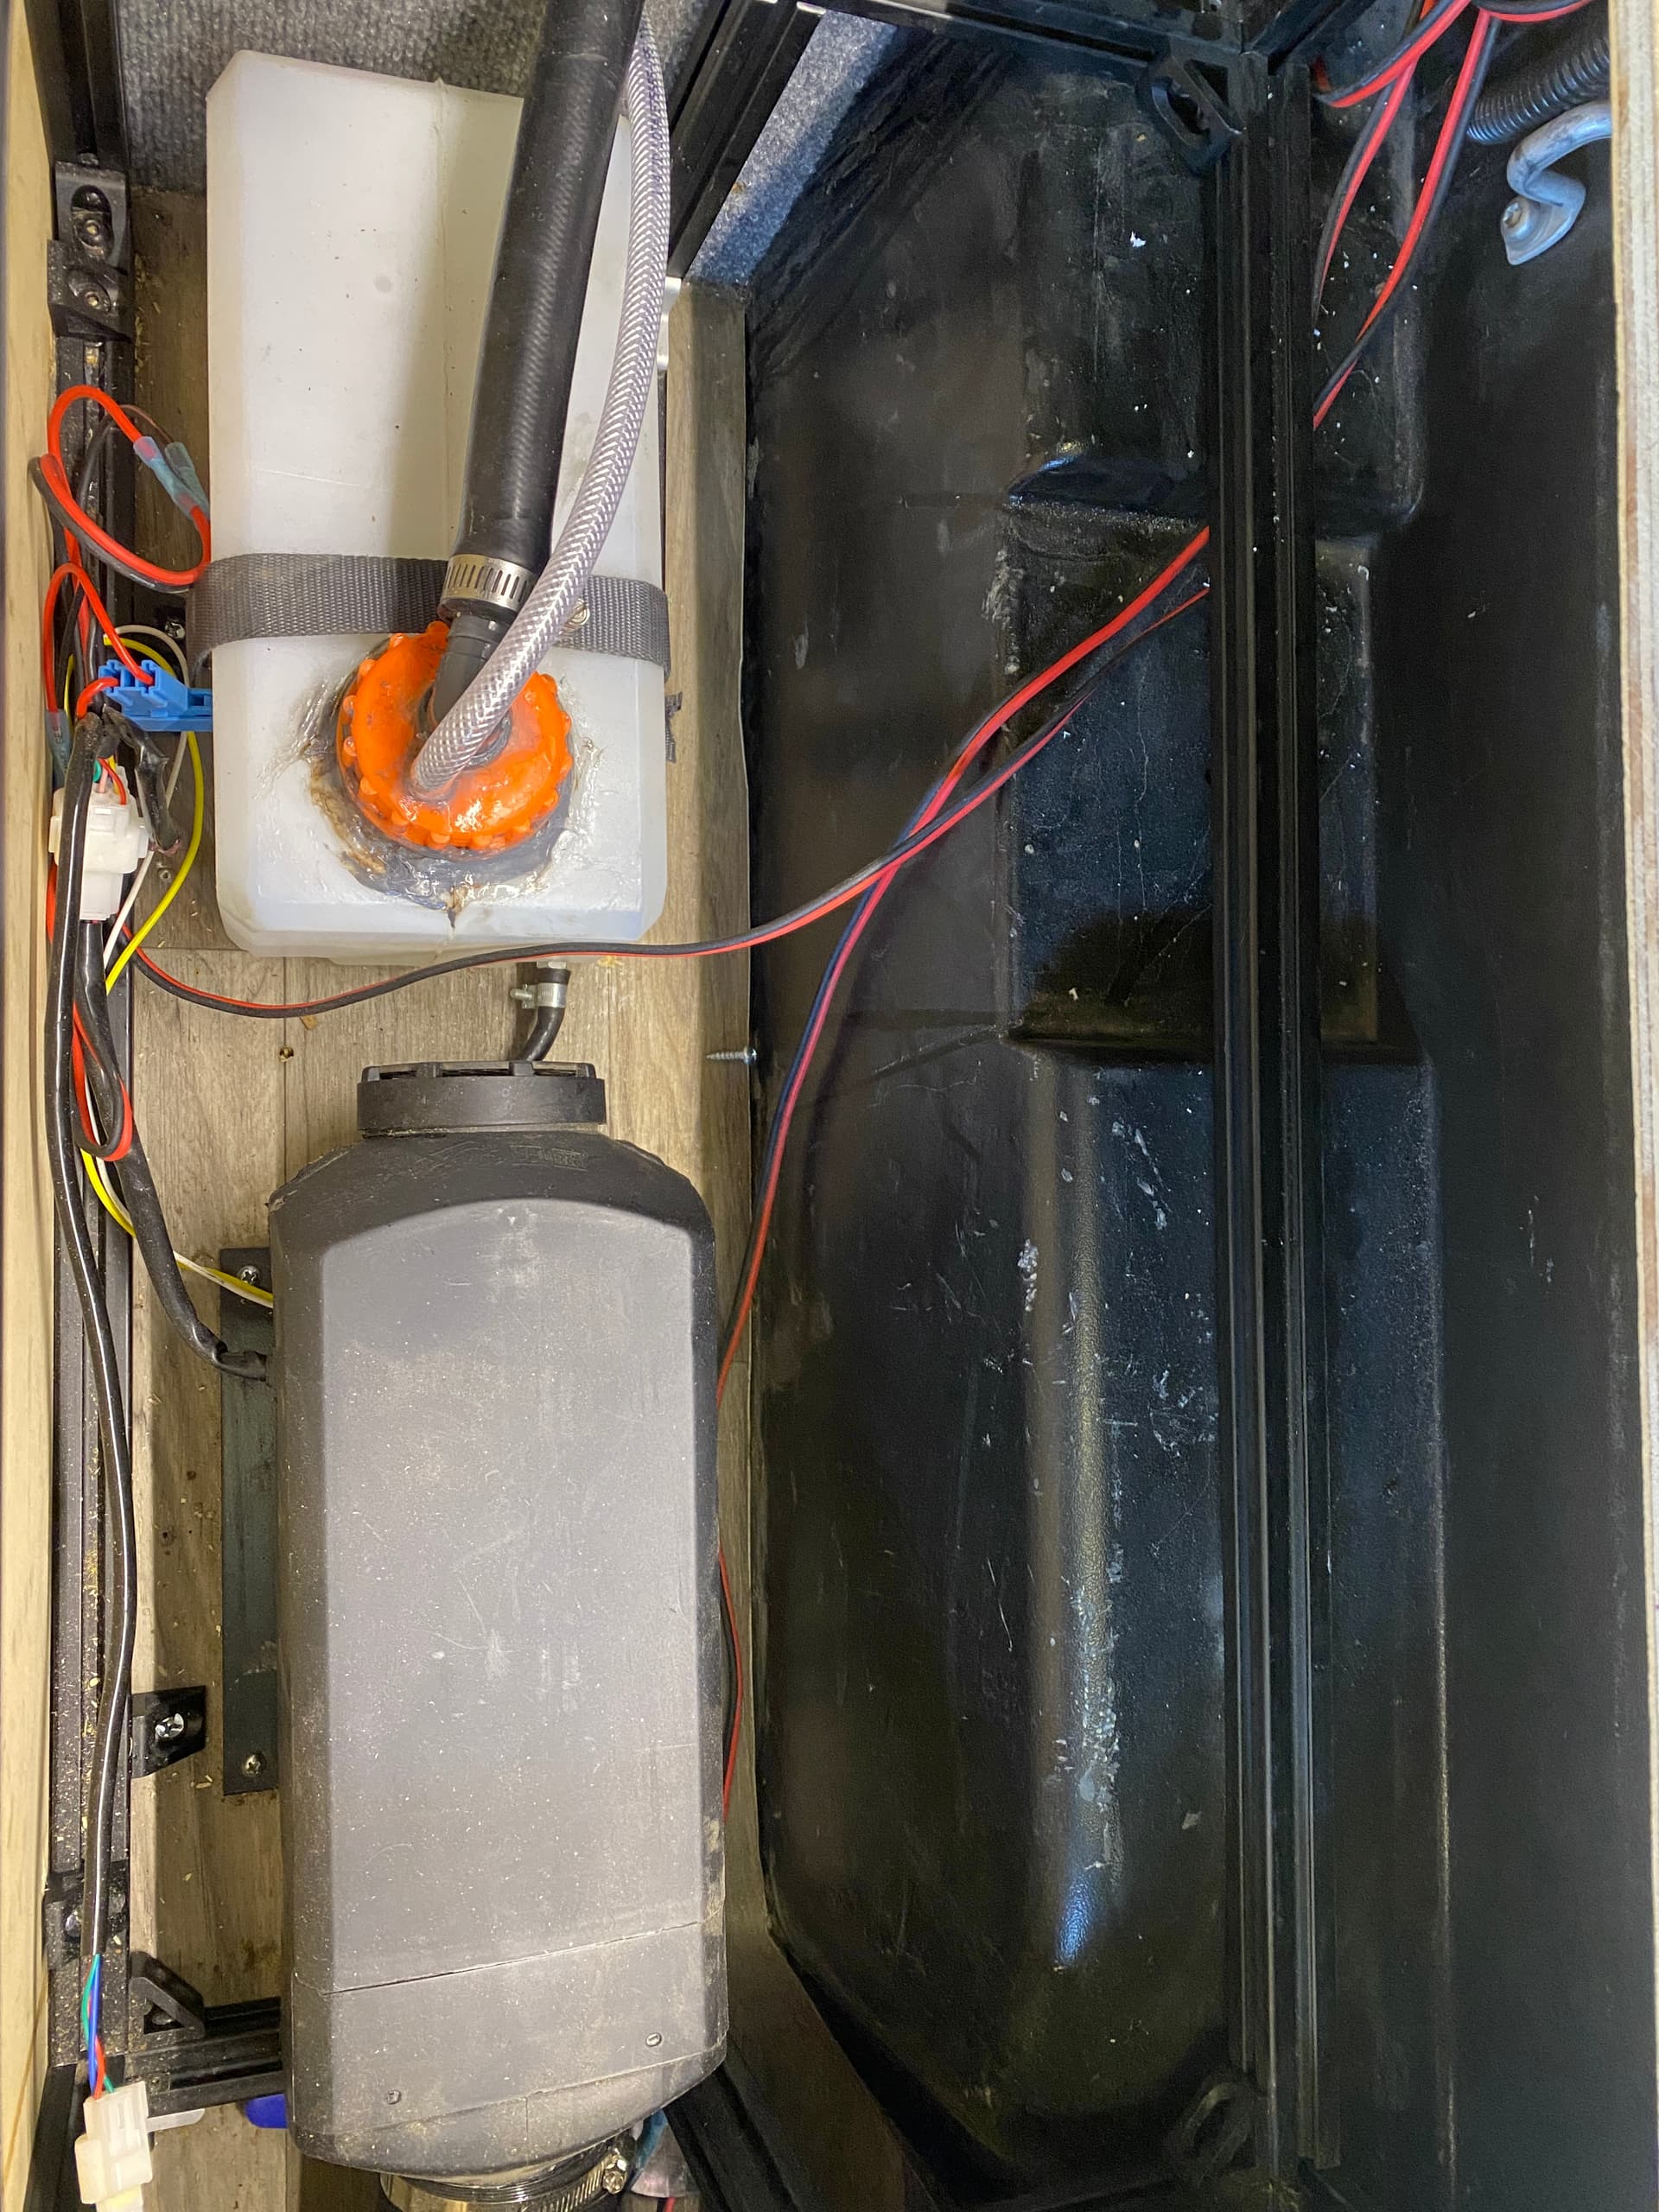
So the heater was installed using a passthrough as shown in the original pictures. High commitment but if you’re willing it’s the safest and cleanest install in my opinion. The wiring for the pump was spliced and routed under the truck, same with the fuel line from the tank. The fuel pump is under the truck mounted to the frame. To do this I cut a hole in the frame and made sure to paint it to prevent rust, and then mounted the pump. This prevents me from hearing the “clicking” noise inside of the cab but its very loud outside… So if winter camping I just don’t park too close to my buddies otherwise they can hear the clicking
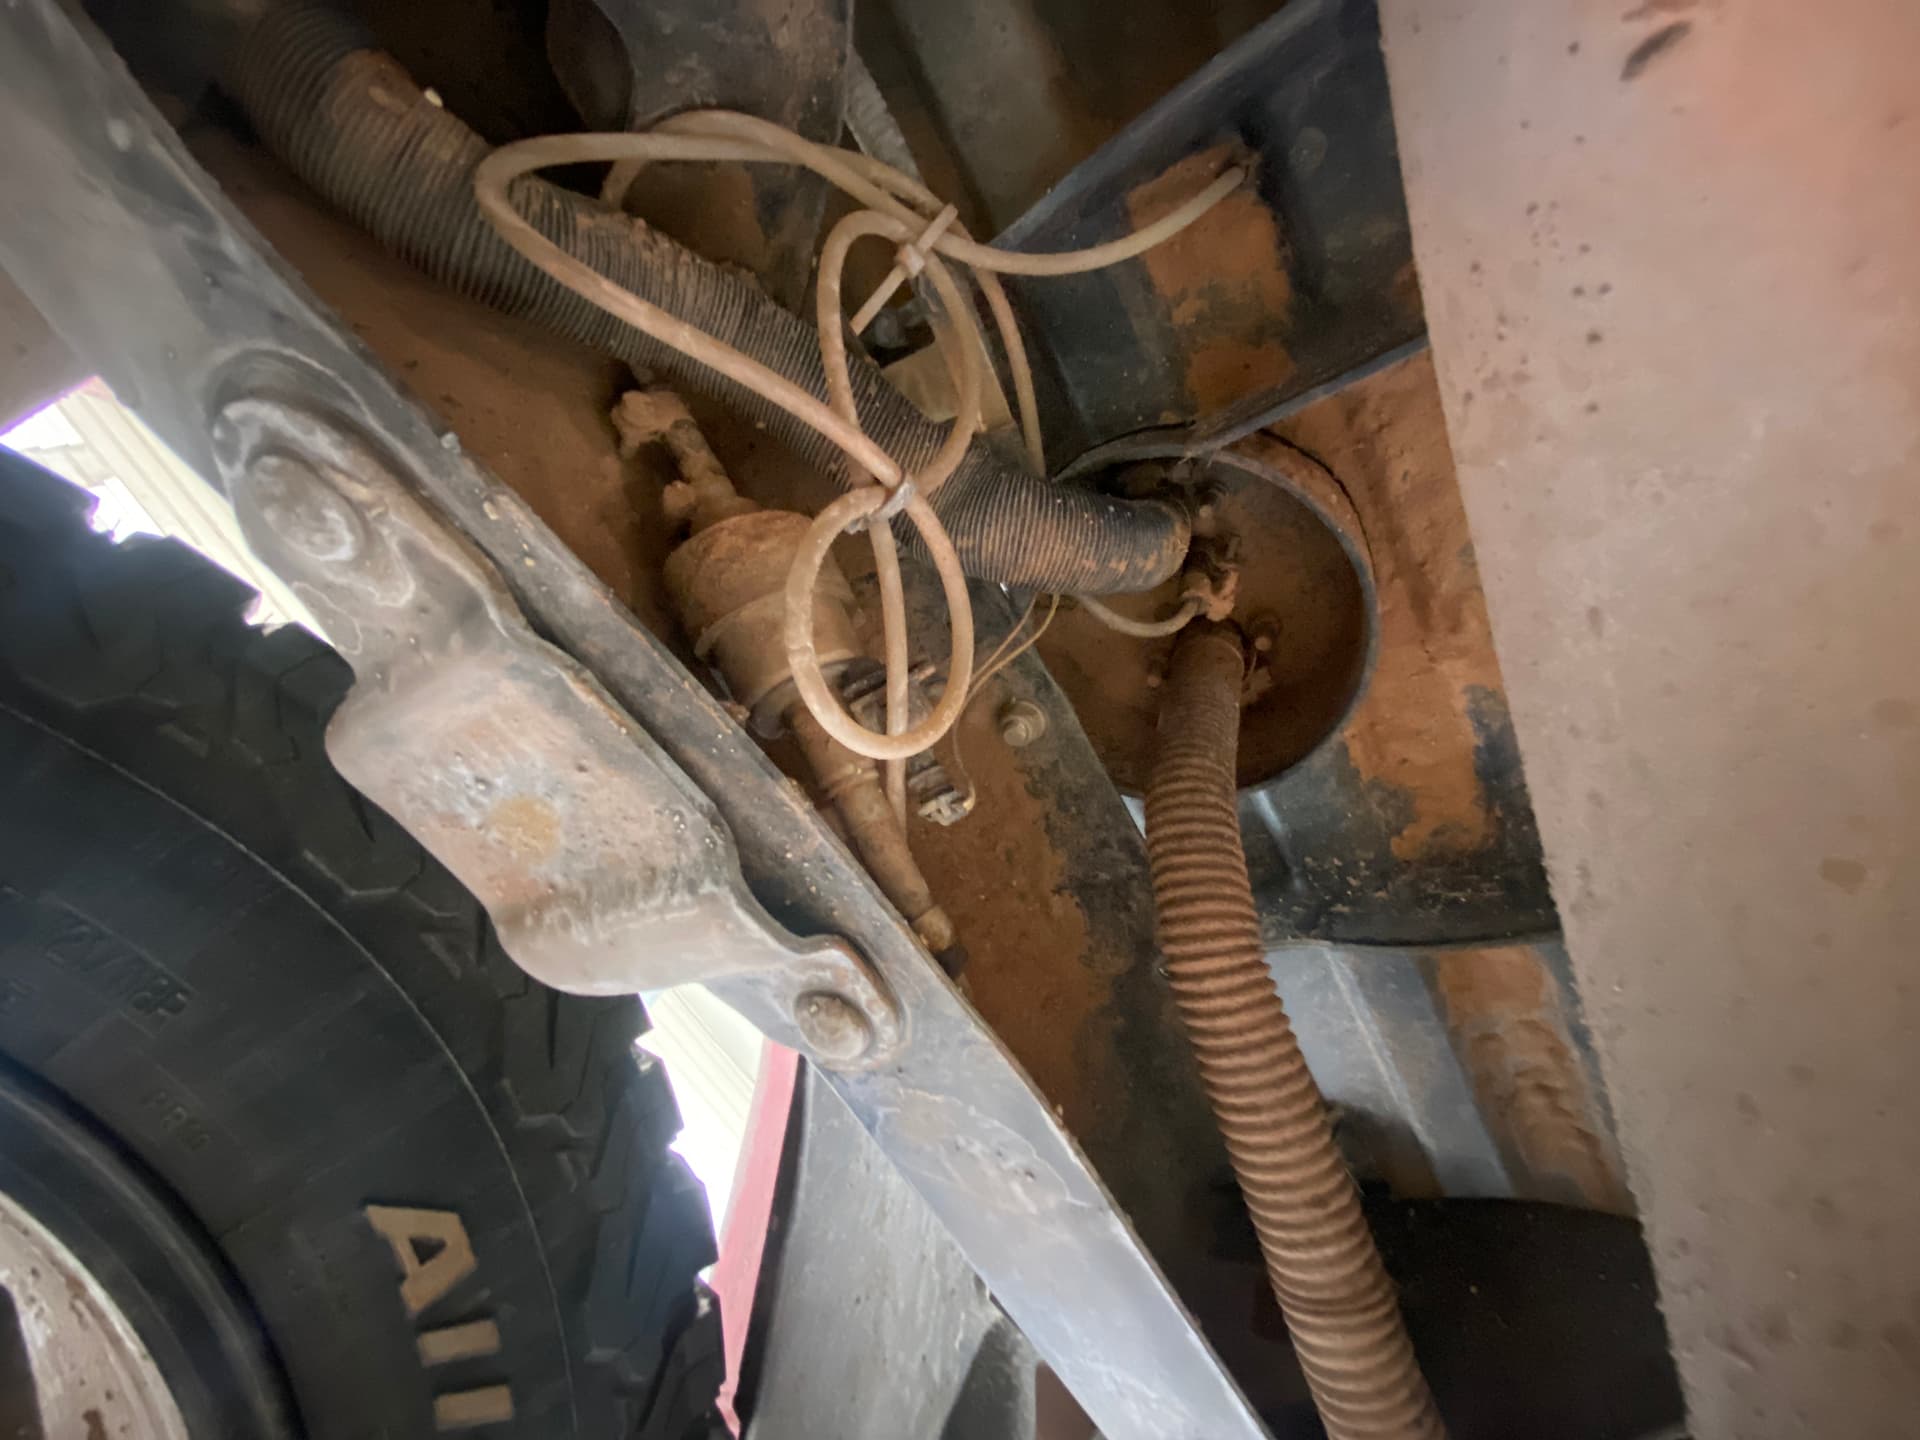
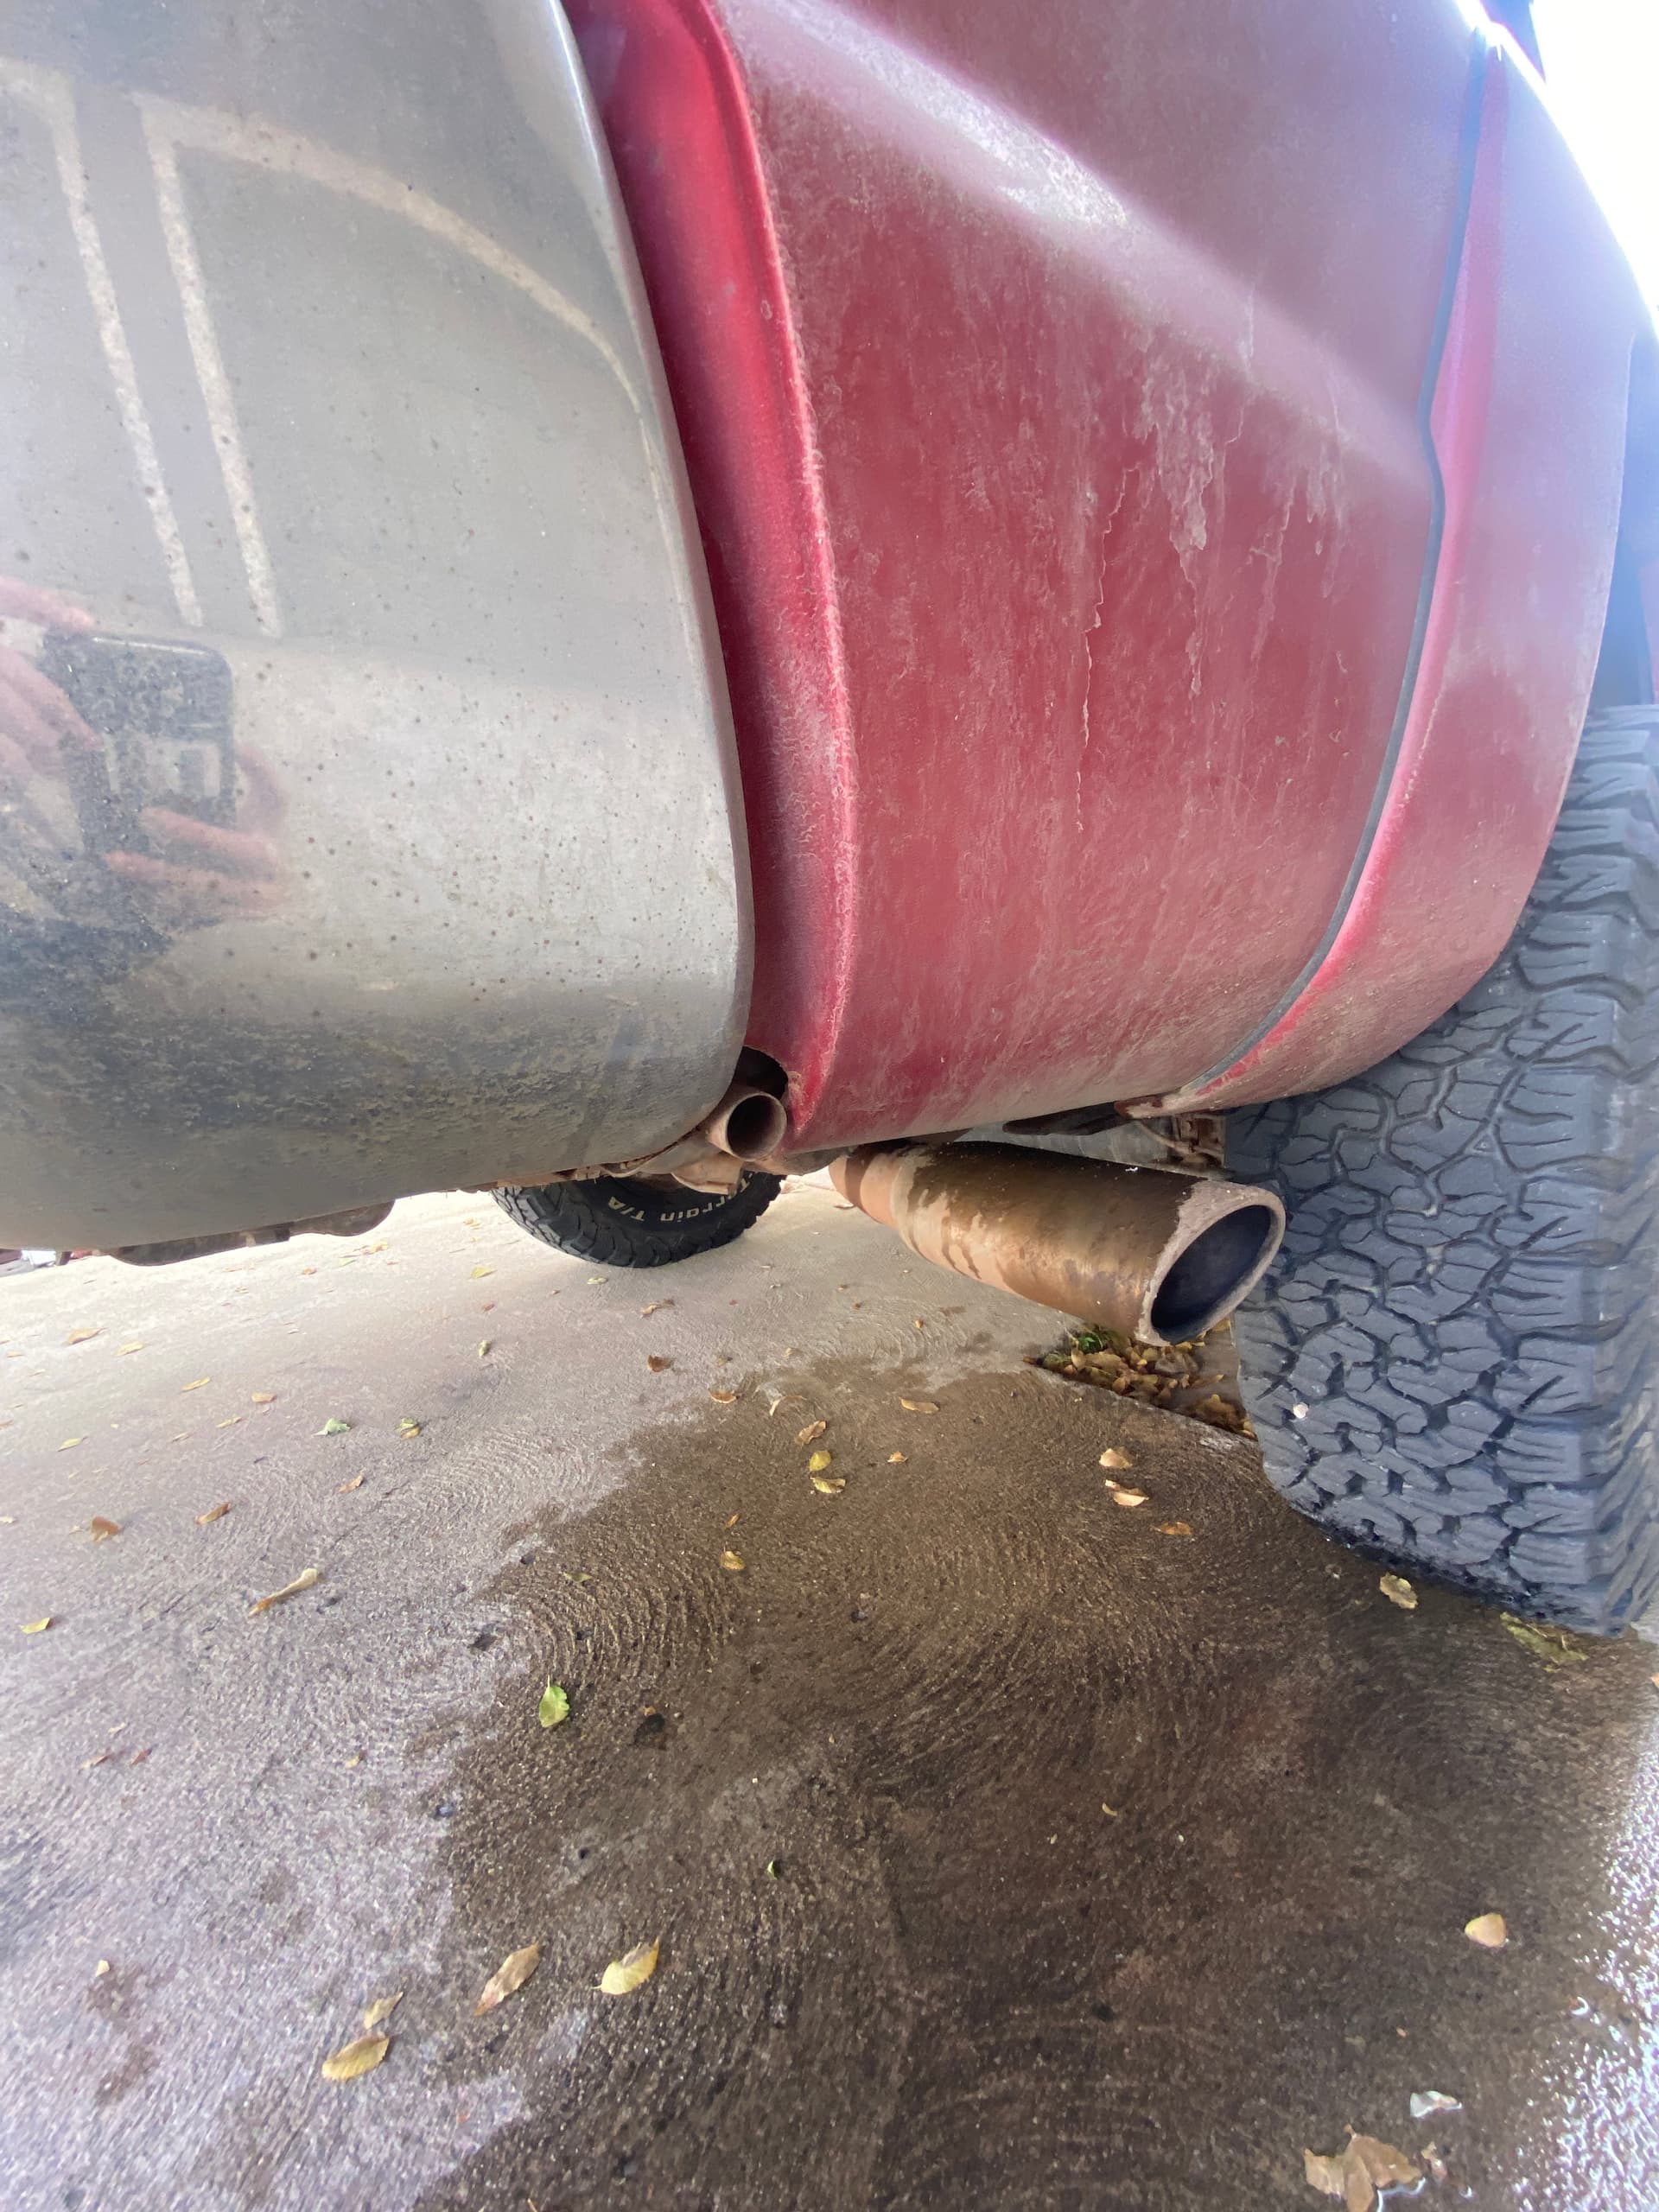
The exhaust comes out the bottom and is routed to the back where it attaches to the bumper.

Here’s another picture showing where the exhaust comes out. Very very hidden.
Back to the tank… I wanted to be able to fill it up from the outside to prevent spilling. To do this I tapped two holes. One for the fuel fill (black rubber hose), and one for the air to escape when filling (vinyl hose). I JB welded the cap shut because it wouldn’t stop leaking kerosene all over the place getting the odor into the intake of the heat exchanger and making the camper smell like kerosene… Works great!

Let me know if you want even more specifics on the electrical.
2 Likes
I’m using the renogy 20ah DCDC charger!
Went with the 20ah because I didn’t want to run a super thick cable to the front of the car. To make it only charge the battery when the car is on I tapped a fuse connecting to my windshield wipers or something like that, any of them work.
Thanks dude! It was my original plan to do this like make a cutting board that fits over the sink but I discovered that the mattress is strong enough so it doesn’t sink into the sink at all! Would be a good spot for a cutting board though… space and minimalism is key.
Thanks brotha! It has worked extremely well even in cold weather. The only things I would change would be
- Fitting the diesel fuel tank under the truck or tapping my gas tank for fuel. It’s a pain in the ass and waste of space to bring the fuel into the cab just to have the fuel line go back out again. I just wasn’t able to find a good spot to put the diesel tank under the truck.
- Use more of an RV style water tank. I originally got the jerry cans because my main way to fill them up is to go into the grocery stores and use the water fillups they have for the office style water tanks. It works well but it is a pain in the ass sometimes… Also I am planning on putting heating pads on the tanks so they don’t freeze in really cold weather.
- Long bed tacoma would’ve been nice
- Instead of carpeting the benches actually treating the wood and staining it would look better and be easier to clean.
2 Likes
Been a while so here’s a build update as of 11/4/2022.
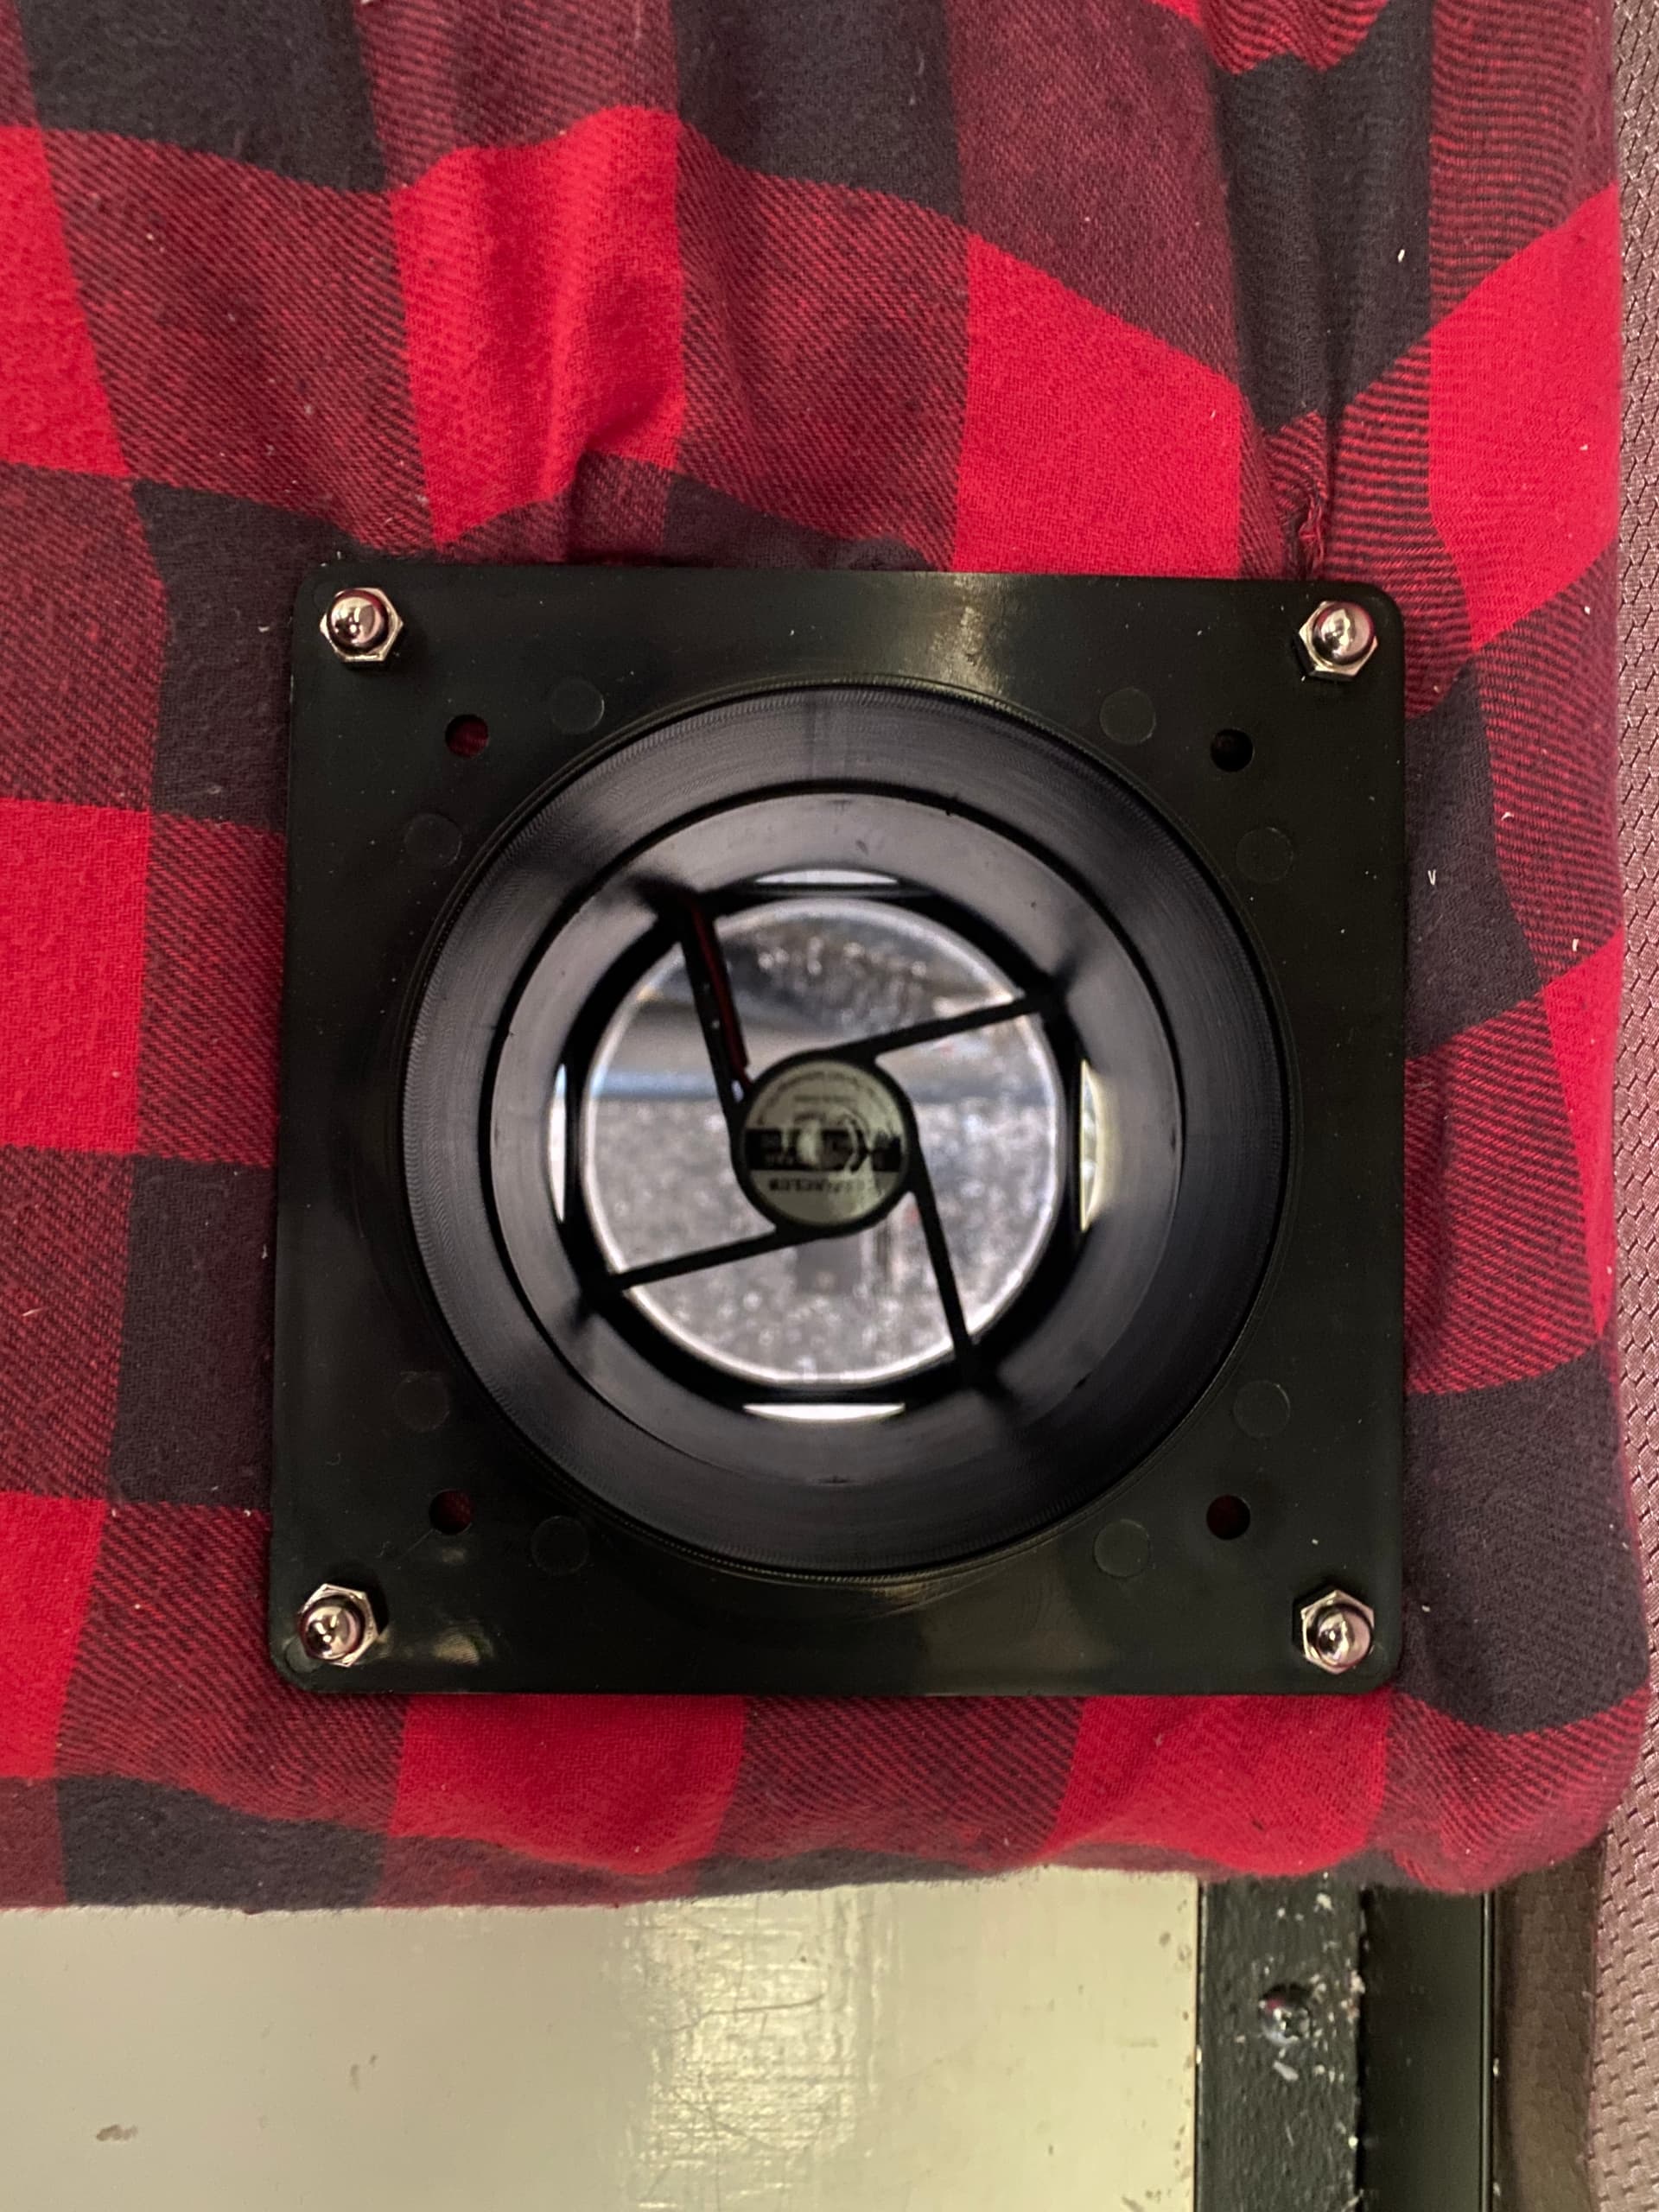
First new addition is a roof fan! These are AWESOME. Helps cool down the place in warmer weather, makes it safer to cook inside the camper, helps prevents condensation and circulates the air inside the camper to make the heat more even.

It’s a pretty low profile fan here’s a side view of it.

It’s a maxxair 4500k with the smokey lid.
HIGHLY recommend this to everyone with a GFC its’ super easy to install and a game changer! Install is a 14x14 inch hole cut into the roof (scary but easy) and then silicon to seal it from rain and a simple 12v connection. I used channel strip to clean up the wires (as shown in first picture)
Next problem was I needed a way to bring the heat up into the bed area from the bottom cab area. So cutting more holes into the GFC… I used 2 4inch ducting pieces and a 92mm fan that would be hooked up to a switch to bring the hot air from the cab up into the bedding area. I did two of these. This is better than ducting the hot air straight from the heater into the bed because the direct heat would be too hot. This way it’s bringing around 90 degree air up into the bed. This worked flawlessly coldest night i’ve done so far was 10 degrees. Heater was on 2nd lowest setting, it was 90 degrees down below and around 70 degrees up in the bed.

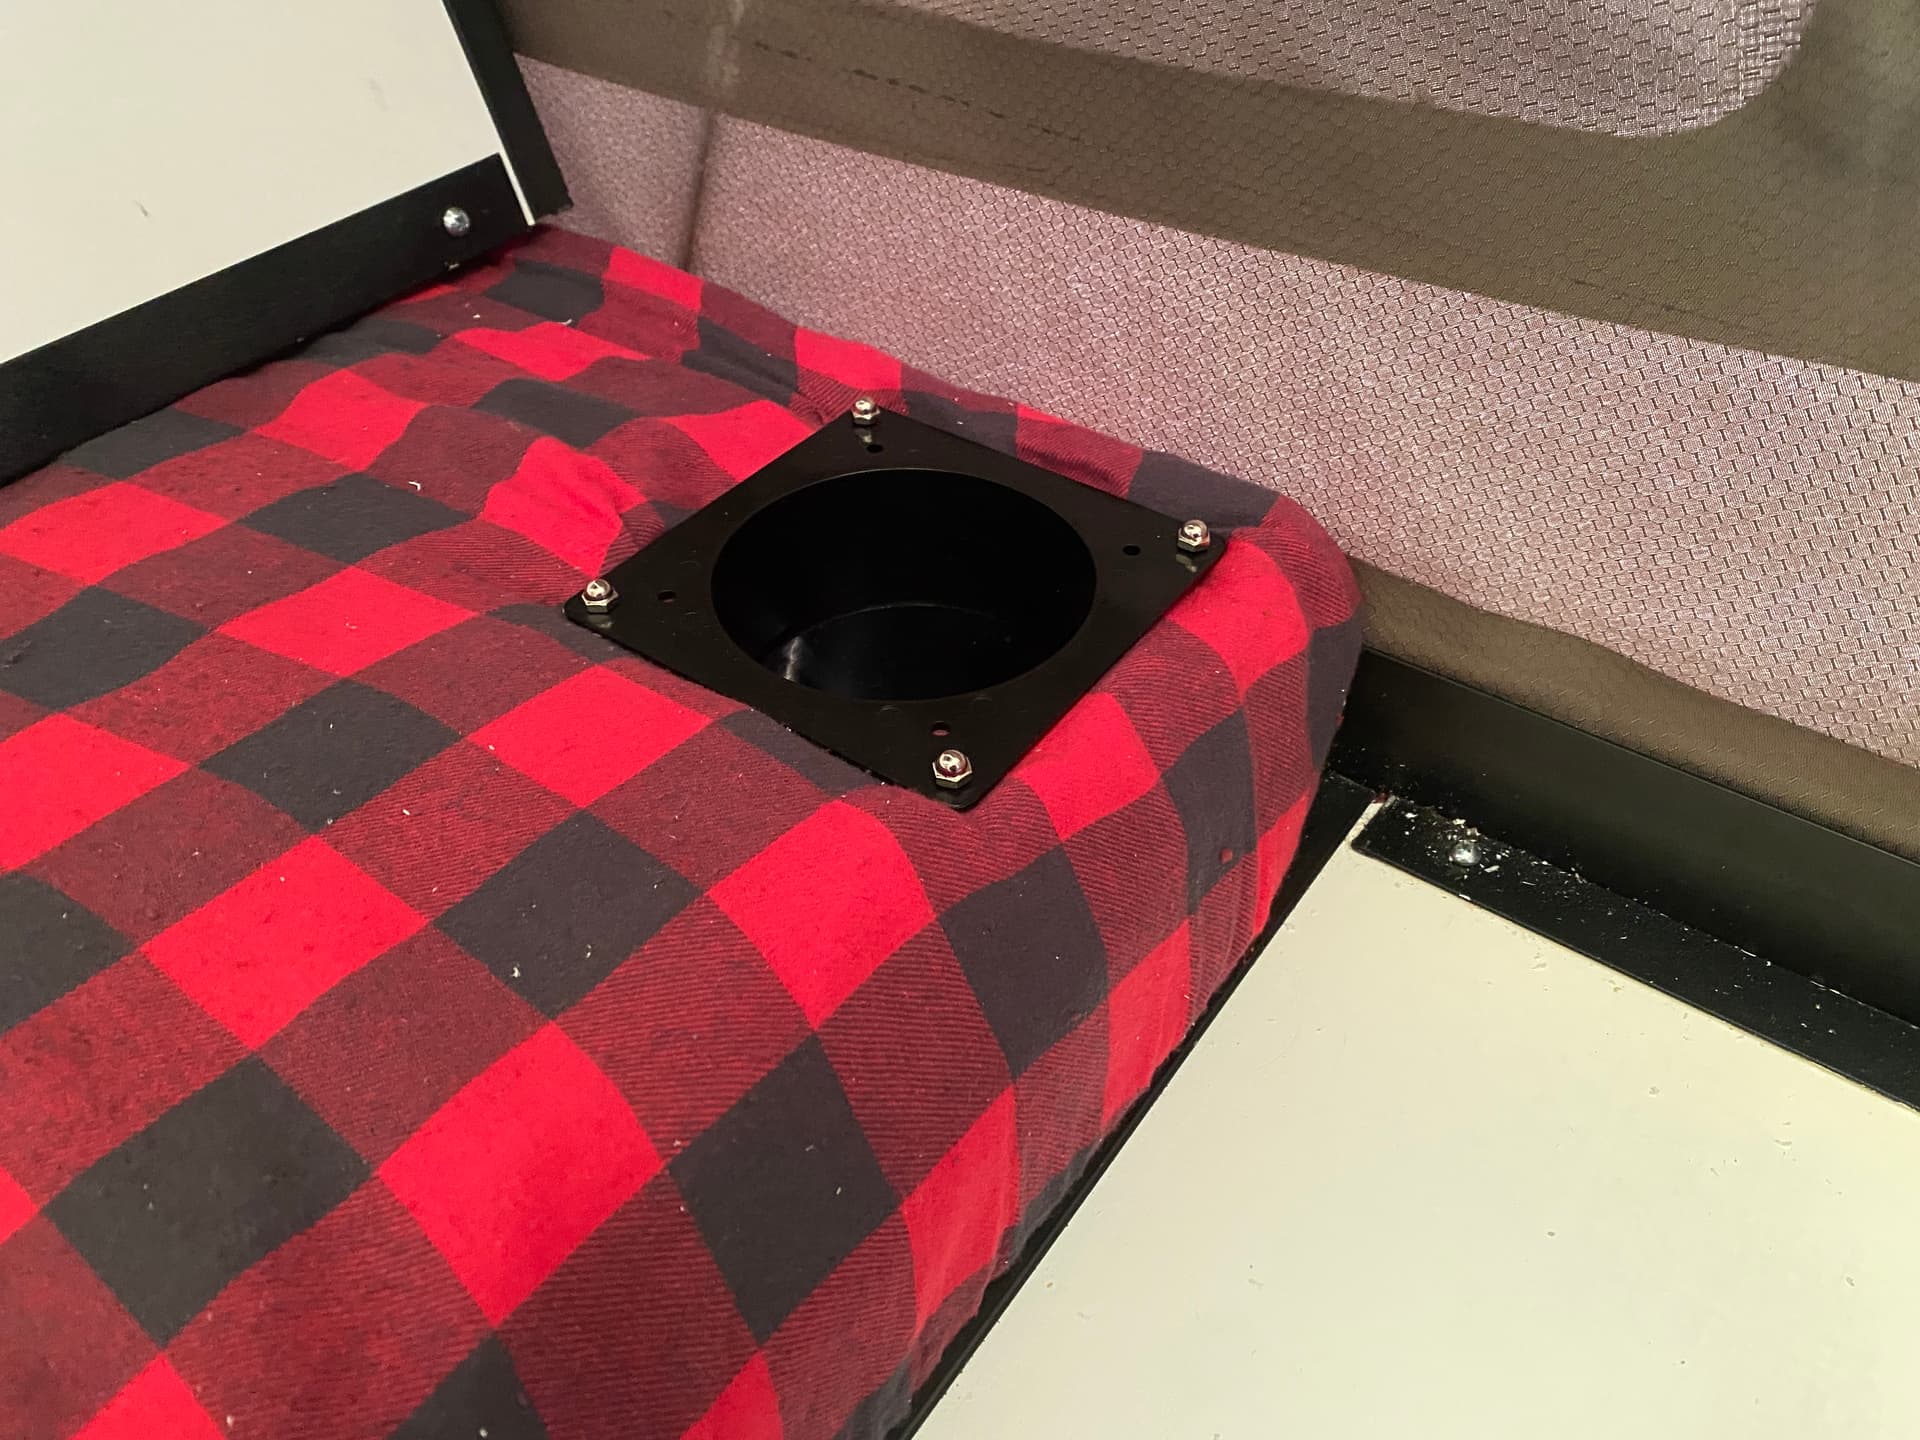
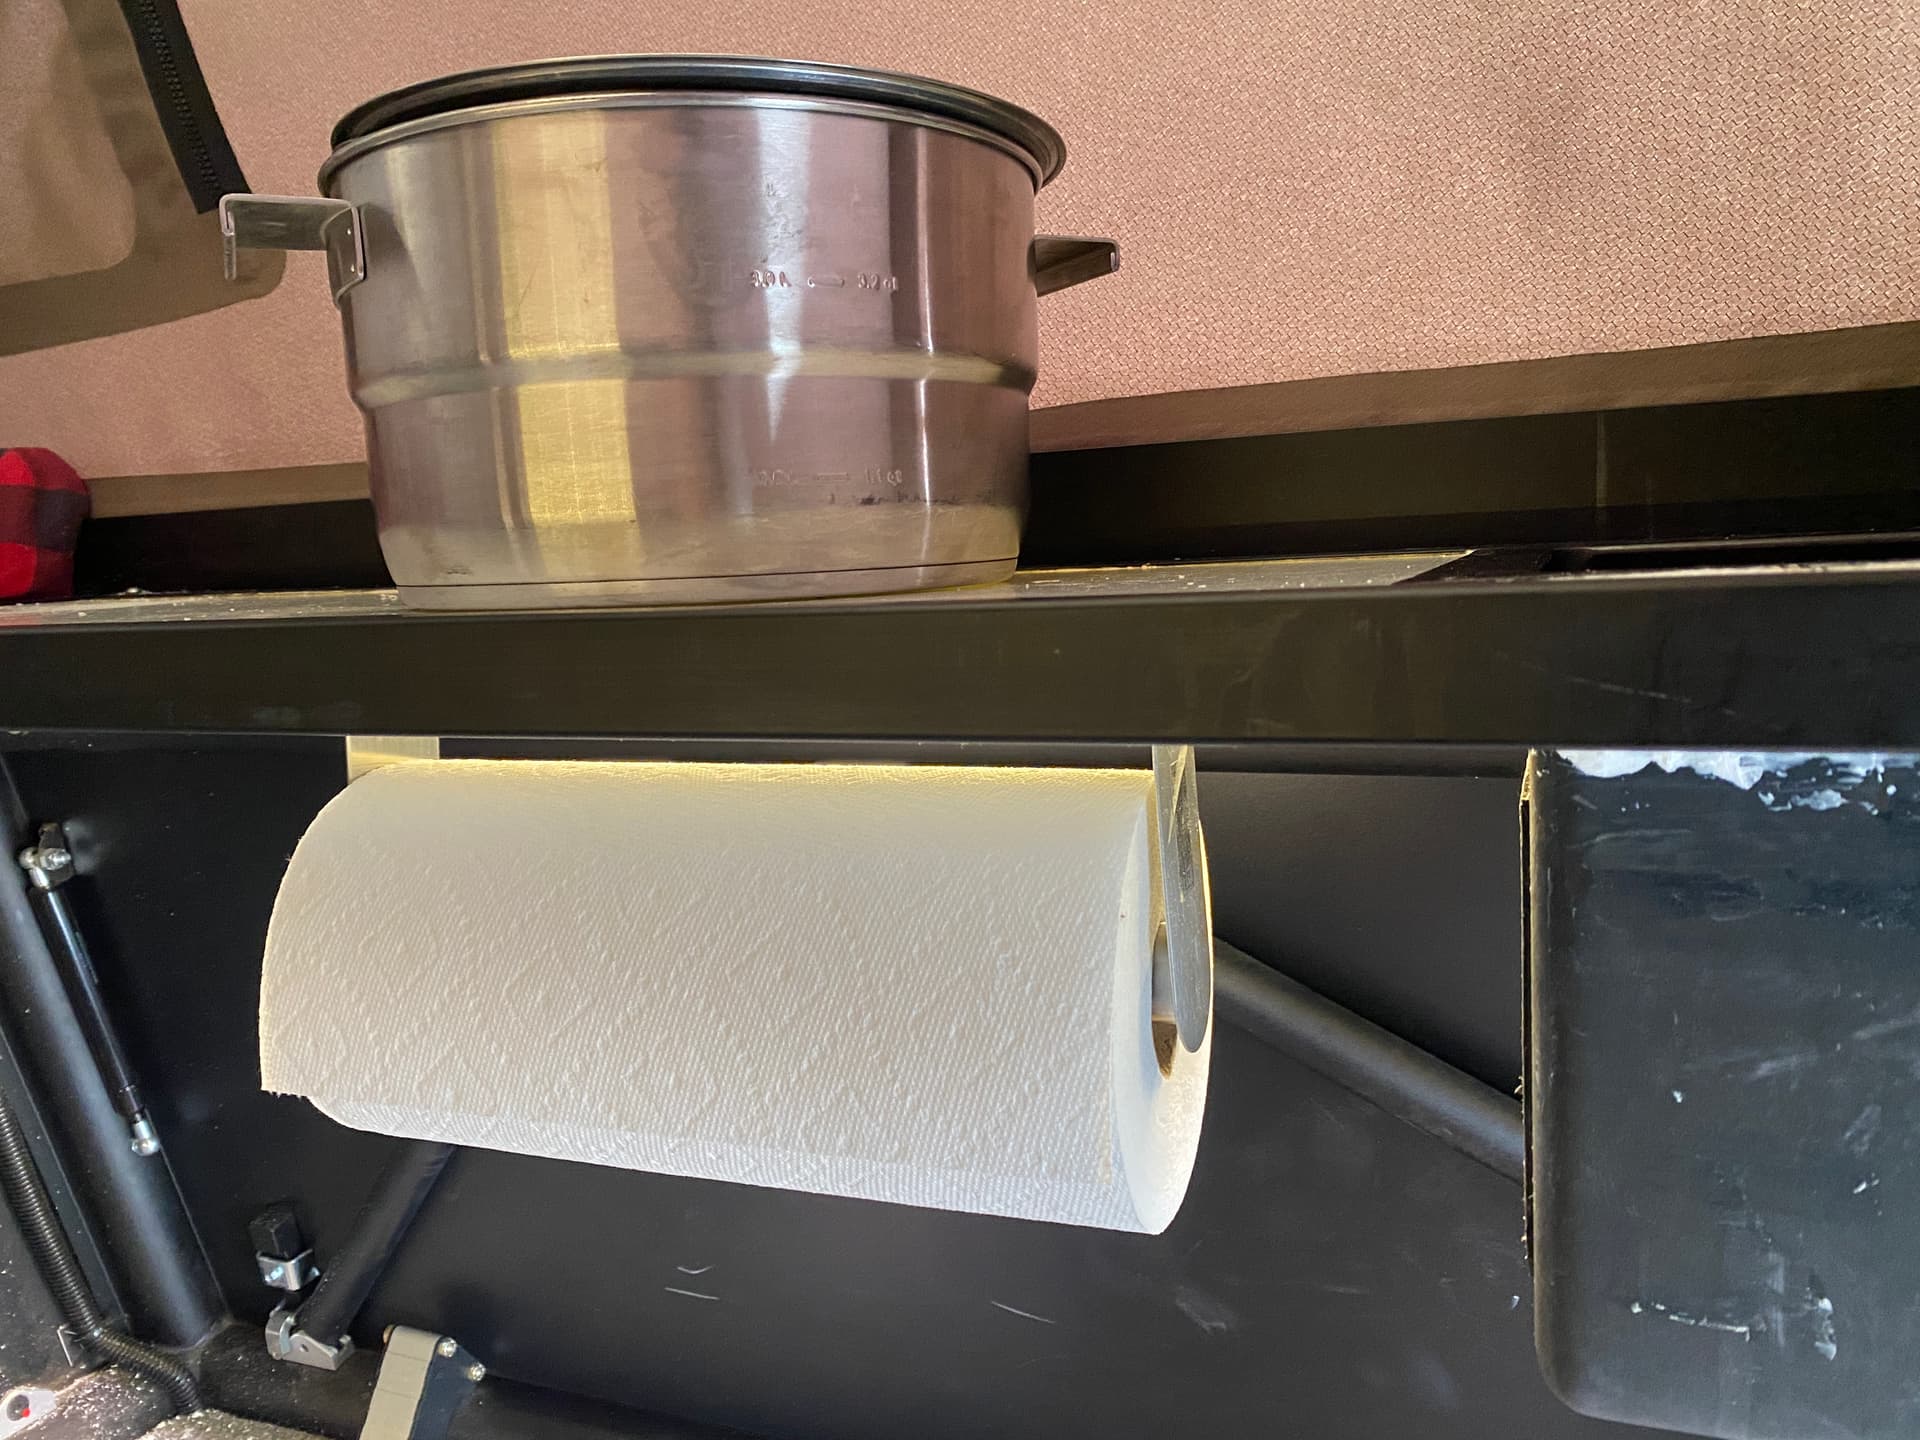
Also I added a paper towel holder ![]()
7 Likes
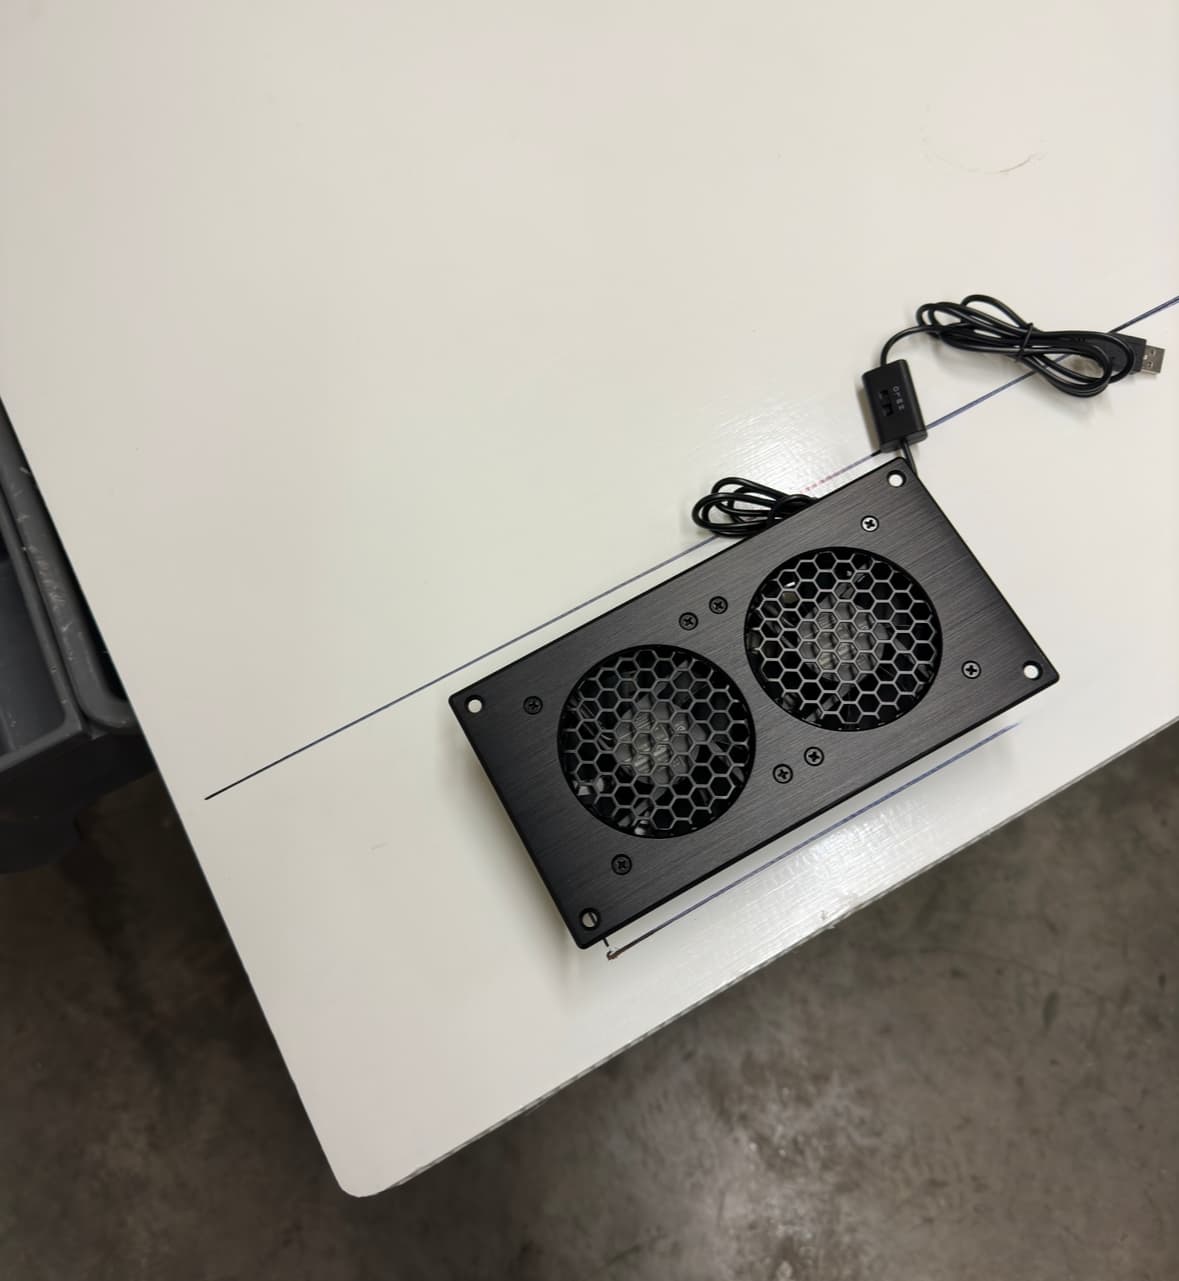
I am working on doing a similar fan setup. I have this usb dual fan but I am cutting a section off one of my square cushion. Just trying to decide if I need to supplement the cut out with some aluminum support.
3 Likes

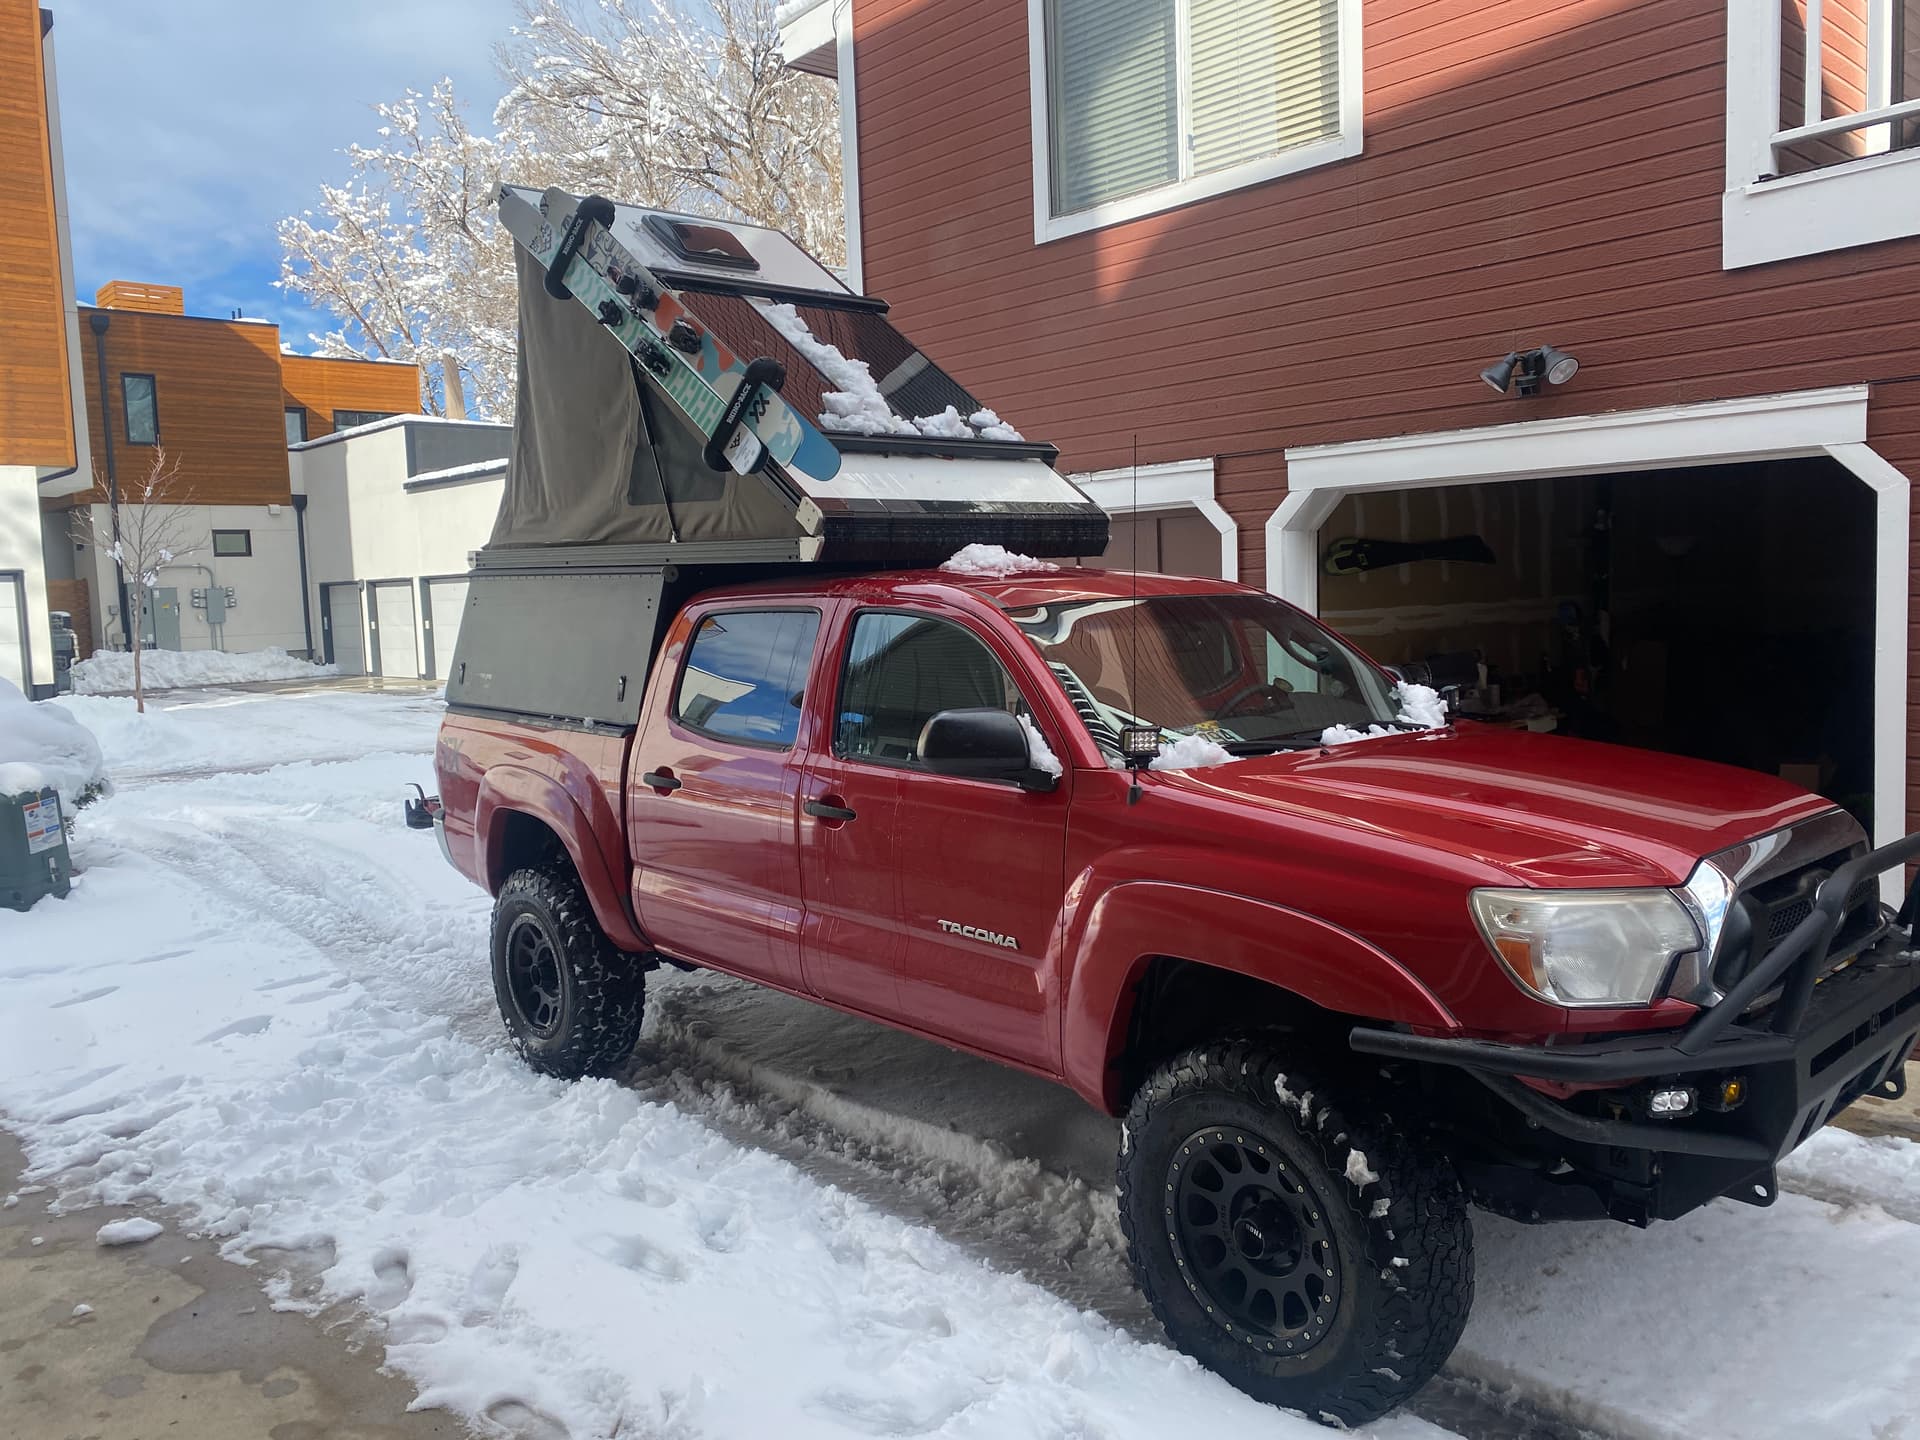
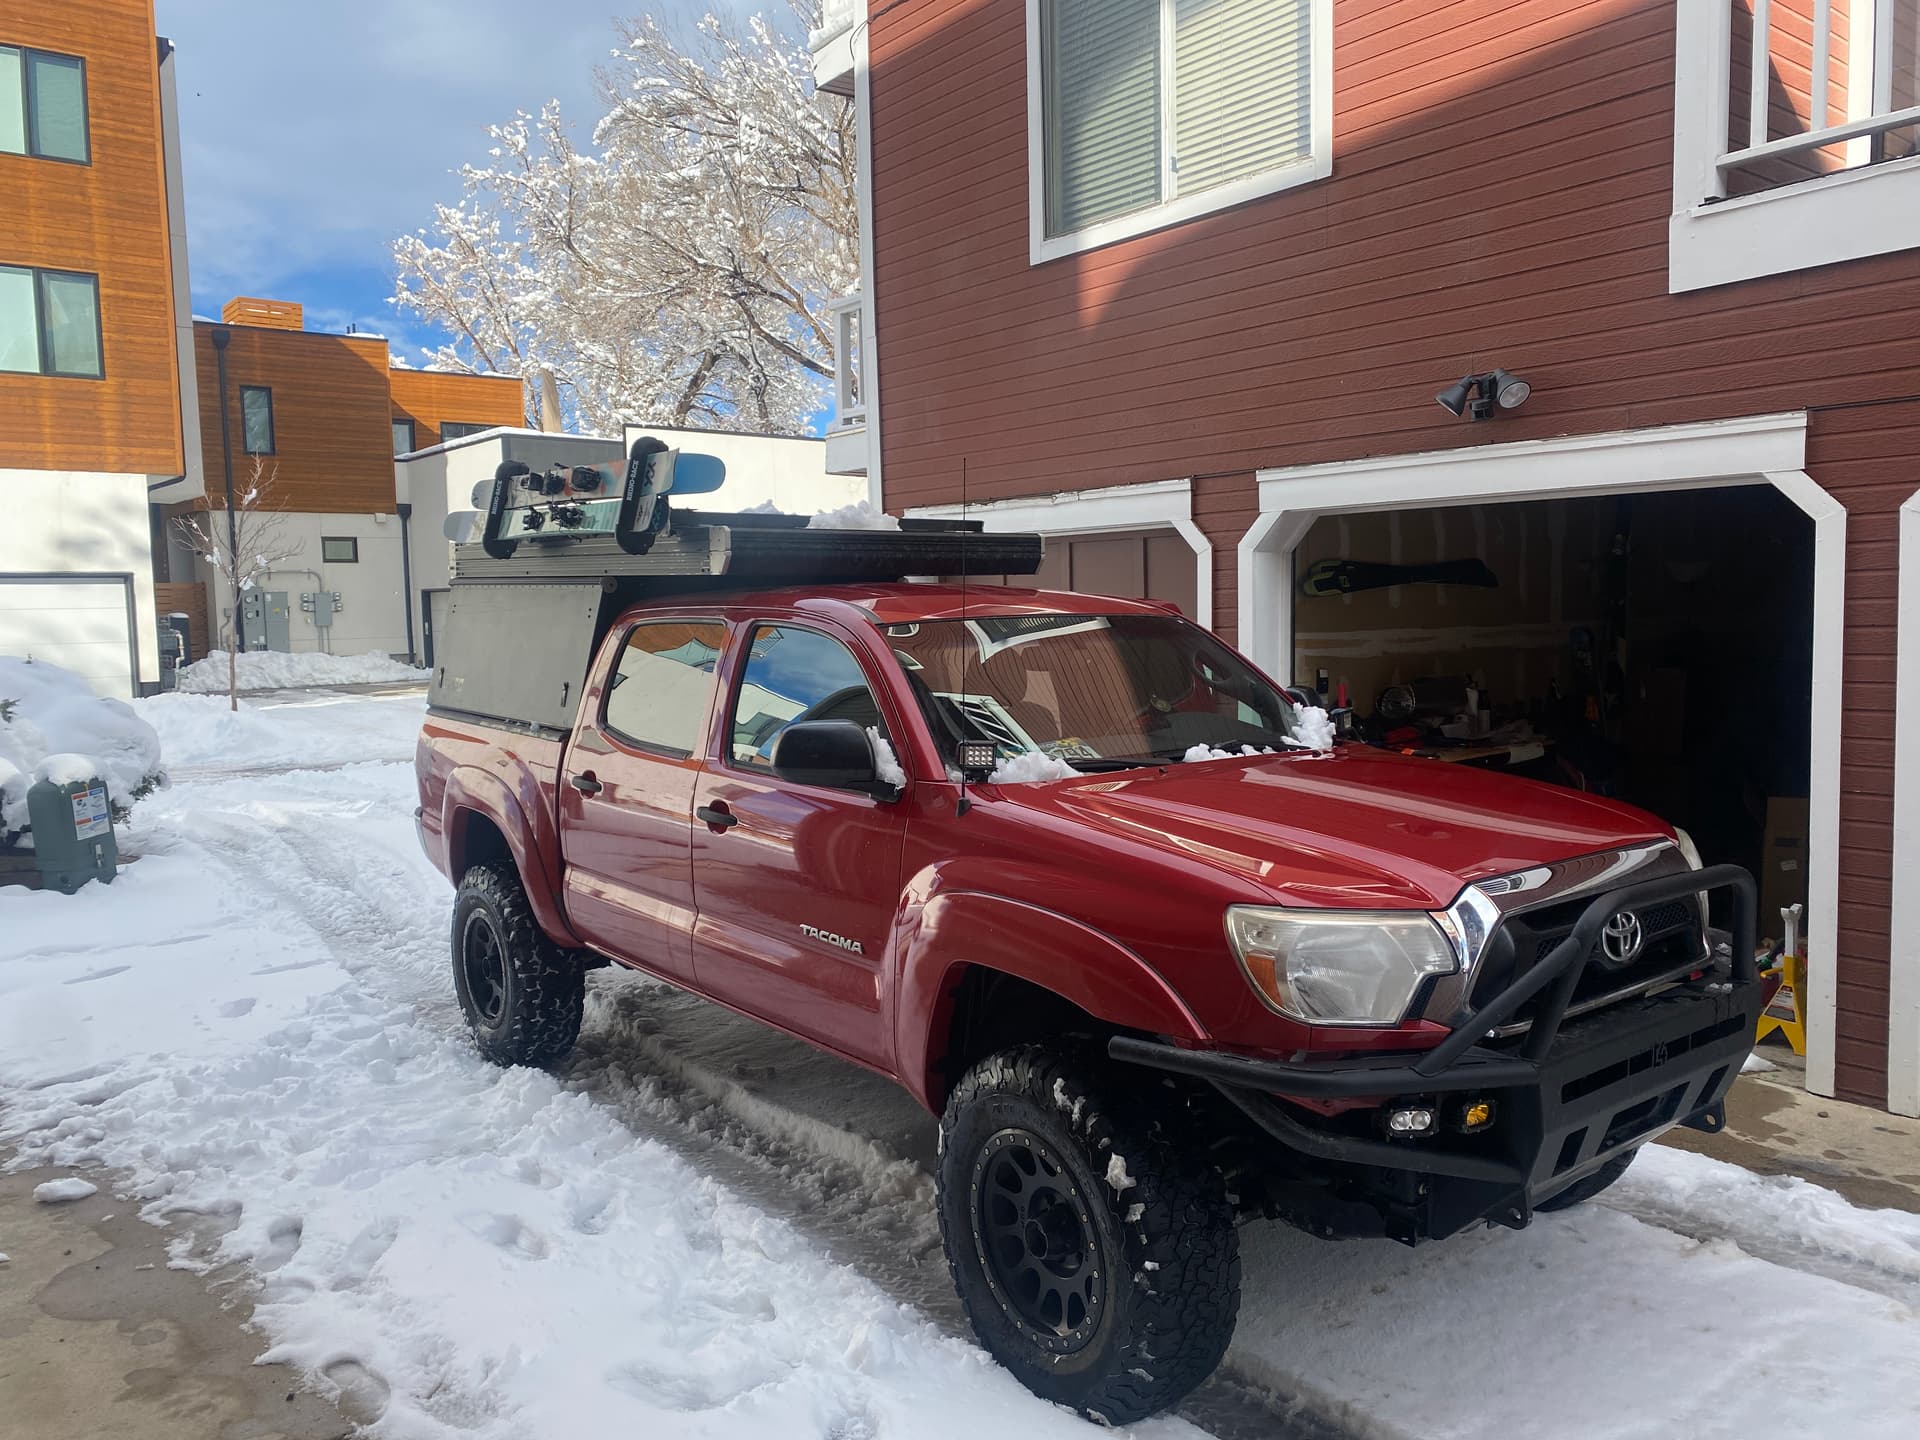
That is so awesome! What rack is that?
2 Likes
Here’s the link.
https://www.etrailer.com/Fishing-Rod-Holders/Rhino-Rack/RR572-43159.html
It barely fits my wide skis I have a 121 underfoot ski and a 105 underfoot ski in the rack and its’ right at the limit can’t fit anything wider than those two. Other than that it is a little hard to load them because it is sideways but worth it because it doesn’t block anything.
1 Like
Update on how the ski system has been working? Done any trips with it? How is getting them in and out?
Looking at this system, is there a possibility to mount the ski rack on the inside of the bed/ topper as well with the hardware provided?
Ski system has been working well. It does its’ job nothing extraordinary… My only complaint is getting them in and out which takes a little bit of work and about 60 seconds to close it without them falling out. However this added time is made up for in solar panel efficiency which is the main reason I would recommend it. The other solution I considered for a while was getting a ski rack made for snowmobiles and then using the universal mounting bracket from GFC. I think that system would work better however it only holds 1 ski and costs way more, which I why I ultimately went with this solution.
The other solution:
Again, it would cost about twice as much but would offer a better loading experience.