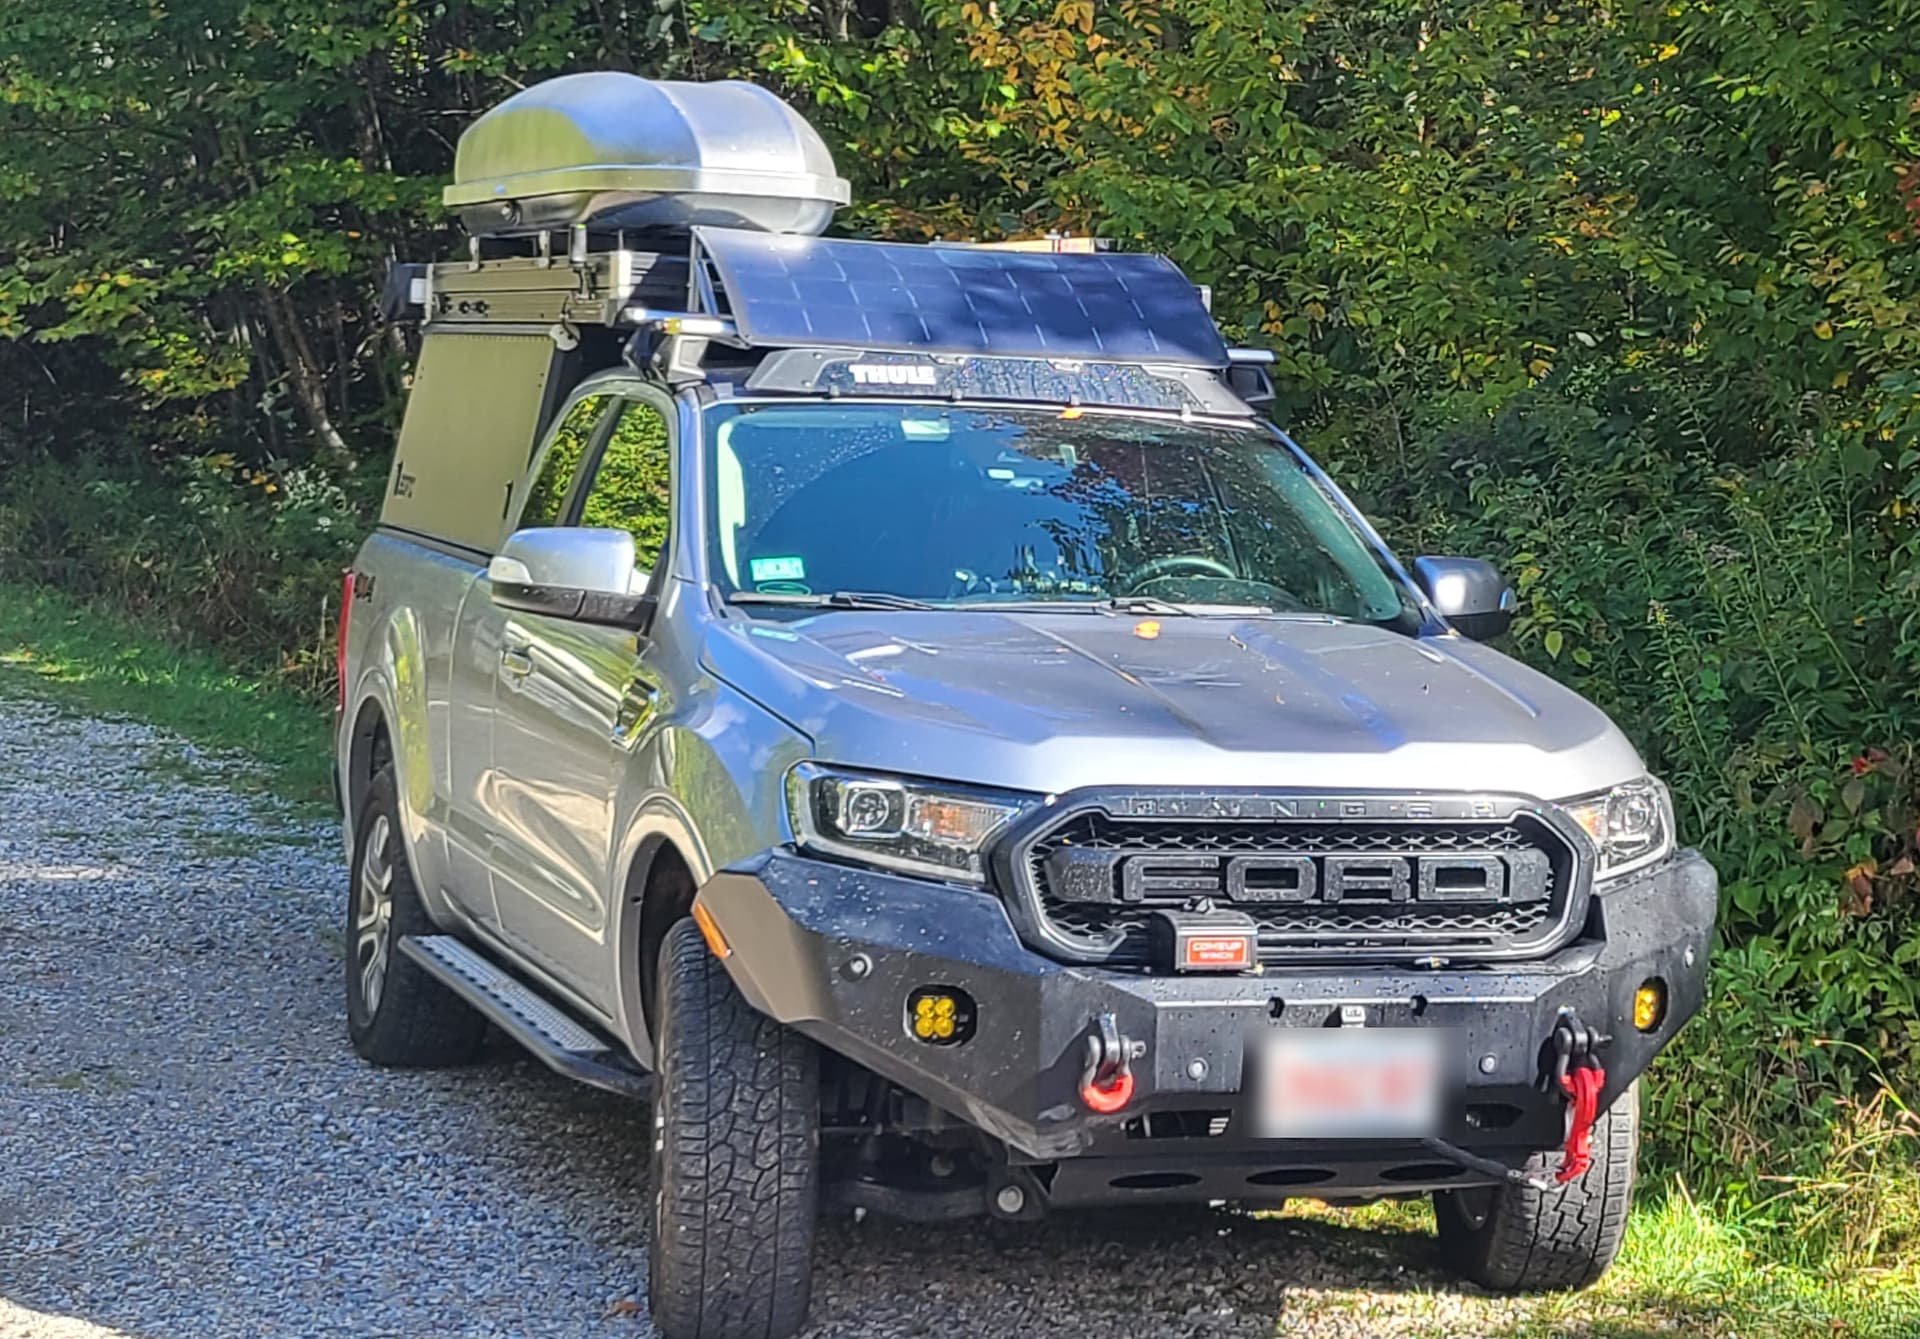
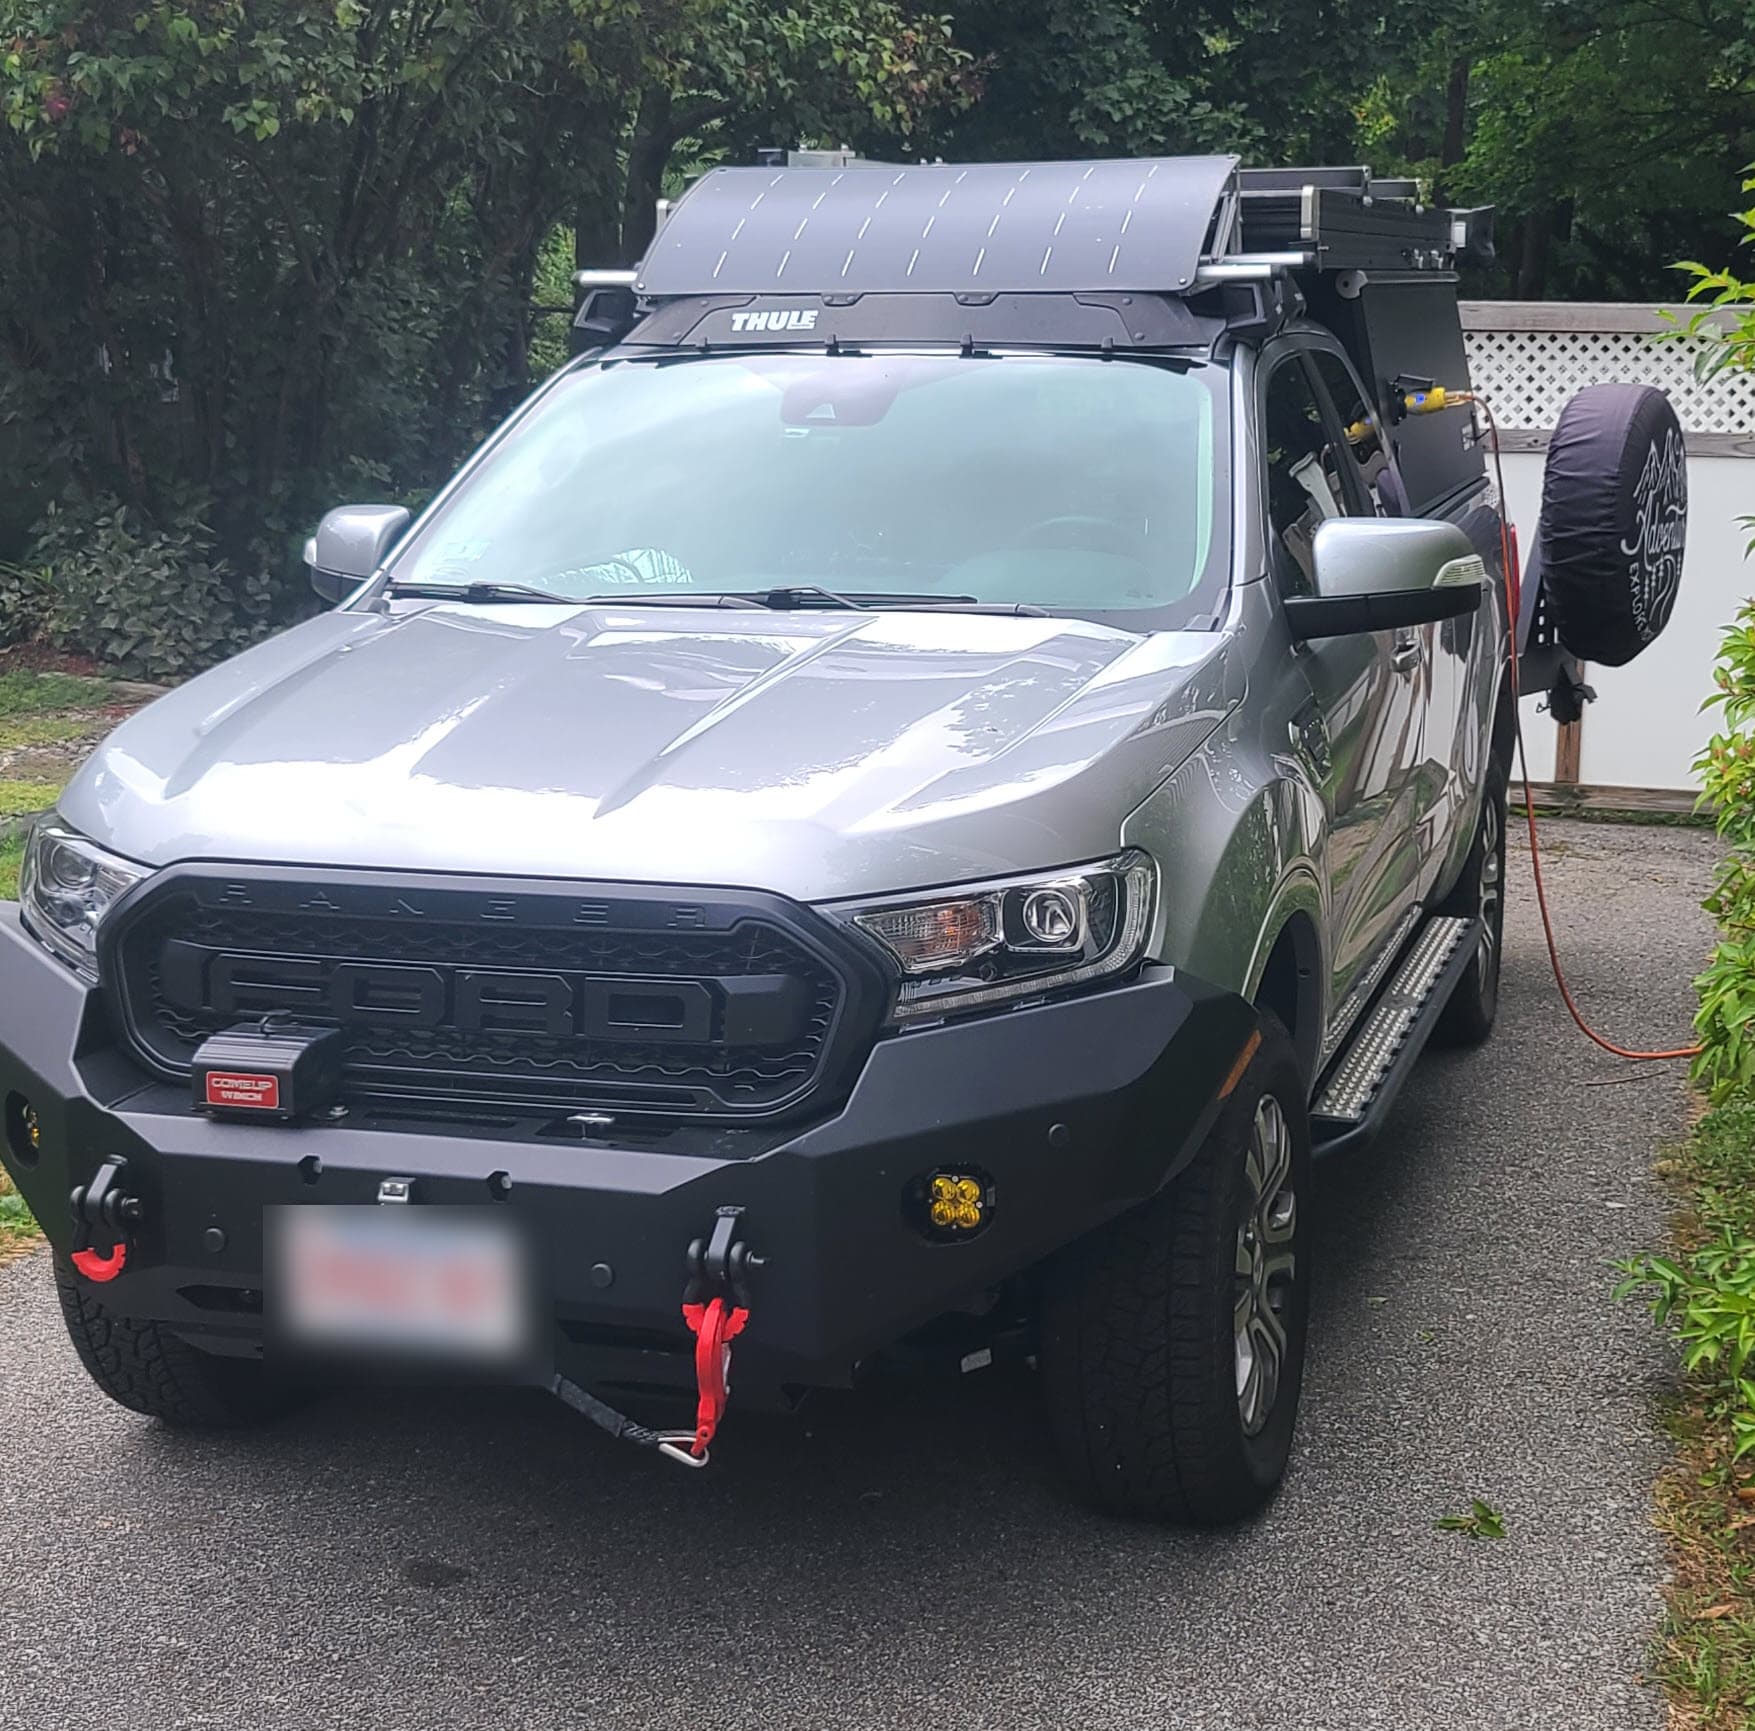
Expedition One Bumpers , Comeup Winch, and rock rails, installed by BuiltEast
sPOD, arb compressor, arb rear diff air lock also installed by BuiltEast
I installed the following
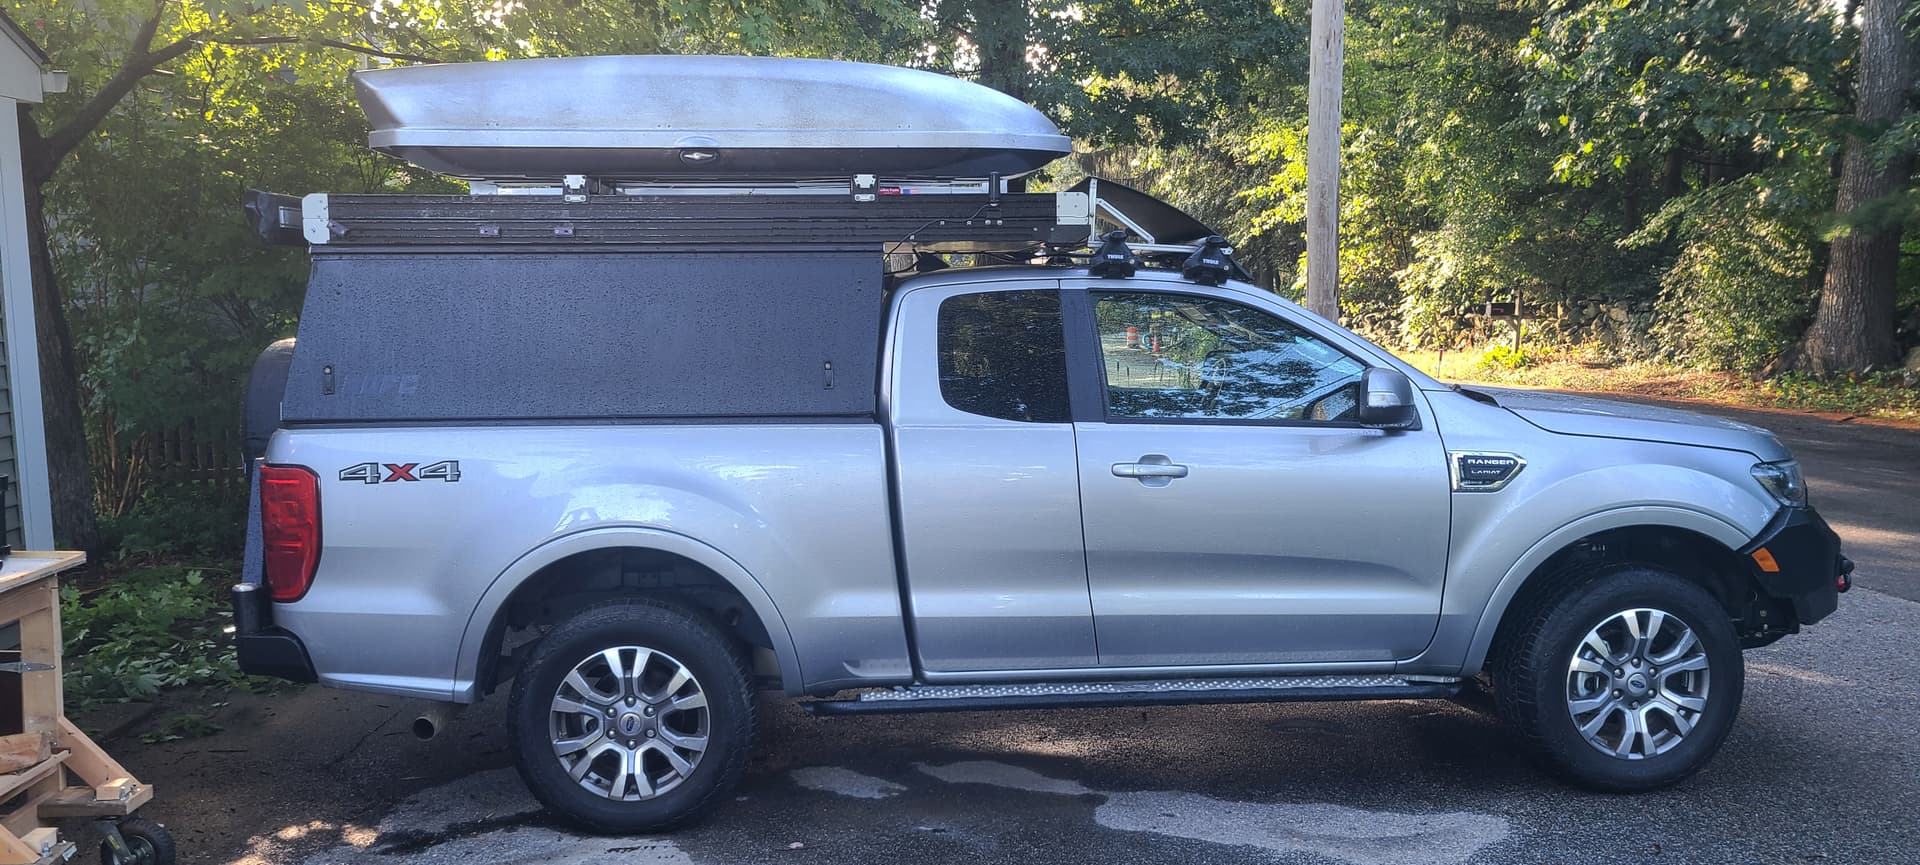
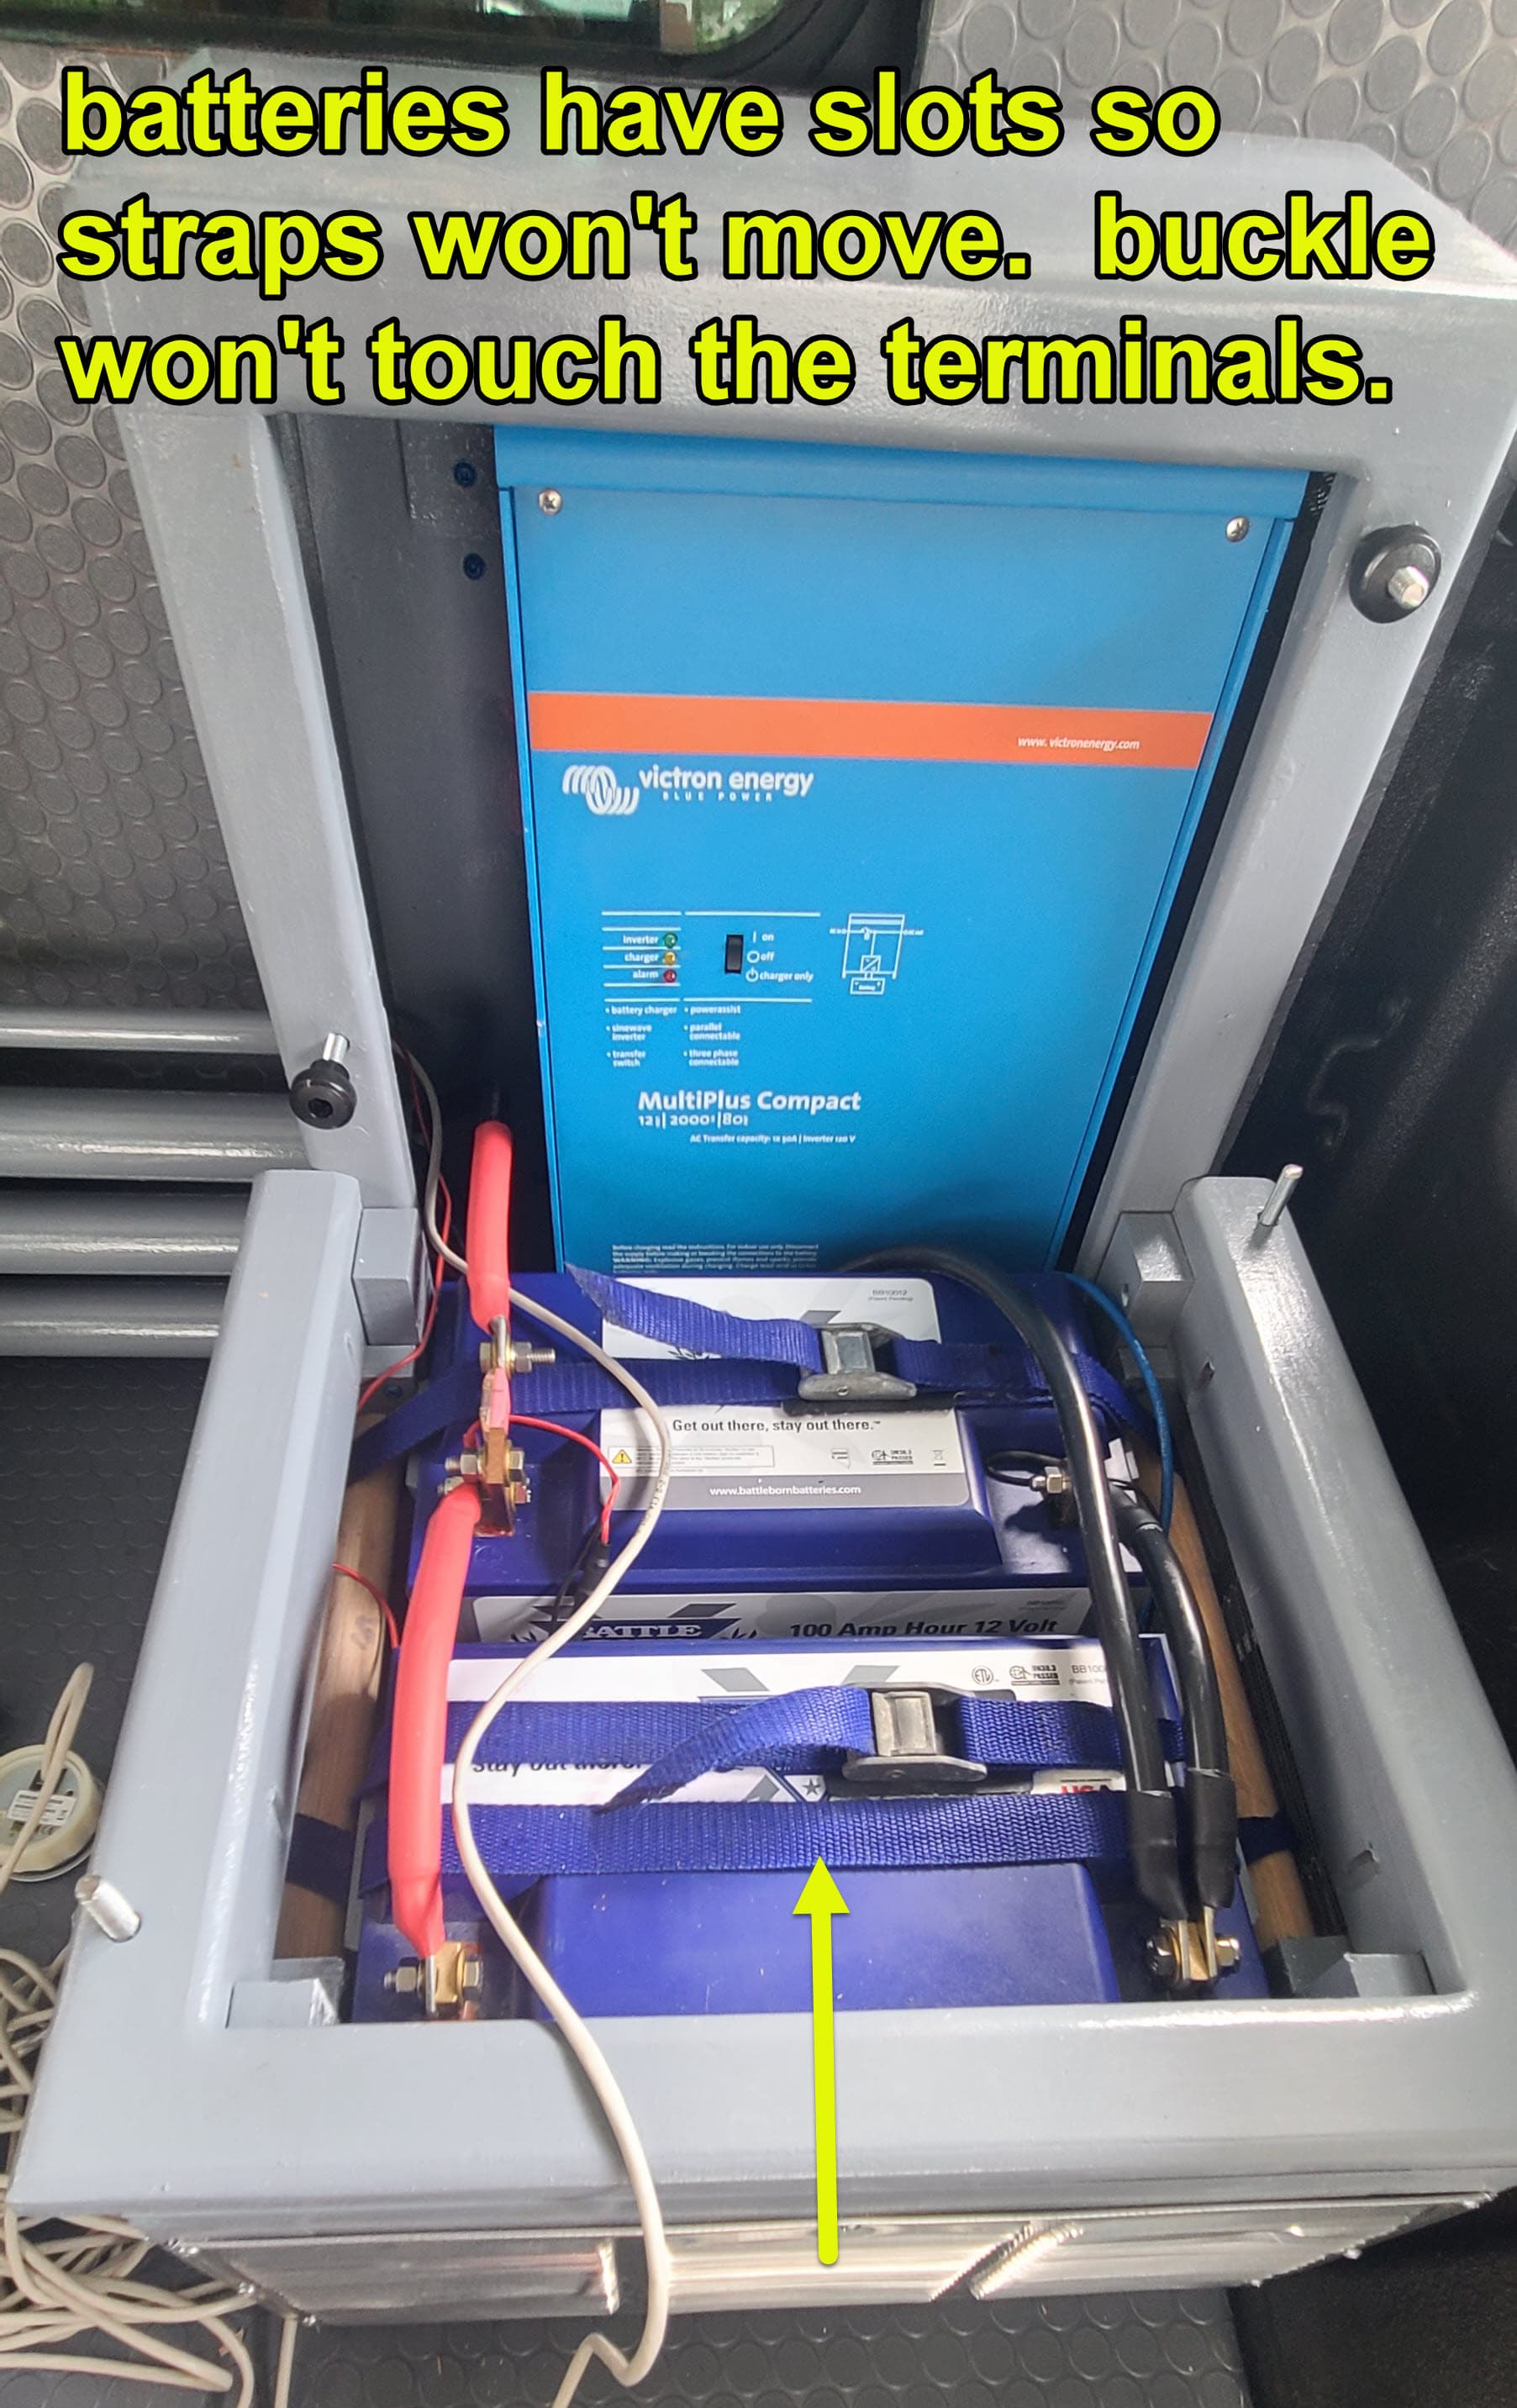
Victron and Battleborn energy system (12volt 200amp hours with 2000 watt Victron Inverter) per ExploristLife instructions, click here LightLeaf solar panel wind fairing
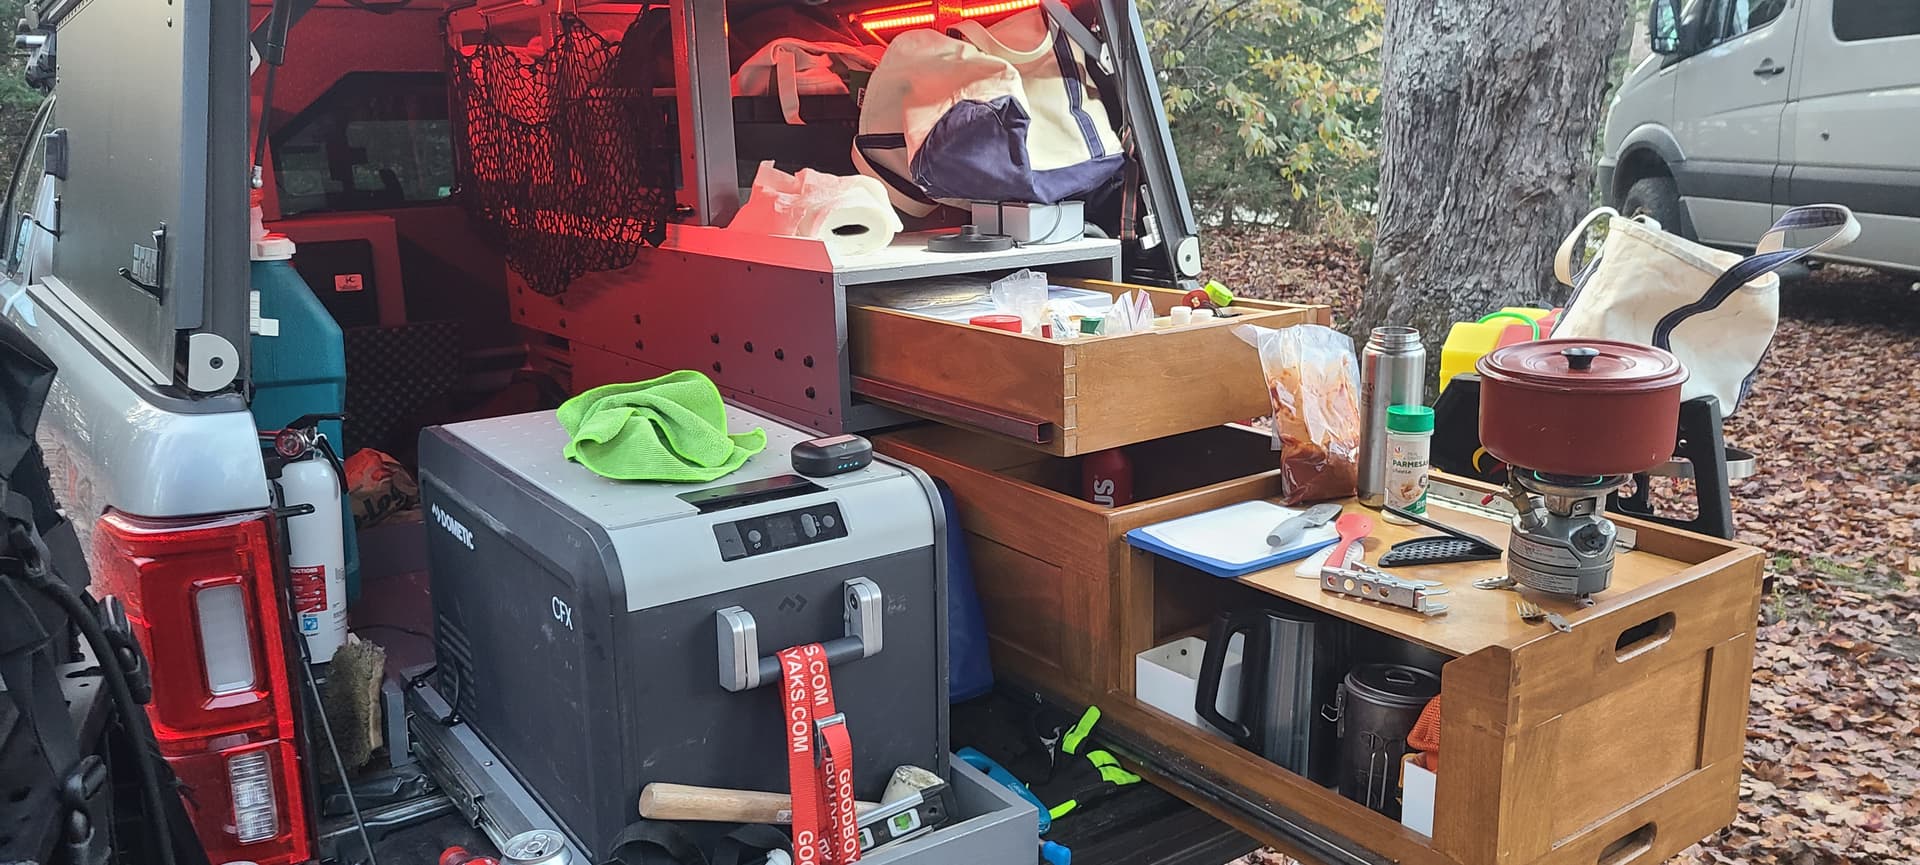
youtuber Pask Makes drawers using roller skate bearings and 1" square tubing, video here
I’ve documented my project on my blog and tons of photos are here [updated links to my new blog aug 2025]
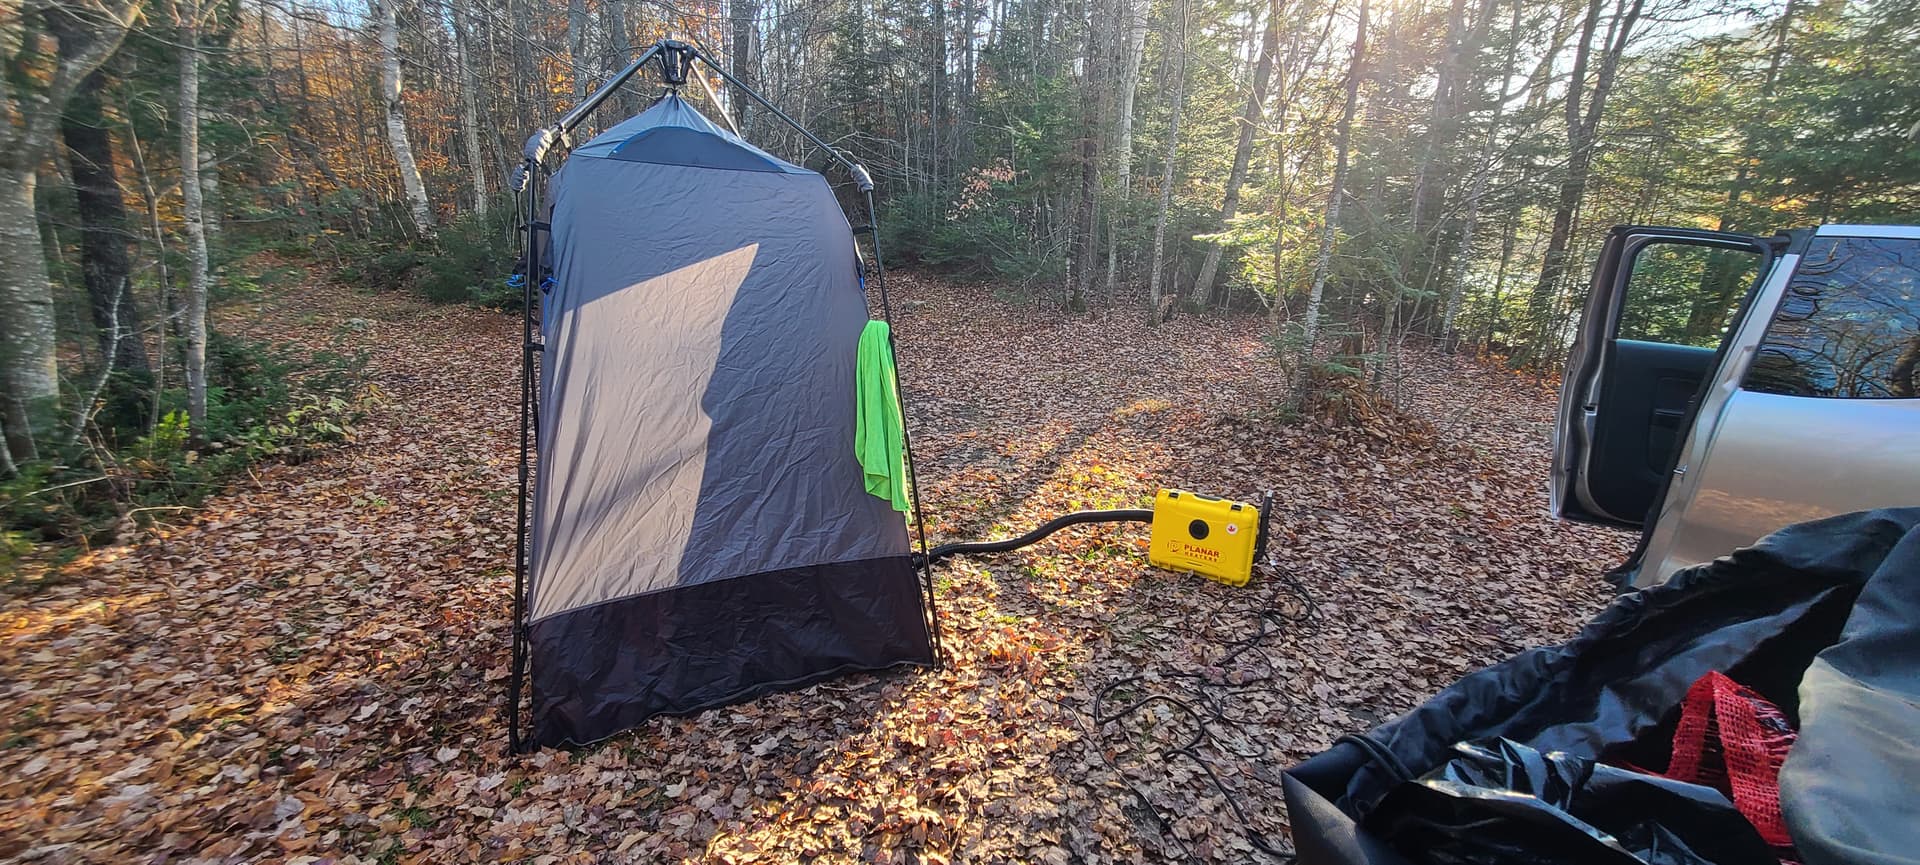
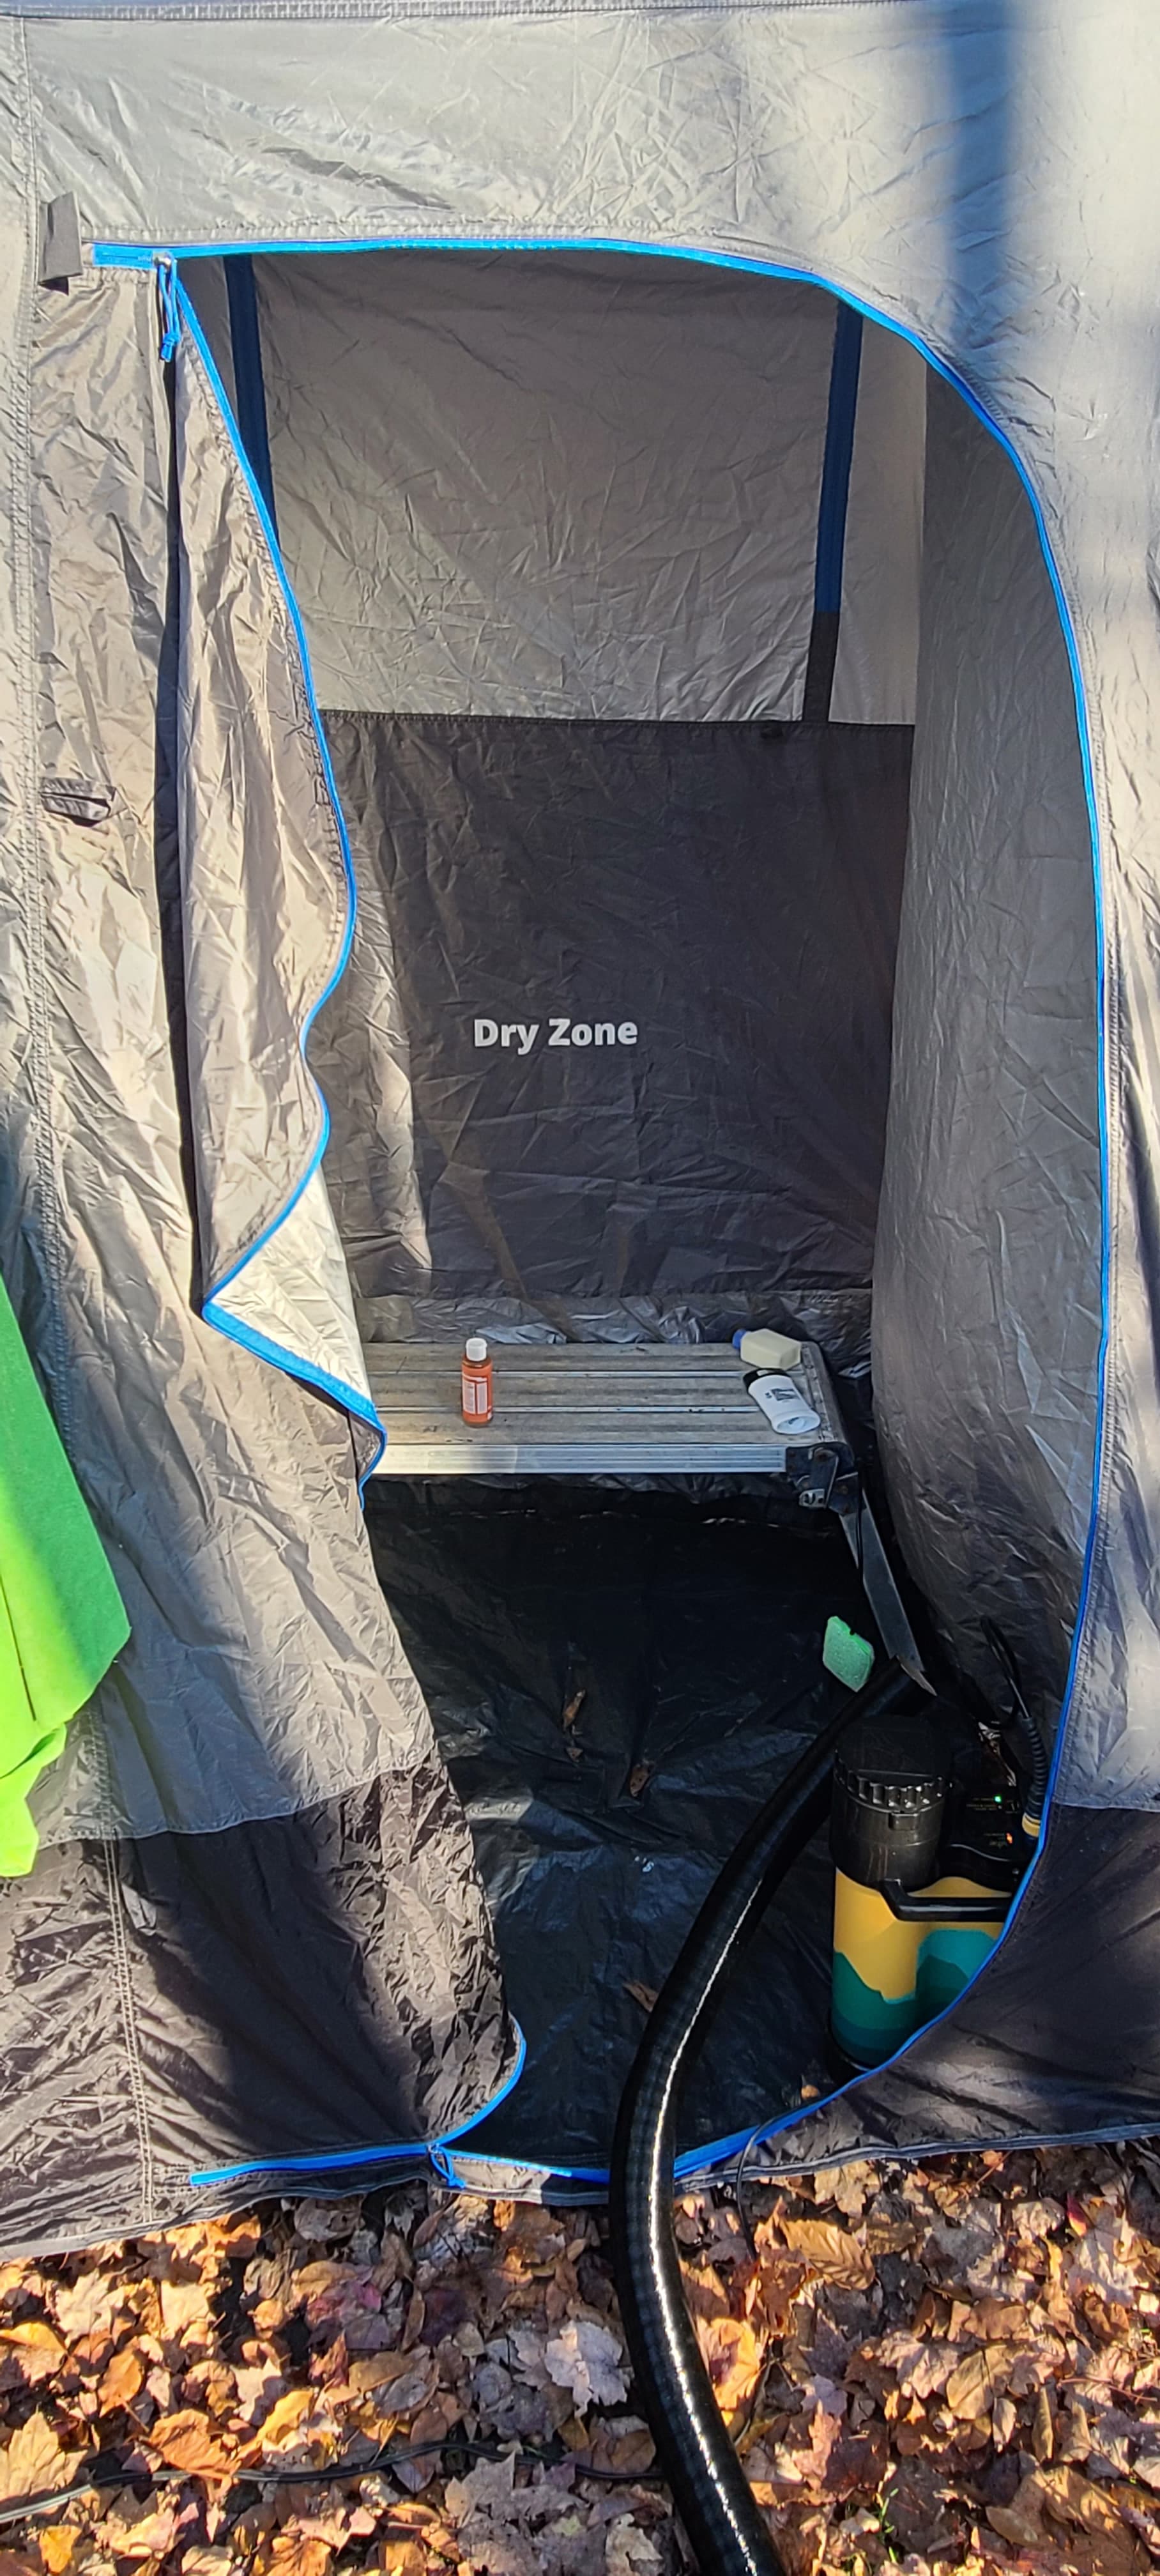
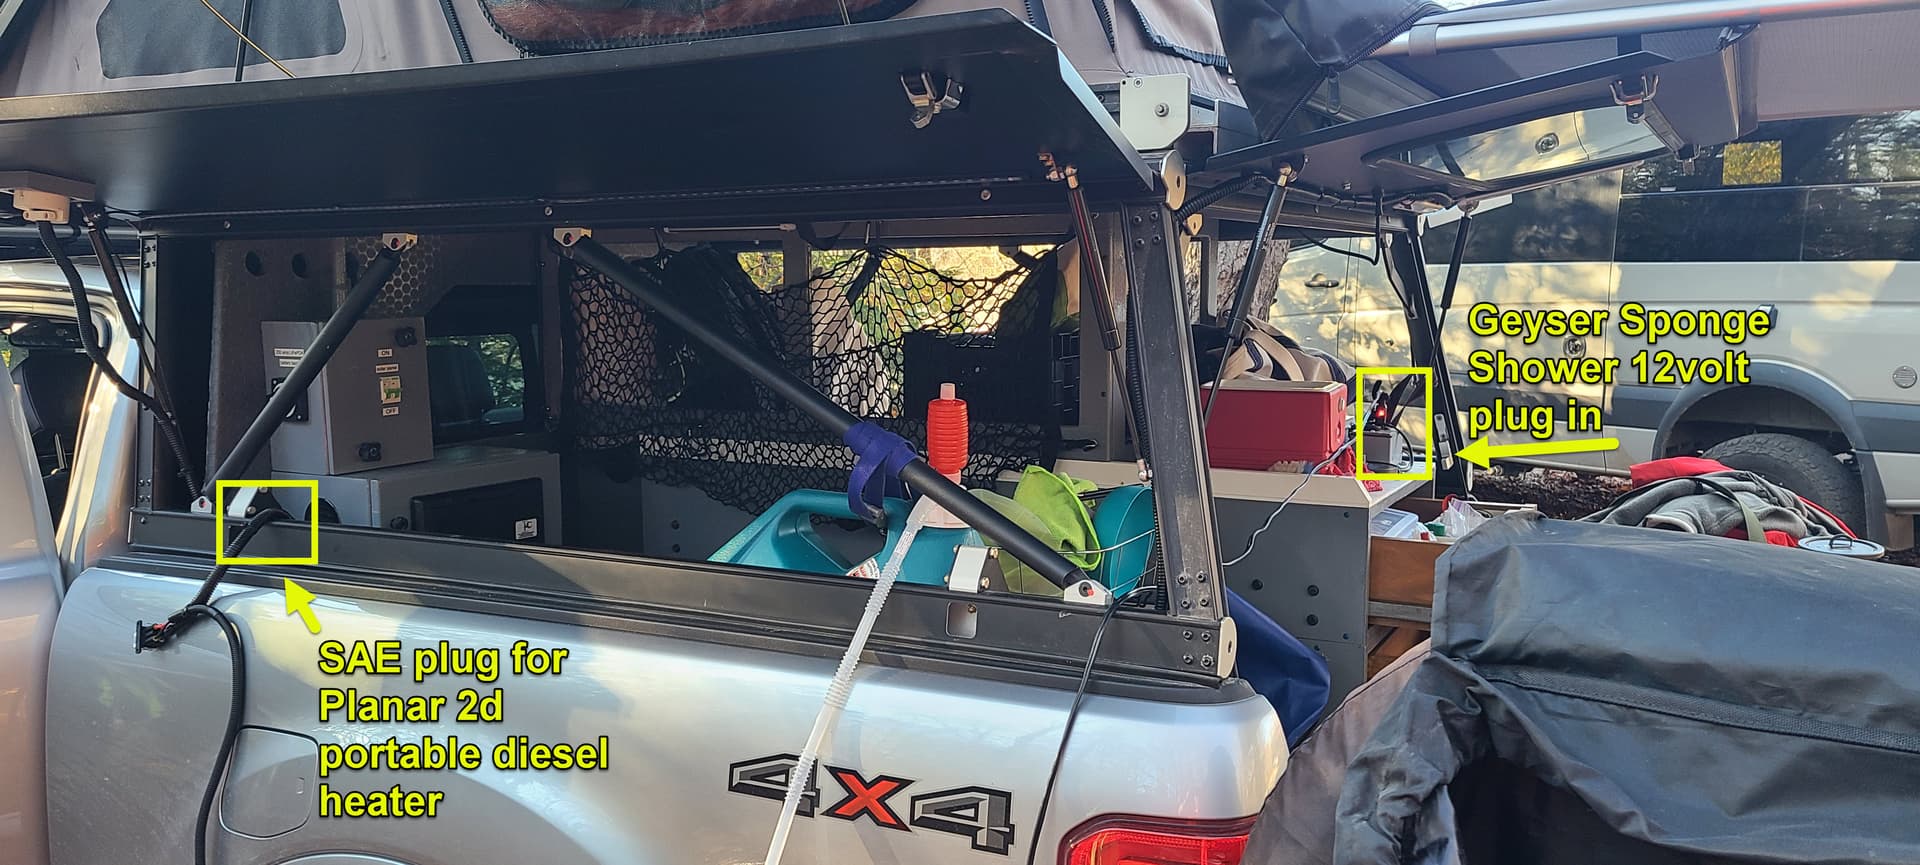
Oh and on my last trip I used a Geyser Sponge Shower, Joolca single shower tent, a Planar 2d portable diesel heater to keep the shower tent warm in 50 F degree weather. I also use a $30 electric kettle to get the 1 liter boiling water the Geyser shower needs.
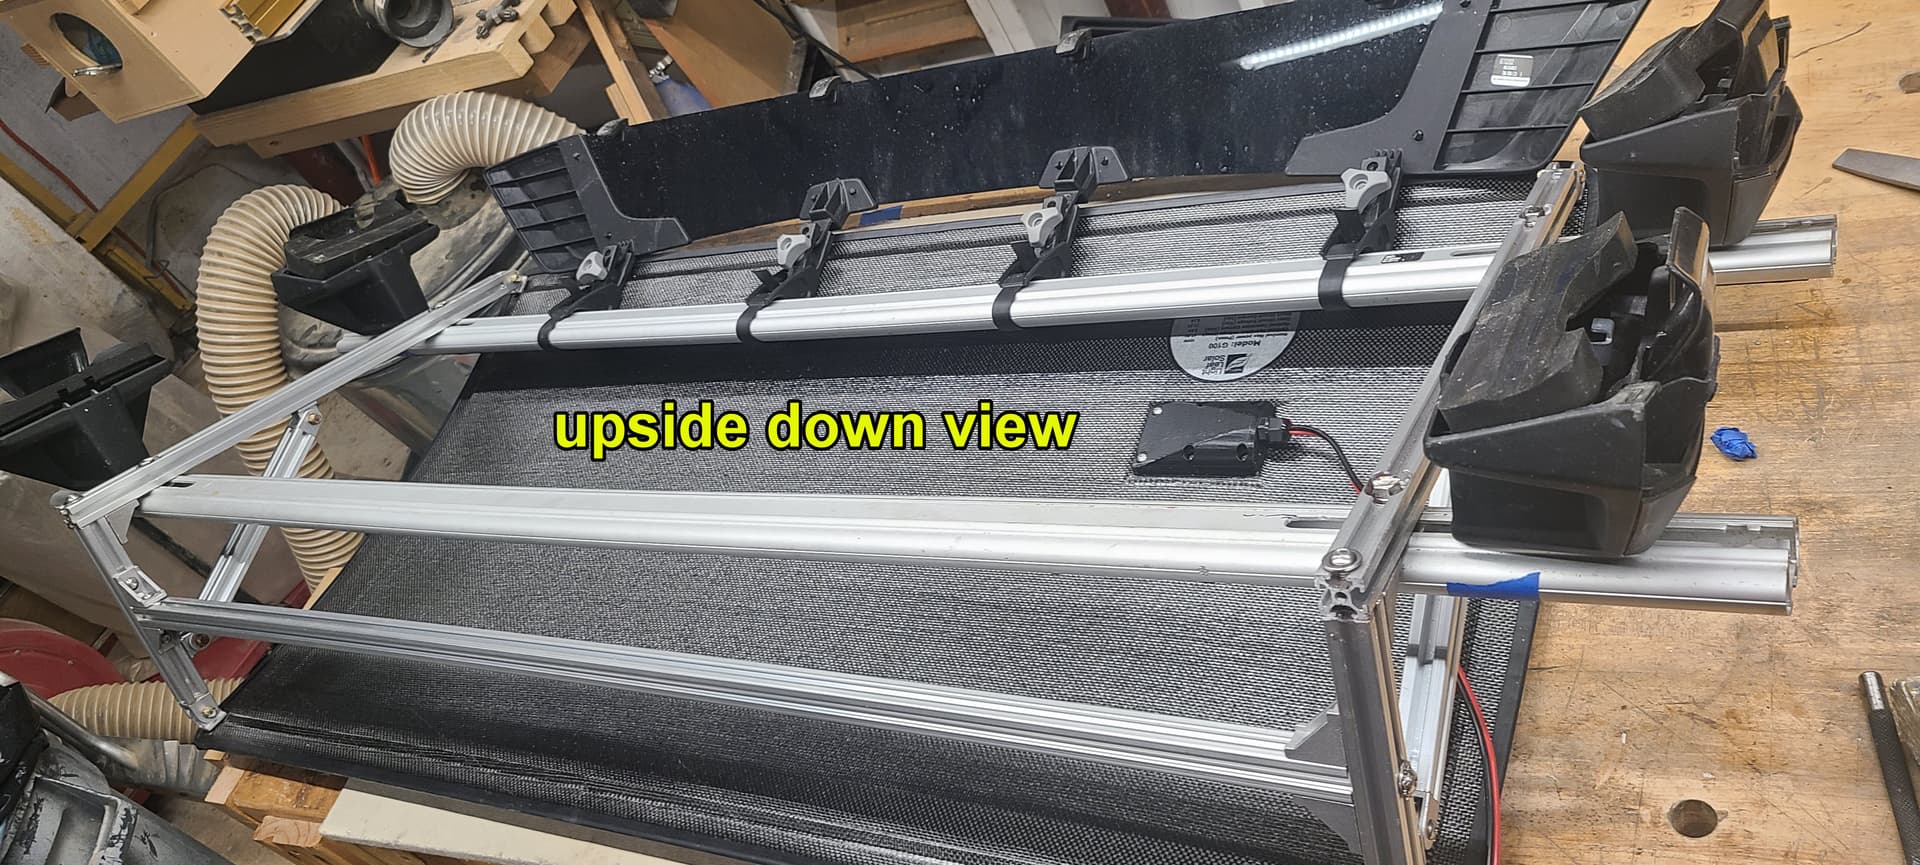
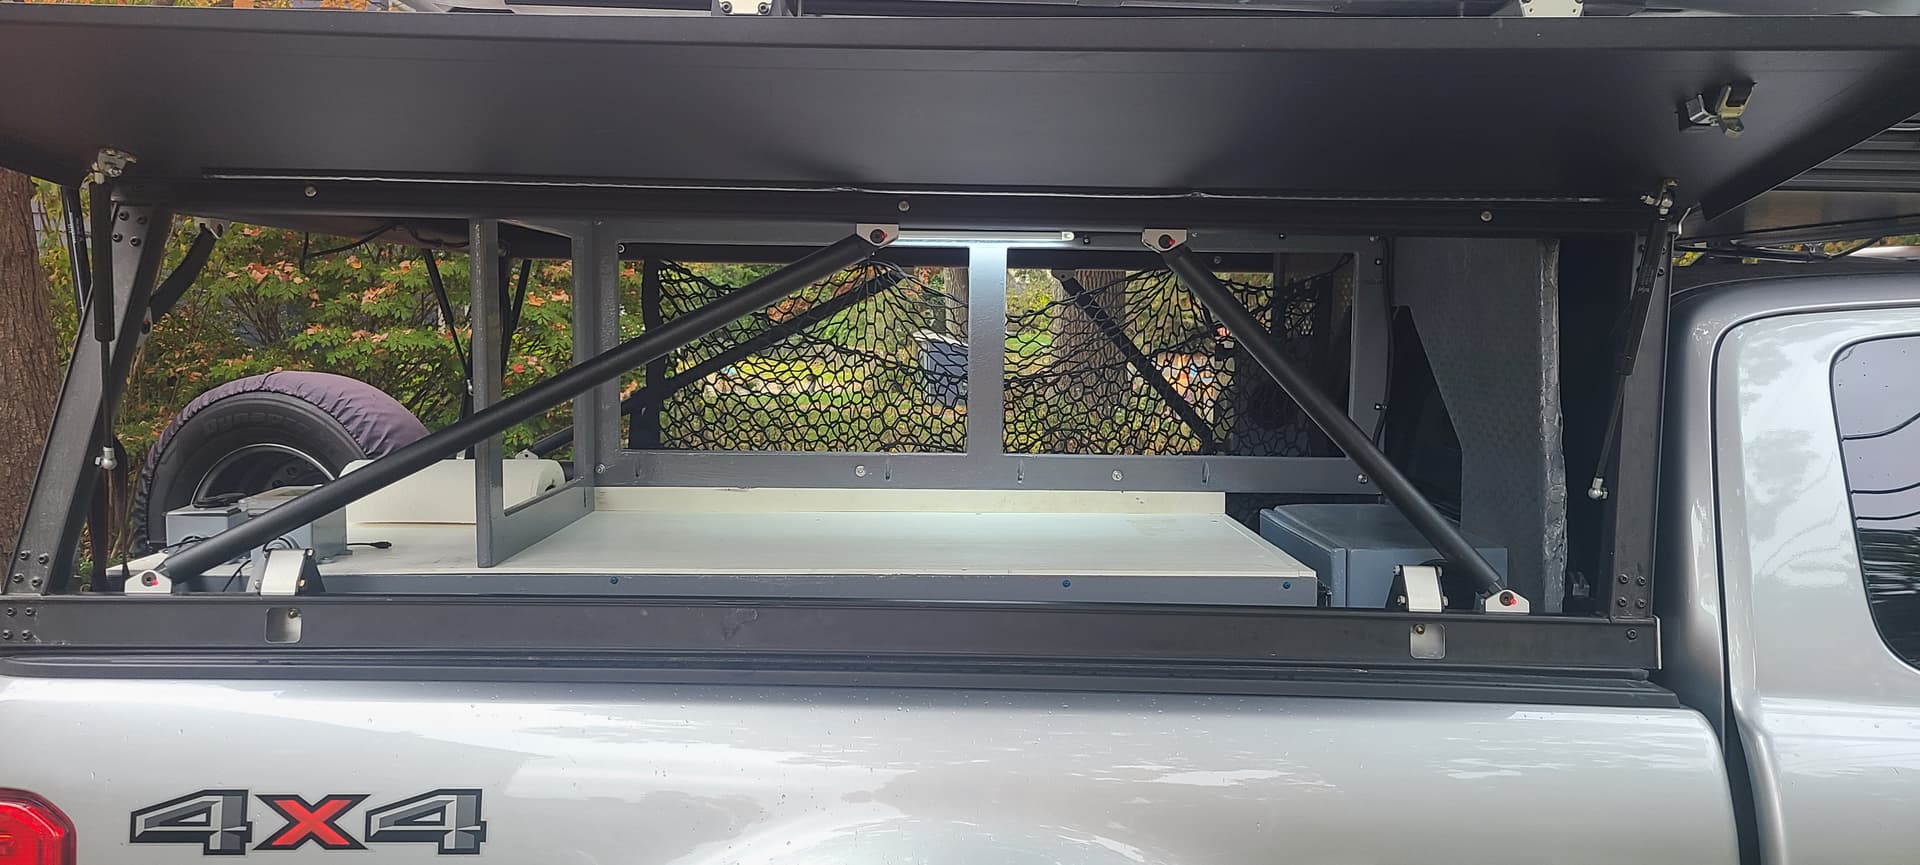
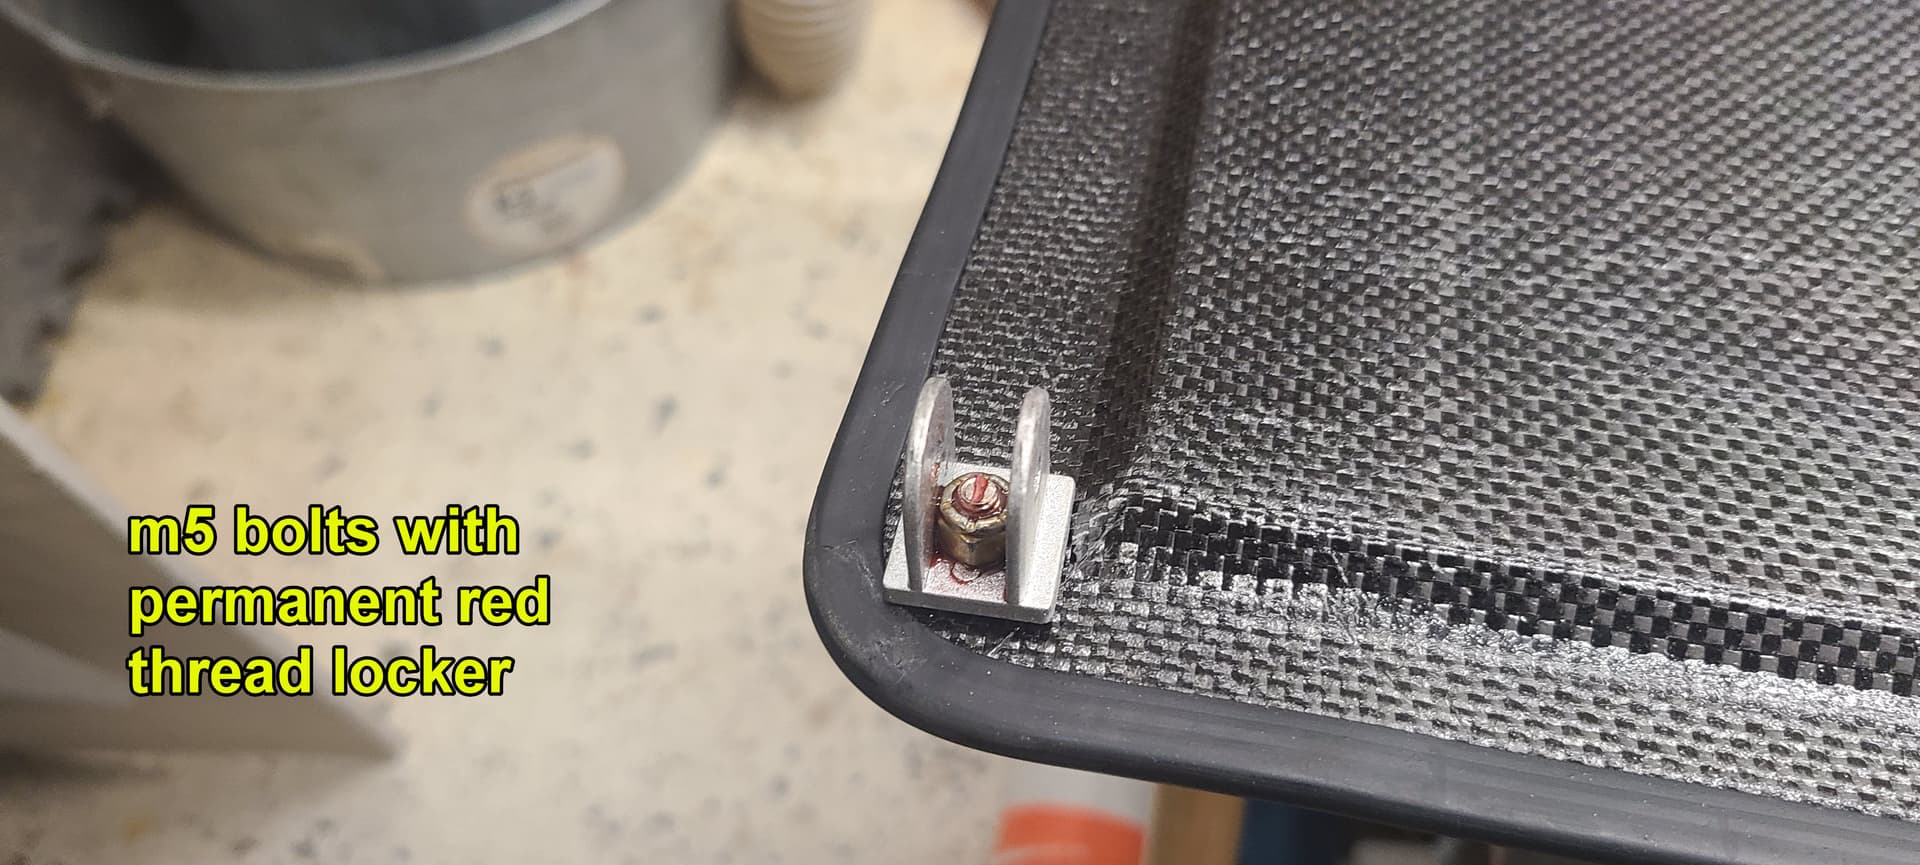
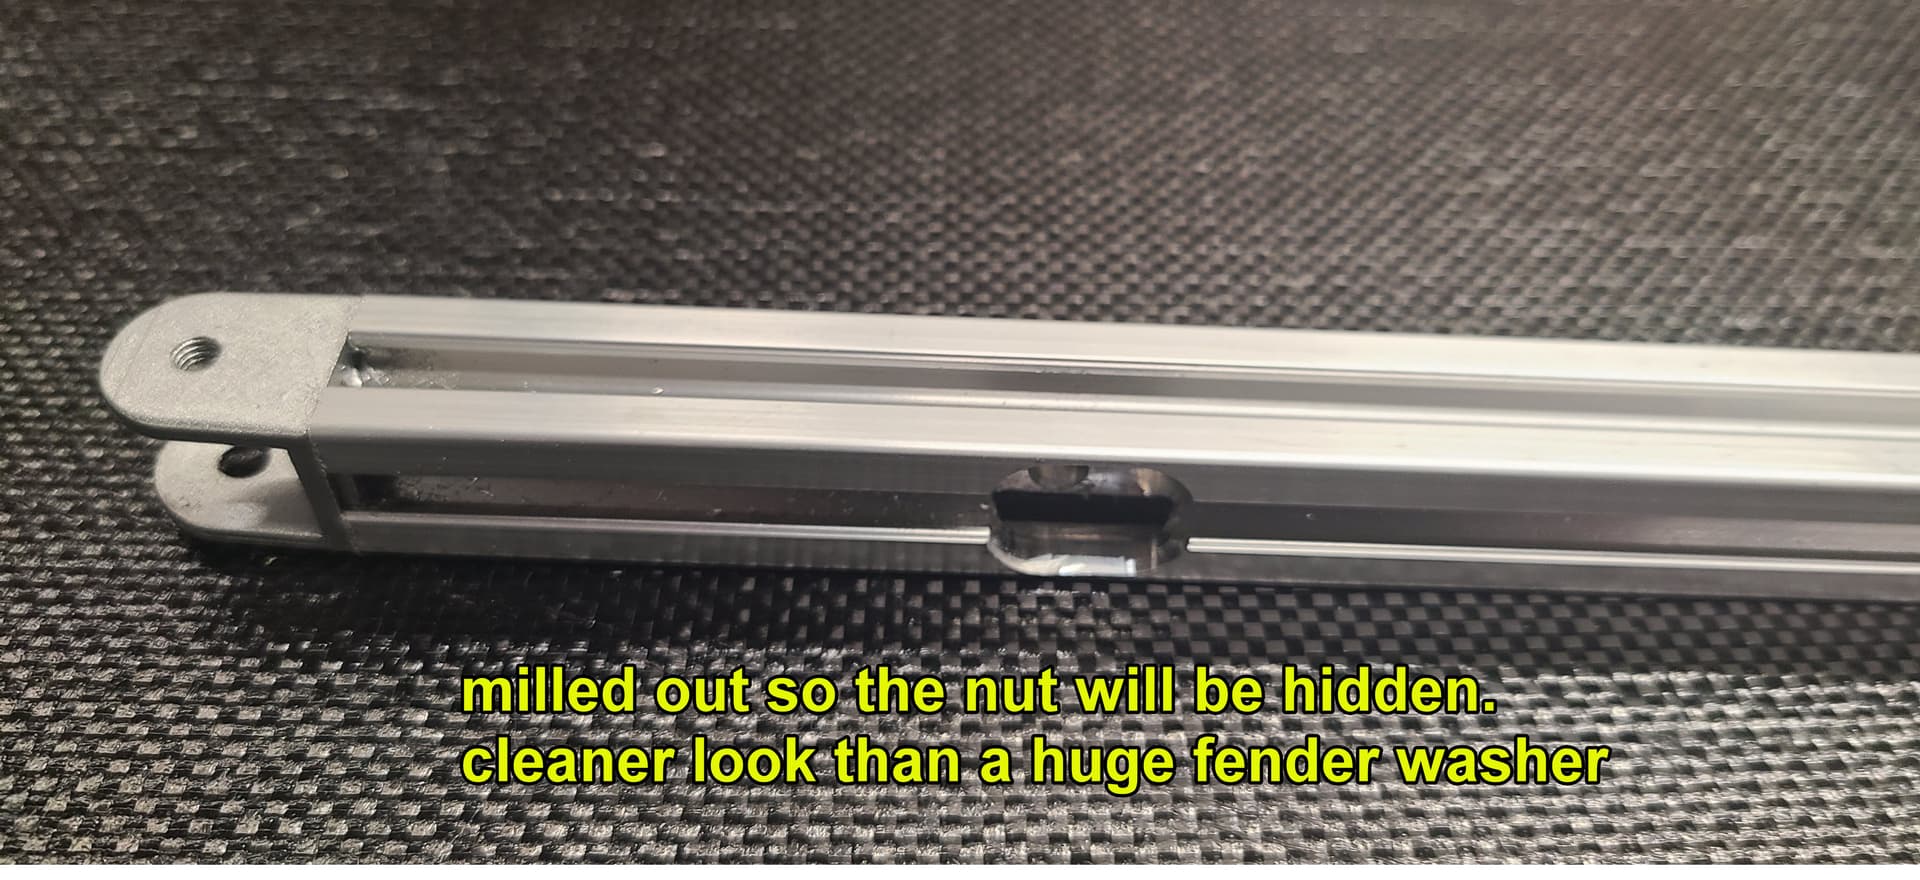
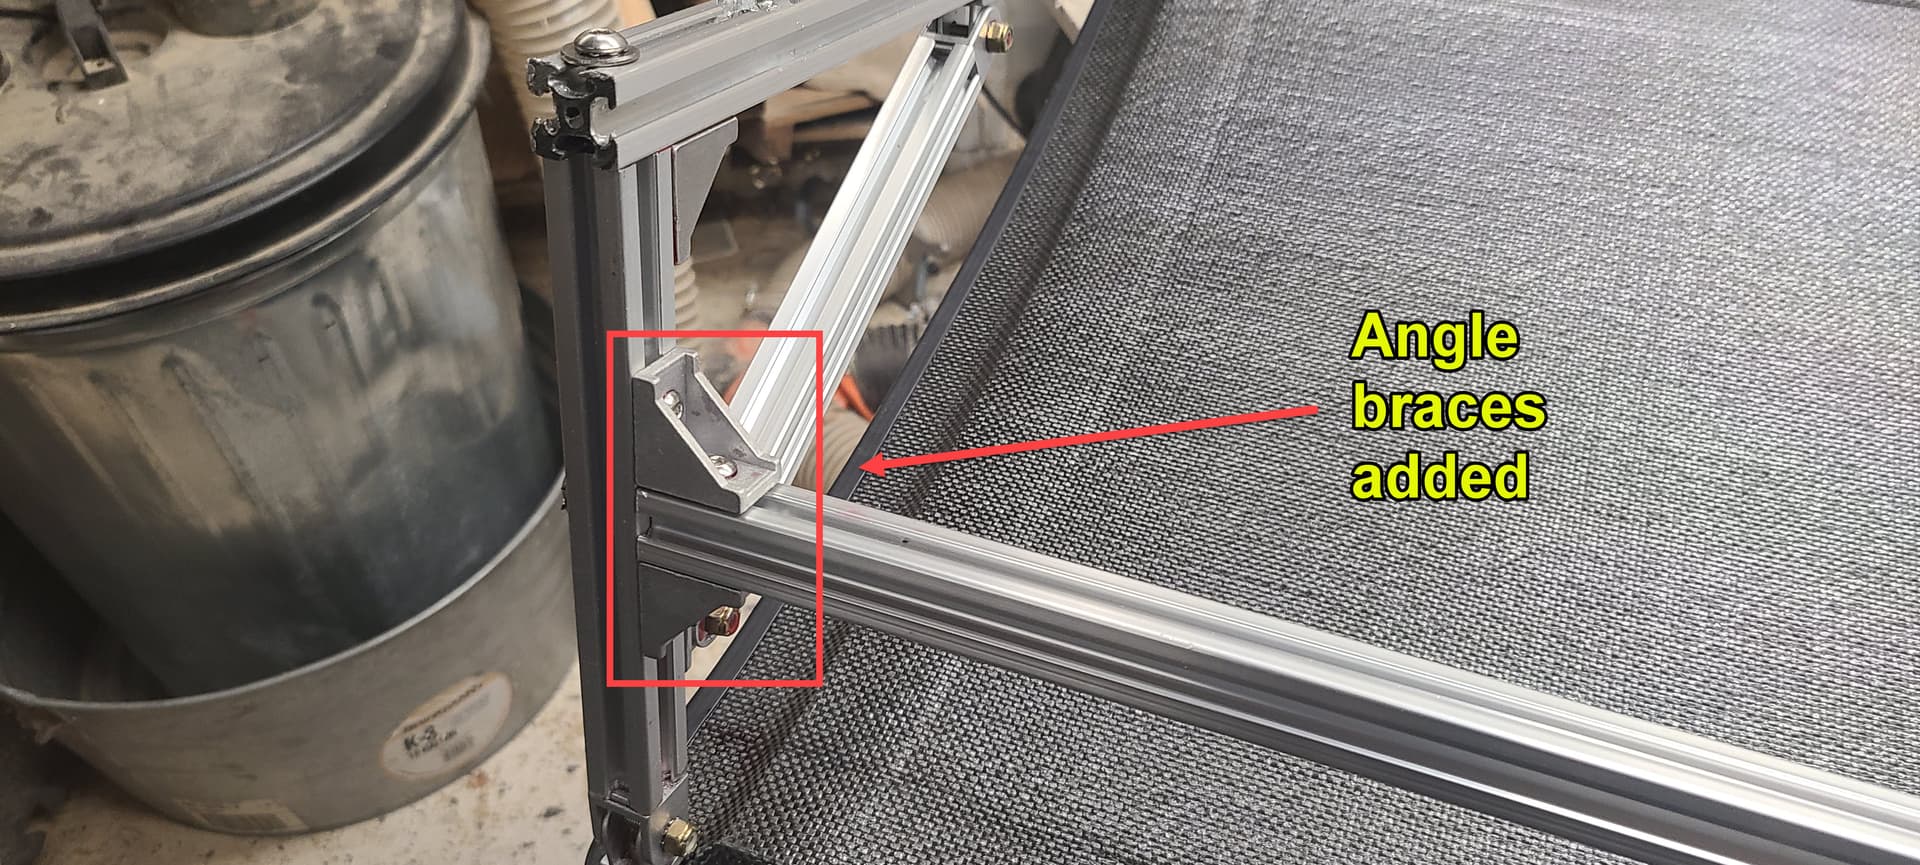
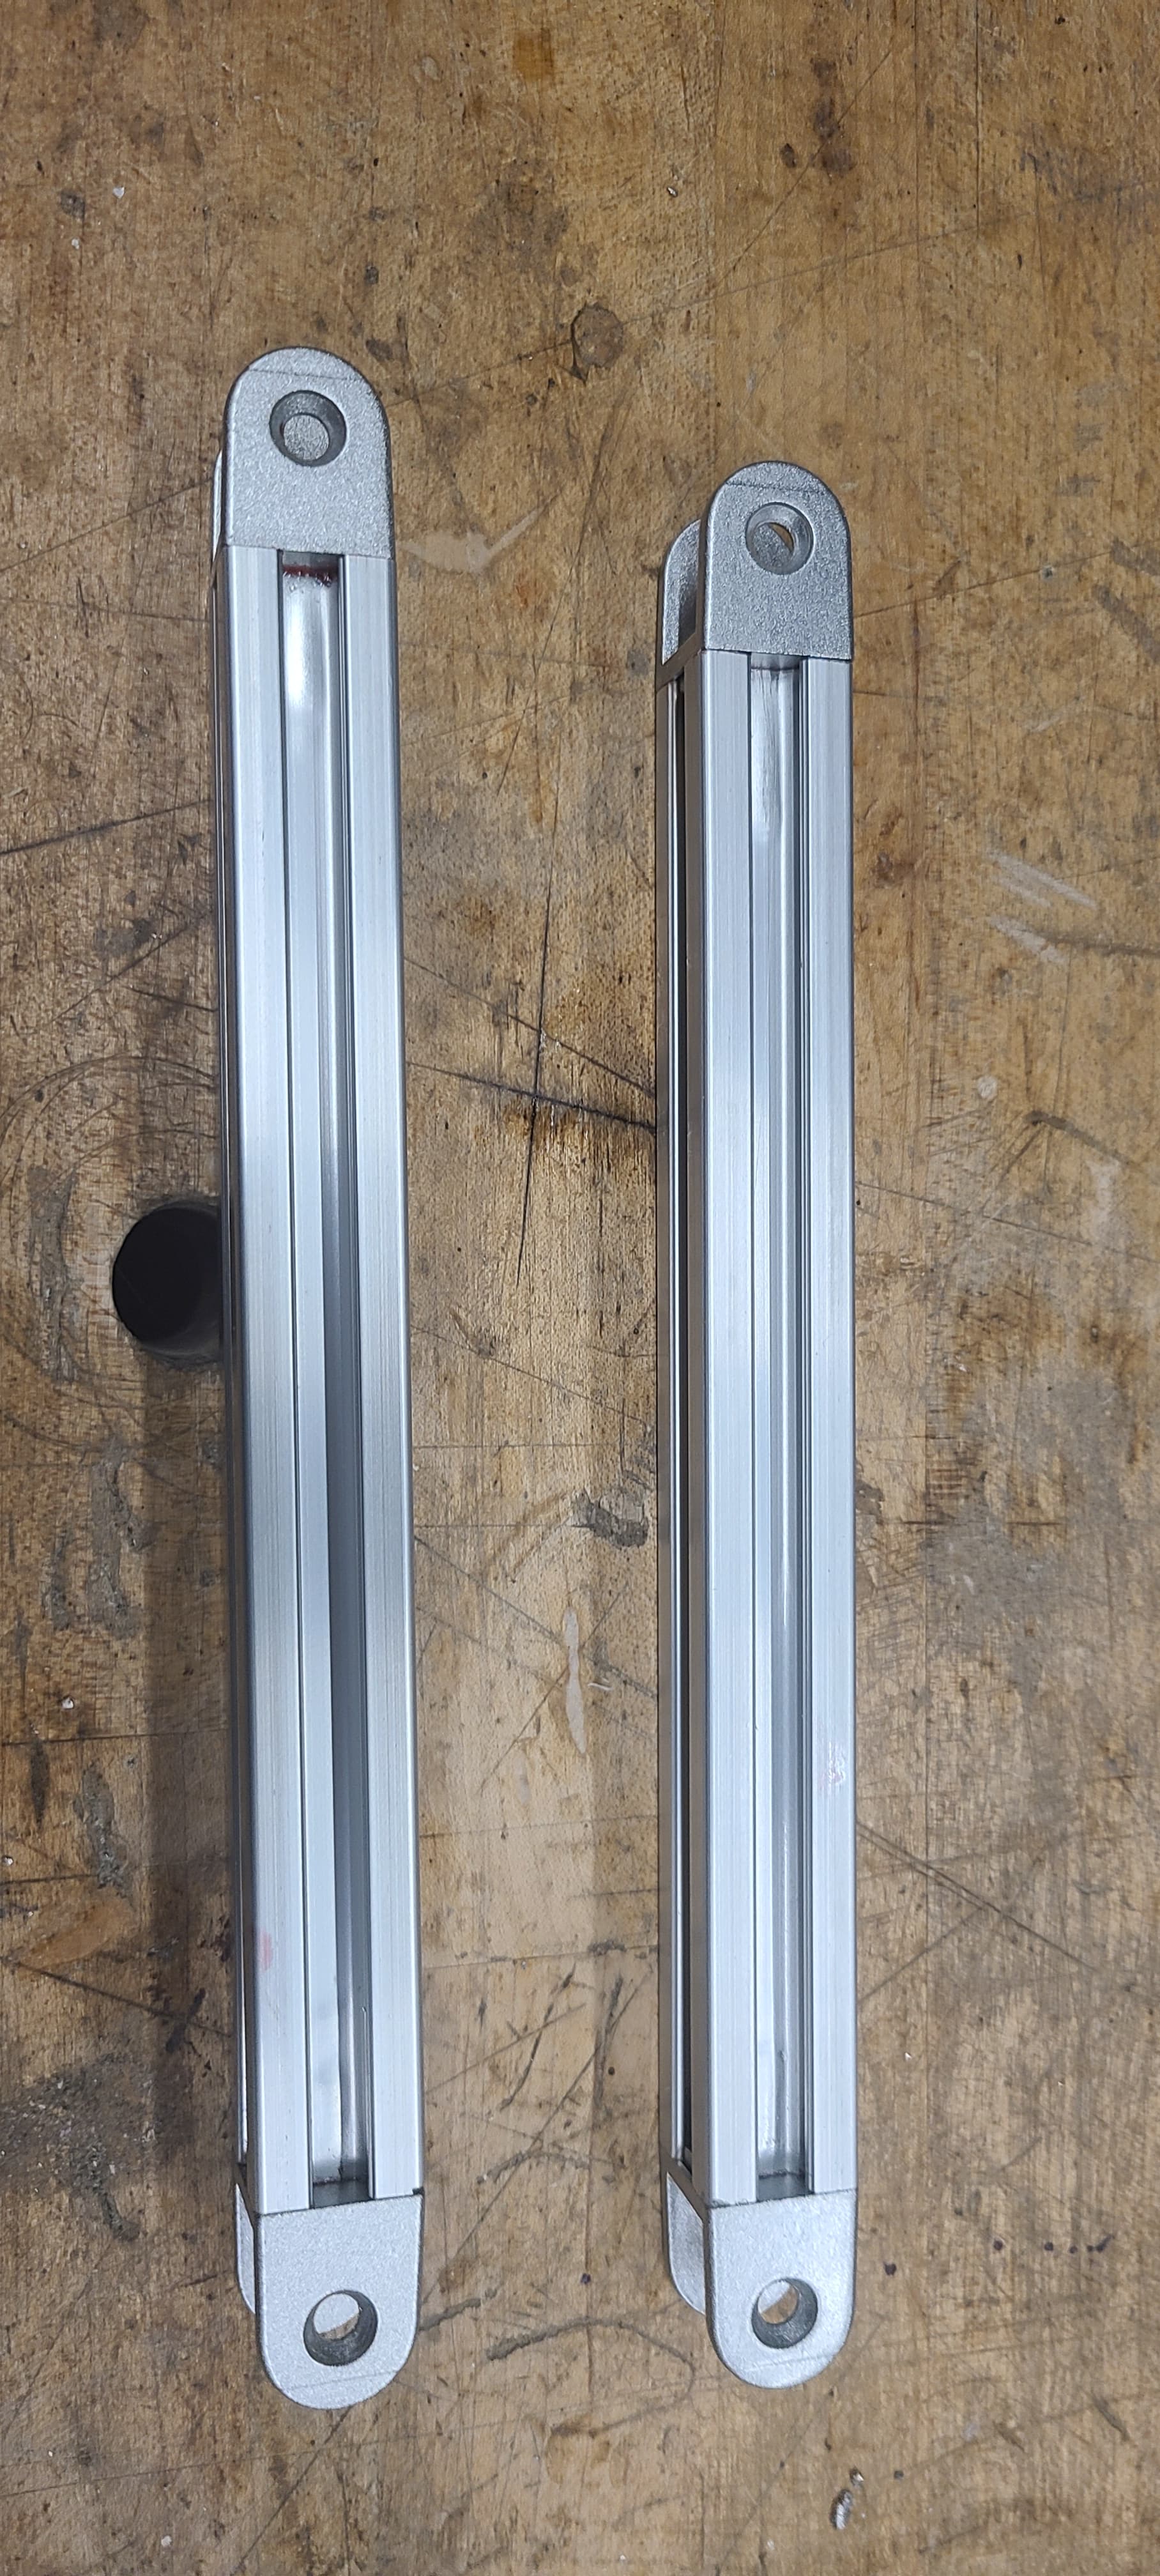
I made the frame for the solar panel out of 2020 parts. There’s a detailed slideshow here. I used red locktite too. It’s held up great. and yeah…suspension upgrades are coming she’s a bit low now.
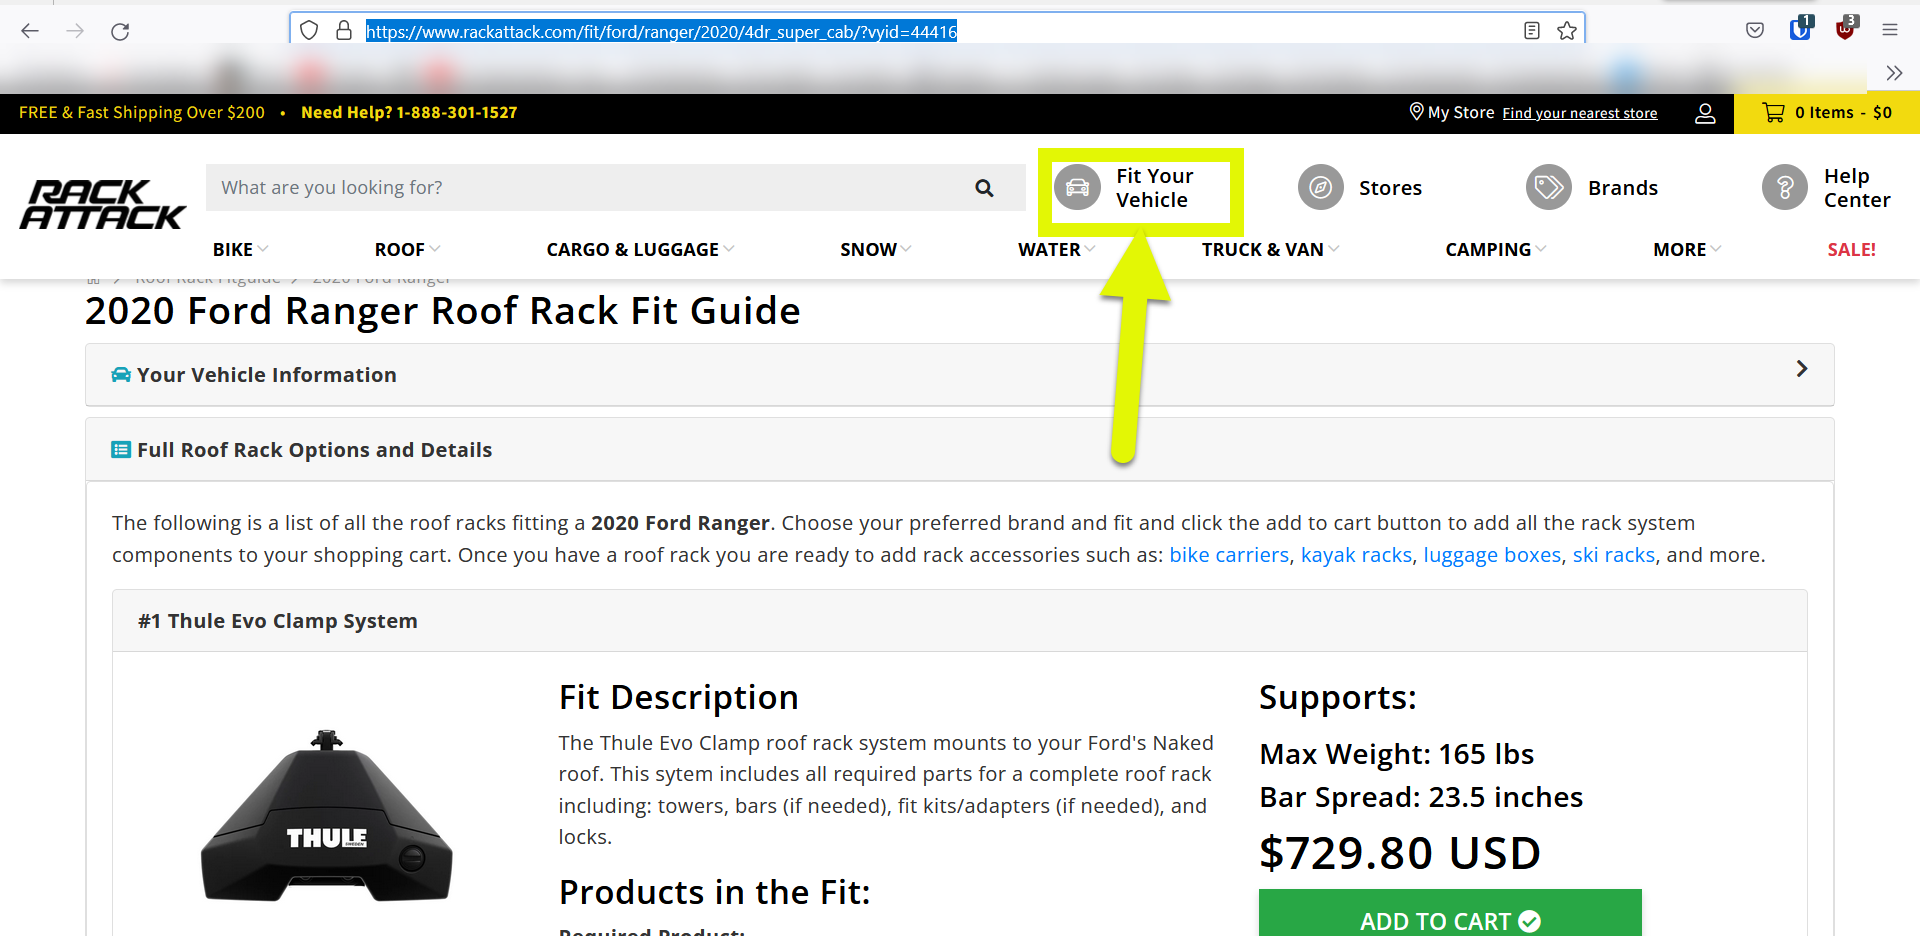
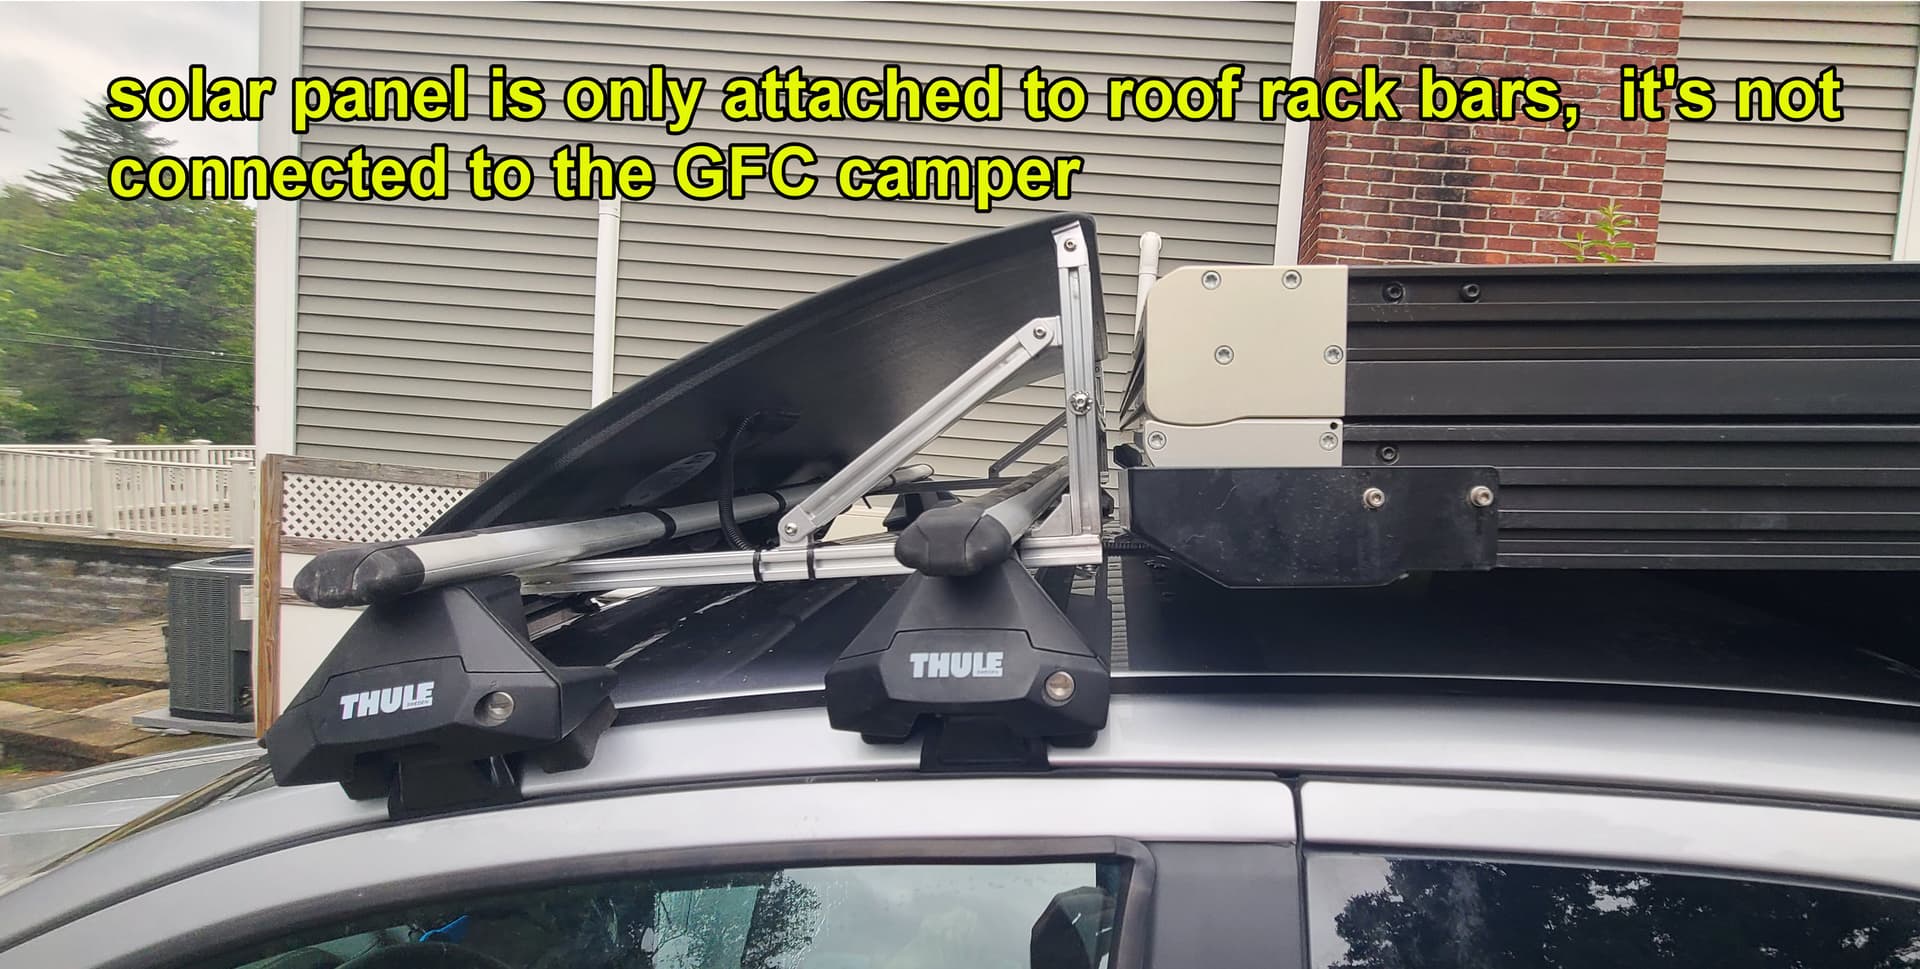
The Thule parts I got from rackattack. I just redid what I picked for my truck for you. Rackattack fit your vehicle
I went with the Thule Evo Clamp system and windscreen. I’ve been getting 18.5-20mpg on the highway, so I think the Thule windscreen and solar panel definitely help.
I think for me it was that they’re used on a lot of tear drop campers. Right on the front. So I figured if they can stand up to that kind of abuse, it would hold up as a wind fairing, which it has so far (touch wood). I liked the slight arch in their gleaf panel, this one. And that the corners are designed with rubber grommets for bolts. The solar cell performance is pretty good too.
I didn’t want a flexible panel because I’d have to make a backer myself and glue the flexible panel to it, and I’ve seen a bunch of youtubers having to replace their flexible solar after a few years and then struggle to peel them up. I think with flexible panels they tend to not last as long and their efficiency isn’t as high, but they are improving. I’ve seen other carbon fiber composite backed panels, but the other ones I saw were more for sailing.
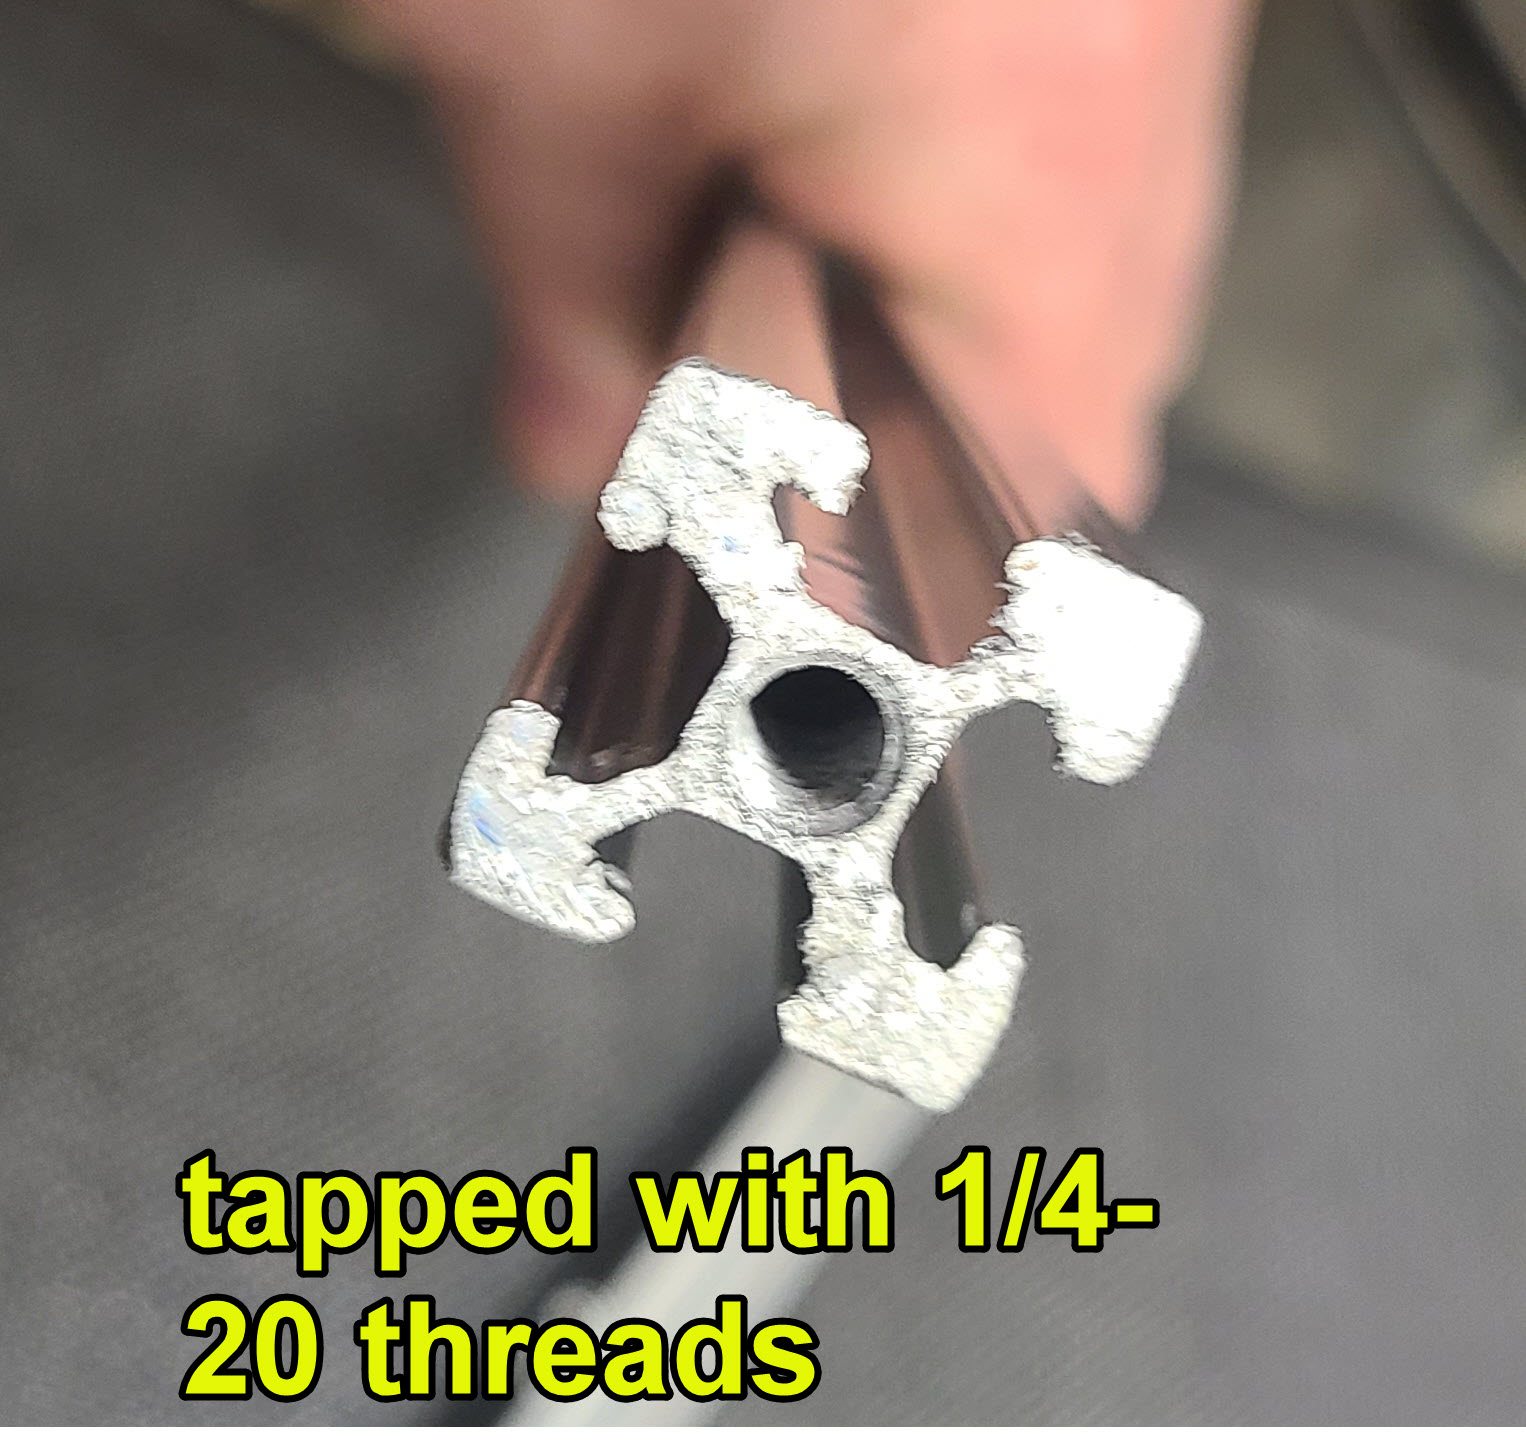
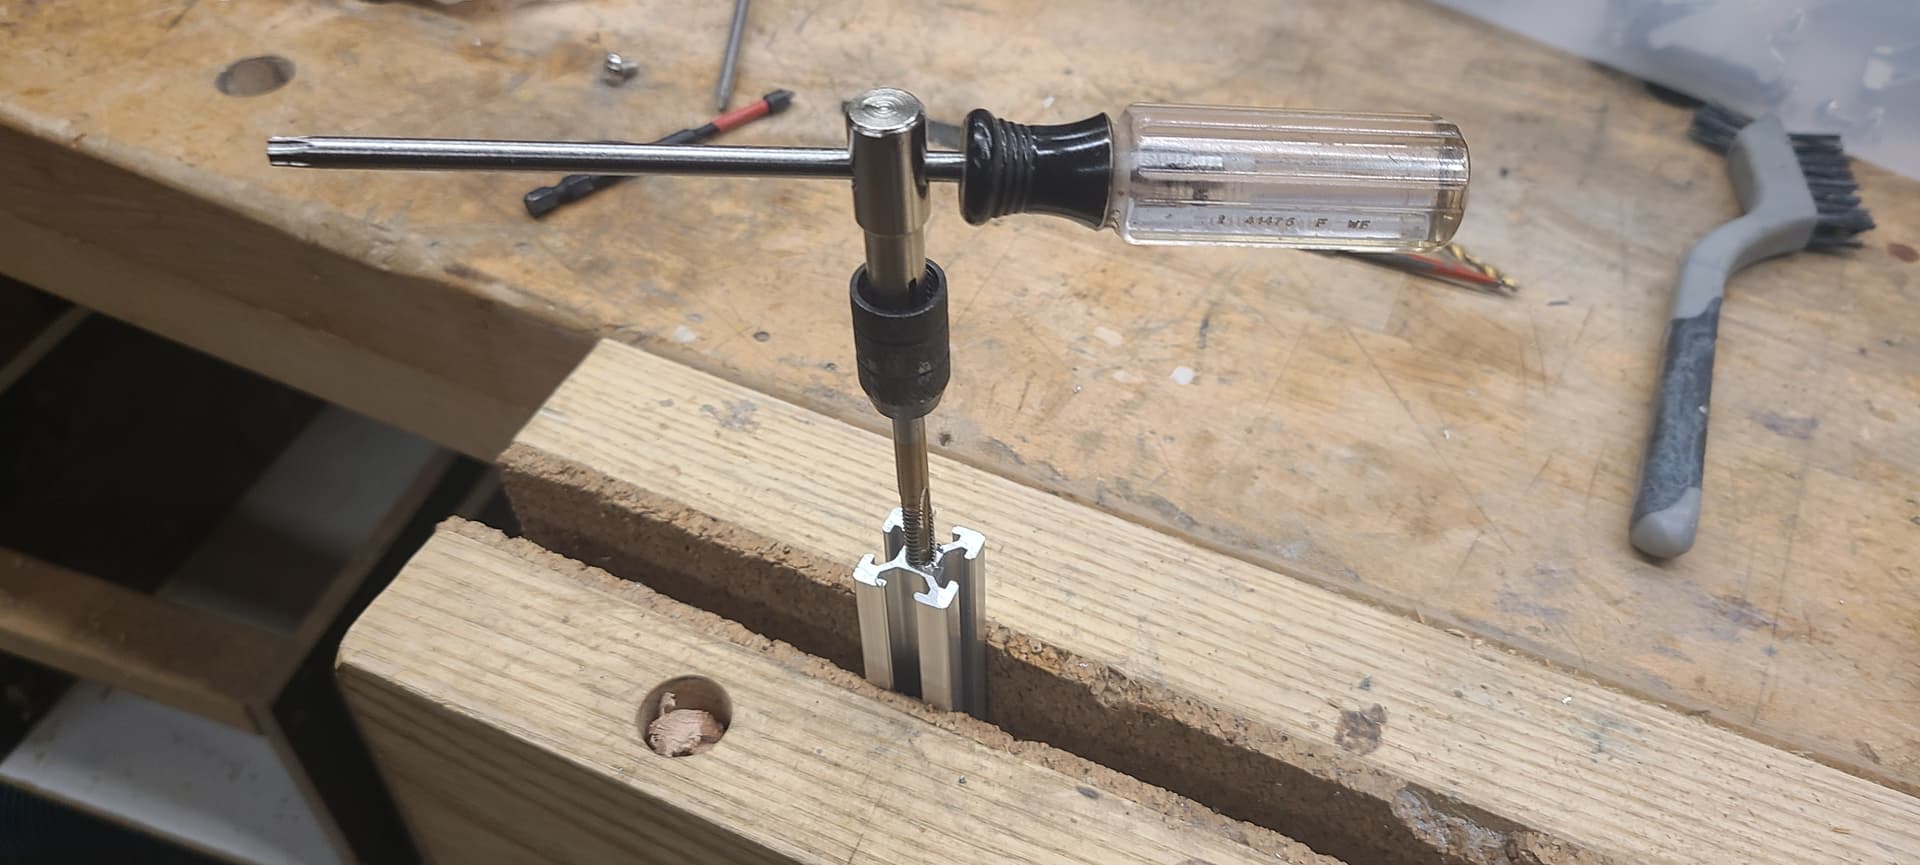
Last two key photos. to get the pivot hinge part on the end of the 2020 tubing, I tapped some threads. I’d never done that part before, but tapping in Aluminum is very easy and you can get a cheap thread tapper kit off Amazon.
Excellent catch @pigneguy ! Love reading stuff like this in the forums so we’re helping others figure stuff like this out. And thanks for sharing that link, I hadn’t seen that online store before. Love window shopping new sites! New to me anyway.
Awesome Build! Well thought out and I love the attention to detail… I also went with 2-100AH Battle Born Batteries and am happy I went with that much battery storage. You cannot go wrong with Victron Components too!
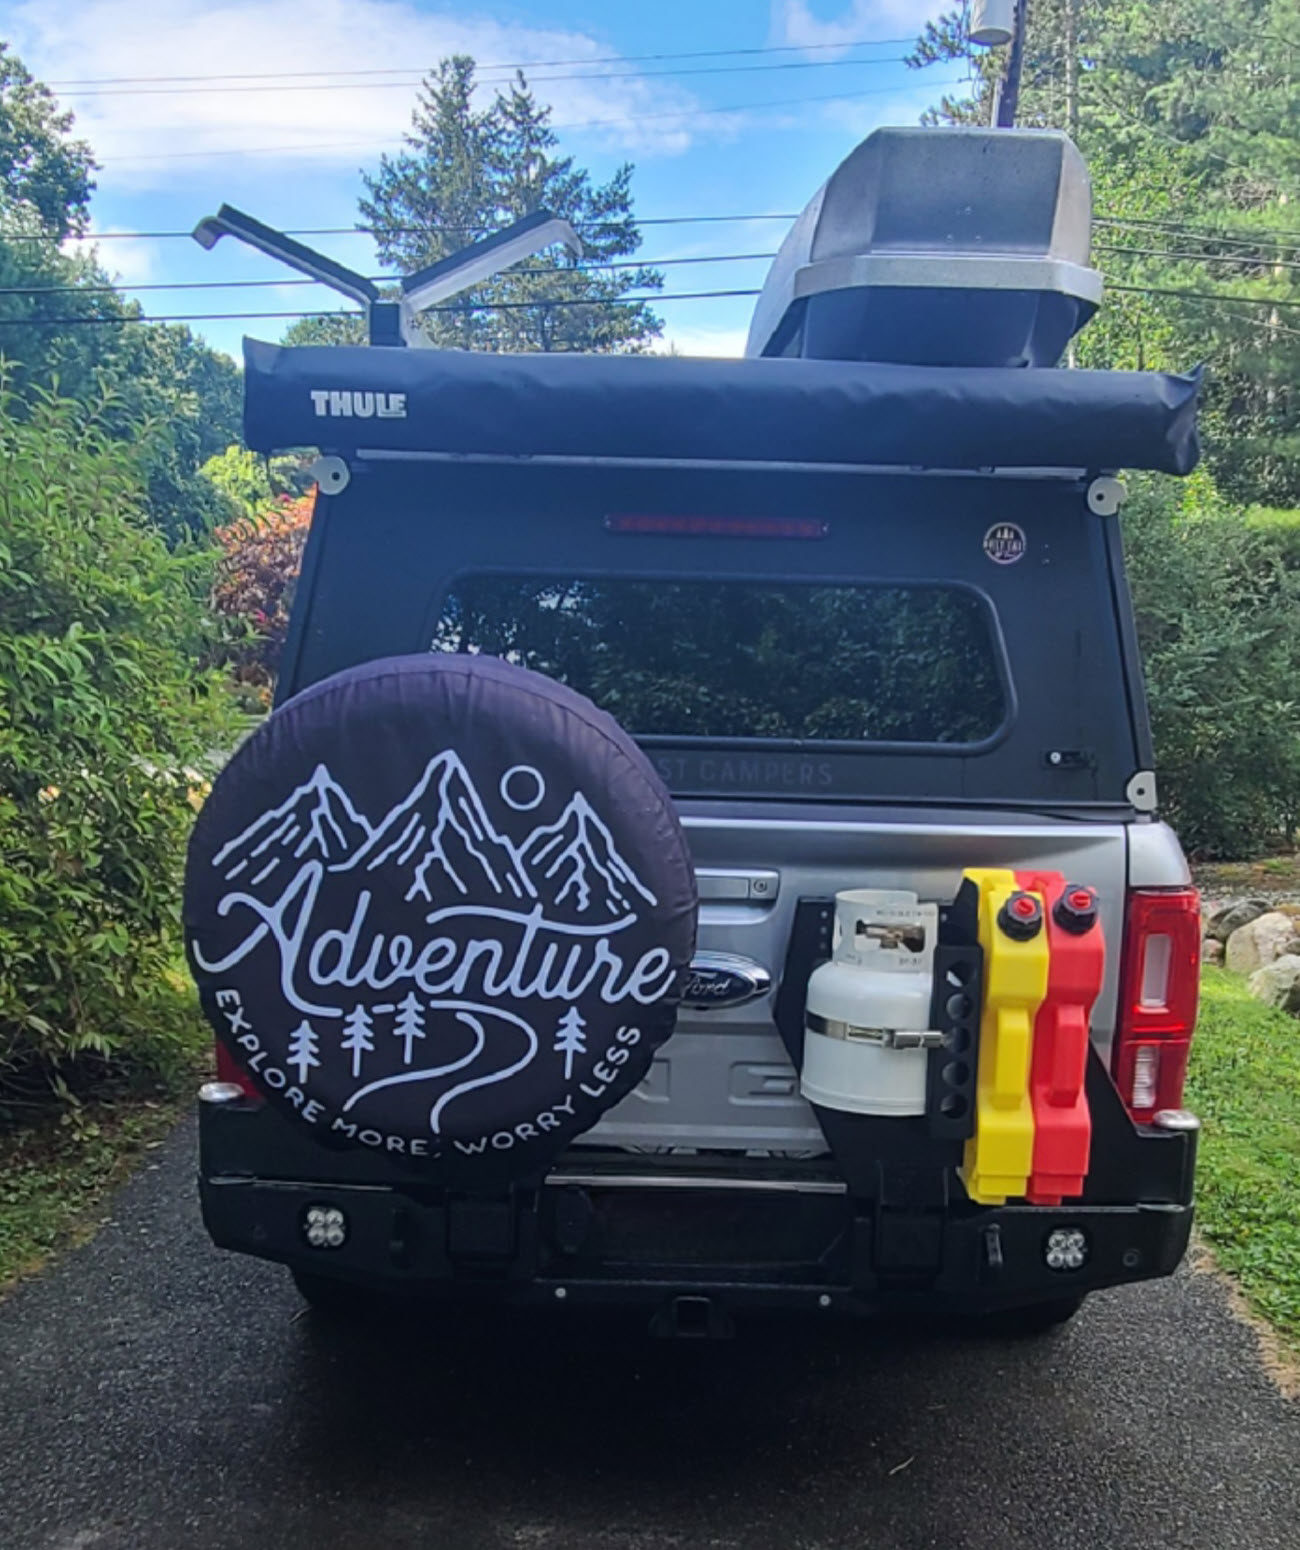
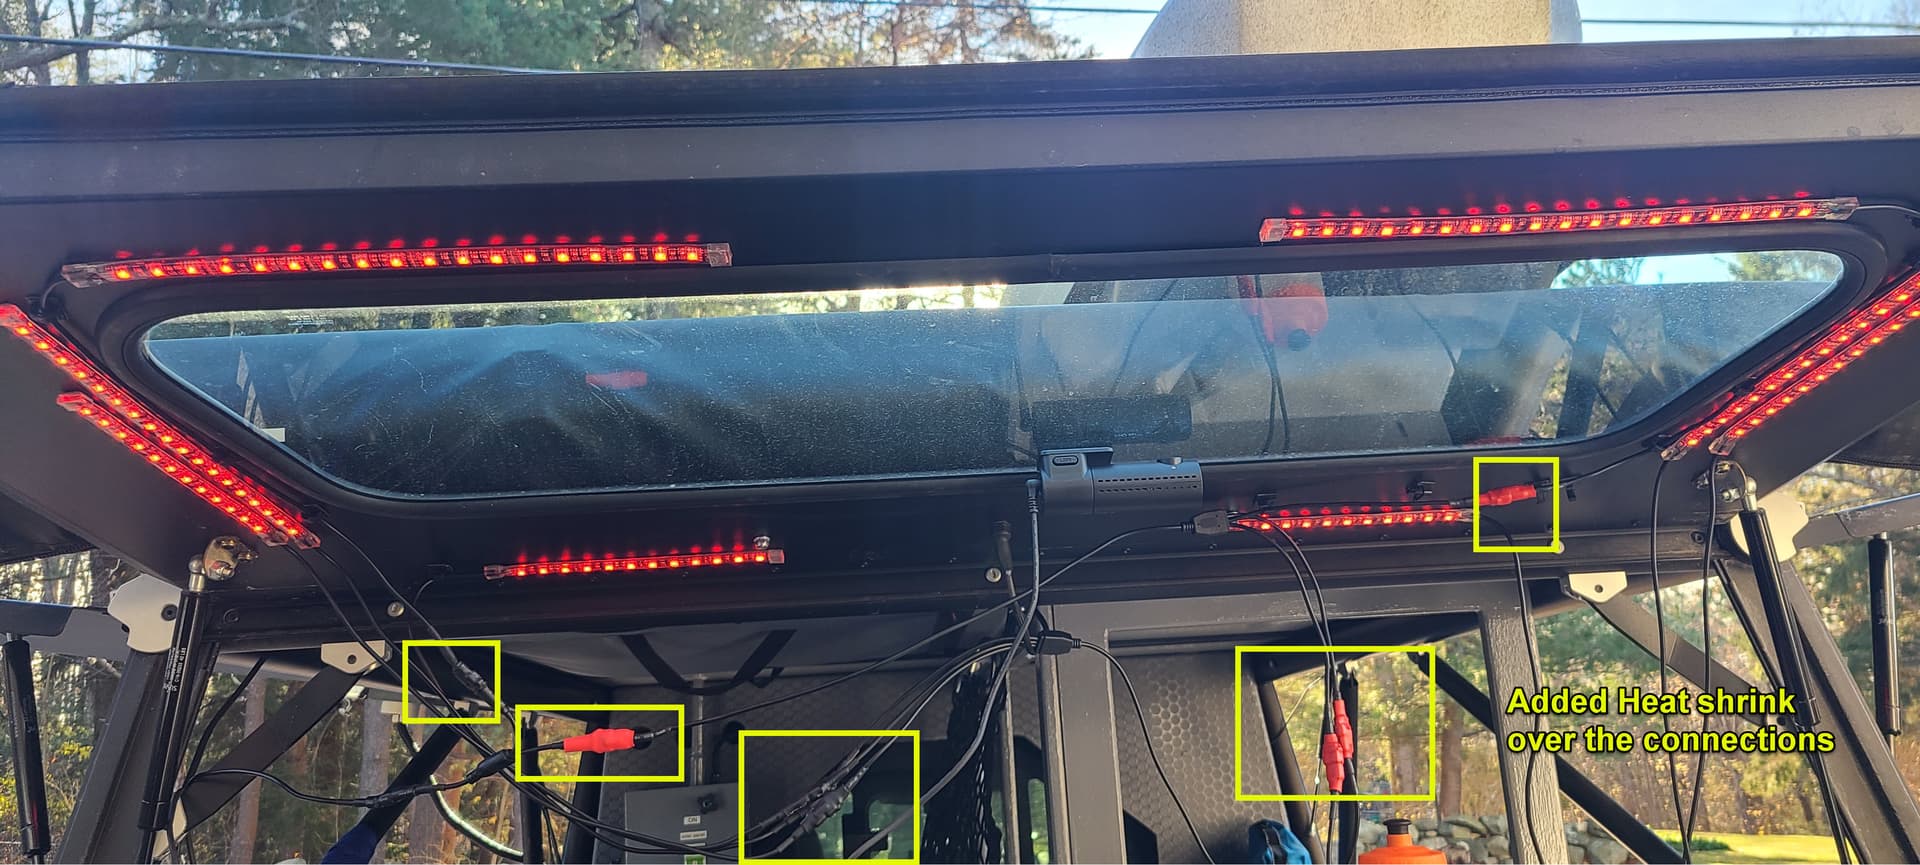
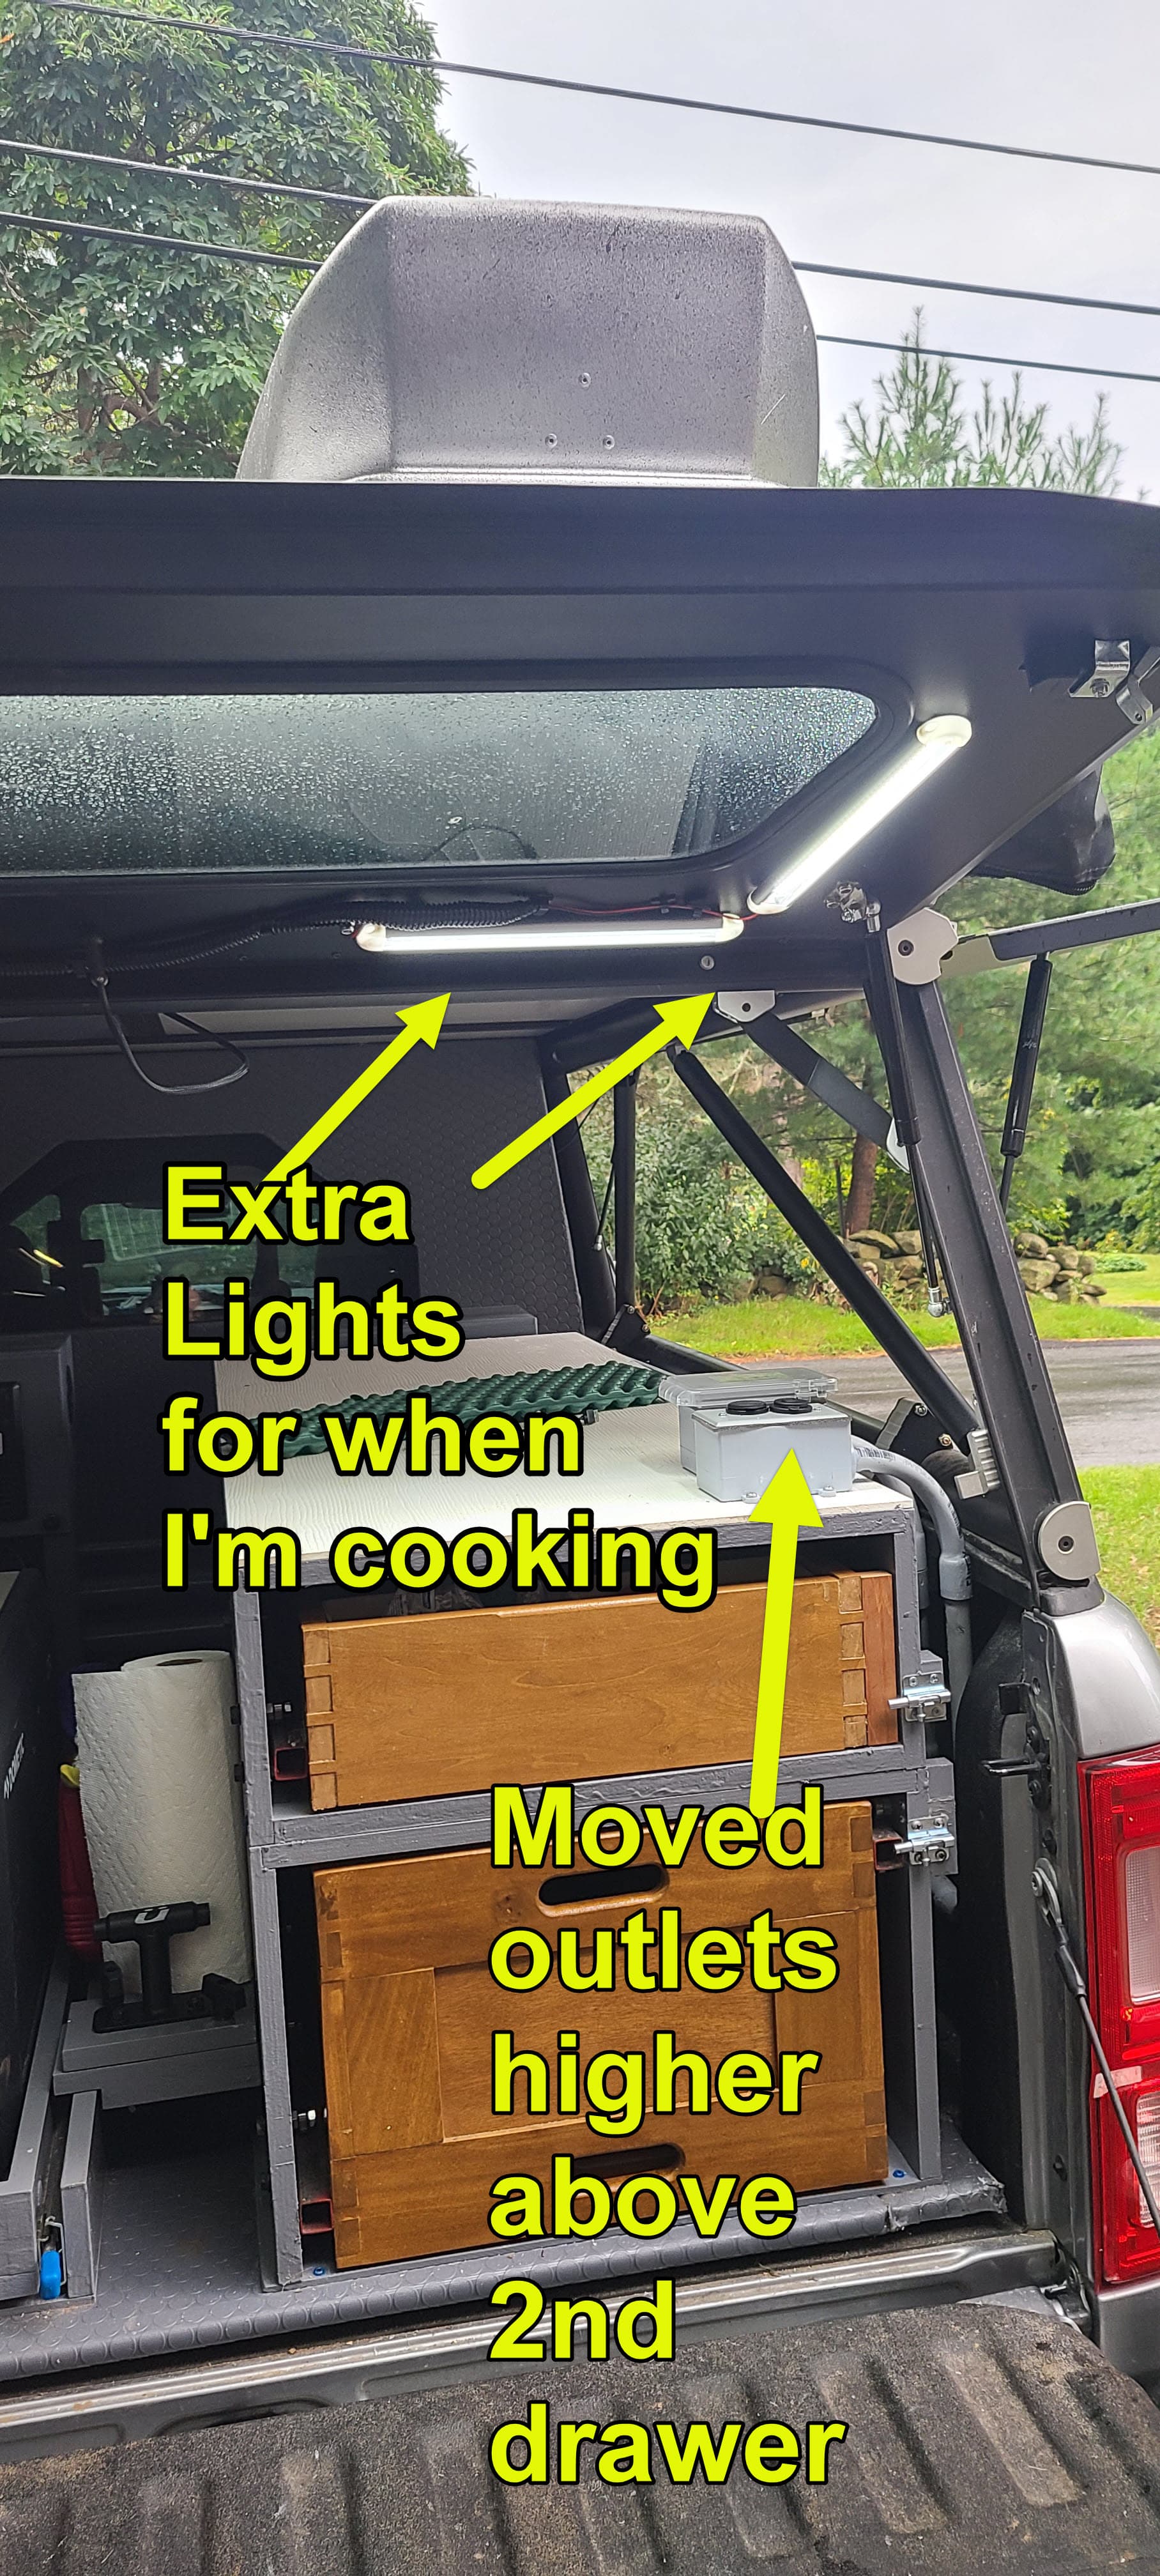
I replaced the rear GFC panel’s led light strips this week. I’d used interior led strips ($20 for a 4 pack), but water must have gotten inside, ruining them.
I replaced them with this motorcycle light kit, only ~$42 on Amazon, click here Being able to change the color is awesome, also has dimmers in the remote.
The new led light strips are weatherproof, but the wire connections don’t seem that robust, so I used 1/2" heat shrink over each connection, which should keep the water out and also help keep the connections together. Before using the heat gun, make sure you test the lights first. Also the heat gun is great for making sure the adhesive mounts stick, when it’s cold out.