Hey! Using this space to document updates to my 2019 DCSB Tacoma TRD Sport. The goal is for a clean build that fits my needs.
As it sits now:

September 2023
Background:
The truck is my daily and also used to haul gear for all the activities (surfing, fishing, biking, diving, skiing, etc.). I’ve wanted a Tacoma since I was a kid, and finally made the move in 2019. I immediately put an ARE camper shell on the truck in order to safely store gear and utilize the roof racks for longboards and lumber.

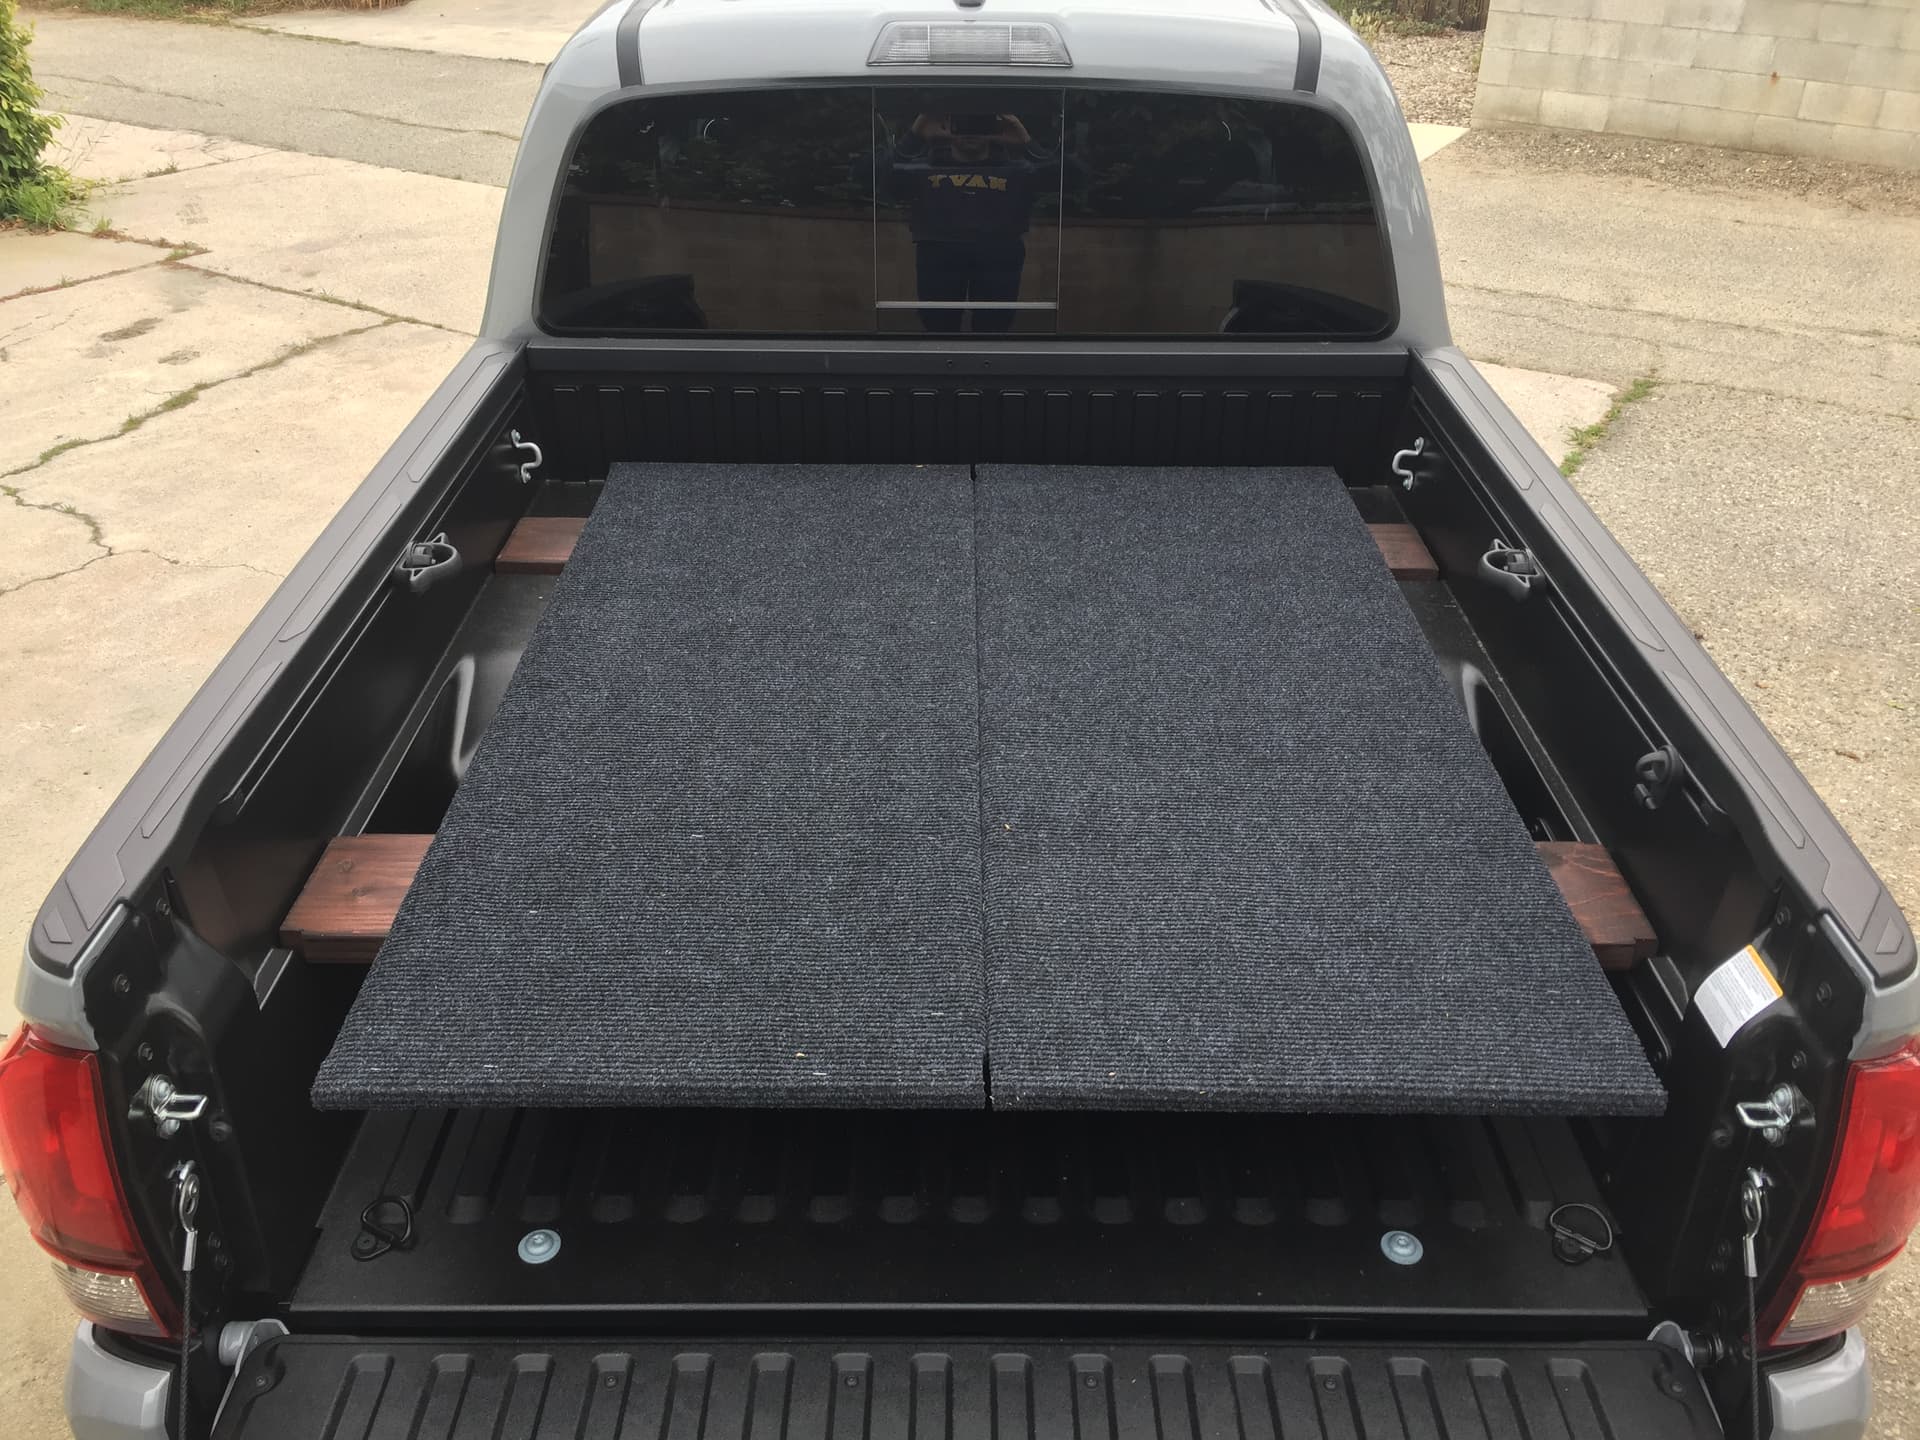
I built a simple platform (two 2x6’s and a sheet of carpeted plywood) to sleep on which worked for about 25 nights over 2 years. Having to move all your gear into the cab each night did get old.
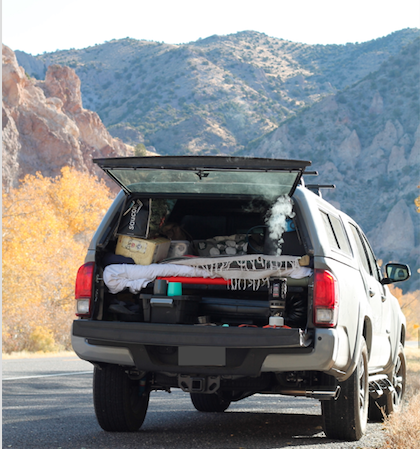
I never wanted an RTT since they always appeared to be heavy blocks that sat on top of vehicles 24/7. Then the GFC SuperLite entered the chat. The SuperLite was light enough to take on/off the truck for camp trips, enabled the truck bed to be fully utilized for gear storage, is quick to setup, and met my budget. Being able to store an RTT in your garage and take it on/off in 10-15 mins is huge! Having the full bed available increased organization (less time looking for gear) and allowed me to bring more fun on each trip (gear, people, boards, etc.).
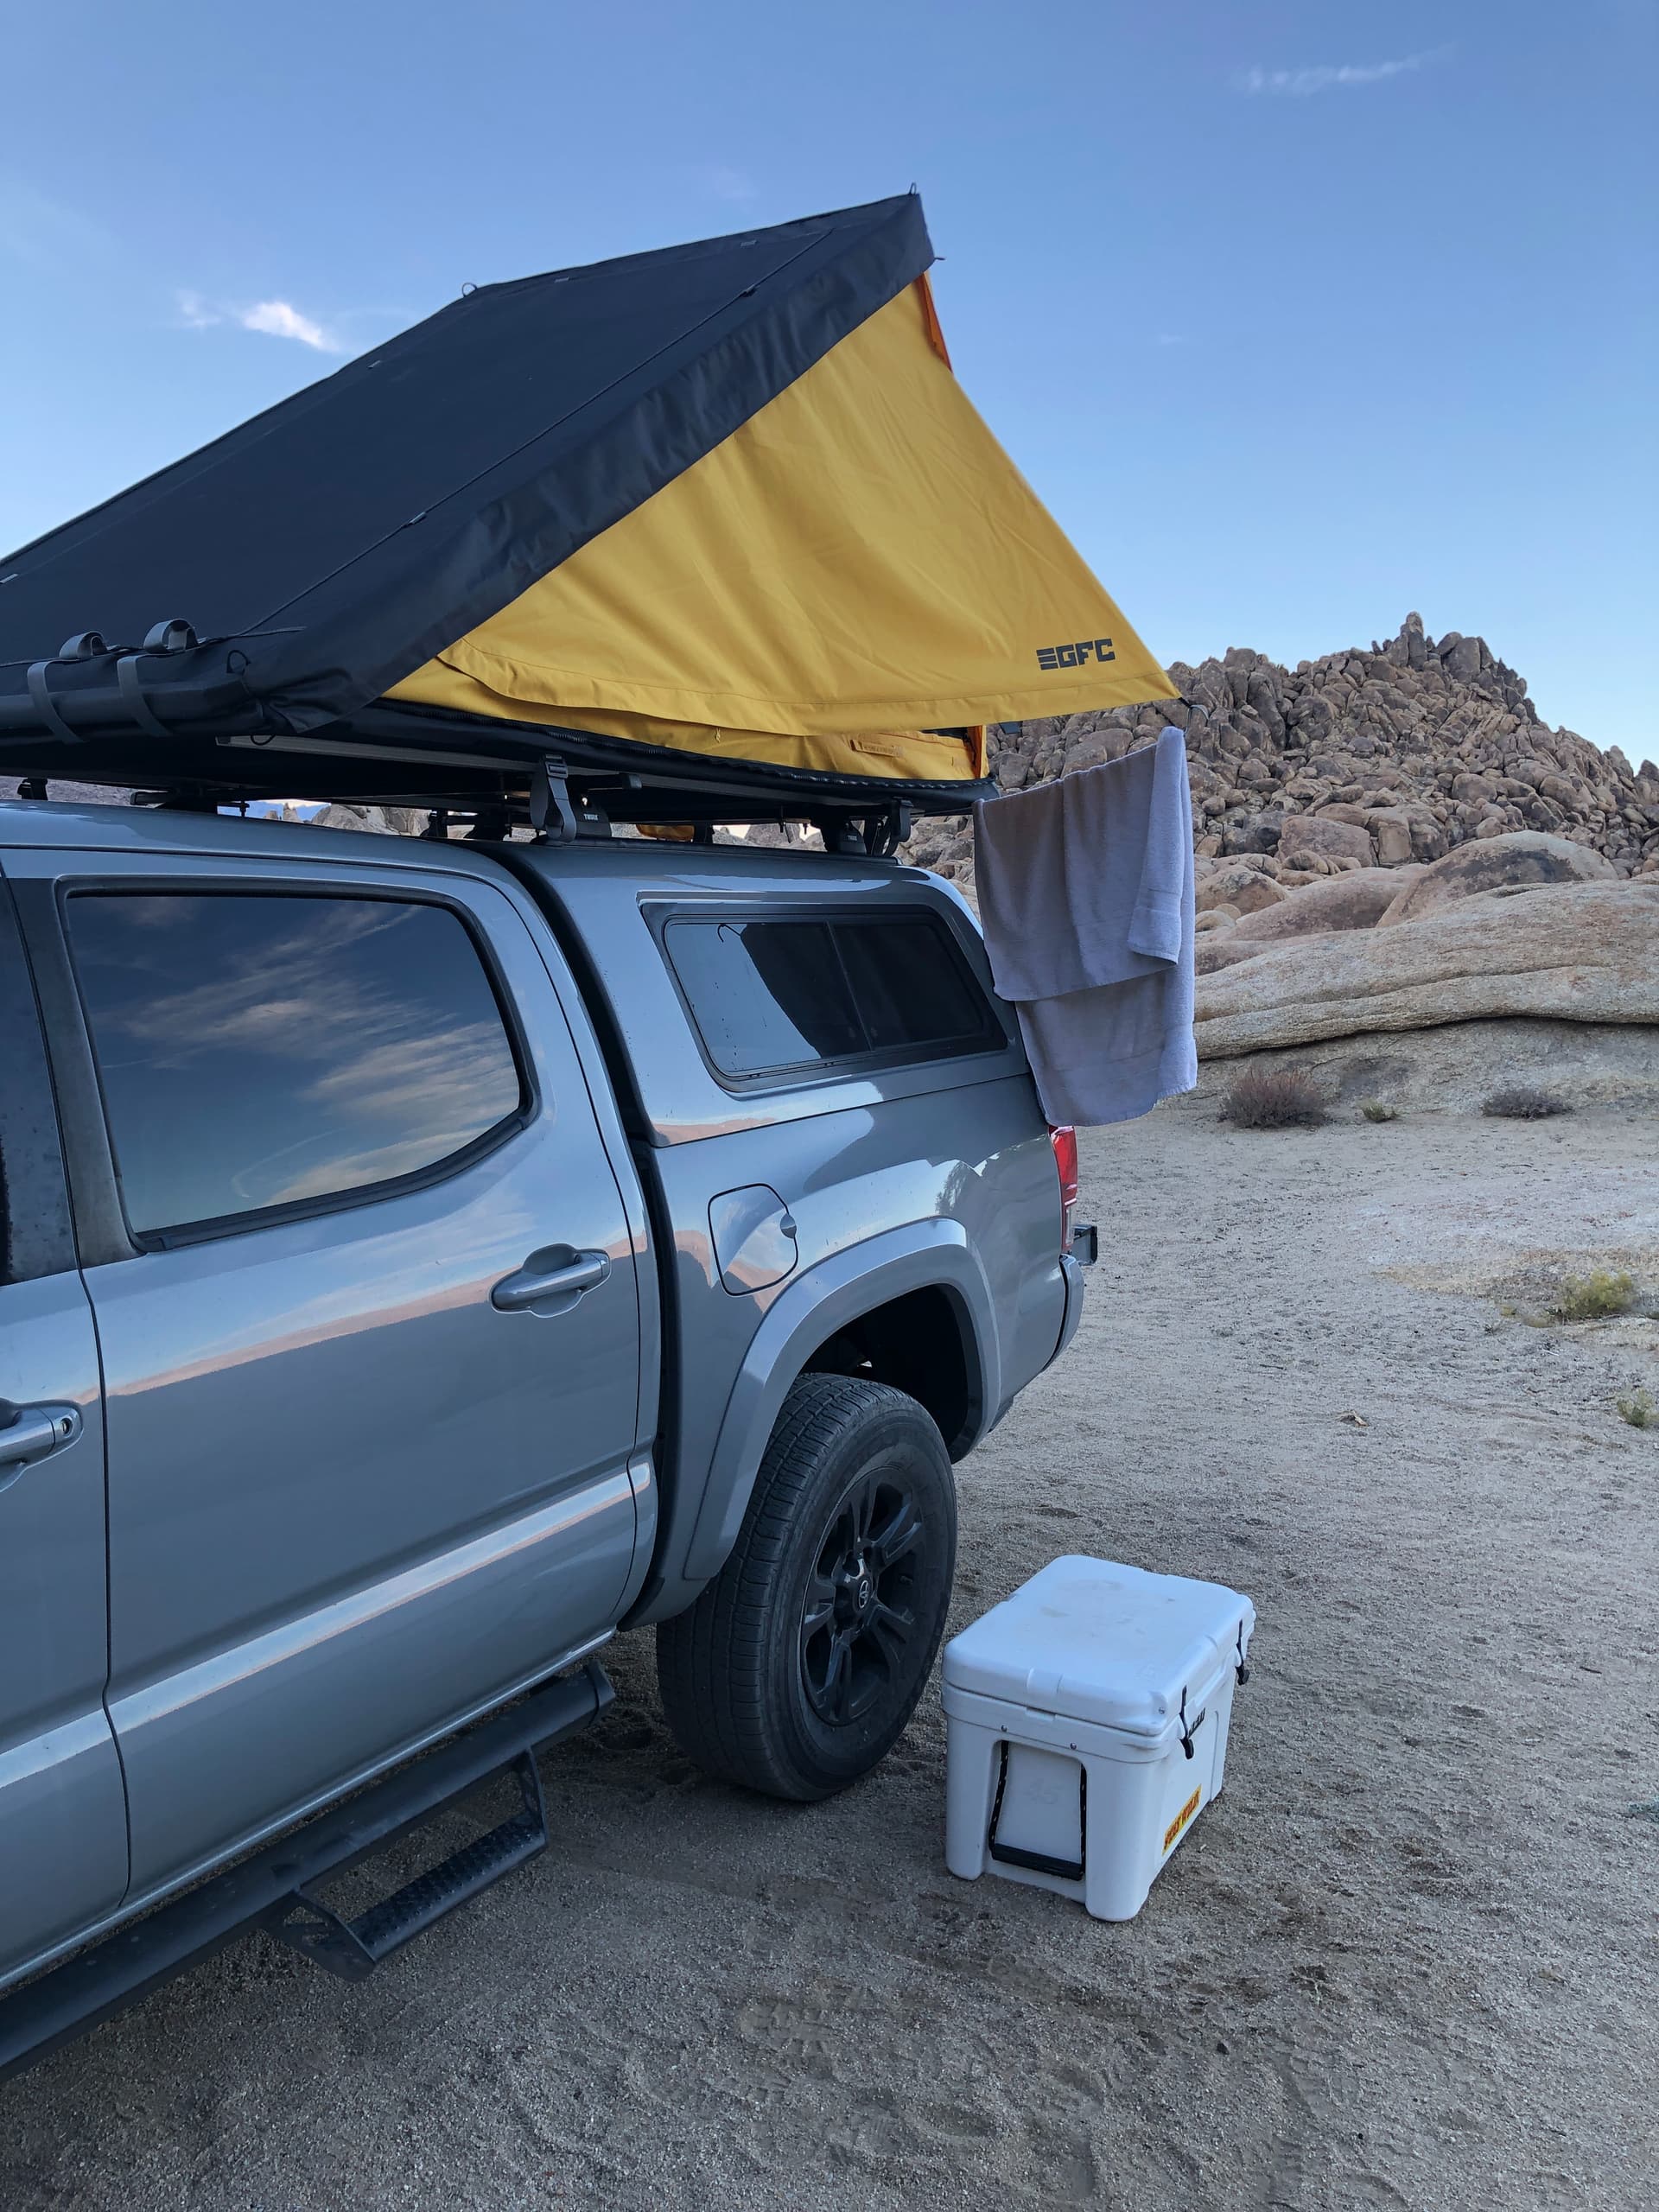
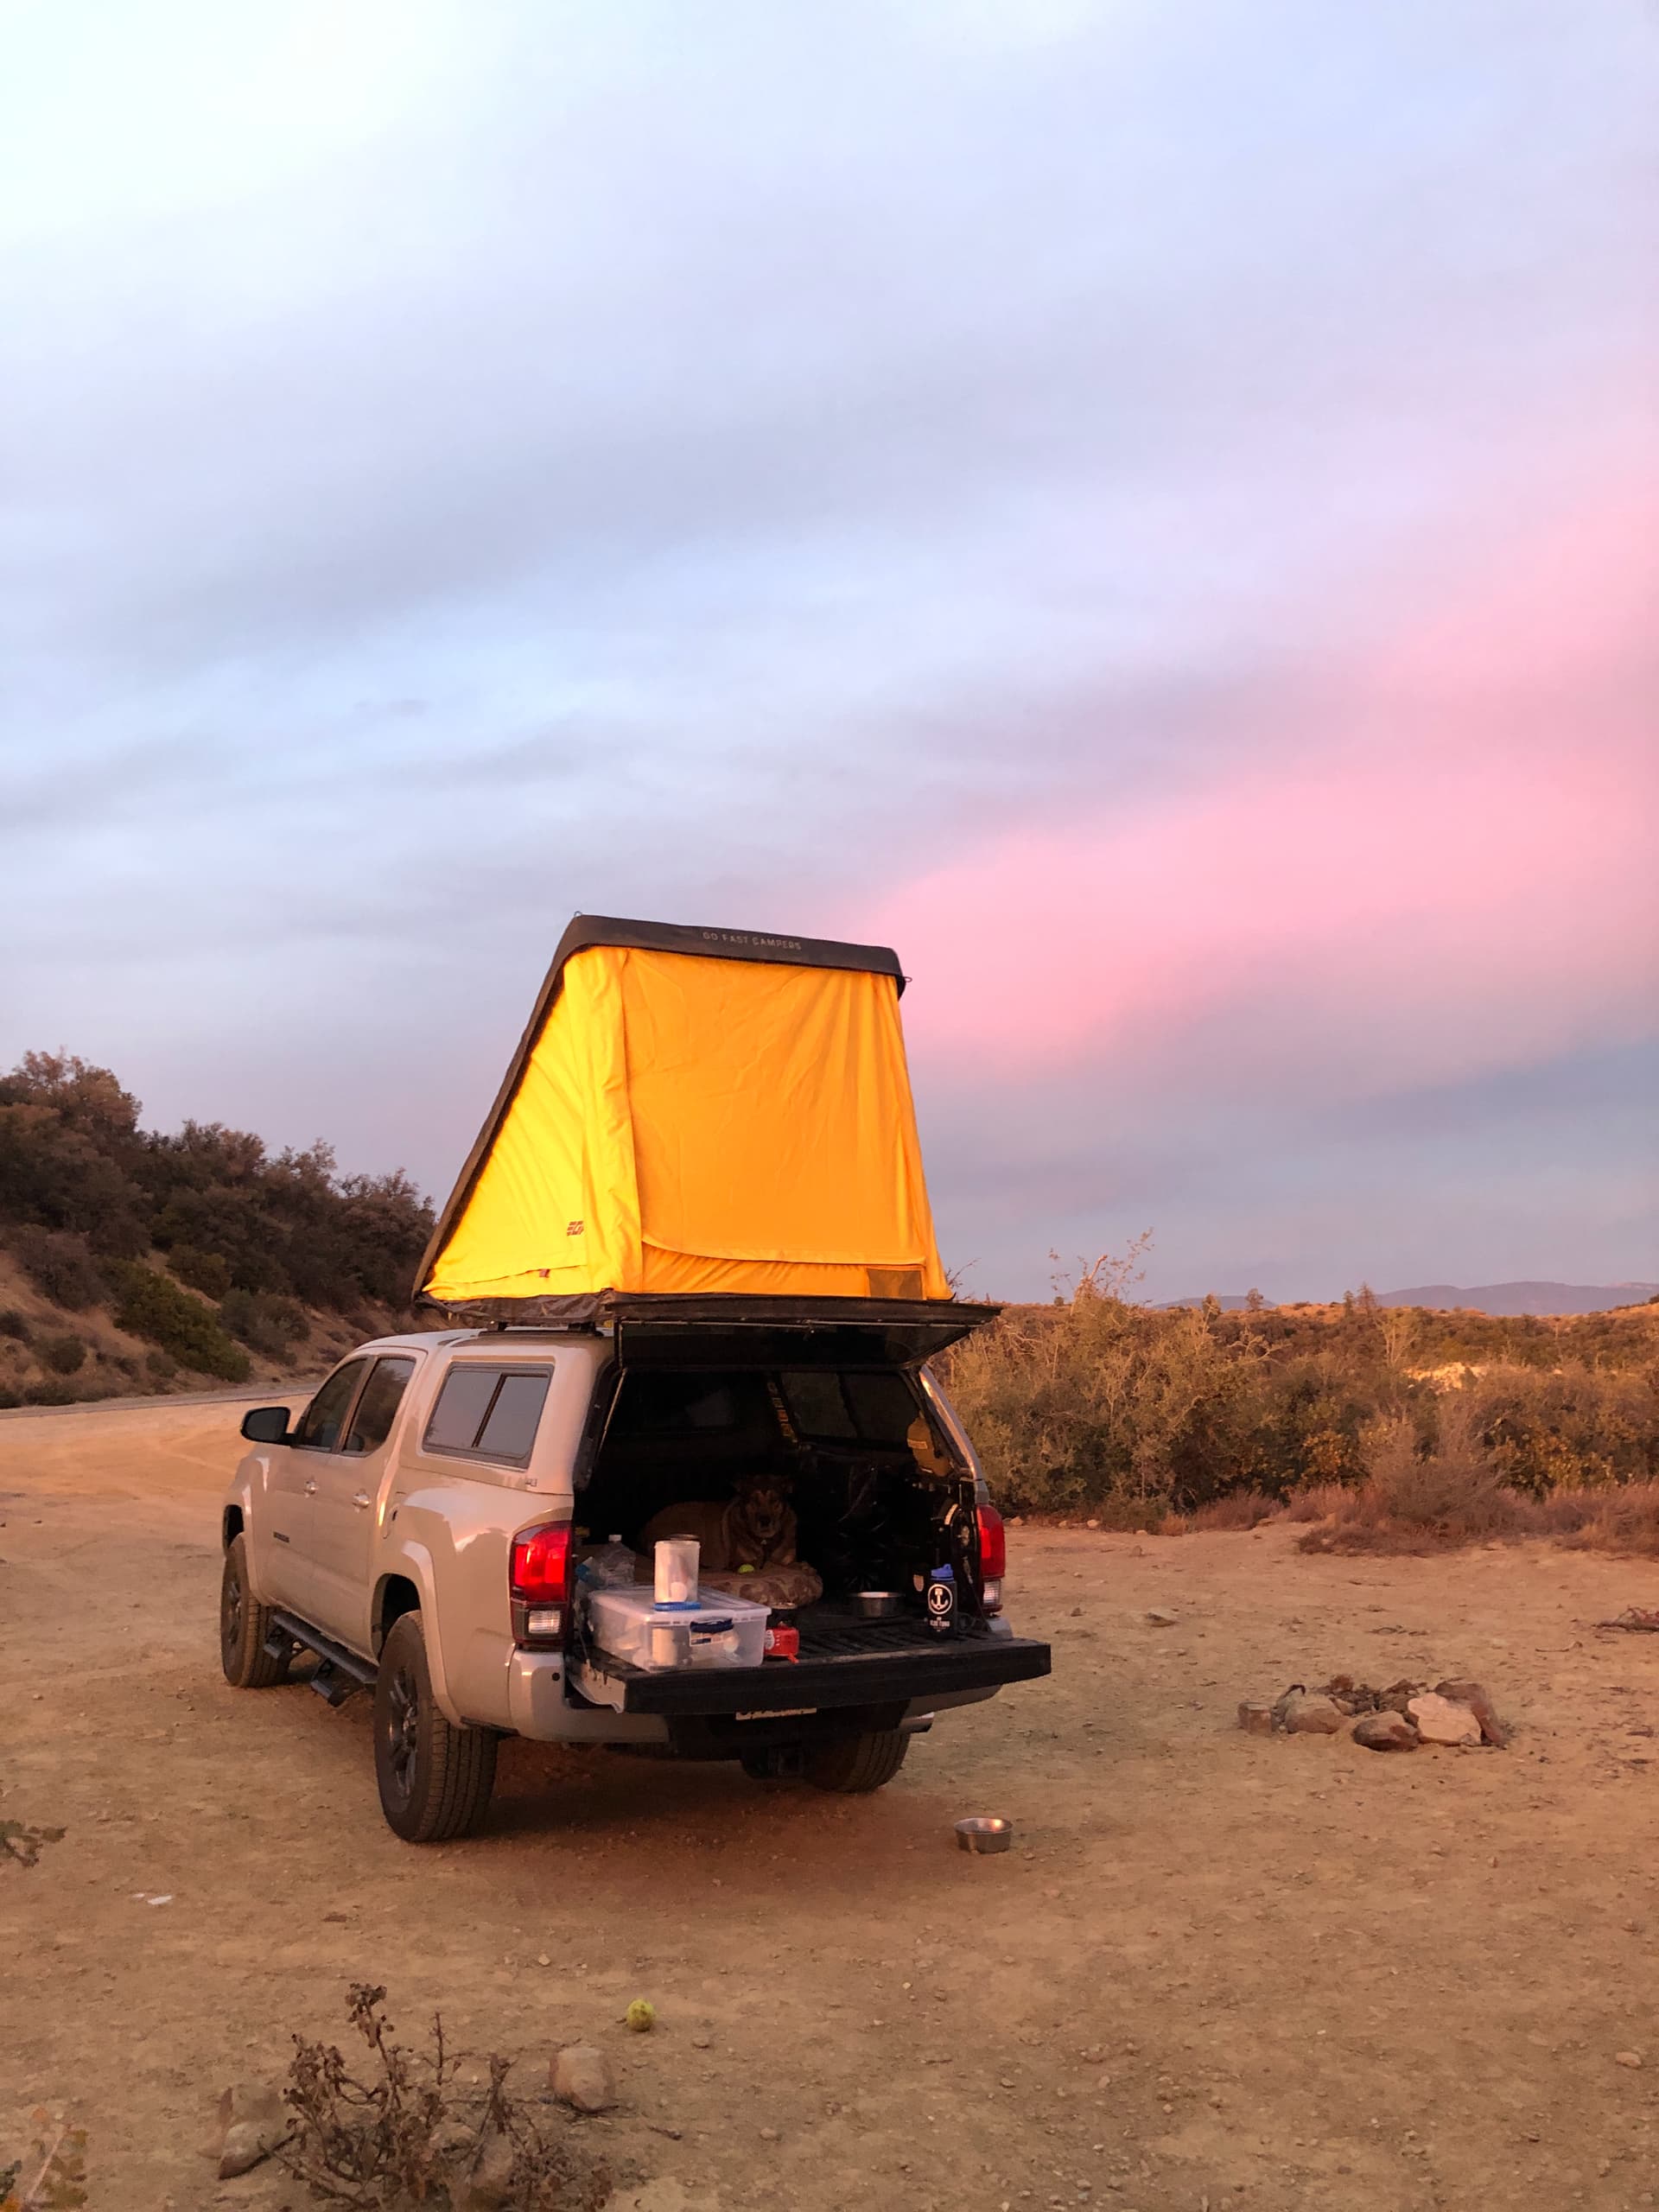
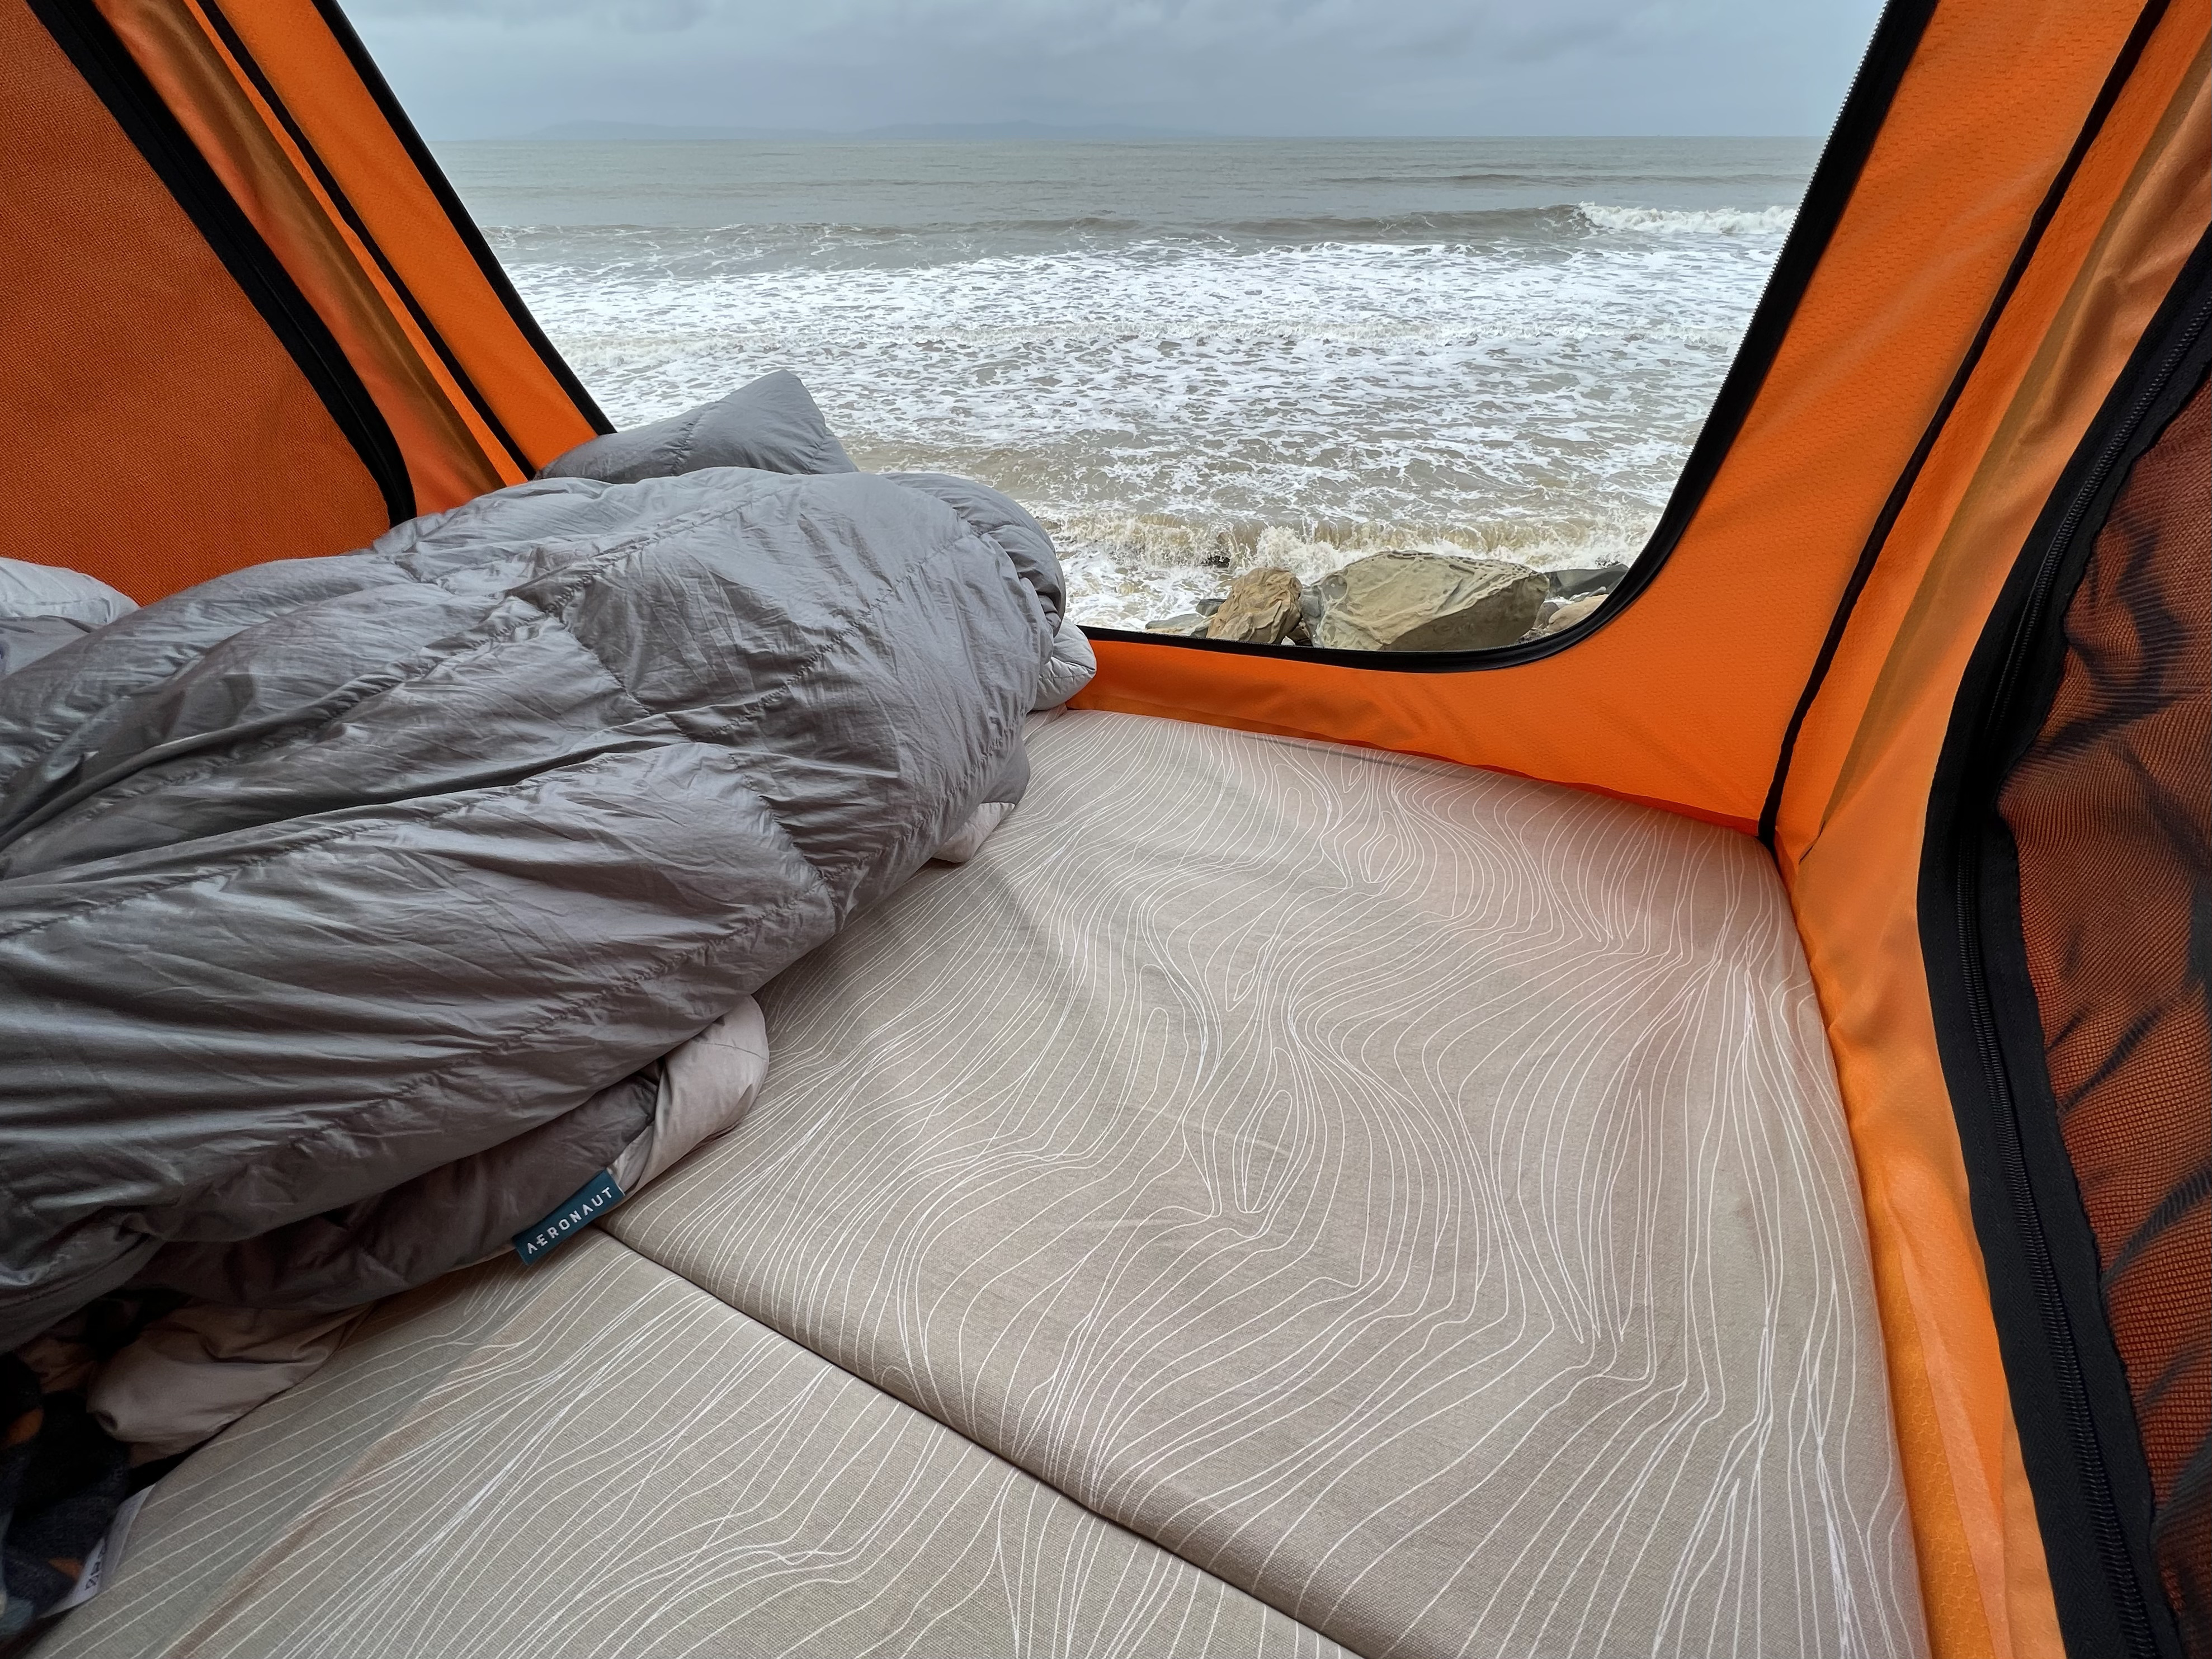
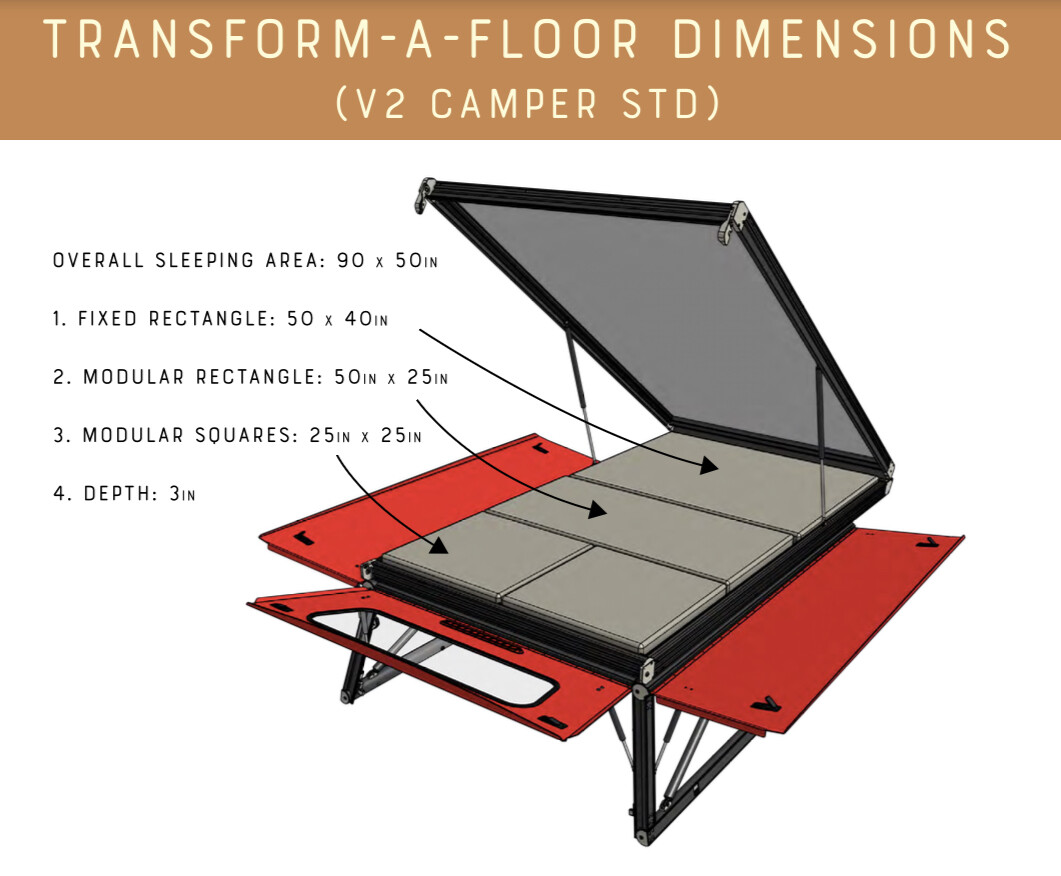
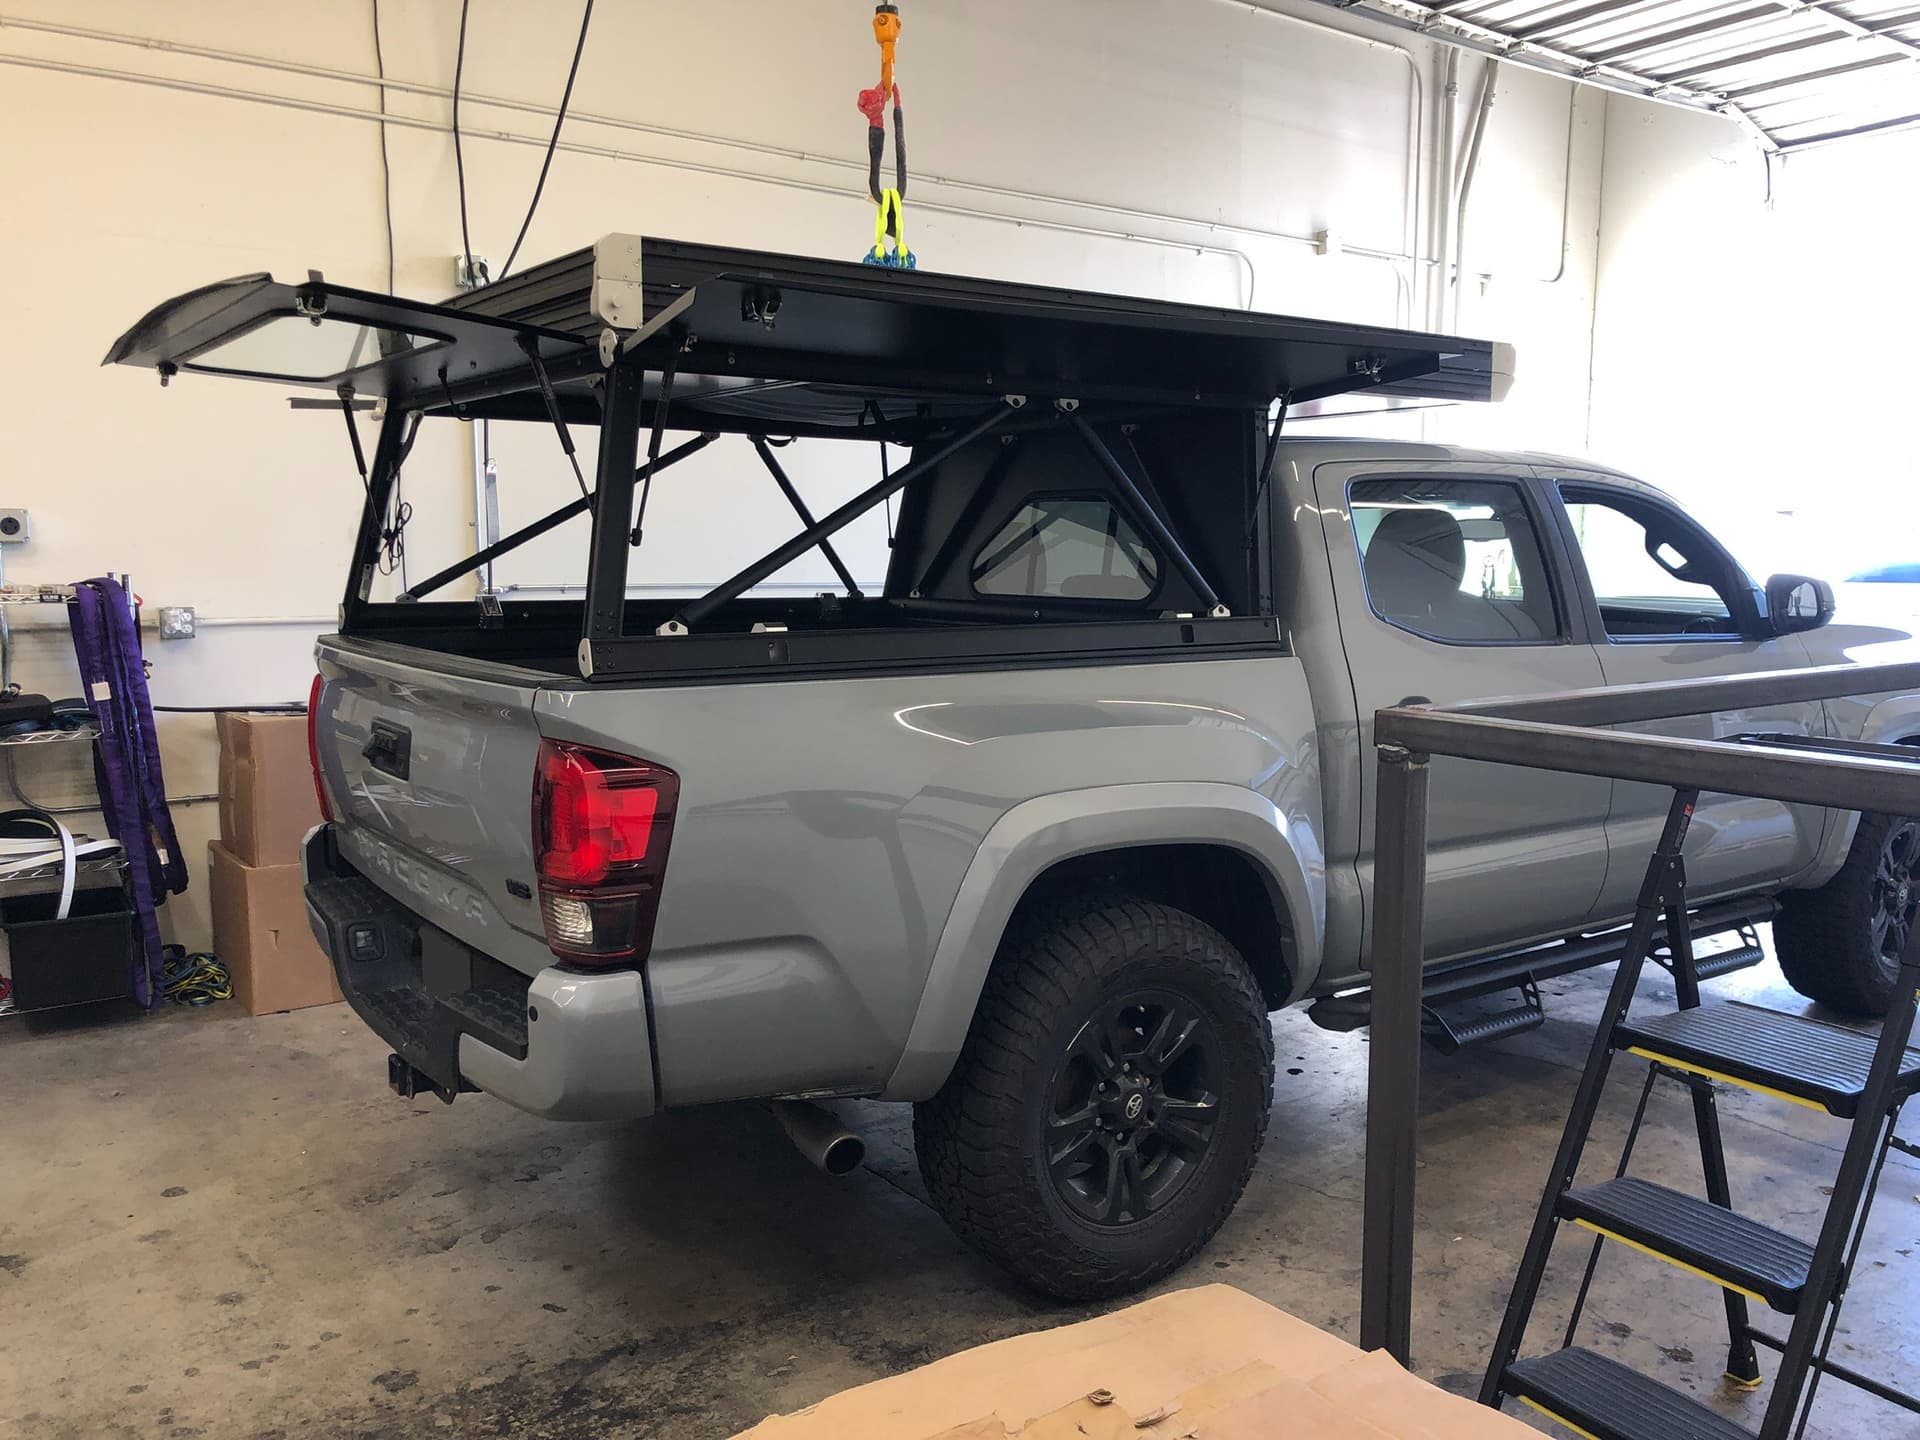
Eventually, I let the SuperLite go and upgraded to the full GFC Platform Camper. The biggest sell for this was the pass through space (Transform-a-Floor) , side bed access (Cabana Mode), and a hardshell platform to build upon. I picked up the GFC at the new Orange County location in January 2023. Prep work included a good rinse out of the bed then sealing the bed sides with foil tape and silicone. GFC options included two beef bars, tent windows, and both front and rear glass windows. Build #4684.
Current Buildout
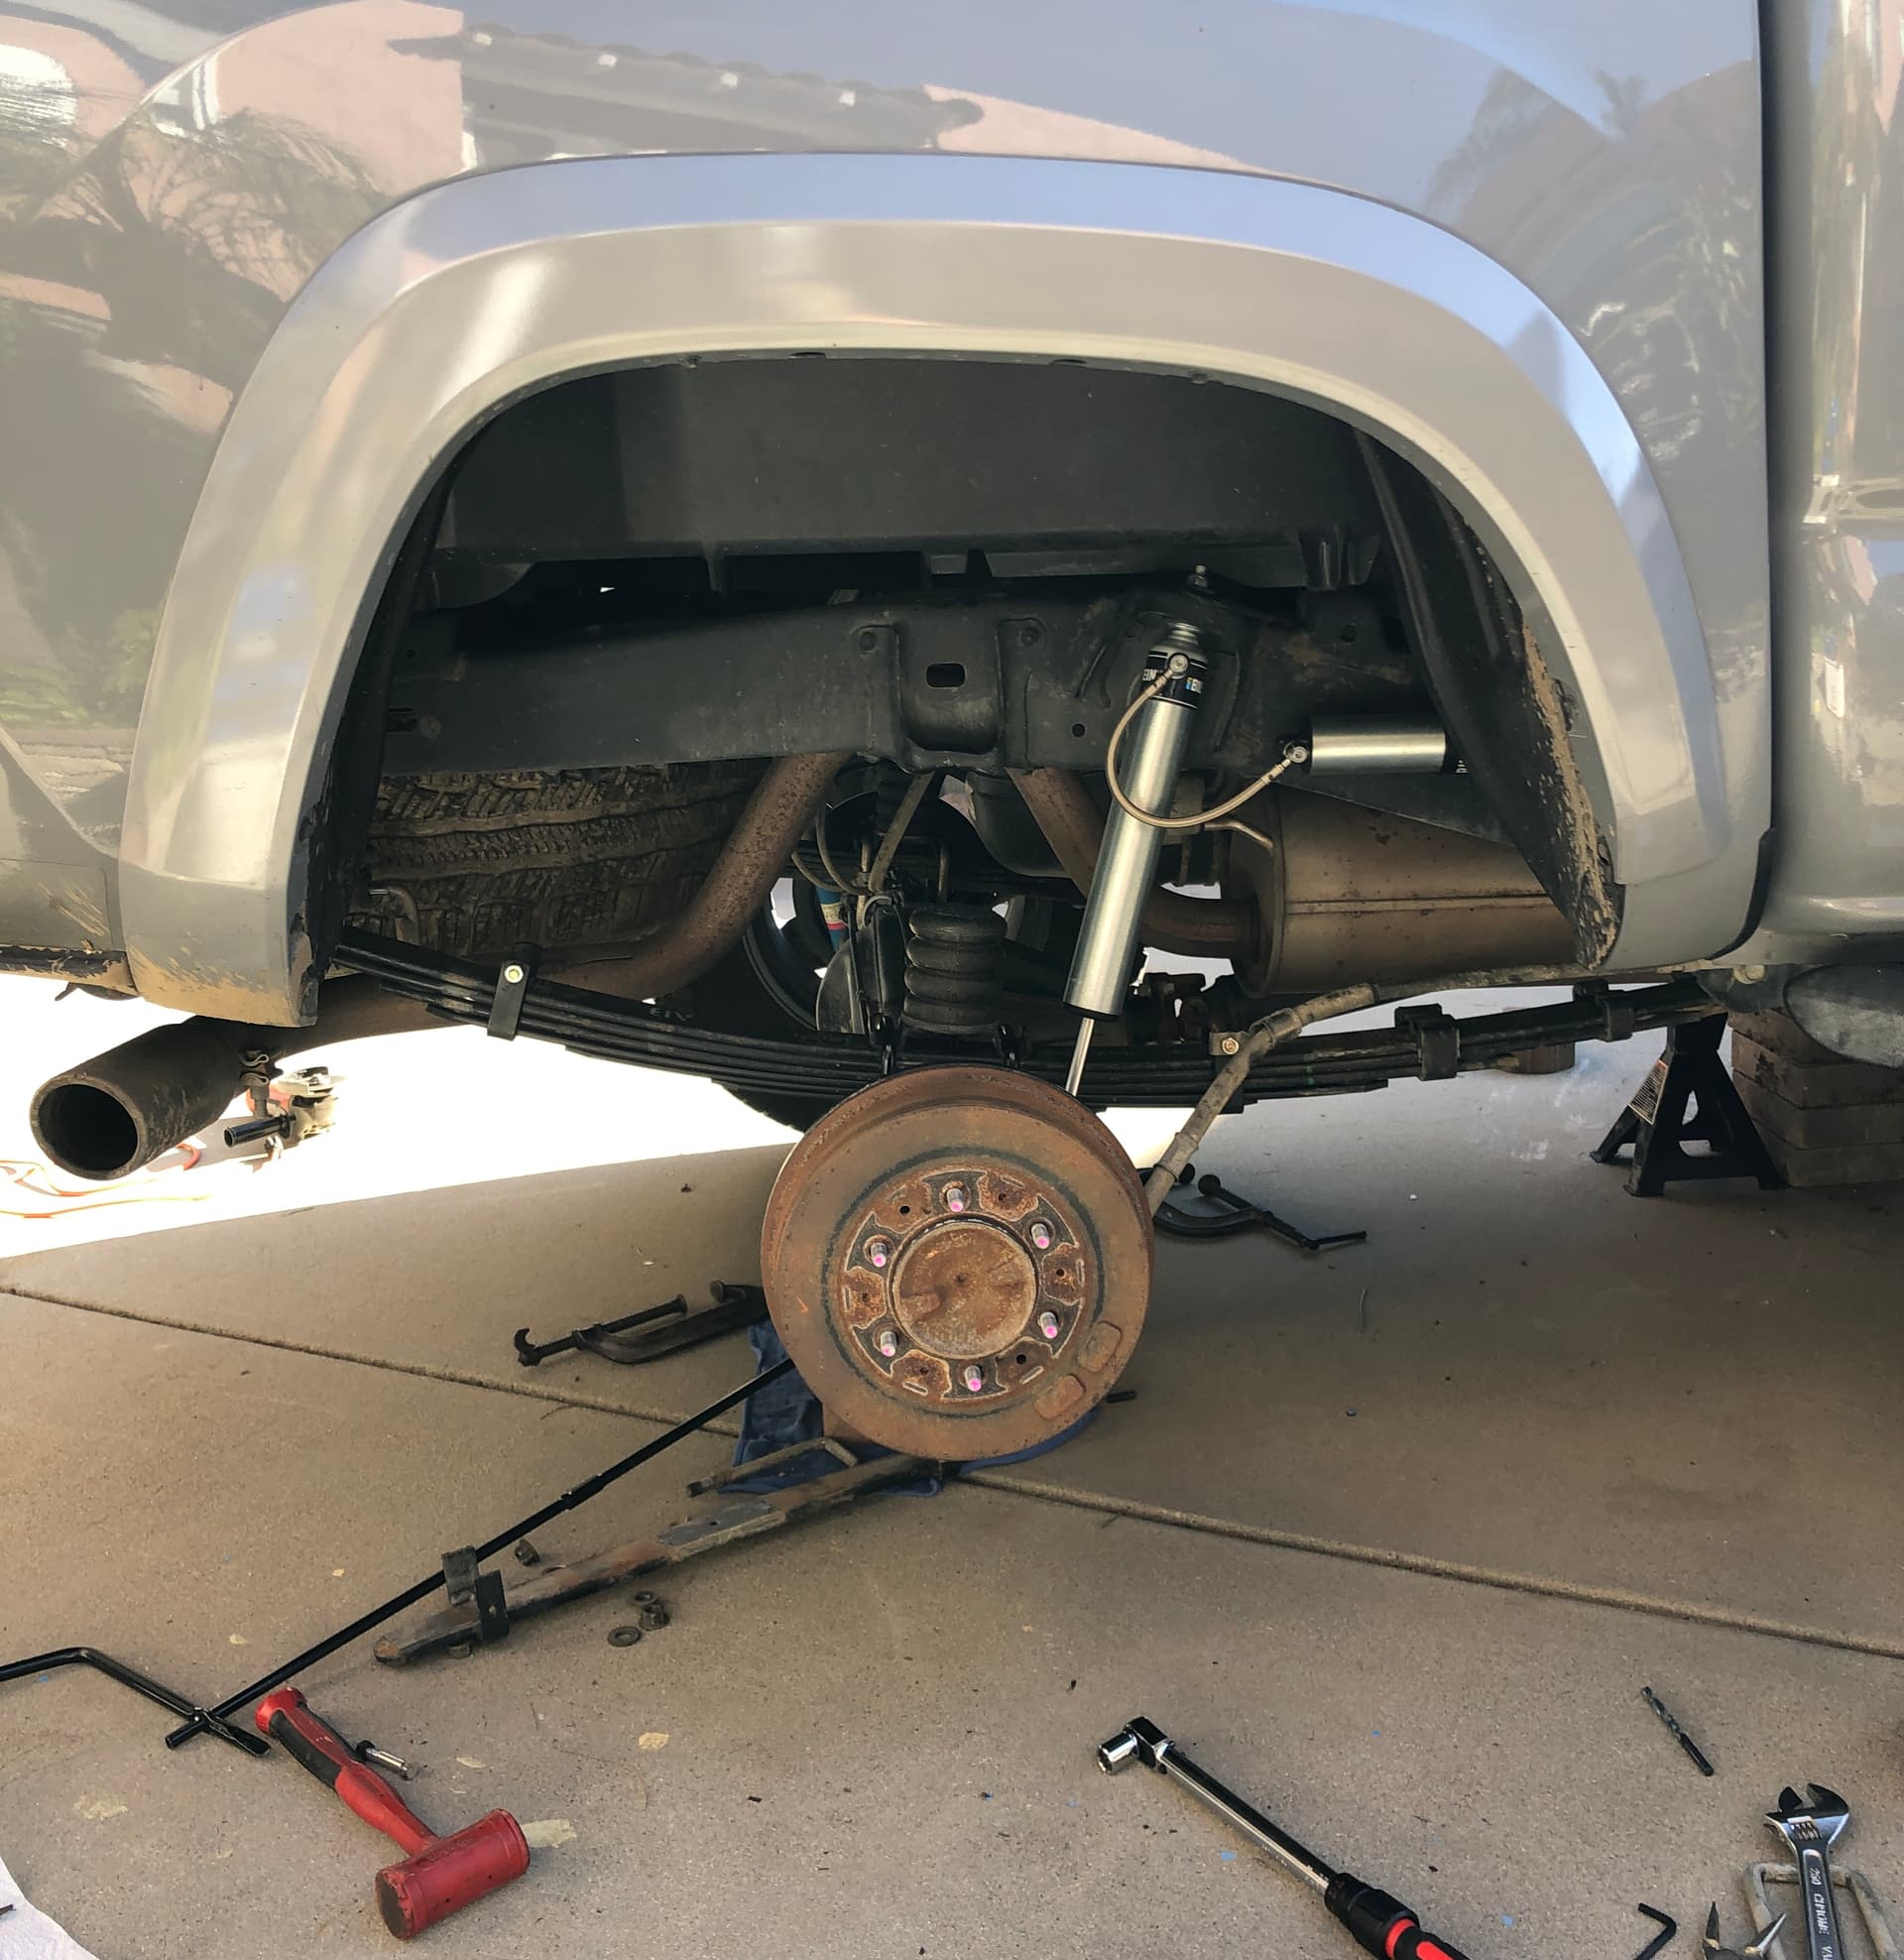
Suspension:
Bilstein 6112
Bilstein 5160
Icon AAL
Sumo Springs
Lighting:
MESO Map and Dome Lights
Diode Dynamics SS3 LED Fogs
Baja Designs S2 Chase Lights
Wheels/Tires:
Method 316 MR
Falken Wildpeak AT3W 265/70/17
Others:
Goal Zero Yeti 500x
WaterPort Day Tank
Total Chaos Bed Stiffeners
Mountain Hatch Tailgate
Very excited to continue chipping away at this build!