Hey bud, I’m going to look into this and get back to you. Thanks again for posting feedback!
If the side rails had slots inside of just two holes for the hold-down to mount to, it would make adjustments easier. Not sure if it would compromise strength or cost too much to add all the extra cutting
Thanks for the feedback and good questions guys, we appreciate it.
To get the front of the deck pushed up against the bulkhead, you will need to move the front most hold-downs one bay back, however you may want to consider the offset discussed below.
Positioning of the Flight Deck
The Tacoma flight deck is length driven based on 12" on center beef bar spacings, which allows us to develop accessories that function universally across all supported truck models. This design decision results in flight deck lengths that have less than full bed coverage. This does come with some user advantages, ability to reach around and grab something if top plates are covered with cargo, places to store boots and wet gear (at the rear), and facilitate stepping into the camper (if equipped). There have been some questions regarding positioning of the flight deck relating to the best practice offset from the cab-side face of the bed’s bulkhead. While the deck can physically be positioned to bear against the front bulkhead it is beneficial to maintain a 1”-1.5” offset. This is because the top of the bed overhangs the inside face of the bulkhead, preventing tying down cargo or a fridge vertically, or capturing the front crossbar below your load.
If you have a GFC platform currently installed, you have flexibility to contact the bulkhead or the recommended 1.5” clearance off the front bulkhead with the hold-downs installed in bay 2 and bay 4 . We are referring to a bay as the area between two cross bars. Long bed Tacoma models have 5 bays, short beds have 4 bays. If you would like to achieve a more custom fit, the hold down can be installed between the camper bracket and the Toyota T-track, or the rails can be drilled out. Hold-down’s are only designed to prevent shifting of the deck laterally and upward, and not meant to support the weight of the deck. The flight deck side rails must be firmly seated against the molded ledge in the bedside during installation.
Angled/Bent Hold-Down Bracket
The reason GFC Engineering designed the hold-down bracket to bend away from the deck is simply to hold the flight deck more securely – by having the brackets inclined, driving forces are split into two directions with a horizontal and vertical component. Considering there is a bracket with an equal yet opposite angle on the other side, the forces balance out and the deck stays put. If the hold-down’s were perfectly vertical they would have to be much thicker and therefore stiffer to resist bending like a parallelogram and allowing the deck to shift. Also, by forcing the hold-down’s to bend rather than manufacturing the parts with two integrated bends accommodating the angle, the connection becomes pretensioned preventing and nearly minimizing deflection and resultant shifting of the deck.
Cheers,
Stephan
2 Likes
Wow, thanks @GFC-Stephan, that’s really neat.
Ok so that all makes sense to me now. I may or may not try to close the gap in front to make a track nugget flush with the overhang after your expert instruction.
As far as the hold-downs, I was just hoping they’d line up nicely with the GFC brackets because that would look cleanest. I could possibly drill the side rails out in the future, if I really get quarantine-bored. But they’re doing their job where they are now, and with the spare on top the chatter is gone from the side rails in the back.
As far as the angled hold downs, I totally get it now after tightening the lower portion to the side rail before fighting with the top to get it attached to the bed rail. After I sat on the FD and tightened both sides to the rails, I could feel the deck “center” itself between the rails.
All in all, I’m glad I pulled the trigger on the FD. It’s much nicer than my plywood/carpet gig I had before, and I can’t wait to get my drawer box in and integrate it with the FD.
1 Like
Where are the flight deck pics?!? I know some of you already have them, how are you using them? PICS!!! 
1 Like
This may help, still playing with it, waiting on some hardware to mount other items.
4 Likes
I’m just waiting for GFC to release the FD for the Colorado. I’m also curious how they choose to mount the FD in the Colorado as we don’t have bed tracks in our beds.
3 Likes
I love the versatility of it in 20 min I could have the whole bed back for hauling whatever if needed. Its strong, compliant so far is you will need to keep the tracks clean of debris for the T-nuts to work and the hole for them is small so be selective on the tie downs used.
1 Like
Team Flight Deck - how about noise? When flying down the gravel do you get any rattle with those panels?
I just picked colors and added a partial deck…
#1238
Any news on the pending Tundra Flight Deck? The Decked in the bed doesn’t cut it anymore. Those of us with Tundra’s are looking forward to Flight Deck.
1 Like
I’m interested in seeing if and how folks are integrating a drawer box setup with their FD. Here’s a pic of my initial setup of the FD

1 Like
Also curious about whether or not this is something that would ever be produced for the f150. Feels like they have been out for a while, but still just for Tacoma’s
1 Like
Appreciate the info, but to be fair, produced is quite a bit different than prototyped and built for one vehicle.
When can I get on the website and buy one for my 5.5ft bed length f150?
I’m crossing my fingers for a tundra flight deck as well. On one of their Instagram live streams, they mentioned that the flight decks were on hold at the moment while they are working on ramping up production times, etc.
I’m still hoping for a flight deck for the Colorado’s but I’m getting near the point where I can’t wait any longer and will start looking at other solutions for my bed/organization storage if they don’t have an update regarding the development of expansion of their flight deck line. But based off one of their recent live Q&A’s it looks like this is a low priority for them which is unfortunate for all us non-Tacoma owners.
1 Like
I’m with you. I love the flight deck design, but don’t have a tacoma.
I hope there’s enough of us that want it and the demand will increase that they will turn their attention back to it.
I was planning on storing the tire under the flight deck, but I may look at the AEV tire mount for my truck, and figure out other methods to store my gear.
1 Like
Me too. I like it because I can put all my clutter and stuff under the deck, then keep the platform clear, use the tie downs for fridge, battery, and anything else if needed.
1 Like
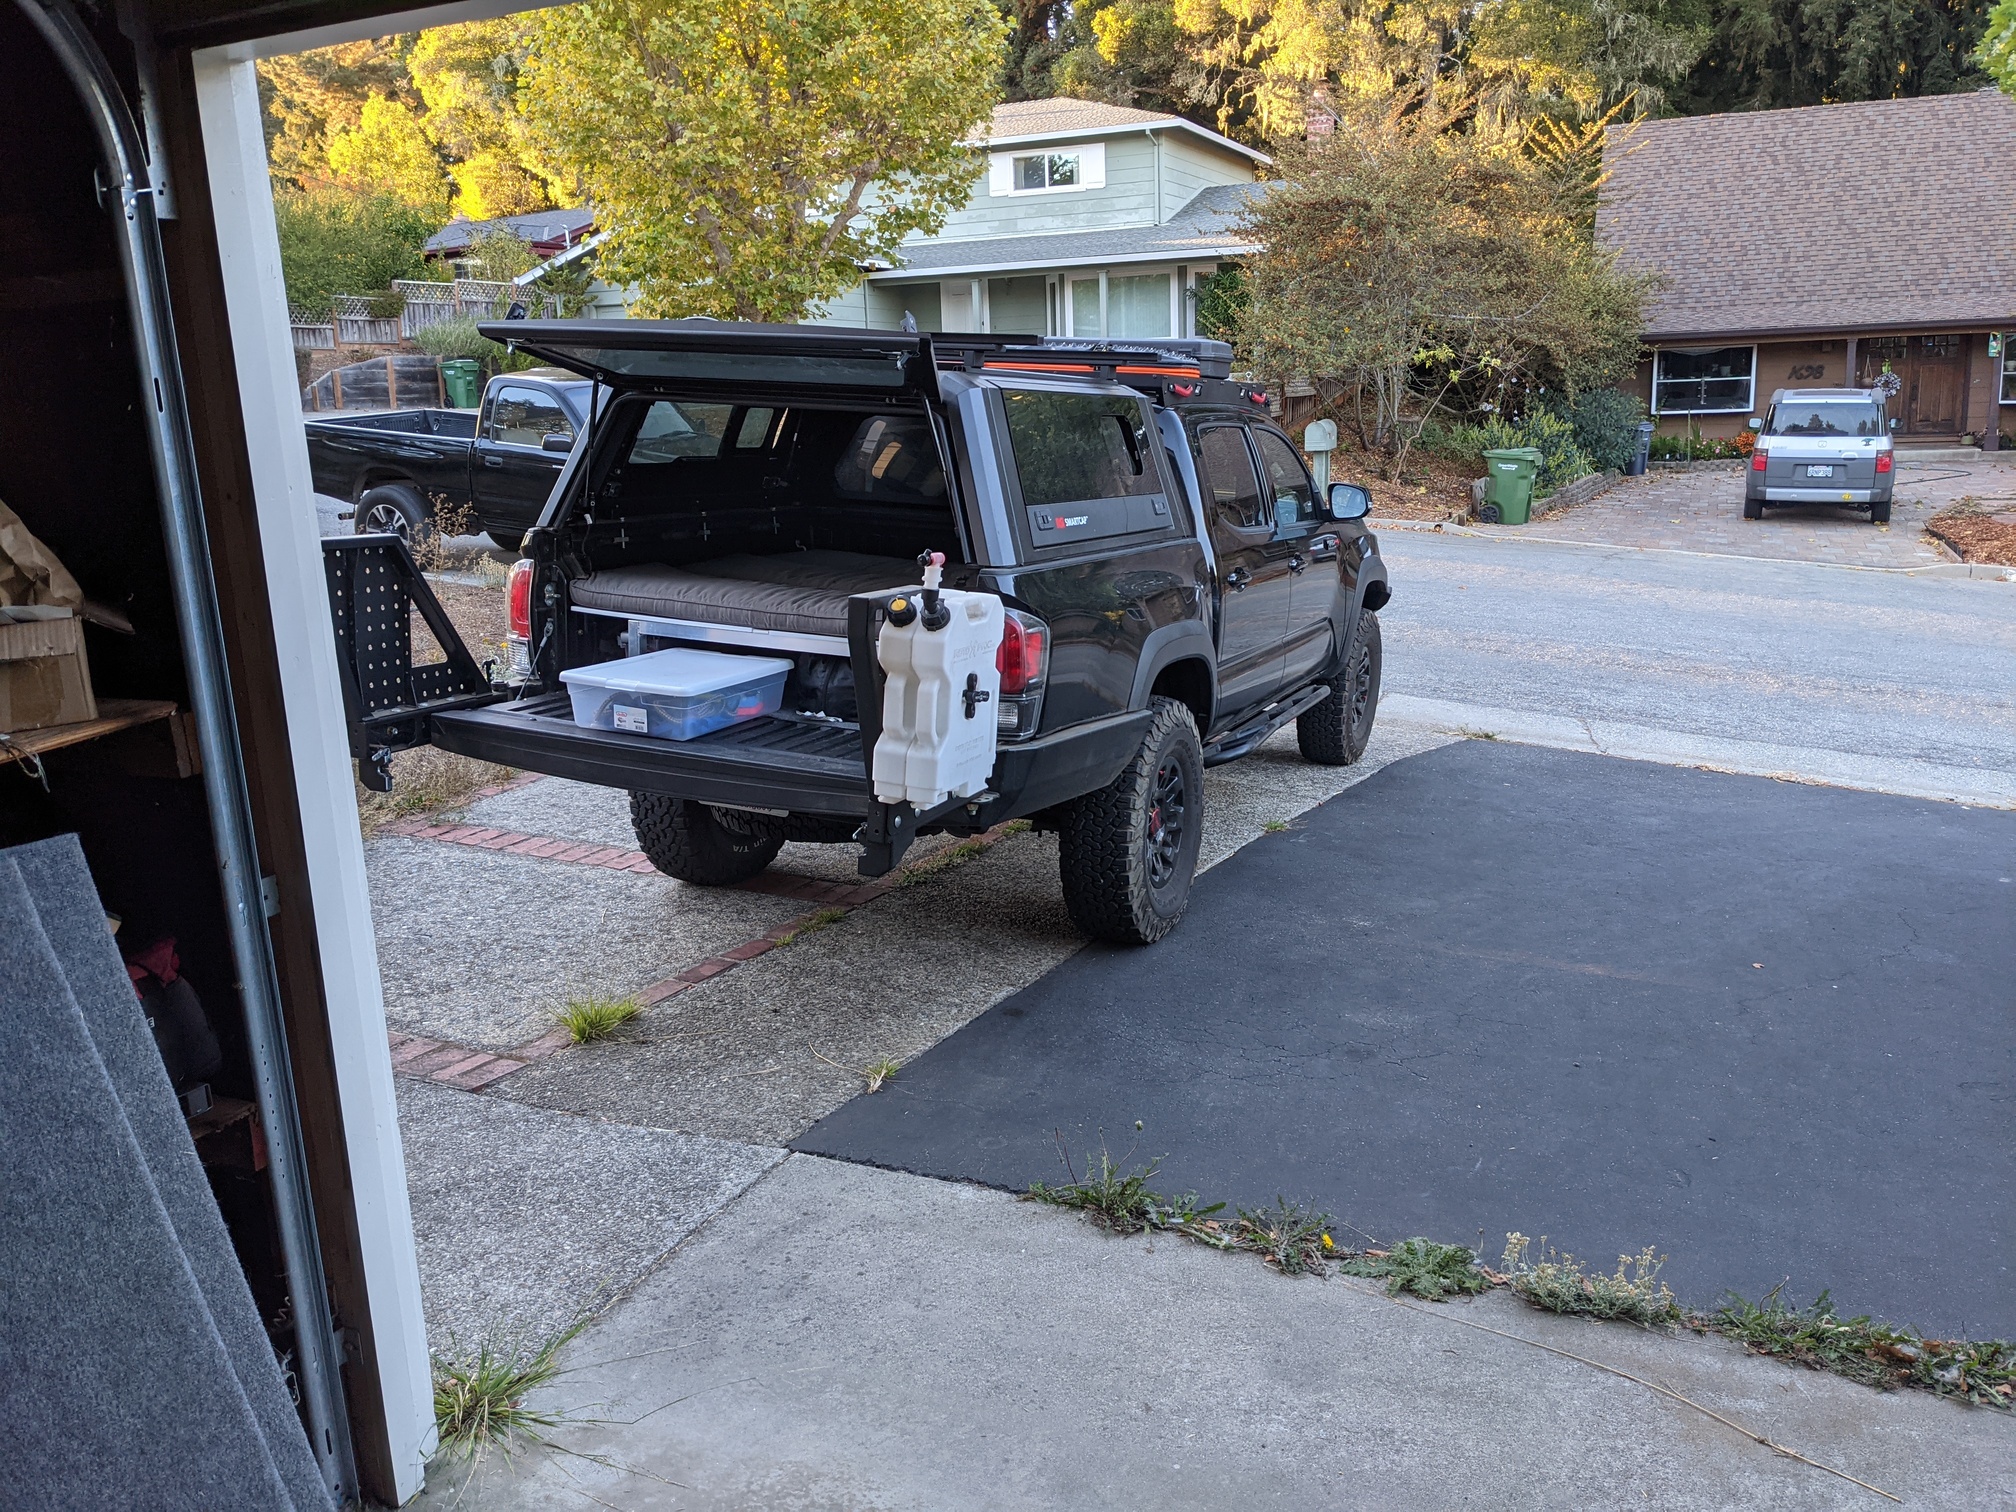
Not a flight deck but here was my solution. I have 2 dogs and my girlfriend has a dog. With the 5ft bed Tacoma I wanted to give them as much room and comfort as possible for long trips. This doubles as a stealth camper setup with just me and my pups.
Goals:
- Large under platform storage for bigger objects, (Skimboards, snowboards, camp chairs, bins etc)
- Strong enough to hold ~500lbs “dynamic” moving dogs on the road
- Water resistant. Skimboards, surfboards dogs… Things get messy
- Removable, may need the whole bed for some things.
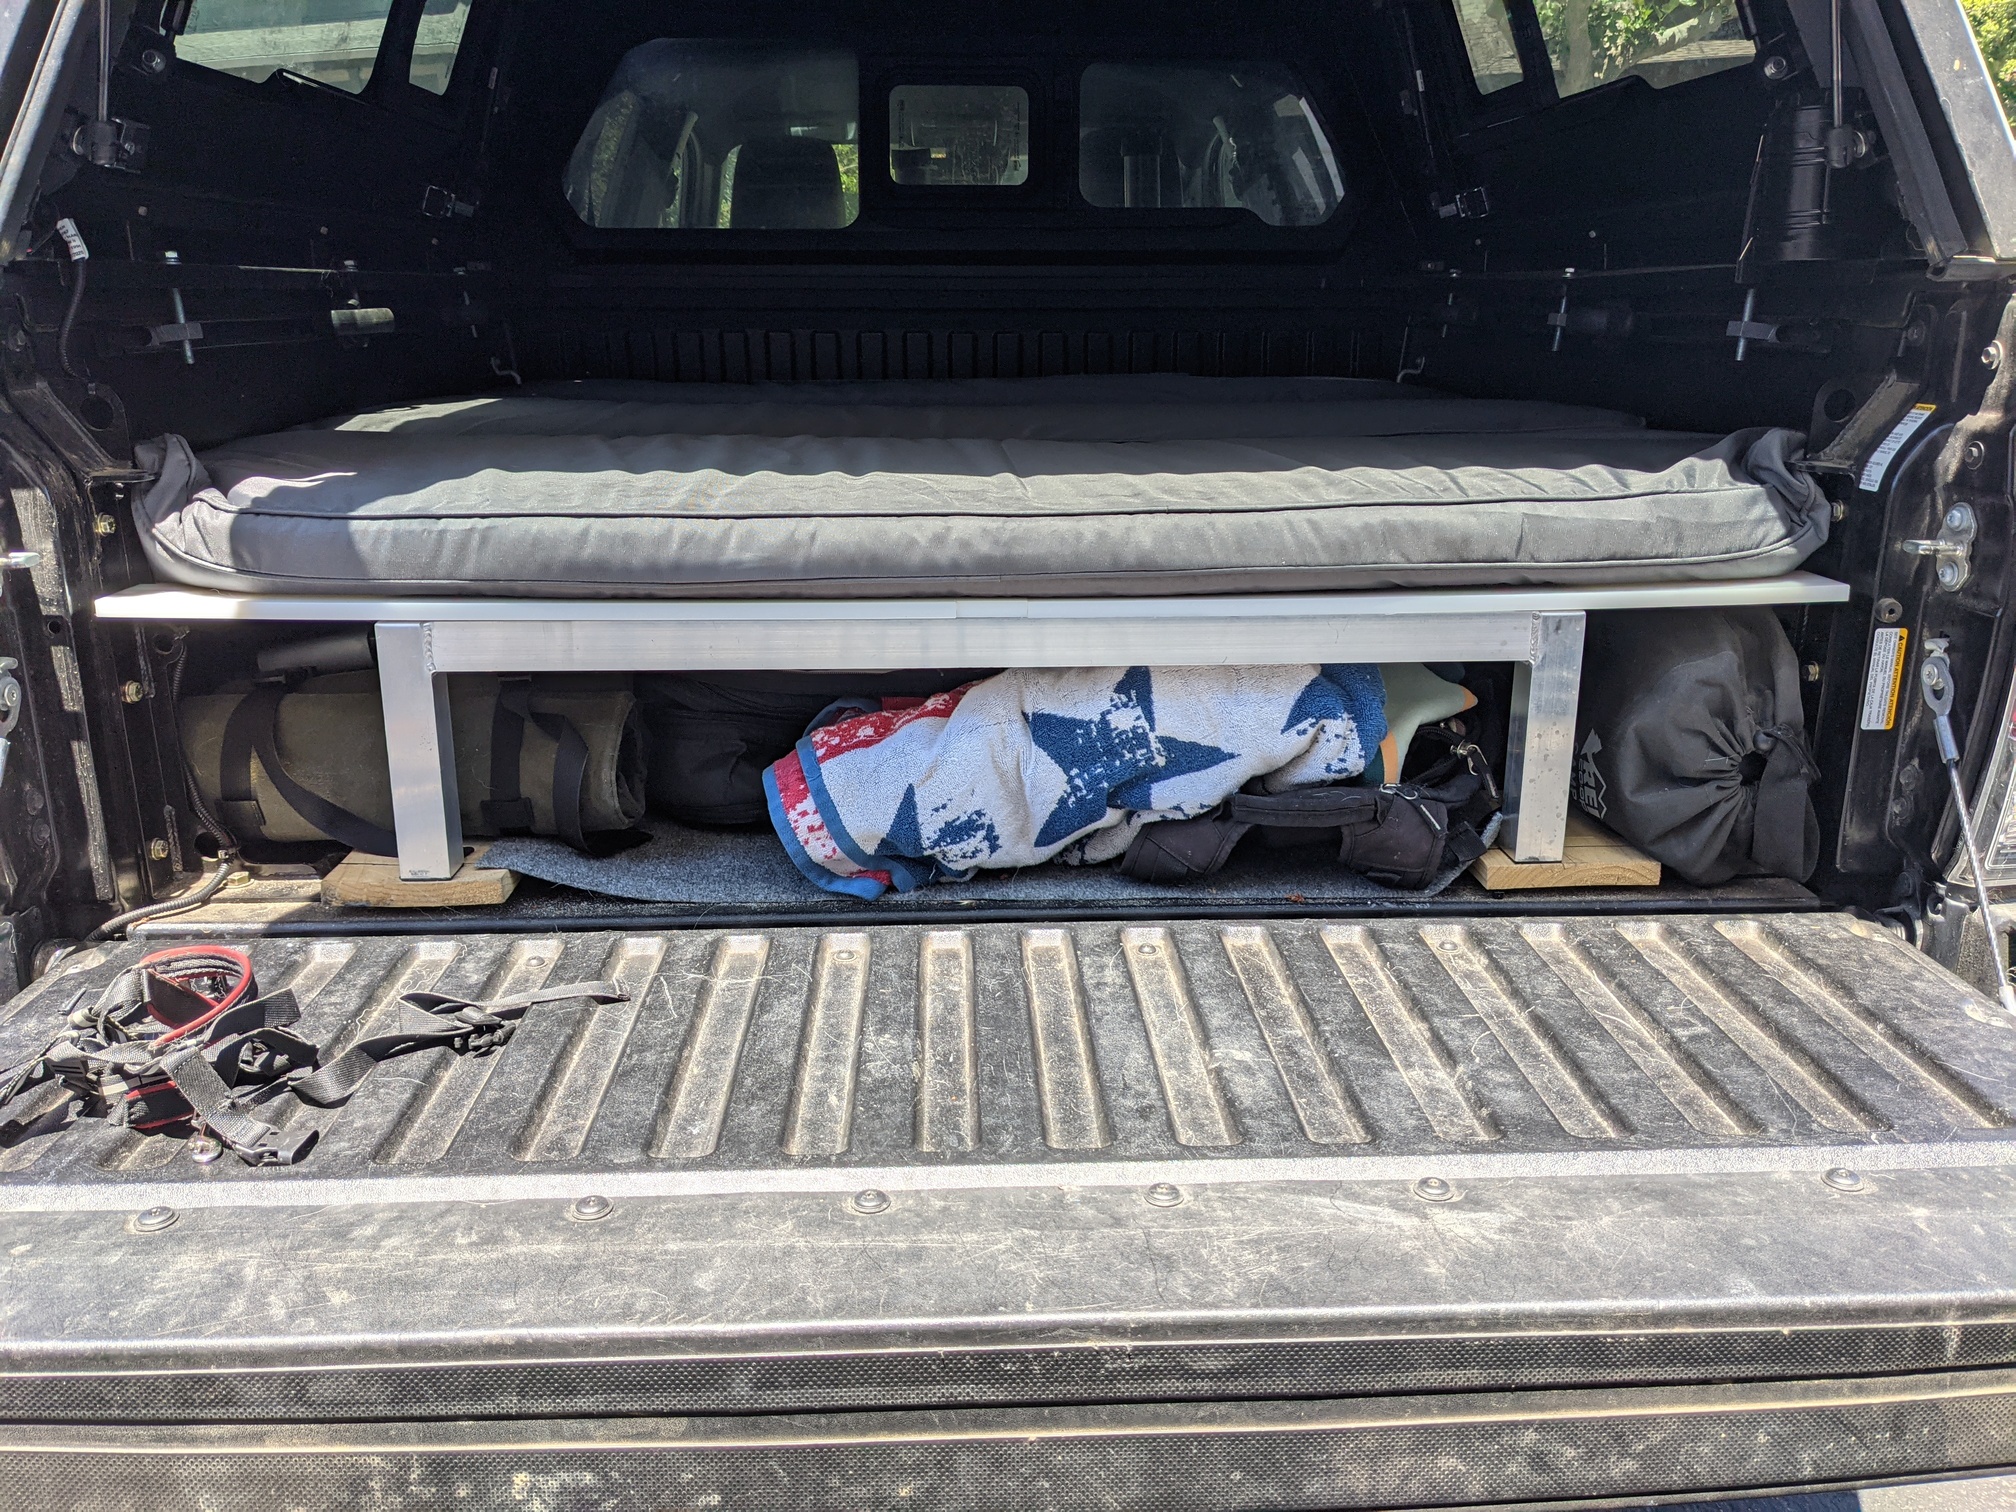
Materials
3 aluminum dunnage racks from webstaruant store. These are 1" square bar 36"x20"x8". They span the length of my bed (5ft Tacoma). You could also use up to a 40" wide to make the center pocket bigger and use only 1,2 or 3 units to span the bed length.
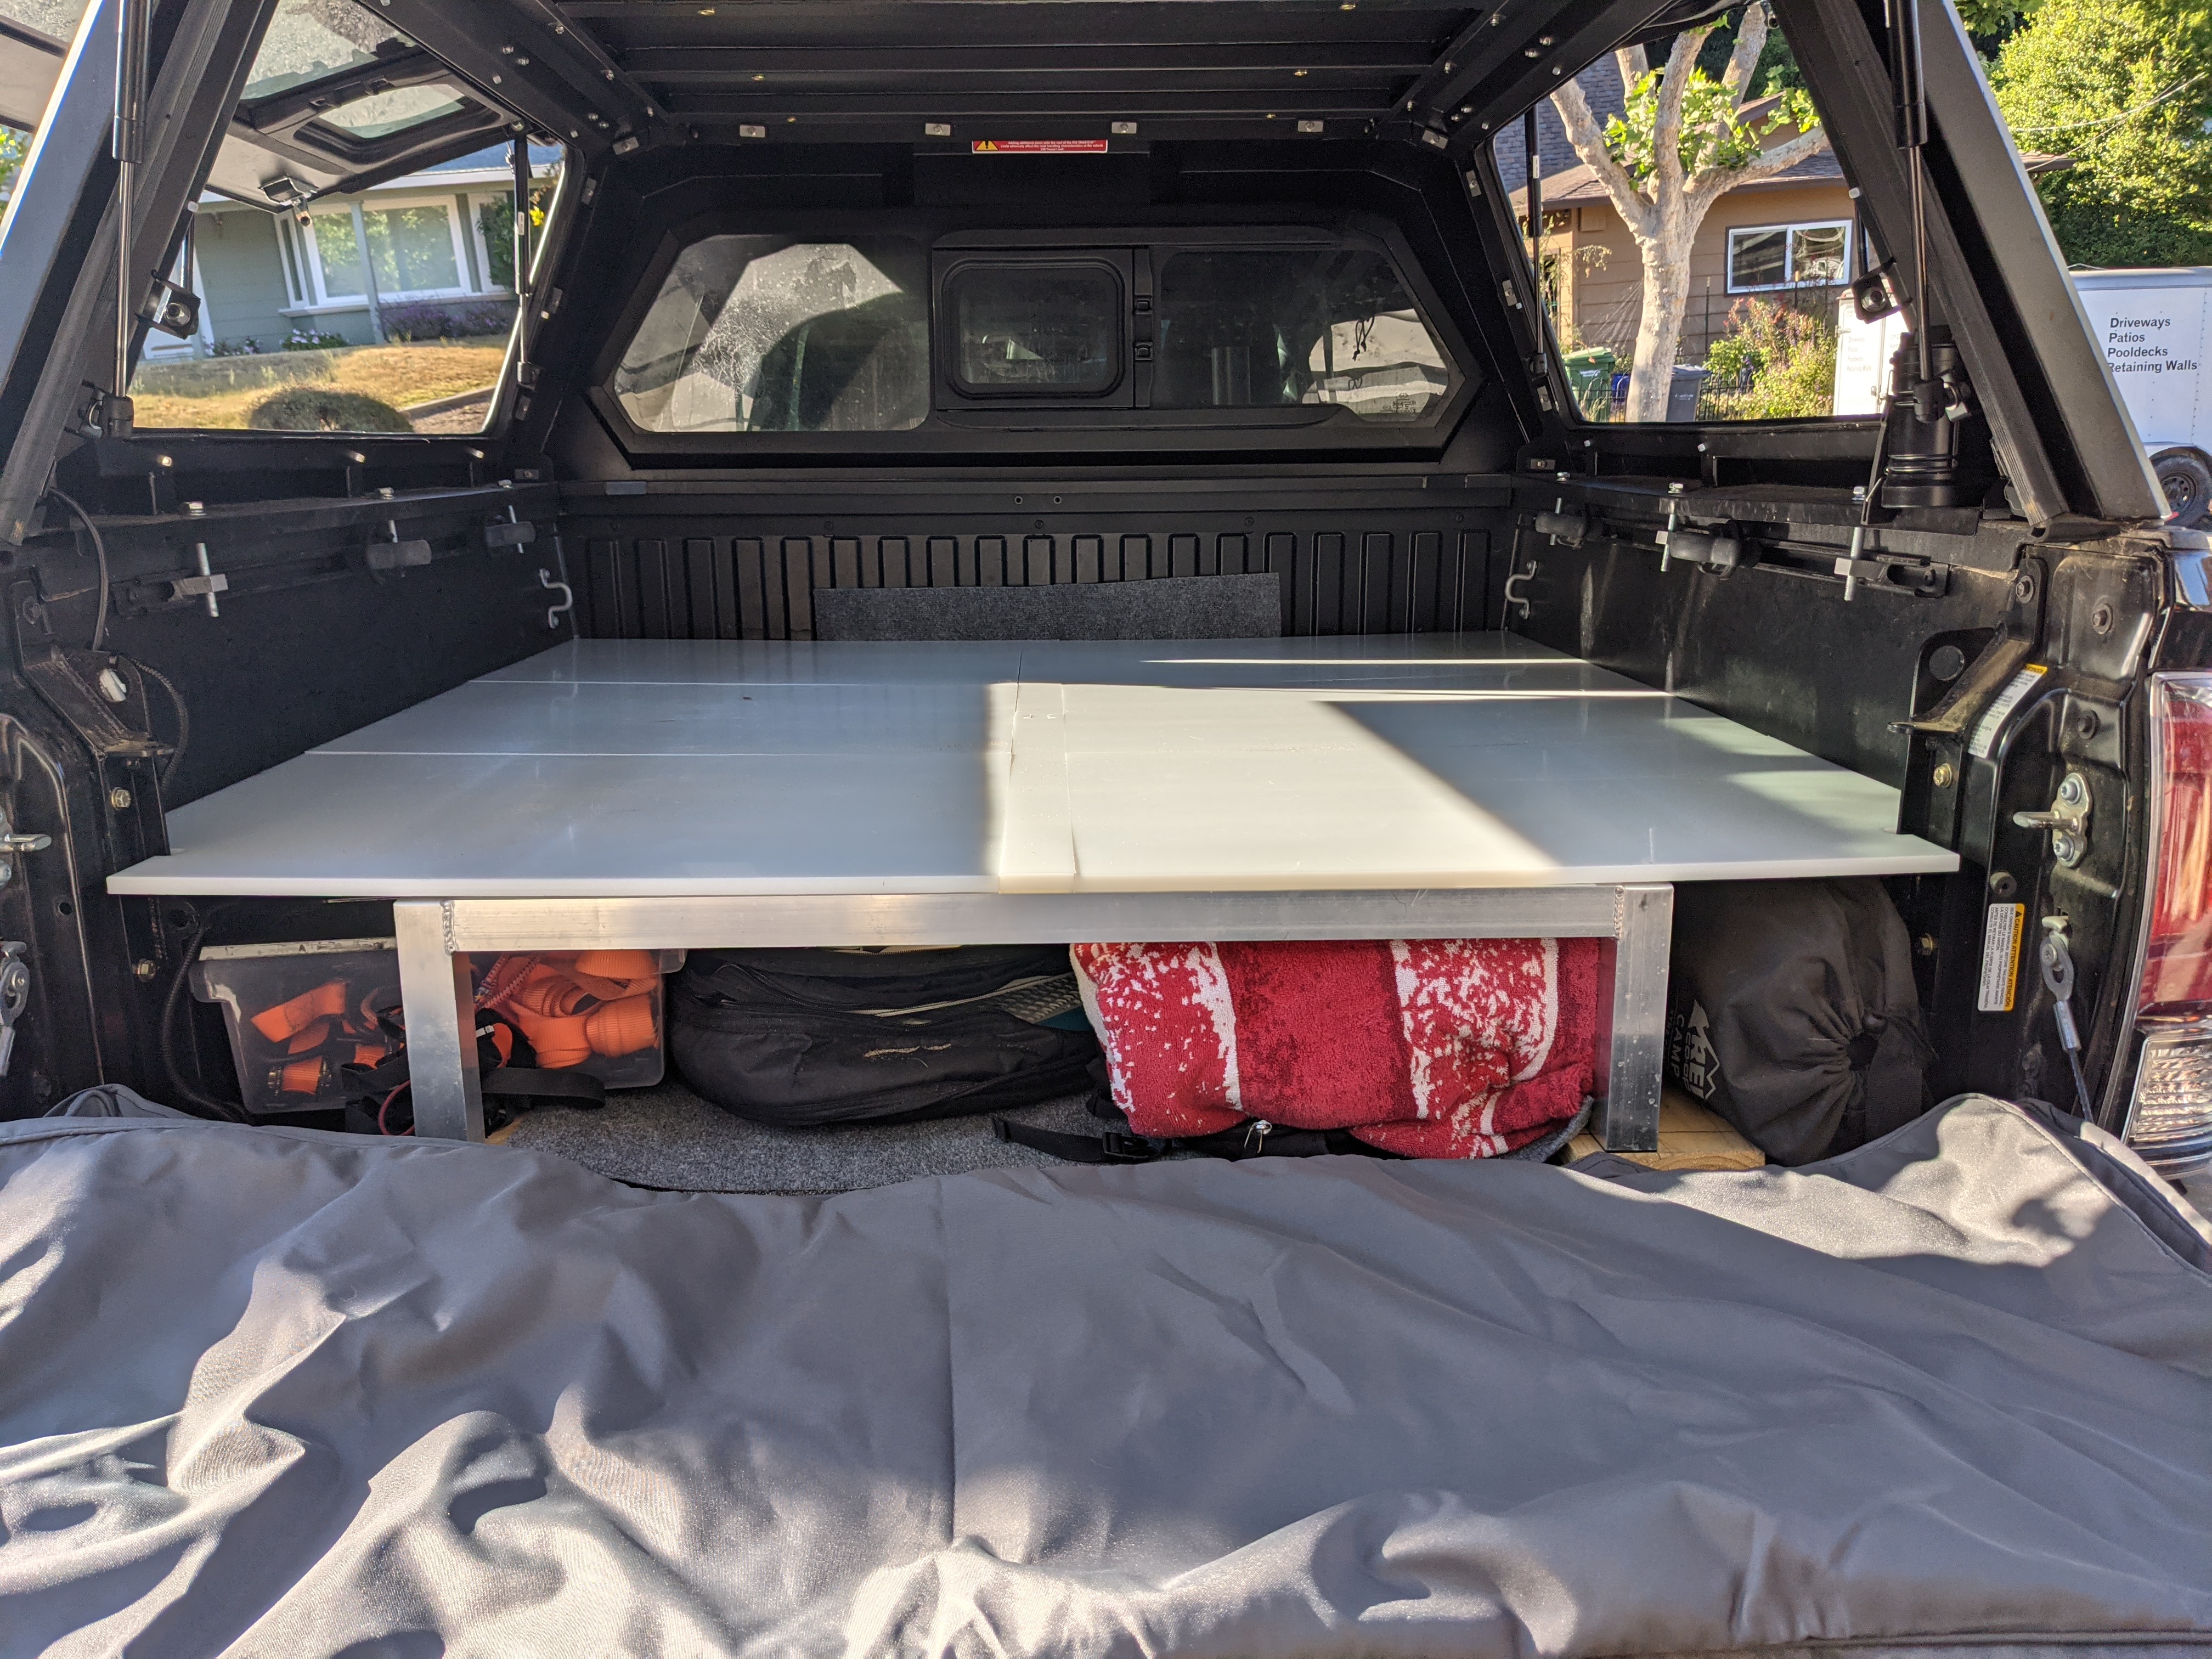
HDPE 3/8" X 60" X 60". I originally wanted 1/2" and I think it would work still, and possibly save some weight. I got a really good deal on some scrap pieces of 3/8" though, so that’s what it is. I made 6 pieces of 20"x28" and a center spine of 2 pieces 2"x30". This setup allows me to lift up cushions and the panels to access small items that could be stuck under the back of the platform.
Cushions:
3 pieces 2" foam cut to 20" X 58"
3 covers from coversansall website.
Good news is they are supposed to be boat cushions which aren’t obsurdly marked up right now.
2 common boards 1x6 60". I keyed in a few pieces of 1/2" ply scrap so that they would lock in the bed grooves, and cut a hole for the bed mounts with a paddle bit. I also used scrap pieces of ply to lock the racks into place so the whole thing can’t move side to side.
2 Likes