HighVoltOverland's Rivian R1T Build

In anticipation of my pending October install date I figured I’d get a thread going on what the early generation of camping in EVs entails.

If you have any questions/ interest* about the Rivian or my general experience as a EV overlander for the past two years (and many more to come!) just give me a shout.

(Pictures coming s00n)

*I know there are plenty who don’t have any desire to go EV.
That’s cool. To each their own! But, I won’t really engage in trying to defend/justify the merits of EVs vs ICE.
I’m just here to have a good time and share cool shit with cool people.

5 Likes

Will the electric aspect of the vehicle allow you to use it in anyway for power in the camper as well? Perhaps being able to avoid having a secondary battery?

In theory yes!
For day trips/ quick over night trips / general errands I often just run everything plugged straight into the truck.
Cooking three square meals on my induction burner uses about 1-2 miles of range from the battery a day.

However If I am going out on multi-day I like to be a little more restrained and I fall back on running my system off a Bluetti Power station and just run the car inverter to top up the portable battery, as even under no load the inverter from HV to 120v wastes juice.

I have an early build, so there is some inefficiency and quirks in the solutions I use that have been/ are being addressed in the Rivian line up.

For instance my build has 2 12v batteries that power various systems and the vampire drain on the system can be around 1% a day just from the HV system power cycling to maintain the health of the 12v batteries. I have a solar trickle charger that eliminates that vampire drain almost entirely.

about 6 months after my build was delivered they removed the dual battery set up and within the past couple months they launched the gen 2 which removed over a mile of wiring and reduced the number of ECUs by a significant margin.

I know plenty of folks who run all their gear off the battery, but I’ve been broverlanding for a while and didn’t have the heart to throw away my old systems that still had years of life in them.

Here for the good time, with moments of range anxiety mixed in while you’re getting out and using it hopefully.

We are looking at making to switch to an EV or PHEV for our around town vehicle but I don’t think EVs will work for how we camp currently.

1 Like

Stoked for my October R1T install as well! Had seen in another thread about the solar 12v trickle charger… do you connect it to the rear bumper jump pigtails?

Oh nice, when did you get scheduled for?
I was on a work call when they reached out so I missed the honorary “first install”

Oh well.

Anyway, I consider myself a hobbyist electrical engineer (minored in EE in my undergrad)
I had 2 50w rigid panel on my roof rack, wired into two mppt charge controllers and directly going to the 12v in the frunk.

Lensun Rivian Solar Panel

I am going to lose/ heavily modify my roof rack, so I’m considering switching to a Lensun Solar Hood panel, they show they have one sized for the Rivian hood. At least, just for the car 12v batteries to virtually eliminate vampire losses

Additionally, since I’m consolidating panels, I will be trying out a dual battery charge controller.

WOW… so glad I reached out to you. I’m not too savvy with overland setup, and especially solar. The Lensun system seems ideal to address the vampire drain! THANKS!!!

I’m scheduled for Oct 23rd in Belgrade… I’m SO excited!!!

What age is your truck?
Do you know if you are dual (pre-march2023) or single (post mar 2023) 12v battery?

That will impact how exactly you need to tie into the batteries

(for instance, the dual battery early builds, only one battery is actually connected to the rear pigtails)

I’m definitely dual (Nov '22 delivery).

1 Like

Assuming shipping is good I’ll post my wiring guide in the next couple weeks

1 Like

Solar Update:

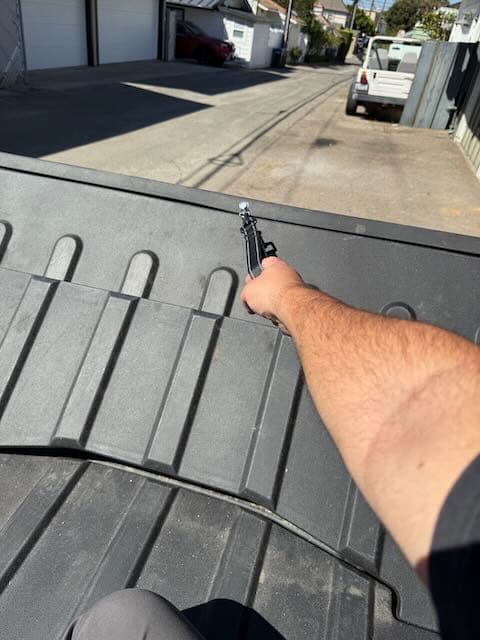
As mentioned earlier in the thread, I pulled the trigger on the Lensun.
It arrived this morning and I played around a bit and took some photos and decided to give my first thoughts.

Rivian R1T R1S Gen 1 Vampire Drain (Possibly) Solved (or Hacked) IMG_1791

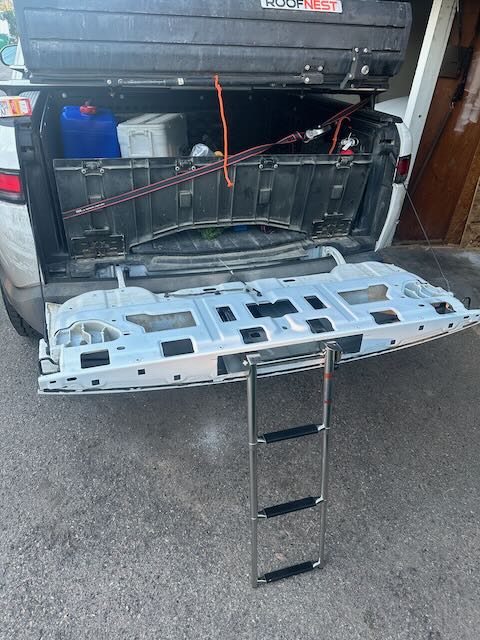
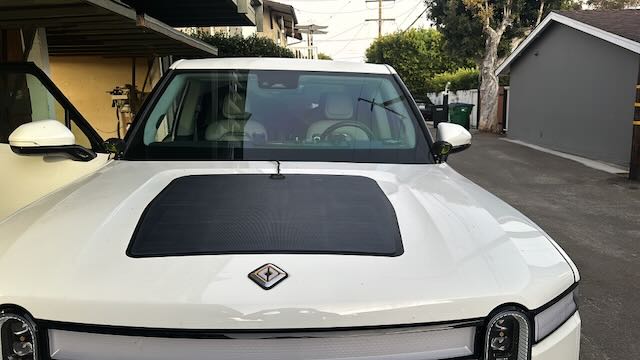
  1. This version seems to be their “universal” 85w panel.
    It would have been nice if it was cut/ designed to fill the full hood scoop/void

Rivian R1T R1S Gen 1 Vampire Drain (Possibly) Solved (or Hacked) IMG_1796

  1. This does not have the metal eyelets like some mentioned/were concerned about
  2. No Adhesive is provided. I have some 3M tape from other projects so I should be okay but that goes into my major gripe:

Do not buy the vinyl they offer.
It came folded, even after letting it soften up in the sun most of the day it still had a crazy crease that stayed even after application and squeegee process.

Rivian R1T R1S Gen 1 Vampire Drain (Possibly) Solved (or Hacked) IMG_1787

For unclear reasons, the precut vinyl that is the same size of the panel came folded
(the panel was shipped and boxed flat)

I’m not a pro but I also have done this enough to know how to prep and apply, and holy shit it looks like dog water.

Rivian R1T R1S Gen 1 Vampire Drain (Possibly) Solved (or Hacked) IMG_1790

As mentioned it came with no actual adhesive so I mocked it up with painters tape.

Rivian R1T R1S Gen 1 Vampire Drain (Possibly) Solved (or Hacked) IMG_1792

I think it will look okay and it covers the line fine, but, even after being applied and undisturbed for about 6 hours, the vinyl came up with the painters tape!

Will likely just find a local shop to wrap my whole hood and use VHB on that.

The hood opens and closes no issue, the panel is pretty light weight
I didn’t notice any straining or audible struggling from the motors/struts when cycling

Rivian R1T R1S Gen 1 Vampire Drain (Possibly) Solved (or Hacked) IMG_1794

I was giving the vinyl as much time to succeed before a very rough test so by the time I got around to testing the panel itself I didn’t have good sunlight (very close to sunset), I plugged the panel into a power station to verify and it works as expected.

Rivian R1T R1S Gen 1 Vampire Drain (Possibly) Solved (or Hacked) IMG_1795

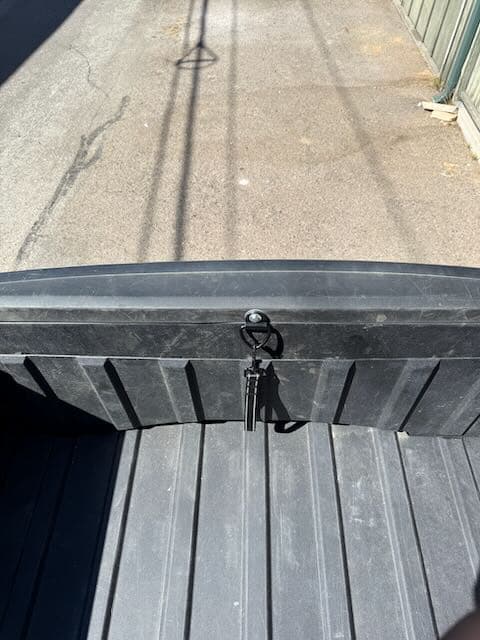
Next up I have to make cables to go between the charge controller and the batteries themselves.

Rivian R1T R1S Gen 1 Vampire Drain (Possibly) Solved (or Hacked) IMG_1790

The panel comes with mc4 connectors, I opted to not buy the cheap charge controller they had as a bundle option as I needed to use a dual output charge controller to connect to both 12v batteries on the truck

Here’s the main portion of the “wiring harness” that I made this evening:

Rivian R1T R1S Gen 1 Vampire Drain (Possibly) Solved (or Hacked) IMG_1801

I always throw a circuit breaker on the + leg of my solar, just in case Helios throws a fireball right at my panel.

I somehow ended up with an uneven number of mc4 pins and plastic bits
and alas, nobody I know of sells connectors in person.
So I’ll be waiting on Amazon to send me a new pack so I can make a short pigtail and wire the panel in to the controller.

Stay tuned, once I get my GFC I will be throwing 600-800 watts of panels on the roof of the camper
(still playing Tetris with panels)

Also Mocking up my poor man’s goose gear set up.

IMG_1798

Toying with the idea of it being higher to maintain an option to sleep “downstairs” if needed.

Currently my “house battery” is behind the driver seat in the cab
(and acts as a support for the dog bed)
My 12v freezer is in behind the passenger seat.

While this works for solo/couple travel if I add kids or friends it quickly shows its weakness.

IMG_1800

+1 For the shop foreman being tired of my shit

1 Like

Any new developments / results with the hood panel install?

Hey dude!
The panel does what it says on the box.
The early architecture of the dual 12v system has made it a bit trickier to balance safety and minimize inefficiencies in the whole electrical set up.
The panel itself I have no major complaints.
I wish that is filled the full hood depression, it would likely boost the rating to the 100-120W range
The vinyl crease is what it is.
It’s not visible under the panel so I’m just rolling with it.

I’ve added an 8 channel switch and have wired up ditch lights and moved my 50w GMRS radio from the cigarette plug to a dedicated circuit.

Once I get my camper mounted I’ll be adding a light bar to the roof and some chase lights.

At this point, I think that something like the Noco smart trickle charger would be a better solution for Vampire Drain on the dual 12v systems.

The solar works, and I’m keeping it as a spend a lot of time parked in the sun at the beach and eventually will add solar to the GFC, but practically speaking I don’t think I can recommend it as a cost effective solution.

The solar works with my dual output well, but that only covers daylight hours.

To cover the intermittence issue I would need to add a battery to the system.
Then I would need a DCDC Converter.
The tricky thing with the dual 12v system is they are not parallel, they are adjacent systems.
I’ve yet to find out from a reputable source if I can have two separate systems on a shared output of a DC converter or if I need to find one with dual outputs.
I’m not sure how complex the cell balancing/ voltage differences would be between batteries so I have significant pause just connecting stuff and accidentally bridging the system.

To remediate that concern I think it would be easier to just throw a 2 channel smart charger on it.
There would be conversion losses with the inverter, but with something as small as a Bluetti EB3A I imagine you could have a solar panel to keep it topped up during the day and have it slowly discharge over night.

Single battery Rivians IMO seem way easier to make robust, none of the dual output confusion to consider so any off the shelf charge controller (direct solar)or DCDC converter (buffer battery) would work with no fuss.

1 Like

HVO… thanks for the detailed information! Unfortunately, most of that is over my head, but I get the gist anyway.

I was always hesitant to bother with adding solar to the truck / GFC, as I’m not too concerned about being away from a charger for extended periods. But after reading about the VD ‘hacks’ and inefficiency of the AC inverter from the main pack, I thought this could be an easy way to offset the VD and to DC charge a separate camping battery for powering AC accessories.

Alas, I’ll probably just run as-is for now. Though I would like to figure out how to run some extra lights someday…

Anyway, thanks again!.. Stevie D.

1 Like

Small Updates in preparation for this weeks install.

Pretty confident I figured out how/where to wire in for the CHMSL to work.

I’ll be sure to document that for folks interested.

The Rivian Tailgate has a gooseneck swing out, so it can be a little unruly trying to close it from the bed space.

Also, the R1T has notoriously had a very fragile tailgate top edge.
Mine has been held on with bubblegum and paperclips for about a year, when I was working on this project:
IMG_1340

It is a boat ladder that is recessed and collapses into the void of the tailgate, like a DIY F150 Step.
Now that the bed is becoming living space, I’ll have to finish this project.

In the meantime, I added a rivnut to the tailgate so I had a point I could attach a mount point. One $10 “Padded Traffic Loop Dog Leash” later I have a convenient and removable handle to close the tailgate now.
IMG_1852
IMG_1854

I also got around to writing in some ditch lights.
3C2EBC5D-6CCF-41F8-9A82-AEA563EEEA78

I keep on seeing really positive feedback on the Baja LP6 clones that Harbor Freight made
I am thinking I may make a roof light bar out of them.
We’ll see what happens once I get my camper mounted and just how much space I have to play with up top.

I’m sharing this a few places, hopefully it’ll help future GFC Rivian owners.

Wiring the rear brake light:

Step one
Remove the rear seat bench
it is held in with two 15mm bolts under the headrests, on bolt on the bottom middle (15mm ) and one nut centered under each passenger back area (15mm as well)

Rivian R1T R1S Go Fast Camper for R1T Announced IMG_1879

don’t forget to unplug the two white plugs behind the seats.
Once removed, pull the small kick/ sill plate from the driver side floor

Rivian R1T R1S Go Fast Camper for R1T Announced IMG_1885

peel up the next two trim pieces, the dark grey going up the side and the lower headliner piece that matches your interior and has the seat belt passing through

In the loom locate the plain green and plain black wire (black wire is smaller 22awg)

Rivian R1T R1S Go Fast Camper for R1T Announced IMG_1874

verify it is the plain green and not the stopped green

this is the chsml pair

I tapped into the wires using a positap
Highly recommend
You can get them at O’Reilly or Amazon

Rivian R1T R1S Go Fast Camper for R1T Announced IMG_1873

In the truck bed remove the rear plastic panel it is held in with 8 M6 (10mm socket) bolts that are hidden under the plastic circles

once pulled you can see the tonneau stack if you have it and a few grommets

I don’t have a tonneau so I used the higher location to not have to fiddle with the sliding over the gear tunnel

Rivian R1T R1S Go Fast Camper for R1T Announced IMG_1880

you can use the lower grommet and fish any wire around the felt of the gear tunnel and out the space behind the passenger seat

Drill a hole in the plastic piece in the location of you liking, or figure out a seam to tuck the wires through if you are nervous about drilling

I don’t like pinching wires so I went the hole drilling route and will use a weatherproof mini box as I have other cables using this area to run power

Rivian R1T R1S Go Fast Camper for R1T Announced IMG_1881

hook up the lights to the provided pigtail (gfc came with some positaps, which I moved to the splice location, and then used the twist connectors to connect the short length of jump wire needed

Rivian R1T R1S Go Fast Camper for R1T Announced IMG_1884

that’s it!
It works

Rivian R1T R1S Go Fast Camper for R1T Announced IMG_1875

No extra sensors or modules to burn out
No false trigger of trailer mode
No issues with turn signal behavior

it just works.

1 Like