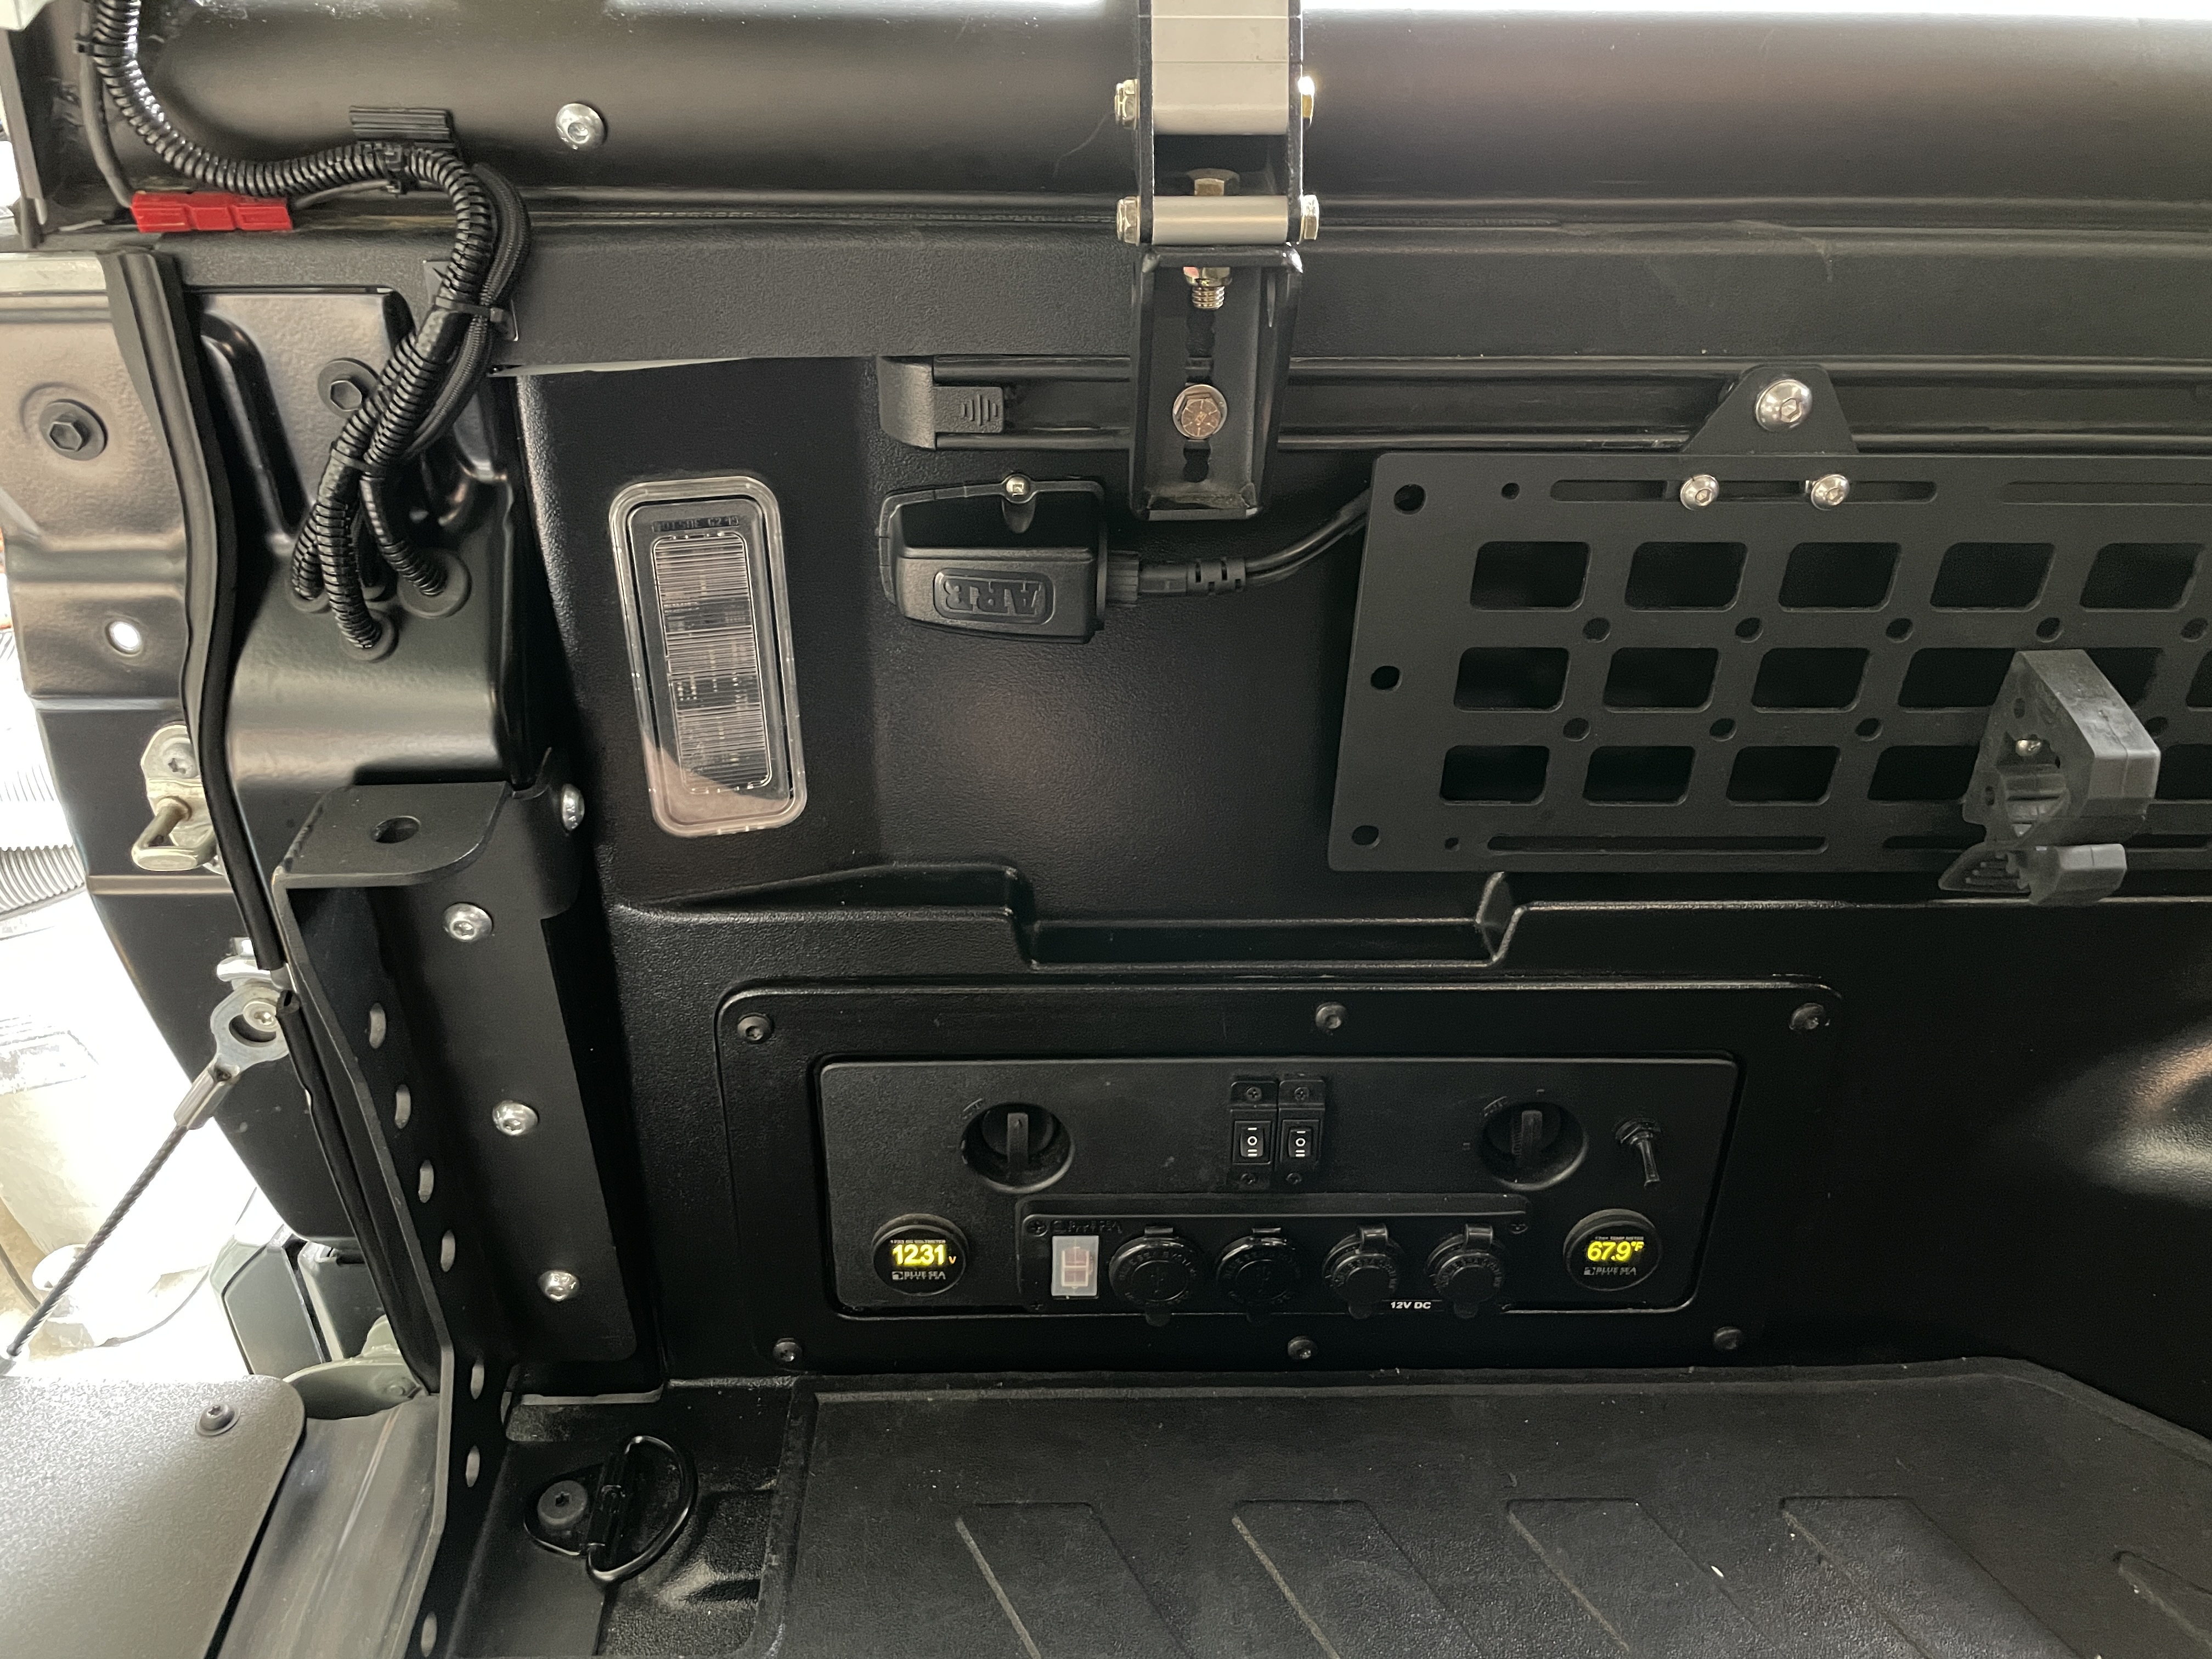
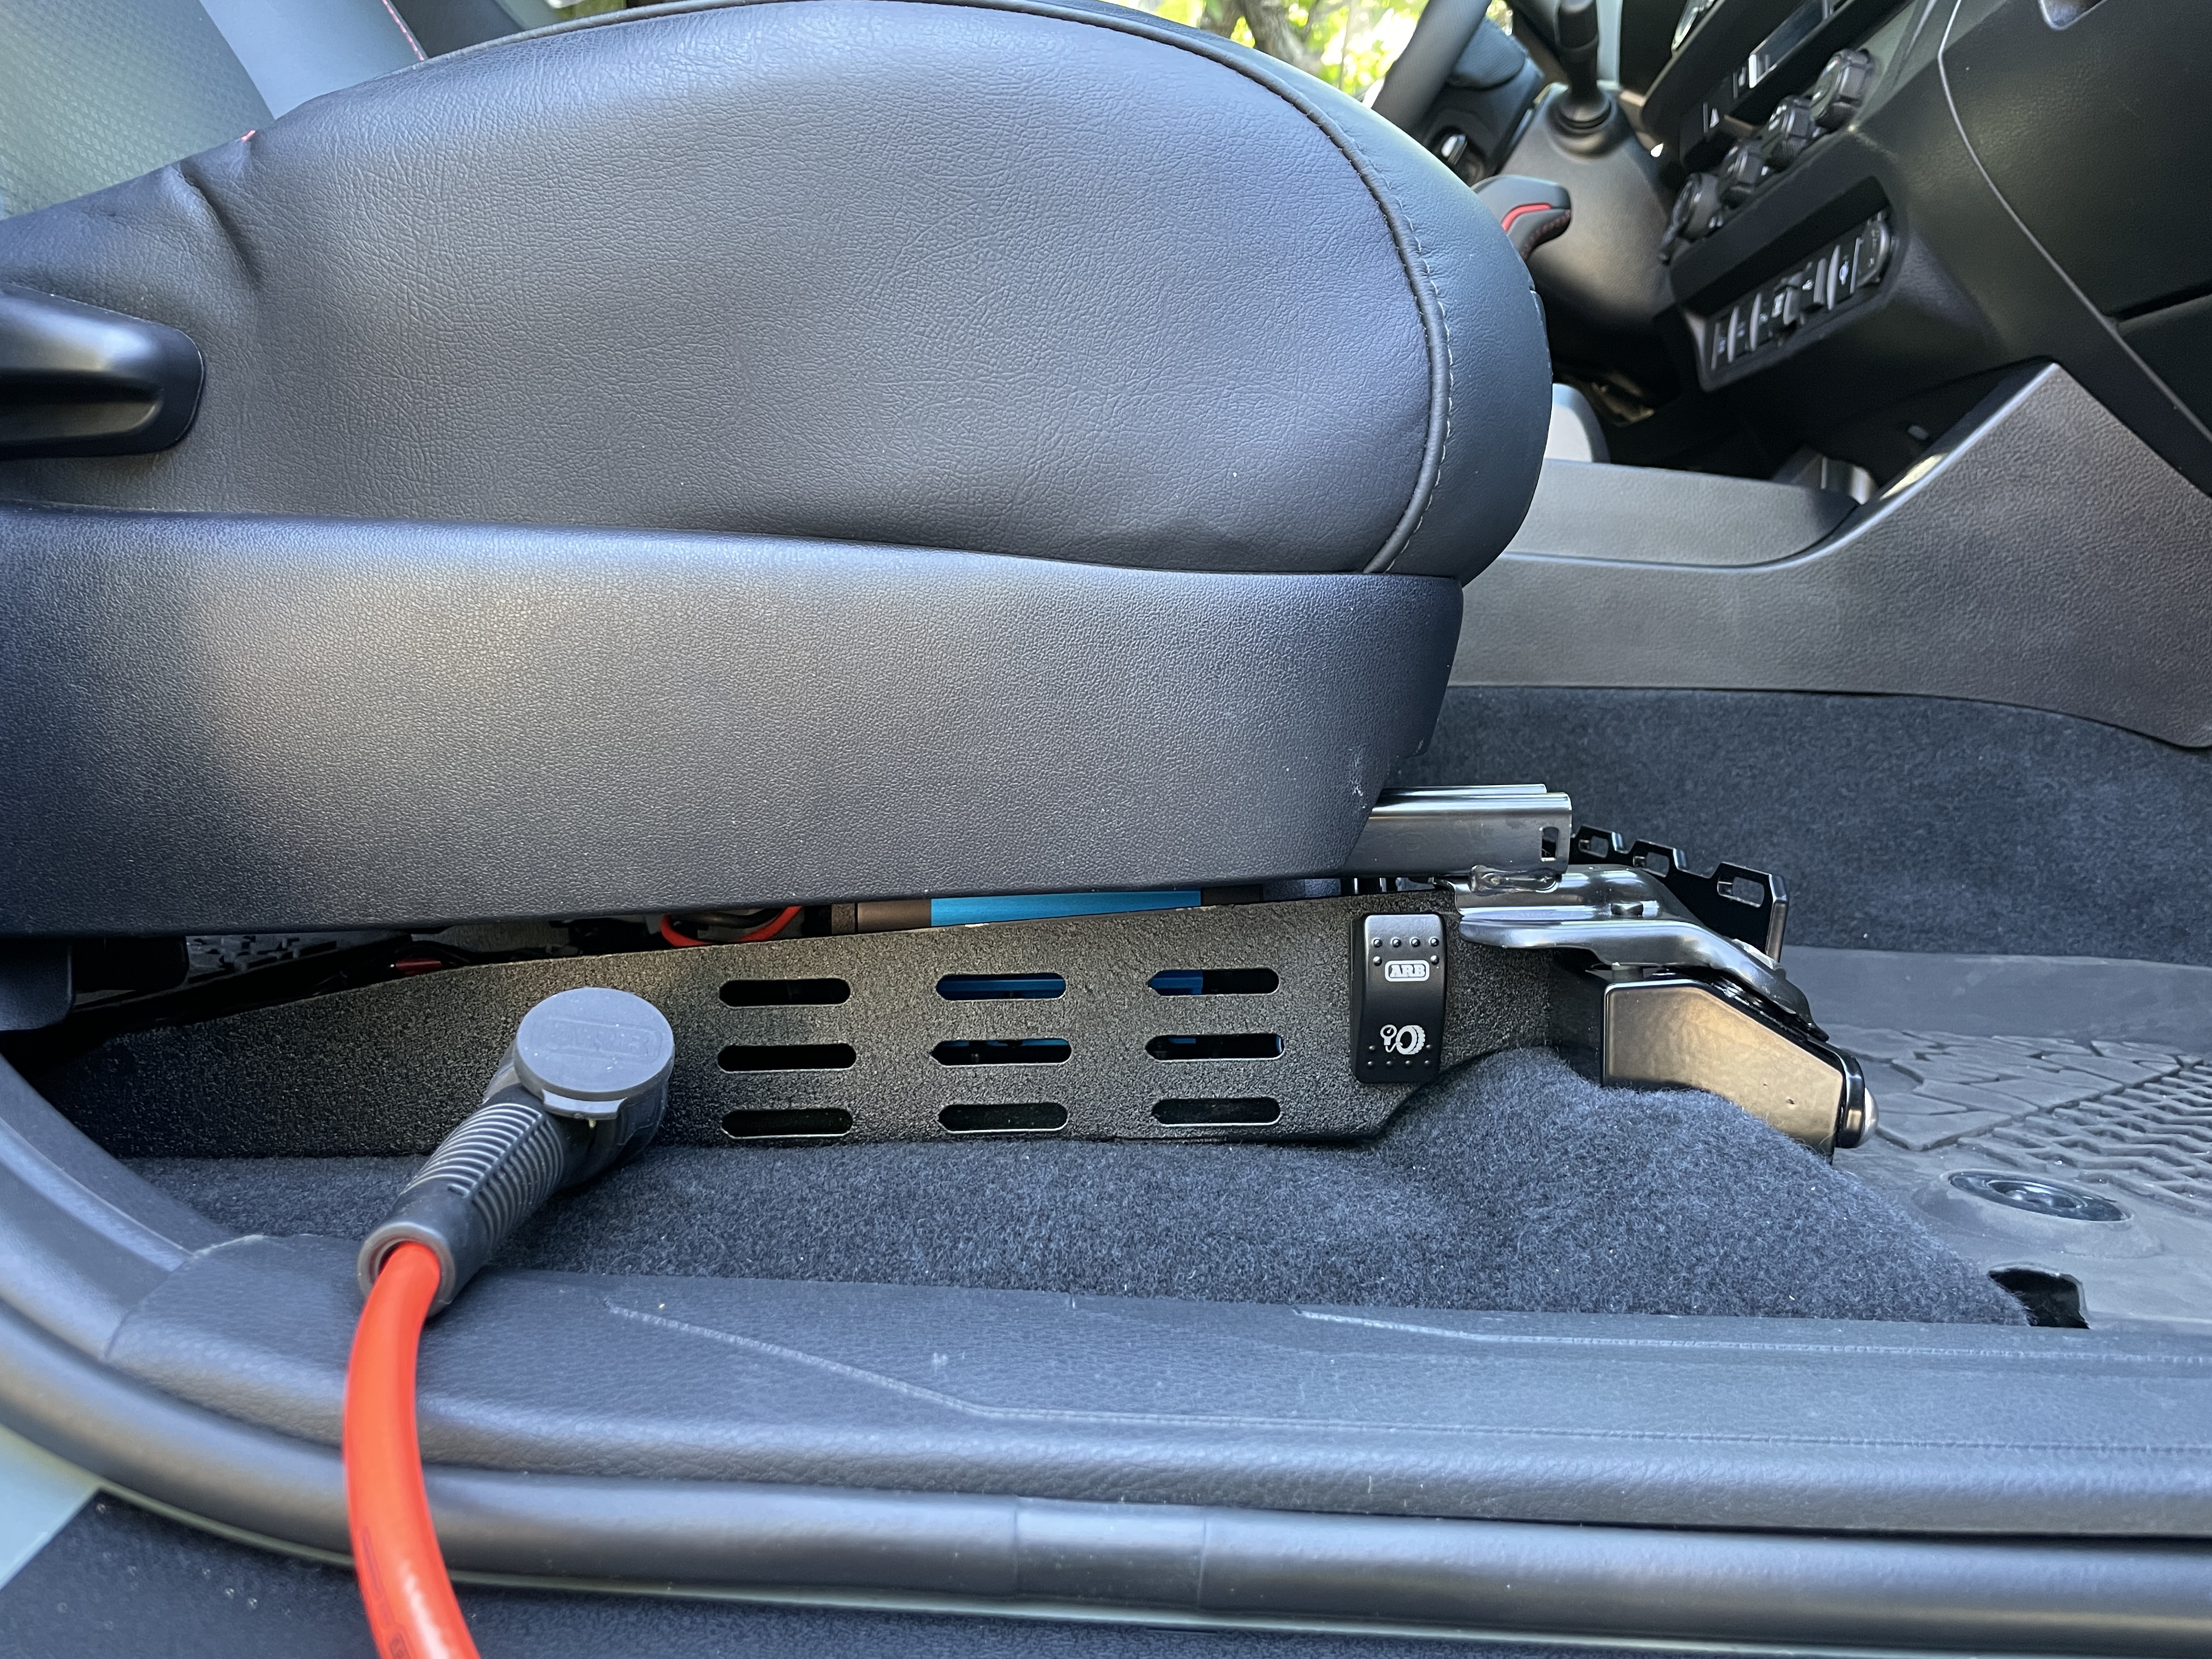
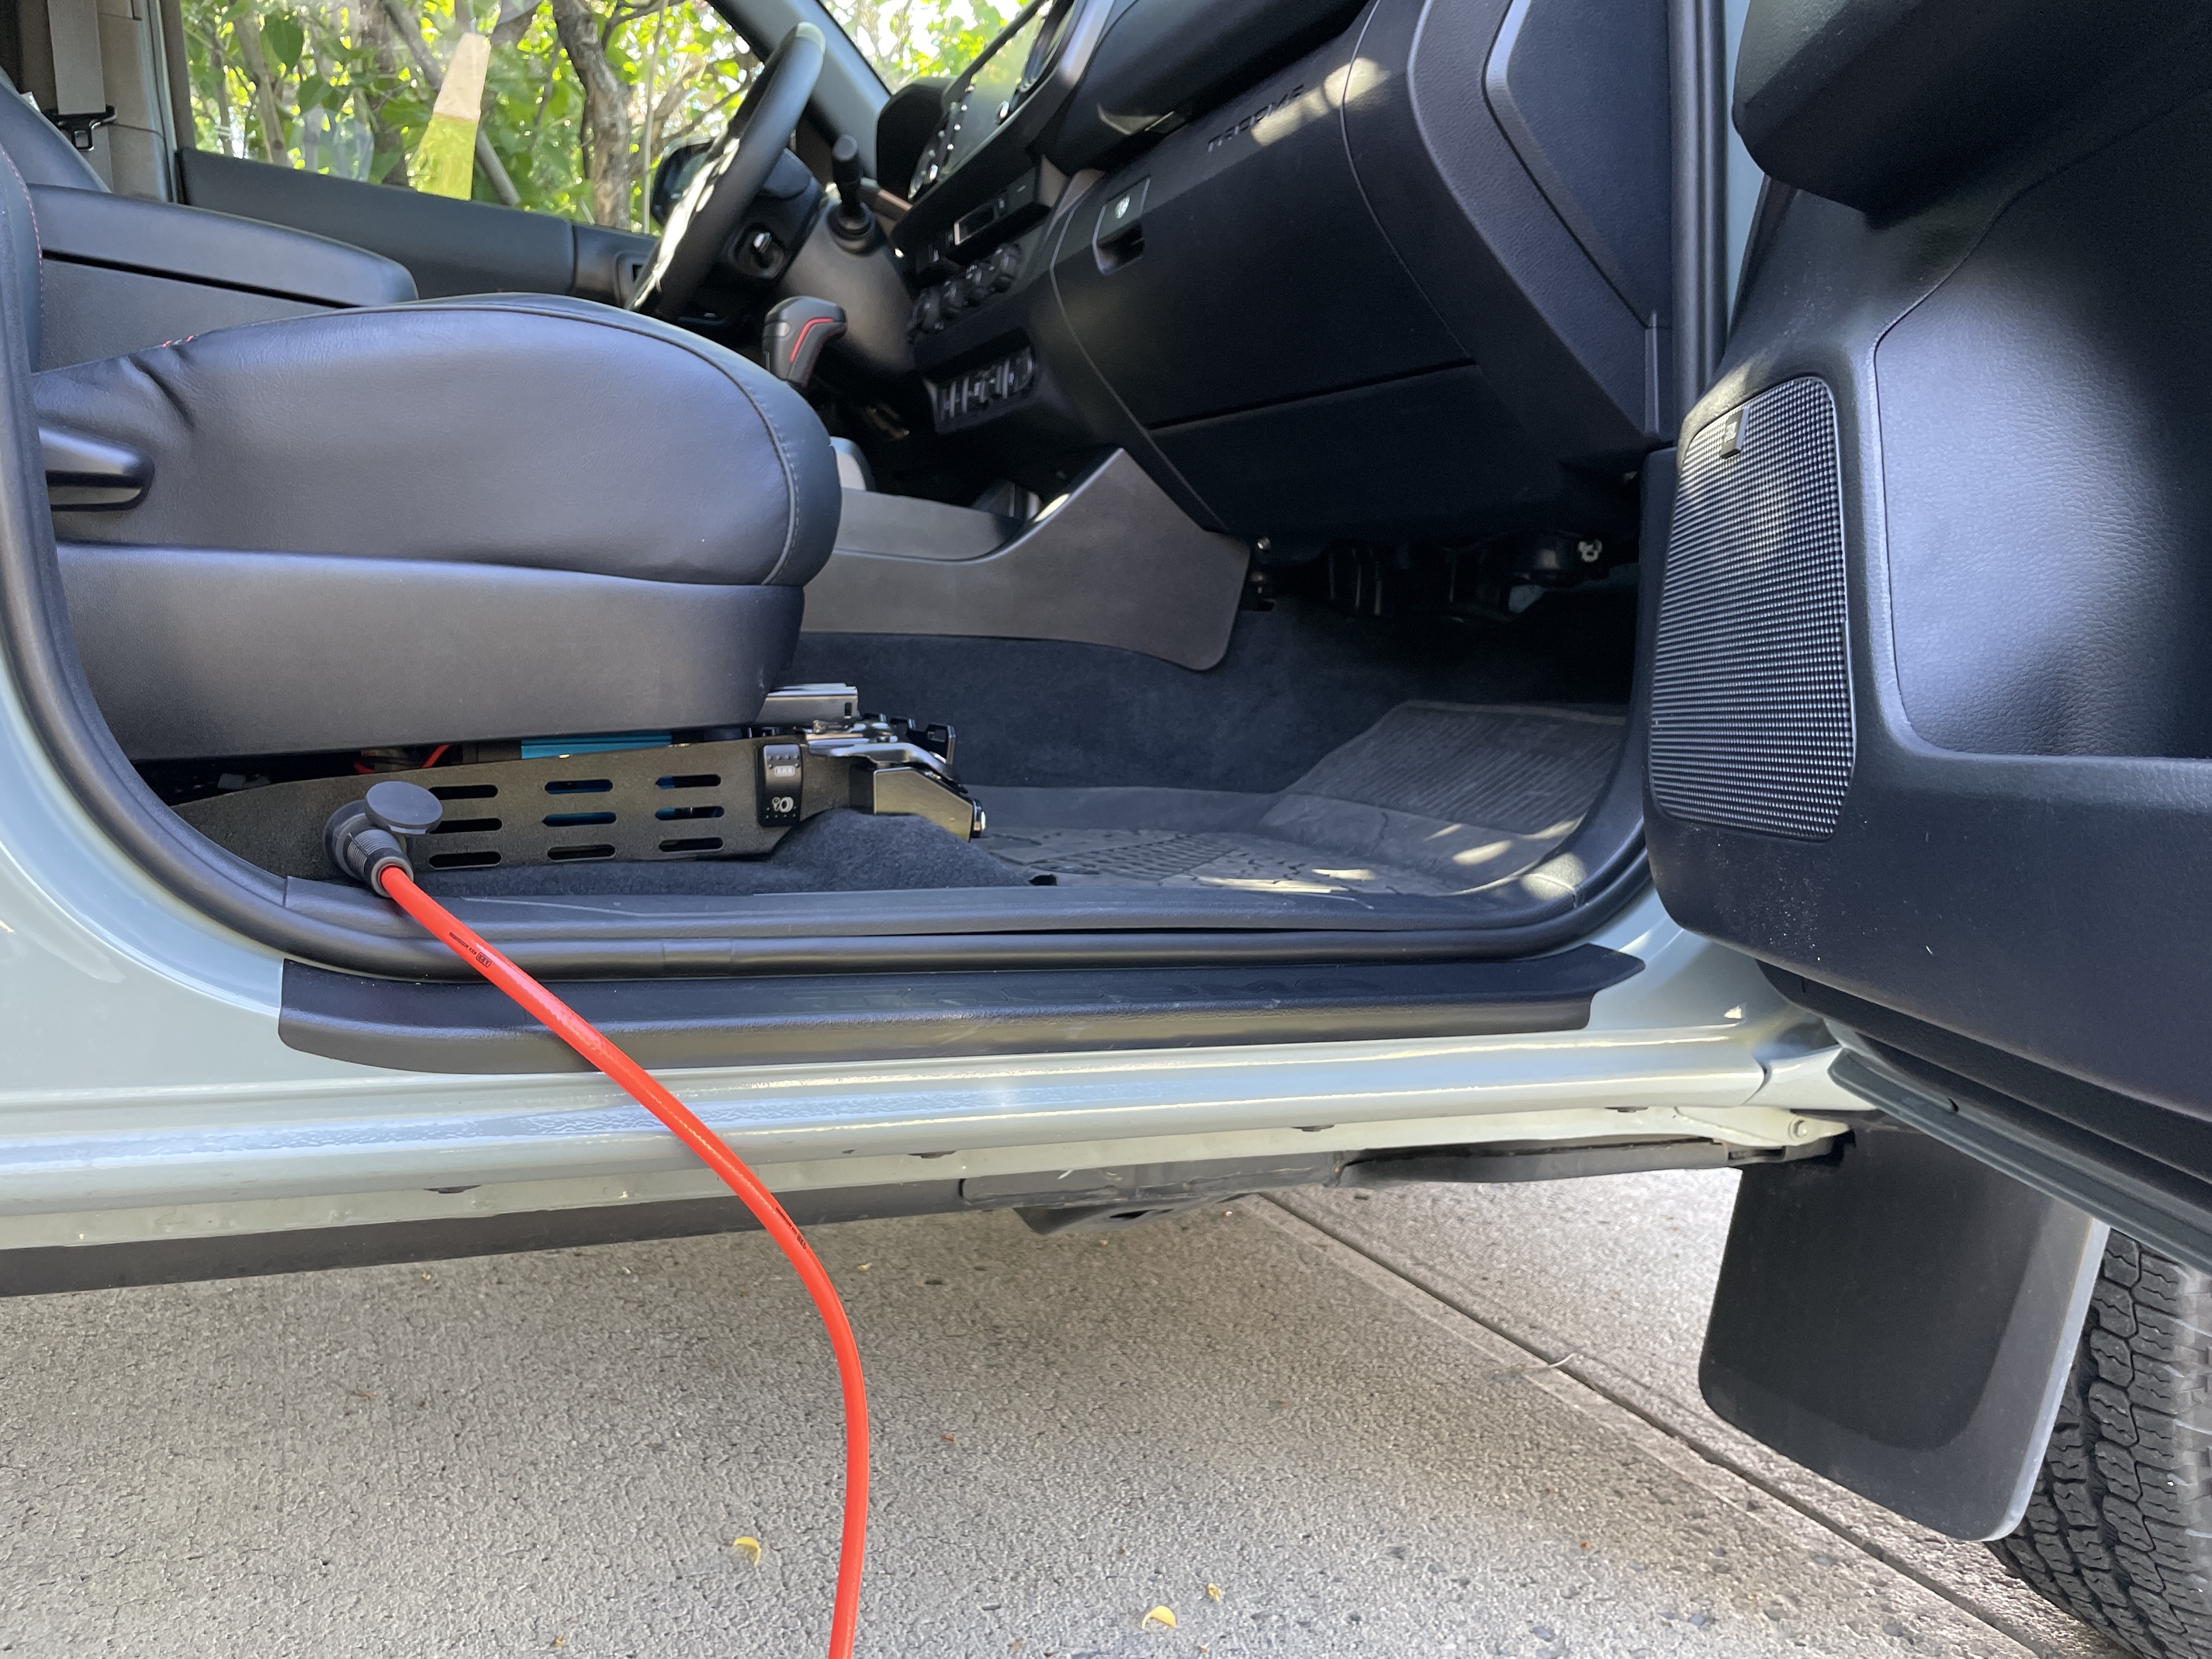
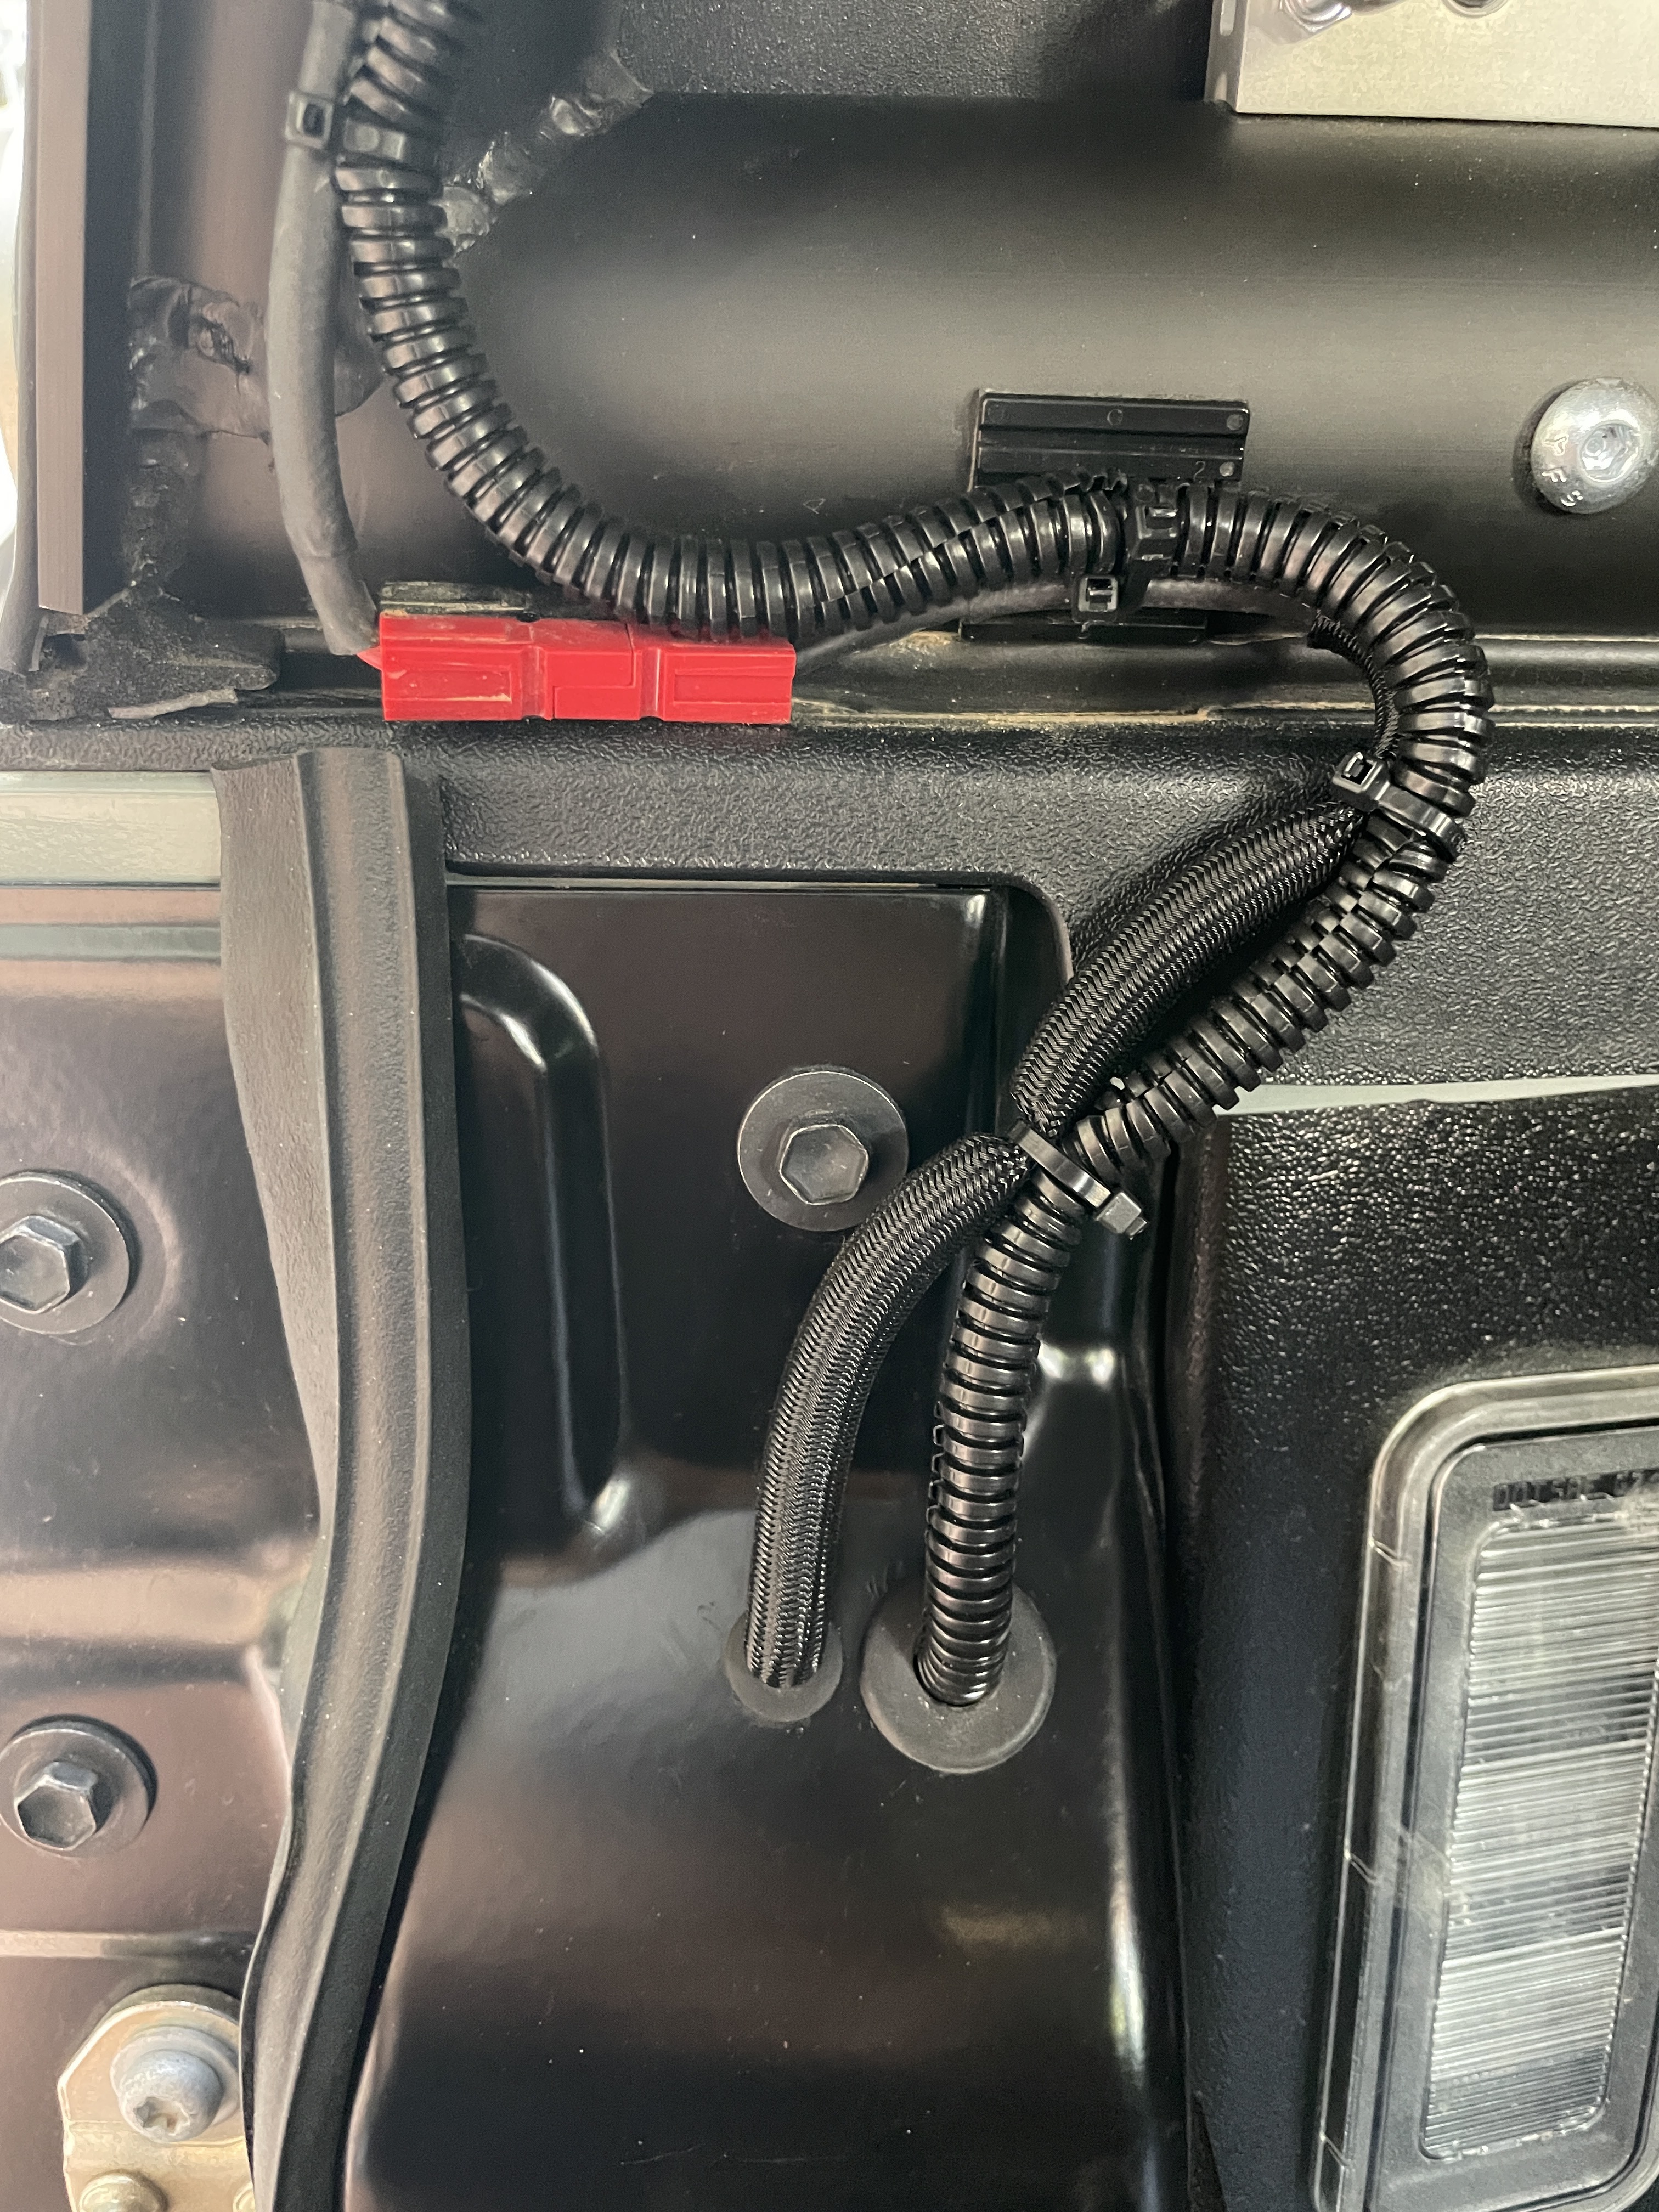
• I tapped into the middle console USB port for ignition/switch power (The loose red wire in photo)
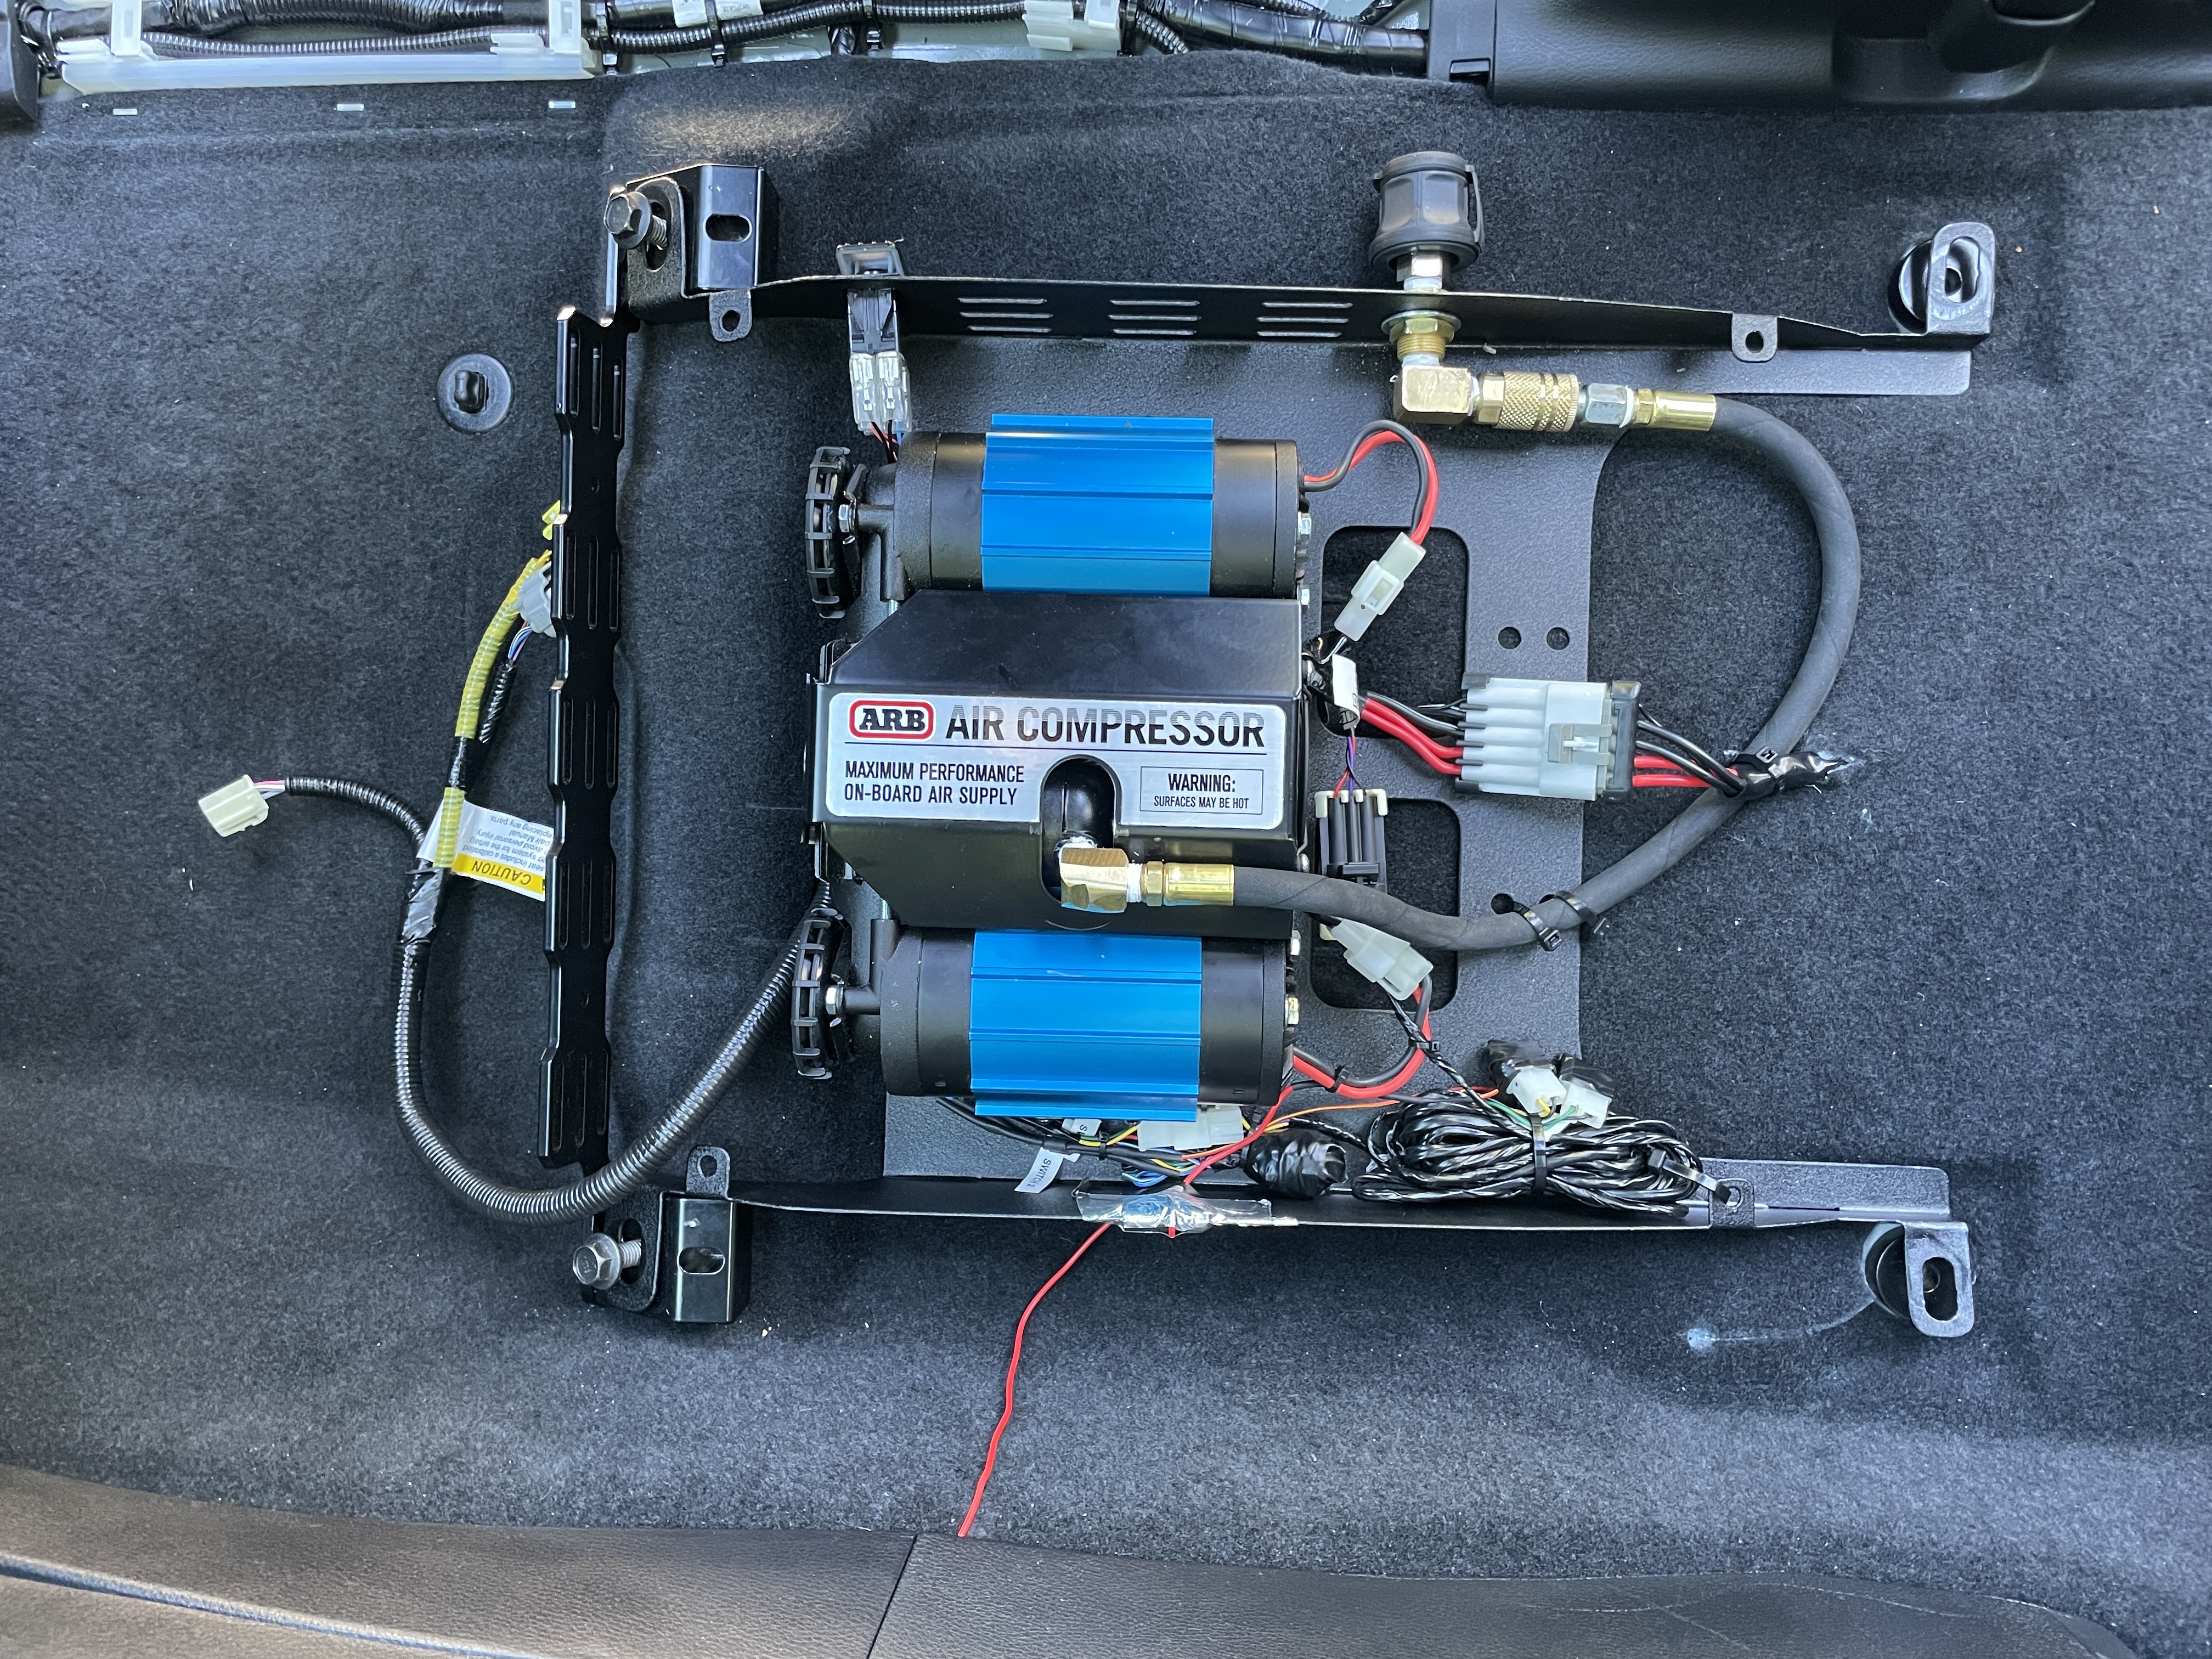
• I ran the ARB Up Down Air Extension Harness under the truck into the engine bay to power the compressor itself.
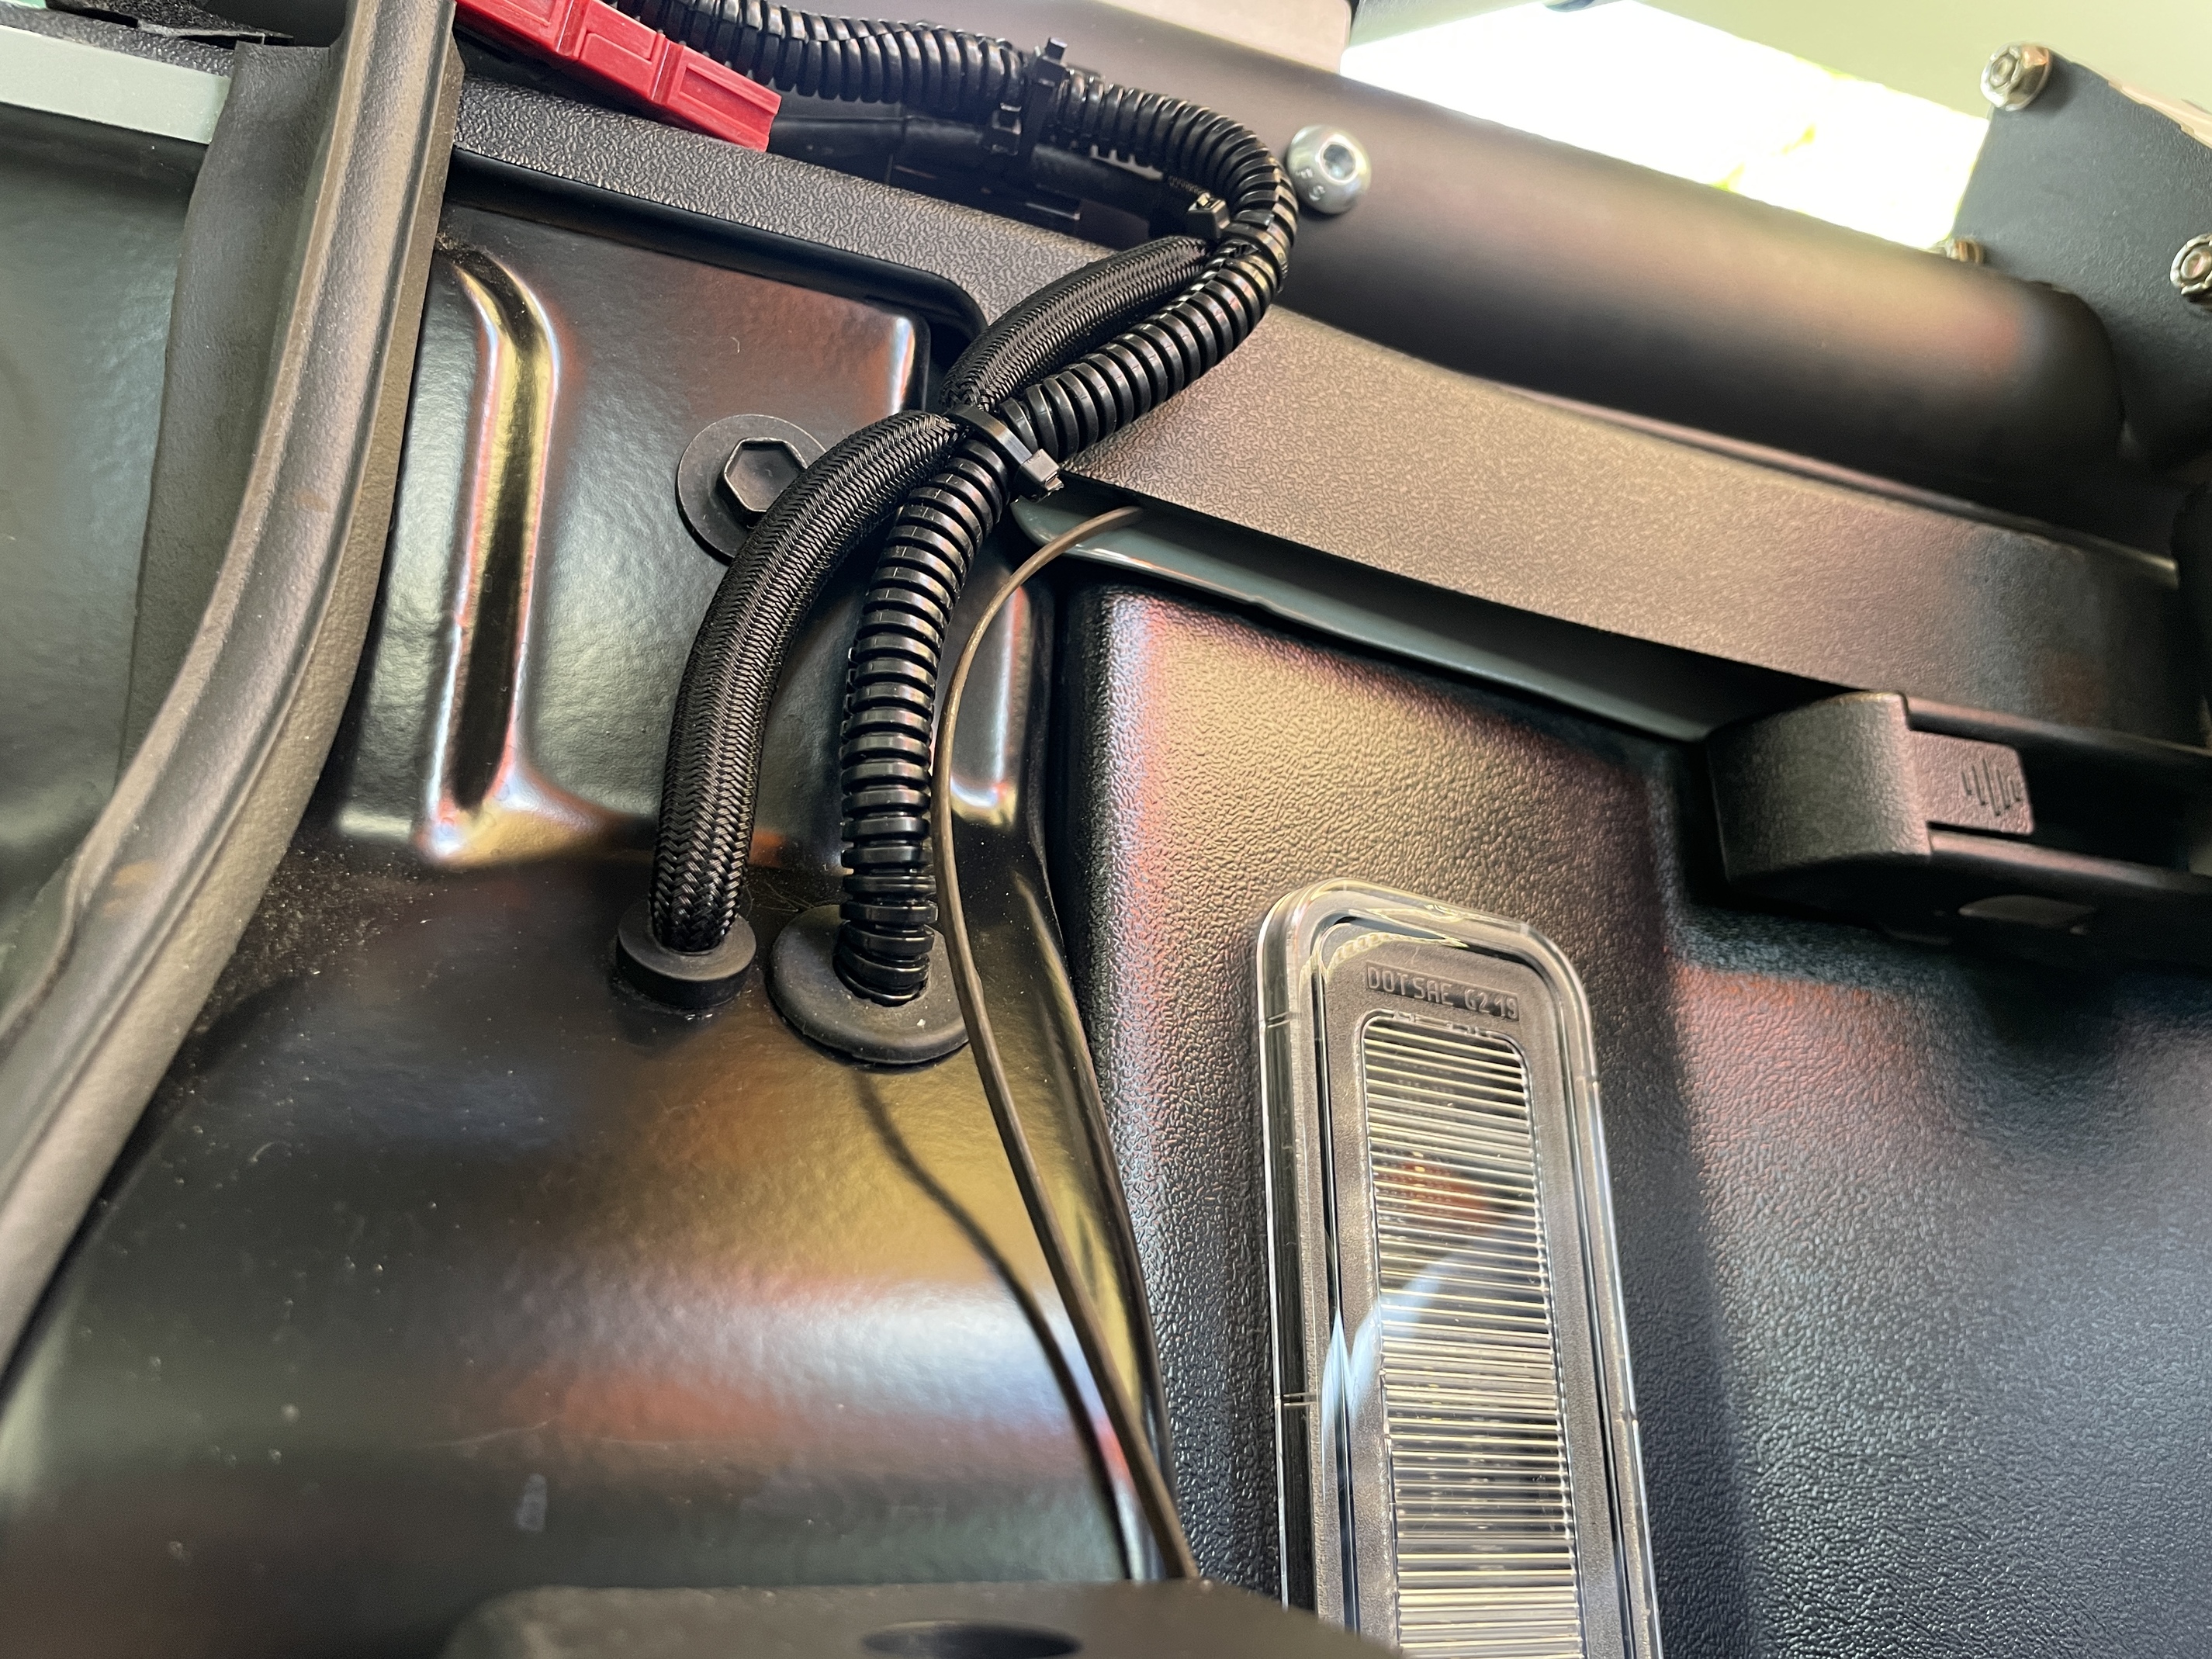
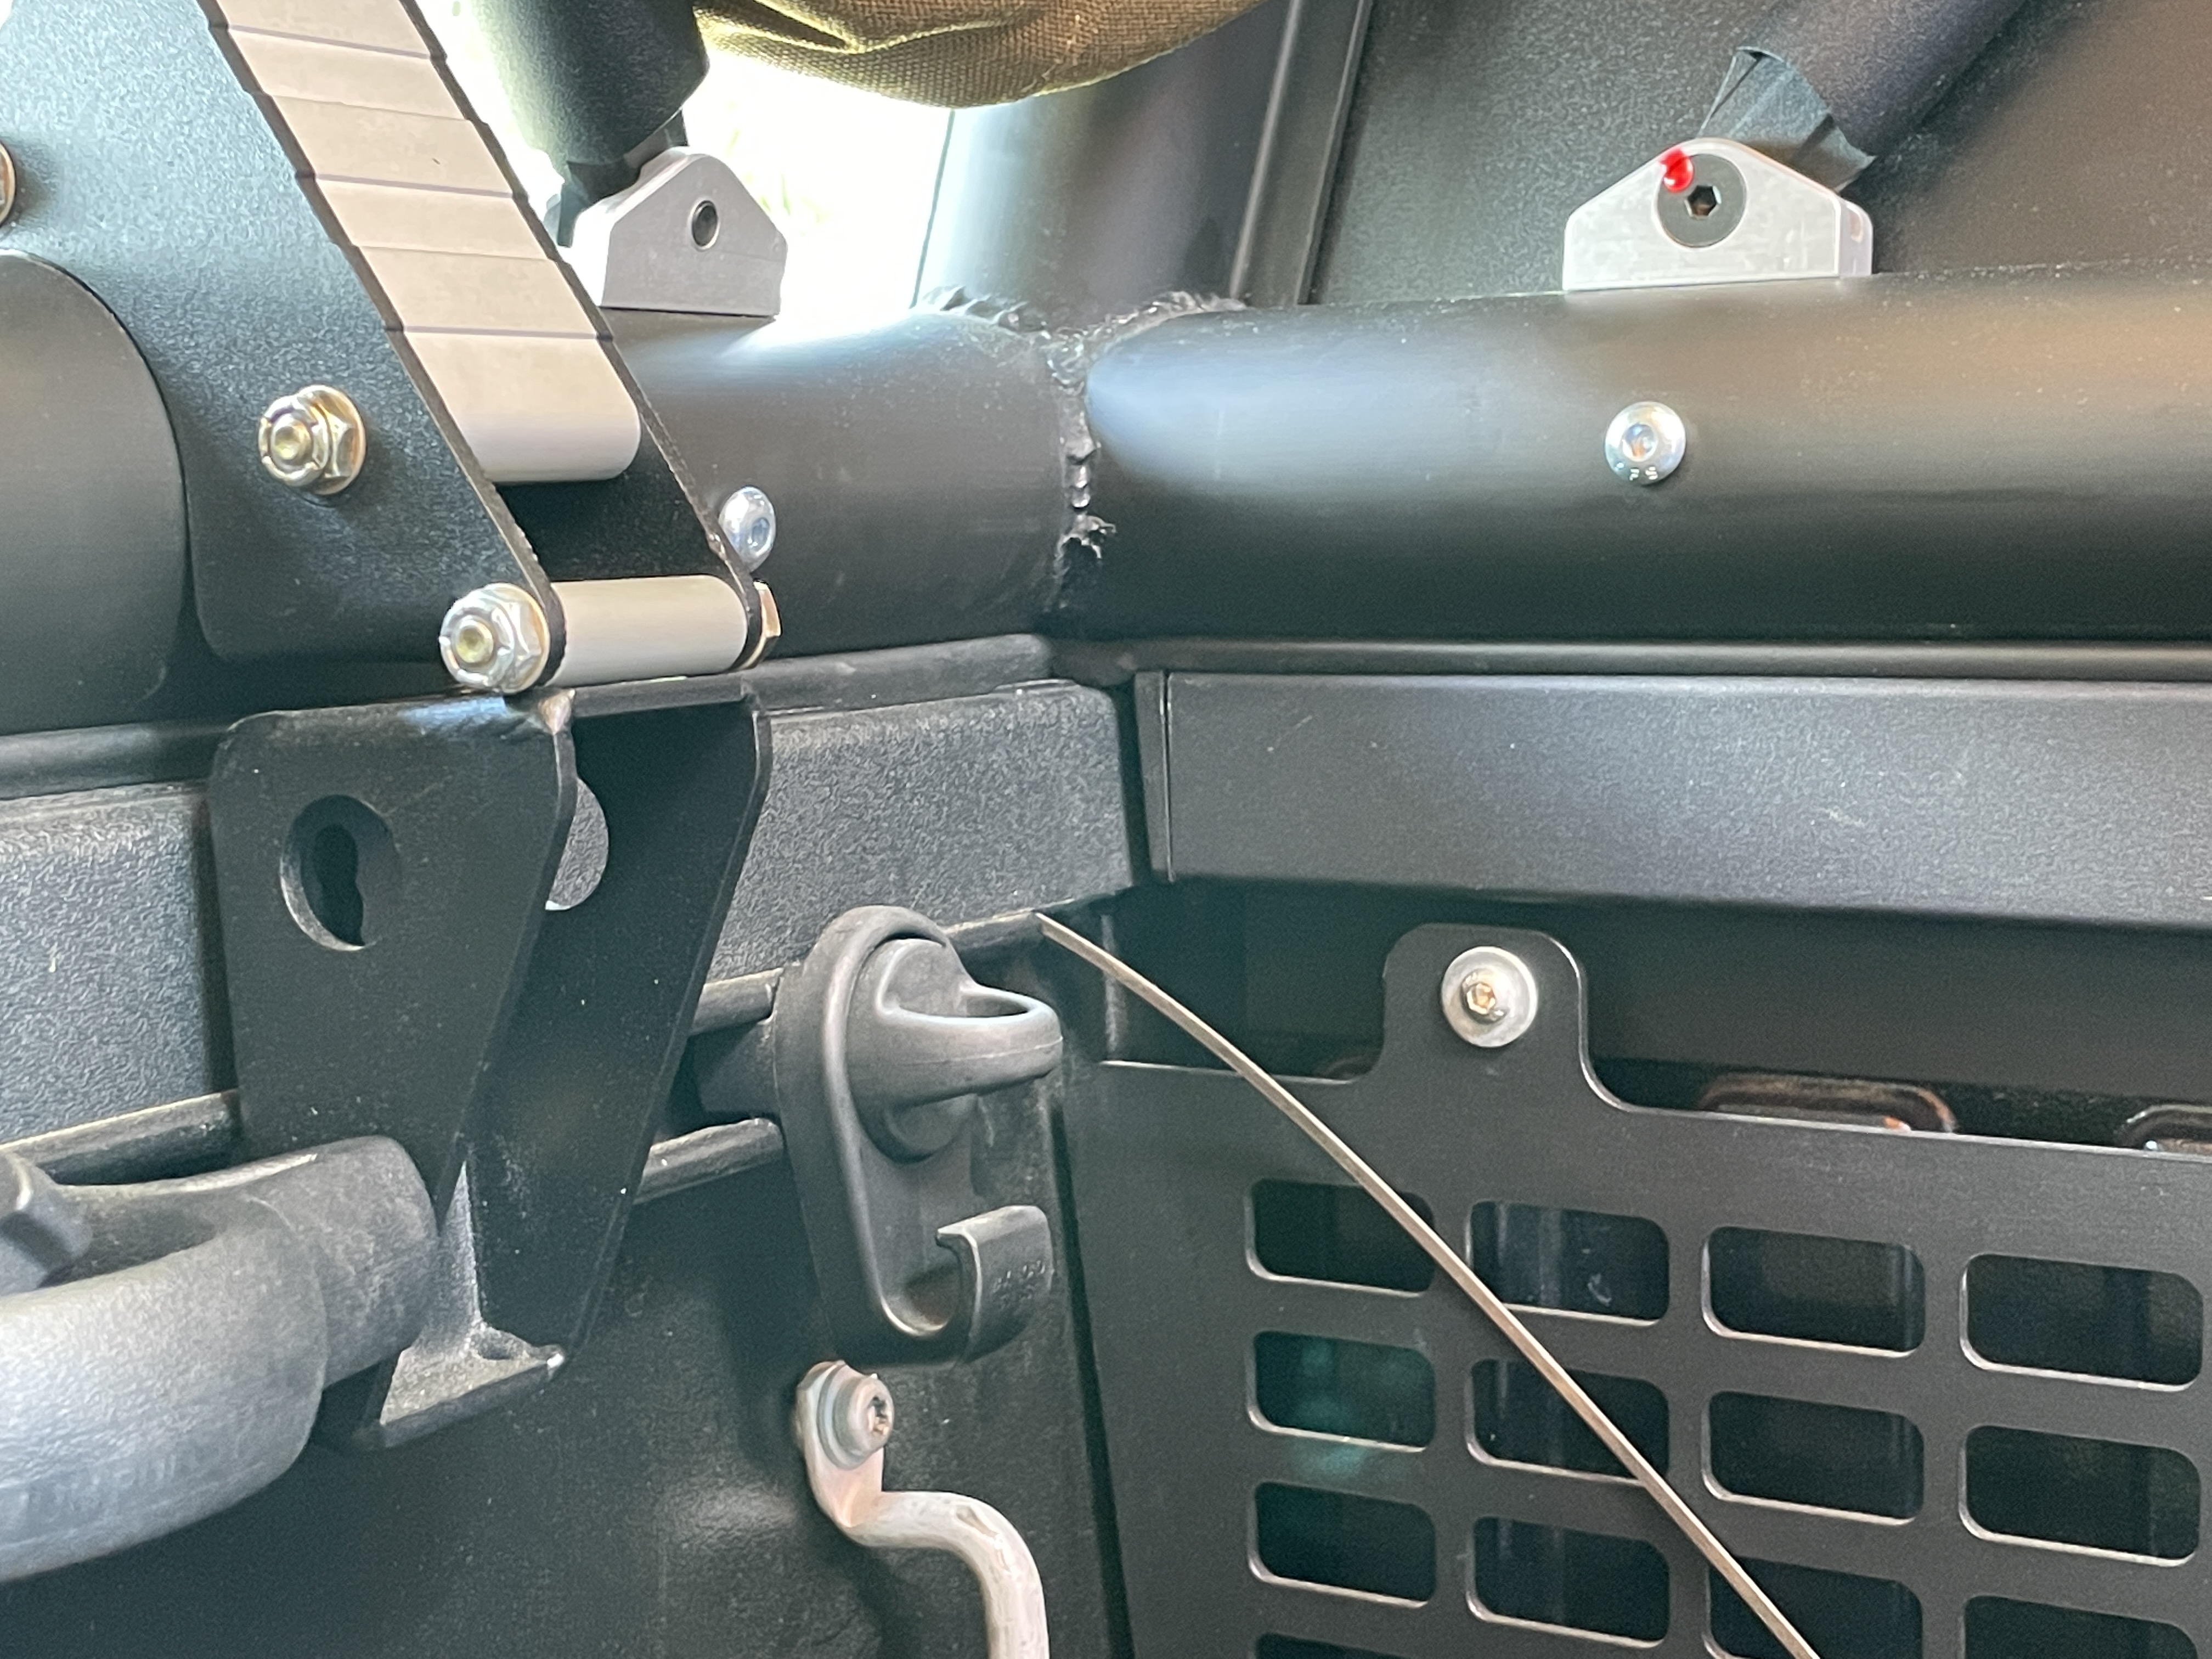
• There’s an unused grommet under the carpet near the rear of the passenger seat that you can pass the extension harness through. Once you’re under truck there is an exisiting wiring harness right there to follow on the inside of the frame all the way into the engine bay (I think it’s the backup camera harness? Not sure.) I followed the same protocol as the under truck harness I ran on the driver side. Insulated wire, fully wrapped in automative loom, then fully wrapped in heat reflective automative tape.
• Everything else I just taped and zipped tied up off to the side since I’m not running air lockers.
Really happy with how clean (and factory looking) this setup is!
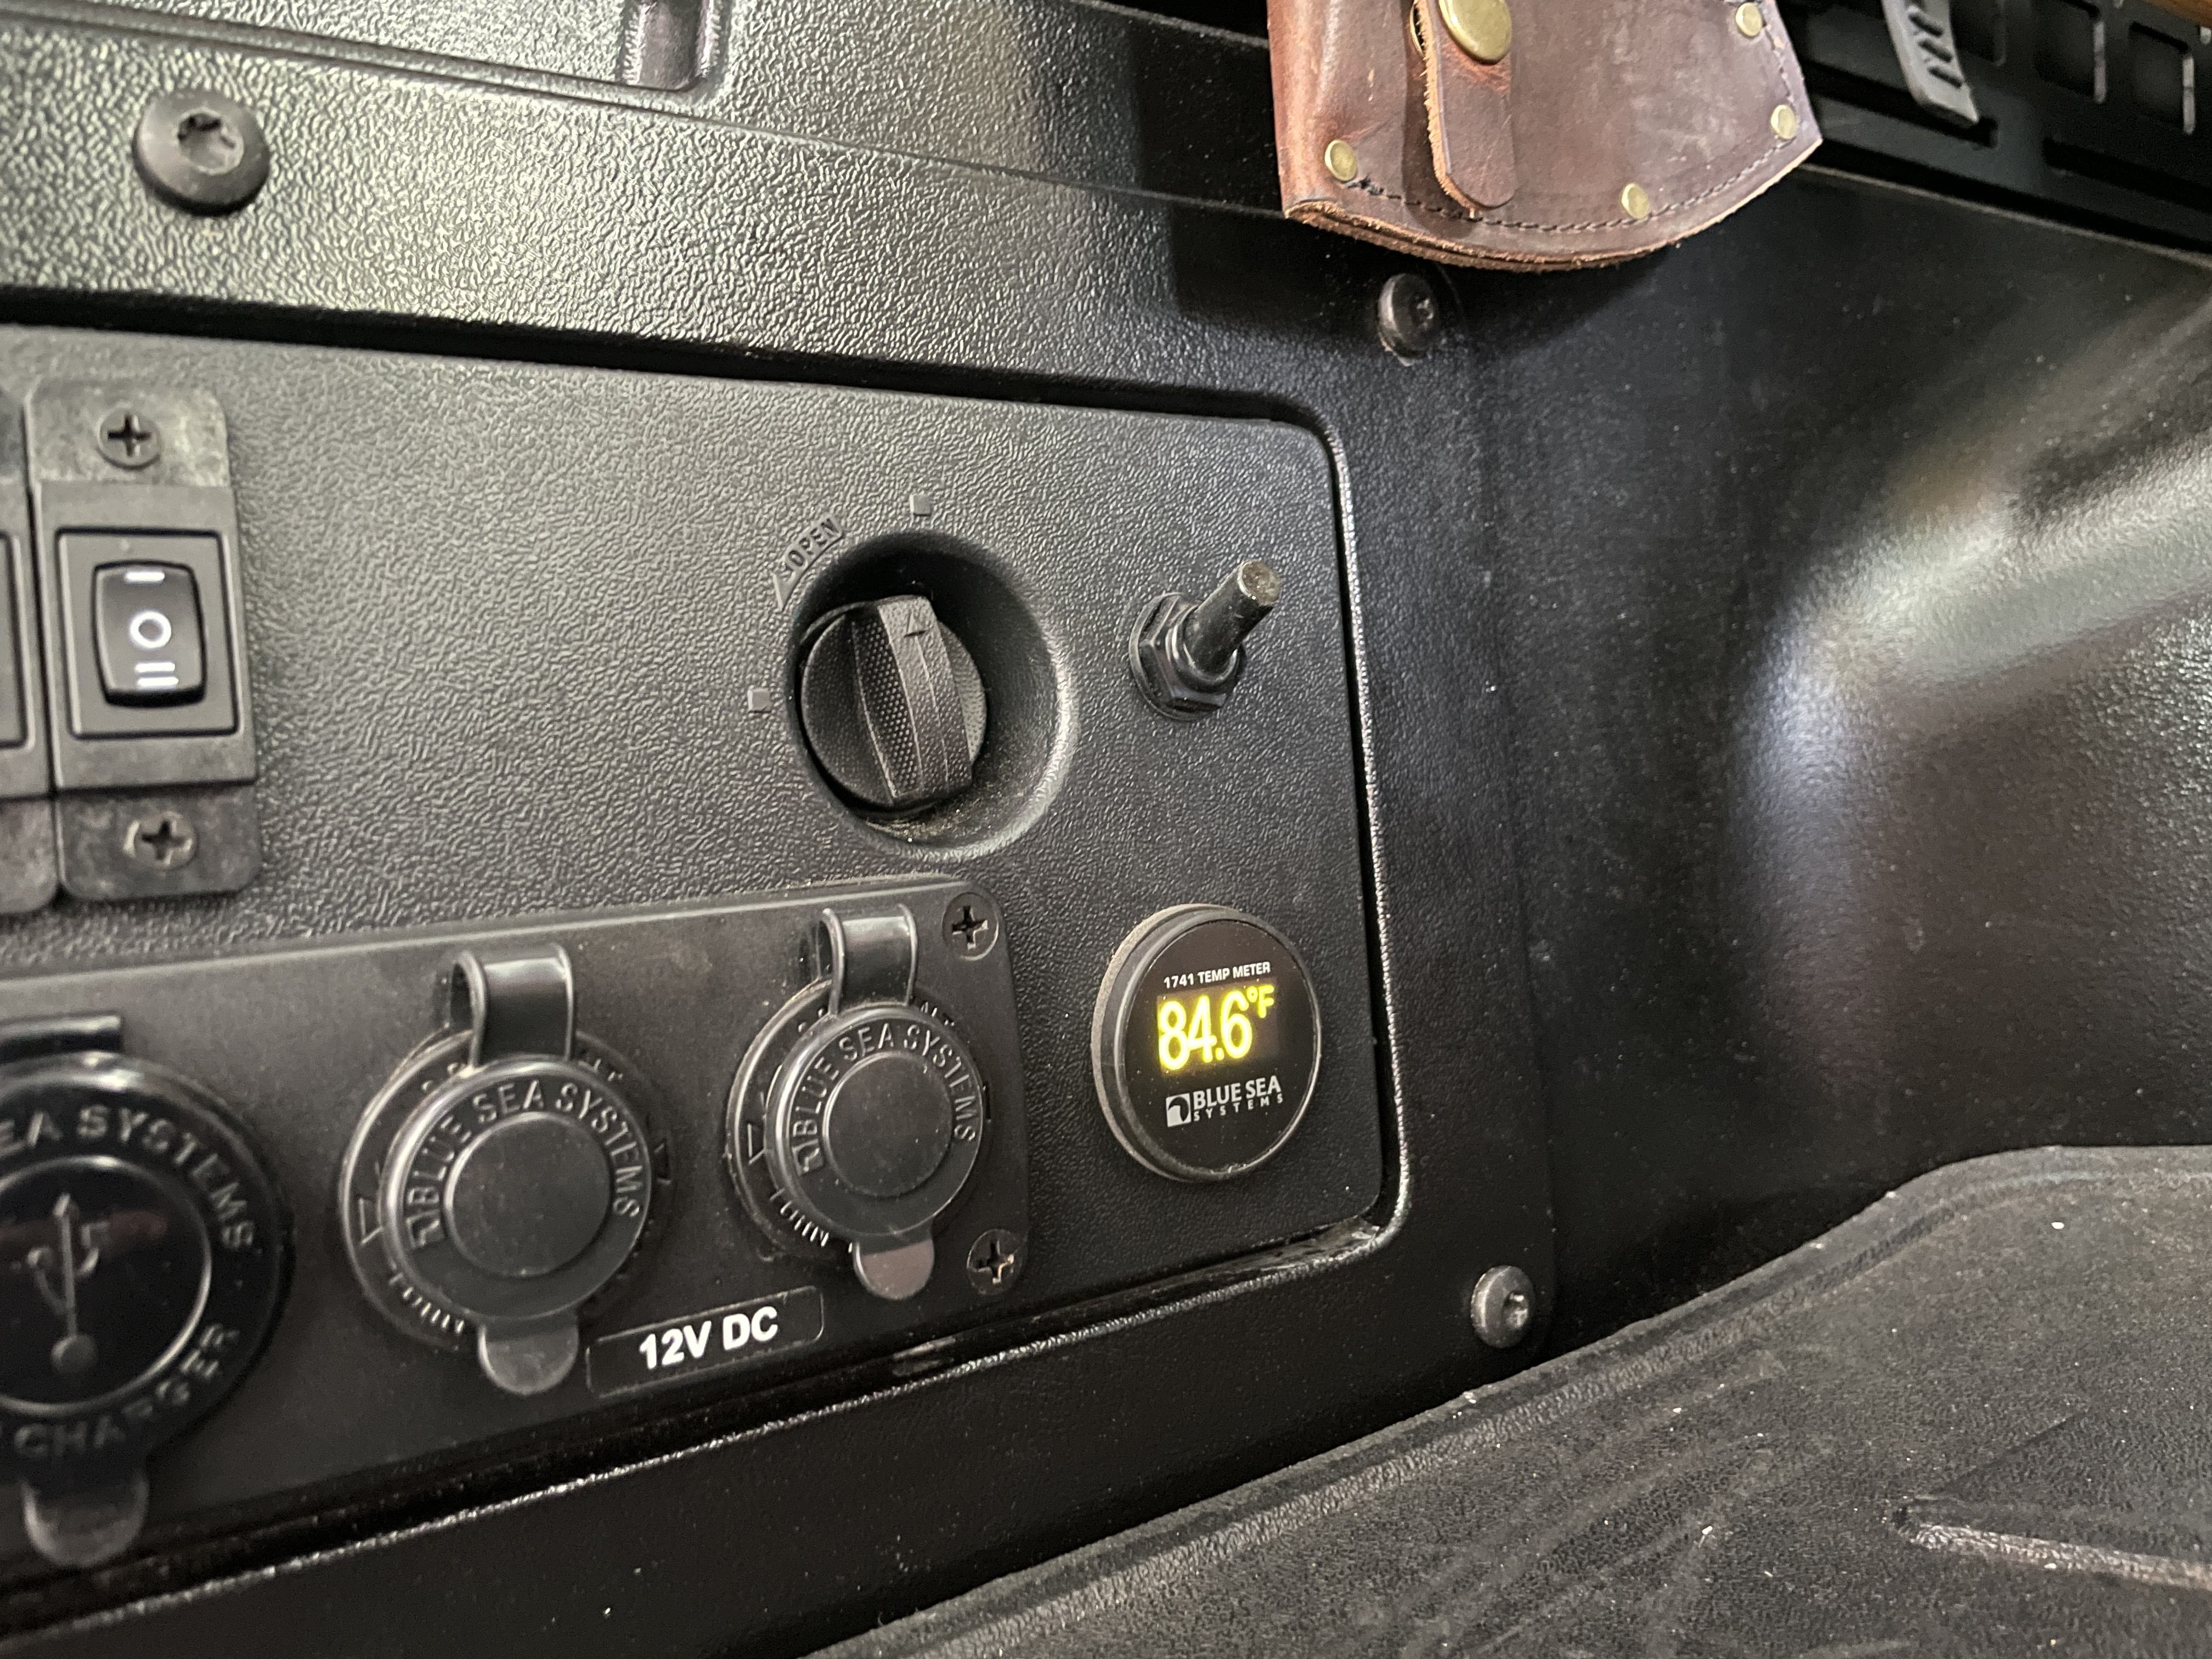
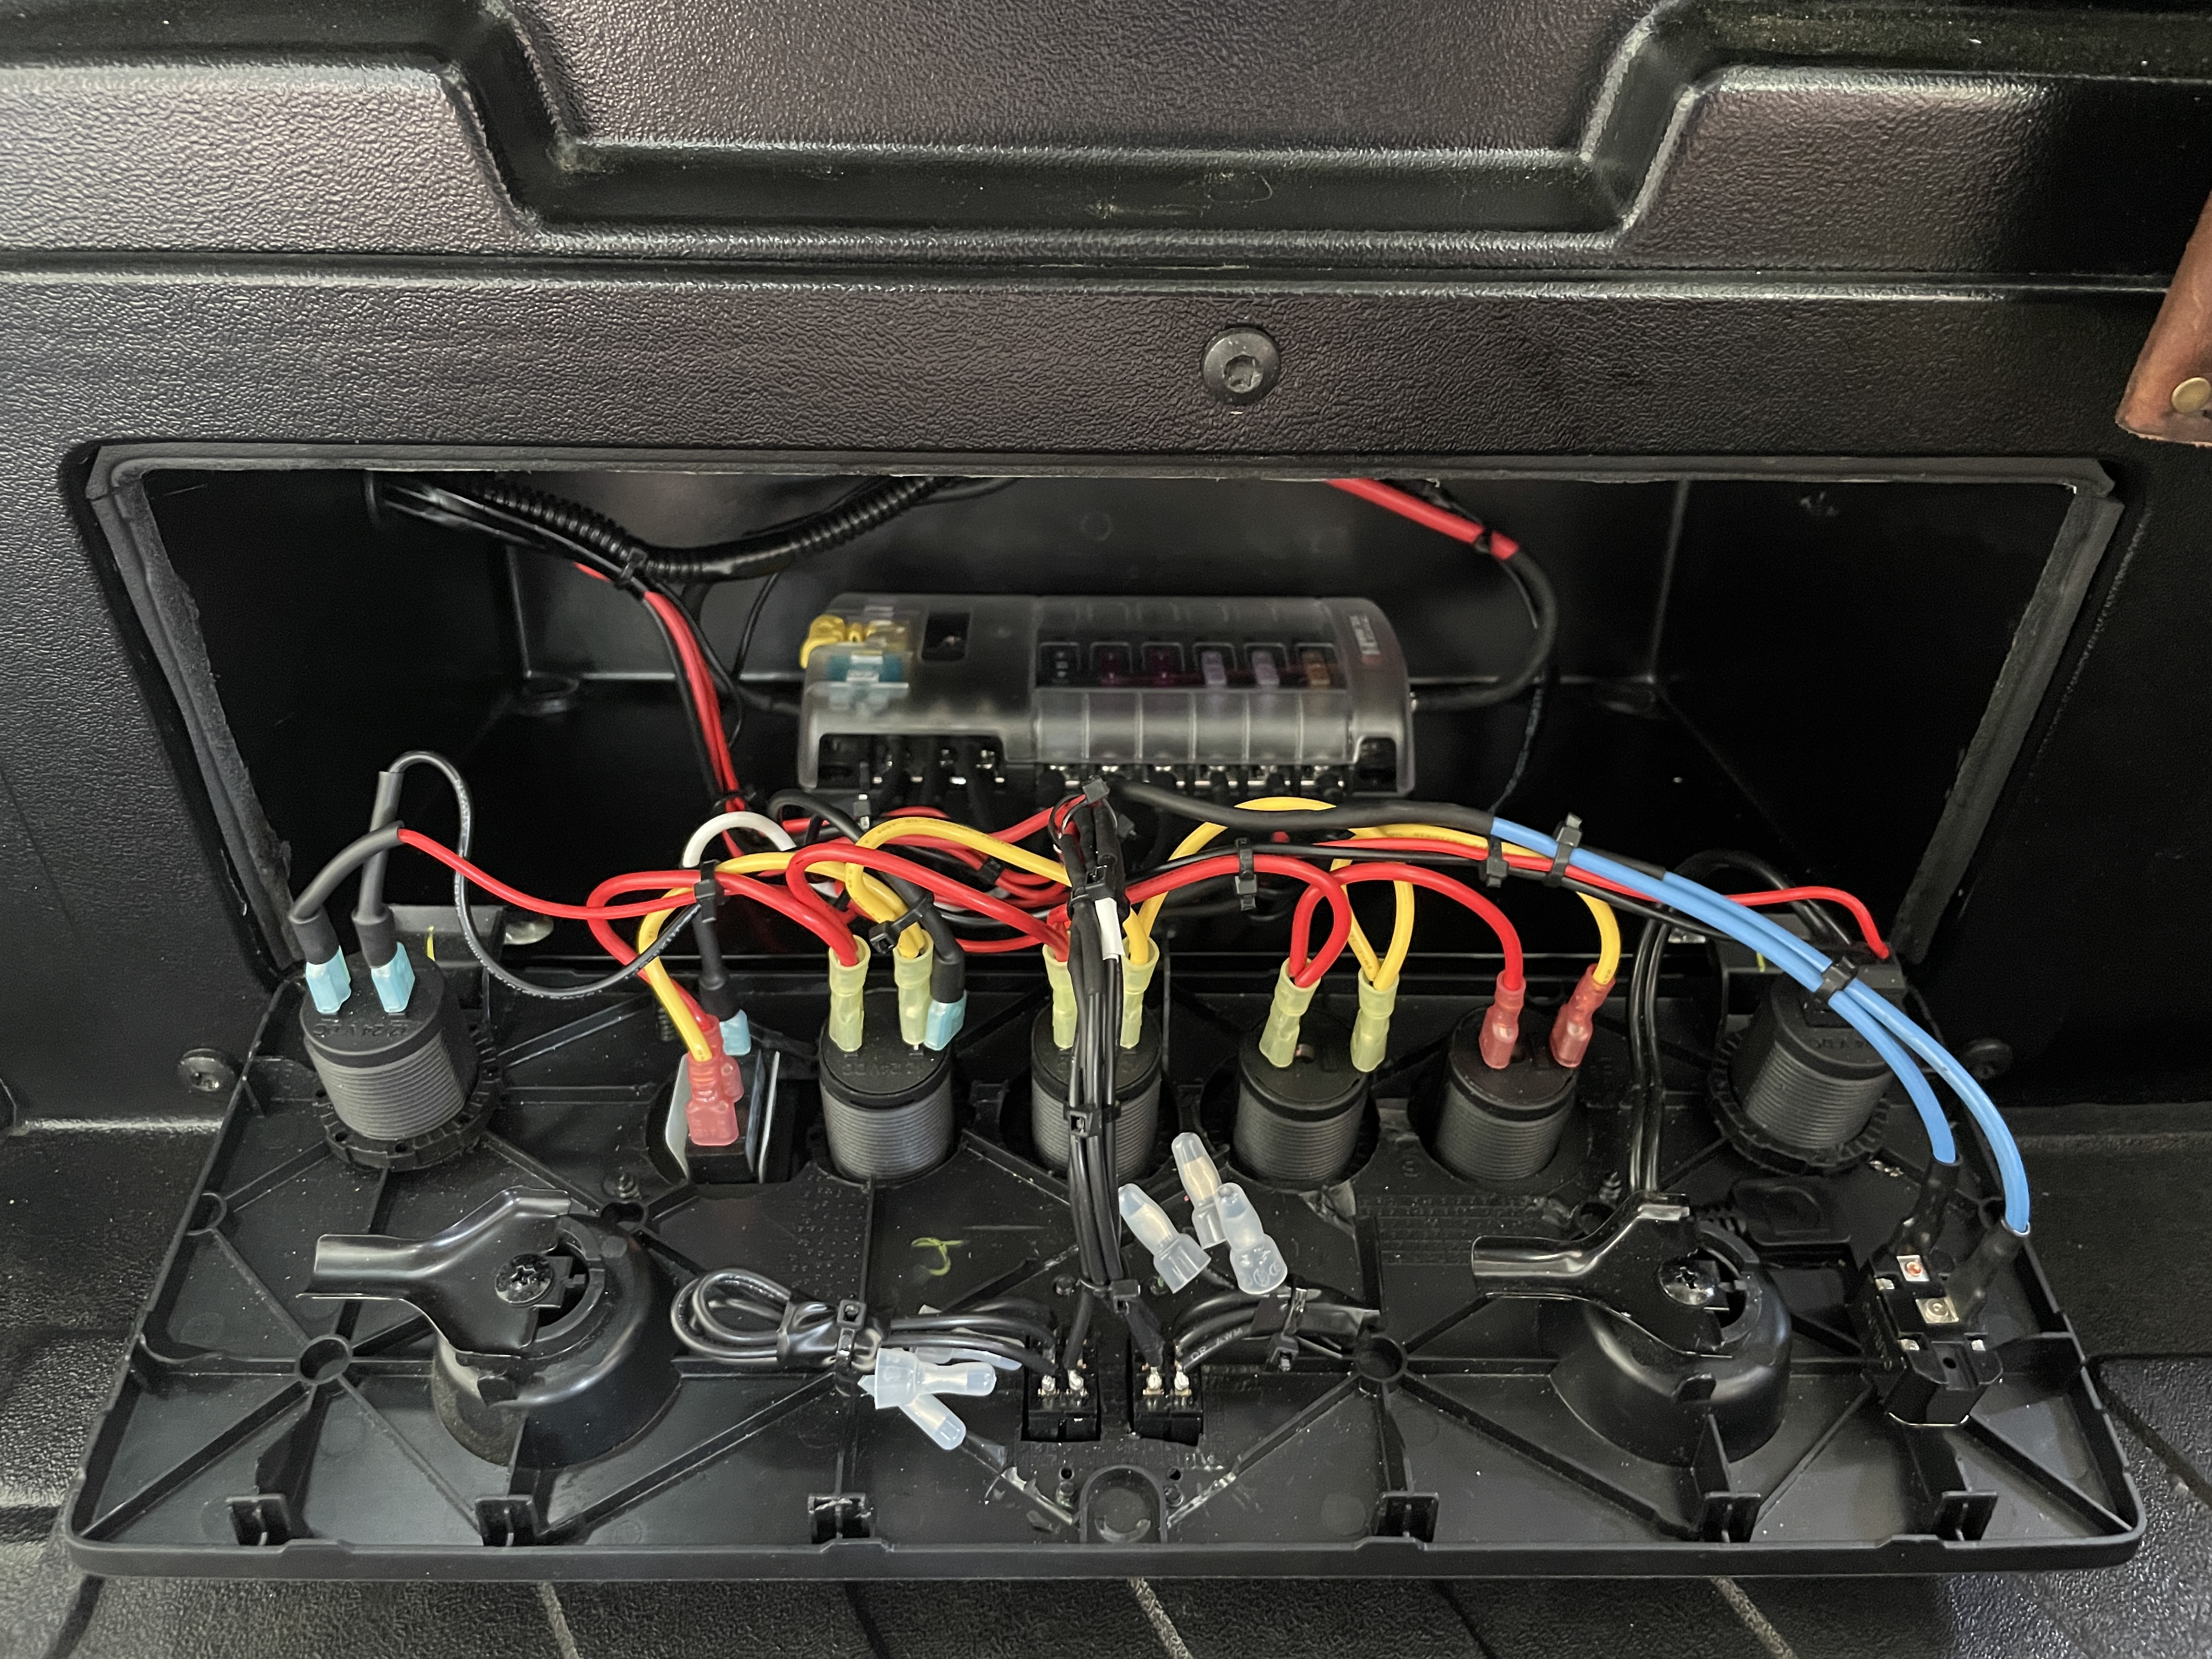
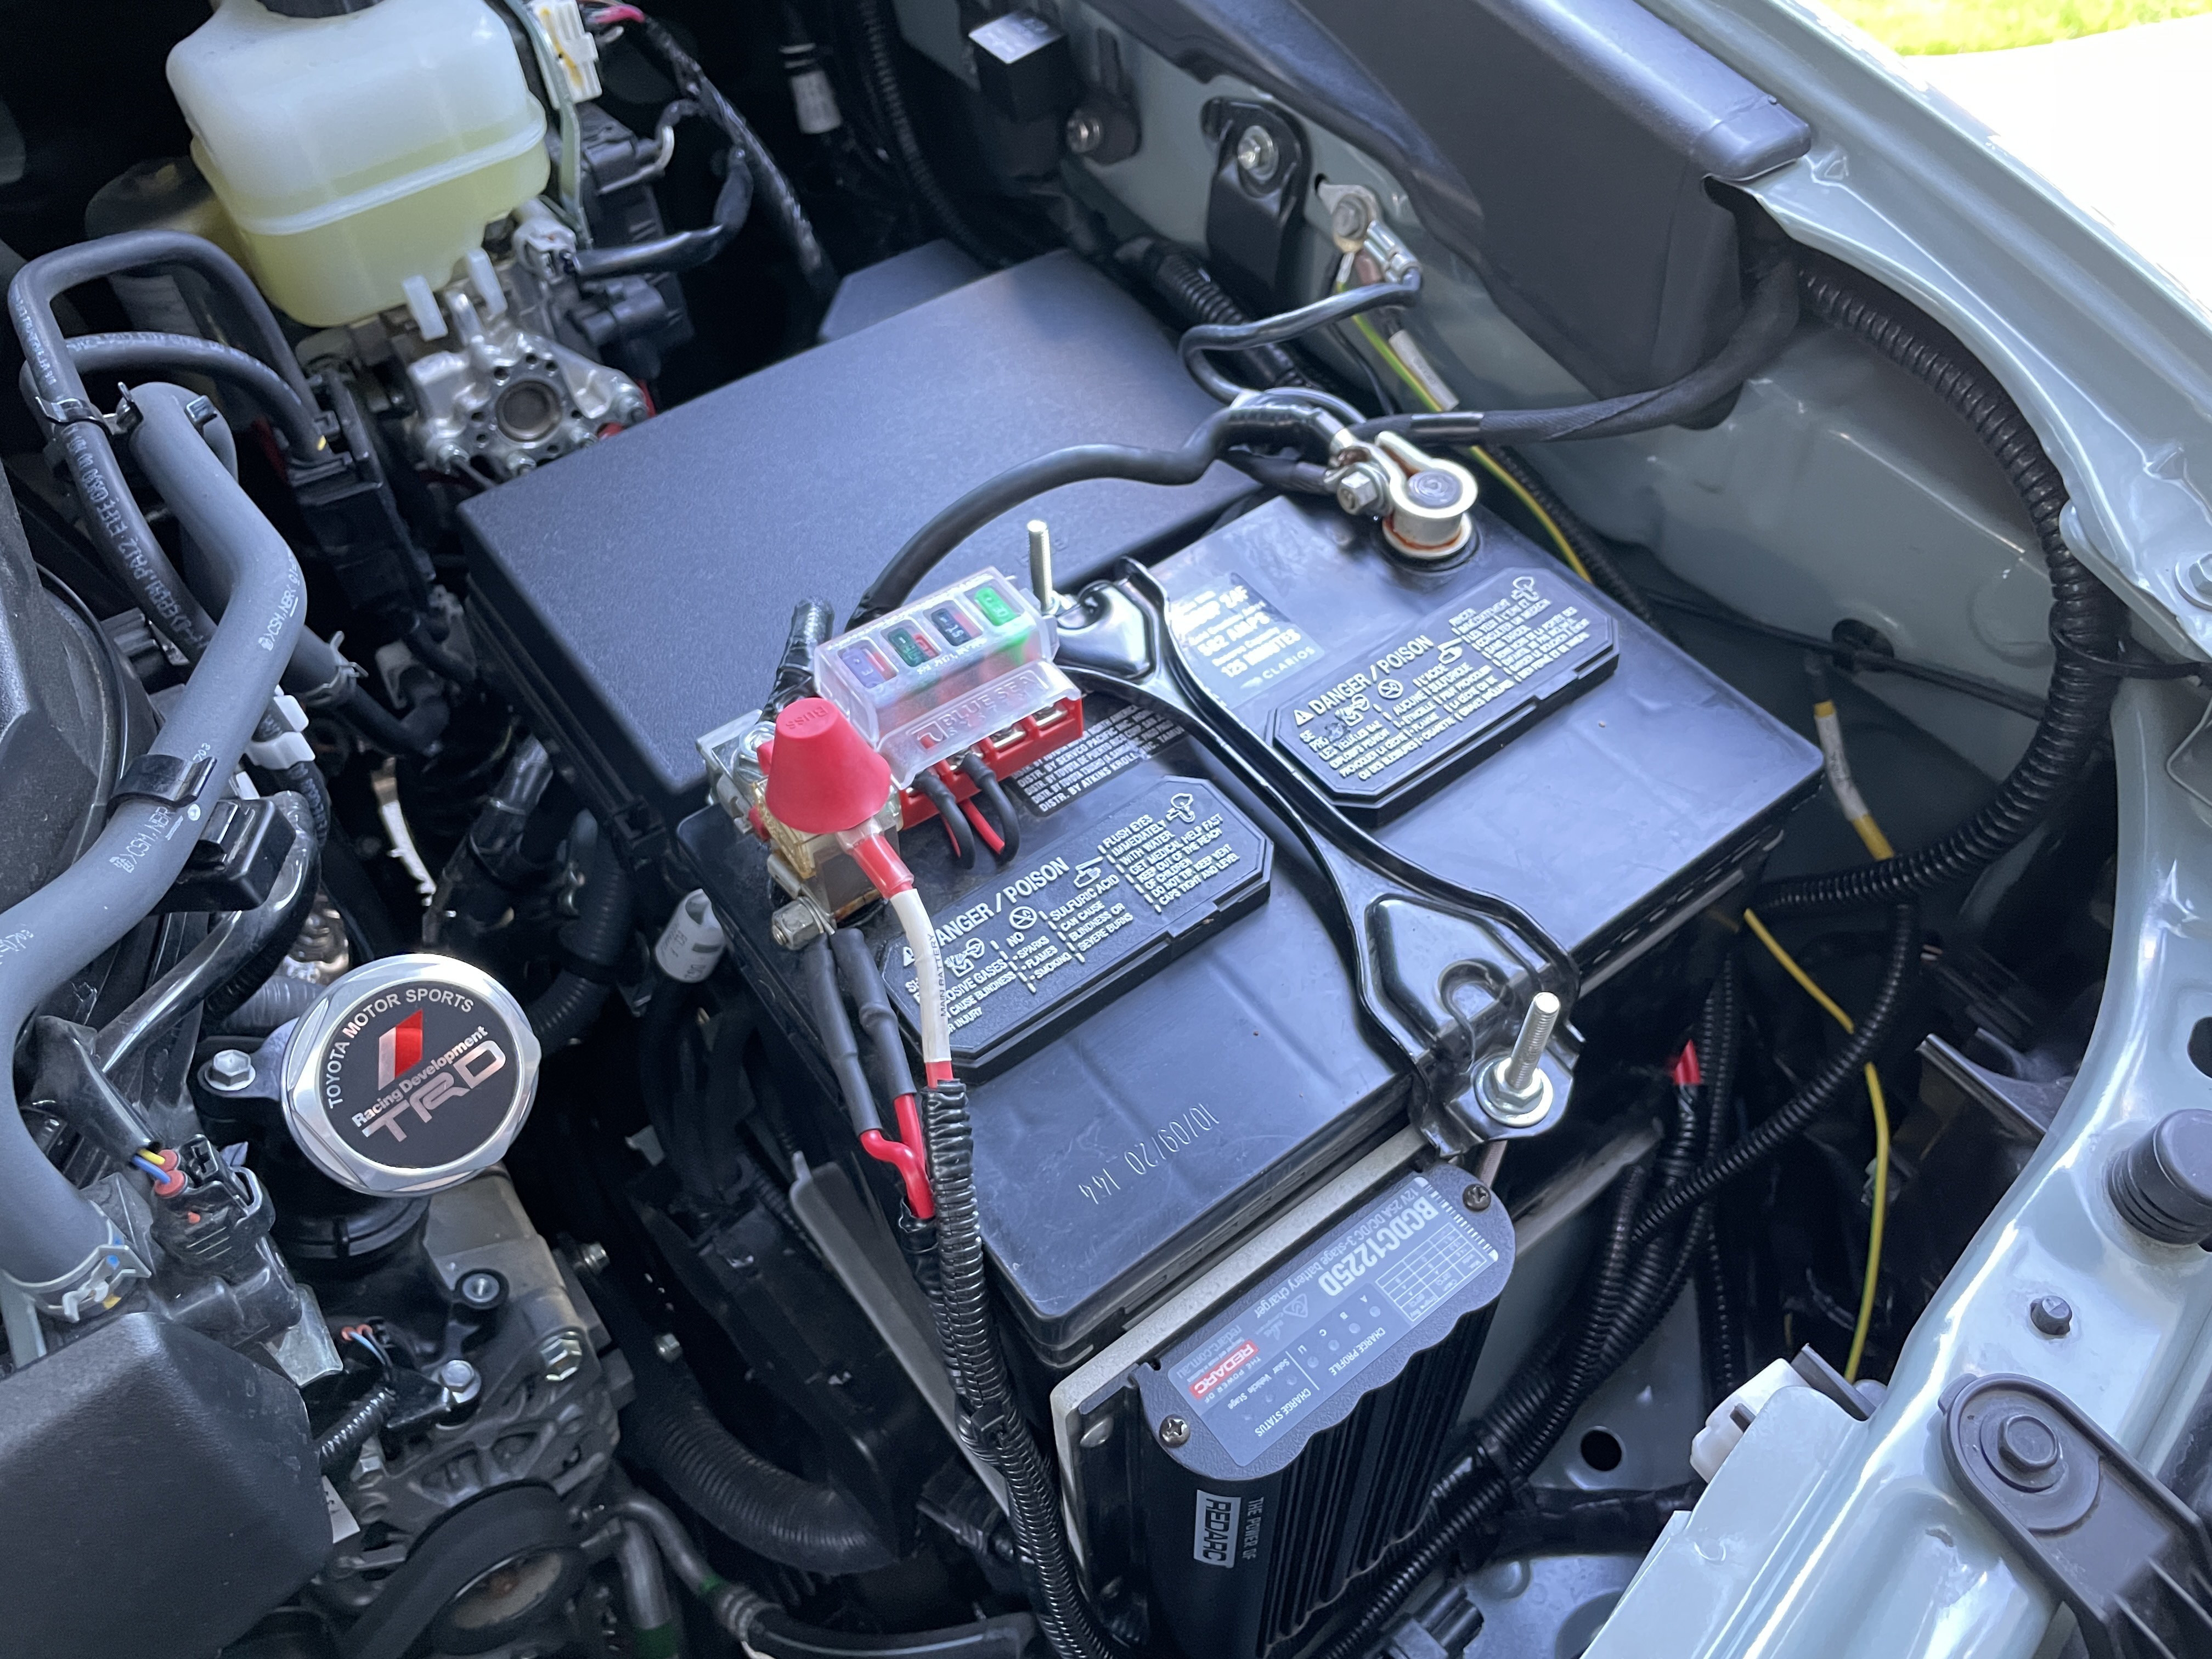
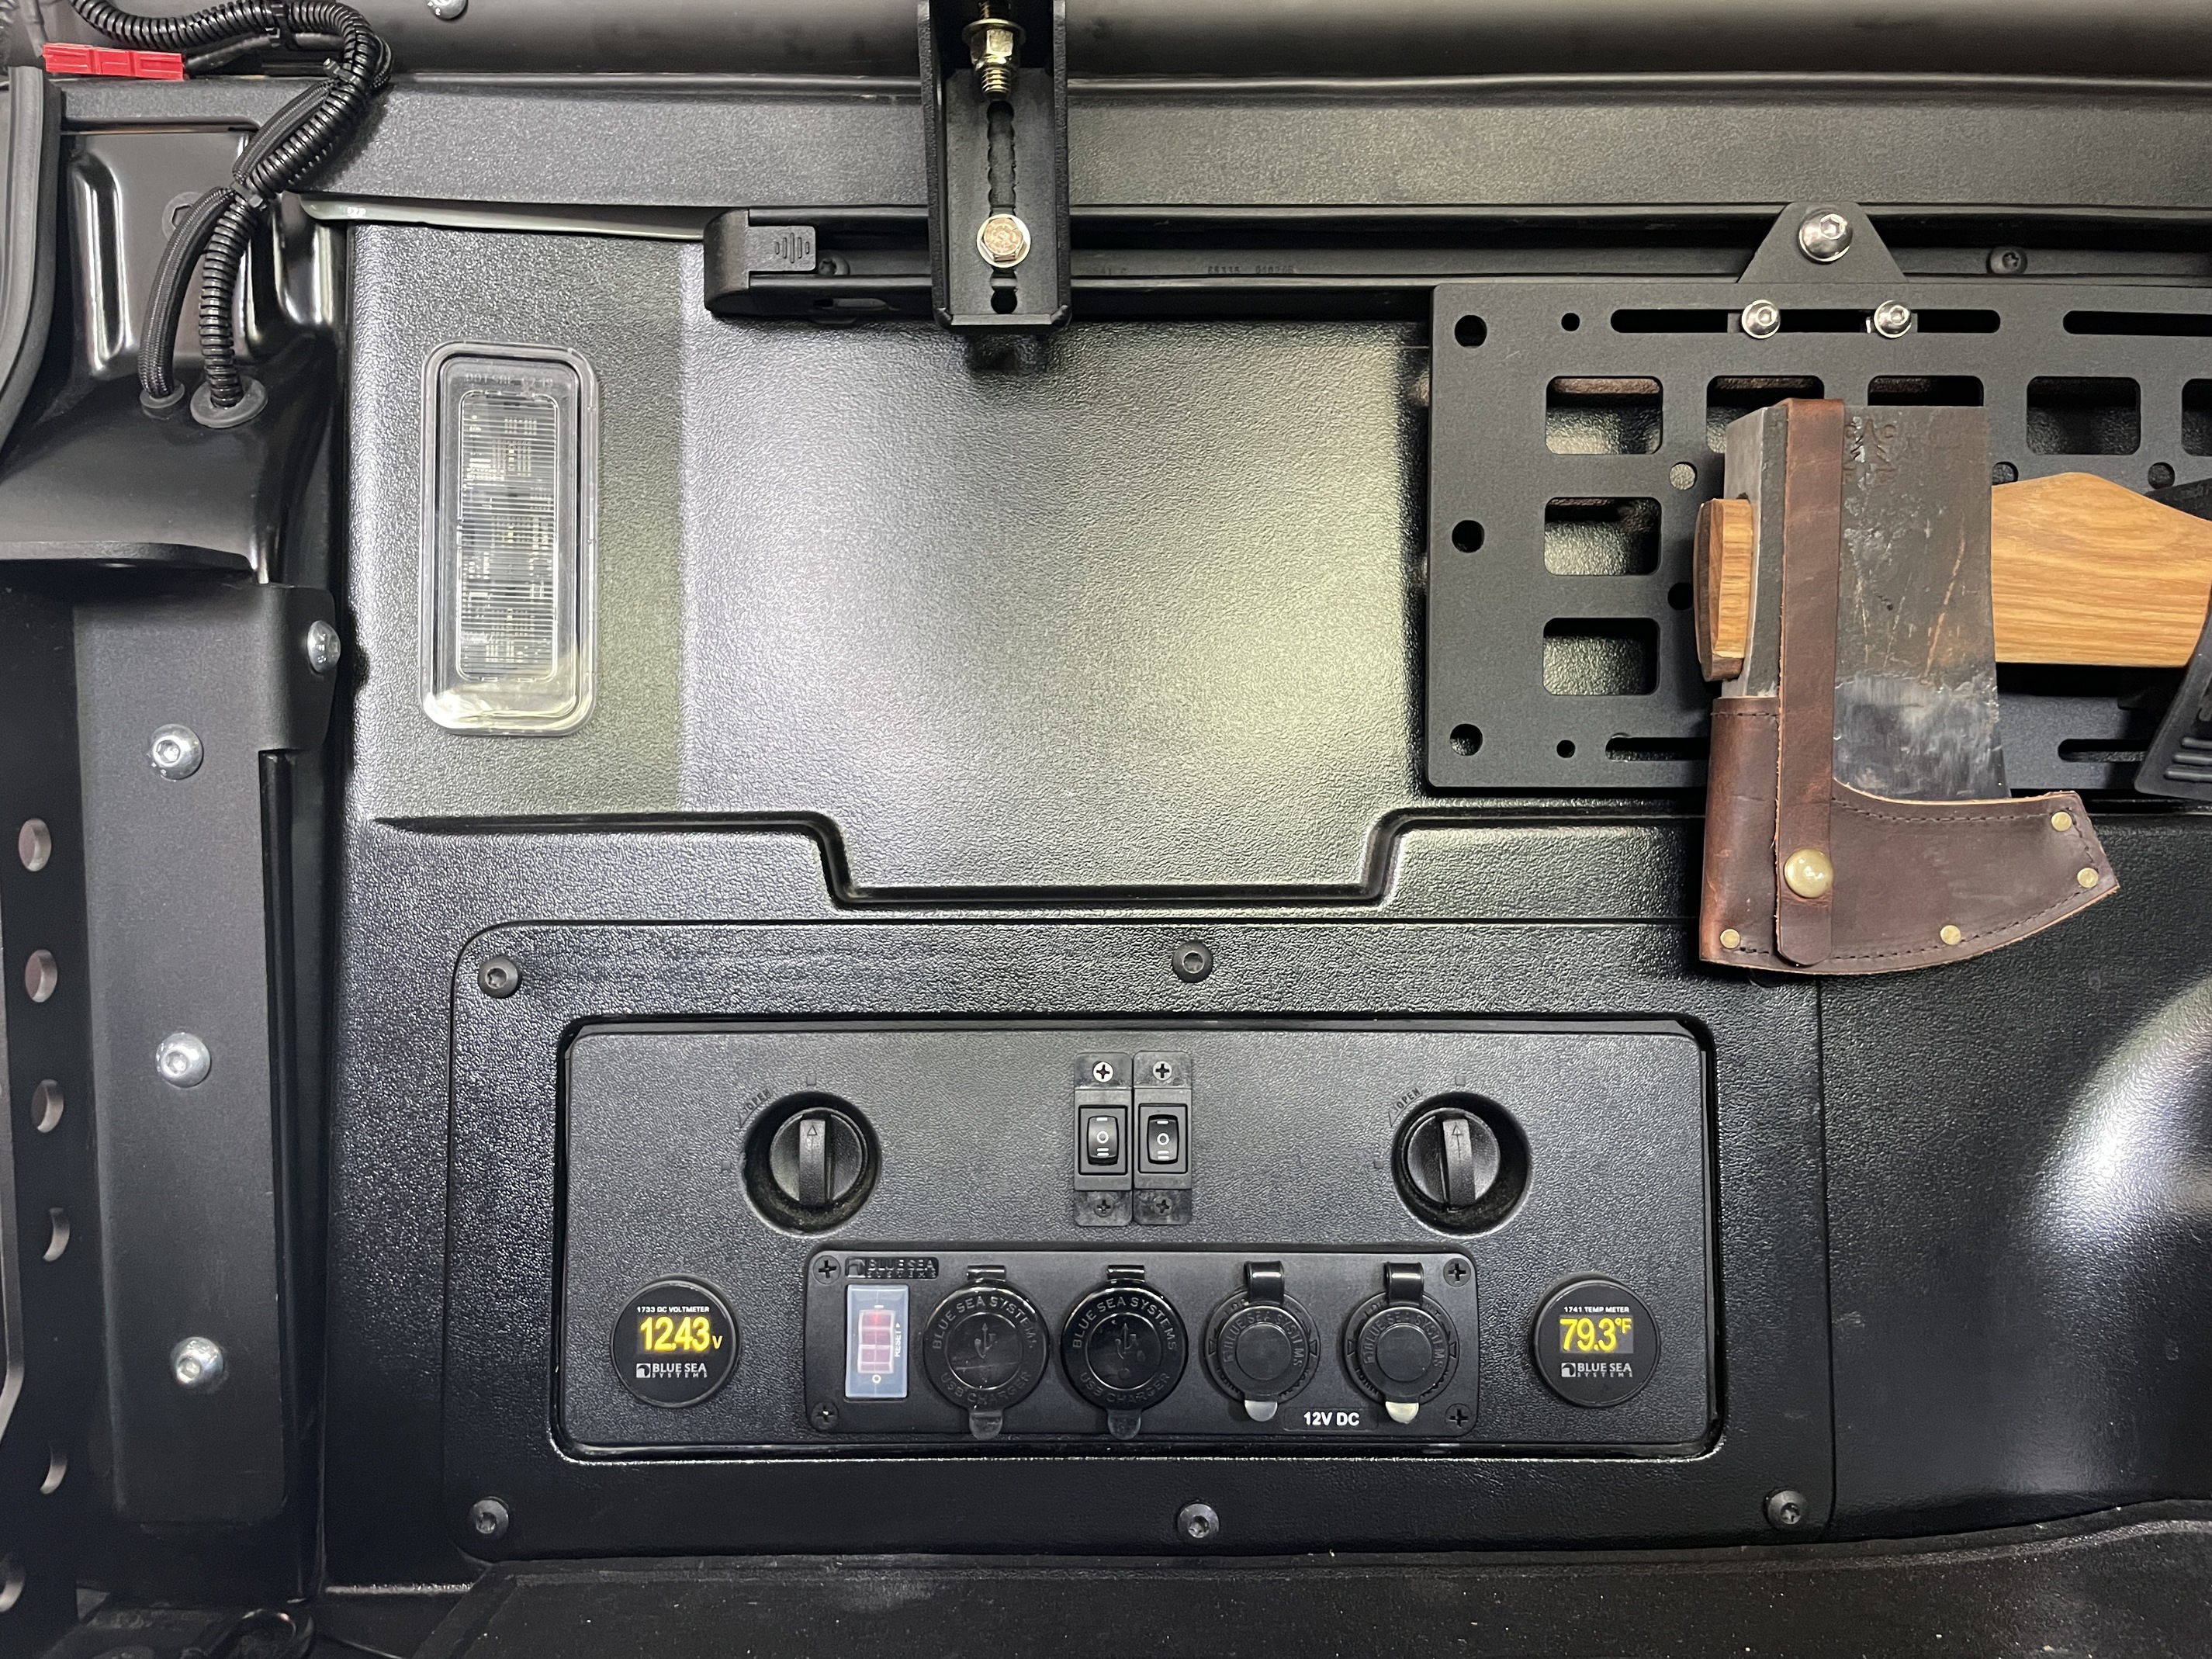
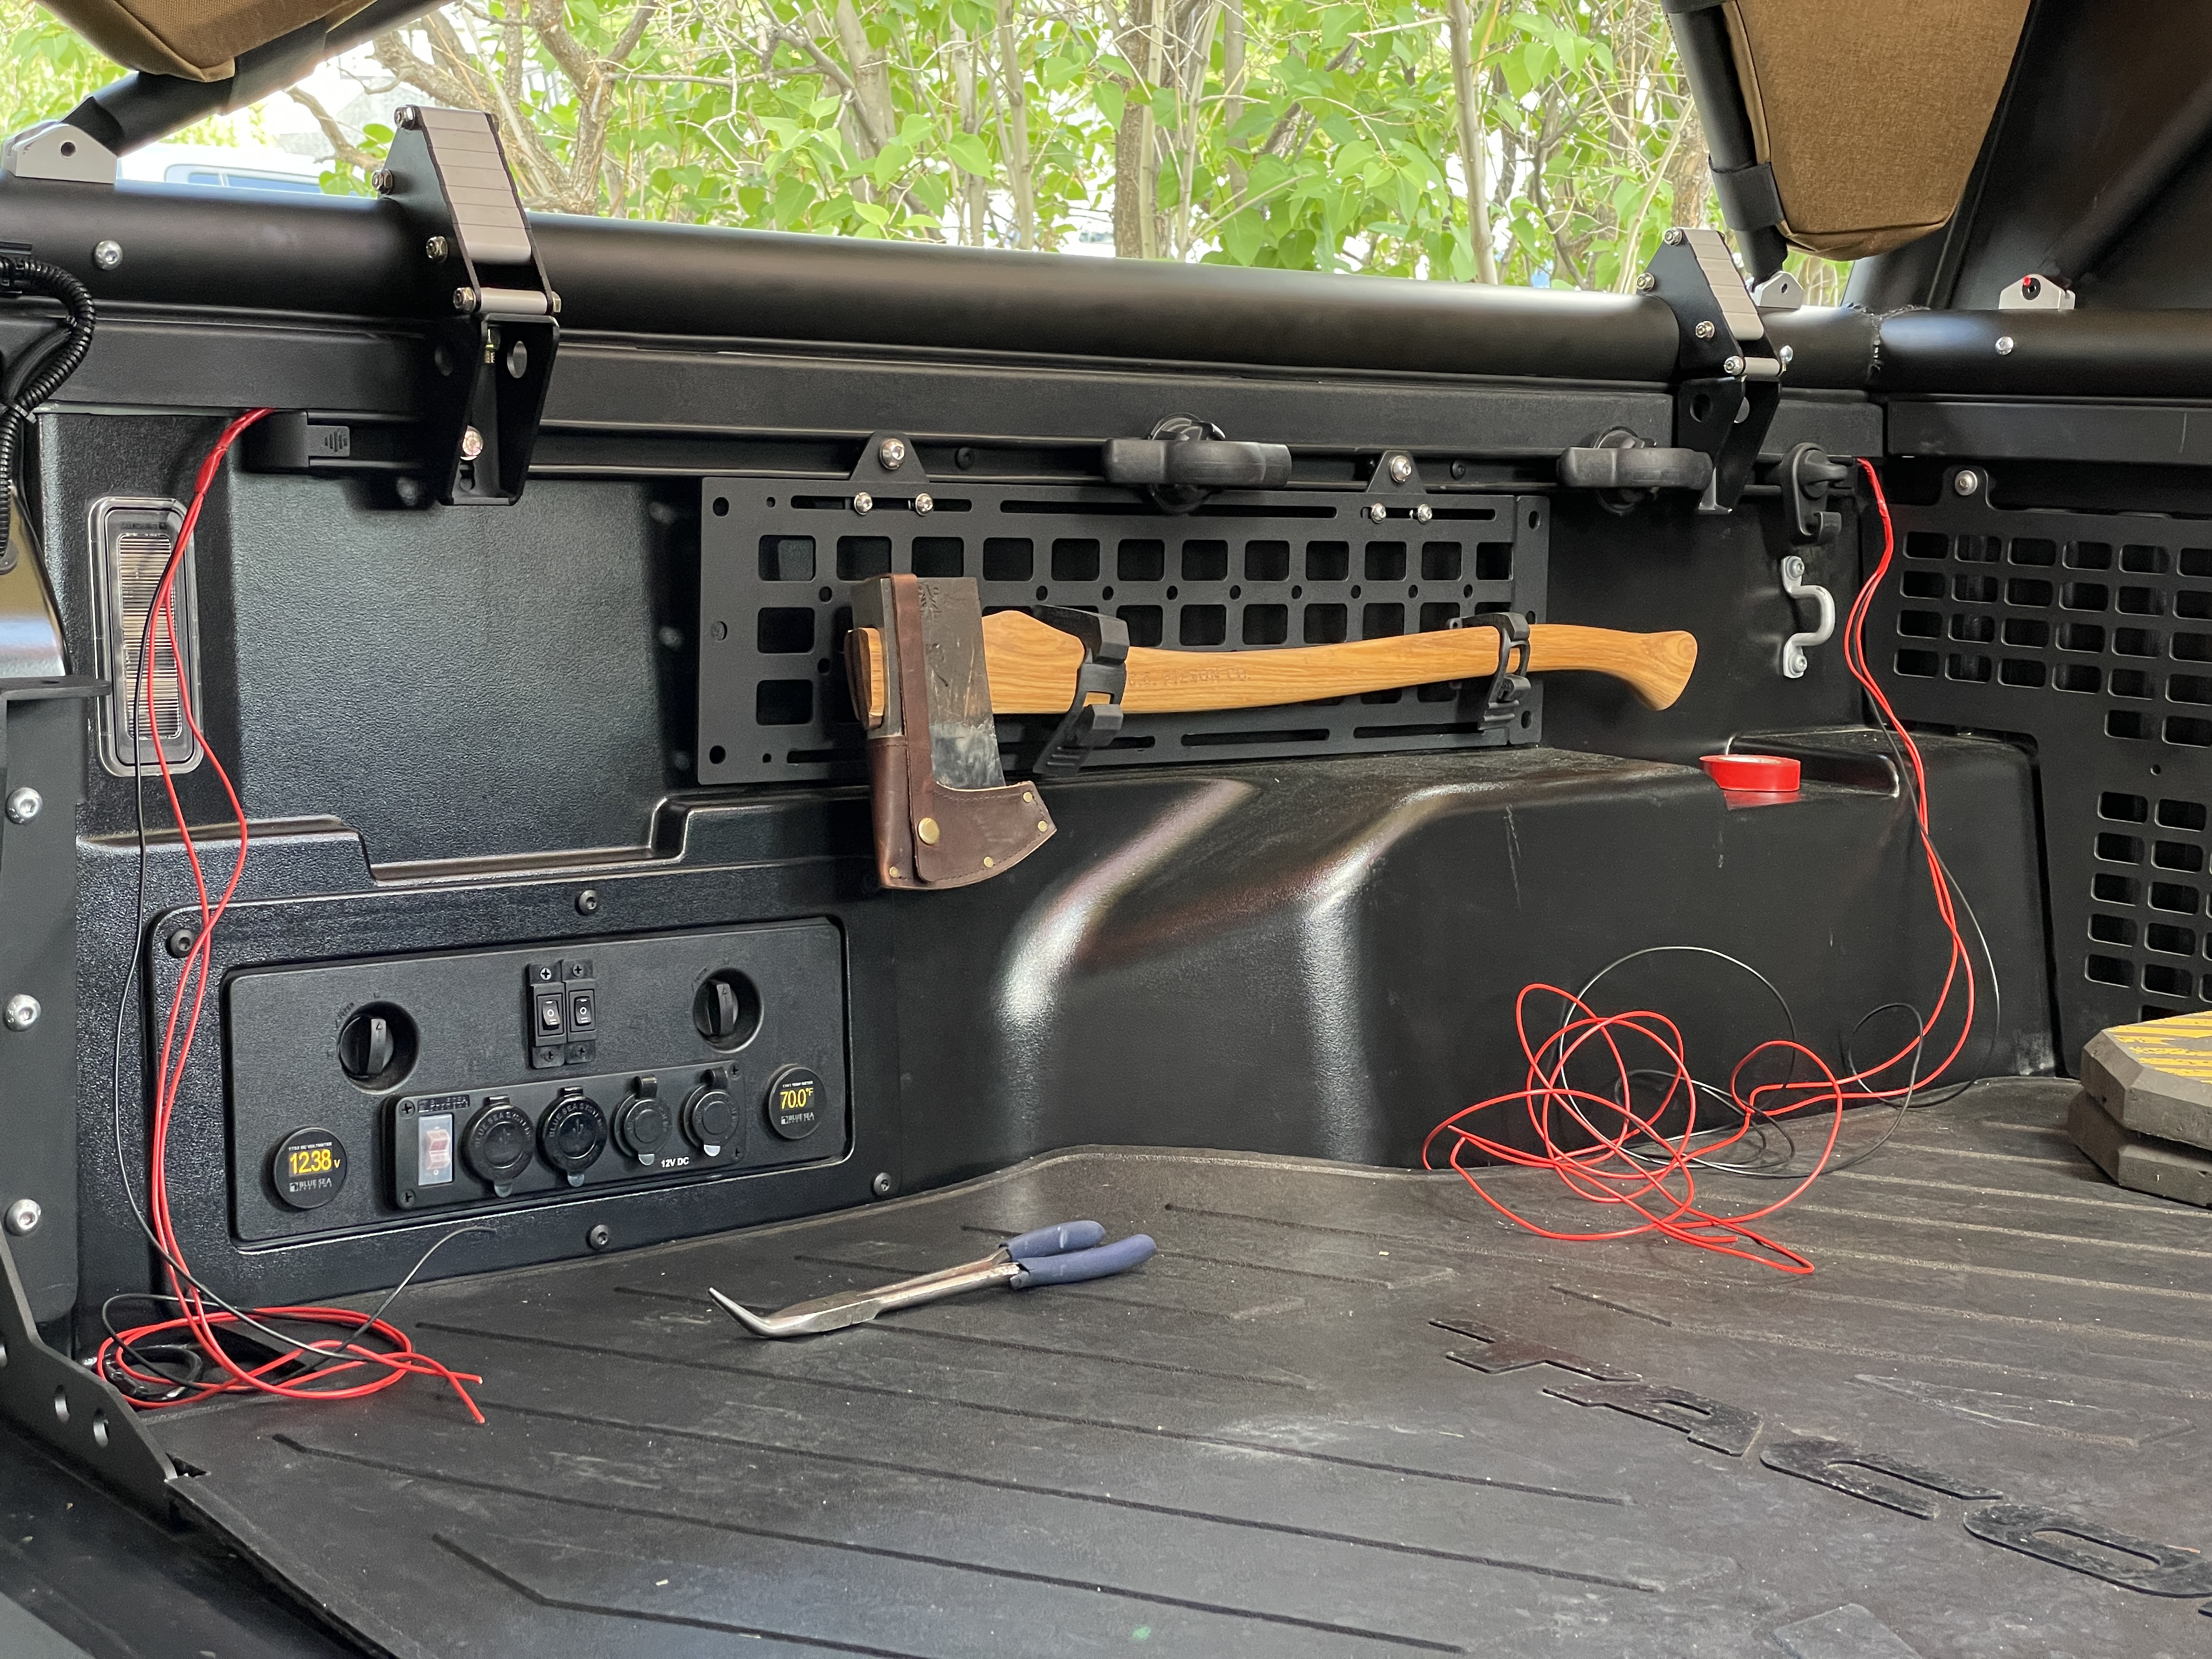
I also took this opportunity to (somewhat) cleanup the wiring on my starter battery by dropping in a Blue Sea Systems Fuse Block. Allowed me to cut out the in-line fuses that were dangling on my ditch light and REDARC monitor wiring. Looks * somewhat * cleaner.
Great question! I don’t see a time in which the compressor would be running with someone sitting in the cab—so not worried about noise—it is a compressor after all. Was more important to me to keep it out of the elements for longevity!
Gotcha. I was thinking more along the lines of running air lockers with said compressor, but I guess if you’re only using it for airing up then I definitely understand the location
I had one internally mounted under the passenger seat in a jeep with air lockers and it really only comes on for a split second when the locker is engaged so it isn’t too bad. Fun to surprise your passenger with too!
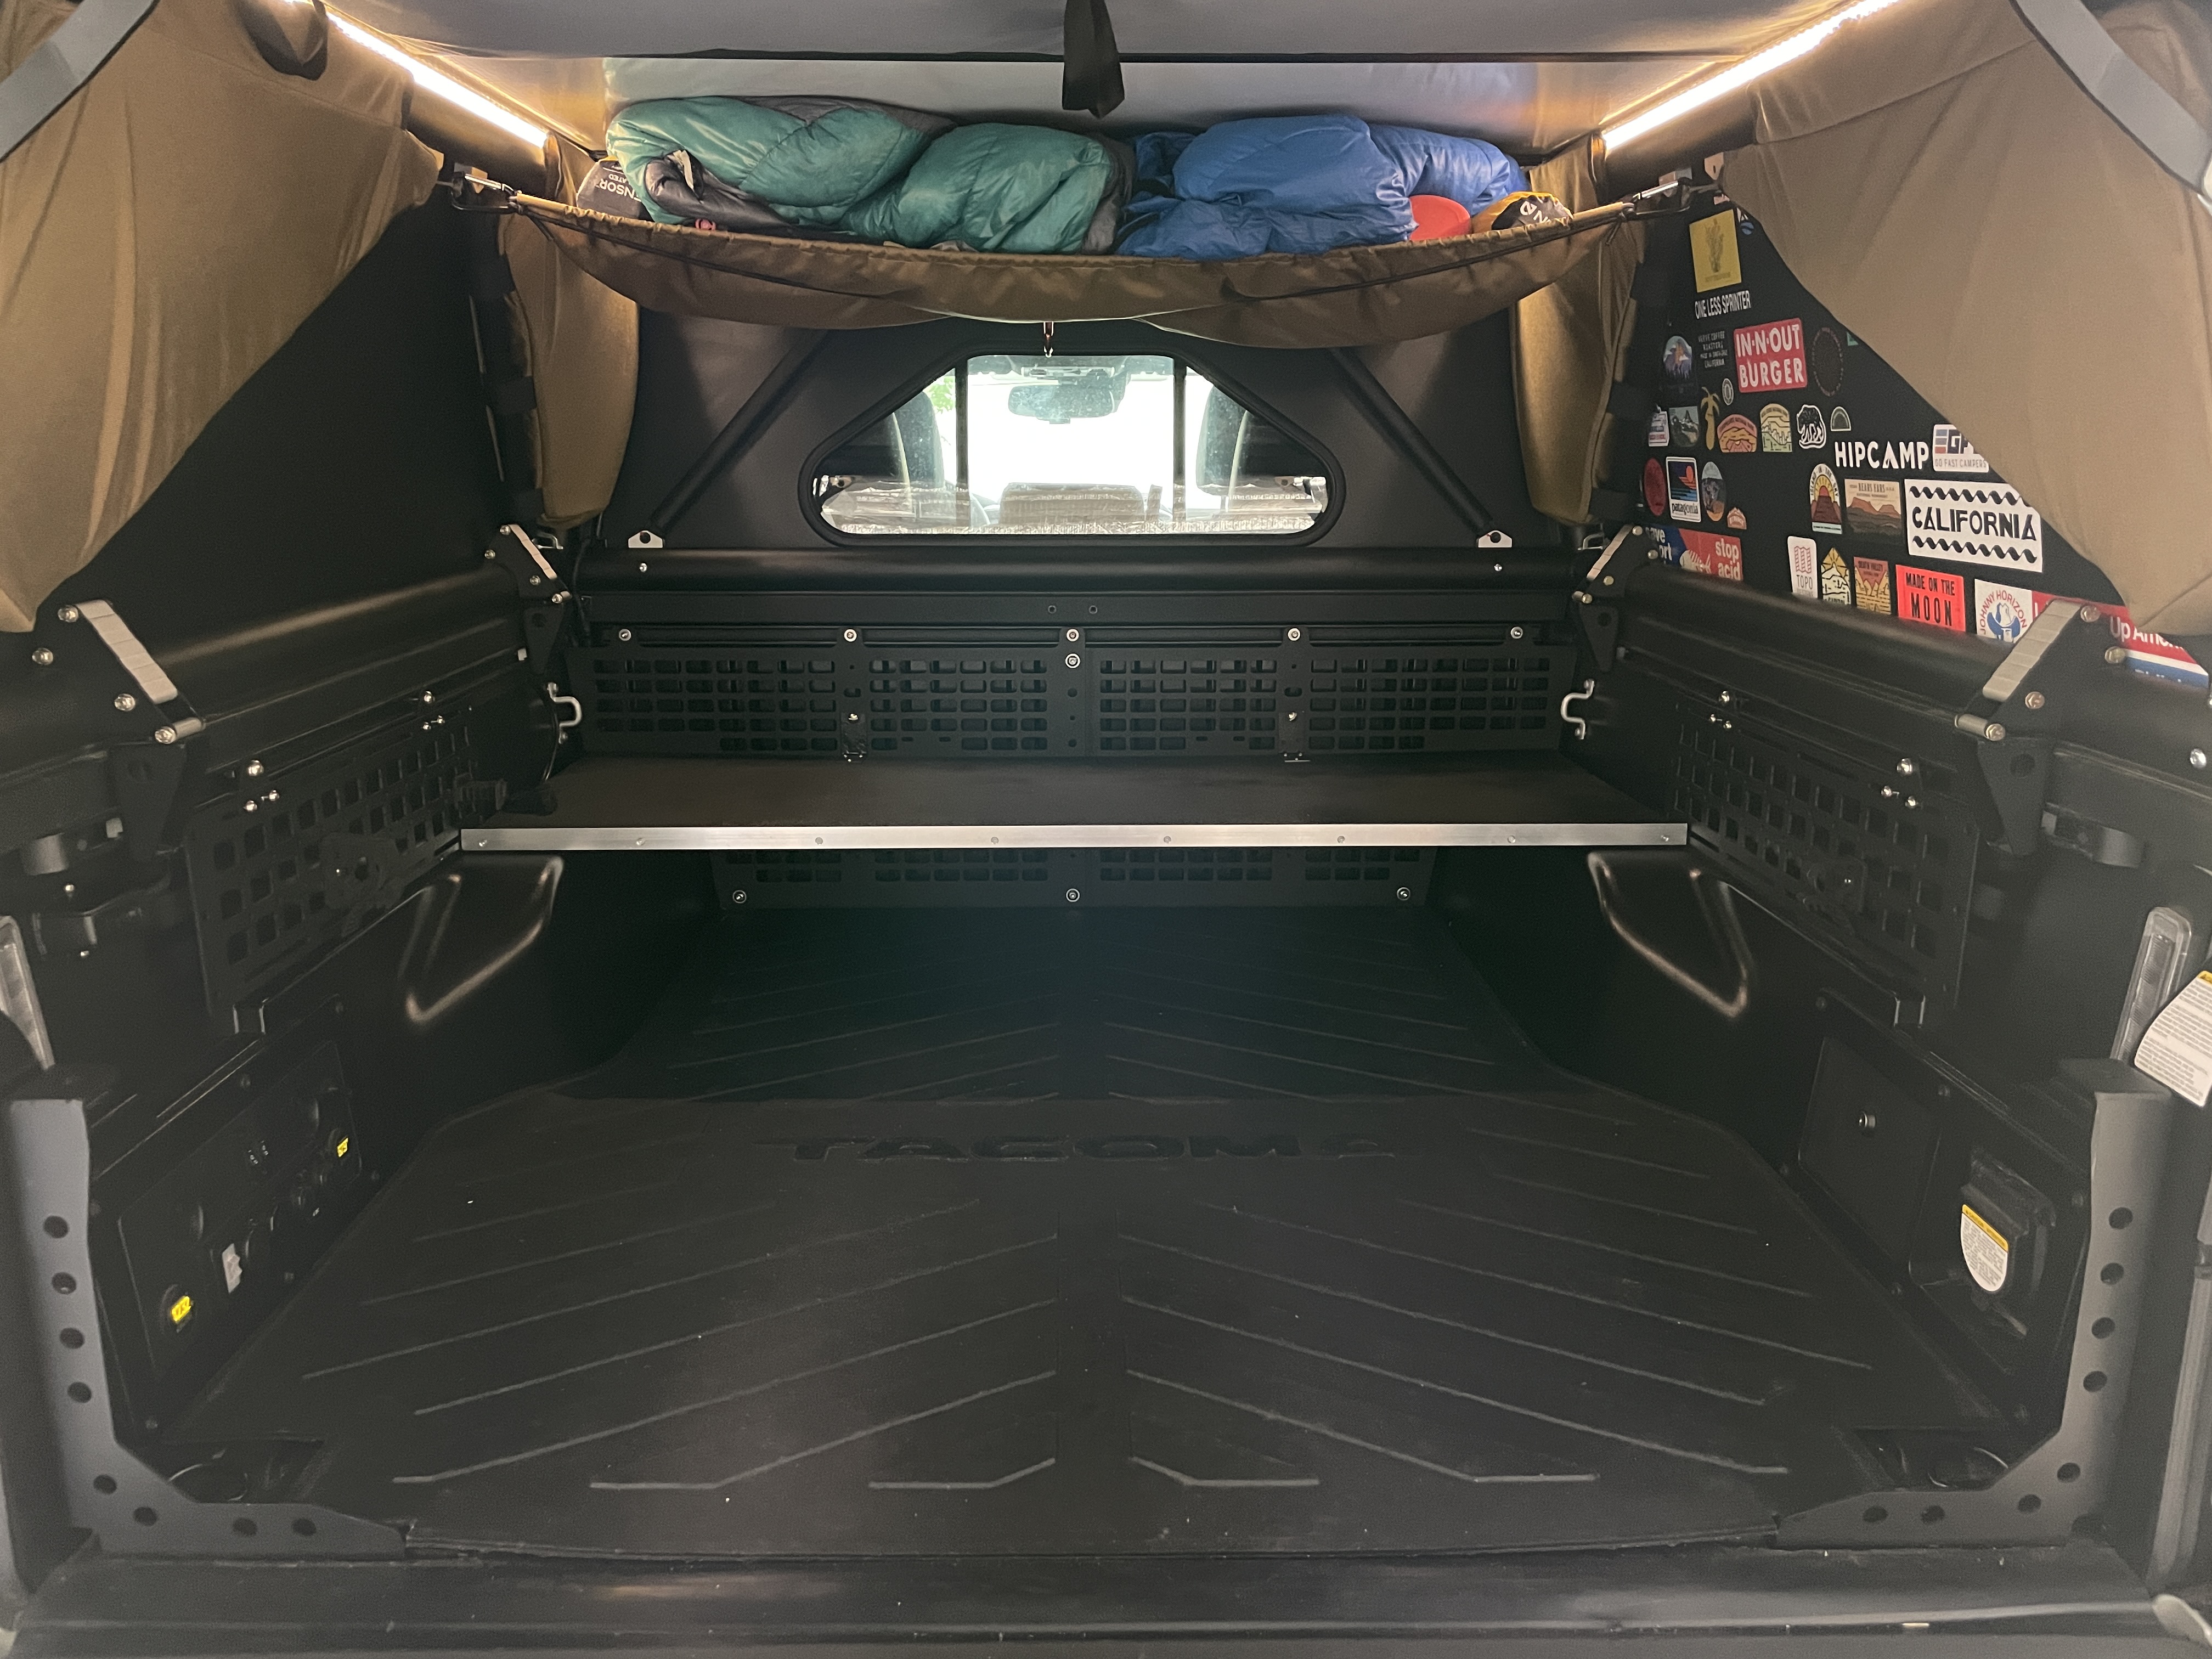
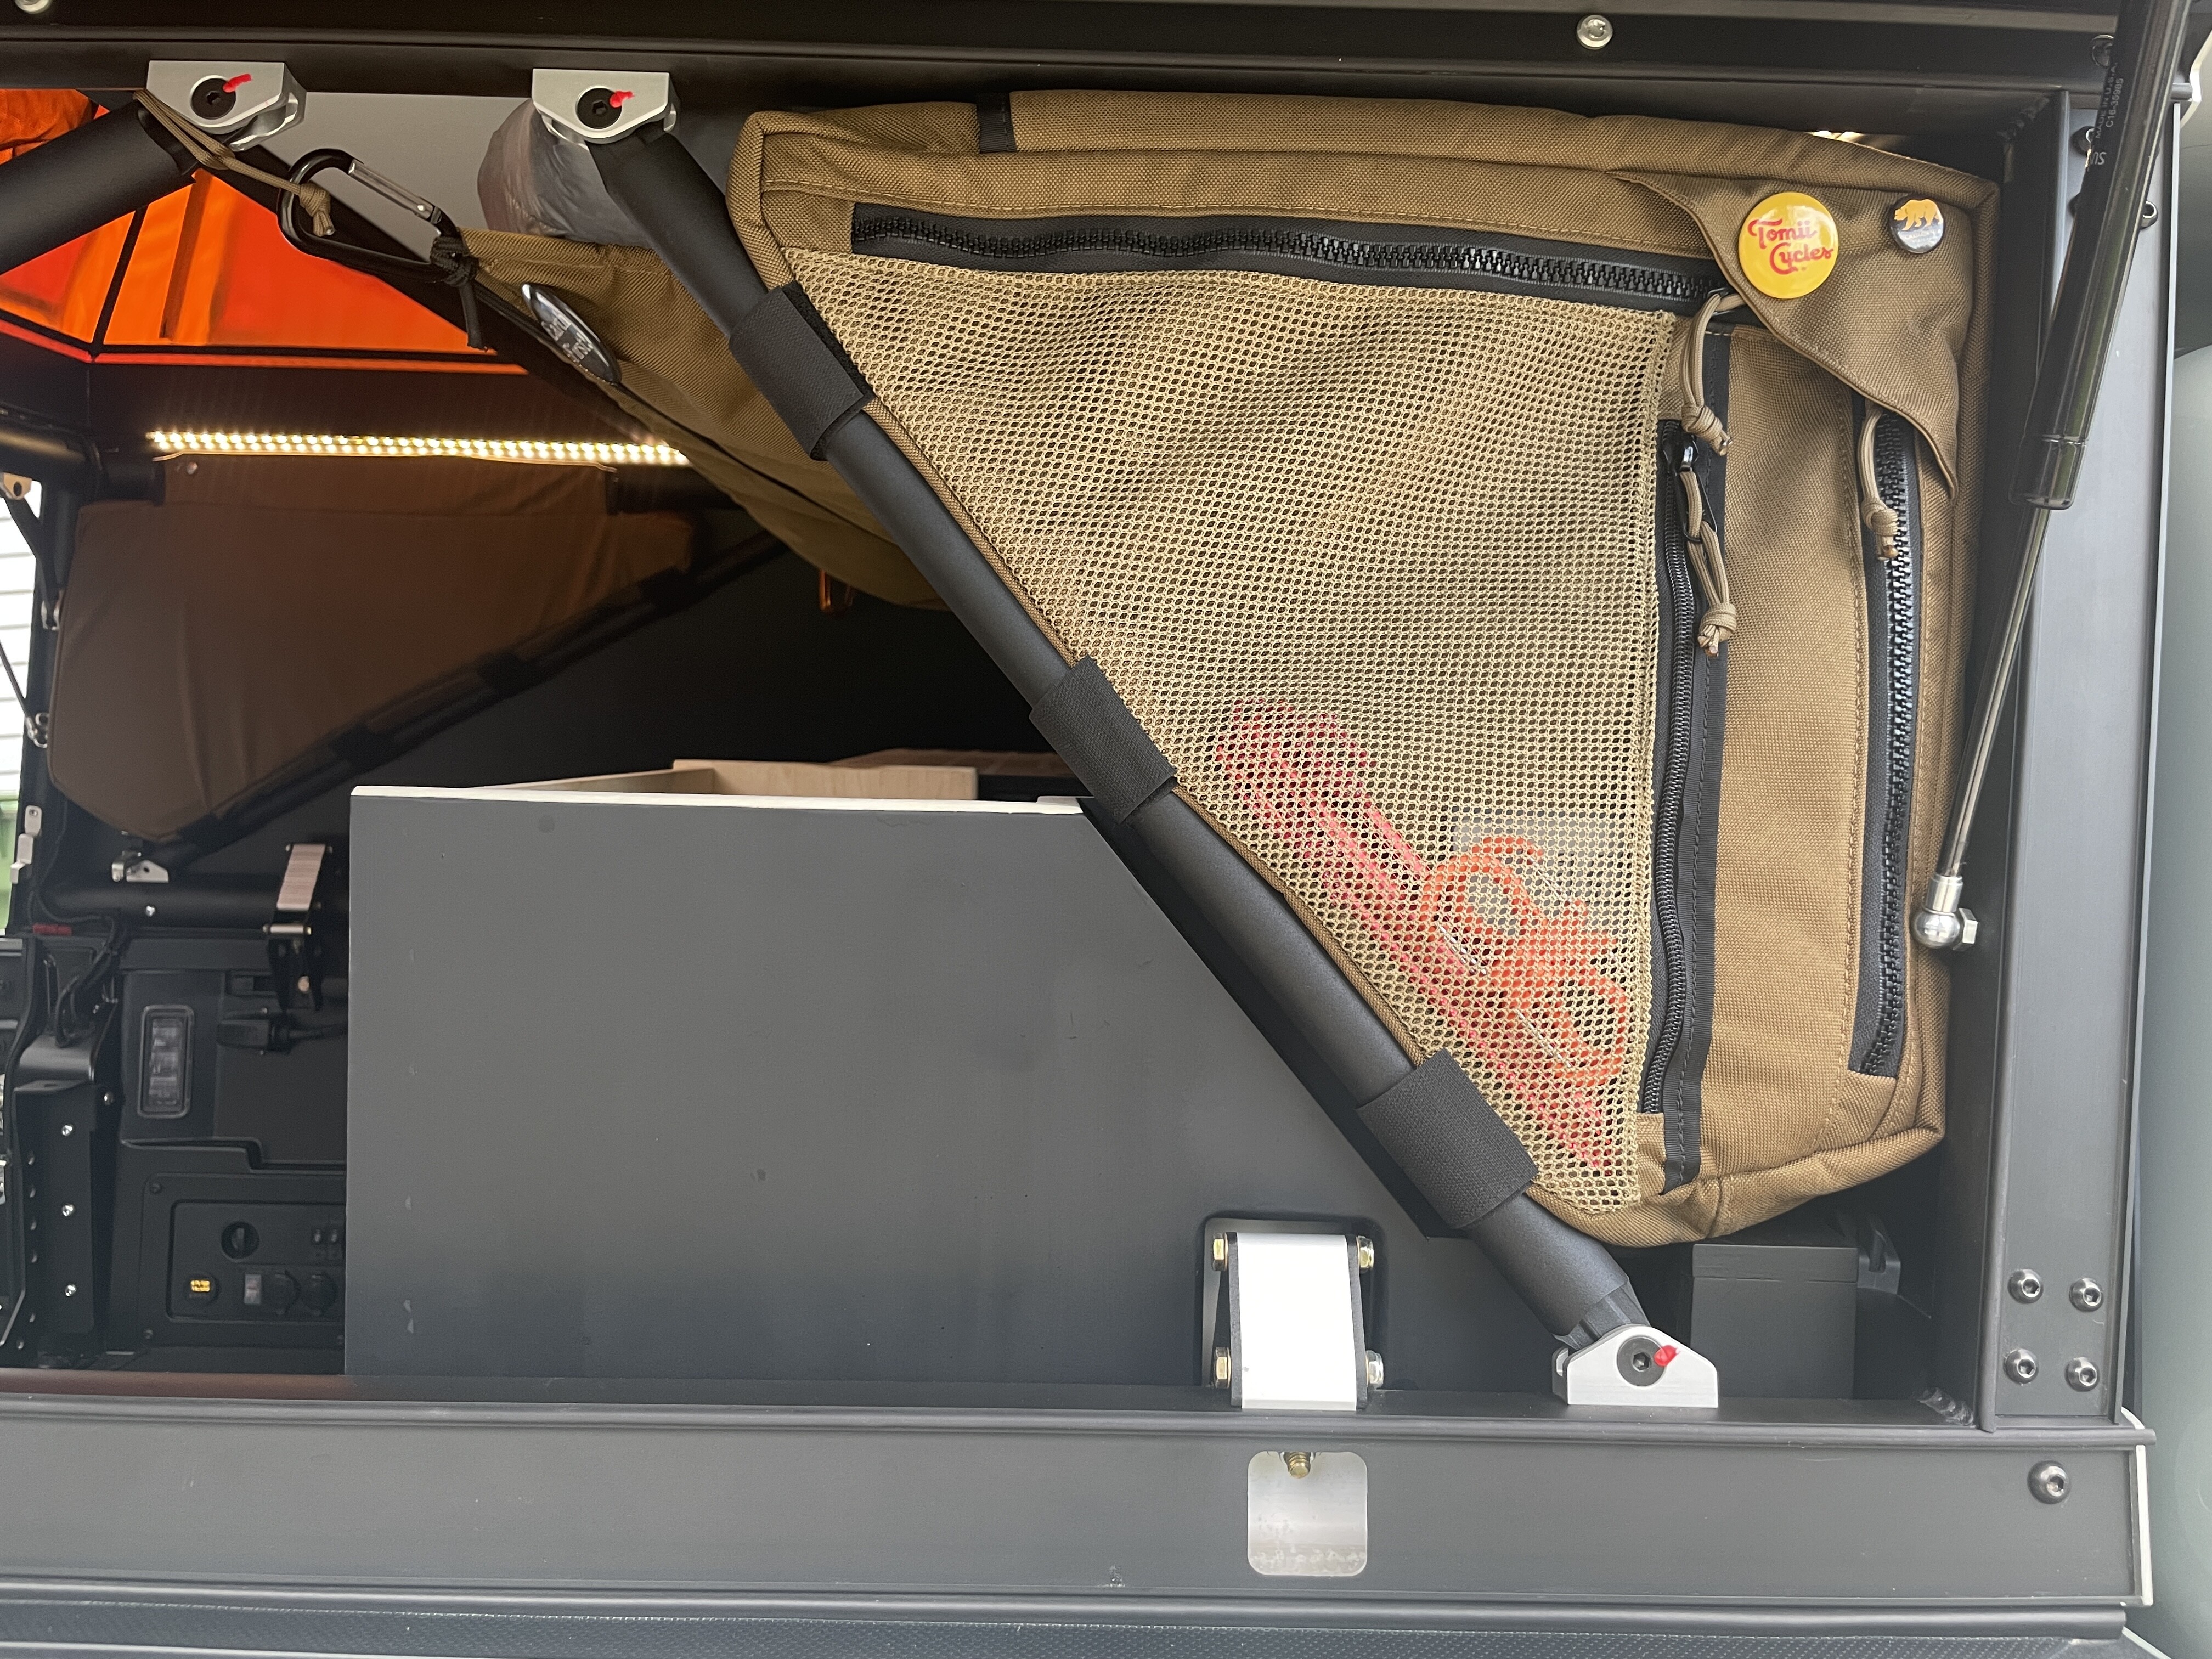
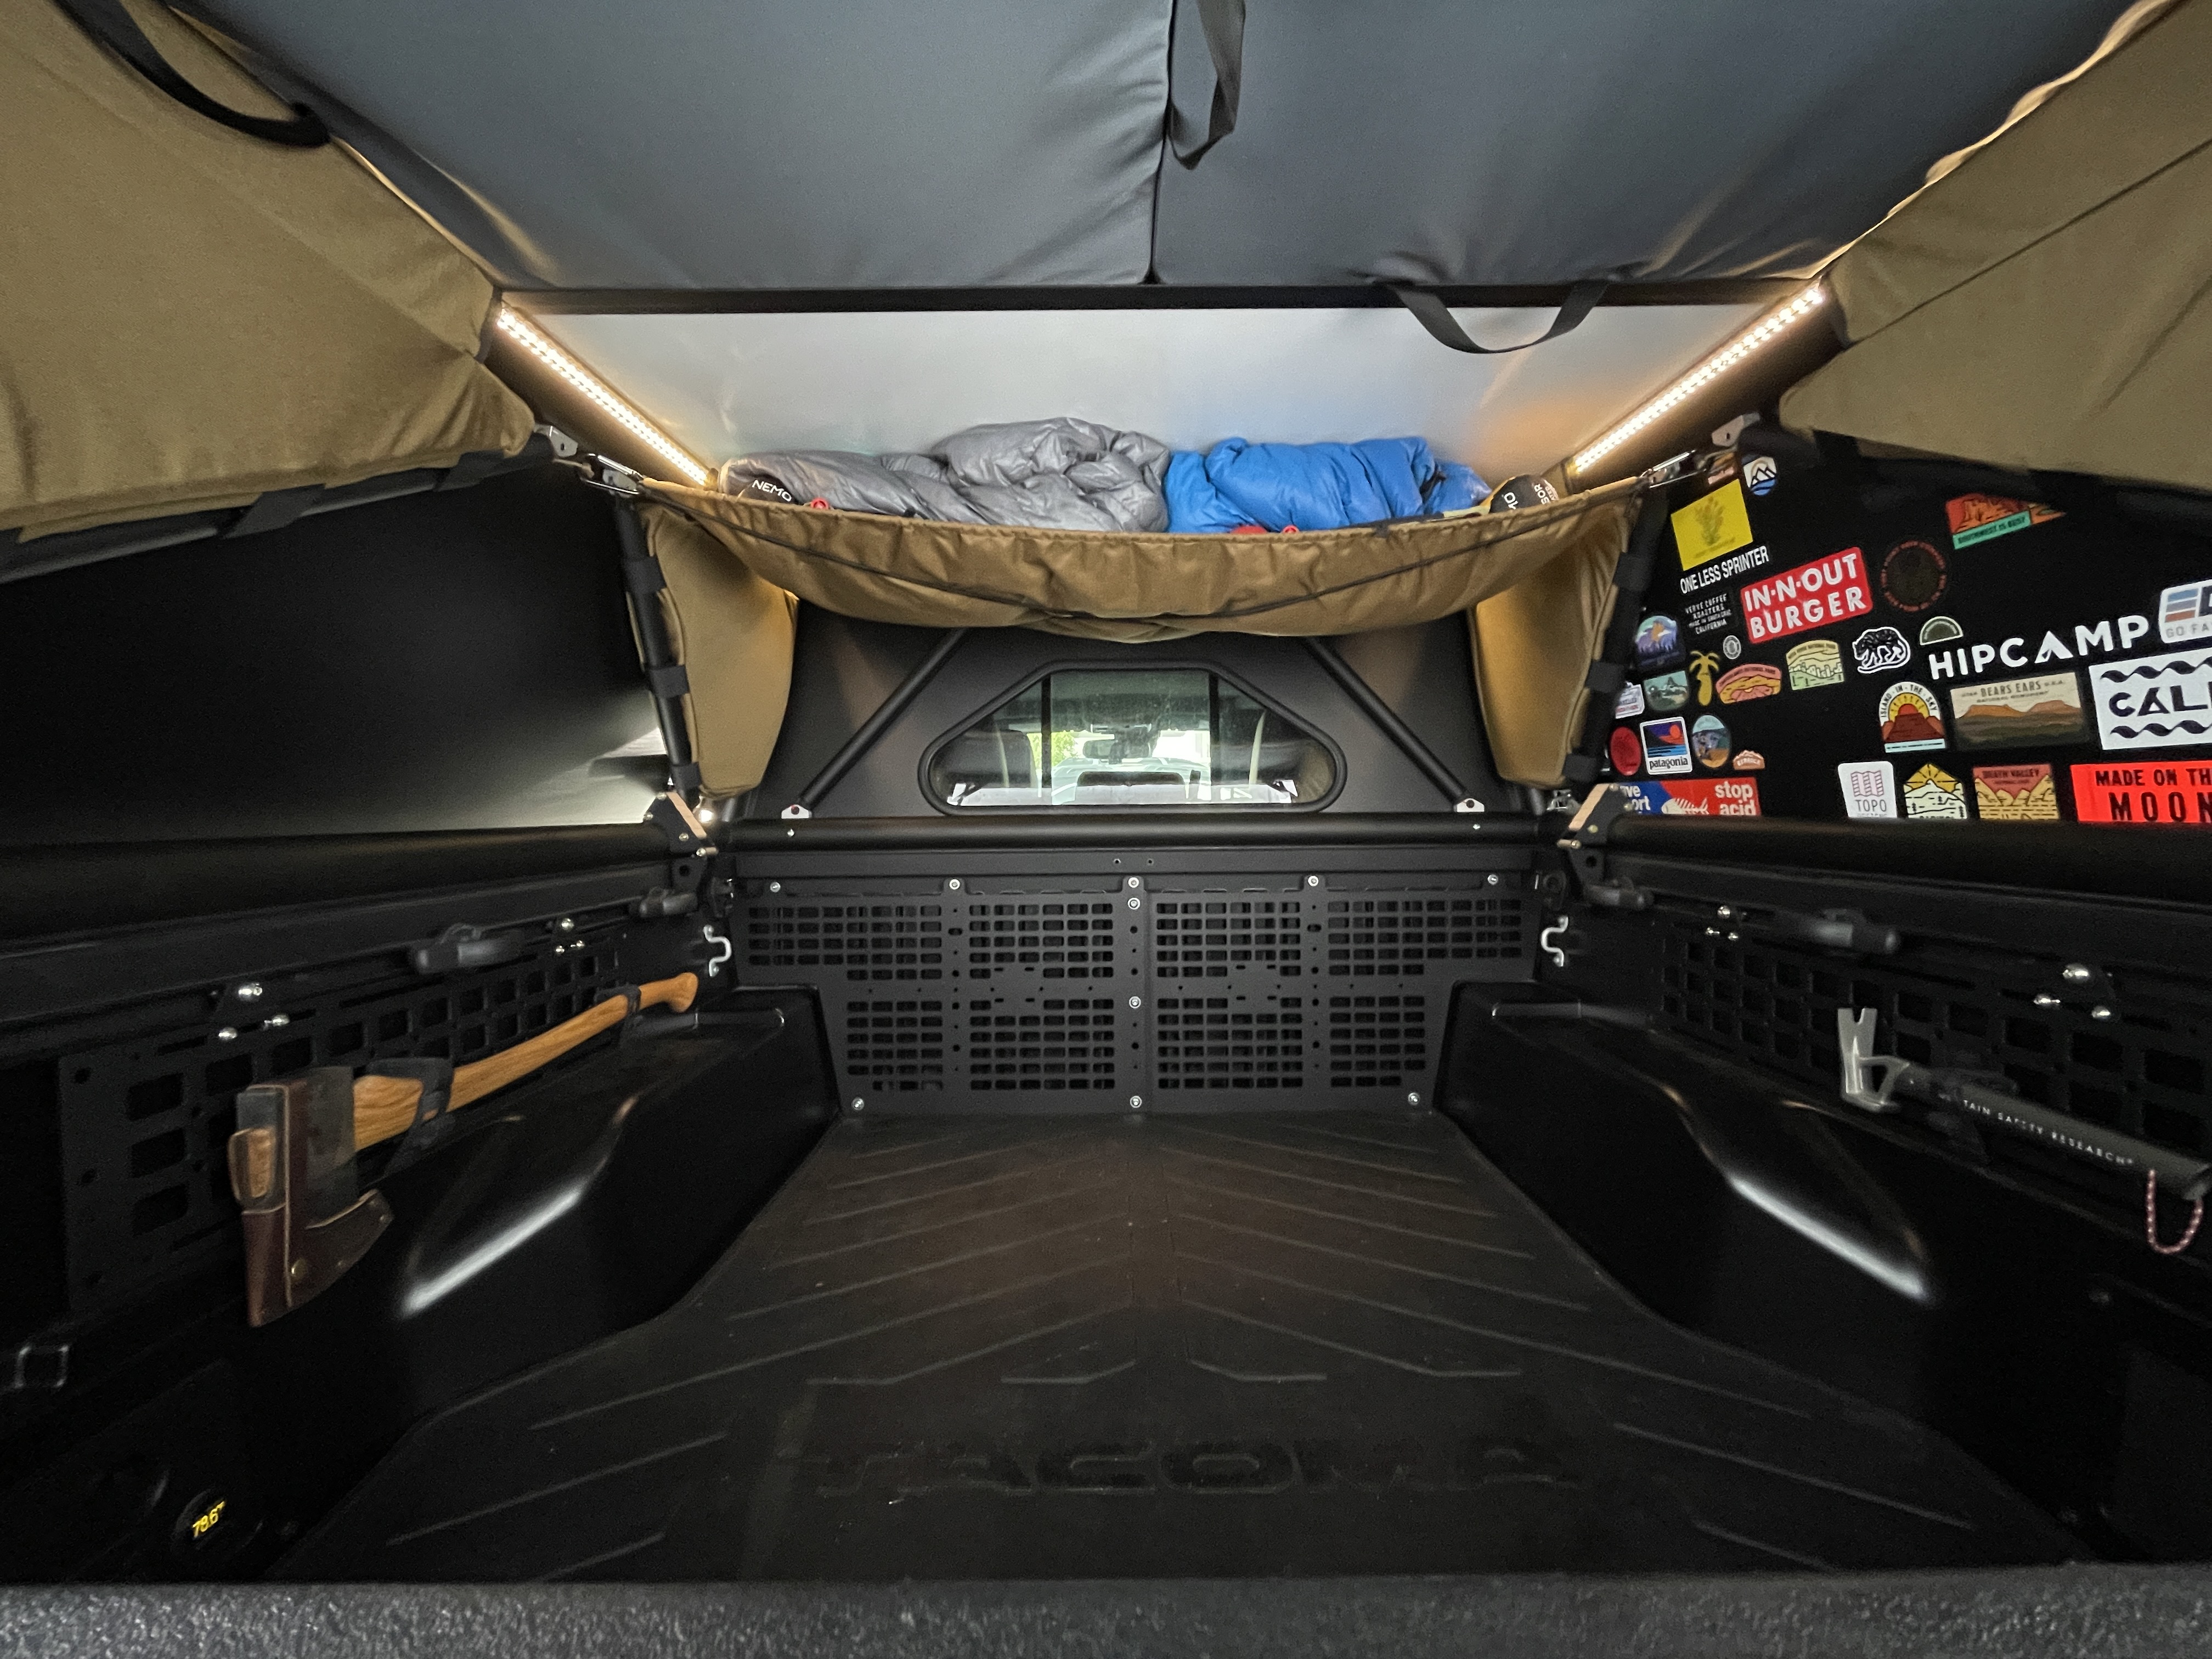
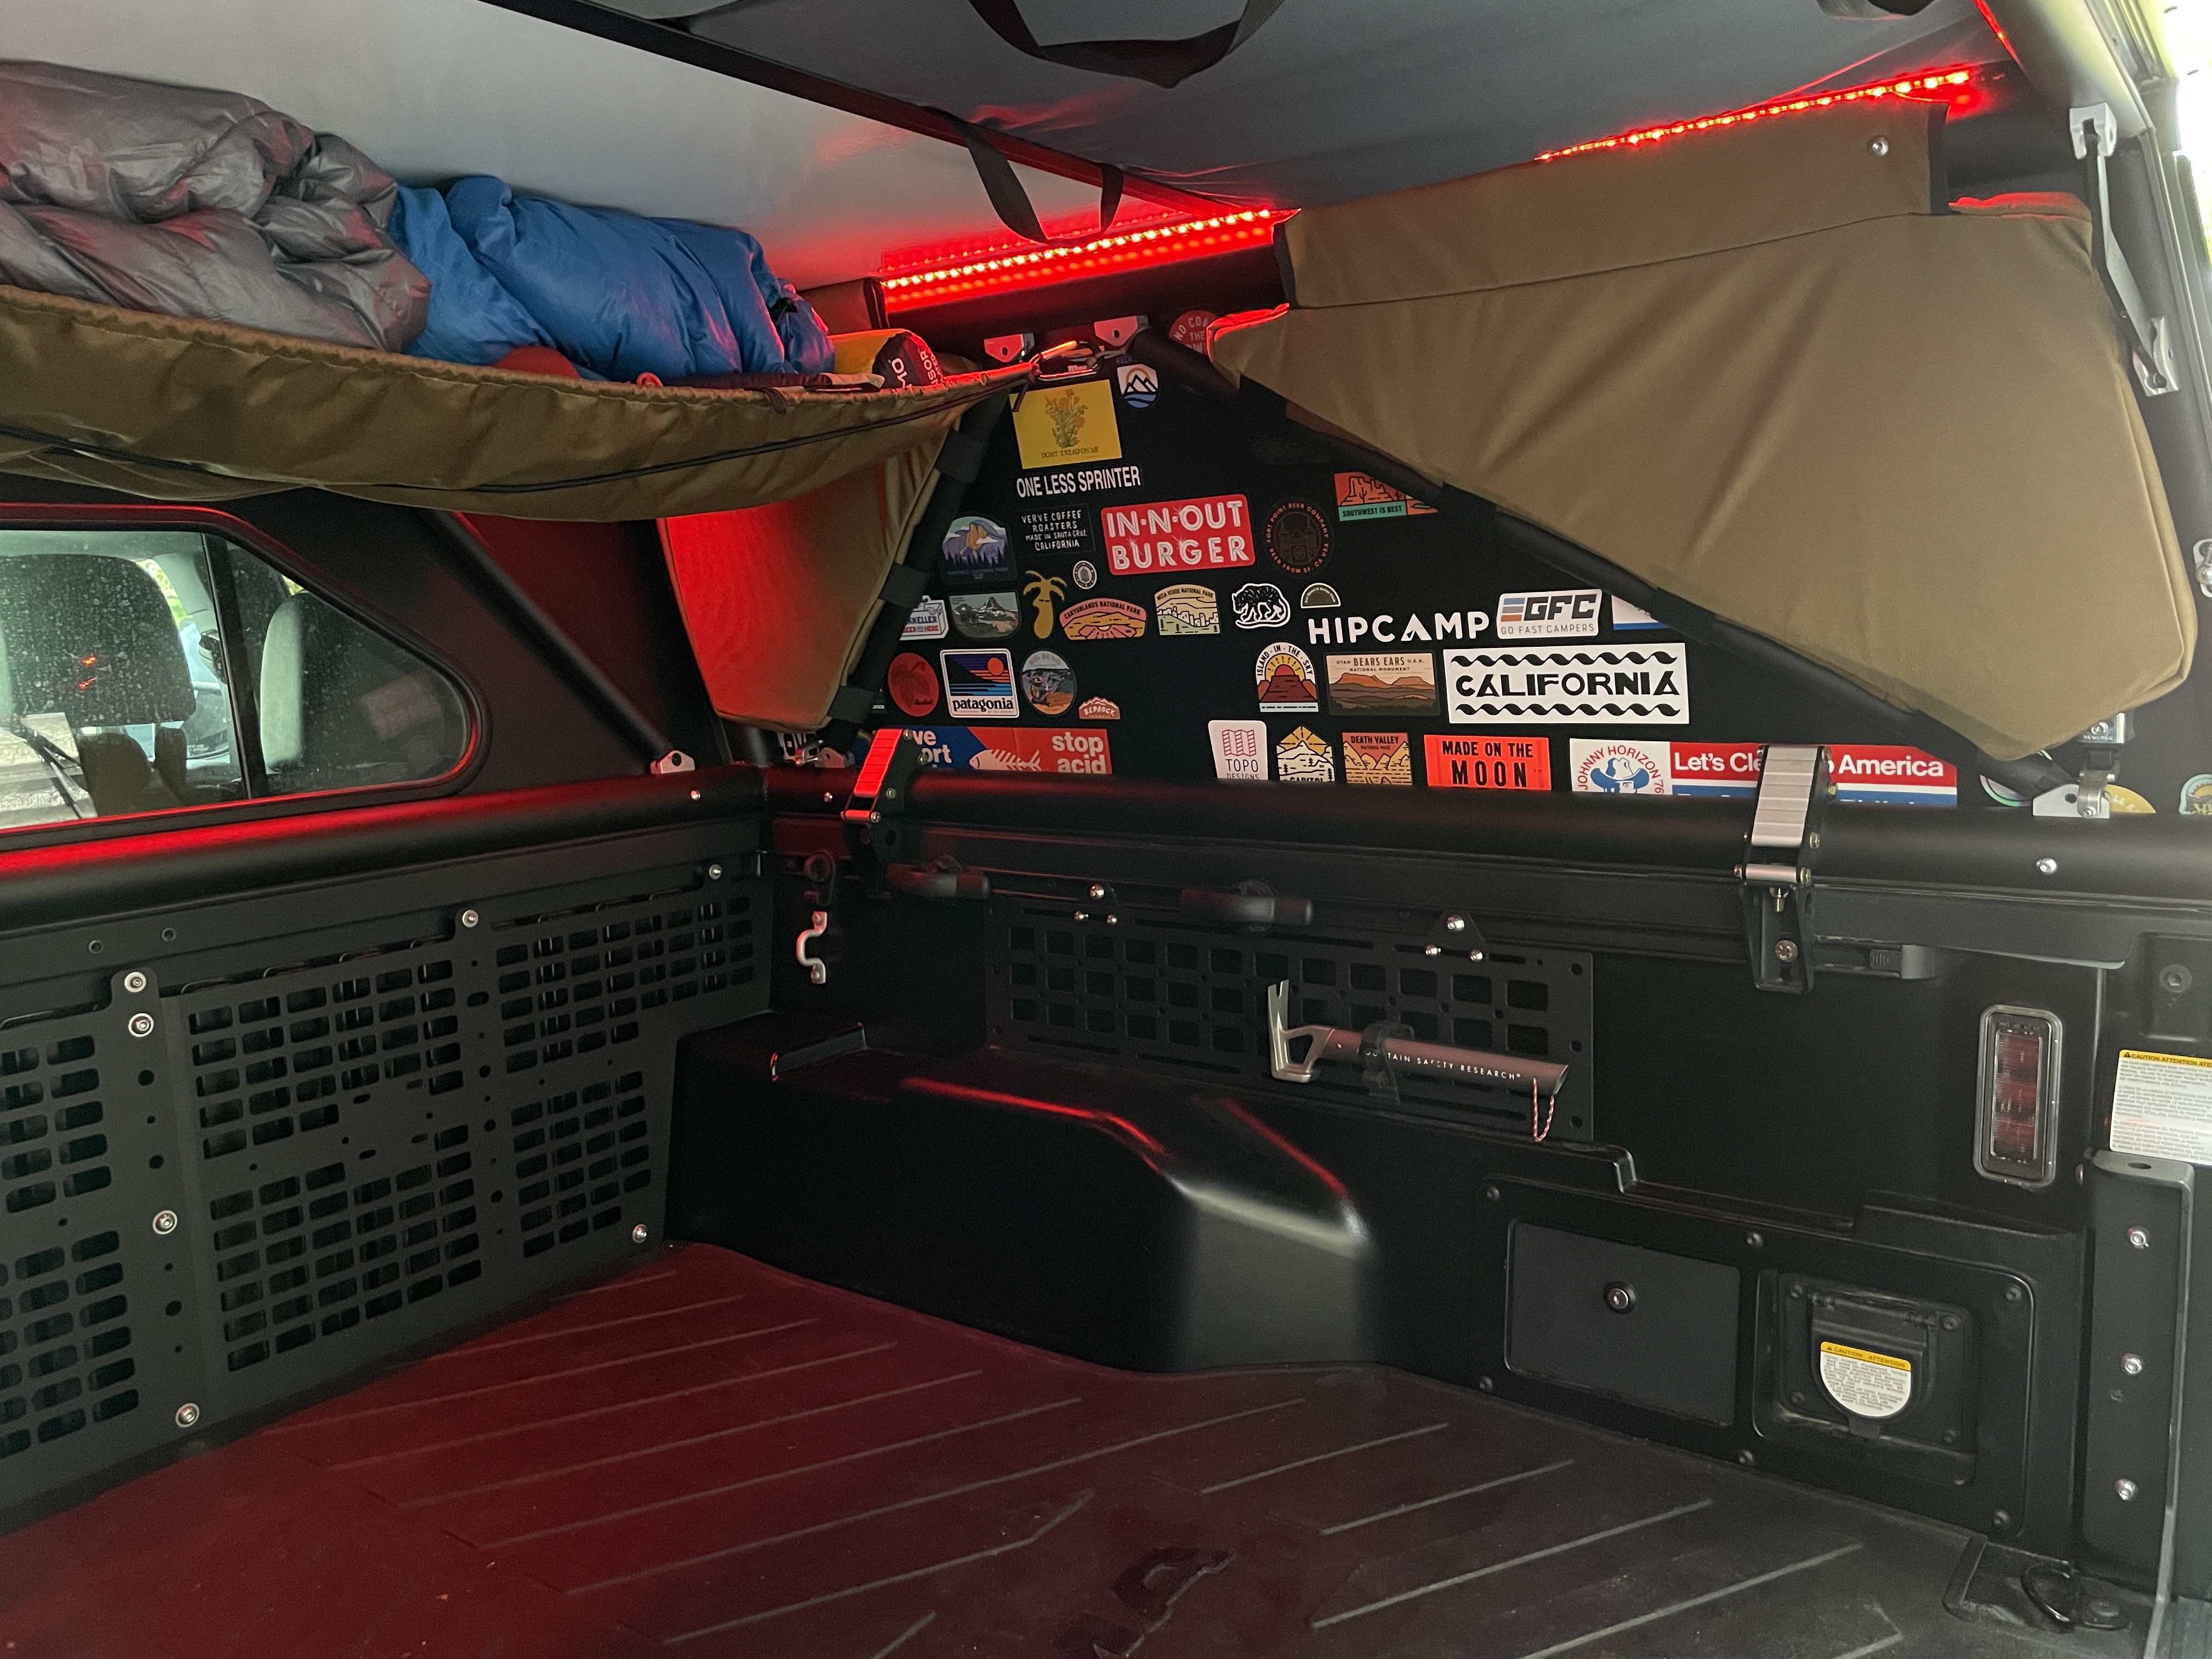
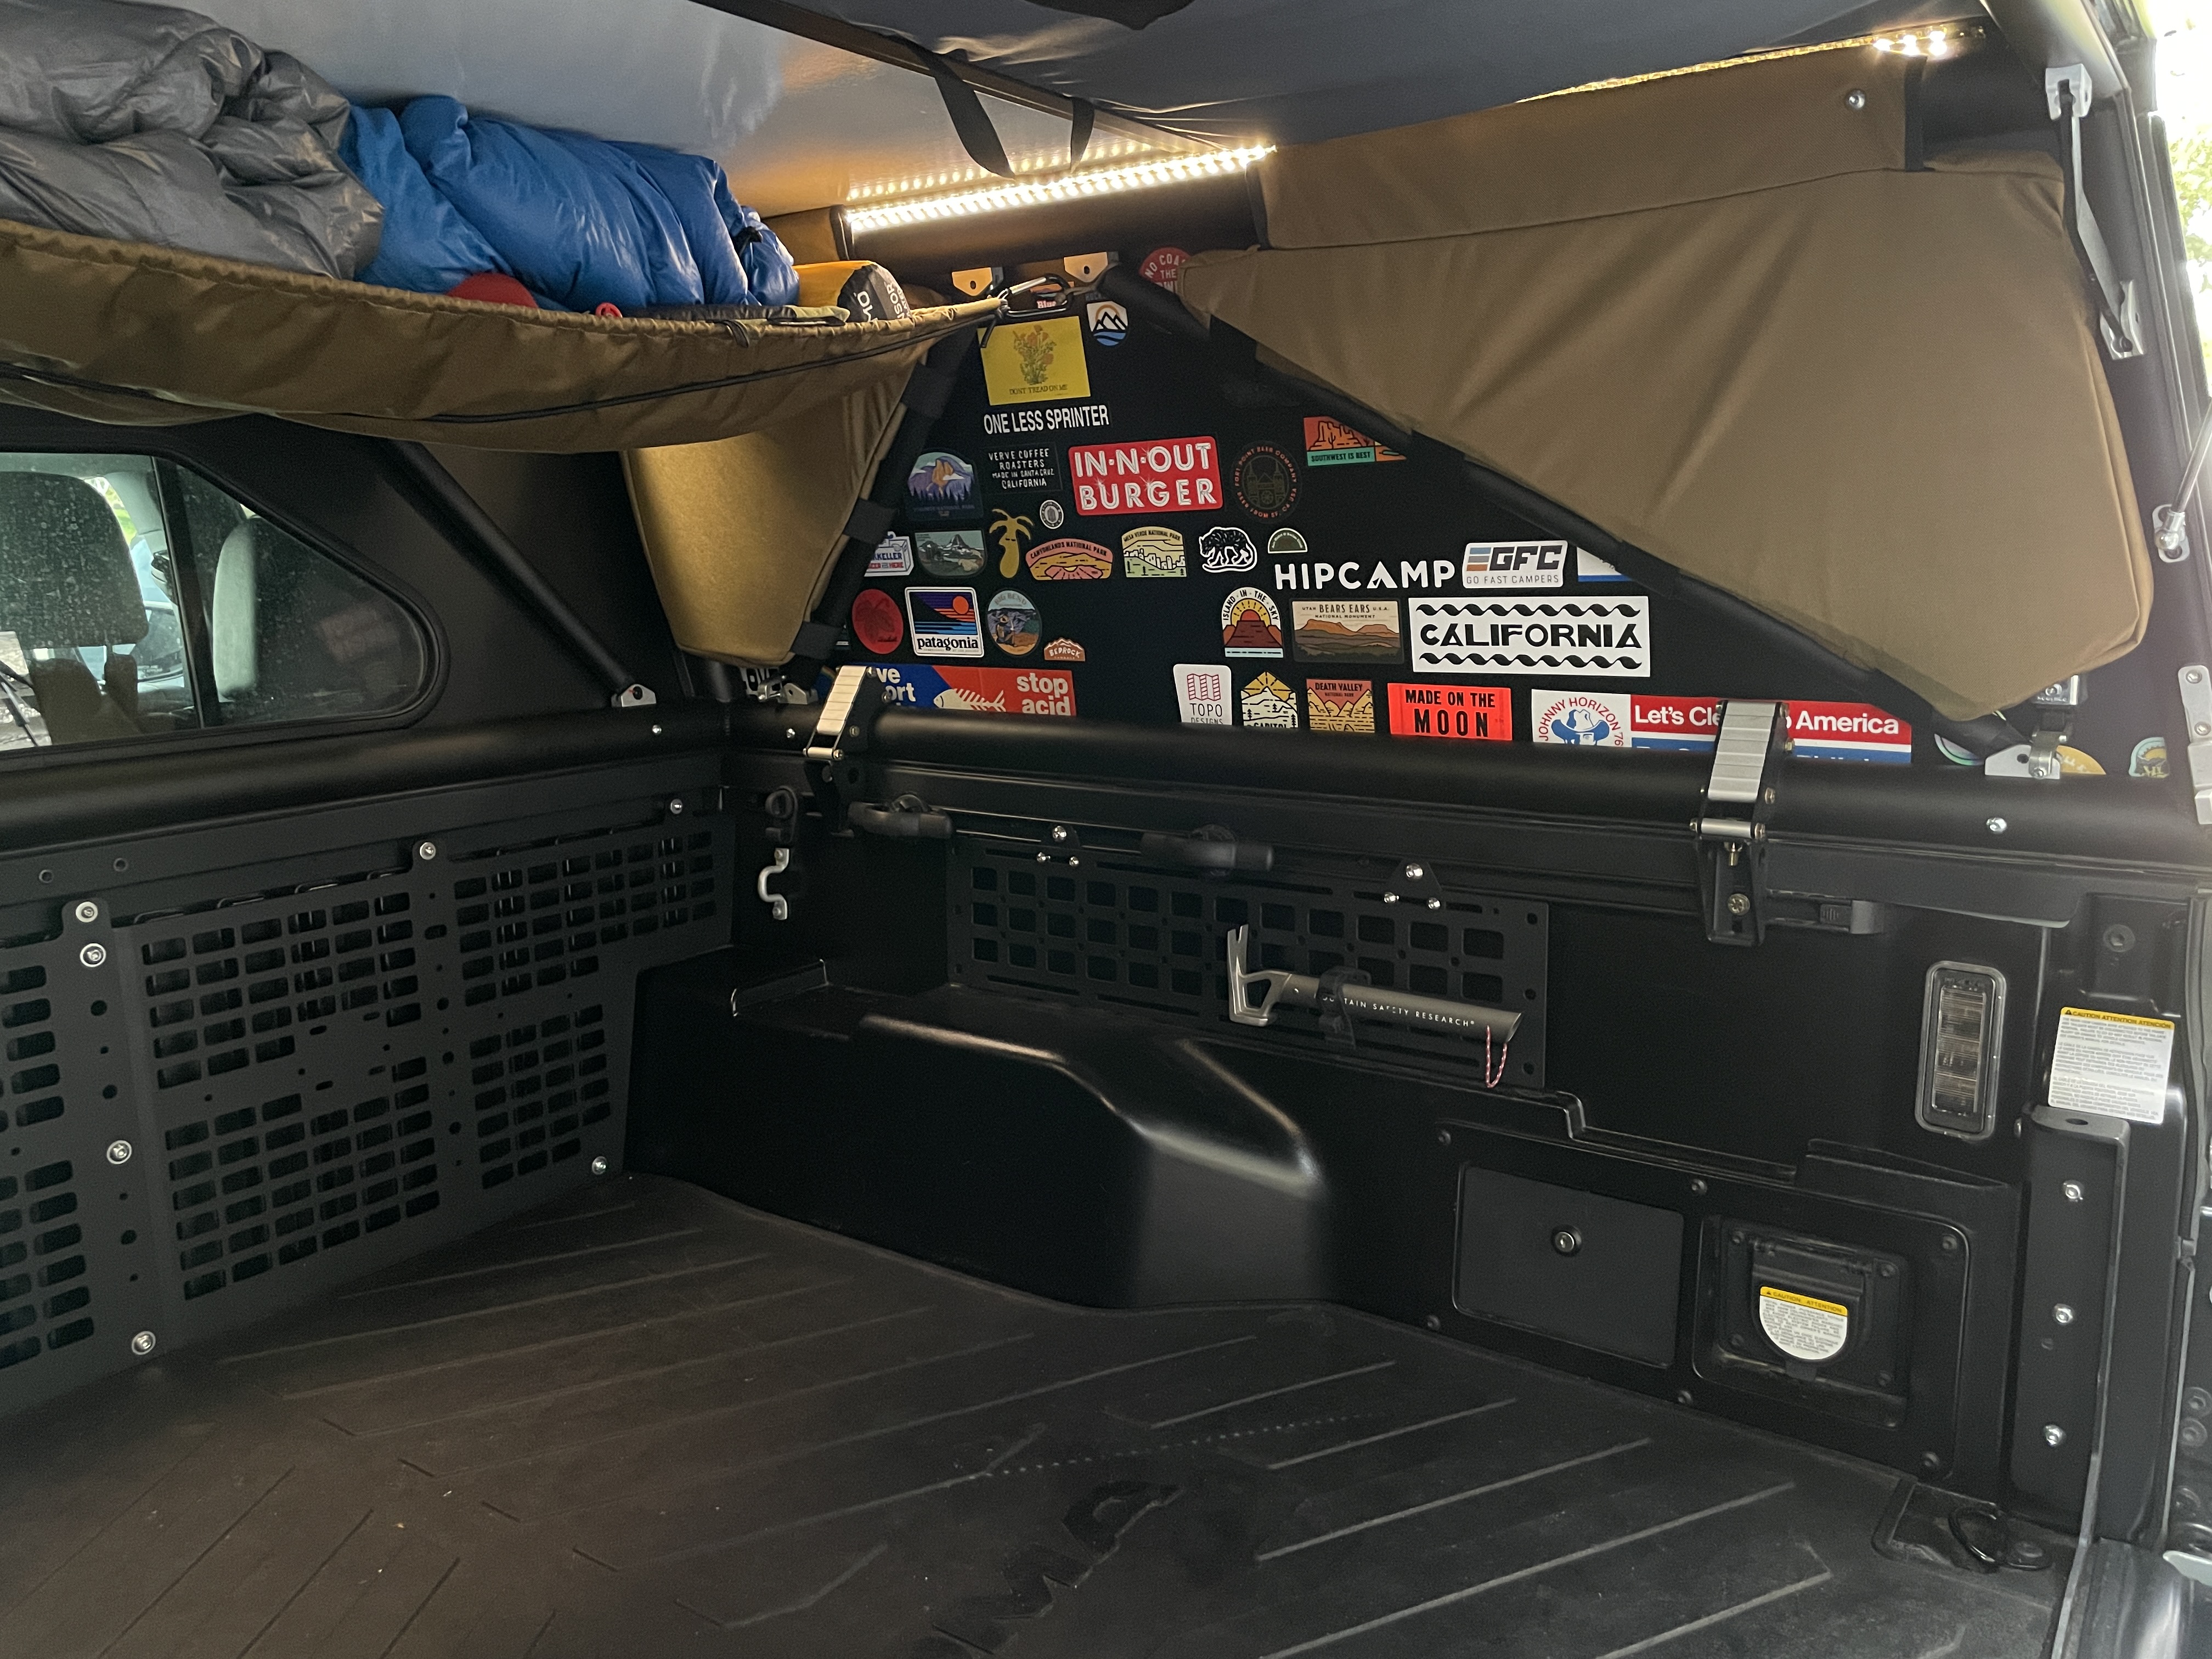
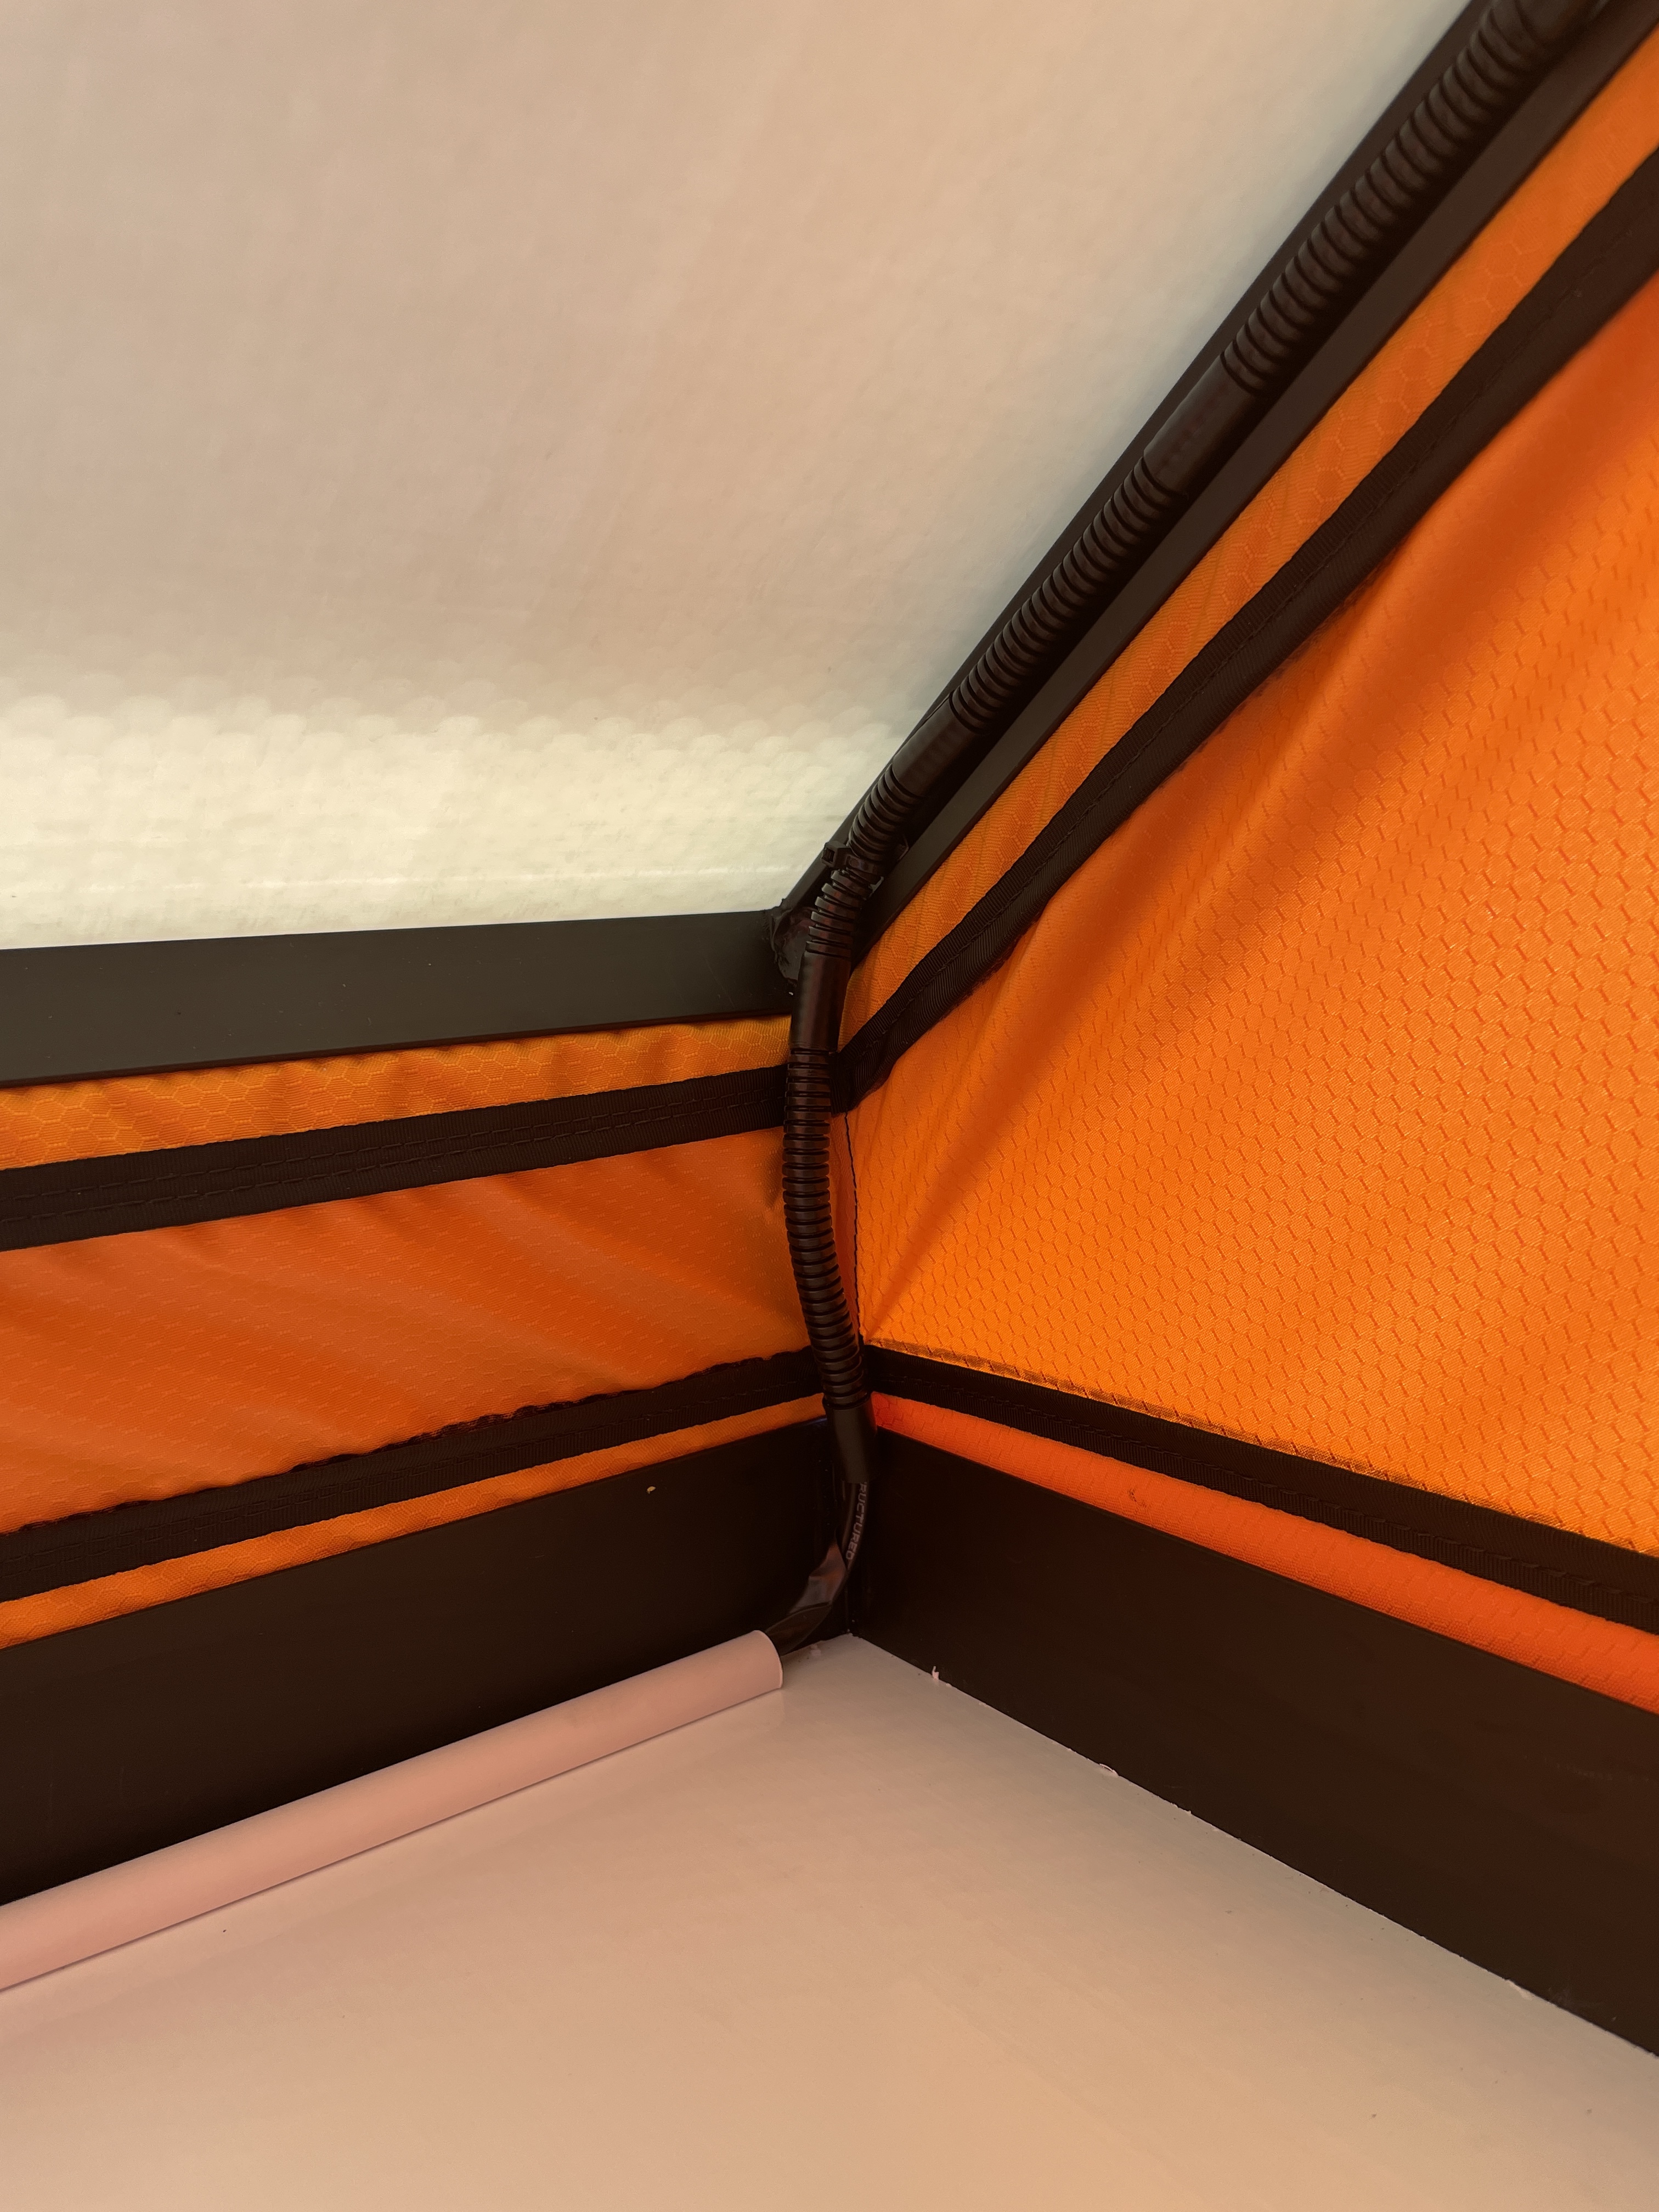
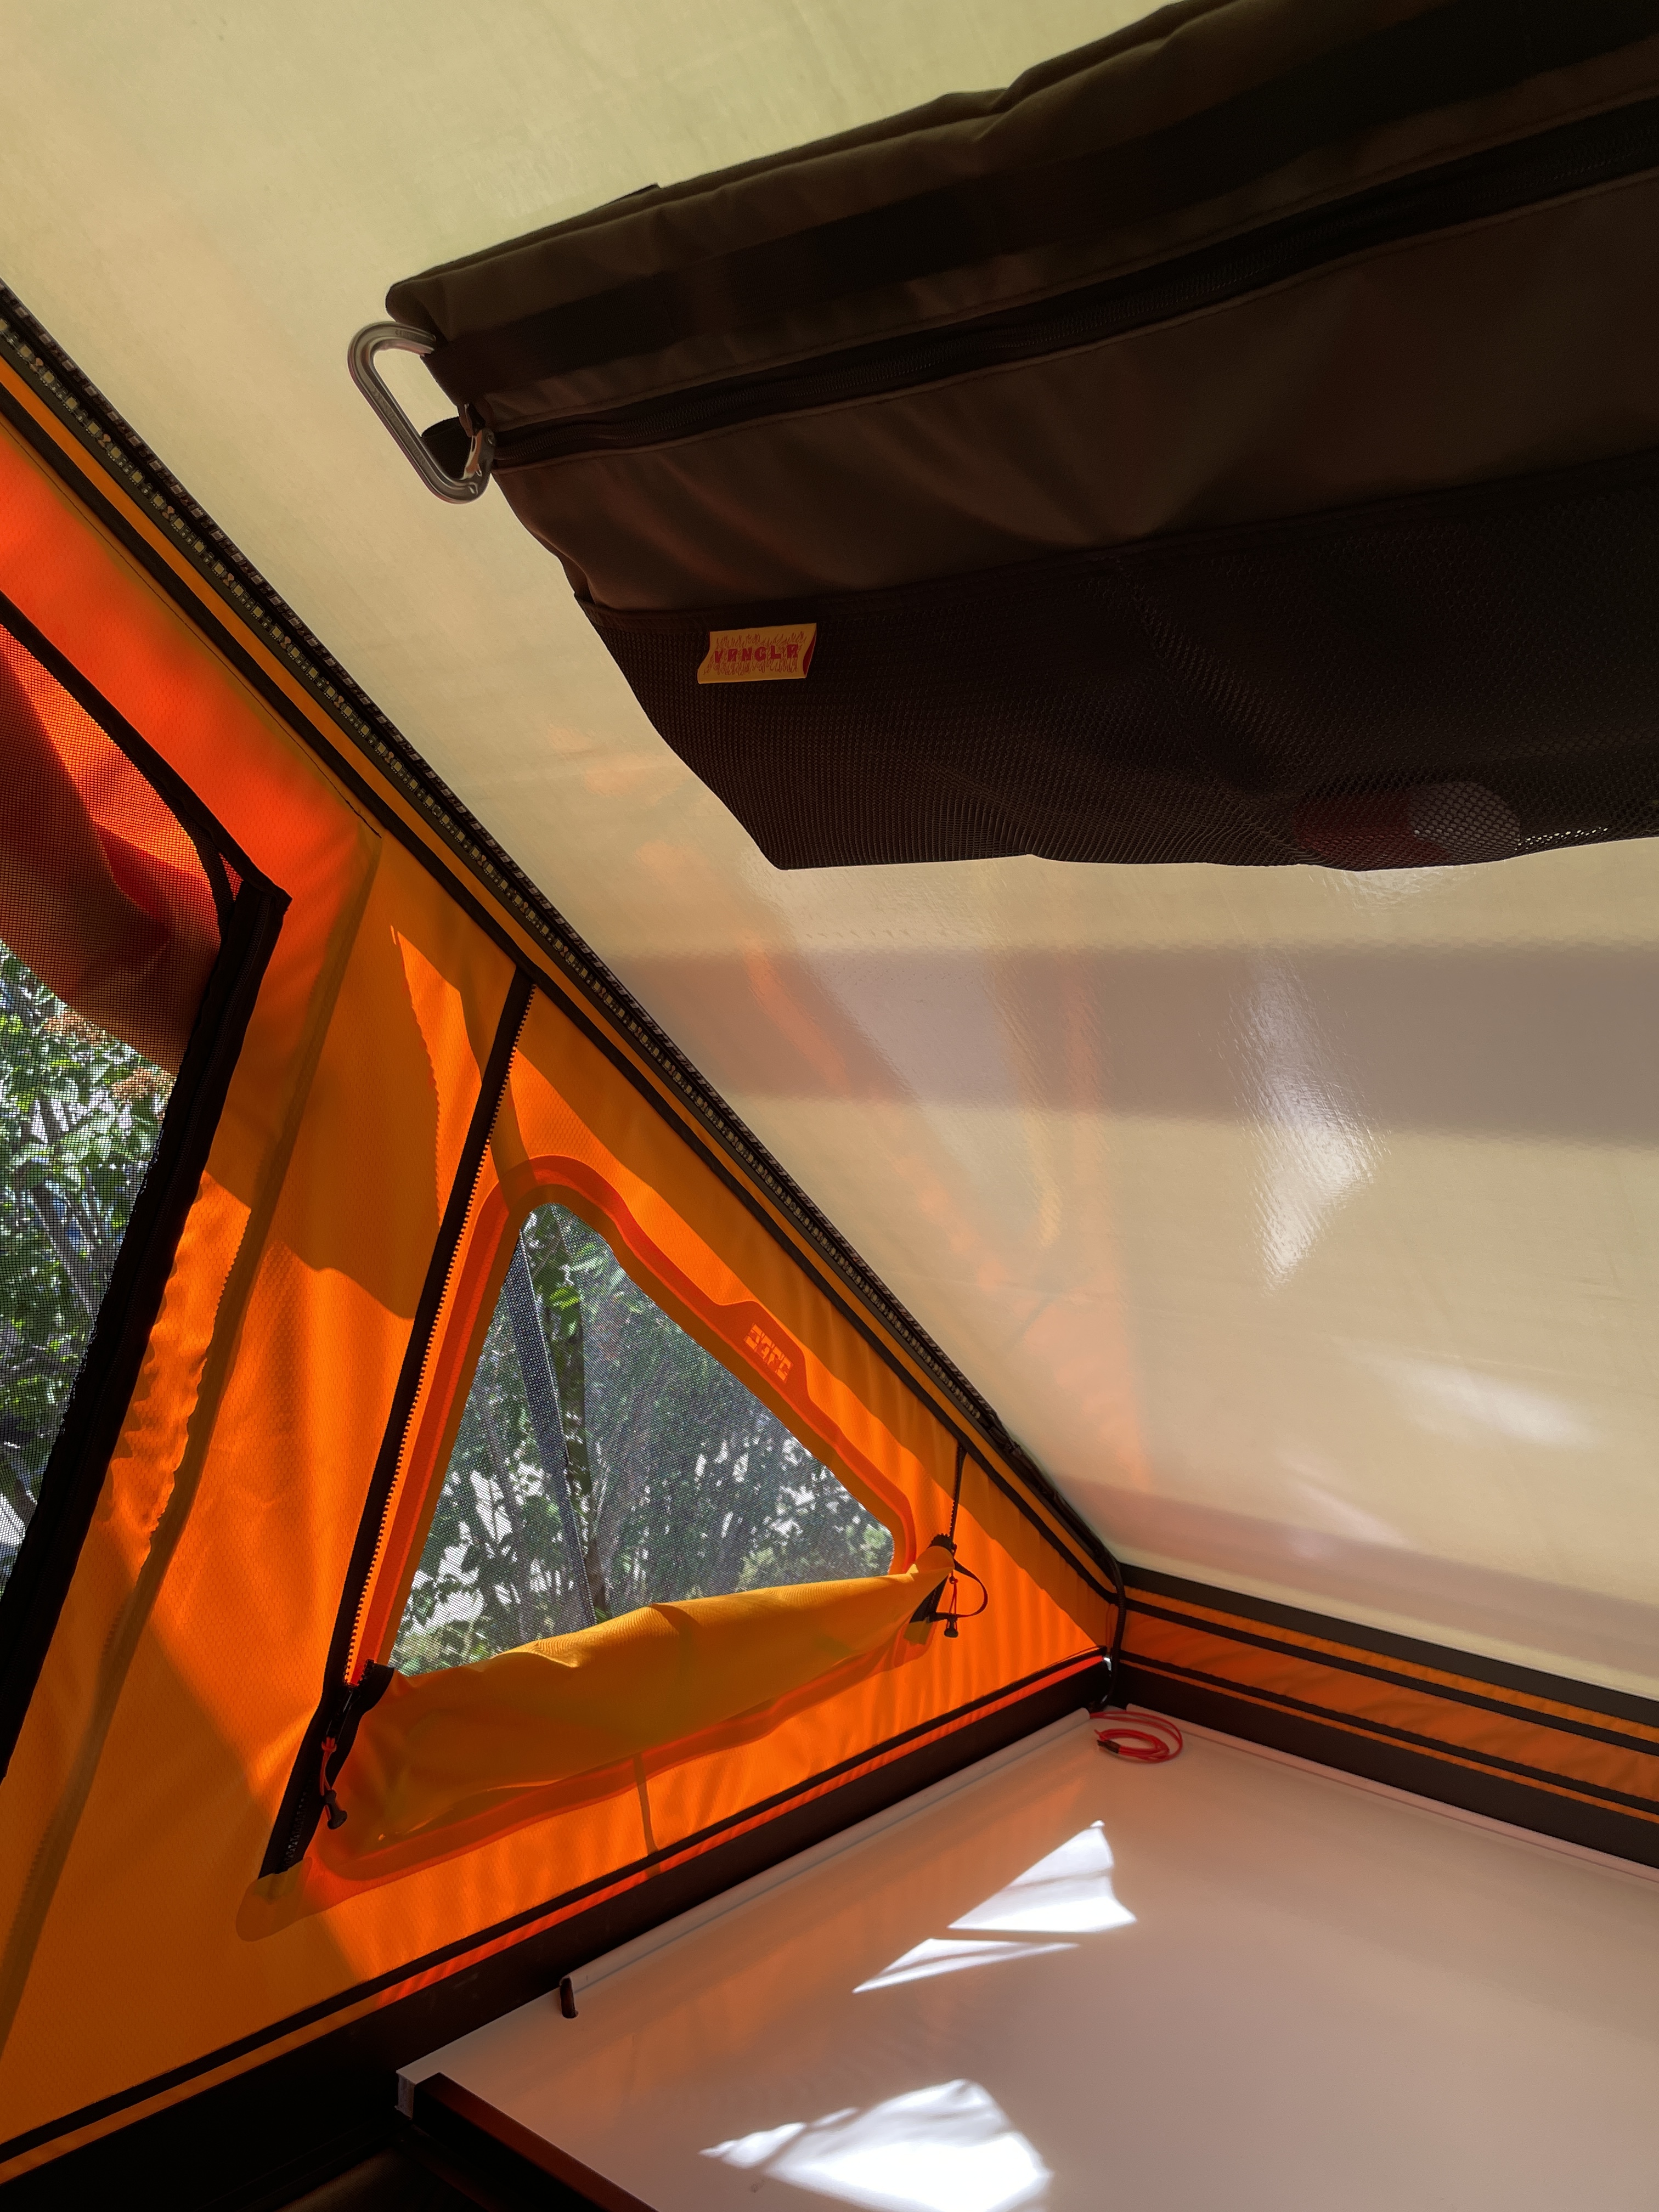
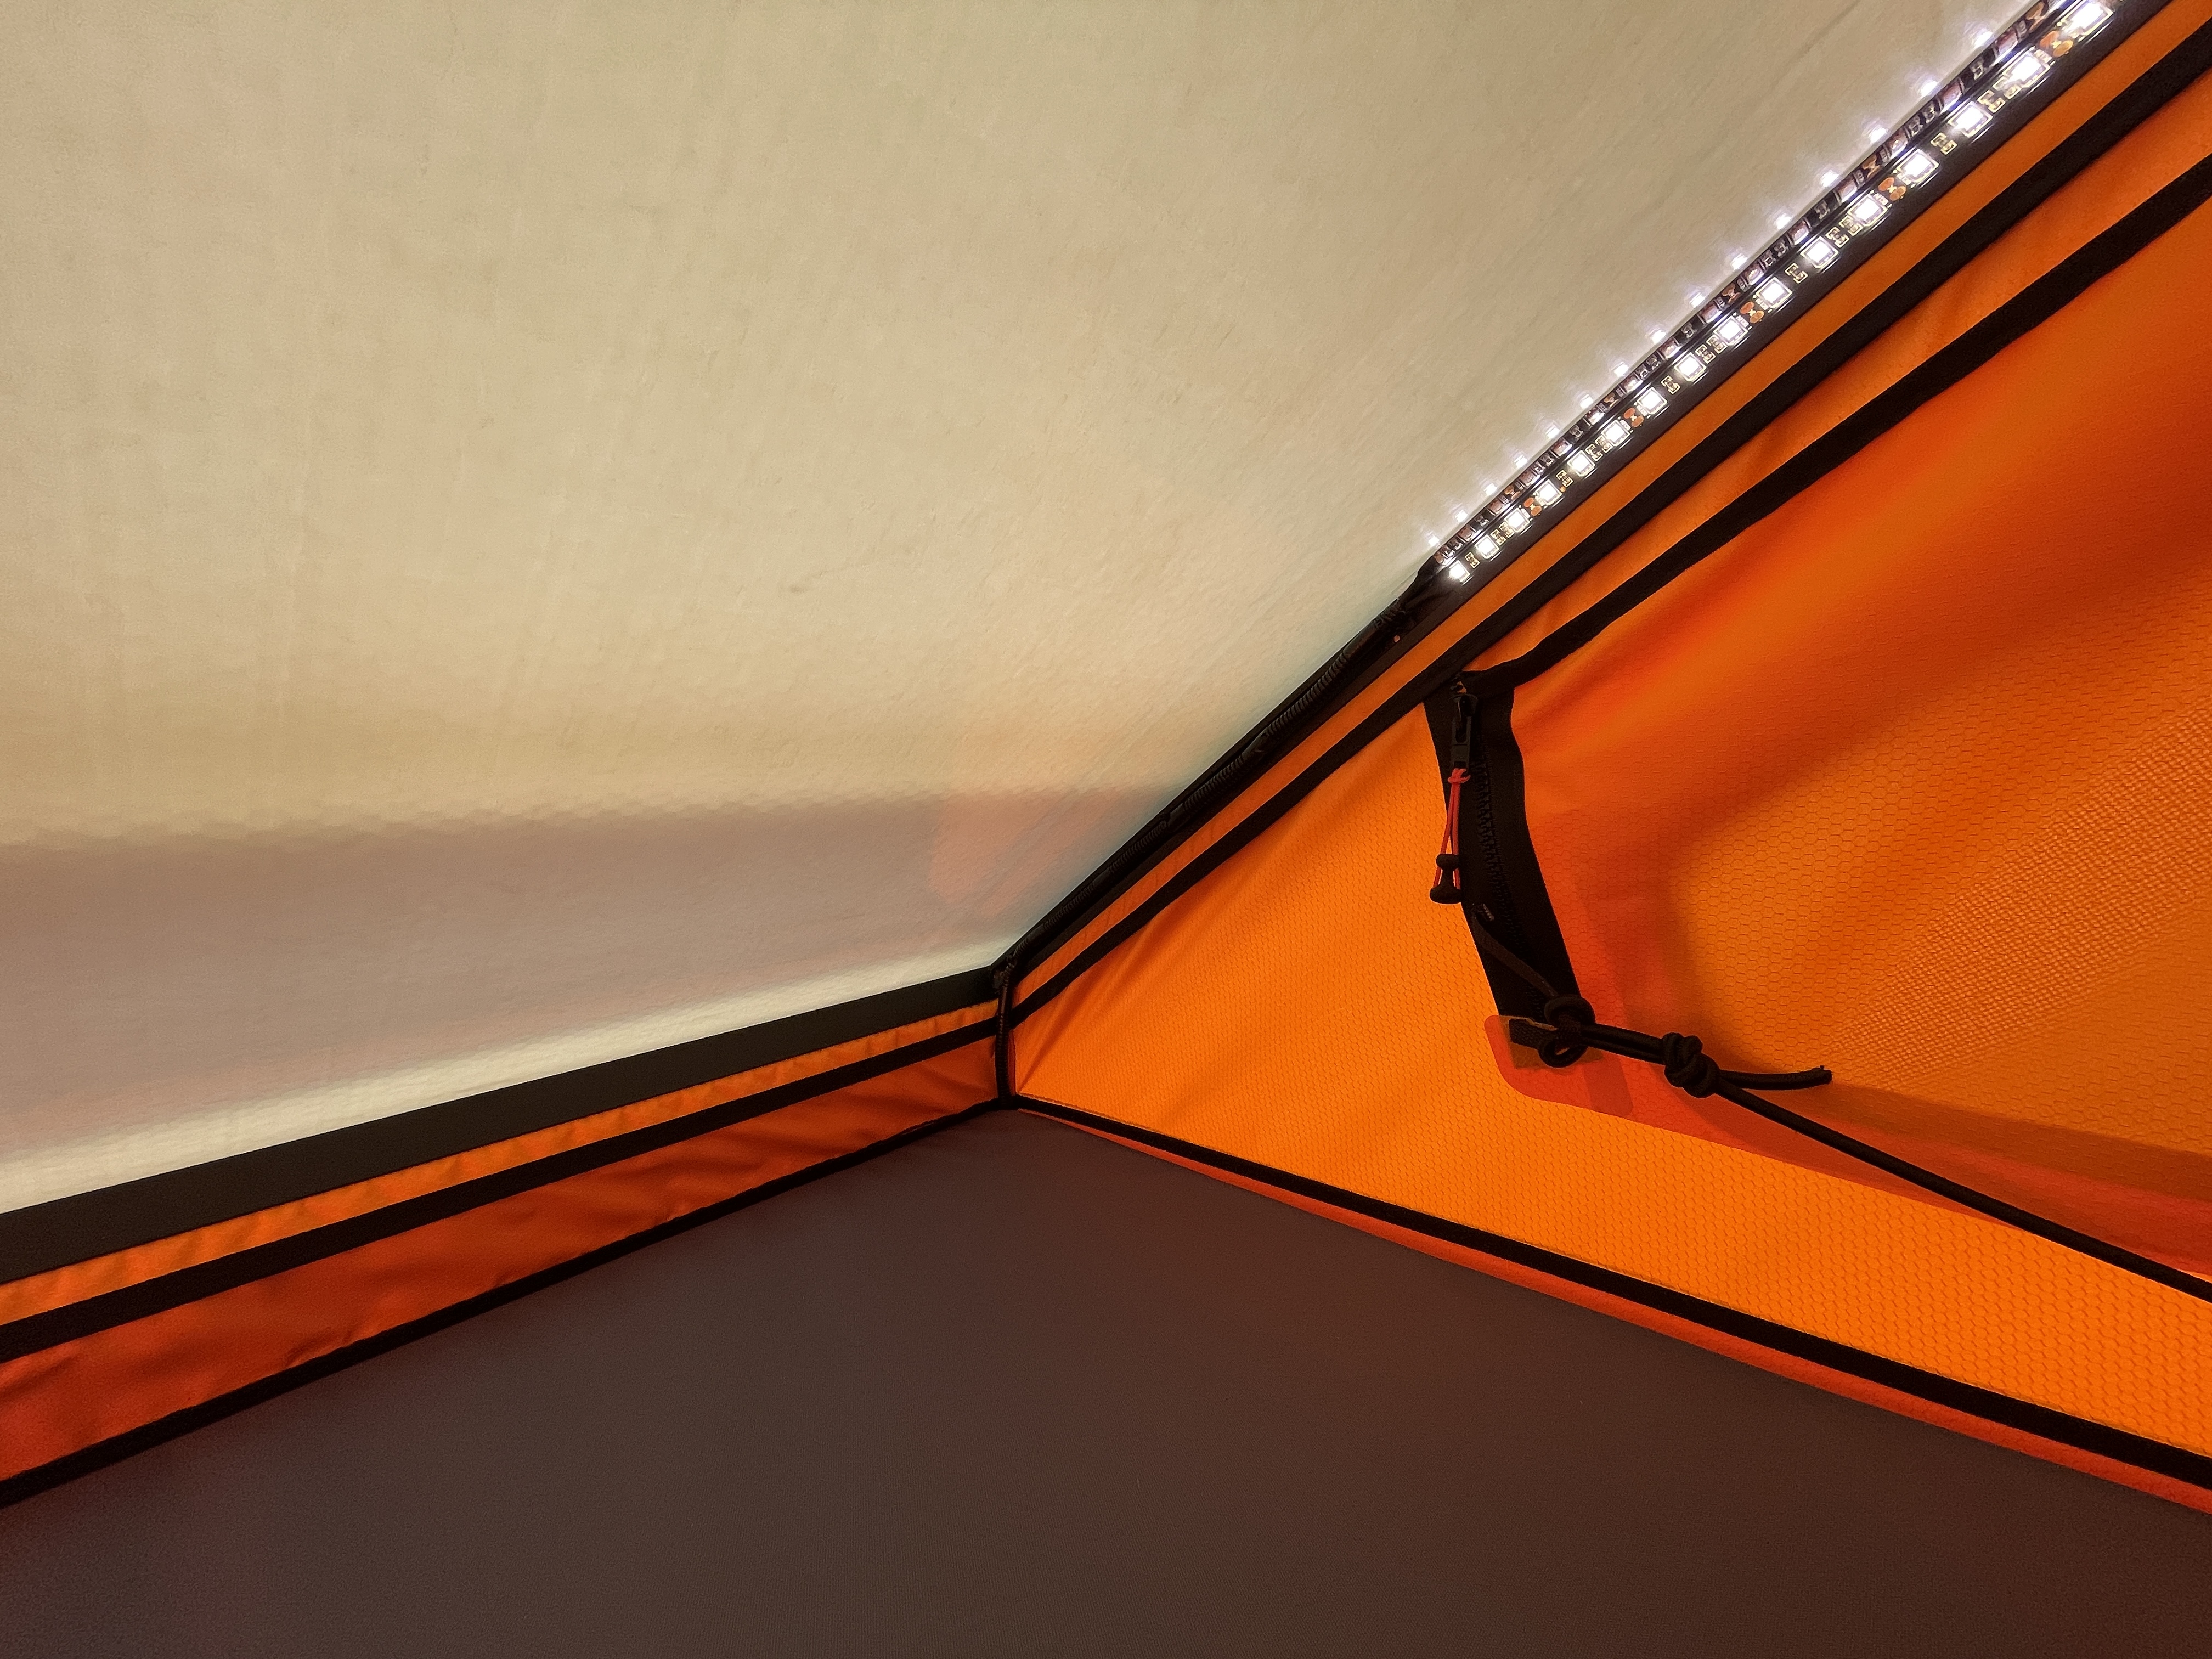
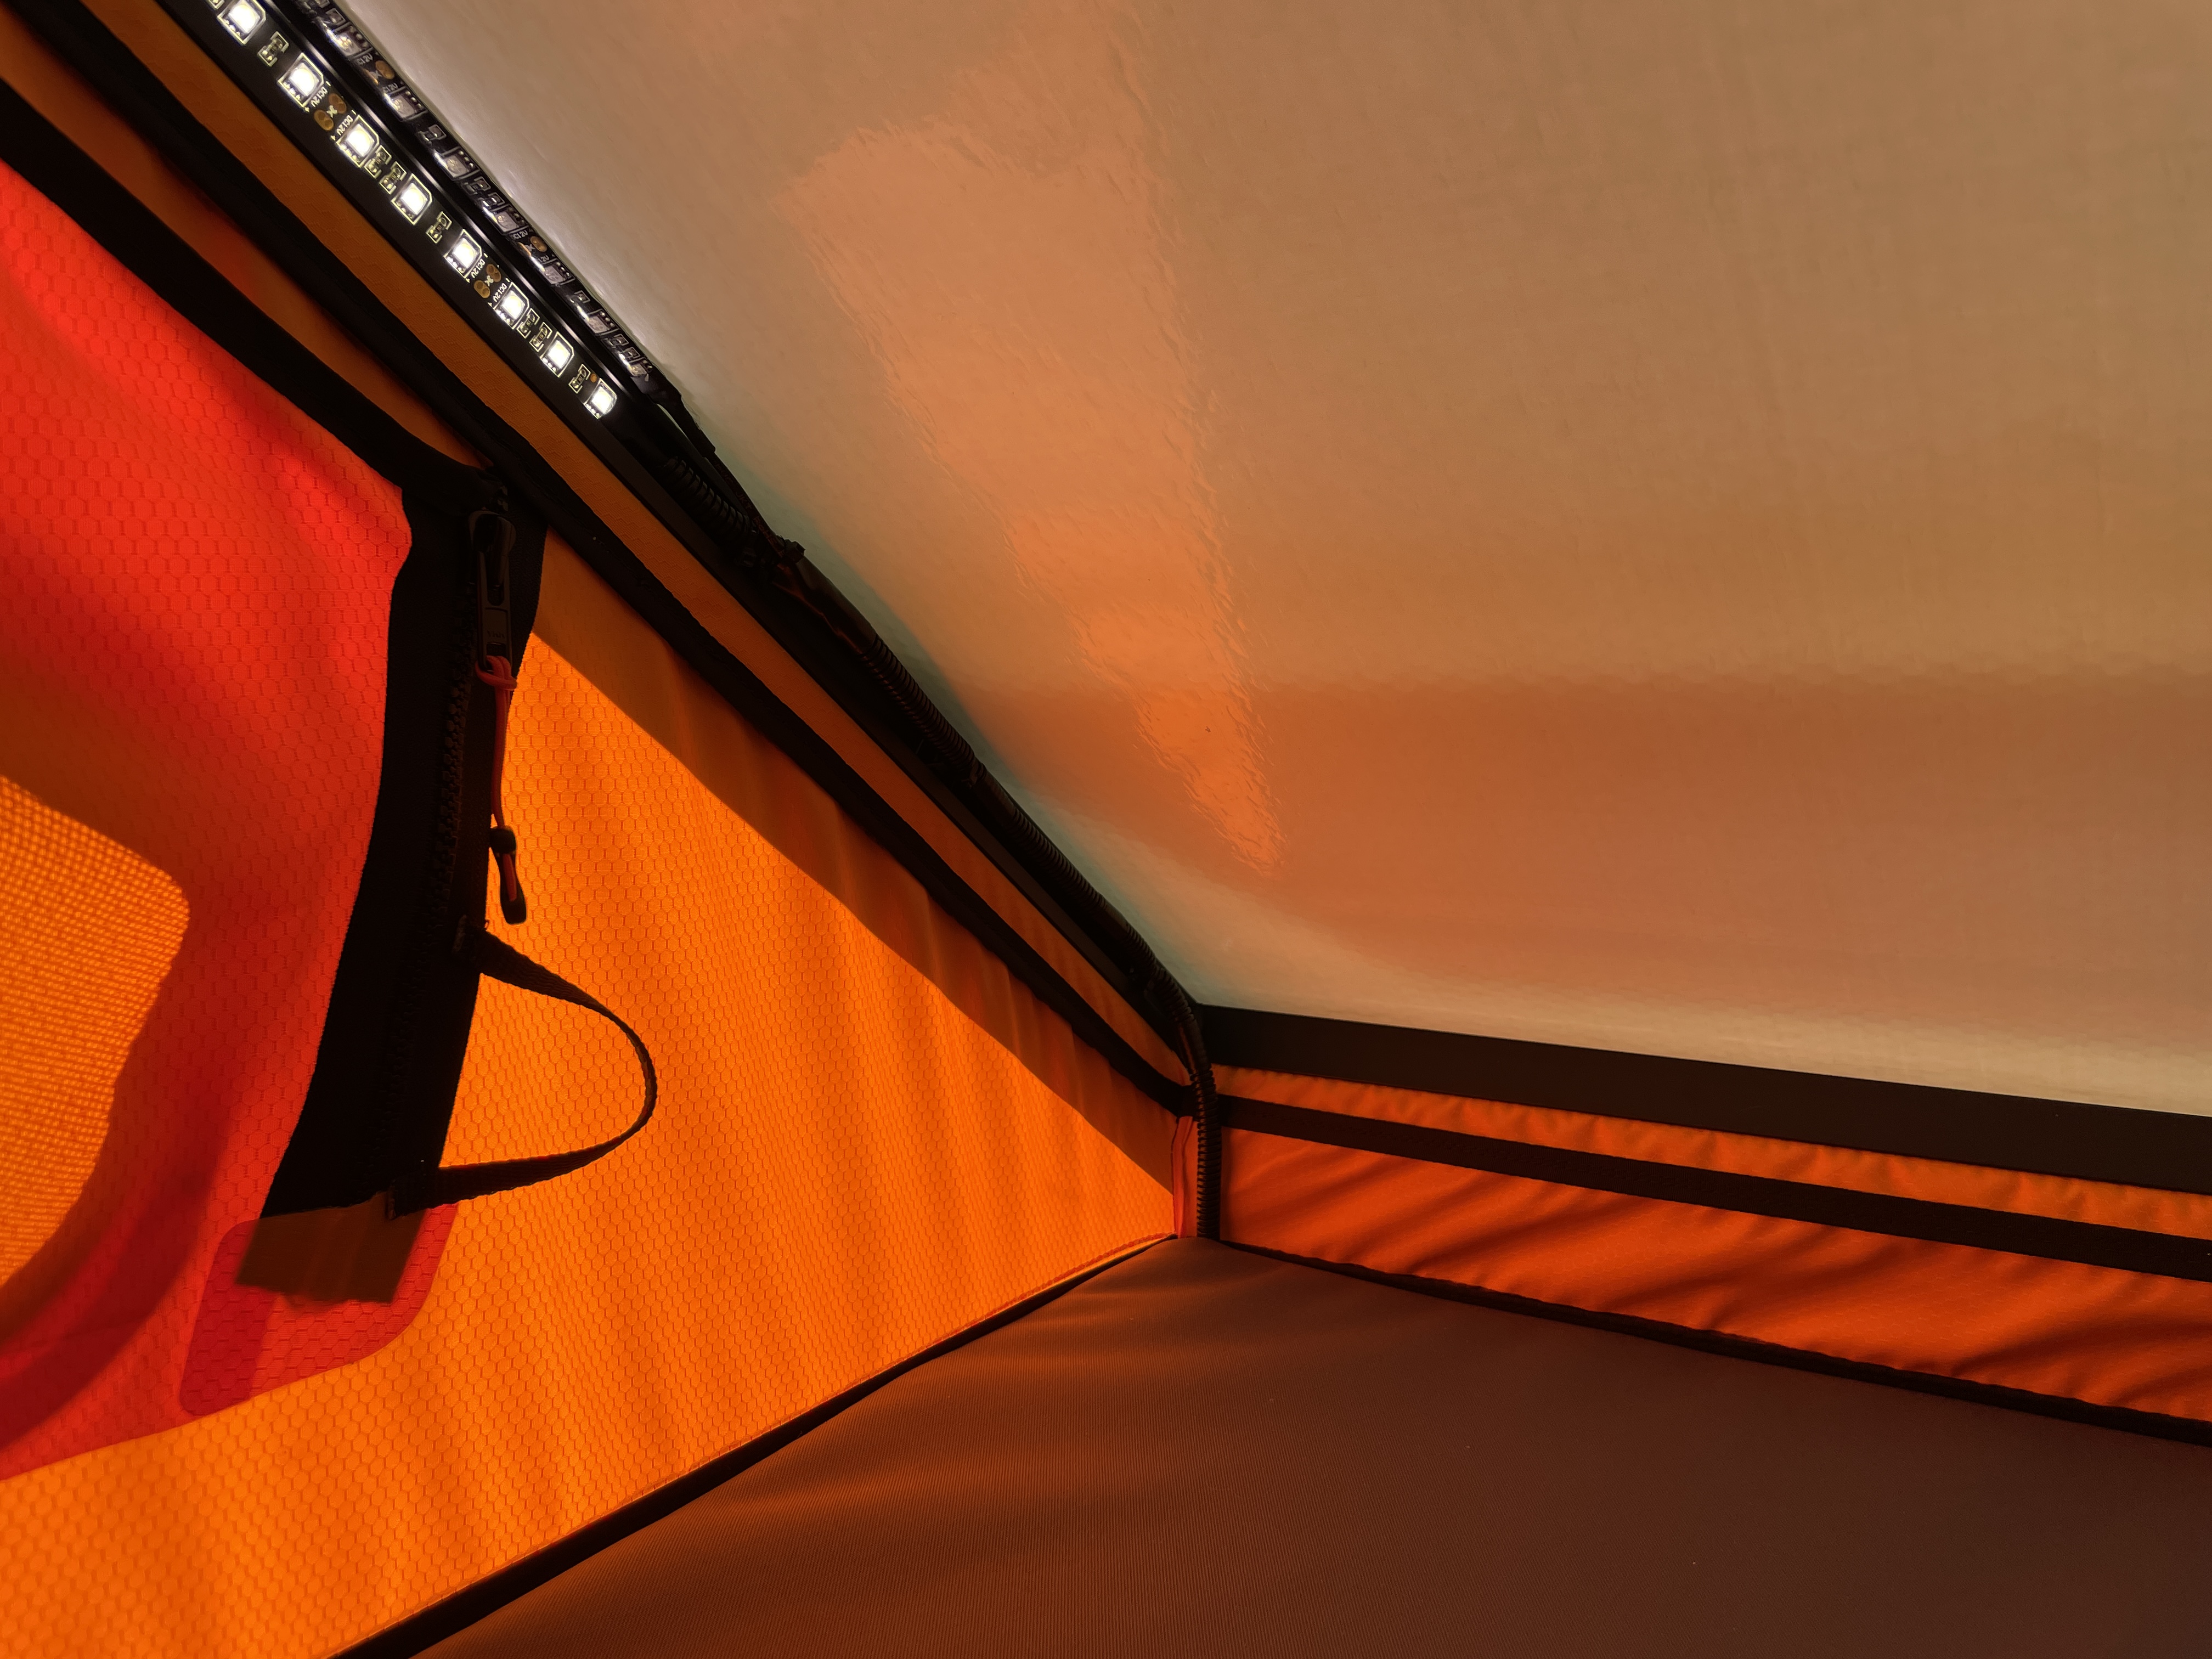
I installed the “Downstairs” portion of my Matt Gecko LED Light Kit today. I ran both the white and red LED strips along the perimeter of the lower deck. Worth noting that these fit the V2 rail perfectly albeit being designed for the V1. (Aside: I’m going to tinker with my VRNCLR bags to try to expose more of the LEDs that are blocked by them.)
I ran all the wiring through the Driver Side tail light (following my path for the GFC brake light) and continued into the “Electrical cubby” (Required a new hole). I opt’d to swap out Matt’s single switches with Blue Sea Systems Rocker Switches to bring the four individual switches down to two. I wired one rocker for the “downstairs” white and red LEDS and prepared the second rocker for the “upstairs”. Really happy with how clean and “factory-esque” this install looks!
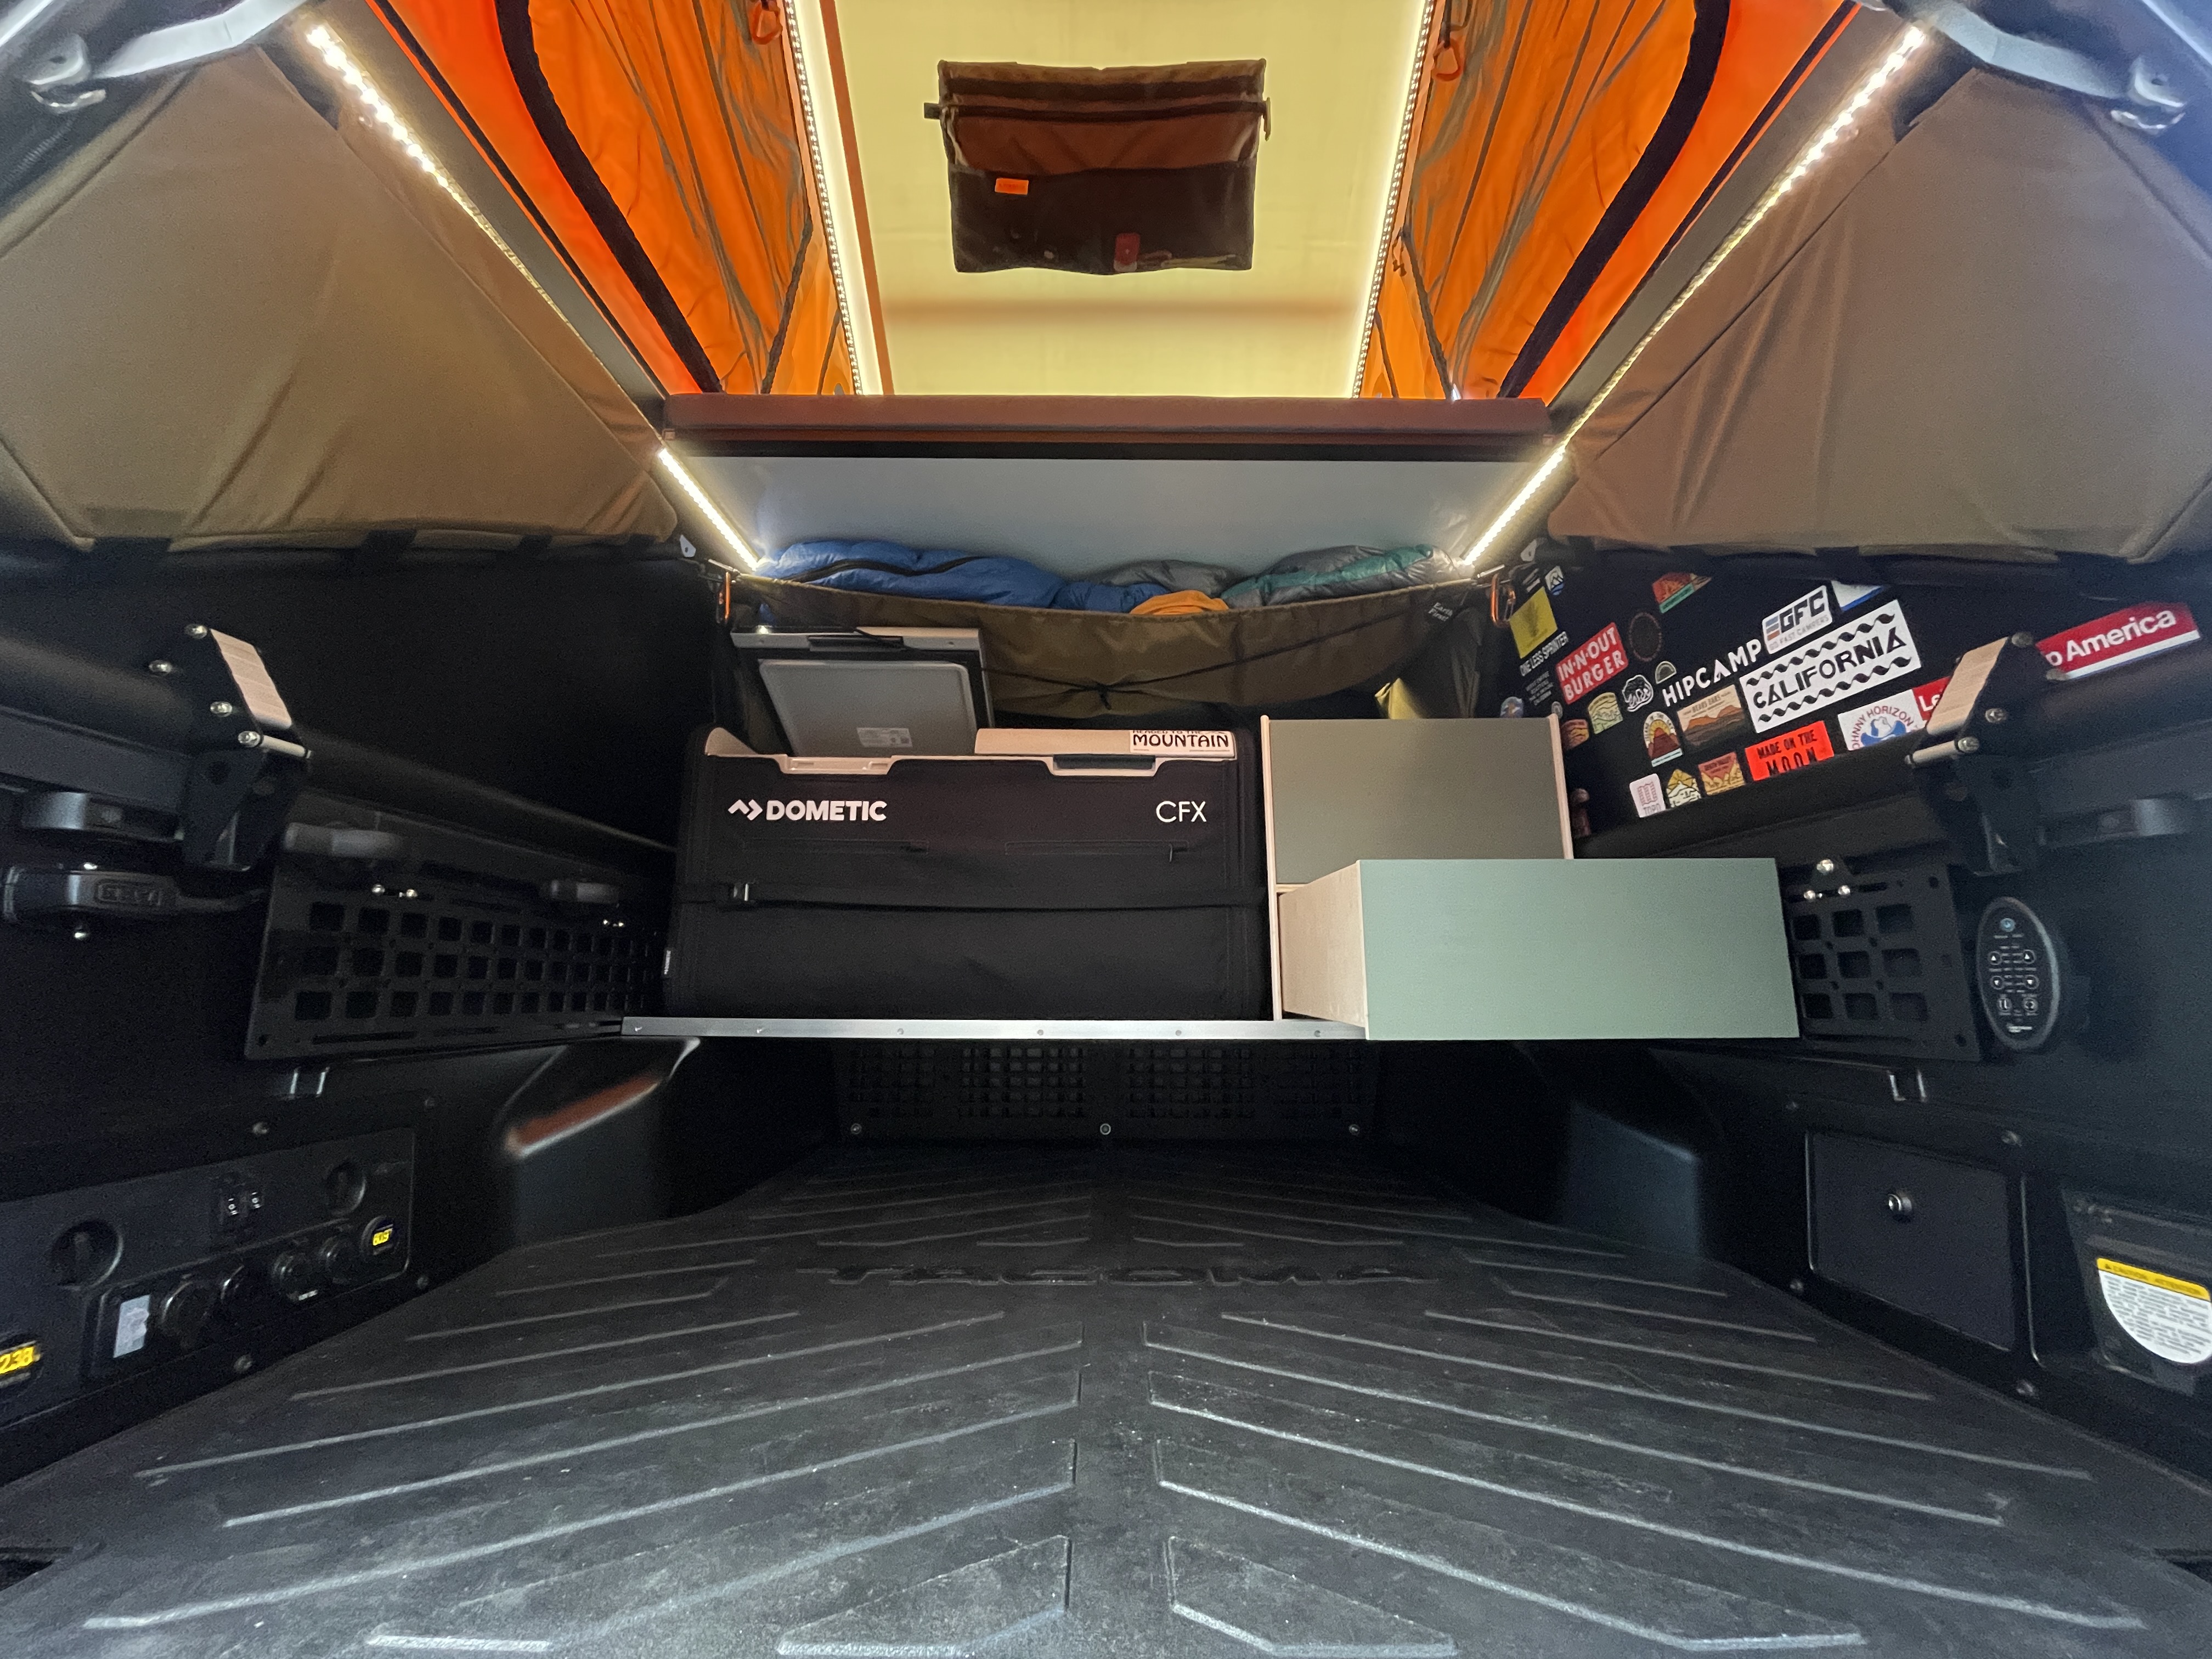
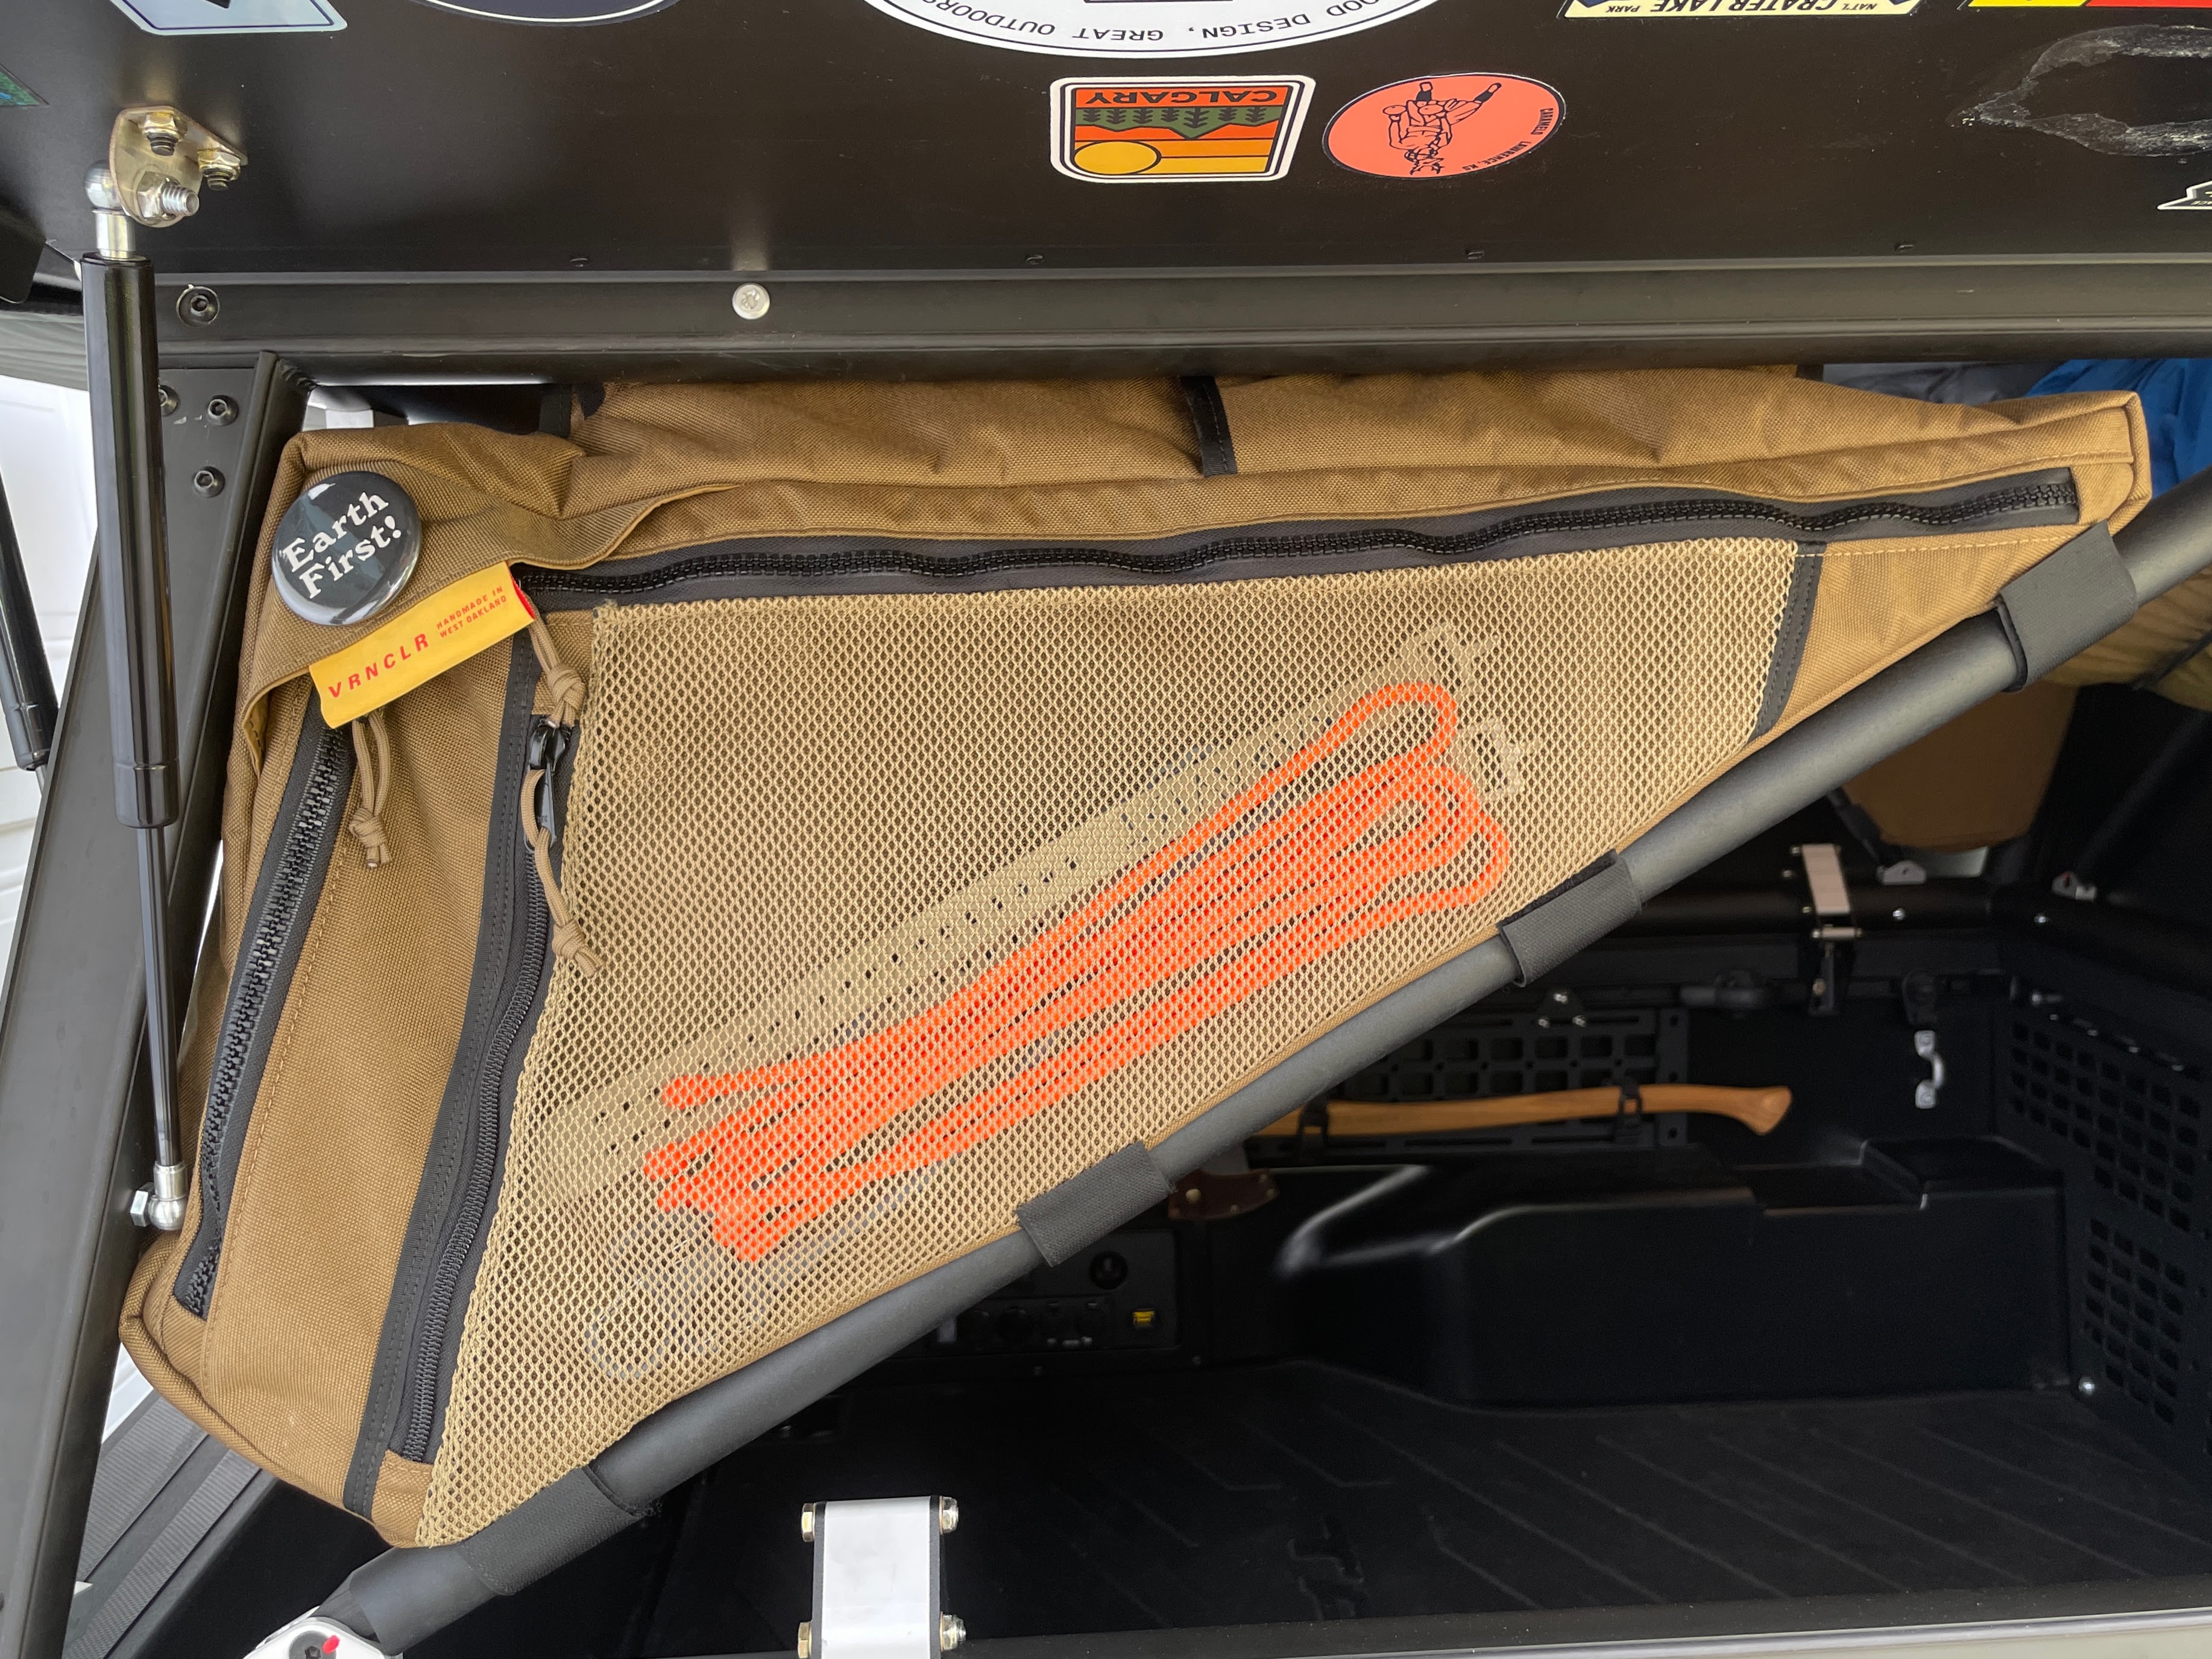
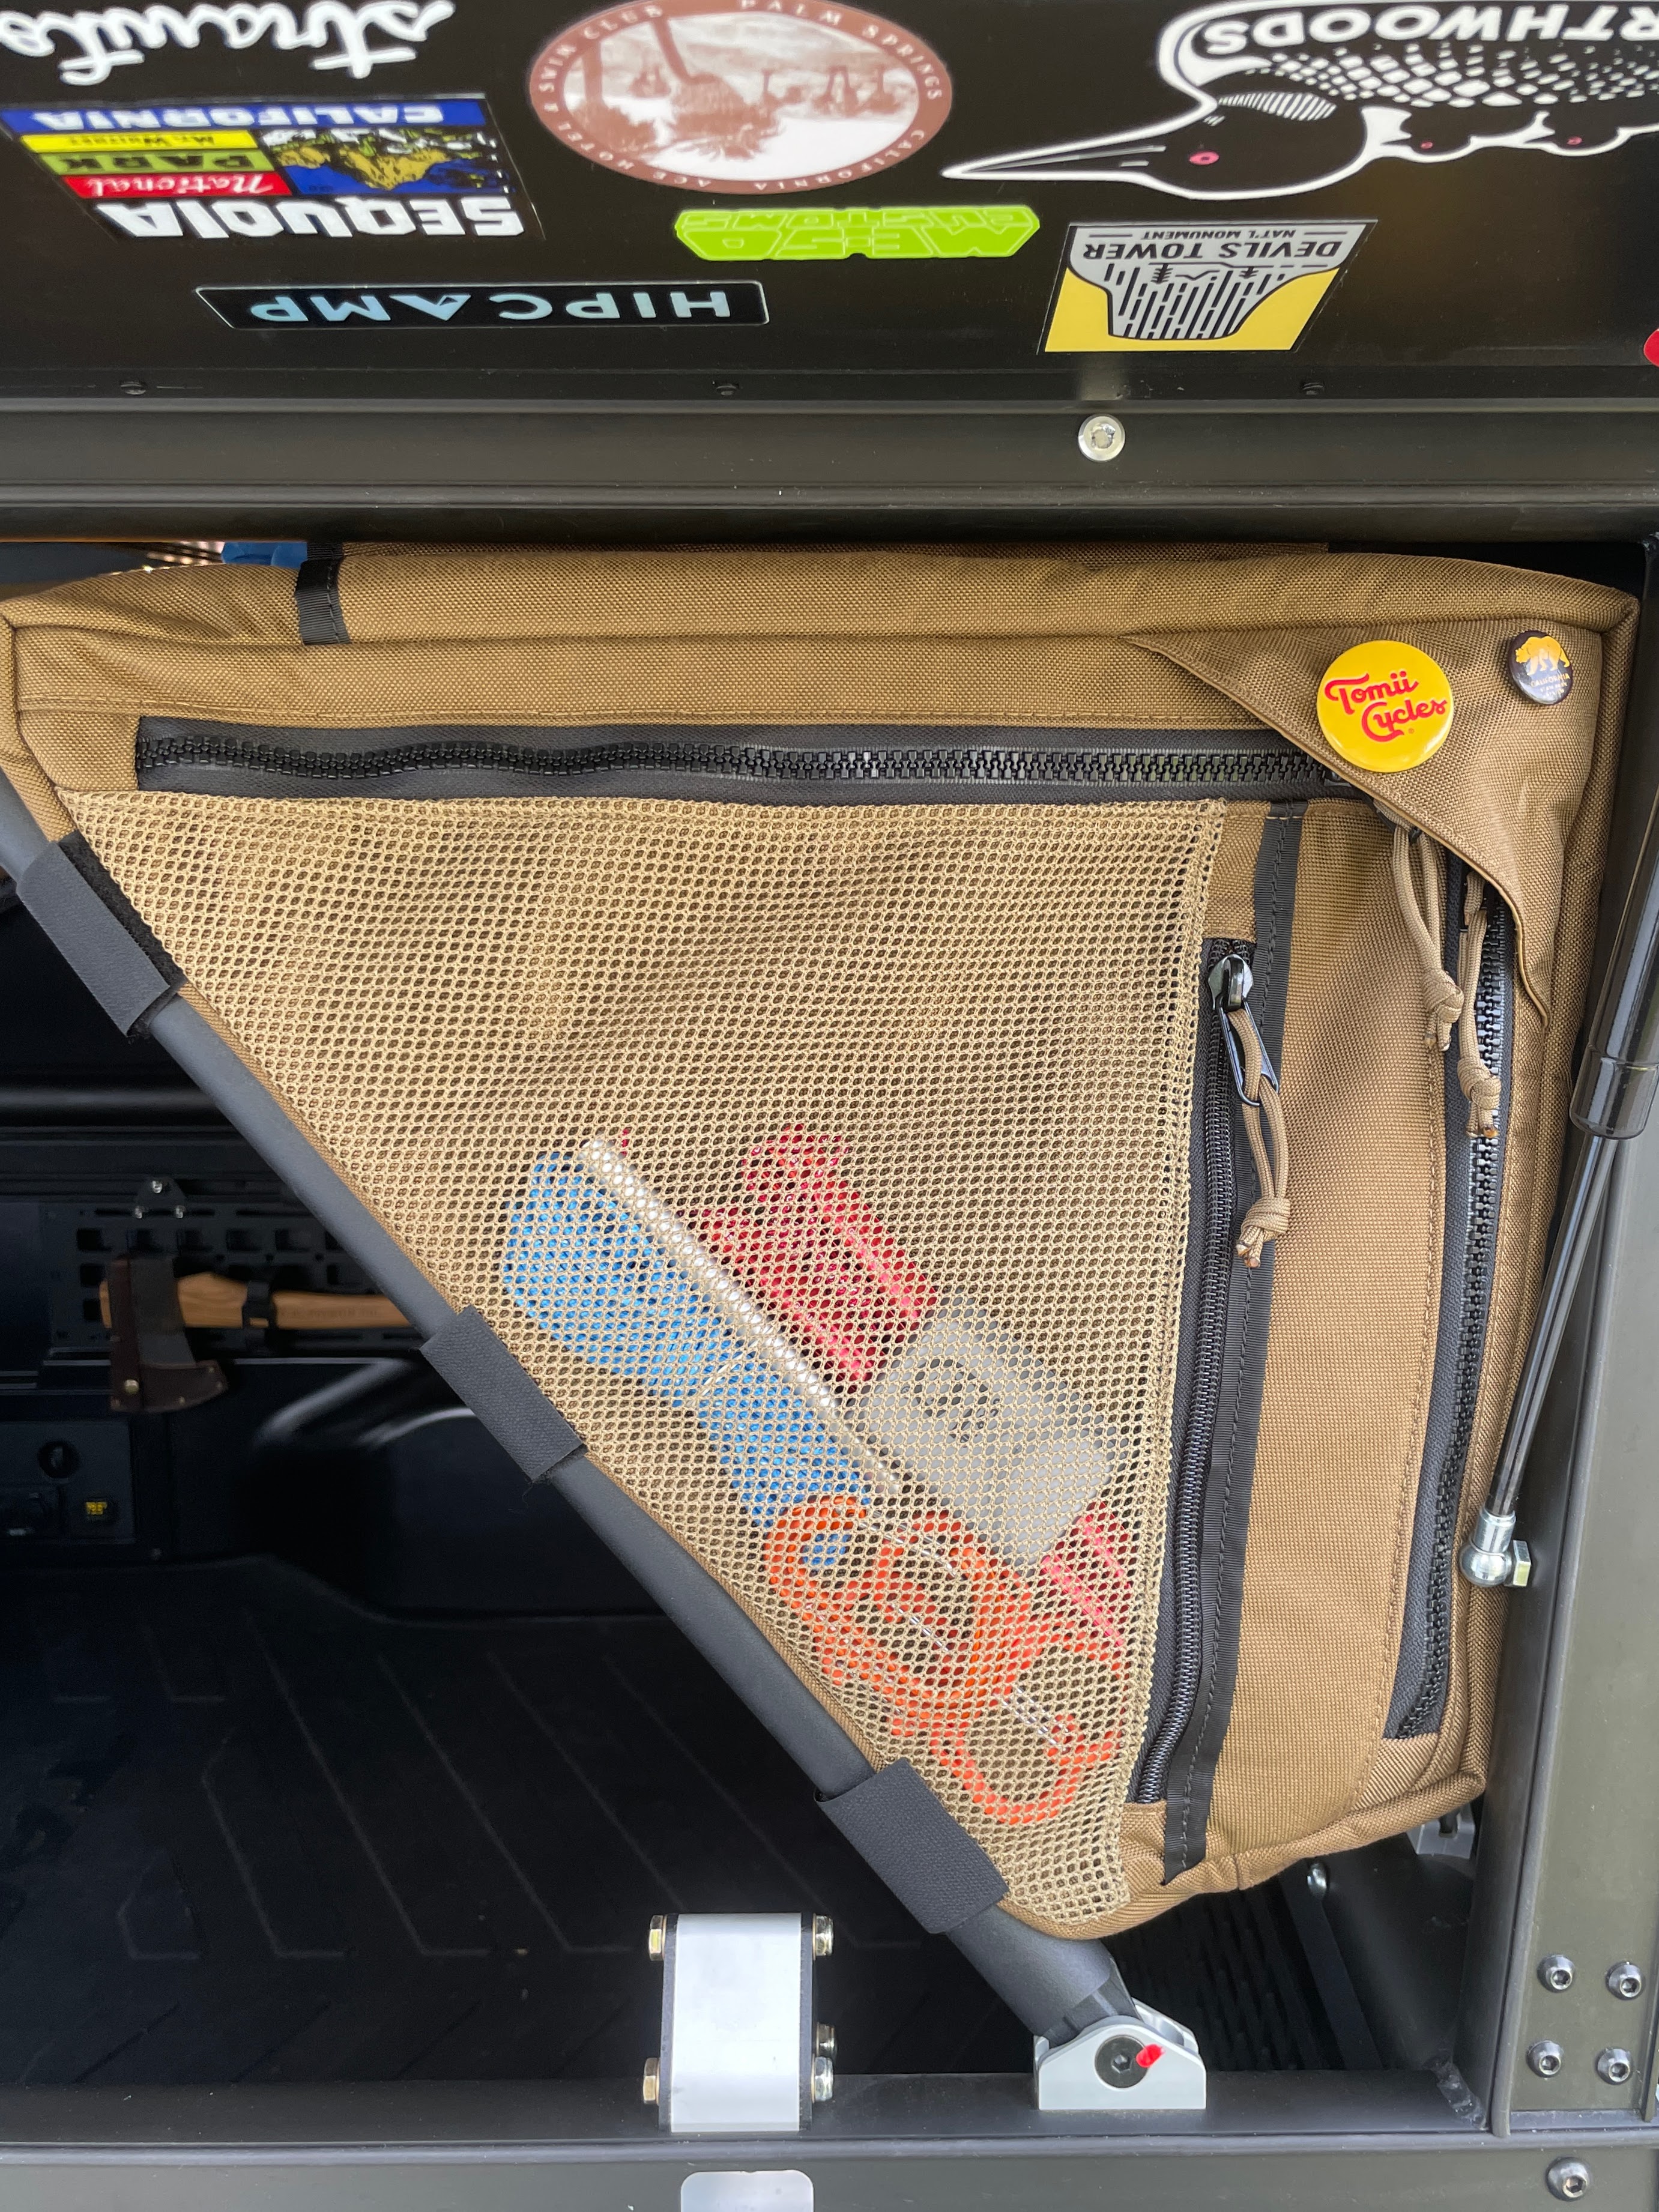
I also dropped in my VRNCLR Sewn Storage V2 Frame Bags, V2 Bedding Catch, and Top Shelf (Not pictured) a few weeks back. Absolutely love all of these — Tom crushed them. I love how they account for ~75% of the gear I travel with and the bed is still empty! …I need to get some better photos of all of these (In the coming days.)
• Running the “Upstairs” LED lights.
• Mounting the Dometic Fantastic Fan.
• Mounting the Sunflare Xplor Solar Panel.
• Designing and building a “shelf” for my Dometic Fridge. (Which is why it was removed)
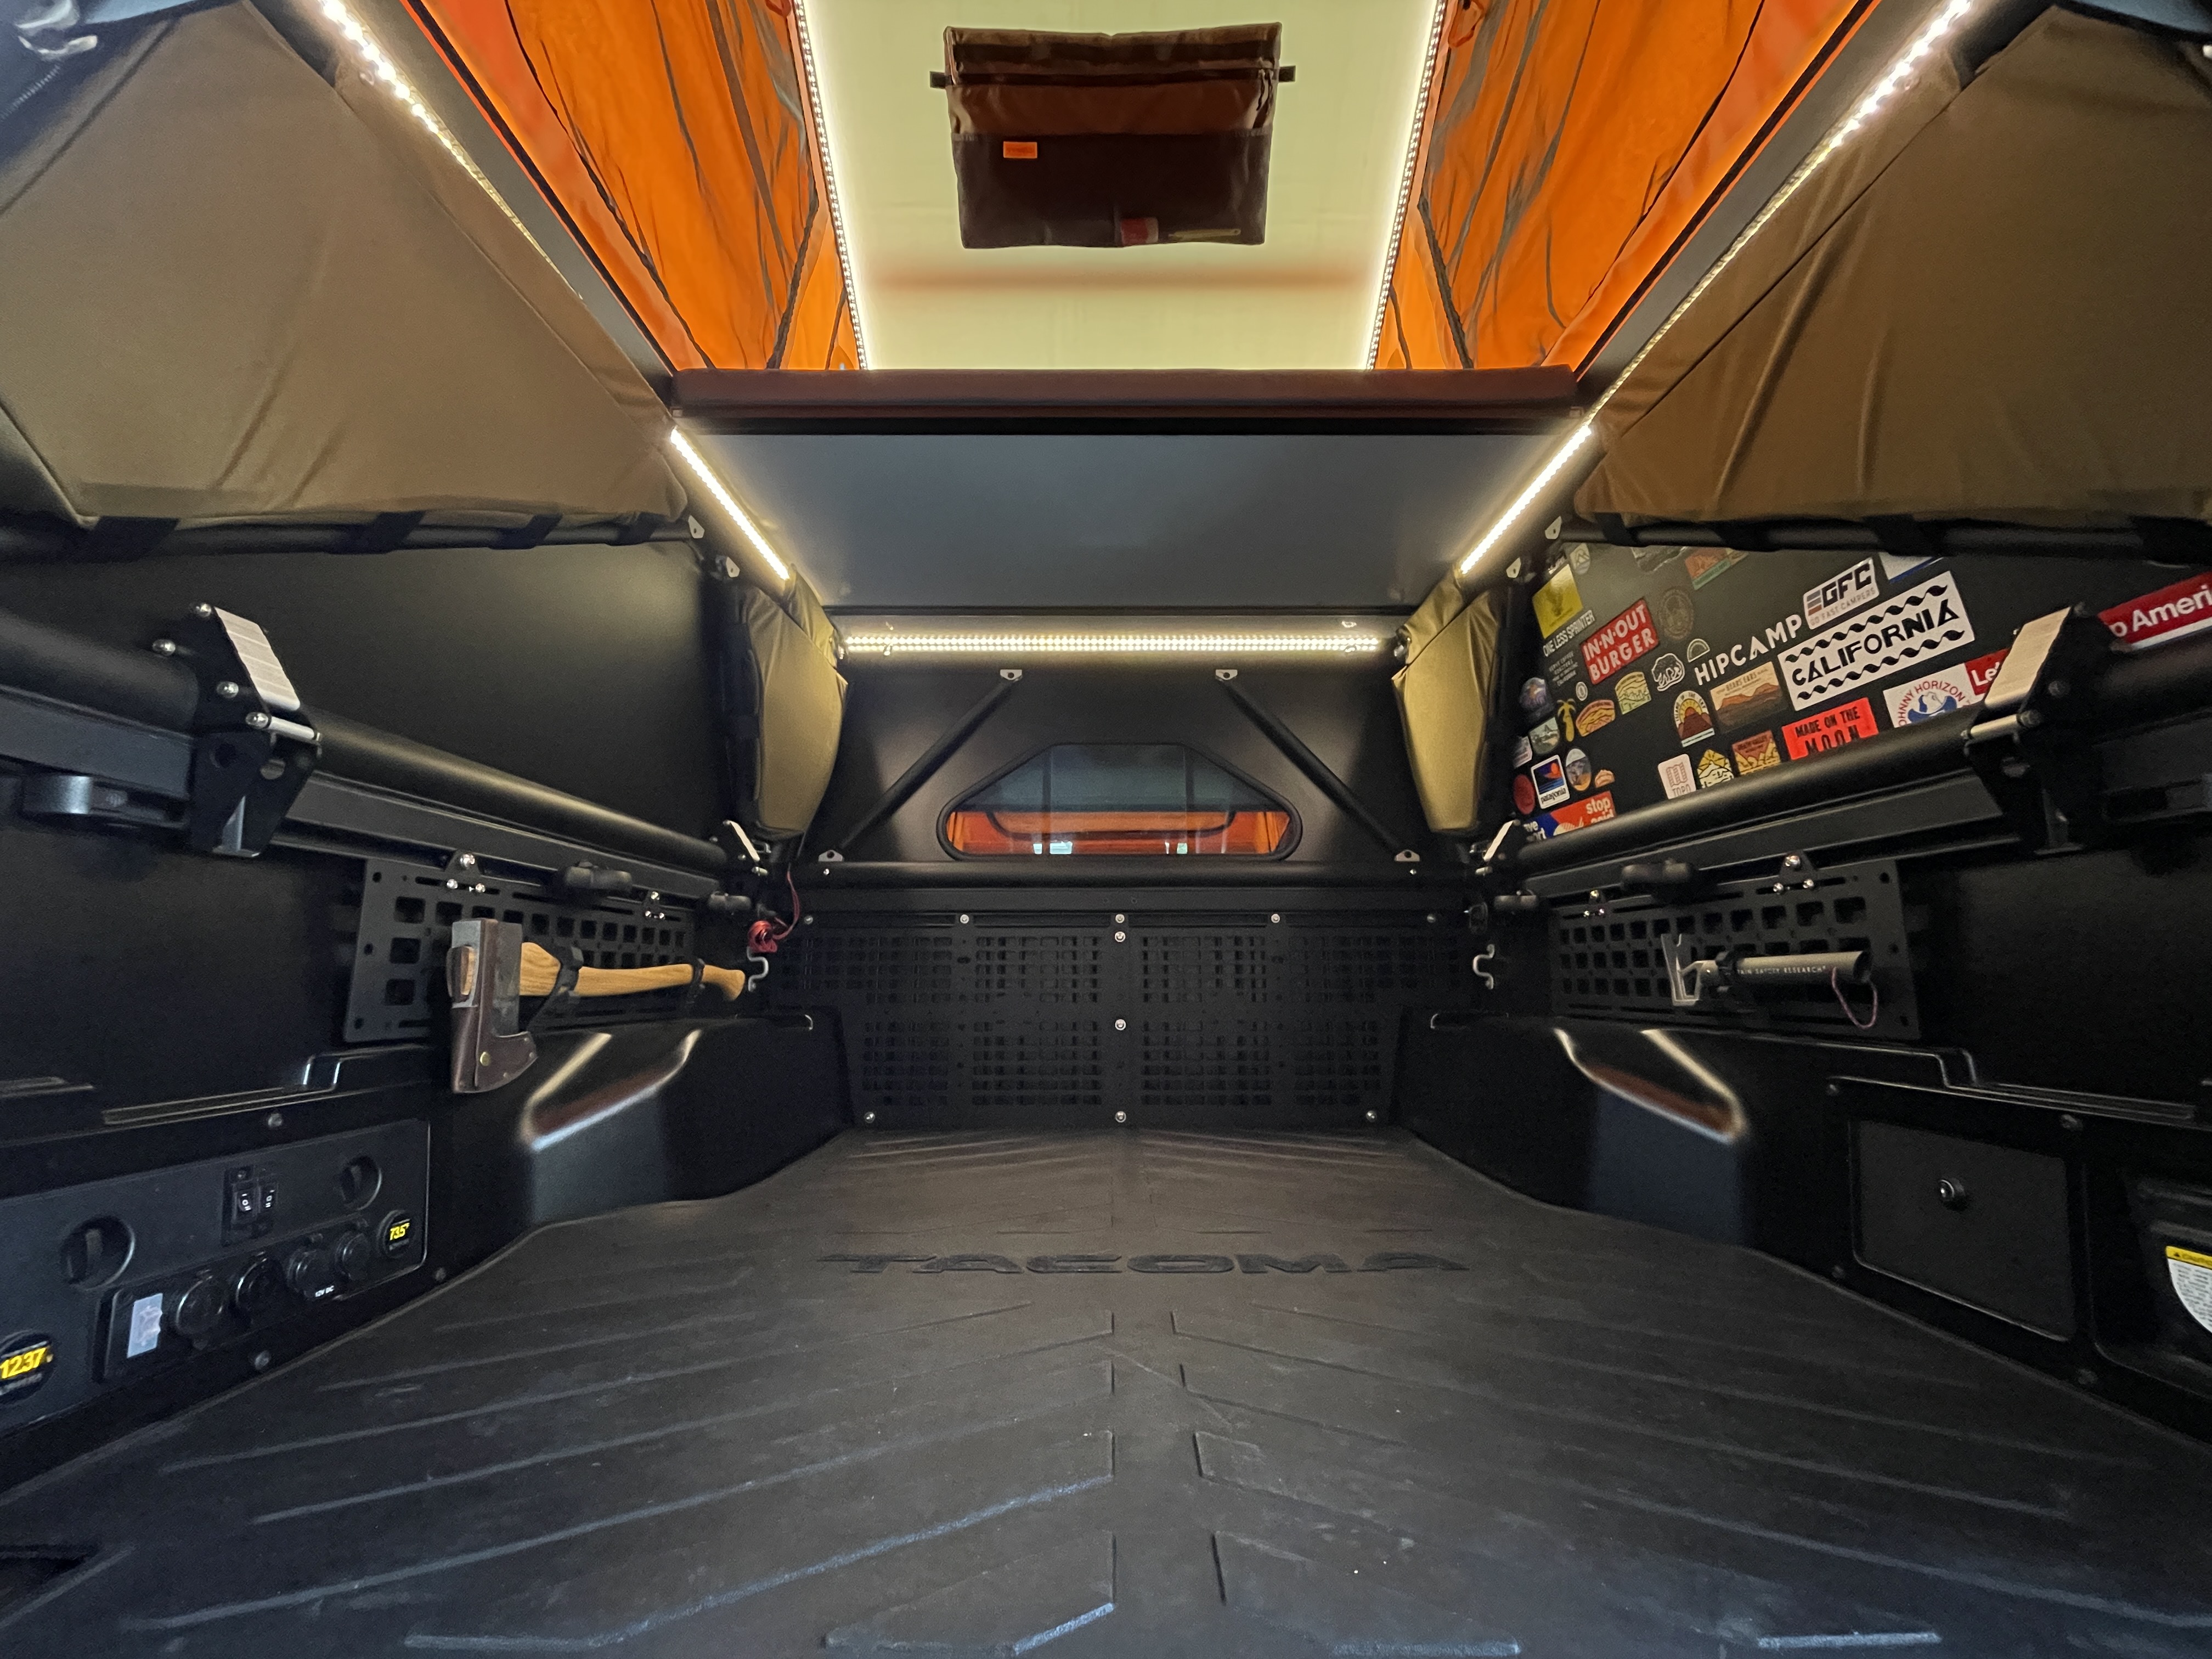
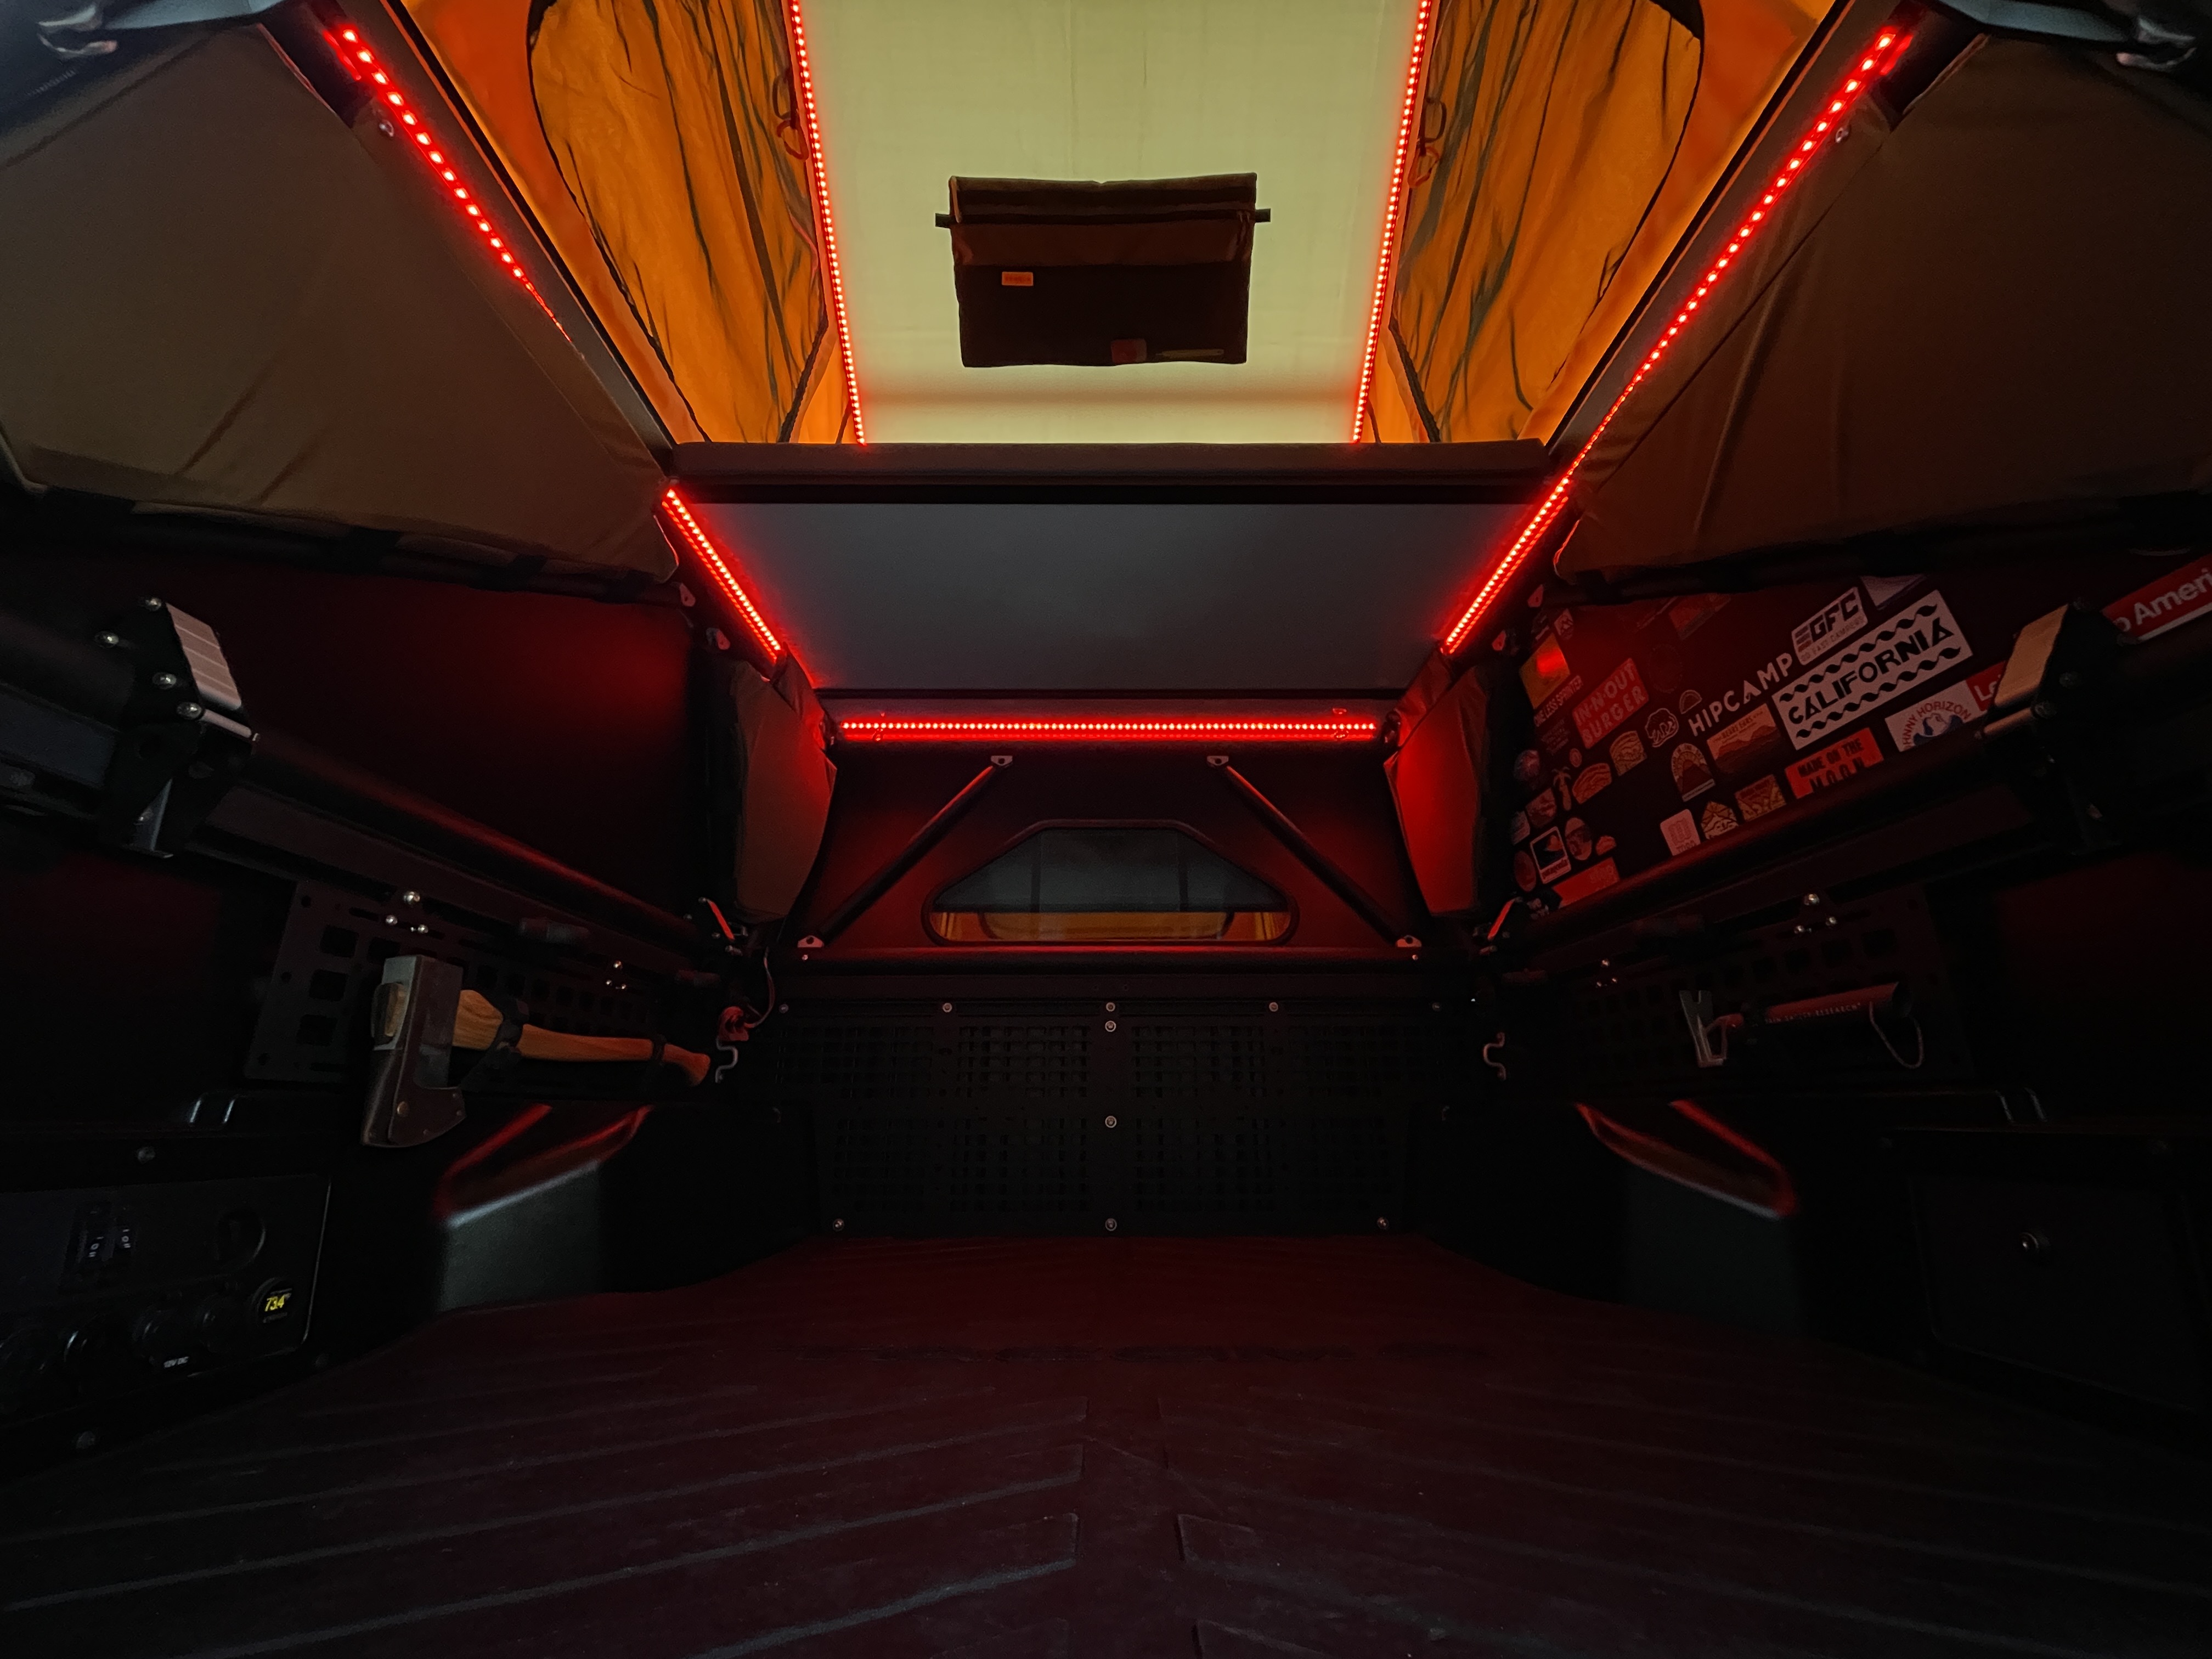
Build Update 06/20/21 — Upstairs LED Lights & Wiring
Running power to the "upstairs"
Today’s goal was to answer the question “how might we run power to the upstairs” for lights, ceiling fan, and any future modifications in the most inconspicuous way possible… Here’s where we my father and I landed.
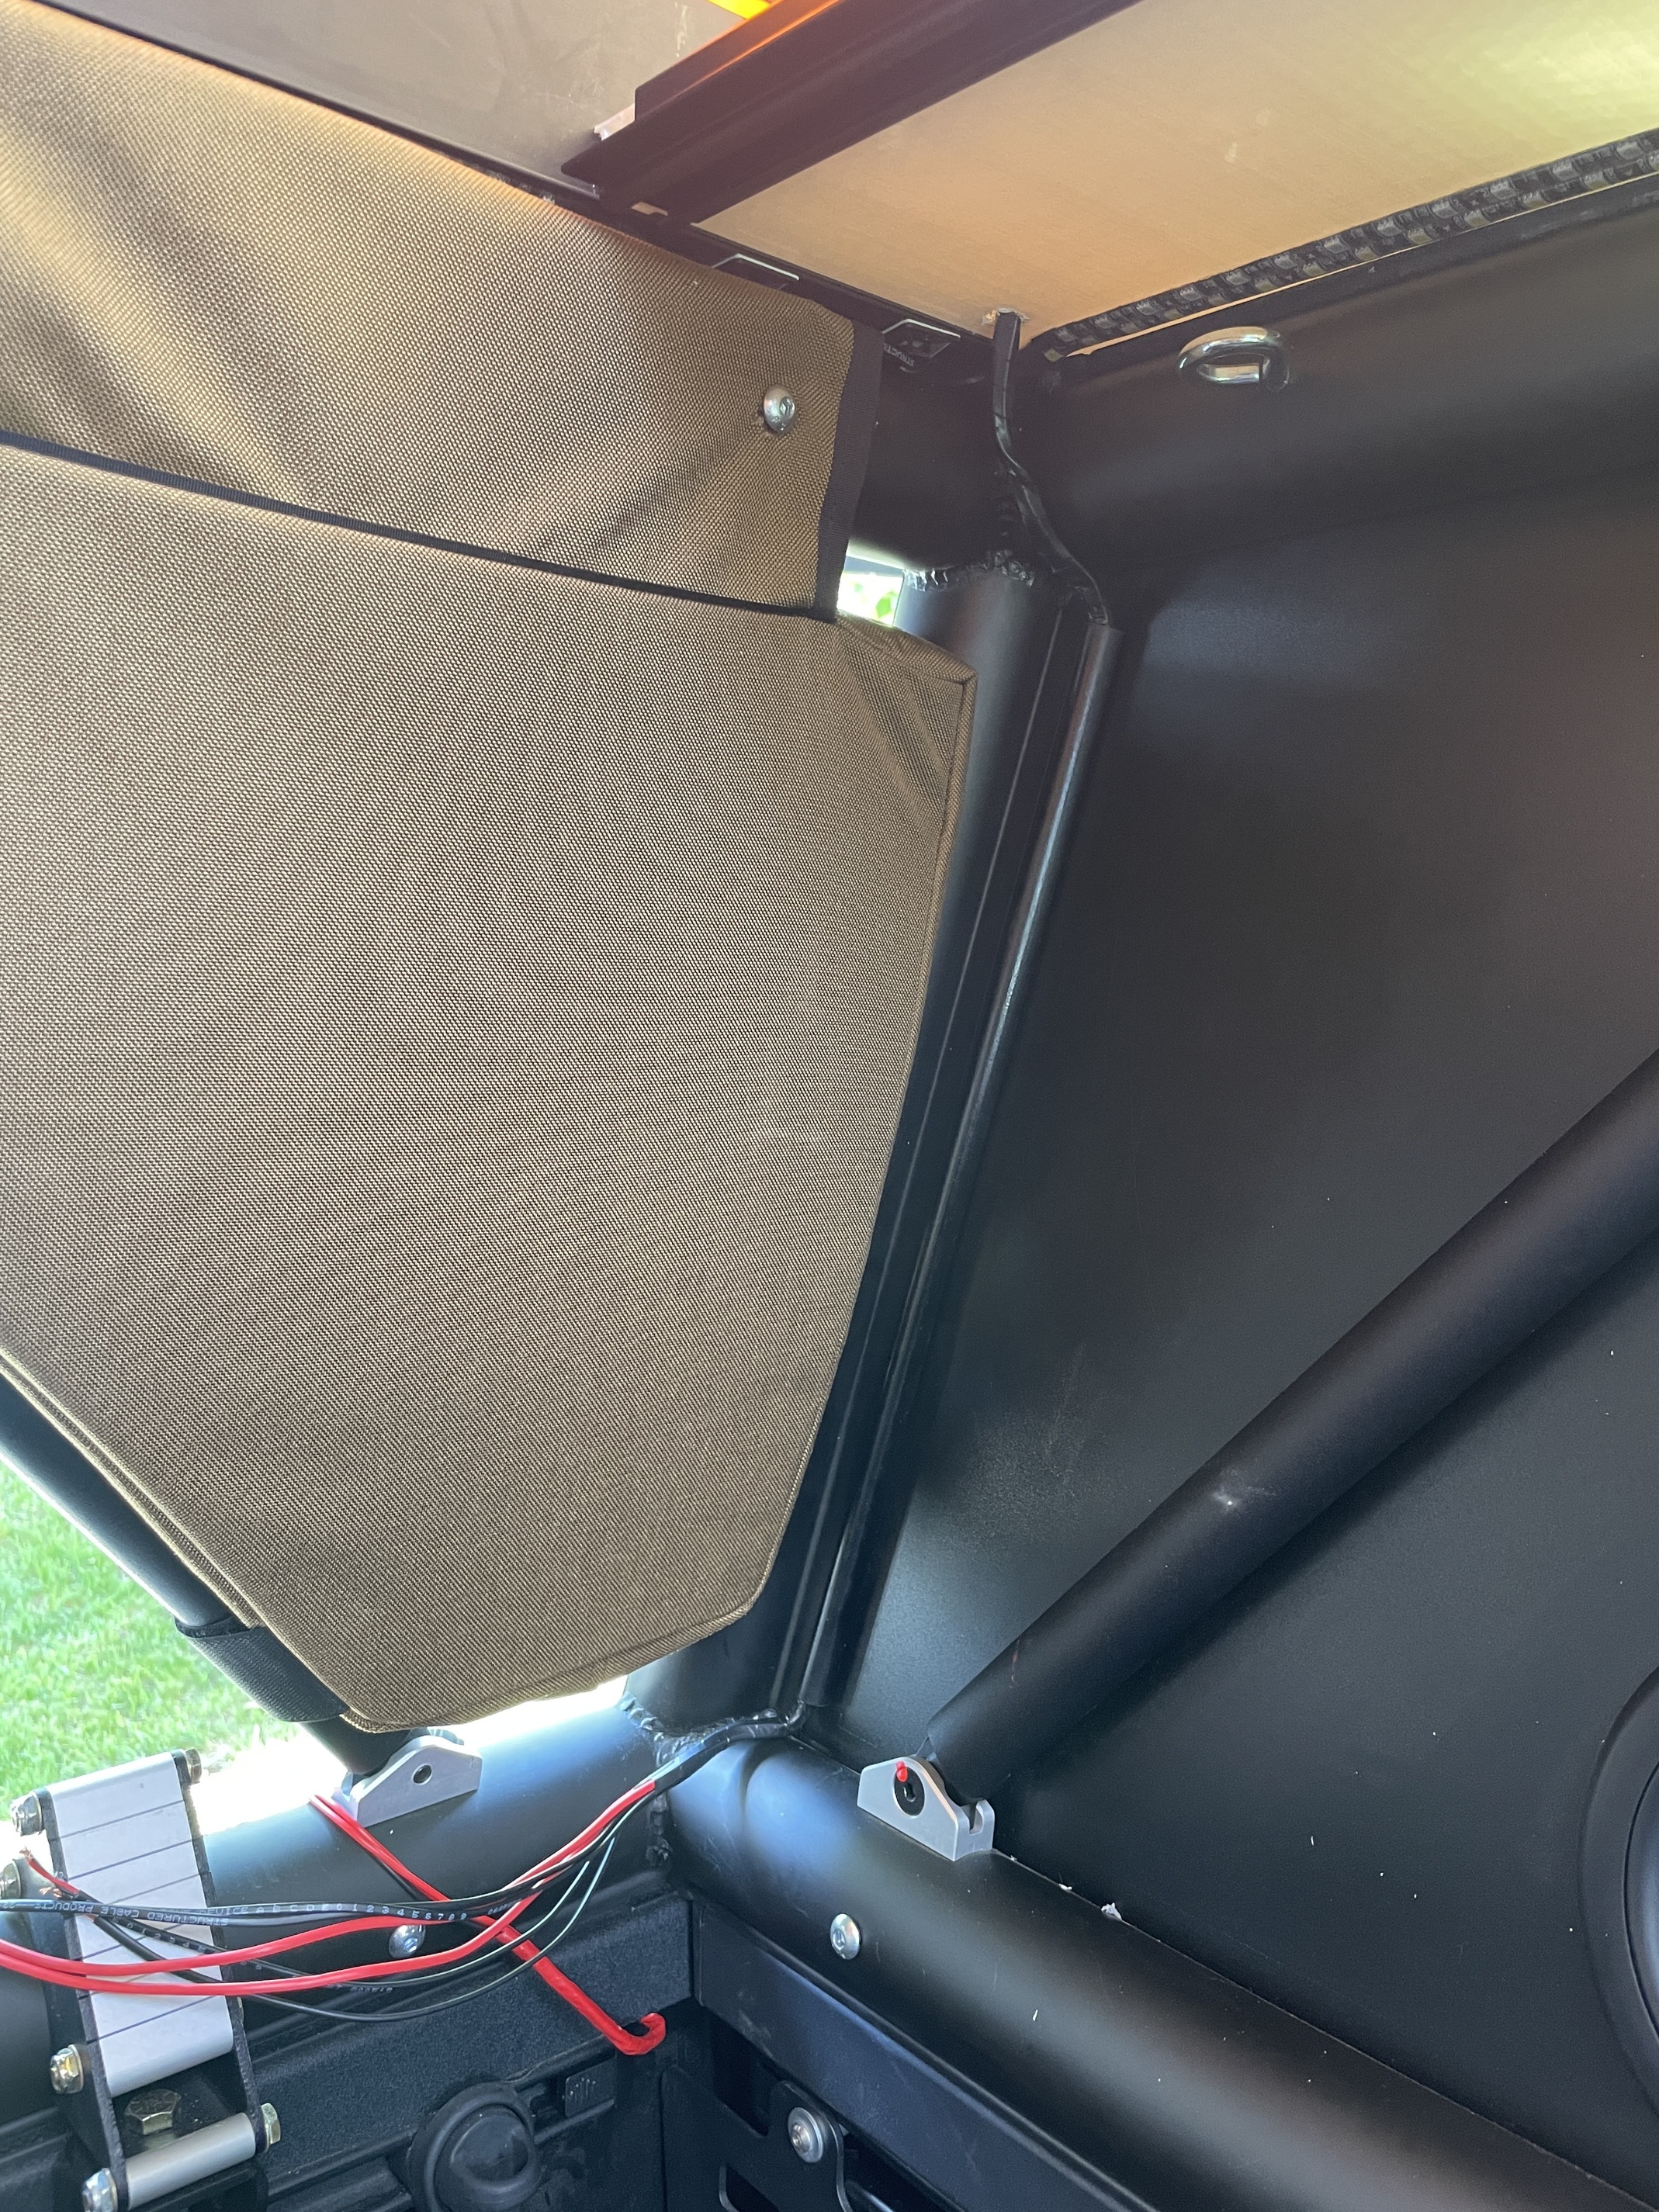
The first step was to run insulated wiring from the electrical cubby to the front of the bed (bulkhead). We opt’d to fish the wiring under the (side) bed rail cap. This was rather painless with proper fish tape but if you’re still waiting on your GFC and interested in doing this I’d recommend passing the wire while you can still easily pop the bed rail cap off!
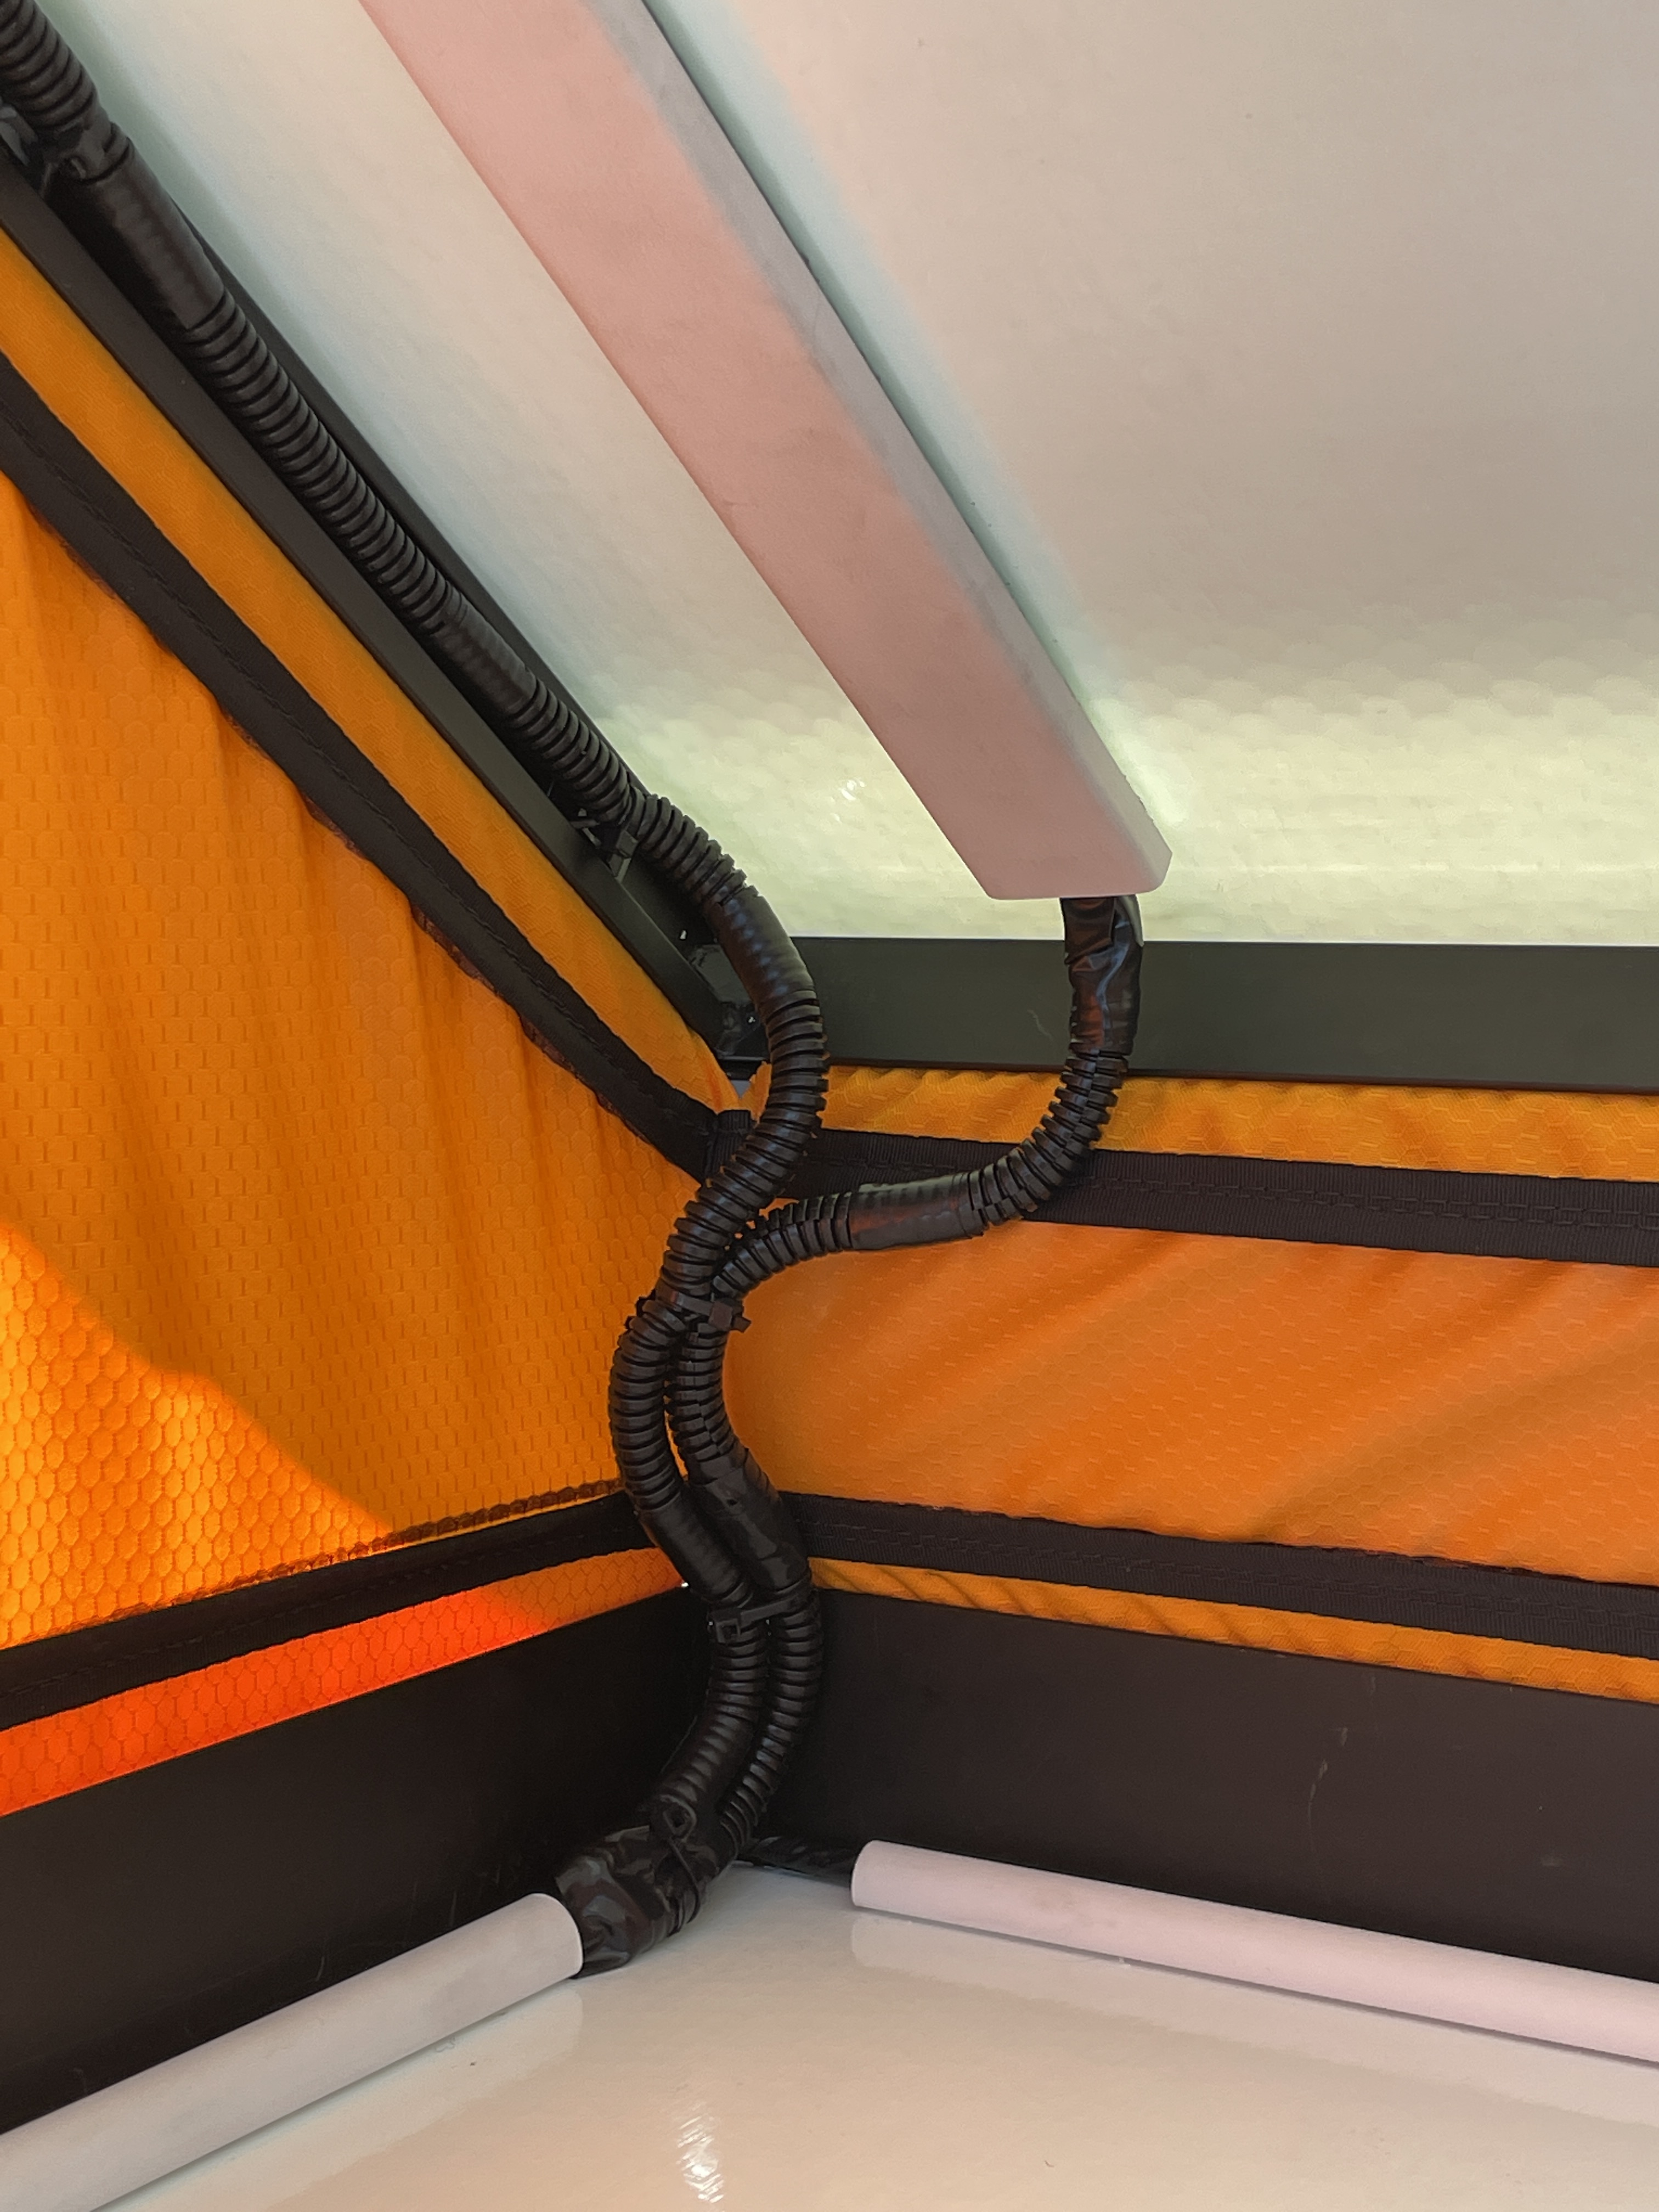
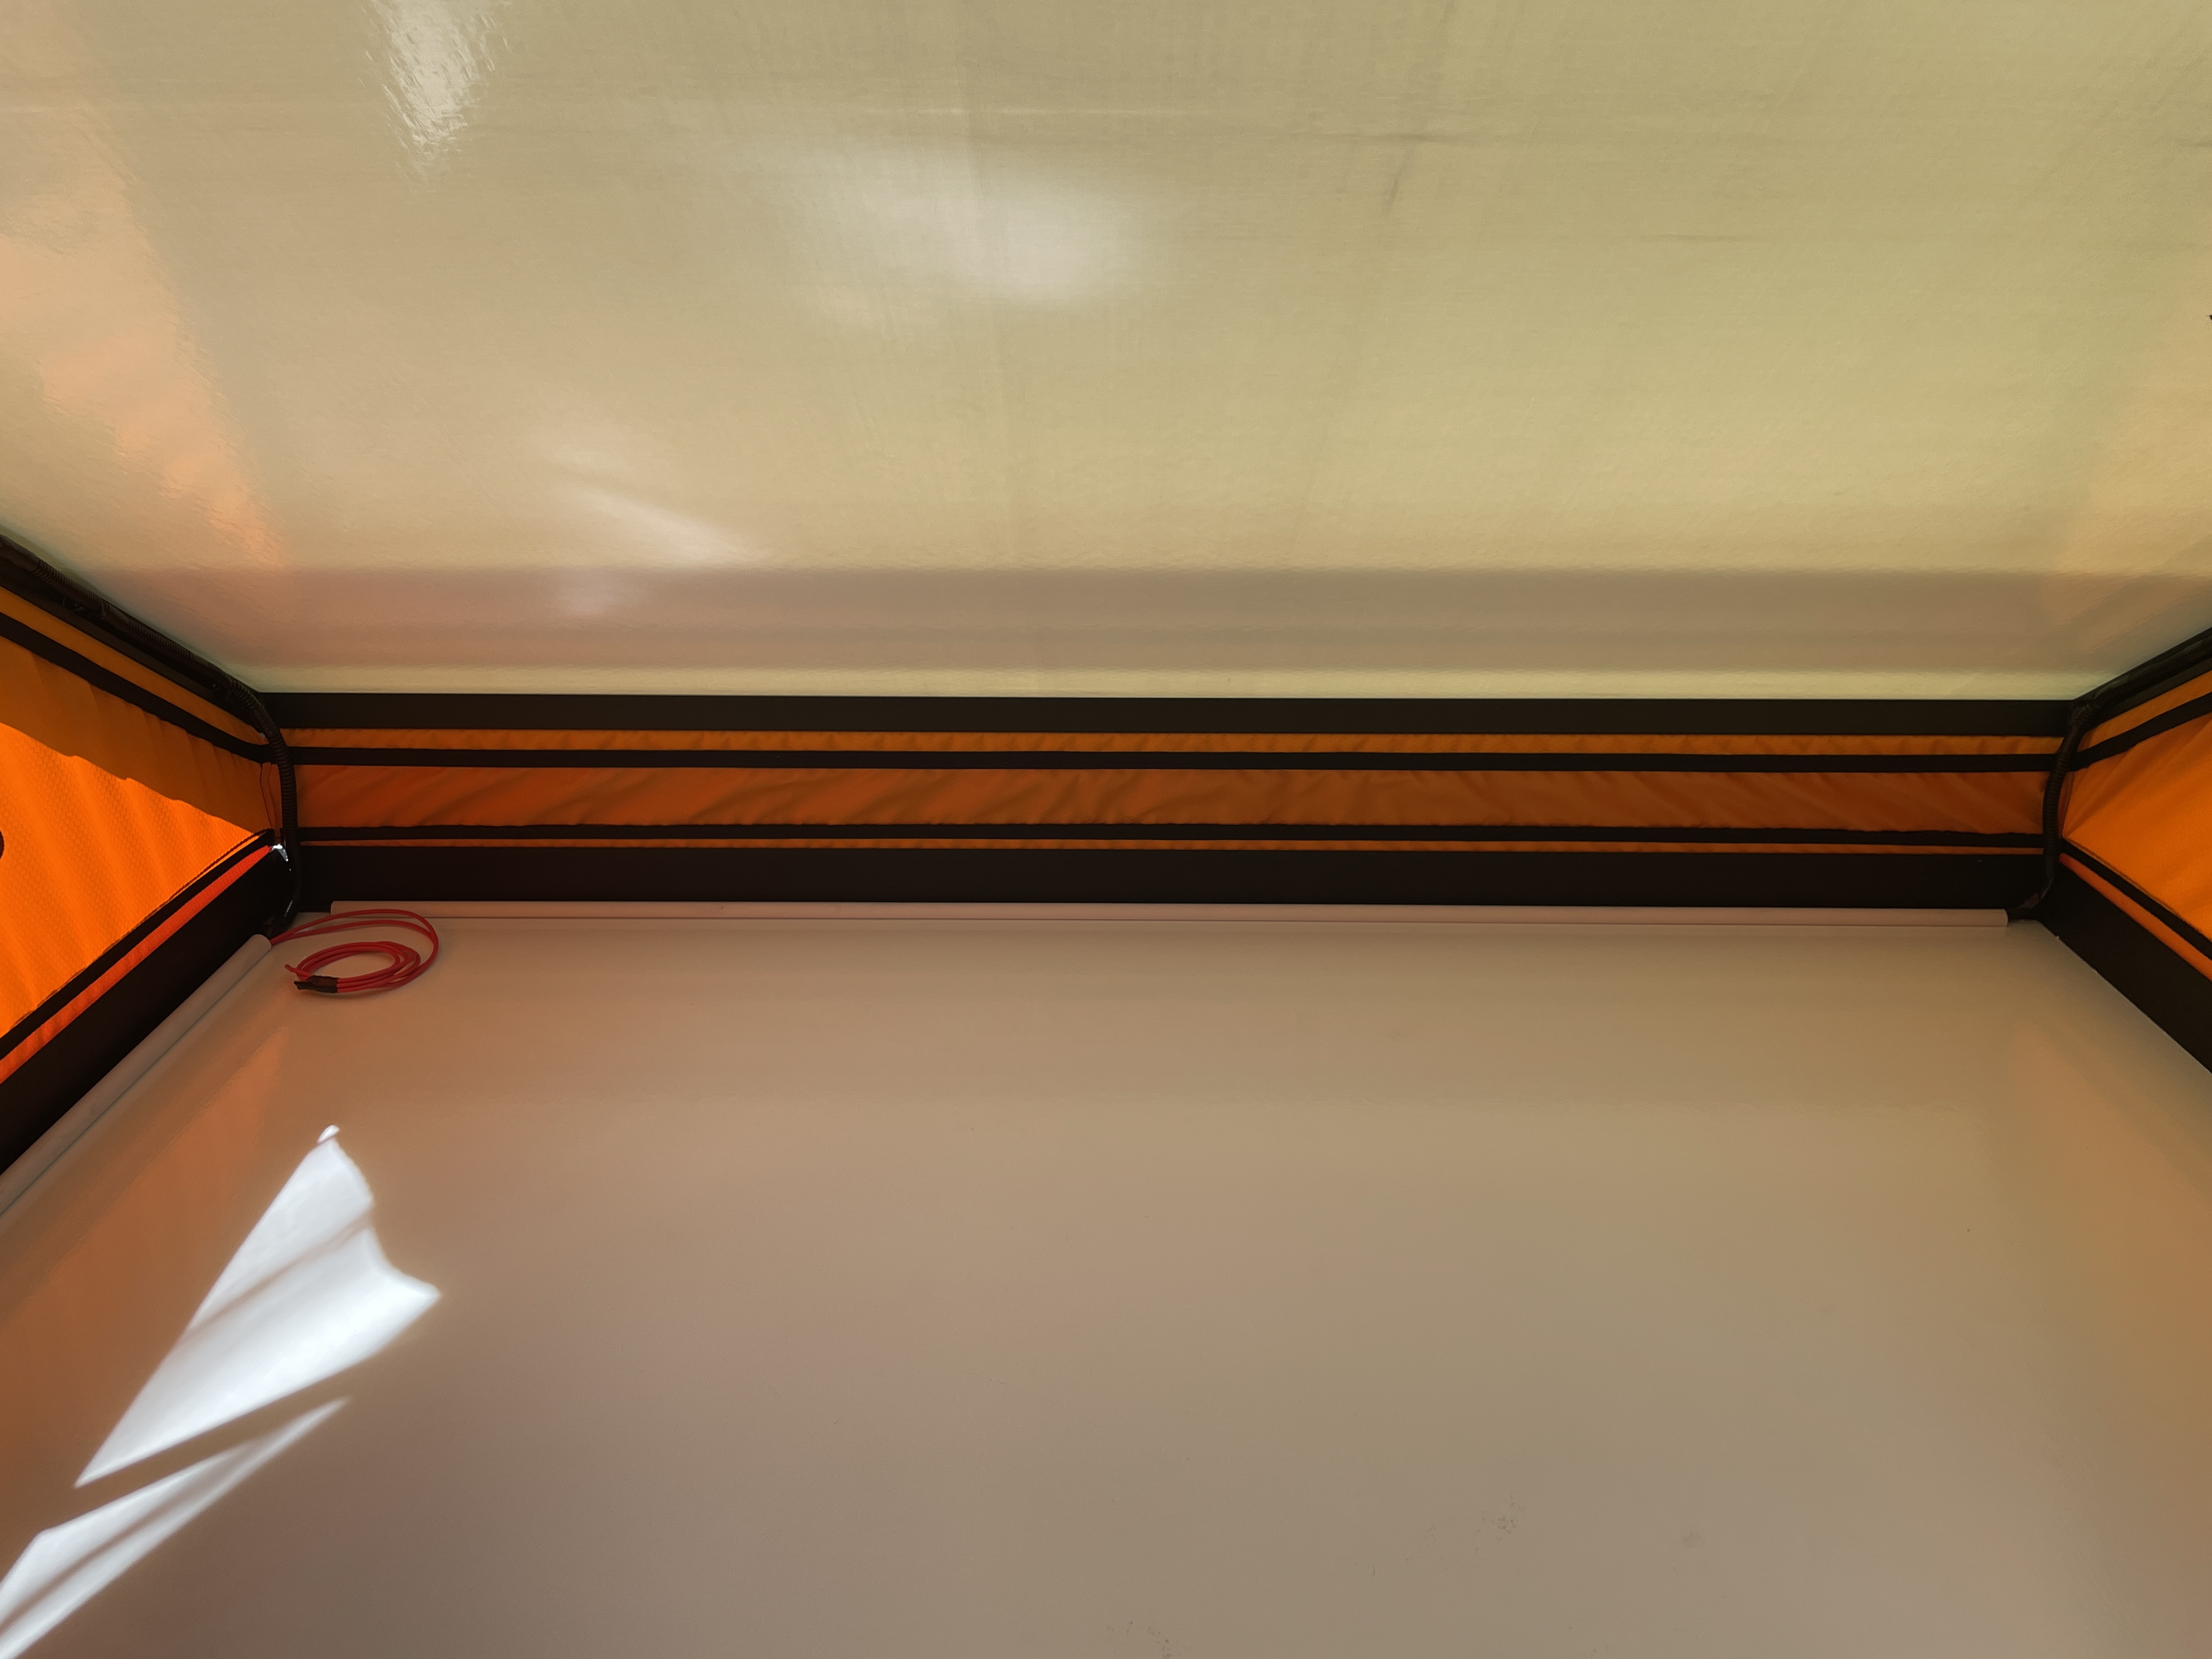
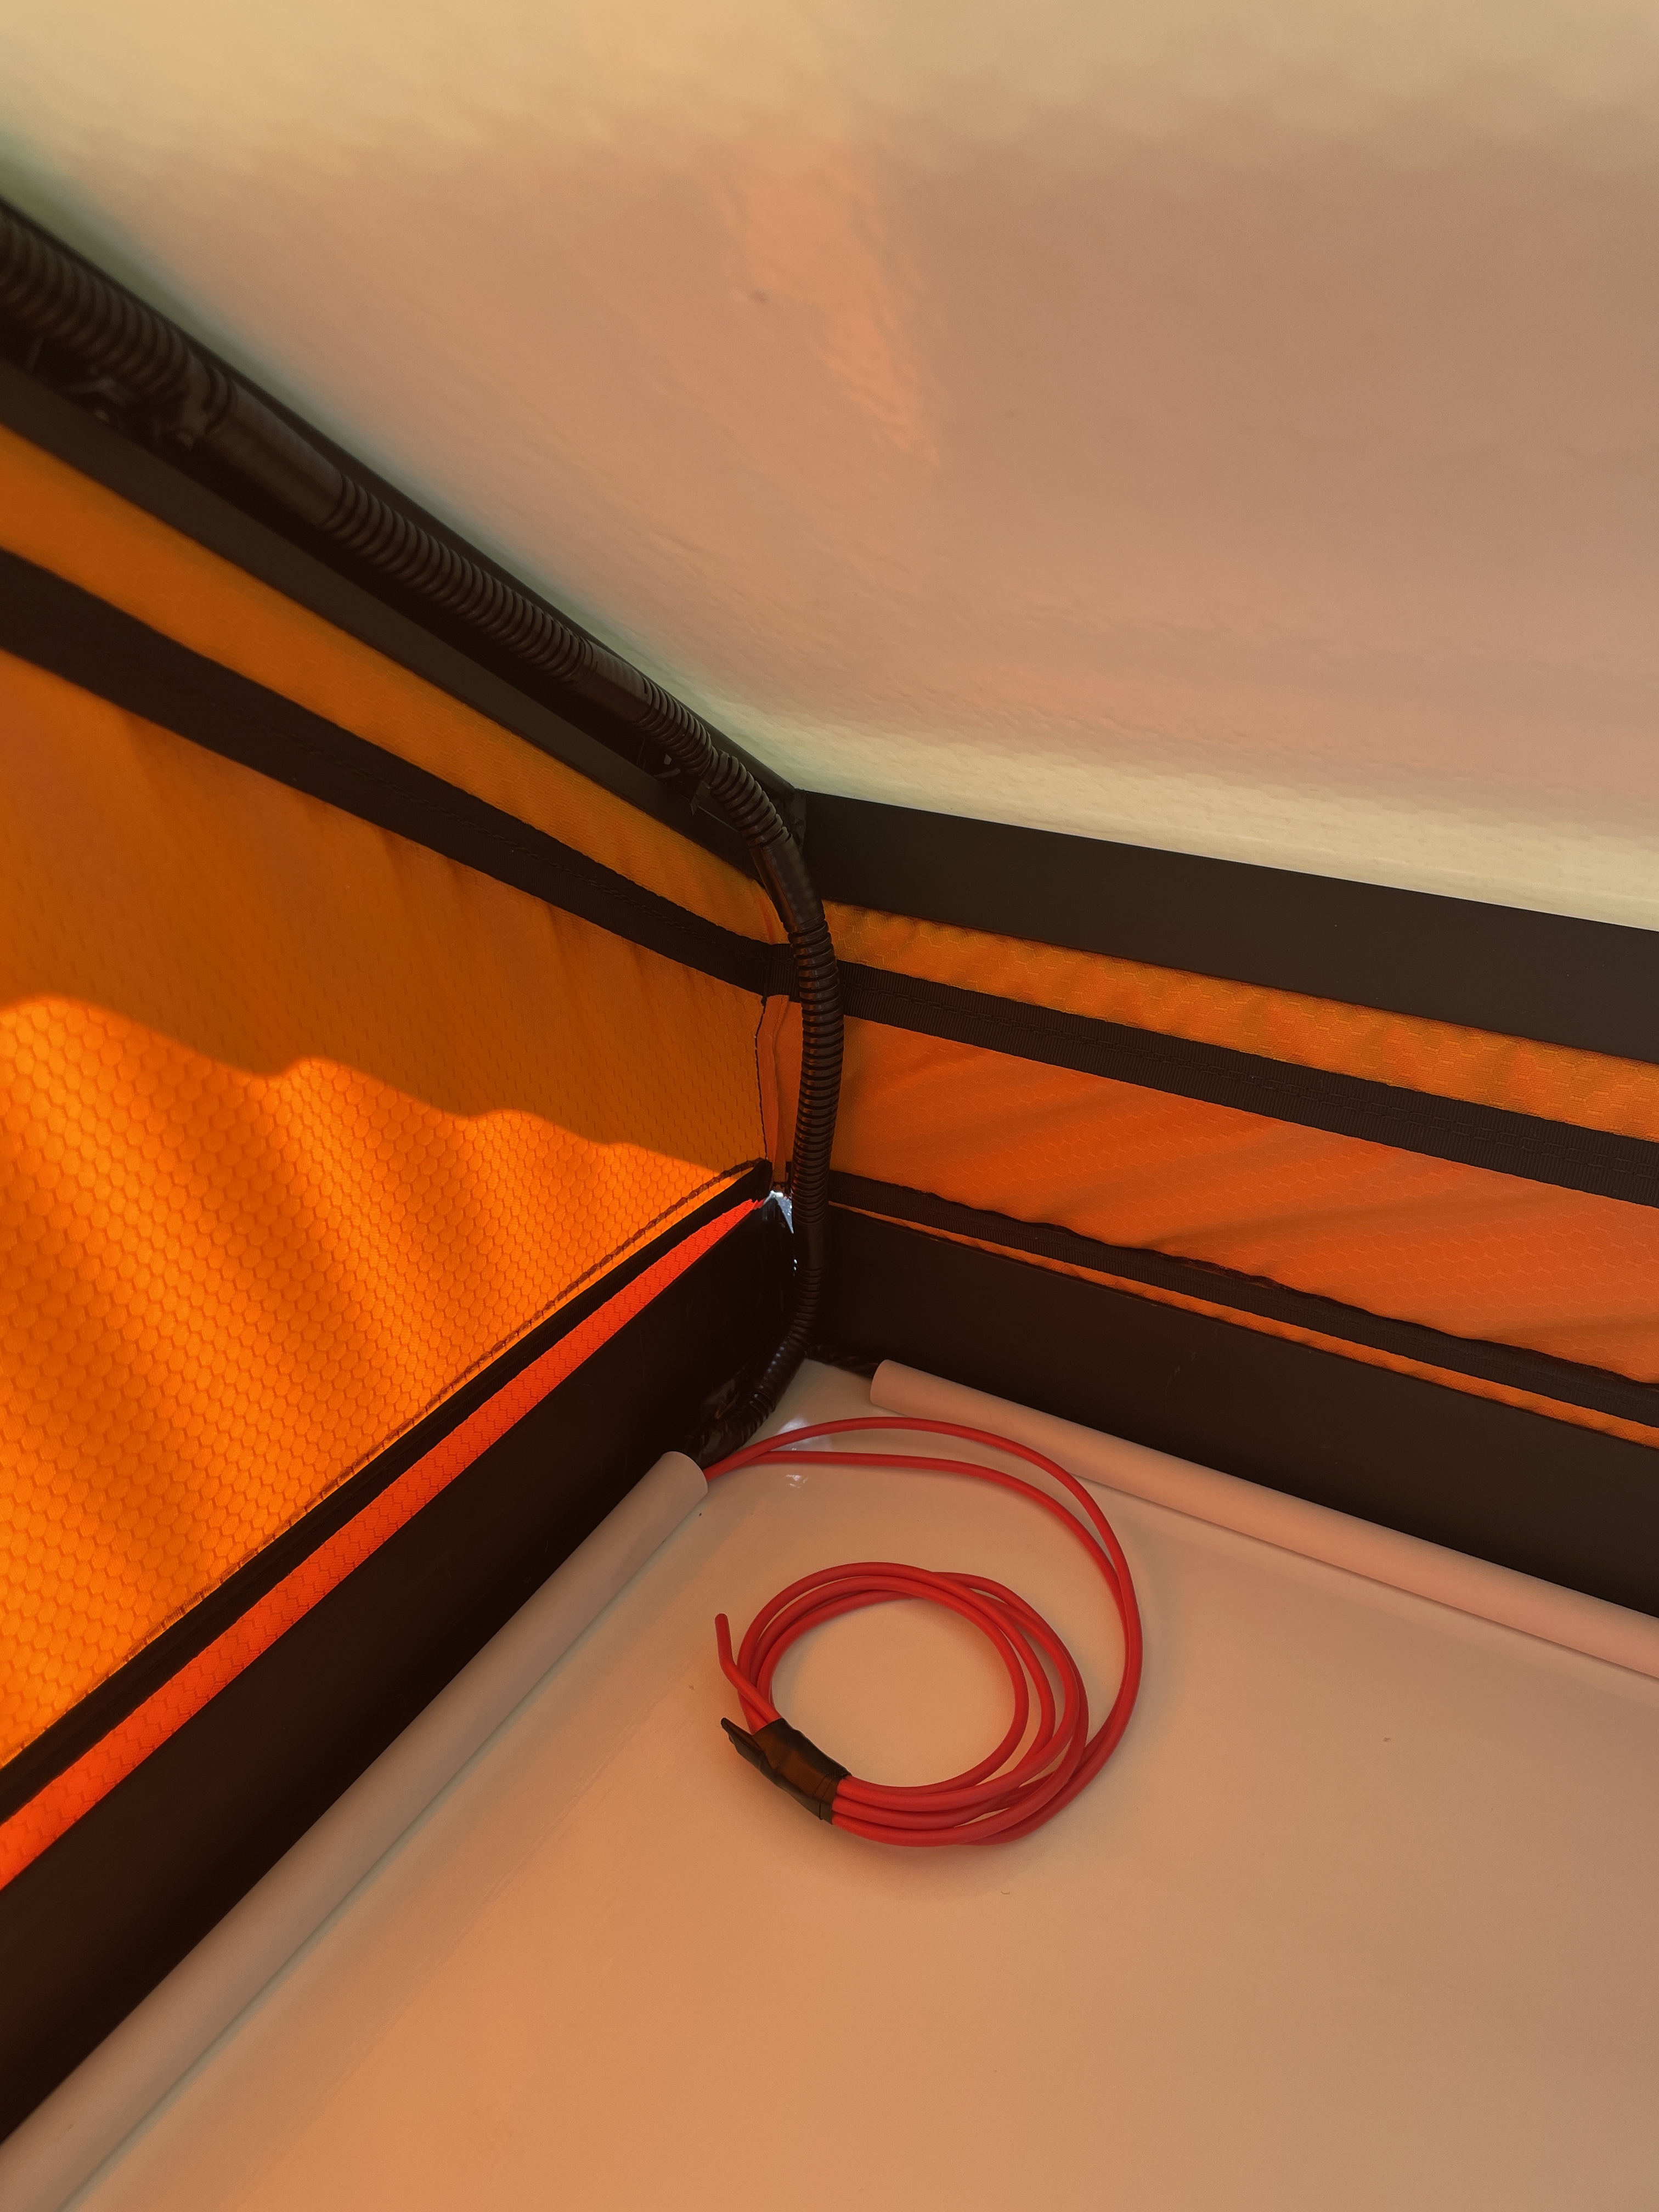
From here we moved upstairs to drop the Matt Gecko LED Light Kit into the GFC extrusion and wrap/zip tie/tape the exposed wiring in electrical loom. We also started working on passing the wiring along the fixed platform panel. We used some plastic conduit/channels that we had laying around to help guide/protect the wiring under the mattress.
(I love how the short potion of exposed loom blends right into the extrusion. You’d almost miss it if you weren’t looking for it!)
*ps. The visible excess red wire is in preparation of the fan install that will be tackled at a later date.
The next step was to drill a small hole in the fixed platform panel to pass the wiring downstairs and continue through another plastic conduit channel (that we spray painted black) along the GFC frame to meet up with the harness that we had previously fished under the bed rail. All that was left from here was soldering, wrapping, and zip-tying on either end of our harness.
• I decided to trim down about half of an inch of the internal plastic frame on my larger (rear) VRNCLR frame bags to expose more of the downstairs LED lights. This was super easy, did not not ruin the integrity of the bag and fully exposes the strip. (You’ll see the LEDs were obstructed previously in my last post)
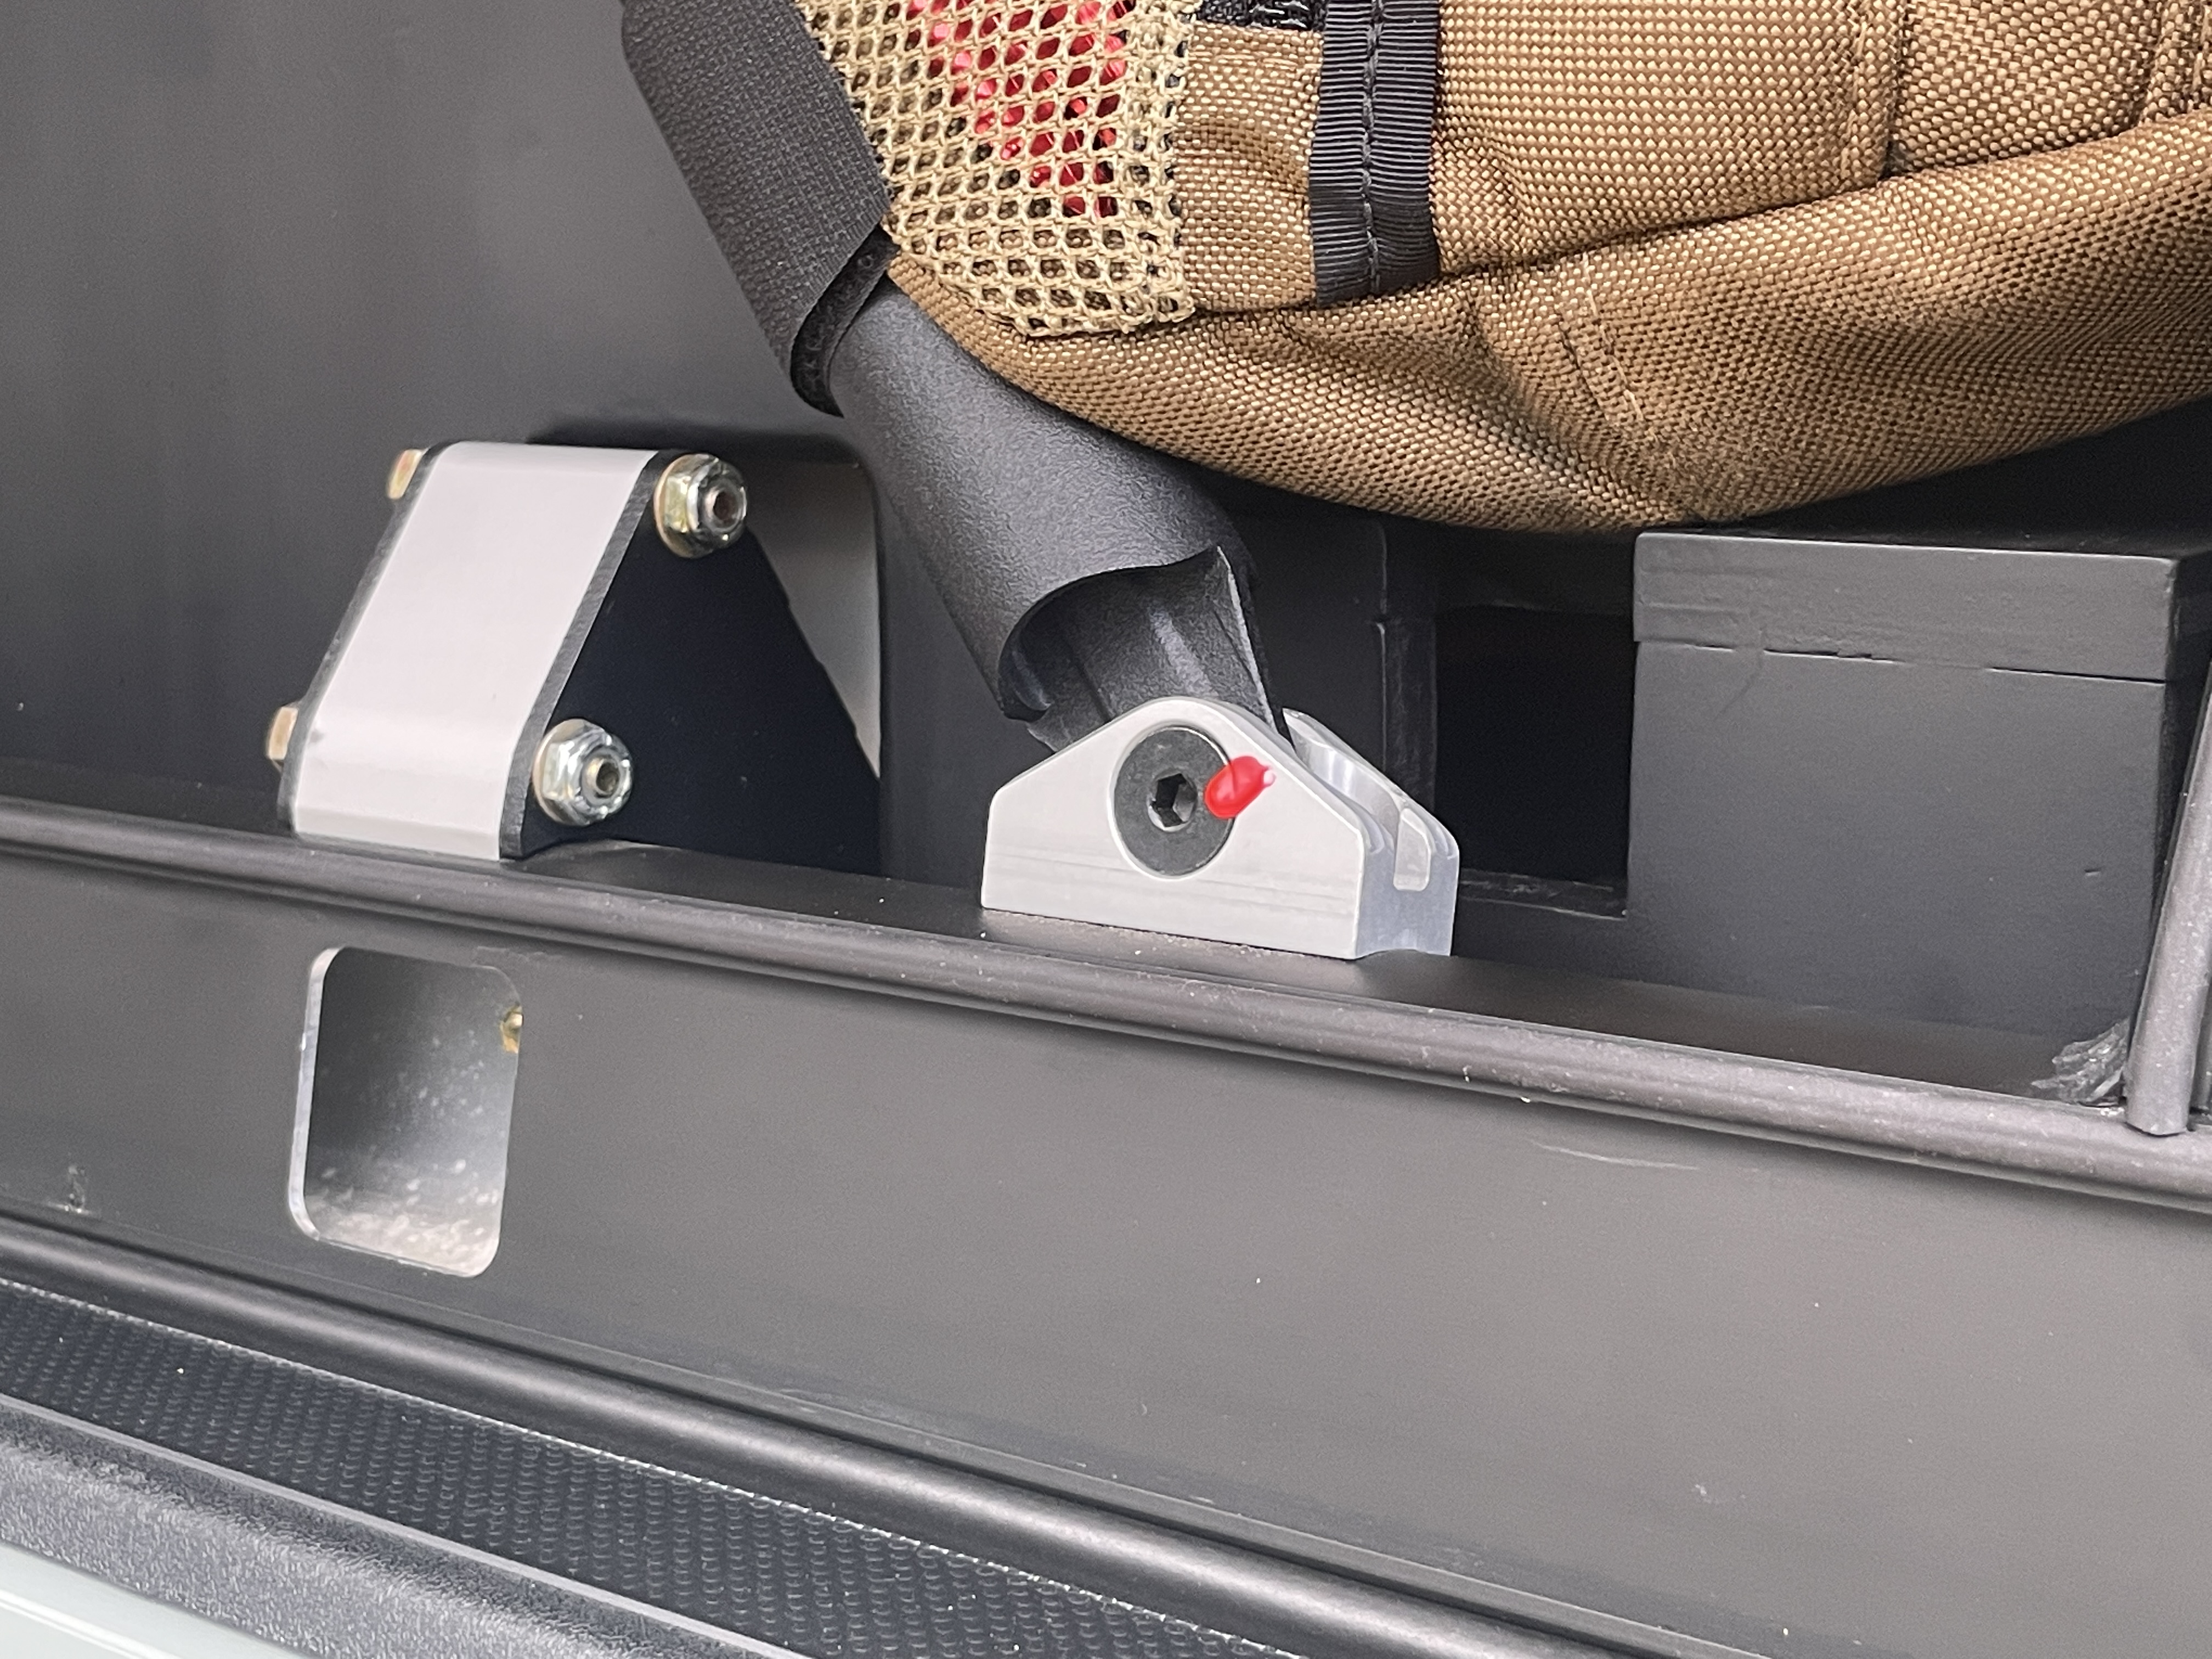
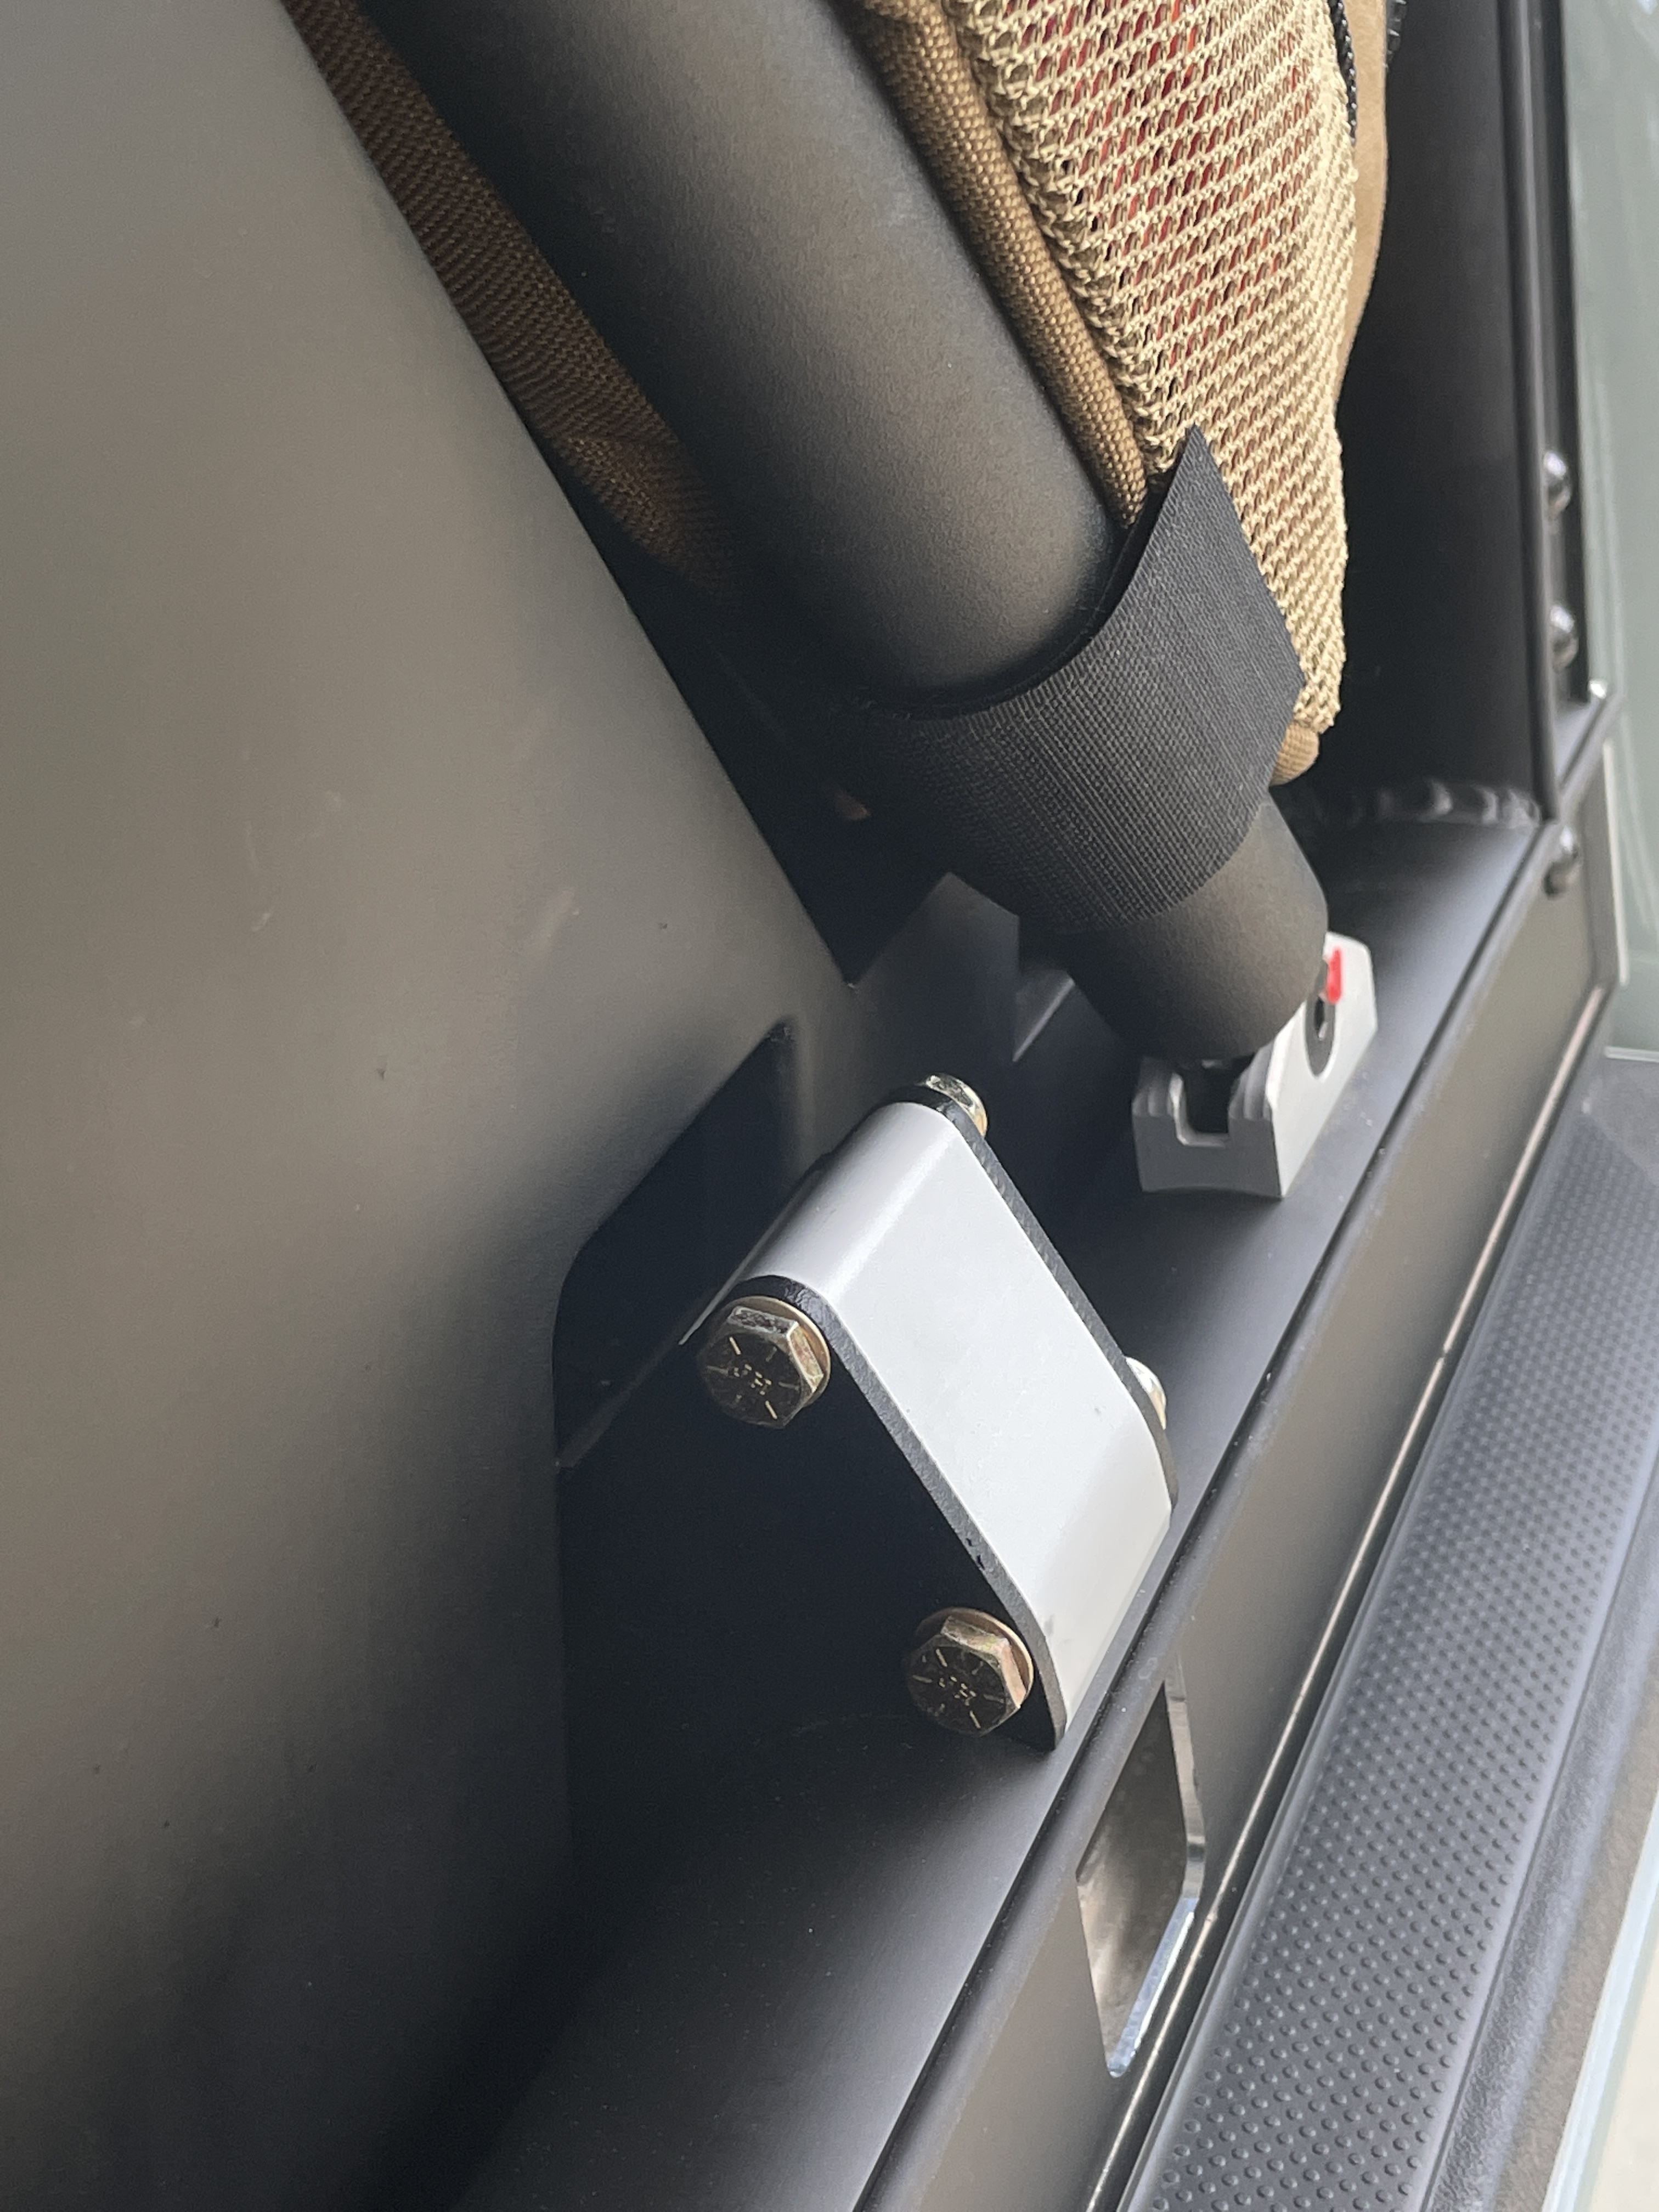
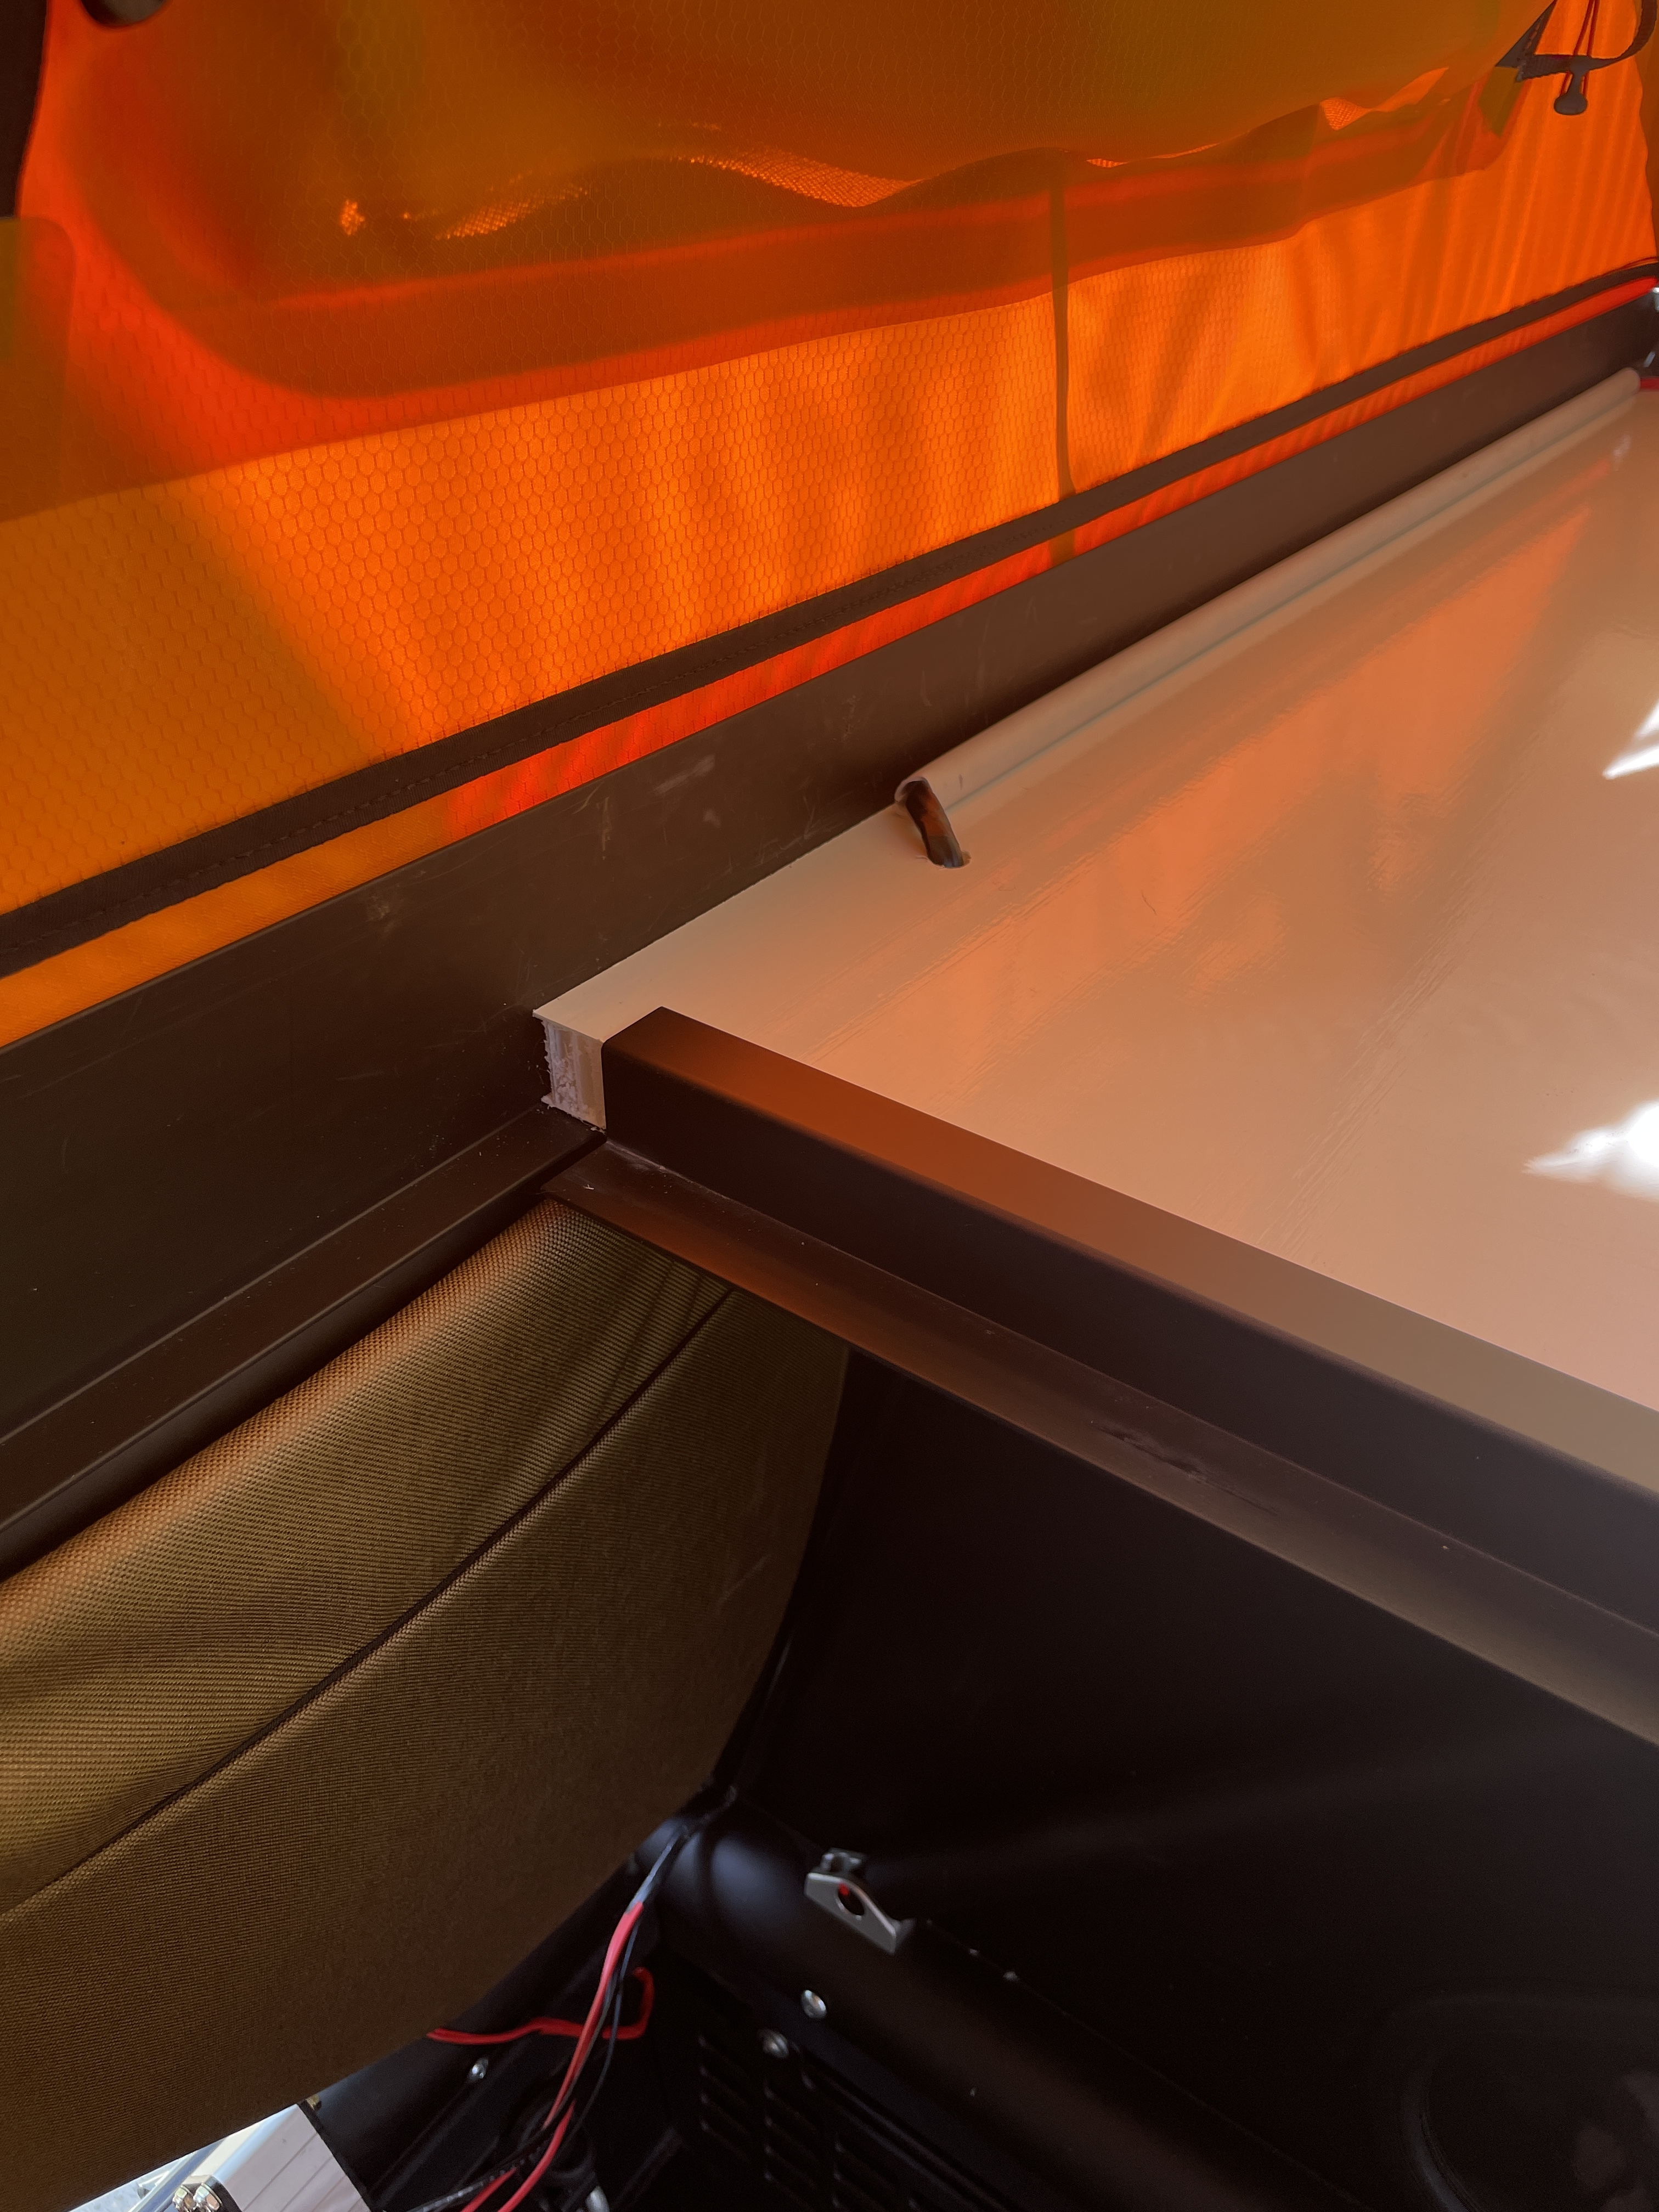
• I also quickly dropped in the OEM Toyota Bed Header Rail behind my Cali Raised Panel. I have no idea why but Toyota deleted this part from my model of truck (Another cost saving measure I guess )
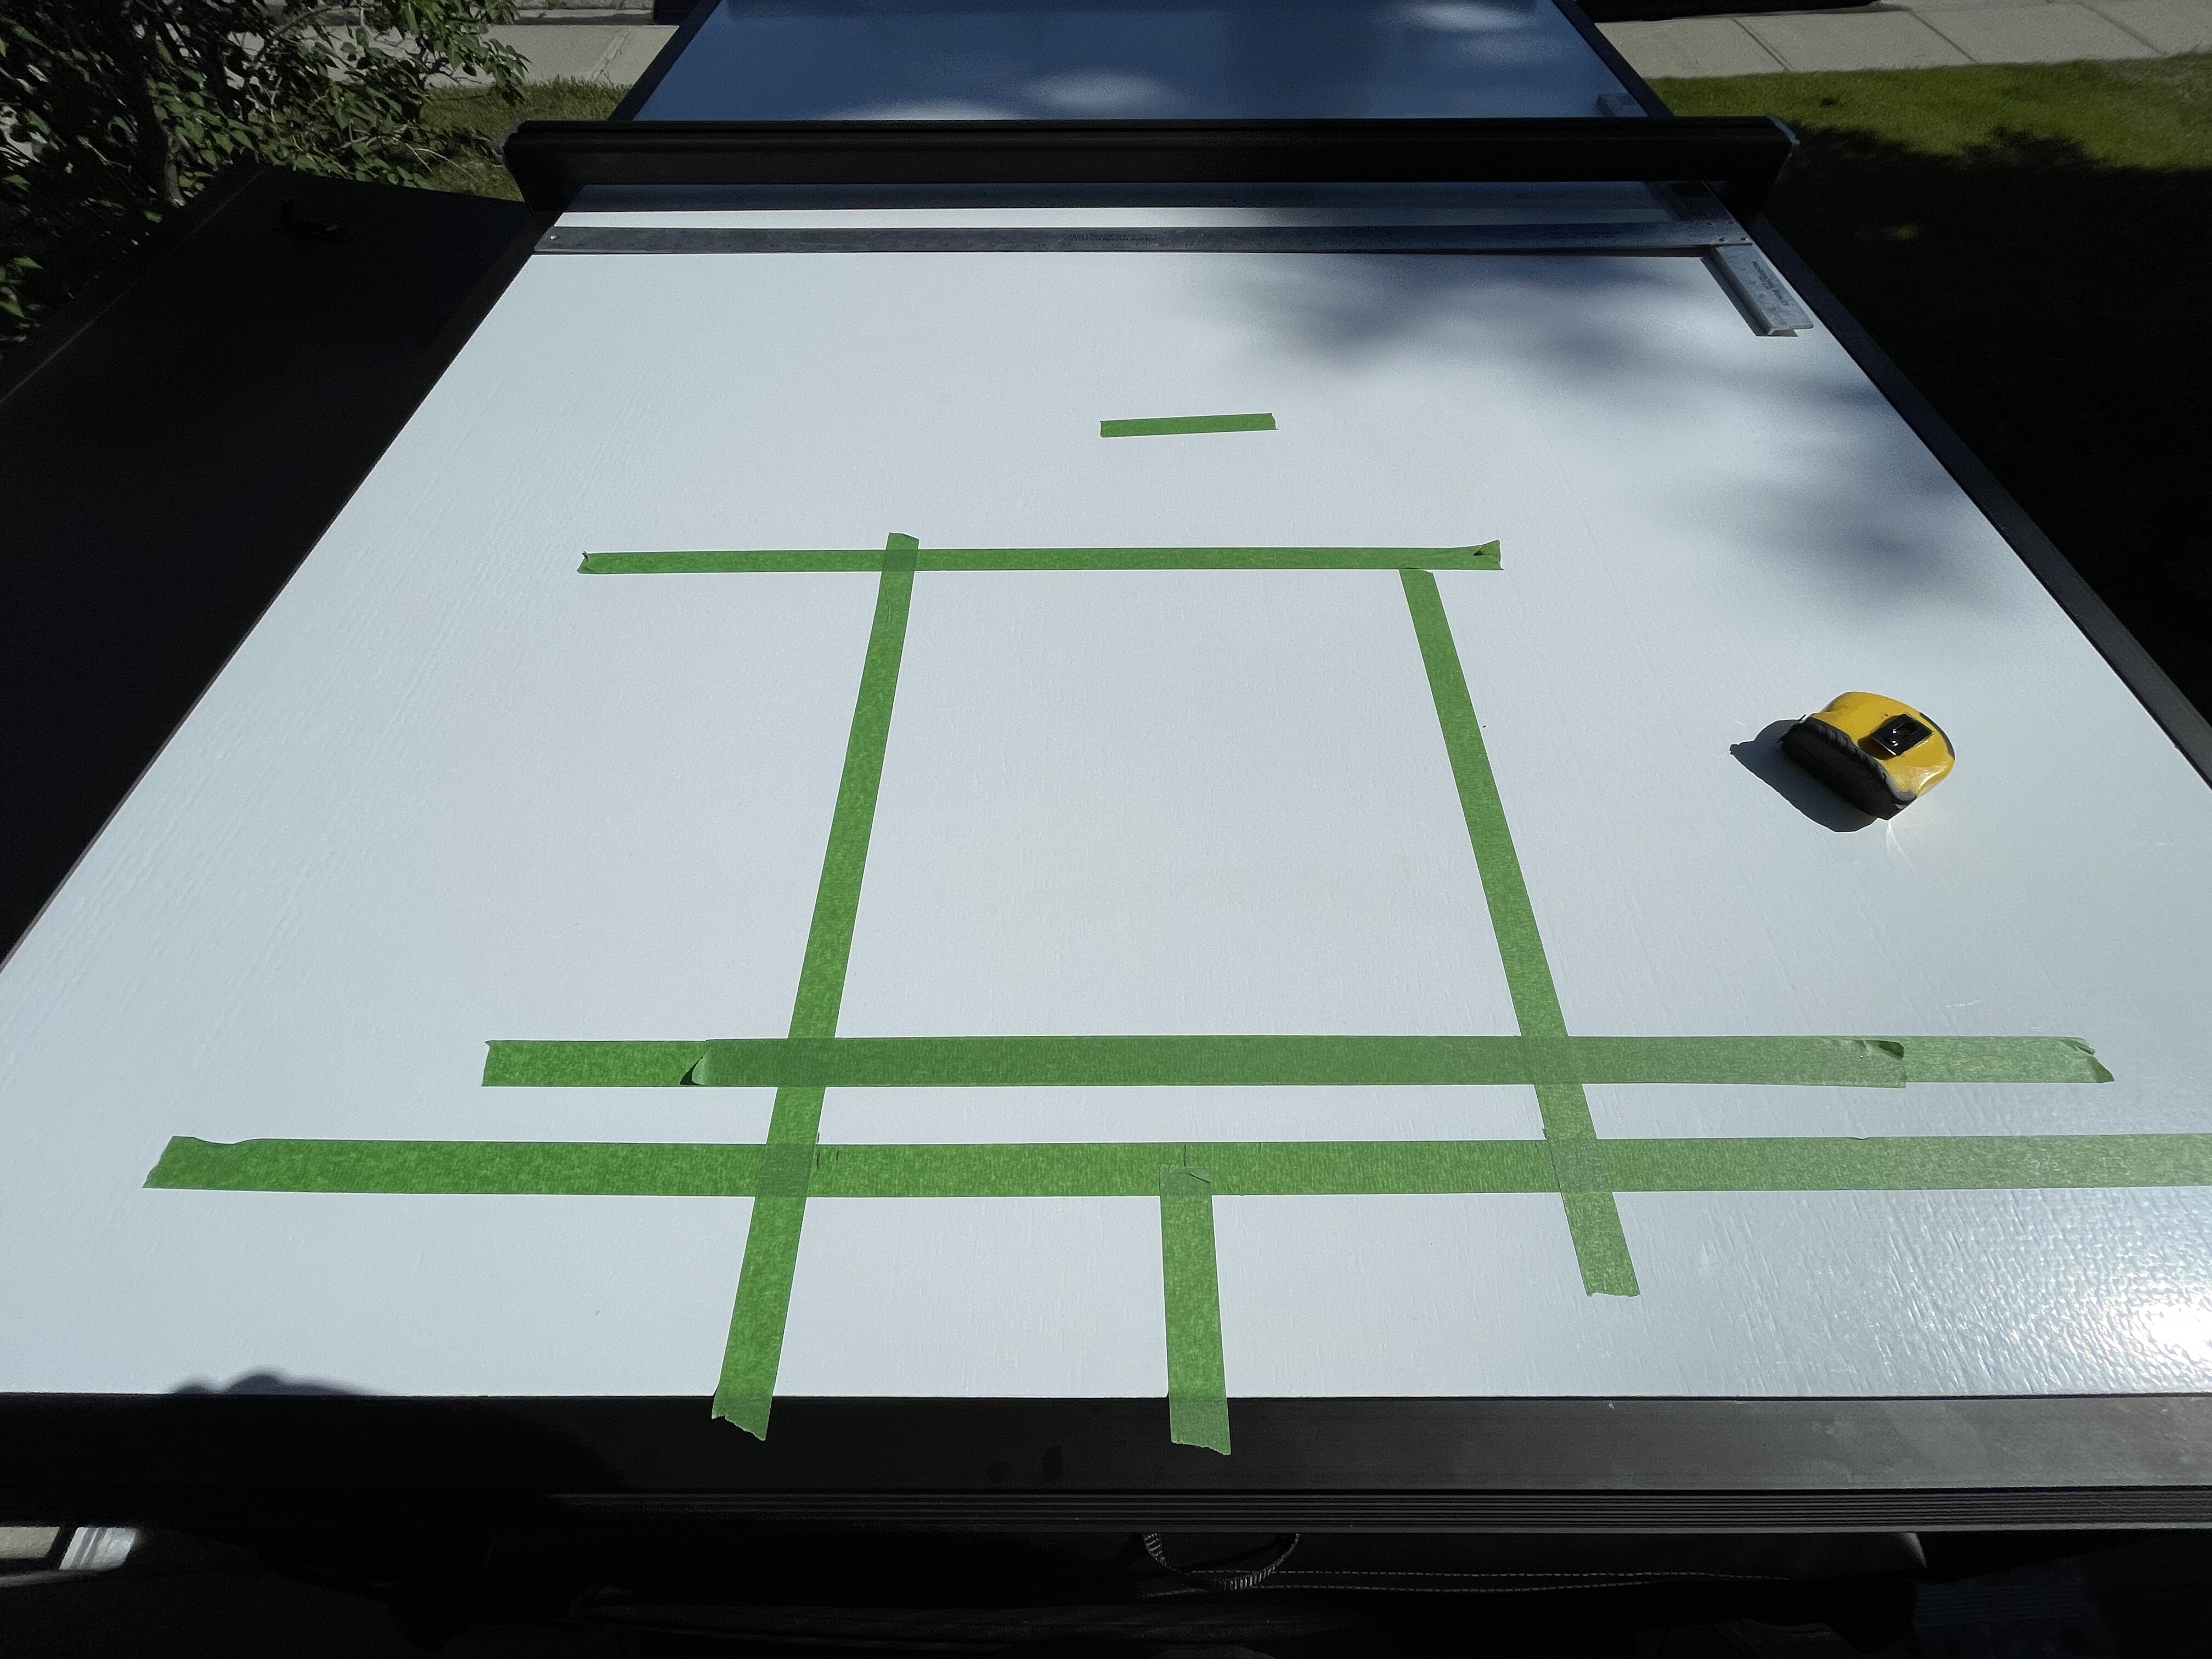
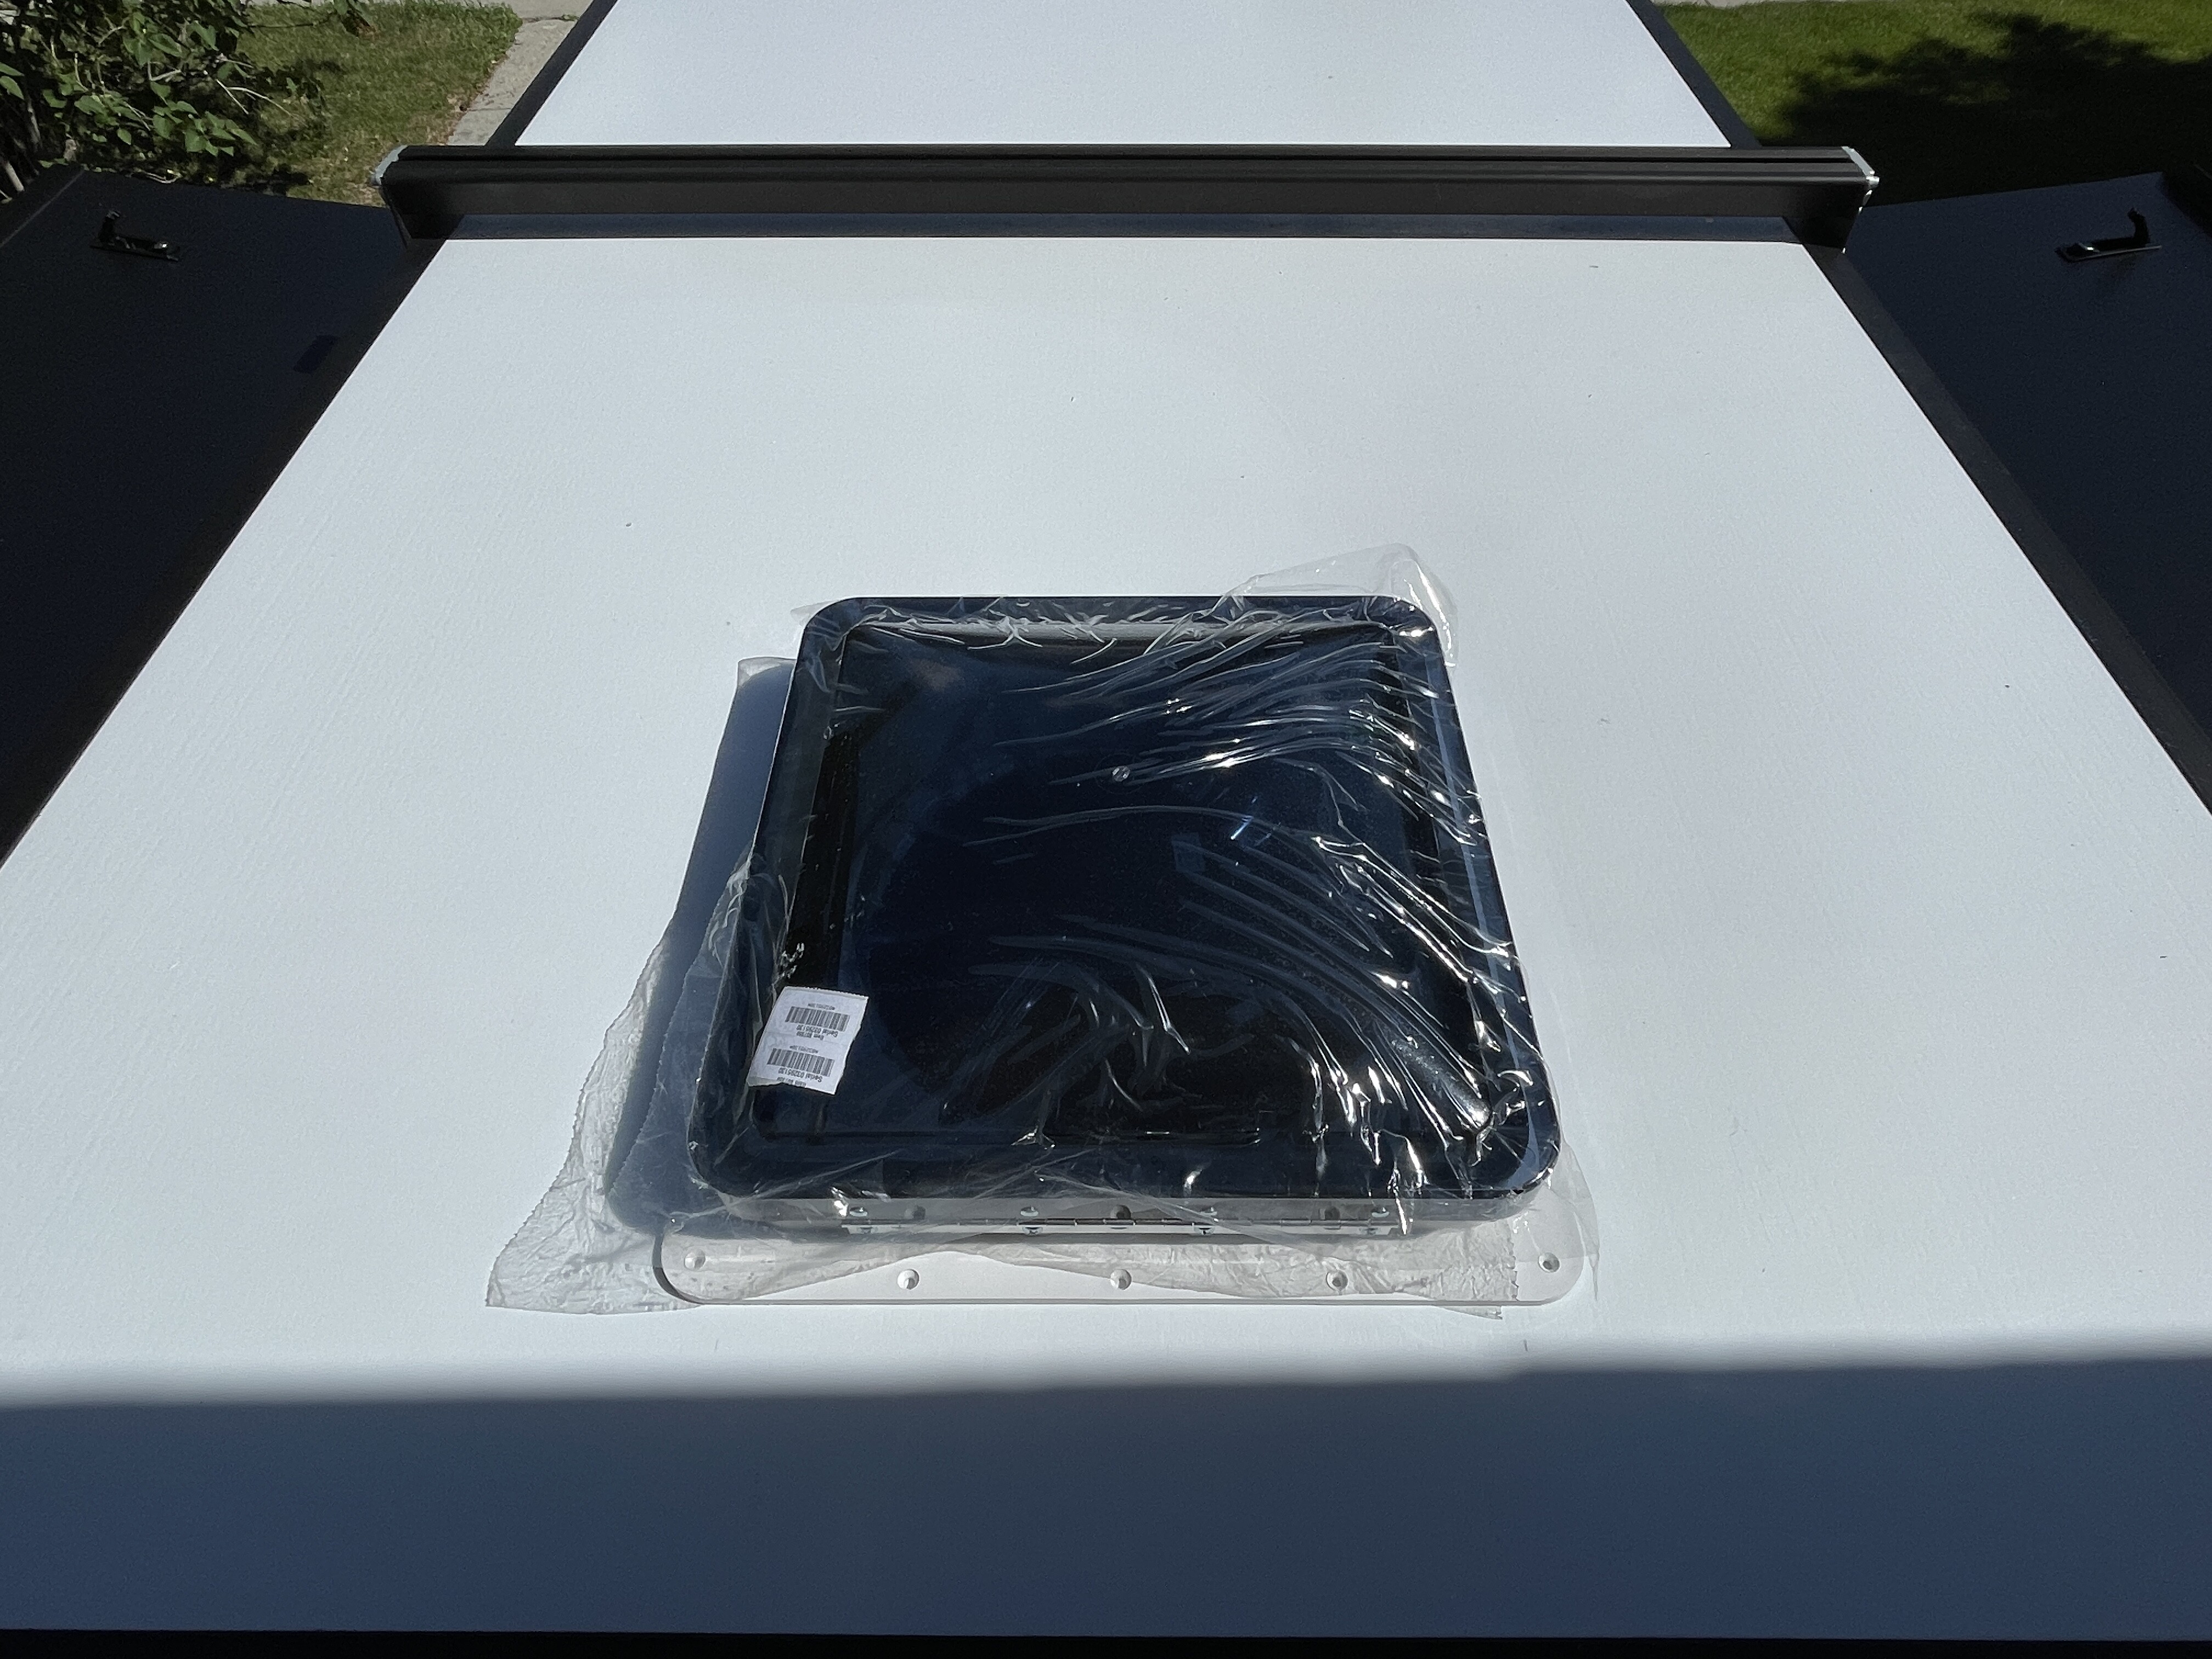
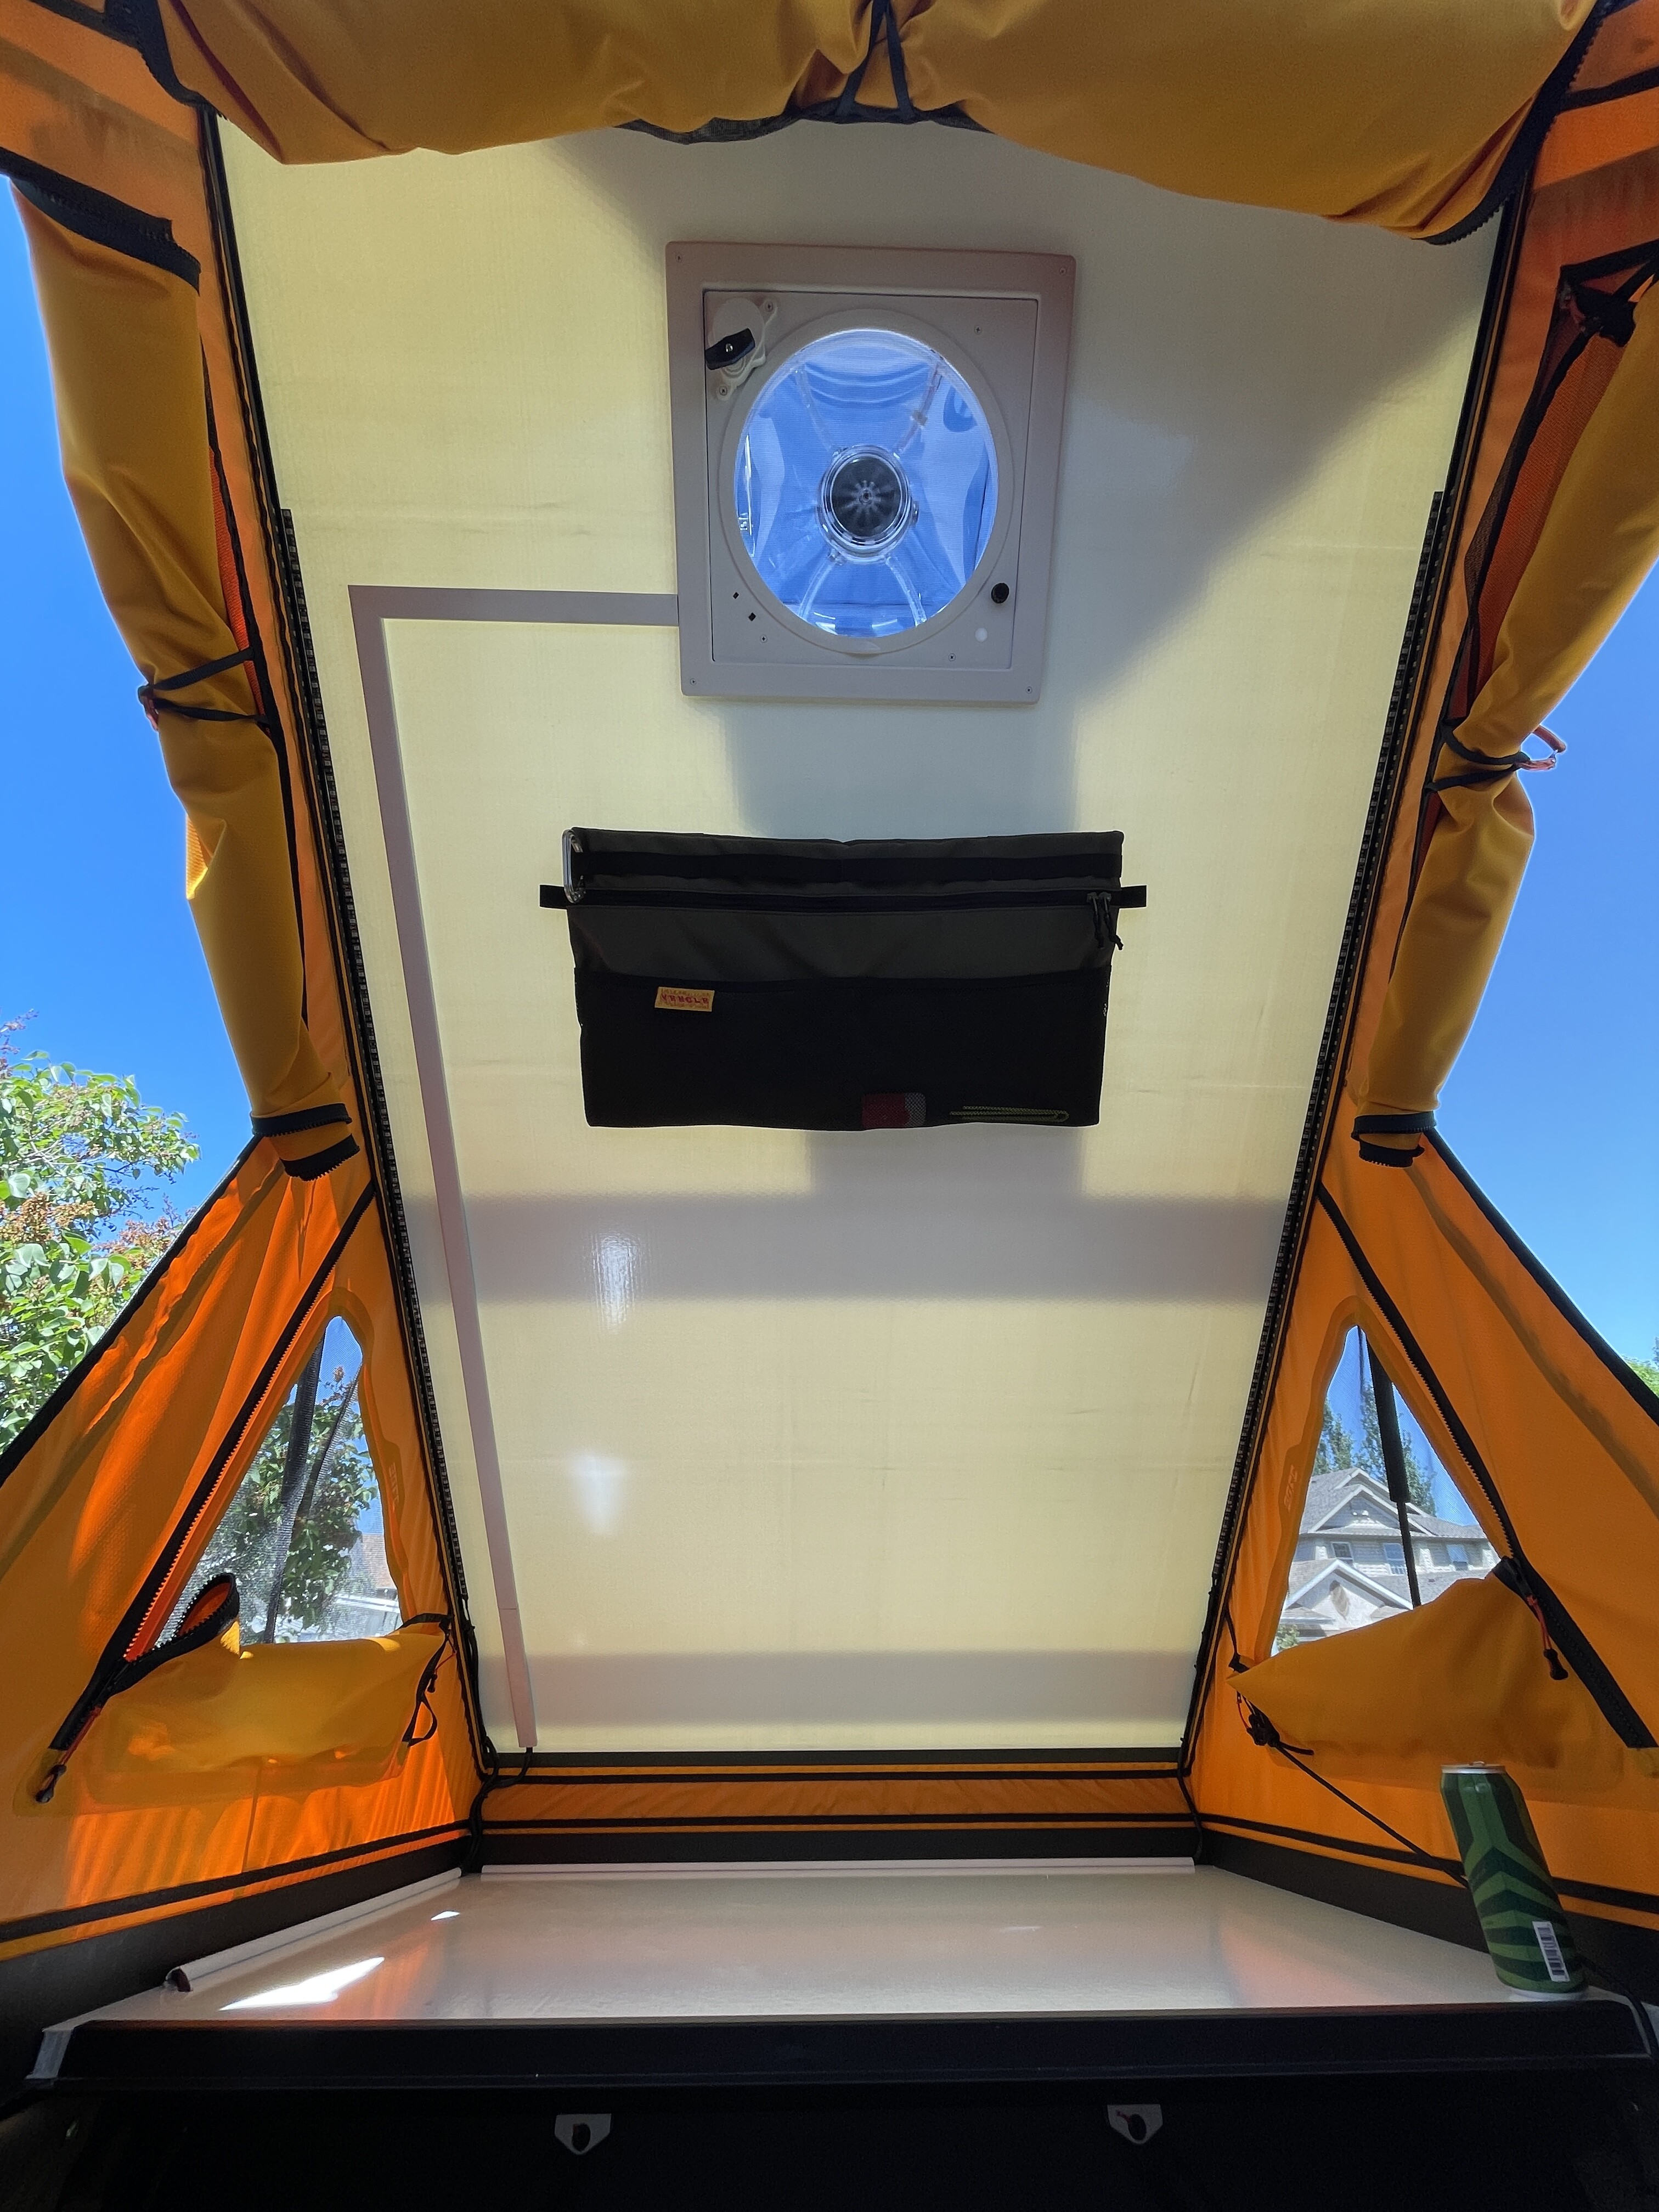
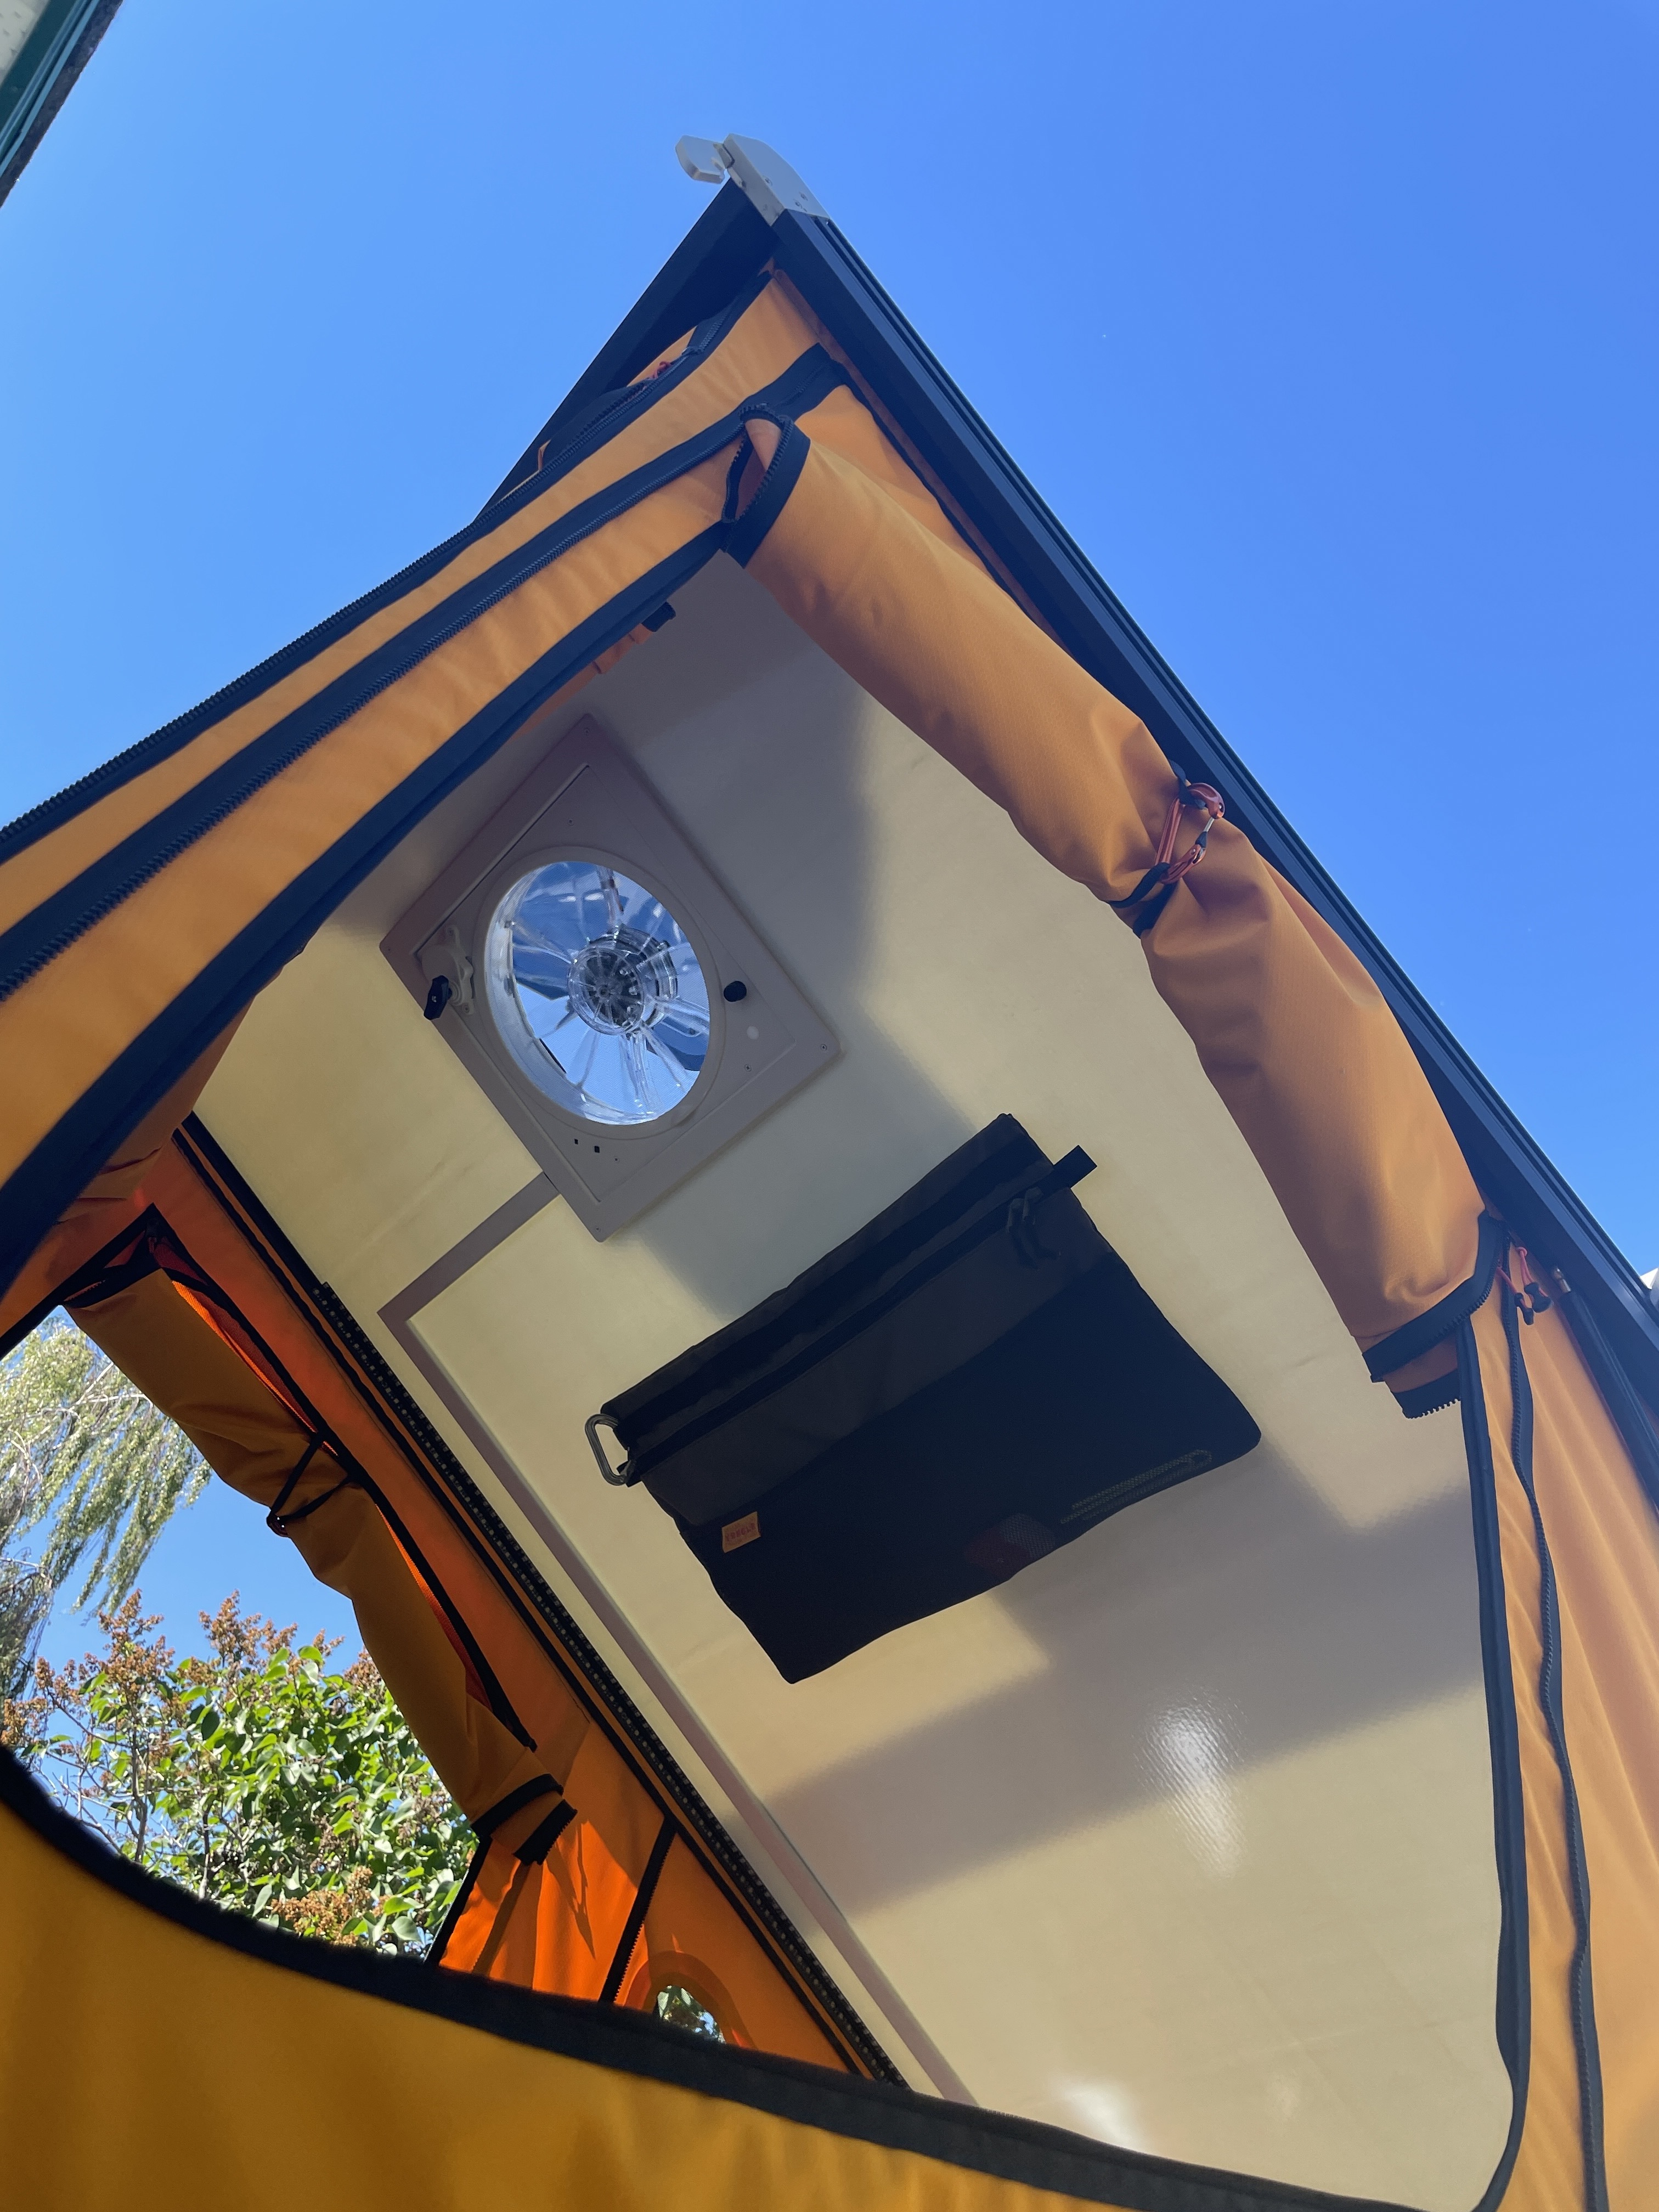
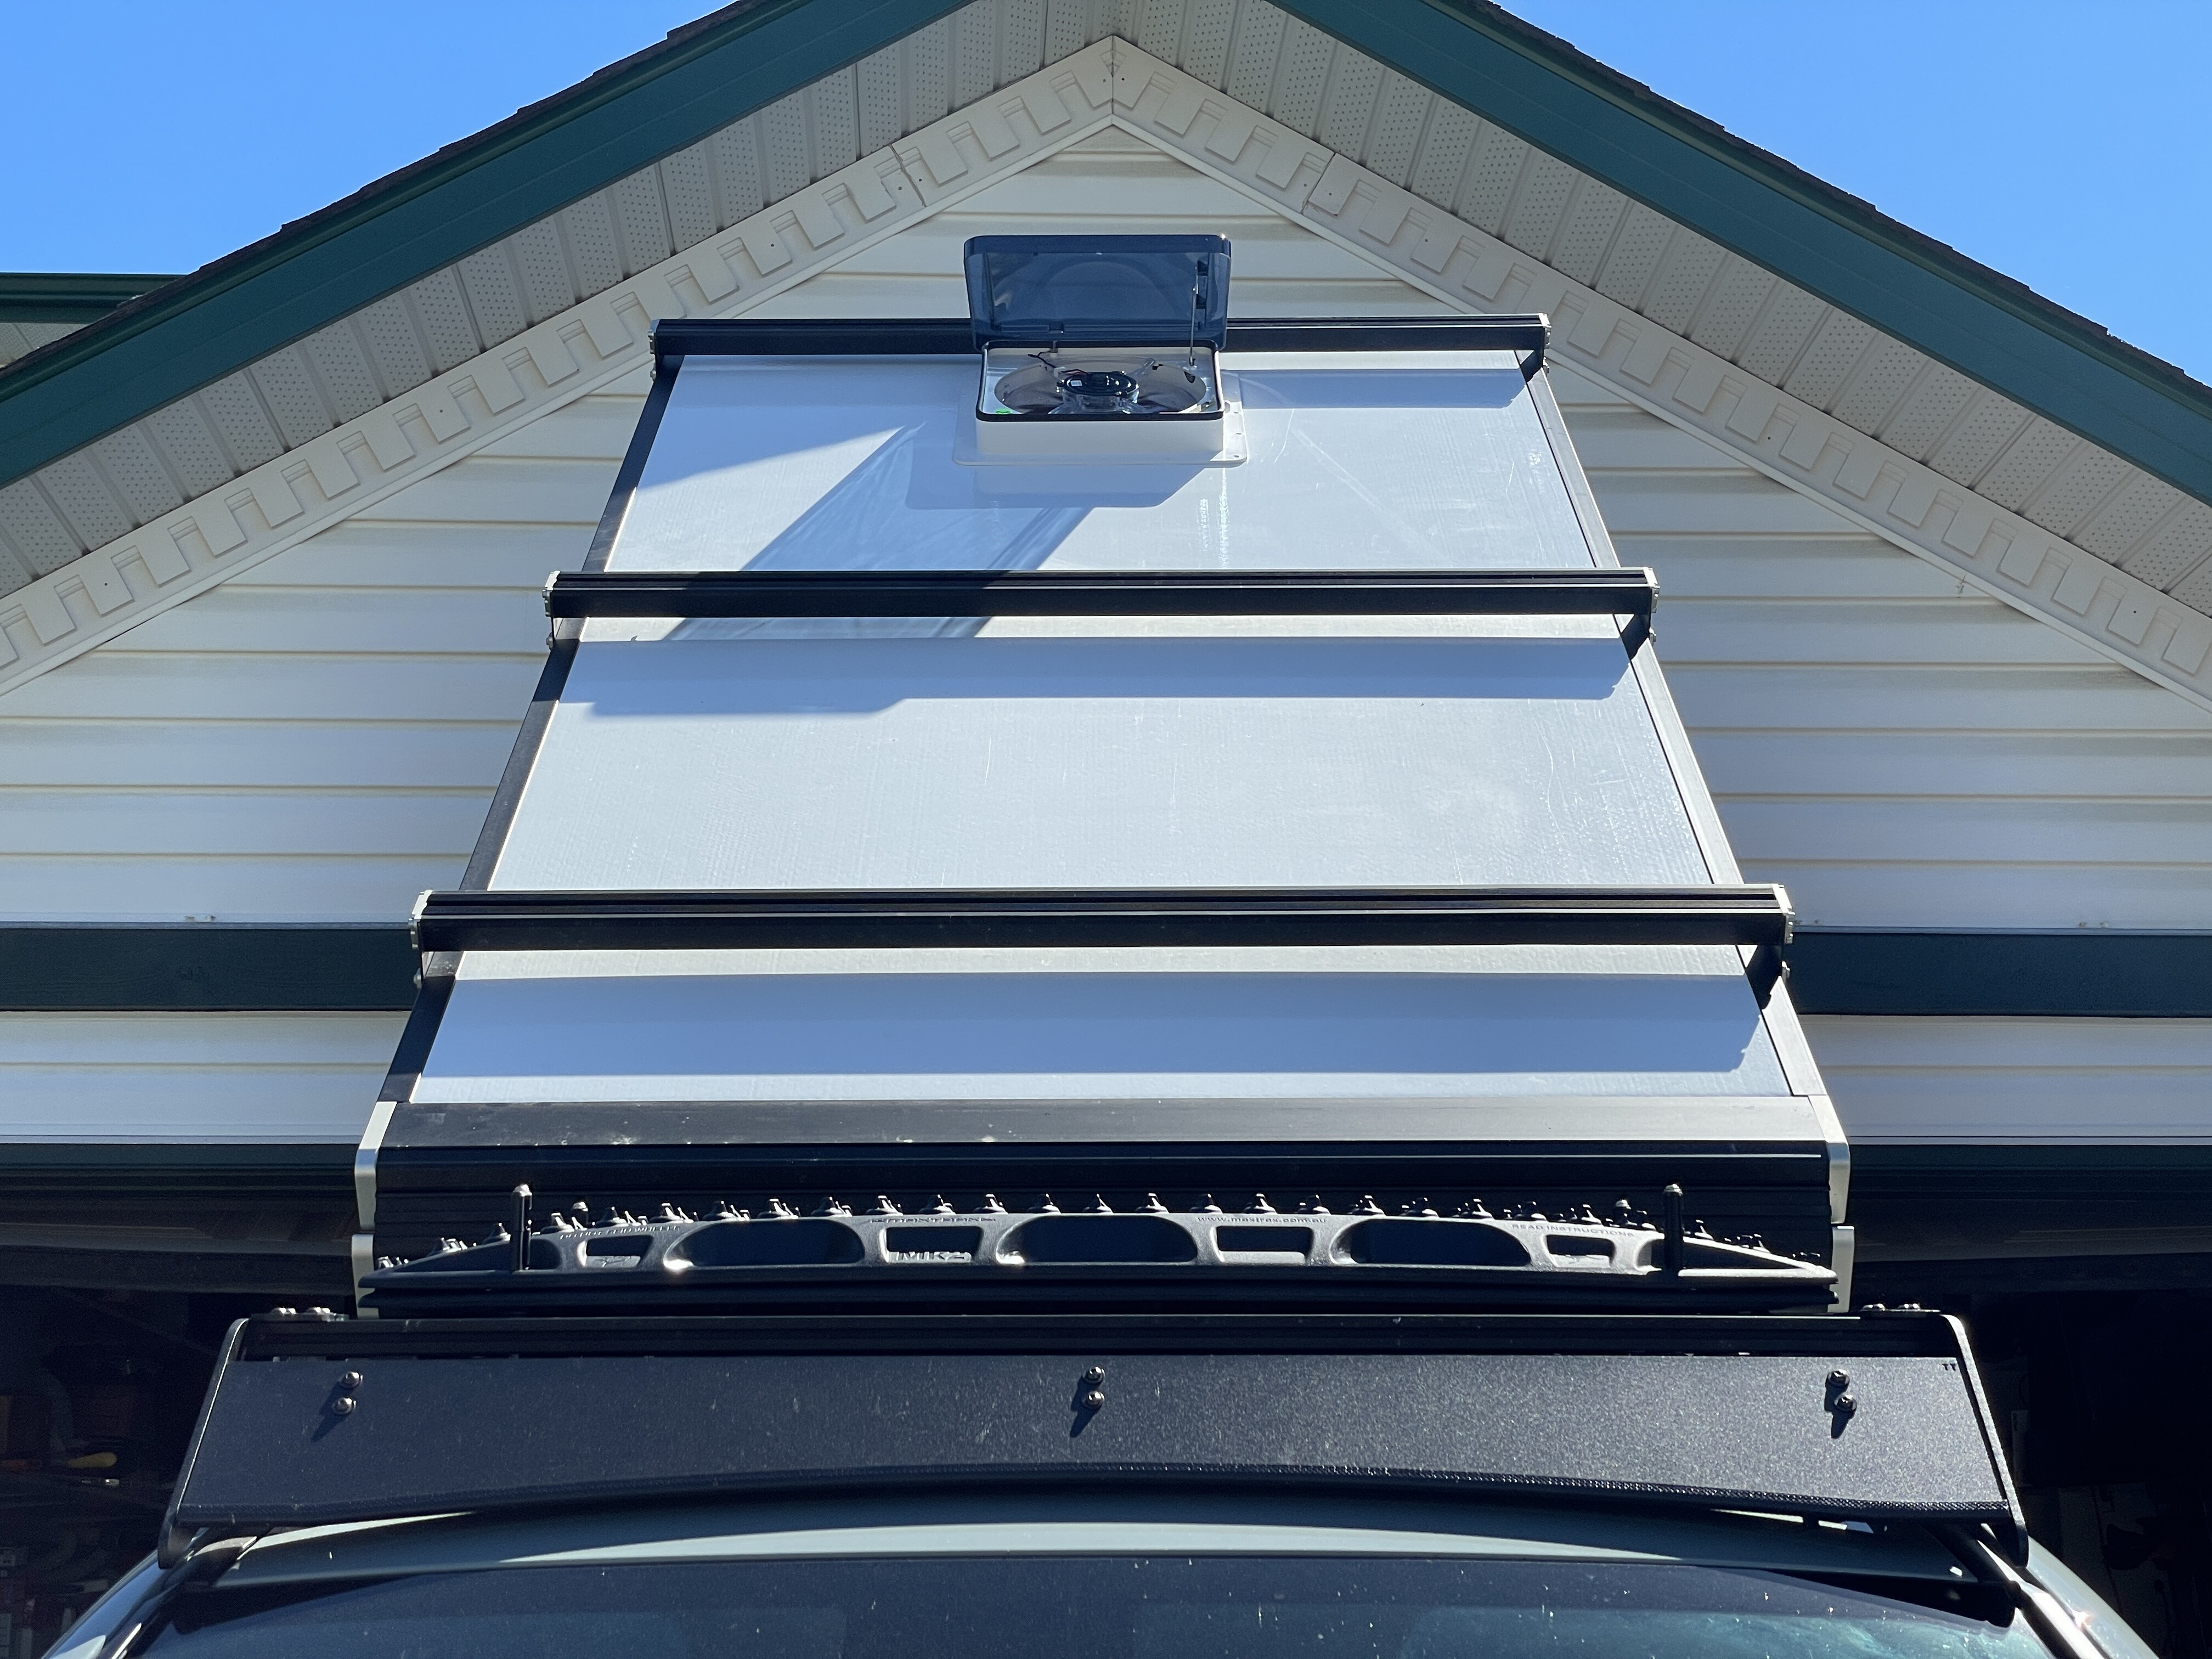
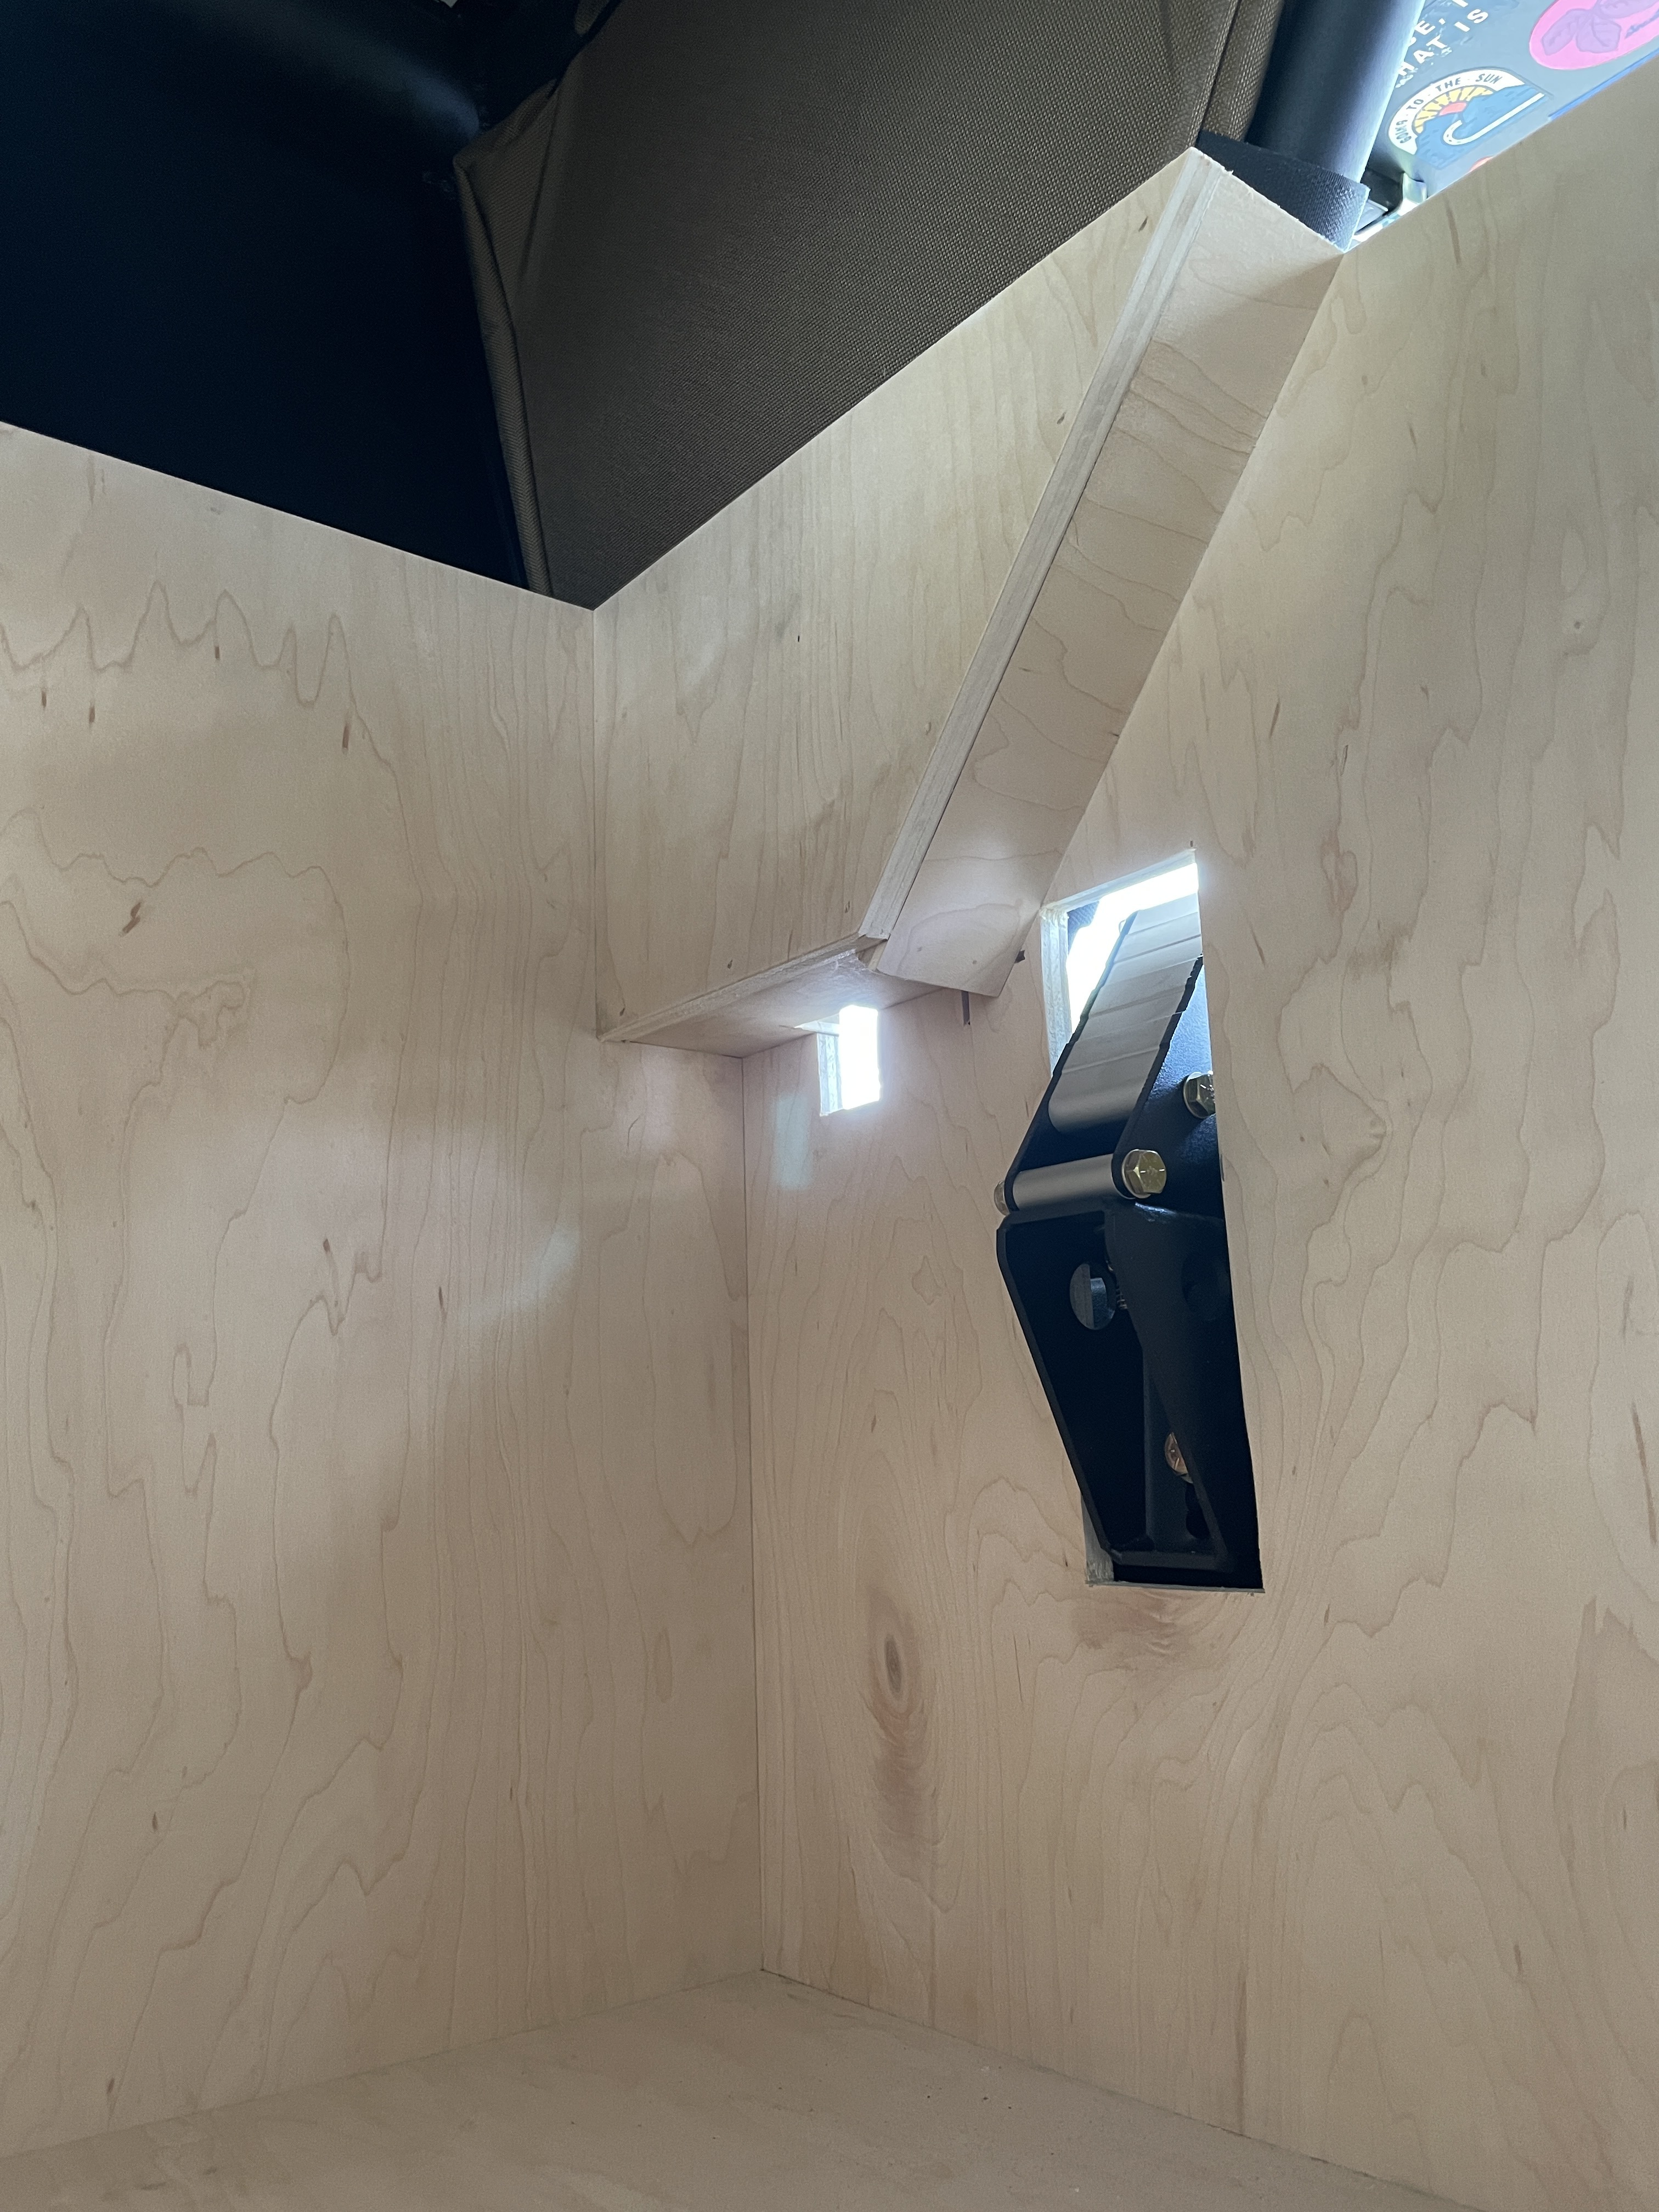
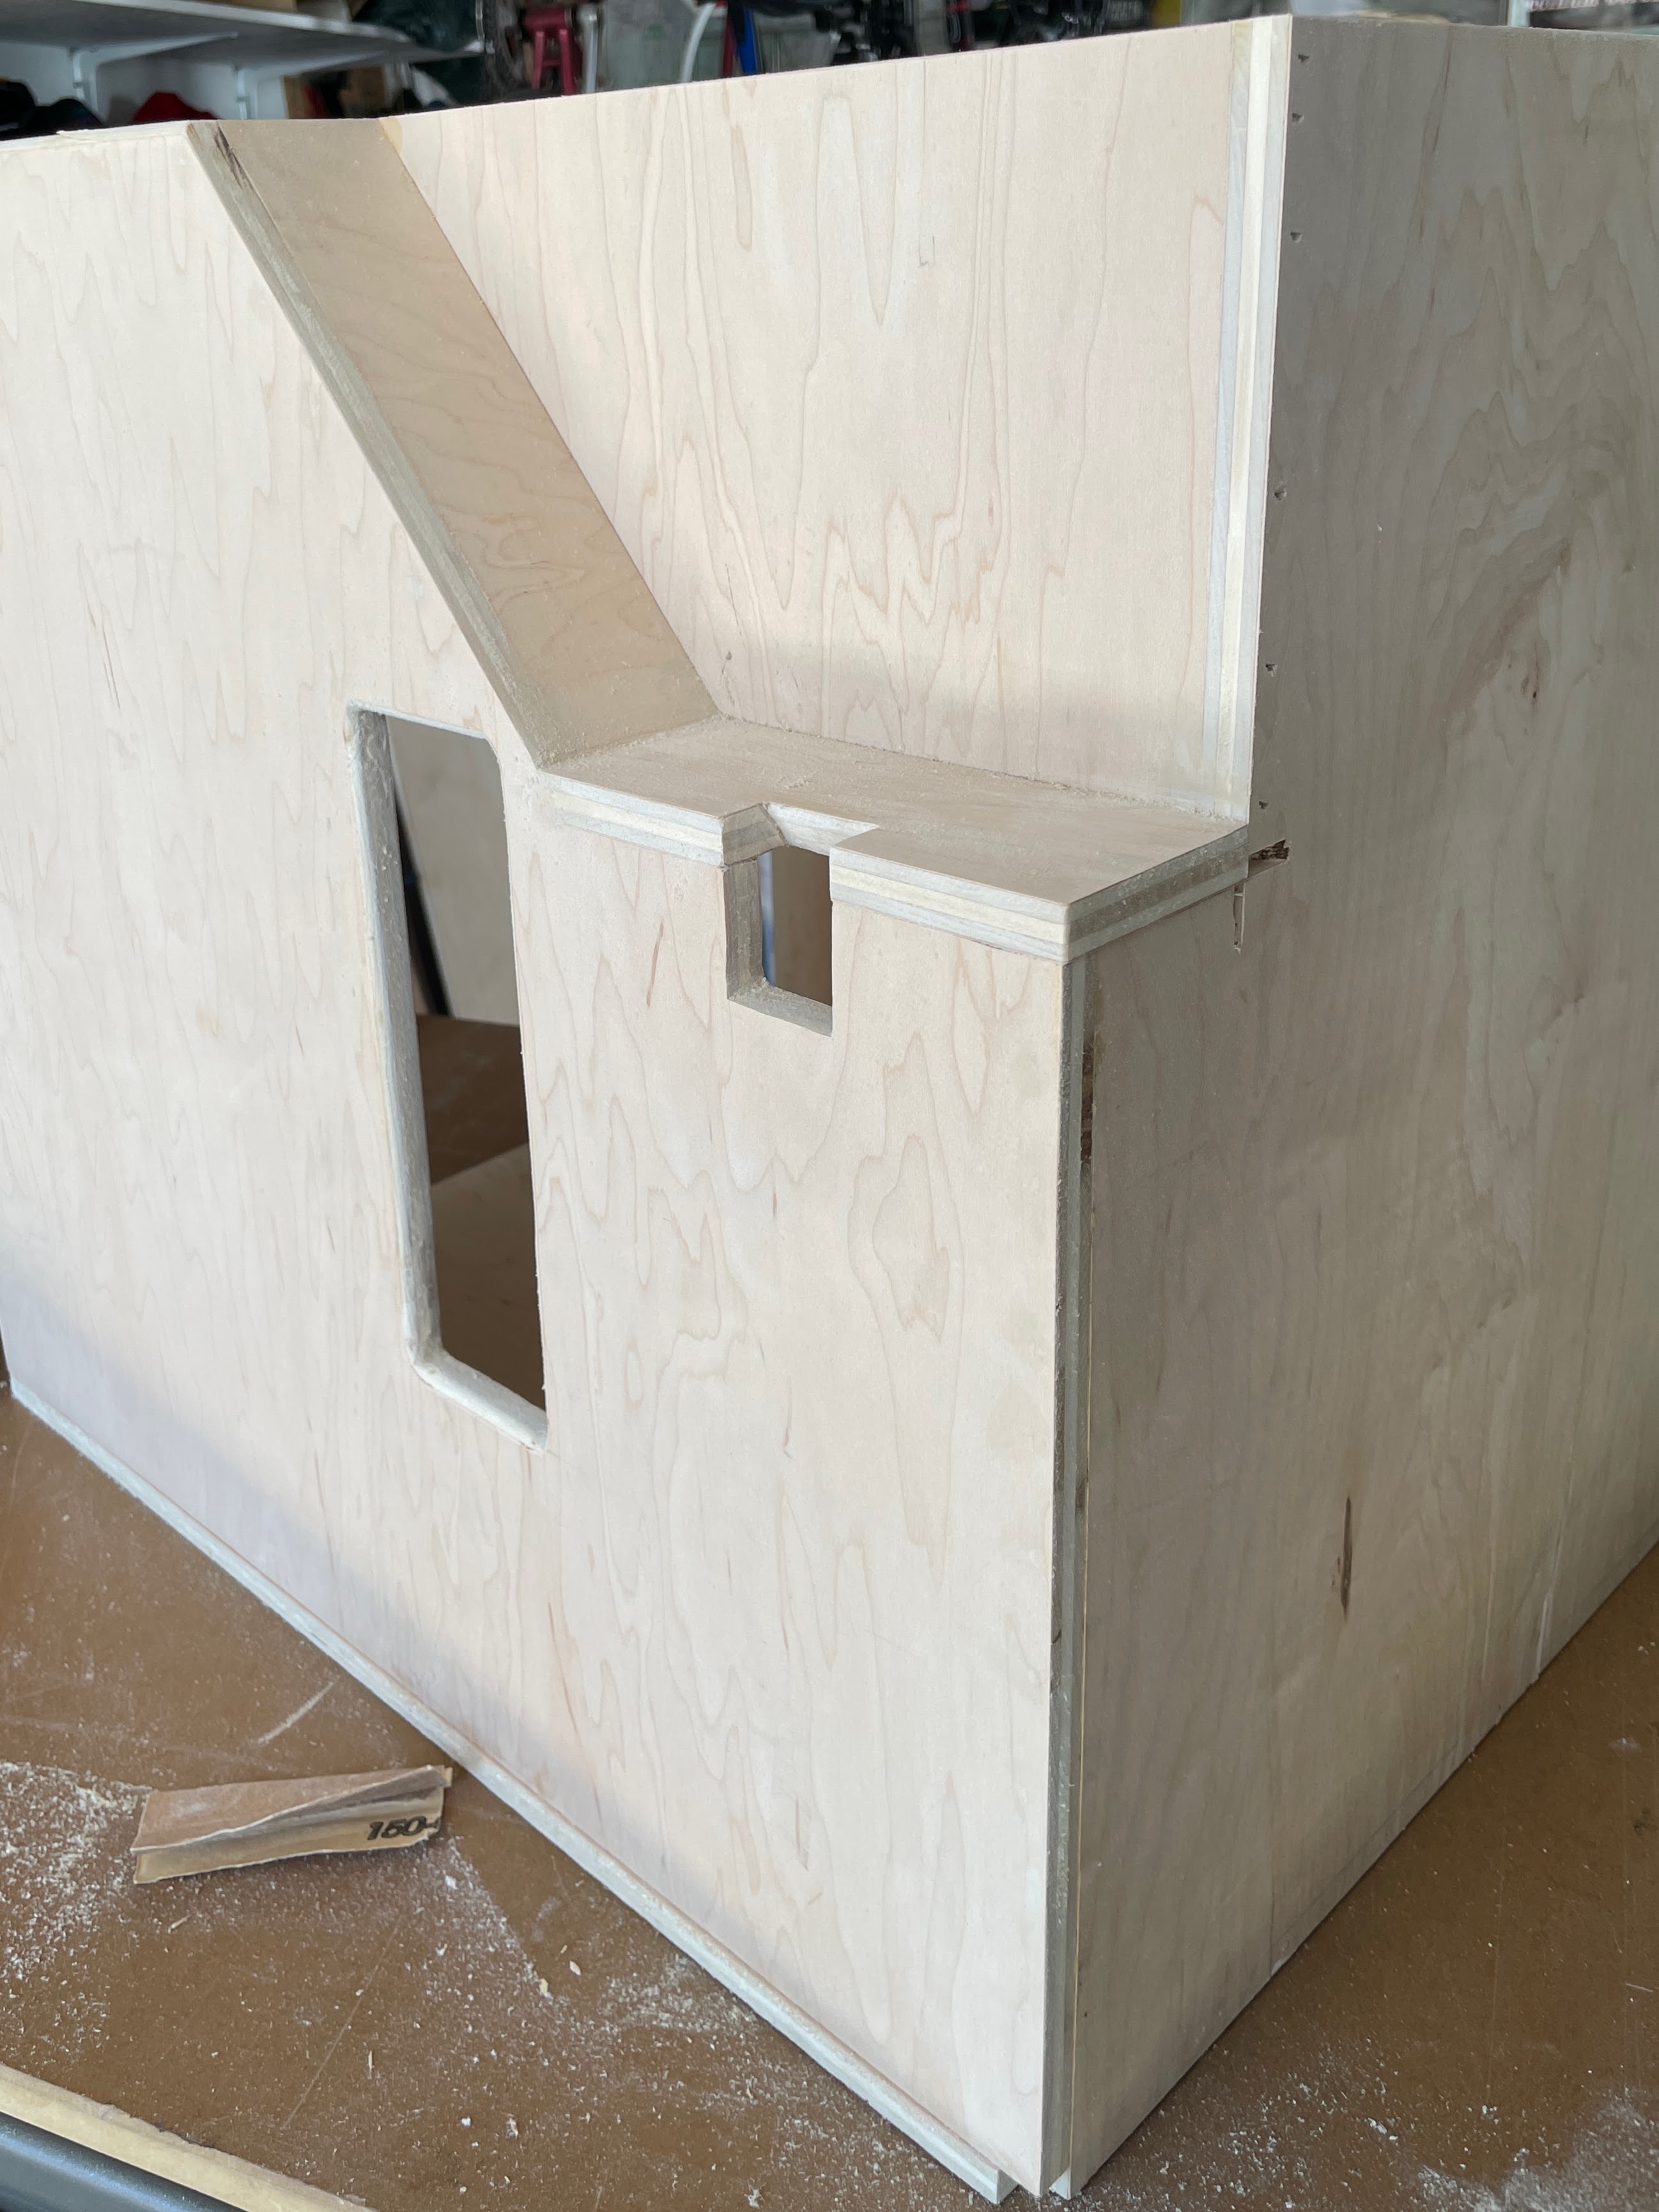
Today’s project was to drop in Dometic’s 7350 Fan-Tastic Fan that I picked up a few months back. If you read my last post you know the power harness for the fan was pre-wired as I tackled the LED lights so we’re going to jump right into cutting and mounting.
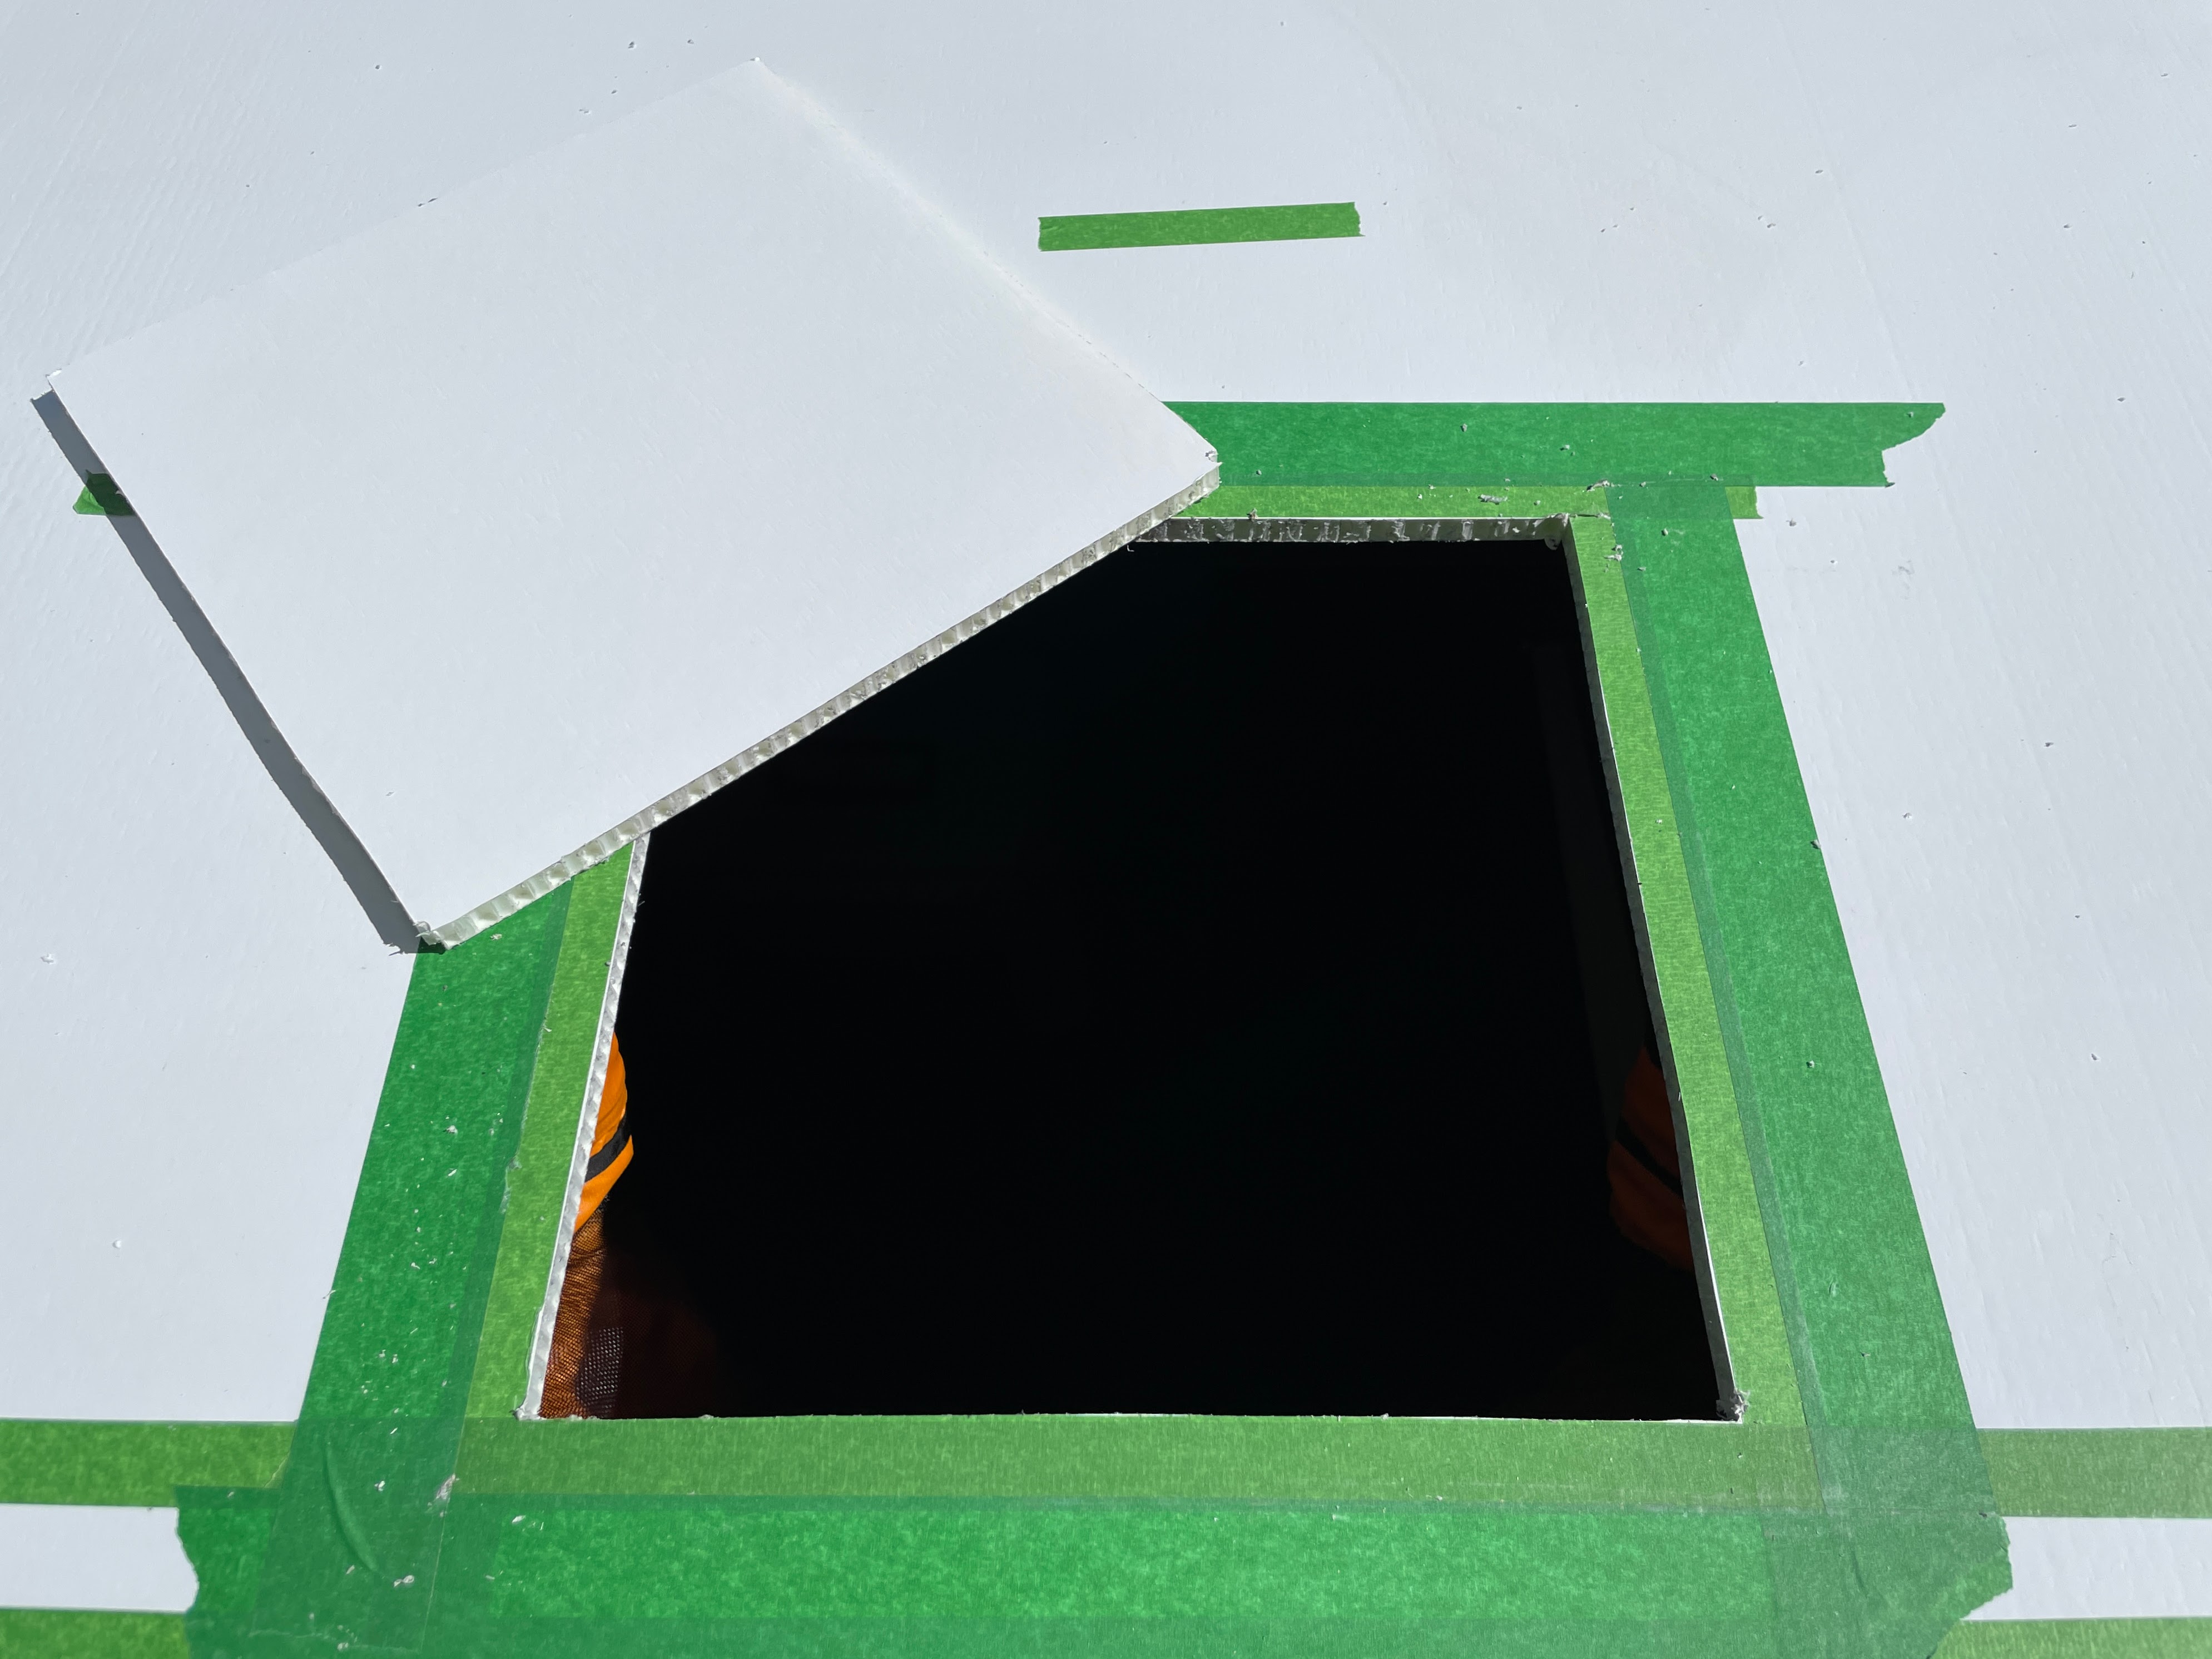
First step was to measure and find a solid spot to drop in the fan so a Beef Bar could still fit behind it. We measured (like four times) dropped down the tape and started cutting. (Started w/ pilot holes w/ drill followed by jig saw).
The roof of the GFC is incredibly thin — not even a full inch so cutting was super easy.
Next step was to apply a ton of marine/rv grade silicone to create a solid seal between the fan and roof of the GFC. Self tapping screws were also siliconed. No water is going to be finding it’s way in here.
(Note: We had to cut down interior trim that comes with the Fan to accommodate the incredibly thin GFC roof. We just used a hack saw to bring it down to the appropriate height.)
Once the fan was properly seated we moved onto completing and running the harness. Once again we used some plastic conduit/channel that we had available to guide the cable down to the top of the camper to meet up with our previously installed harness.
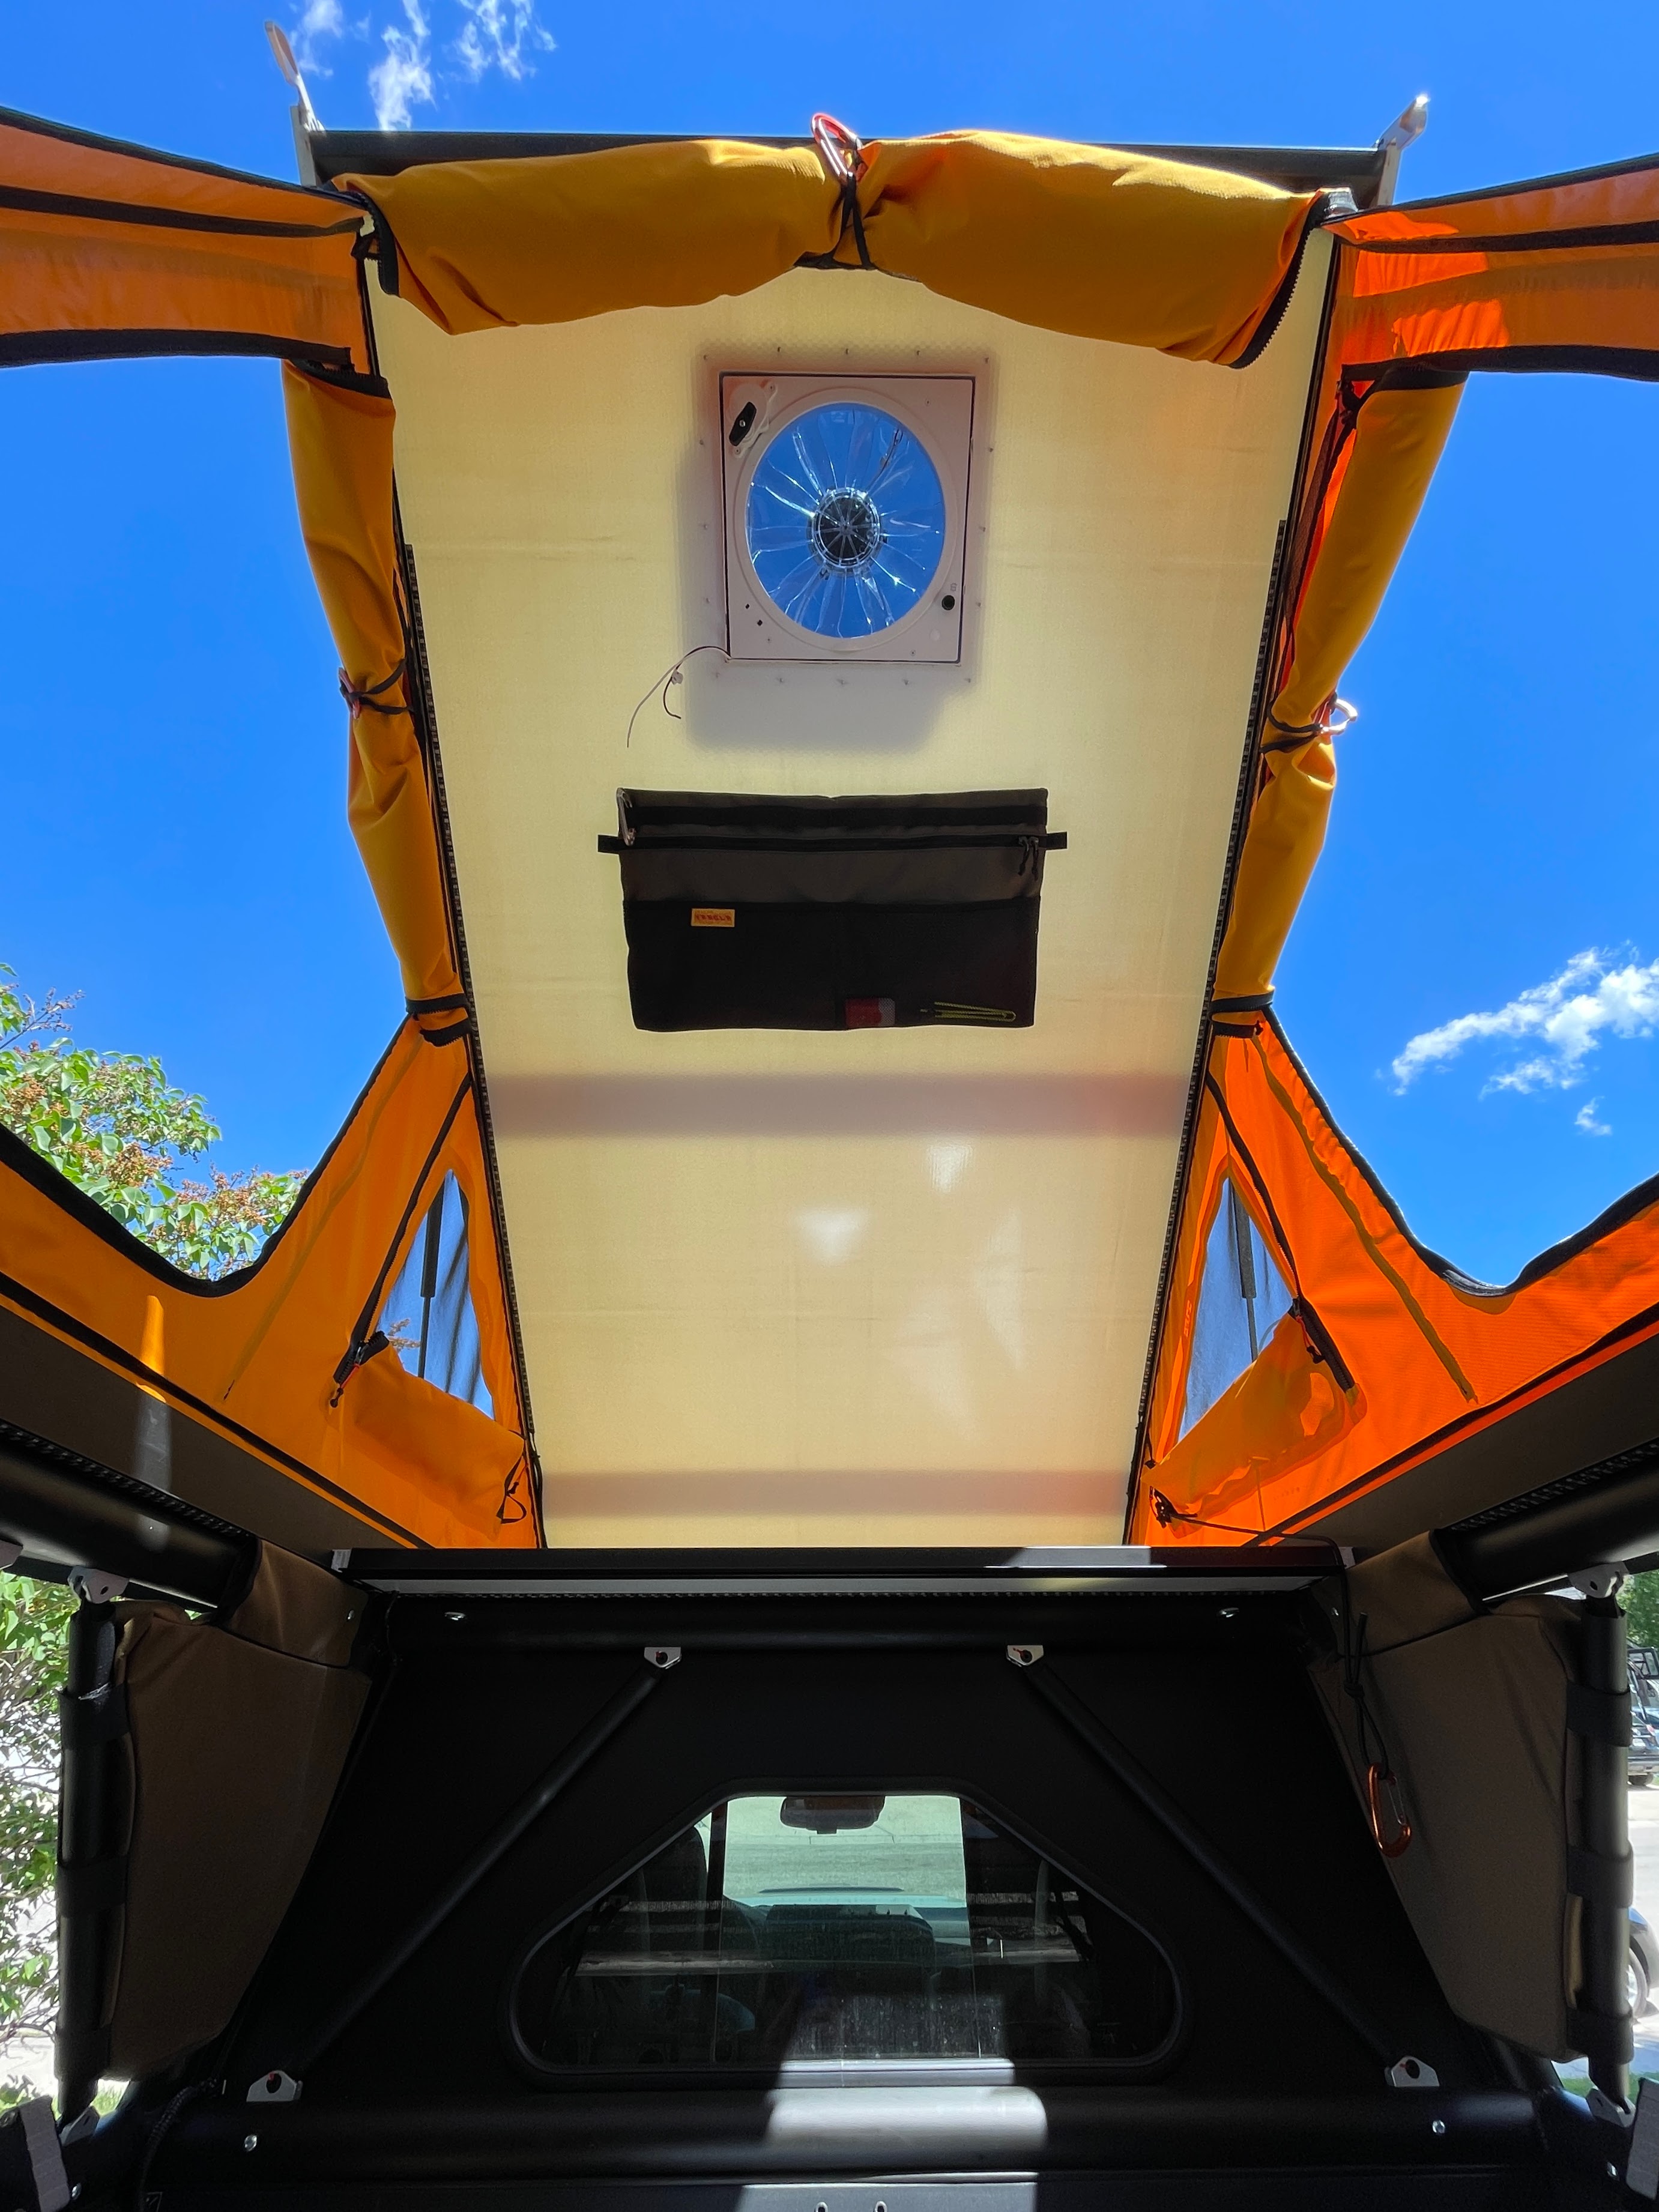
I decided to drop in a Blue Sea Systems Toggle Switch w/ Boot to kill power to the fan when not in use. It would have been way too easy to accidentally press the remote when the camper was closed and put the dome’s lift motor under strain. (The fan’s crank handle rests against the GFC mattress when closed).
What a great build thread! Thanks Julian for sharing. It’s very cool that you stayed with the GFC theme of keeping the bed uncluttered. Your build has a lot of the elements that I hope to incorporate in mine. Look forward to seeing what’s next!
I opt’d to drop in conduit and an ARB Socket Mount behind my side panel to elevate and conceal my Dometic’s power harness. The socket is weather sealed and wired directly into the electrical cubby behind the bed. If you look at the photos of how the power harness sat when plugged directly into one of the cubby’s Blue Sea sockets earlier in this thread you’ll see how unsightly it looked (to me).
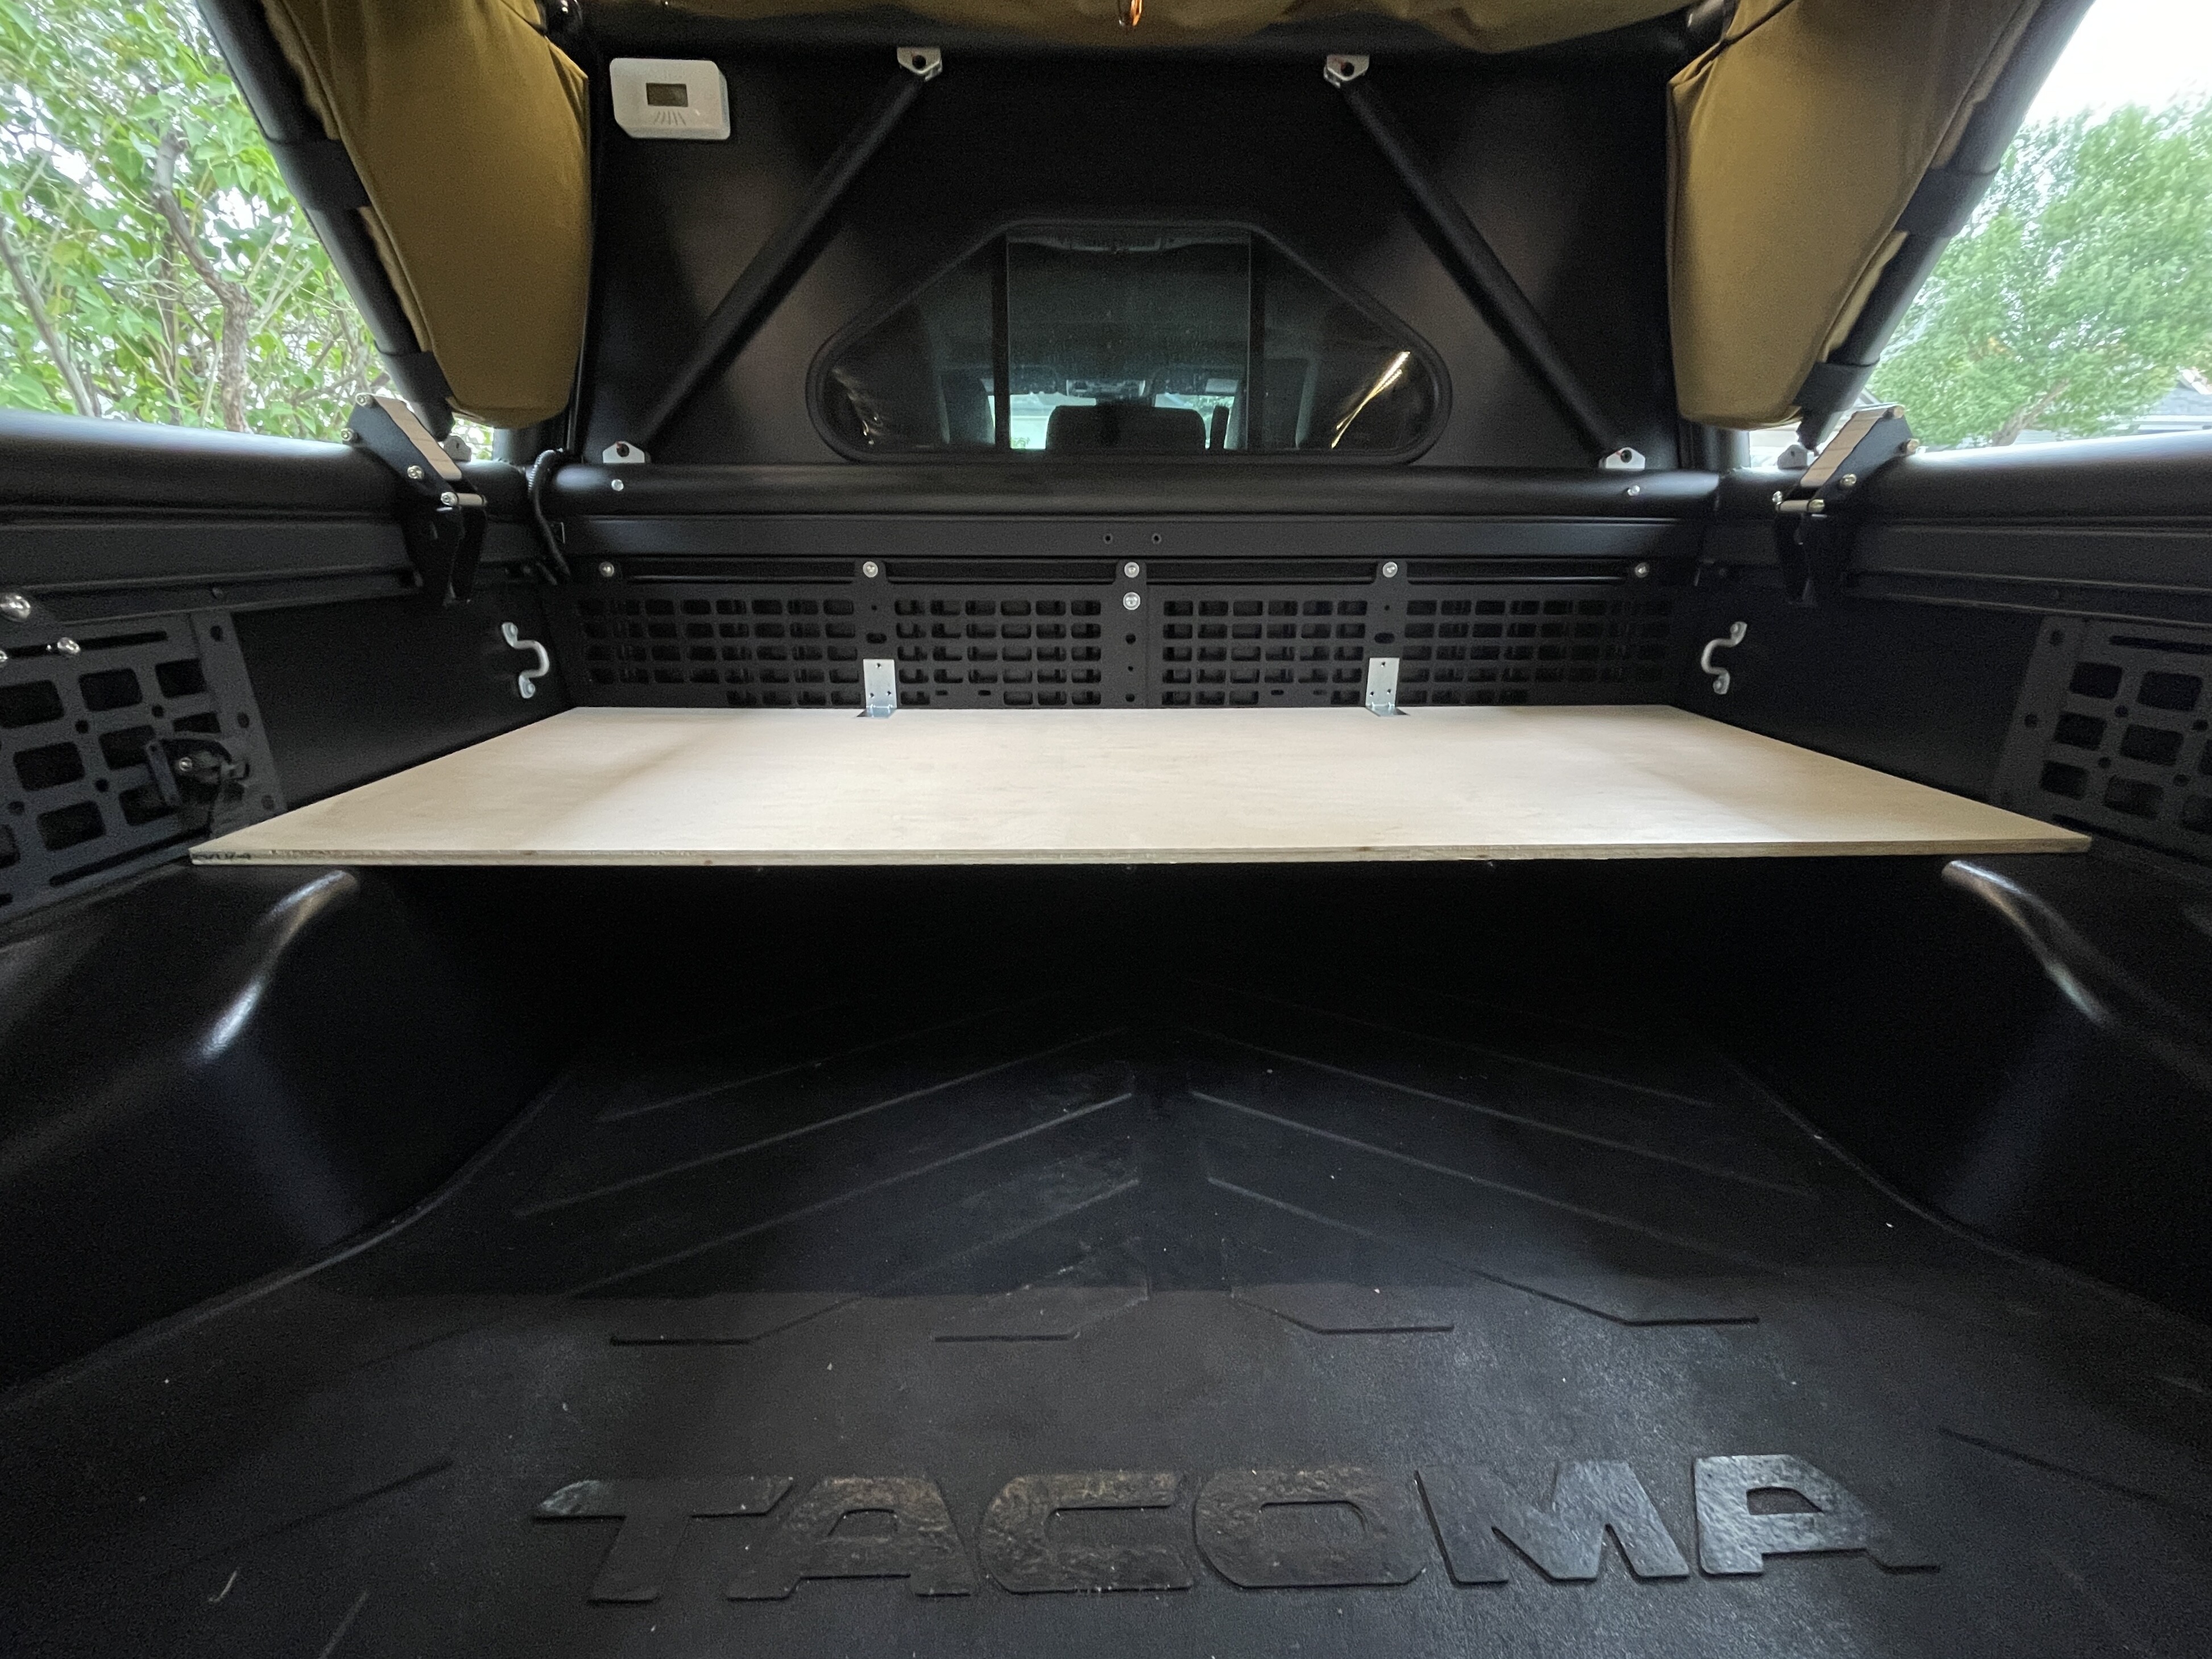
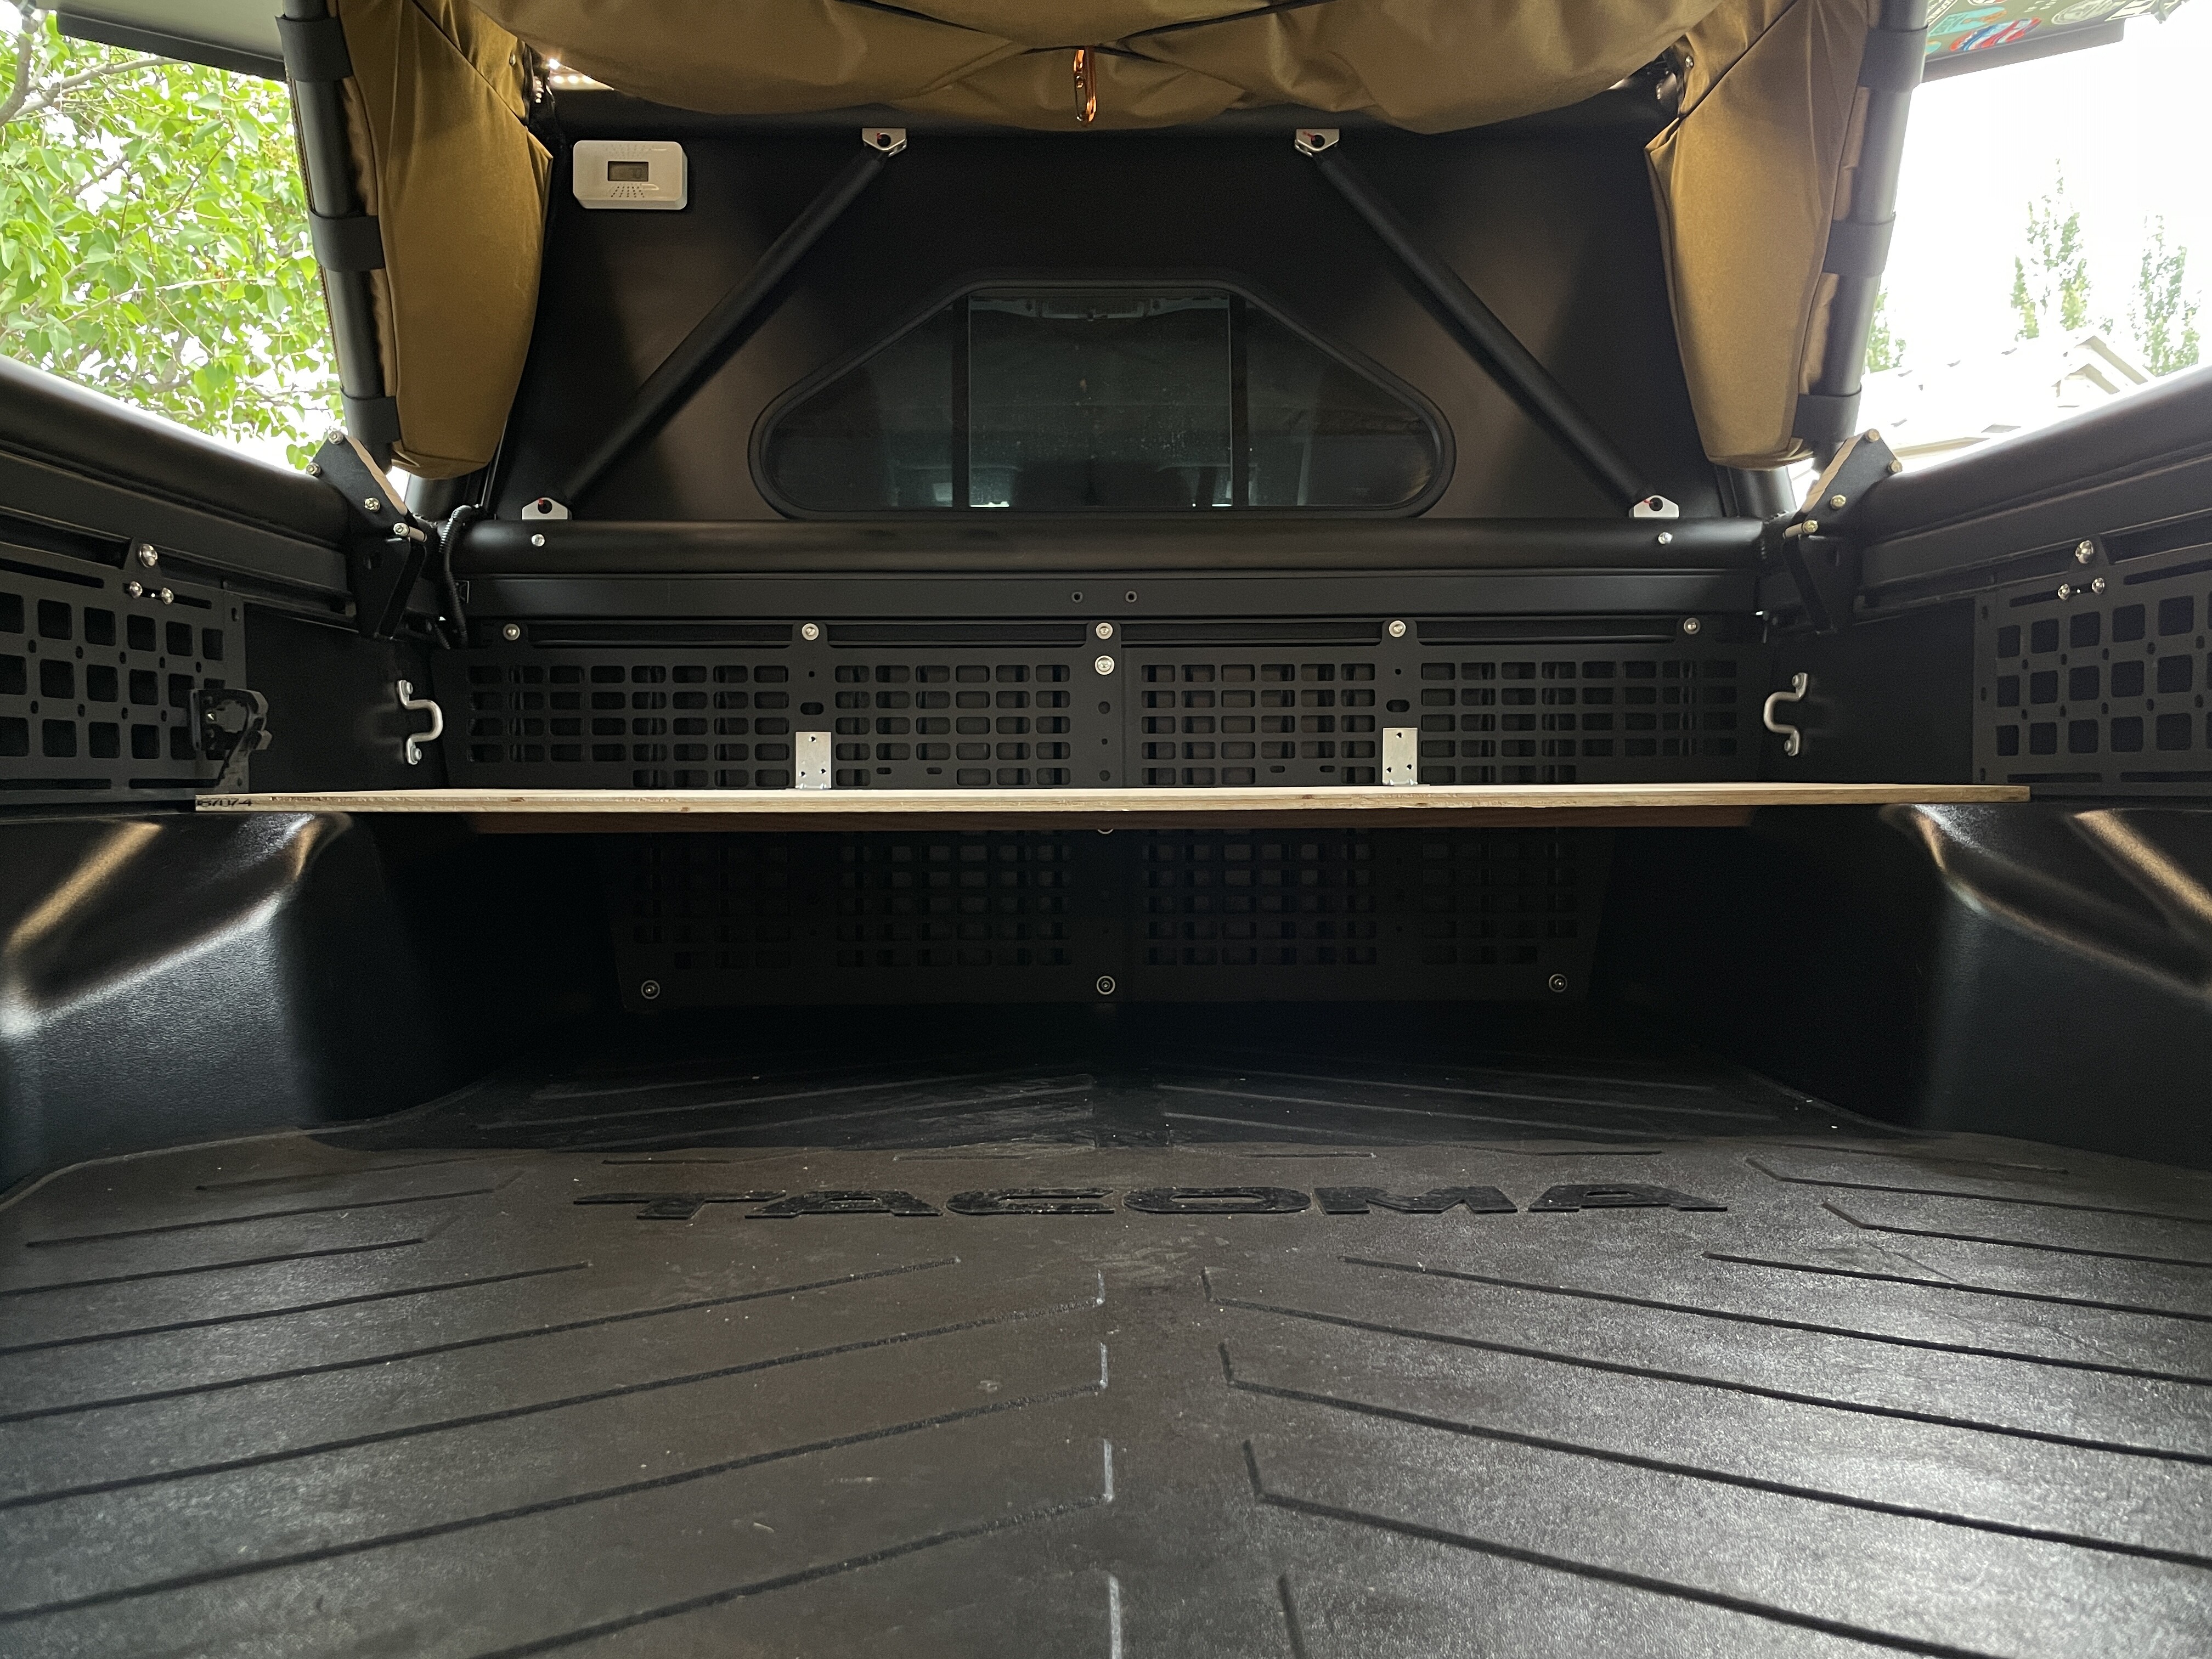
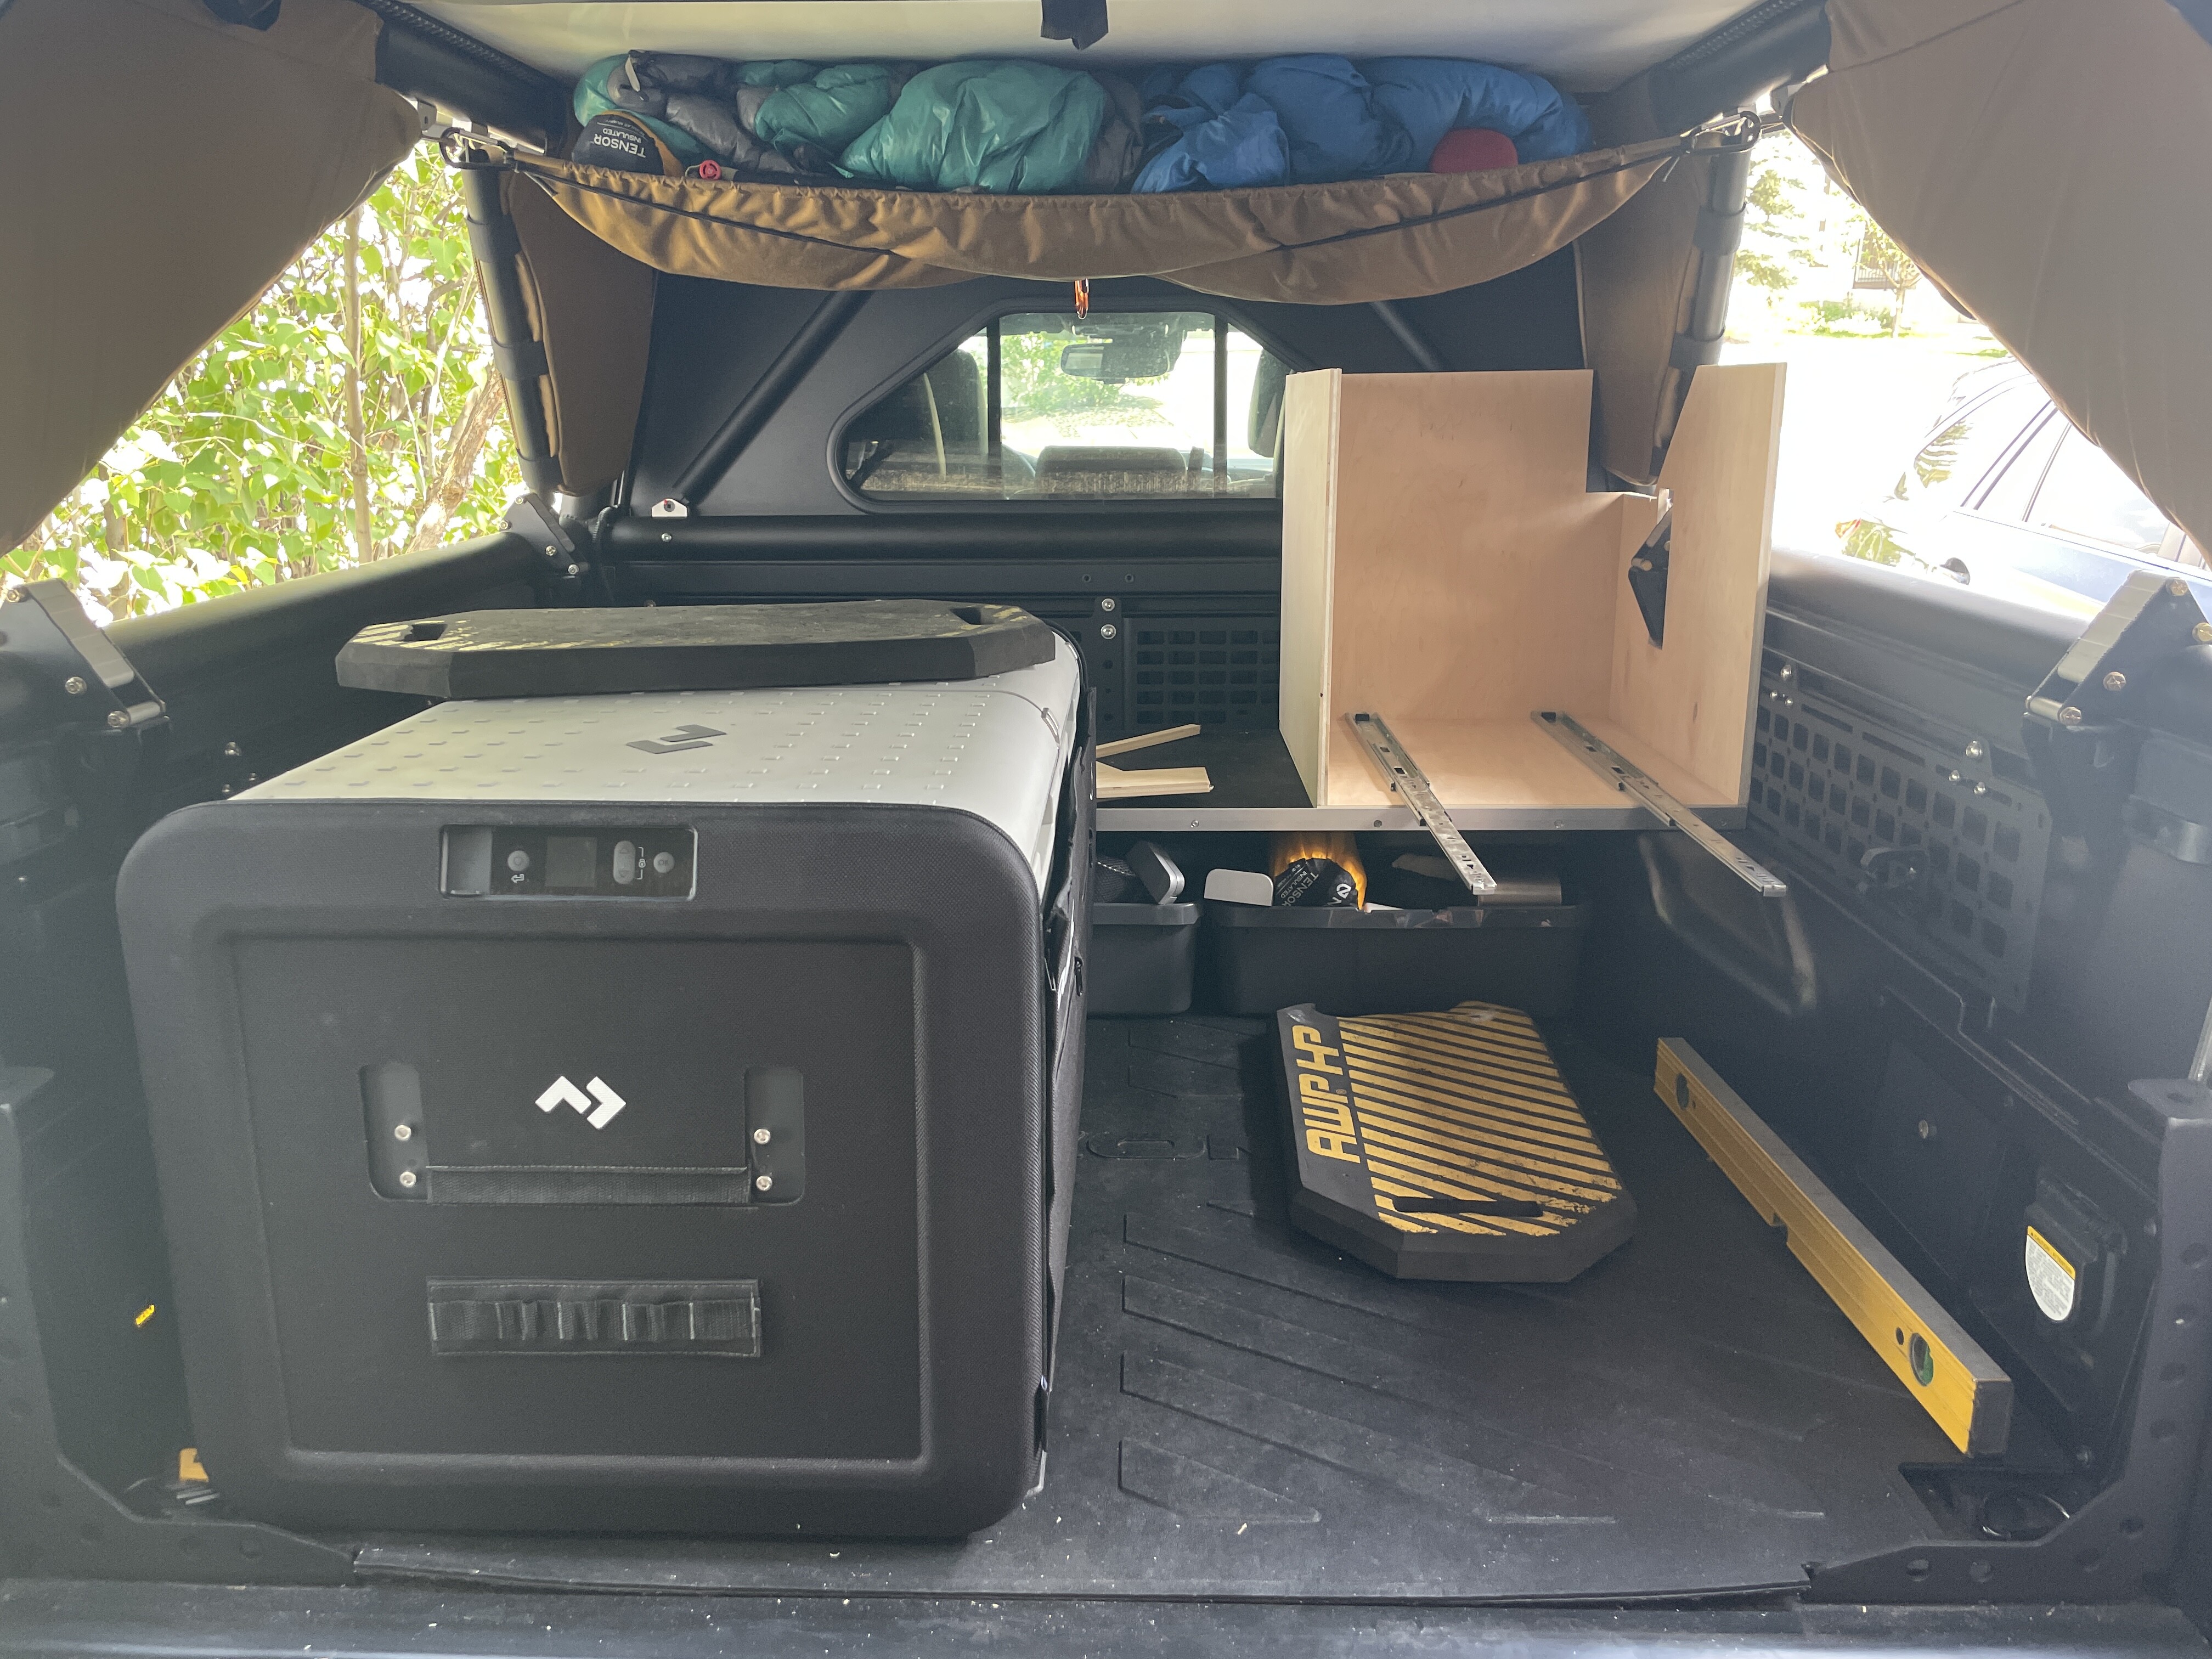
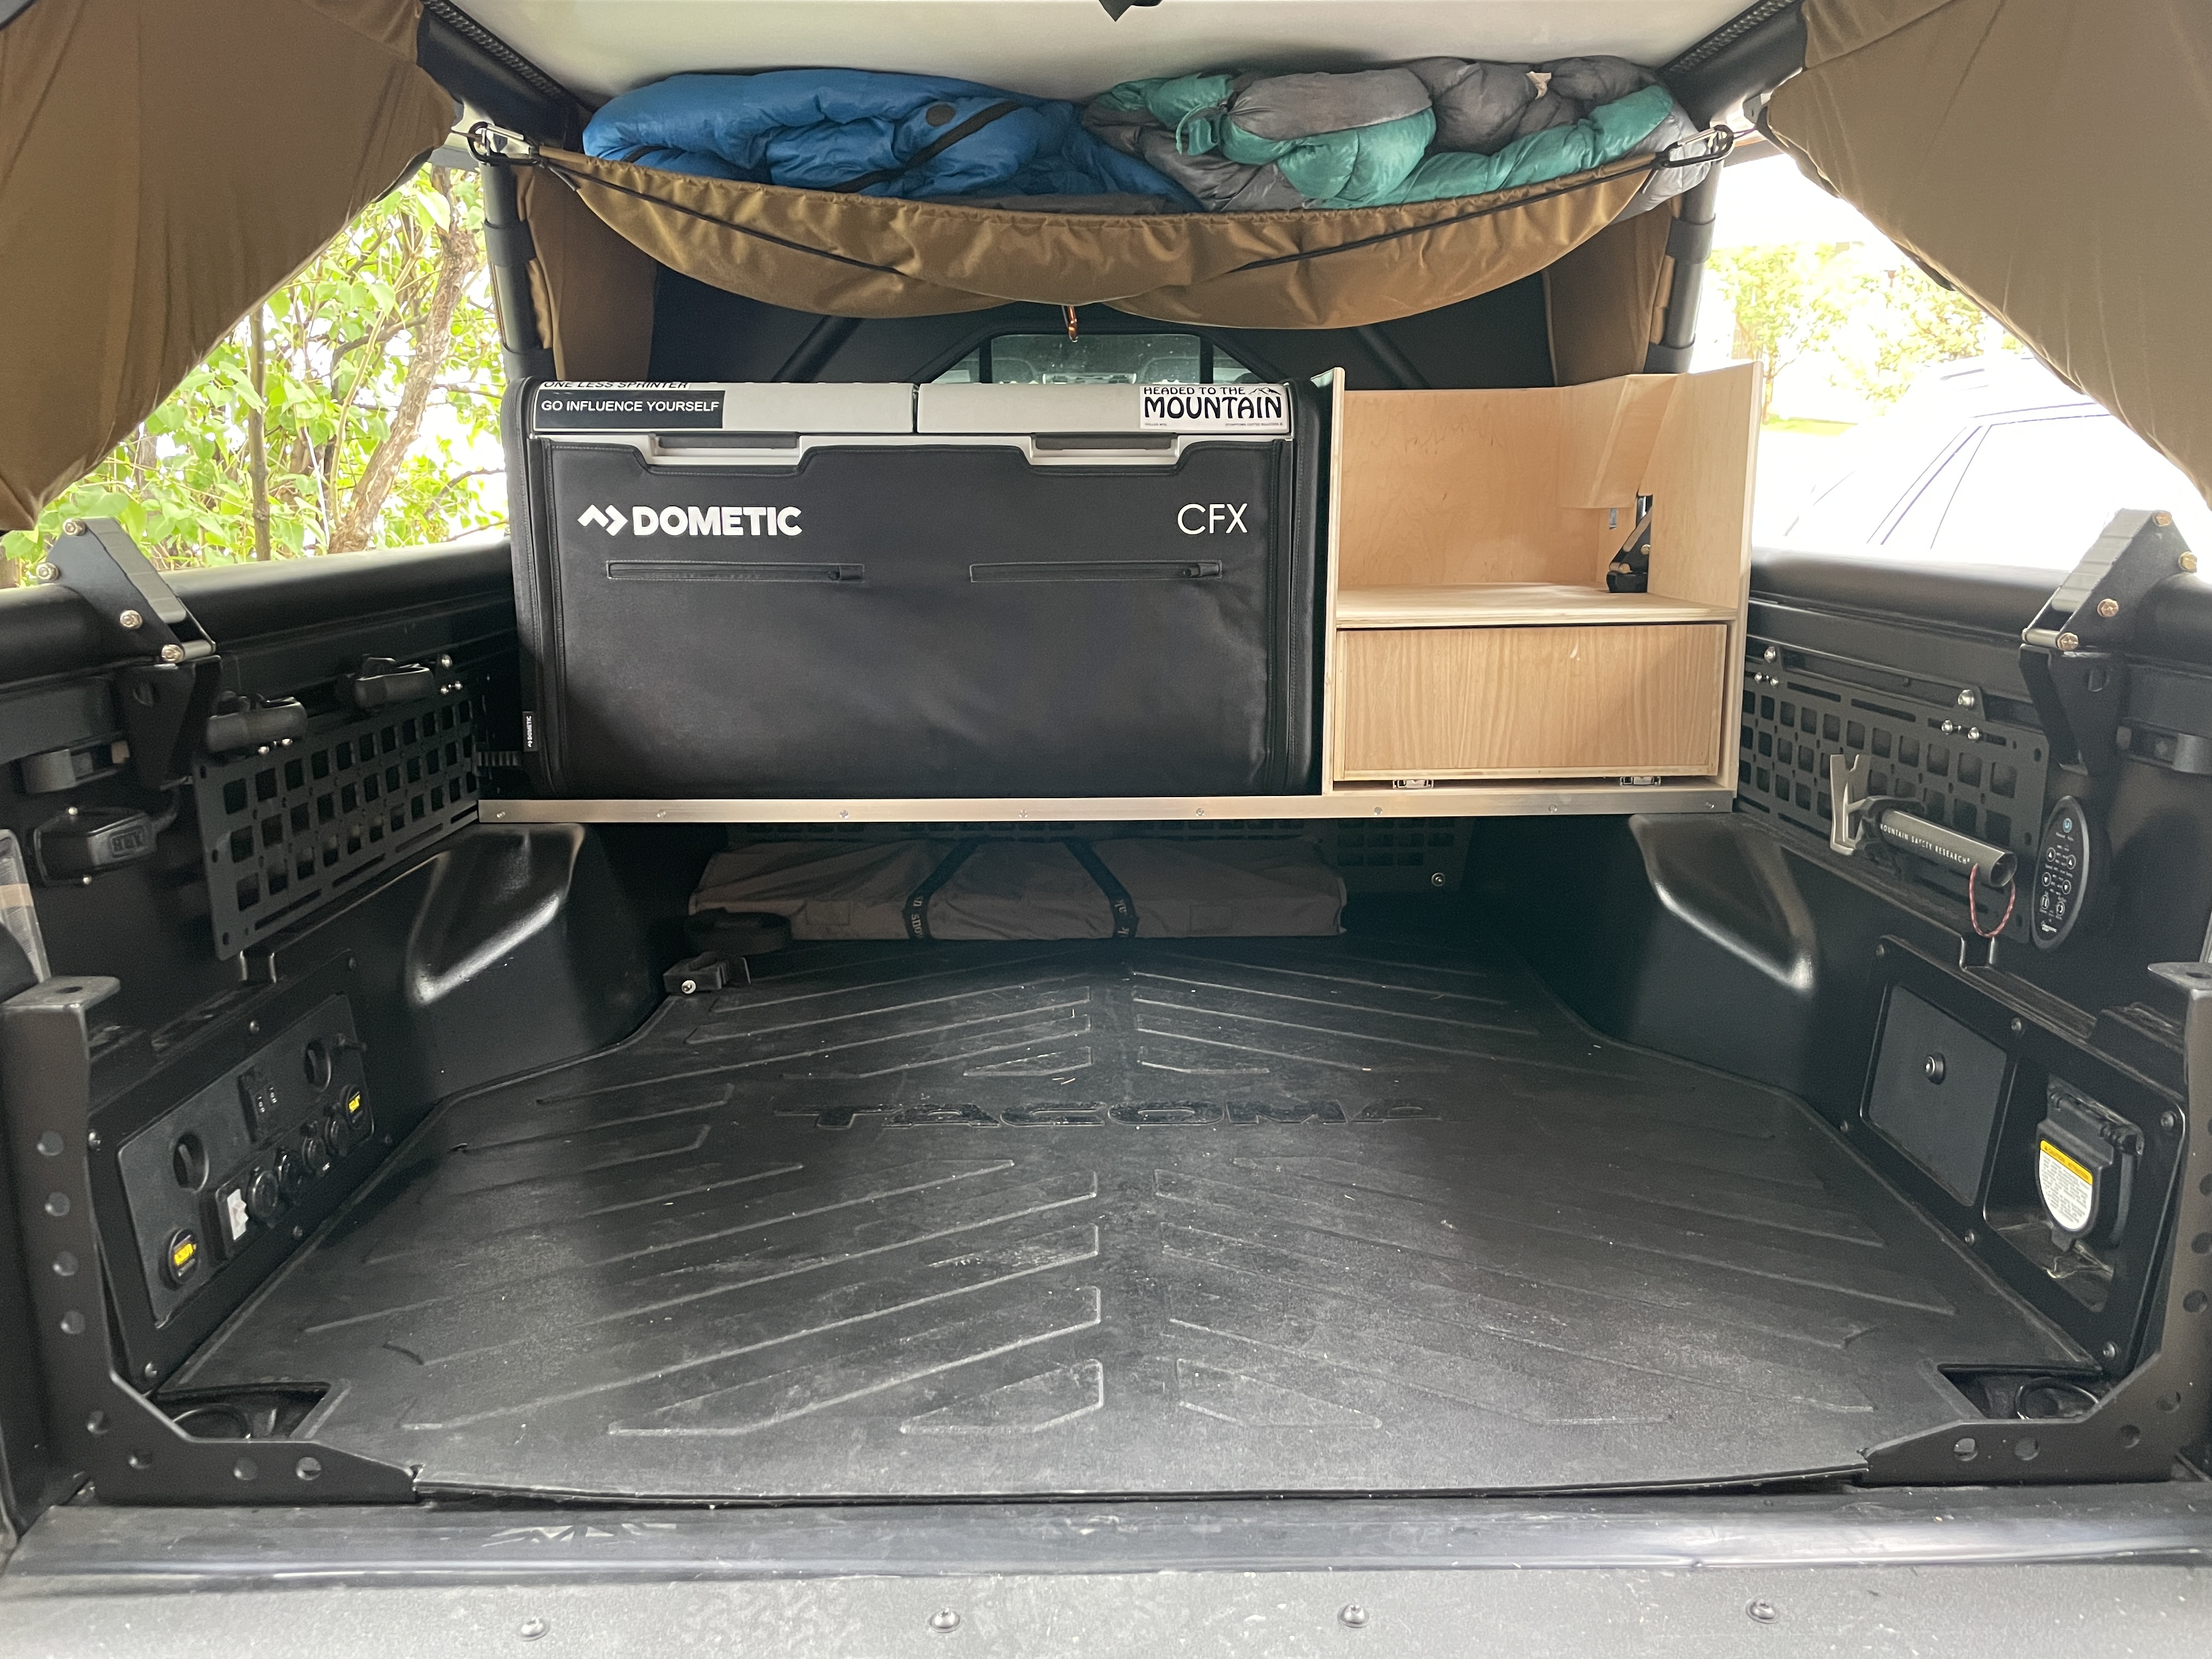
I decided to build a simple shelf to elevate my Dometic fridge and get back the full length of the truck bed for day-to-day use. (Just as @FUJIMOGOAT happened to call out yesterday — I’m really trying my best to keep the bed as uncluttered as possible while still supporting all my camping necessities/wants/luxuries.
The shelf is made of plywood and supported by a 2x6 (in the OEM Tacoma wheel-well slot.) I painted it black with some “rubberized” spray paint and added an aluminum L edge for longevity/support/aesthetic
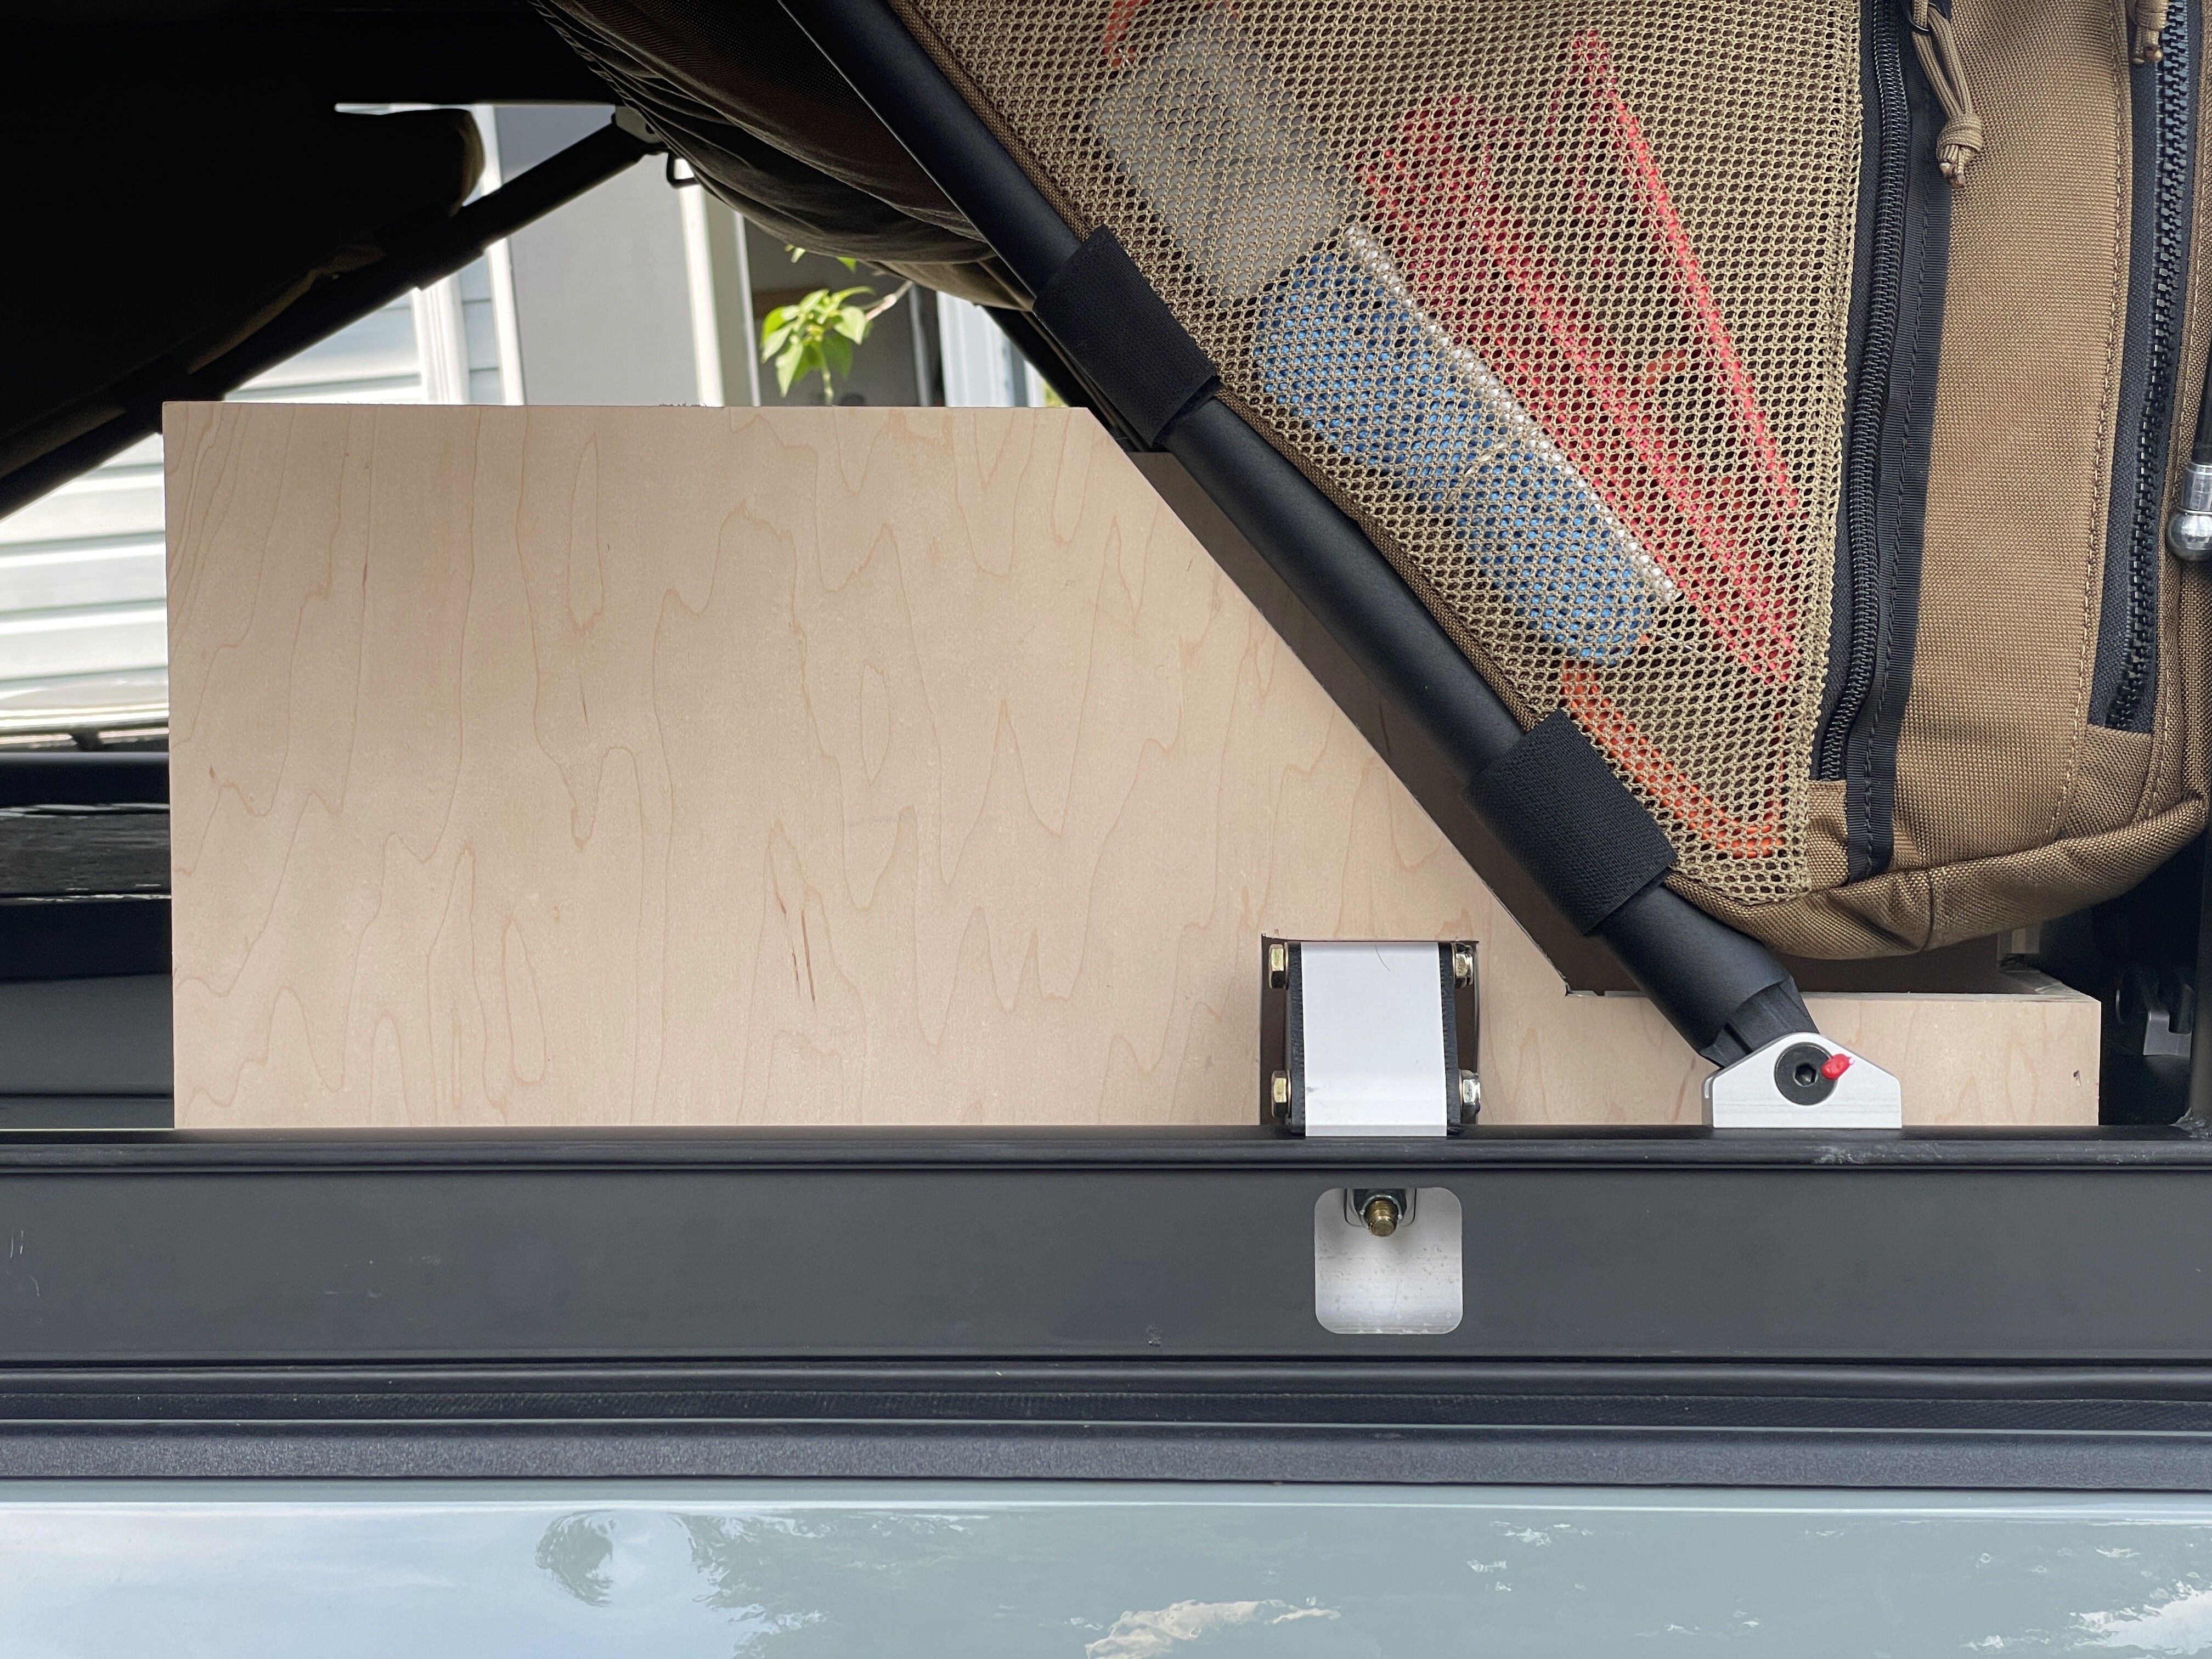
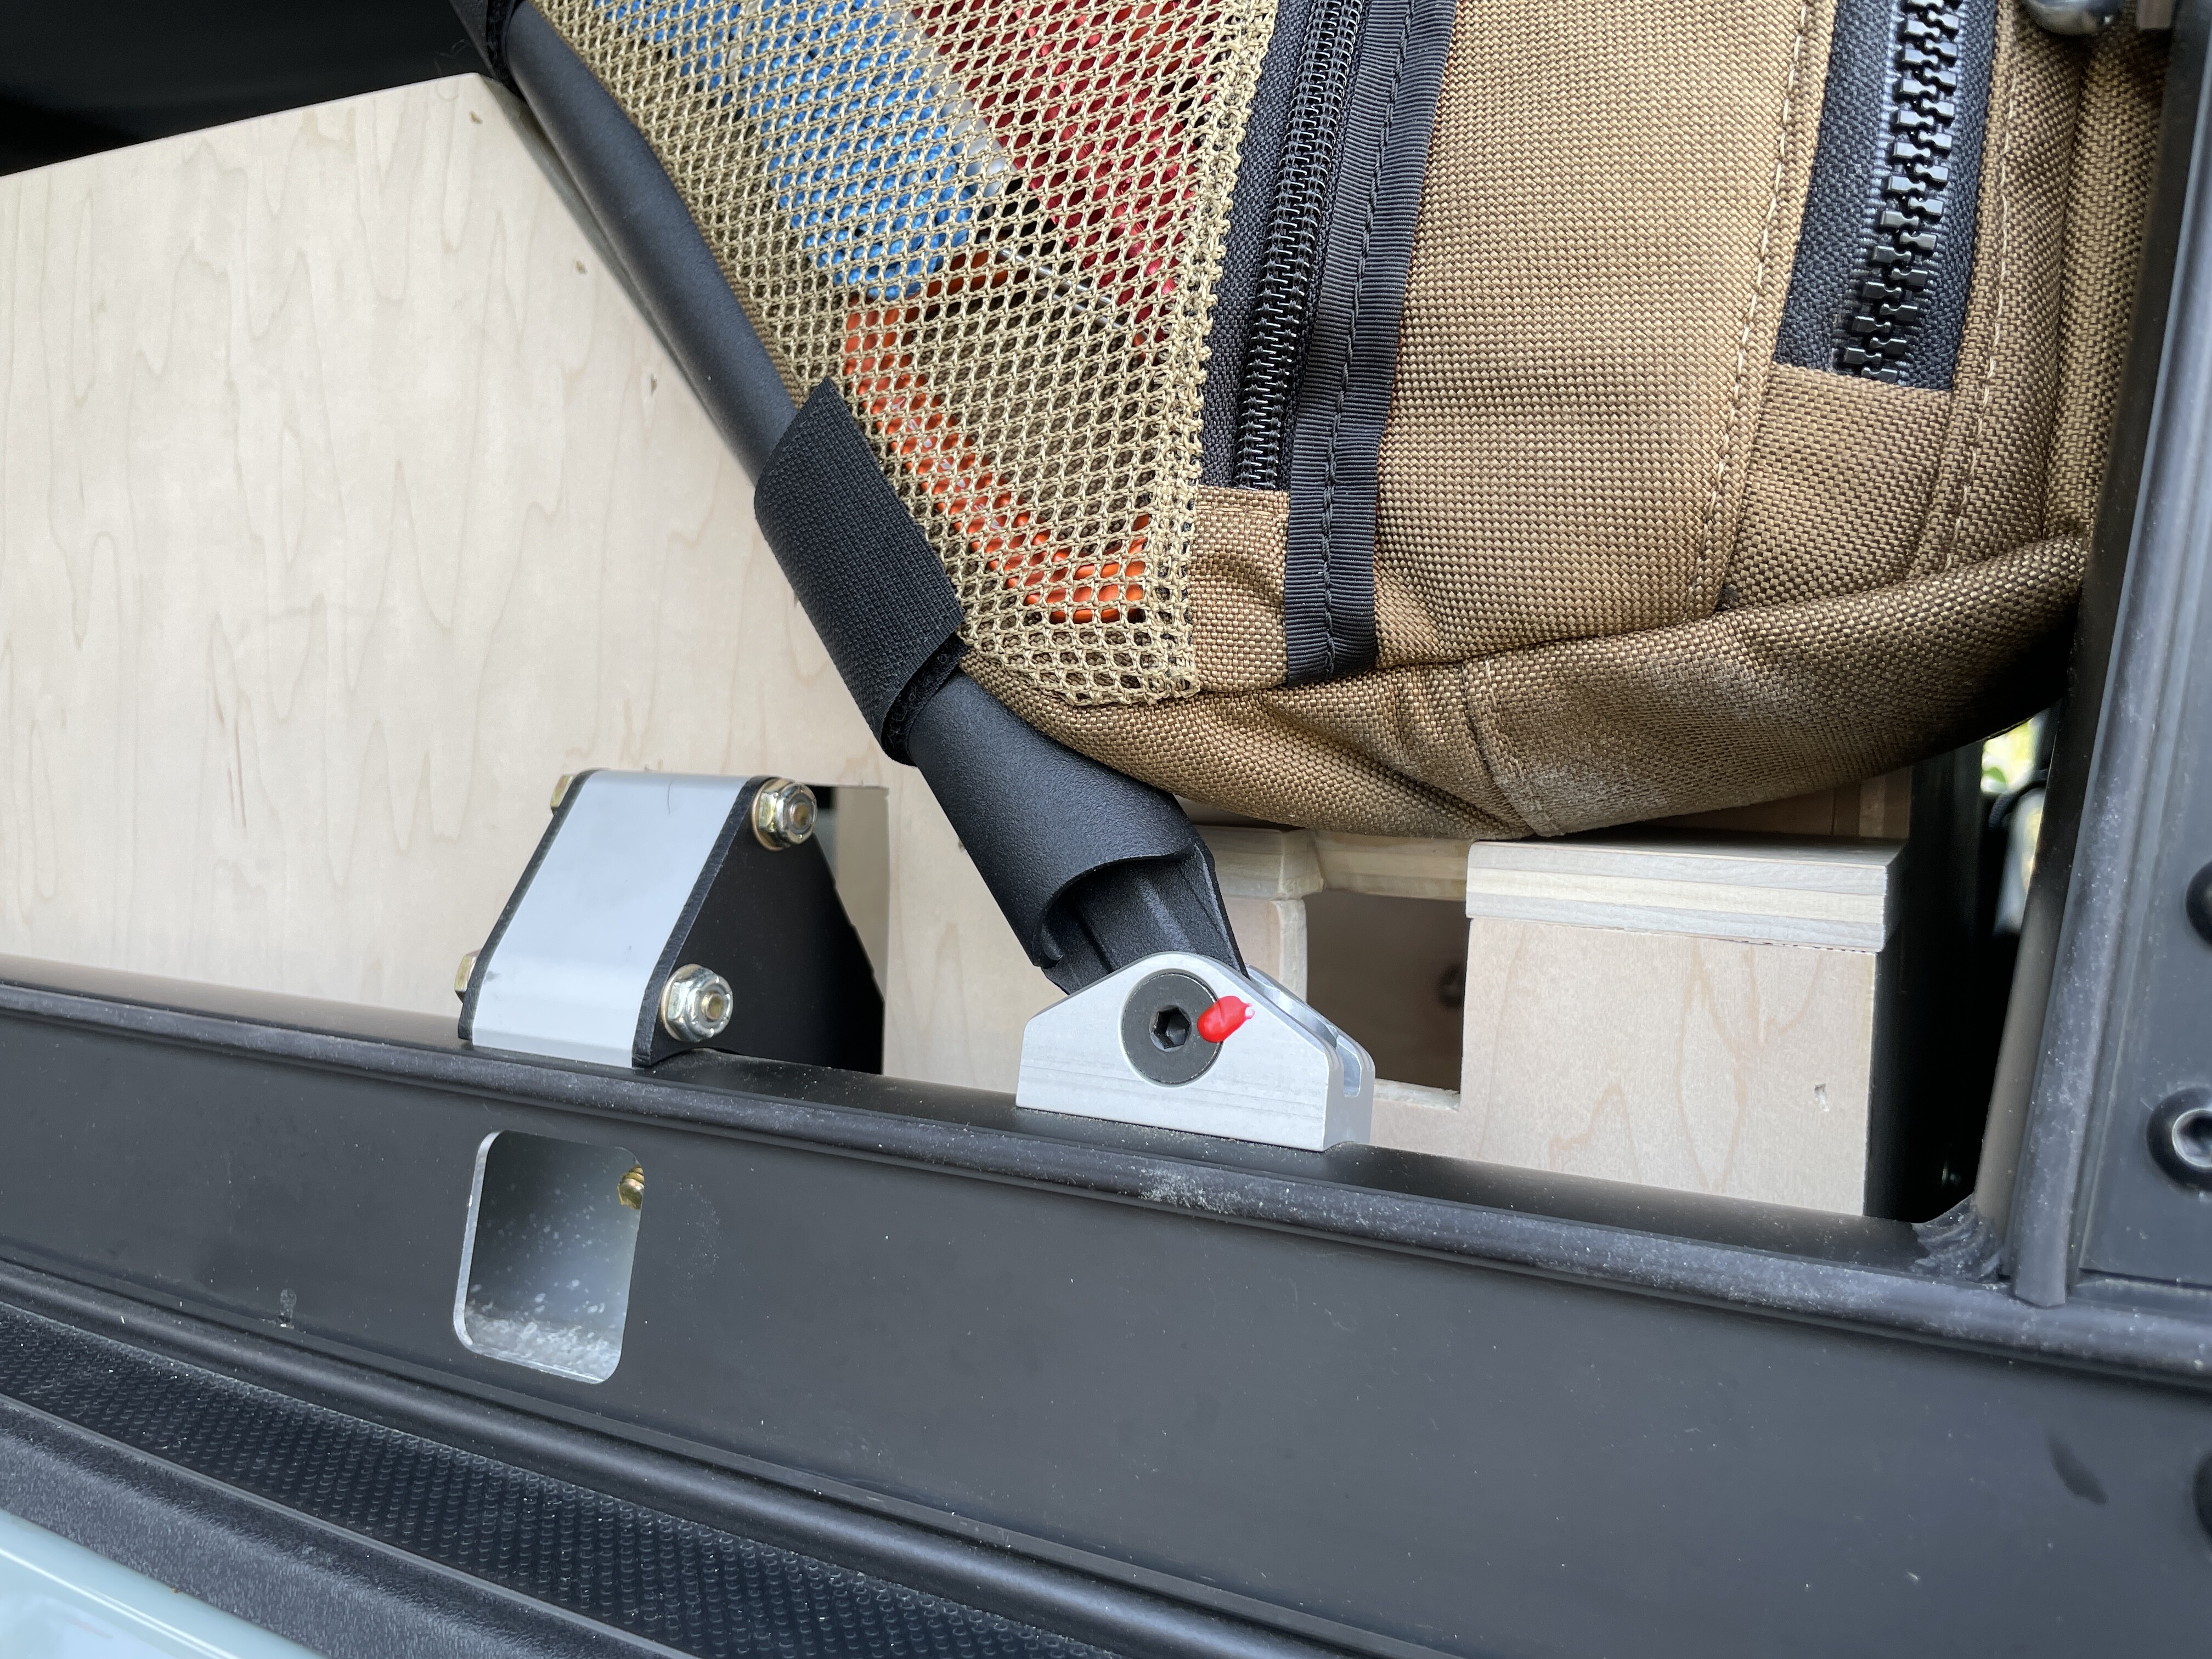
anybody have bad experiences mounting the fan in this orientation (hinge is on the back end)? my concern is wind blowing it open driving down the road, but if it’s not a problem, i really dig that orientation
@Nrampp I know right — the plug on the dometic is just so long — I’m so happy with this setup. It’s perfect.
Thanks so much @jedgar@SlaminEpi29@gus2Gus — The hinge on the Dometic Fantastic Fan is really burley… Have already driven around in severe thunderstorms and it hasn’t gone anywhere (and no water has gotten in). It was crucial to me that it was orientated this way so it would work effectively when the camper was raised.
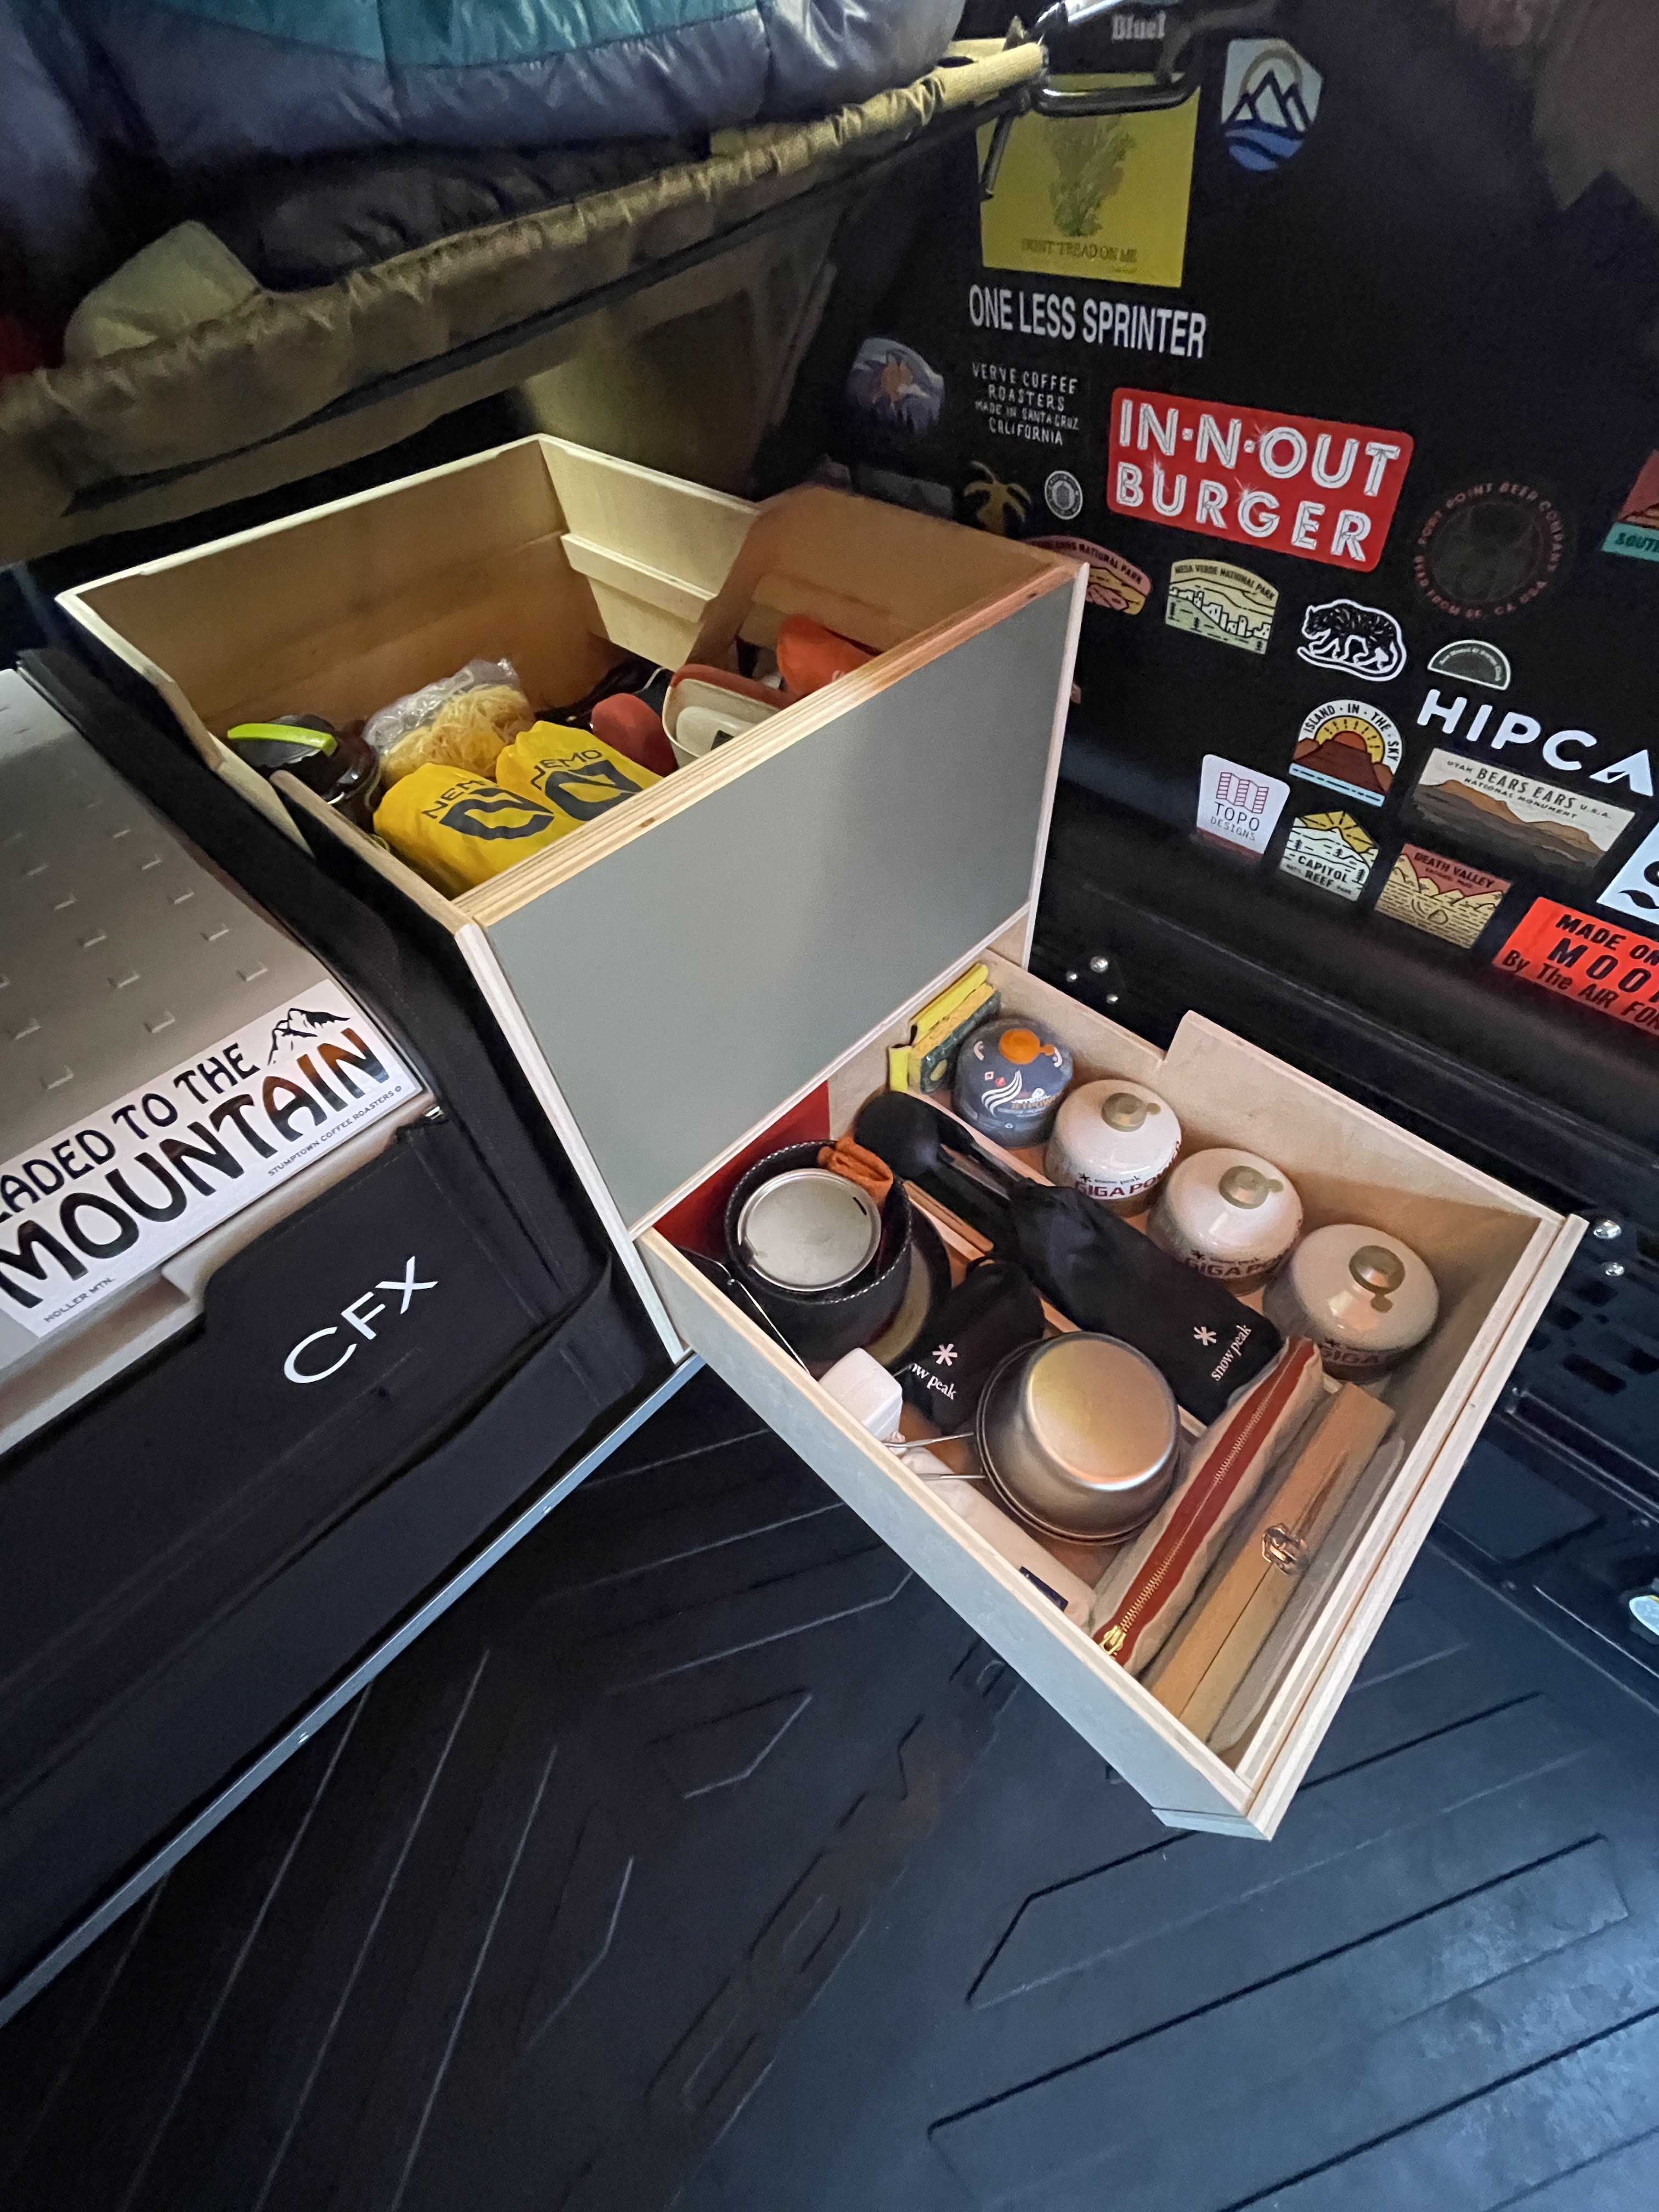
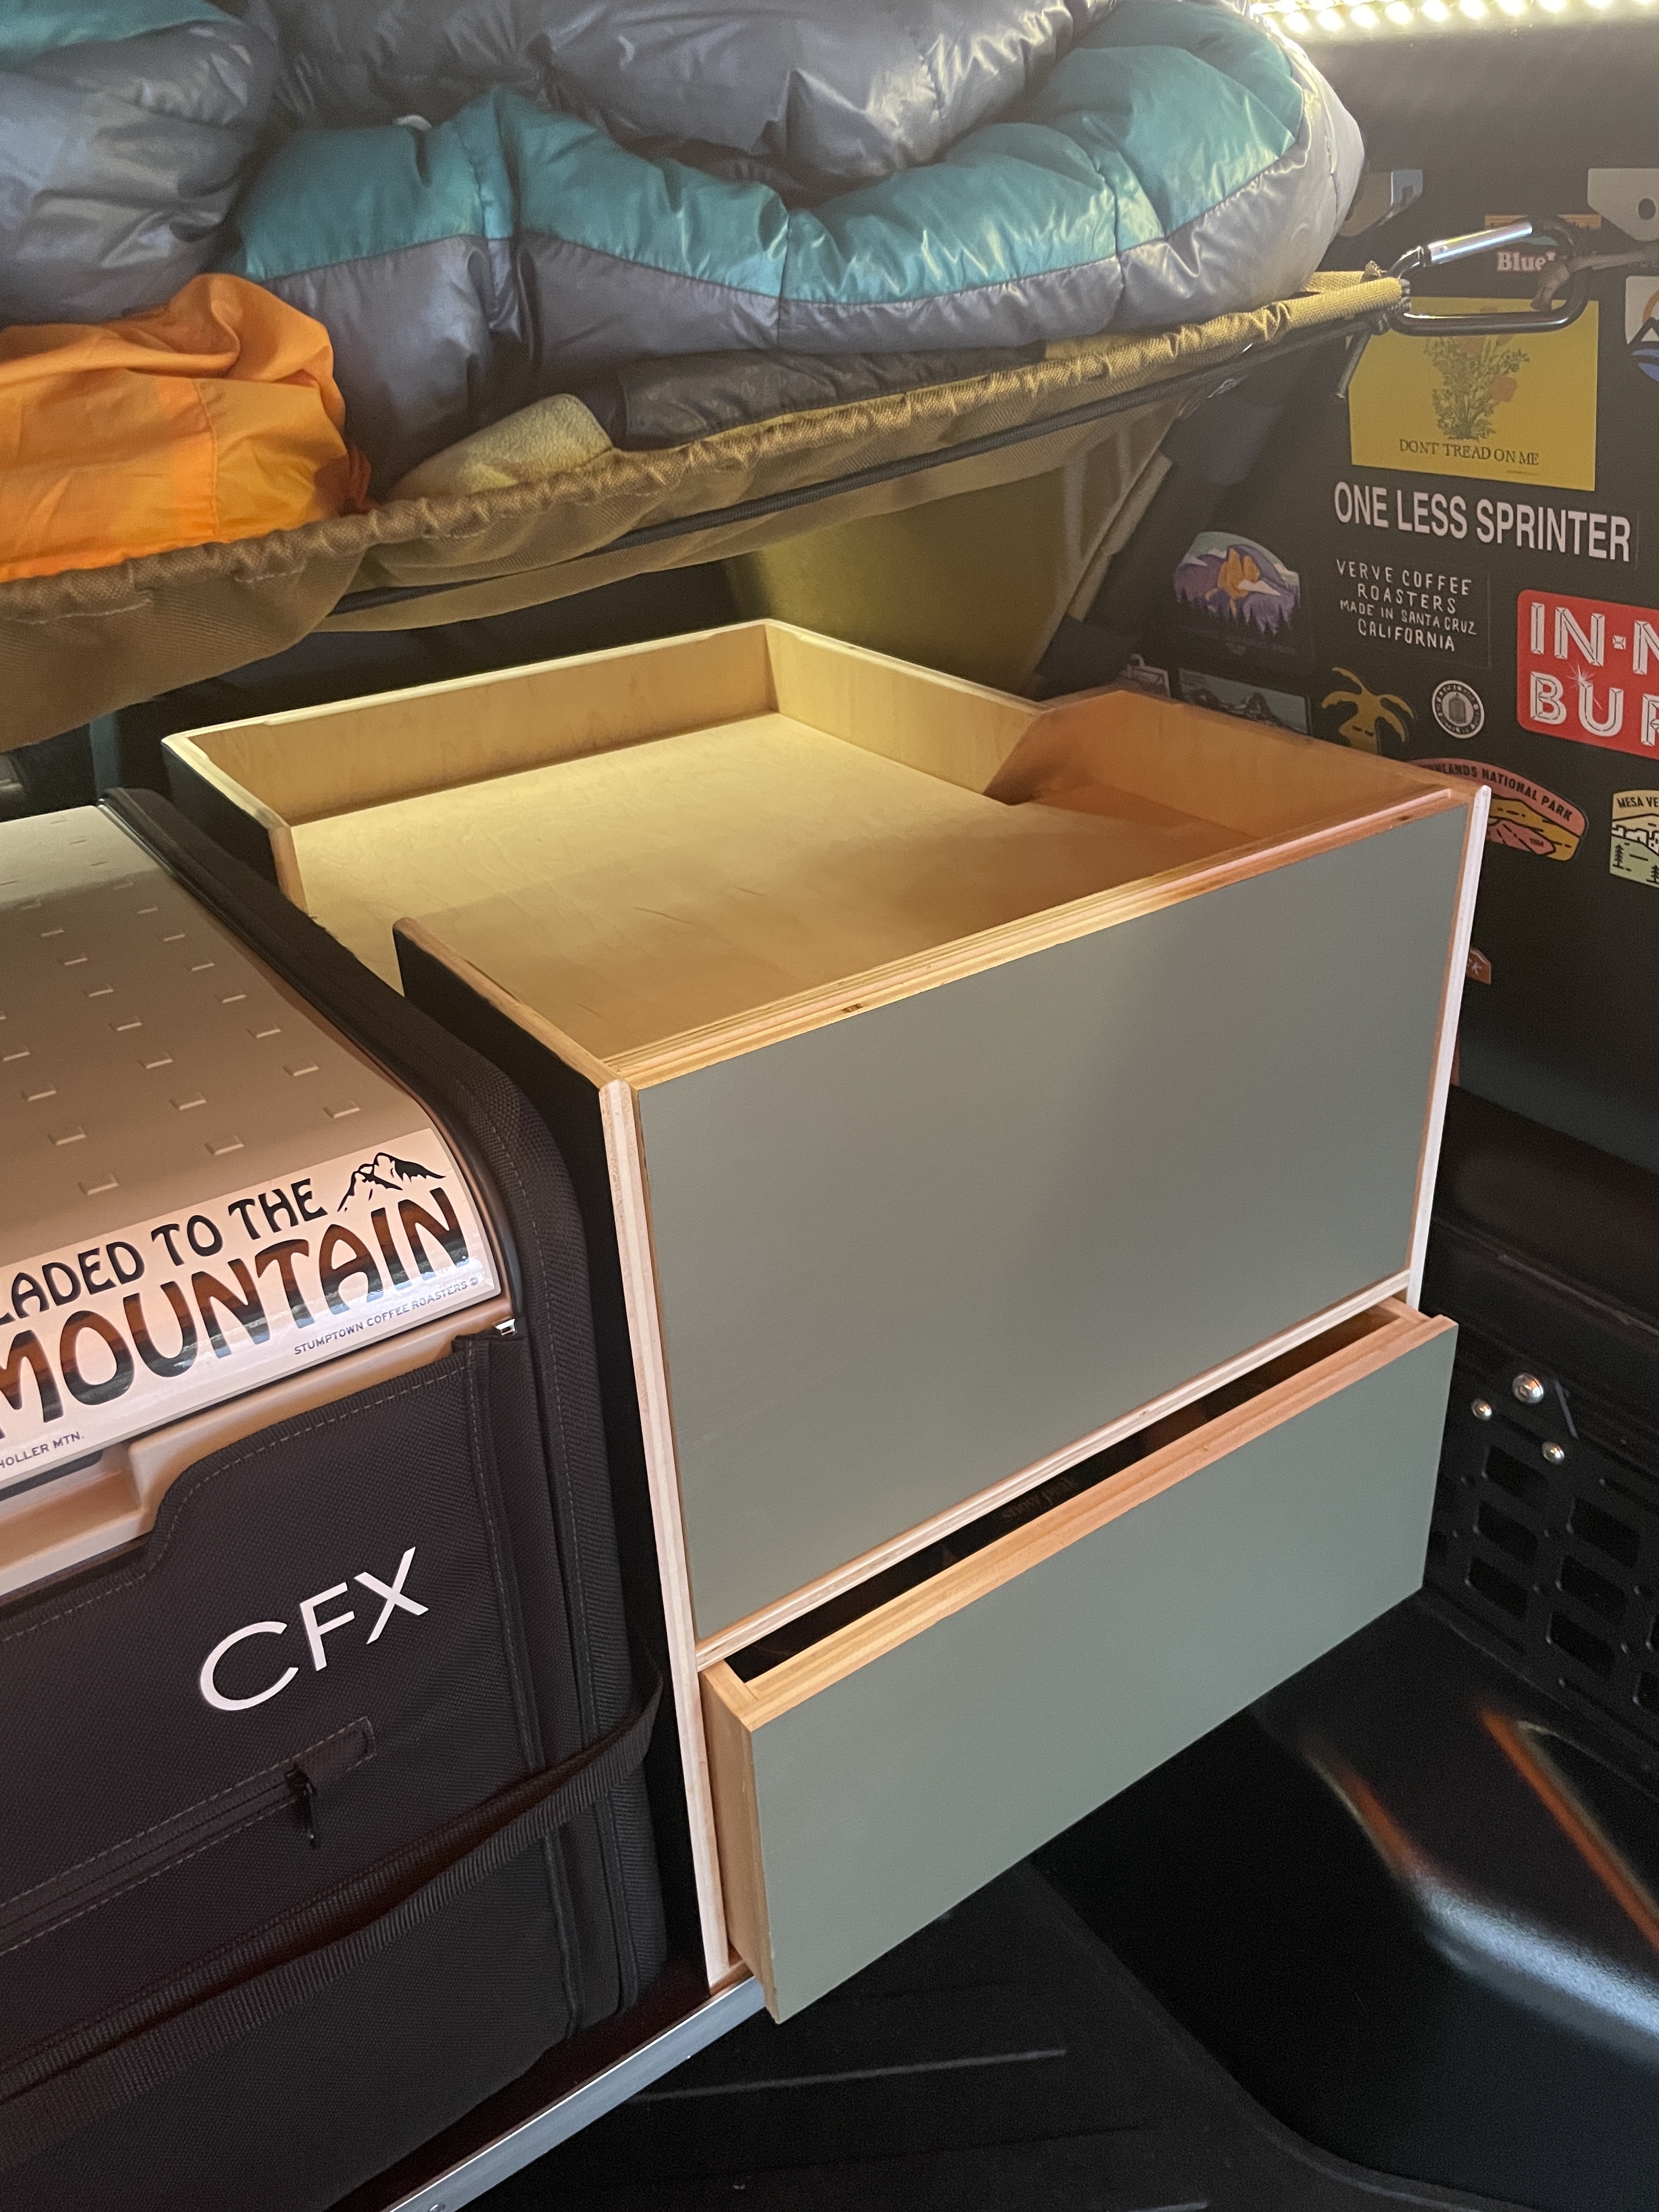
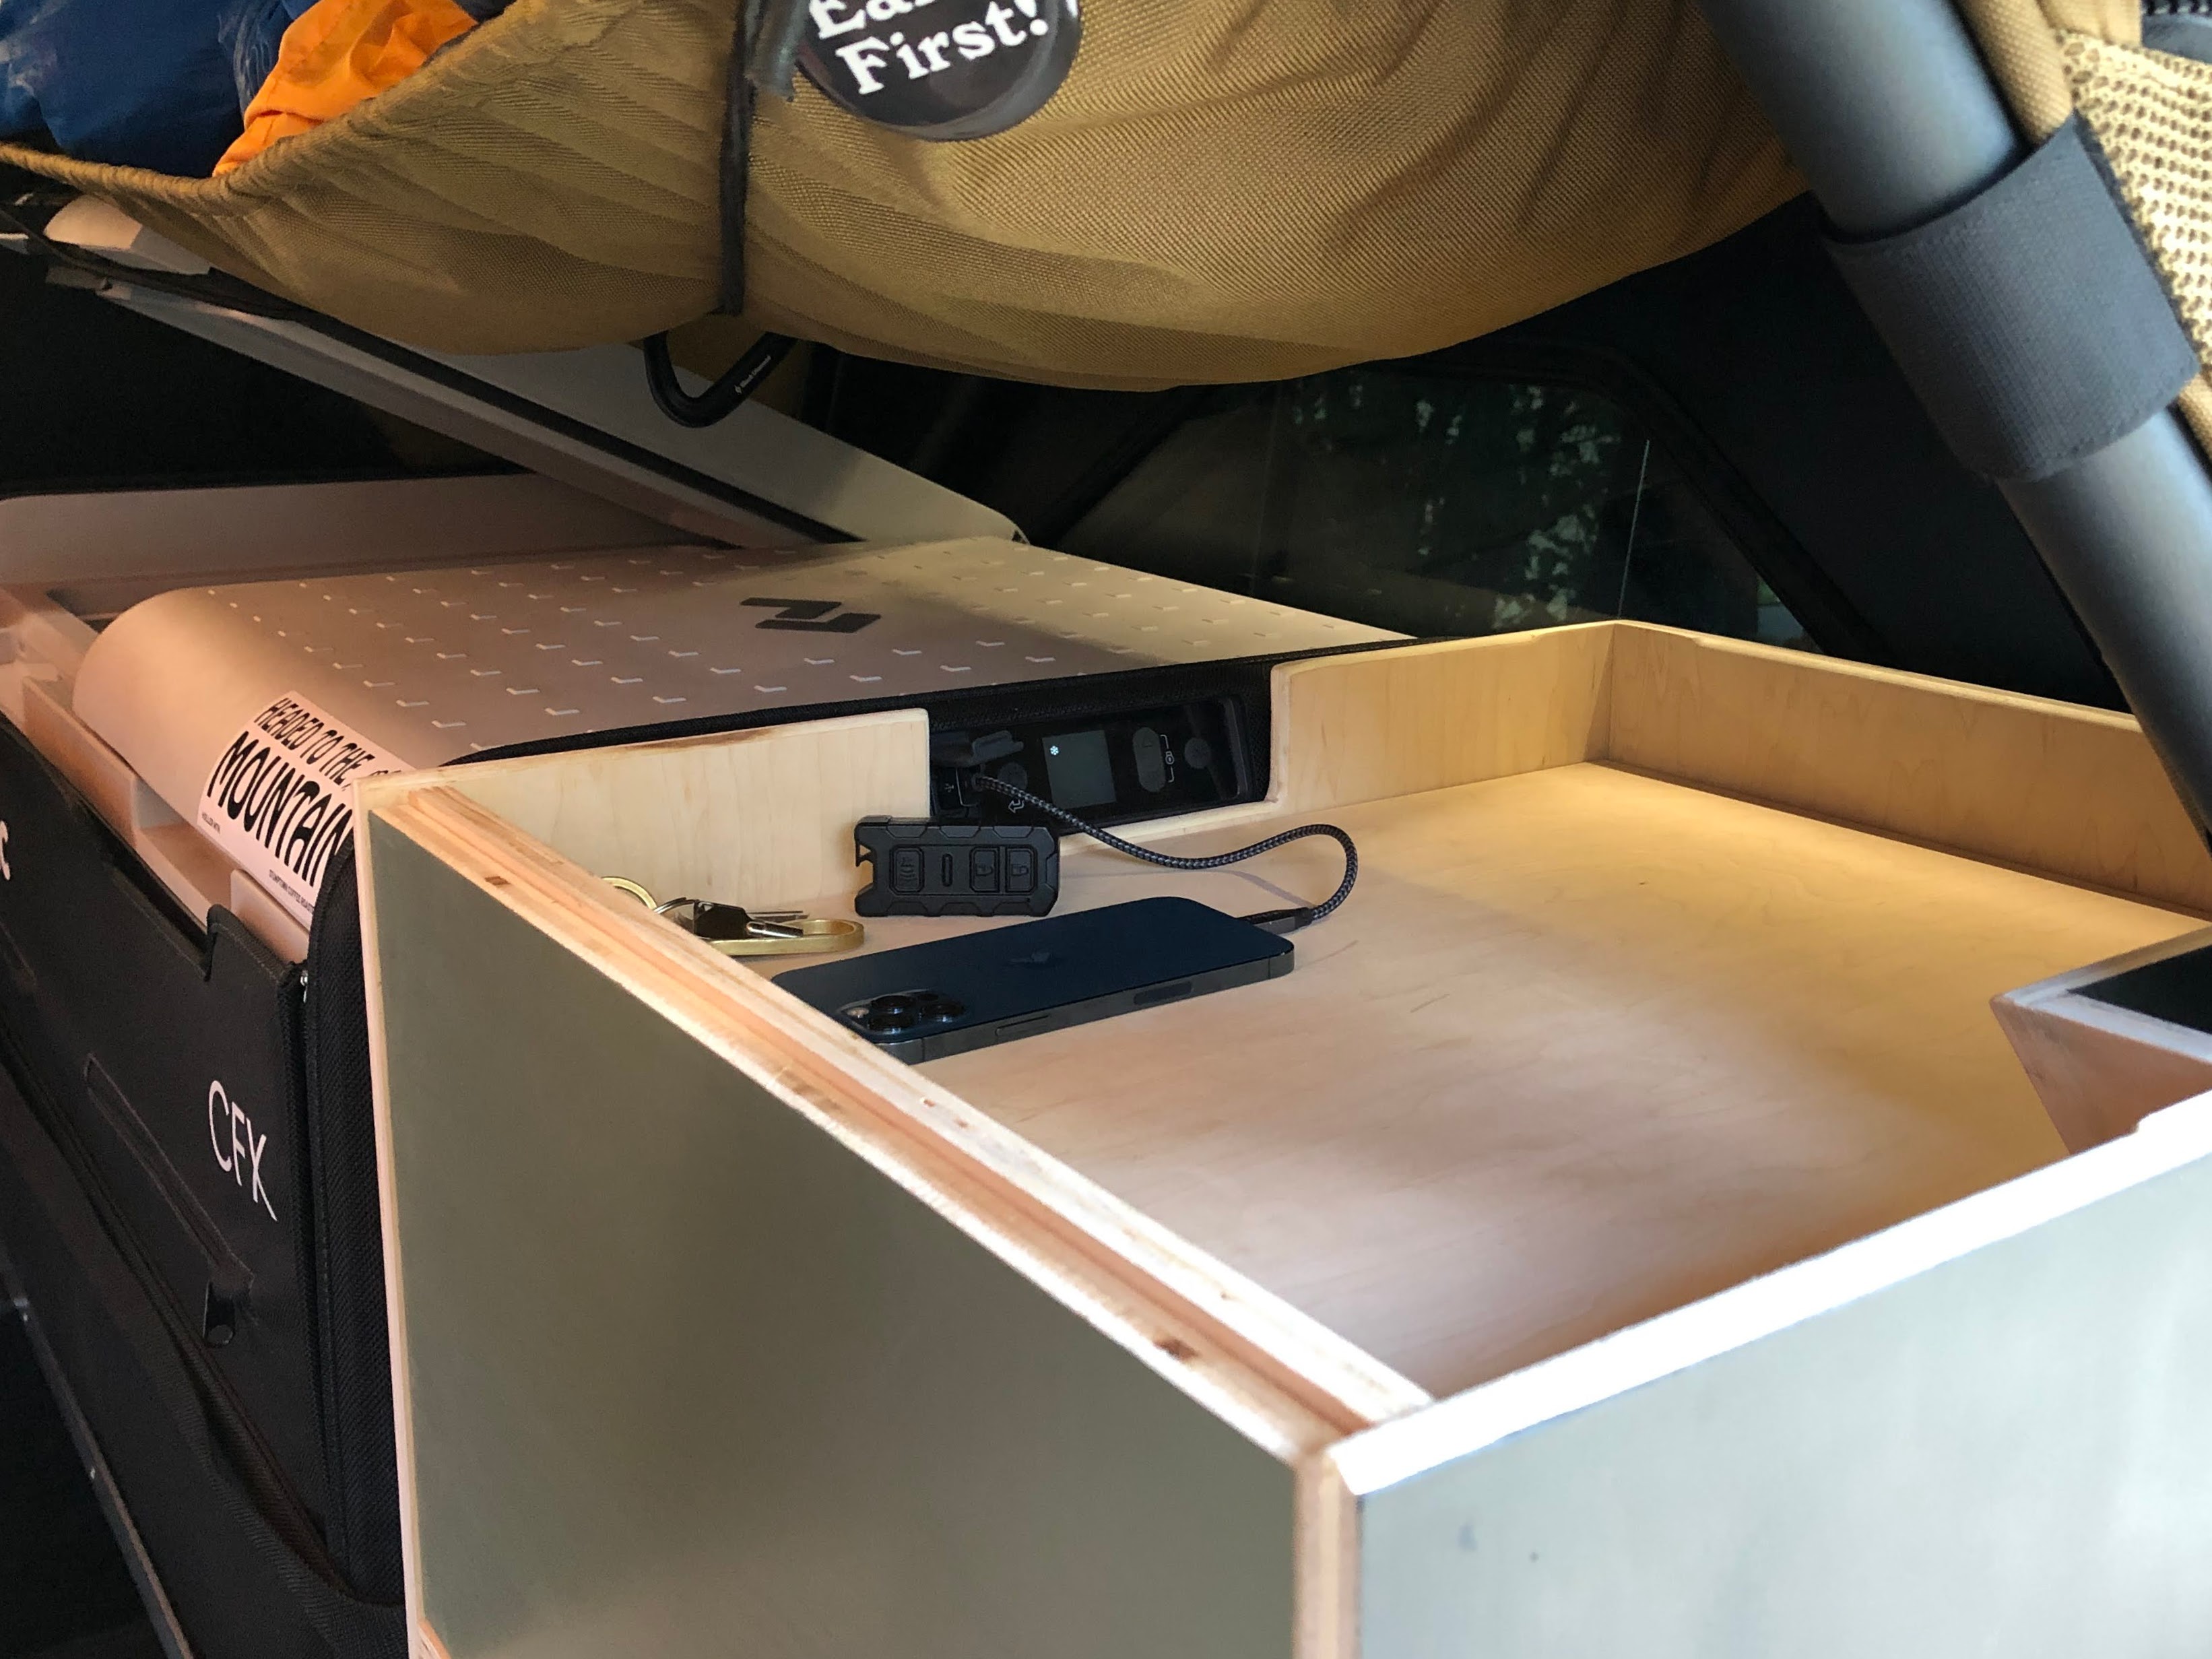
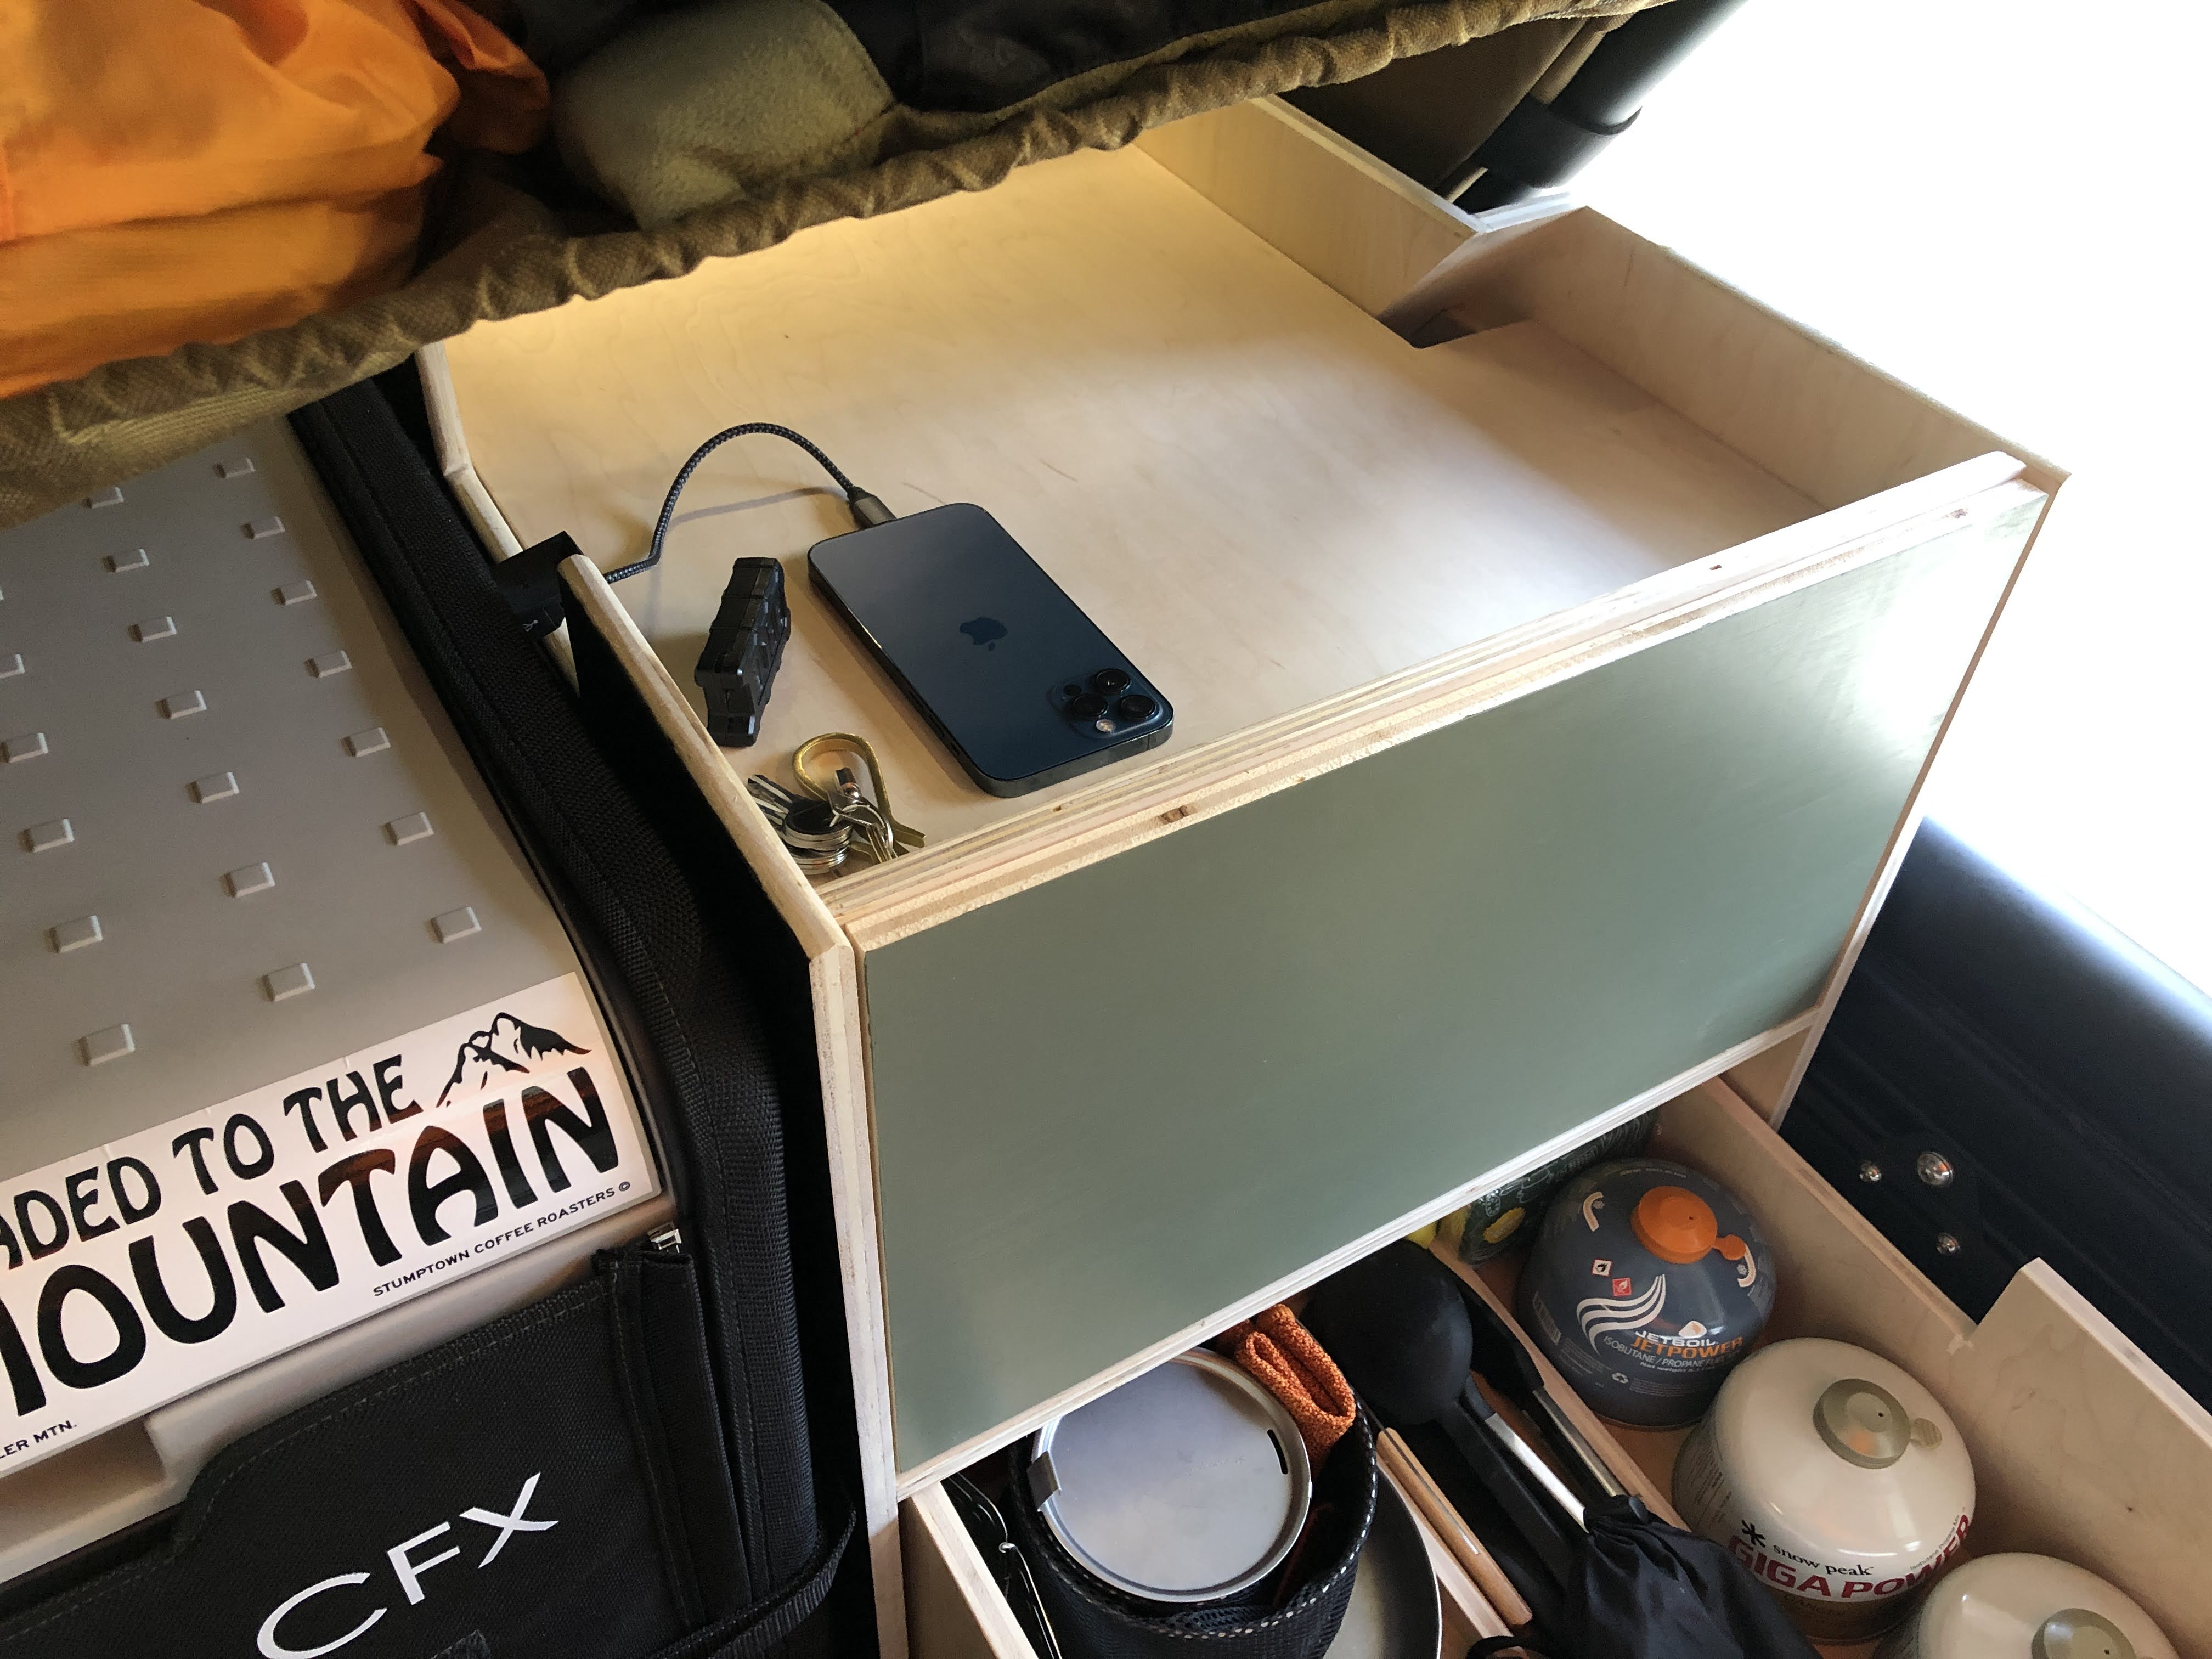
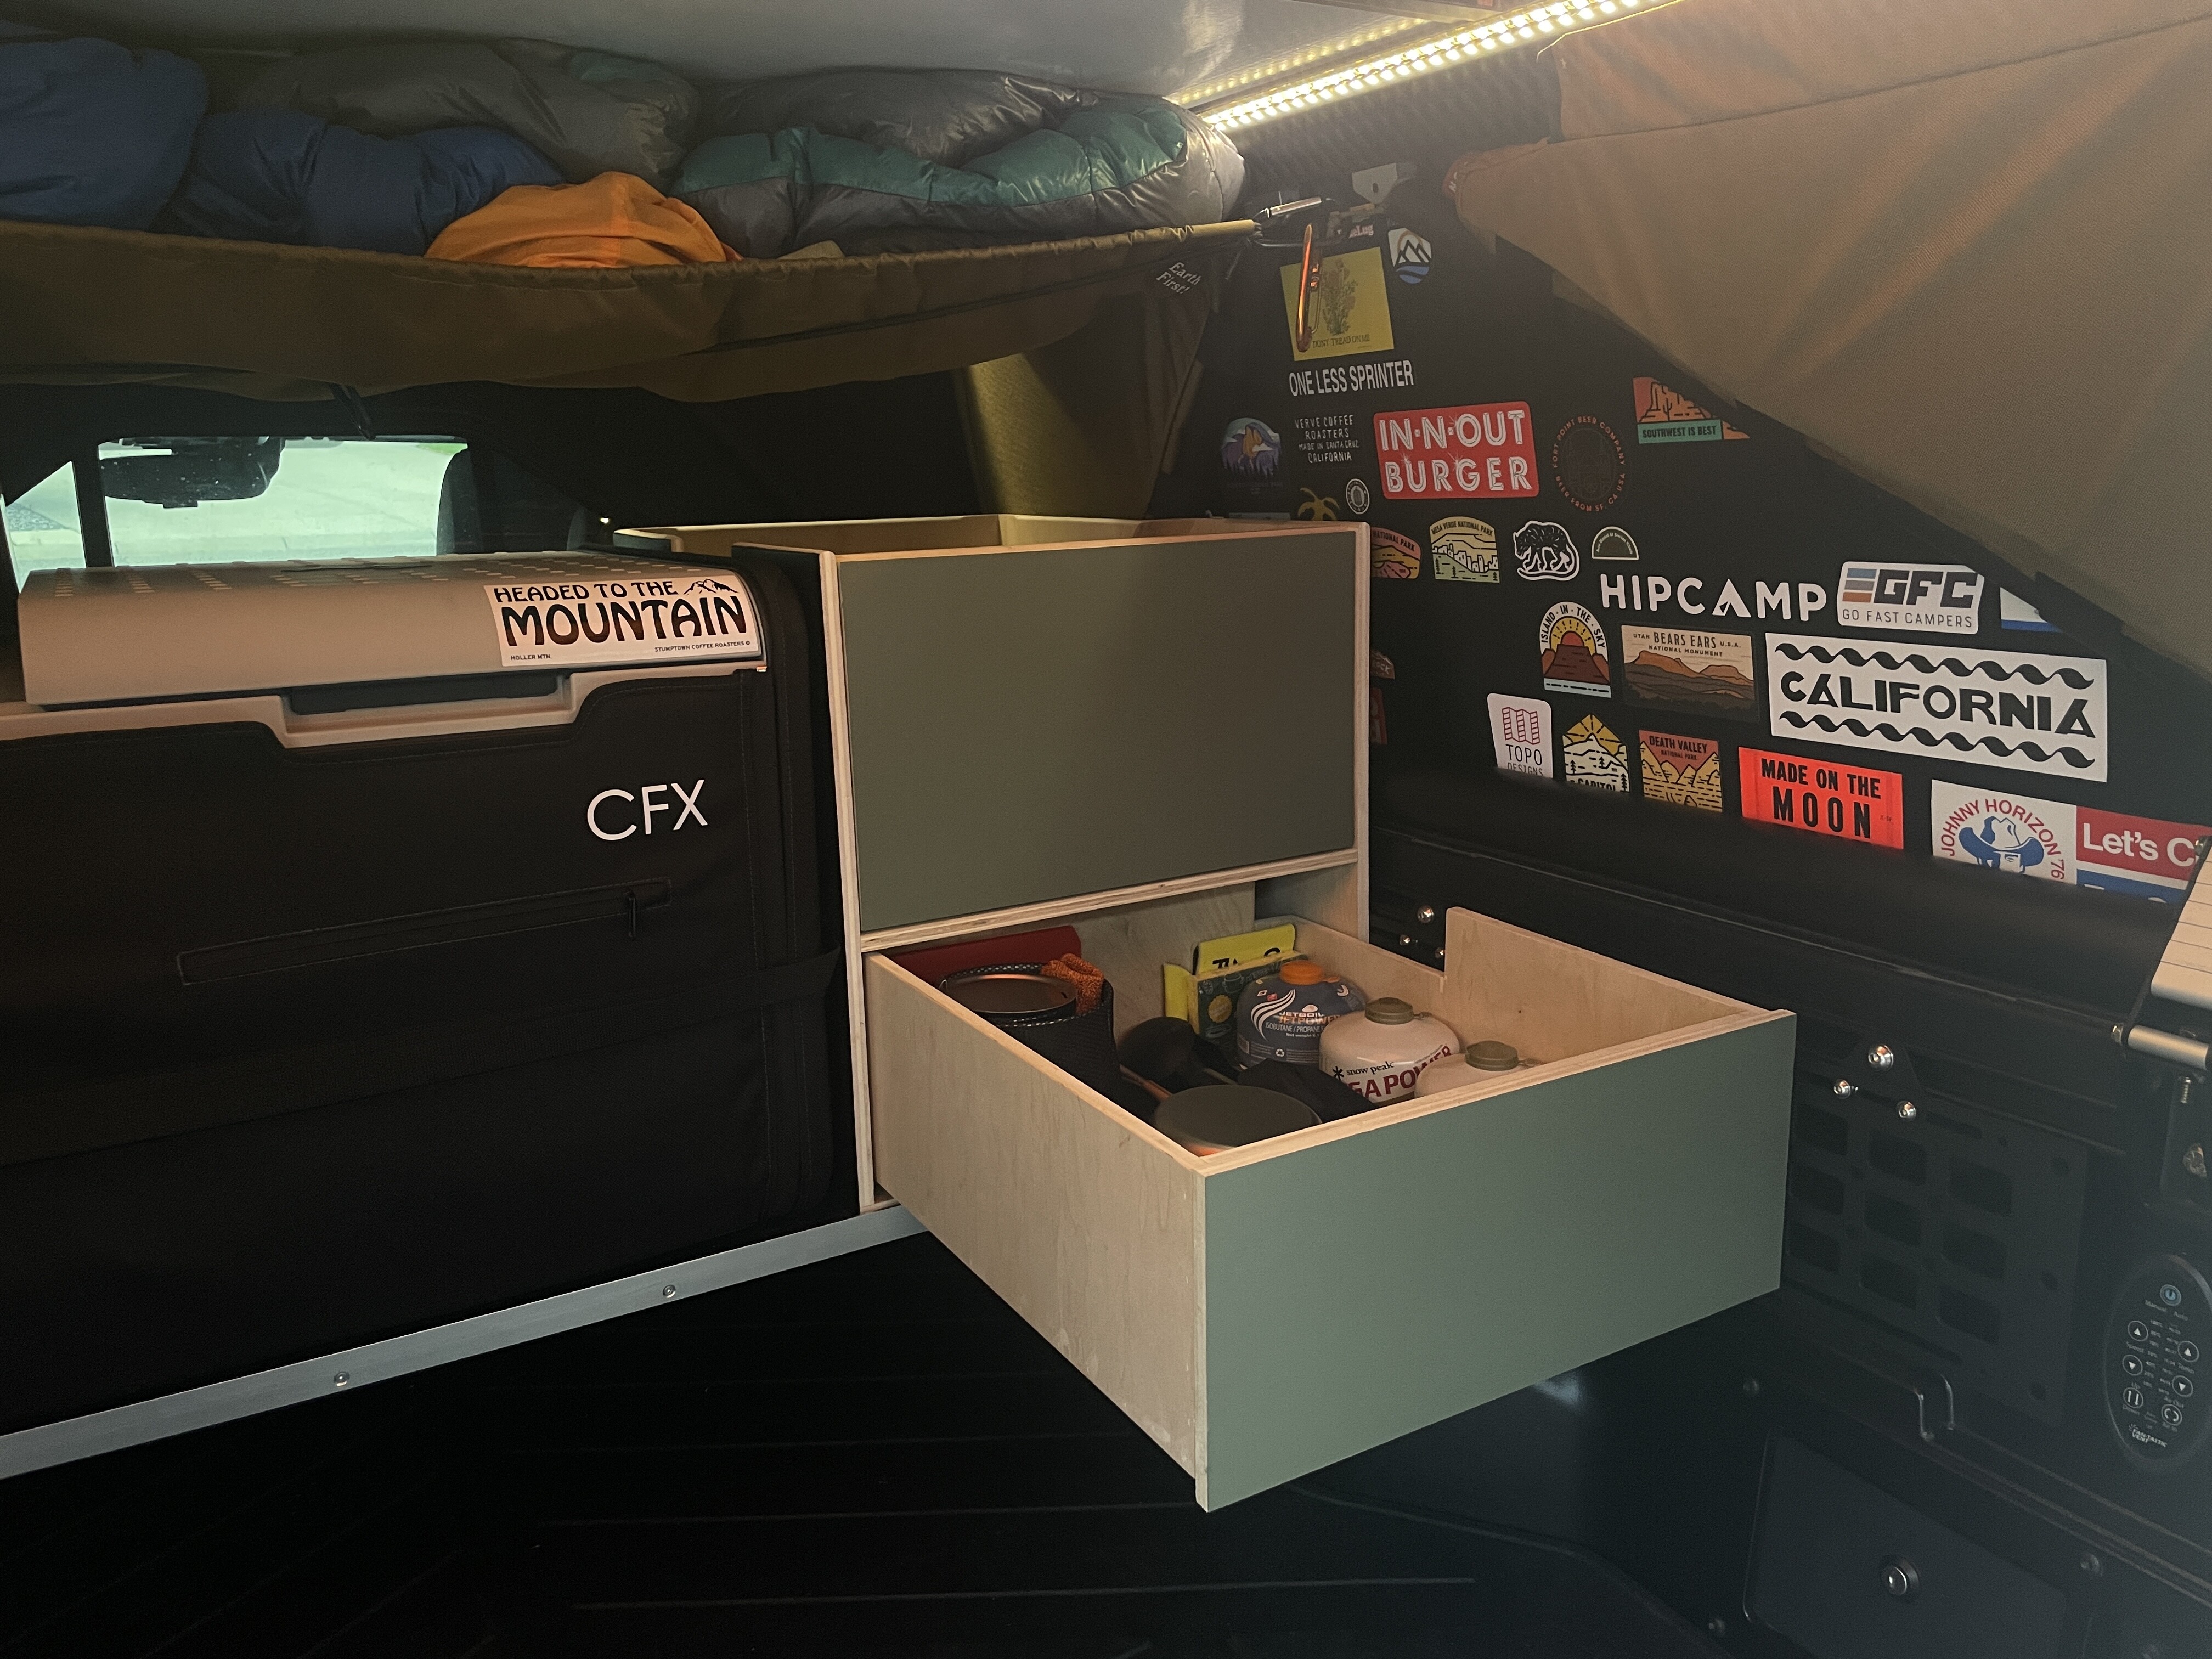
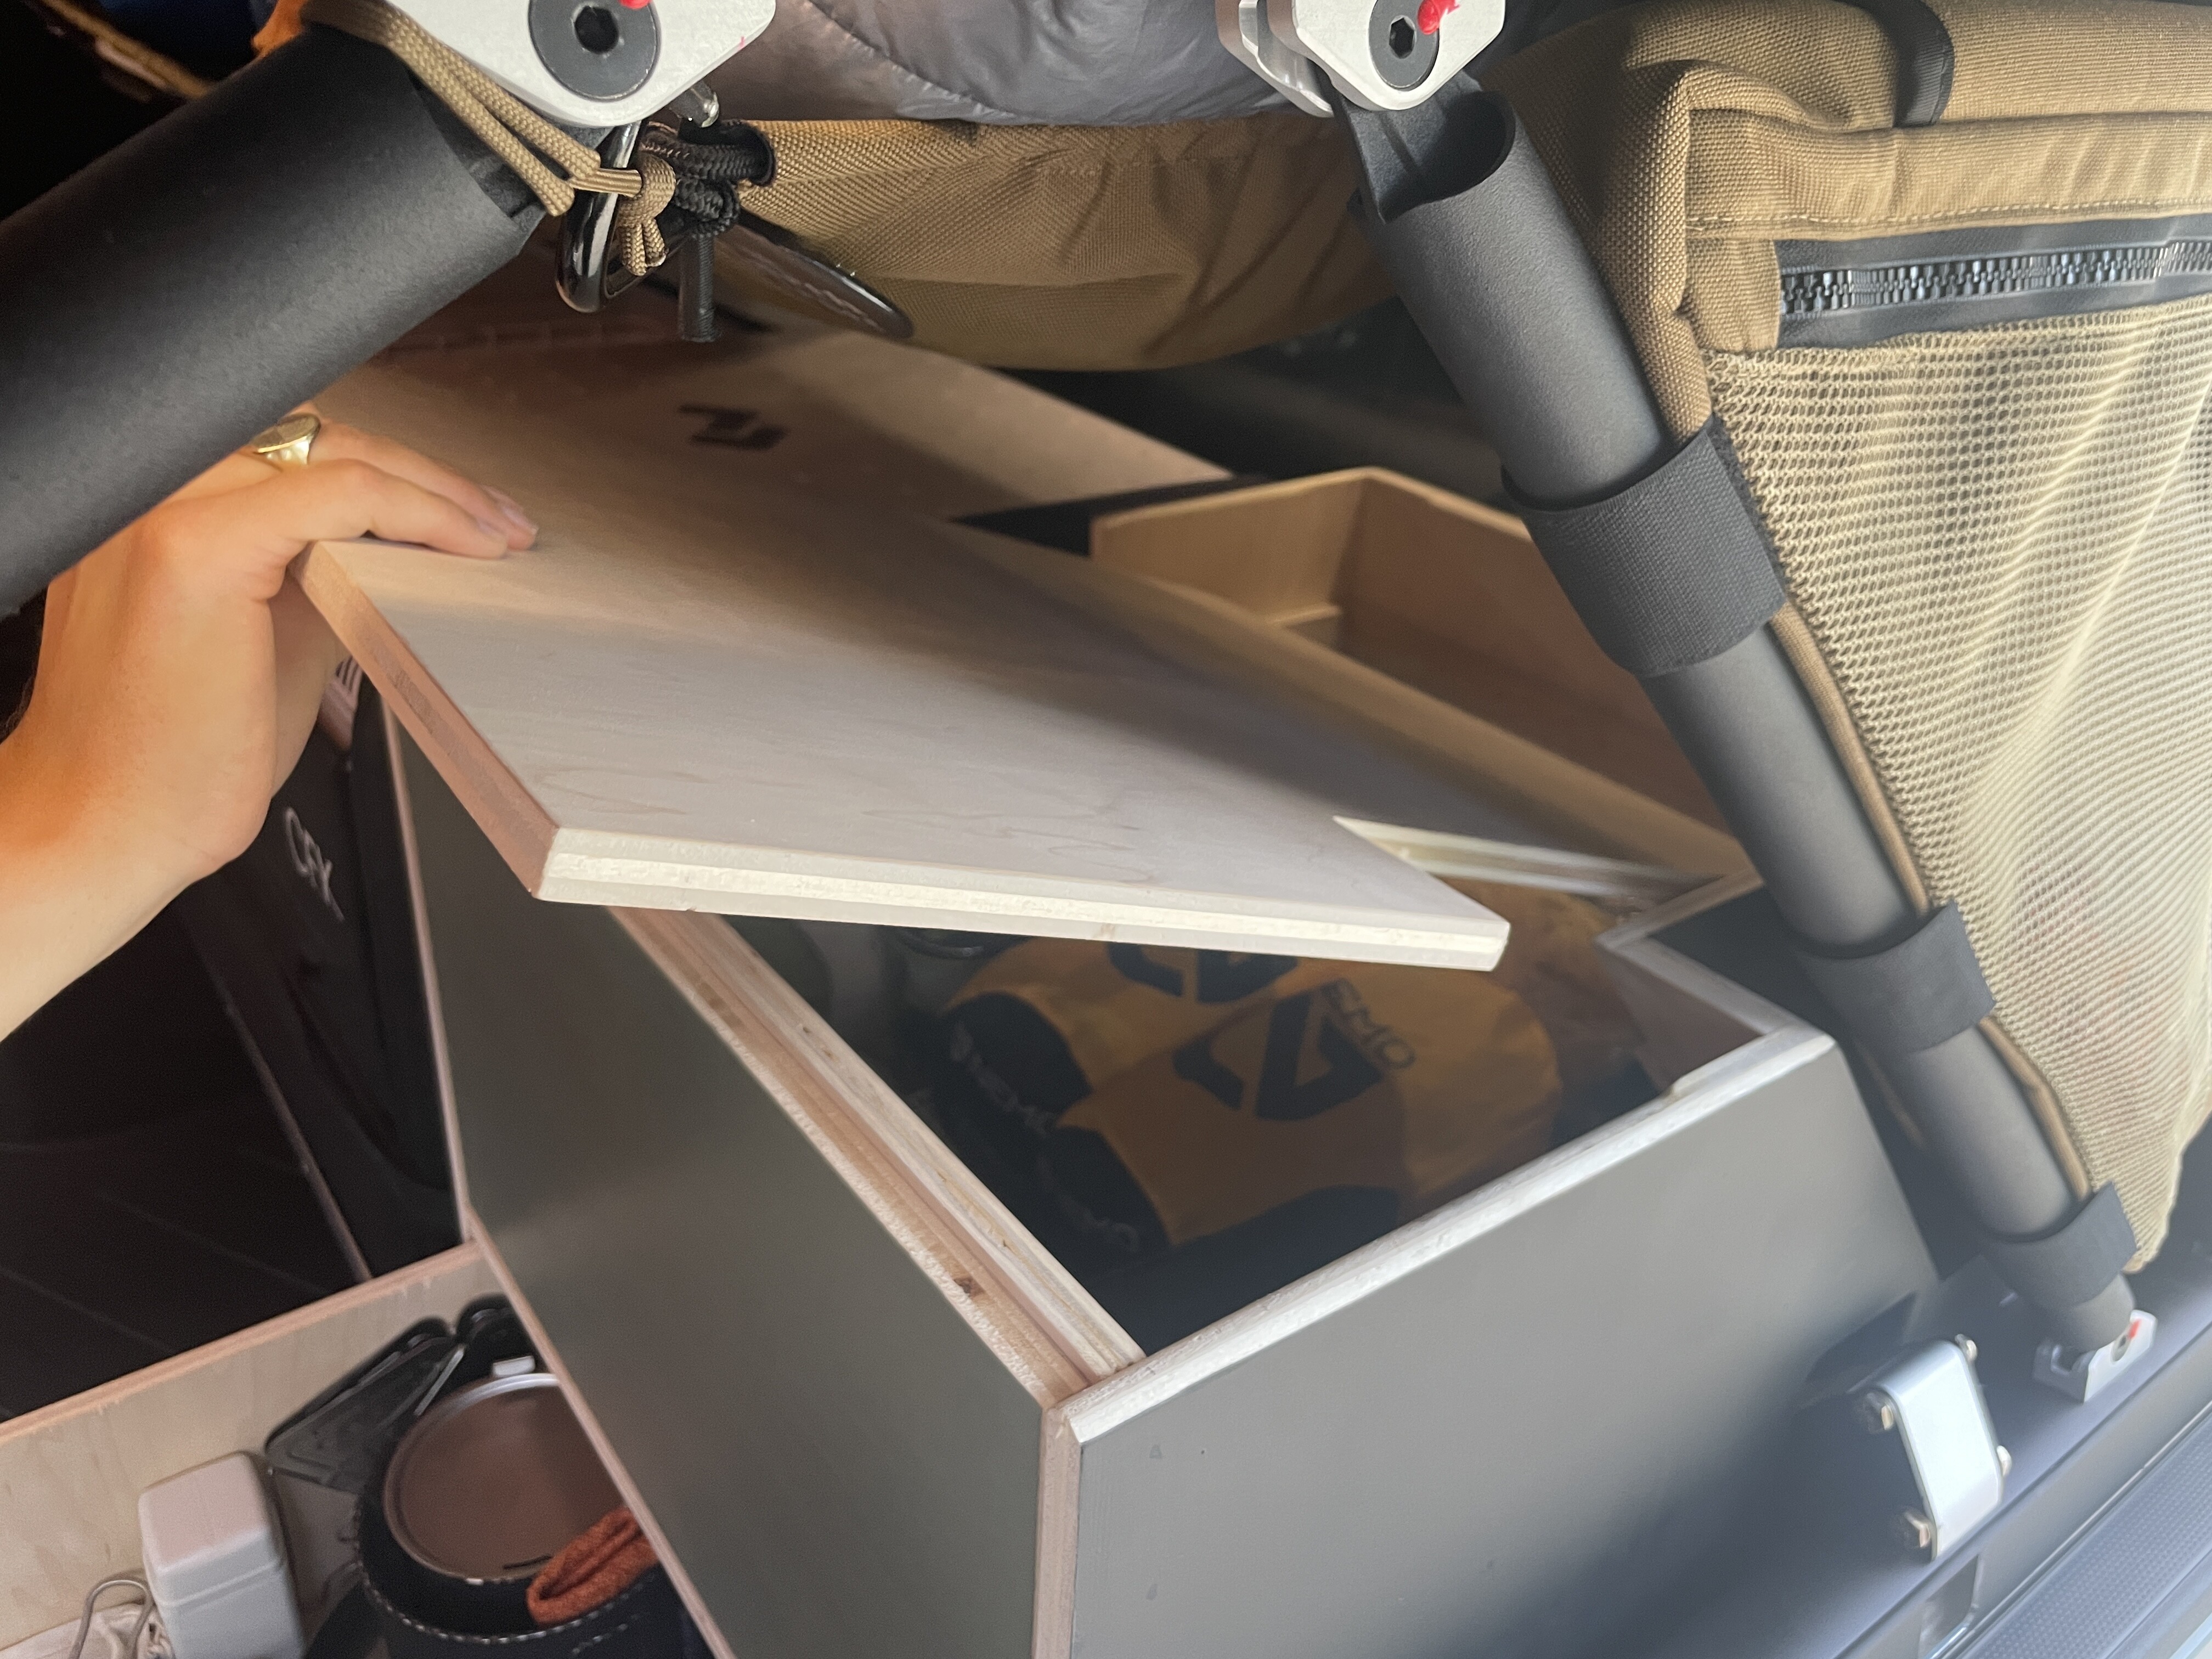
This was a fun one and my father gets all the credit for the build. We designed and added in a single drawer and cubby on the fridge shelf to remove my two camping bins from the equation (Visible in second picture). All of my camping goods are now elevated off the bed and in the truck and ready to go at all times.
The build out for this cabinet was a precision job to clear the fridge’s control panel, GFC mounting hardwear, GFC lock, GFC crossbar, and my VRNCLR frame bag.
The bottom drawer is the full width and depth of the shelf, as is the upper cubby. (We opt’d for a cubby up top vs. a second drawer for less weight). We also sank the cubby’s lid to create a safe contained surface for things like keys, phones, etc. that can easily be accessed from both the outside and inside of bed when at camp.


 )
)