Julian's 2021 TRD Pro Build

Build Update 03/31/21 – or the weekend I drilled two new holes in the truck


REDARC’s Dual Voltage 52mm Gauge G52-VVA

I’ve been debating where to drop in this REDARC Dual Battery Monitor ever since I installed my REDARC BCDC Dual Battery System this past November. Decided to drop it into the center console in the dead space under the parking brake. Was able to tuck away the Enhanced Lightning Controller under the trim, and place the programming switch in the center console box. I also have the Hall Effect Current Sensor under the hood near the house battery.

*This was a precision job. Required aligning the cut to the cusp of the bend in the trim and grinding down one of the brackets below that holds the trim in a place. Really love how it turned out. Almost looks factory!


OEM Toyota Block Heater

I have family up in Canada — where it can get down to -40F over the Holidays. This feature will come in handy when visiting then. Getting the heater into the slot under the engine was a PITA but happy it’s done. Love how clean the plug looks on the grill. So much better than the cable I had hanging out of the grill on my old vehicle.

*I bought this part in Canada, not sure if it’s available in western US market — it definitely wasn’t available in California


Up next: Thinking about cutting out a hole in the bed of the truck next weekend to drop in the driver side cubby hole that Toyota decided to scrap around the 2019 model (I think?) — Found the part on eBay and would love to have it back there.

:v:

7 Likes

Nice super clean installs!

1 Like

Awesome job man! Appreciate the write up.

1 Like

Build Update 04/04/21 – Another weekend, another hole.


Bringing back the OEM Driver Side Cubby

It’s my understanding that Toyota decided to drop these from all models around 2018/19 as a cost saving measure and left the area between the bed and body completely empty. I always thought that this cubby would be a great place to house all my back-of-house electrical wiring so was motivated to find a way to reintroduce it.

After searching around, I managed to find one dealer selling the cubby via eBay along with another dealer selling the cover. Finally, I secured the 6 black OEM torx head bolts (Part No. 90148-A0006) from a local dealer here. (Warning: the box and cover are pricey new — they were everywhere I looked online and from every dealer I called. You should have no problem finding them used for about half the price—or go to your local pick-n-pull!)

I used an angle grinder to cut into the bed and fit the box in place… after measuring three times and starting with a test cut. I went slow, experienced no marring or cracking issues, and got a perfect fit. (ps. I used a hand saw to finish off the 4 corners) I’m waiting to mount it as I want to get all the electrical components in the box first. (Hopefully next weekend!)

All for now! :v:


12 Likes

Solid work! Was just wondering about doing the same thing on the cubby, missing the one I had on my 2nd Gen!

1 Like

Epic build. Can you talk about what its like using this for extensive travel? Im seriously considering a GFC but do a significant amount of freeway driving both as my commute and travel. My intention would be that whatever build i settle on, it will be my daily driver, as i currently dont have room for more than one vehicle. Is there a significant increase in road noise in the cab with the GFC? I haven’t really seen many people talk about what having the GFC on does to overall ambient noise in the cab while driving at freeway speeds. I obviously would expect some amount of increase, but if its a significant amount that would be a deal breaker.

1 Like

I believe mine is quieter with the GFC on. No wind turbulence hitting the rear window of the pickup.

1 Like

Build Update 04/10/21 — Electrical cubby Phase I


Blue Sea Systems Components

I started spec’ing out the “Electrical Cubby” today.

I mounted my Blue Sea Systems 12 Circuit Fuse Box inside the cubby and mounted my 4 Socket Accessory Panel, 12V Sockets, Dual USB Socket, Voltmeter Monitor, and Temperature Monitor on the cover of the cubby. I also drilled a hole in the top of the cubby and placed a grommet in to feed the battery wiring through (Not pictured).

Nothing is locked in just yet. I’m considering moving the Voltmeter Monitor to the left of the panel, and dropping in an additional Dual USB Socket in it’s place. I’m also considering dropping in Blue Sea Systems Rocker Switches above the panel for my Matt Gecko Red & White LEDs. (To cut down from his 4 single circuit switches to 2 dual circuit rocker switches).

Would love any feedback or ideas from the forum before I commit to all of this! Hoping to dial in by next weekend.


ps. @pcurran @skier — This camper build is also the daily driver for my wife and I (It’s our only vehicle). There has been no noticeable change to cabin noise or responsiveness of the truck. Was the main reason we went for the GFC over competitors. We honestly forget it’s back there when running errands or on when on the freeway. Worth noting: I have the Sherpa Animas Rack in front of the camper. I’m sure this helps with wind deflection and noise. :metal:

2 Likes

Maybe some usb-c? I love being able to charge my MacBook without any inverter.

2 Likes

@jedgar Interesting… Love this idea — I always assumed charging my Macbook would require an inverter, even with USB-C but I guess not. Do you have a suggestion for a usb-c socket that I could permanently mount on the cover here? Not sure if Blue Sea makes one.

I have this one which is awesome as it can pull 72w. Not sure about a permanent mounting solution.

https://satechi.net/products/72w-type-c-pd-car-charger-adapter

1 Like

Build Update 04/11/21 — Electrical cubby Phase II


Small improvements to the electrical cubby:

• Moved the Voltmeter Monitor to the left of the 4 socket panel.
• Dropped in an additional Dual USB outlet into the panel.
• Added weatherproofing seal/gasket to the cubby opening.
• Sealed the rear drain holes with locking fasteners and a ton of silicone.
• Sealed the self tapping screws that I used to mount the fuse block with a ton silicone.
• Used some conduit, scrap plastic, and silicone to create a dome and seal the hole where the cover’s two upper locks latch. Fully sealed and still fully functional. Pretty nifty!
• Ordered 3D Printed caps from a TW user to seal the three latch holes on the bottom. These will only be mounted after the cubby is permanently mounted. I’ll slap some more silicone down there as a redundancy as well. No water will be getting into this thing!

:metal:

7 Likes

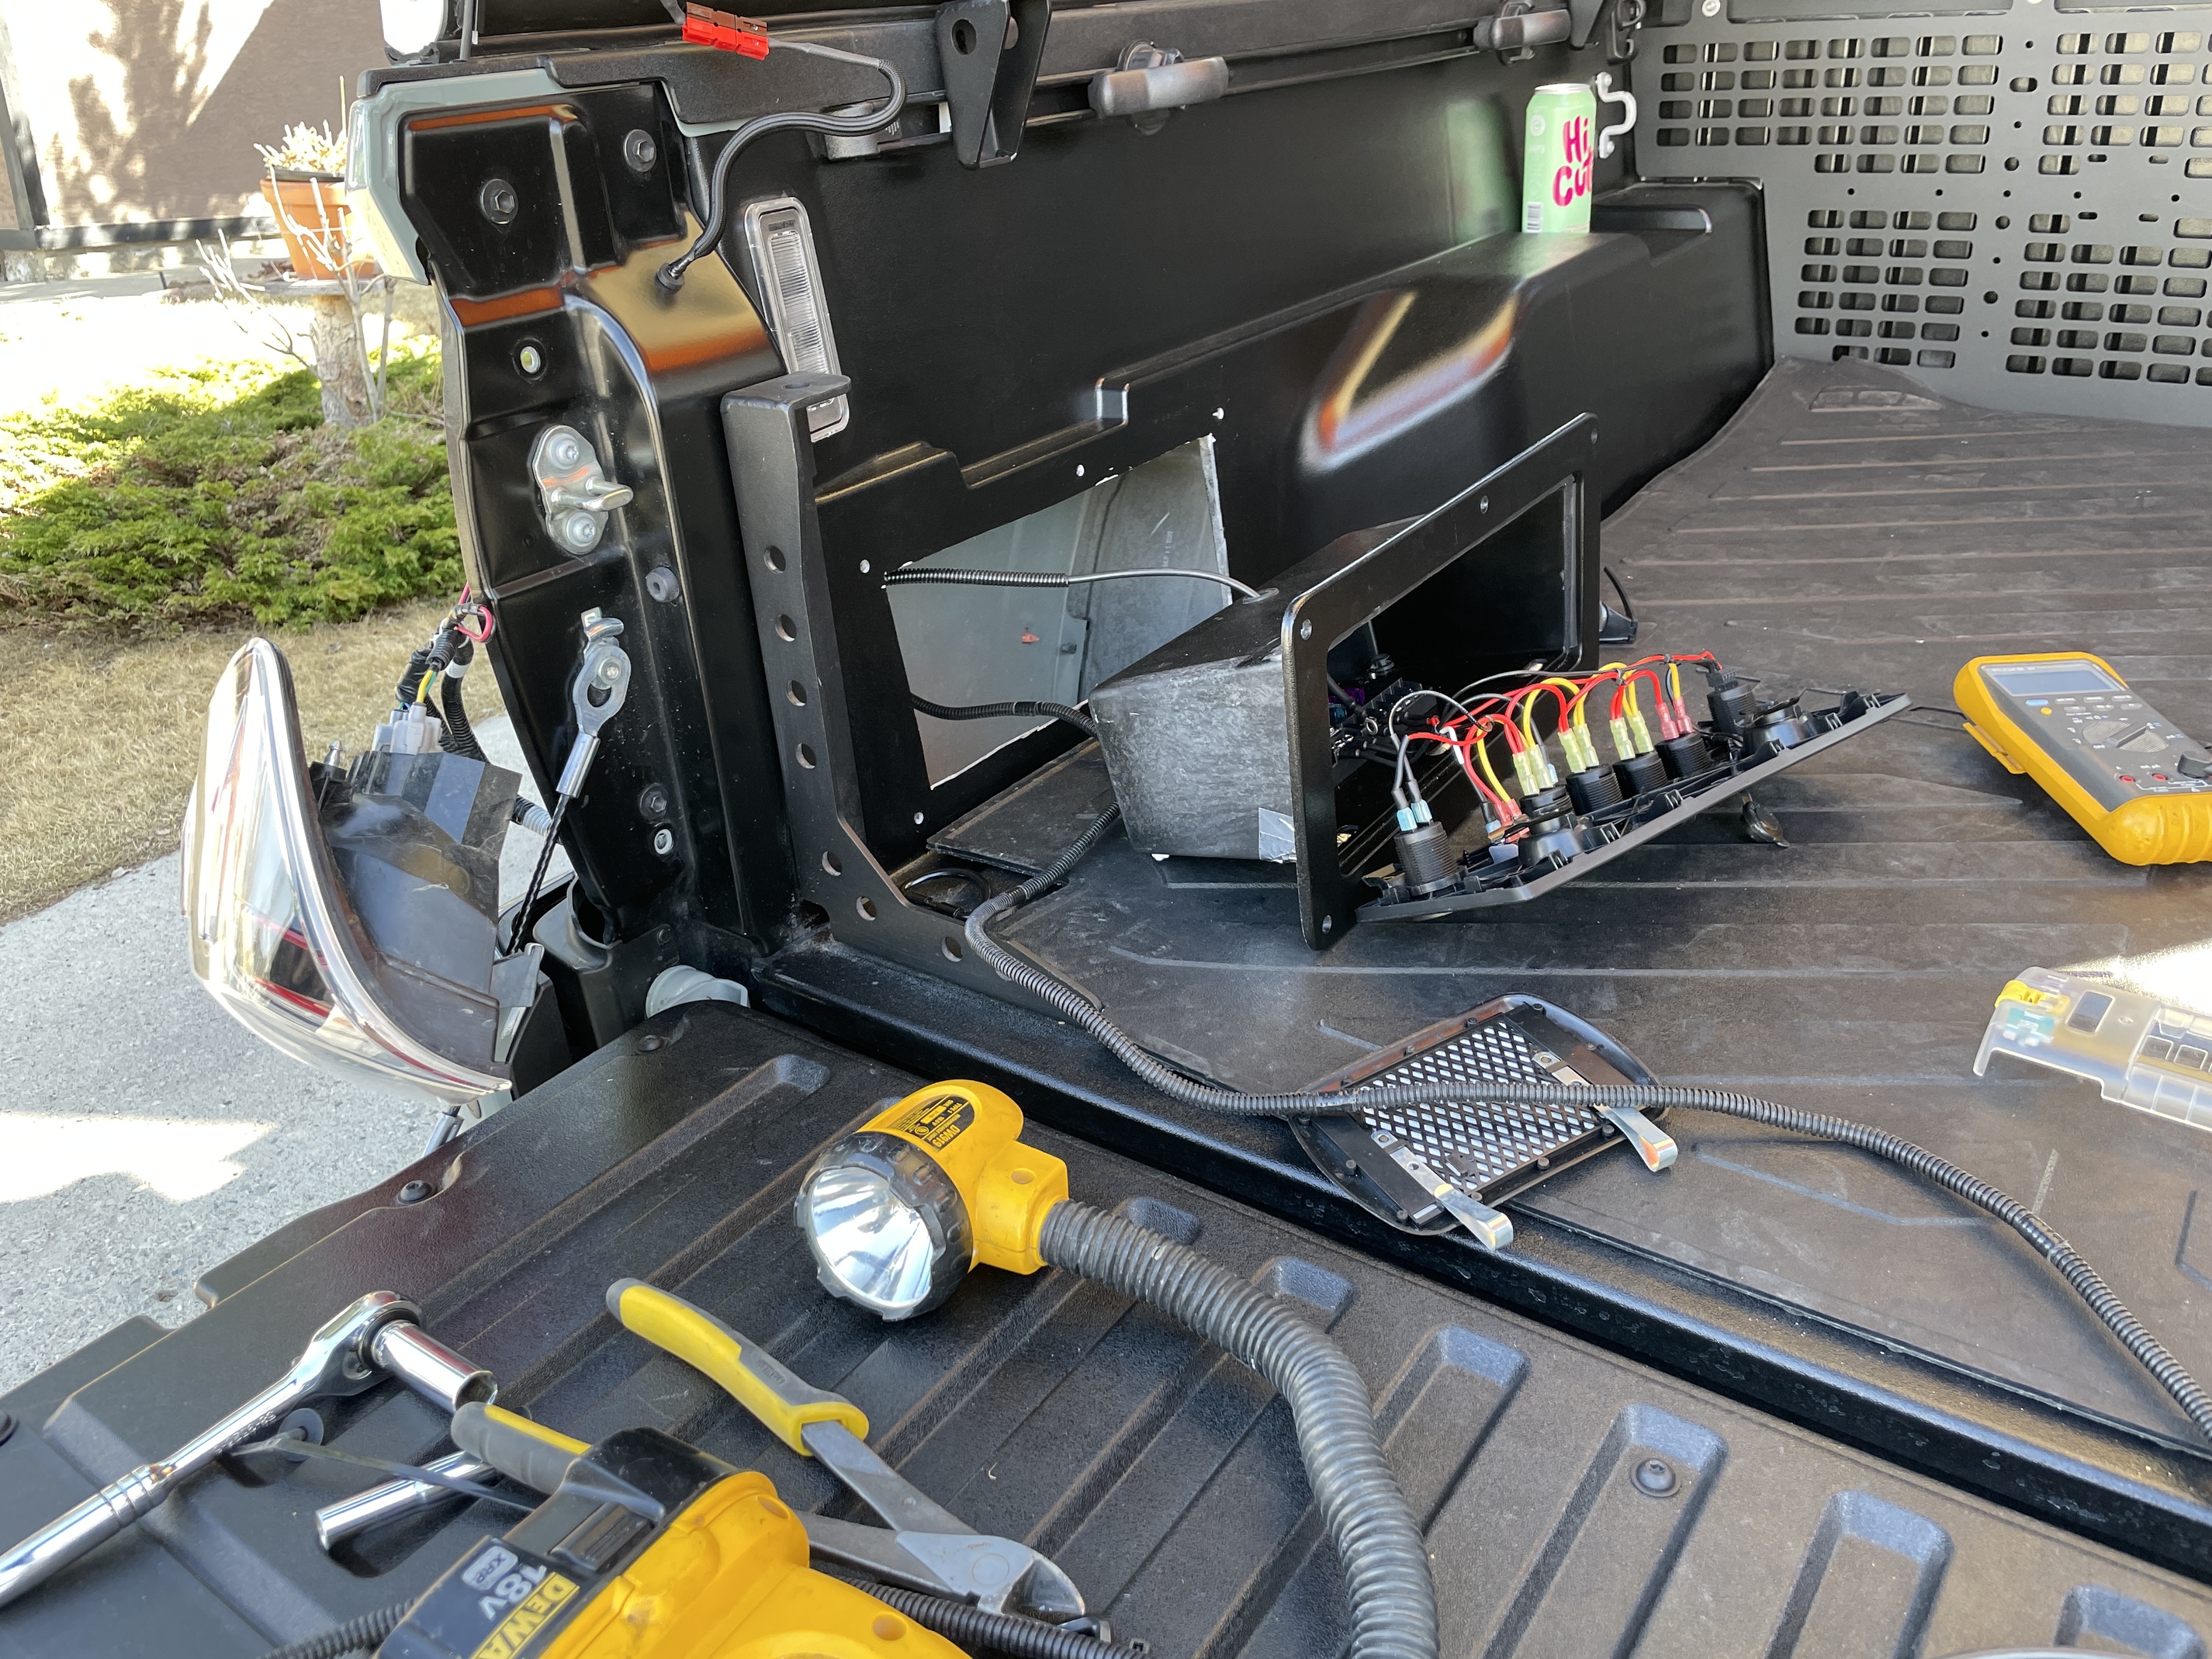
Build Update 04/17/21 — Electrical cubby Phase III — Install day


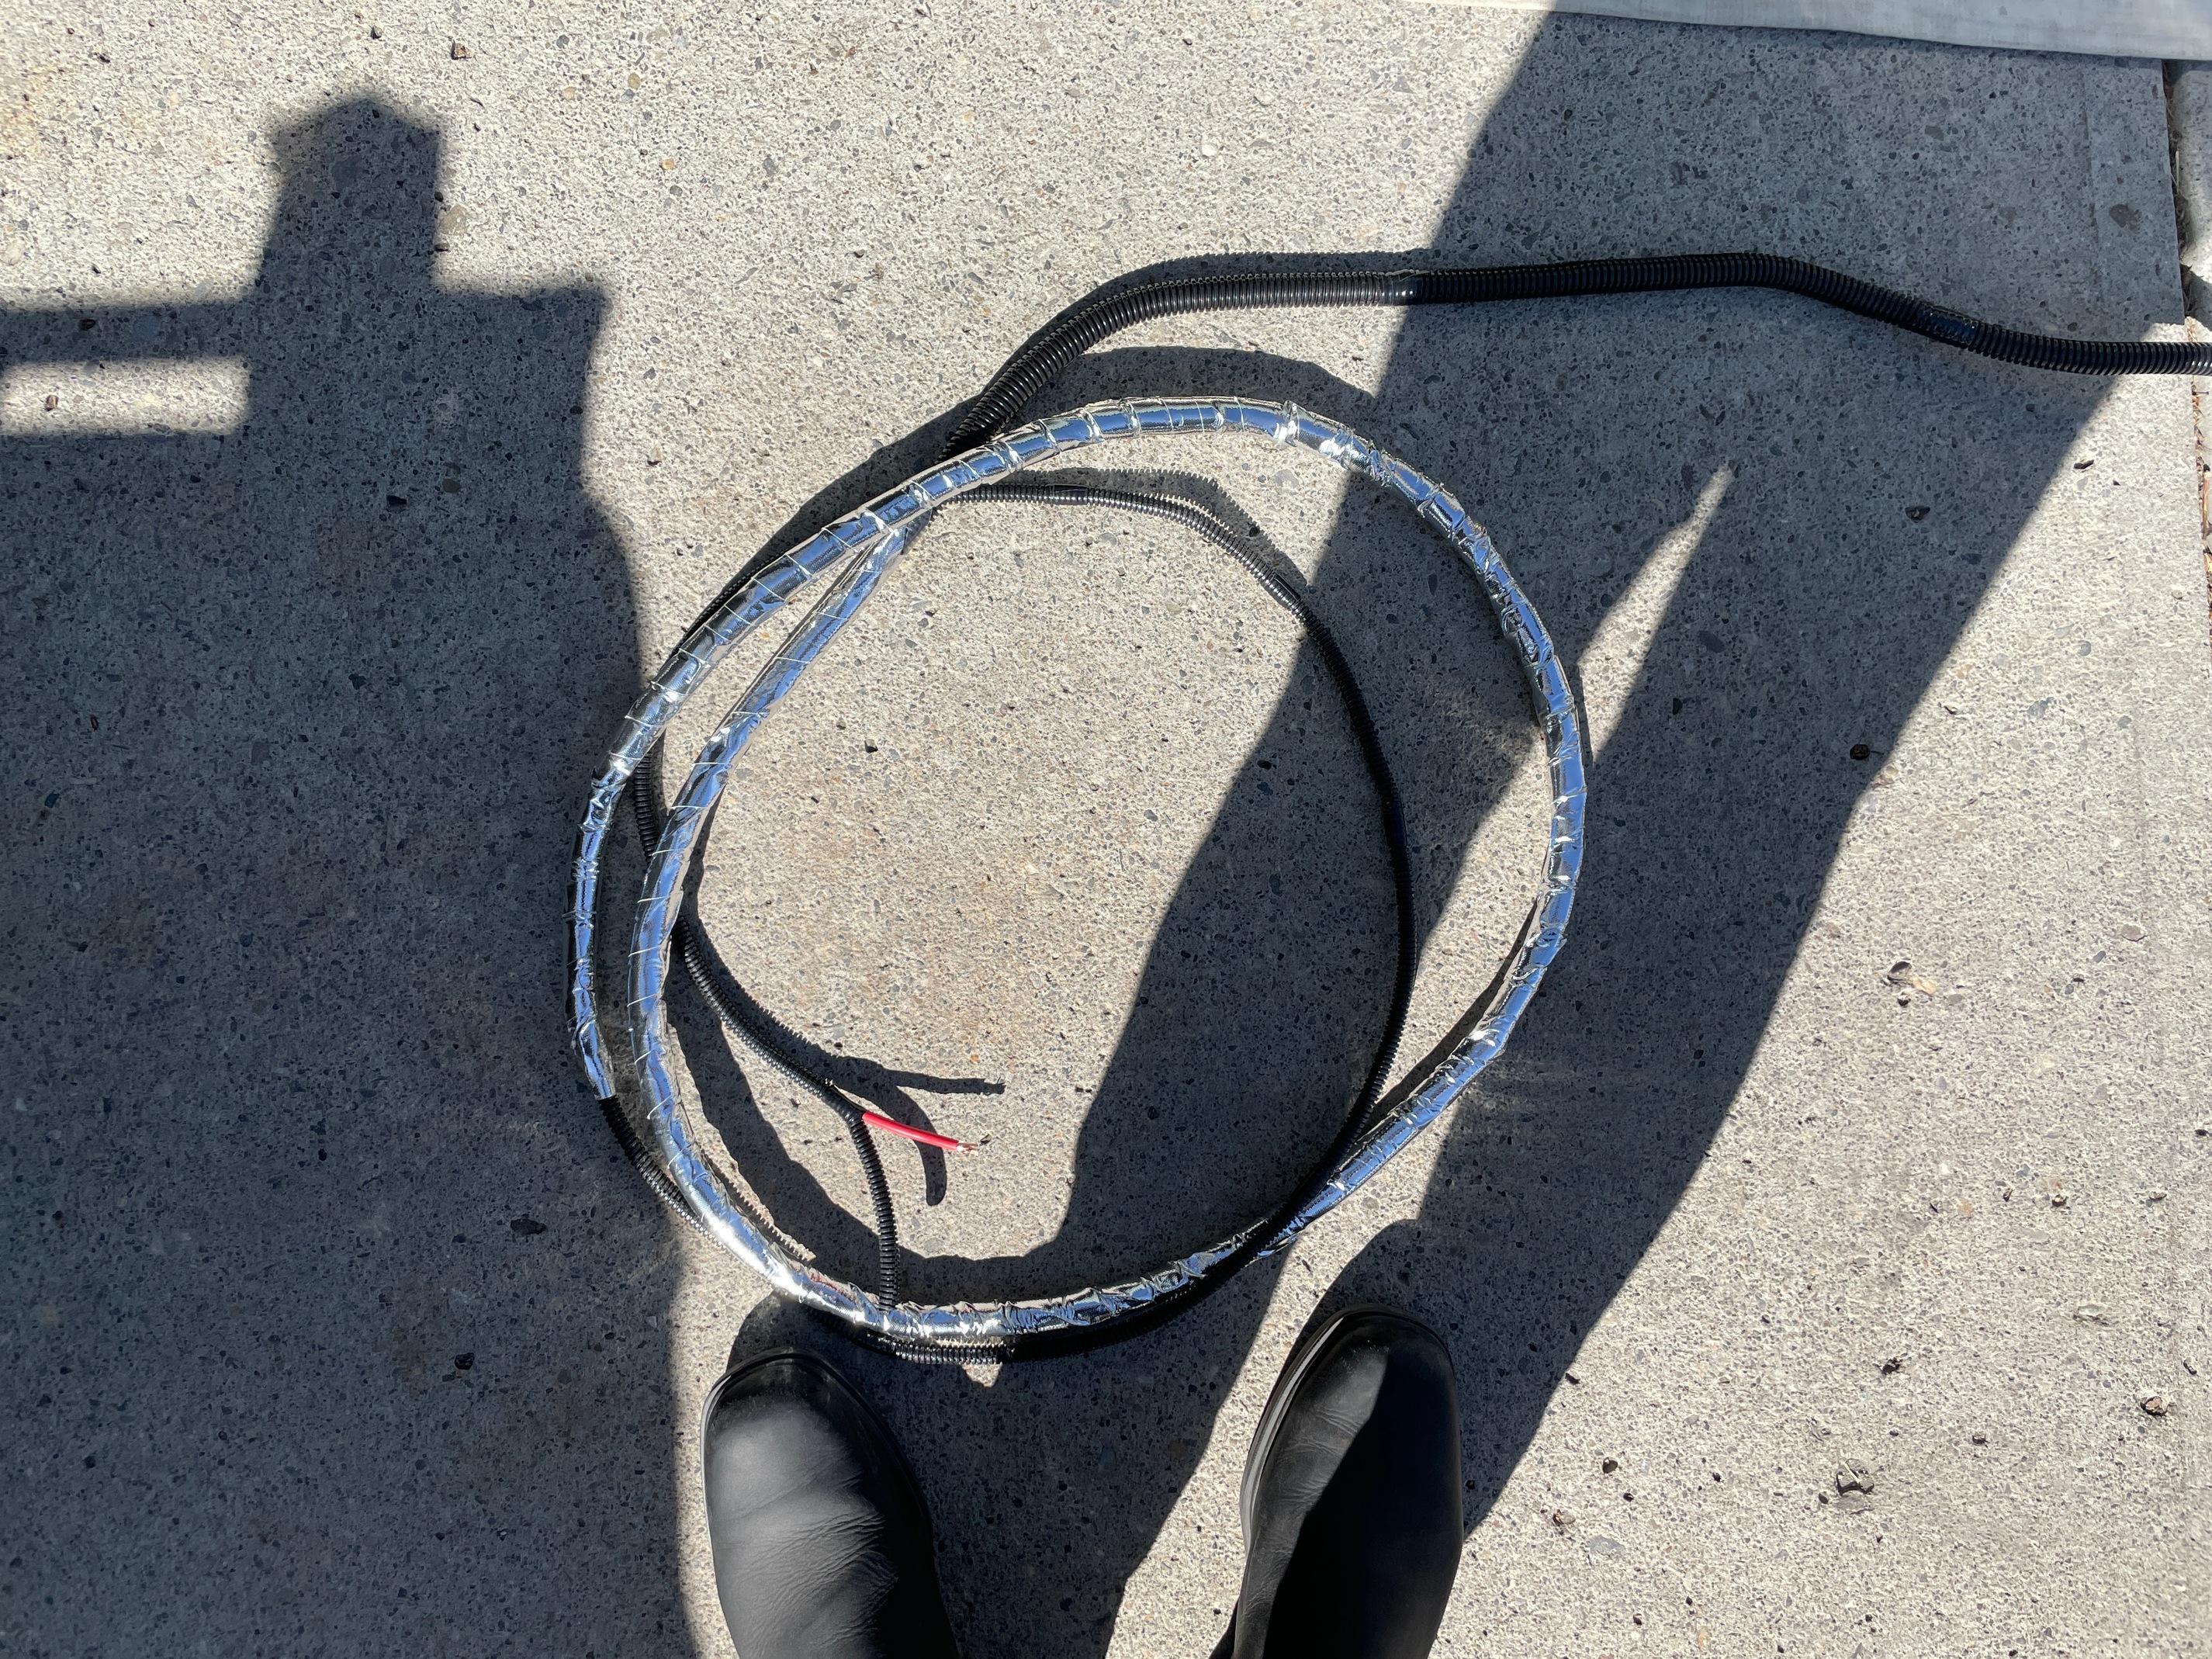
Preparing to run power to the bed – Creating the harness

I started with 35ft of insulated automative 8AWG wire and wrapped the entire length of it in 1/4" automotive plastic loom. From there I measured where the harness would start to pass down through the engine bay from my second battery and wrapped the entire length from that point in 1/2" plastic loom. Finally I wrapped heat reflective automative tape to the portion of the harness that goes down pass the engine, pass the exhaust, and takes a short trip on the exterior side of chassis. This took some time but worth the peace of mind since this harness will be exposed to elements. It’s now quadruple sealed in the most exposed areas.


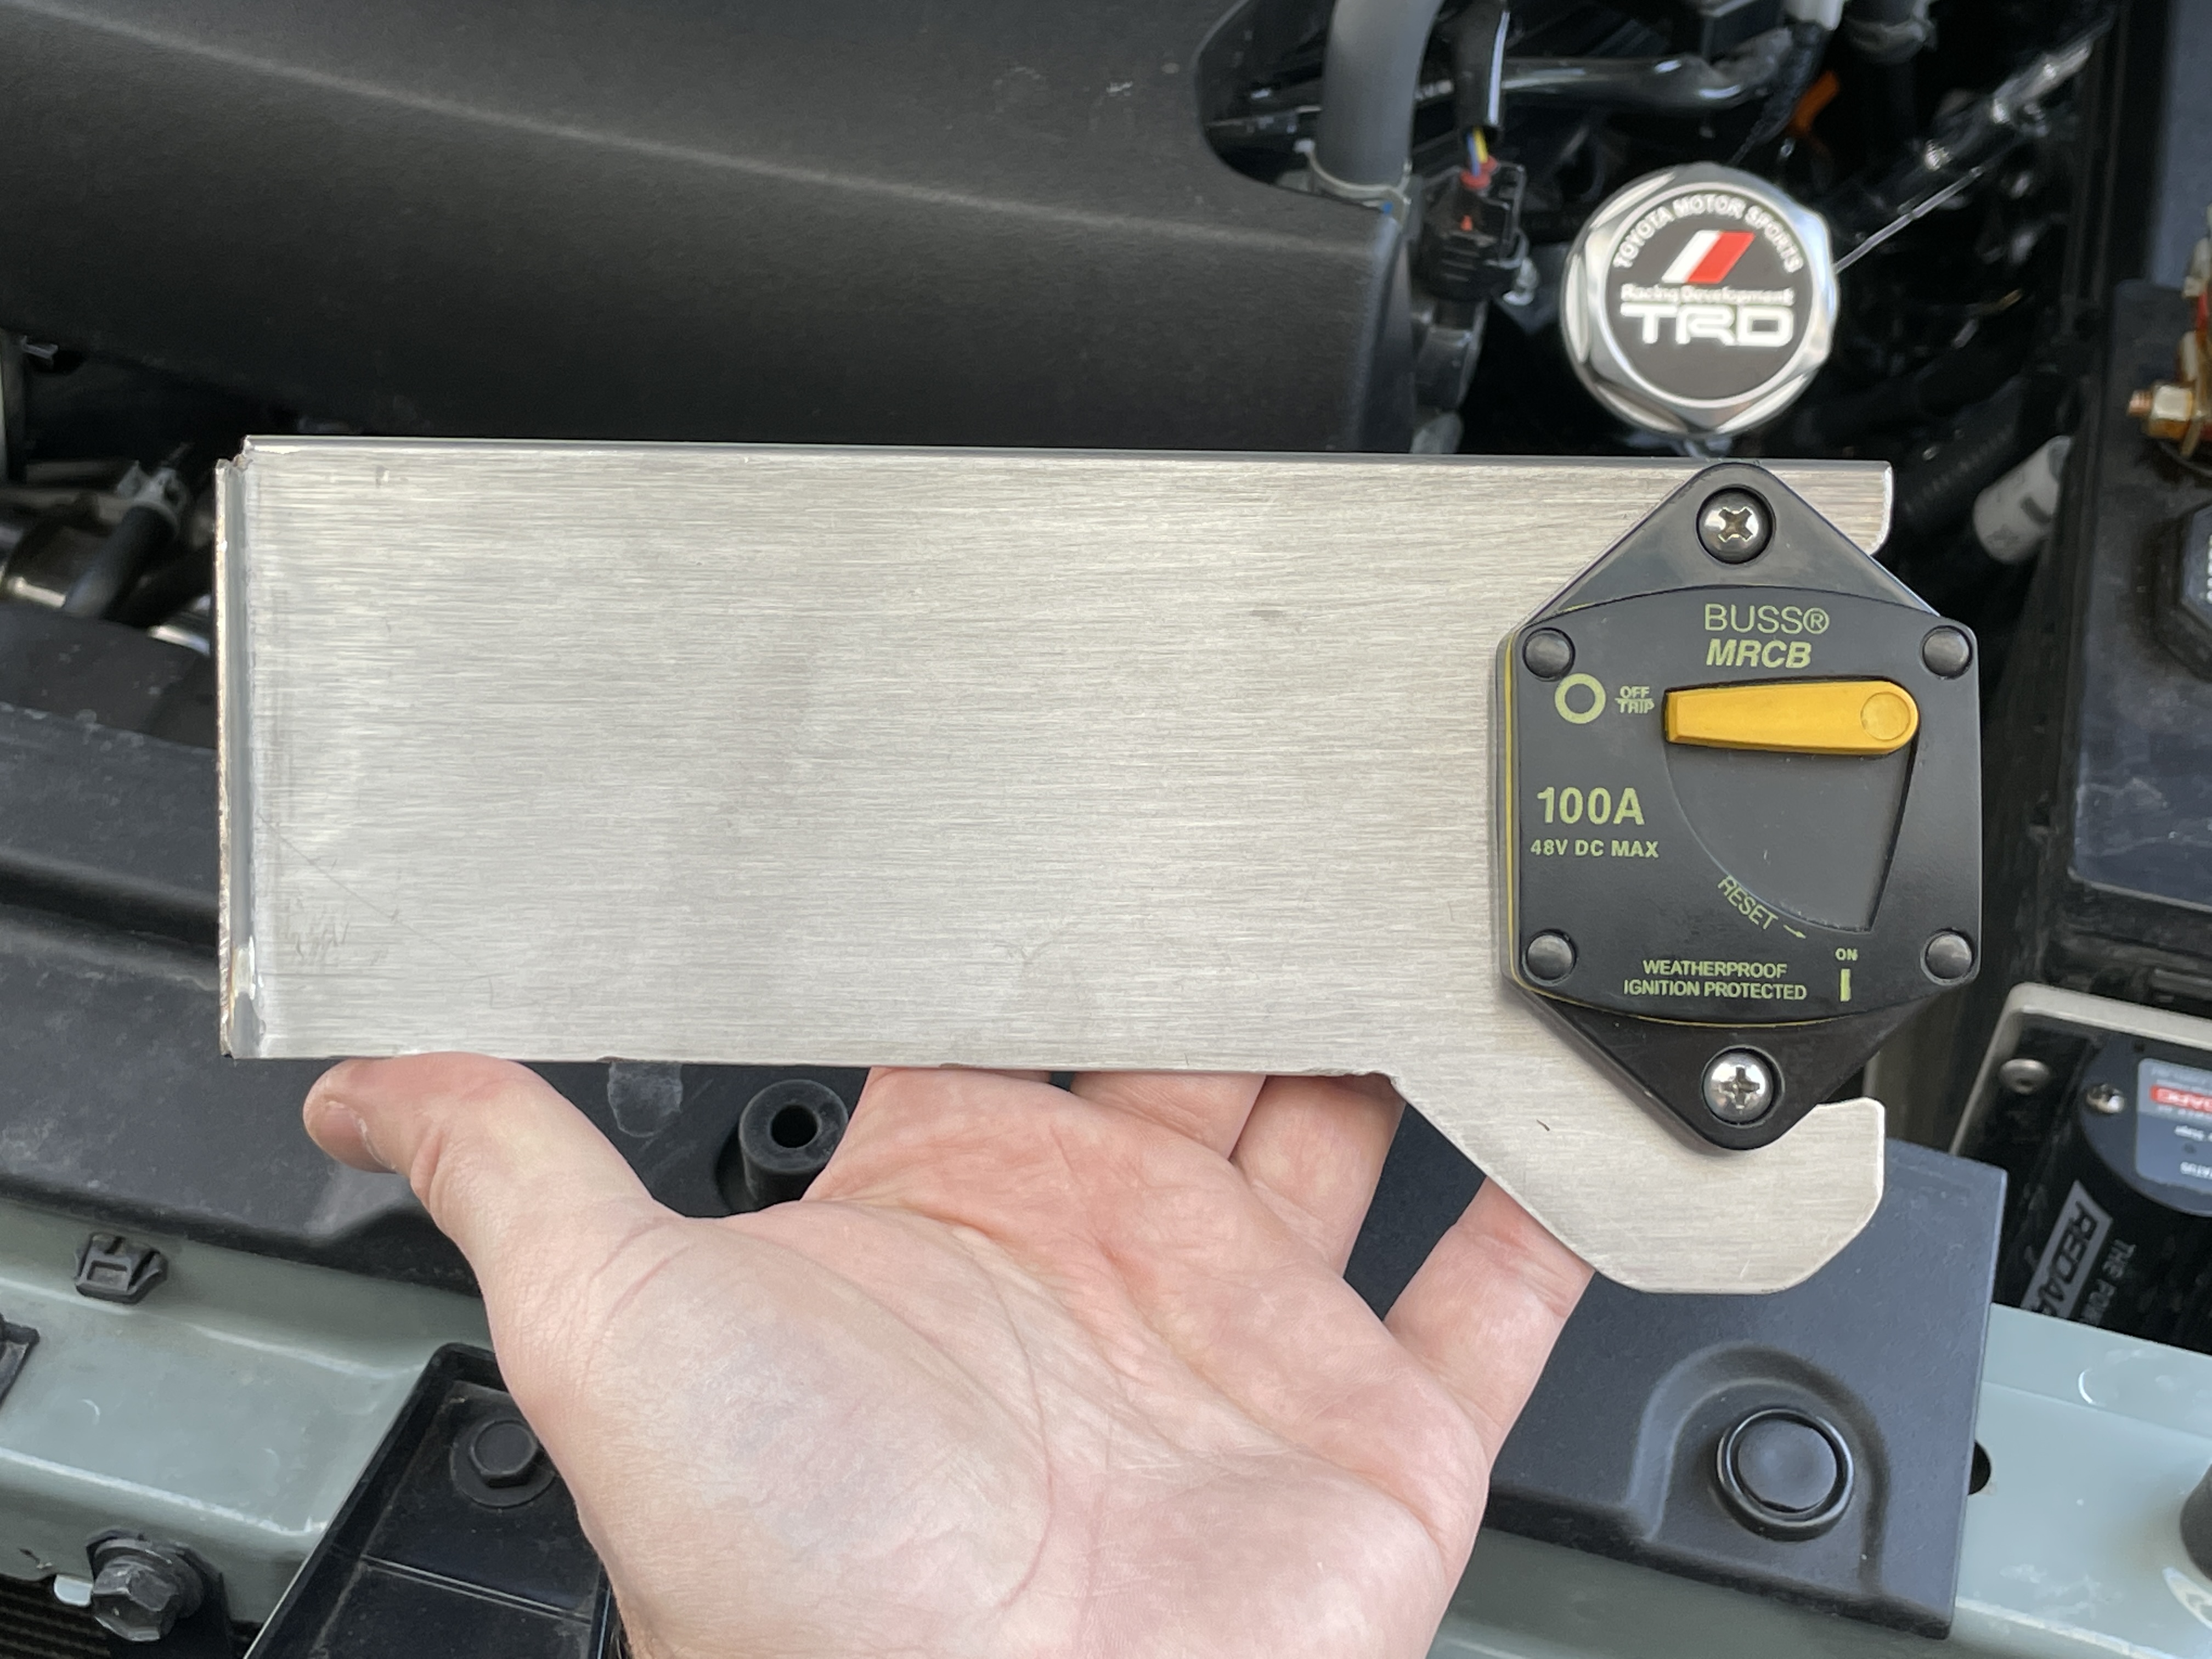
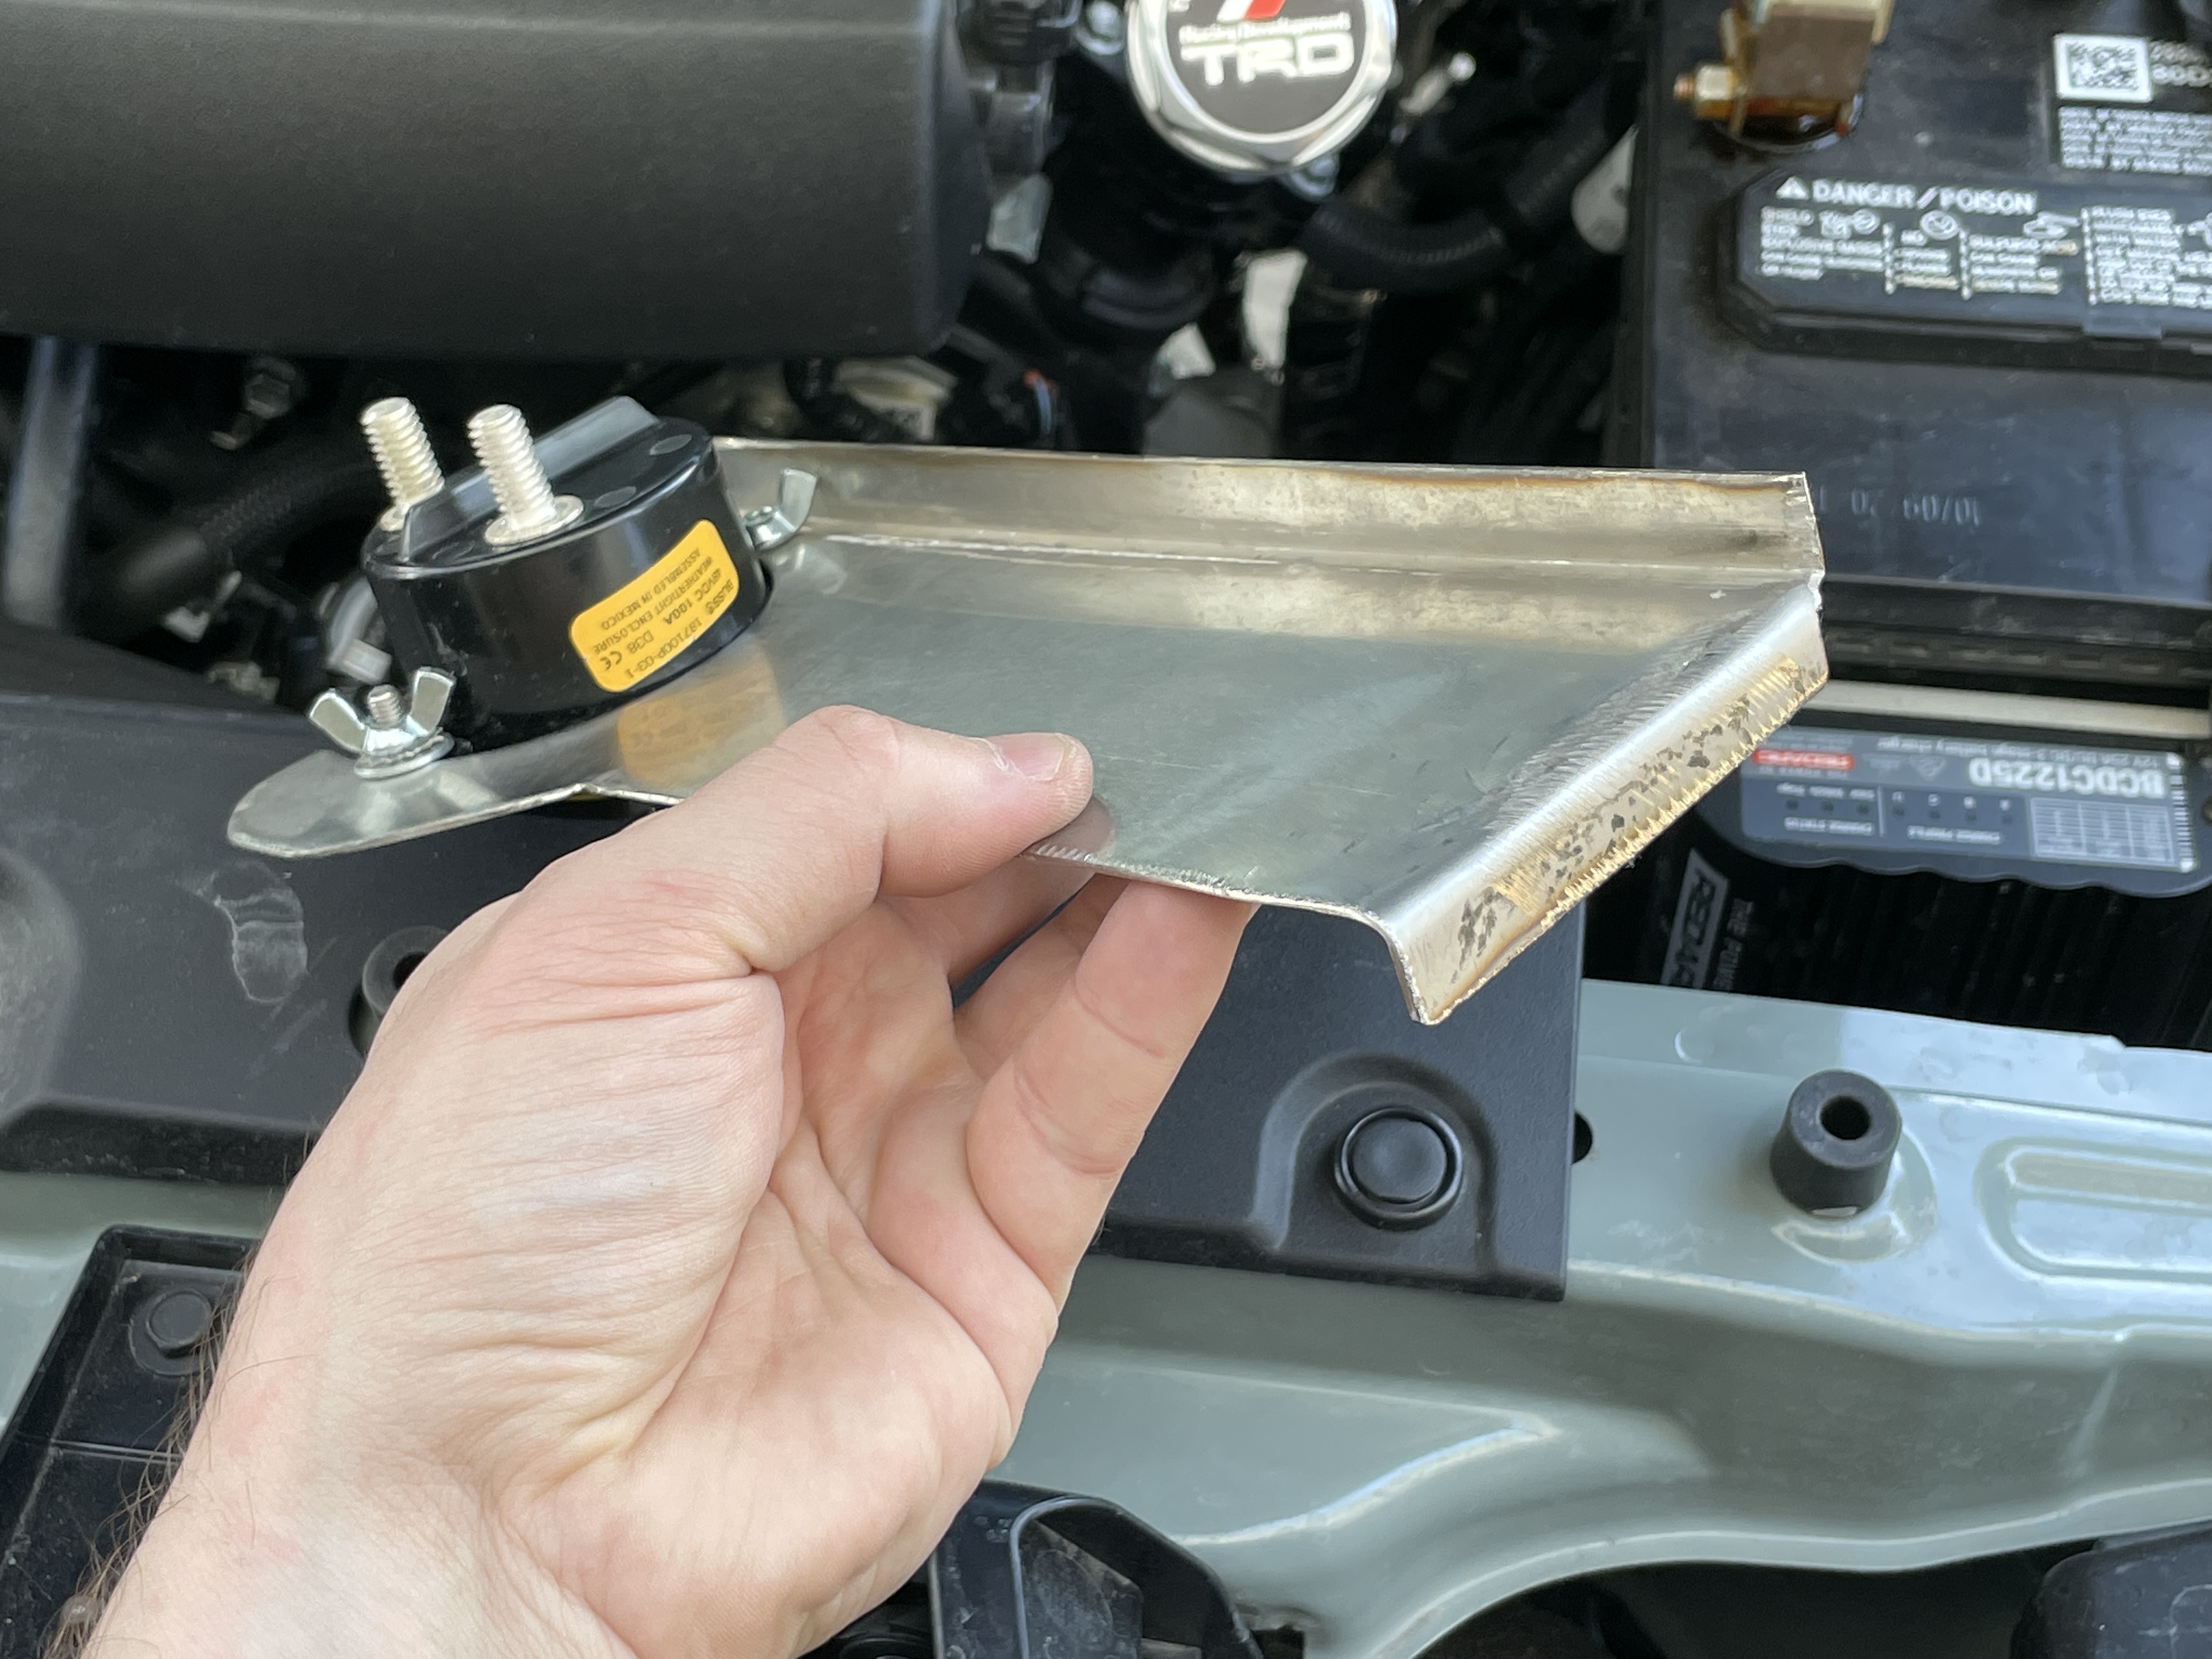
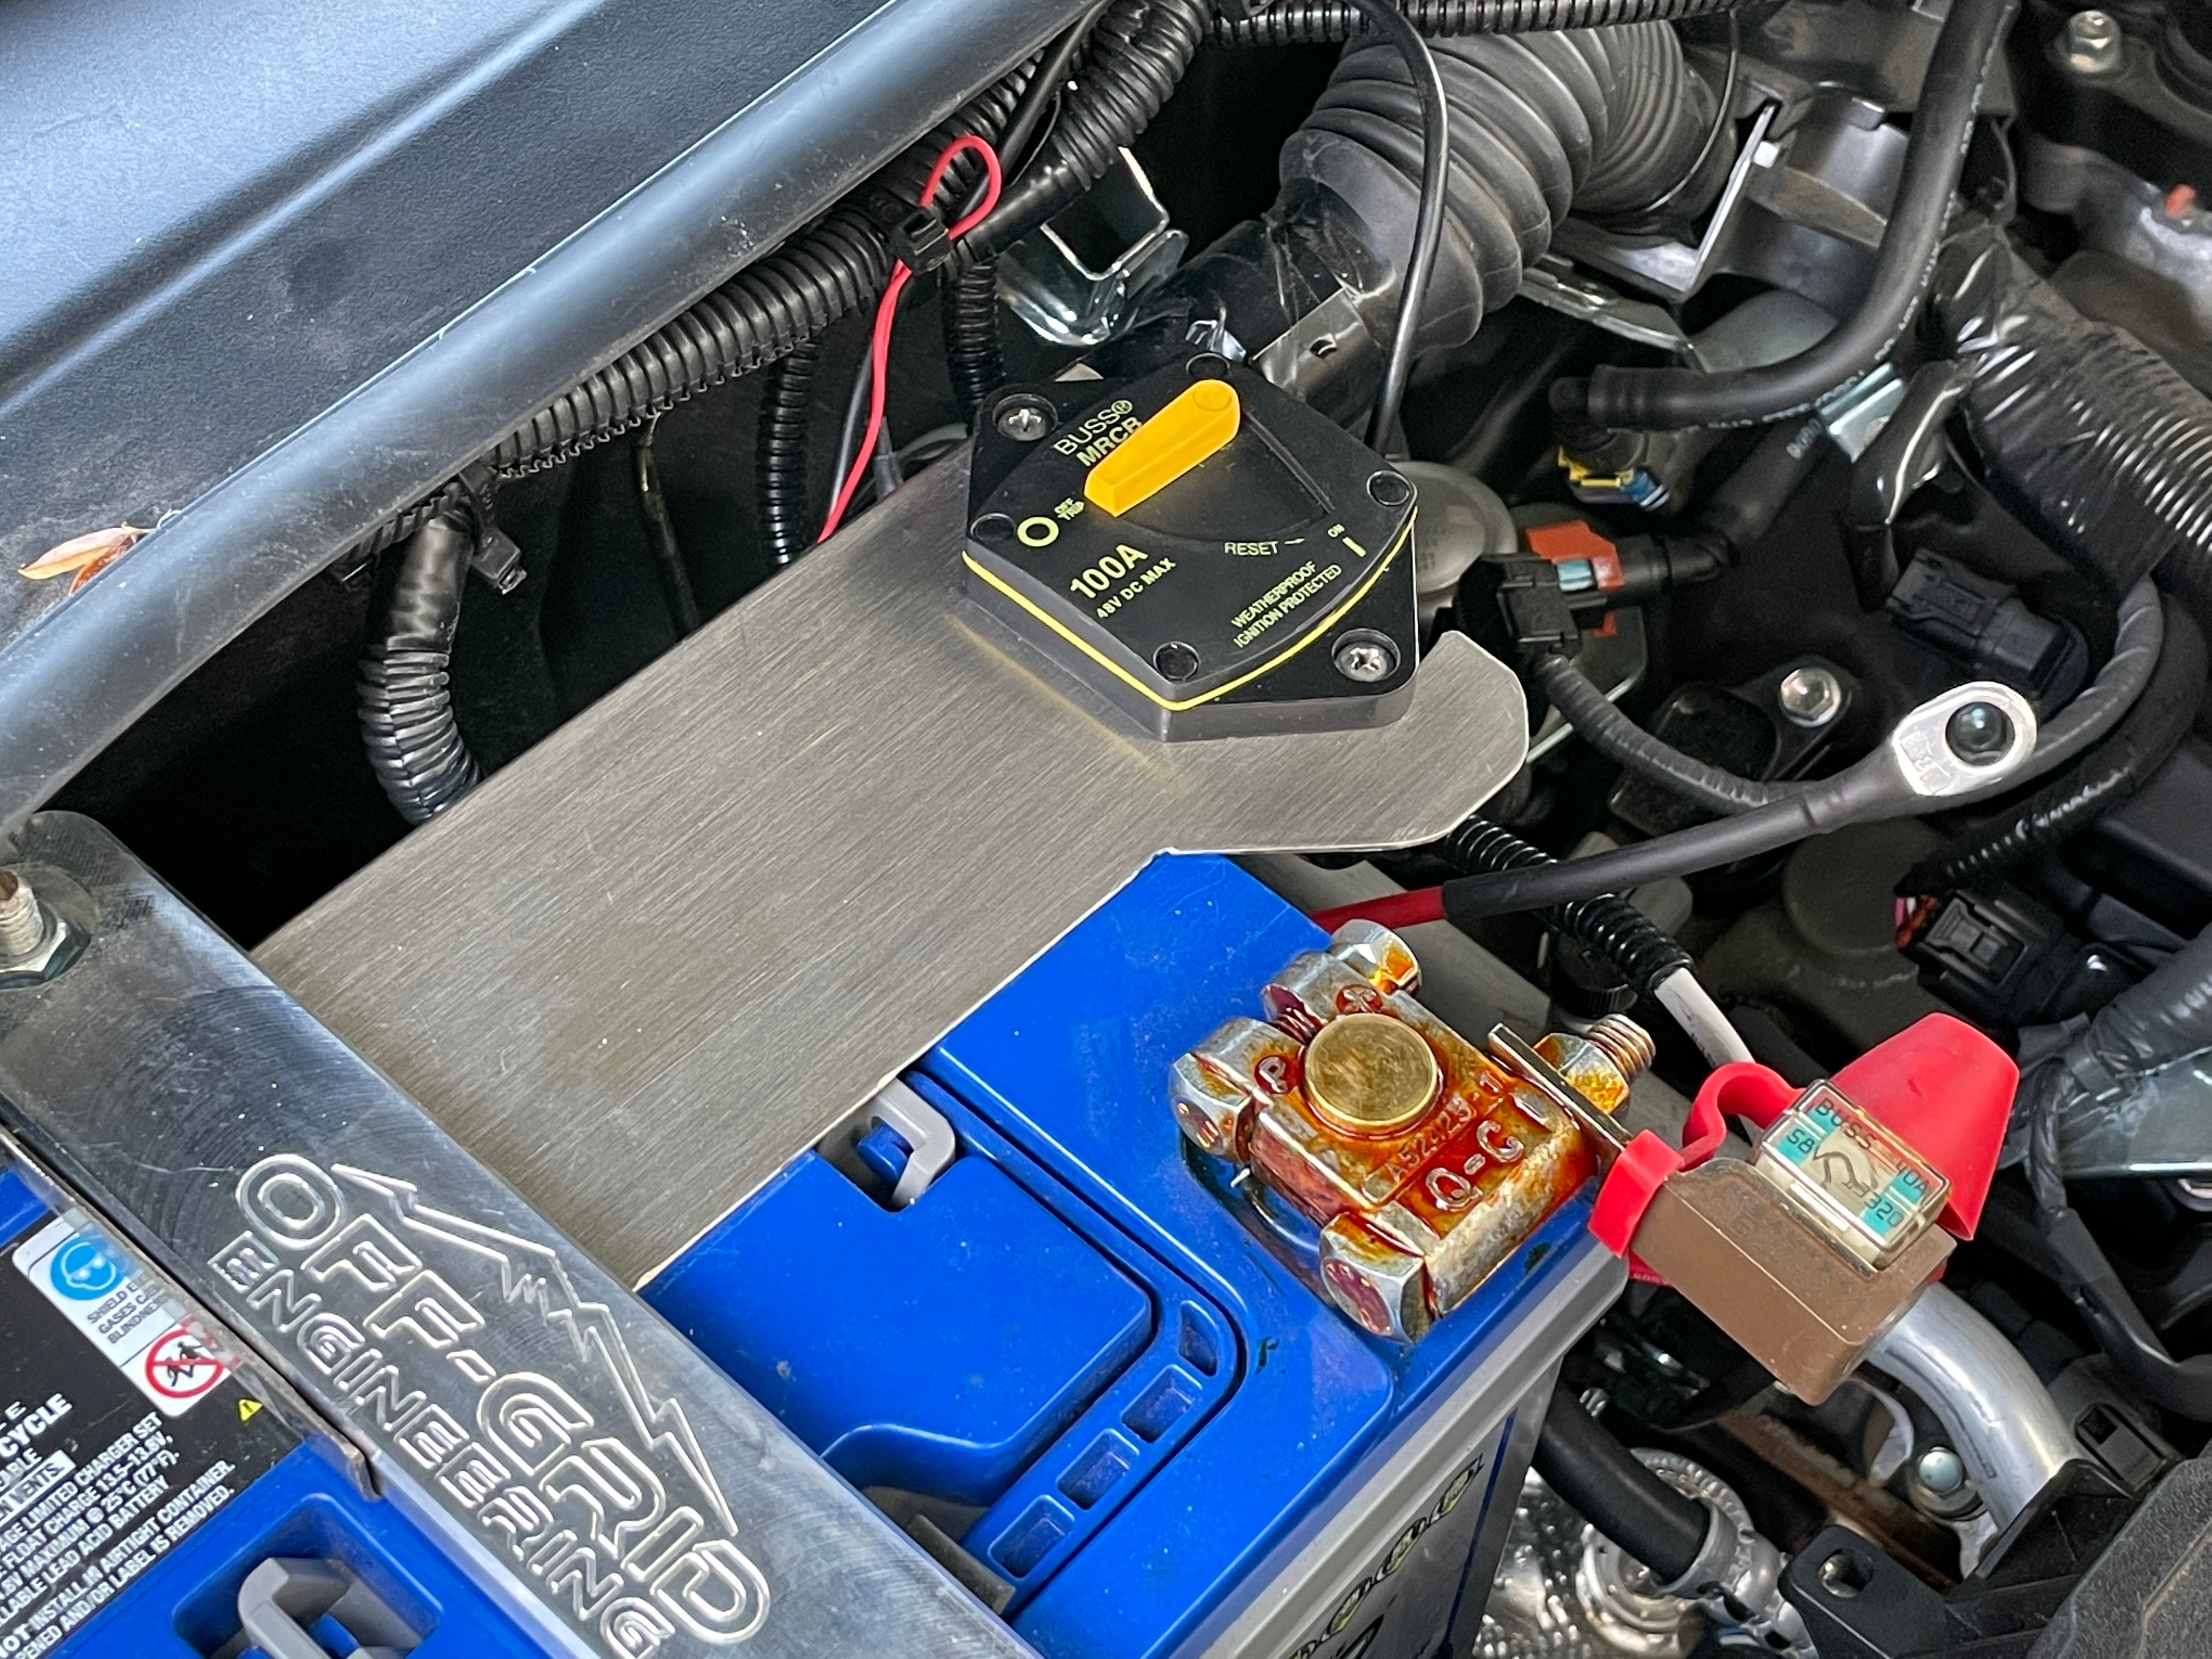
Preparing the second battery — Circuit Breaker install

My dad fashioned up a nifty bracket from some scrap metal to wrap around the battery and Off-Grid Engineering tie down to cleanly and securely mount my Blue Sea Systems Circuit Breaker. I can use this to kill all power to the bed with a flip of a switch. (eg. when in daily driver mode and not in camp mode)


Running the harness

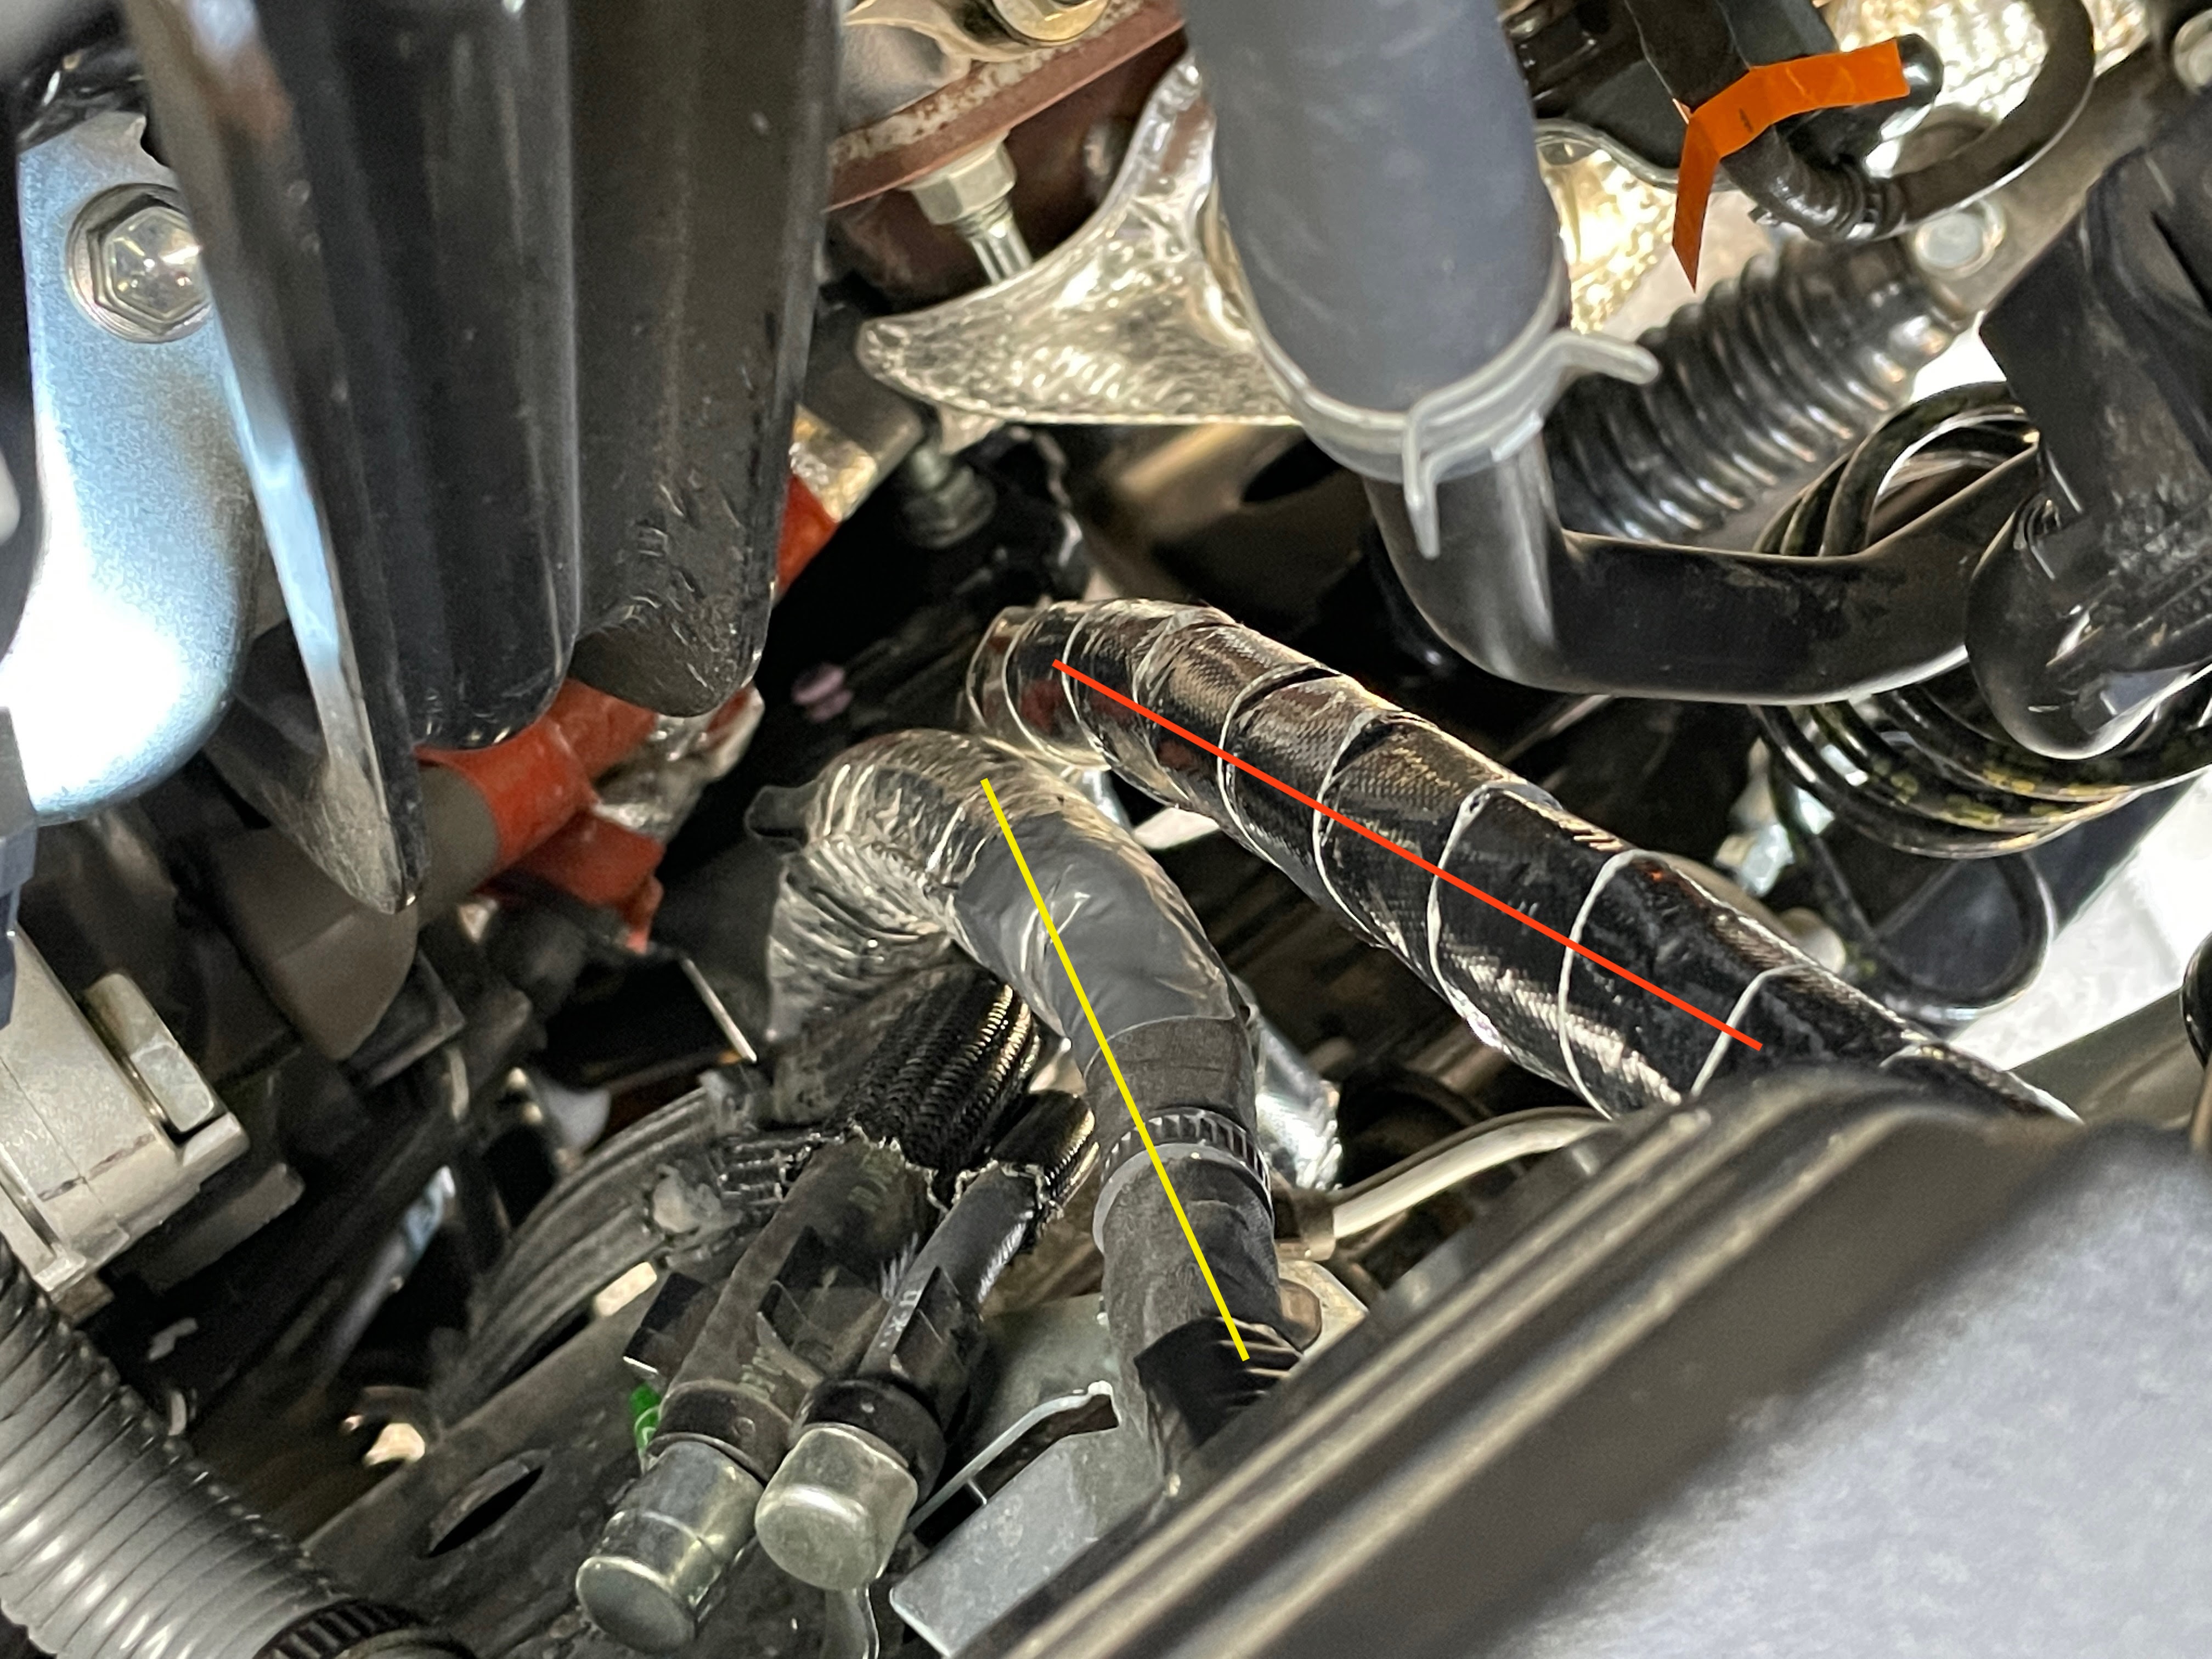
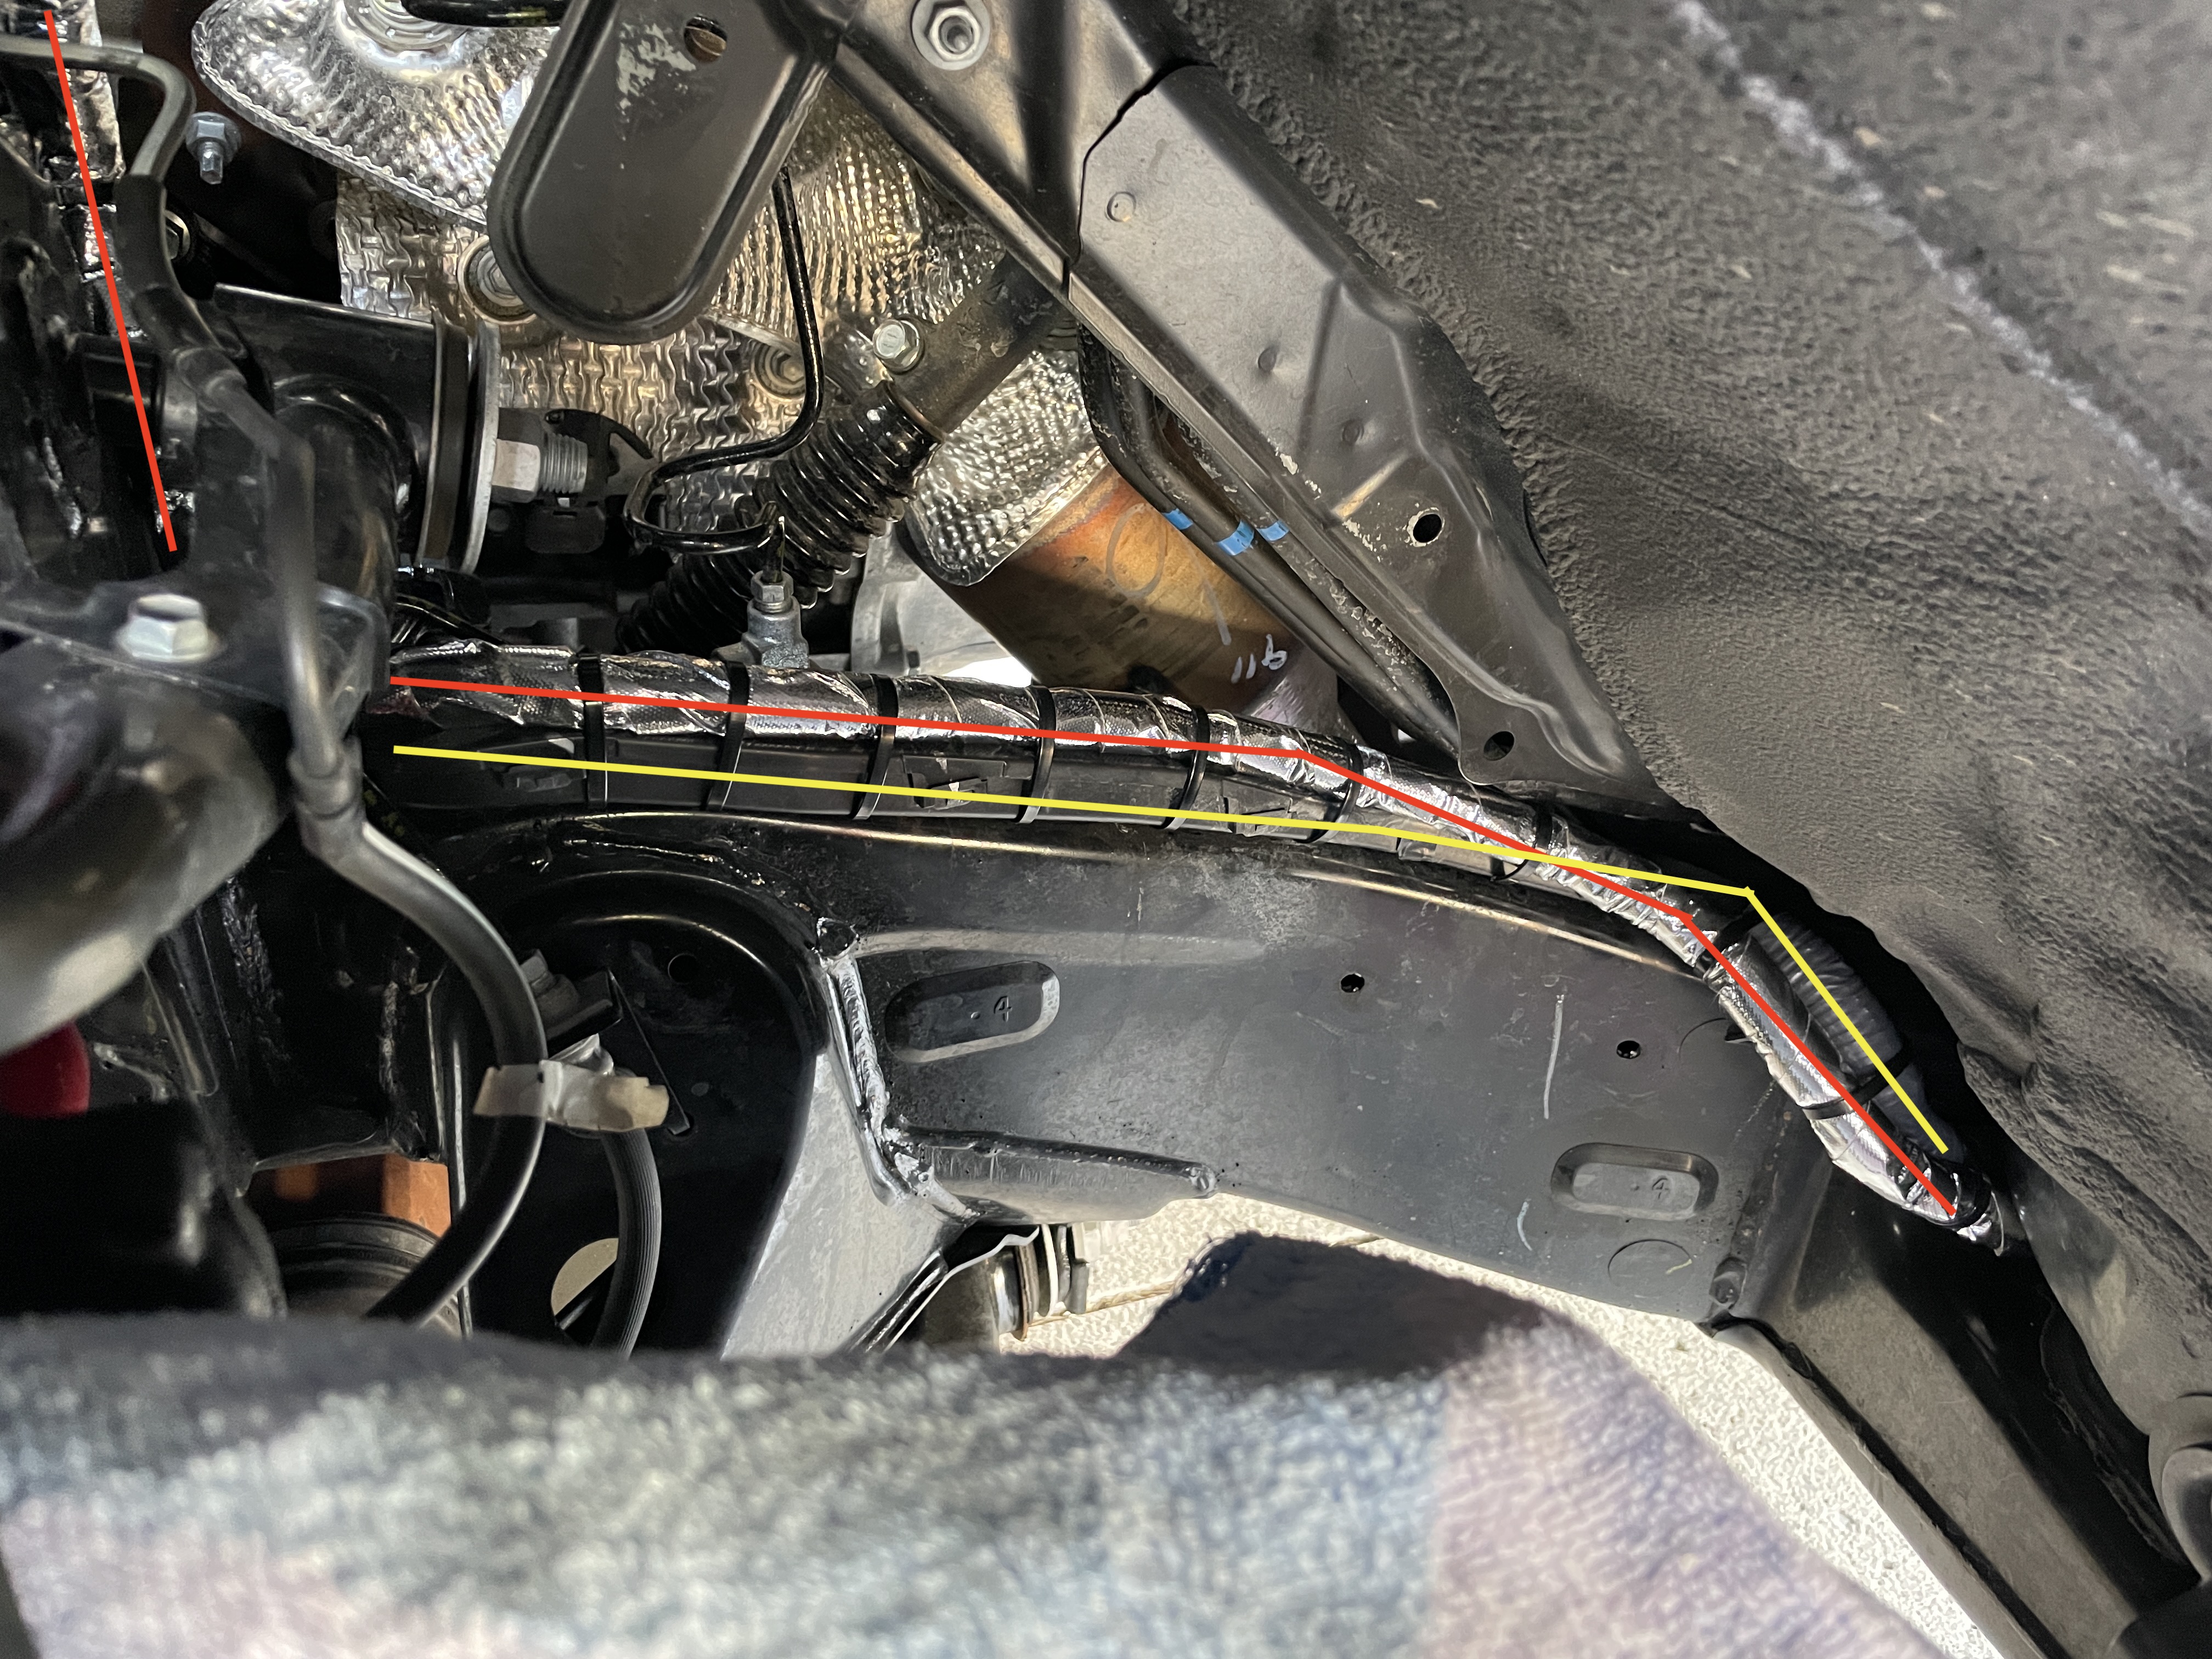
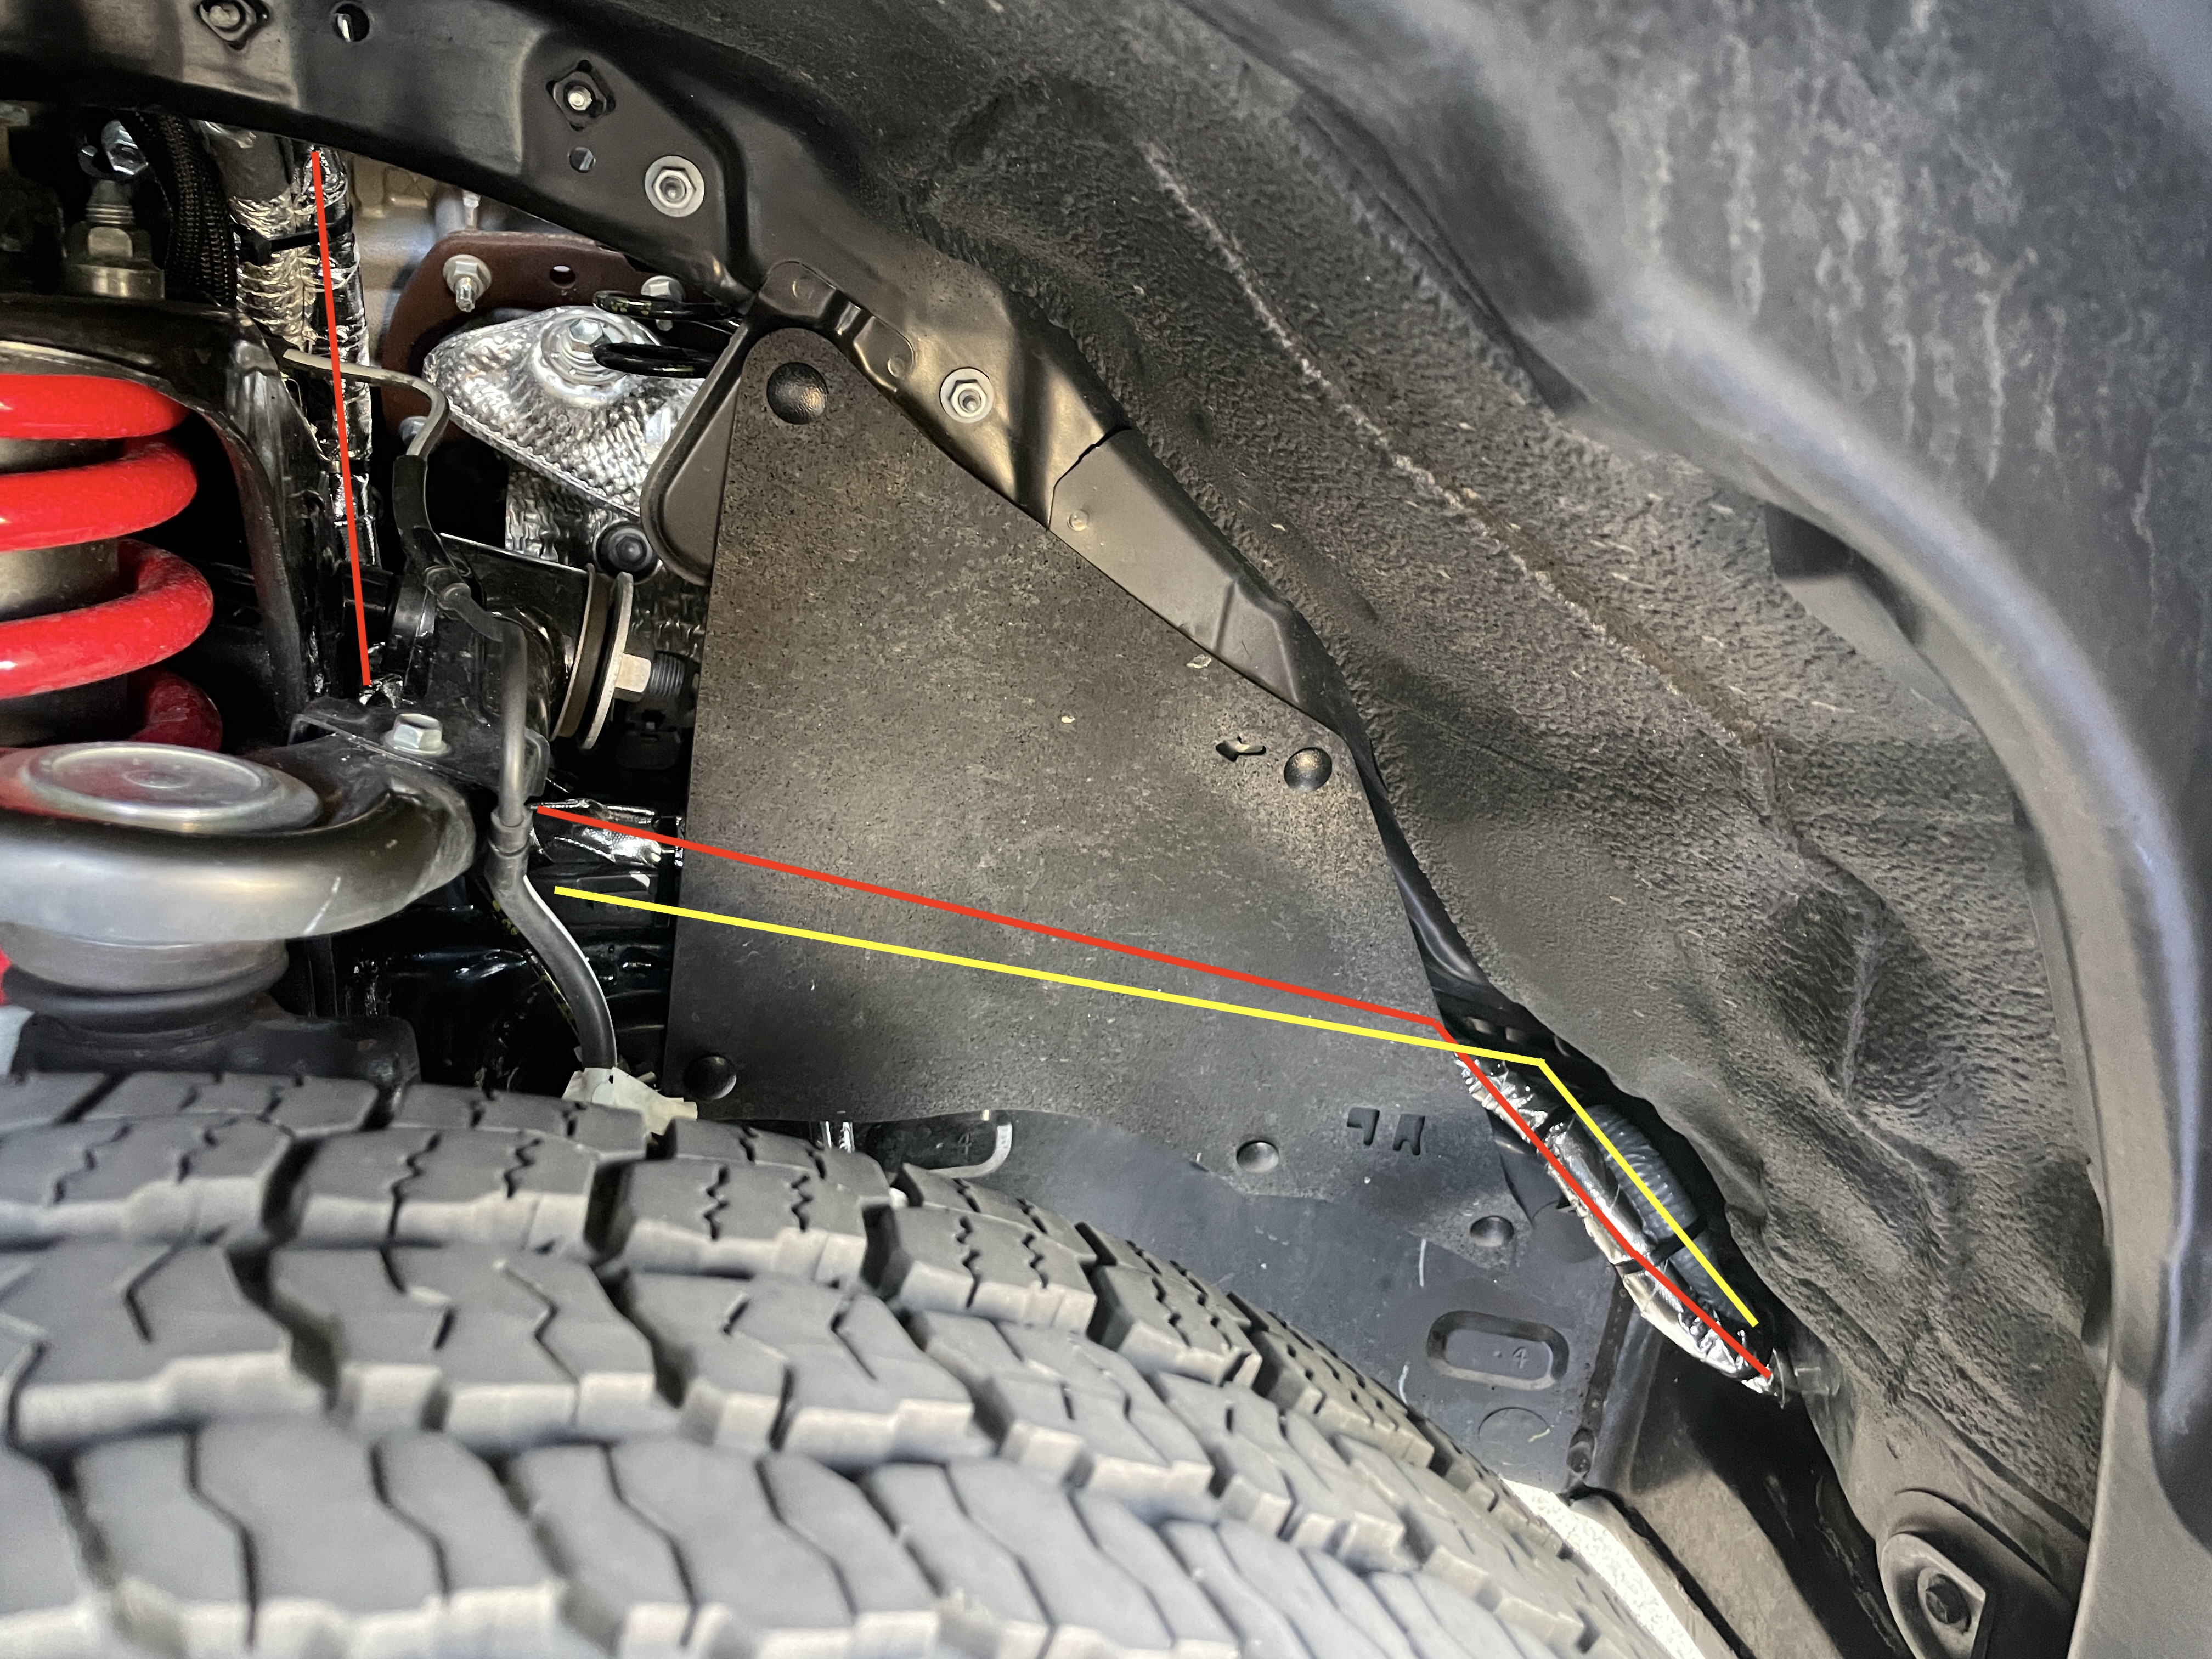
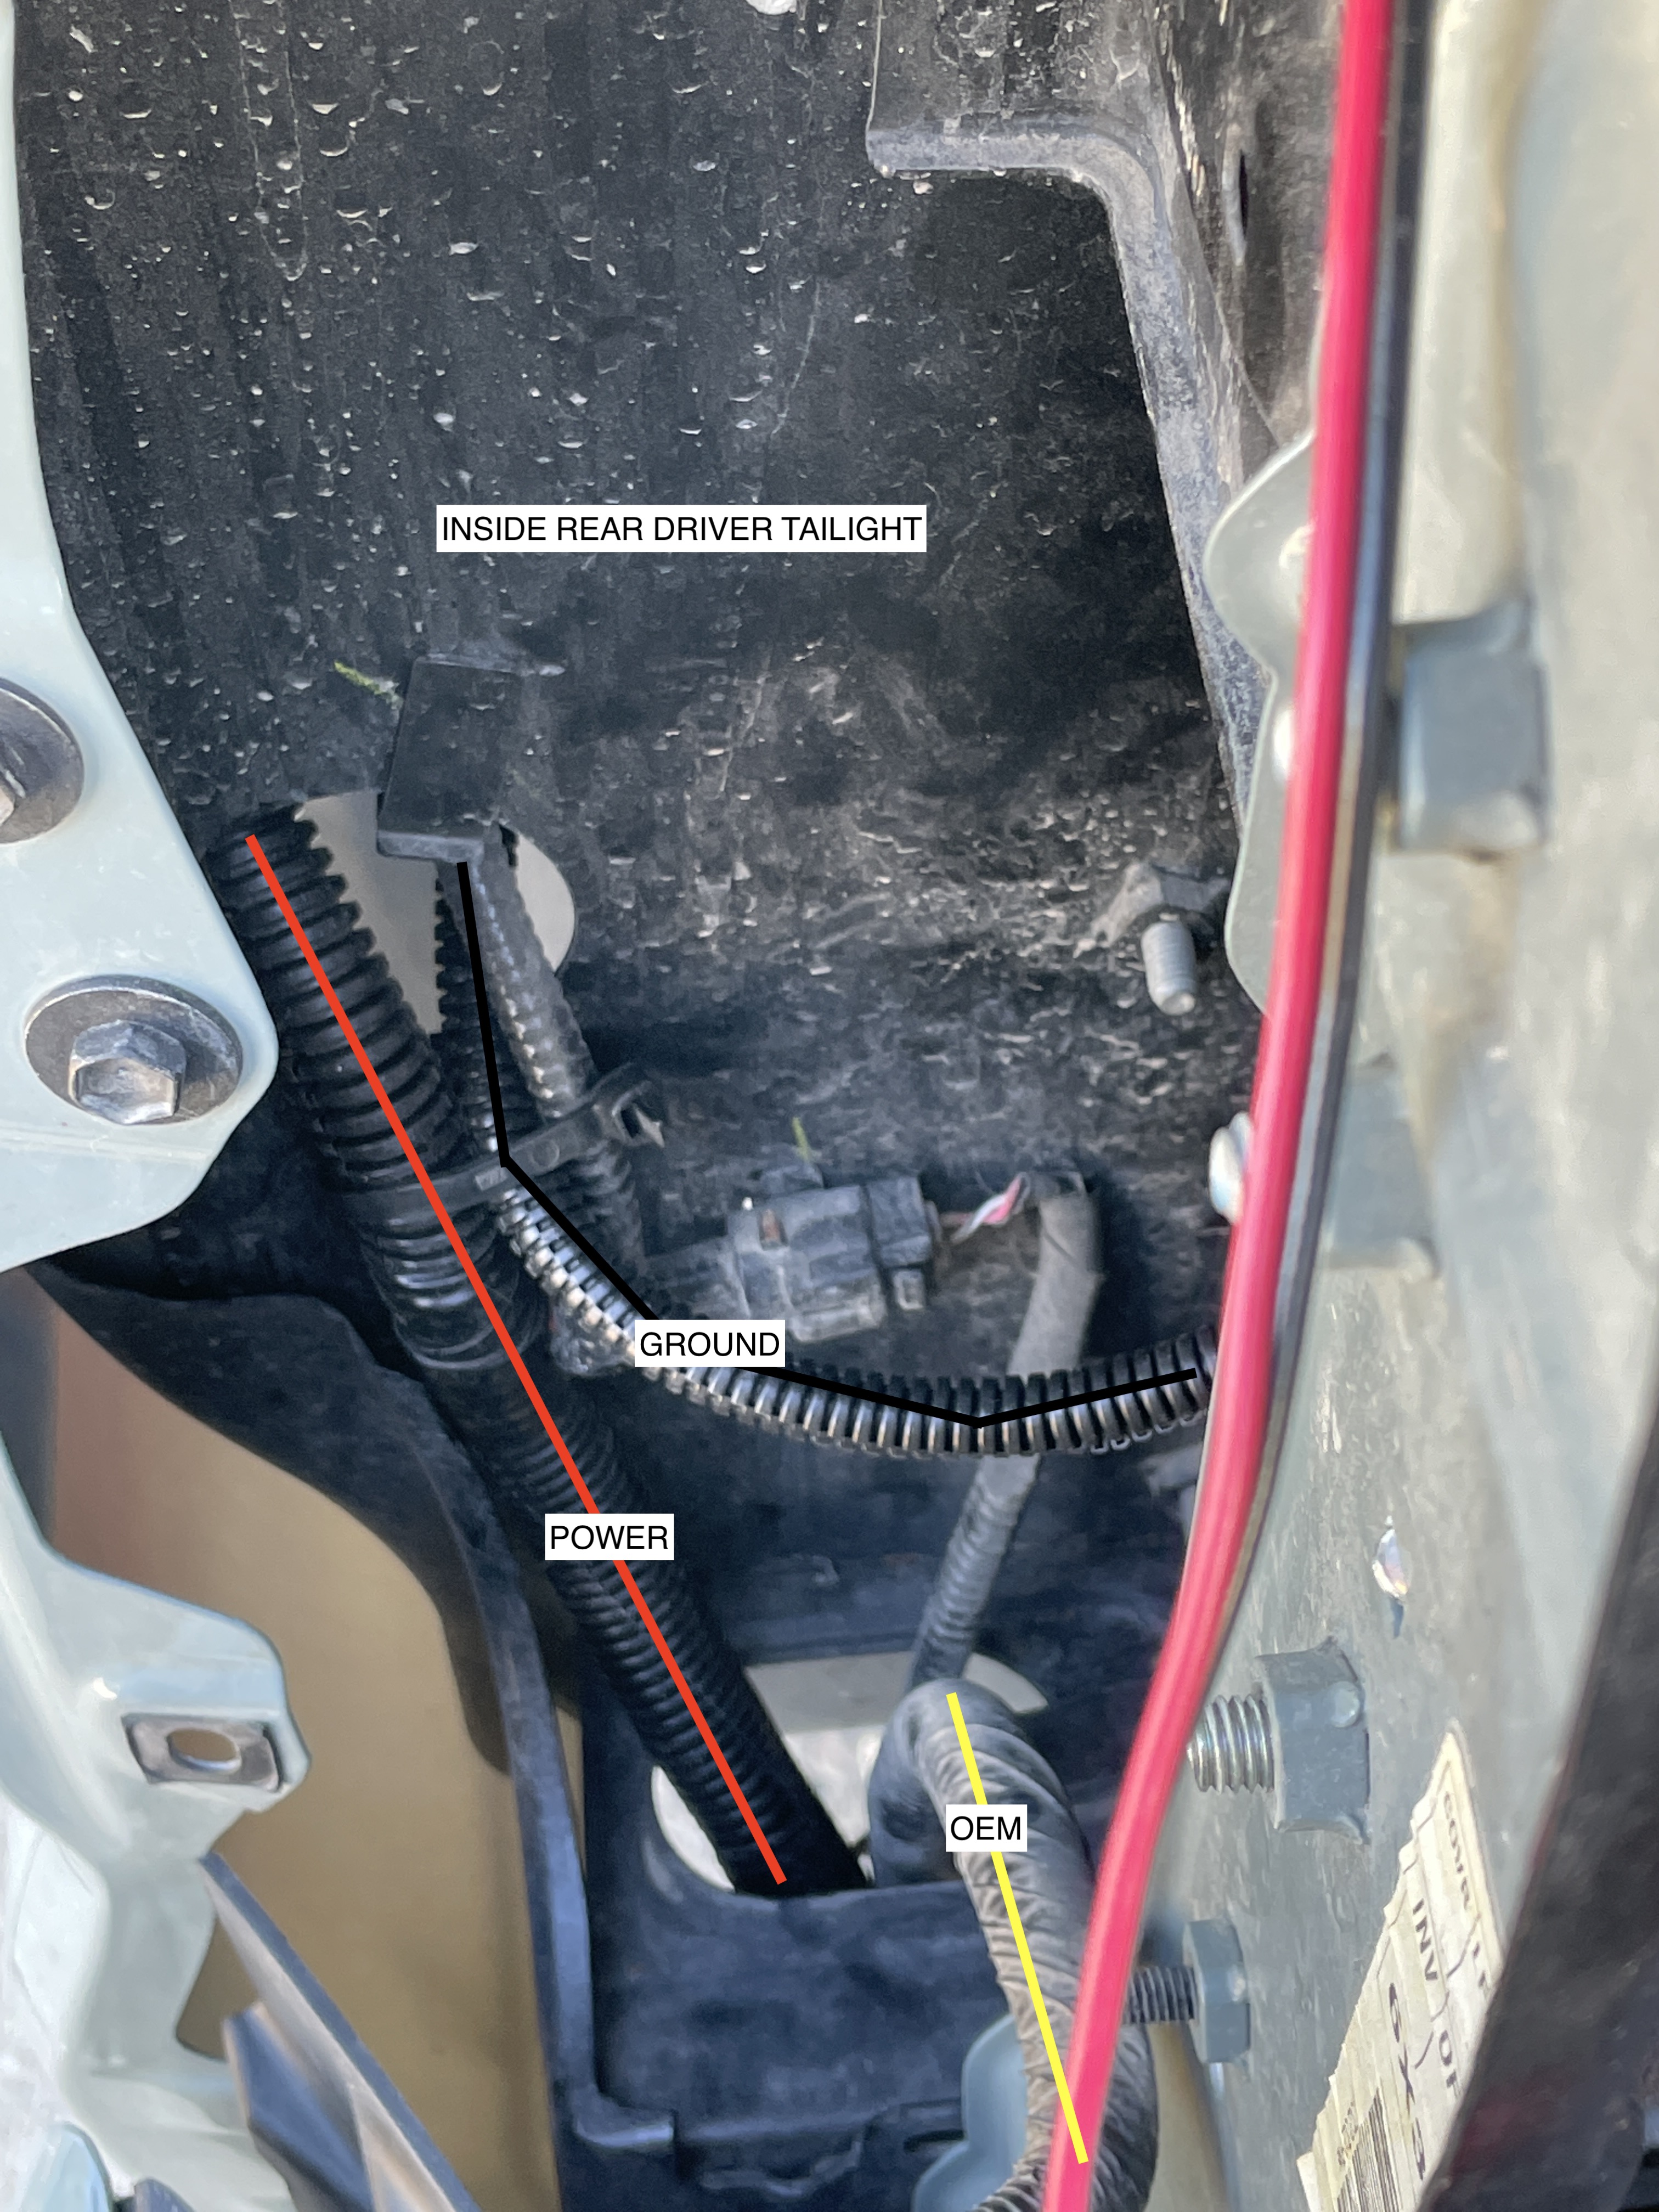
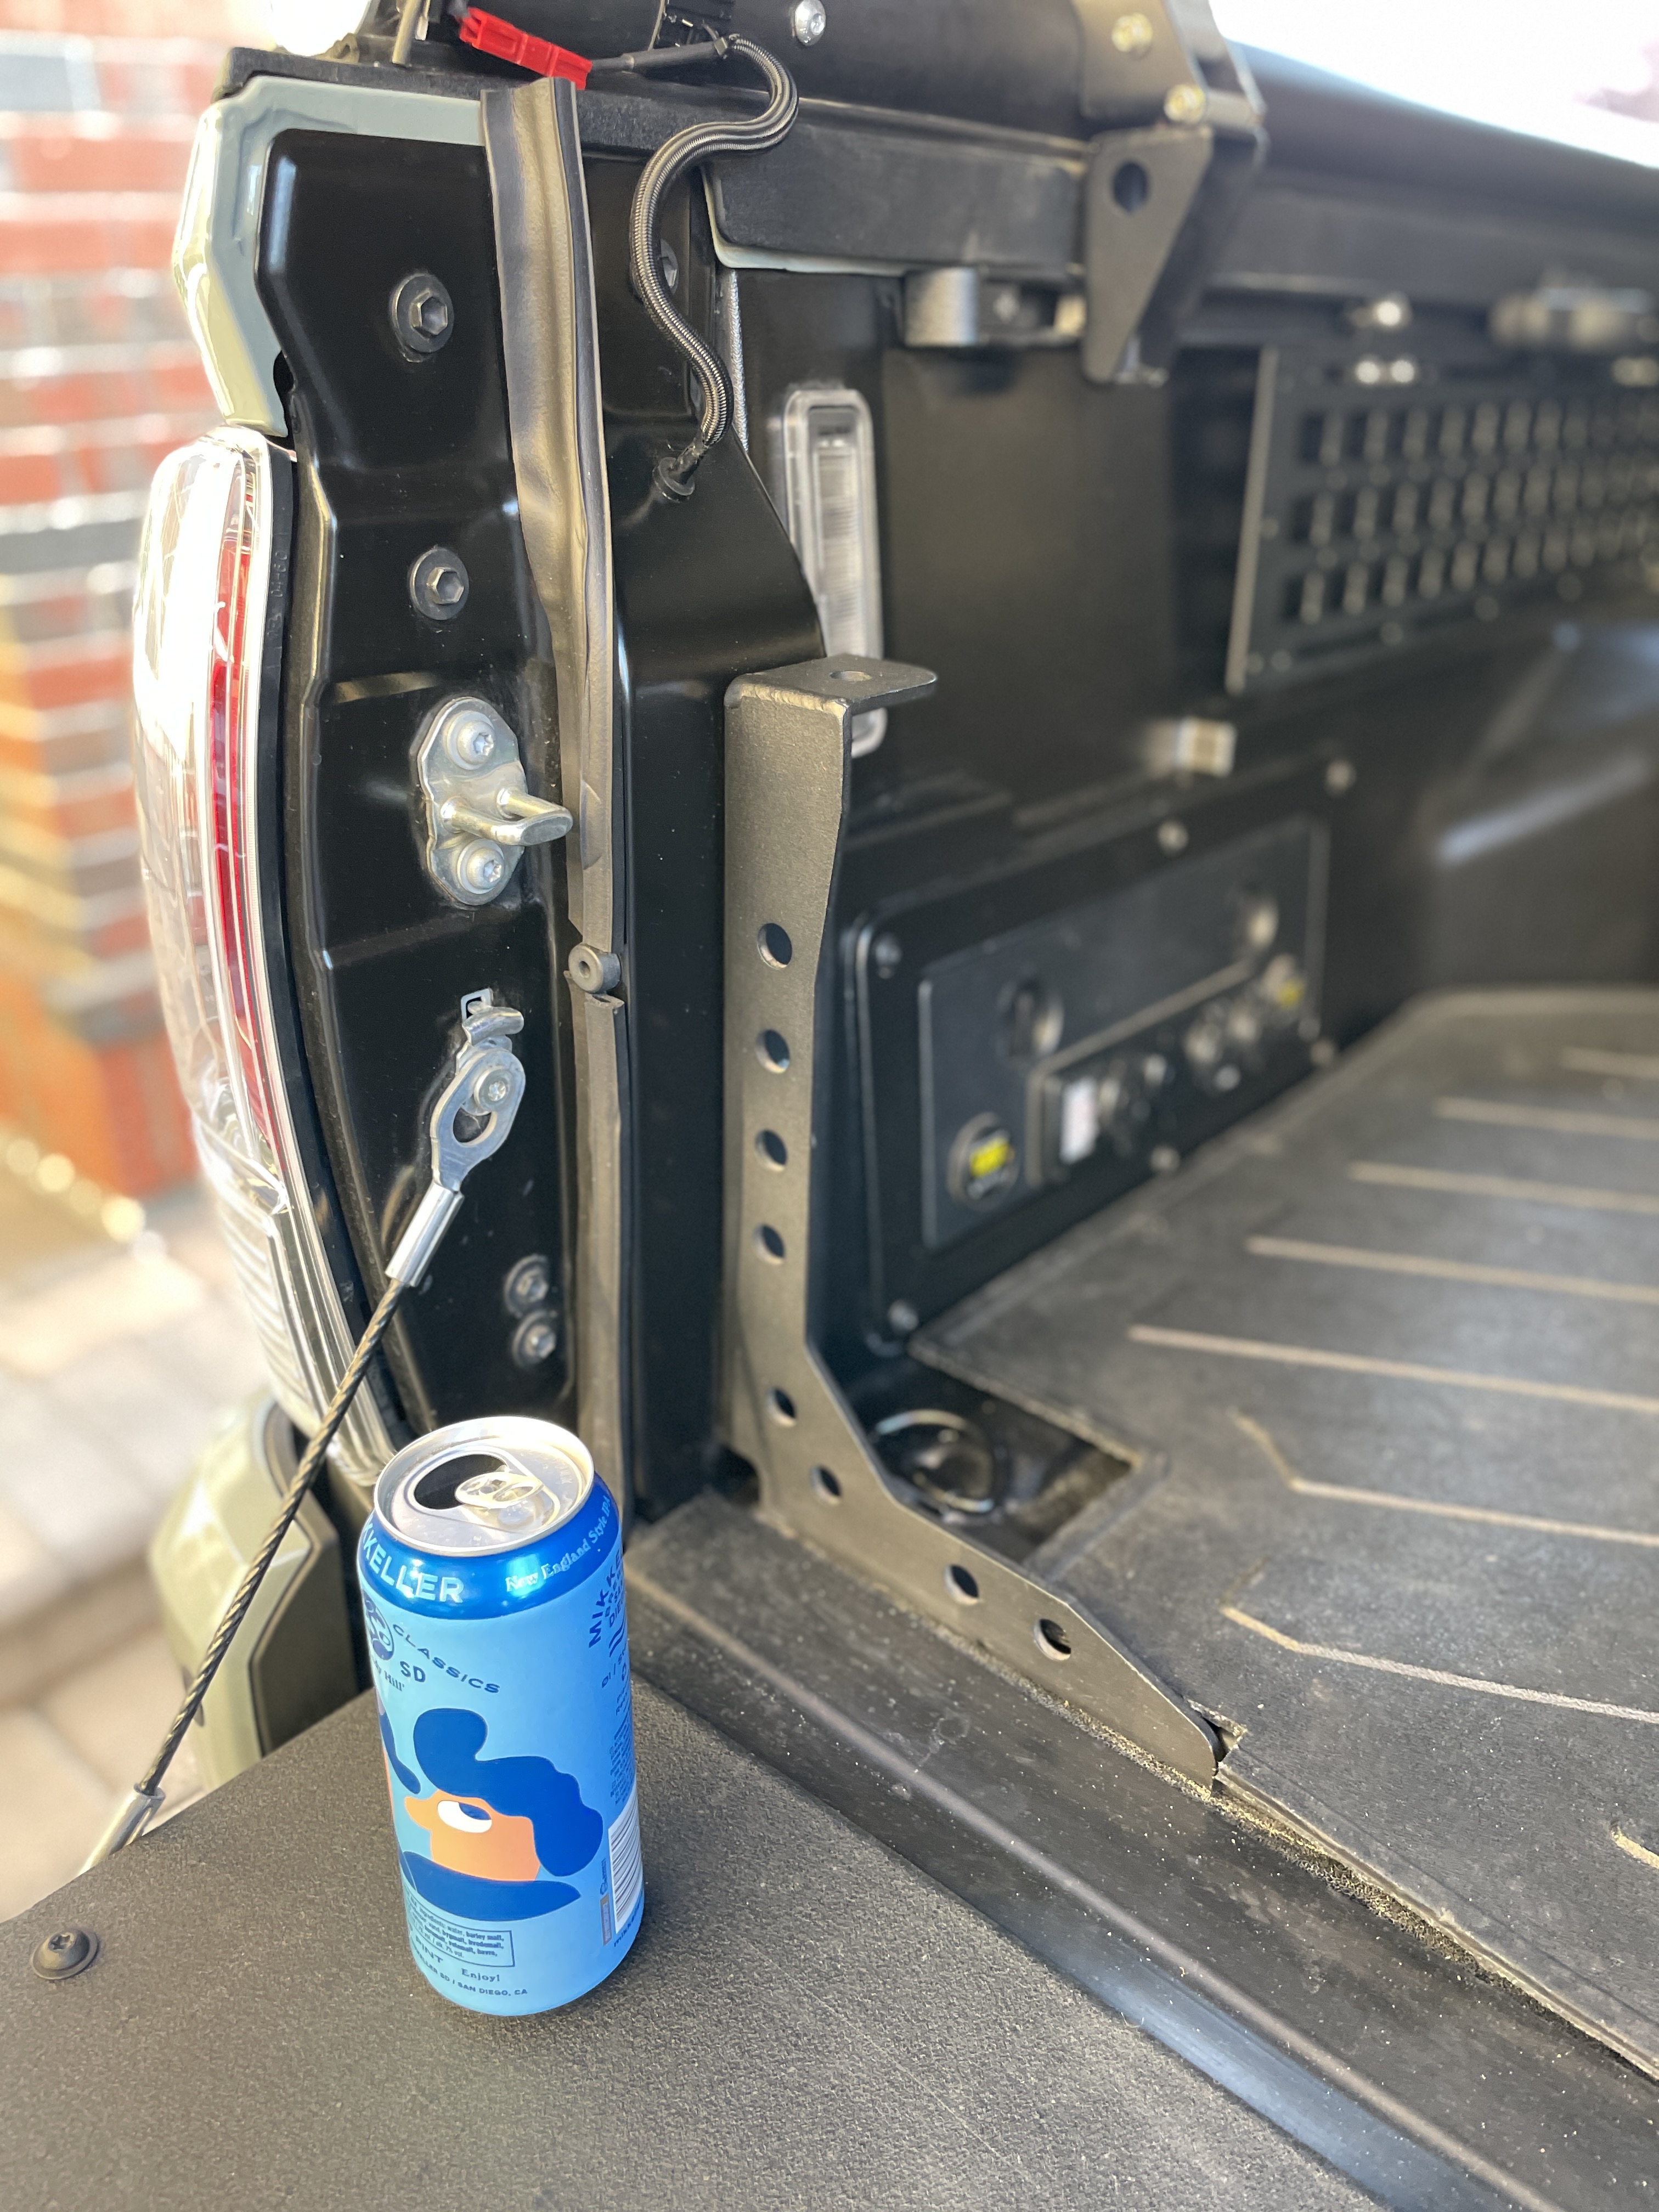
I ran my harness across the engine bay to the driver side, wrapped around the brake fluid reservoir, passed the fuse box and started to make my way down from there. I followed an OEM harness that makes its way through the front driver side wheel well, makes a slight detour to exterior of chassis (I assume to clear the exhaust) and continues along the inside of chassis all the way to the rear driver side taillight. This was all straight forward other than passing by the fuel tank / rear wheel as you loose visibility on the OEM harness here. We used a clothes hanger as a fish and after a few attempts of locating the path got it through, zip tied it taut on either end and continued along to the tail light.

Harness making its way down under the fuse box

• Red line is my harness (Prior to zip-typing it down in first photo)
• Yellow line is the OEM harness that I followed.

Path in wheel well (With splash guard removed)

Path in wheel well (With splash guard installed)

** No photos under the truck, the path is obvious once you’re down there, and nothing to photograph around fuel tank **

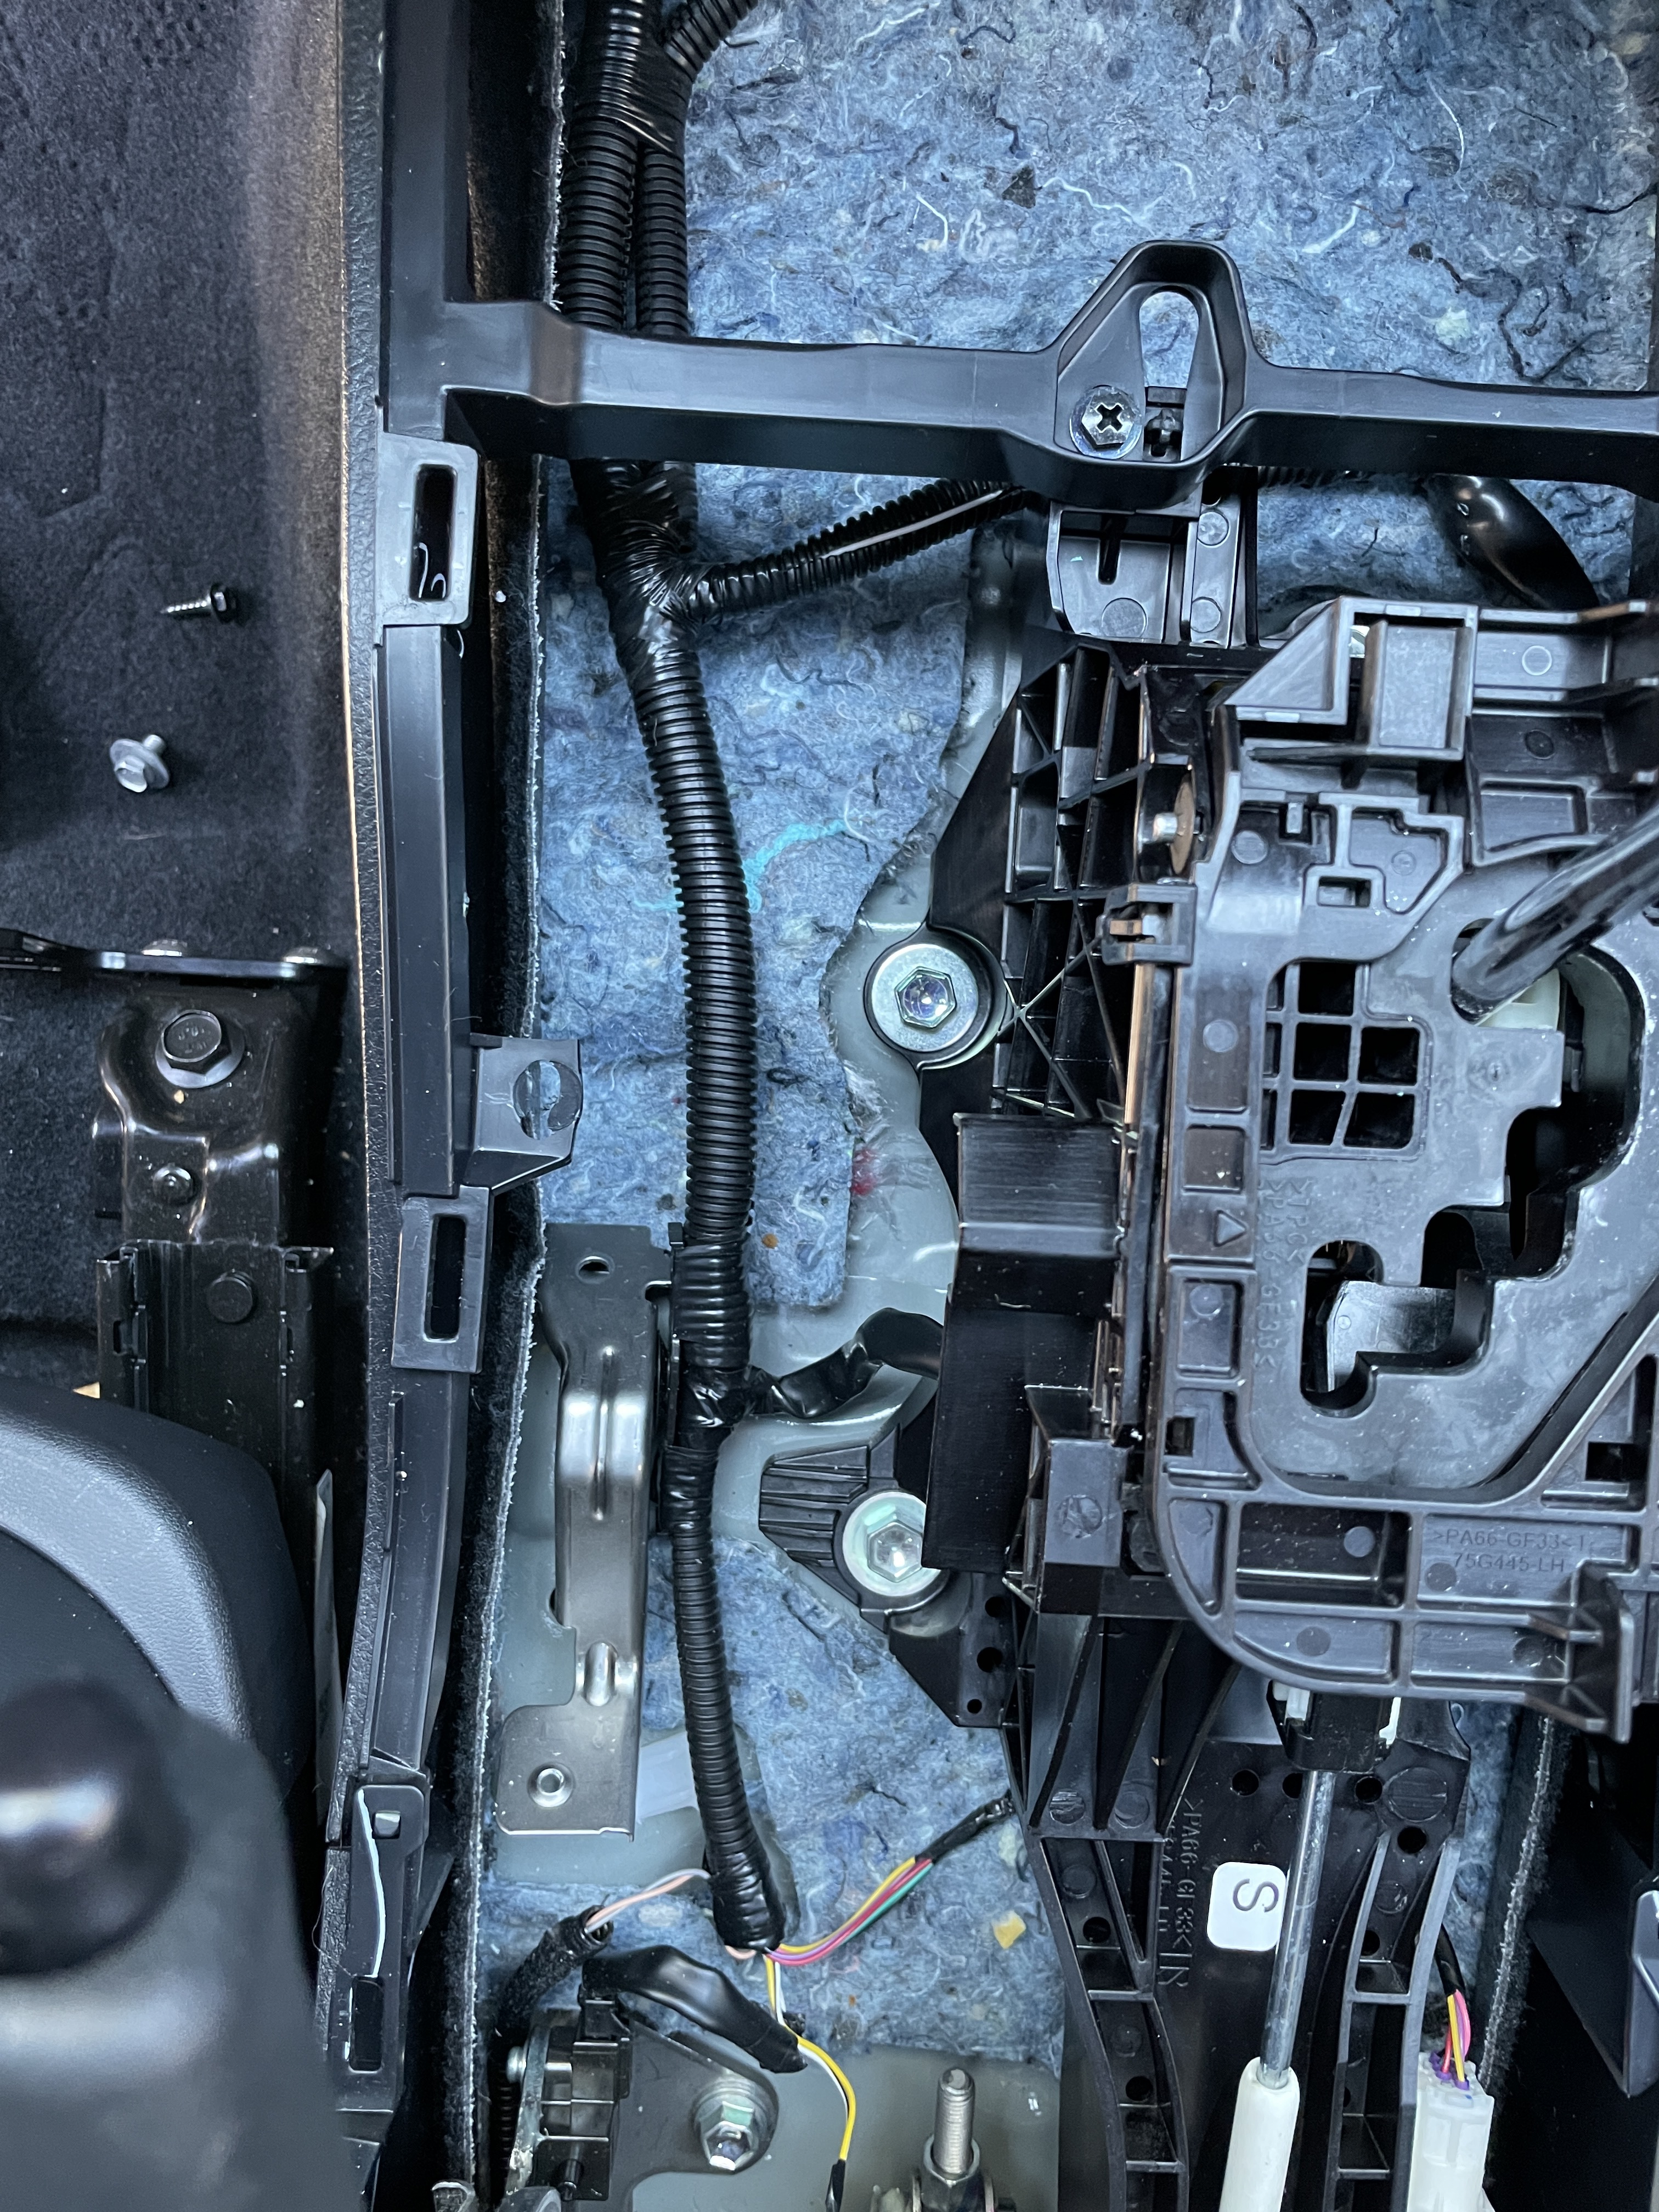
Path coming into the taillight from under the truck

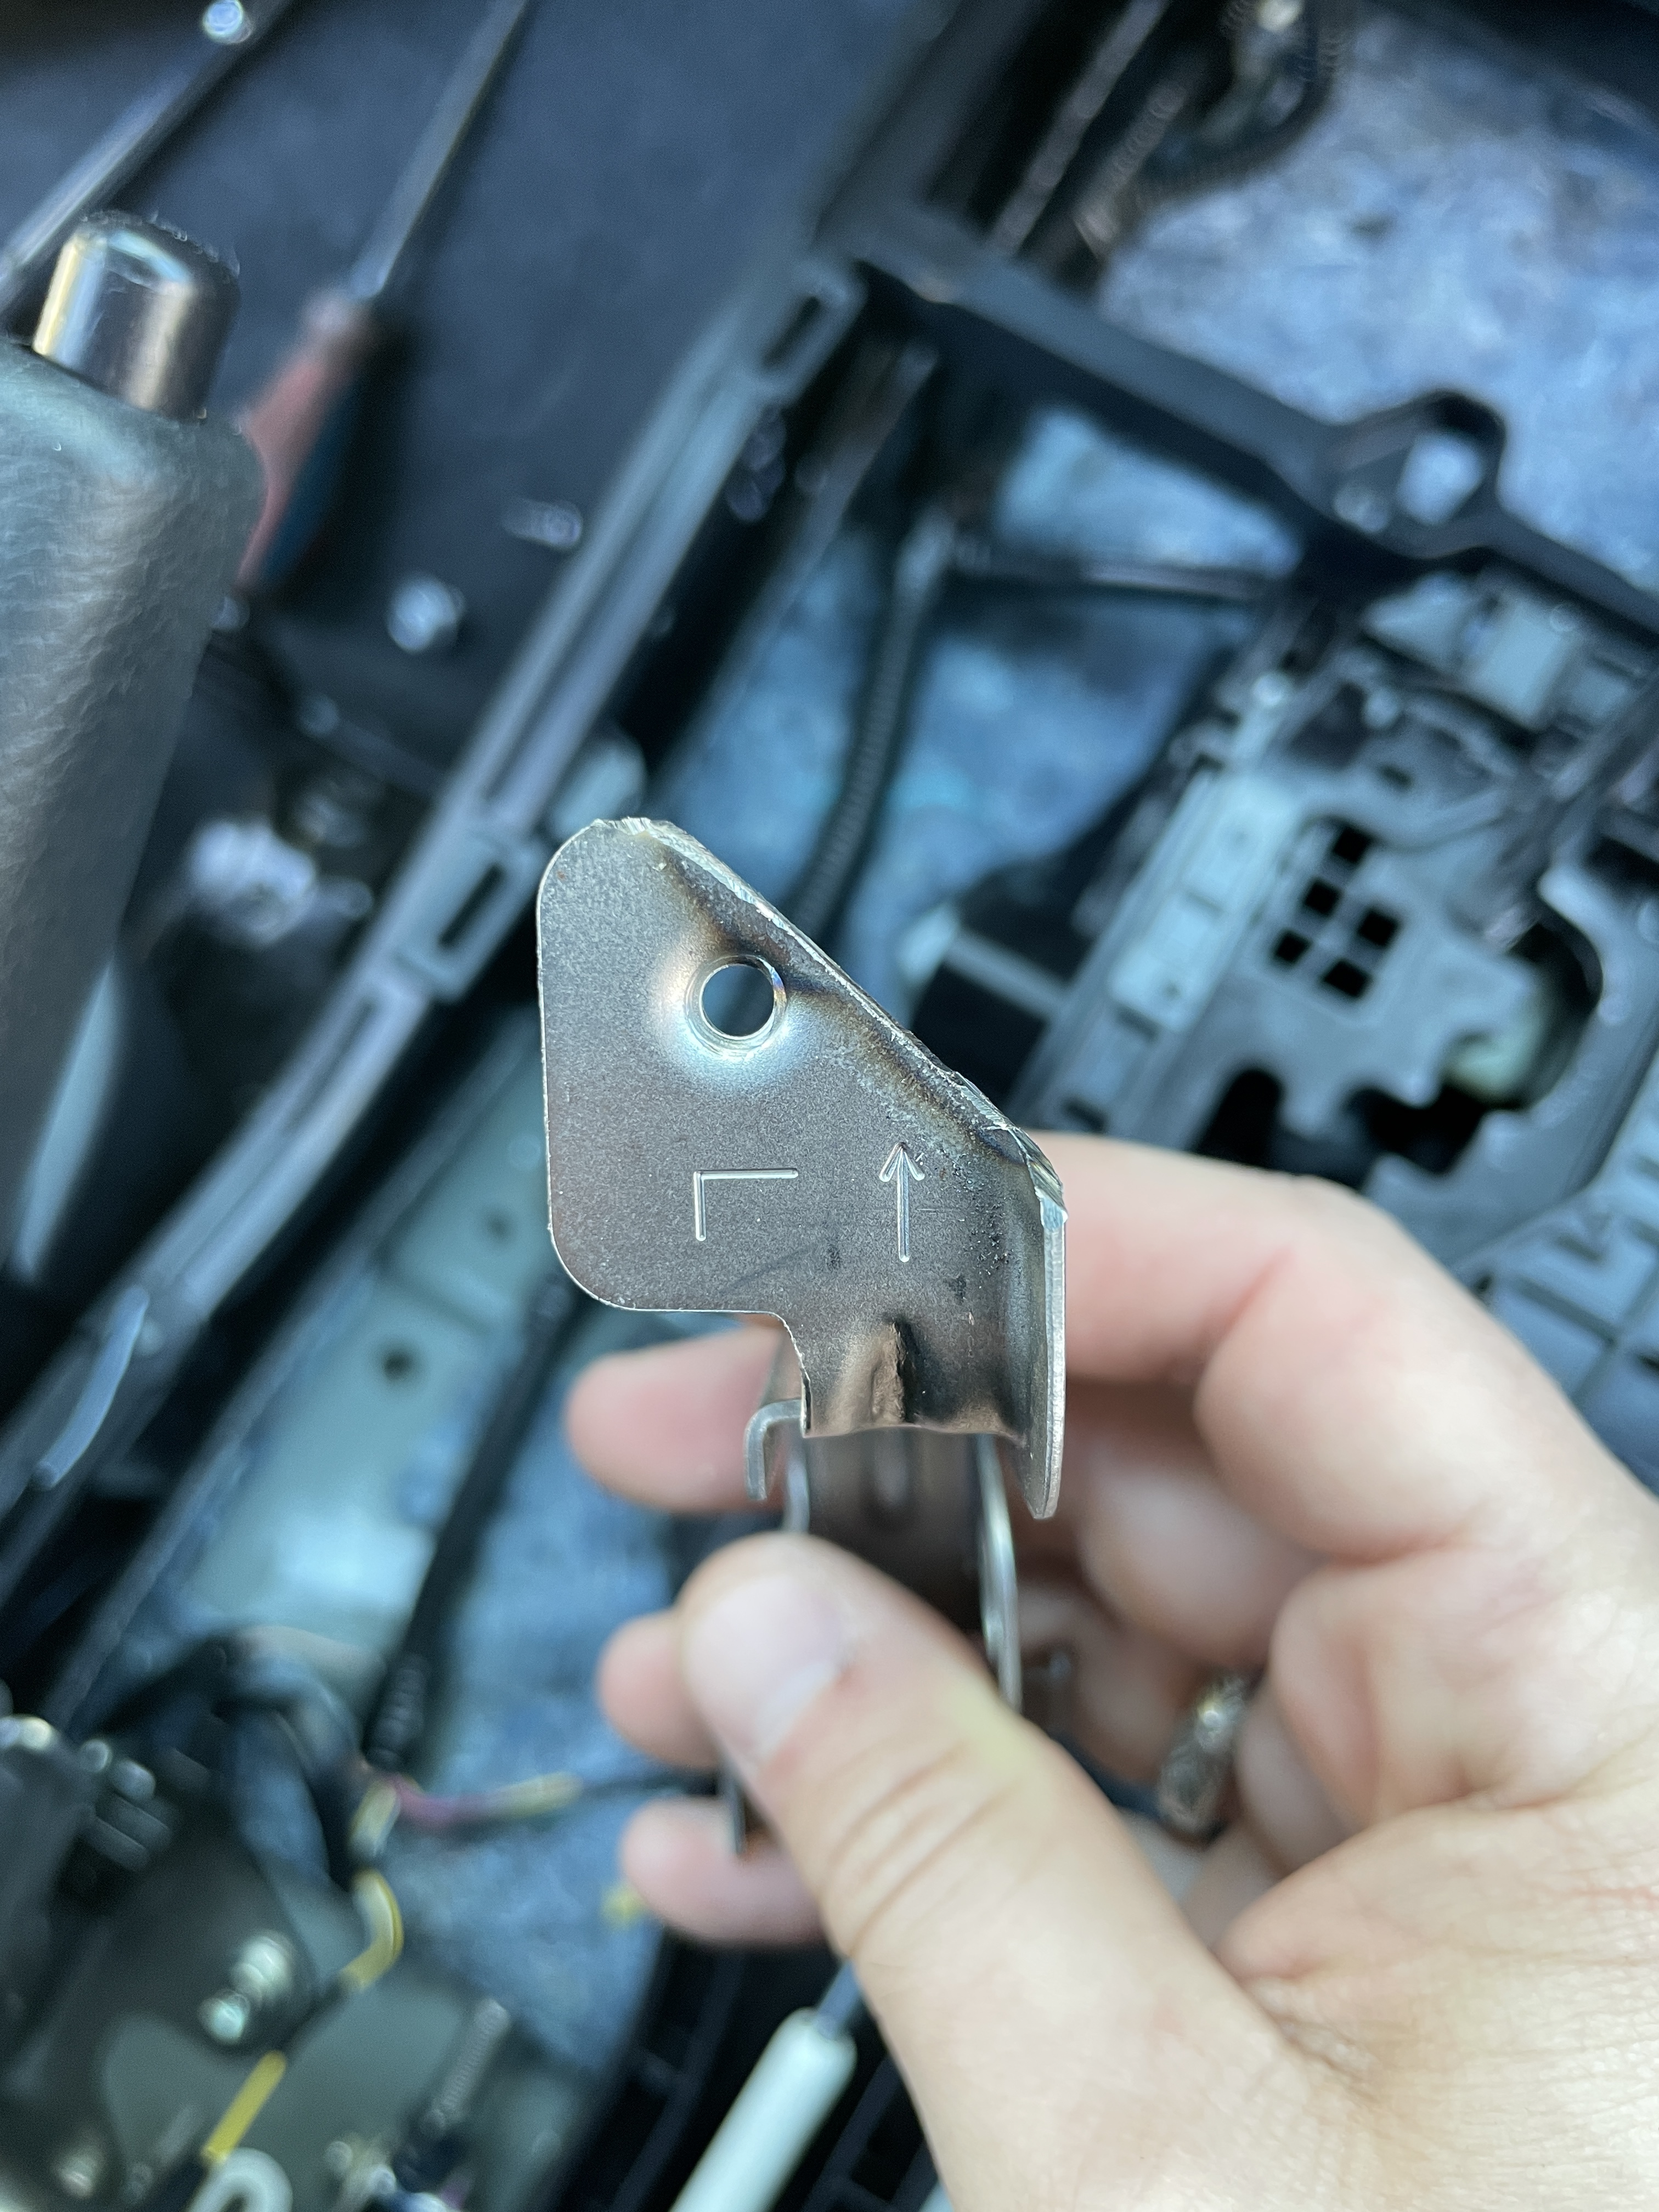
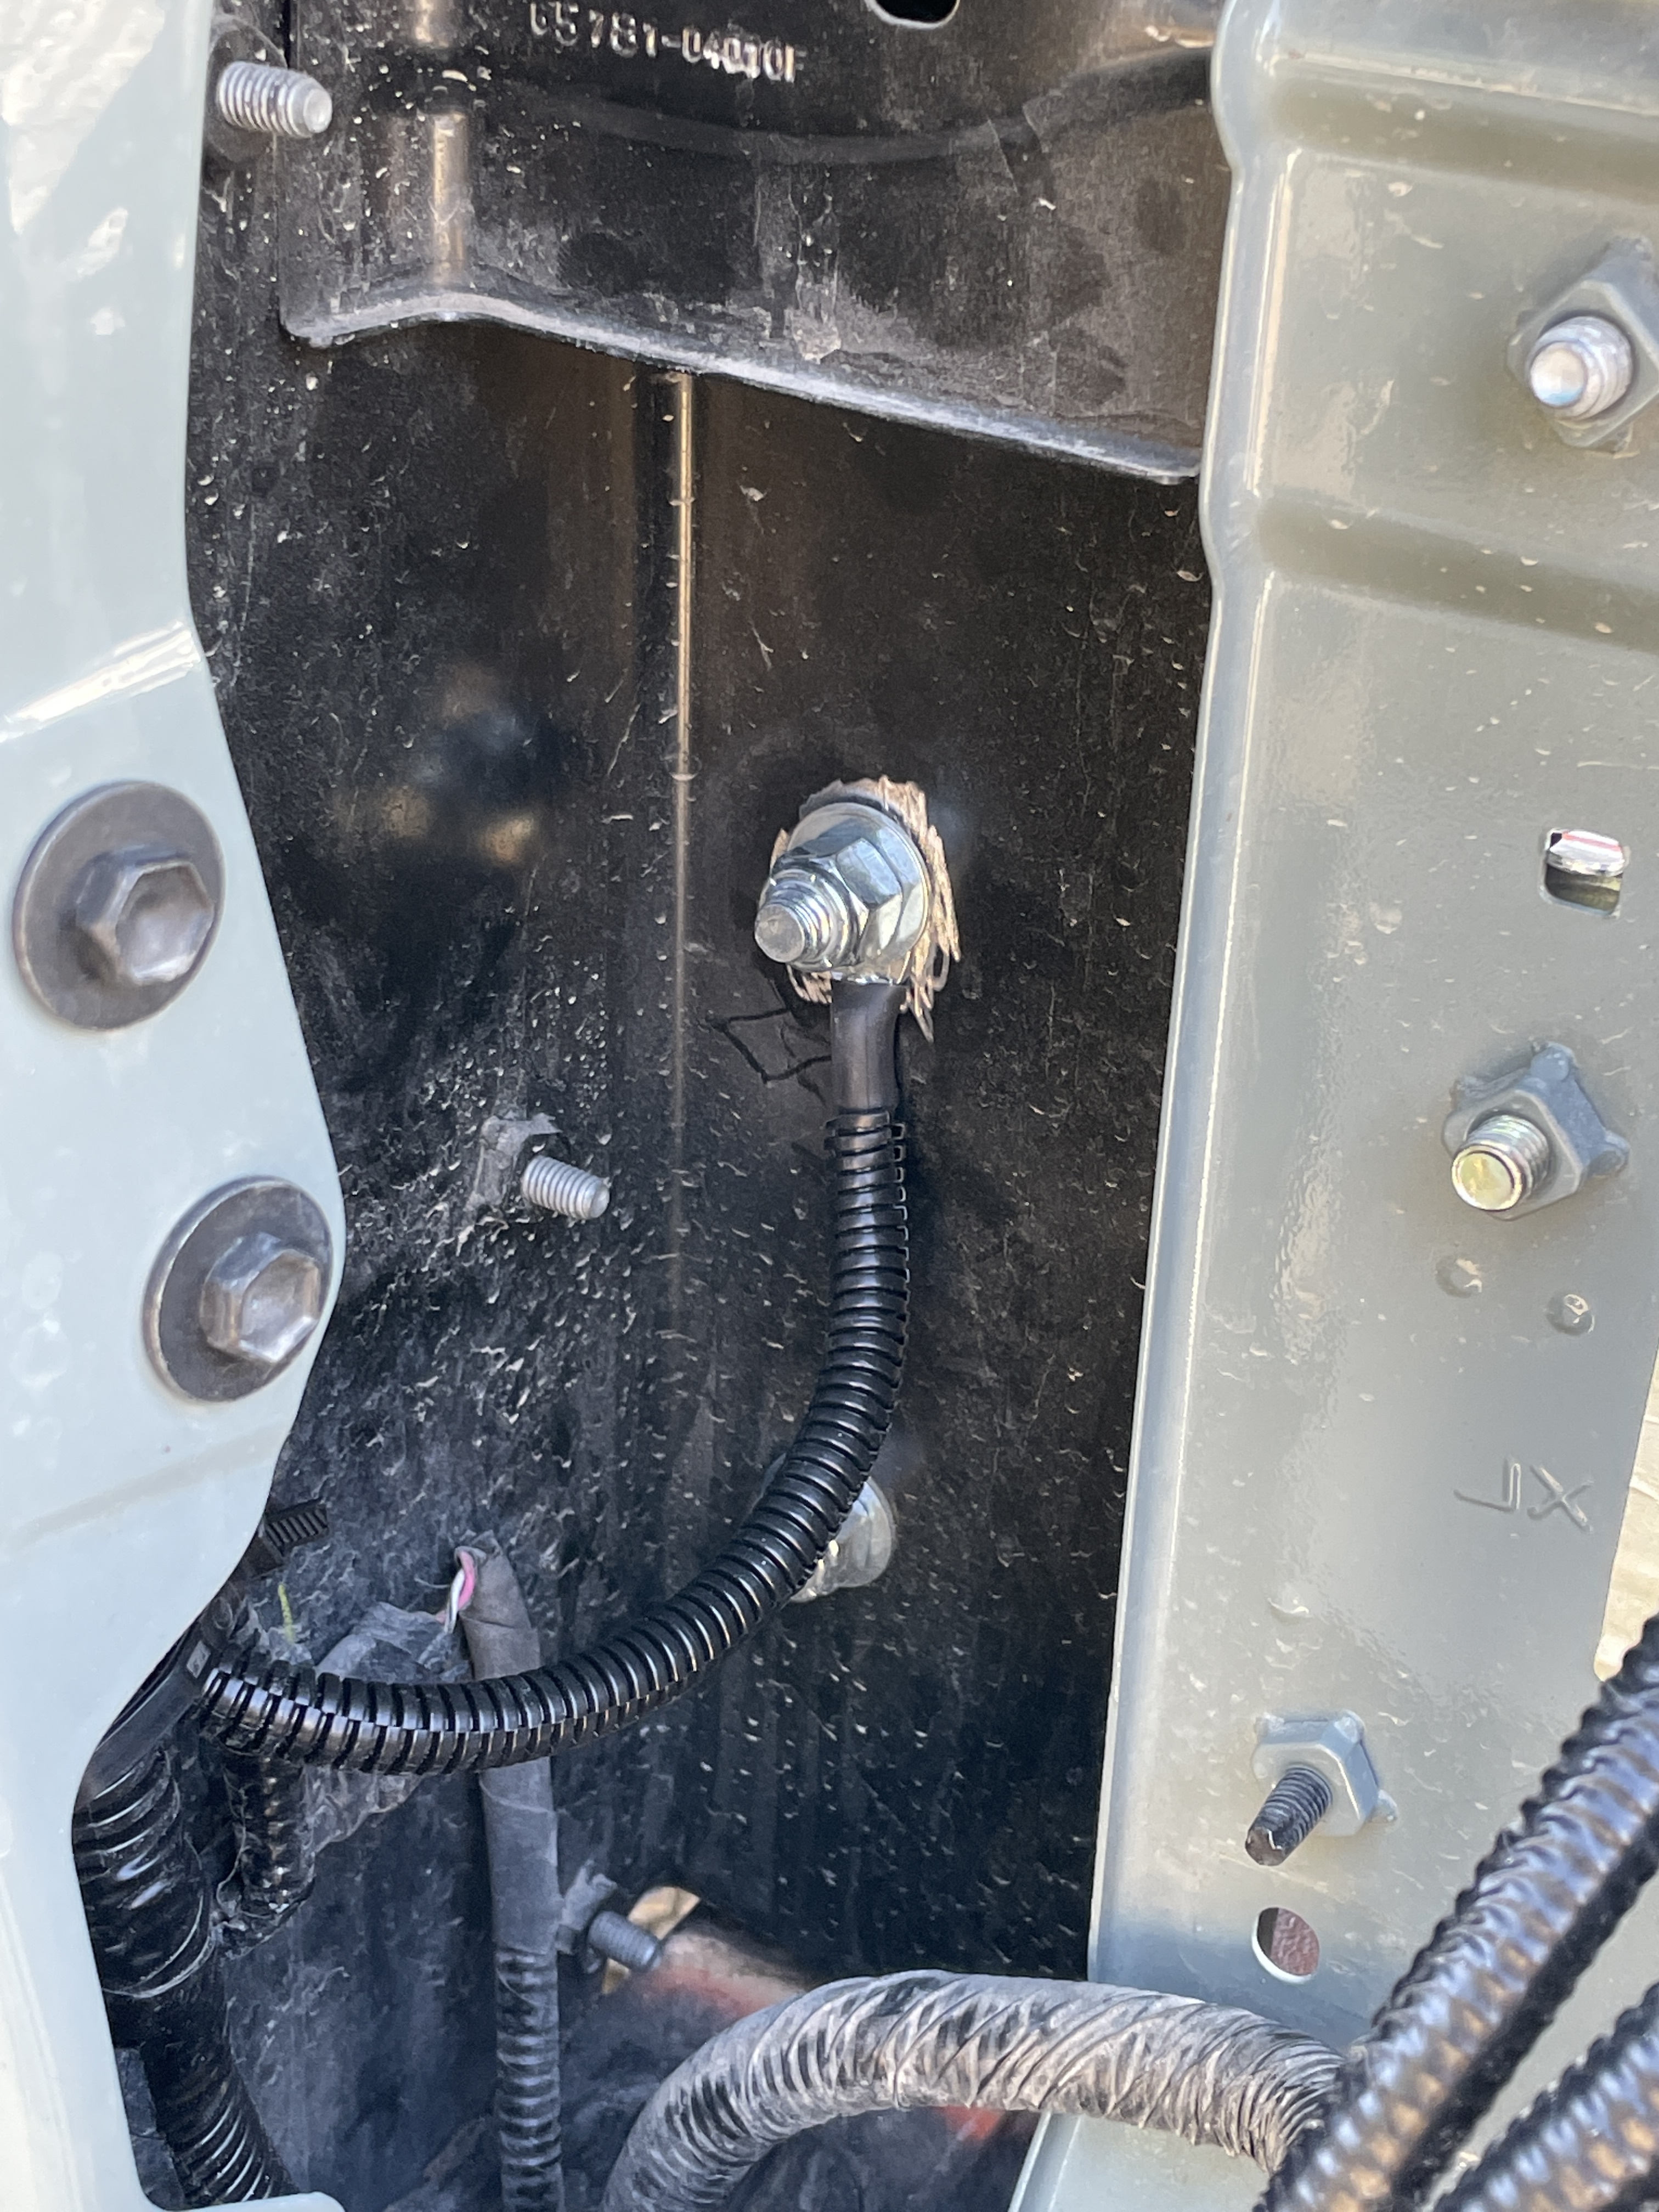
The fuse box ground is also visible here. We stripped away some paint from frame and used one of the Cali Raised LED bed stiffener bolts inside the taillight as our grounding point.
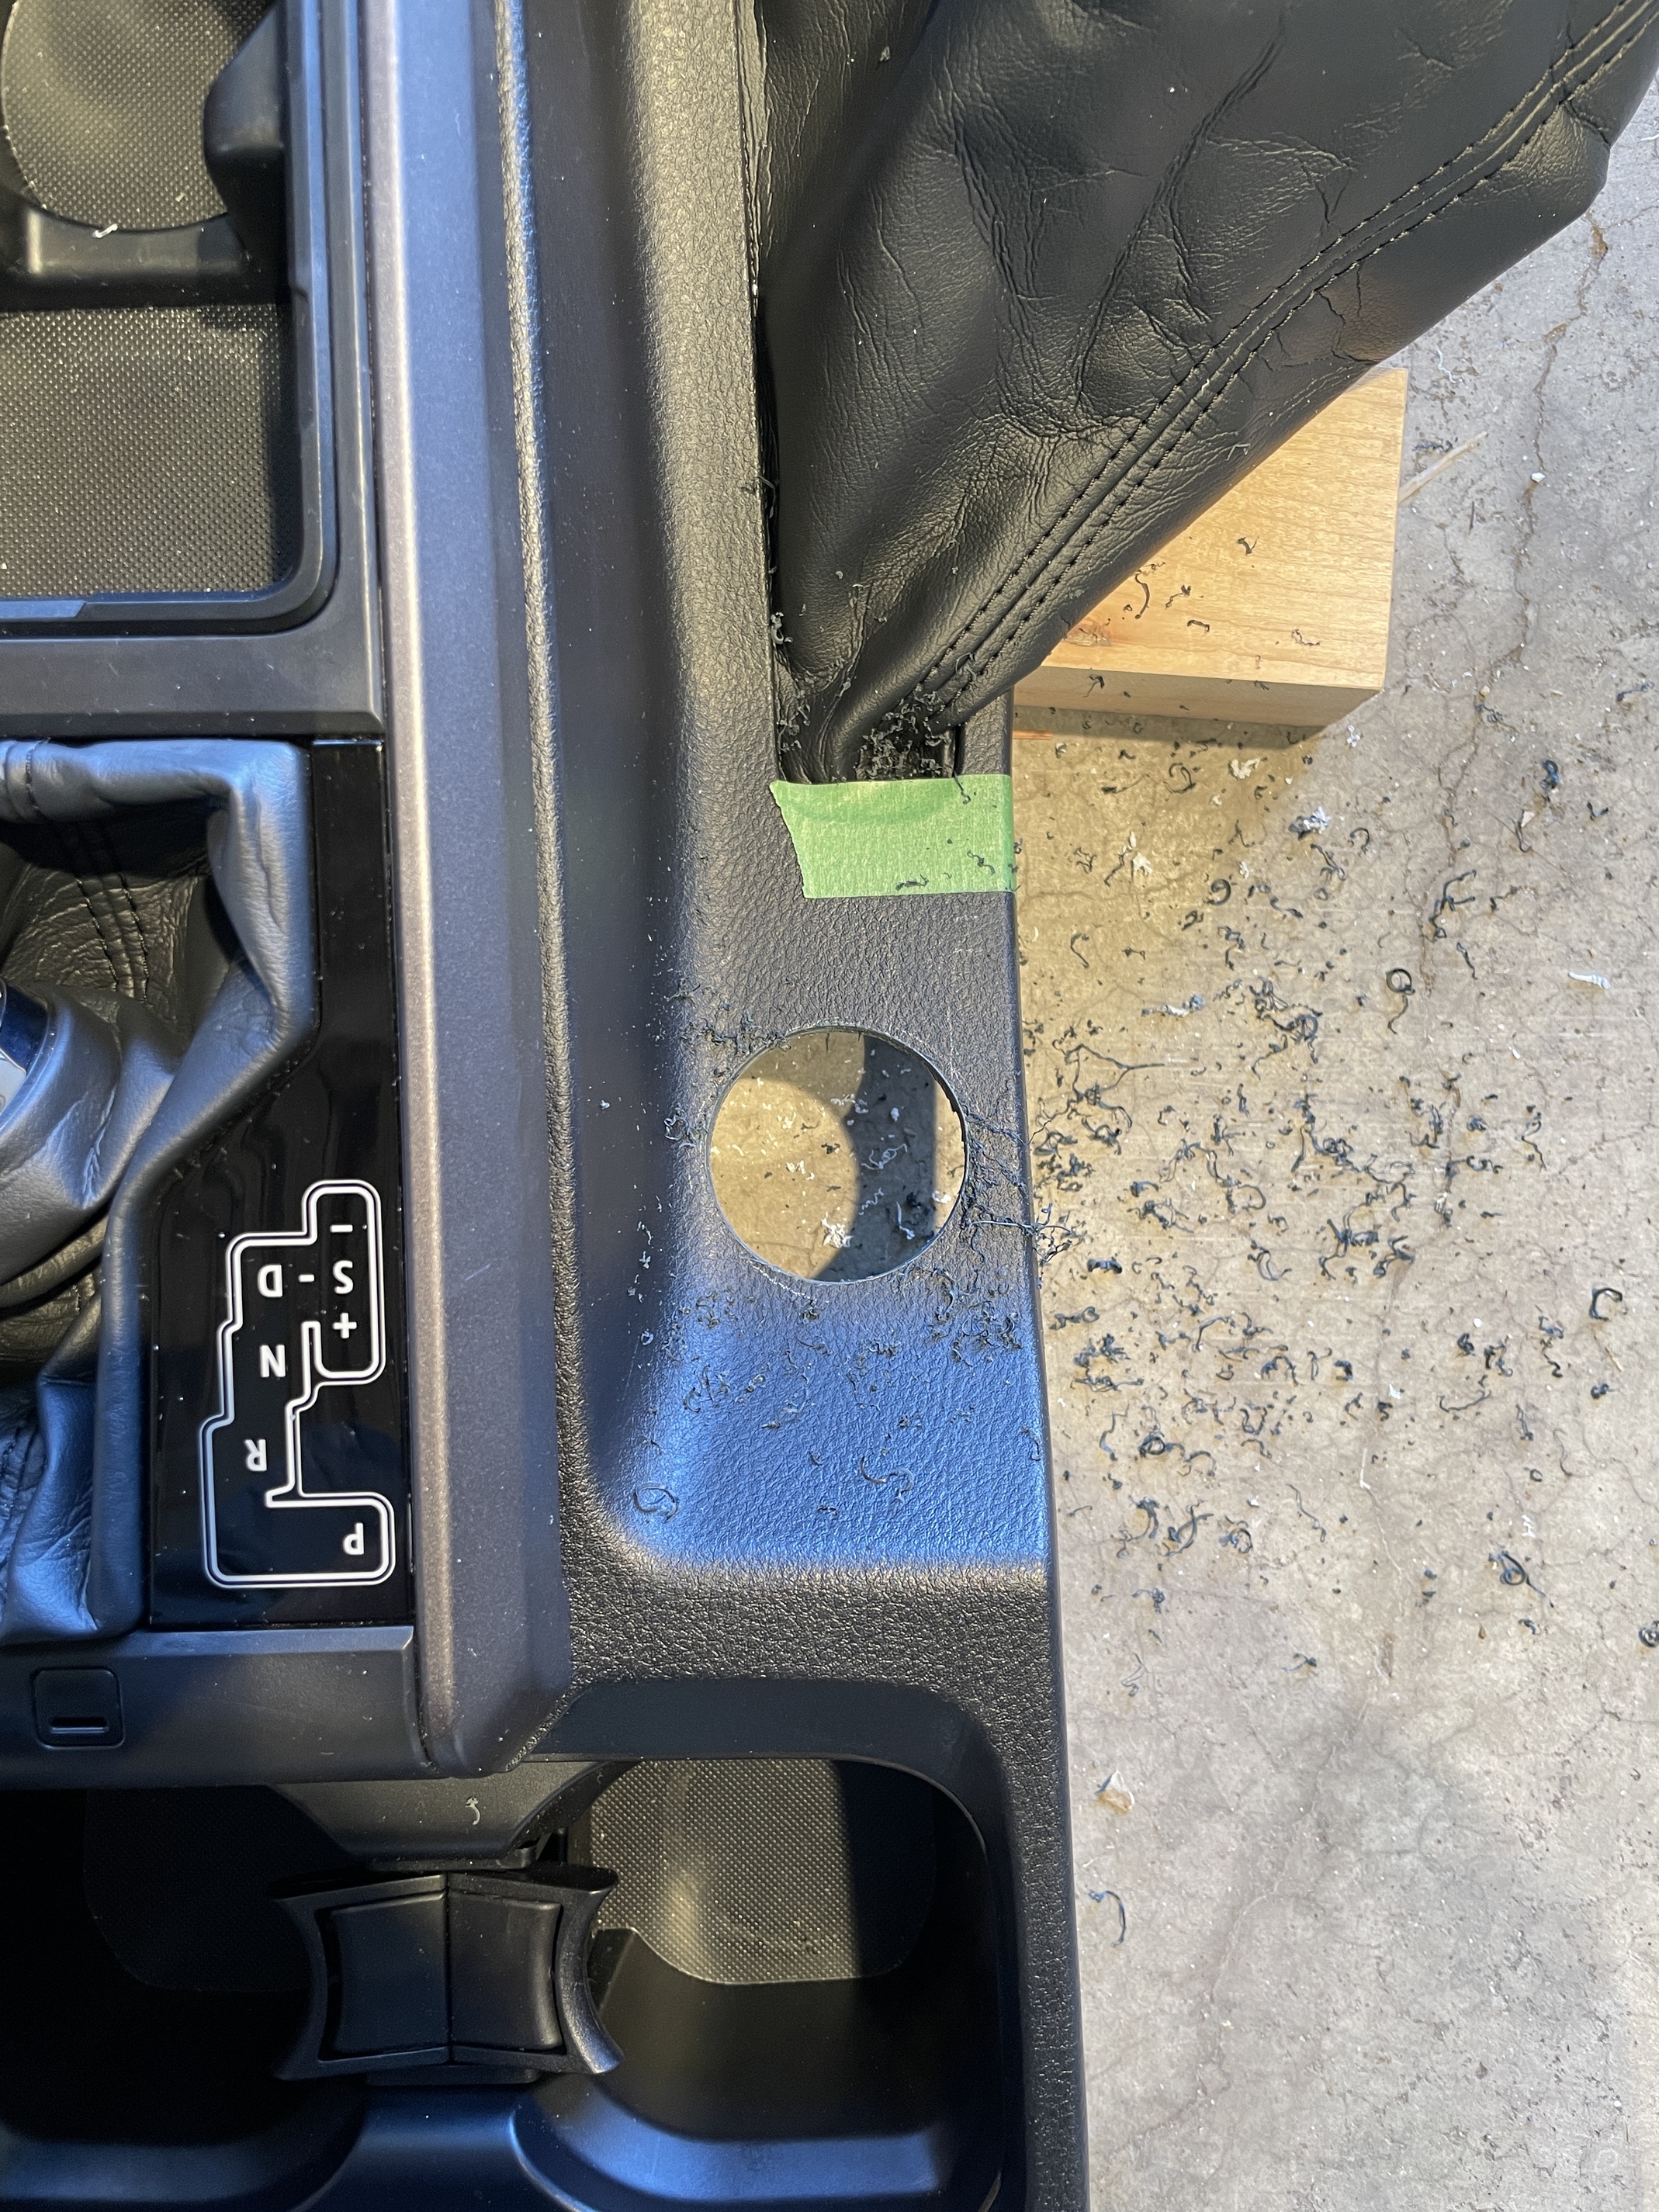
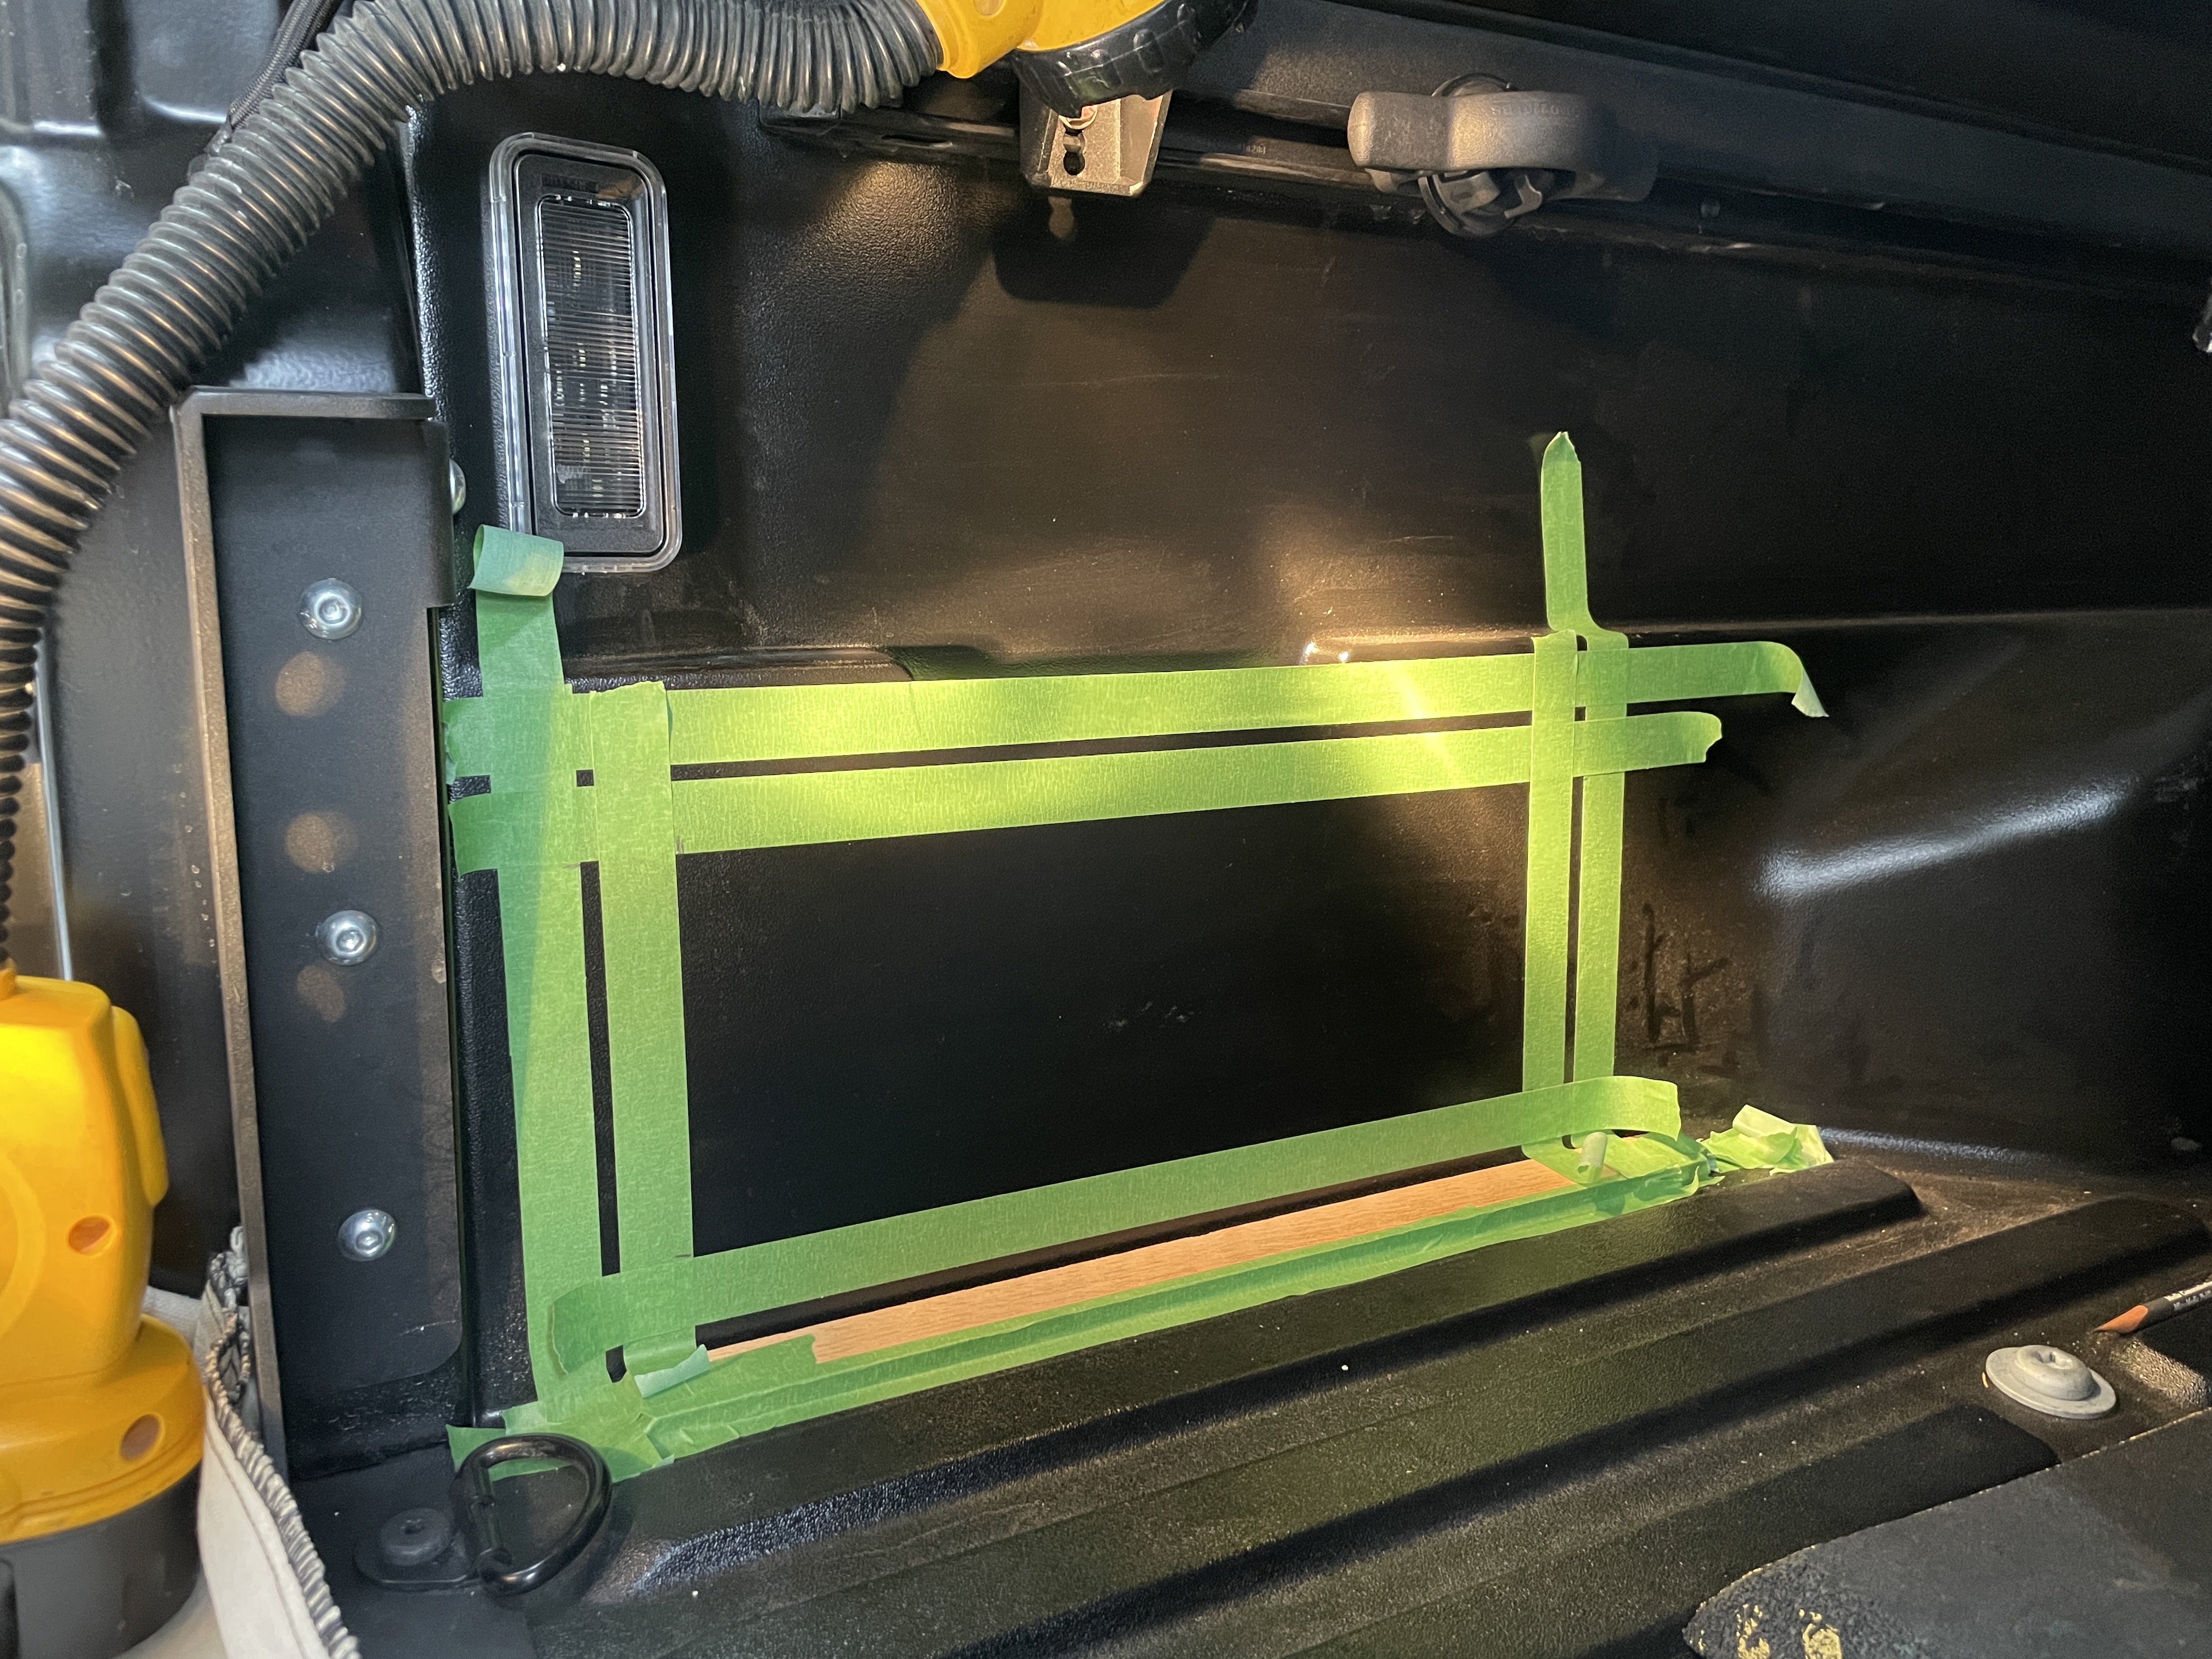
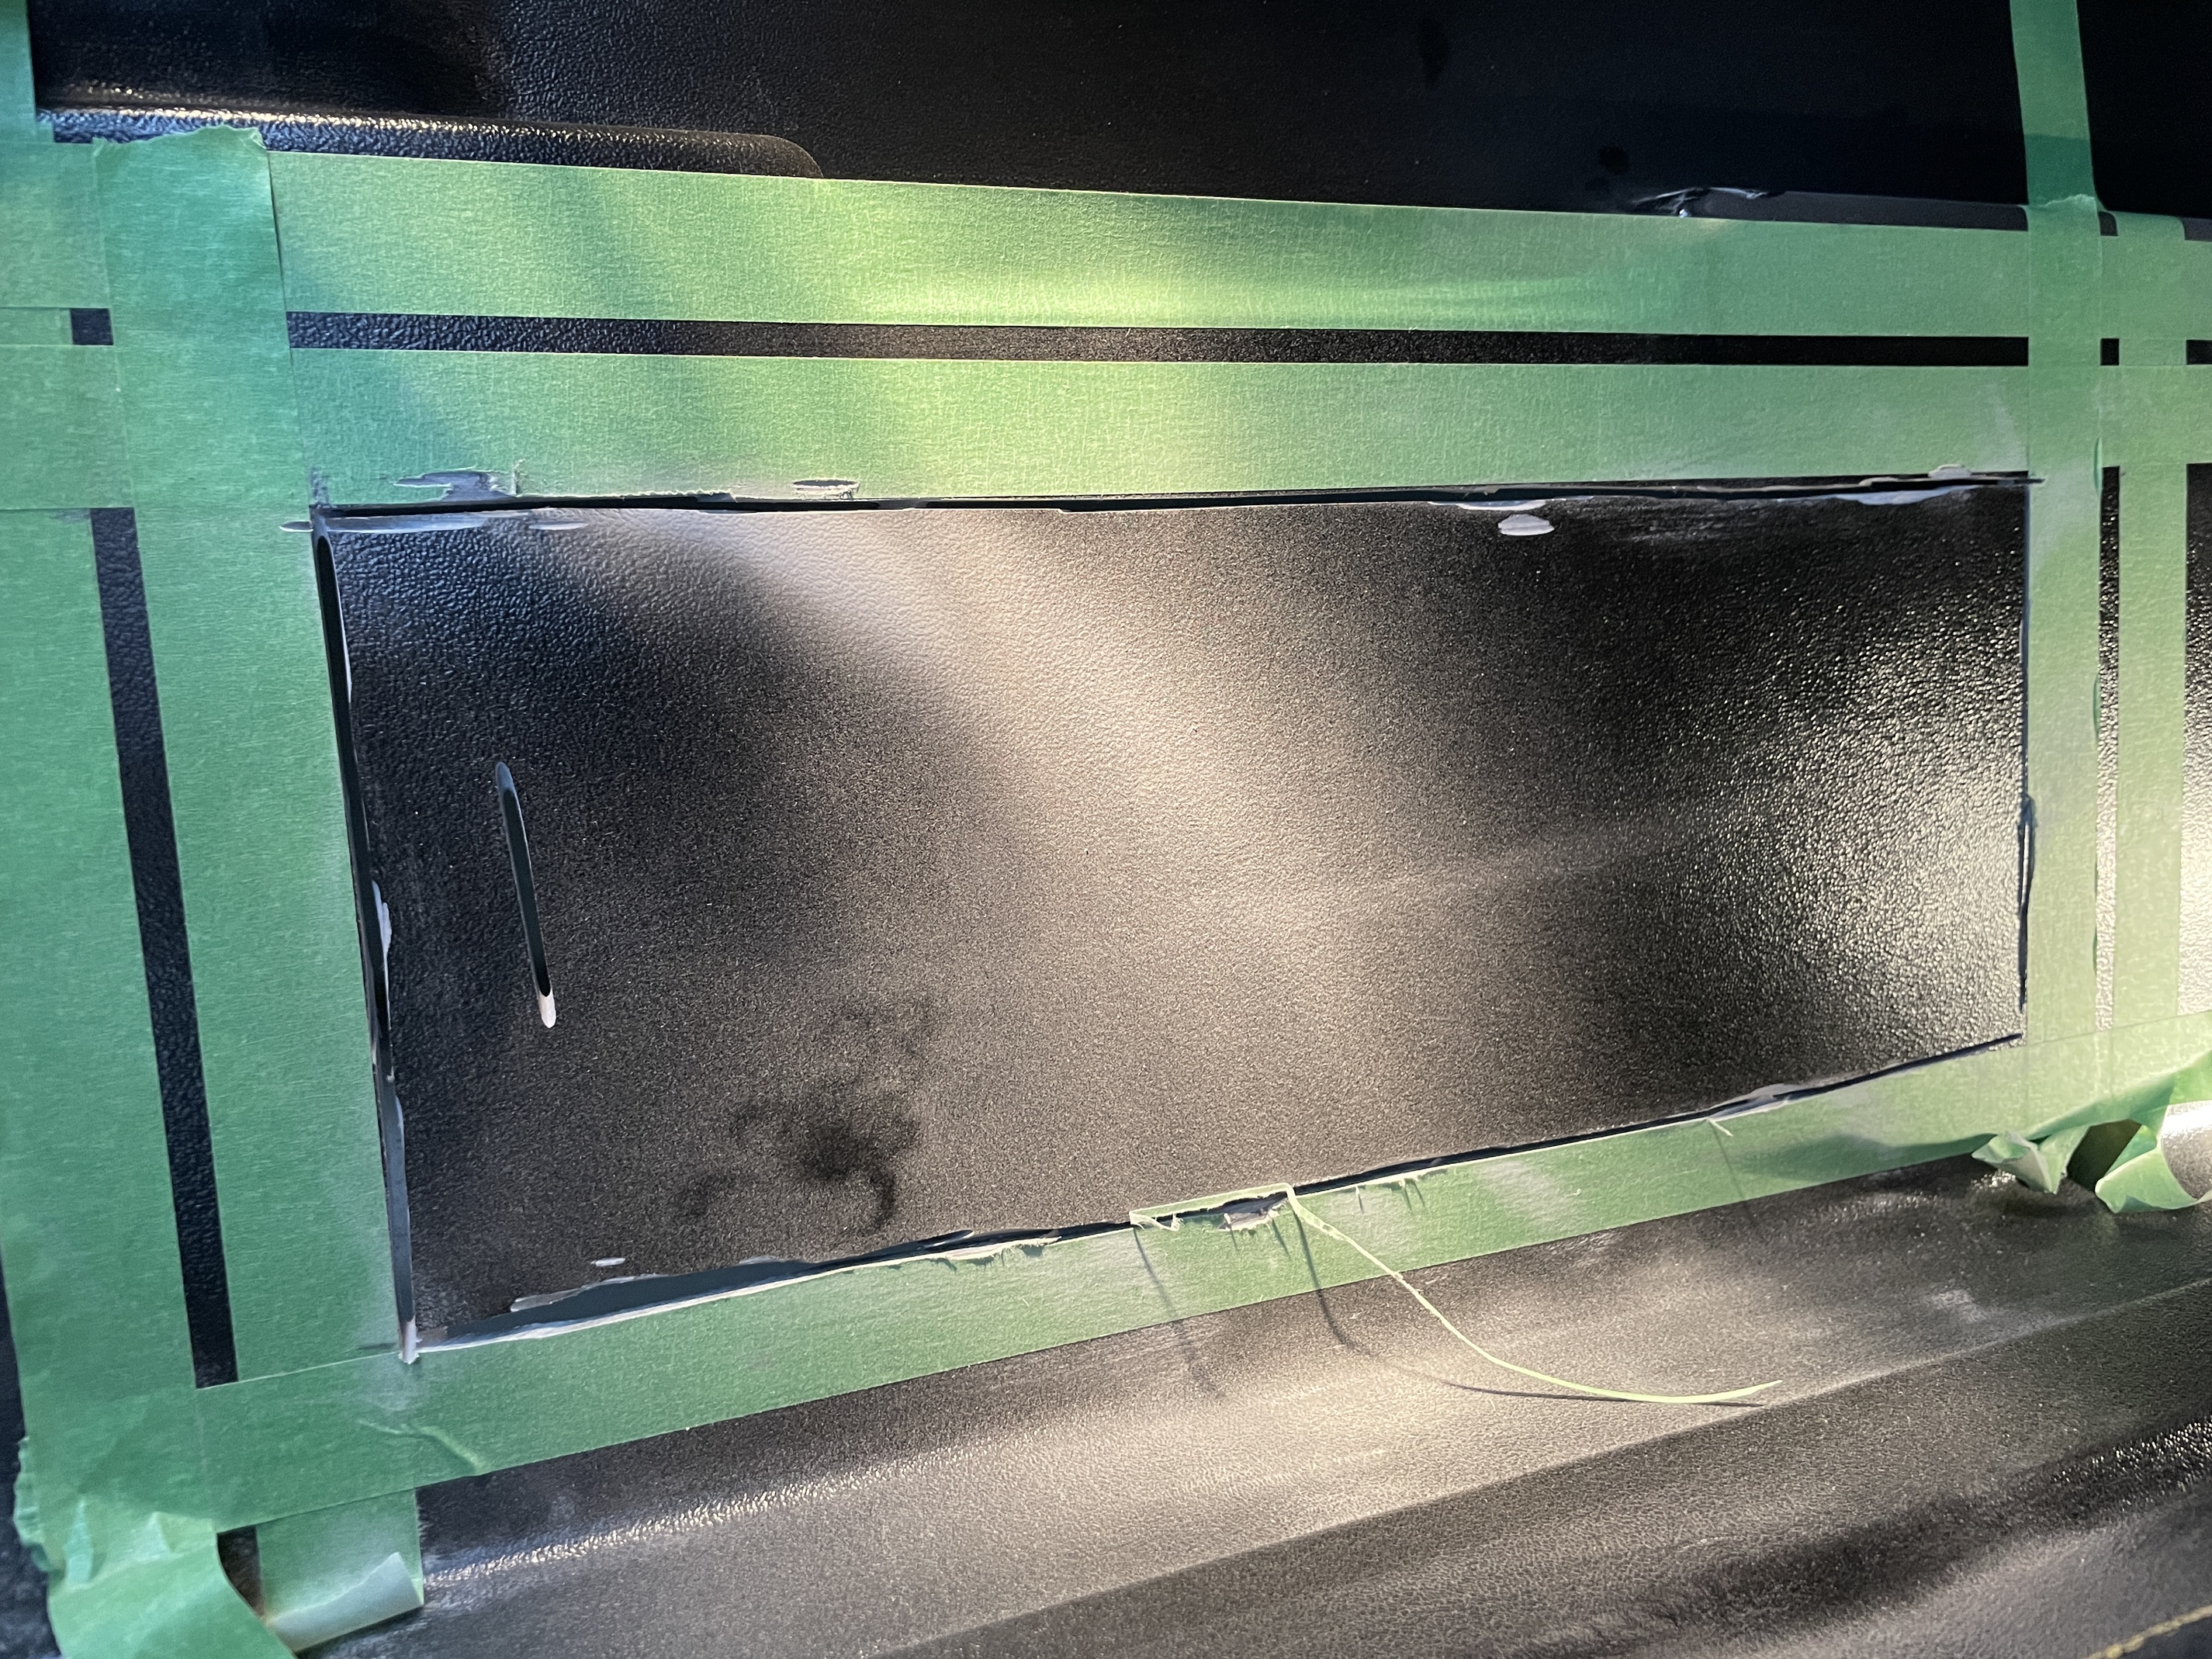
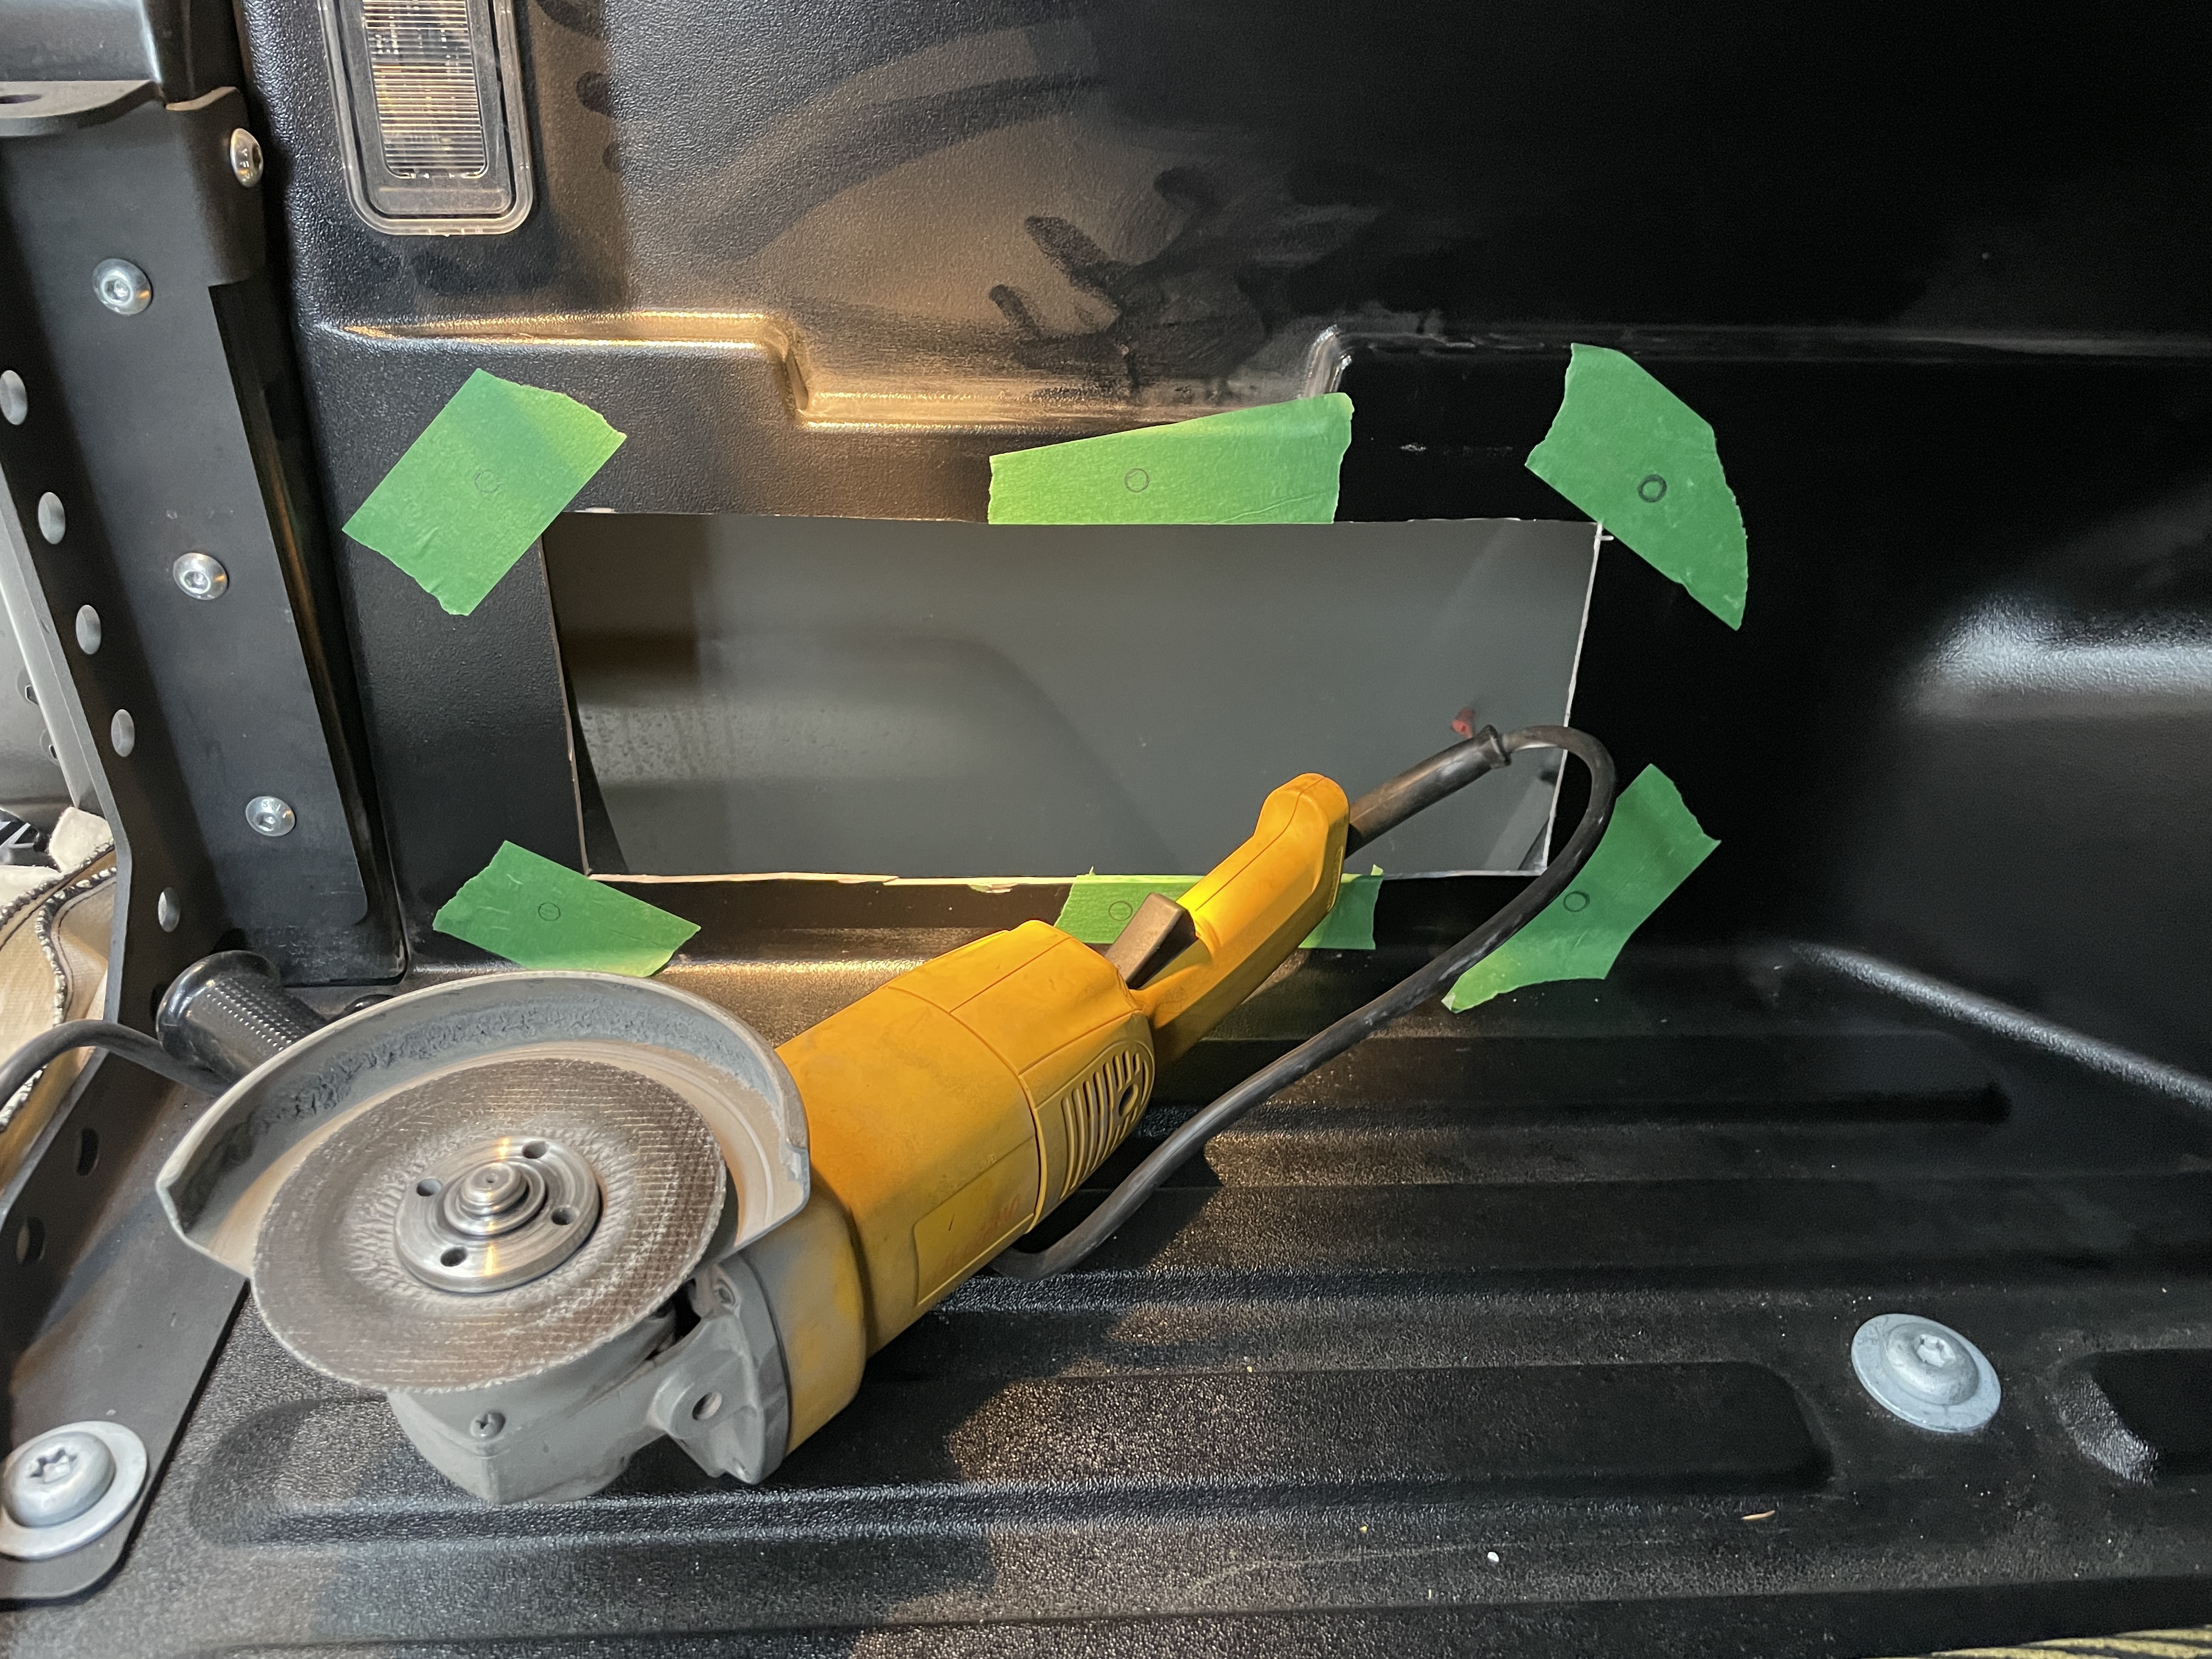
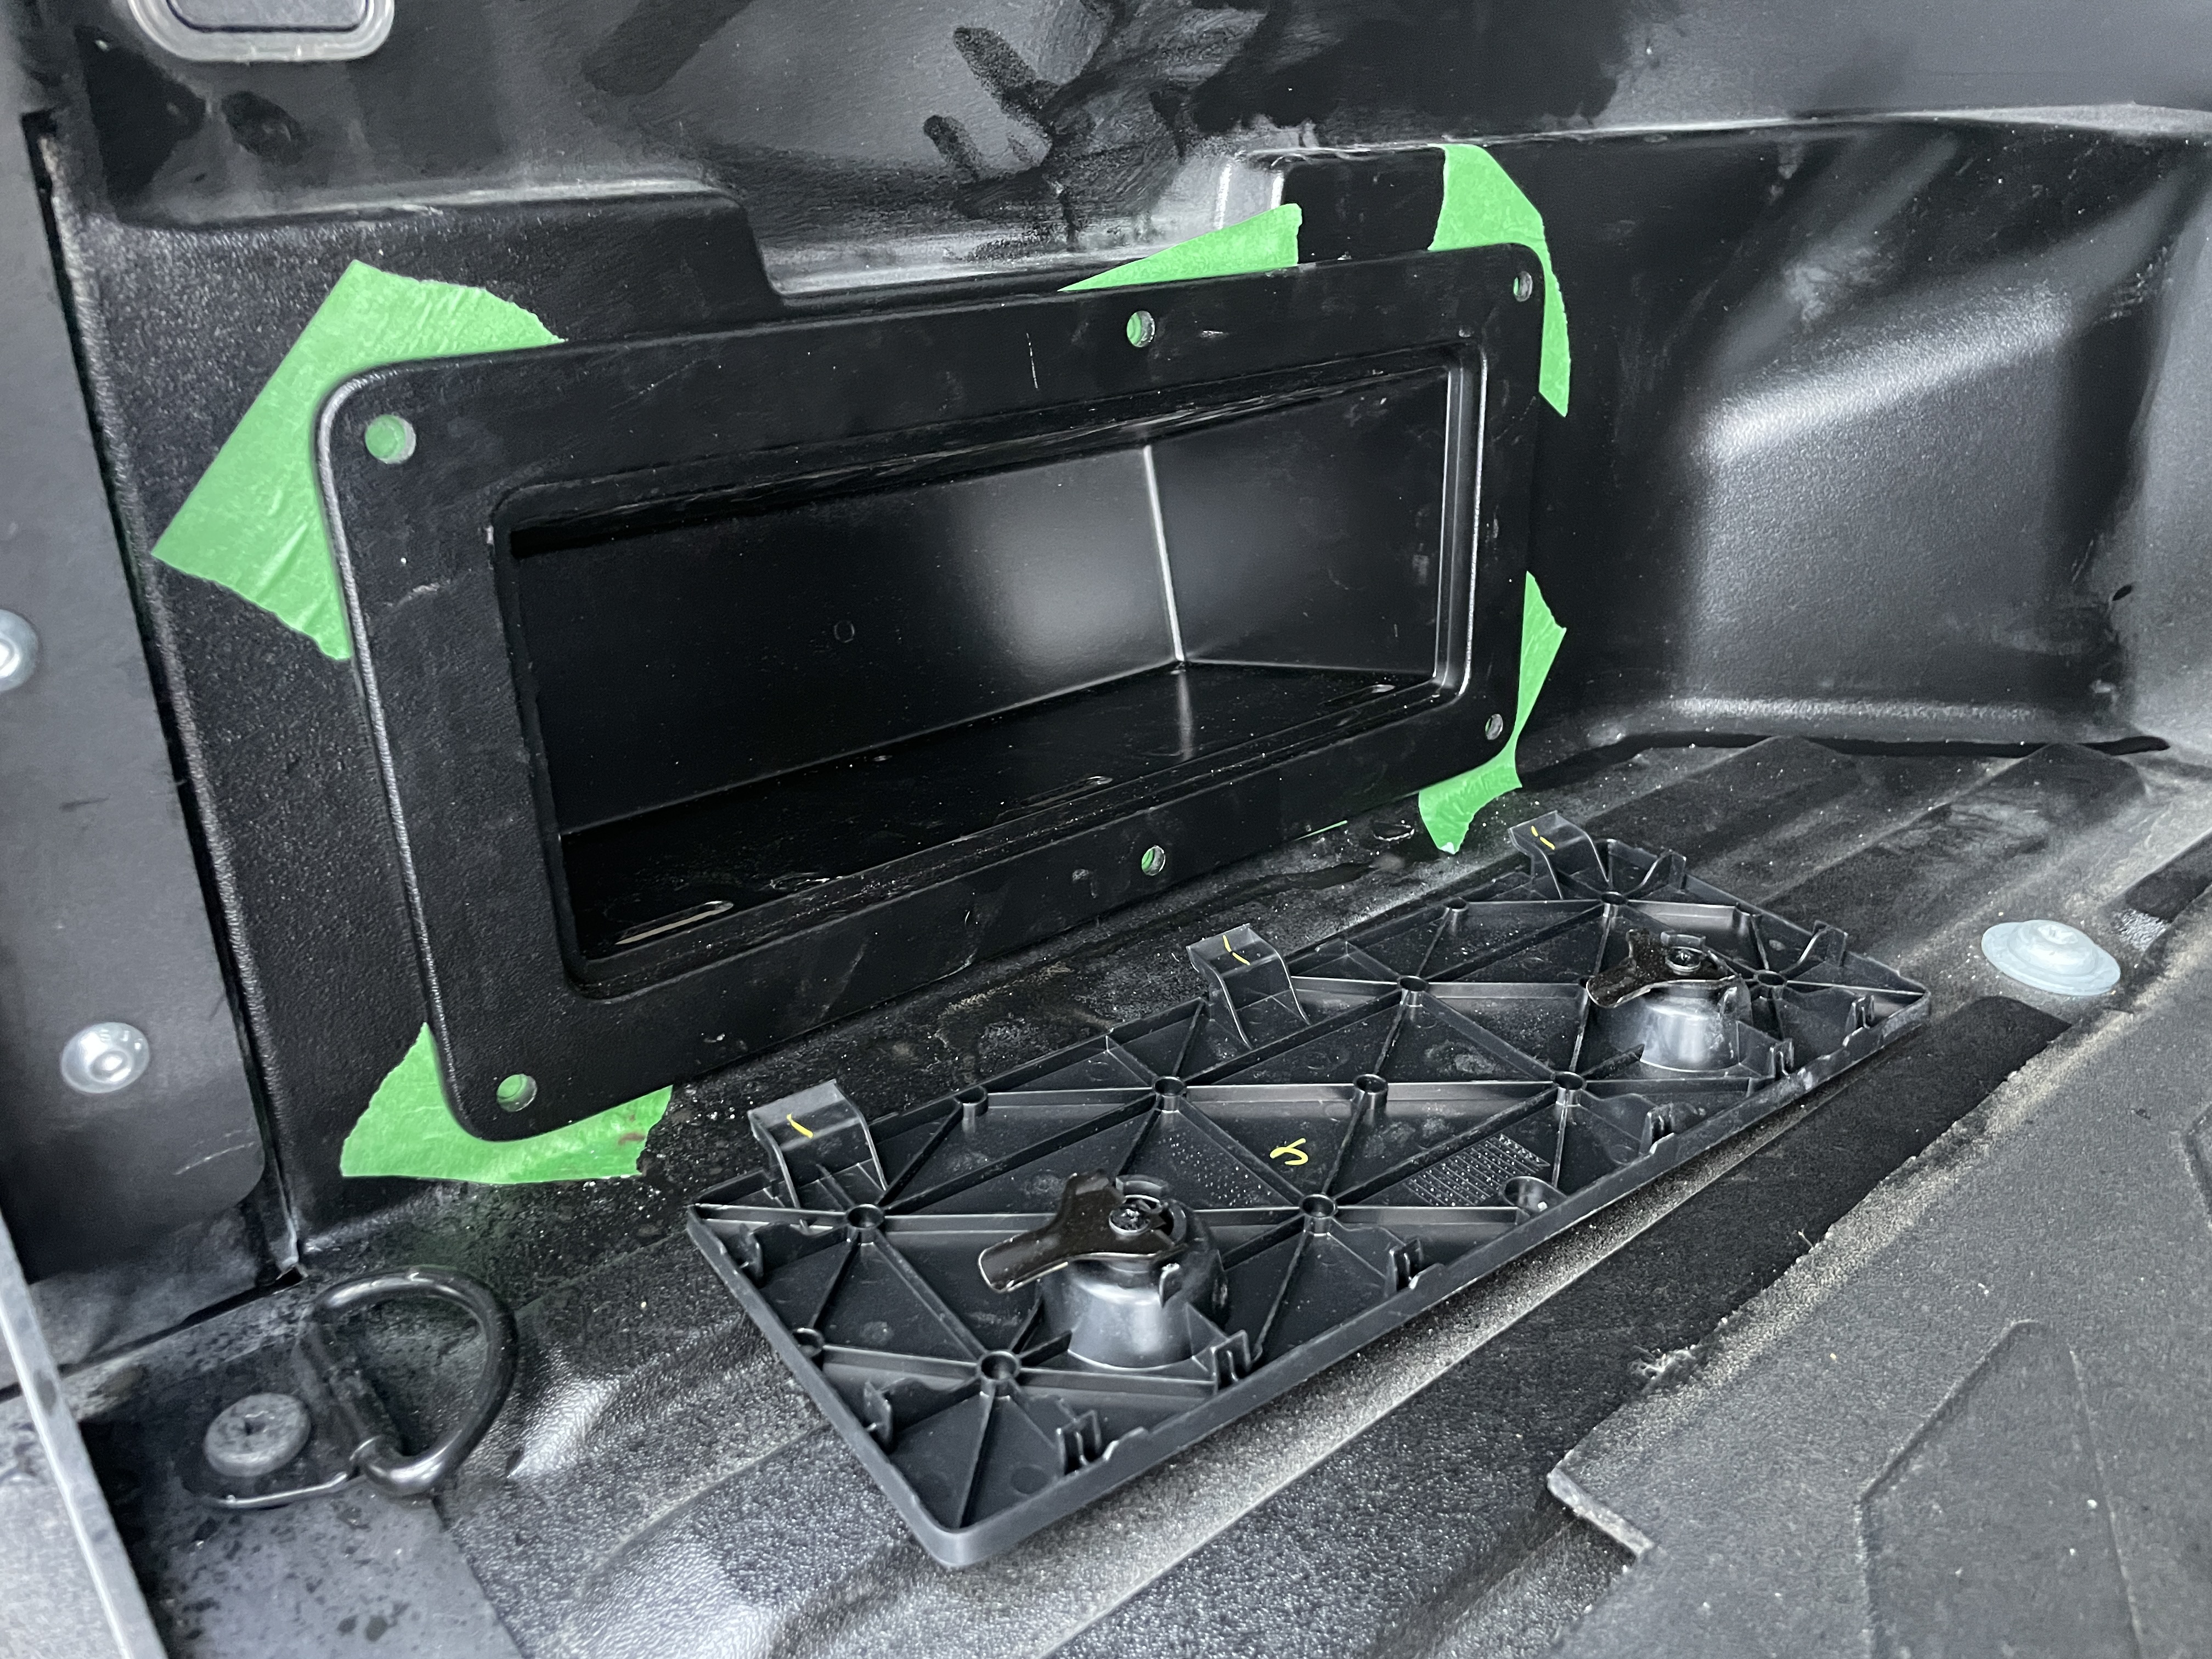
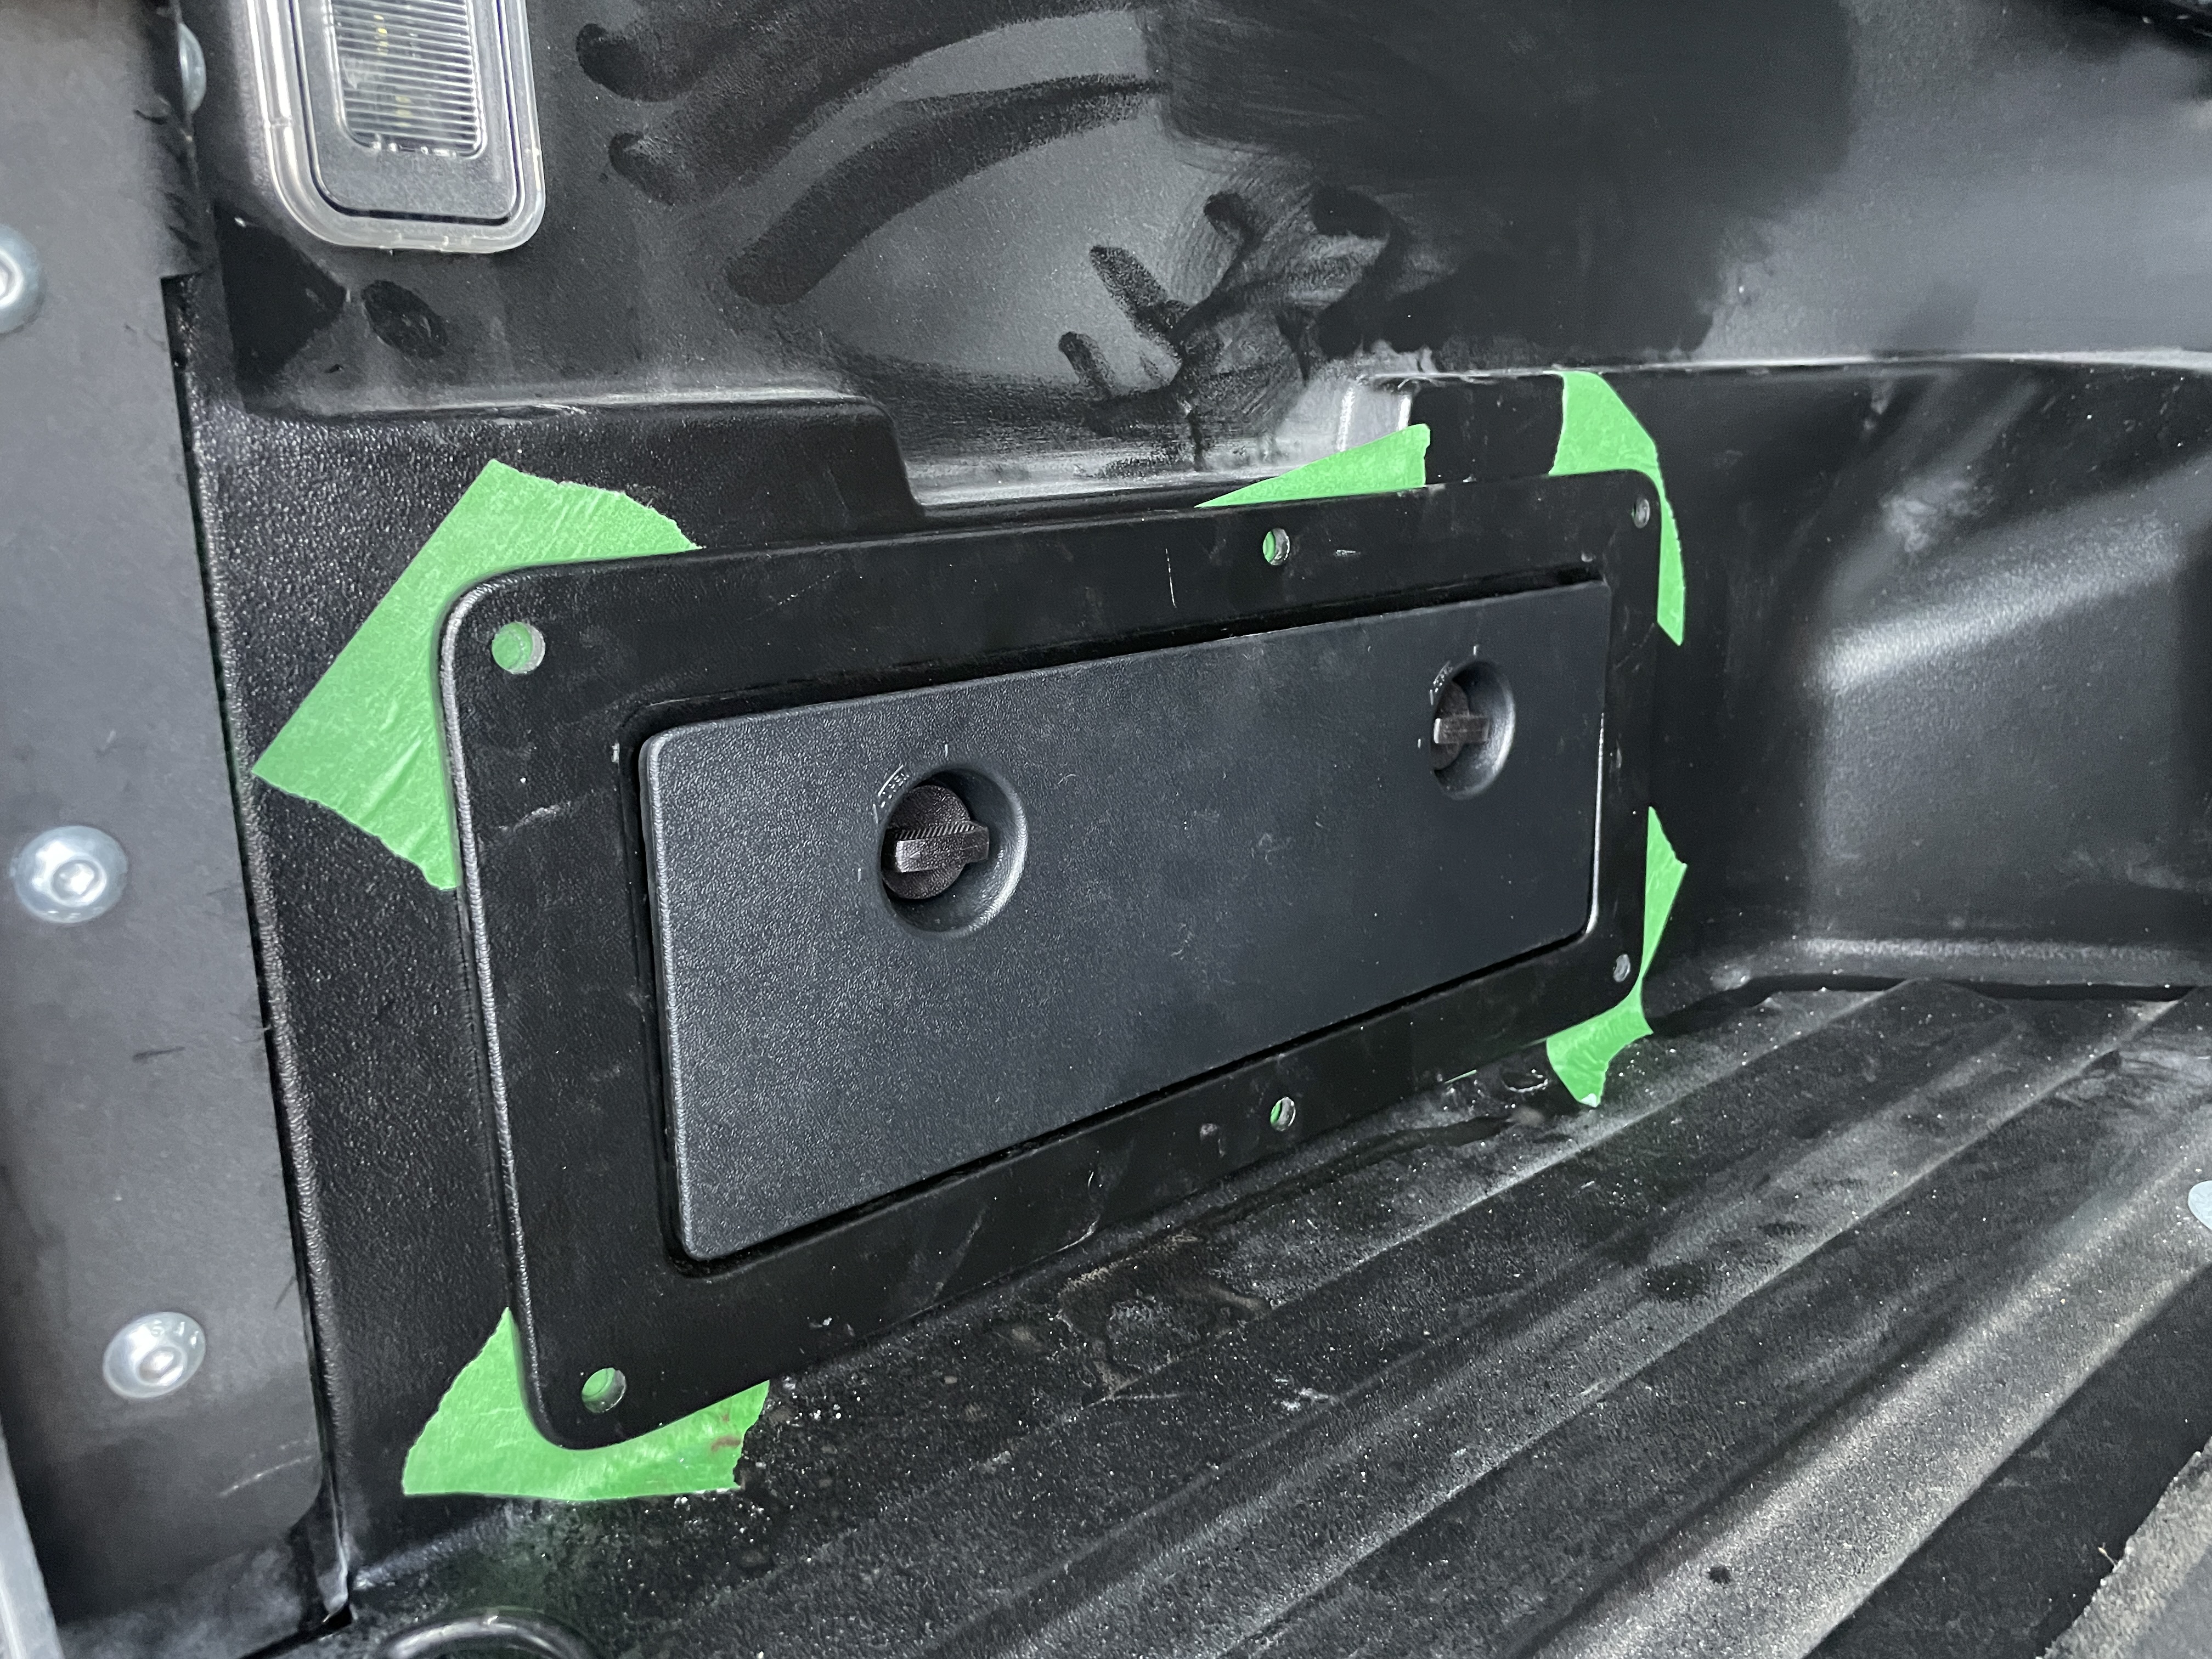
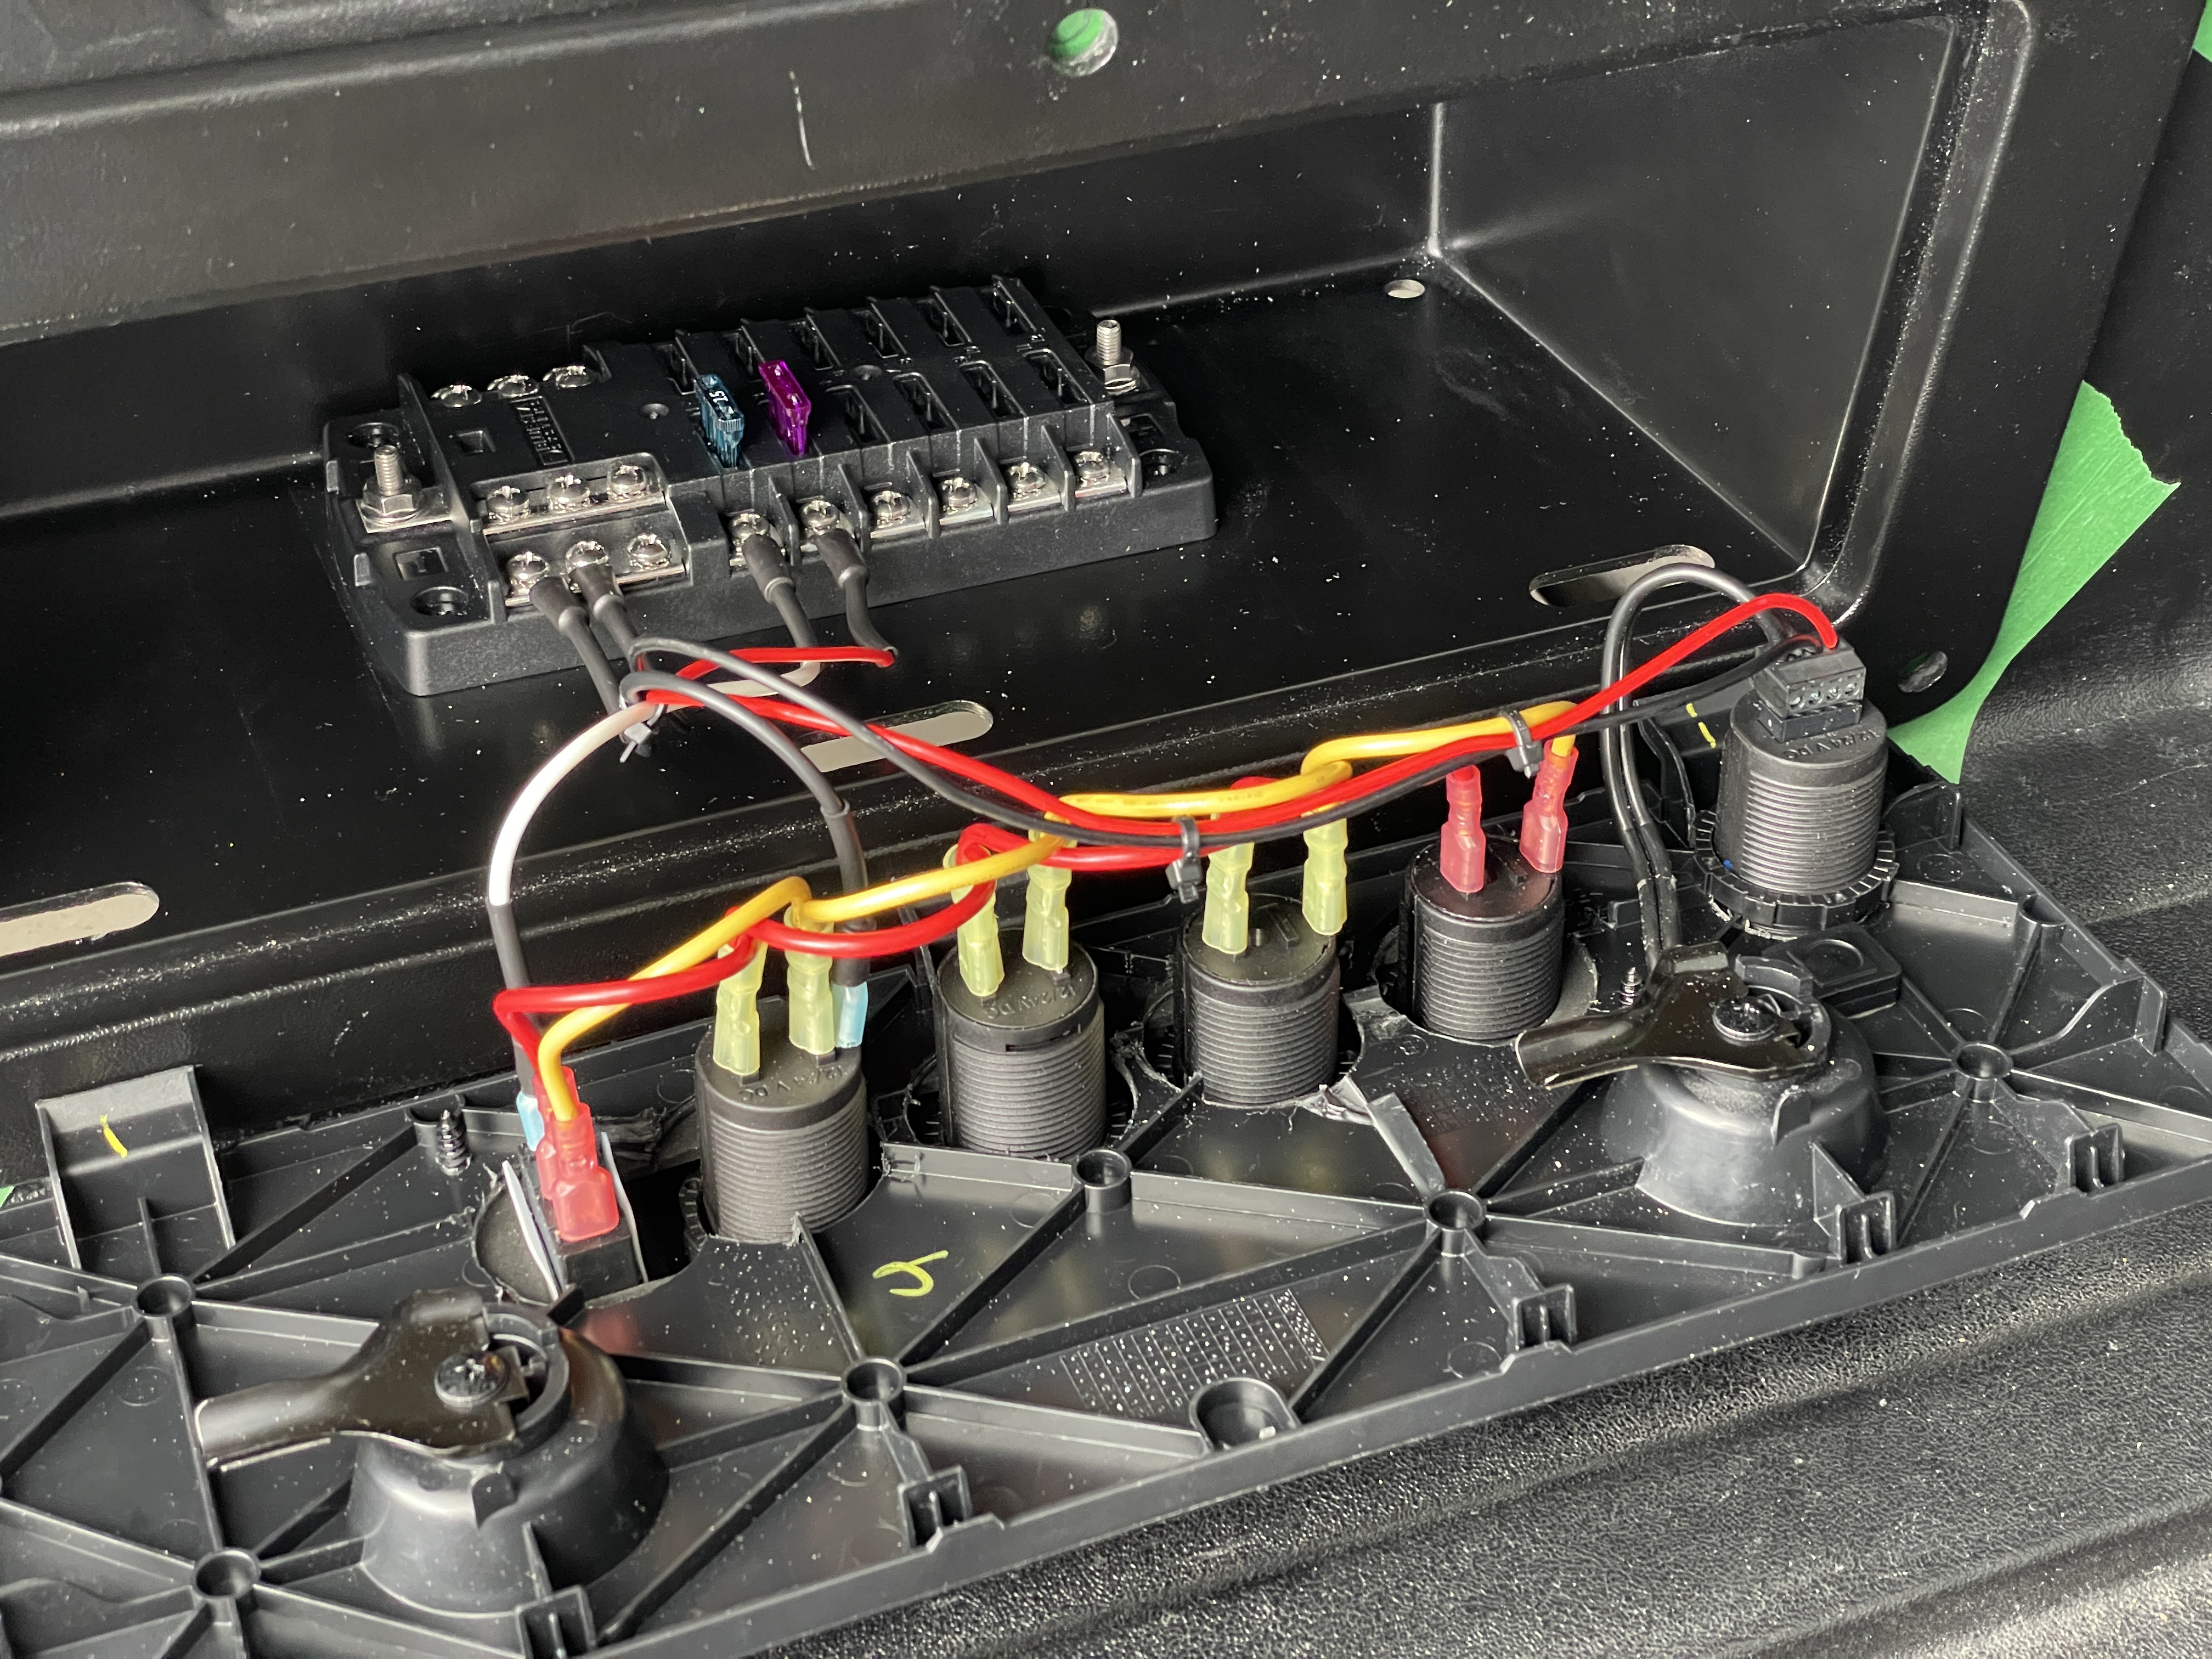
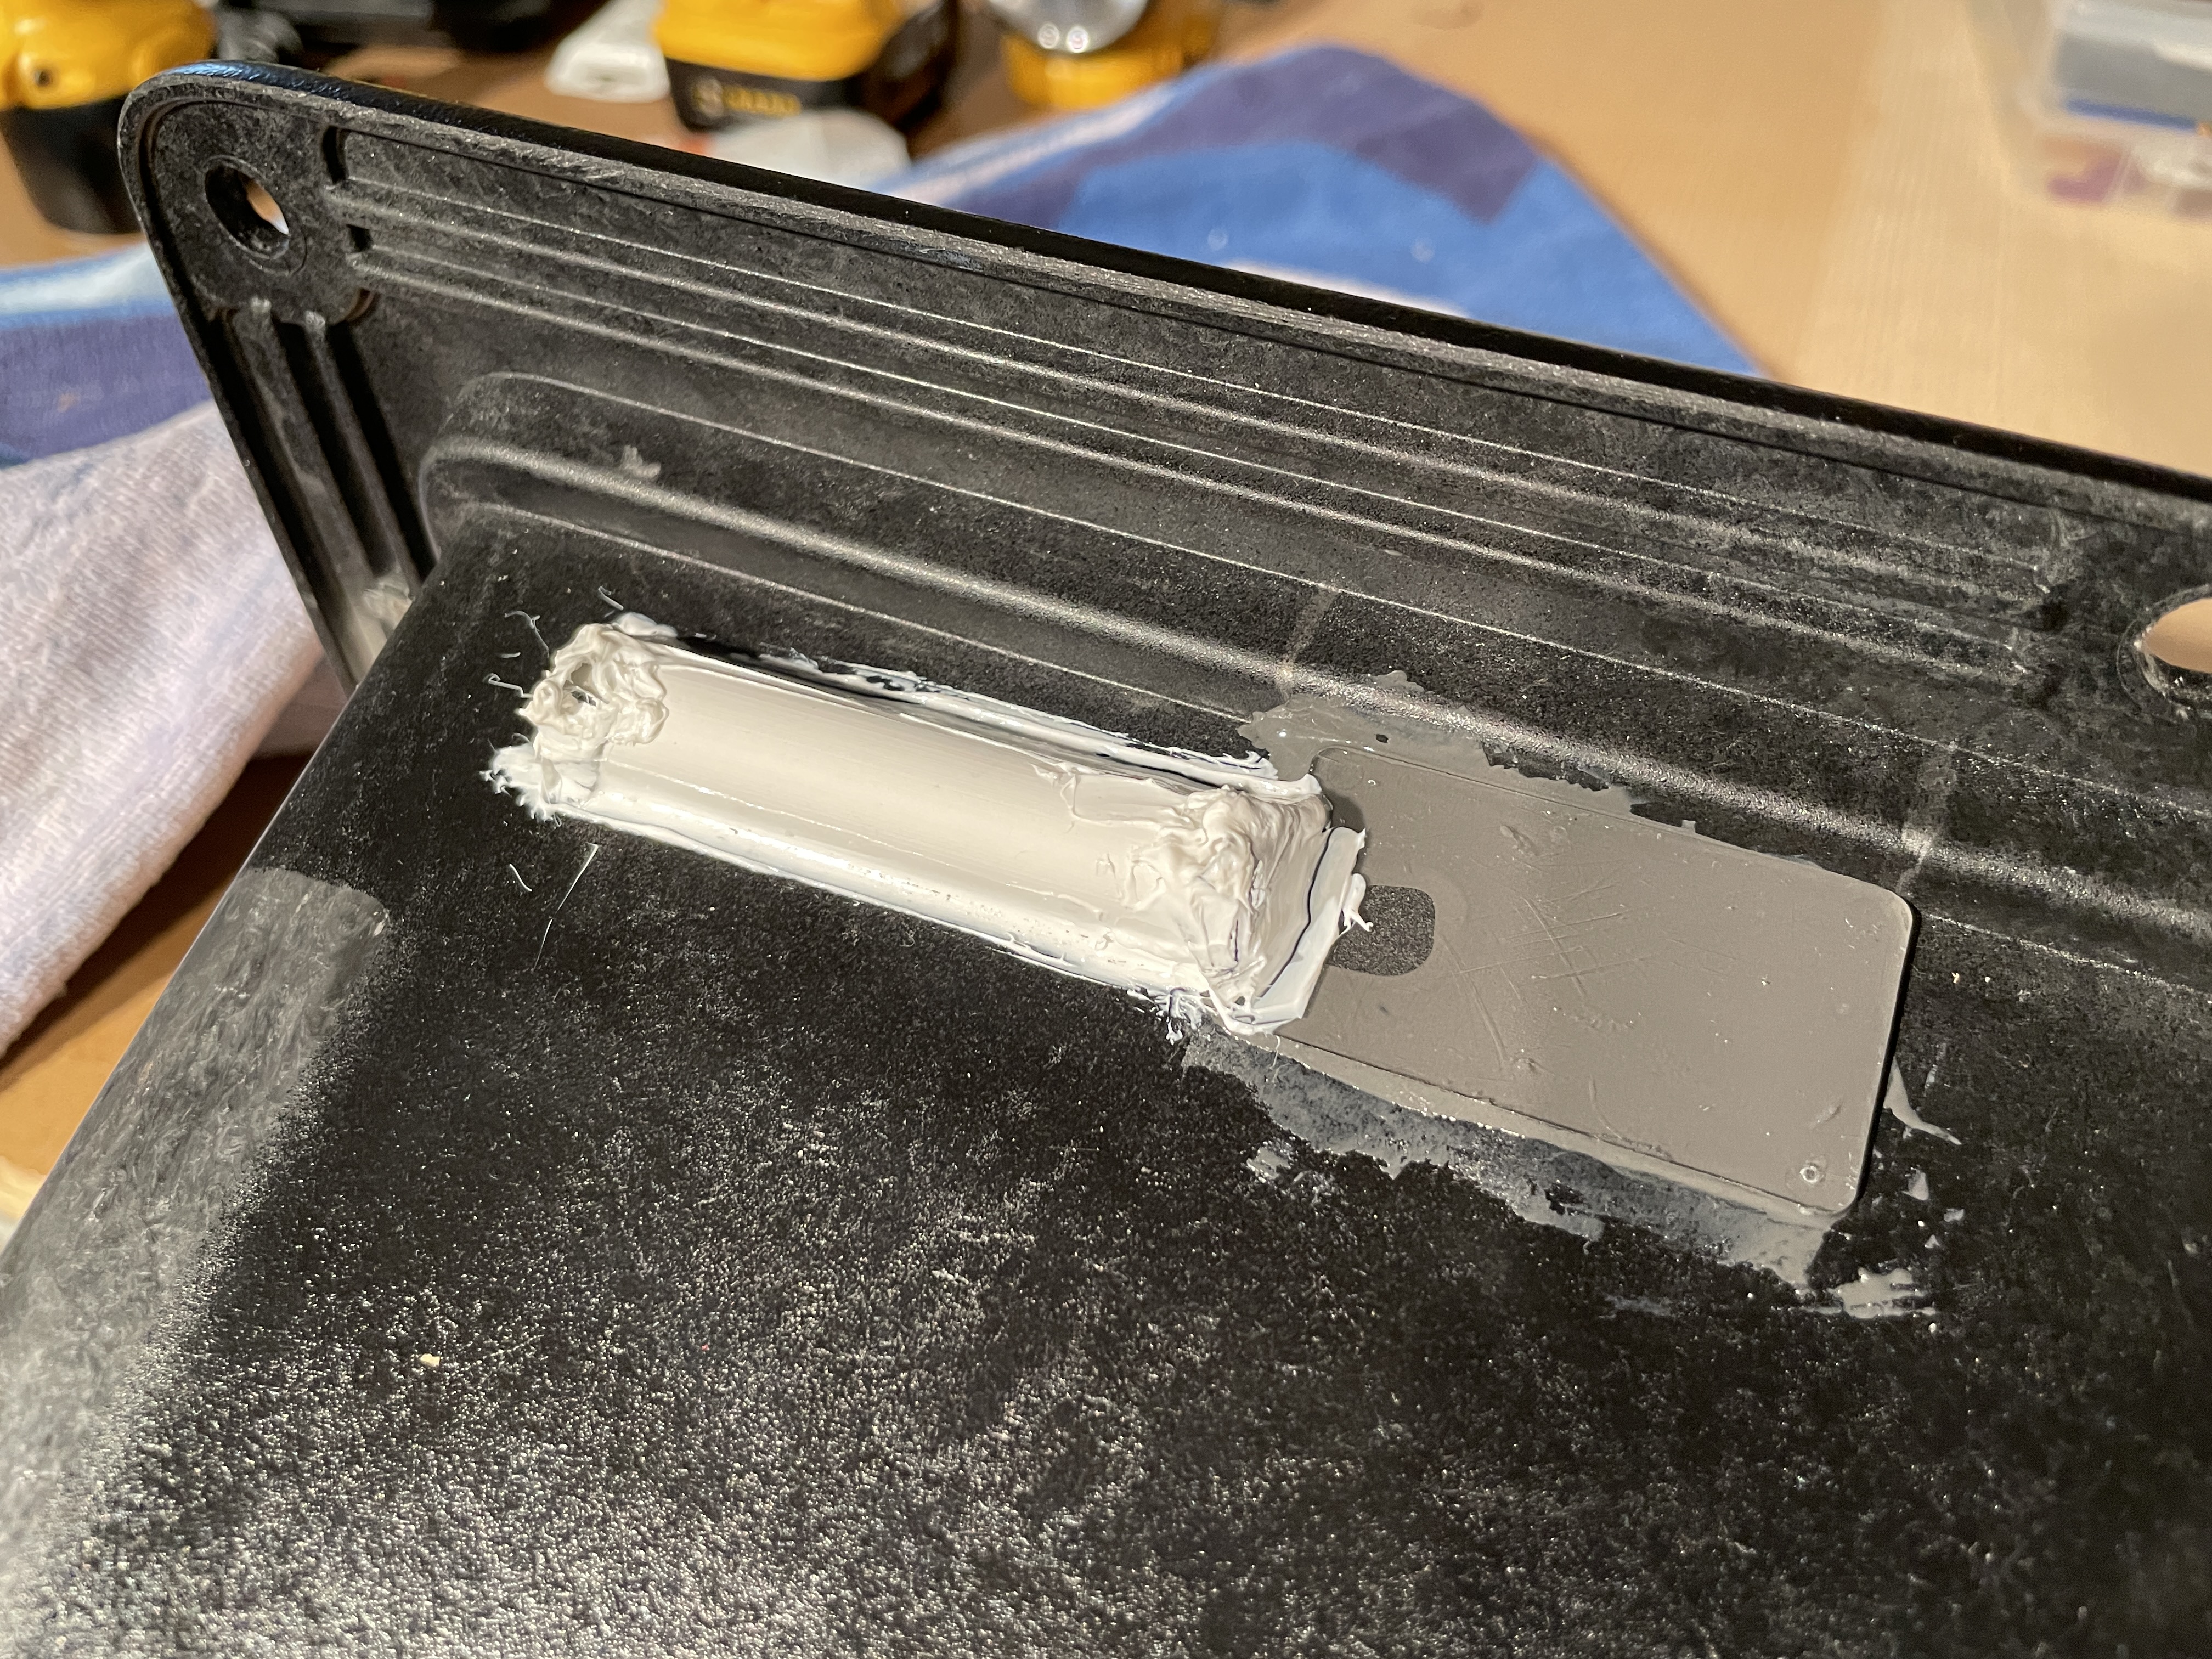
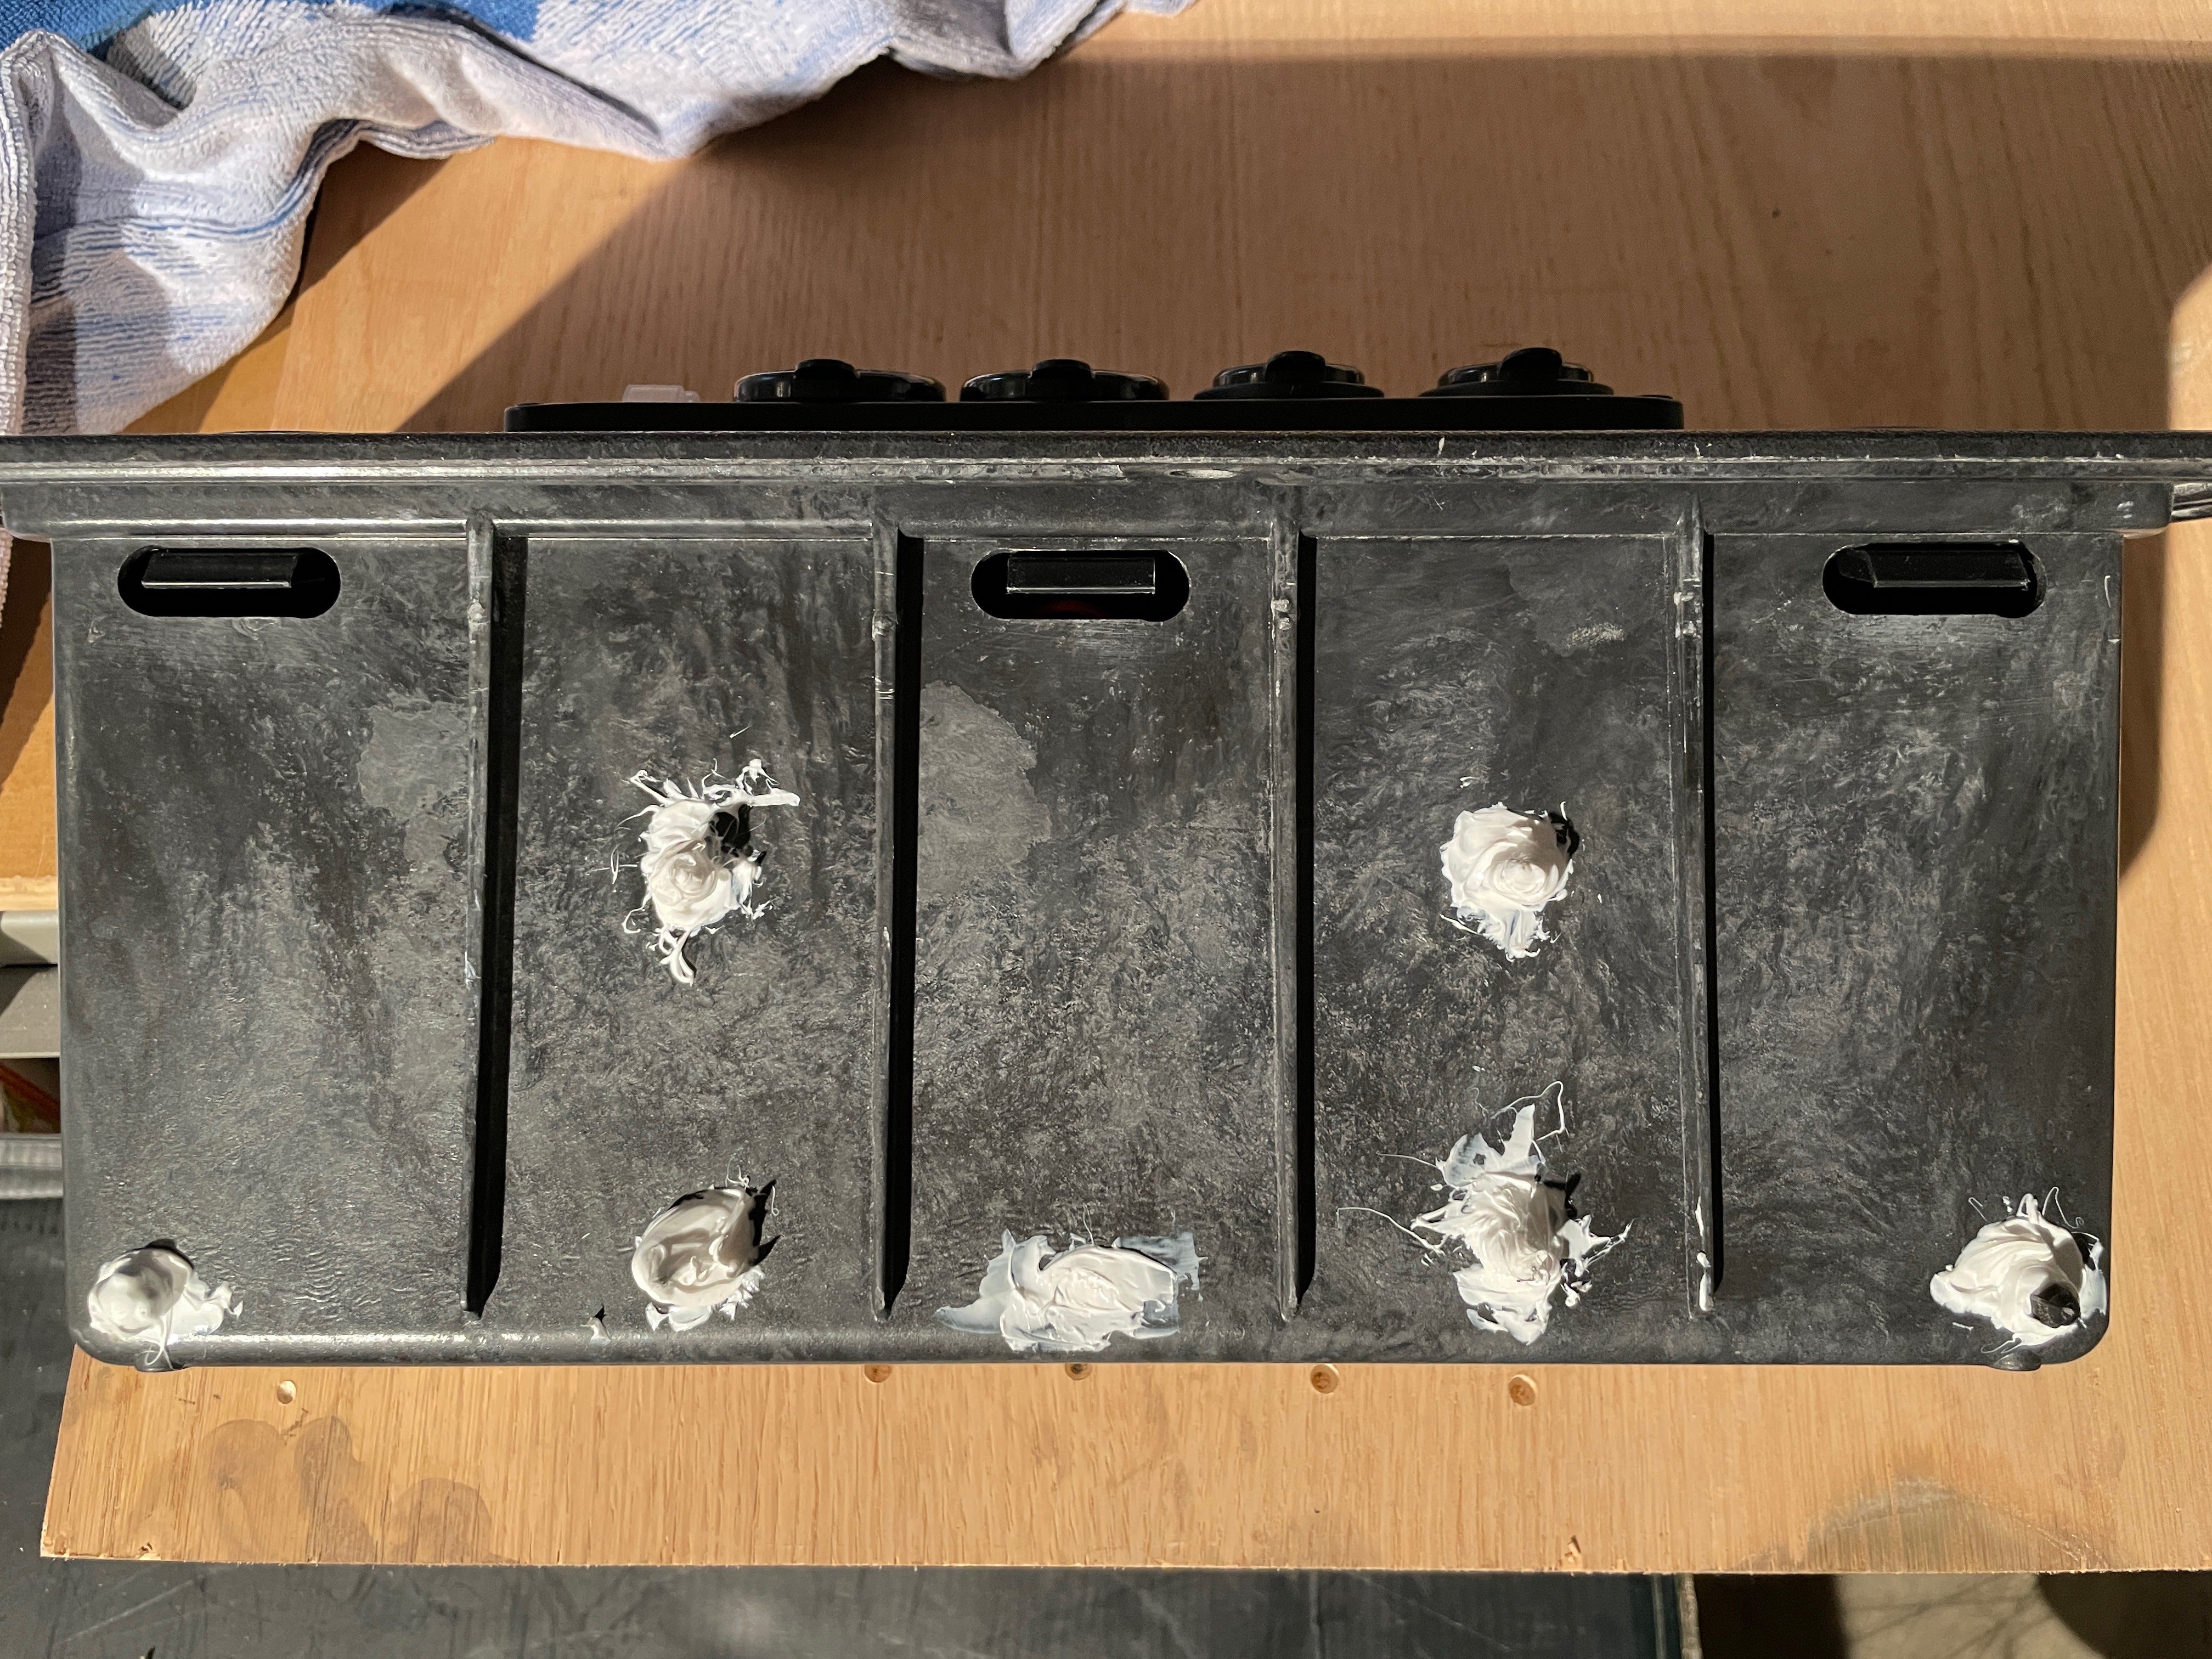
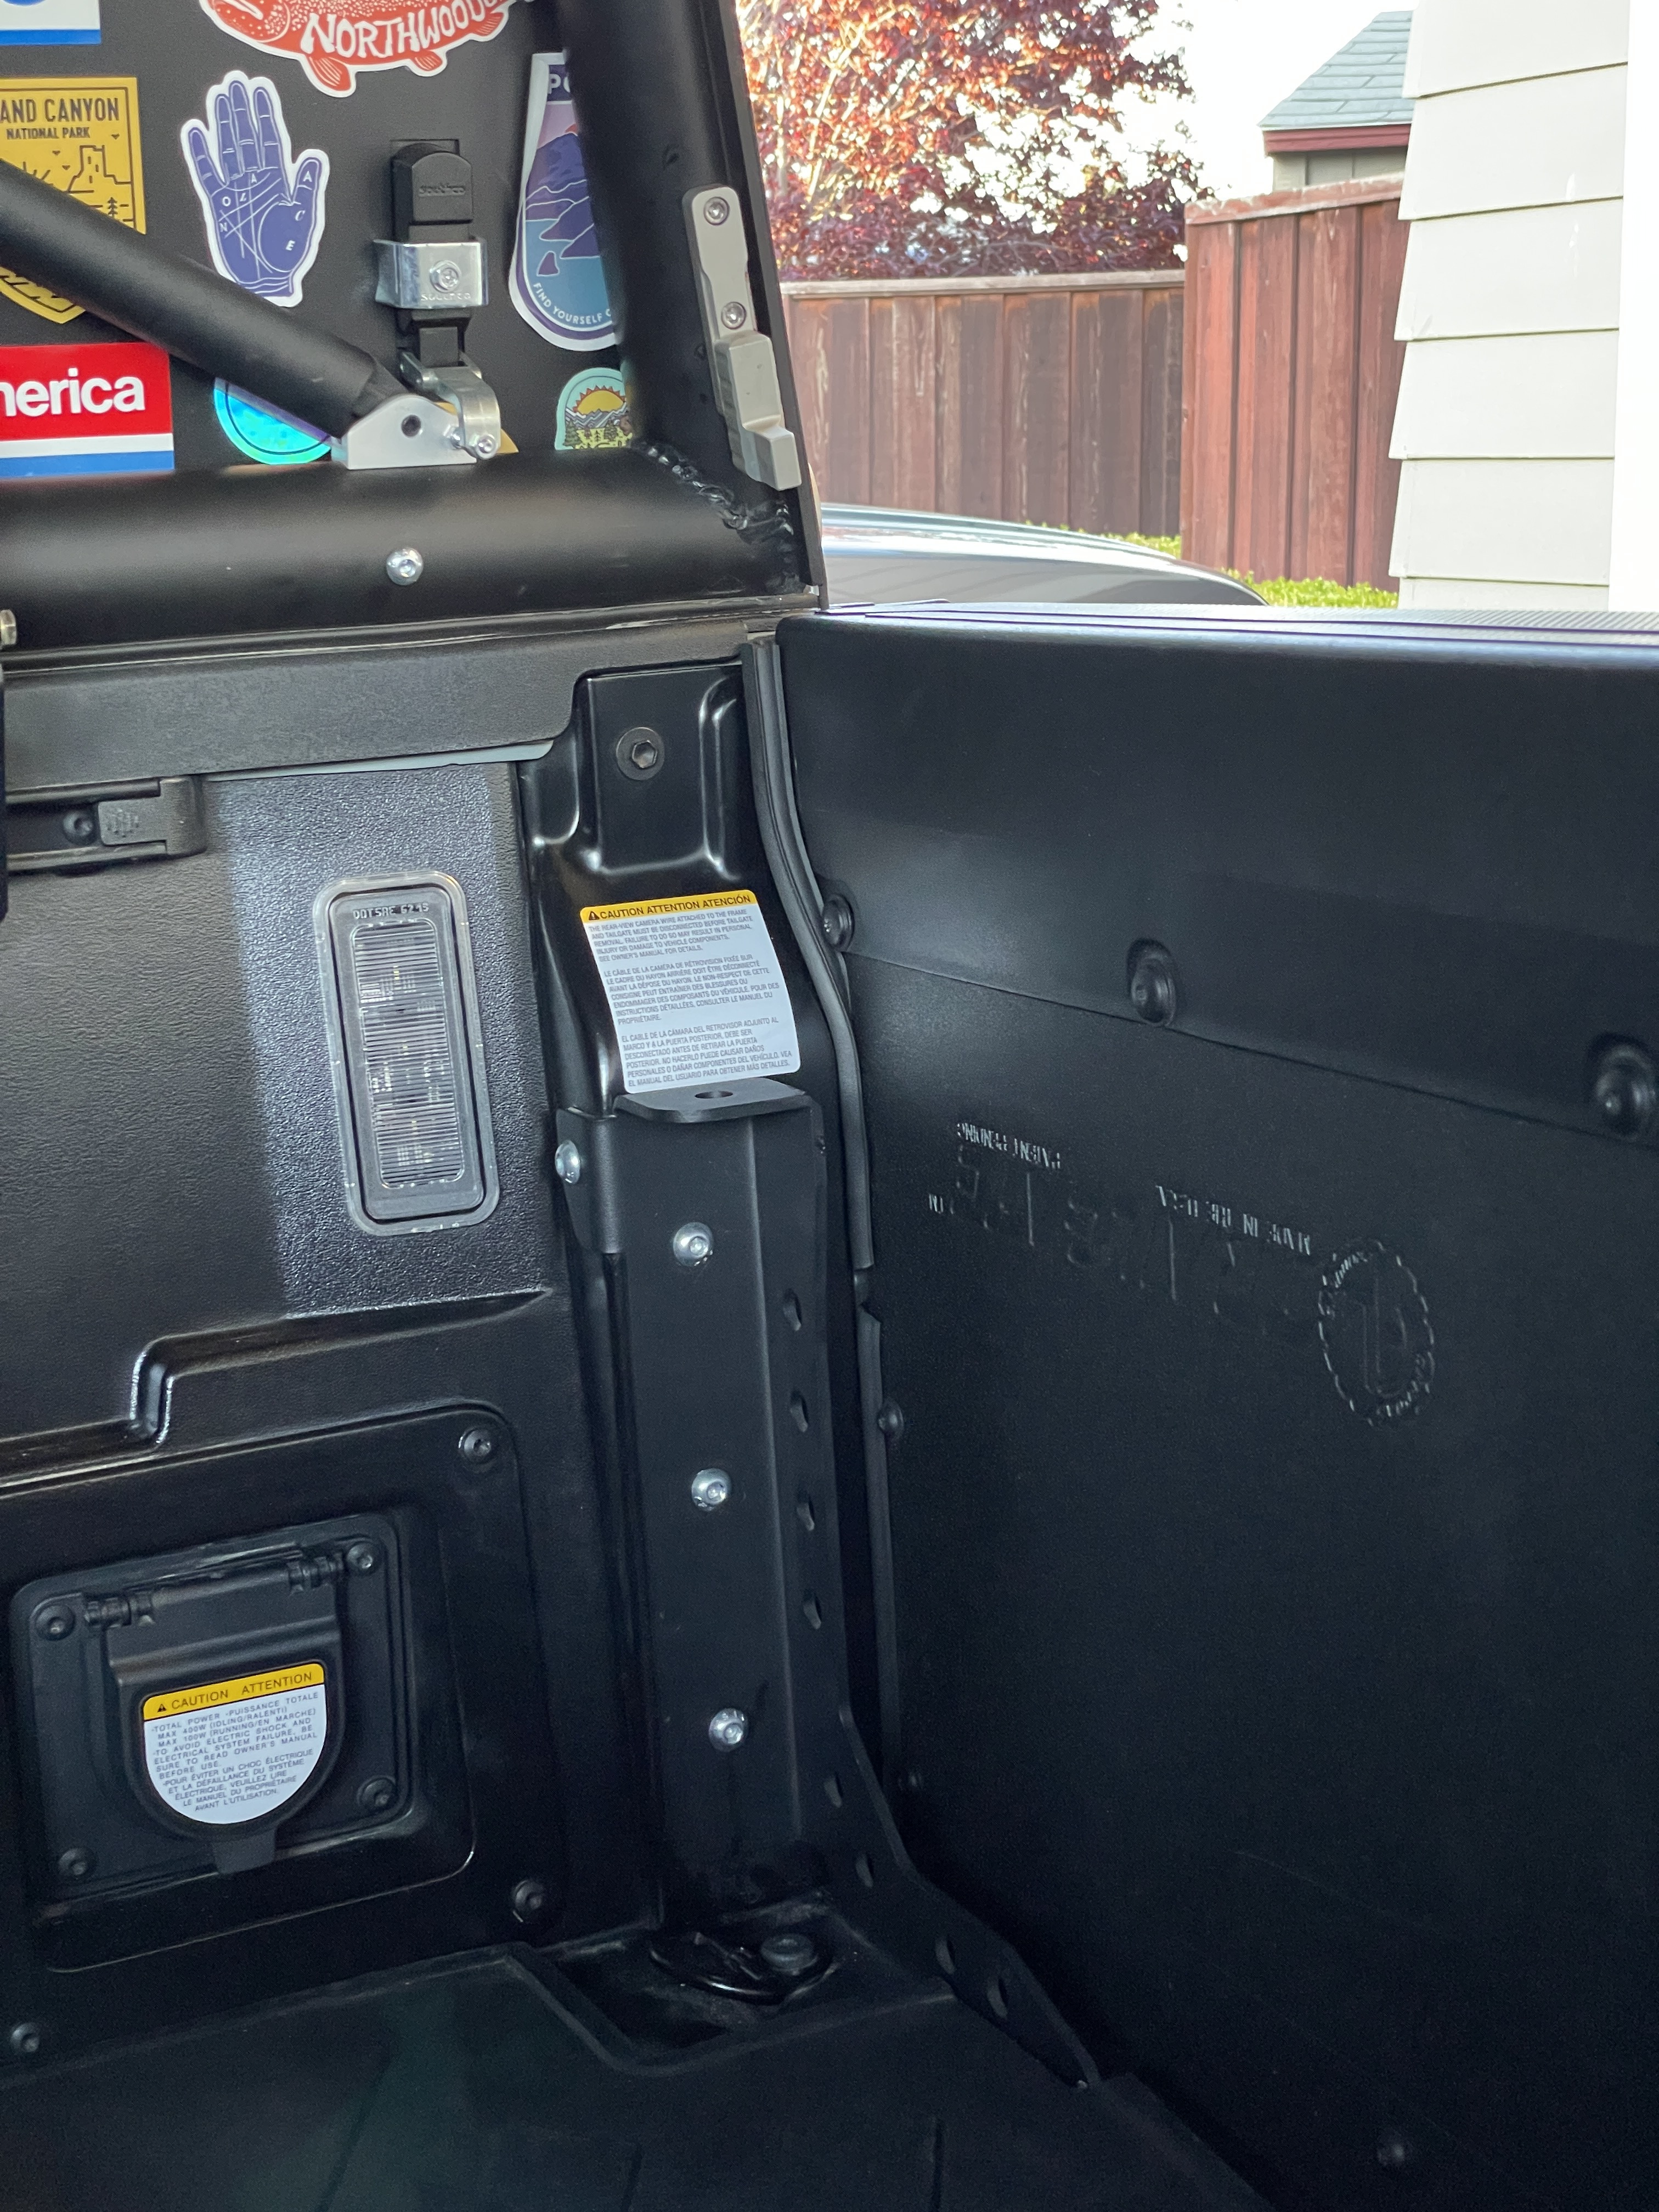

Mounting the box

The hole and grommet where the power runs into the cubby and the ground runs out is visible at the top here. (Which was also heavily siliconed.)

This was pretty painless with the exception of securing the cubby’s top middle bolt. Threading the nut completely blind in the most awkward angle was a royal PITA but with luck got it.
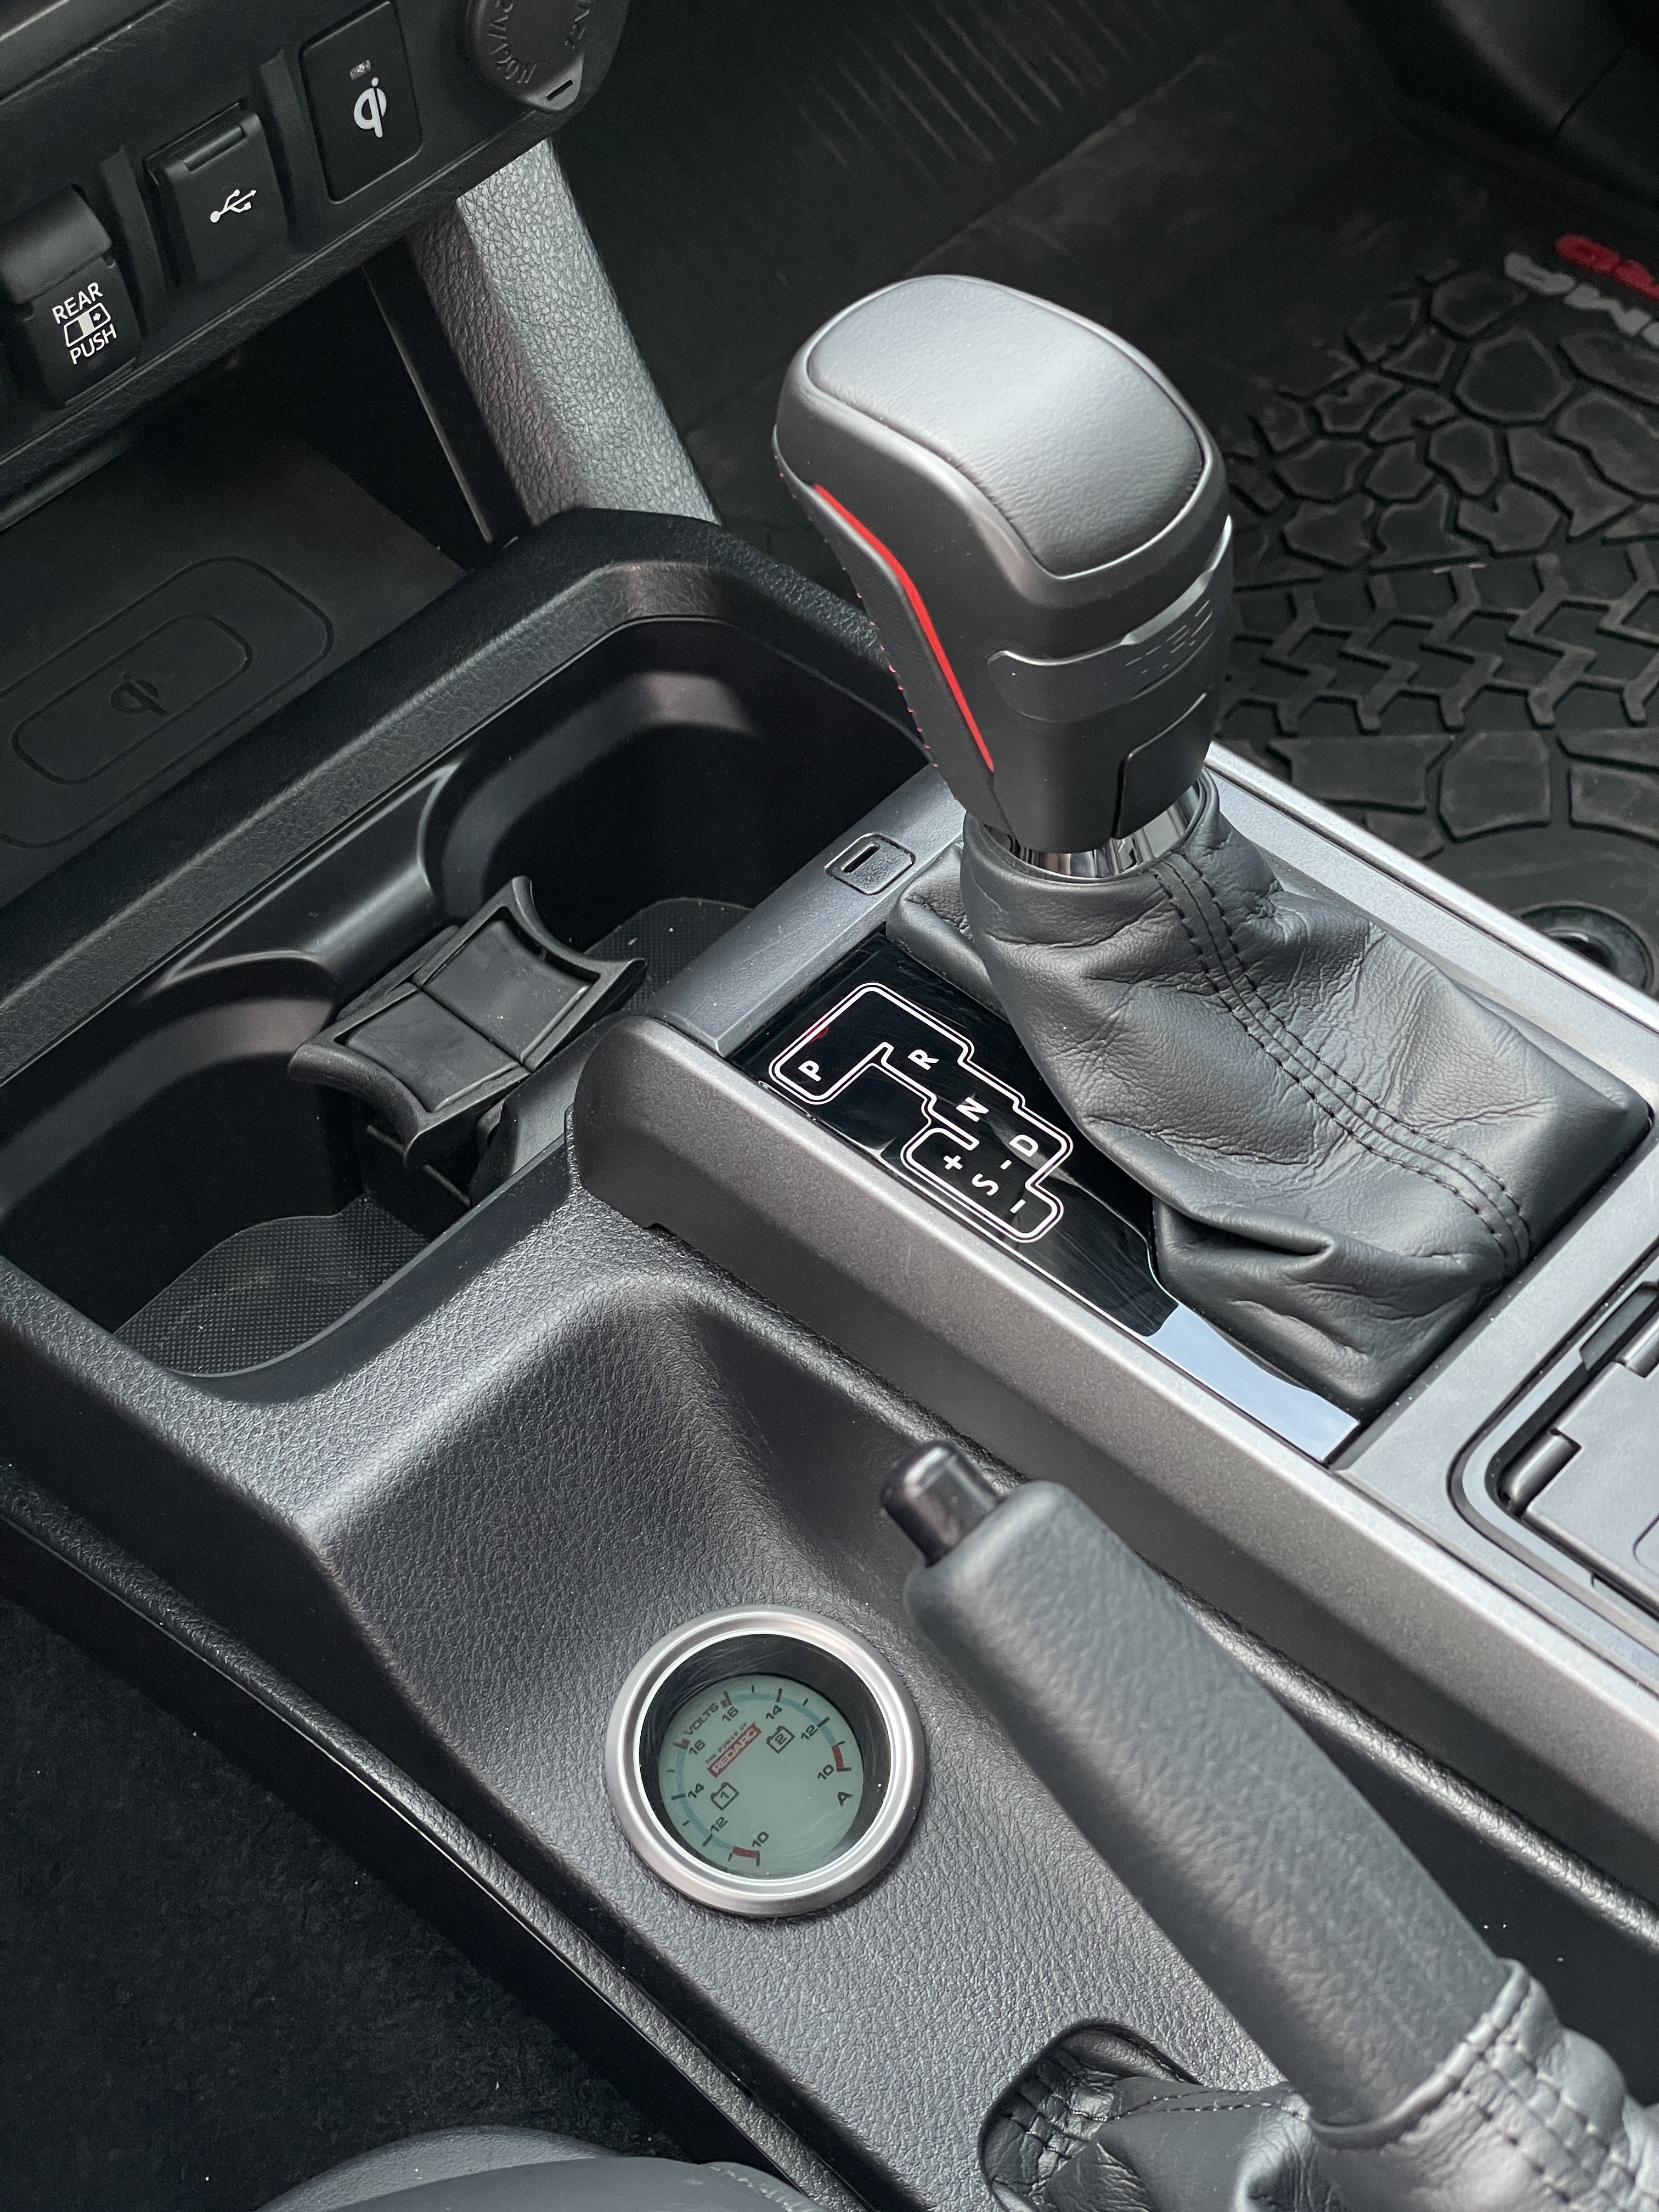
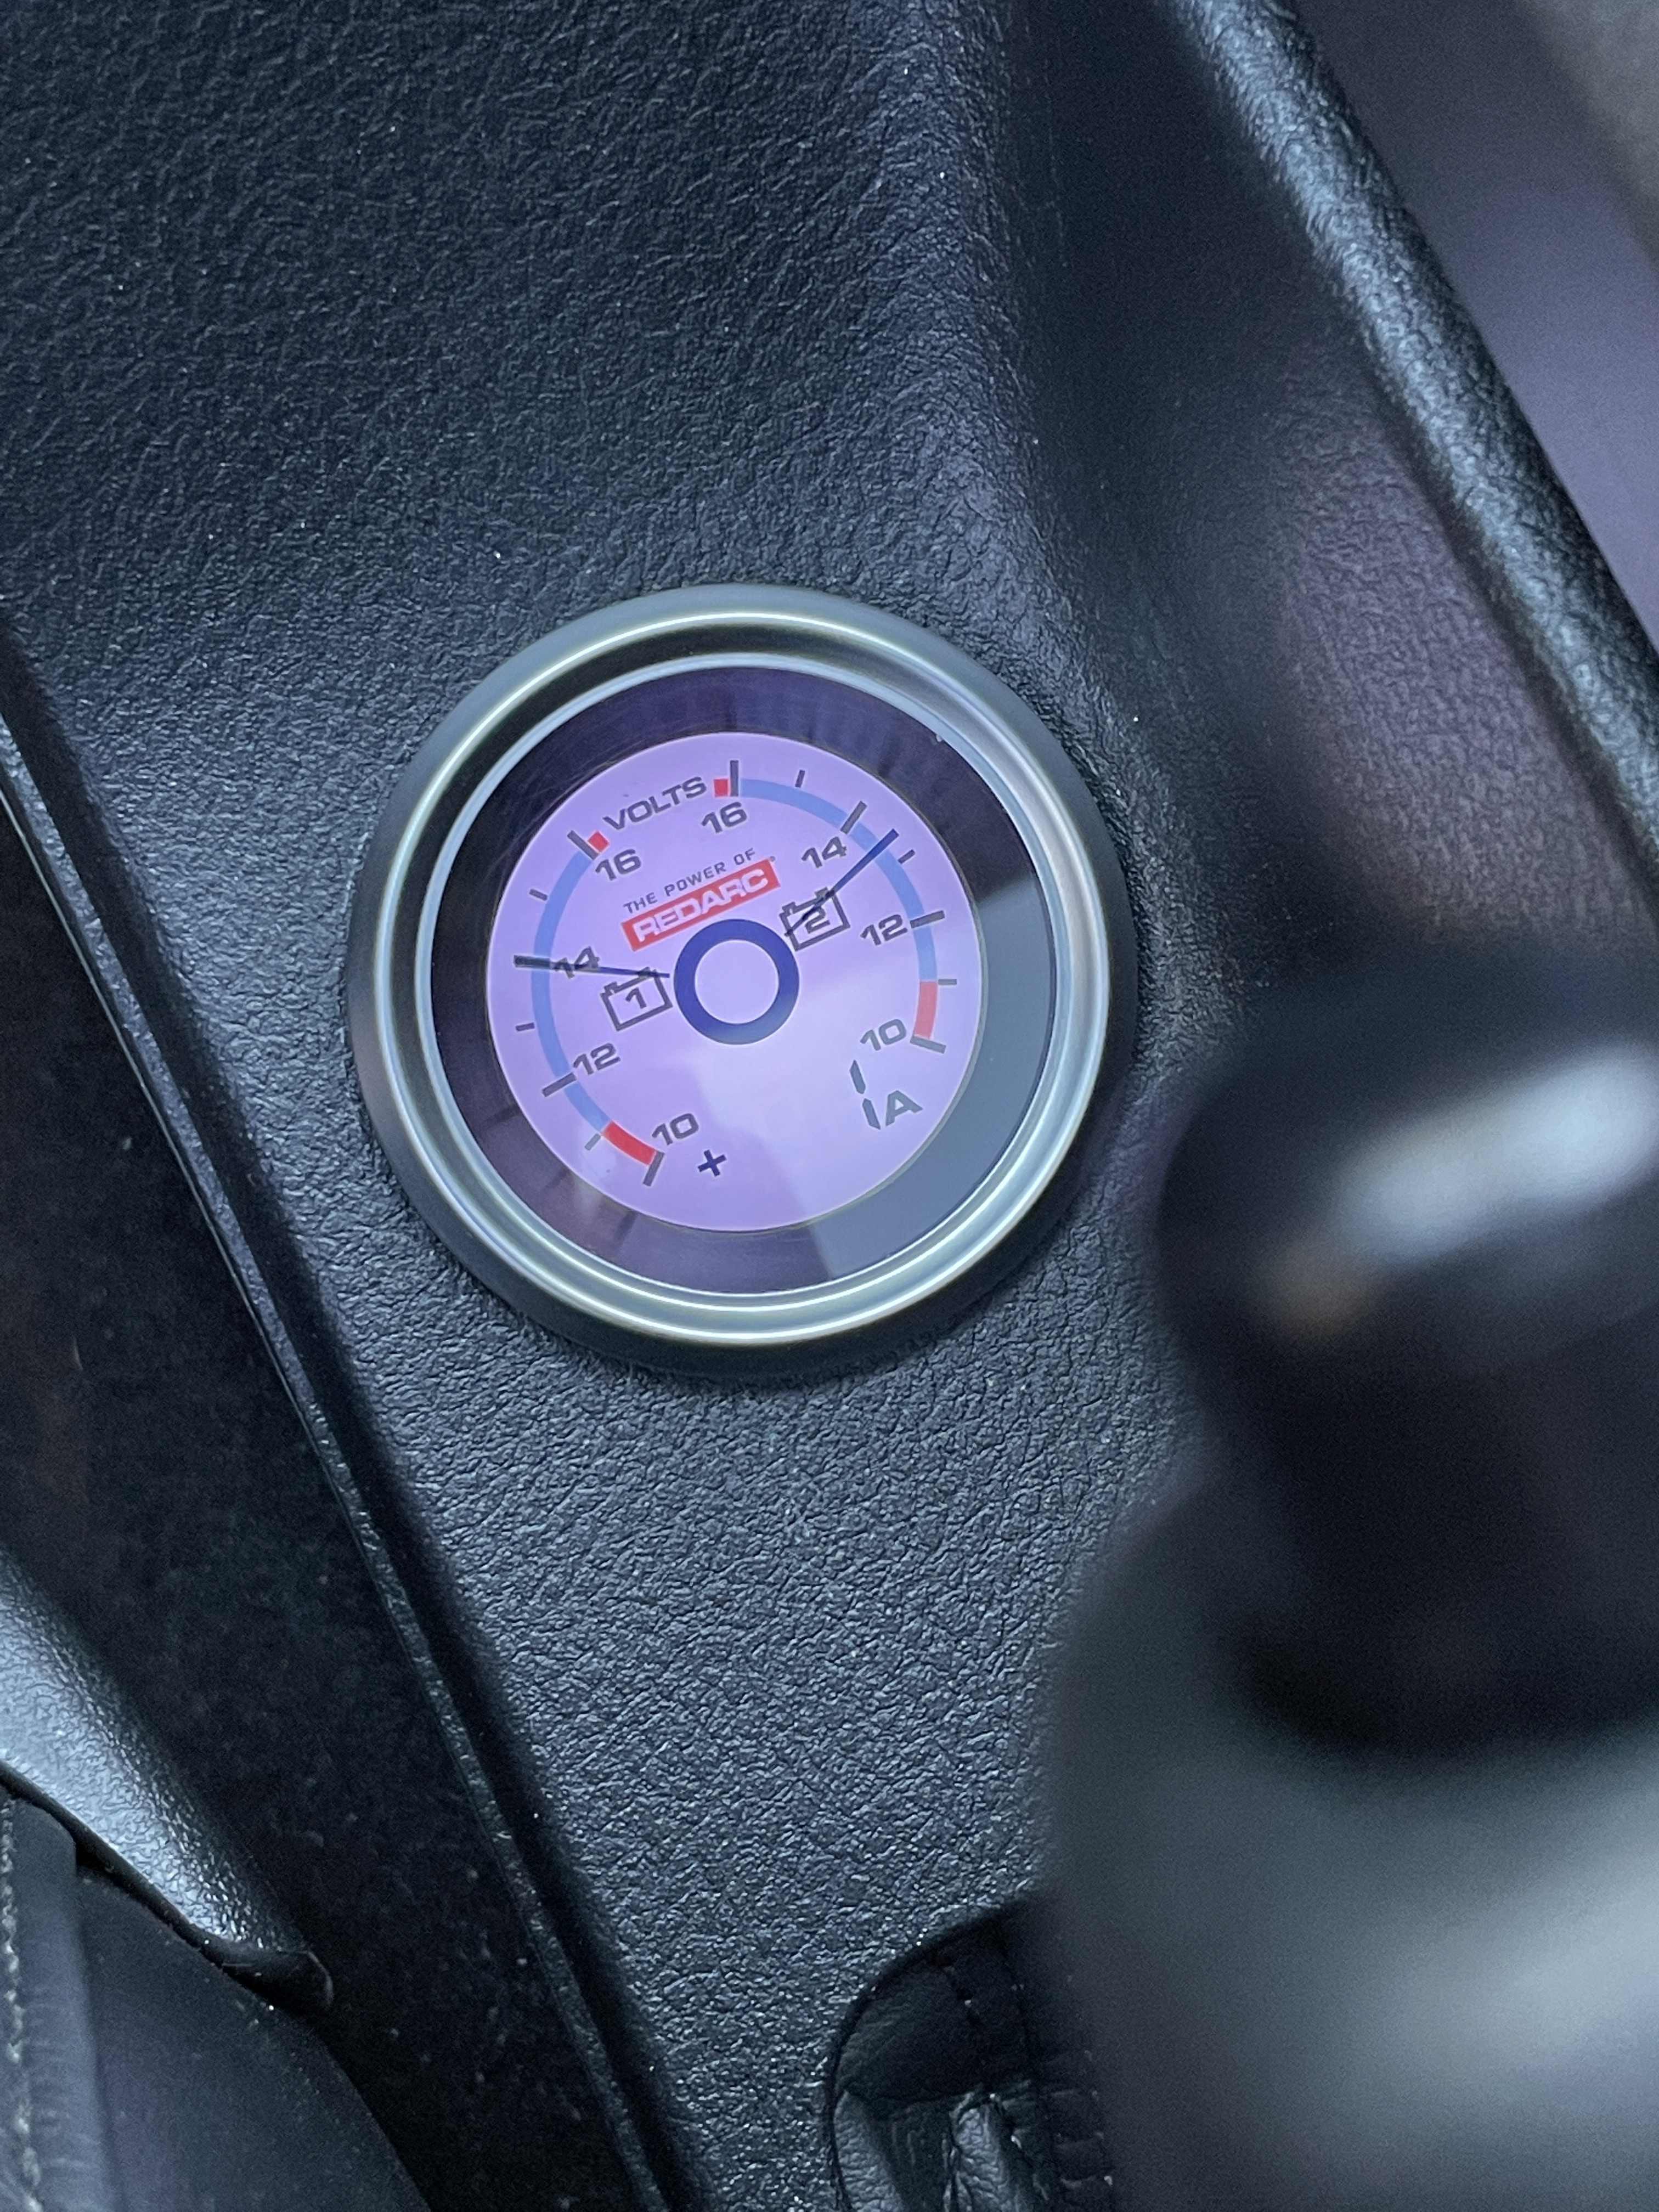
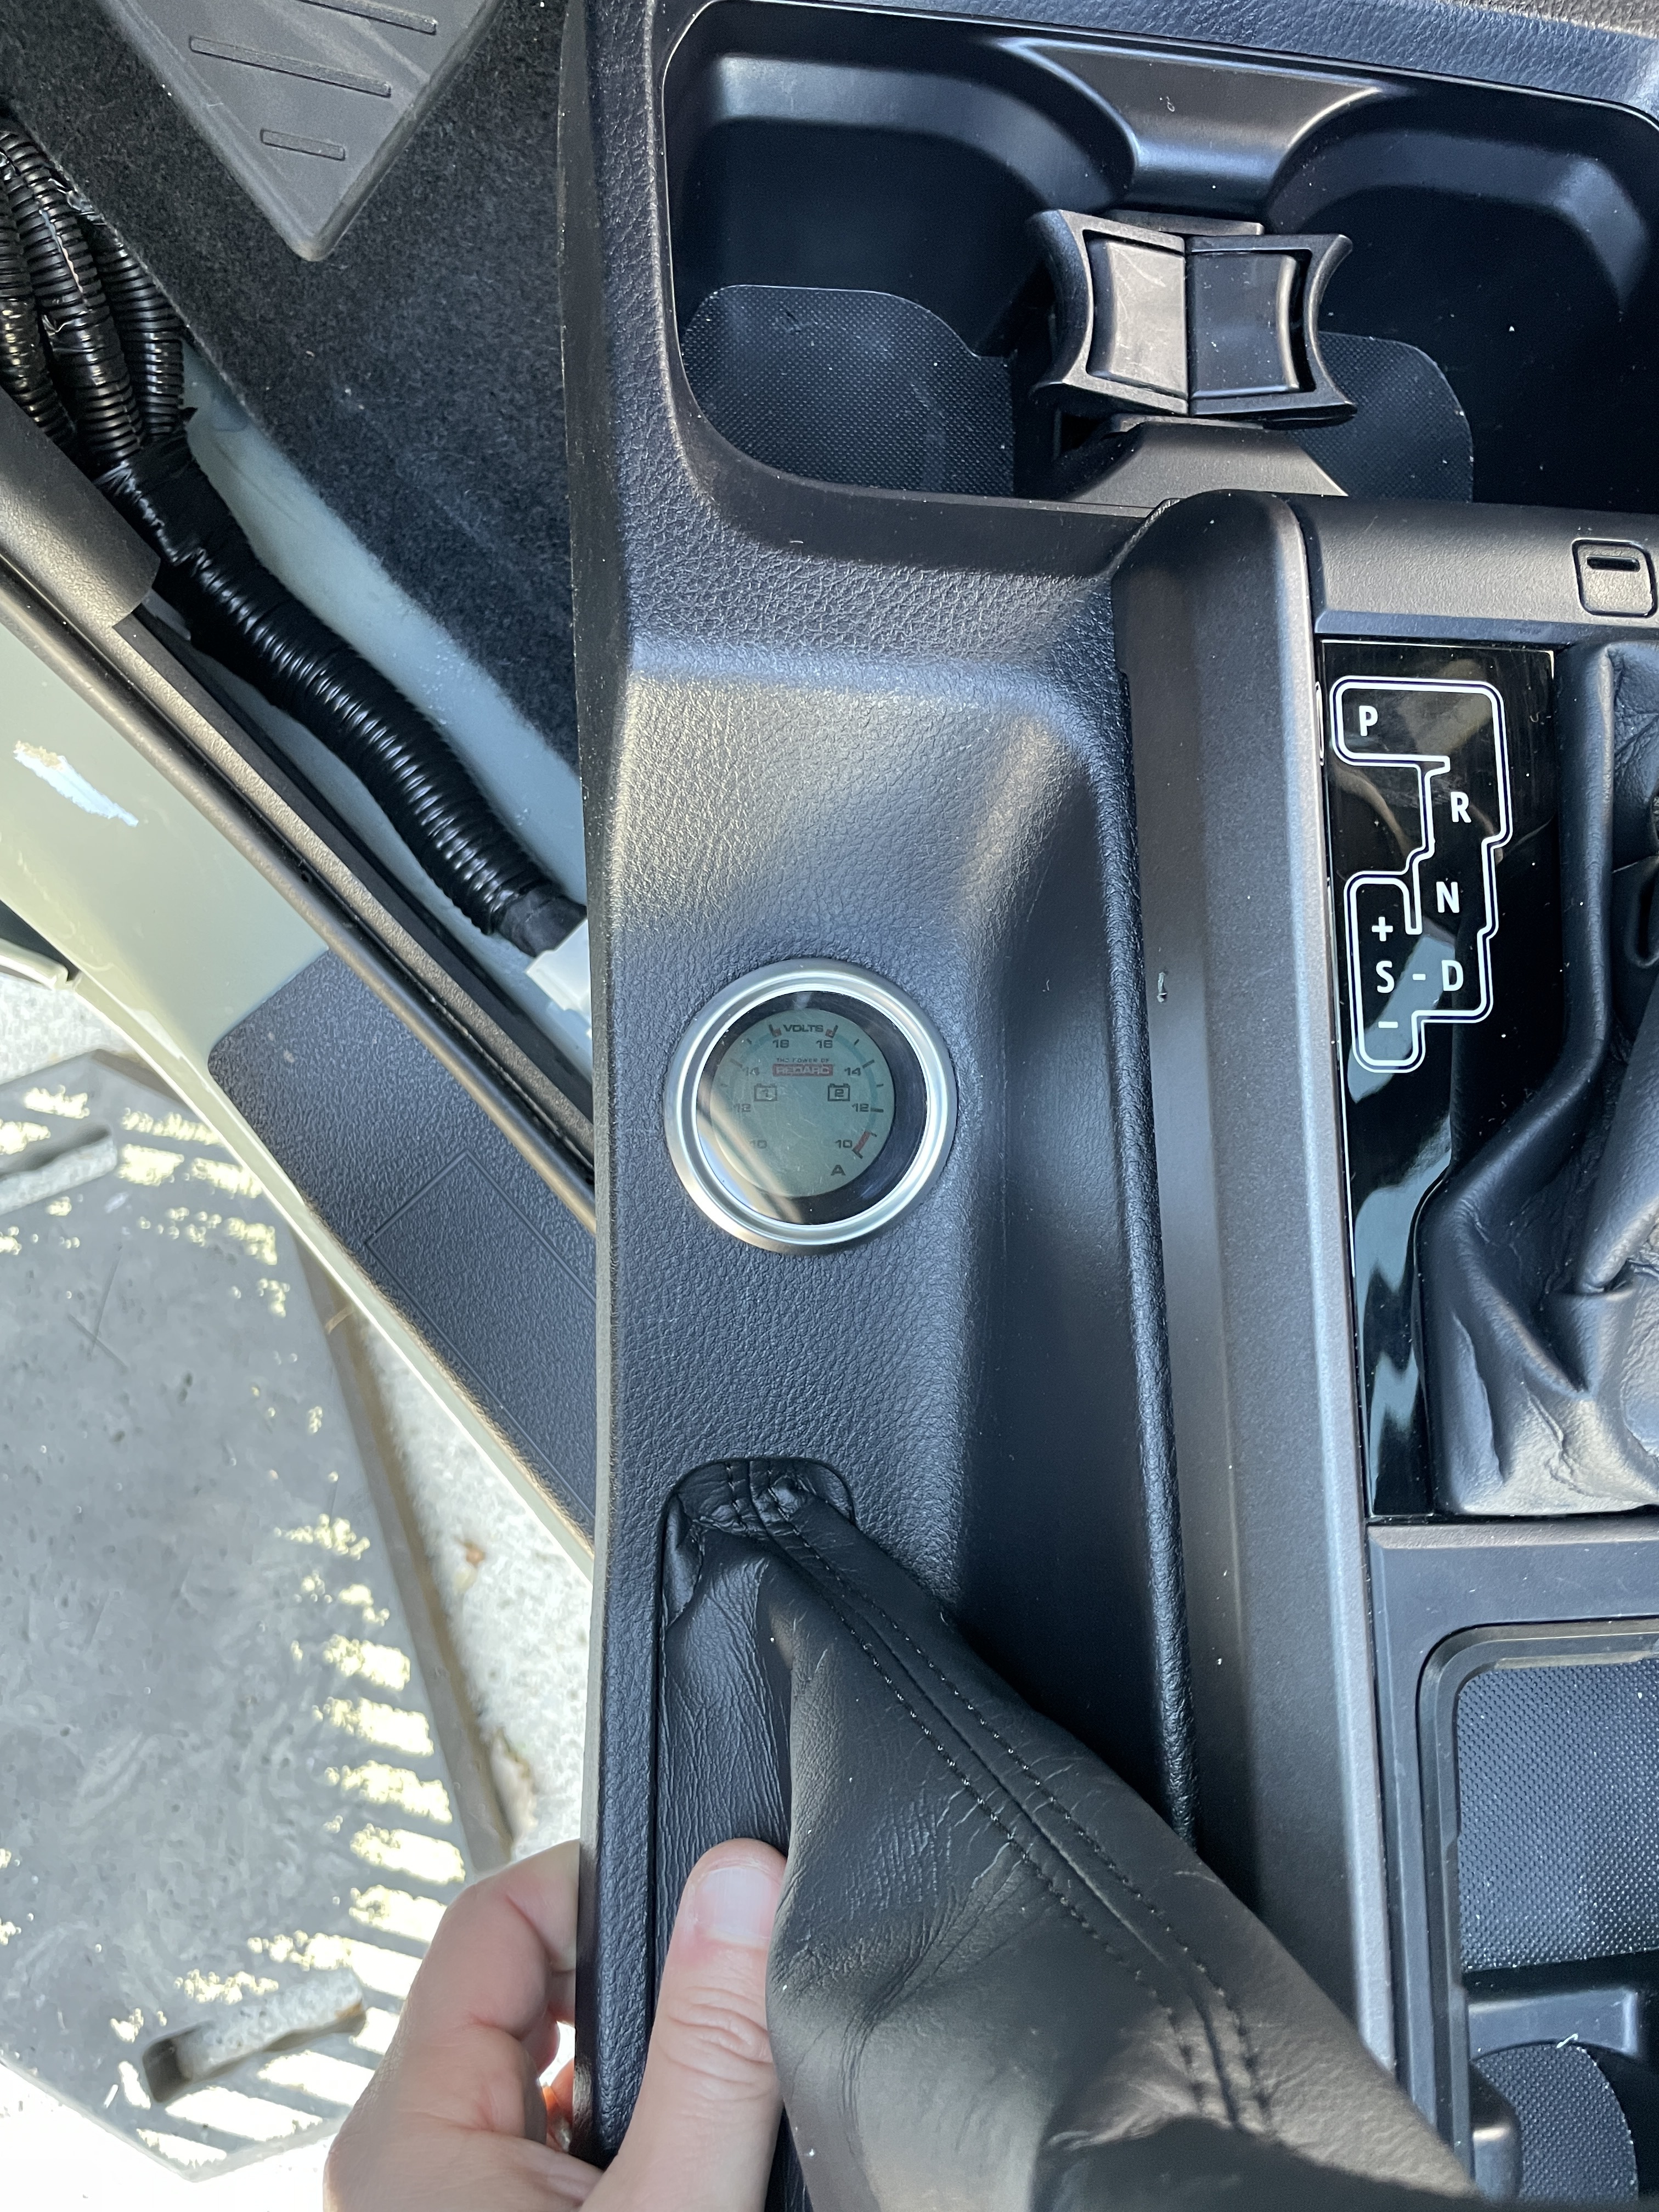
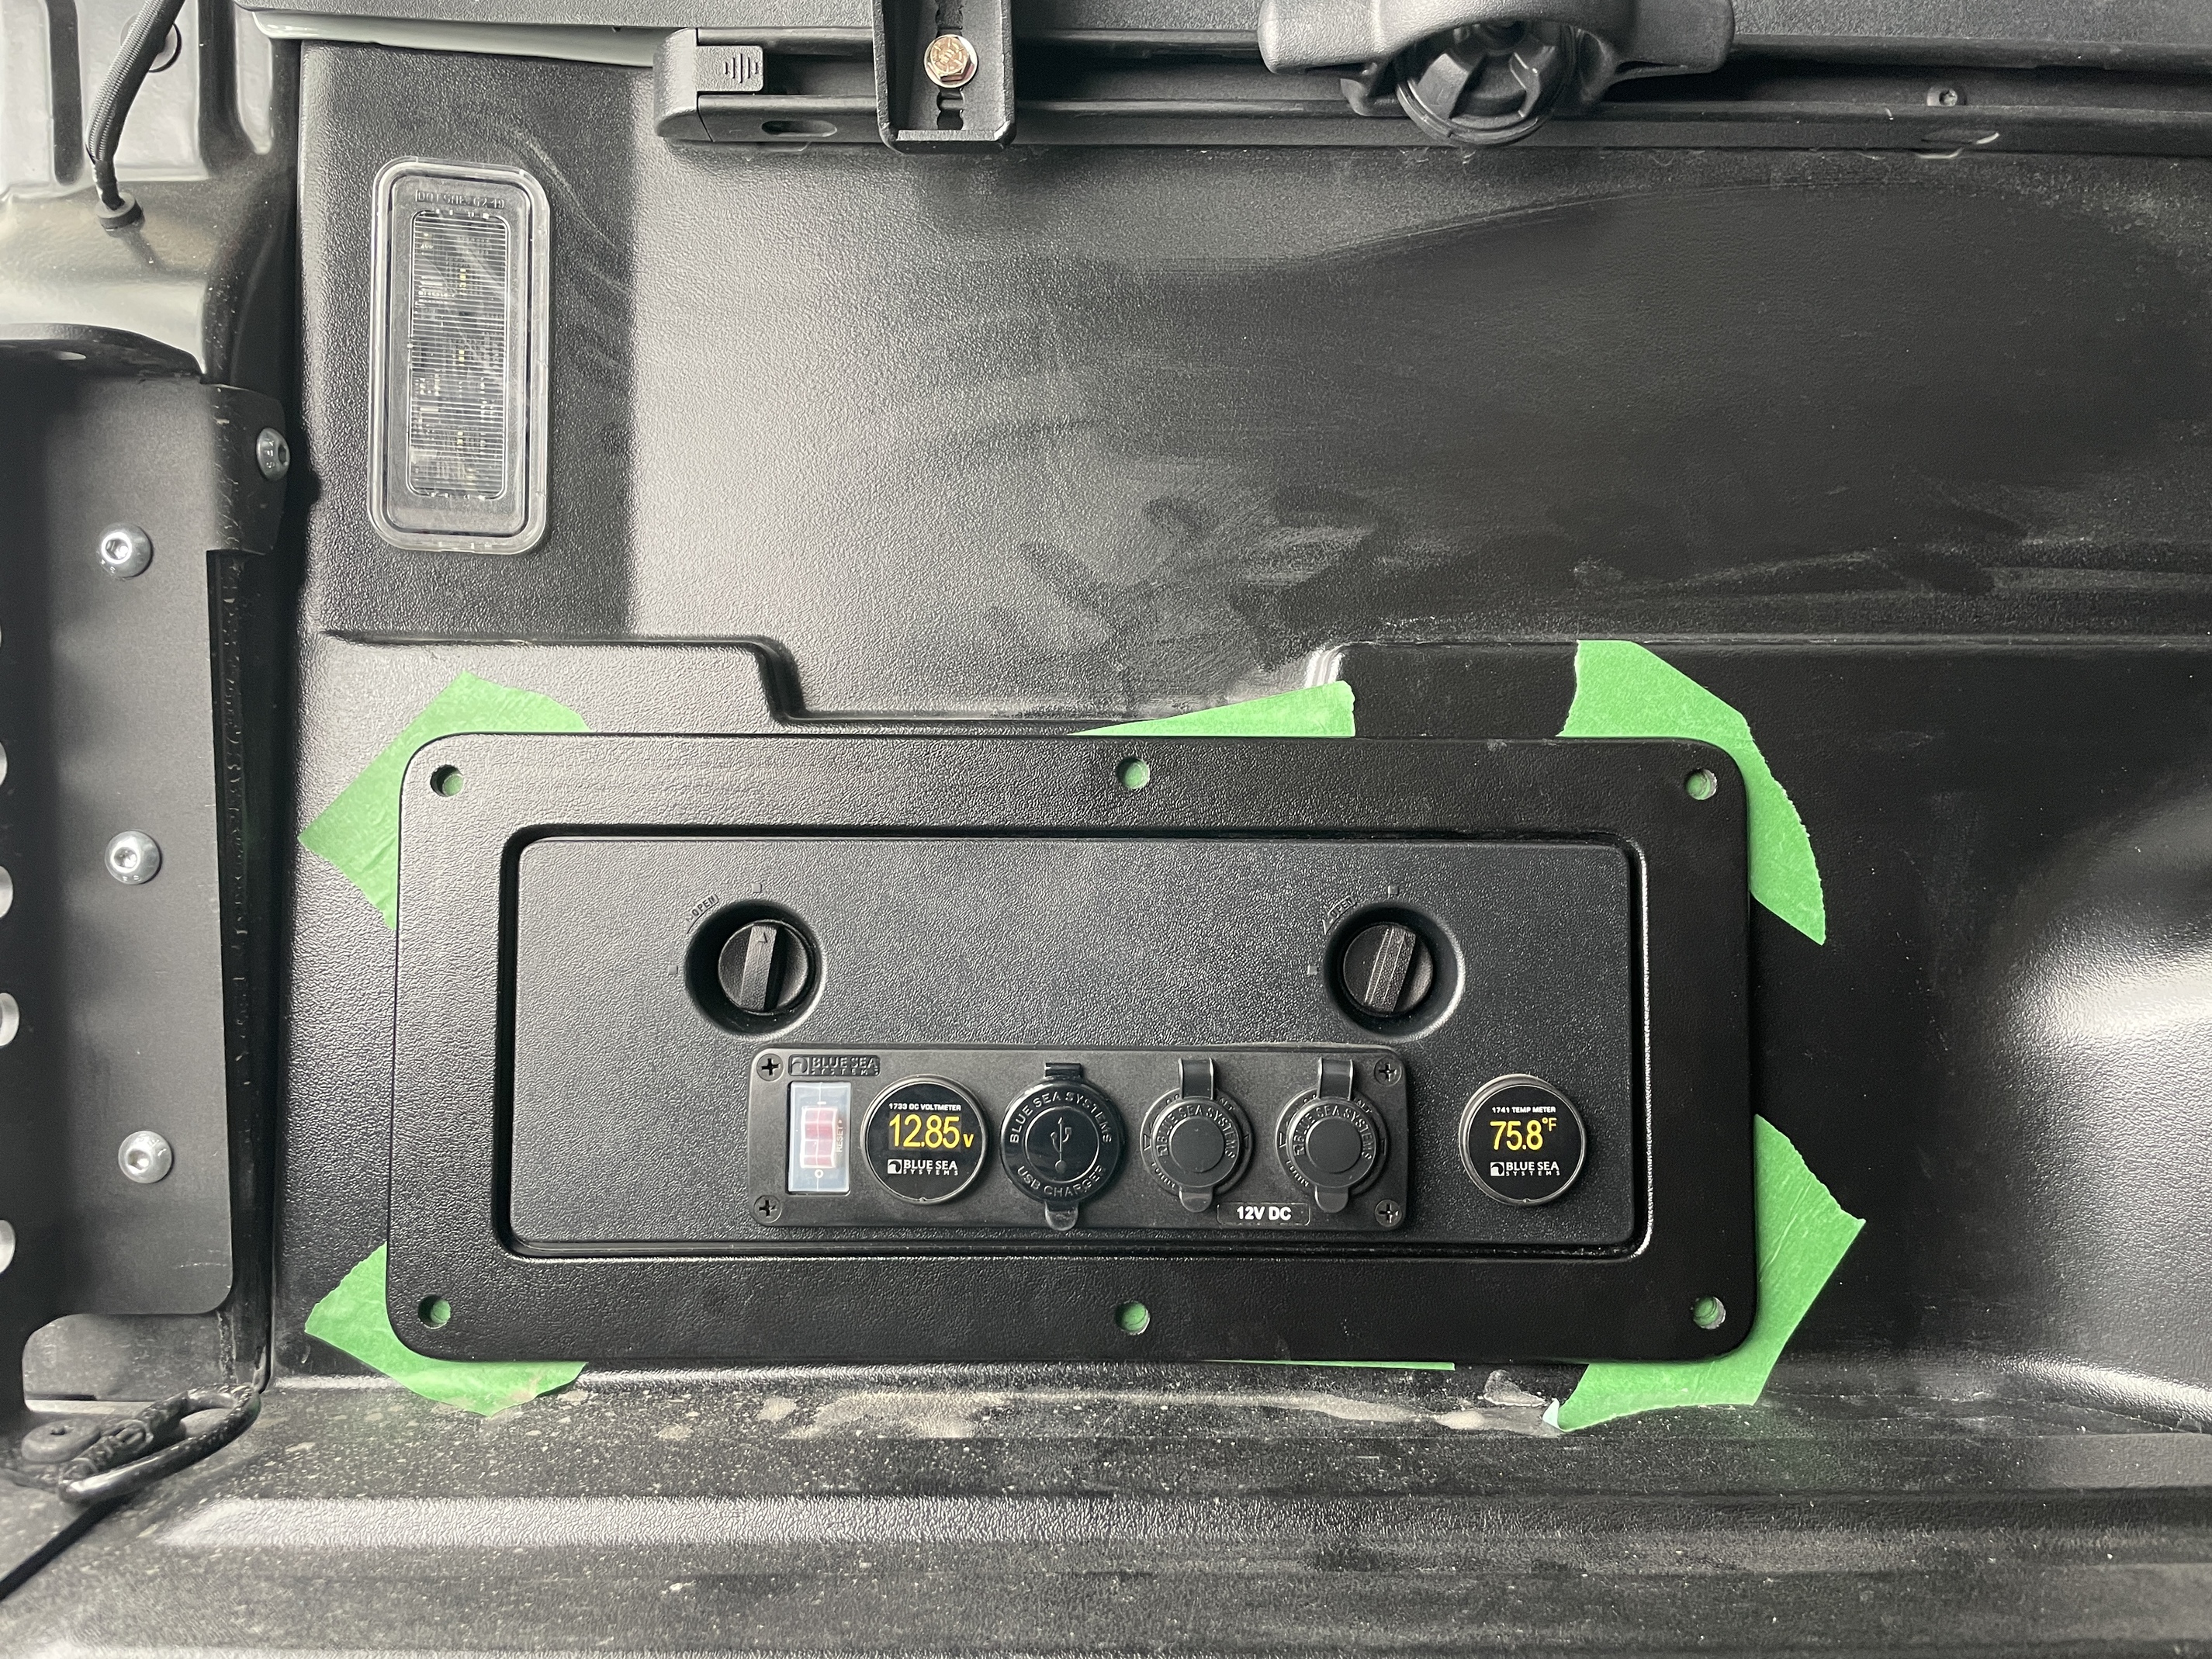
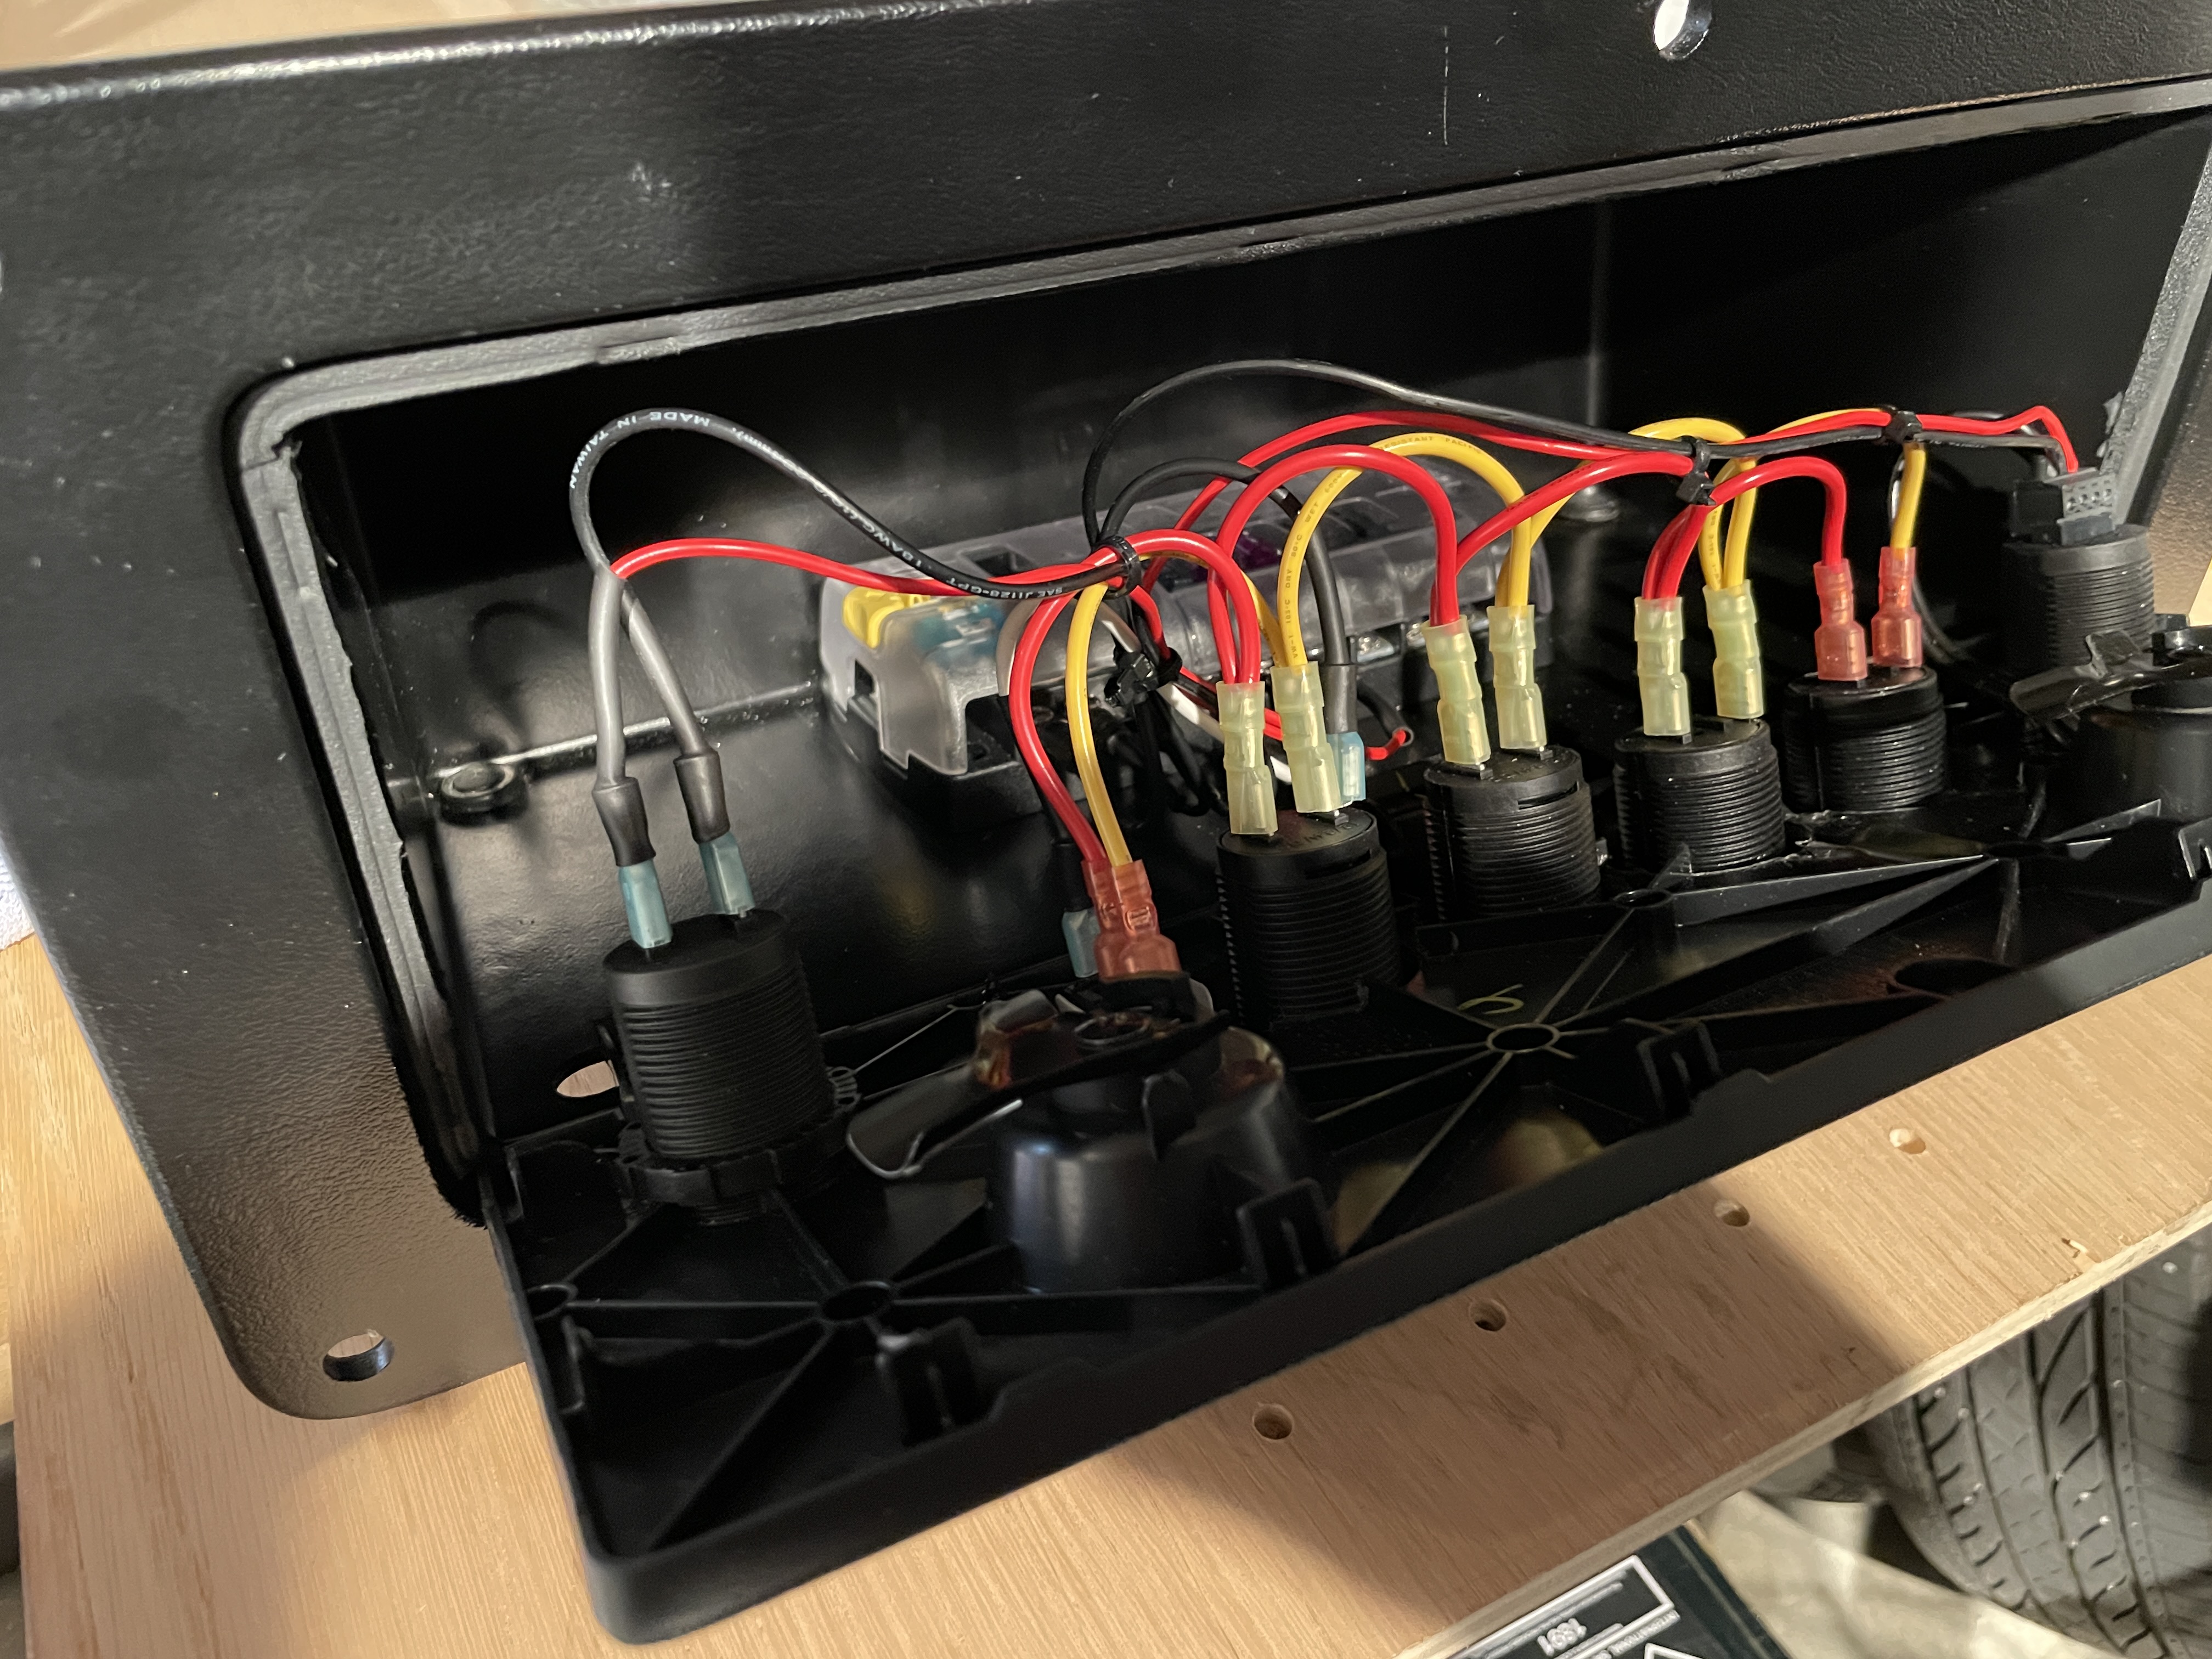
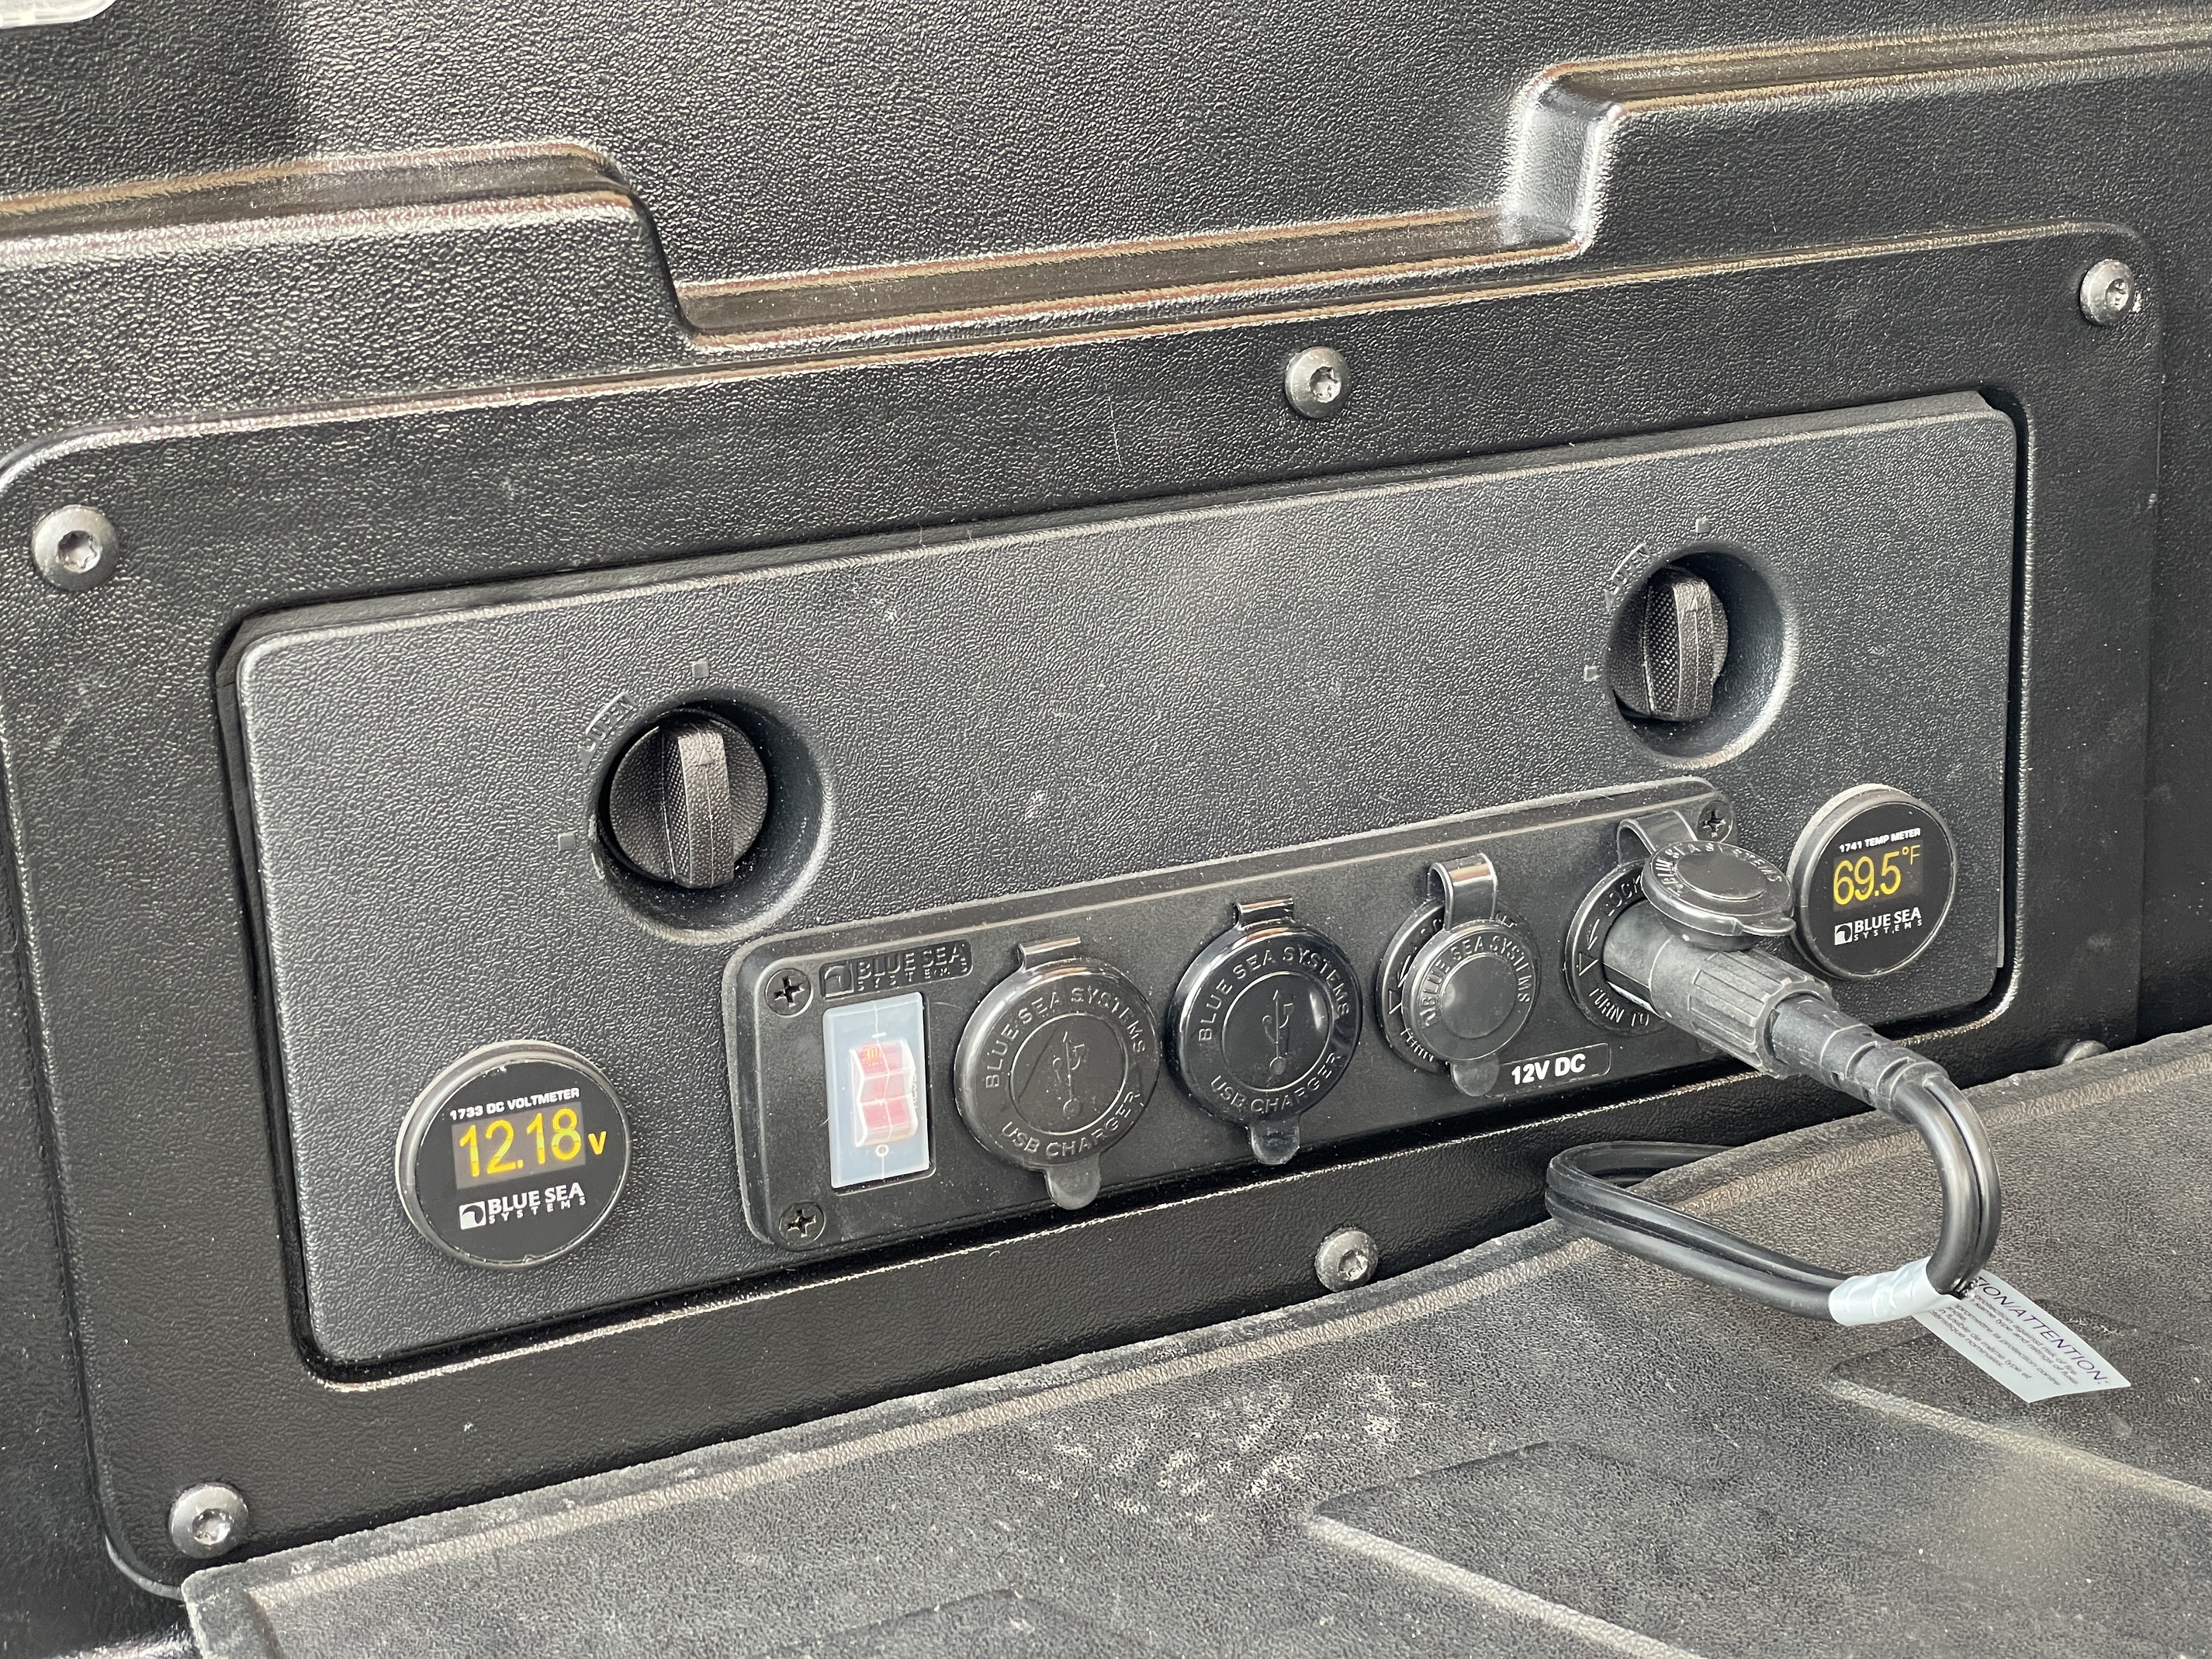
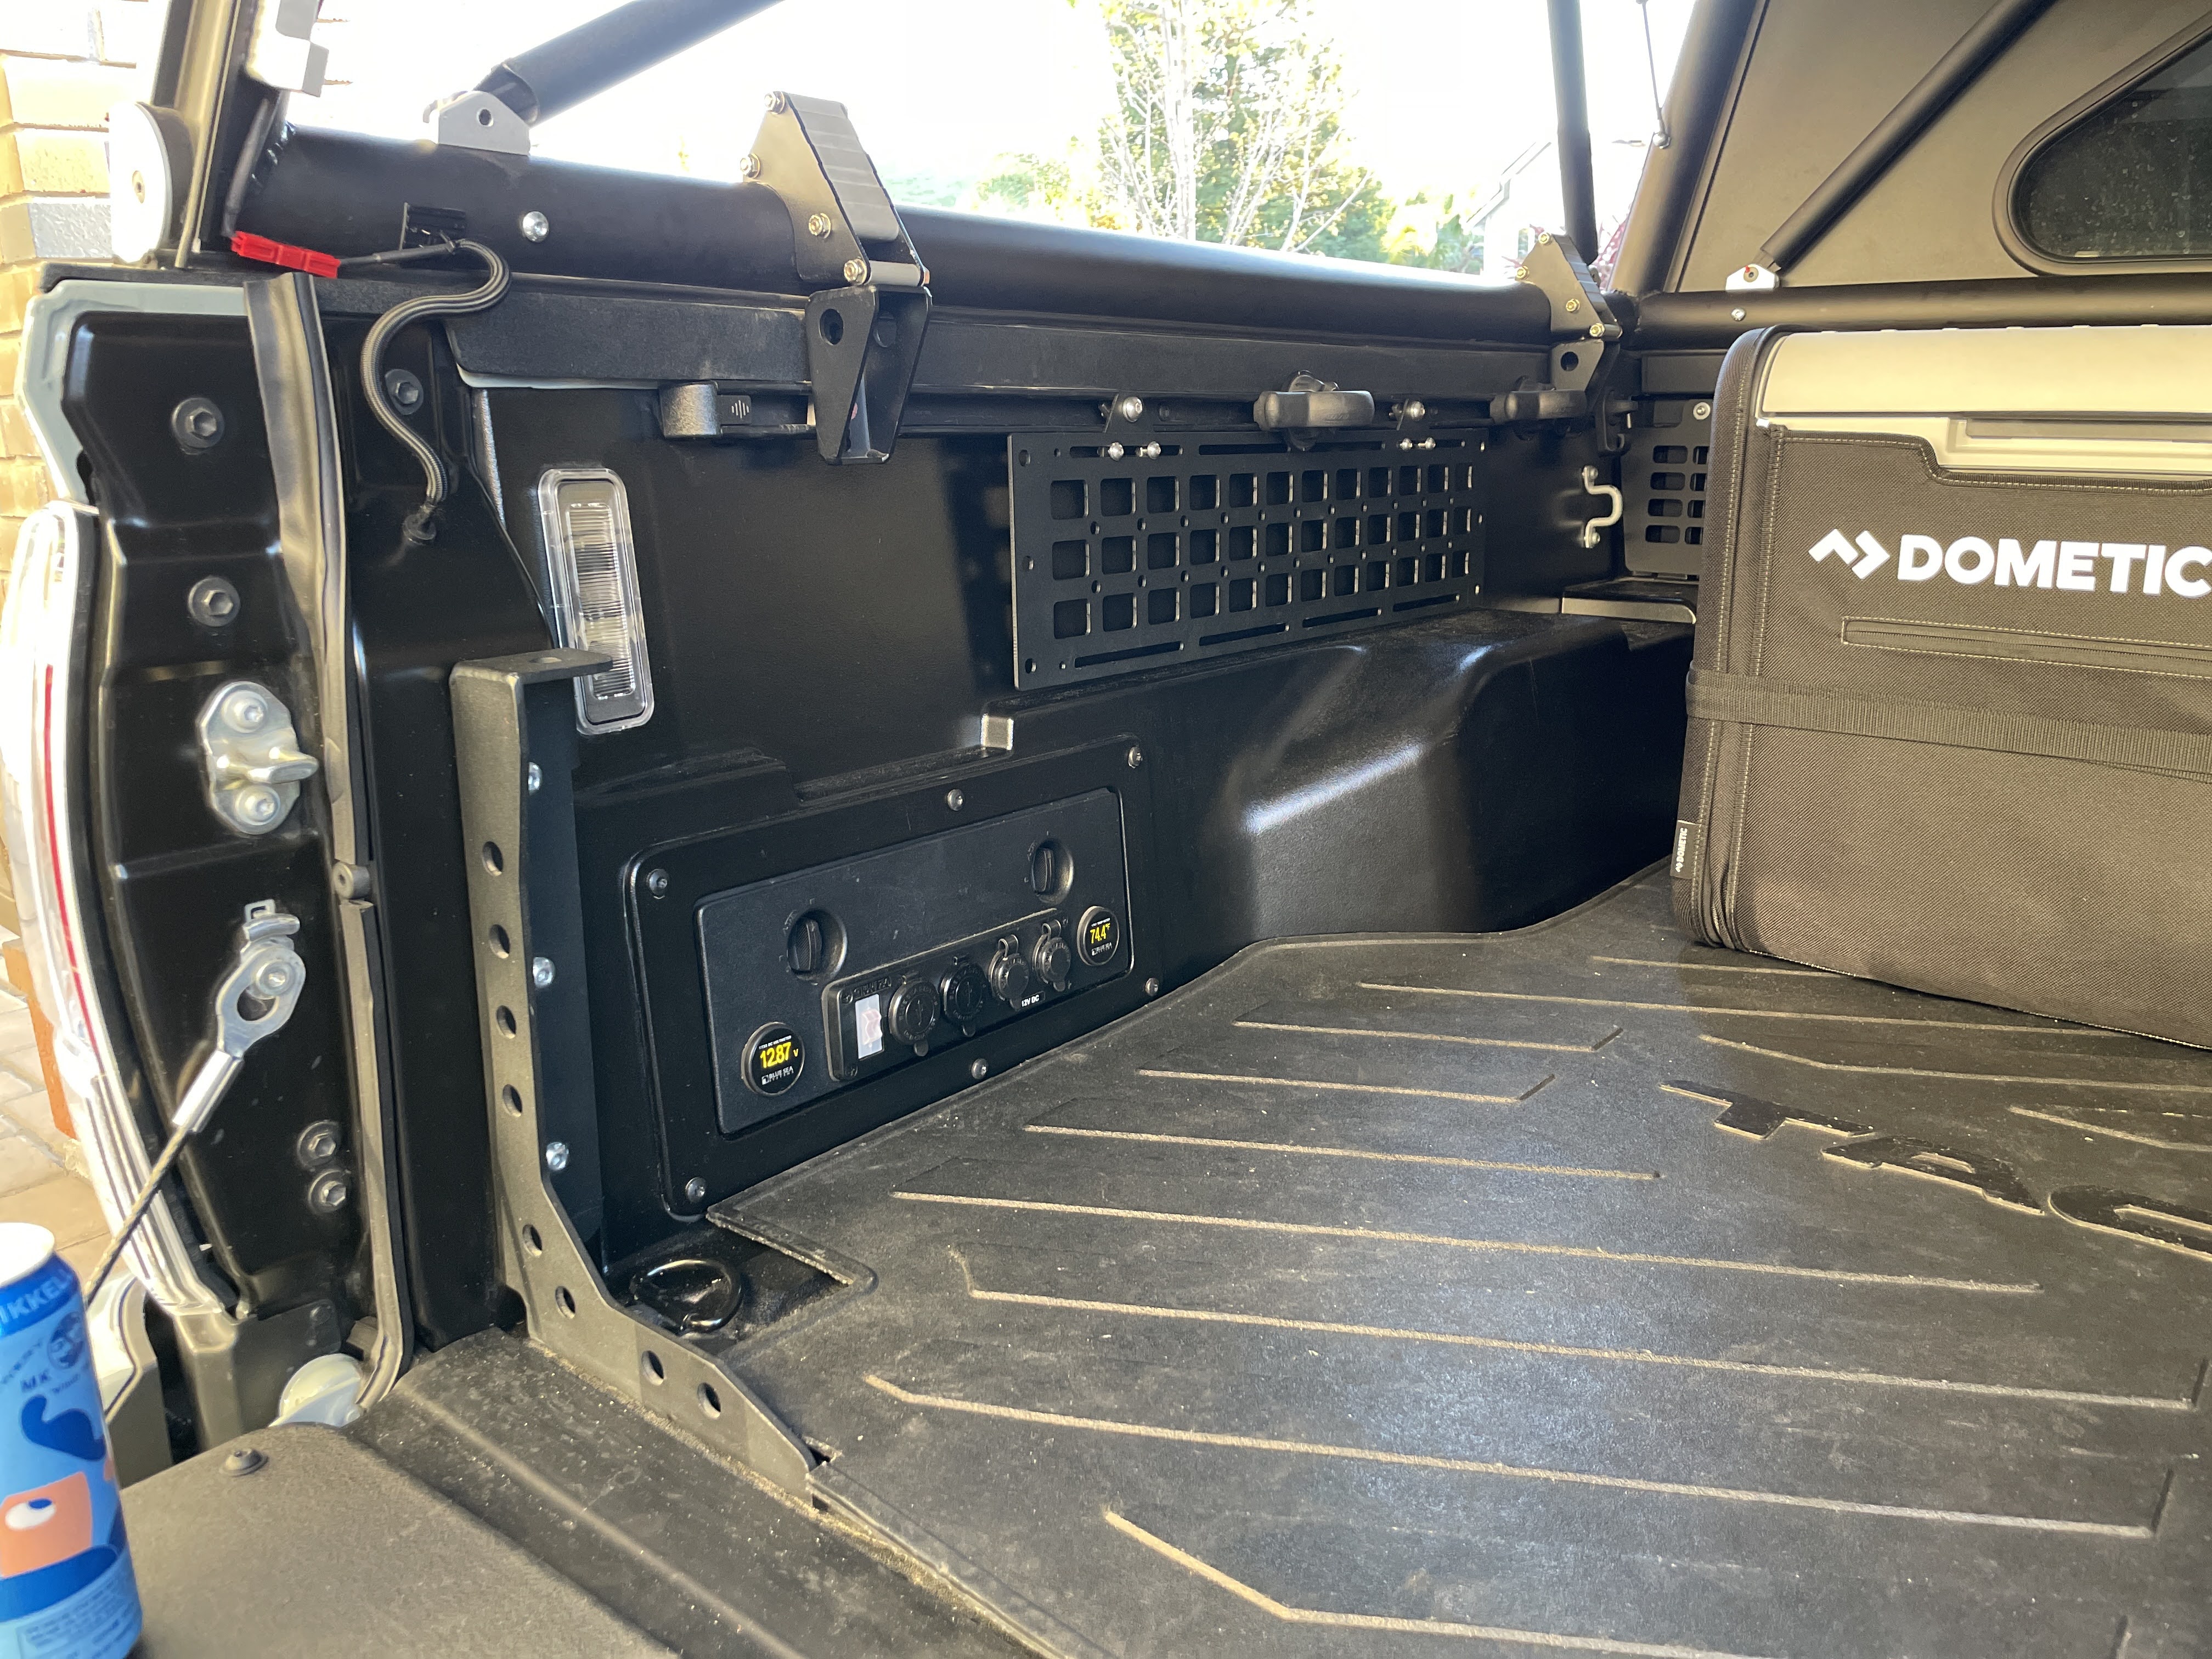
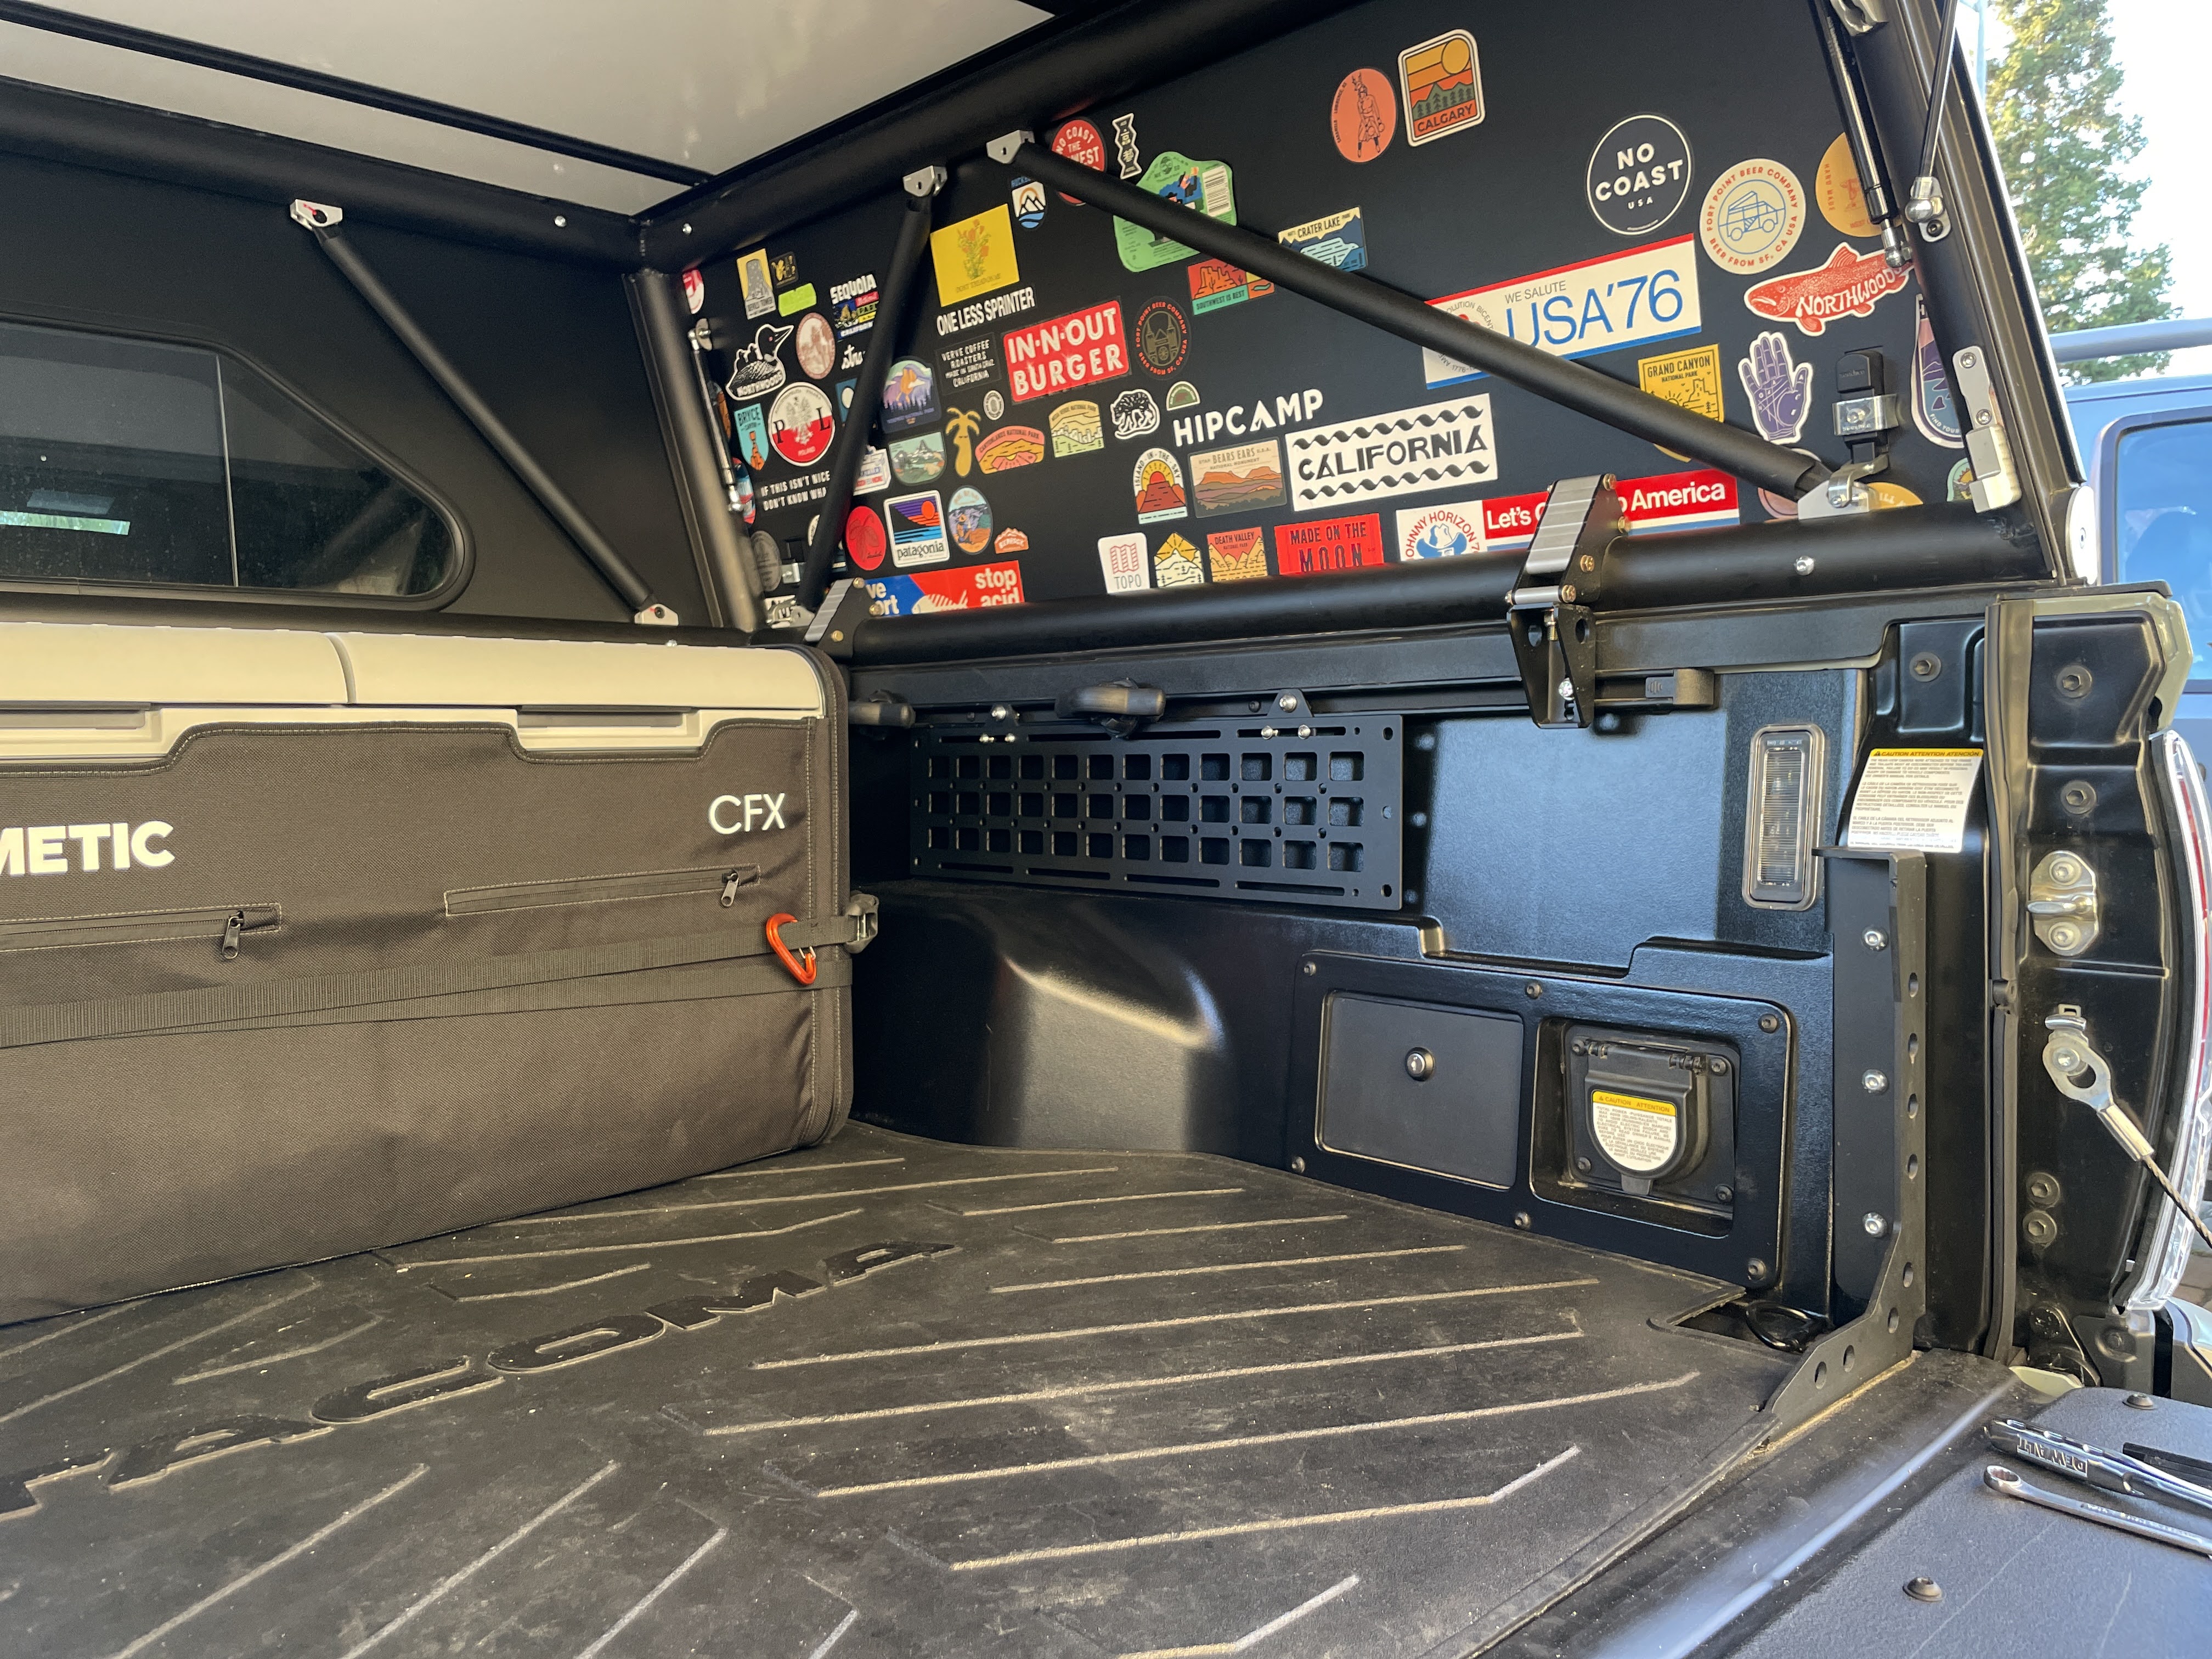

We have power!

Voltmeter, Temperature Sensor, USB Sockets and 12V Sockets are all functioning as expected. The REDARC Monitor in cab is accurately showing battery levels and charging too! Very excited about all of this coming together!


Next steps on electrical work

• Clean up wiring, lugs, shrink tubing, in-line fuses, and zip ties under the hood where needed.
• Mount Sunflare Xplor Adventure Solar Panel to the roof of the GFC and connect to REDARC battery charger as additional charging source.
• Install Matt Gecko LED lights and install Blue Sea Rocker switches in electrical cubby.
• Install Dometic Fanstatic Fan in roof of GFC.
• Intall ARB Twin Compressor under passenger seat.
• Cut hole in bed mat and run conduit underneath for fridge wiring.

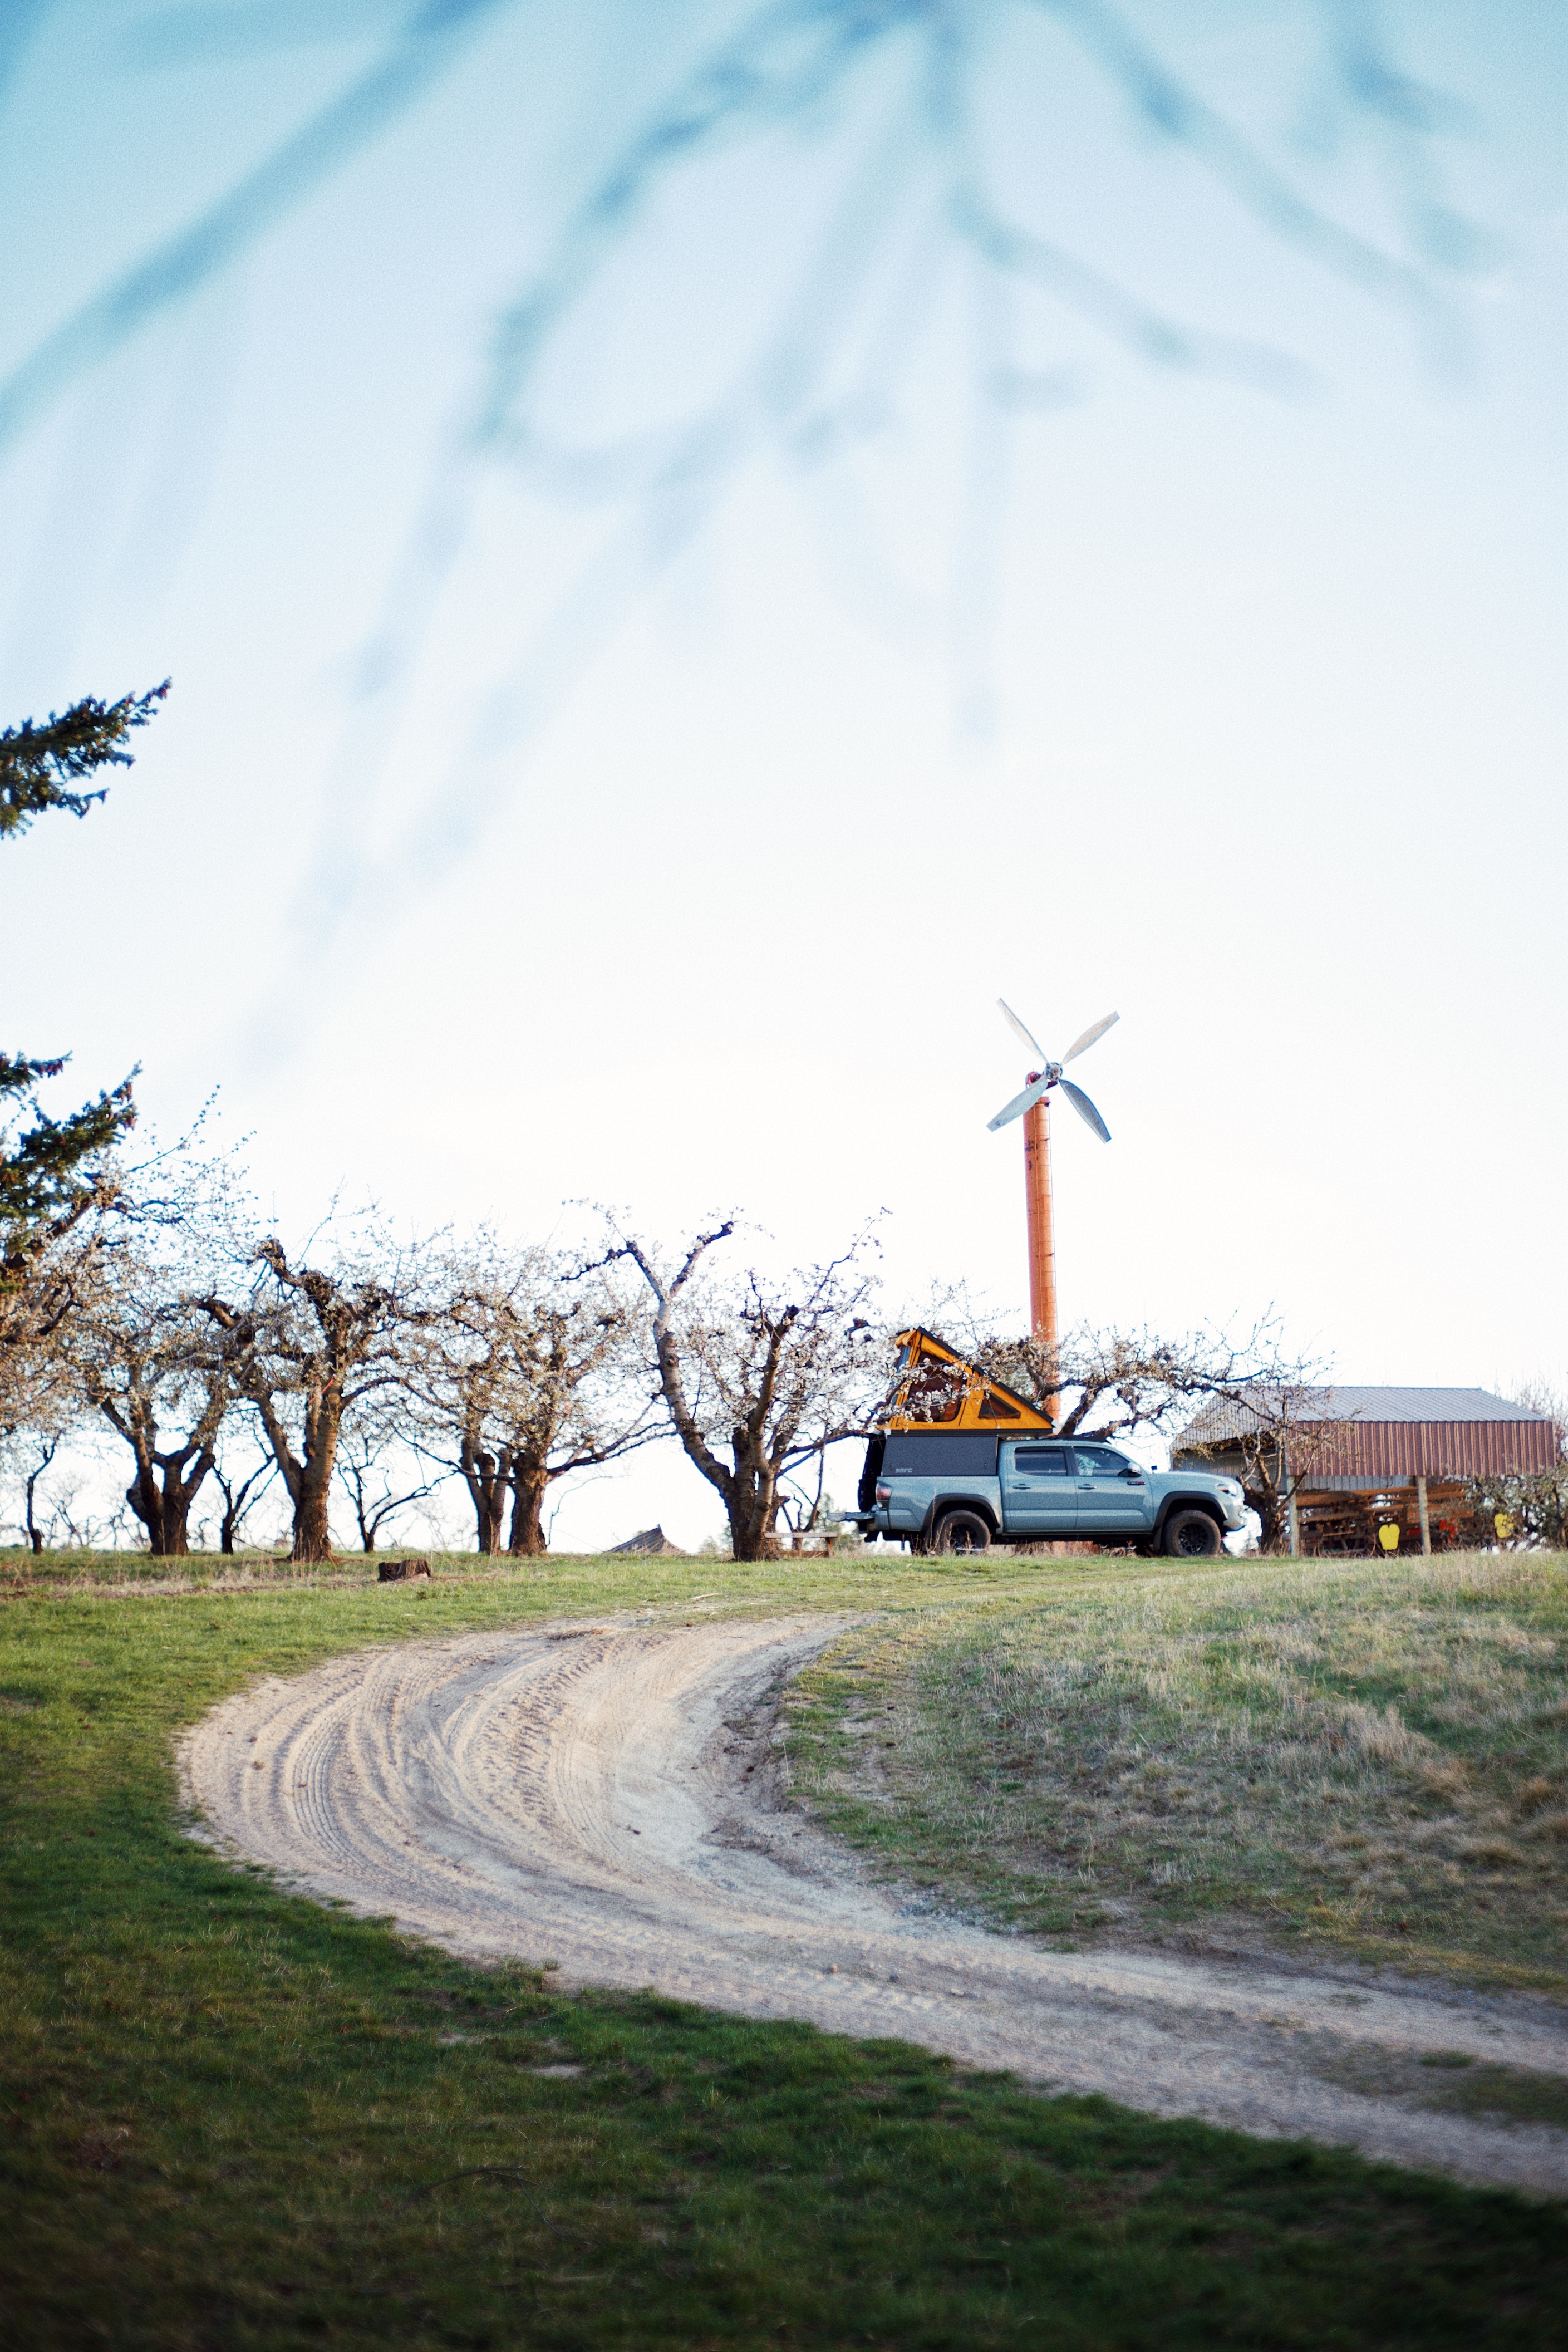
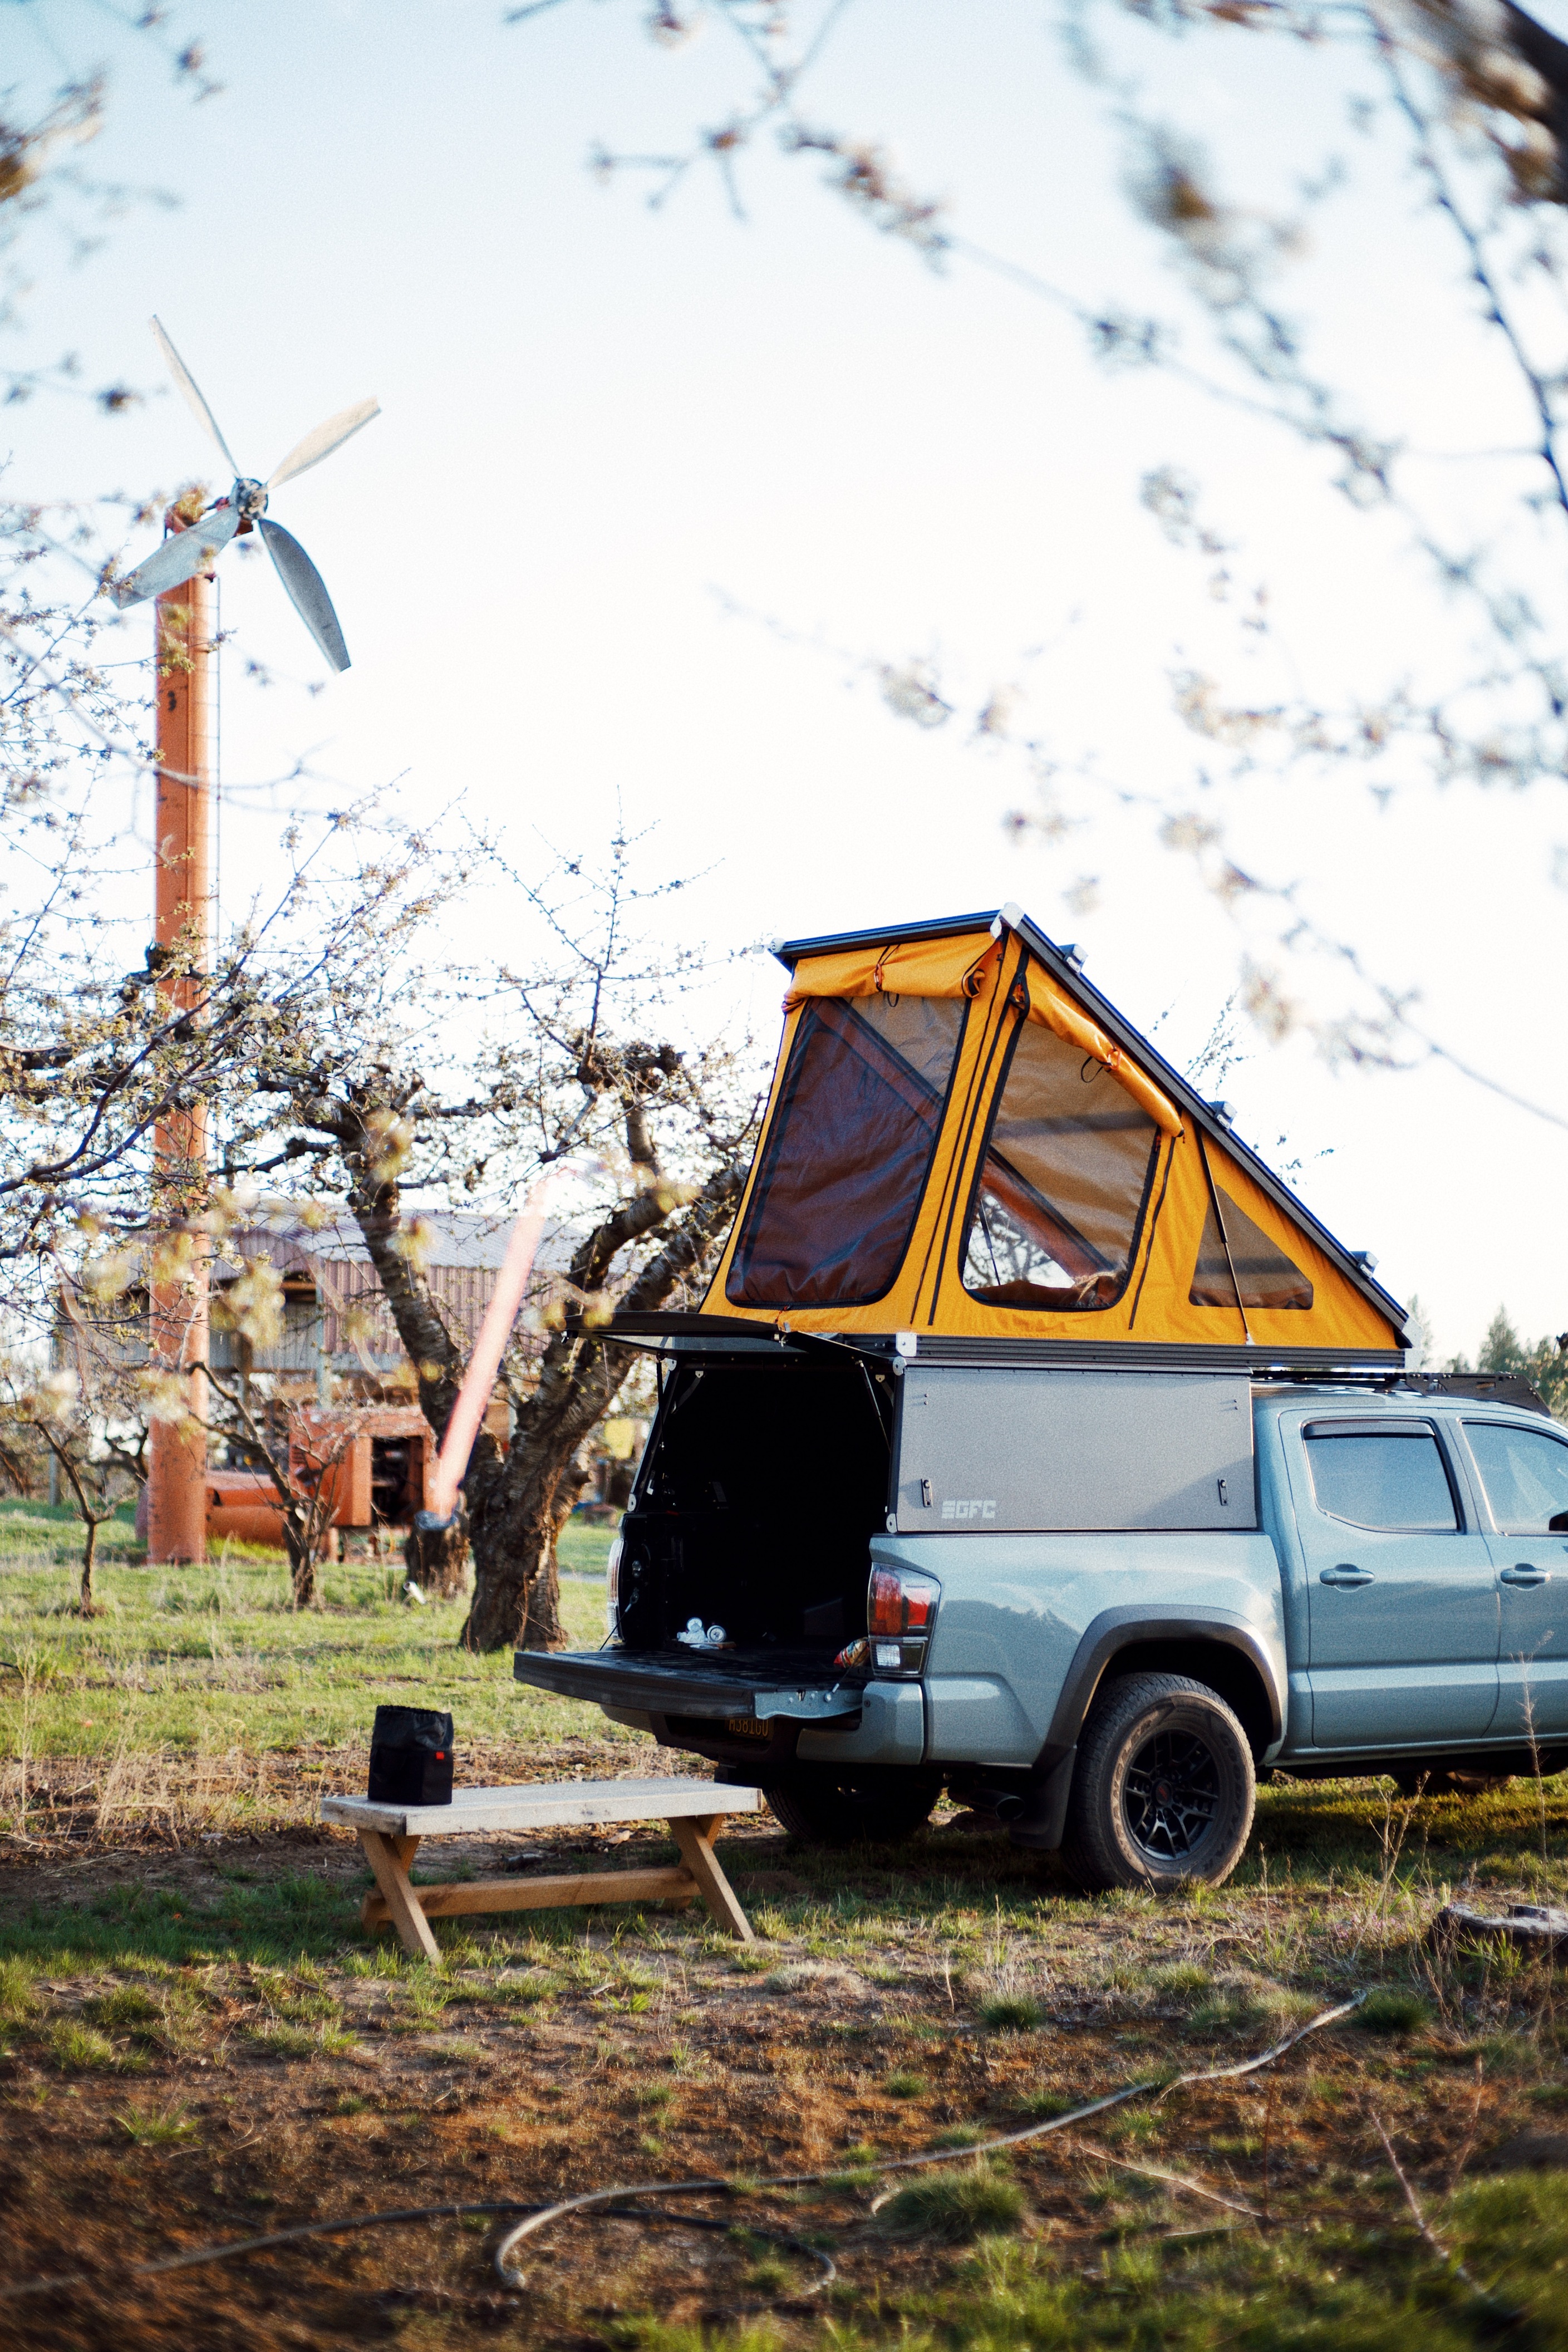
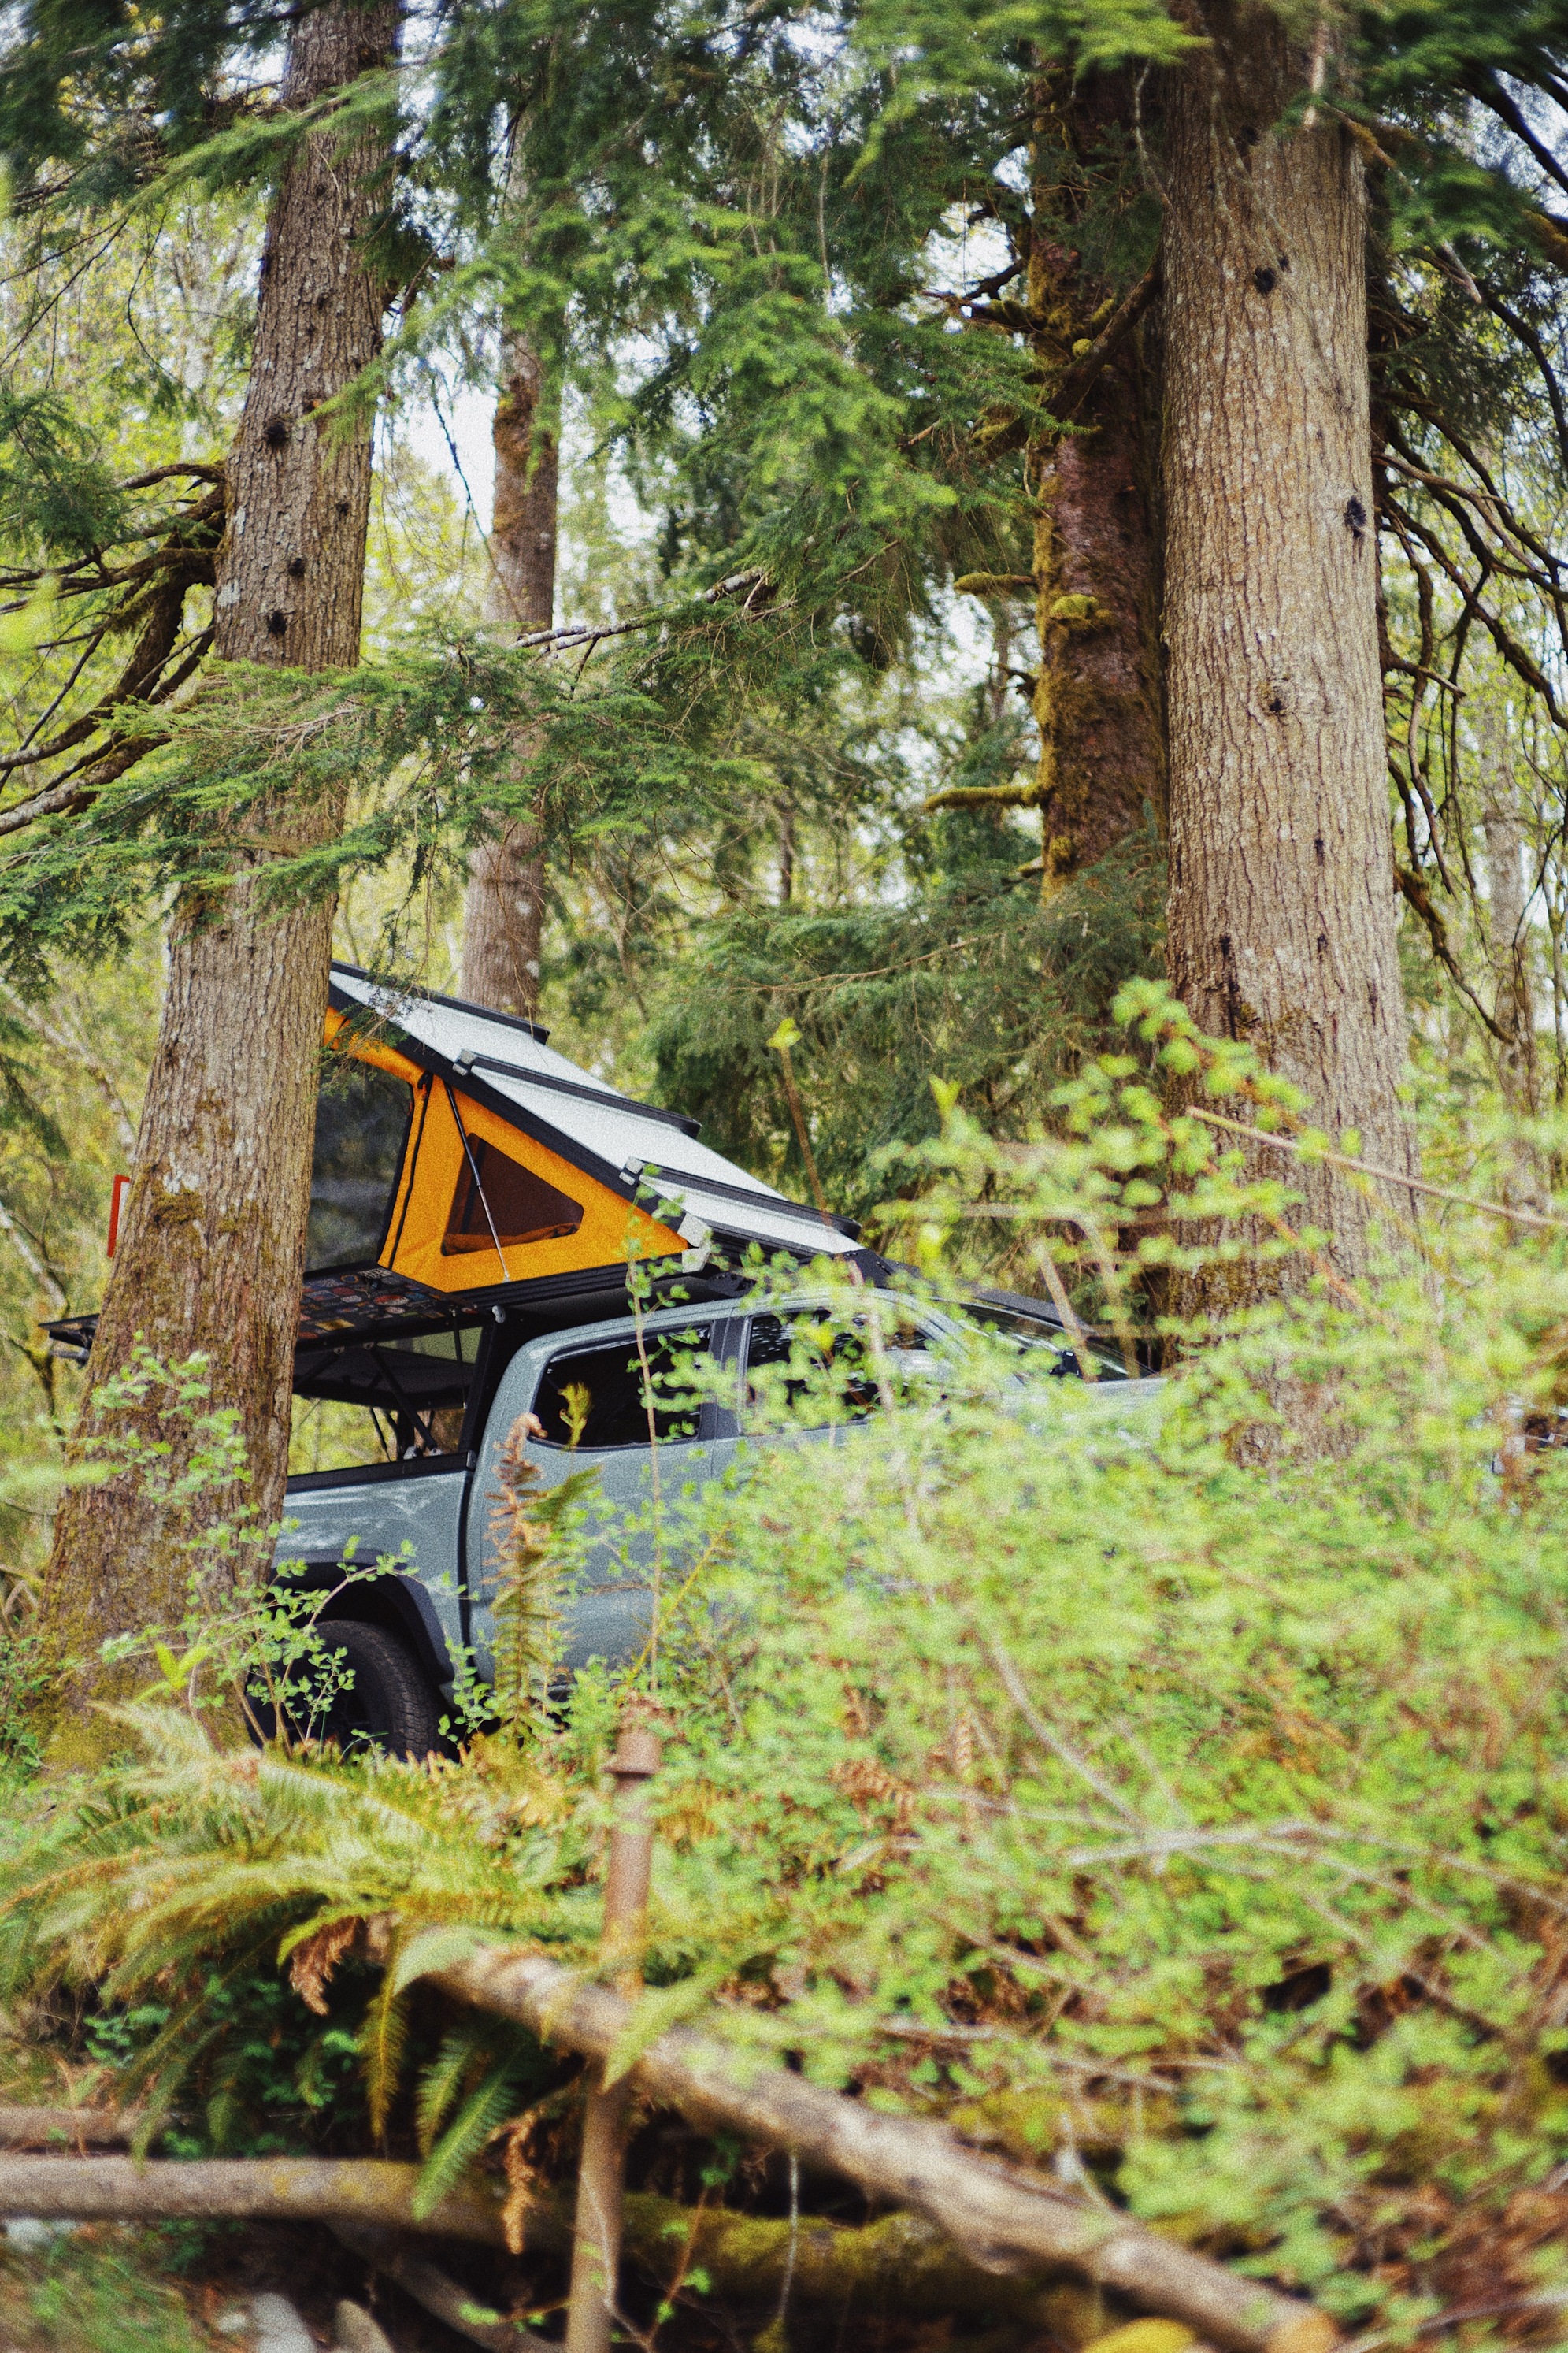
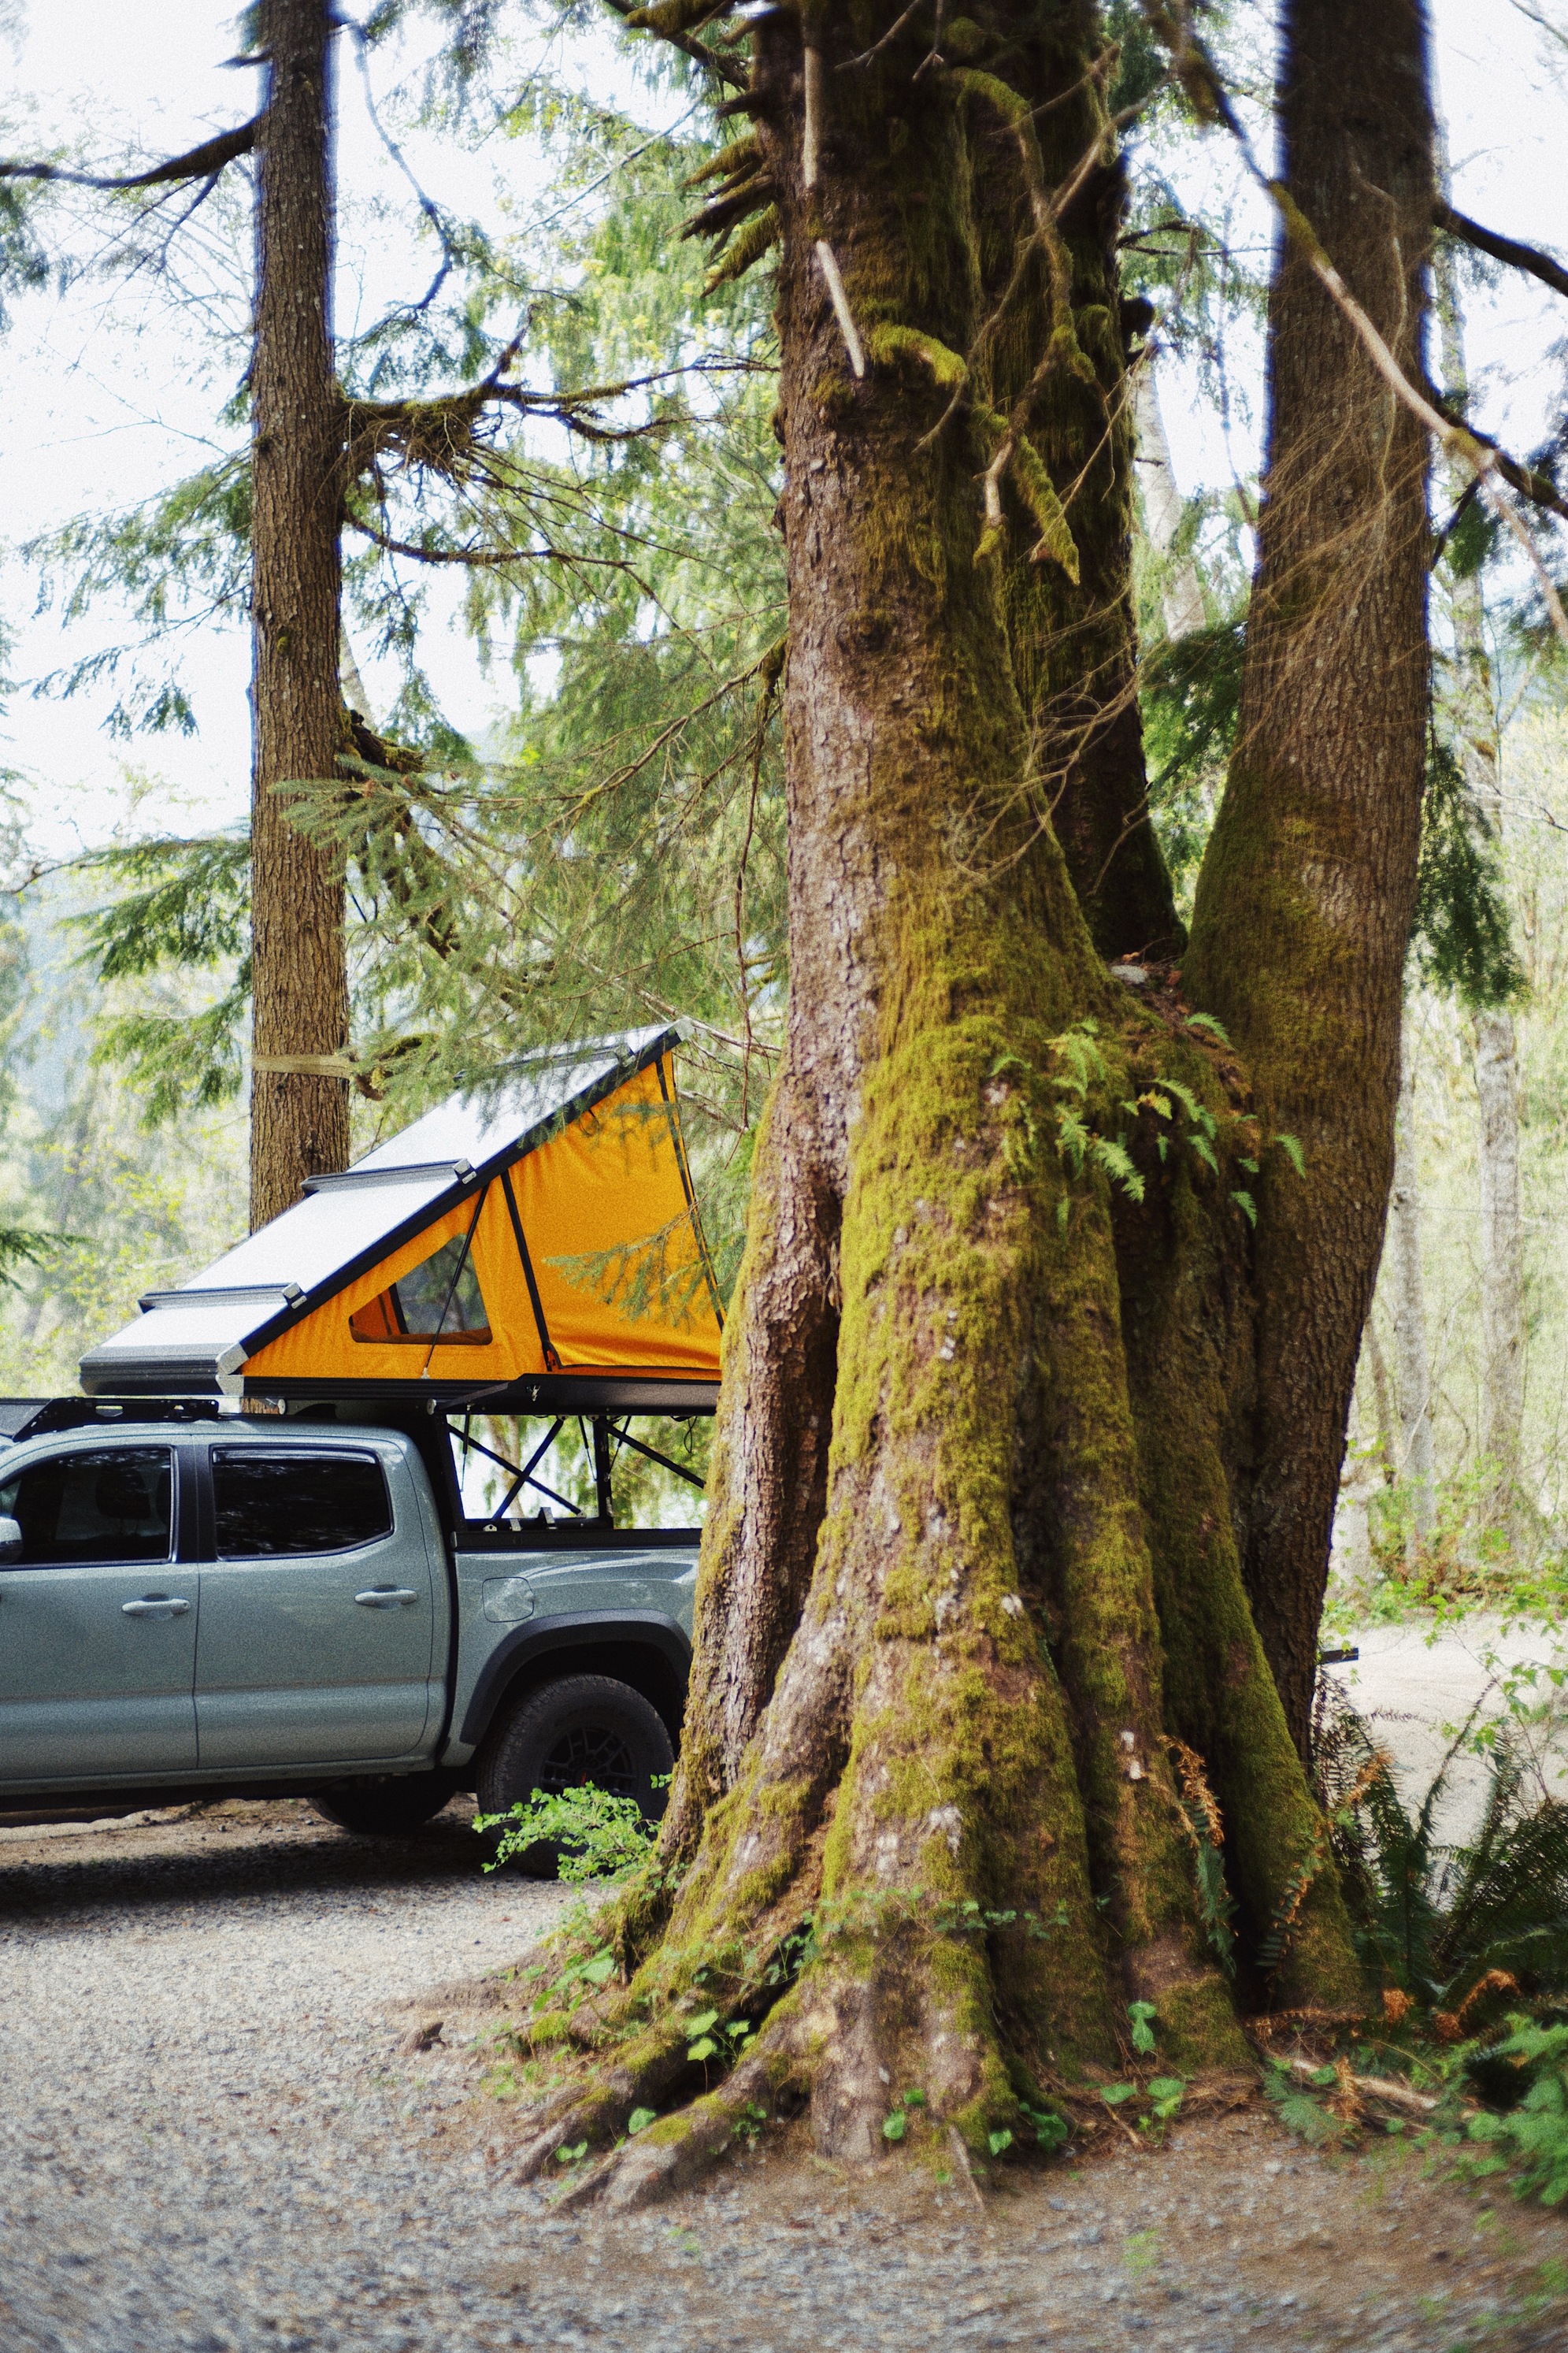
Will probably get to most of this electrical work next month, as for now, time to go camping :metal:

11 Likes

Build Update 04/24/21 — Gone camping!


Quick overnights in WA, OR, and CA as I roll back down to the Bay from Alberta.

Was also able to quickly meet up with @jedgar as I passed through Bend so he could test fit his DripRail prototype on a V2! :raised_hands:

10 Likes

Build Update 04/27/21 — Few Easy Additions


Toyota OEM Bed Step

I always wanted the OEM Bed Step to make quickly jumping in and out of bed a little easier. Easy install, tucks away tight to the bumper, and looks good—would recommend.


AL Offroad Trailgate Panel

Hated how hard the OEM tailgate panel was on the knees (and how difficult it was to balance anything on the ridges.) All of those problems are gone with the AL Offroad Trailgate Panel. (w/o cupholders)


Tailgate Weatherproofing + AOD Fabrication Bed Mount Panel

I dropped in ESI’s Rok Block and Ultimate Tailgate Seal to minimize the amount of dust that gets into the bed of the truck. (Crazy amount of dust and water got in on my last camping trip driving on ranch and forest roads.) Has been raining here in Bay and seemed to help driving around town! Will stress test when camping this weekend.

I also dropped in AOD Fabrication’s Bed Mount Panel. I opted to install only half the panel as I don’t require the full length of the bed to be set up with molle.

6 Likes

I have the Sherpa rack on my truck as well and found that the rear cab mounts were leaking in heavy rain because the foot is slotted. I filled the slot with silicone and have not had any issues since. Figured I’d give you the heads up!
:call_me_hand::call_me_hand:

1 Like

@julian Been looking to get an Animas for my truck as well. Do you guys feel it helps with MPG at all? Any wind noise? How about interference/annoyance with the sunroof?

1 Like

Hey Julian, I’ve got a V1 camper and my V2 should be arriving in July, so, yeah, another reason to drive from Baltimore to Bozeman. I am following your build (and shamelessly stealing ideas…).

Two Questions:

  1. I’m also going to install a RedArc 1225D charger and a 200amp Lithium battery in a custom box in the bed. I have a 2019 TRD off road and I’m pretty sure we have the same alternator. I’ve gone back and forth with folks on Tacomaworld as to whether or not we have to install the blue wire on the RedArc. But you seem to have things more dialed in than any of them.

So, did you install the blue wire to your ignition and if so, where did you connect it?

  1. This one might require measuring. There are two clamps on each side of the V2 that hold the camper in via the Tacoma bed rails. What is the distance between the two outer faces (clamp face closest to the tailgate and face closest to the cab window of the camper) and what is the width of the clamp? Clamp width within .5 inch is fine. With that info, I’m hoping fabricate a drop in 18 inch wide laptop table. Crazy, yes. But I’m planning on taking my job mobile and I’ll need a table I can put up on those days when the weather requires me to be in a closed camper. The table will end up higher than the clamps, but having those dimensions will give me a good idea of what I have to work with. Use them as some kind of support perhaps.

Should we ever meet IRL, I’ll gladly stand you two cold pints.

Cheers,
Lance

2 Likes

Love seeing your build! Super clean, and your Google spreadsheet compilation of parts/add-ons is pretty dope.

1 Like

@DoubleDown My Animas was installed prior to the GFC so I can’t compare how it impacted noise and MPG. I can tell you that wind noise has been minimal and I’m still averaging 20 – 21mpg on long freeway hauls with GFC + Animas. These results are inline with my expectation for what the TRD Pro can do. The Animas does not interfere with the sunroof.

@artieTwelve Love it! Congrats on the V2!

  1. My REDARC BCDC charger is wired to the starter battery (fused), second battery (fused), ground (OEM ground point), and ready to accept solar (coming soon). I have not connected (the blue wire) to an ignition source. The unit is “smart” enough to recognize when the engine is running and the alternator is sending amps through.

  2. I can DM you these measurements in the coming days.

@docdave15 Happy to hear this thread and sheet have been helpful! I need to add a few new items to the spreadsheet which I’ll also do in the coming days.