Thanks again @FUJIMOGOAT! My second battery is a “X2Power Premium AGM Group 35.” — If I recall correctly I believe this is just a Northstar battery w/ different branding so they can market it as being “exclusive” at Batteries+Bulbs.  I went with this one as it was on sale at the time and easiest one for me to pickup. (Adding to Master Parts List now, too!)
1 Like
@the_philxx The problem that I ran into with the fans that I looked at were they only have a hinge on one side. If you want it to be open and vent while driving it just acts as a rain scoop if you want to use it while the tent is open. If you mount it to keep the rain out when the tent is open it then would be a wind scoop (and the cover would probably get ripped off) while driving.
This is the fan that he used and you can see in the photo it can only be opened in one direction. Dometic FanTastic Vent 7350 - Variable Speed Fan, Automatic Dome Lift, Thermostat, Rain Sensor, Remote, Reverse | Dometic.com
@the_philxx @zwickt The lid on this model can be manually hand cranked open to a desired height for circulation w/o running the fan itself. When running the fan the motor opens the lid all the way, there’s no manual control.
I oriented the fan to function when the tent is popped open (hinge at rear of truck.)
I’ve driven through storms all over the continent from the PNW to the Canadian Rocky Mountains to East Coast to South and haven’t had a single issue with it oriented this way. The lid and hinge are burley.
I have not tried driving with it manually cracked open, but have confidence it’d be fine for city driving. I may be hesitant to try on the freeway.
1 Like
Hi Julian, I too have to say fantastic job on the build, progress, and sharing of your investigations, knowledge, and results!! In Q1 2022 I will be a GFC V2 owner, build #2801. I quickly found your build because I also took delivery of a Lunar Rock Pro April 2021. My Pro is all stock still showing 1700 miles making challenging trips to get grocery and food, lol. This remote work has kept me home so much. I just read about the need for bed stiffener from you and others, and just bought one hours ago. I am also about to buy your USB dash accessory mount, THANKS AGAIN! You are like 6-10 months ahead of me. I also found the same ARB recovery mount that you did (haven’t ordered it yet). I have bought basic recovery stuff like straps, boards, etc… I also bought Renogy 2x100W solar panels with a 100Ah LiFePo battery for powering at night around camp sites. GFC told me about Renogy. I have selected tangerine tent, black panels, 3 beef racks, we picked THE SAME THINGS! We have twin Pro’s, LoL. I am in ATL GA and will have a rough 2k drive one-way, but very excited to take delivery. I will do a build progress, and for sure it will not be as well documented as yours. Again, you have done a superb job, and I am grateful for your knowledge sharing! Thank you.
Eddie.
5 Likes
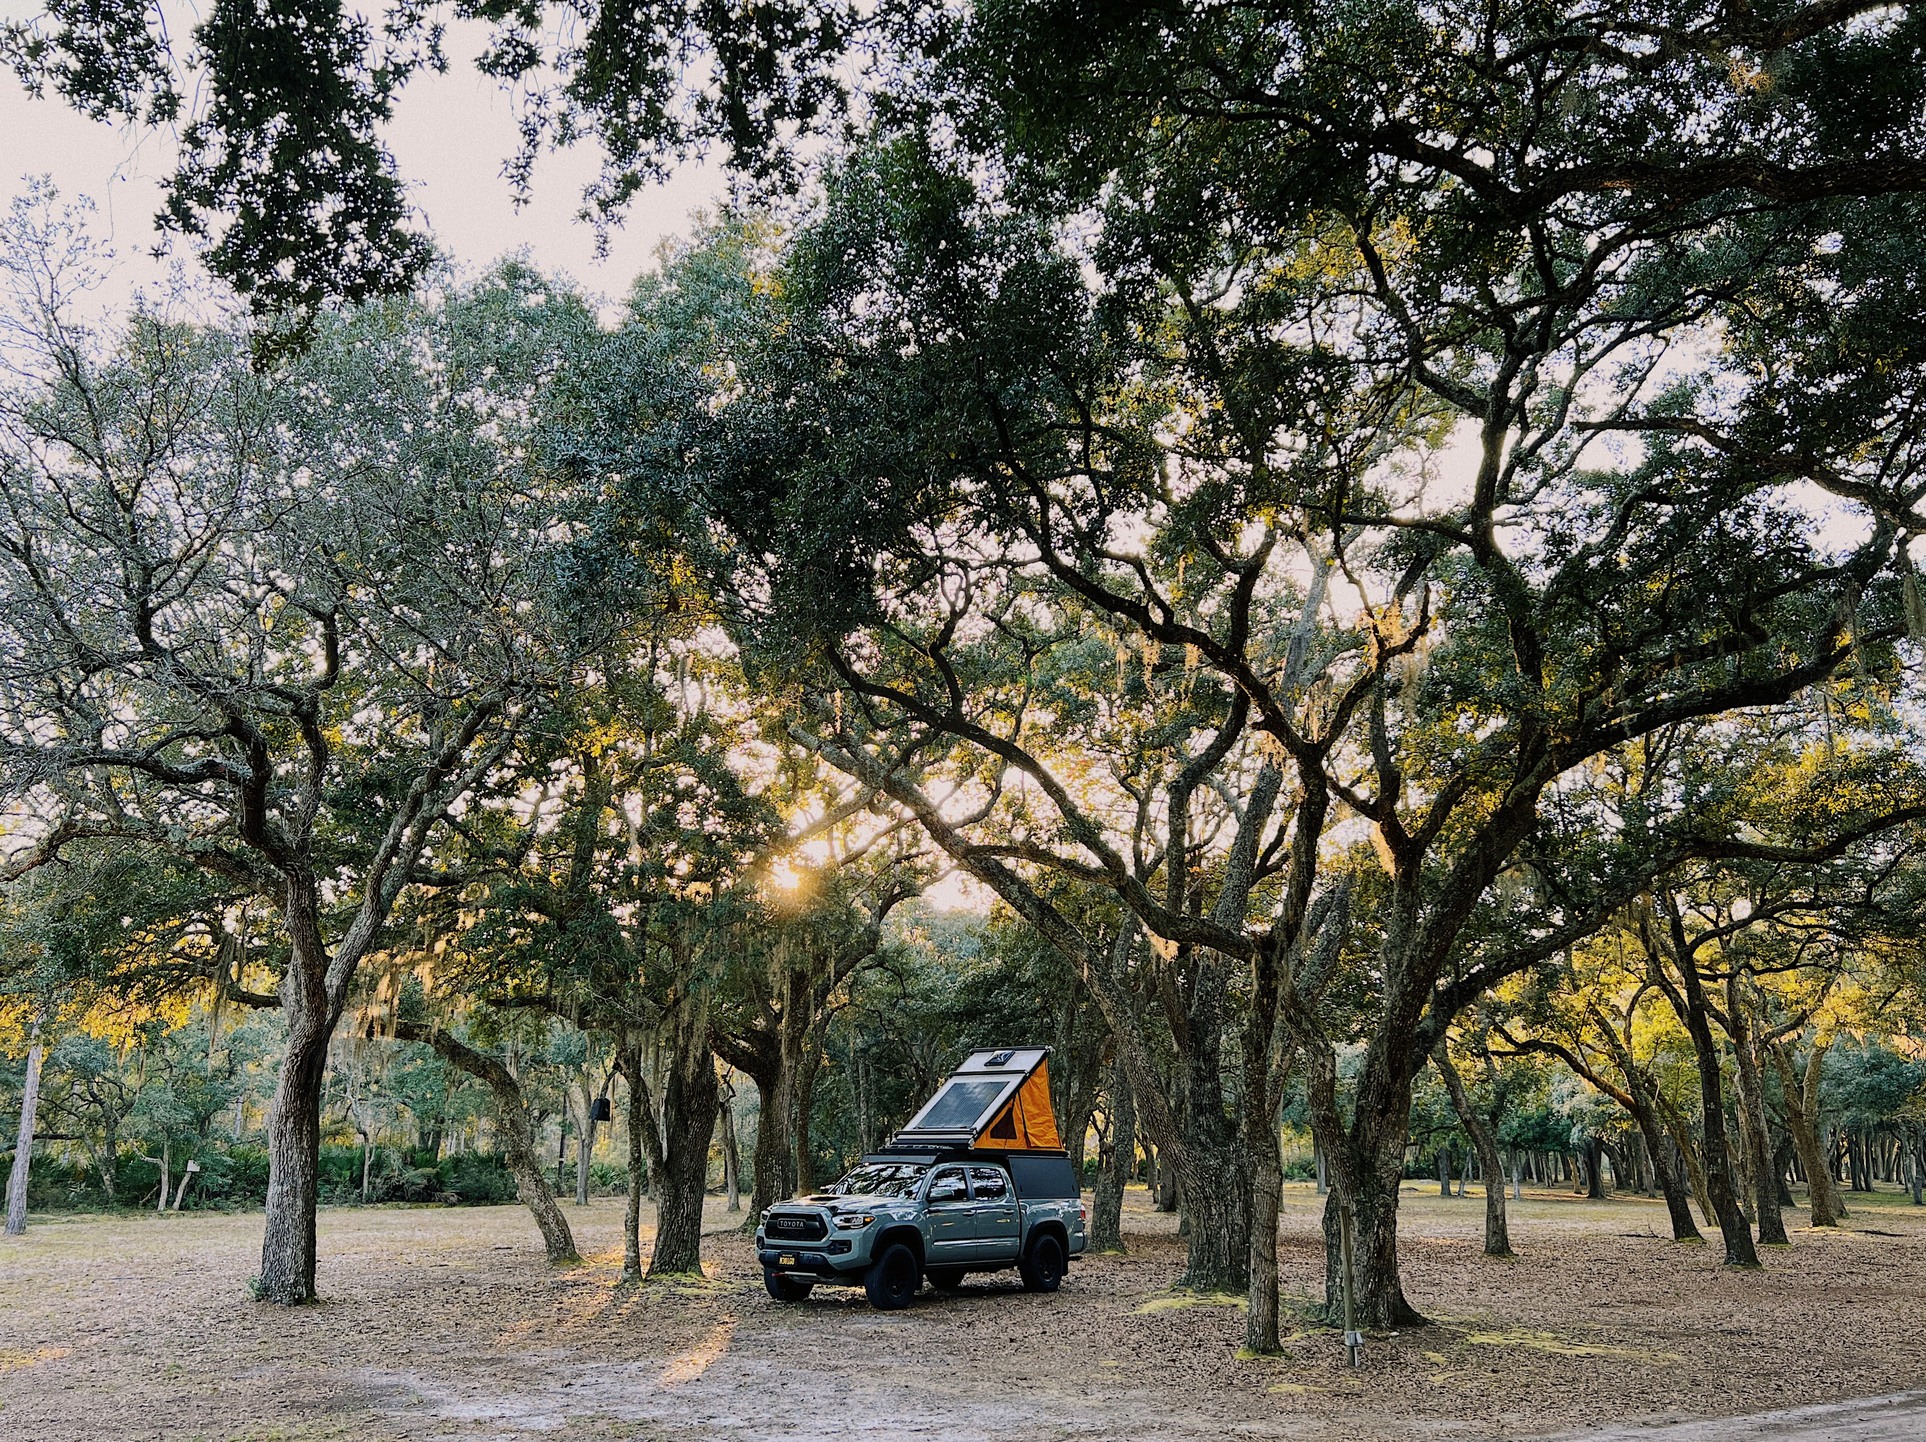
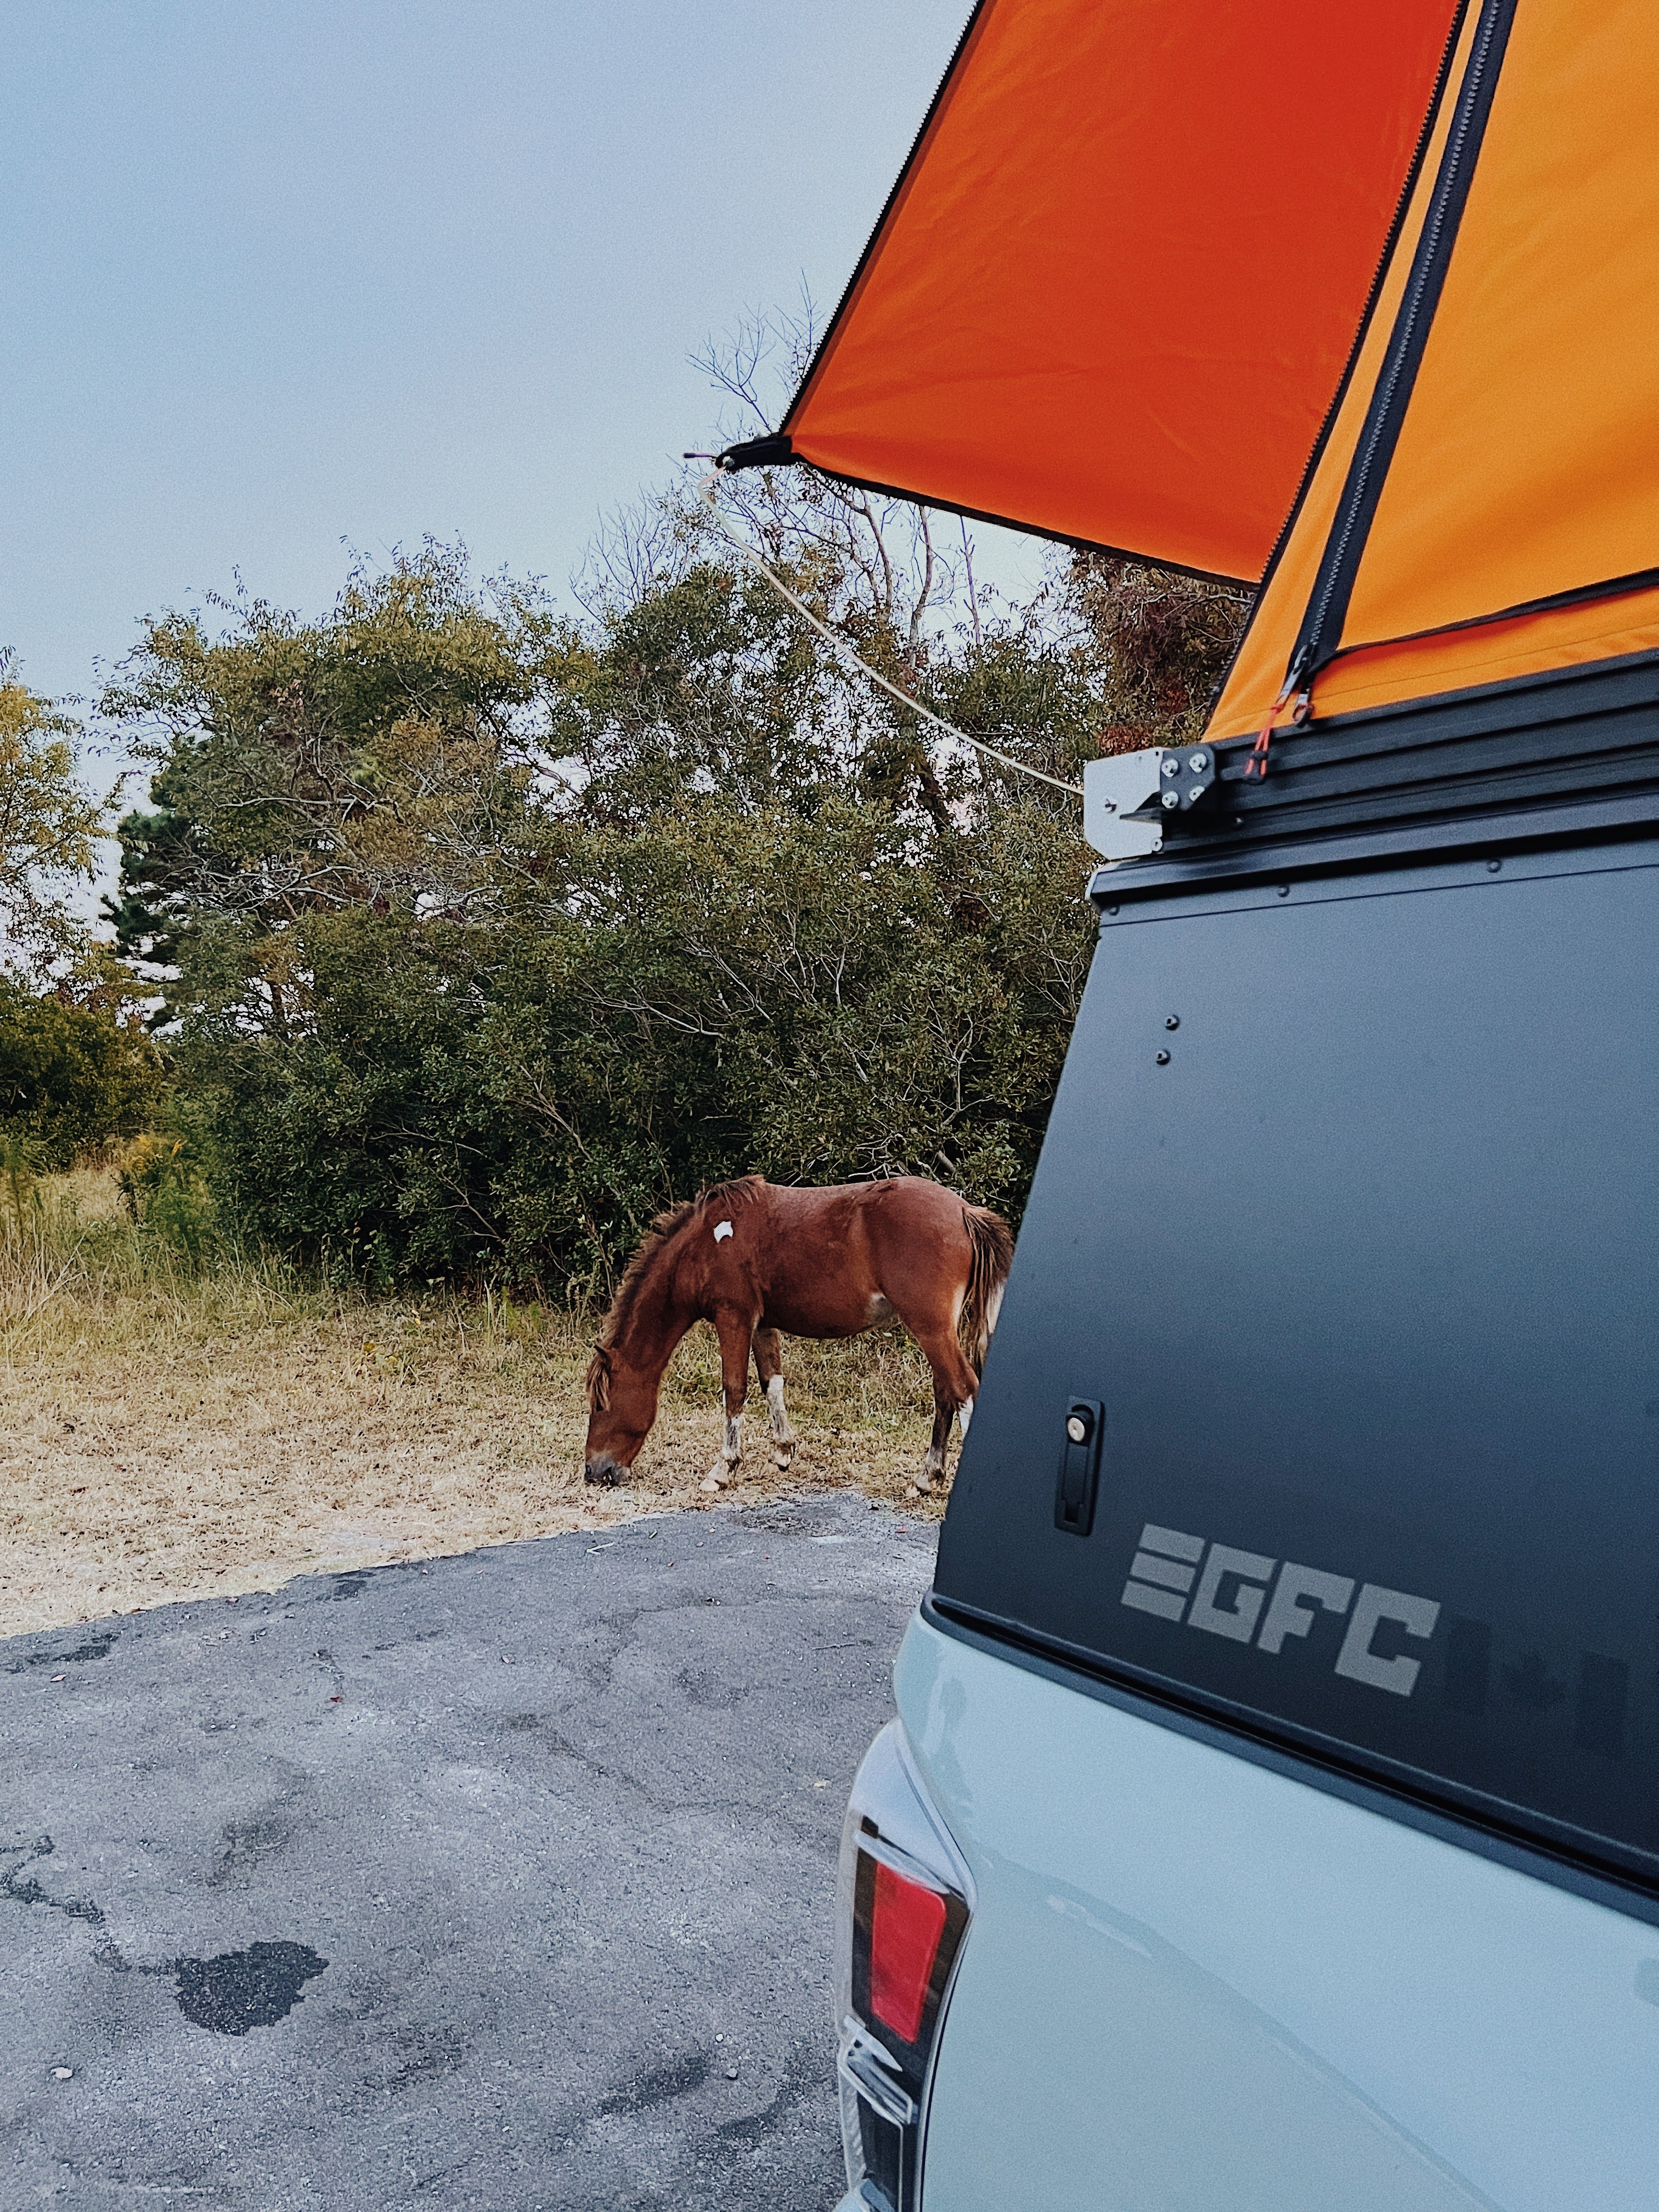
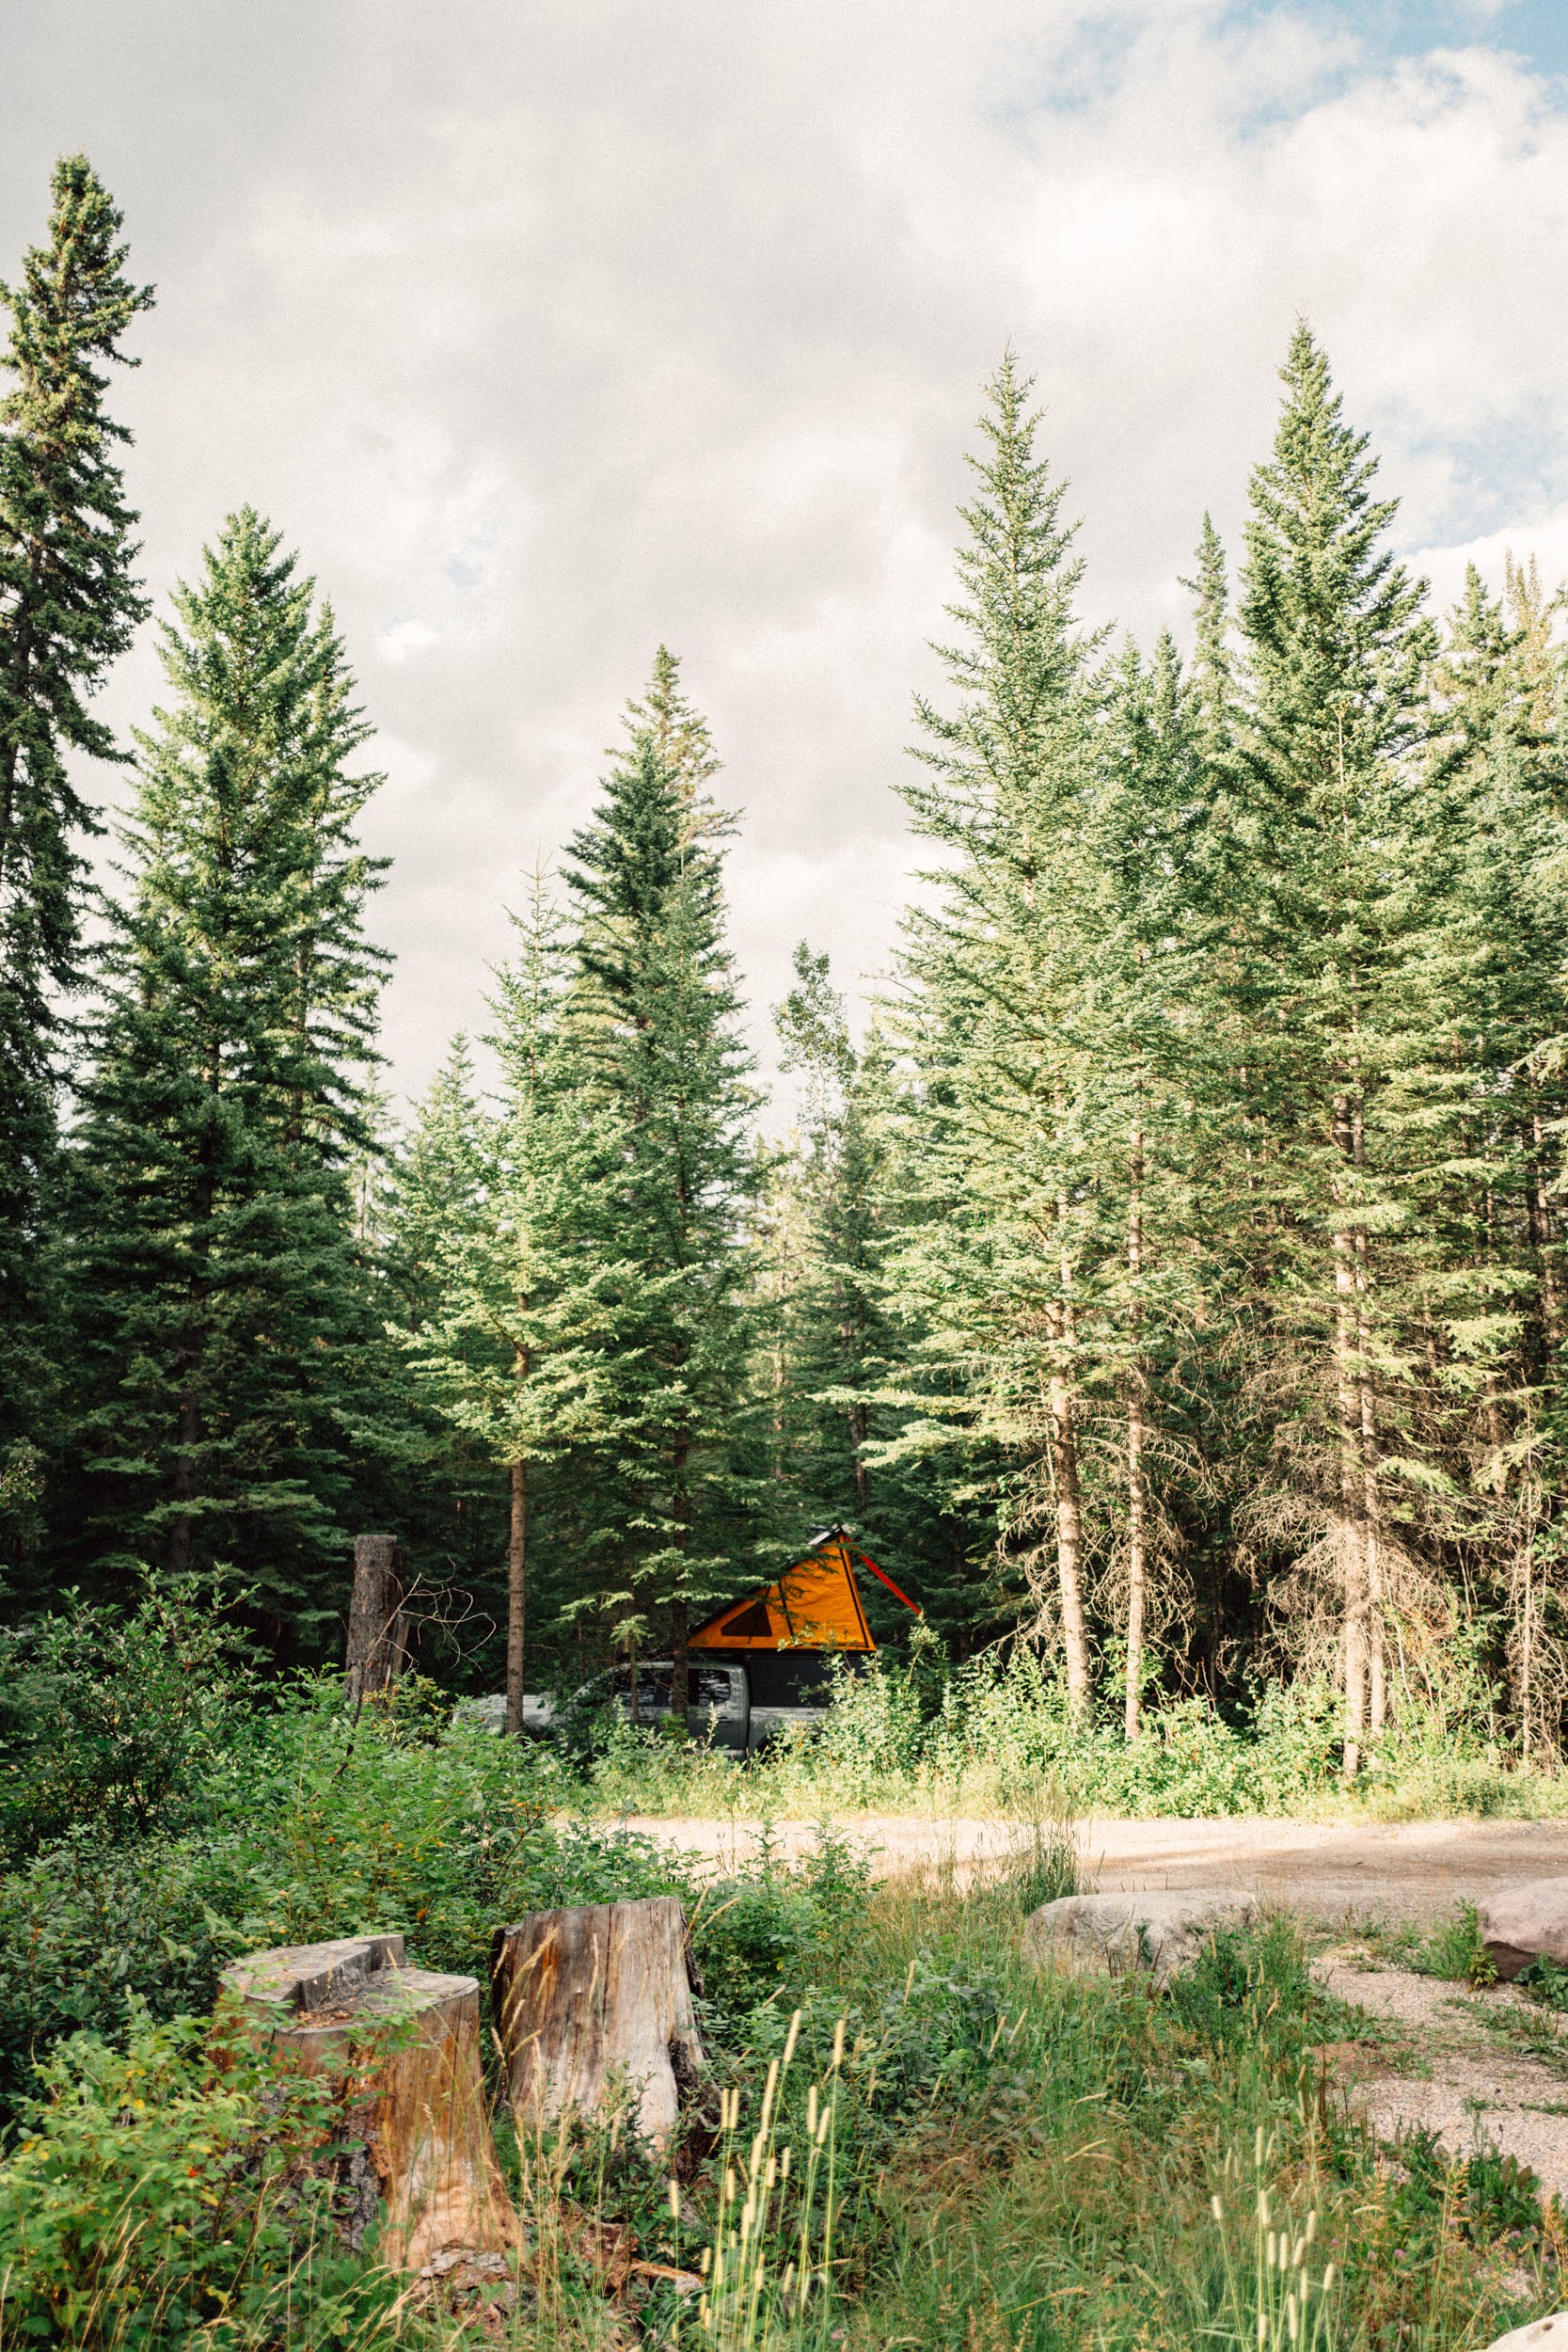
Build Update 11/27/21 — Back in California
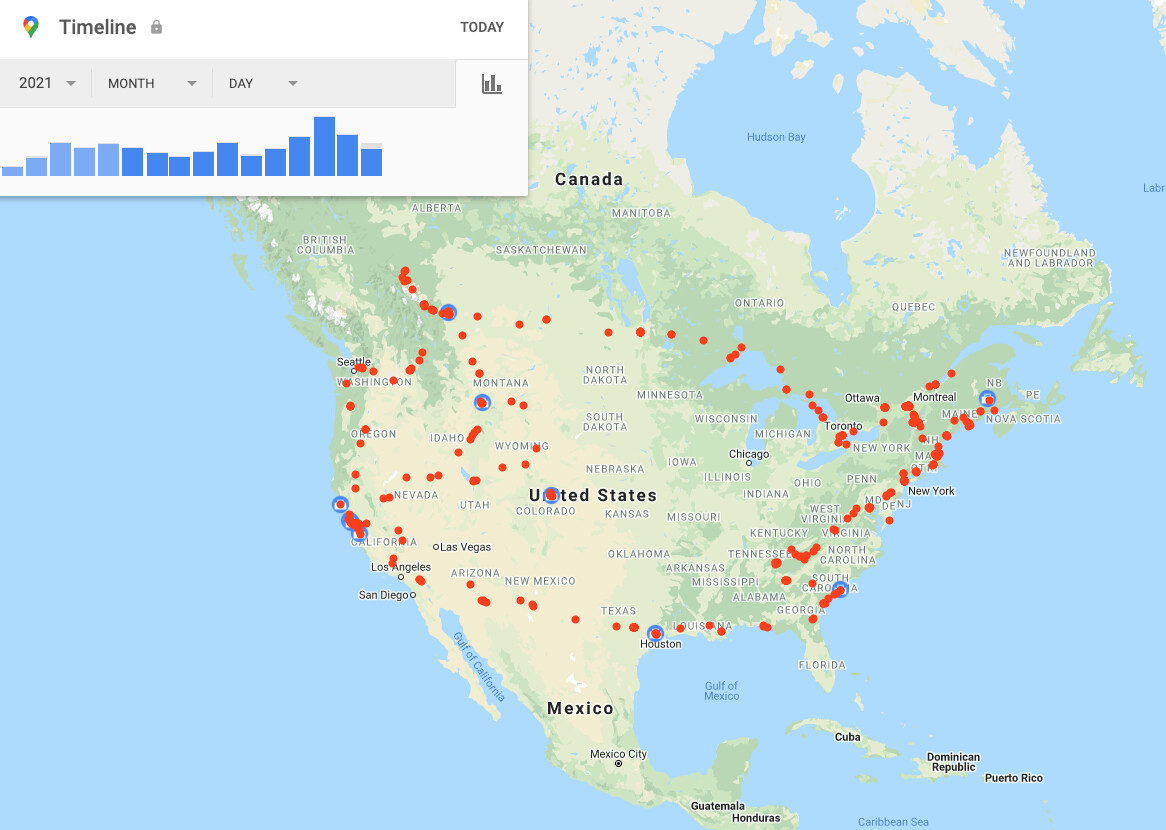
+20,000 miles, 34 states, 7 provinces, and countless nights in the GFC later I’m back in California. The camper and truck held up great—two tire punctures, one cracked windshield, and a few hail dents aside.

Storage Upgrades
The extended trip made it clear that we had to introduce some improved organization into the back of the cab to keep the GFC as sparse as possible for day-to-day use. I went ahead and installed a Goose Gear 40% Seat Delete Plate System, MESO Customs HexRack and dropped in a few Cali-Rased Tie Downs to improve the in-cab cargo/storage situation.
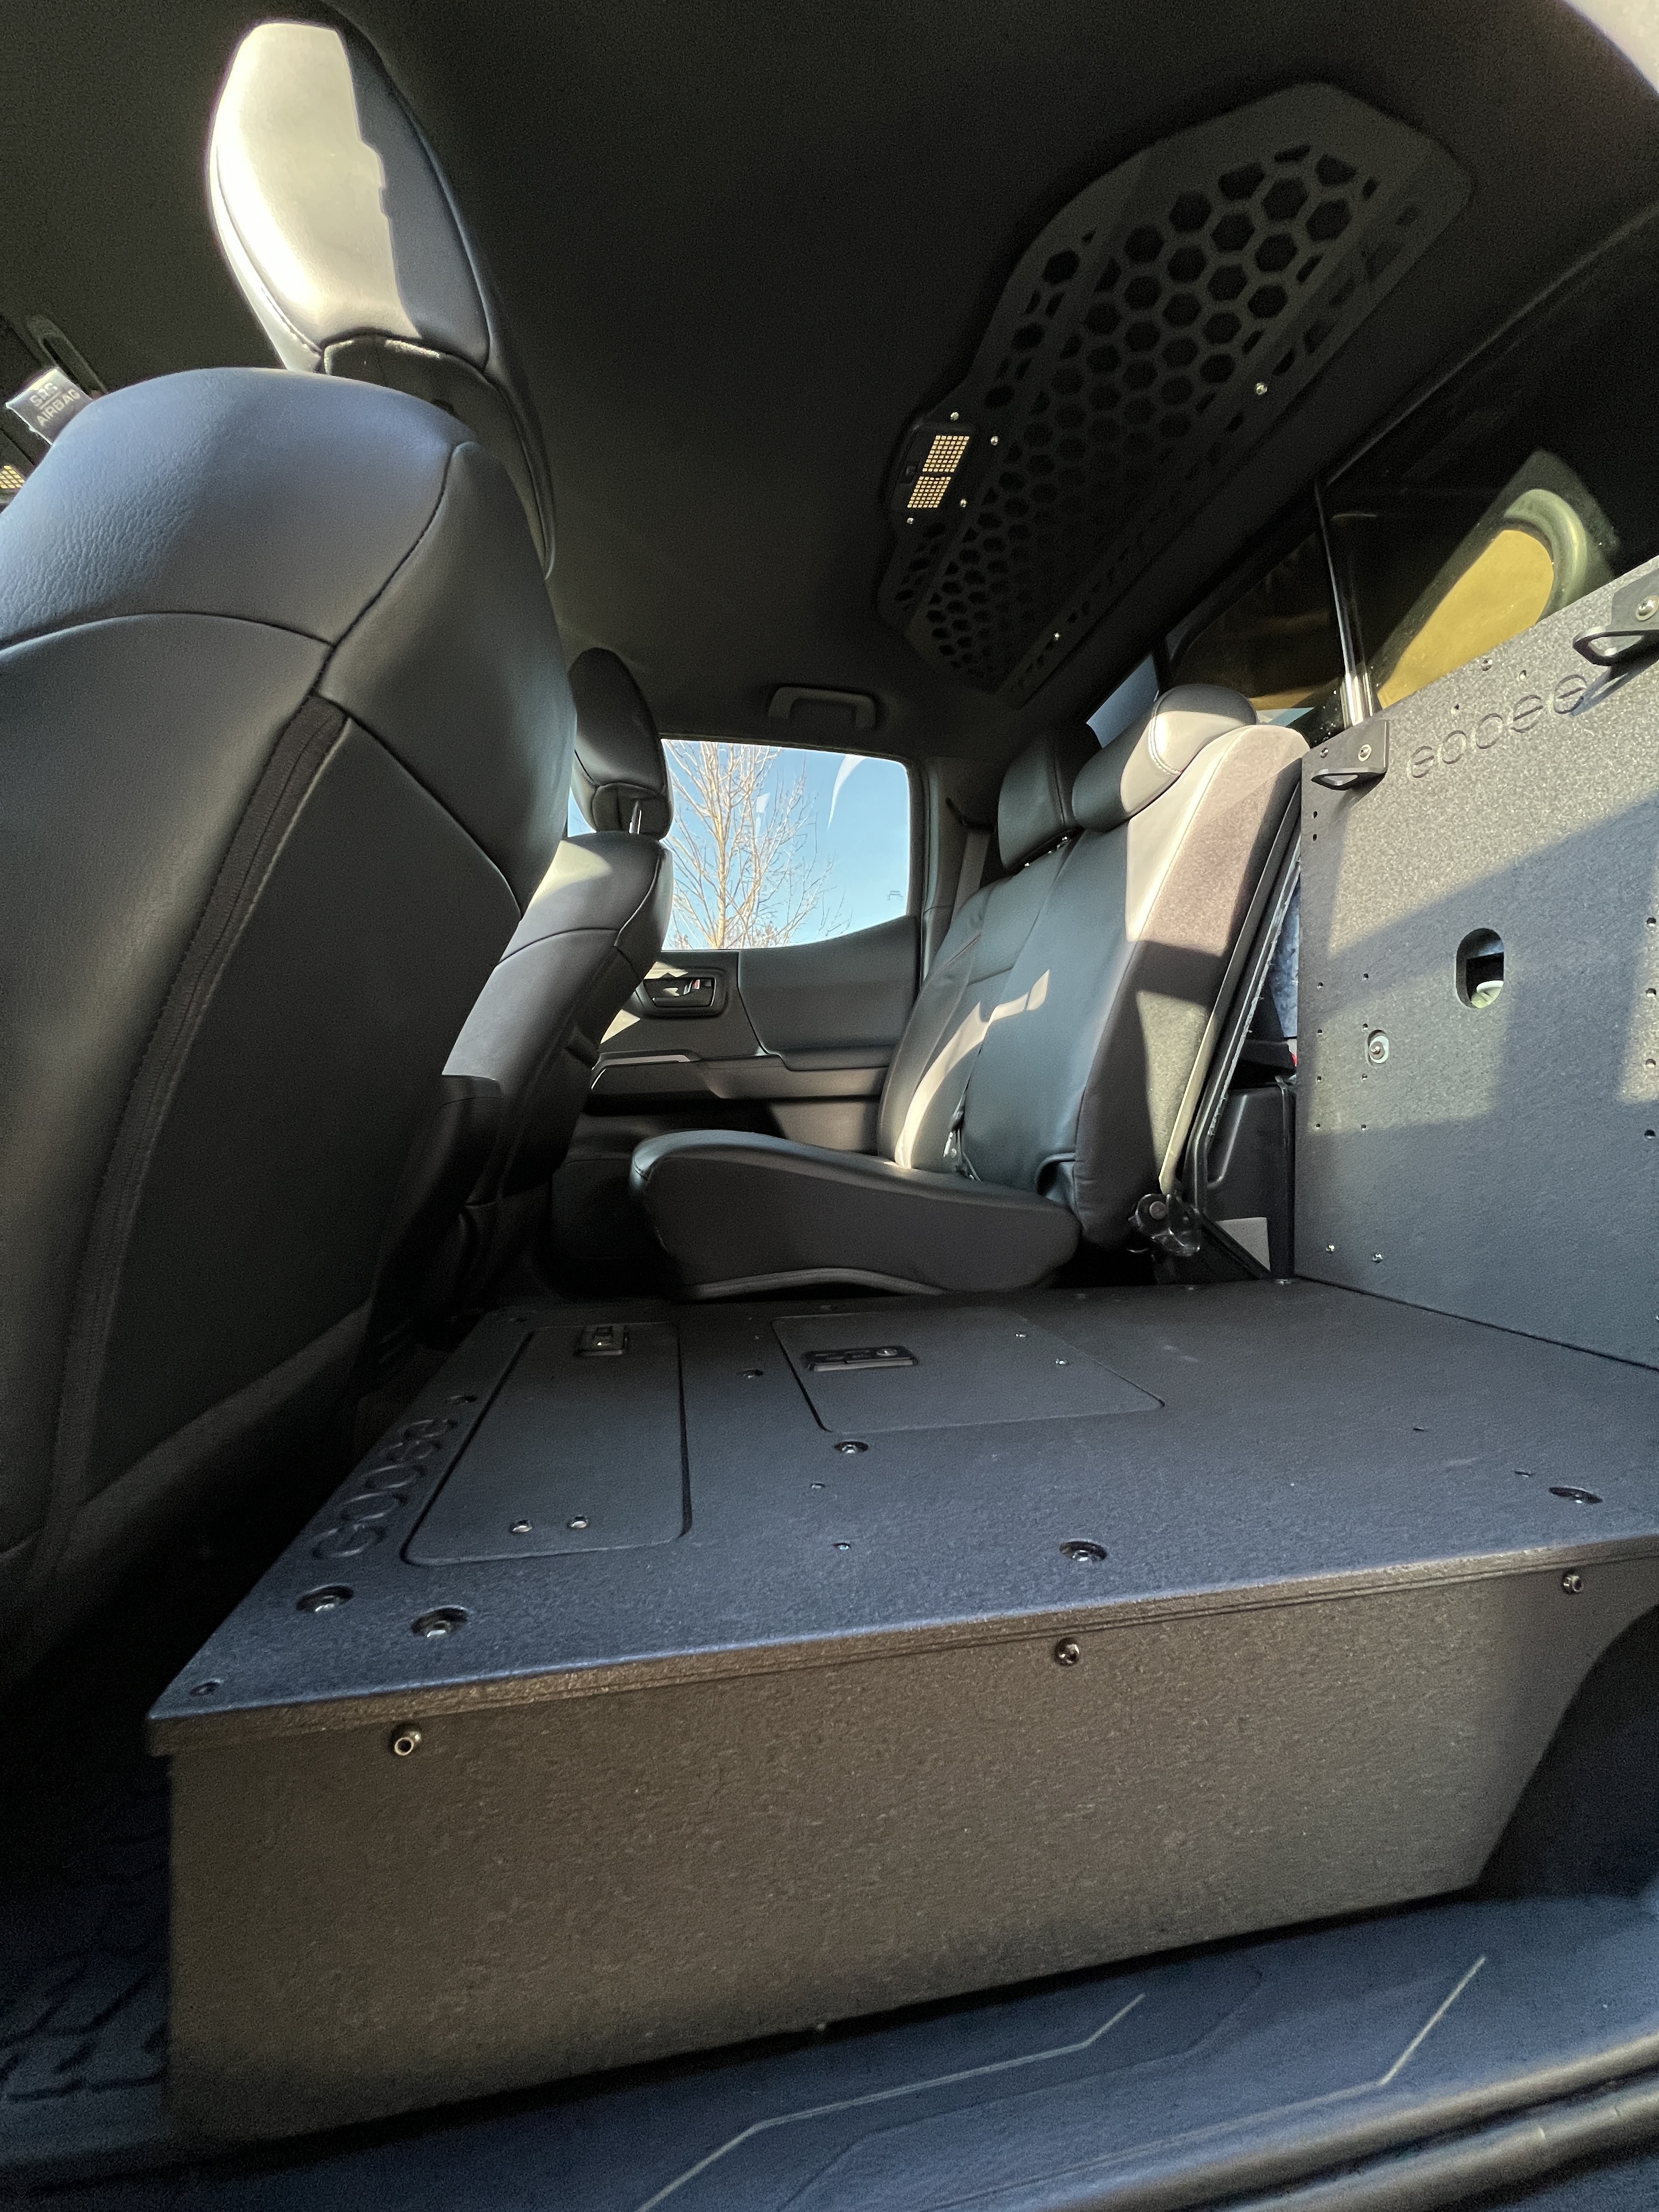
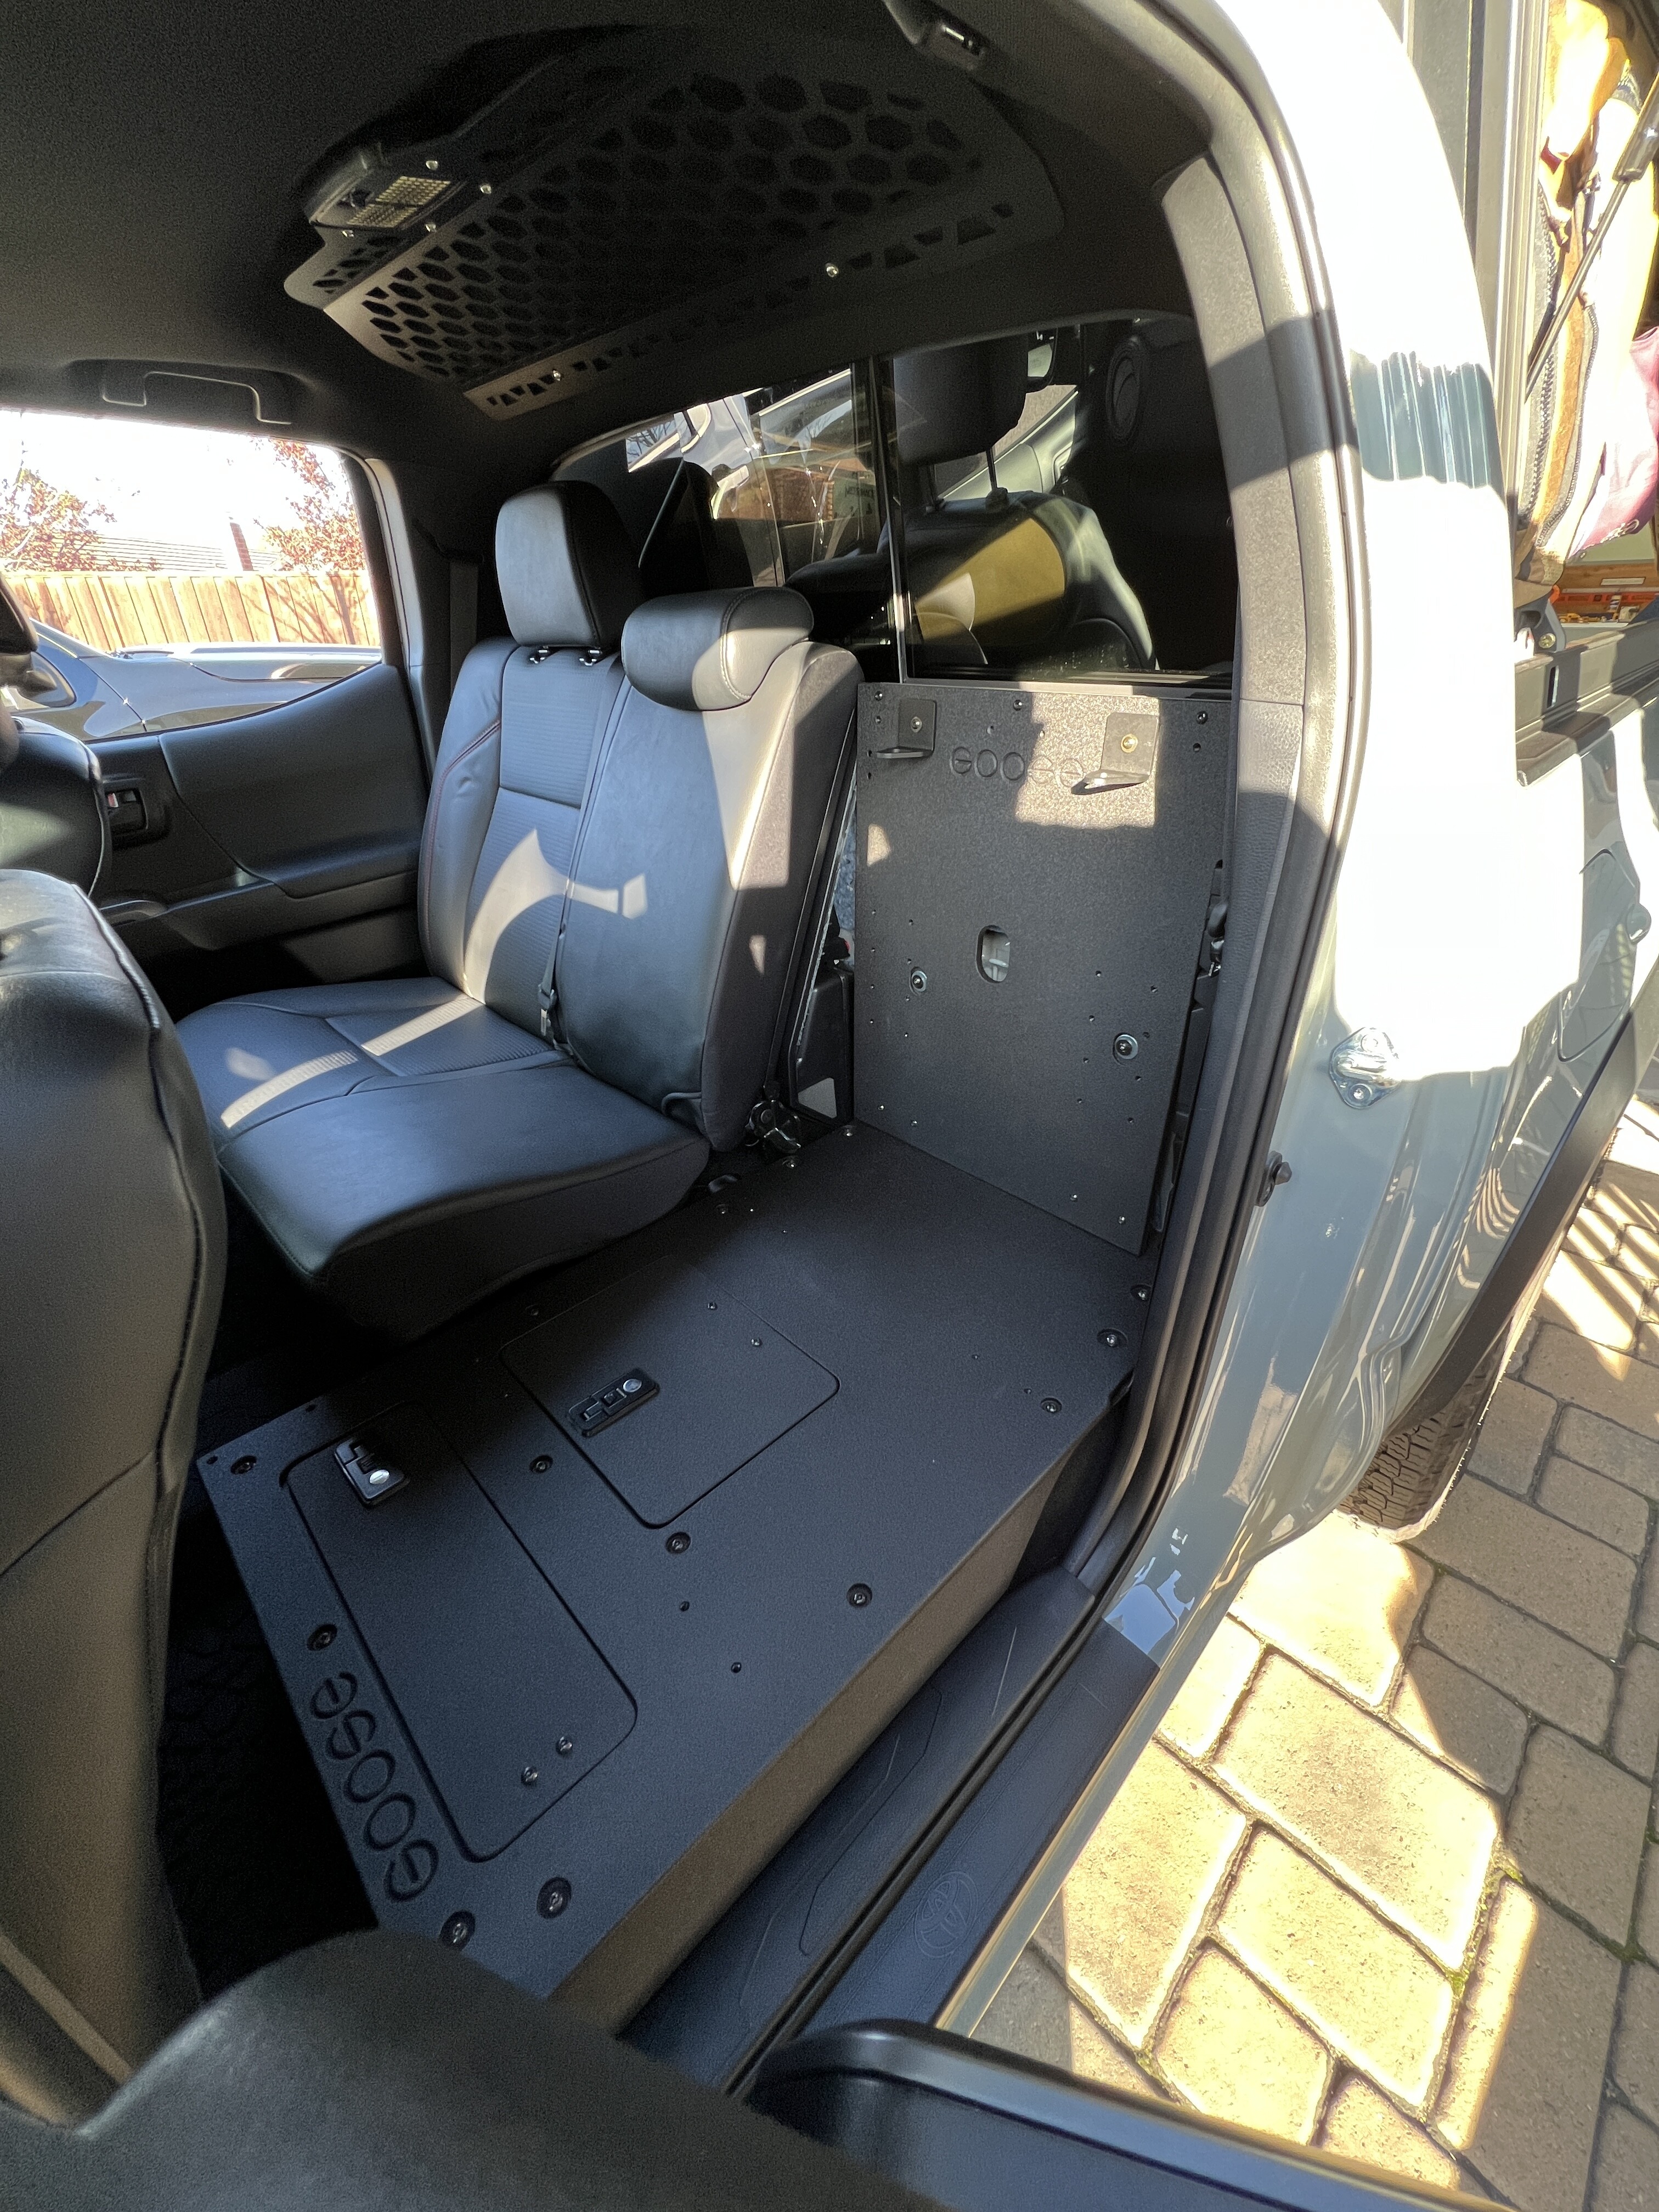
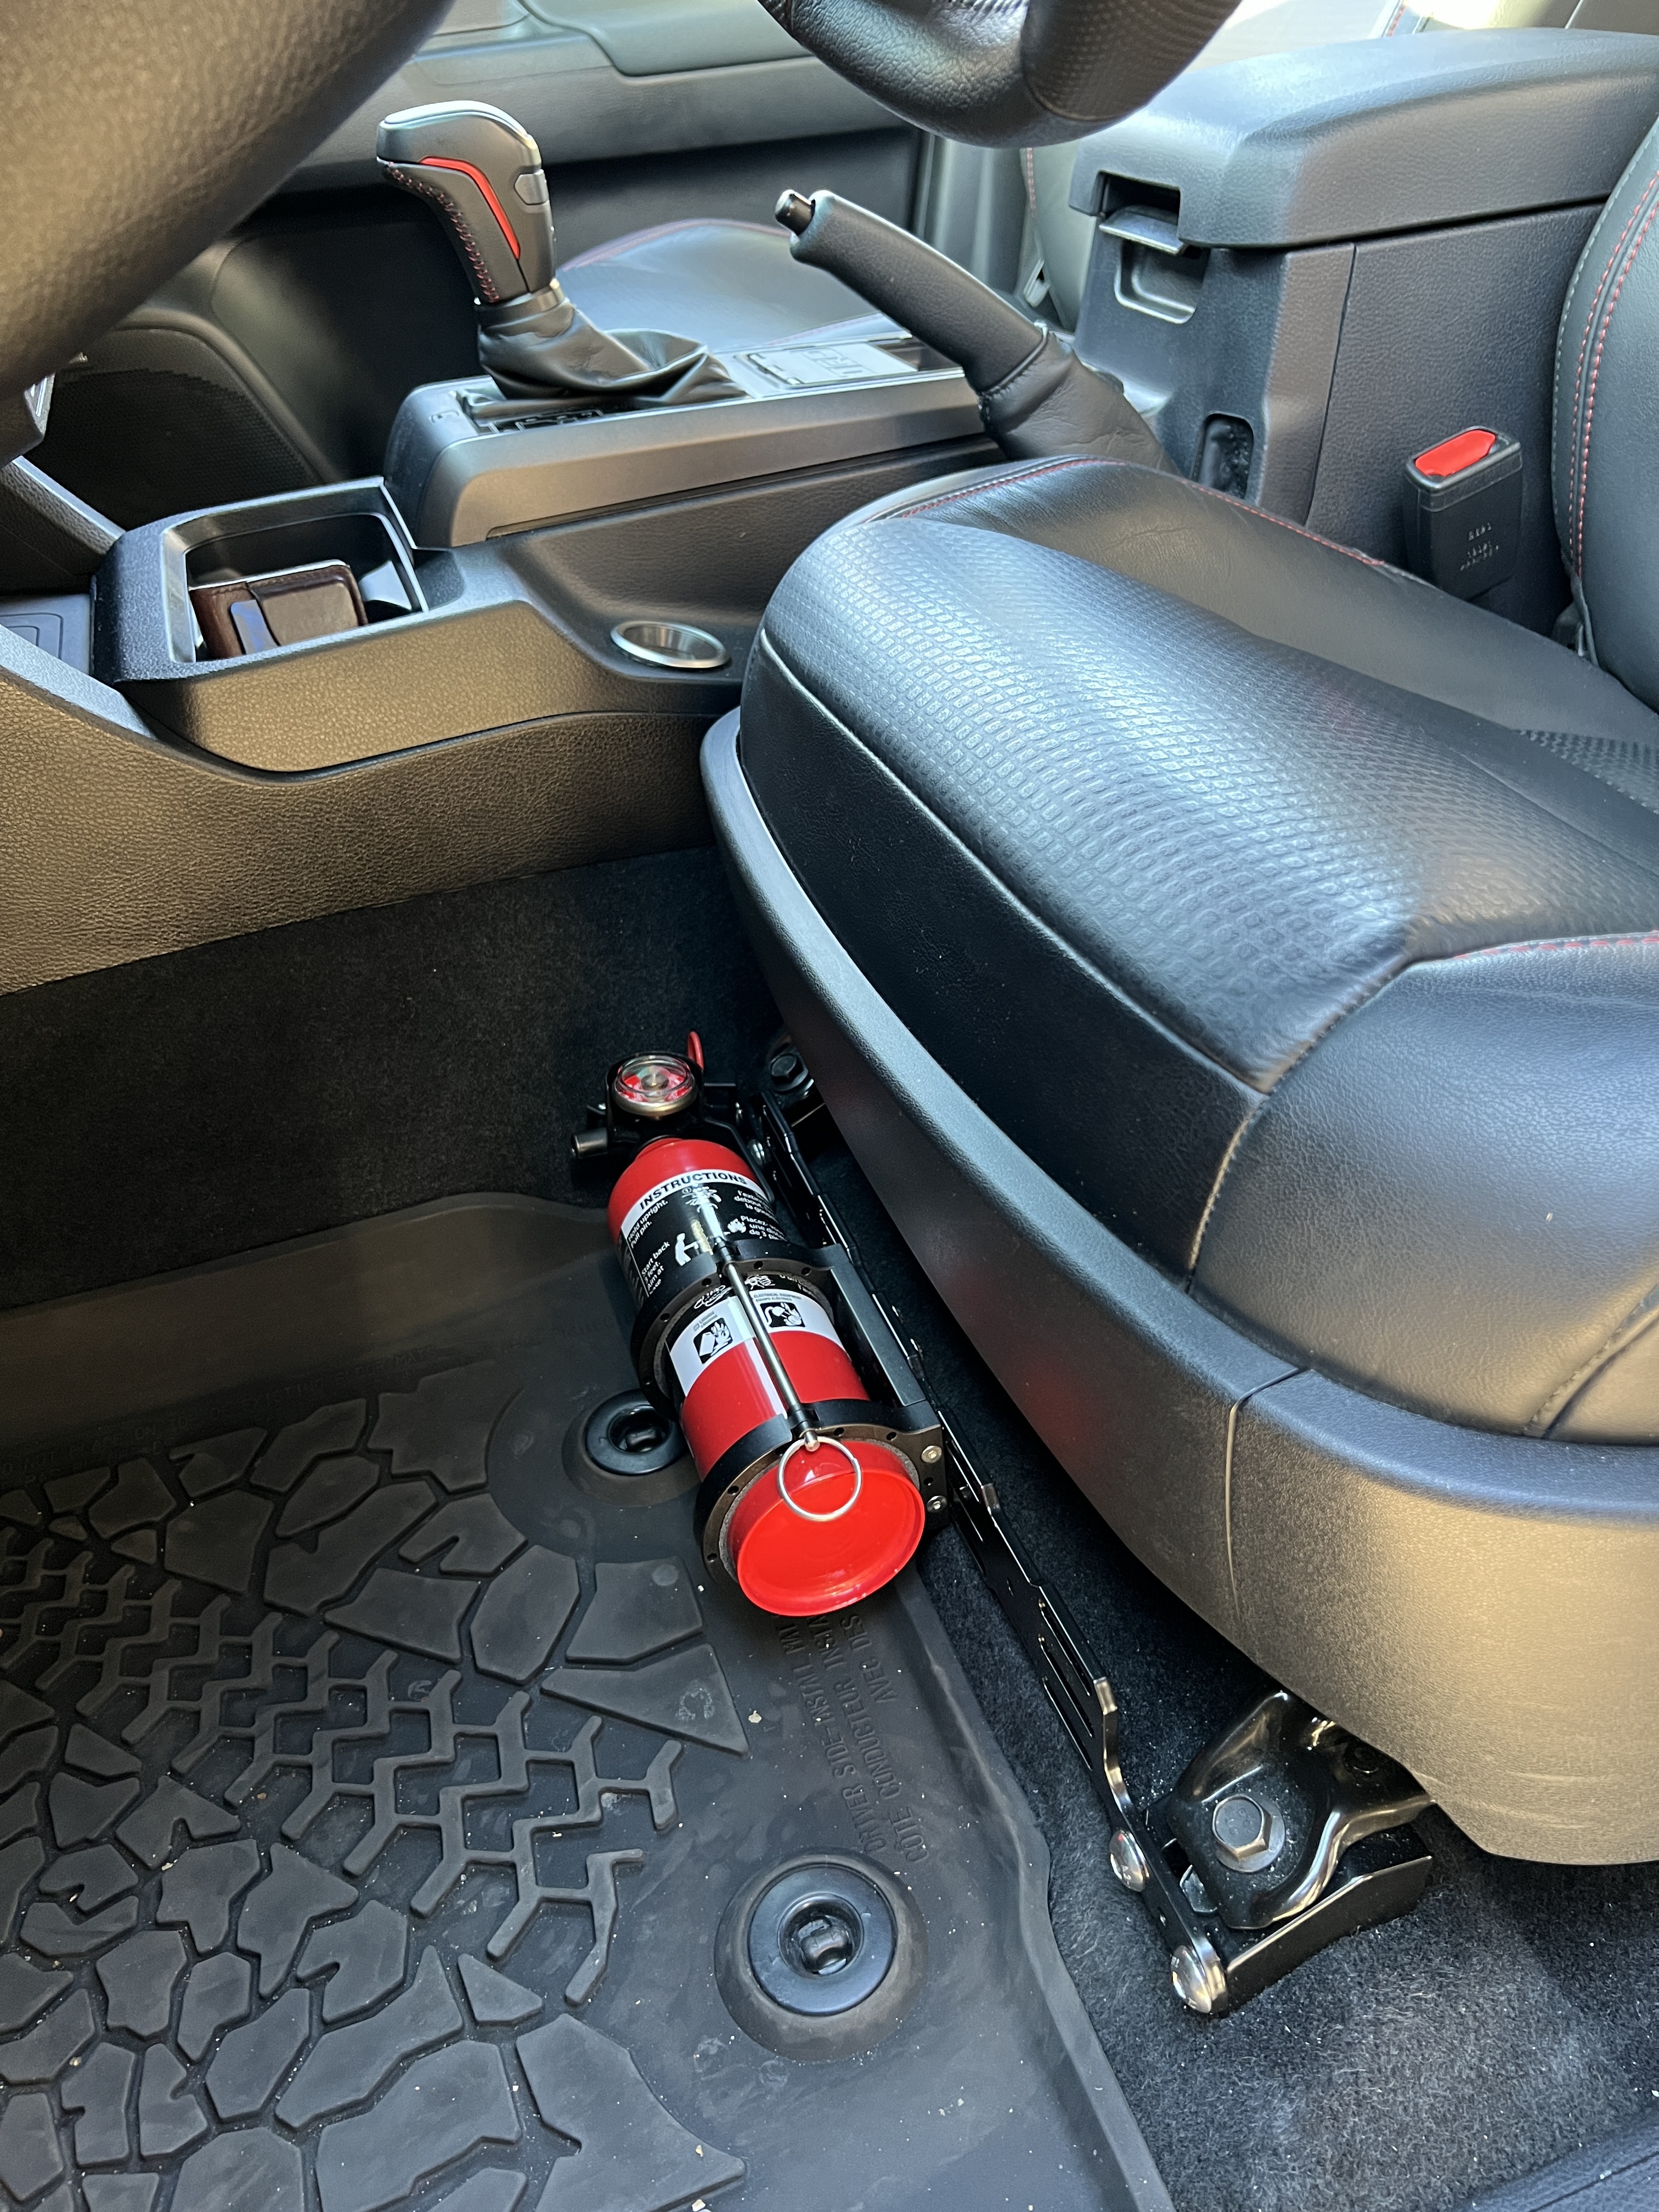
I also dropped in a DDI Fire Extinguisher Mount under the front drivers seat to get this out of the camper.
That’s it for now!
13 Likes
Love to hear it, Eddie! Congrats on the new truck and becoming a GFC owner! Your build plans already sound great! I just spent a week in Atlanta back in October—would have been fun to meet up! Catch you on the next go-around and feel free to message with any questions as you get into the build 
2 Likes
Build Update 12/12/21 — Installing OEM Glass Breakage Sensor
Small but practical update… dropped in Toyota’s OEM Glass Breakage Sensor (Part No. PT39835160)
This was a plug-and-play solution—simply daisy chaining into factory wiring and securing everything down. The instructions I followed can be found here. My only hiccup was that my lower switch panel didn’t have a tall and skinny sized slot available so I had to dremel one of the smaller blank slots for it to fit… Not perfect but looks okay for now. I may upgrade to a custom MESO Panel if they ever do another run.
Oh — I also skipped the hood dummy latch step since my truck is equipped with a sensor under the hood already.


4 Likes
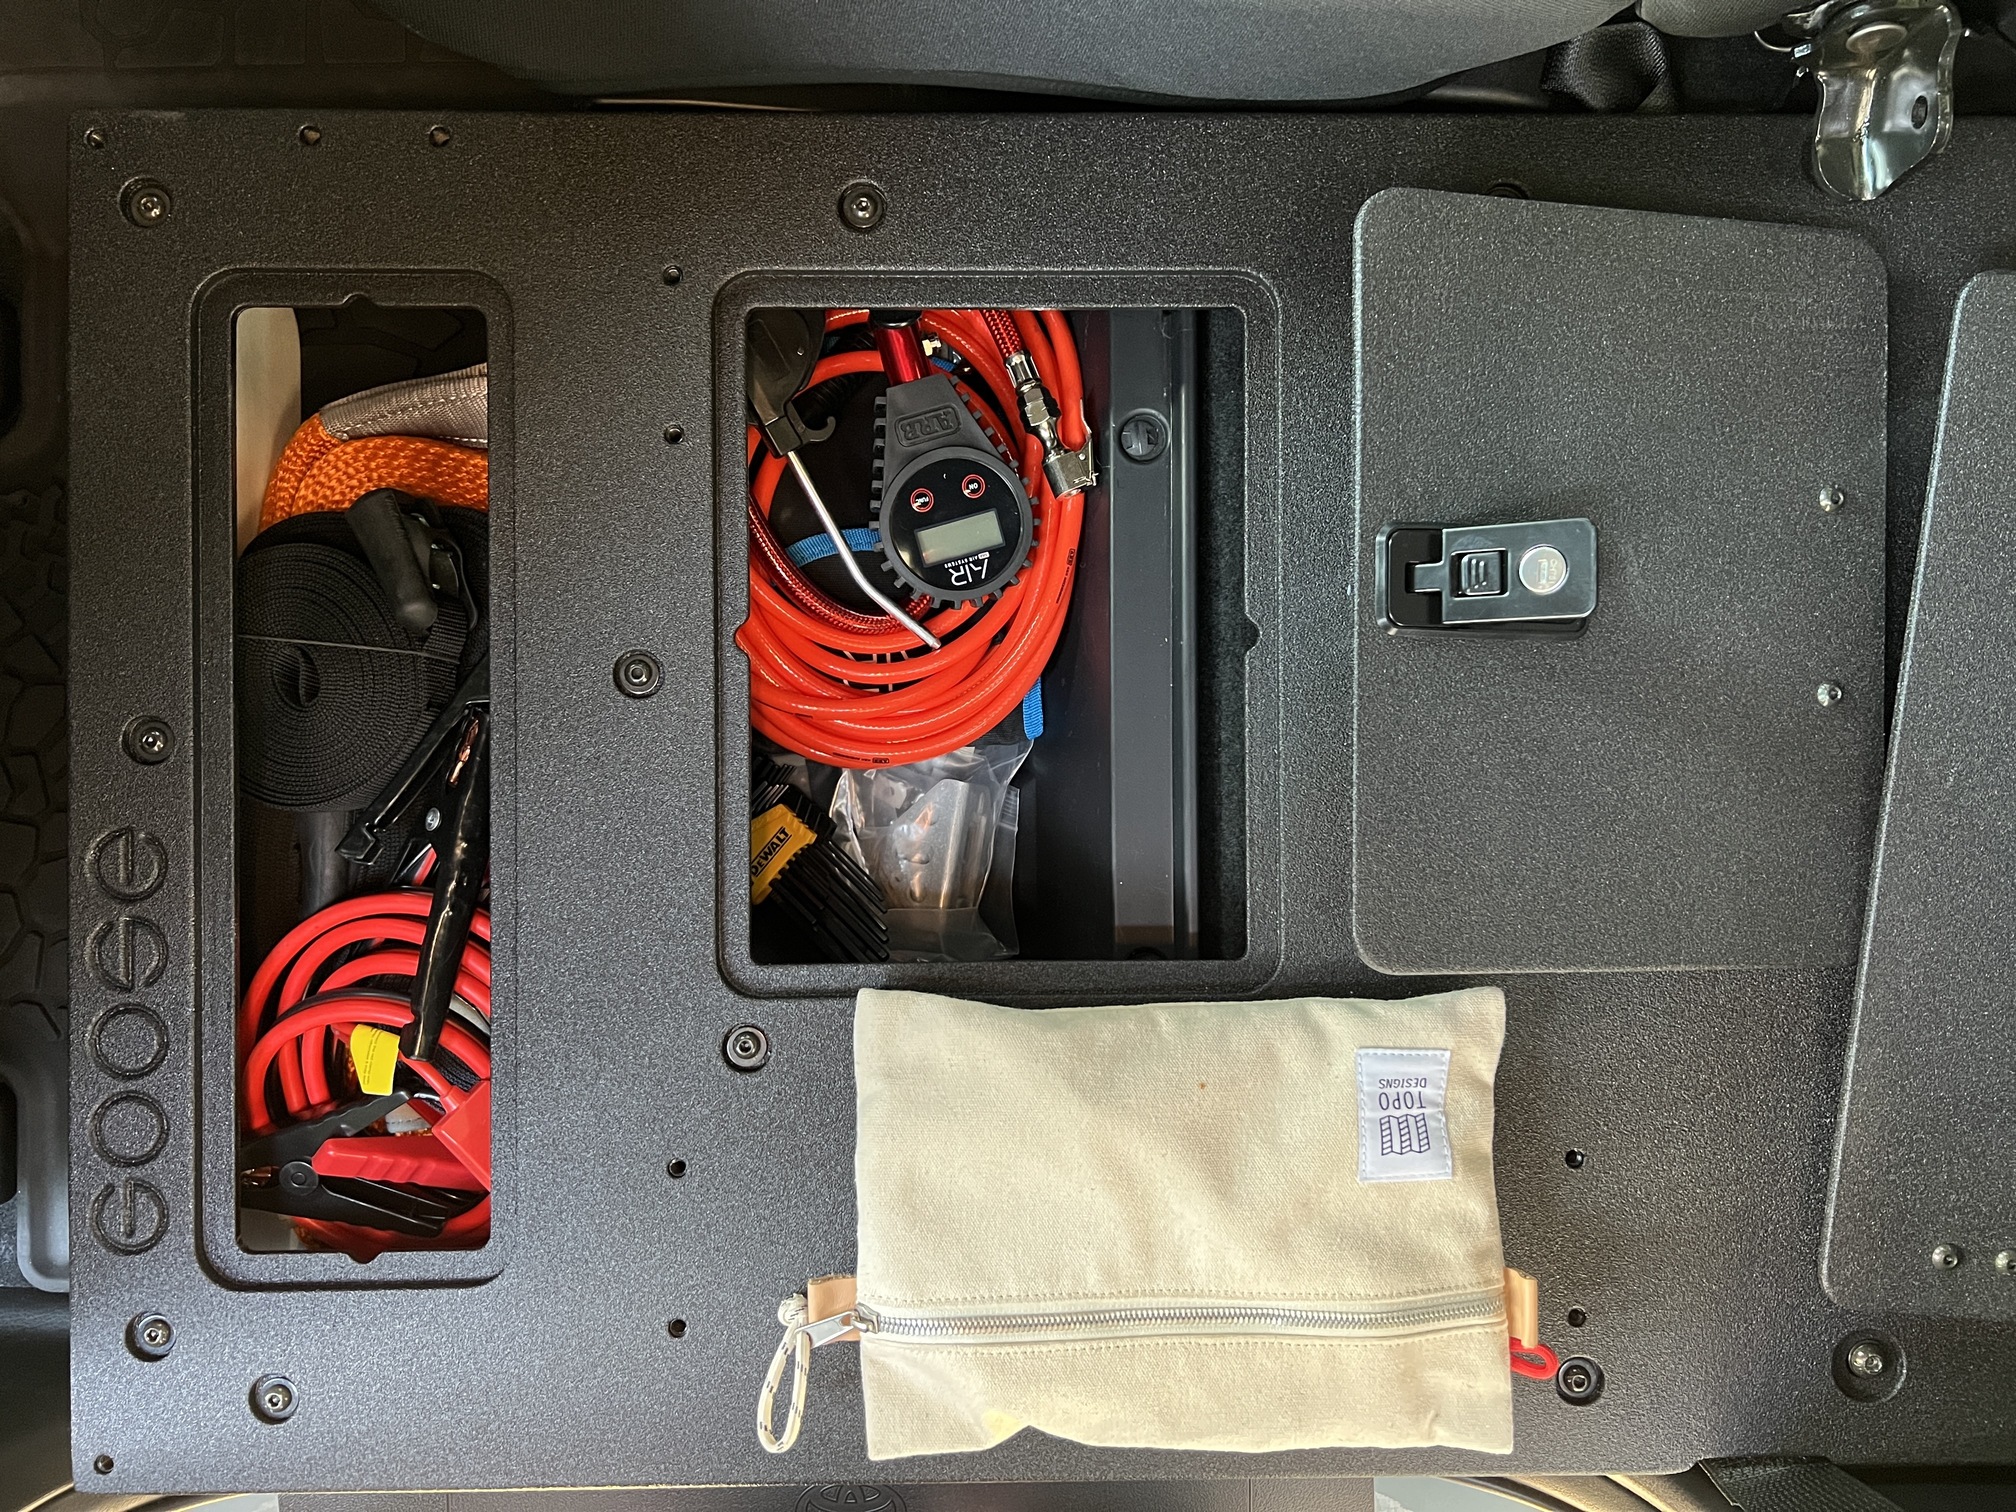
Build Update 02/13/22 — Full Send on the Seat Delete
It’s been a minute since the last build update—I’ve been busy going fast and camping! Anyways, I decided to go full send on the Goose Gear rear seat delete and bought the remaining 60% portion. My goal with this project was to prepare for the drawers I have on order for the next stint of living on the road for ~8 months or so. Here we go!


Goose Gear Seat Delete Plate System Install
I kicked this project off by removing the bench, factory subwoofer, and the 40% Seat Delete Plate System I had previously installed to lay down some Kilmat Sound Deadening material.


Once I had all the sound deadening material down I dropped in the factory sound deadening (the blue stuff) and started to reinstall the goose gear plates.

A quick note/hack/tip: In the “Official Goose Gear Install Video” they rip out the plastic under-seat cubby housing which I was always confused by… When I mocked the plate up, the plate sat level on the housing so I assume the only reason they remove it was to allow access to threading the nut on the bolt. Instead of ripping out the housing I simply drilled some holes out with the hole saw to access the bolt and thread the nut.

The final step was to relocate the factory JBL amp… I simply notched out a hole in the plate to pass the harness through and bolted the amp to the plate—doesn’t look great right now but will eventually be hidden away behind the Goose Gear drawer I have on order so all good!


So much storage space. All for now 
9 Likes
Where does the Sub go?
@jasont I deleted (and sold) the subwoofer — this was a required step for this version of the seat delete. Goose Gear does make a plate system that works around the factory sub and factory trim but it wasn’t for me… you loose a ton of useable space and it looks a little awkward/unfinished.
Damn so there’s no bass in the truck anymore? Did you pay extra for the JBL entune package or does it come standard for the TRD Pro?
Nah, it wasn’t an additional cost or upgrade — it’s included on this trim. The harness for a sub is still there zipped tied behind the plate so I can always reintroduce in future if I wanted (and same goes for all the seats obviously, this is all reversible). Not on my radar as sound and extra space has been rad and exactly what I needed right now🤘
1 Like
Too bad it isn’t a long bed, I would sell you my Decked drawer system that I am going to remove from my 2019 TRD.
Build Update 04/16/22 — Custom GFC Bug Screen Prototype
 It’s been a minute.
Since getting my camper installed I’ve been interested in finding a way to make it comfortable to hang out “downstairs” in extreme bug zones without feeling like a hermit and holed up with the panels closed. Bug screens were the obvious solution but I wanted something that felt custom and fitted to the GFC…
I’m also headed up to Alaska for the next several months to live out of the GFC so felt like a good time to finally try and tackle this problem.
I got my hands on some rare earth magents, 1000D Cordura Mil-Spec fabric, No-See-Um bug netting, some binding (all UV resistant) and got to work with my father-in-law.


I’m pretty stoked on how this one prototype turned out. It completely encloses the downstairs without losing light or air flow and perfectly aligns to the GFC support bars and struts. I’m going to explore adding zippers so I can still access Tom’s (VRNCLR) bags and some leather pull tabs in the corners to give it a finished look.
Still in planning stages for the tailgate… I’ll share more once I come up with a game plan there.
35 Likes
Dude. Serious props. I’ve been thinking about this for some time. Great solution!
1 Like
Amazing build and attention to detail @julian 
1 Like
this would be great for dogs
2 Likes
Need this for my dog when I’m out in the back country!
1 Like
Thanks y’all! @the_philxx Yes! The magnets keep the screen incredibly taught without gaps.
I sewed in five “N52 Neodymium Bar Magnets (3in x 1/2in x 1/8in)” along the bottom of the screen and three along the top. On the camper I placed the same incredibly strong N52 magnets—just a much smaller size (1/2in x 1/2in x 1/16in).
I’ll add the zippers and pull tabs once I have the drive side screen done!
Are you running a walking foot industrial sewer? Or a regular machine? I only ask because I used to sew with an industrial but don’t have it anymore. Thinking about picking up another one for stuff like this.