MotoVan/ MTBVan Buildout

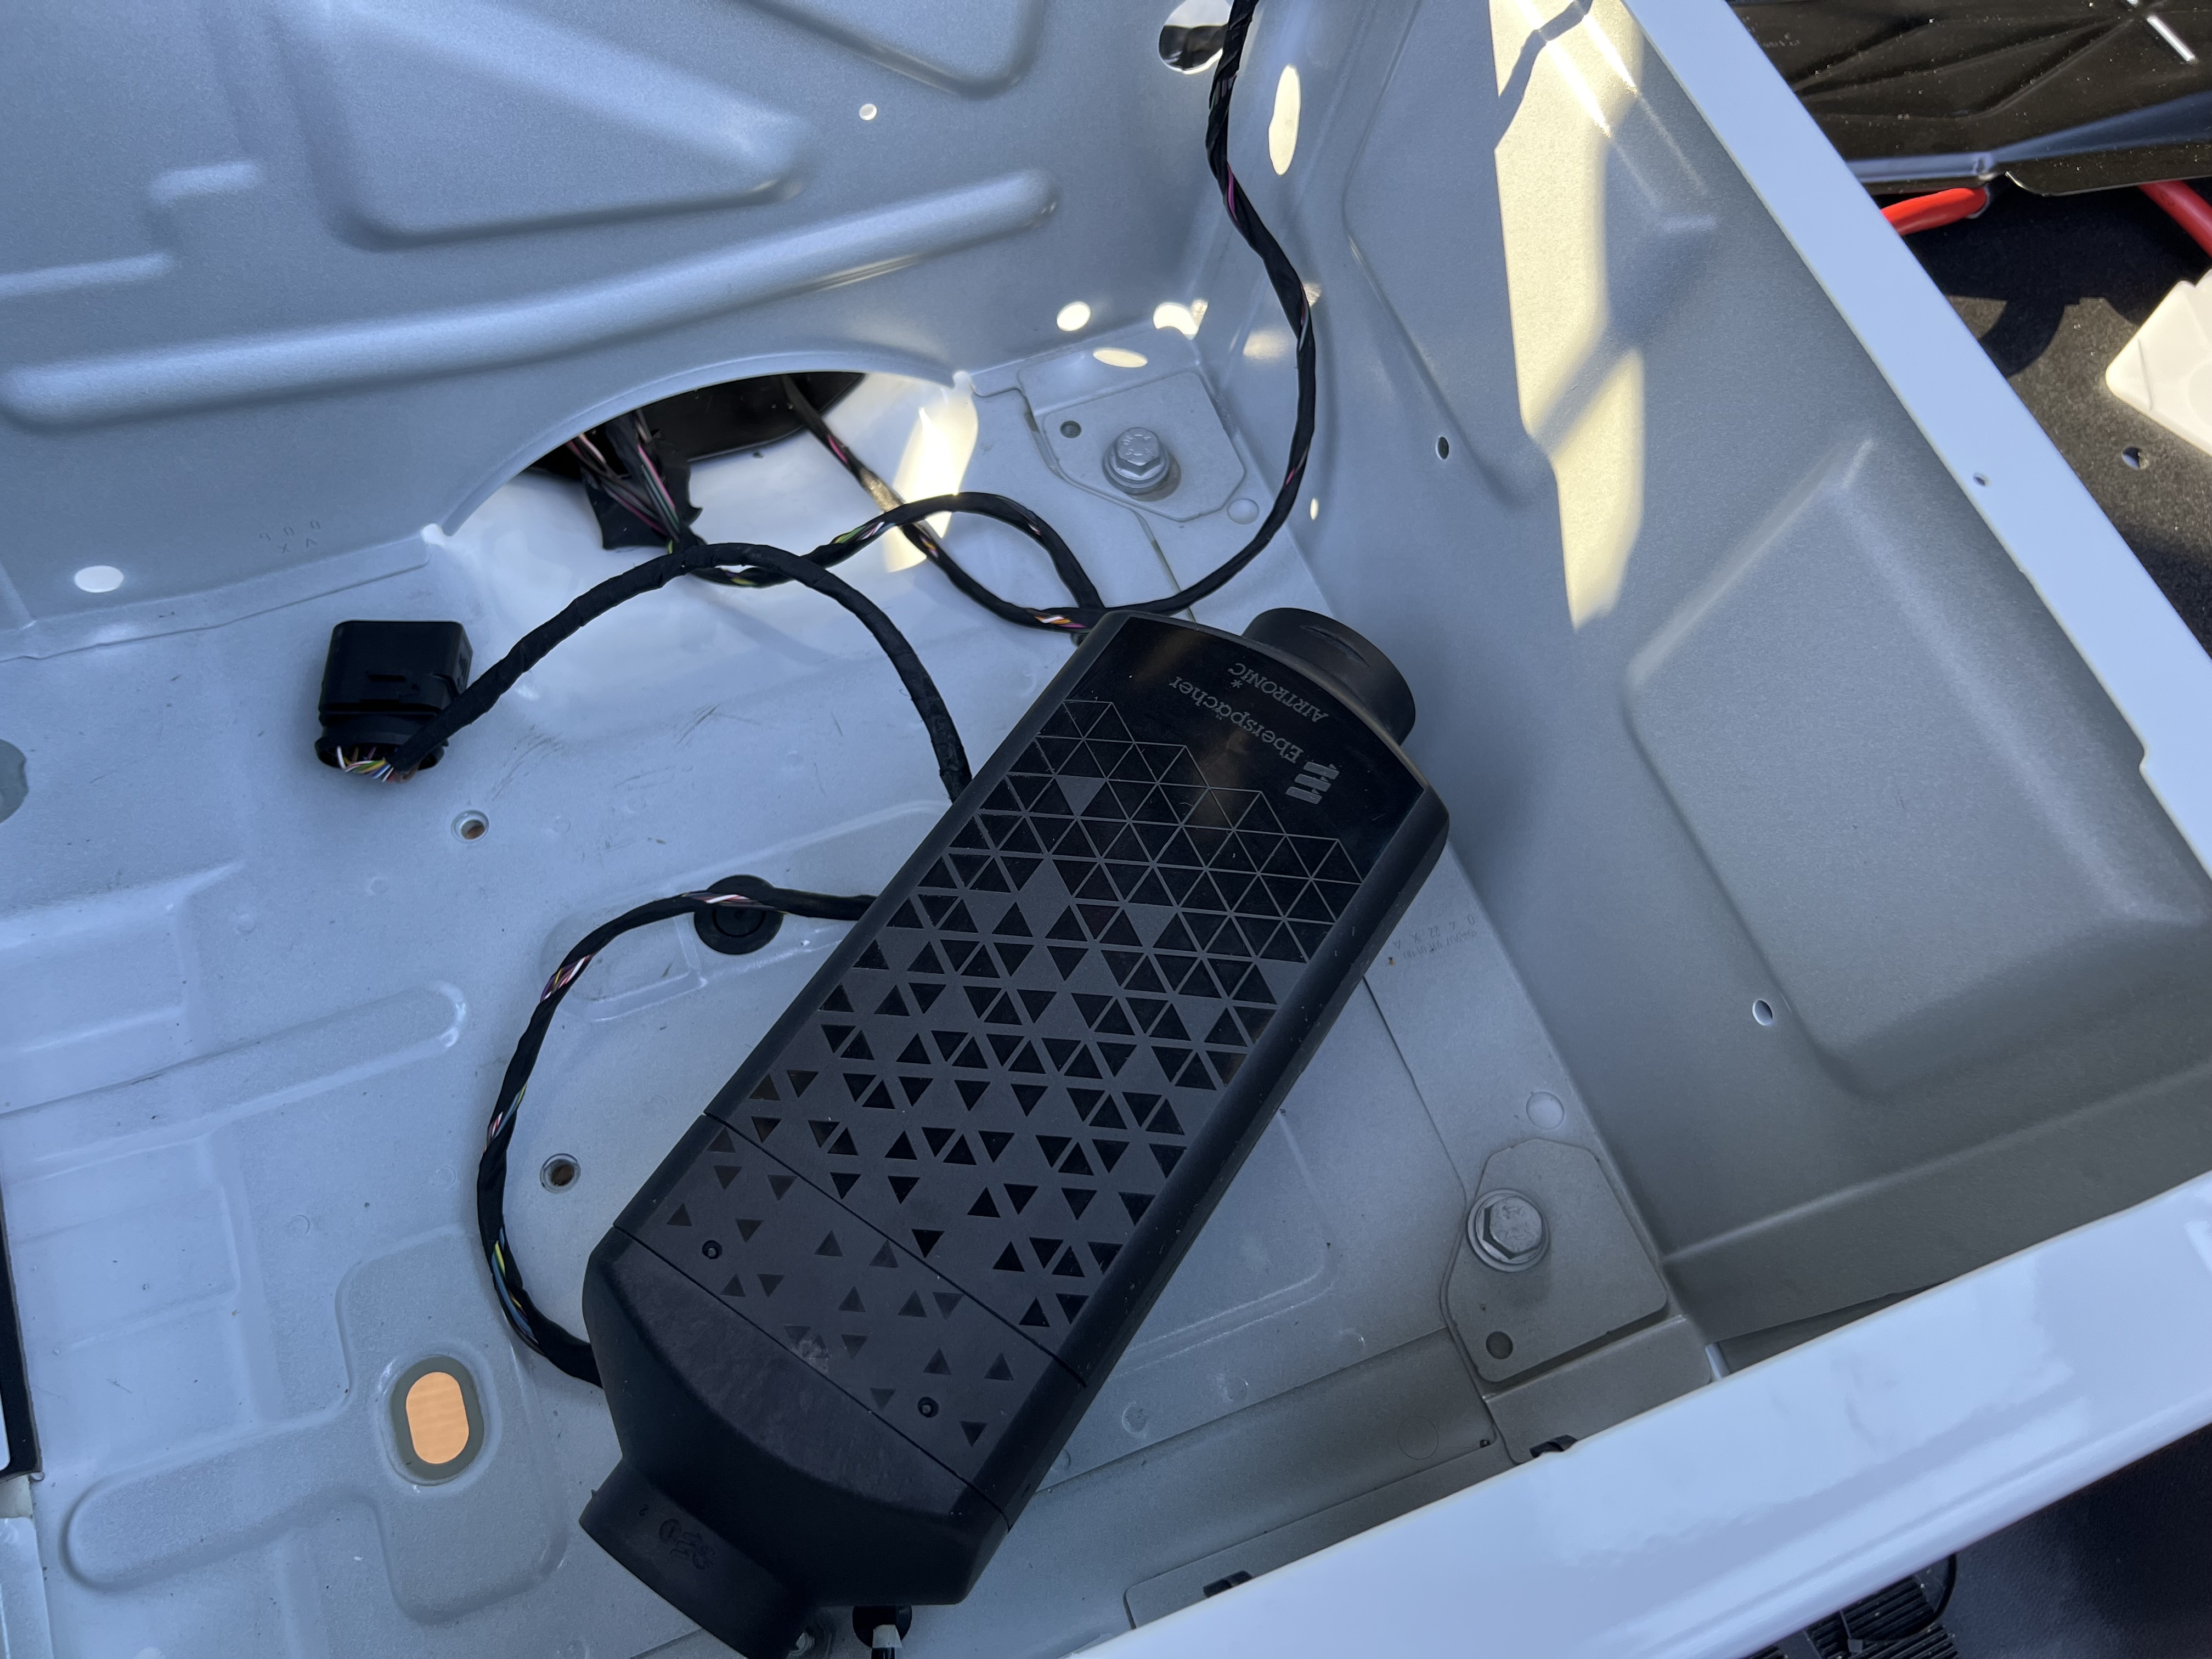
Despite 110F temps, this last week I tackled quite a few projects. I installed the Espar AS3-D2L Diesel Heater, wired the DC to DC charging system and shore power inlet. To do this, I had to remove both driver and passenger seats.

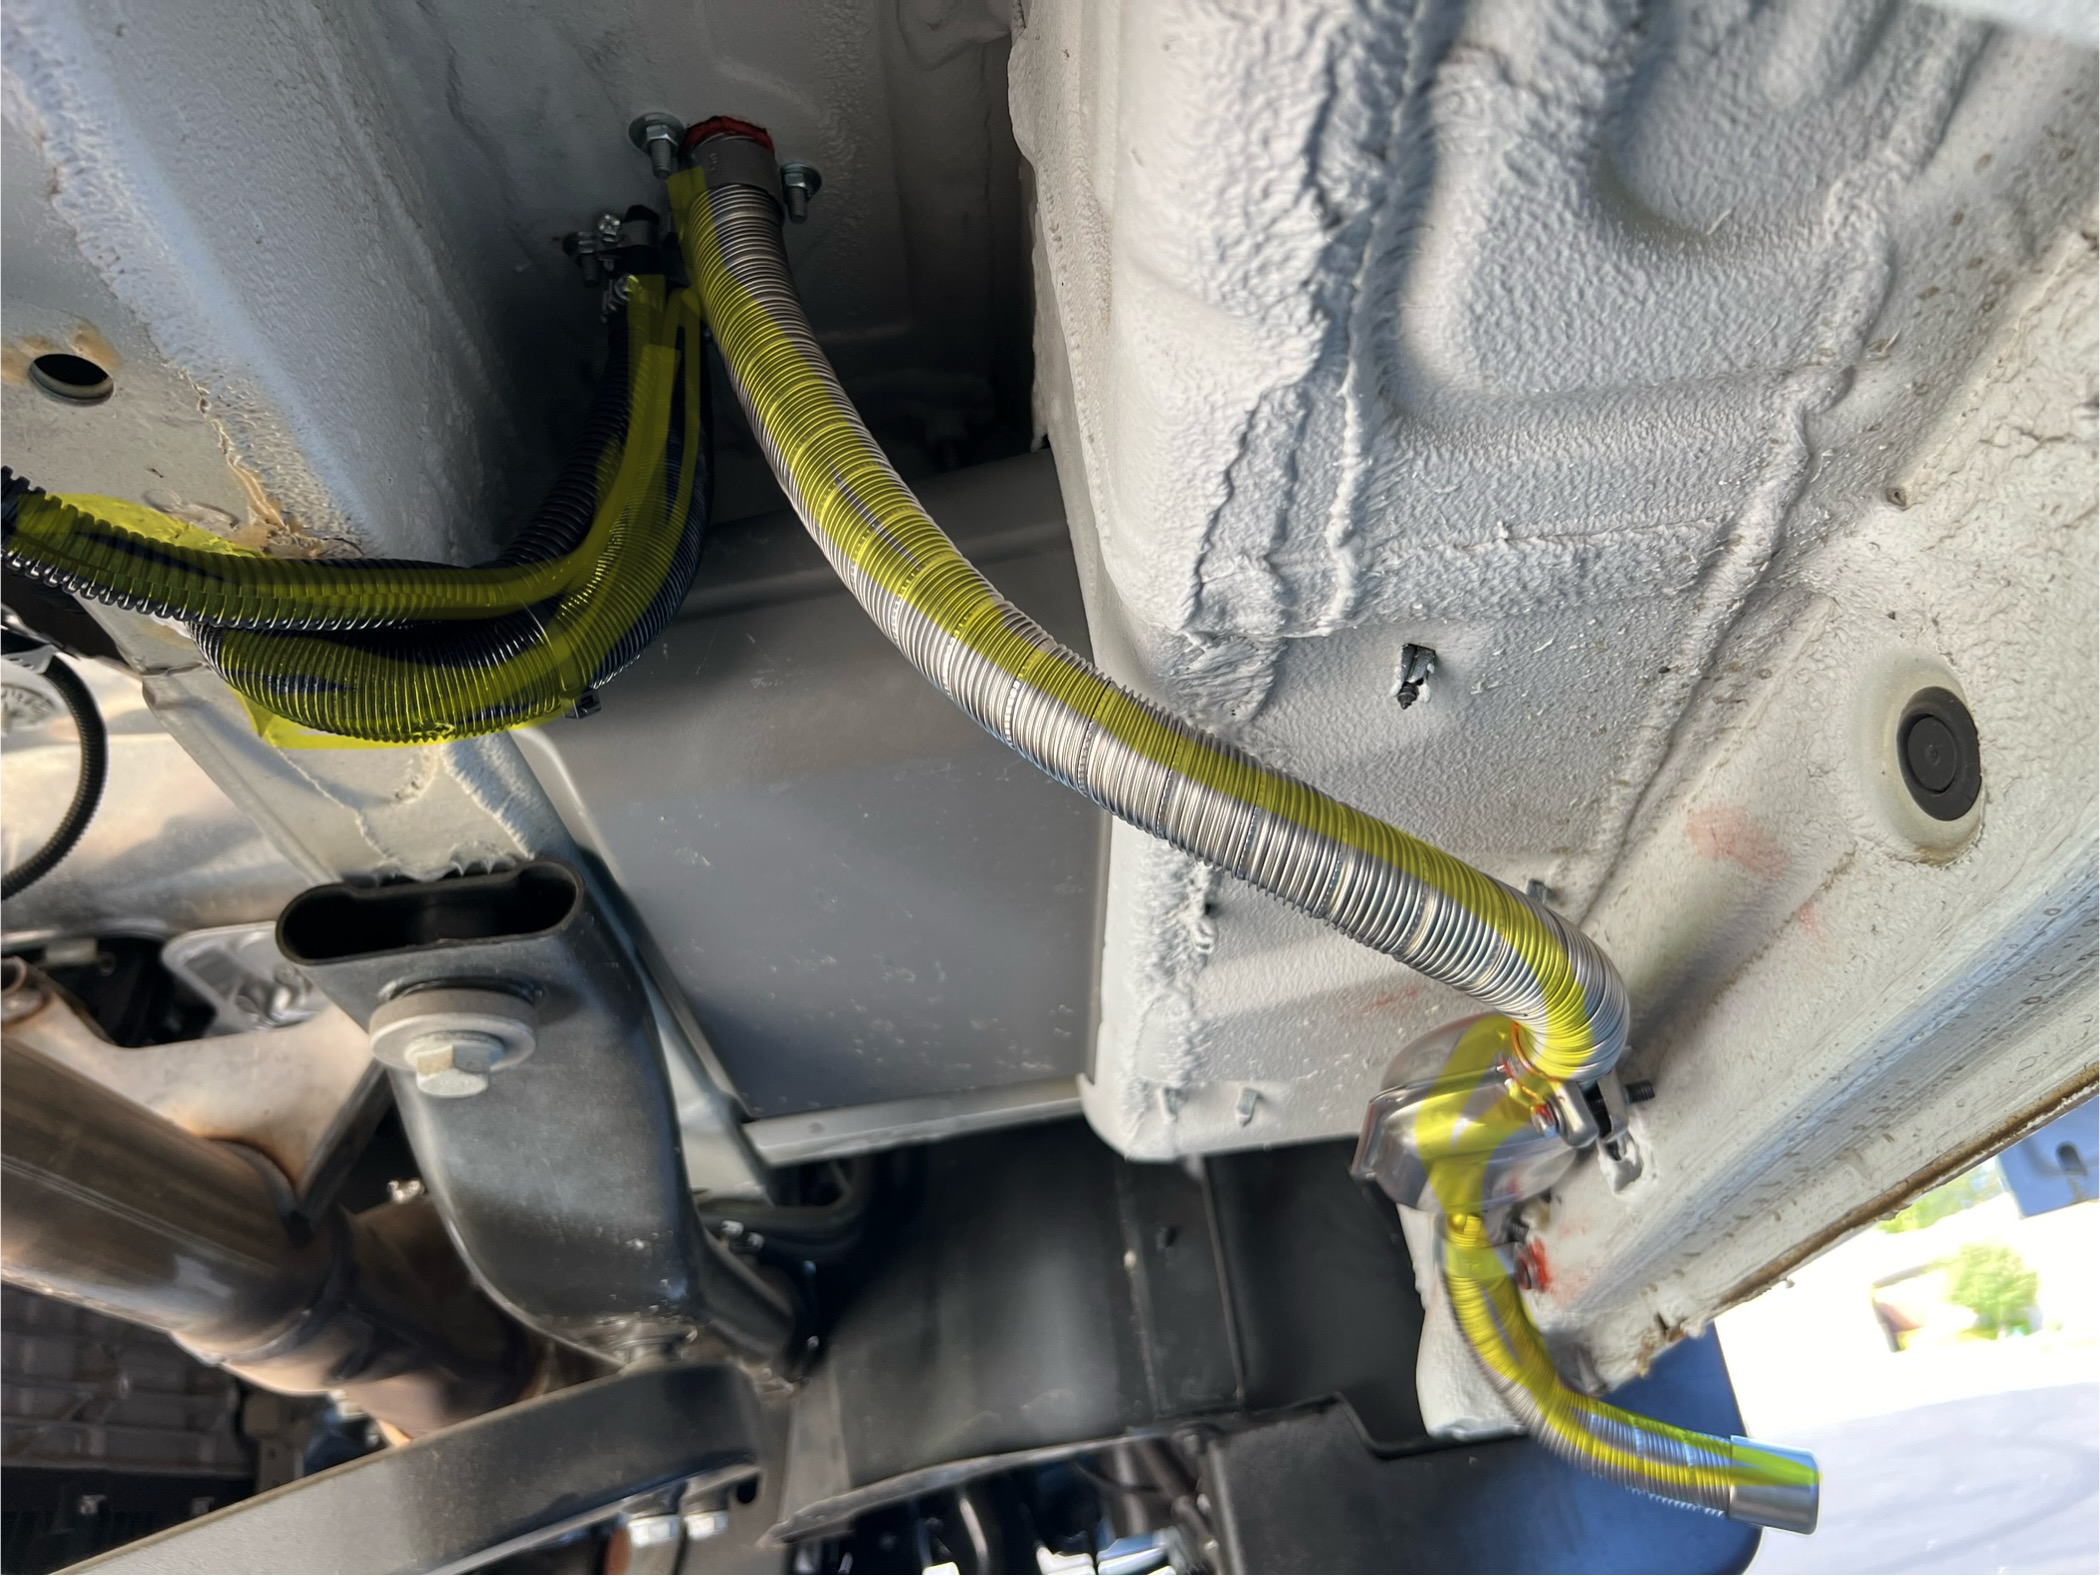
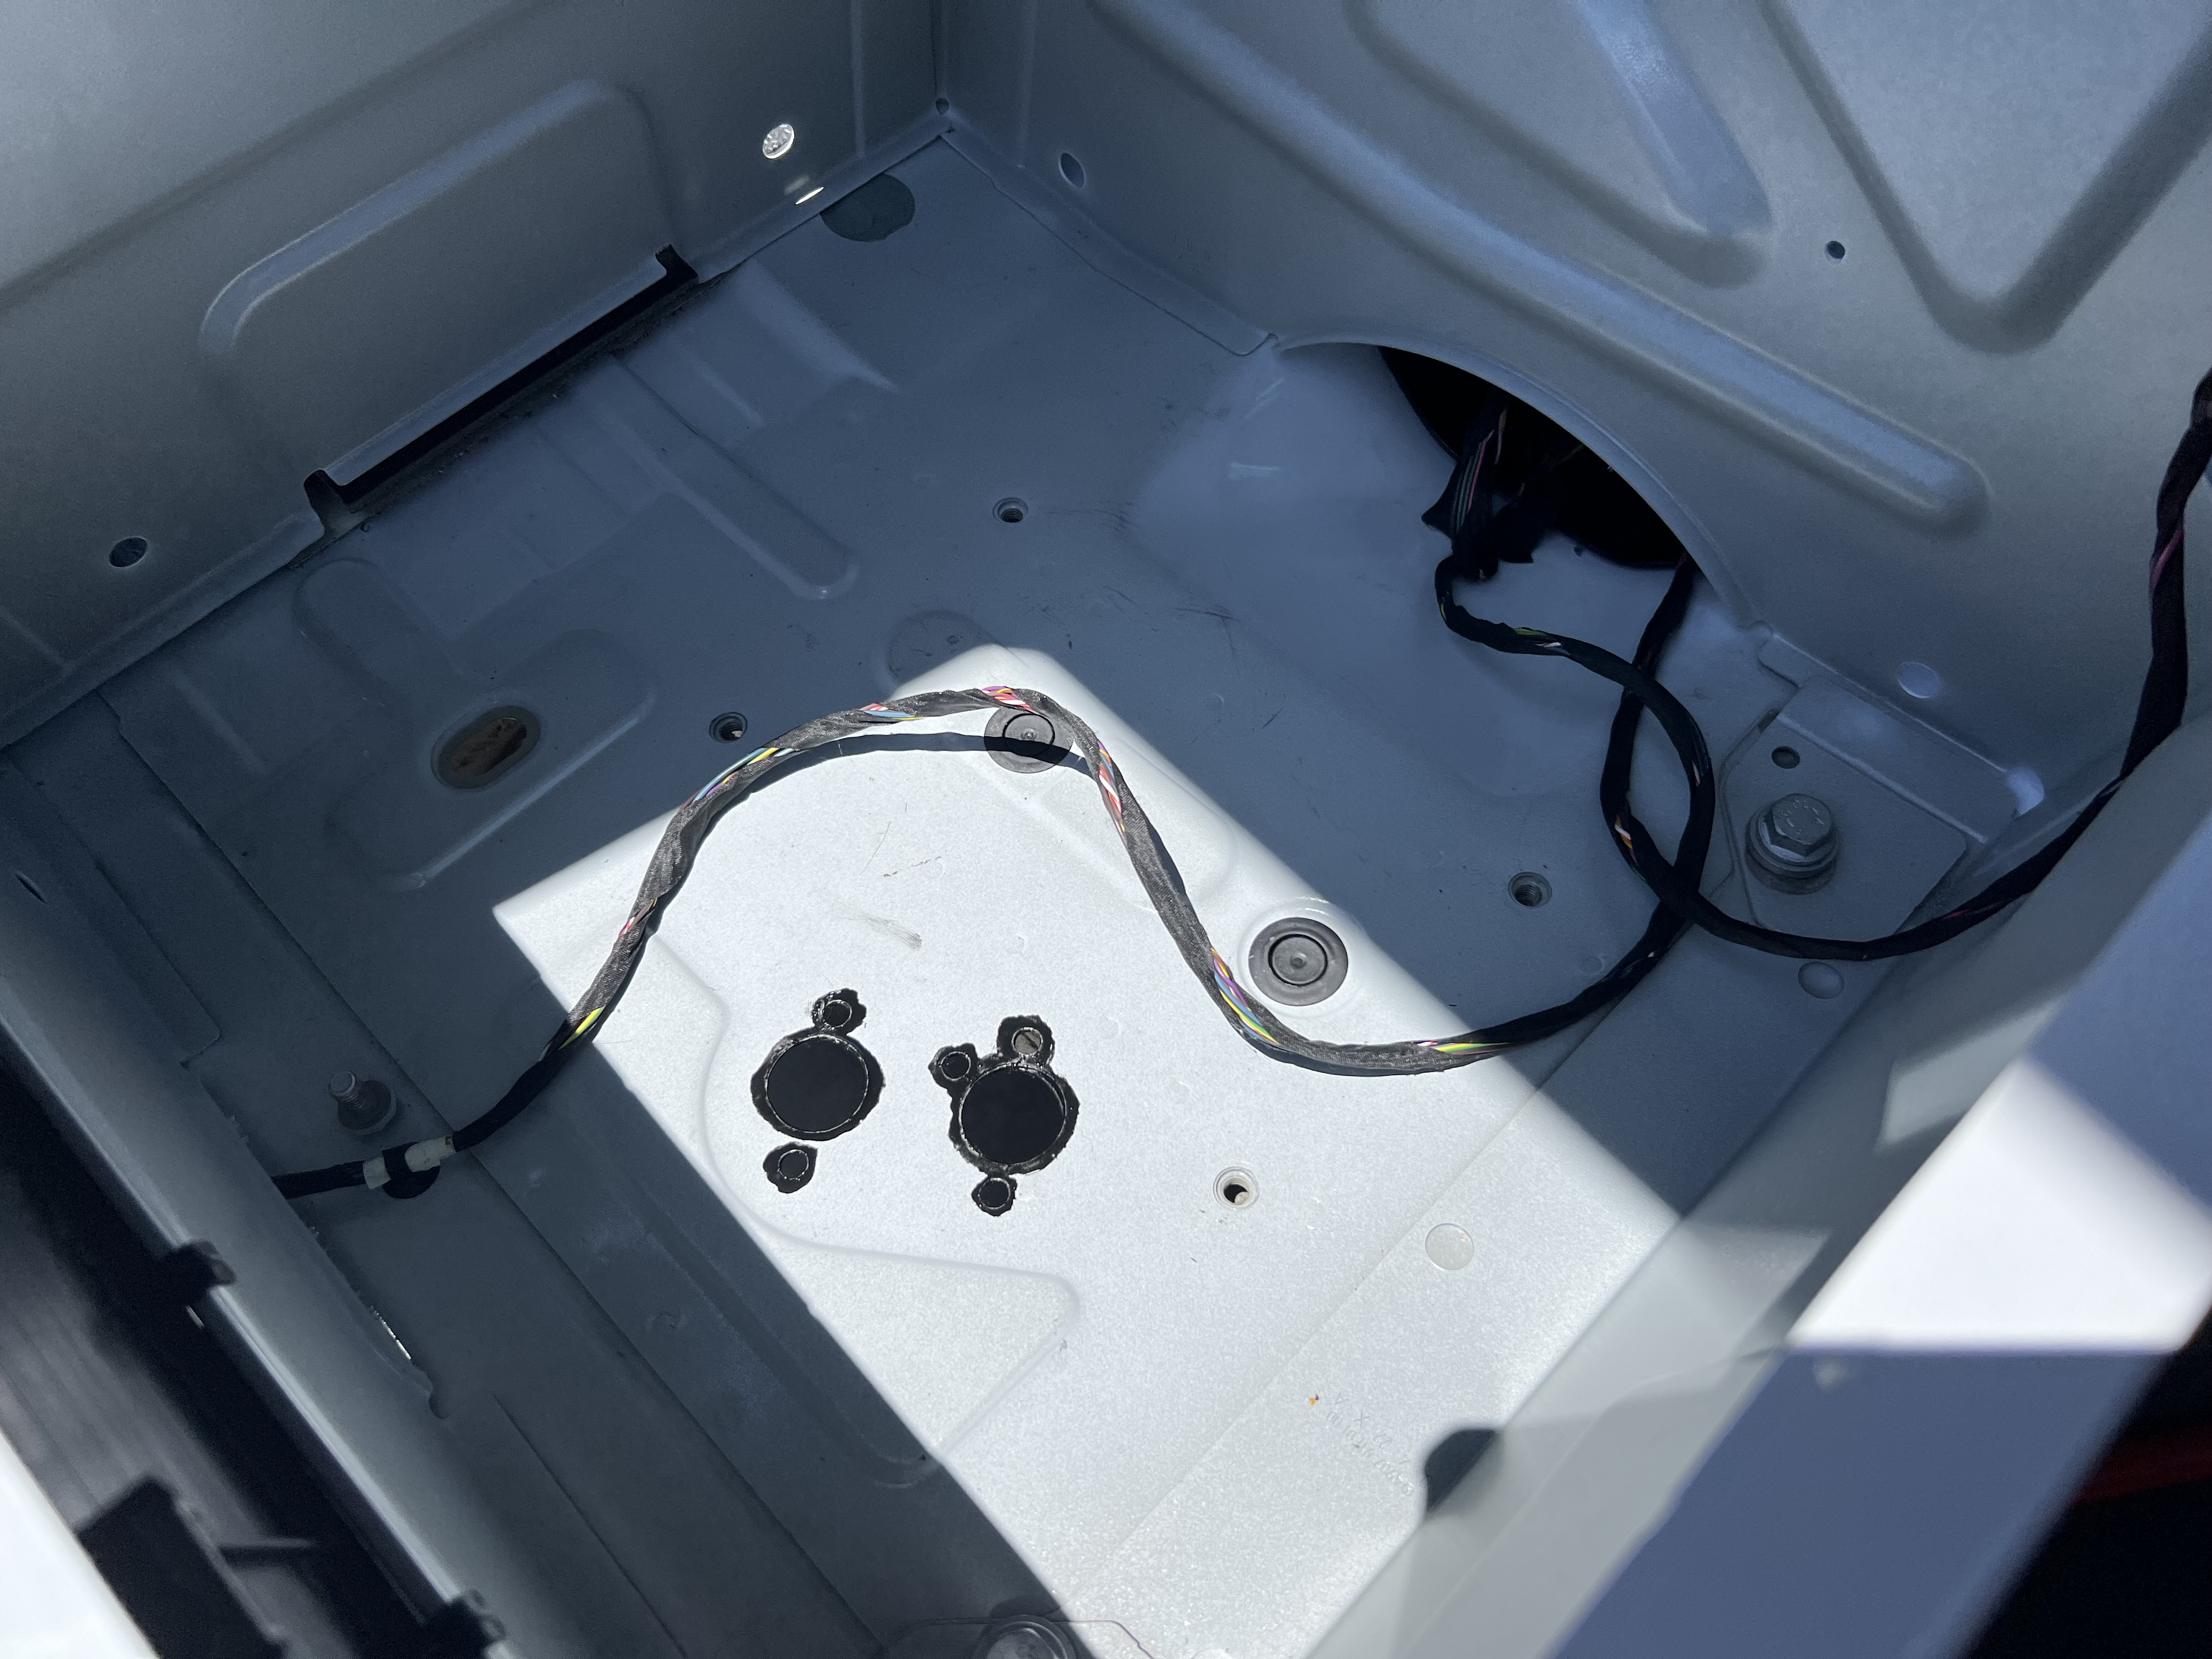
My van came with an auxiliary battery under the front passenger seat. I removed the auxiliary battery and associated wires as it’s not needed. To install the diesel heater I used the diesel heater base gasket as a template to drill out the holes for the intake/exhaust/ mounts/fuel line on the van floor. Once drilled, I deburred the edges and painted Por-15 over the exposed metal. I used high temp silicone at the mounting location to prevent any water intrusion near the exhaust plate. I ran the exhaust, and air intake and used rivet nuts to secure the muffler and exhaust pipe safely to the van.

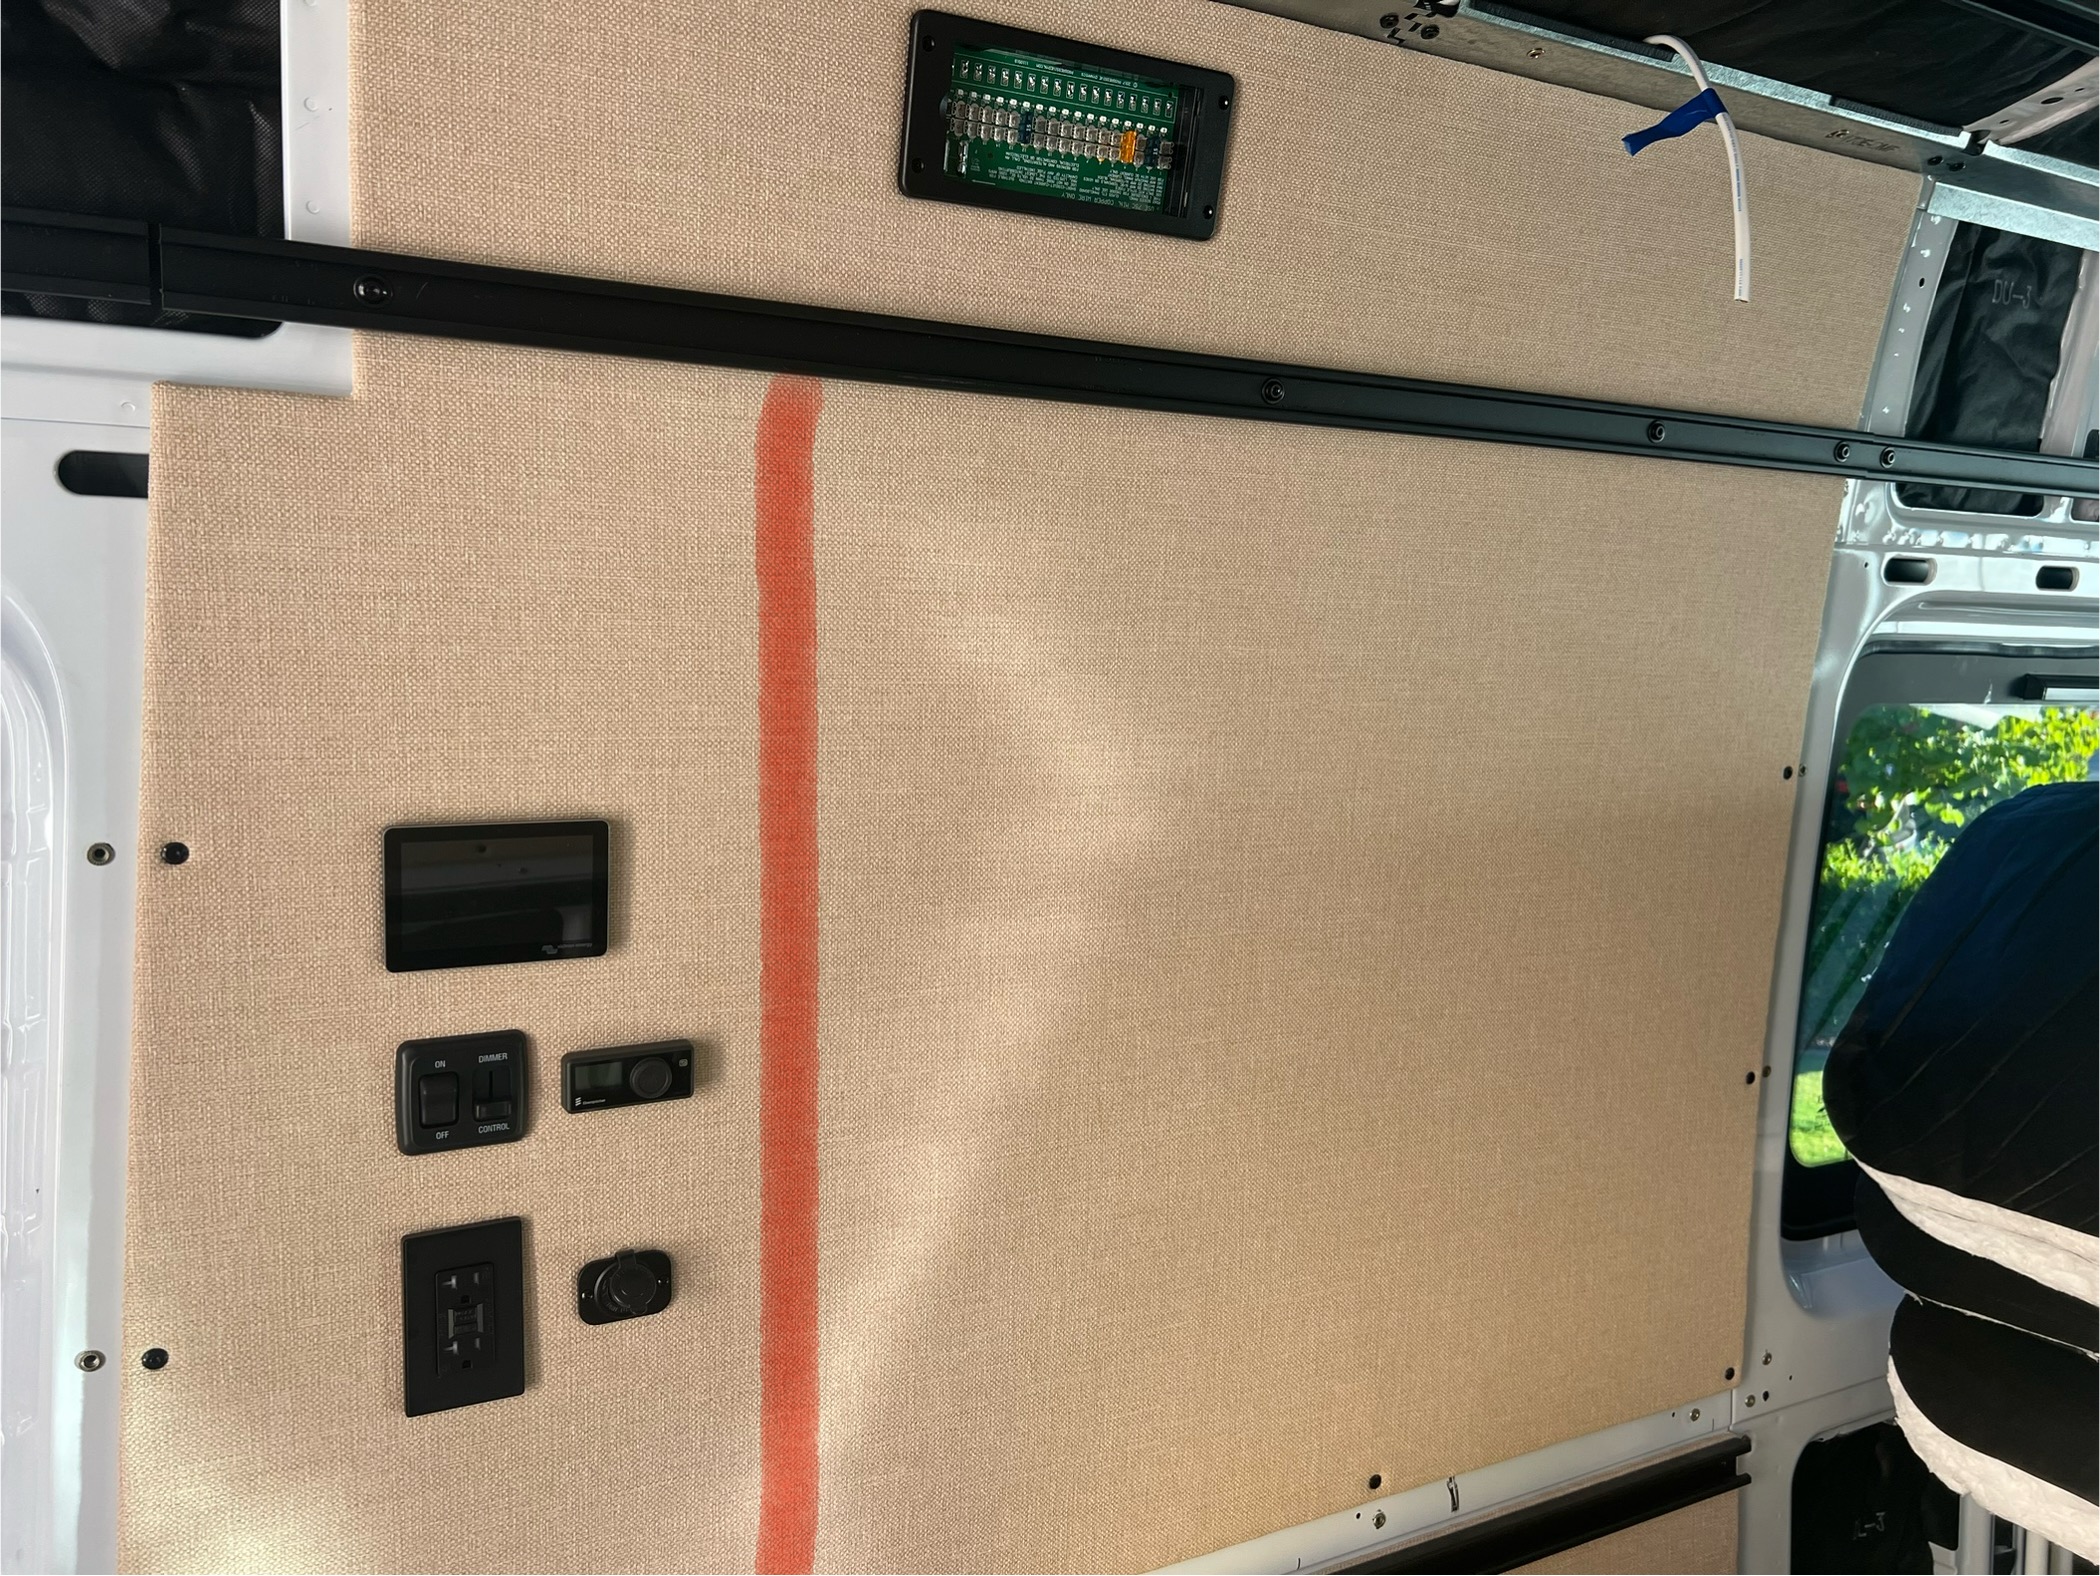
Mercedes was kind enough to have a Dorman auxiliary fuel tap installed so I used that to tap into the diesel tank. I mounted the fuel pump near the gas tank, routed the wire from the diesel heater to power the fuel pump. I haven’t decided yet where I’m going to place the Espar Easy Start Pro Controller, but there’s enough included wire in the harness to place it anywhere in the van.

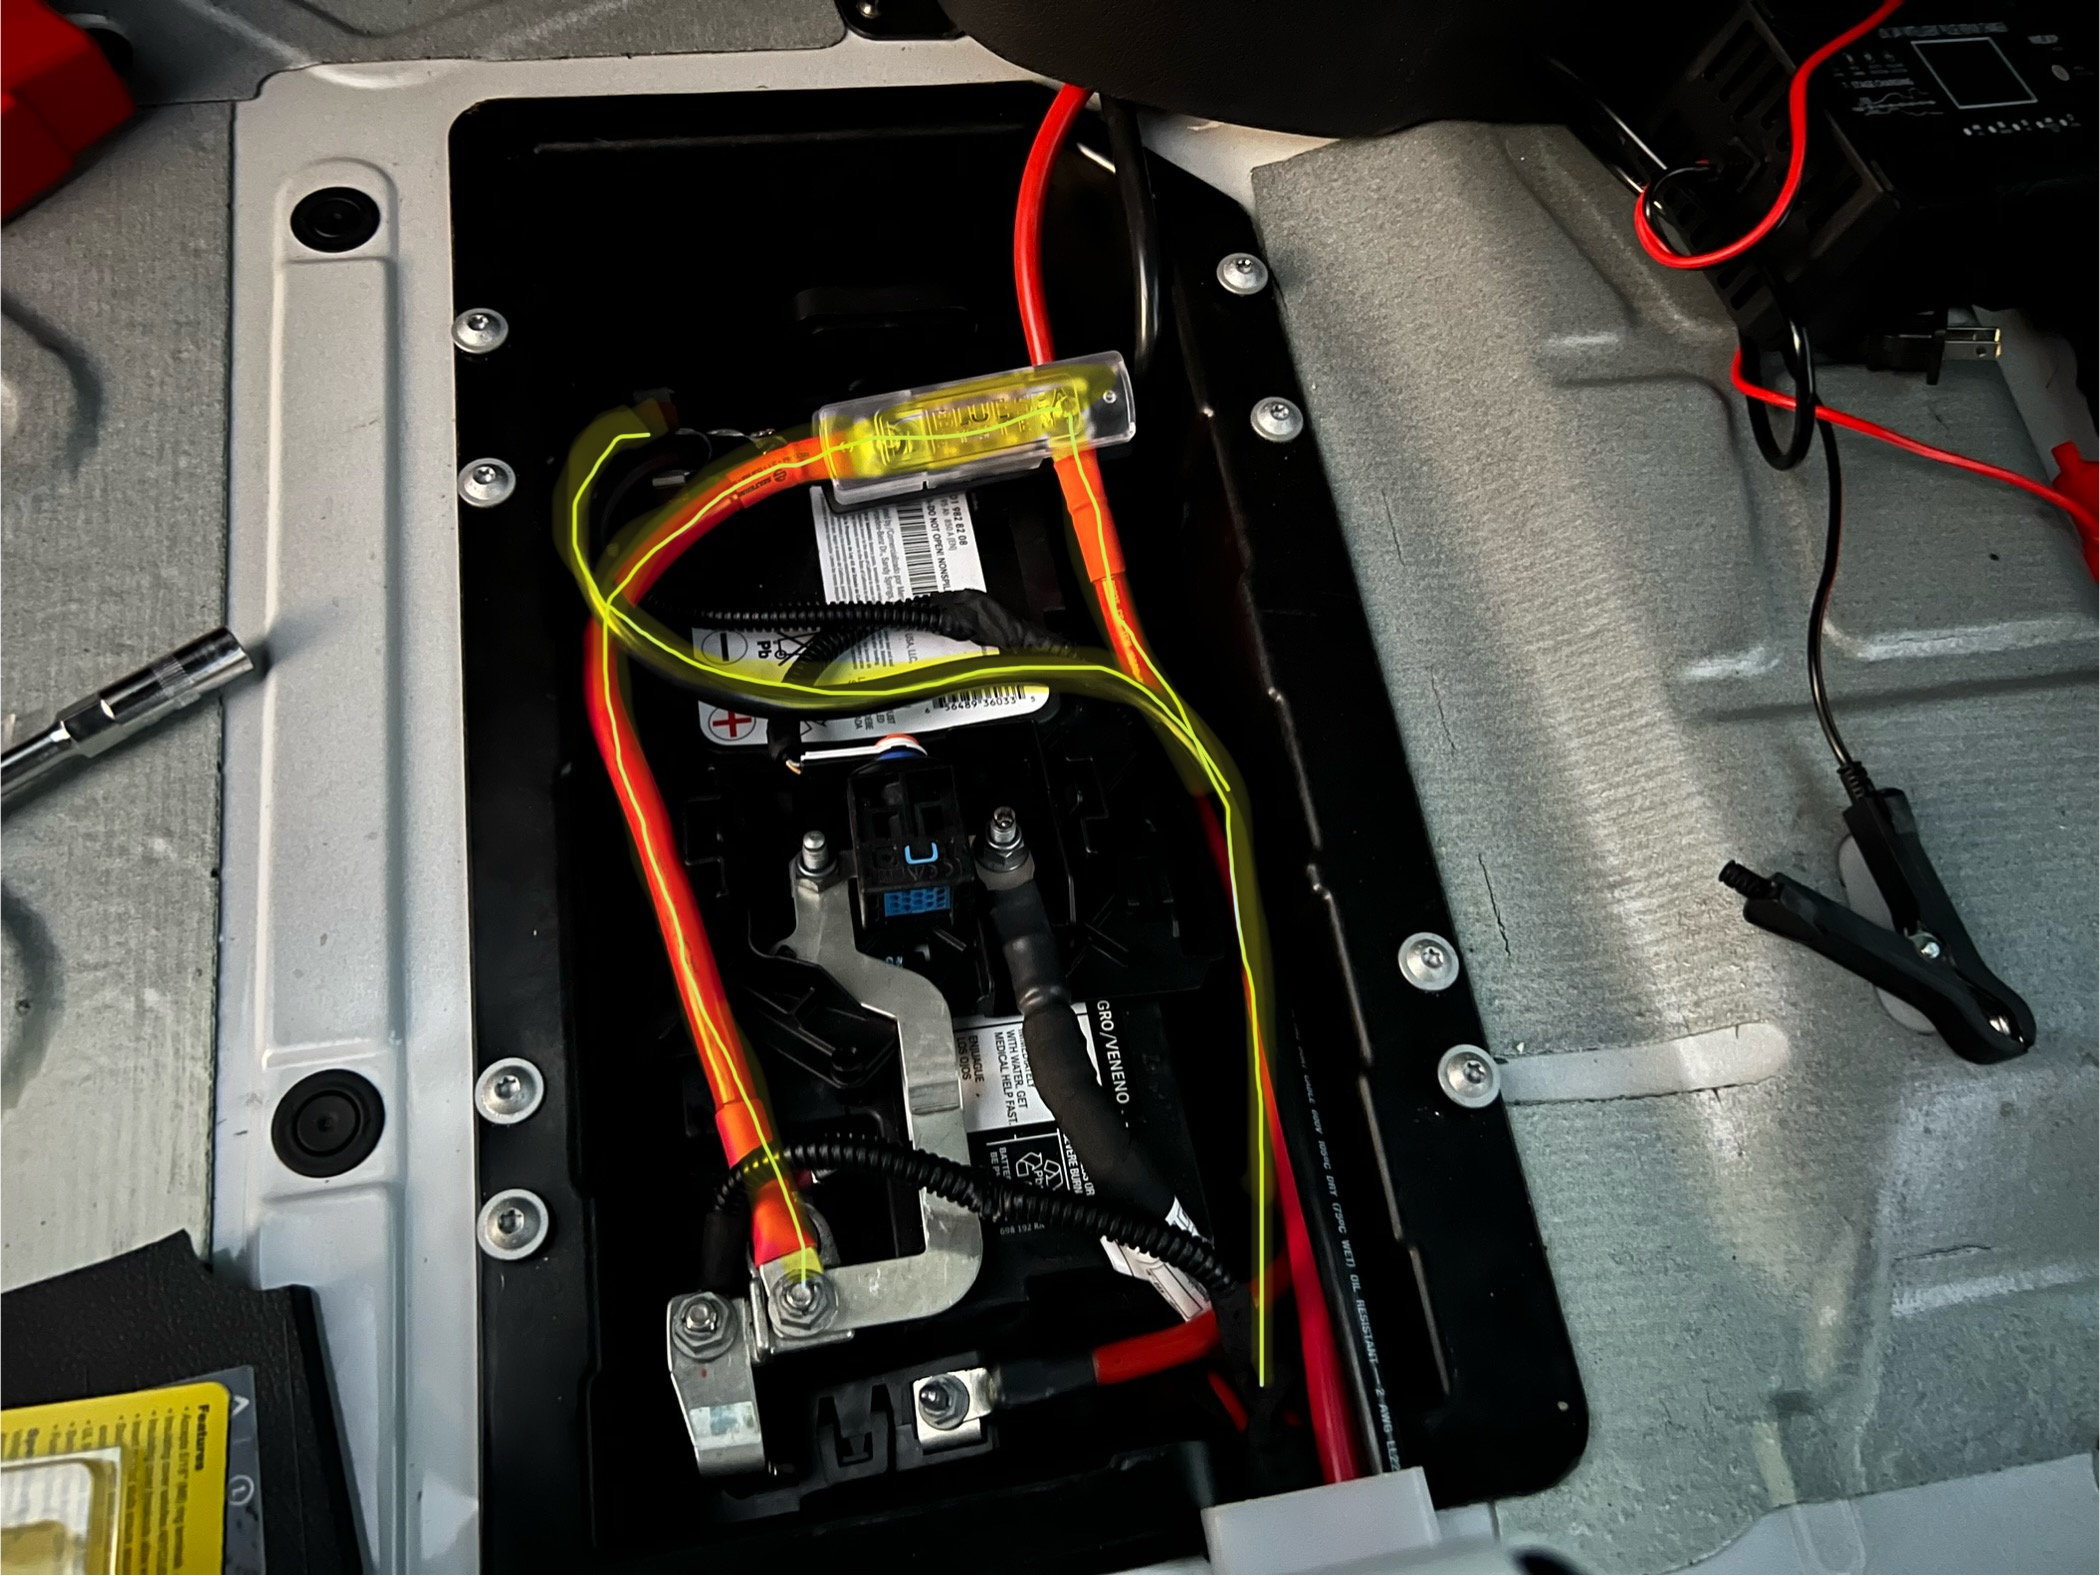
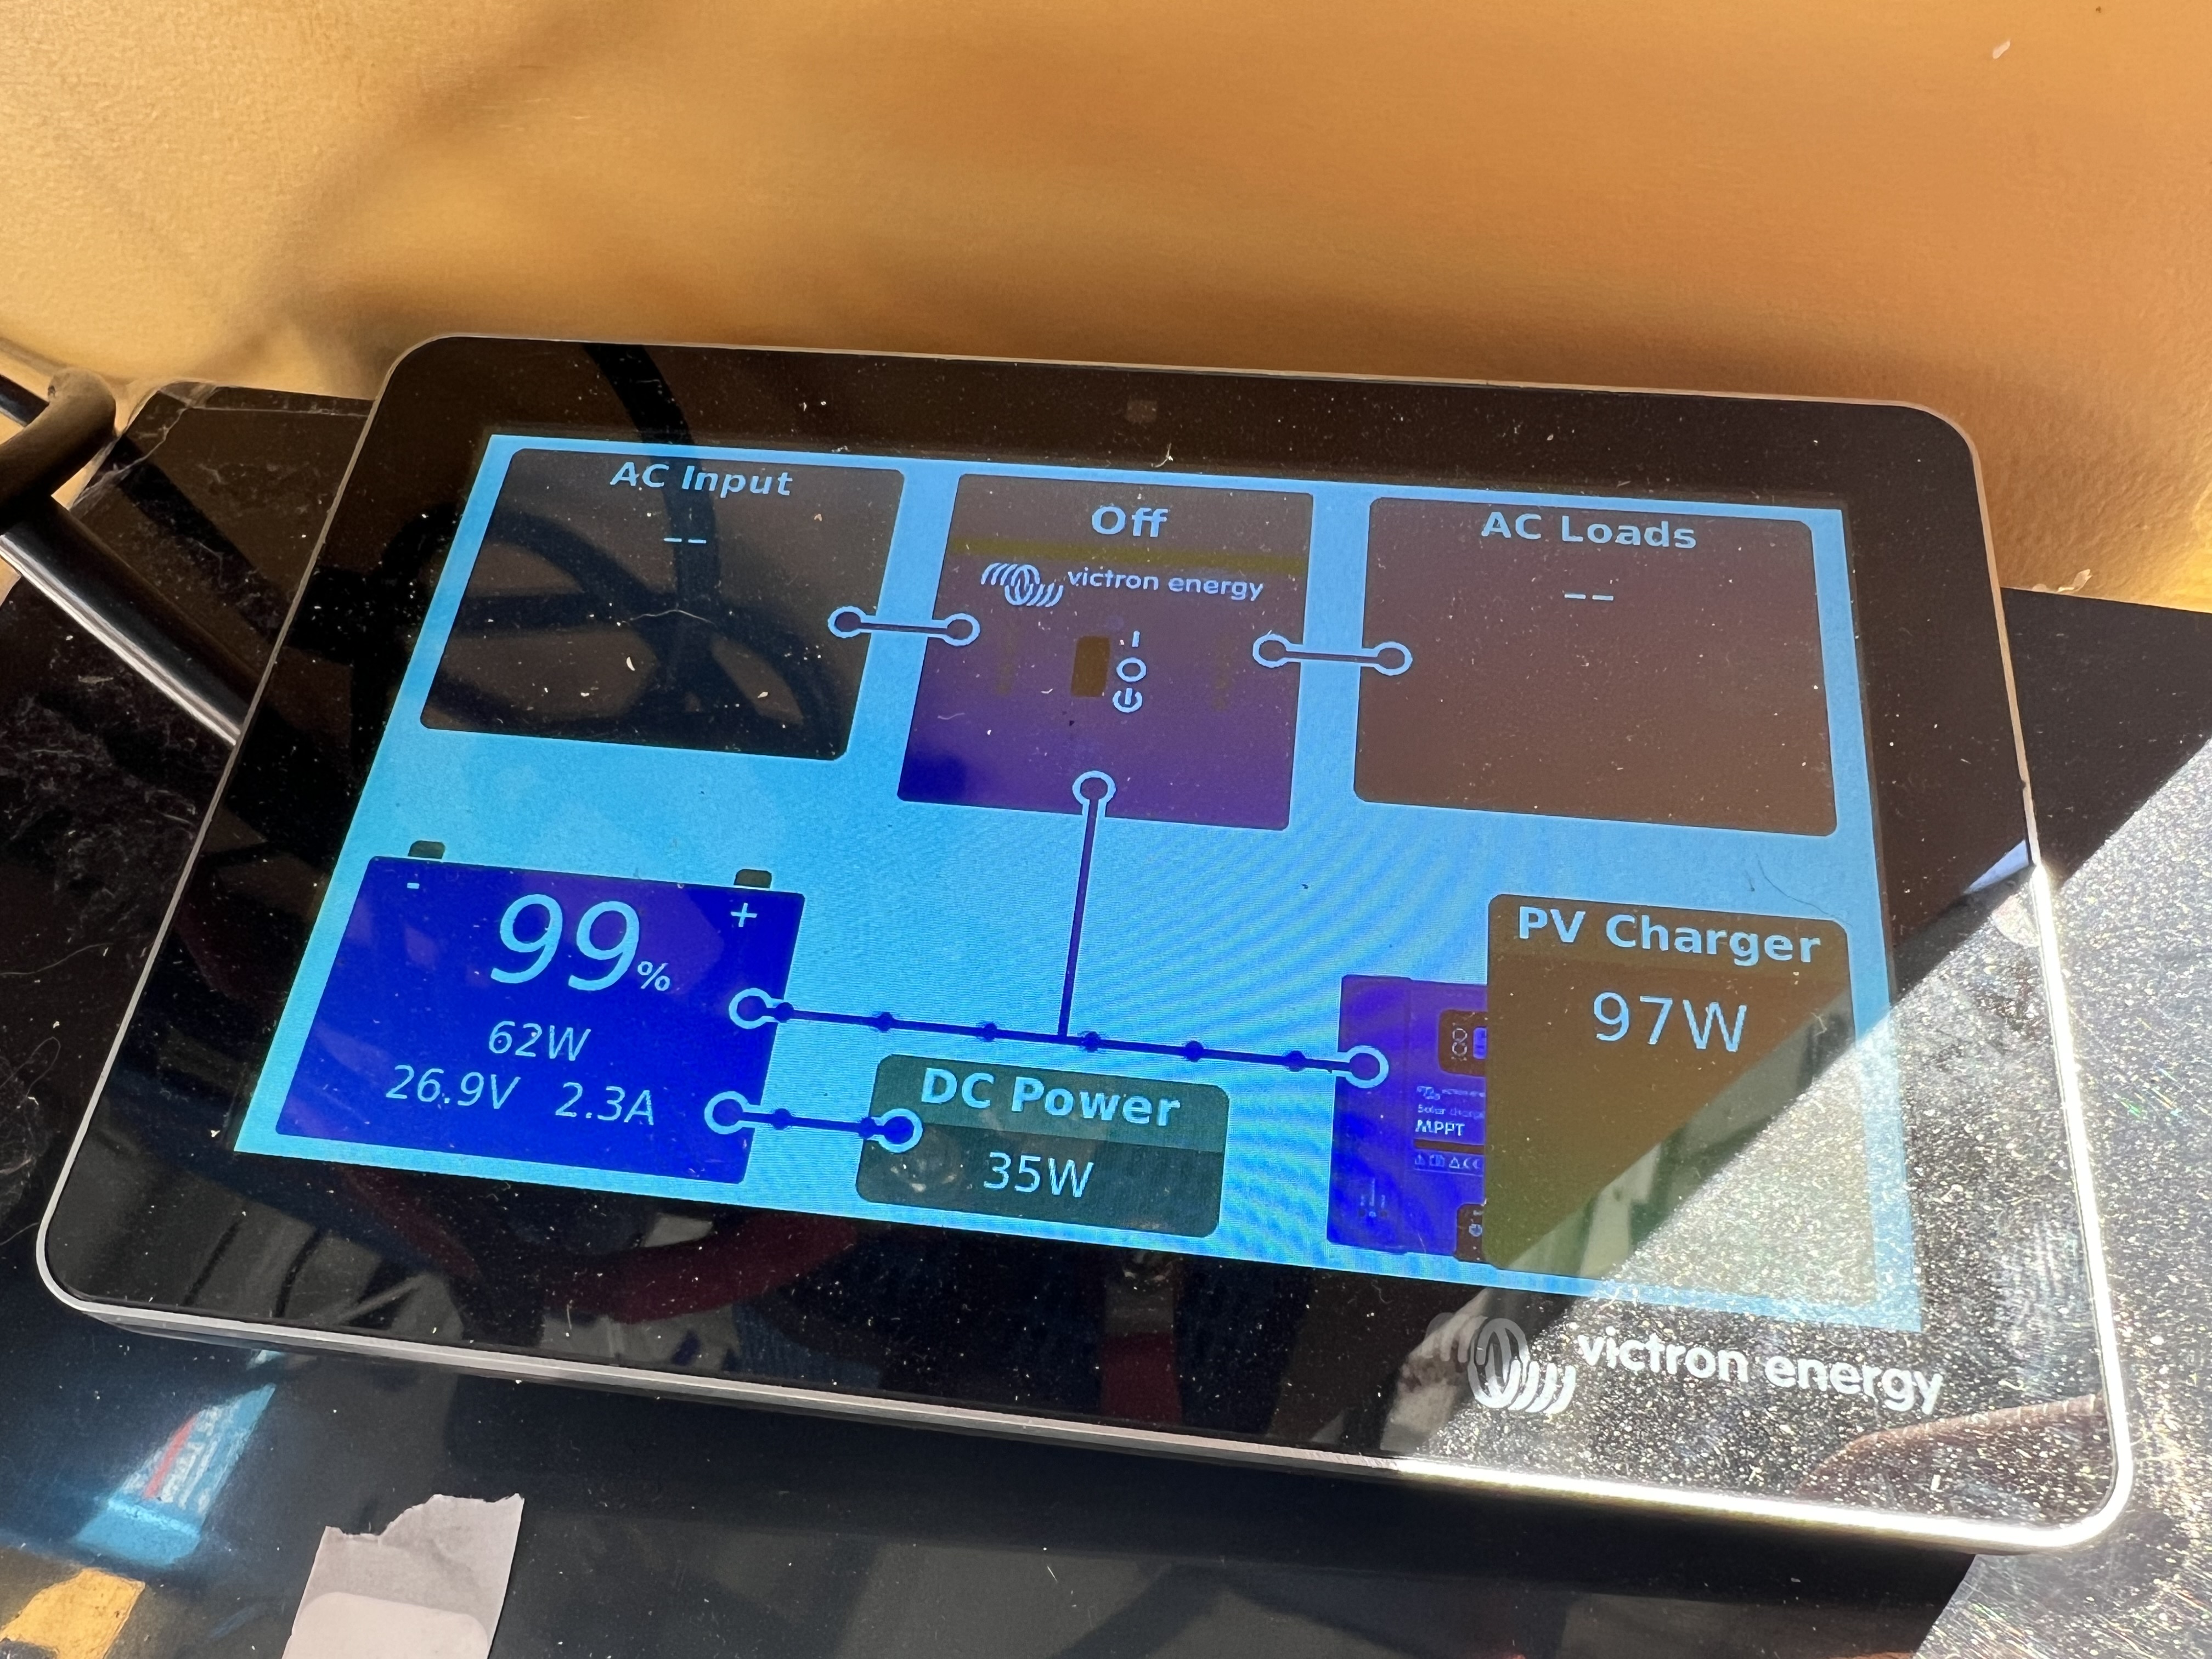
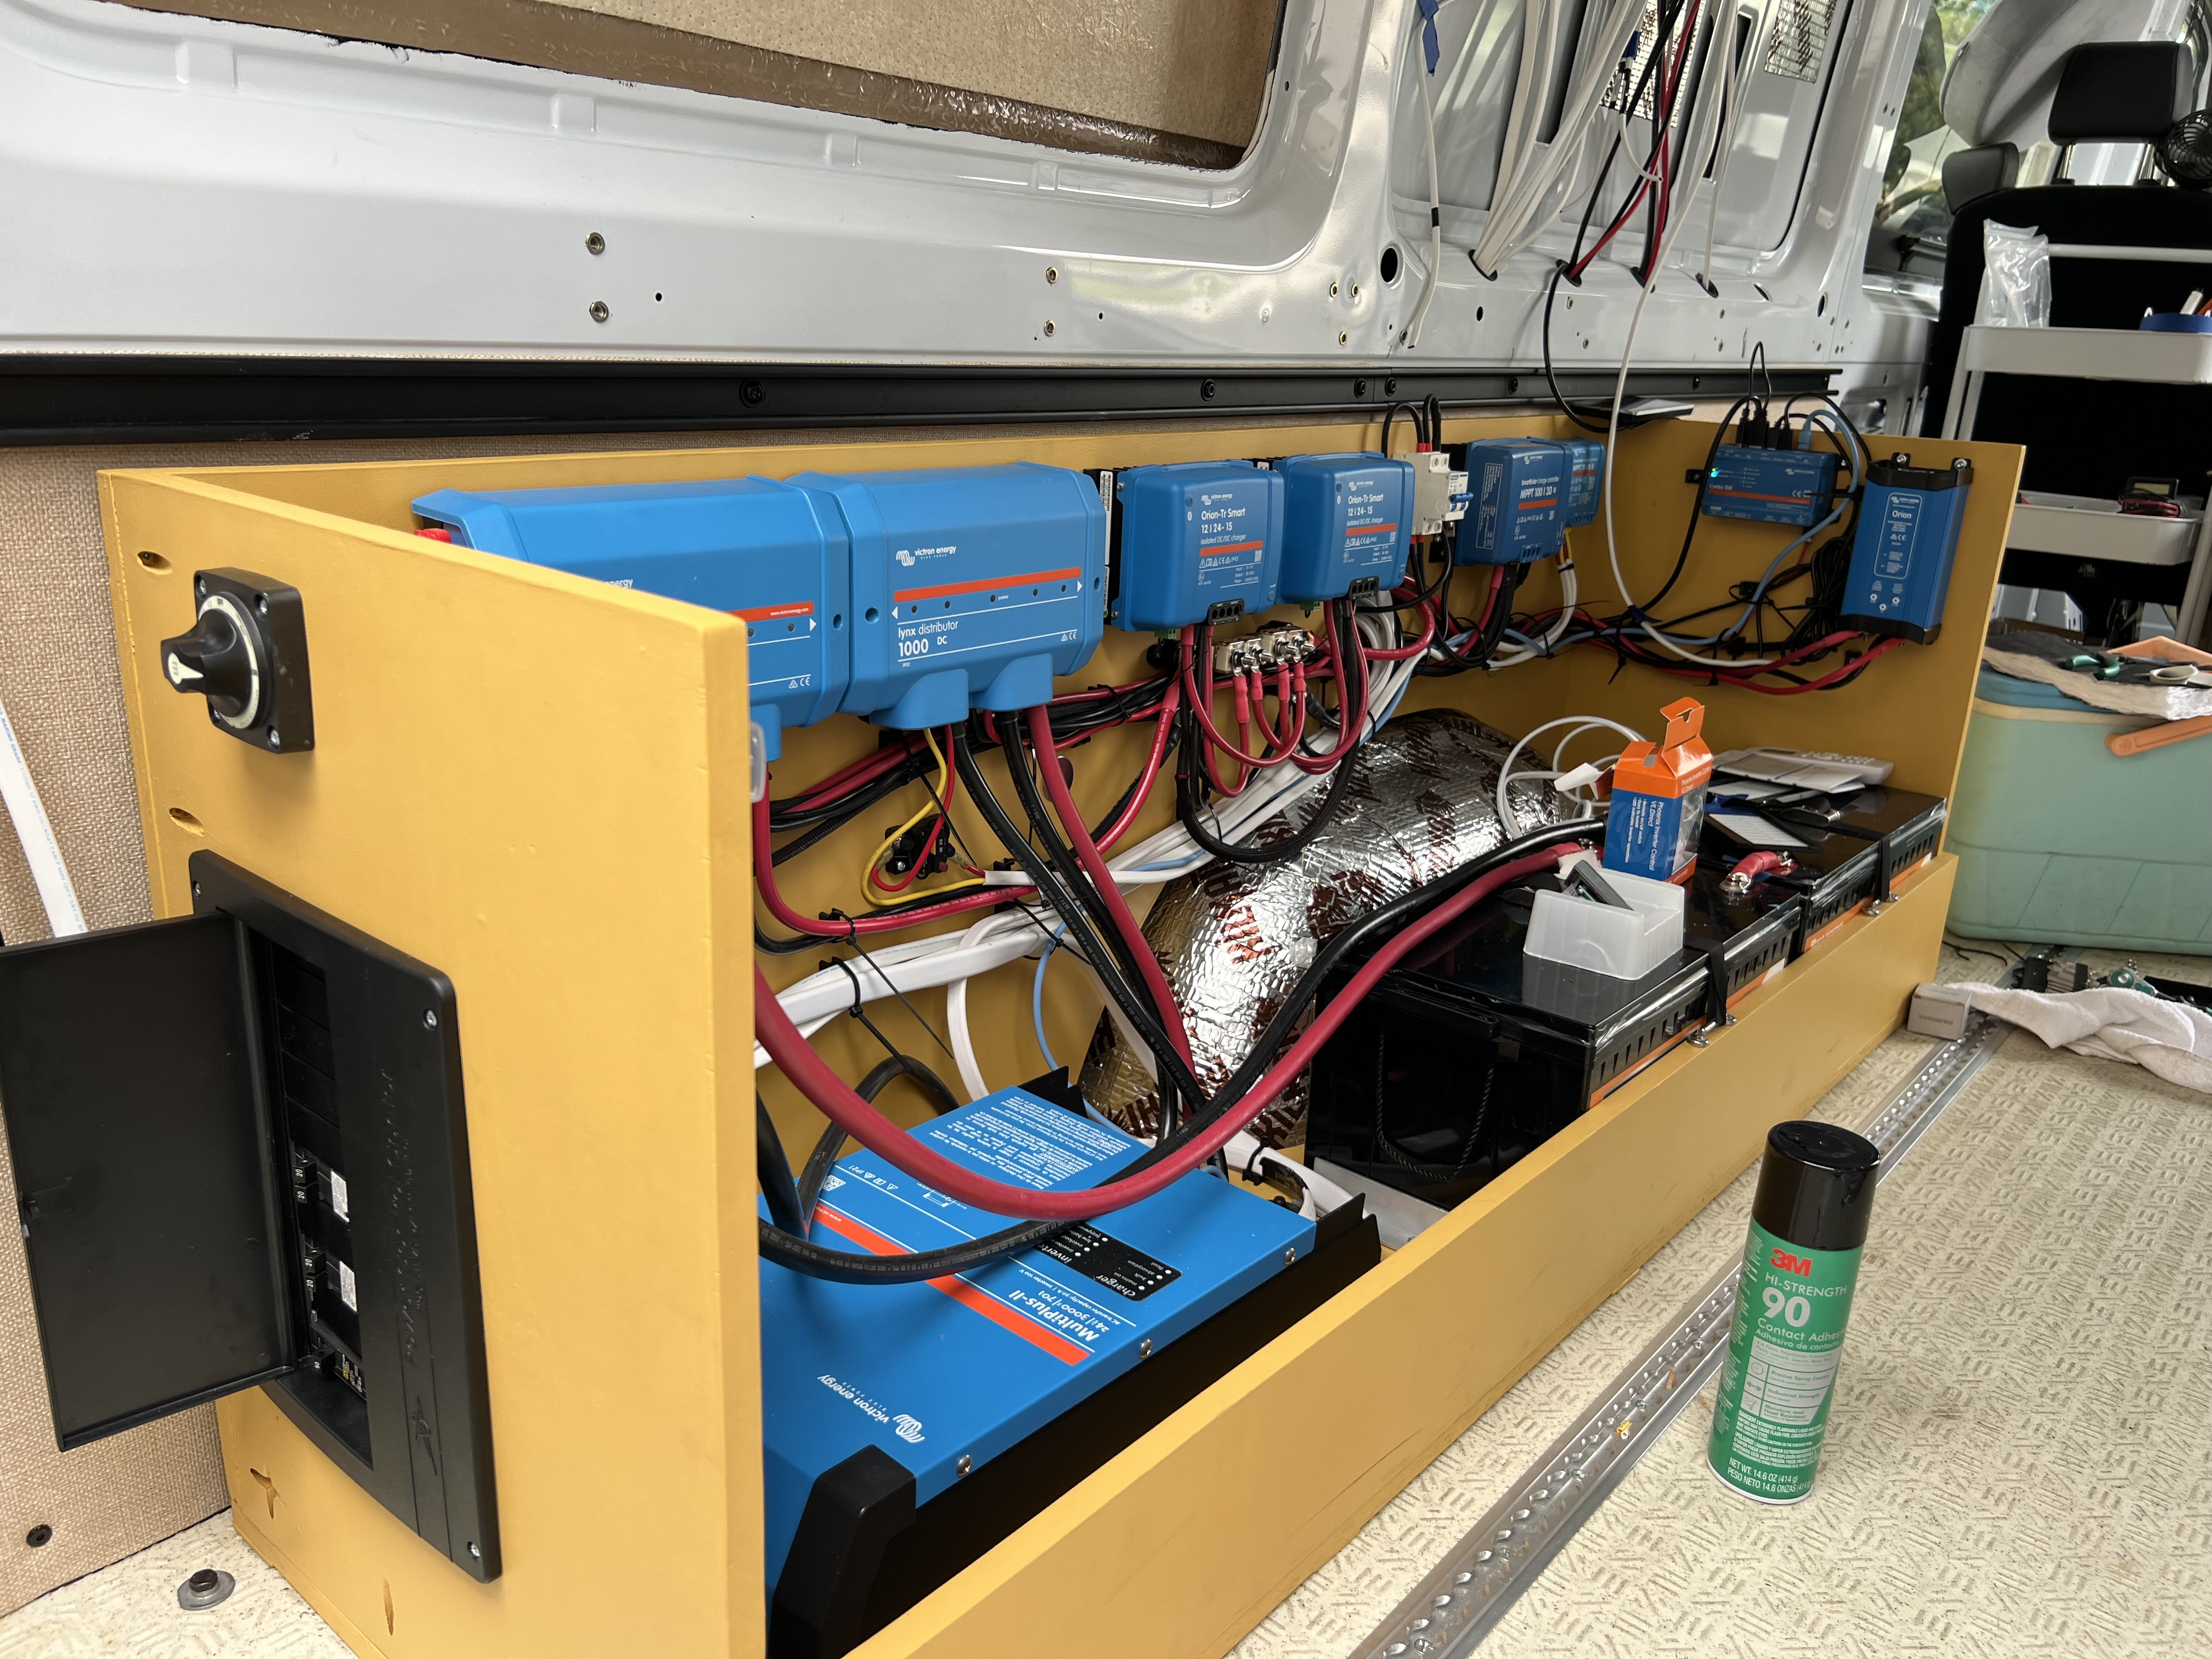
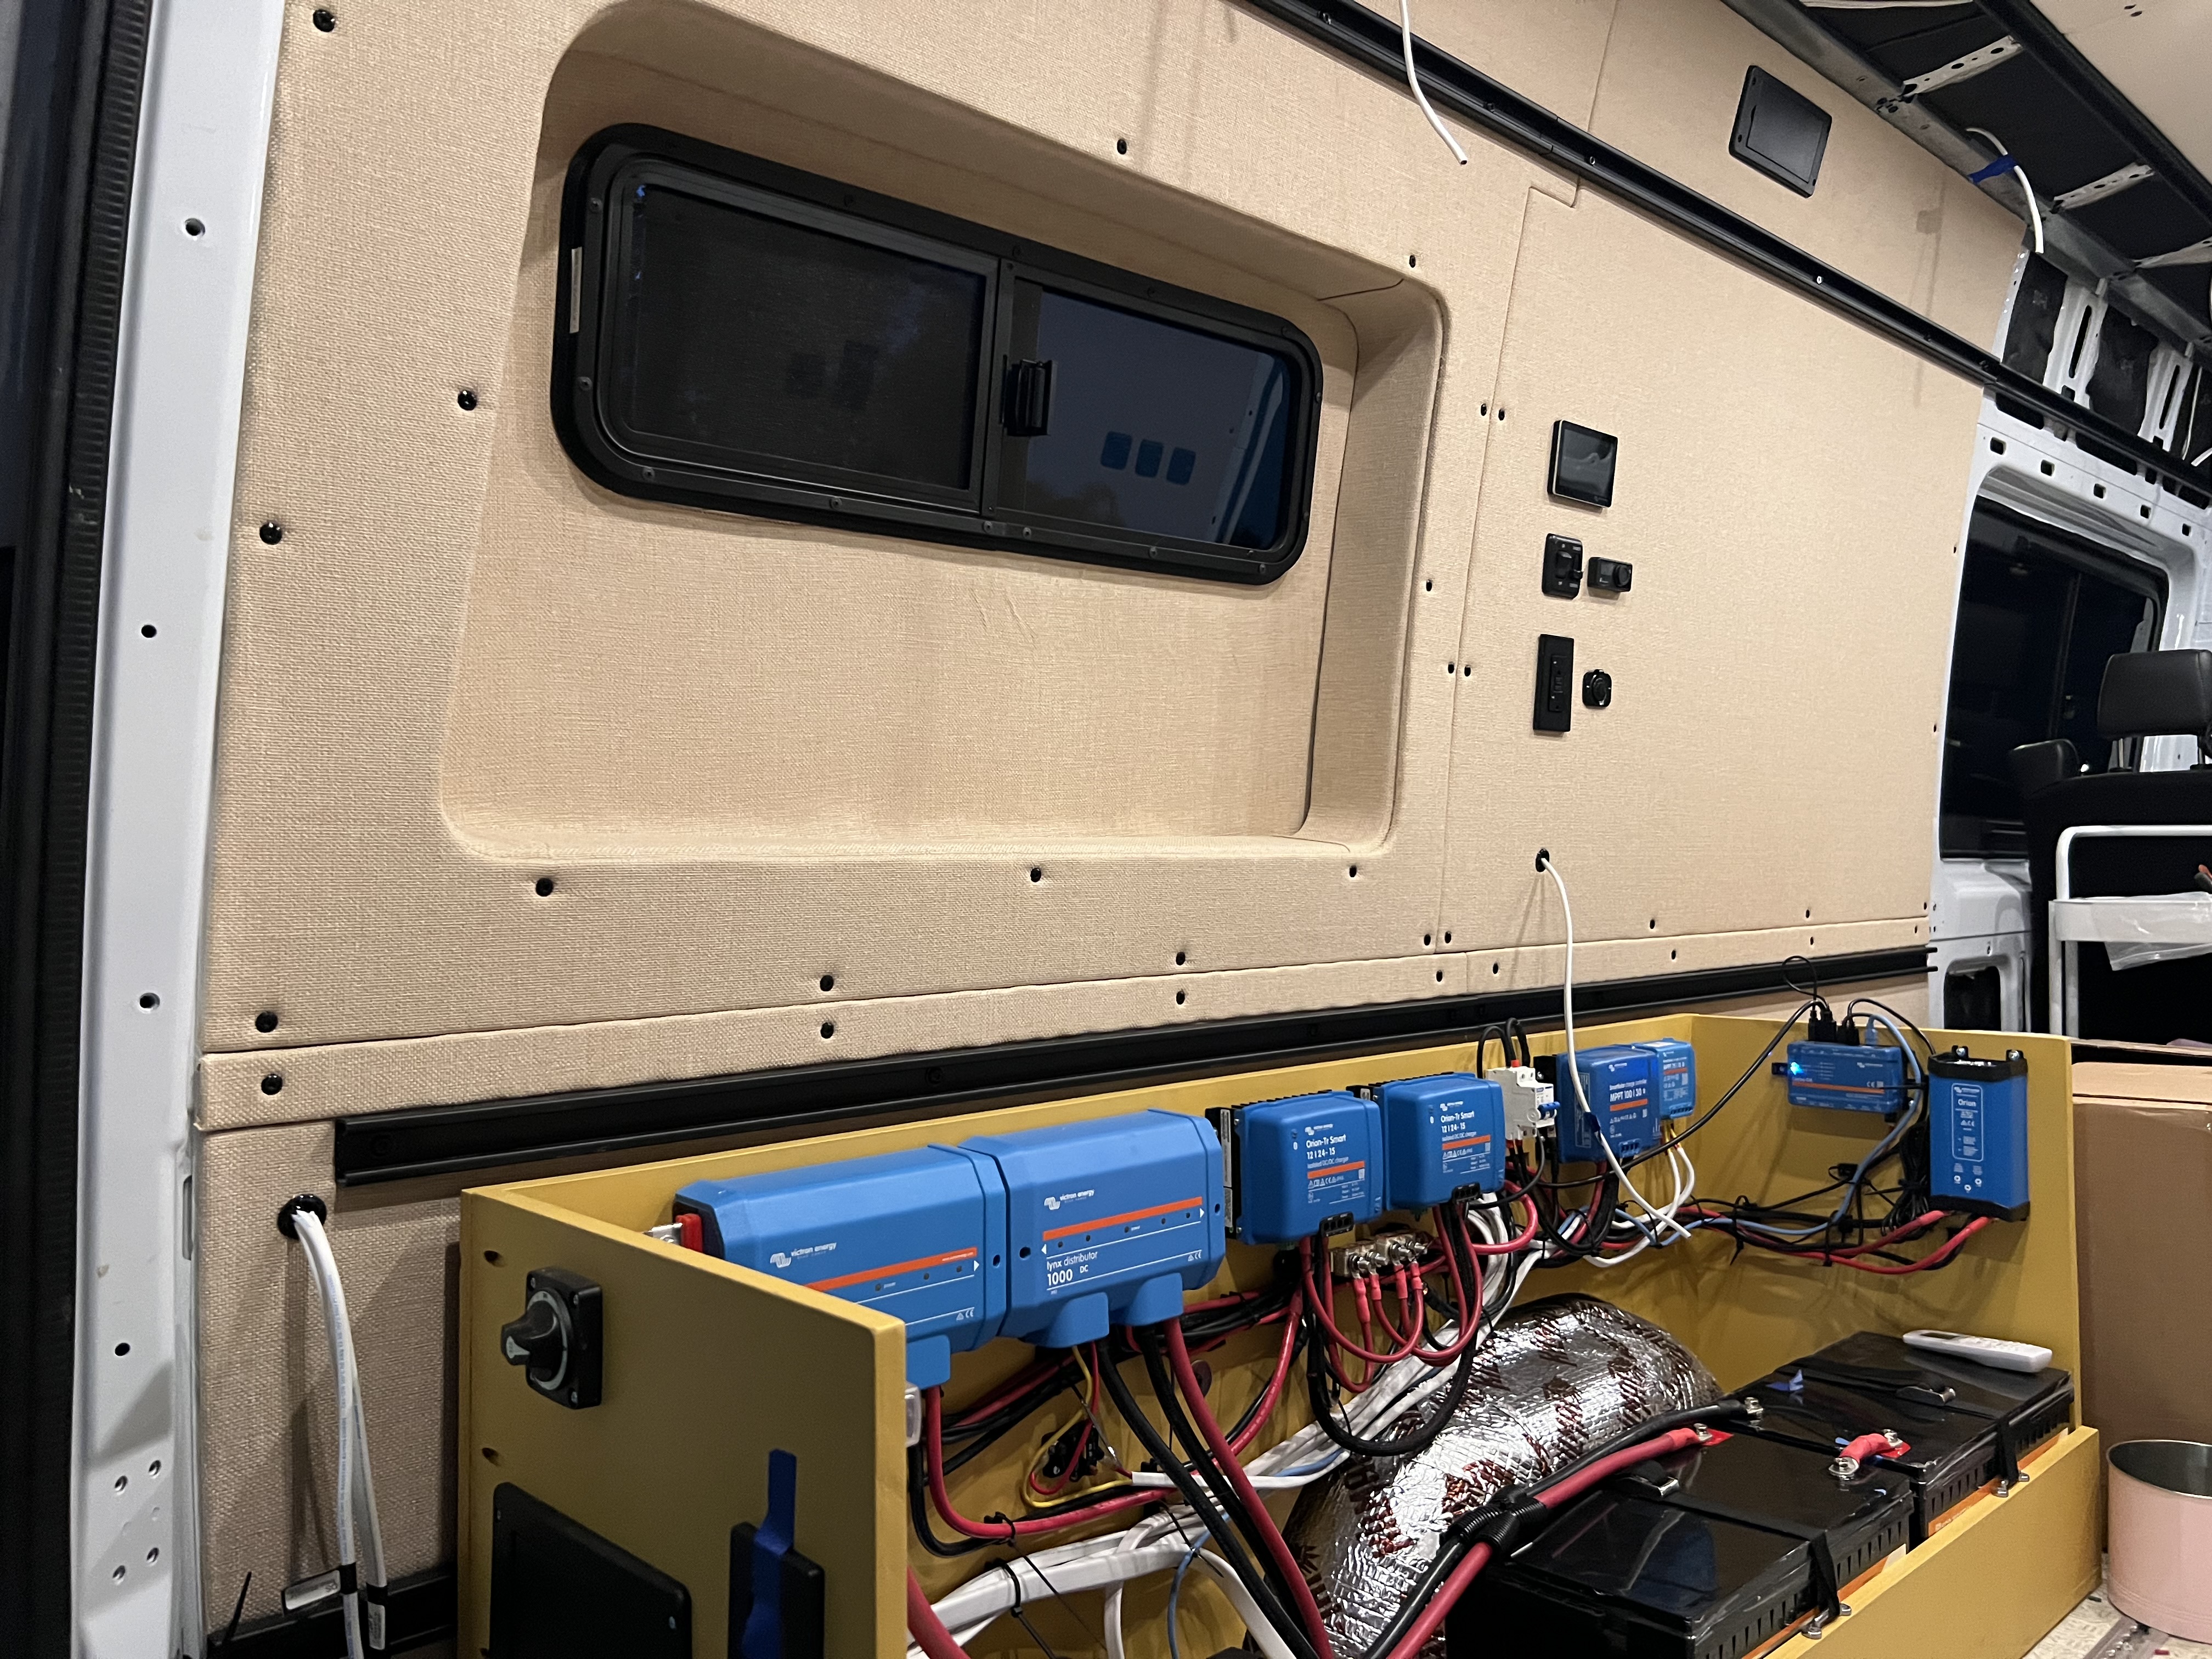
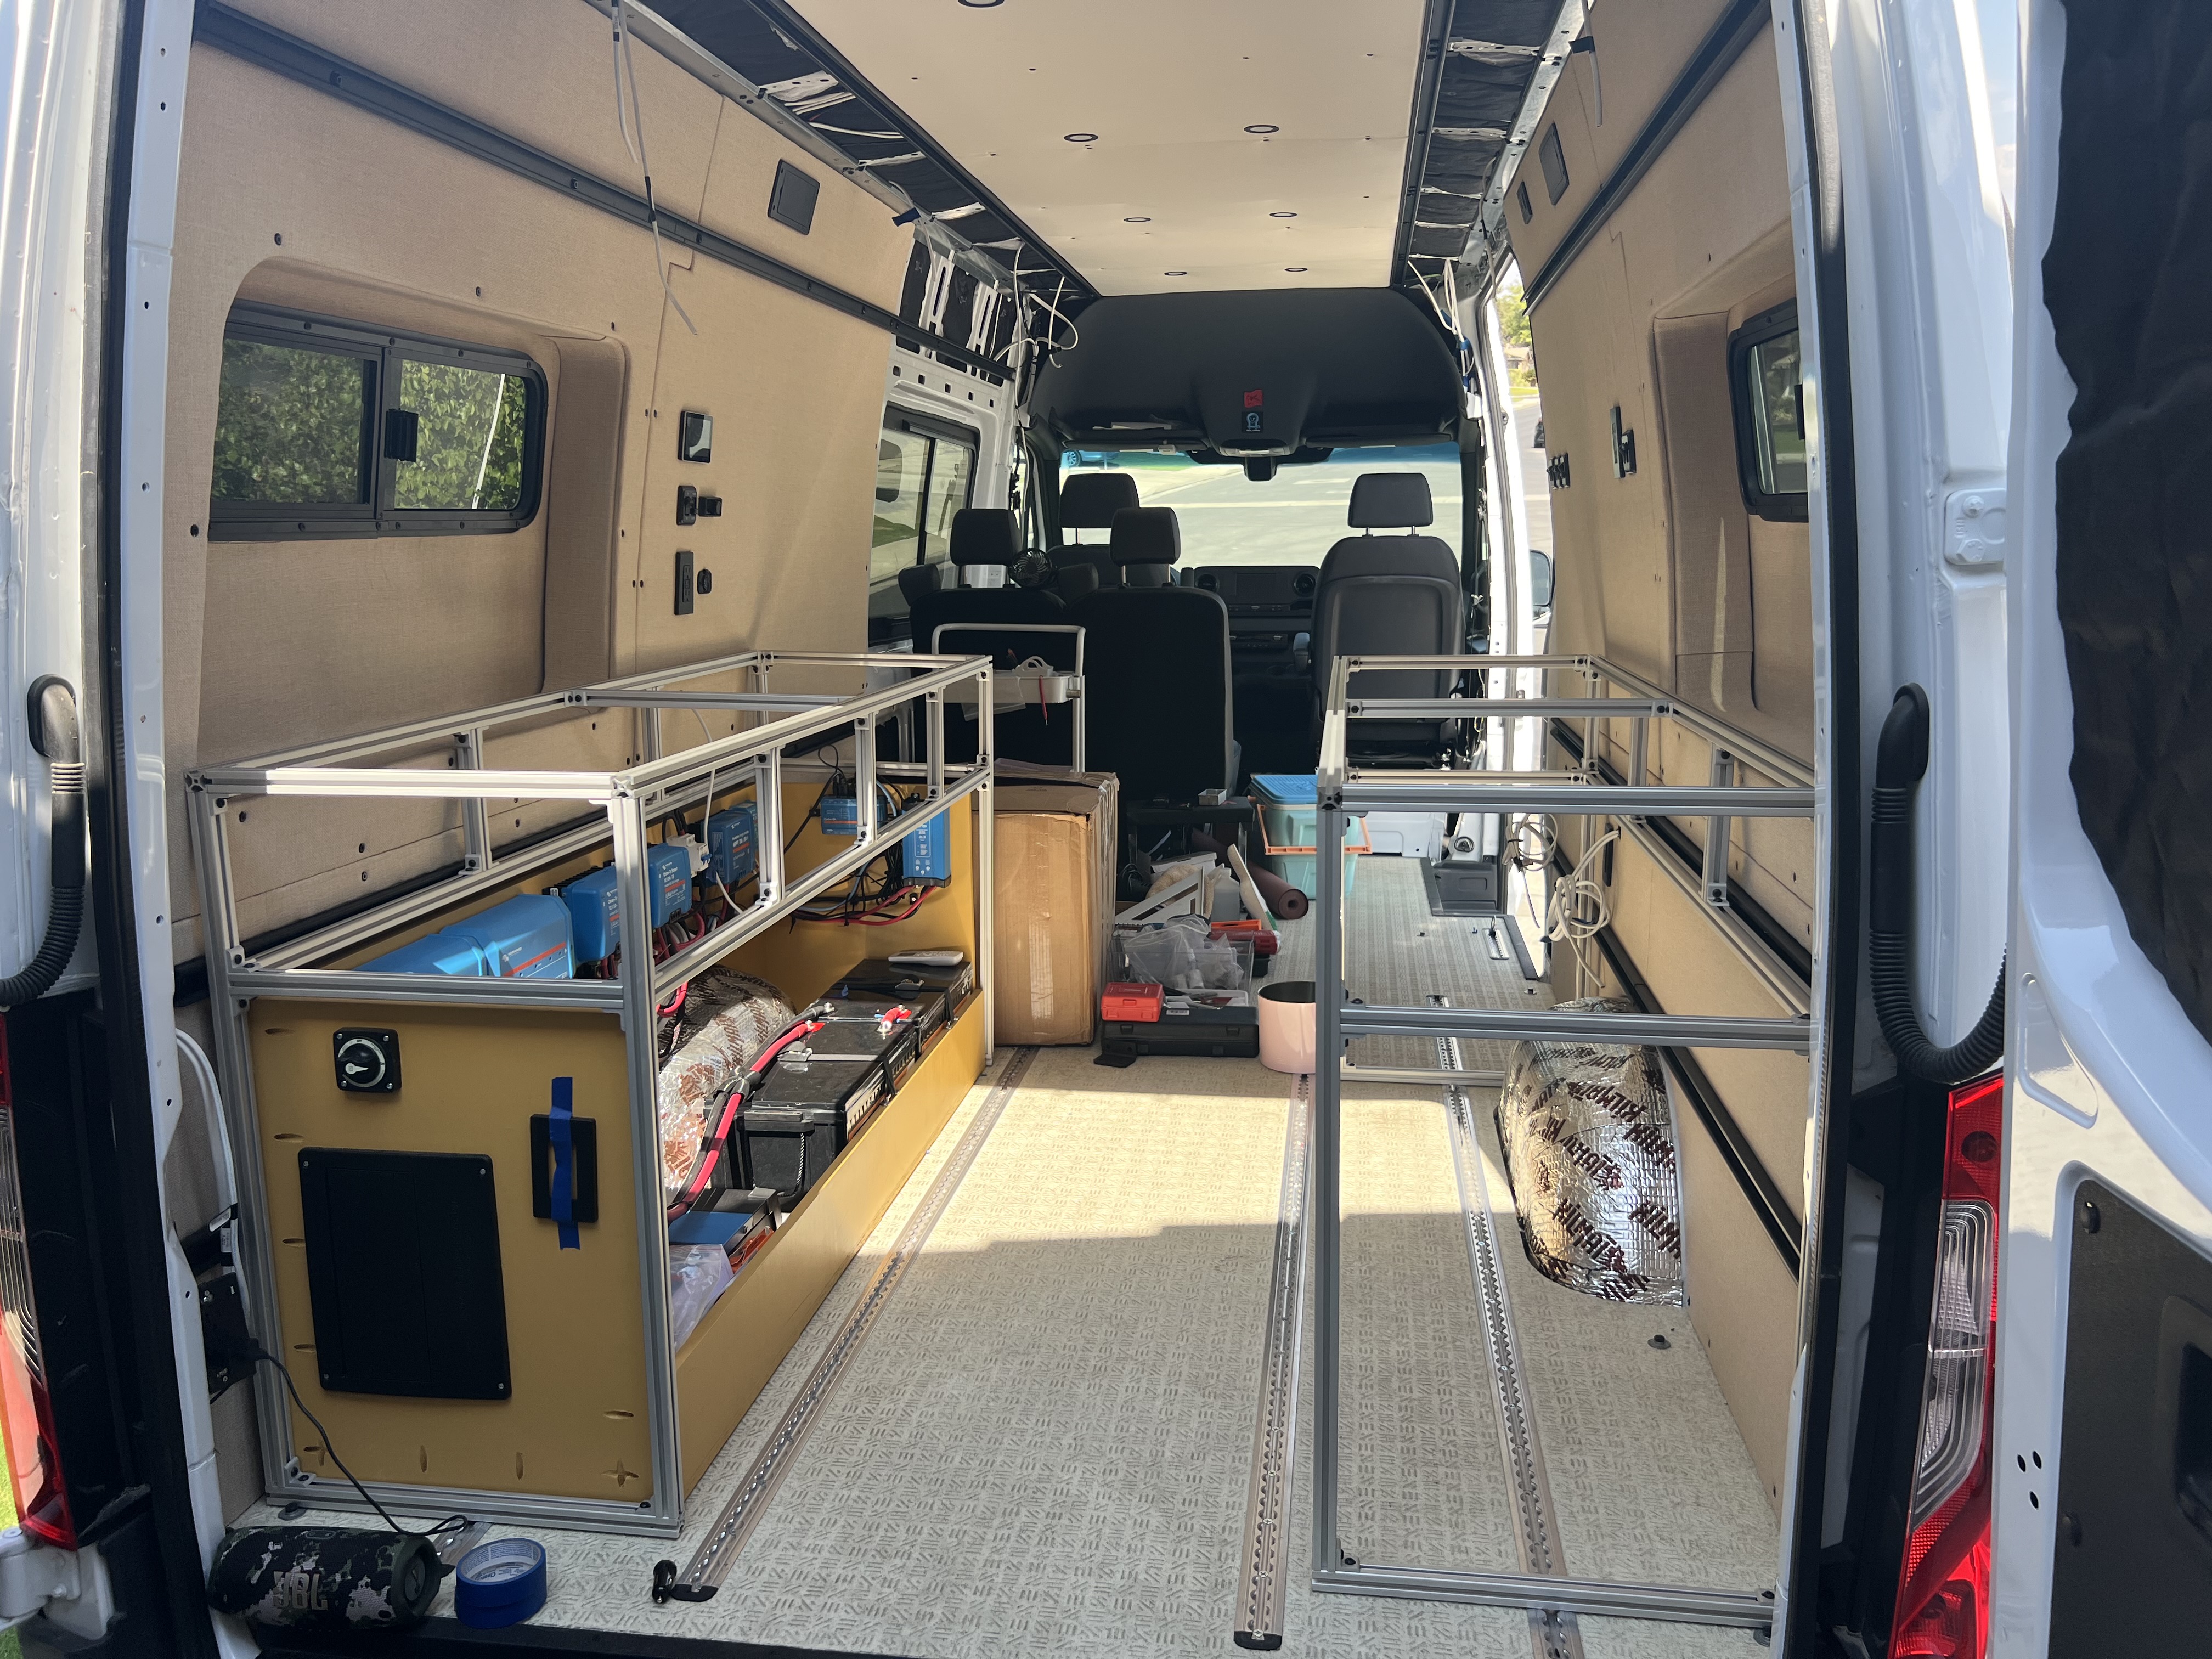
For DC to DC charging, I ran 2 gauge wire from the van battery (driver floorboard) outside through a rubber boot under the driver seat, along the frame, and into an access hole near the driver side rear tire. From there it’ll connect to the two Victron 12-24/15 Orion Smart Chargers running in parallel to give me 30 amps at 24 volts of charging. This system will be fused at the van battery as well as before the Orions and at the Lynx Distributor.

The Victron Multiplus 2 also has a built in shore power inlet. I ran 10/3 triplex wire from the electrical cabinet (Multiplus 2) though the same access hole near the driver side rear tire, along the frame and to the rear bumper. This will give me 30 amps at 120V of charging capability if I’m plugged in to shore power.

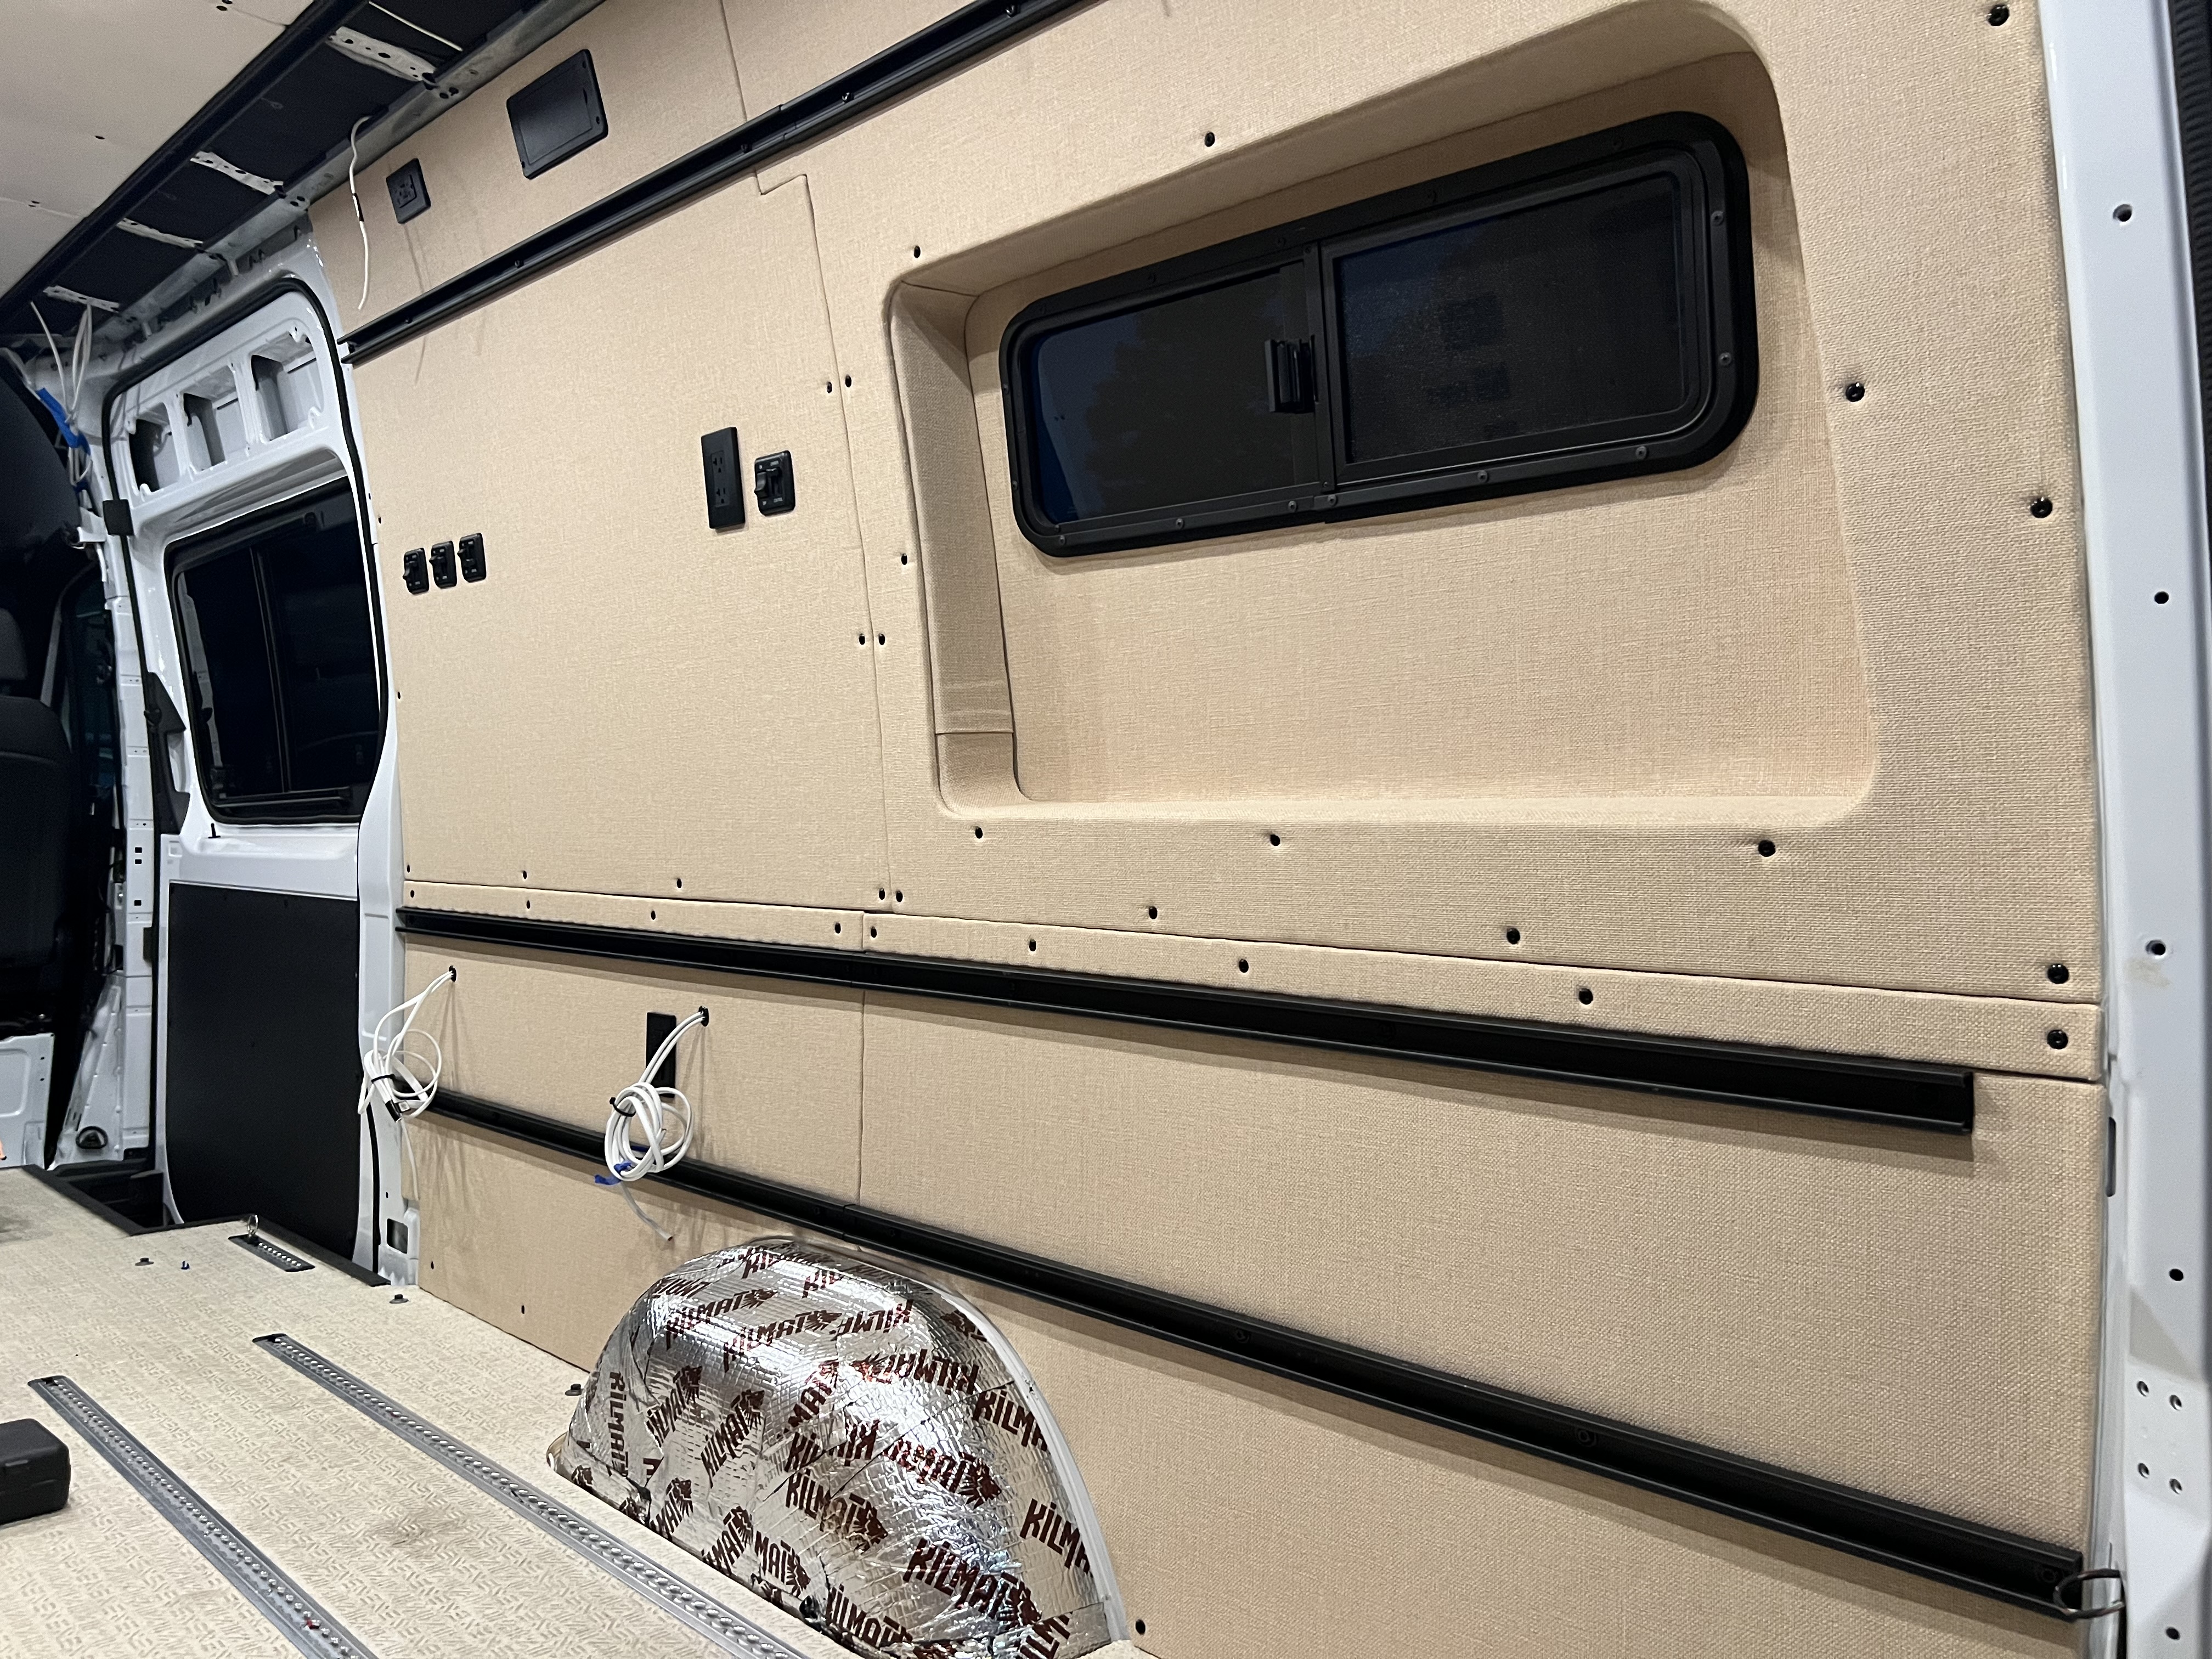
To protect the fuel lines and electrical wires, I used flexible split loom conduit.

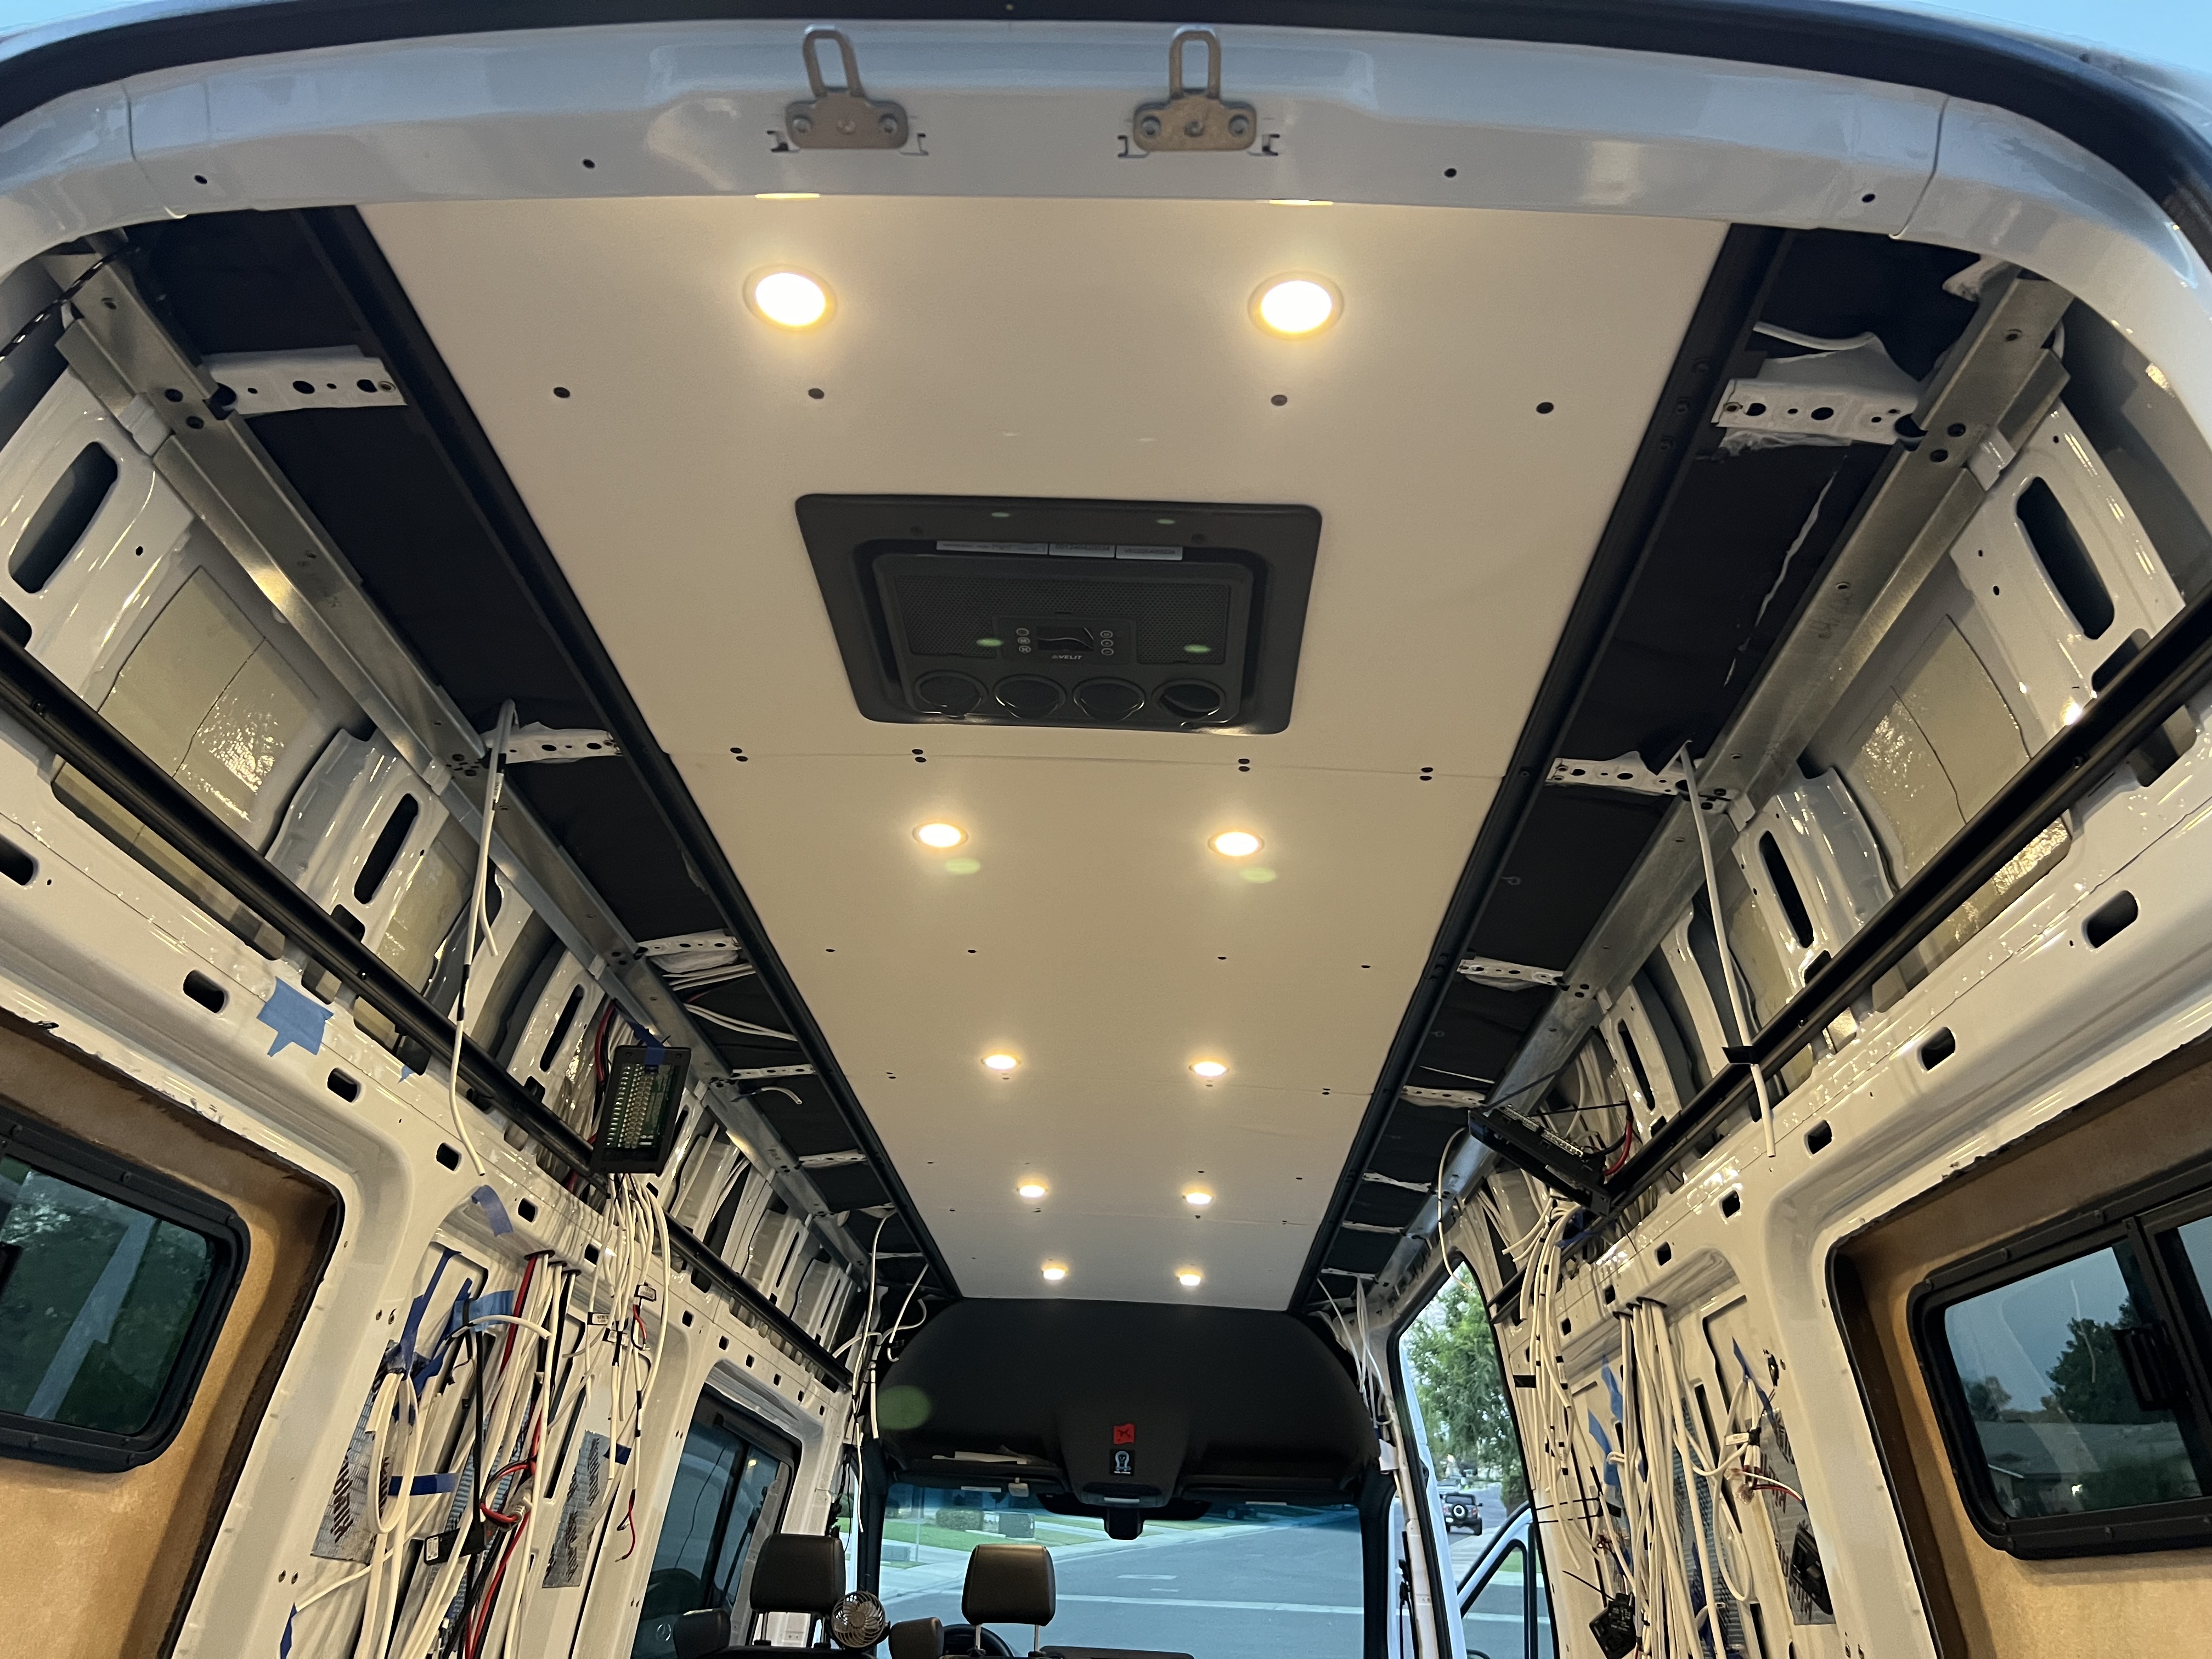
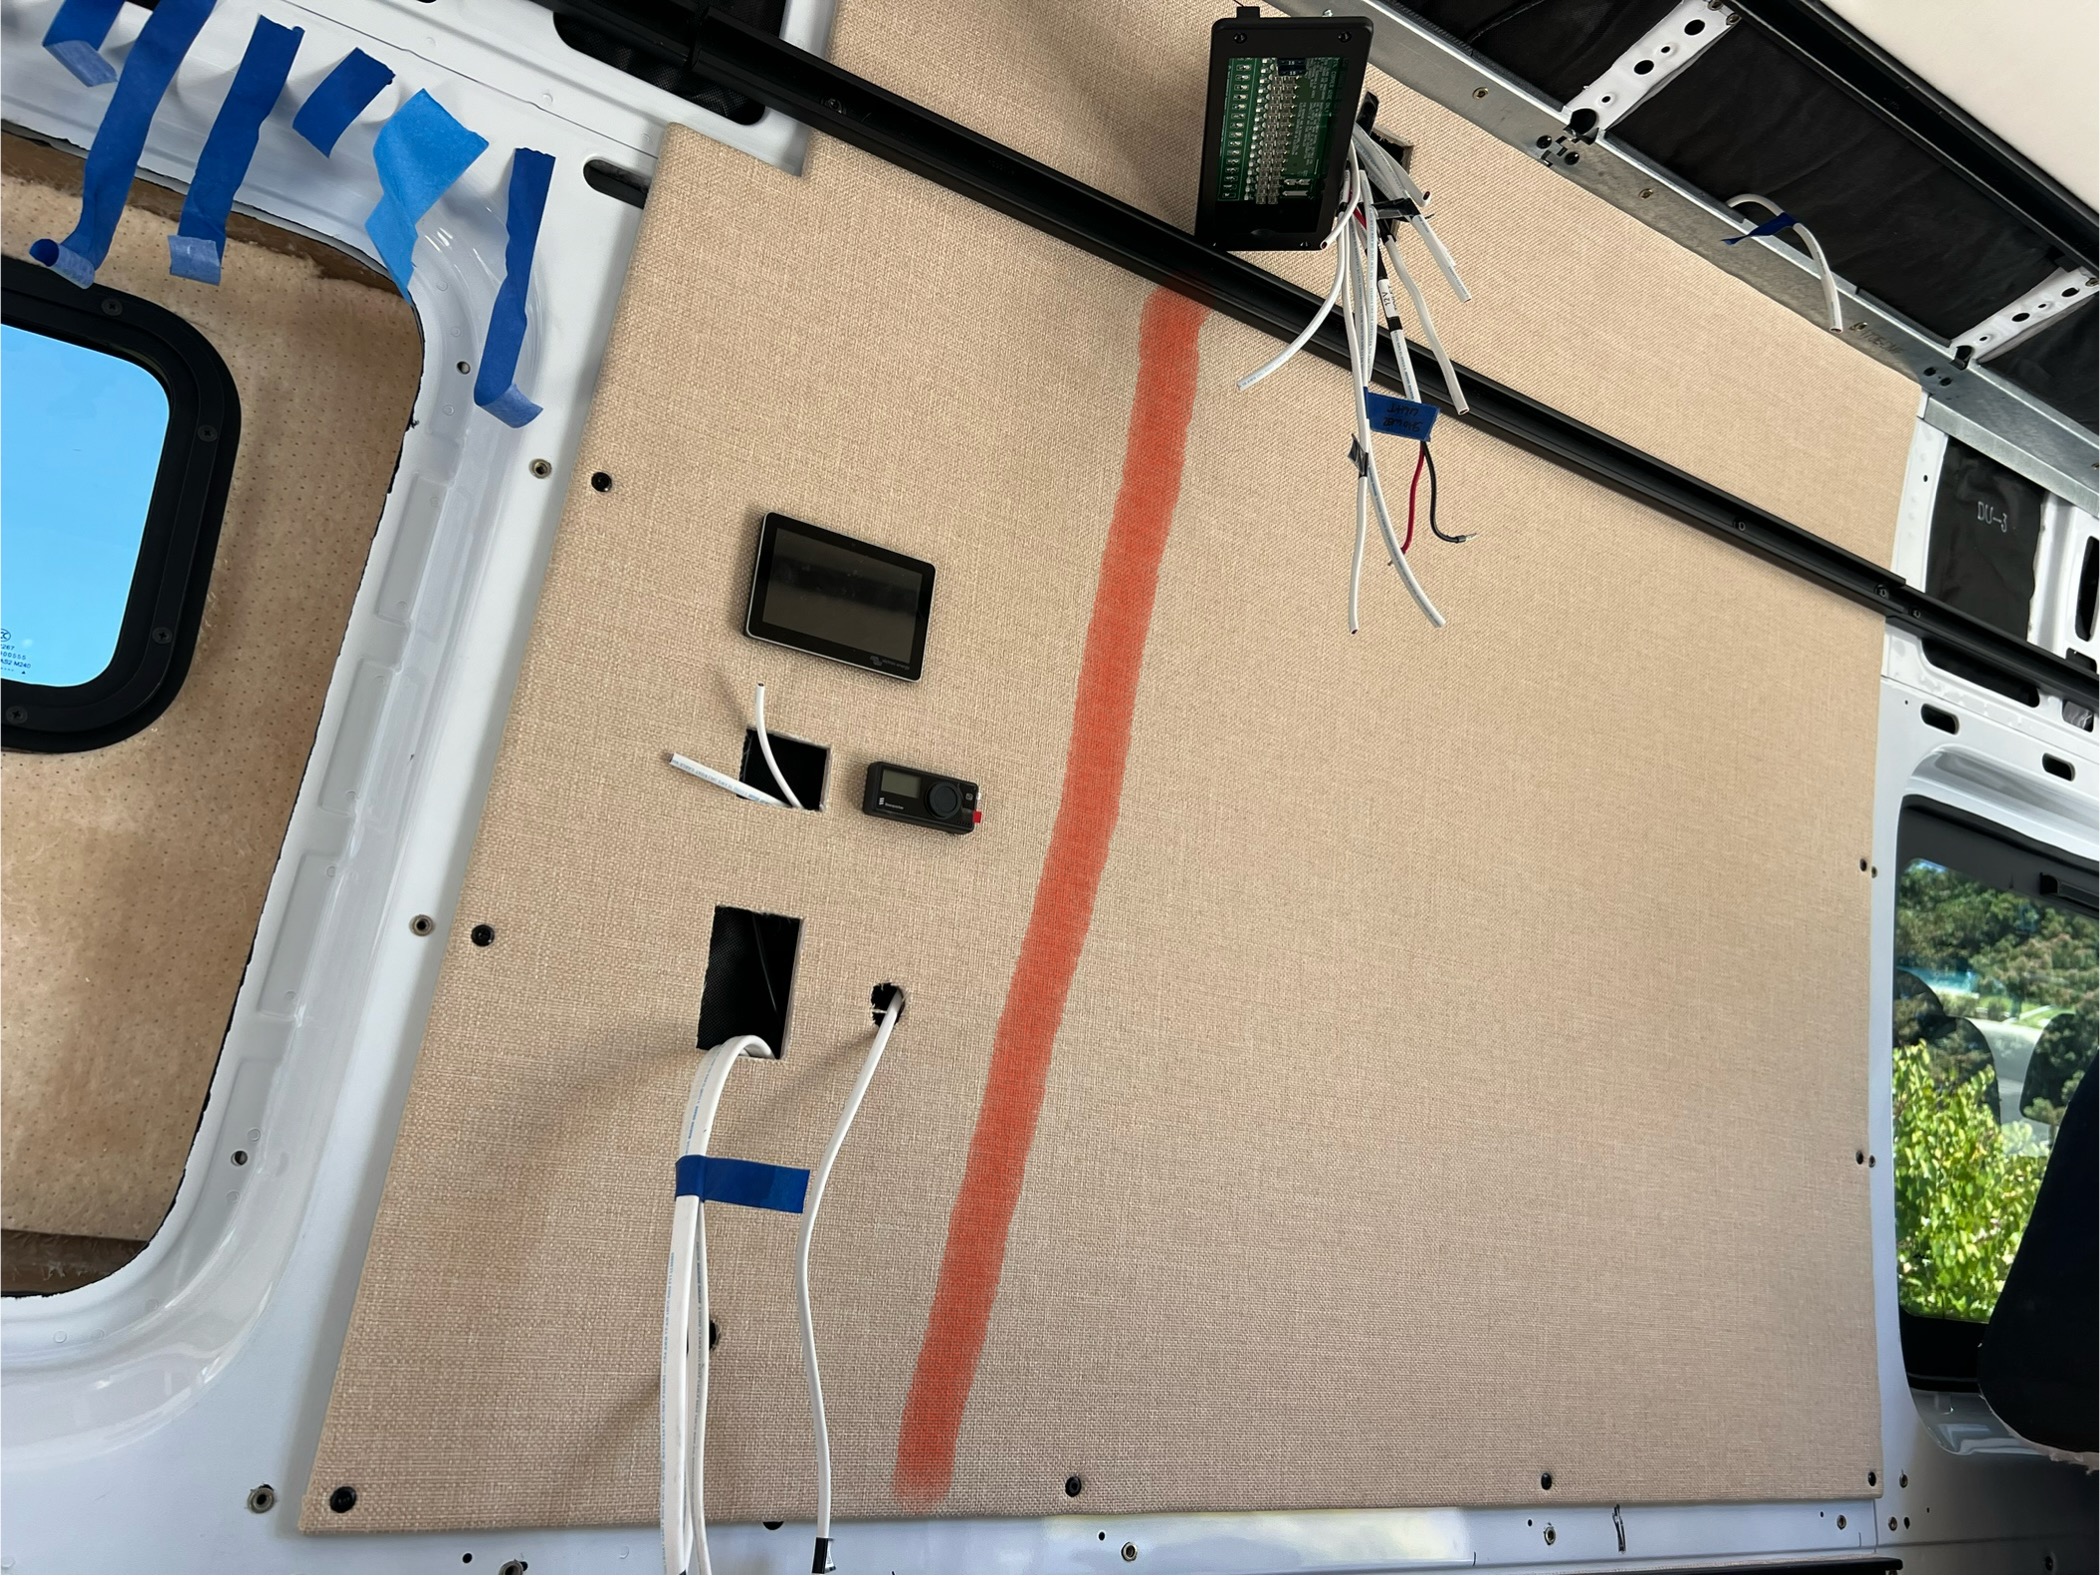
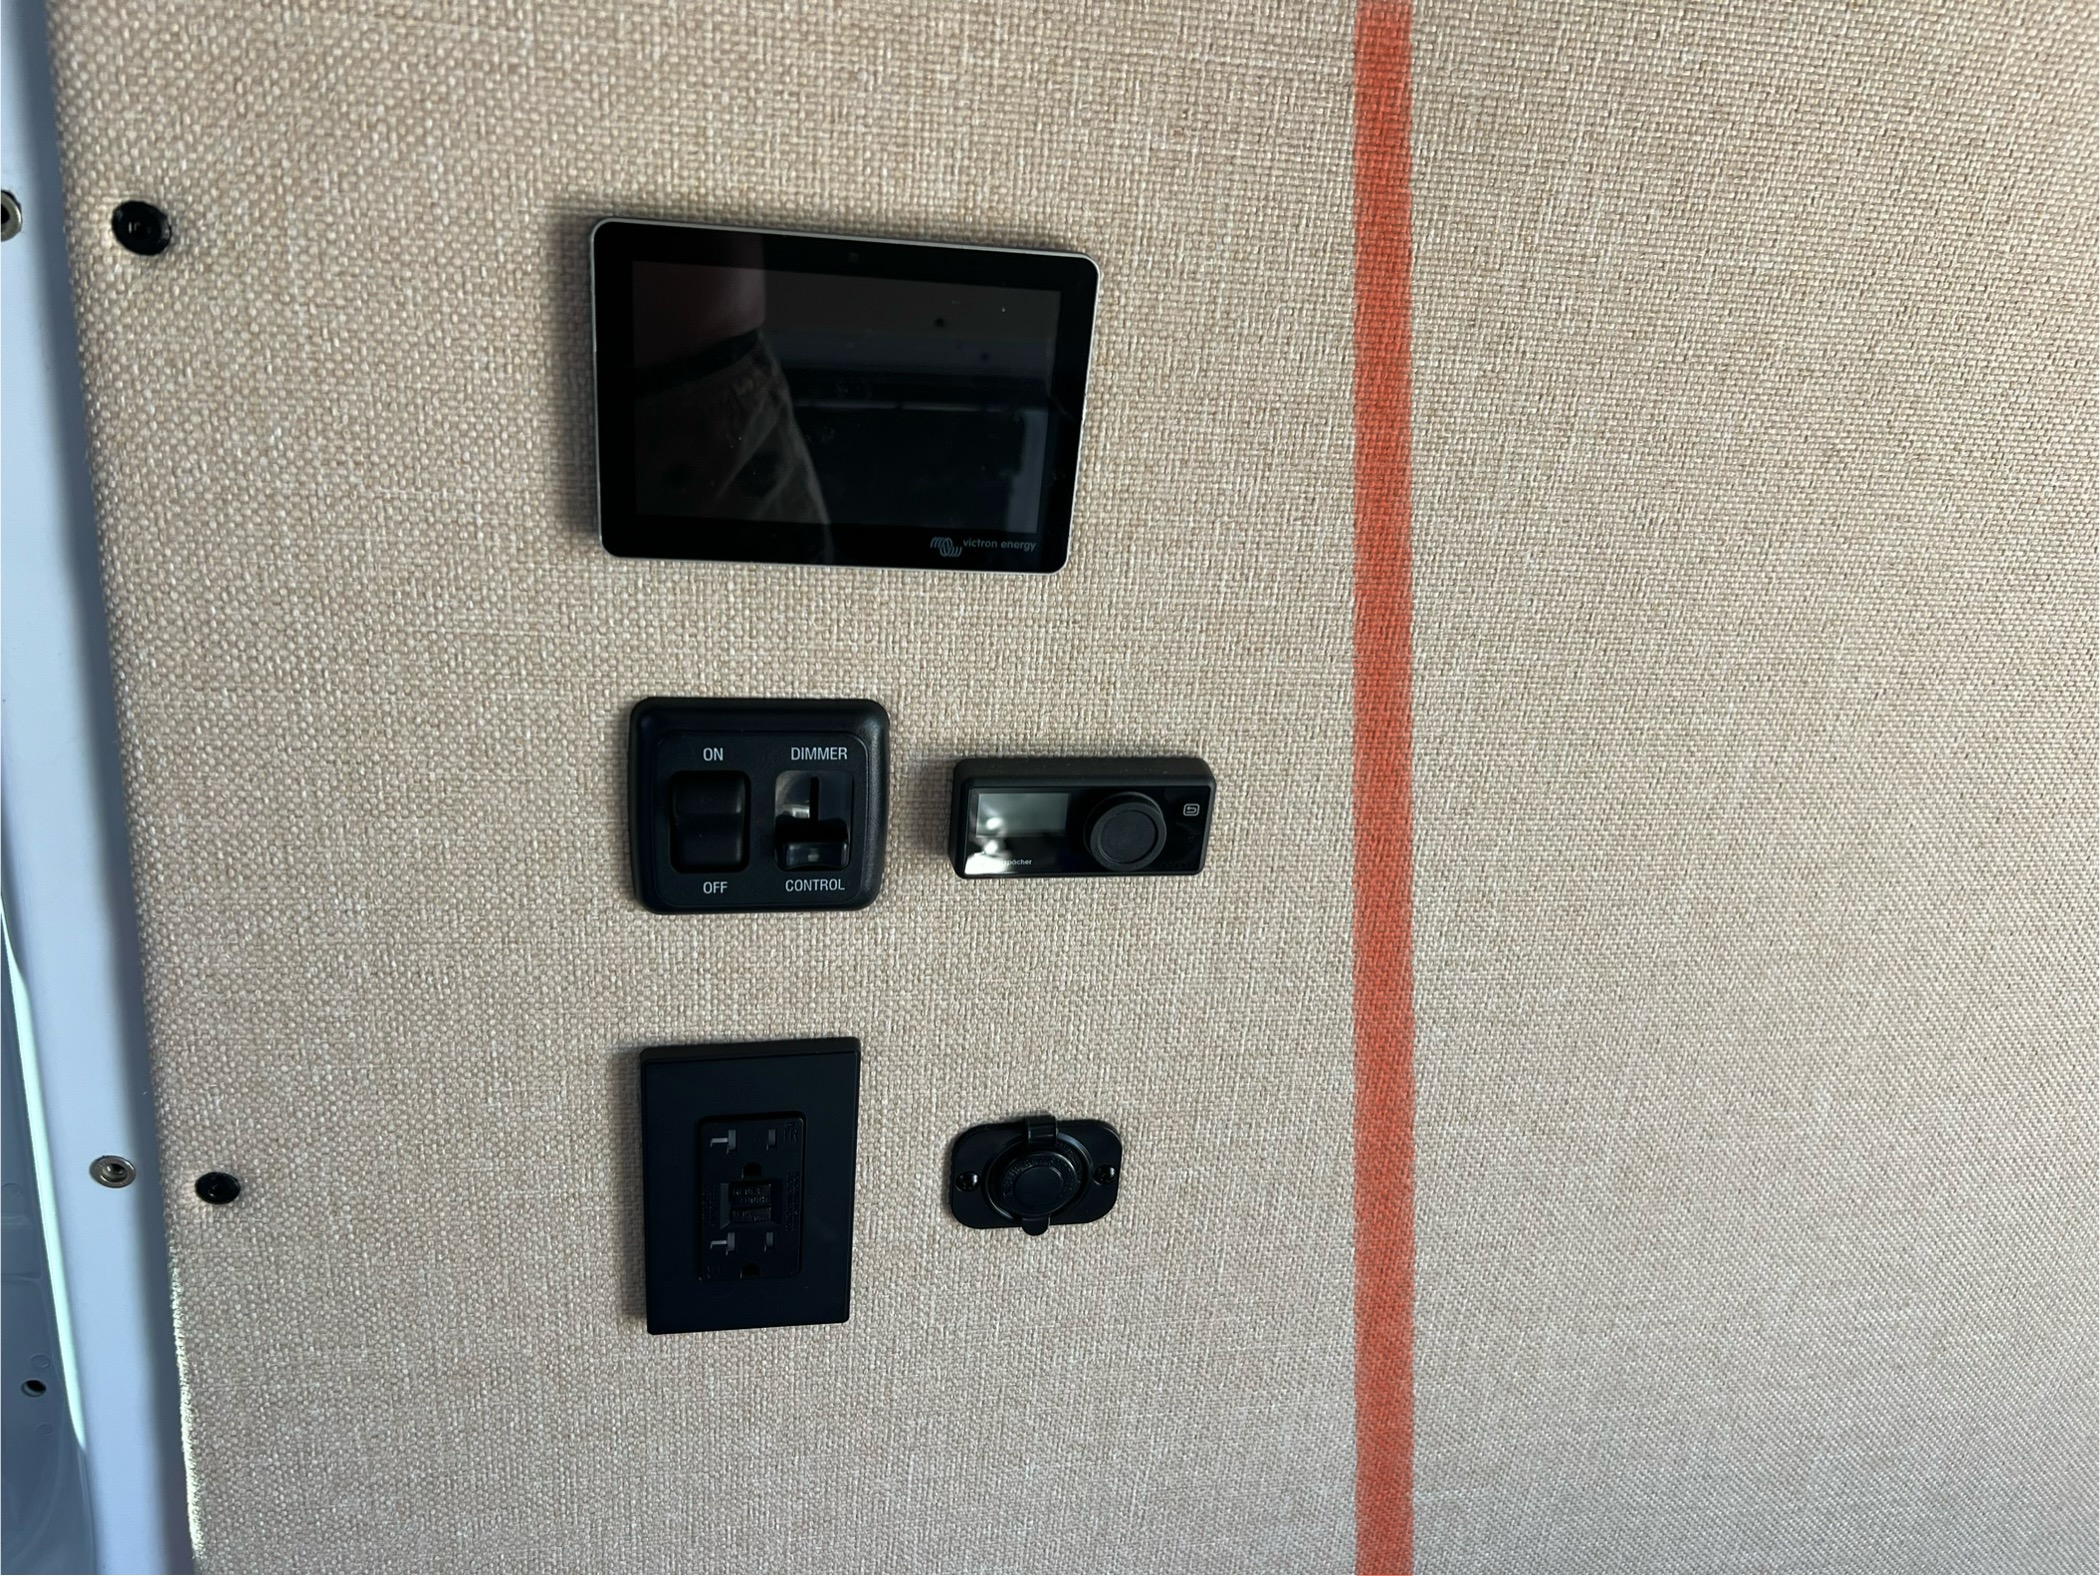
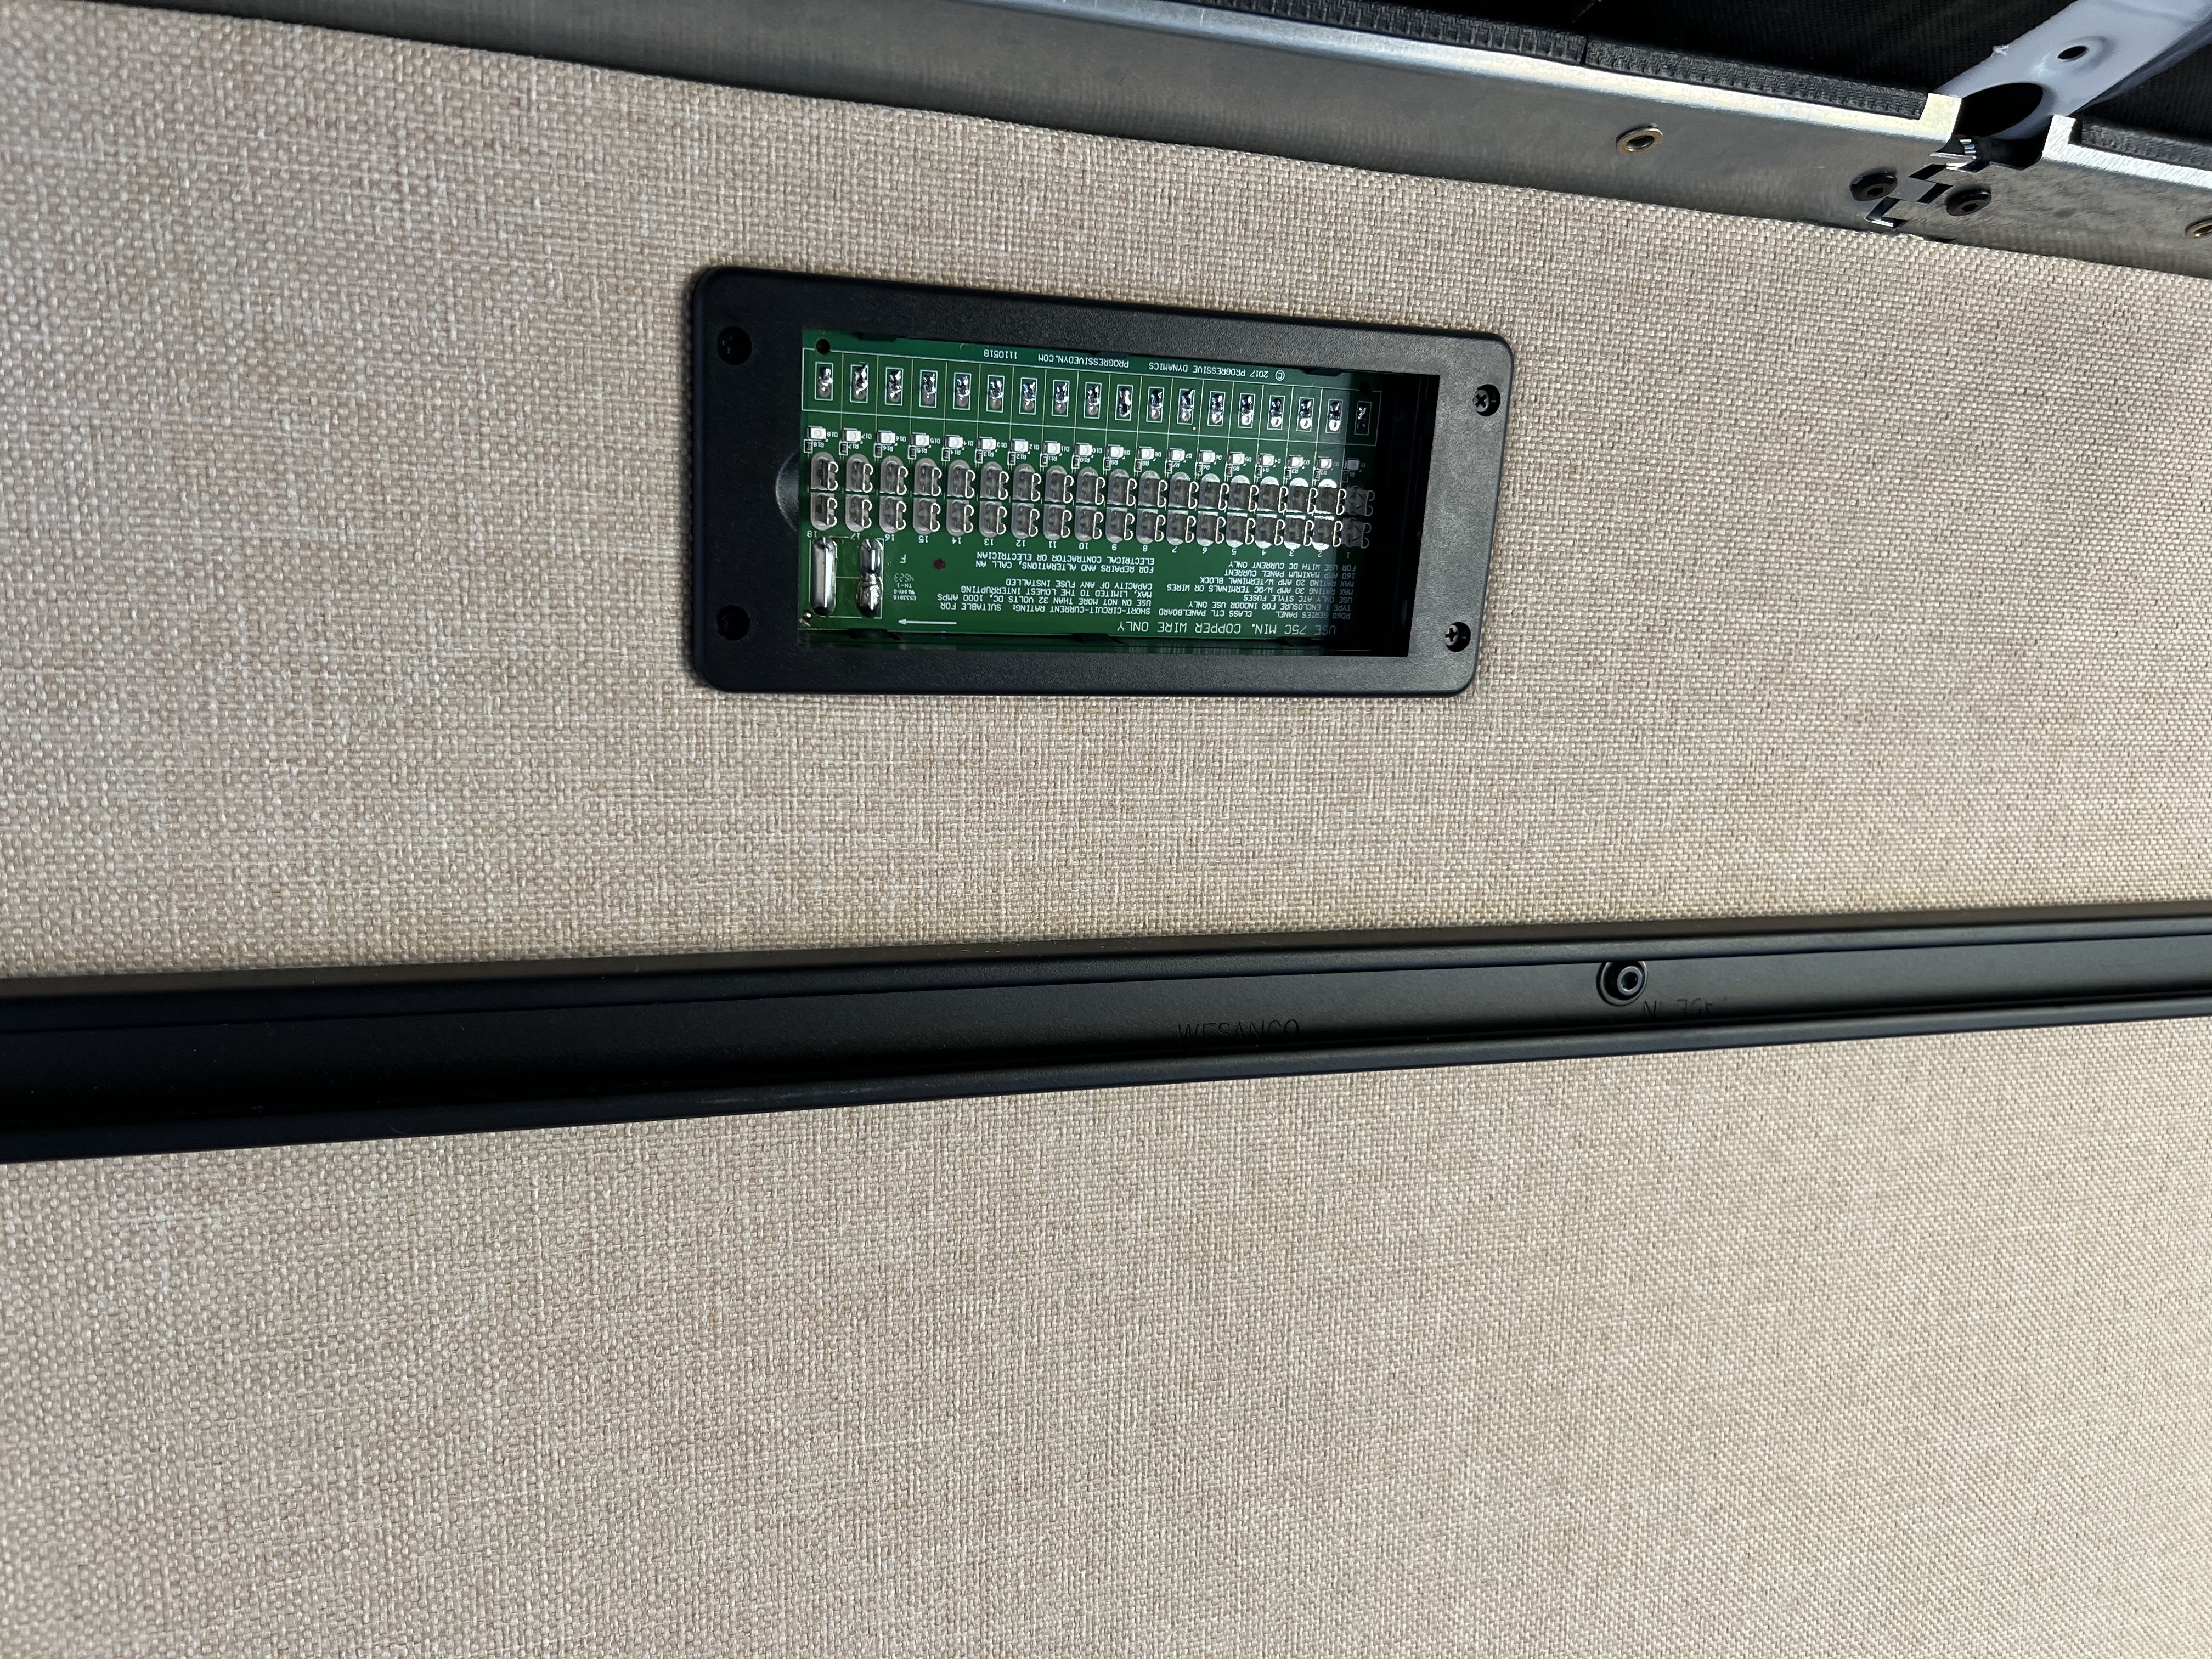
The end is in sight for doing the electrical. I can’t wait to insulate, install the panels


2 Likes

I am sure you know this based on your other builds and moto experience but exhaust wrap that exhaust! Just to be on the safe side. Maybe it isnt as big of a deal on the van but I did that under my tacoma.

@78westy Per Eberspaecher North America its not needed unless the exhaust pipe is 2" or less to anything heat sensitive. If I end up adding any, it would most likely be near muffler. Thanks though for the advice!

Oh interesting, good to know! I’ve been rocking my chinese knock-off for a few years.

1 Like

@78westy That’s awesome! Can’t wait to use ours this winter

Use it a lot in ski season, especially this winter with a broken foot while the friends skied and I manned the Apres.

1 Like

Below are are few updated pictures. With the battery compartment being at the driver floor board, there is not much room to go with a terminal fuse for the DC to DC Charger(s) on the positive battery terminal; however because of a slight slope in the floorboard, there is another 2” of room near the front of the battery (negative terminal). So I improvised and ran about 12” of 2 AWG wire from the positive battery terminal to the front of the battery. I had enough room to install a Blue Sea ANL in-line fuse. From there, both the POS and NEG 2 AWG wire go under the driver seat to the rubber boot and along the frame to the driver side rear tire area where if re-enters the van through another rubber boot.

This morning I did a test run on the Espar AS3-D2L Diesel Heater. I had the thermostat set to 100F and am impressed with how little current it needs. The picture below shows the DC current at 35 watts. 10 of those watts are a parasitic draw for my Victron 24-12 Converter, so the wattage needed for the Espar was only 25 watts. Now that everything works with the Espar, I’m going to unplug everything and run the wires and controller in the van walls.

I’m at over 450 feet of wire, which includes 30 DC circuits and 6 120V outlets. This evening I am going to double check all my wire runs and this weekend I can finally begin the insulation and panel the rear bed area.

I received all my extrusion from www.tnutz.com and am hopeful I can build/ install the rear Murphy bed system in the next week or two.


2 Likes

when you’re done can you tally up the ballpark cost of all the wires lol
im curious how much it is gonna cost

@ws6616 Here’s a breakdown and approx. cost of the electrical part of the build:

Electrical Cabinet:

¾ Plywood: $100

Paint and supplies: $80

(2) 280AH 12V Eco-Worthy Batteries: $1000

Victron Multiplus: $1000

Orion 24-12 Converter: $134

Victron Smart Shunt: $130

(2) Victron Orion Smart 12-24/ 15 DC to DC Chargers: $460

(2) Victron Lynx Distributors: $450

Mega Fuses for Lynx: $100

Blue Sea Main On/Off: $50

Blue Sea In-Line Fuse Holder and ANL 300amp: $80

Cerbo GX and Touch 50: $600

Victron Orion Smart MPPT 100/30: $250

Victron Orion Smart MPPT 75/15: $100

Solar Isolator/Breaker (20 Amp): $50

Total: $4584

Solar:

(2) NewPowa BiFacial 200w Panels: $375

Unaka Mounts: $100

Aluminum Angle: $70

Total: $545

Misc:

(2) Progressive Dynamics DC Panels: $130

Progressive Dynamics AC Panel: $70

(6) 12V Outlets: $100

Blade Fuses: $50

Miscellaneous items: $200

Total: $550

Lights:

(10) Acegoo Puck Lights: $100

(4) Acegoo Puck Lights (Touch): $50

(3) Rigid Scene Lights: $300

(5) 12V Dimmer Switches: $200

Total: $650

Wire/Conduit/Connectors/Lugs

100ft of 12/3 Triplex: $100

150ft 12/2 Duplex (Heavier Loads): $120

250ft 16/2 Duplex (Lights and USB’s): $120

25ft of 2 Gauge Black/Red (DC to DC): $150

20ft of 10/3 Triplex (Shore Power) and Shore Power Inlet: $150

15ft of 6/2 (ARB Air Compressor): $50

25ft of 10/2 (Ground Deploy Solar) and DC Connector: $90

10ft of 8/3 Triplex (Multiplus to AC Panel): $50

25 ft of 6 AWG (in Black/Red) for DC Panels: $100

15ft of 2/0 (in Black/Red): $150

20ft of 10 AWG (In Black and Red) for solar: $50

Wago Connectors: $125

Lugs: $150

Heat Shrink: $50

Butt and Spade Connectors: $50

Total: $1505

1 Like

The electrical cabinet is finally complete and mounted over the driver side wheel well. It is bolted to the L-Track on the floor and the unistrut on wall. Prior to bolting it down I installed 3M Thinsulate 600M in the walls and then the upholstered panels. From there I reconnected all the wires to their respective components.

I installed 3M thinsulate on the ceiling and then bolted the ceiling panels up and set the puck lights in their spots. The rear 4 lights are on a circuit and controlled with an on/off dimmer switch and the front 6 are on a circuit and controlled with an on/off dimmer switch.


3 Likes

very nice!

1 Like

Thanks! Slowly getting there

1 Like

Driver and passenger side “Main” panels upholstered and finally installed. (The vertical red line is where the shower wall will begin)

The driver side main wall panel comprises of:

Victron Touch 50 Display,
12V outlet,
120V outlet,
Espar Easy Start Pro Controller (Diesel Heater Thermostat),
Rear scene light switch,
DC Panel (13 fused circuits)

The passenger side main wall panel comprises of:

Switches for front and rear ceiling lights,
Switches for driver and passenger side scene lights,
120V upper microwave outlet,
120V galley countertop oulet,
DC Panel (12 fused circuits),
and the red horizontal line is the countertop.

Next step is to upholster the Flares and Trim Rings and panel in both sides surrounding the Flares.


3 Likes

So clean! Really like the upholstery choice too.

1 Like

Thank you :pray:t2:. The color is “Oatmeal” and we really like it too.

I finally finished upholstering the panels from the sliding door back. The flares took a lot longer than I had anticipated as it was very time consuming. I had to trim both of the FlareSpace Trim Rings to get them to fit properly inside the Flares. Overall I’m really happy with how everything has turned out so far.

I’m excited to move on to the next part of our build, the rear murphy bed. I already have the aluminum extrusion cut to length and all brackets to make it. Over the next couple days my family and I will be able to build it inside our house away from the 100F heat.


5 Likes

This weekend I built both sides of the Murphy bed and test fitted it inside the van. As it sits now, the strength of these sections are very impressive. There will be more structural elements added, consisting of more bracing with additional extrusion and 1” steel bar bolted to the extrusion on more load bearing sections. Additionally there will be 1/2” baltic birch plywood bolted to the extrusion for the surfaces

These next couple days I will be making some L-brackets out of aluminum angle to secure these sections to the floor and walls.

3 Likes

The main components of the murphy bed system are installed and came together nicely. The Murphy bed system is made in three sections (driver/ middle/ passenger), with the middle section being on hinges to allow transporting a motorcycle or other large things. The middle section has 5 pieces of extrusion spanning the width of the walkway. Each of these 5 pieces has steel plate bolted to the vertical side to increase load bearing capacity. The surfaces are made of 1/2” 9-Ply Baltic Birch. If I end up not needing to modify anything, I will laminate the bed area and use Lonseal Lonridge on the garage walls below the bed.

For the bed, I bought an Amazon 6” memory foam queen size mattress. I used an electric turkey carving knife to notch out the areas near the flares.

I have some 80lb gas struts I’m going to mount on the Murphy bed to aid in lifting.


1 Like

Looking great!

1 Like