
2 Likes
Looking great!
1 Like
@jedgar Thanks Josh!
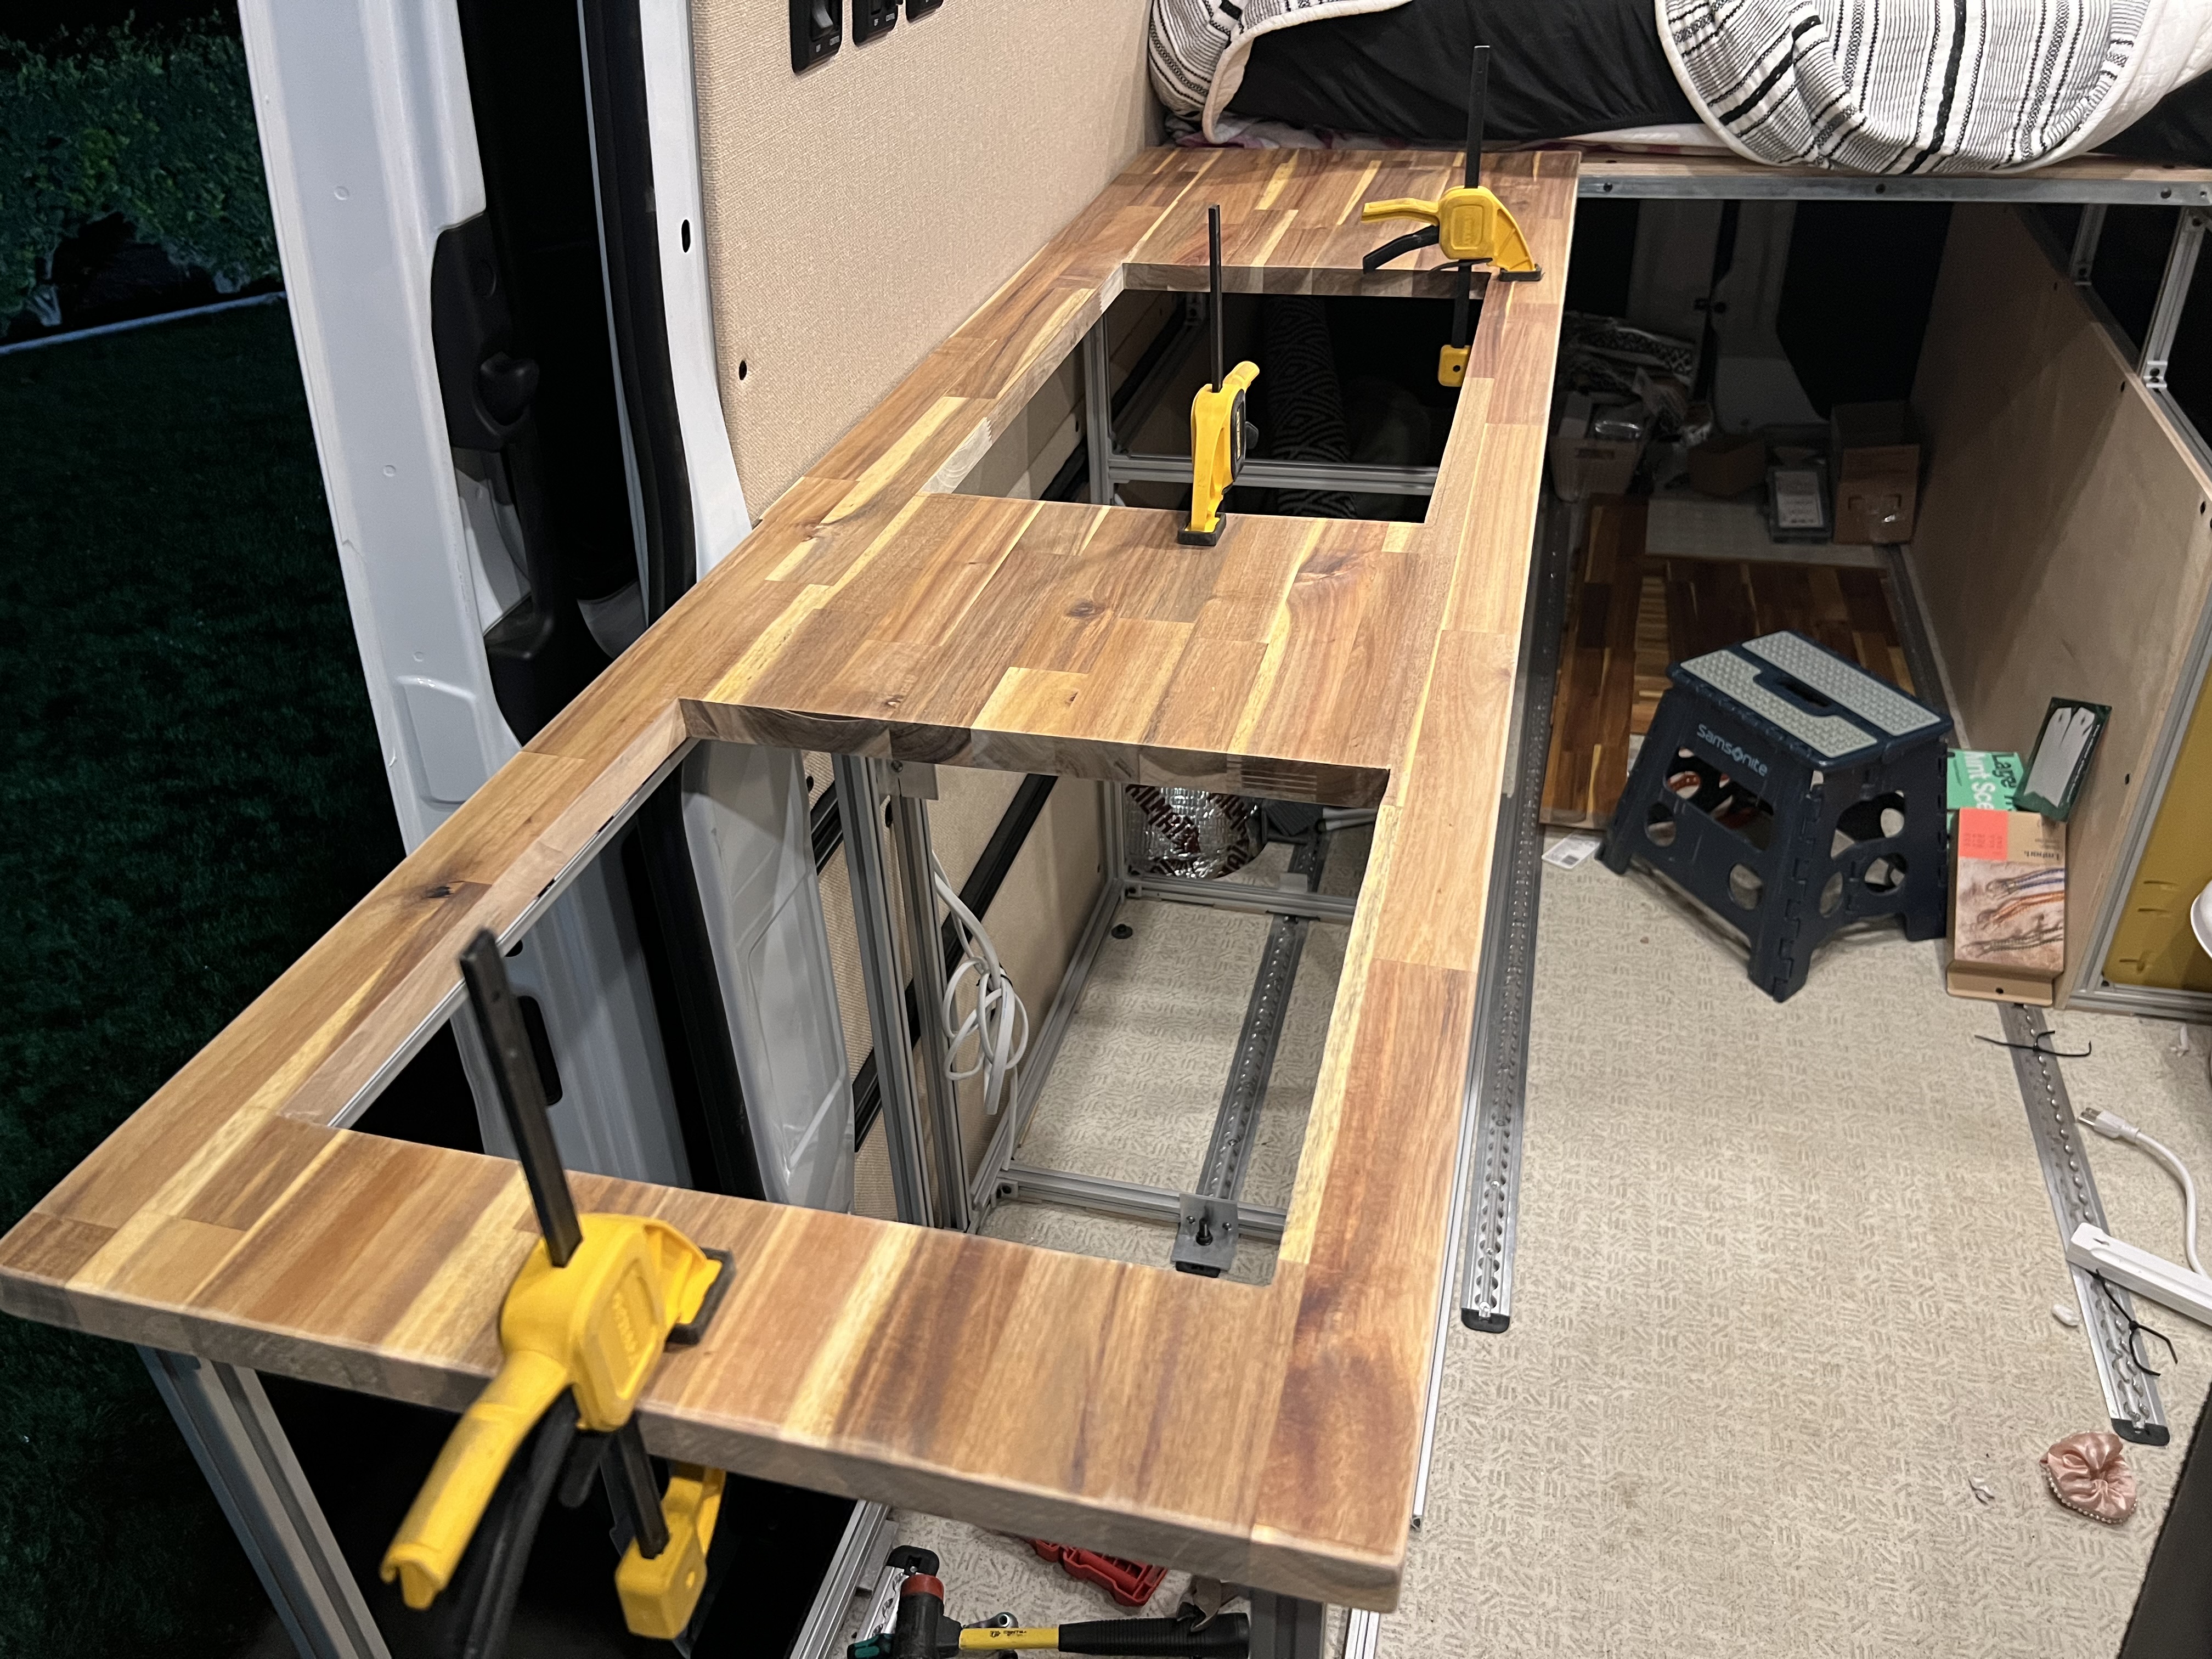
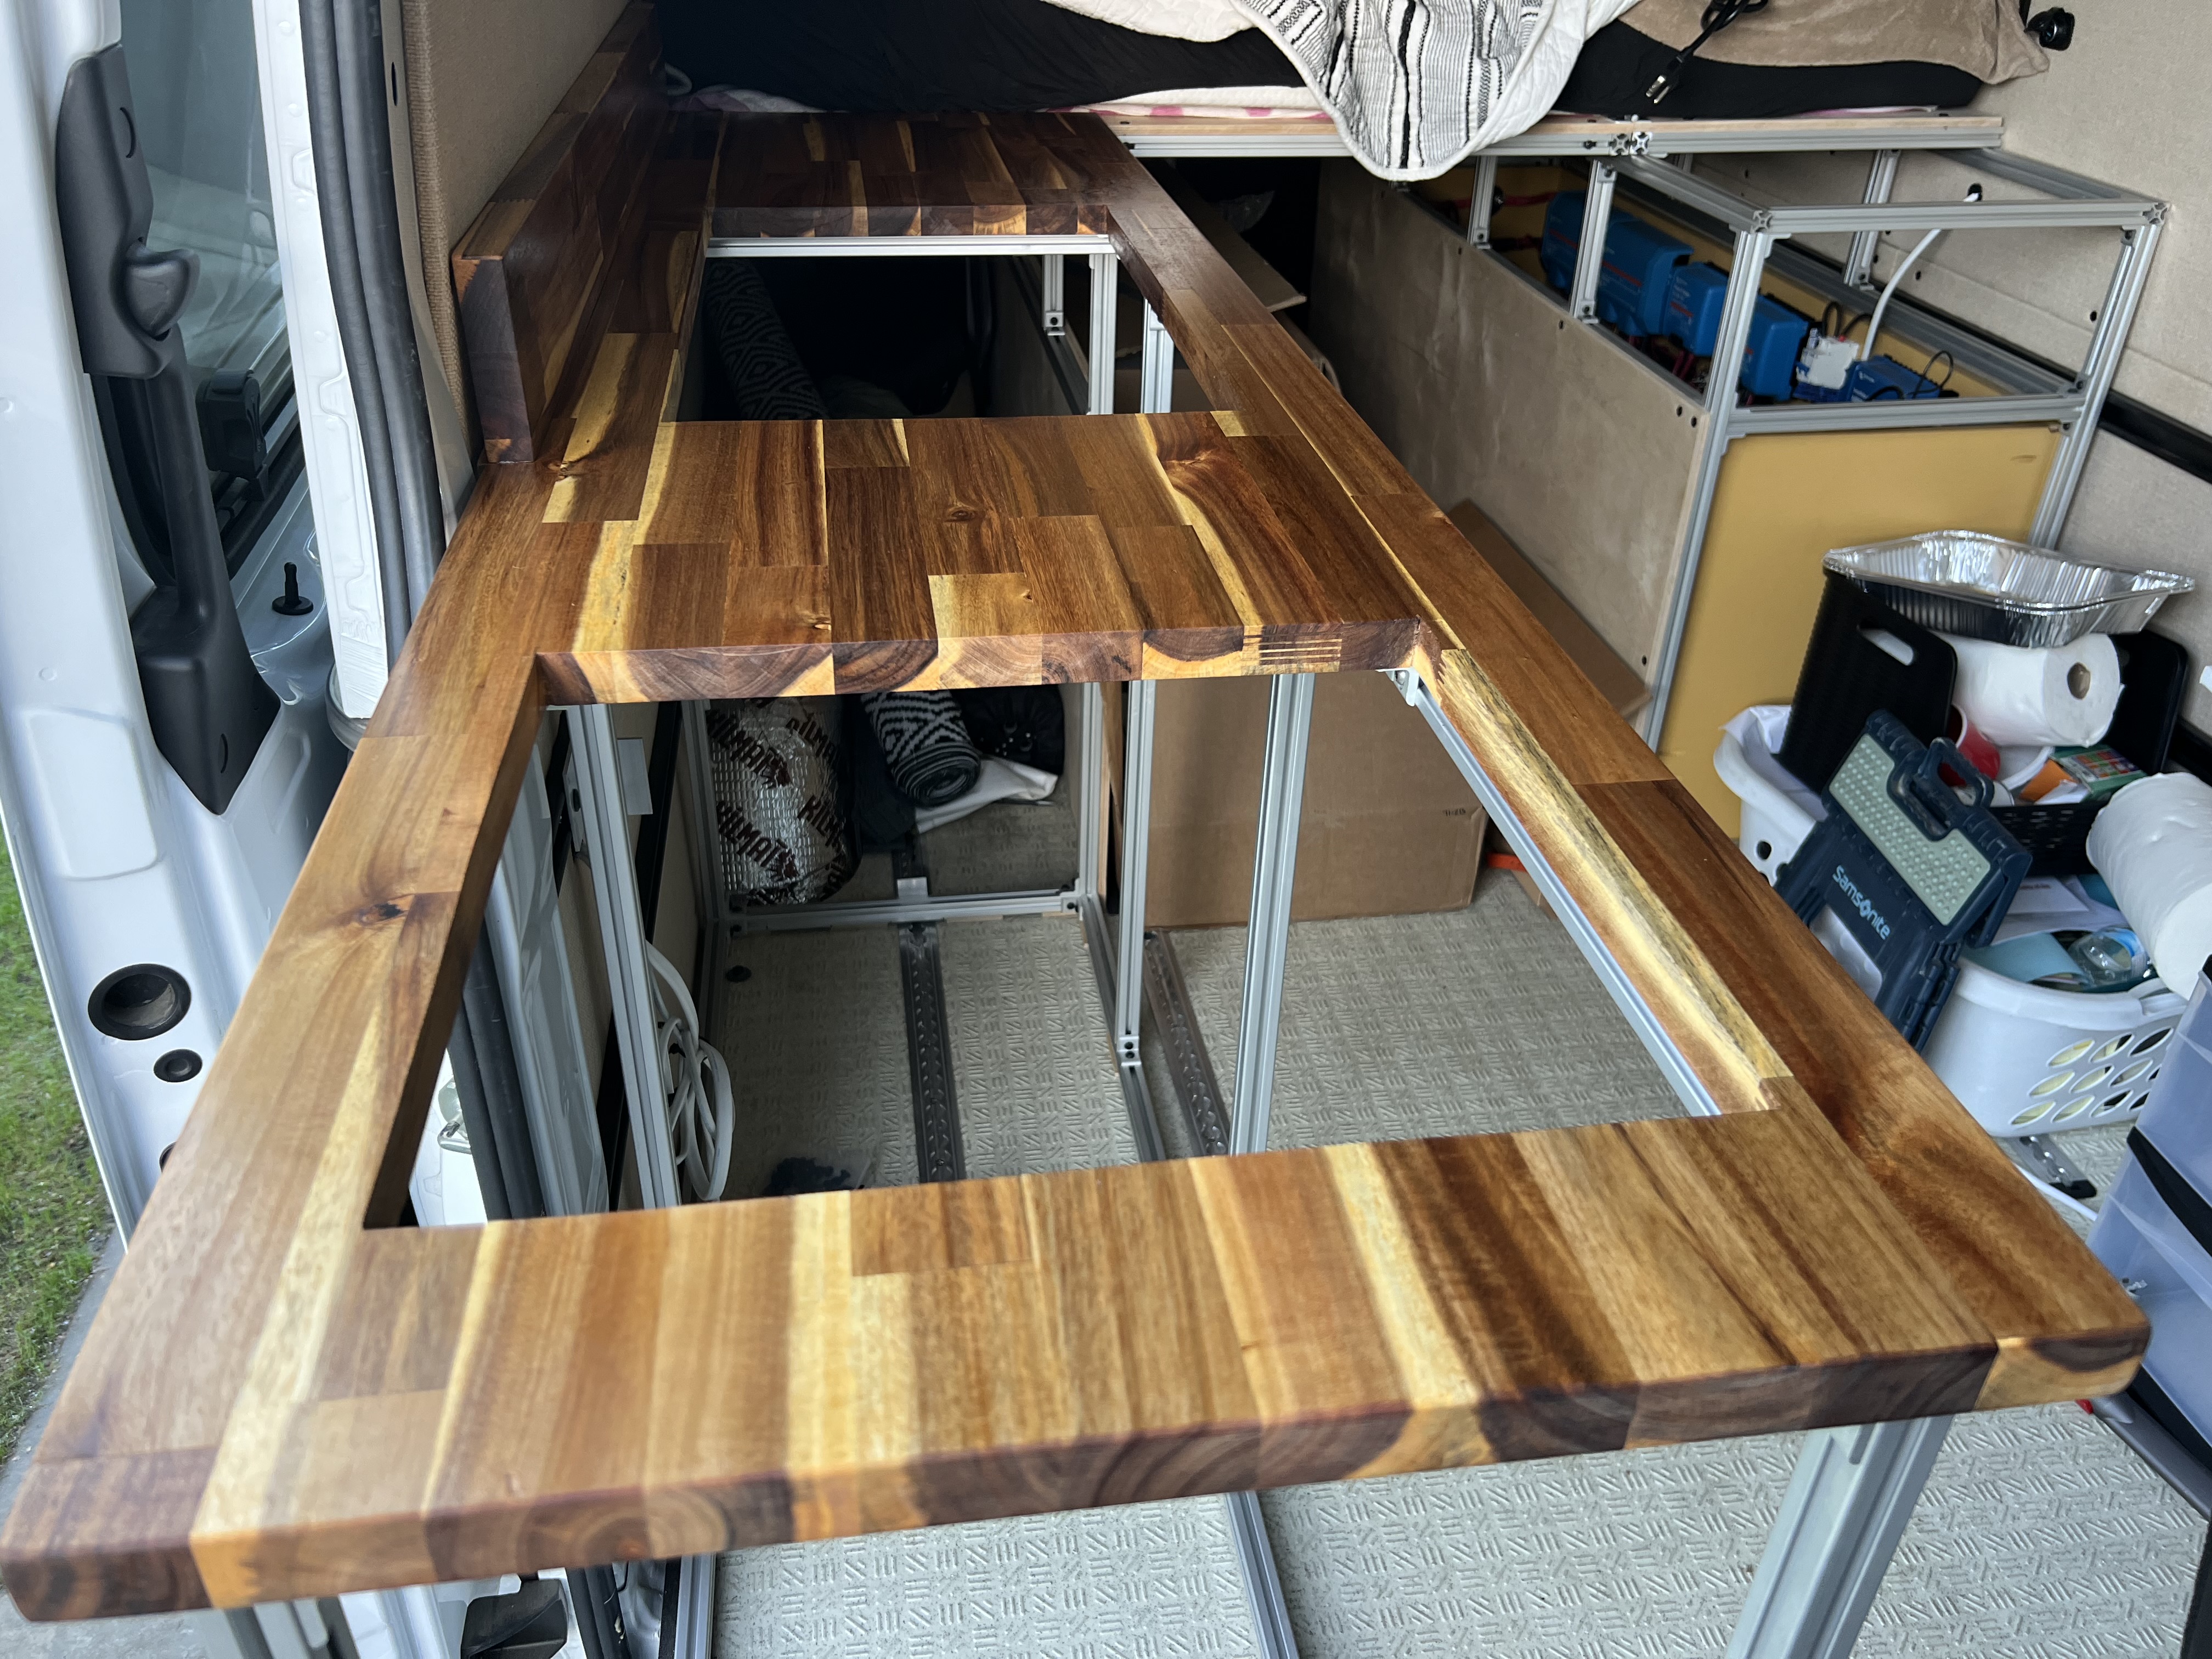
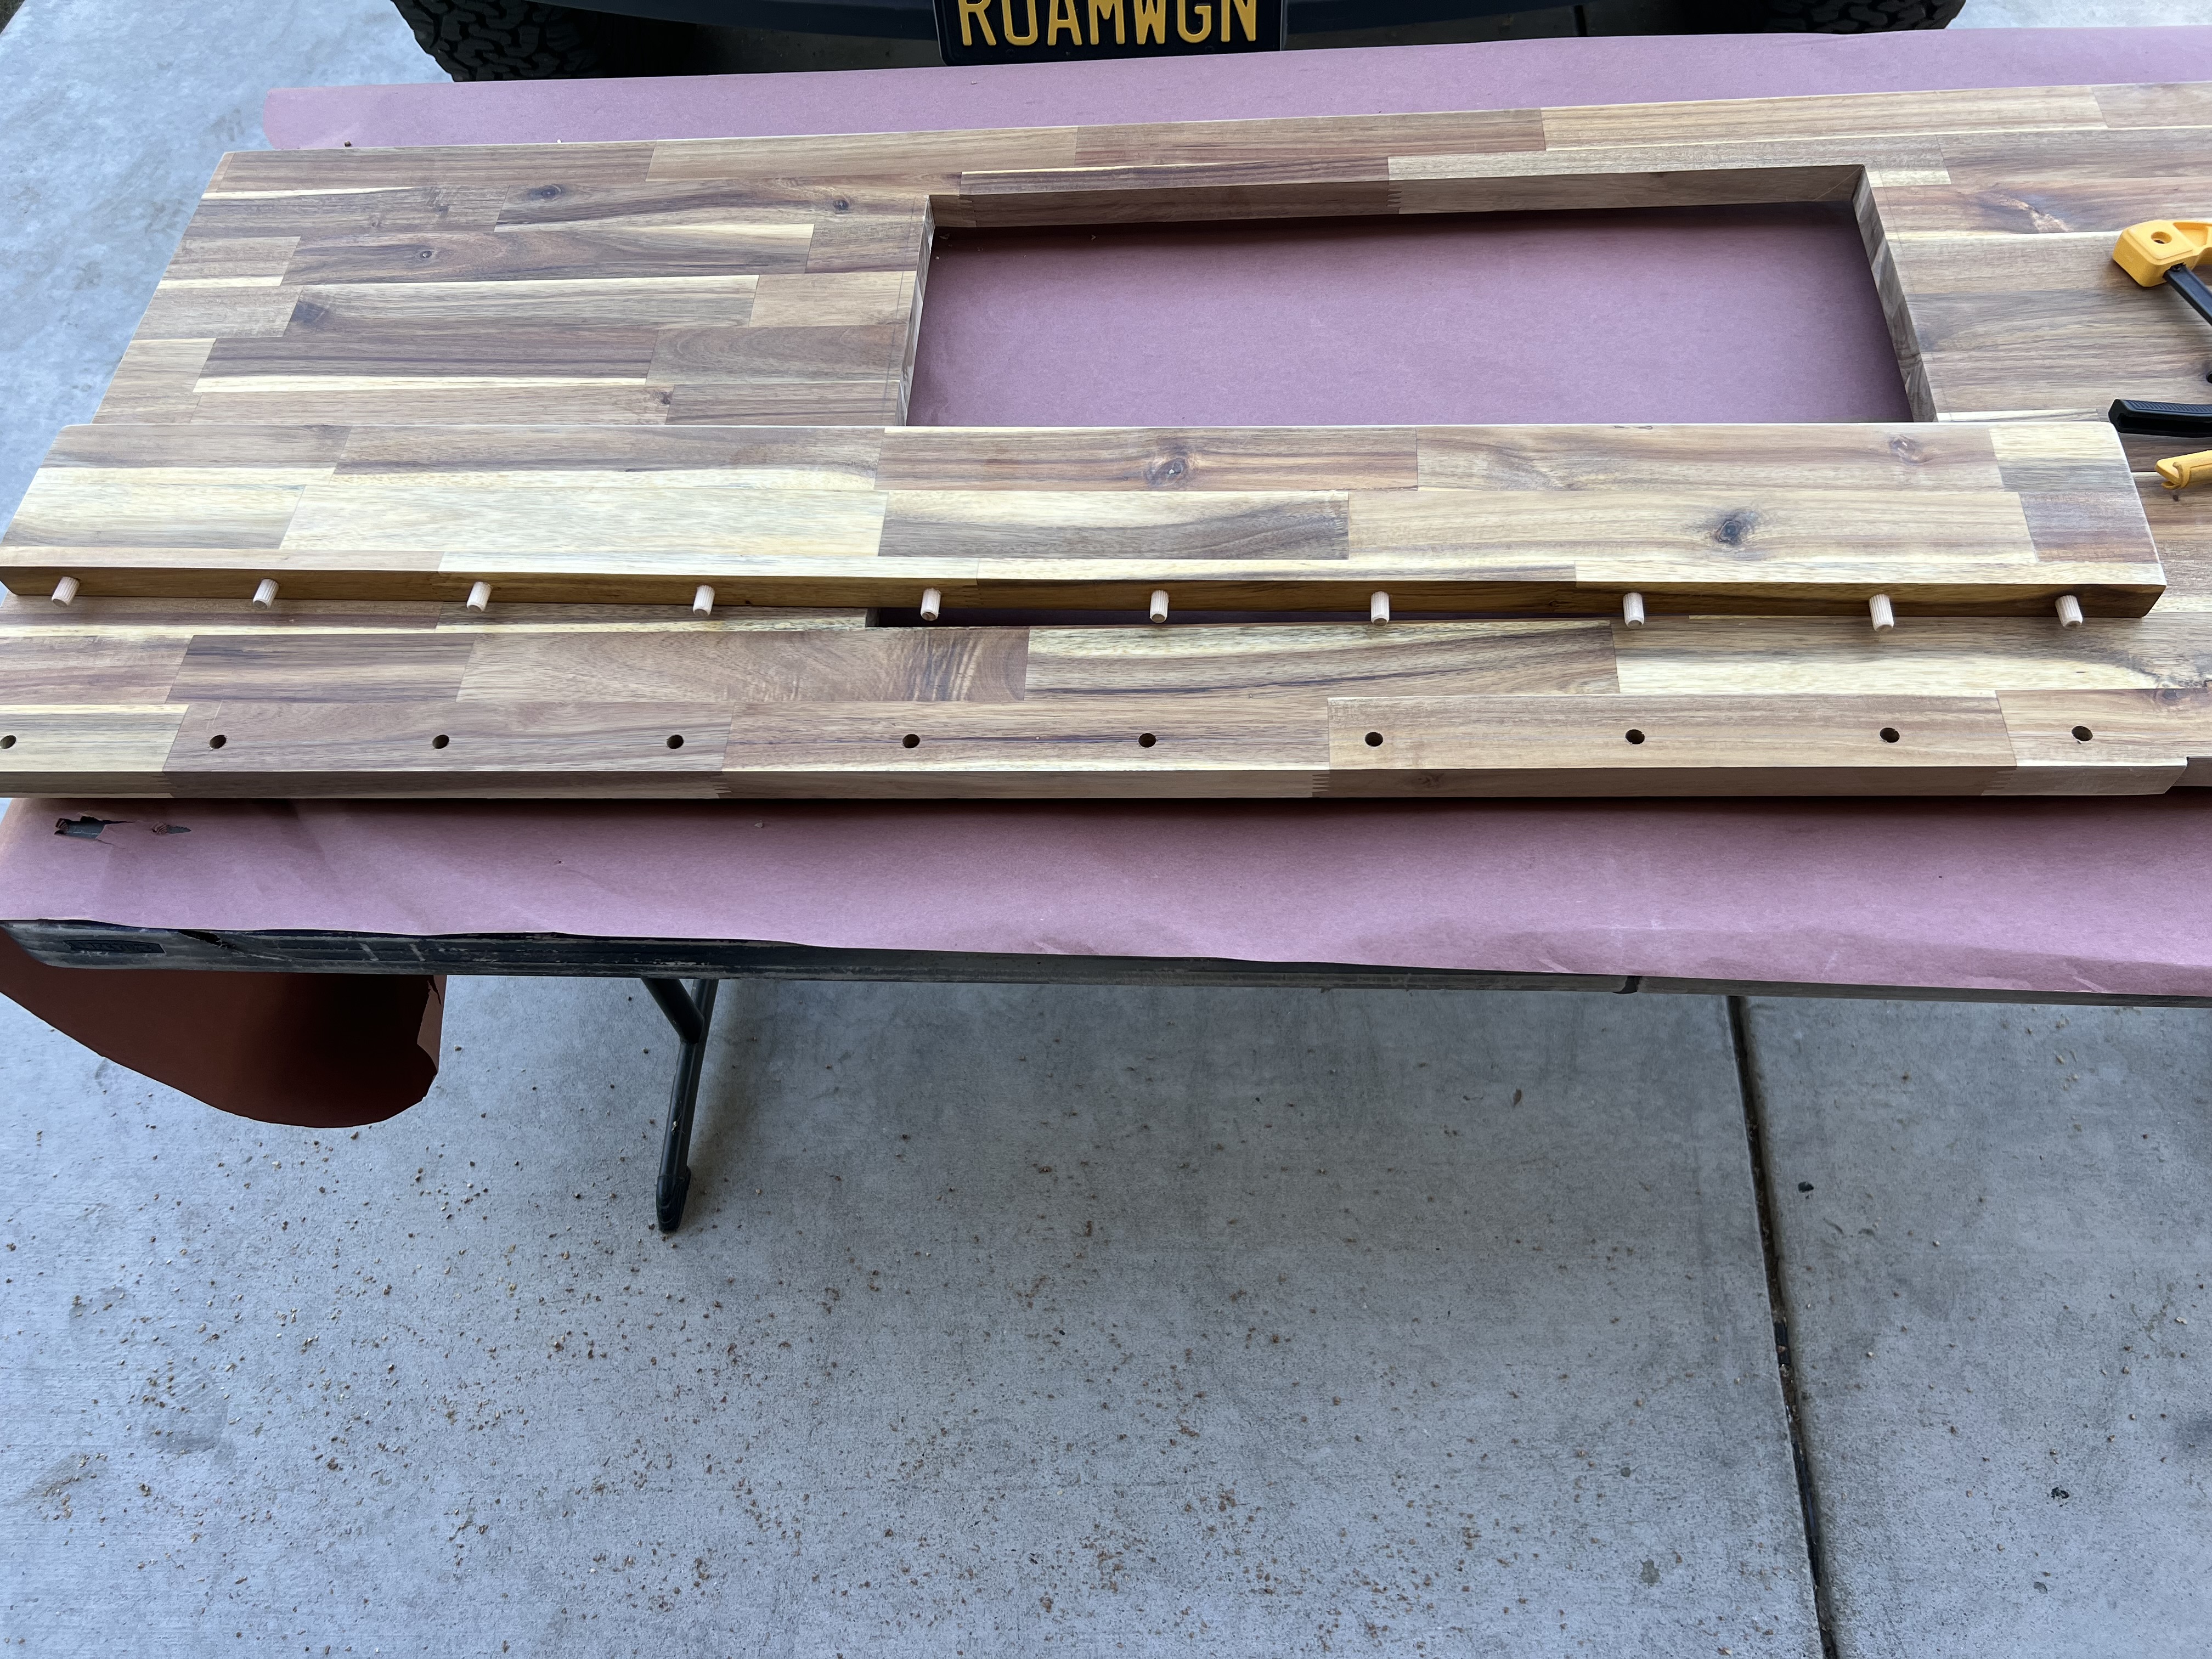
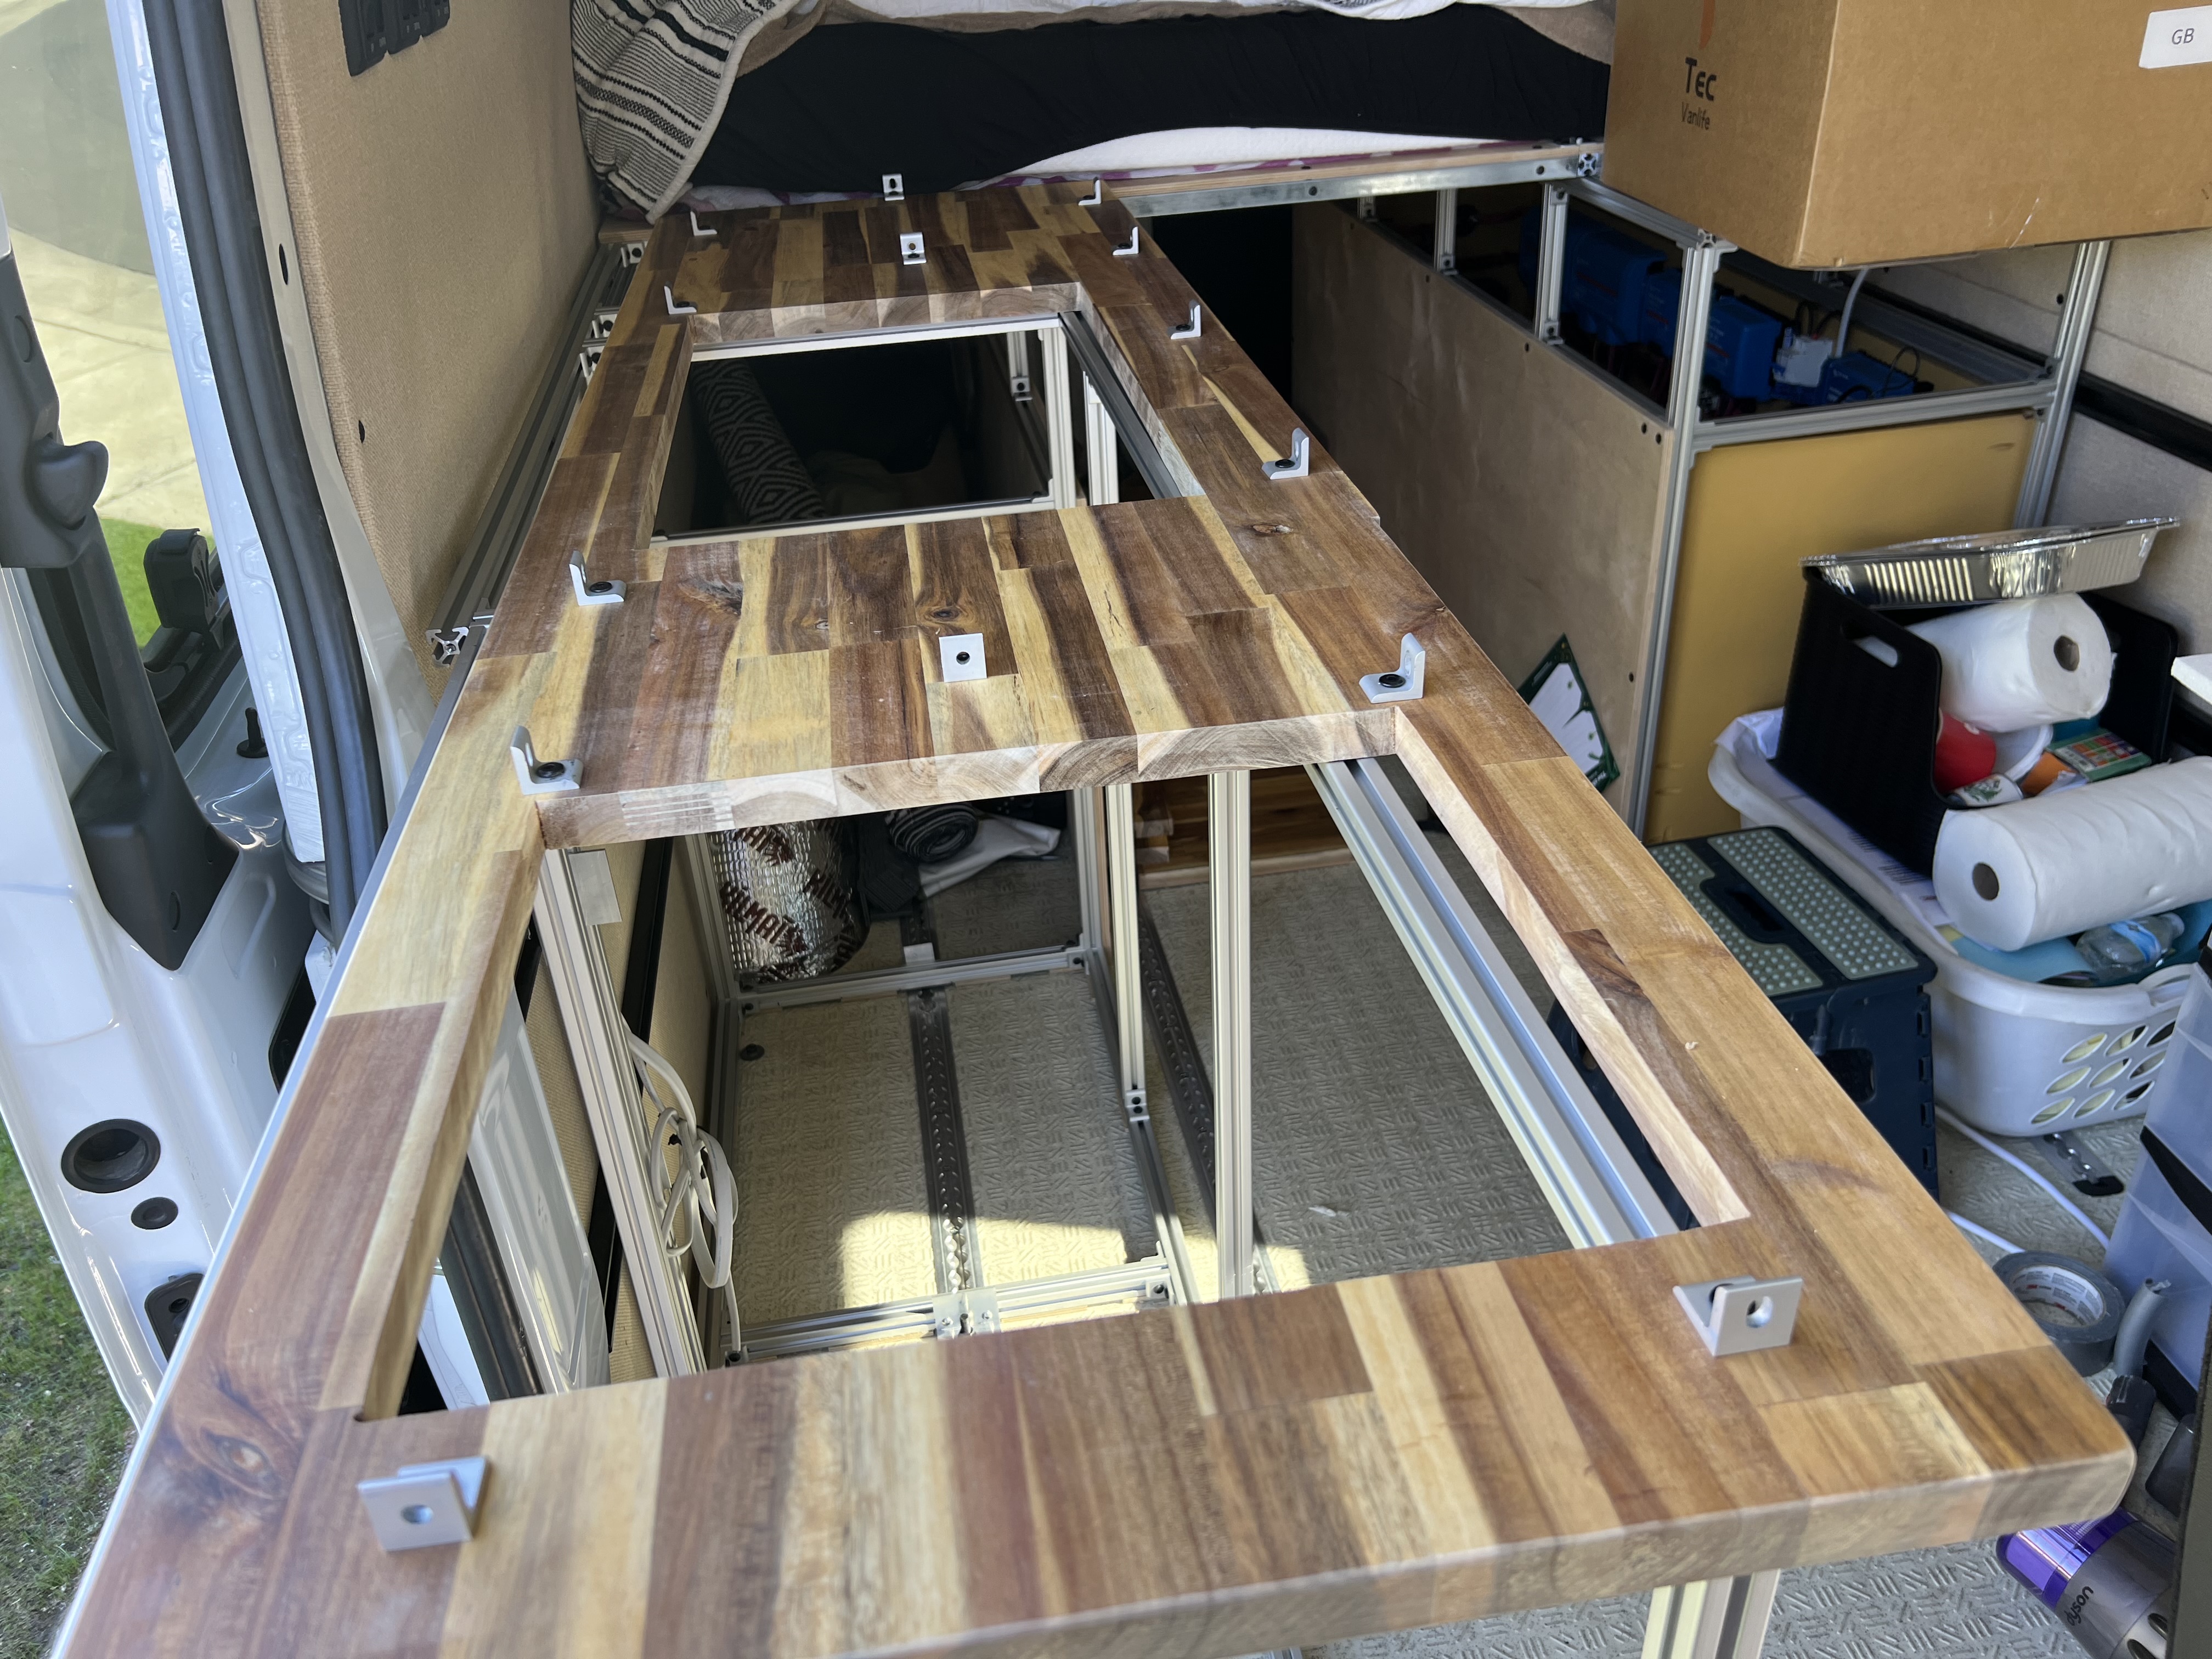
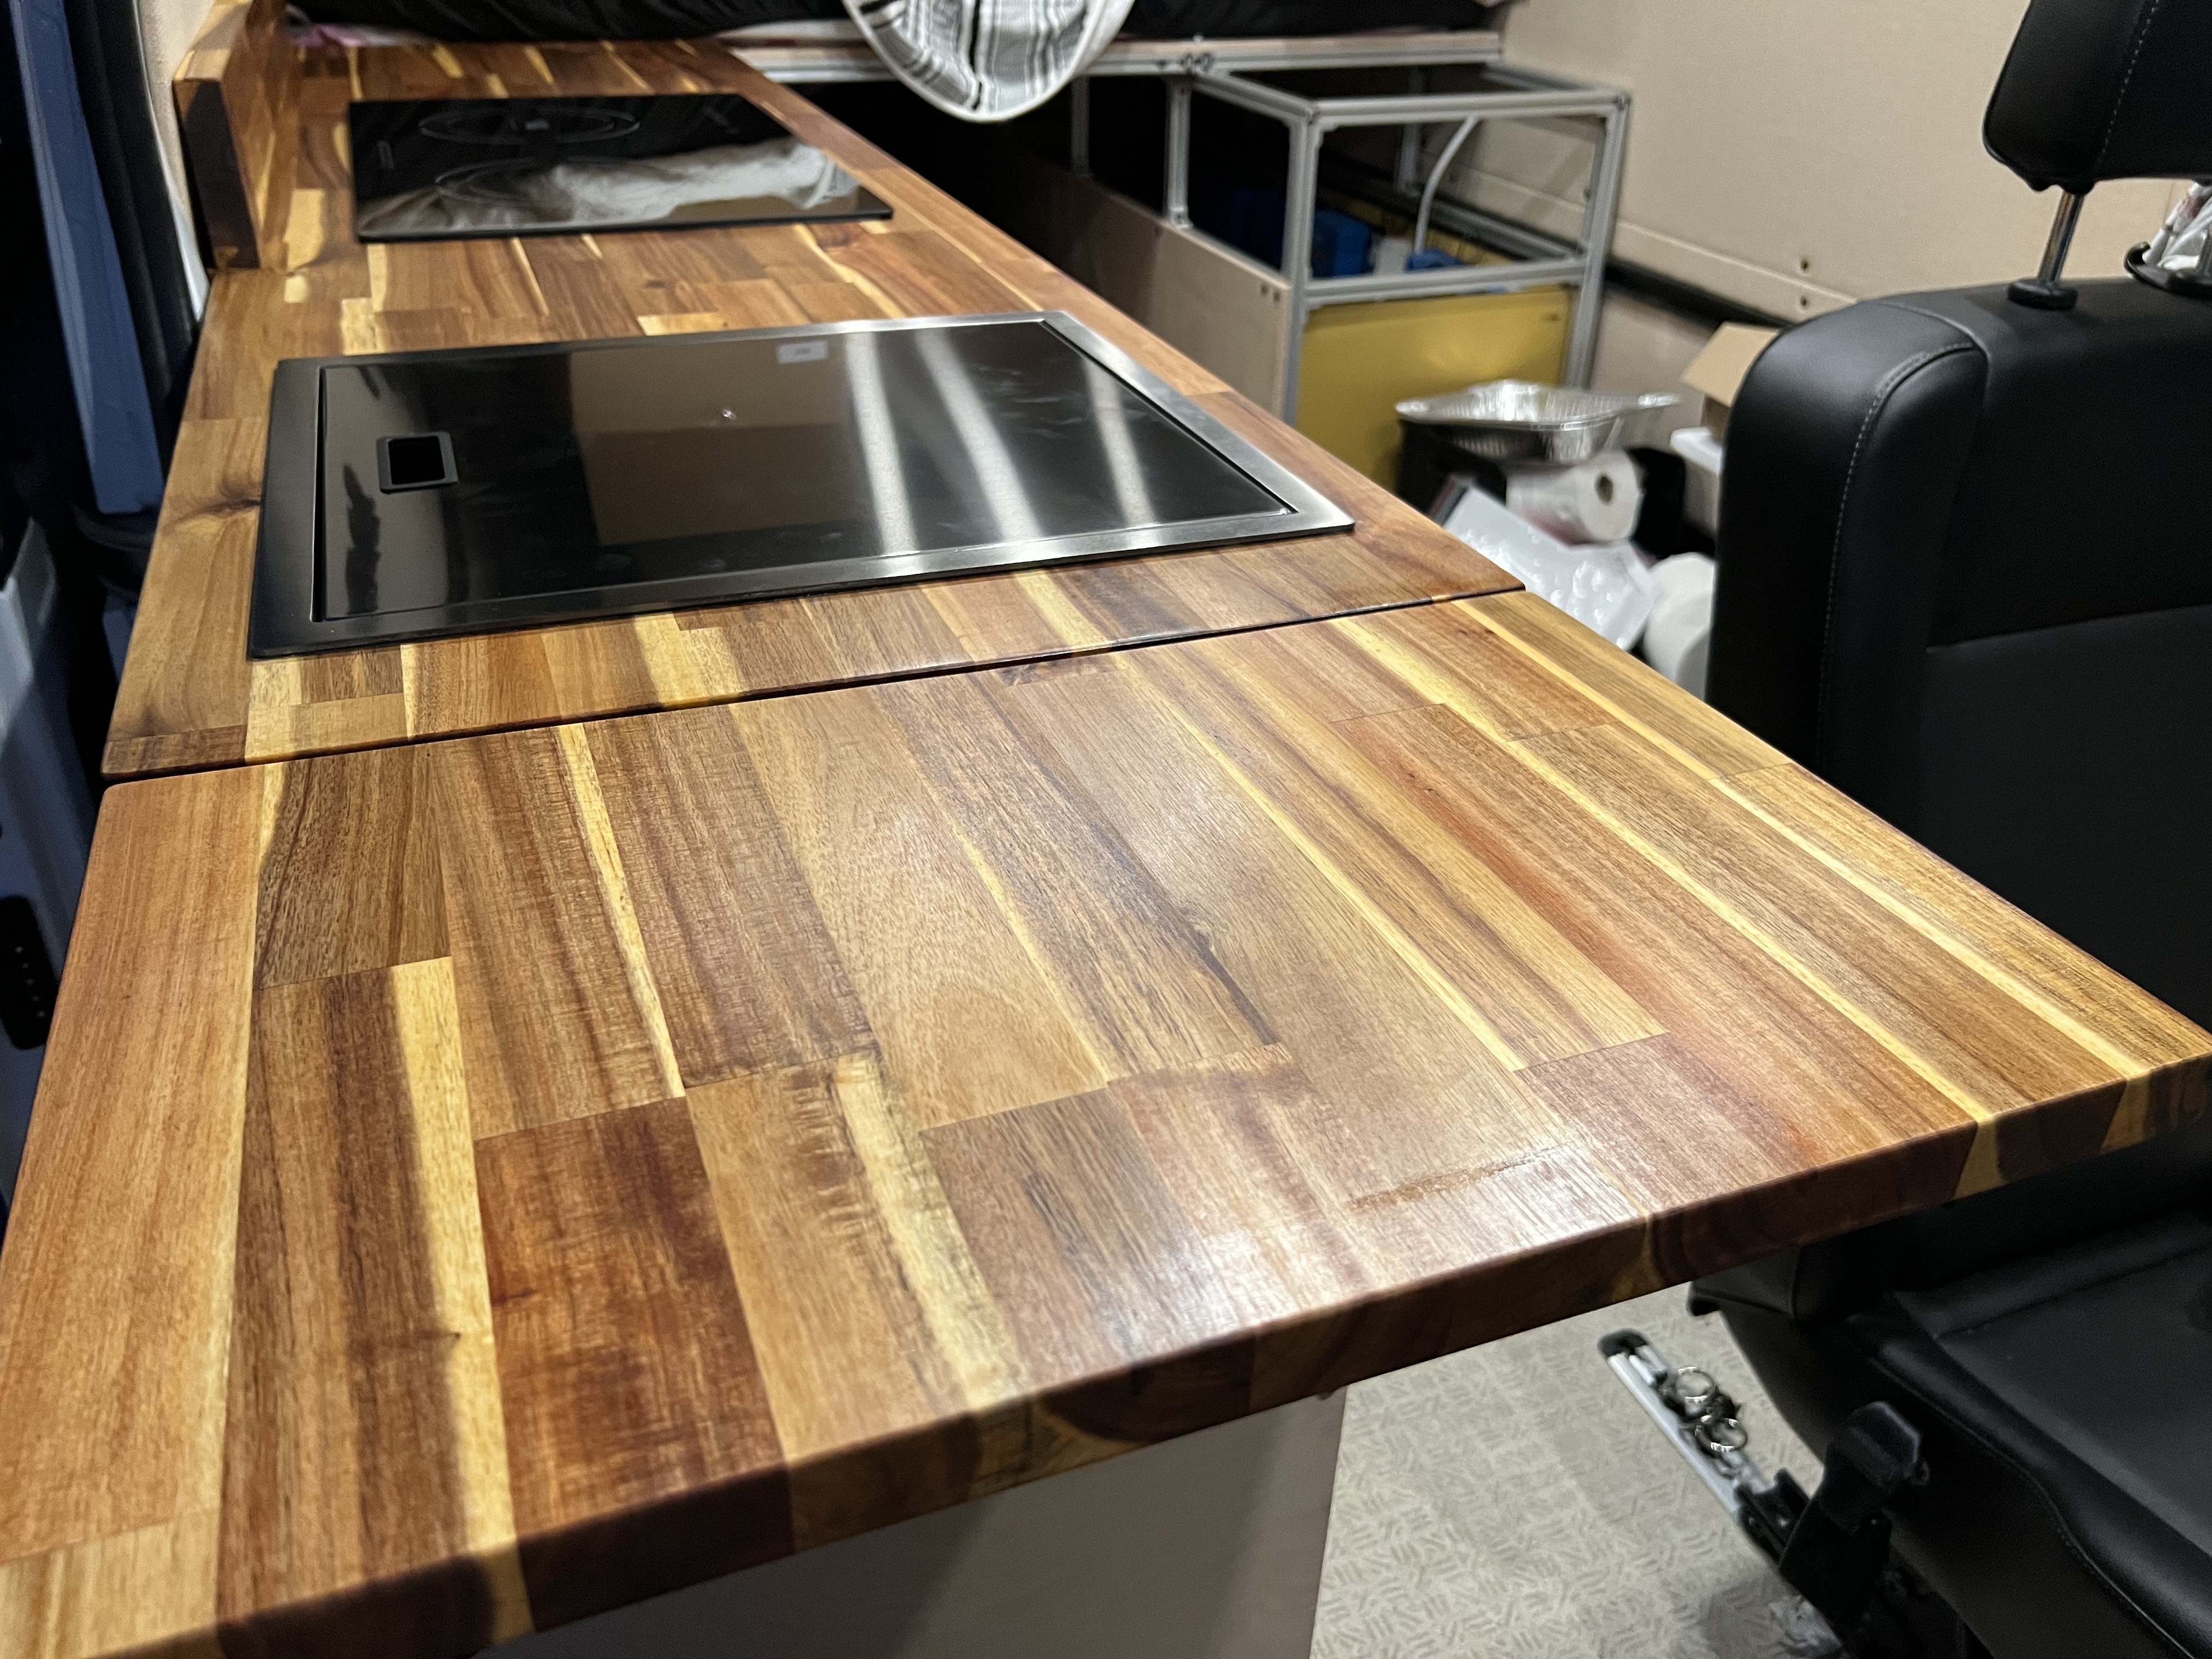
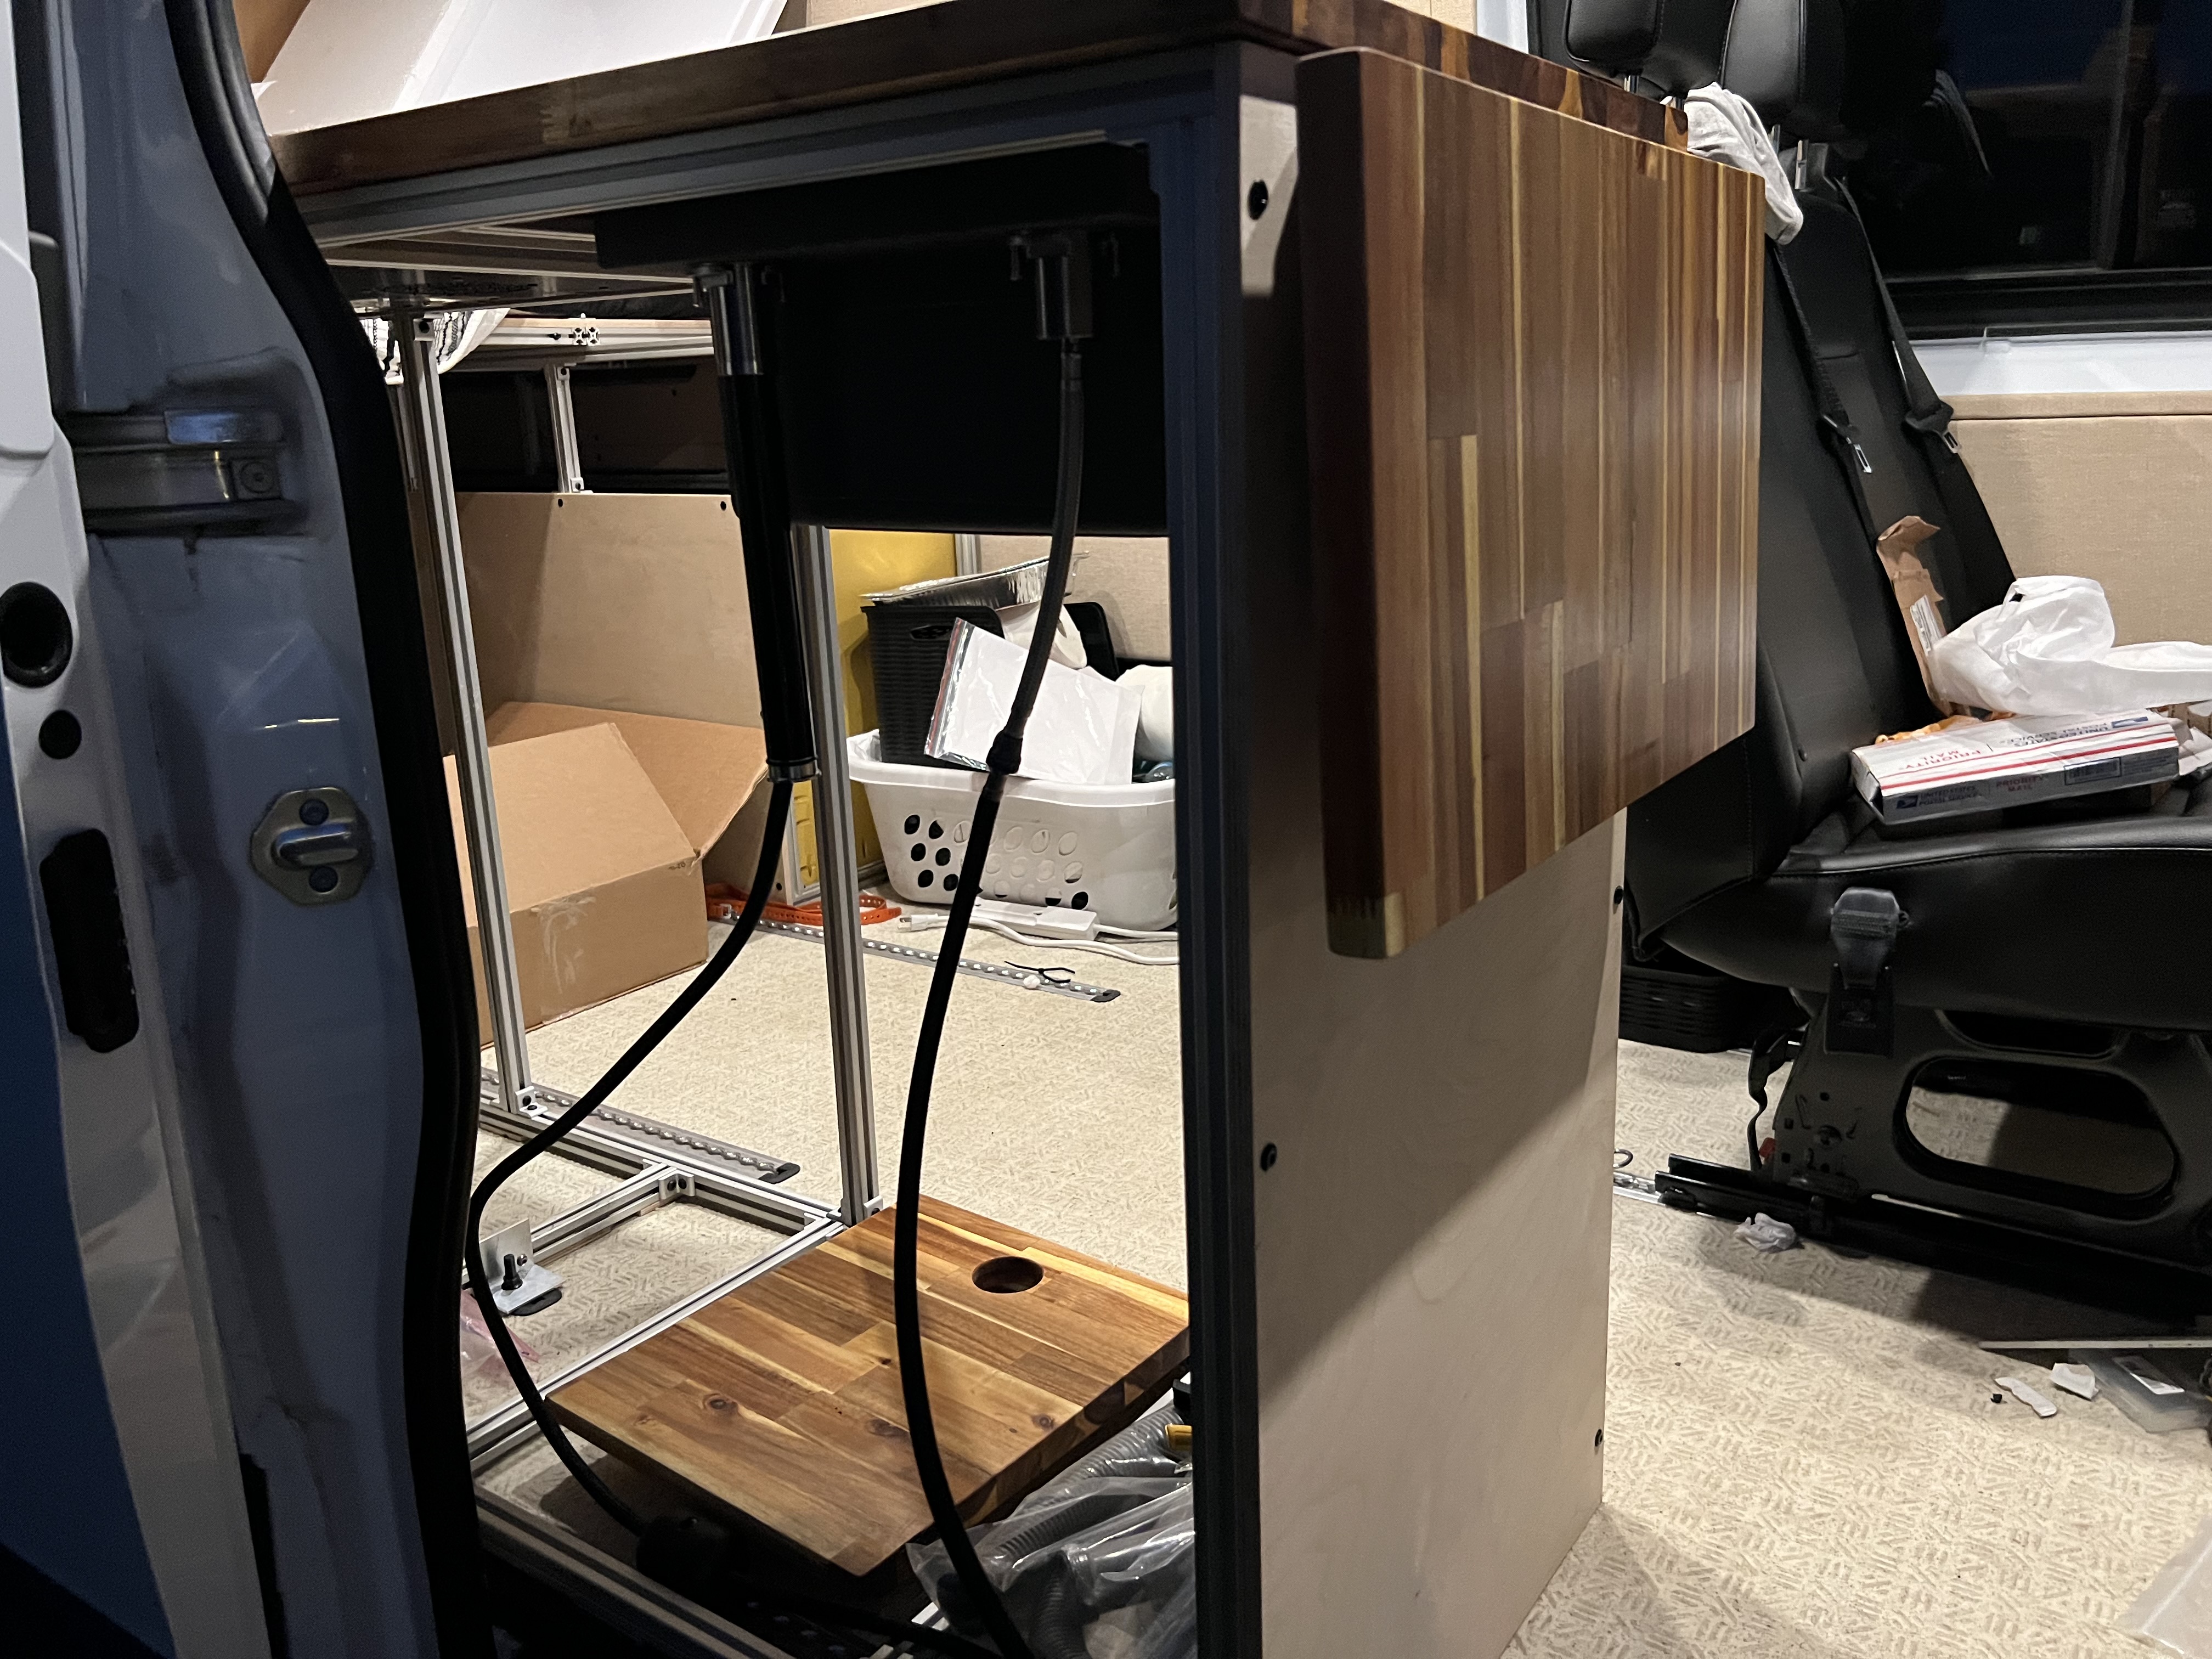
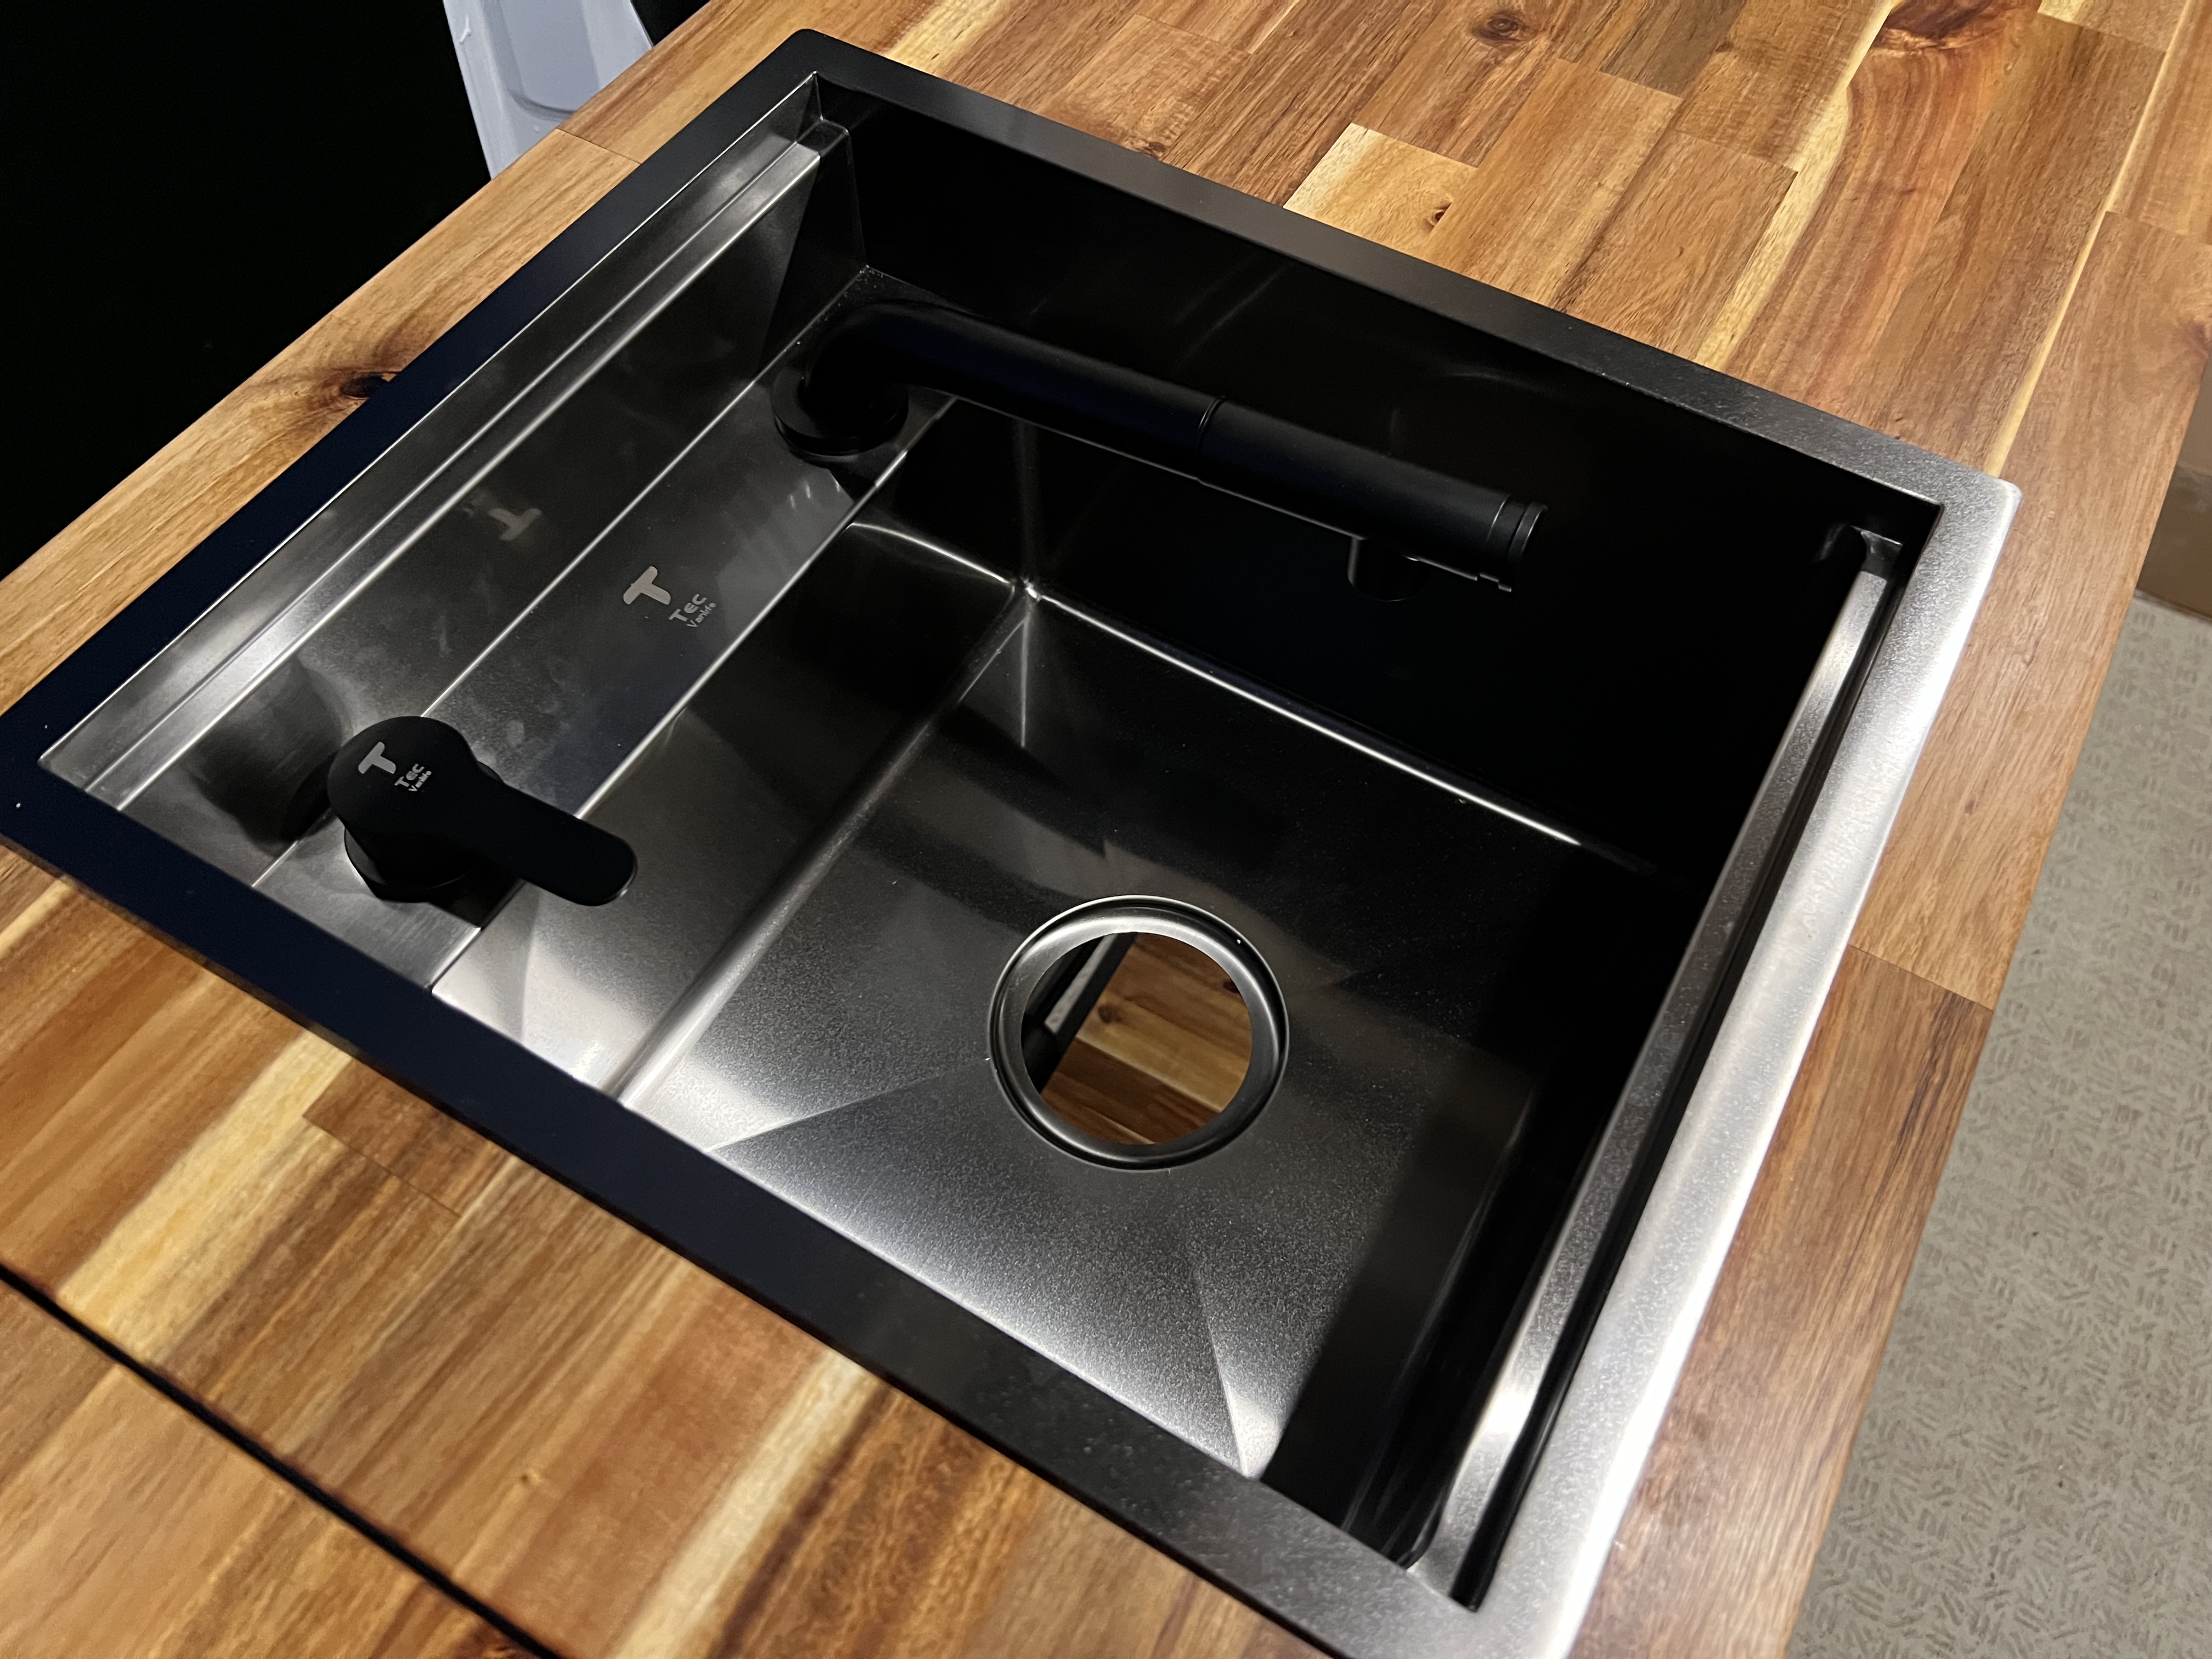
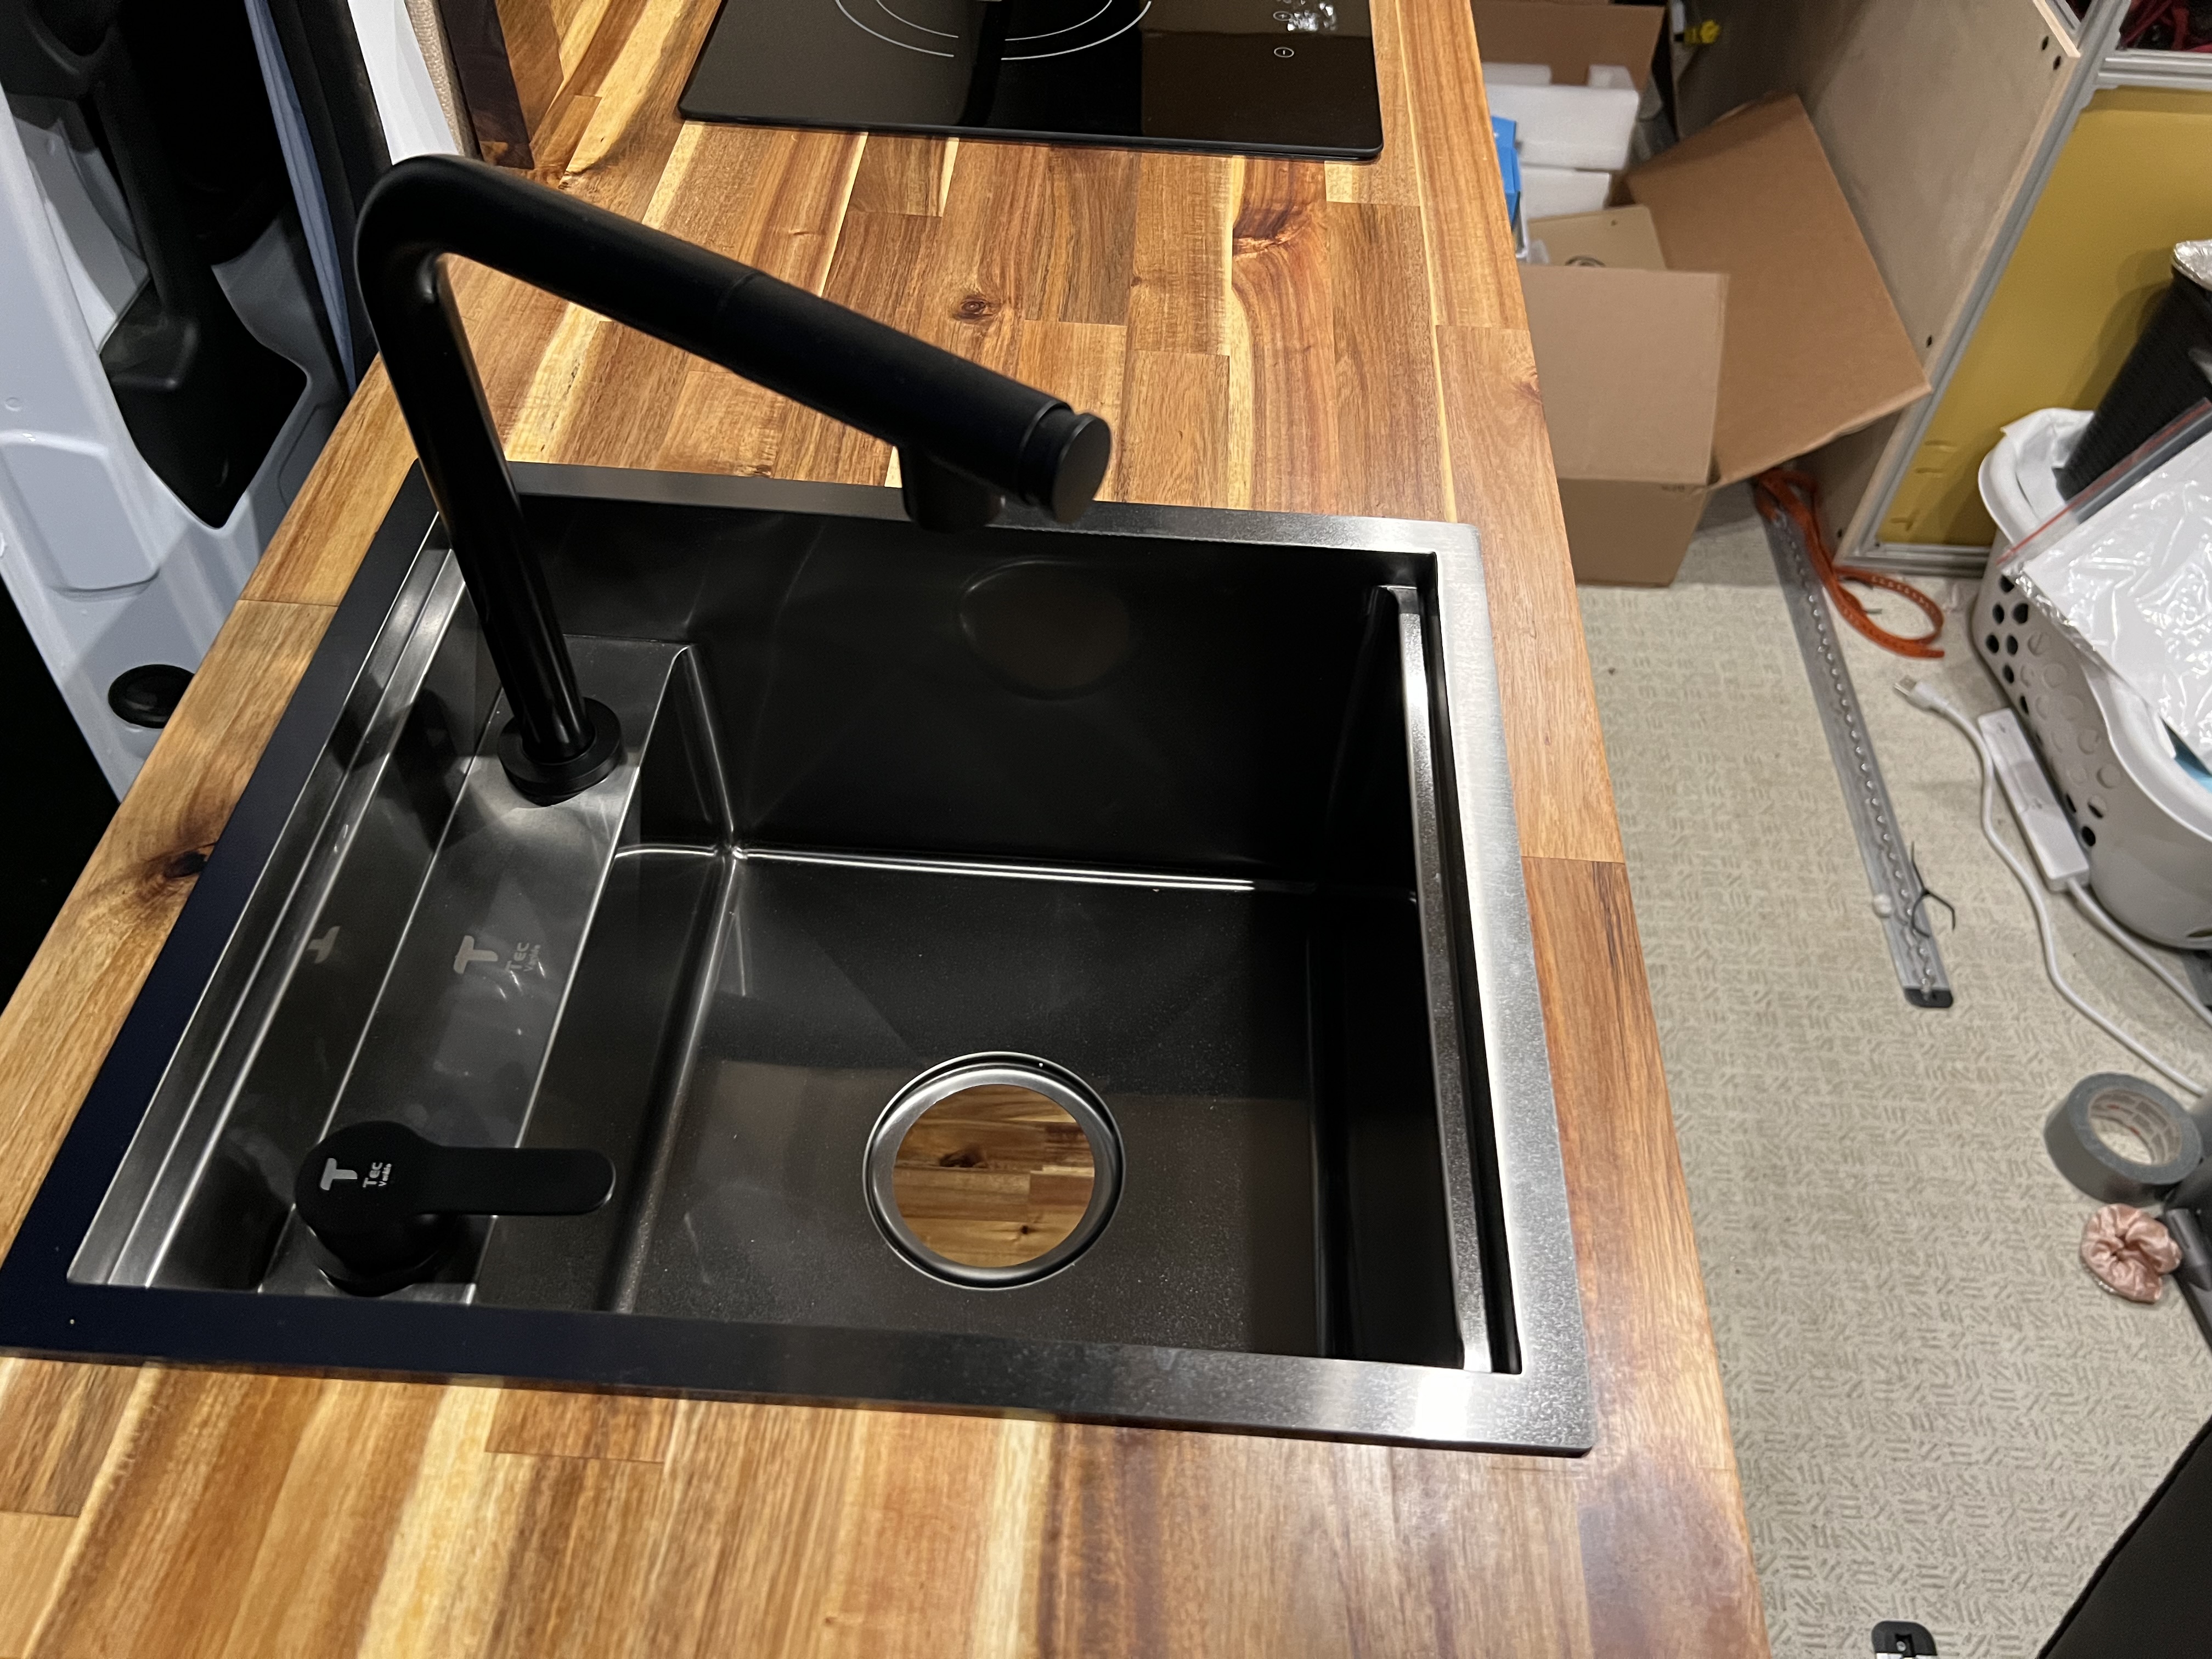
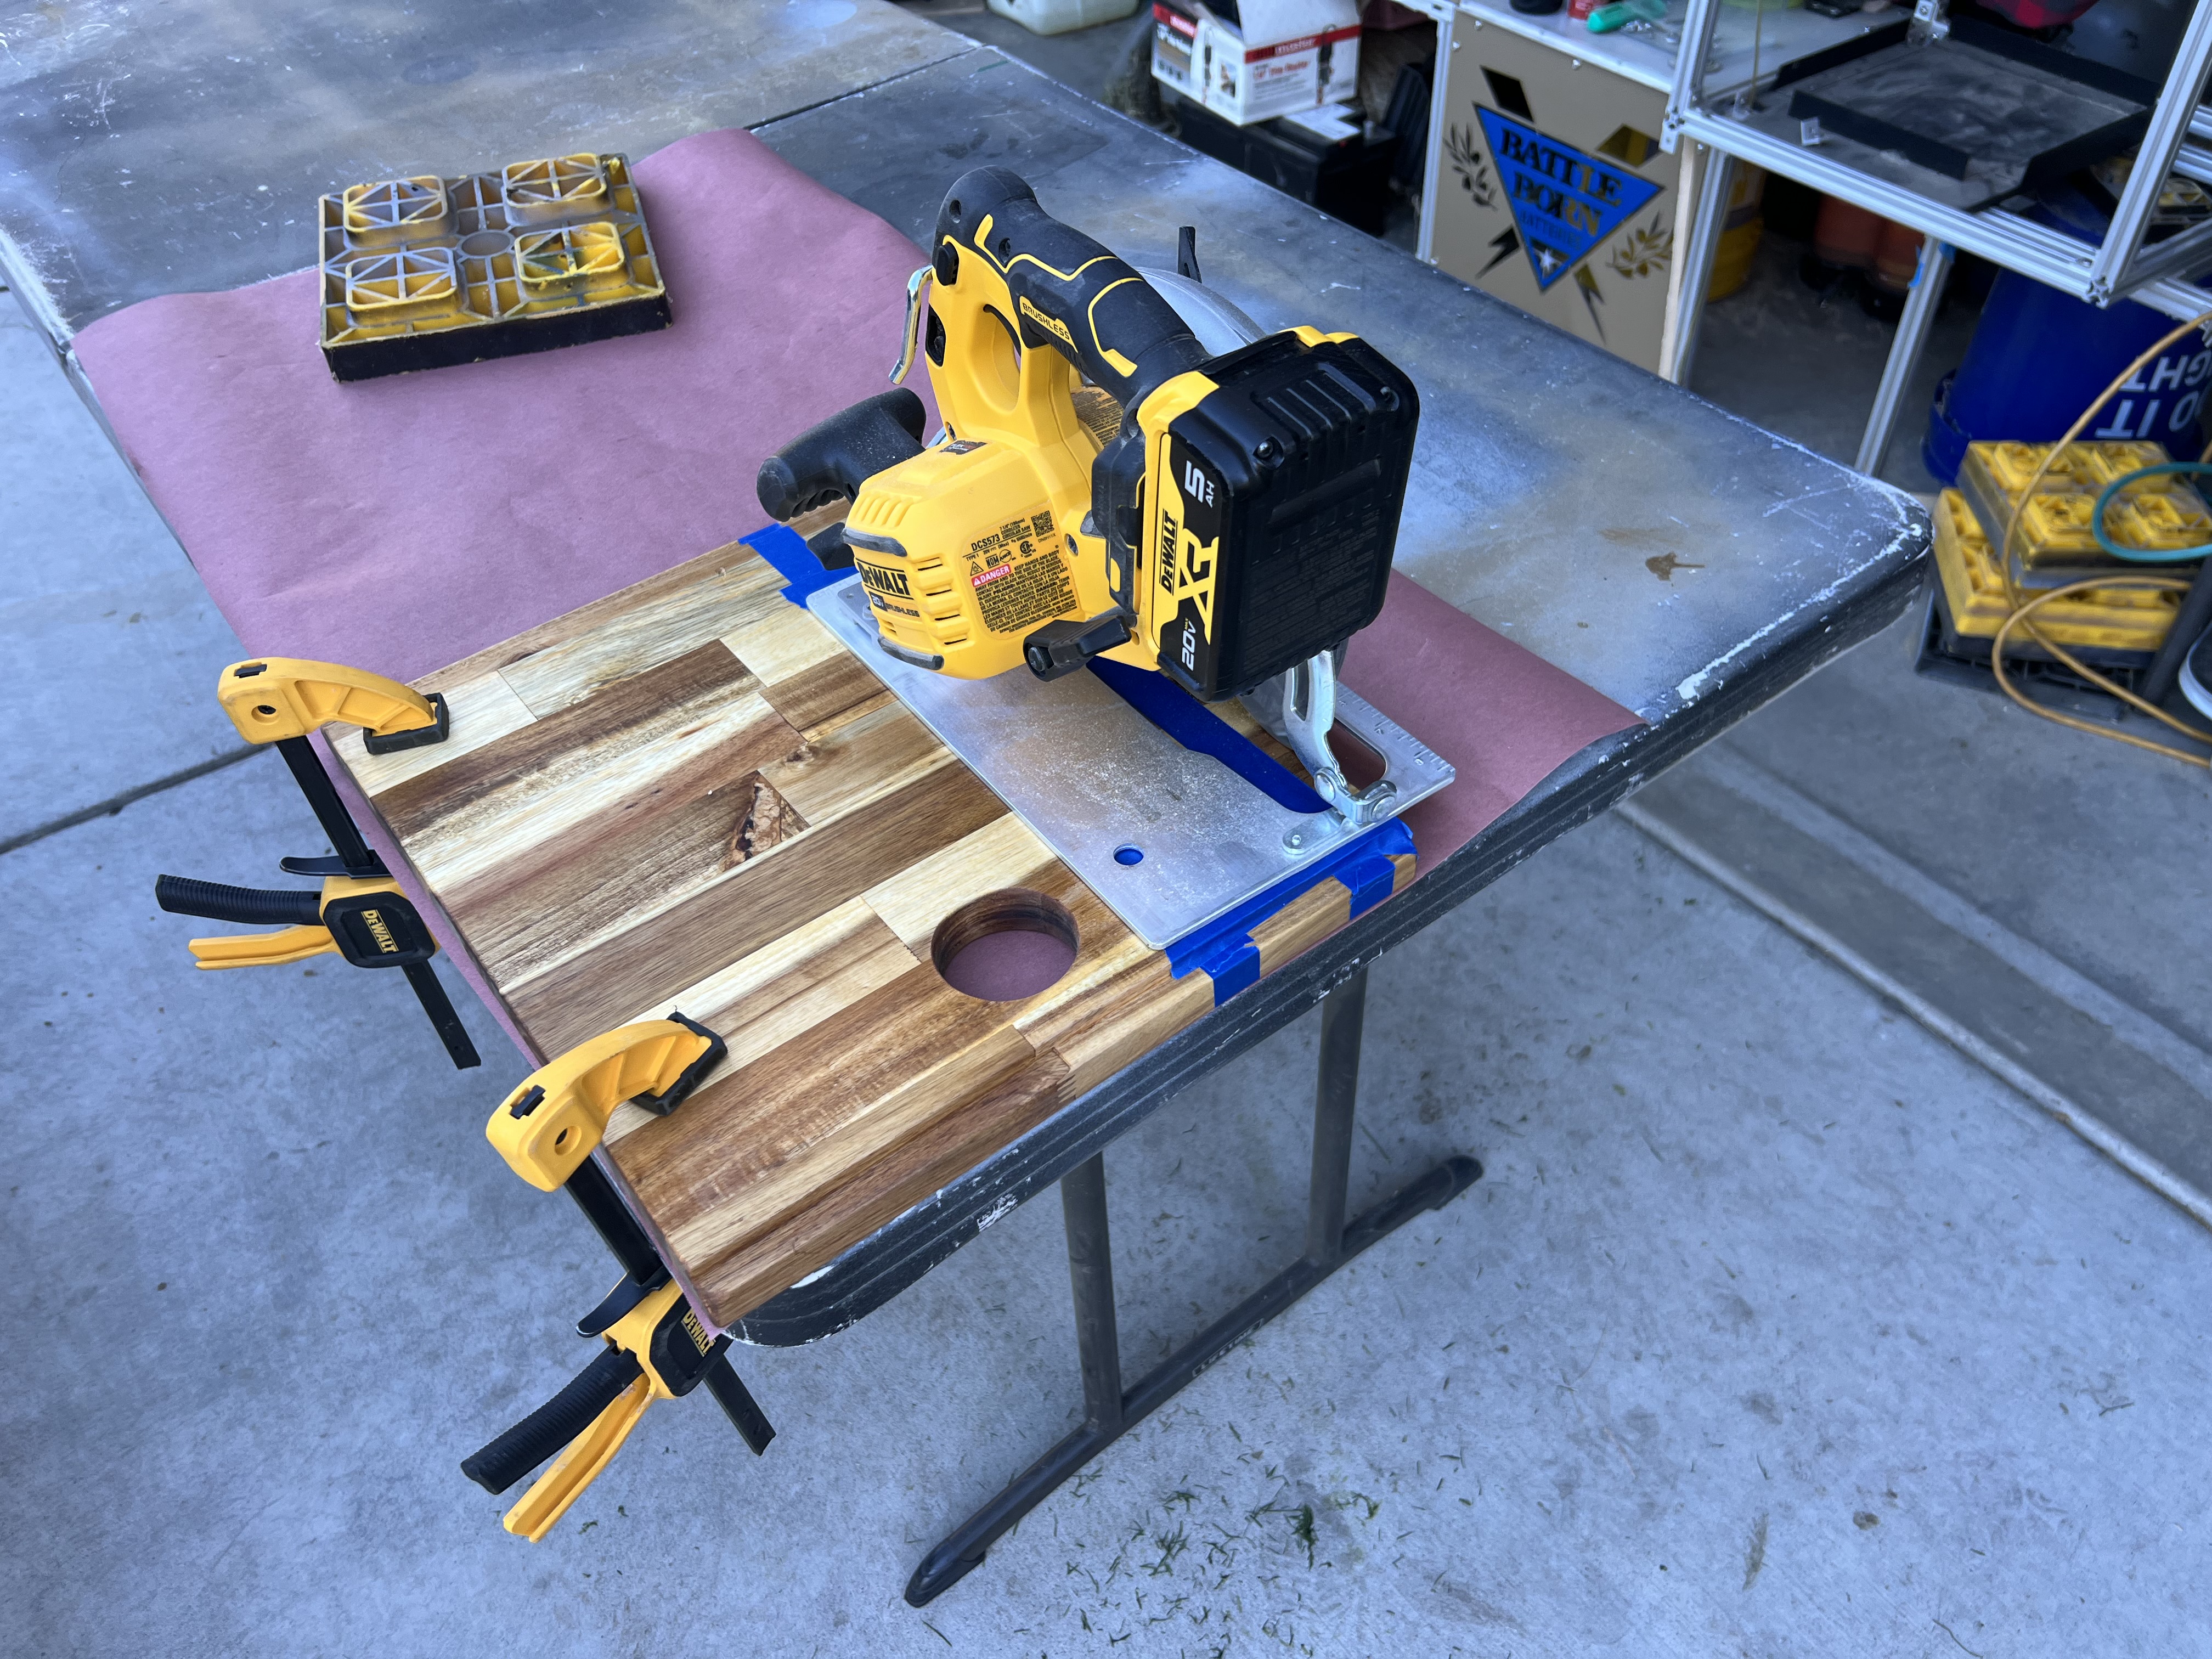
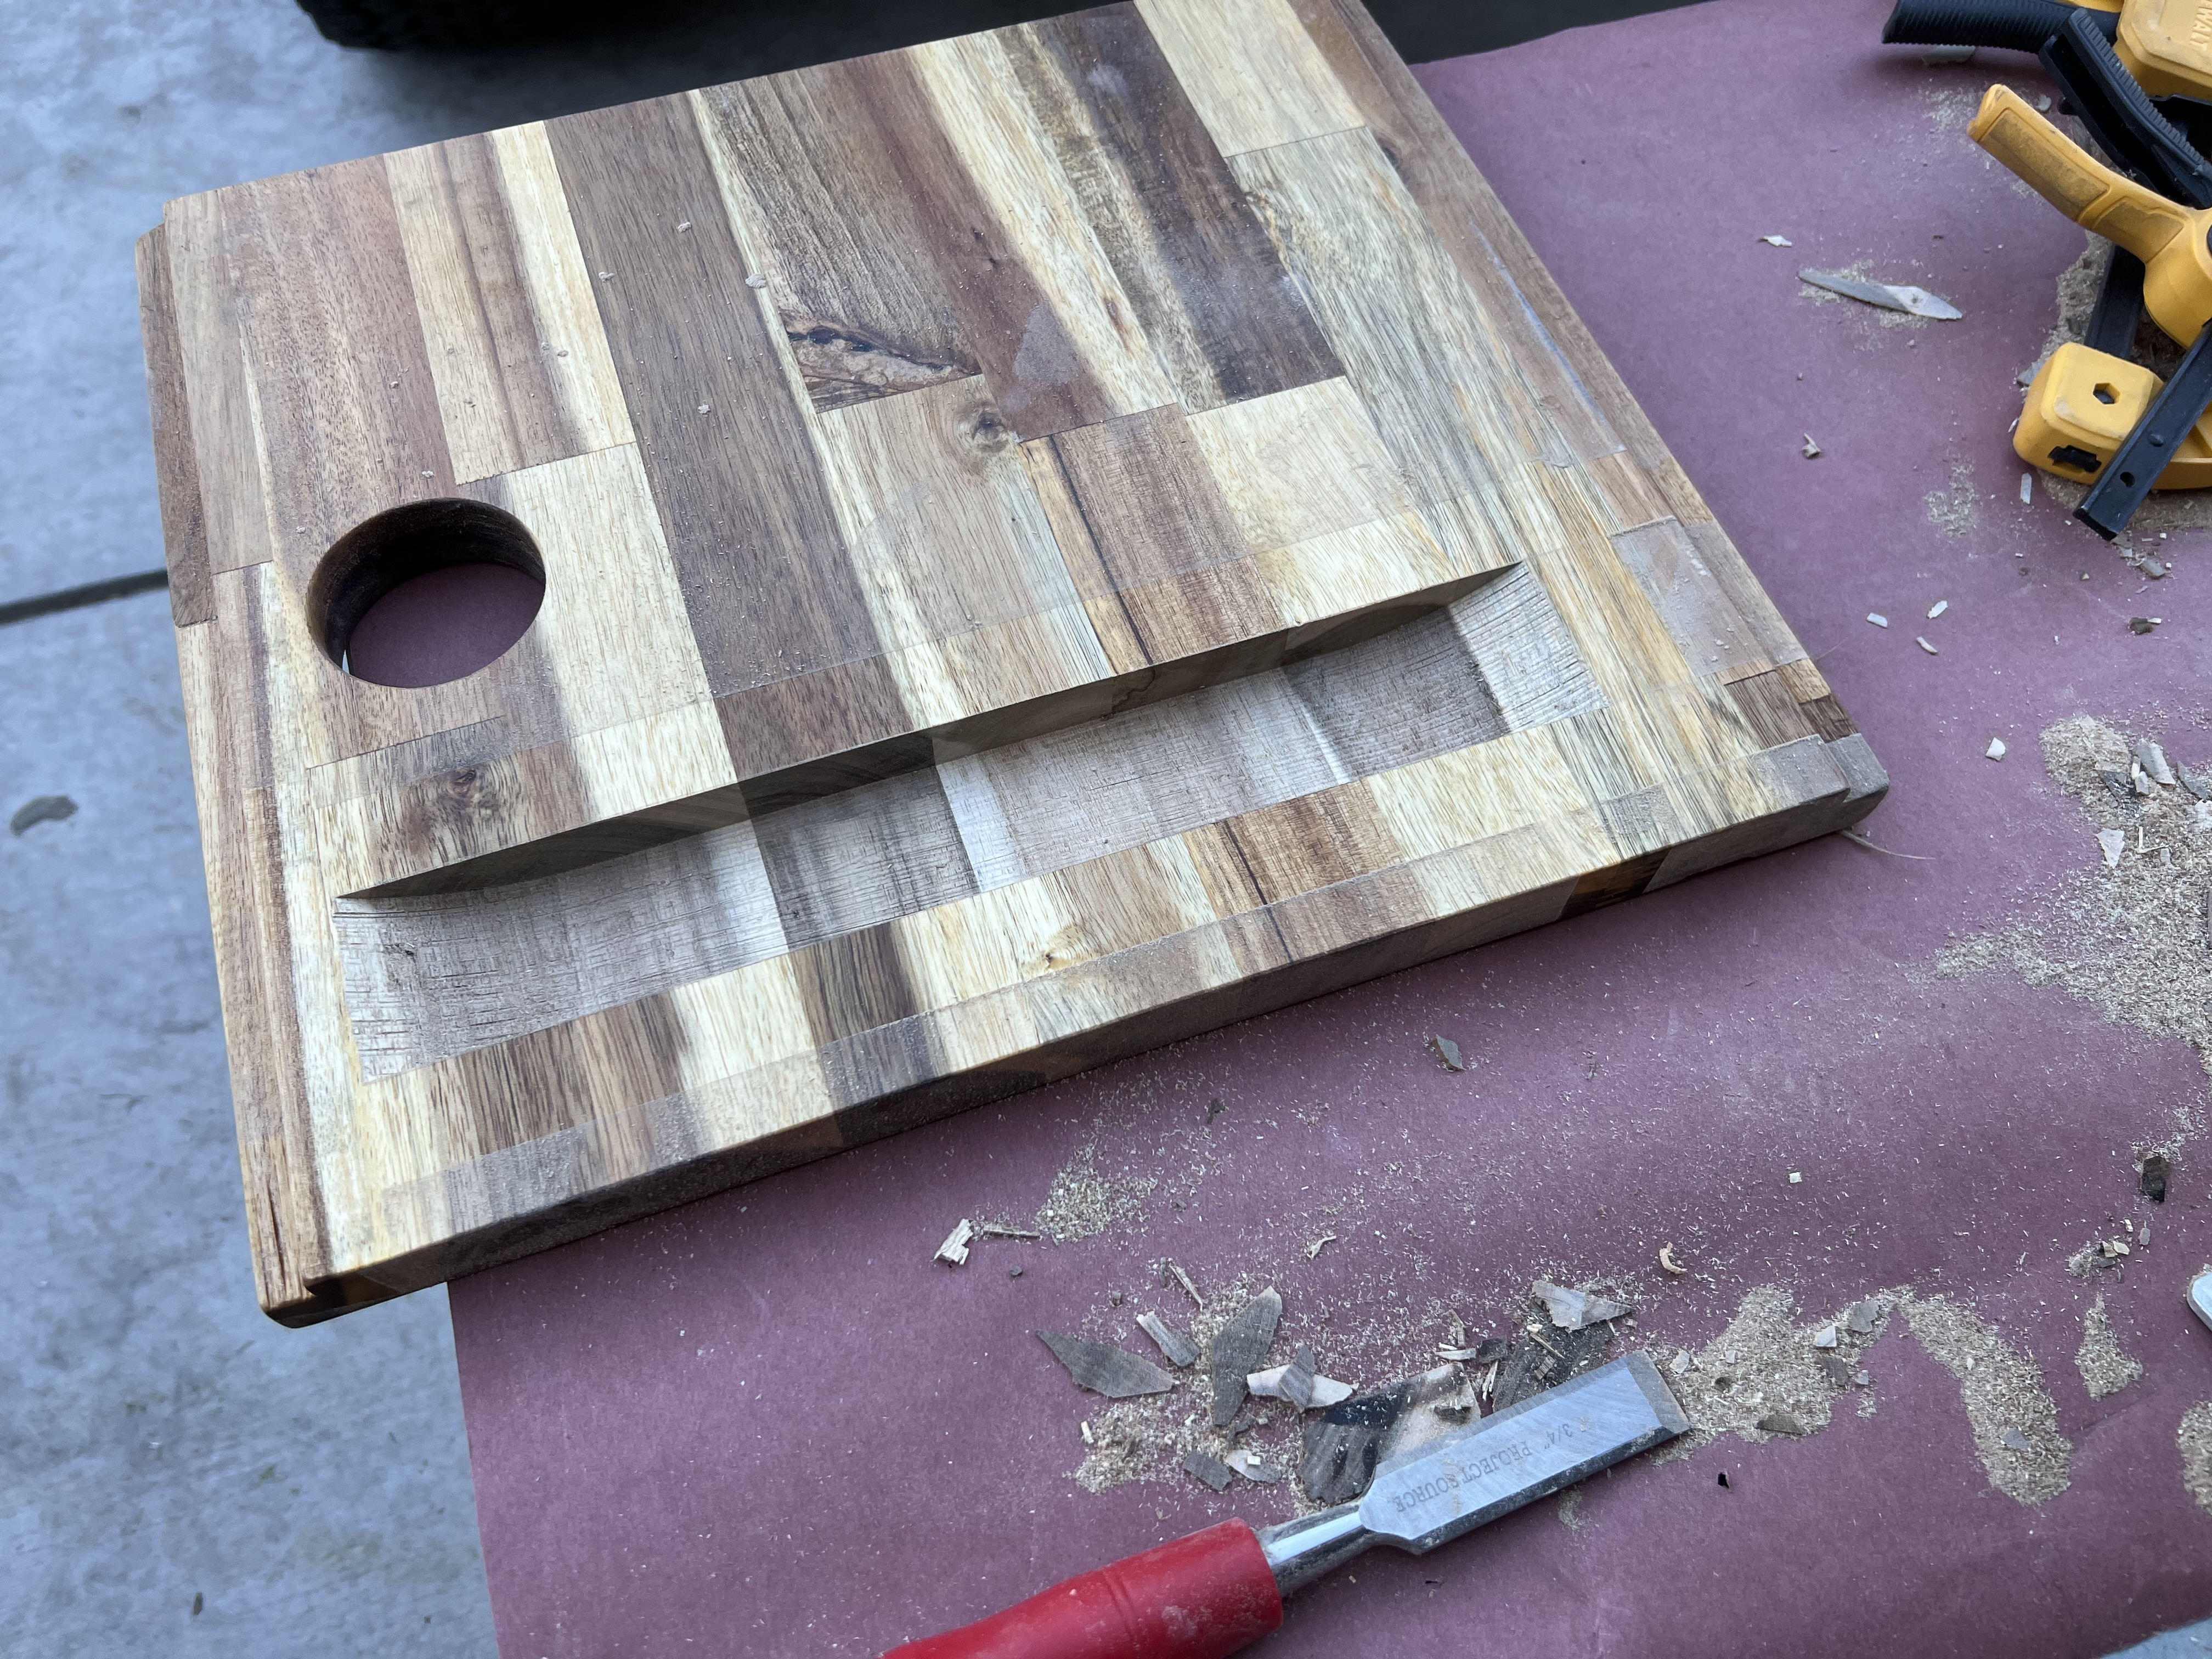
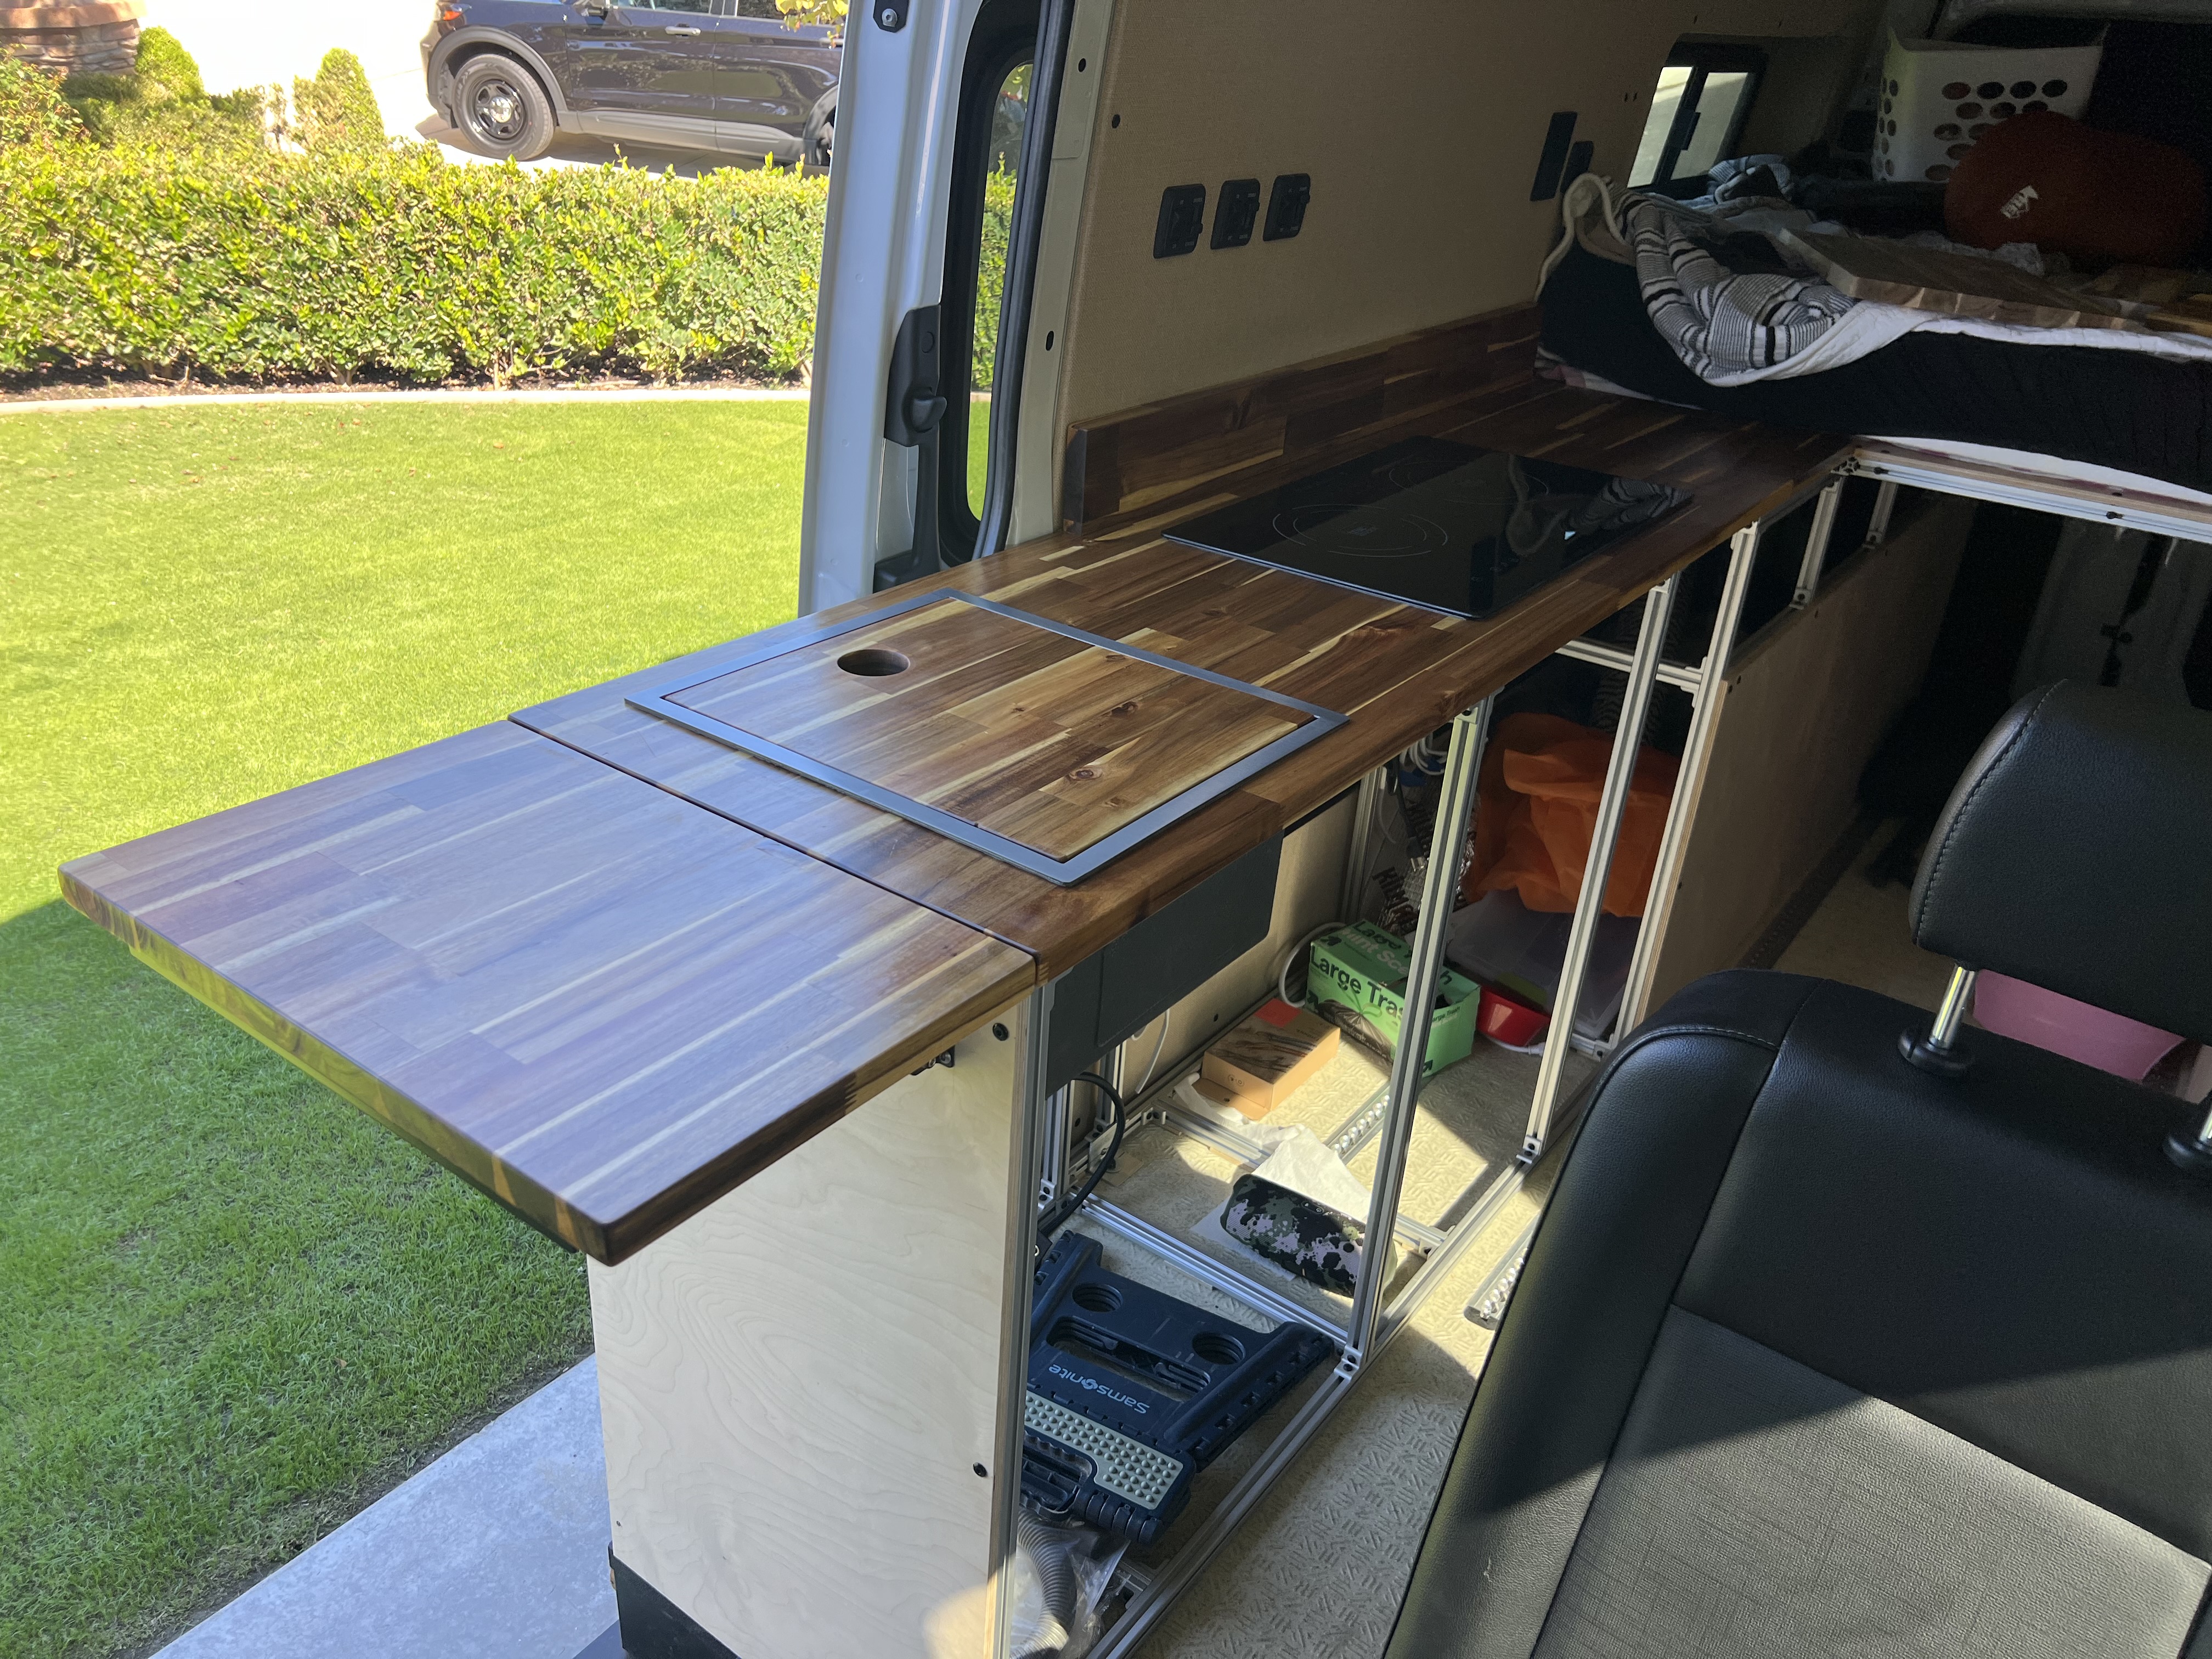
Here’s some pictures of the finished product. I need to miter/route out the bottom of the cutting board in the sink so it’ll sit flush when the faucet is in the lowered position.

2 Likes
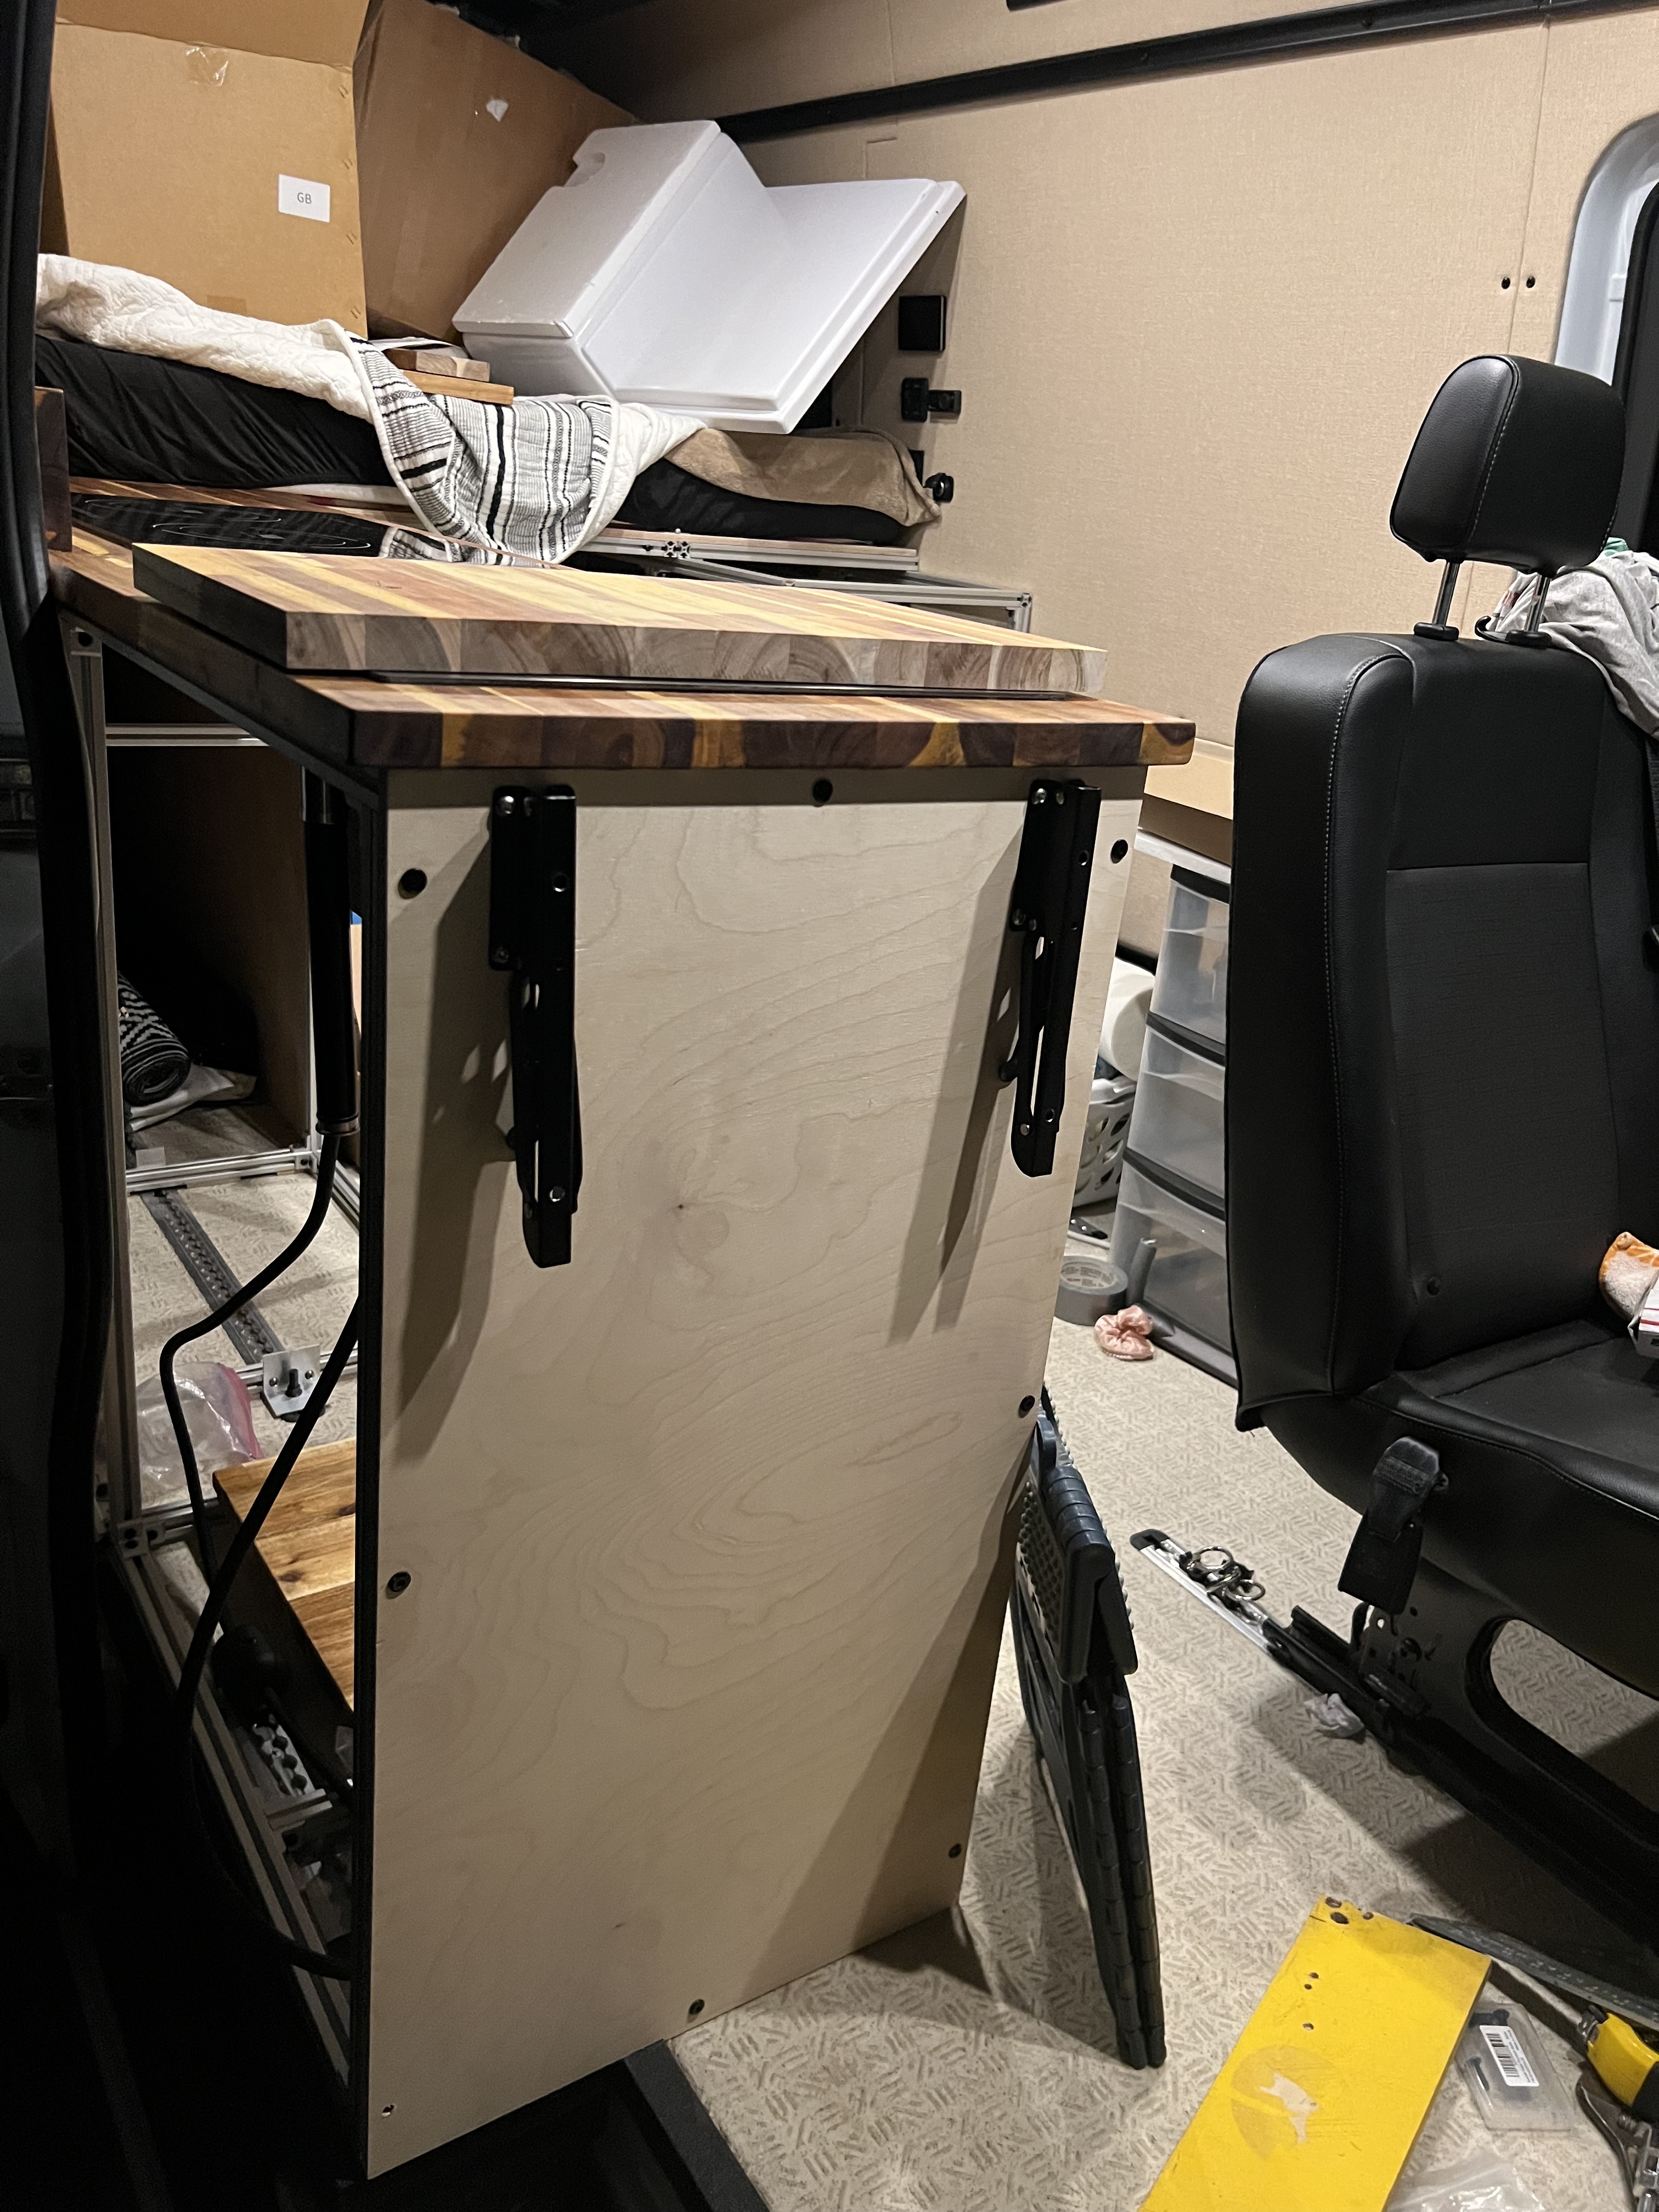
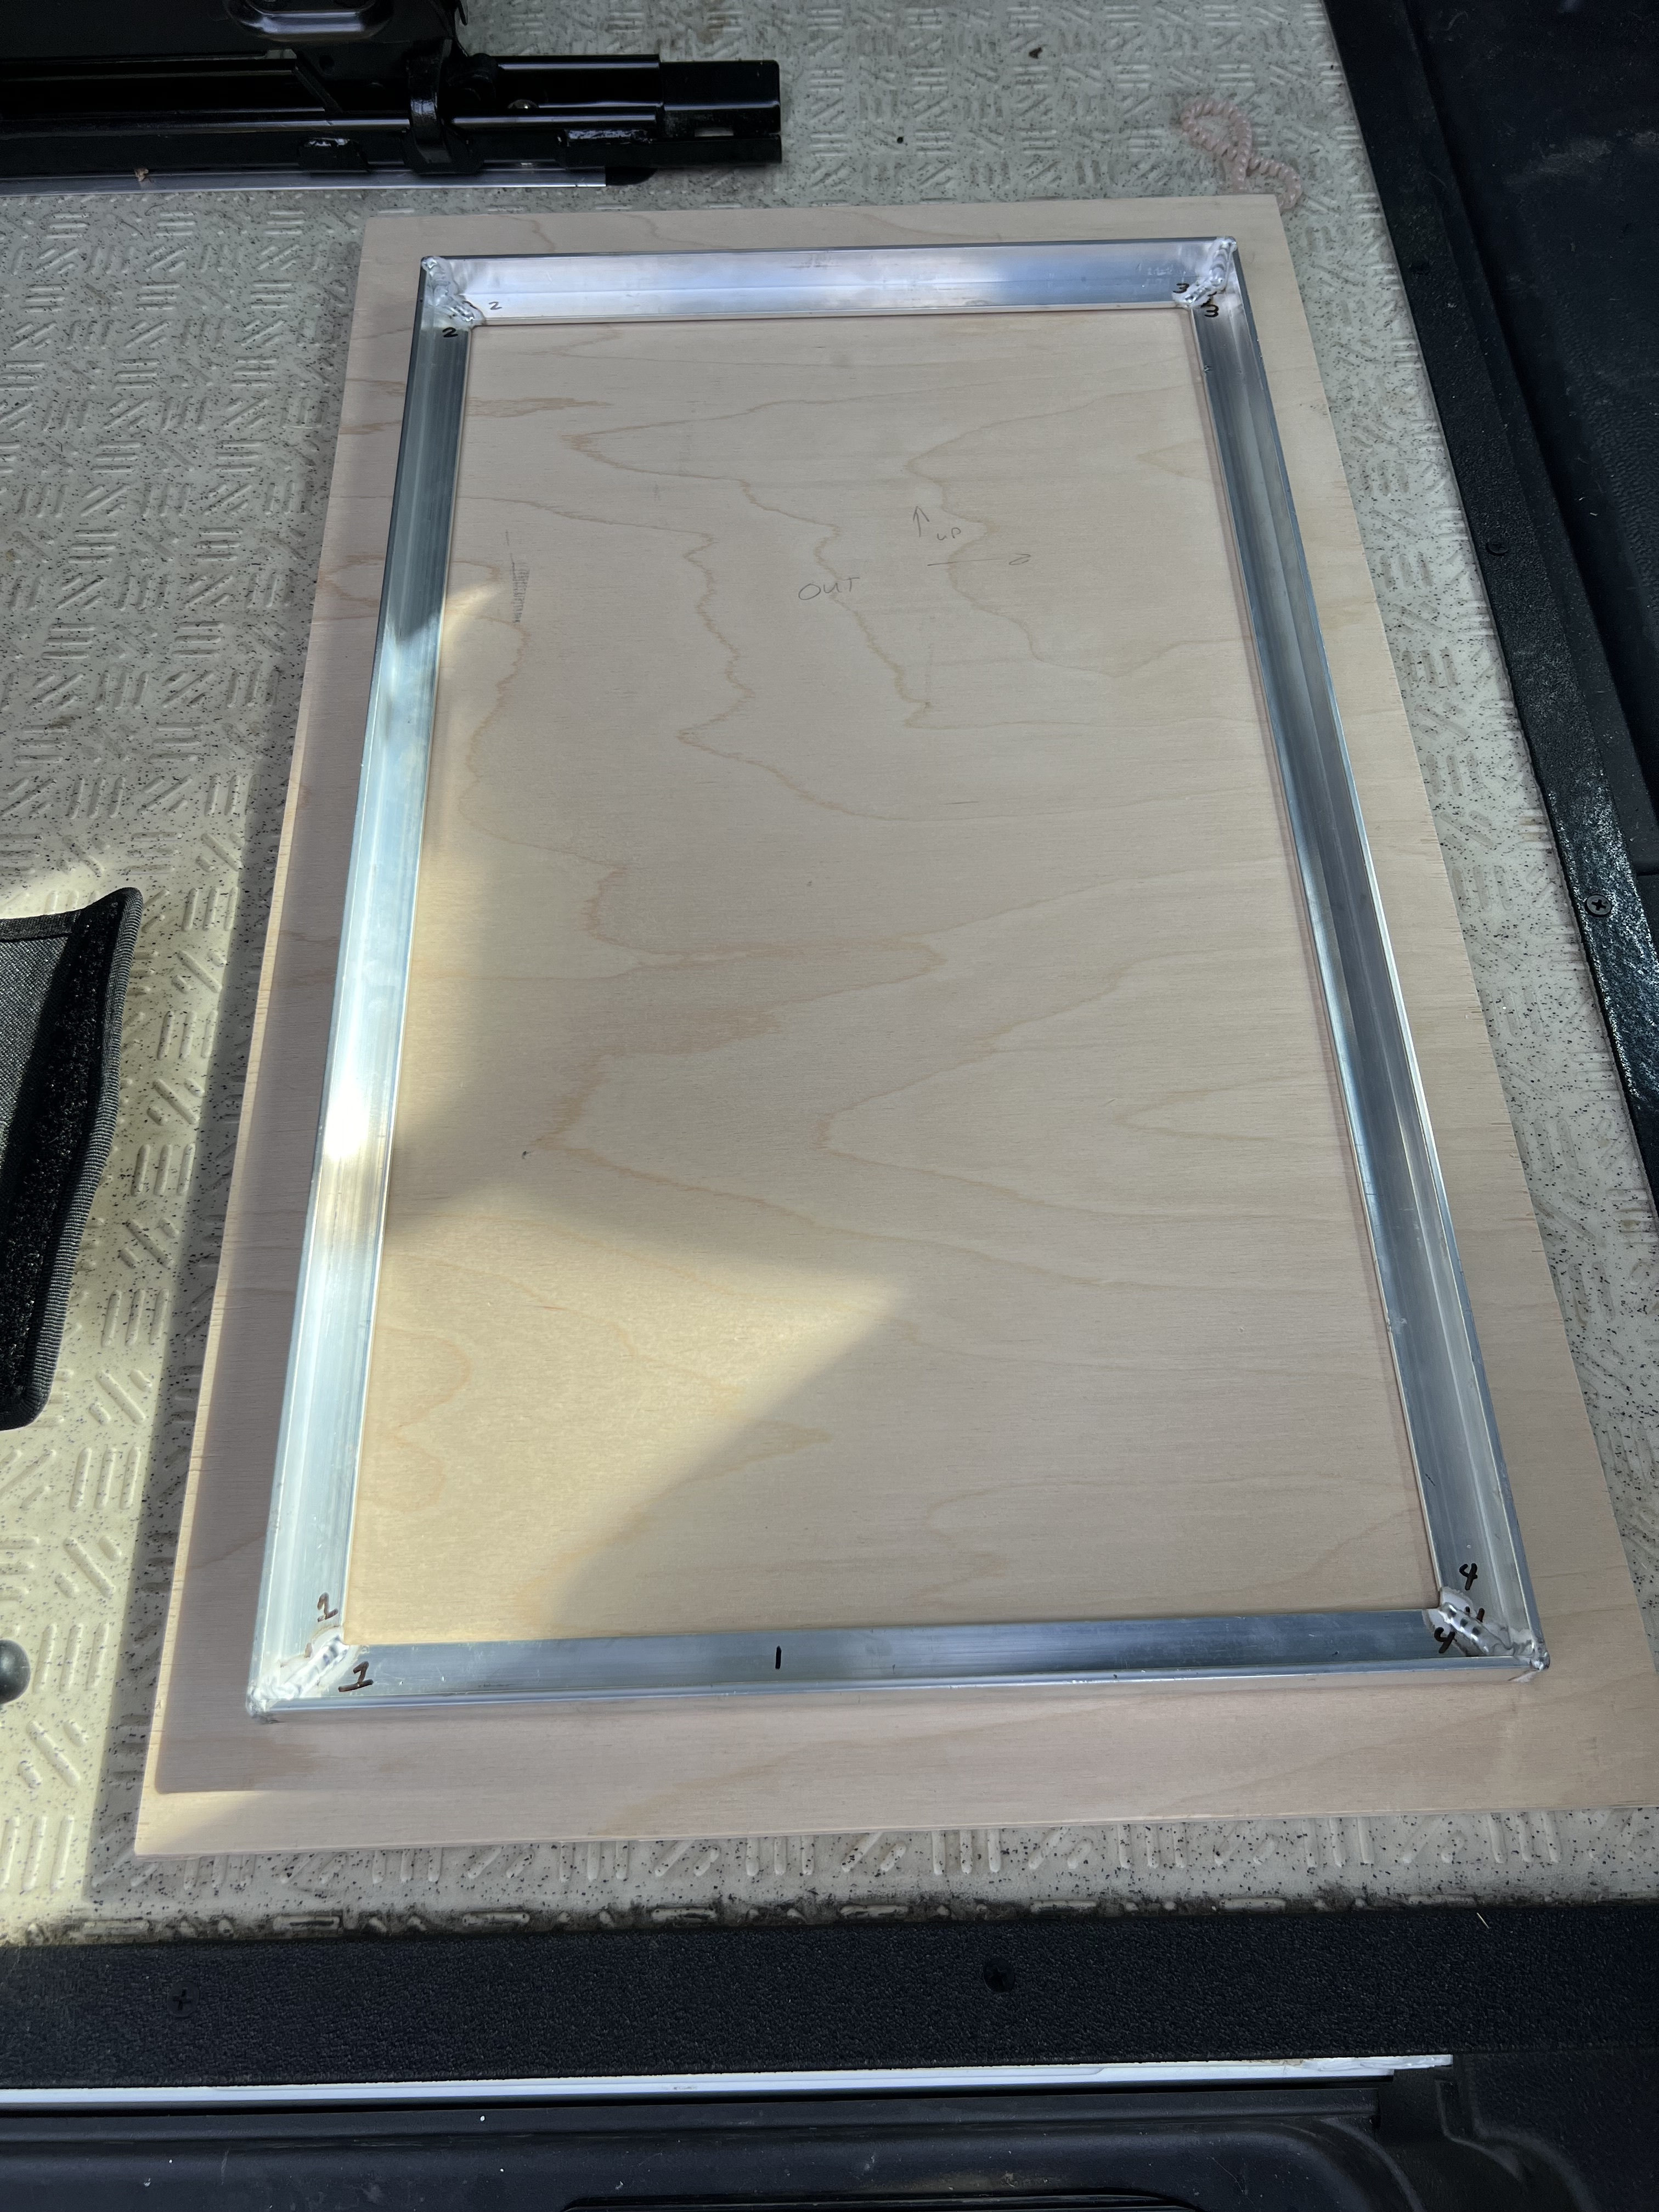
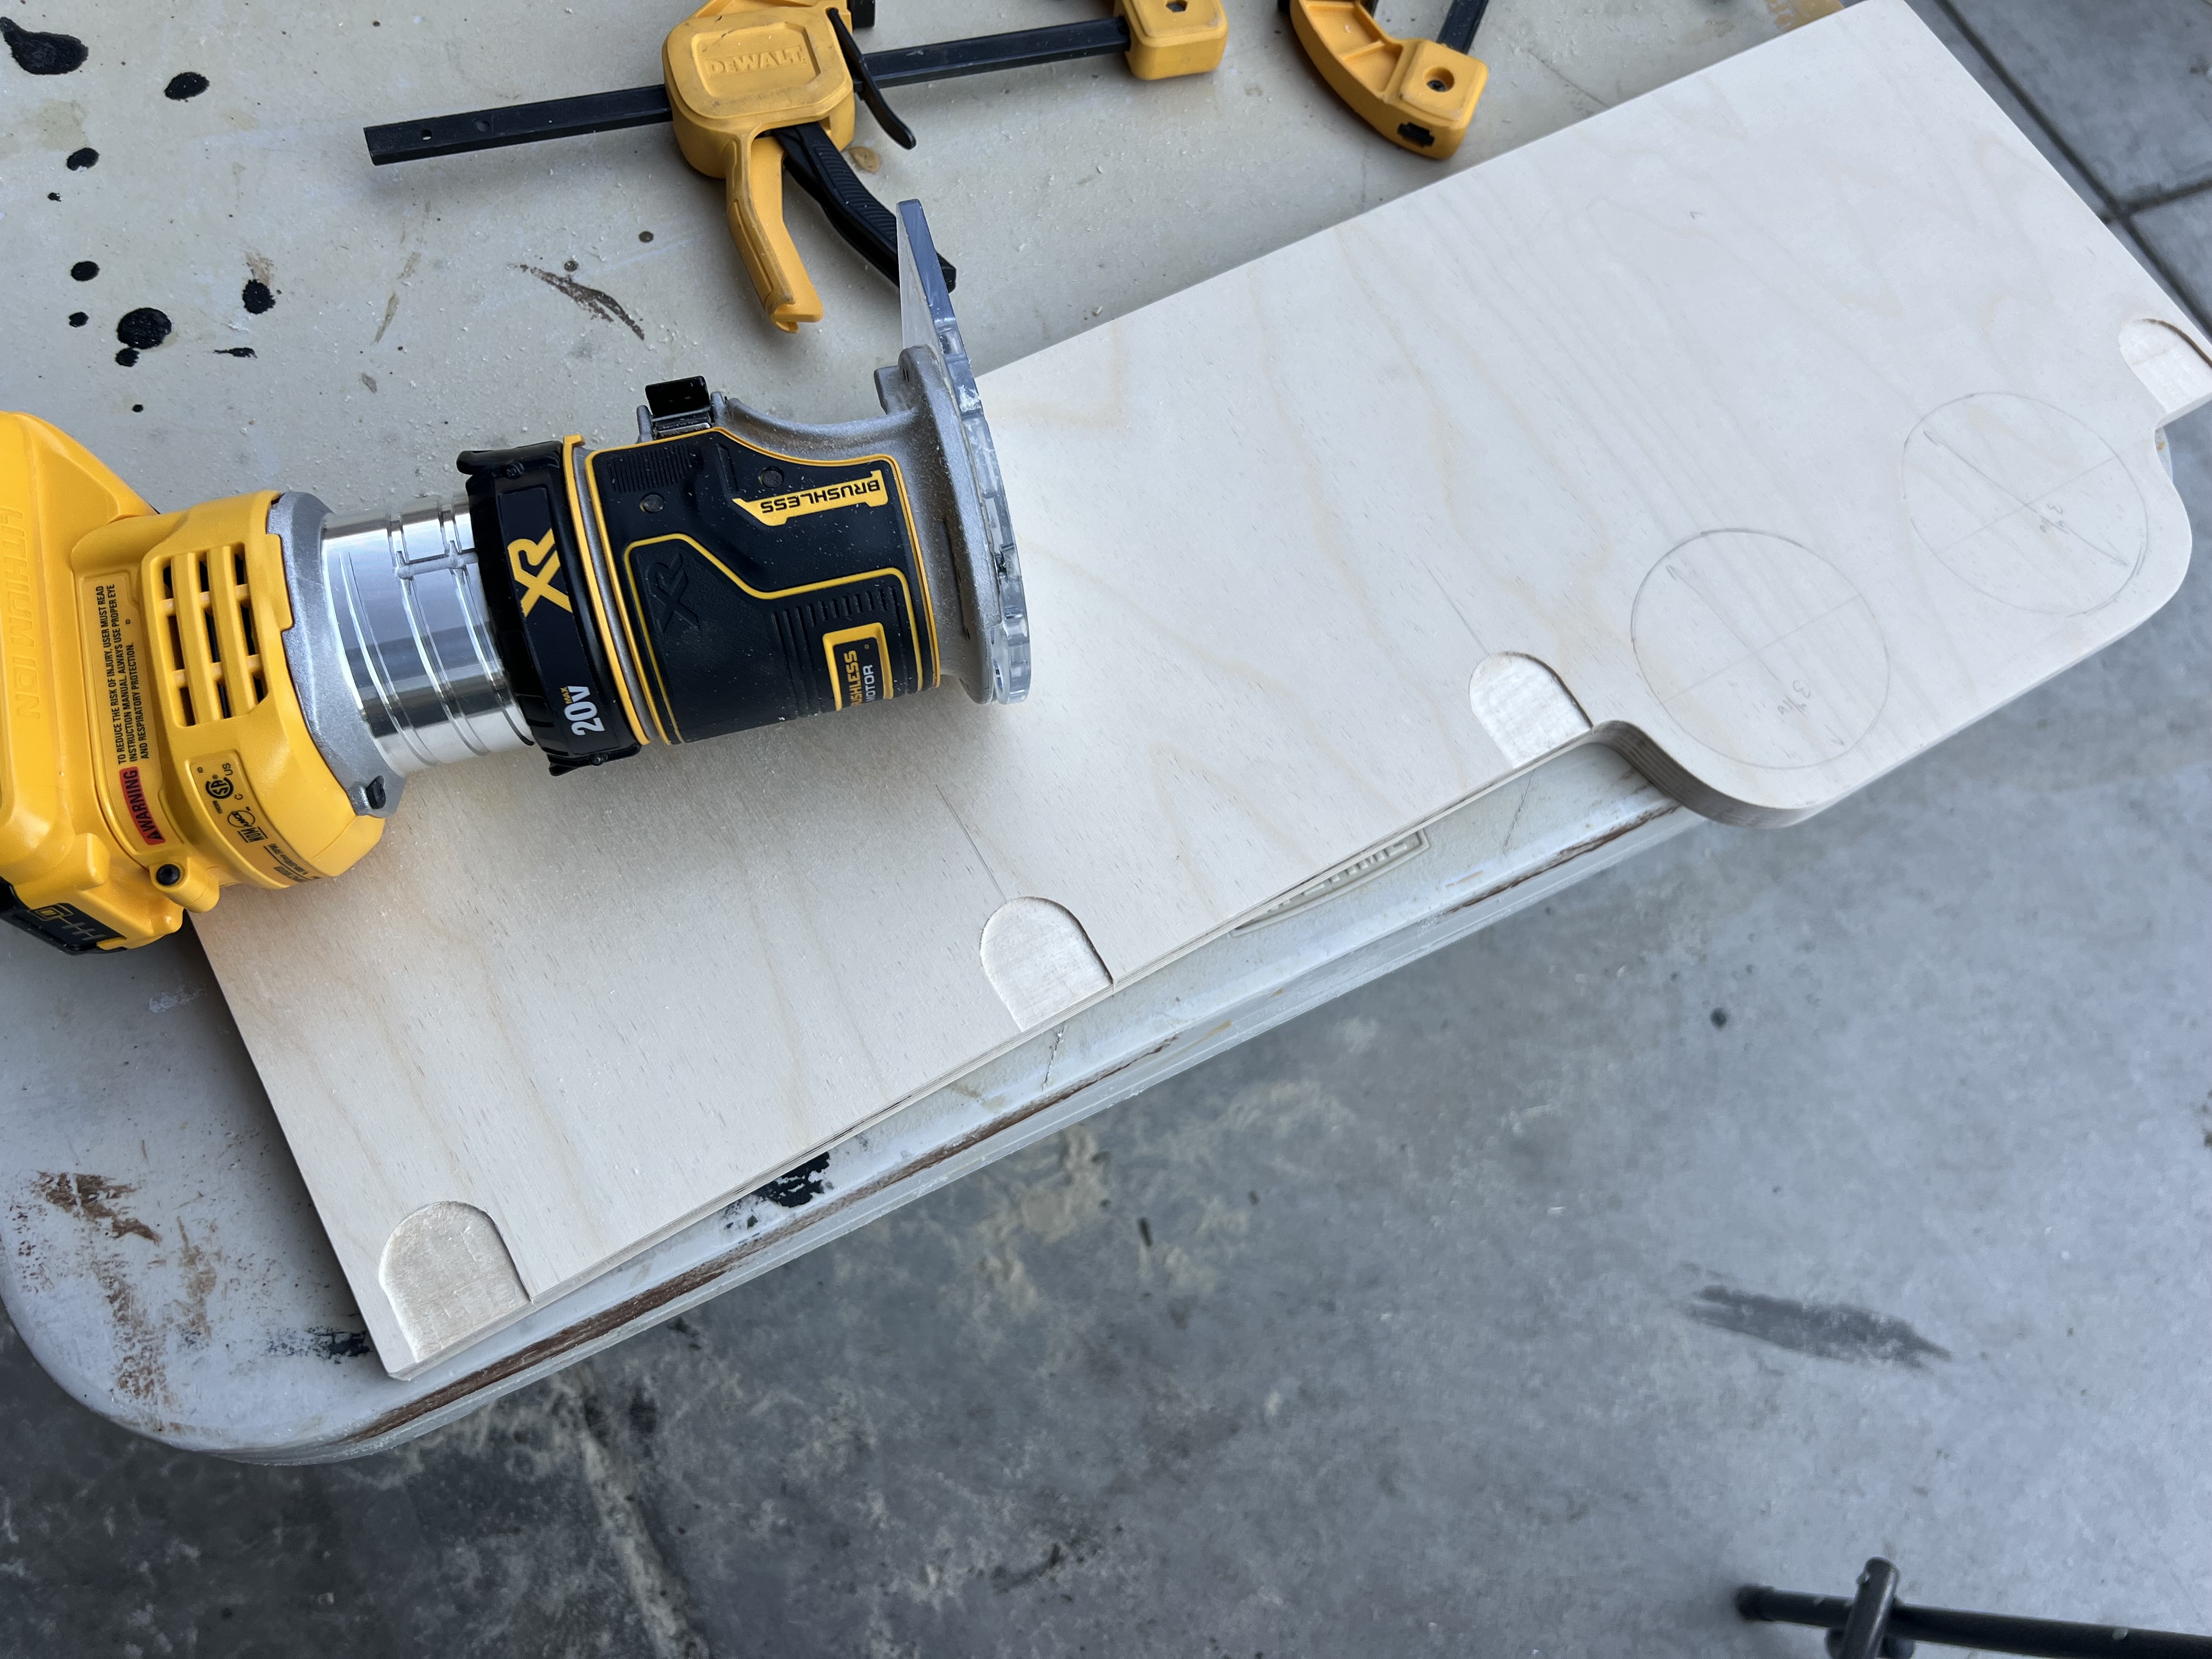
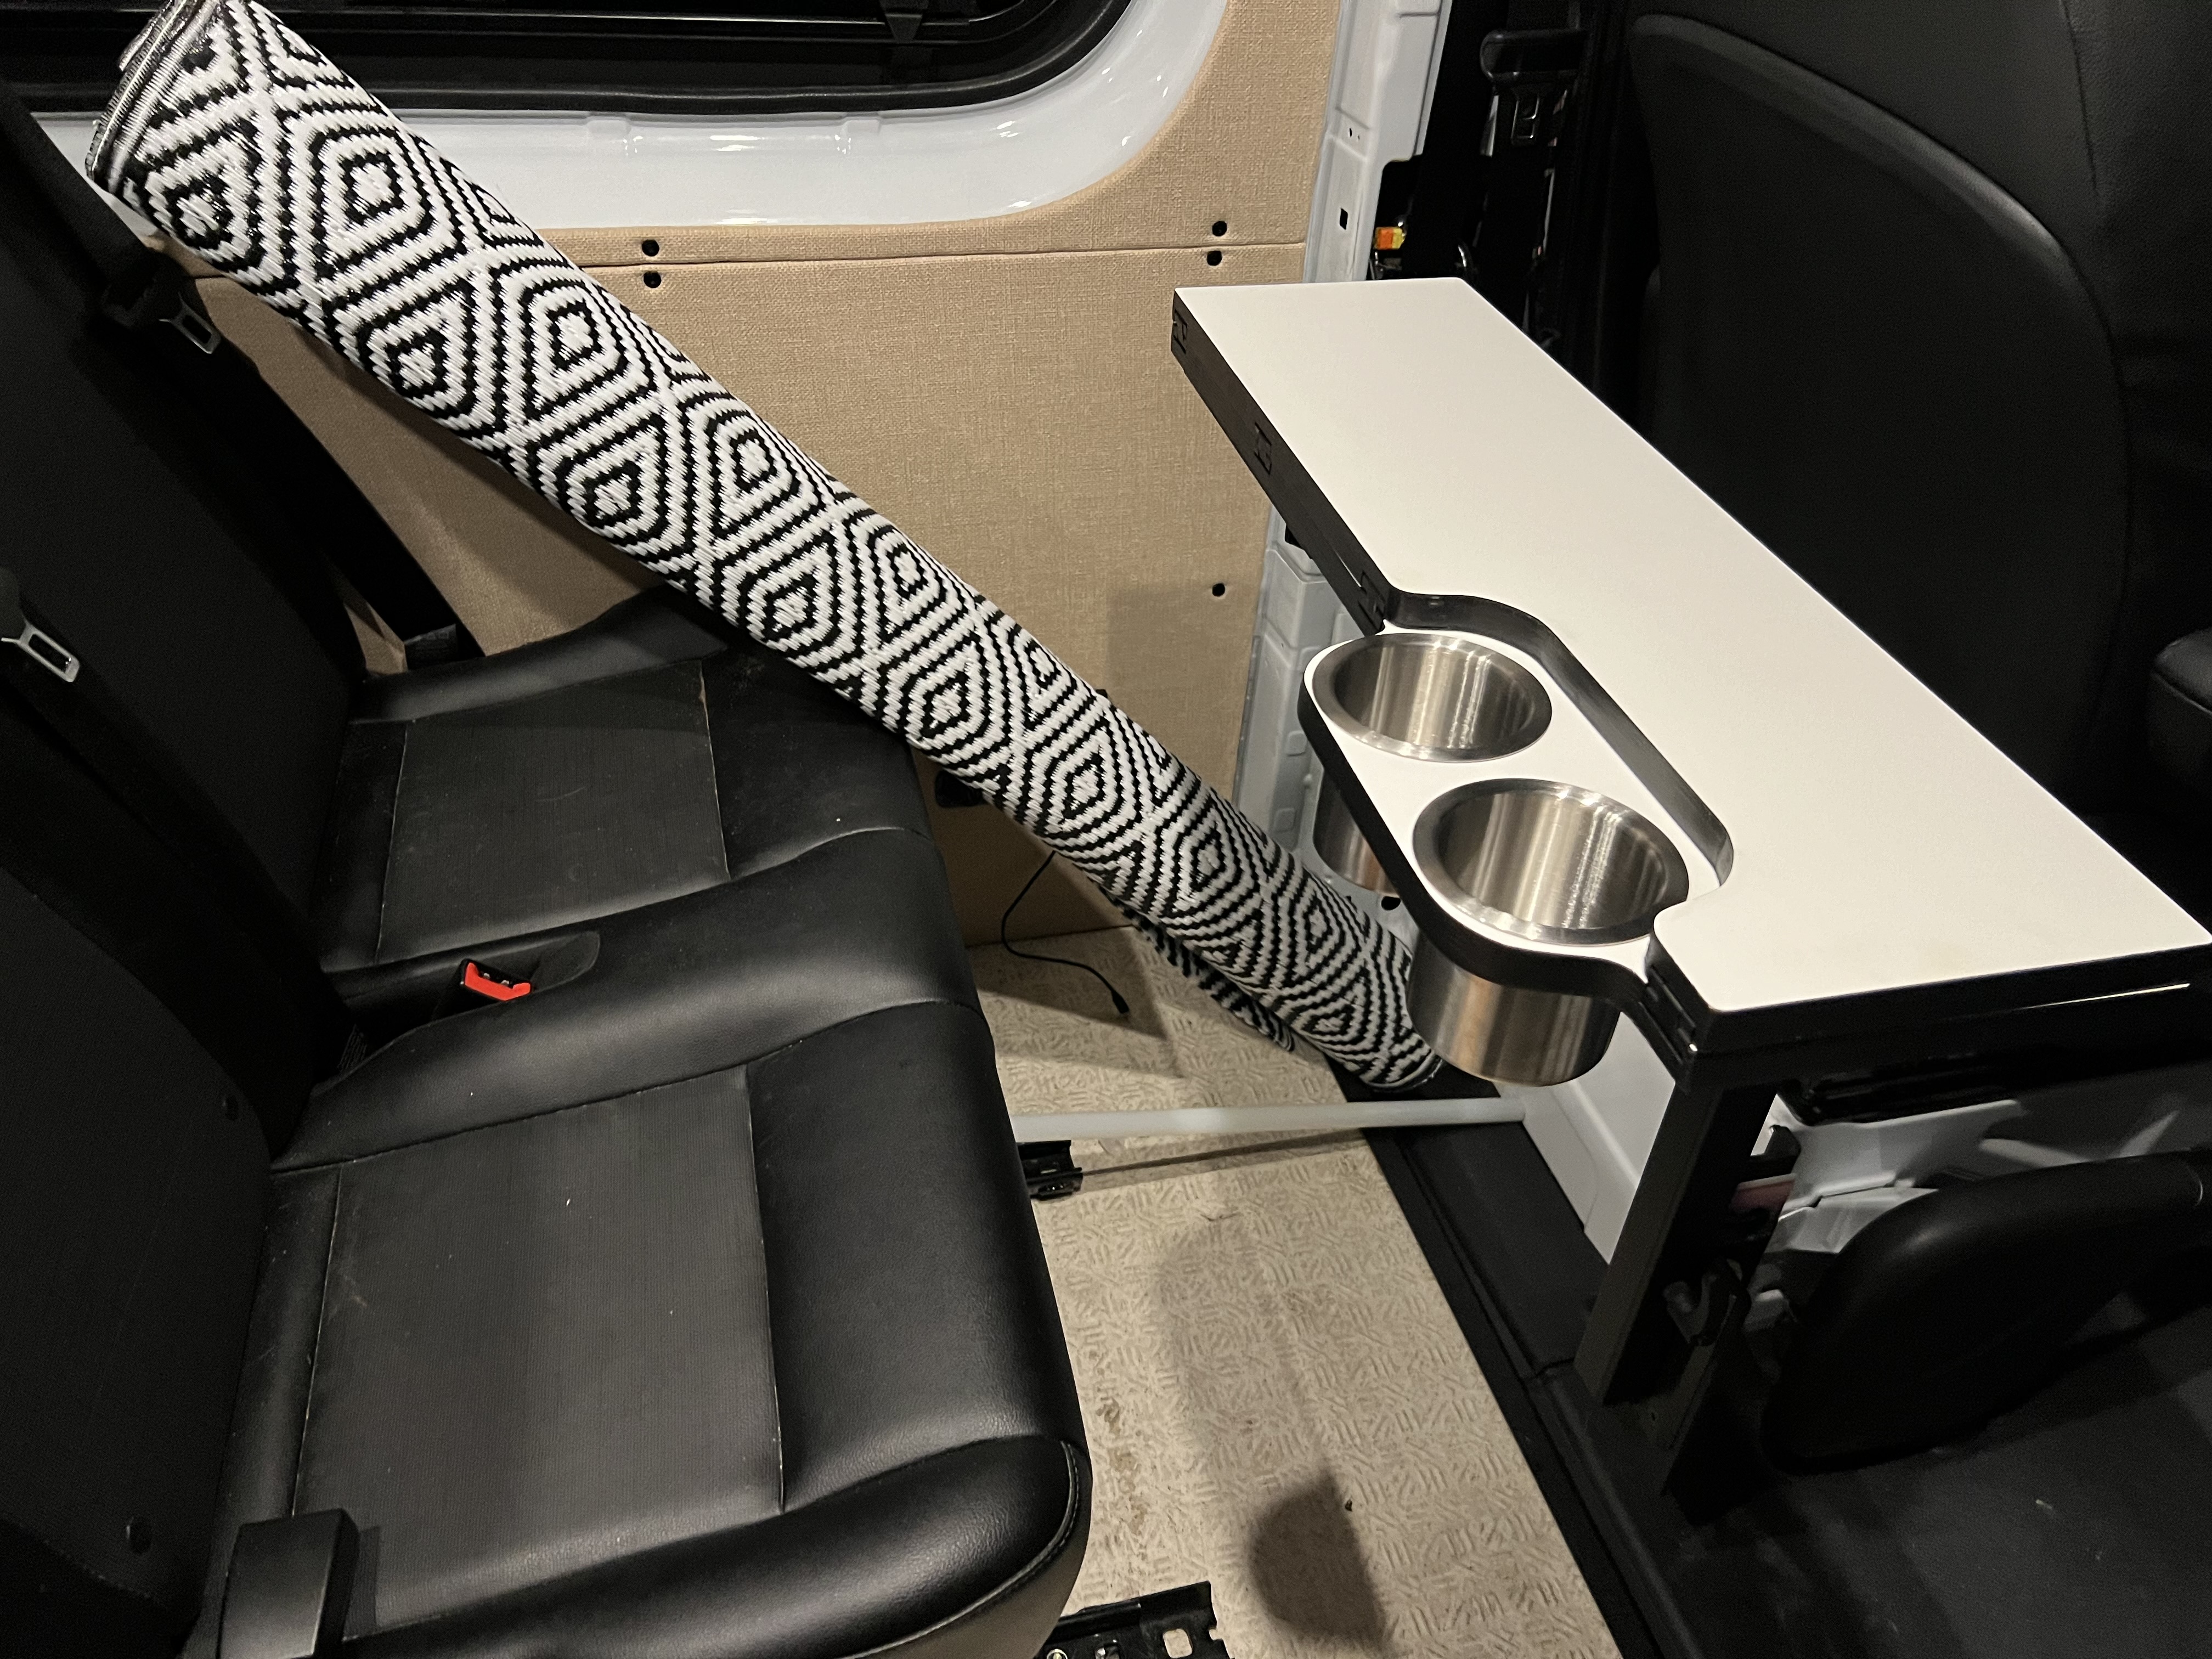
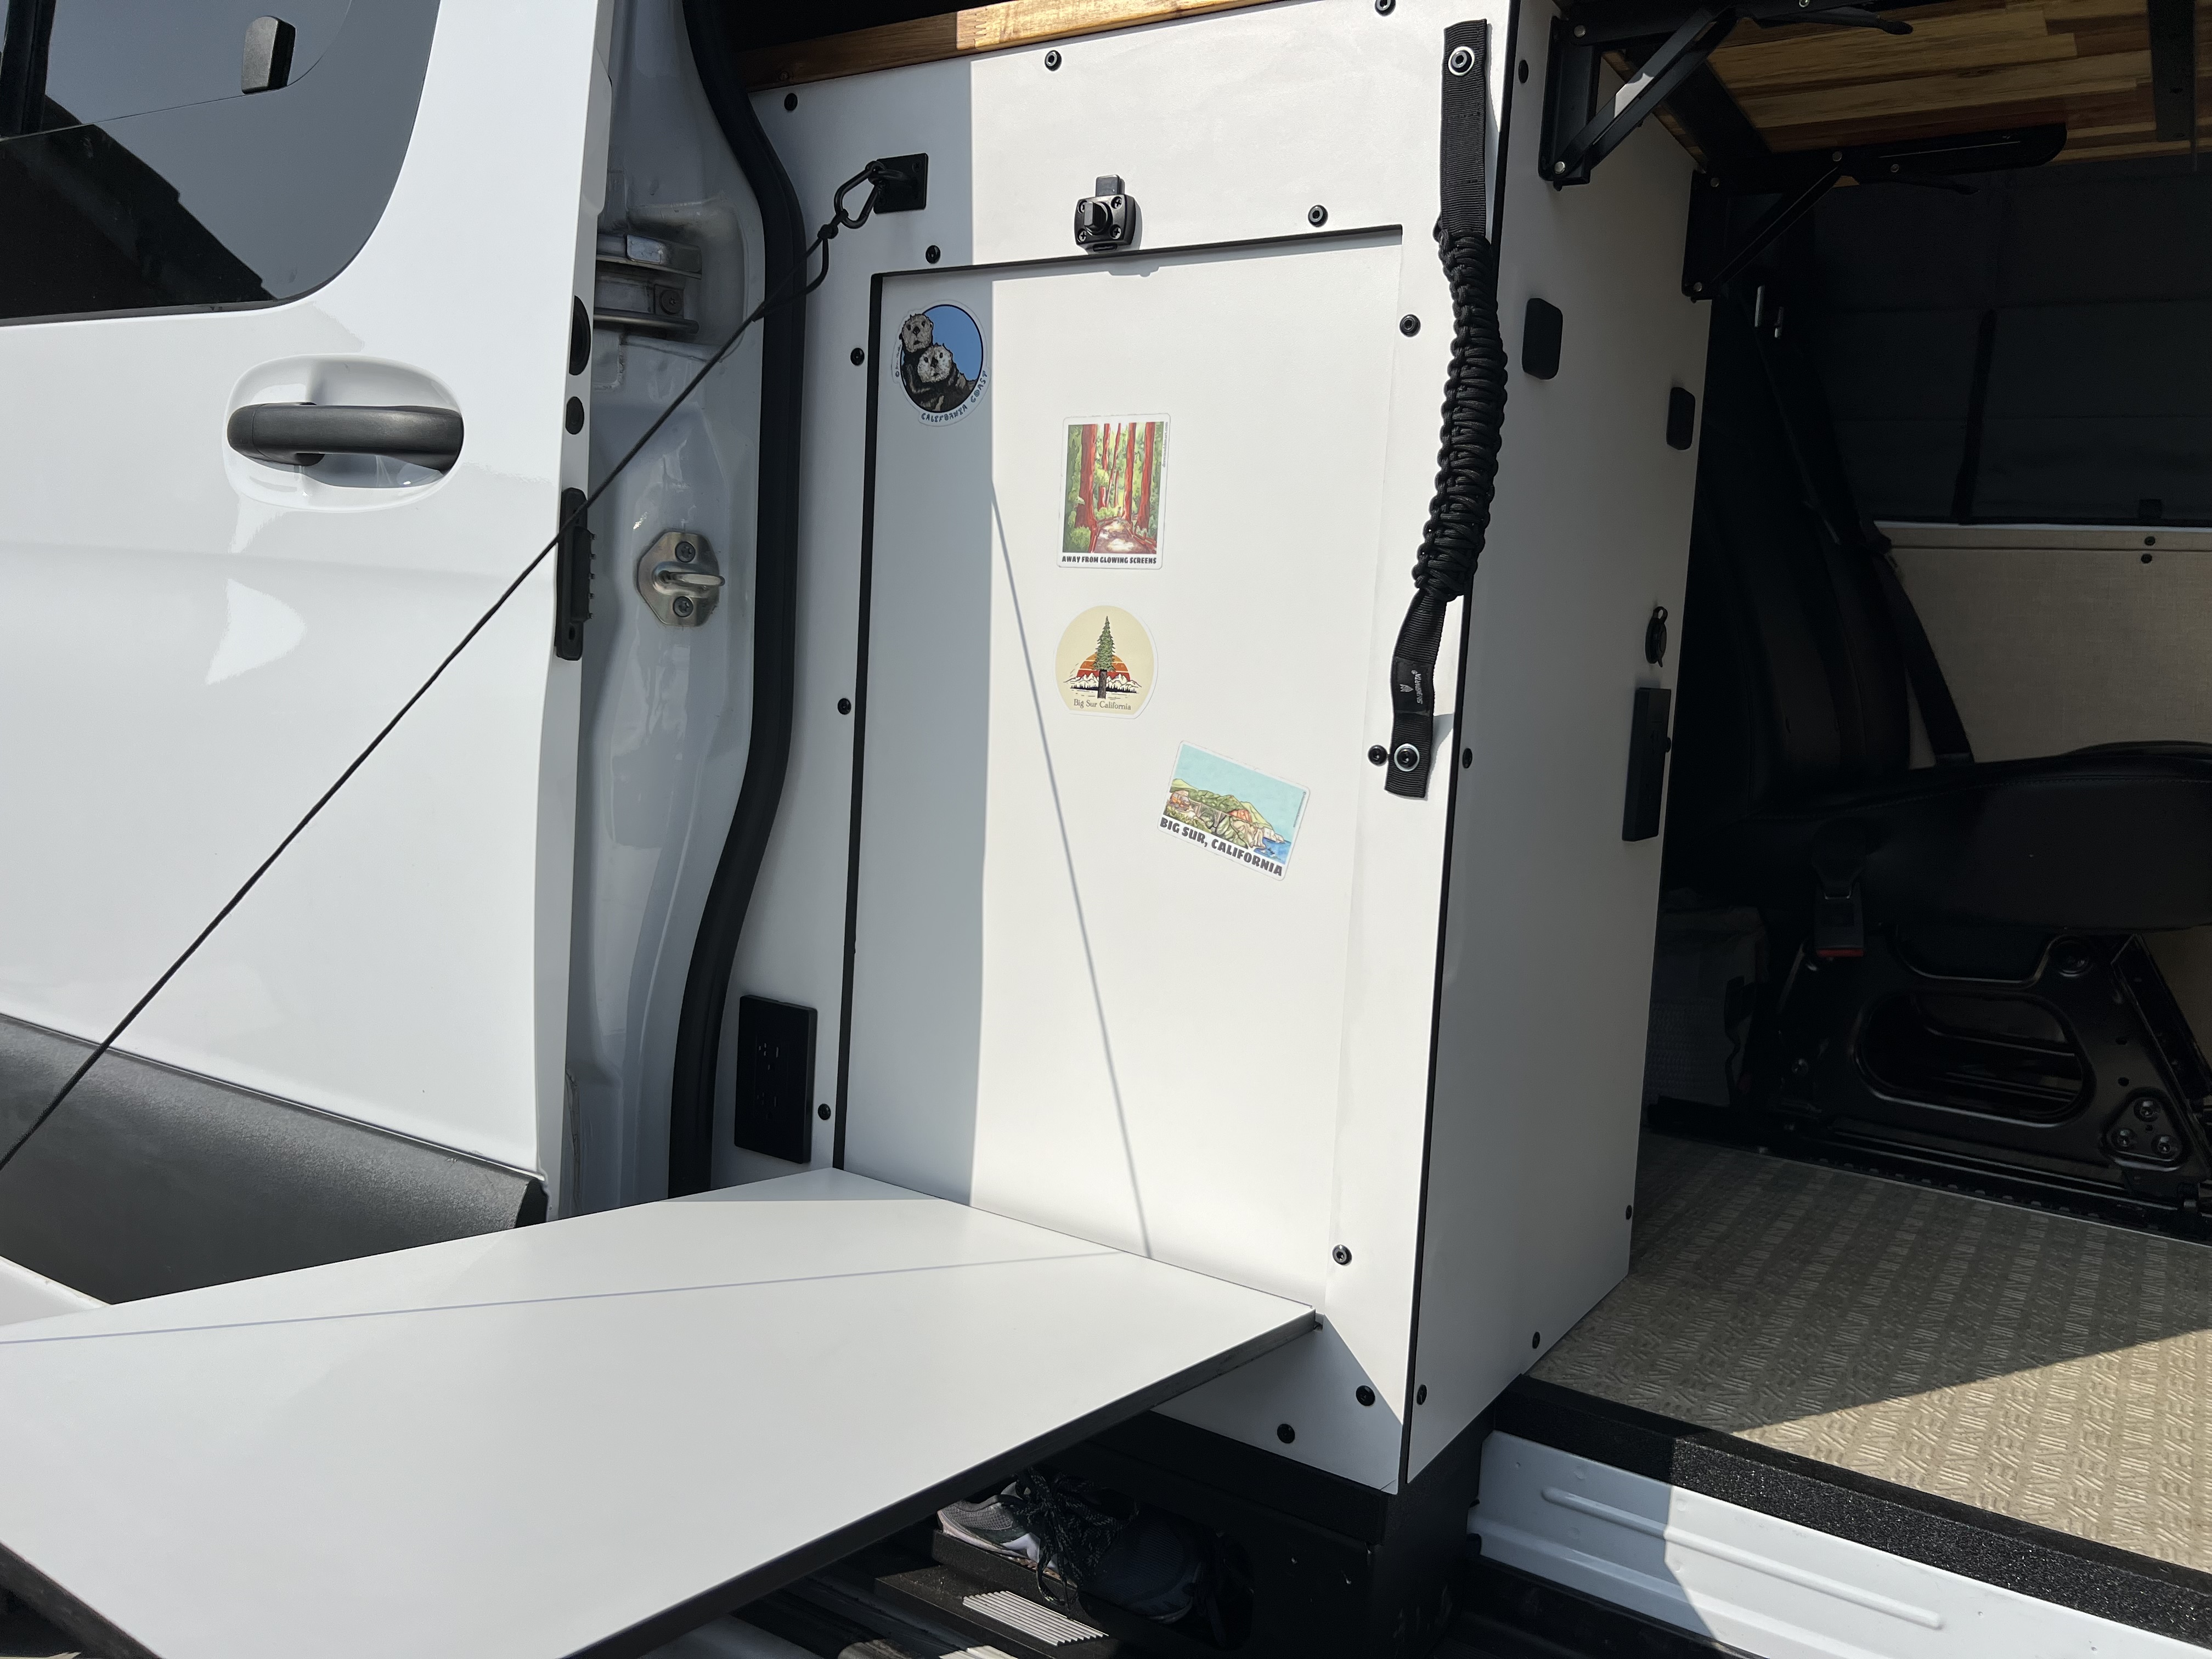
This last week I used my redneck skills to cut/notch the underside of the kitchen sink cover (butcher block) with my handsaw so it would sit flush and not interfere with the faucet. I cut out and test fit some of the panels for the galley. I wanted to make a small table that opens and folds down when the van slider door is open, so I cut out a section of the passenger side panel. I then cut a piece of plywood slightly larger than the opening to act as a backing when the table is shut so it will sit flush with the panel. I have decided to forgo painting the galley panels and will be using a white laminate. It is more time consuming than painting, but more durable and looks much better.

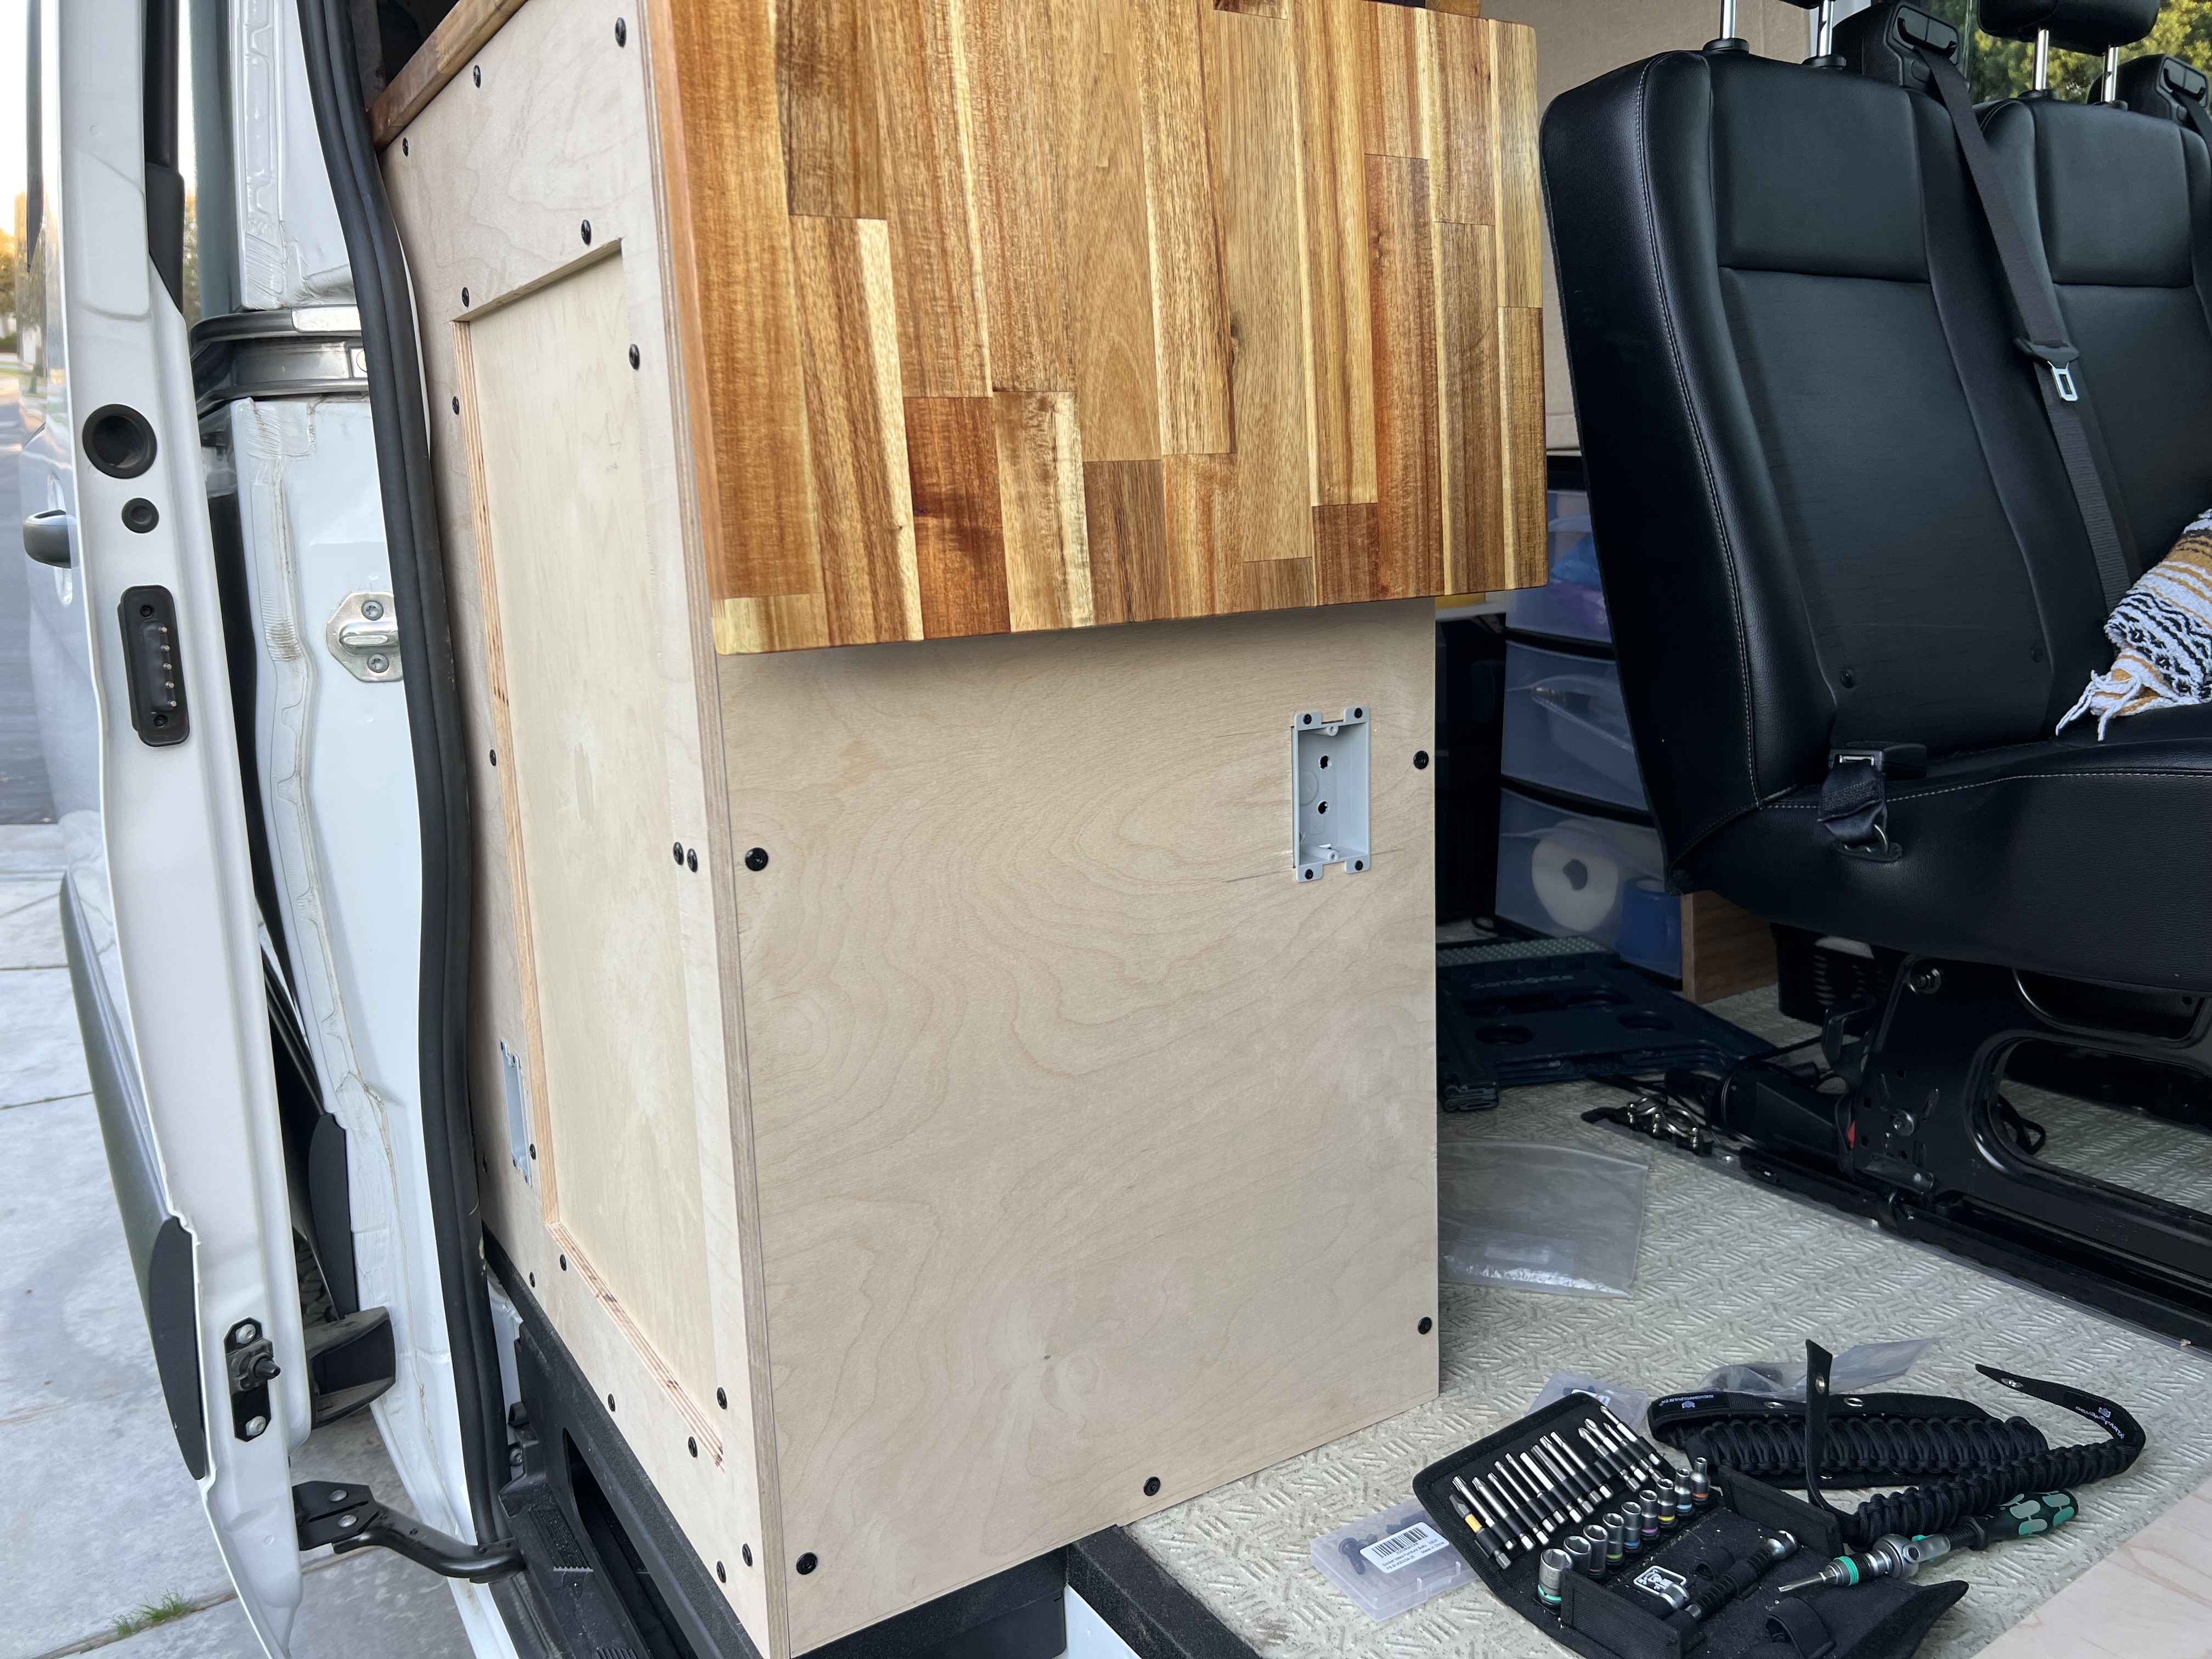

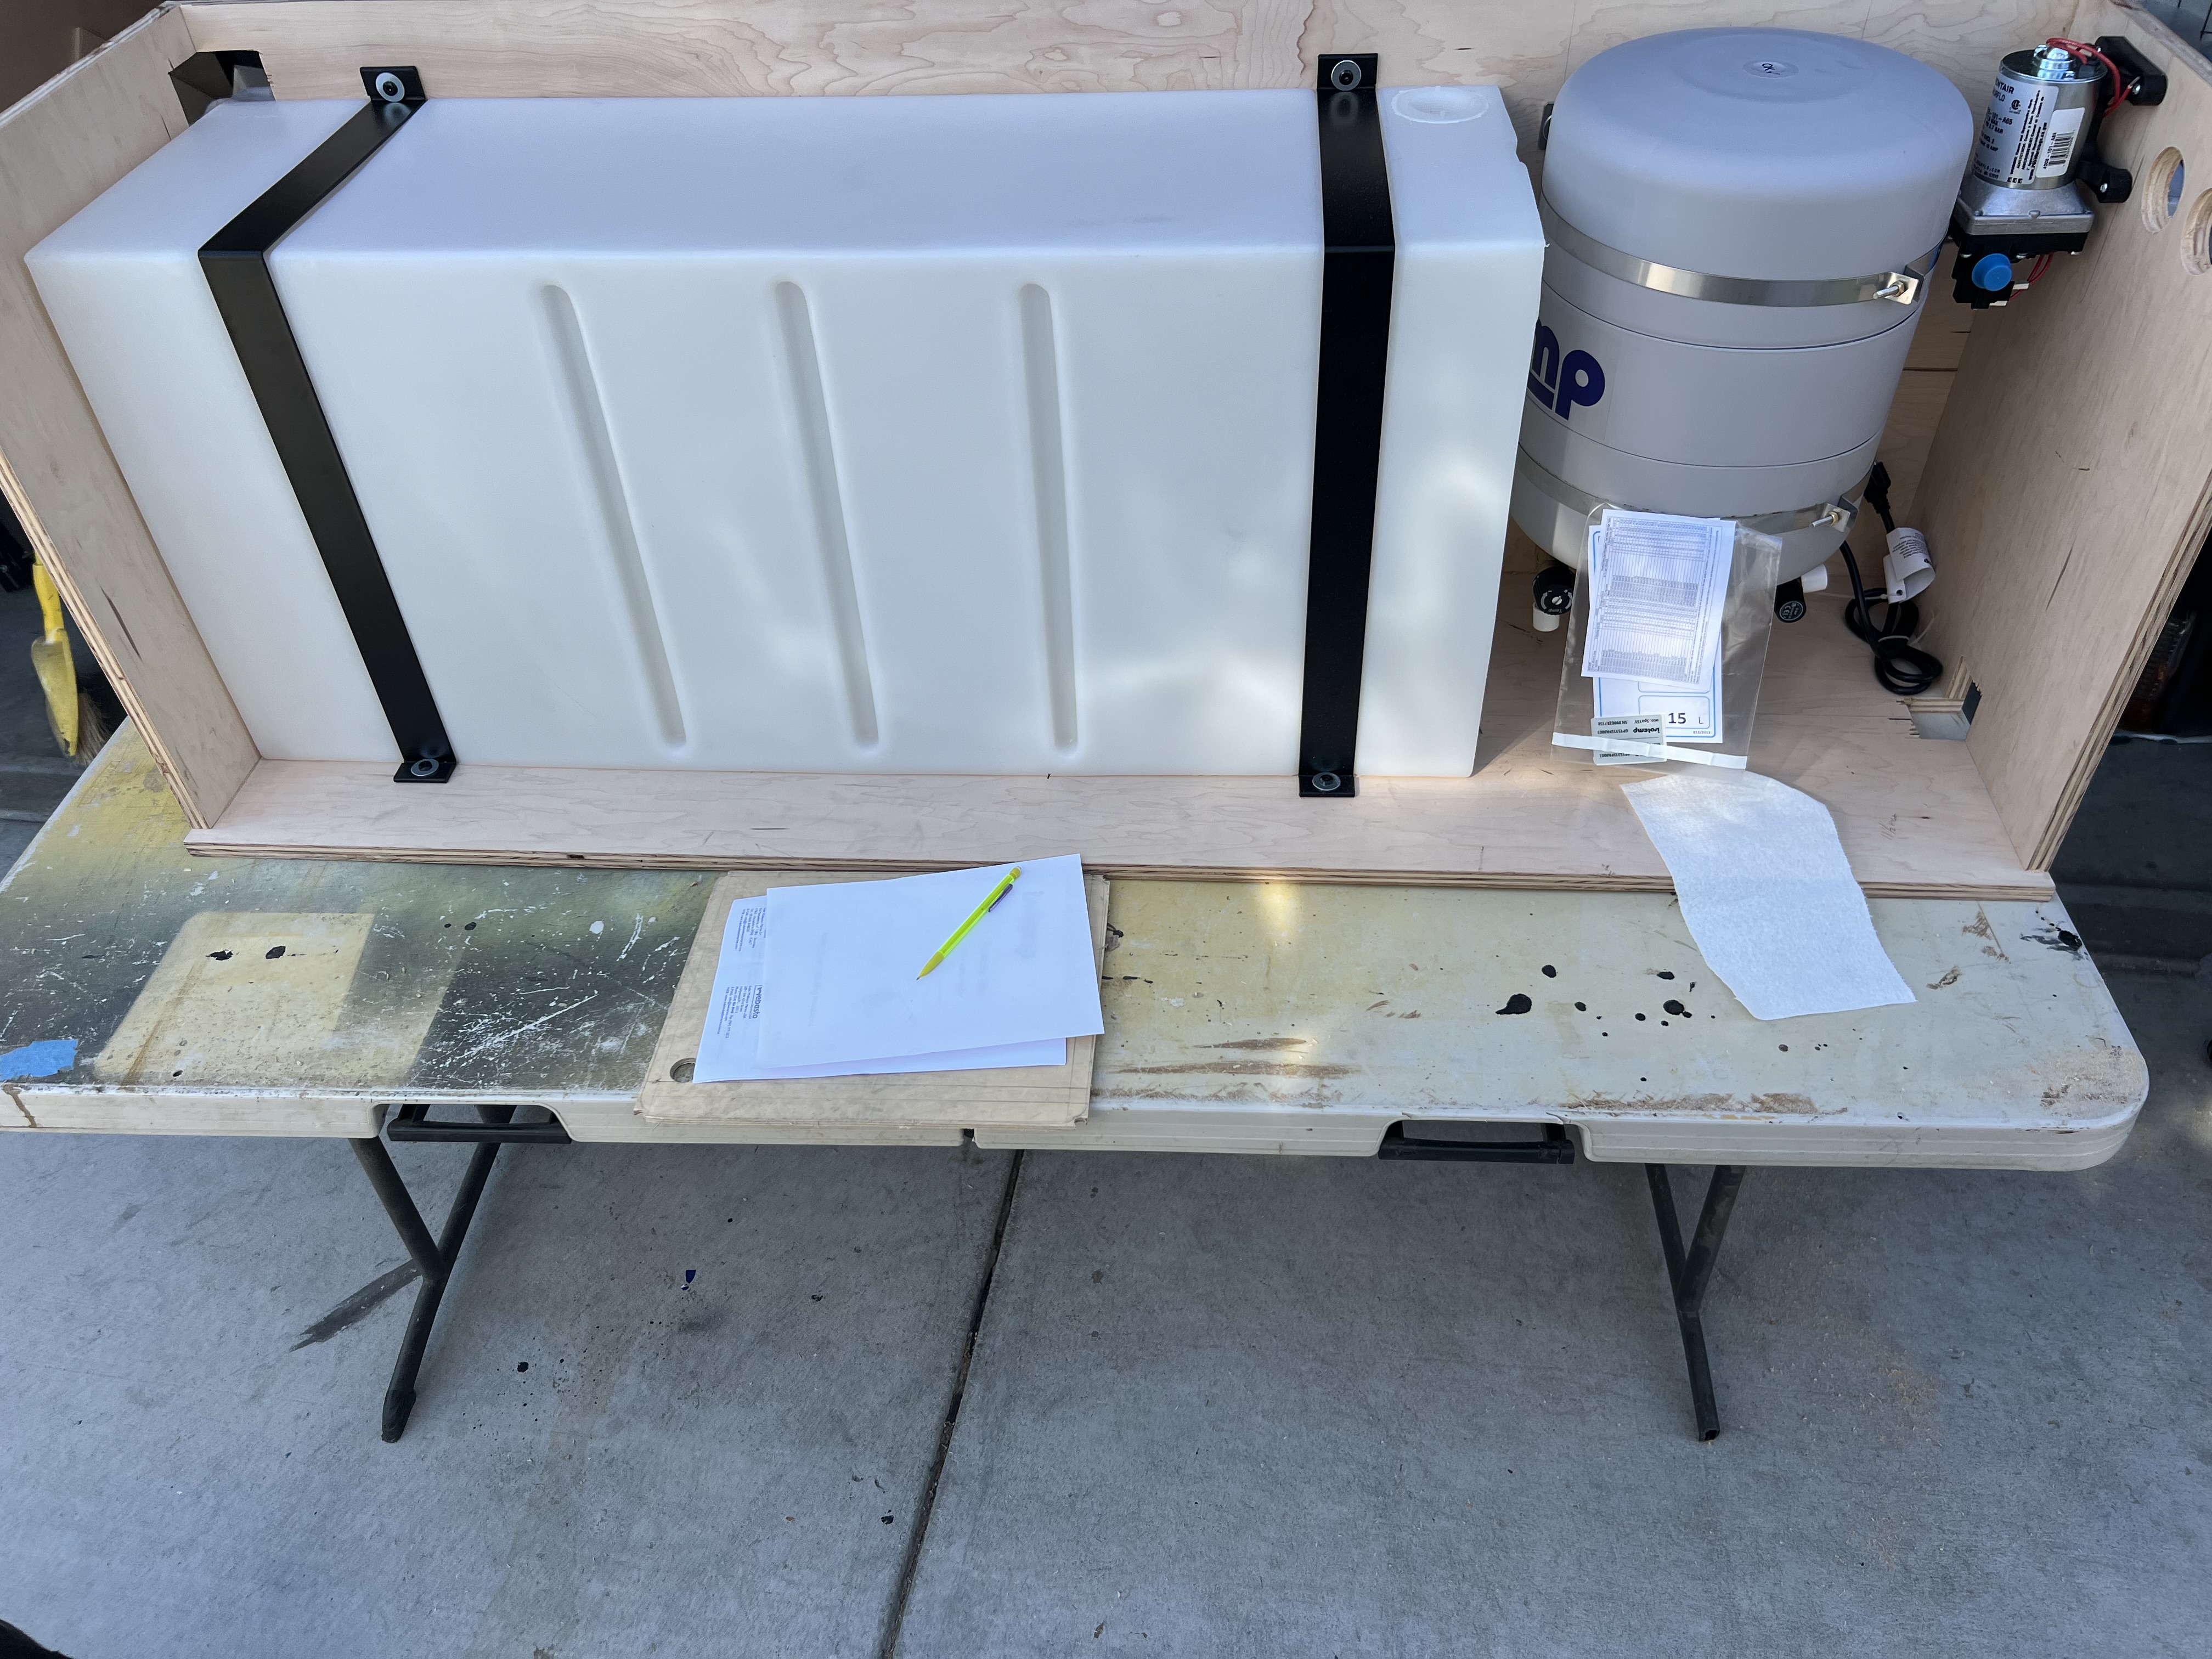
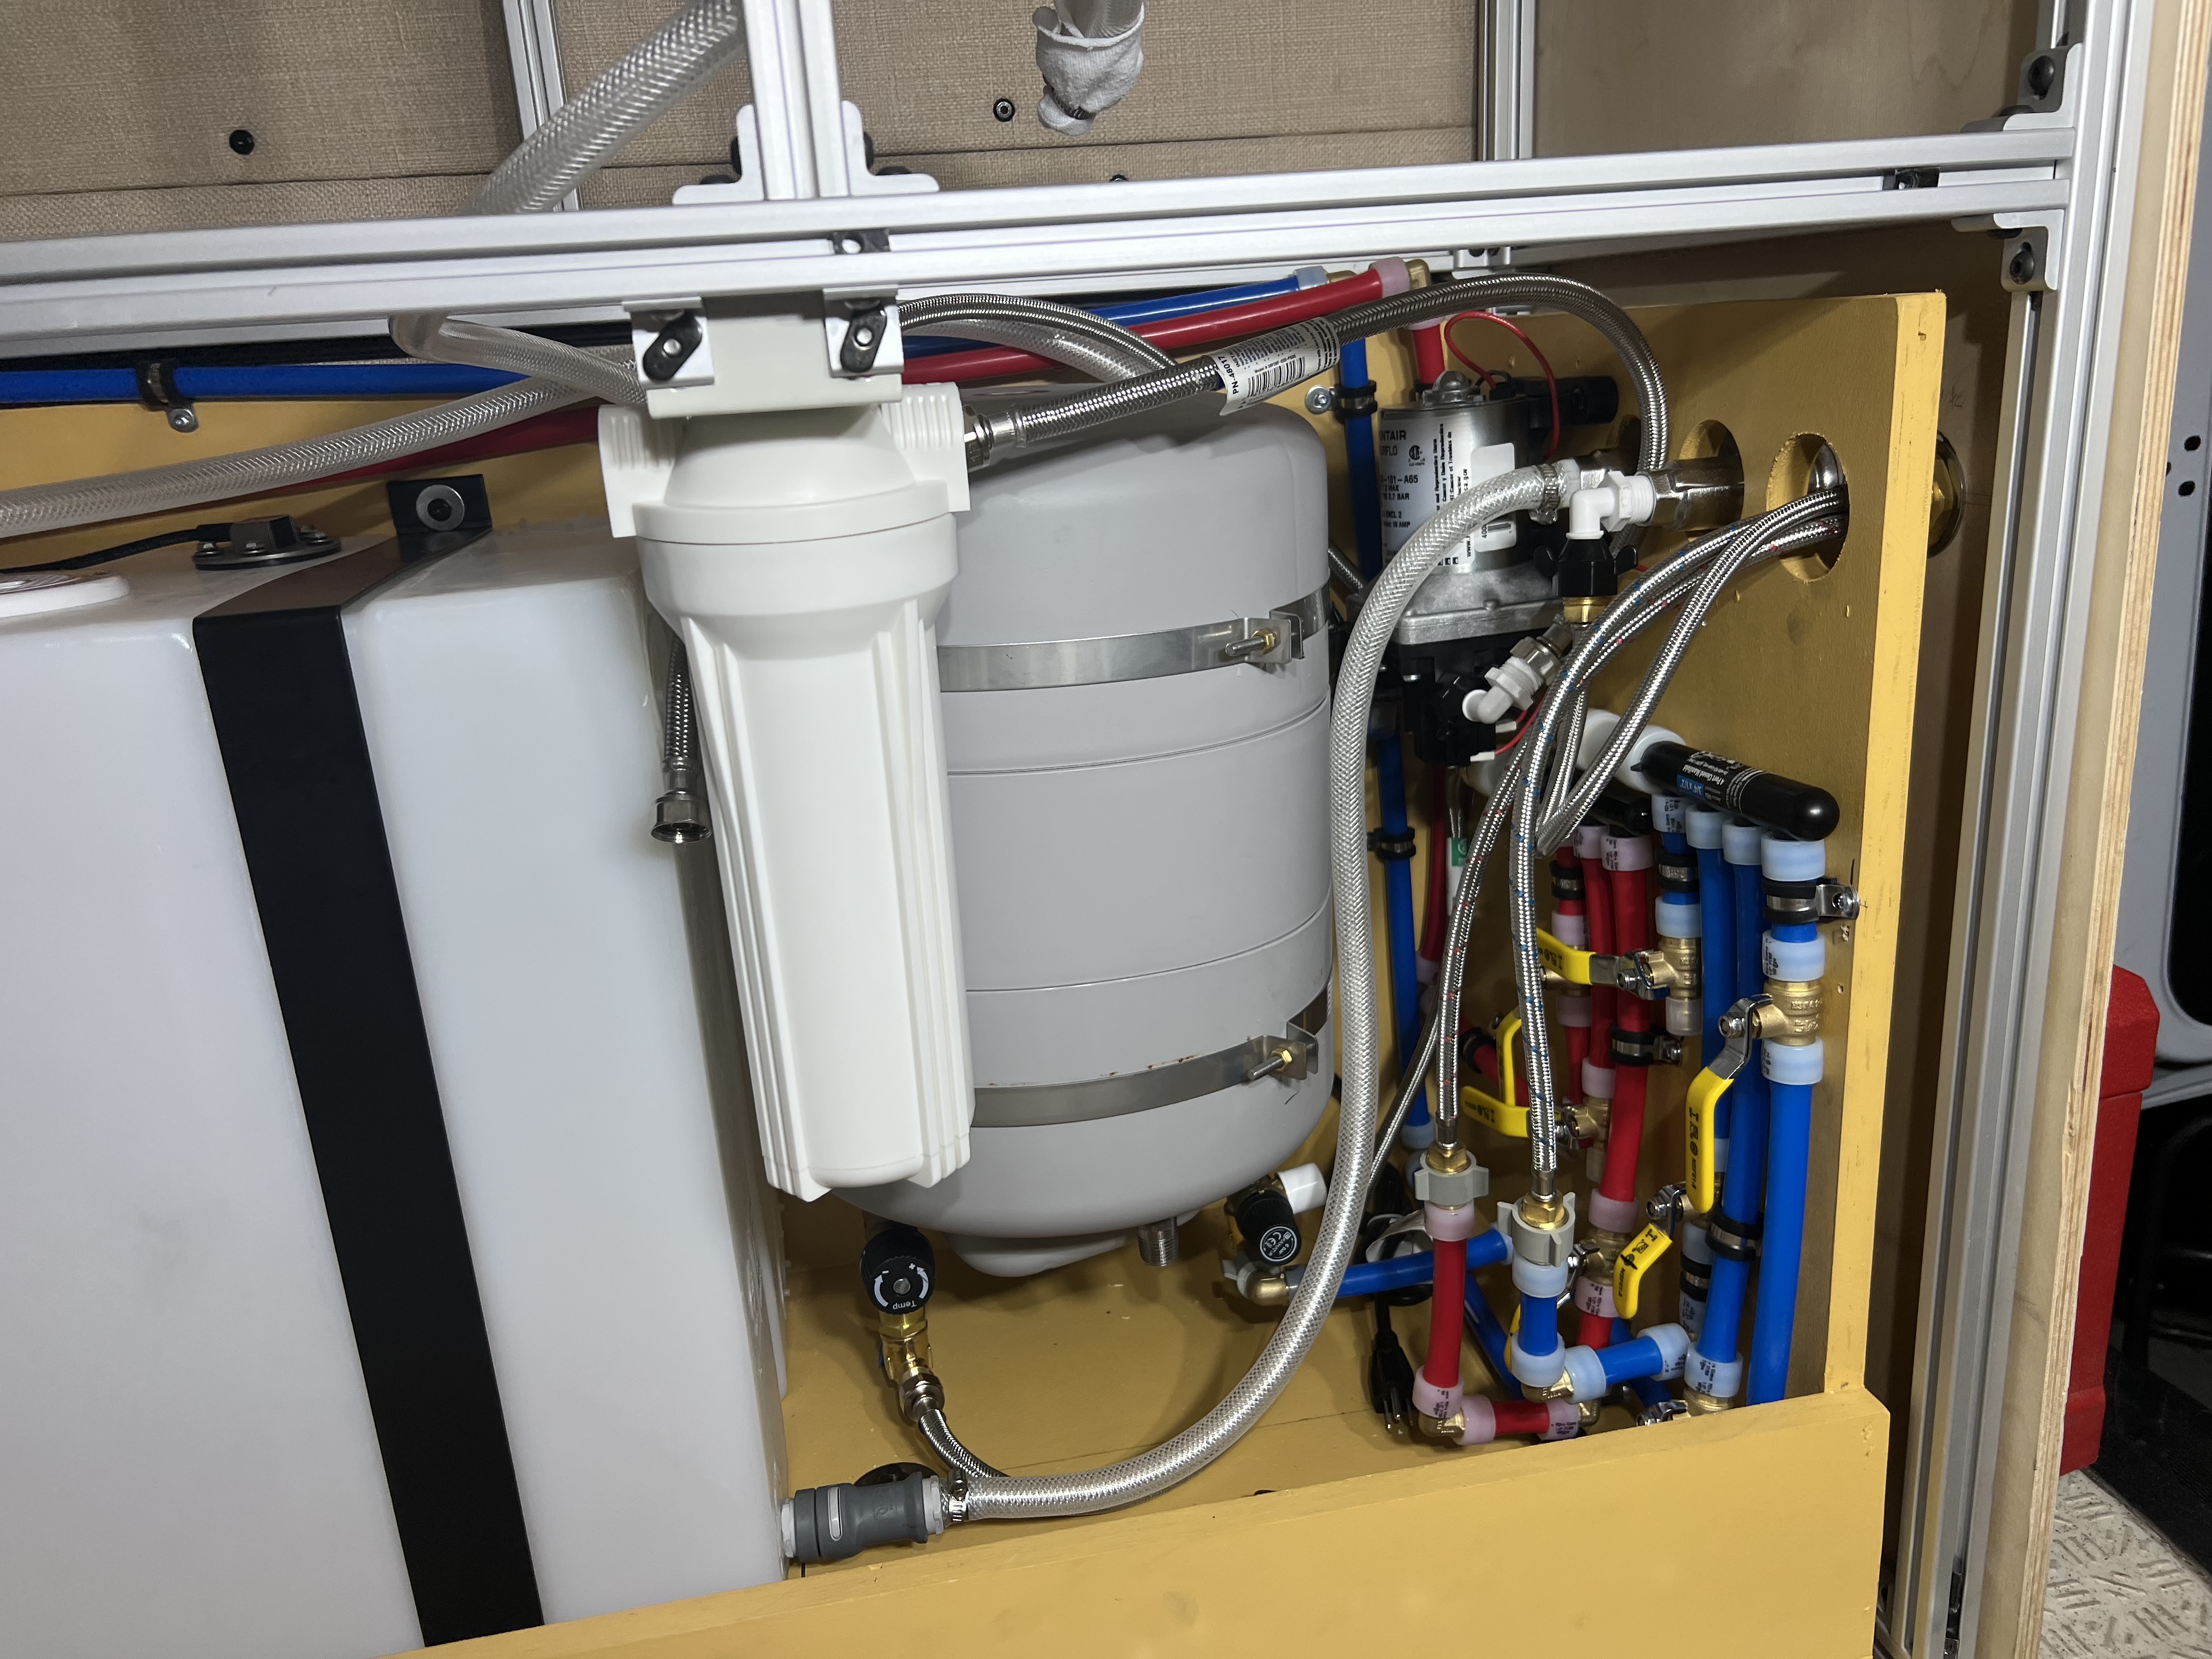
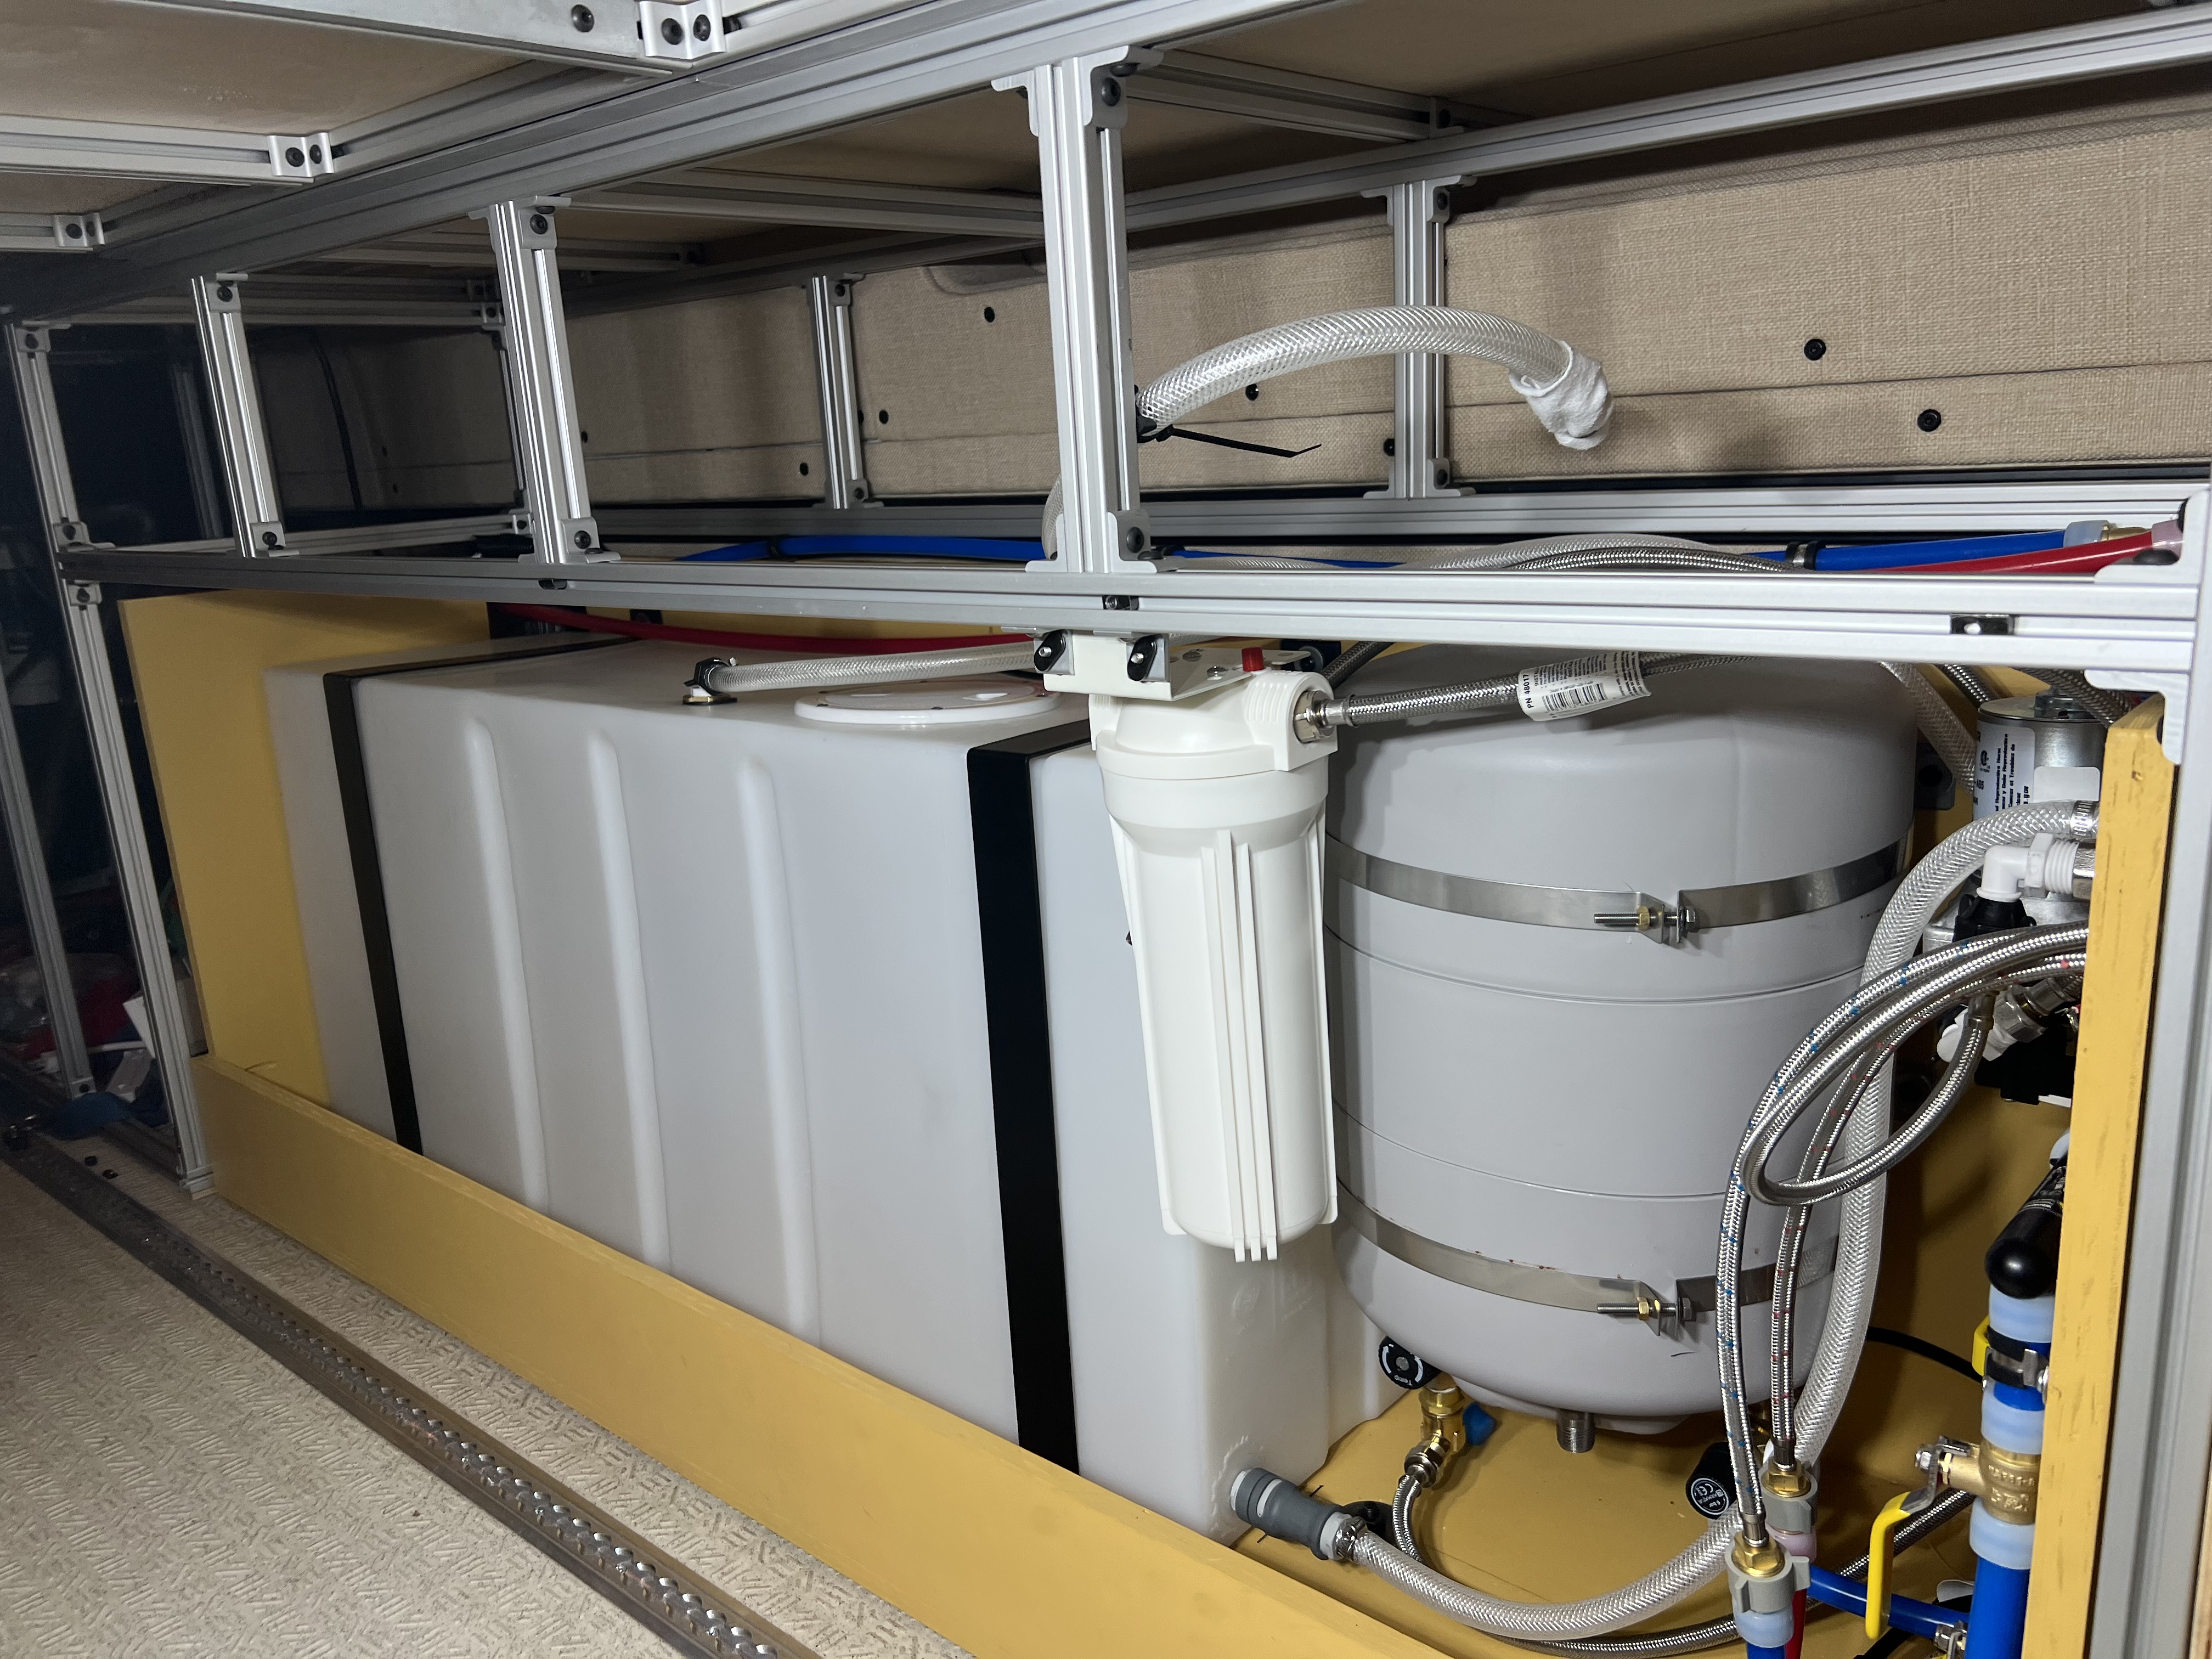
This last week I started the plumbing system. Like the electrical cabinet on the driver side, the passenger side water cabinet will be a self contained unit that is easily accessible and secured via the L-Track and Unistrut. Before painting the water cabinet, I test fit the main components: passenger side over-the-wheel-well 35 gallon water tank, Shurflo Water Pump, and IsoTemp Spa 15L hot water heater. The water tank and hot water heater are bolted to the water cabinet via t-nuts to keep them secure and allow for easy removal and install. I am hoping to run the Pex-A water lines and get some water flowing this weekend.
I laminated the galley panels white with a WilsonArt laminate sheet. I painted the edges and back sides of these panels black. For the fold down table, I reinforced it with some 3/4" aluminum angle and had a friend weld the pieces together. I painted the aluminum angle black with rustoleum bedliner spray paint and screwed it to the table. I bolted a nylon webbed/paracord grab handle to the galley to aid in getting into the van

This last weekend I tackled the majority of the plumbing system. I went with Pex-A and I highly recommend using Pex-A if you are going to run a water system in your Rig. It is extremely easy to work with and supposed to be bullet proof.
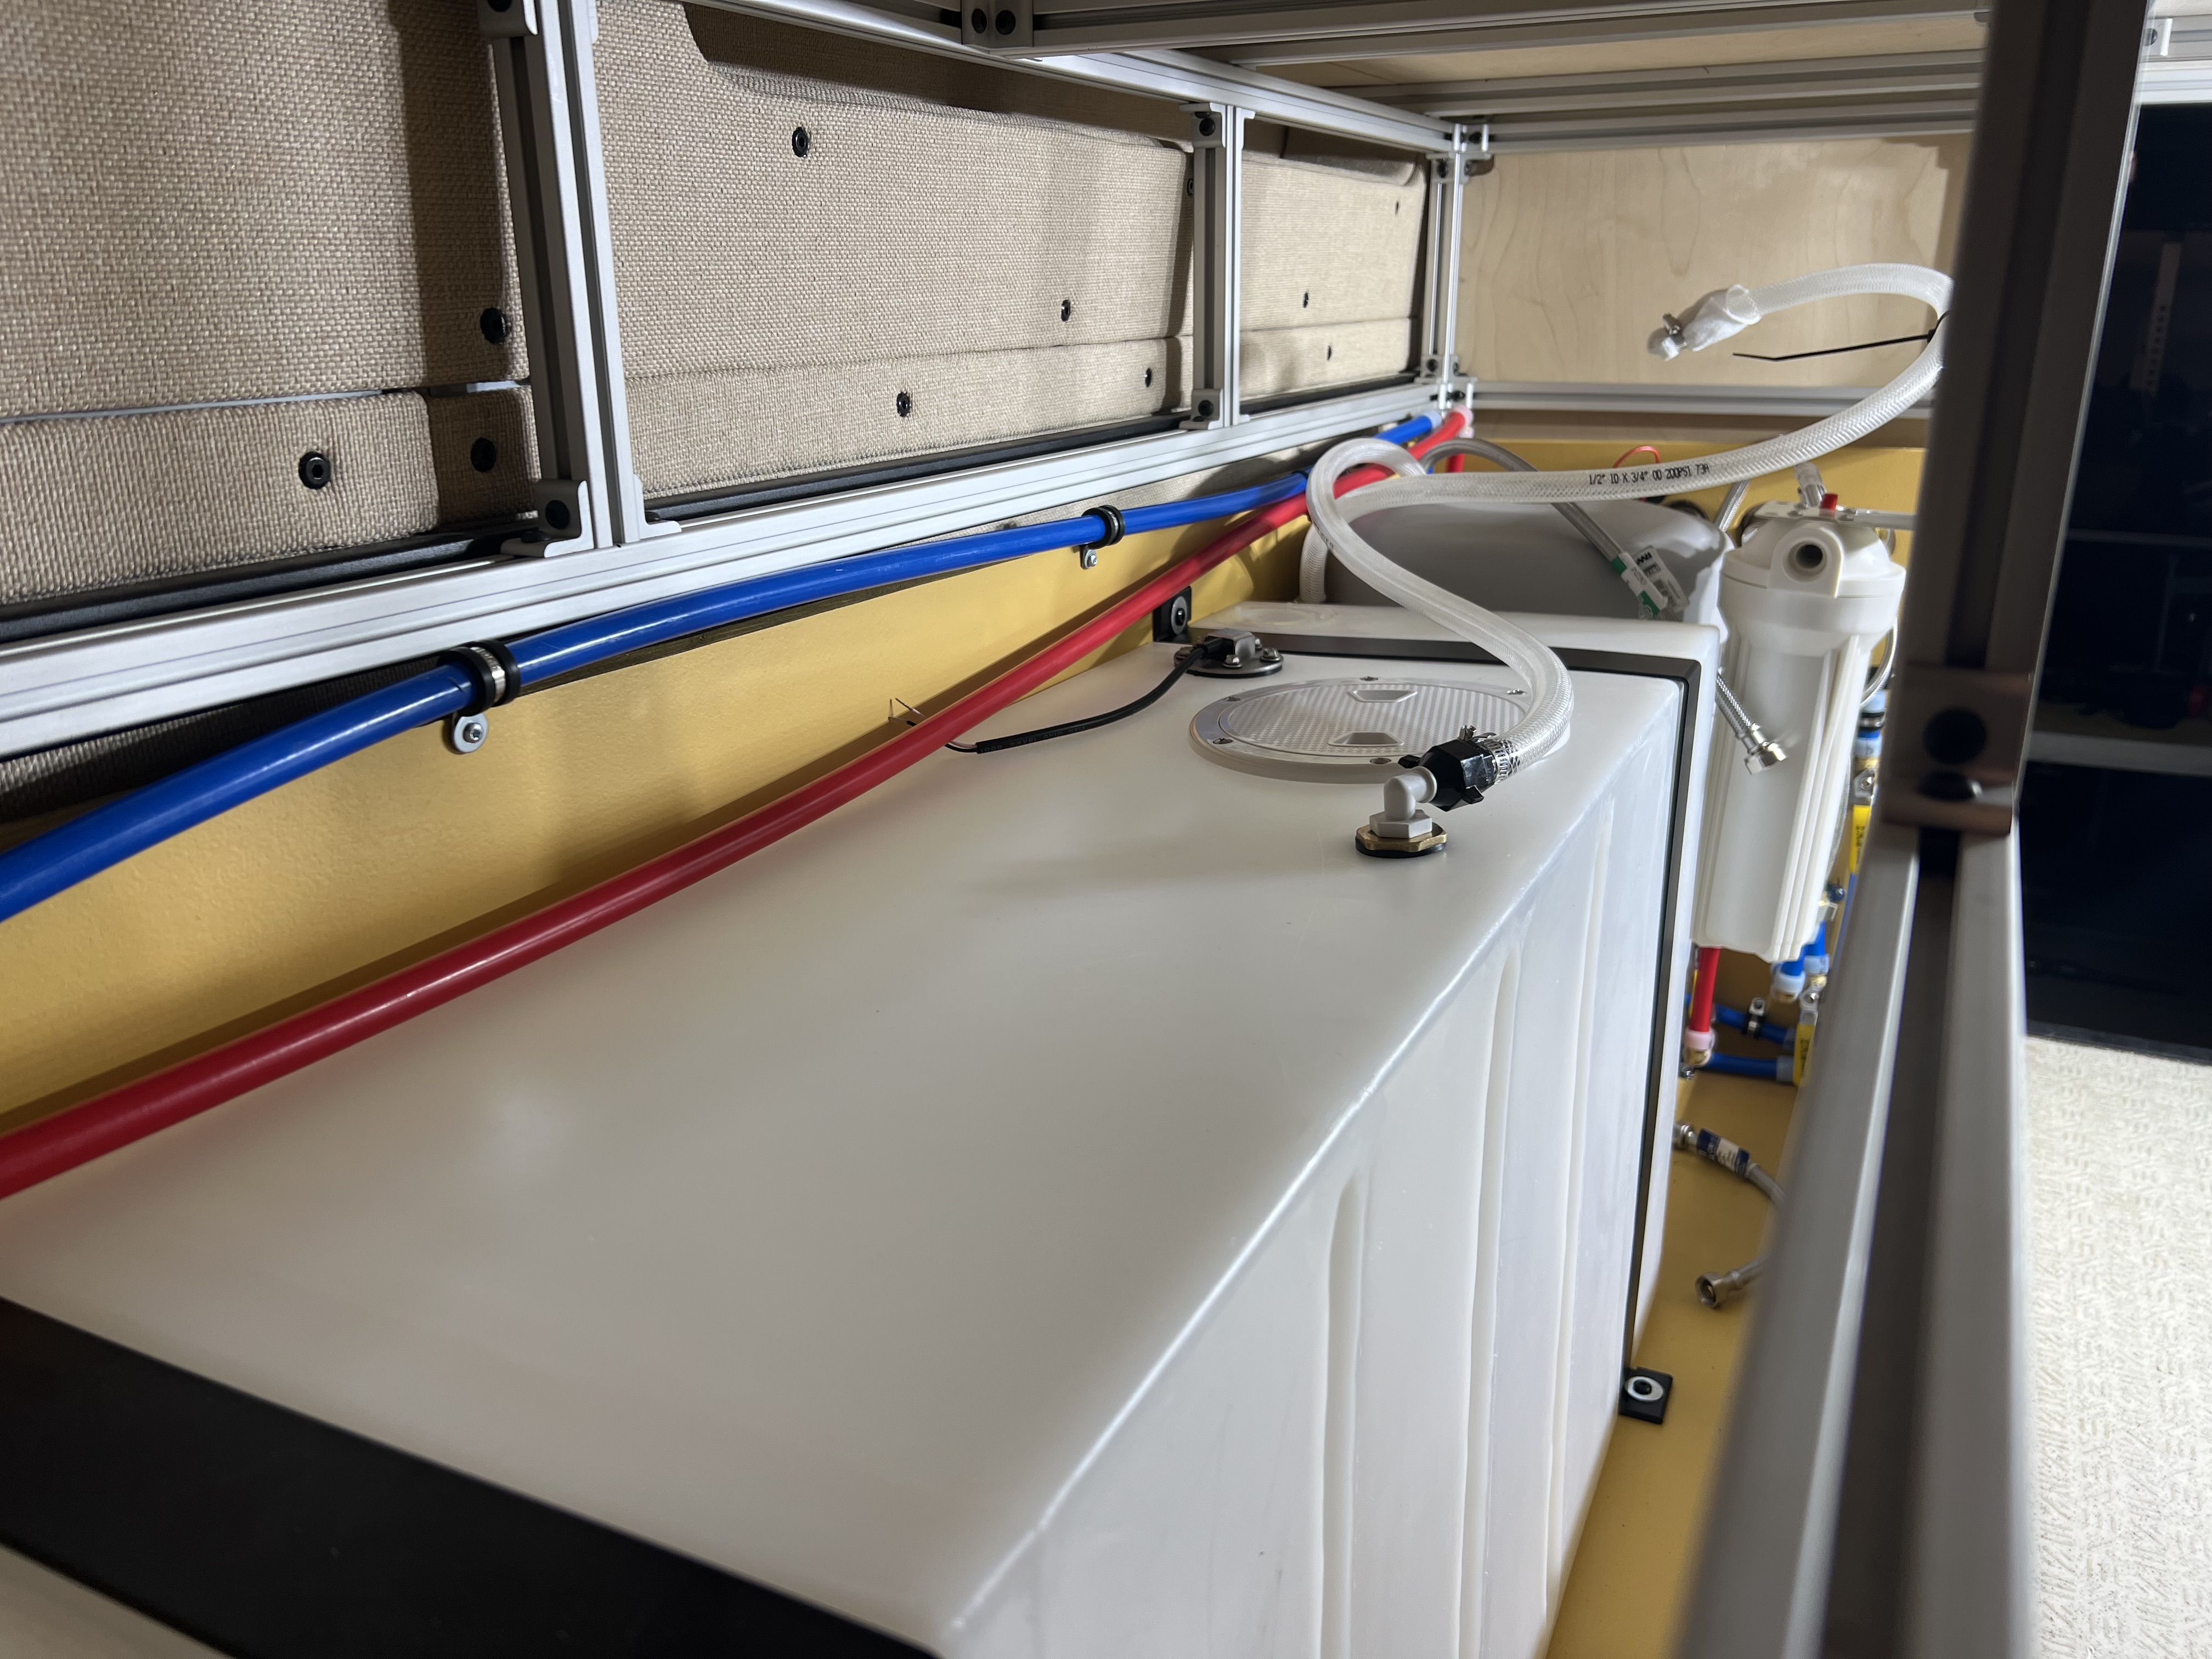
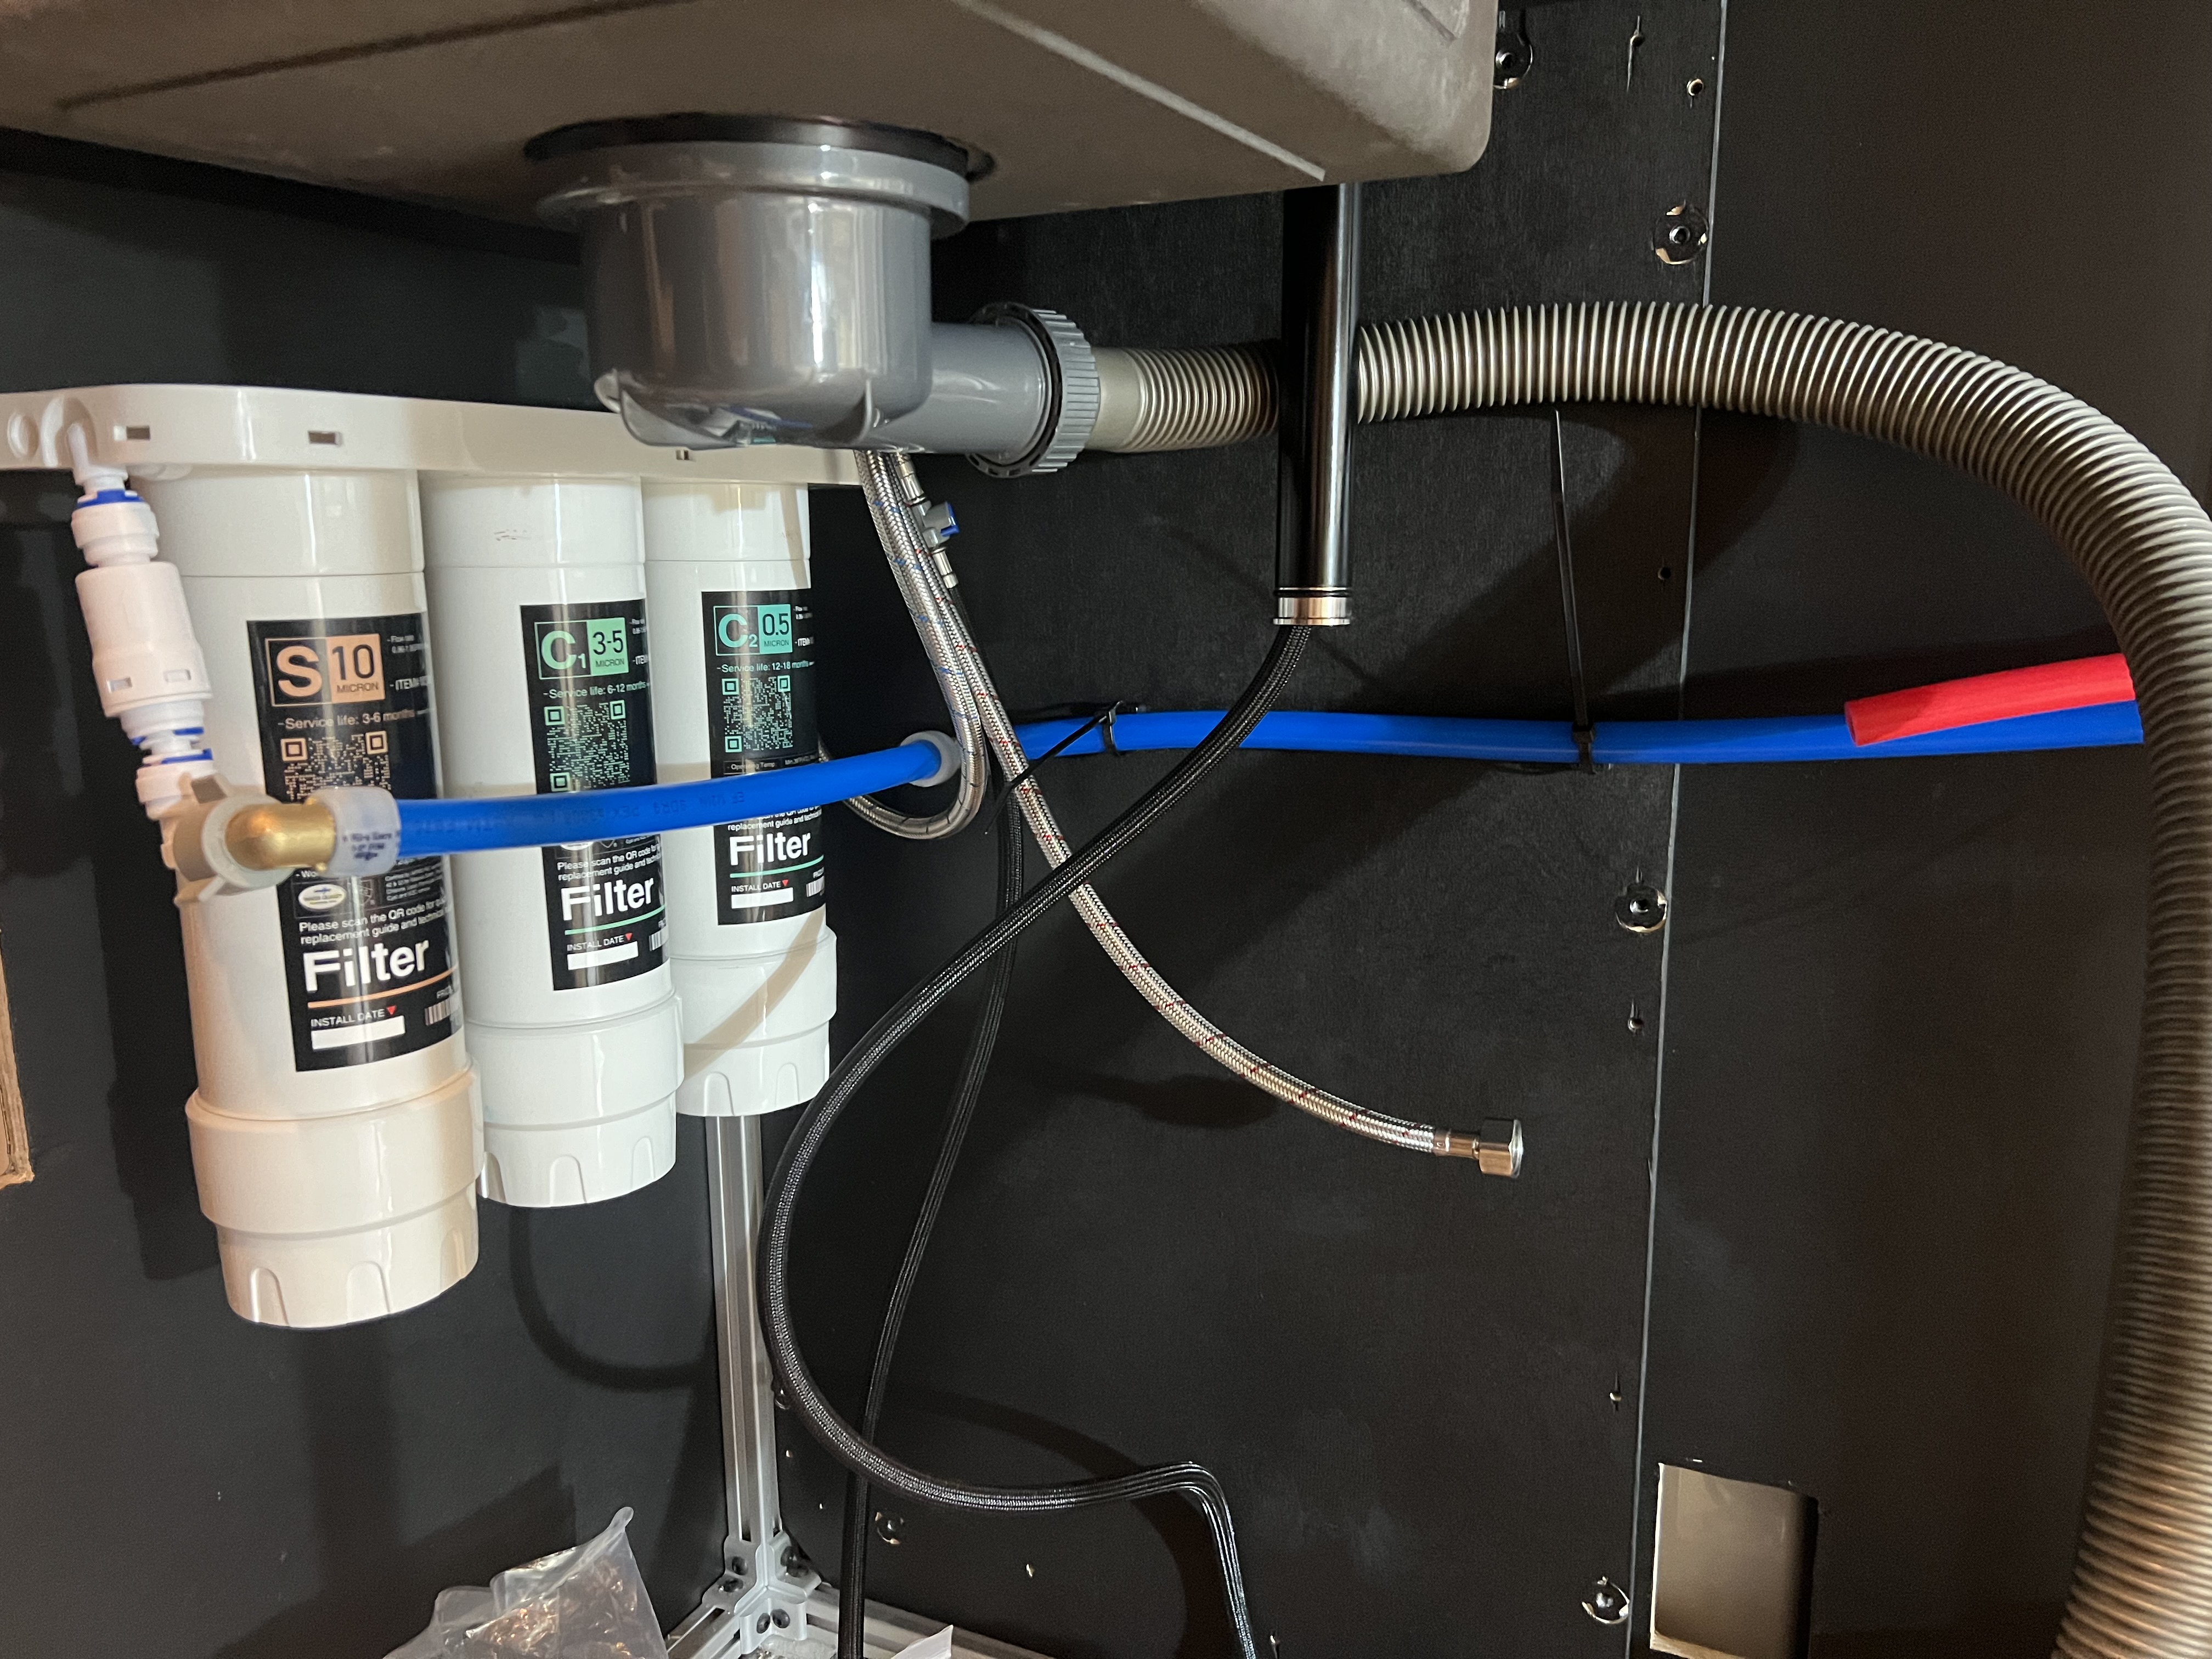
I modified the 35 gallon wheel well water tank using a 6" hole saw to install an inspection hatch. I made two additional holes to install an electronic water gauge, and water pickup line. The water tank has 1/2" npt threaded ports at the bottom of the tank; however the ports sit 2" above the floor of the tank so I did not use these for the water pickup line. By installing my own pickup line that extends to the bottom of the tank I am able to get every last drop of water out of the tank. The other hoses coming from/to the tank are for the water fill and breather tube. I used steel braided water hose with built in swivel fittings in place of the clear vinyl tubing/barbed fittings/clamps for anything high pressure related where Pex-A would not be beneficial. On my MotoTruck build I was always chasing water leaks with the vinyl tubing/barbed fittings/clamps method. So for this build, the vinyl clear tubing is only used for low pressure applications.
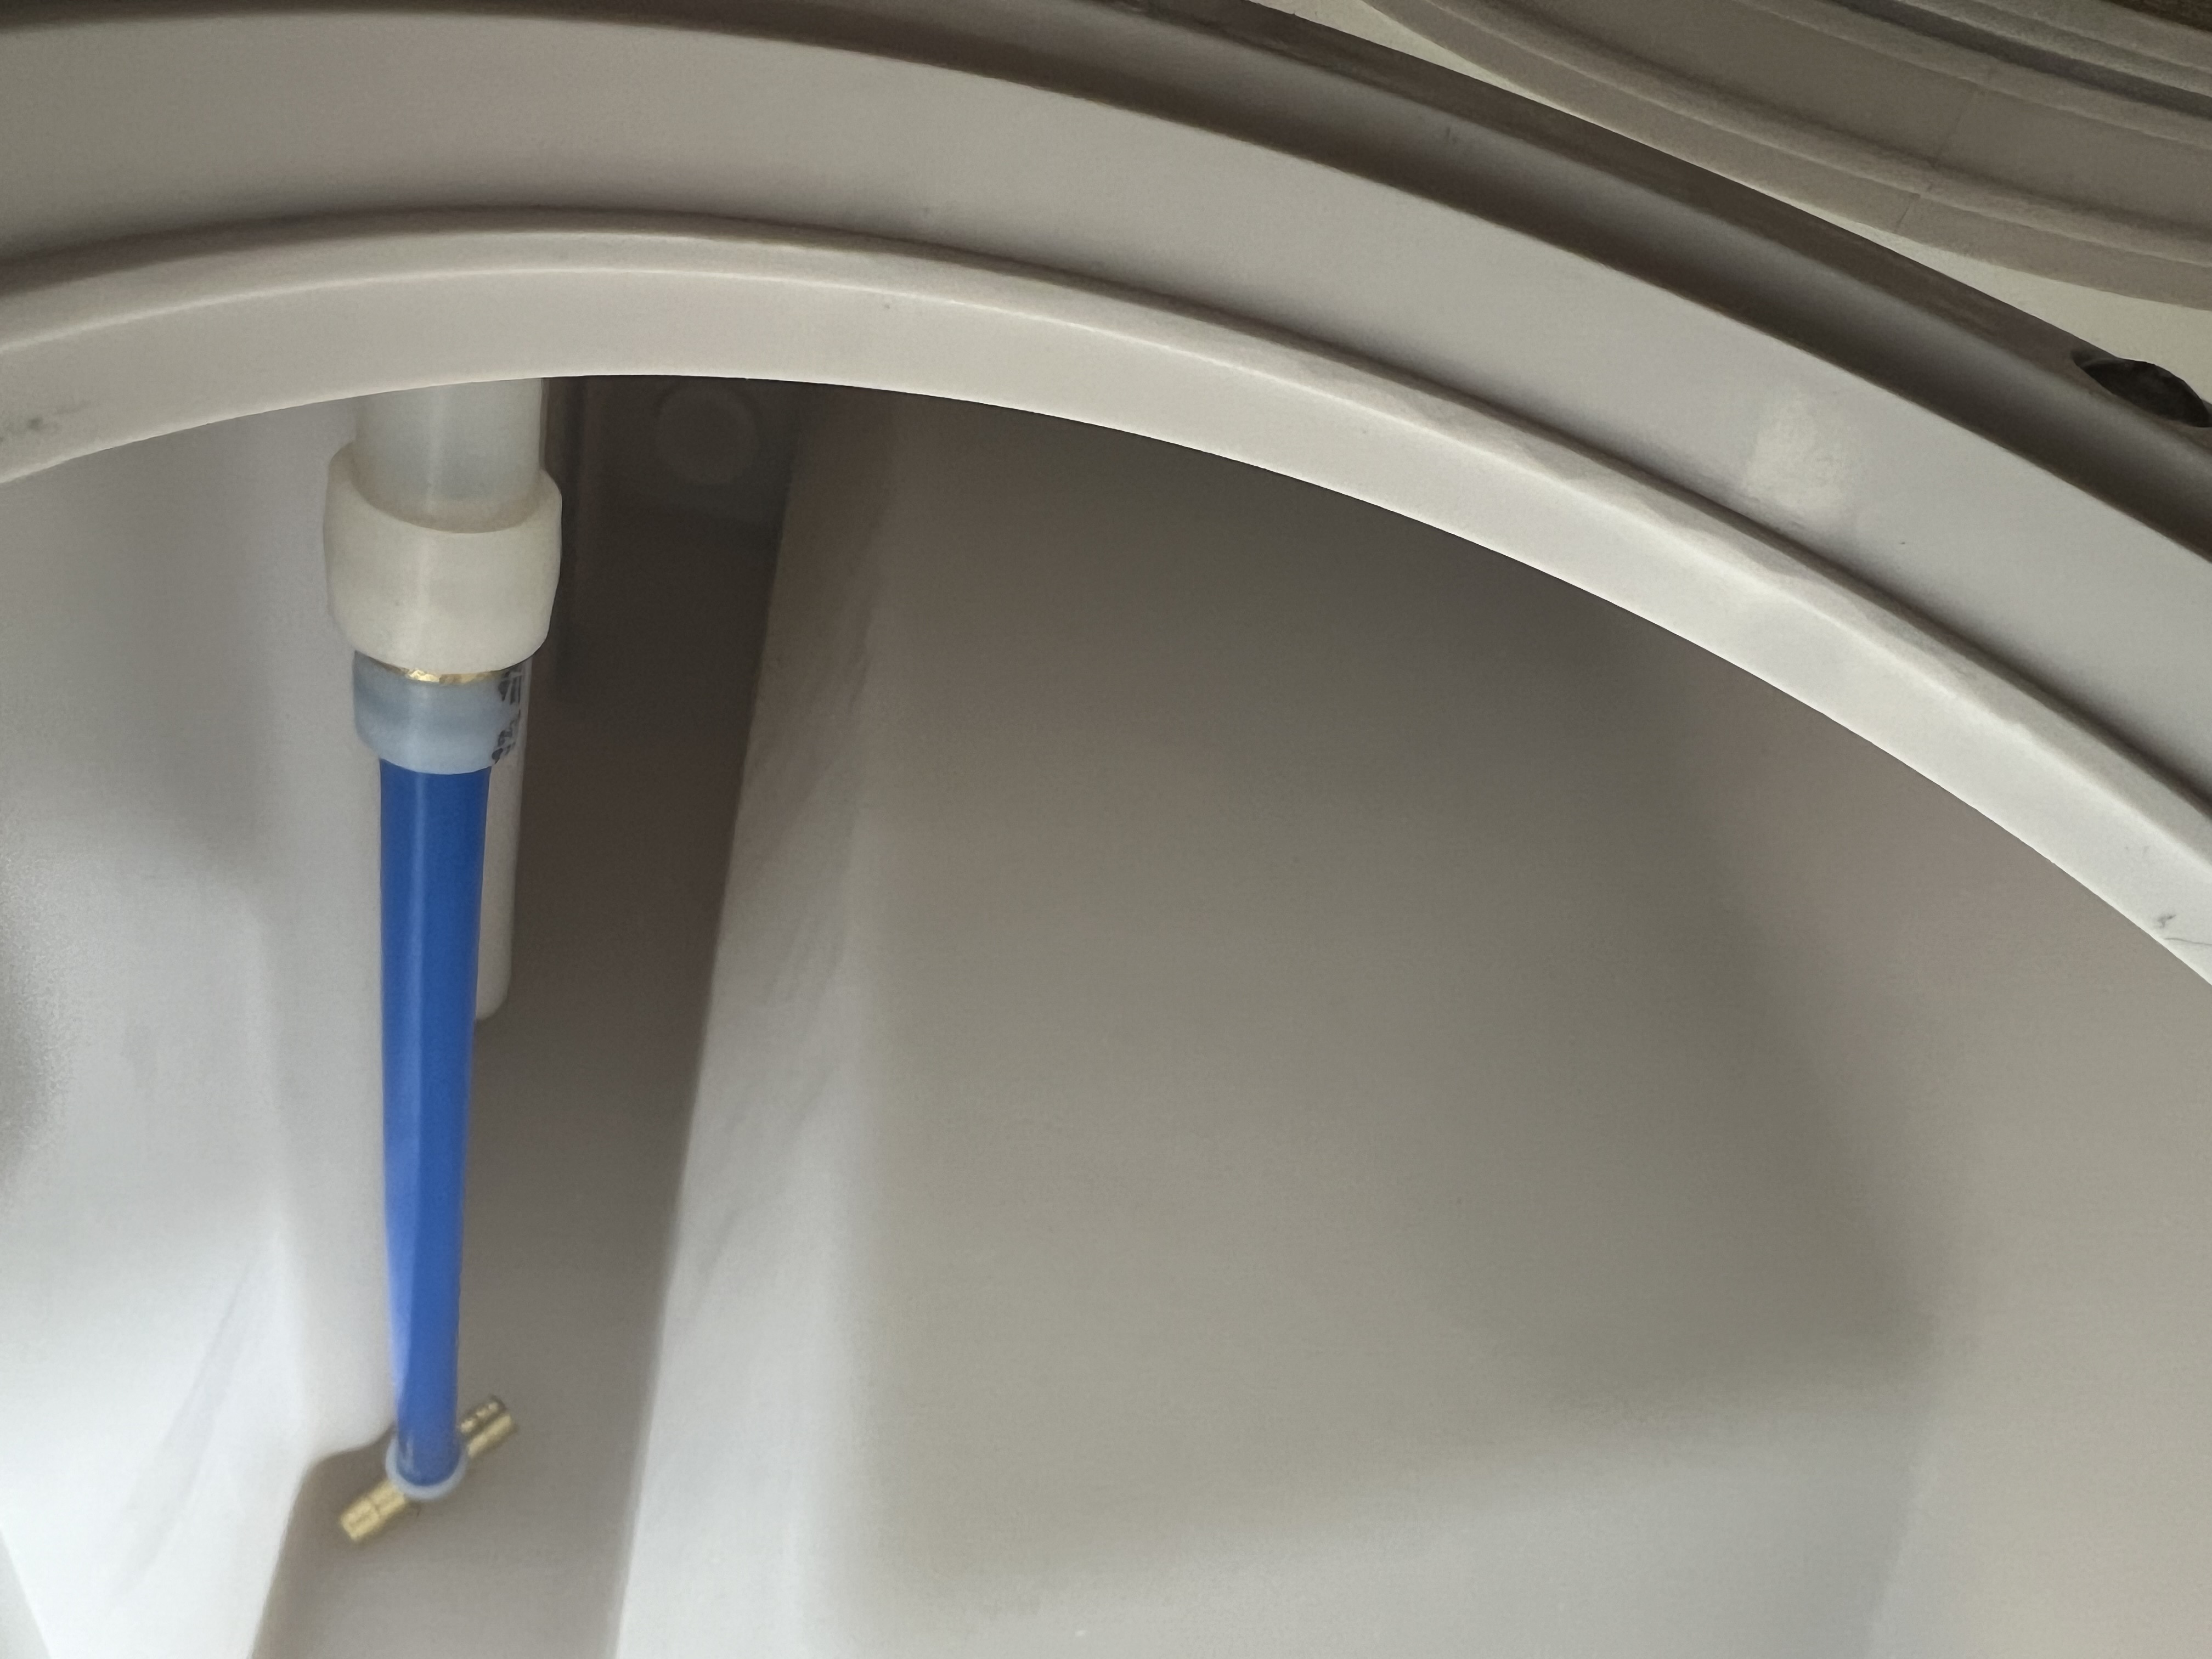
The water pickup line goes directly to the water pump. After the water pump, the water passes through a high flow single stage 5 micron water filter. The water then goes to a 4 port Pex-A manifold. From here, each line has a ball valve to shut off water to each Pex-A (Blue hose) if need be. One of the blue lines goes to the Isotherm water heater, while the other three blue lines will go directly to the rear outdoor shower port, driver side interior wet bath, and galley sink. The blue line for the galley sink passes through a 3 stage water filter that filters down to 0.5 microns for drinking water.
The hot water line exits through the water tank and goes to a 3-port manifold. The 3 ports (Red hose) are controlled by ball valves and each go to their respective locations (rear outdoor shower, driver side interior wet bath, and galley sink).
I am waiting on a couple fittings to finish this system and hope to give it a test run in the next few days
I will start on the wet bath plumbing after the holidays, so the blue and red water lines have not been run and currently end at their ball valves.
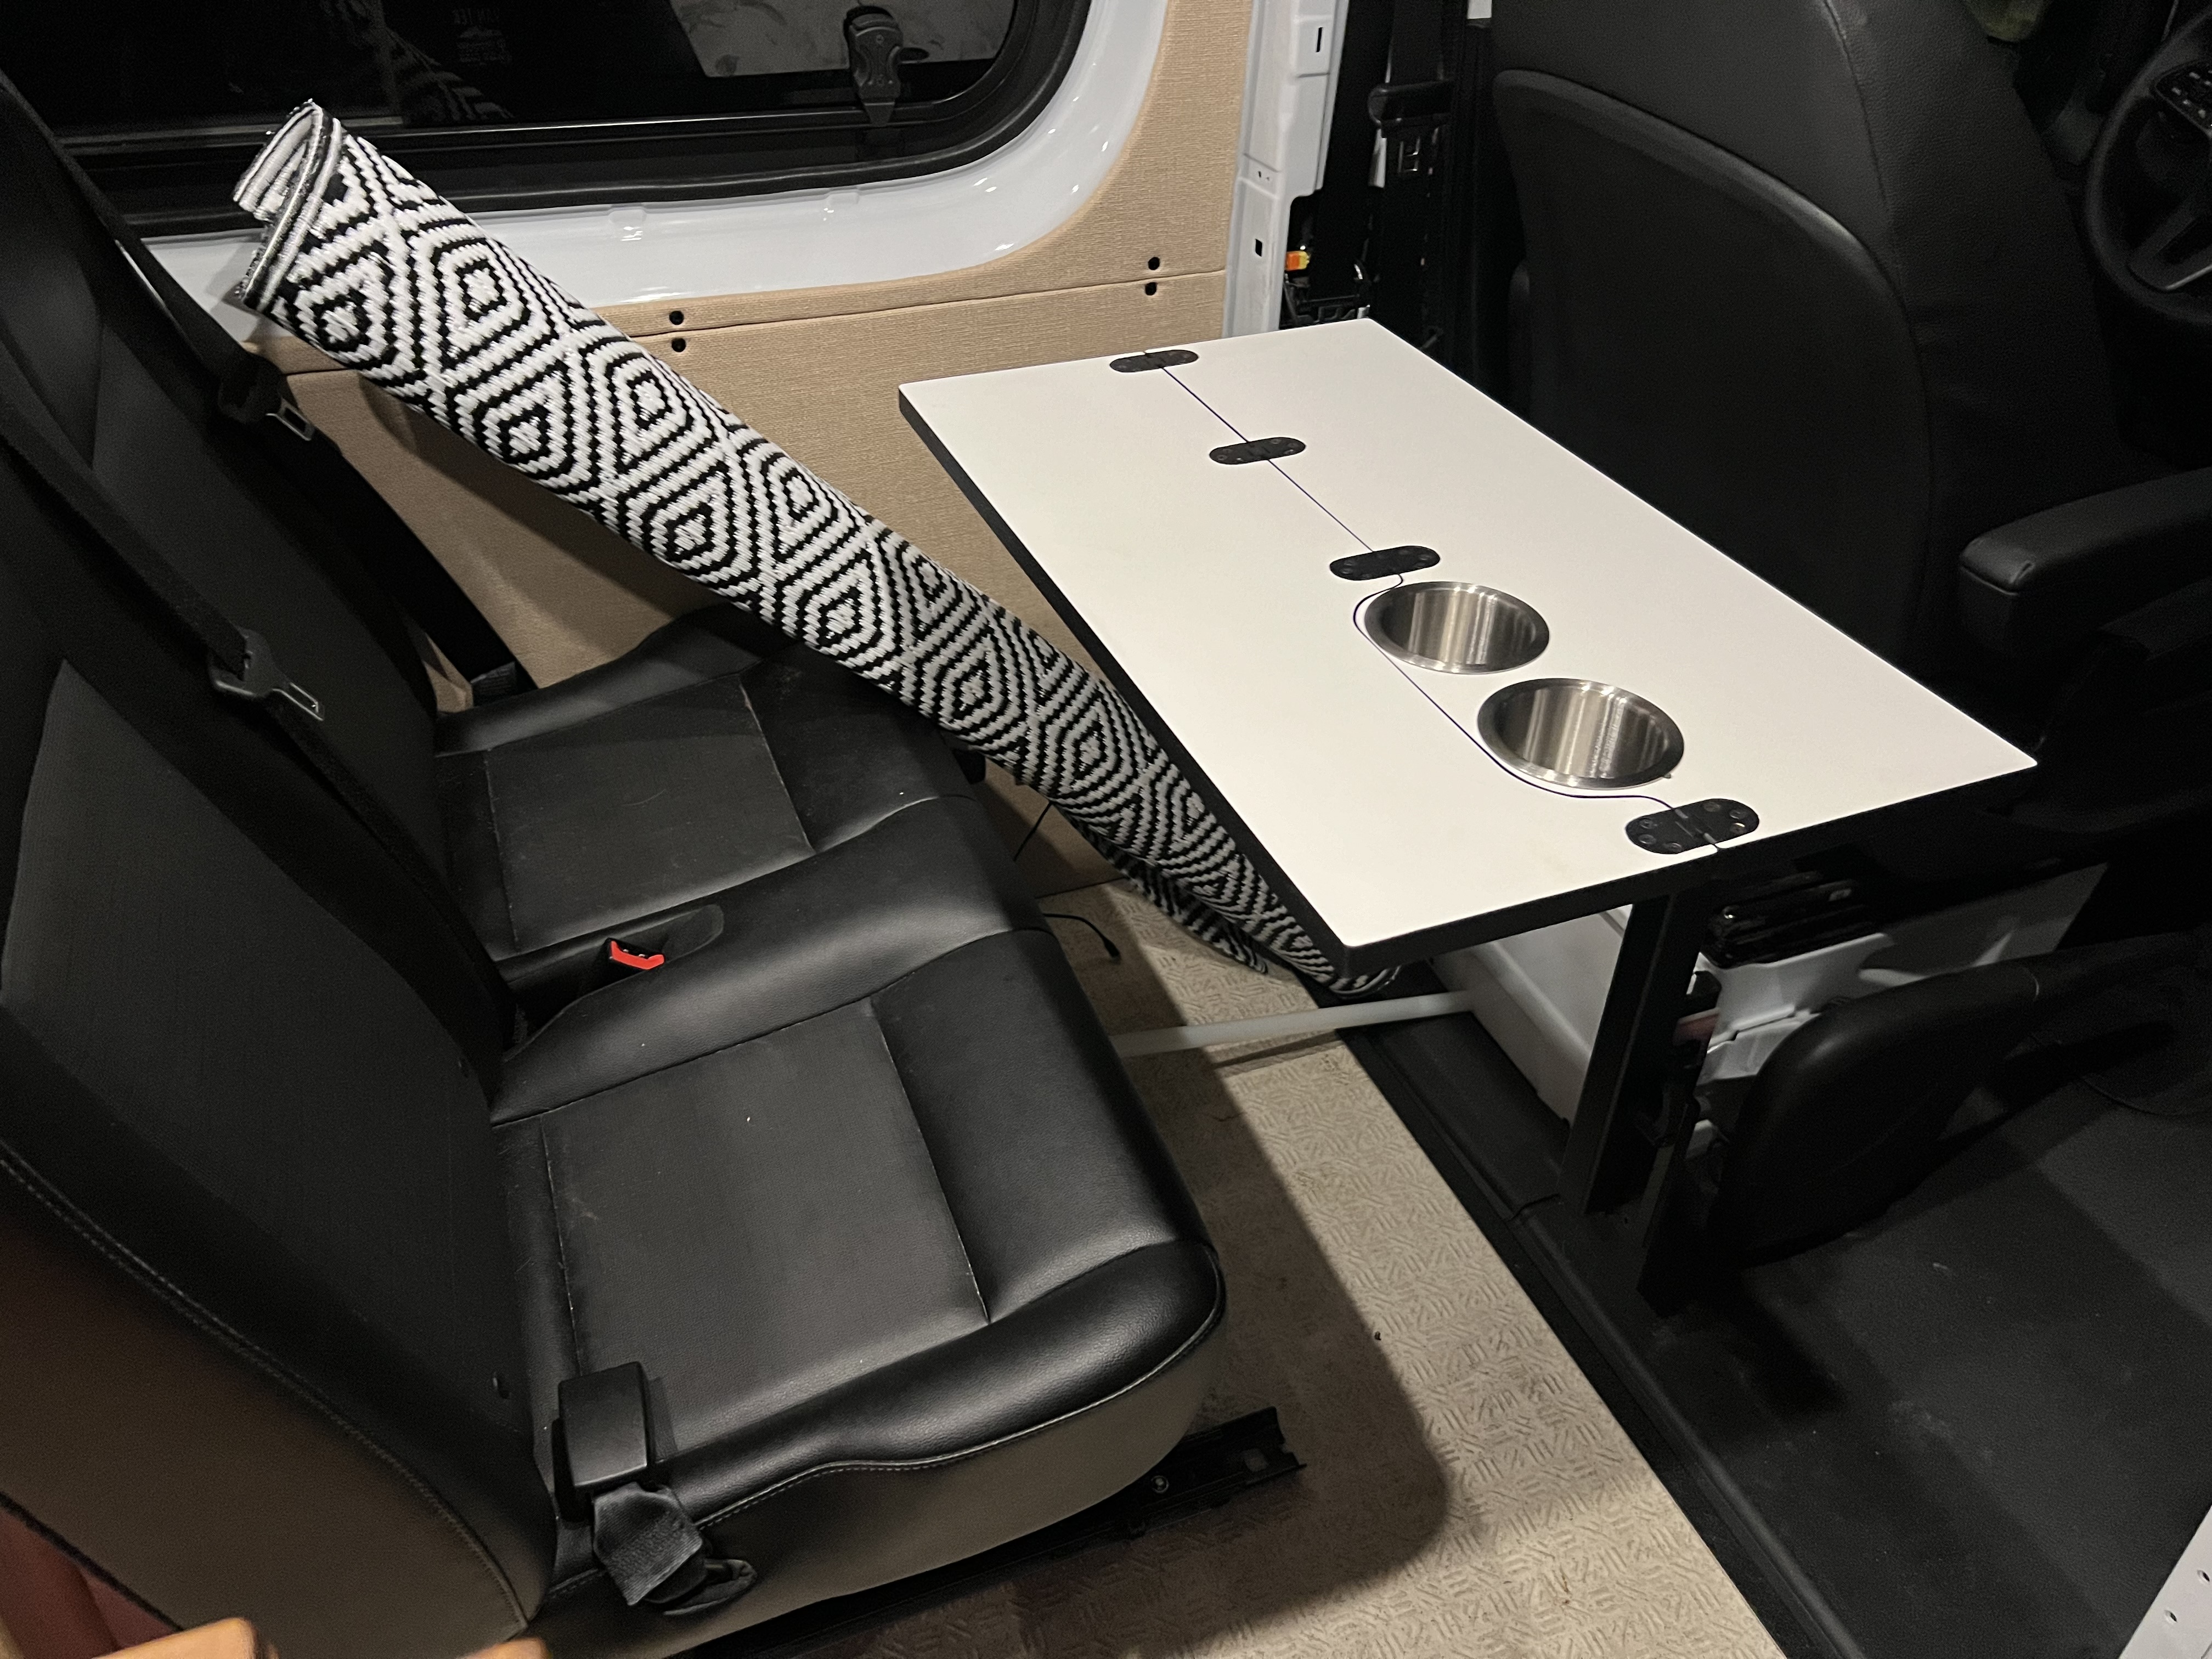
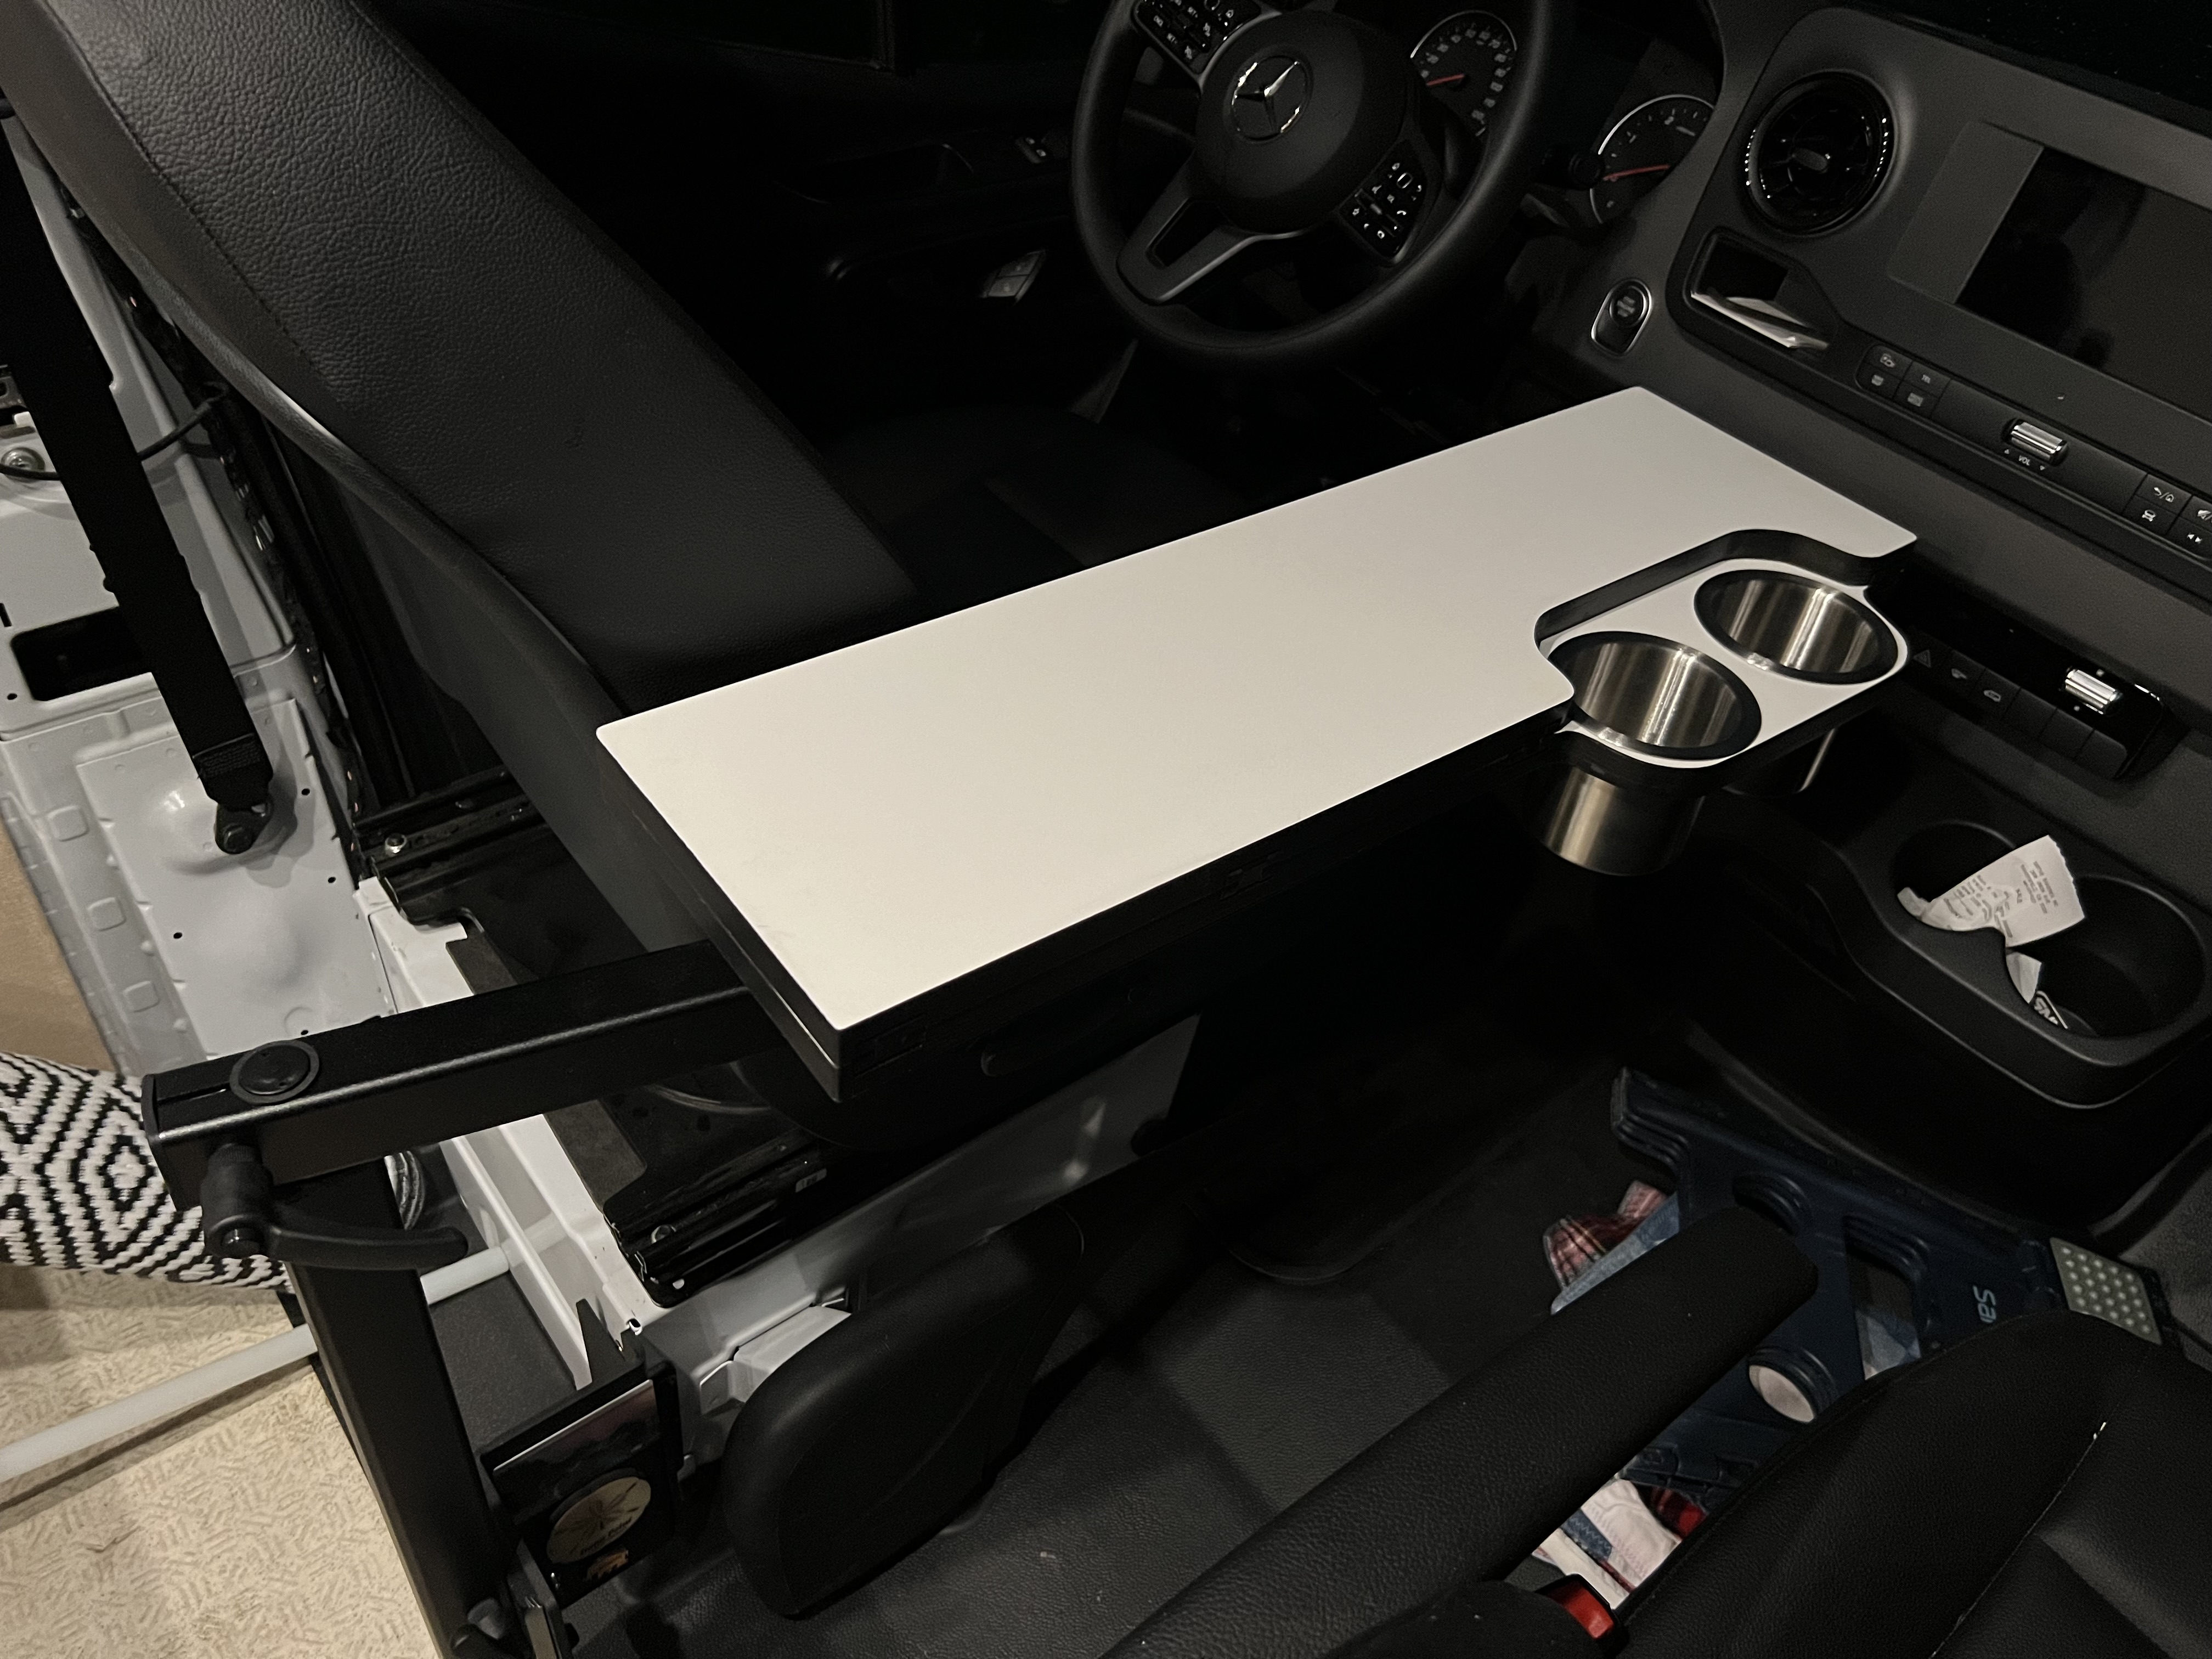
I made a folding table that can be used for the rear passengers and/or the driver and front passenger. There are companies out there who make similar tables, but I didn’t want to pay the “Van Tax” and I wanted to use the same laminate as rest of the galley and cabinets.
I had to buy the bracket and Lagun swivel kit but found both online for around $225. All in, I have about $300 invested which sounds like a lot, but I saved a lot of money making the table myself.
I used 3/4” Baltic Birch and a router and handsaw to cut everything. I then laminated both sides of the table to match the panels. The table is attached to the Lagun bracket via threaded nut inserts.
3 Likes
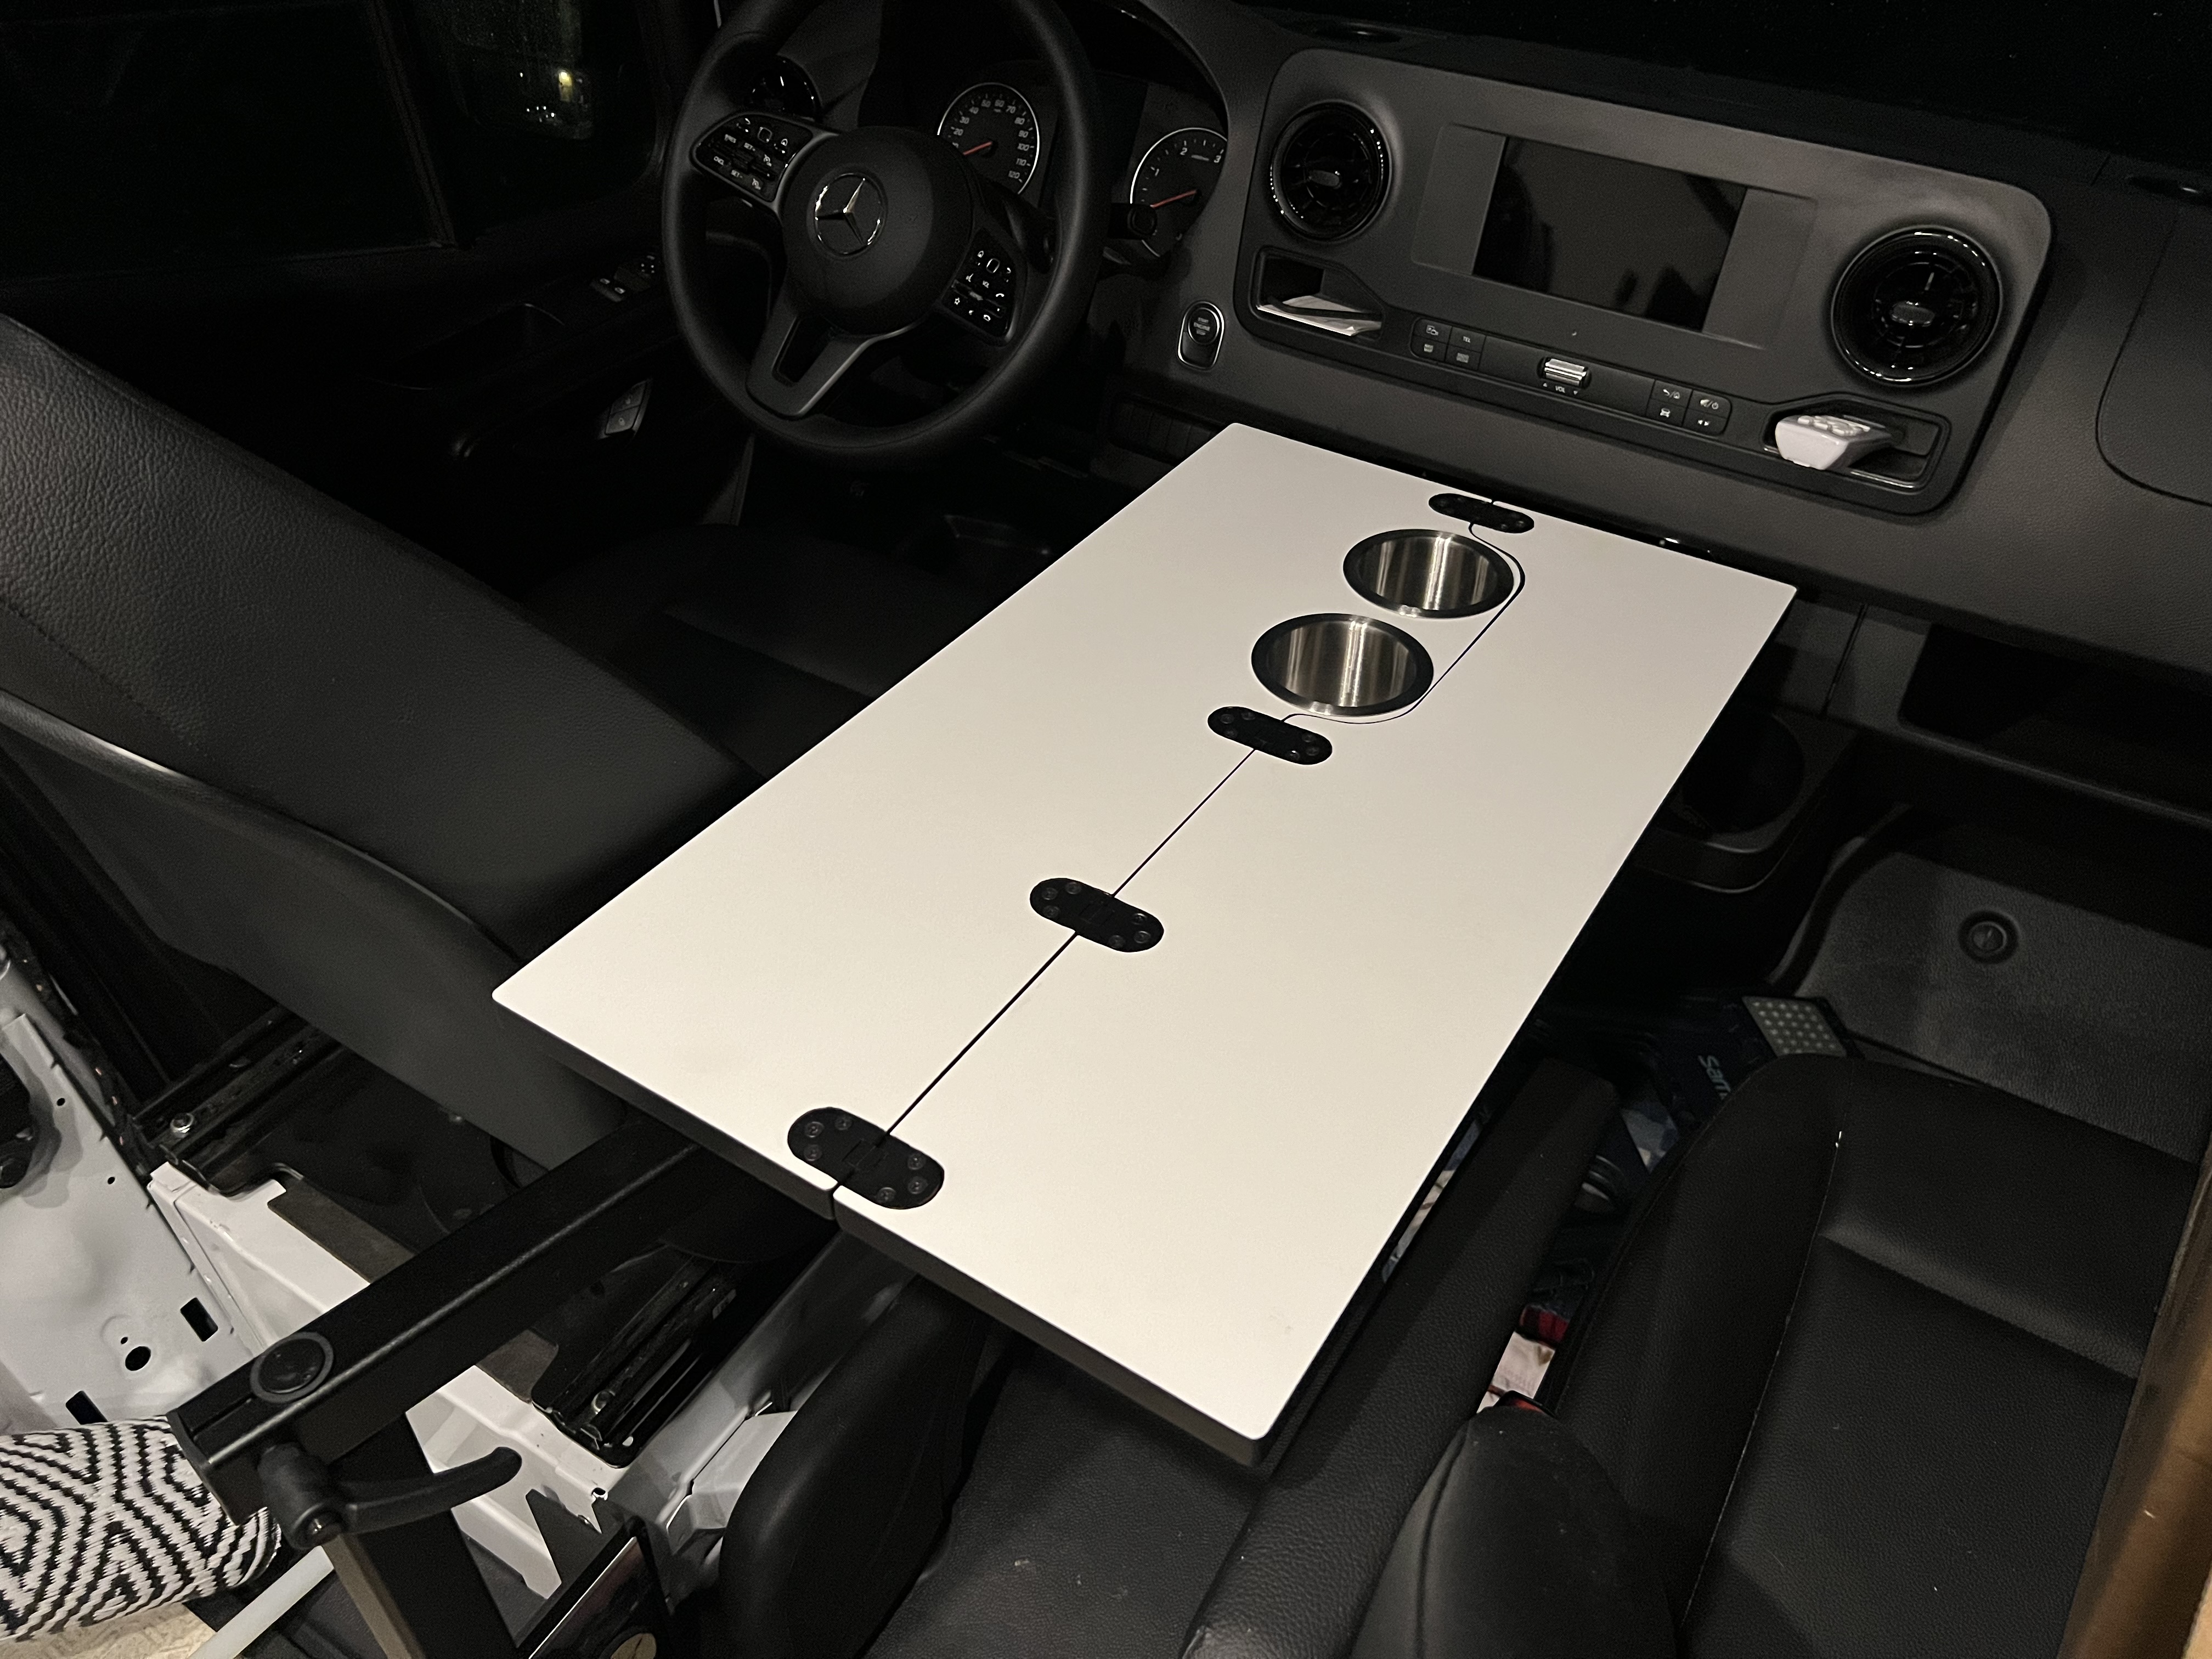
Really nice work on the table. The inset cups/holders are a super cool touch. Are the hinges all that is needed to keep it flat/flush when opened up?
2 Likes
@Vice_Chief Thank you! Yeah, those hinges open up on each other. Here is the ones I bought for more detailed photos:
QCAA Solid Brass Table Folding… QCAA Solid Brass Table Folding Flip Top Hinge, 2-3/4"x1-3/16", Matte Black, 4 Pack, Made in Taiwan - Amazon.com
1 Like
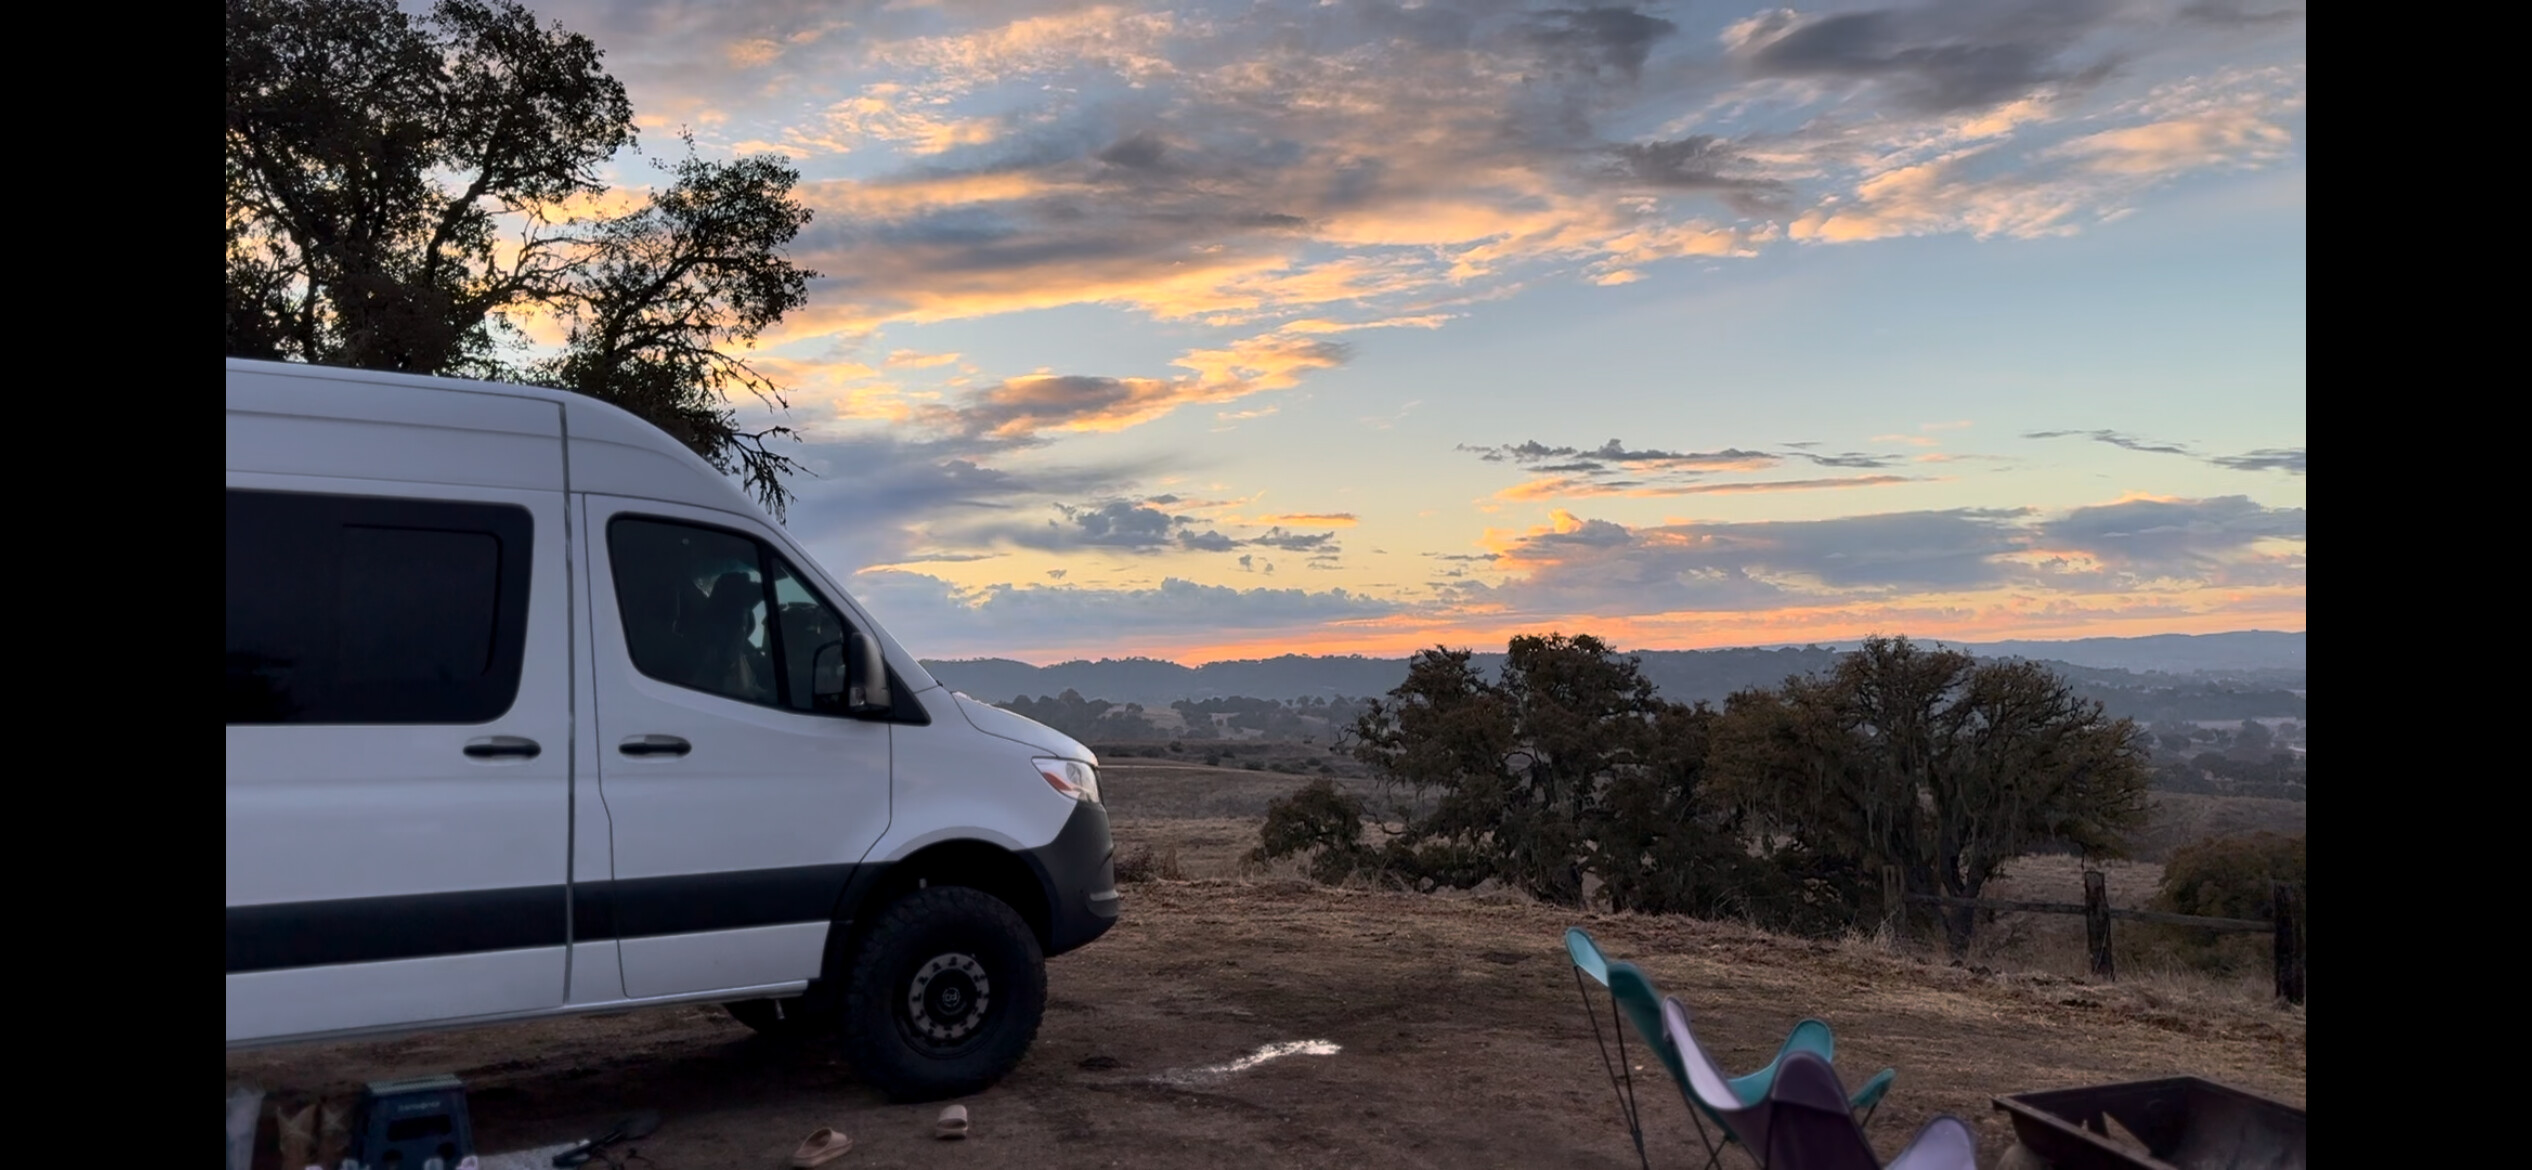
For Thanksgiving, we camped out in Big Sur for 3 nights at one of our favorite locations. It is along the Big Sur River and the tree canopy is one of the best around. This campground only has about 20 sites, has showers, washer/dryer and a general store. If you’re in California and interested check out: www.riversidecampground.com. On our way home we did a last minute over nighter and used www.hipcamp.com to camp on a small secluded ranch in Paso Robles. I must say we were a little skeptical about using Hip Camp, but had a great experience and will be using it in the future.
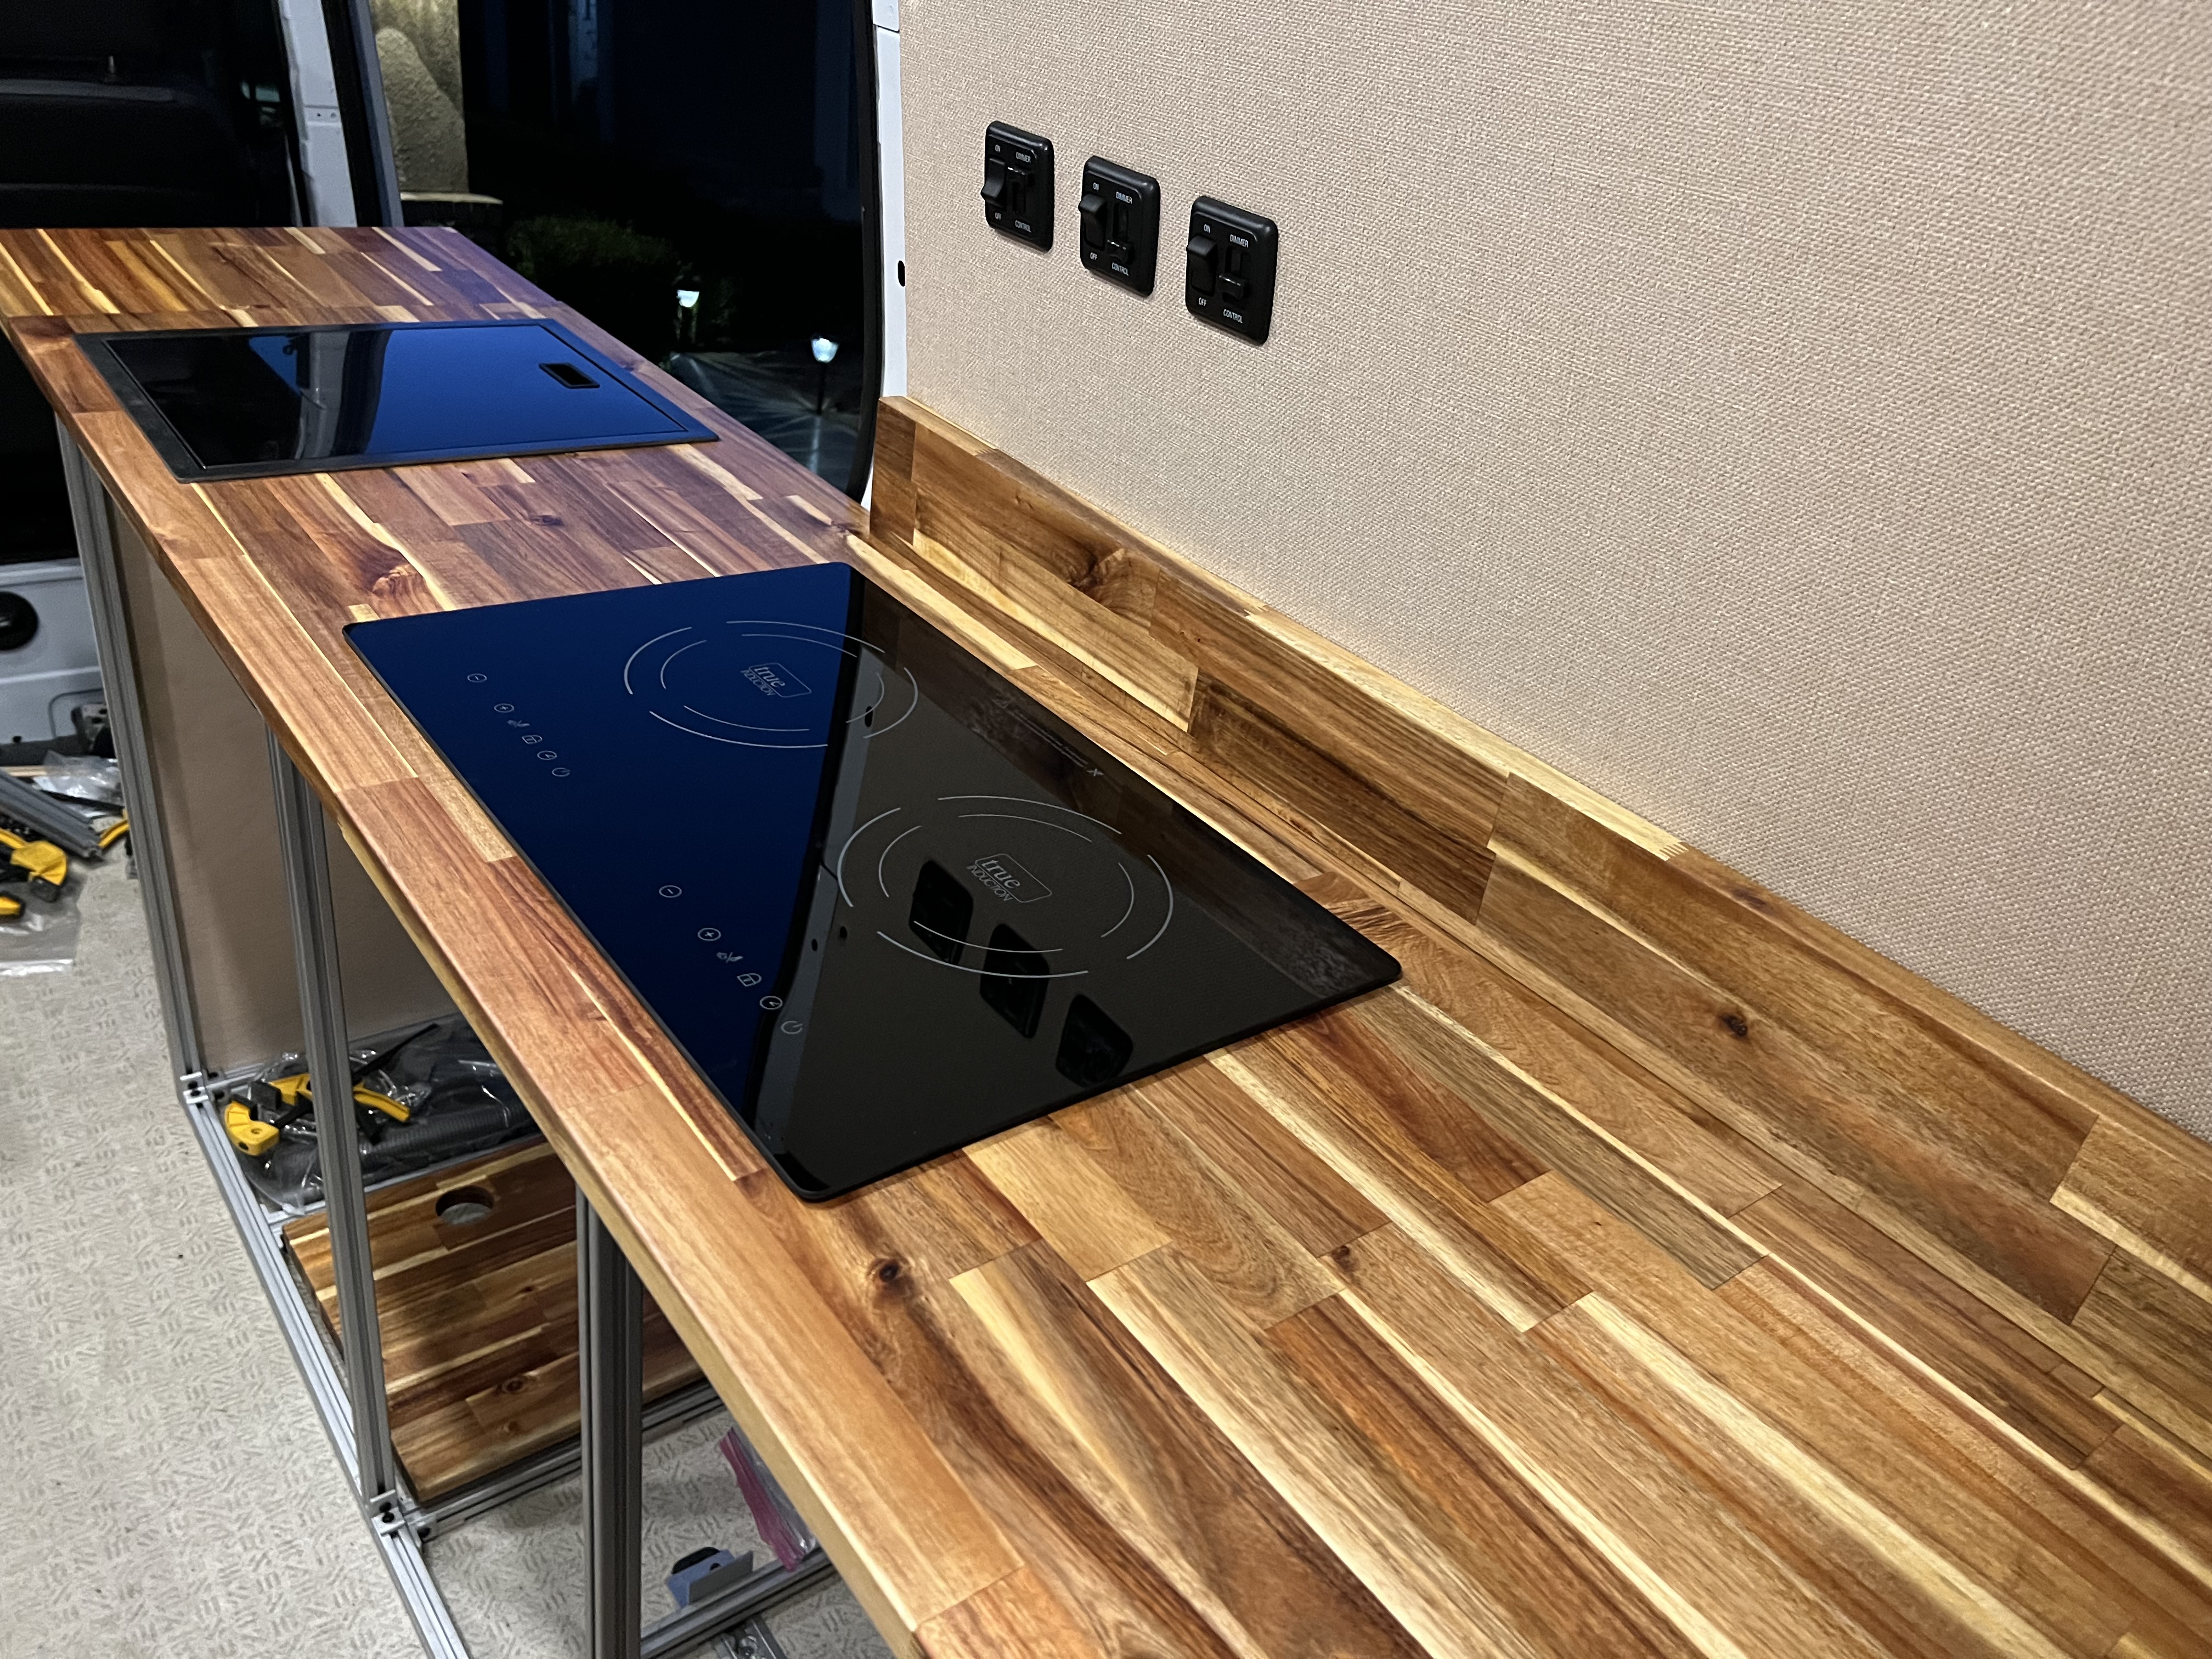
All the major components: Electrical, Plumbing, Water Filtration, Heater, Induction Cooktop worked great. The only issue I ran into was a small weeping leak at a copper fitting on the water heater. I used teflon pipe tape on the threads when I was supposed to use a high heat latex sealant. So, lesson learned.
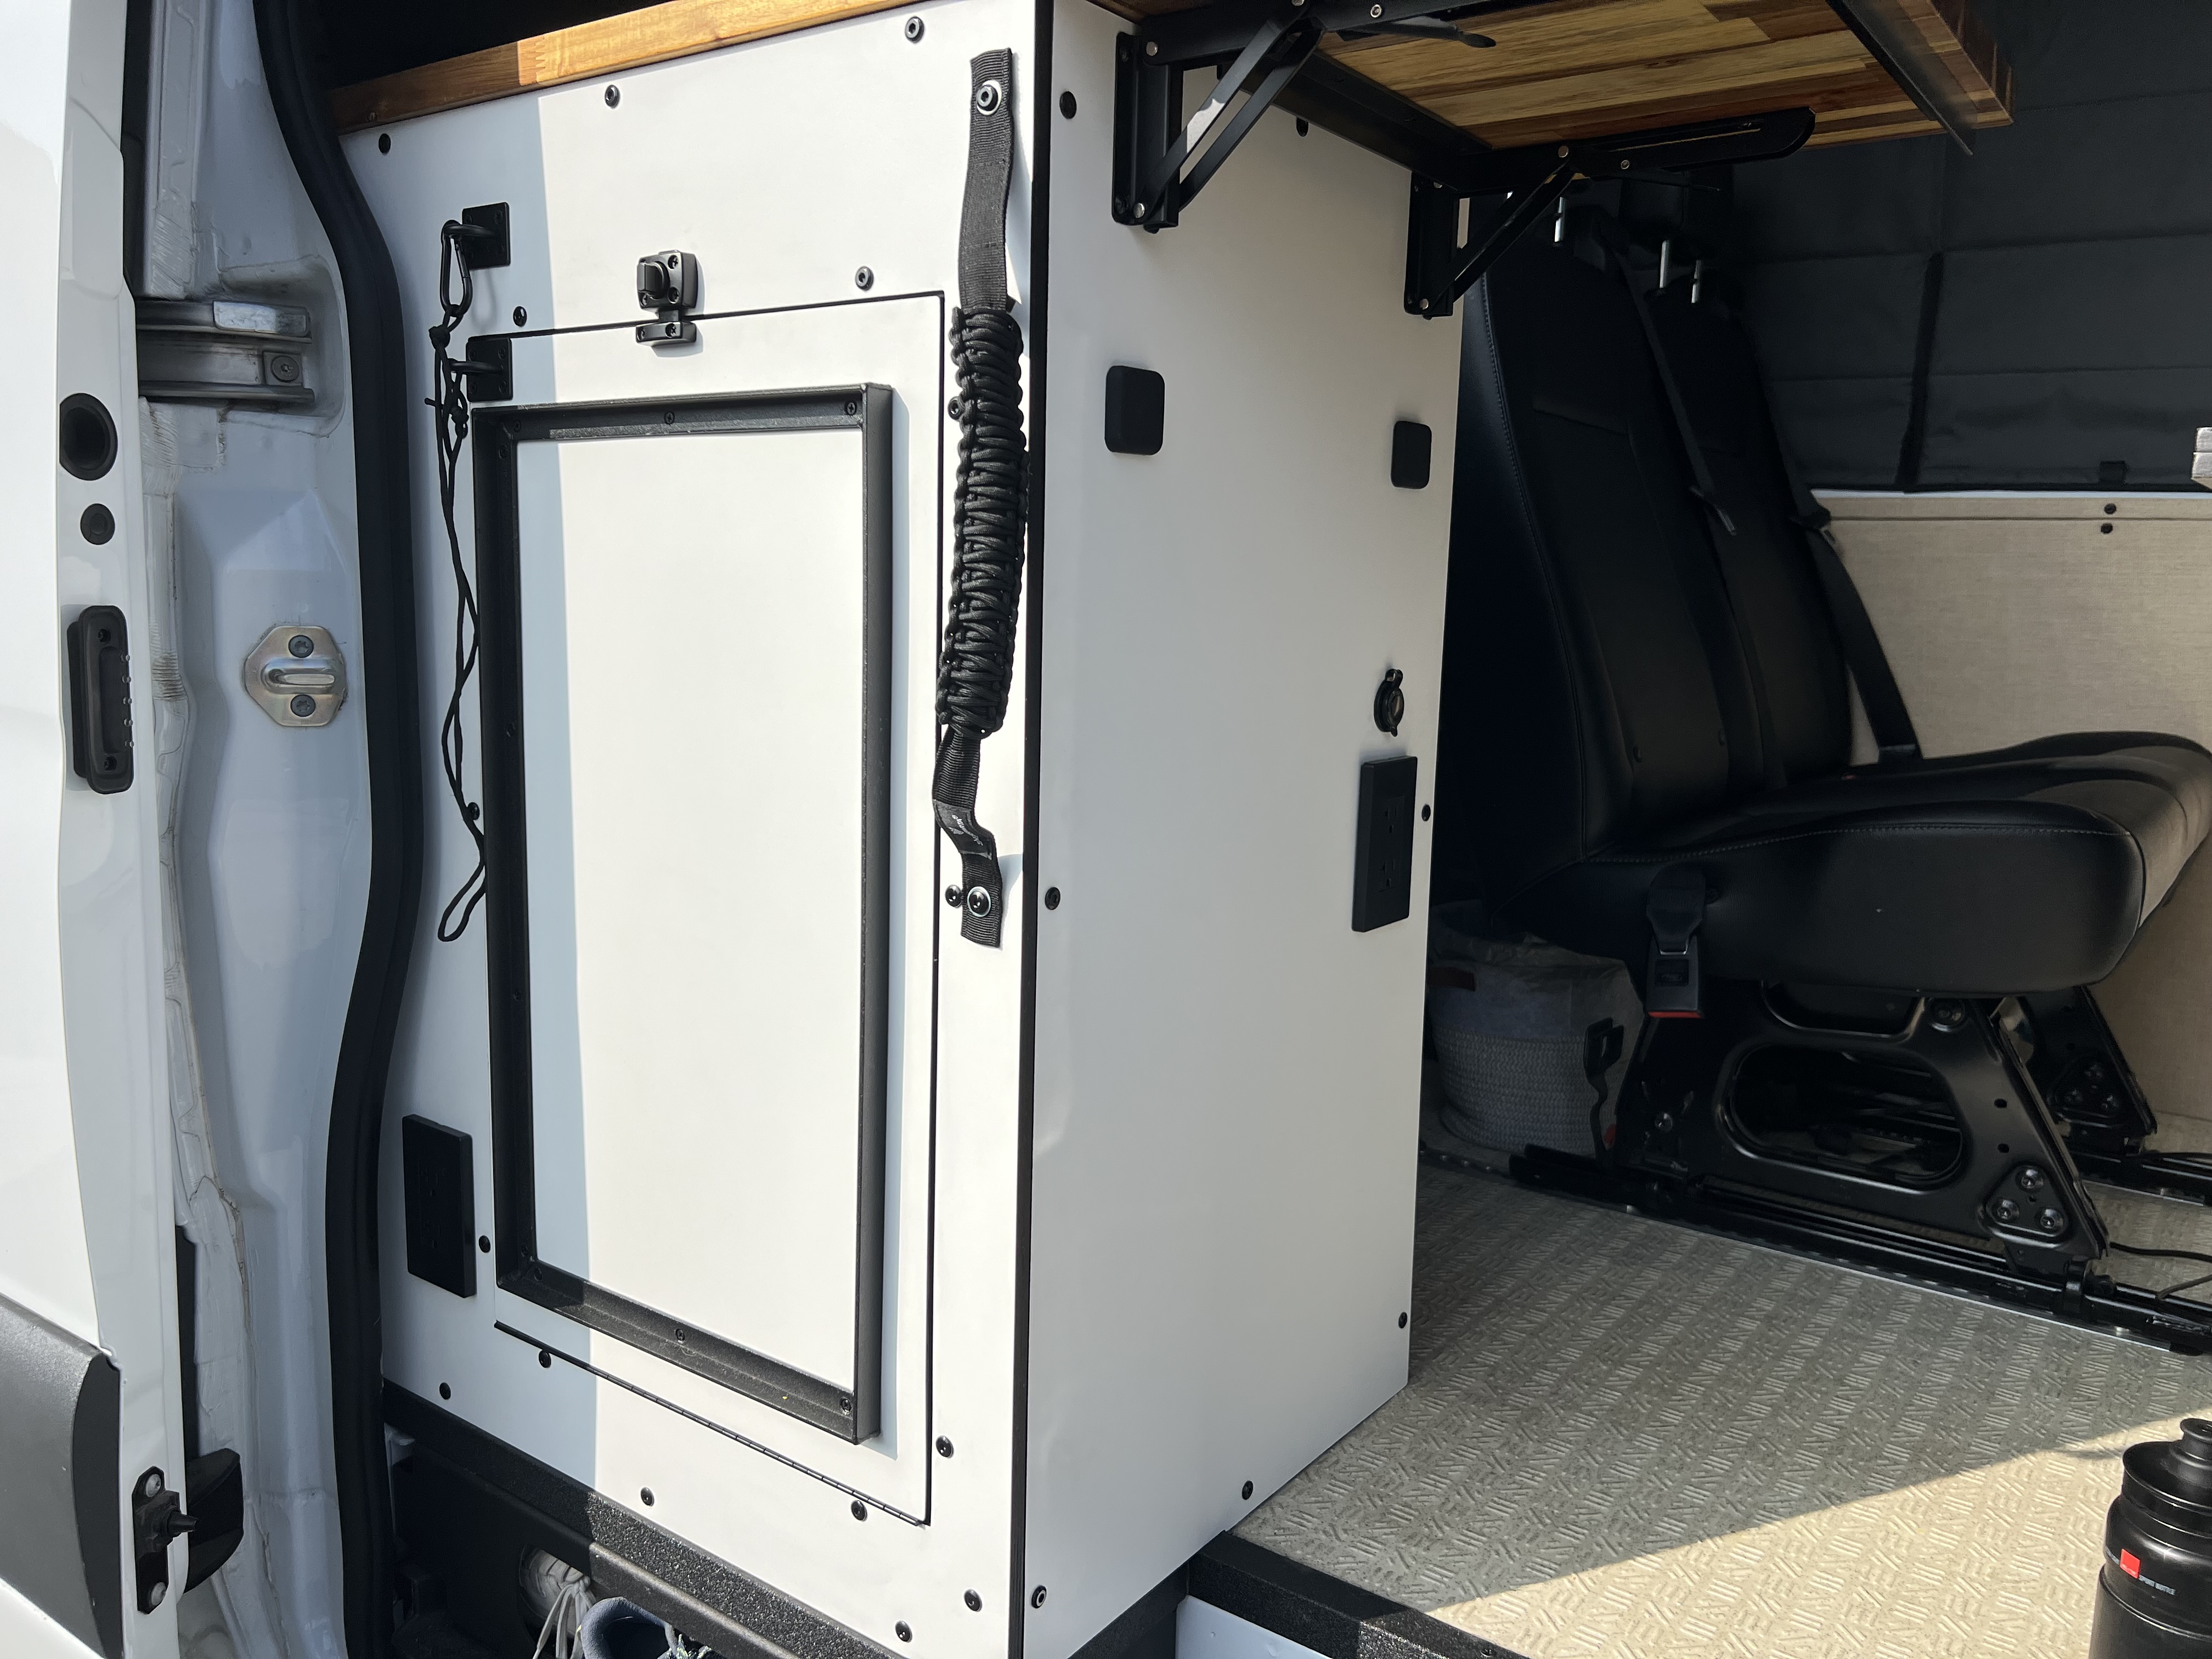
I finished up the Galley Island and the rear water panel. The water panel consists of a water fill inlet, washdown outlet and mixer valve. I wanted to be able to take an outdoor shower or rinse off and have hot water. I mounted up 2- 12" sections of L-Track on the rear water panel to hold small storage bags.


Awesome to see all the hard work paying off!
1 Like