First off I have to give credit to @Buhlockaye and @Coastal for the inspiration with some of their mods.
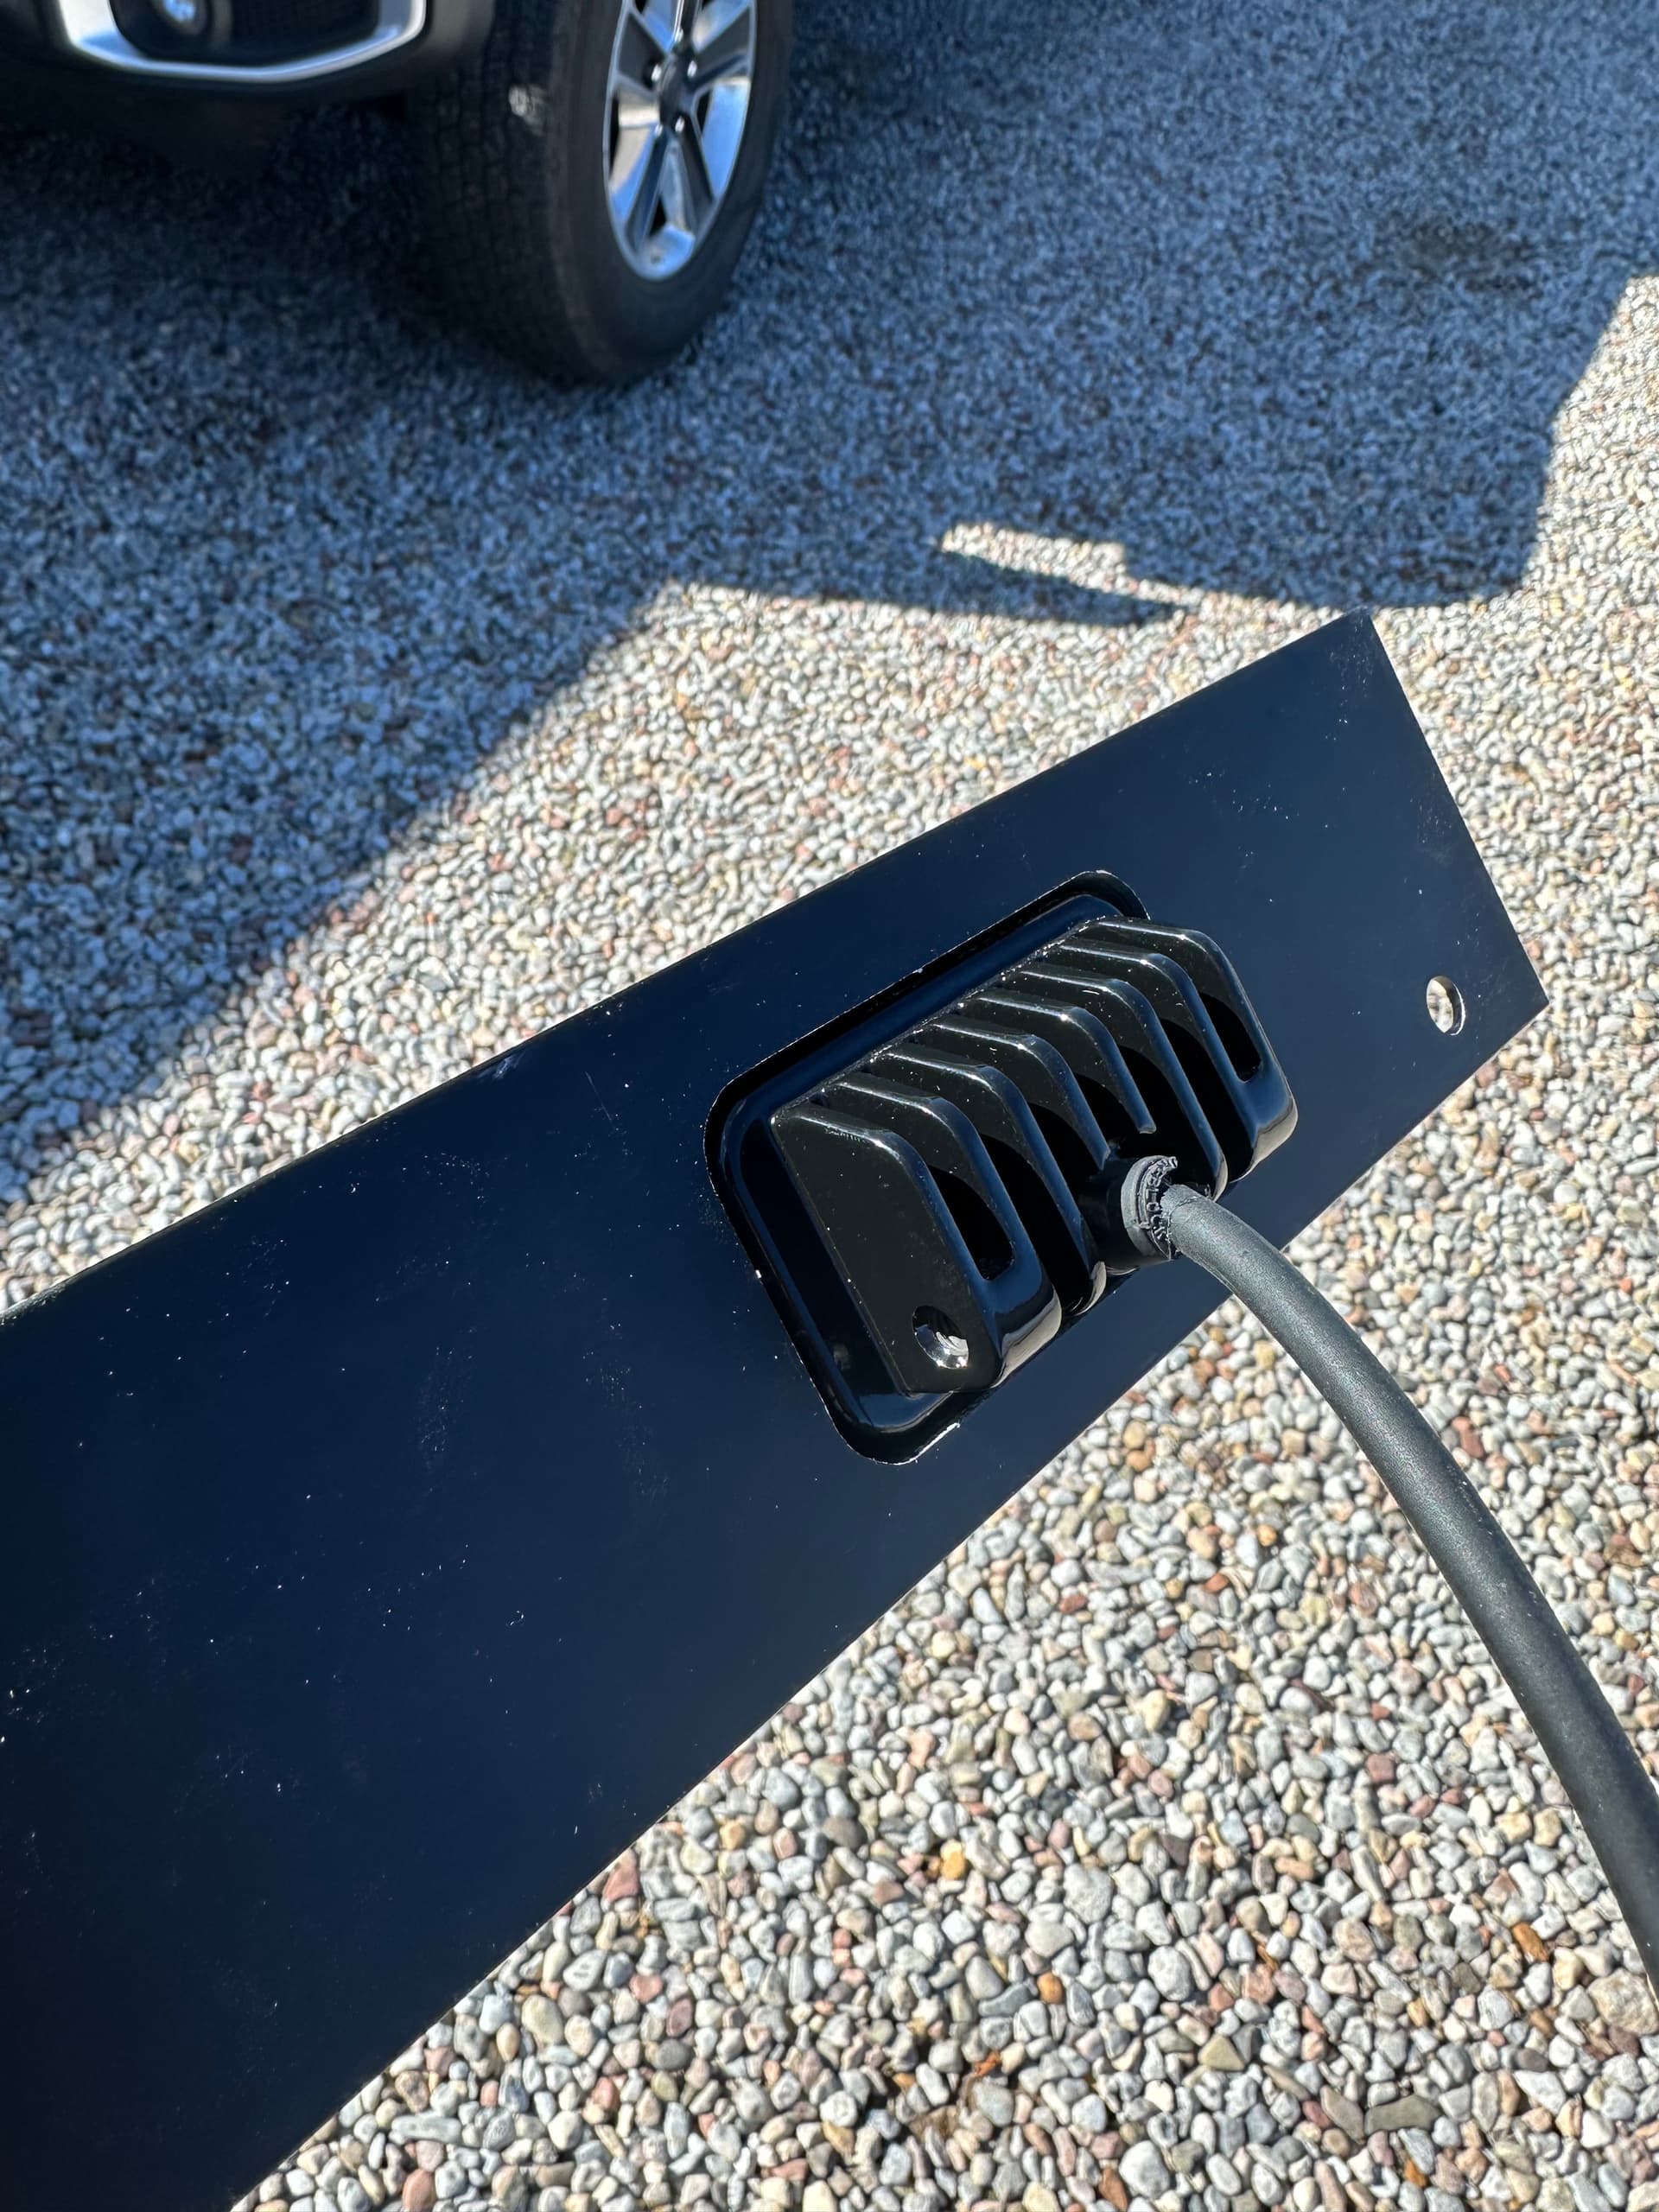
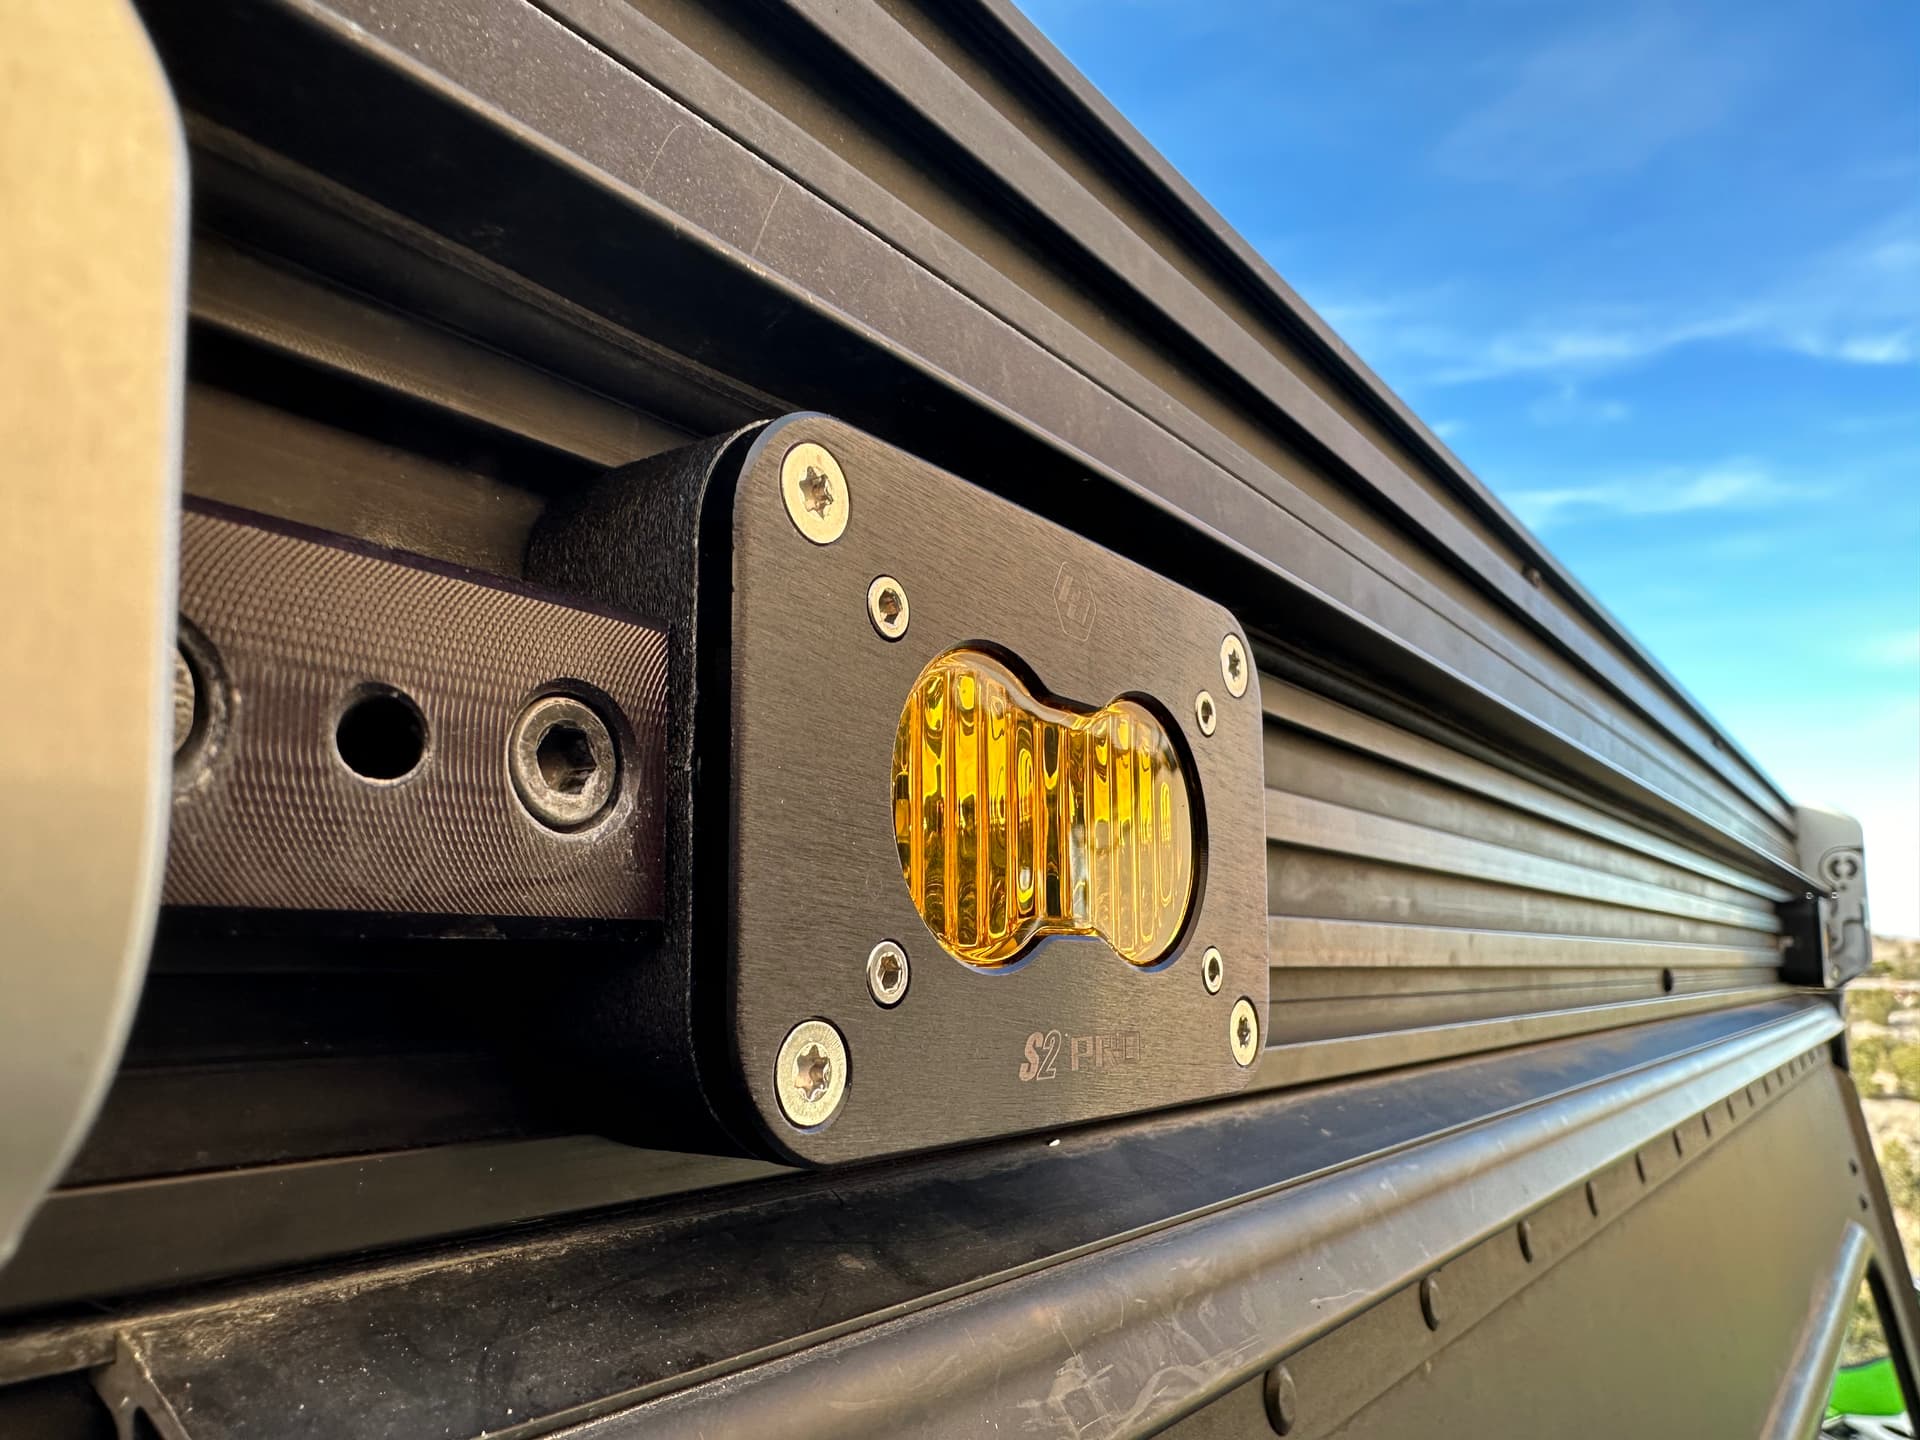
I wanted rear chase lights but wiring showing and the lights protruding bothers me. I chose flush mount Baja Designs S2 Pros with a wide/cornering light pattern in order to be visible from the widest angle.
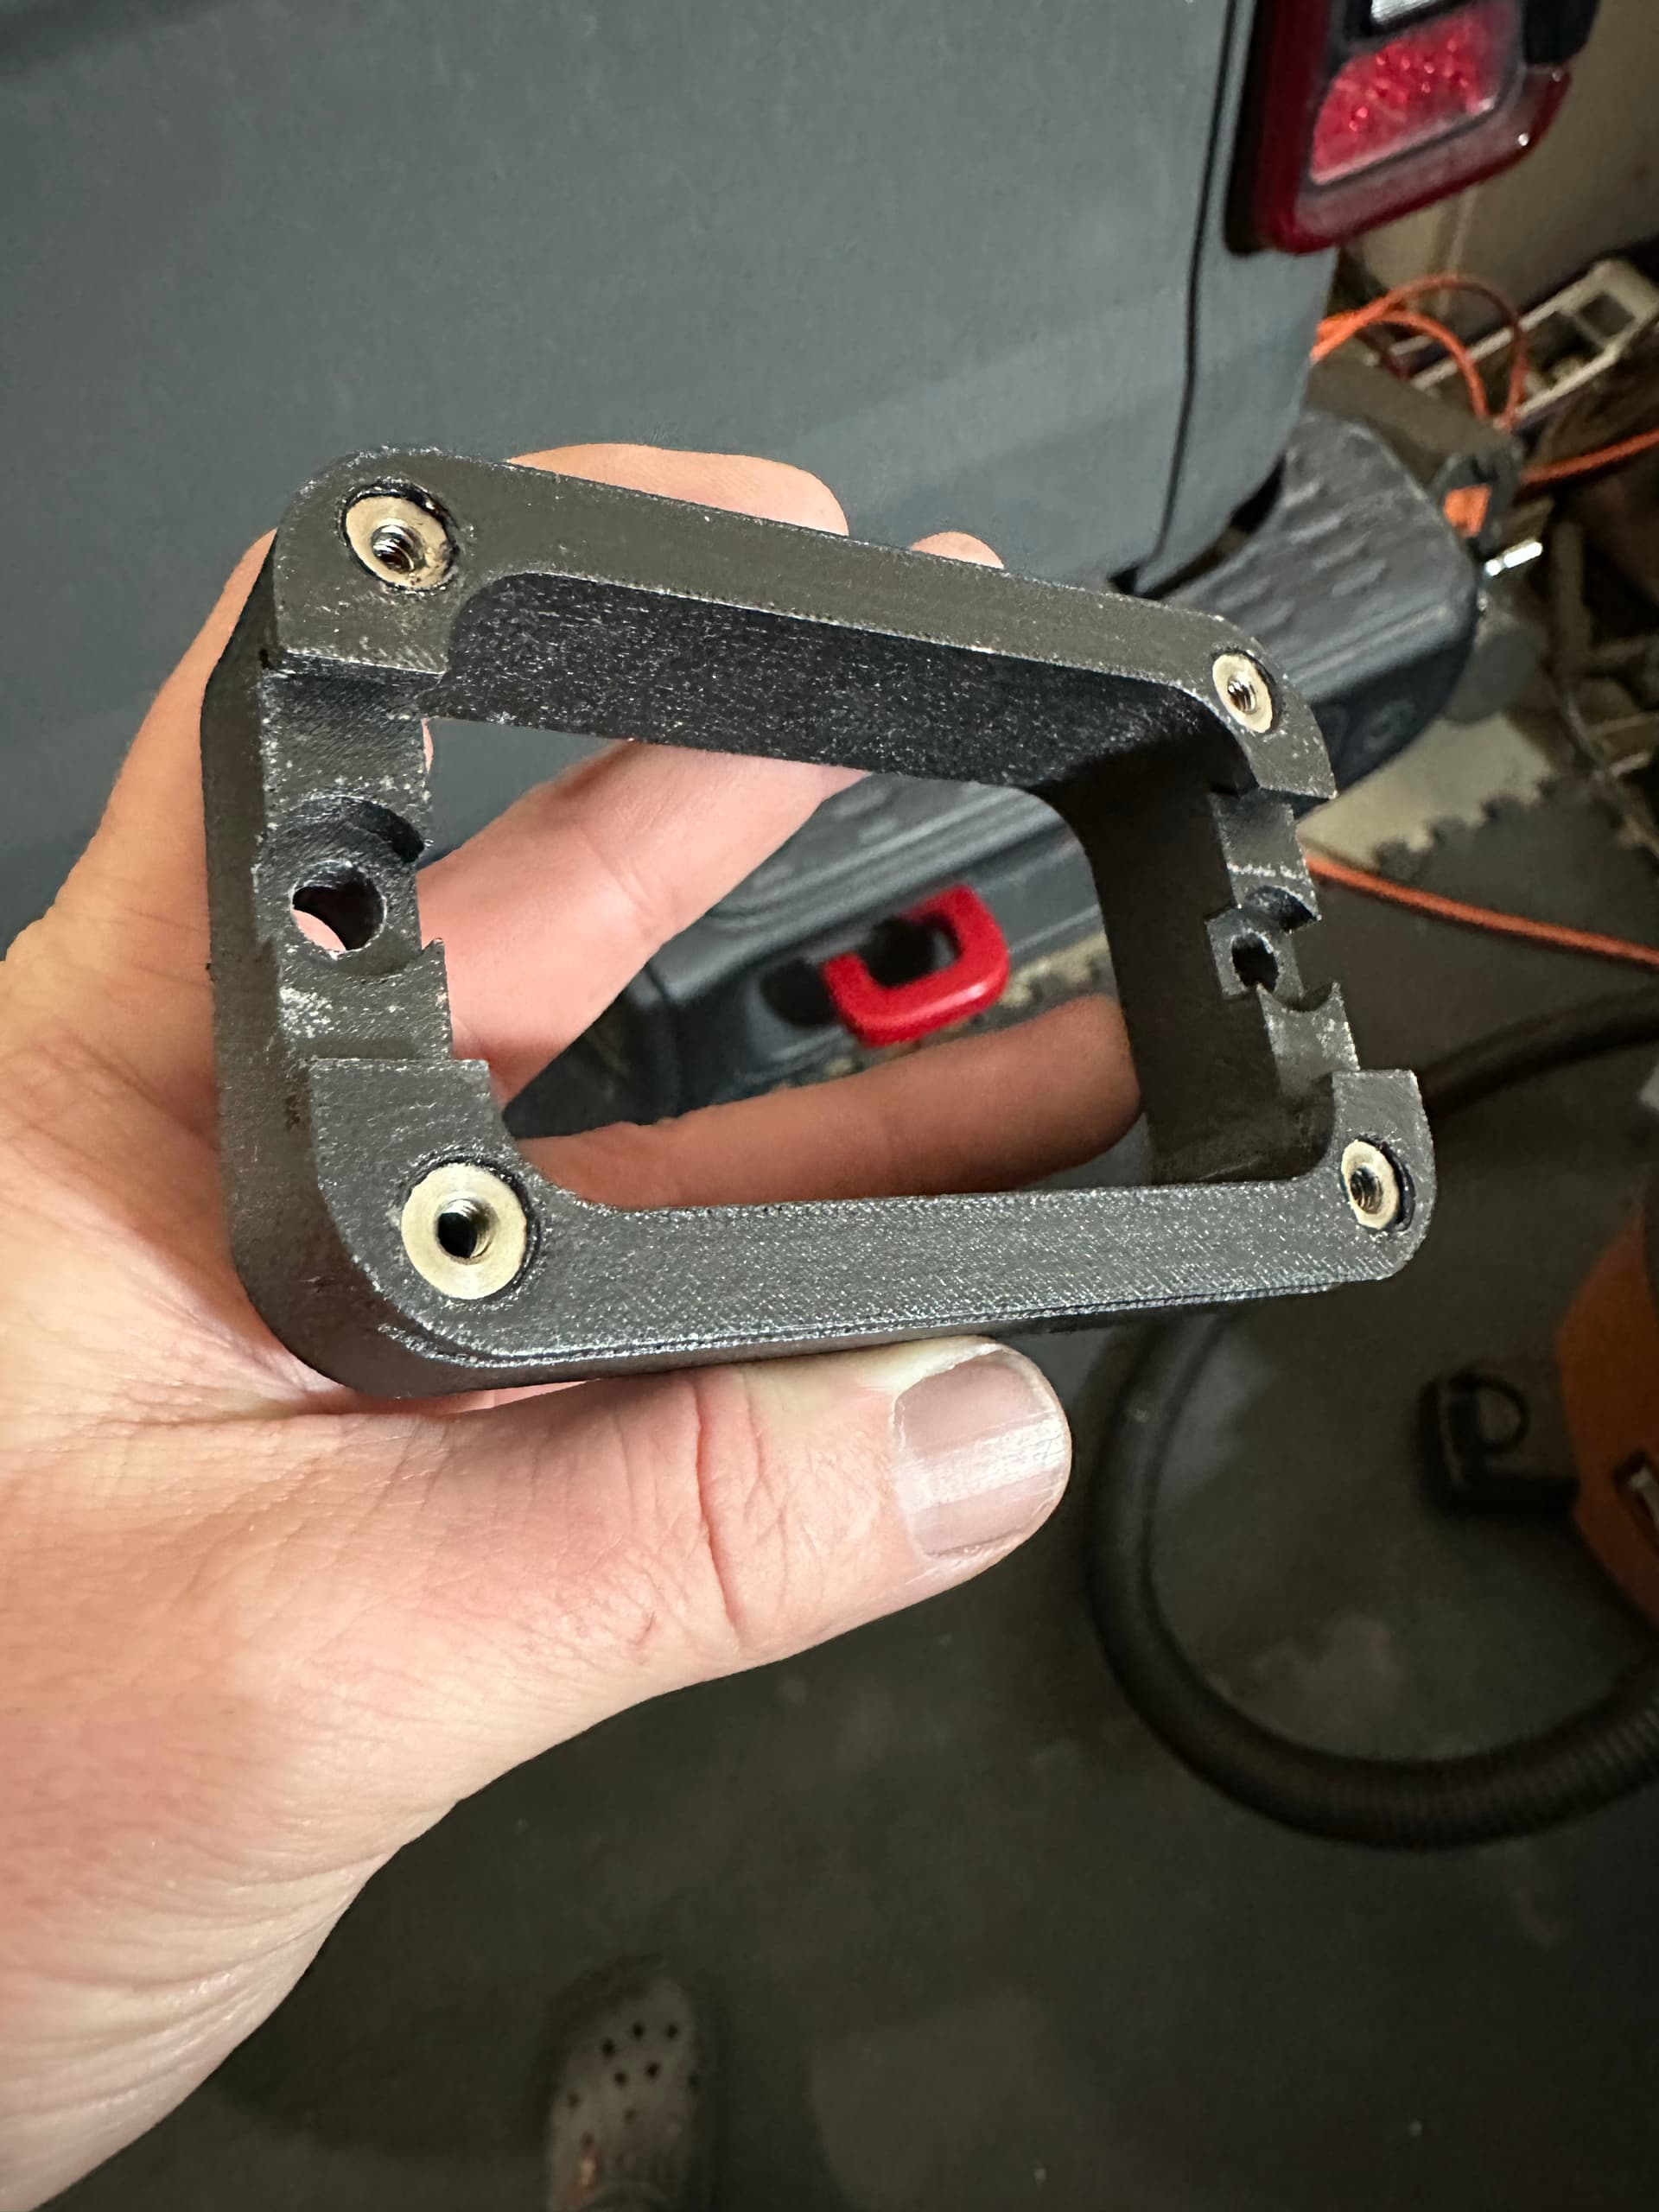
I modeled a mount in fusion that would allow assembly and disassembly from the front of the light.
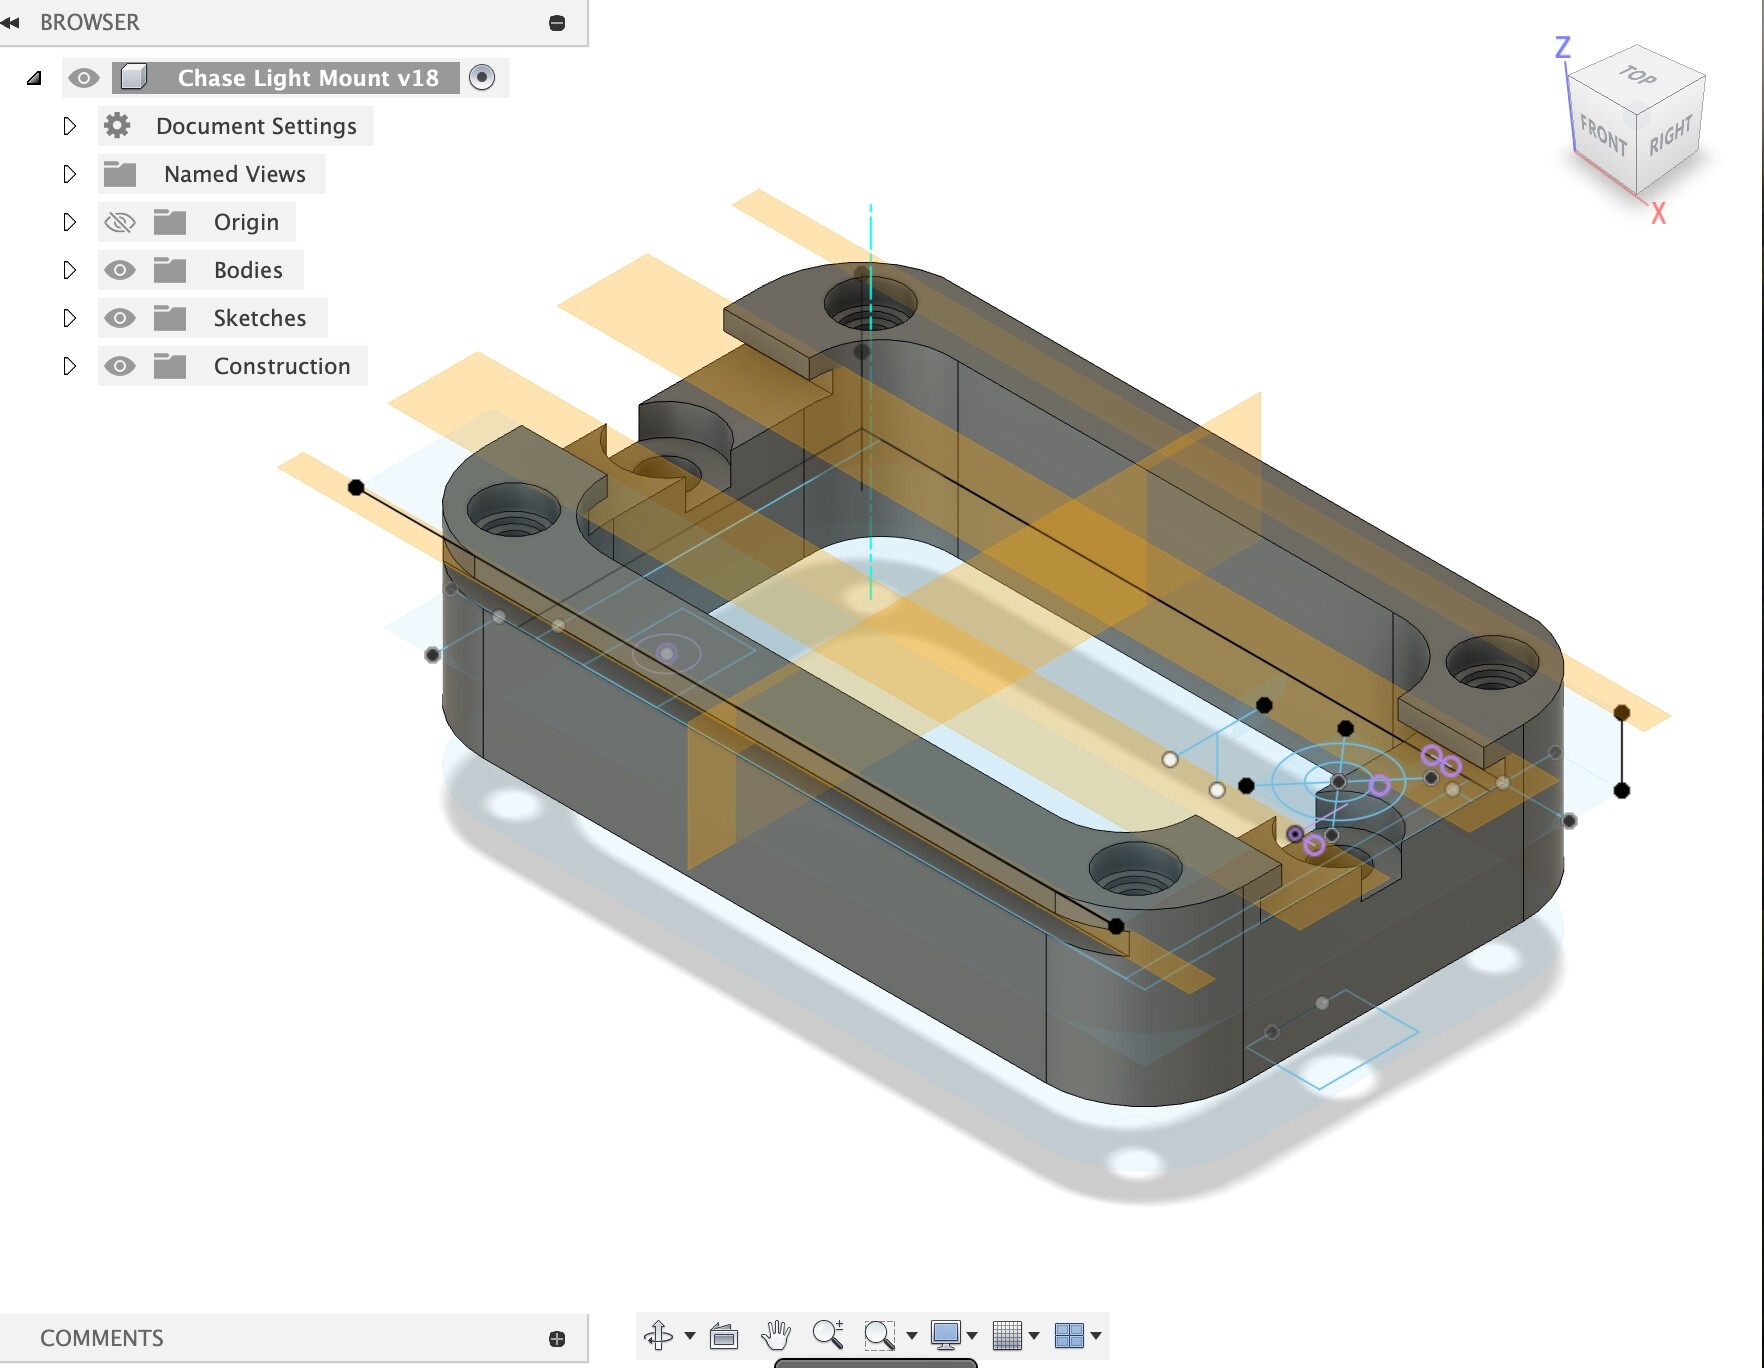
The light has recesses for captured nuts so the light can be installed from the front without having to worry about alignment of a nut.
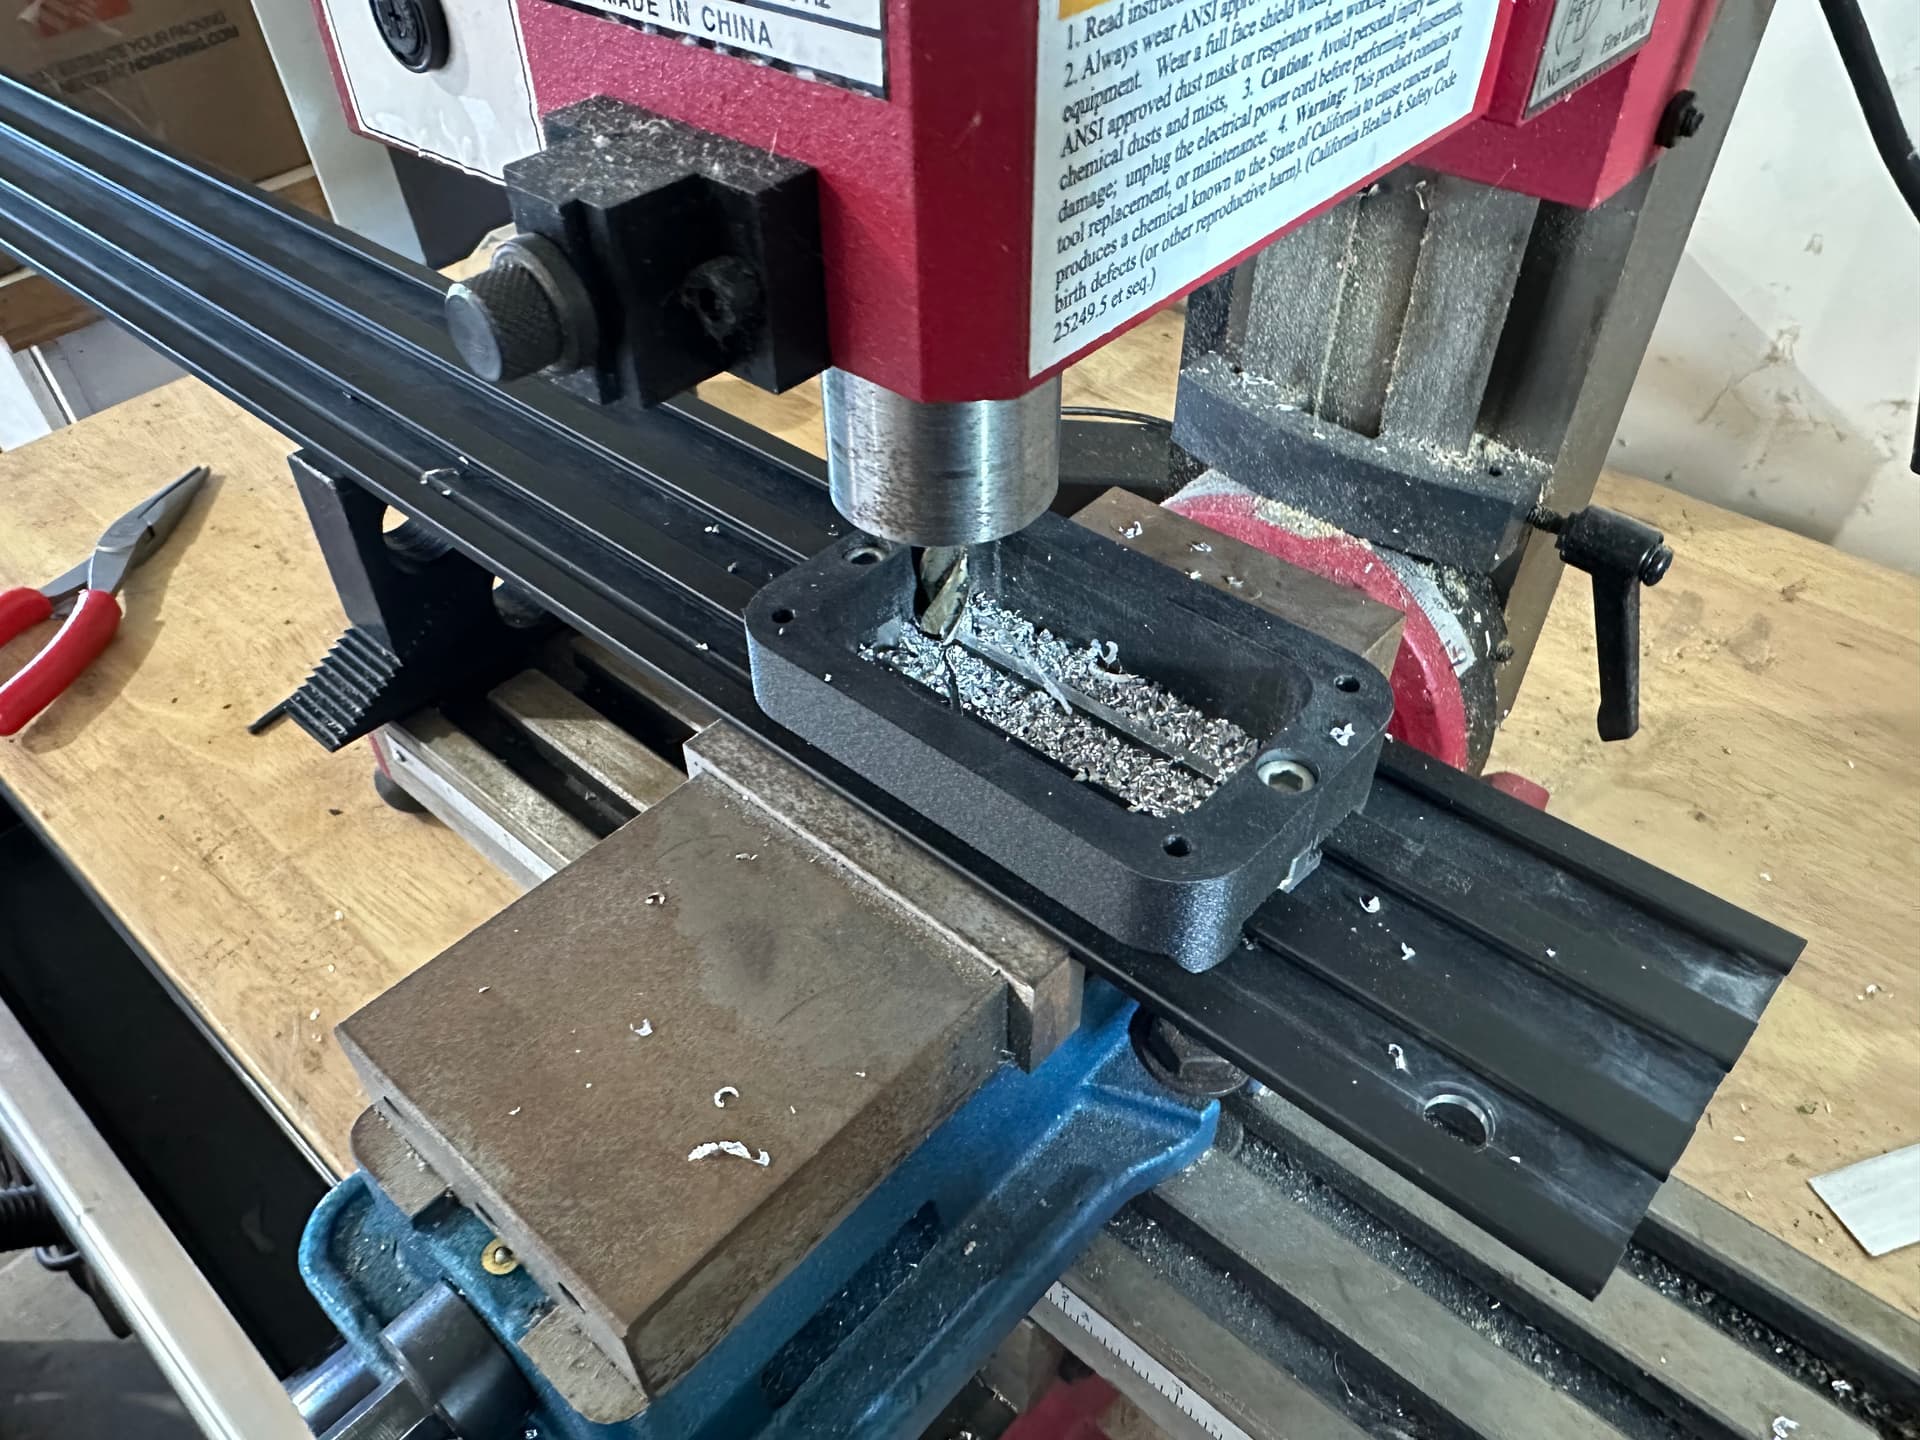
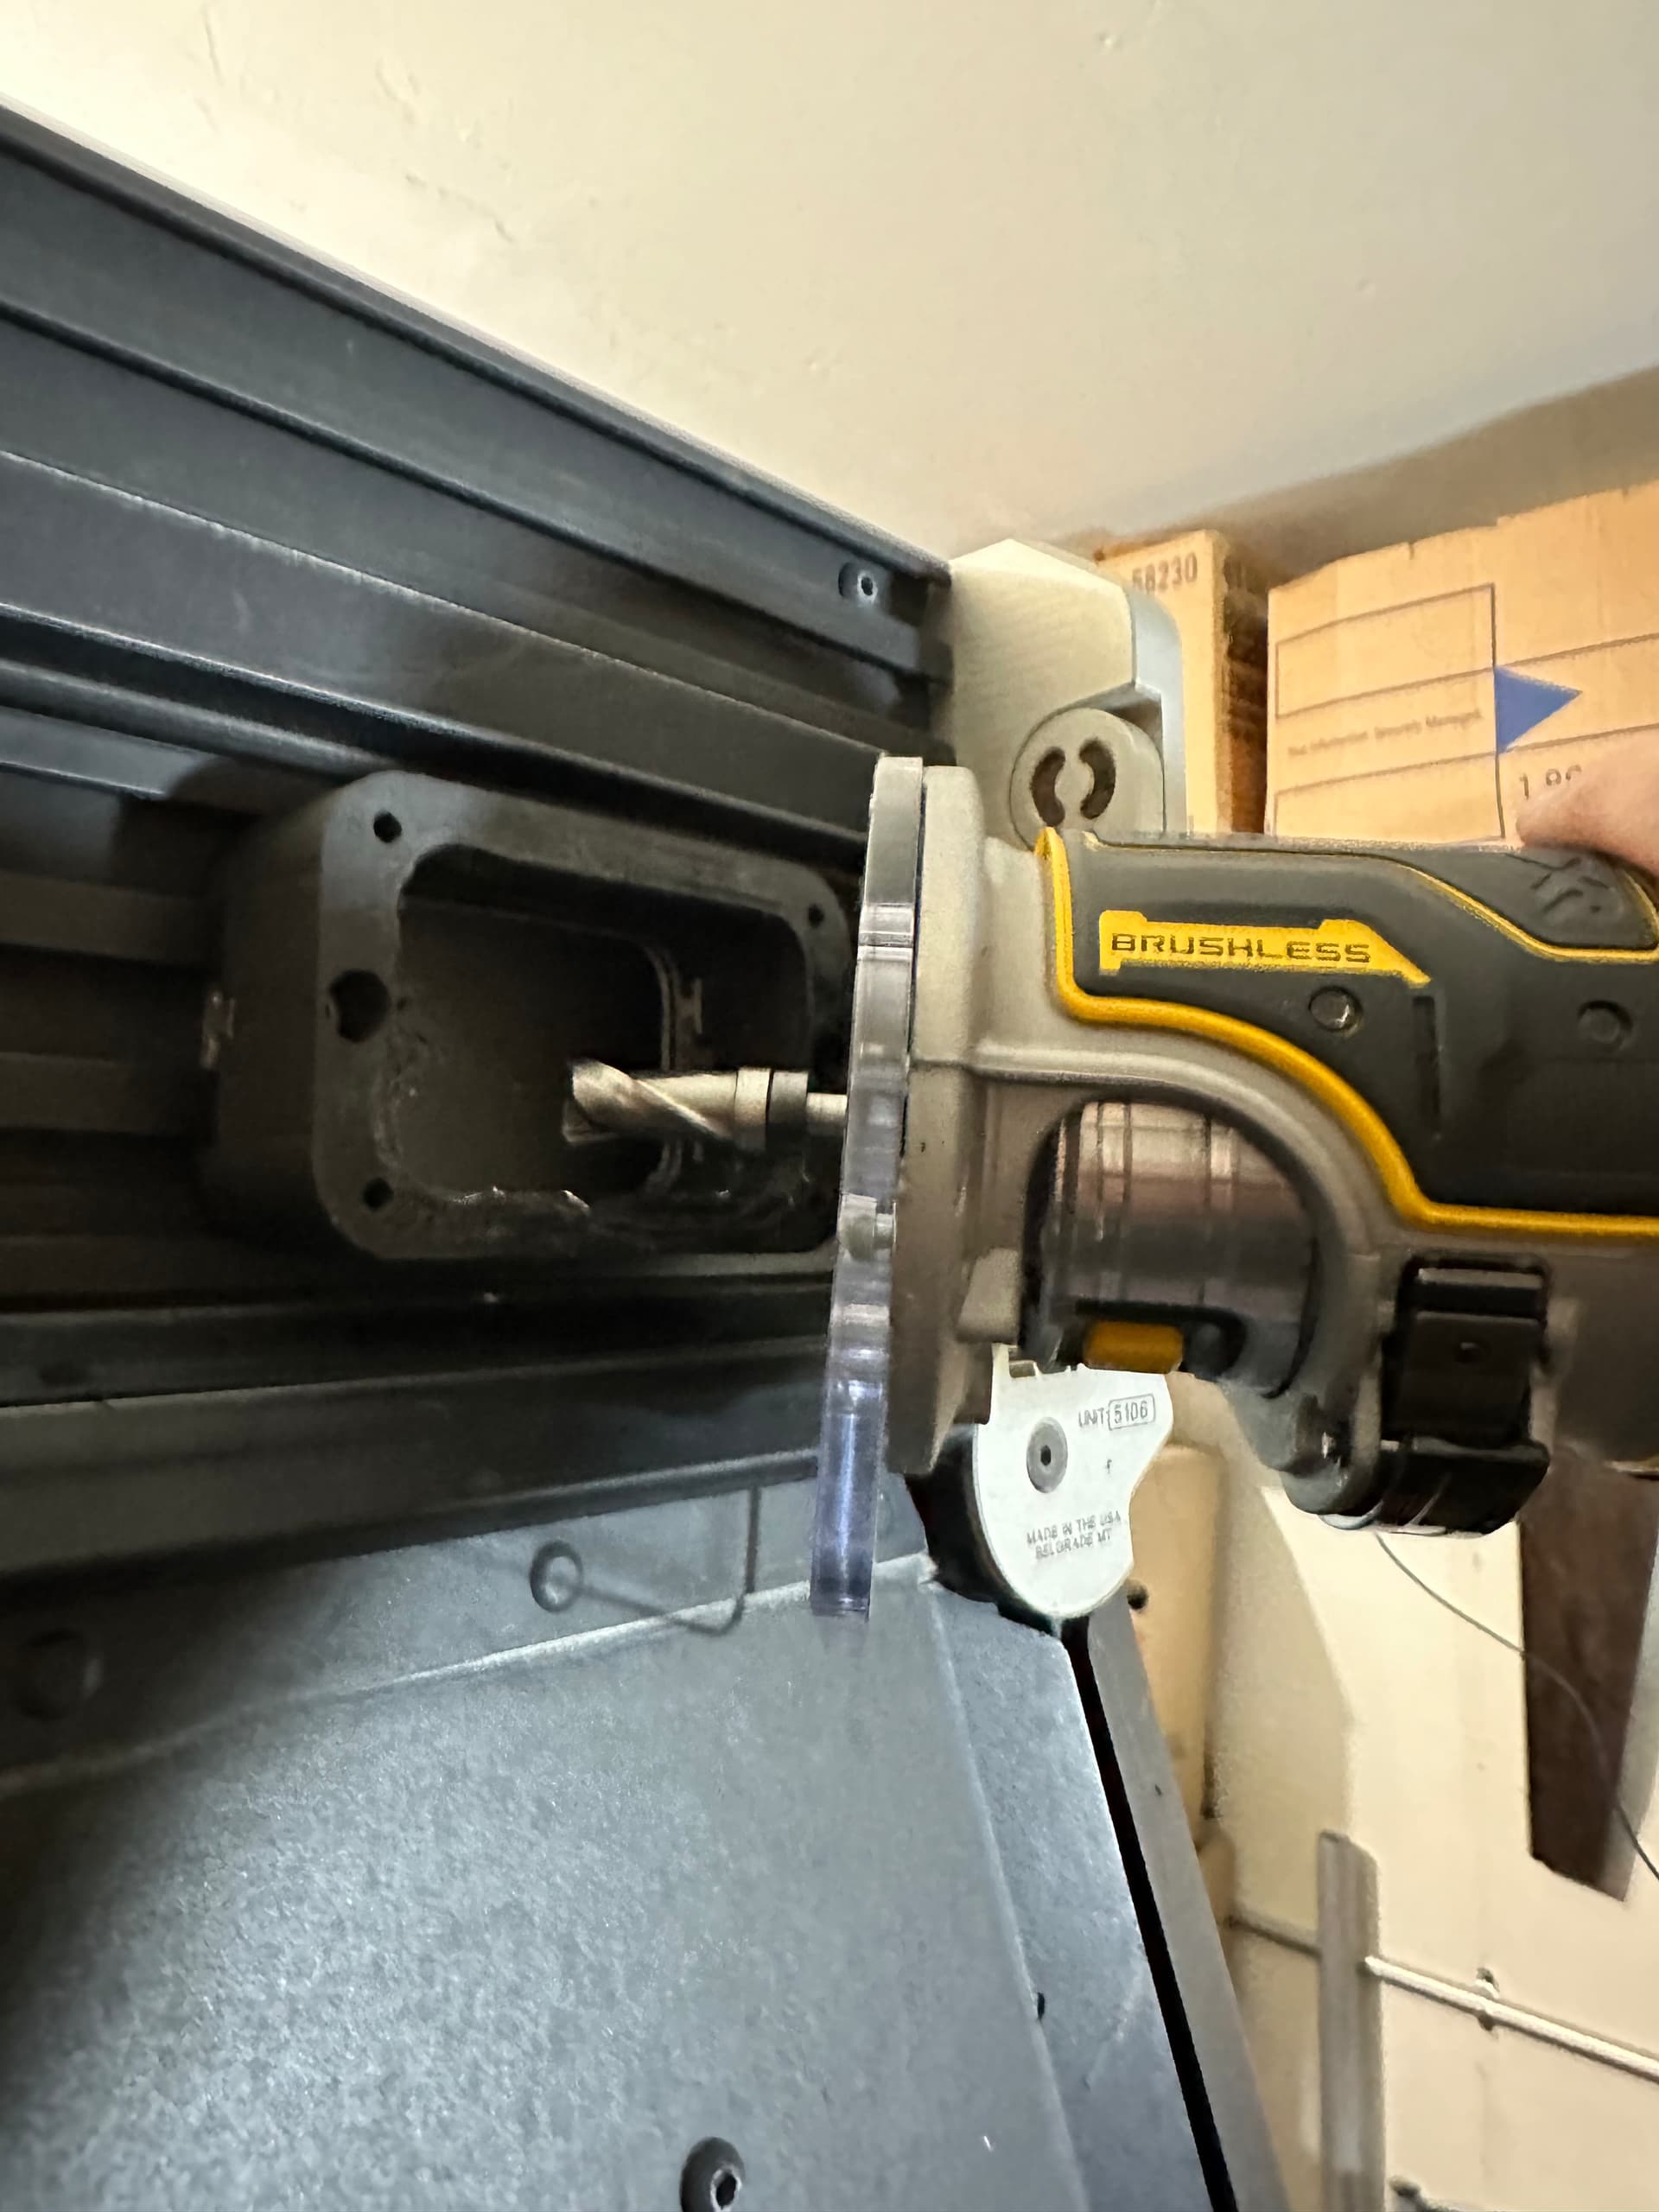
Next it was on to the GFC side of things. This is the part I was most nervous about. I removed the rear t-track/extrusion, after loosening the 3 hex bolts, with a pry bar.
I chucked the extrusion into my mill. This is a cheap Harbor Freight mini-mill that has atrocious measuring and no DRO so I used a sacrificial mount as a guide.
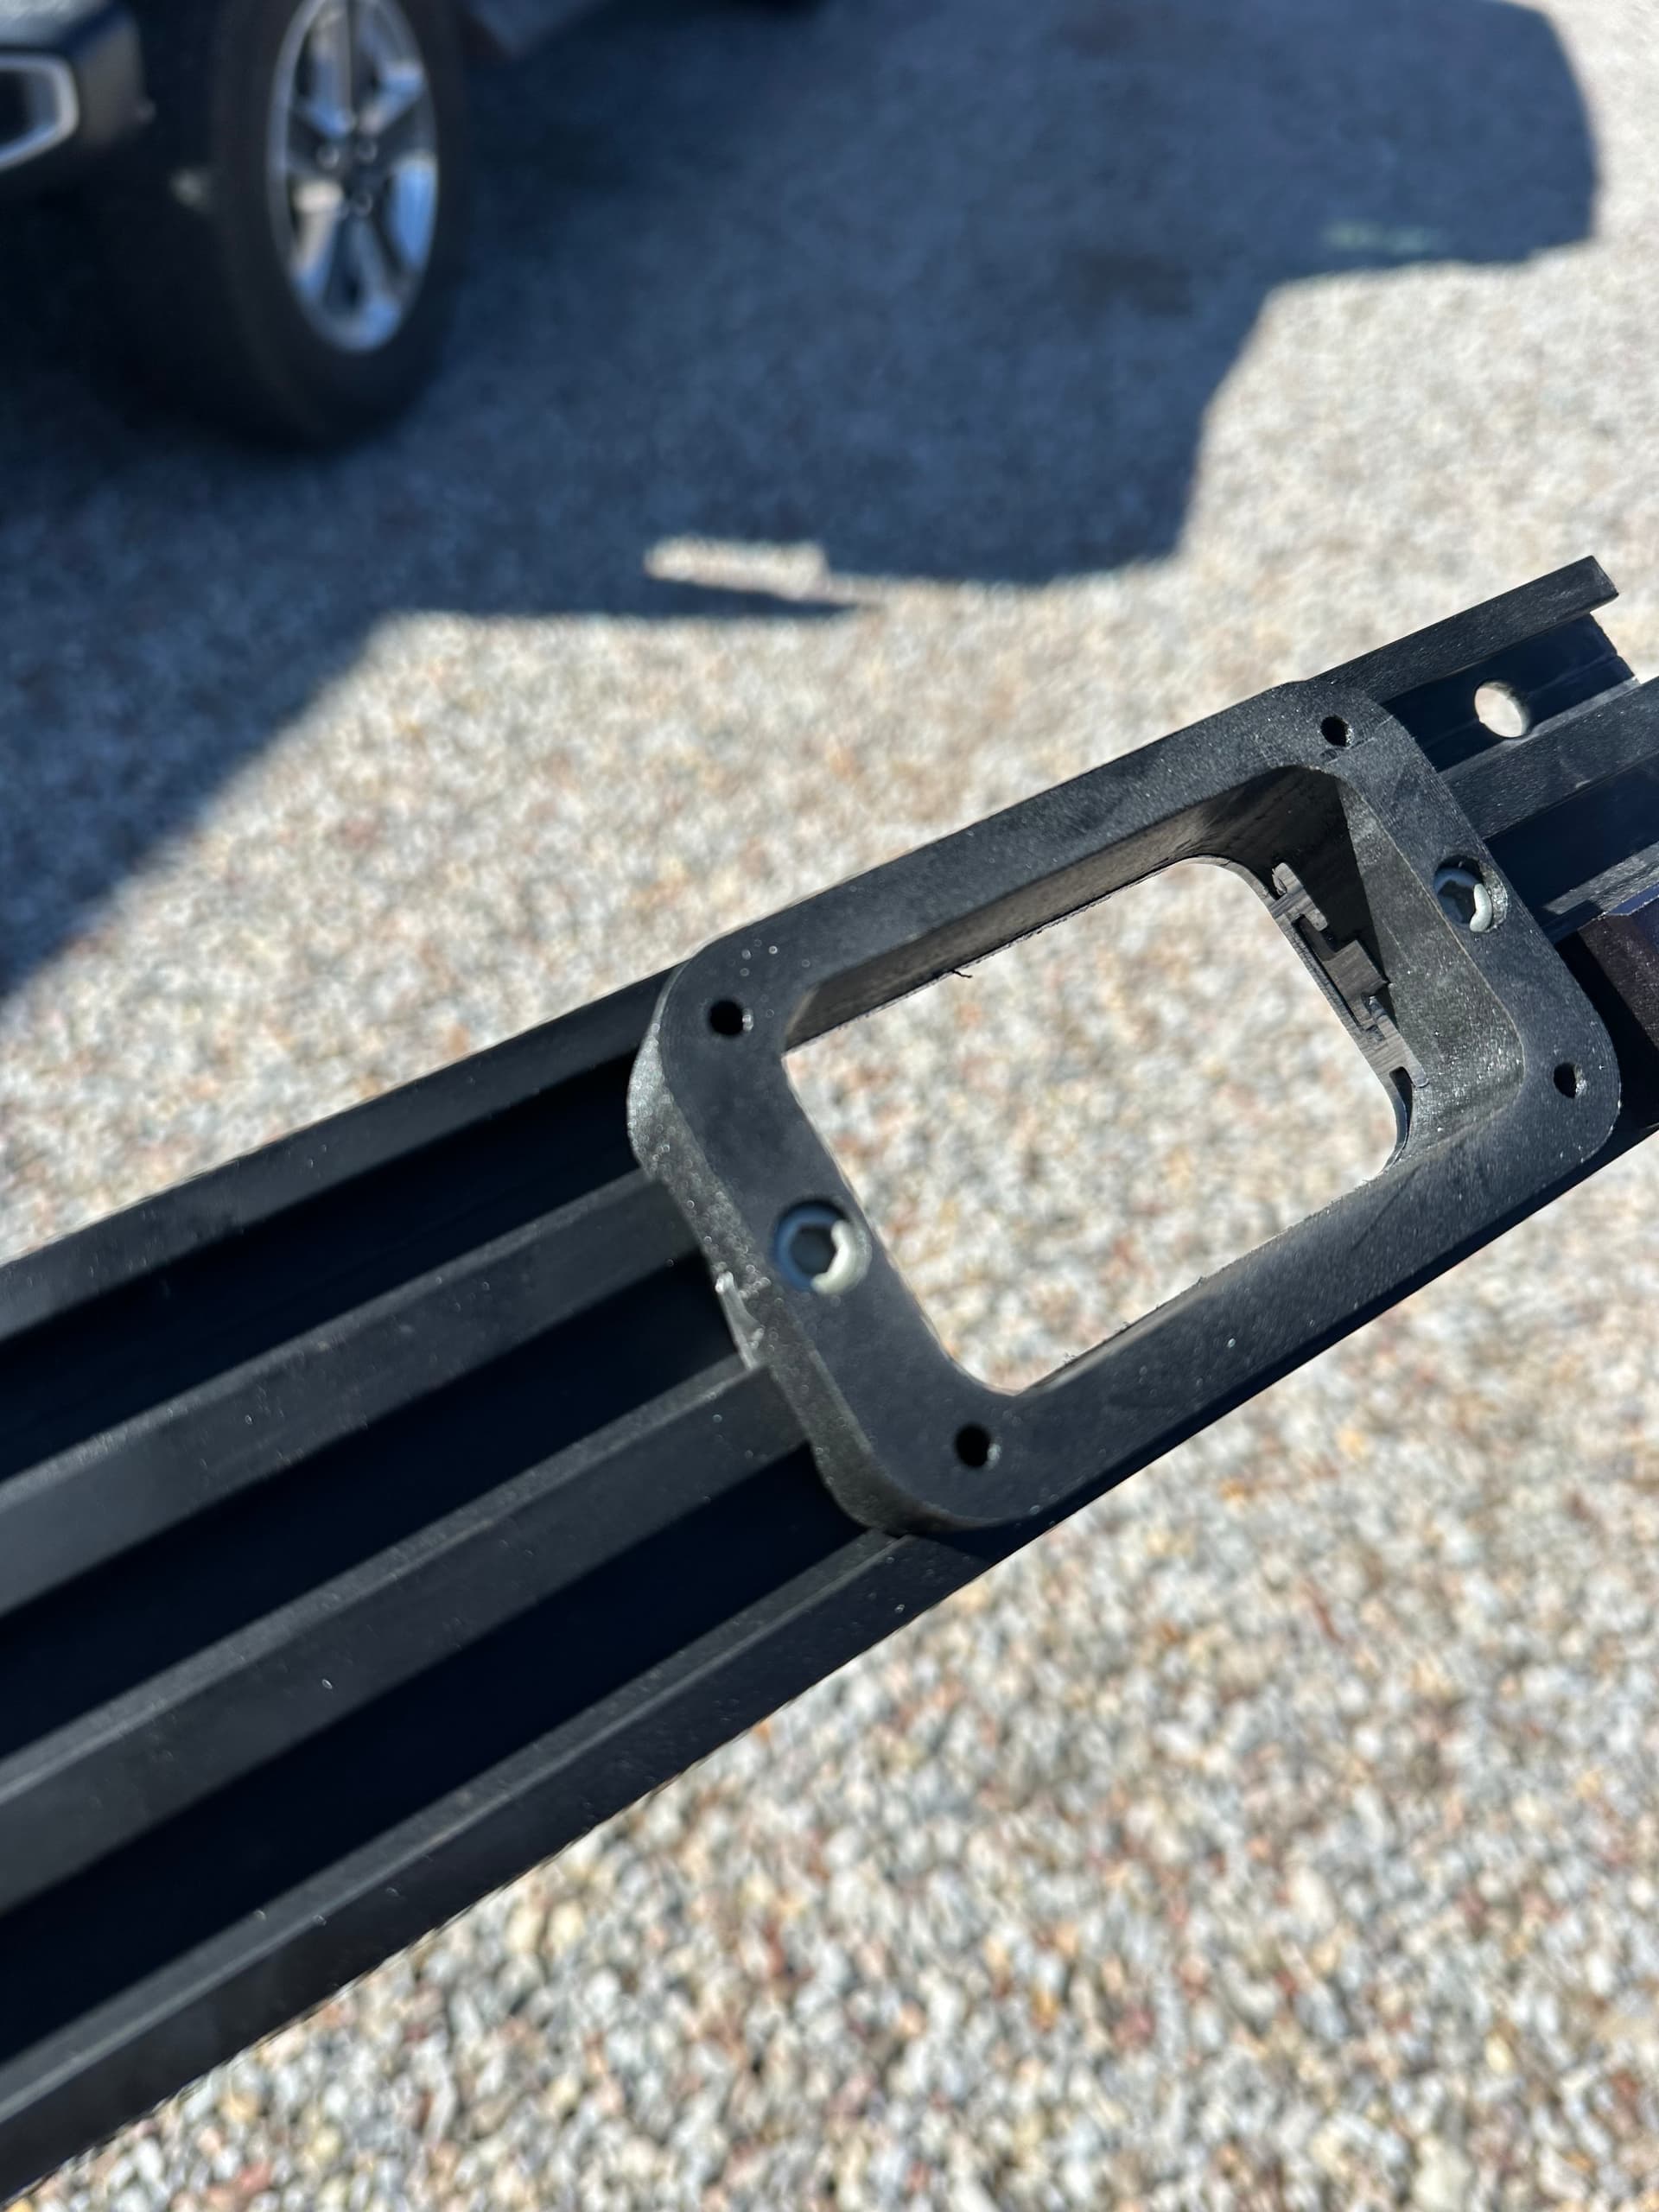
The finished product showing how recessed the lights are.
The next obstacle to overcome is the vertical piece of aluminum behind the t-track/extrusion. I tried to figure out how to remove this but gave up and decided to use a router with a pilot hole from a unibit. I later found there are two more bolts with access holes.
After routing the holes I build a wiring harness and installed it. Clearance is tight (0.9" I think) behind this aluminum piece but it’ll fit the wiring if you think it through.
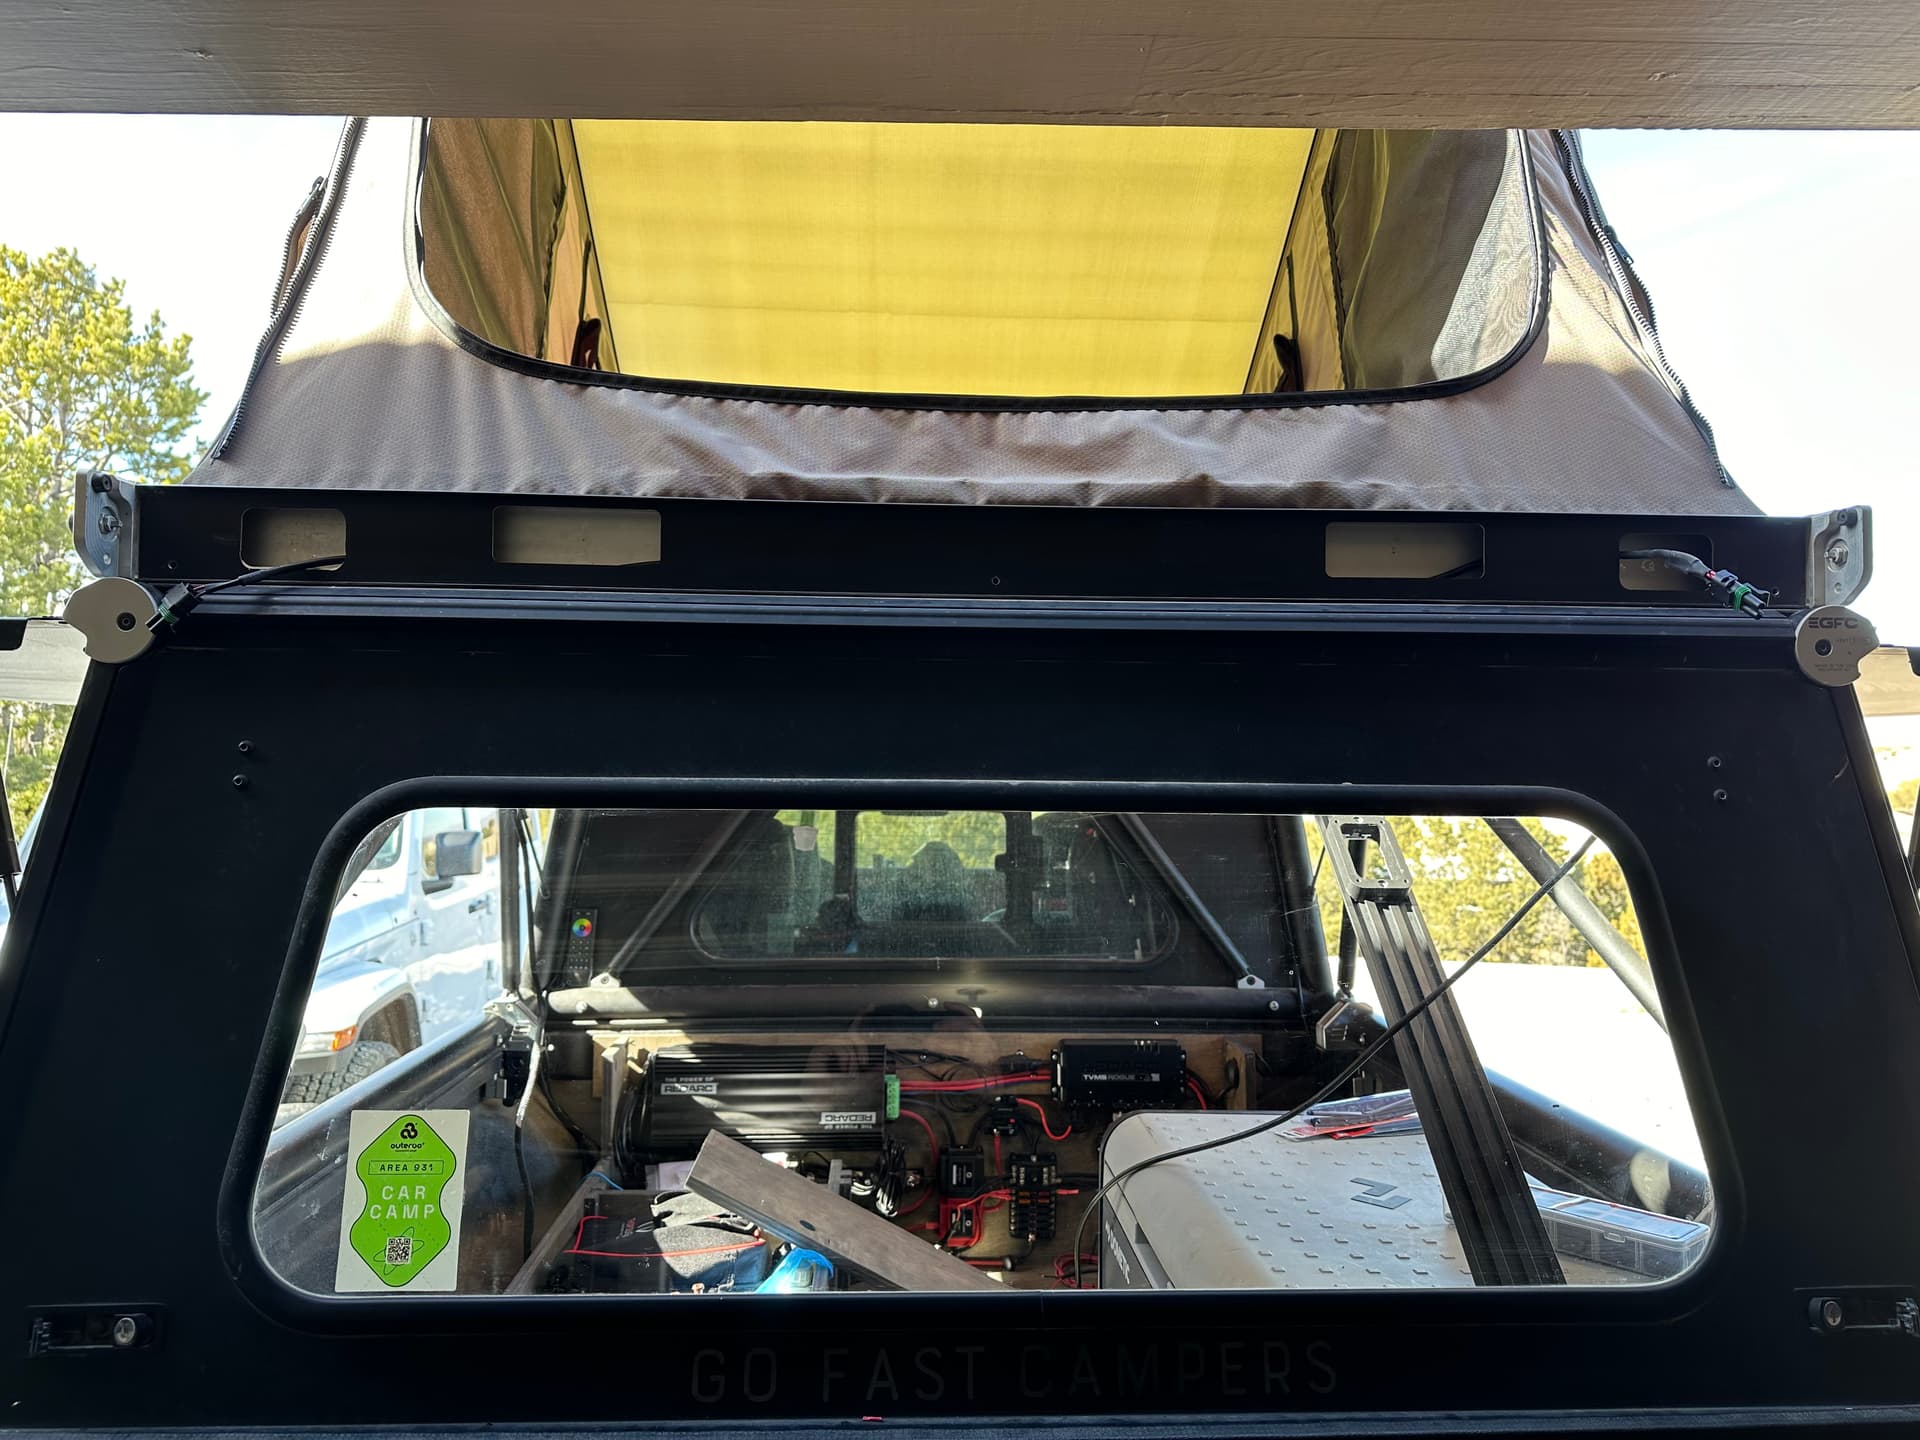
I don’t have a picture of the wiring exiting but I drilled horizontally on the right hole that I routed. The wiring then goes down the vertical pillar and under the bed rail to my RedArc Rogue.
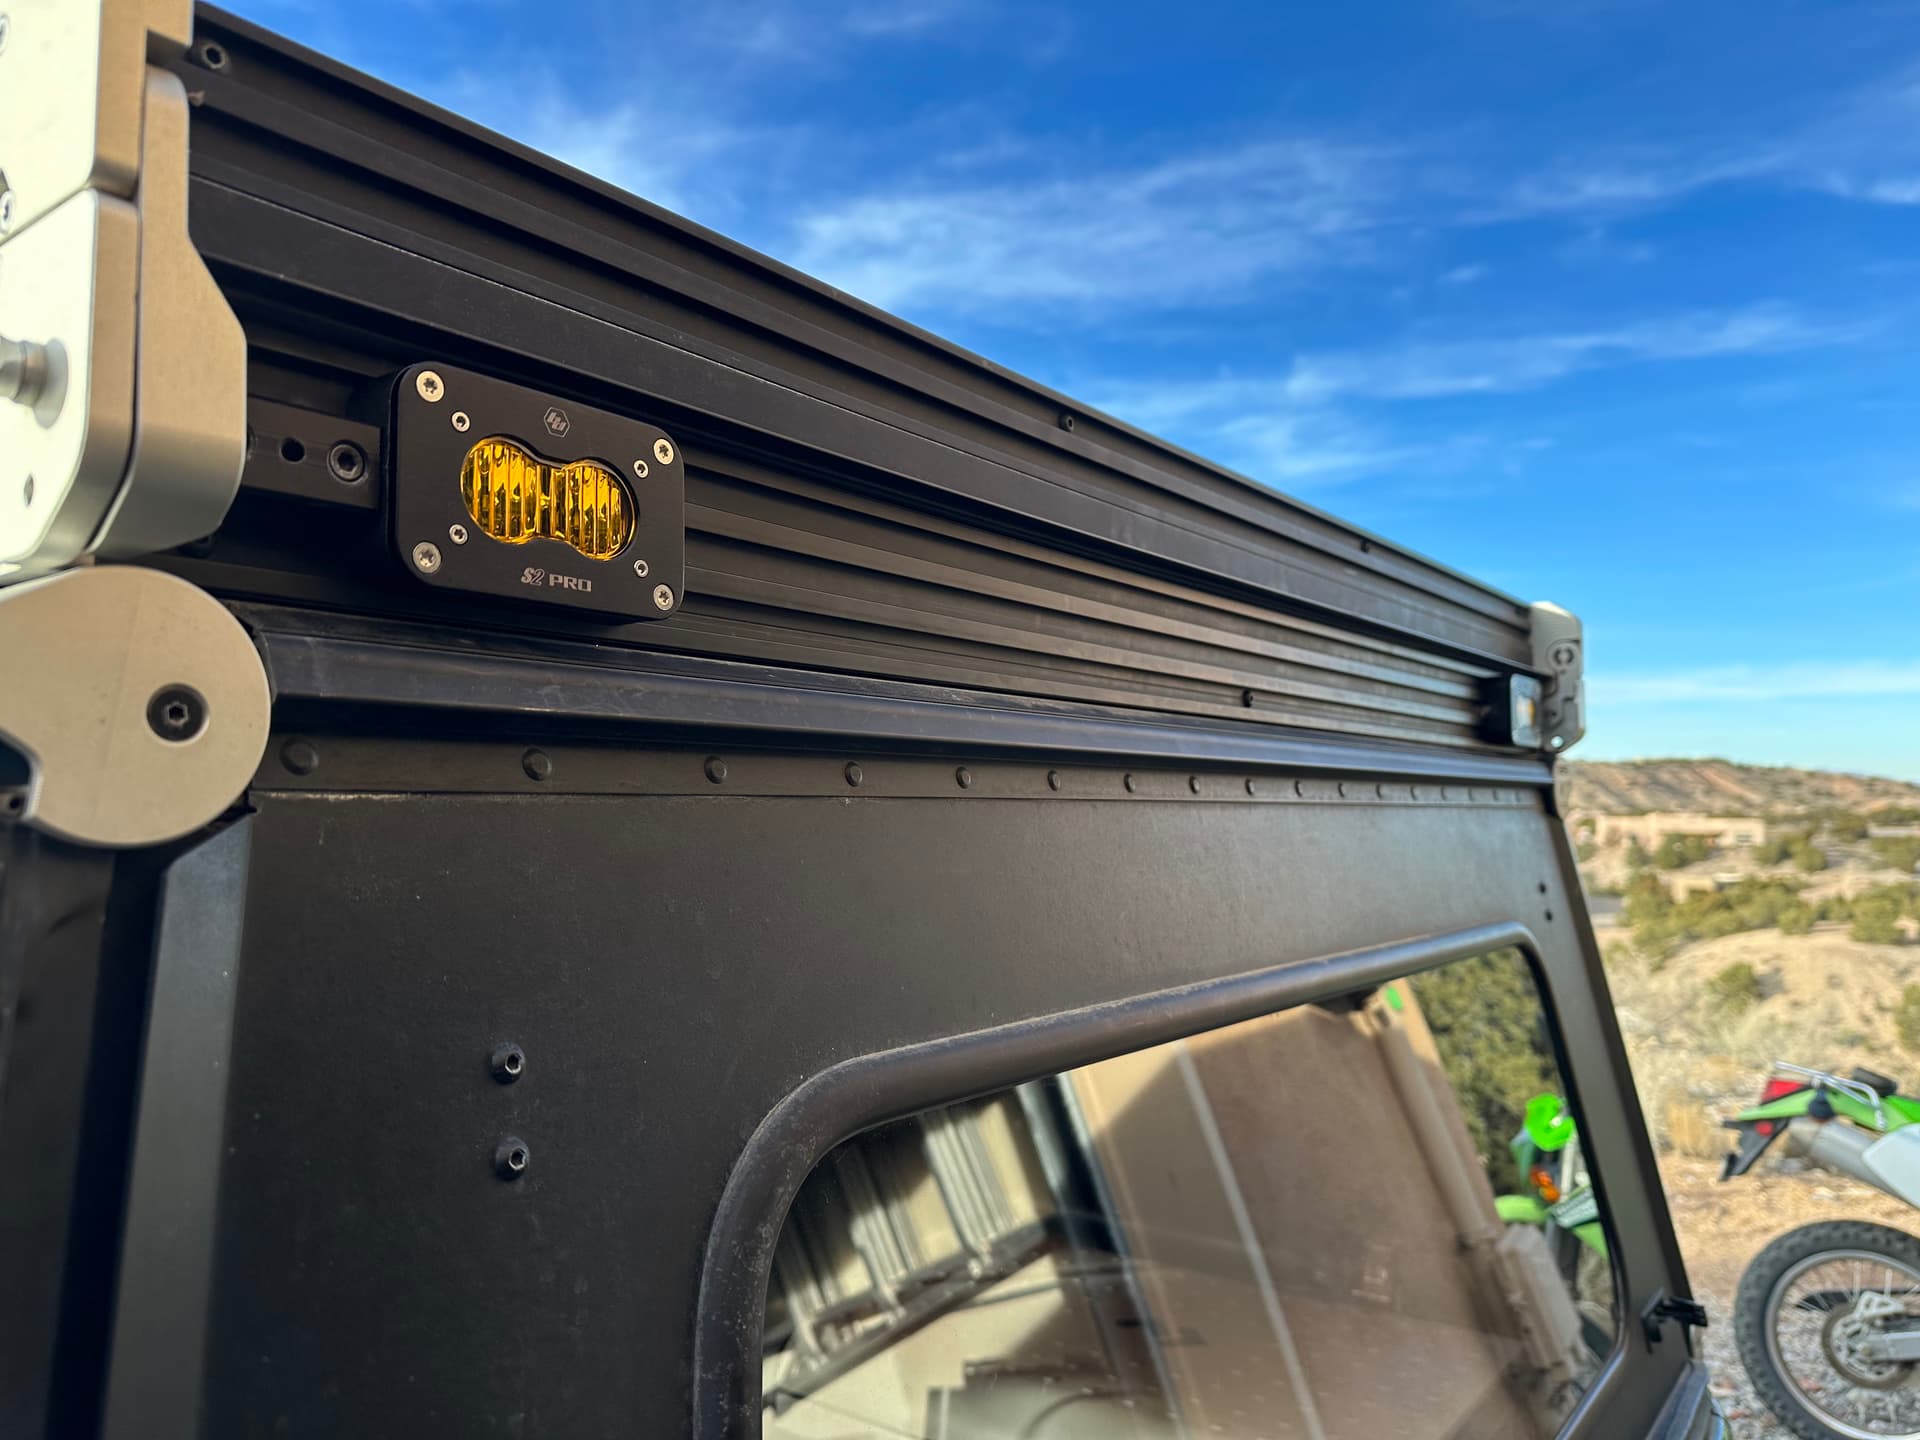
Final product:
As mentioned earlier I wired the lights into the Rogue which manages output from the house battery. I also ran a lead from my factory auxiliary switches to the Rogue. This lead works as control voltage for the Rogue so I can turn the chase lights on from a hard mounted button. I can also turn the light on from the RedArc display or bluetooth app. Since it’s wired to the house battery I can leave the chase lights on for visibility without risk to the starting battery.

The model is available for printing here.
