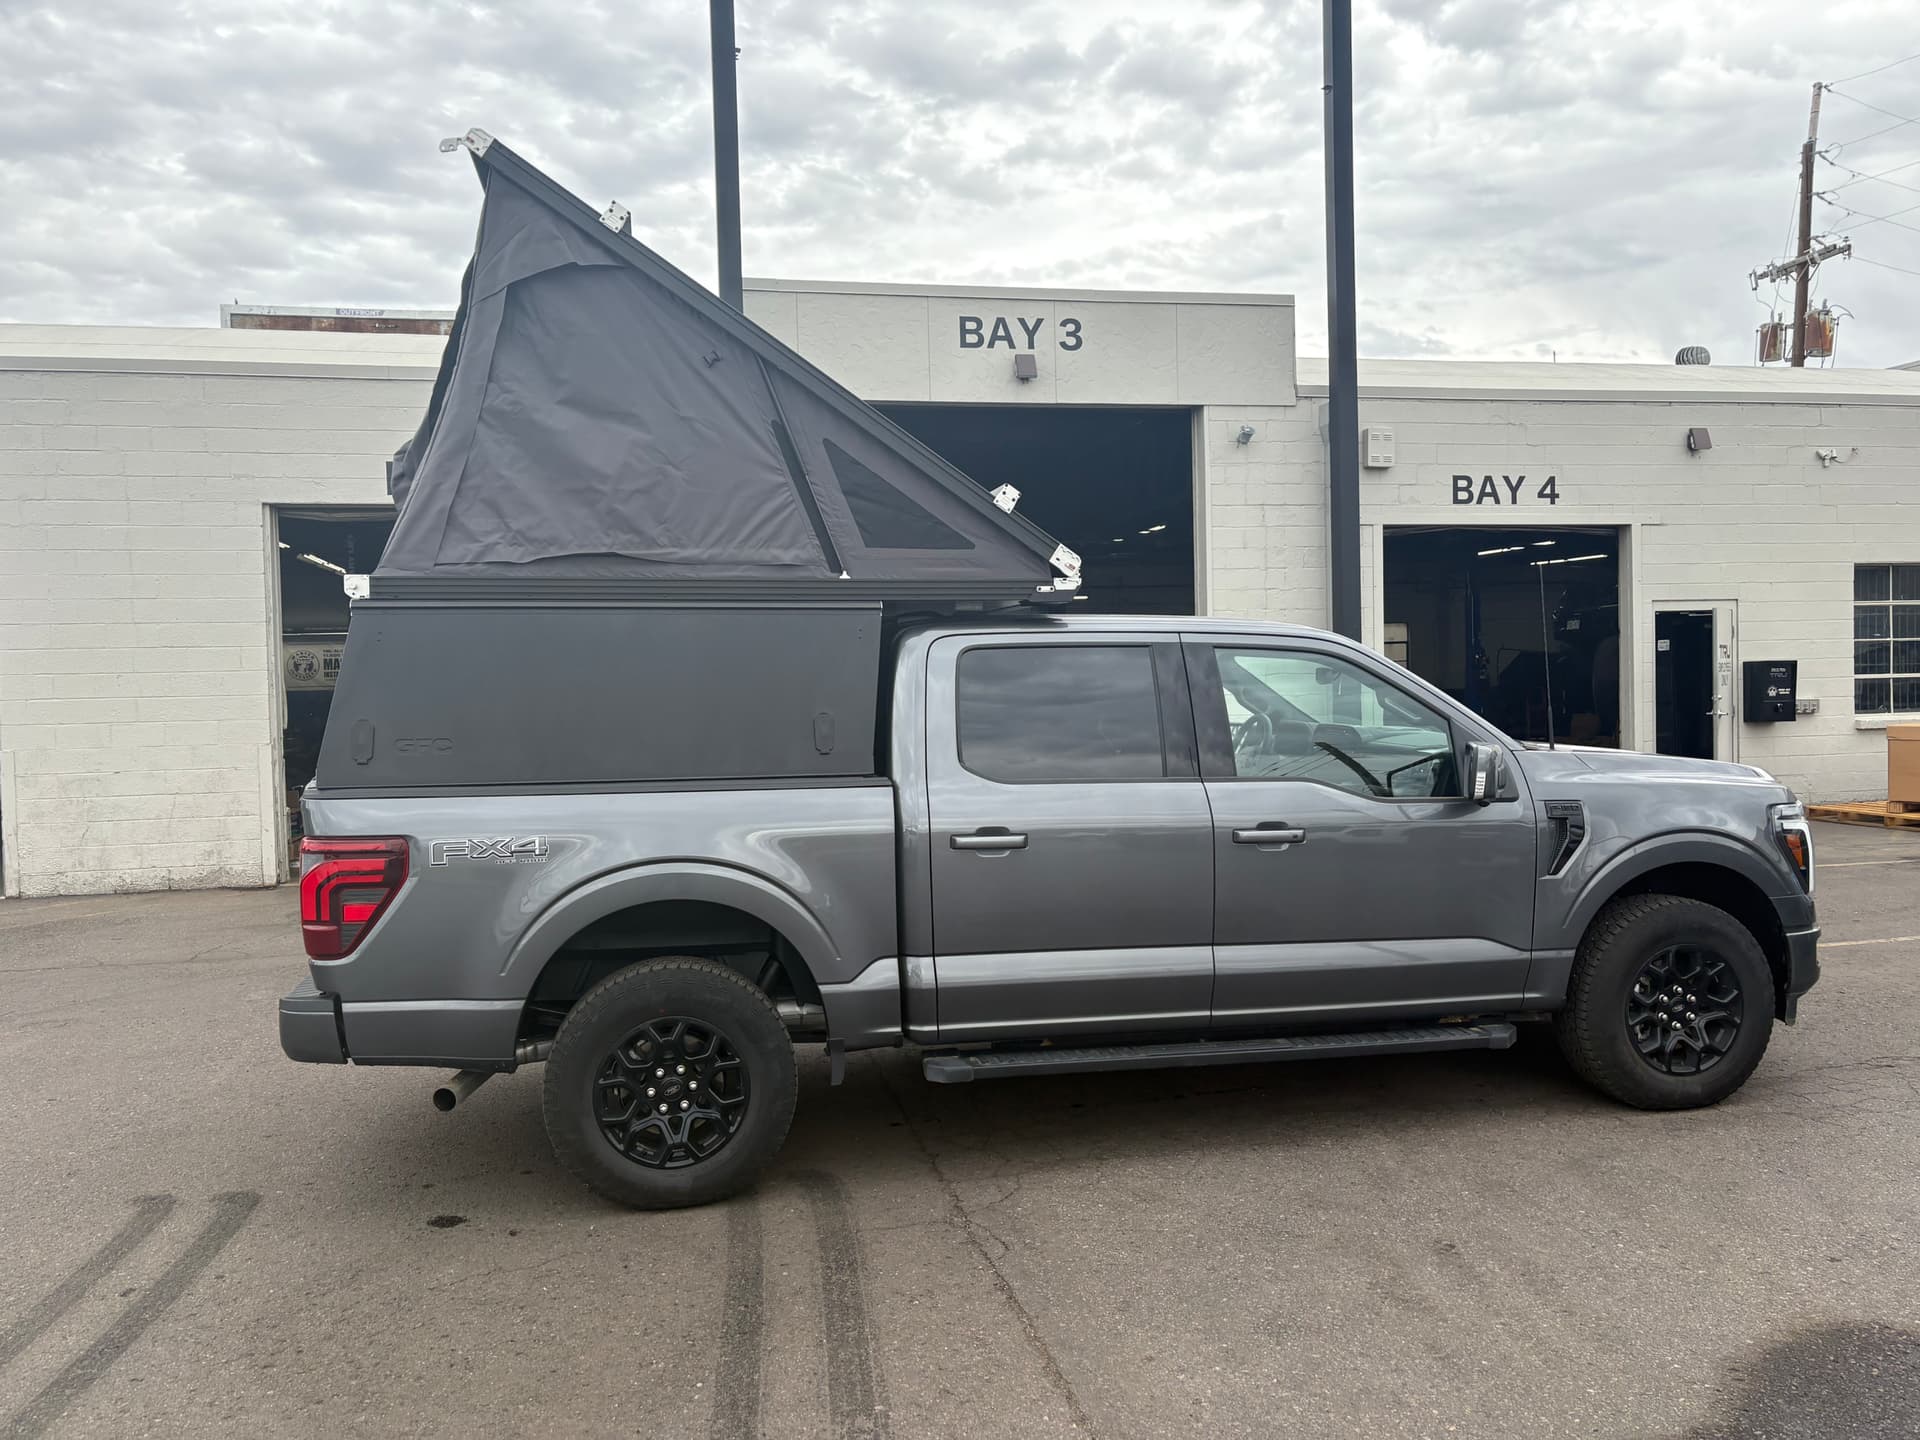
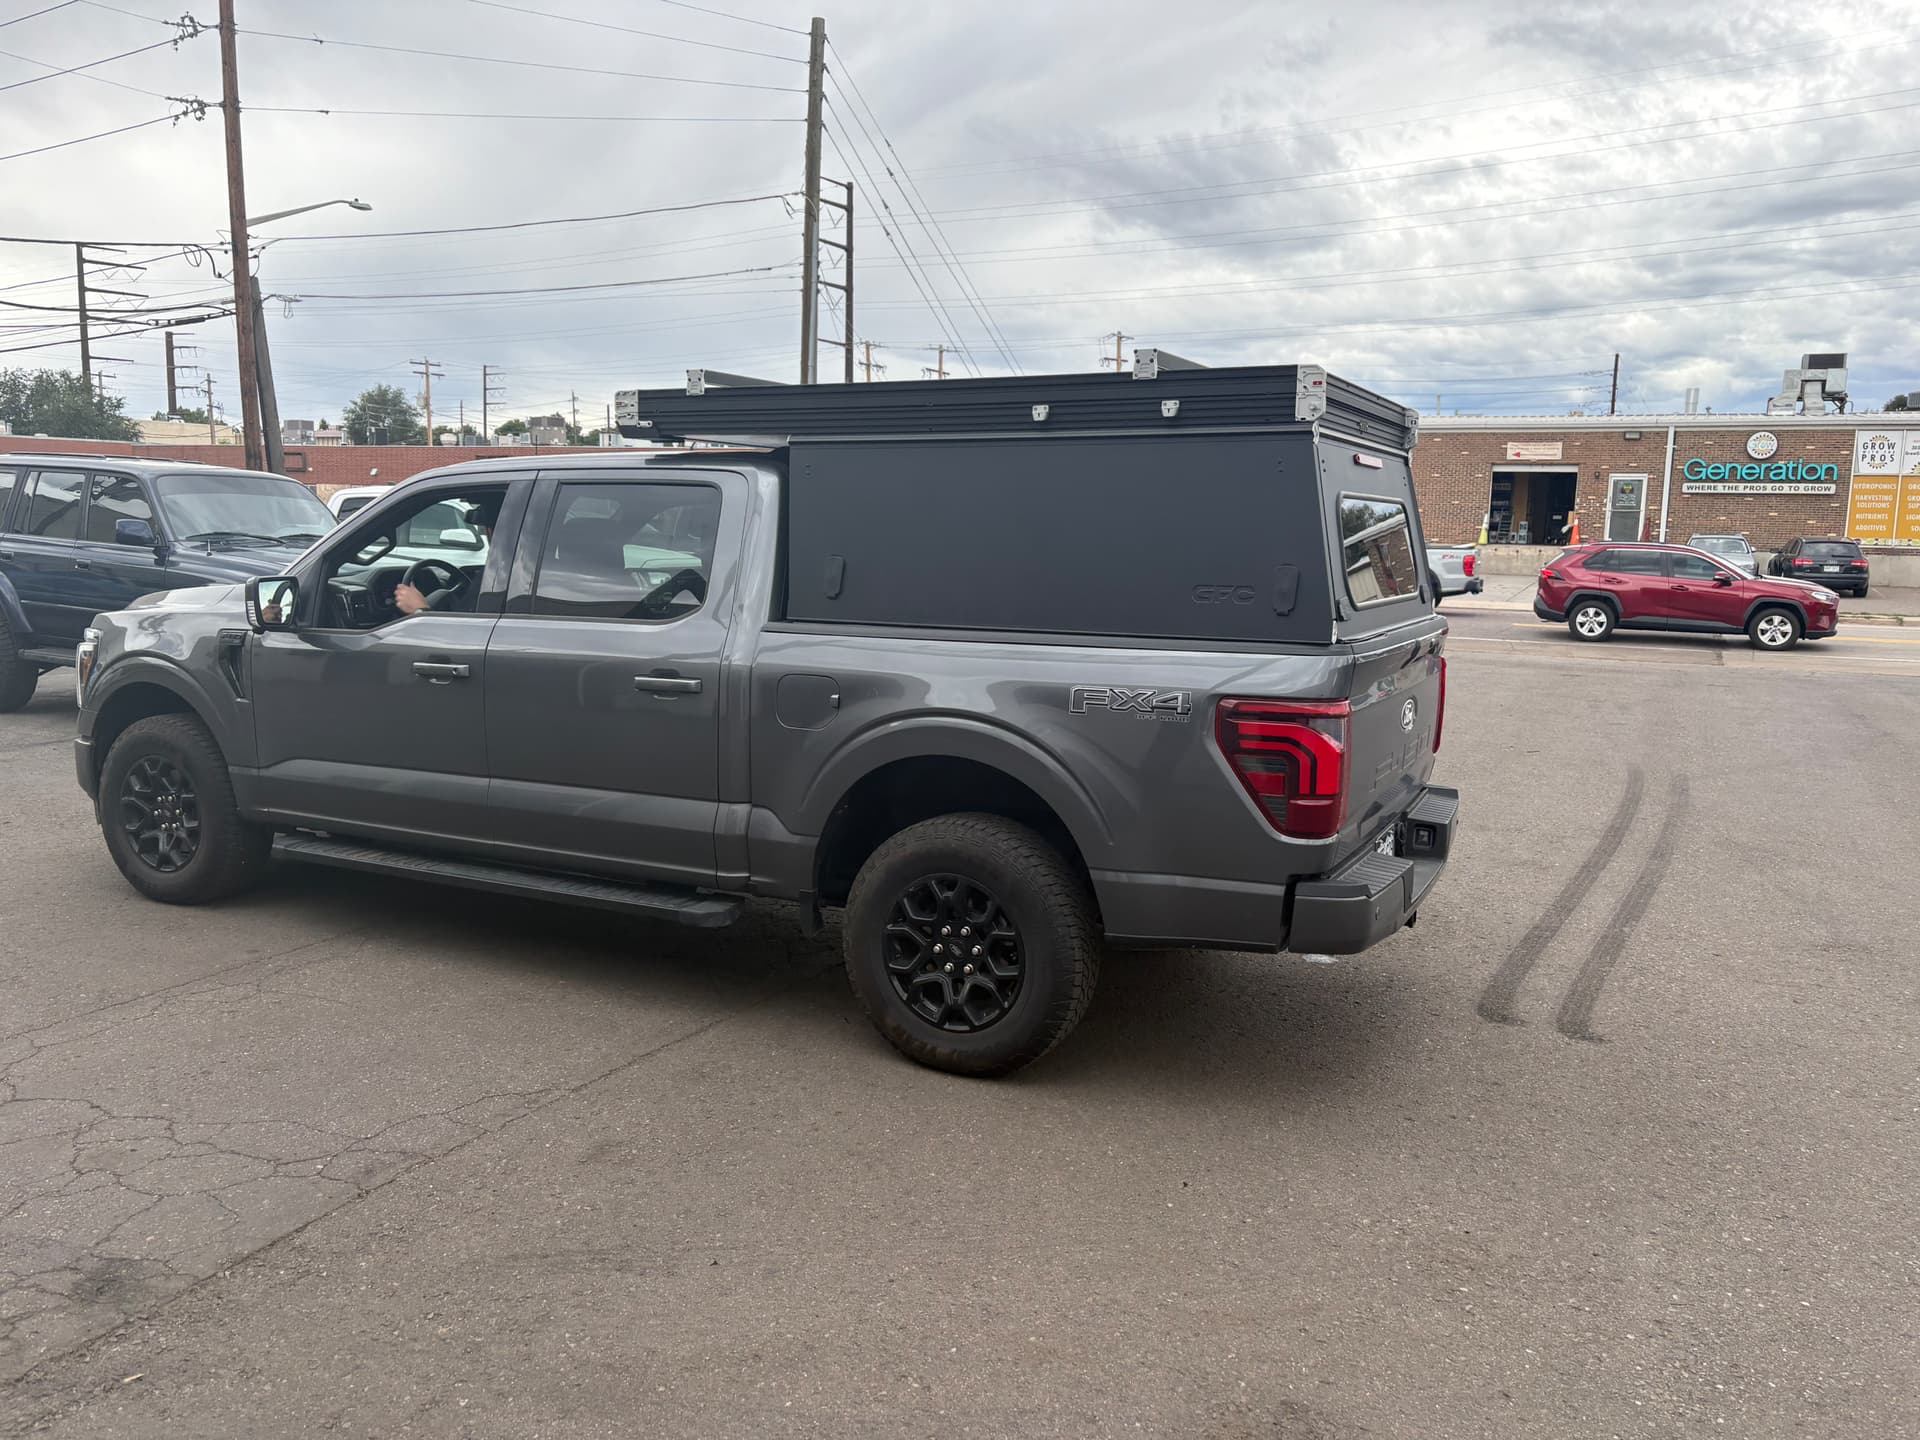
2025 F150 crew cab 5.5 bed daily driver. GFC V2 pro. Hopefully some help to folks of what works and what did not….
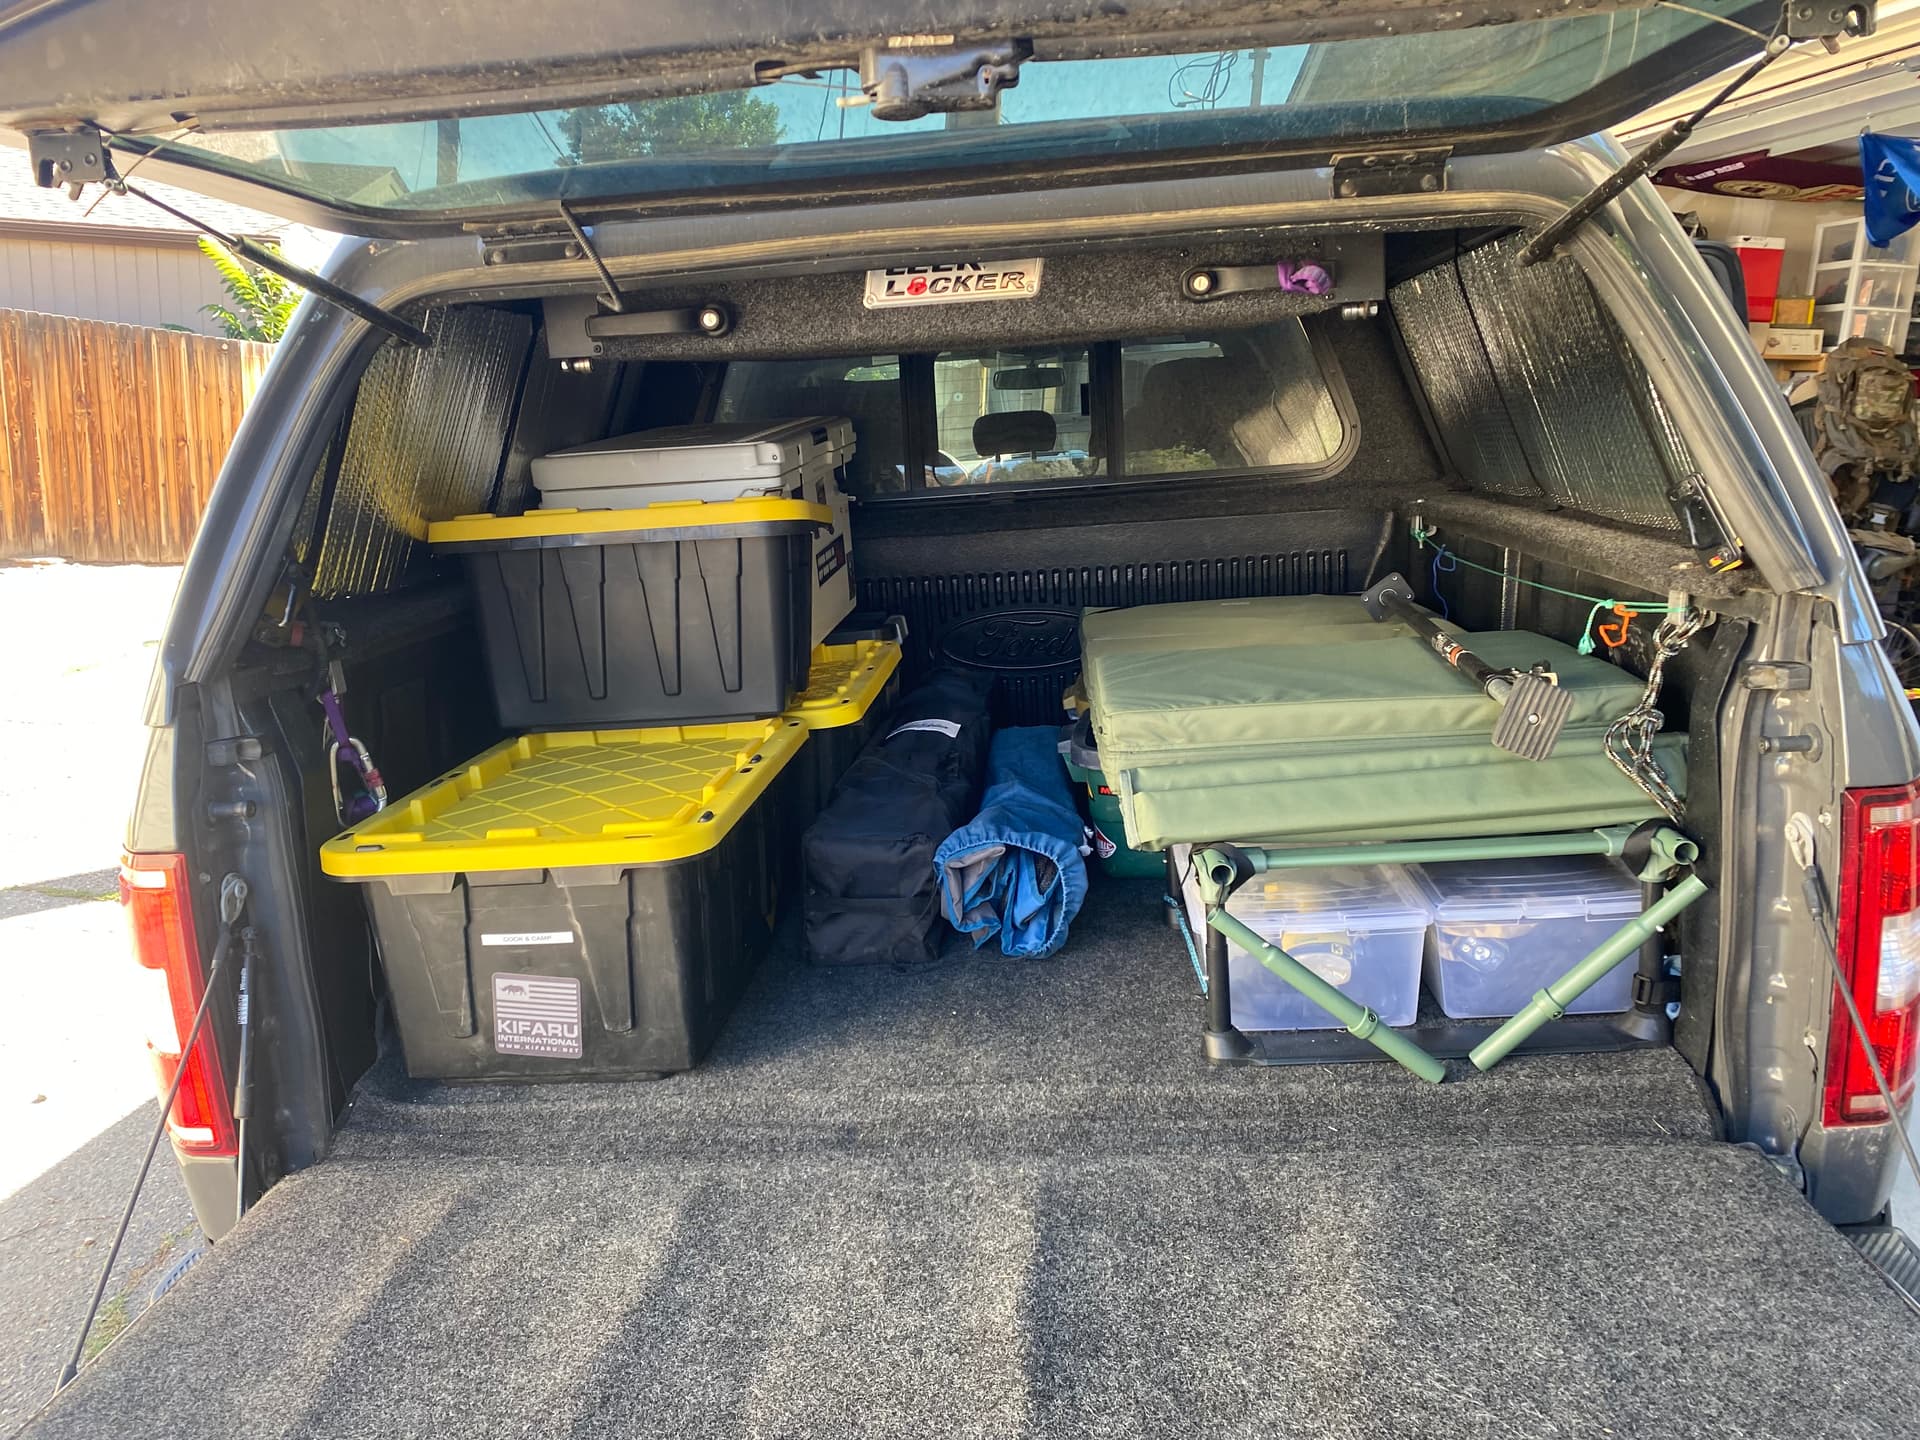
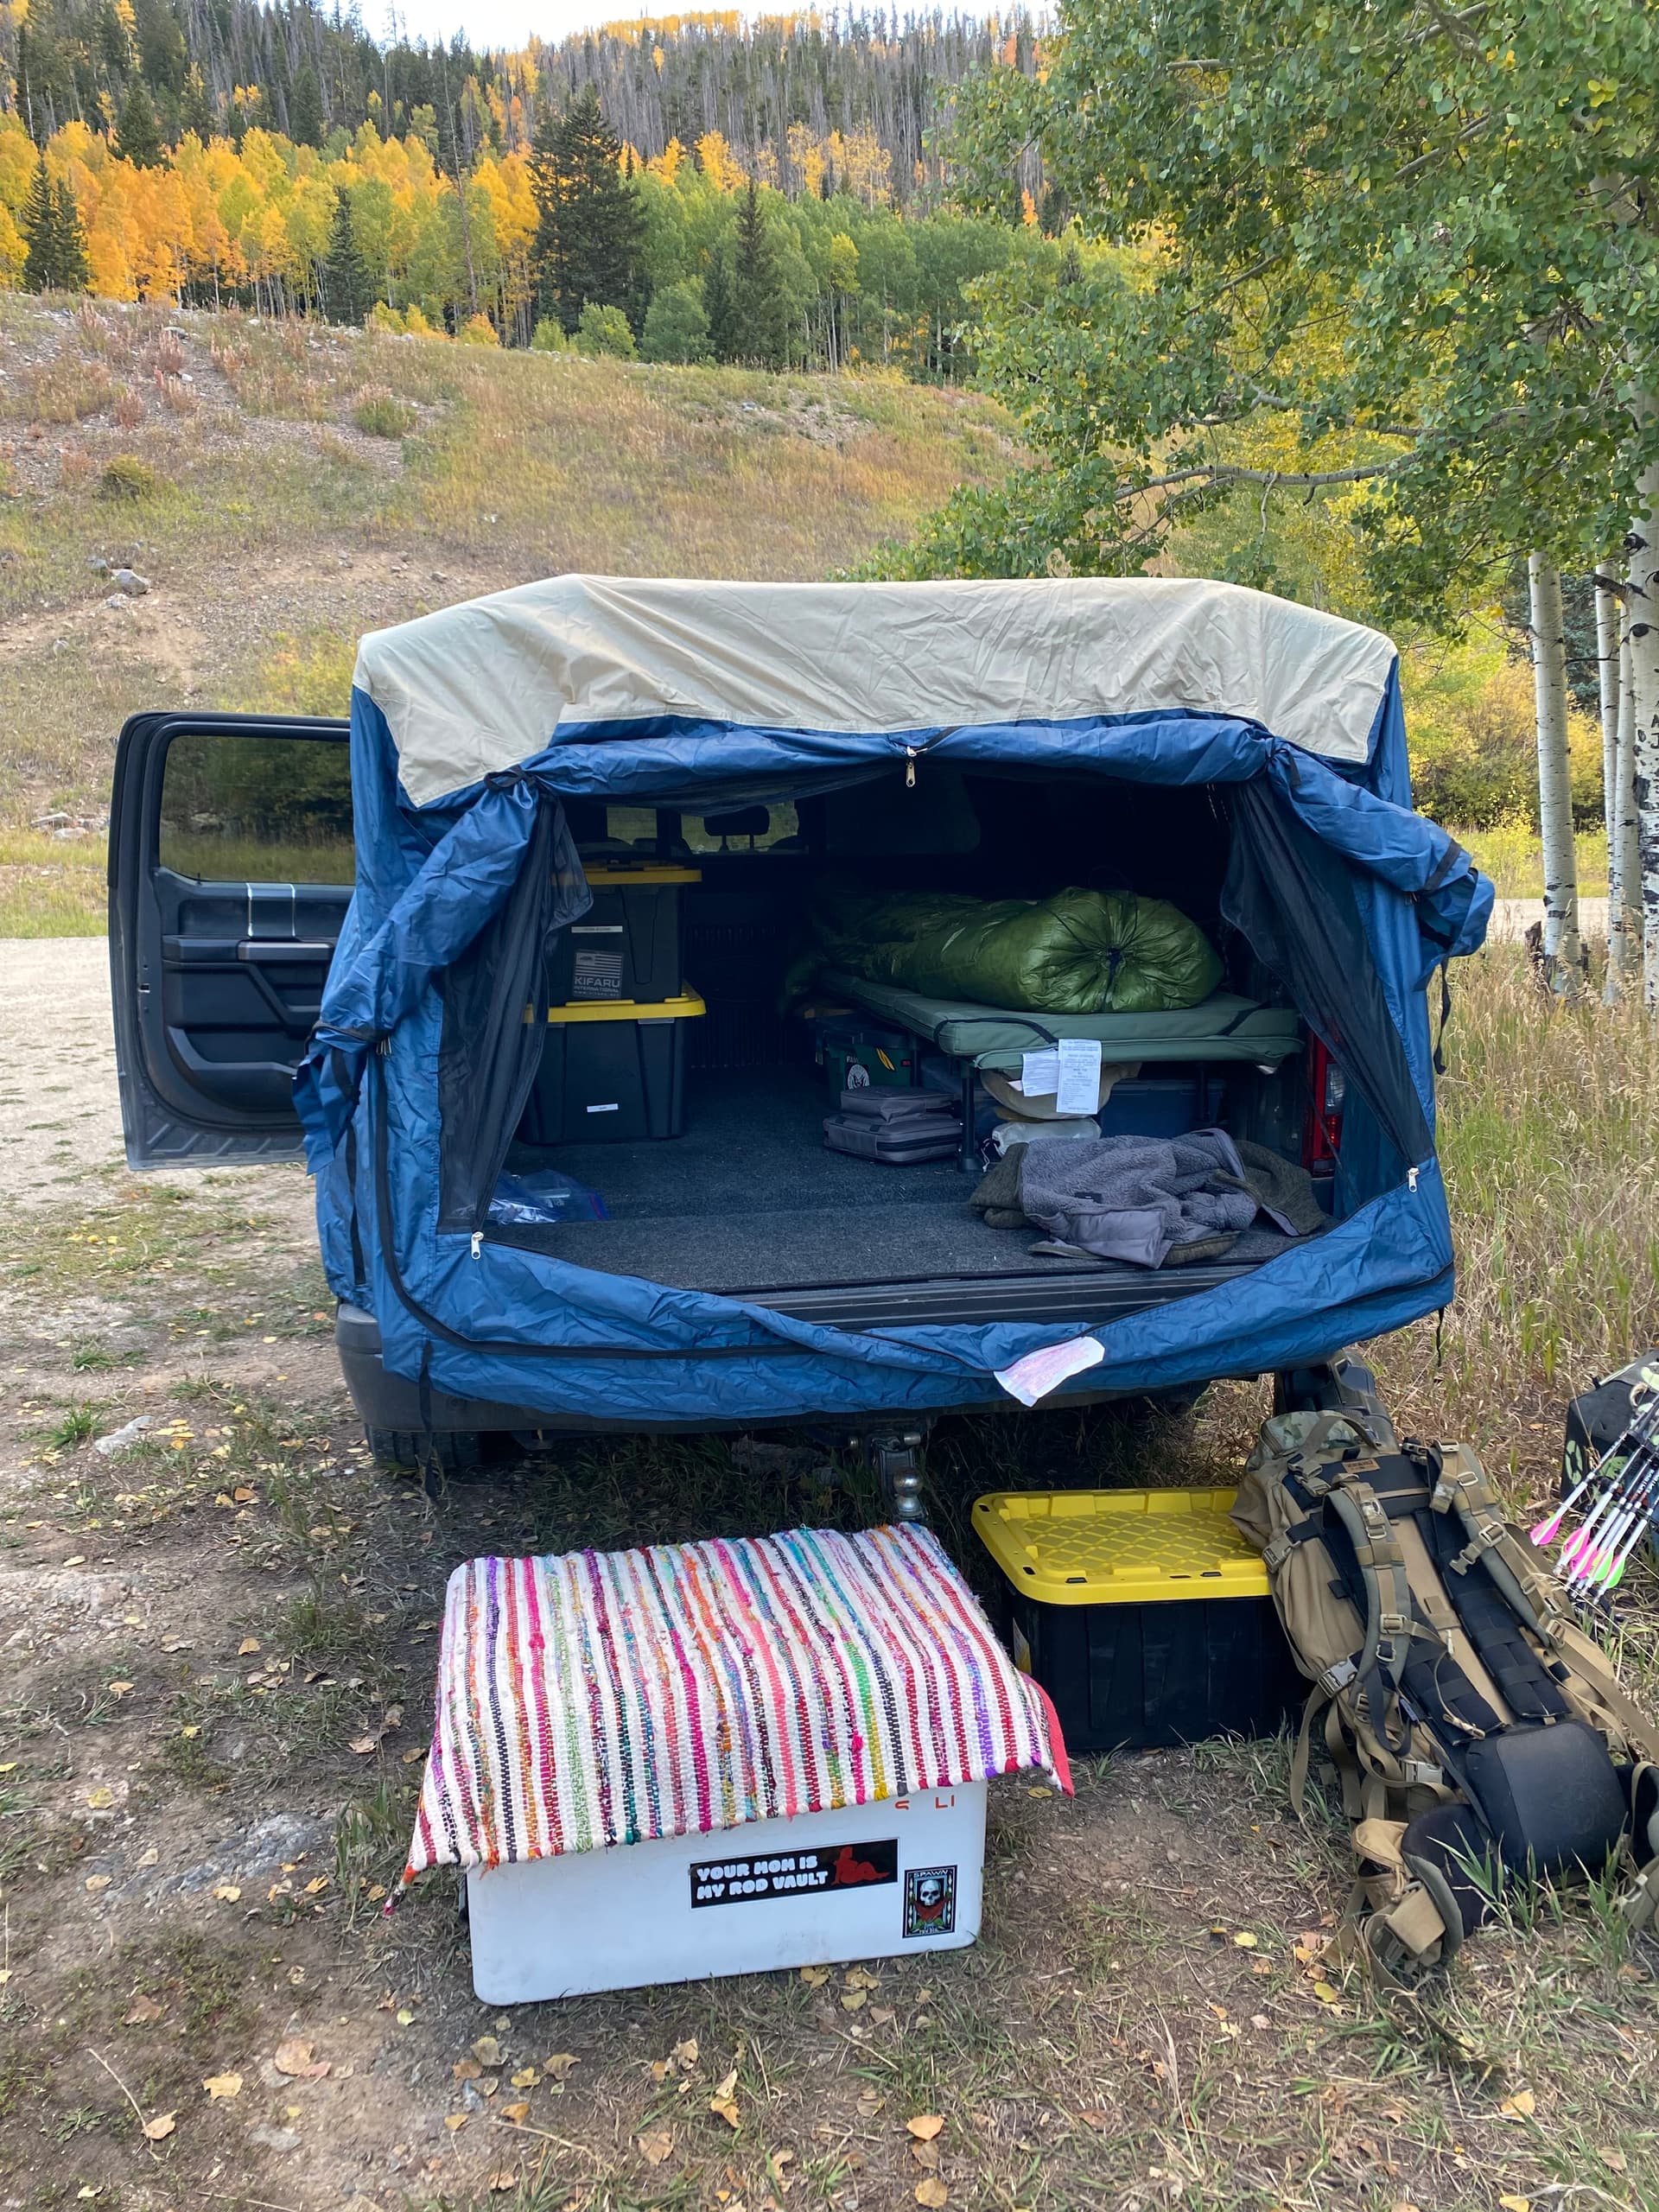
Old rig 2018 f150 with leer topper, with leer locker, rei trail gate sleeping platform. and truck tent to seal the back with tail gate down. The trial gate thing is made for SUVs but fits perfect in the 5.5 bed then the extension is off and easily extends when the tail gate is open for full length. It is adjustable height to sit over the wheel wells. This set up was great but the cap started leaking and truck was high mileage and having some maintenance cost.
Install date sept 9th at TRU automotive in Denver. These guys are a great off road focused shop BTW and would highly recommend. They fit me in for install the day before I left for a 10 day hunting trip.
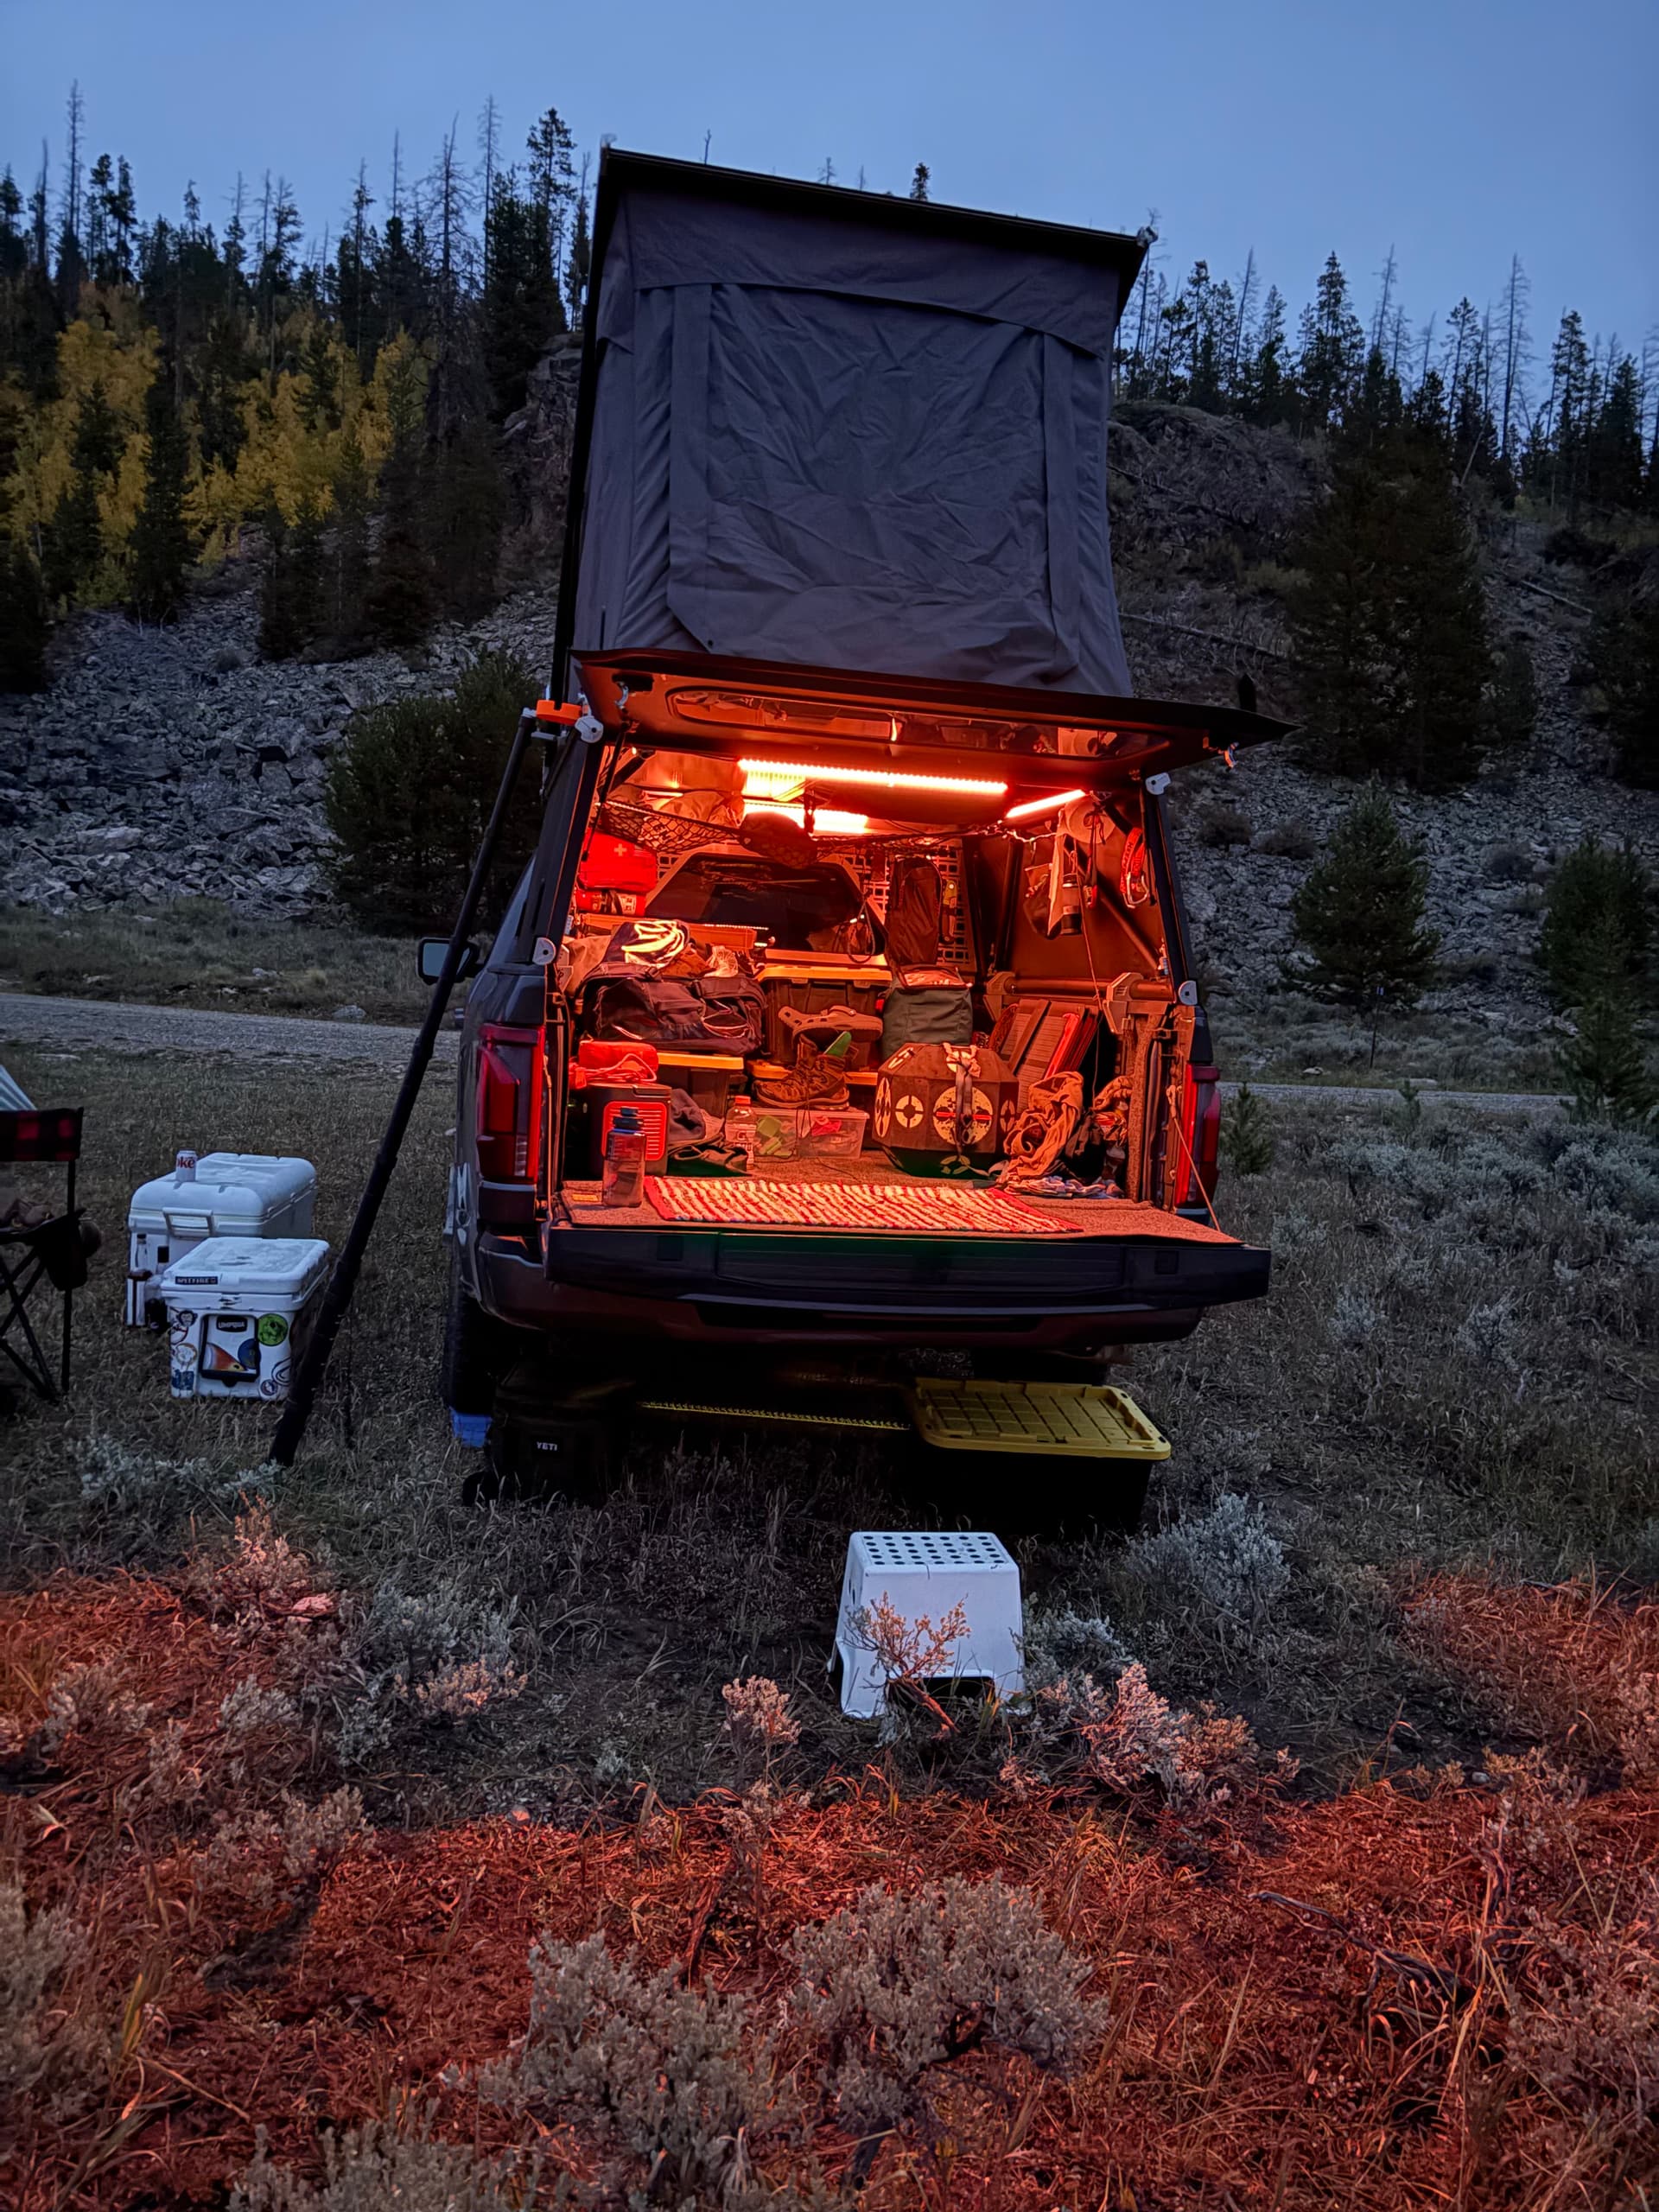
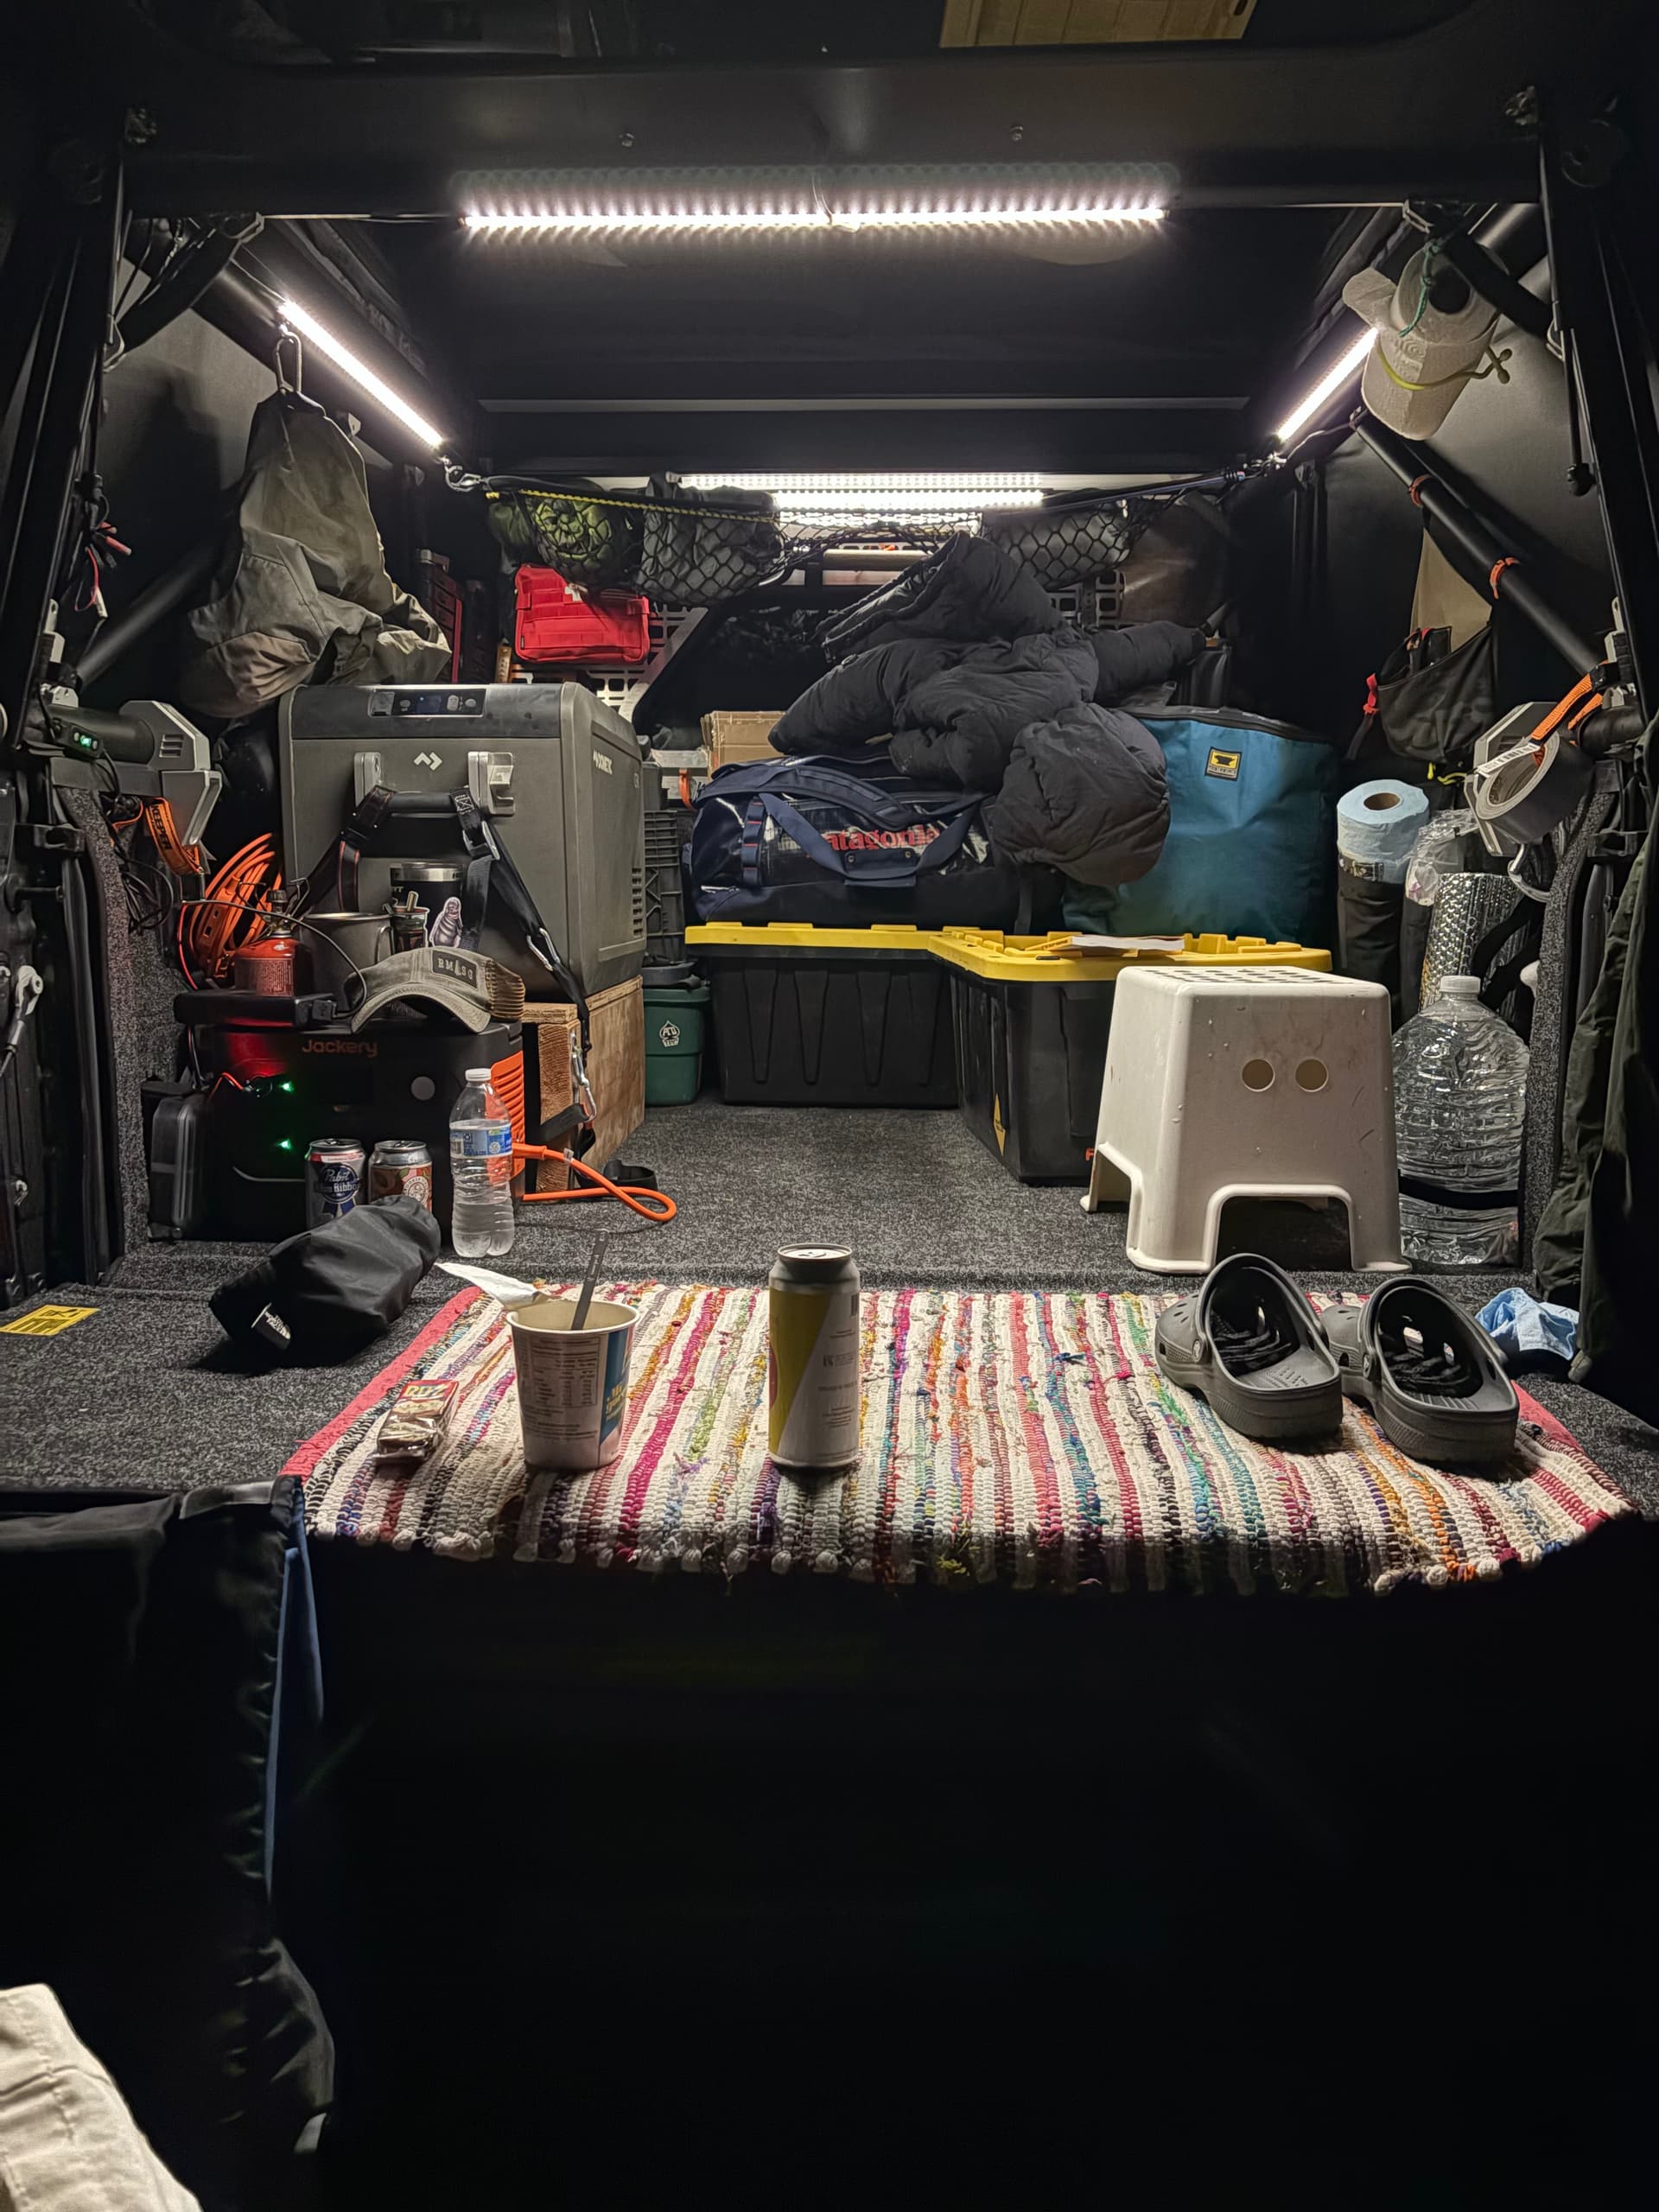
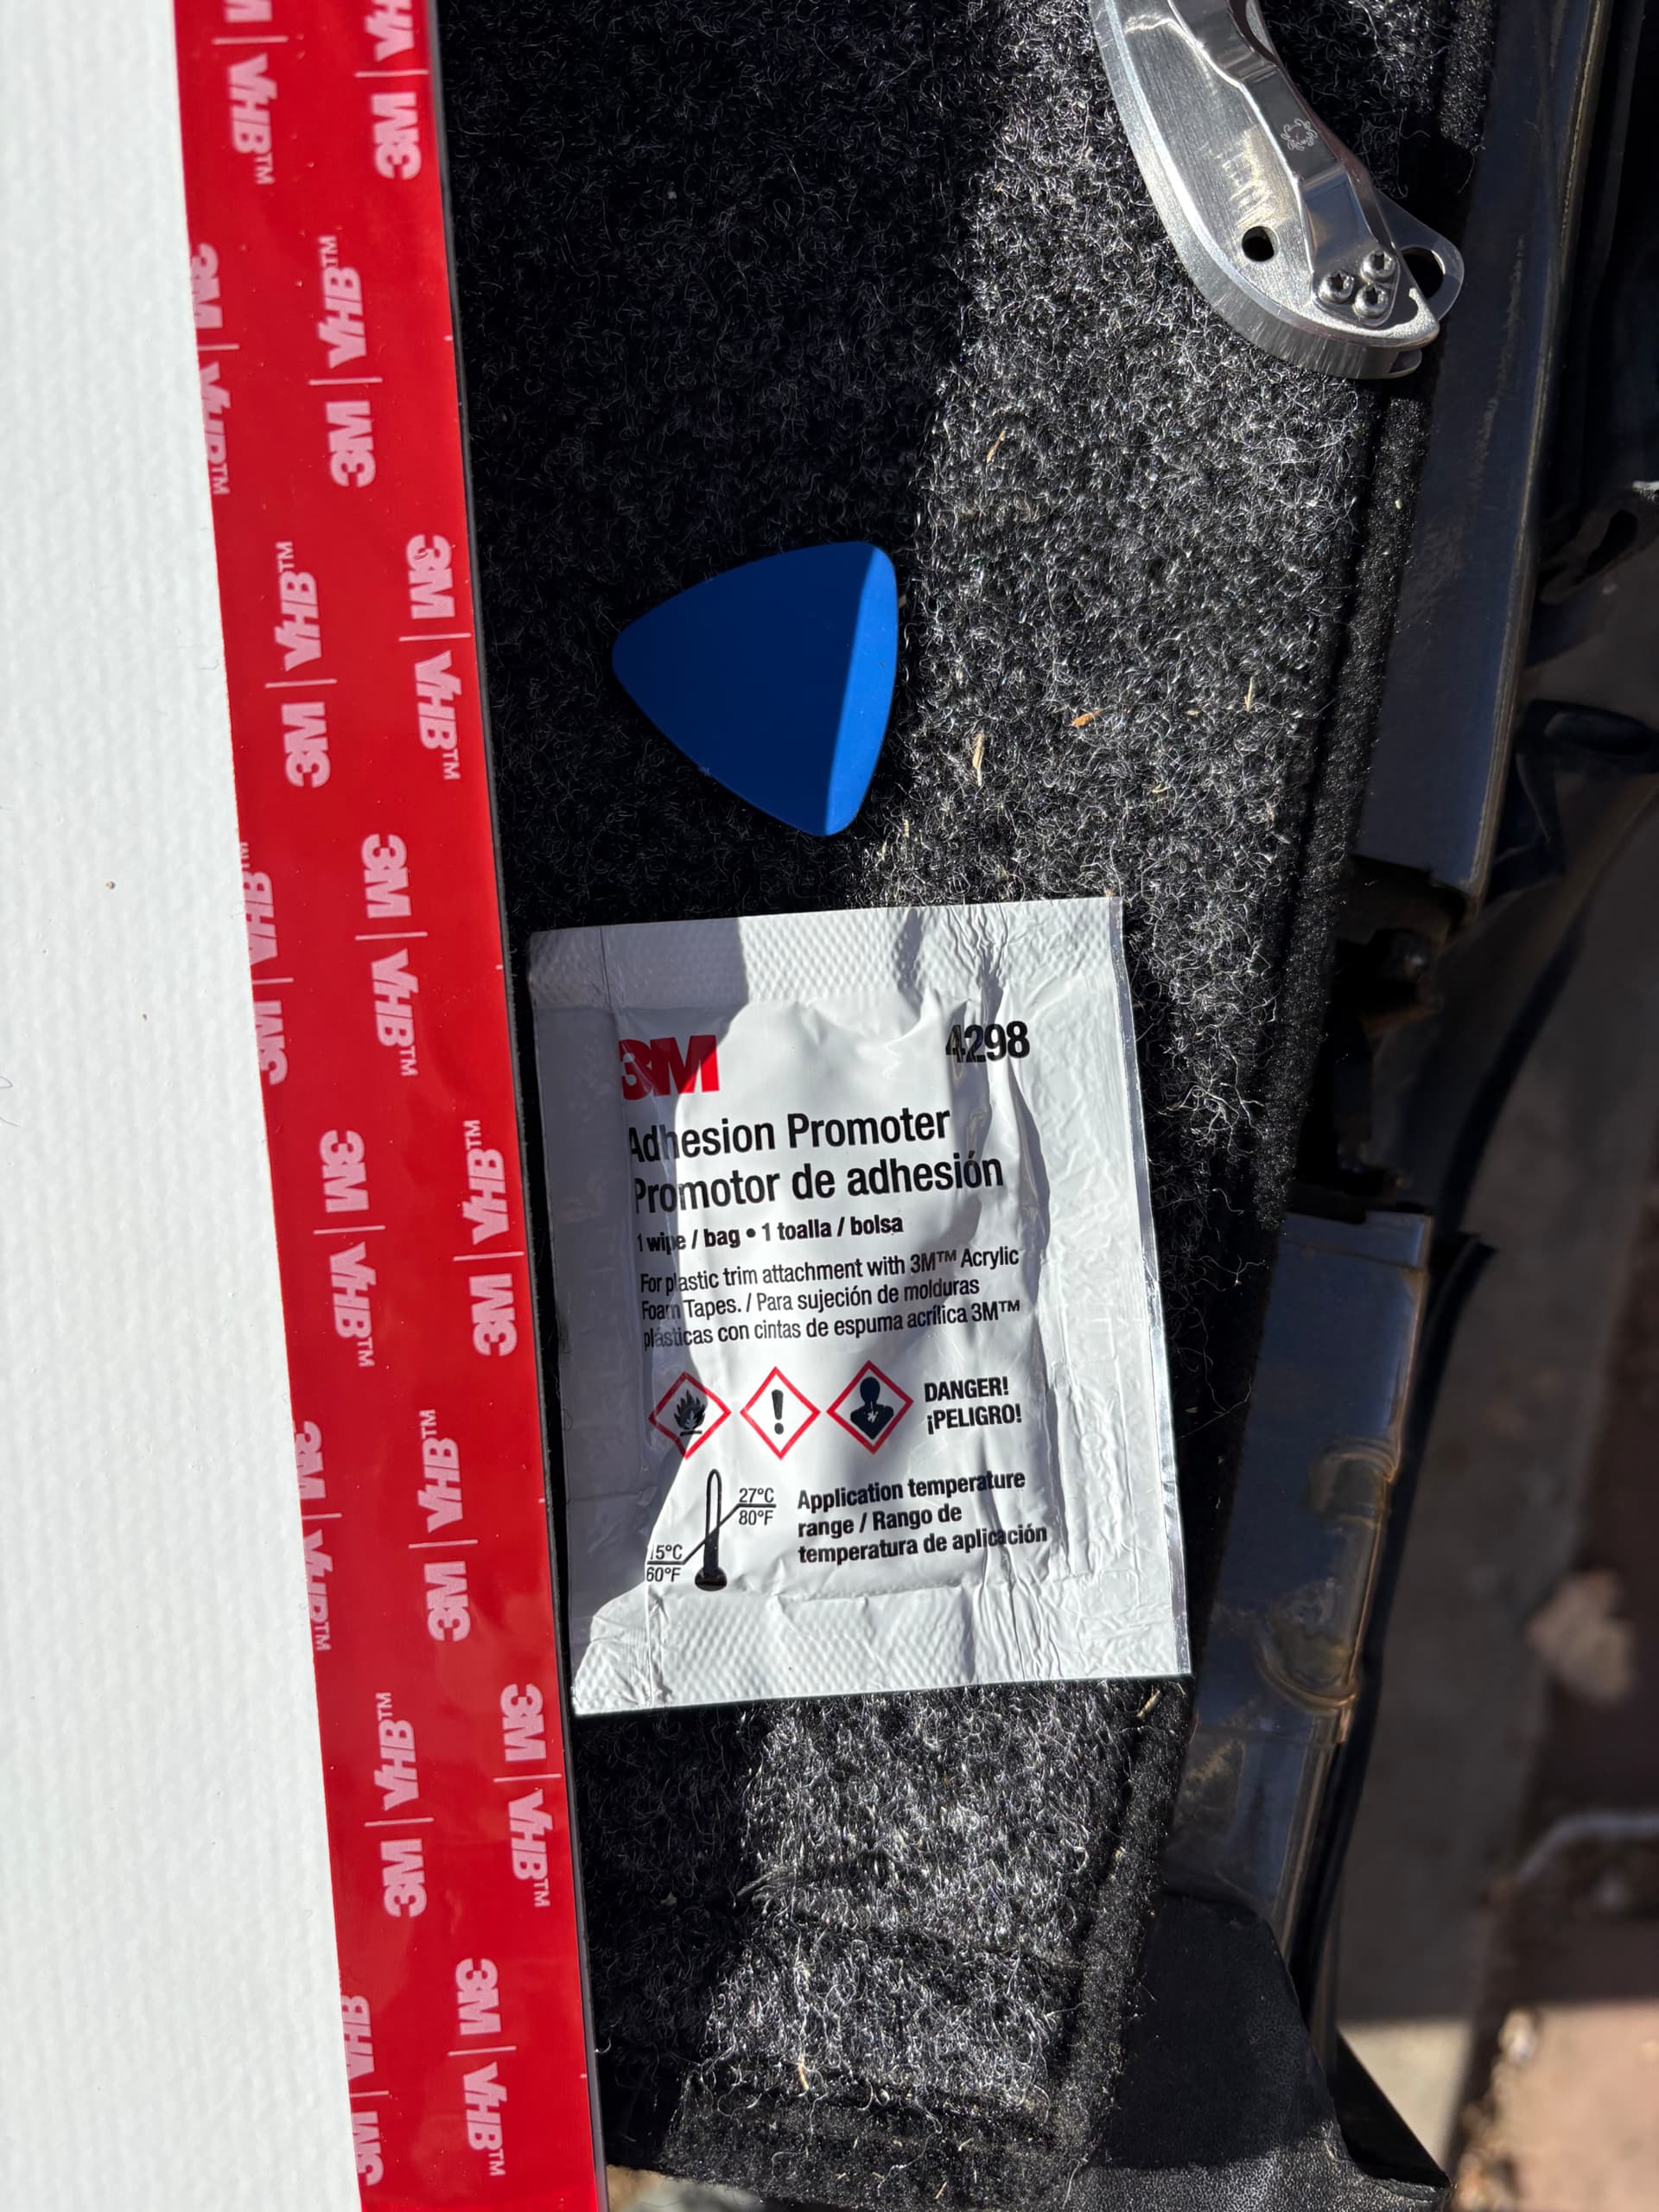
First thing was tail gate seal from Amazon and bed rug . https://bedrugshop.com Ford has so many places for dust and water to get in. I removed the plastic bed rail caps and sealed with metal duct tape and added a bulb seal under. Removal of the caps is a trick and I broke several of the tabs before I figured it out from the YouTube’s. Used butyl tape for all the long seams, leaving gaps in the corners Incase some water does get in it can drain and used electoral grommets for the round holes. So far dry as a bone inside with some minor dust still getting in around the back window. Pros: bed rug significantly cuts down on dust and condensation, super deluxe on the knees and sock feet when inside. Cons: for the f150 you have to cut out all the interior lights switched and anchor points. These are perforated on the bed rug but they are not exact to my truck, should have matched it up before assuming they were correct.
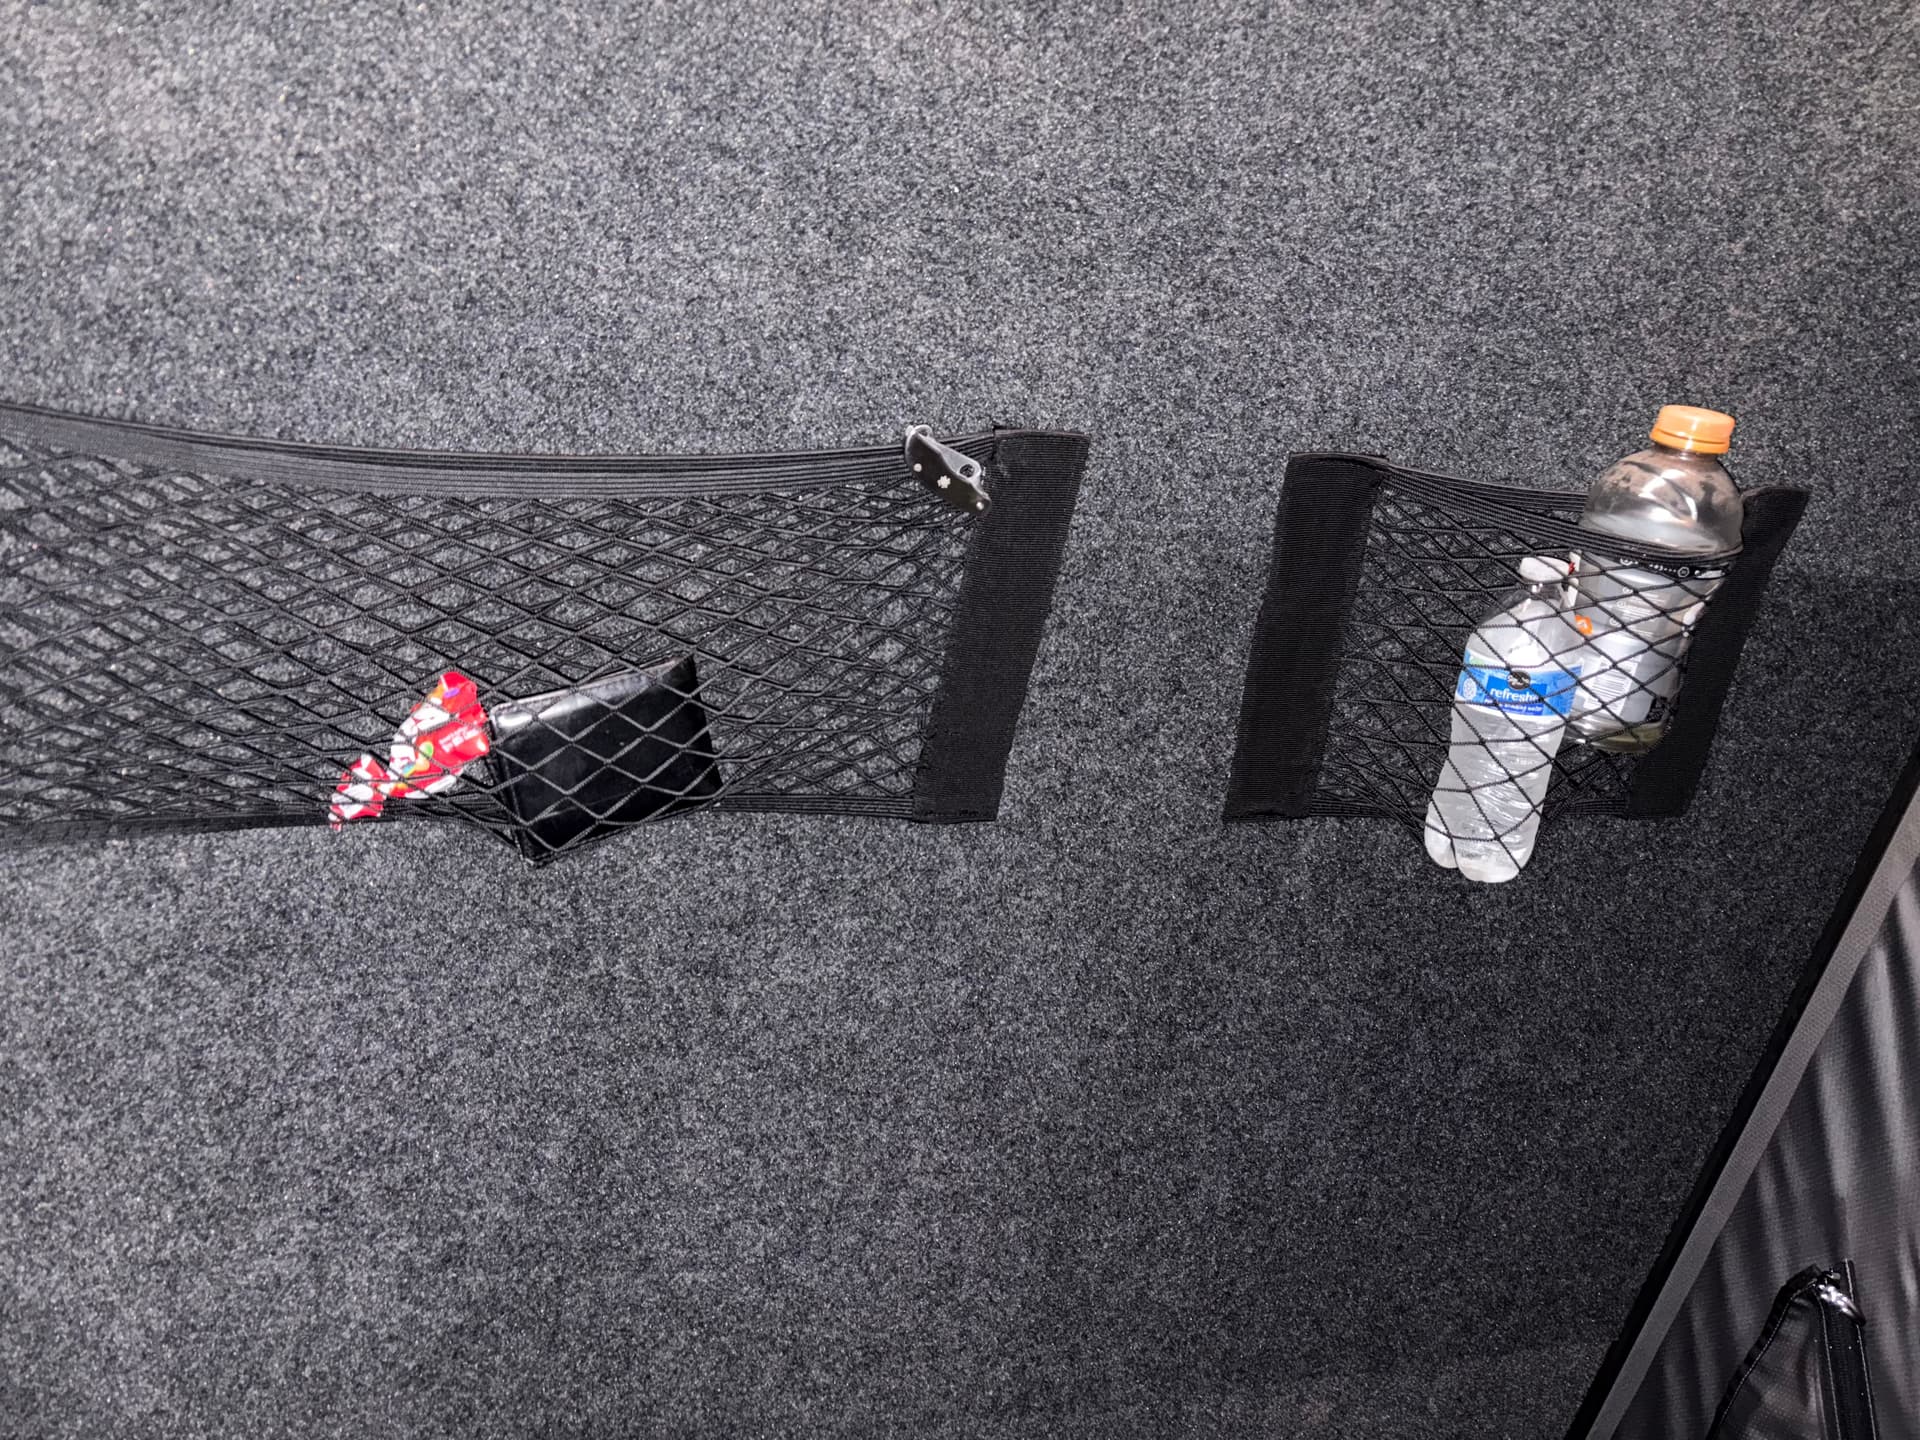
And these on the roof carpet. I did one big one for water bottle, empty post water bottle and backup flashlight and a smaller one for pocket stuff phone wallet keys knife.
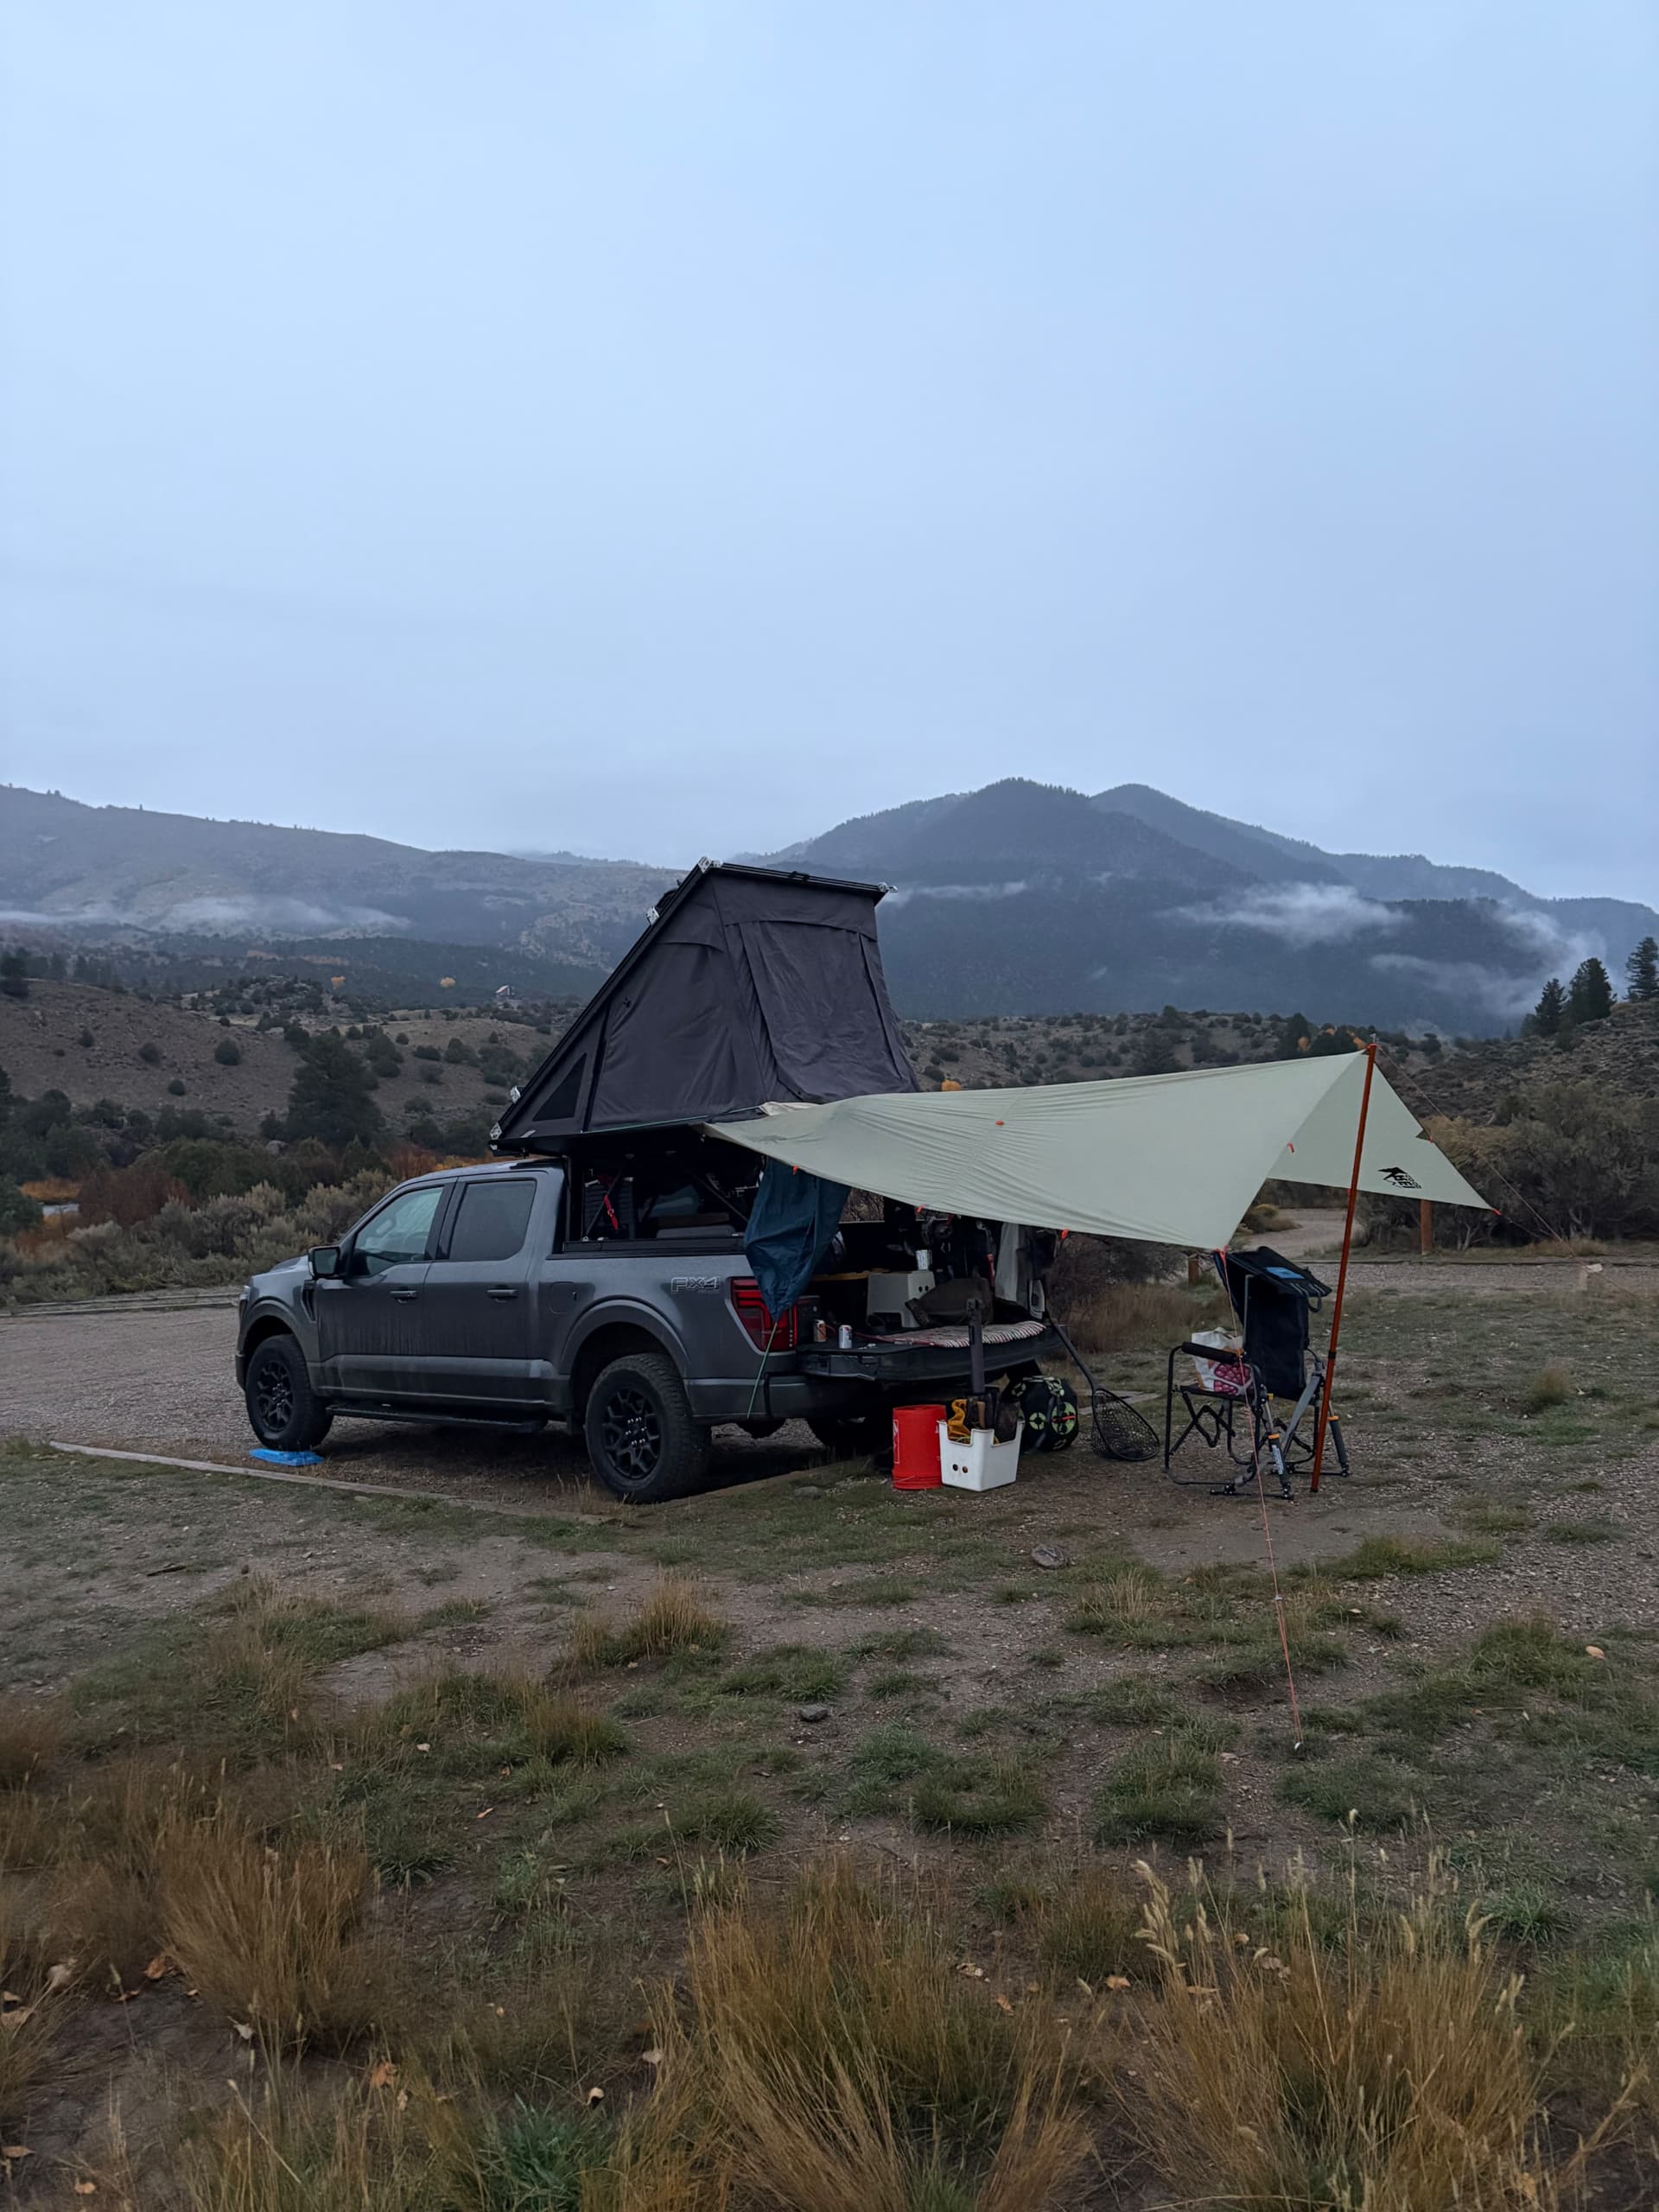
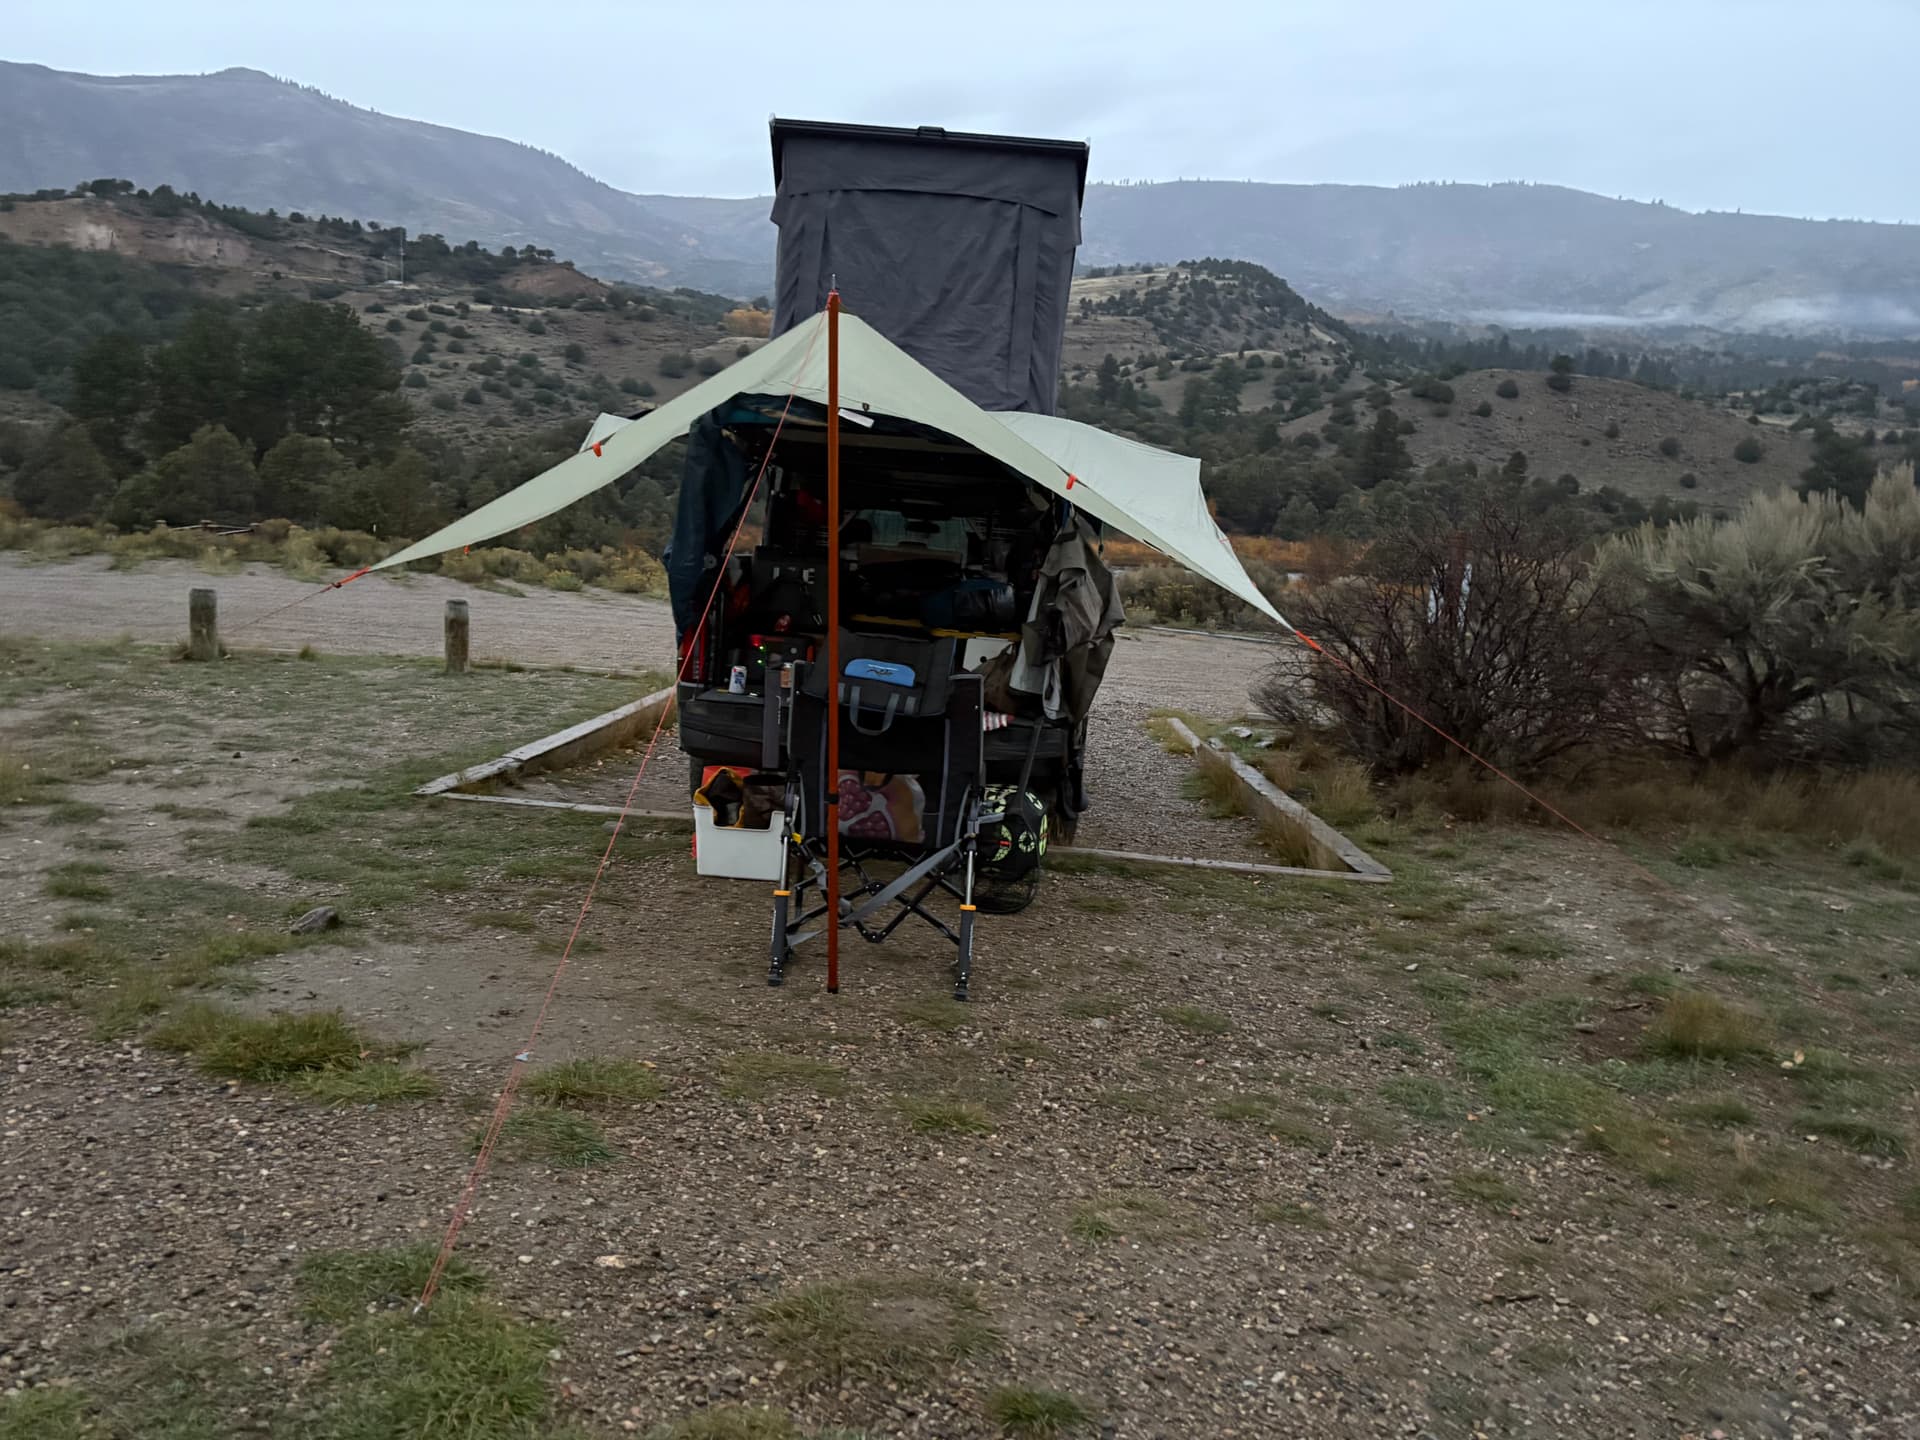
Next up are the printed drop in hooks from @rancho aka lumbering bear adventure gear. I got a couple of different ones not exactly sure how or where i would use them. The first real rain storm they were clutch for my tarp. Rain fly is an older REI sil nylon light weight backpacking tarp.the attachment points are perfect spacing for the using the lumbering bear hook in the side of the extrusion an hooking to the latches on the wing panels. I used one of those foam pool noodle things on the corner of the back panel to avoid ripping the tarp. I will probably add some bungee loops next time just to add some play for heavy wind. Hiking pole keeps the panel open.
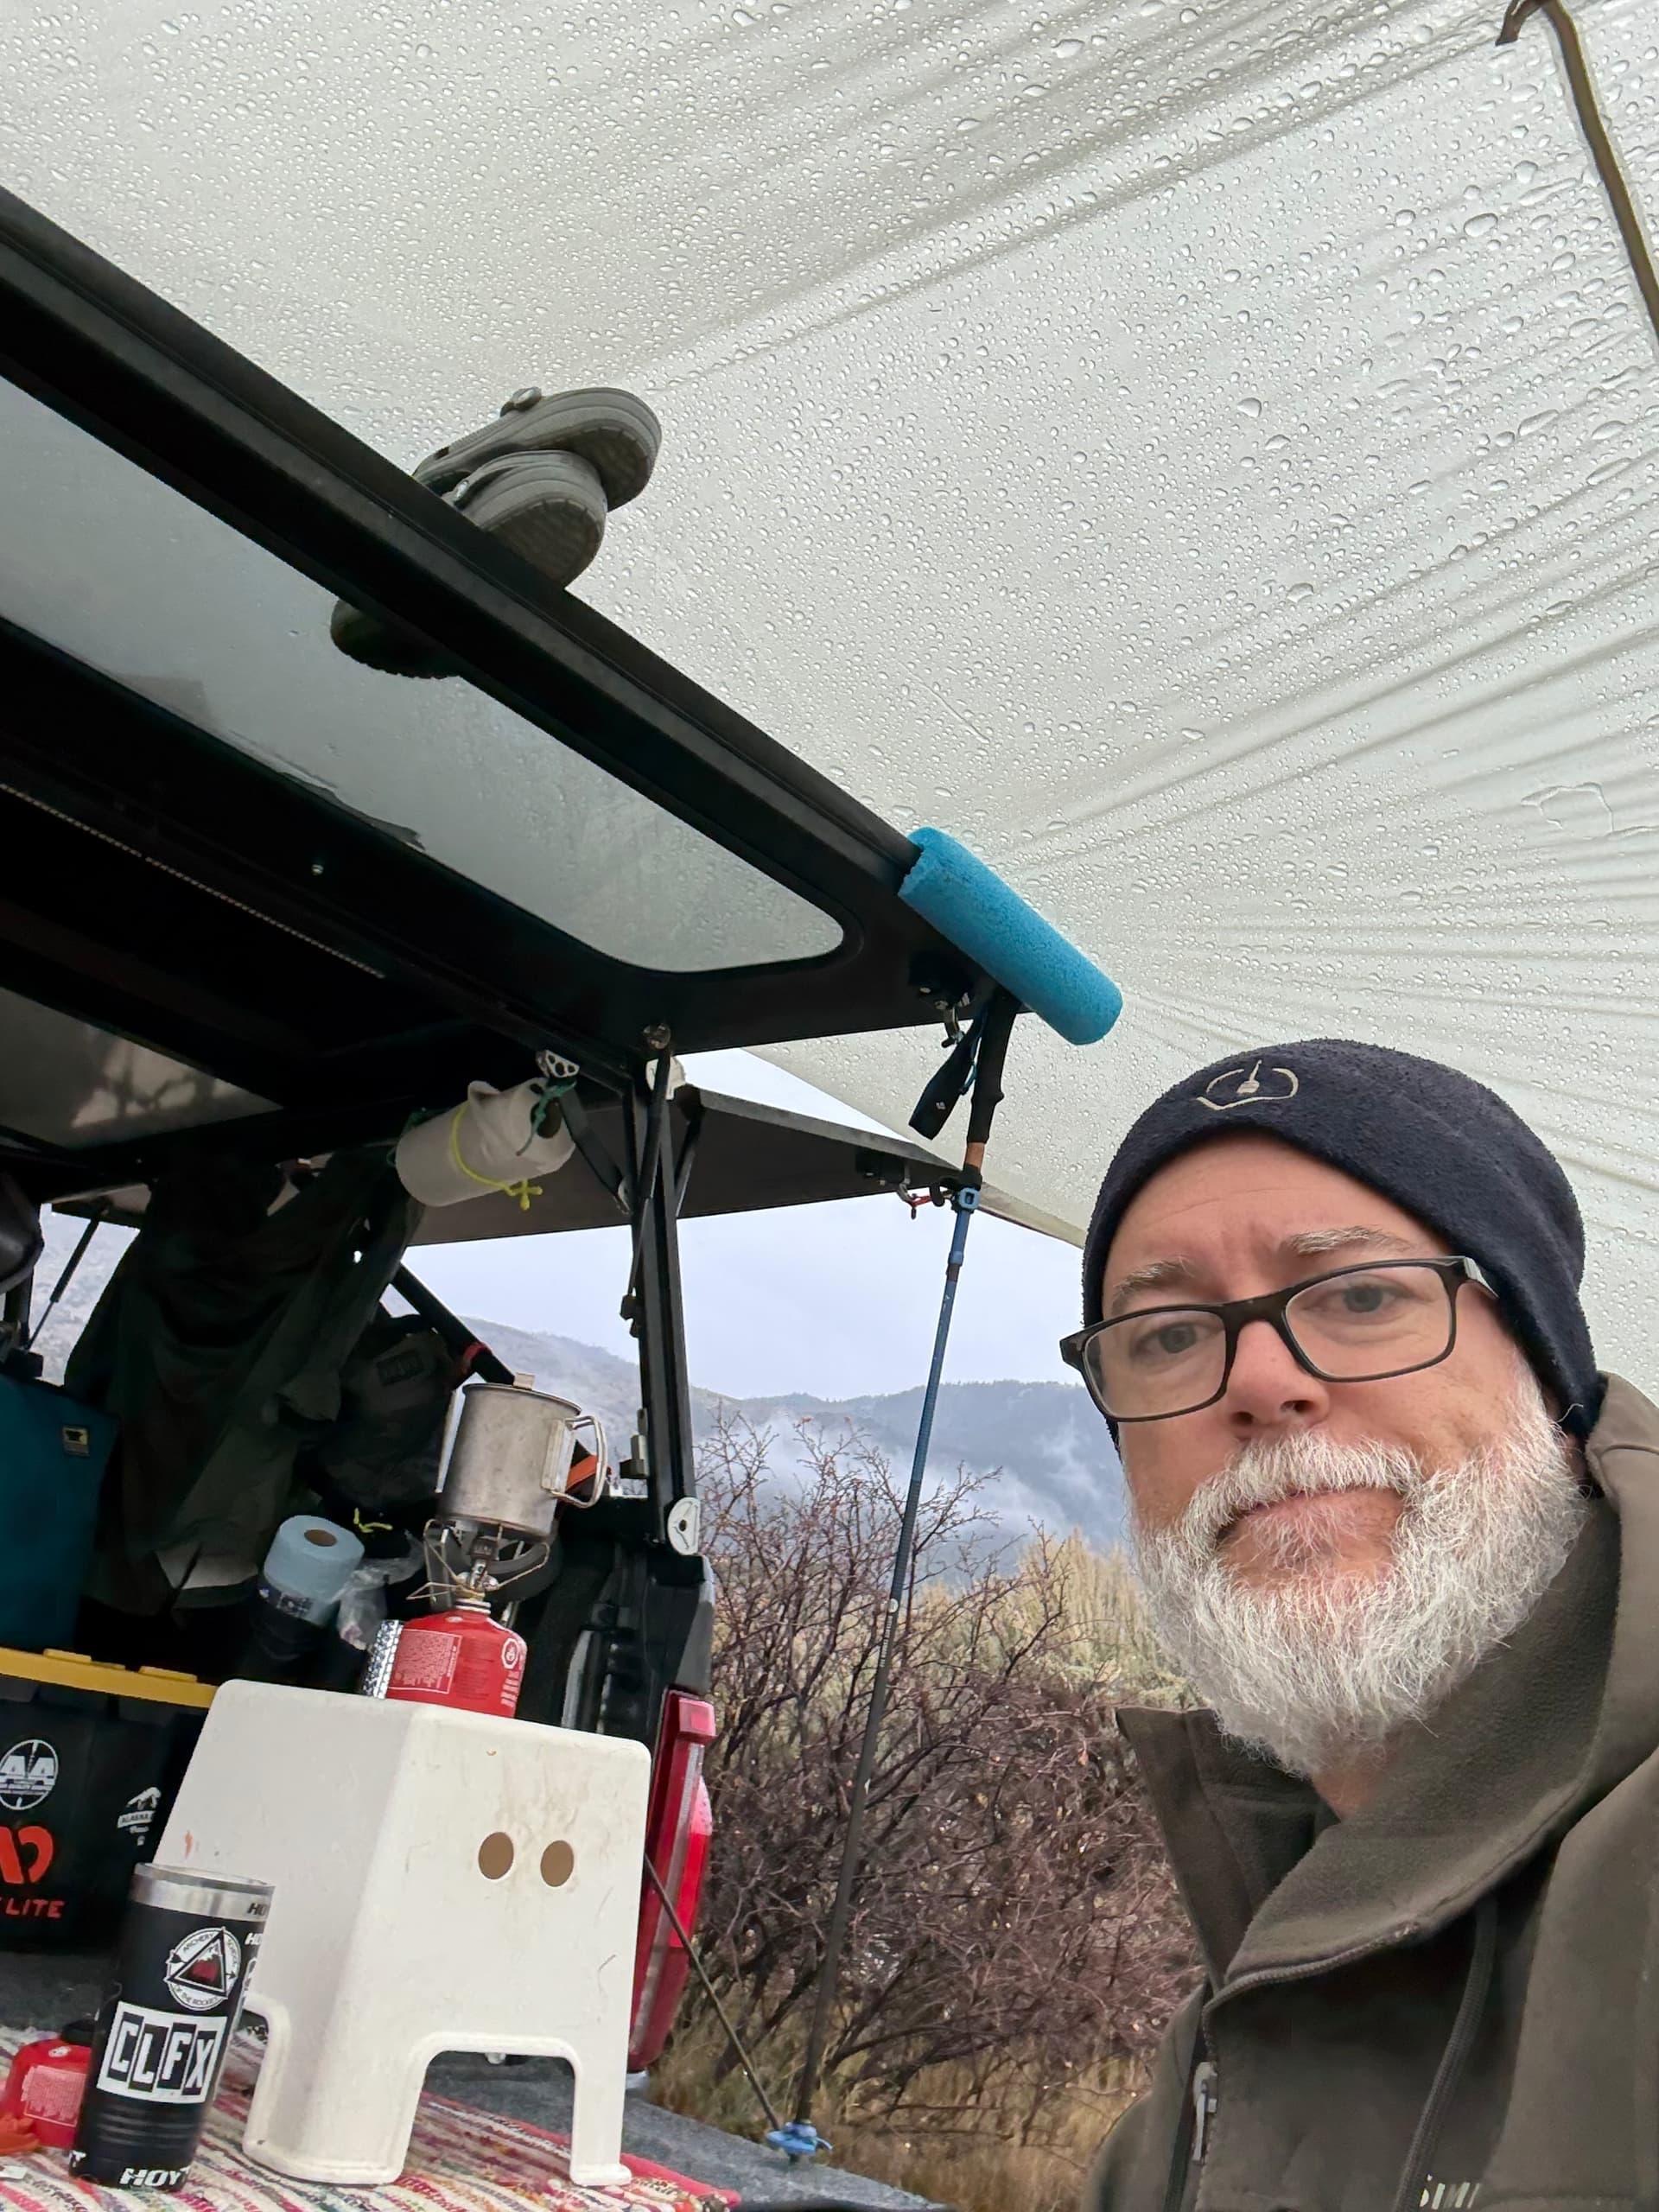
Better pick of the pool noodle and crocks to keep water running off to the sides and not pooling on the panel. I did get some dripping on the tail gate coming through t the window gasket. I contacted GFC and they responded saying it was normal and the panel is not designed to act as an awning when open. Not the answer I wanted, but I get it, they did provide an option for a sealer to go between the gasket and the glass. They suggested Lexel or Teroson. I have not had a chance to do this yet and since it’s just a drip it’s not that big a deal.
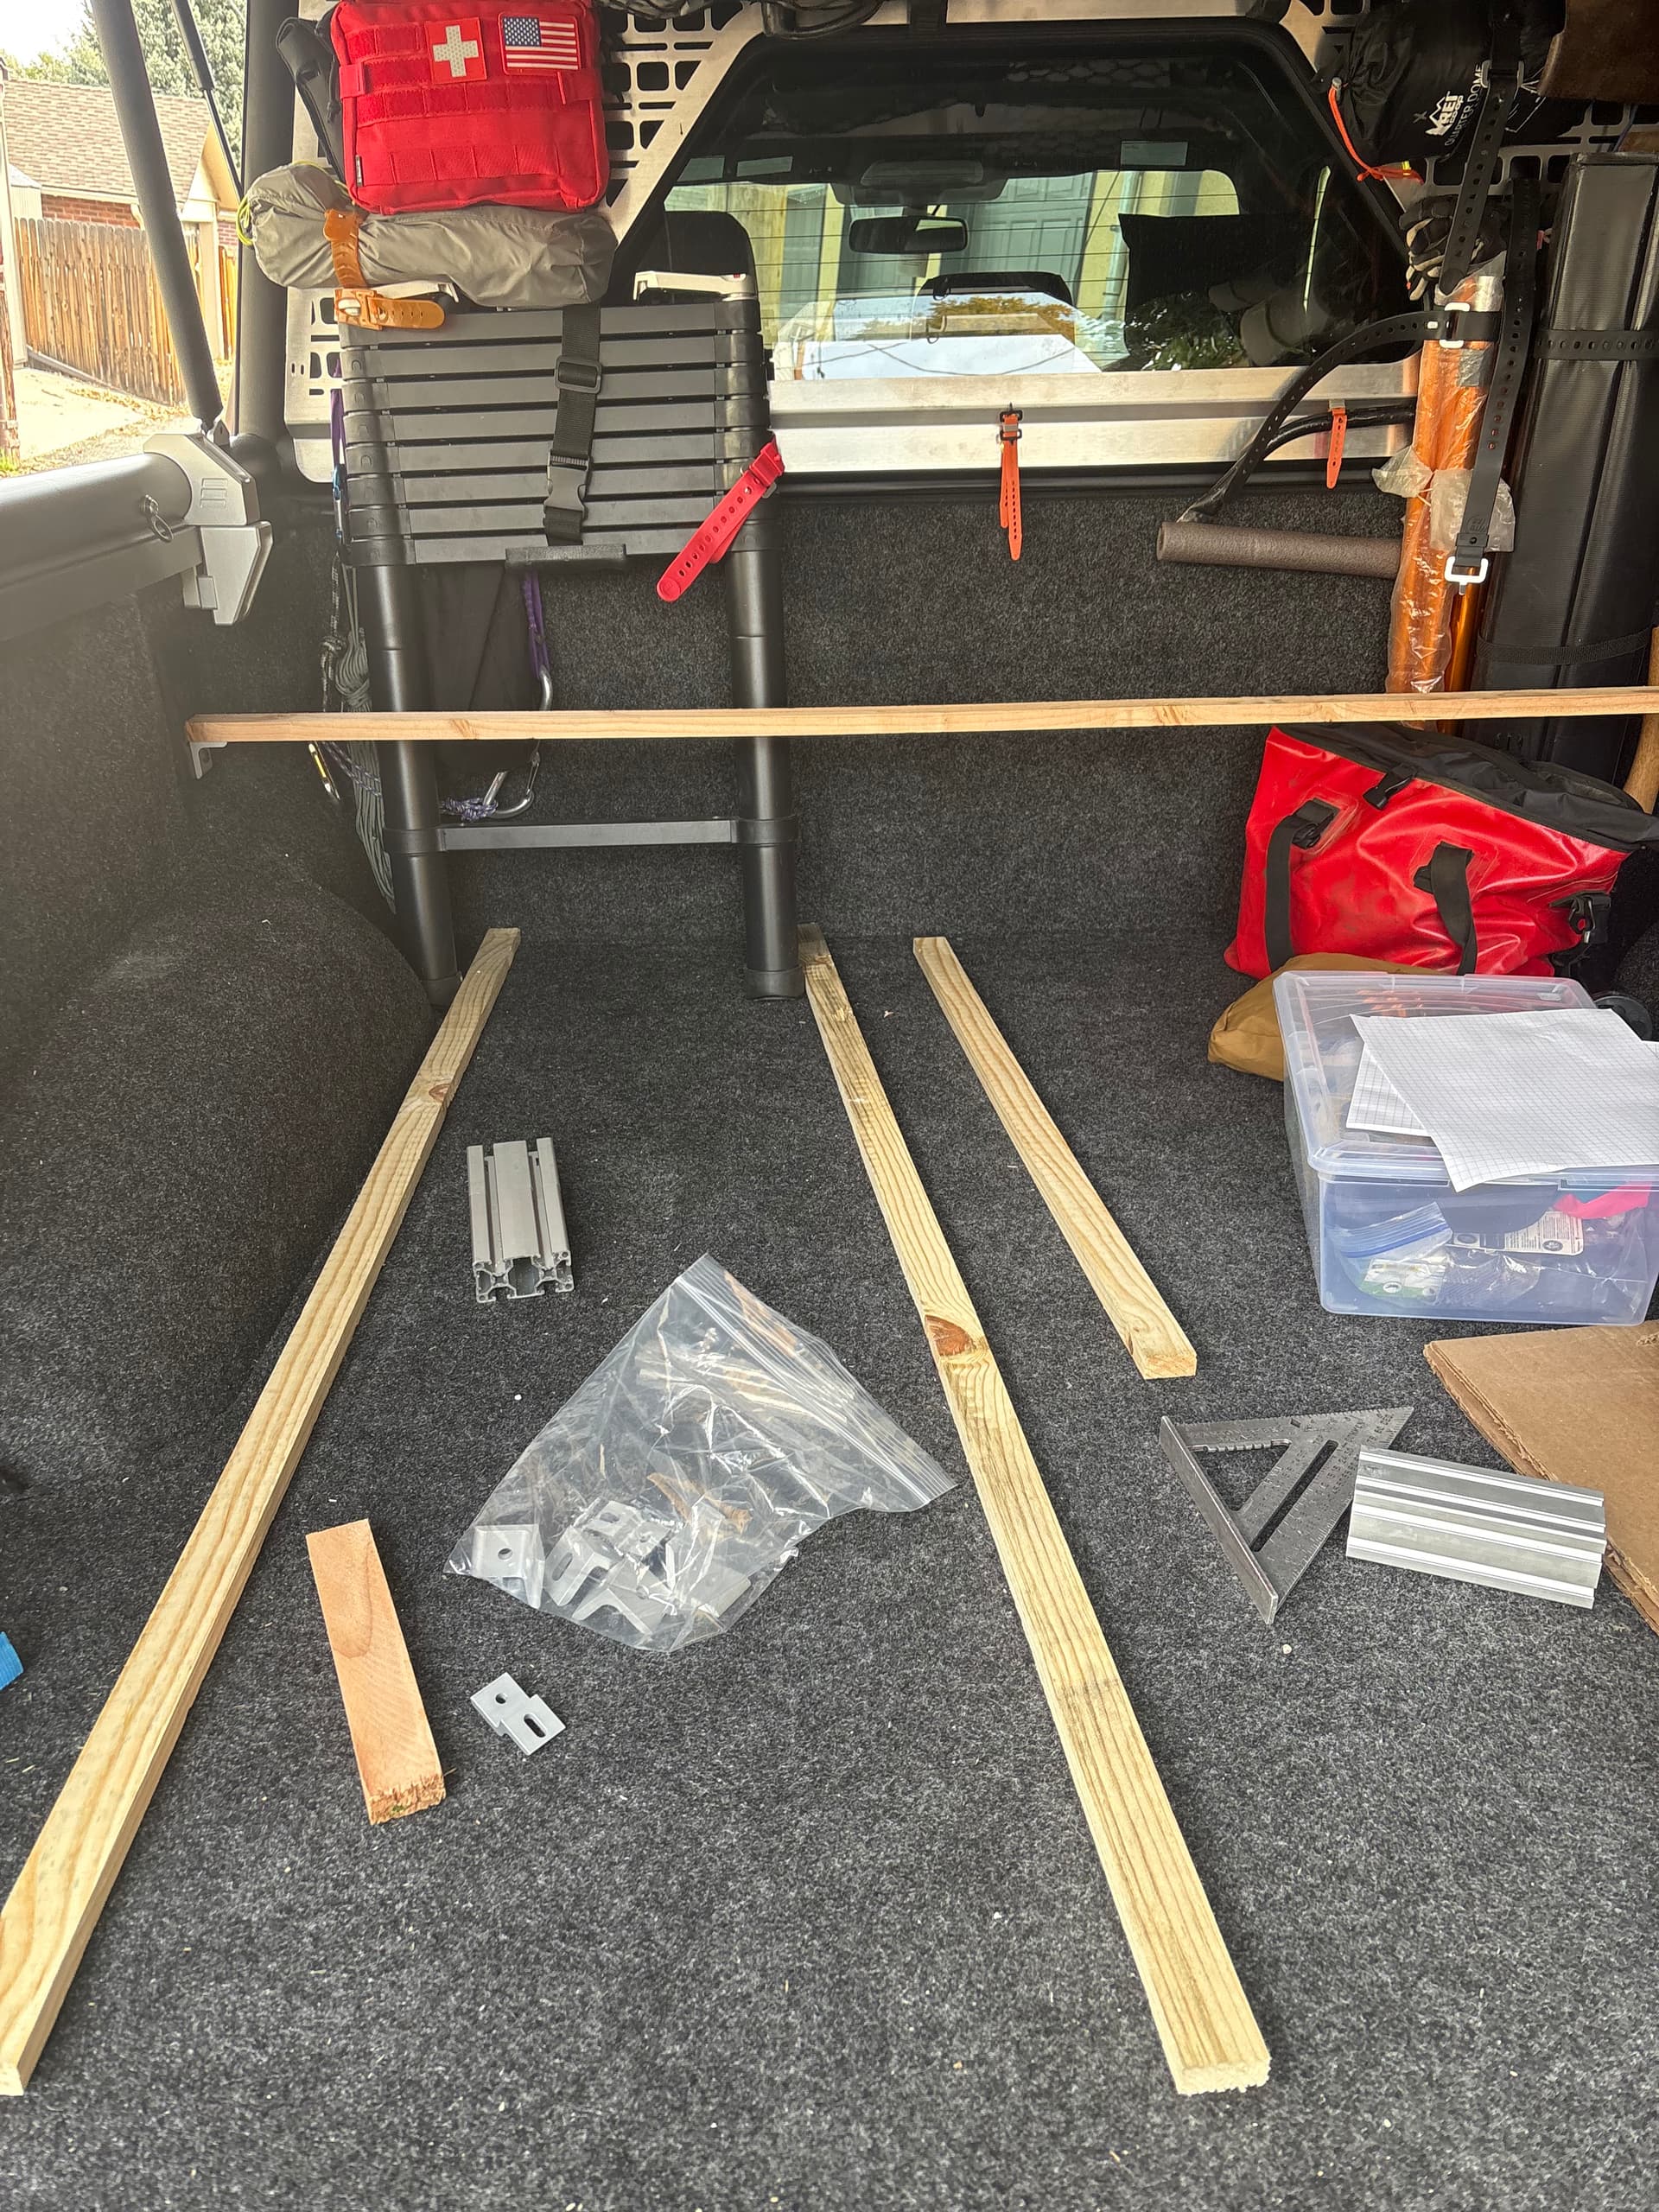
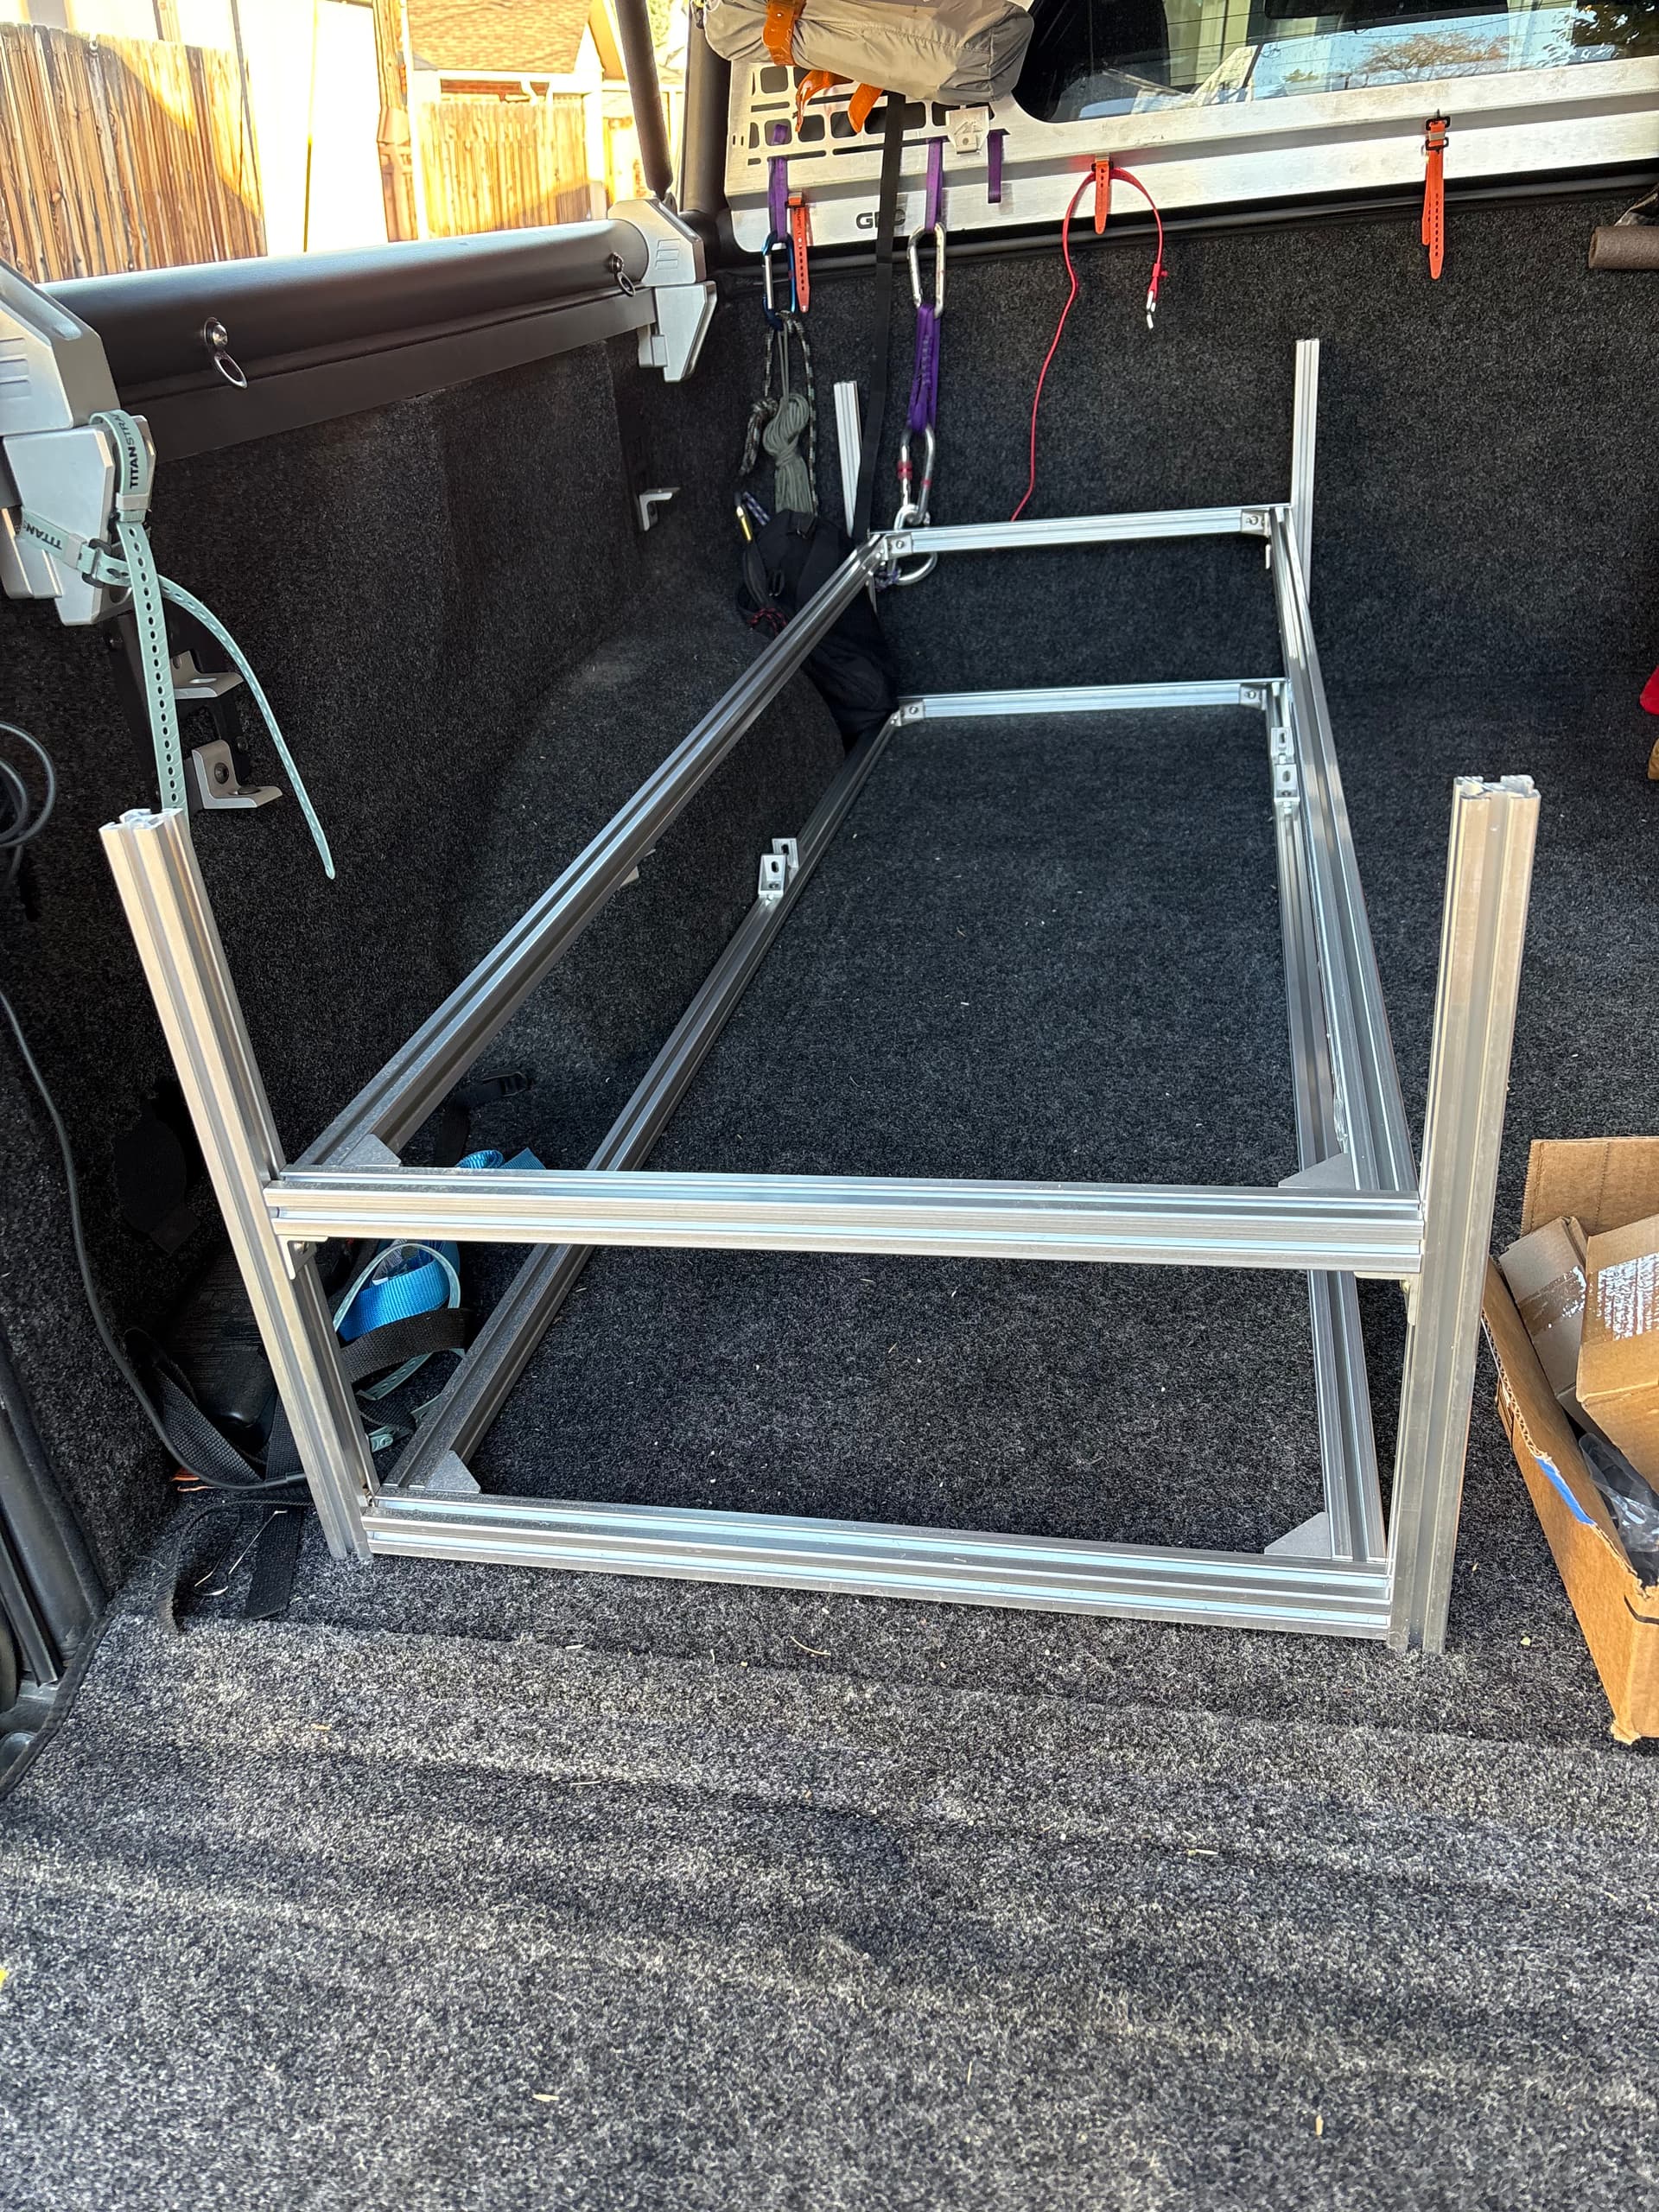
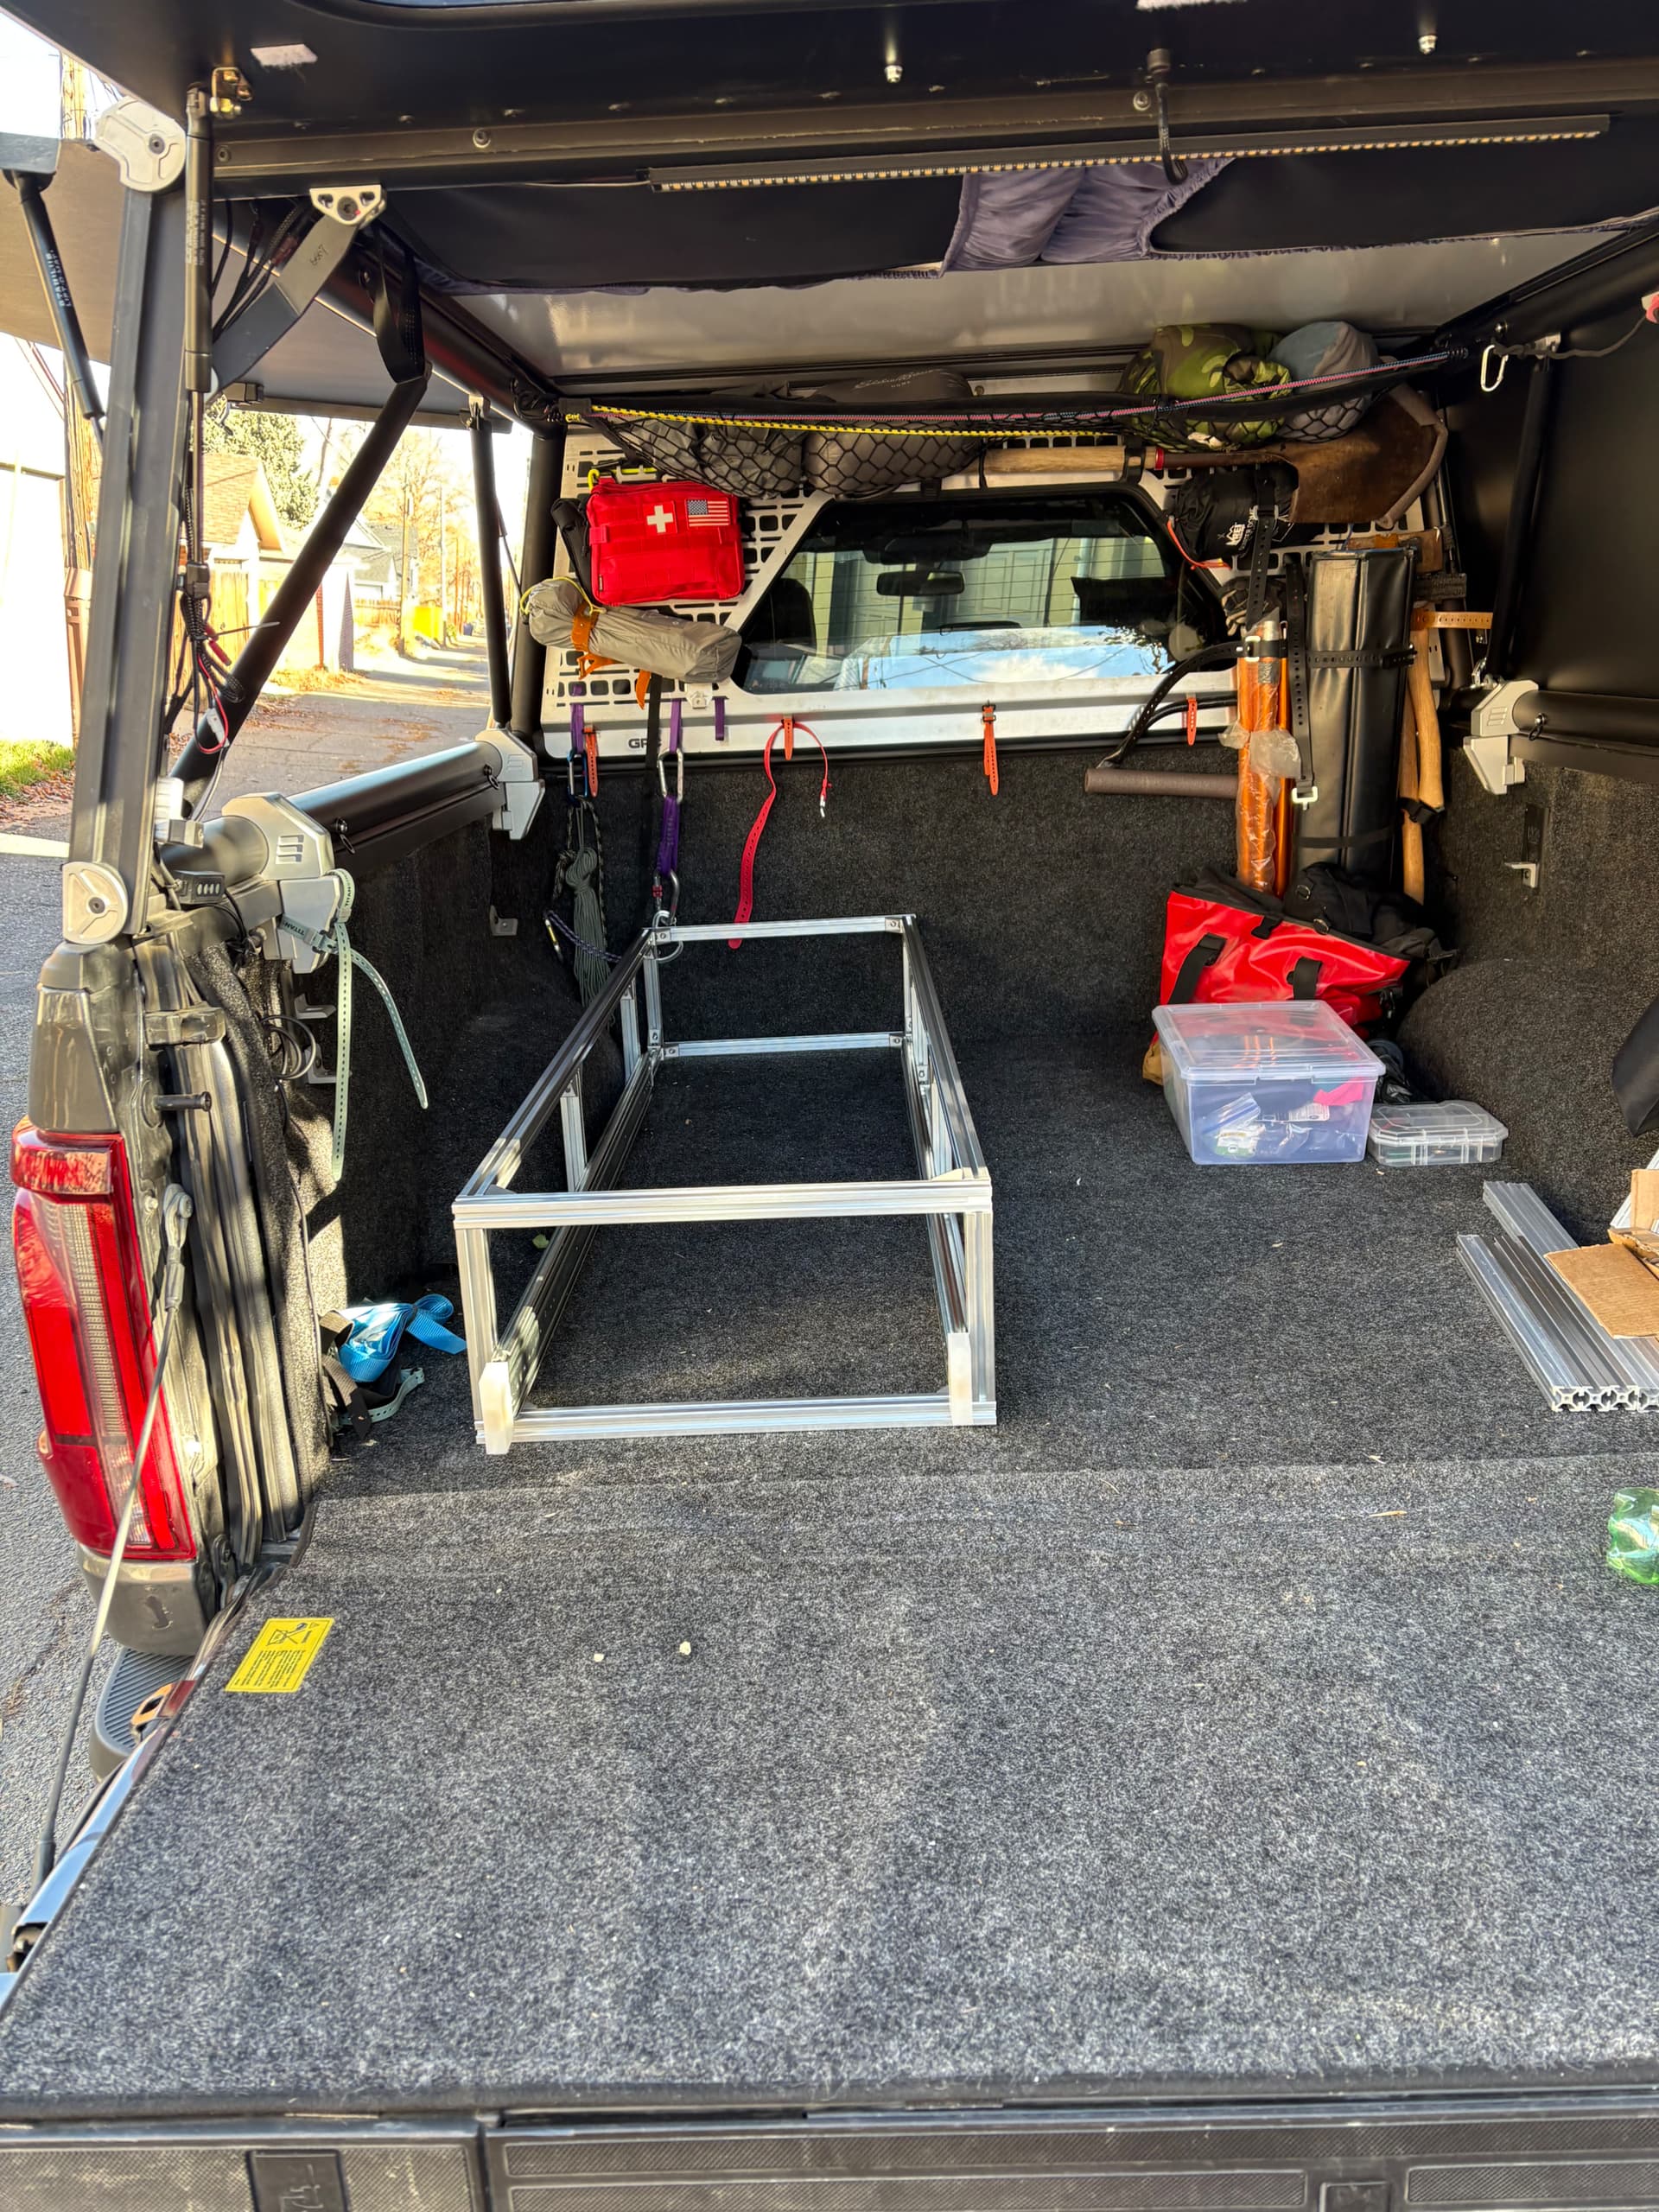
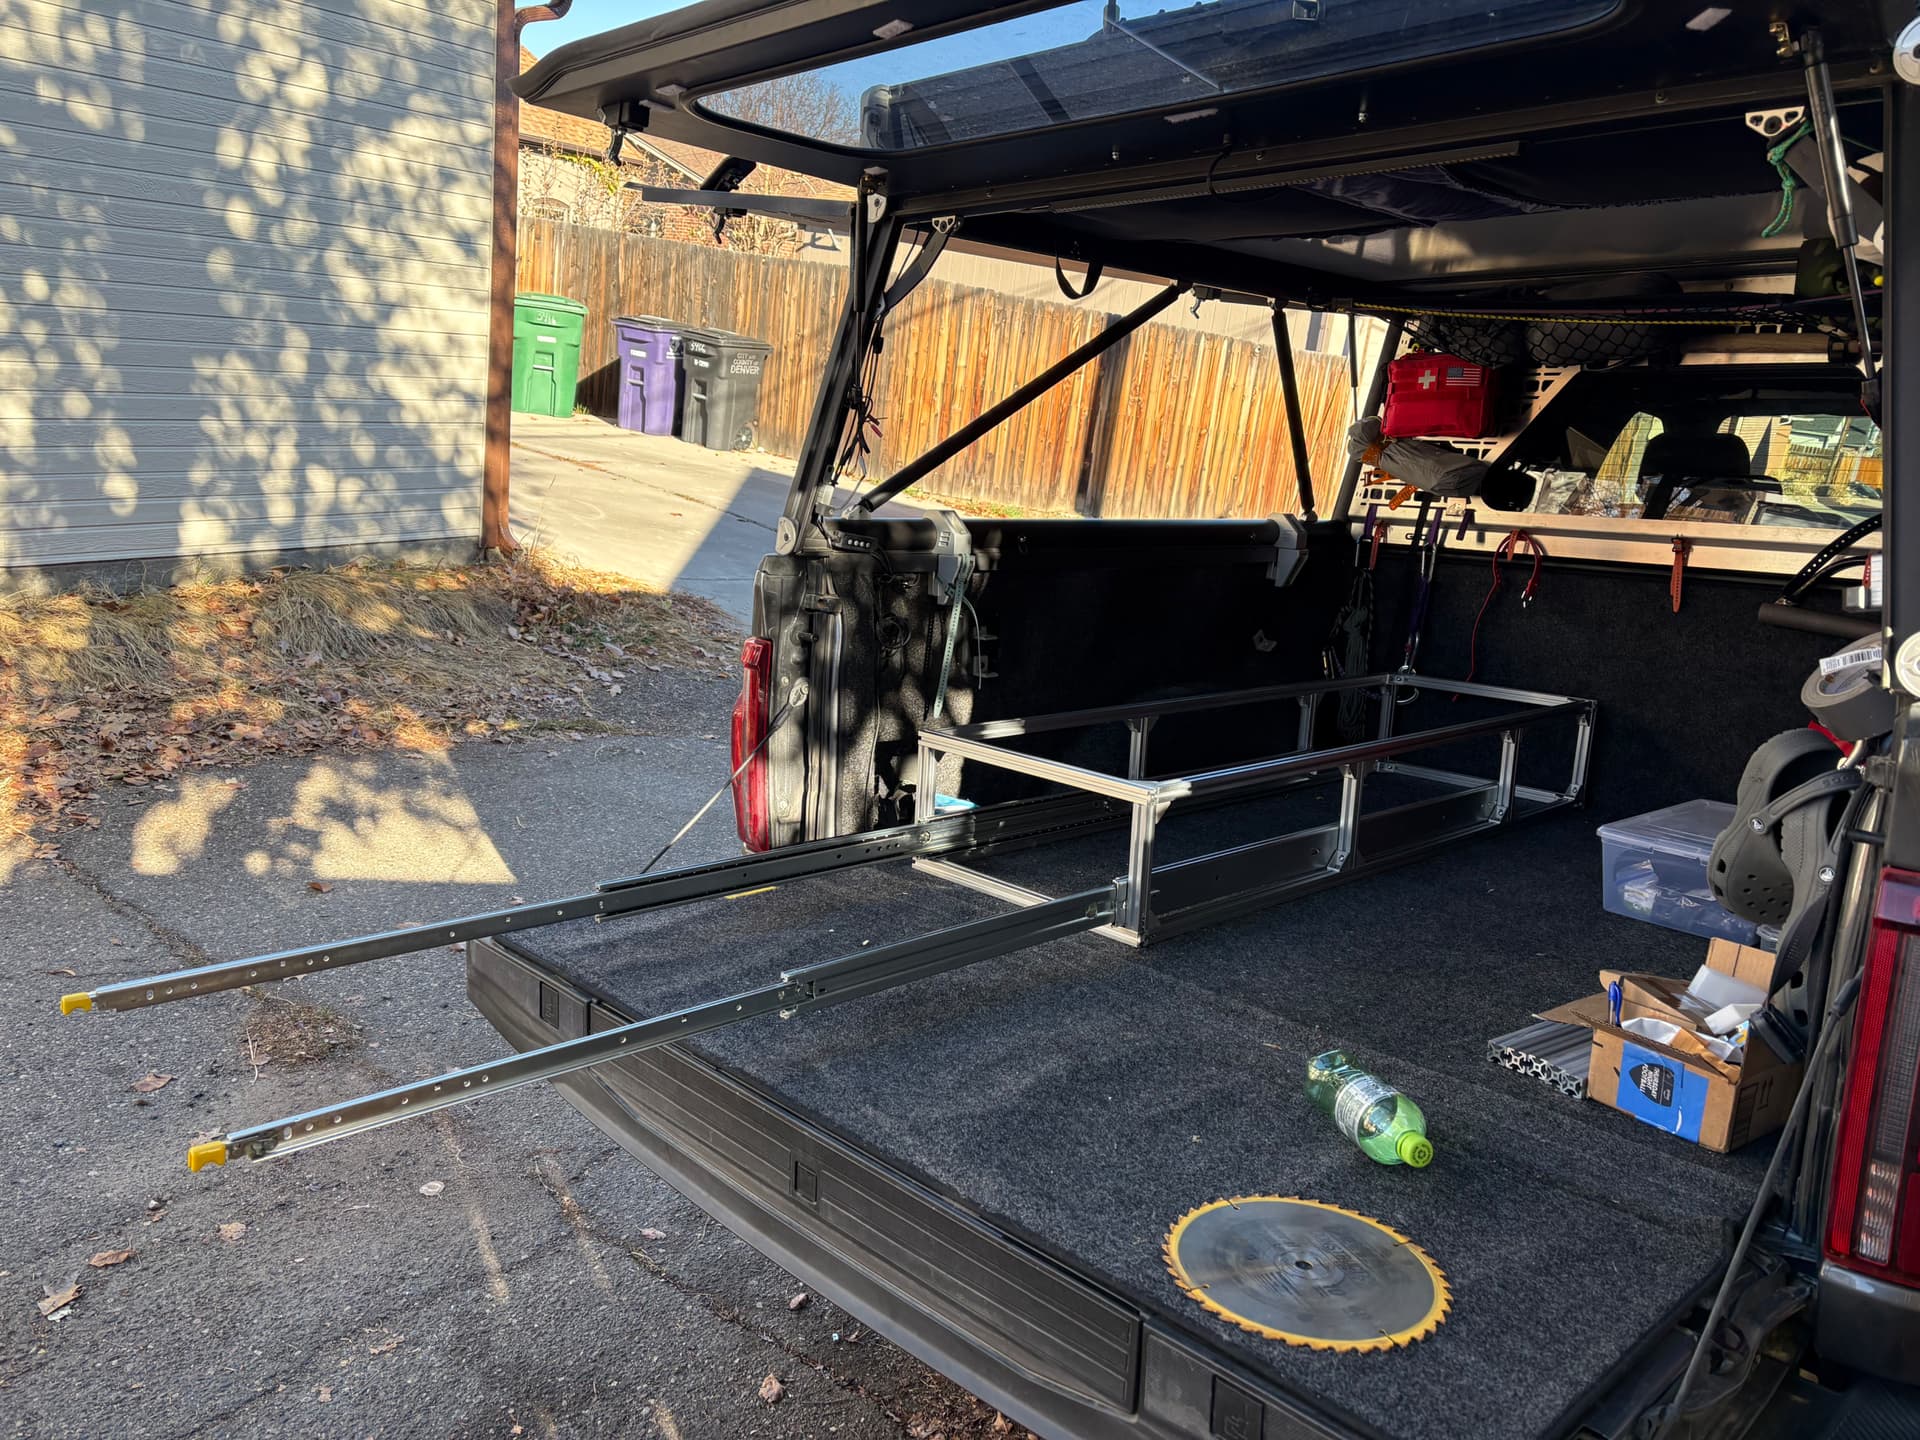
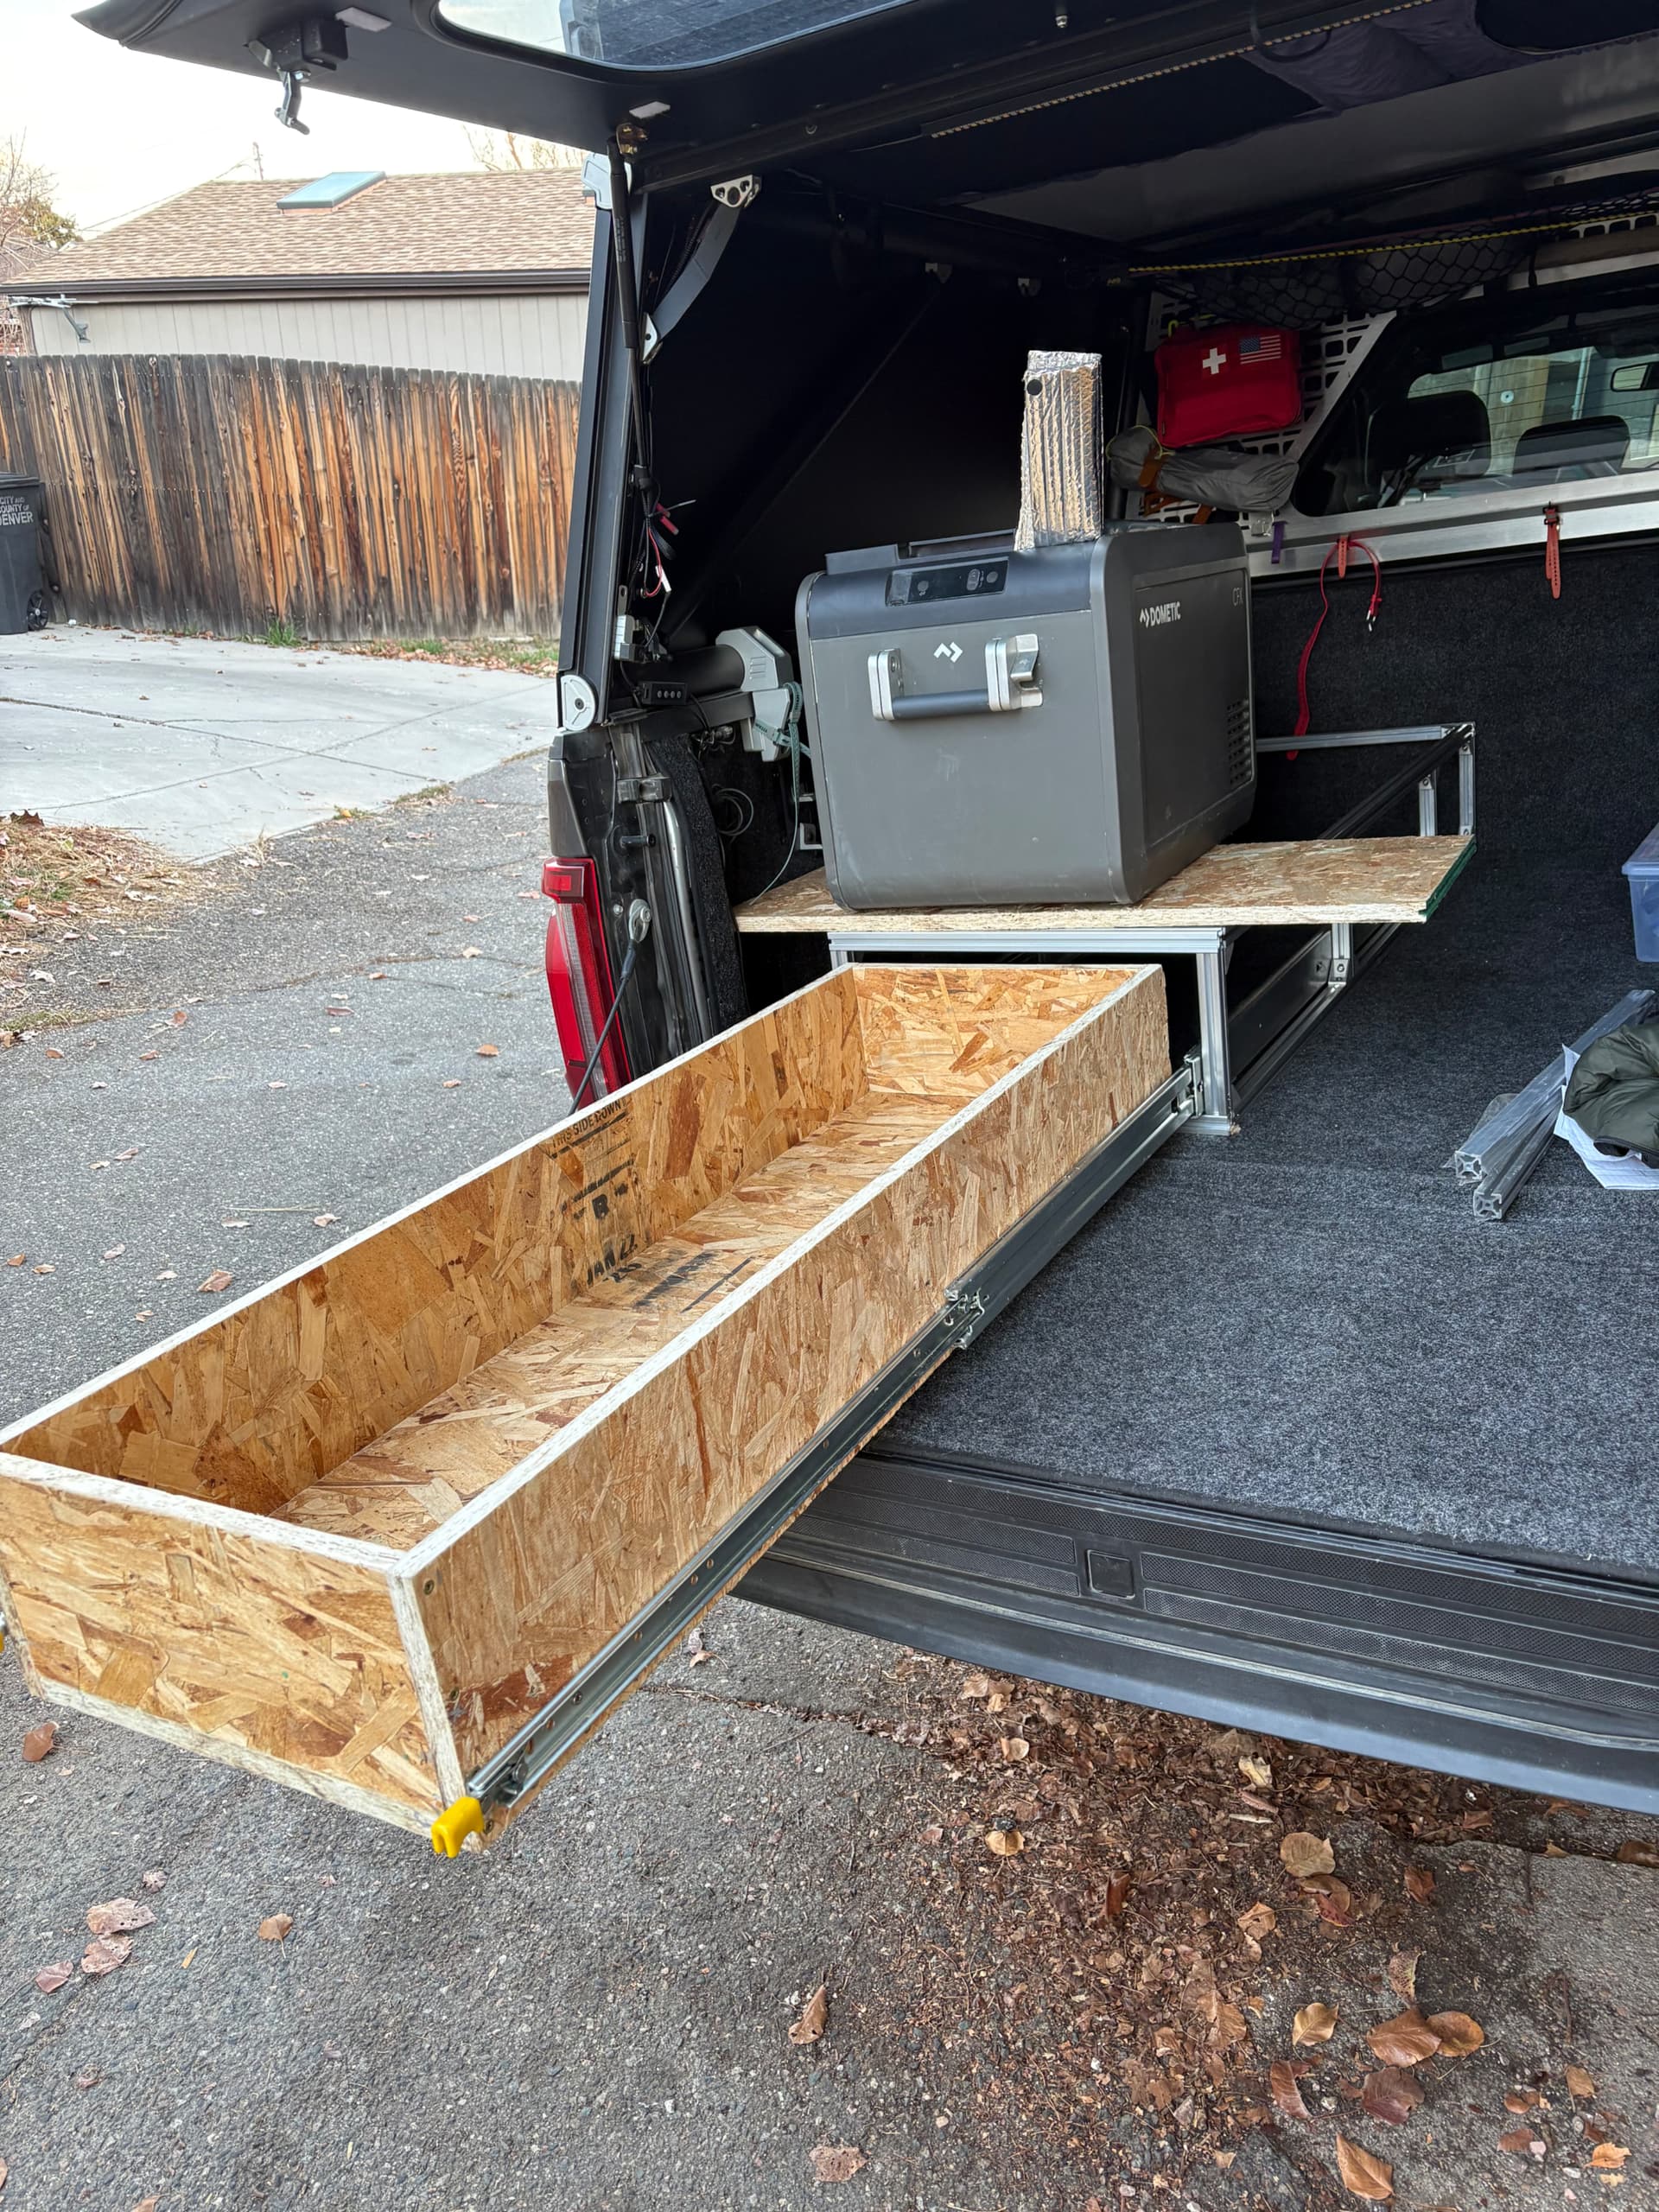
After a few trips I wanted to get the fridge elevated a bit so I could reach in from the side or the back. It worked fine in the bed floor but I am not tall enough to reach in without leaning on and rubbing against the truck body and getting covered in dirt. Also I really liked the lock box in the roof of my old leer cap for extra security of things I don’t want walking away and started looking at decked and the various 80/20 and other drawer systems. I ended up mocking this up with some scrap I had to see how I like the height and space usage etc. with the eventual plan to build a lockable drawer.
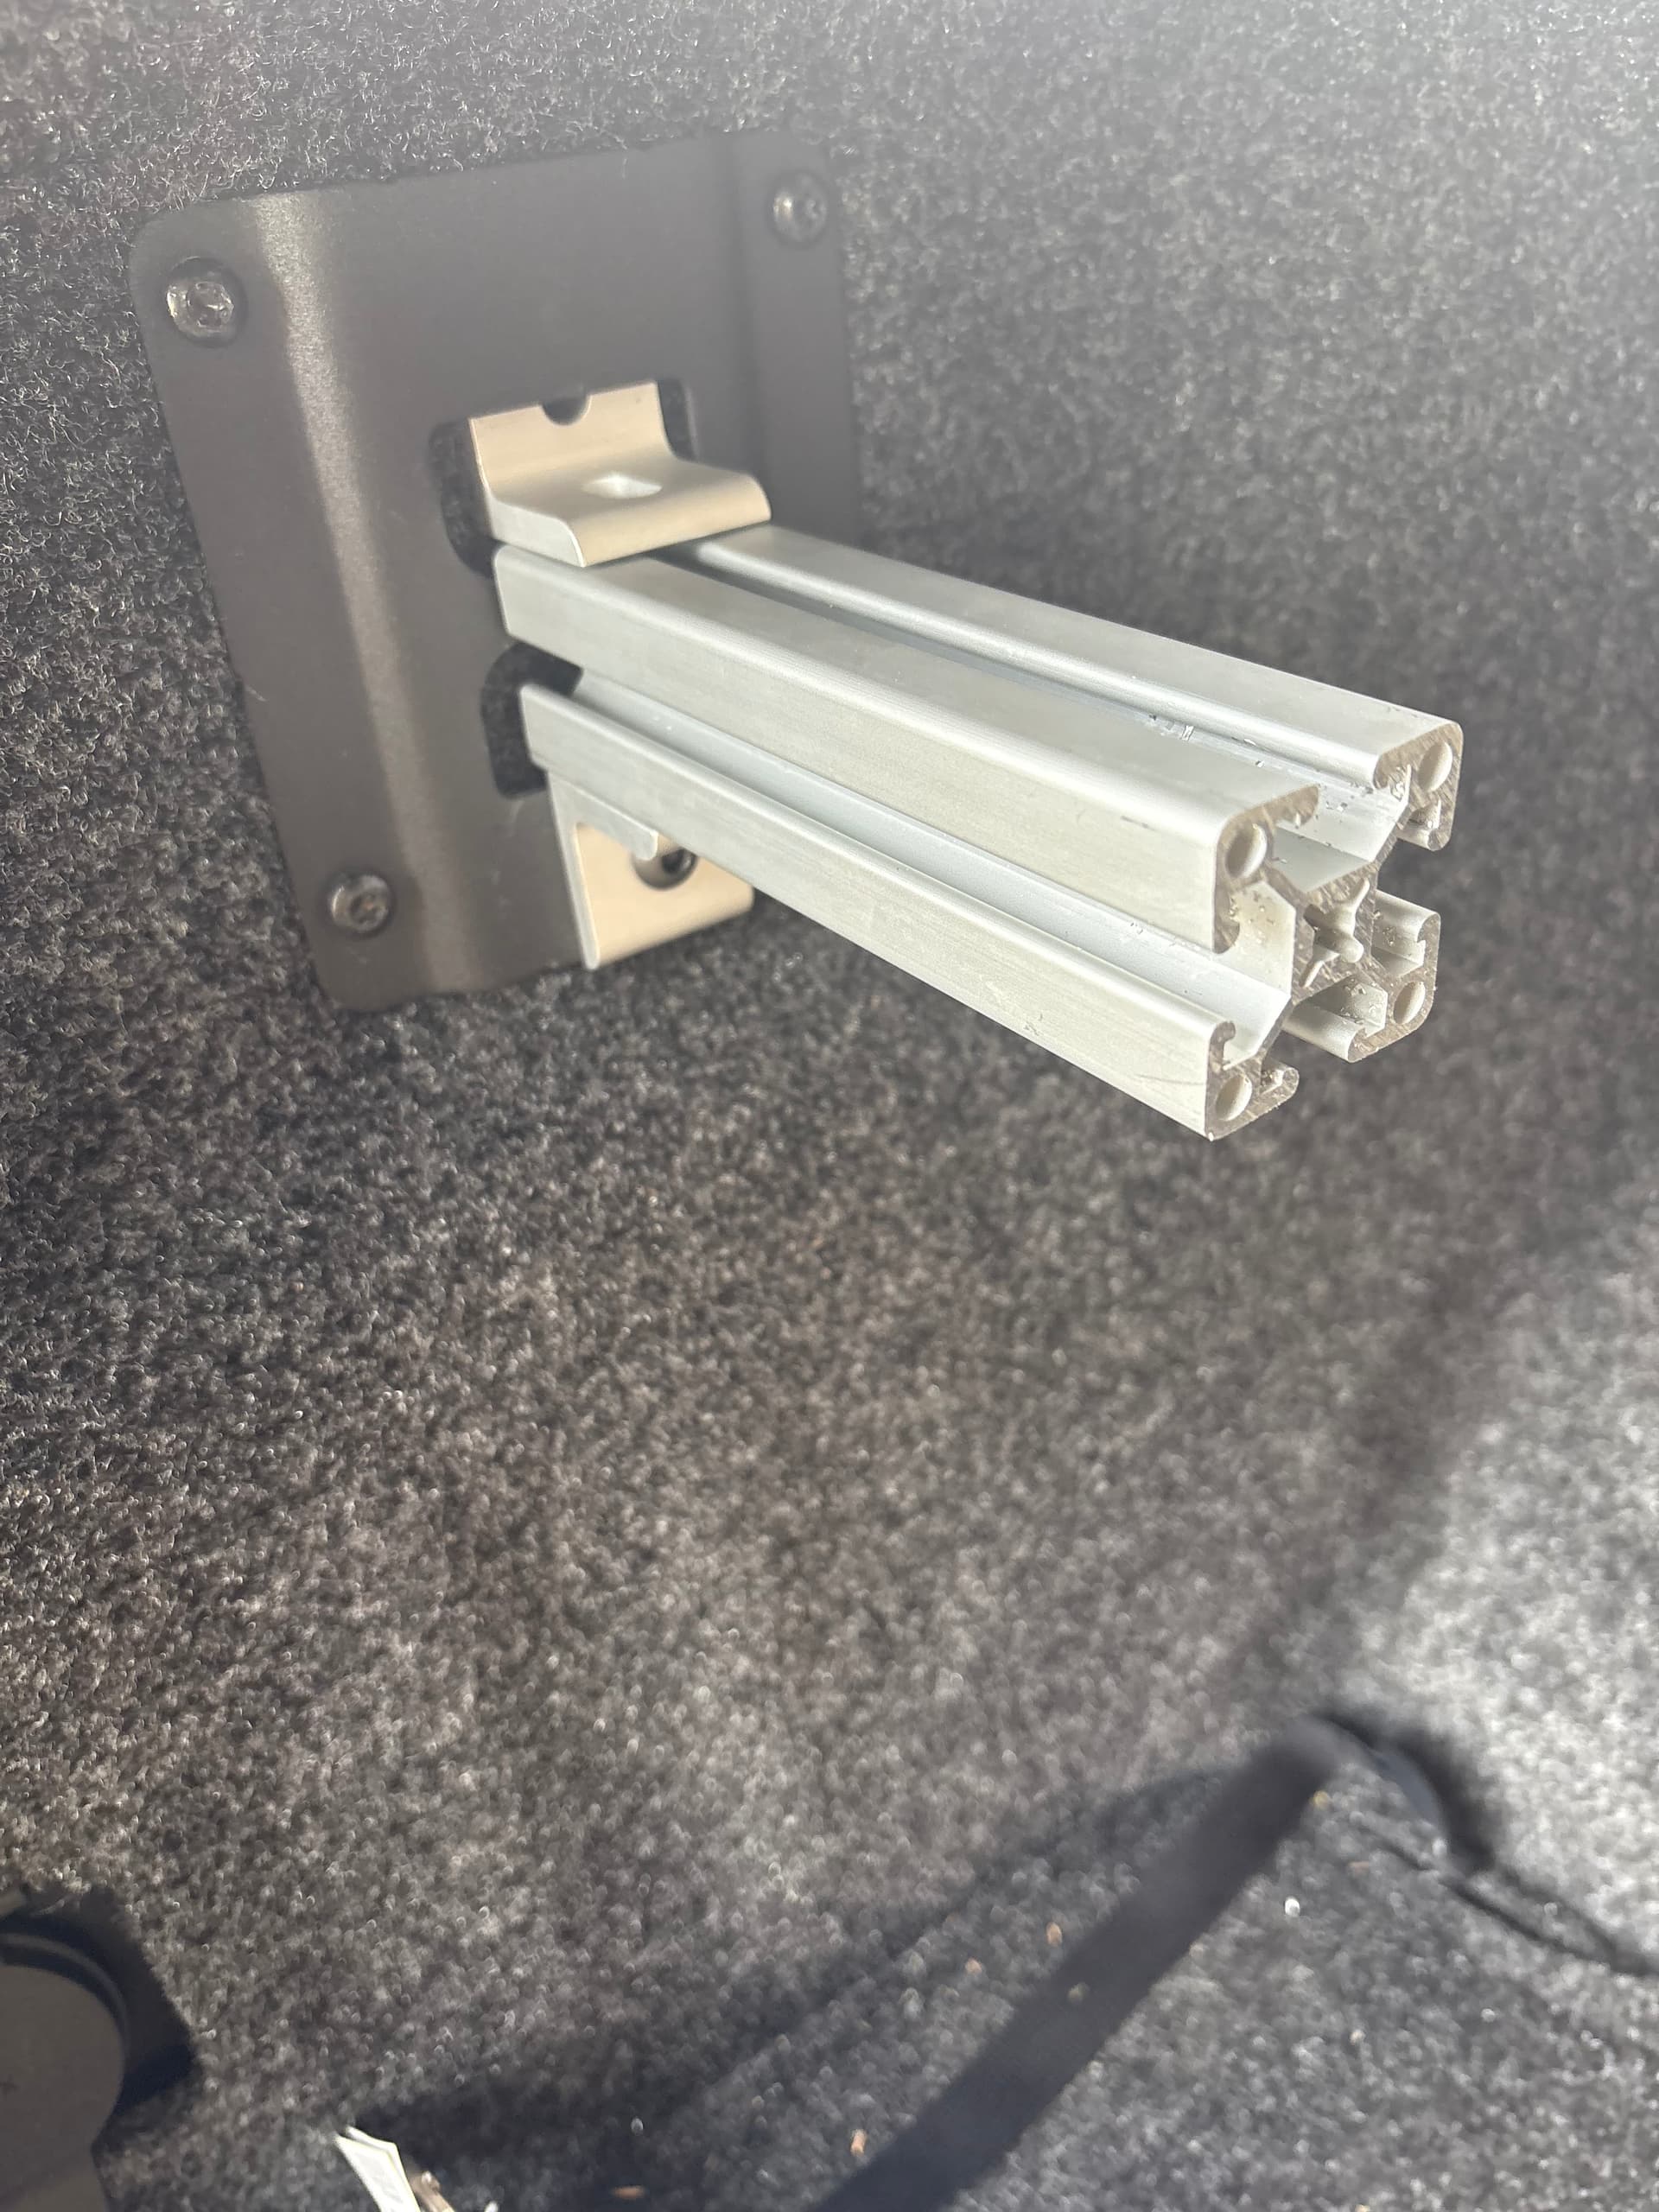
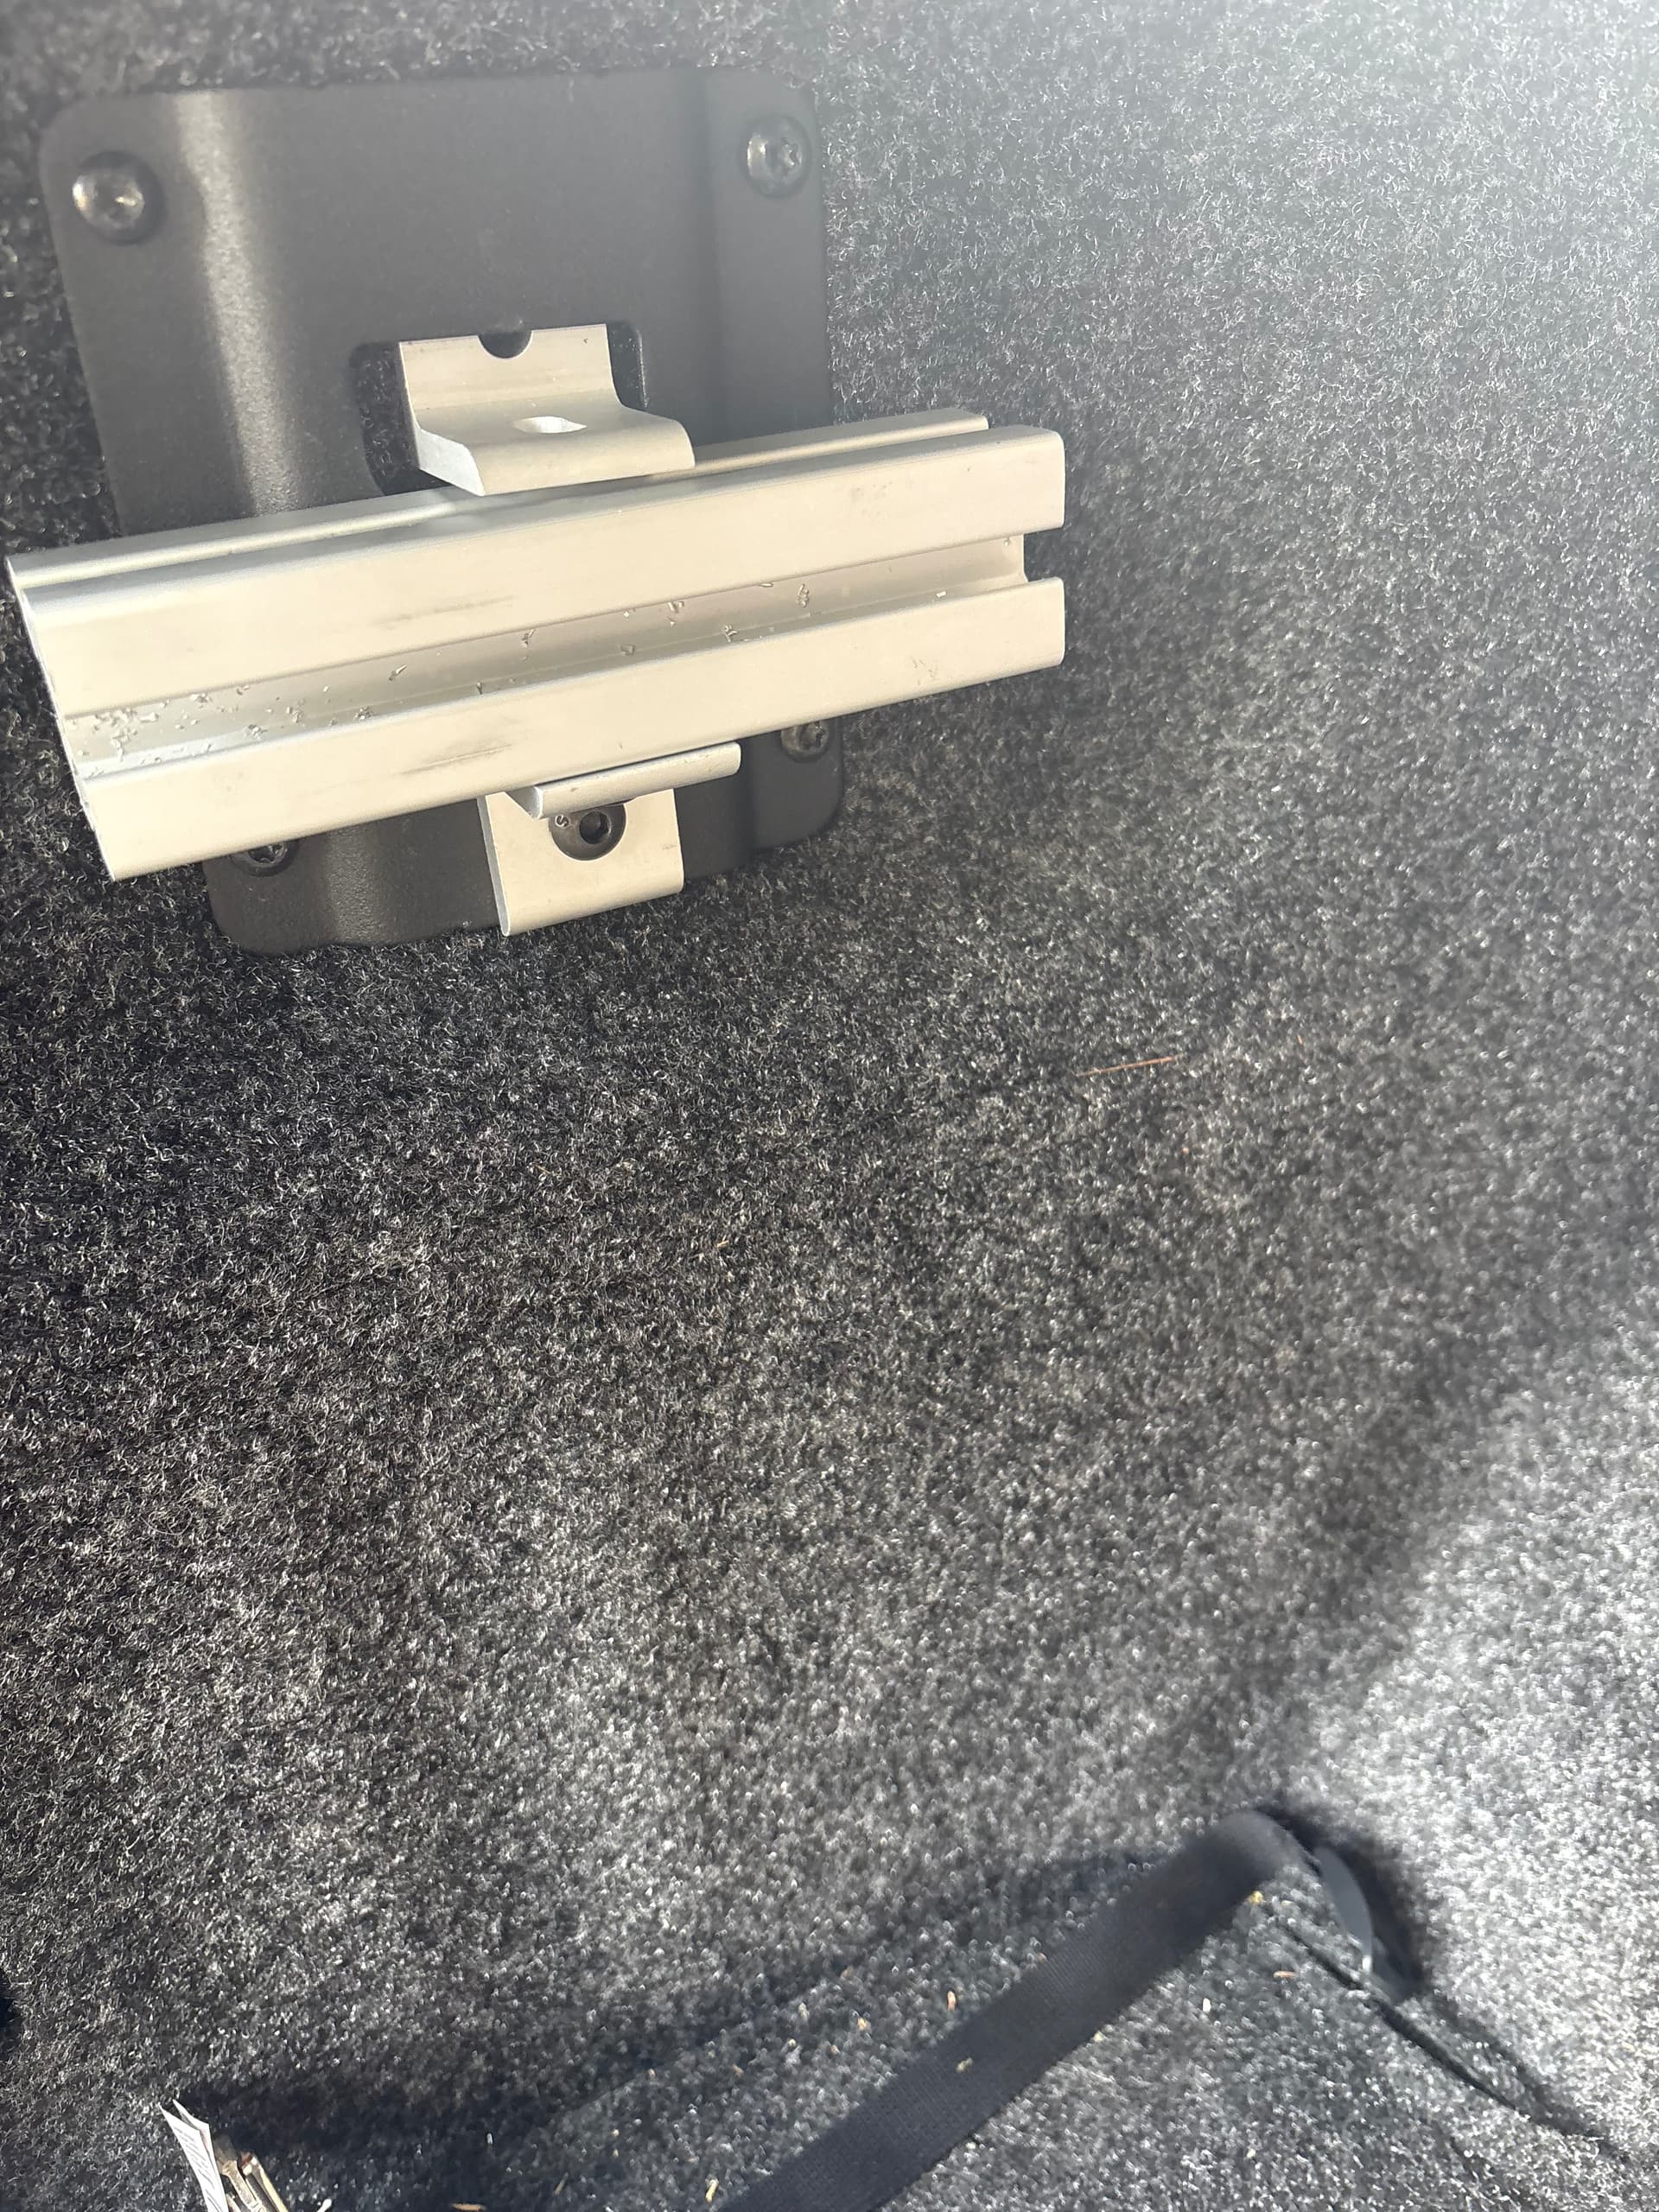
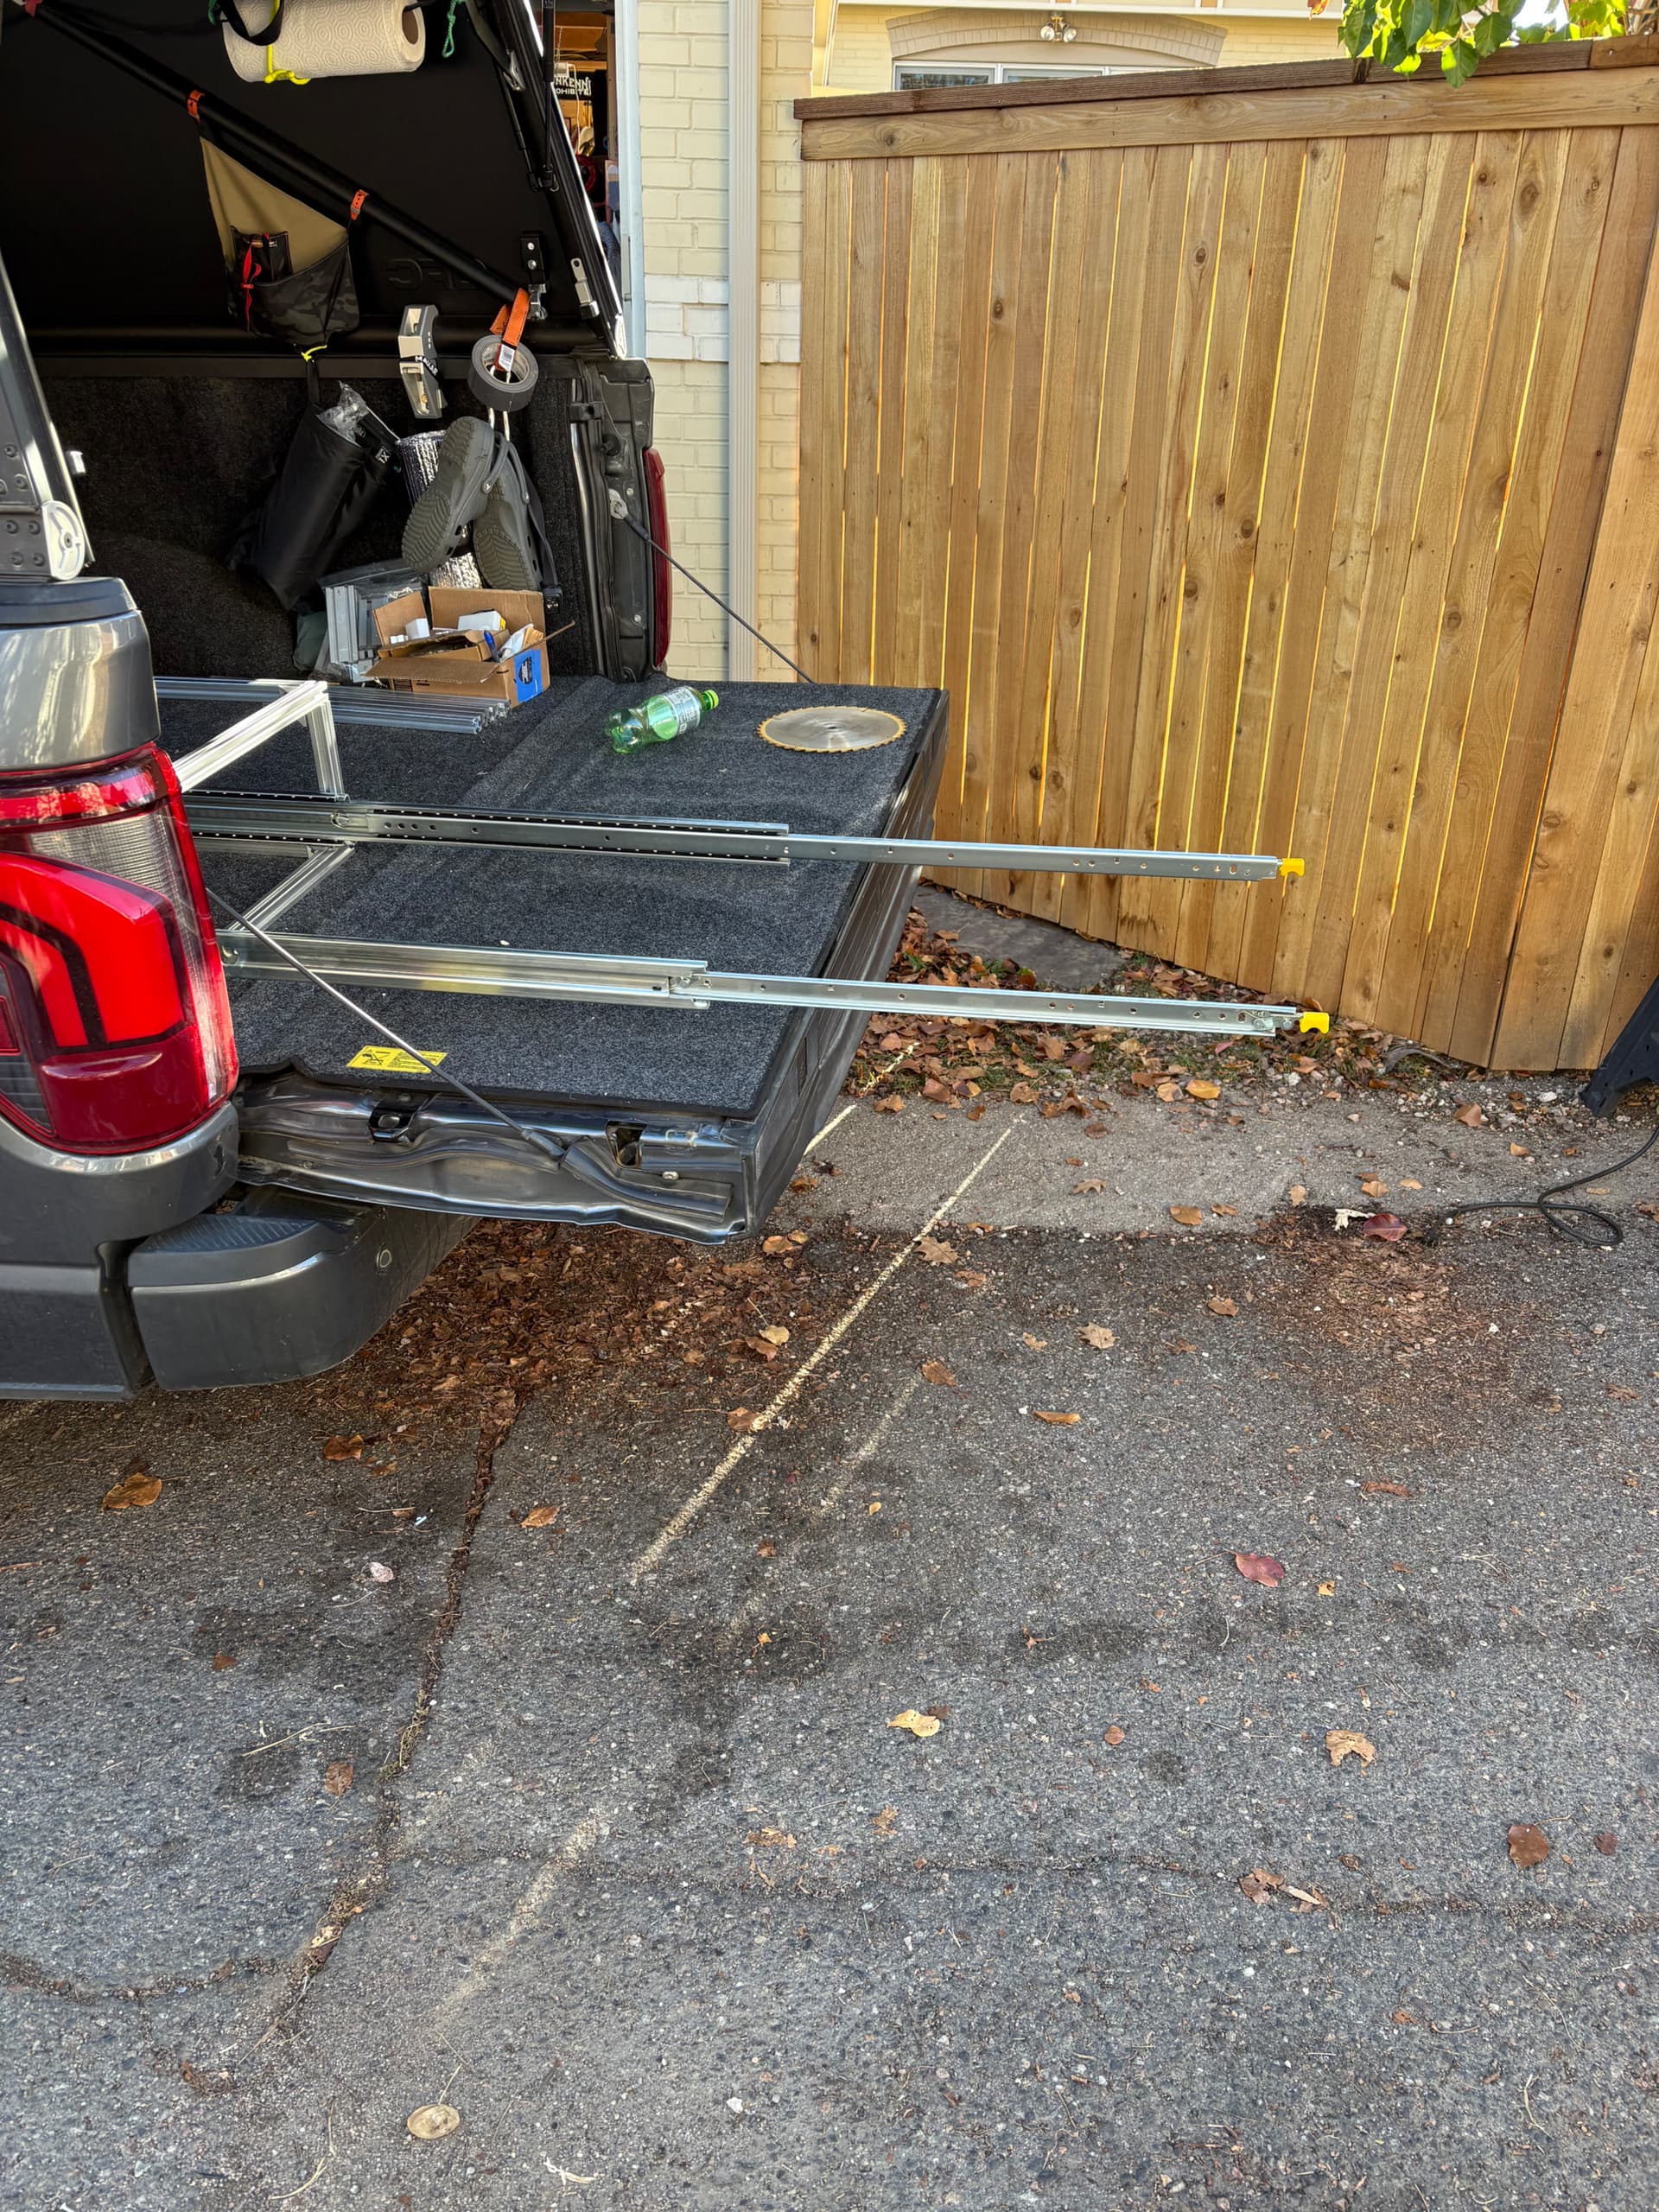
That all worked out so on to a more robust solution. The trick with the F150 bed is nothing is straight flat or aligned. Toyota has this on lock with their full length mounting rails. For example check out built rite industries rail kits for fords. BuiltRight Bulkhead Accessory Rail | Ford F-150 & Raptor (2015+) - BuiltRight Industries Looks like a pretty good product and would be an easy way to attach and build off of. Trouble is the tie down in the back of the bed are only rated for 40 lbs and are much lower than the box link mounts on the side of the bed which are stronger. The built rite guys were very helpful but ultimately recommended not attaching to the rear most tie downs. I started exploring how to attach to the box link. My first thought was to run side to side with a single piece creating essentially a brace for a rear bench to build off. Luckily I mocked it up with a piece of wood before buying and expensive custom length of 80/20 . What I learned is that the box links are recessed into the bed deep enough that the total length of the piece is longer that can be wedged around all the weird lines of the bed sides. It was also higher than I wanted. Hopefully that made sense. Pick using 1/2 for mock up and the weird angle in the bed sides. This would never go with apiece of rigid metal.
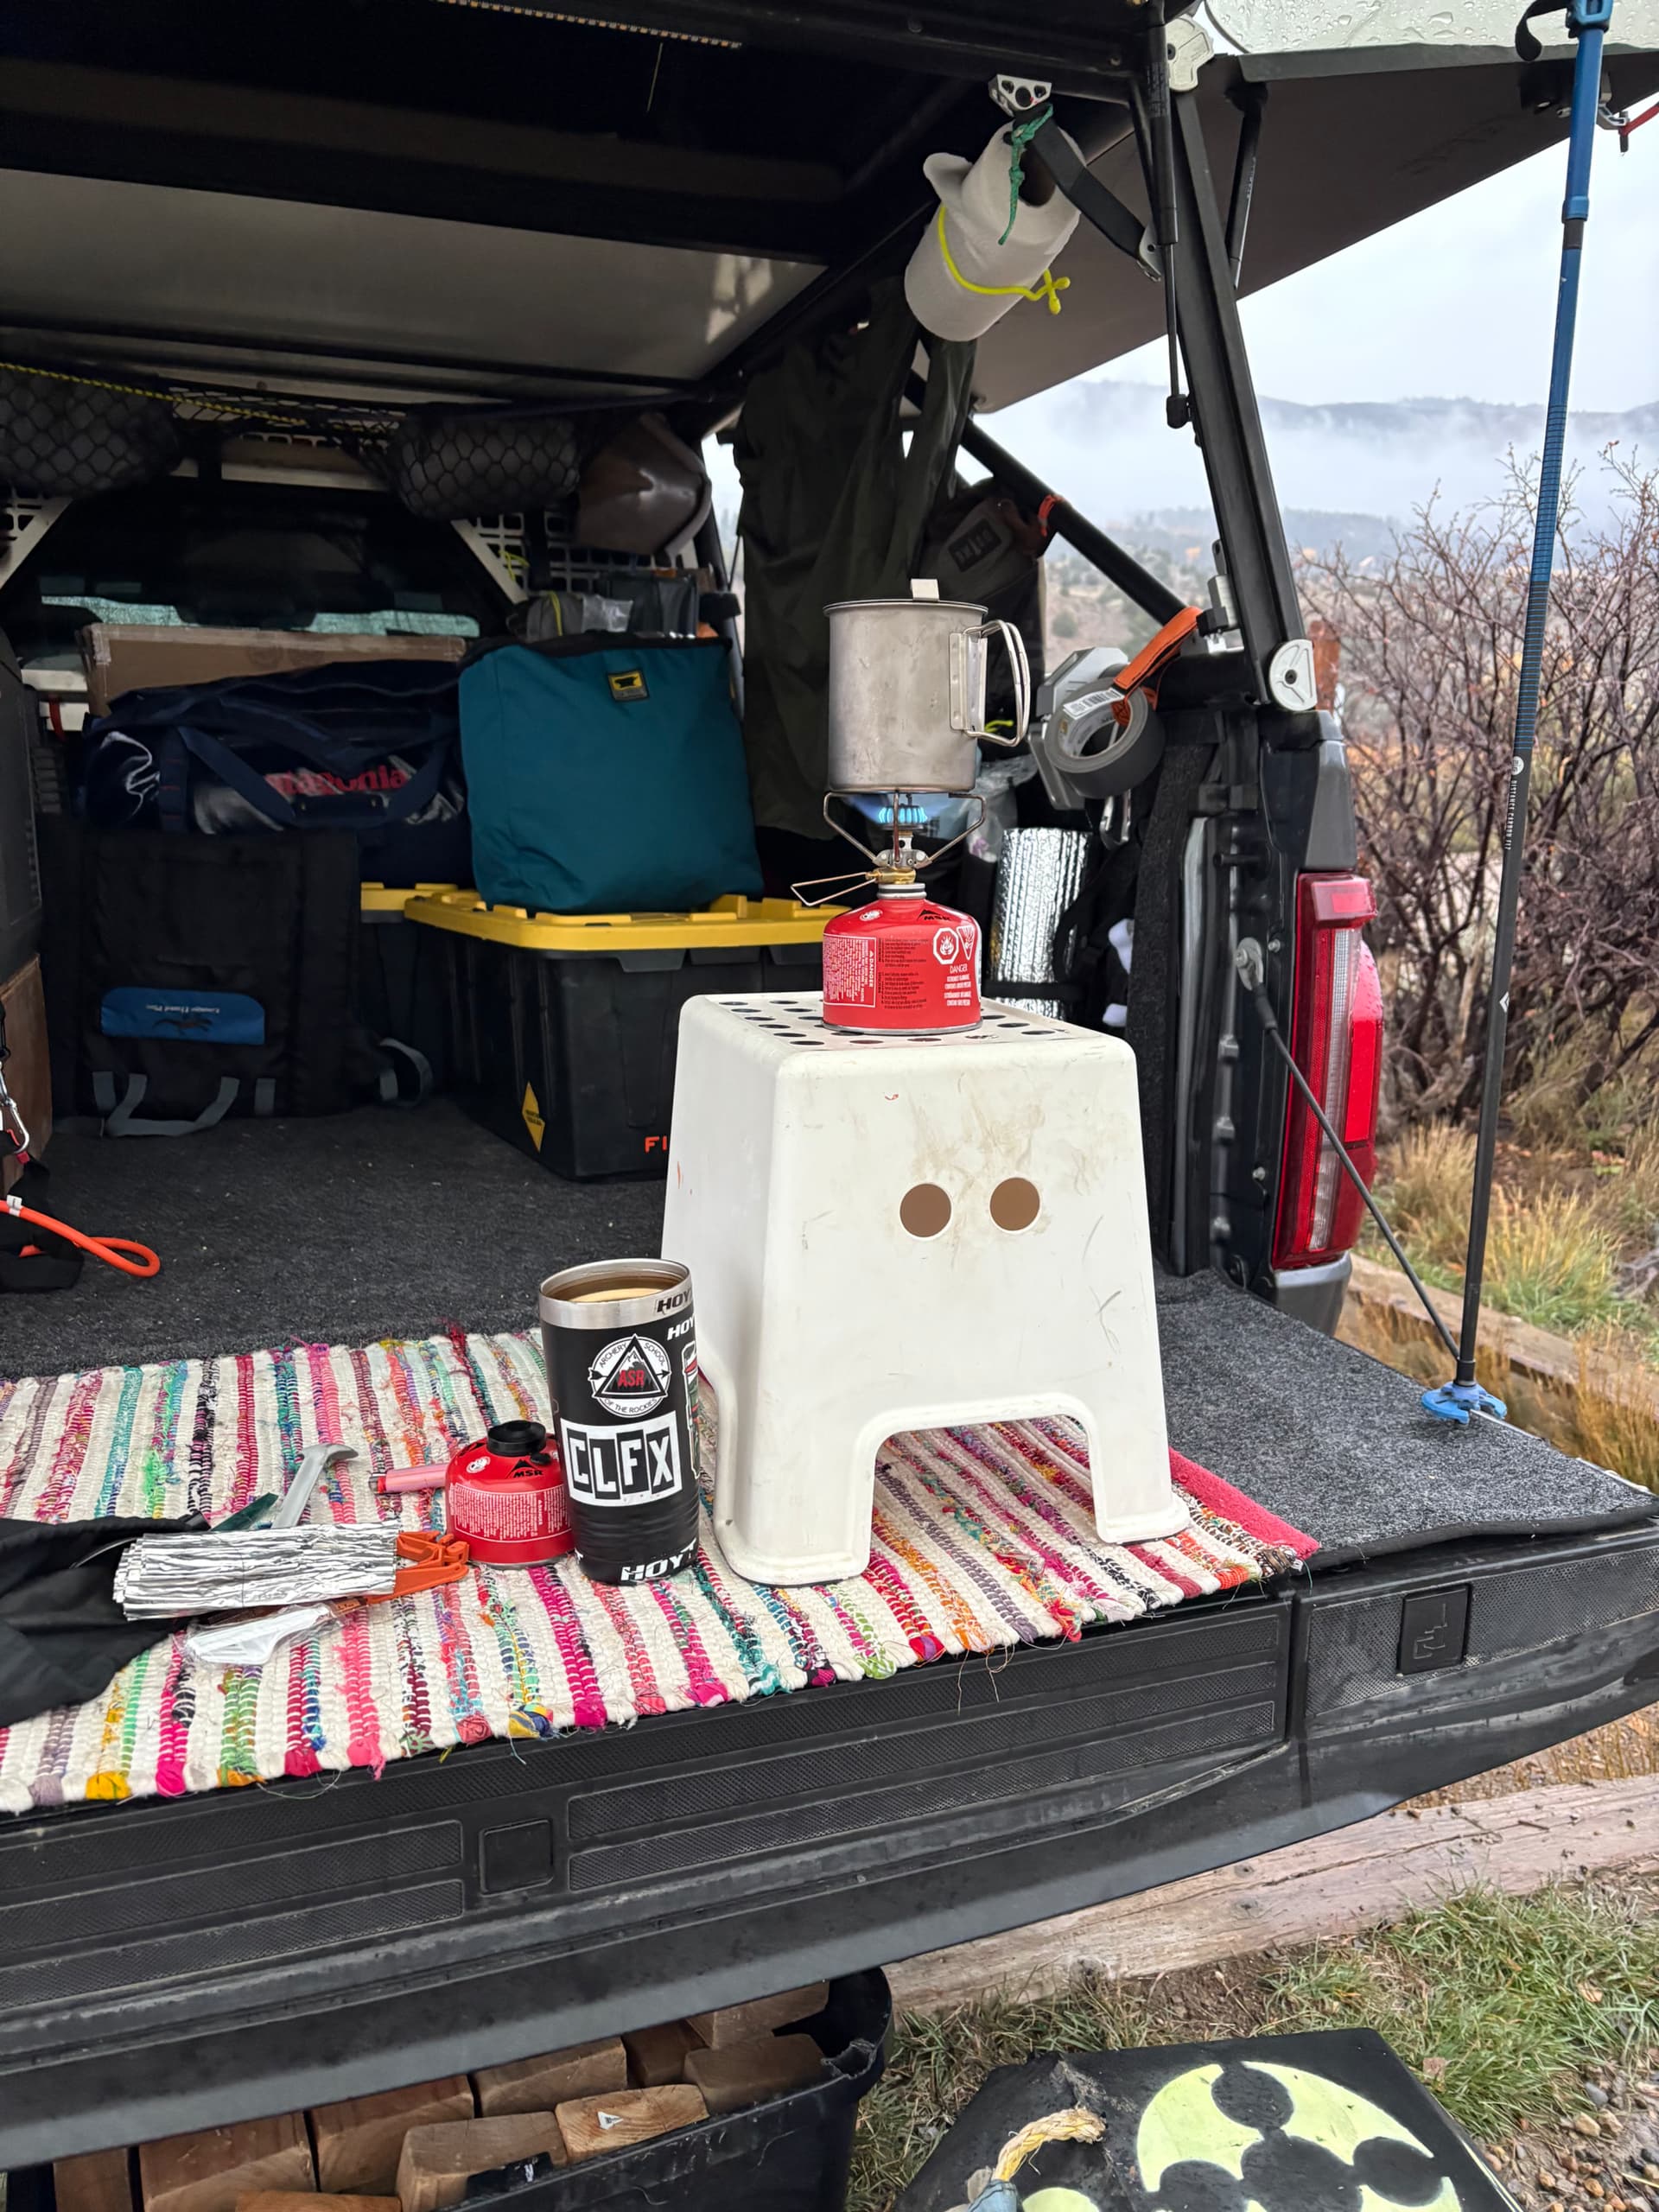
Note the buddy heater… it was 20 out the day I did this. I ordered the handy molle brackets Frog MOLLE Hook 2" from mountains 2 metal. They are great 10/10. And the @jedgar buddy heater bracket BuddyMount this combo works great to get the heater off the bed rug where I was worried about melting. I am intrigued by the diesel heater set ups out there but I already had this heater and it simplicity and function is amazing. Got this carbon monoxide sensor as well DS-100 Portable Carbon Monoxide Detector for Travel, 140H Standby, CO Detector with Magnetic Back, 3-in-1 CO Monitor with Audible & Visual Alarm for Camping, Hotel, Car & RV - Amazon.com
I know this should not be an issue with this heater but I nearly died in a single wall tent running a hanging stove when the snow was so heavy it completely covered the vents and ability of the tent to breath. I got very lucky so lesson learned……
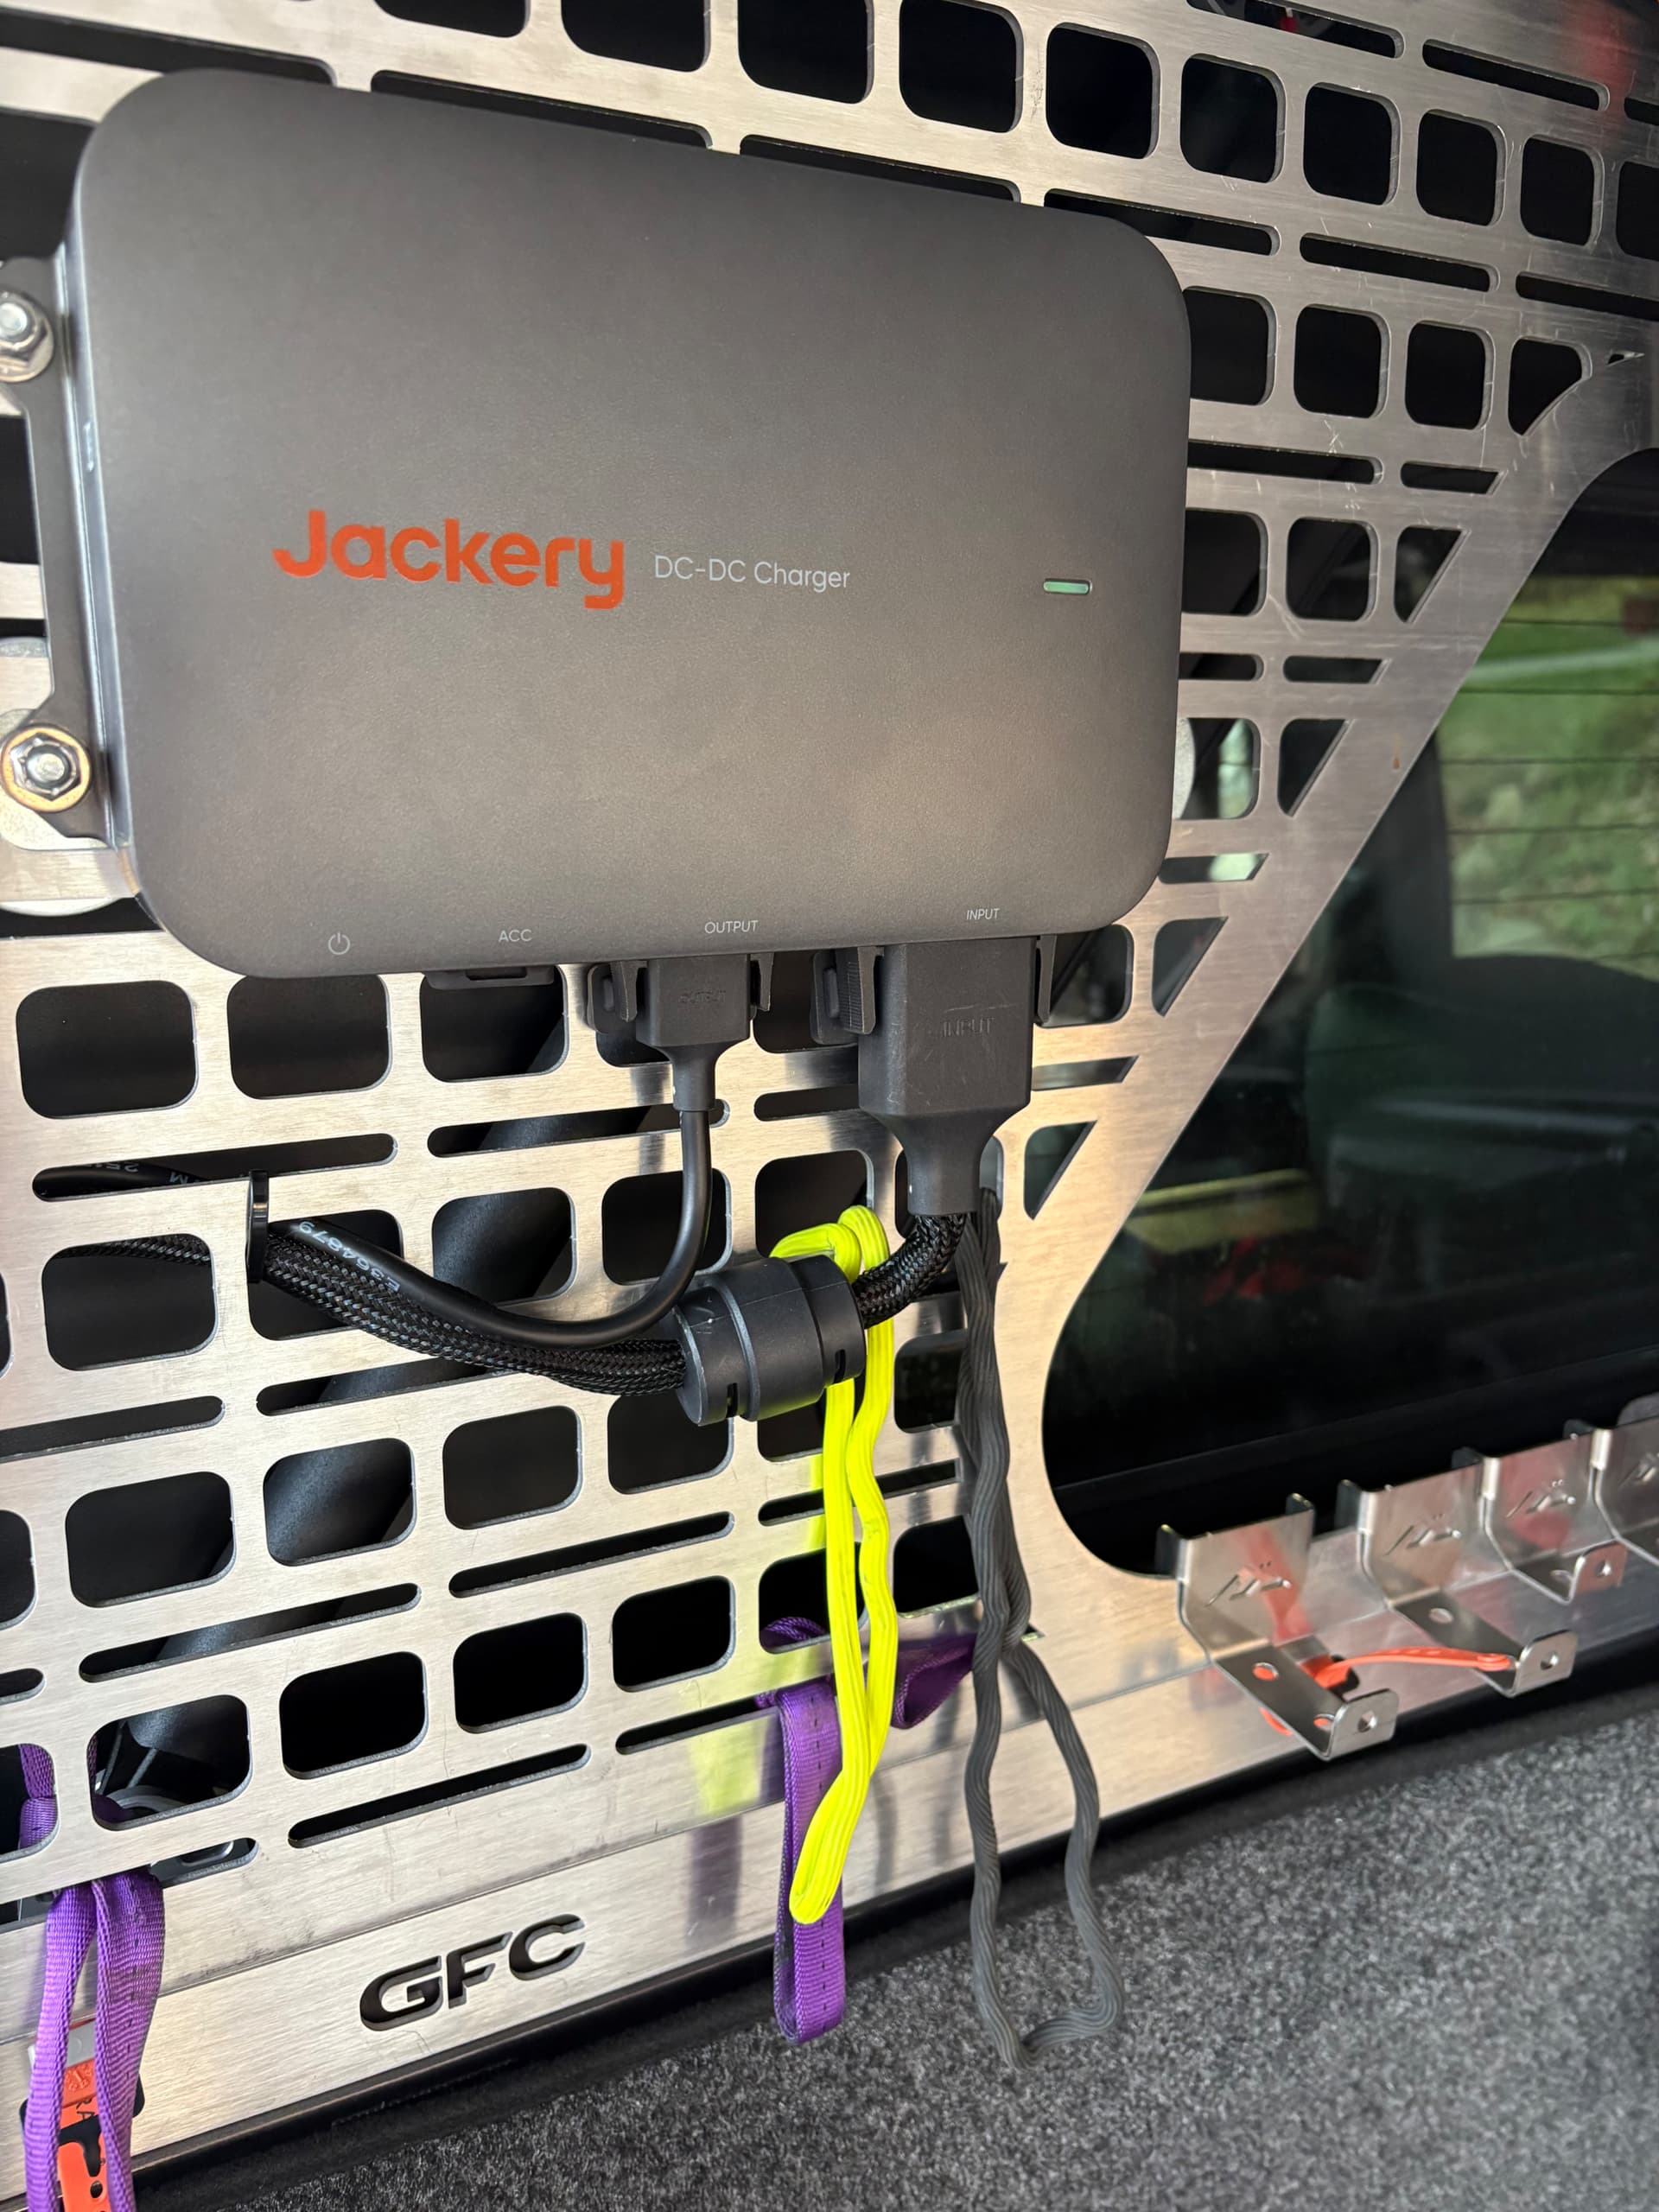
Got the jakery DC DC charger installed and connected. I did not hook up the acc power wire yet as still have not figured out the connections. All the ford diagrams talk about a ground wire but the ACC wire that came with the unit does not have one. So far it’s working and charging but intermittently am still working through if this is related to the ACC wire not being or something else.
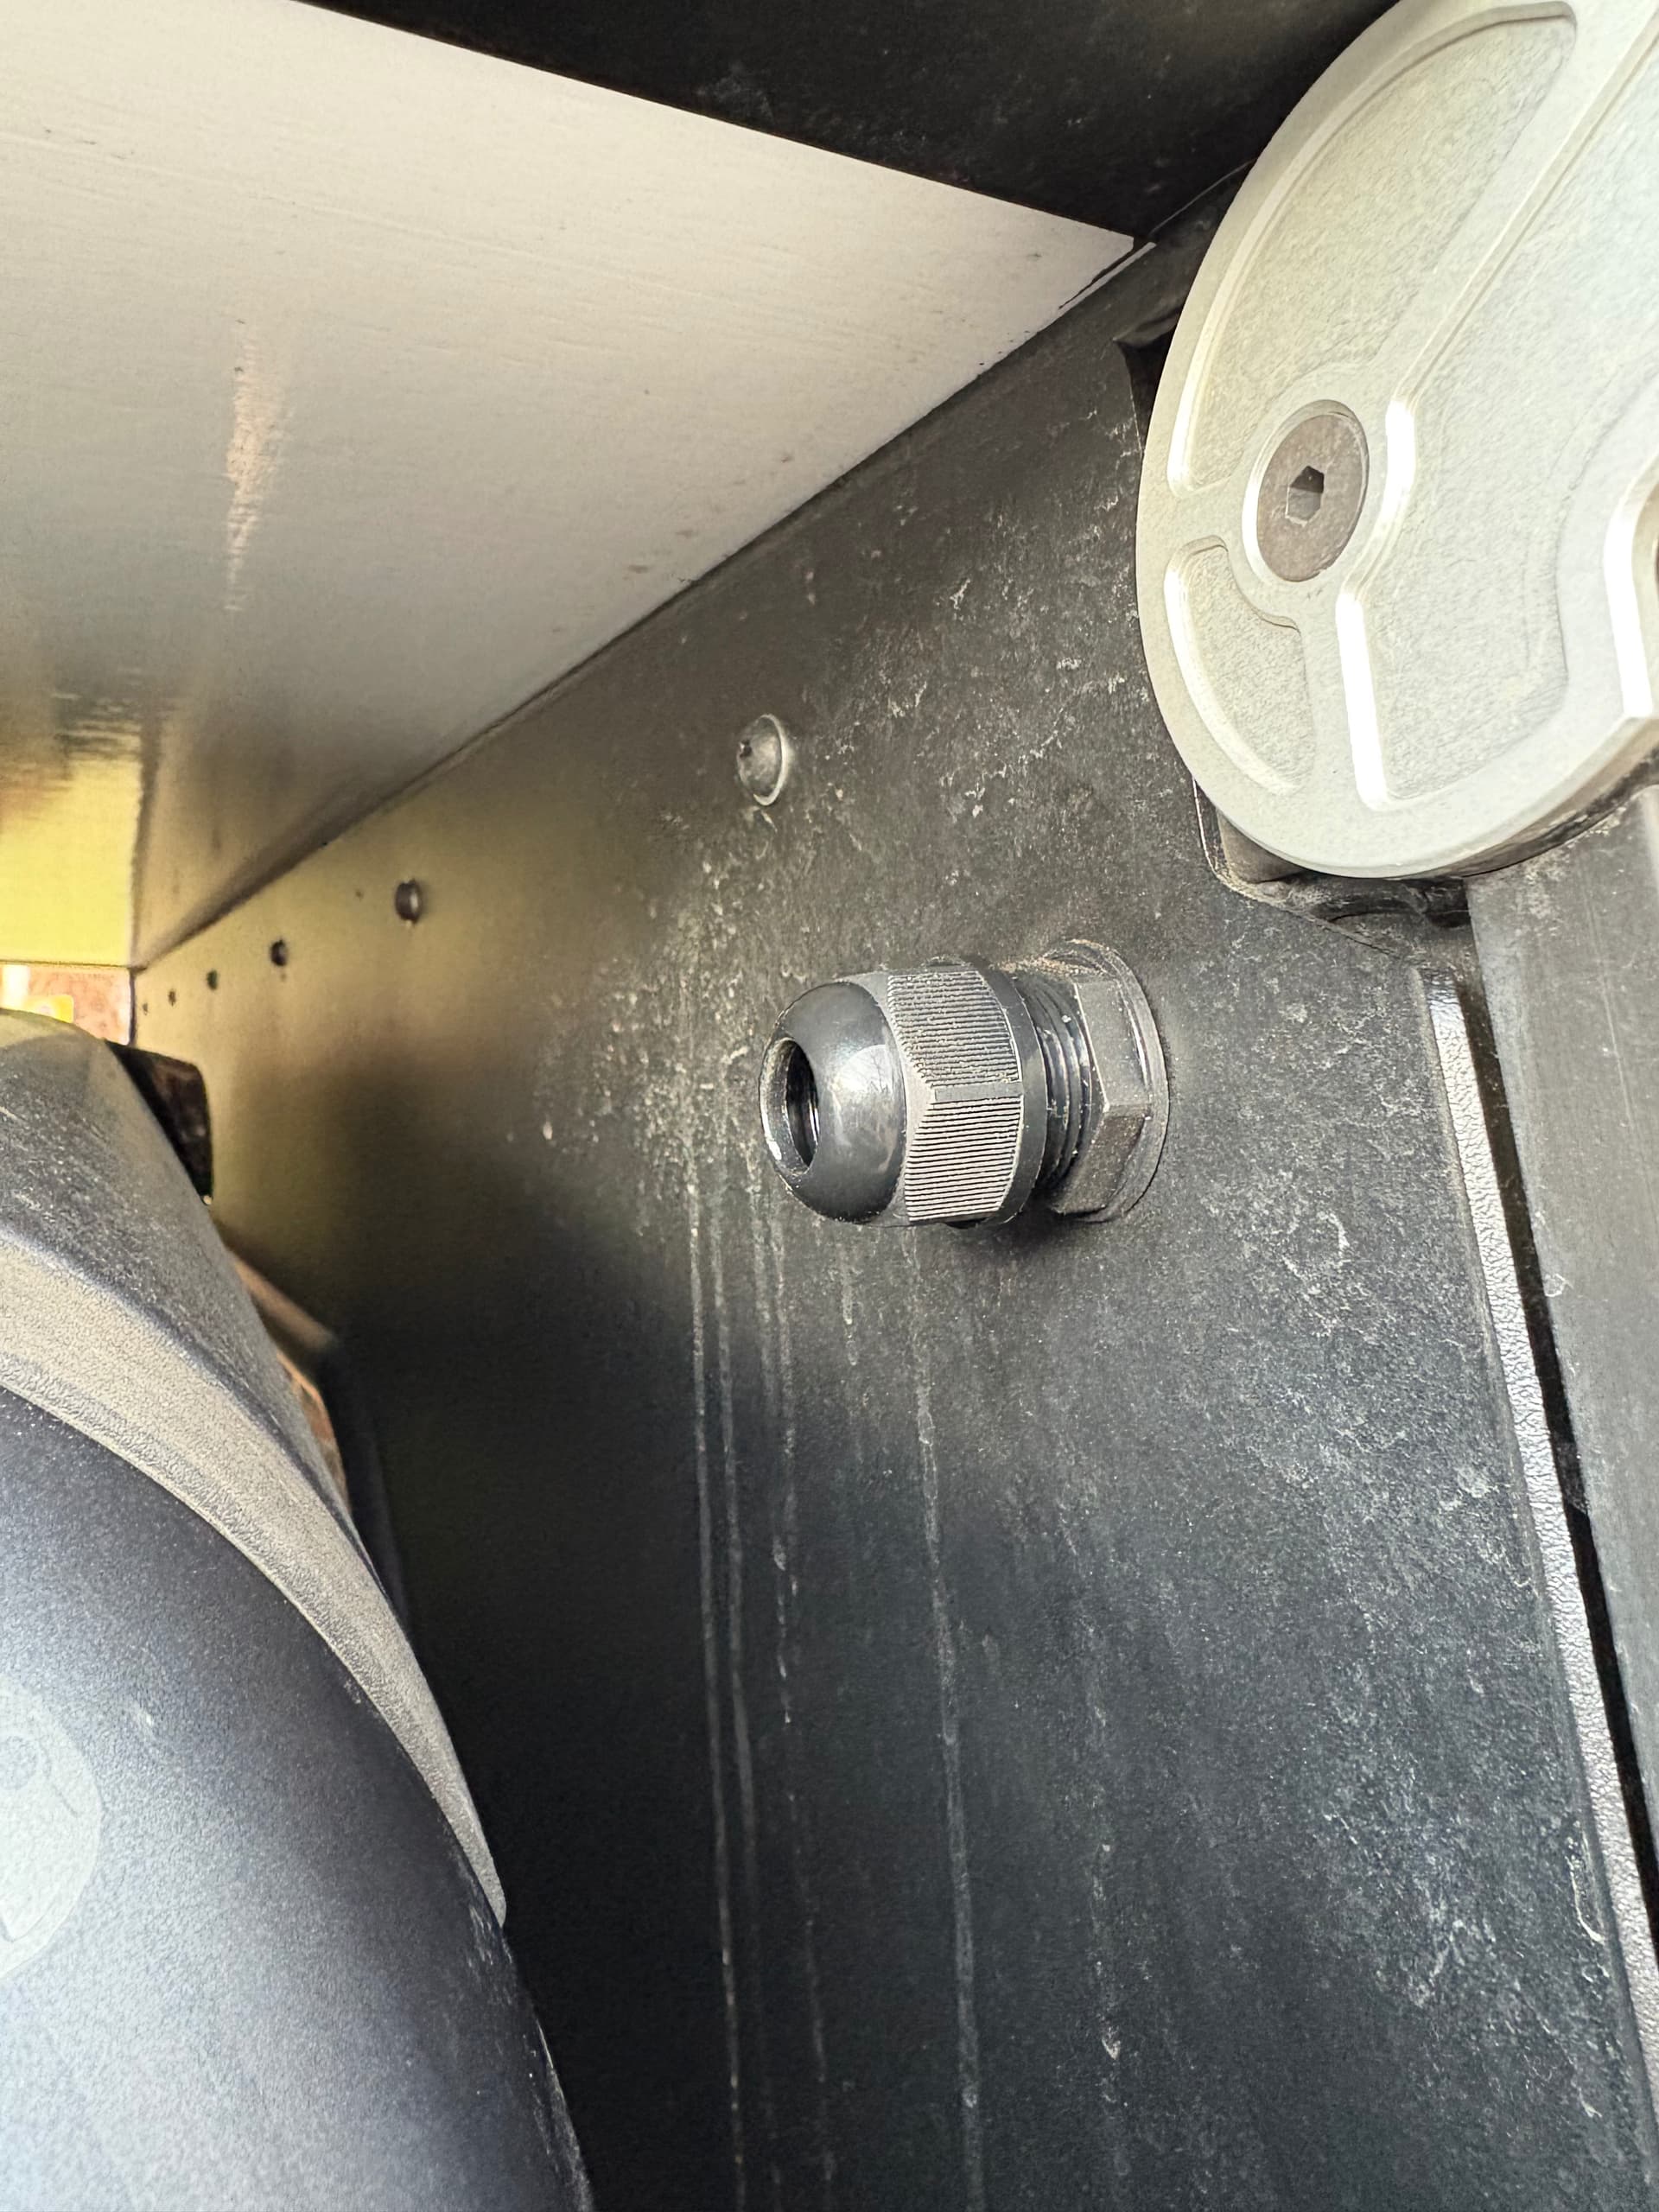
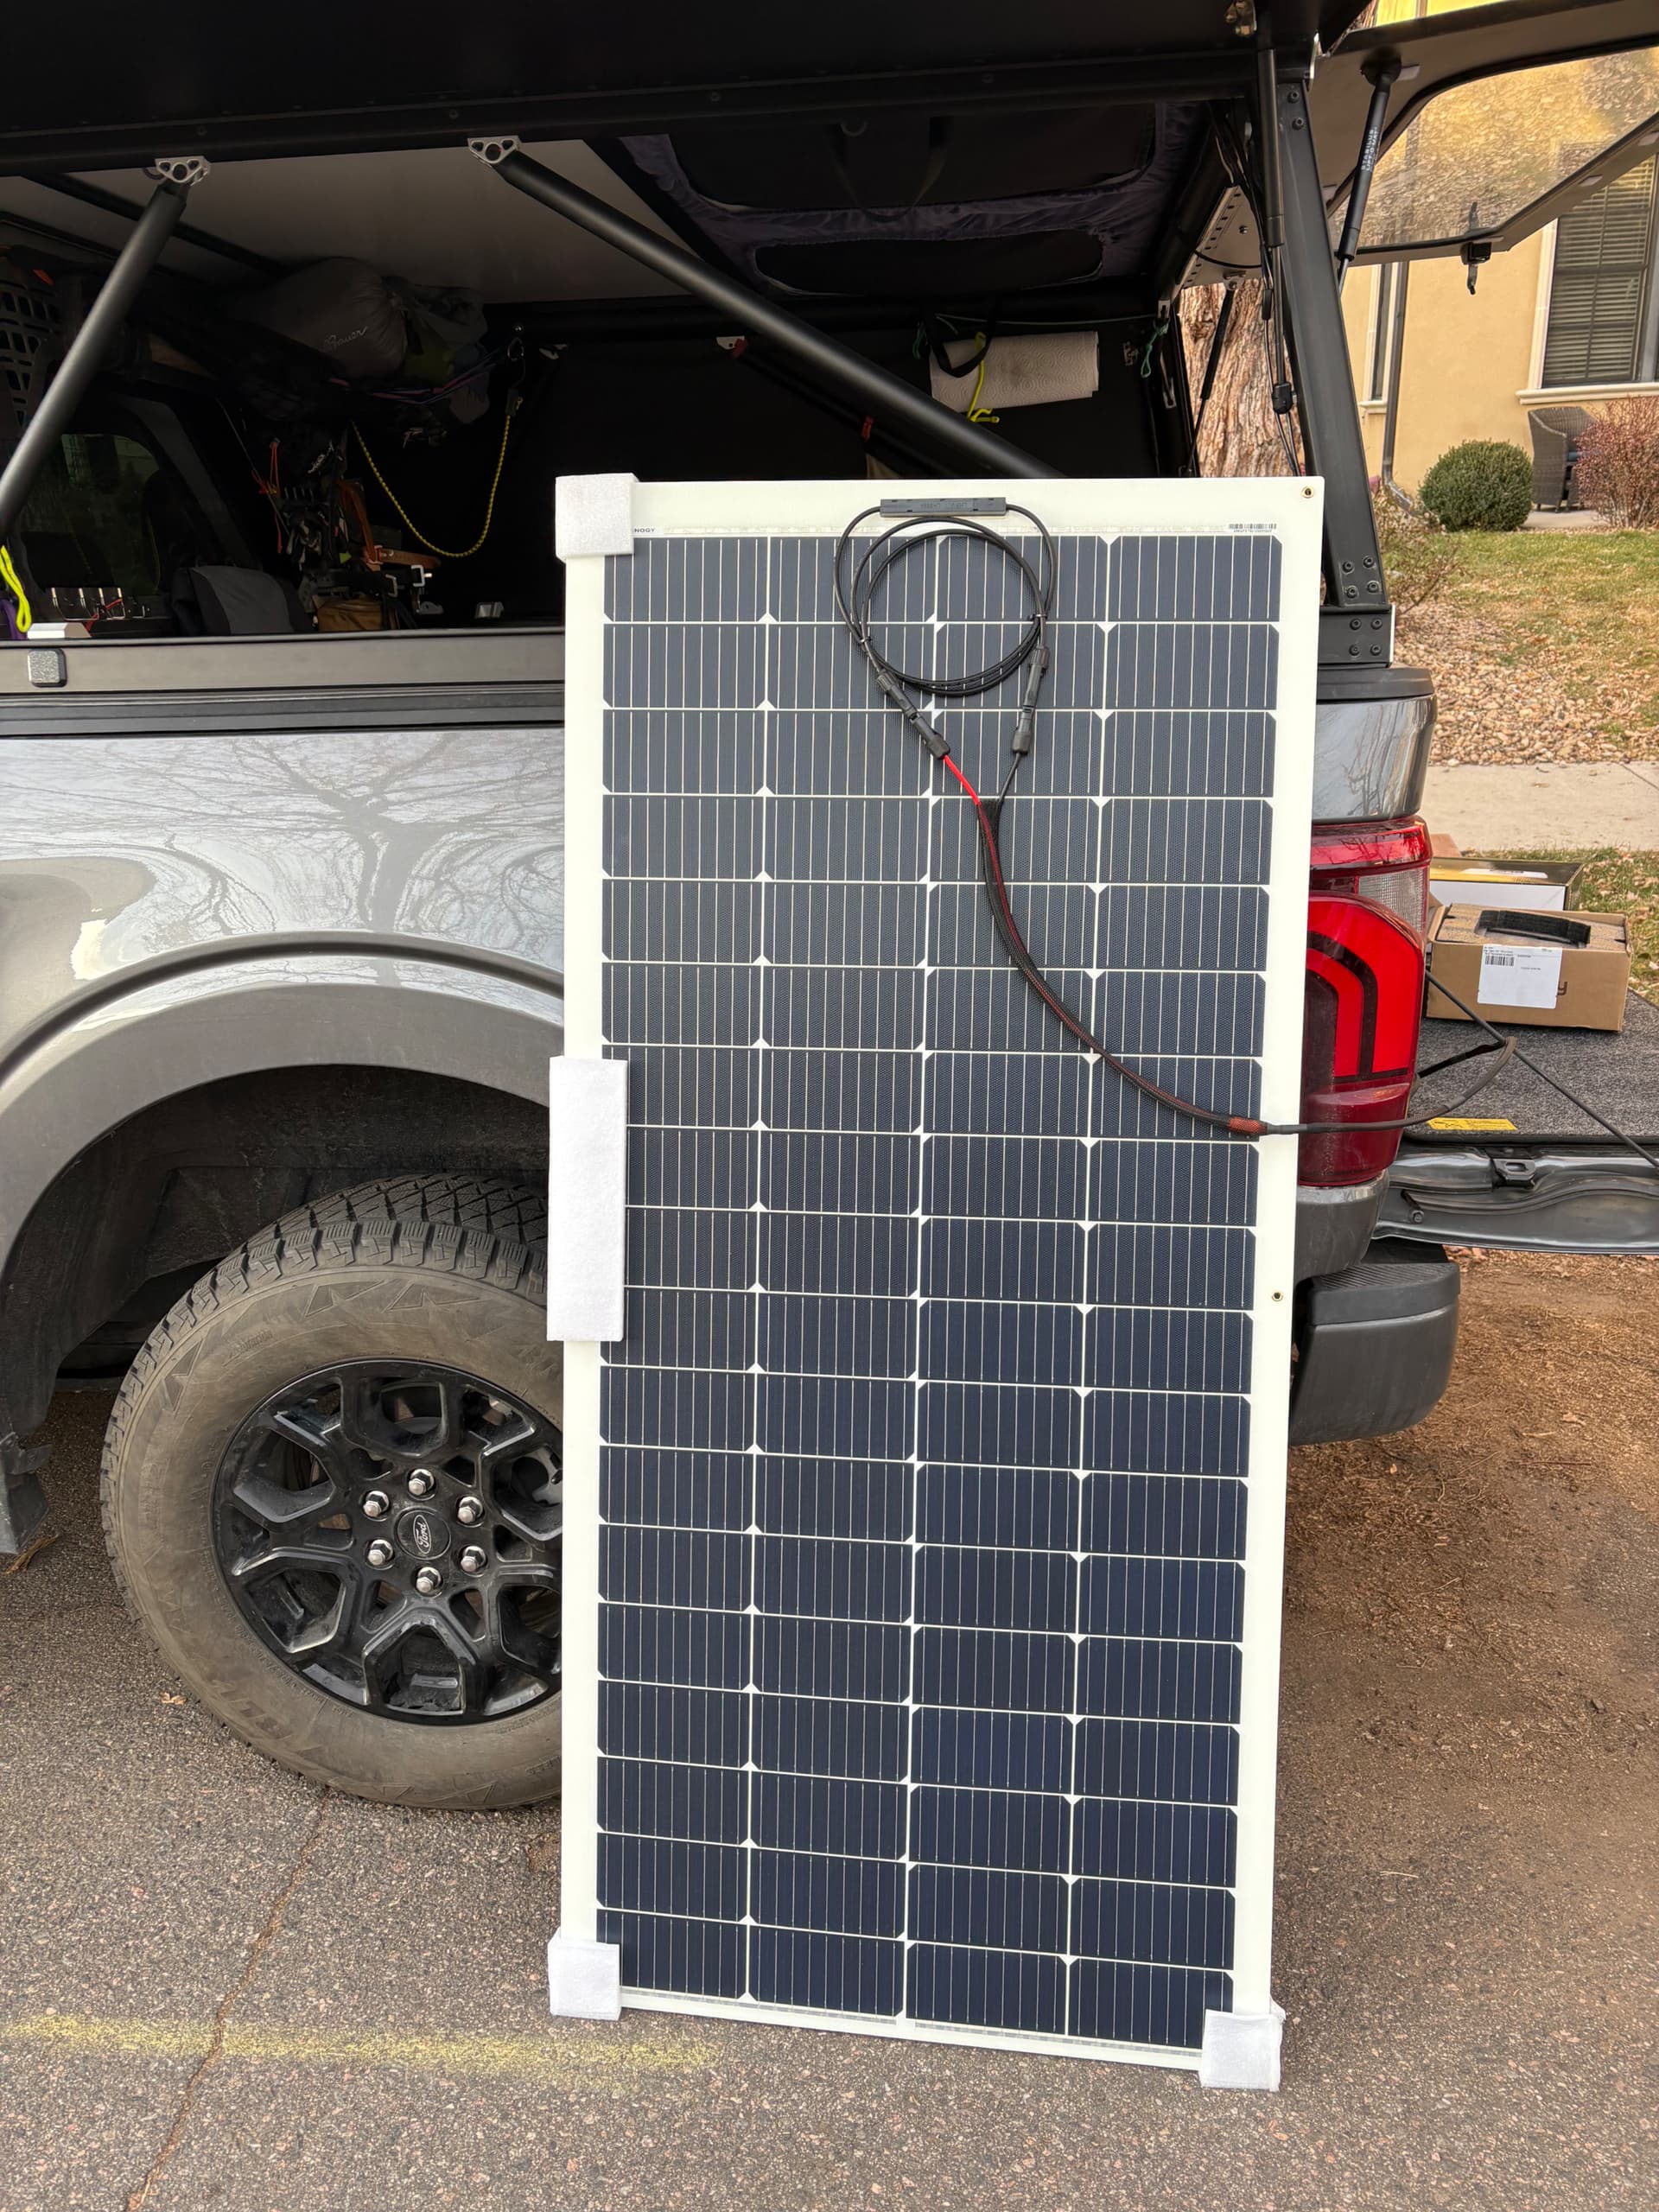
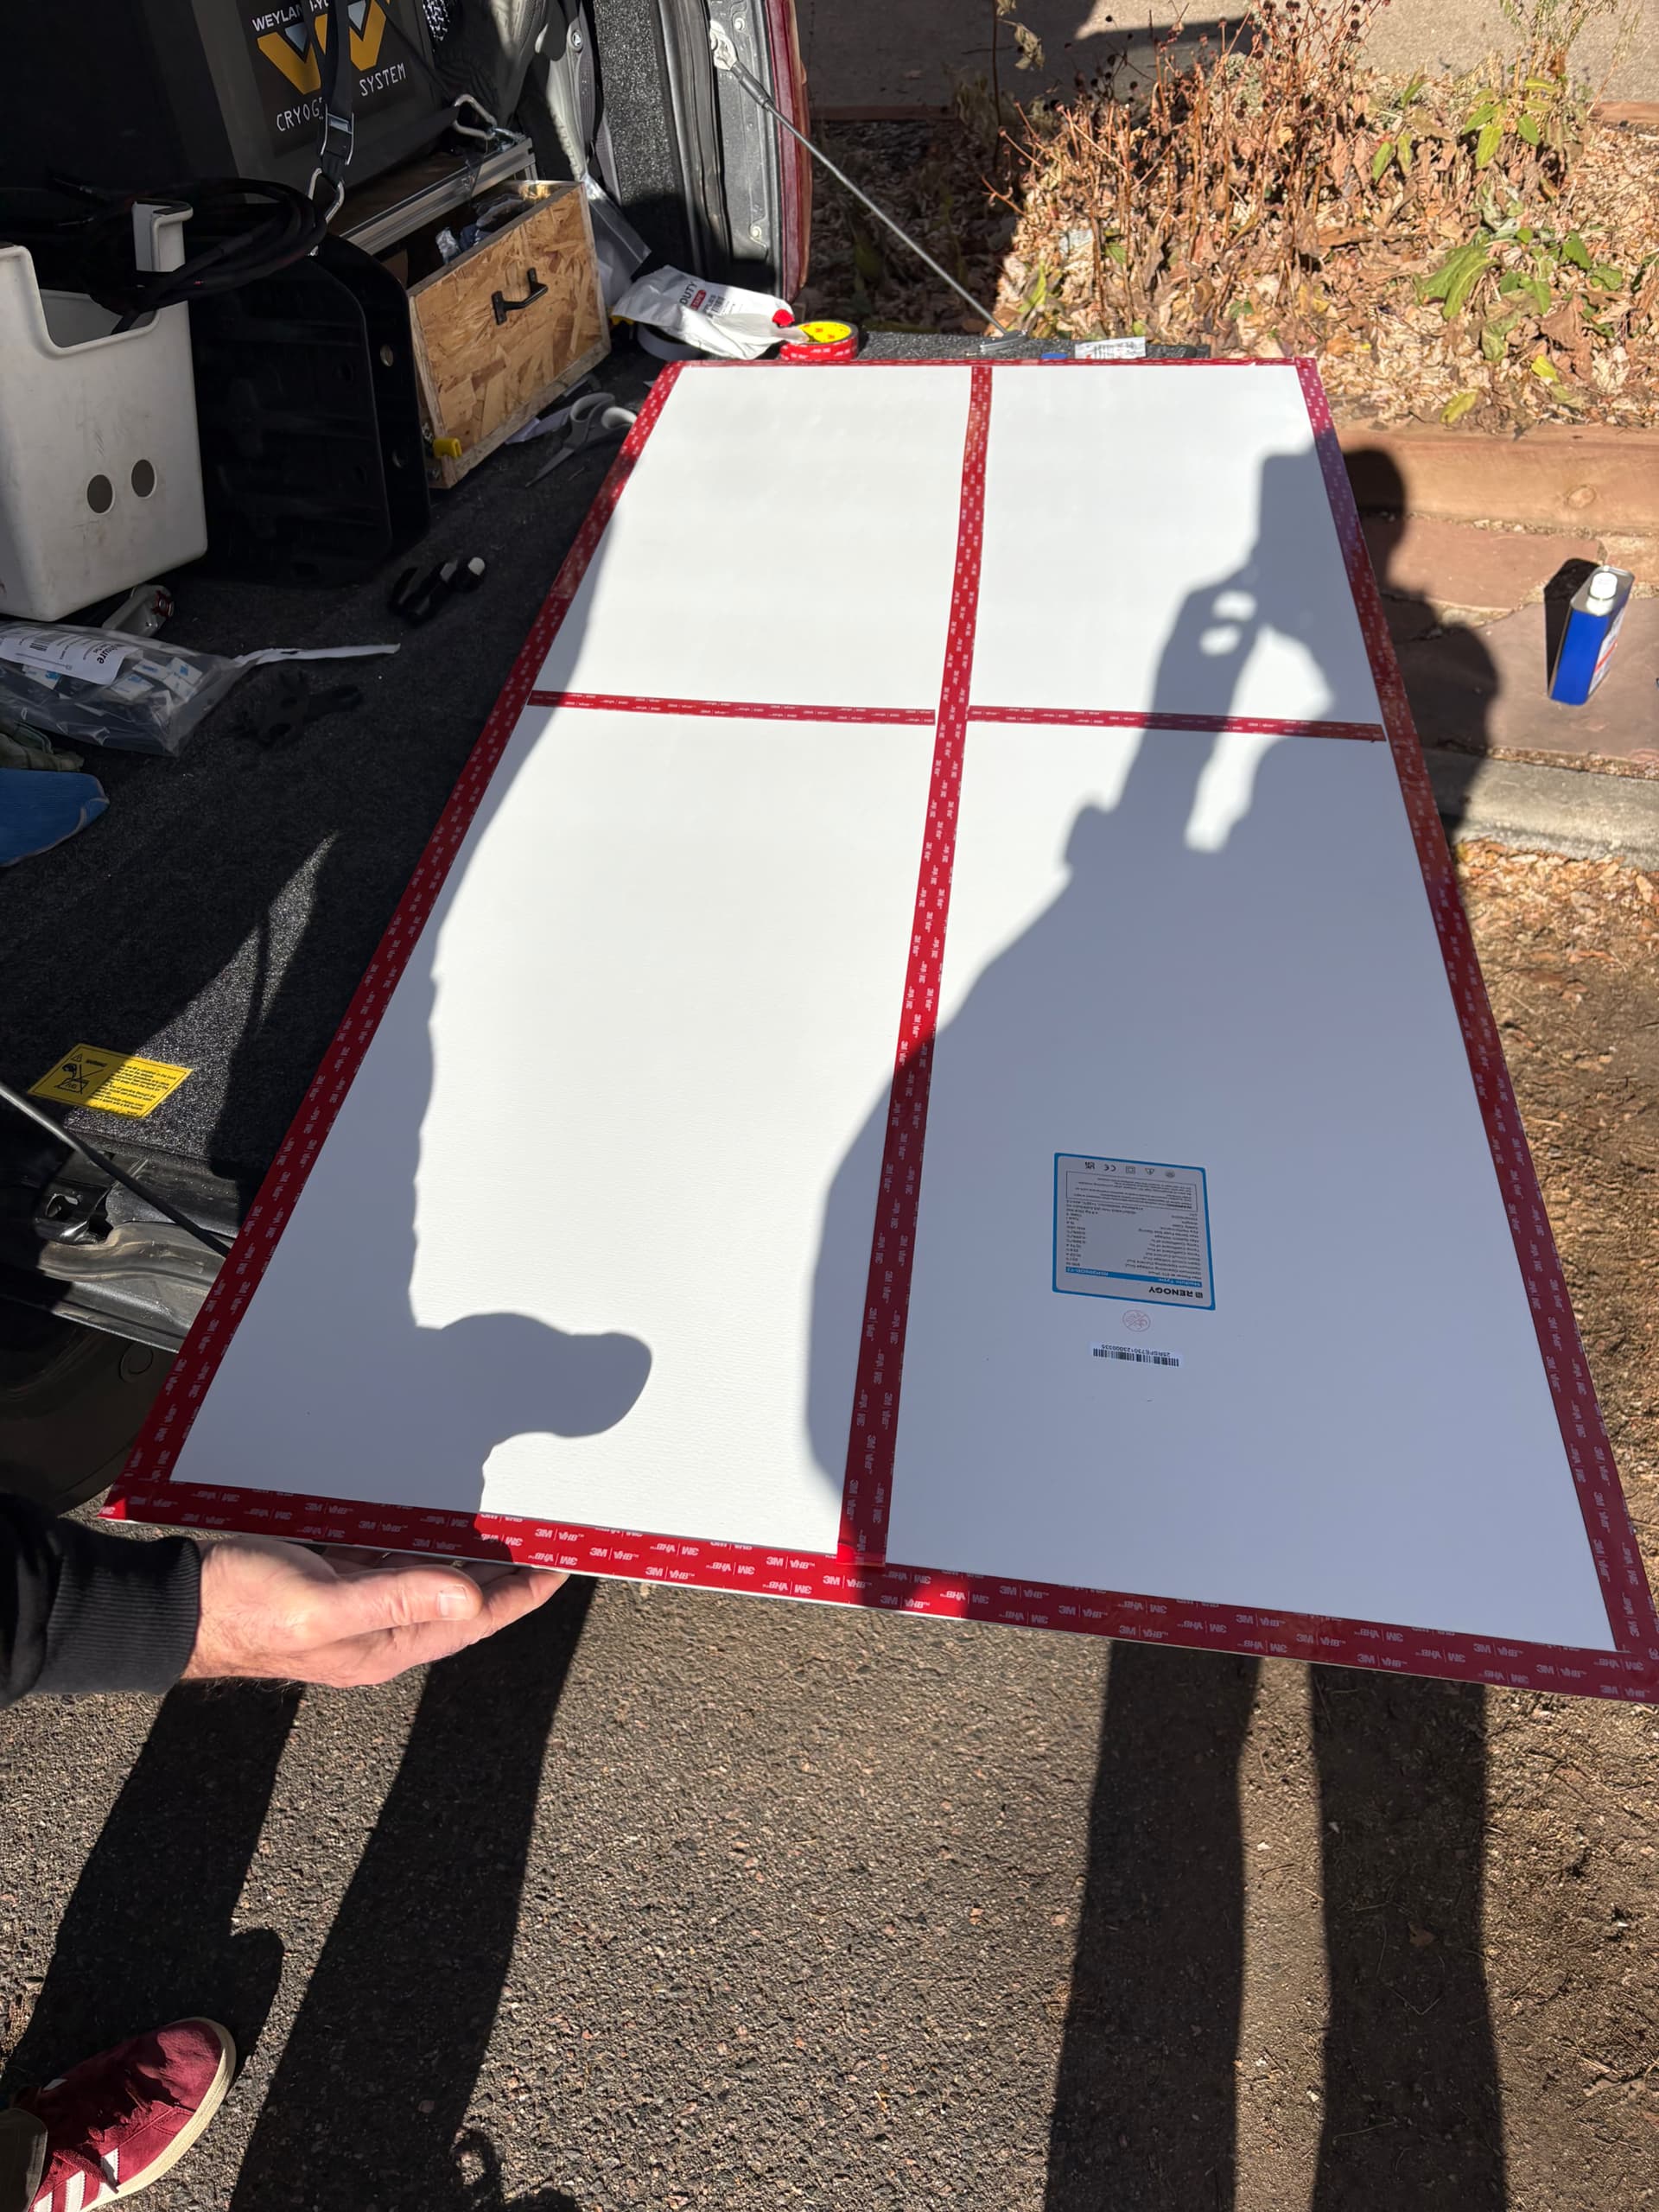
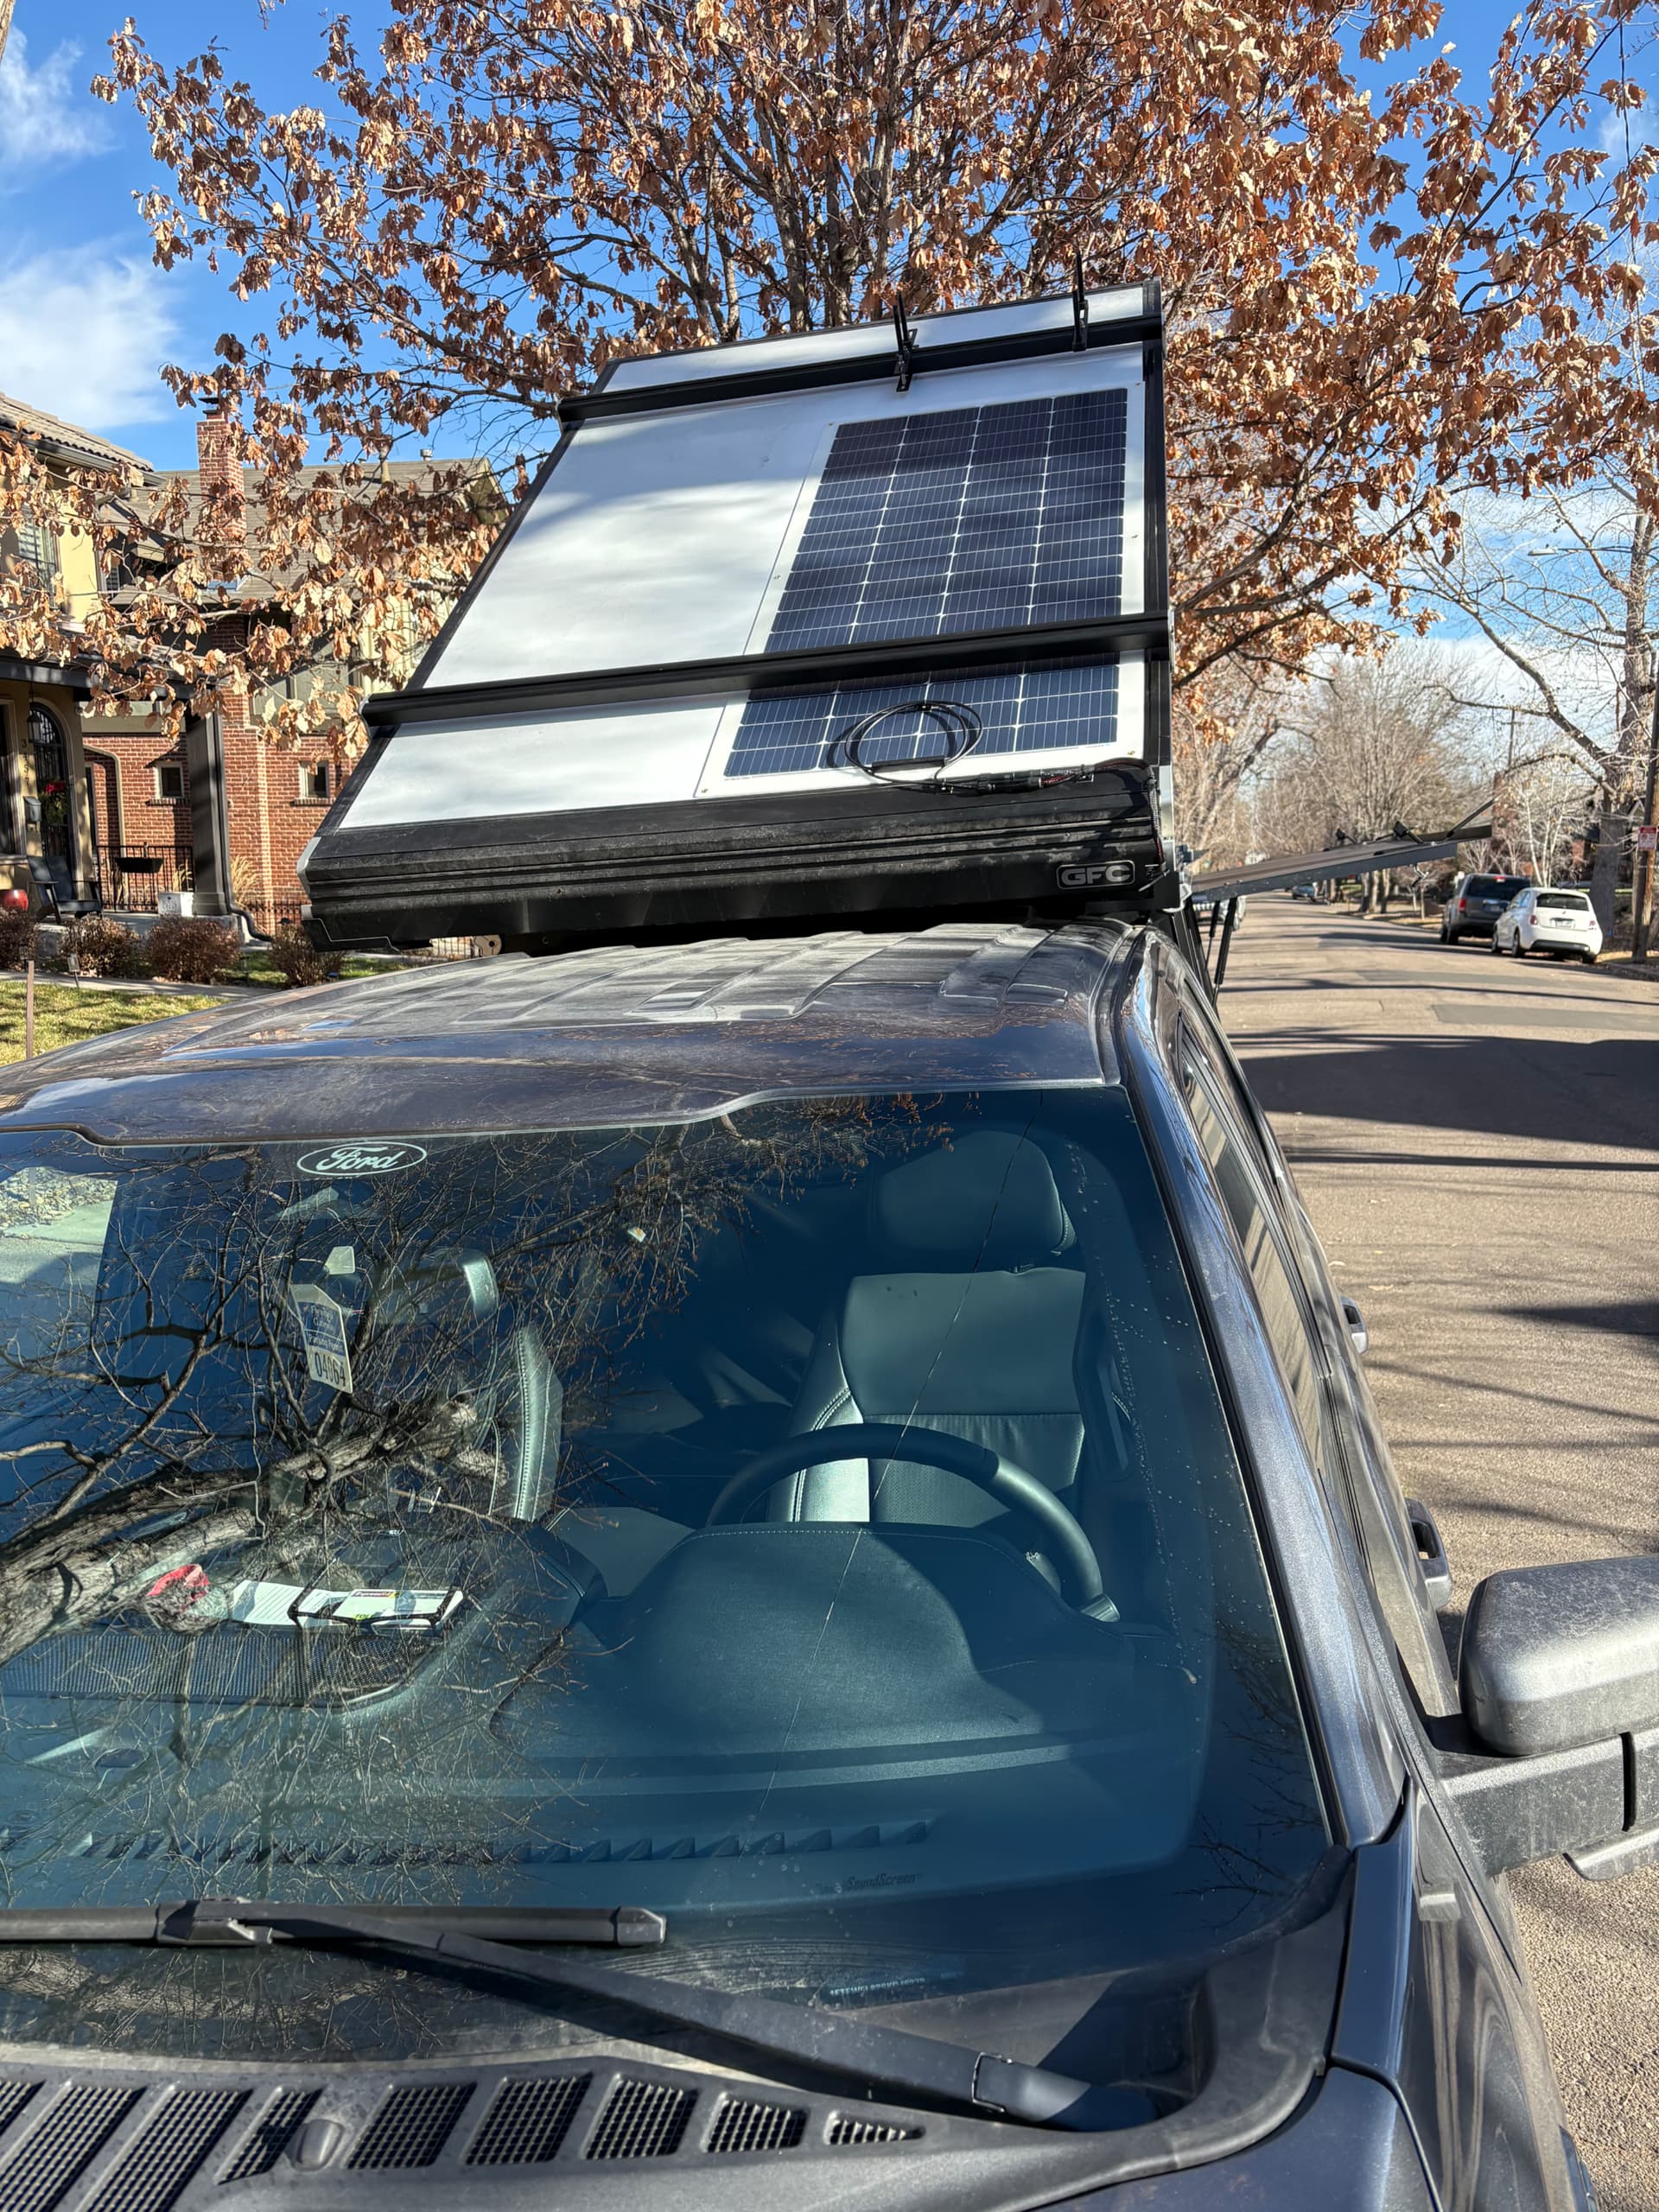
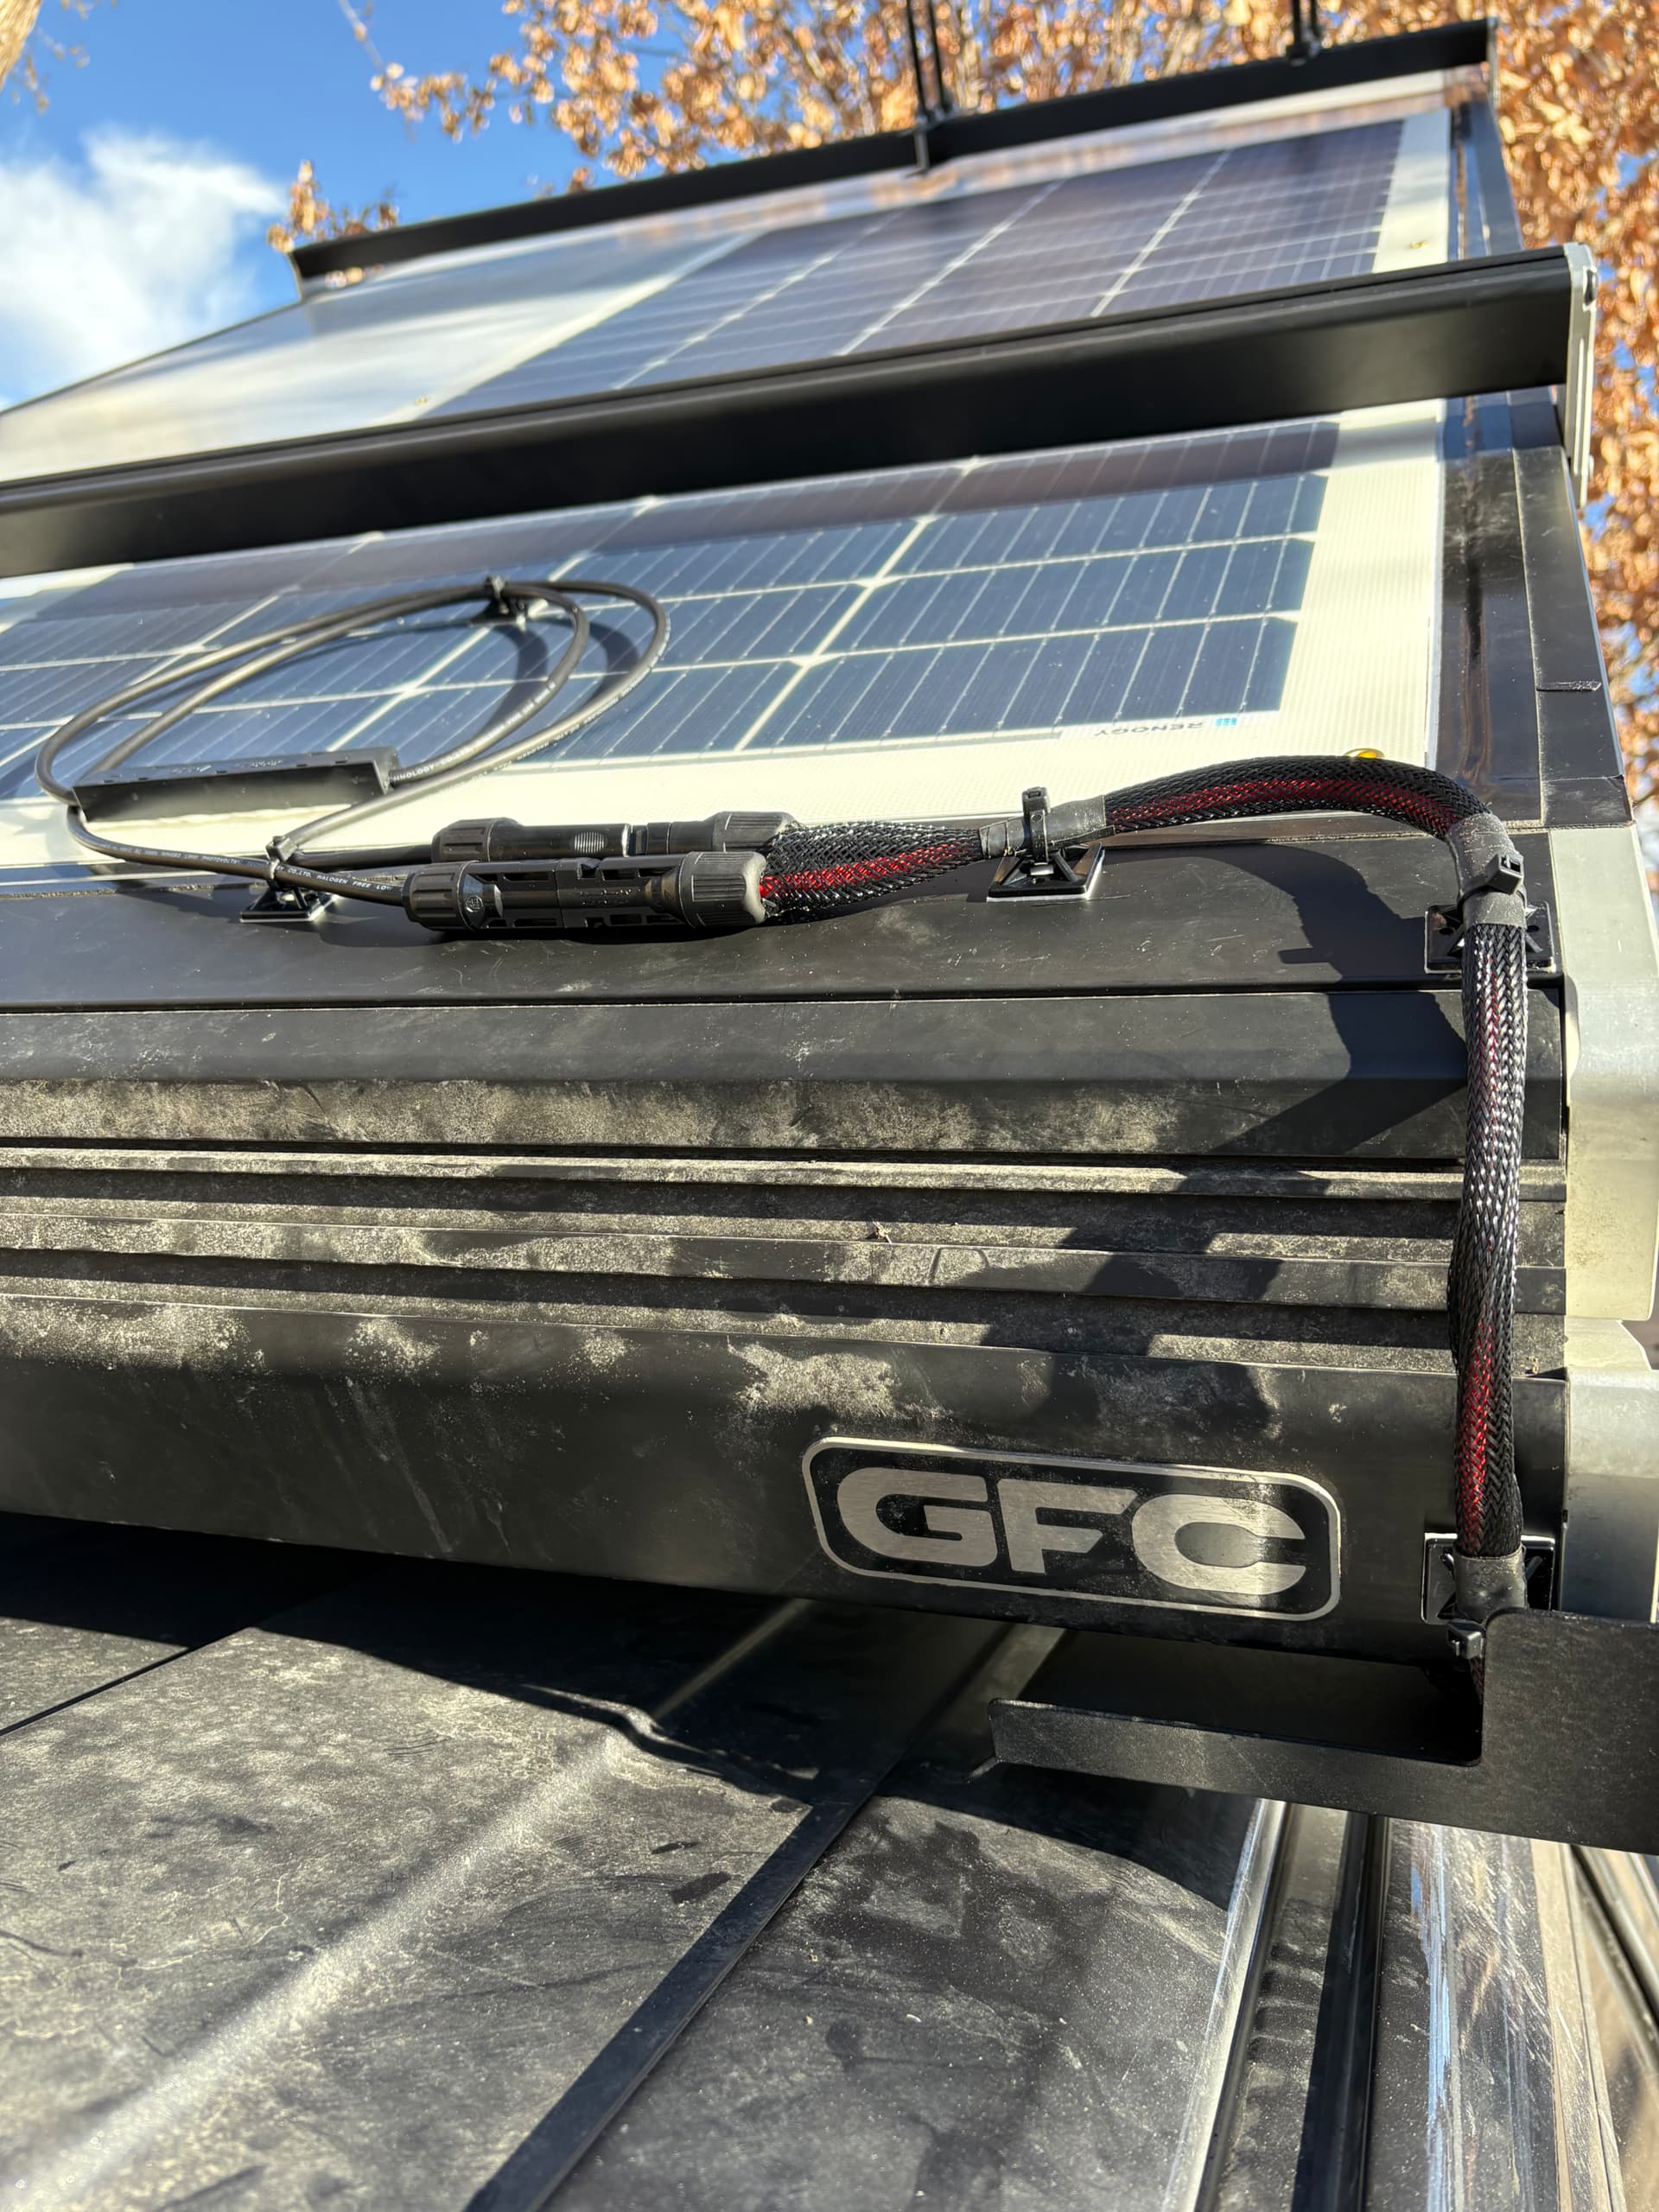
Also received 200w Renogy solar panel. Box was damaged but panel tested out good so ready to mount. Got hole drilled and compression grommet installed. So I should have 200w solar and the DC DC input when running to keep everything running and topped off. Hopefully install panel on the roof and run wiring this weekend.
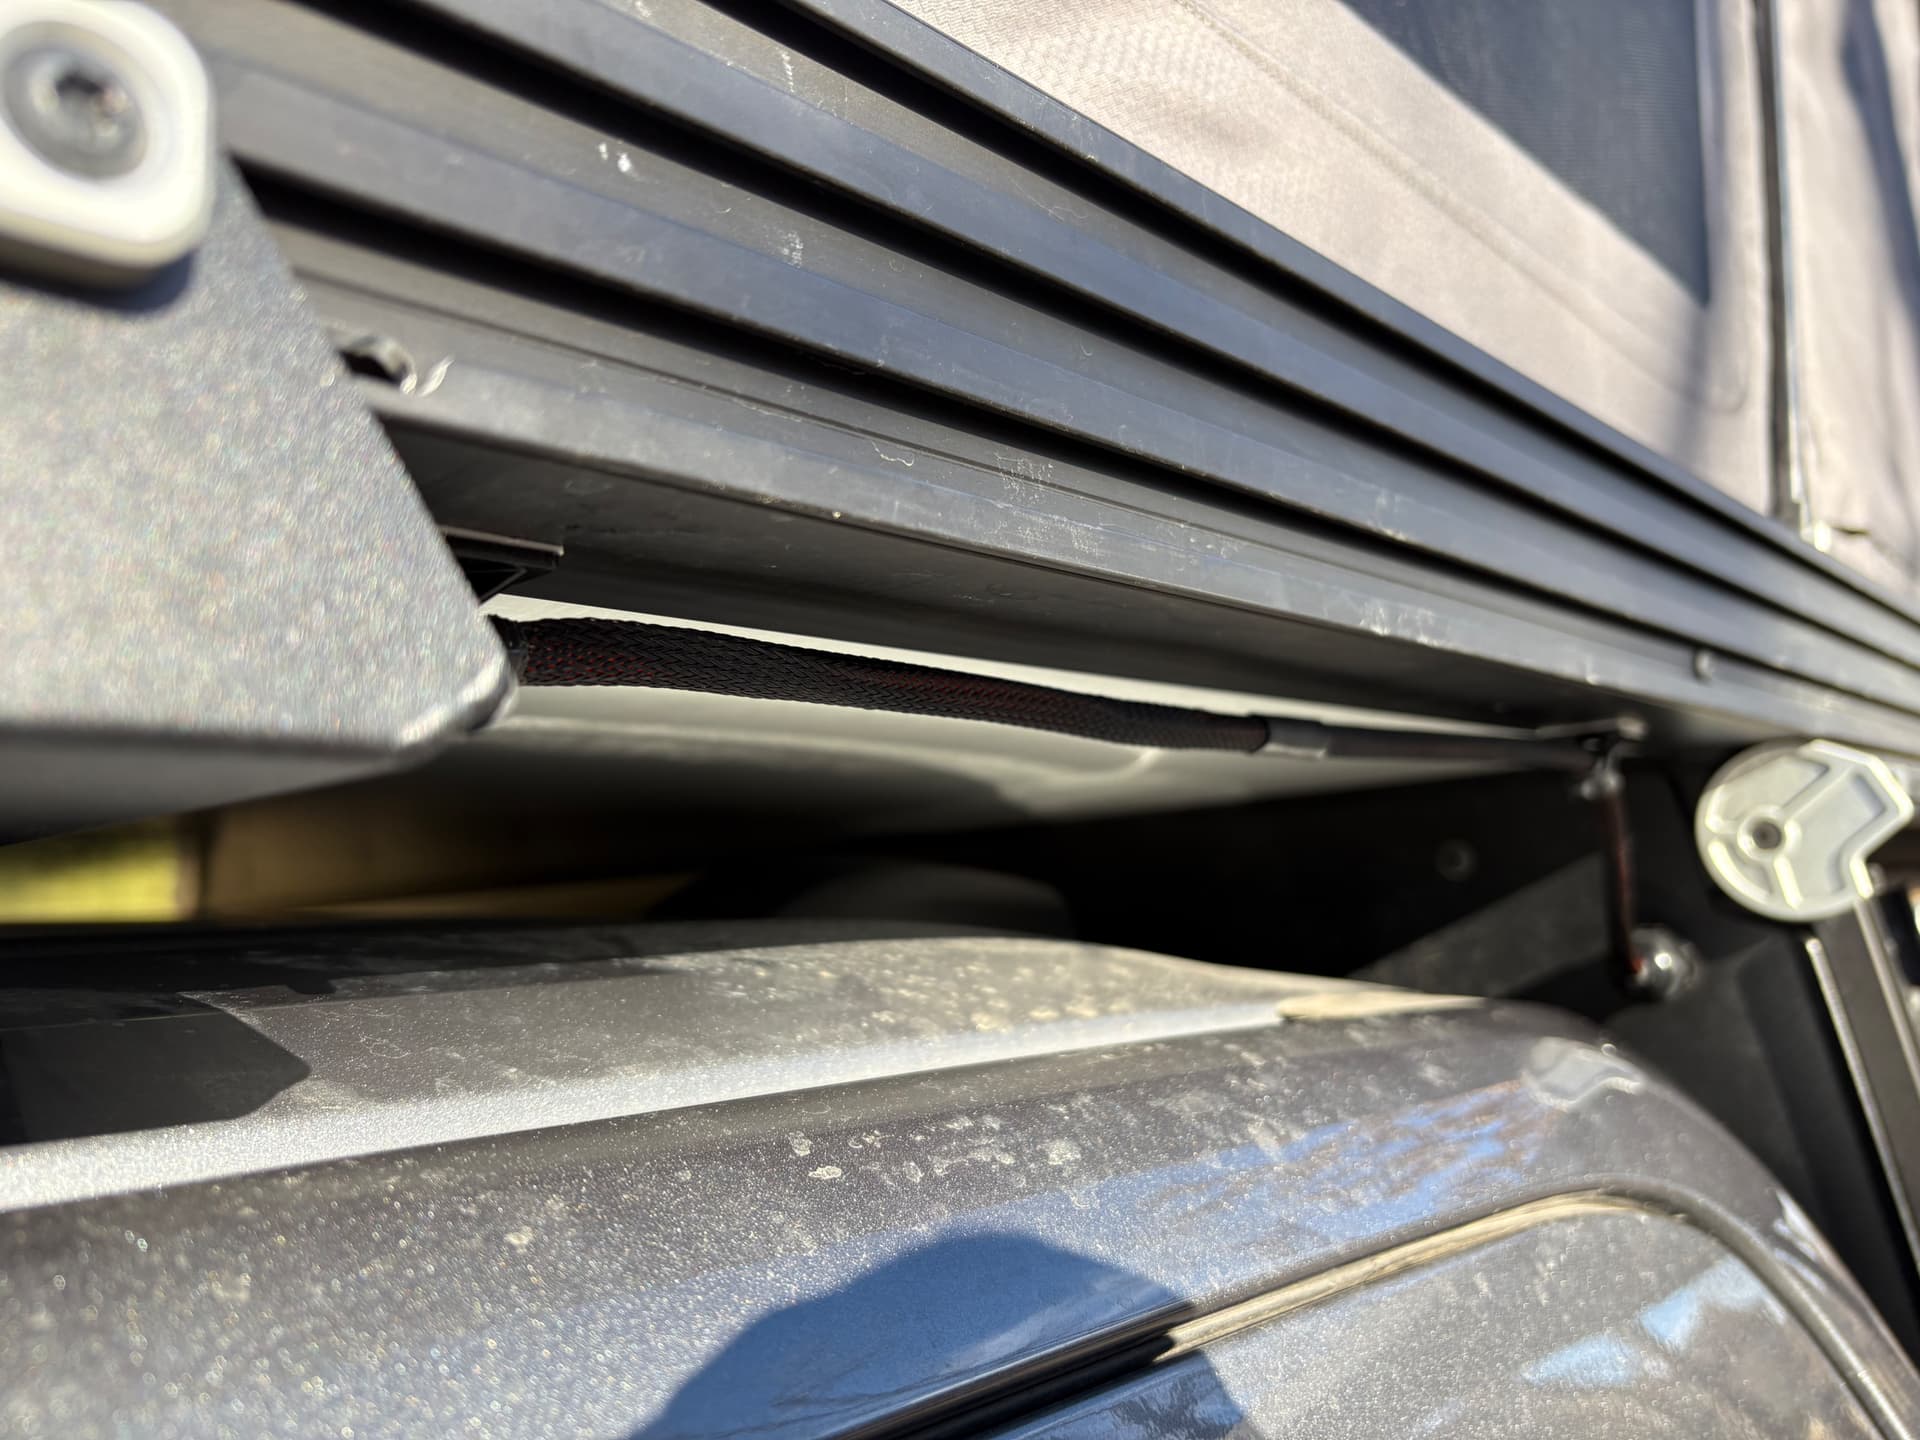
Lowered the drip gutter and ran wiring under, also covered the wiring in a loom and added heat shrink to keep it tight and 3m anchors that stick on and zip tie around anchor points. Plus I hated the bright orange cable. They seem to work well but are a lightly higher than I would have liked. Time will tell.
Just a heads up but the DripRail will most likely bend in that lower position. I have had a few people install them lower by mistake and they failed pretty quickly.
@jedgar thanks for the heads up. Interesting as this was recommend by my local shop/GFC installer. Honestly I prefer the look of it in the higher position. I have a fairing coming so should reduce some of the stress from wind/pressure but not the stress from the mass weight on the bumpy bumps. Decisions….
Update.. don’t run wiring with large connectors through the Molle panel like this unless you are sure you won’t move it. I am now stuck with this location unless I want to redo the entire run back to the battery
My experience with solar panels has been that they are very sensitive to partial shading. The panel elements are in series so partially shading one can drastically cut the current for the whole array. Even minor shade from branches or cables can have a significant effect. On my install I mounted the panel between the Beef Bars so it is not shaded by them. You might want to put an ammeter in line with your panel and experiment to see how much of a hit you’re taking. Cheers.
That’s good advice. I had planned on putting a meter on it to see if it was cable length or possibly bad cable but had not considered the shading from the beef bar or the cabling. That should be easy to test and rule in or out. Thanks.