Edit: Moved to Mods, tips and Tricks. Added image.
Has anyone here made their own GFC add-ons or camper equipment with 80/20? Curious to see if anyone’s done any custom GFC accessories or custom storage builds.
If you’re not familiar, it’s used heavily for aerospace and industrial applications. Here are a couple DIY builds from their site:
I interned at nasa a few times and we used it extensively for environmental testing and when prototyping spacecraft hardware. I do think you’re right in that it may not actually fly a ton, but we used it a lot.
I’ll see if I can track down @Trouttaco’s work, thx
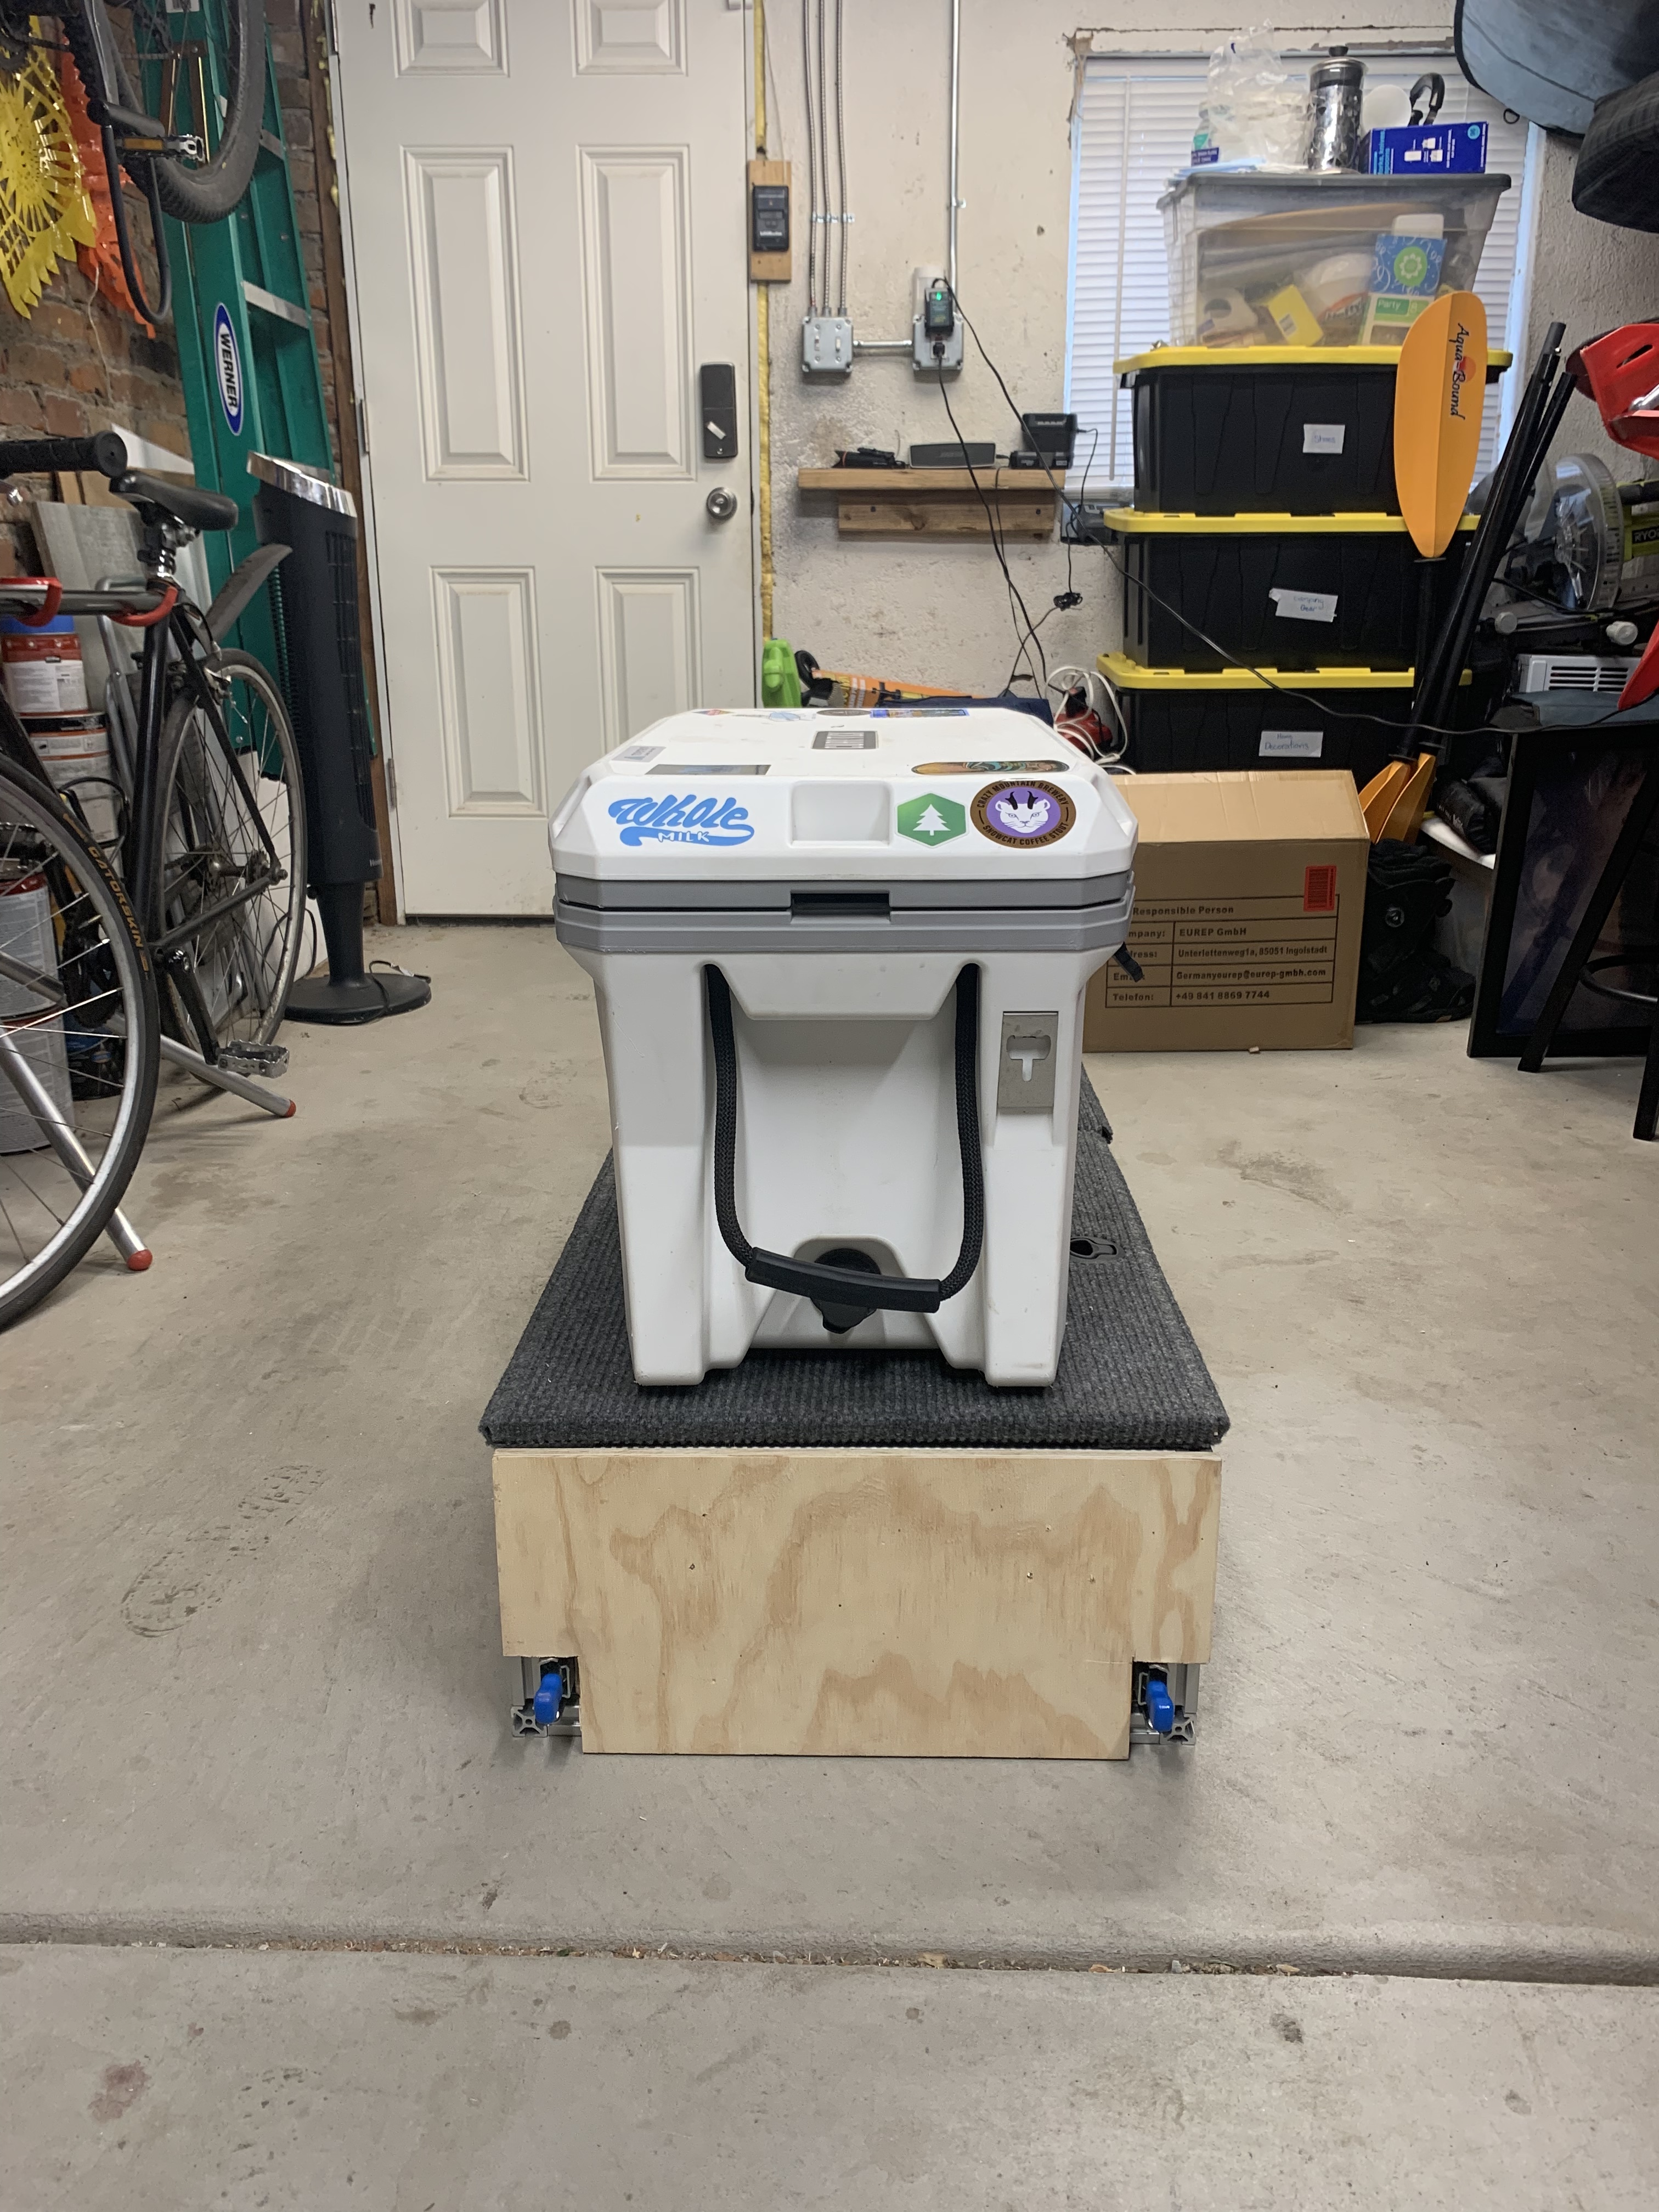
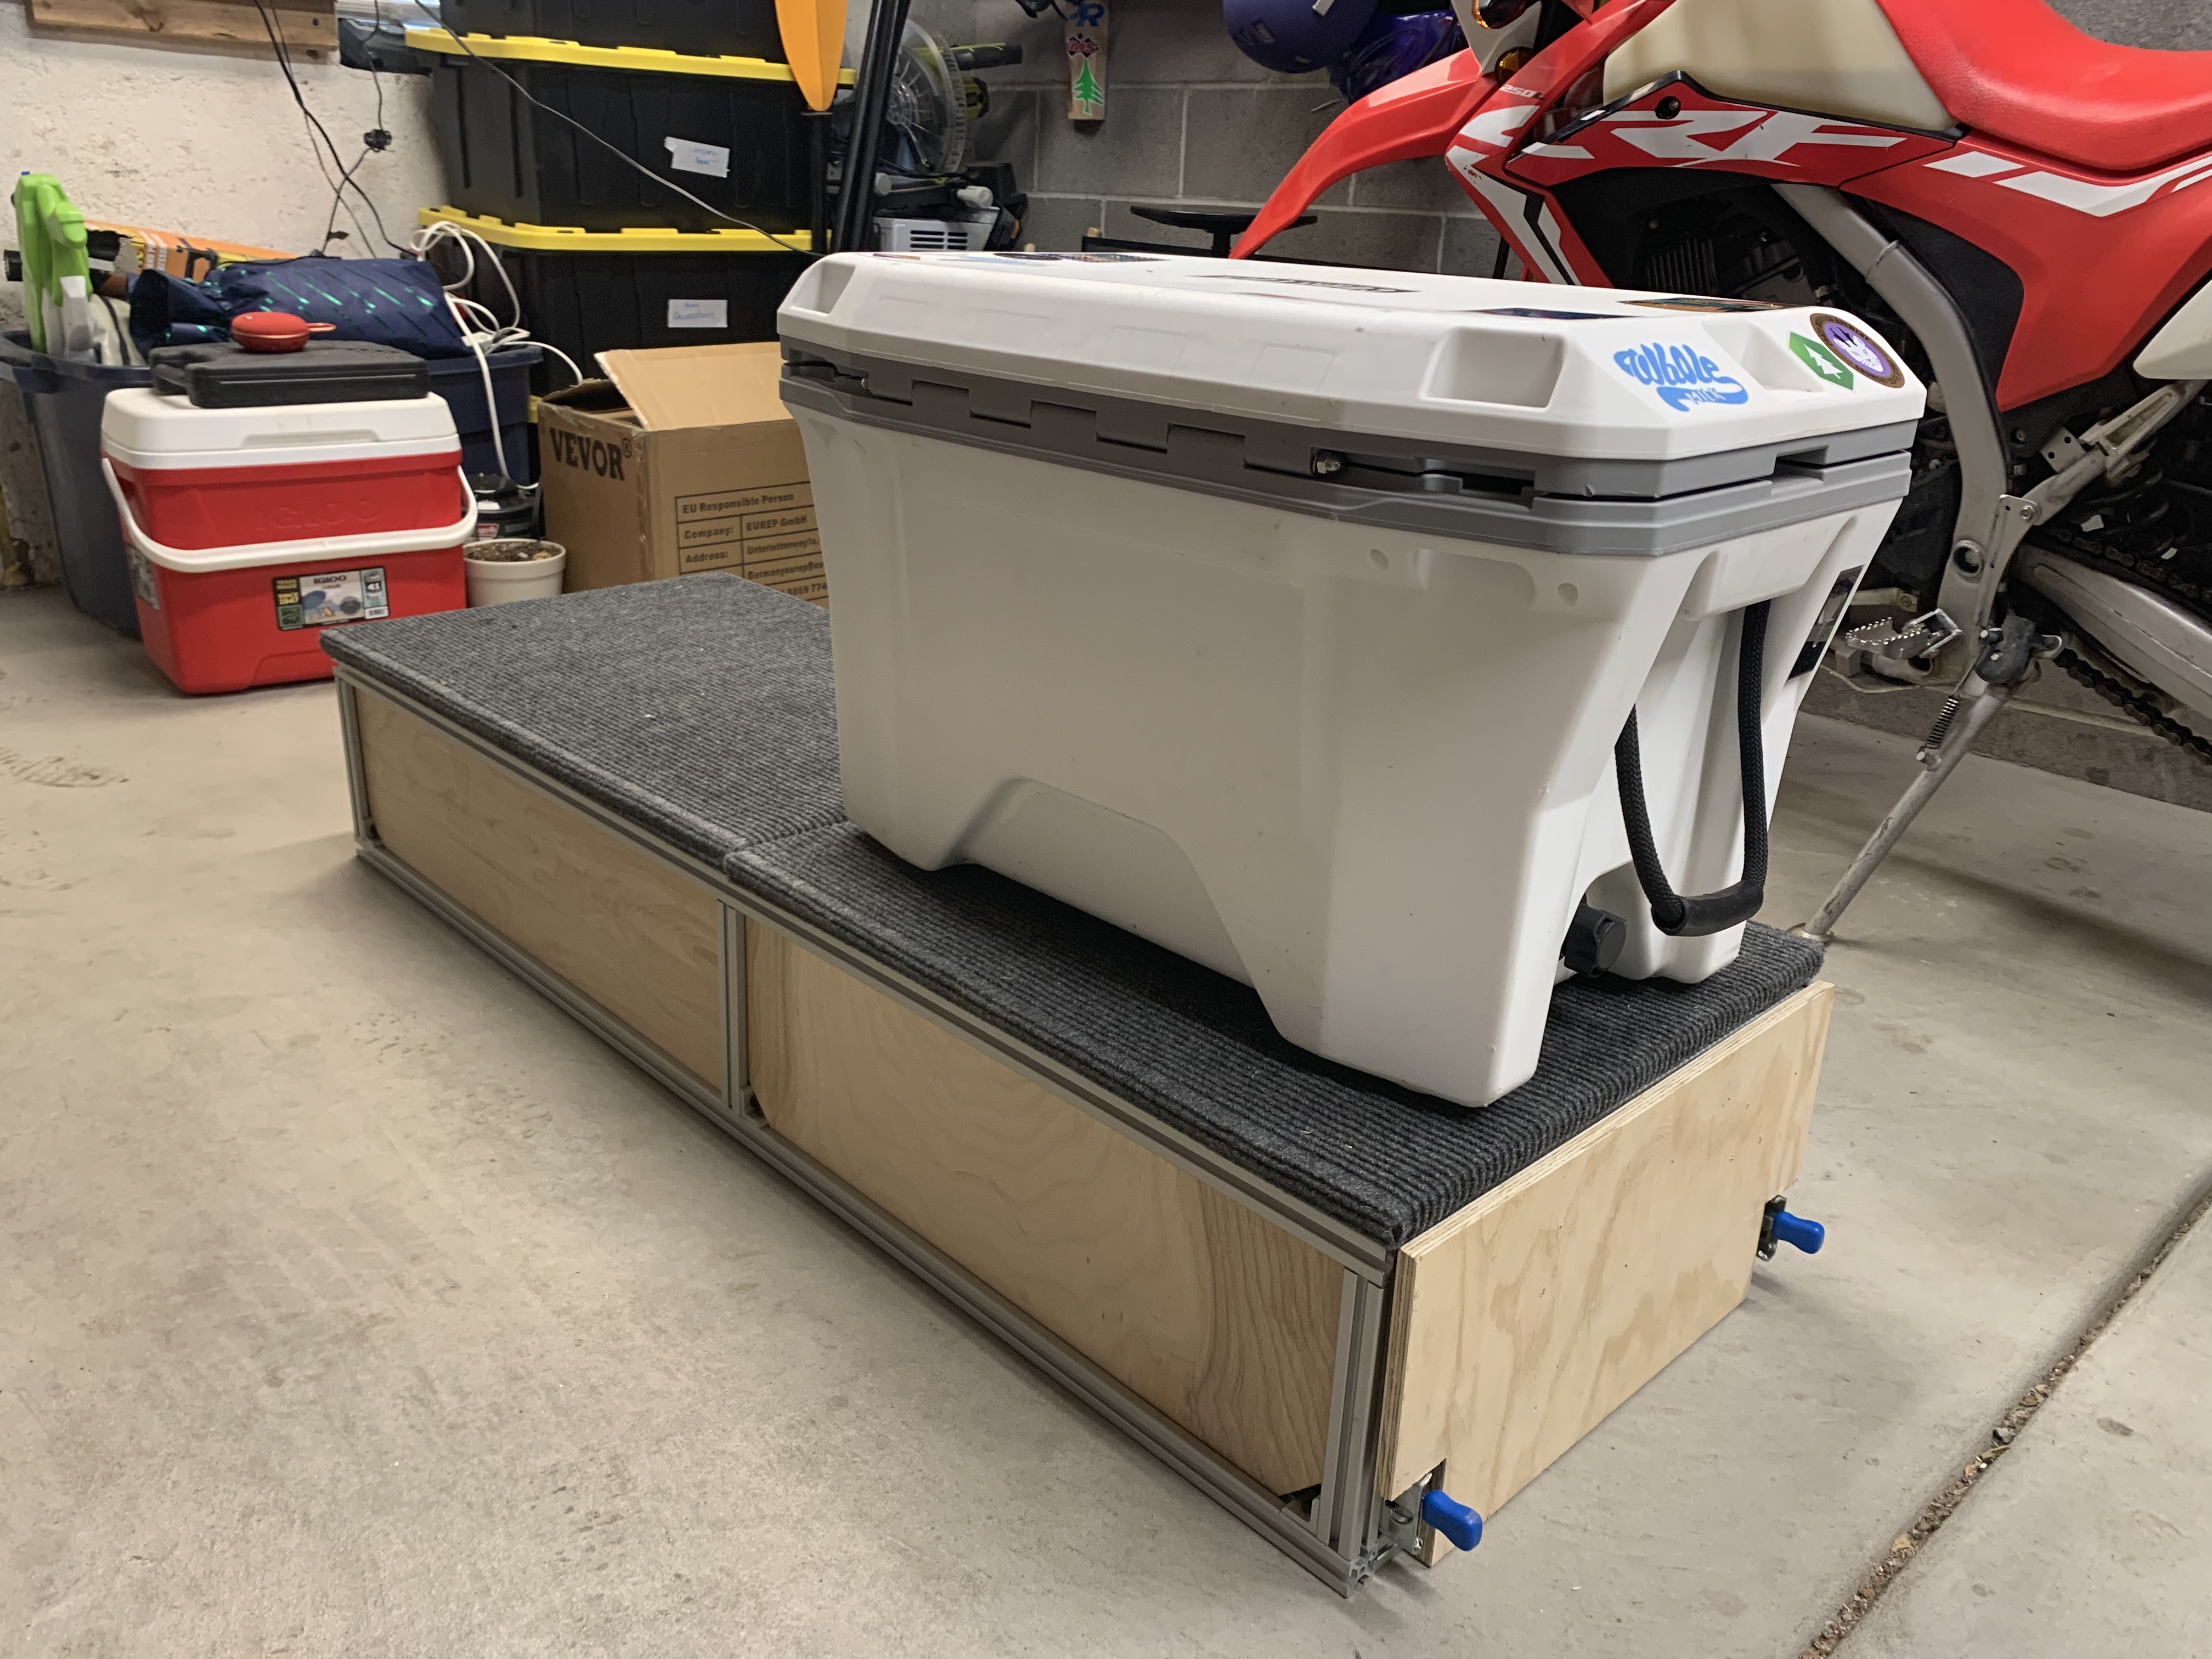
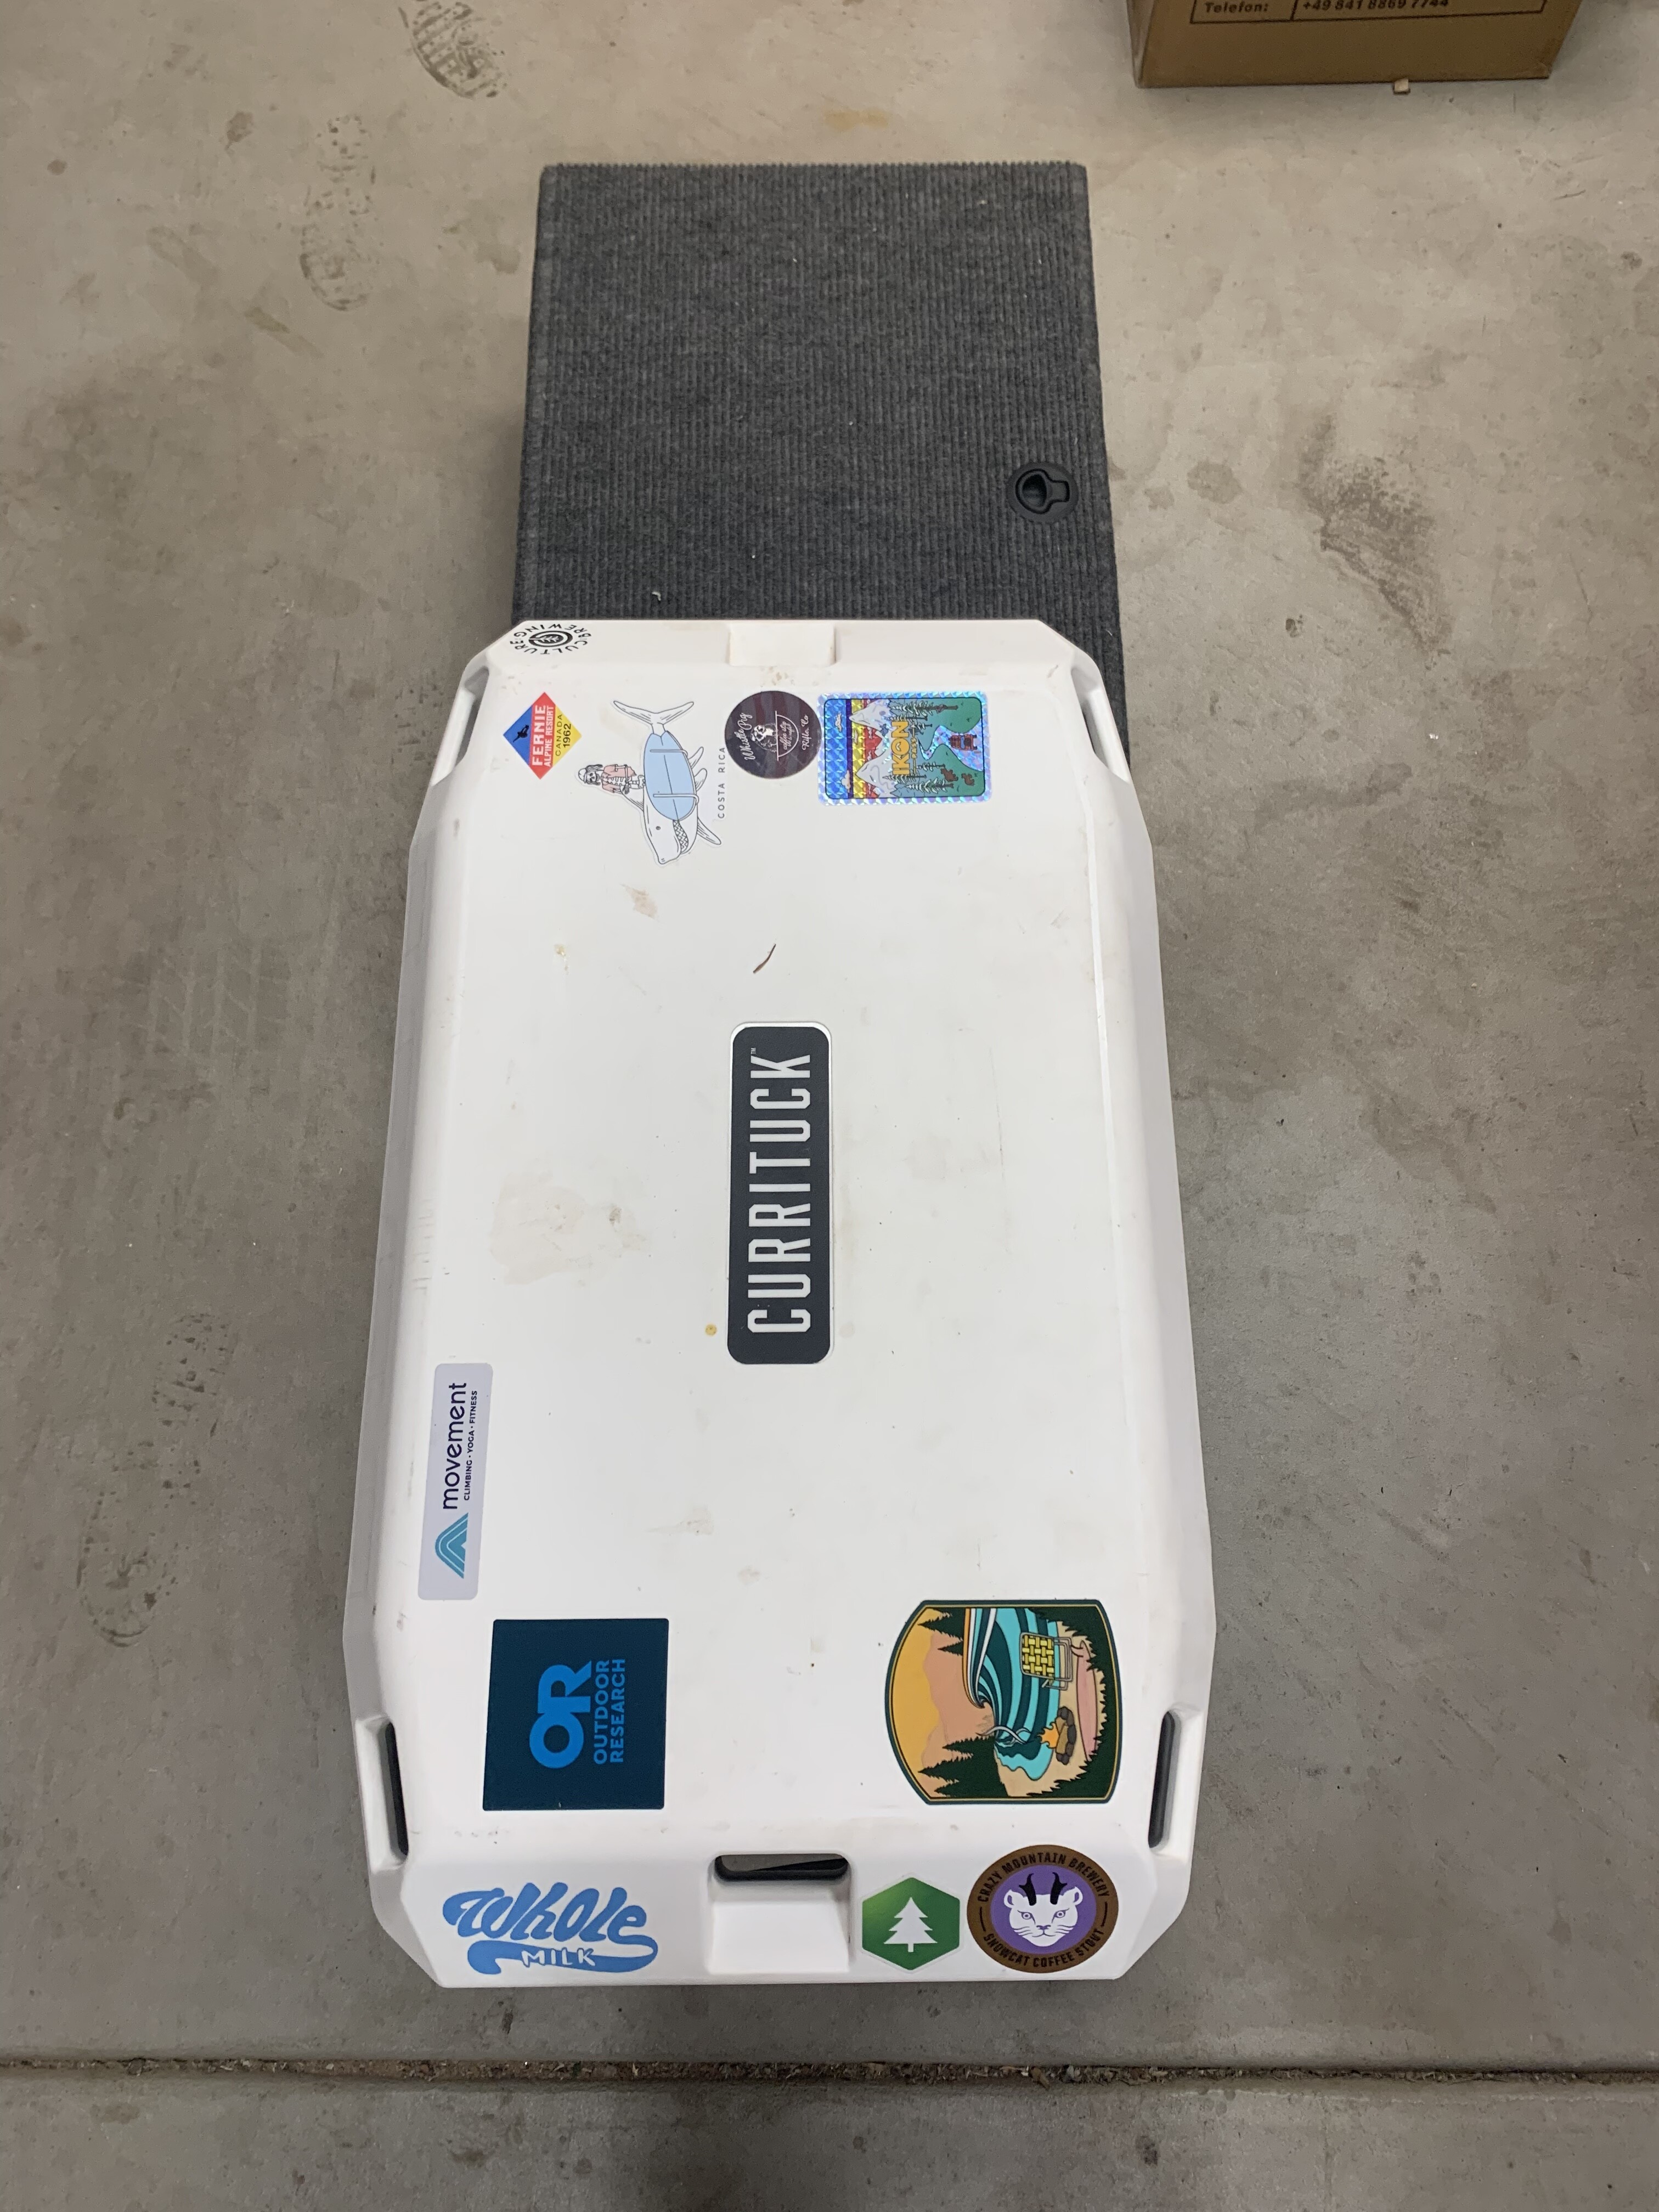
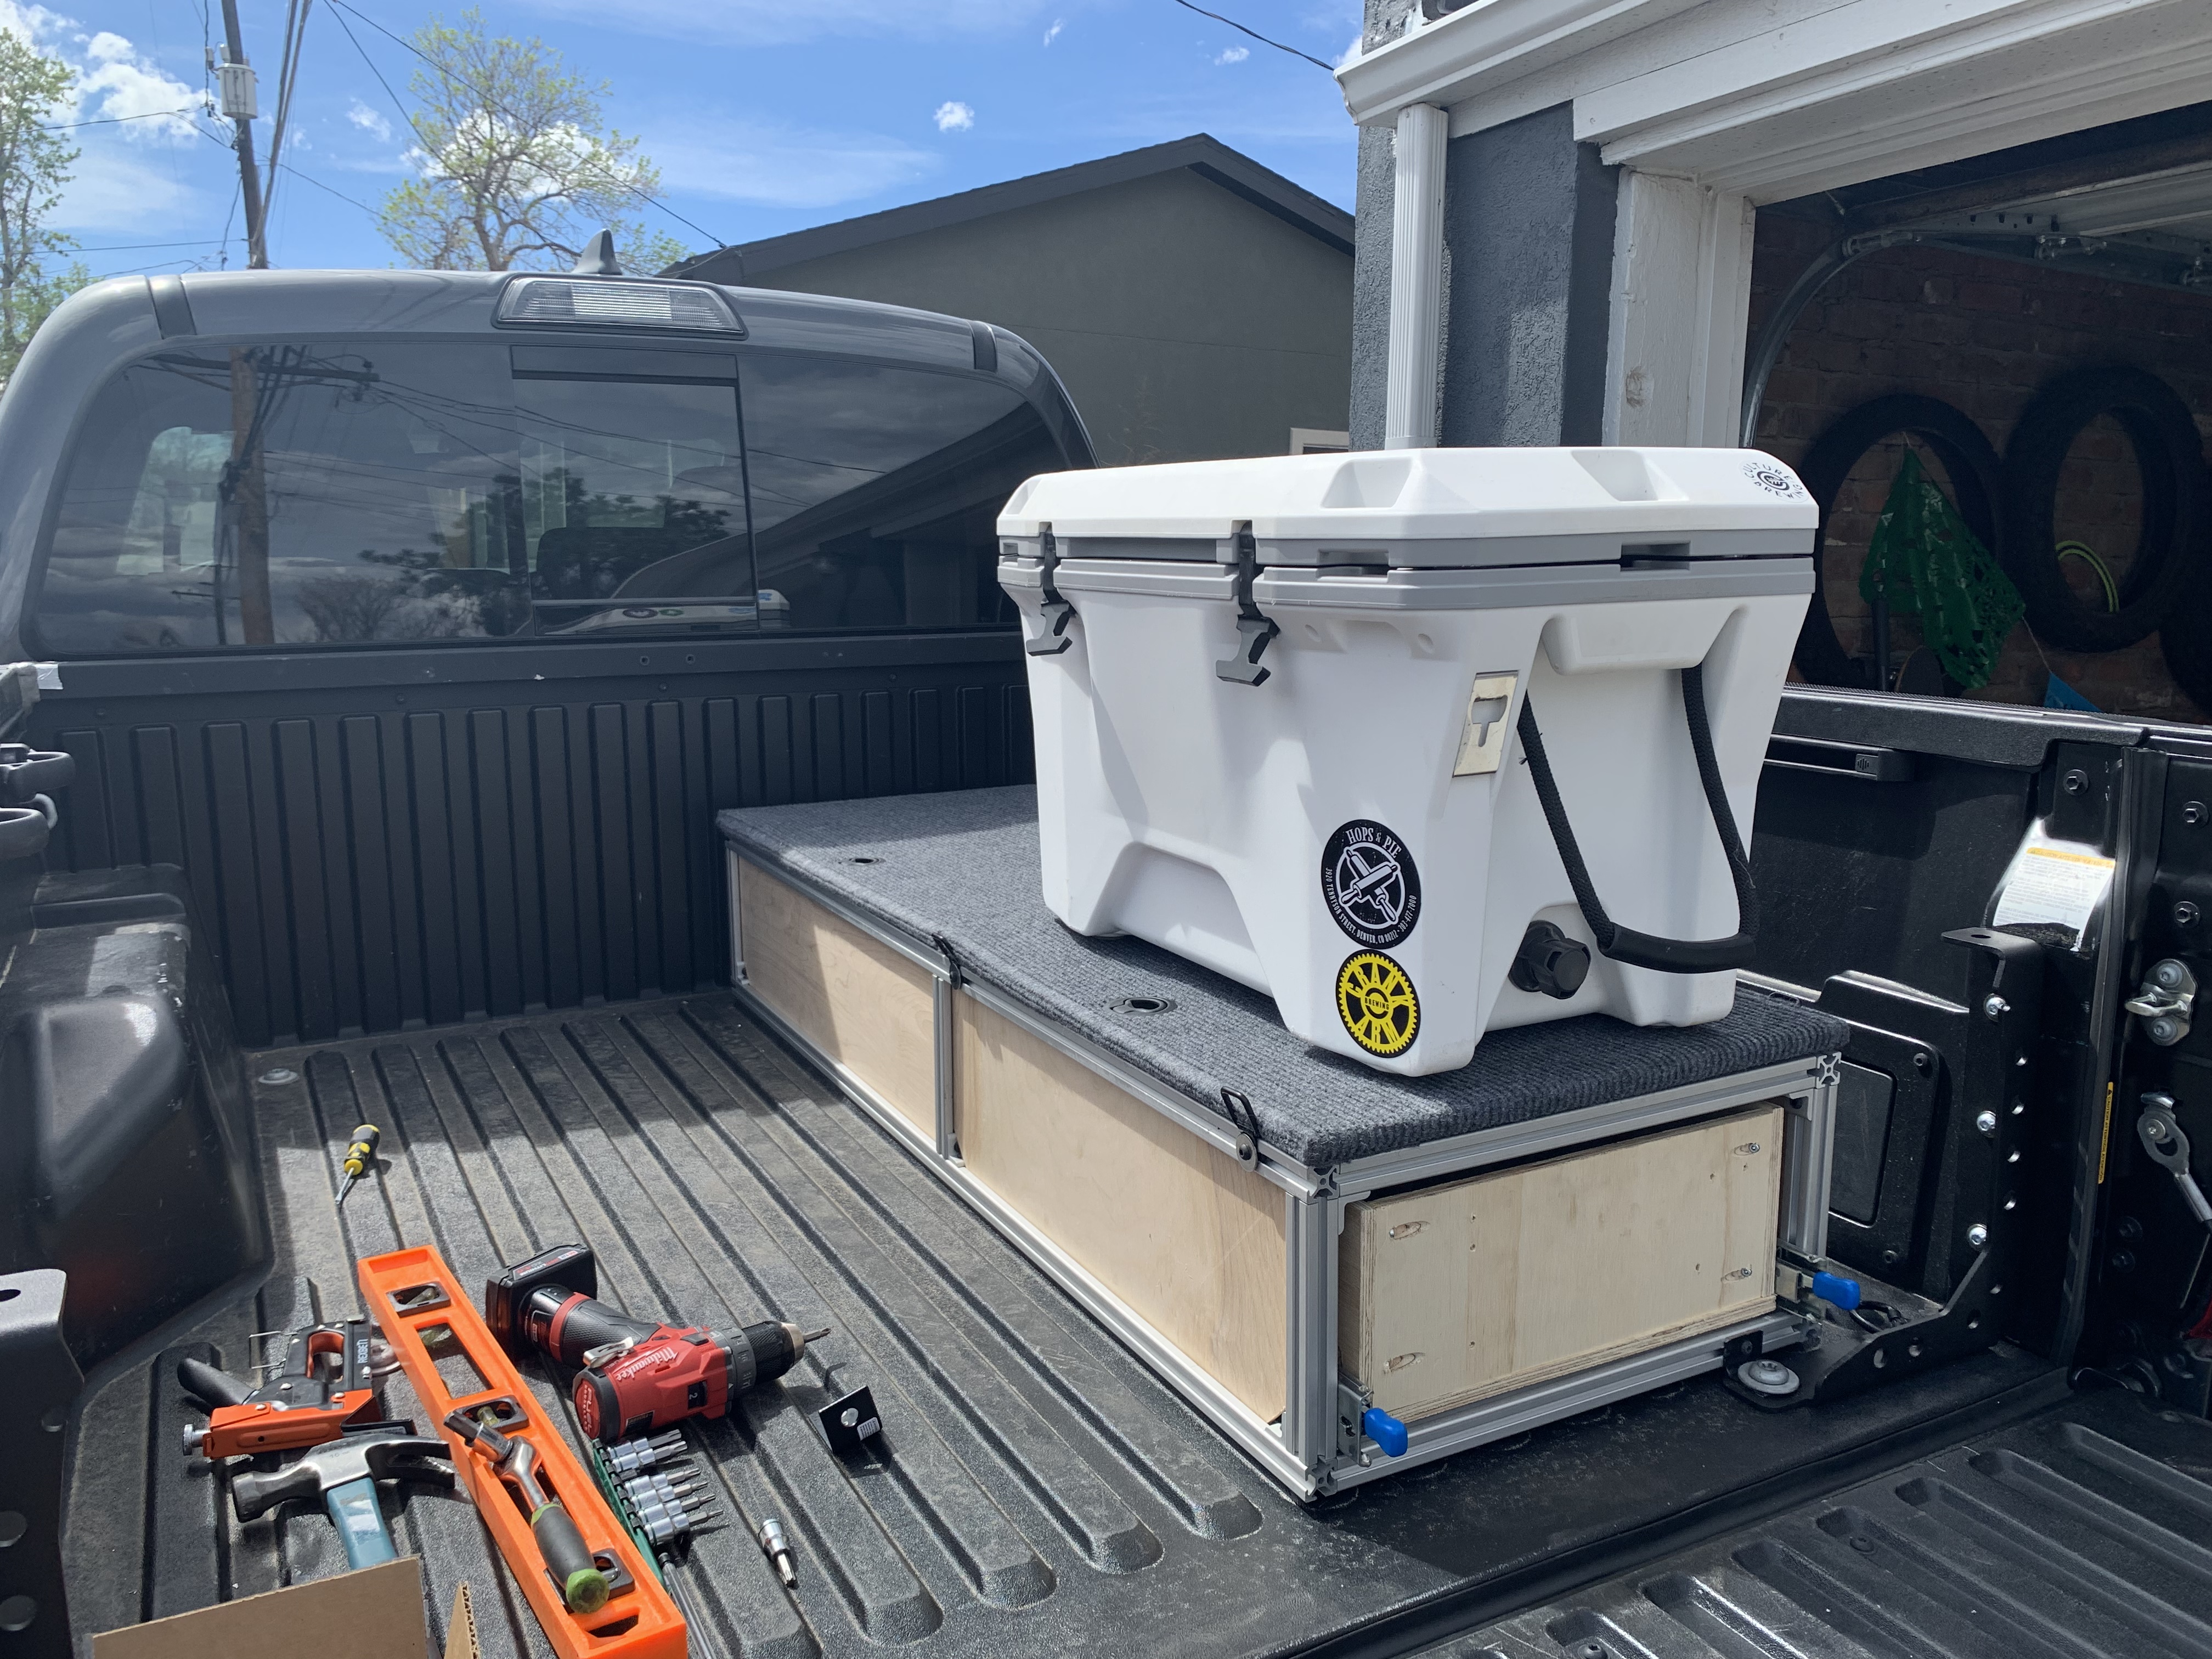
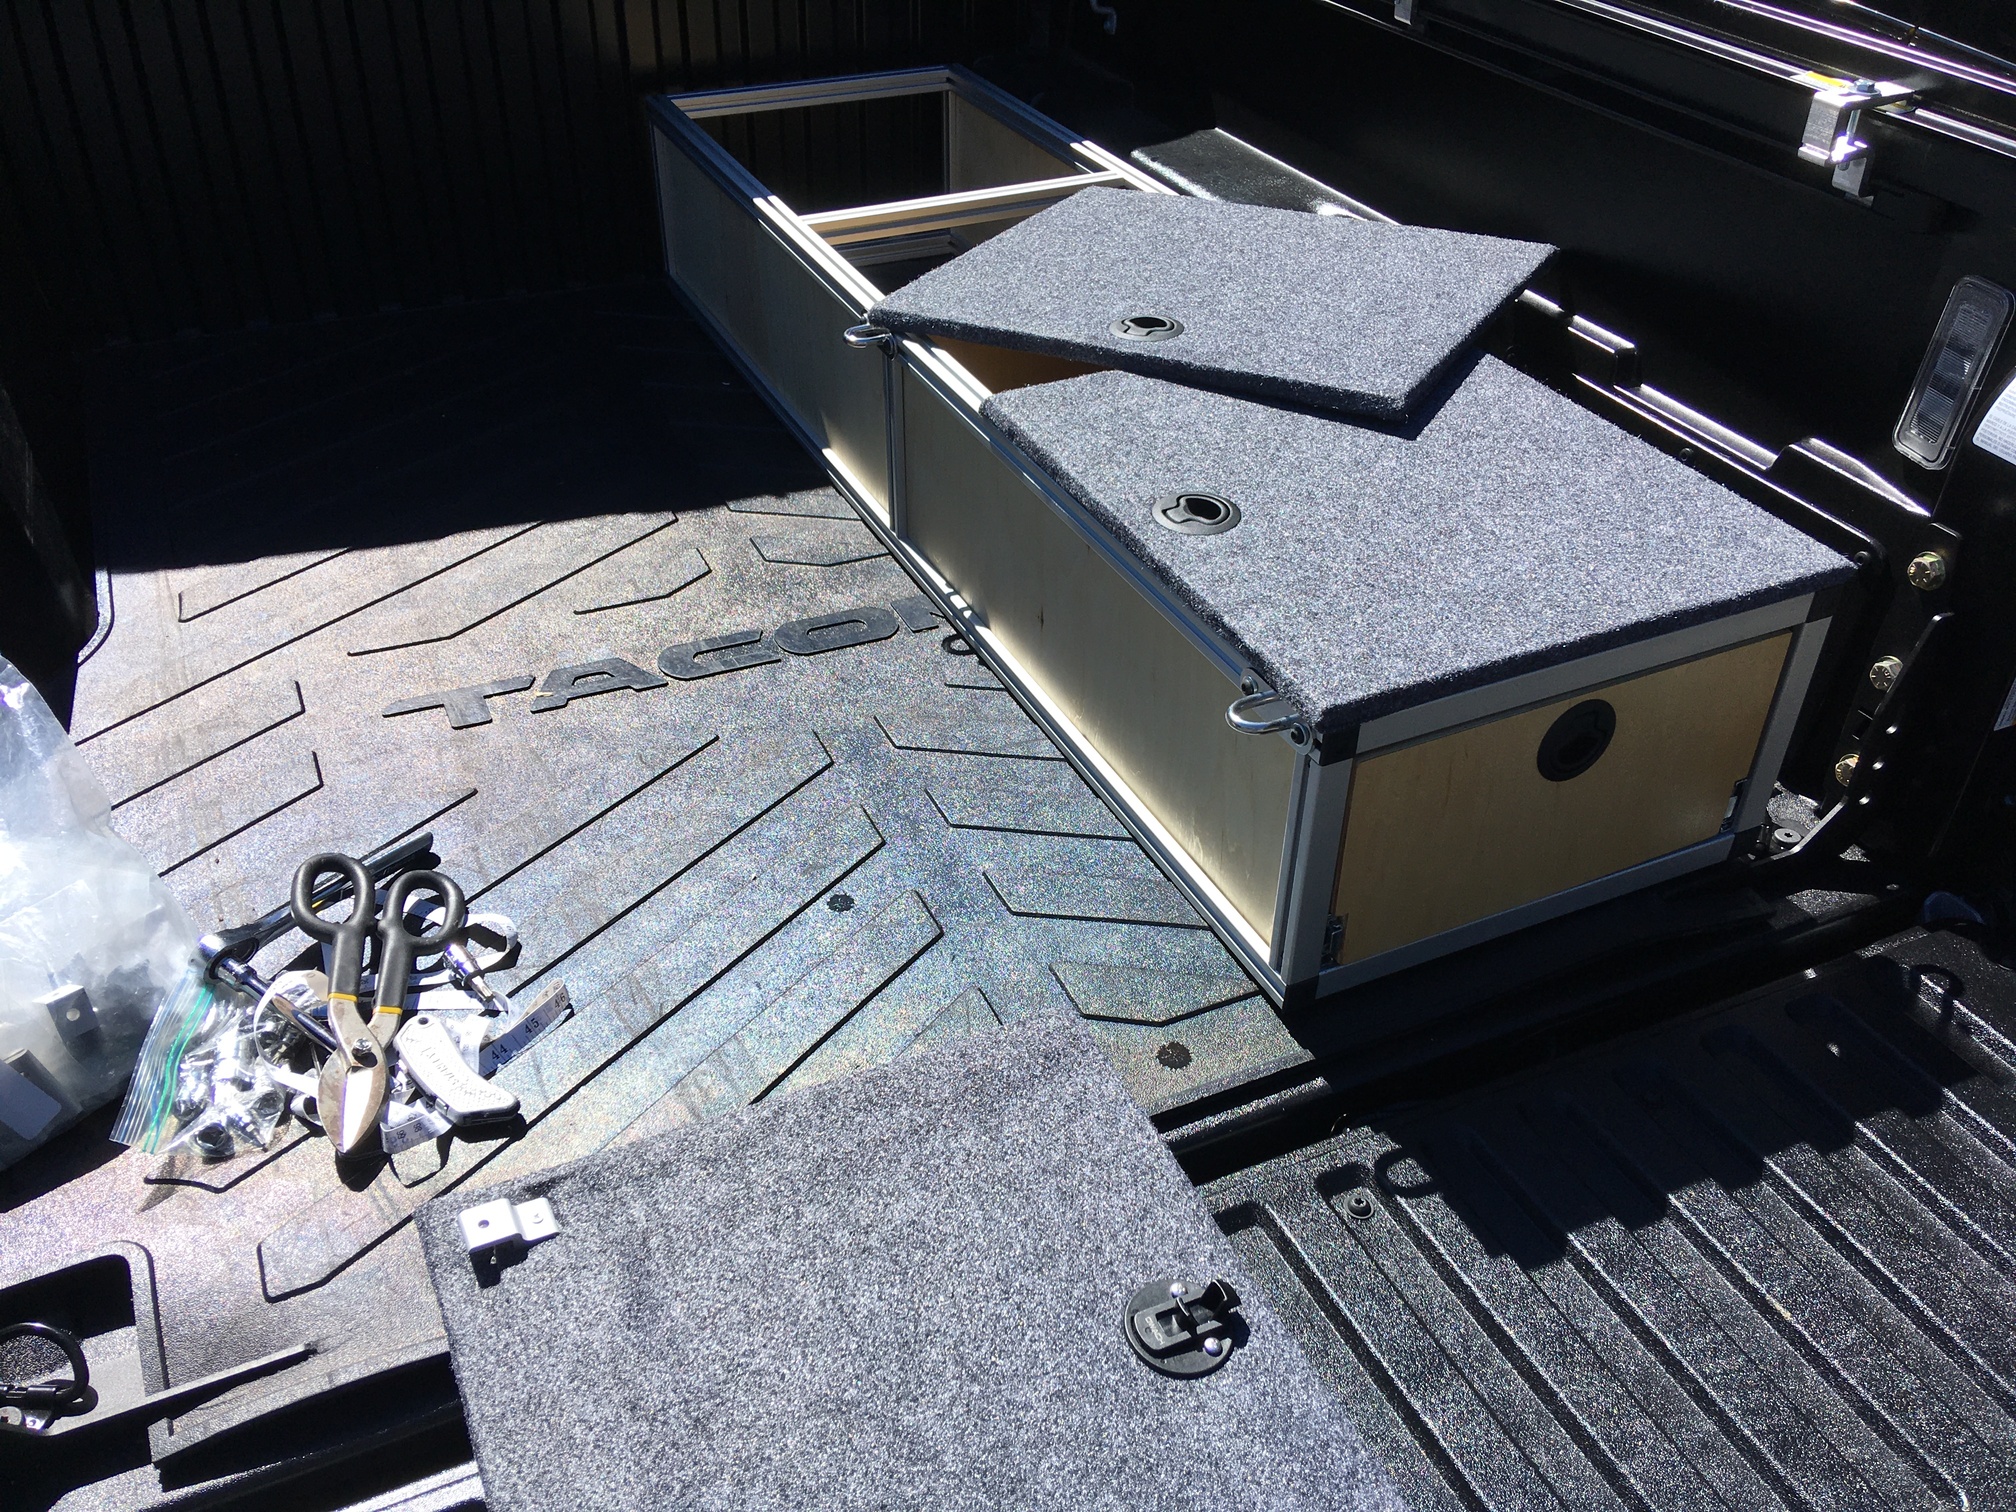
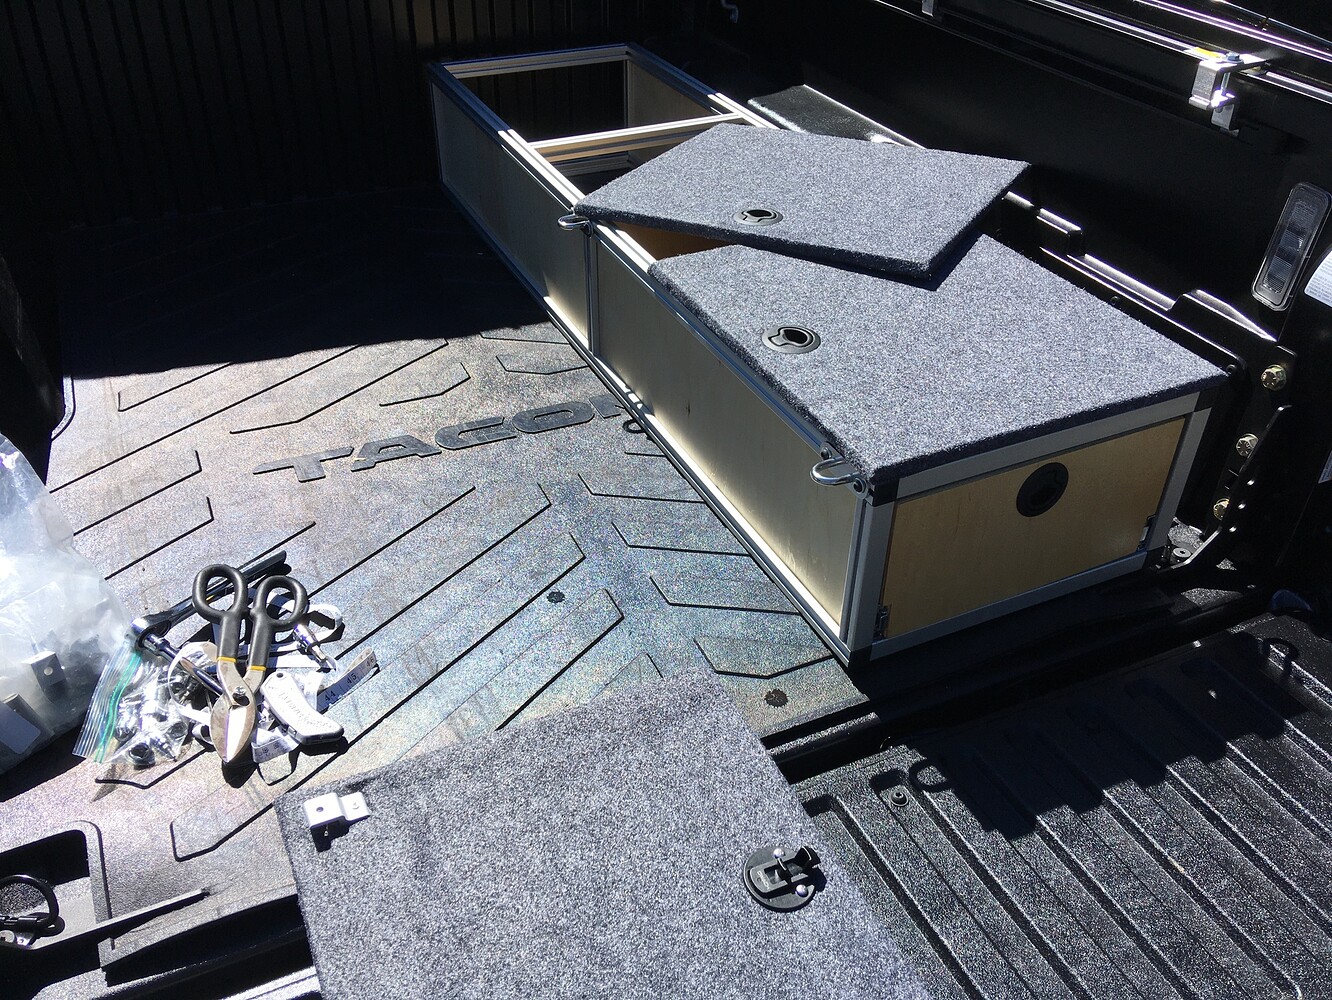
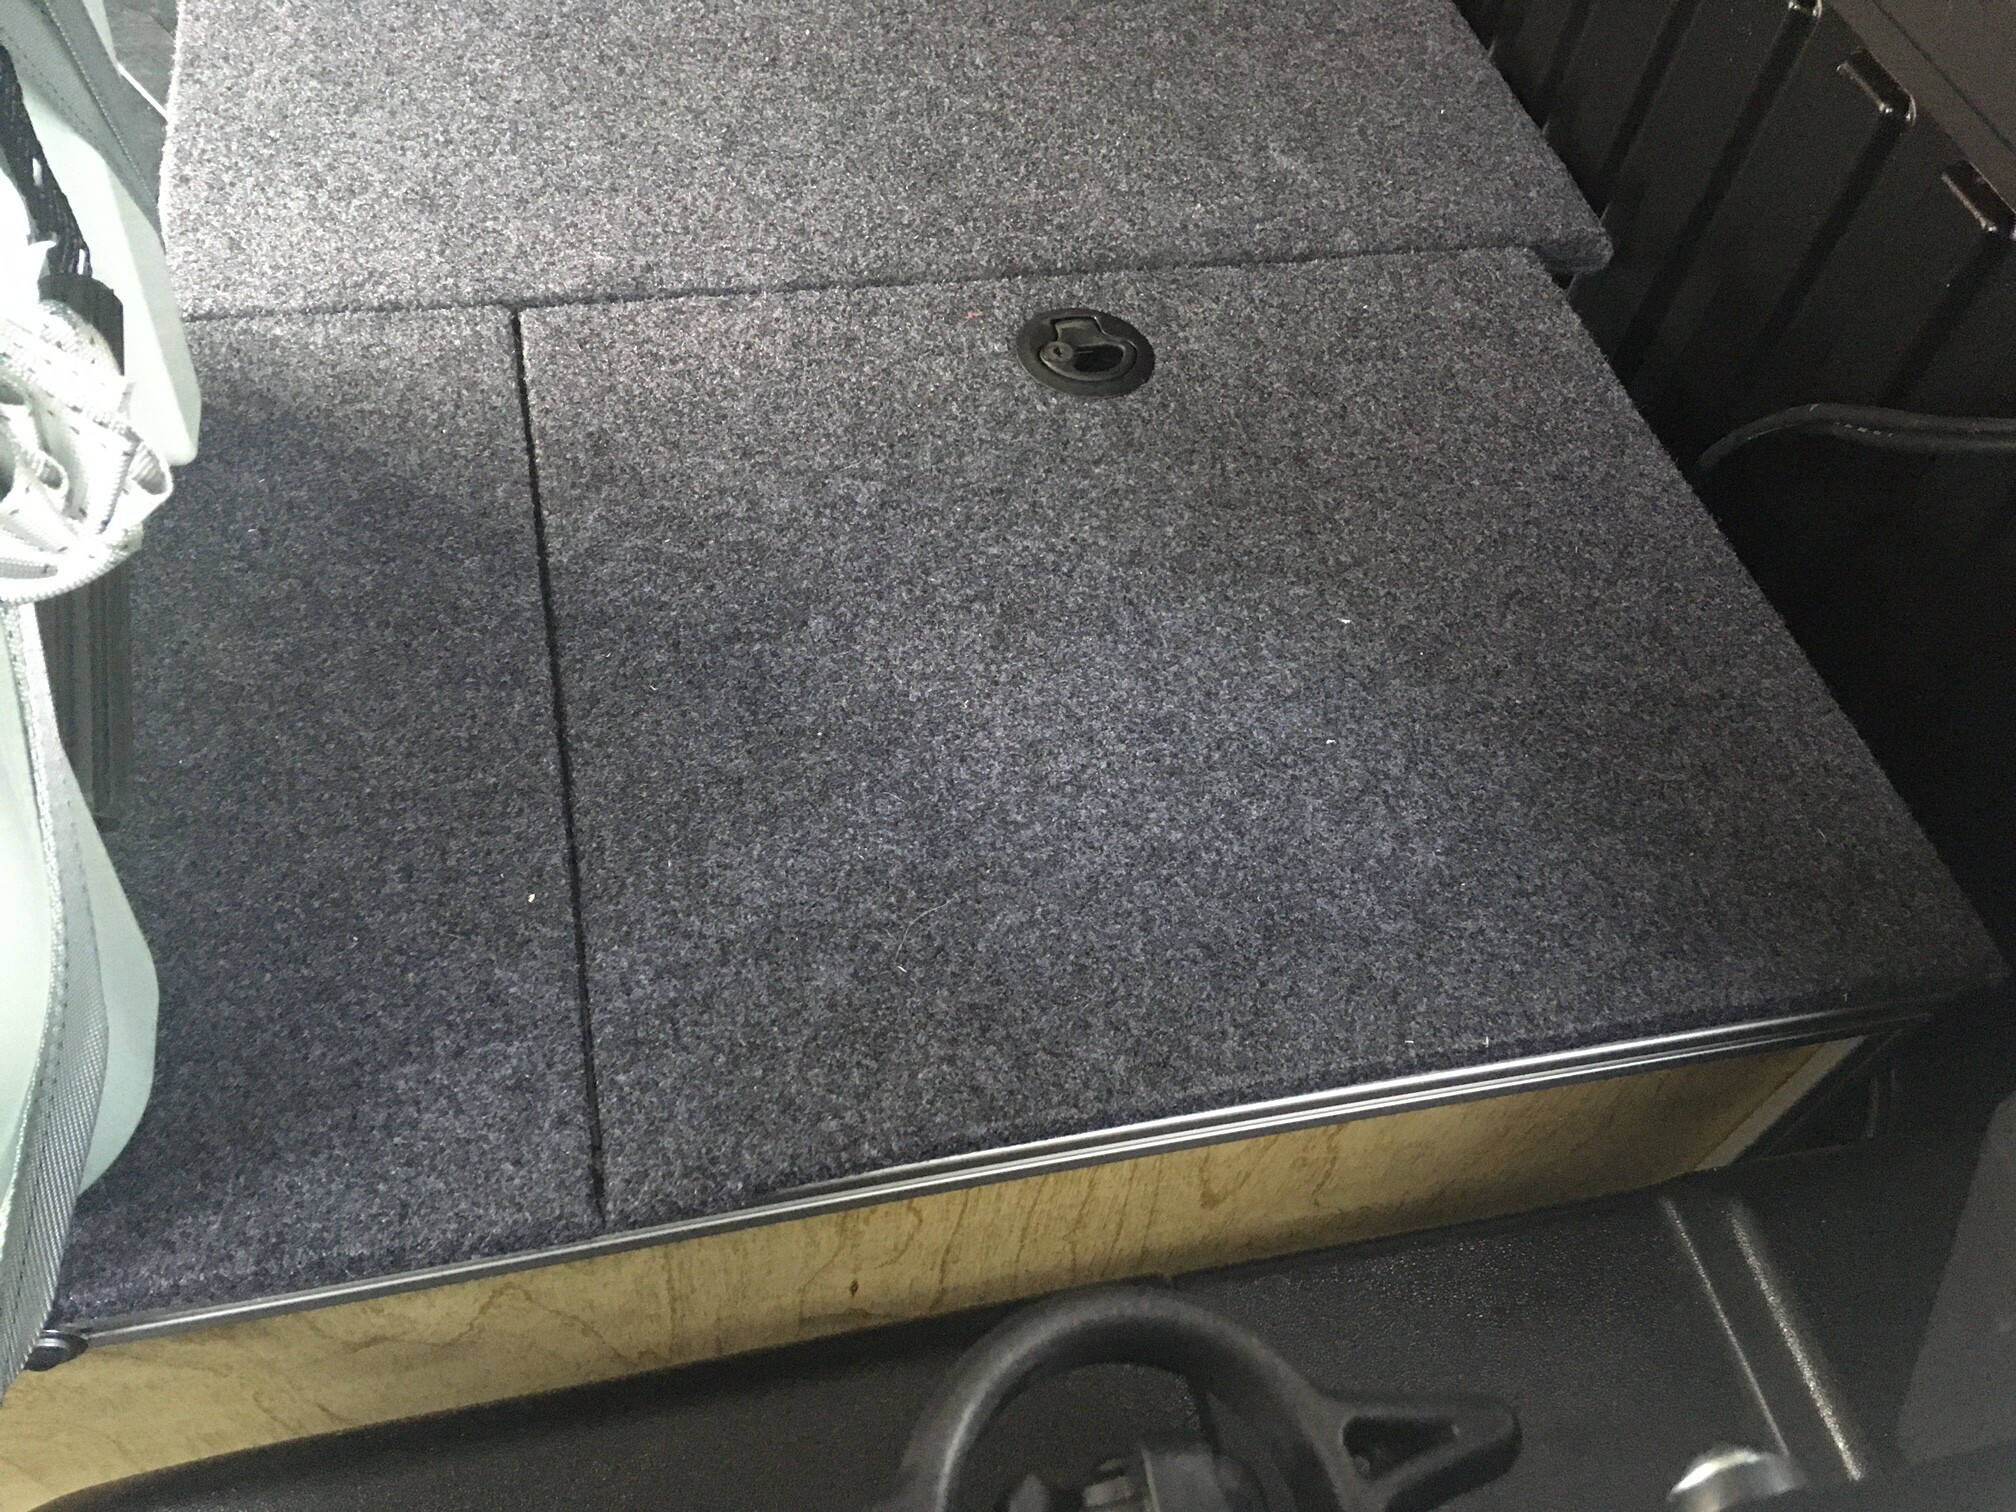
First accessory while waiting for camper: storage drawer and box. It ended up weighing more than expected (38 lbs) but is quite sturdy and bolted into bed. I like 80/20 because its easy to add to- for instance, i added a couple attachment points to strap my cooler on the top. Anyway, pretty happy with a sub-$150 weekend project.
Thanks!
Yes, I only have a little portable circular saw and drill and it wasn’t too bad, but it would be a snap to make with the right equipment (table saw, chop saw, etc.).
Tnutz for extrusions and fittings! They’ll cut it and machine it for you if you plan well. I used their hidden counterbores and hardware to connect everything. I also plan to use them for the roof rack.
Owach slam latches, 1/2" depth (amazon)
Polymat carpet (amazon)
drawer slides, 28" (amazon)
1/4" wood paneling
I had a sheet of half inch plywood lying around. I suppose that would have added another $50 or so if I had to buy it now.
Looking back at my receipts, the Tnutz order was also about $50 more than I remembered- shipping was expensive. But still worth it!
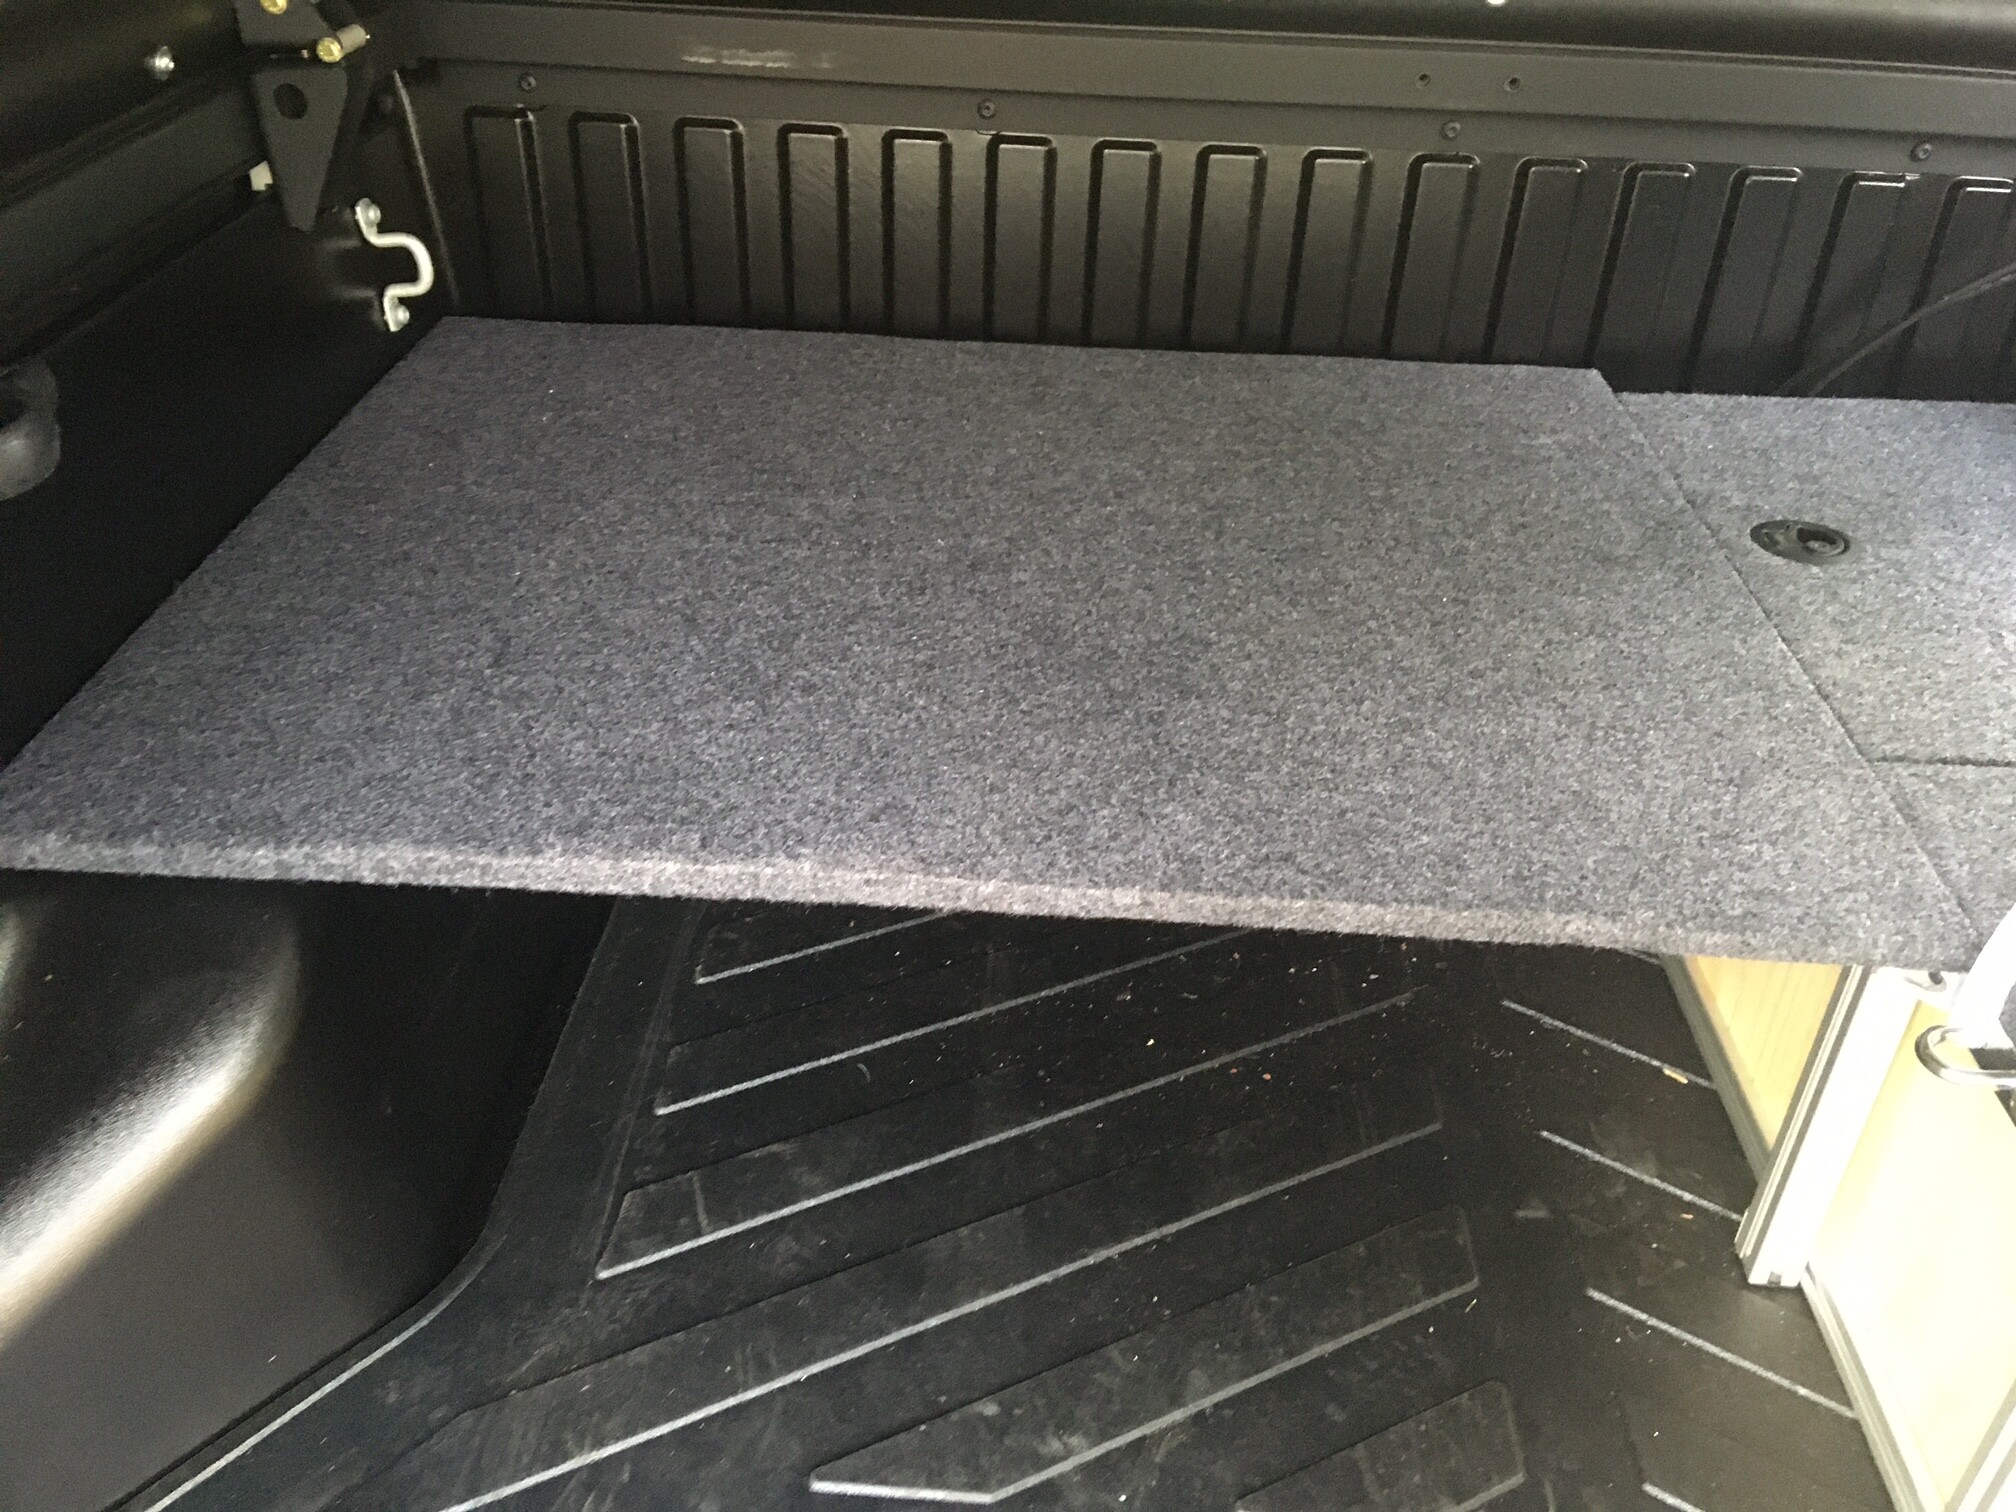
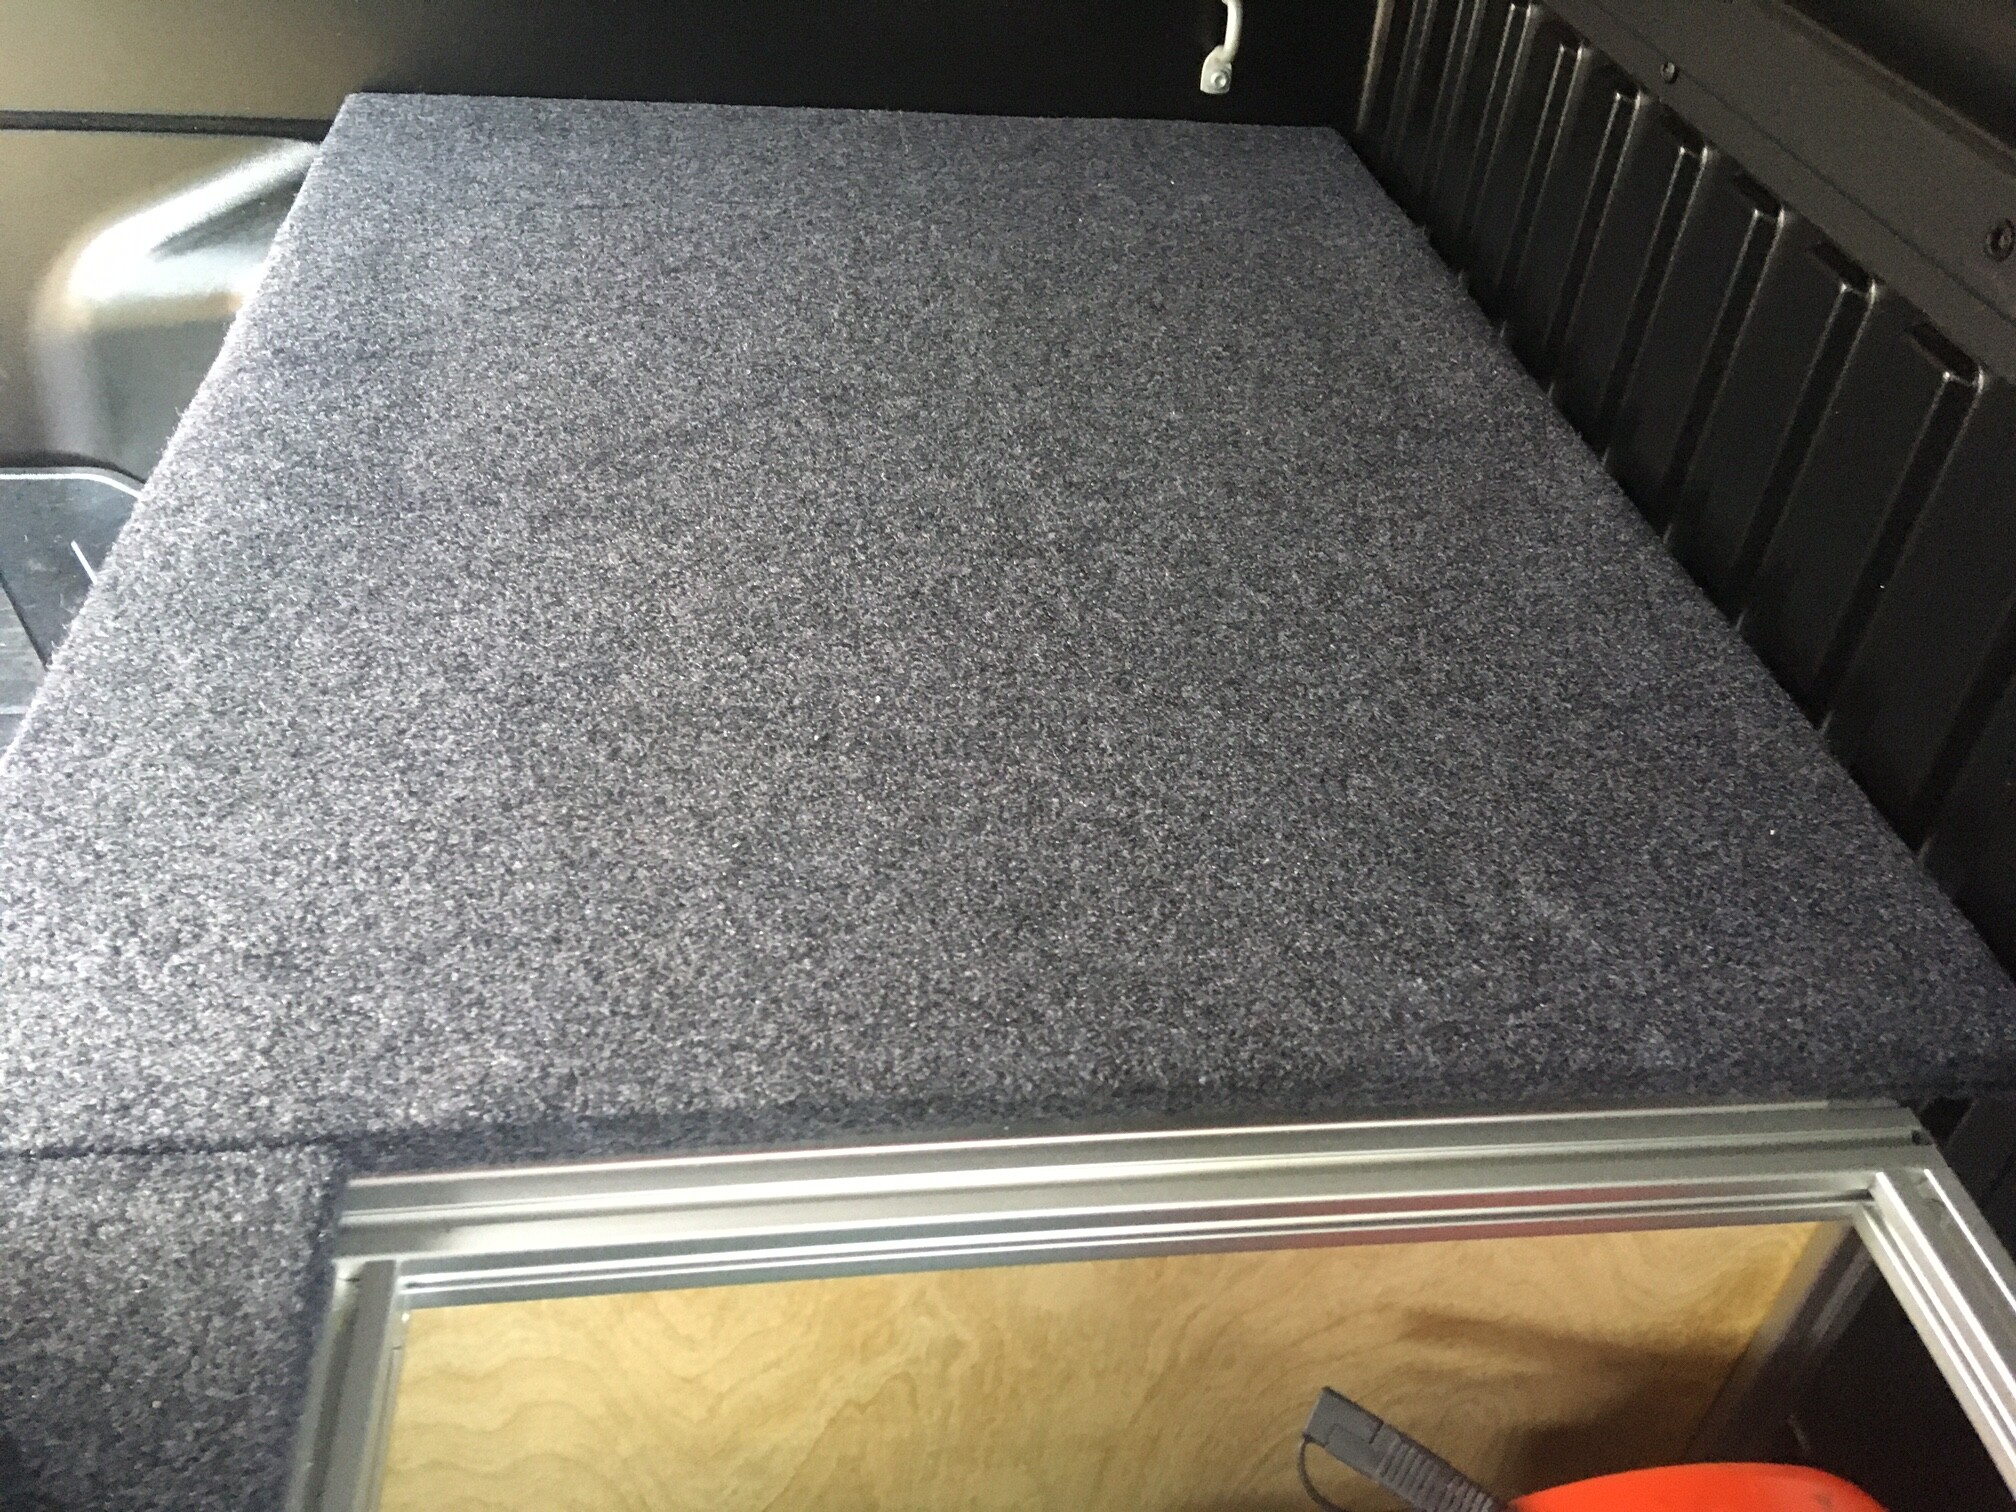
Added a support brace and 26”x34” platform for a Peapod tent. Cooler goes on top of drawer box in rear and dog bed goes in empty space. Configuration complete at +46lbs.
I’ve had several people ask about parts I used to make this drawer box for a short bed gen3 tacoma. Rather than reply individually, I’ll post as much info as I can here!
(also see pictures above for reference)
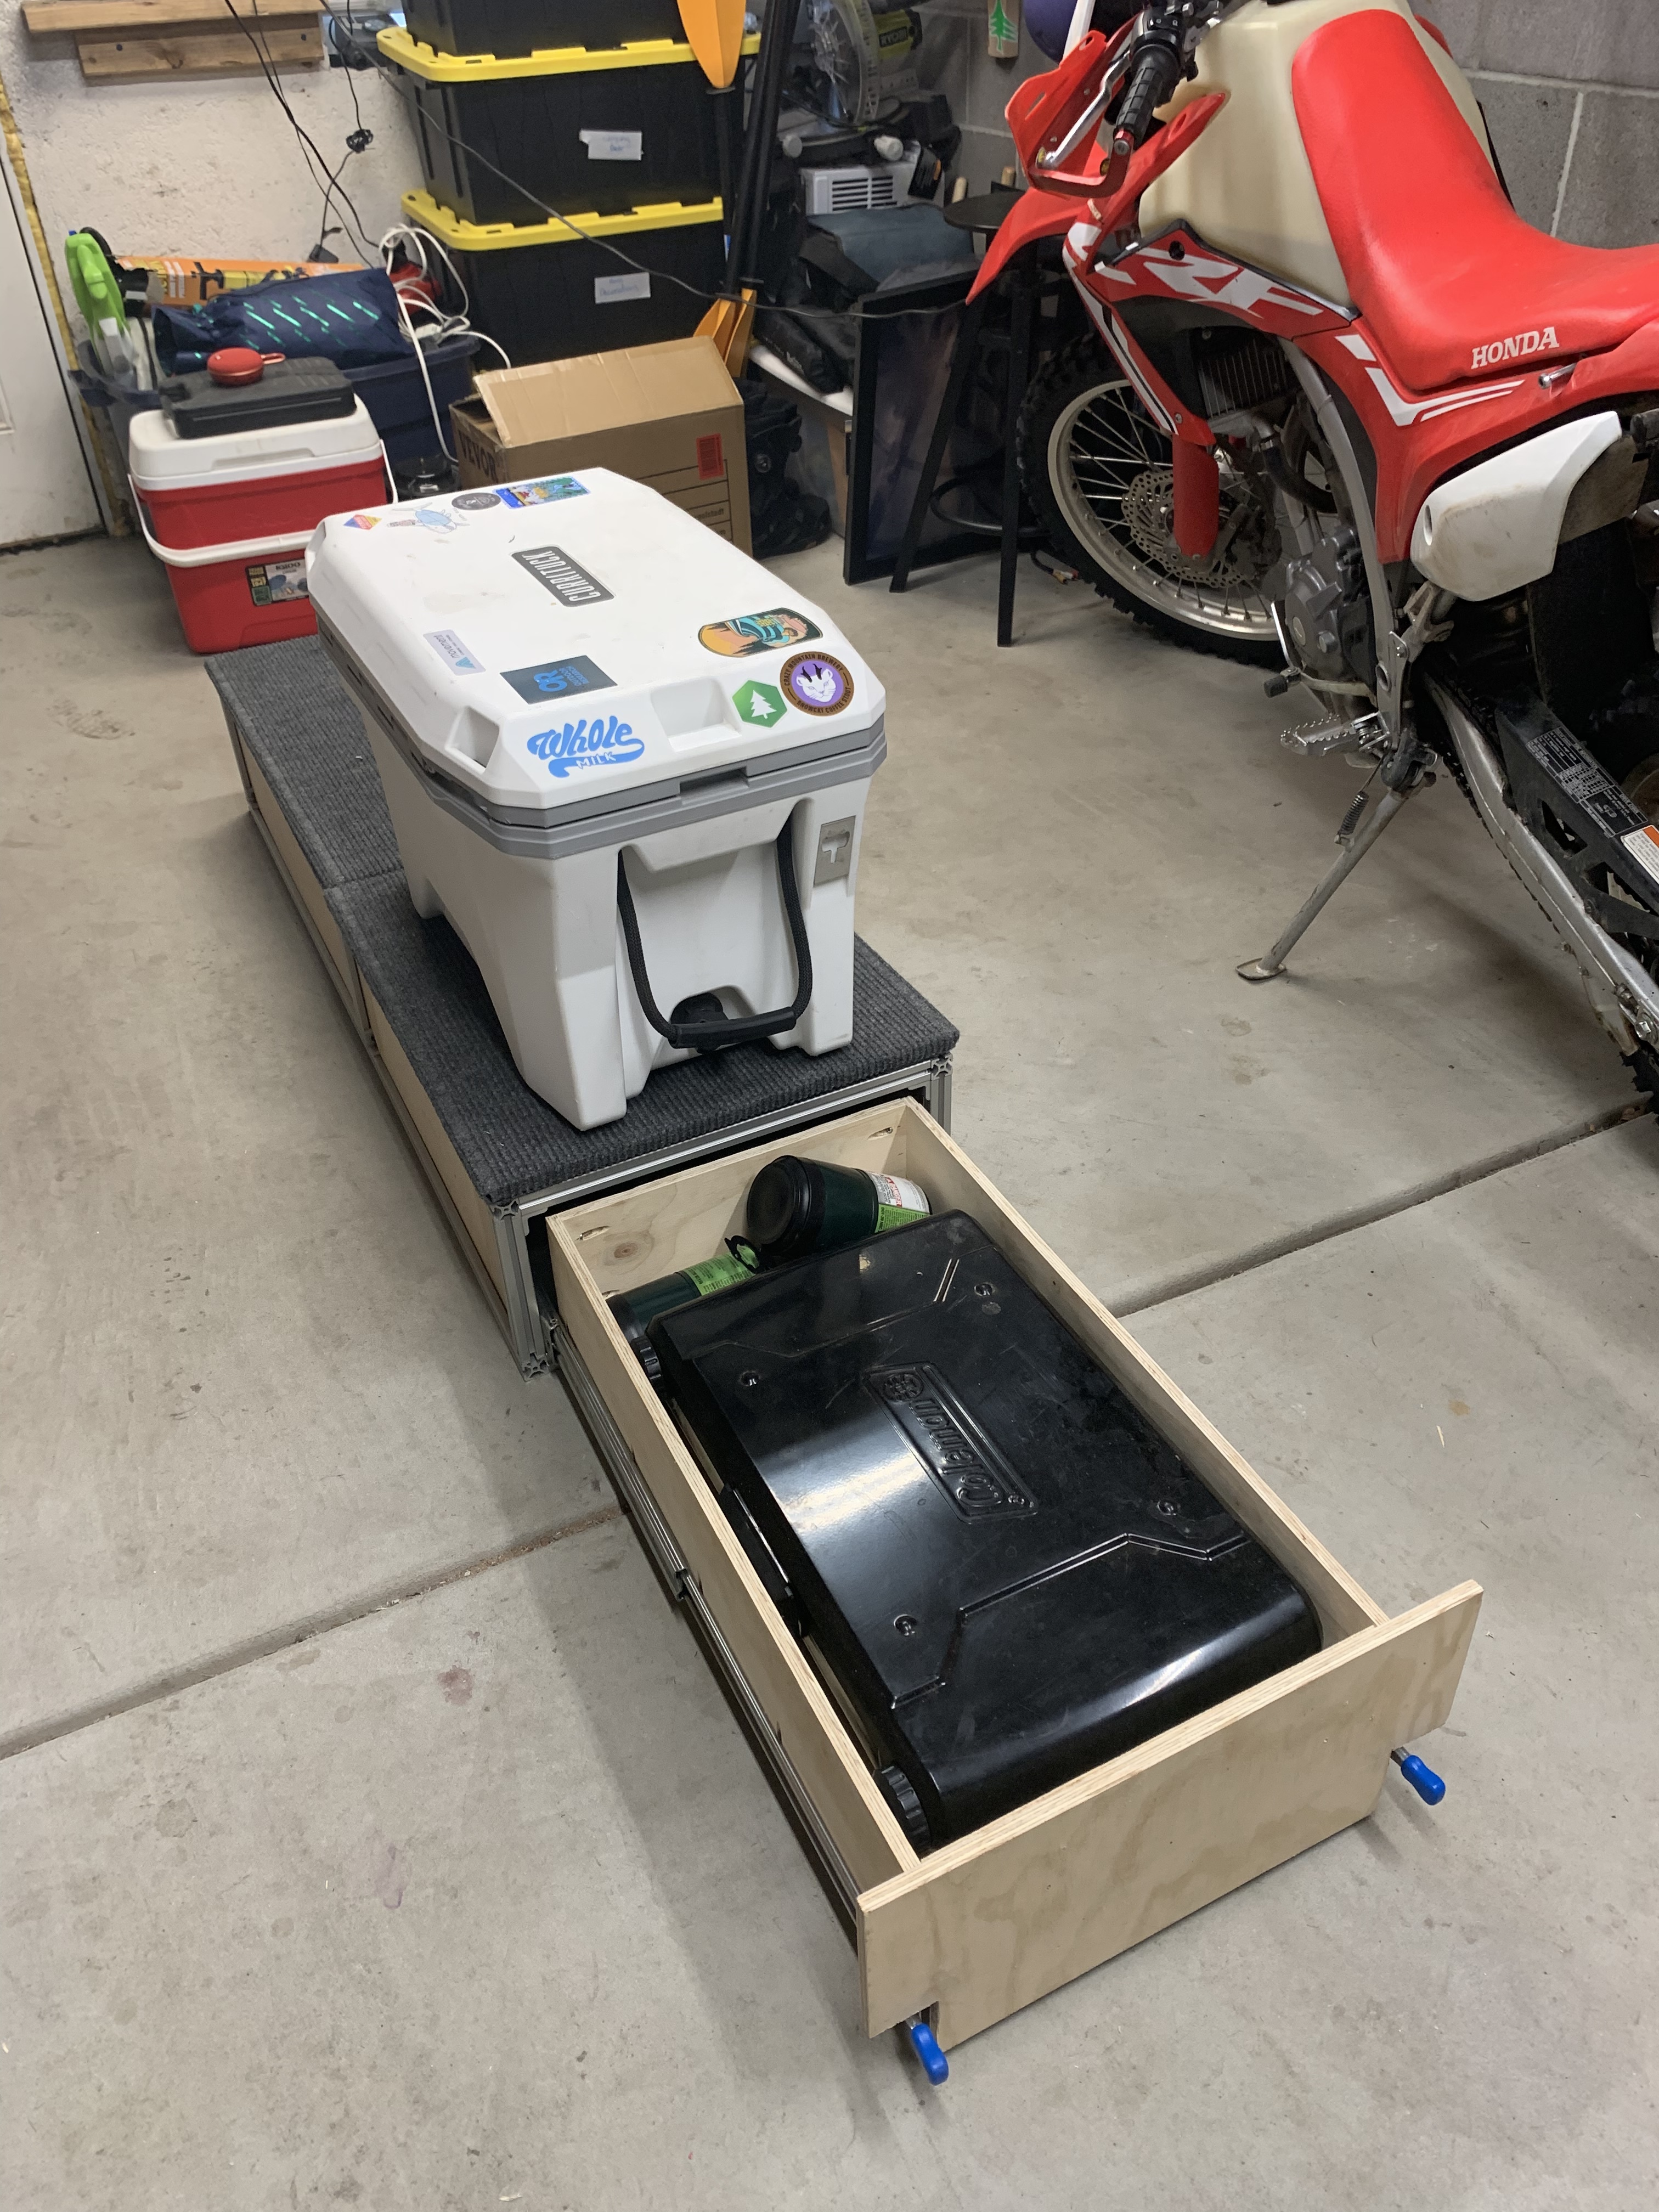
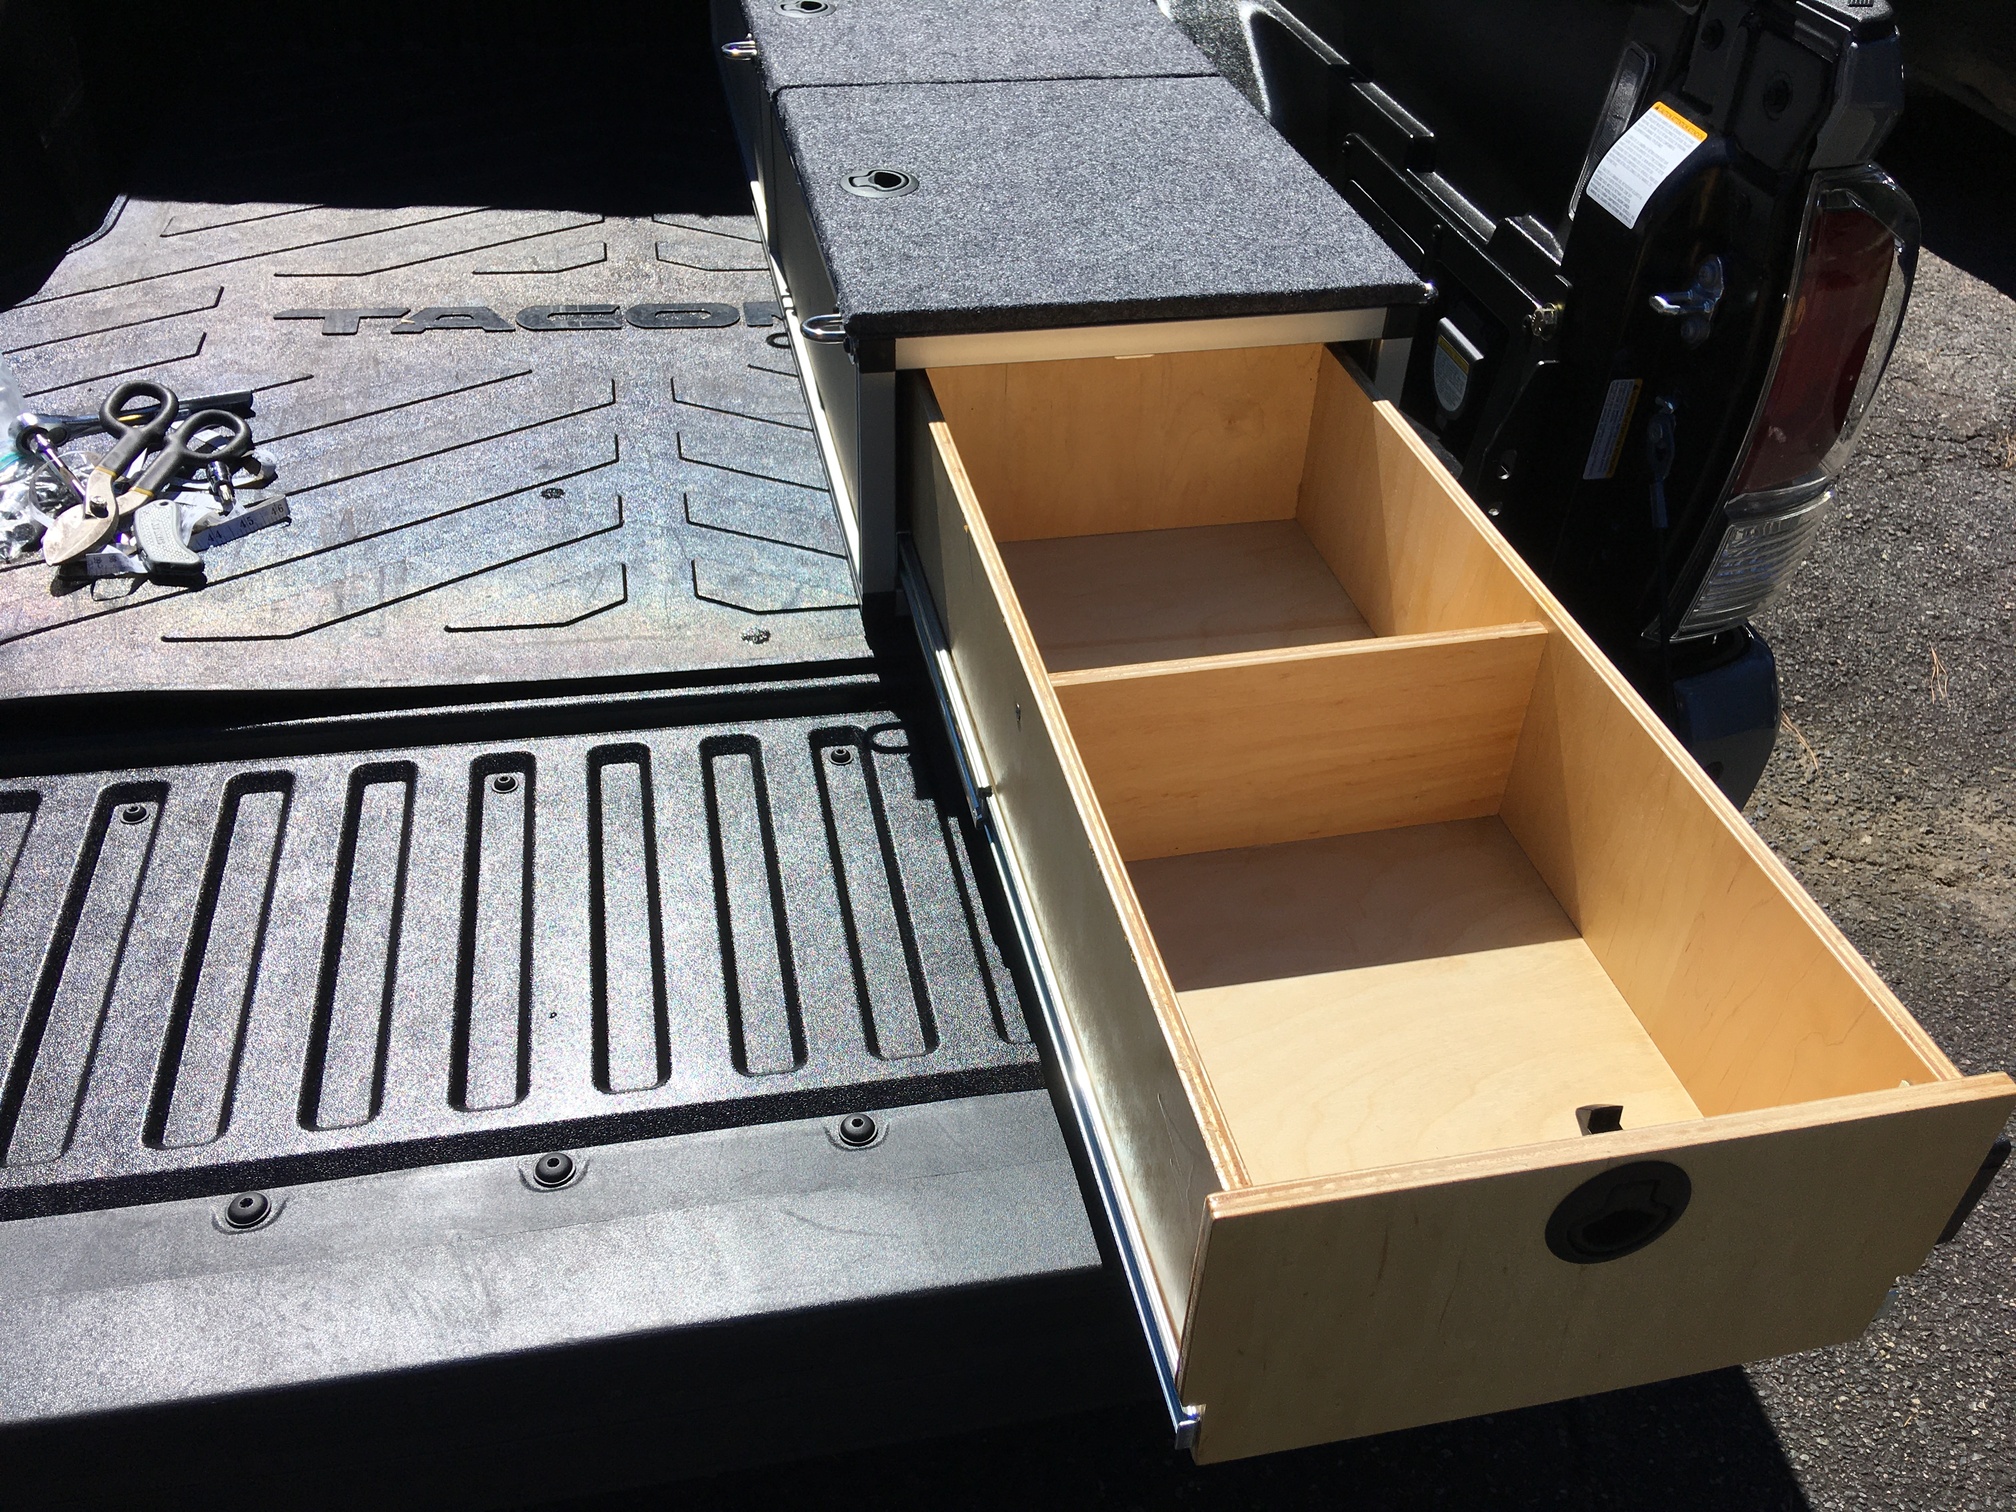
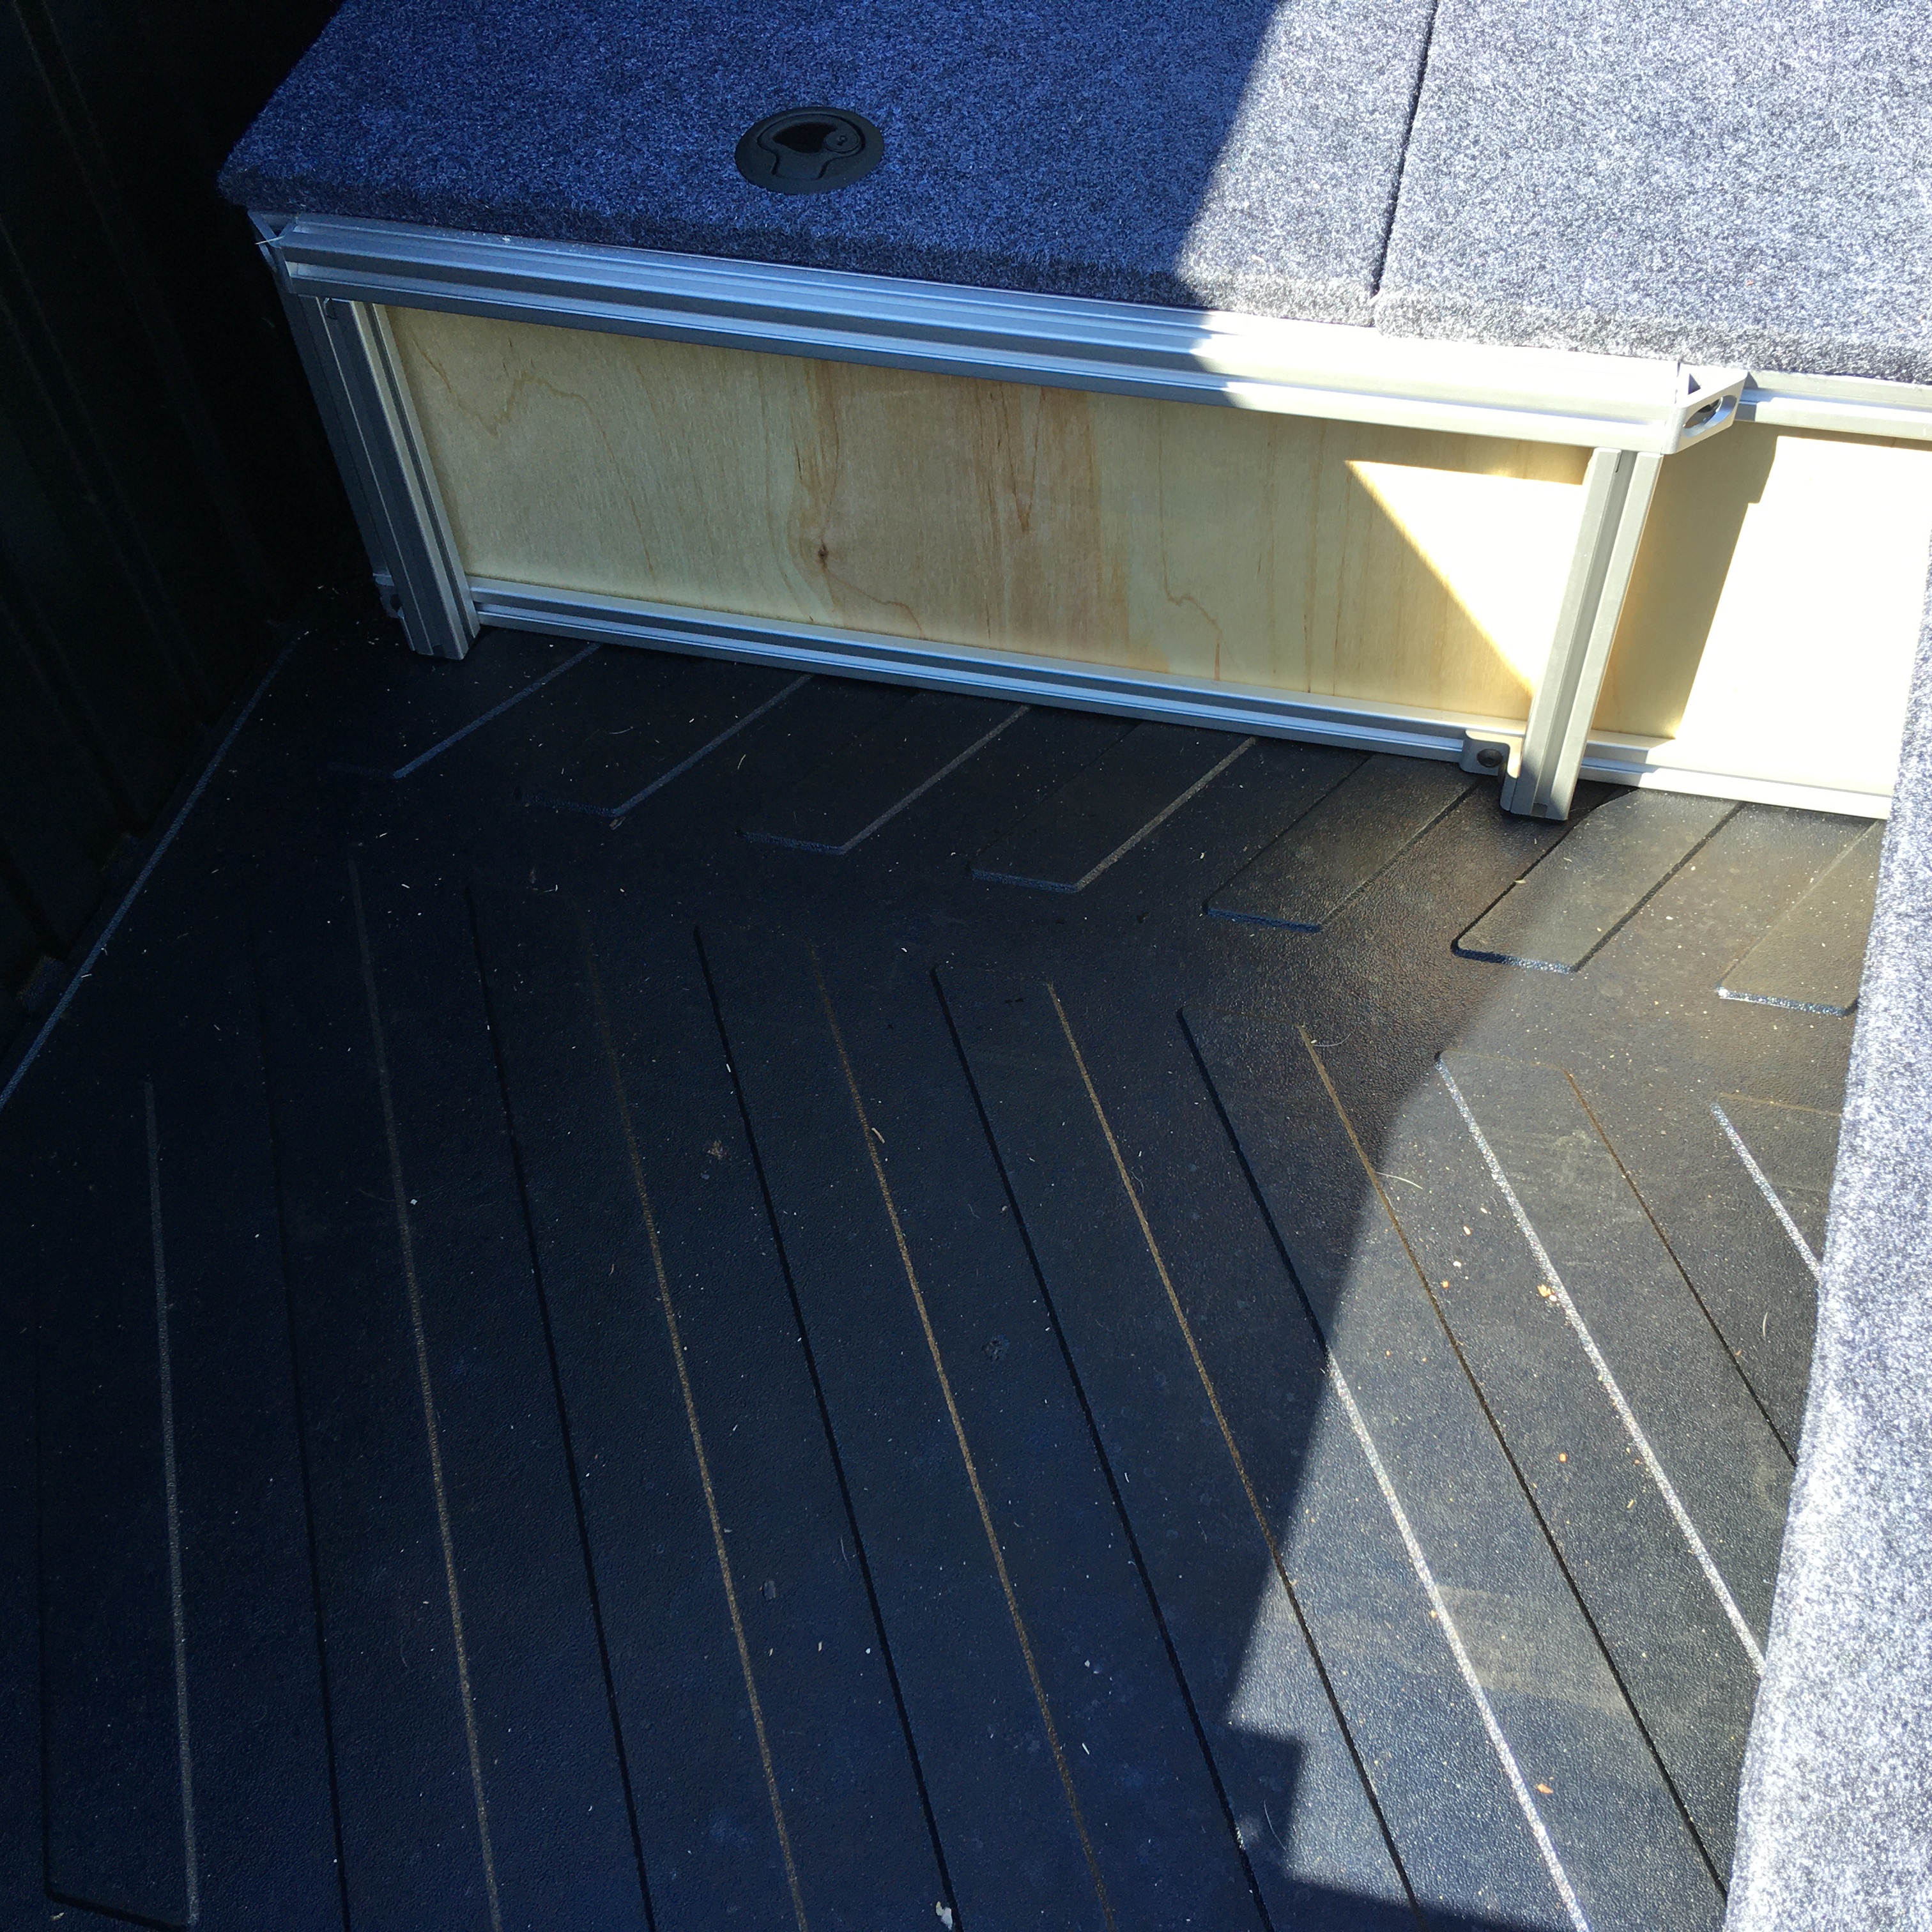
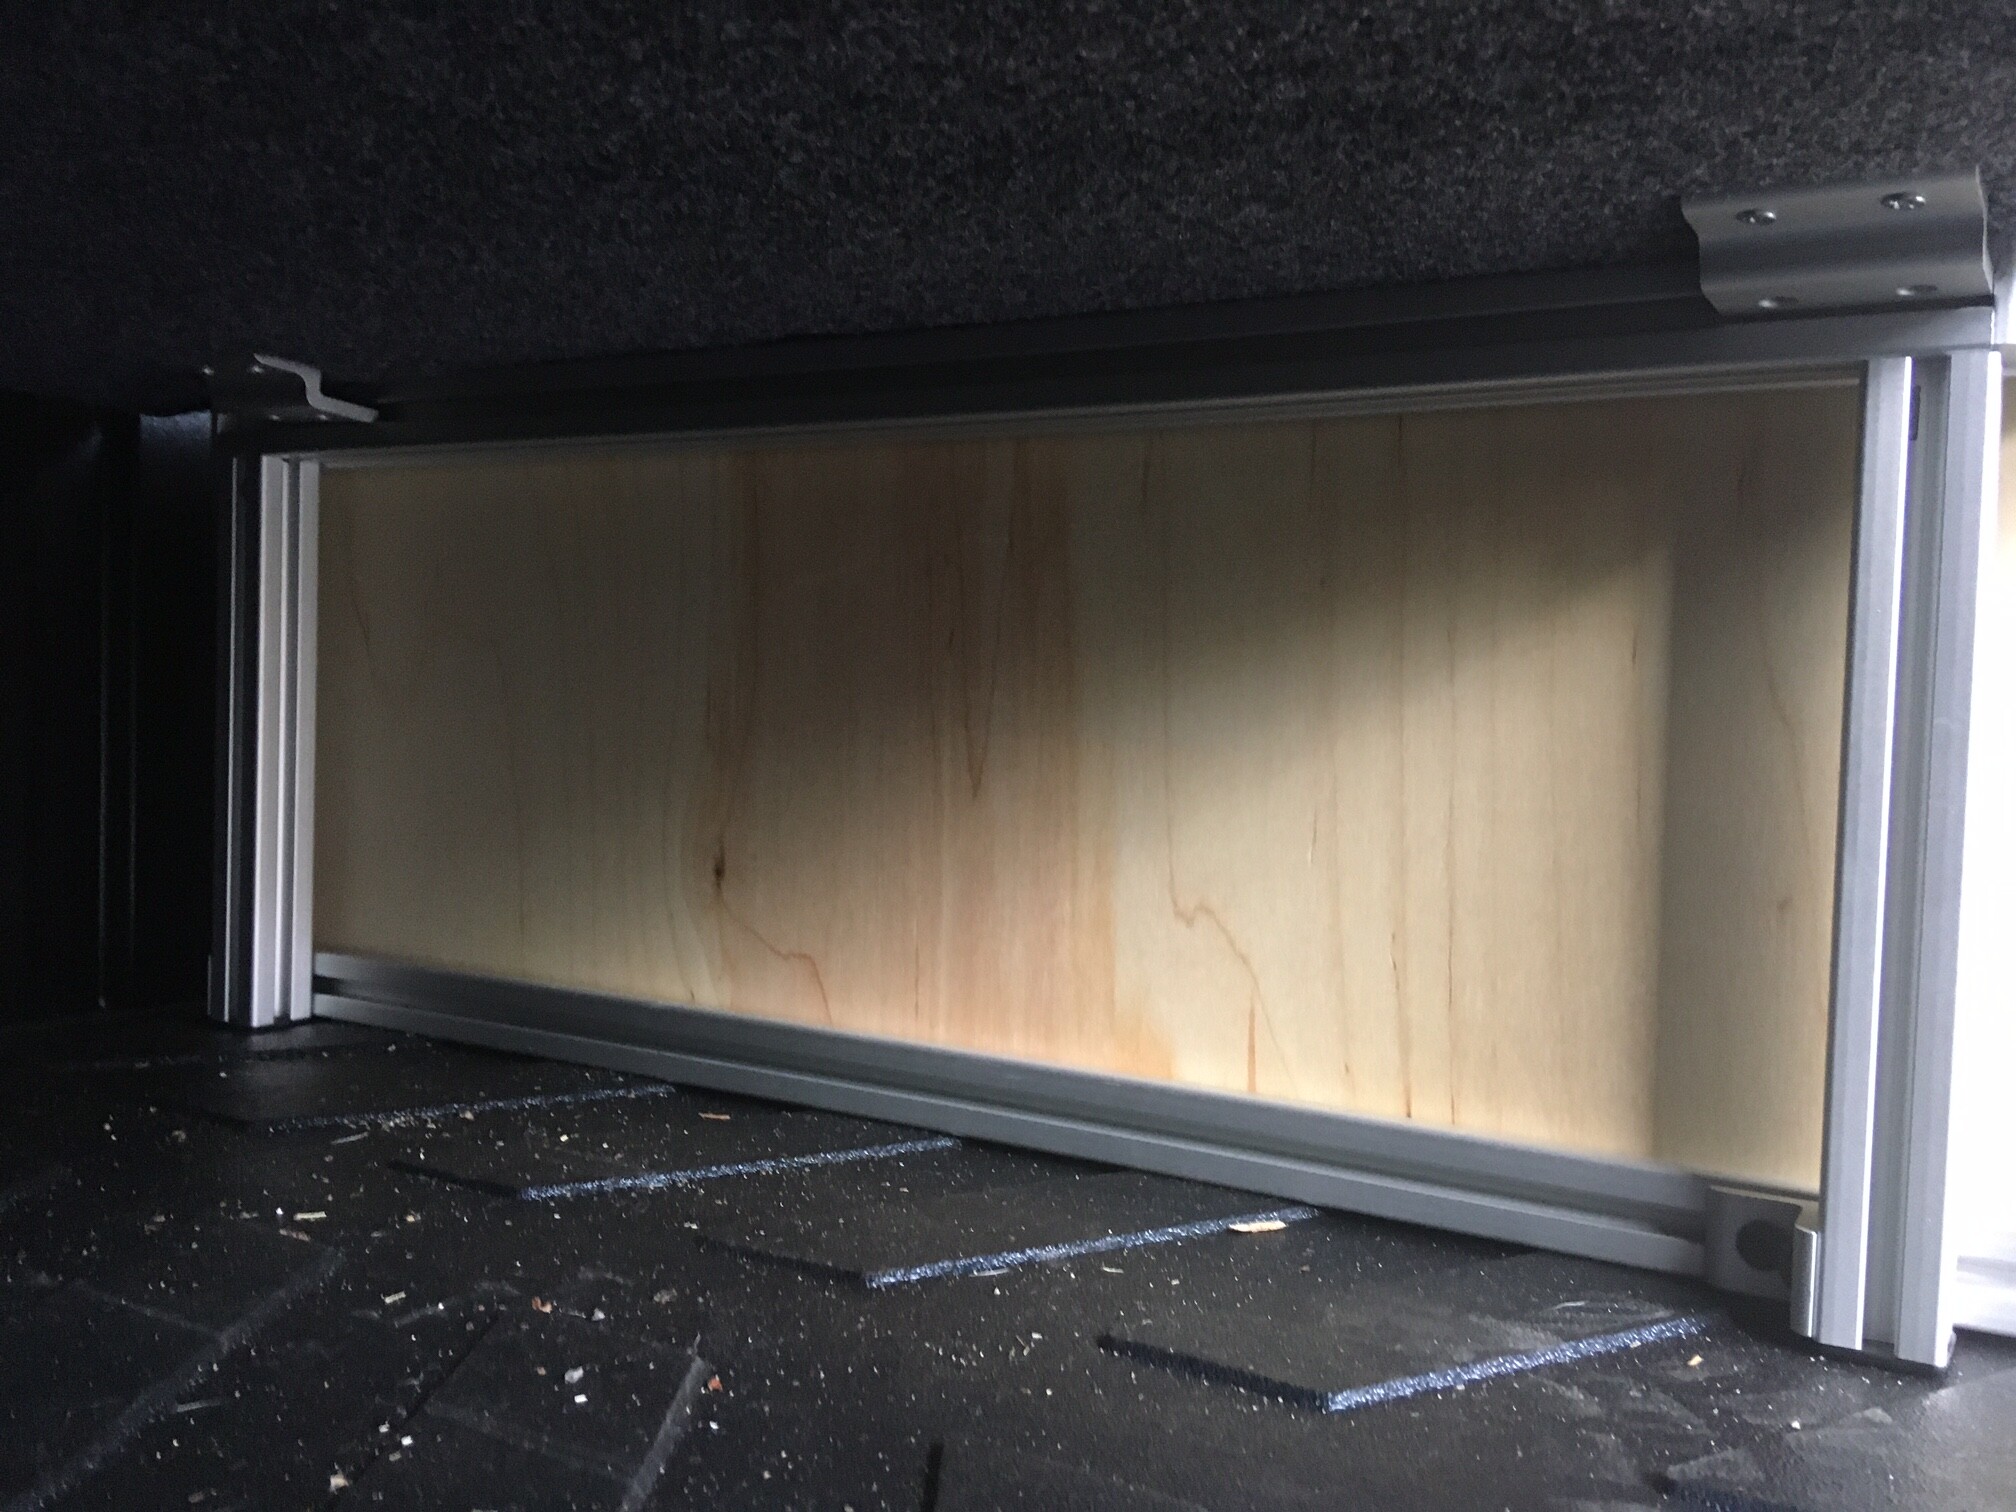
The basic goal was to provide some drawer storage for eating utensils/cookware, a separate compartment behind the drawer for future battery pack/inverter and other odds-and-ends, and a removable platform for the kiddo’s peapod tent or dog bed. There are two components- a drawer/box and a platform. The platform was added separately by bolting a few 80/20 pieces onto the side of the drawer box.
A couple tips and tricks:
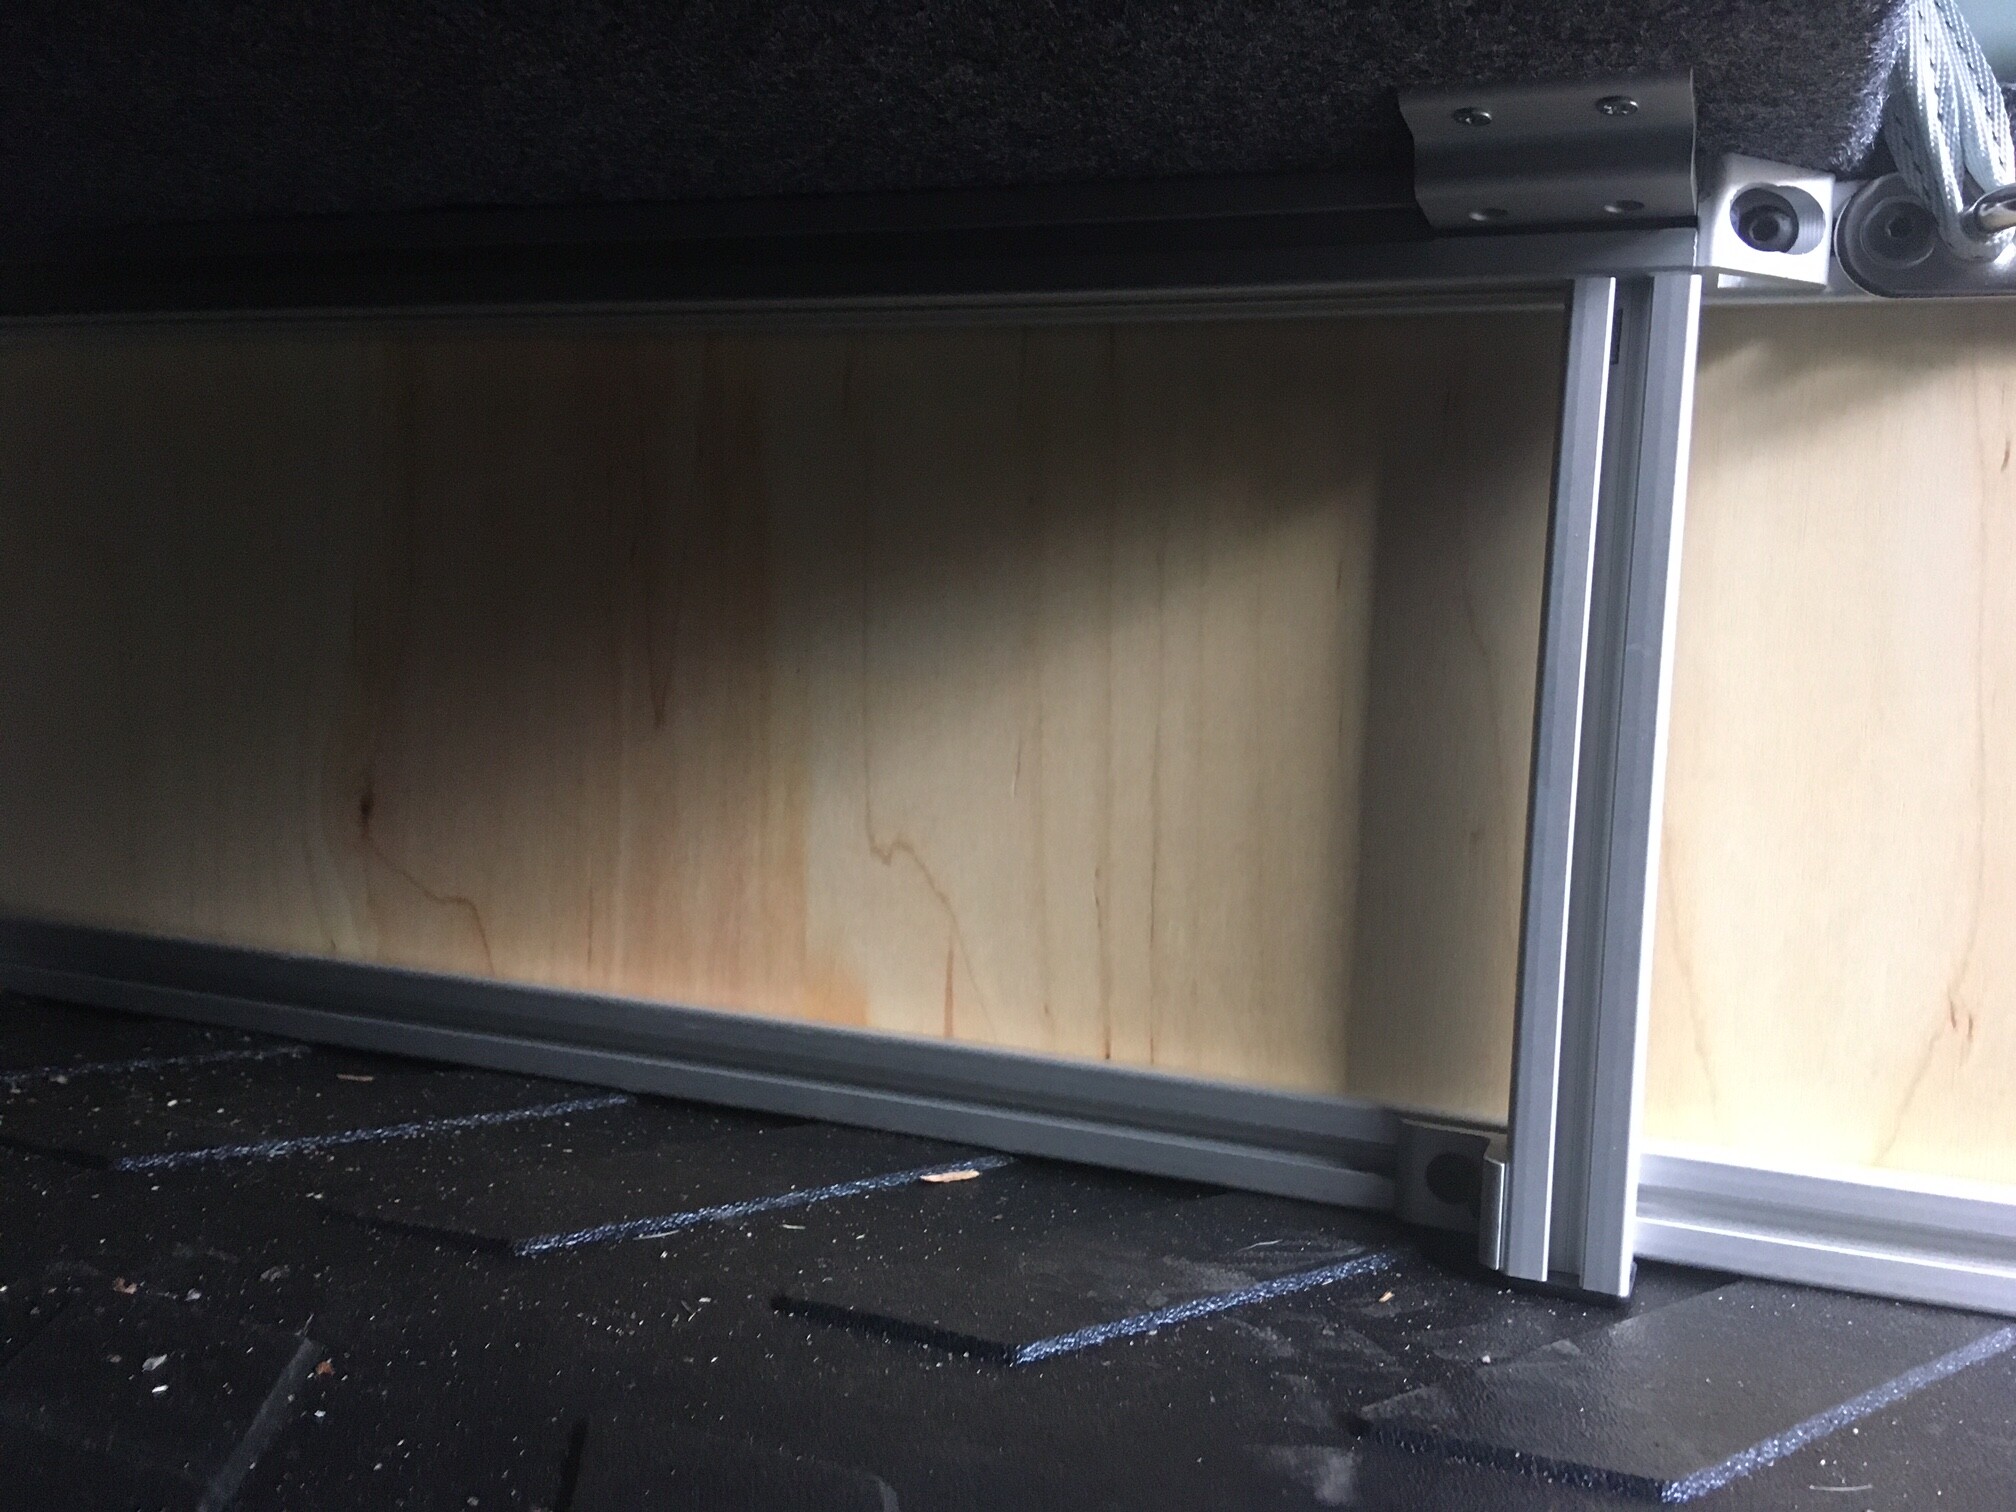
Face 80/20 anchors toward rear and slide 1/4" paneling into 80/20 frame as it is assembled, front to back. Some corners of 1/4" paneling will need to be notched out to allow for anchors.
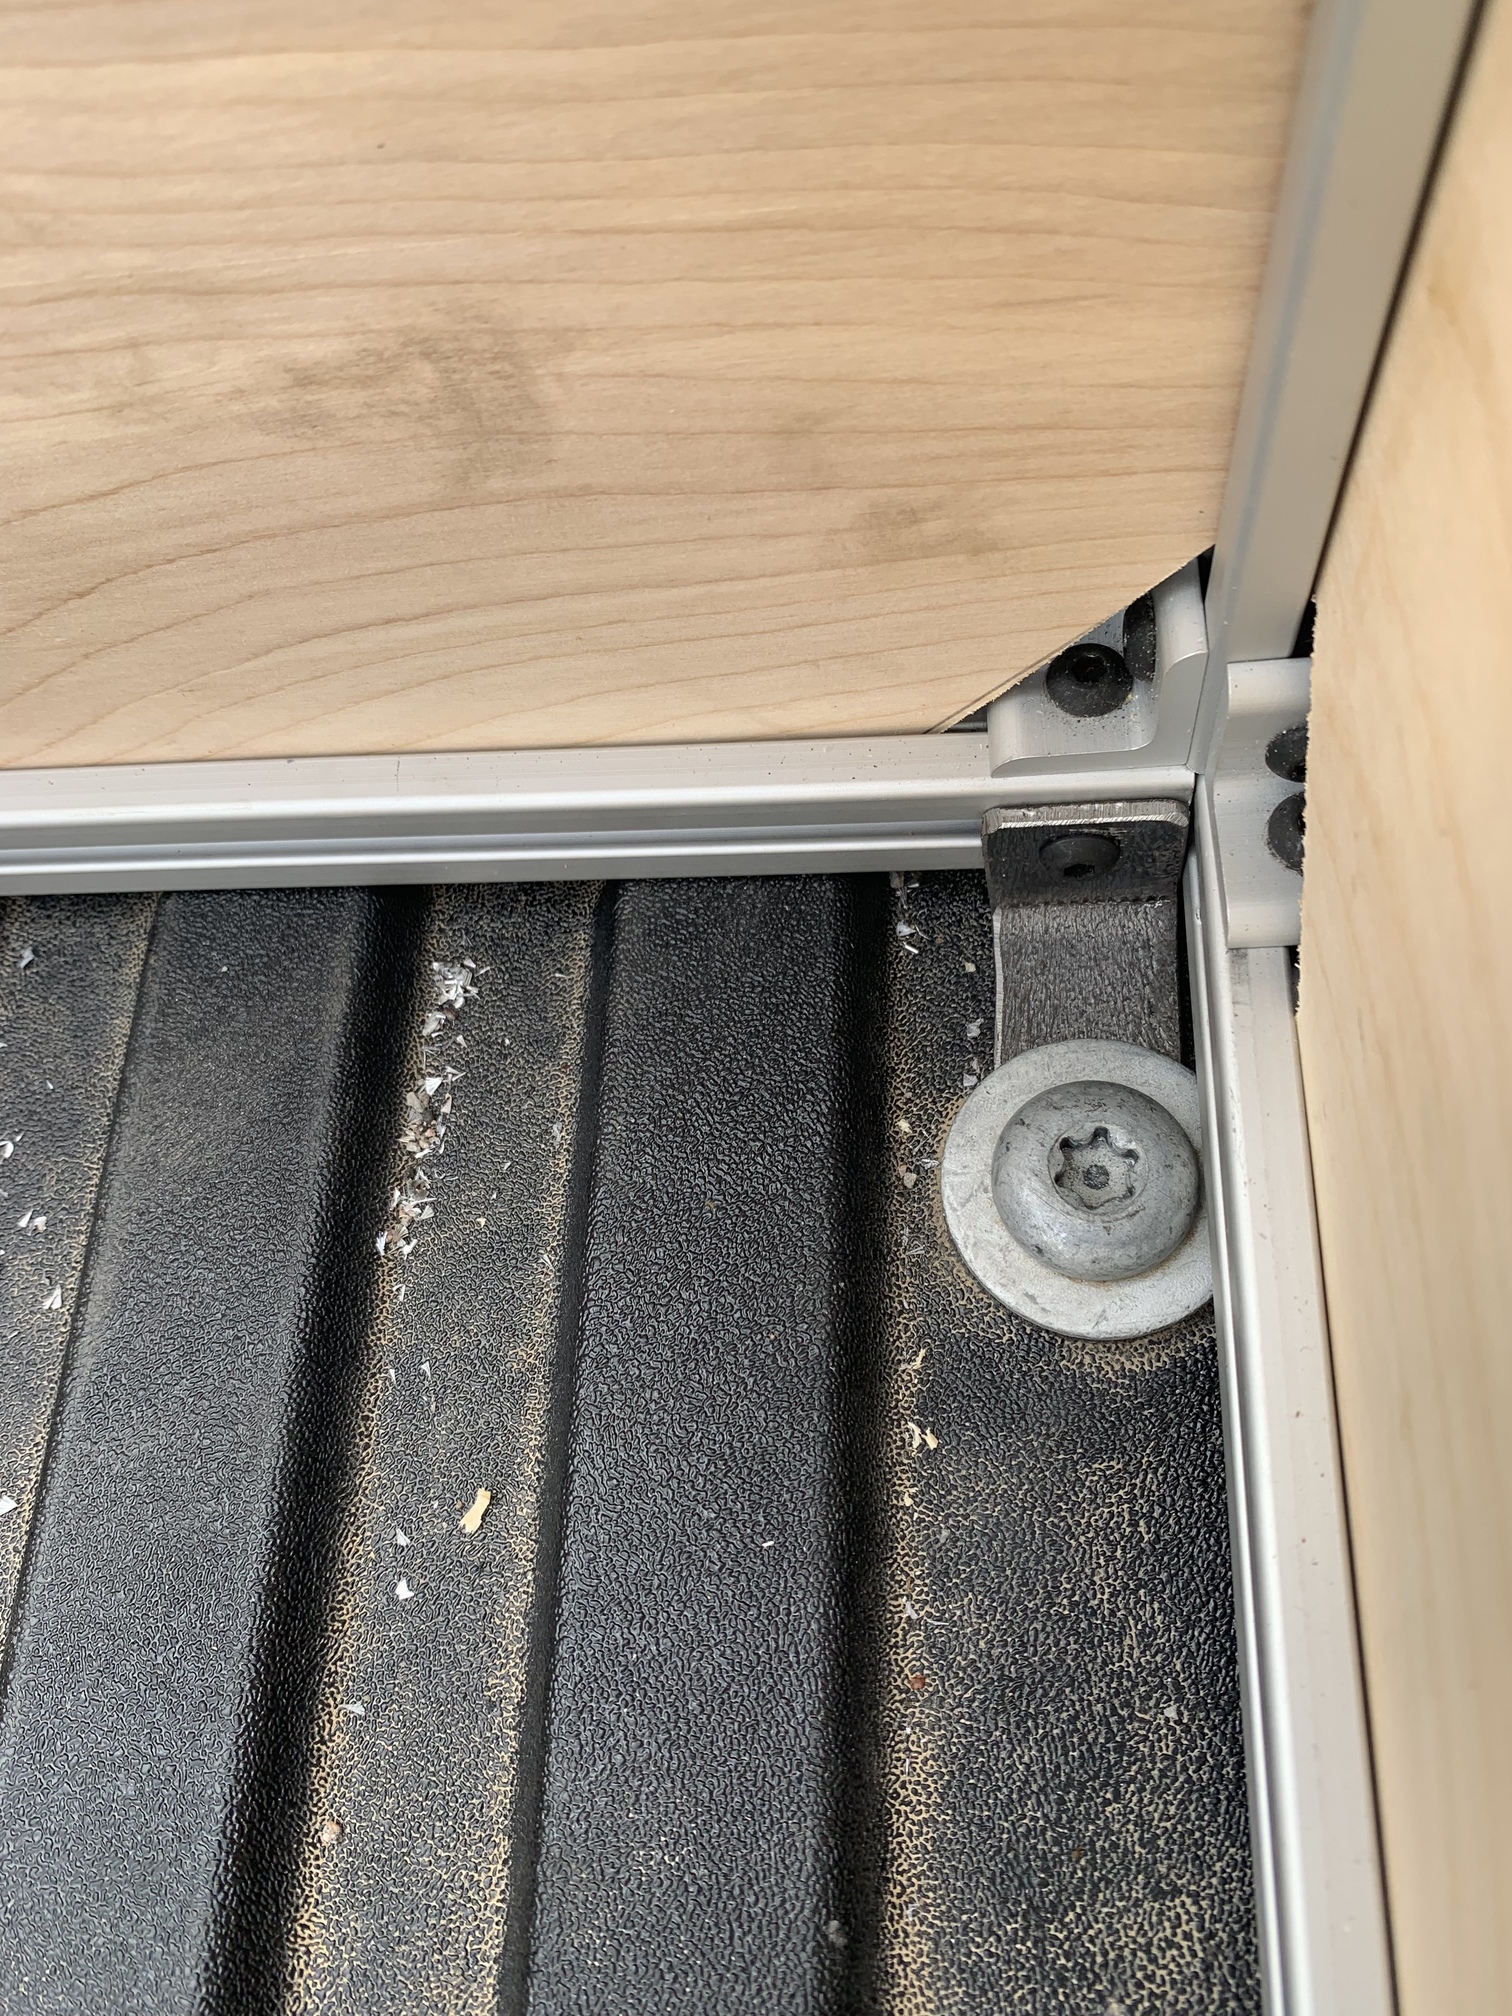
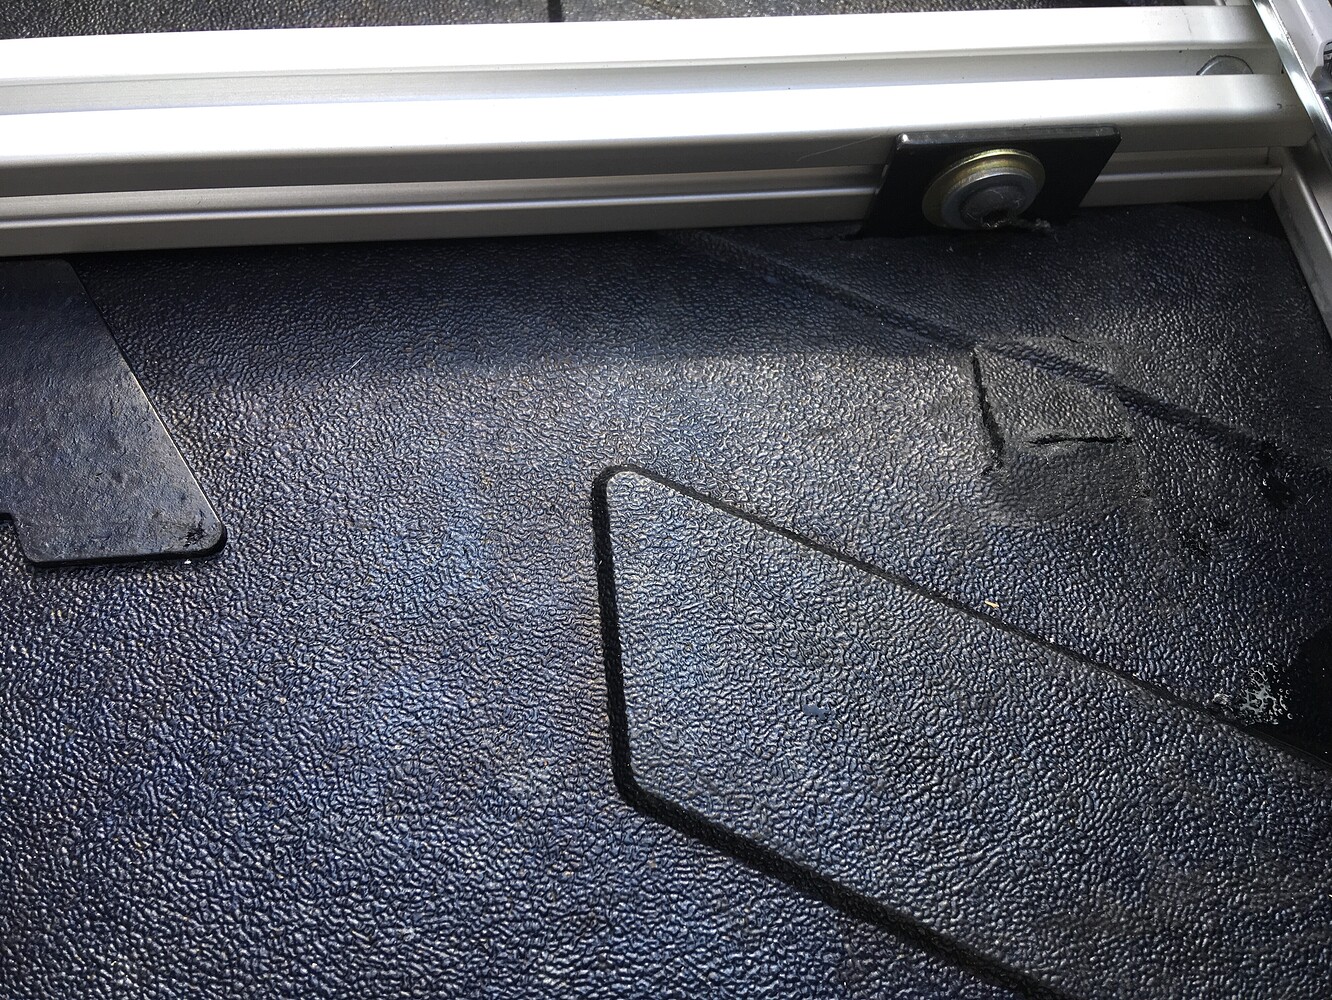
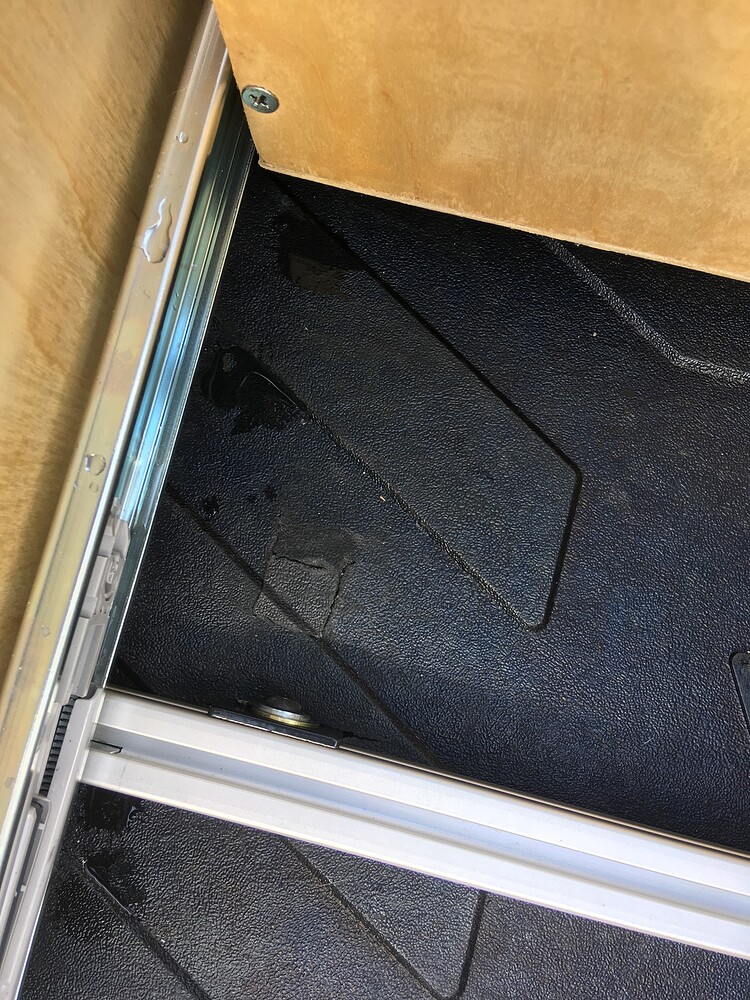
Mount middle bracket into truck bed using existing truck bed bolt first- cutting bed mat is very difficult, but at least a slit is required. Rear bracket can be mounted later.
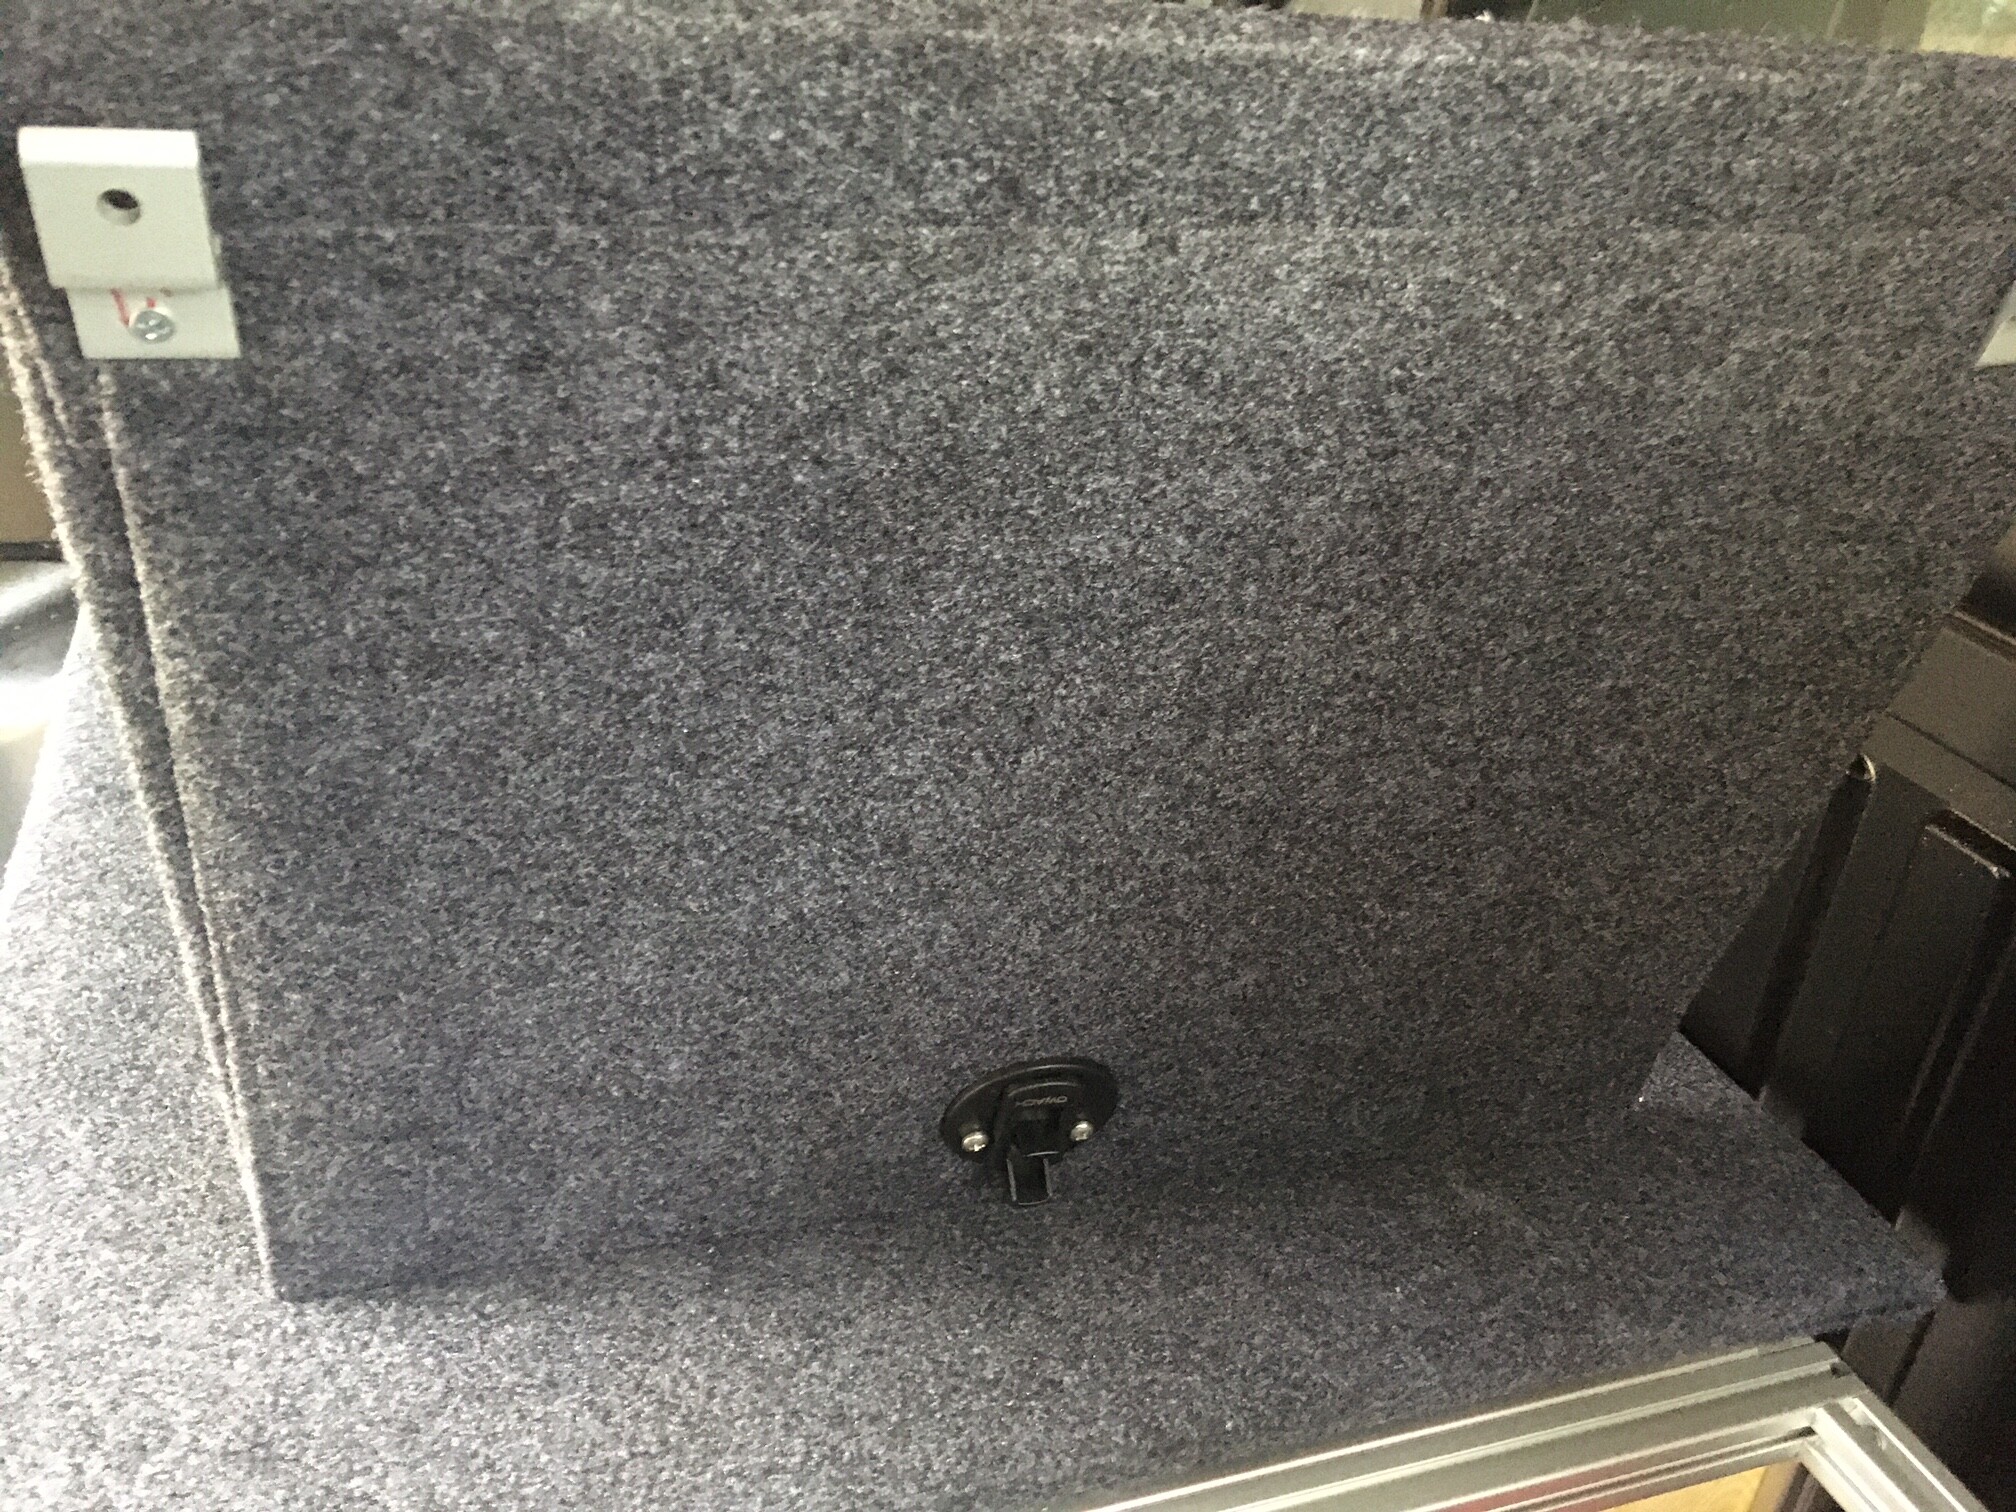
Lid clips (see pictures) are 80/20 retaining clips (6 x part no. 2496 for box lids and 2 x part no. 2497 for platform).
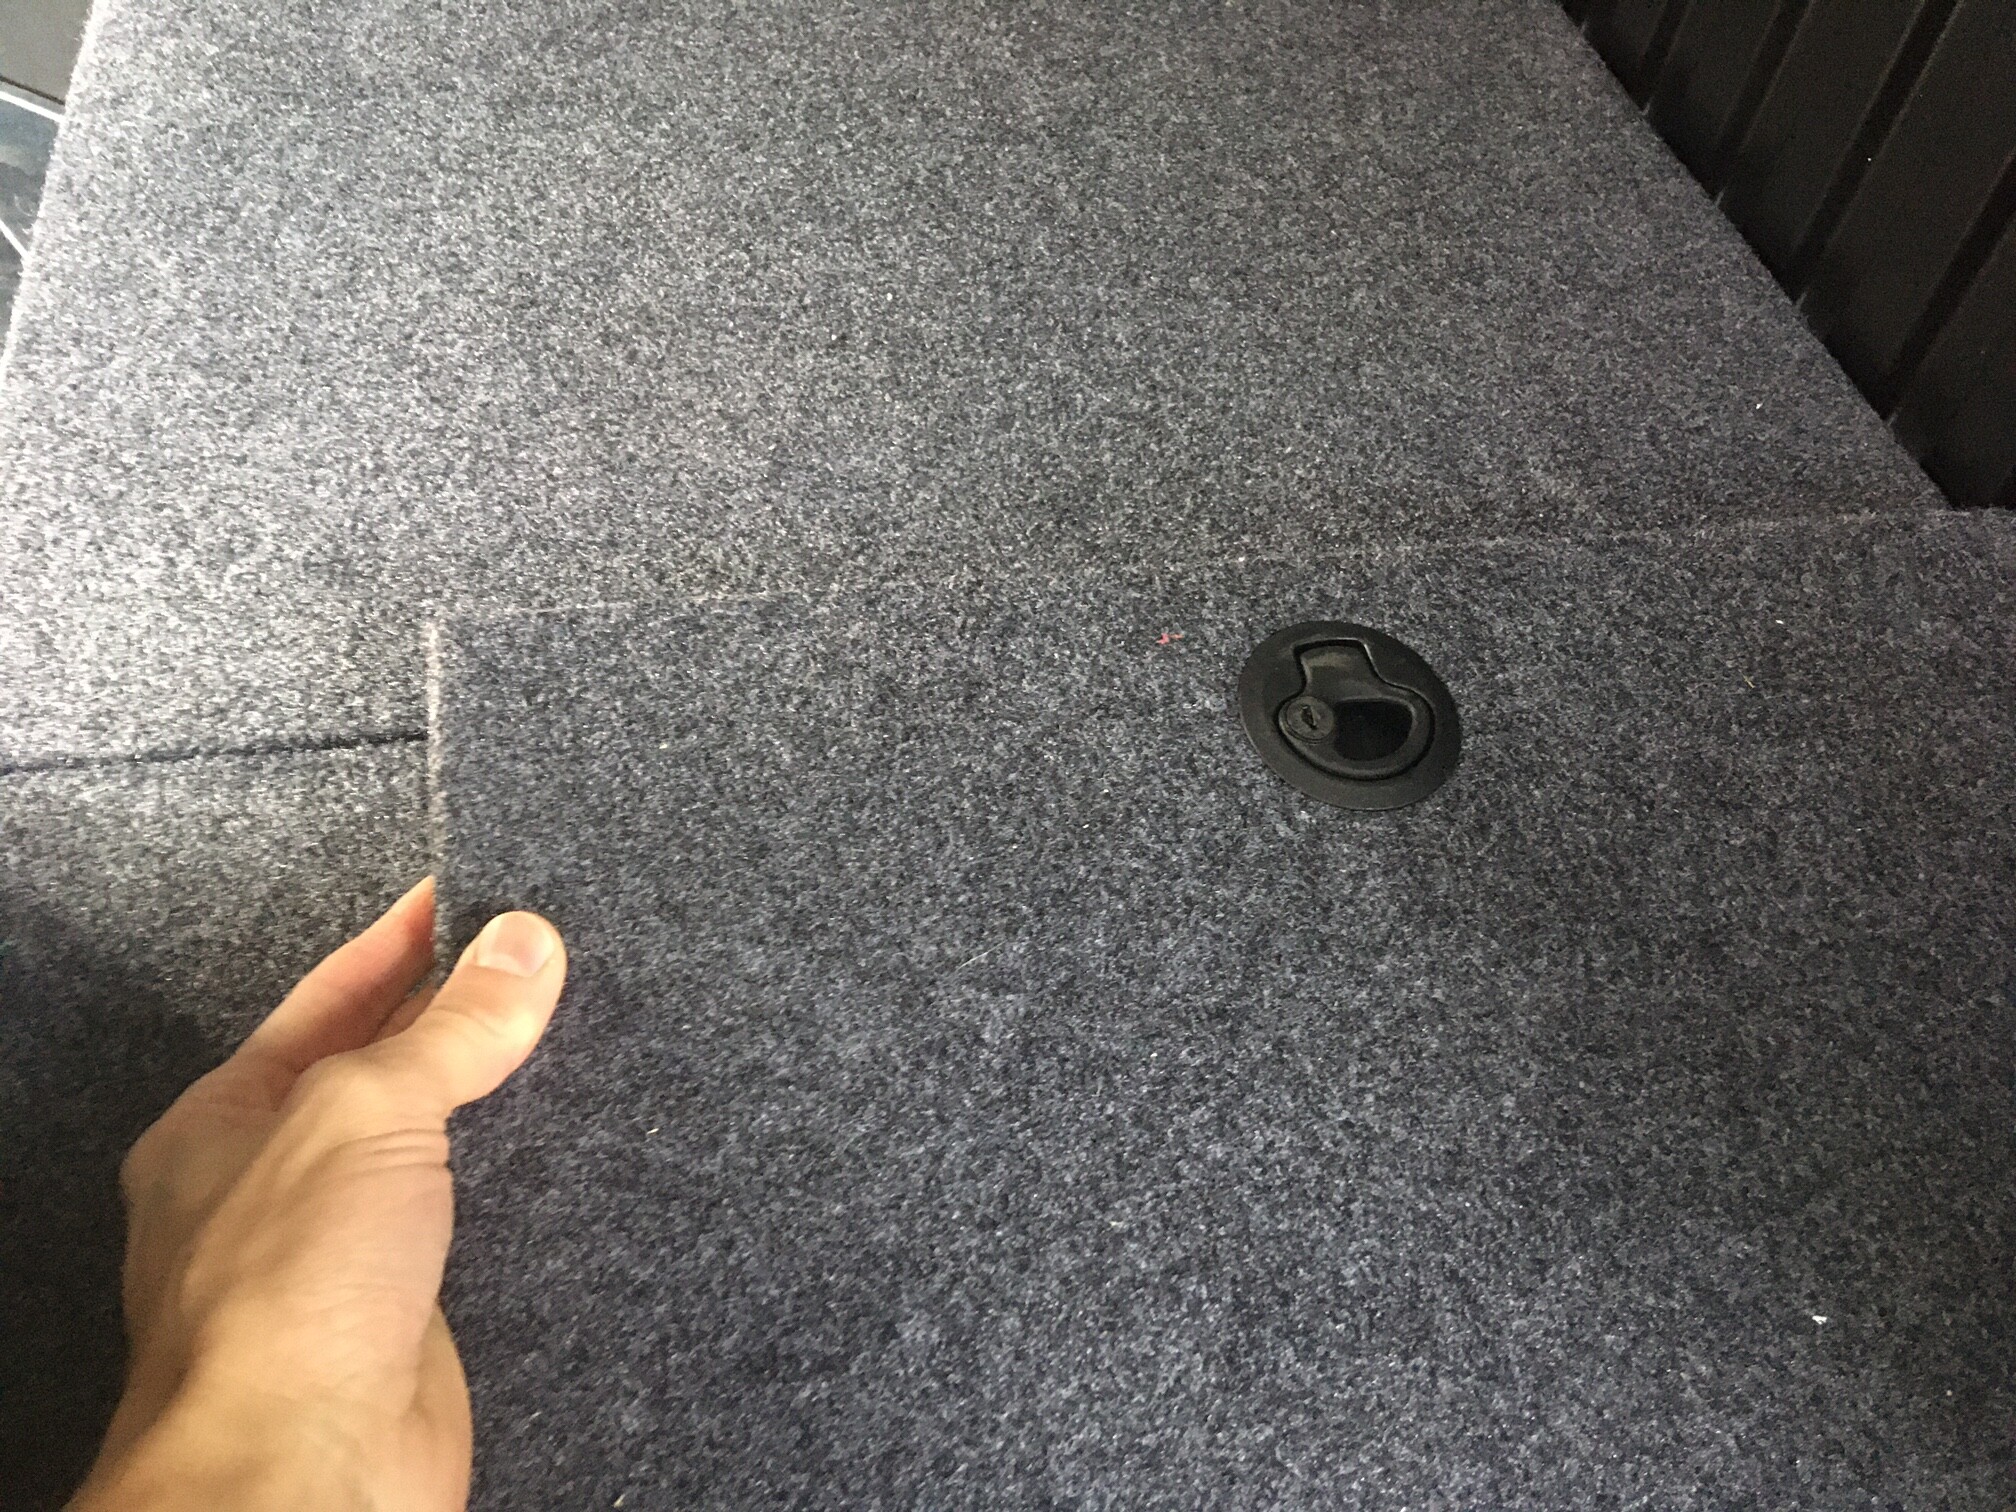
Slam latches should be positioned so spring latch locks into 80/20 slot.
Cut a slot in the outward side of the platform so it can pass freely by the existing tacoma bed tie when platform is lifted. (I did not do this yet in the pics)
Drawer slides bolt into 80/20 vertical supports with t-slot hardware.
Parts
80/20 order from Tnutz.com:
Everything is 10-series. The drawer box is easily strong enough to stand or sit on (intentionally so).
It is hard to show each part because they are customized in the Tnutz order with counterbores and hardware.
However, I generally use a single anchor counter bore (facing rear) for each connection with included hardware.
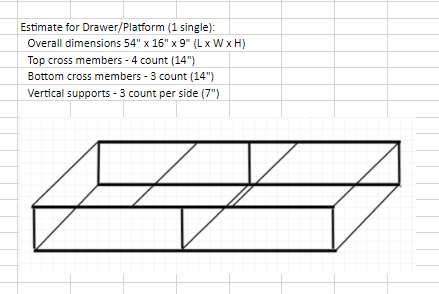
Drawer box: overall dimensions 54" x 16" x 9" (l x w x h)
There are 4 crossmembers on top and 3 on the bottom.
There are 3 vertical supports on either side.
Platform:
There are two verical supports connected to the drawer box with corner braces and one horizontal support.
hardware/lumber store:
4x4 sheet 1/4" or similar wood paneling
outdoor polyurethane varnish (pick your favorite)
4x8 (maybe 4x4 would do) 1/2" or 5/8" maple/birch plywood
Nice work. There are so many simple configurations once you start playing around with this stuff. The point mentioned is a good one: keep some channels “open” so you can pop off an end cap and slide in attachments, including hooks, loops, or even other extrusions to expand the project. In my design I tried to keep the main lengthwise extrusions “open” to be able to add anchor points (and the platform) later on. But also, there are “slide-in” t-nuts available for captive channels if needed. They’re just not as strong.
I don’t have my Gen3 Tacoma yet or GFC, both due in April/May. I am trying to recreate your design cause it looks very simple, yet purposeful. Platform to sit on, drawer for either gear or cooking stuff, etc. I have a few questions since this would be my first attempt.
The length of 54 makes sense given a 5ft bed. Width as well given not wanting to take up the entire bed. Was there a logic for the 9 in height or just about the average knee bend?
Are you saying you just anchored it into the existed bed mounts?
If I follow correctly, below would be my measurements to request from Tnutz. I am debating about just ordering these to not have to learn about counterbore, etc. I am sure I would have to notch out a little. Basically assembling the frame via those with t-track nuts and bolts.
I guess I would build the frame with wood first and then figure out how to build a drawer. Did you have 1/4in wood paneling in the bottom? If so, did you attach the drawer slides on the vertical cross supports?
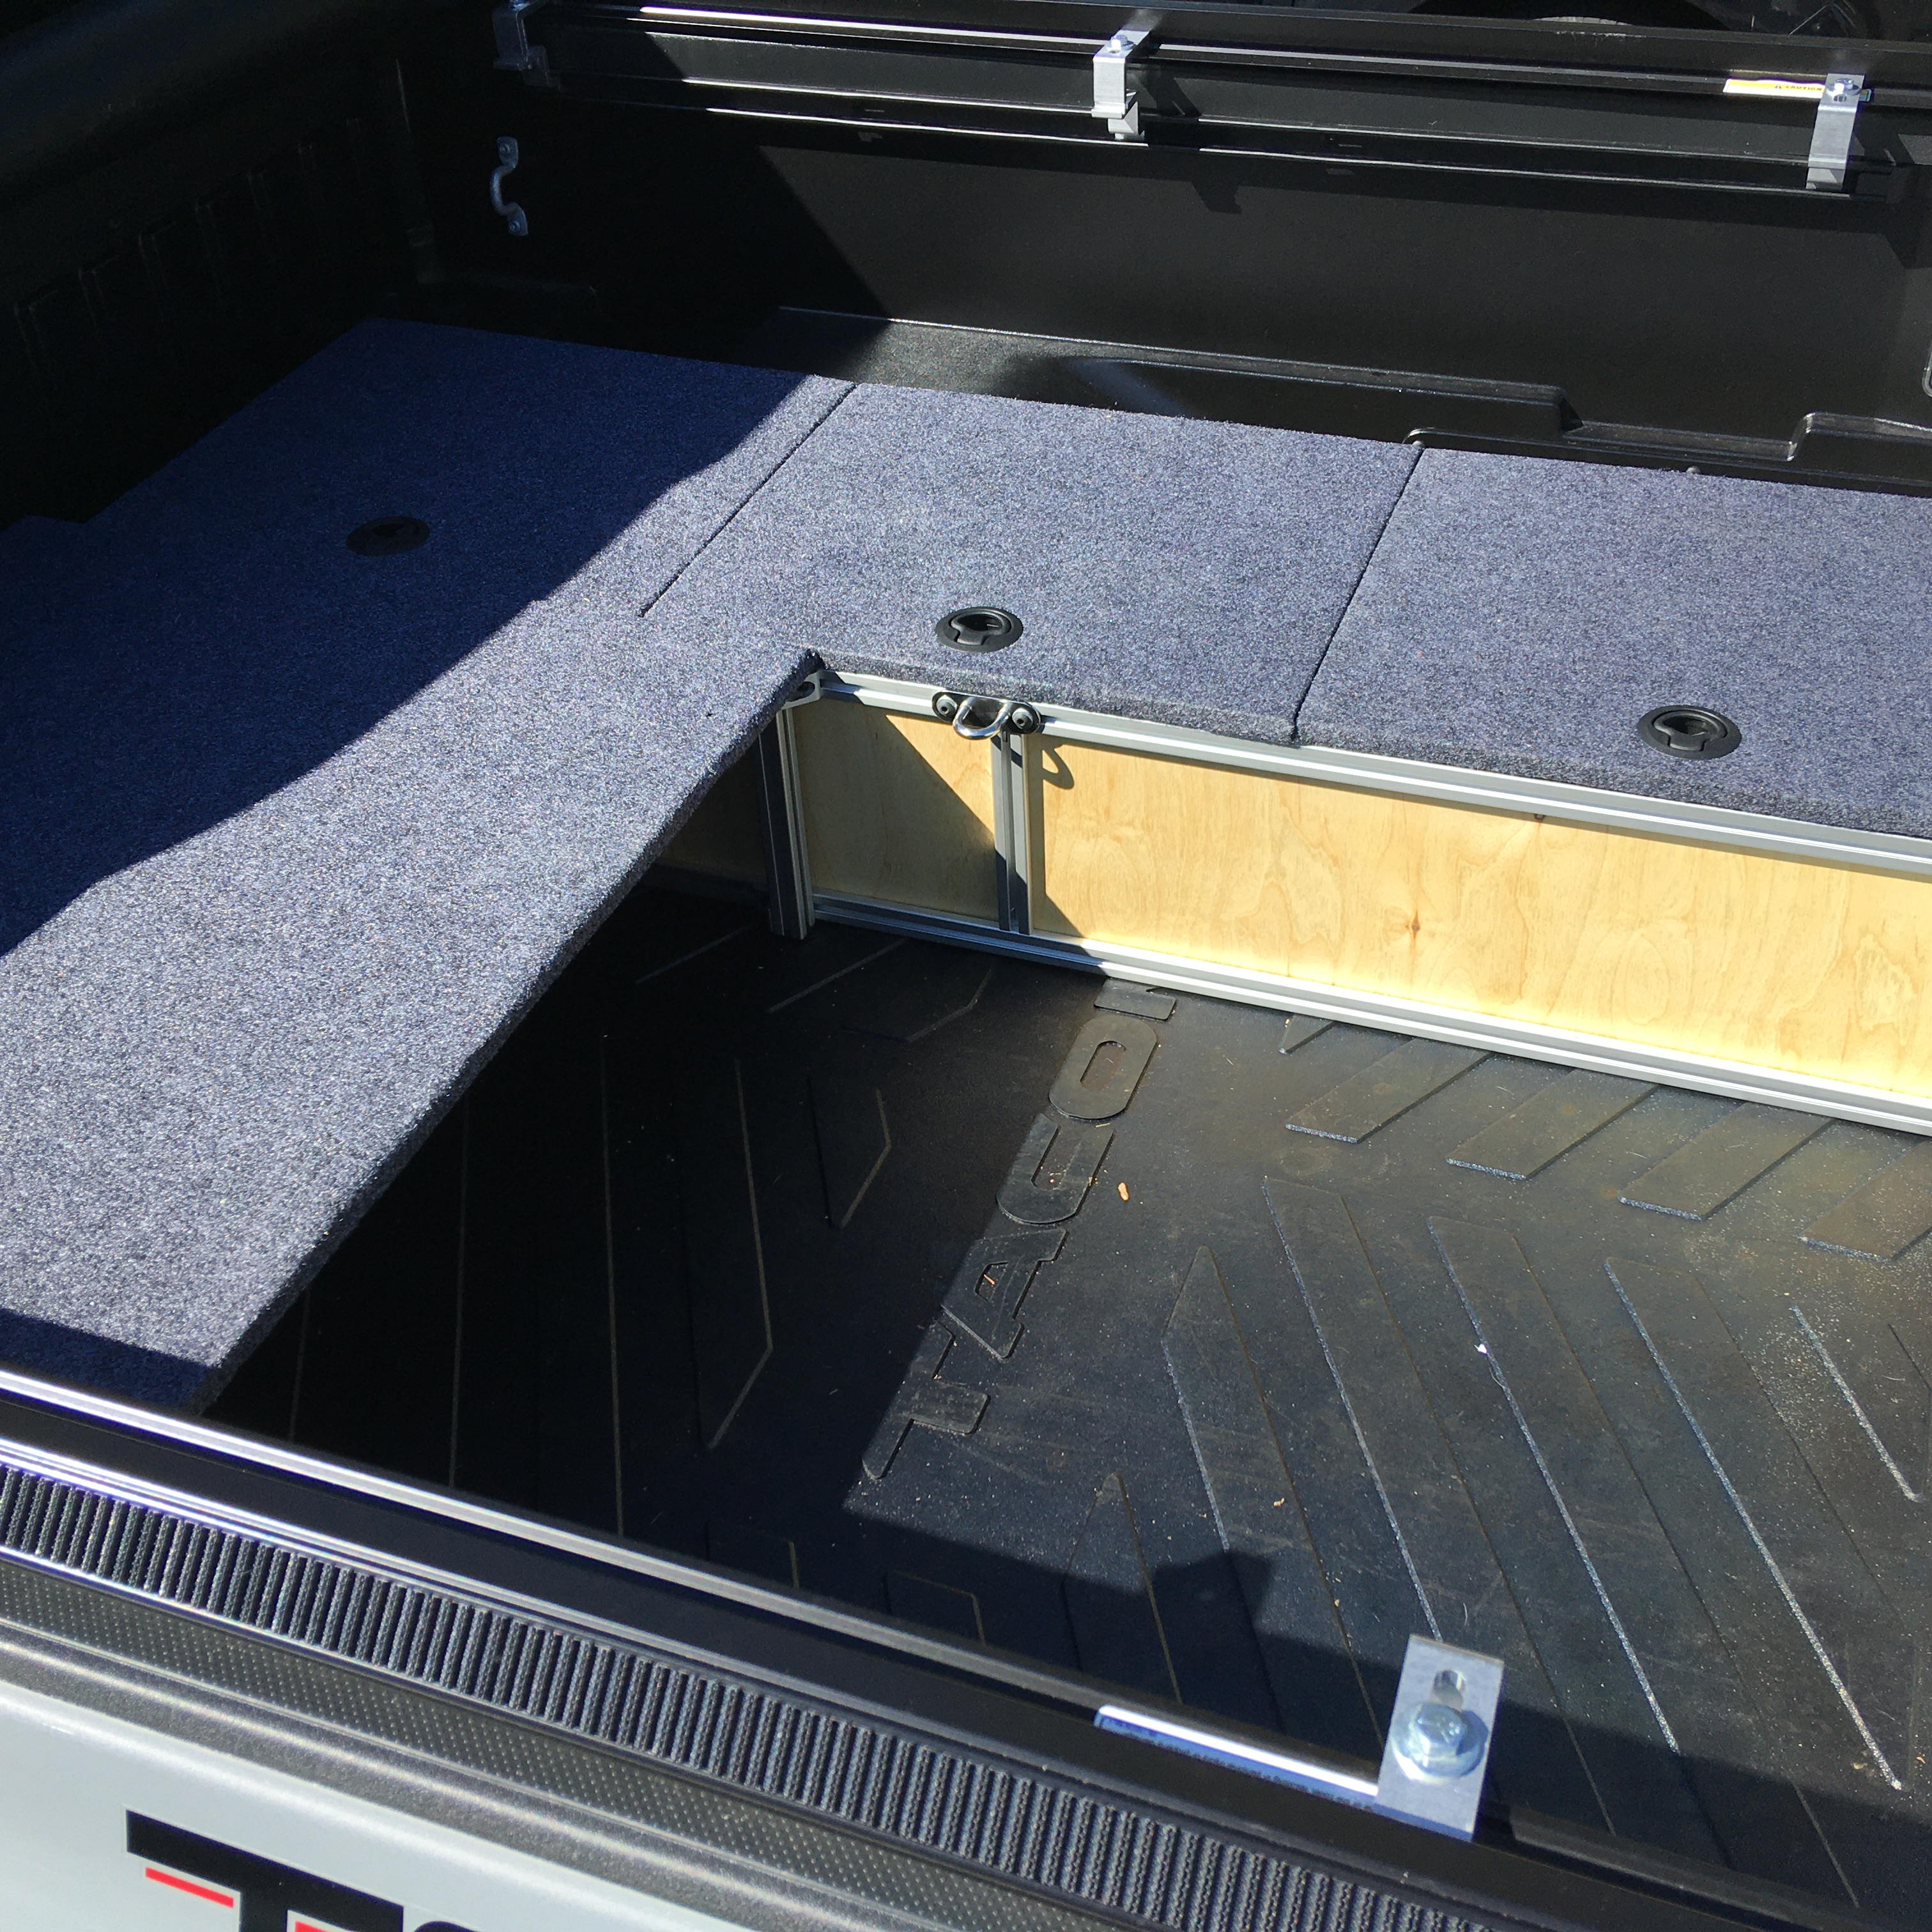
Yes, it’s been the perfect amount of useful space for me- I also like that it leaves a gap on the passenger side to access the Tacoma truck bed inverter. It’s a good place to throw things and mount a fire extinguisher.
To quickly answer your questions,
The 54" length was chosen to leave an approx 1-2" gap in front for wires or to slide large flat items (pads, fold-up shower tent, or other). I actually left the front panel out because I saw no purpose for it. The space in rear near the tailgate is because I have bed stiffeners (Rago, see picture). The 9" height was chosen because it’s the height of the wheel wells (with bed mat). This allows me to lay the 5/8" carpeted plywood kid tent/dog bed platform across onto the wheel well (see pics).
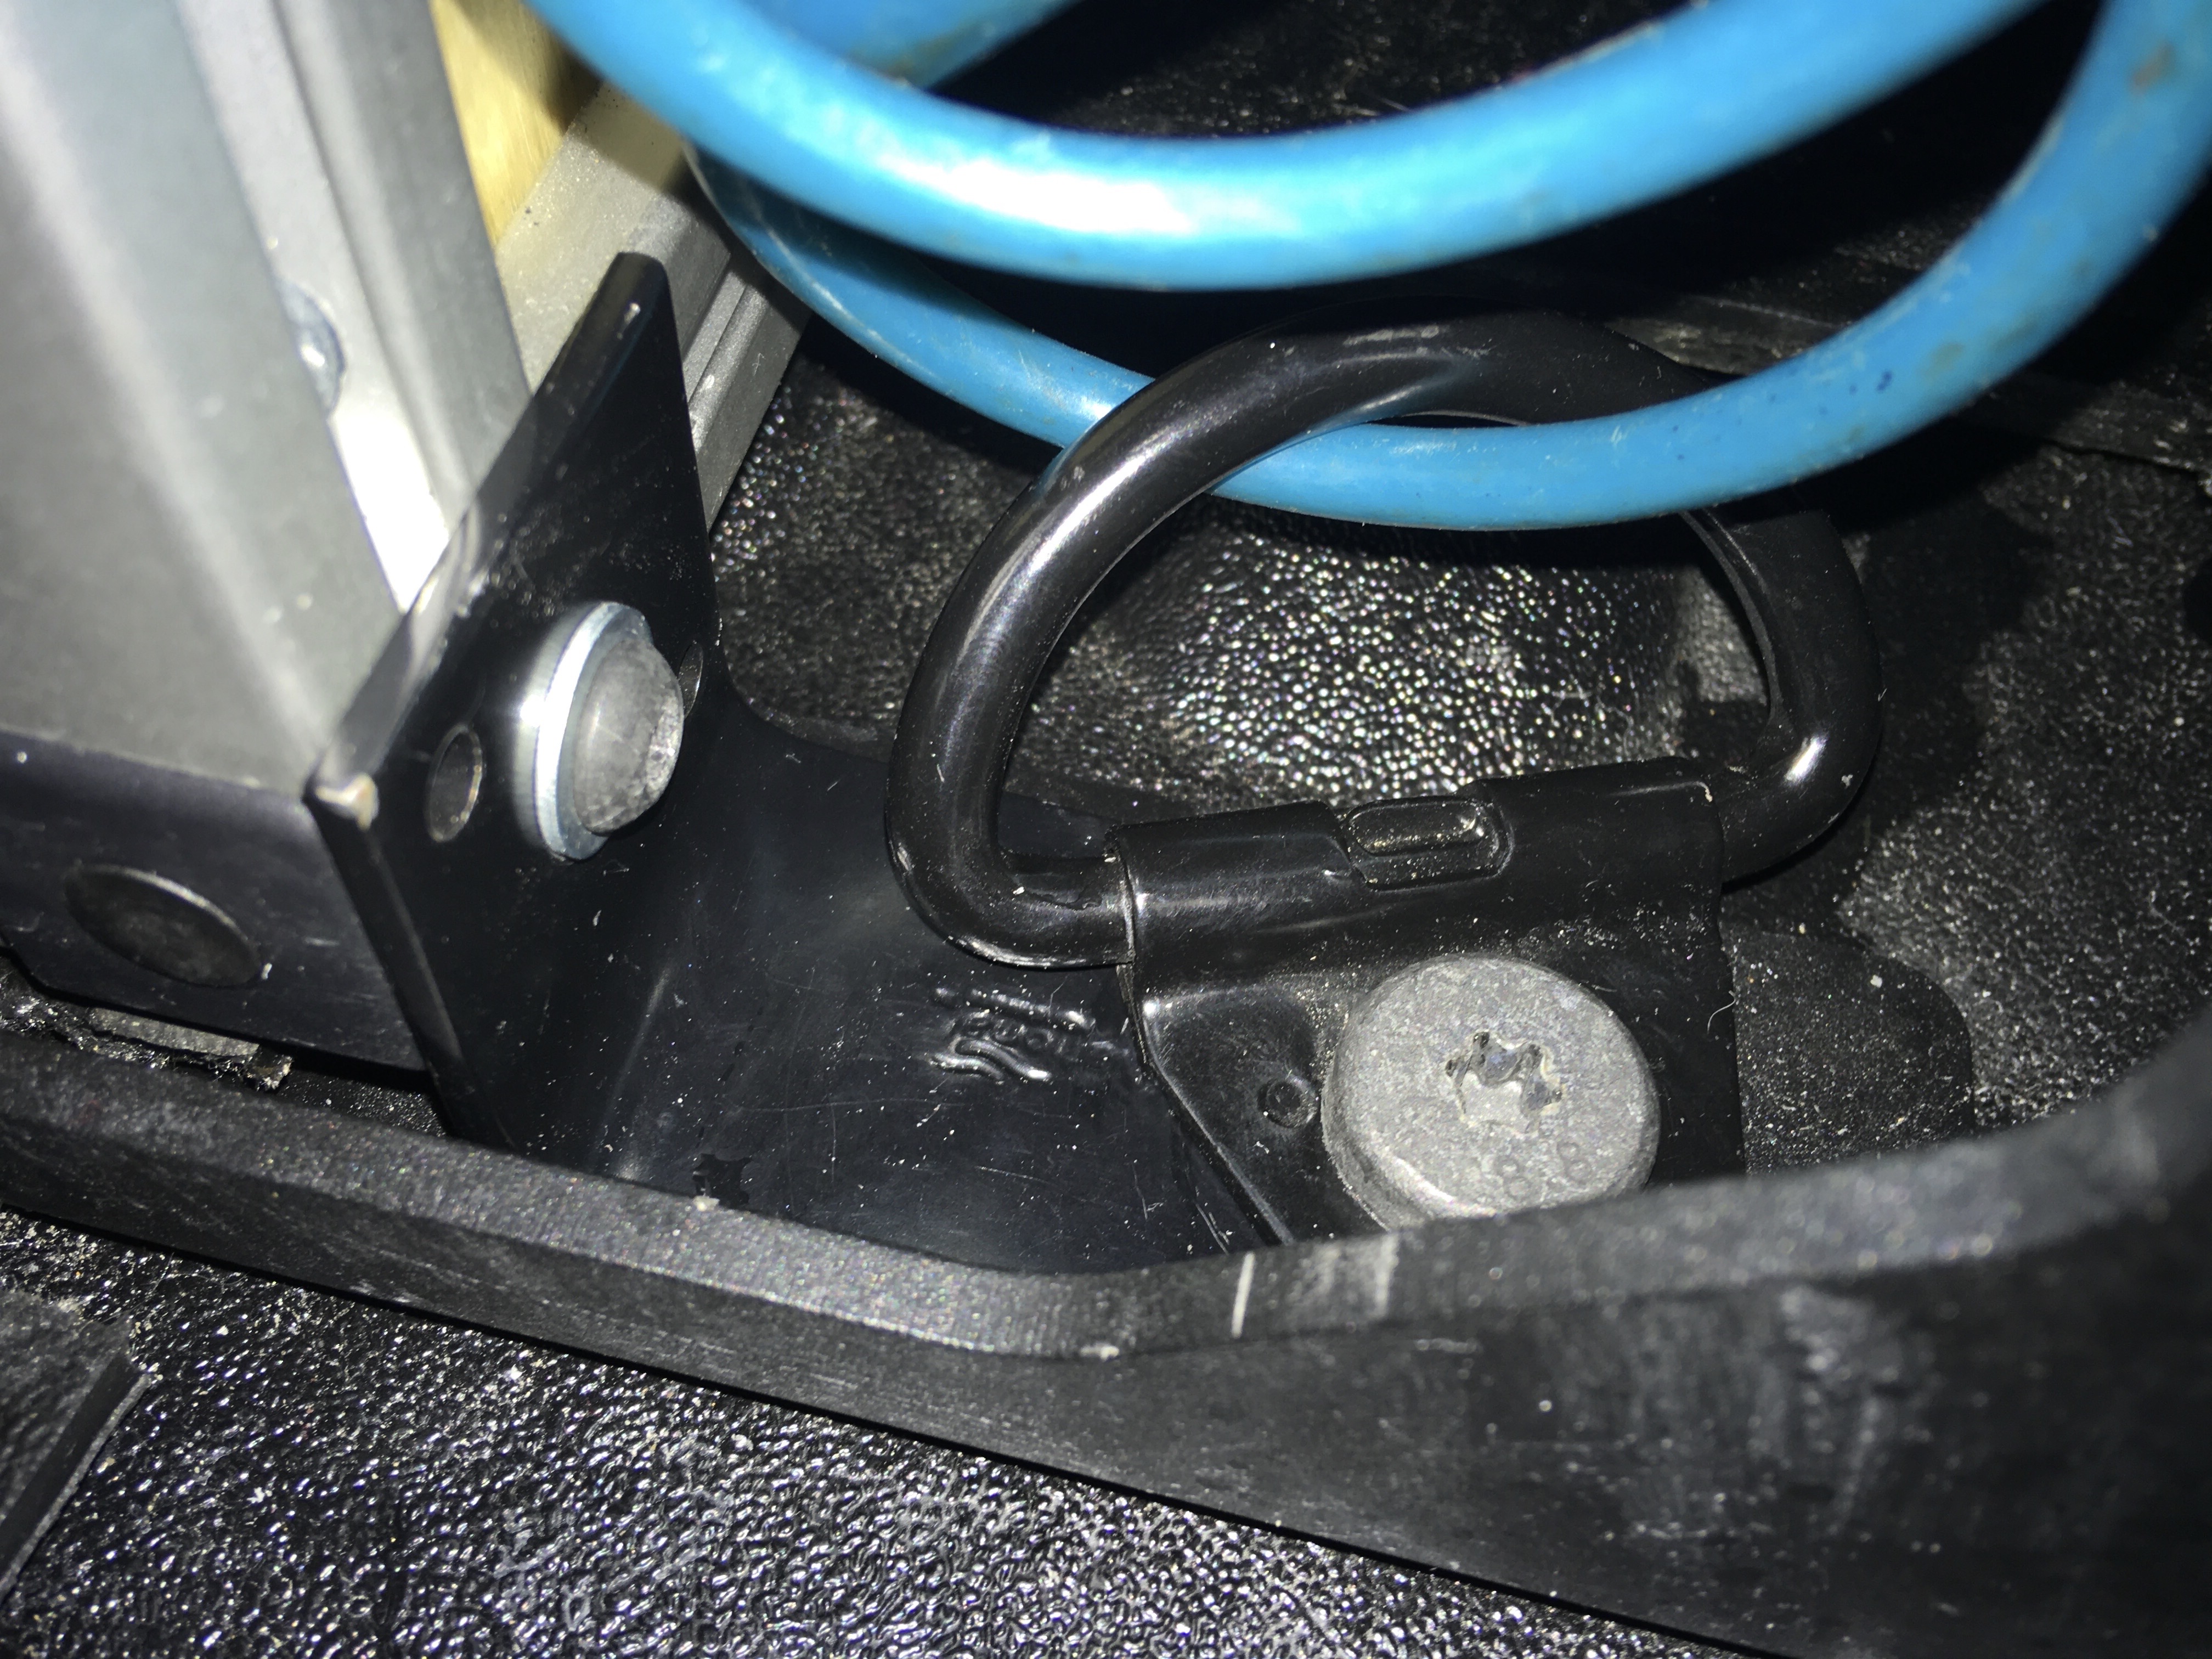
Yes, it is anchored into the middle Tacoma bed mount (see pic) and rear-most mount (added new picture below, ignore my blue lock cable for the cooler). I linked the L bracket I used for the middle mount from Build.com and I used a similar, but longer one, in the rear.
Corners work great too, just a little more effort getting the paneling to fit into the exoskeleton drawer box. I found that notching the 1/4" paneling works best by carefully, firmly, pressing with a utility knife on the flat side (not edge) rather than a saw. As for using corners with T-nuts or anchors with counter bores, there are no concerns for strength here… this will be over-built no matter how you do it! Your measurements look good. I purchased smooth faced bars for the front but the 4-slotted extrusions would work just fine for everything.
Yes, start with assembling the frame, and tighten everything only a little. THEN figure out how to cut your wood paneling and assemble the drawer. The drawer has 1/4" wood paneling in the bottom (stapled into the bottoms of the side and rear drawer walls and small L-brackets on the front face). The drawer slides themselves are mounted with the smaller T-slot hardware into the middle and rear vertical supports.
Good luck and always happy to answer questions. If you need any specific pictures, just ask!
Also, one more note. I used to purchase long sections of 80/20 extrusions and cut on a chop saw with a non-ferrous blade. Shipping has gotten more expensive for extra long items, but it worked great… though quite a mess and nobody likes finding sharp flecks of aluminum in their feet because sweeping didn’t go as thoroughly as planned A little extra drawing and planning and then having someone else do the cuts was well worth the very small extra cost!
Thanks @Taq! I just ordered extrusions from Tnutz along with a bunch of corner brackets and hardware. Hoping to recreate your idea!
I still need to figure out how to build a drawer, mount sides, order latches, etc but I figured starting with the frame was a good starting point. A few follow-up questions:
6 x part no. 2496: Not on Tnutz, only 8020 so I still need to order. Did you just screw this in to the tops?
When you say you used the smaller Tnuts for the drawer slides did you also order these from there? I didn’t order them yet since I do not have slides in hand to visual size/thickness.
Yes, for the 2496 pieces, I installed these once I had the outer box frame completed. I positioned each lid on top where I wanted them, then reached in and aligned the 2496 pieces underneath one at a time so they’d be in the correct spots, snugging up a little into the extrusion slot. I marked the holes with a white colored pencil on the carpet. Then, yes, screw short wood screws into the underside of the lids to attach the 2496 pieces. I made a couple mistakes with my original positions, but the carpet covered that up and I’ve forgotten about it until just now!
Be aware though, if the lids are pulled all the way open like they were on normal hinges, the screws attaching the 2496 pieces would probably eventually be ripped out. It’s better to pop open a few inches and then pull the lid off.
For the smaller tnuts to mount drawer slides into vertical extrusions:
You may have to drill out some of the holes slightly in the drawer slides for the 10-32 screws, but maybe not depending on what you purchase.
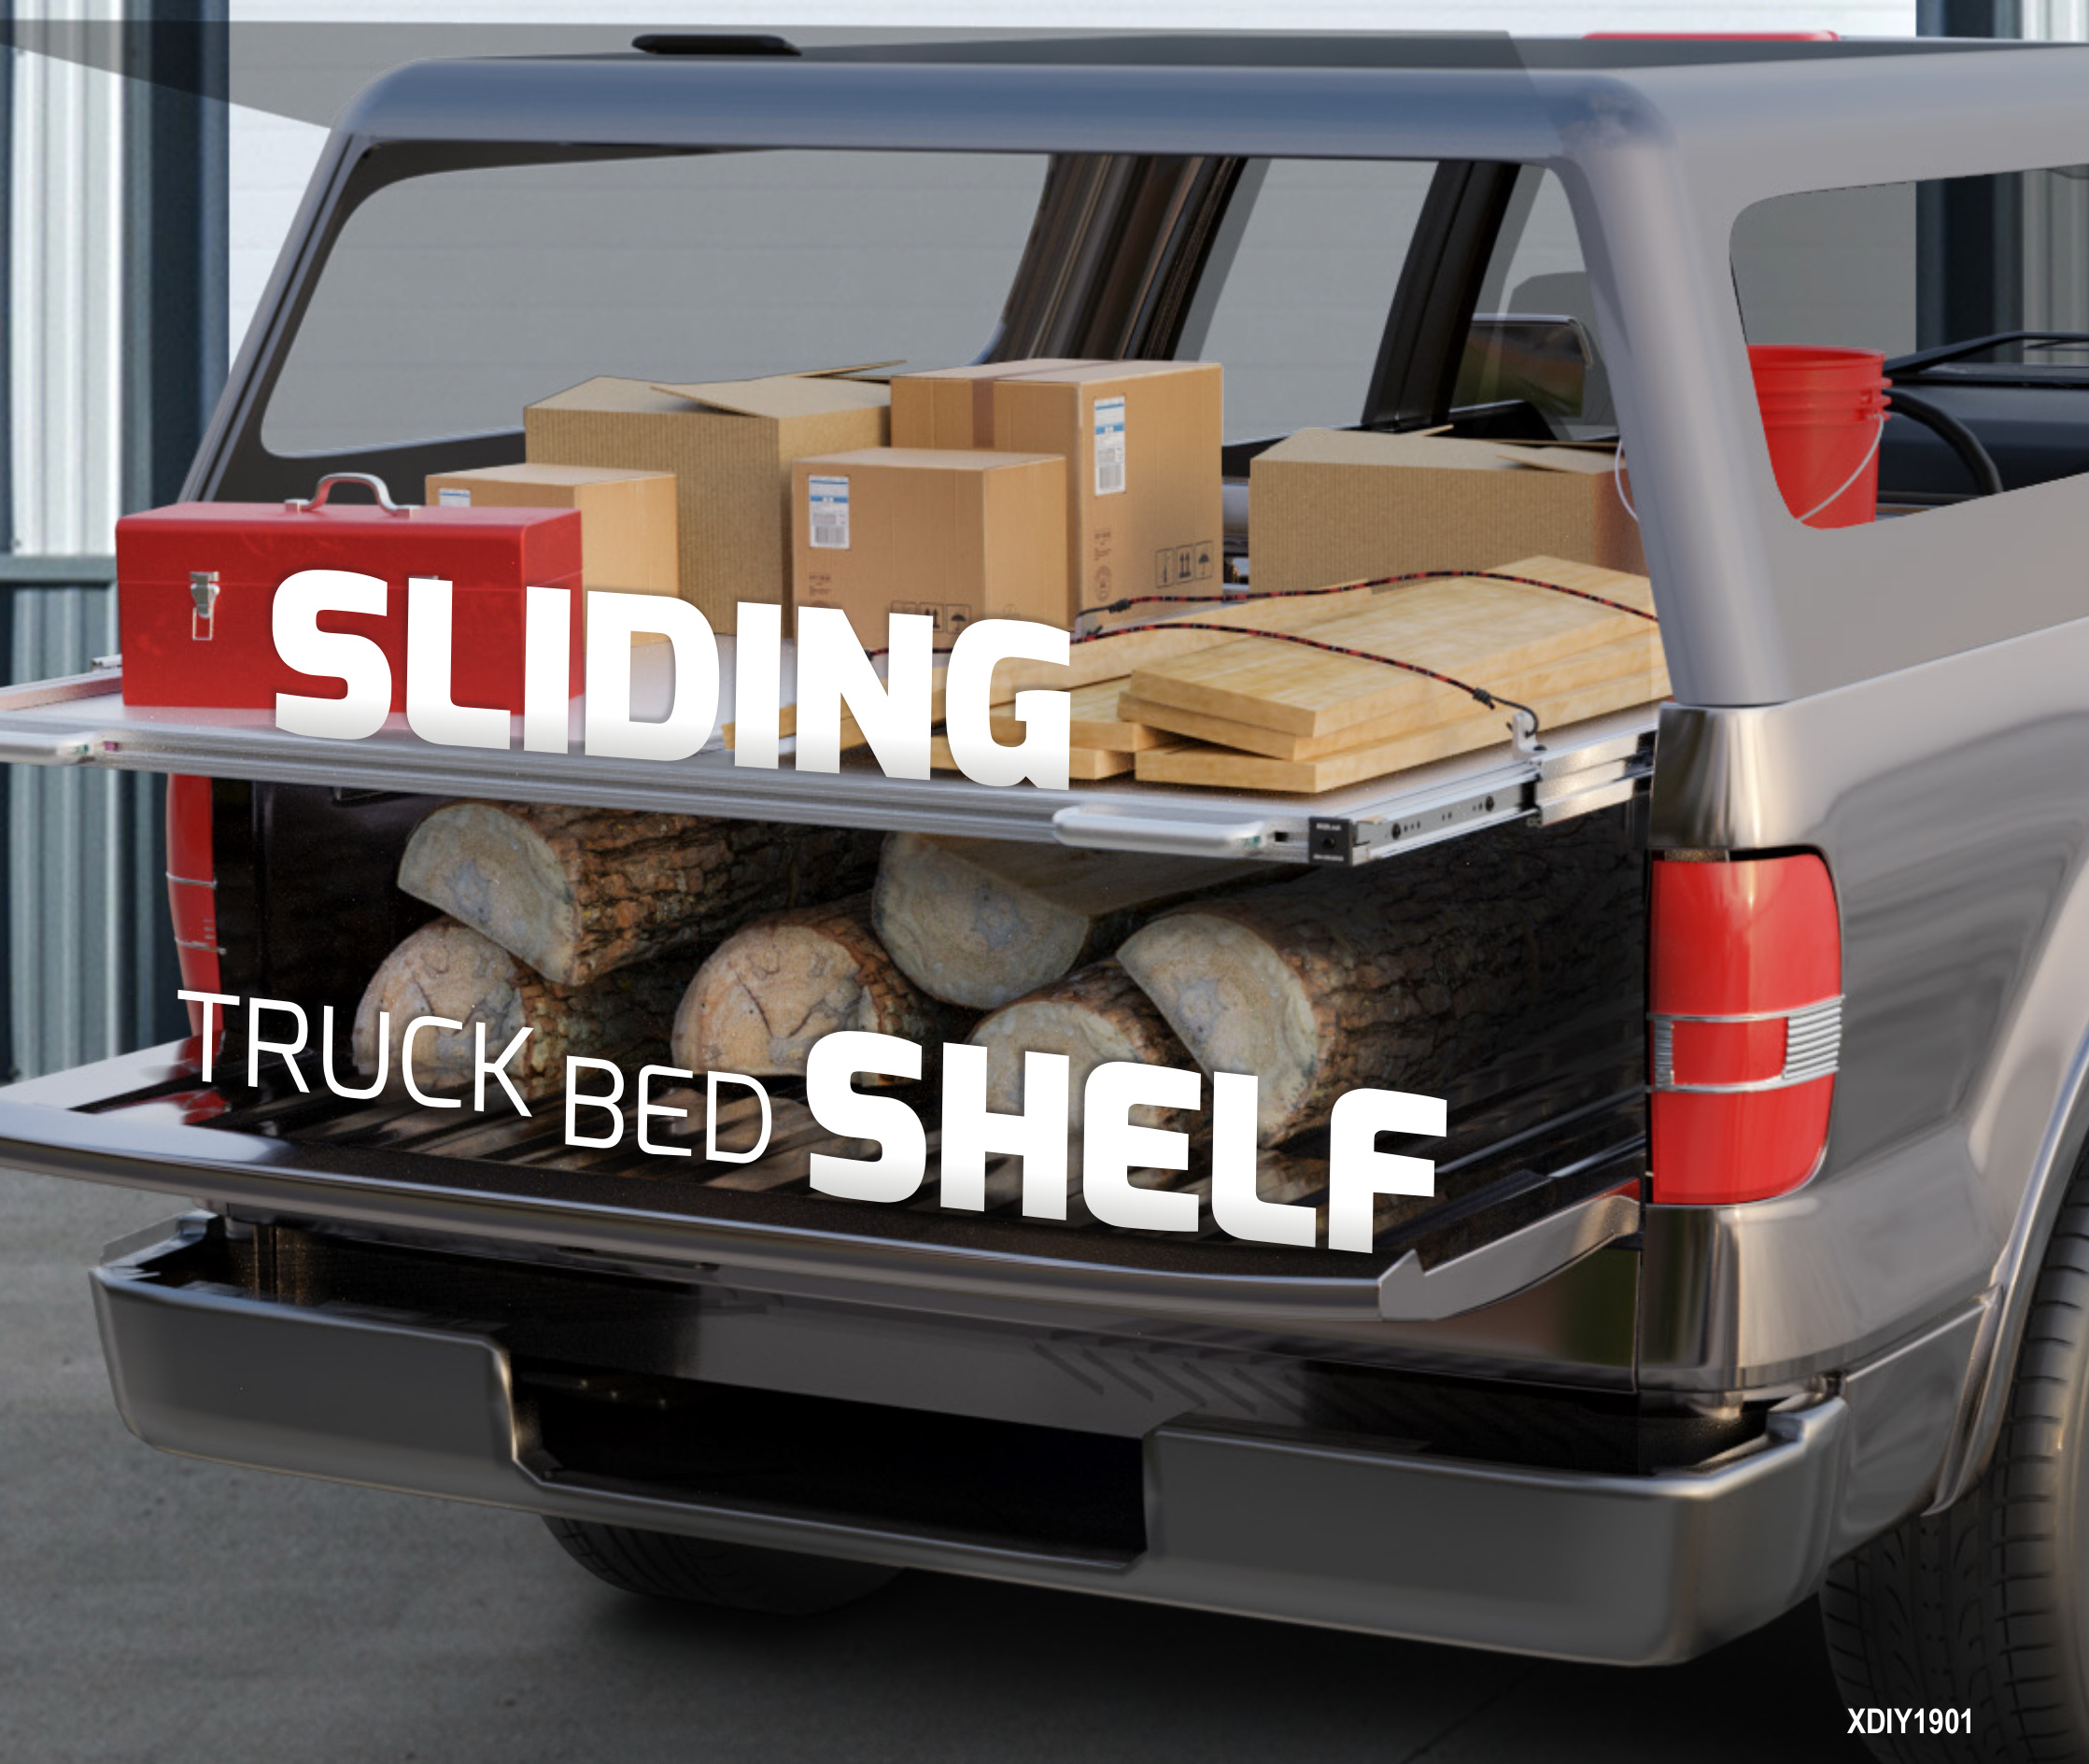
Extruded aluminum may not be the cheapest stuff to build with, but it’s really nice how re-usable it is. Tore apart my old drawer unit and made a bed slide instead. Still in process (building sides and finishing the bed mounting brackets), but pleased so far.


 A little extra drawing and planning and then having someone else do the cuts was well worth the very small extra cost!