Julian's 2021 TRD Pro Build

They are pricey, the reason I made my own…

1 Like

Build Update 03/13/24 — A few small details


:signal_strength: LTE system monitoring

I introduced a Victron GlobalLink 520 to remotely monitor vitals when the vehicle is left behind (as long as its parked within range of a LTE cell tower). Pretty nifty little unit, the device includes a 5 year LTE plan at no additional cost.

The only data I have available on the VRM right now is voltage (via the unit itself) and cabin temperature (via a RuuviTag in the cab).

The unit’s internal antenna struggled to pick up a strong signal from the cubby so I ran a wire to an external antenna puck in the rear bumper—which dramatically boosted signal strength while keeping everything clean and tucked away.

That’s all on this front for now, way more to follow here over the coming weeks.


:nut_and_bolt: JE Designs Tent Pull

Bolted in @jedgar GFC Tent Pulls. I have yet to mount the @AERONAUT straps but have them in the cab.

1 Like

@shadesbro @Medicfung @Trudog I’m quite happy with the Goose Gear baseplate. This is the one piece where I felt the need to pay for a machined solution for a perfect fit (and I appreciate the plate’s water resistance). Everything else on top of it we’ll treat and cut by hand.

3 Likes

Solid work! Was just wondering about doing the same thing on the cubby, missing the one I had on my 2nd Gen!

1 Like

I ordered a Viato equipment bed setup, I’ll have a separate post up soon.

1 Like

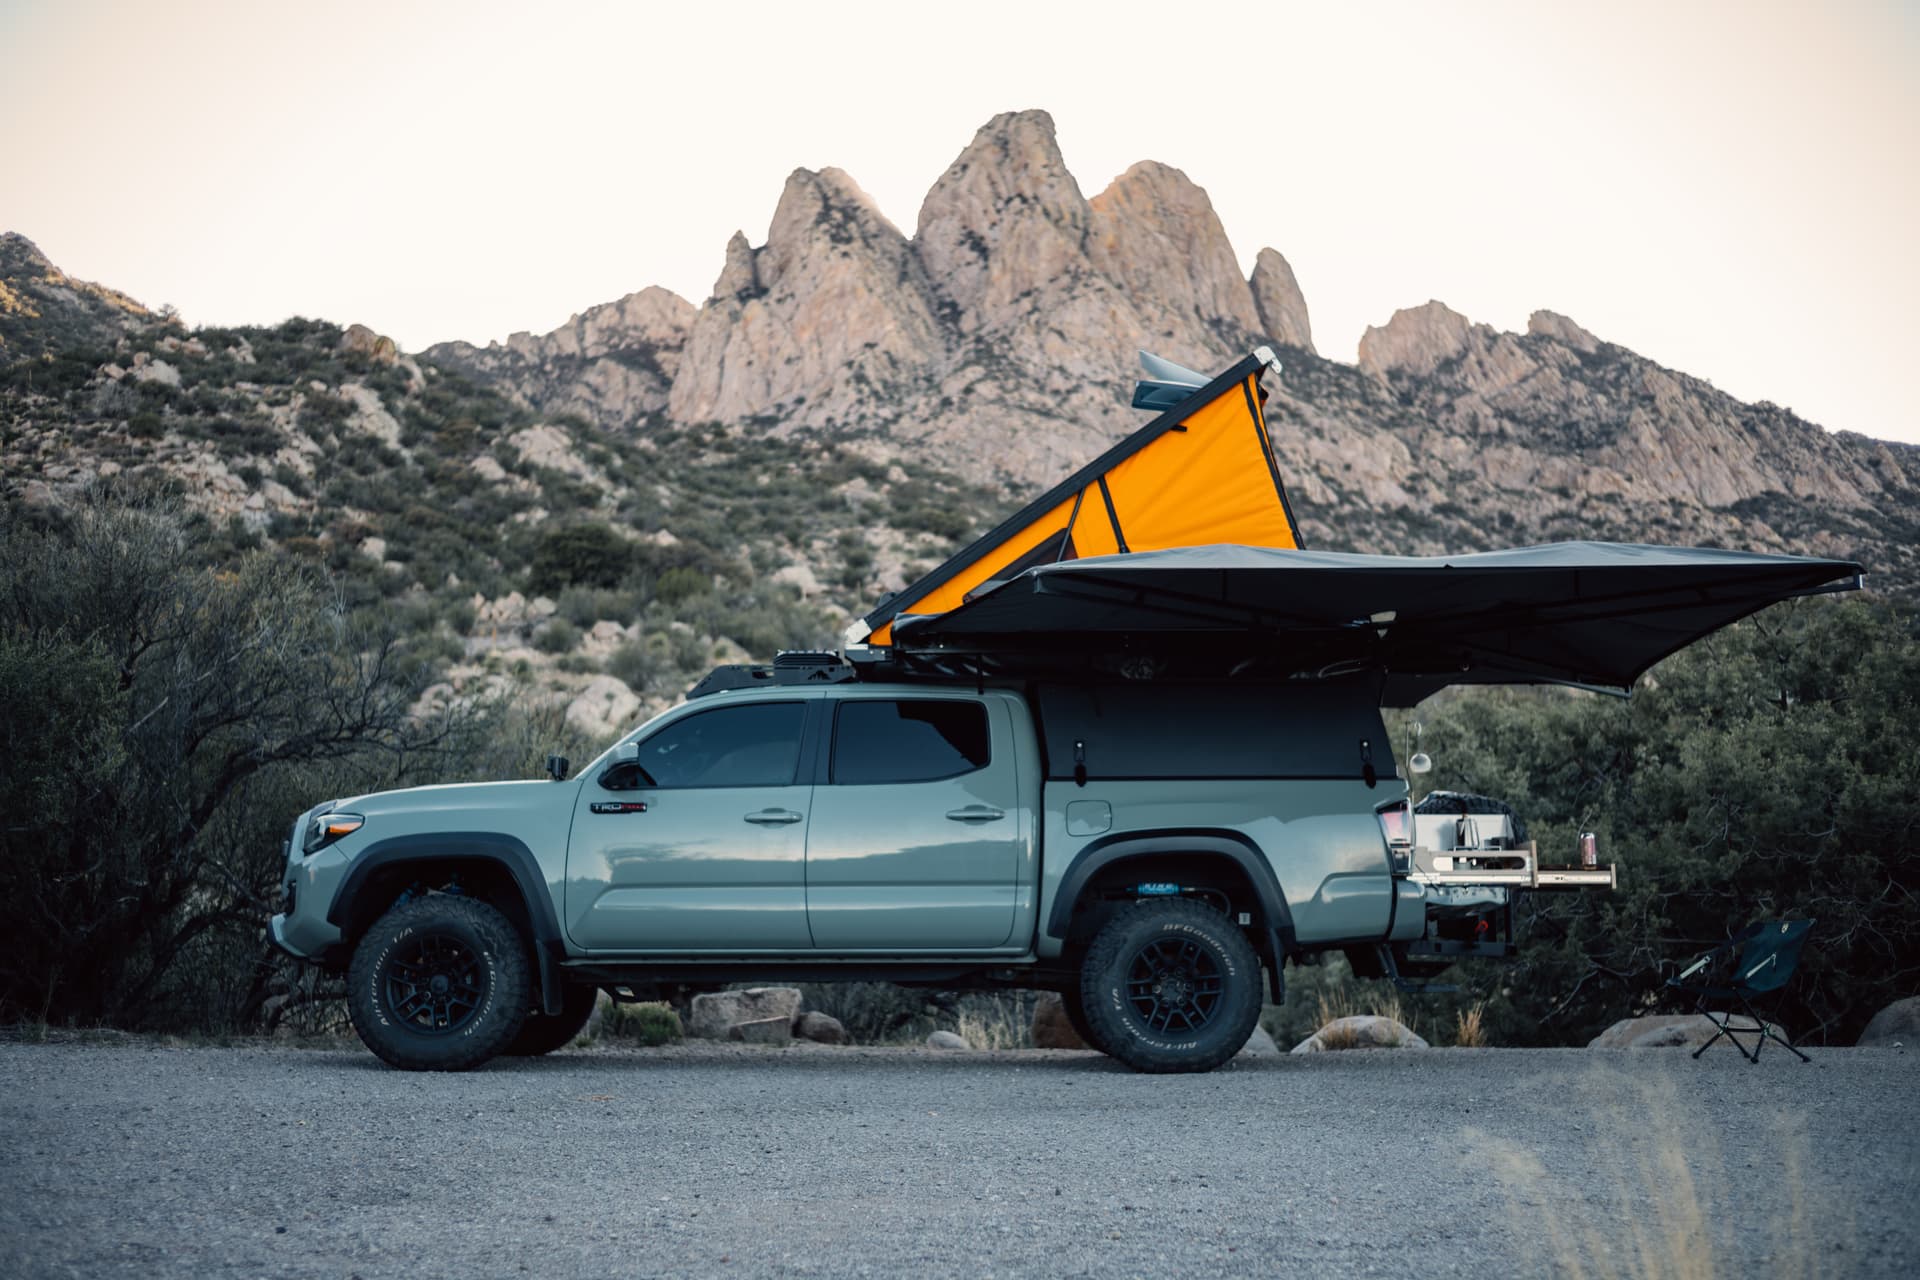
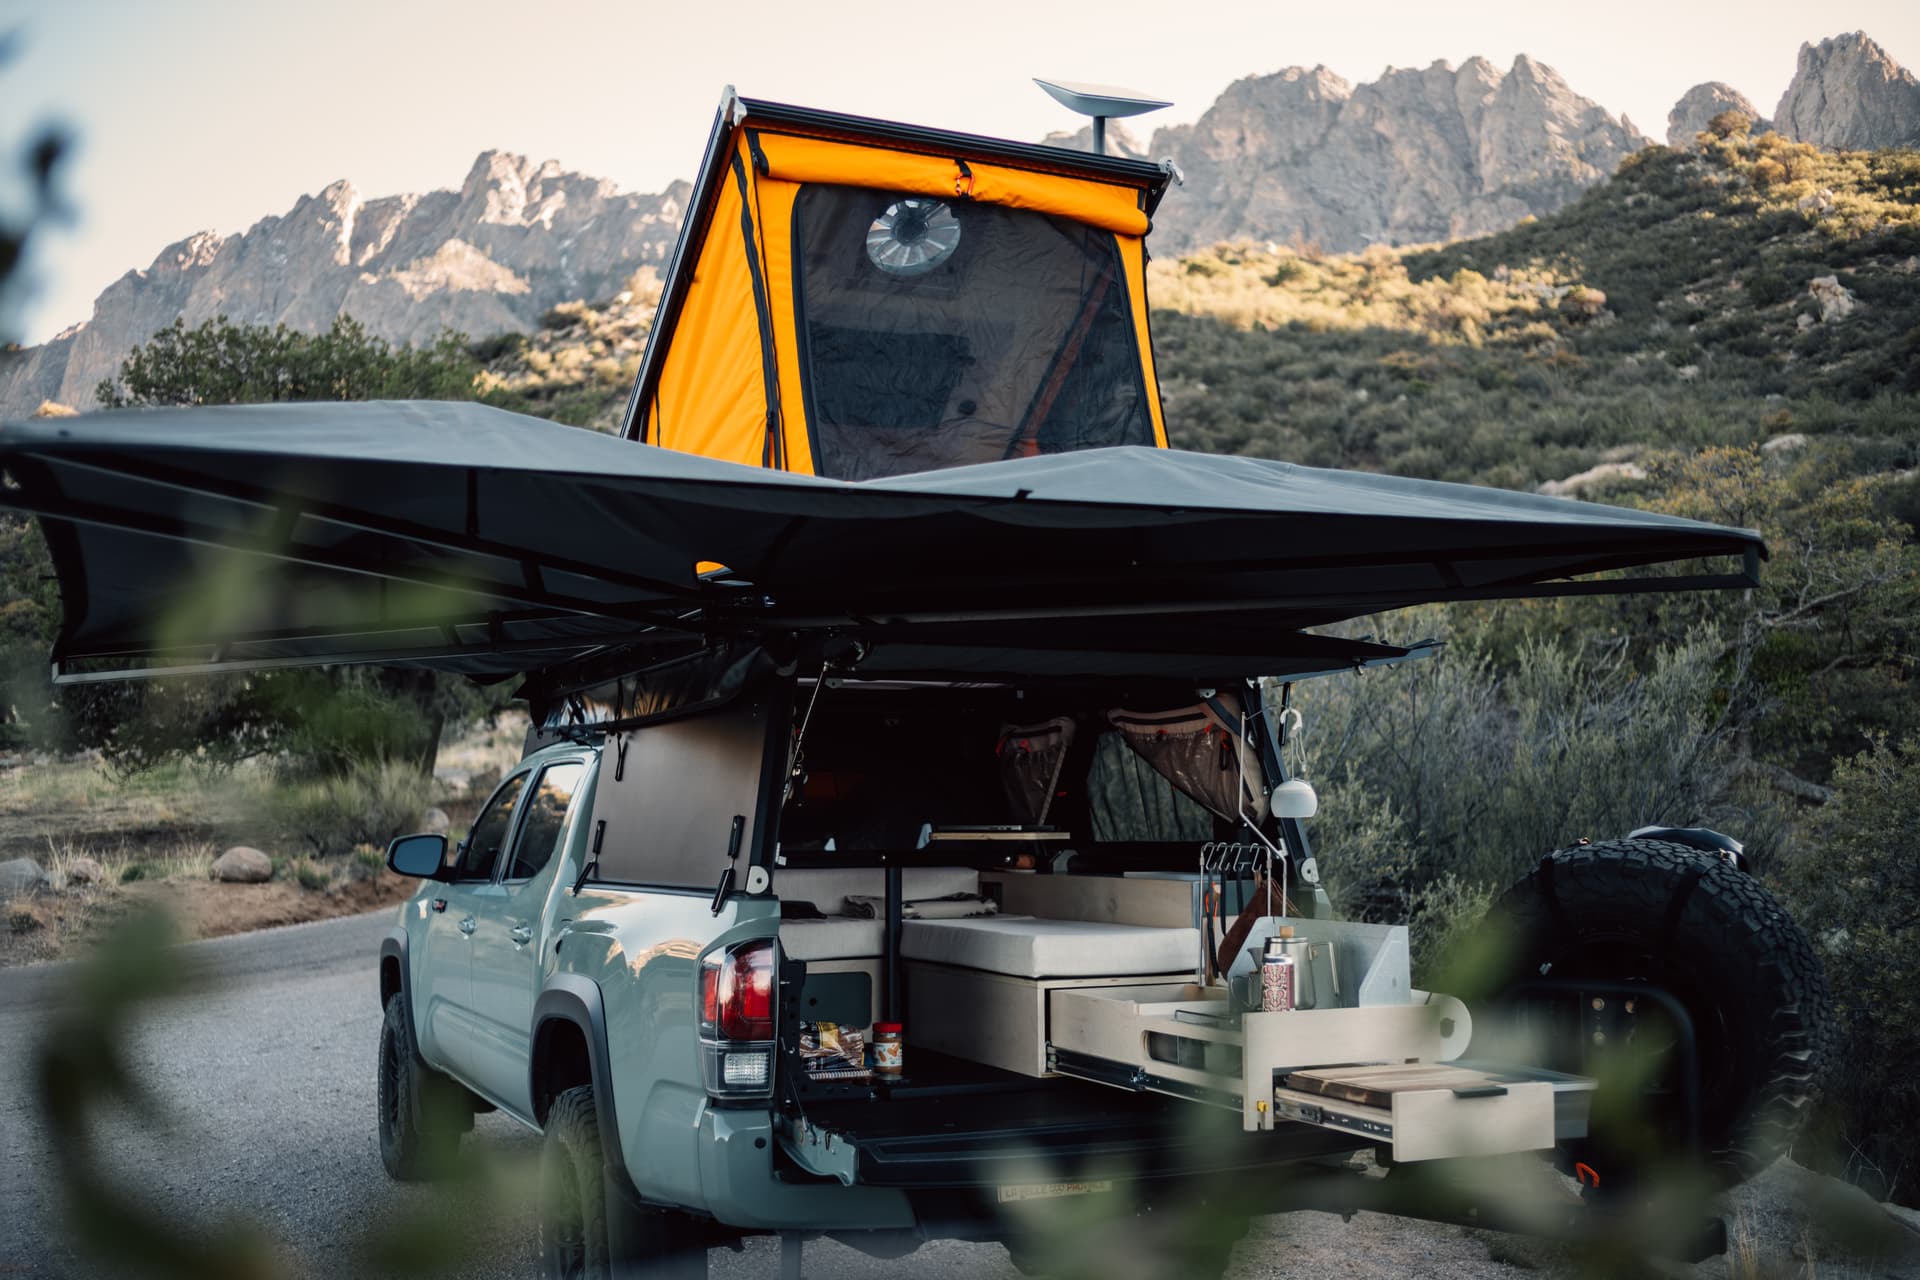
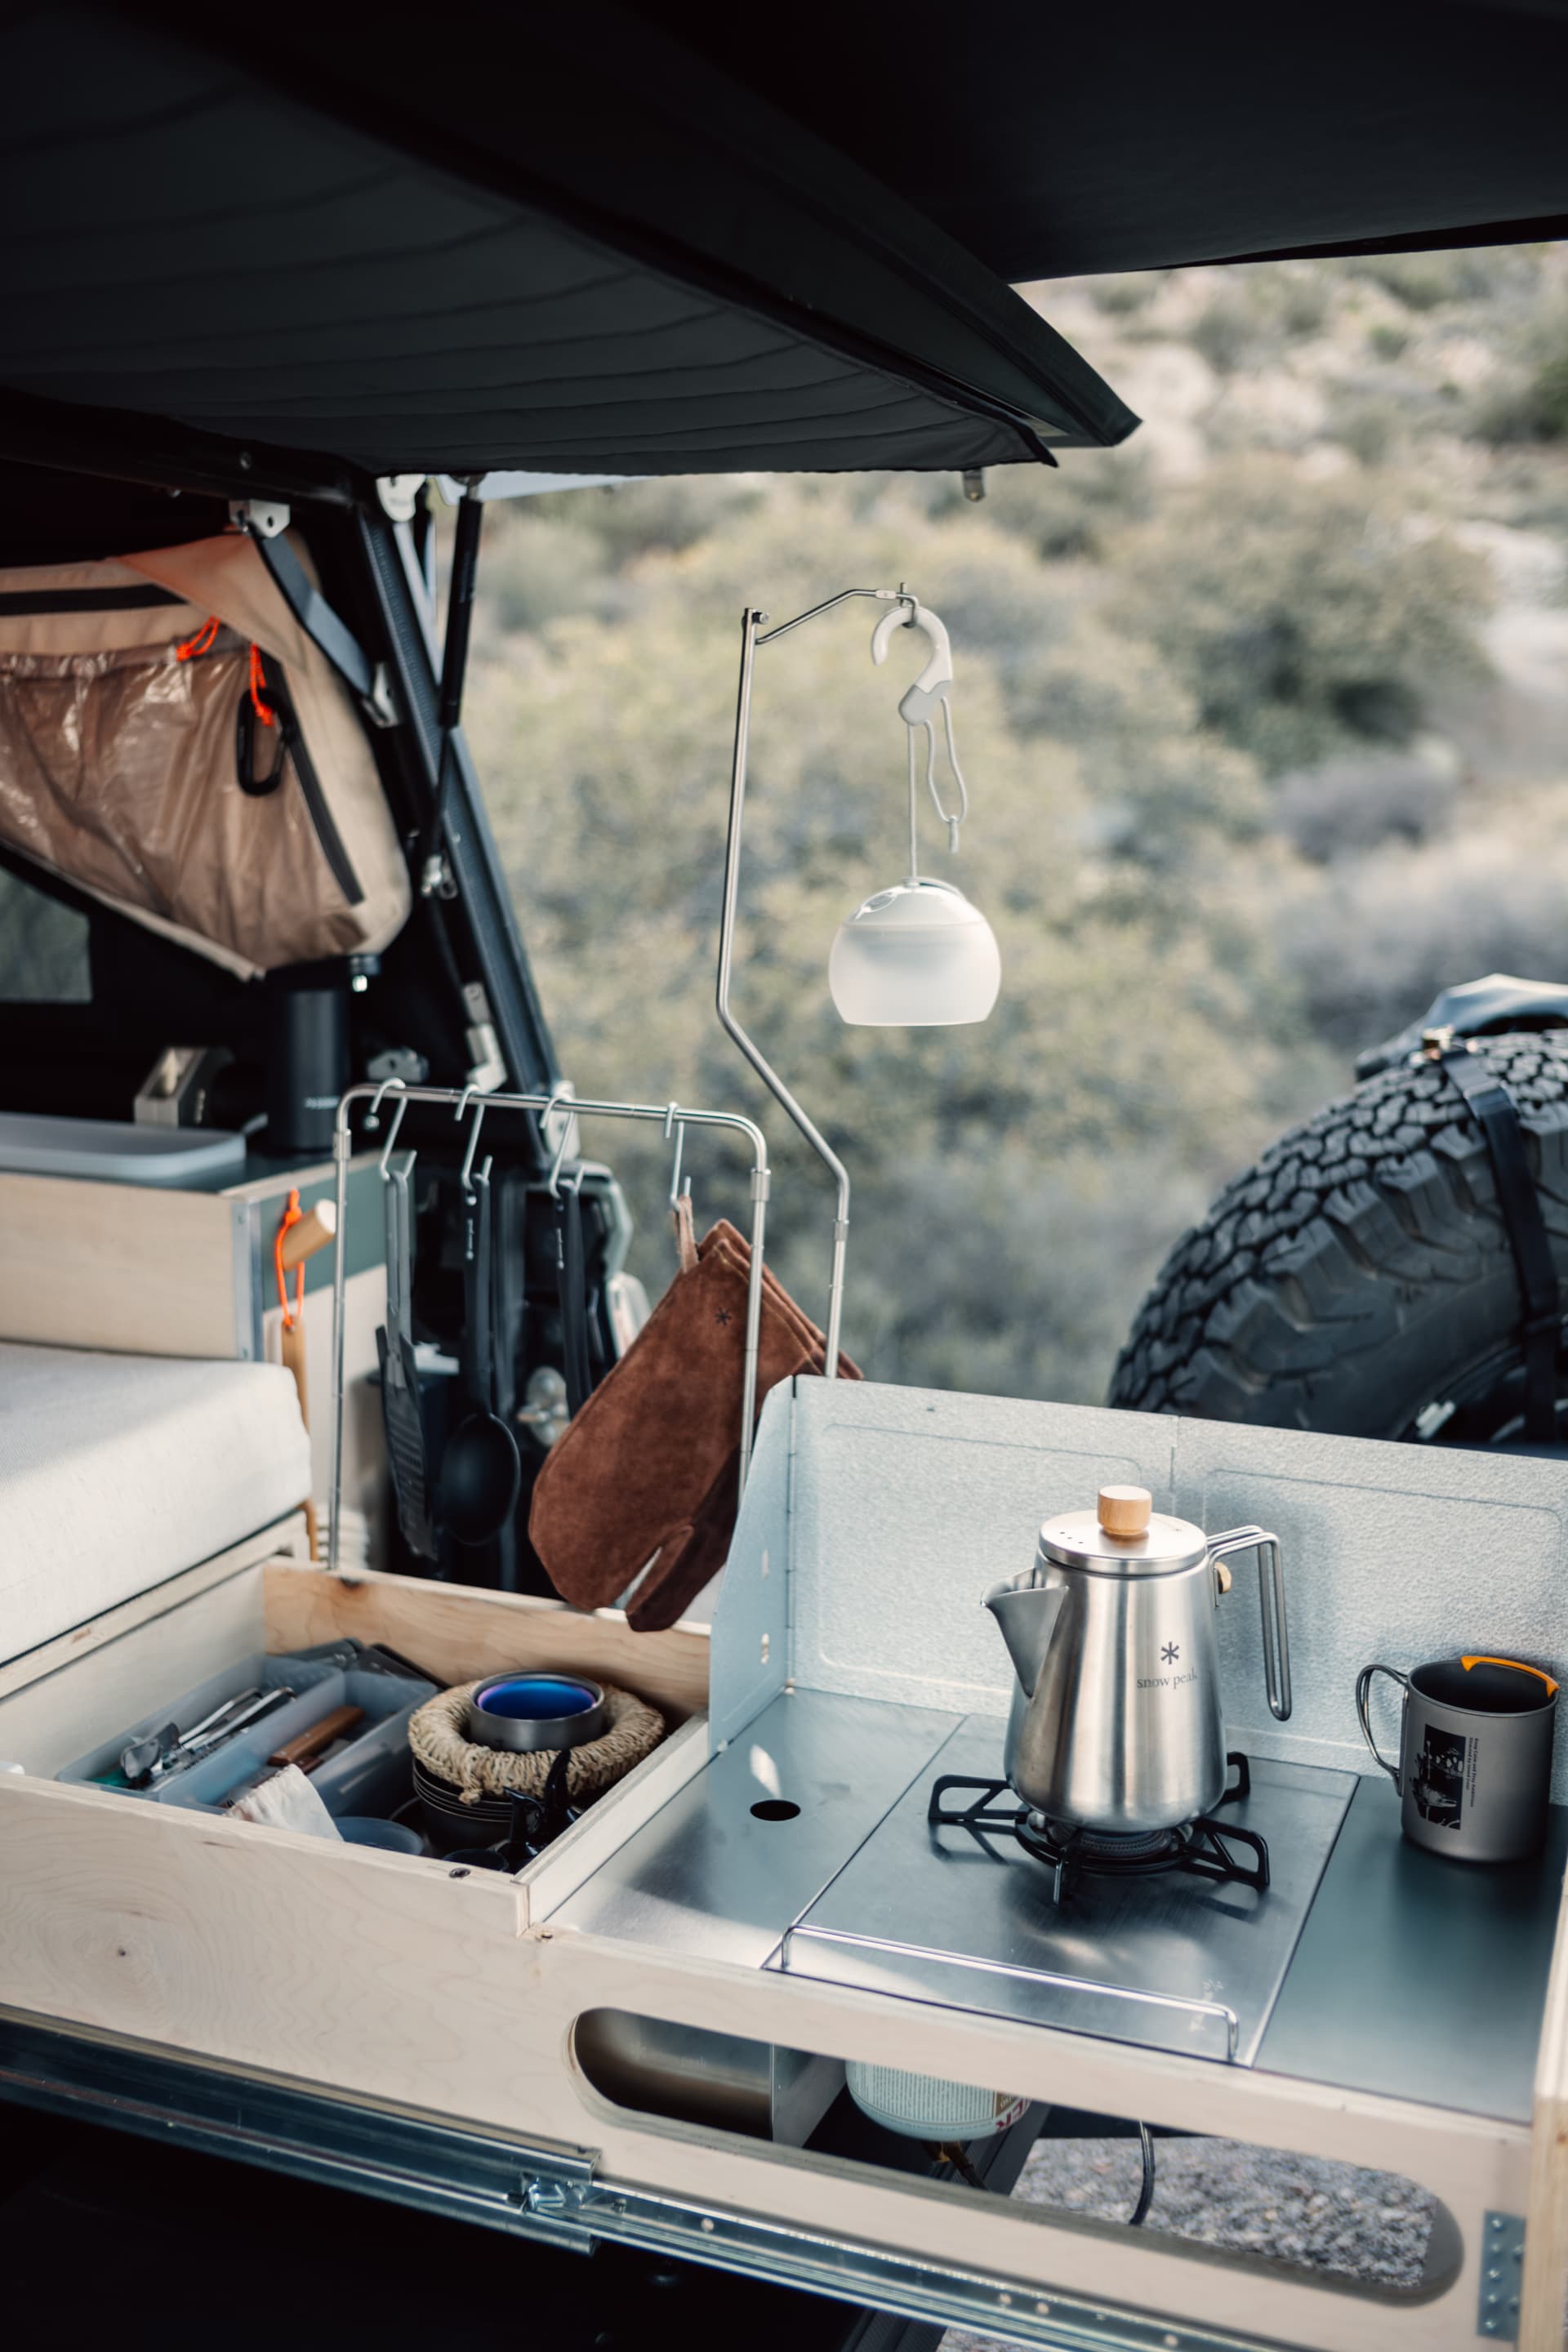
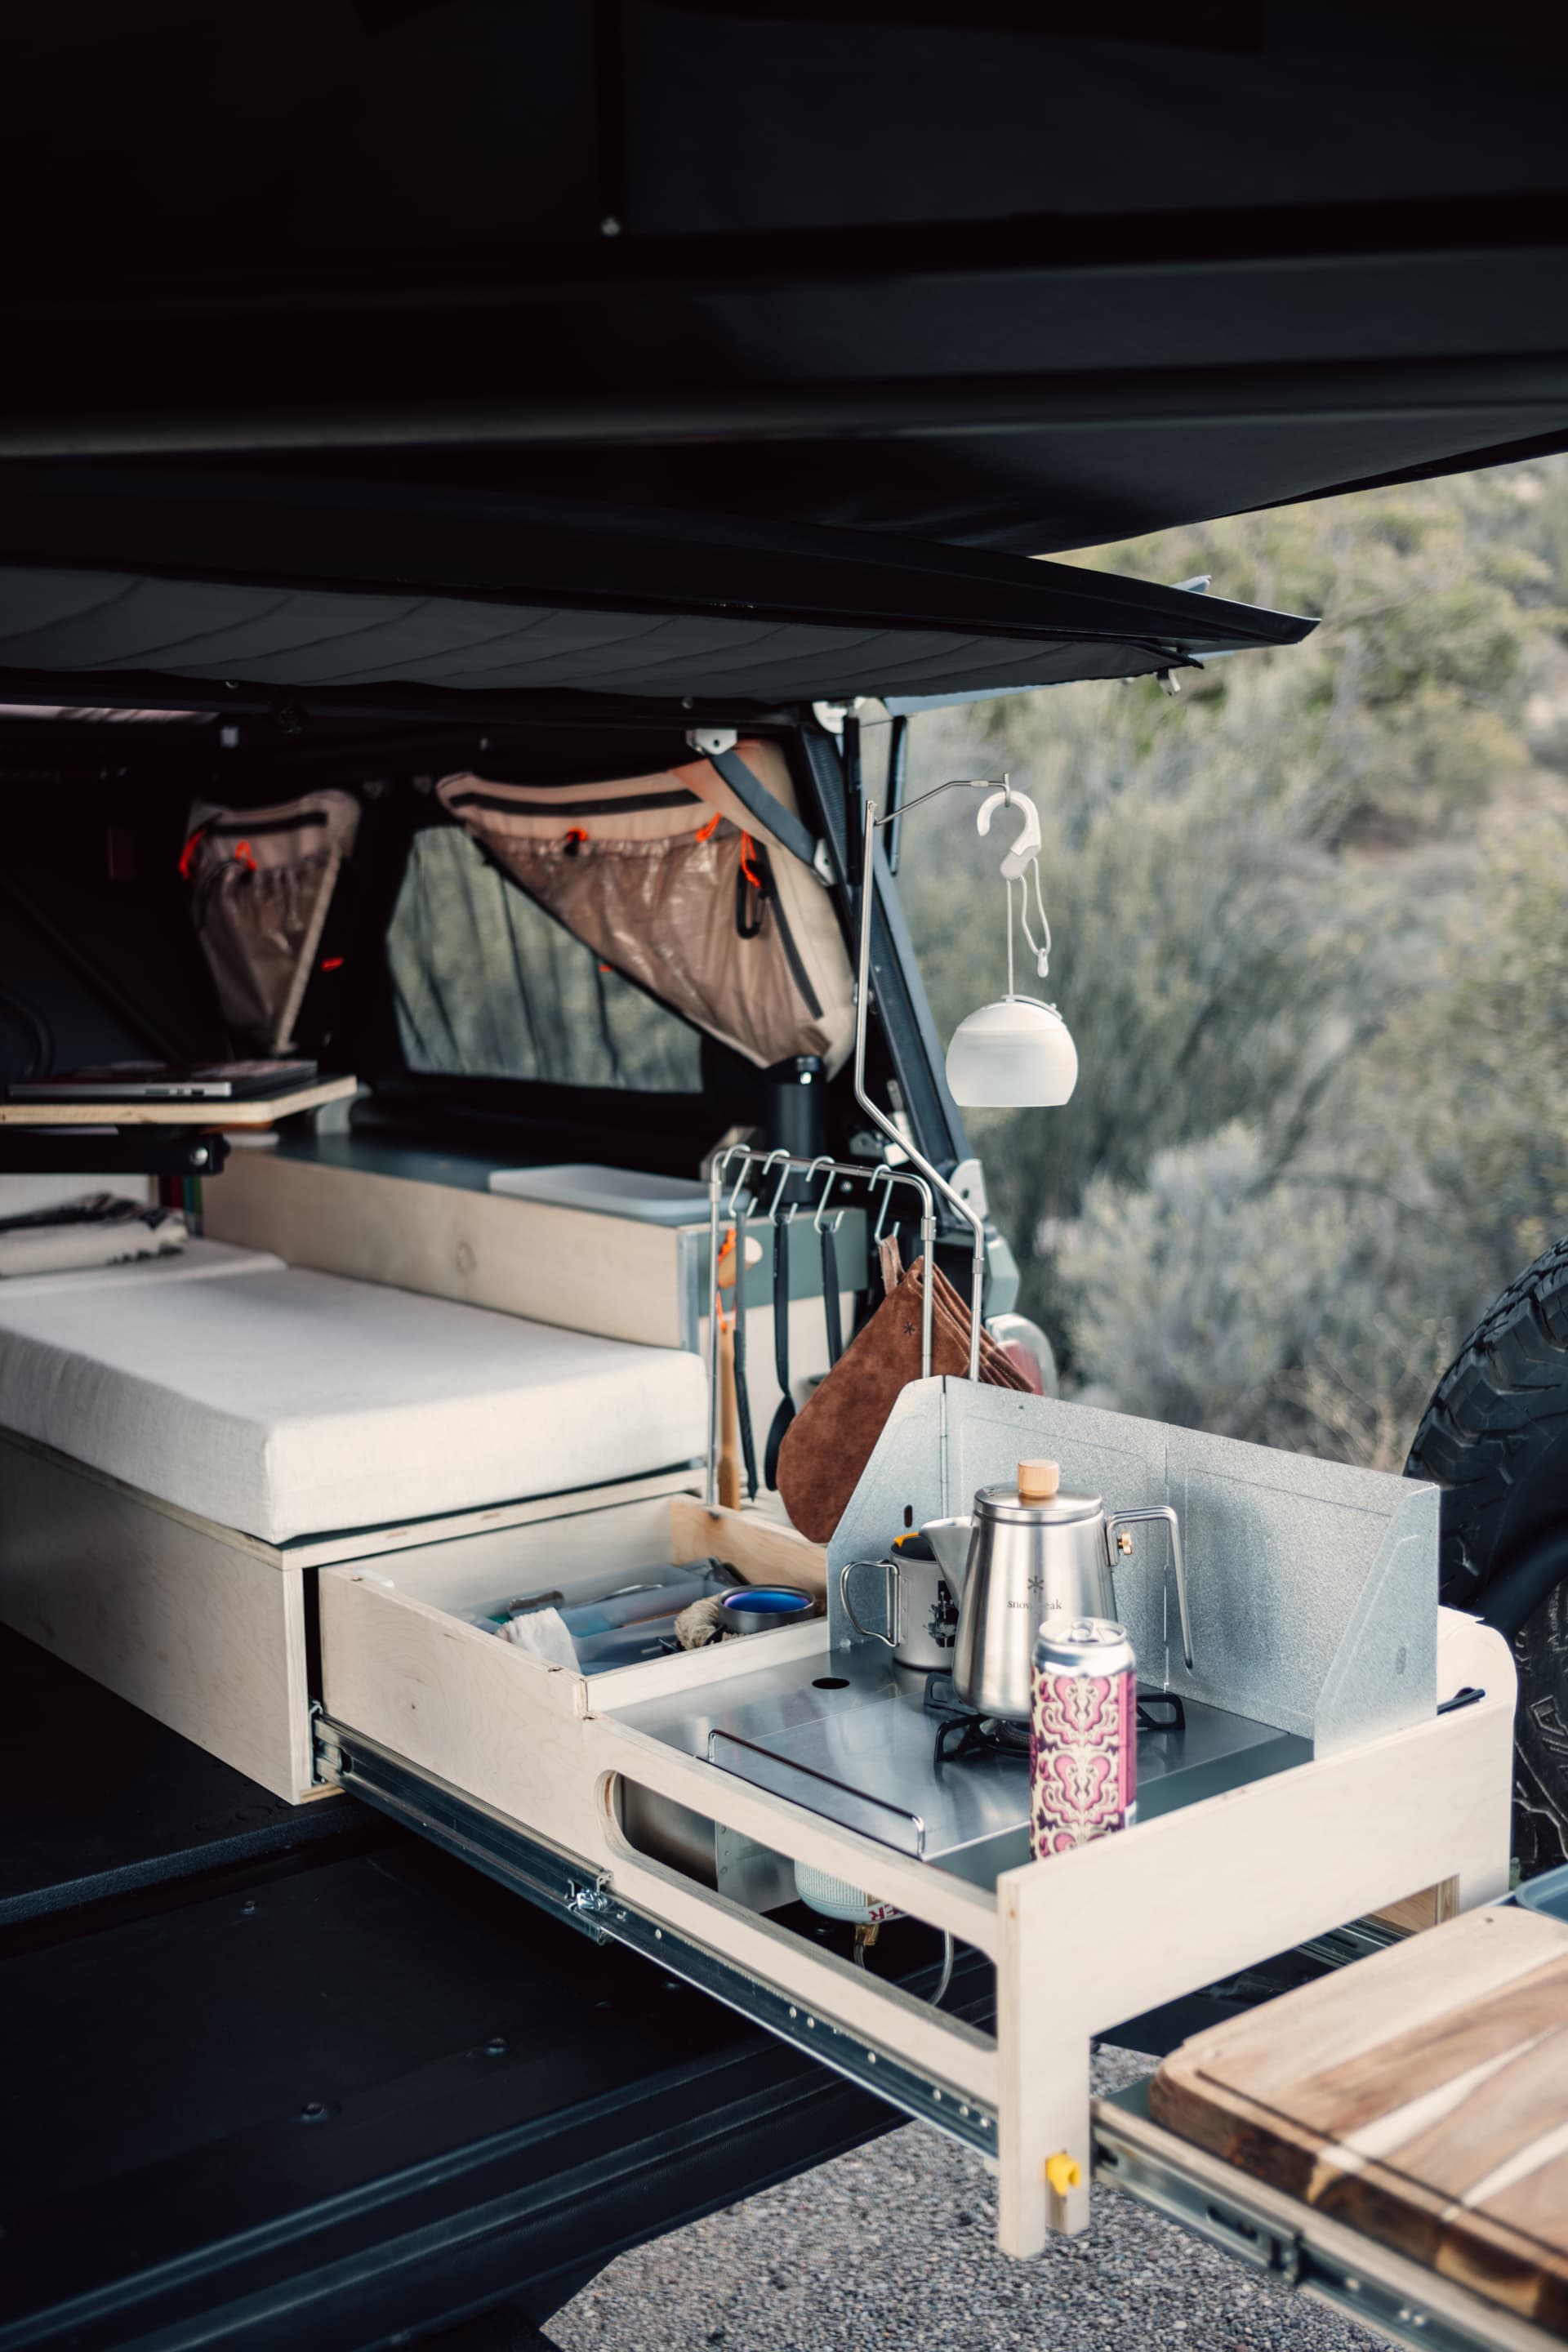
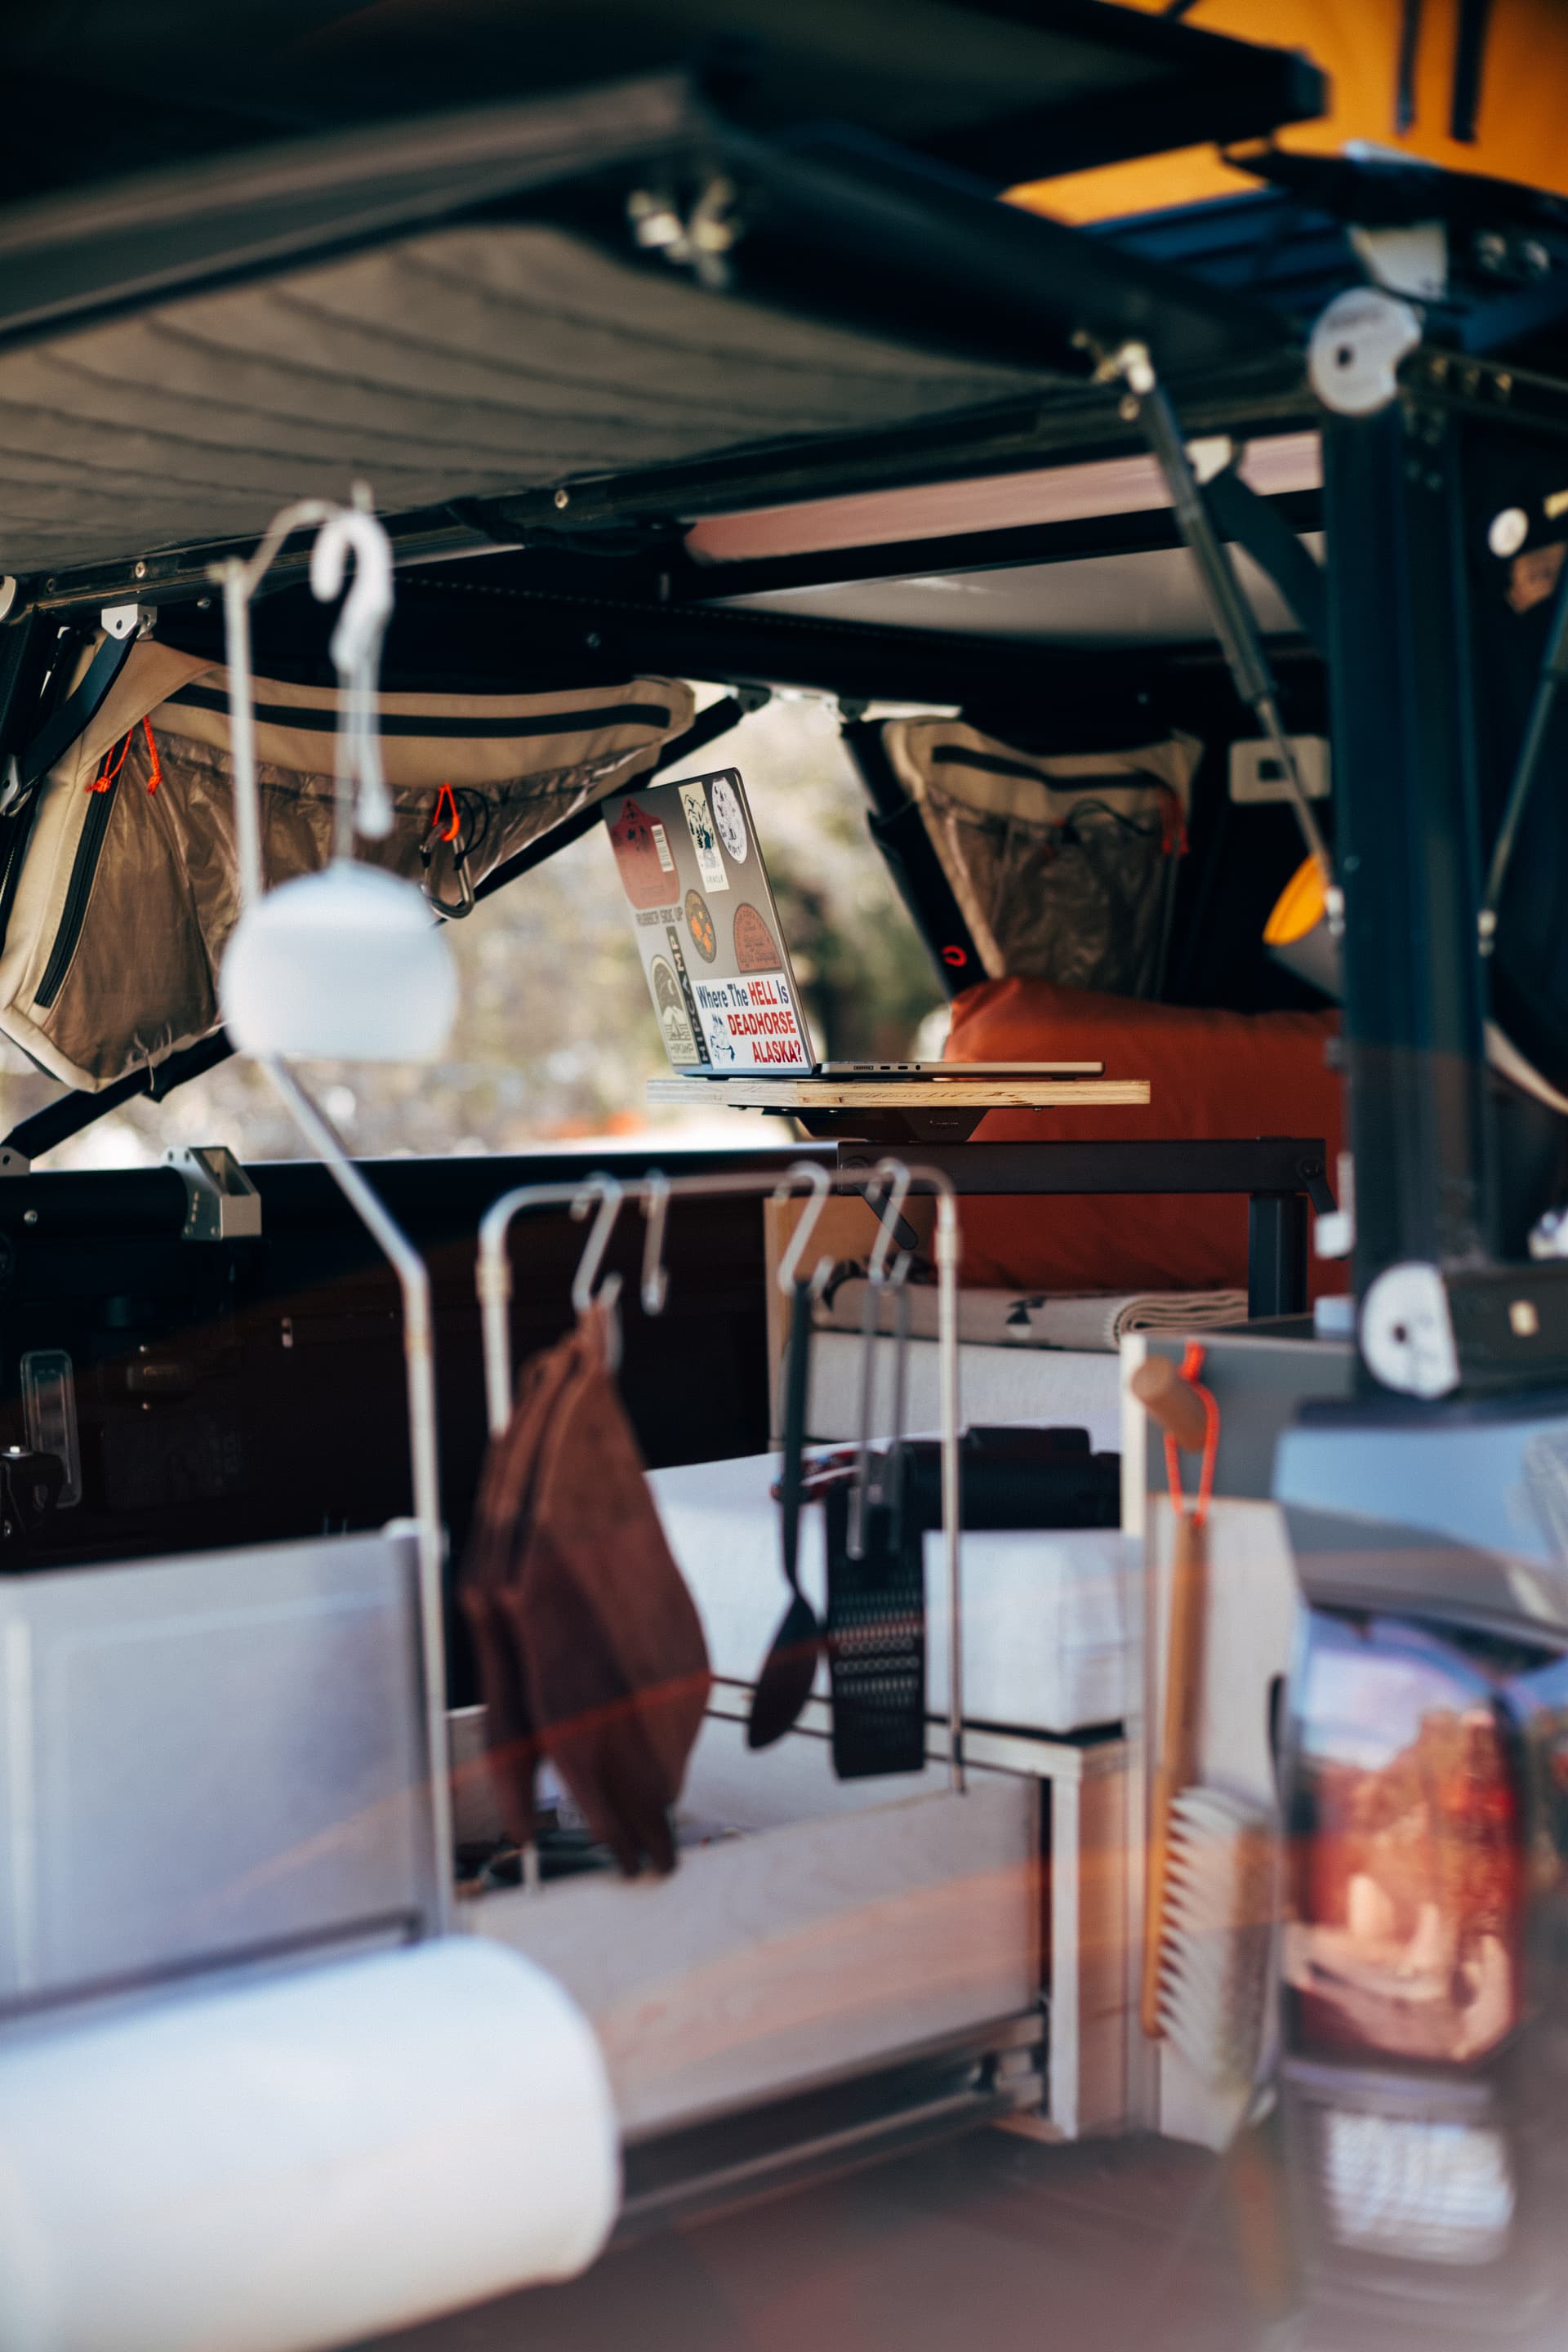
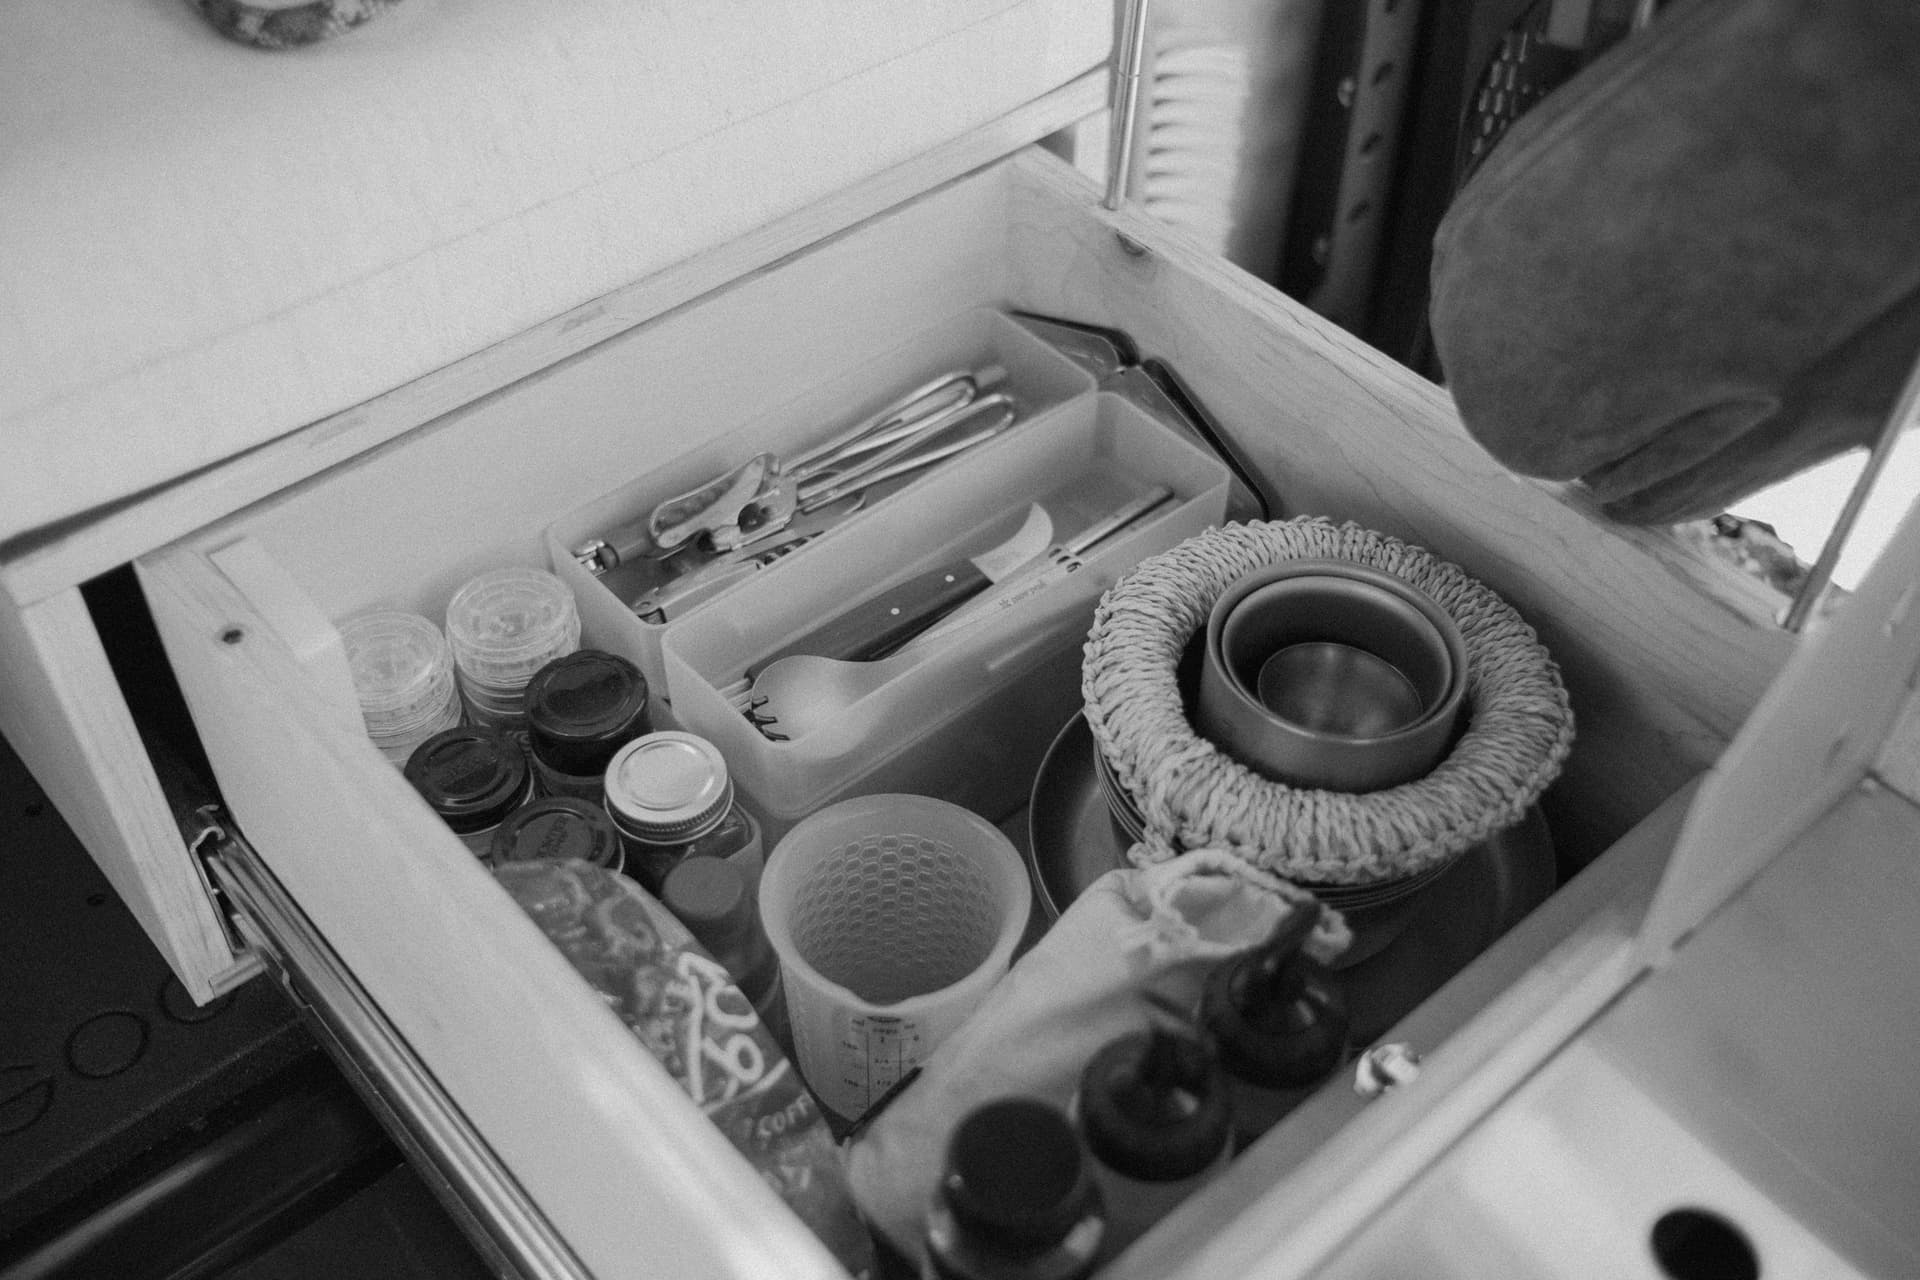
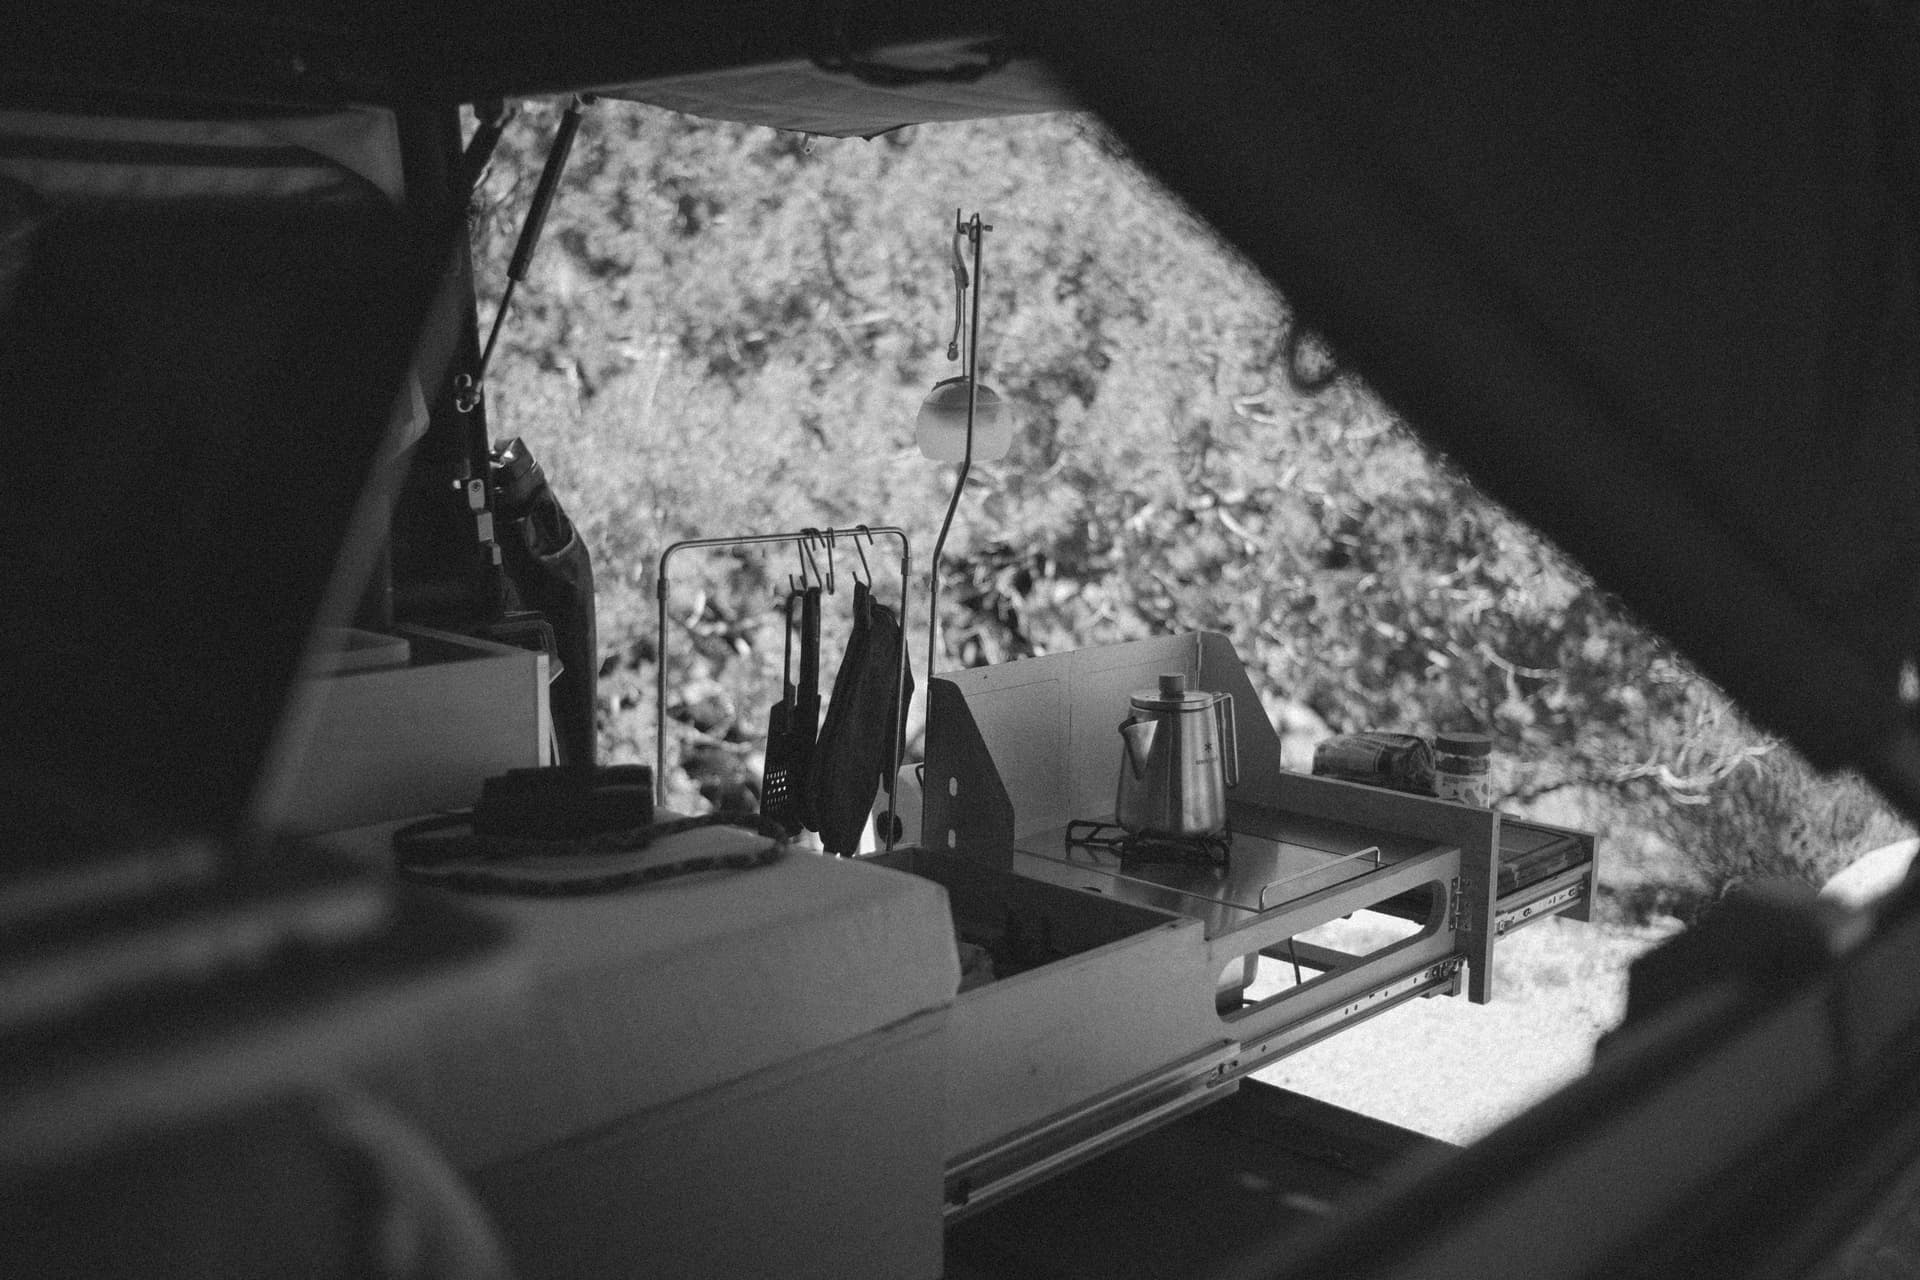
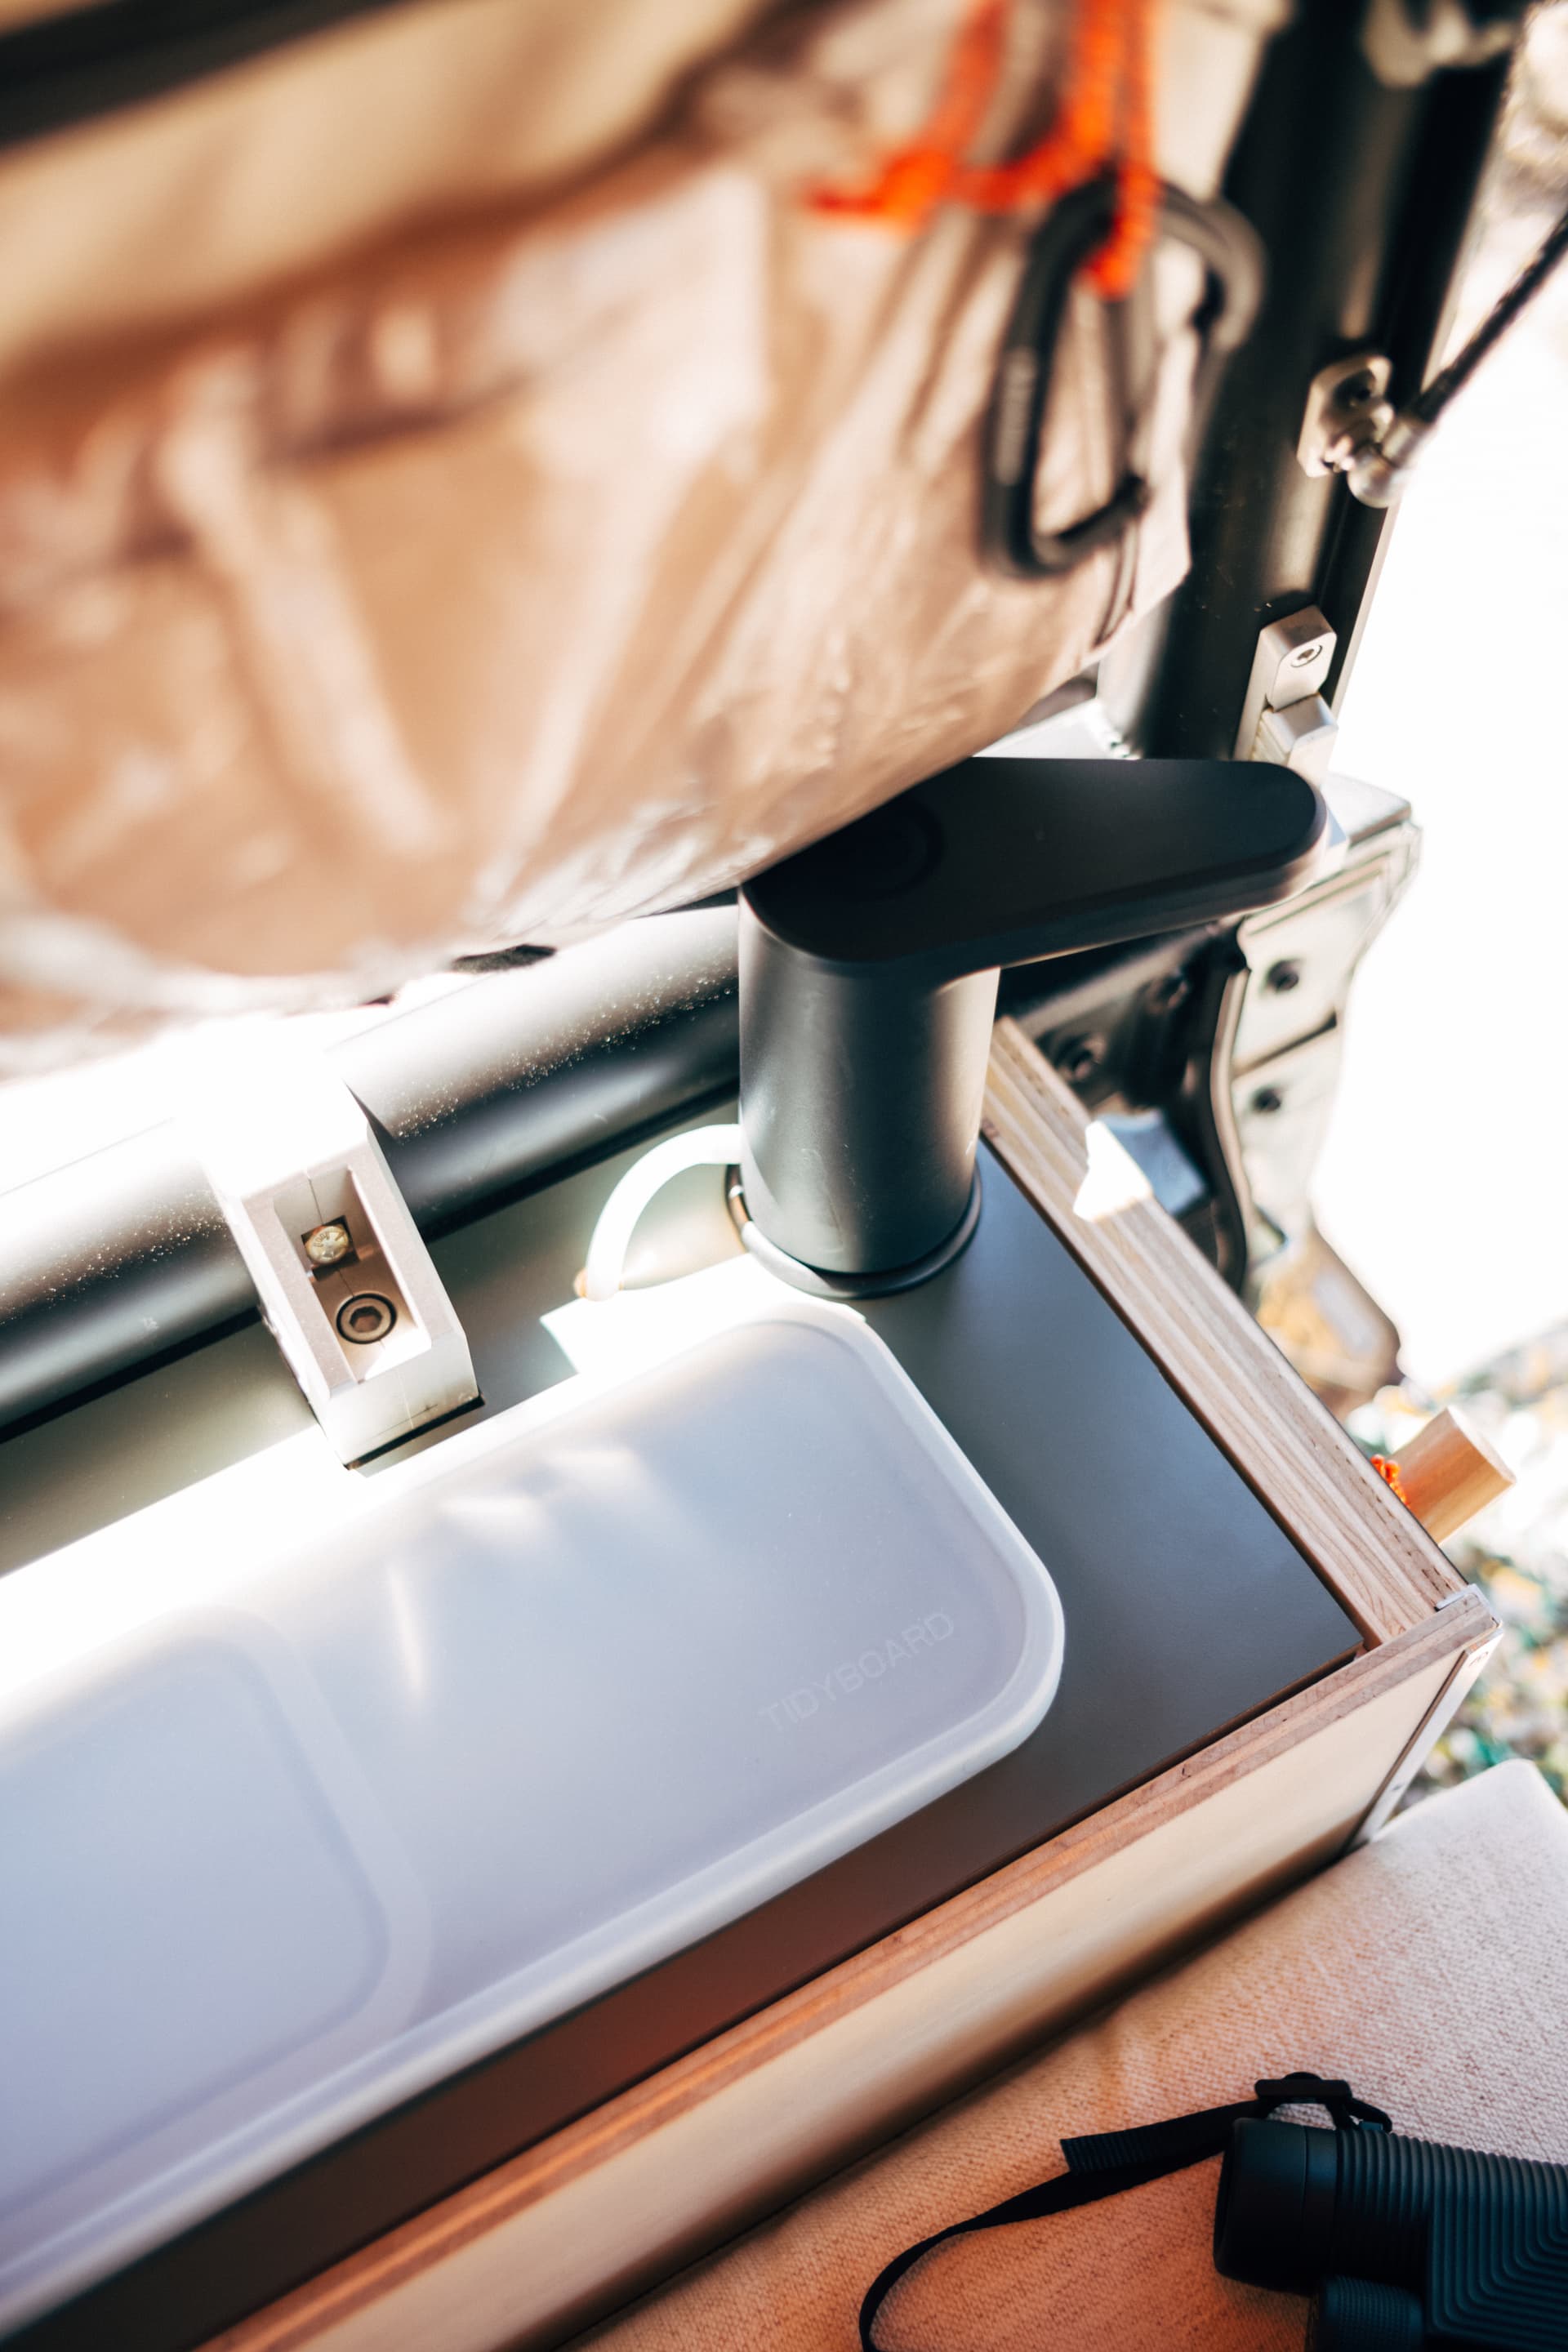
Build Update 04/03/24 — V2 LAYOUT COMPLETE

Alright! It’s been quiet here! I was heads down all of March sprinting to complete V2 of the layout before hitting the road for the next +7 months (!!!) I’m so stoked to share that the new layout is finally done—I’m actually writing this post from the truck on the Starlink at a National Monument in New Mexico.

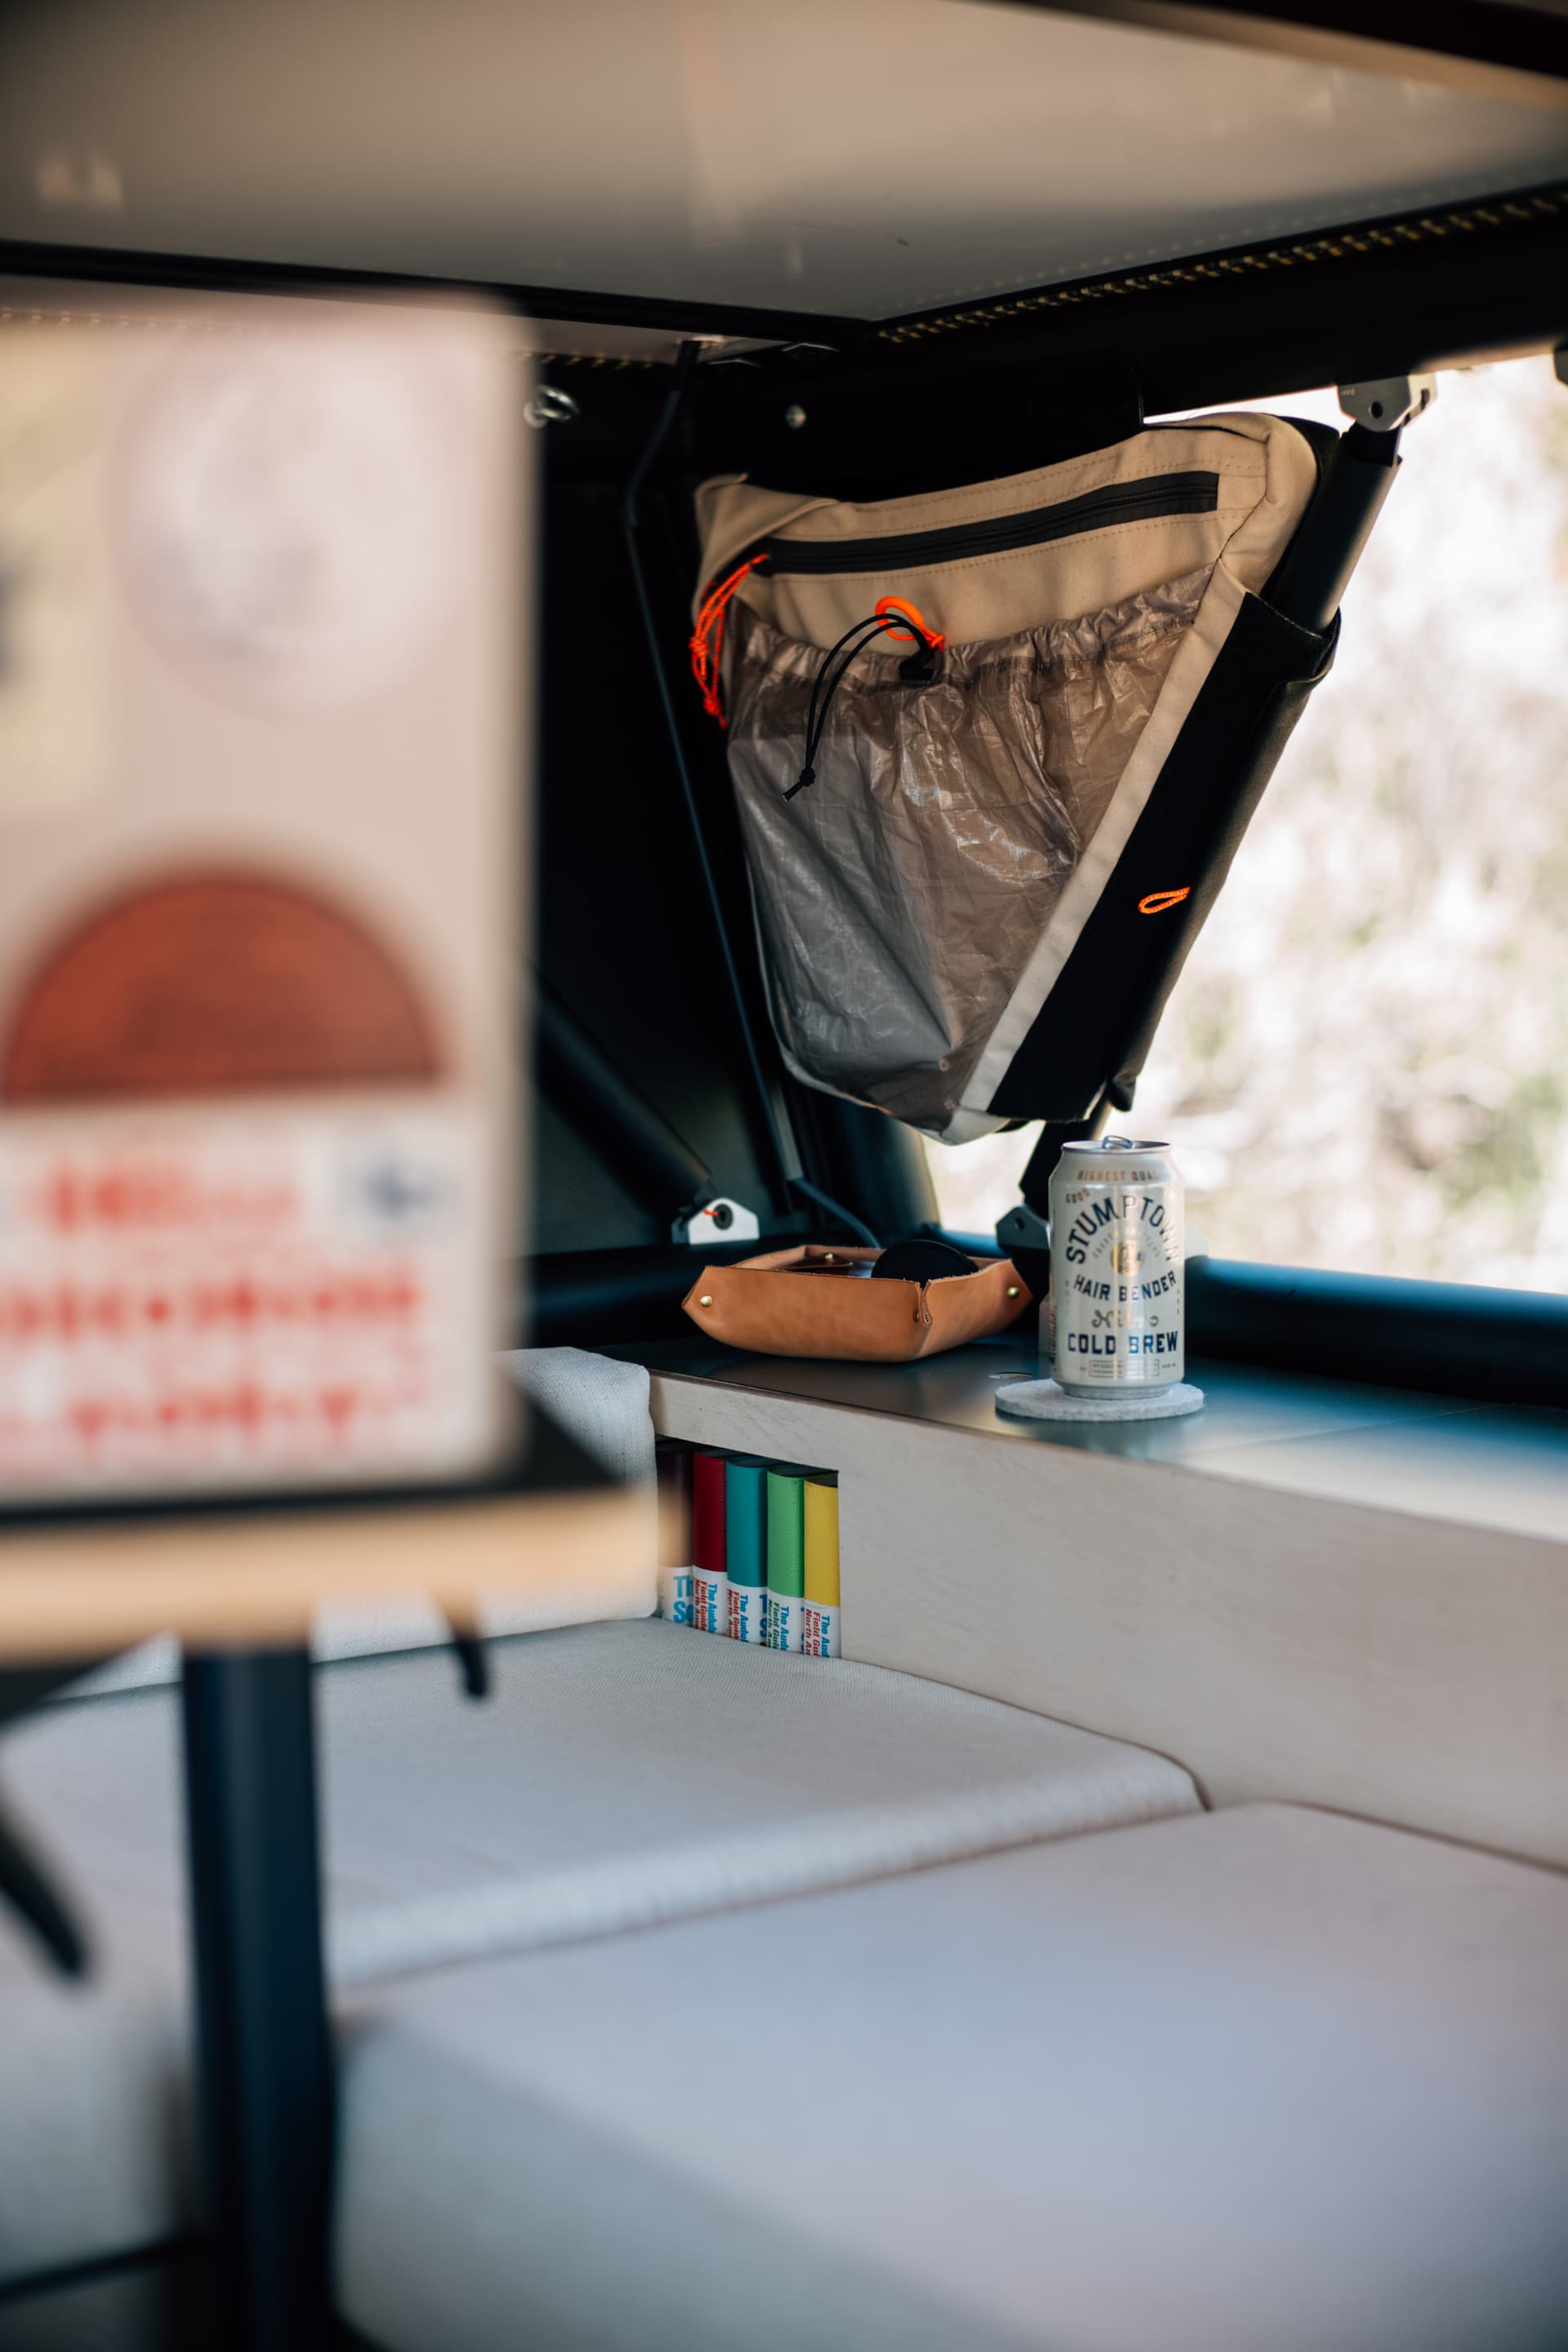
I took hundreds of photos during this build process and I’ll go into great detail explaining every step and decision of the new layout over the coming weeks… Currently racing to get to the center of the path of totality for the Eclipse on the 8th. (:crossed_fingers: for good weather)

Sharing a few snaps below for now, see y’all out there :metal:

24 Likes

What an insanely cool build!! Love the attention to detail and overall clean look it has. Curious what wood you used. I am actually planning on doing a similar setup in the next month or so. ANy tips and tricks?

1 Like

Good lord, just when I get my build planned out you go and raise the bar. That laptop/table placement makes a ton of sense. Also, did you match the paint to your tacoma? Nice touch.

1 Like

Such a great build and great photos! Nice work as usual!

1 Like

So aesthetically pleasing :heart_eyes:

1 Like

The velcro on the pillar is so clever! It seems obvious now, but one of those things that I probably wouldn’t have thought of.

1 Like

V2 Retroactive Build Update 04/05/24 — Planning Stage

Alright! Let’s go back to the start.

We spent a solid month measuring, prototyping, and sketching to dial in the final layout. In a short 5ft truck bed being efficient with every 1/4" of space matters—we went deep and measured everything as we worked towards improving QoL things—while maintaining nimbleness and simplicity.

As you can see in the photo above, we went into this build under the assumption we would design our kitchen around our Cook Partner stove. That assumption changed as the mockup process identified two major pain points pretty quickly: 1) where do we store the massive propane tank without eating into our livable space and 2) do we really want to dedicate so much of our limited drawer space to just a cooktop. I’m a fan of multi-use / multi-purpose solutions and had a strong desire to design something better here. A bulky heavy box that holds a bulky 2-burner stove was not our answer.

The desire to adhere to this design principal led me to Snow Peak’s IGT (Iron Grill Table) system. For those not familiar with the system, it’s essentially just a table frame that allows the user to drop in a wide range of standardized accessories from single burner stoves, to dual burner stoves, to cutting boards, even a bbq! As a big SP fan, I’ve always been intrigued by this concept but have never had a reason to invest in one as I have no space to store their table frame itself.

Then I had the idea: What if we got our hands on the dimensions of the table frame and built the “drawer” itself as an IGT frame? The drawer did not need to be a bulky heavy box—it could be two simple rails with no floor that house the IGT accessories. It would be infinitely modular, and could adapt to our needs from trip to trip.

As an added bonus, the IGT burners use the same isobutane fuel our Snow Peak torch, lanterns, and 2 pocket backpacking stoves utilize. The simplicity of carrying one fuel source for everything was liberating.

We committed to the concept and and moved into higher fidelity drawings for what would become the focal point of the new layout—the first known custom Snow Peak IGT kitchen built into a truck bed.


(Shoutout to my Dad for taking my early figma concepts and parts list and translating into these clean drawings! NOTE: These are early measurements that can be used for guidance, but are not the final build measurements)

We picked up our materials: 2 sheets of 3/4" maple veneered plywood and 1 sheet of 1/2" plywood and got to work.

In the next post we’ll move into construction!

3 Likes

V2 Retroactive Build Update 04/09/24 — Construction Stage

The first stage of construction was to figure out how to treat the wood. After a few rounds of testing we landed on a Behr “White Wash” stain followed by a number of coats of a Behr Spar for a solid seal and neutral look. My wife and I both prefer a lighter and cooler toned wood aesthetic over the yellowed and warm look you typically get from most stains + poly.


Here’s a great side-by-side of how the wood reacts to the spar with and without the white-wash coat.

After about a week of going through the motions of coating and drying we were ready to start ripping the boards down and mocking up the foundation. Starting with the bulkhead bench and what we dubbed the “Garage” (the long narrow space on the passenger side)

We utilized the Tacoma’s bulkhead t-track to mount the back wall (where the molle panel use to be) and squared off the area around the wheel wells.

Note: These are some of the messiest cuts as they were tackled with a jigsaw trial-and-error approach to work around the wonkiness of the angles at the bulkhead of the truck bed! We knew this back wall would be hidden by the finishing pieces so we were not stressed about it. We intentionally left space for any water ingress (:crossed_fingers: hopefull none) to drain without ever pooling on the wood in this area, too.


Next we mocked up and dialed in the spacing for the “Garage” for a tight fit of our Dometic Go Water Jugs while still ensuring they can slip in and out with as little fuss as possible.


Once the bulkhead bench and garage were looking solid we began the process of dialing in the measurements for the IGT kitchen drawer and cut it down to size. We dedicated 20" of the drawer to the IGT rail to accommodate a number of accessory combos and left a 16" box at the rear for utensils, cookware, plates, bowls, etc.


A note: We intentionally did not extend the drawer to the bulkhead to save on rail and drawer weight and instead opted for a static cubby under the bench for dry food.

With the kitchen drawer starting to take shape it was time to bust out the router, prepare a template, and get to work on cutting out holes for the cubbies and burner controls. (All of which were cut to perfection by my dad as I was working my day-job :handshake:)

One fun detail here is that we were able to standardize the 4 cubby holes into 2 sizes to allow the lids to be shuffled around depending where people are siting (as one of the rectangle lids will double as our tabletop)

At this point we tackled a quick side mission to build out a little library for a few copies of my vintage Audubon Field Guides. This side mission served two purposes: 1) naturally, to contain and display the books (in a pleasing way), and more importantly 2) to create a few surfaces to mount all the starlink hardware within the garage space (more on this later)

At this stage the build was really starting to come together and we were ready to start thinking about finishing details before getting into assembly. We were all really happy with how it was looking and how light and airy it was feeling. (There is not a ton of material used here at the end of day!)

The first finishing detail to tackle was laminate, which we chose over paint for sturdiness, longevity, and a real factory finished looked. This was a slow and tedious process of cutting the laminate down and gluing (We went through 3 cans of glue) but was oh so worth it in the end.

This post is getting very long so pausing here for now. I’ll continue with more finishing details and assembly in the next post! (As nothing was permantelty bolted or screwed down at this point.)

9 Likes

Thank you for sharing these details. I’ve been staring at your recent posts trying to figure out how you’d created the space and this is really inspiring. Can’t wait for my upcoming week off work to start building out something similar.

1 Like

I was curious what that little library was! The Audubon Field Guides look great there.

1 Like

Beautiful, meticulous, and thoughtful build, @julian. Thank you for sharing your progress with us. I’m looking at your roof fan. Some questions I have about it.

  1. What did you learn and what would you have done different? Anything you would change or redo if you had the chance? I see you mentioned adding connections to allow disconnection if you were to remove the roof again.
  2. How is this fan? Would you choose another fan?
  3. Does the fan limit you in adding a roof box or rack to the beef bars?
  4. Did you have to use custom screws for mounting the fan?
2 Likes

Replies in-line:

Thanks so much @LeSmurf @yodabest :pray:

@timwentoutside! The whole build is made out of 2 sheets 3/4" + one sheet of 1/2" plywood. Last post goes into more detail on how we treated the wood prior to construction.

@dmg5000 Appreciate the kind words Darin. The table is a game changer. It’s hard to believe we spent the past three years working without one. We spent a long time tracking down the laminate color. Wanted something that was as close to the paint we used on the previous small cabinet we had!

Thanks @jedgar! Excited to share a deep dive on your contribution to it in a little bit here too :slight_smile:

@weightshift The Audubon Library is the first thing neighbors at camp have noticed thus far when checking out the build. So happy we included it!

@depthofperception If you scroll up in this thread there is a dedicated post on the fan install! (:point_left: Linked for you here as I know this thread is getting long to scroll through!)

  1. I should have wired the fan (and solar) with quick releases out of the gate. I had to cut all the wires on the spot at GFC when getting the tent replaced which was not ideal as I was without solar and fan for the next few weeks. The fiberglass can now pop out with the solar panel + fan left in place which will make any future service a breeze.

  2. Fan continues to be a top mod and has had no issues.

  3. With the fan so far back I was able to mount a yakima roofbox on beef bars infront of the fan. I’ve only done this once to help move some belongings)

  4. No custom screws.

:metal:

1 Like

Where did you get the table mount? I see a lot of items meant for RV’s but they usually have huge bases/poles.

1 Like

It looks like it is a Lagun table mount

1 Like

Good eye, definitely looks like it from their web page

1 Like