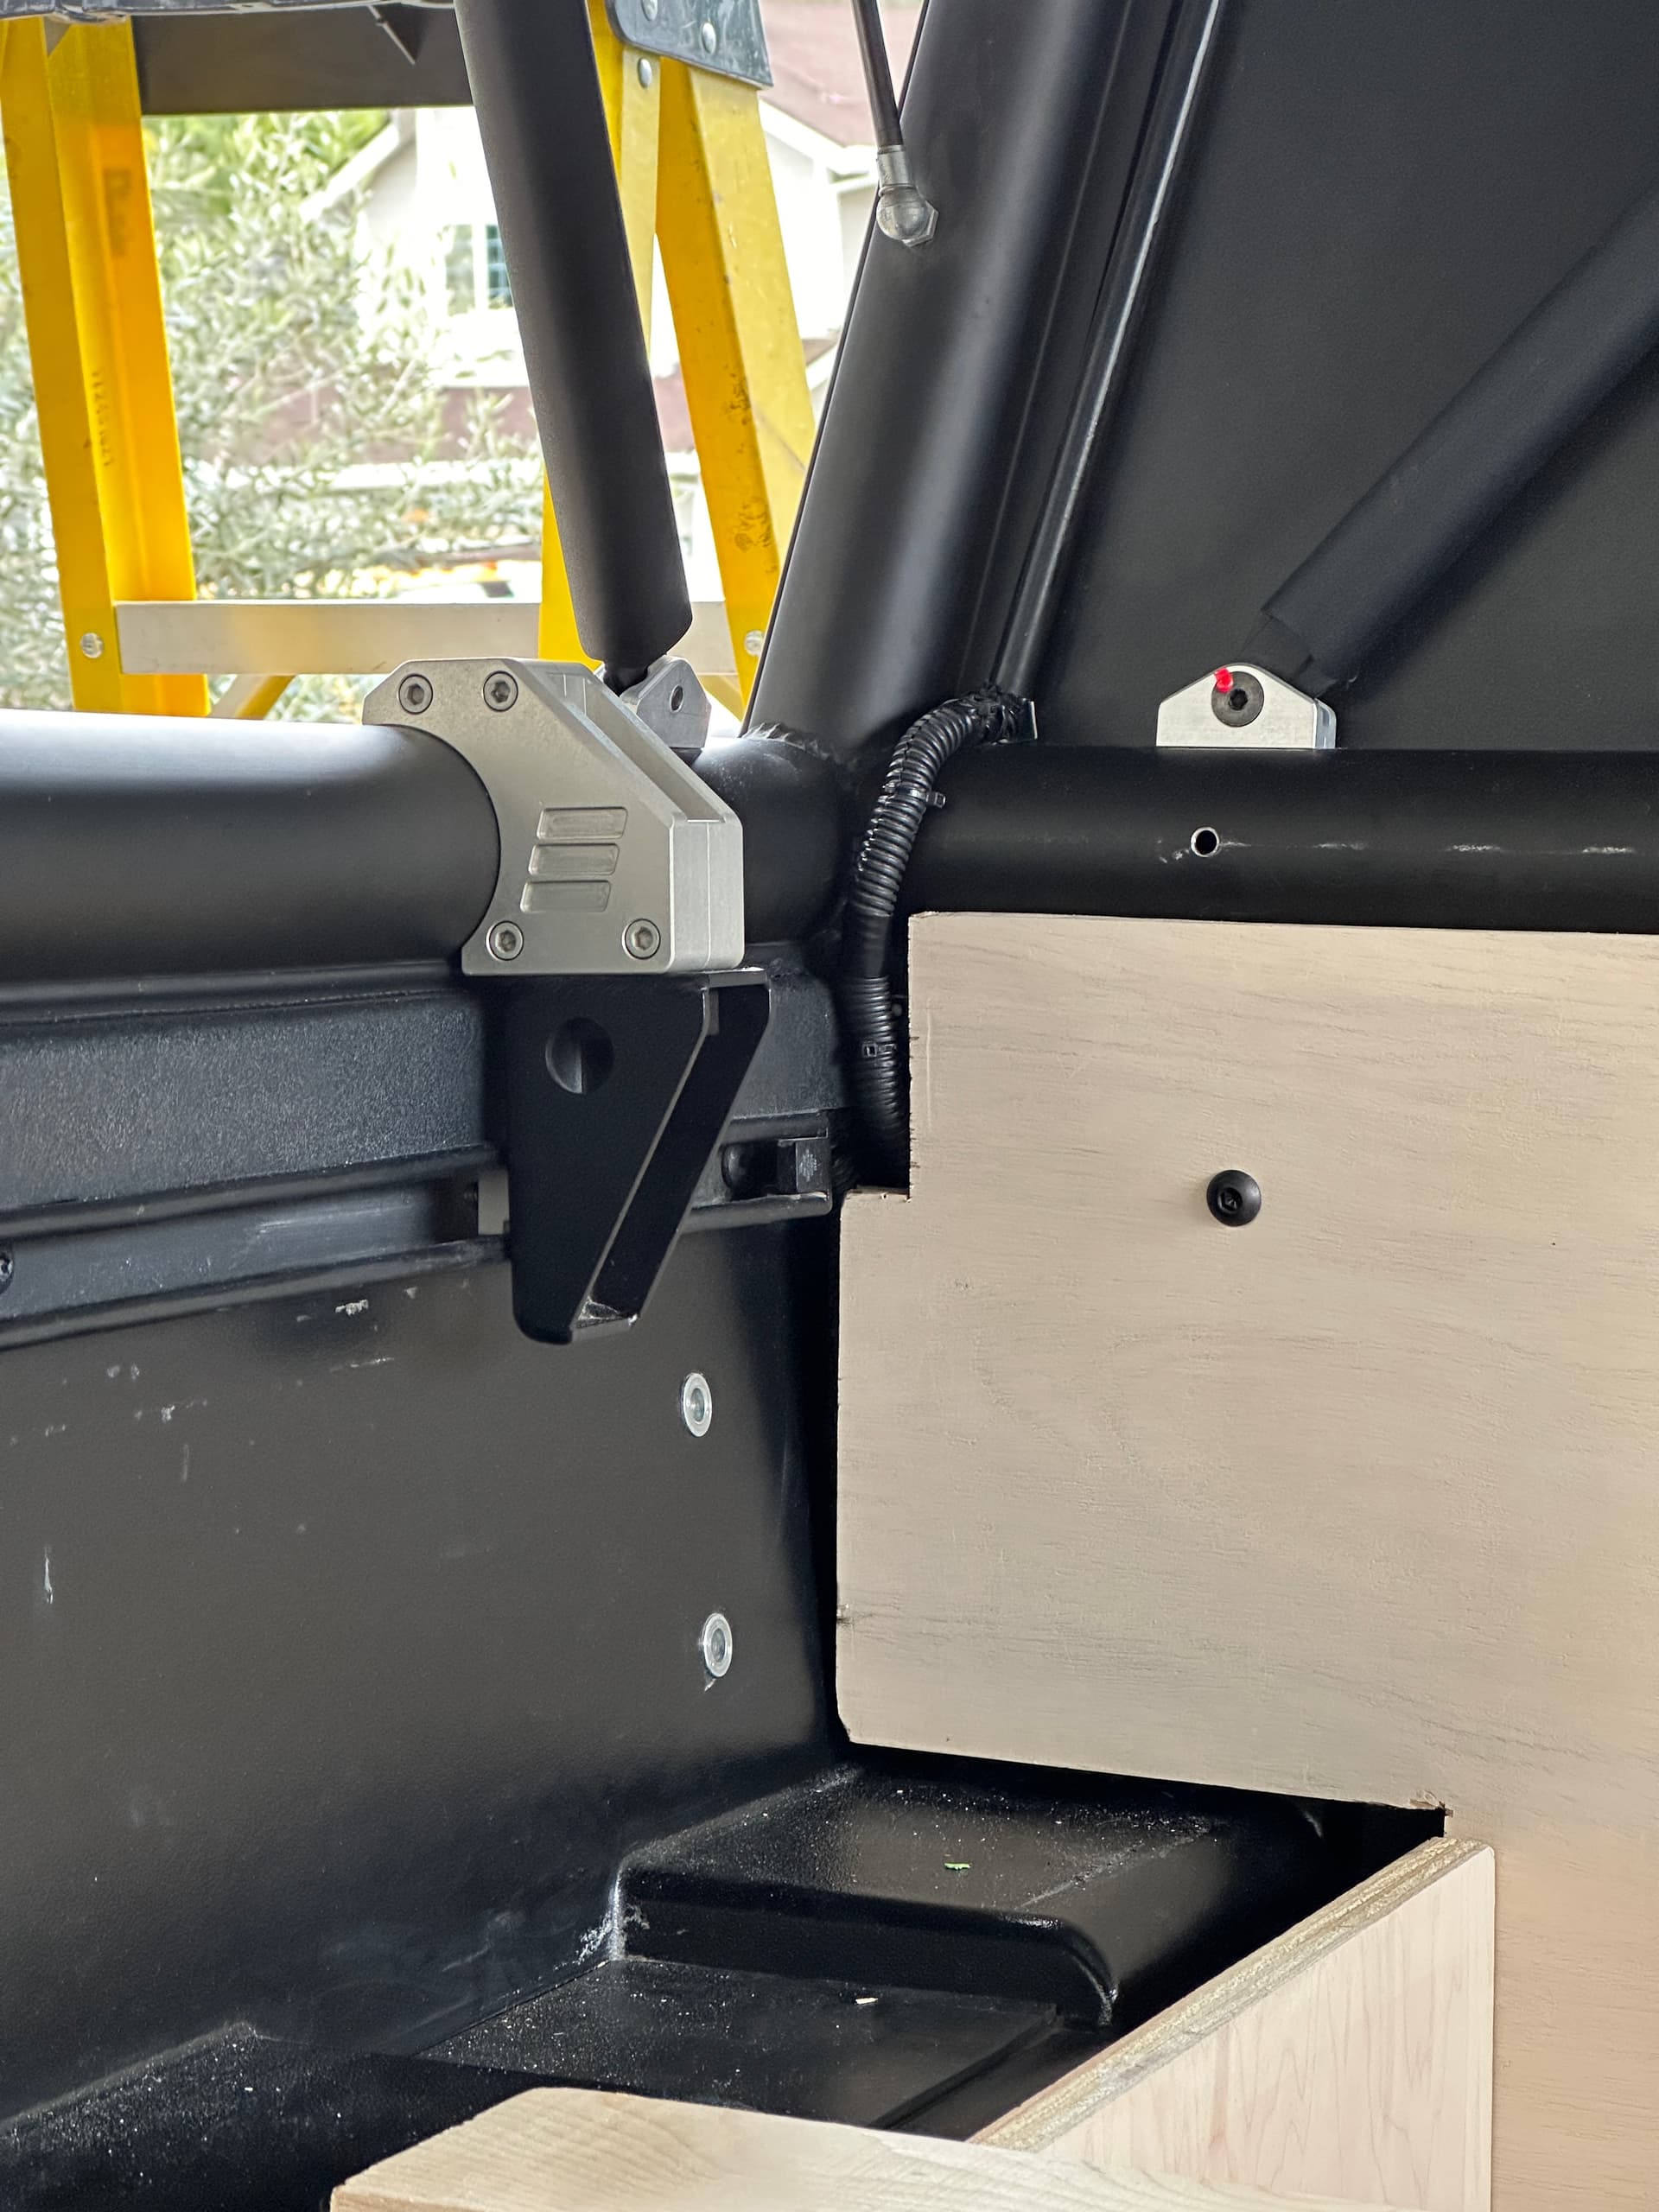
The velcro on the pillar is so clever! It seems obvious now, but one of those things that I probably wouldn’t have thought of.
1 Like
V2 Retroactive Build Update 04/05/24 — Planning Stage
Alright! Let’s go back to the start.
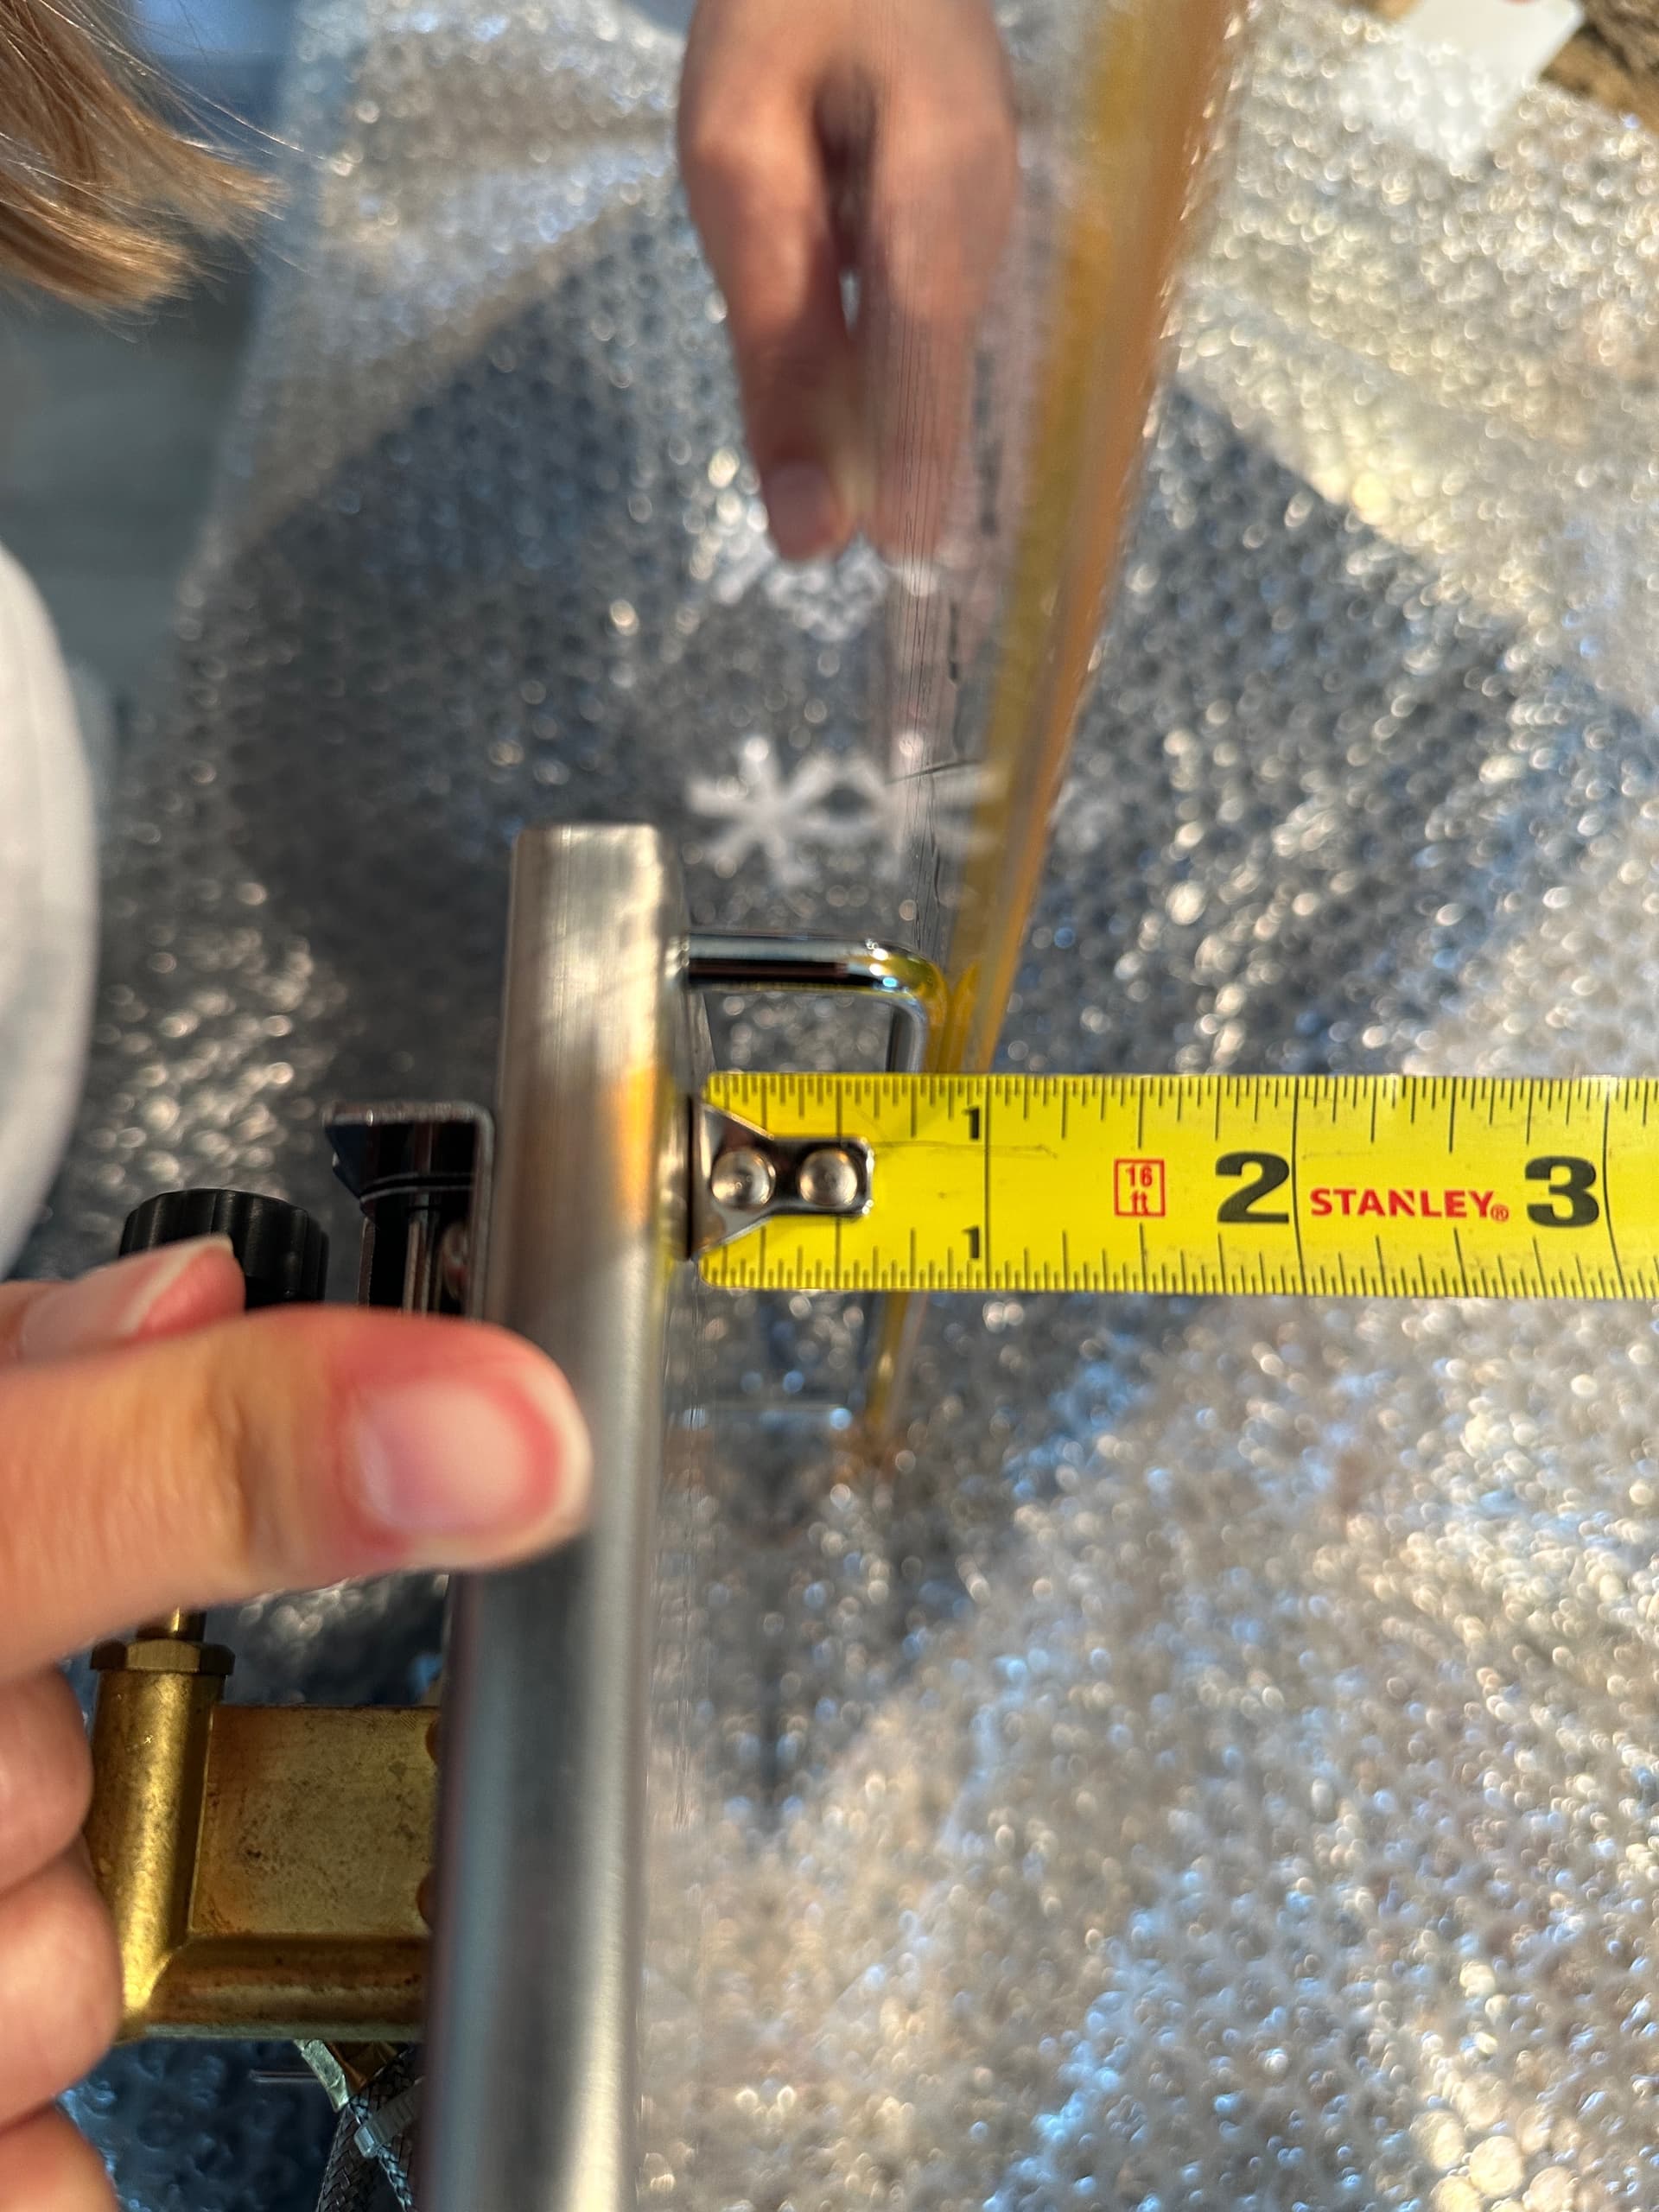
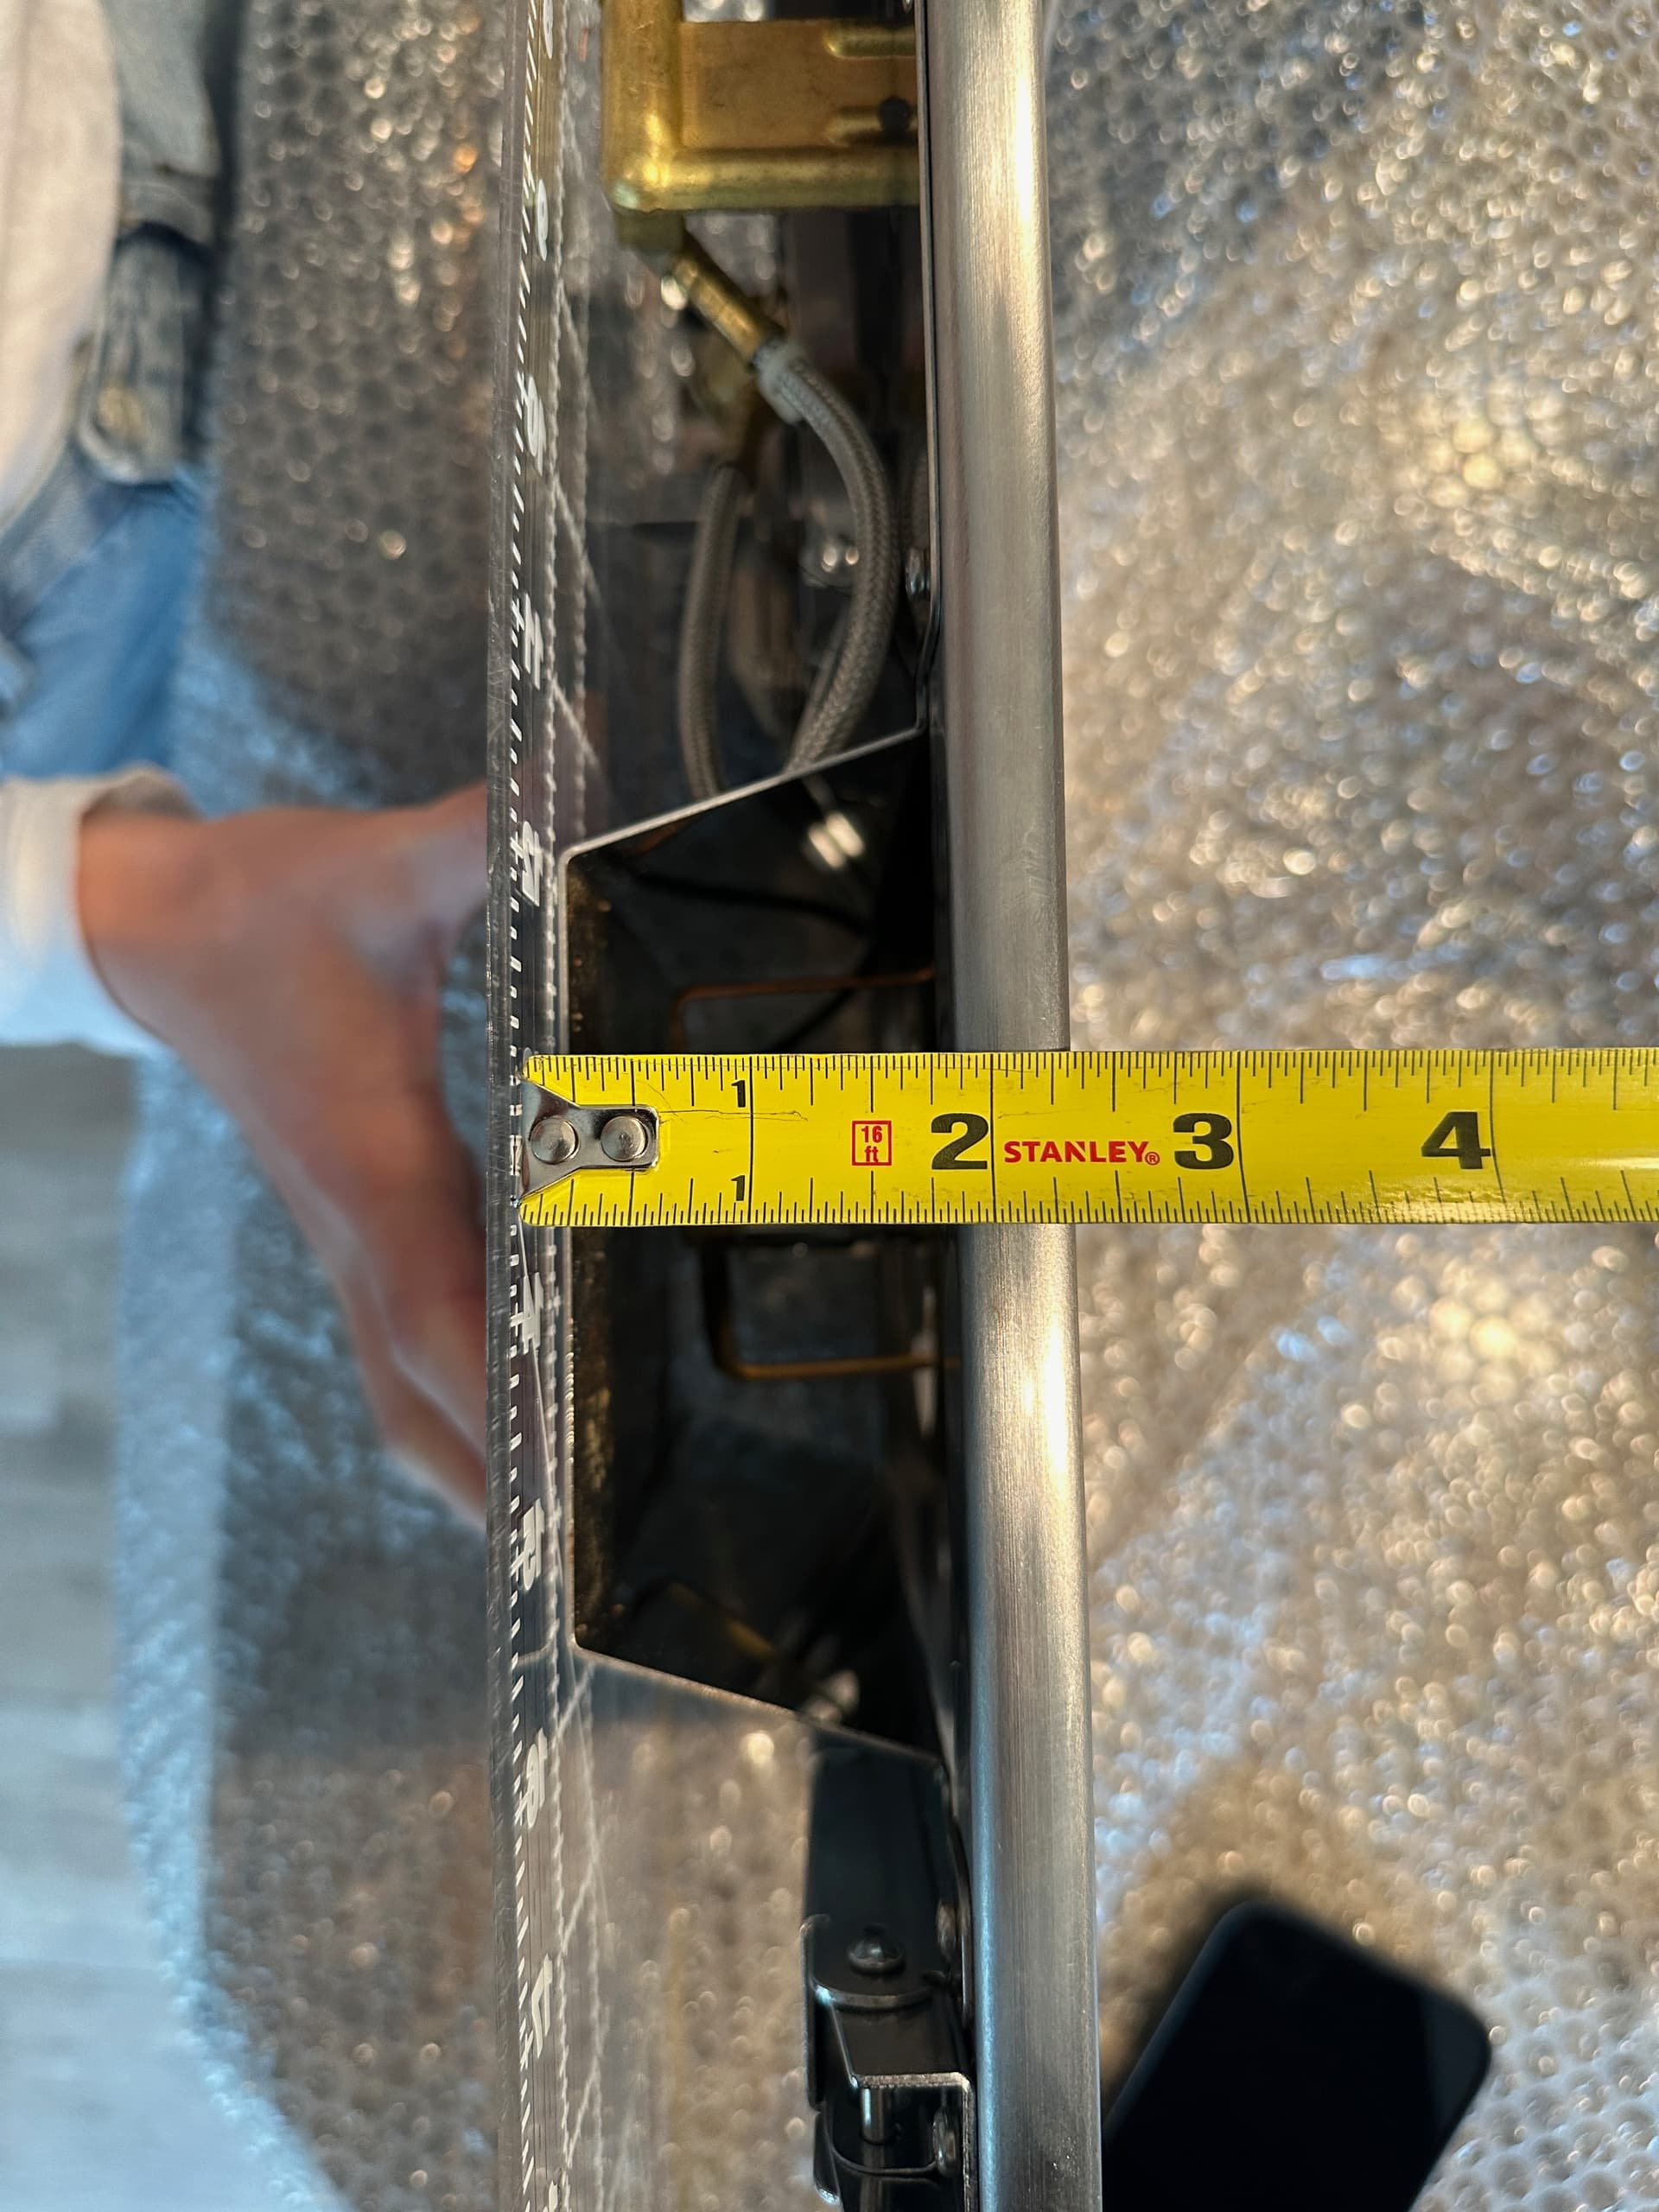
We spent a solid month measuring, prototyping, and sketching to dial in the final layout. In a short 5ft truck bed being efficient with every 1/4" of space matters—we went deep and measured everything as we worked towards improving QoL things—while maintaining nimbleness and simplicity.
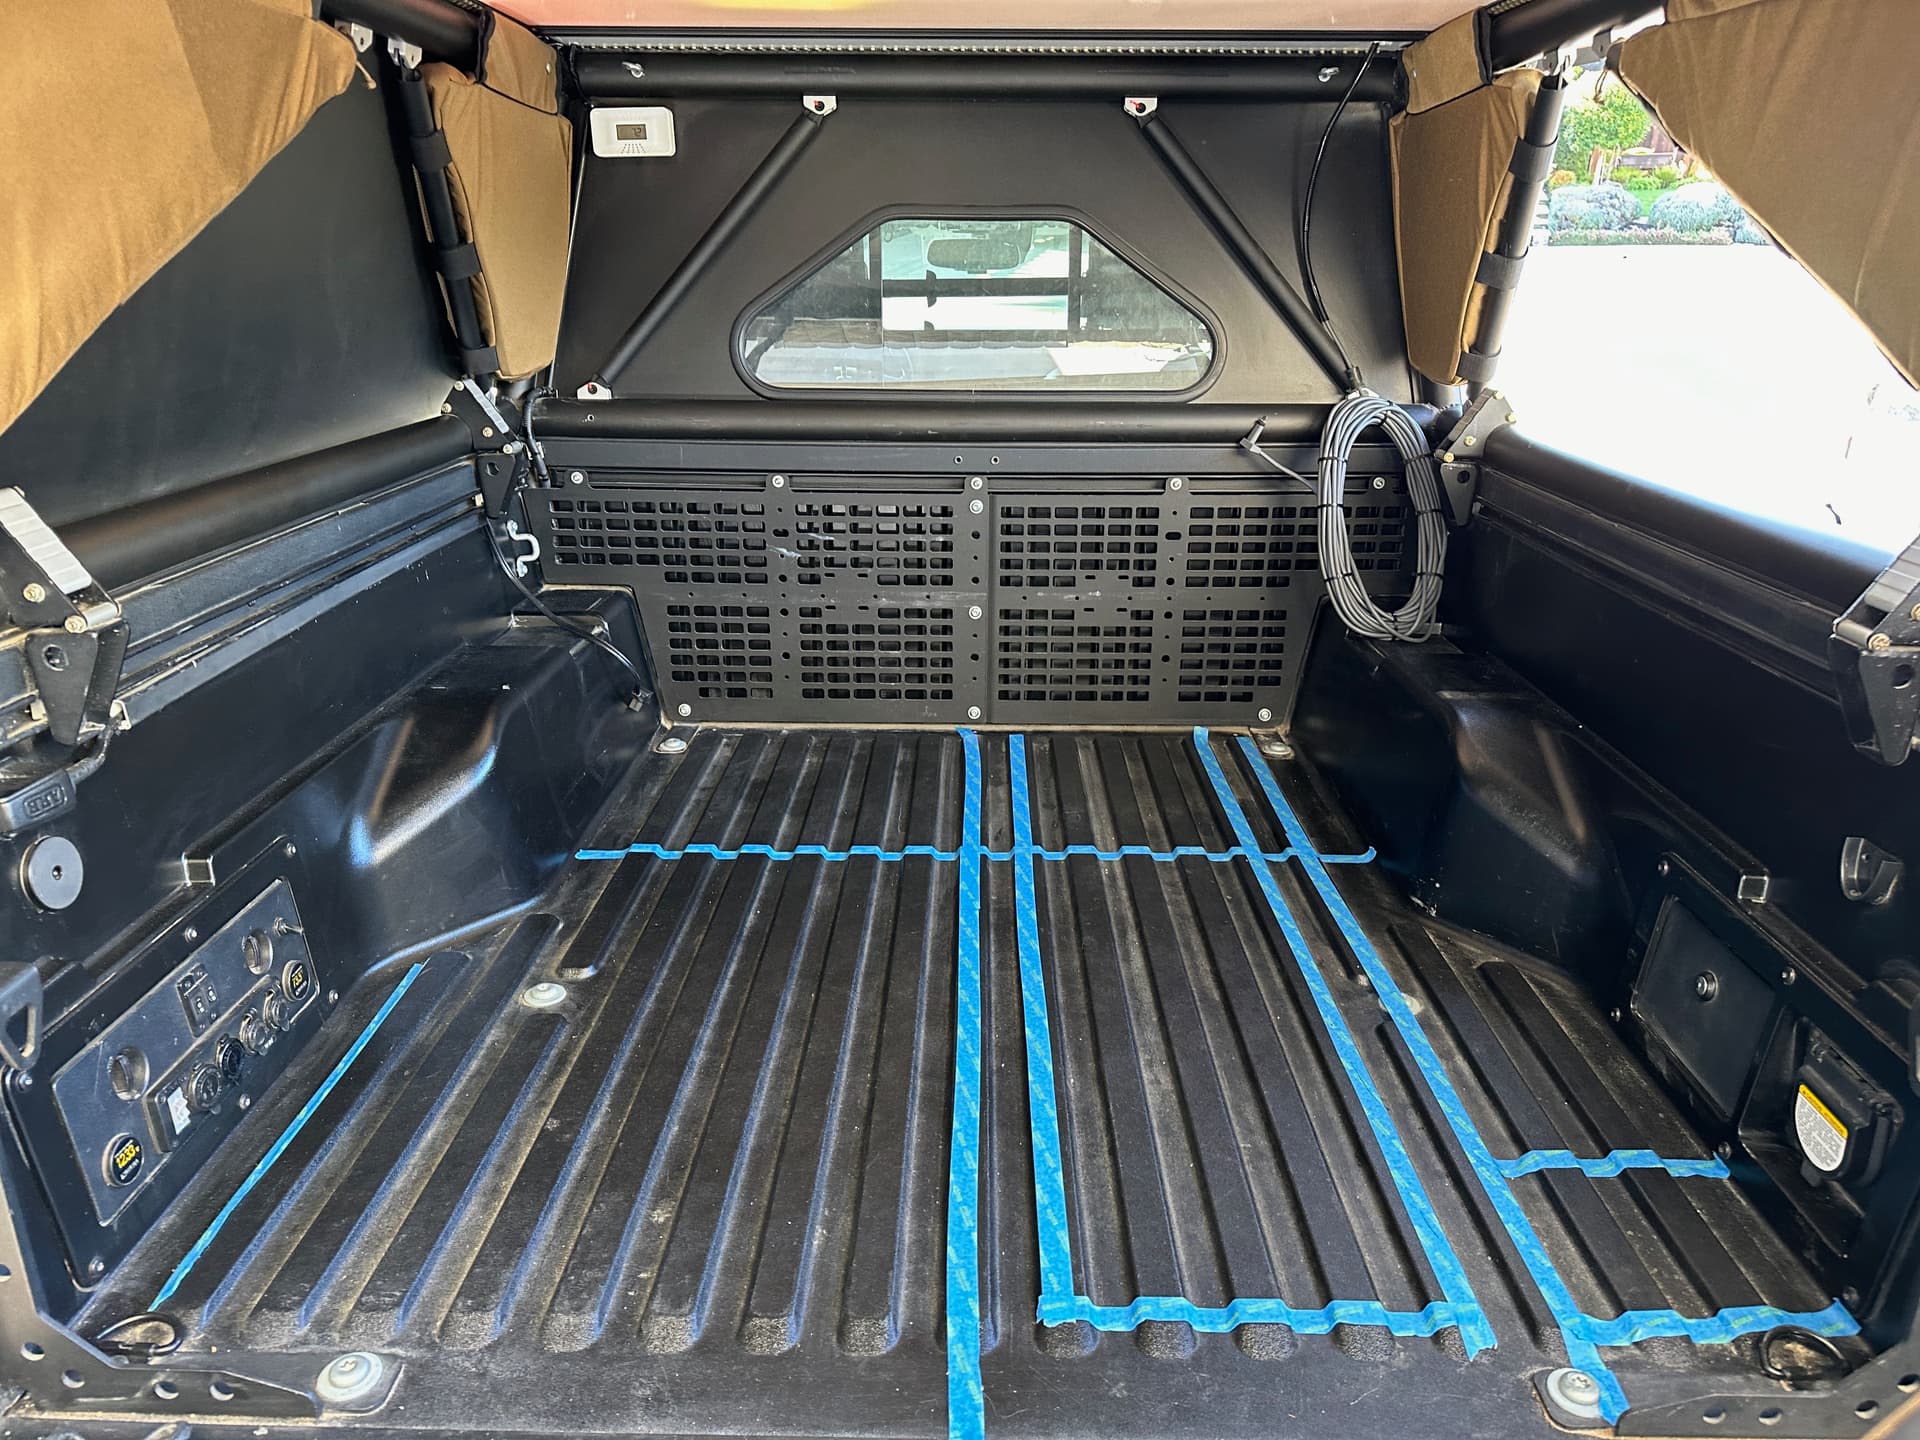
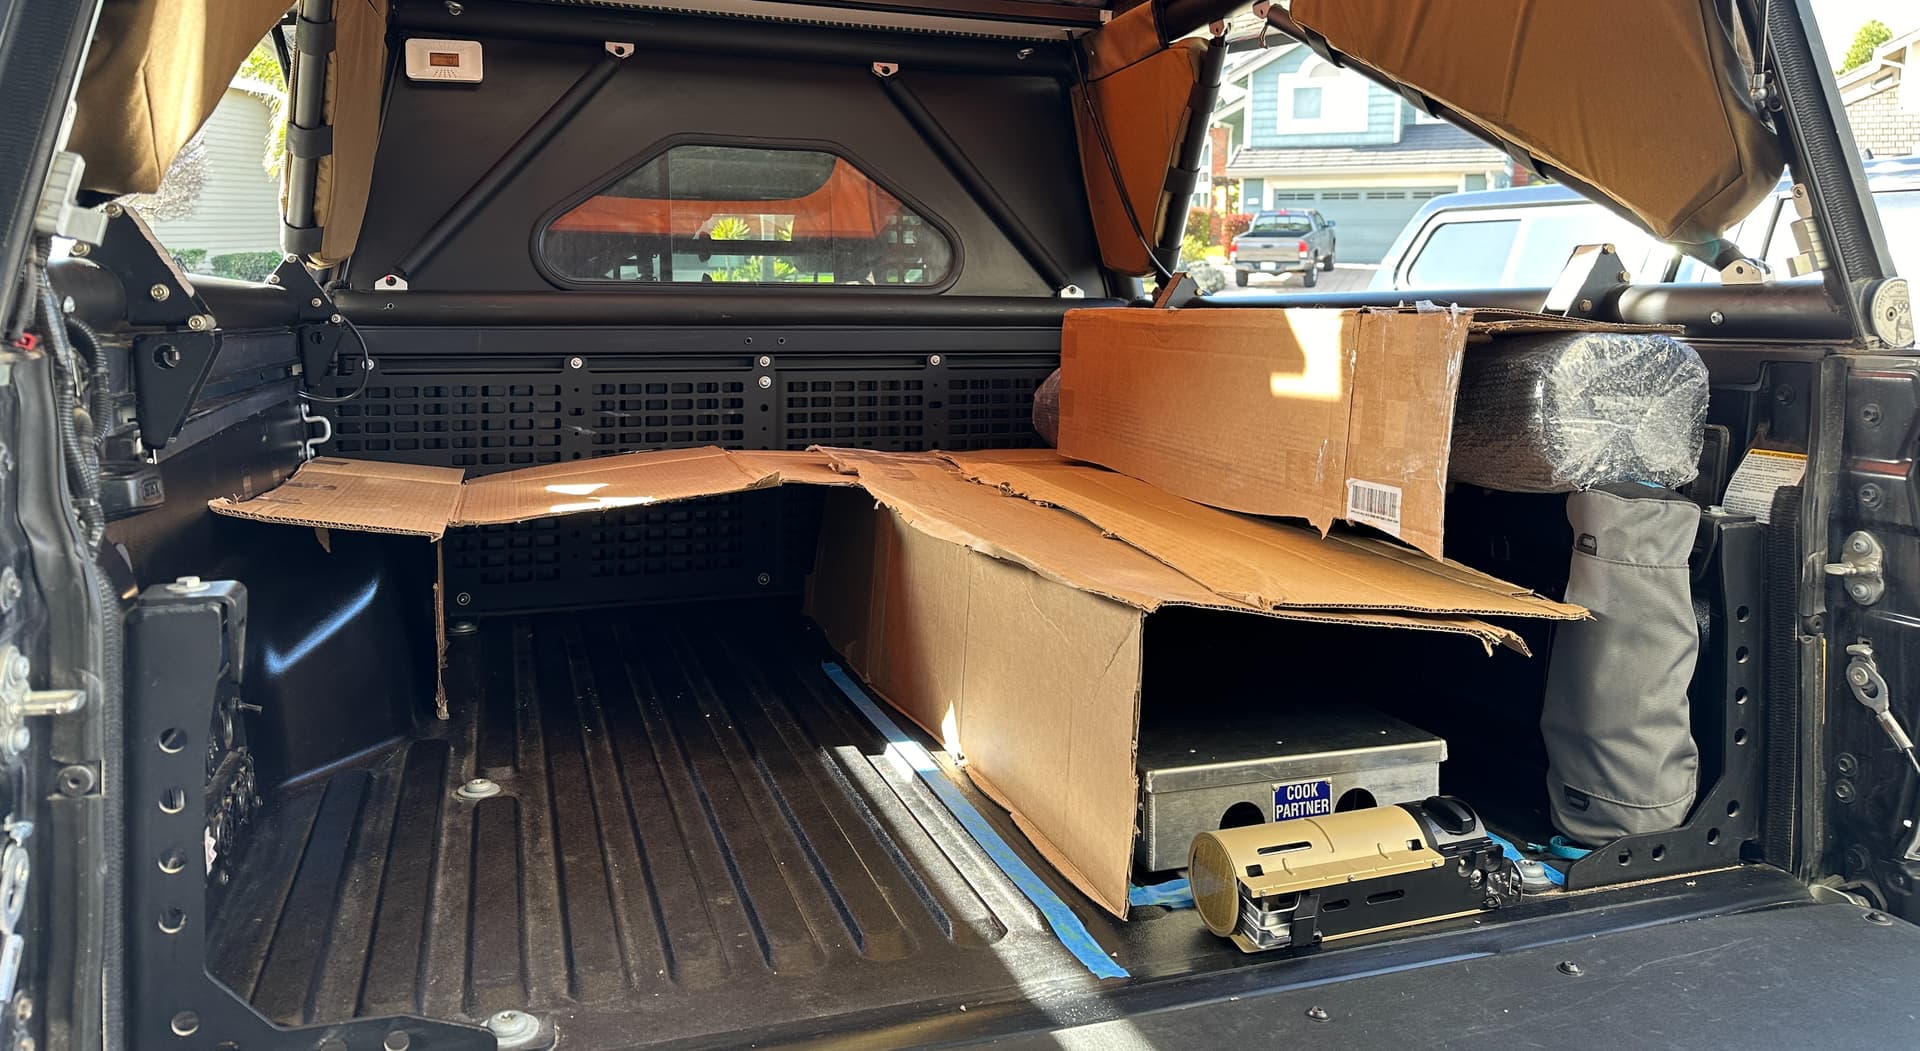
As you can see in the photo above, we went into this build under the assumption we would design our kitchen around our Cook Partner stove. That assumption changed as the mockup process identified two major pain points pretty quickly: 1) where do we store the massive propane tank without eating into our livable space and 2) do we really want to dedicate so much of our limited drawer space to just a cooktop. I’m a fan of multi-use / multi-purpose solutions and had a strong desire to design something better here. A bulky heavy box that holds a bulky 2-burner stove was not our answer.
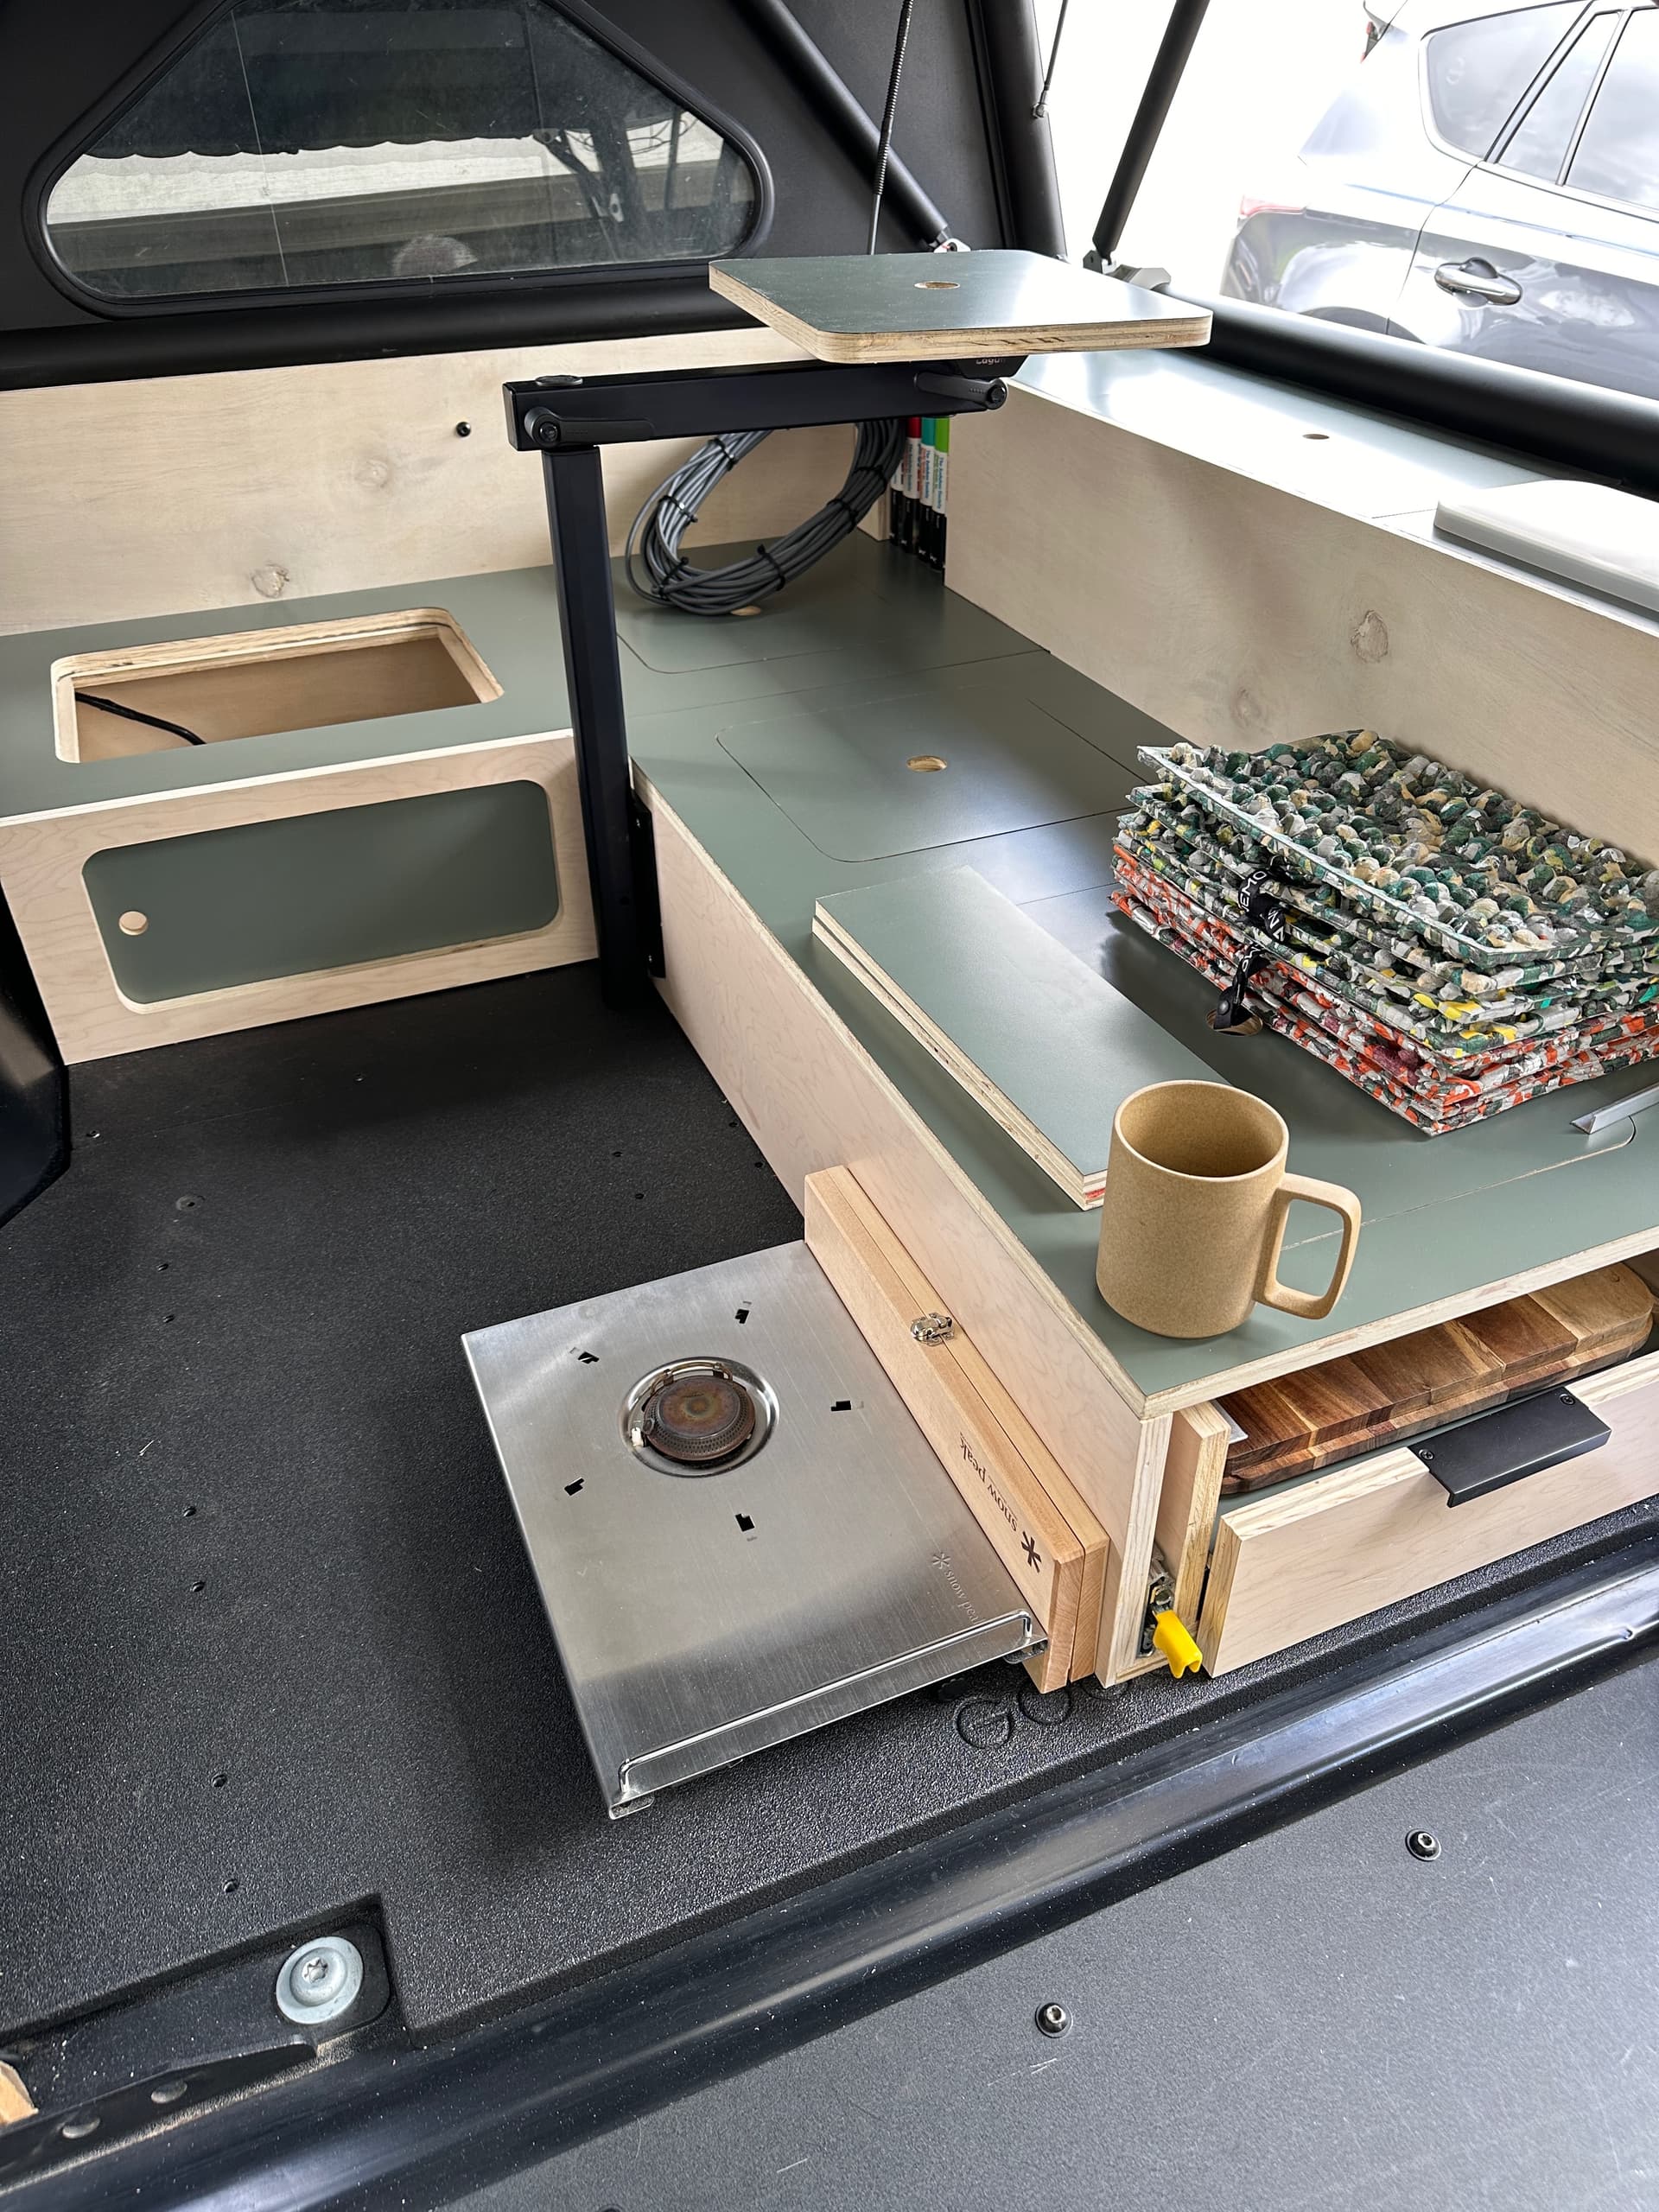
The desire to adhere to this design principal led me to Snow Peak’s IGT (Iron Grill Table) system. For those not familiar with the system, it’s essentially just a table frame that allows the user to drop in a wide range of standardized accessories from single burner stoves, to dual burner stoves, to cutting boards, even a bbq! As a big SP fan, I’ve always been intrigued by this concept but have never had a reason to invest in one as I have no space to store their table frame itself.
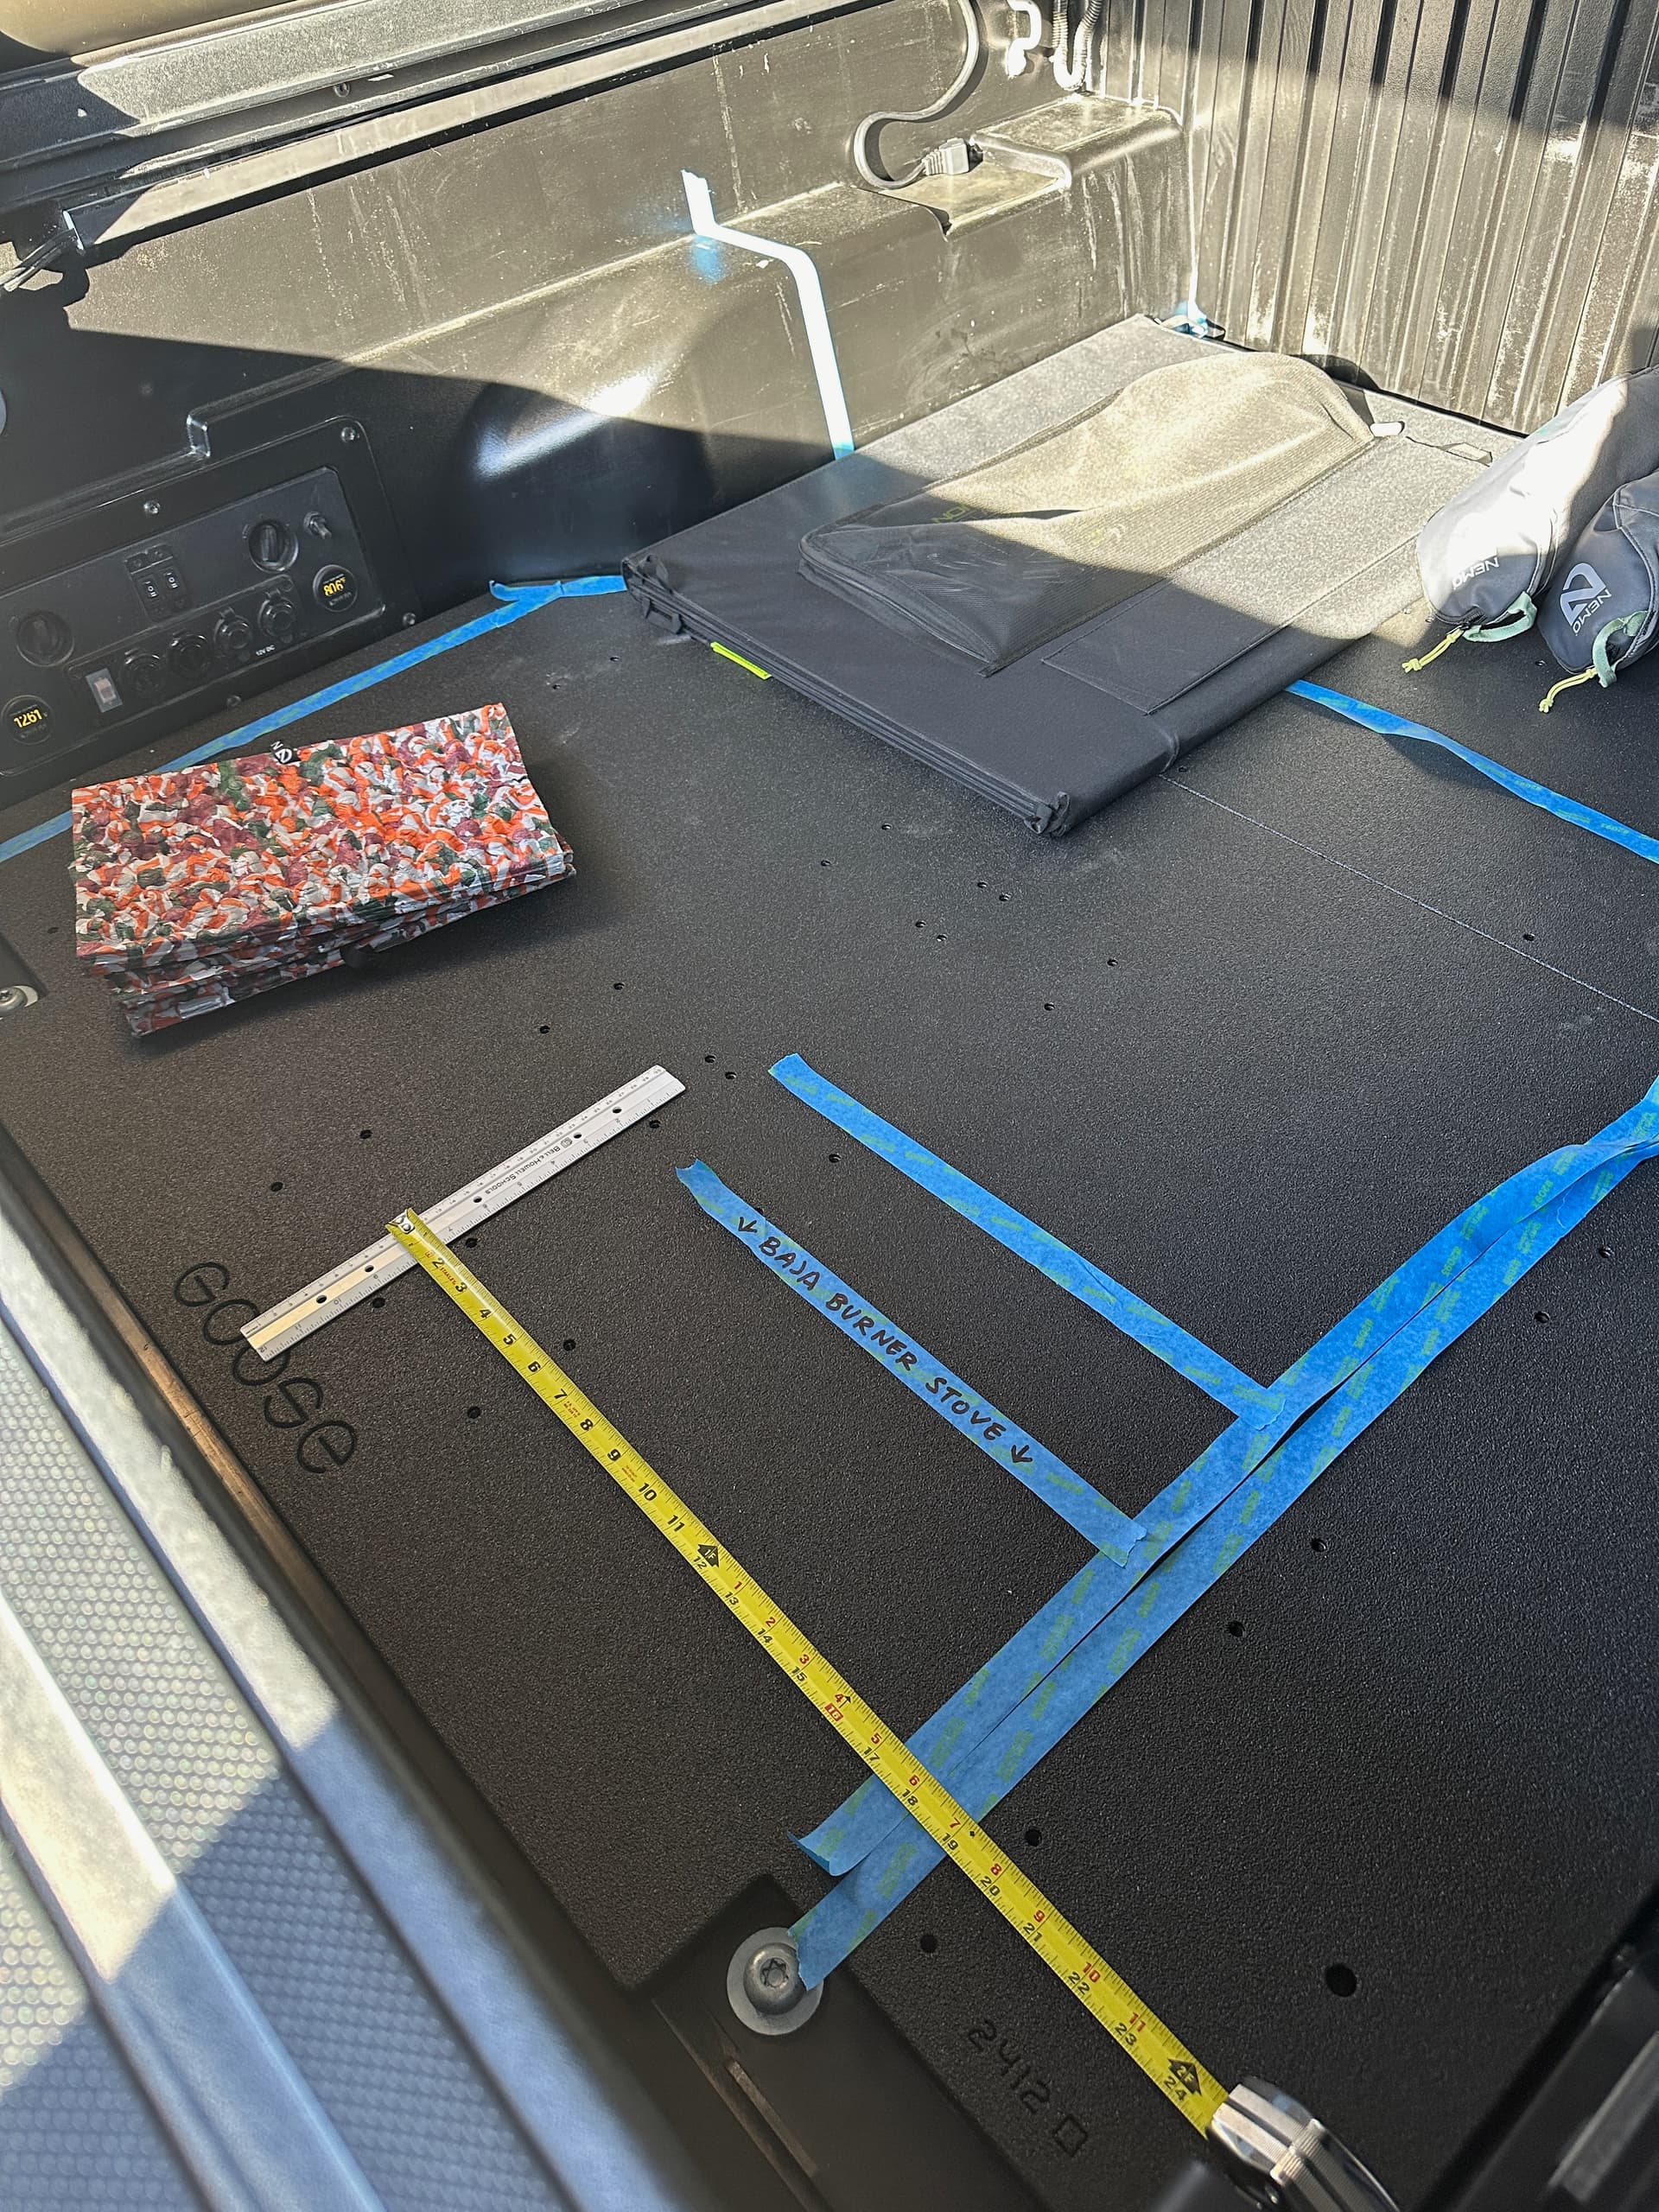
Then I had the idea: What if we got our hands on the dimensions of the table frame and built the “drawer” itself as an IGT frame? The drawer did not need to be a bulky heavy box—it could be two simple rails with no floor that house the IGT accessories. It would be infinitely modular, and could adapt to our needs from trip to trip.
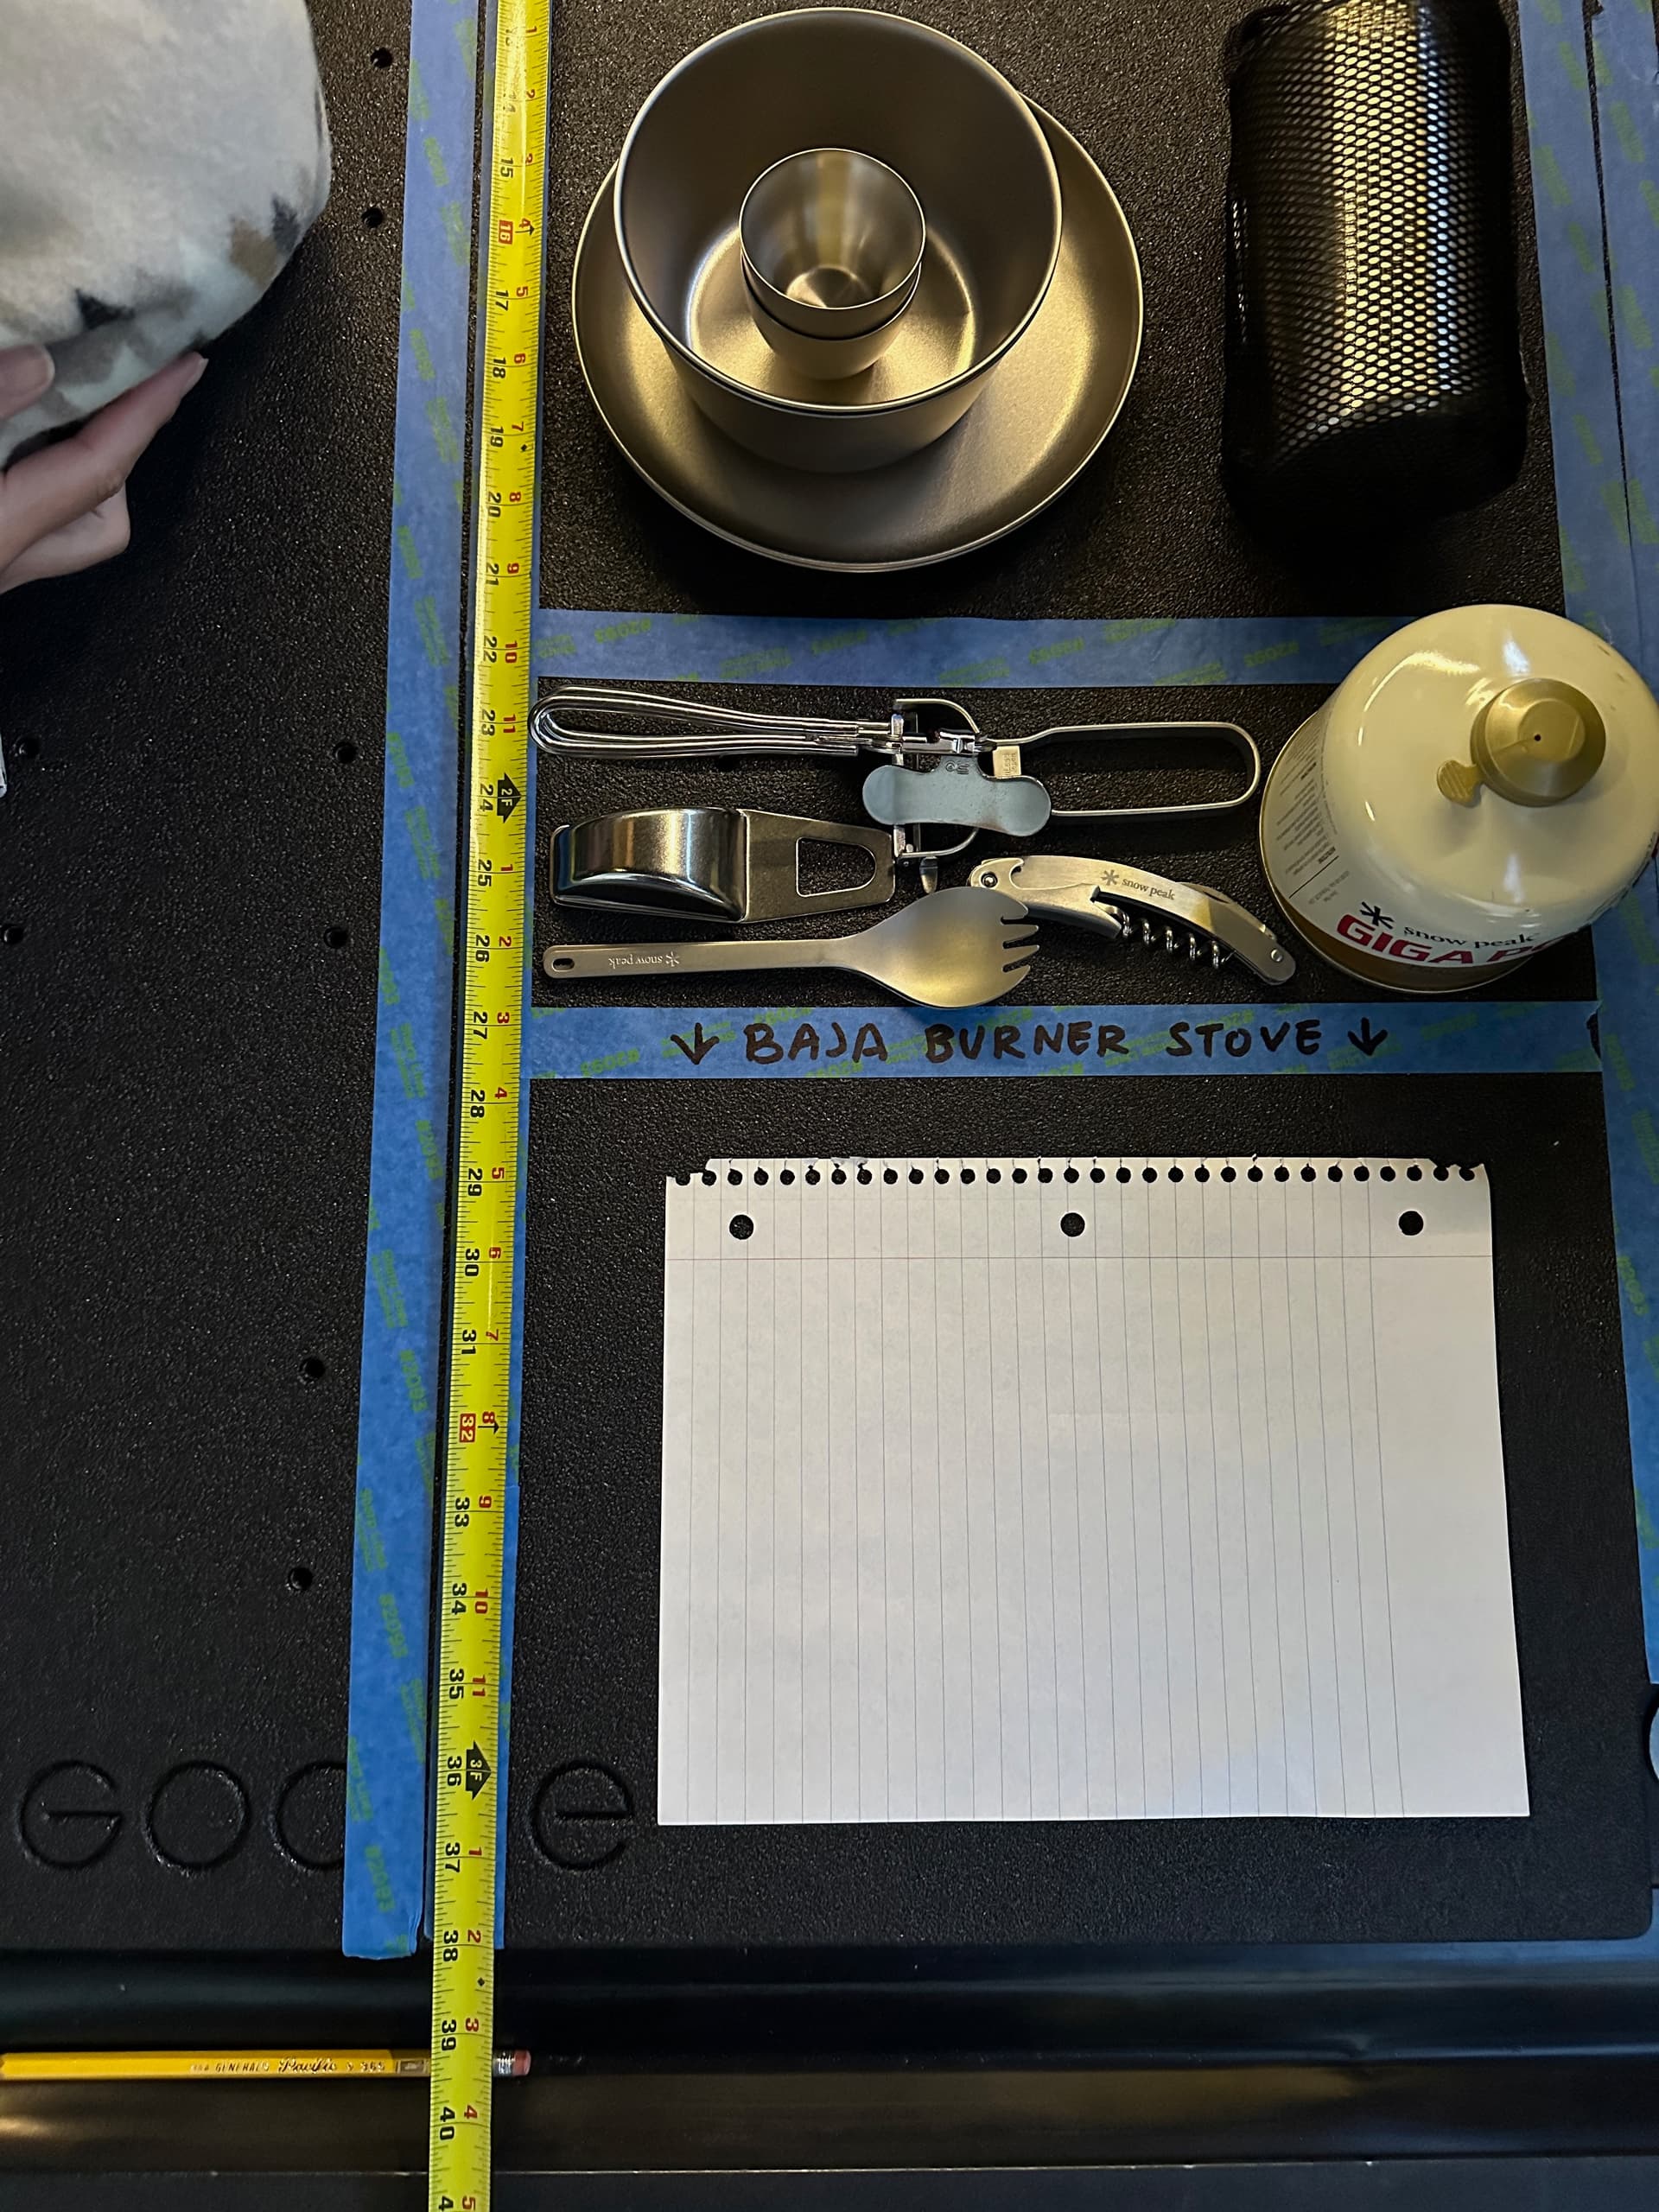
As an added bonus, the IGT burners use the same isobutane fuel our Snow Peak torch, lanterns, and 2 pocket backpacking stoves utilize. The simplicity of carrying one fuel source for everything was liberating.
We committed to the concept and and moved into higher fidelity drawings for what would become the focal point of the new layout—the first known custom Snow Peak IGT kitchen built into a truck bed.

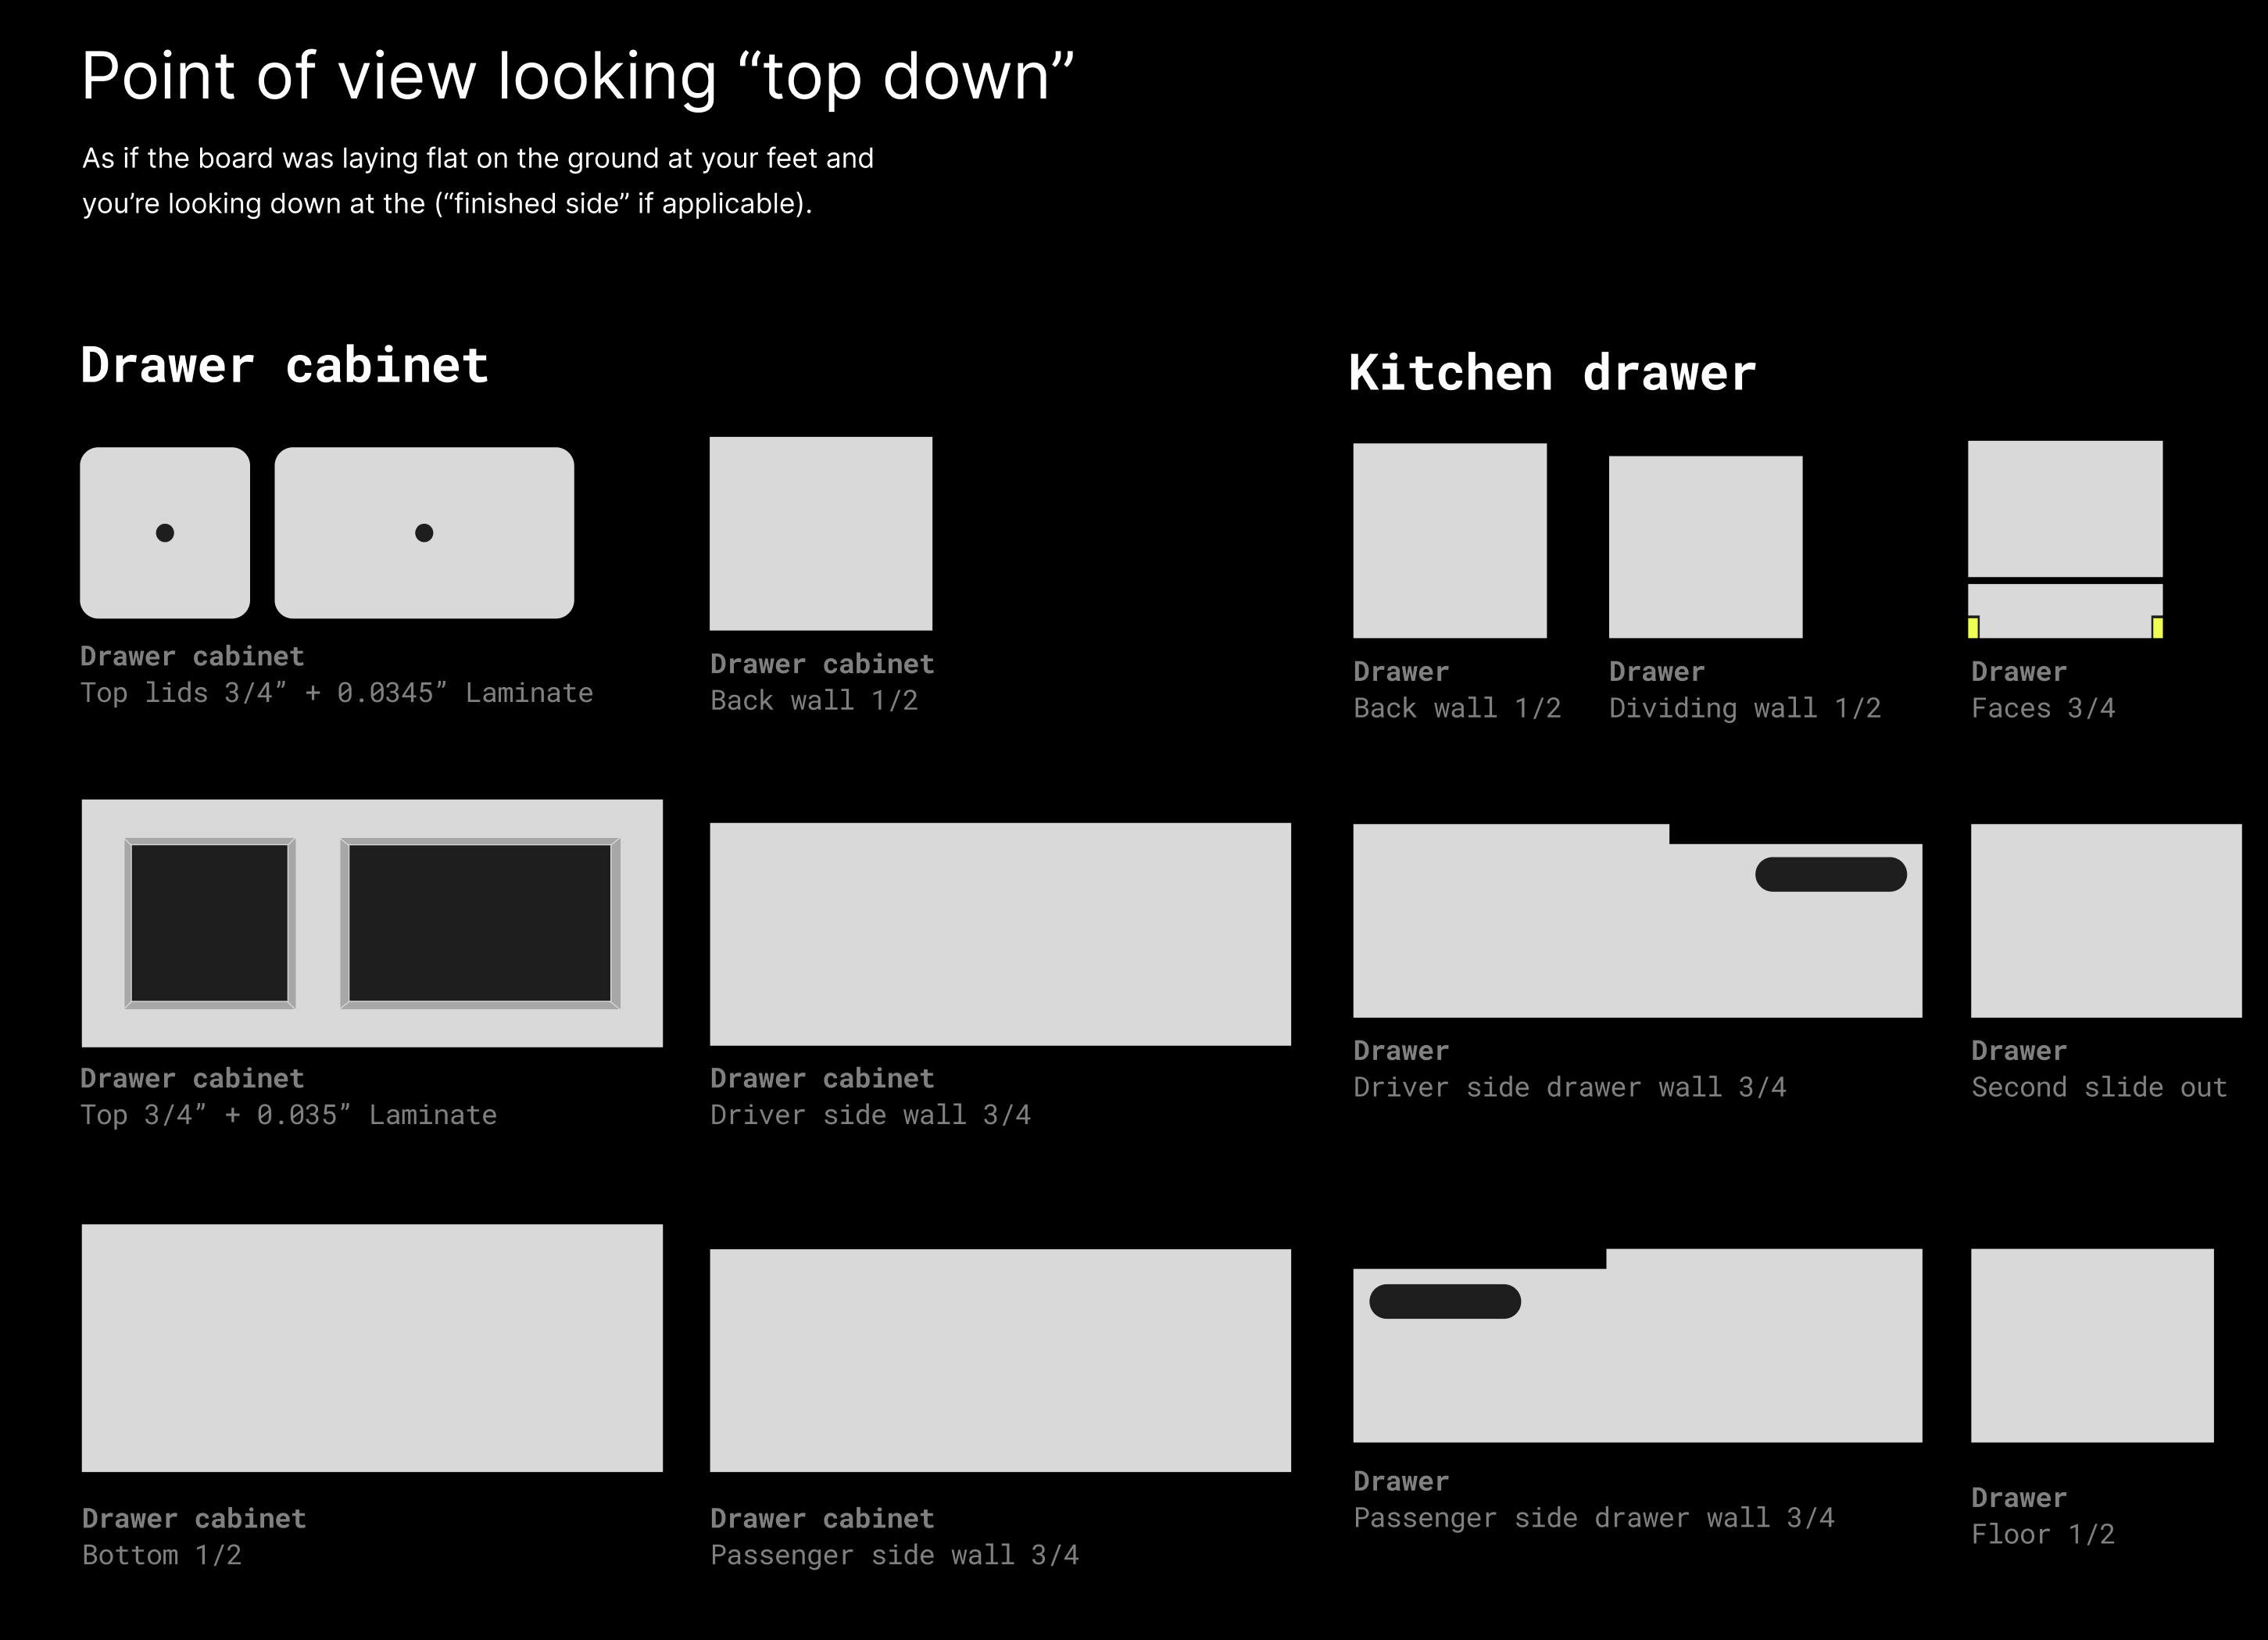
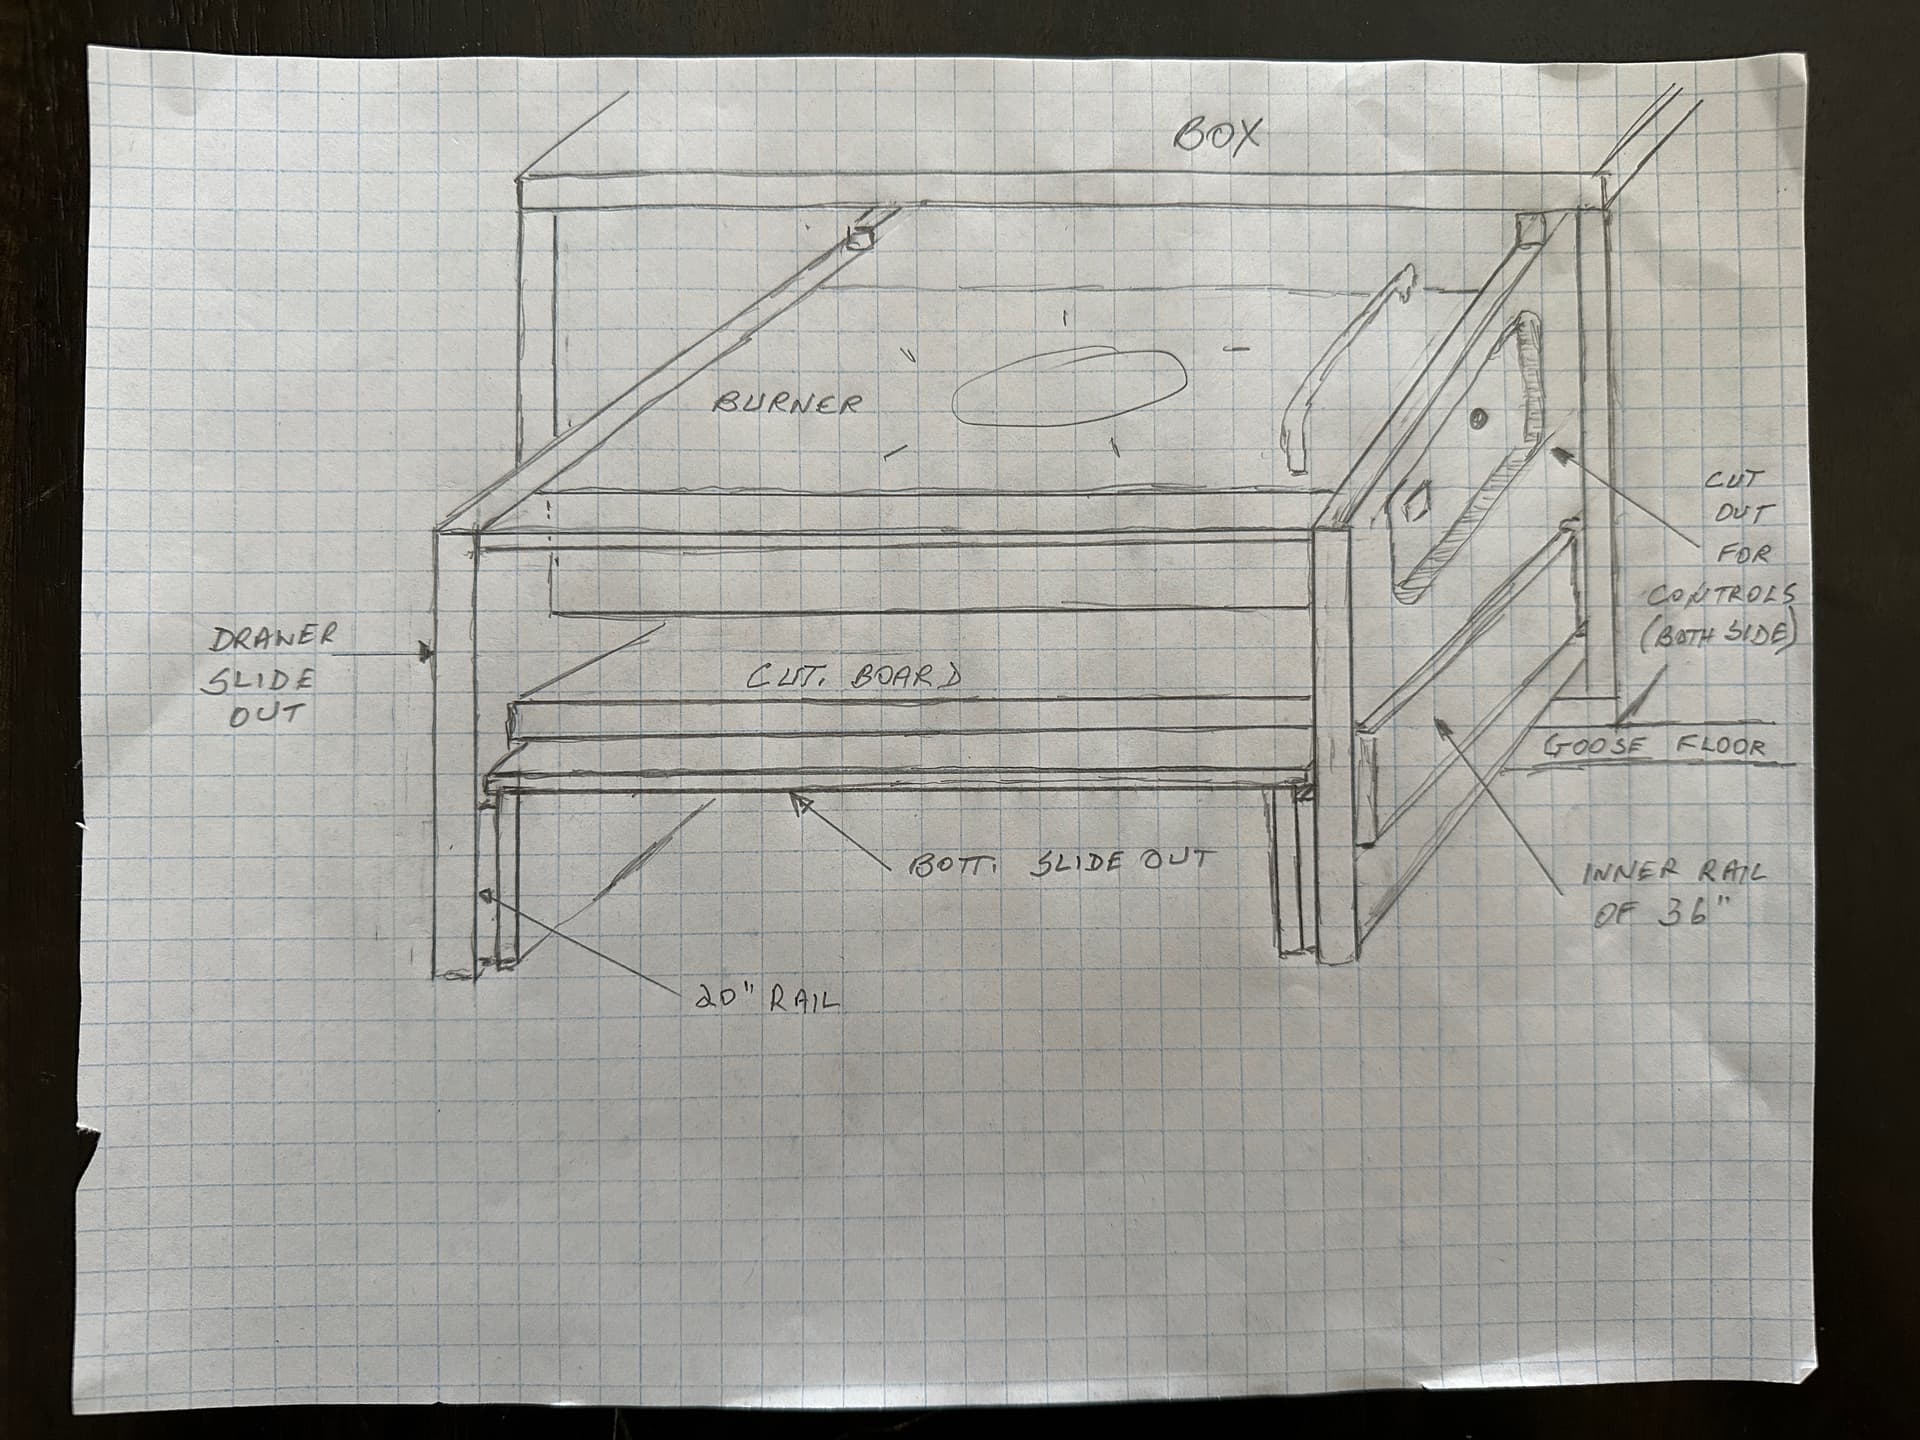
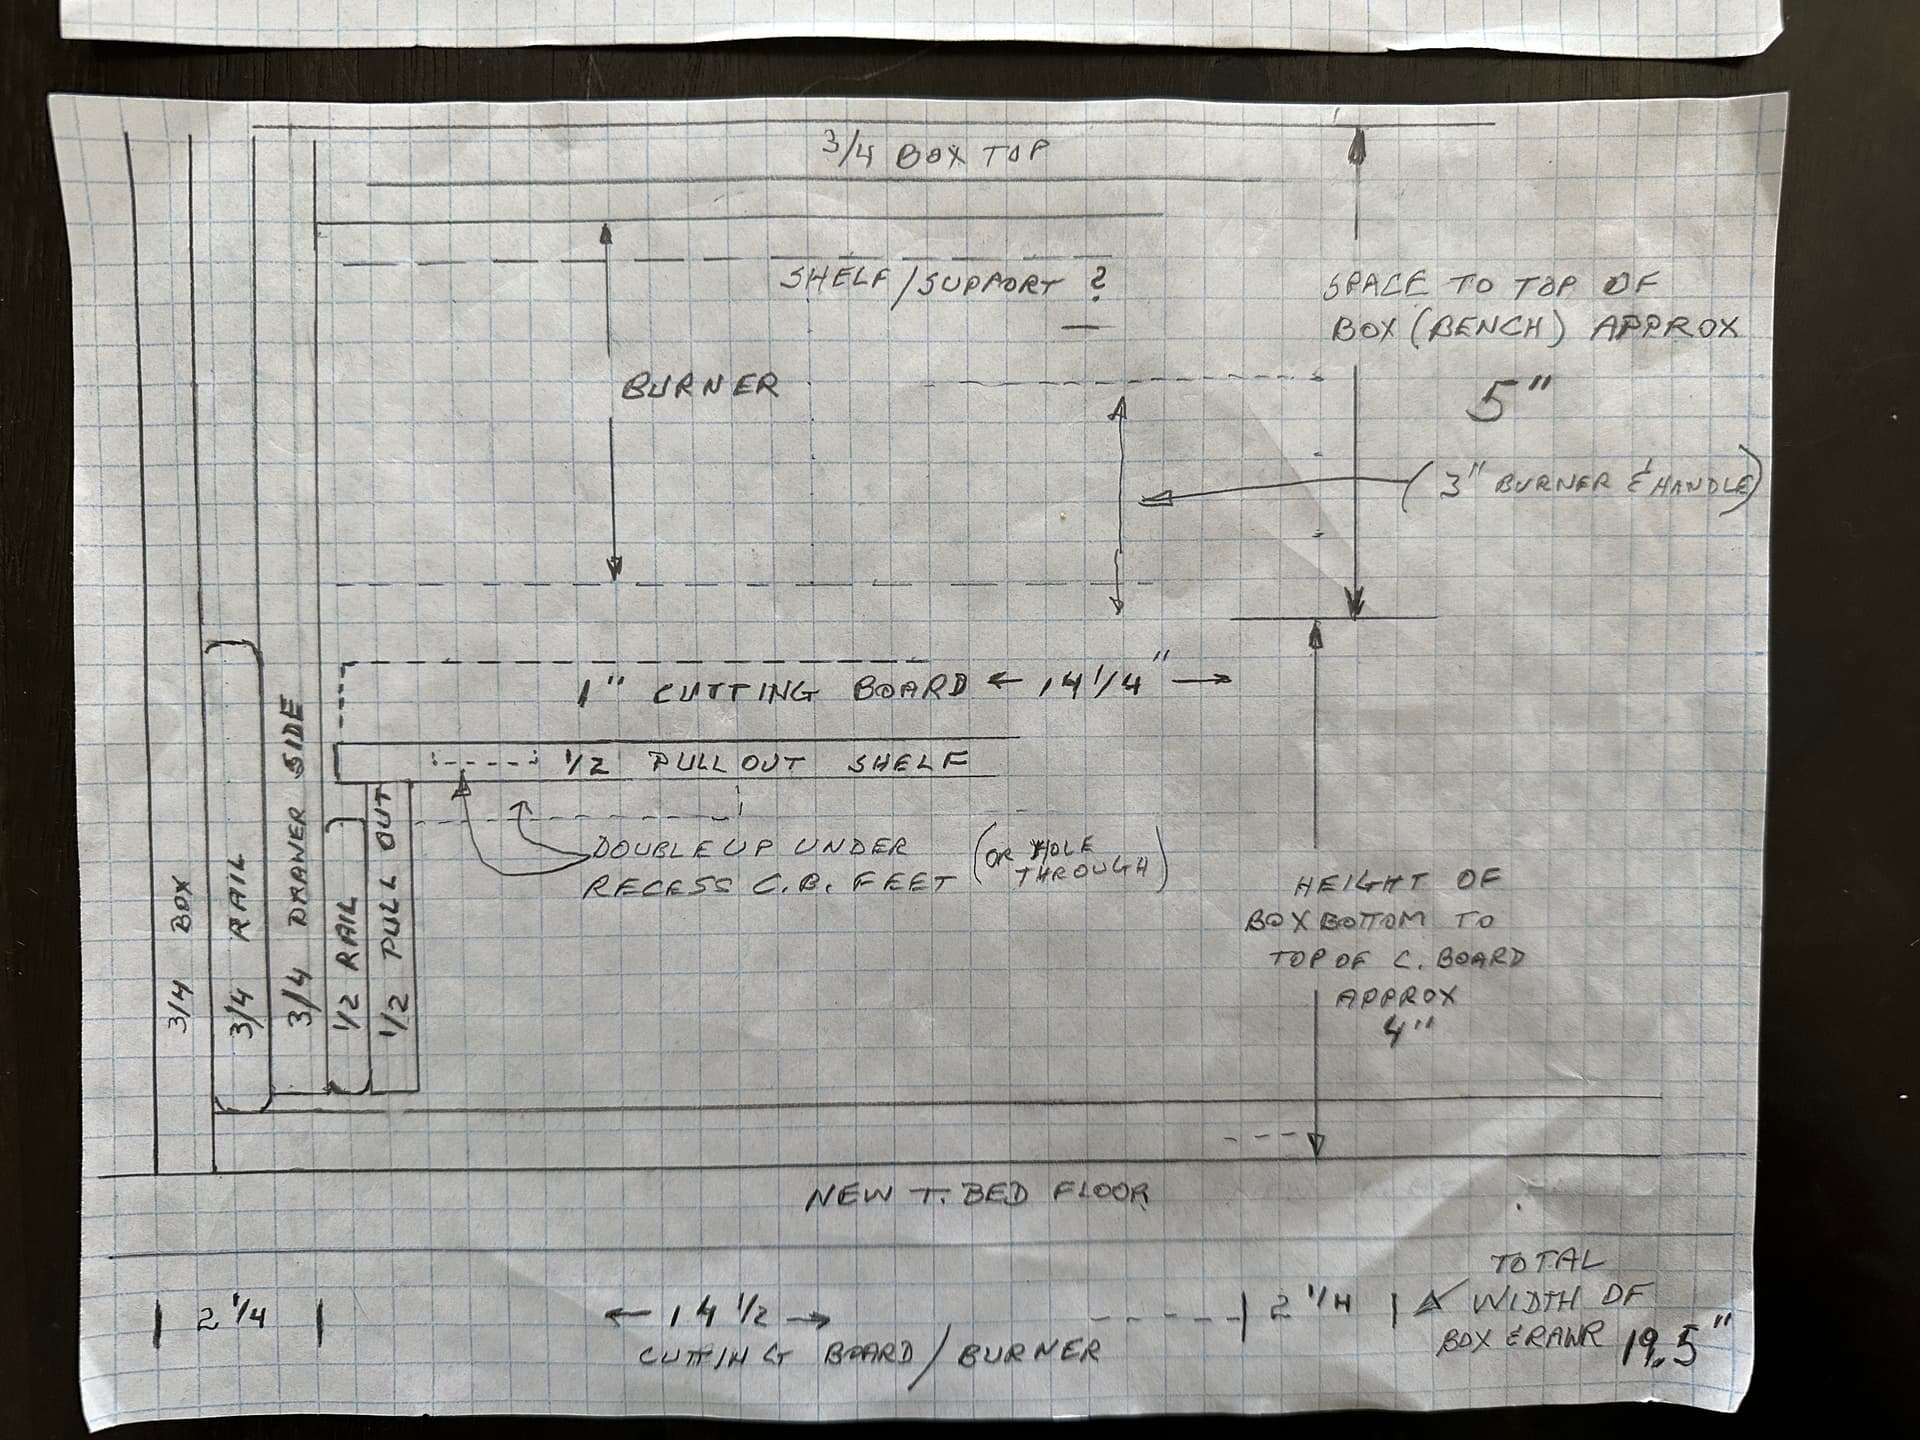
(Shoutout to my Dad for taking my early figma concepts and parts list and translating into these clean drawings! NOTE: These are early measurements that can be used for guidance, but are not the final build measurements)
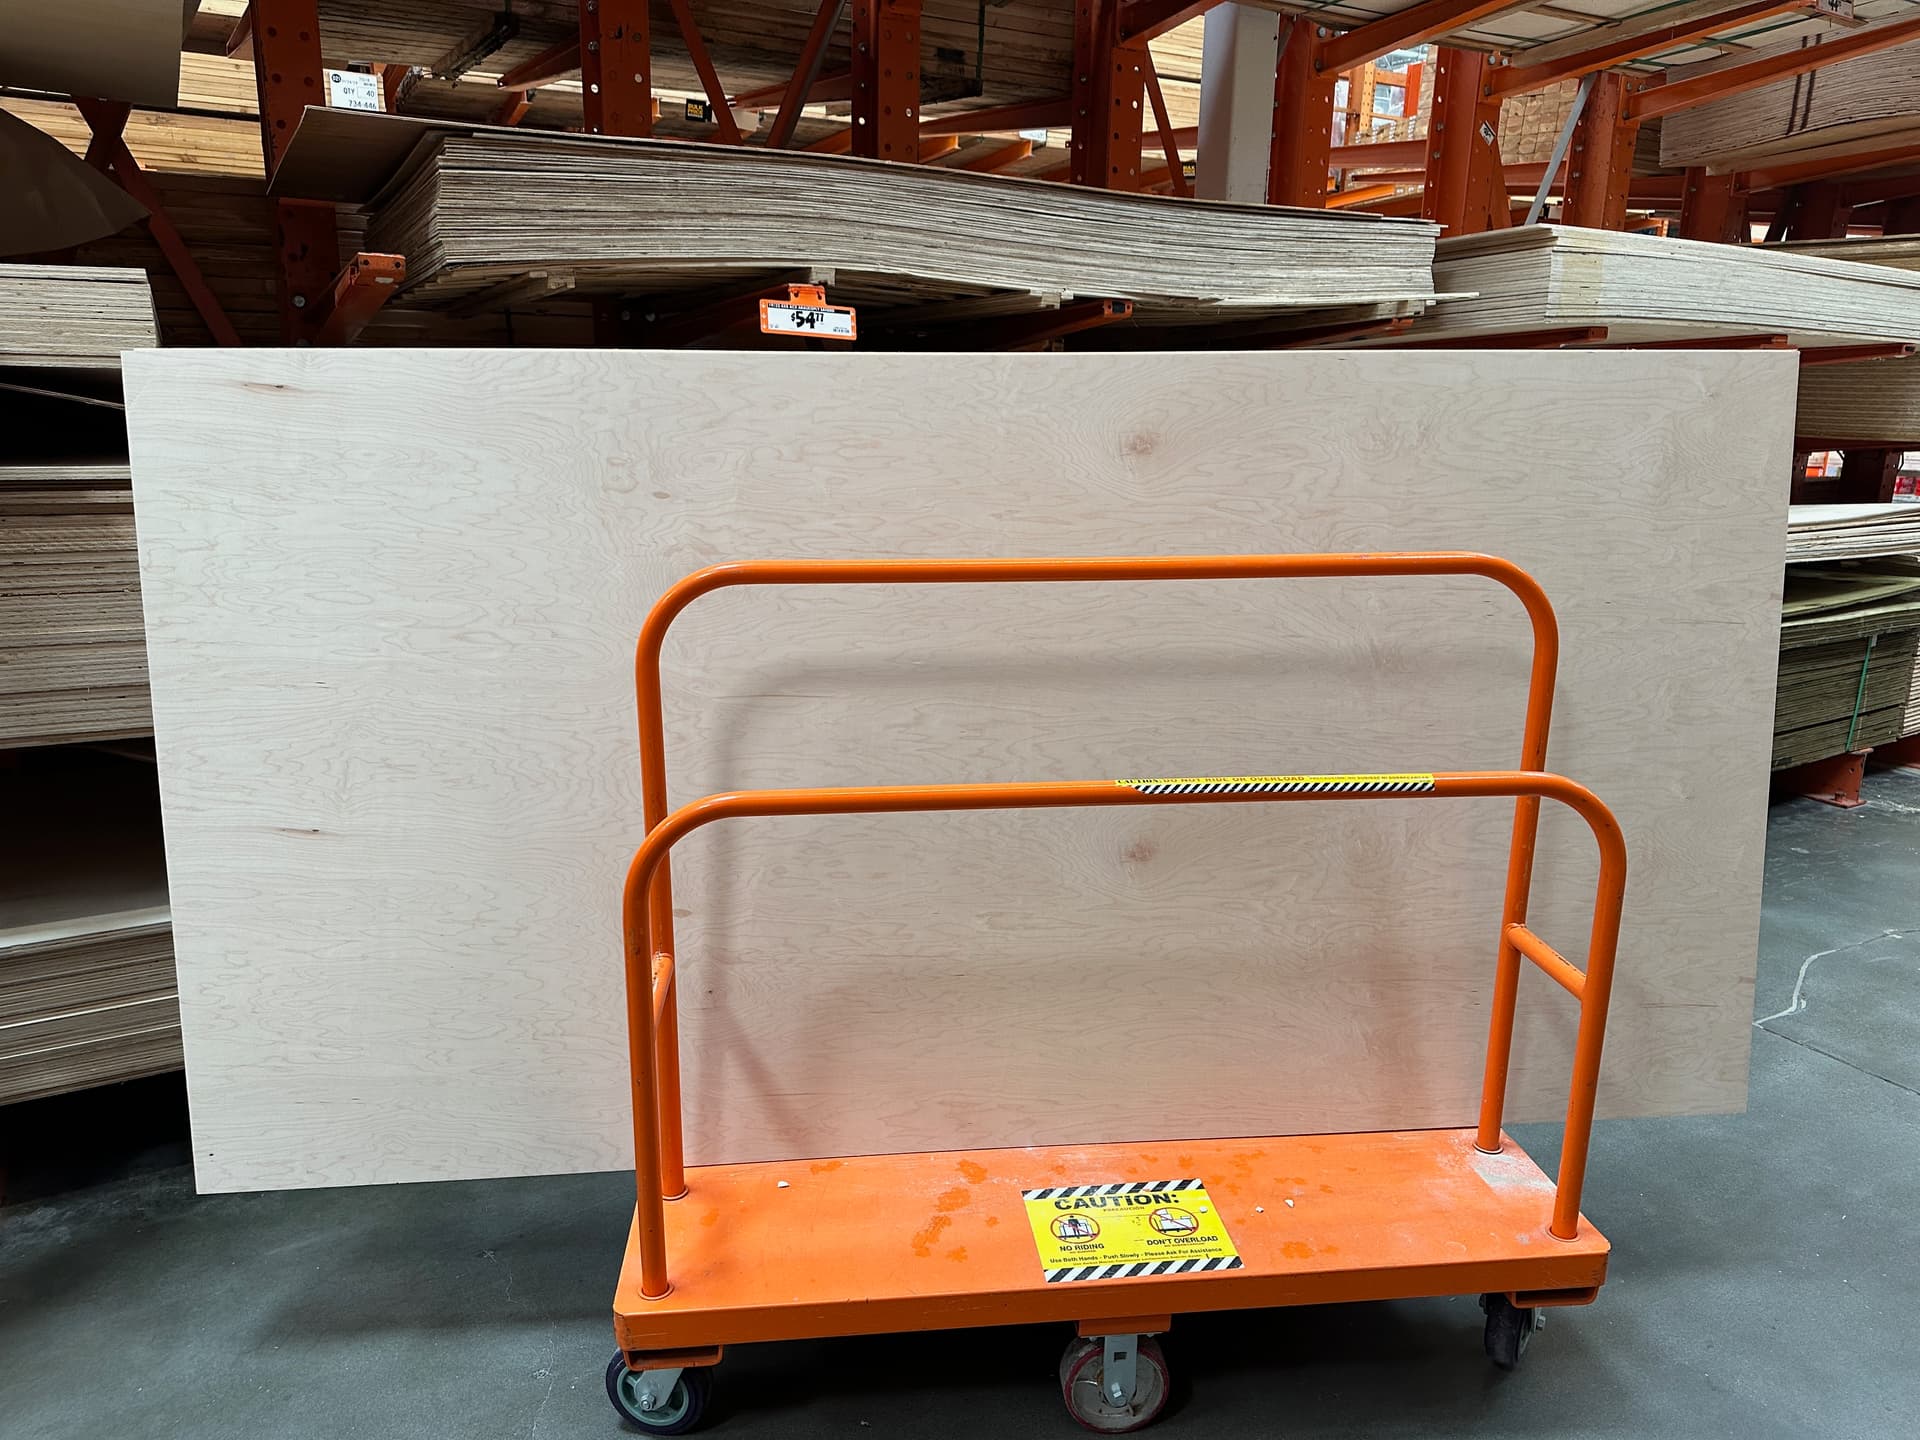
We picked up our materials: 2 sheets of 3/4" maple veneered plywood and 1 sheet of 1/2" plywood and got to work.
In the next post we’ll move into construction!
3 Likes
V2 Retroactive Build Update 04/09/24 — Construction Stage
The first stage of construction was to figure out how to treat the wood. After a few rounds of testing we landed on a Behr “White Wash” stain followed by a number of coats of a Behr Spar for a solid seal and neutral look. My wife and I both prefer a lighter and cooler toned wood aesthetic over the yellowed and warm look you typically get from most stains + poly.
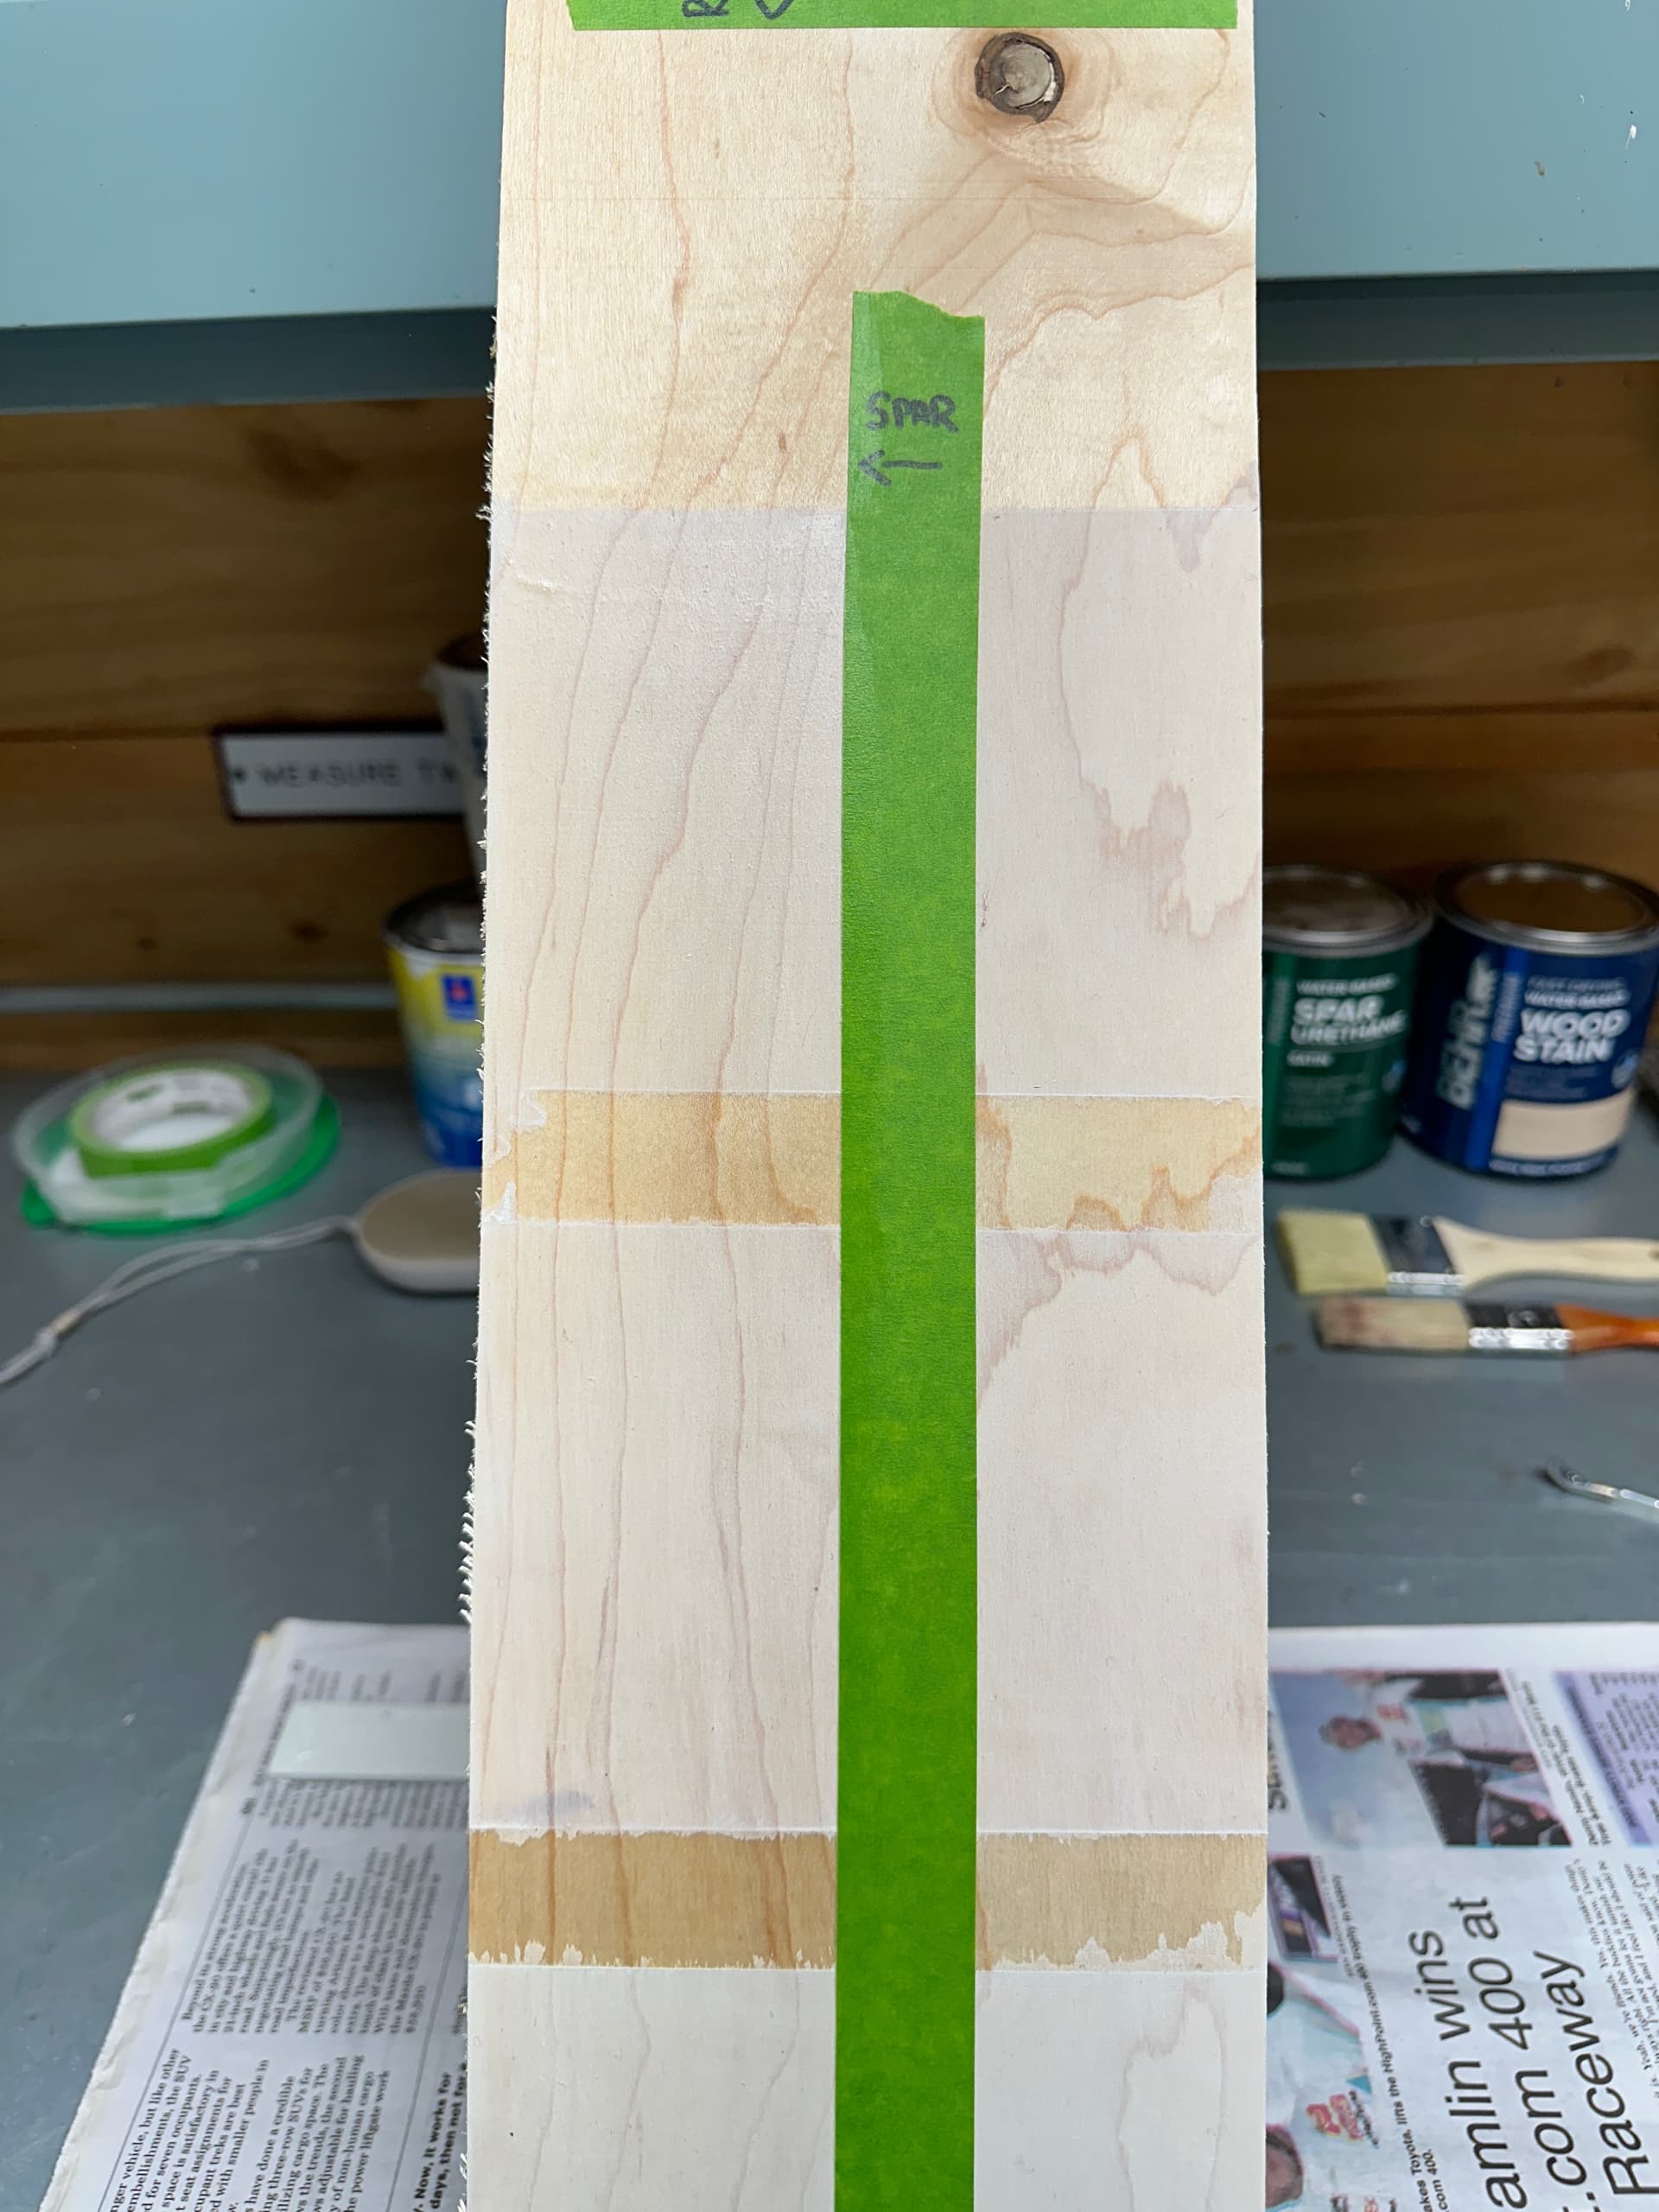
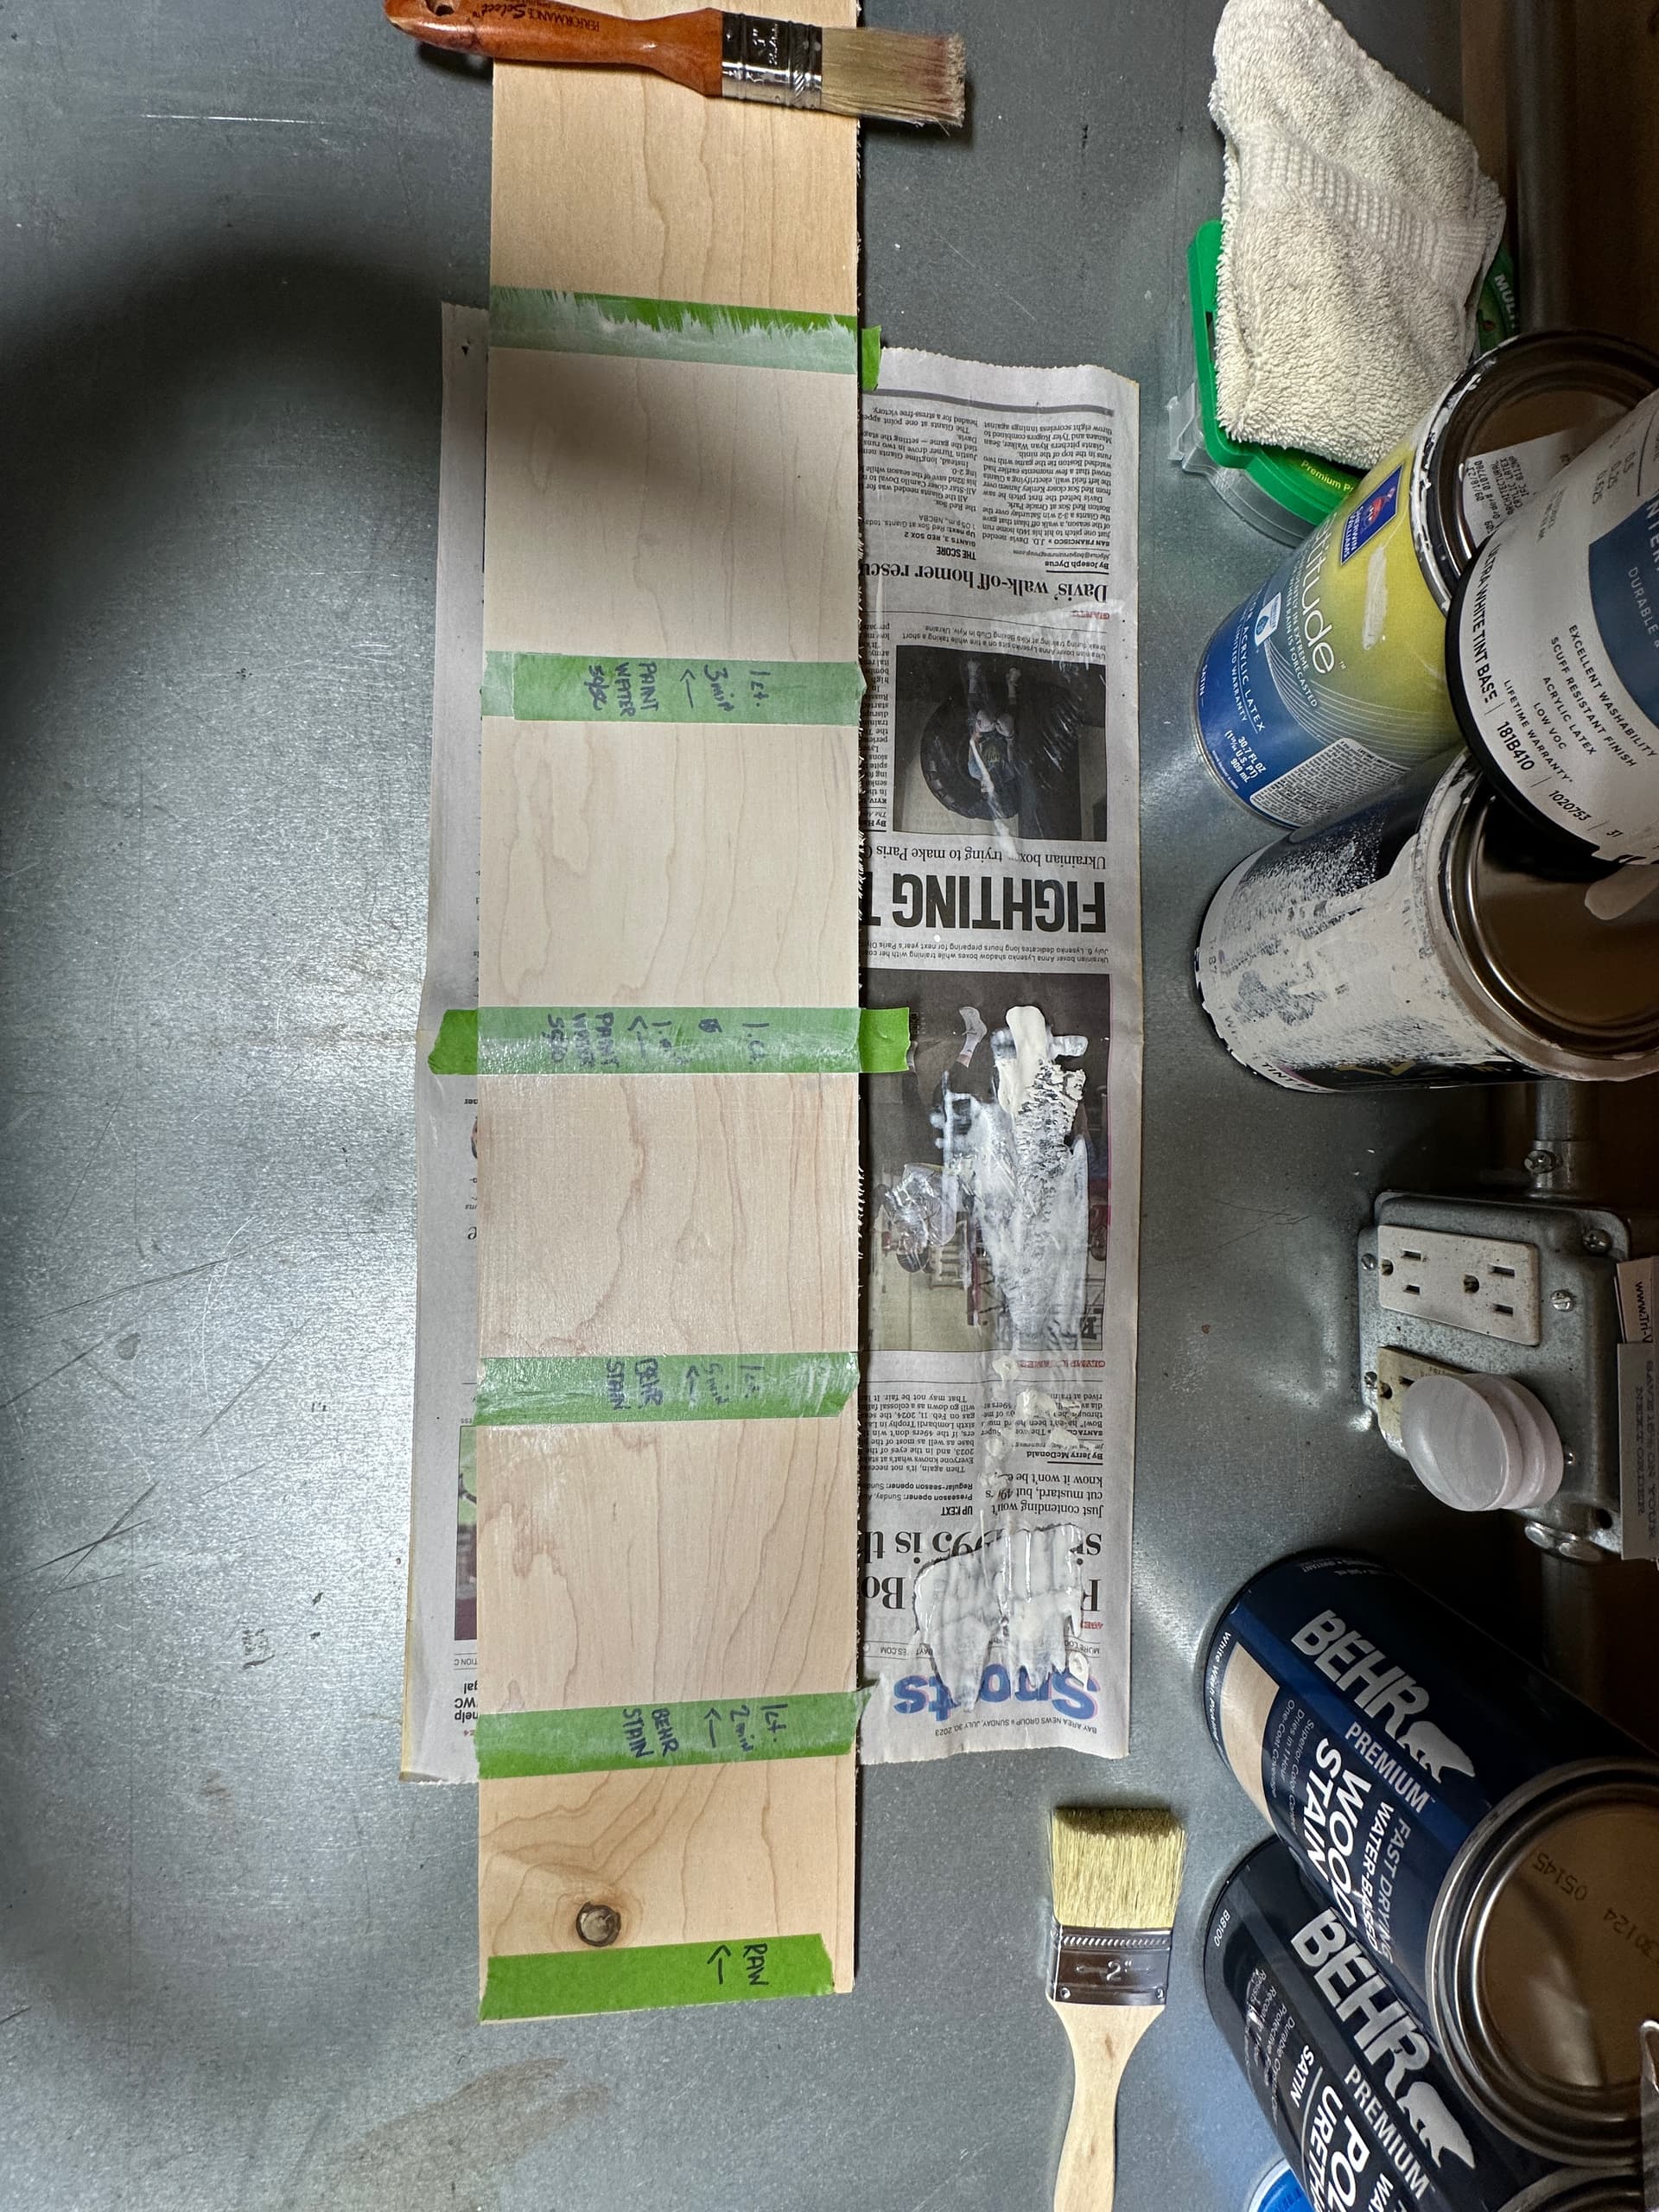
Here’s a great side-by-side of how the wood reacts to the spar with and without the white-wash coat.

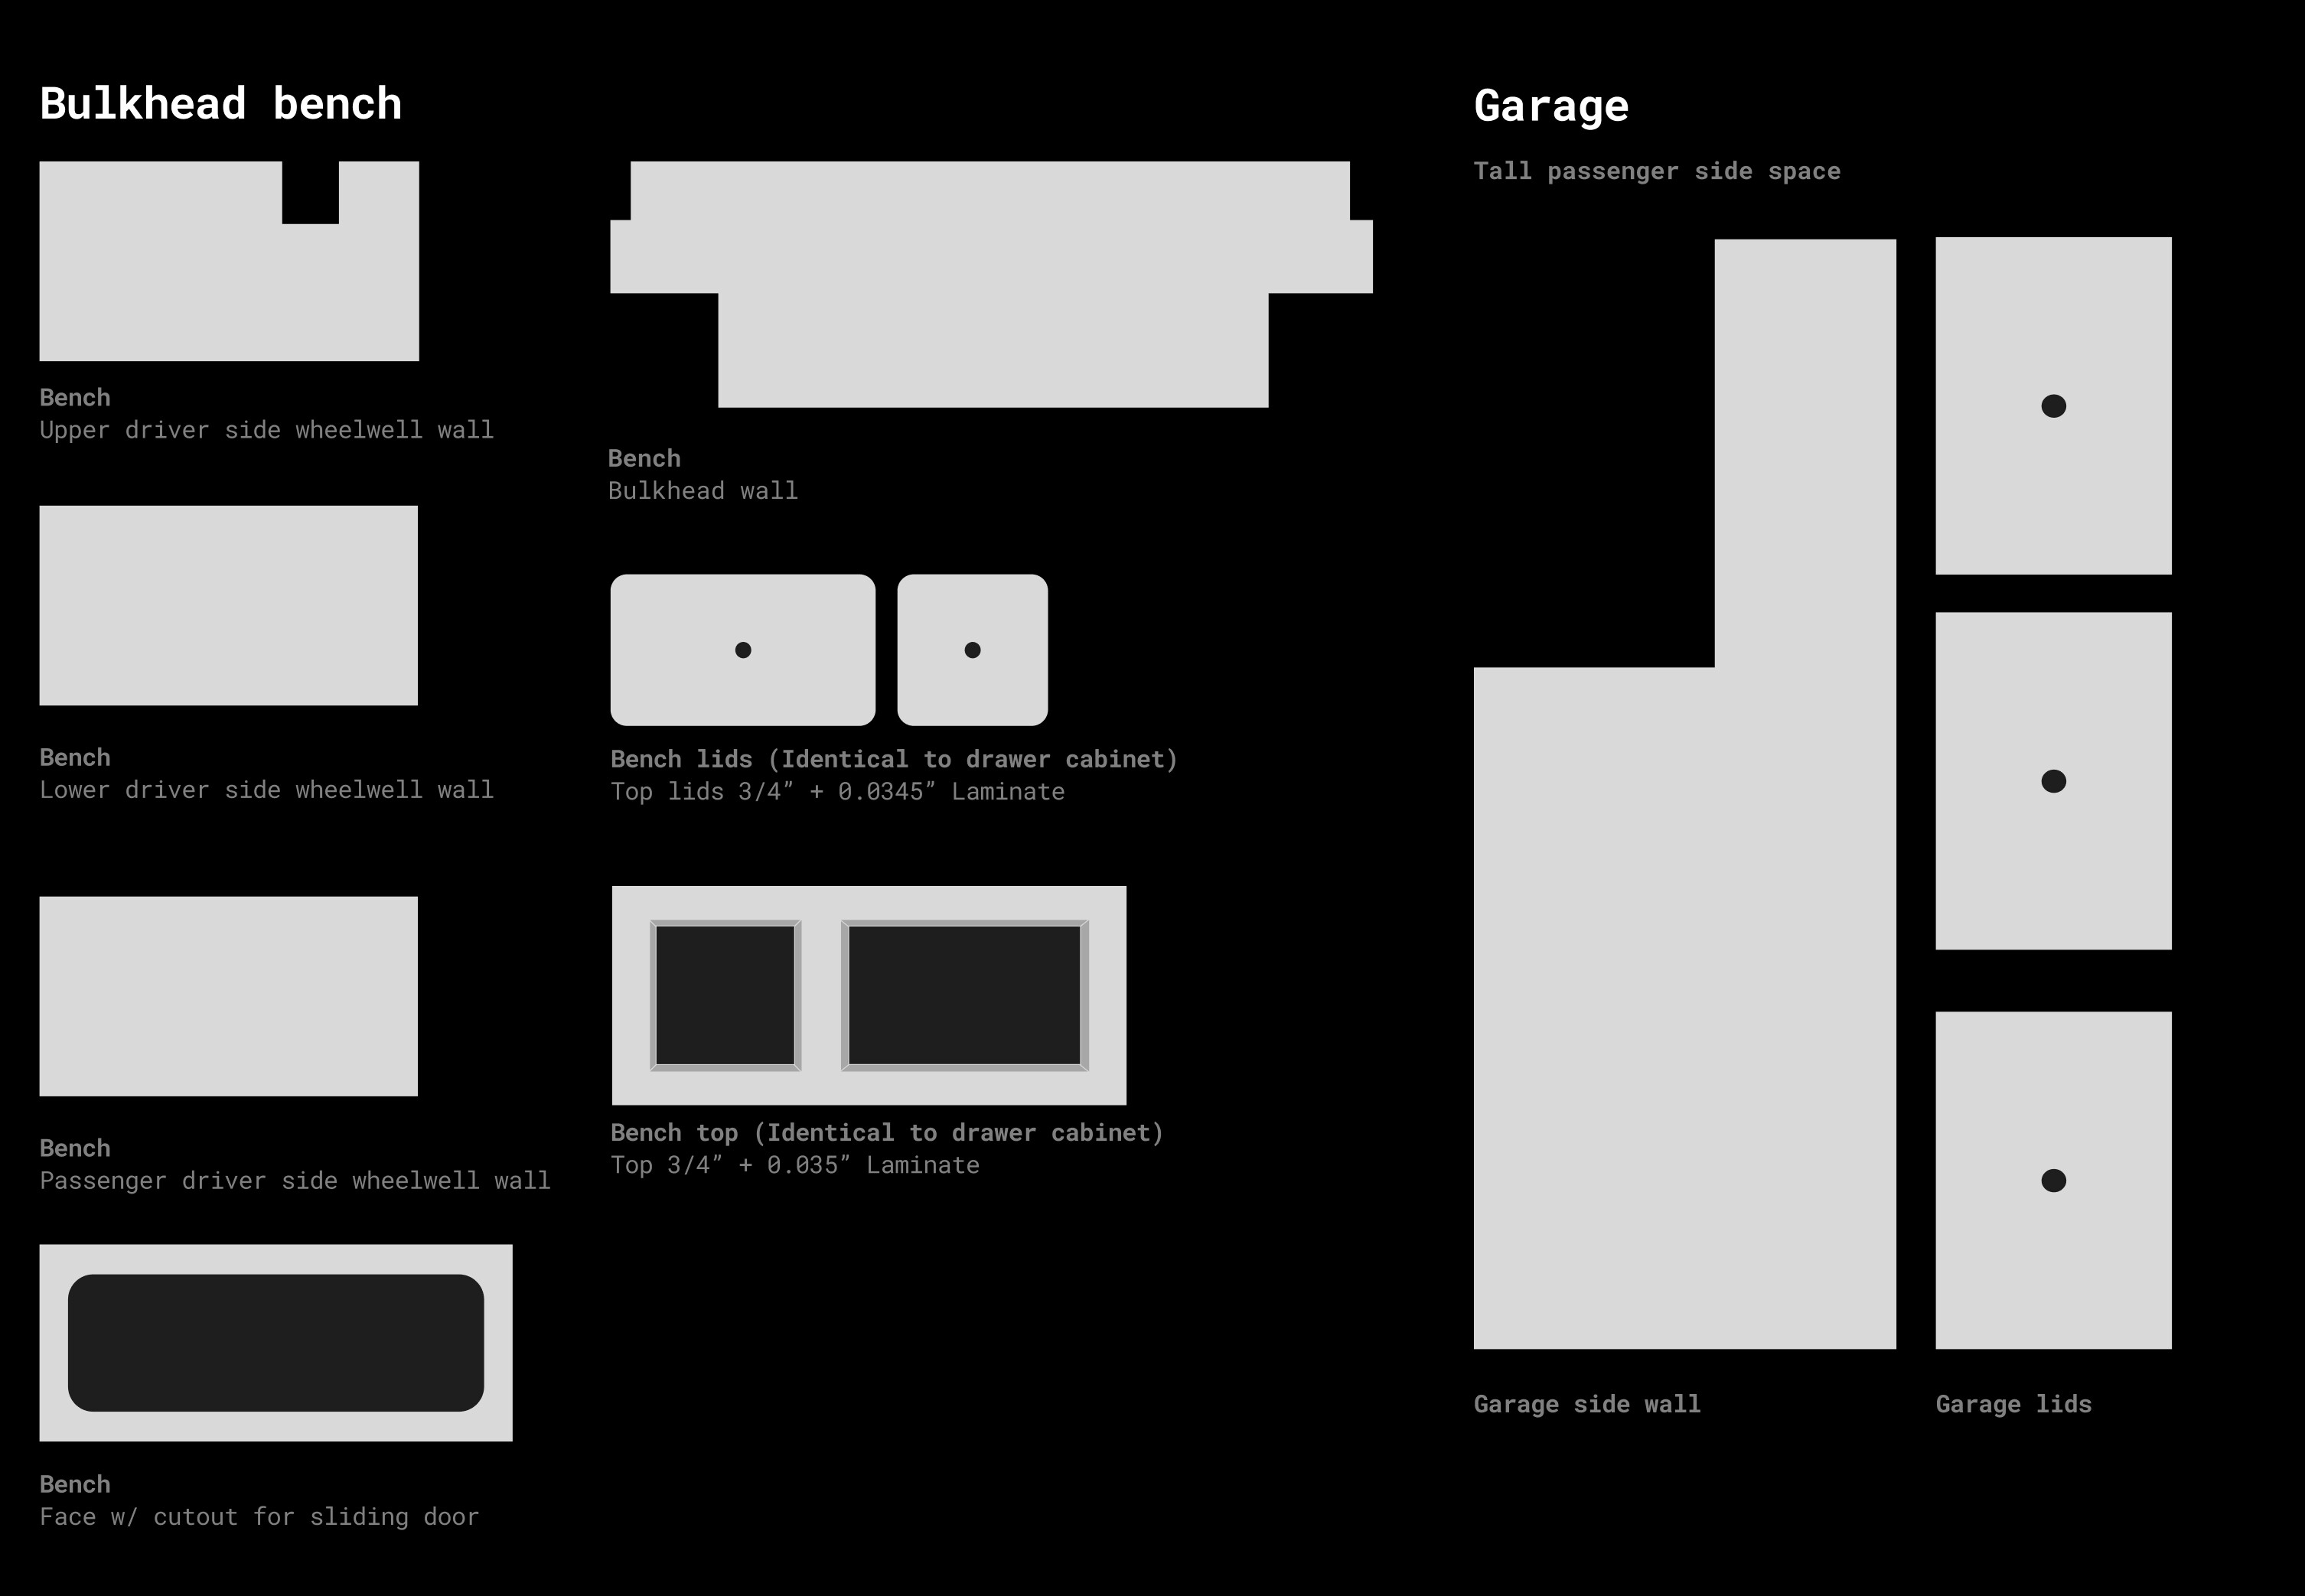
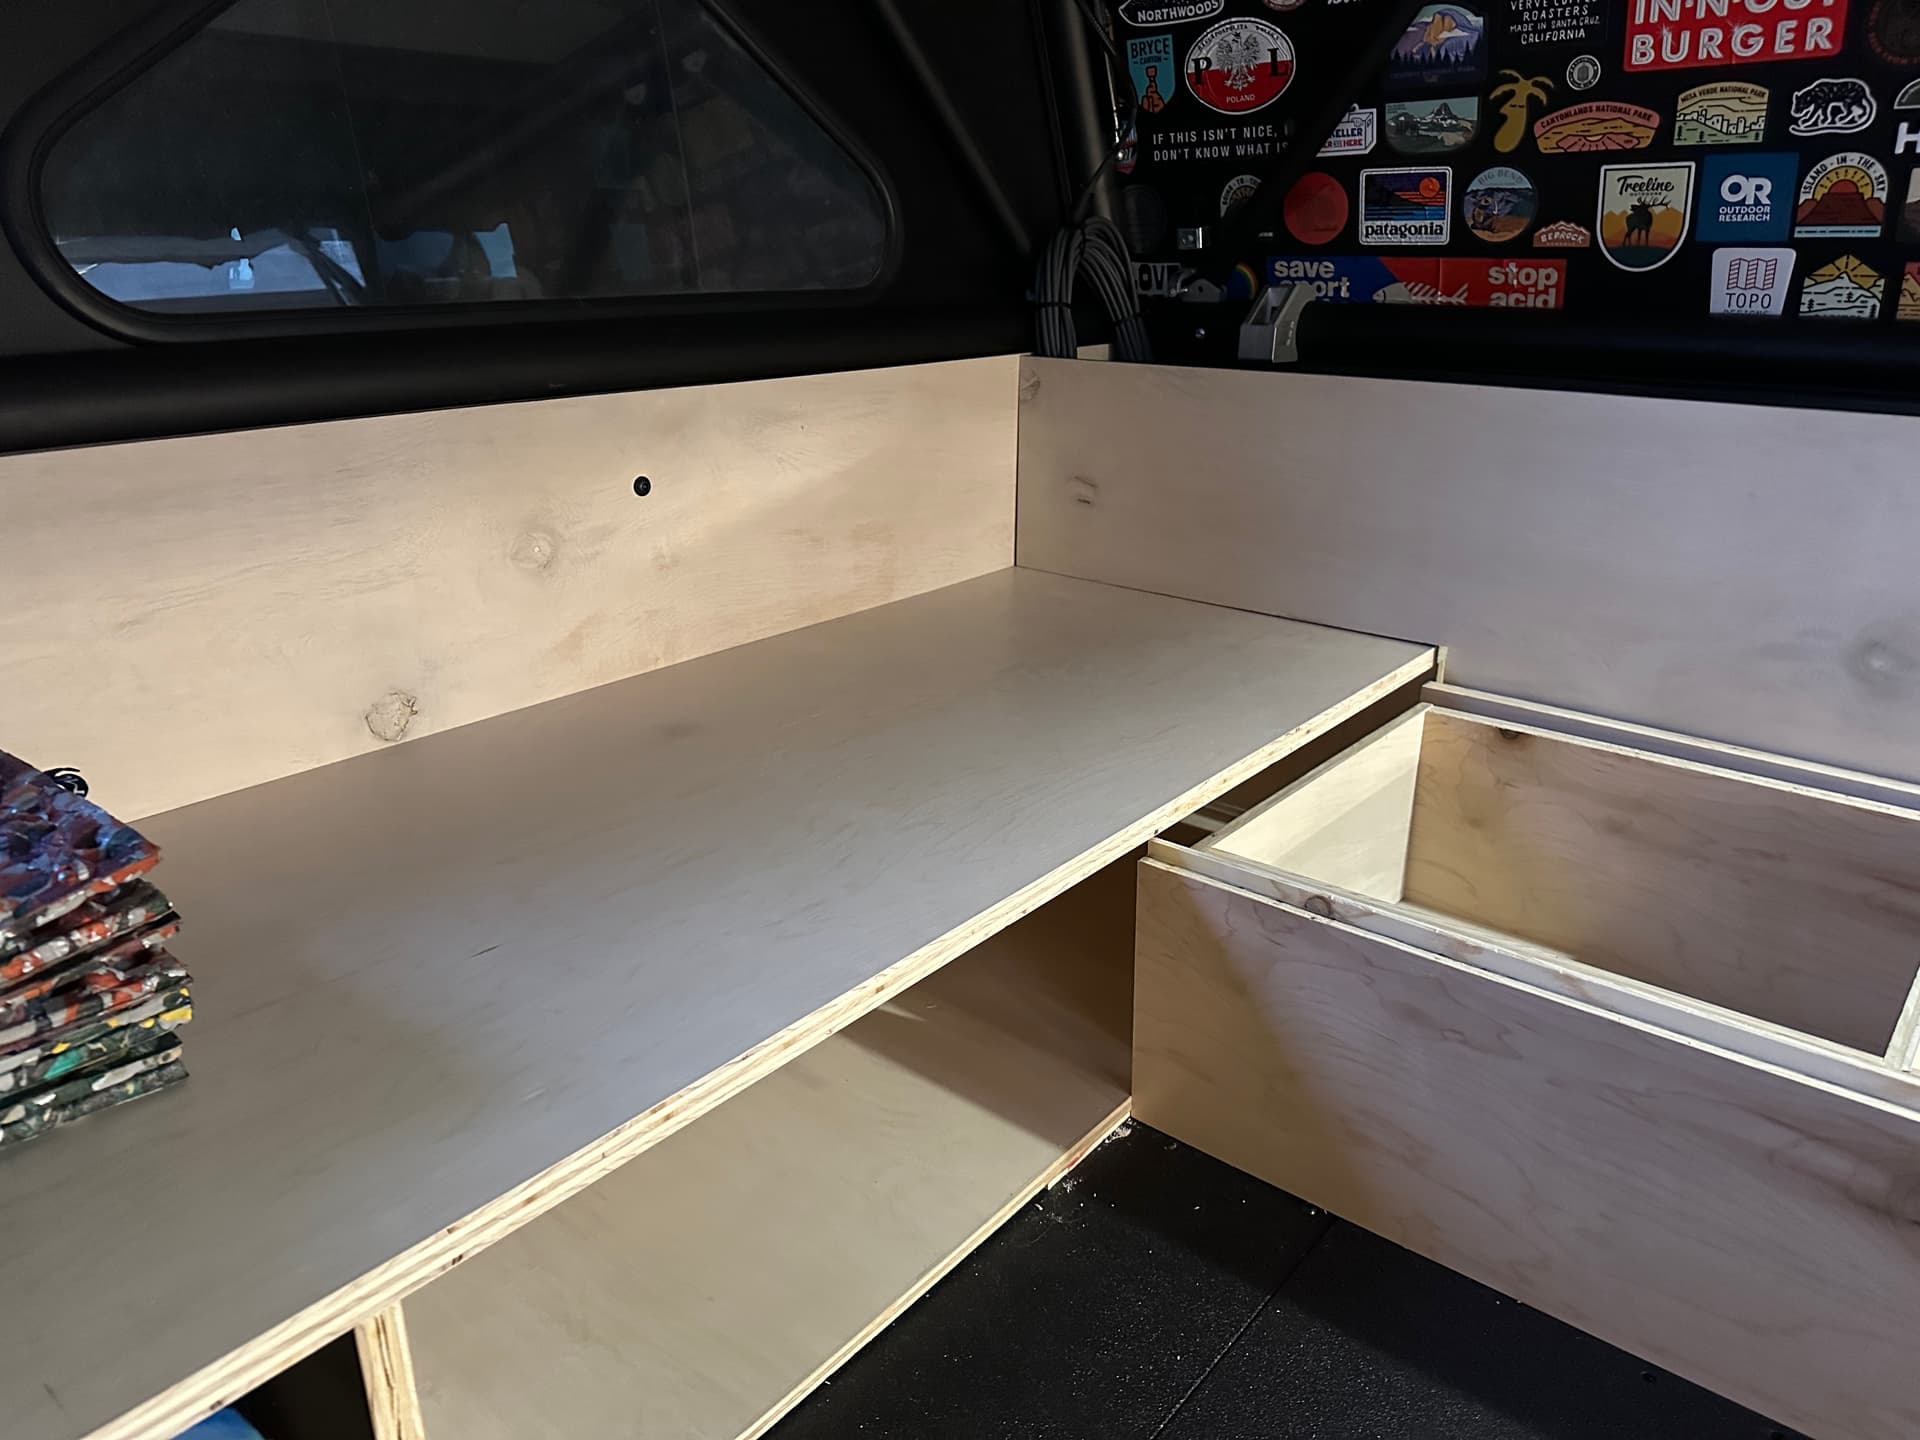
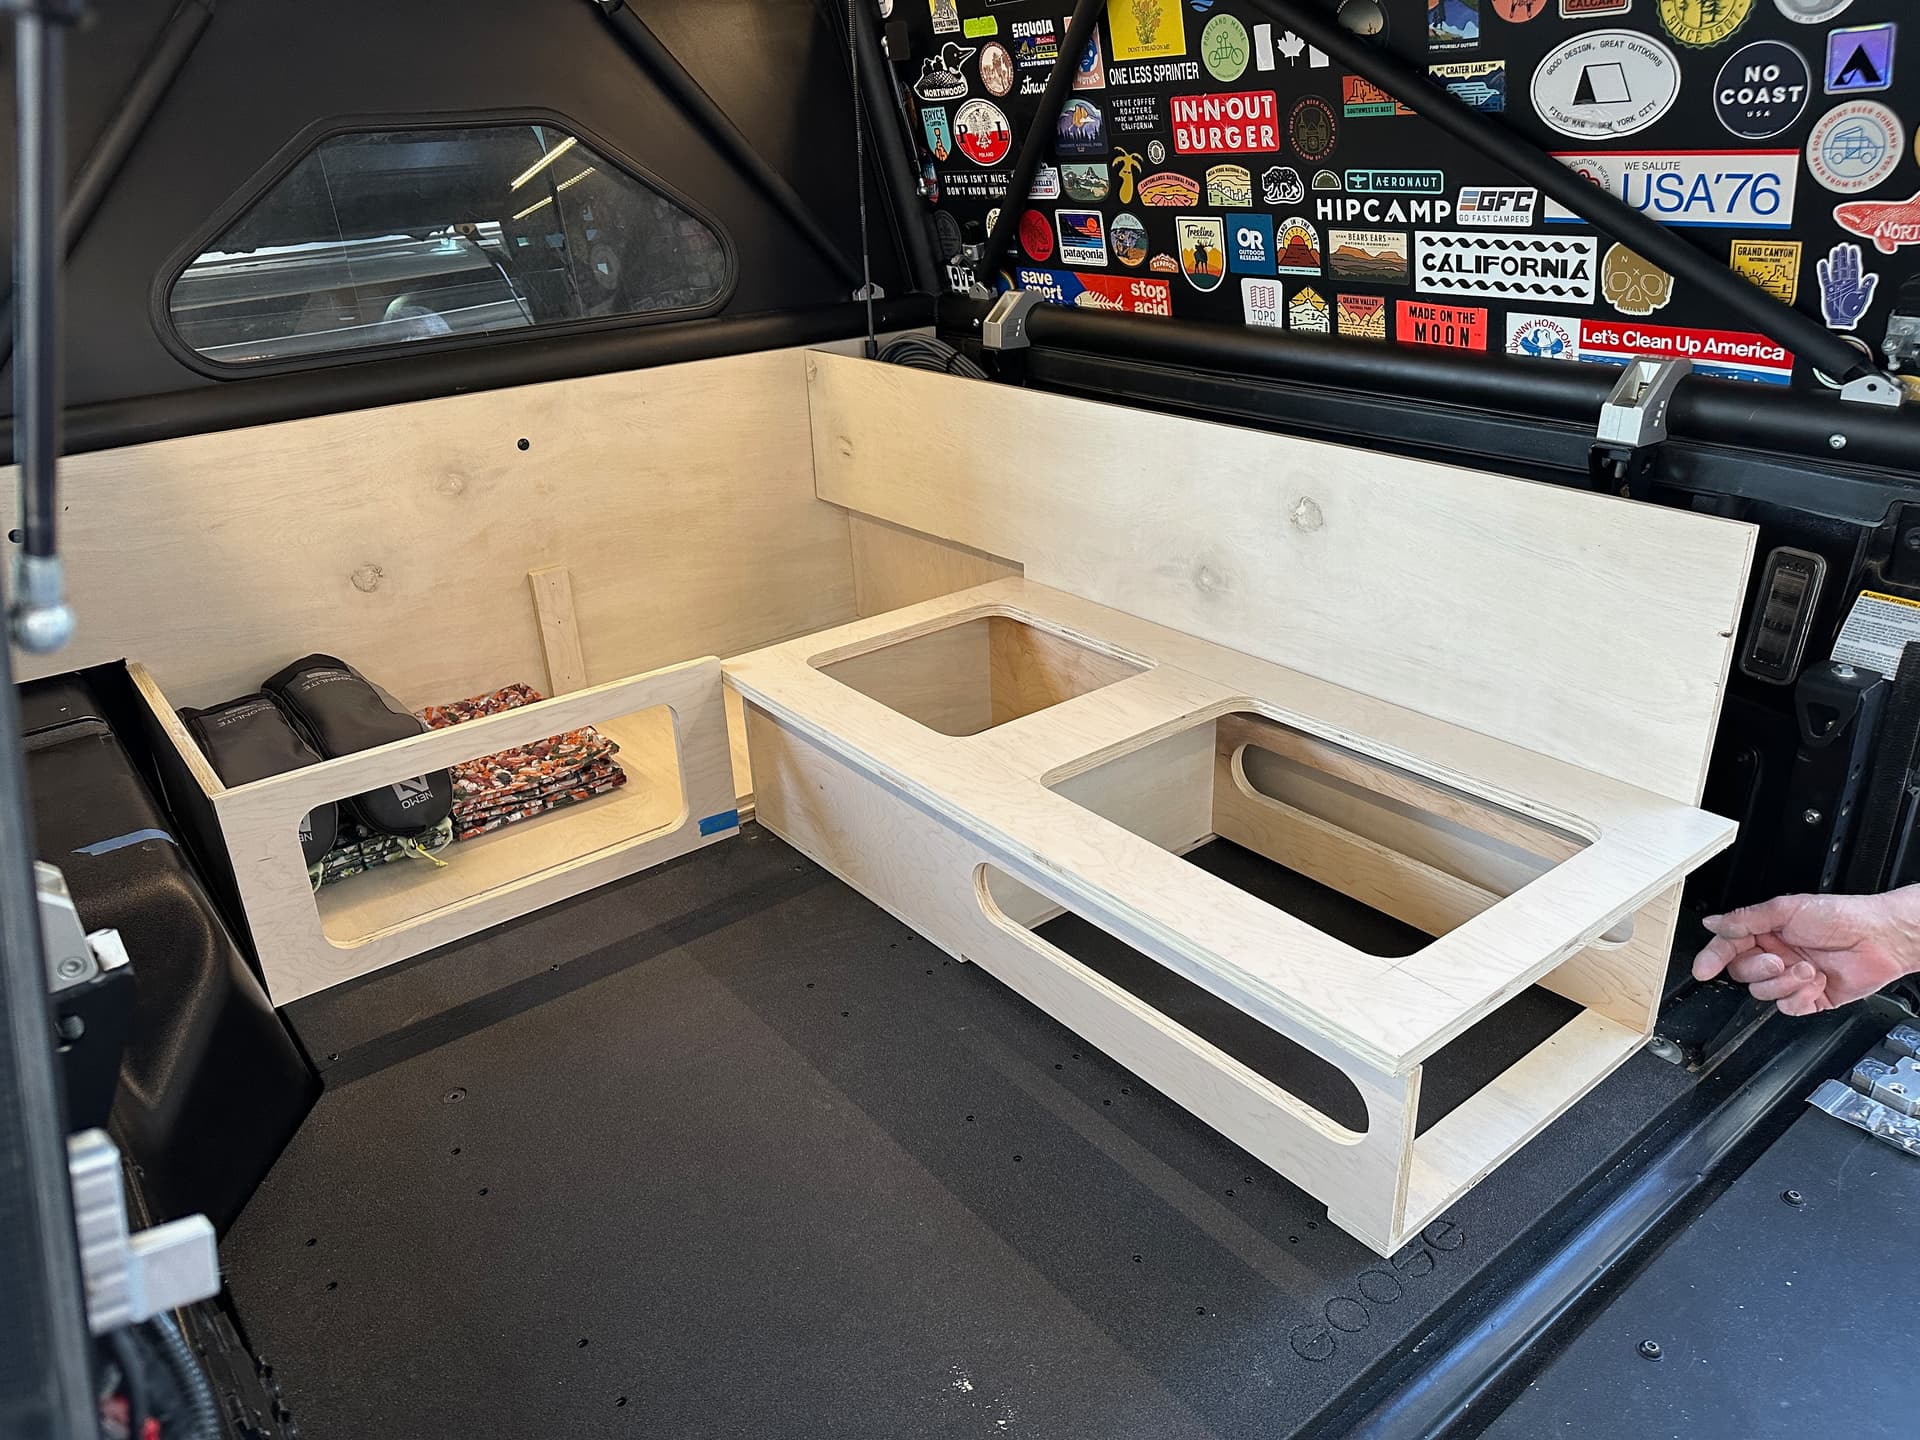
After about a week of going through the motions of coating and drying we were ready to start ripping the boards down and mocking up the foundation. Starting with the bulkhead bench and what we dubbed the “Garage” (the long narrow space on the passenger side)
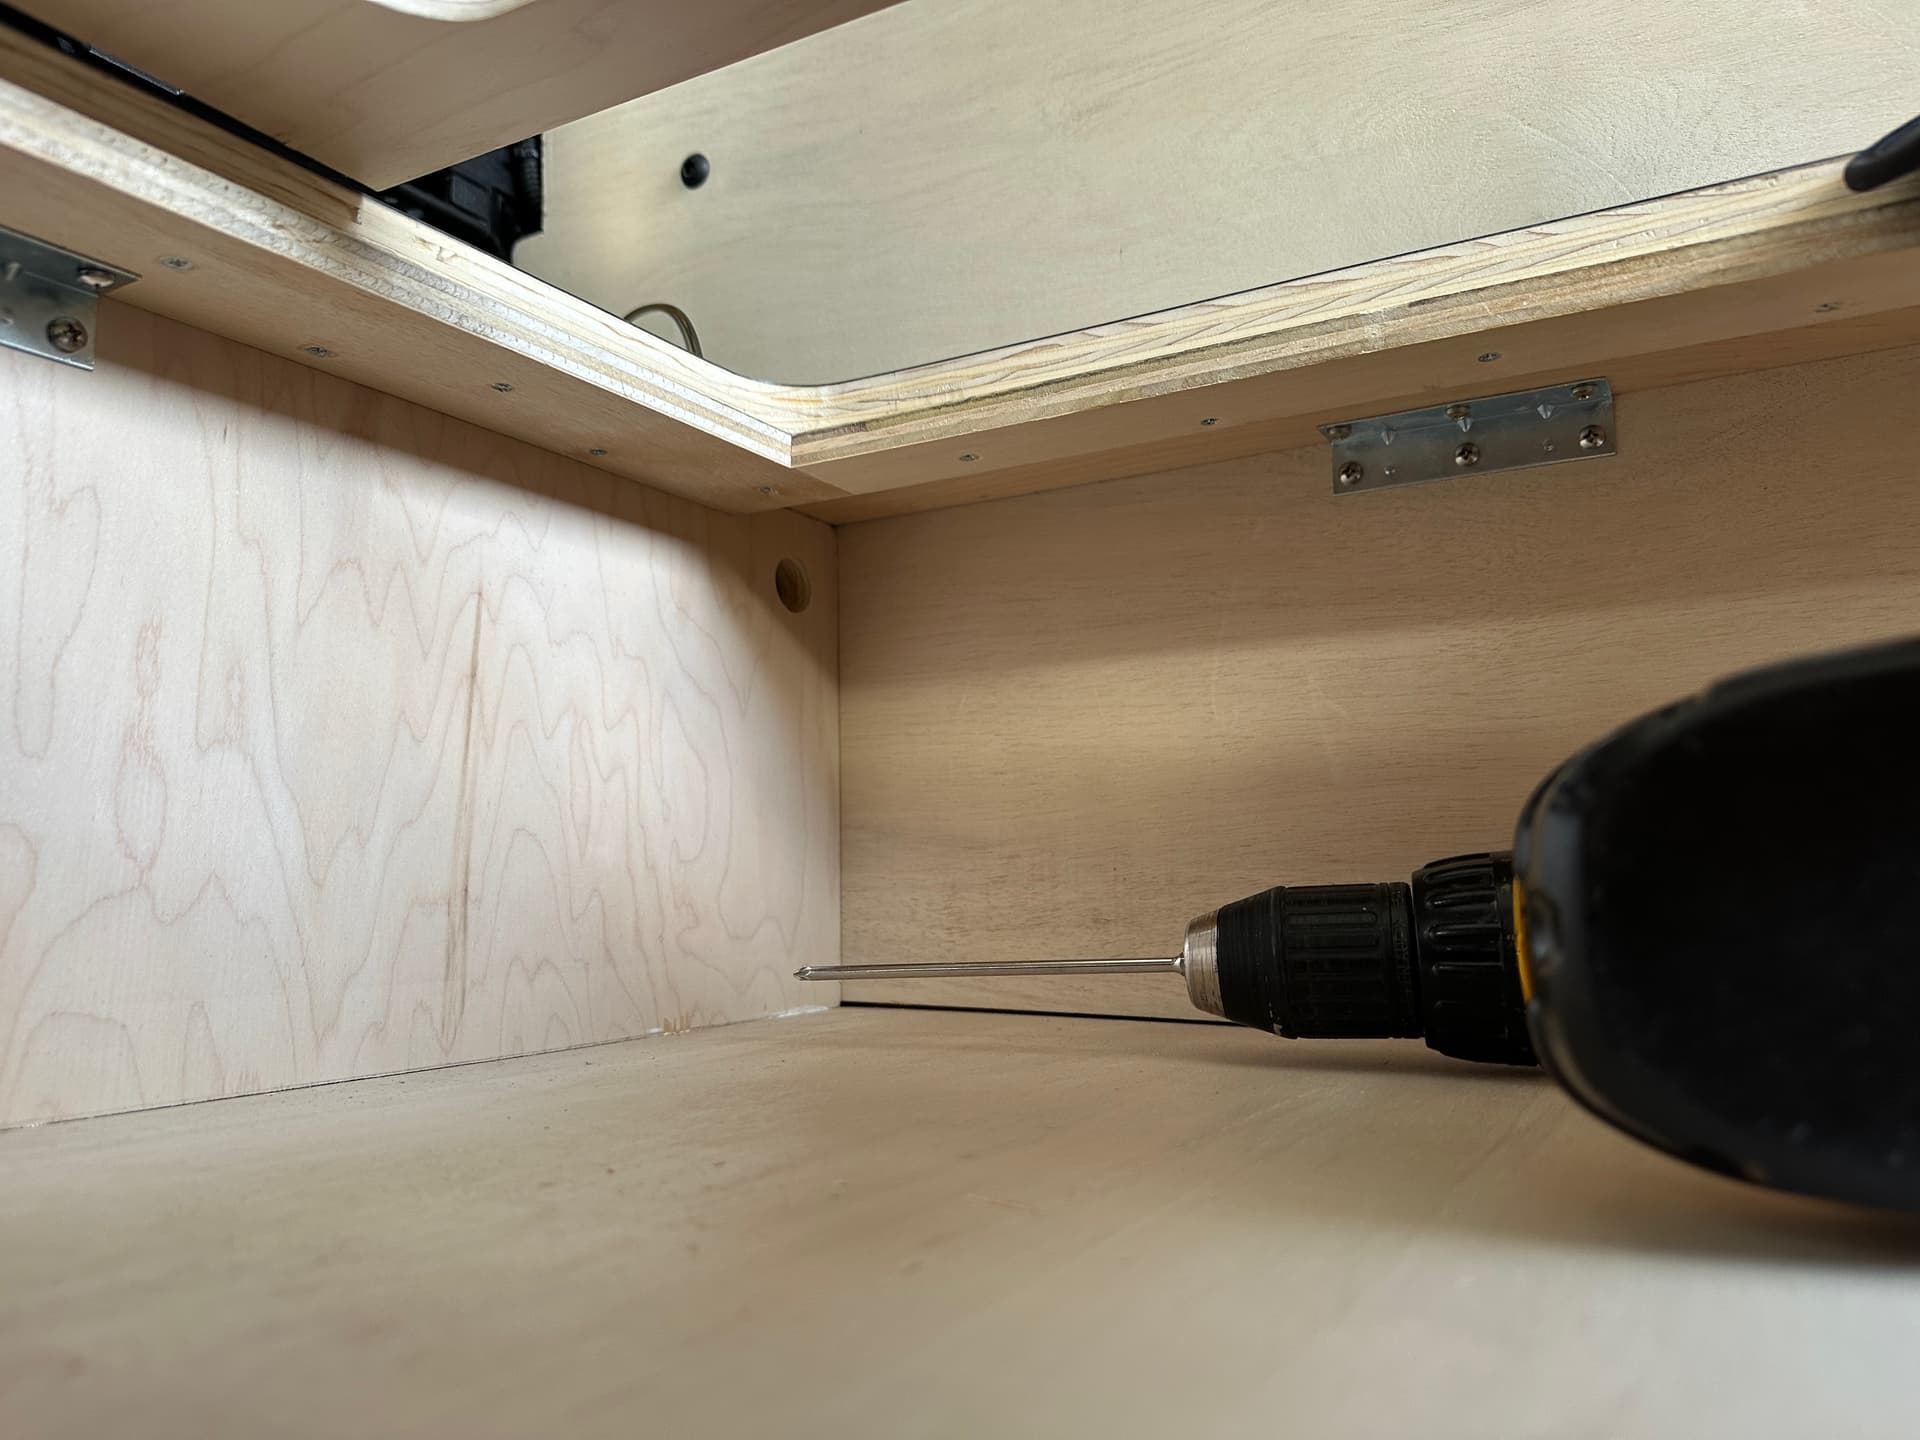
We utilized the Tacoma’s bulkhead t-track to mount the back wall (where the molle panel use to be) and squared off the area around the wheel wells.
Note: These are some of the messiest cuts as they were tackled with a jigsaw trial-and-error approach to work around the wonkiness of the angles at the bulkhead of the truck bed! We knew this back wall would be hidden by the finishing pieces so we were not stressed about it. We intentionally left space for any water ingress (![]() hopefull none) to drain without ever pooling on the wood in this area, too.
hopefull none) to drain without ever pooling on the wood in this area, too.
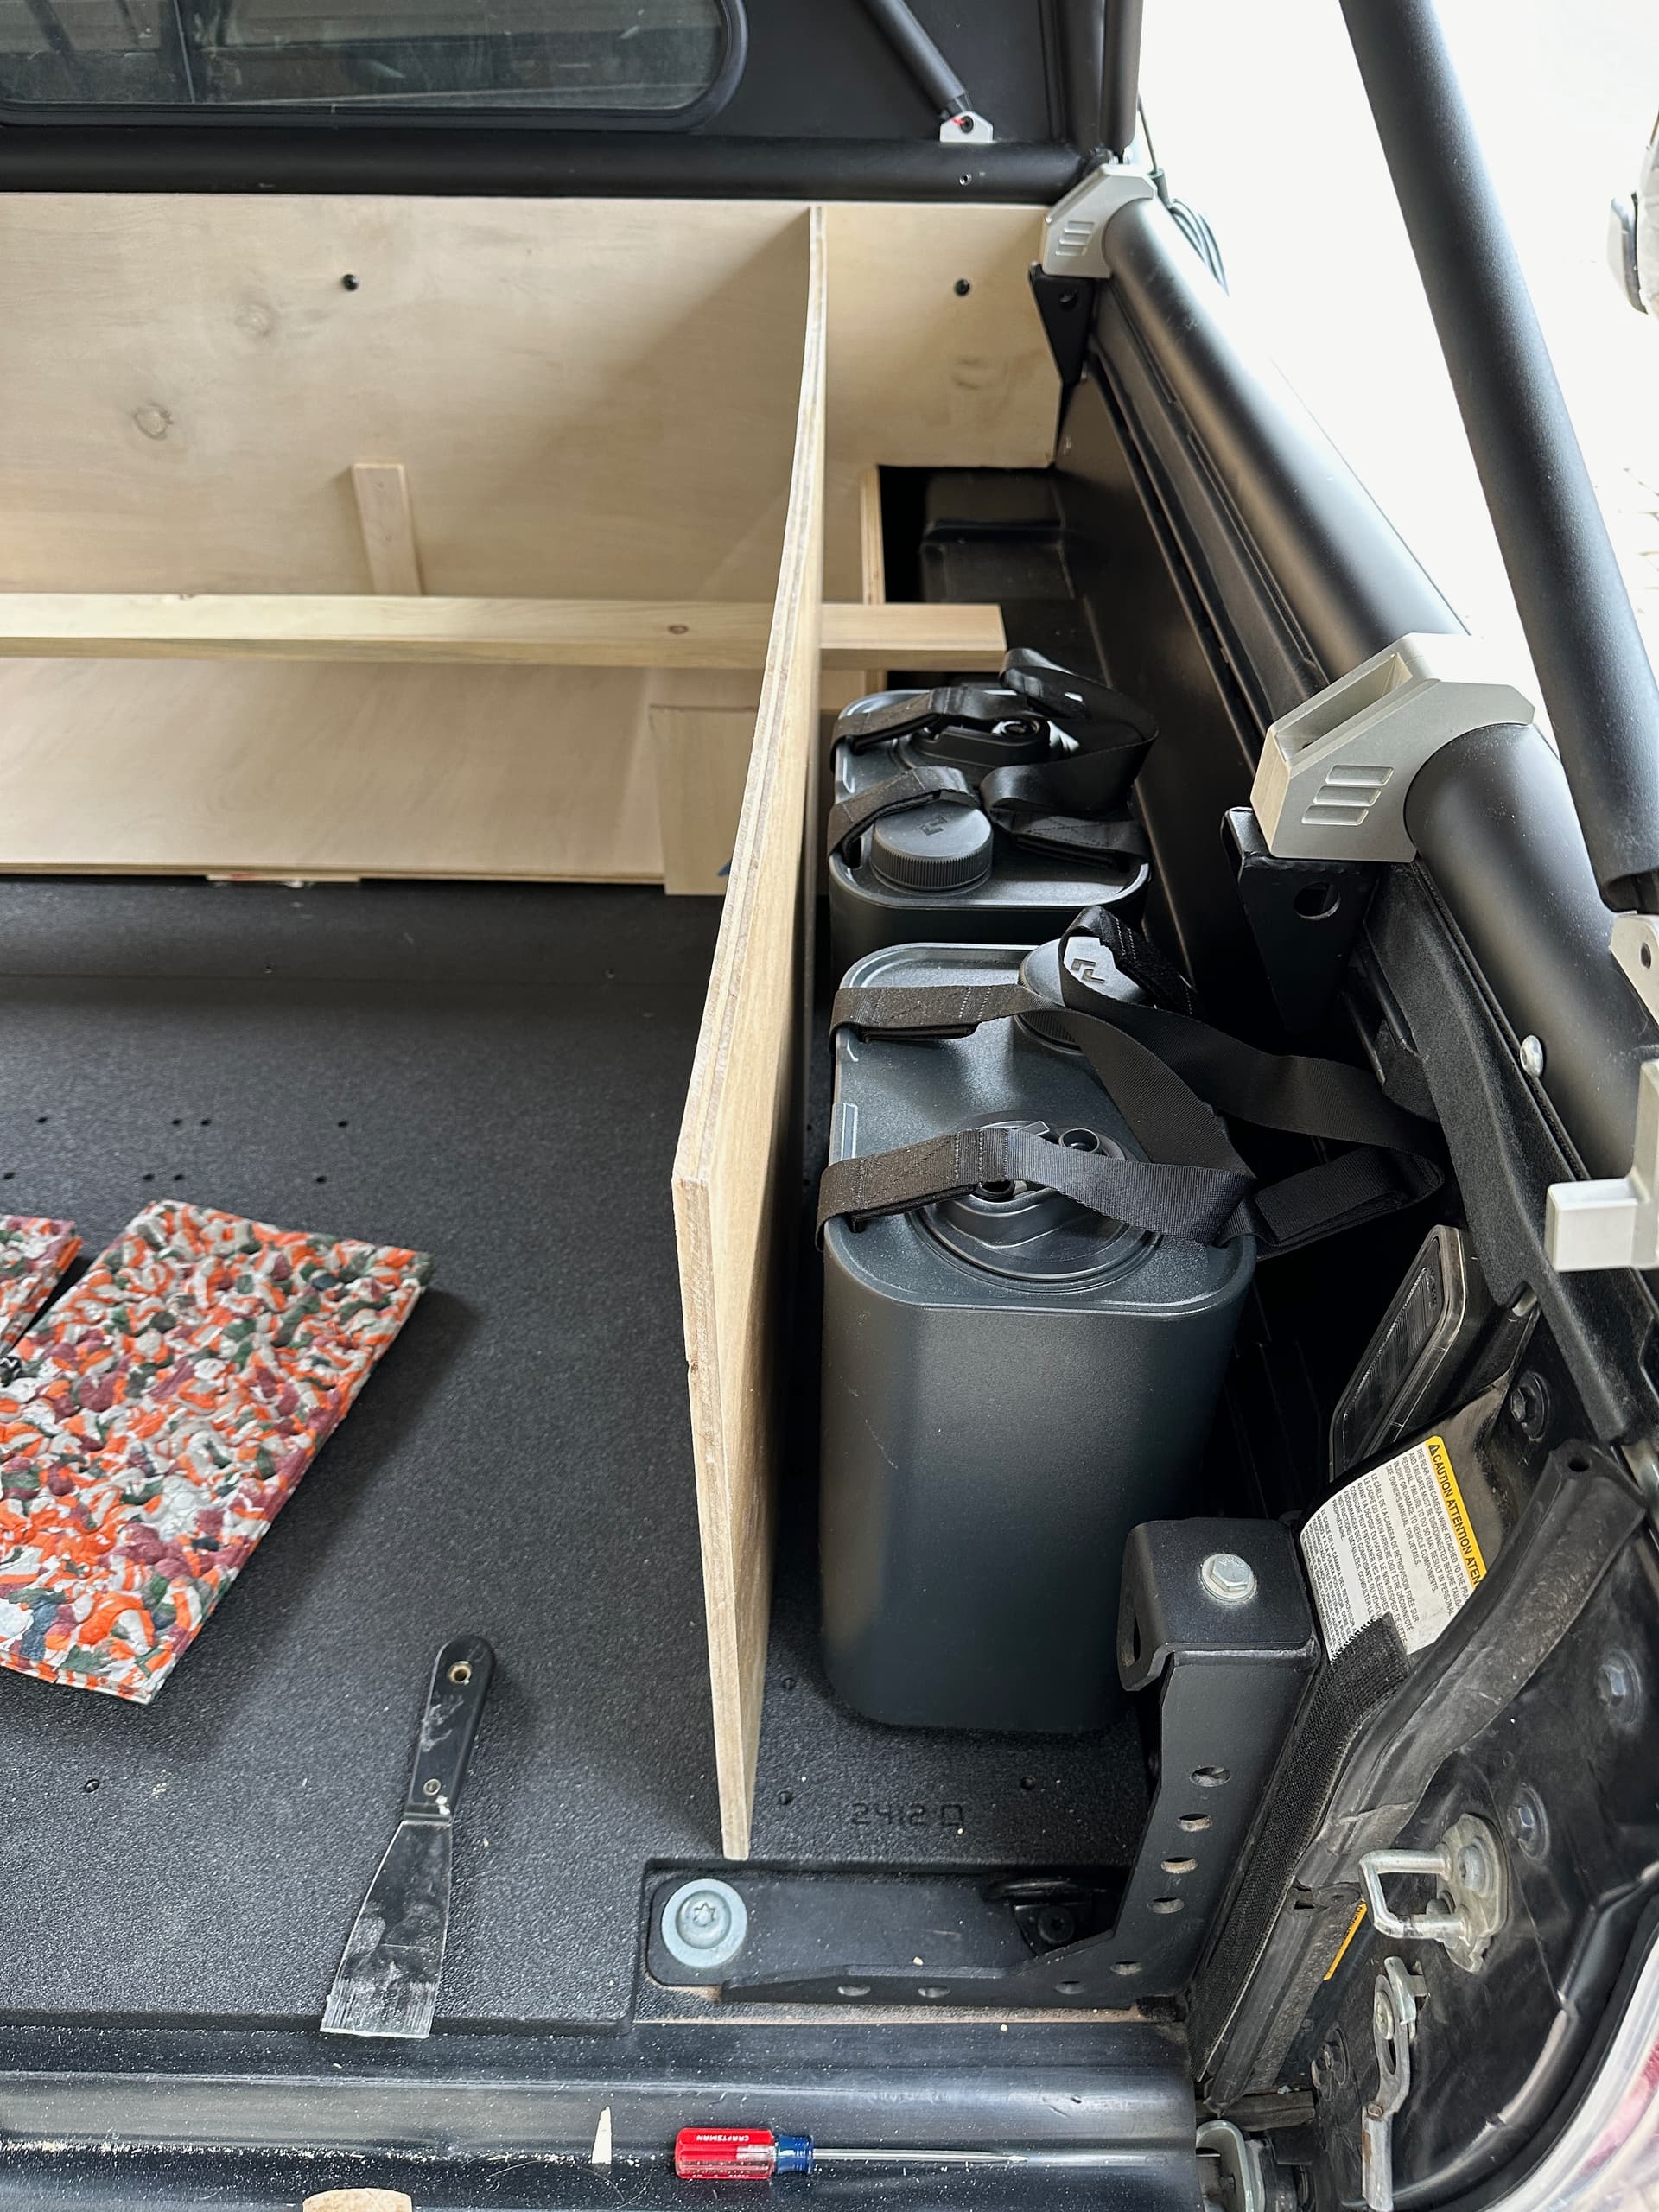
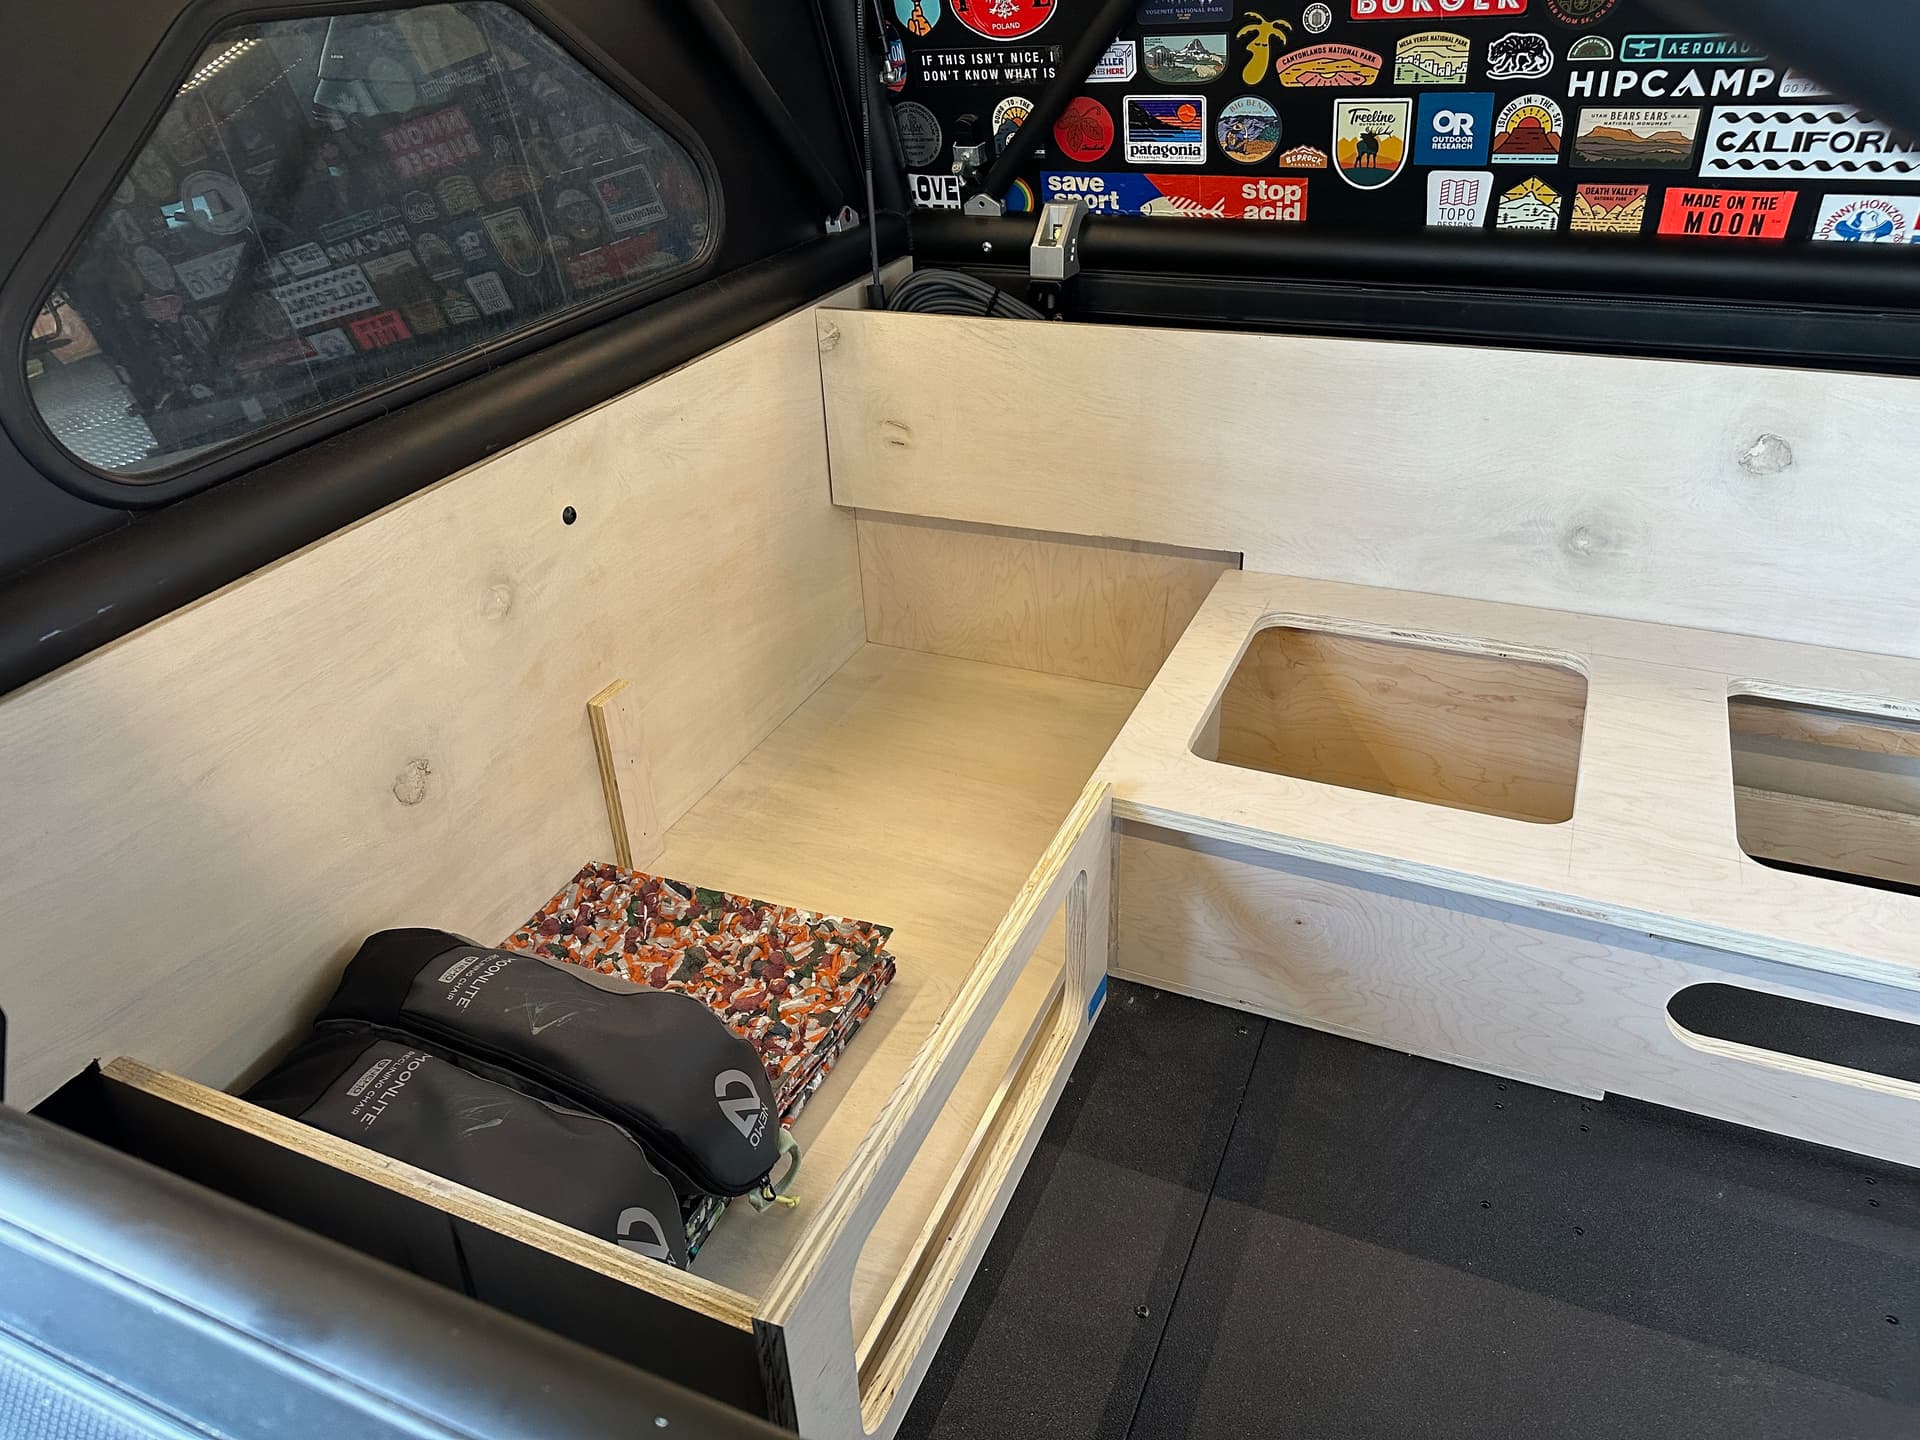
Next we mocked up and dialed in the spacing for the “Garage” for a tight fit of our Dometic Go Water Jugs while still ensuring they can slip in and out with as little fuss as possible.

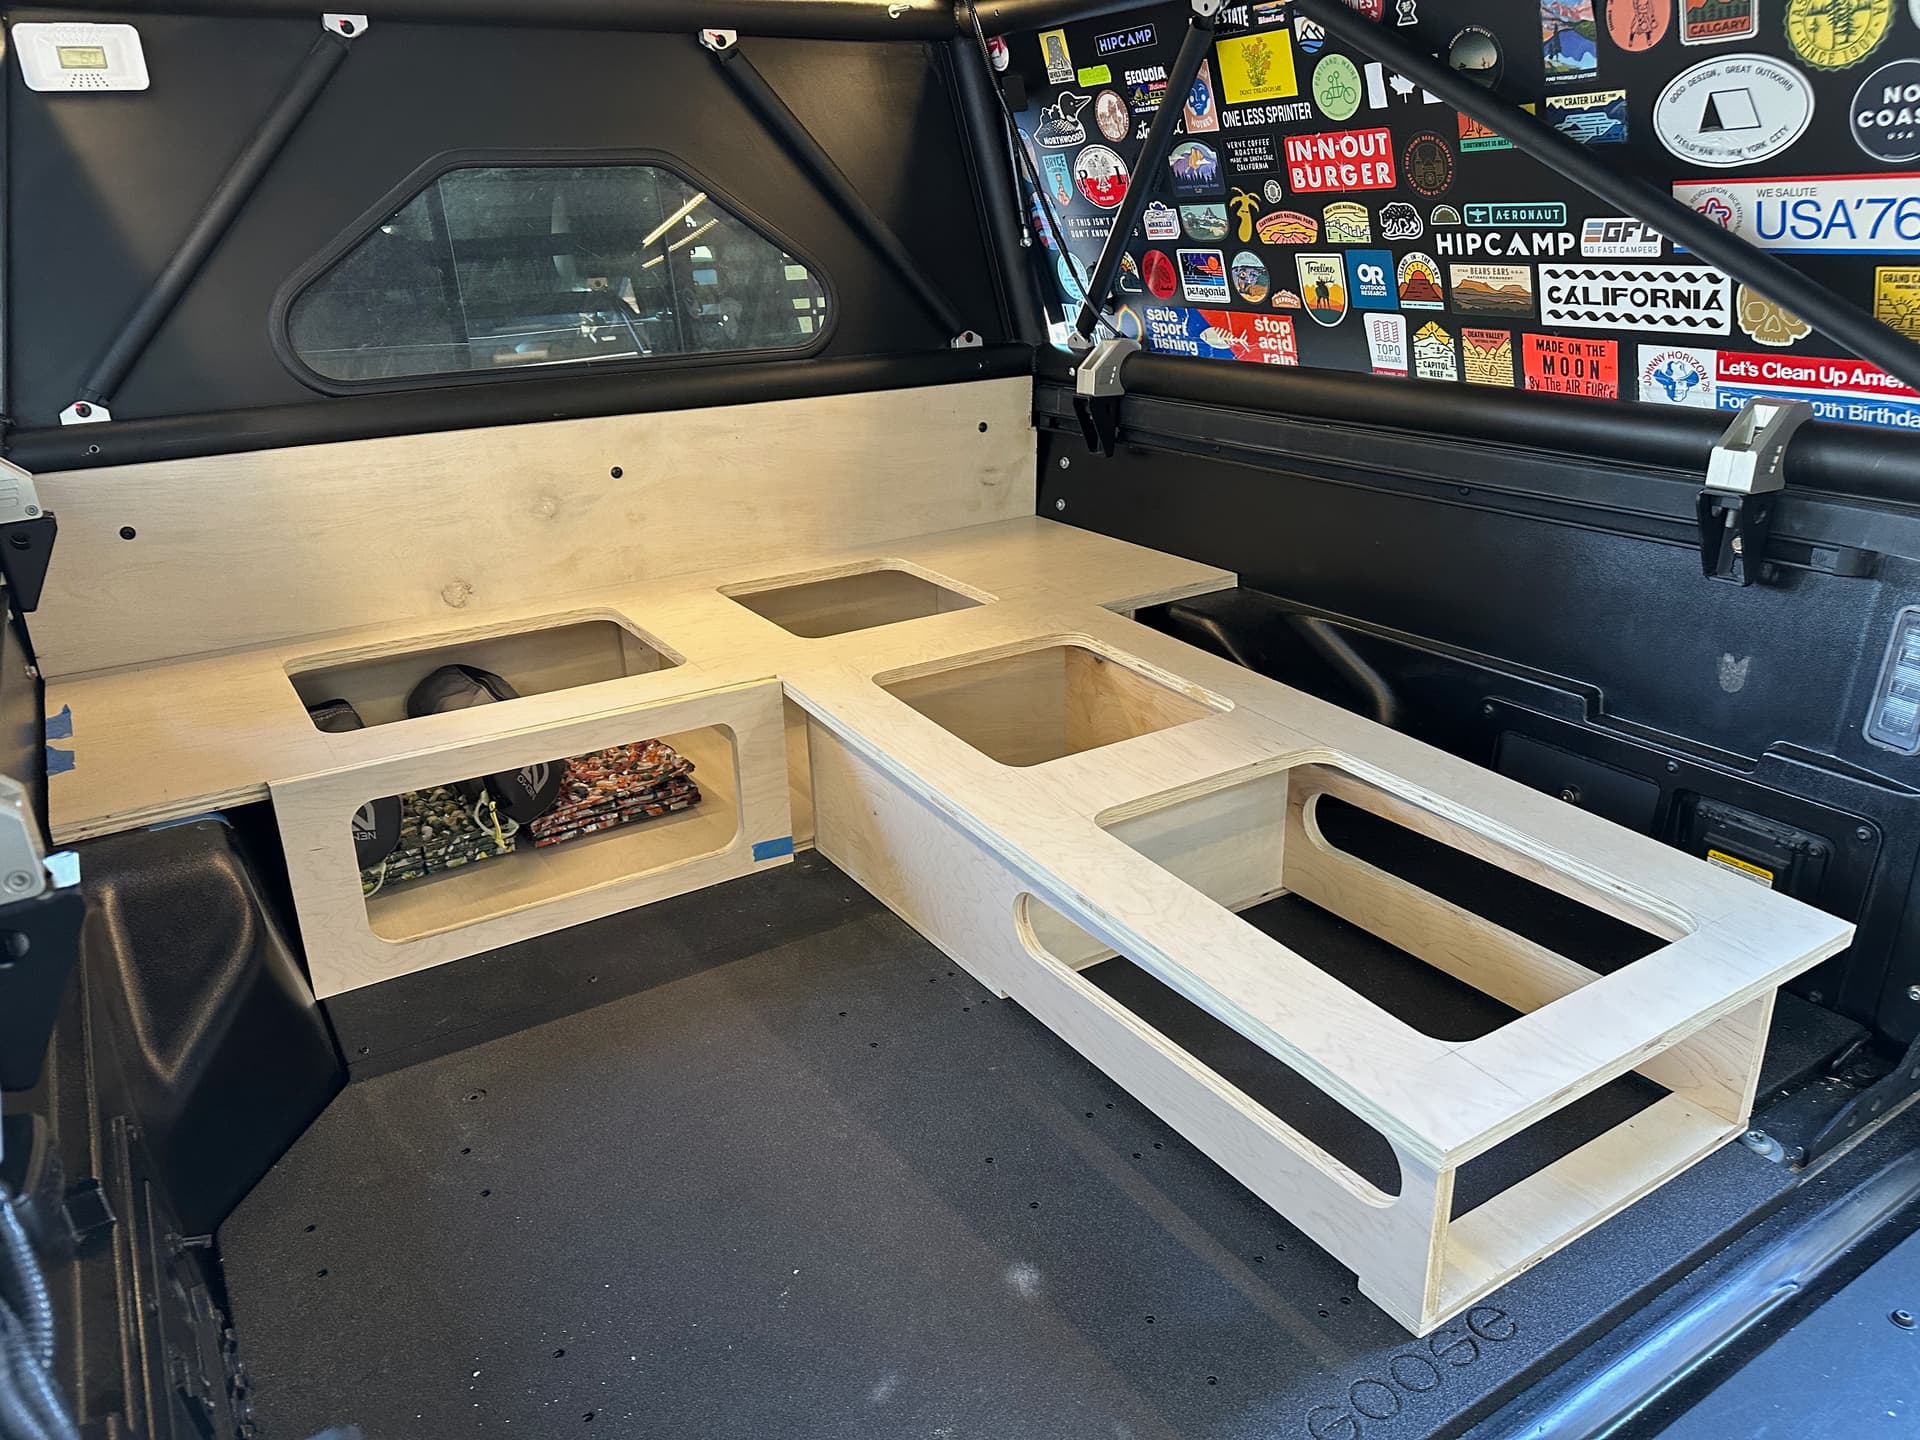
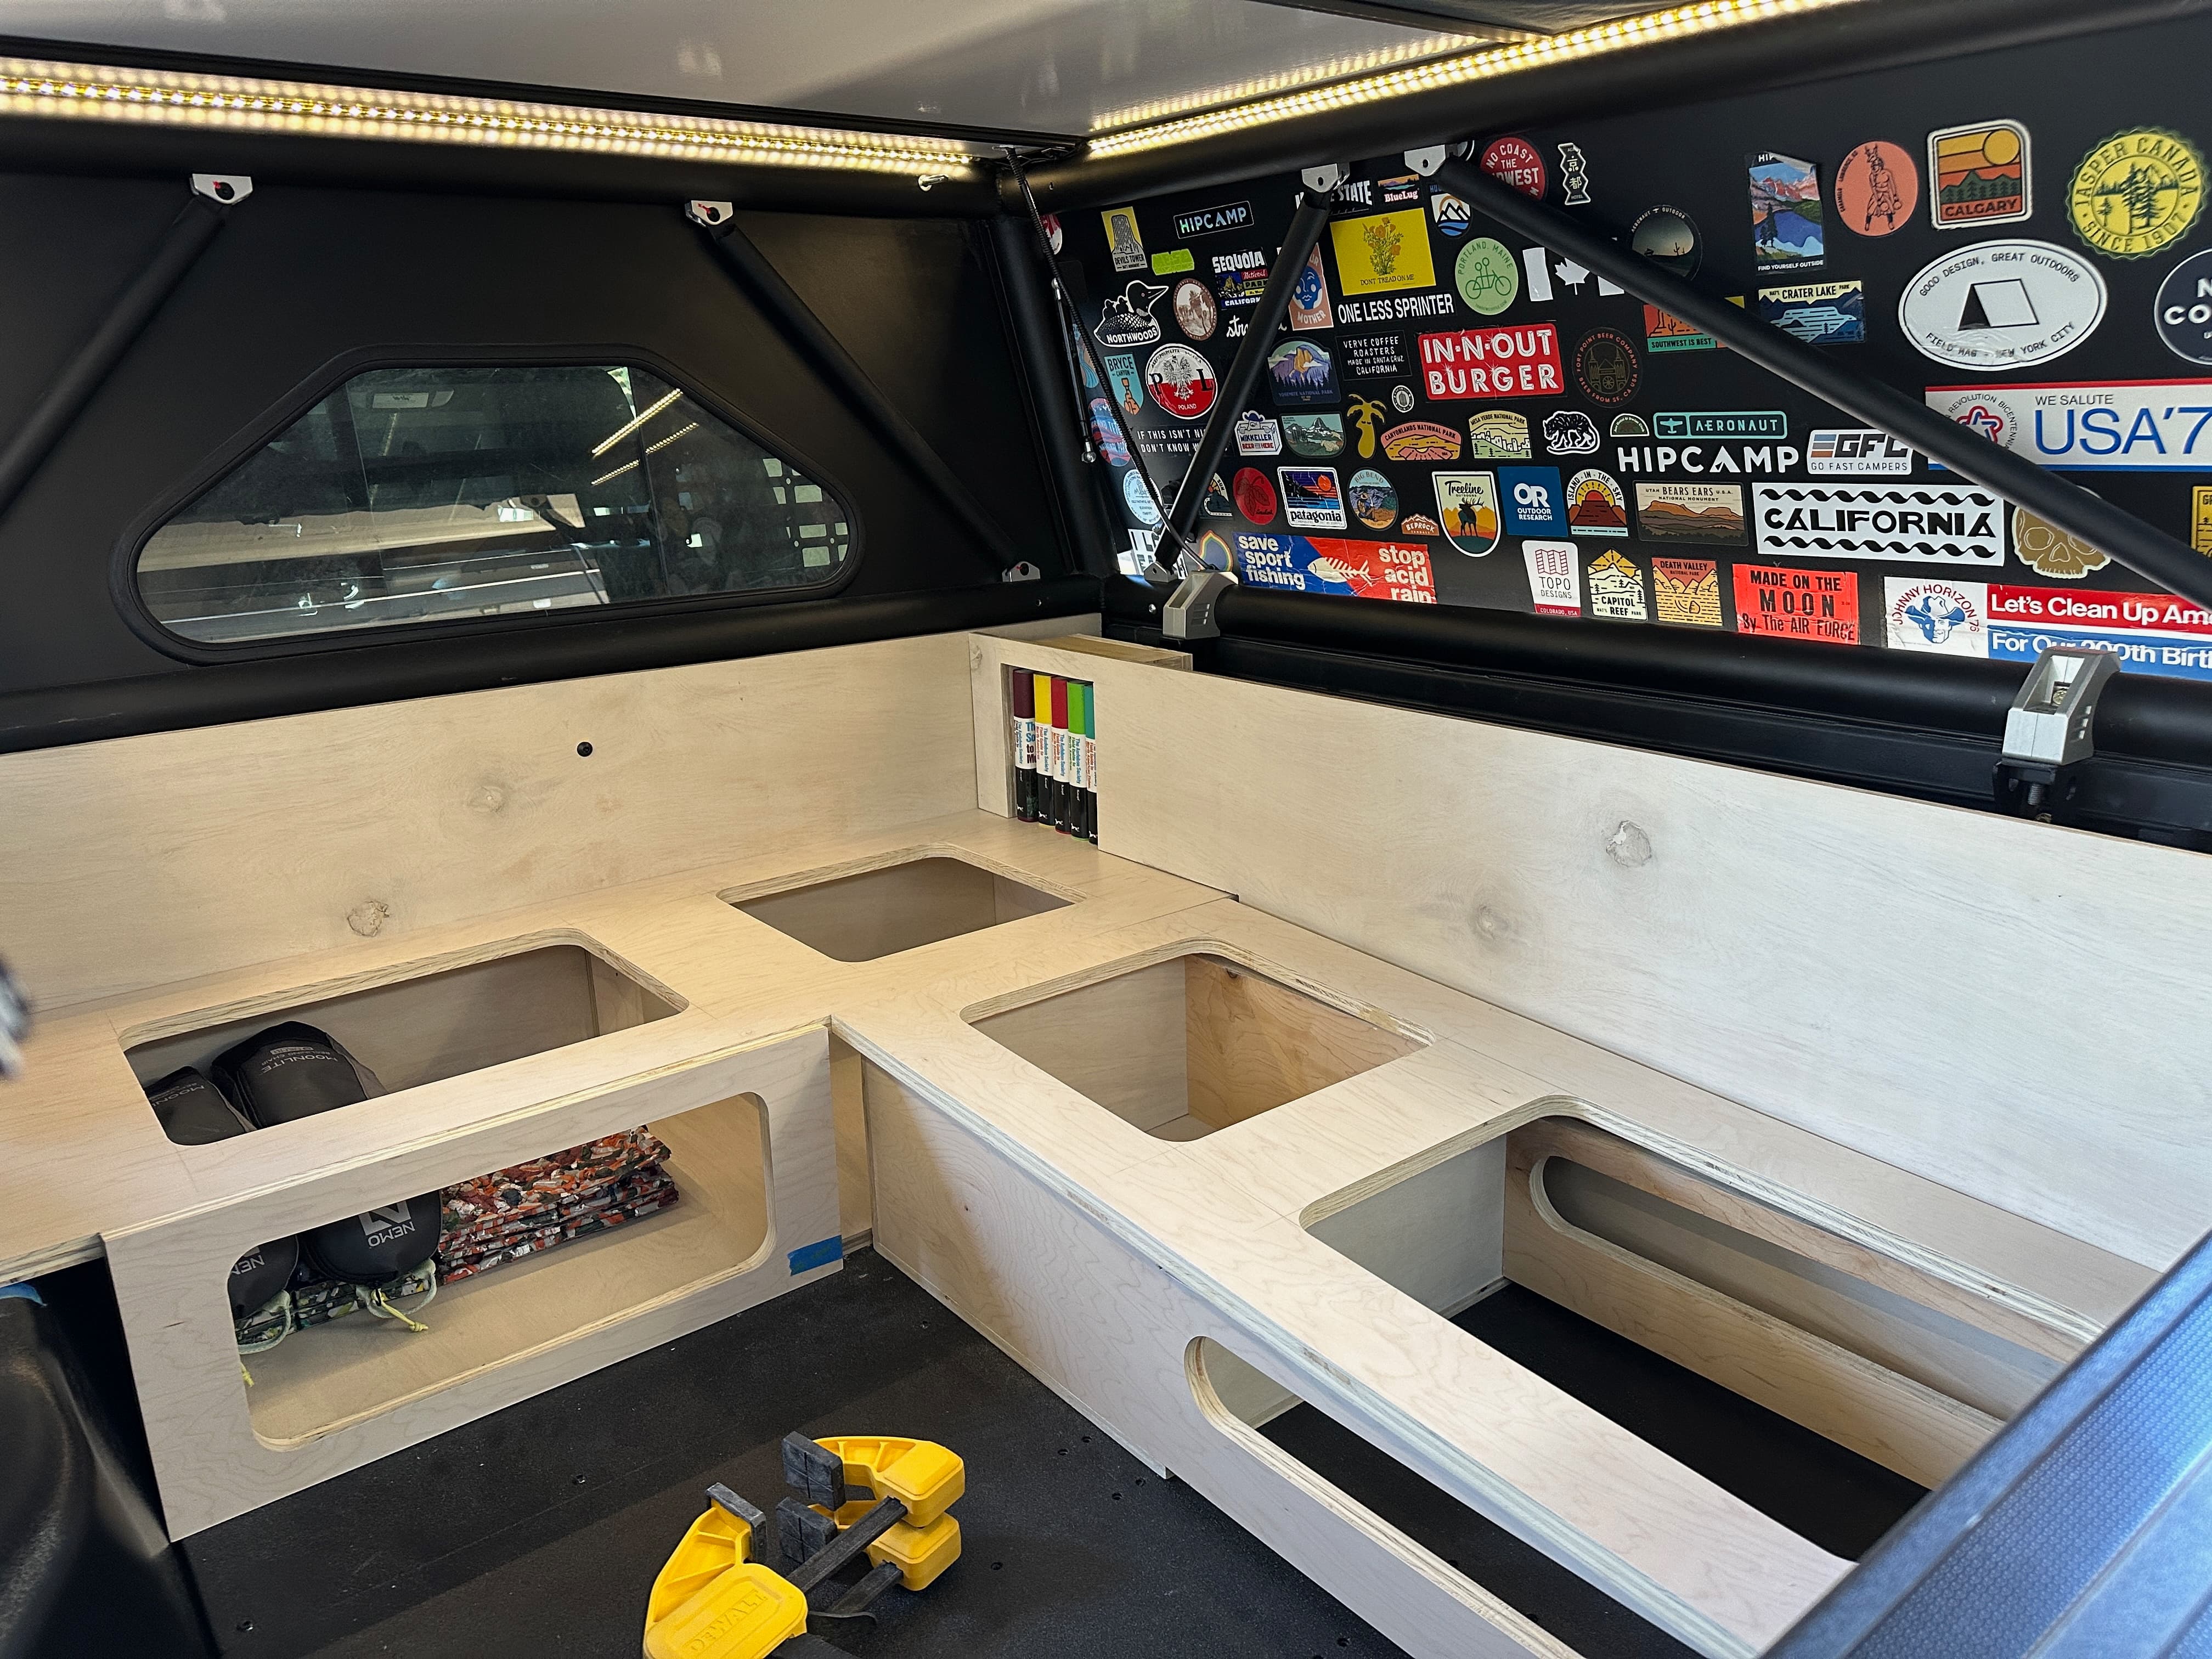
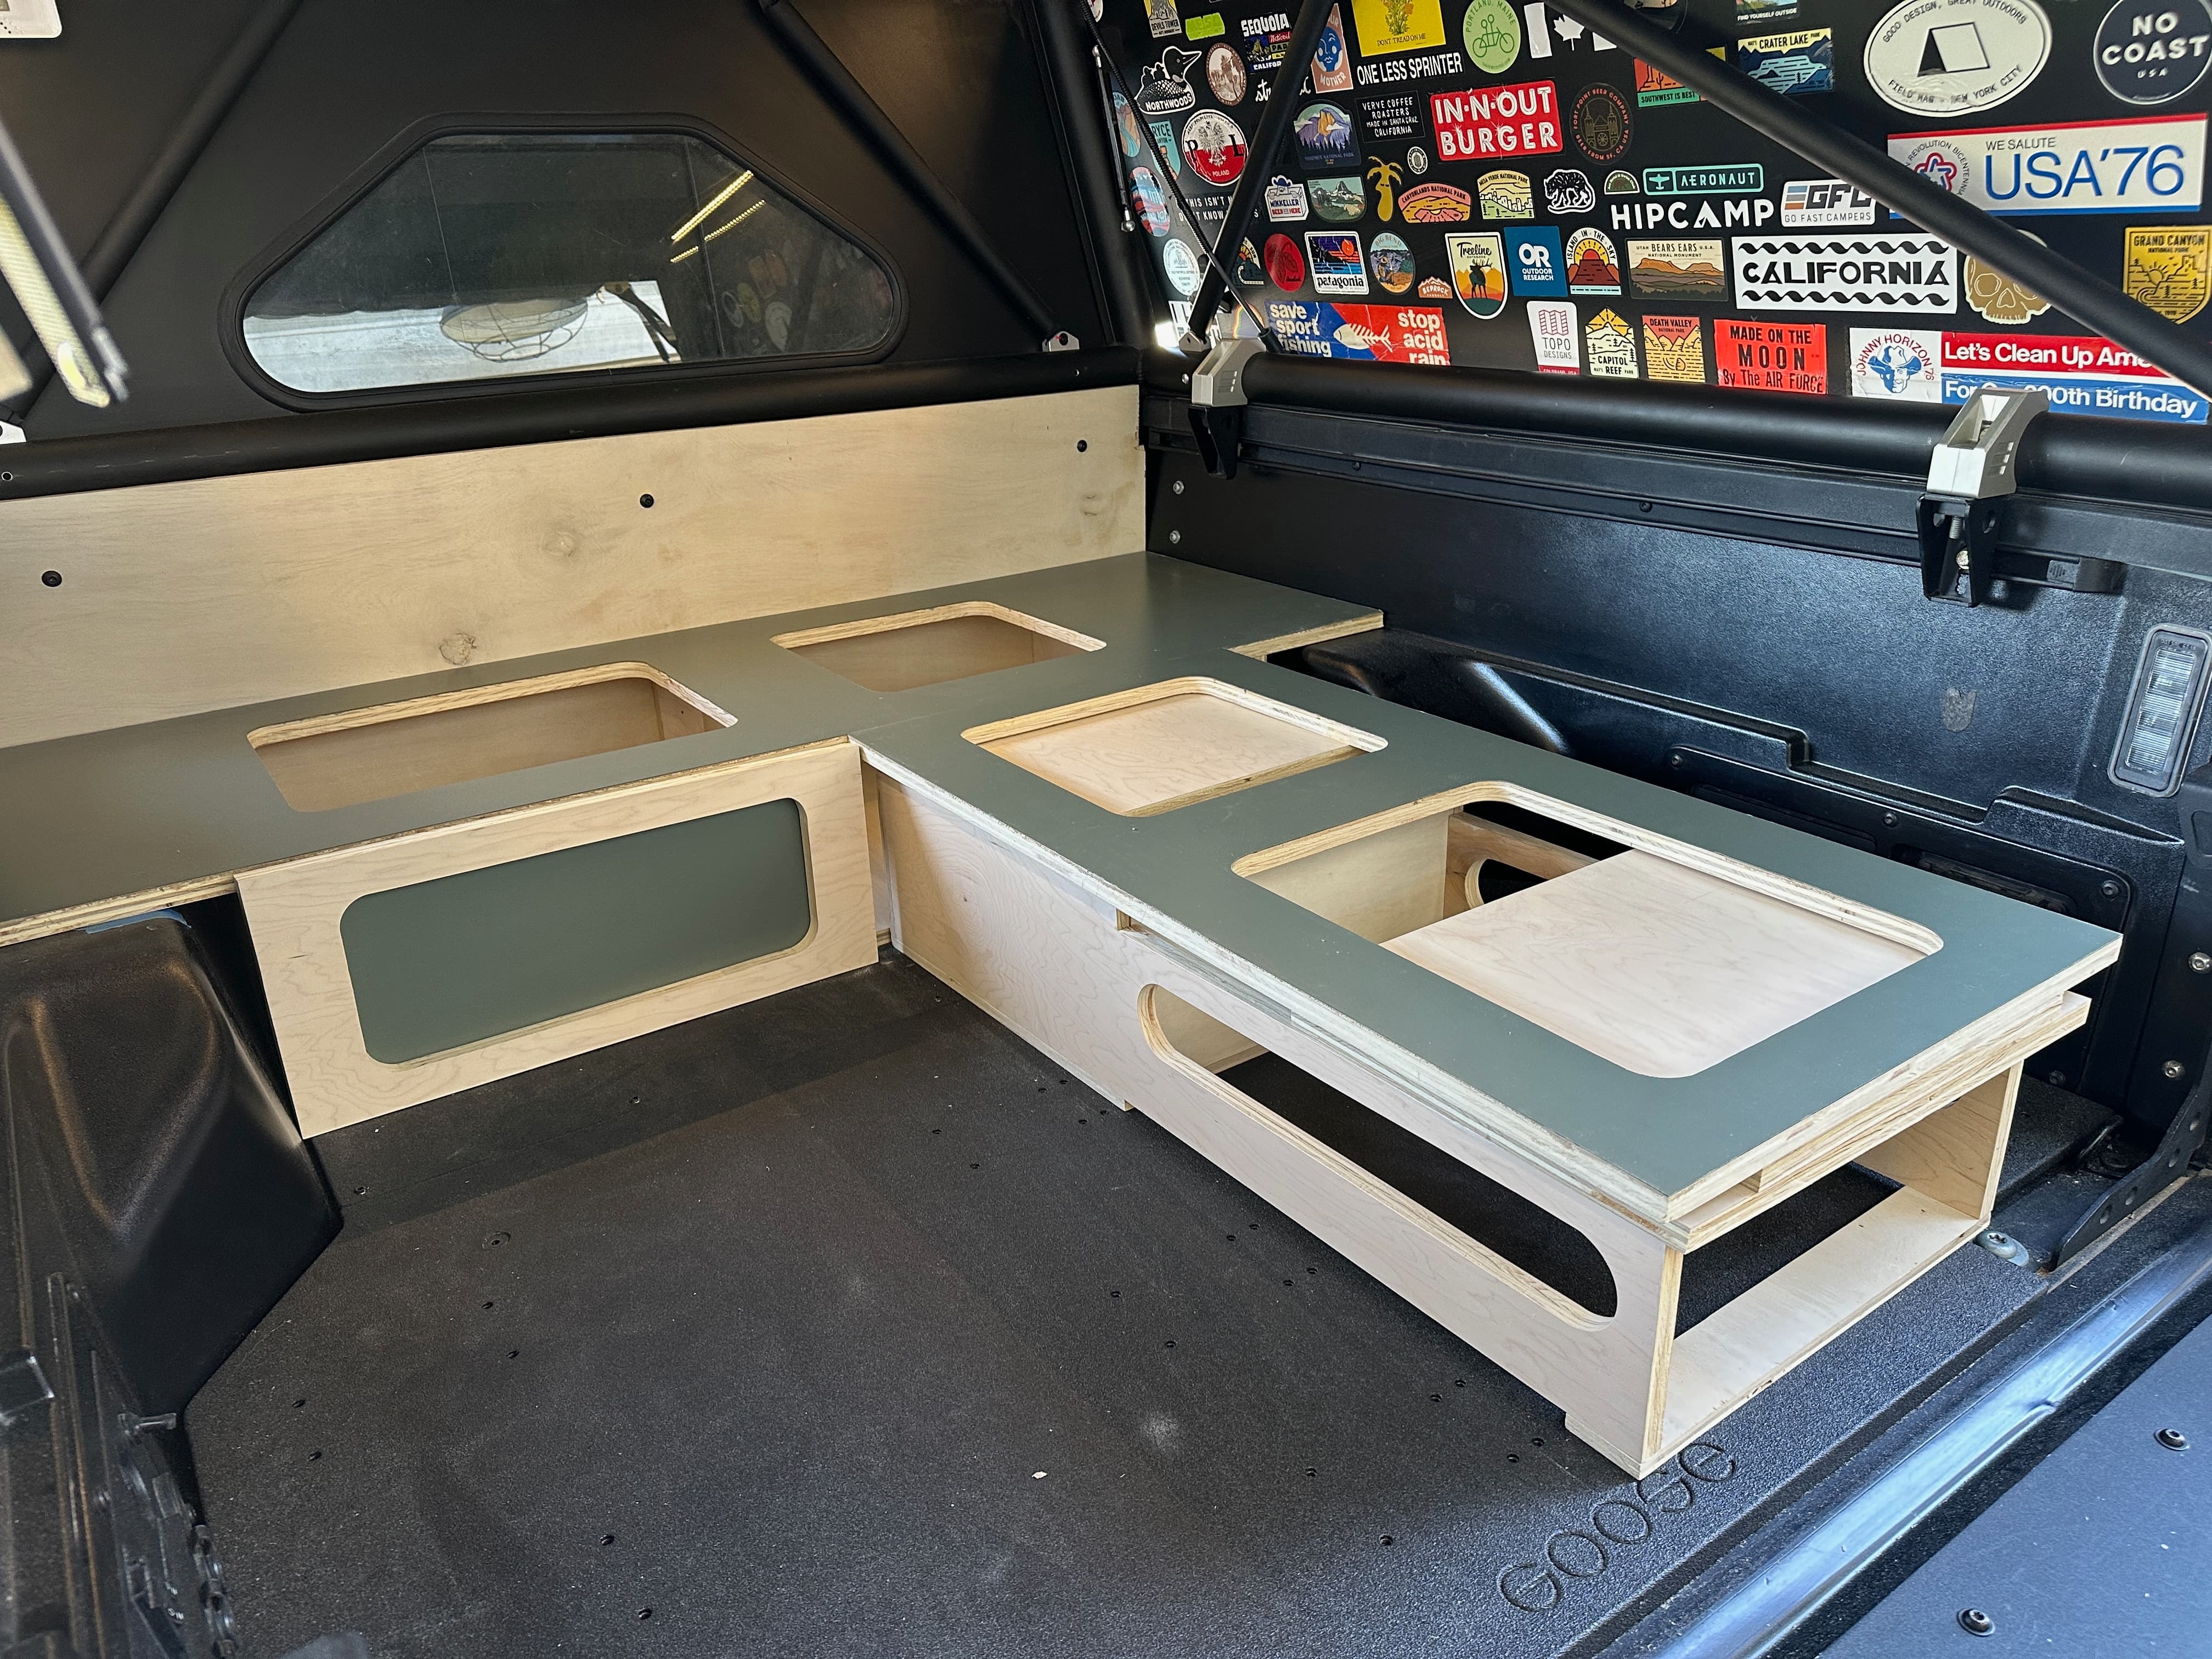
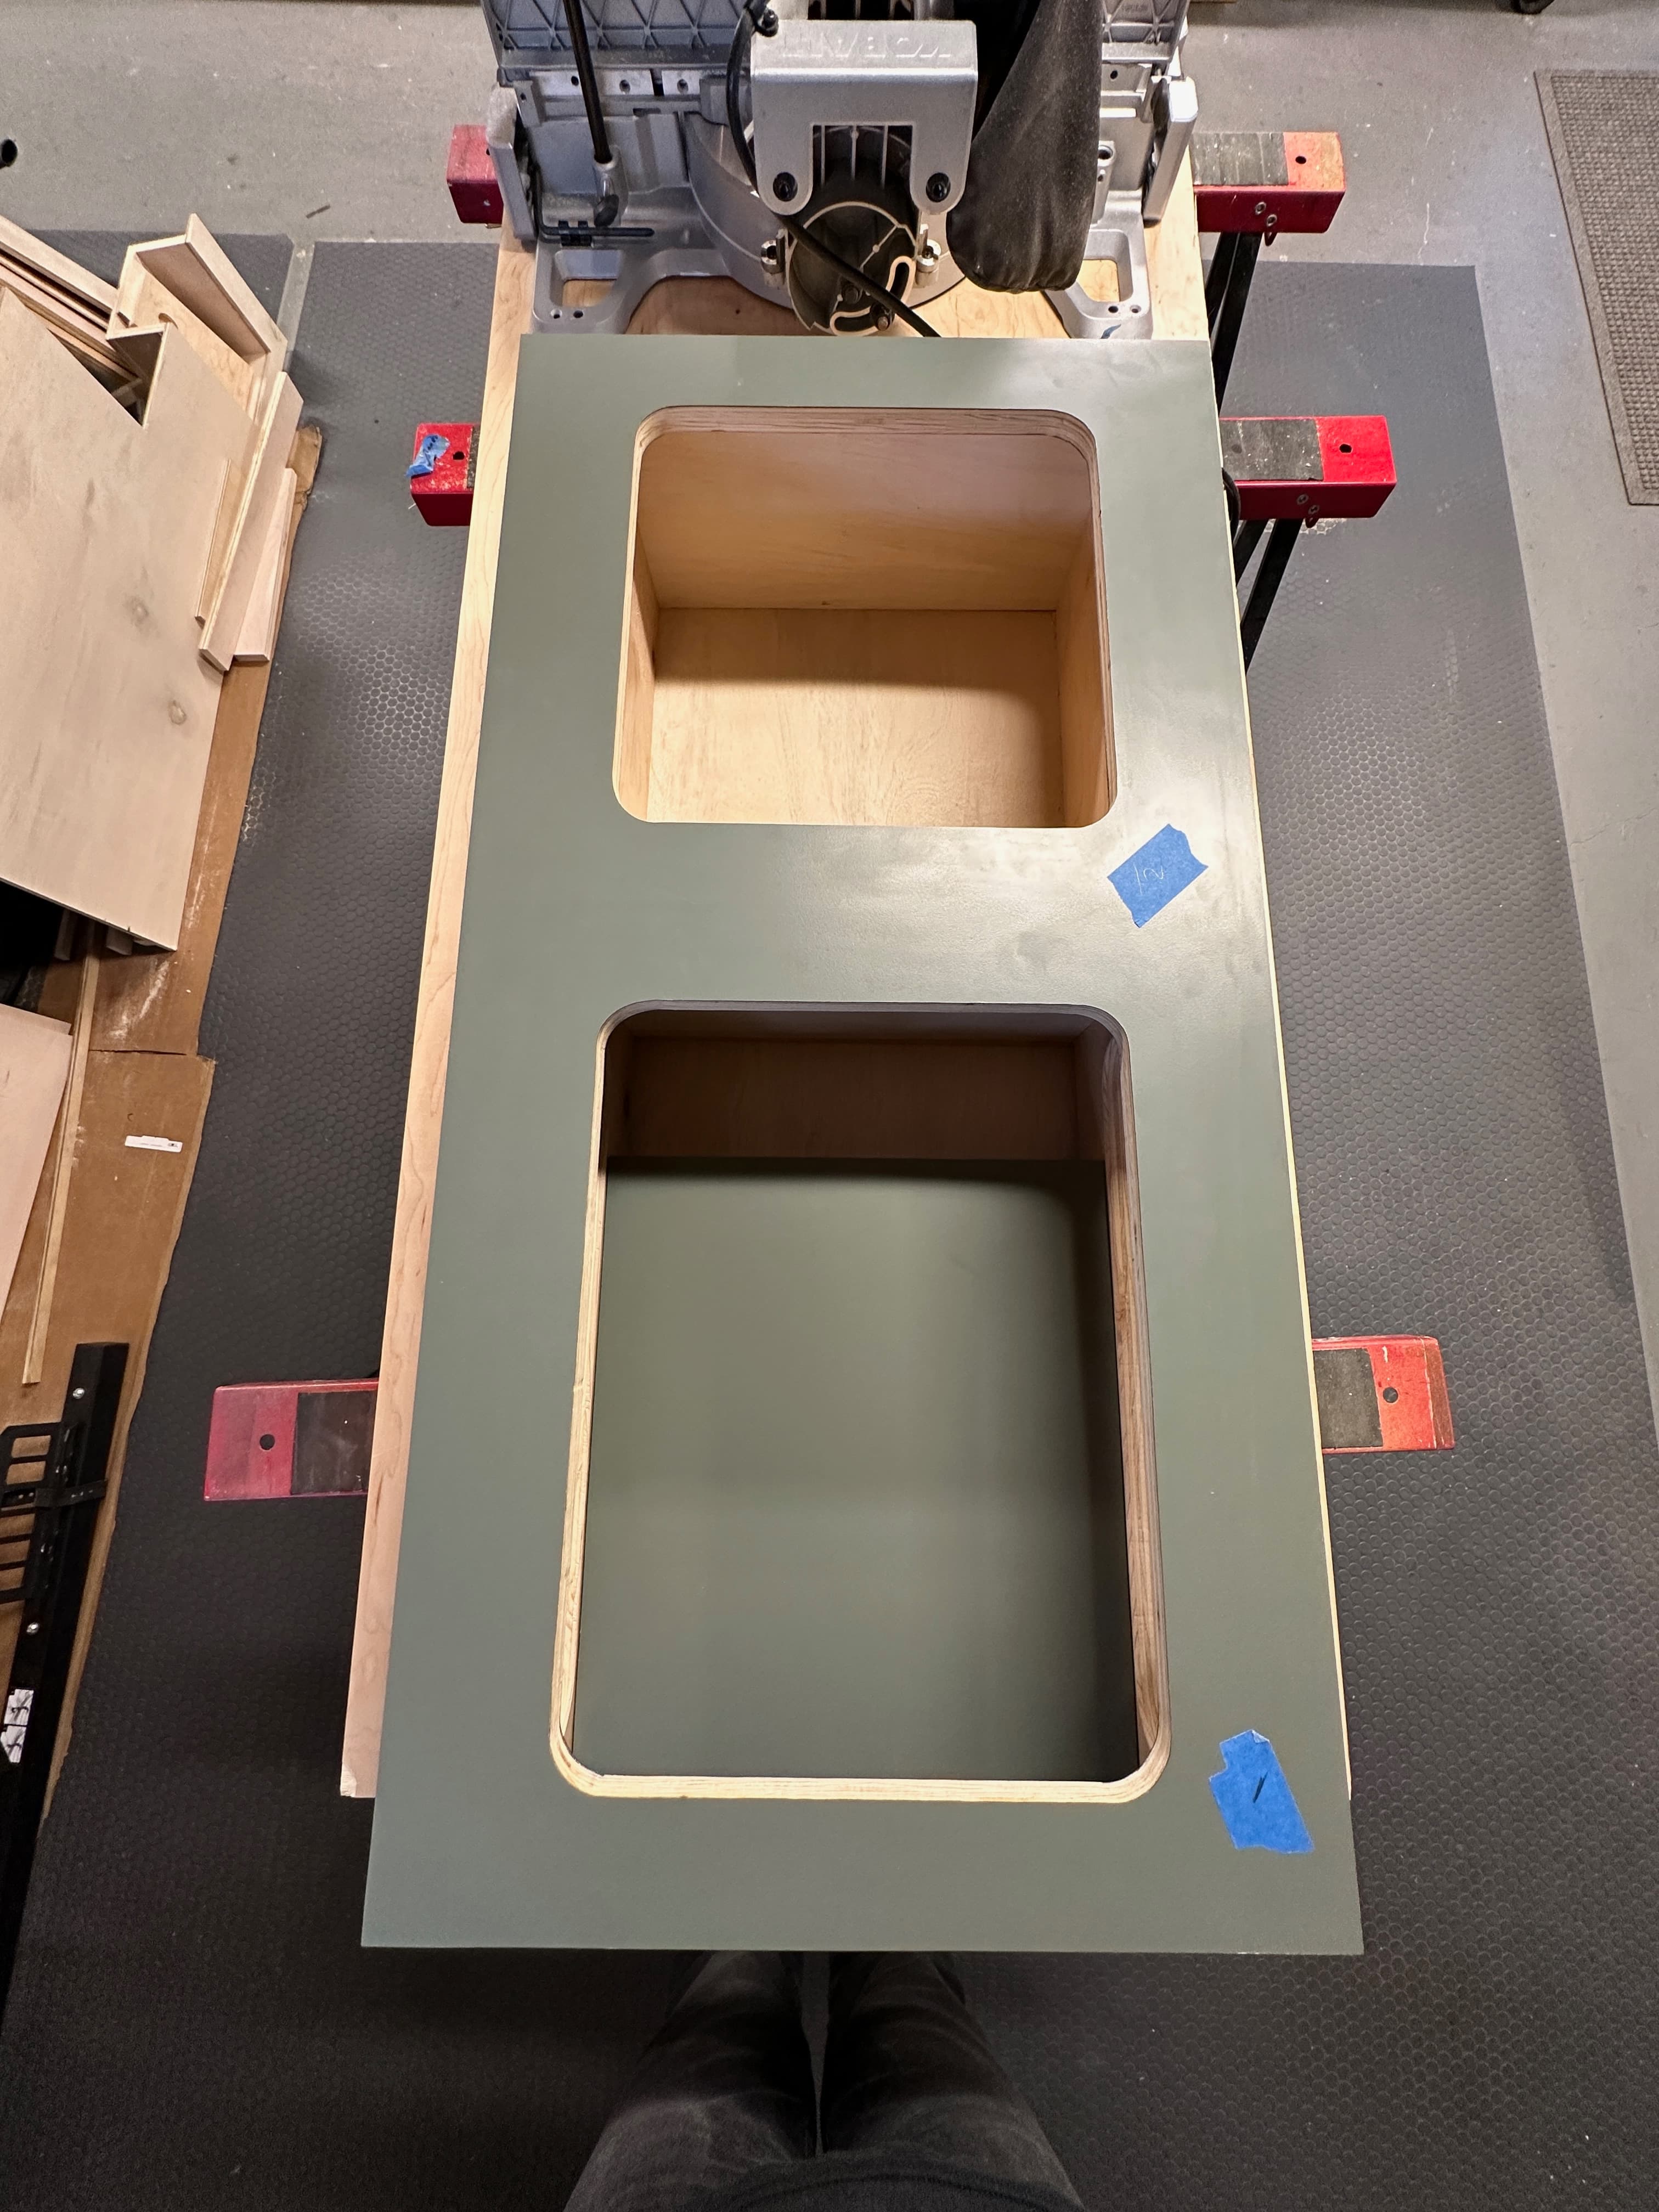
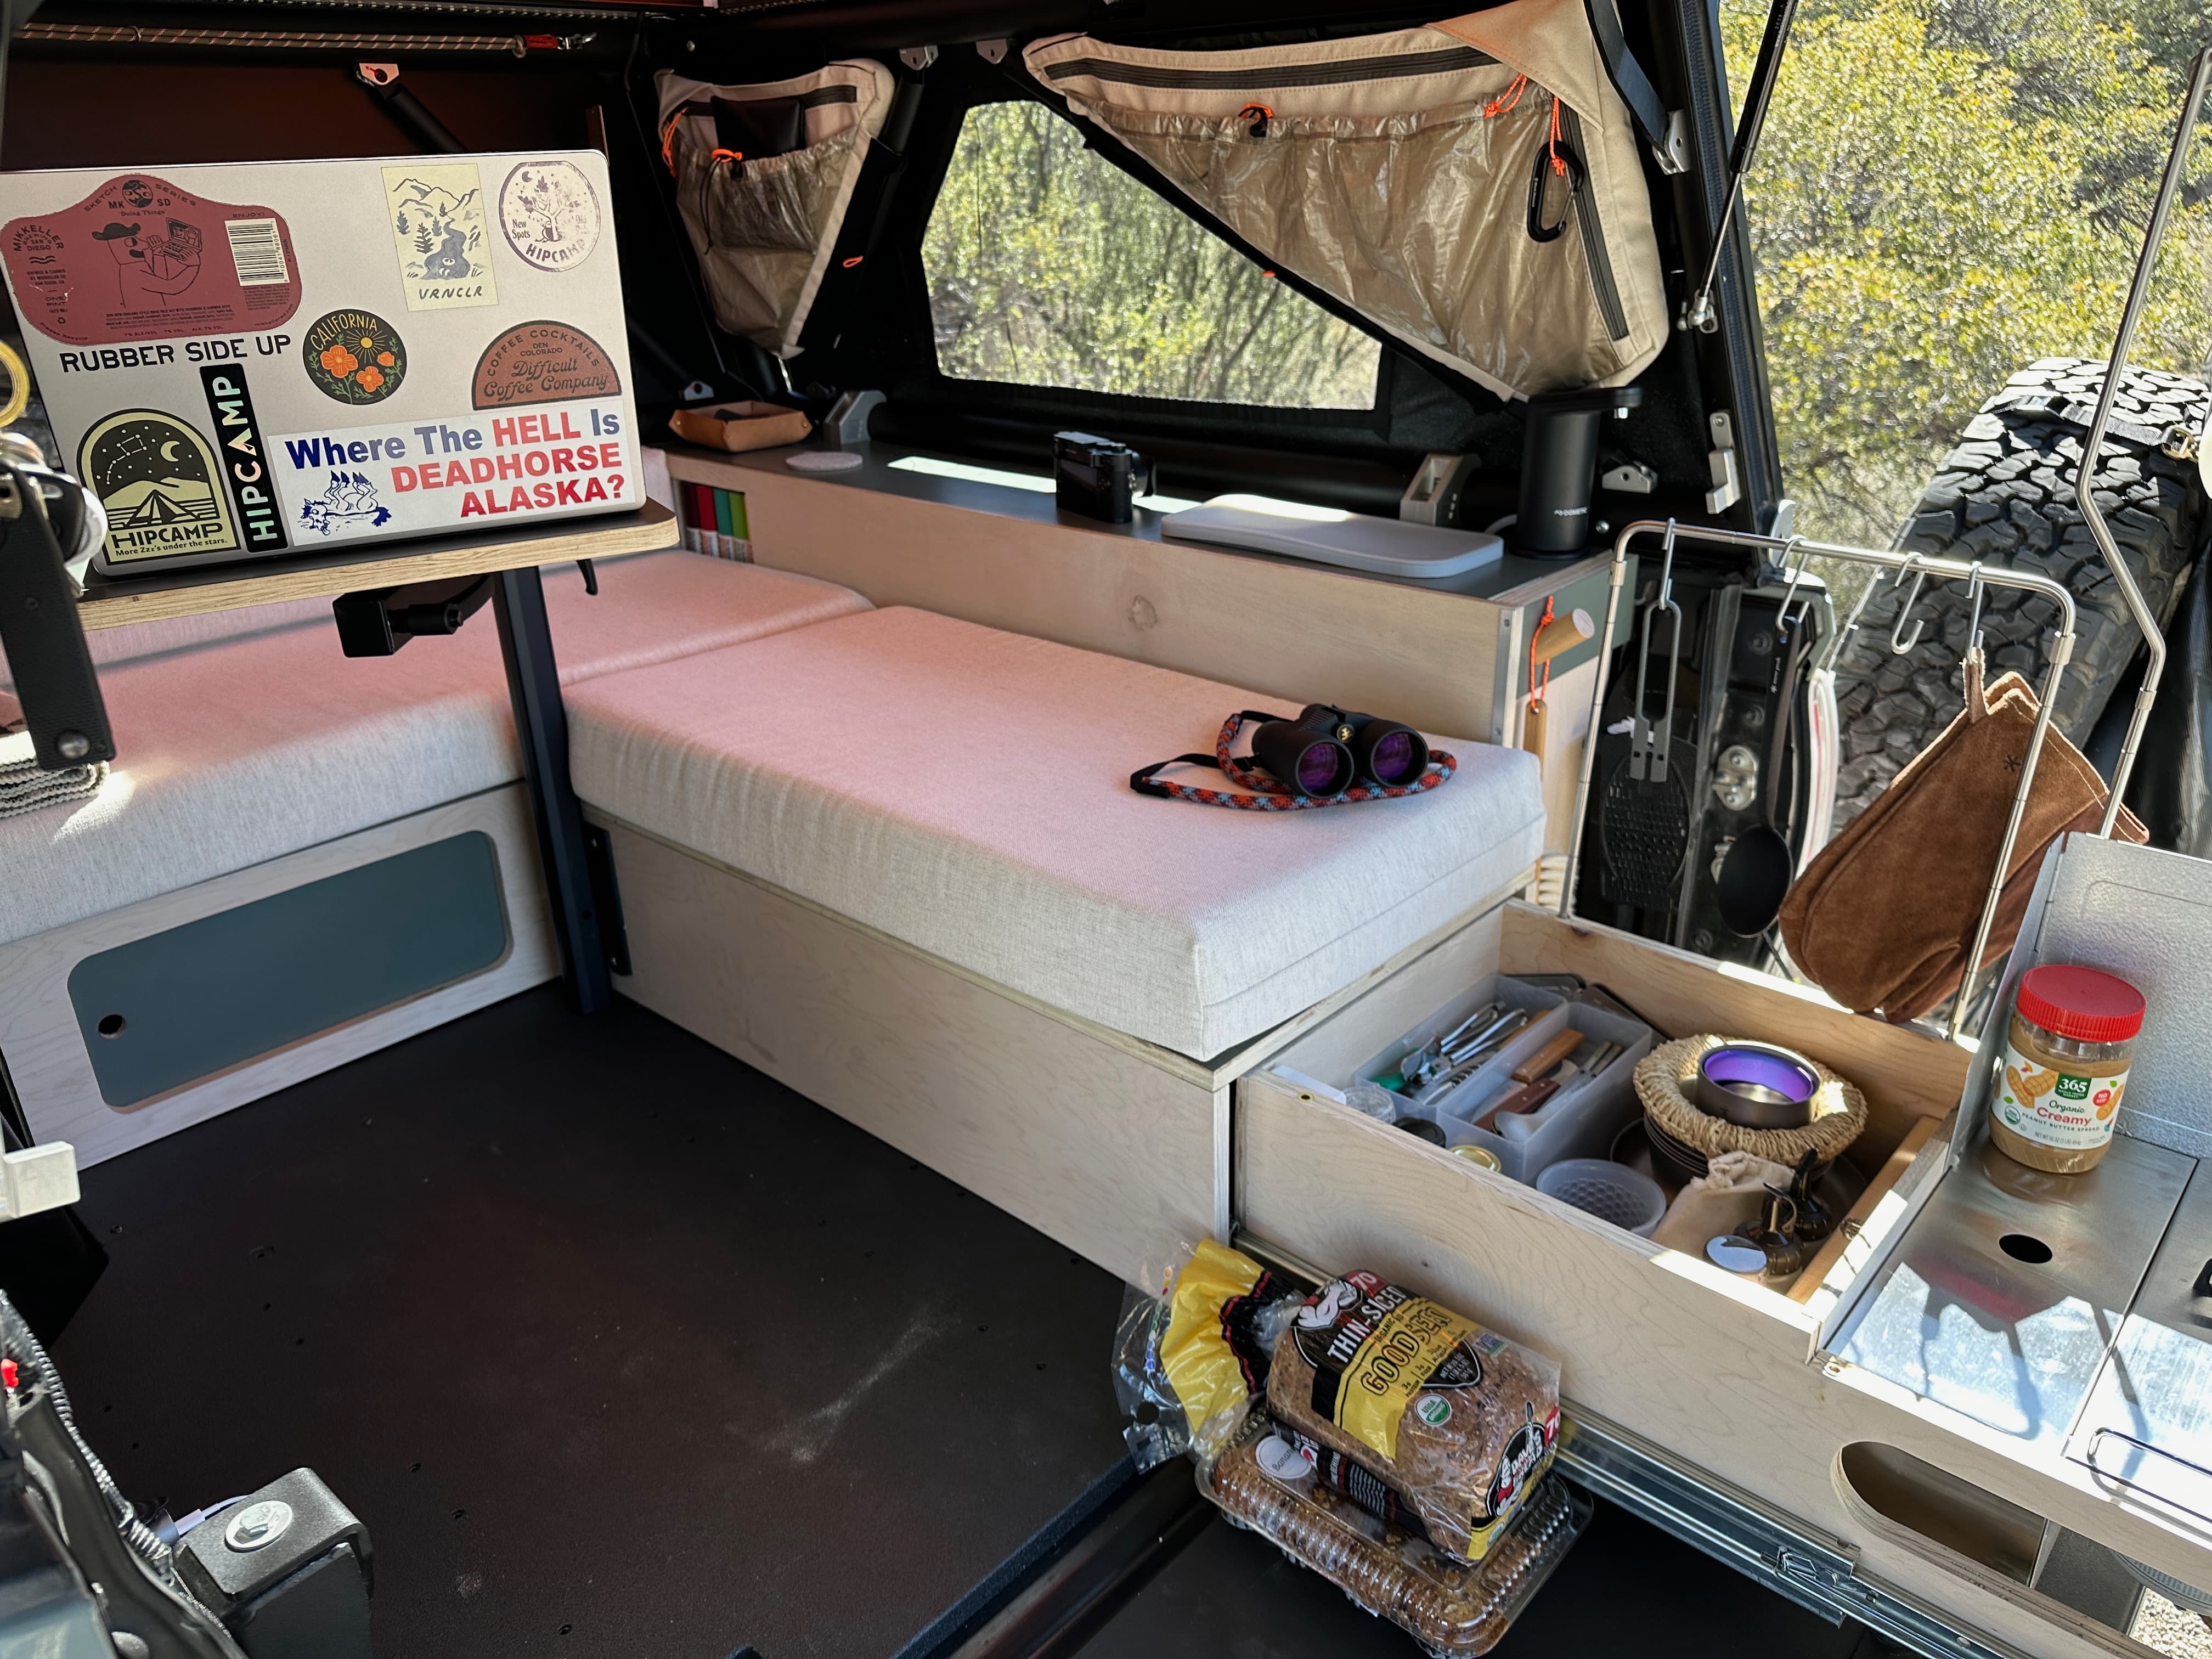
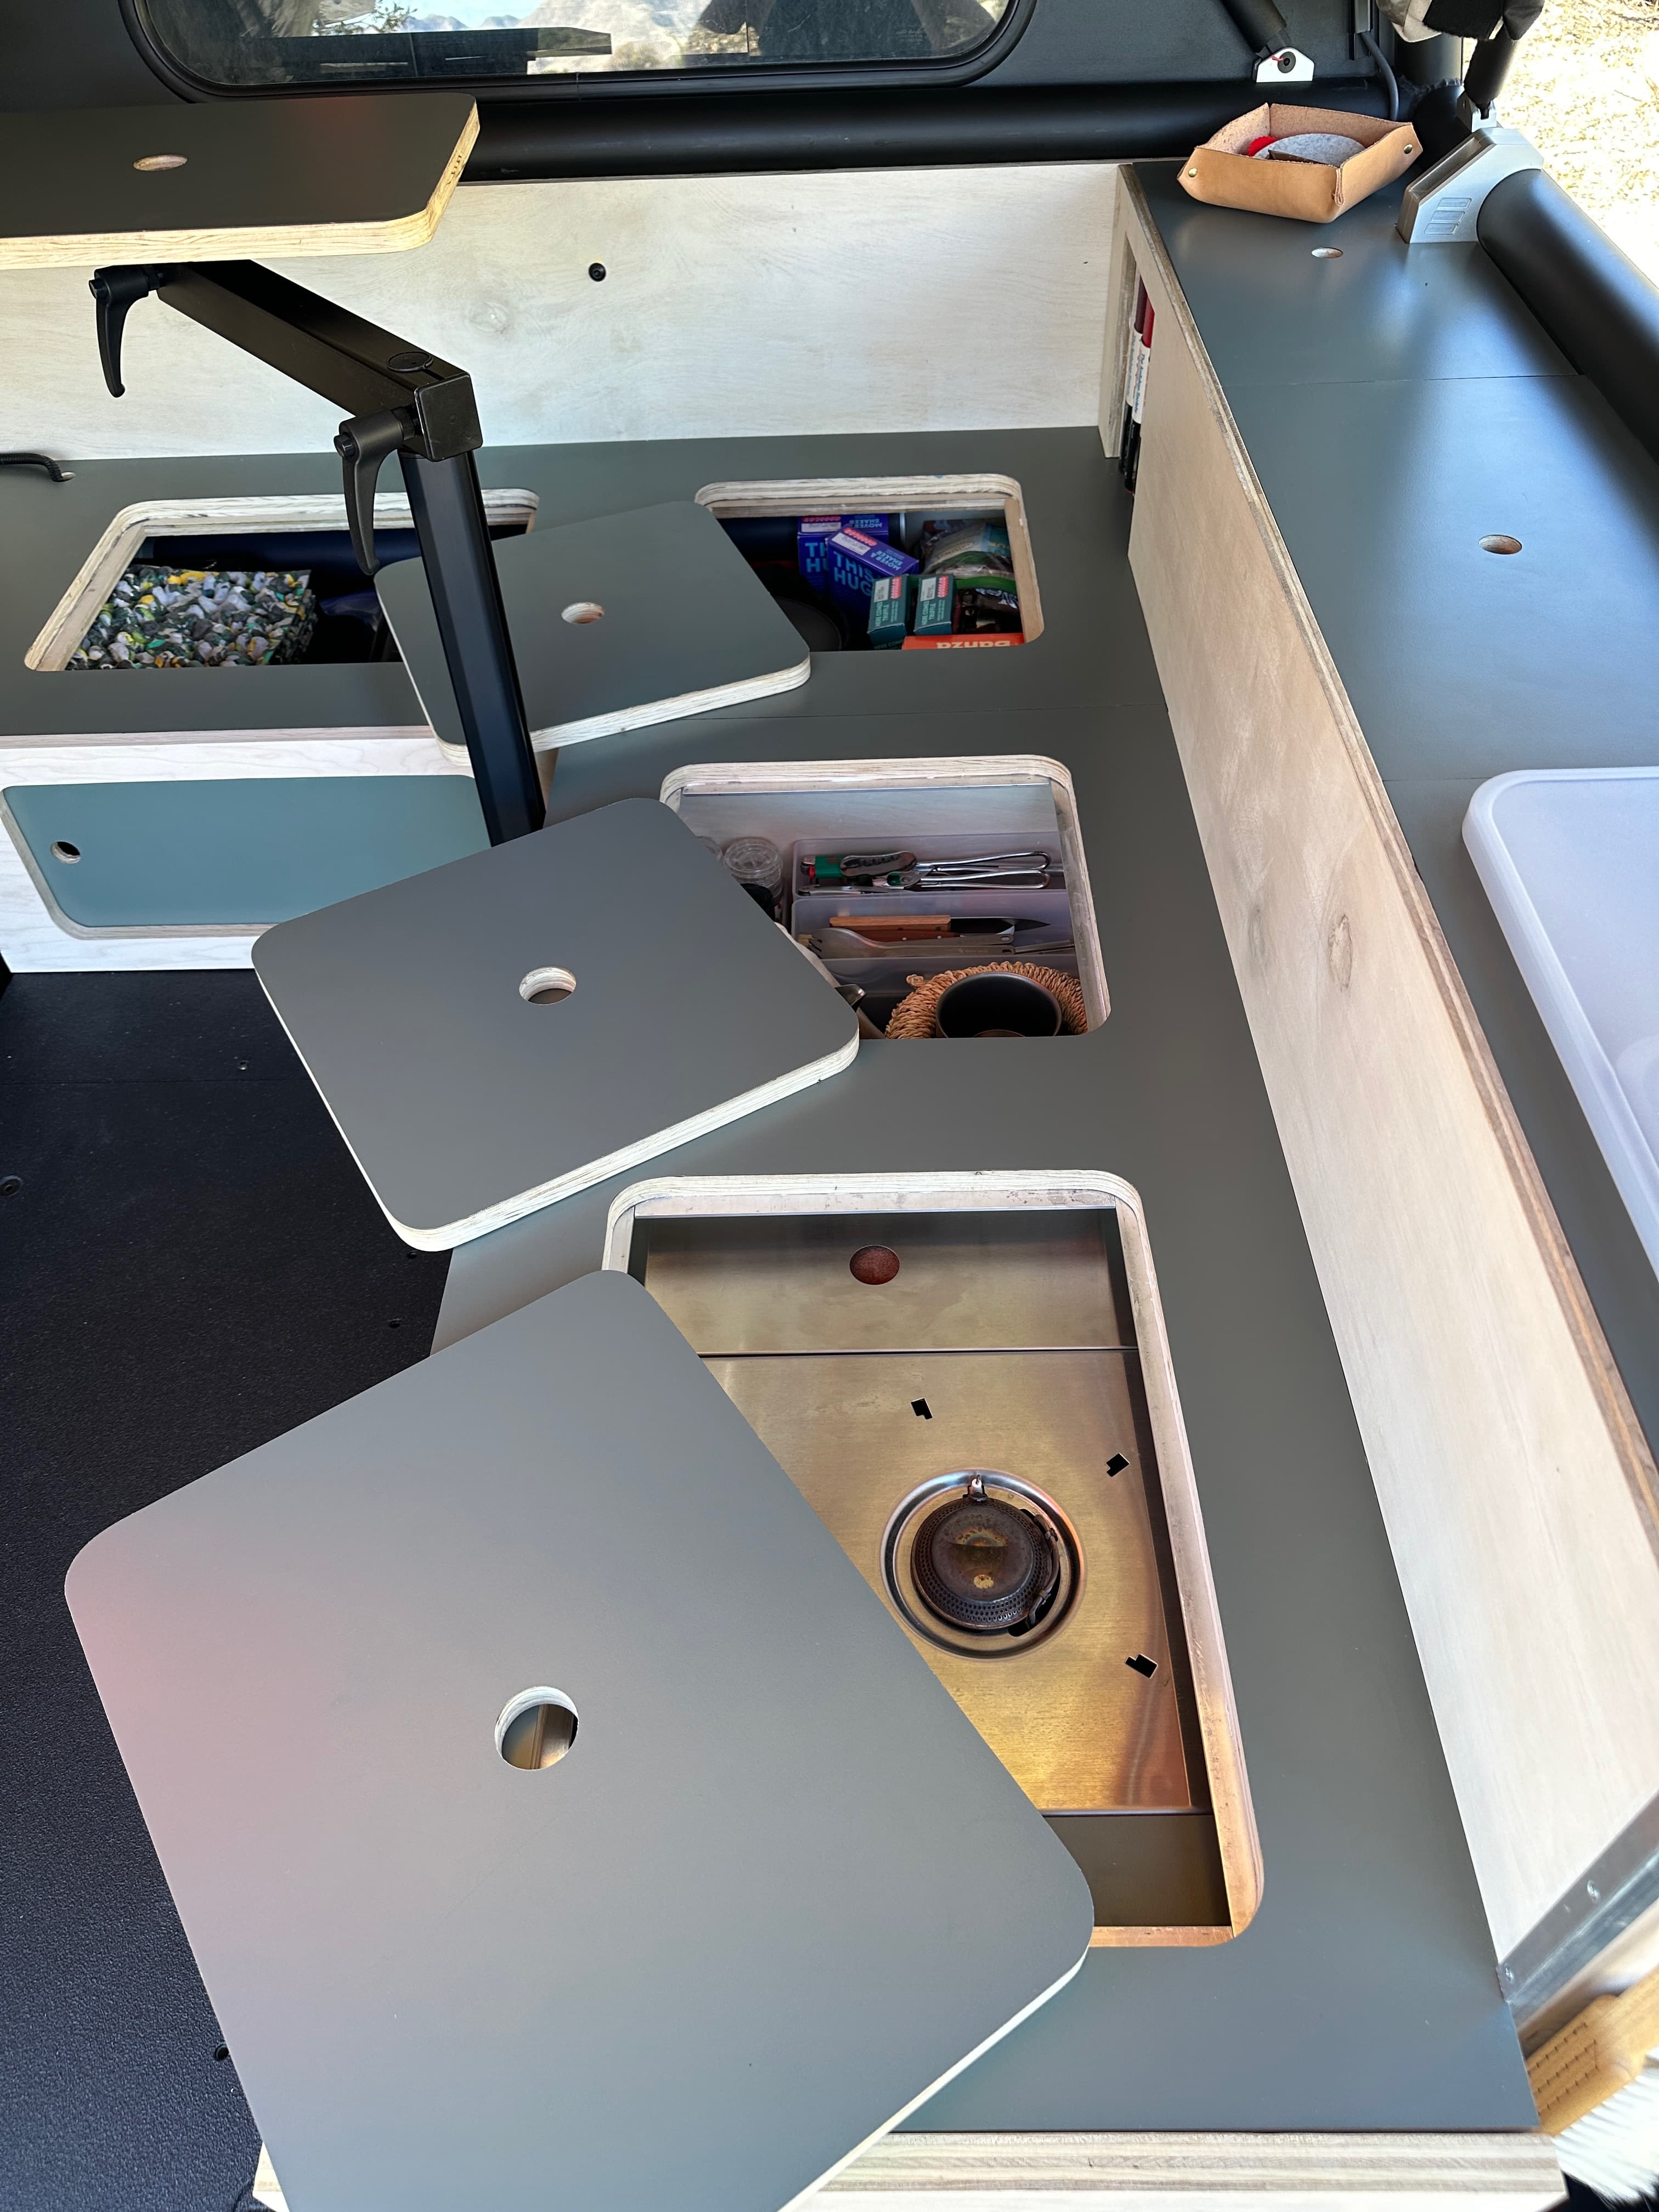
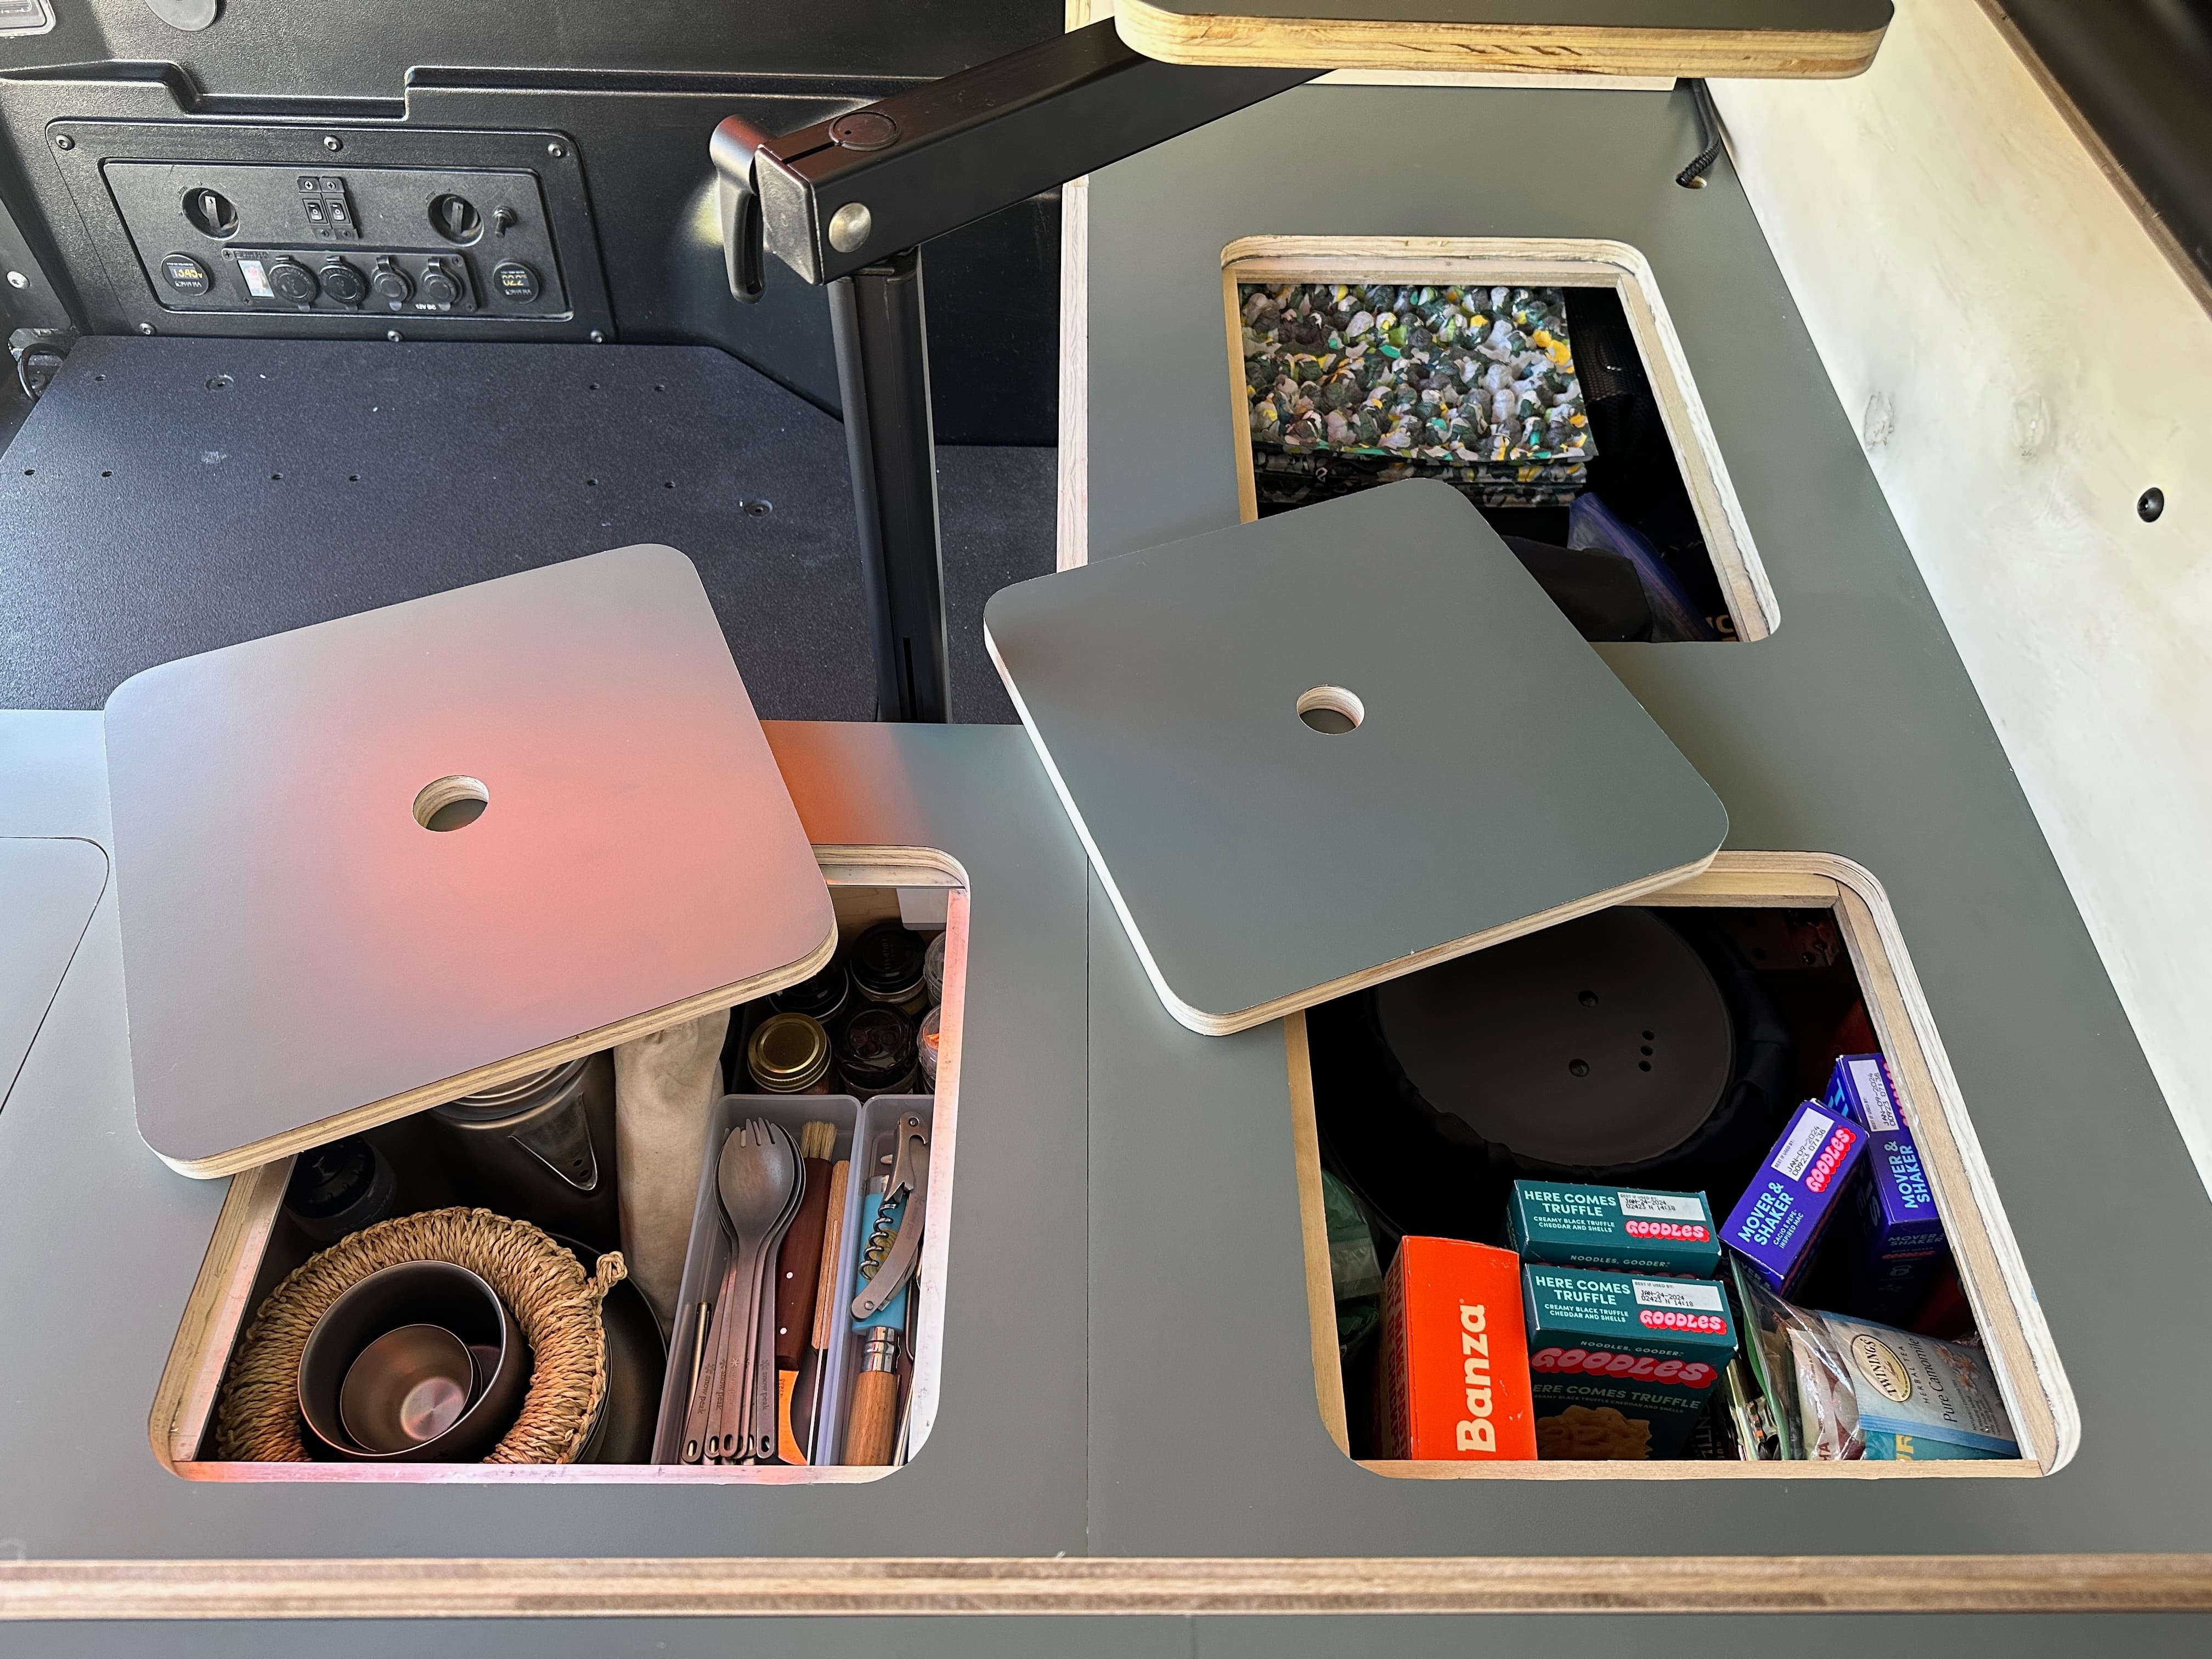
Once the bulkhead bench and garage were looking solid we began the process of dialing in the measurements for the IGT kitchen drawer and cut it down to size. We dedicated 20" of the drawer to the IGT rail to accommodate a number of accessory combos and left a 16" box at the rear for utensils, cookware, plates, bowls, etc.
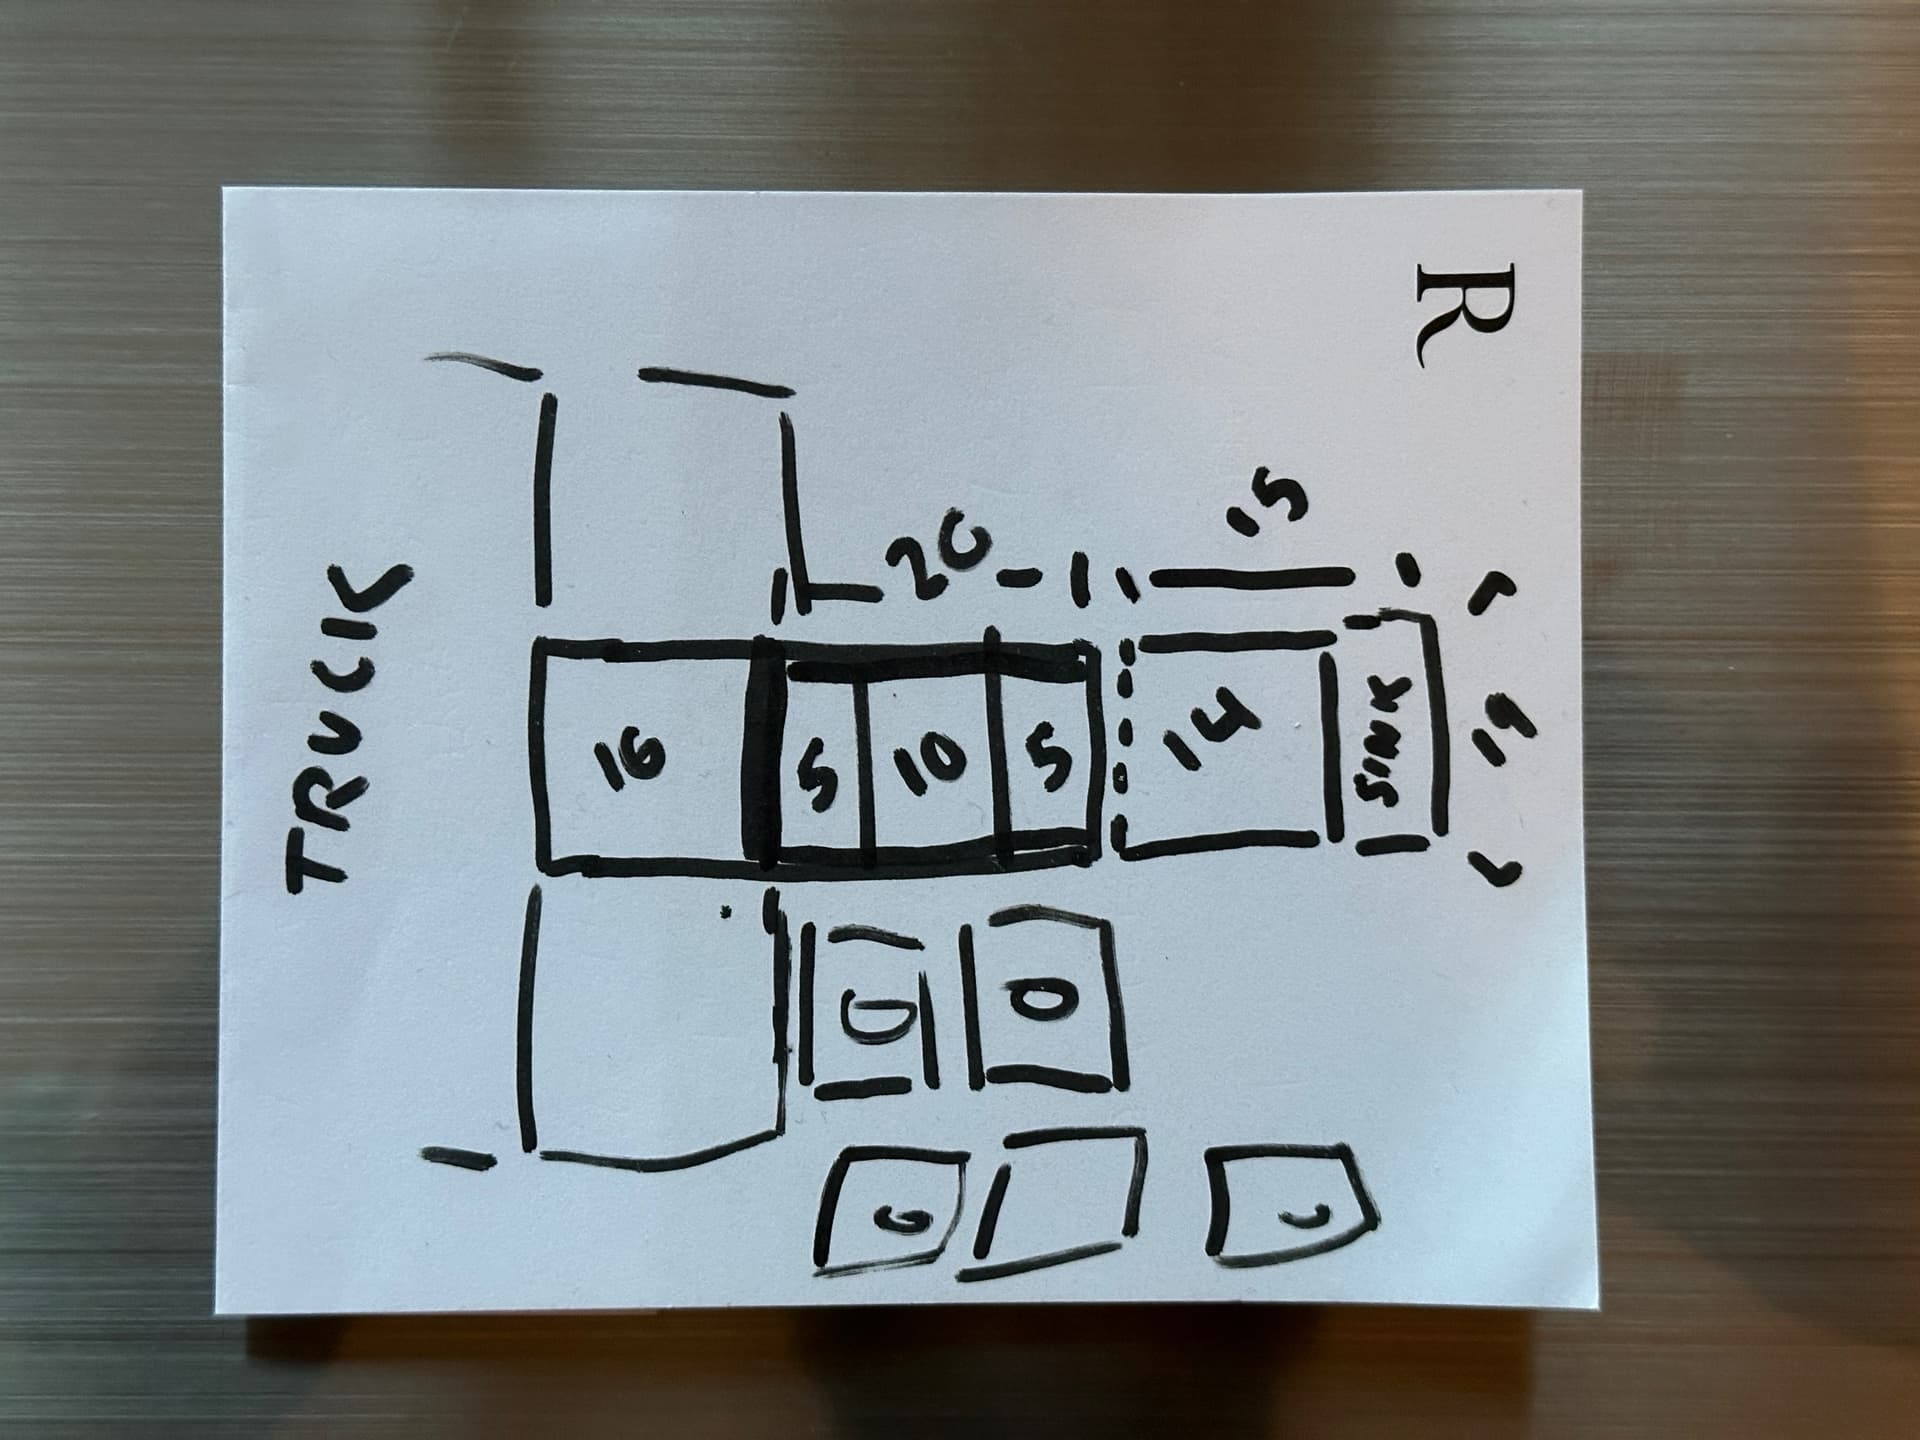
A note: We intentionally did not extend the drawer to the bulkhead to save on rail and drawer weight and instead opted for a static cubby under the bench for dry food.
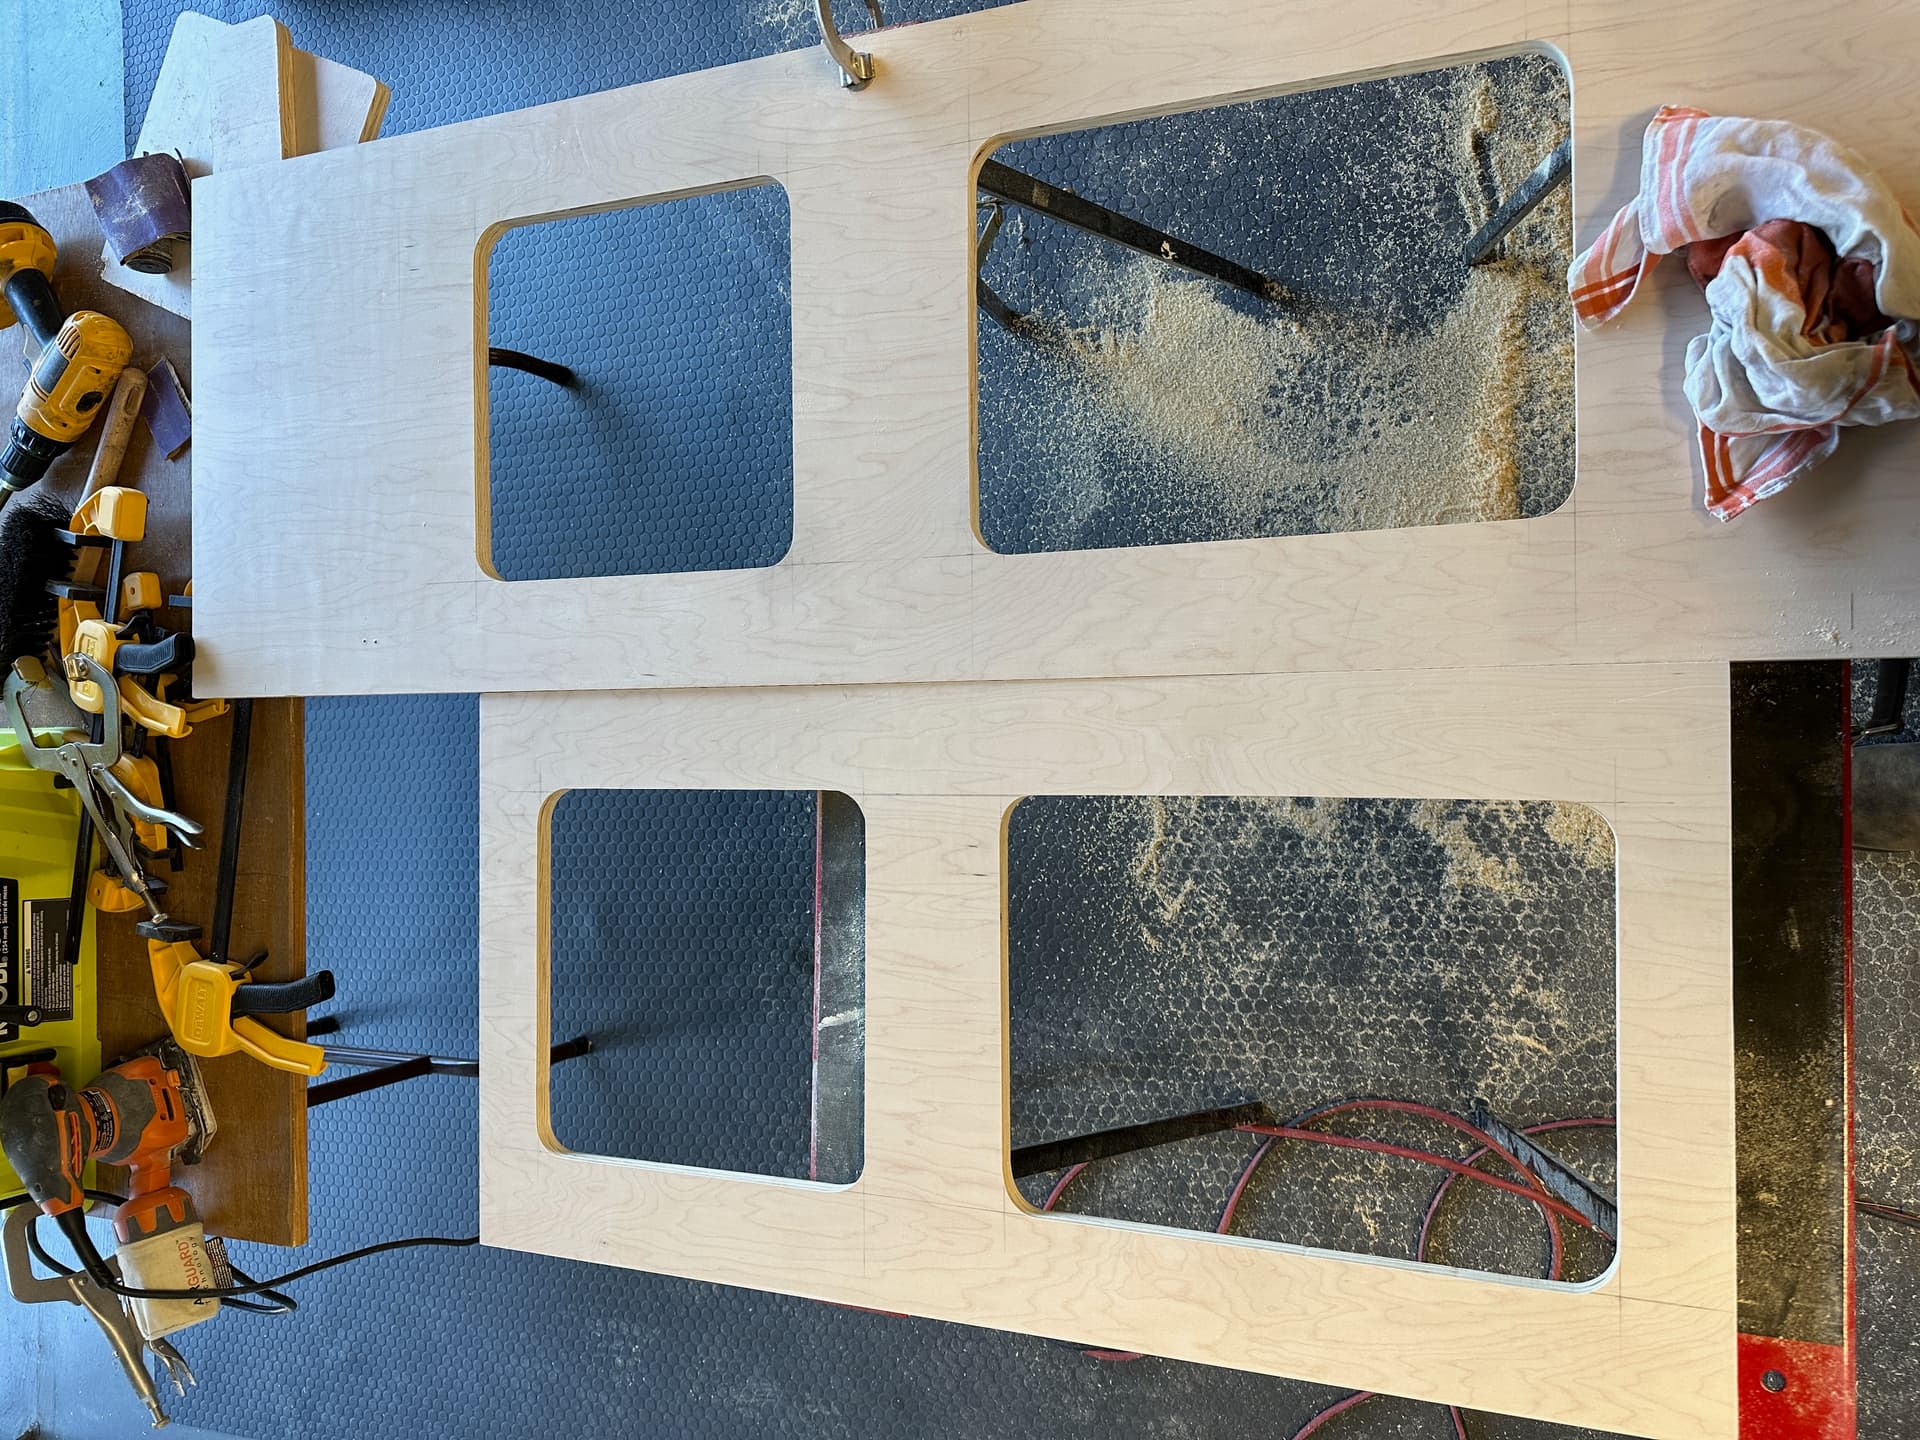
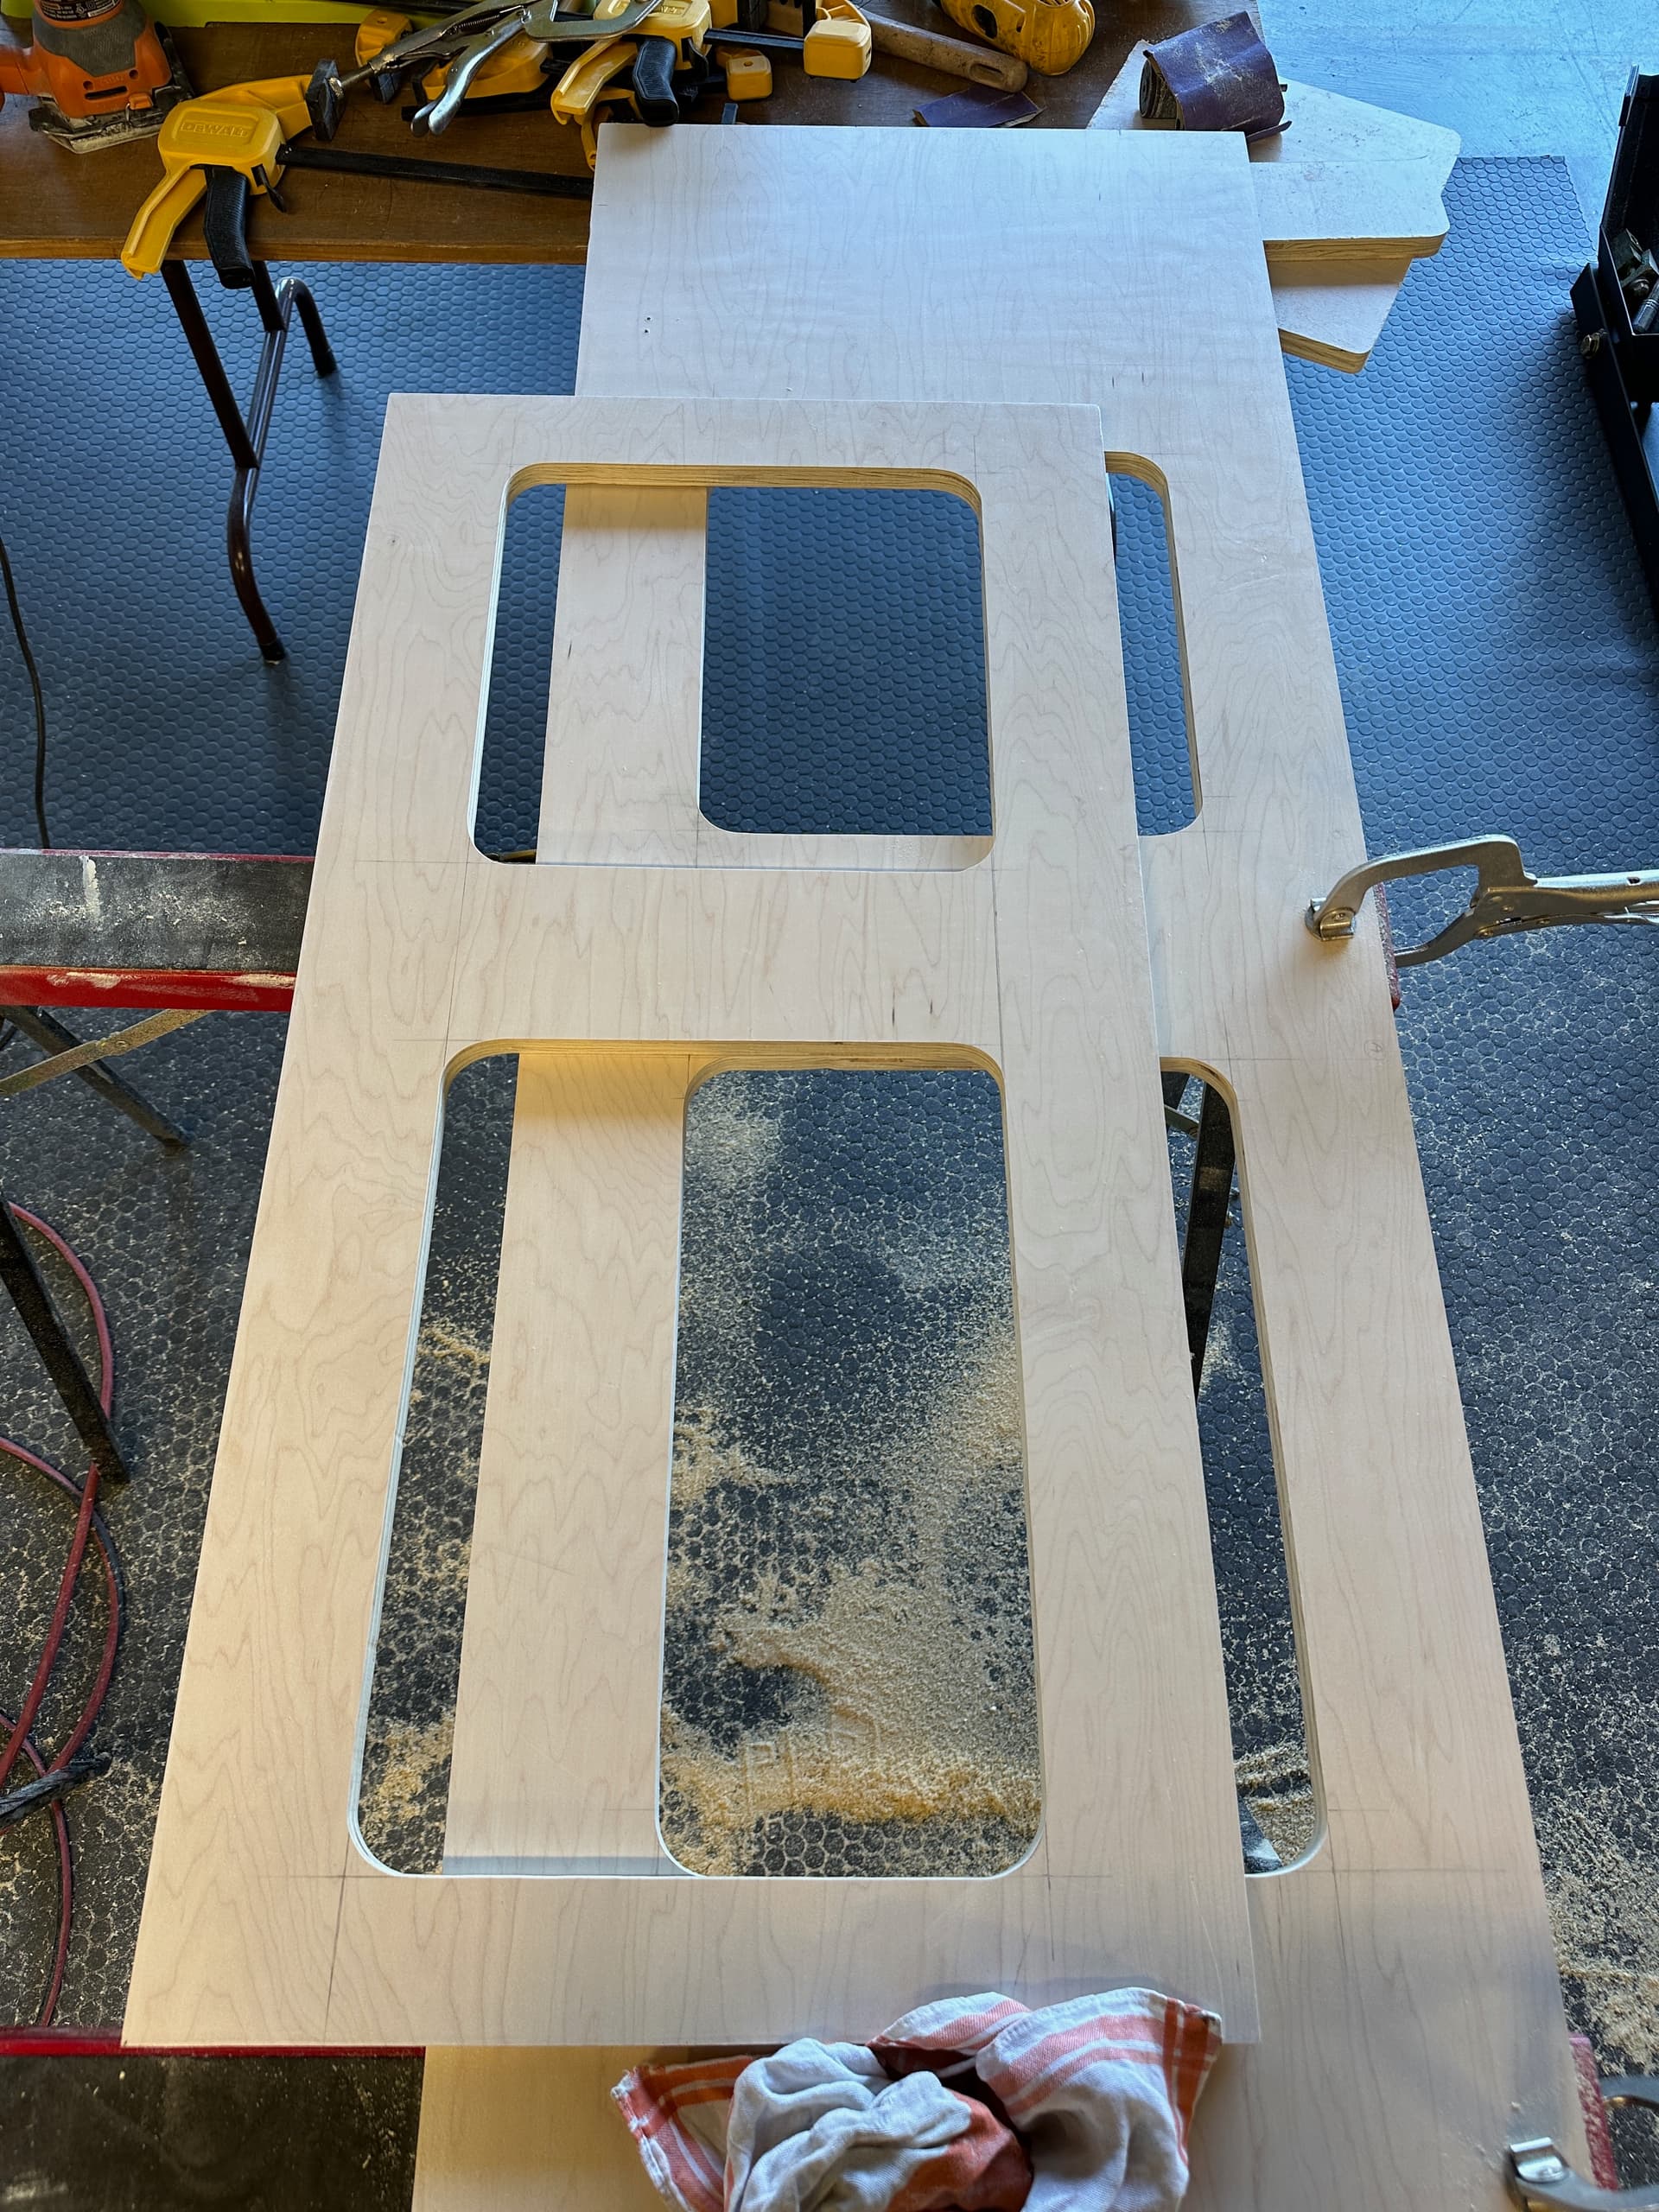
With the kitchen drawer starting to take shape it was time to bust out the router, prepare a template, and get to work on cutting out holes for the cubbies and burner controls. (All of which were cut to perfection by my dad as I was working my day-job ![]() )
)

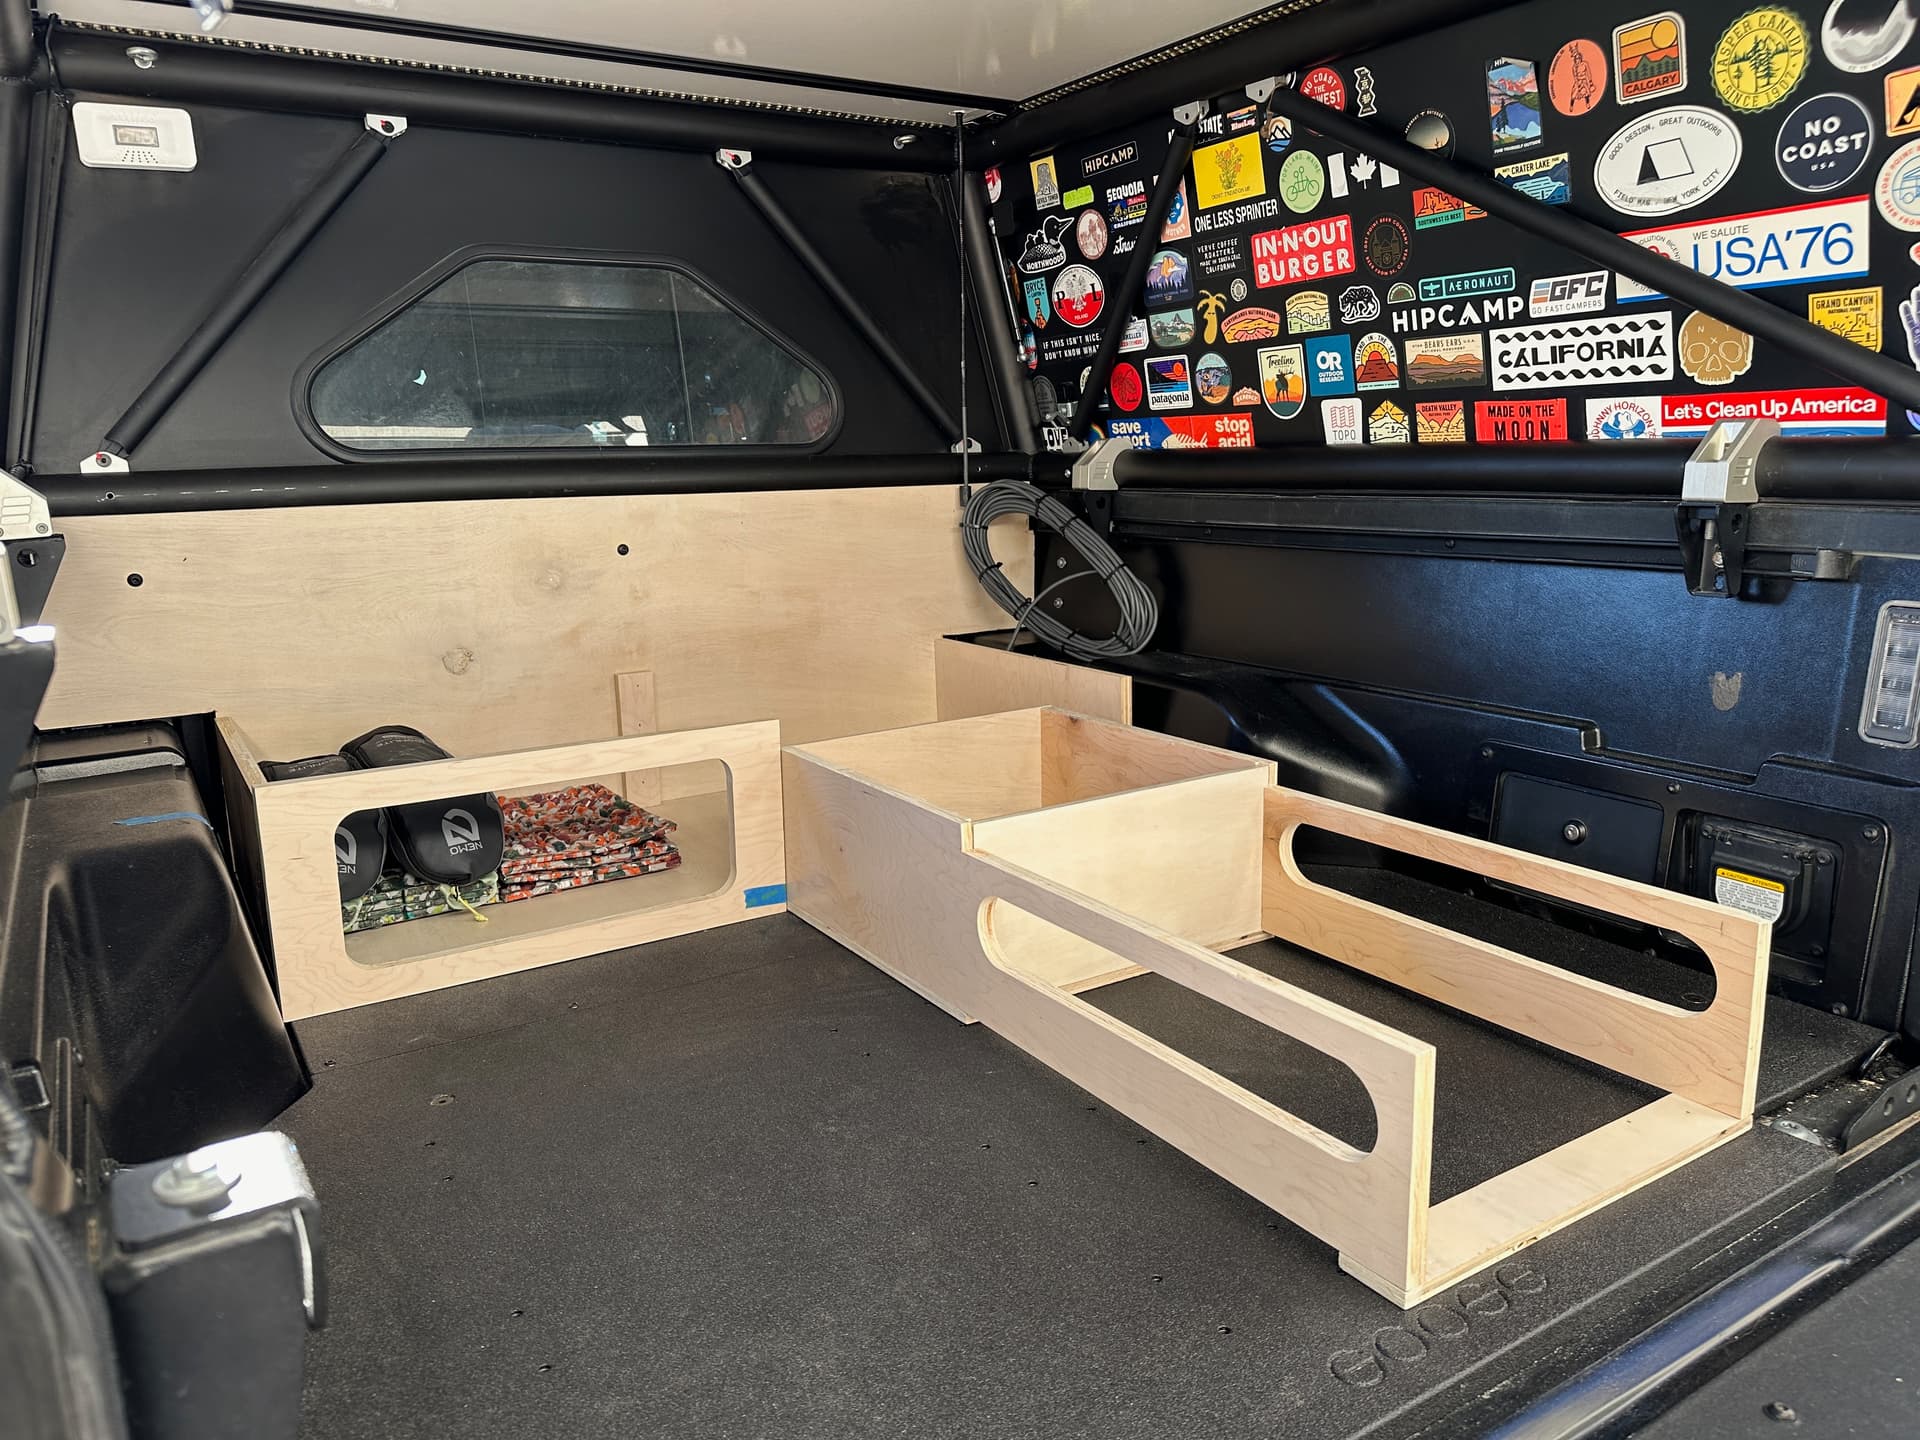
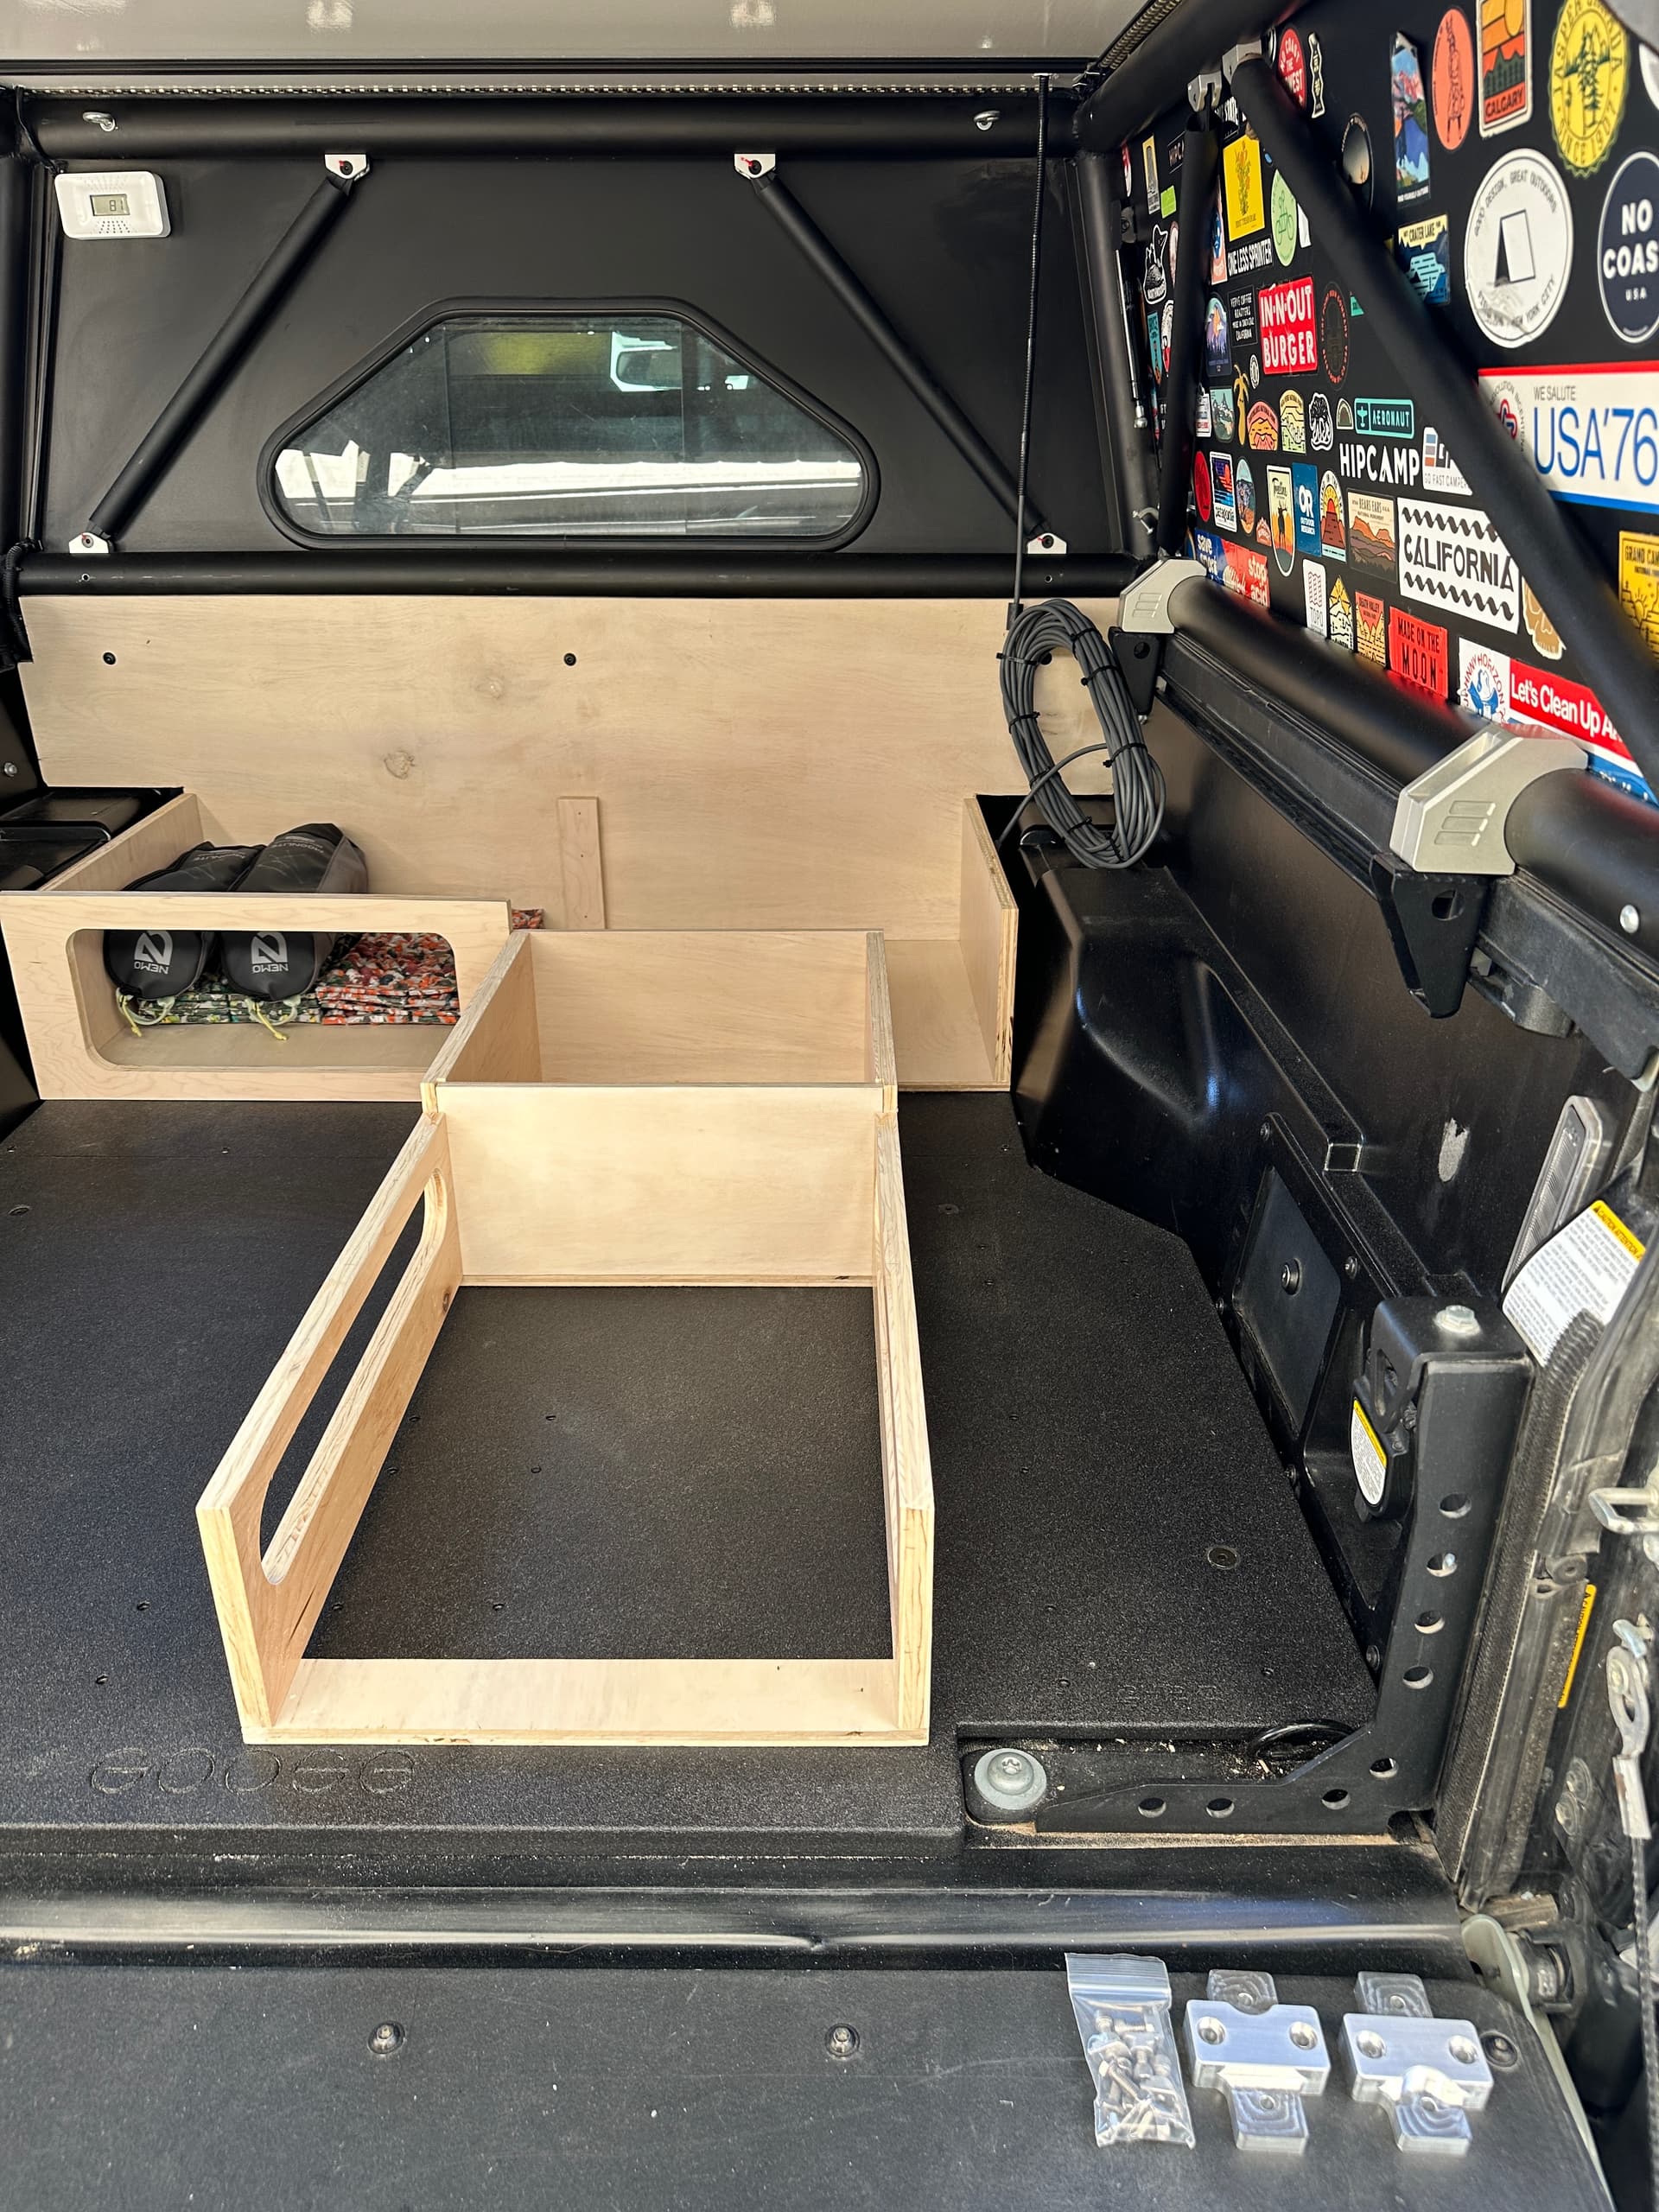
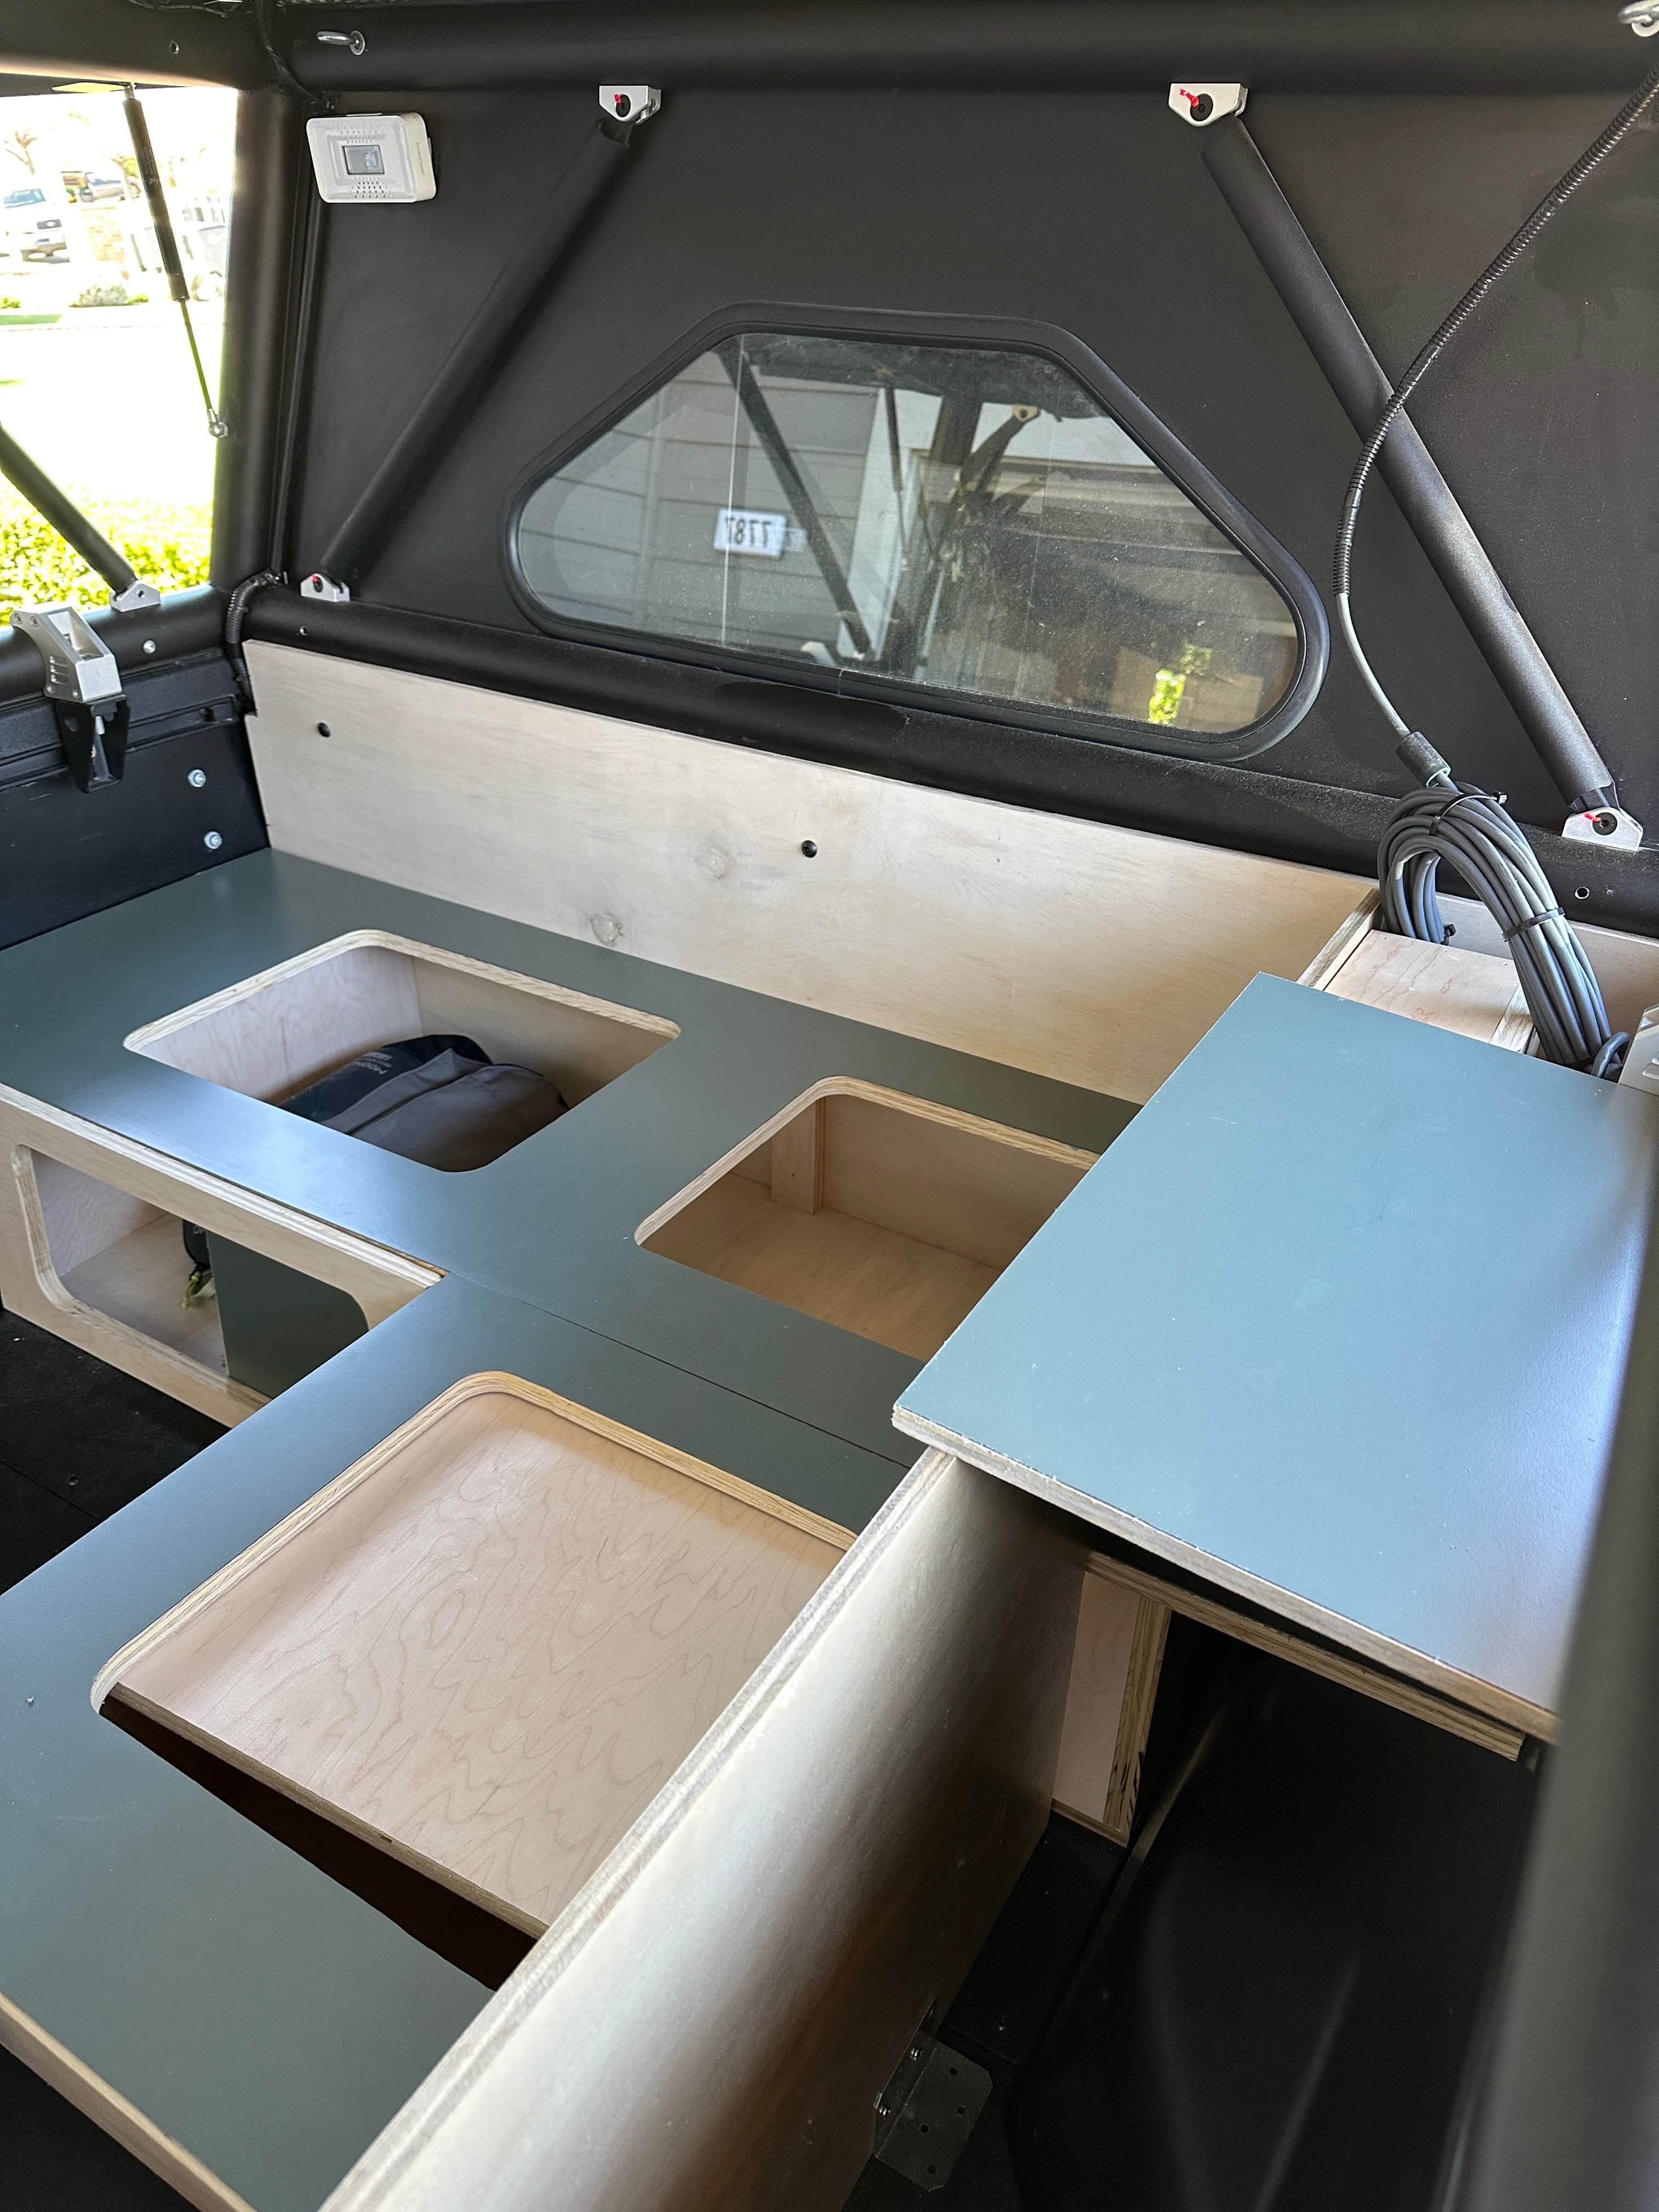
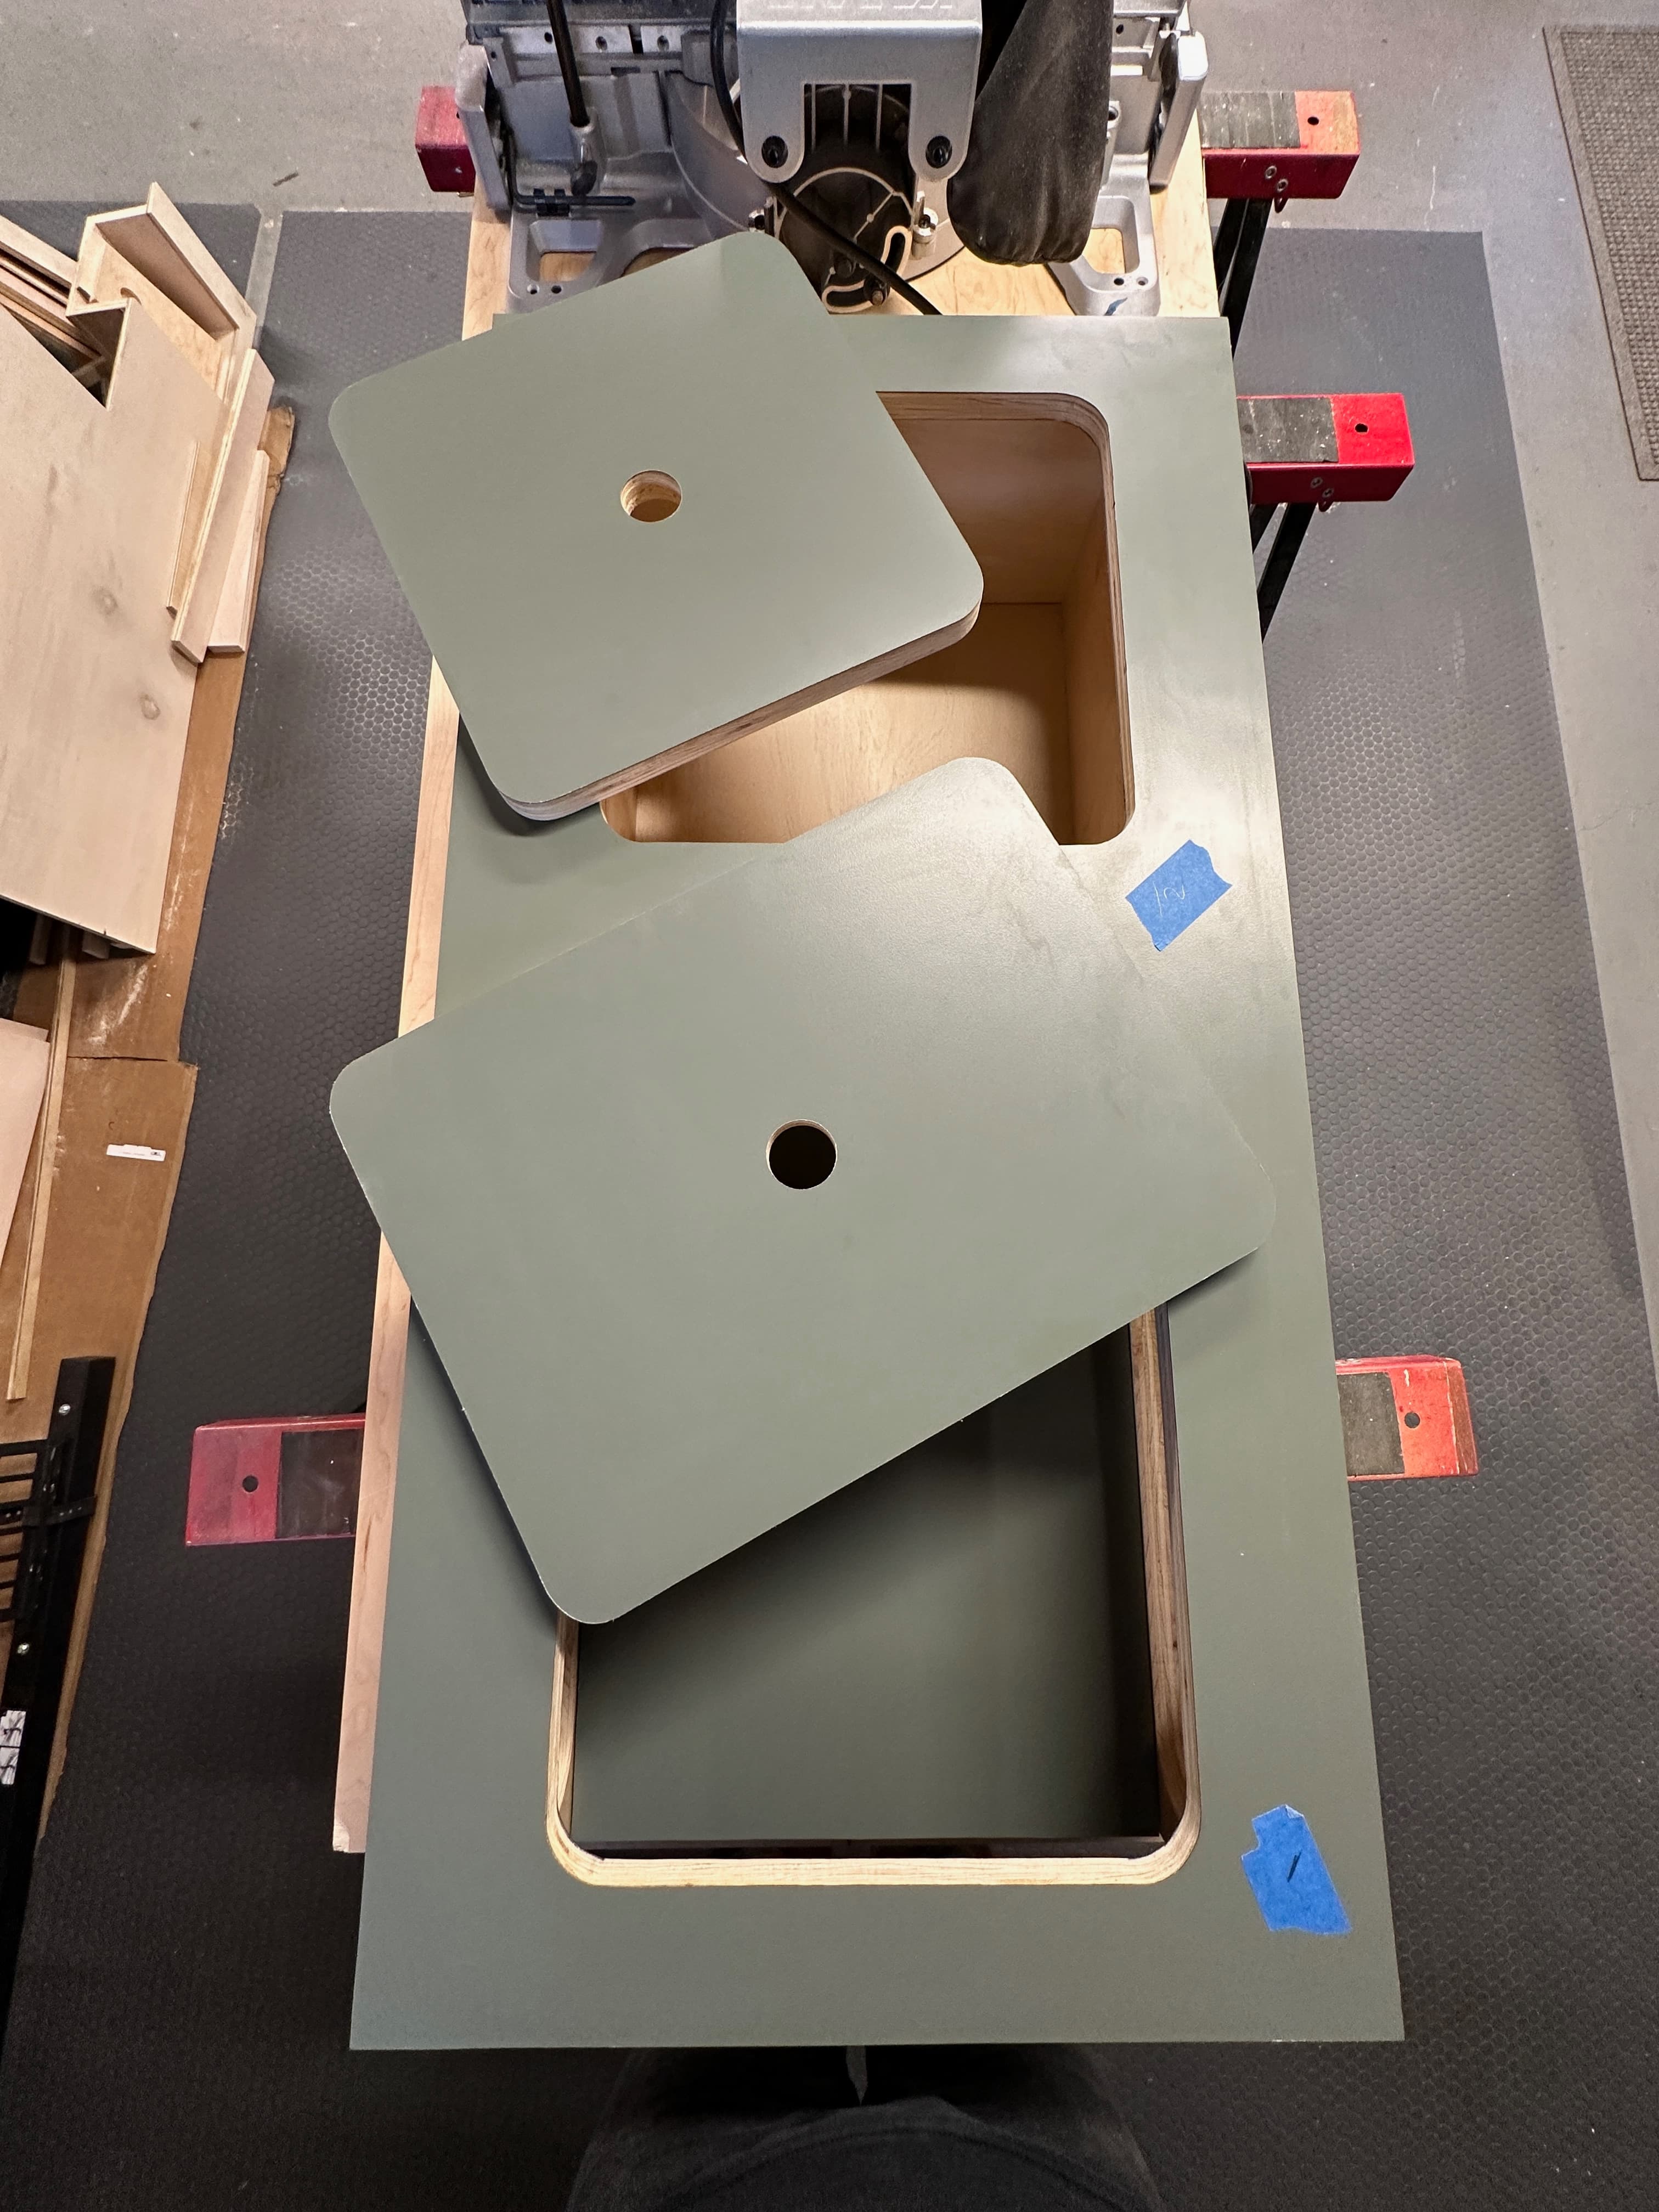
One fun detail here is that we were able to standardize the 4 cubby holes into 2 sizes to allow the lids to be shuffled around depending where people are siting (as one of the rectangle lids will double as our tabletop)
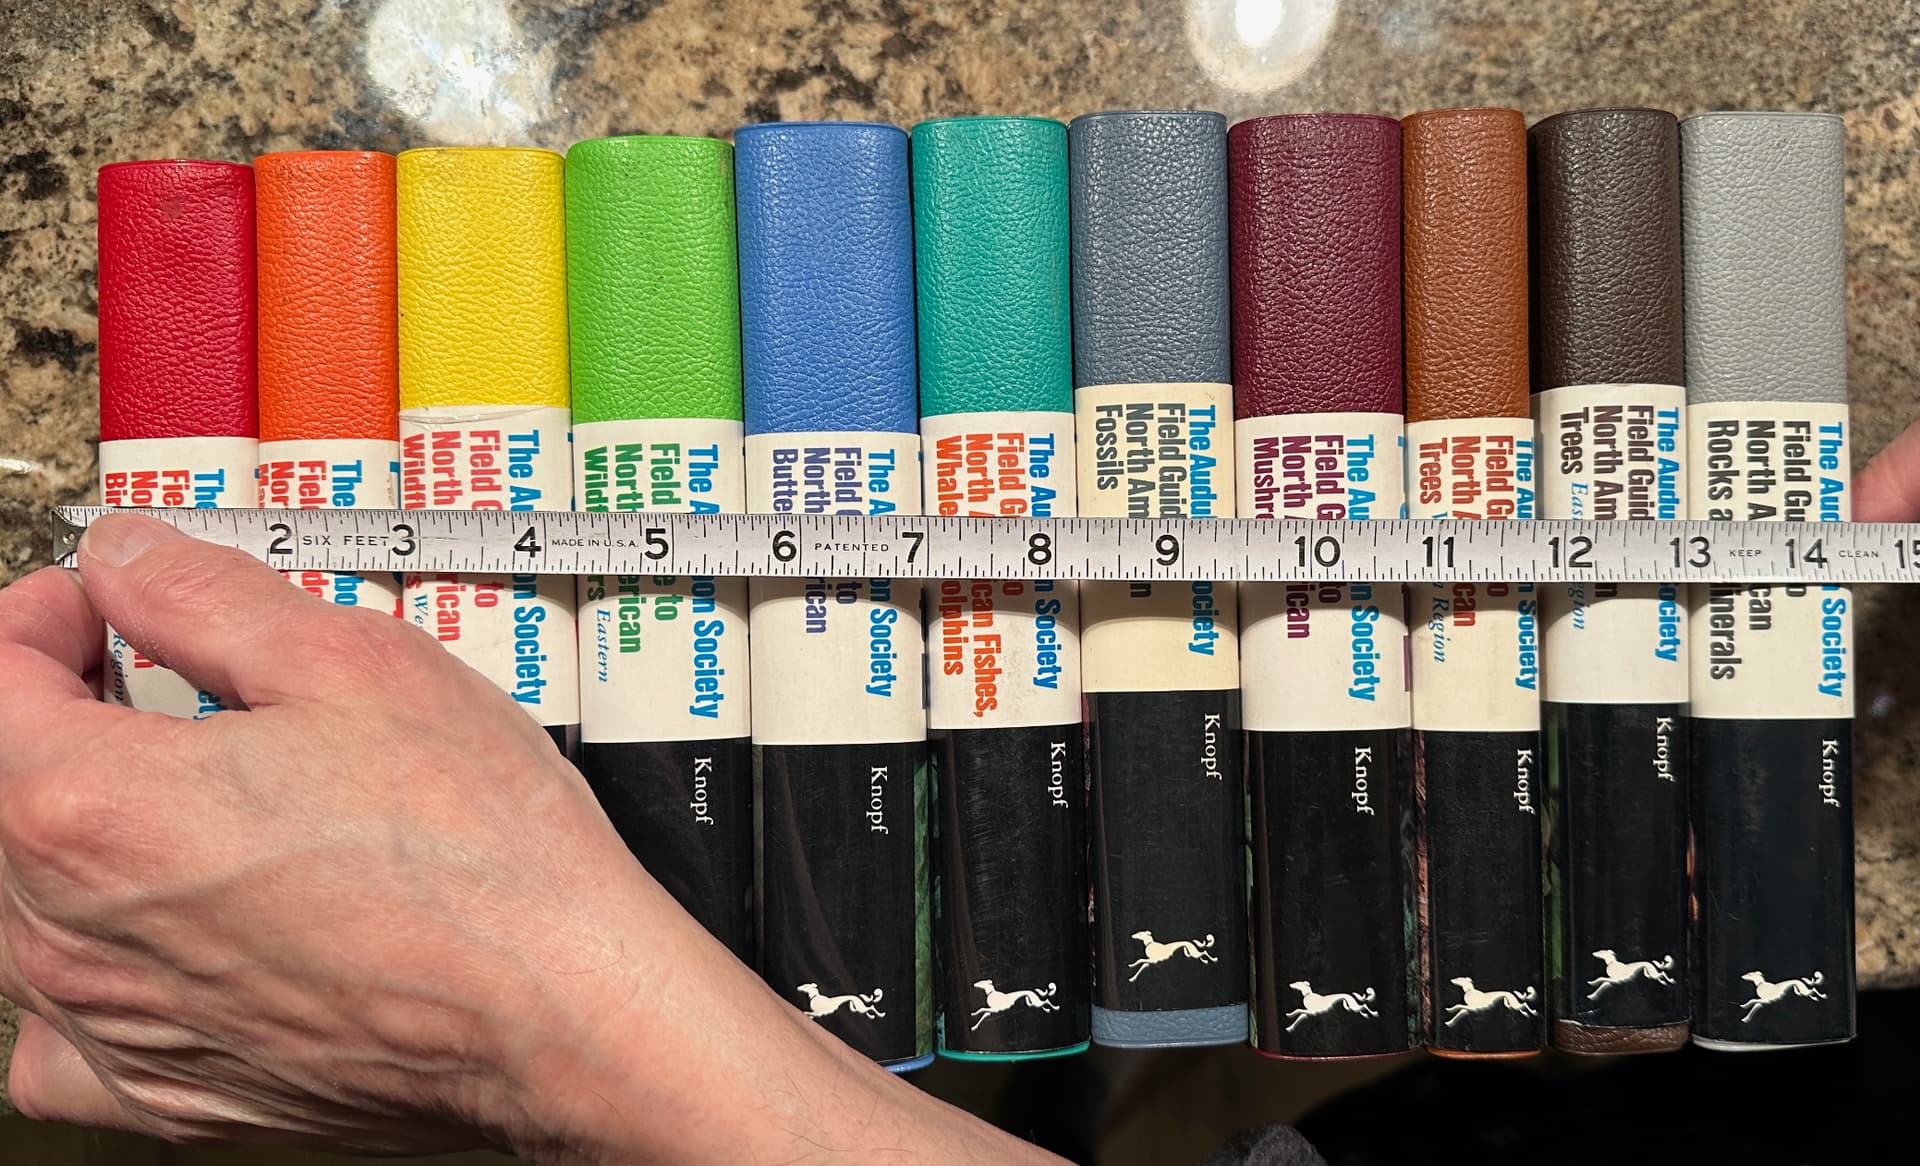
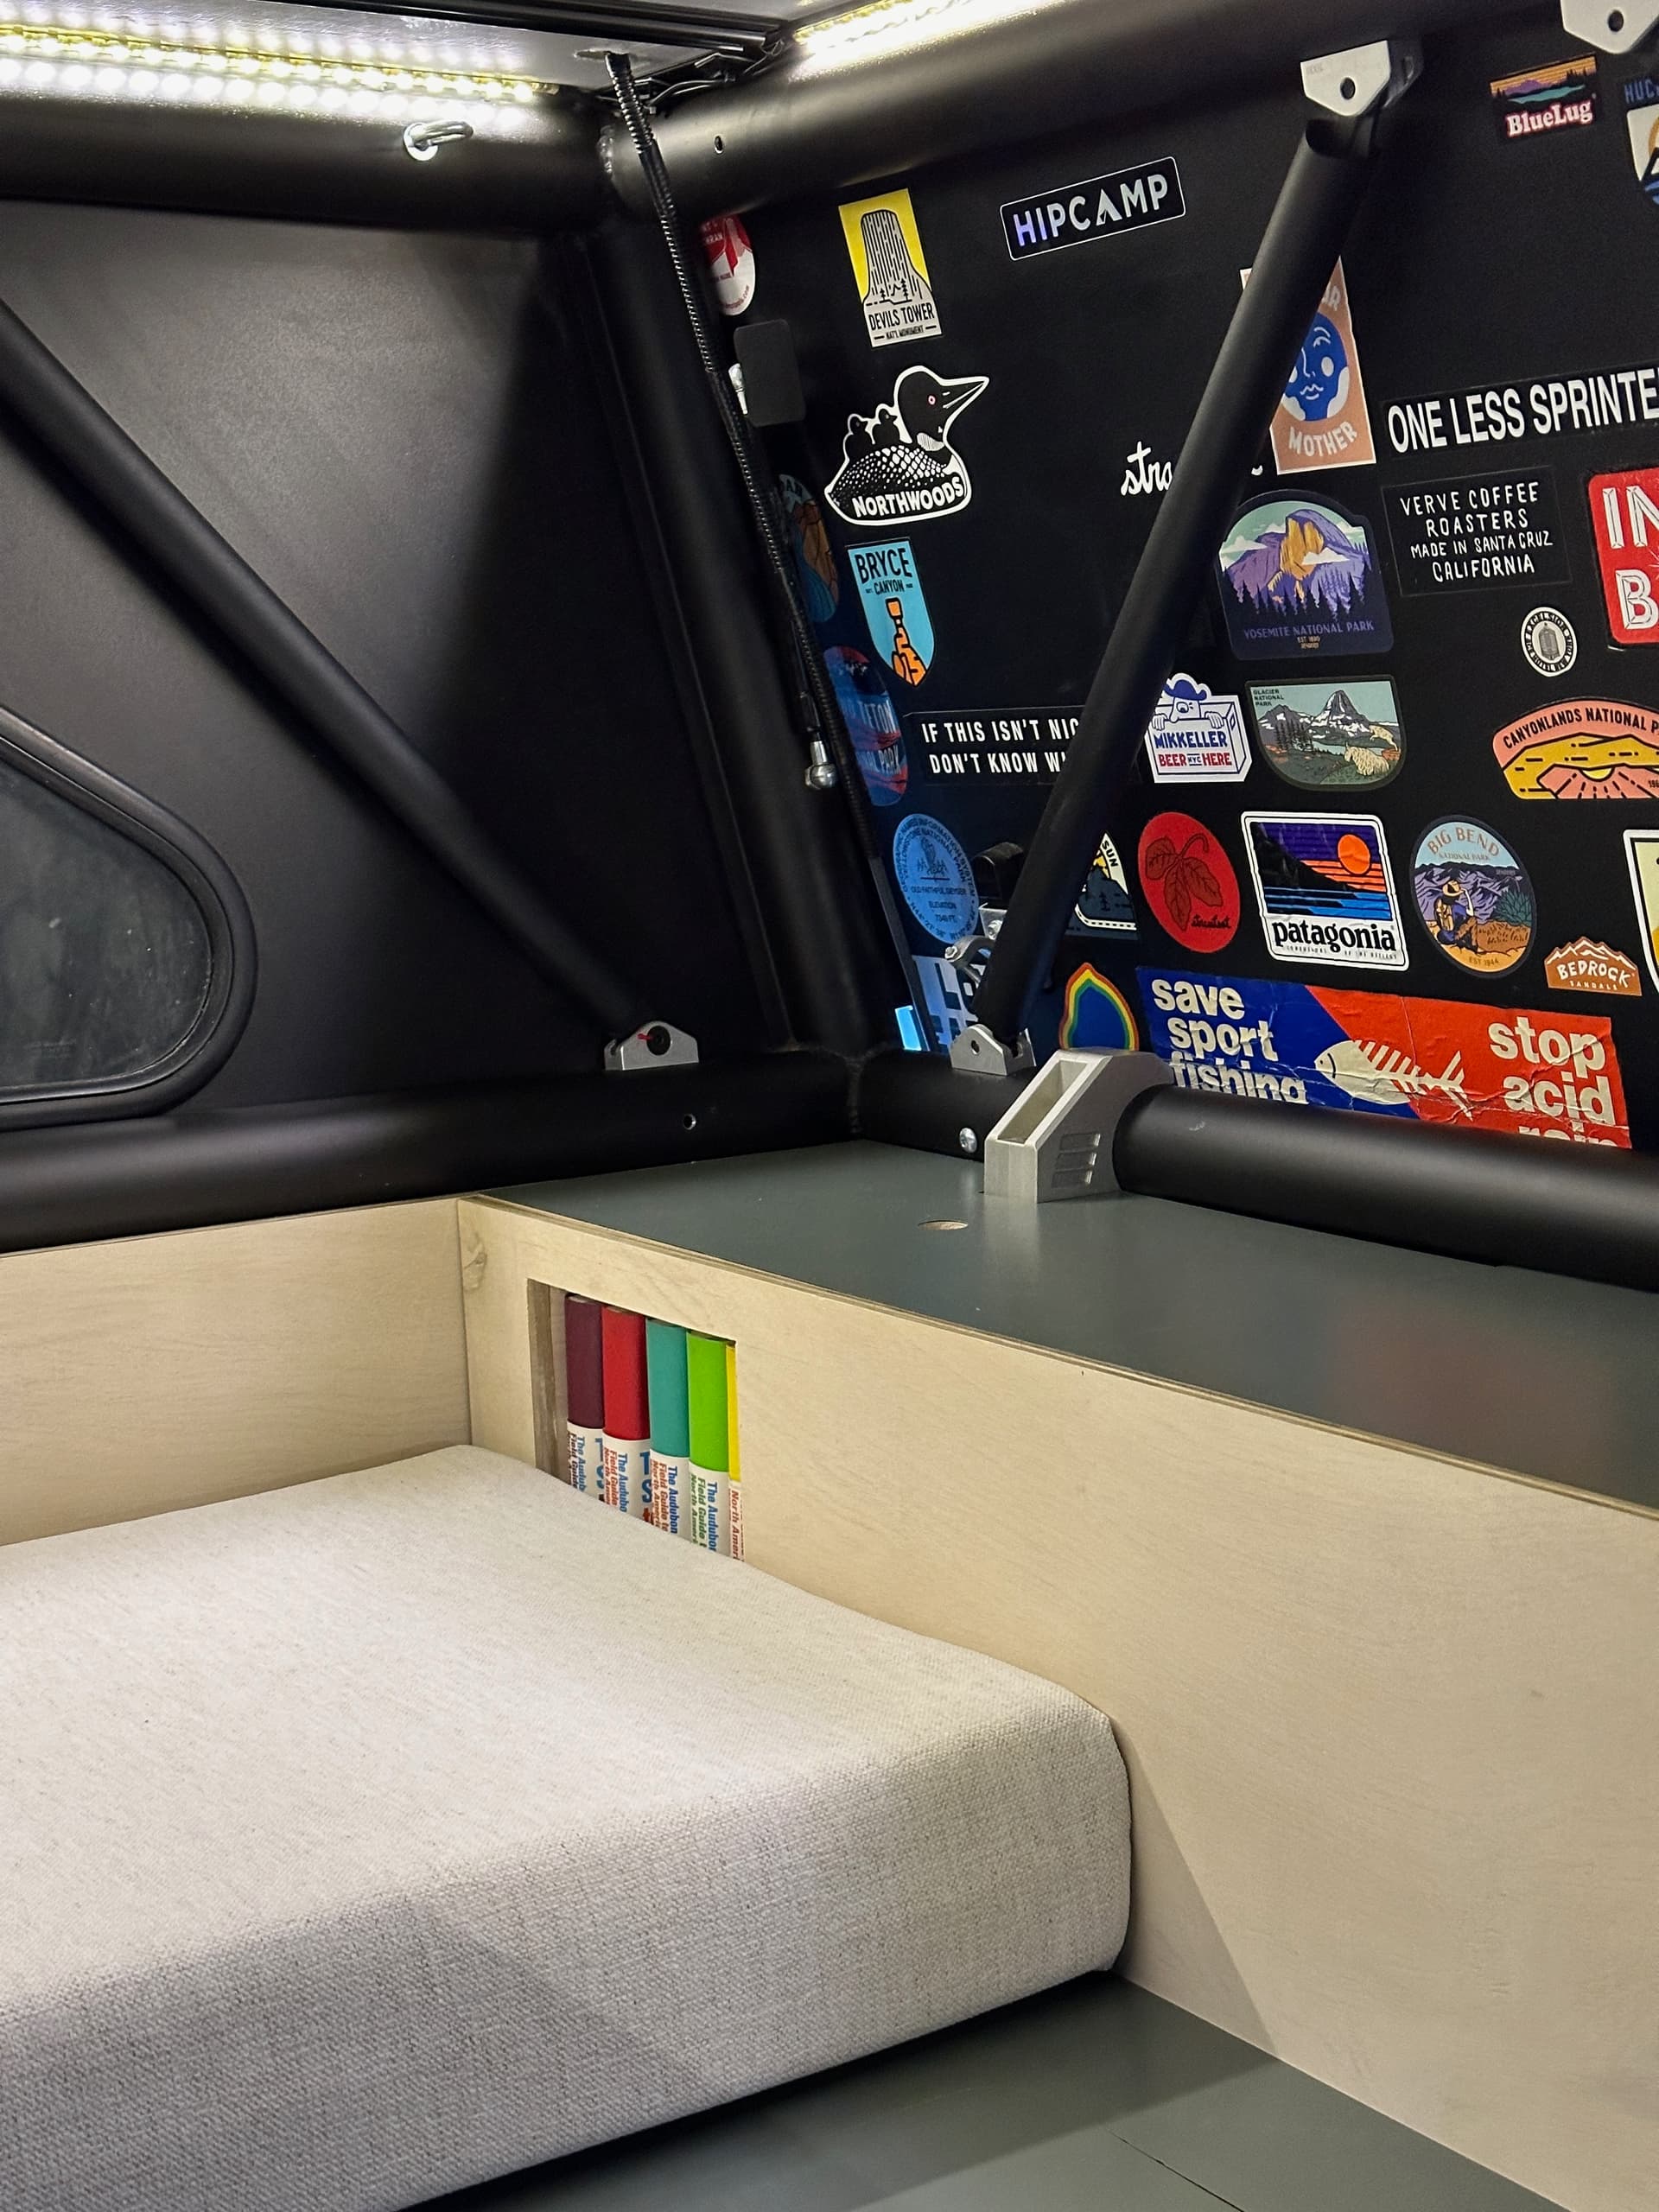
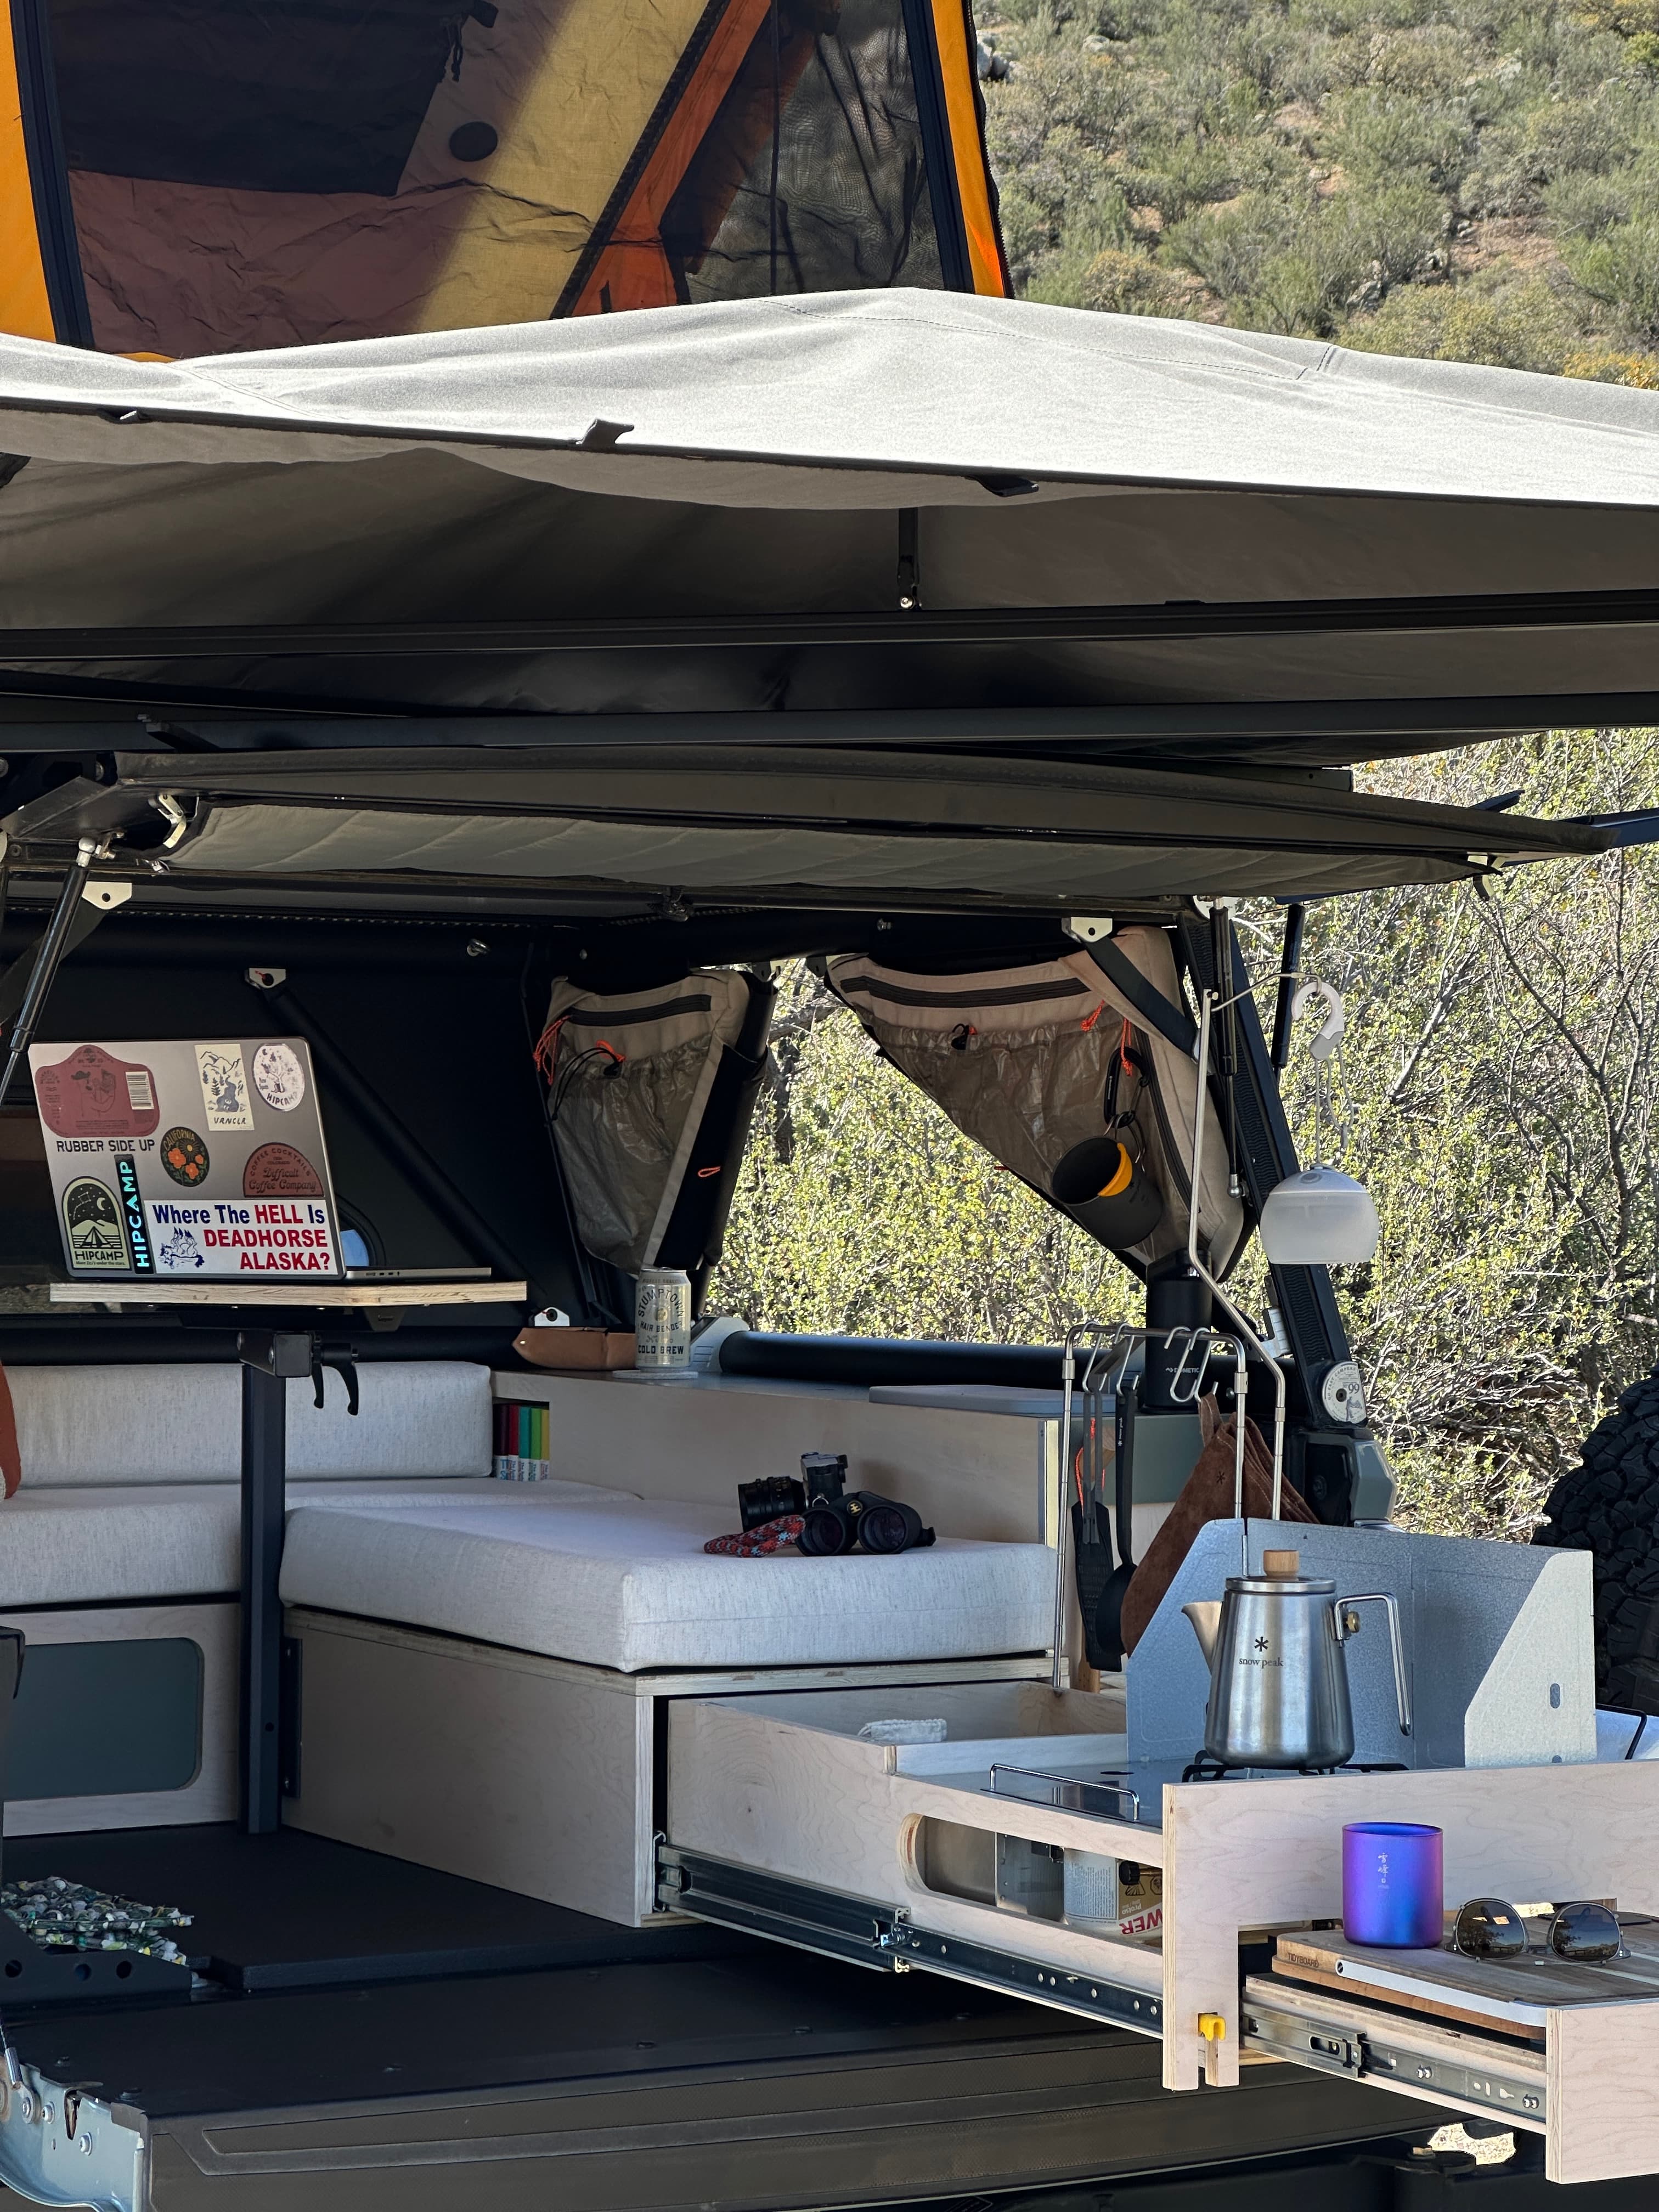
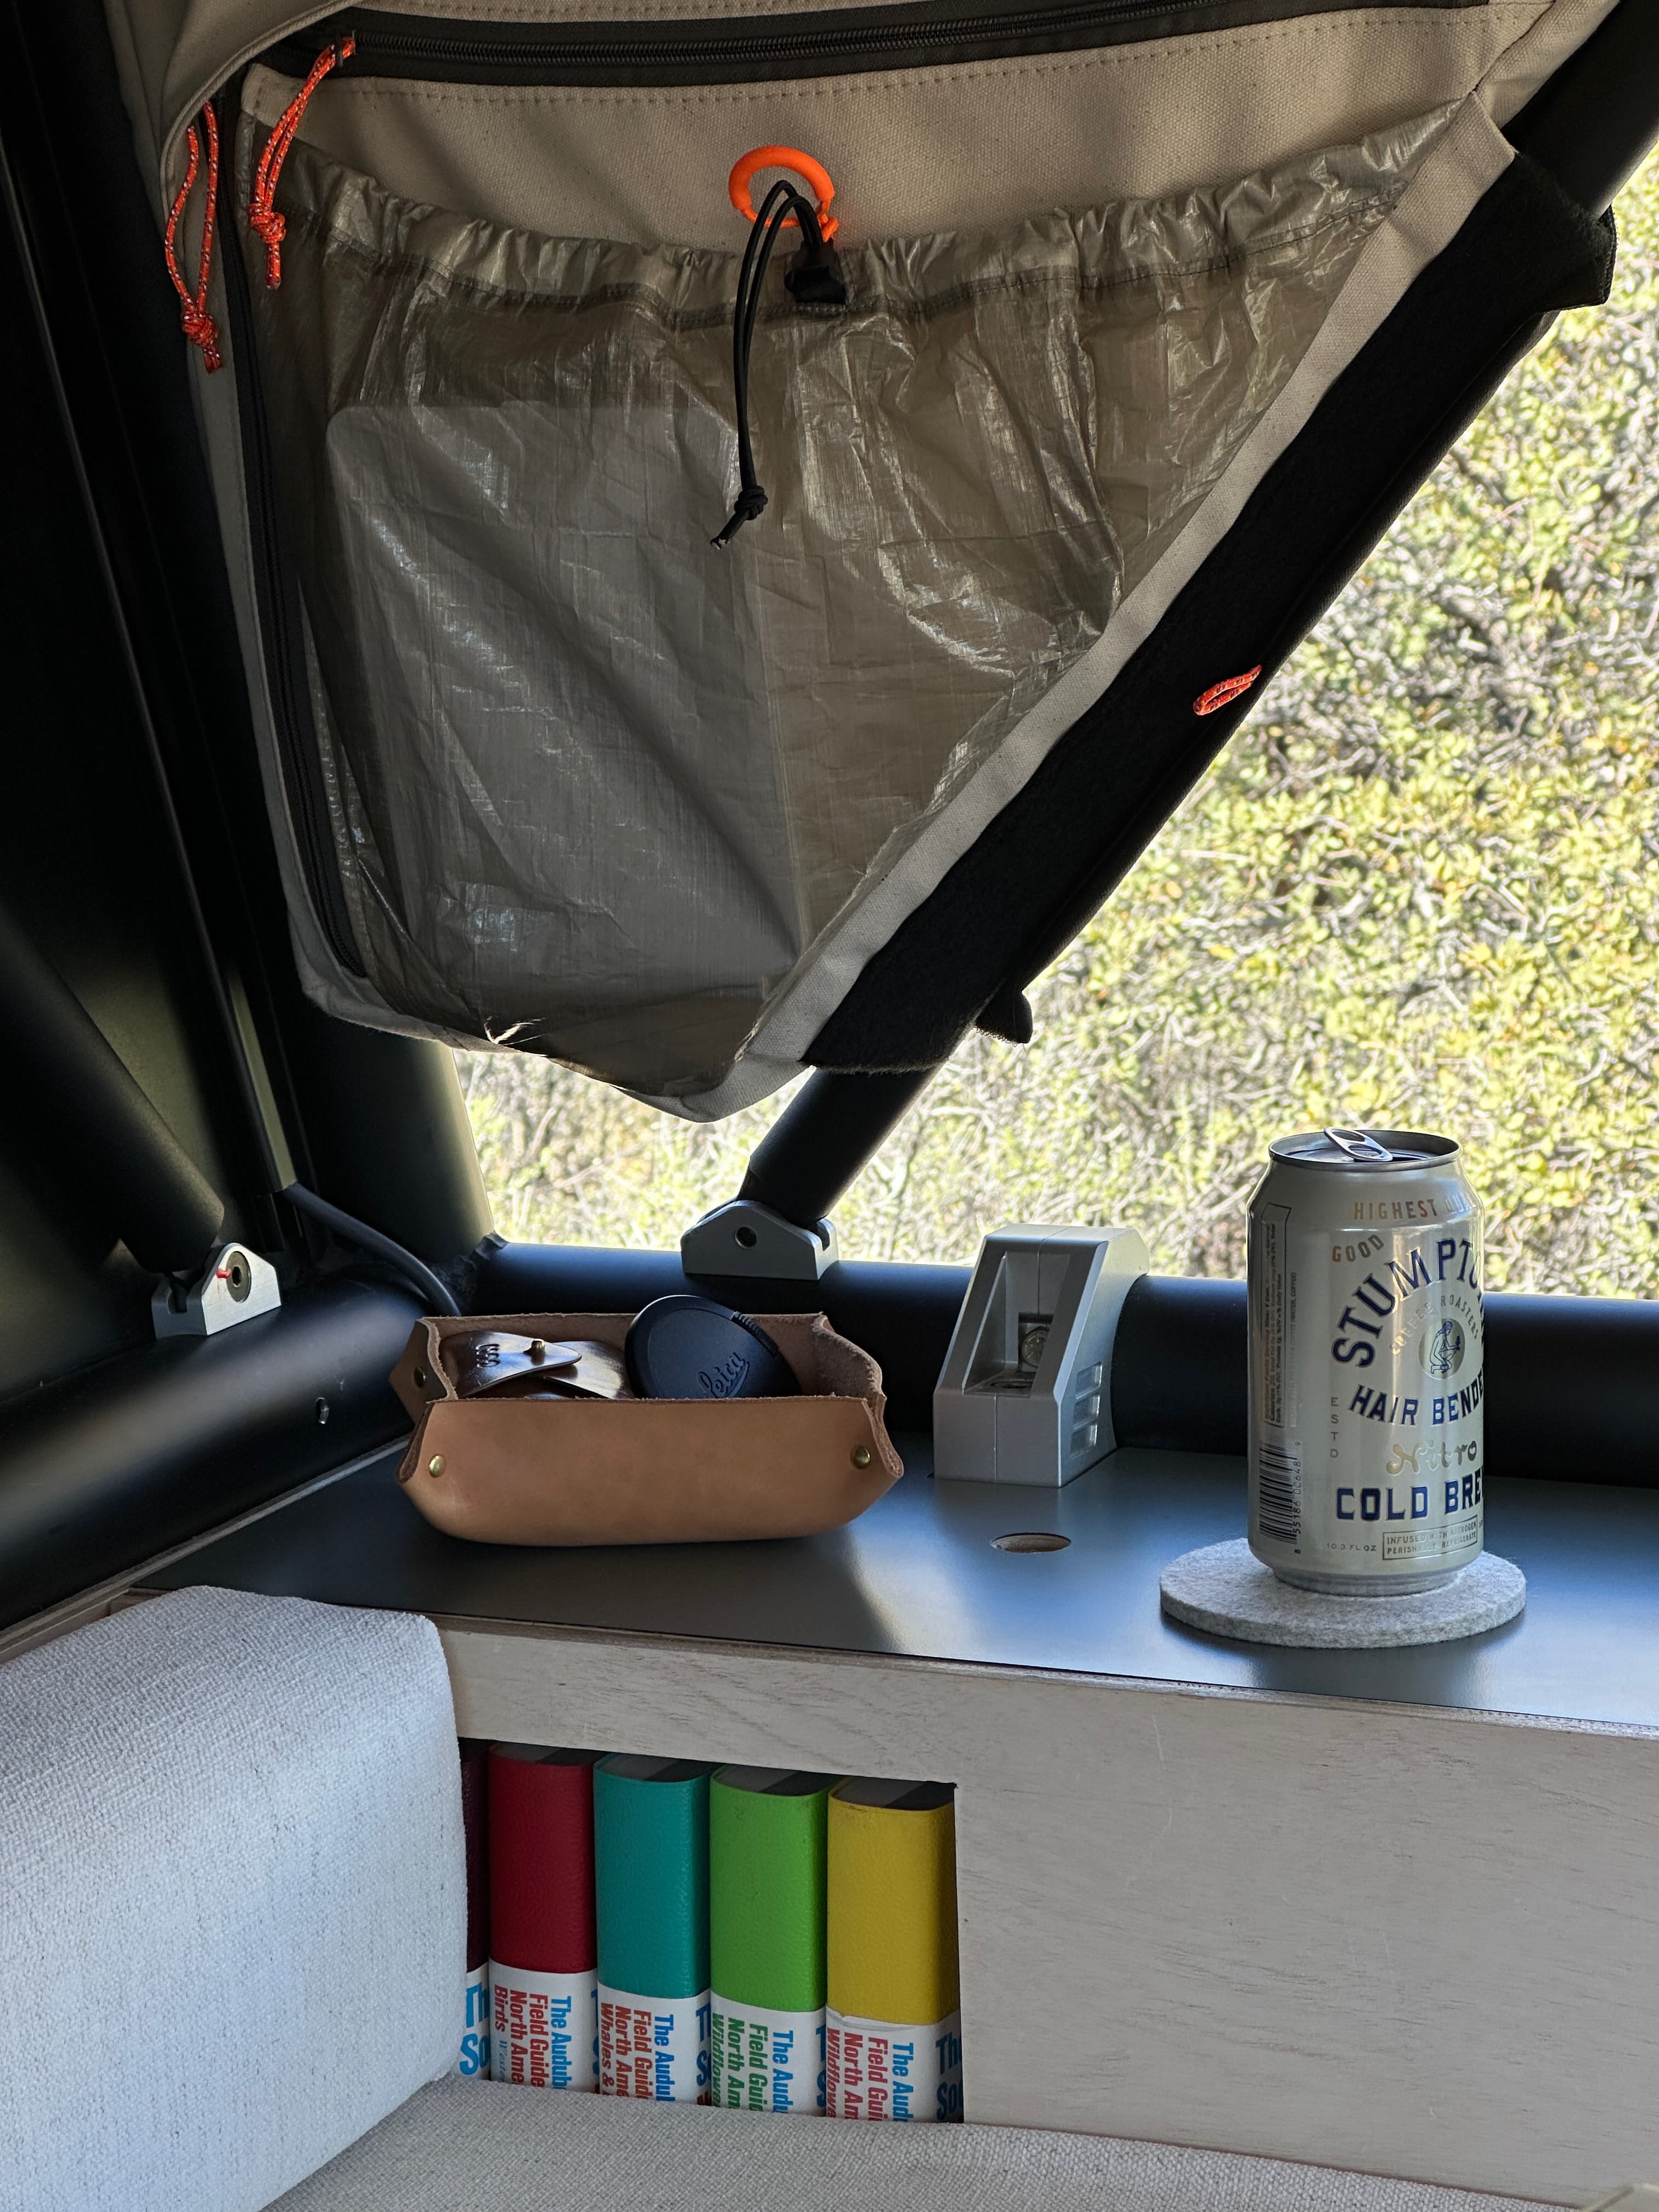
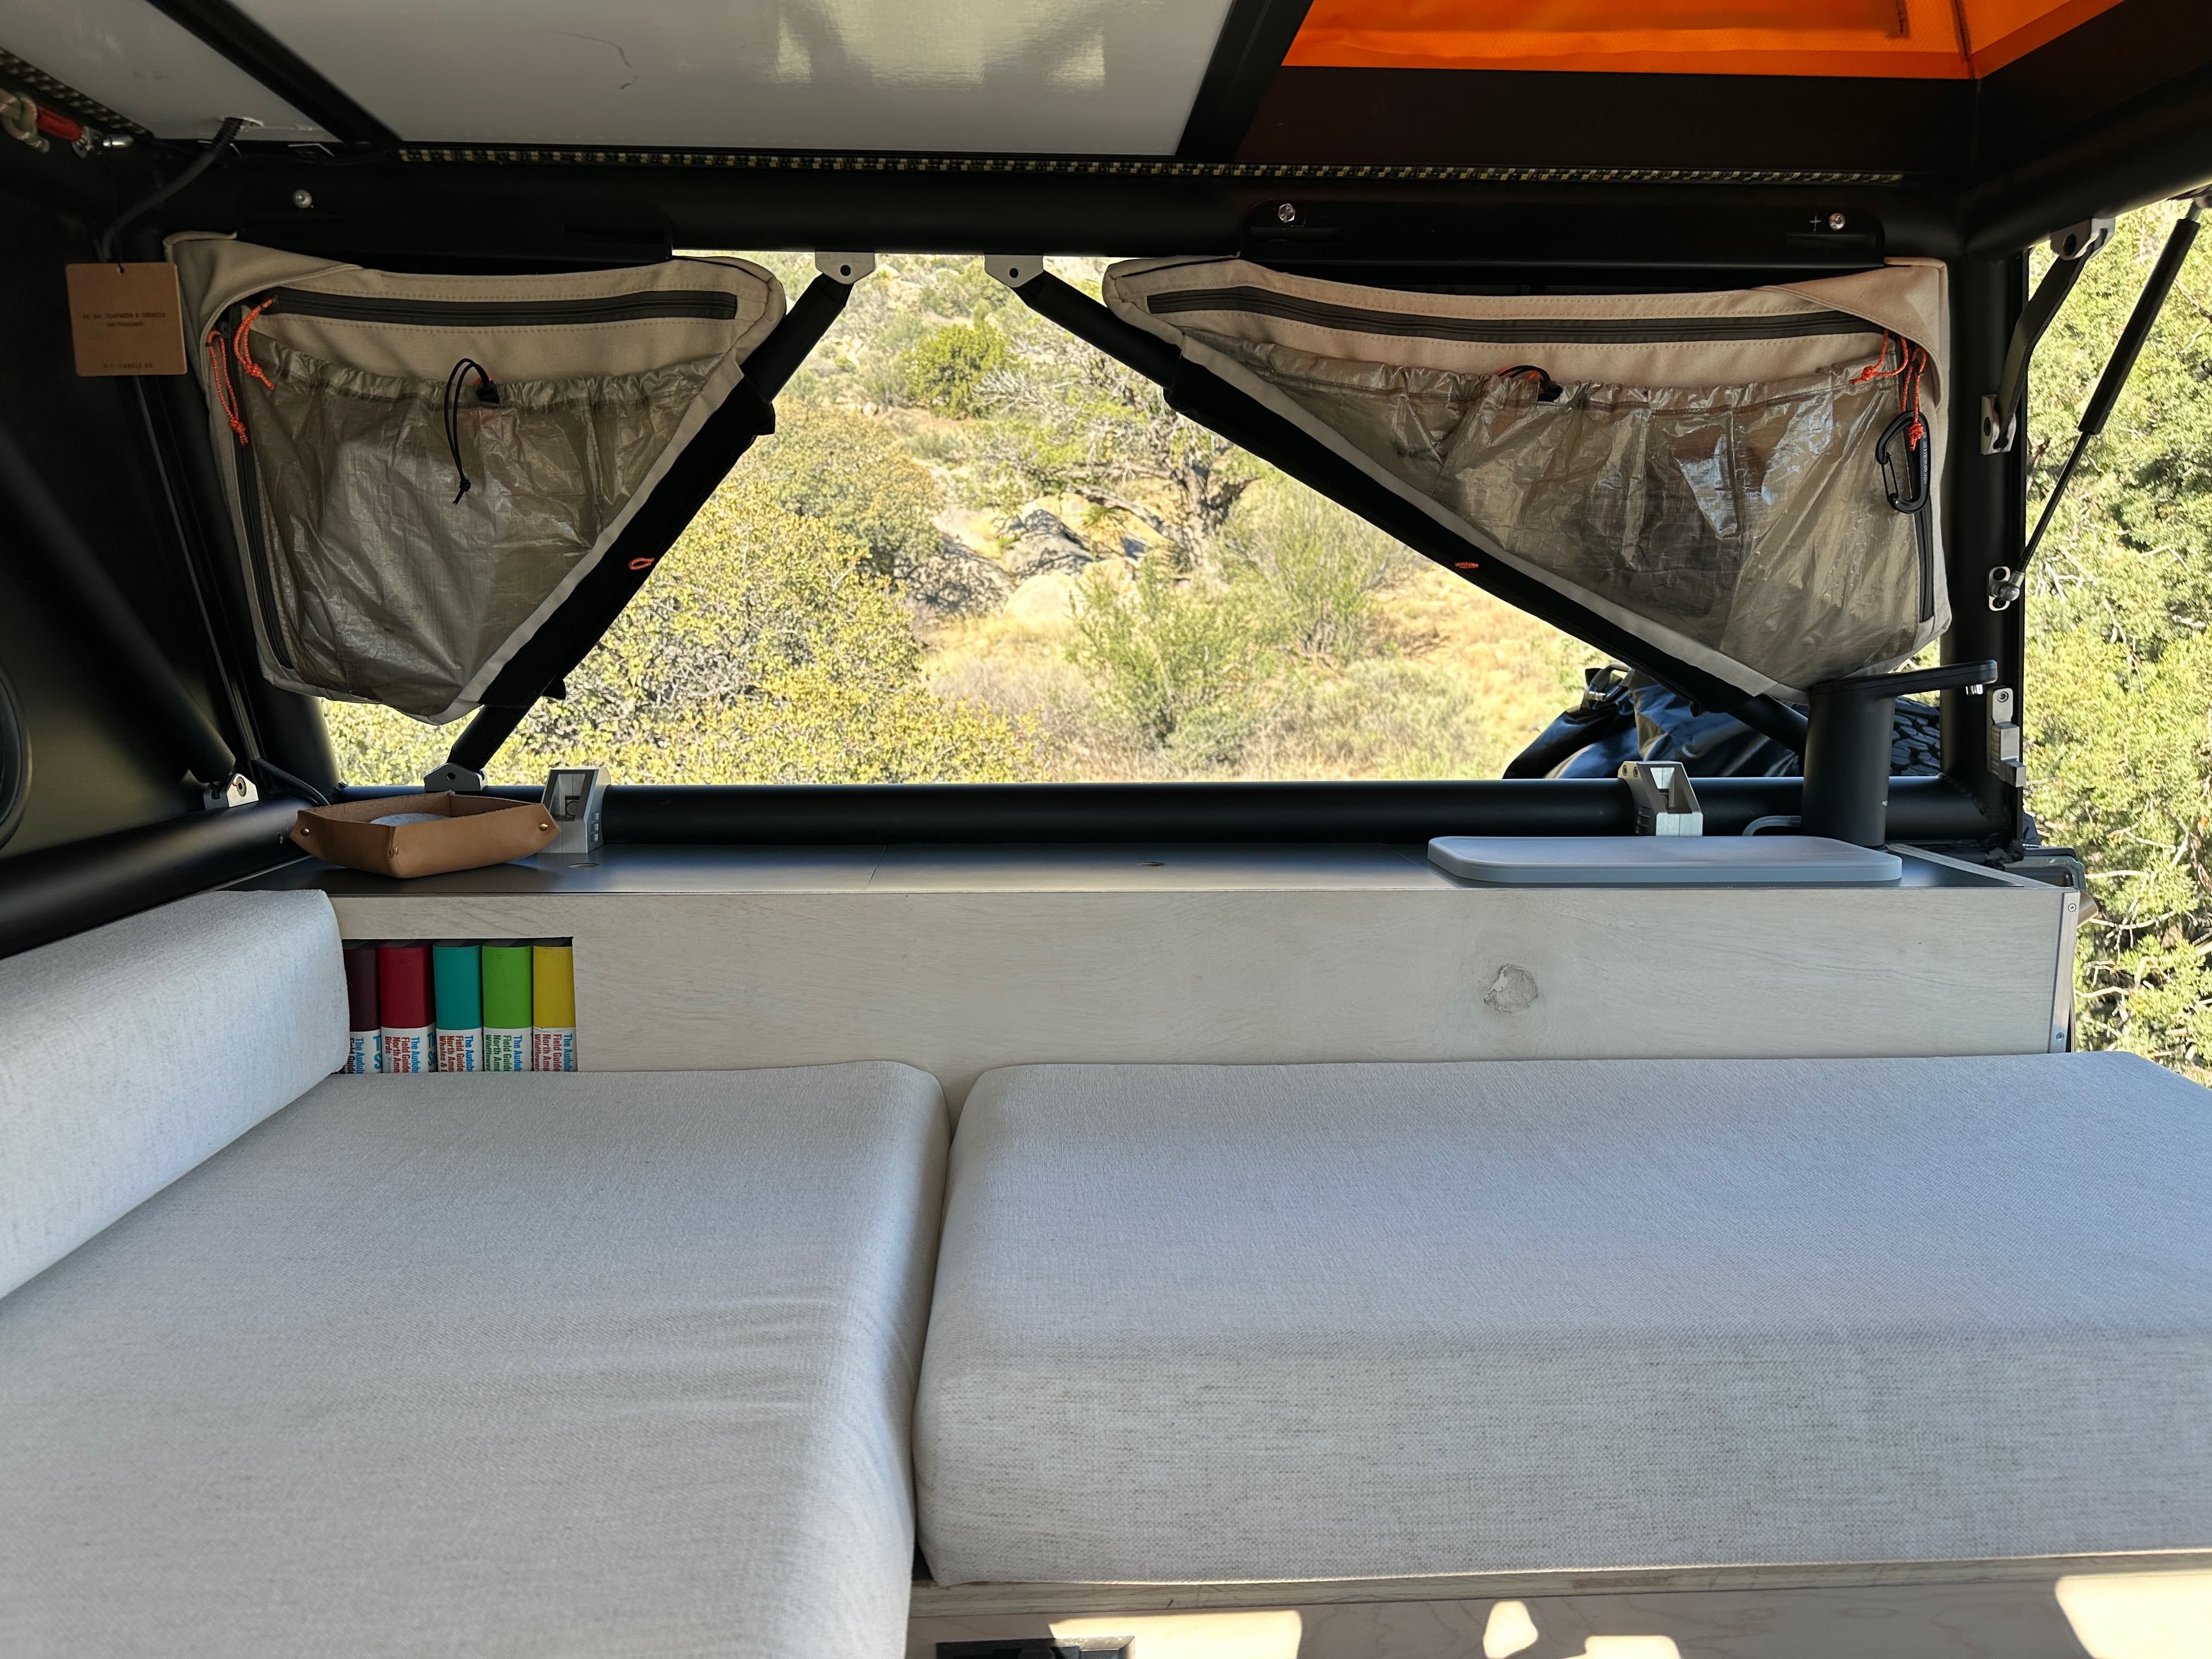
At this point we tackled a quick side mission to build out a little library for a few copies of my vintage Audubon Field Guides. This side mission served two purposes: 1) naturally, to contain and display the books (in a pleasing way), and more importantly 2) to create a few surfaces to mount all the starlink hardware within the garage space (more on this later)

At this stage the build was really starting to come together and we were ready to start thinking about finishing details before getting into assembly. We were all really happy with how it was looking and how light and airy it was feeling. (There is not a ton of material used here at the end of day!)
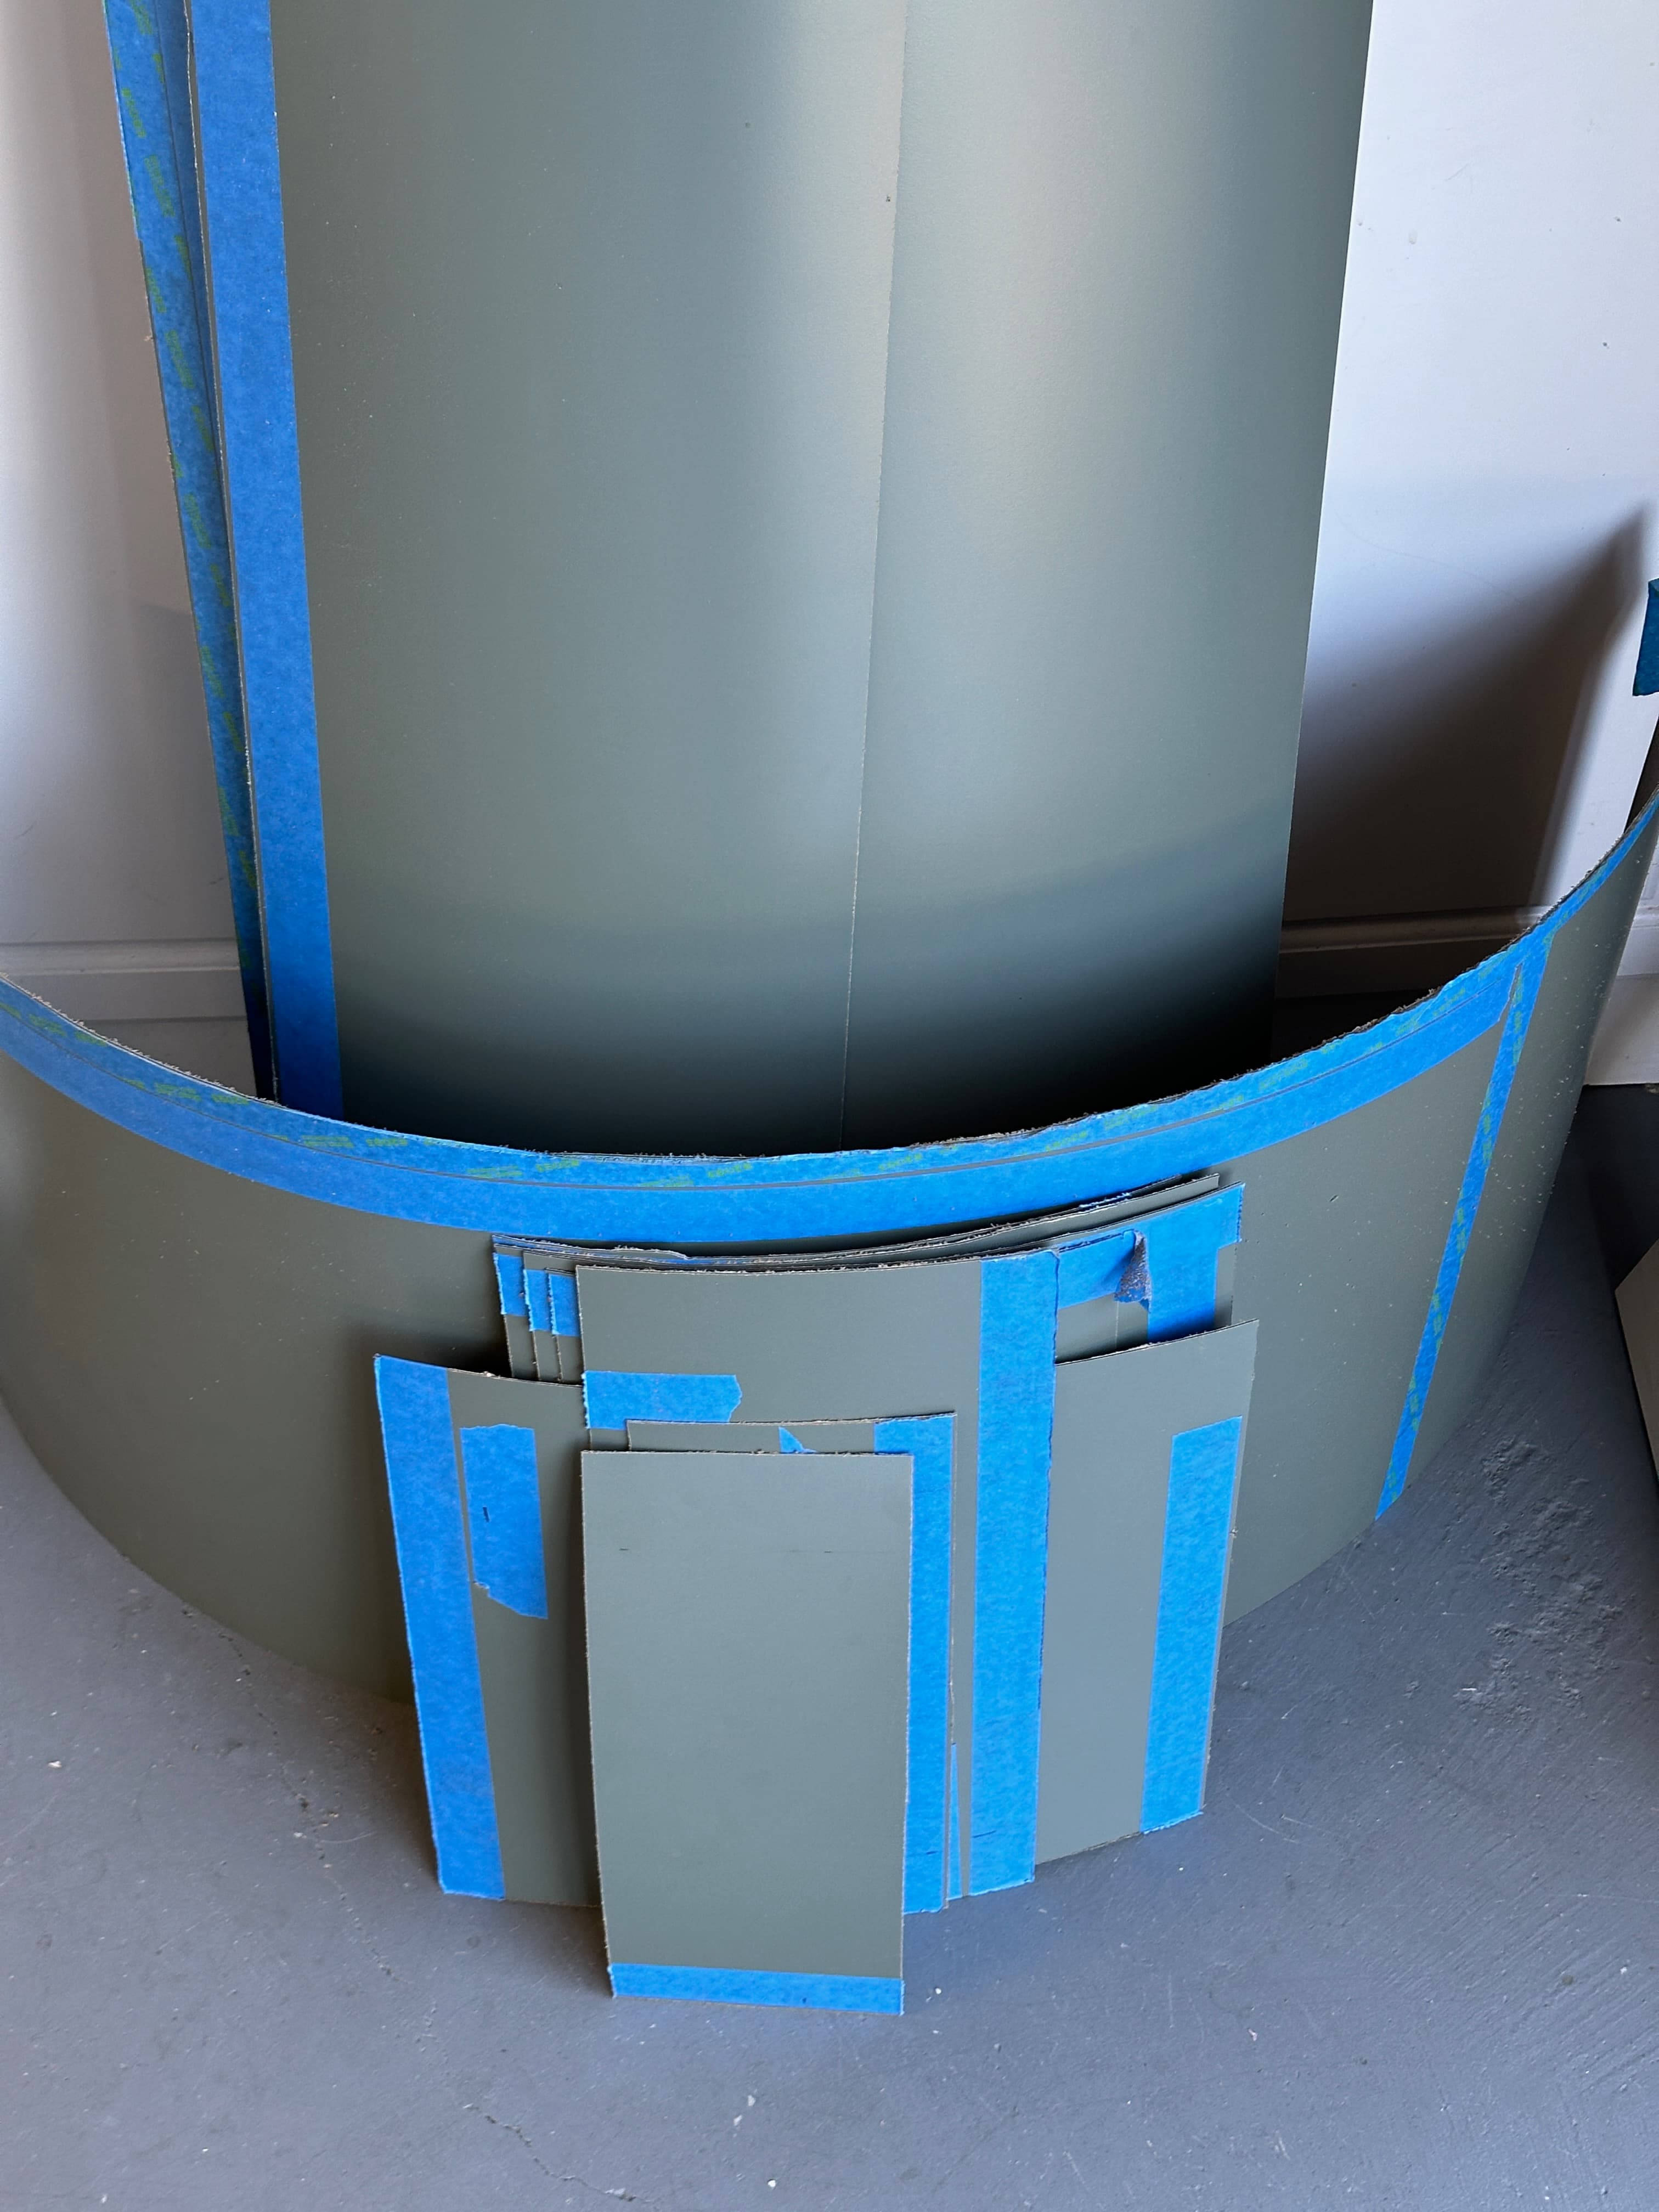
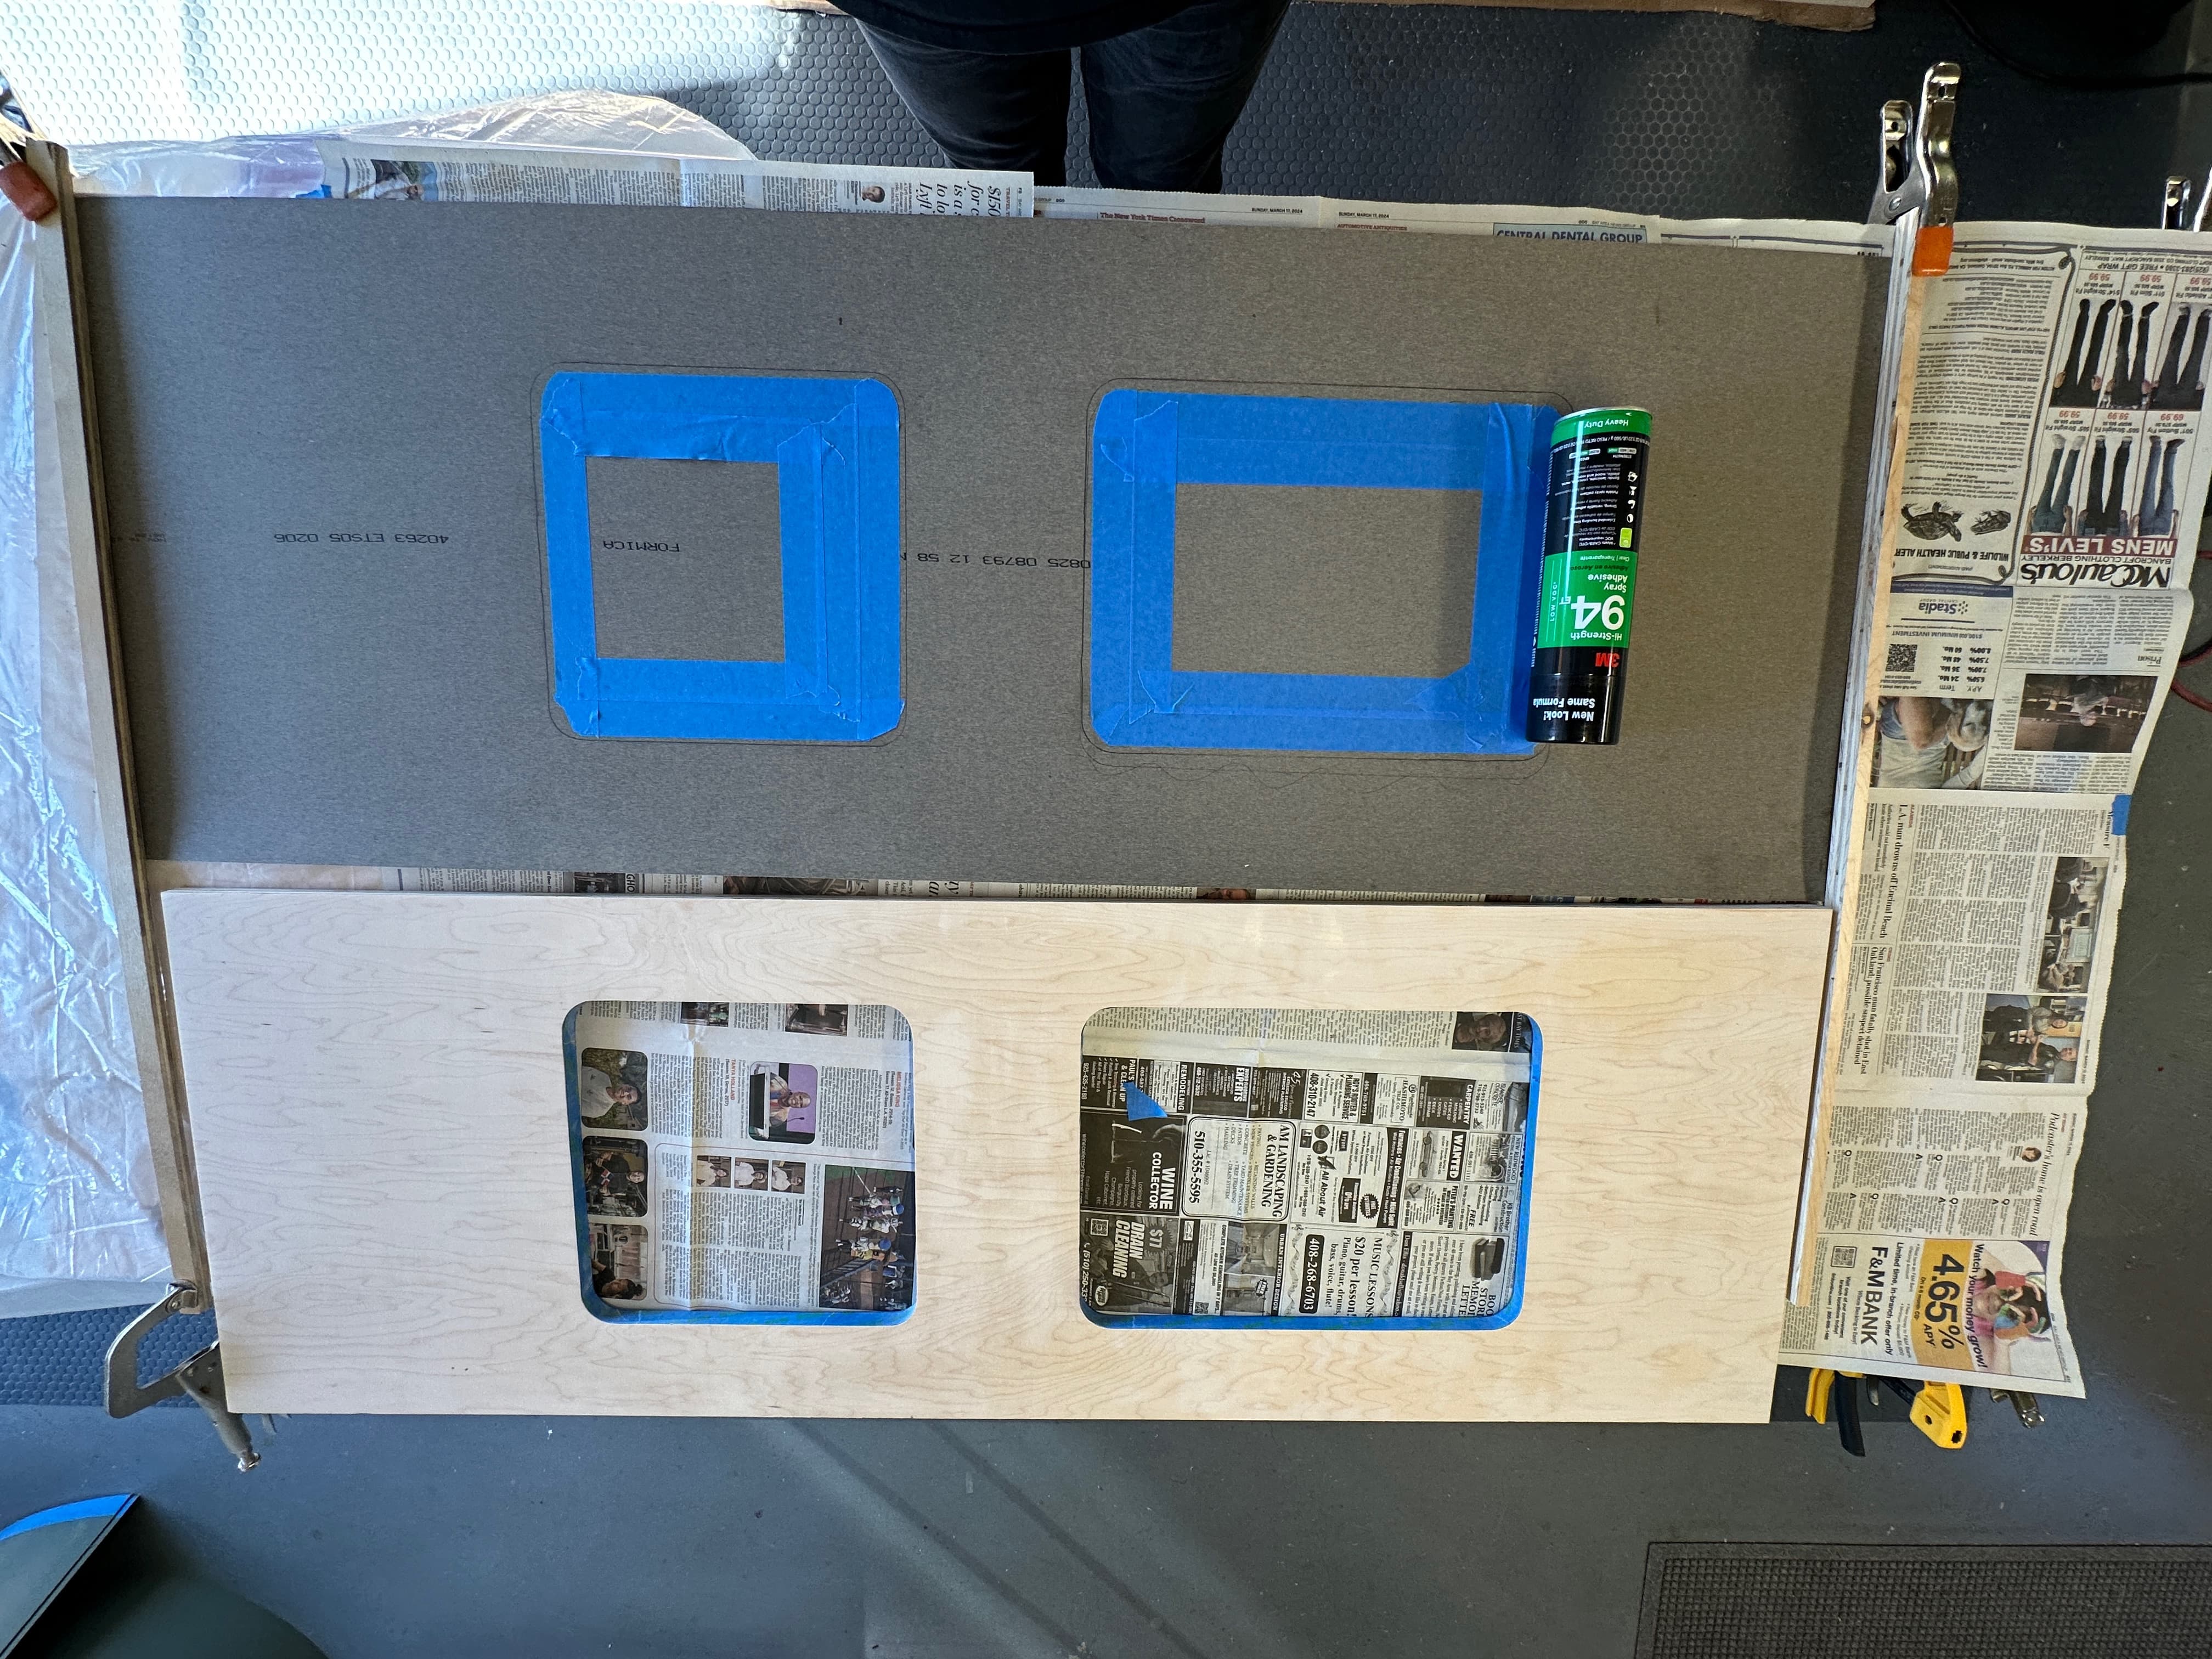
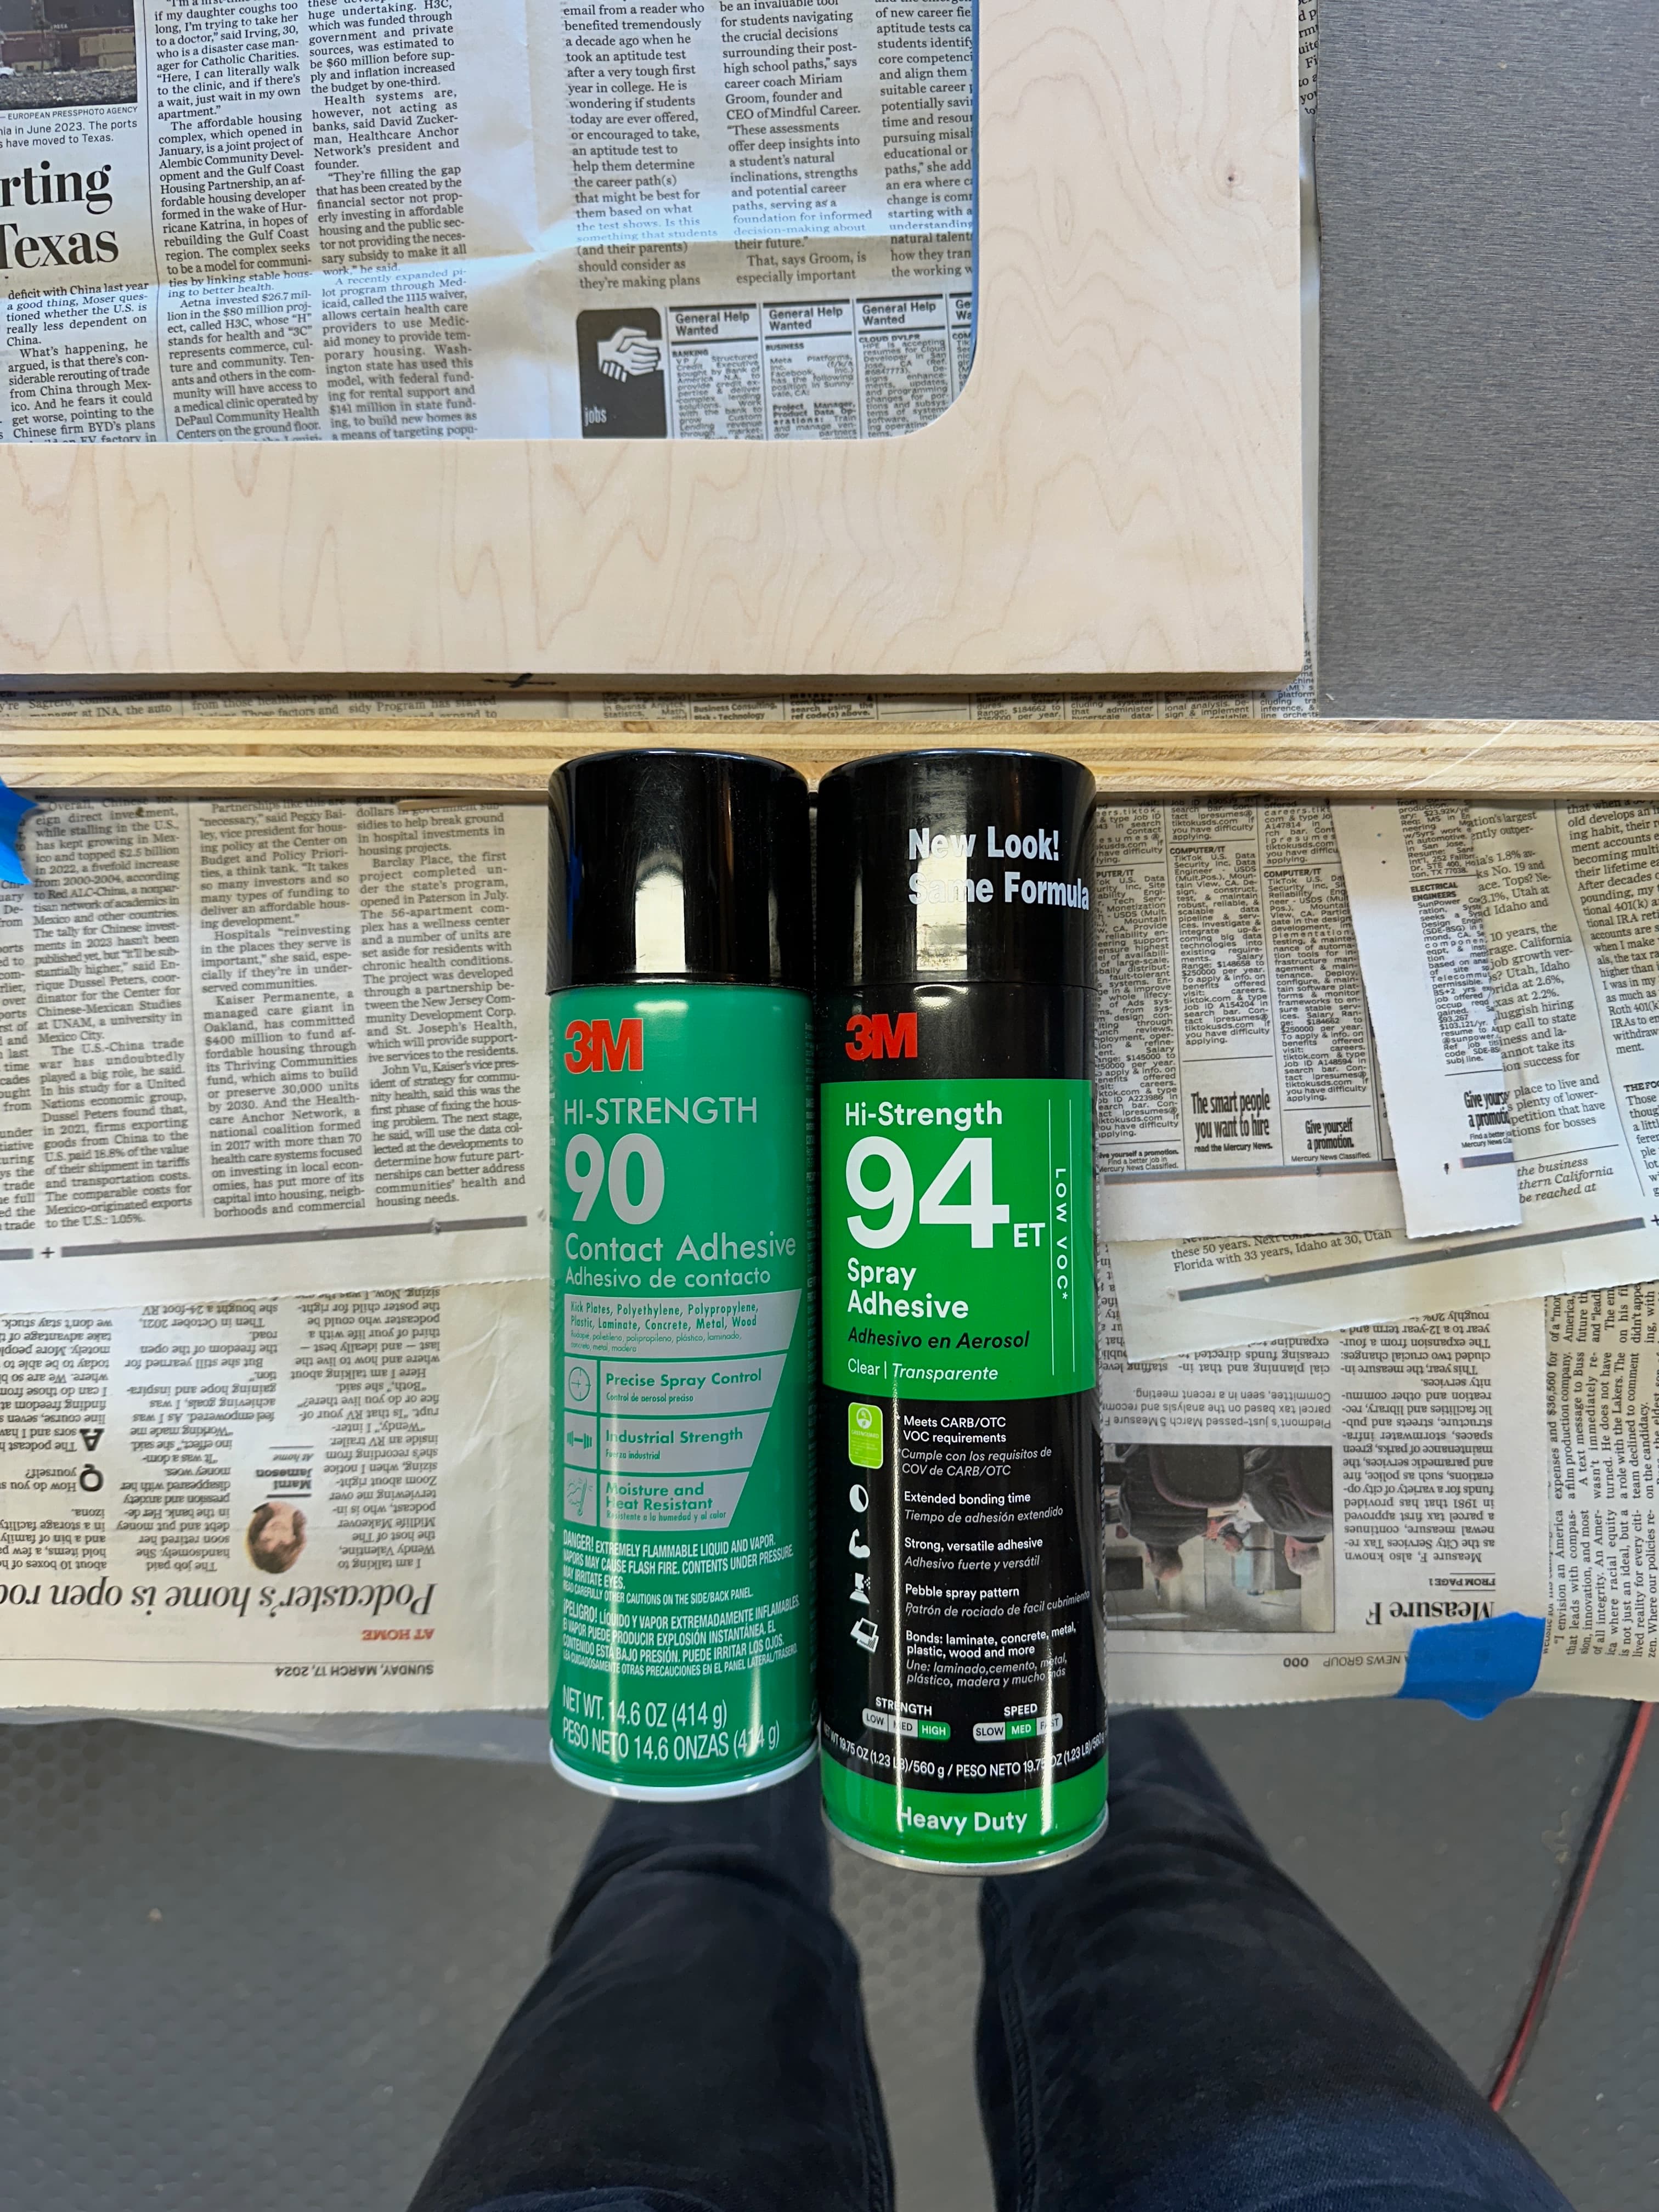
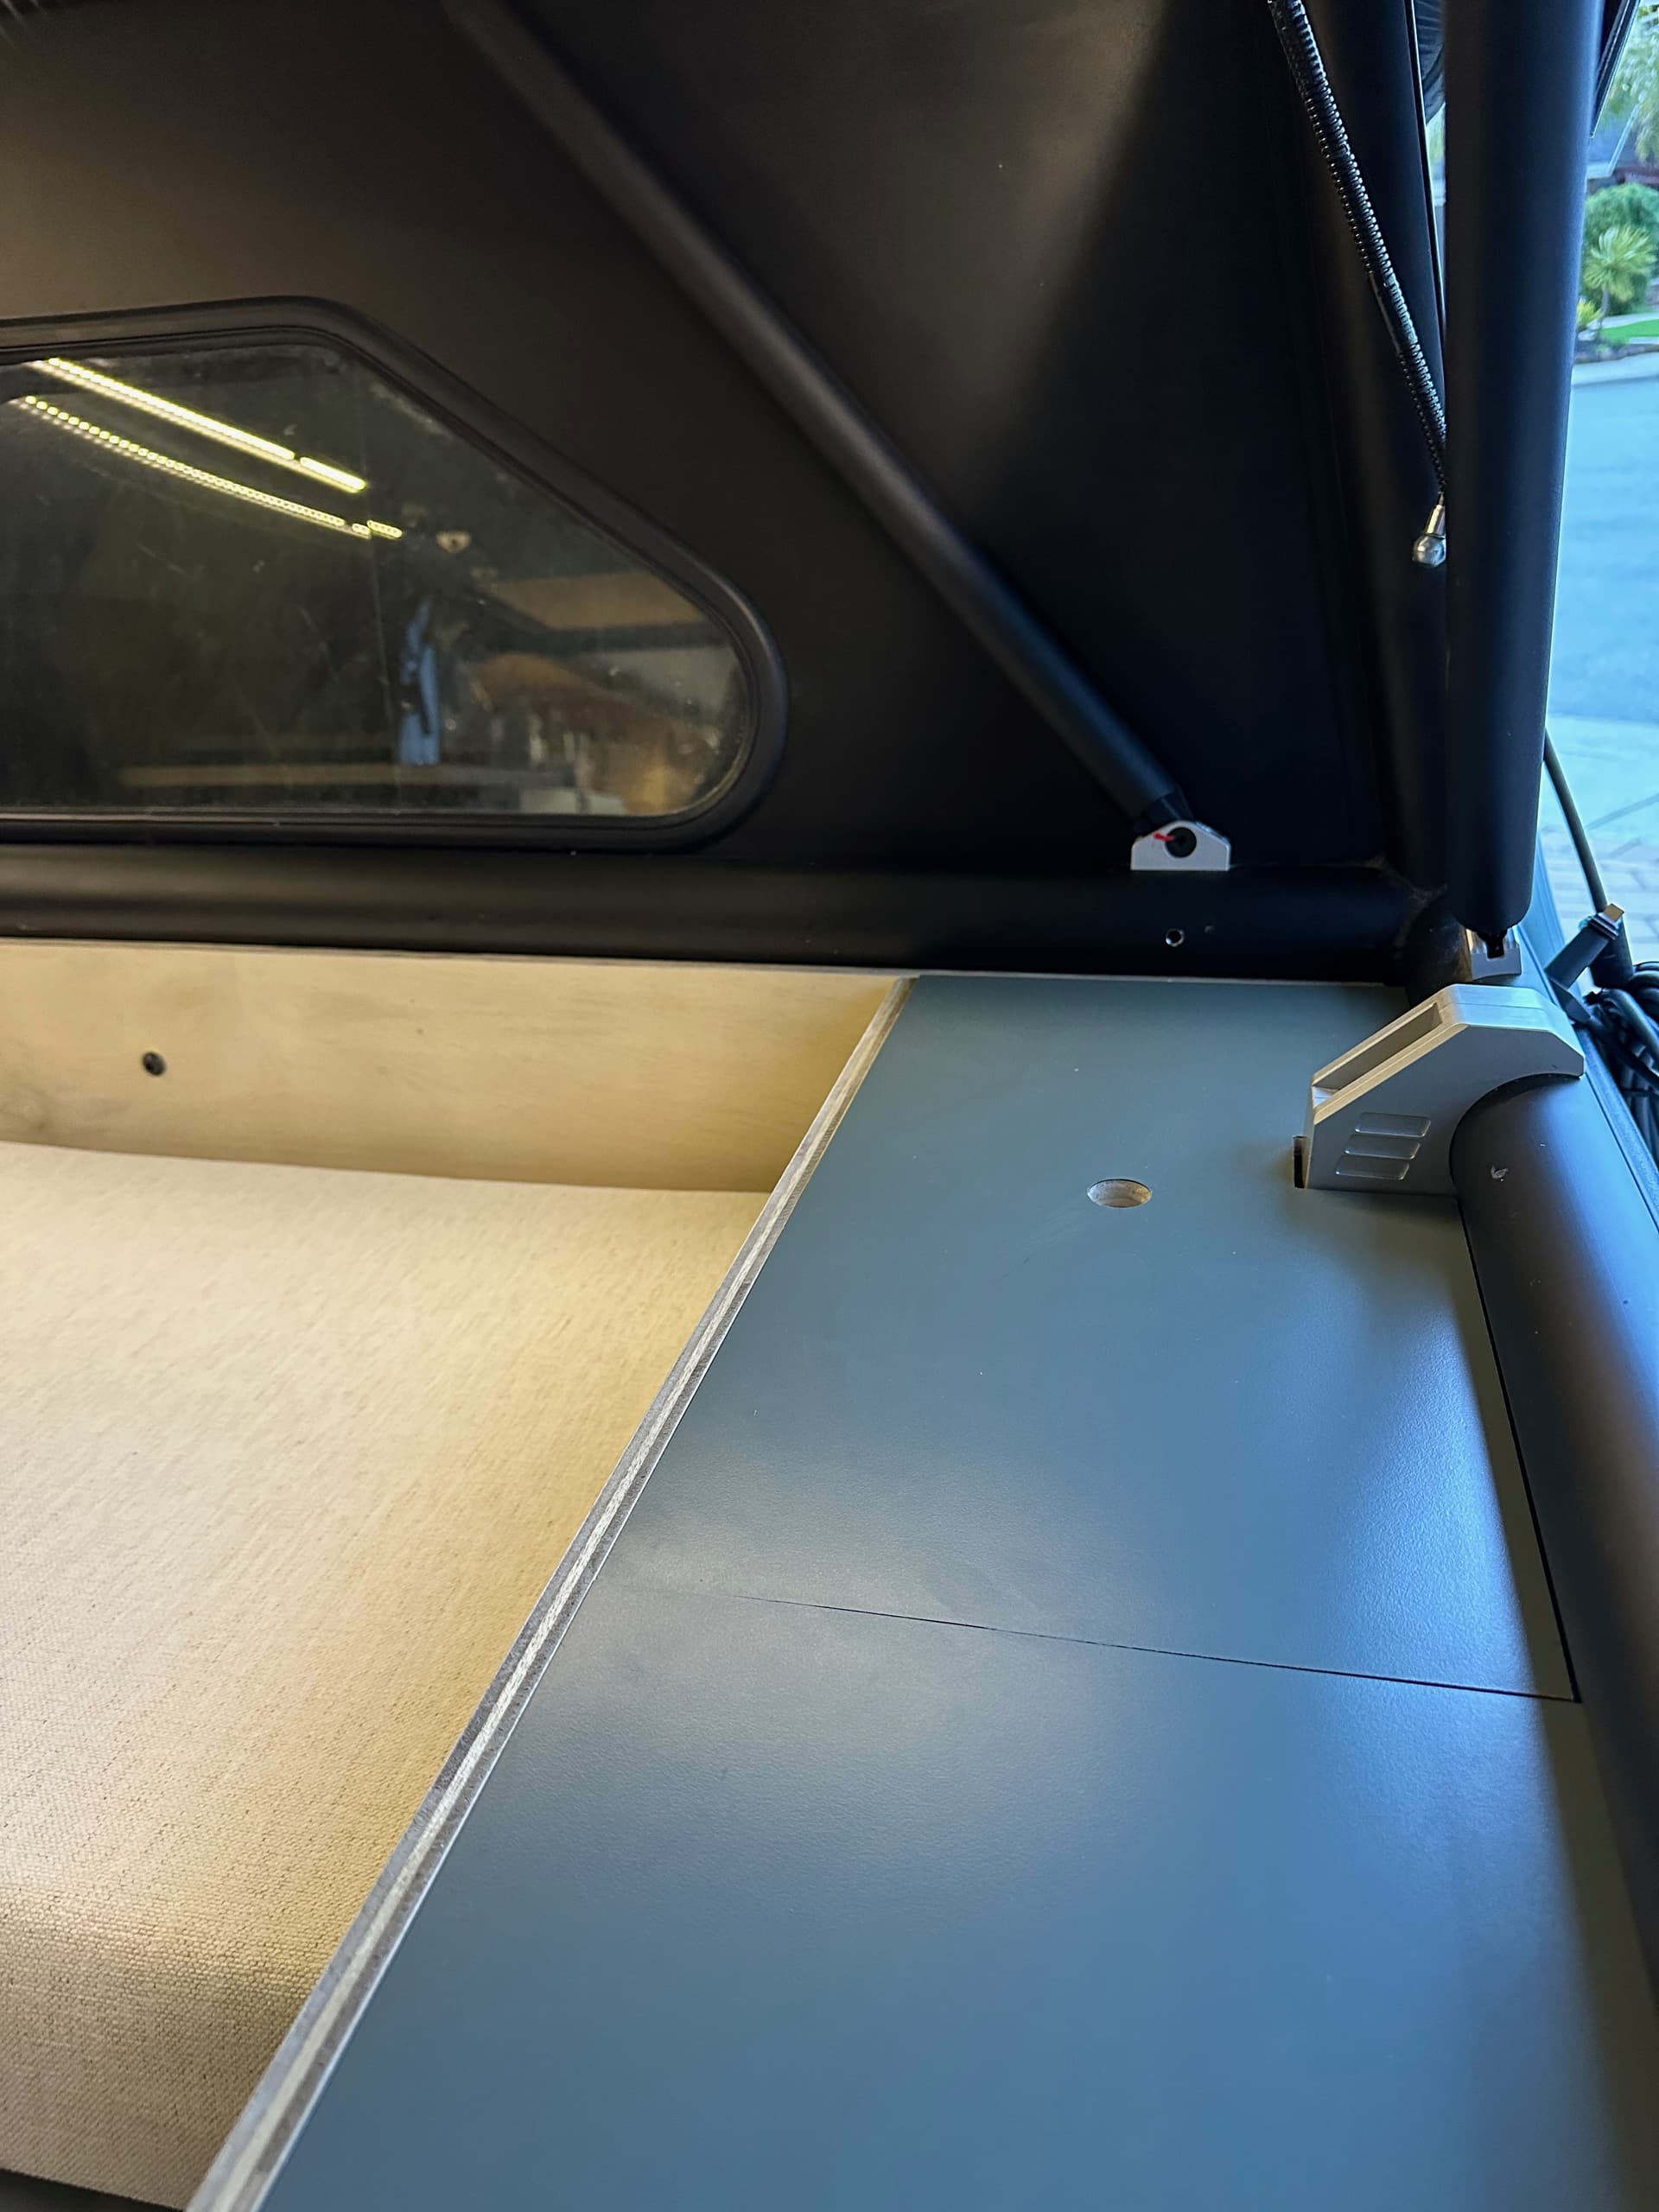
The first finishing detail to tackle was laminate, which we chose over paint for sturdiness, longevity, and a real factory finished looked. This was a slow and tedious process of cutting the laminate down and gluing (We went through 3 cans of glue) but was oh so worth it in the end.
This post is getting very long so pausing here for now. I’ll continue with more finishing details and assembly in the next post! (As nothing was permantelty bolted or screwed down at this point.)
11 Likes
Thank you for sharing these details. I’ve been staring at your recent posts trying to figure out how you’d created the space and this is really inspiring. Can’t wait for my upcoming week off work to start building out something similar.
1 Like
I was curious what that little library was! The Audubon Field Guides look great there.
1 Like
Beautiful, meticulous, and thoughtful build, @julian. Thank you for sharing your progress with us. I’m looking at your roof fan. Some questions I have about it.
- What did you learn and what would you have done different? Anything you would change or redo if you had the chance? I see you mentioned adding connections to allow disconnection if you were to remove the roof again.
- How is this fan? Would you choose another fan?
- Does the fan limit you in adding a roof box or rack to the beef bars?
- Did you have to use custom screws for mounting the fan?
2 Likes
Replies in-line:
Thanks so much @LeSmurf @yodabest ![]()
@timwentoutside! The whole build is made out of 2 sheets 3/4" + one sheet of 1/2" plywood. Last post goes into more detail on how we treated the wood prior to construction.
@dmg5000 Appreciate the kind words Darin. The table is a game changer. It’s hard to believe we spent the past three years working without one. We spent a long time tracking down the laminate color. Wanted something that was as close to the paint we used on the previous small cabinet we had!
Thanks @jedgar! Excited to share a deep dive on your contribution to it in a little bit here too ![]()
@weightshift The Audubon Library is the first thing neighbors at camp have noticed thus far when checking out the build. So happy we included it!
@depthofperception If you scroll up in this thread there is a dedicated post on the fan install! (![]() Linked for you here as I know this thread is getting long to scroll through!)
Linked for you here as I know this thread is getting long to scroll through!)
-
I should have wired the fan (and solar) with quick releases out of the gate. I had to cut all the wires on the spot at GFC when getting the tent replaced which was not ideal as I was without solar and fan for the next few weeks. The fiberglass can now pop out with the solar panel + fan left in place which will make any future service a breeze.
-
Fan continues to be a top mod and has had no issues.
-
With the fan so far back I was able to mount a yakima roofbox on beef bars infront of the fan. I’ve only done this once to help move some belongings)
-
No custom screws.
![]()
1 Like
Where did you get the table mount? I see a lot of items meant for RV’s but they usually have huge bases/poles.
1 Like
It looks like it is a Lagun table mount
1 Like
Good eye, definitely looks like it from their web page
1 Like
I have this one saved on amazon. I think it is a knock off but basically identical. About $80 cheaper too.
1 Like
Nice, I’d found this one but the one you posted is cheaper still.
1 Like
Incredible build. Reading every detail with great interest. Thanks for taking the time to document and post all this hard work.
1 Like
V2 Retroactive Build Update 04/14/24 — Assembly and Finishing Details
Alright! This is going to be a long post.
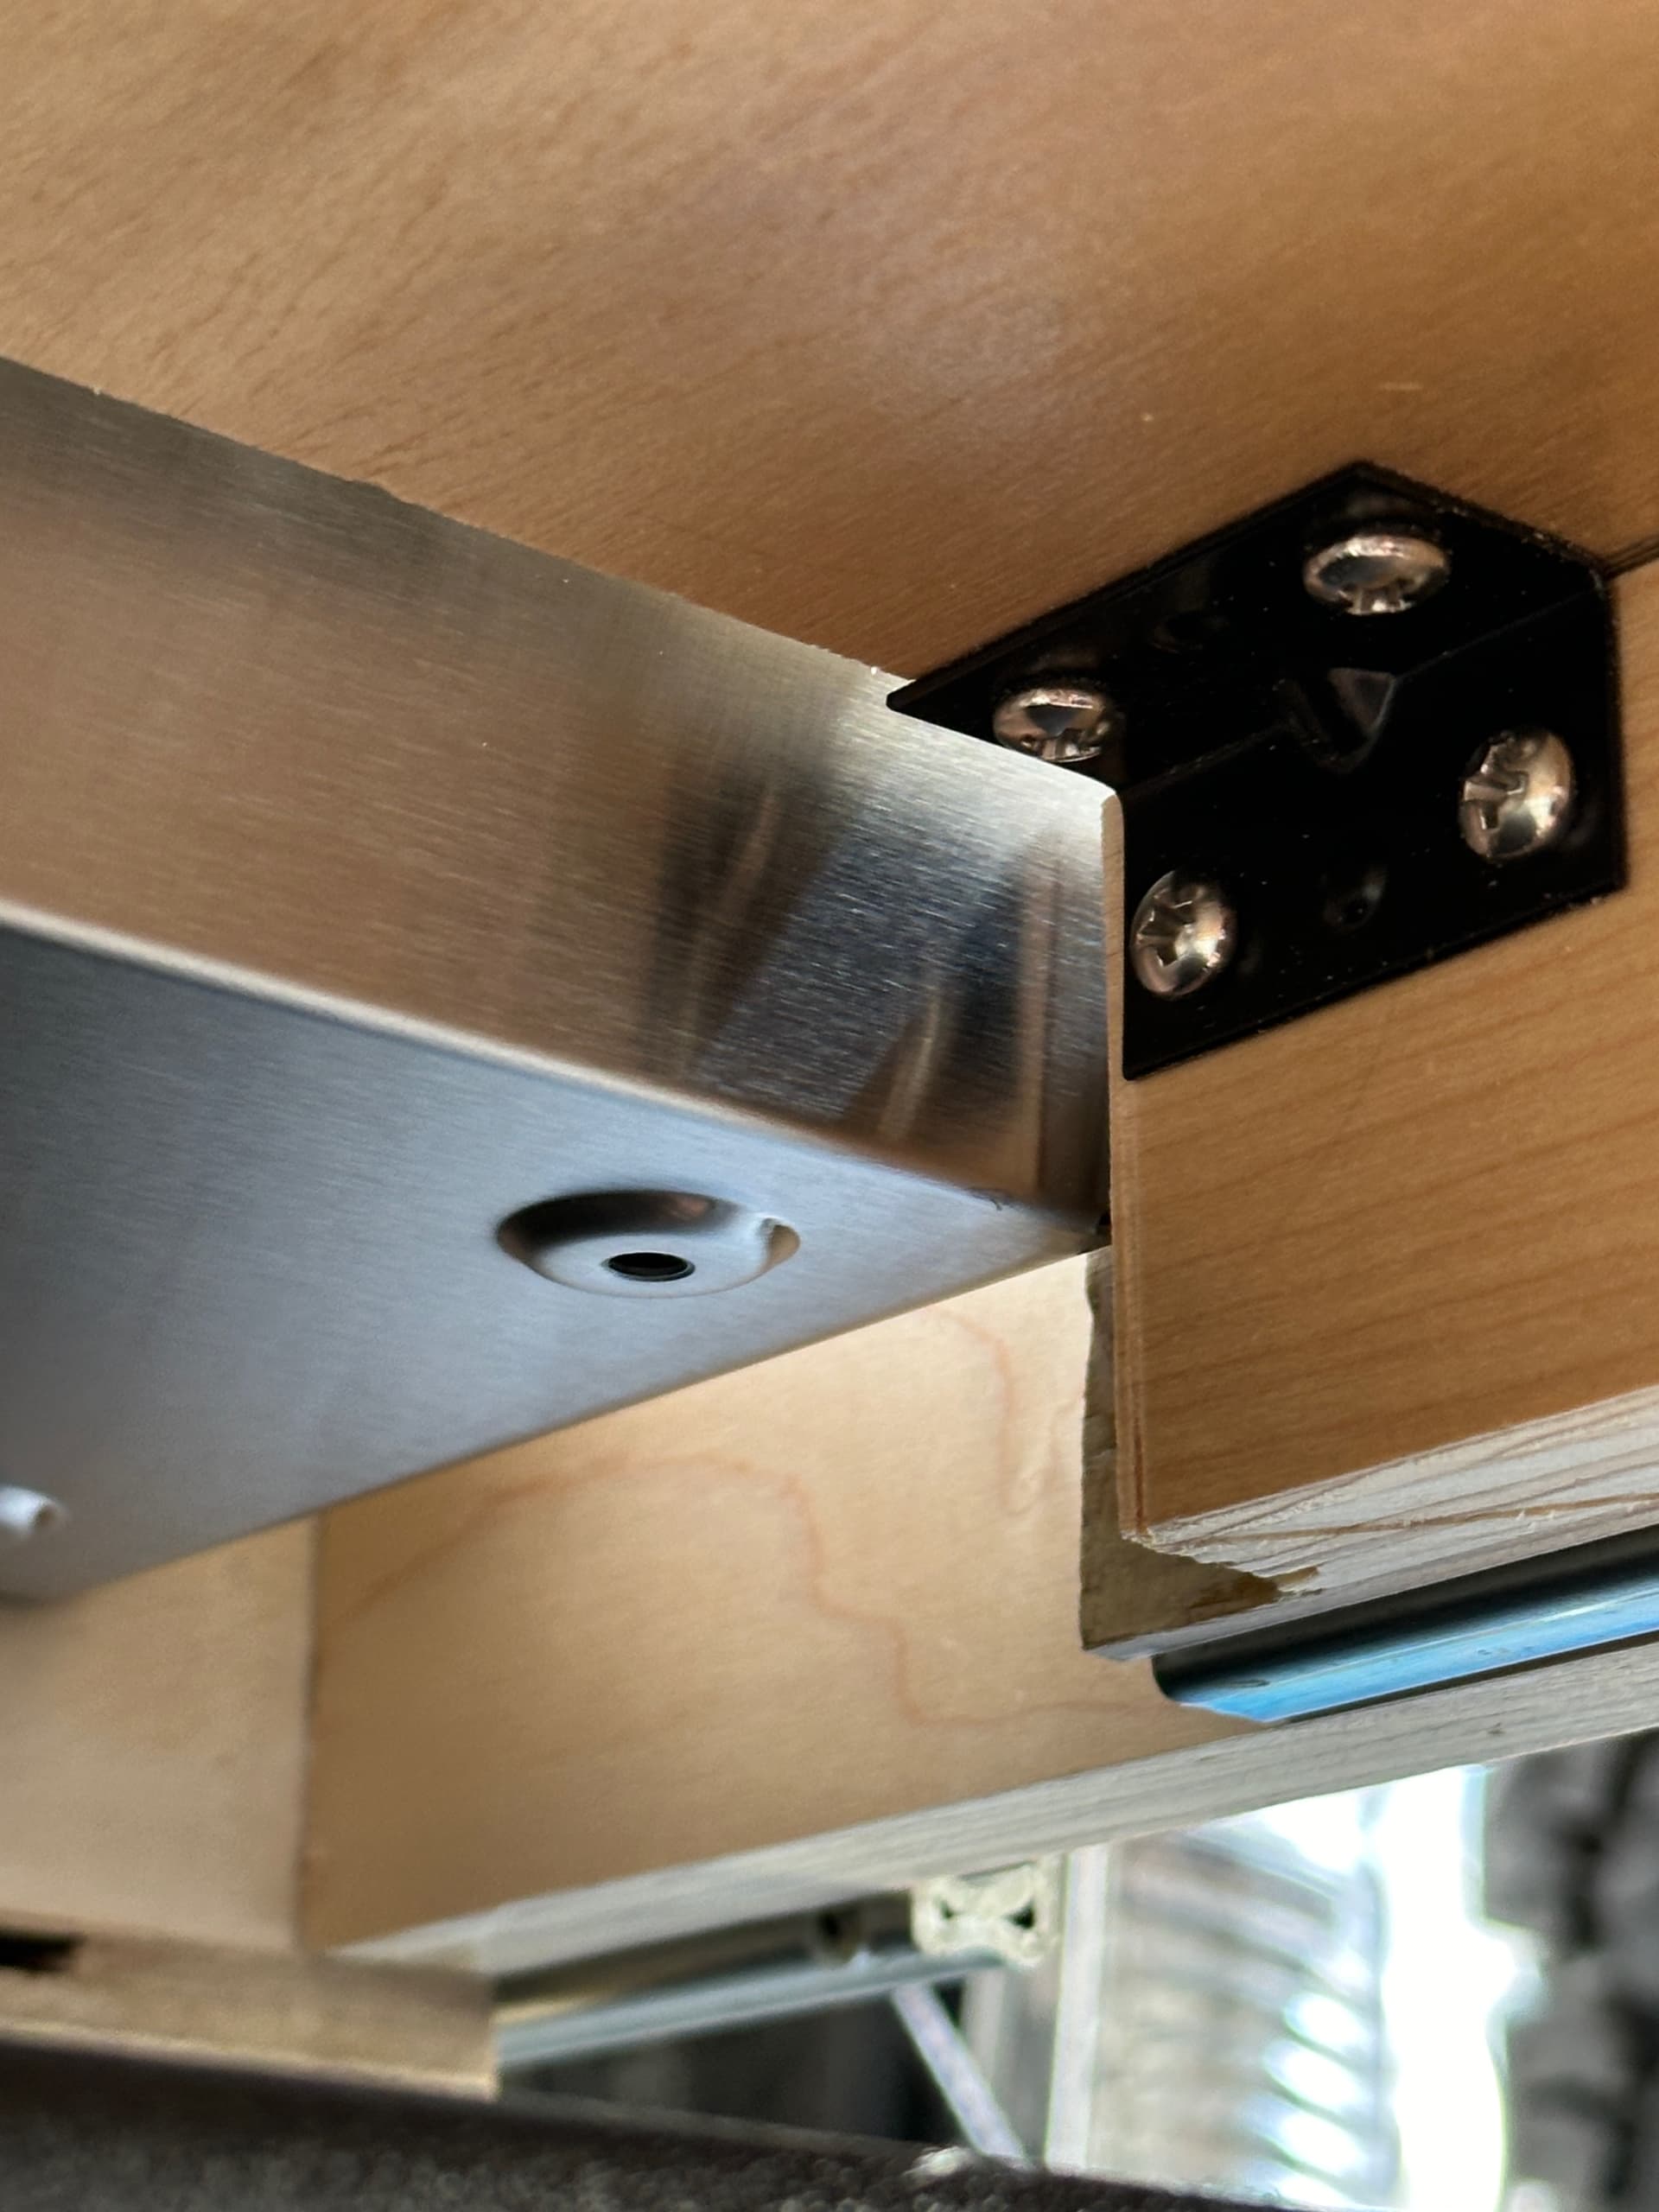
The first step was to add “cleats” to support the cubby lids on the drawer cabinet and bulkhead bench.
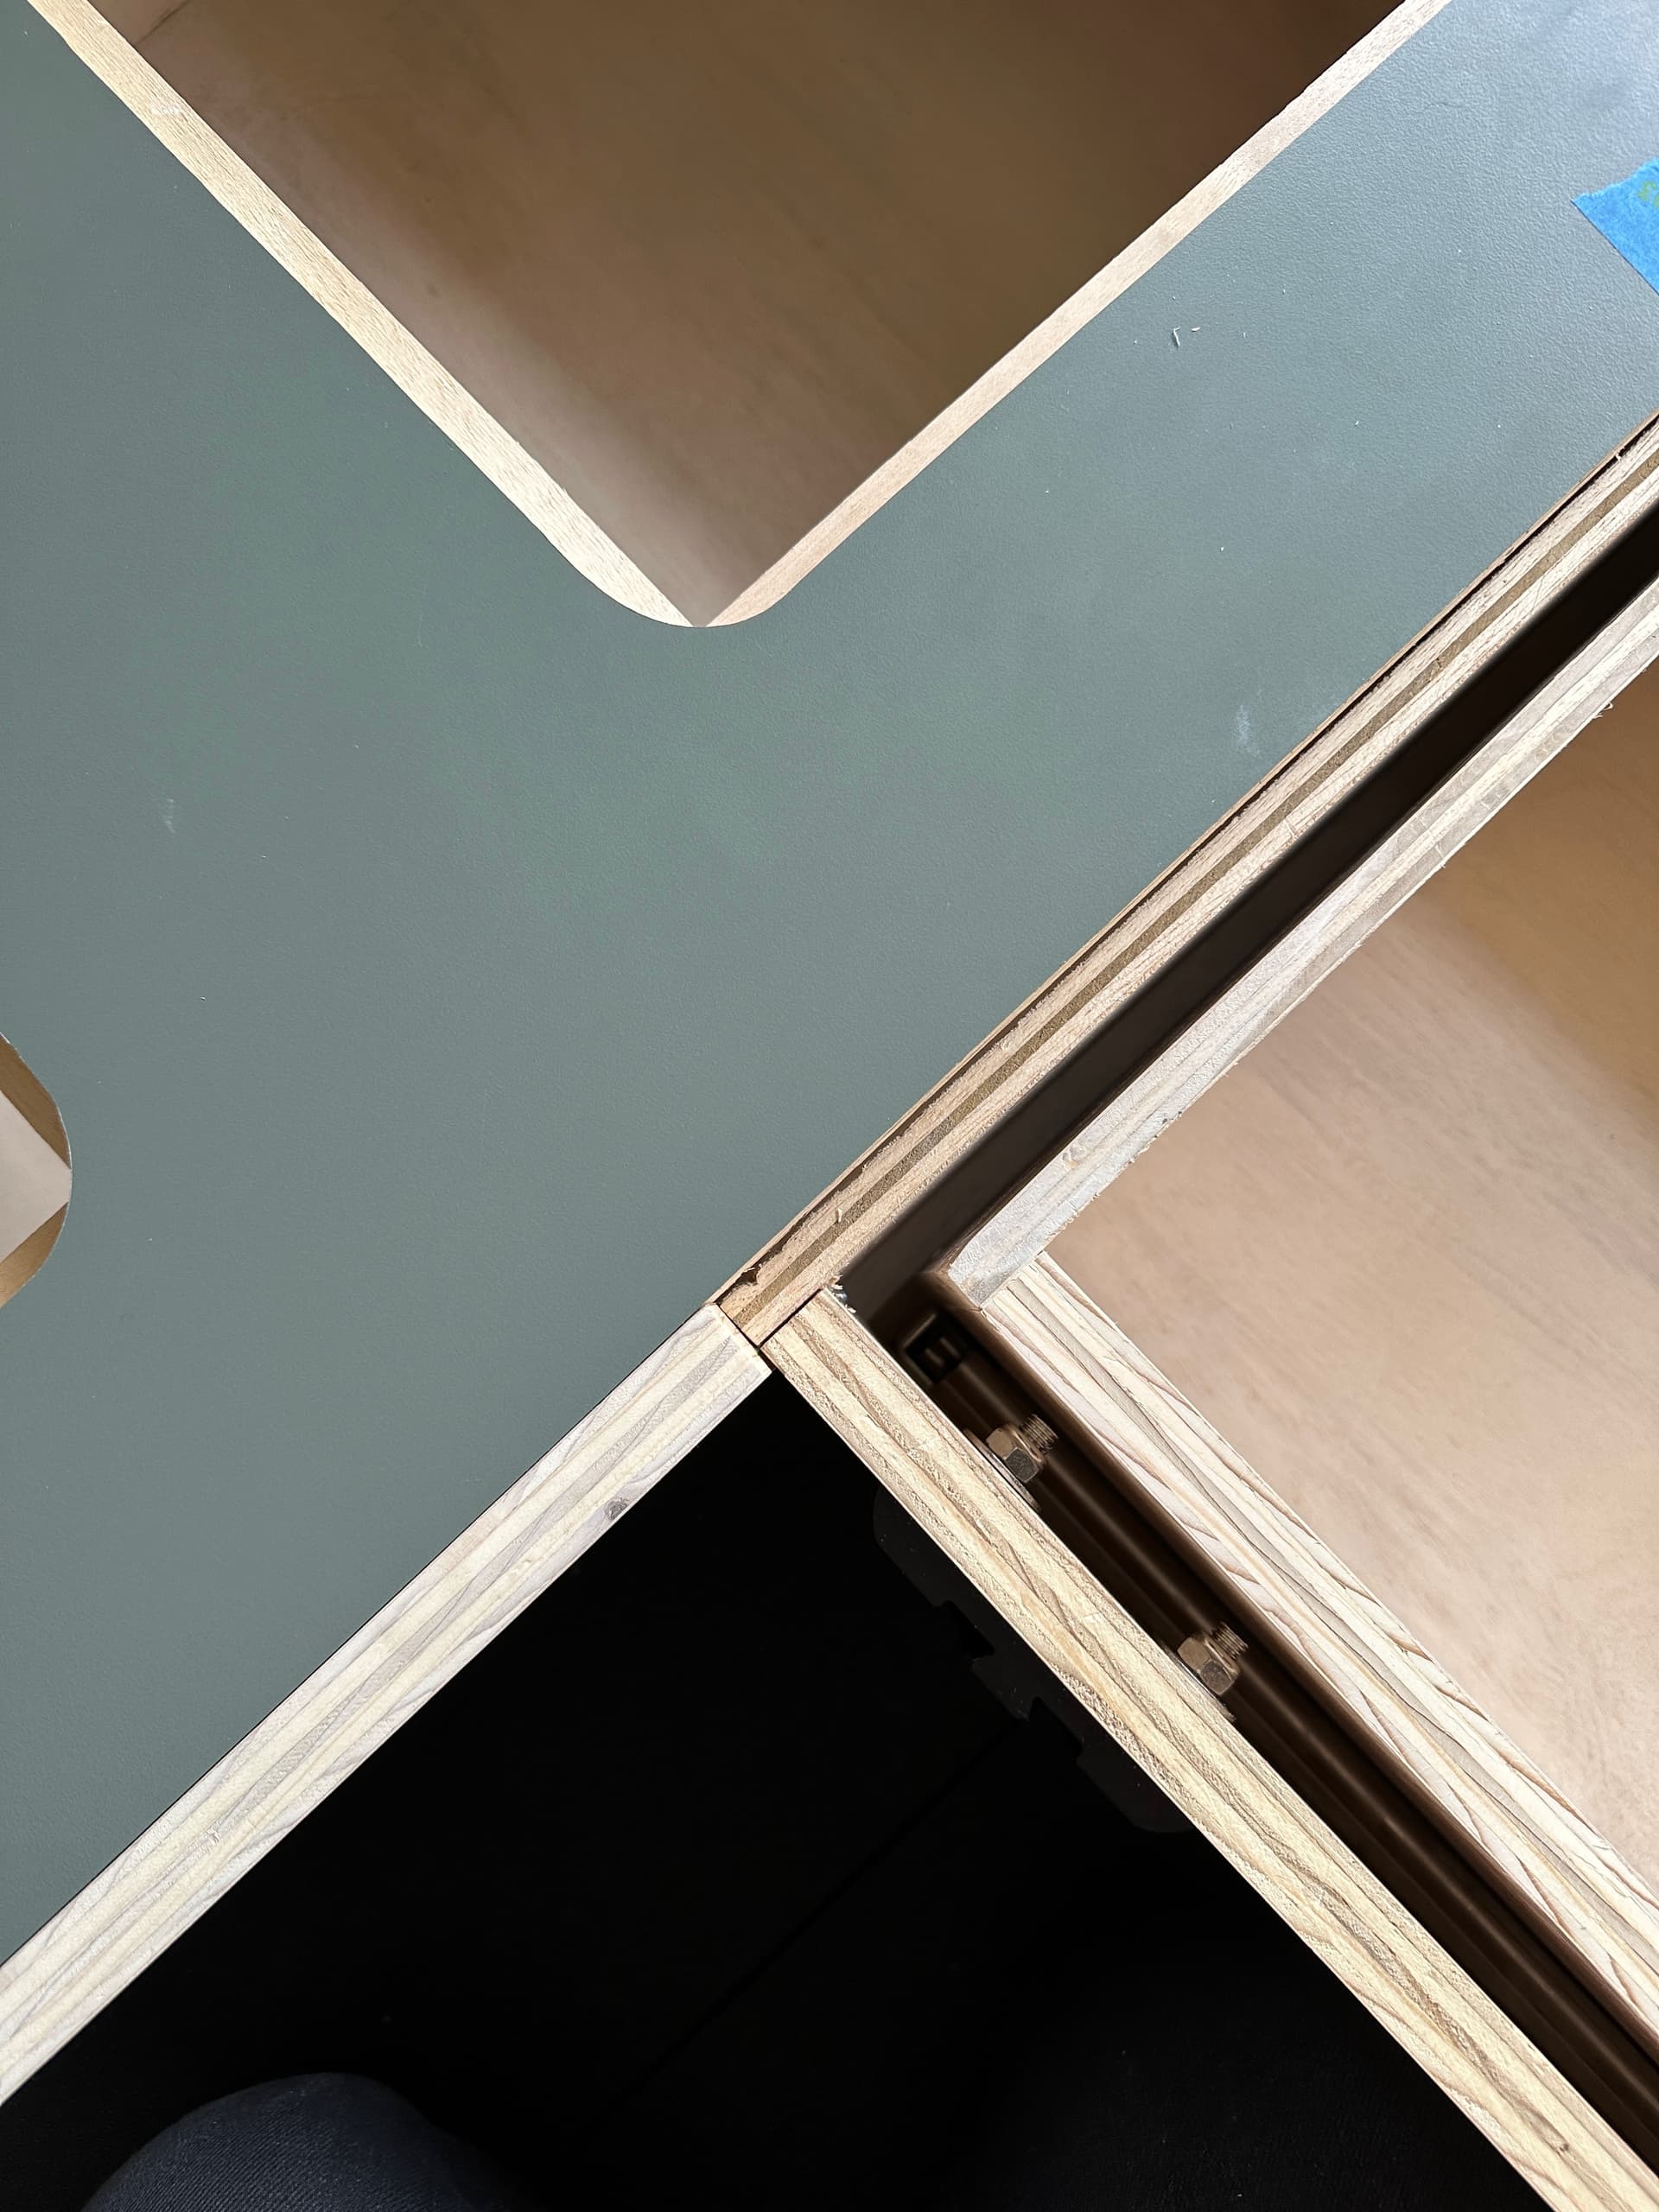
We used wood for the cleats on the bulkhead bench and aluminum on the drawer cabinet for a lower profile to clear the kitchen drawer.

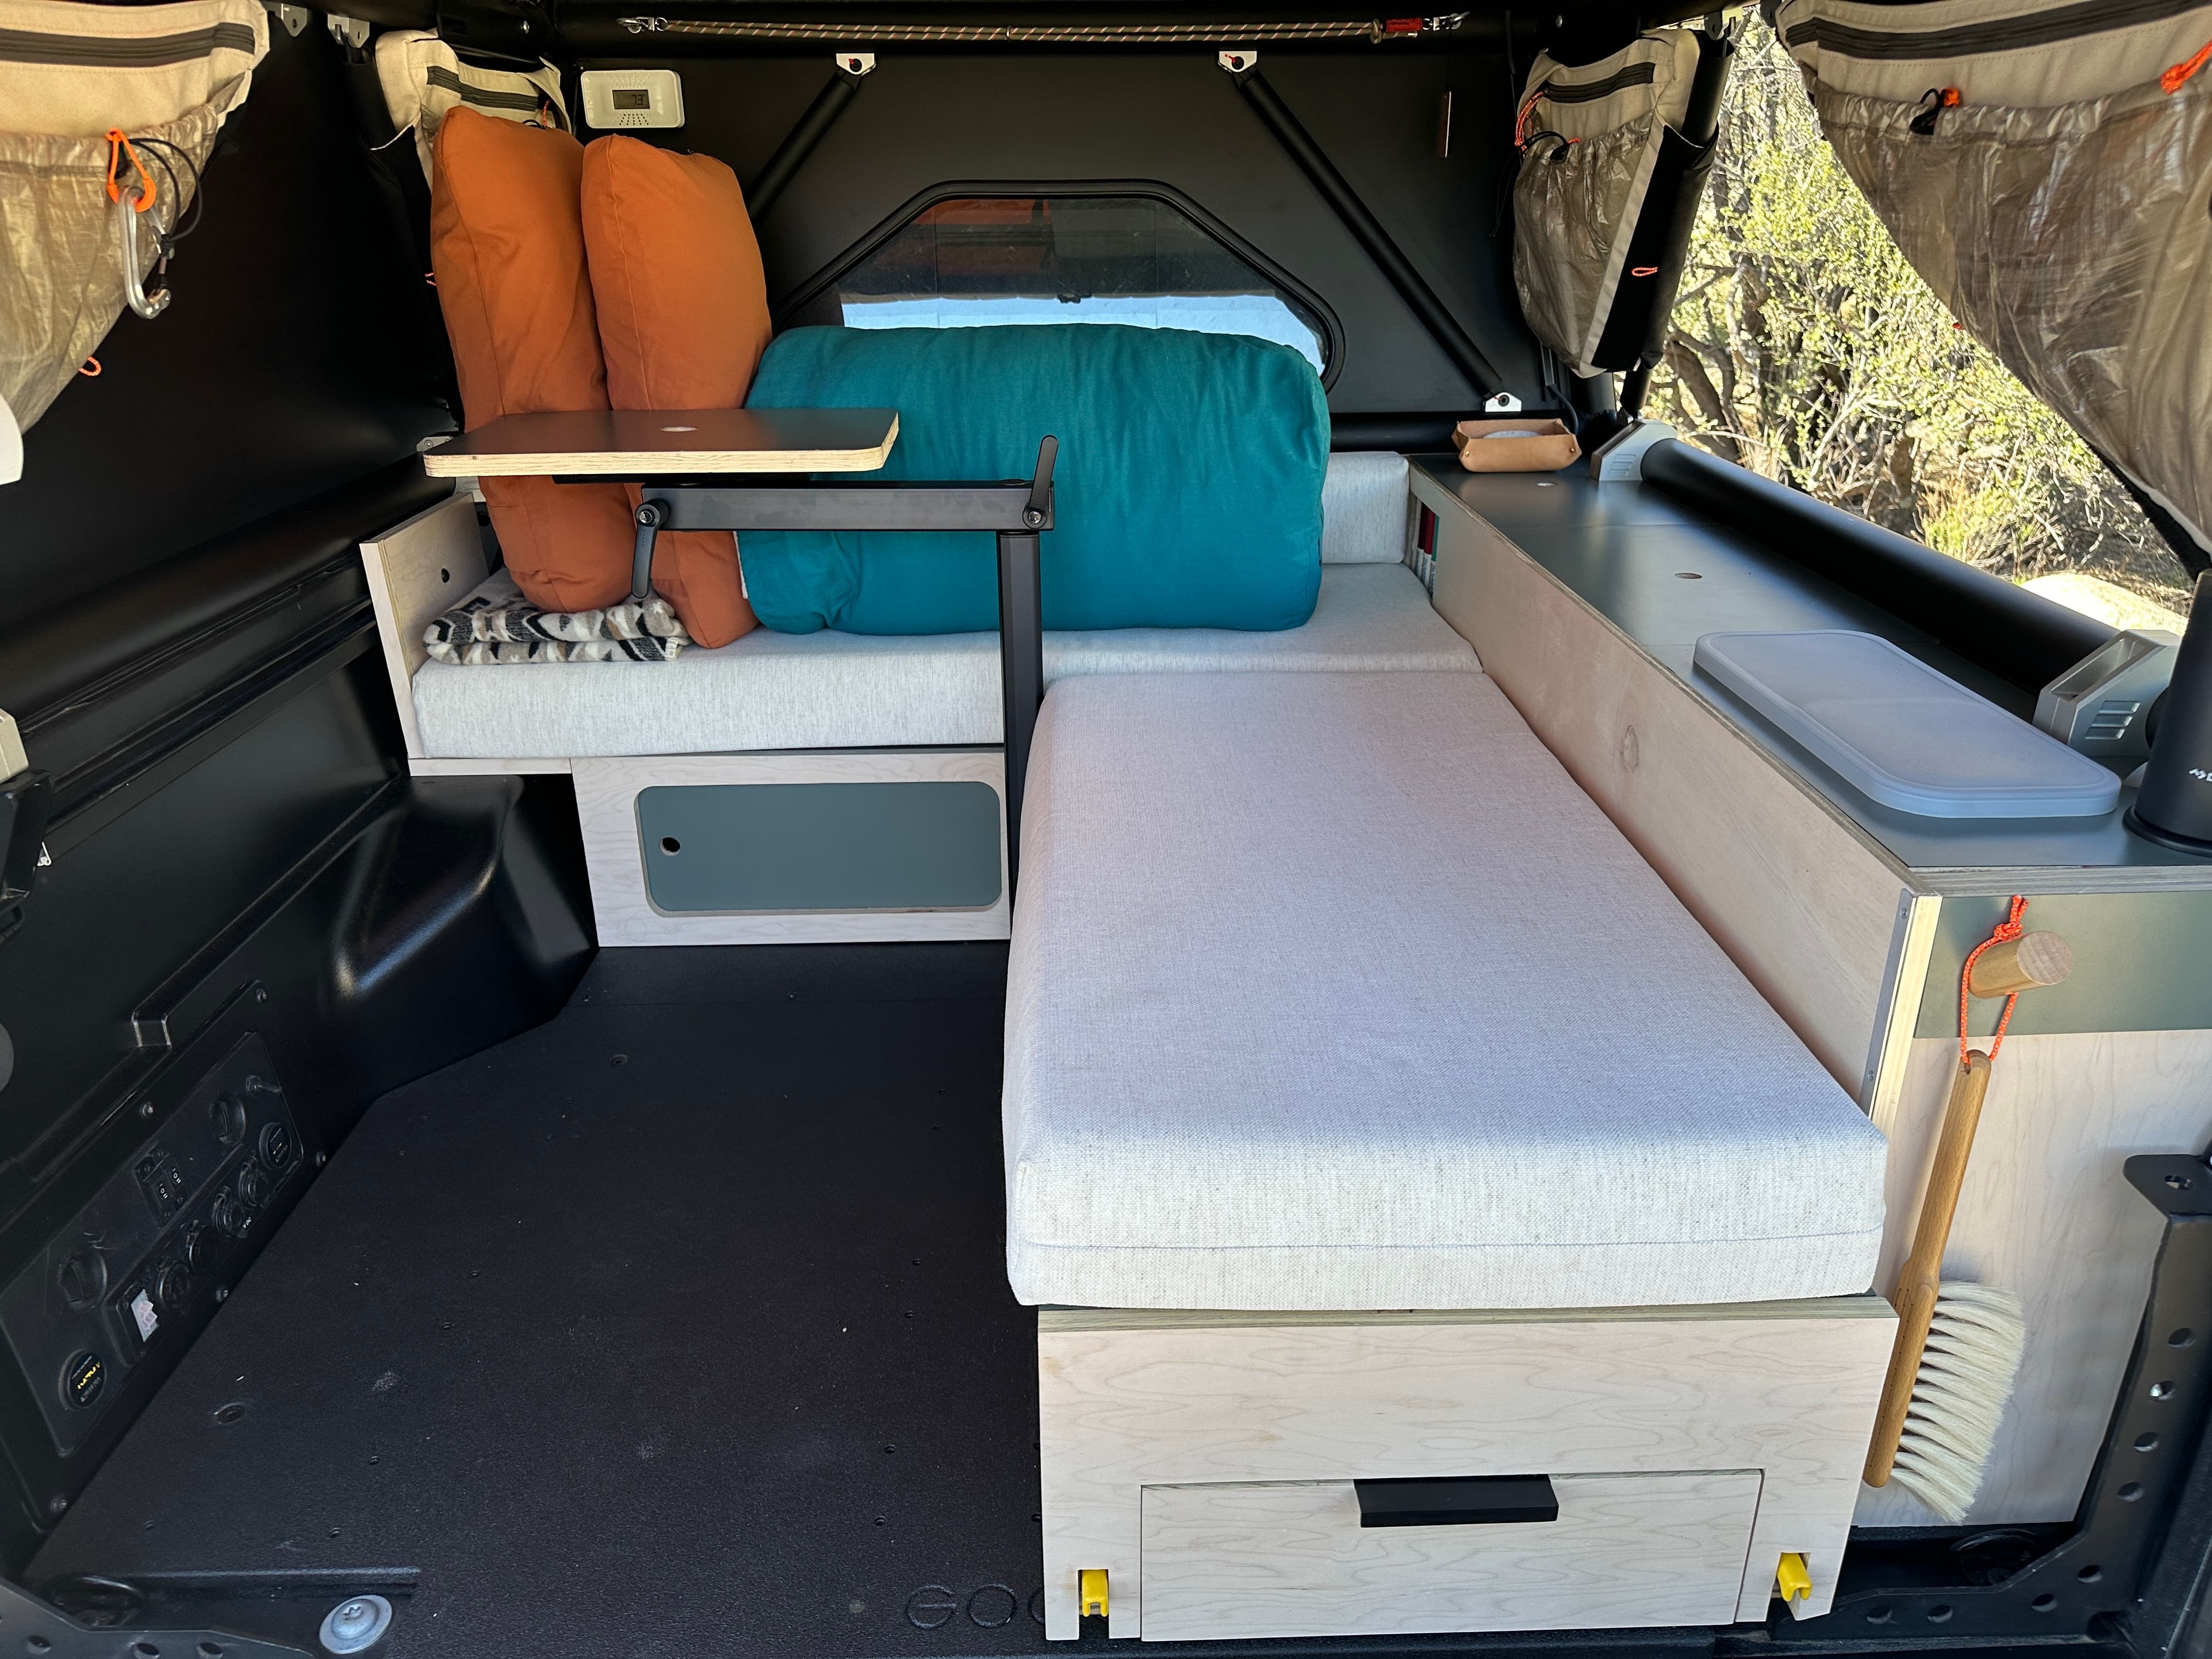
Before affixing the tops we mounted the Lagun Table System. With some dumb luck the lower mounting holes on the bracket aligned perfectly with existing holes in the rail slide. The top bolts were cut down in length to clear the drawer itself.

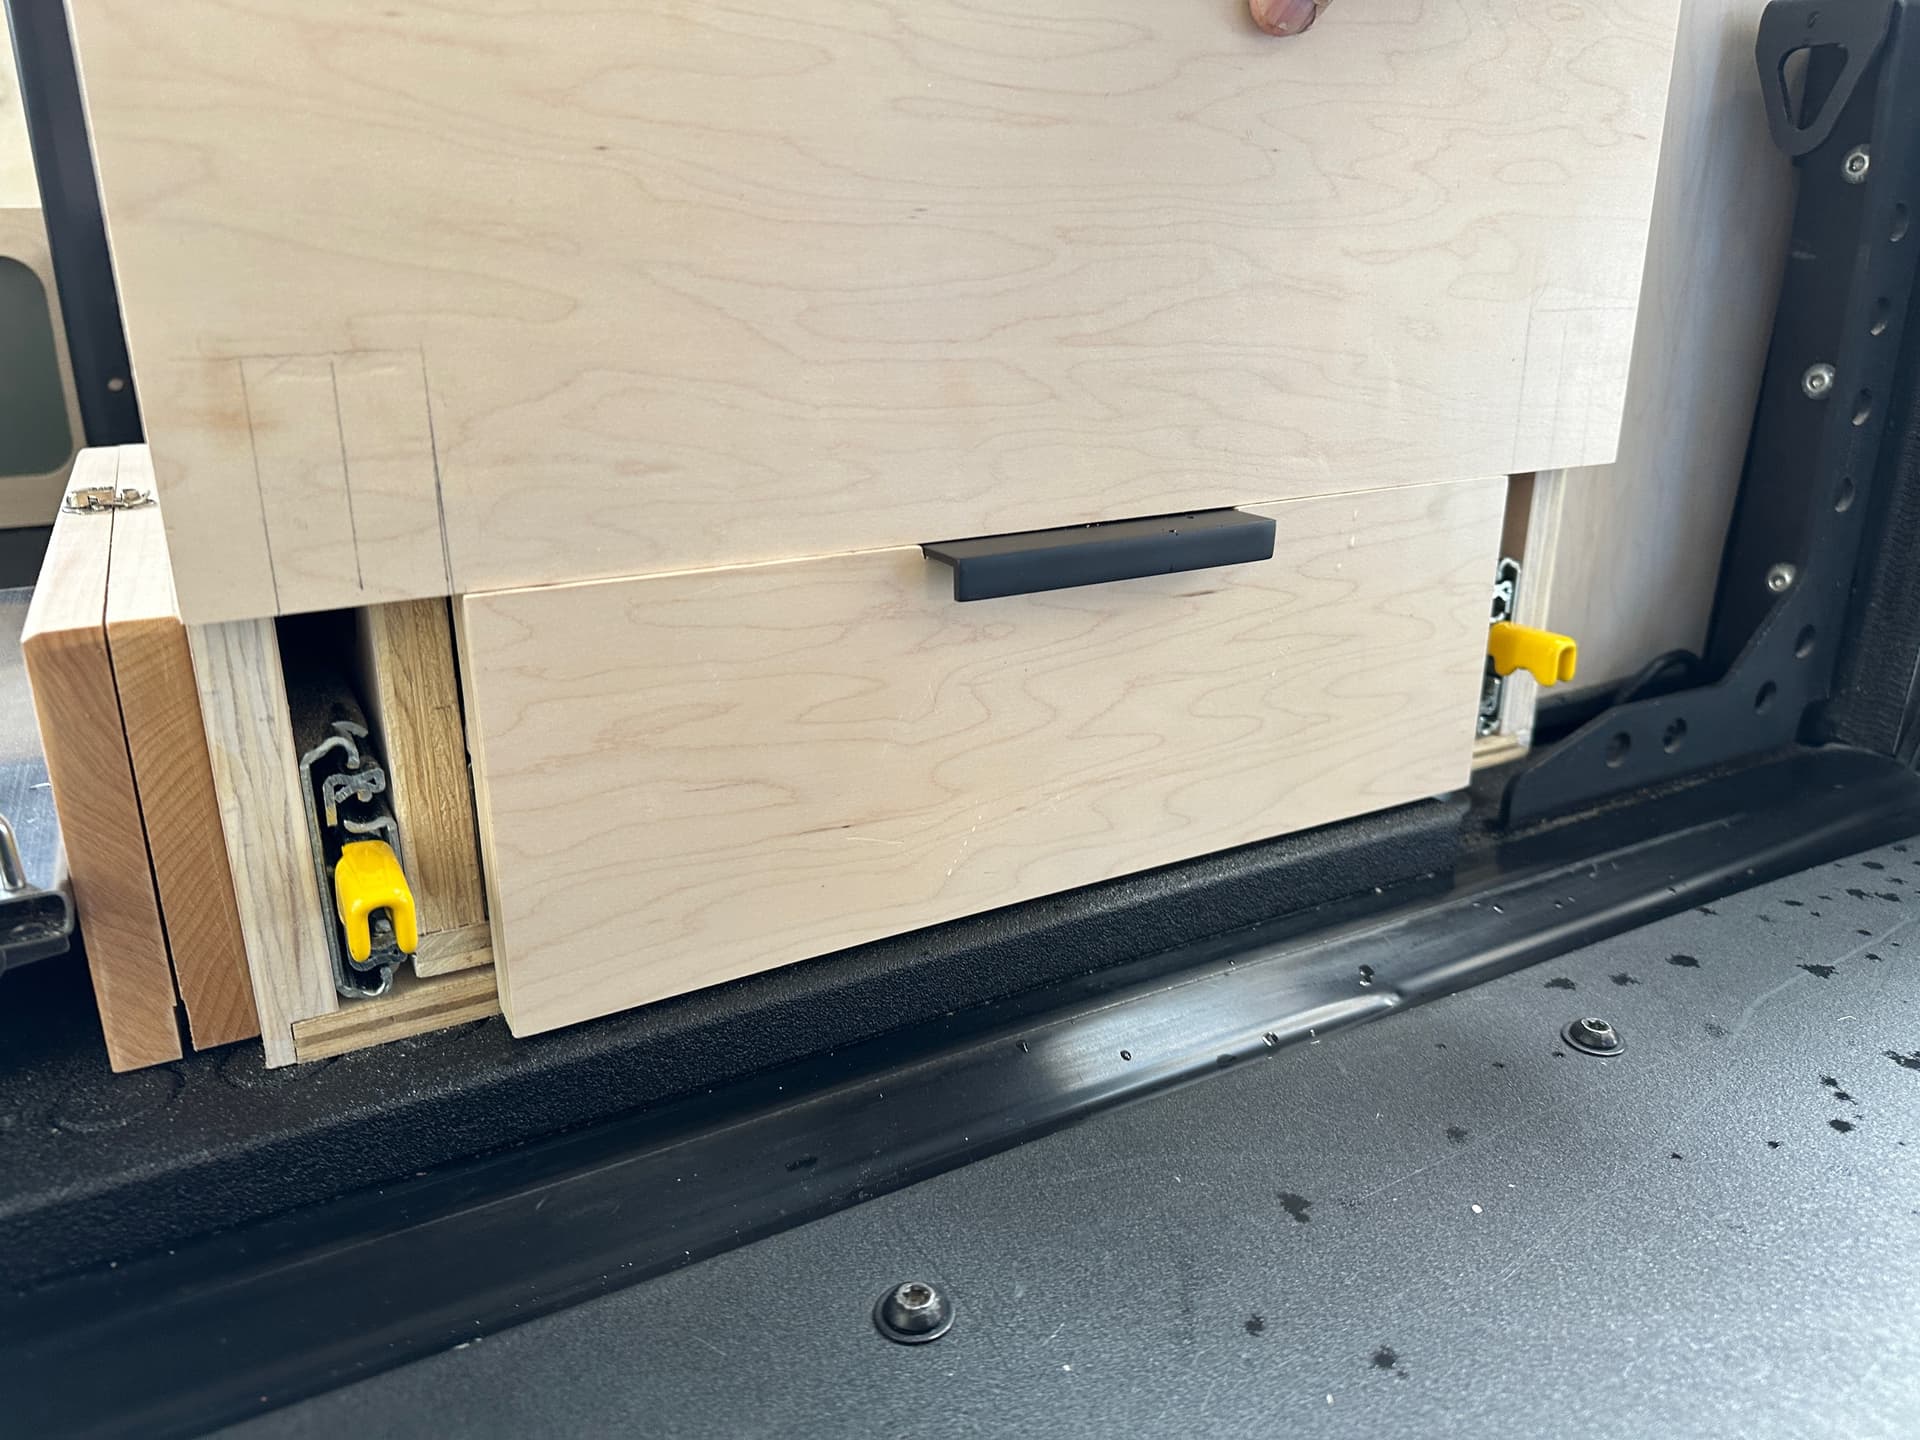
We also installed the hardware (A few pieces of aluminum angle) to guide and keep the sliding door face in place.

At this point we were ready to screw in the tops of the bulkhead bench and drawer cabinet.

Next up we tackled the “Garage” and the “Kitchen sink”. First we built out a simple cleat system with a mix of aluminum angle pieces and 3/4" wood for the laminated garage lids to sit on and cut out holes around the GFC brackets for a tight and clean look.
For the “sink” we cut out a hole for a large Tidy Board container (note: There is no drain on the container, its just a catch). We’ve yet to actually use it as a sink, it’s more so just a place to store the container when the kitchen drawer is closed.

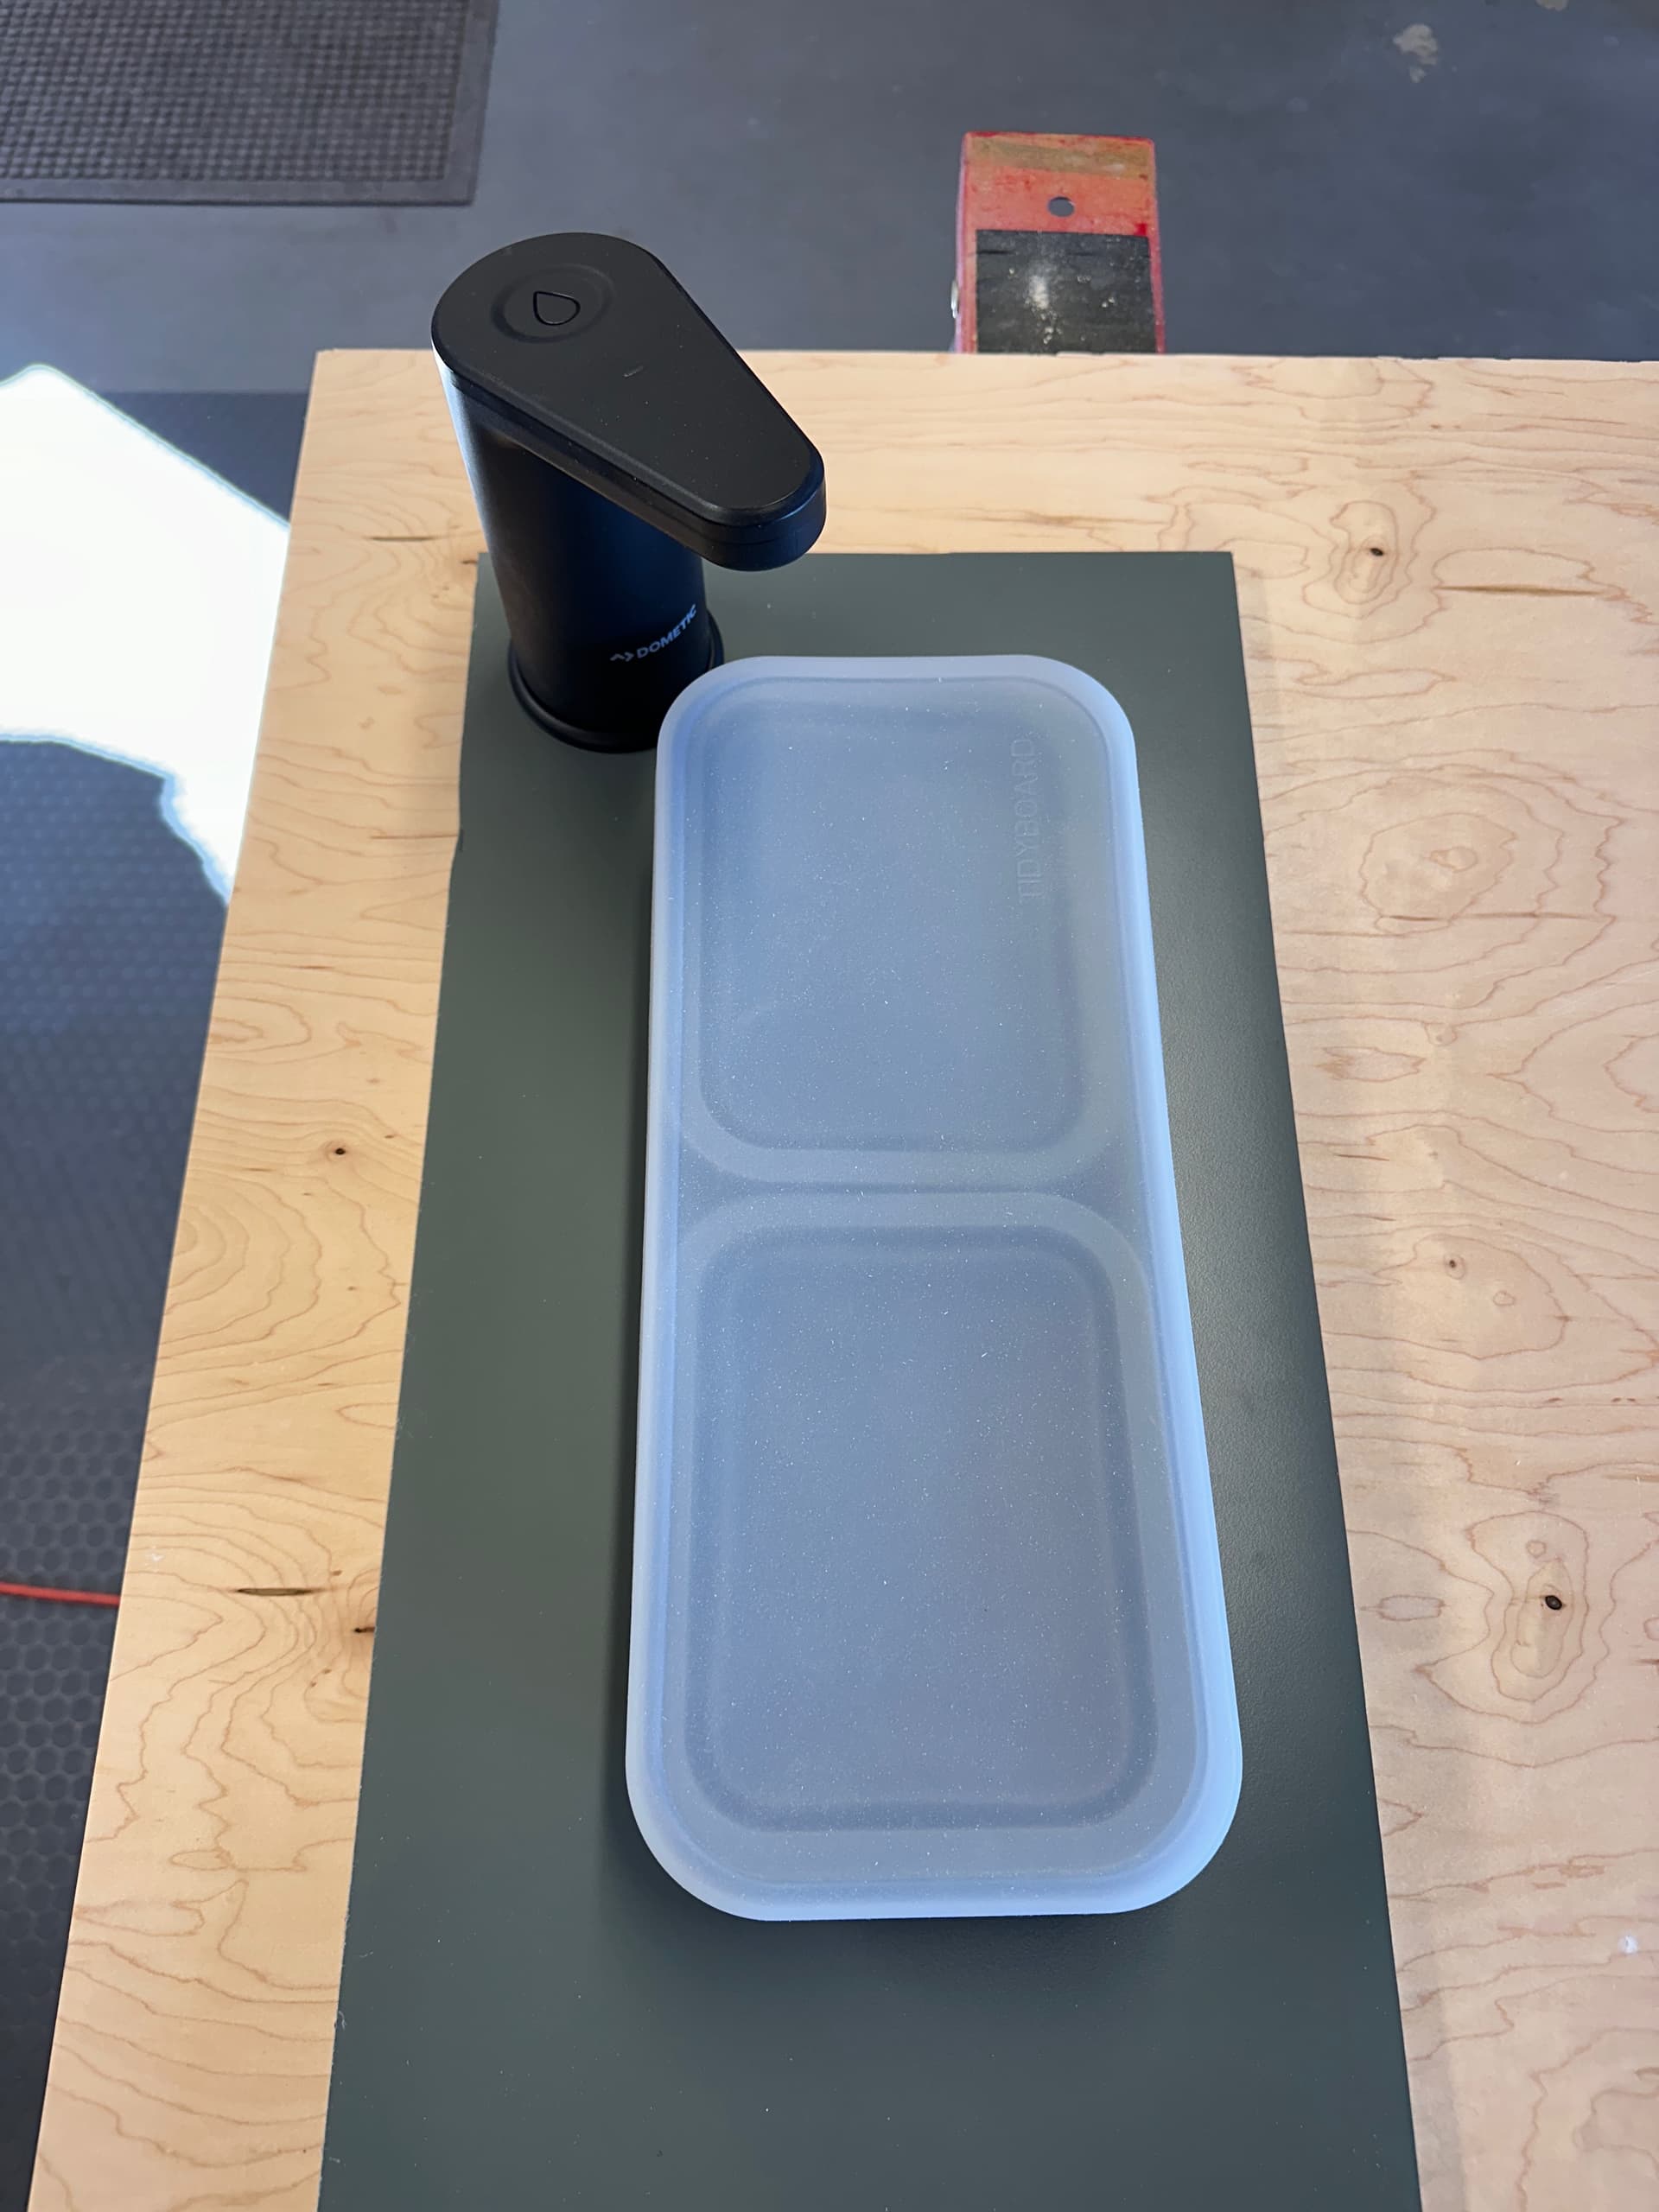


(Credit where credit is due: The long and skinny “Garage” concept, faucet placement, and water jug placement are all directly inspired by and copied from @DirtTrailsWanted build.
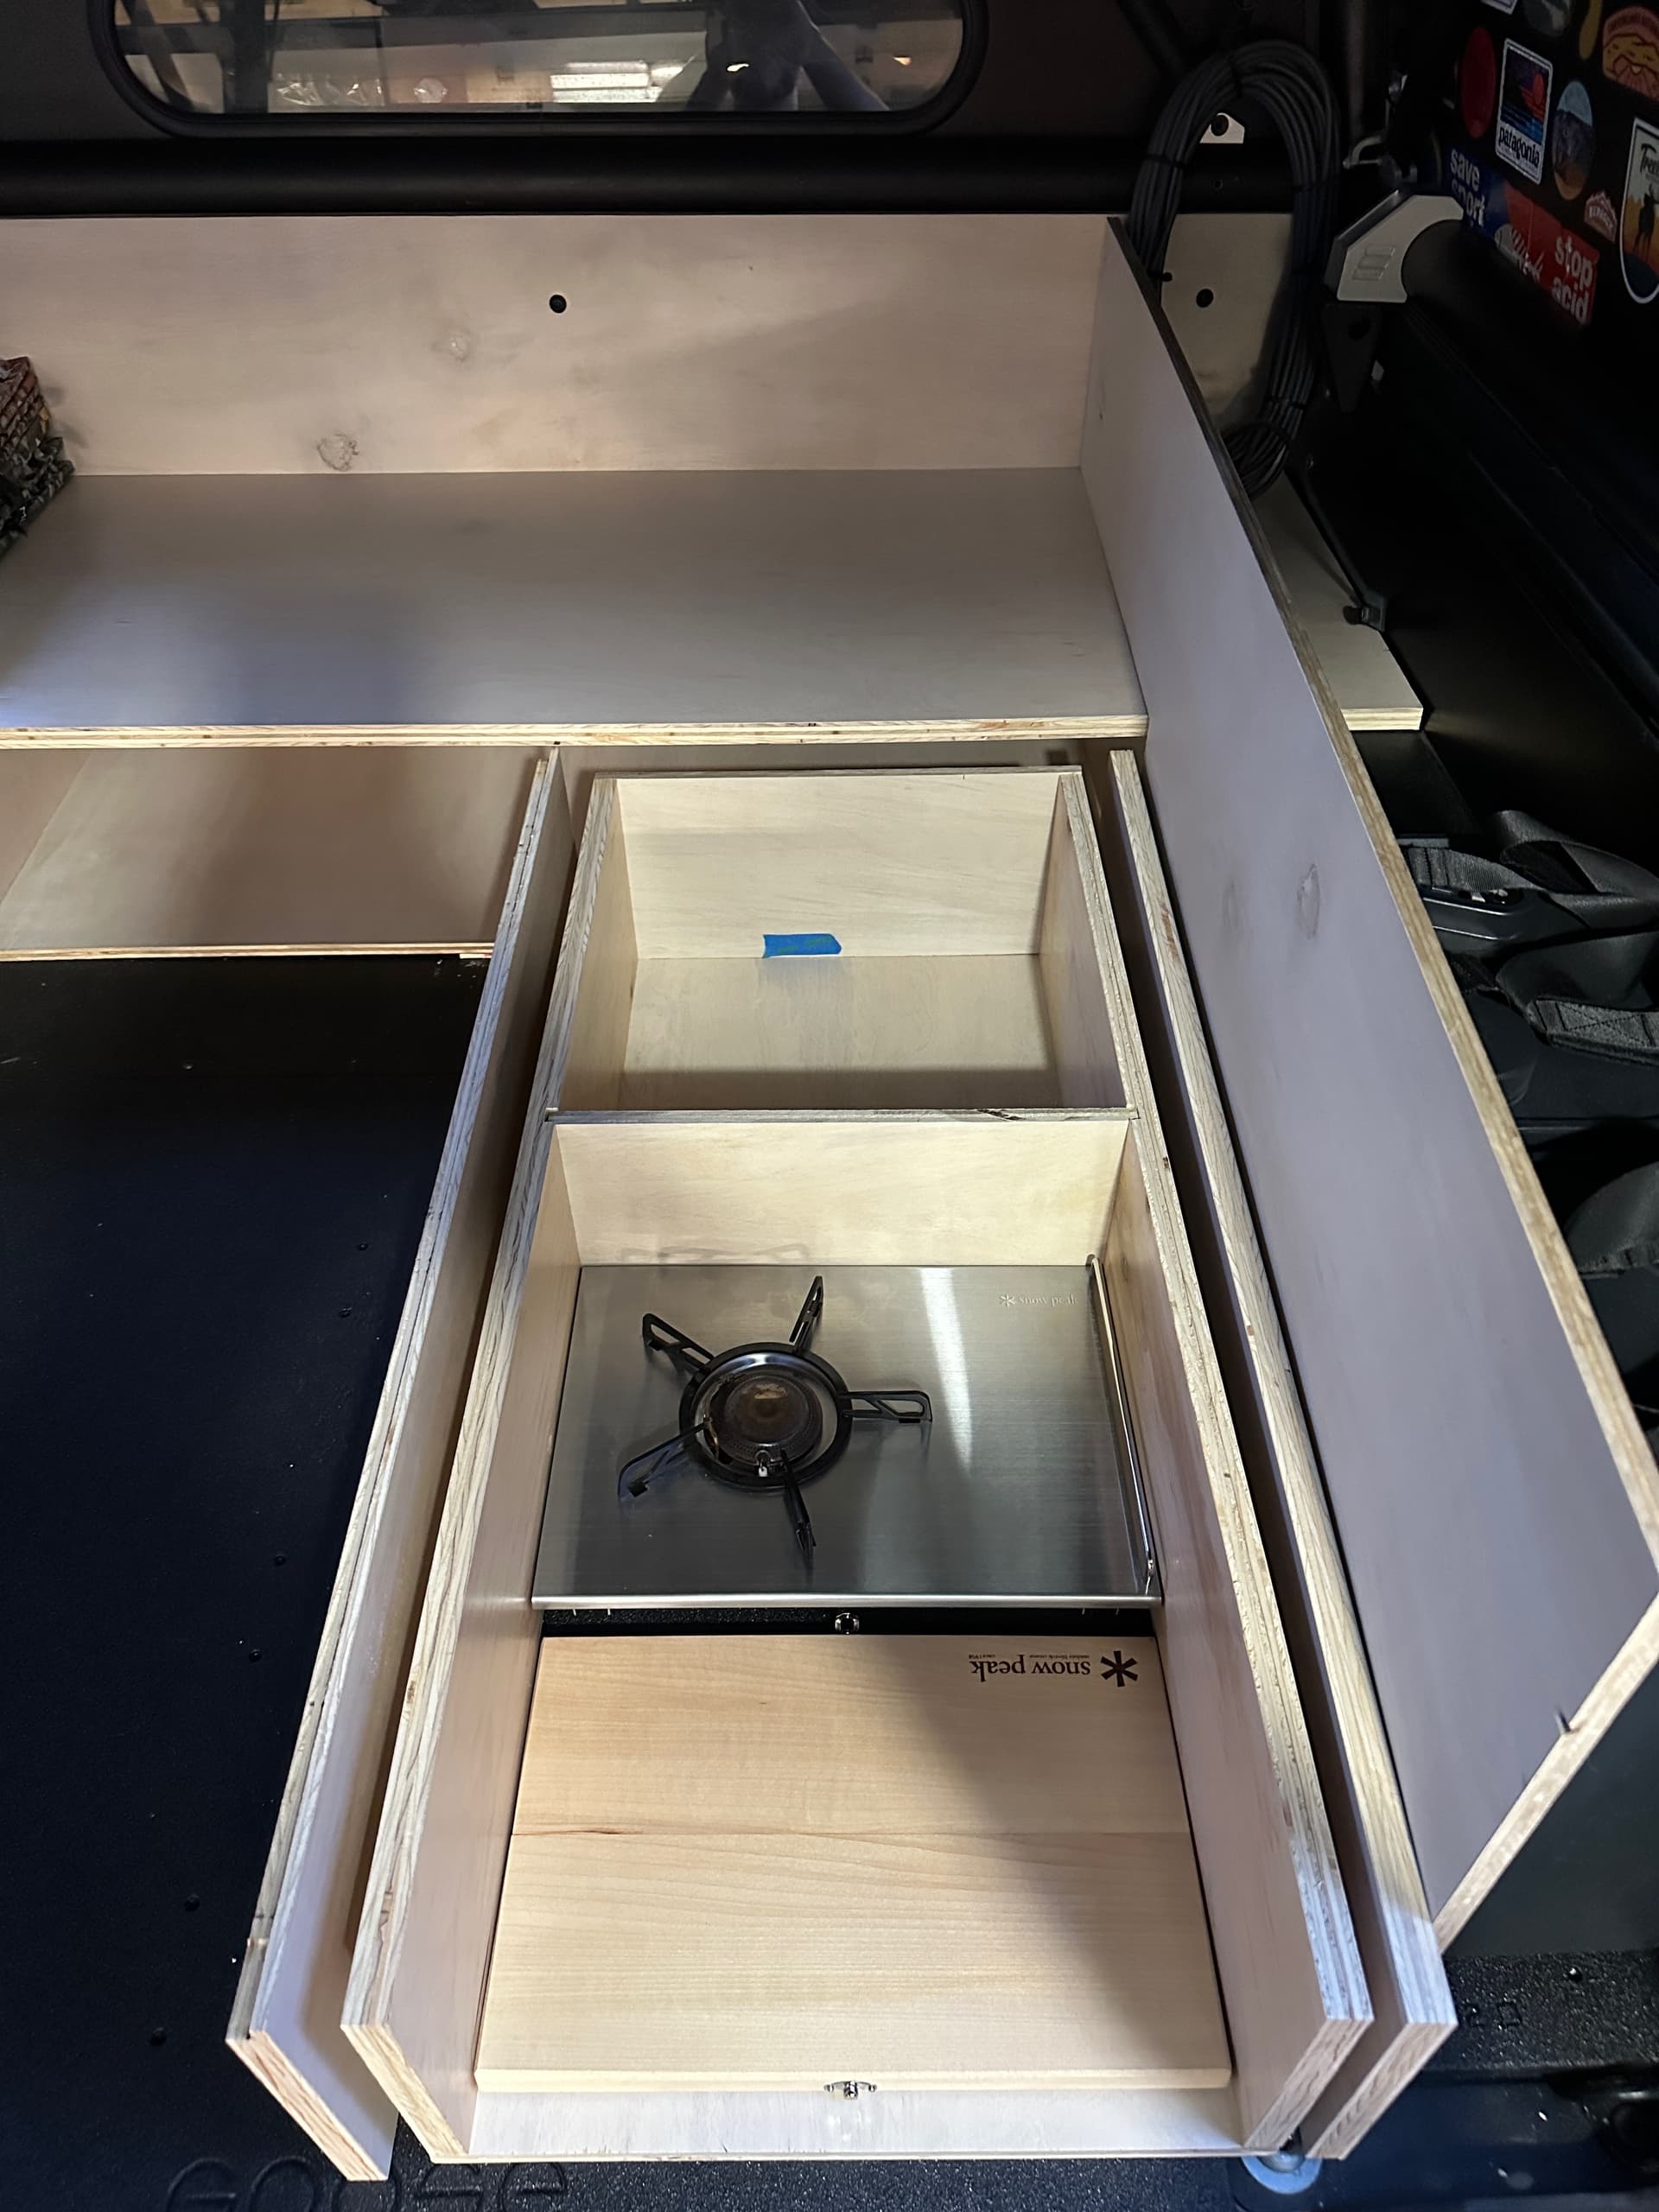
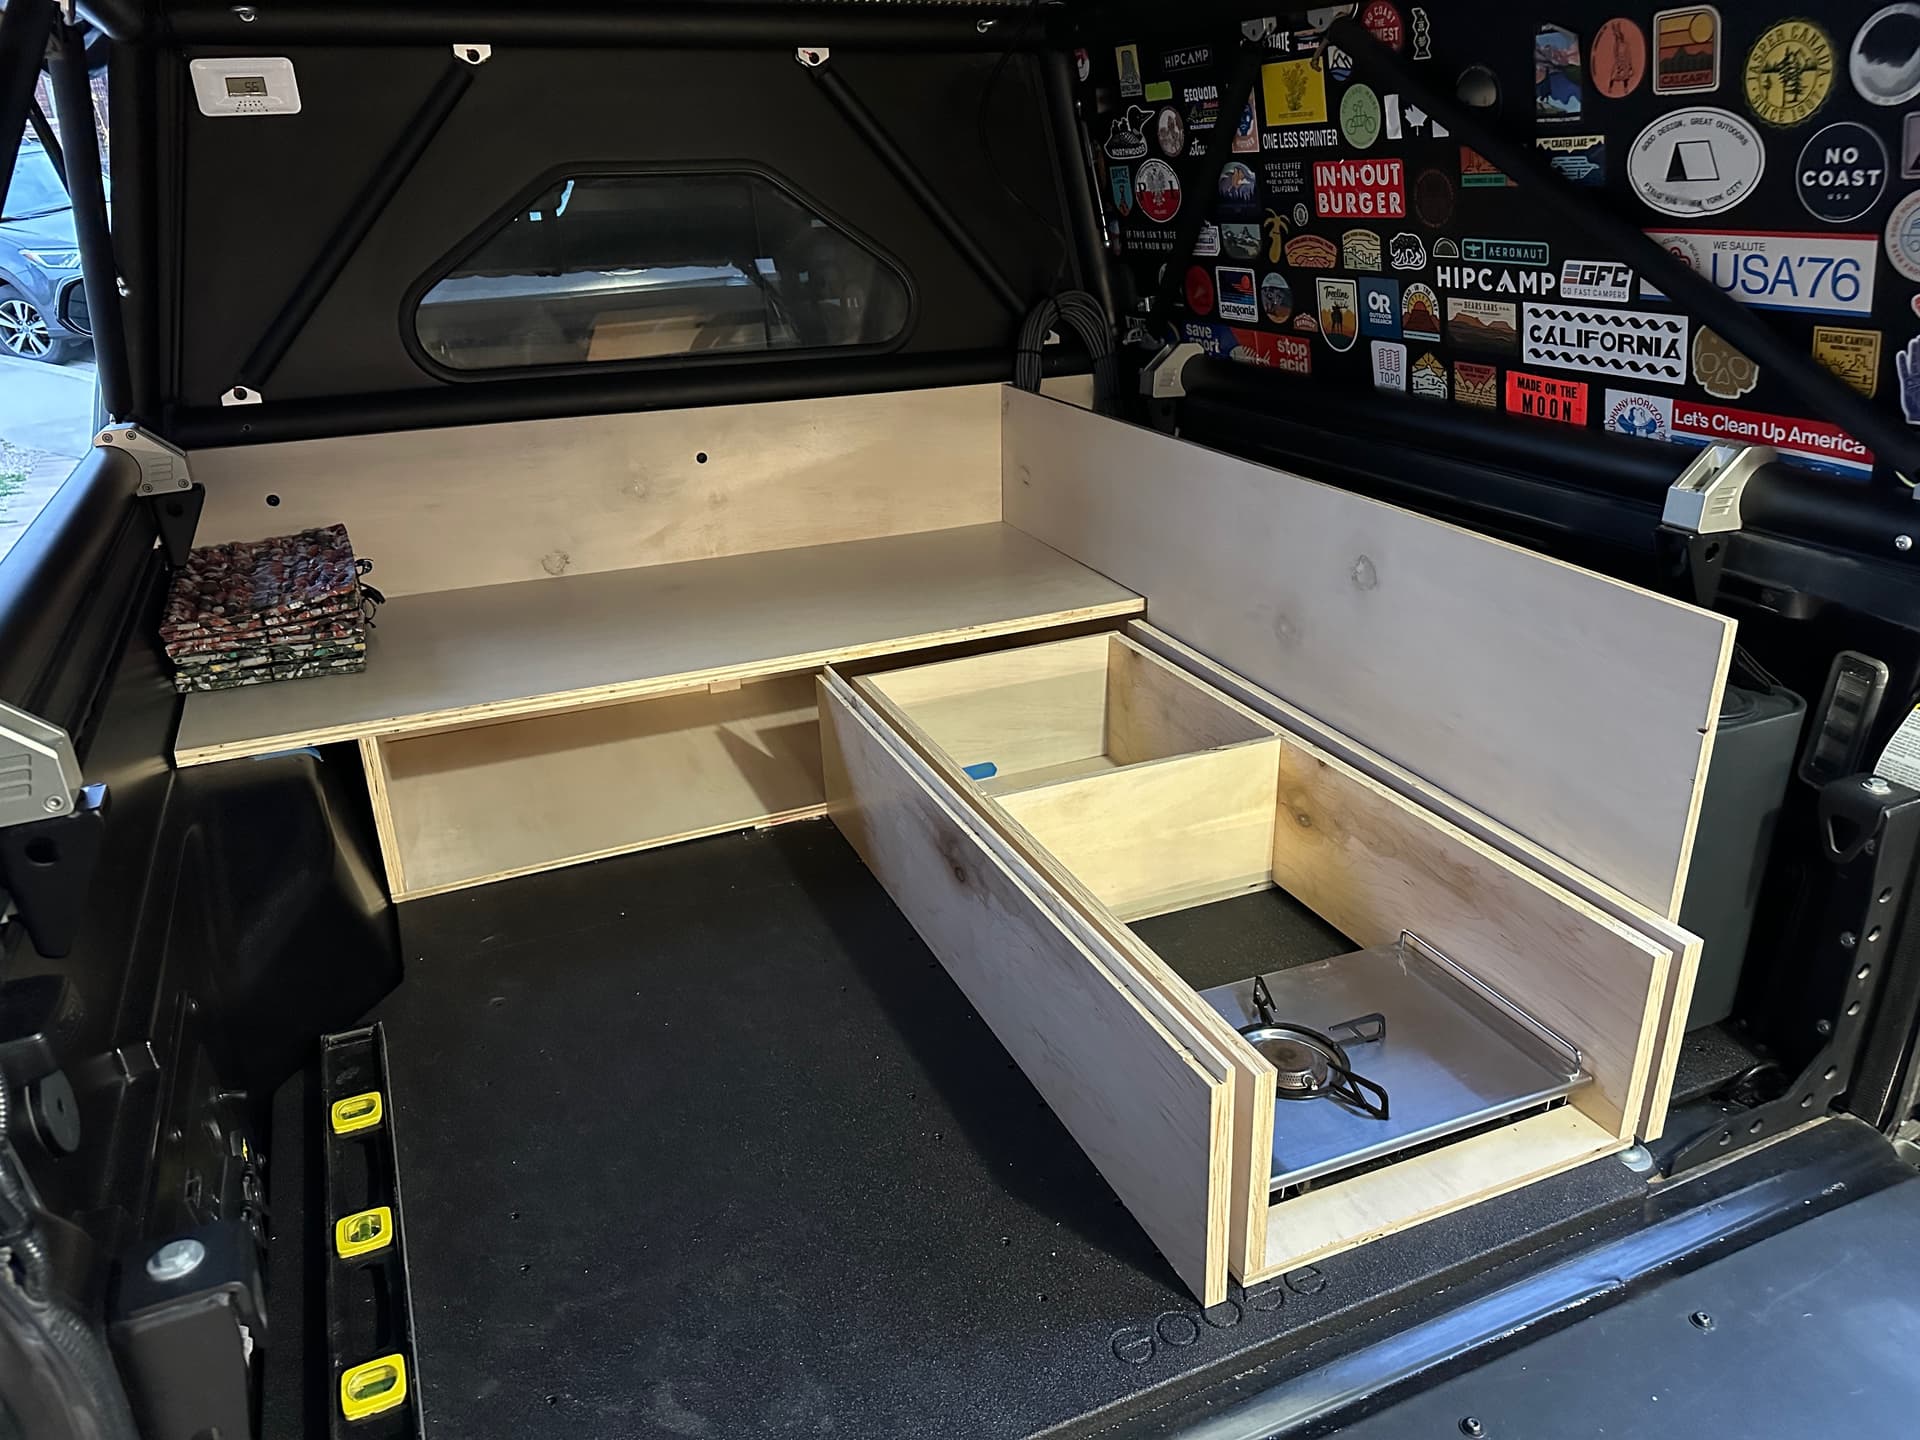
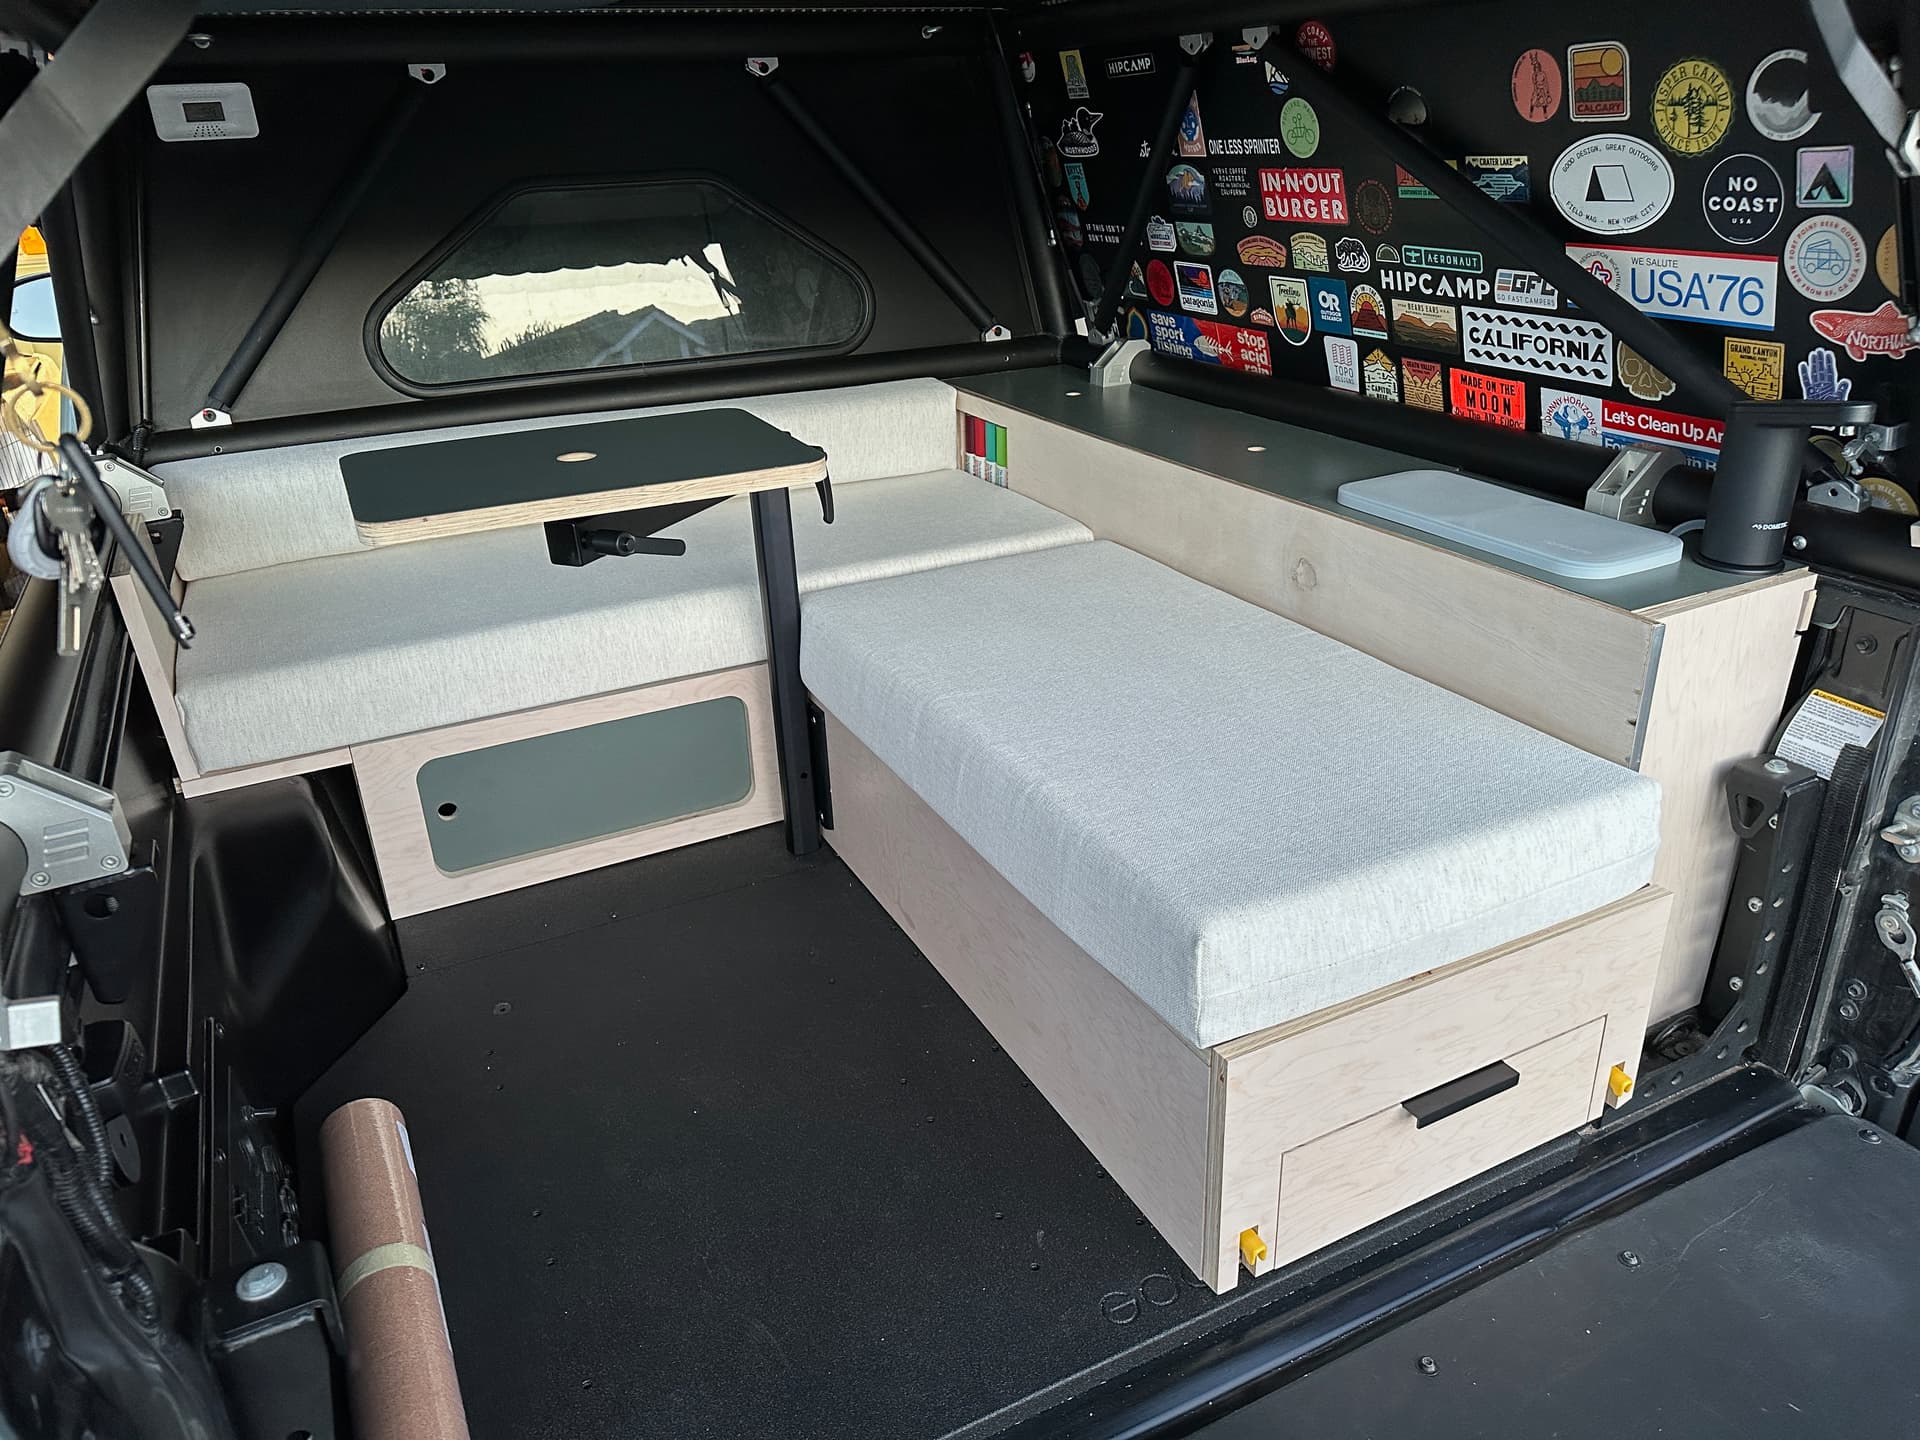
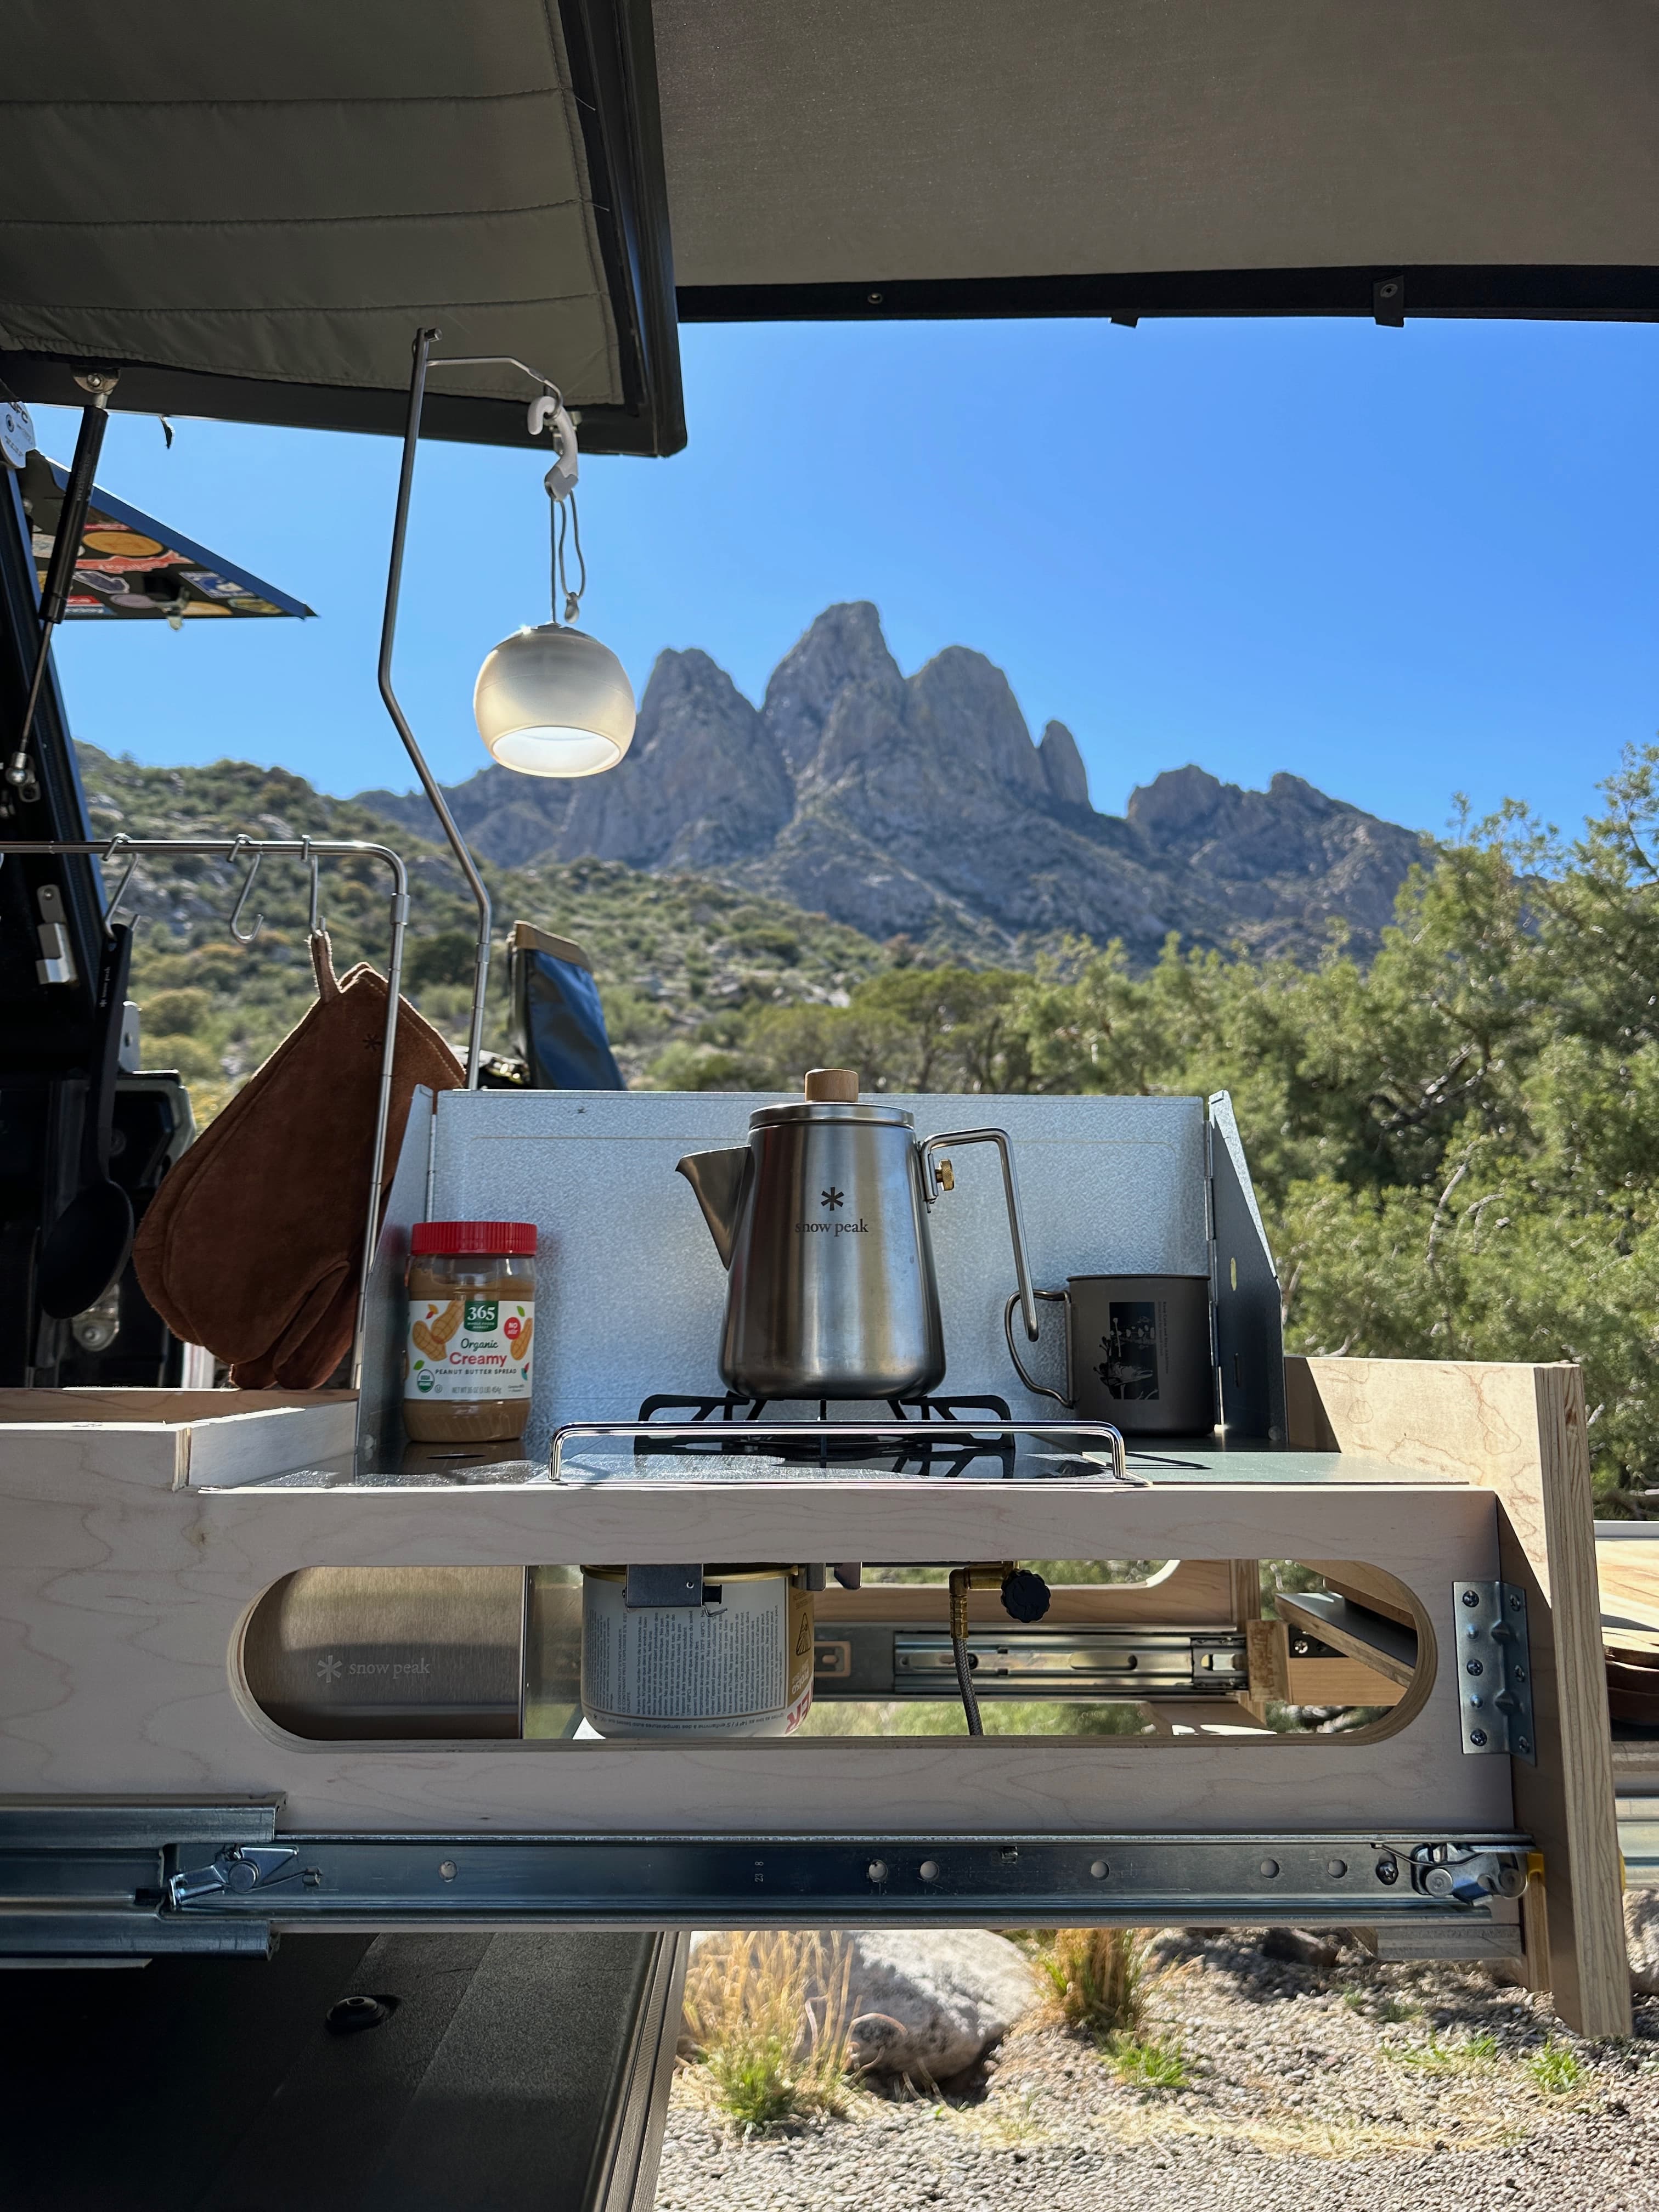
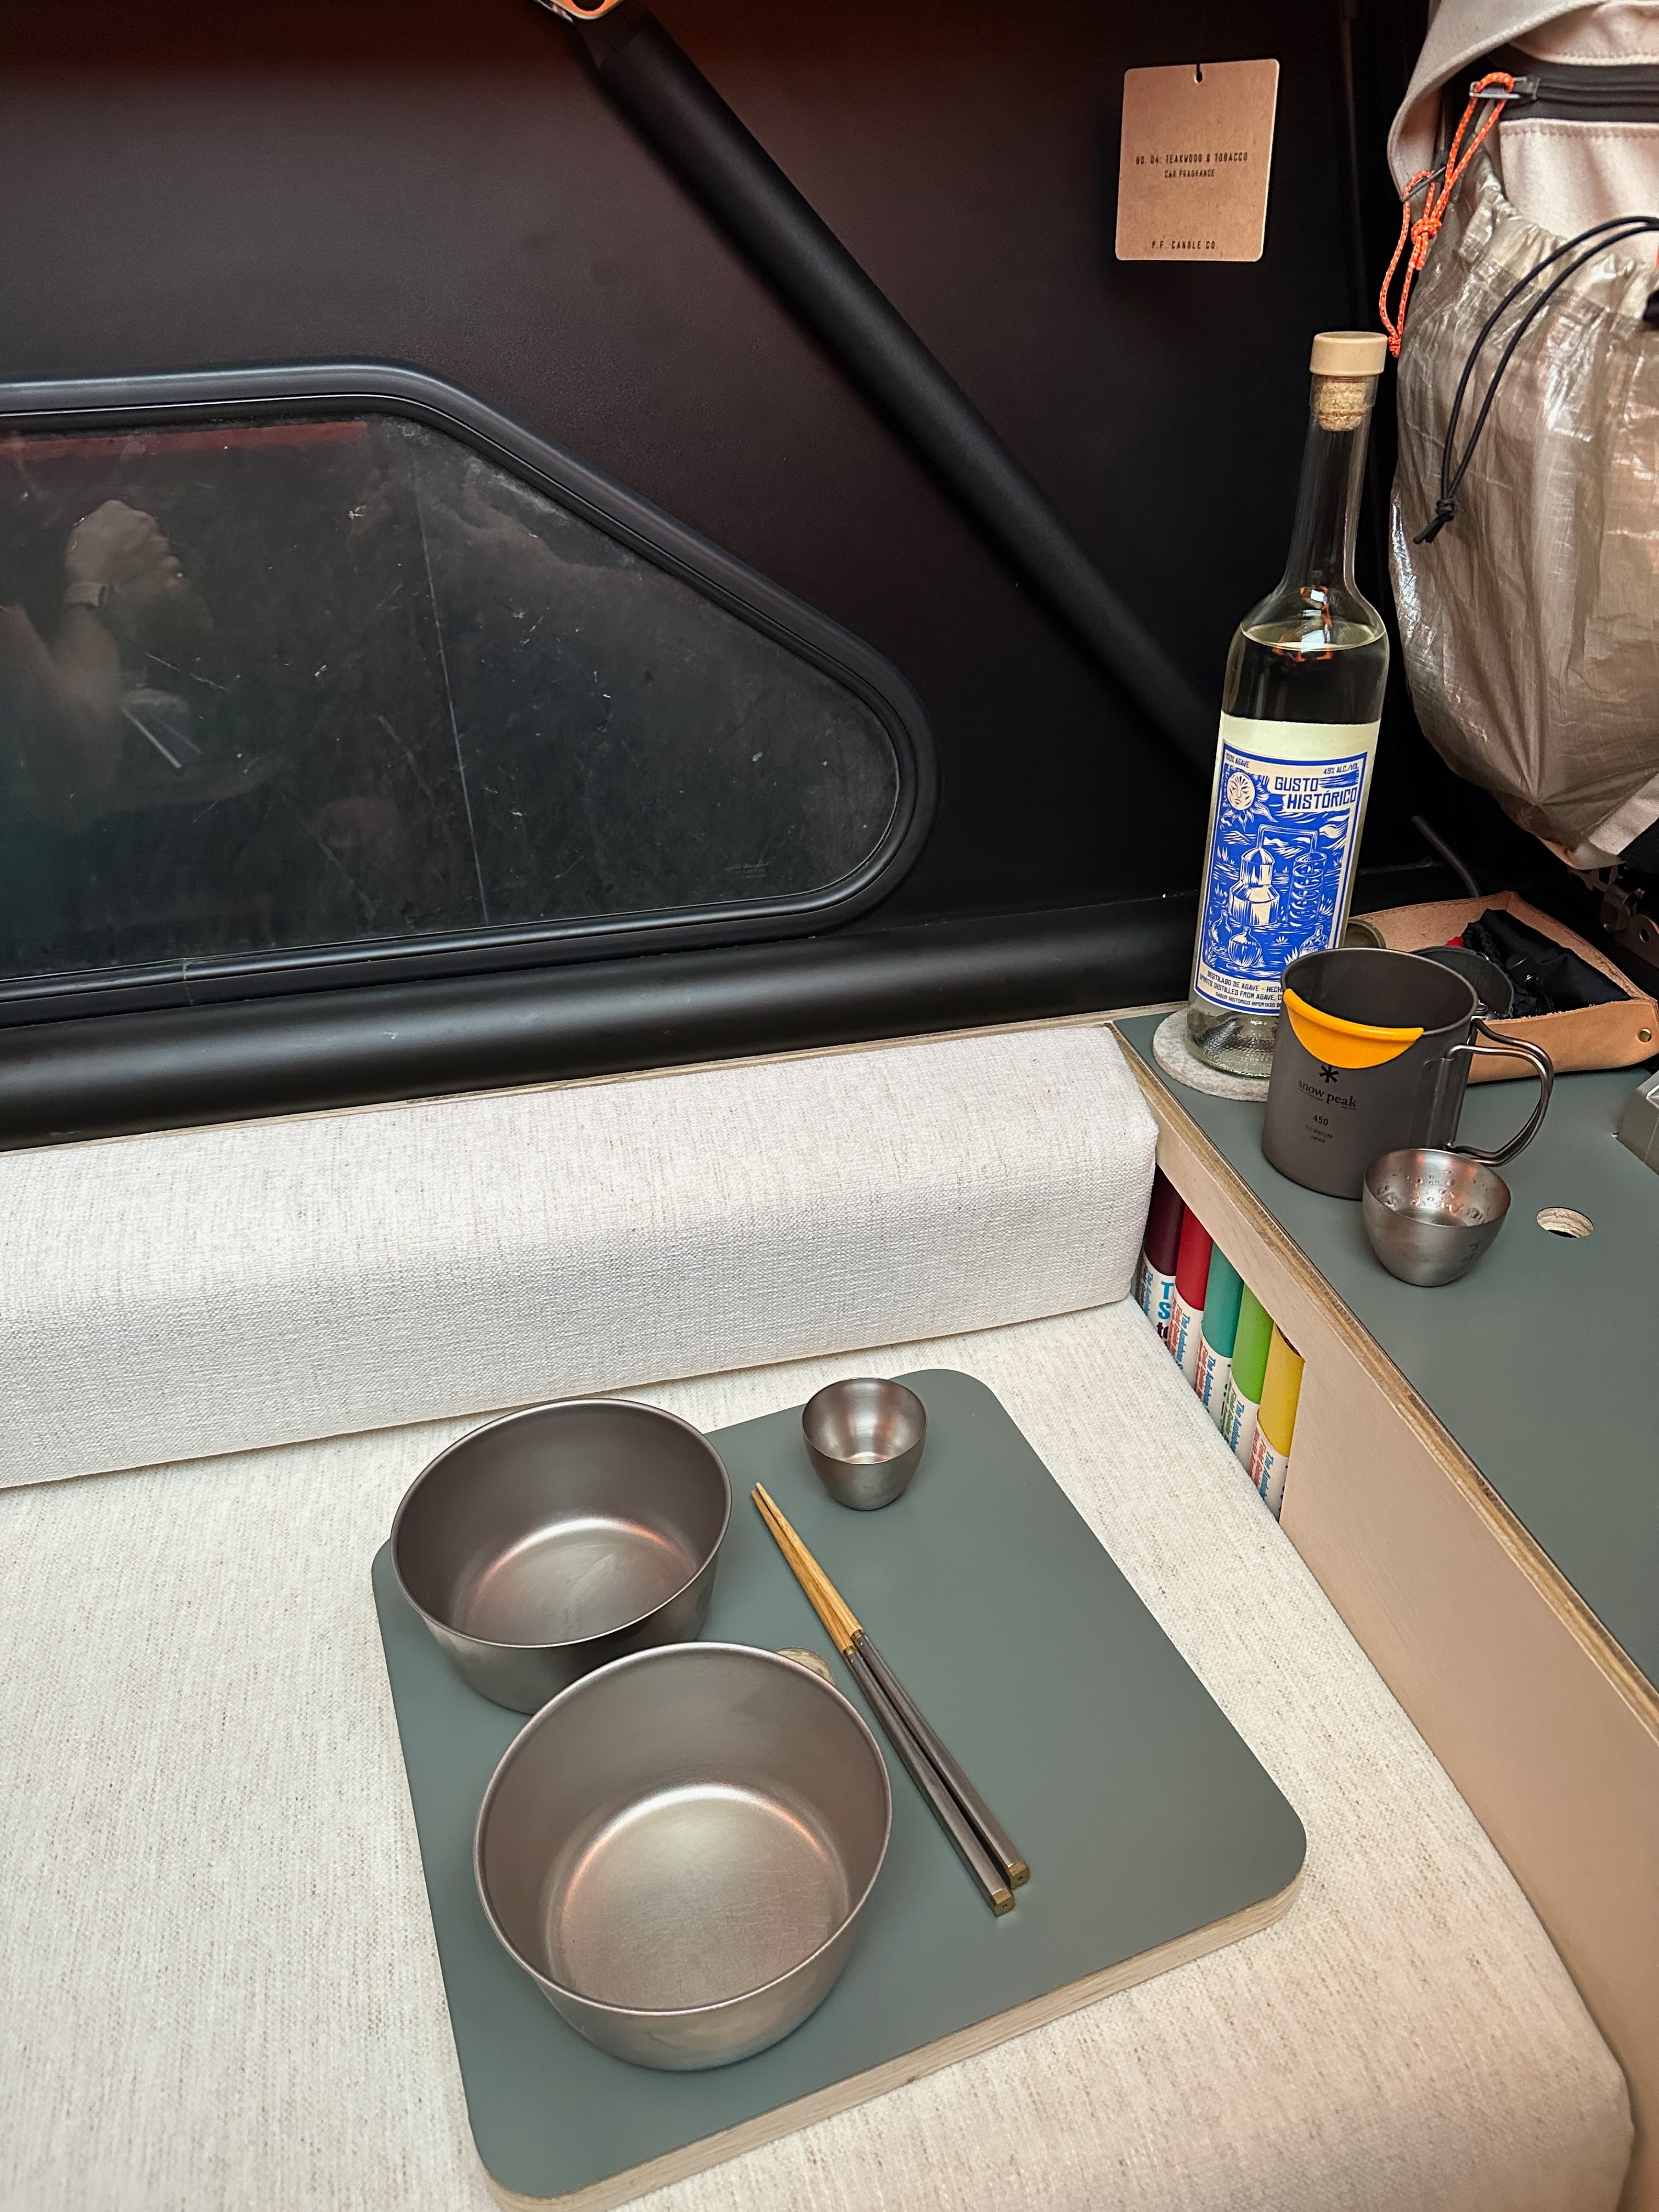
Let’s move onto the kitchen drawer! As I shared above, the drawer was designed to be as light and small as possible—so everything within the drawer fits like a glove (Snow Peak Baja Burner, Snow Peak IGT Half Unit Container, and the Tidyboard cutting board)


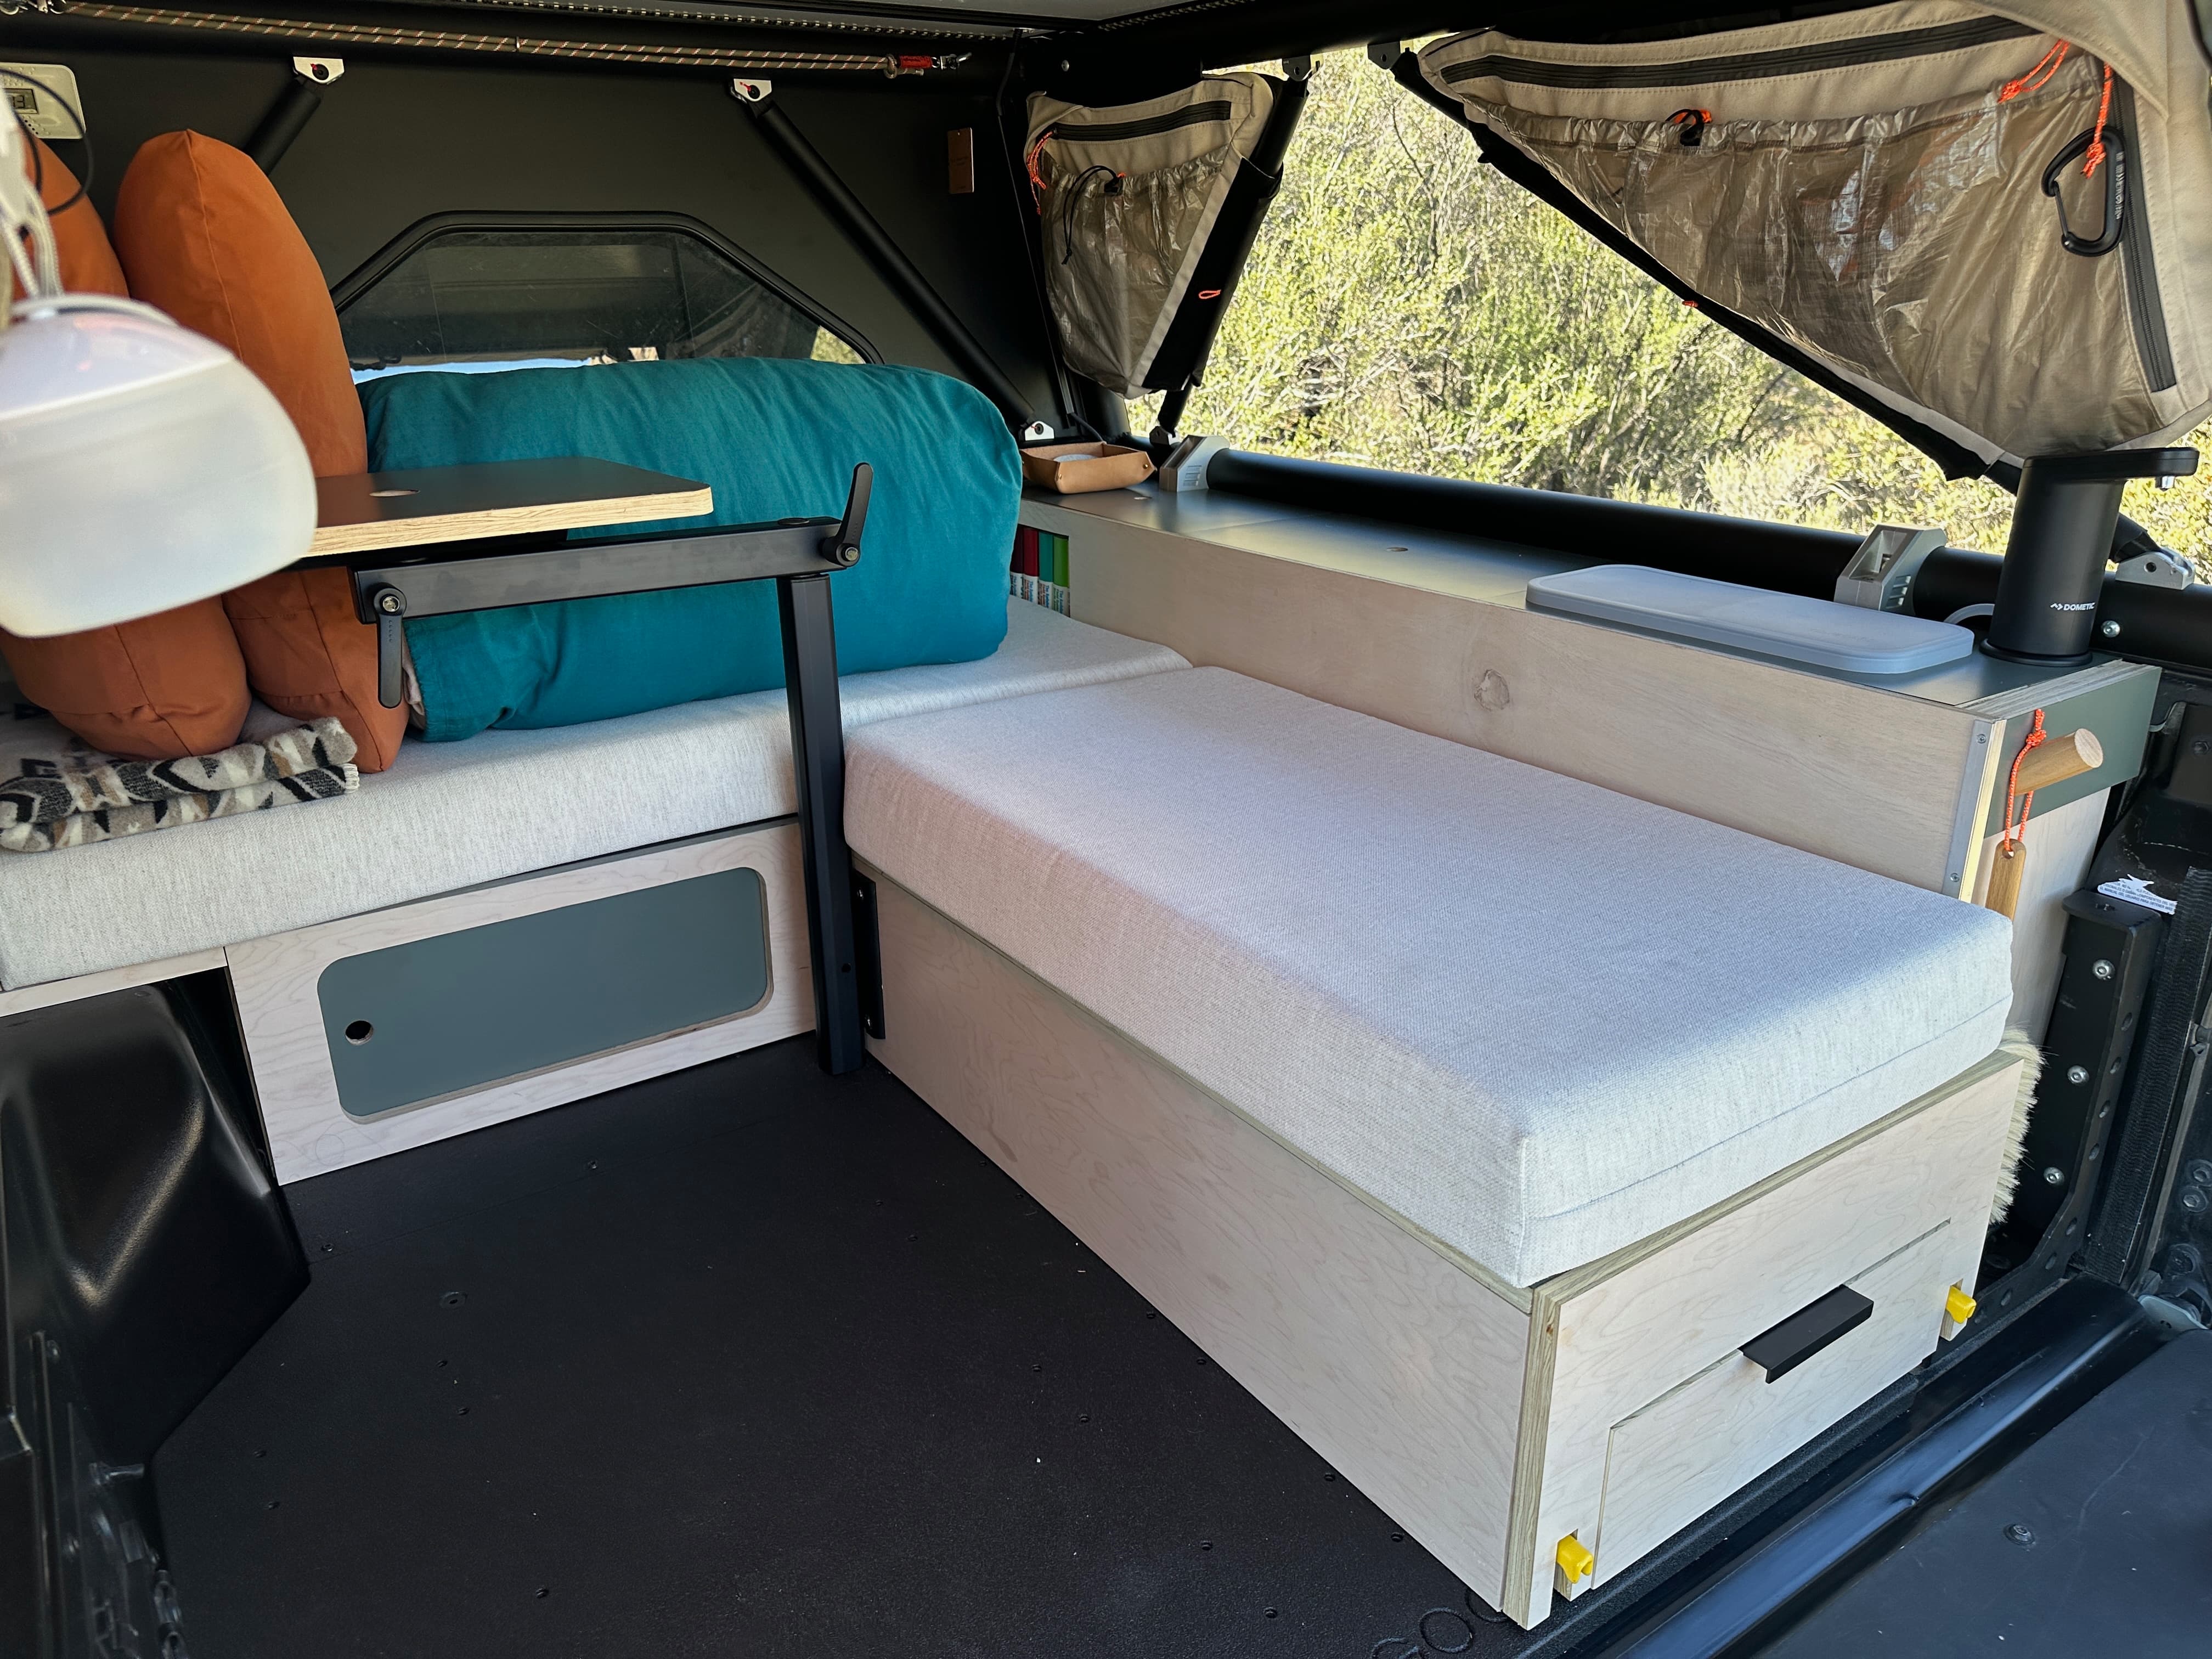
![]() CUSTOM CUSHIONS
CUSTOM CUSHIONS
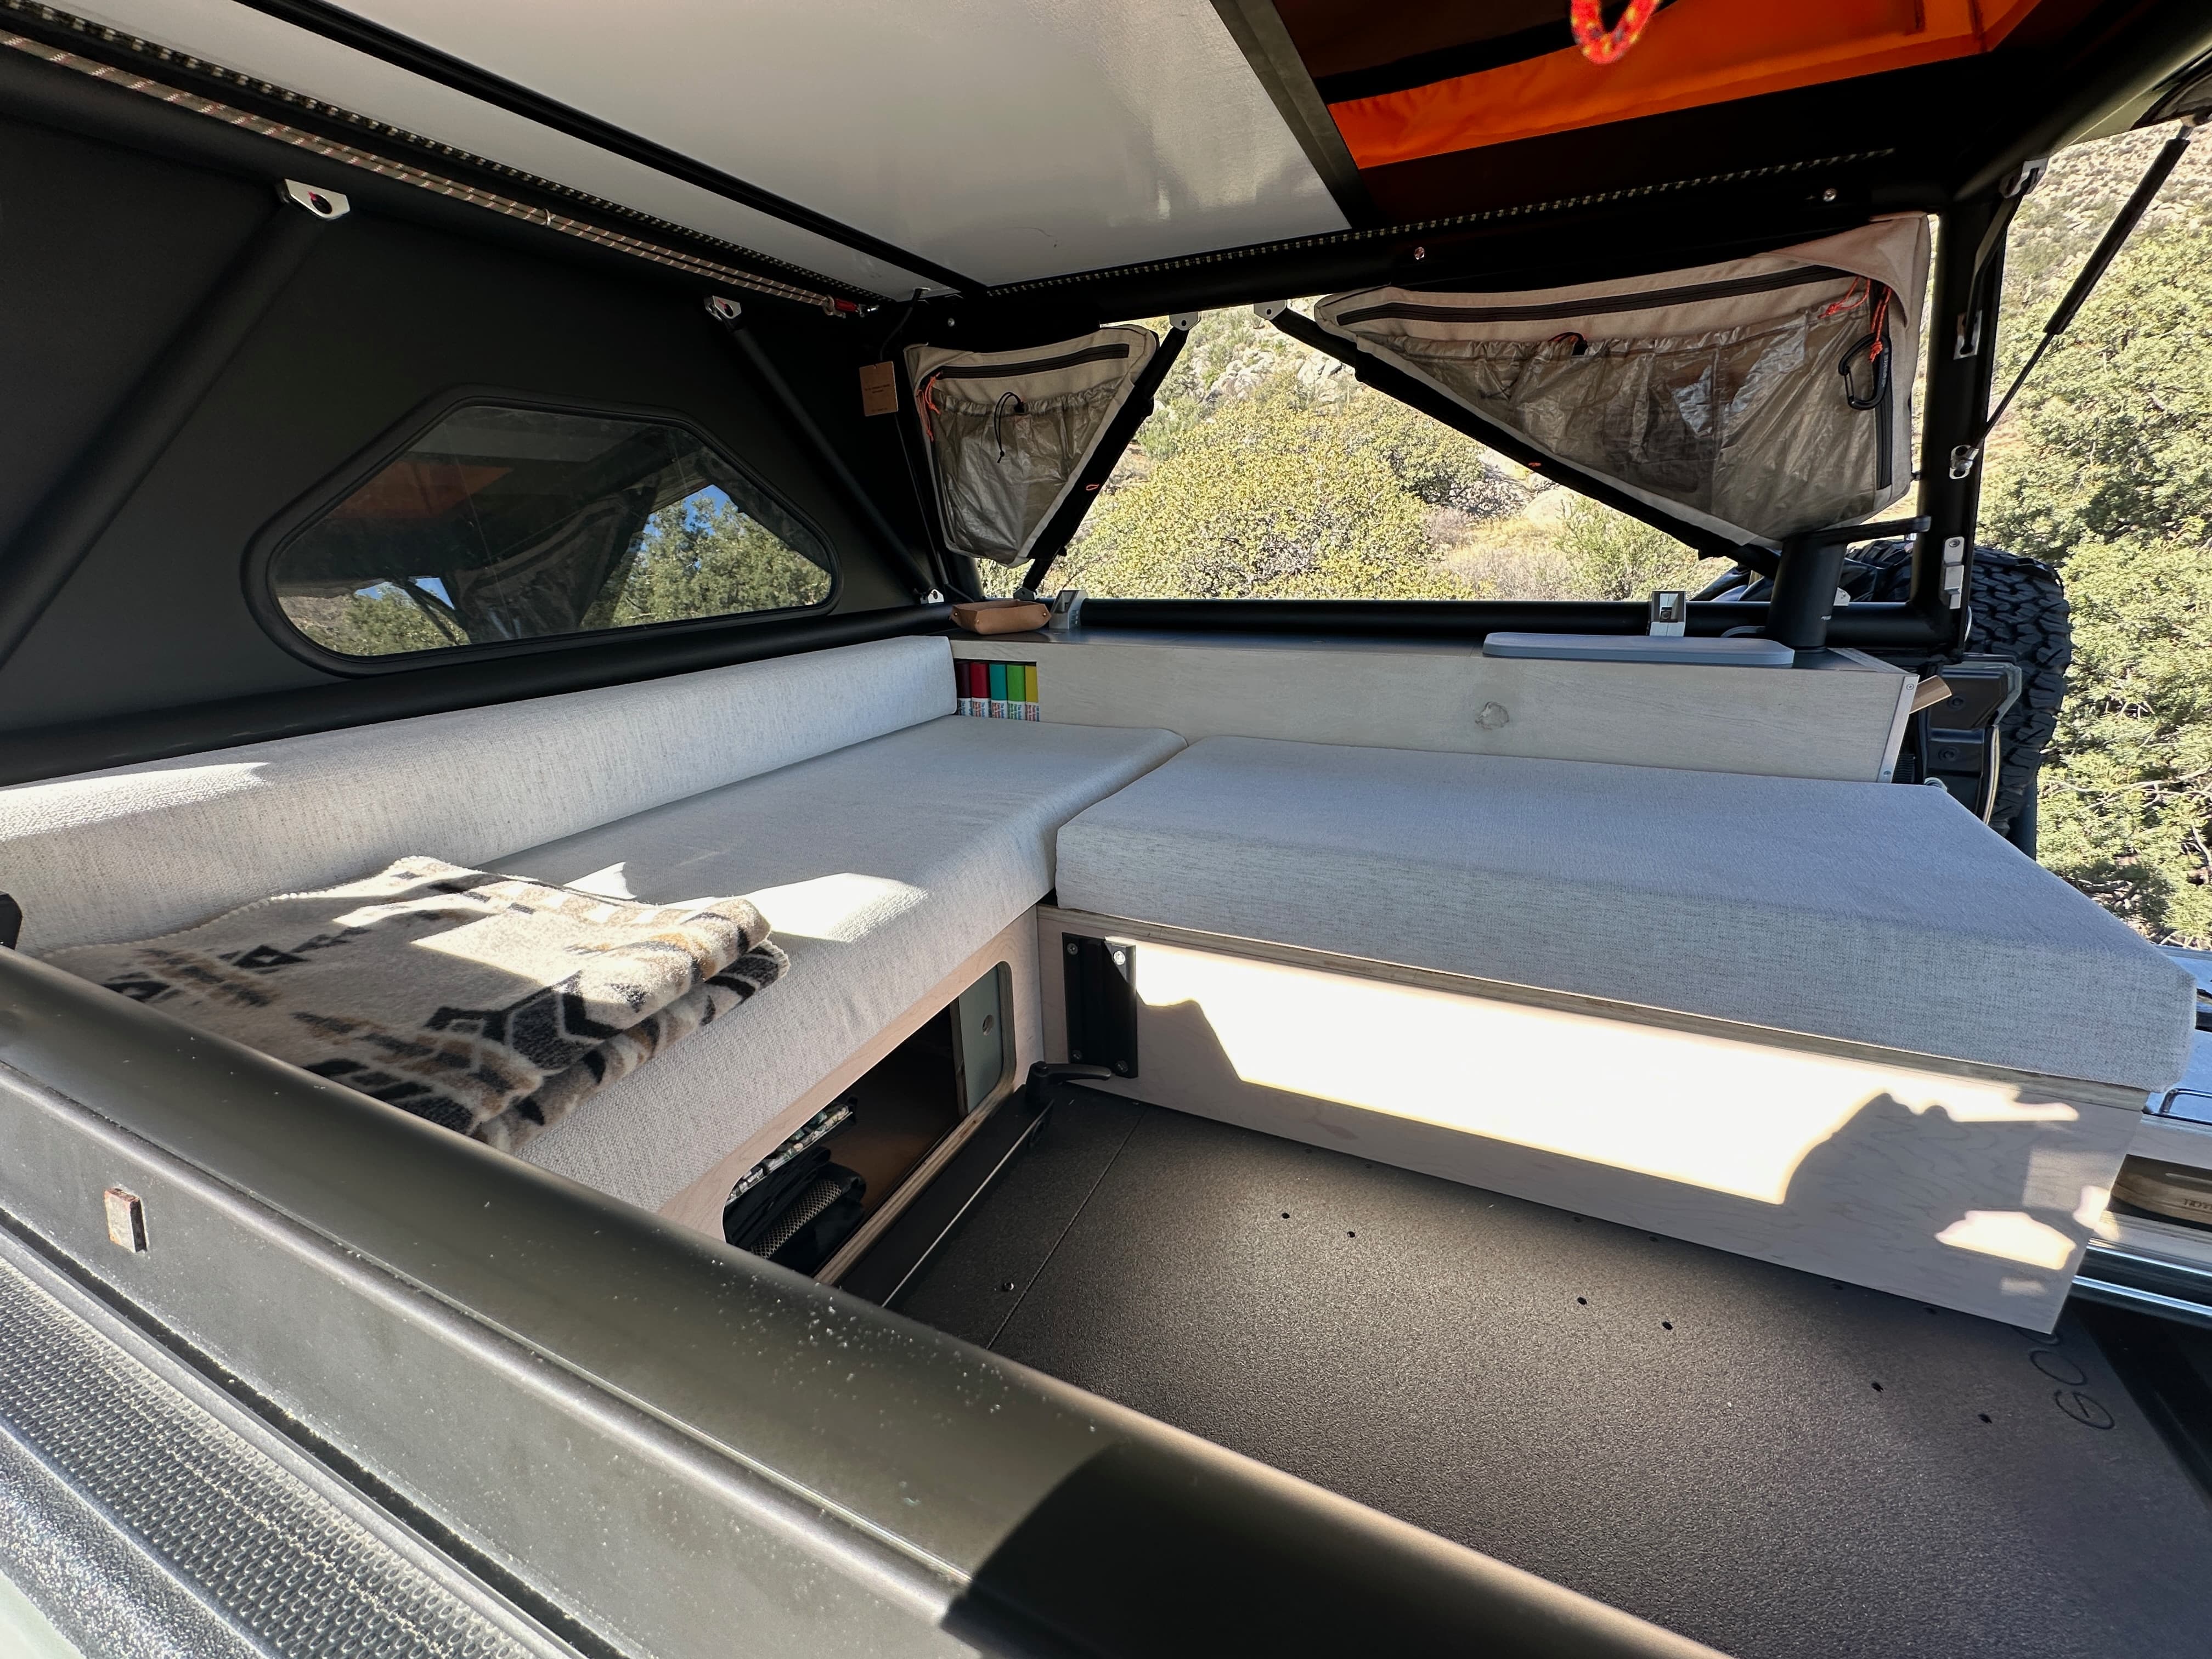
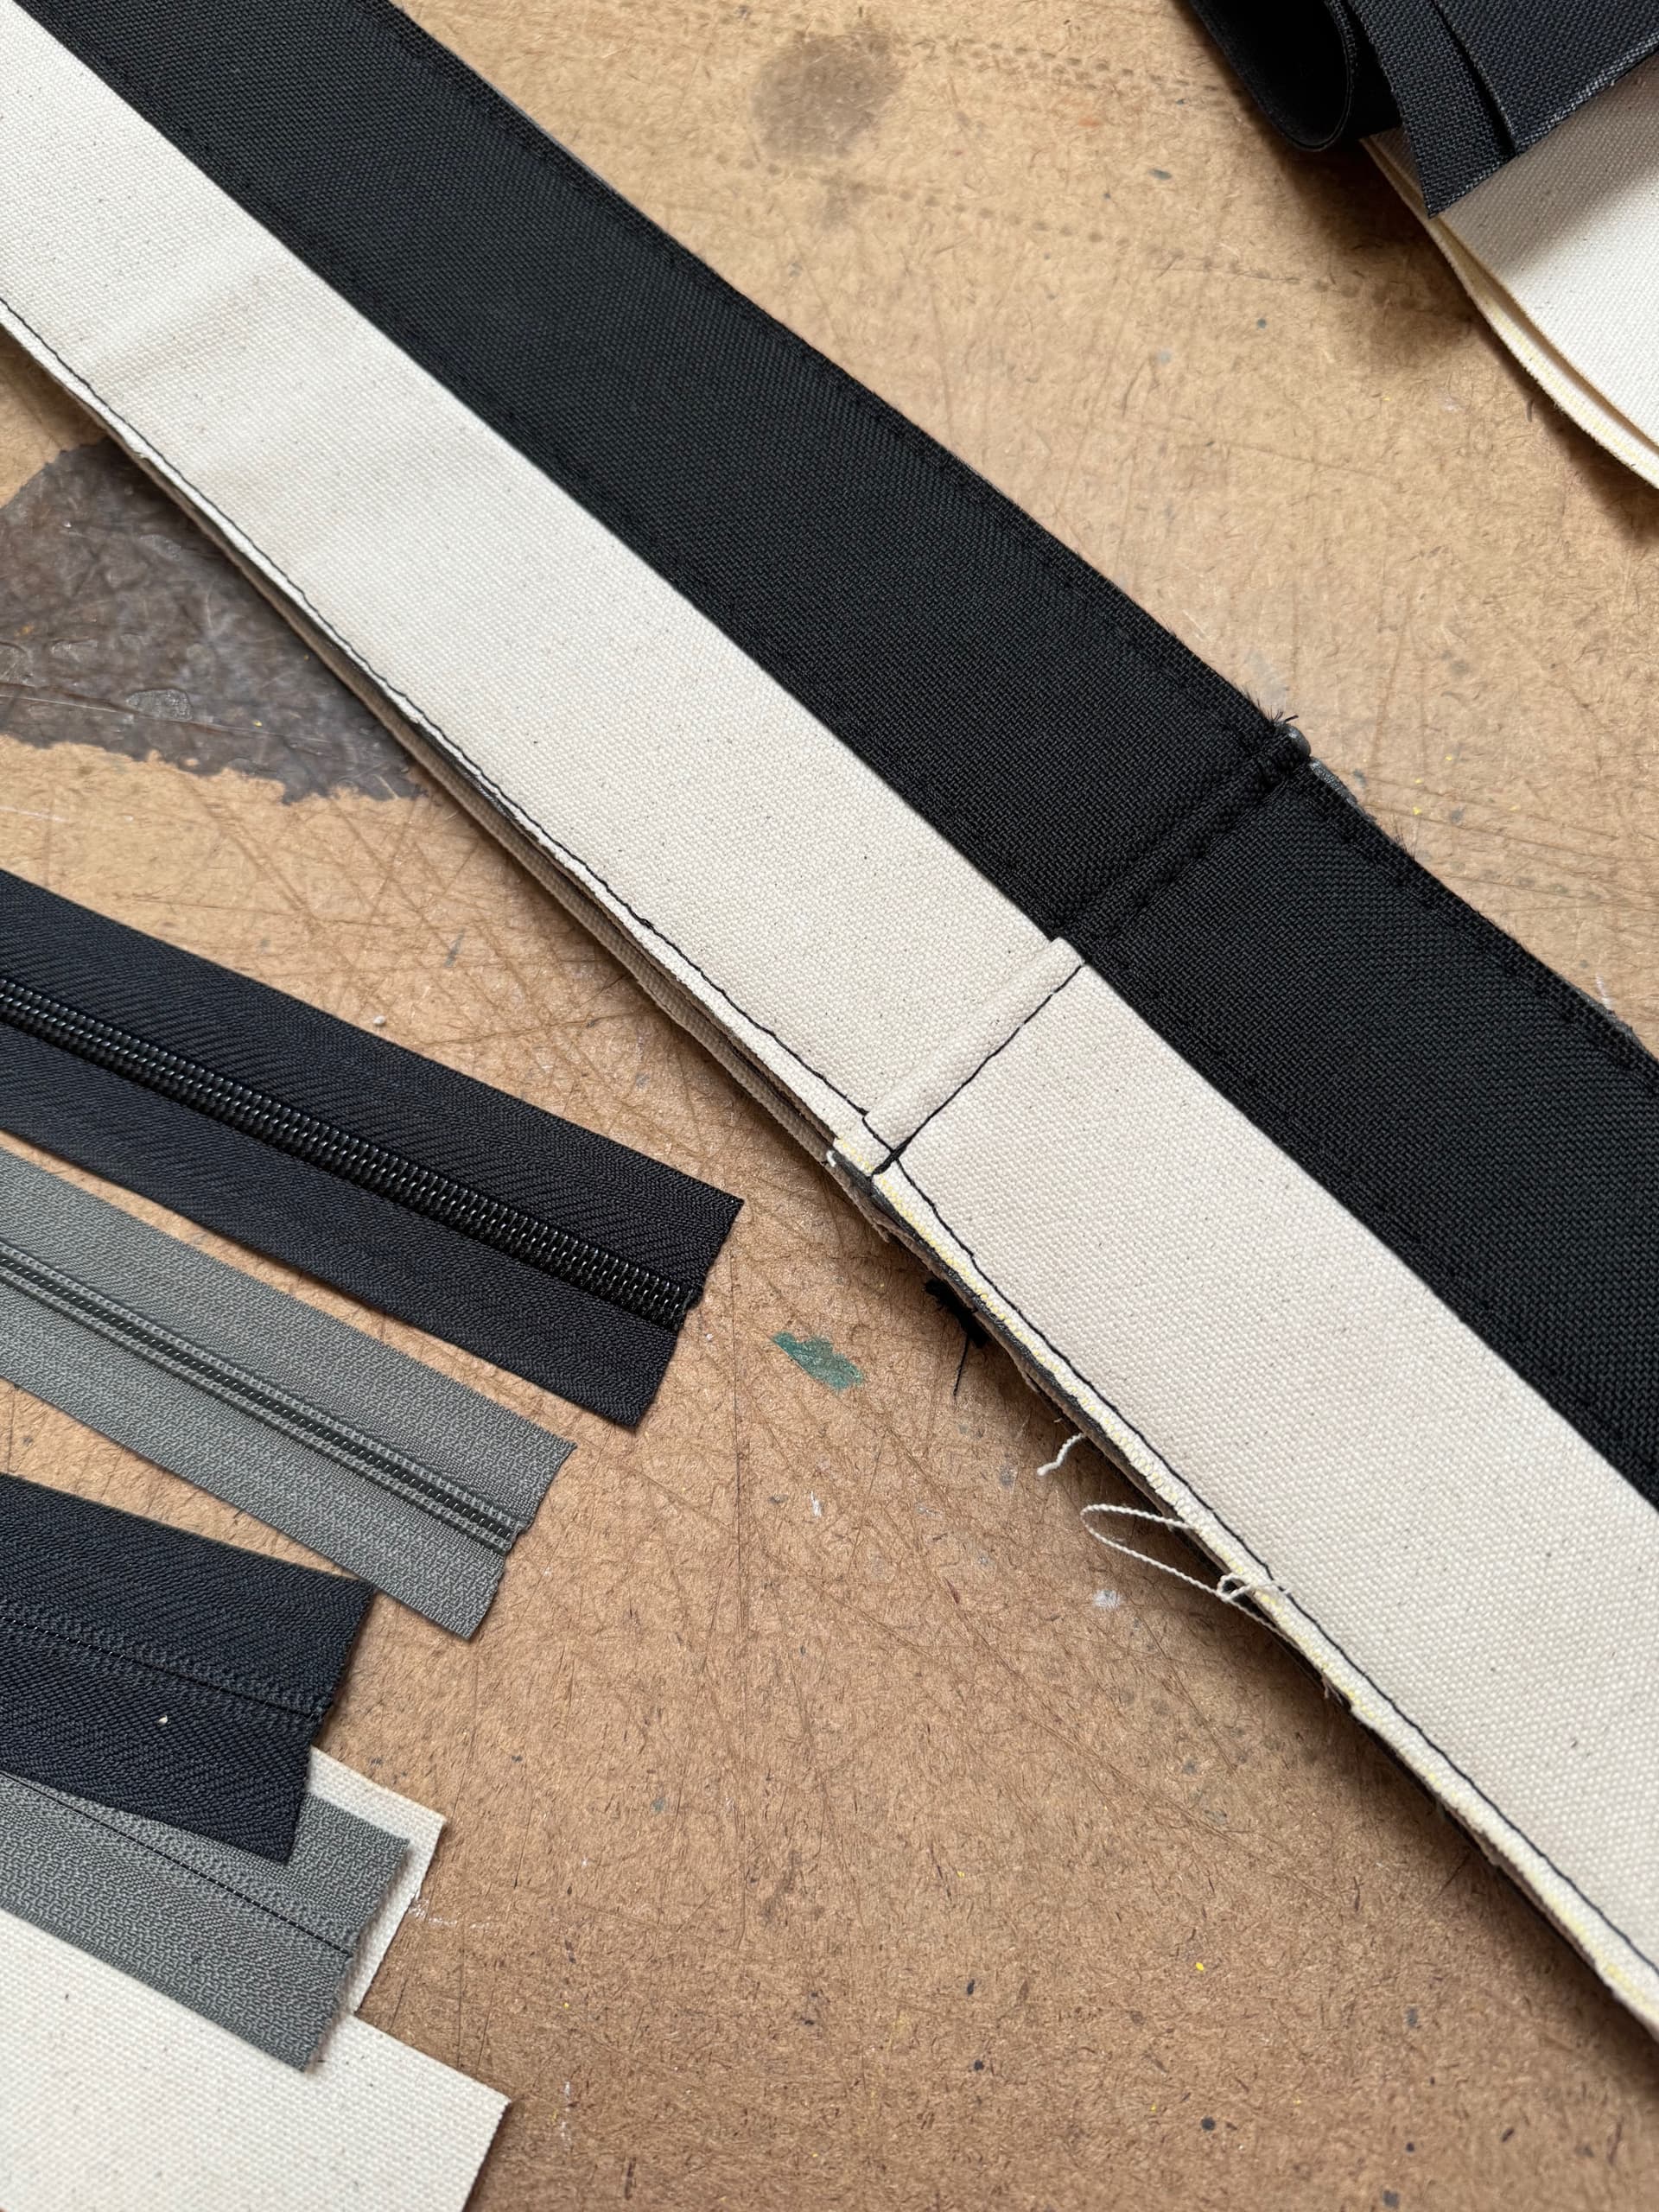
After watching a handful of youtube videos My wife (@lisselundin figured out how to sew custom box corner cushion covers for the benches. She got her hands on some high density 4 inch foam, crypton fabric (durable, stain resistant), and zippers and sewed 'em up in 2 days. They are so comfortable. We’ll report back in 6 months to see how the fabric holds up after this journey.


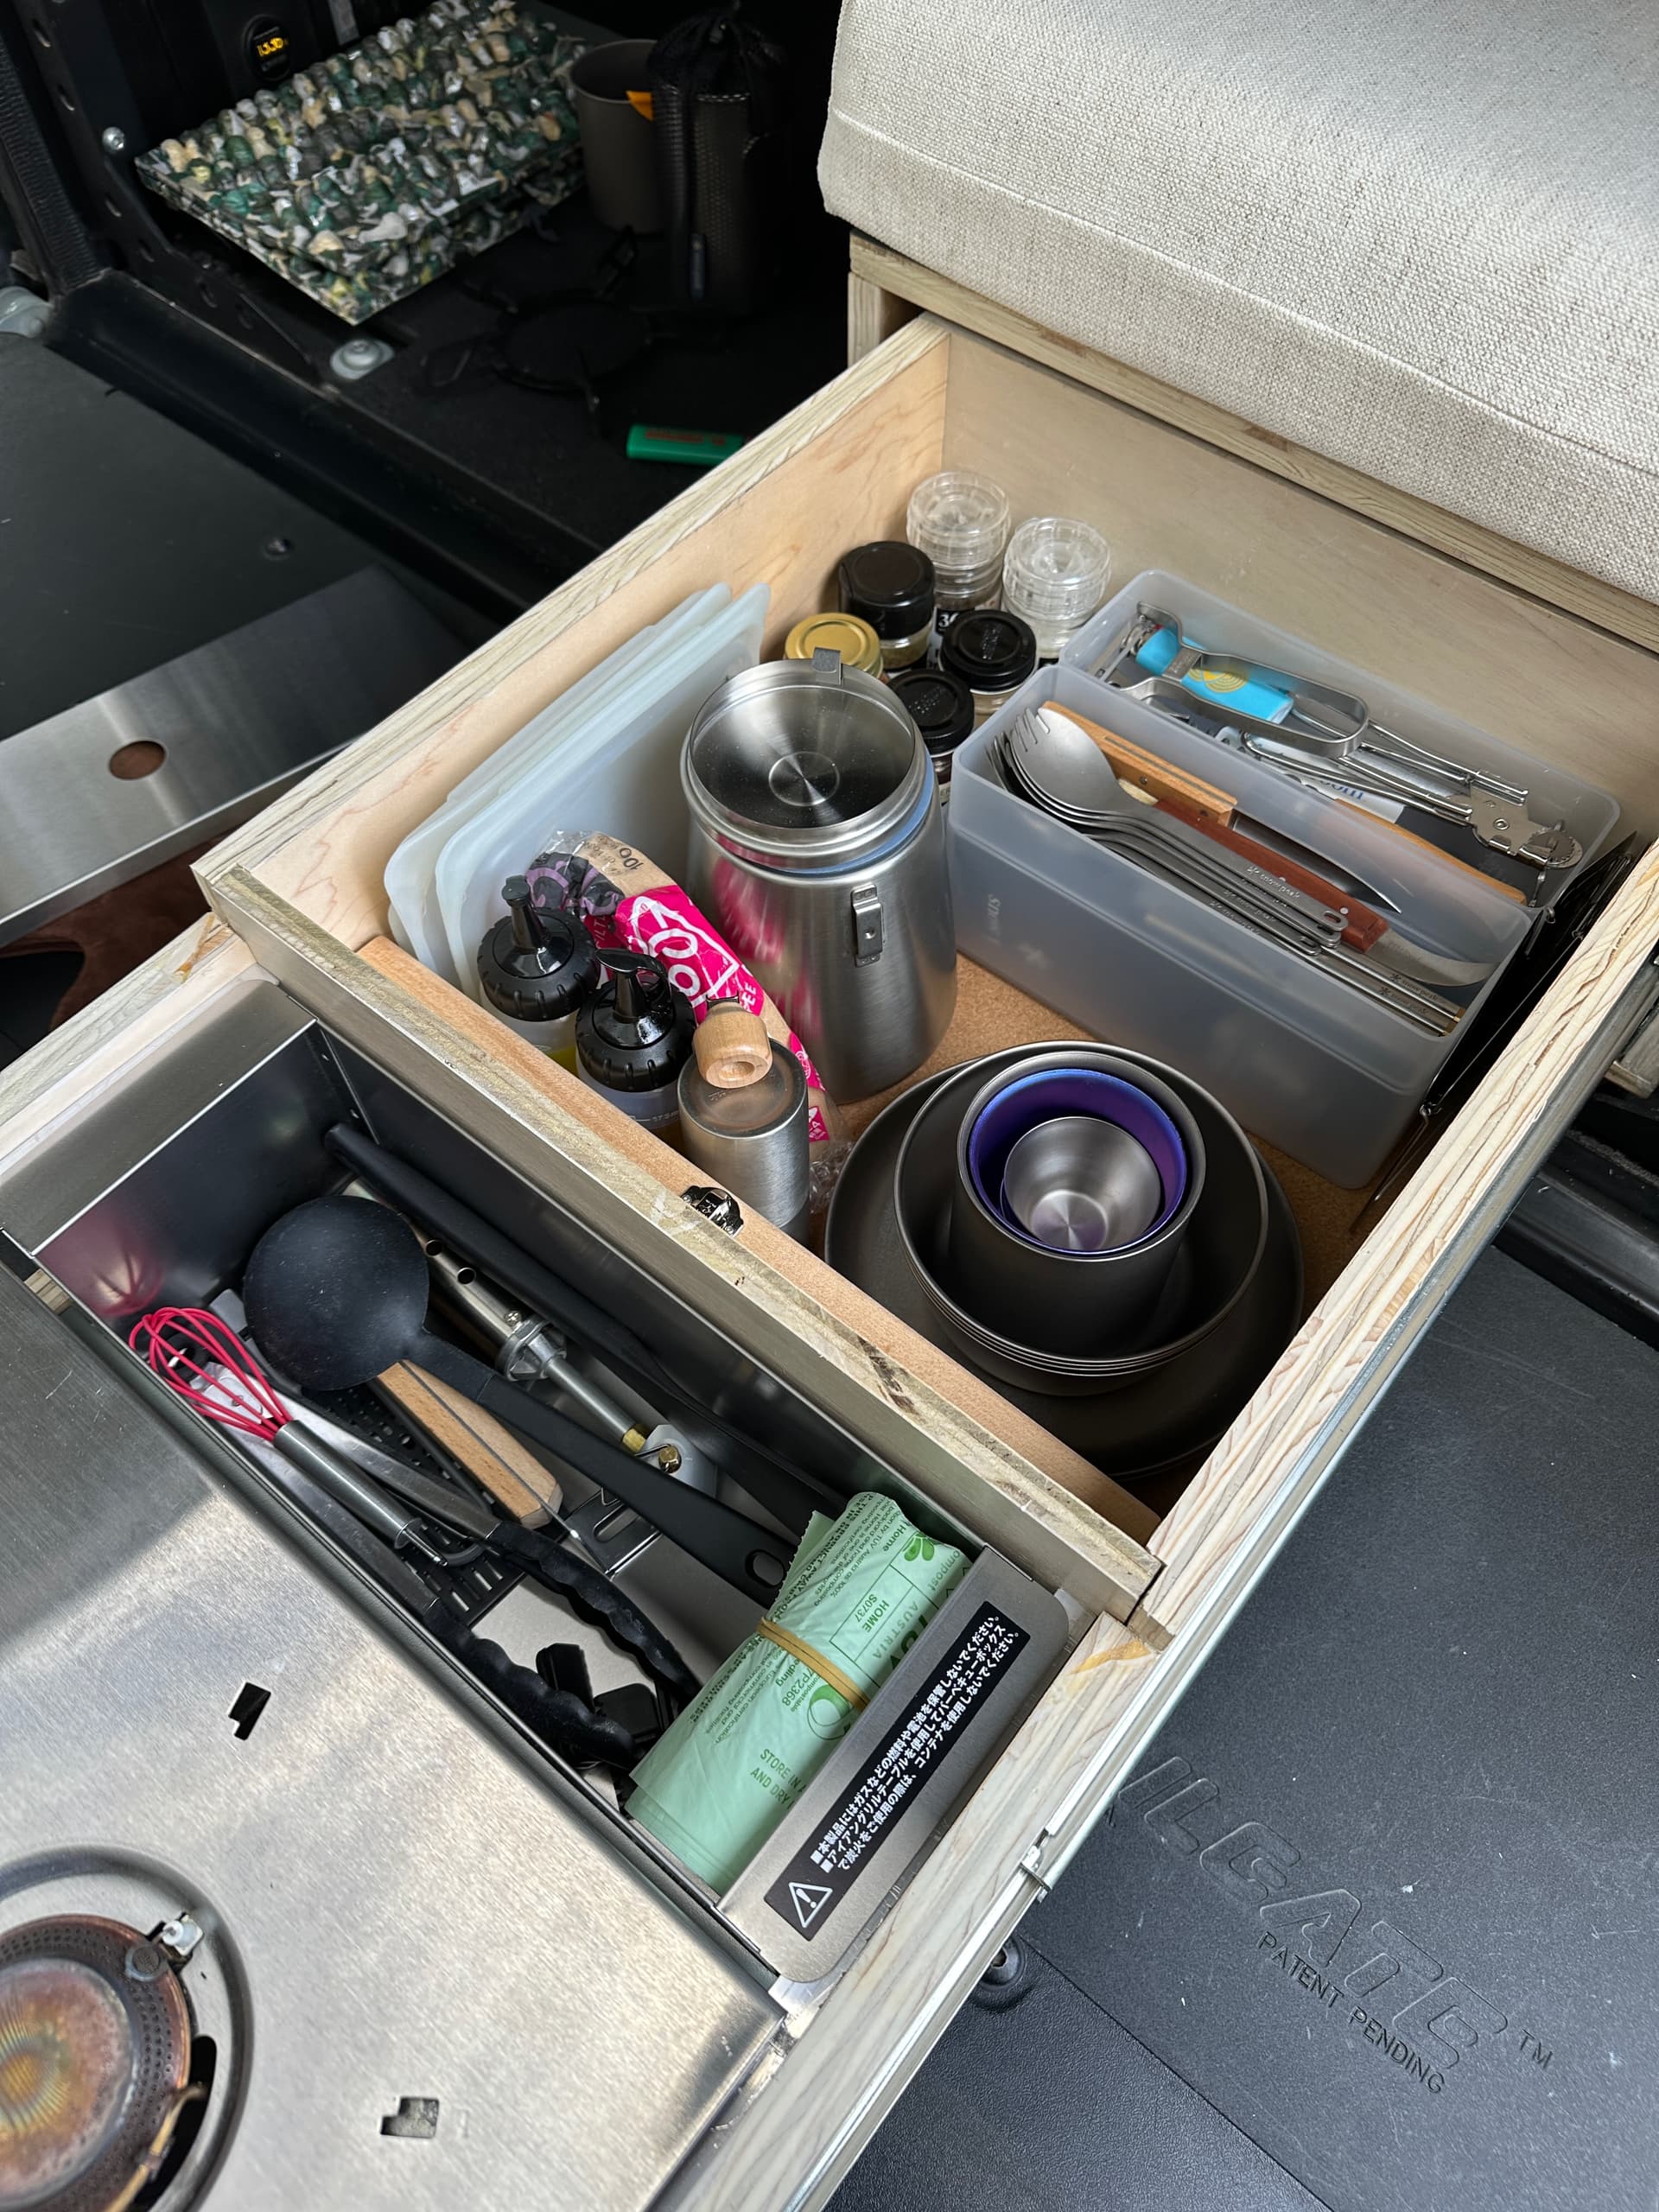


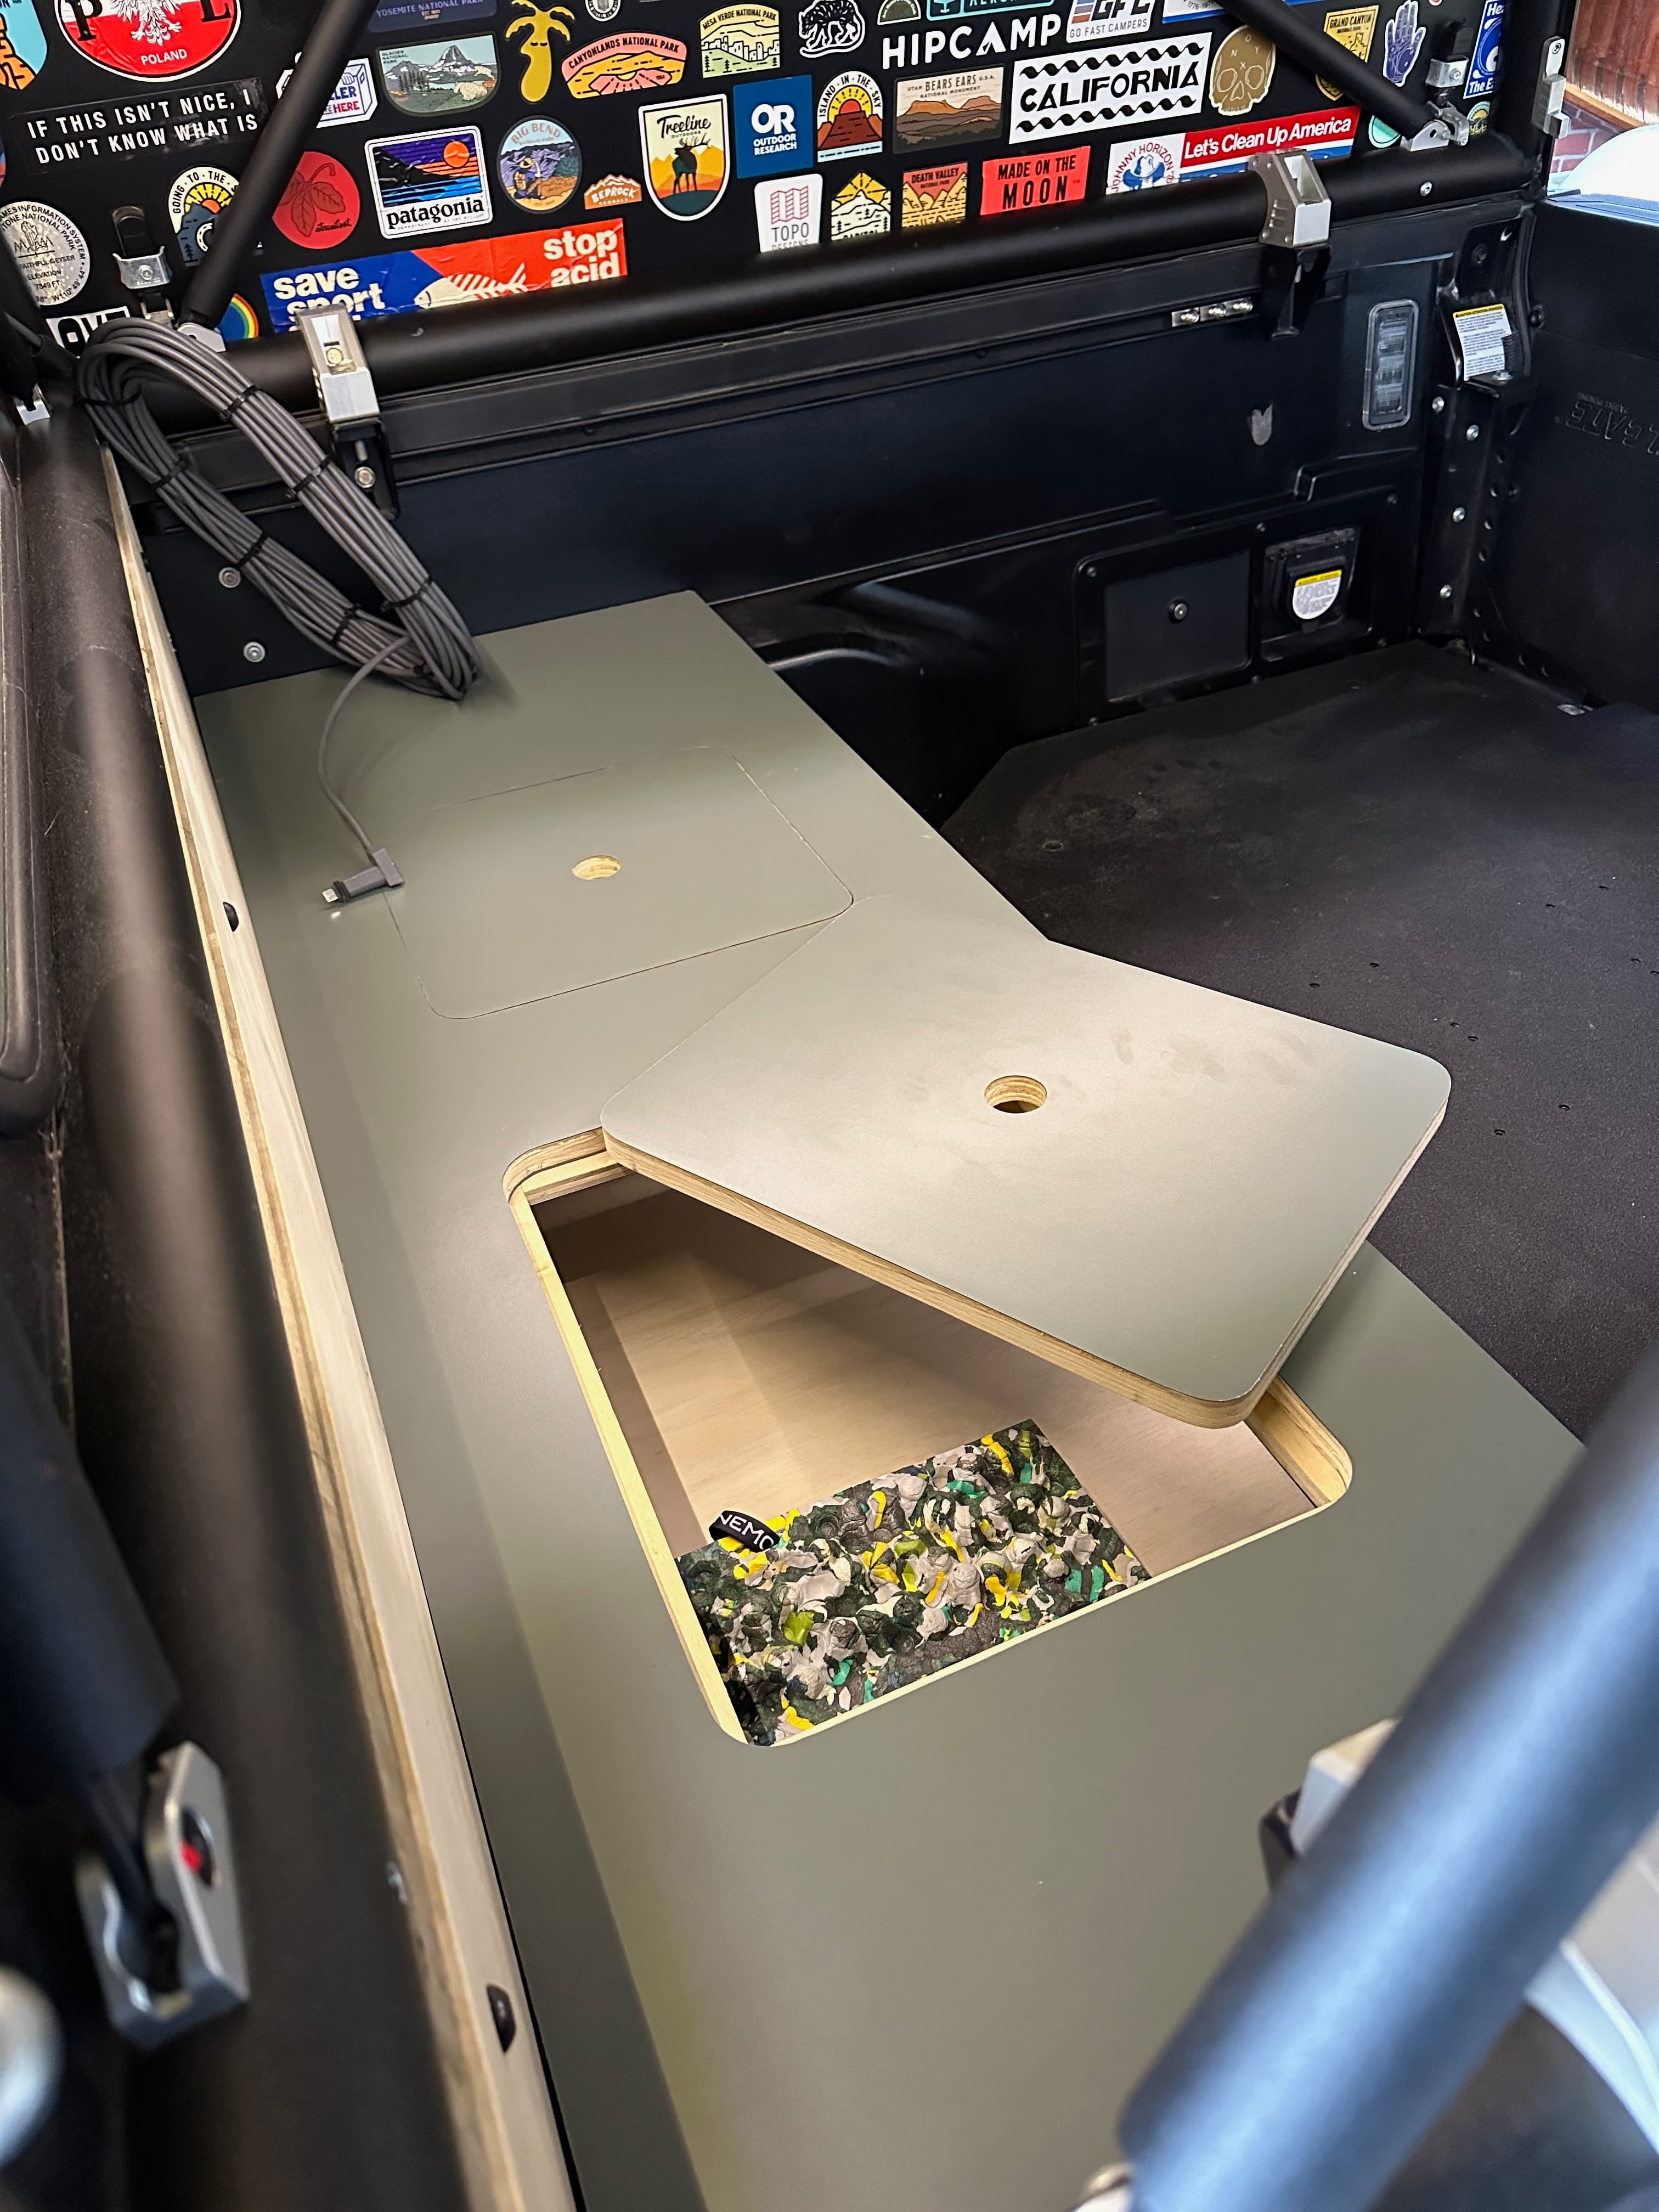
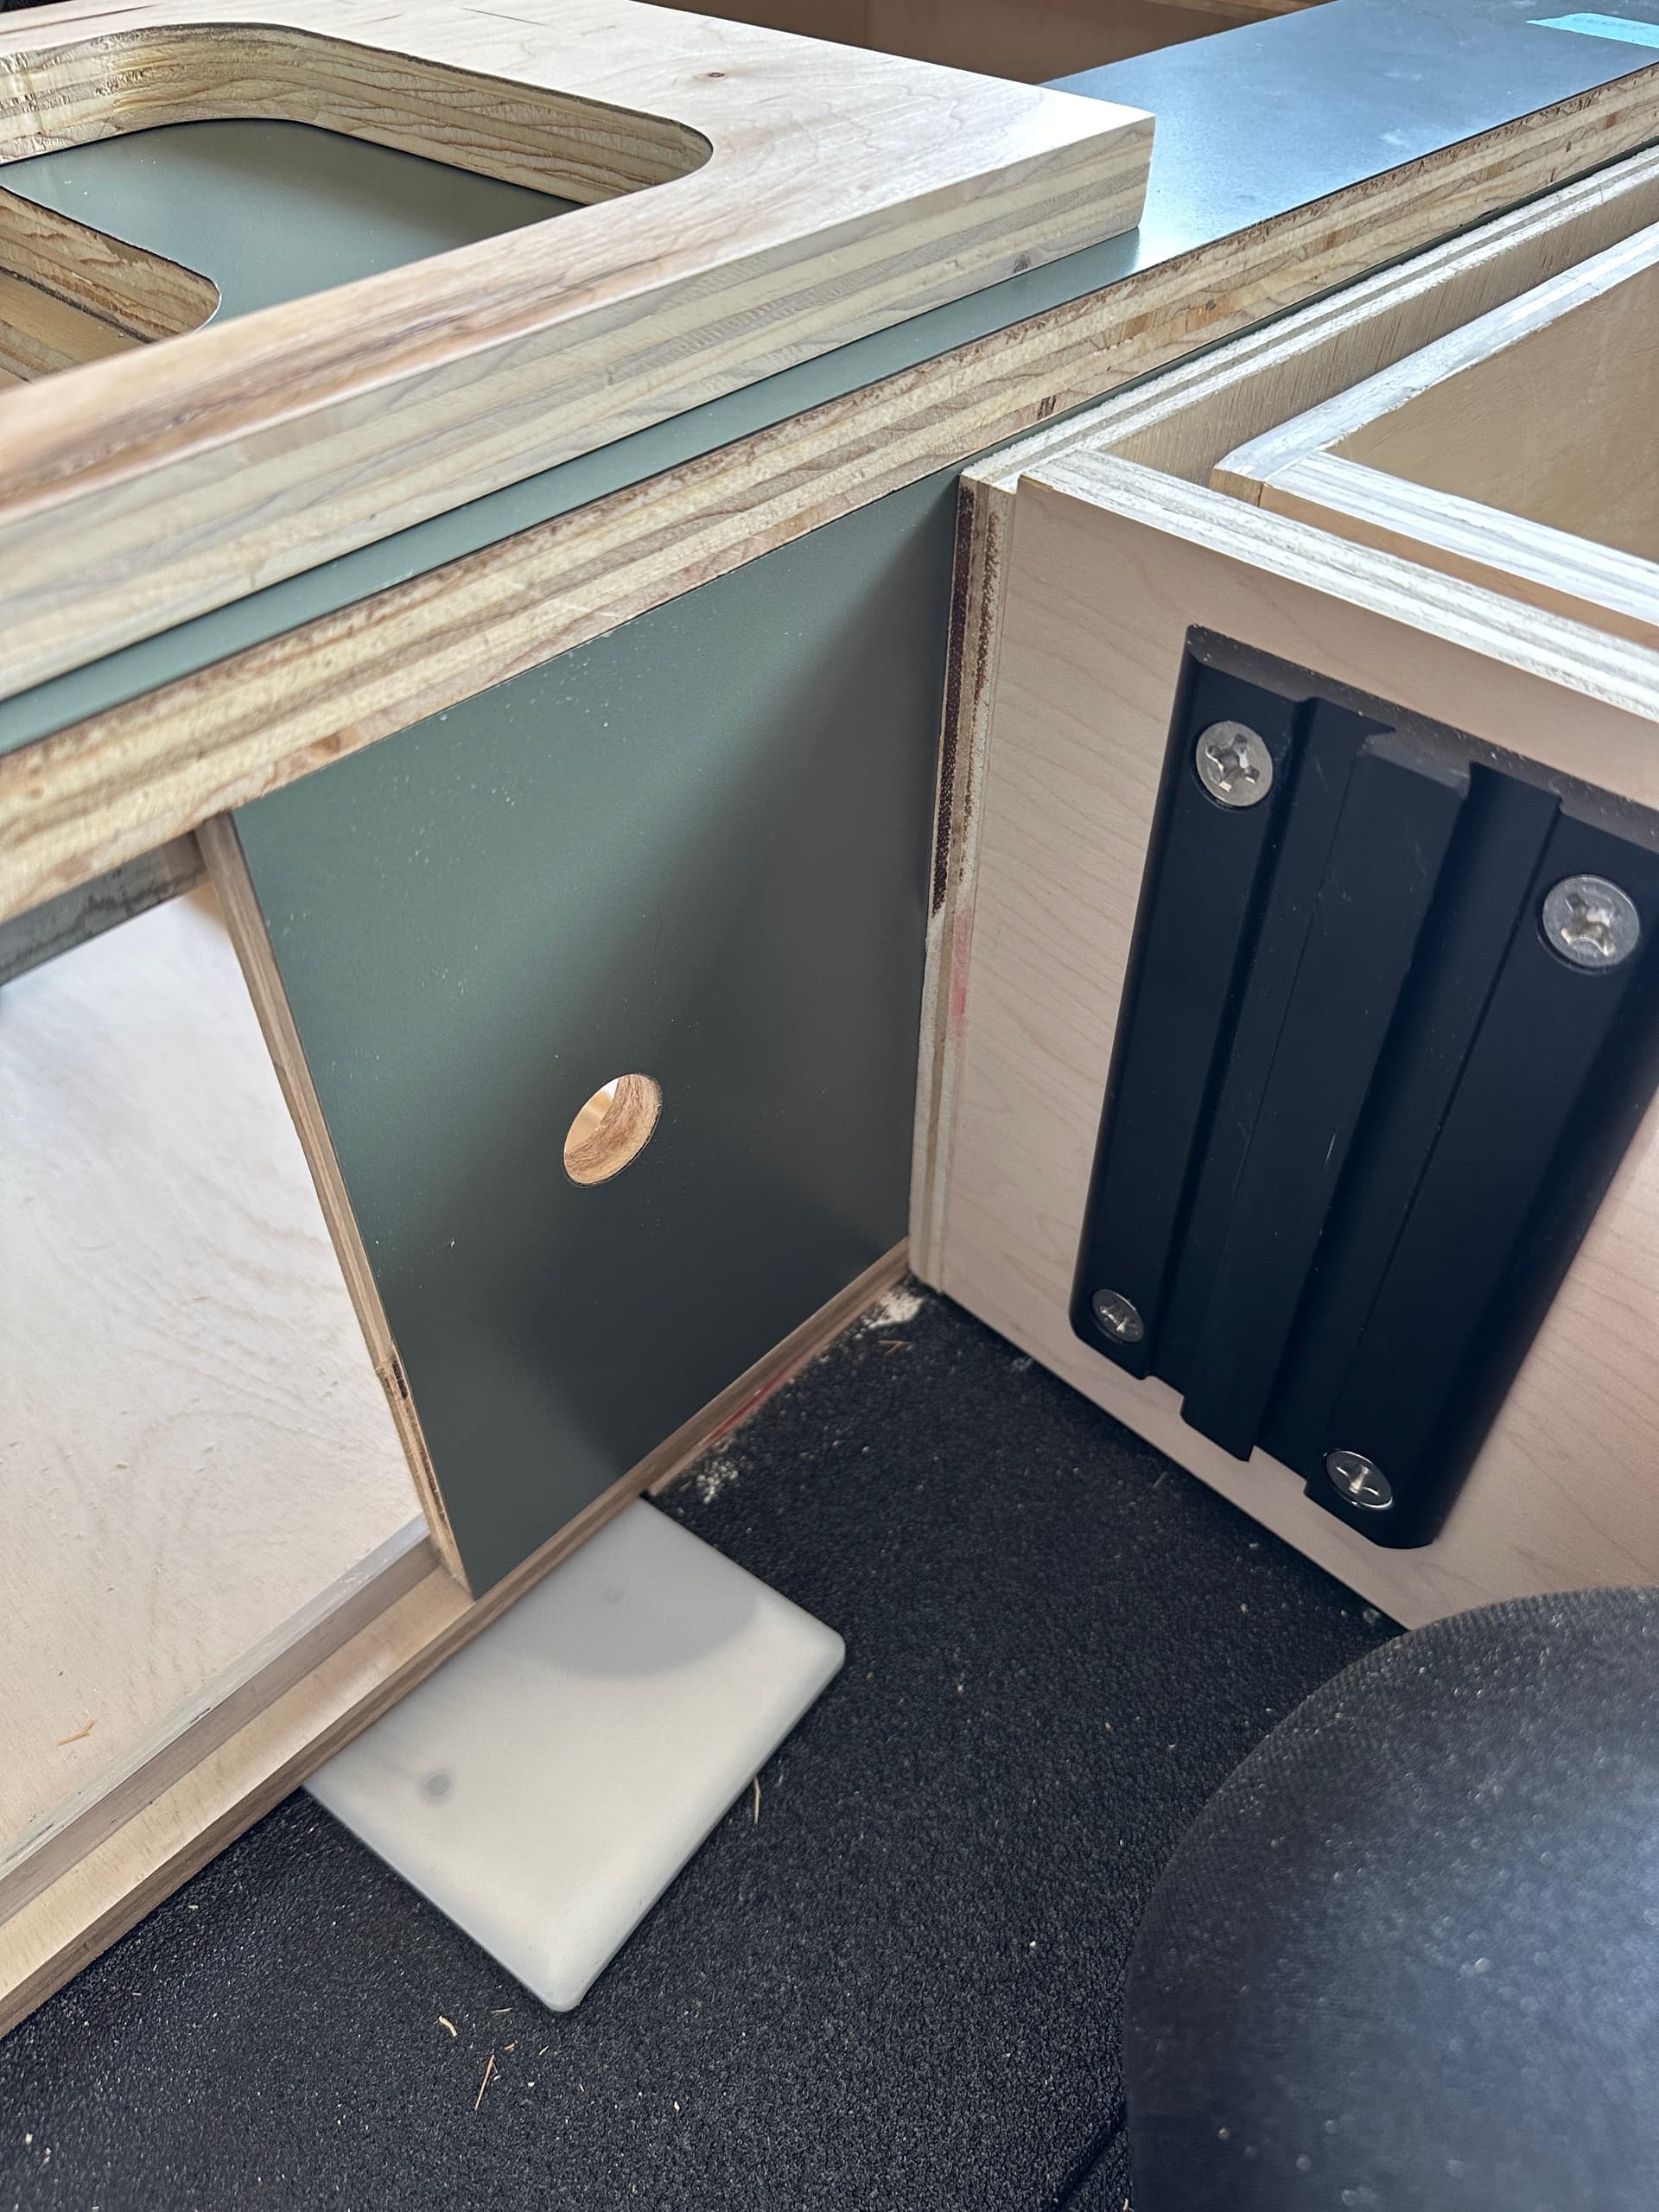
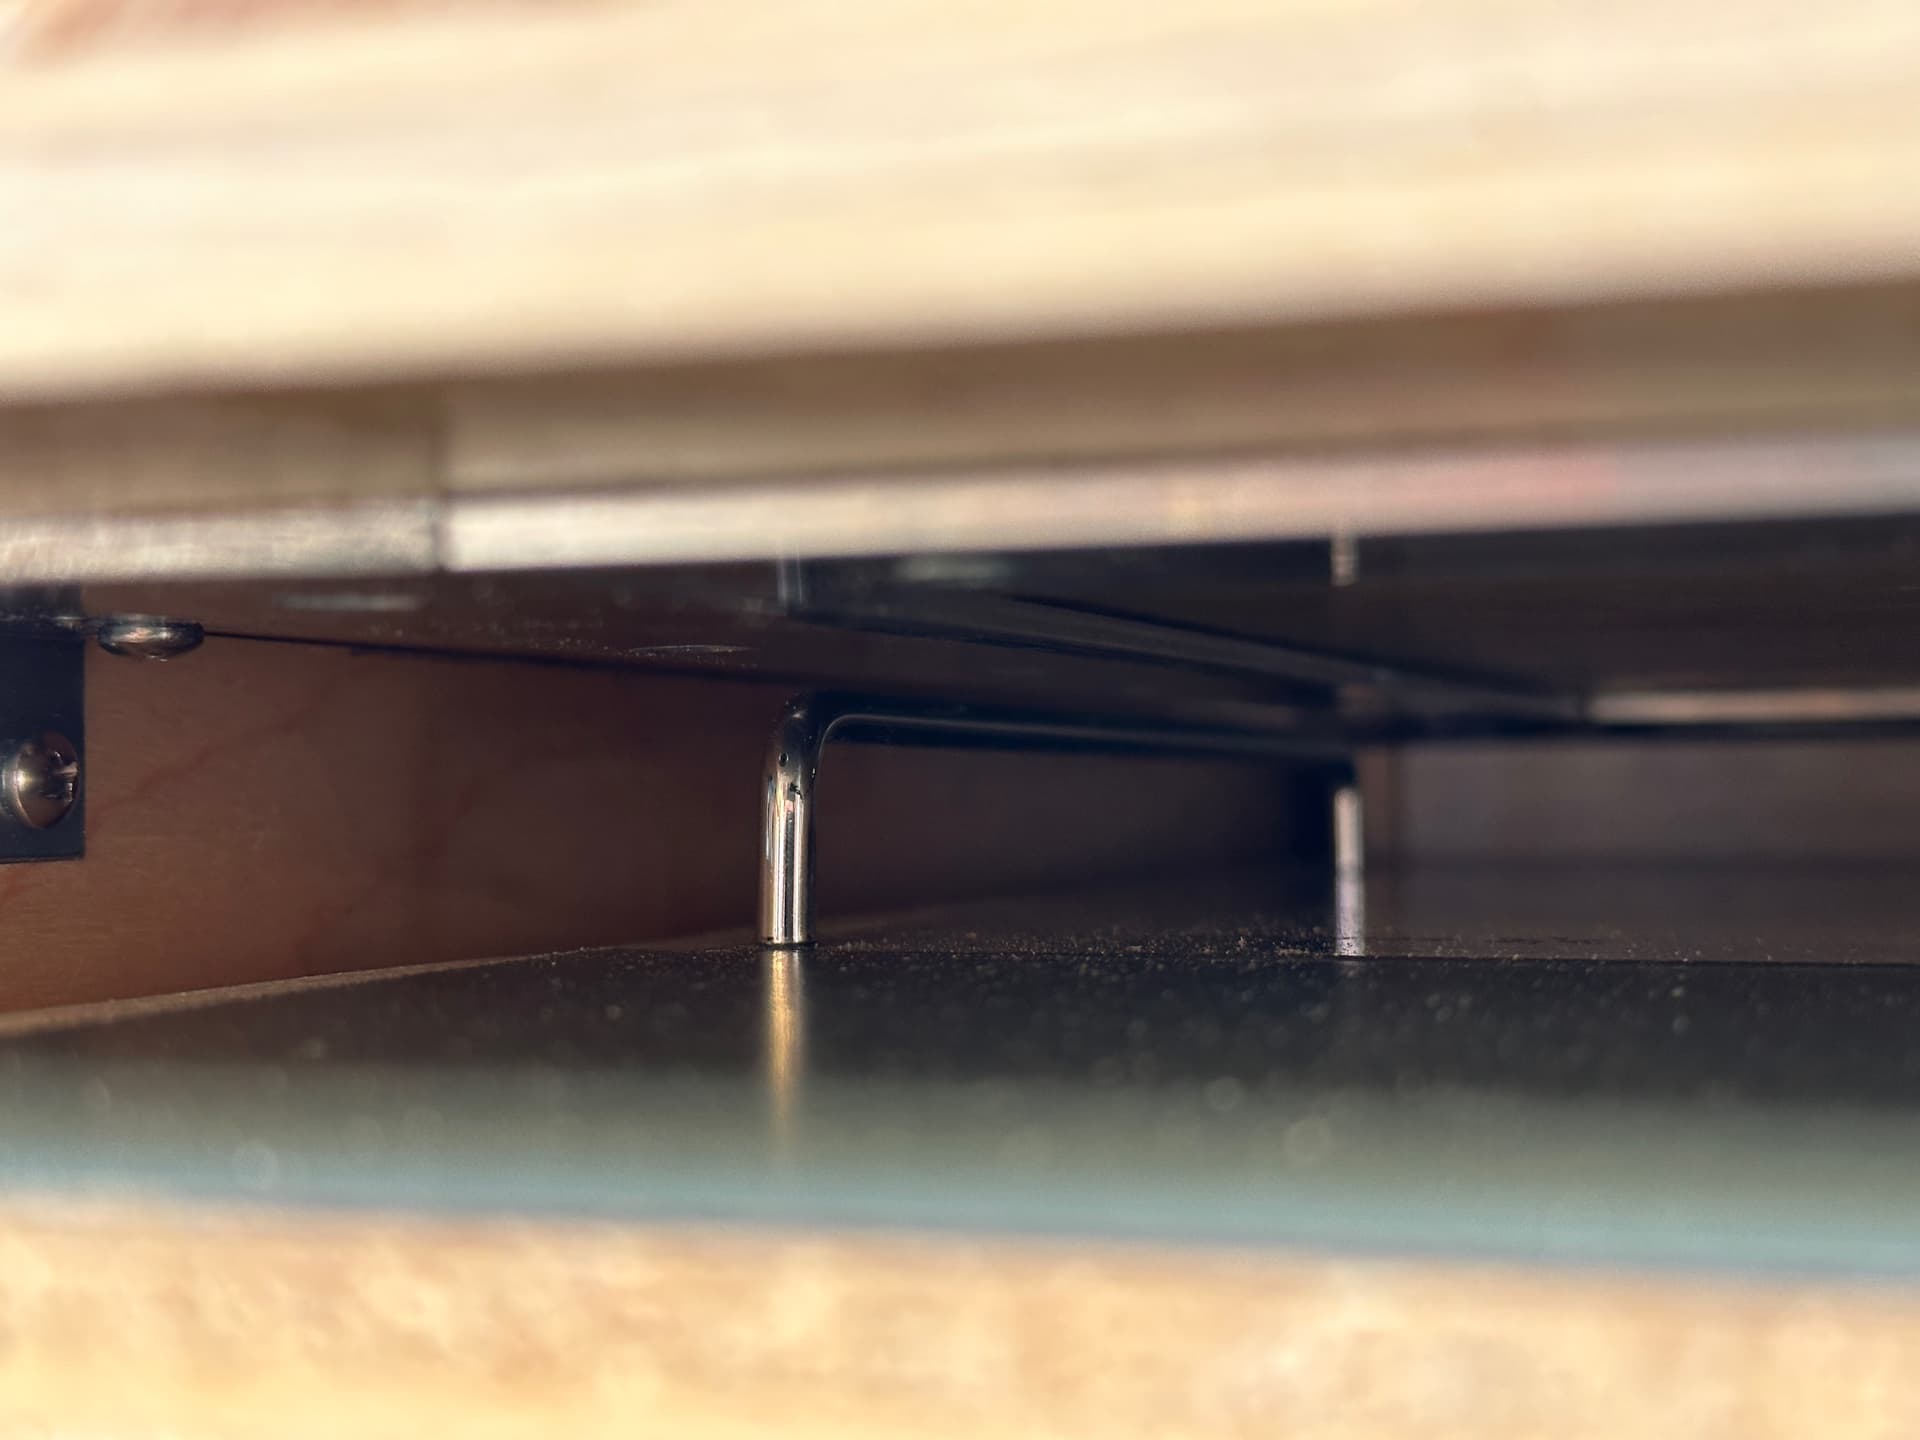
The notch out on the side of the drawer is to expose the burner controls (ignition and fuel flow dial) and save on material weight.
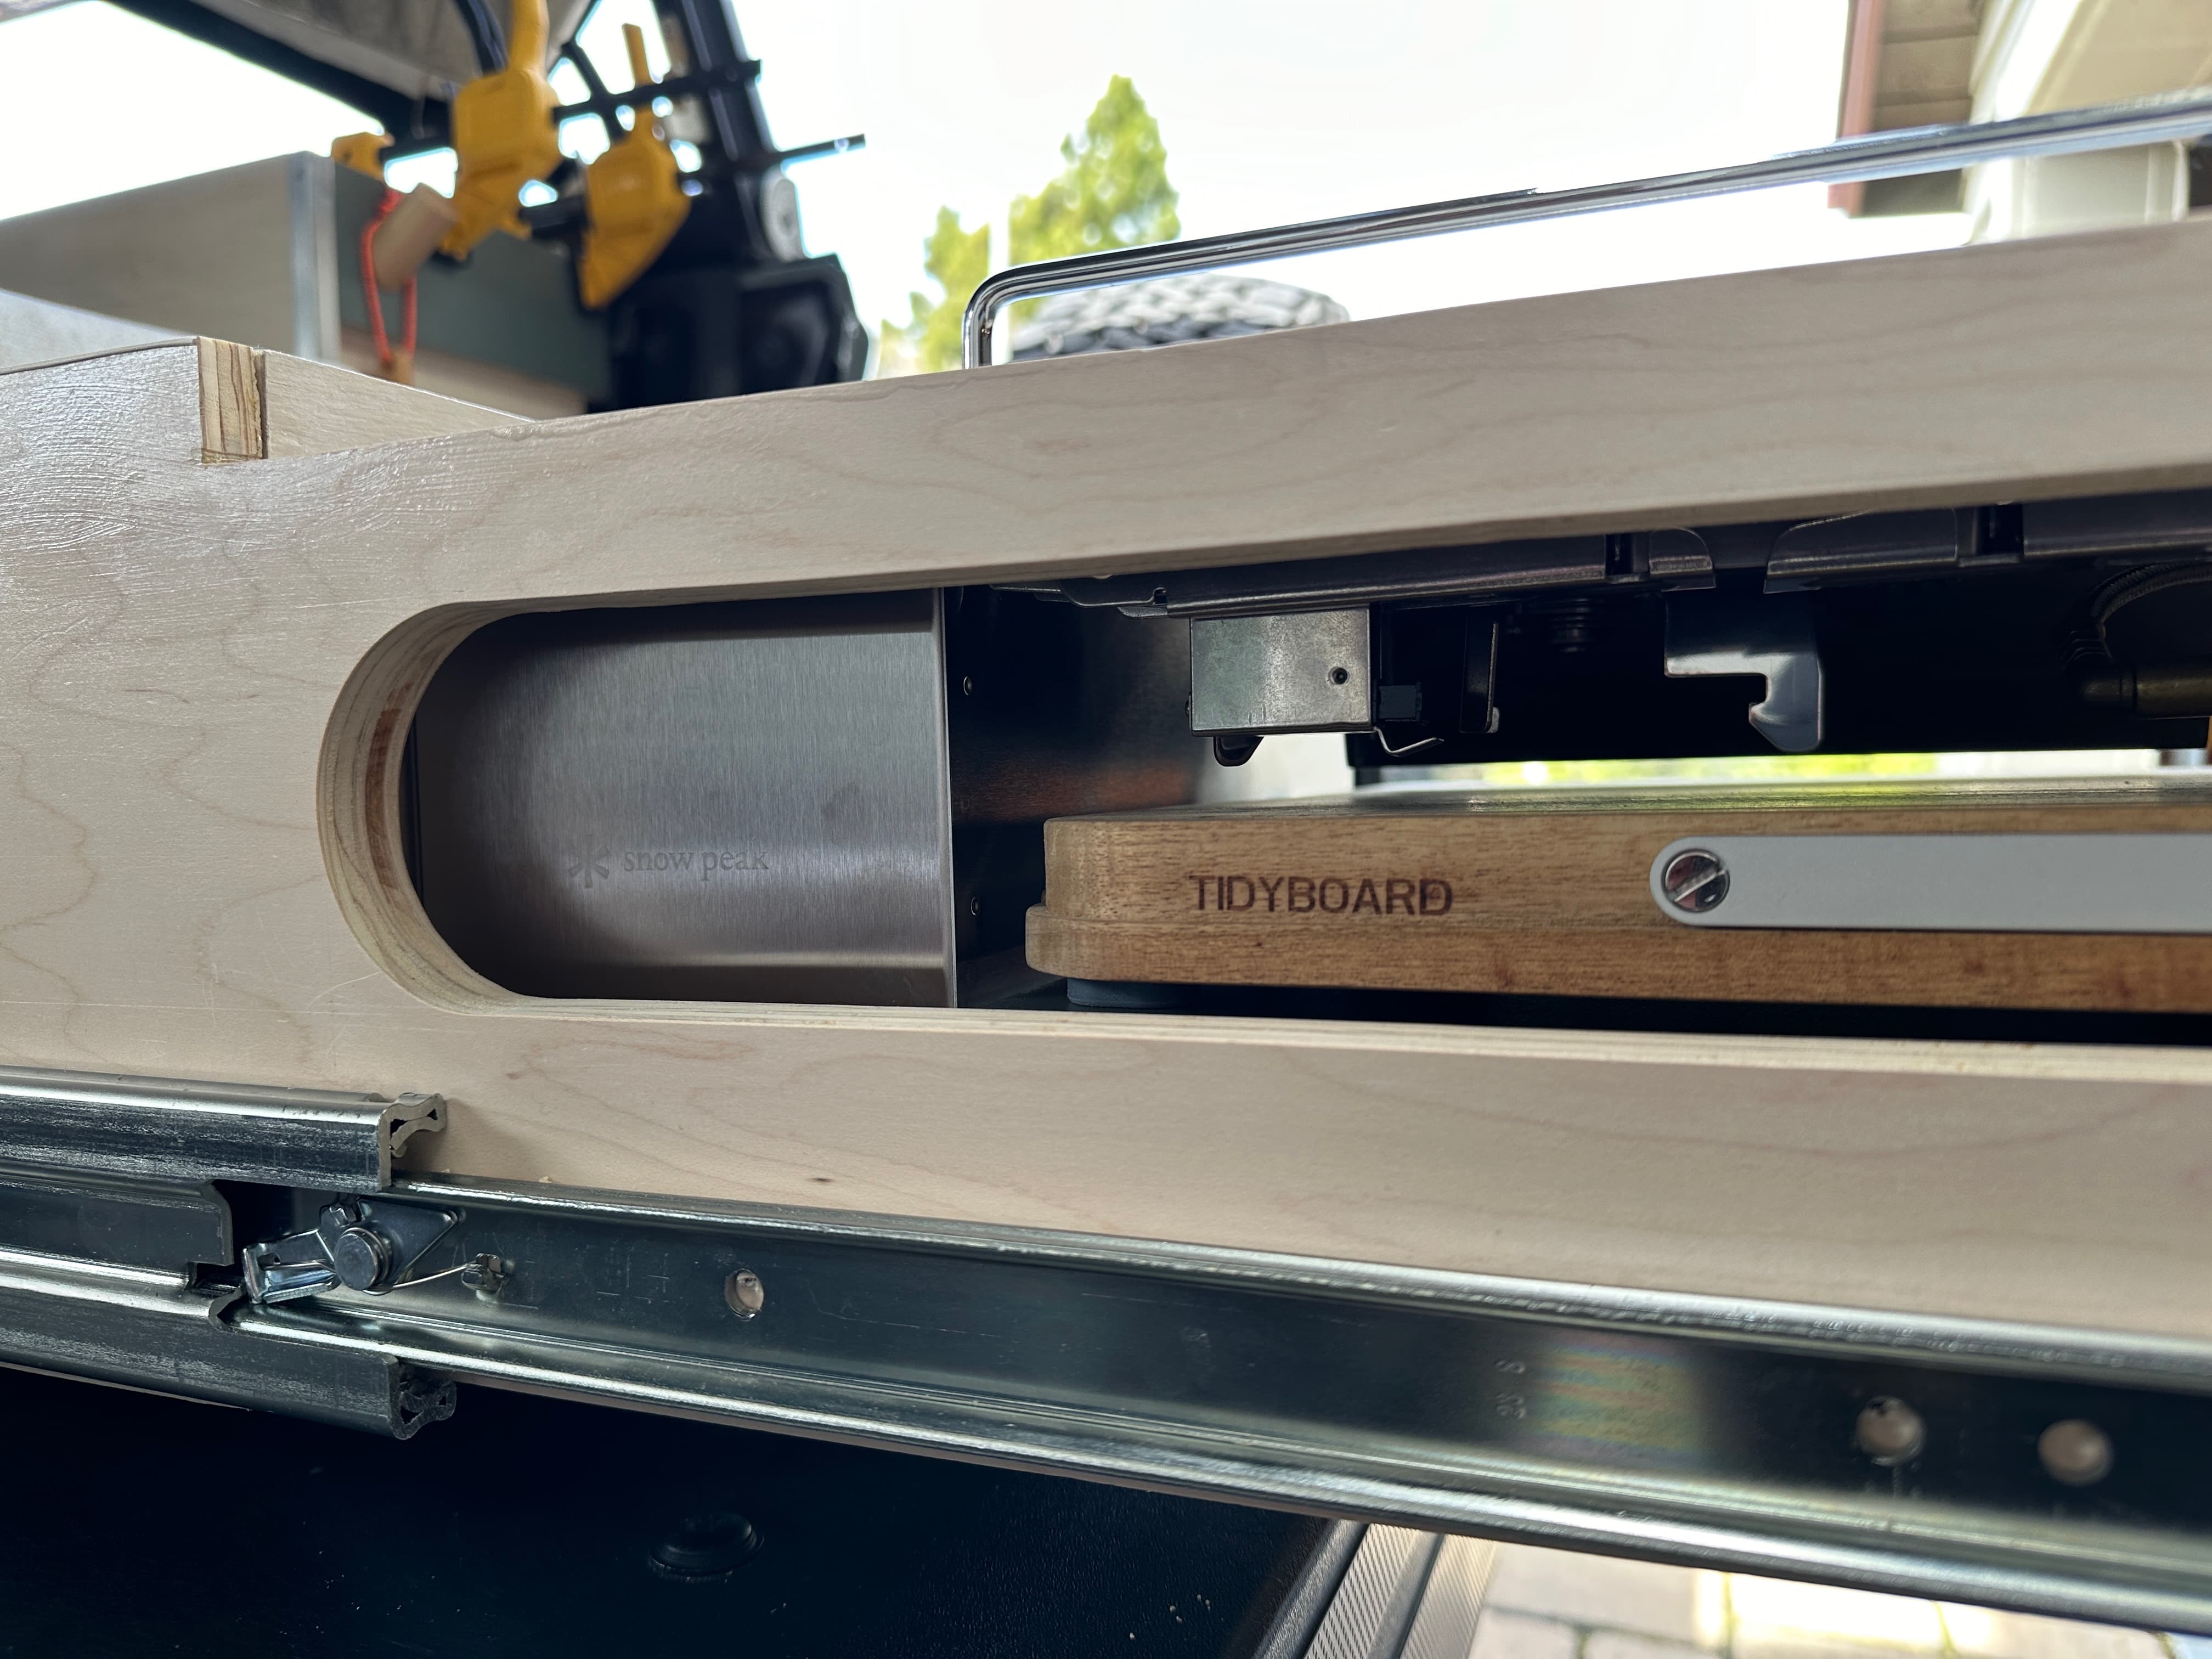
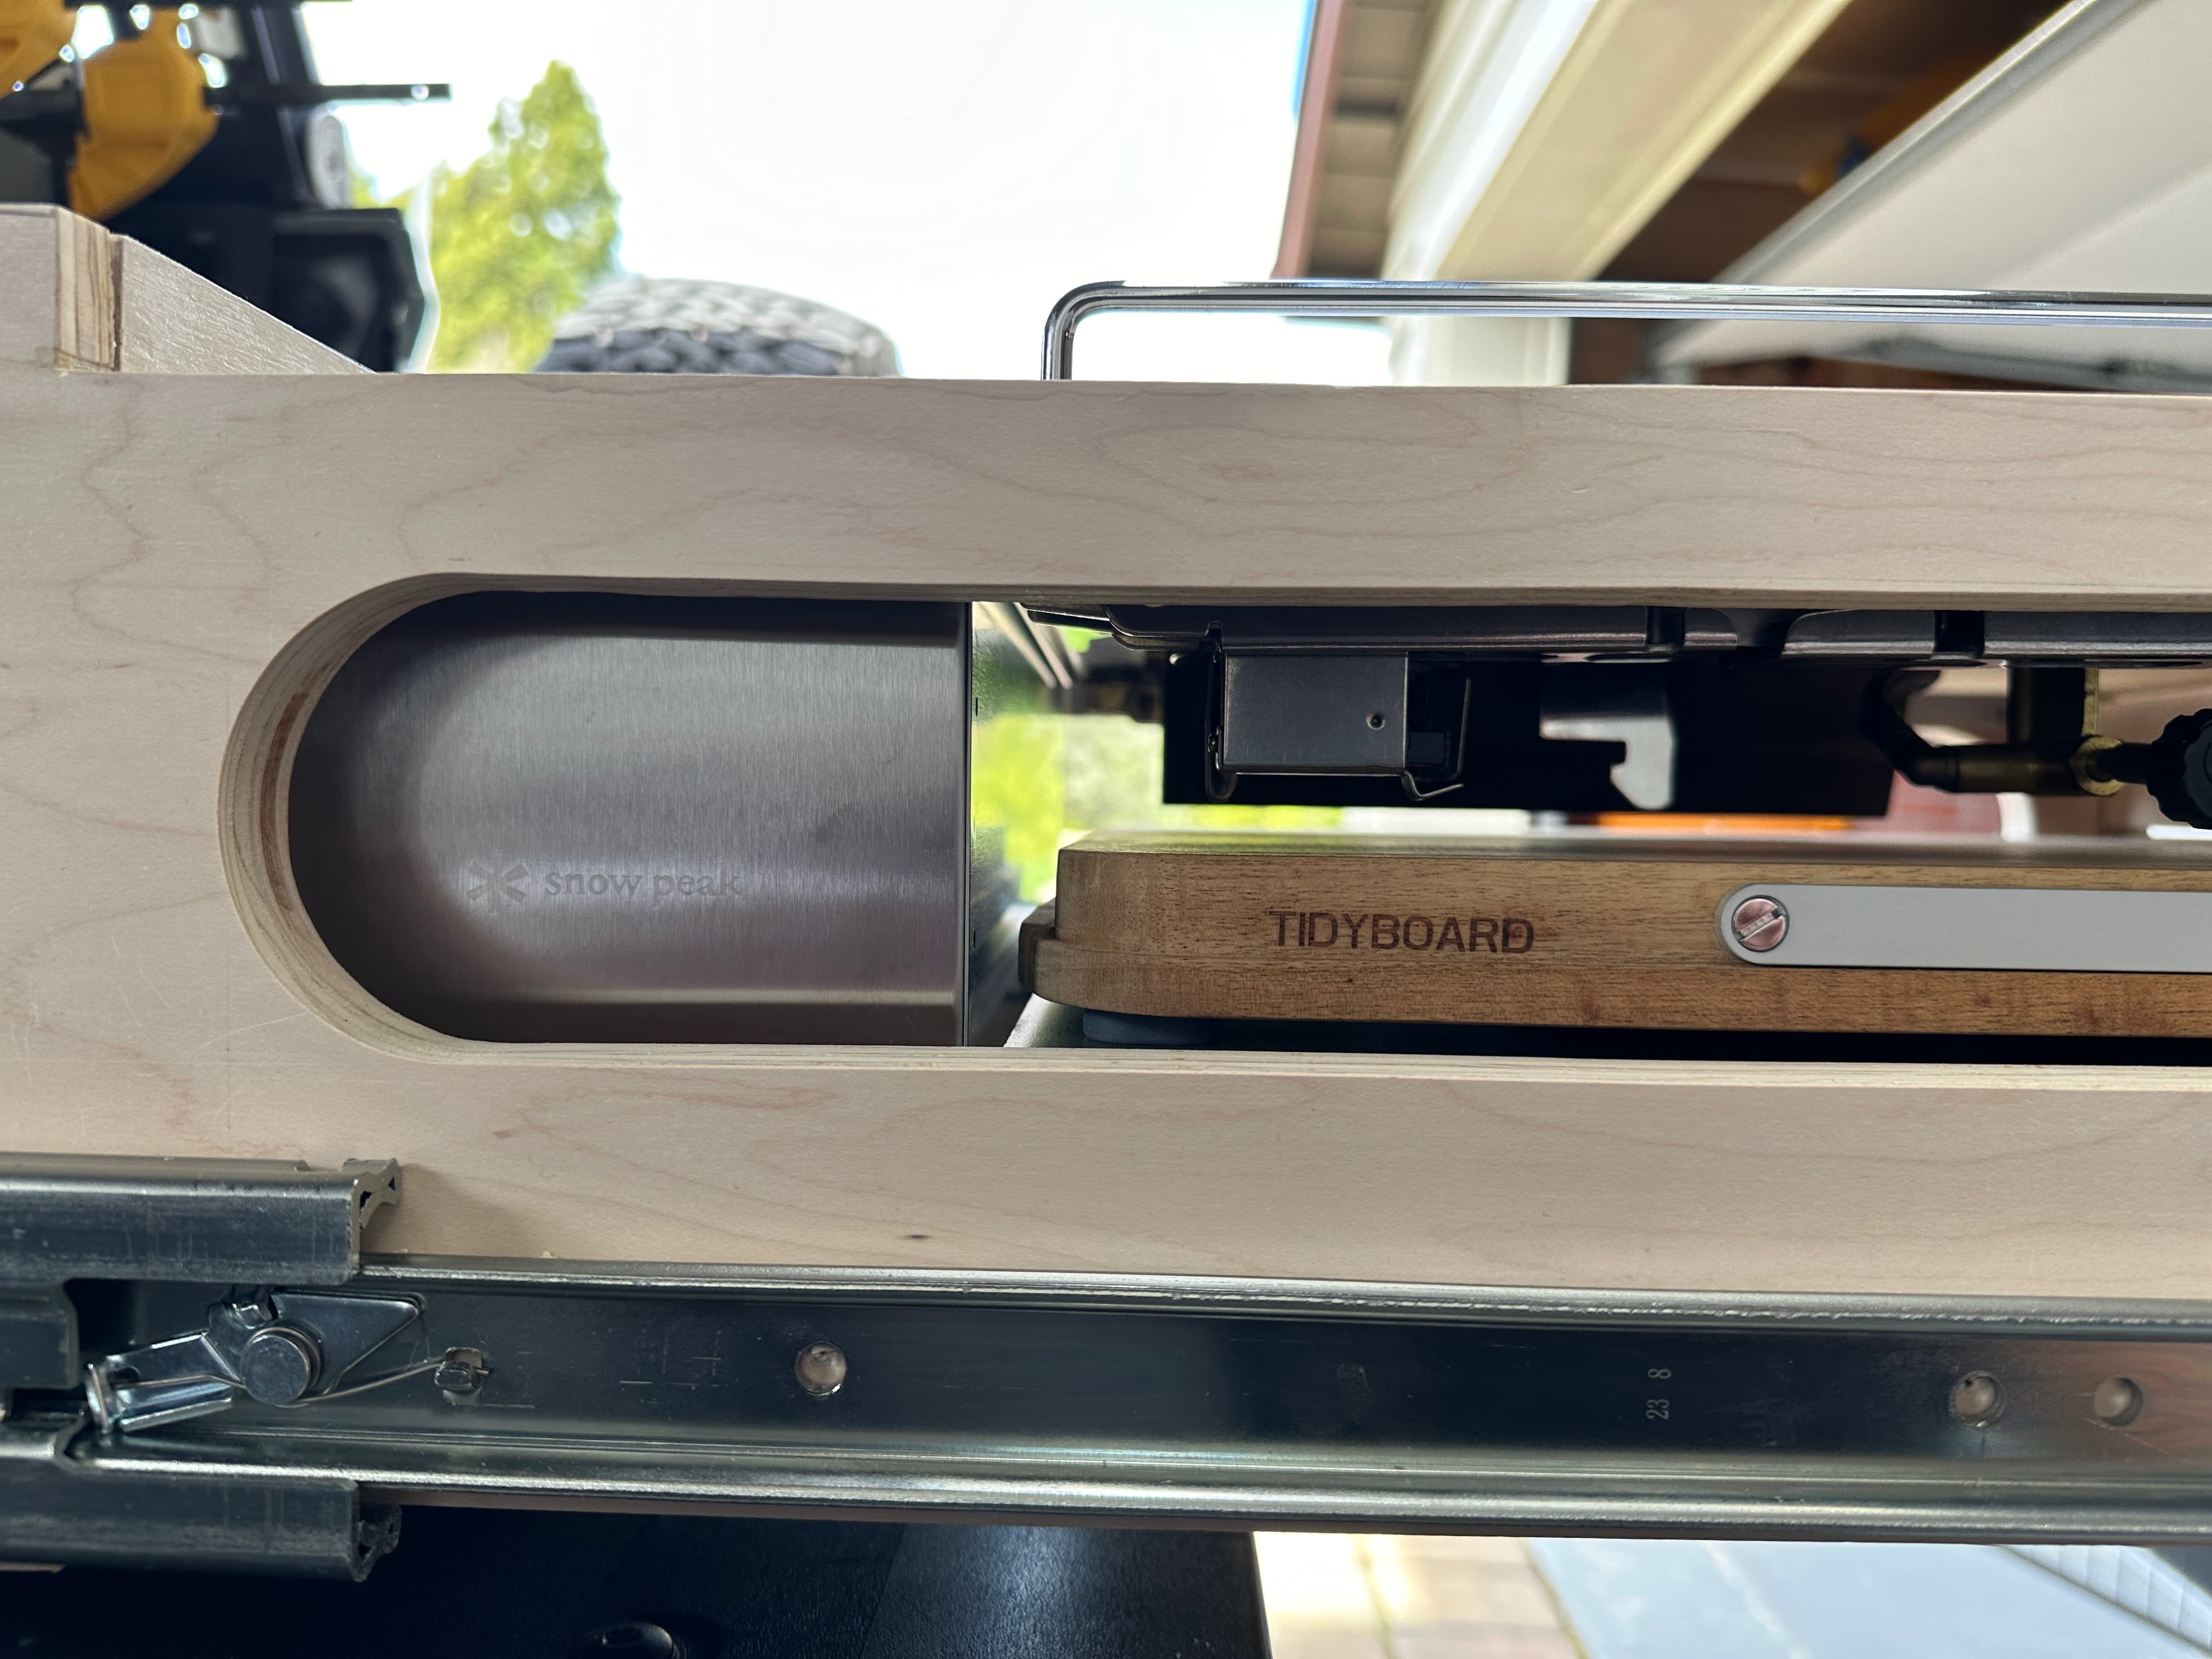
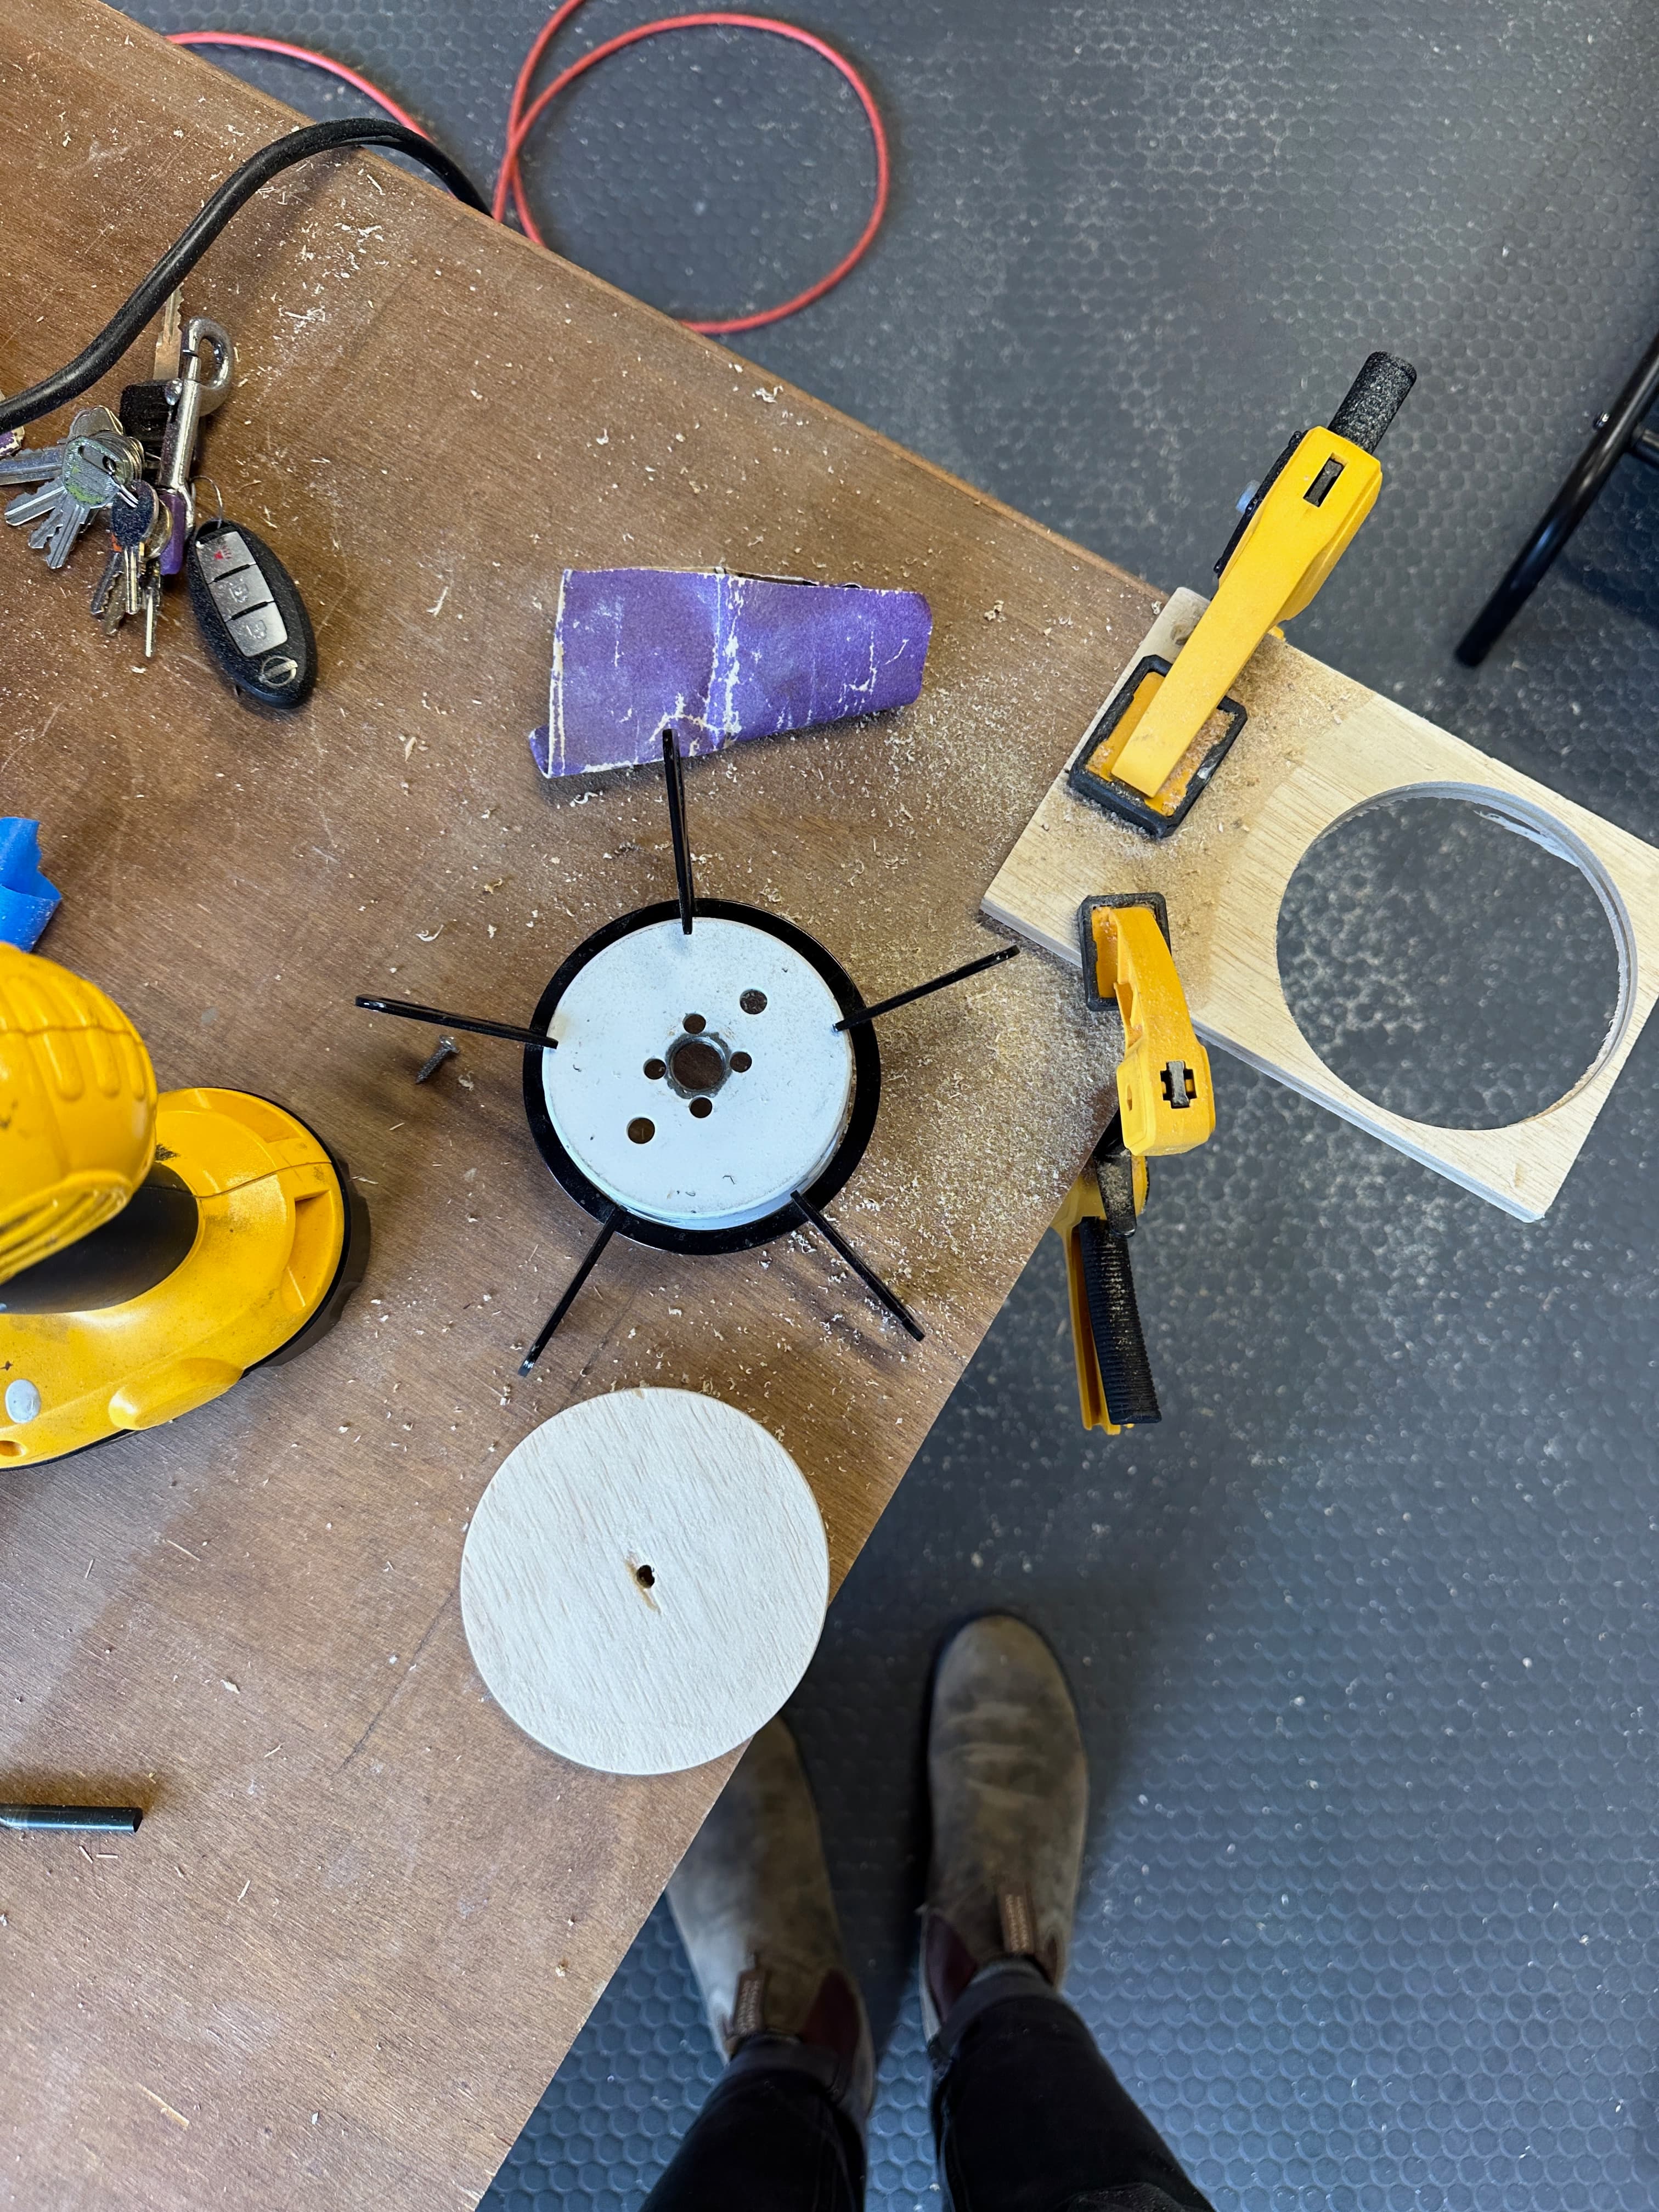
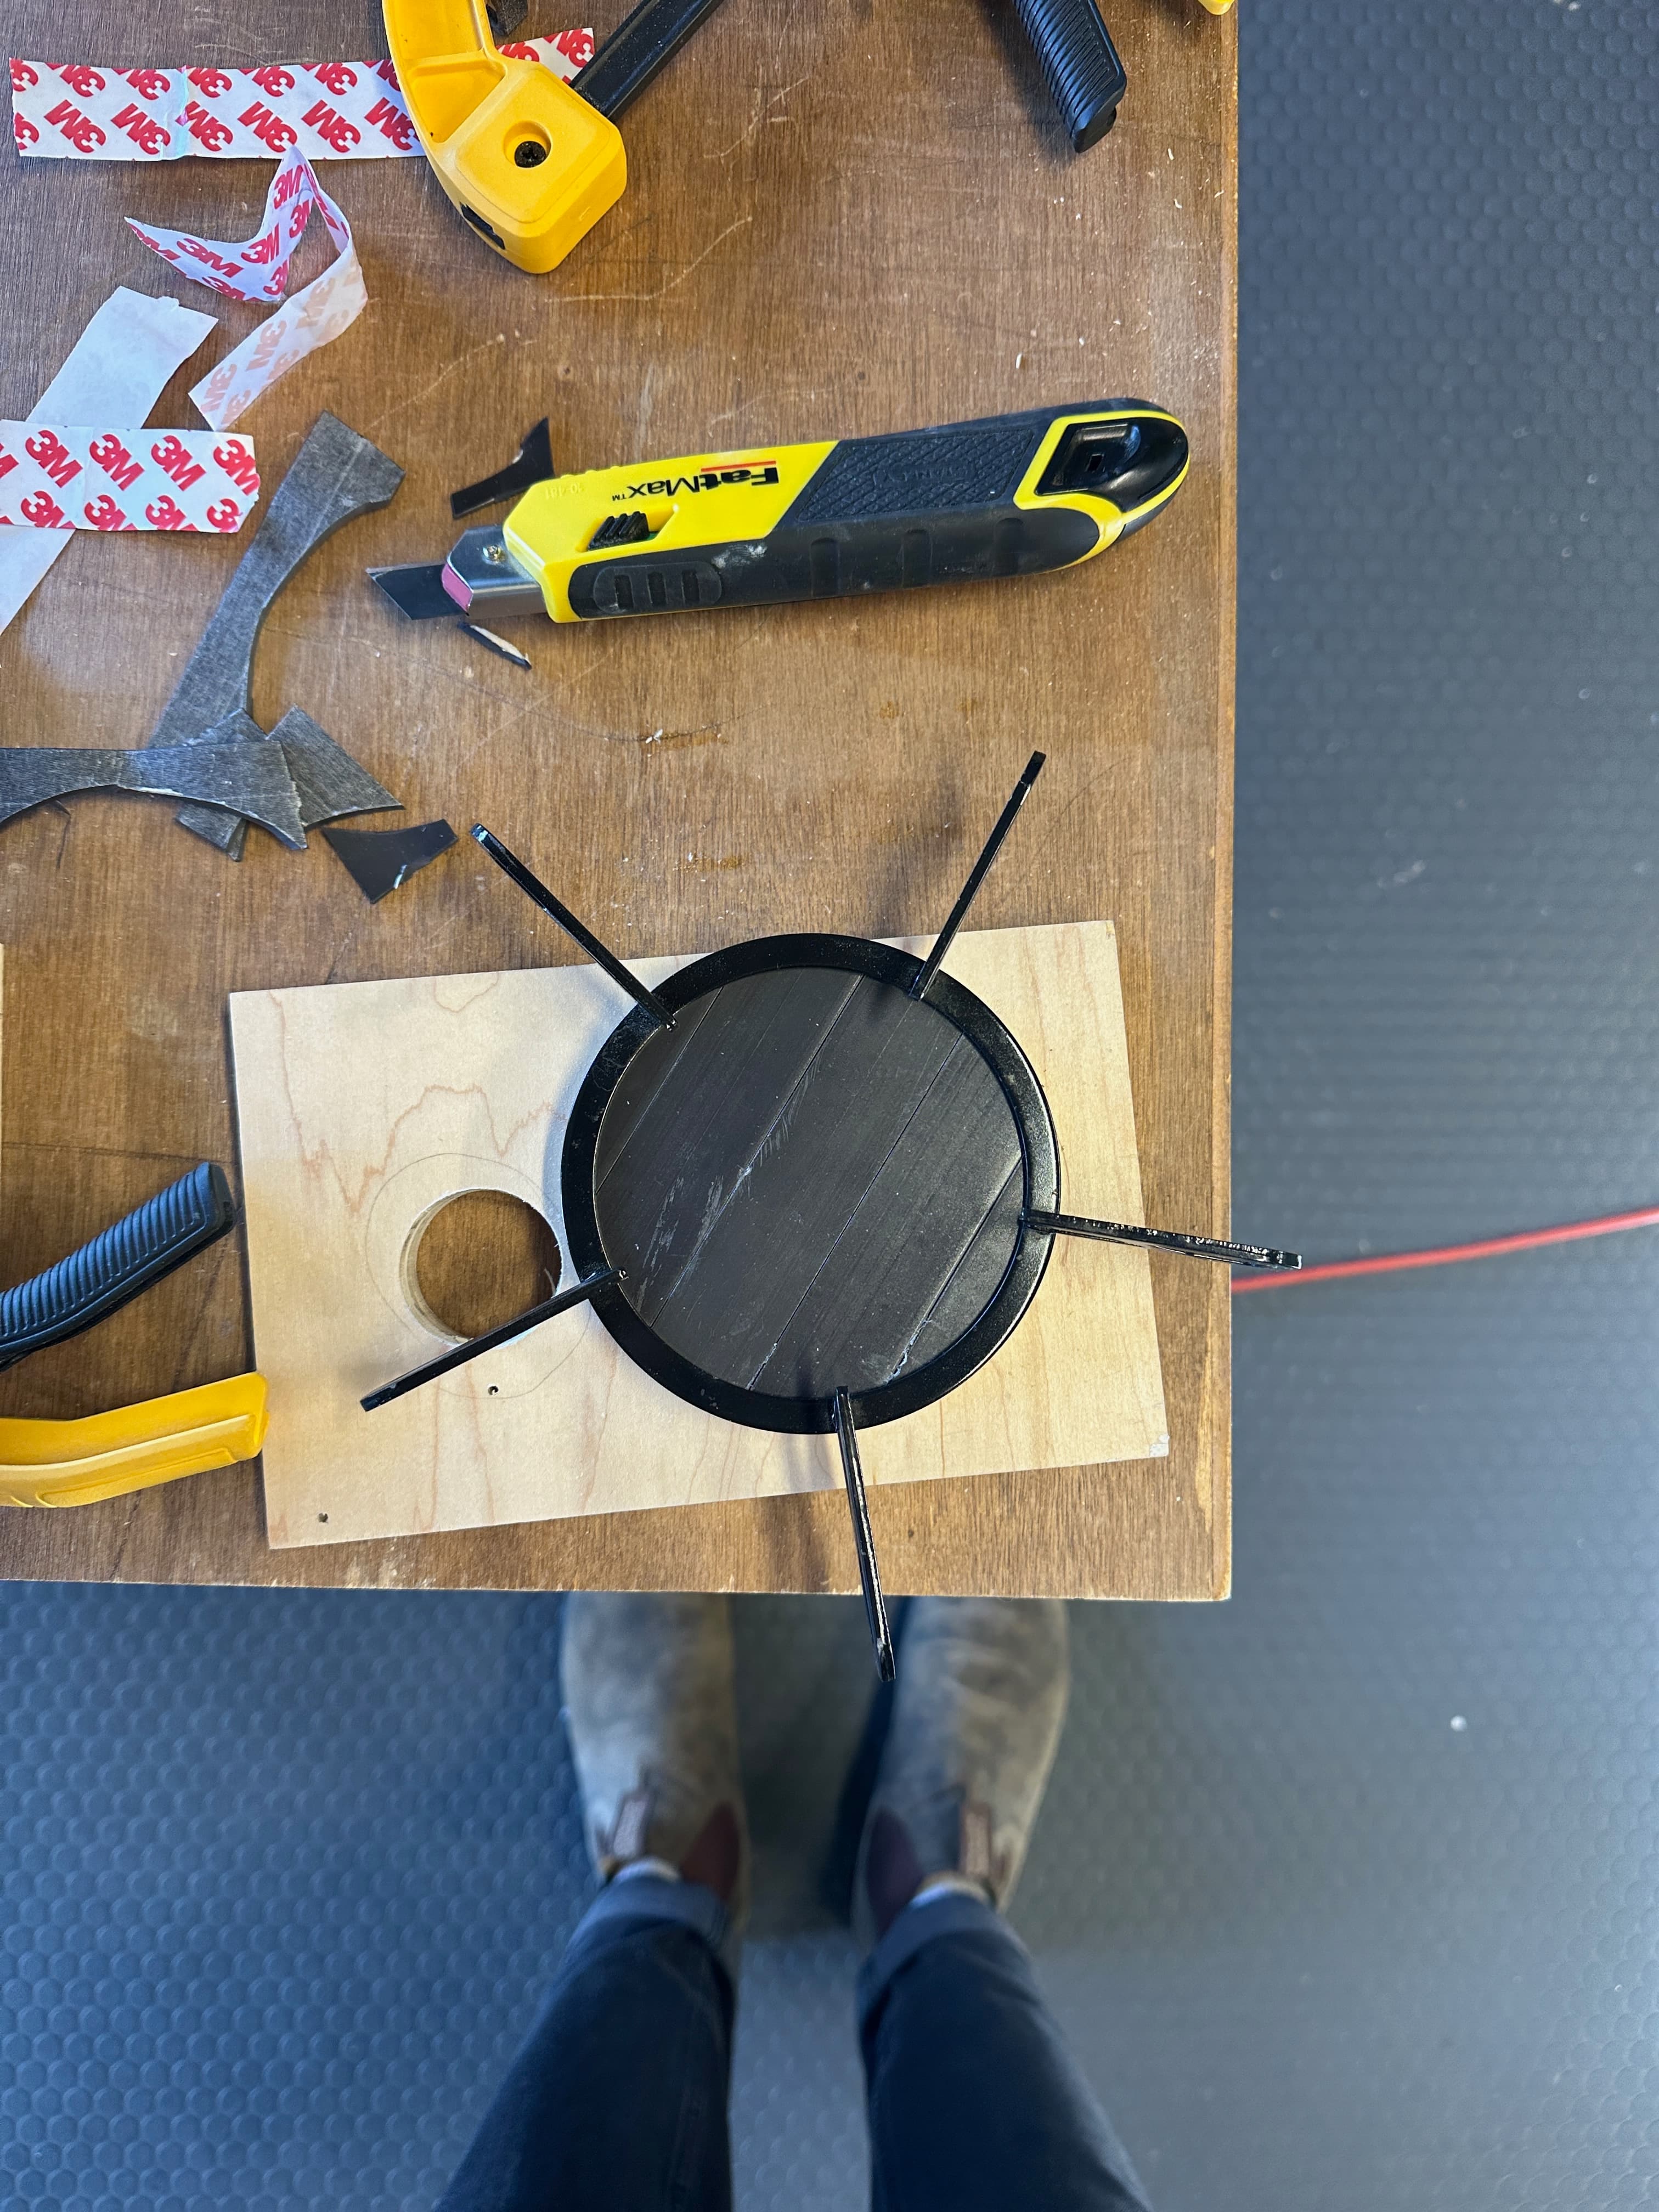
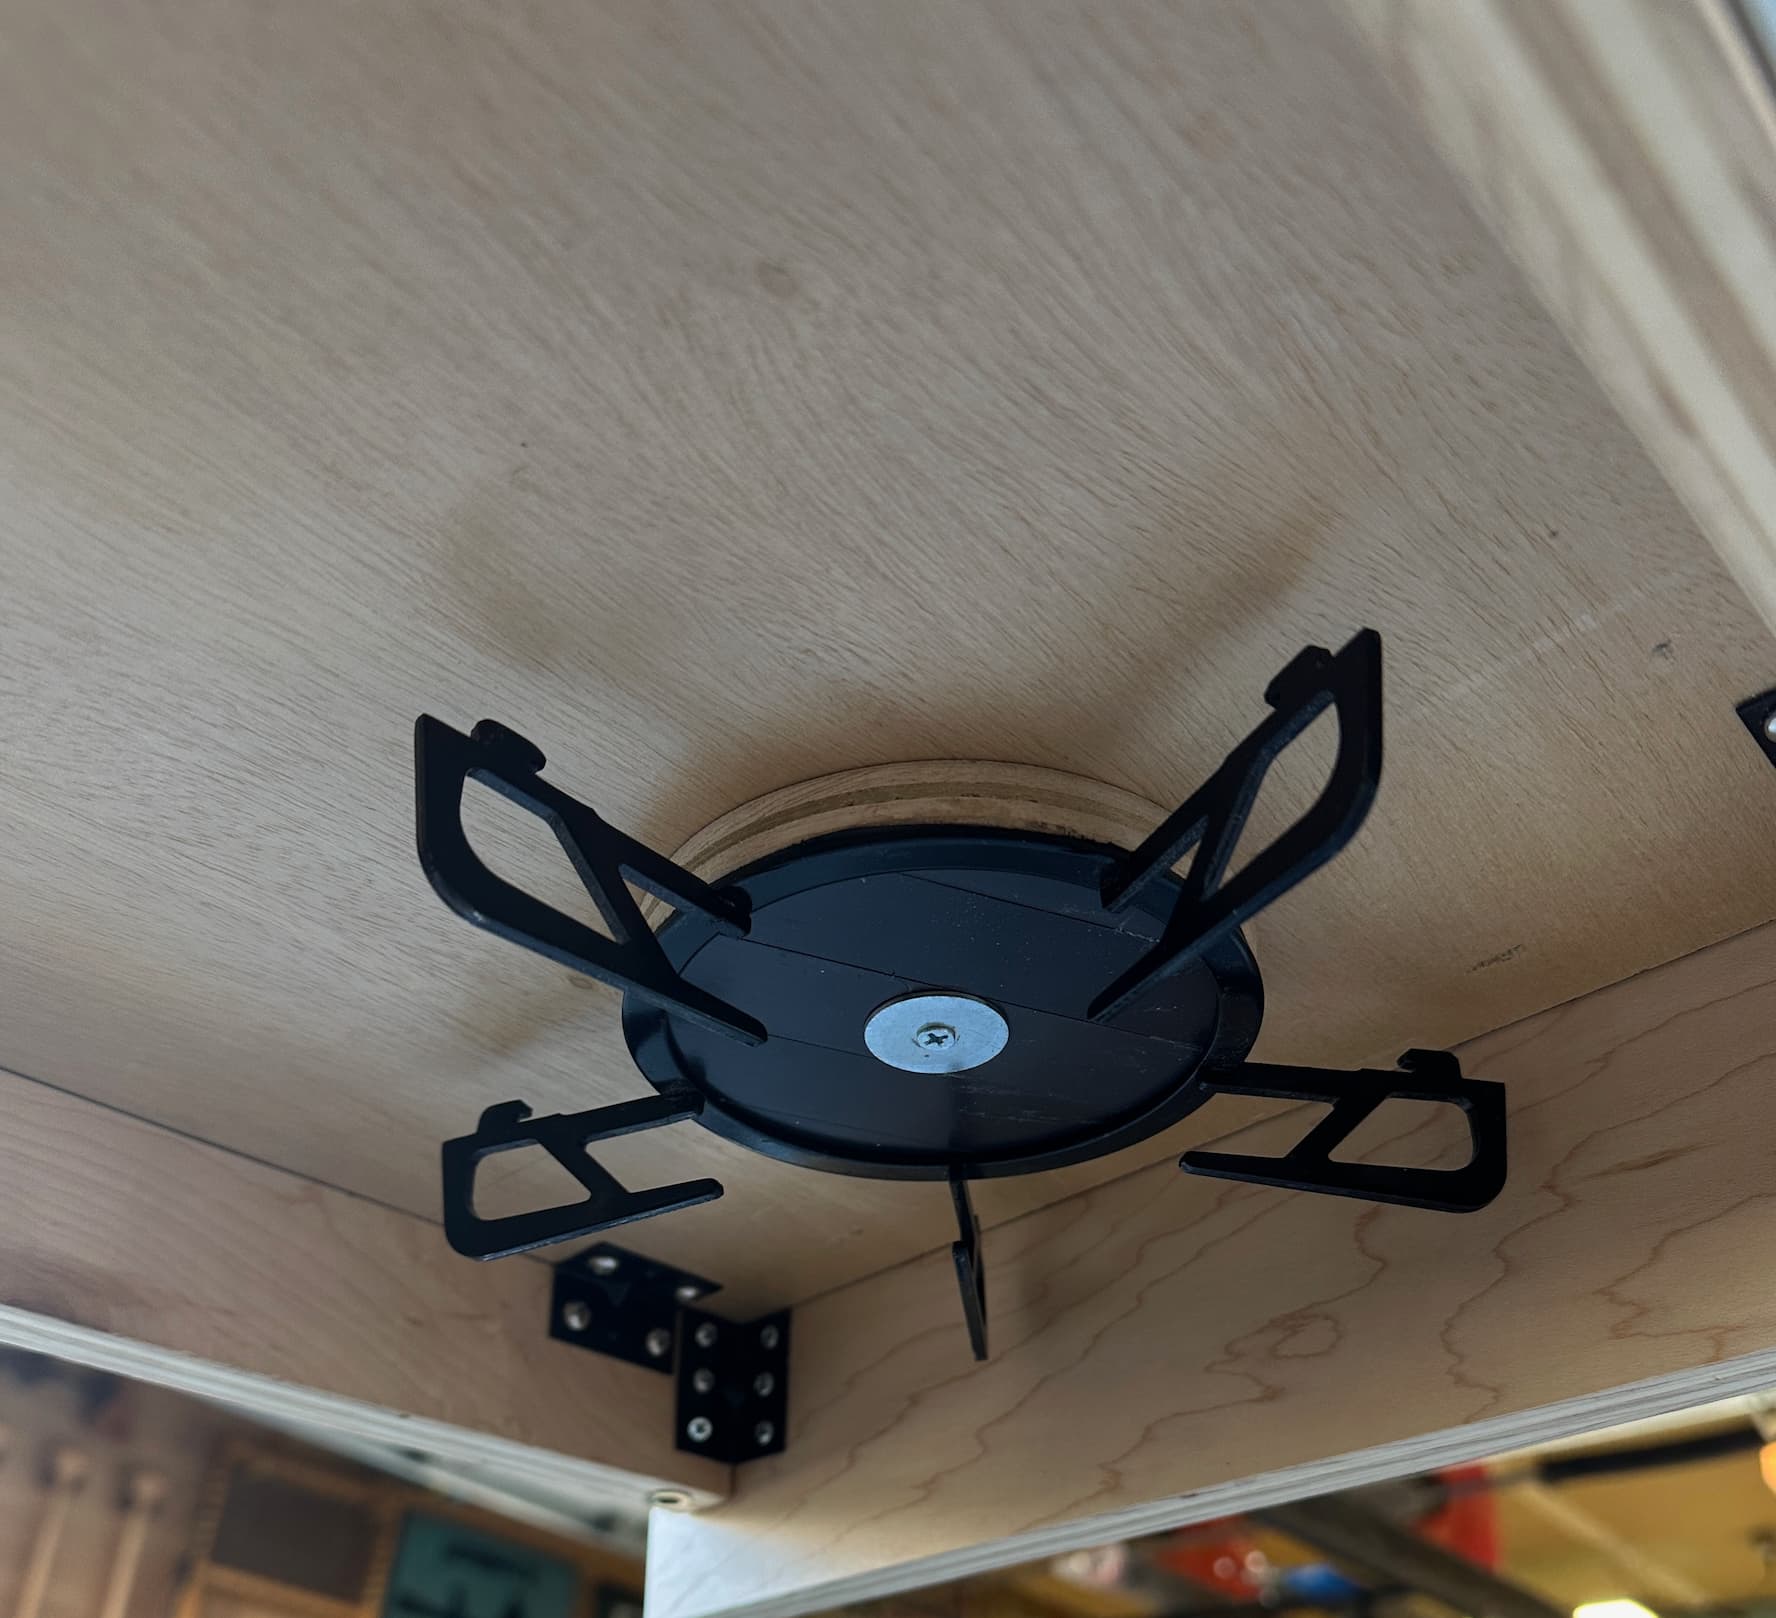
The grill of the burner was the highest point. We did not want to extend the overall height of the drawer for just the grill so I built out a magnetic base on the under side of the cutting board slide to house it when stowed.

Dropped in a piece of leftover laminate, leftover aluminum, and a hook to finish off the face of the garage.

I also added a handful of threaded inserts in the drawer to be able to mount Snow Peak’s TTA accessories. These accessories are stored in the “garage” when the drawer is stowed and will only come out when posting up at same camp for 2+ nights.


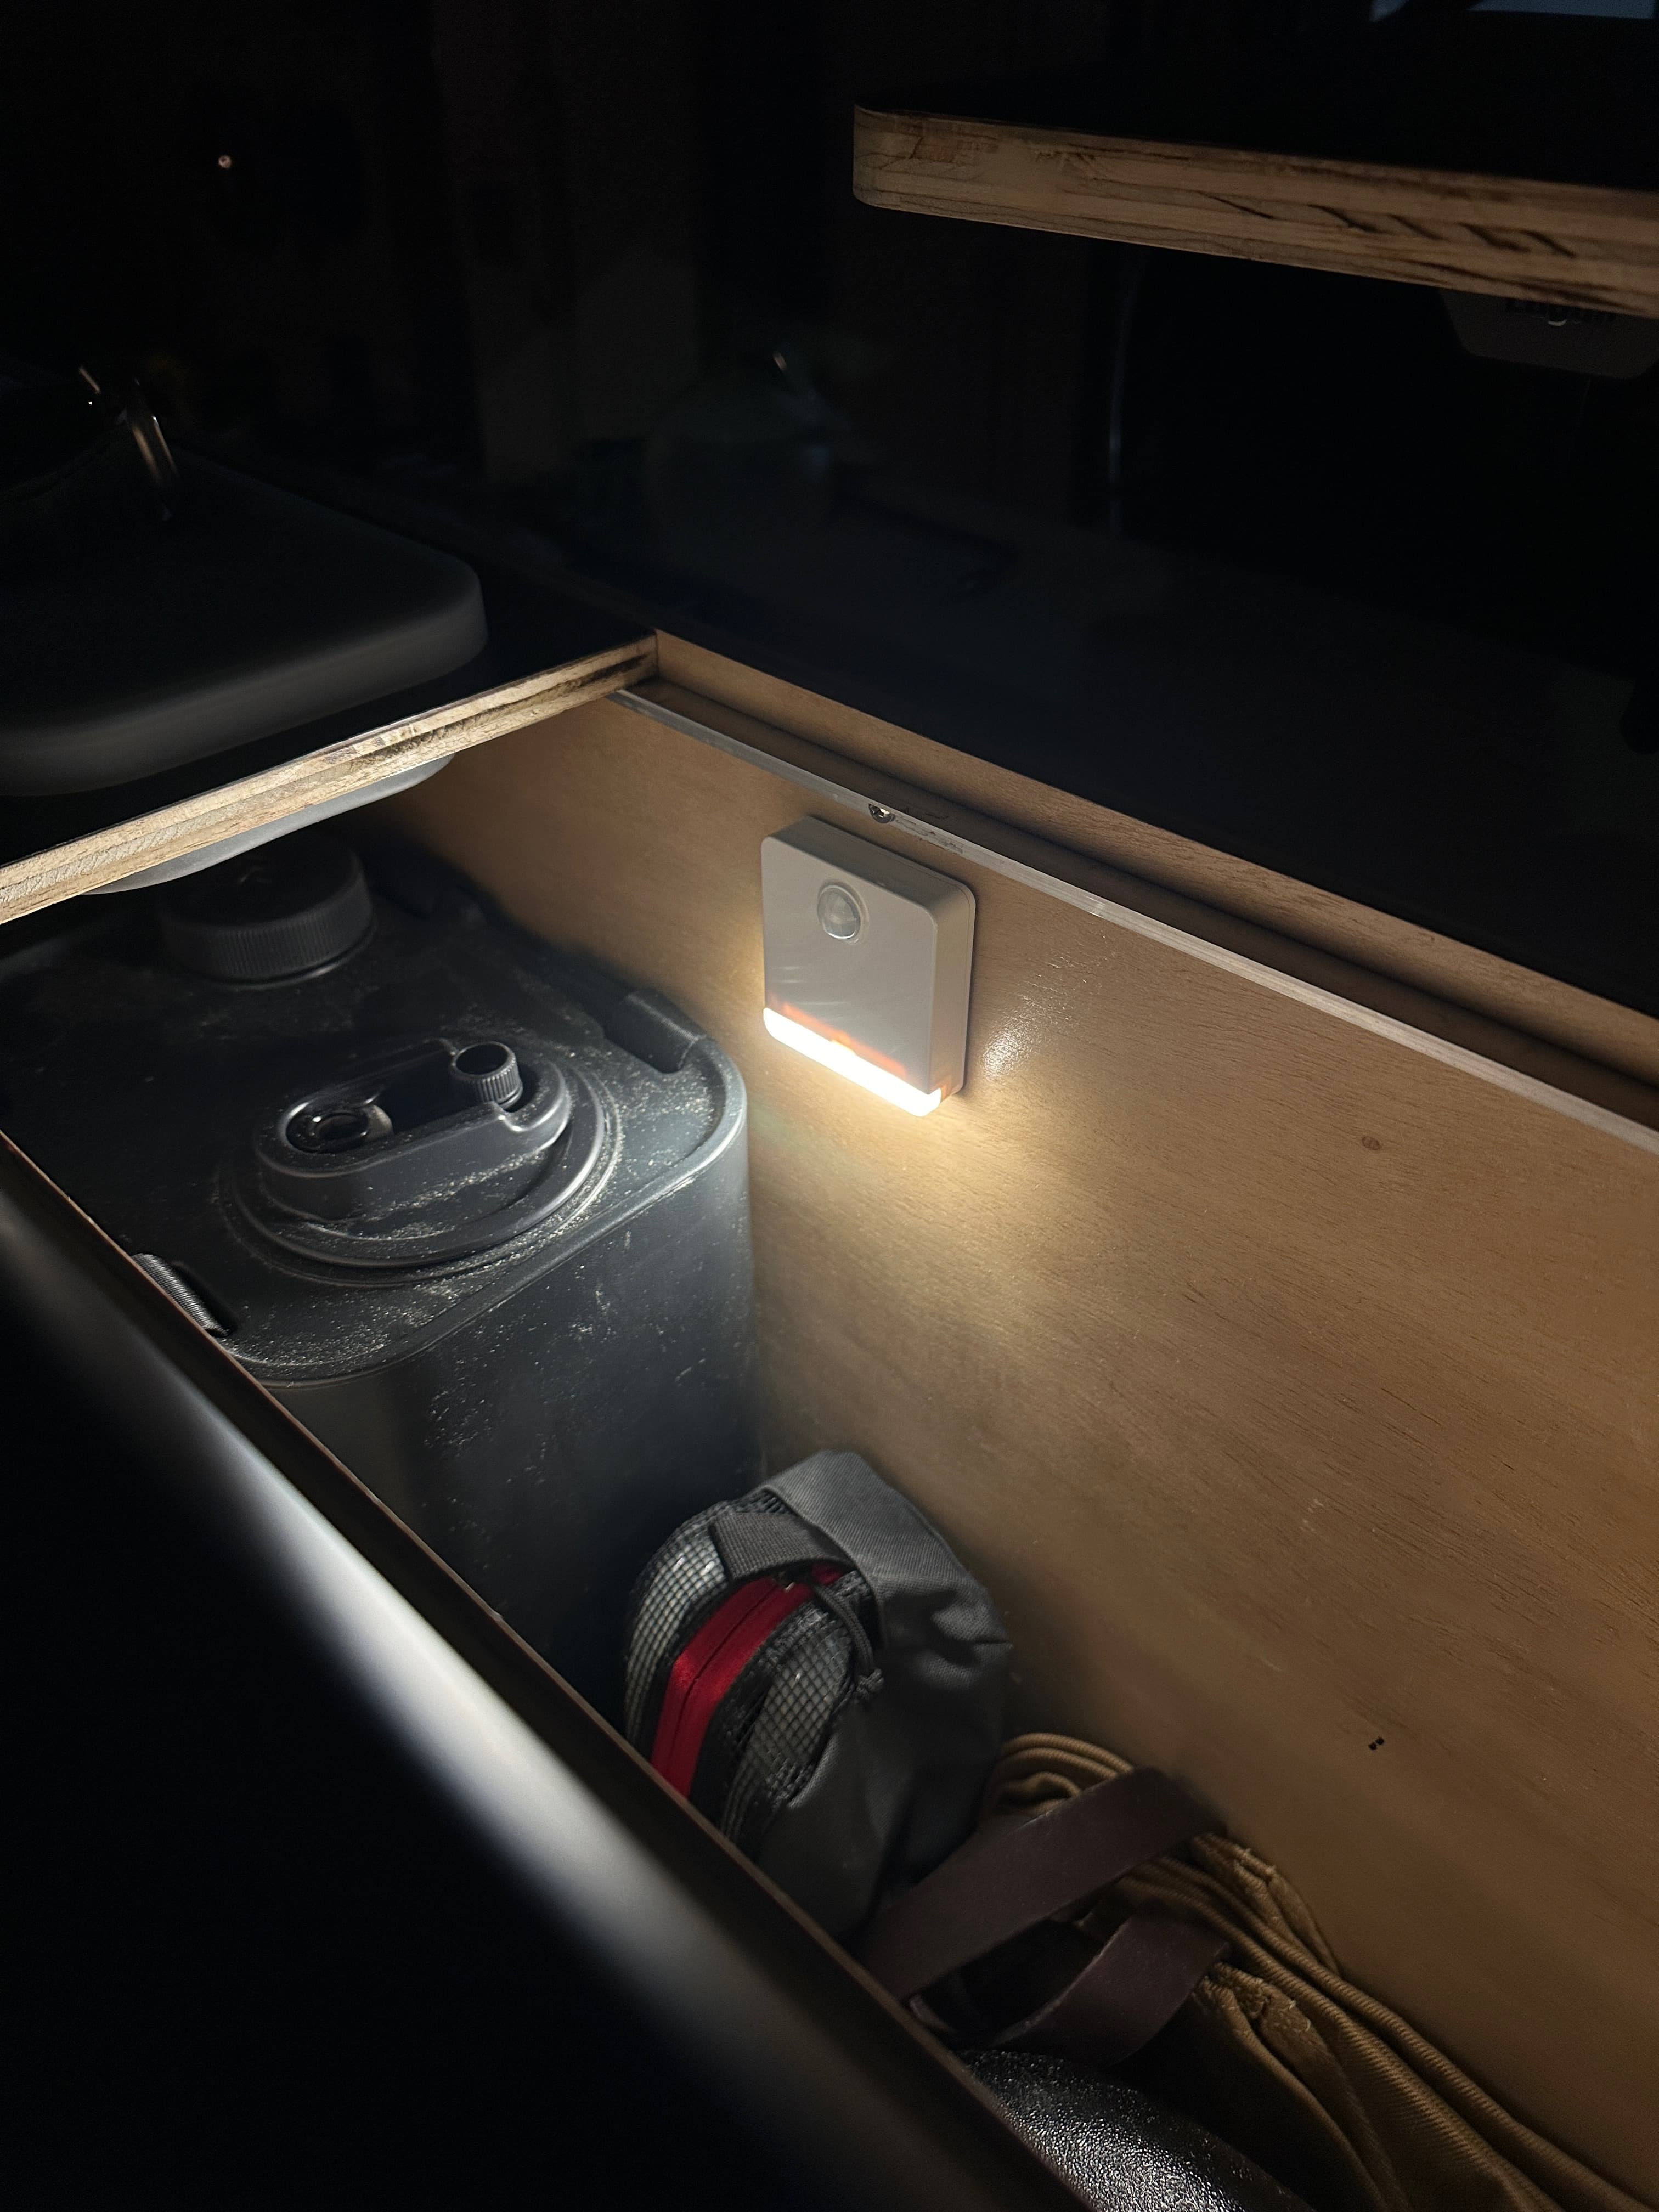
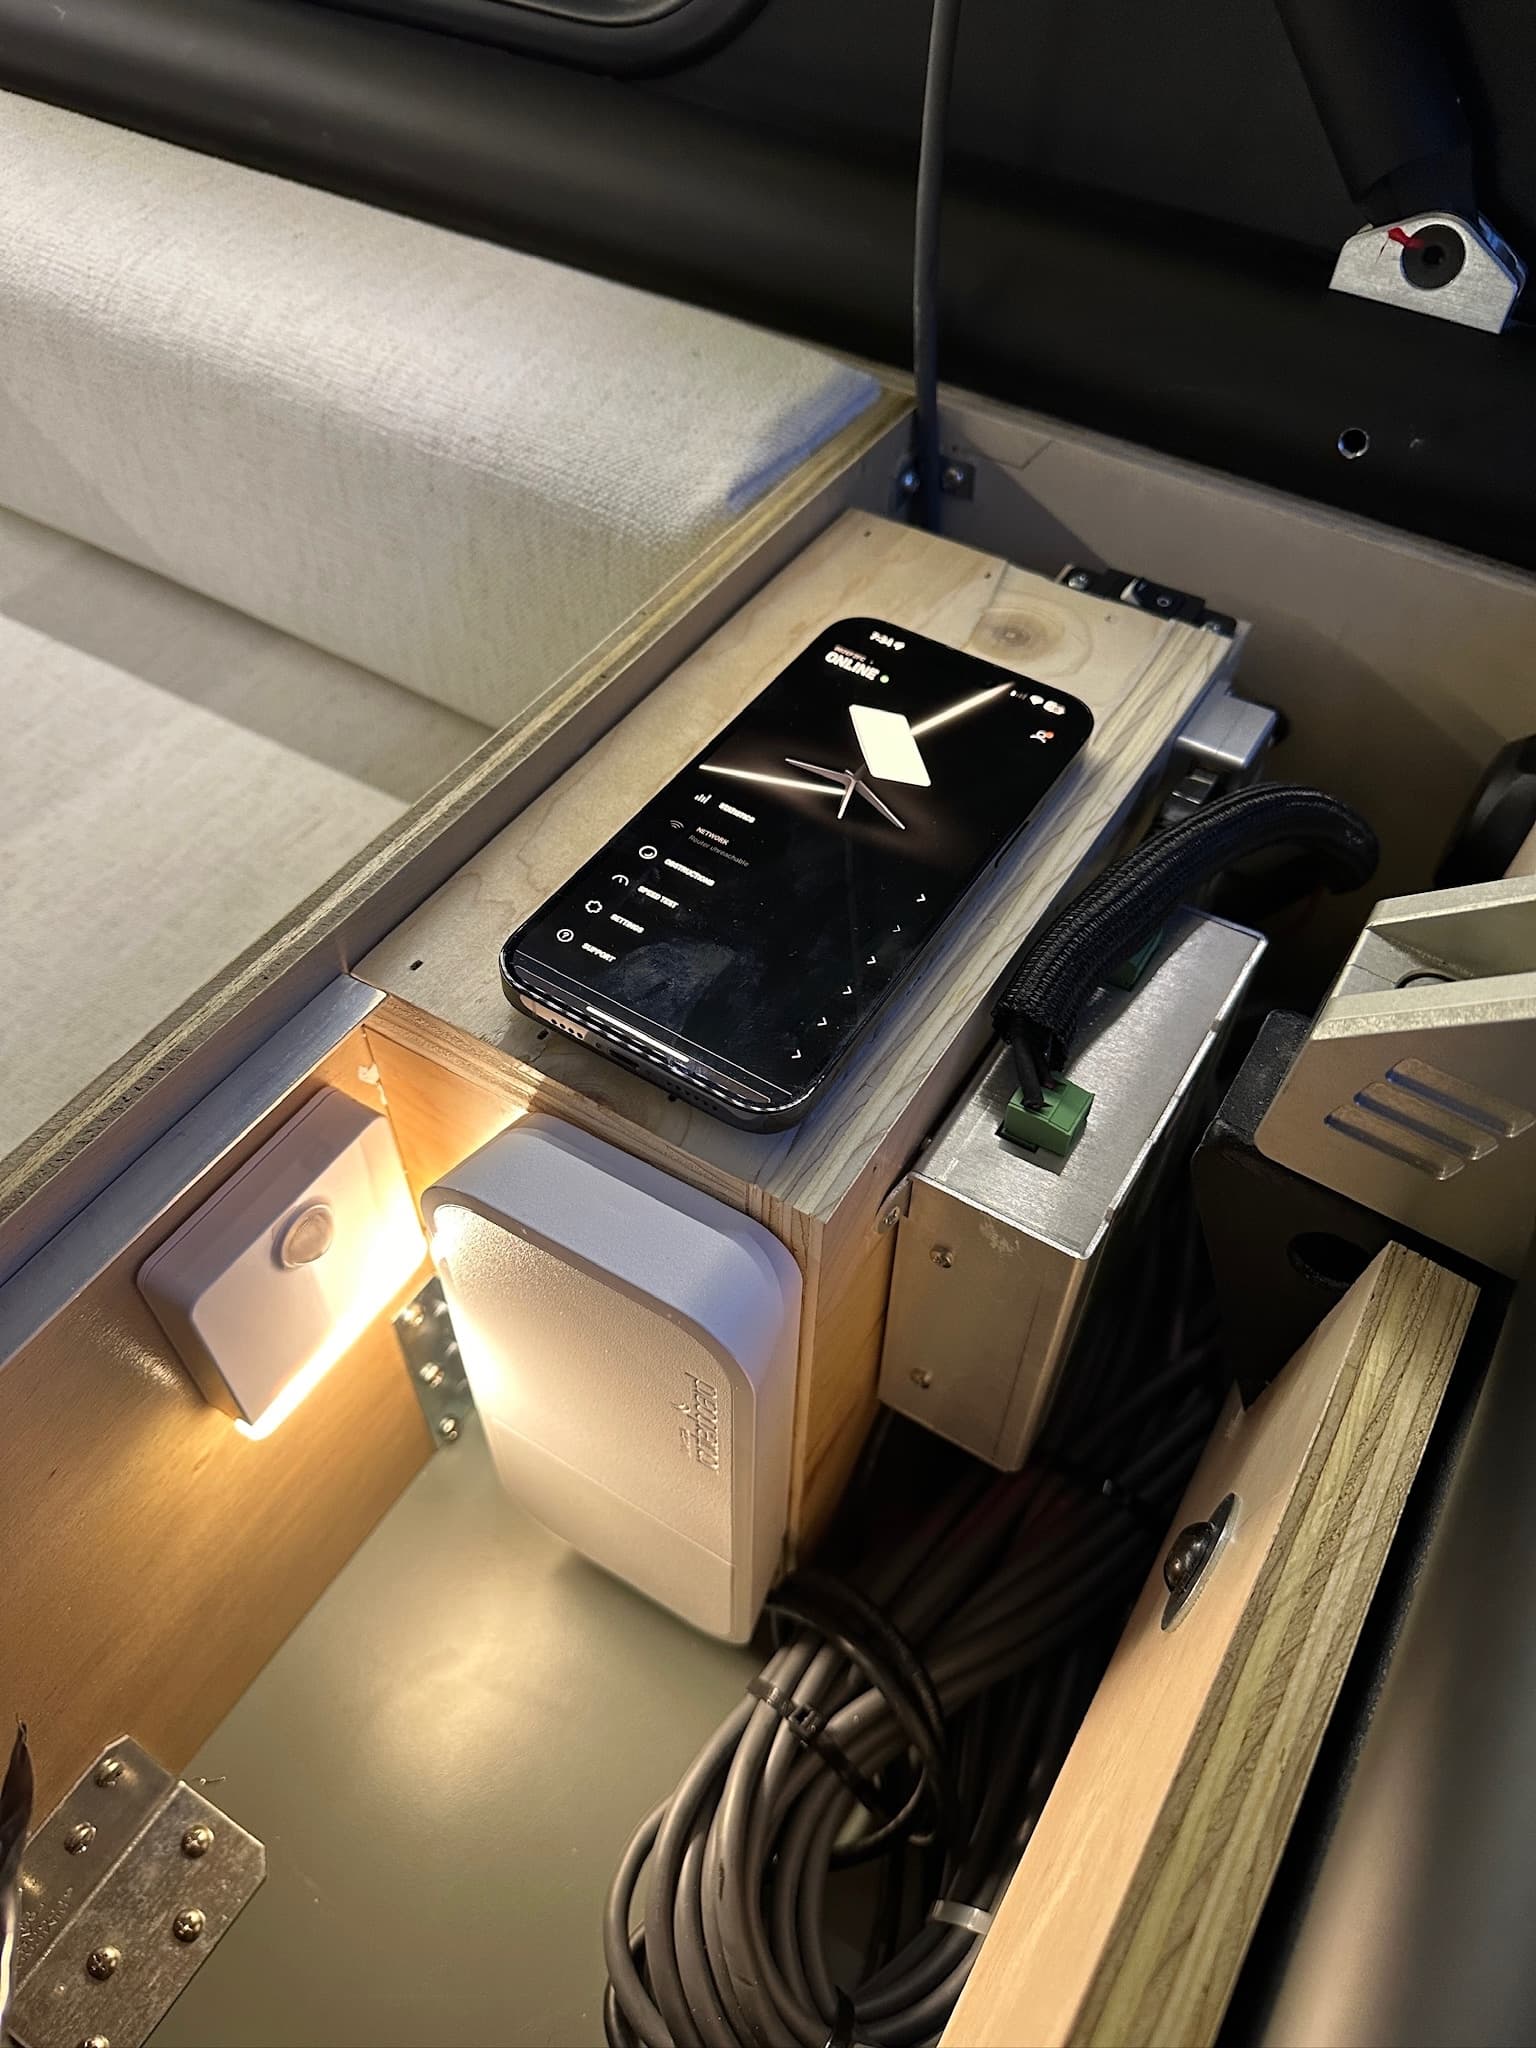
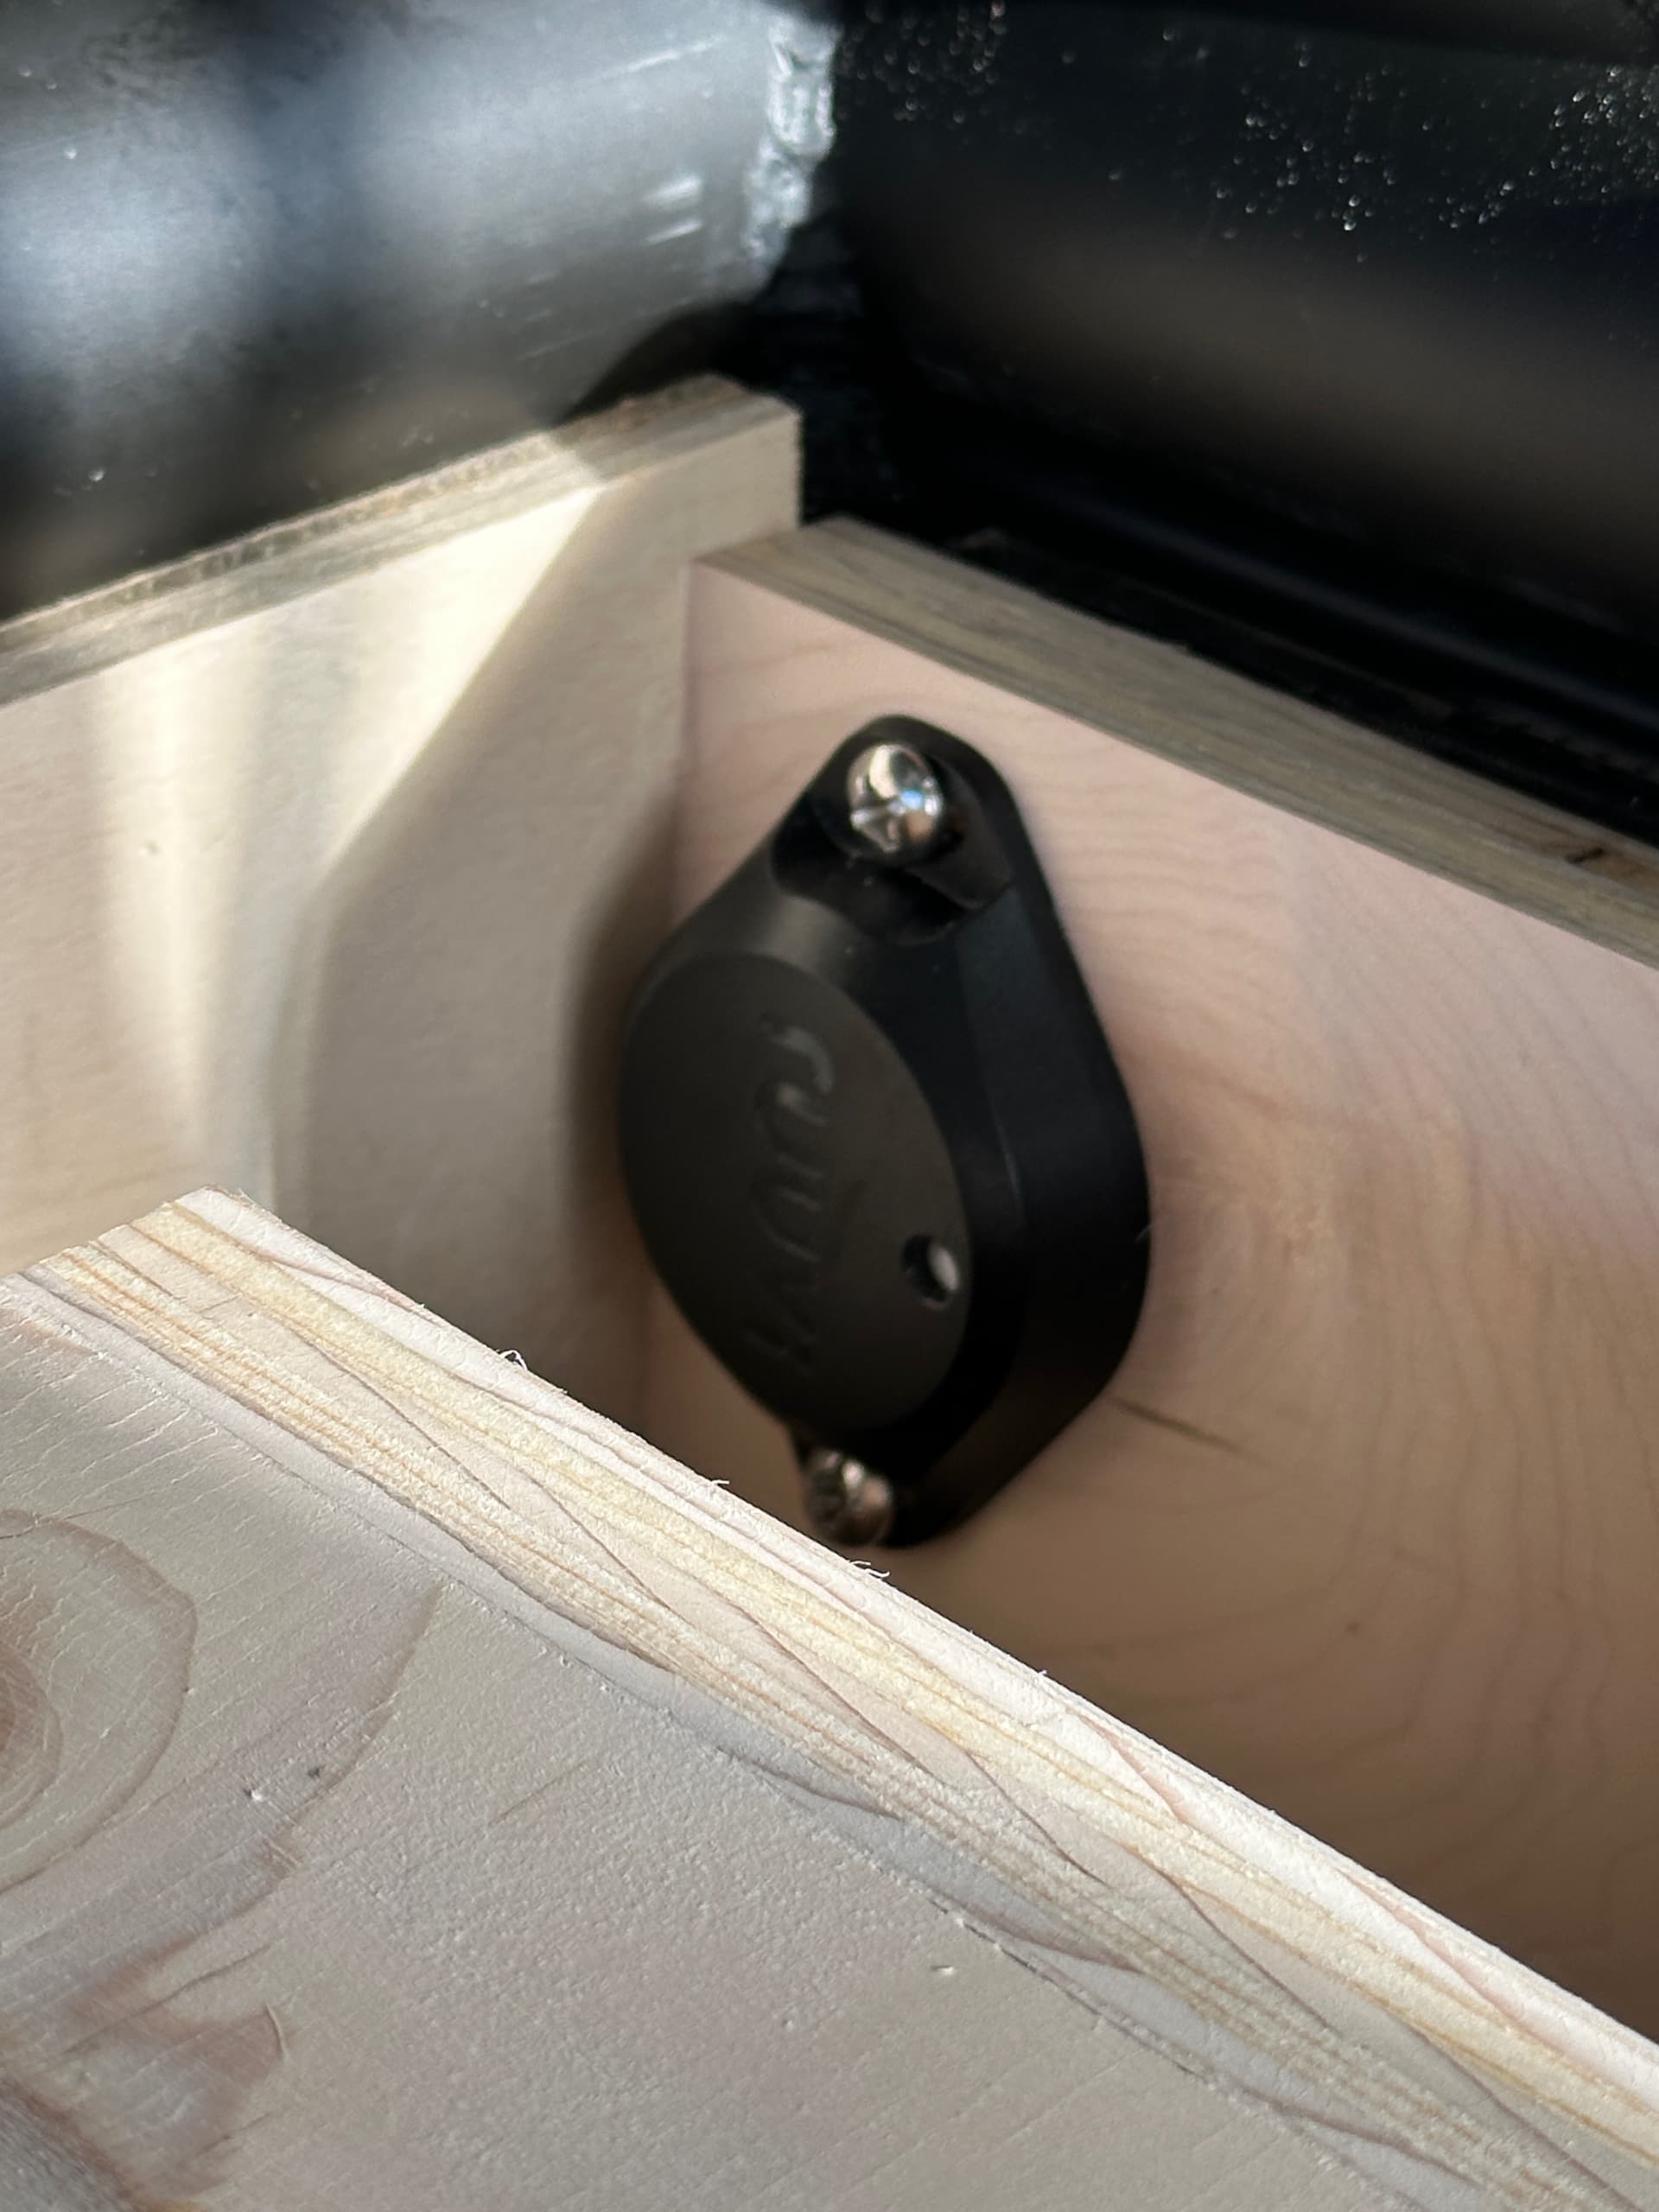
The garage was a bit of a black hole so I added these battery powered motion sensor lights that turn on when the lids are removed. It’s been really cool to have on the road the past two weeks. I’m really curious to see how long the aaa batteries last… I wish they were usb rechargeable.


![]() ASIDE FOR STARLINK SIDE PROJECT
ASIDE FOR STARLINK SIDE PROJECT
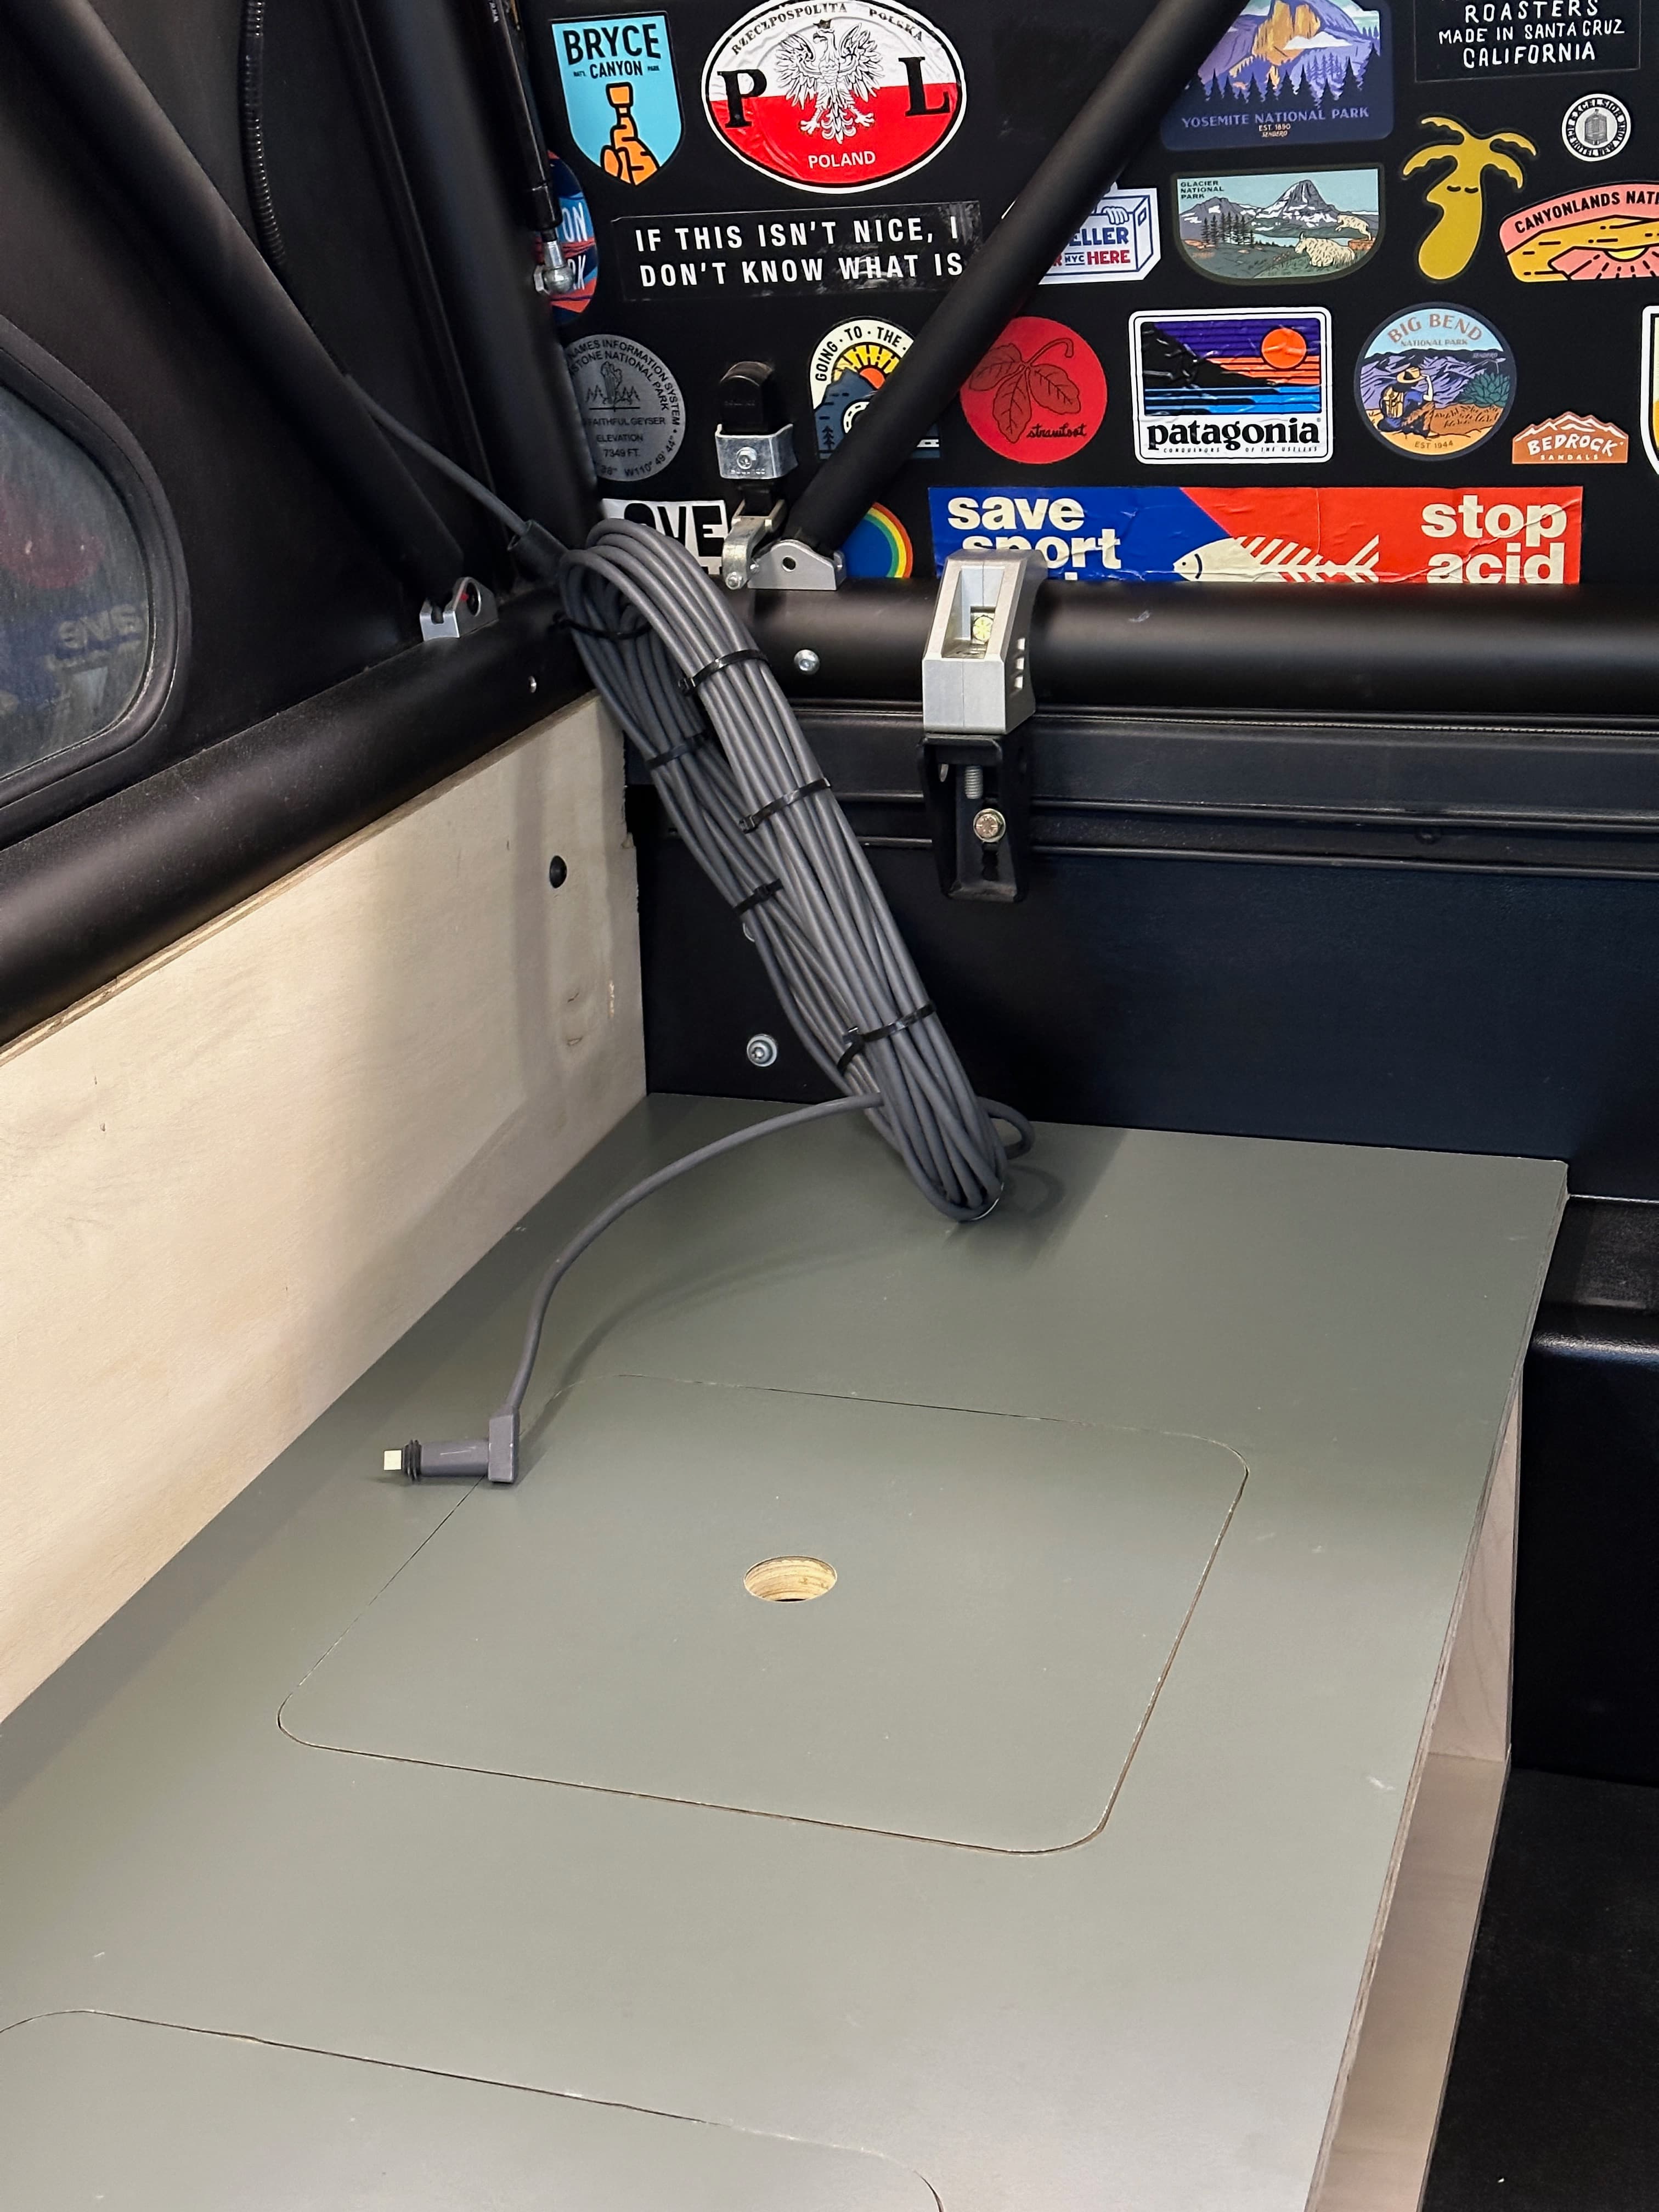
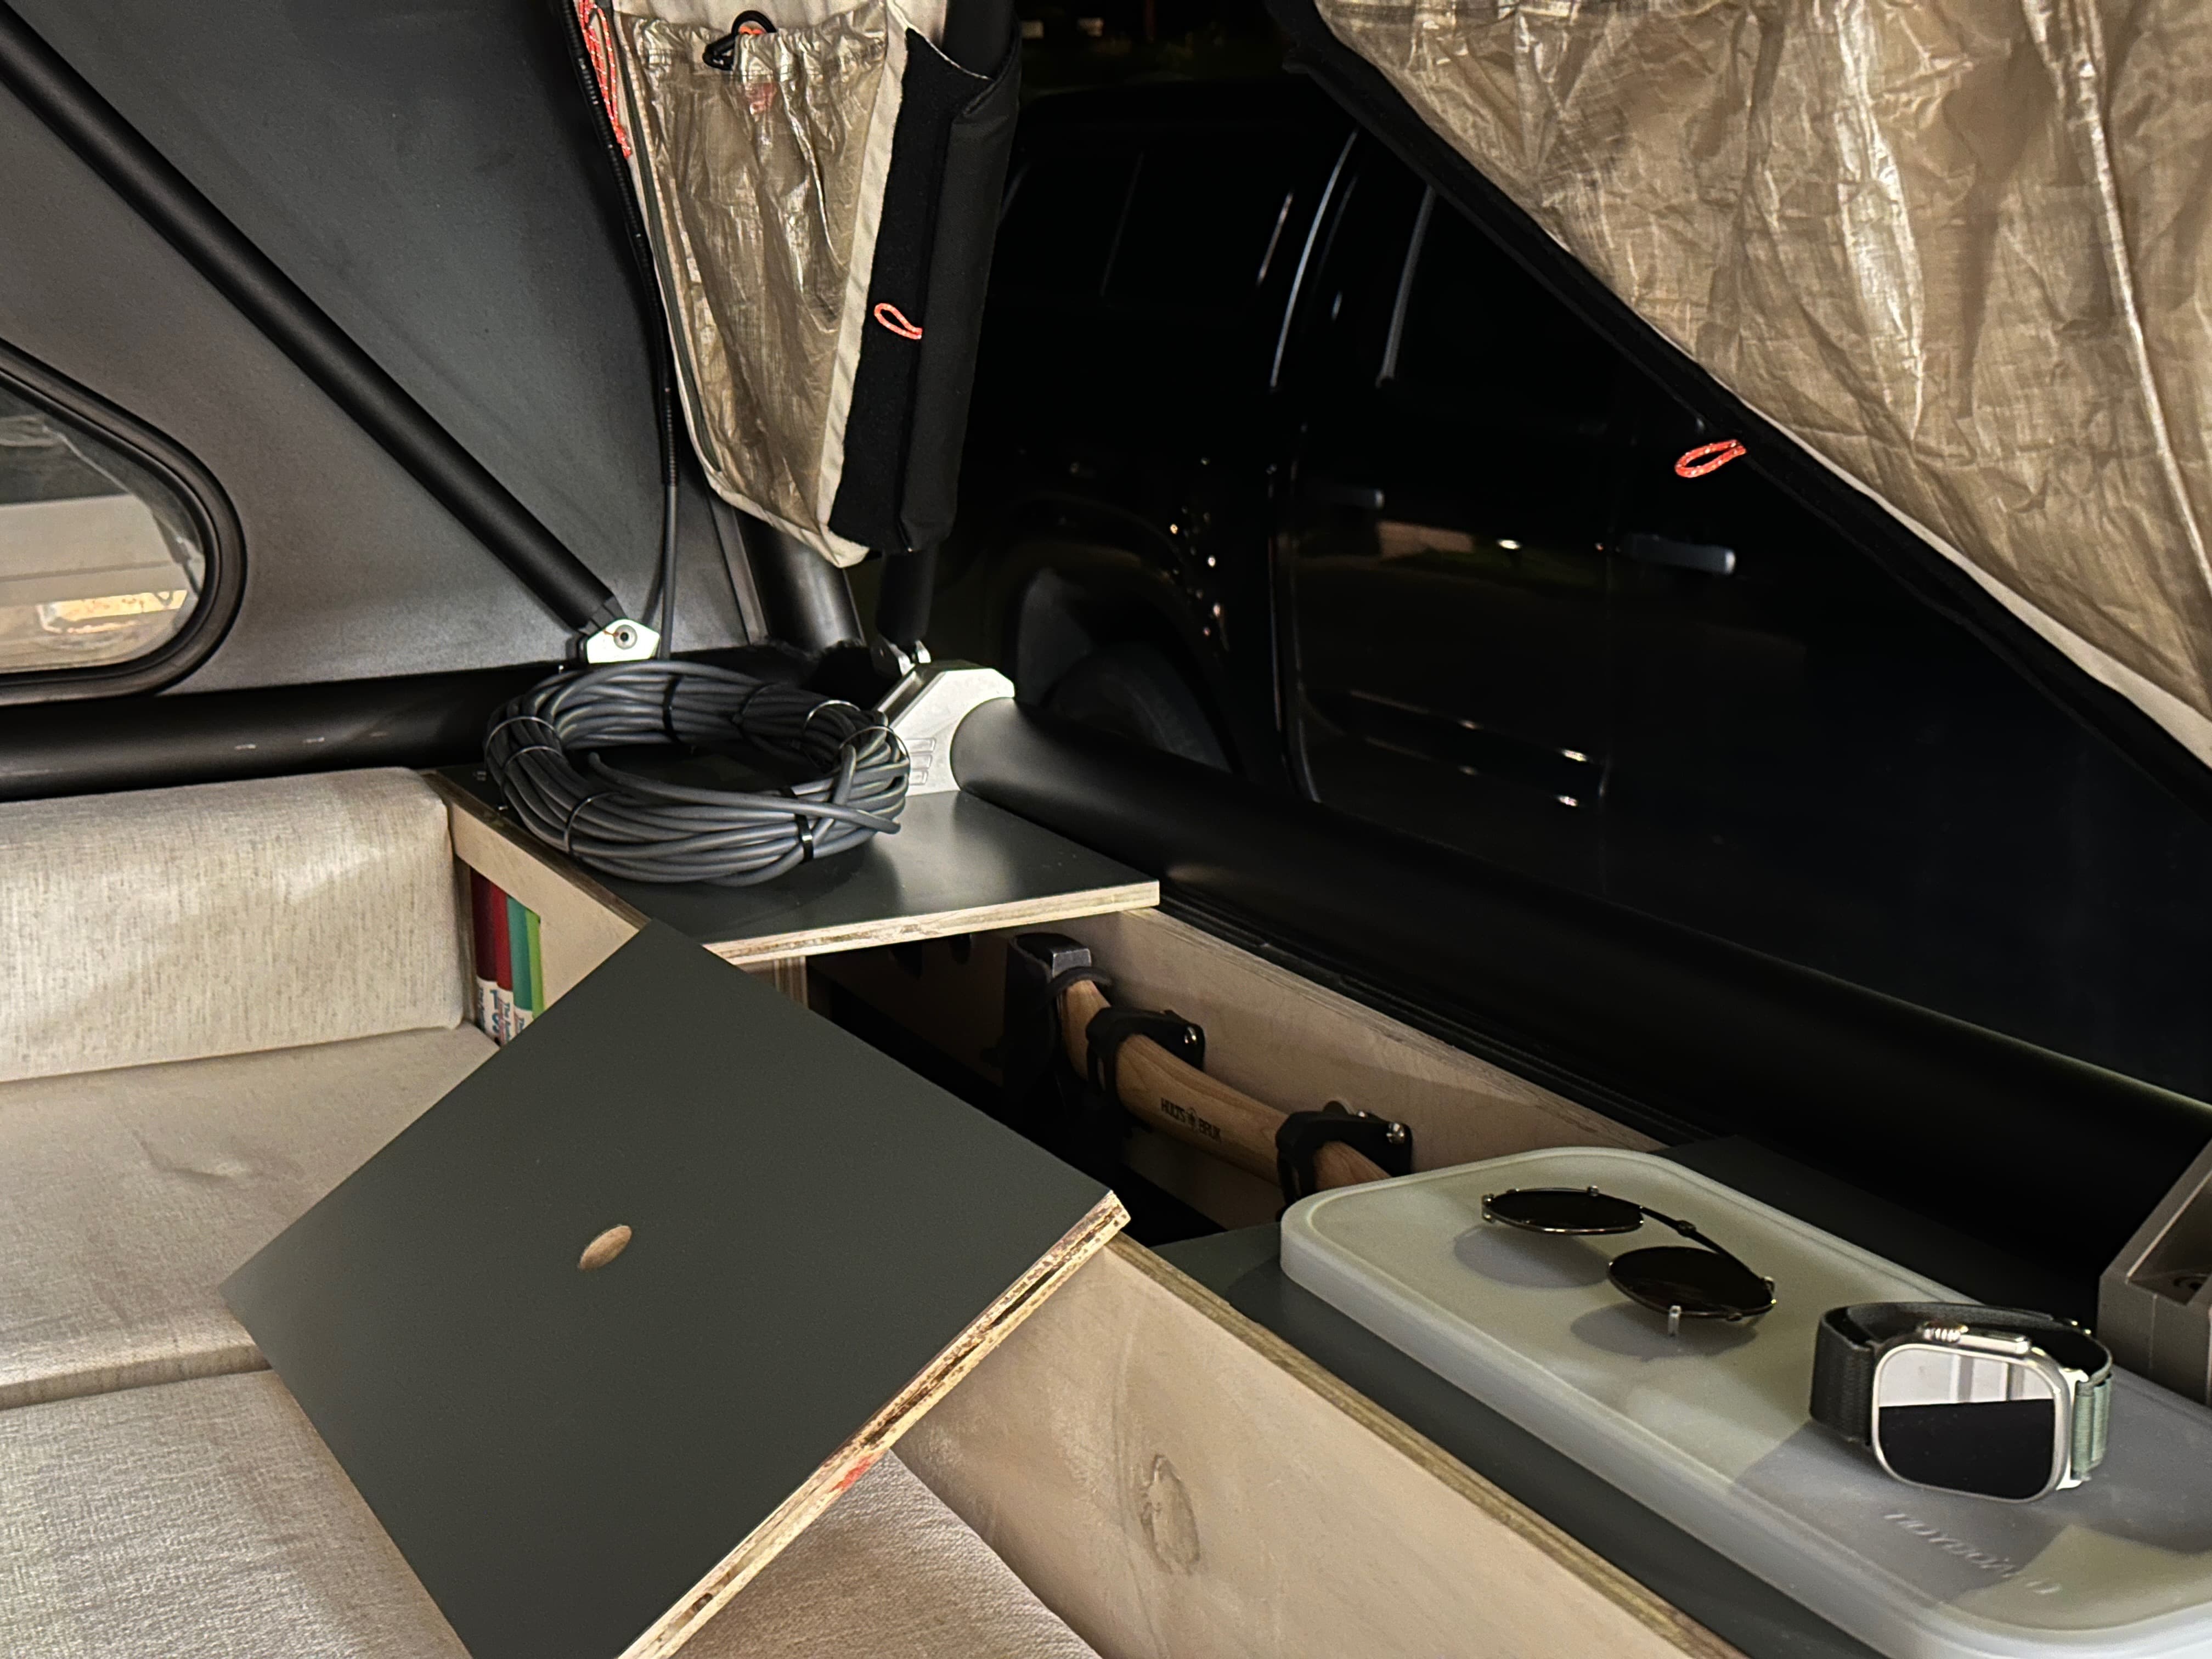
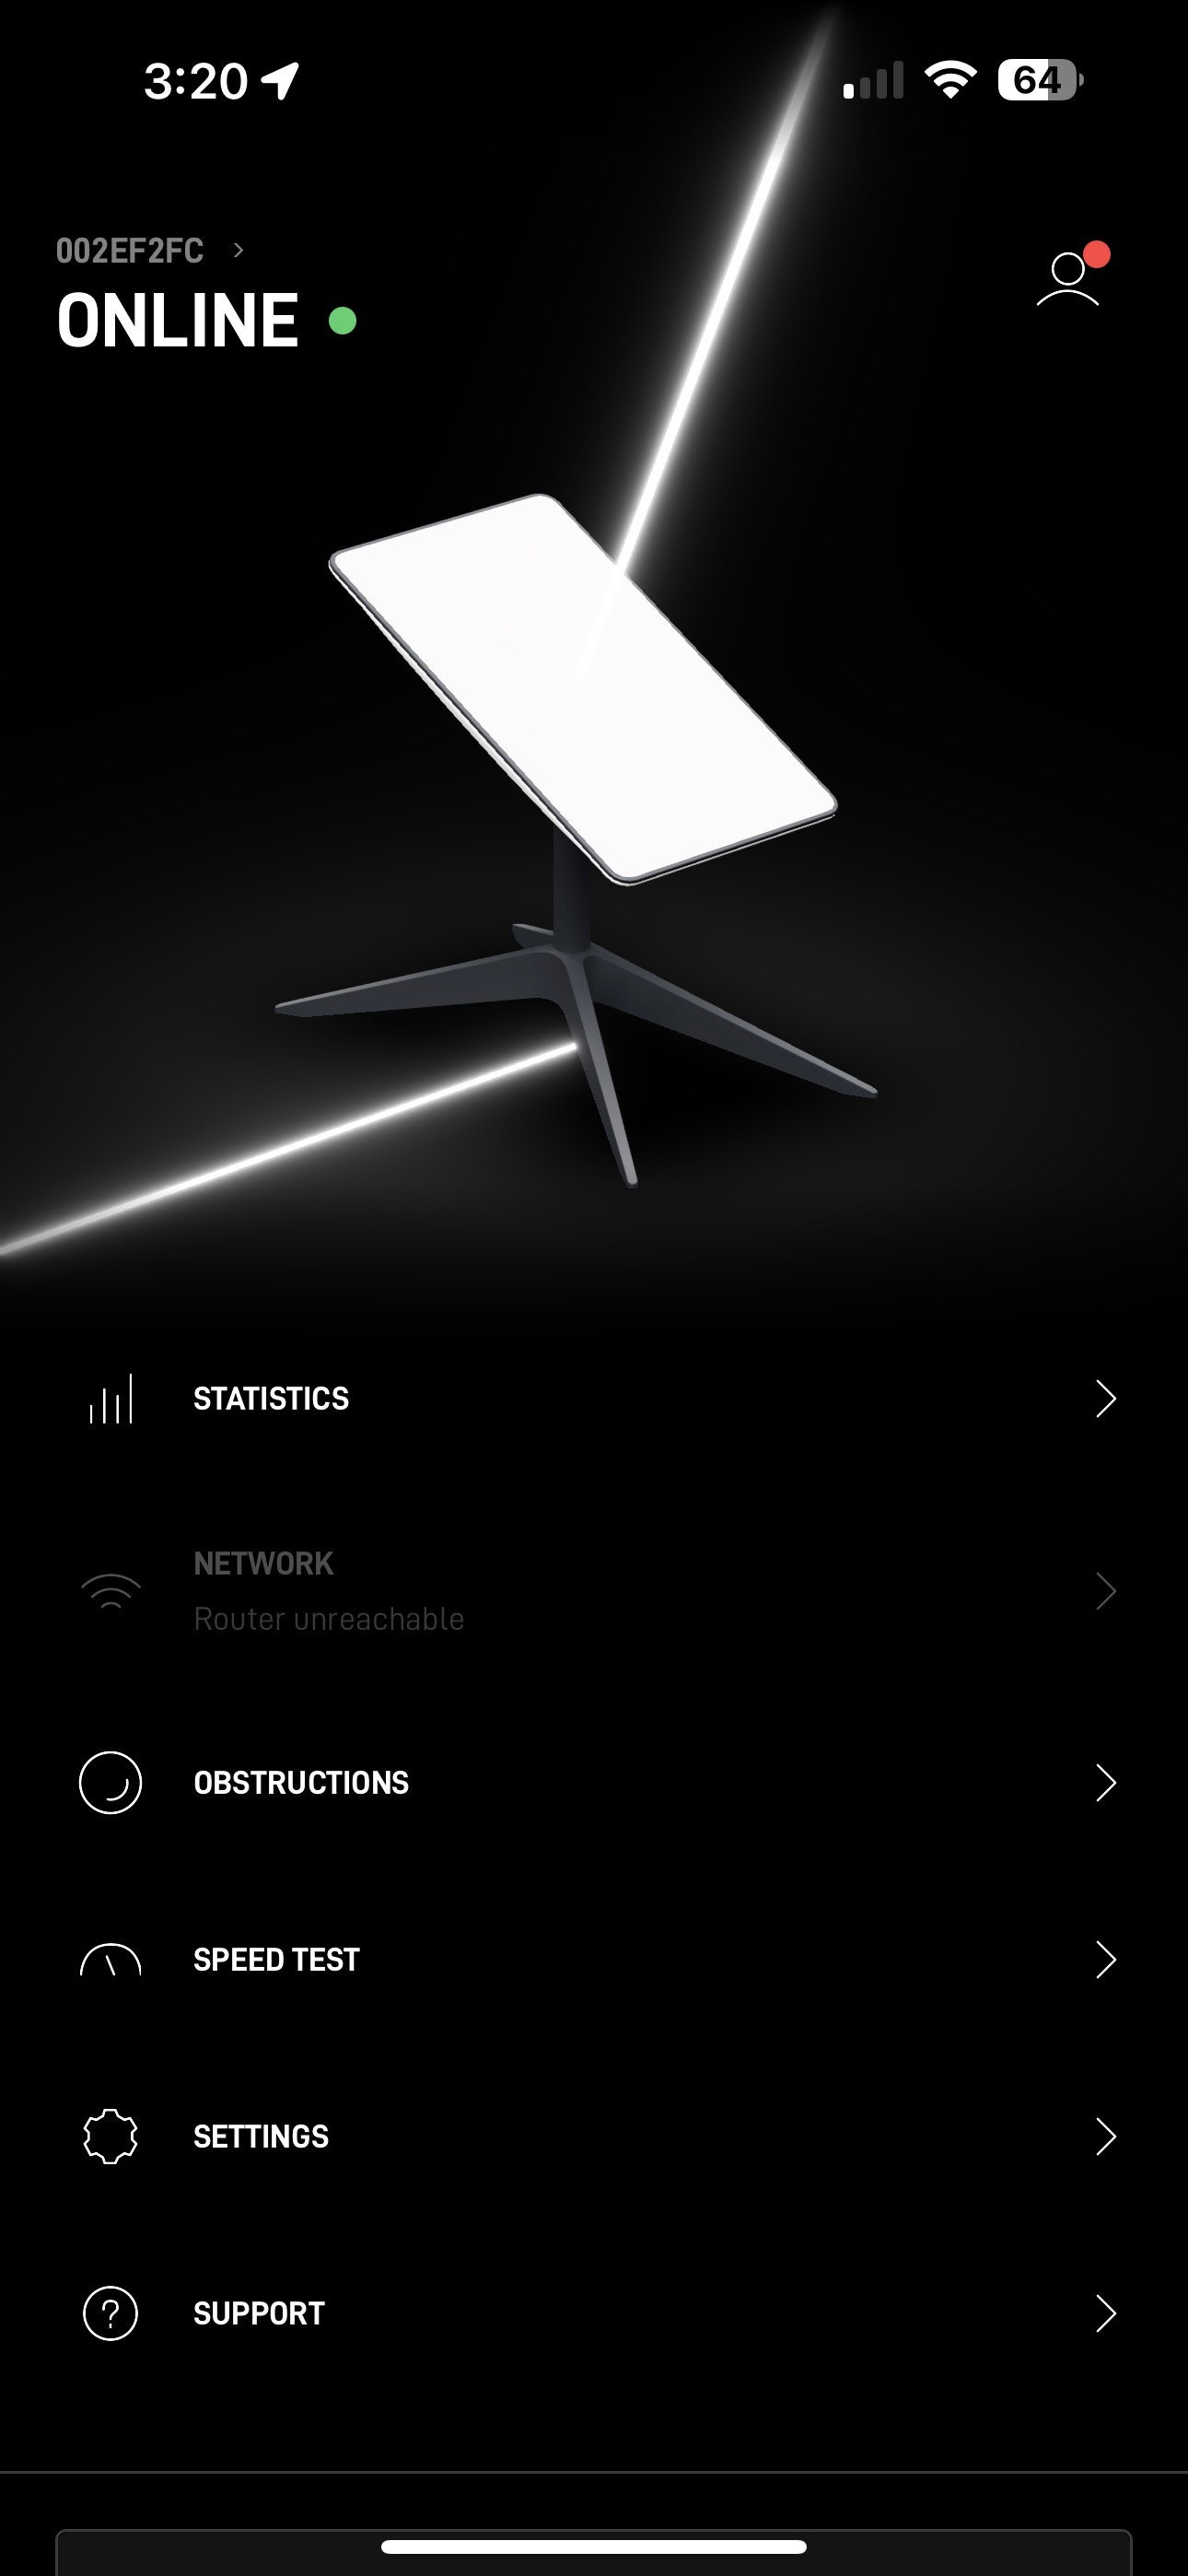
With most of the assembly complete it was time to move into some electrical work. I did not want to bring the Goal Zero or factory router on this journey and instead run the Starlink off the 12v “house” battery under the hood. I wired up a Dishy Dualie, YAOSHENG converter, Blue Sea kill switch, and a PoE (power over ethernet) MicoTik router.

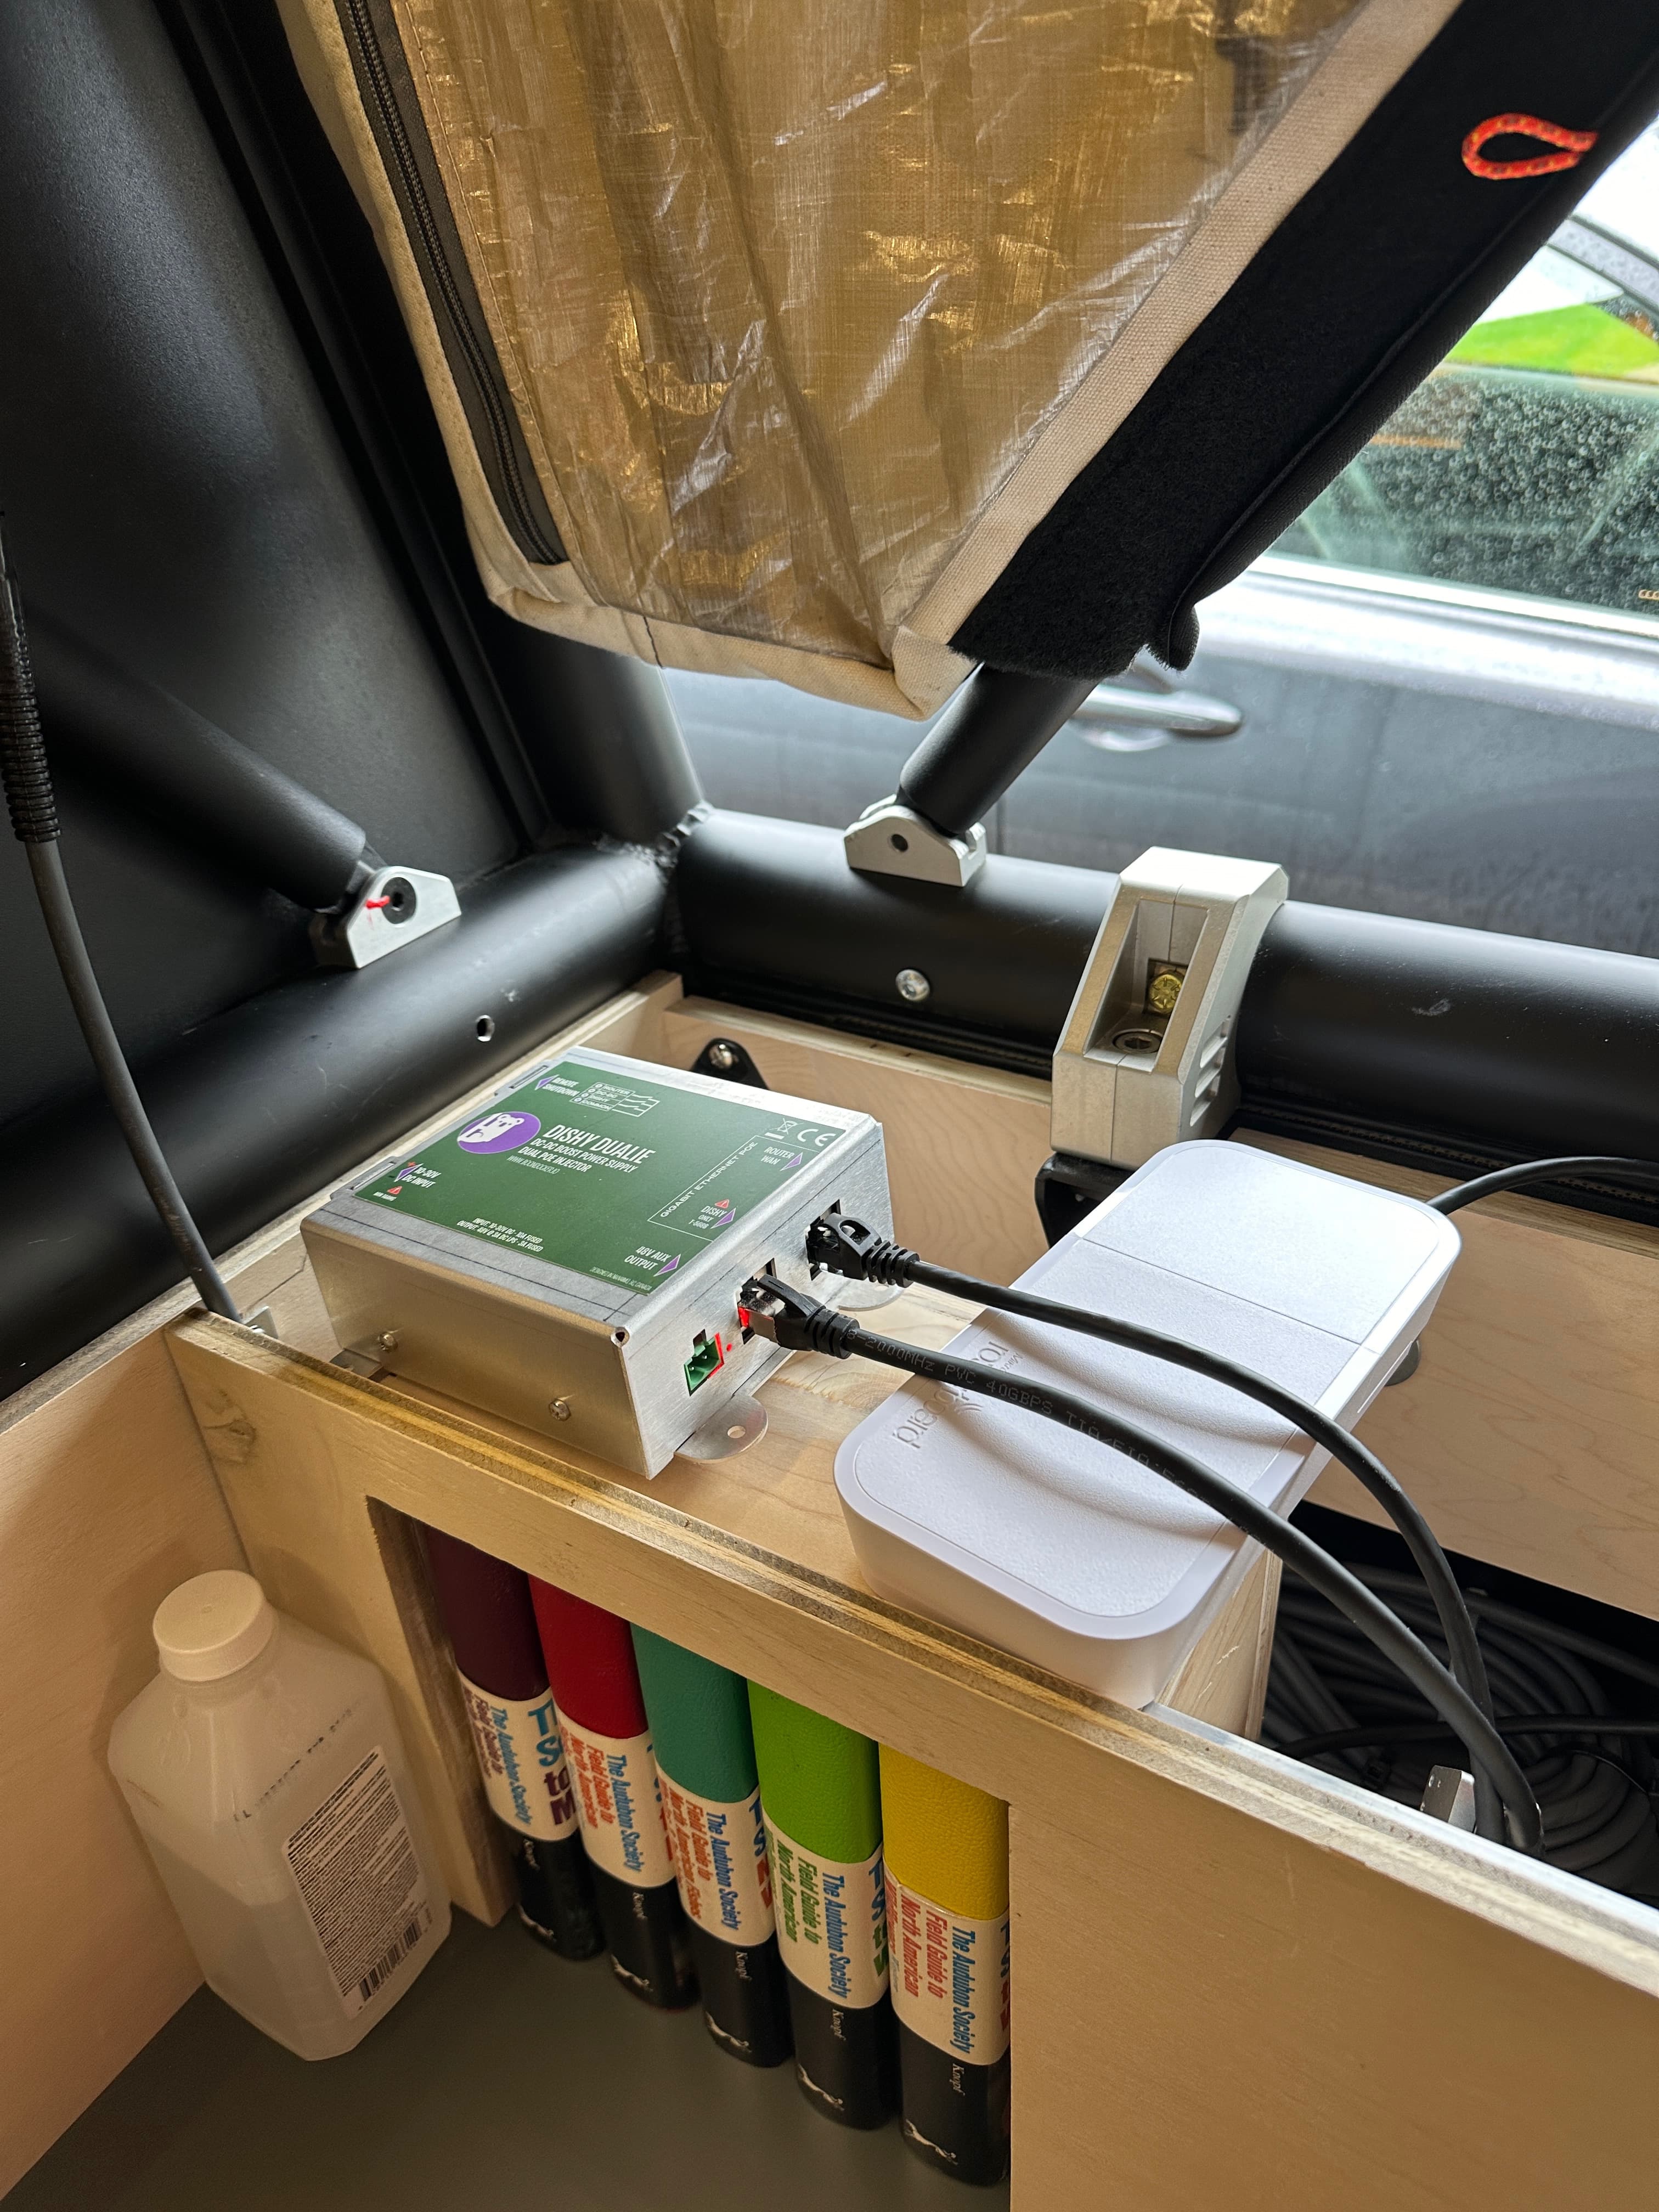
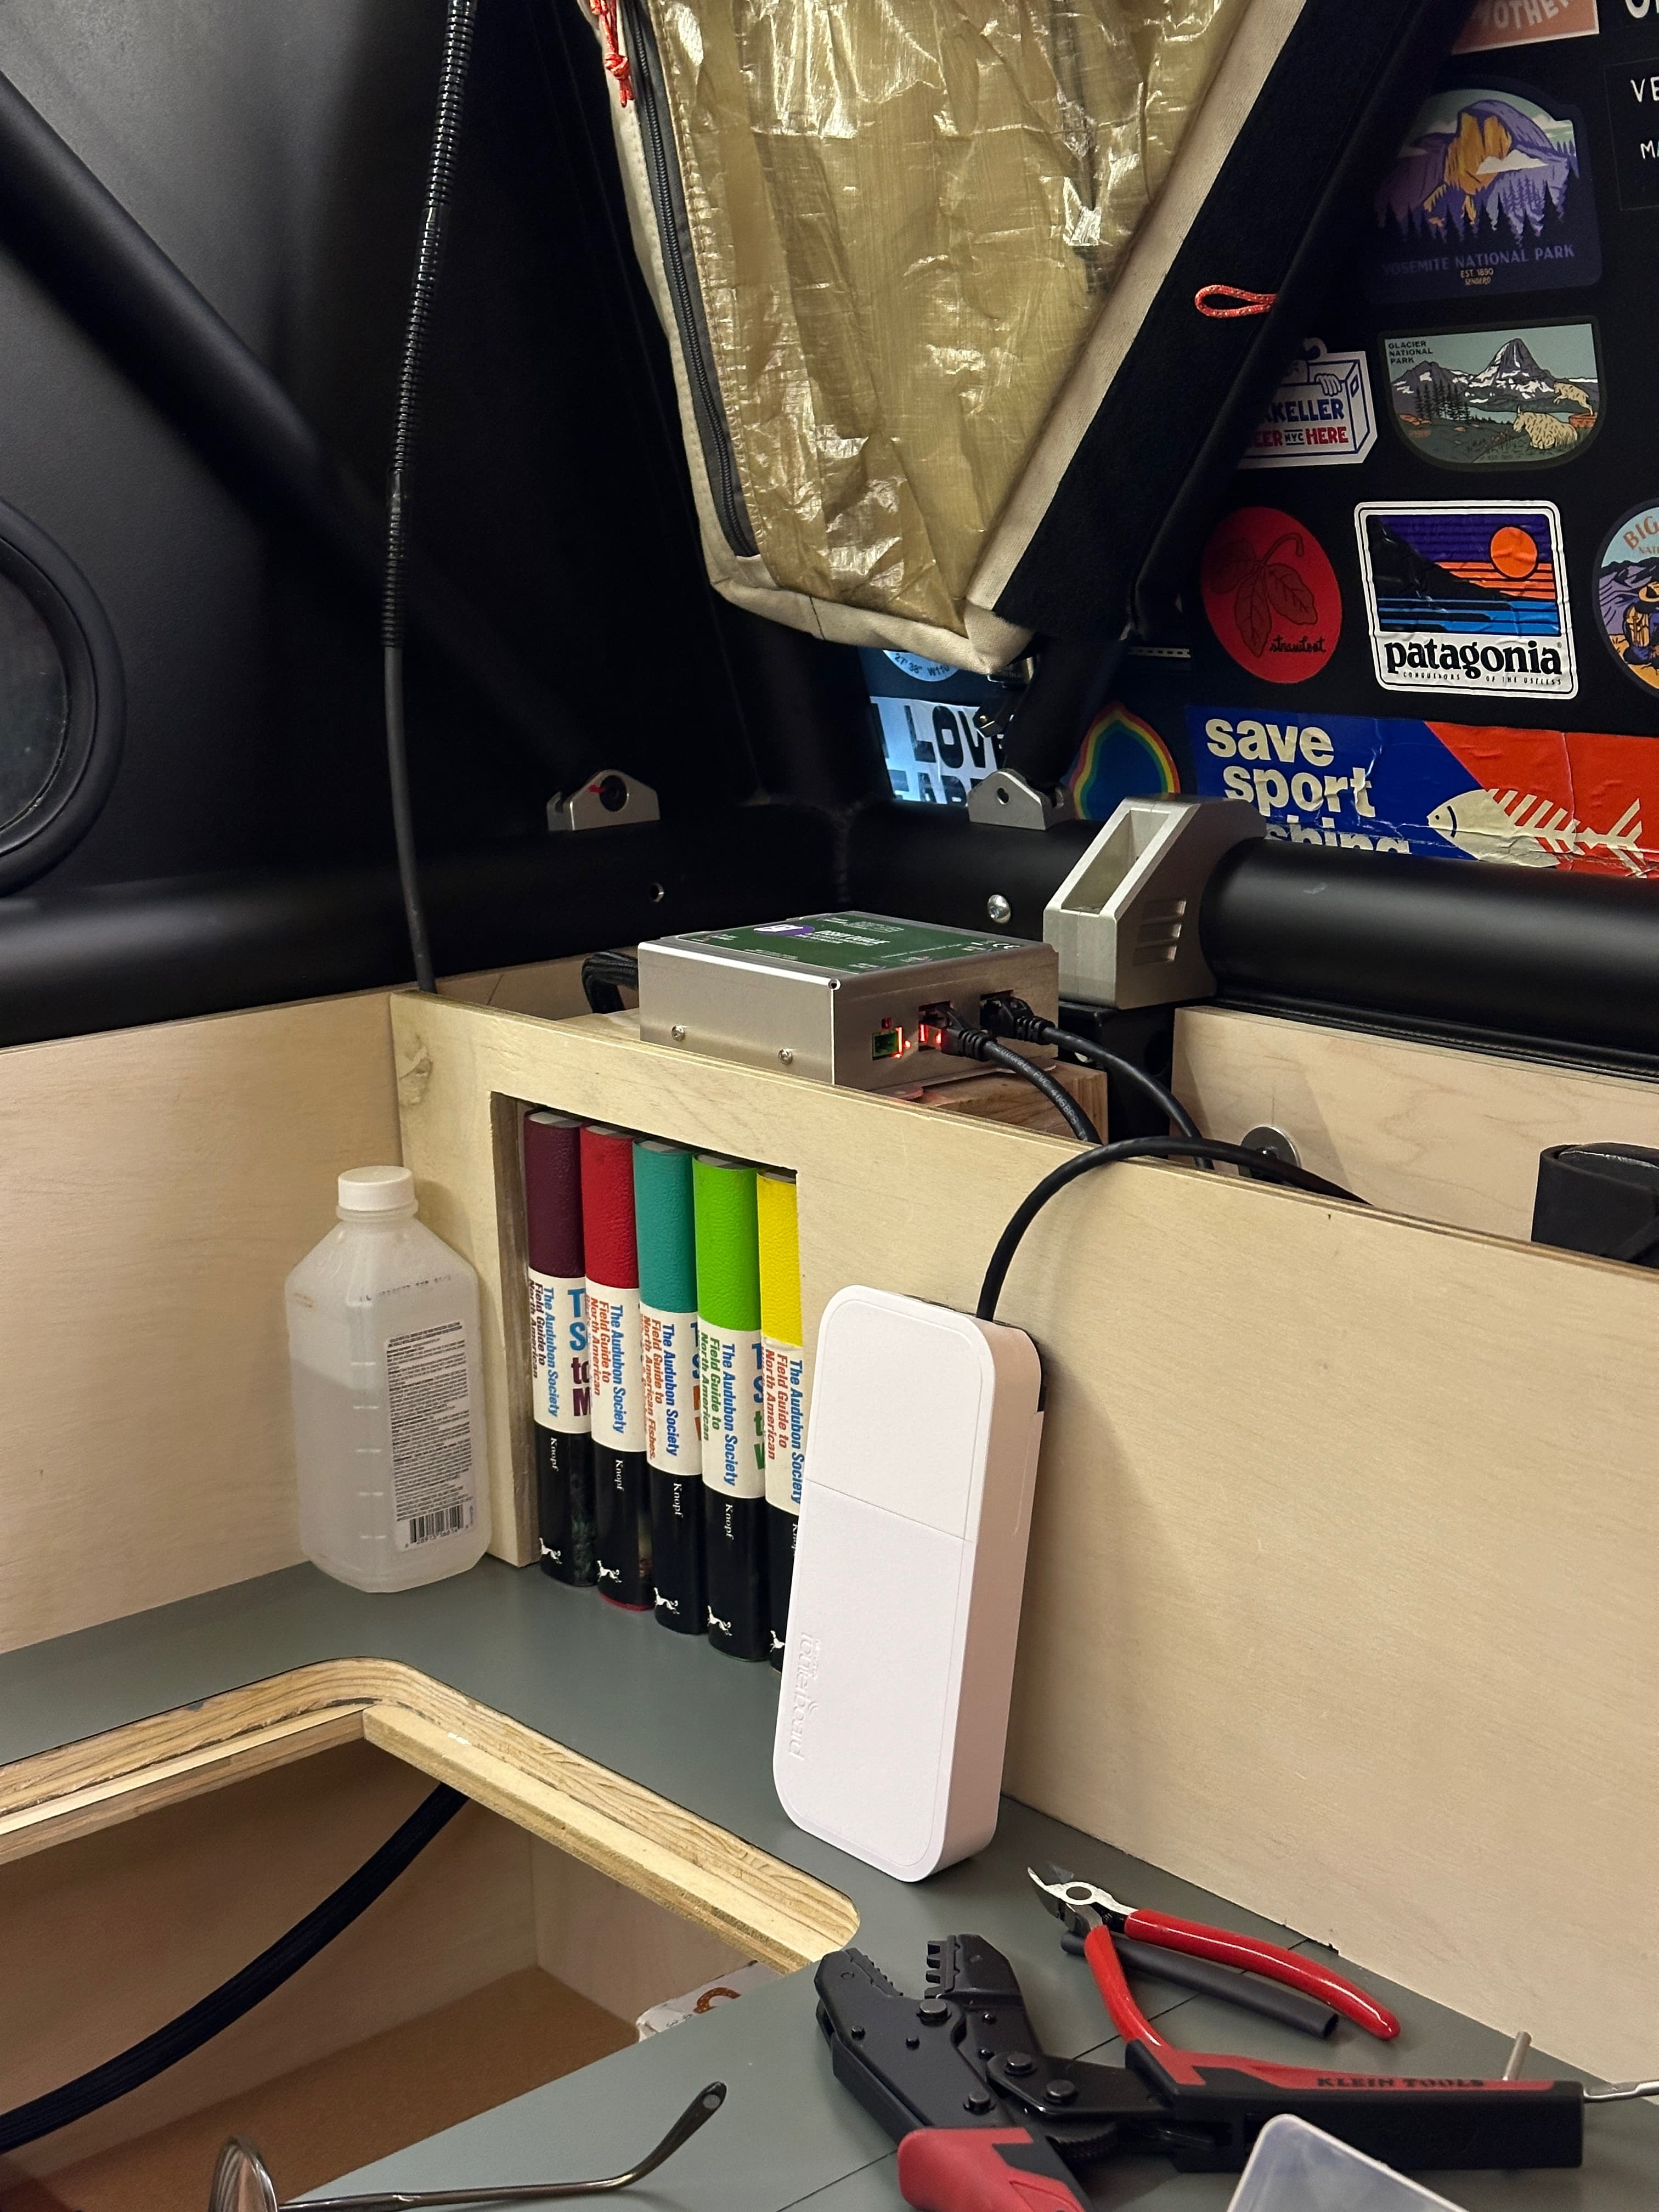
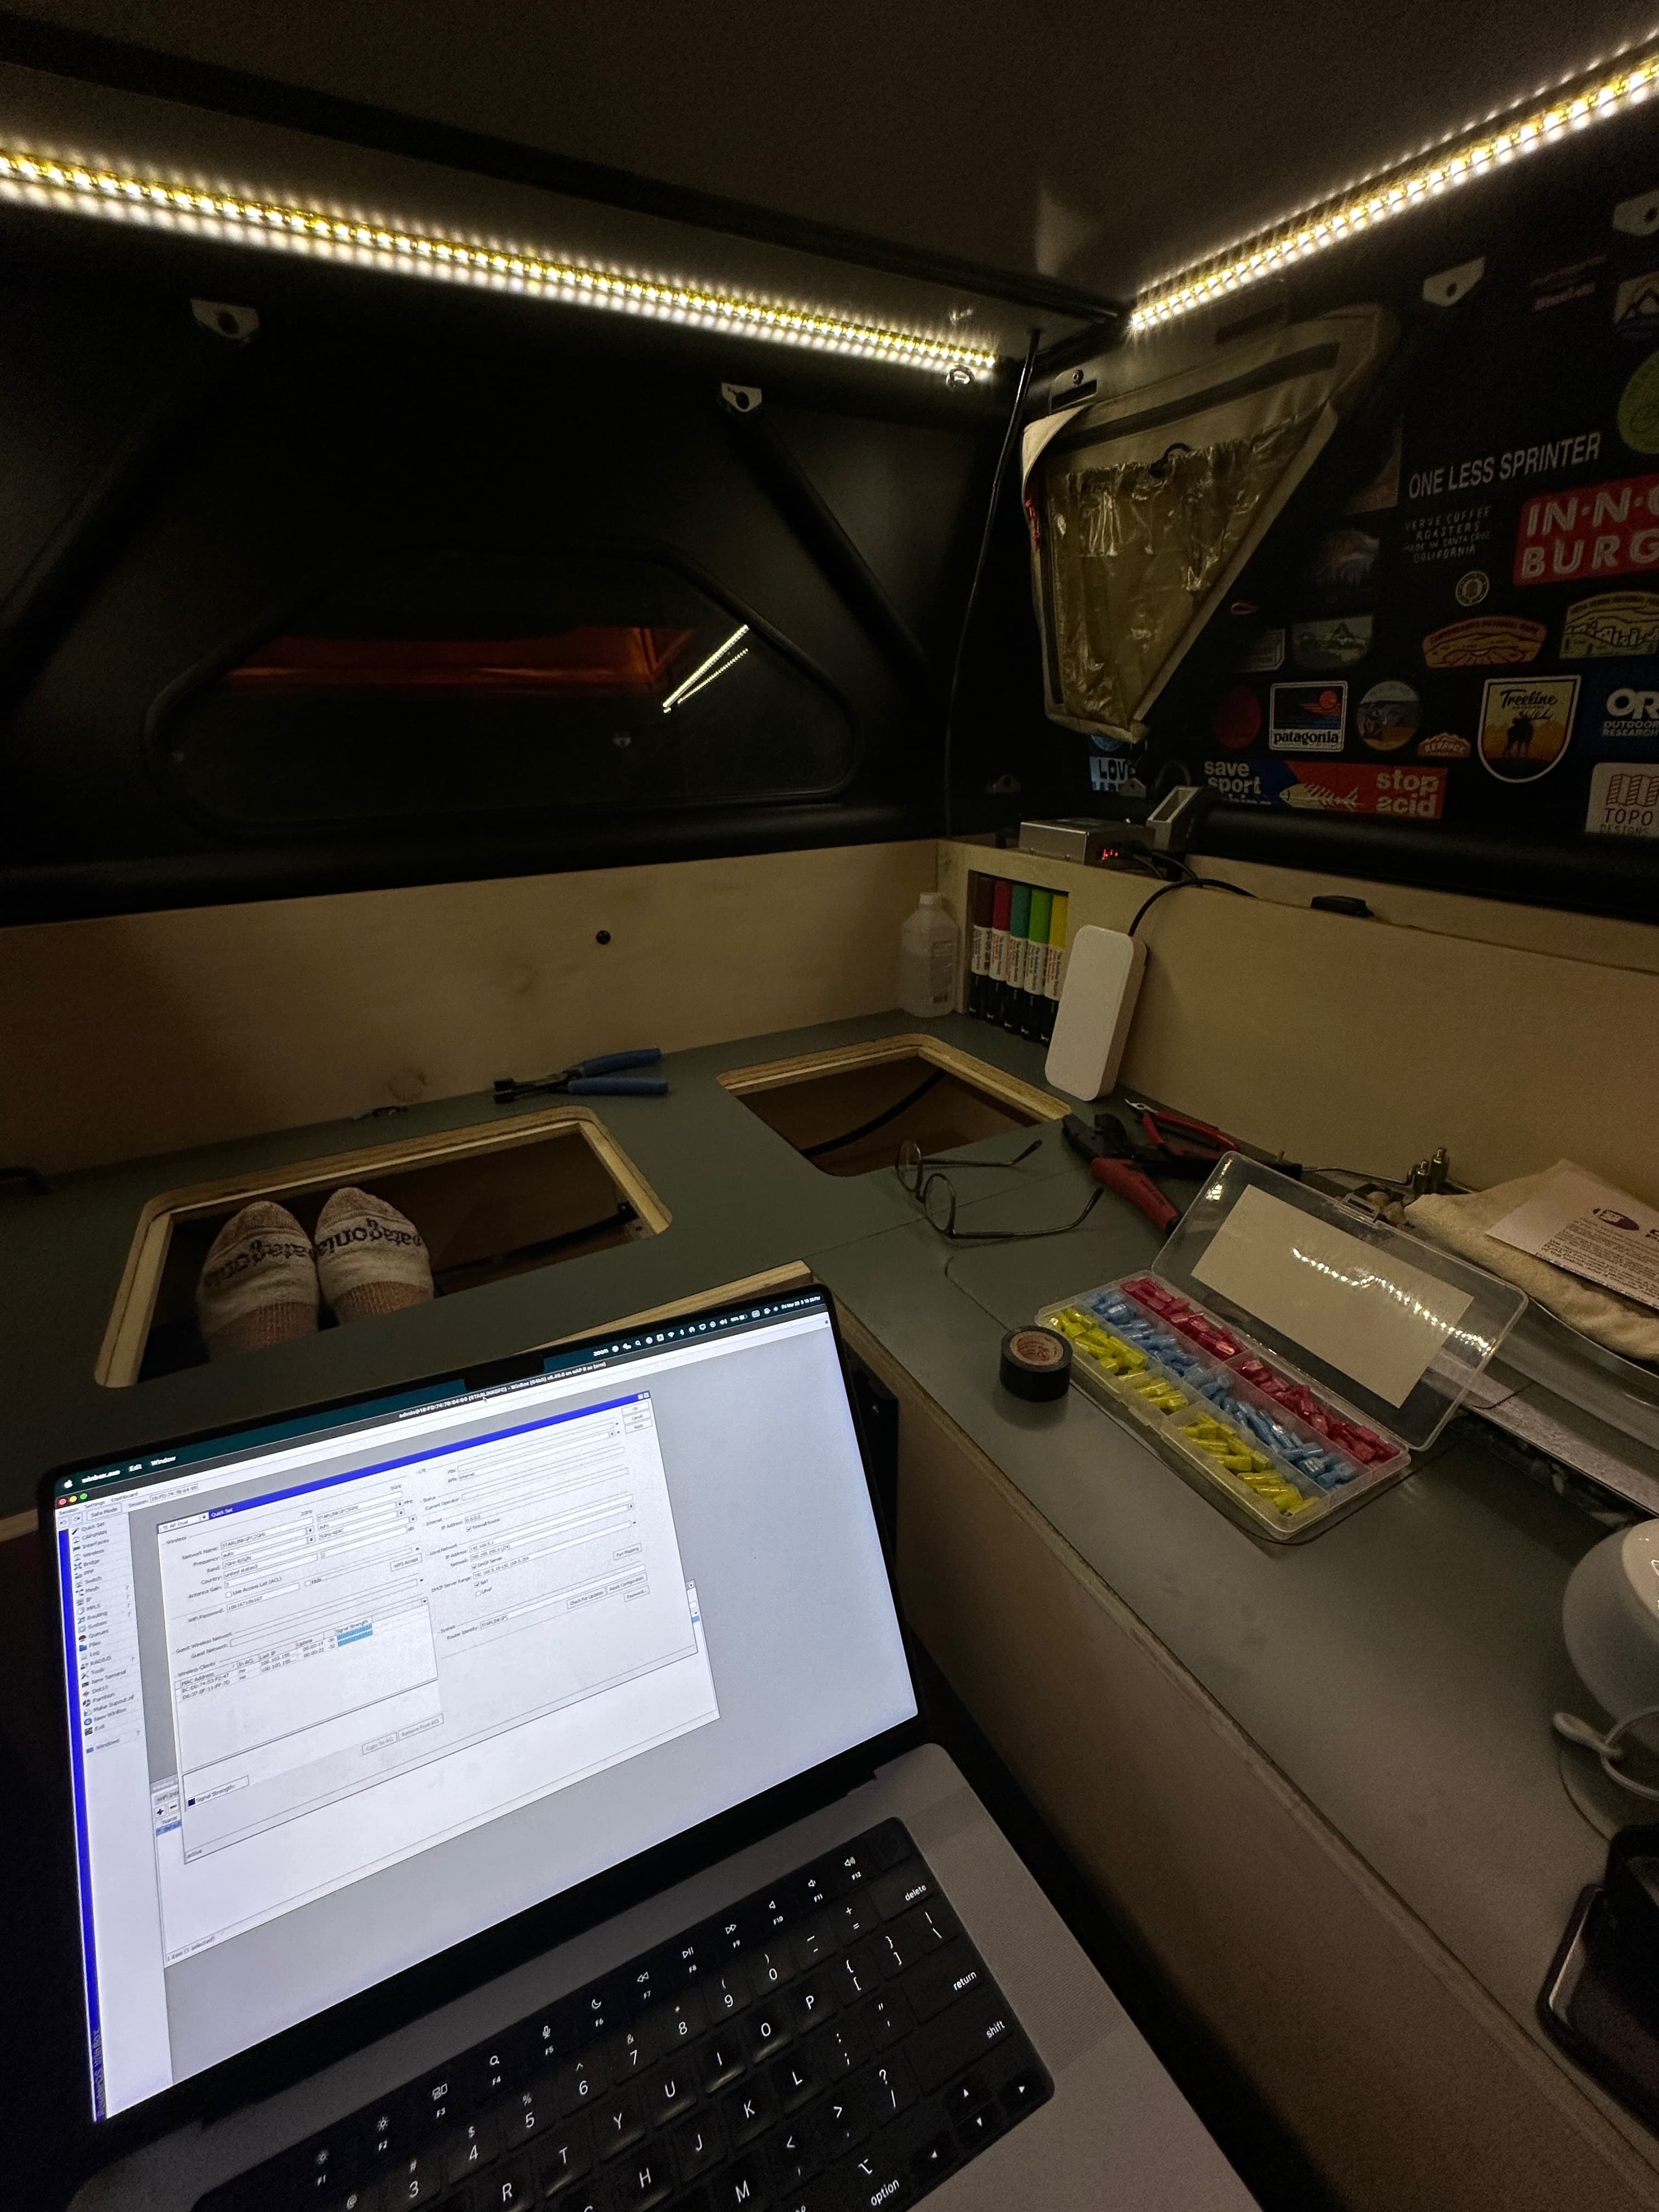
Shockingly everything just “worked” when I flipped the blue sea switch (wired to my electrical cubby via the ARB socket I was previously using to power my fridge). This whole endeavor and project deserves a post of it’s own that I’ll go deeper into in a few weeks as it included upgrades to the house battery and solar on roof. I still want to cut my Starlink cable down to remove some of its length, crimp on a standard RJ45, and remove the YAOSHENG converter. (I just ran out of time before hitting the road, I may attempt to tackle this from camp one day.)

That just about wraps the big updates on the bed layout. No complaints or issues yet after spending two weeks in it. Has been such a level up in comfort when hiding out downstairs during downpours and mosquito swarms in the gulf here in Texas.


Coming next: I’ll share updates on the upgraded electrical system, our upstairs/sleeping setup, a few new exterior accessories, and provide a deeper dive into the starlink solution.
I’ll also take some to list out everything that we removed and/or sold to ensure this thread remains up-to-date and accurate.
14 Likes
V2 Retroactive Build Update 04/14/24 — New VRNCLR Frame Bags and Appendix
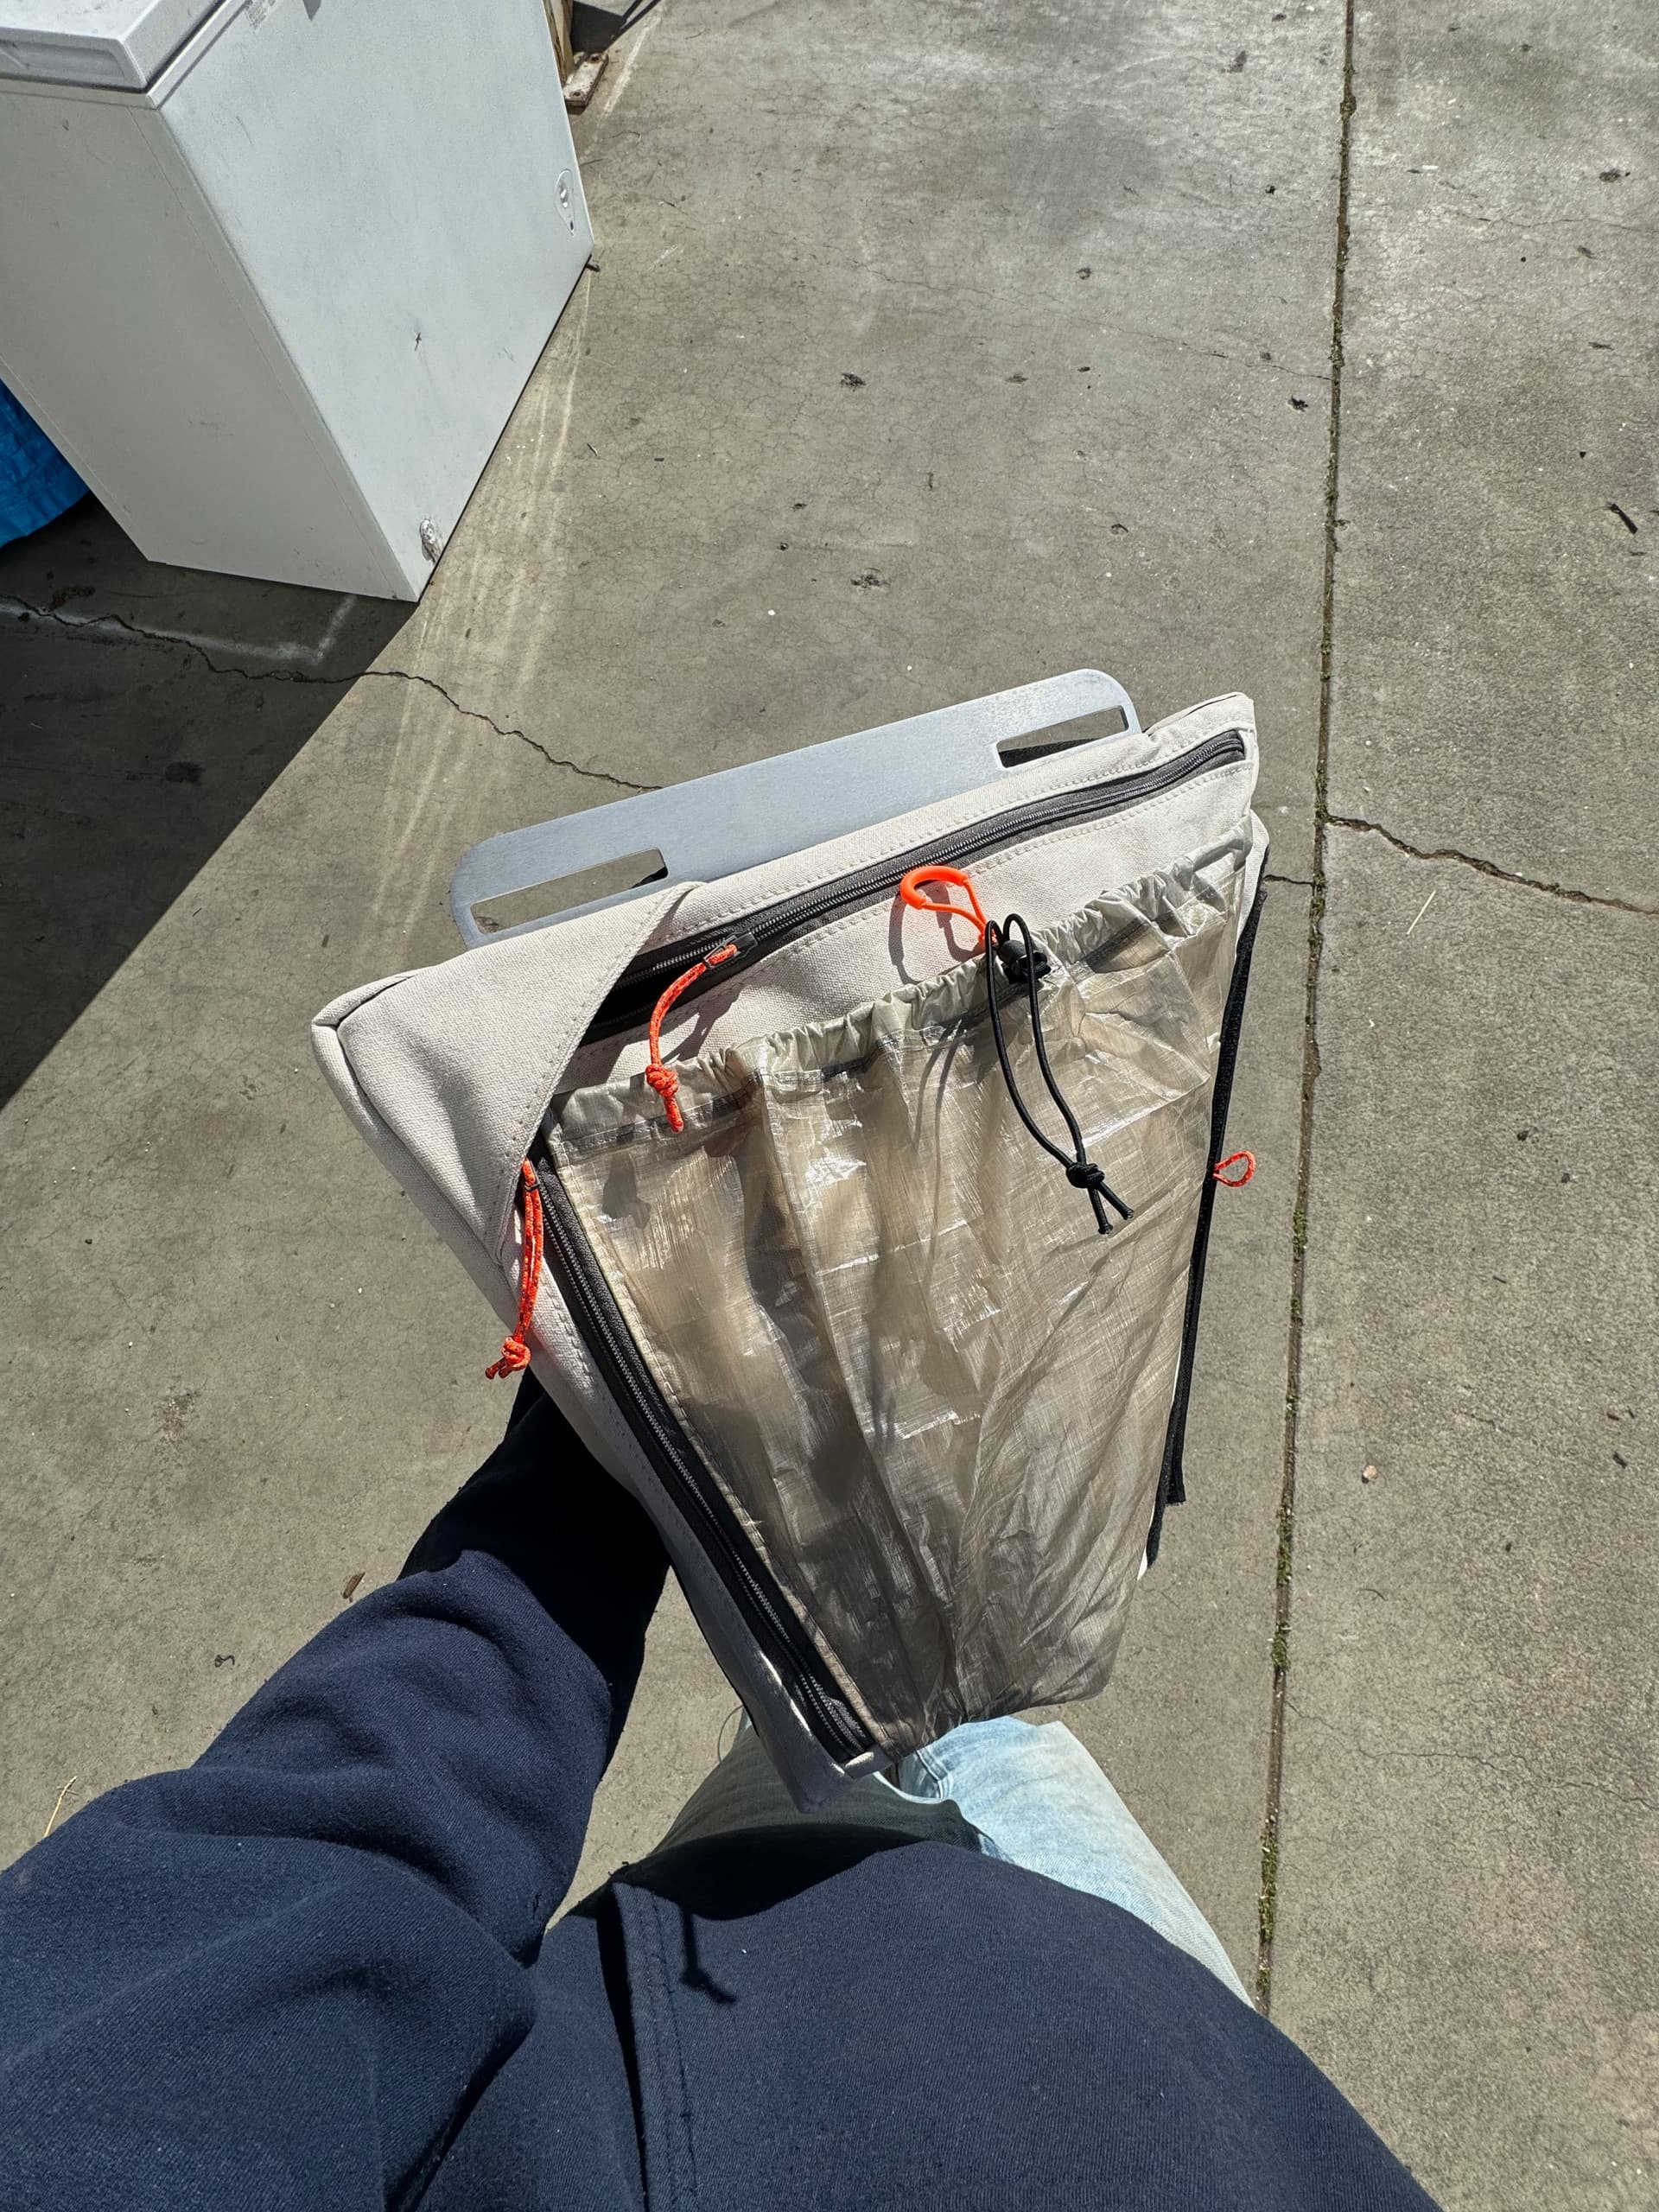
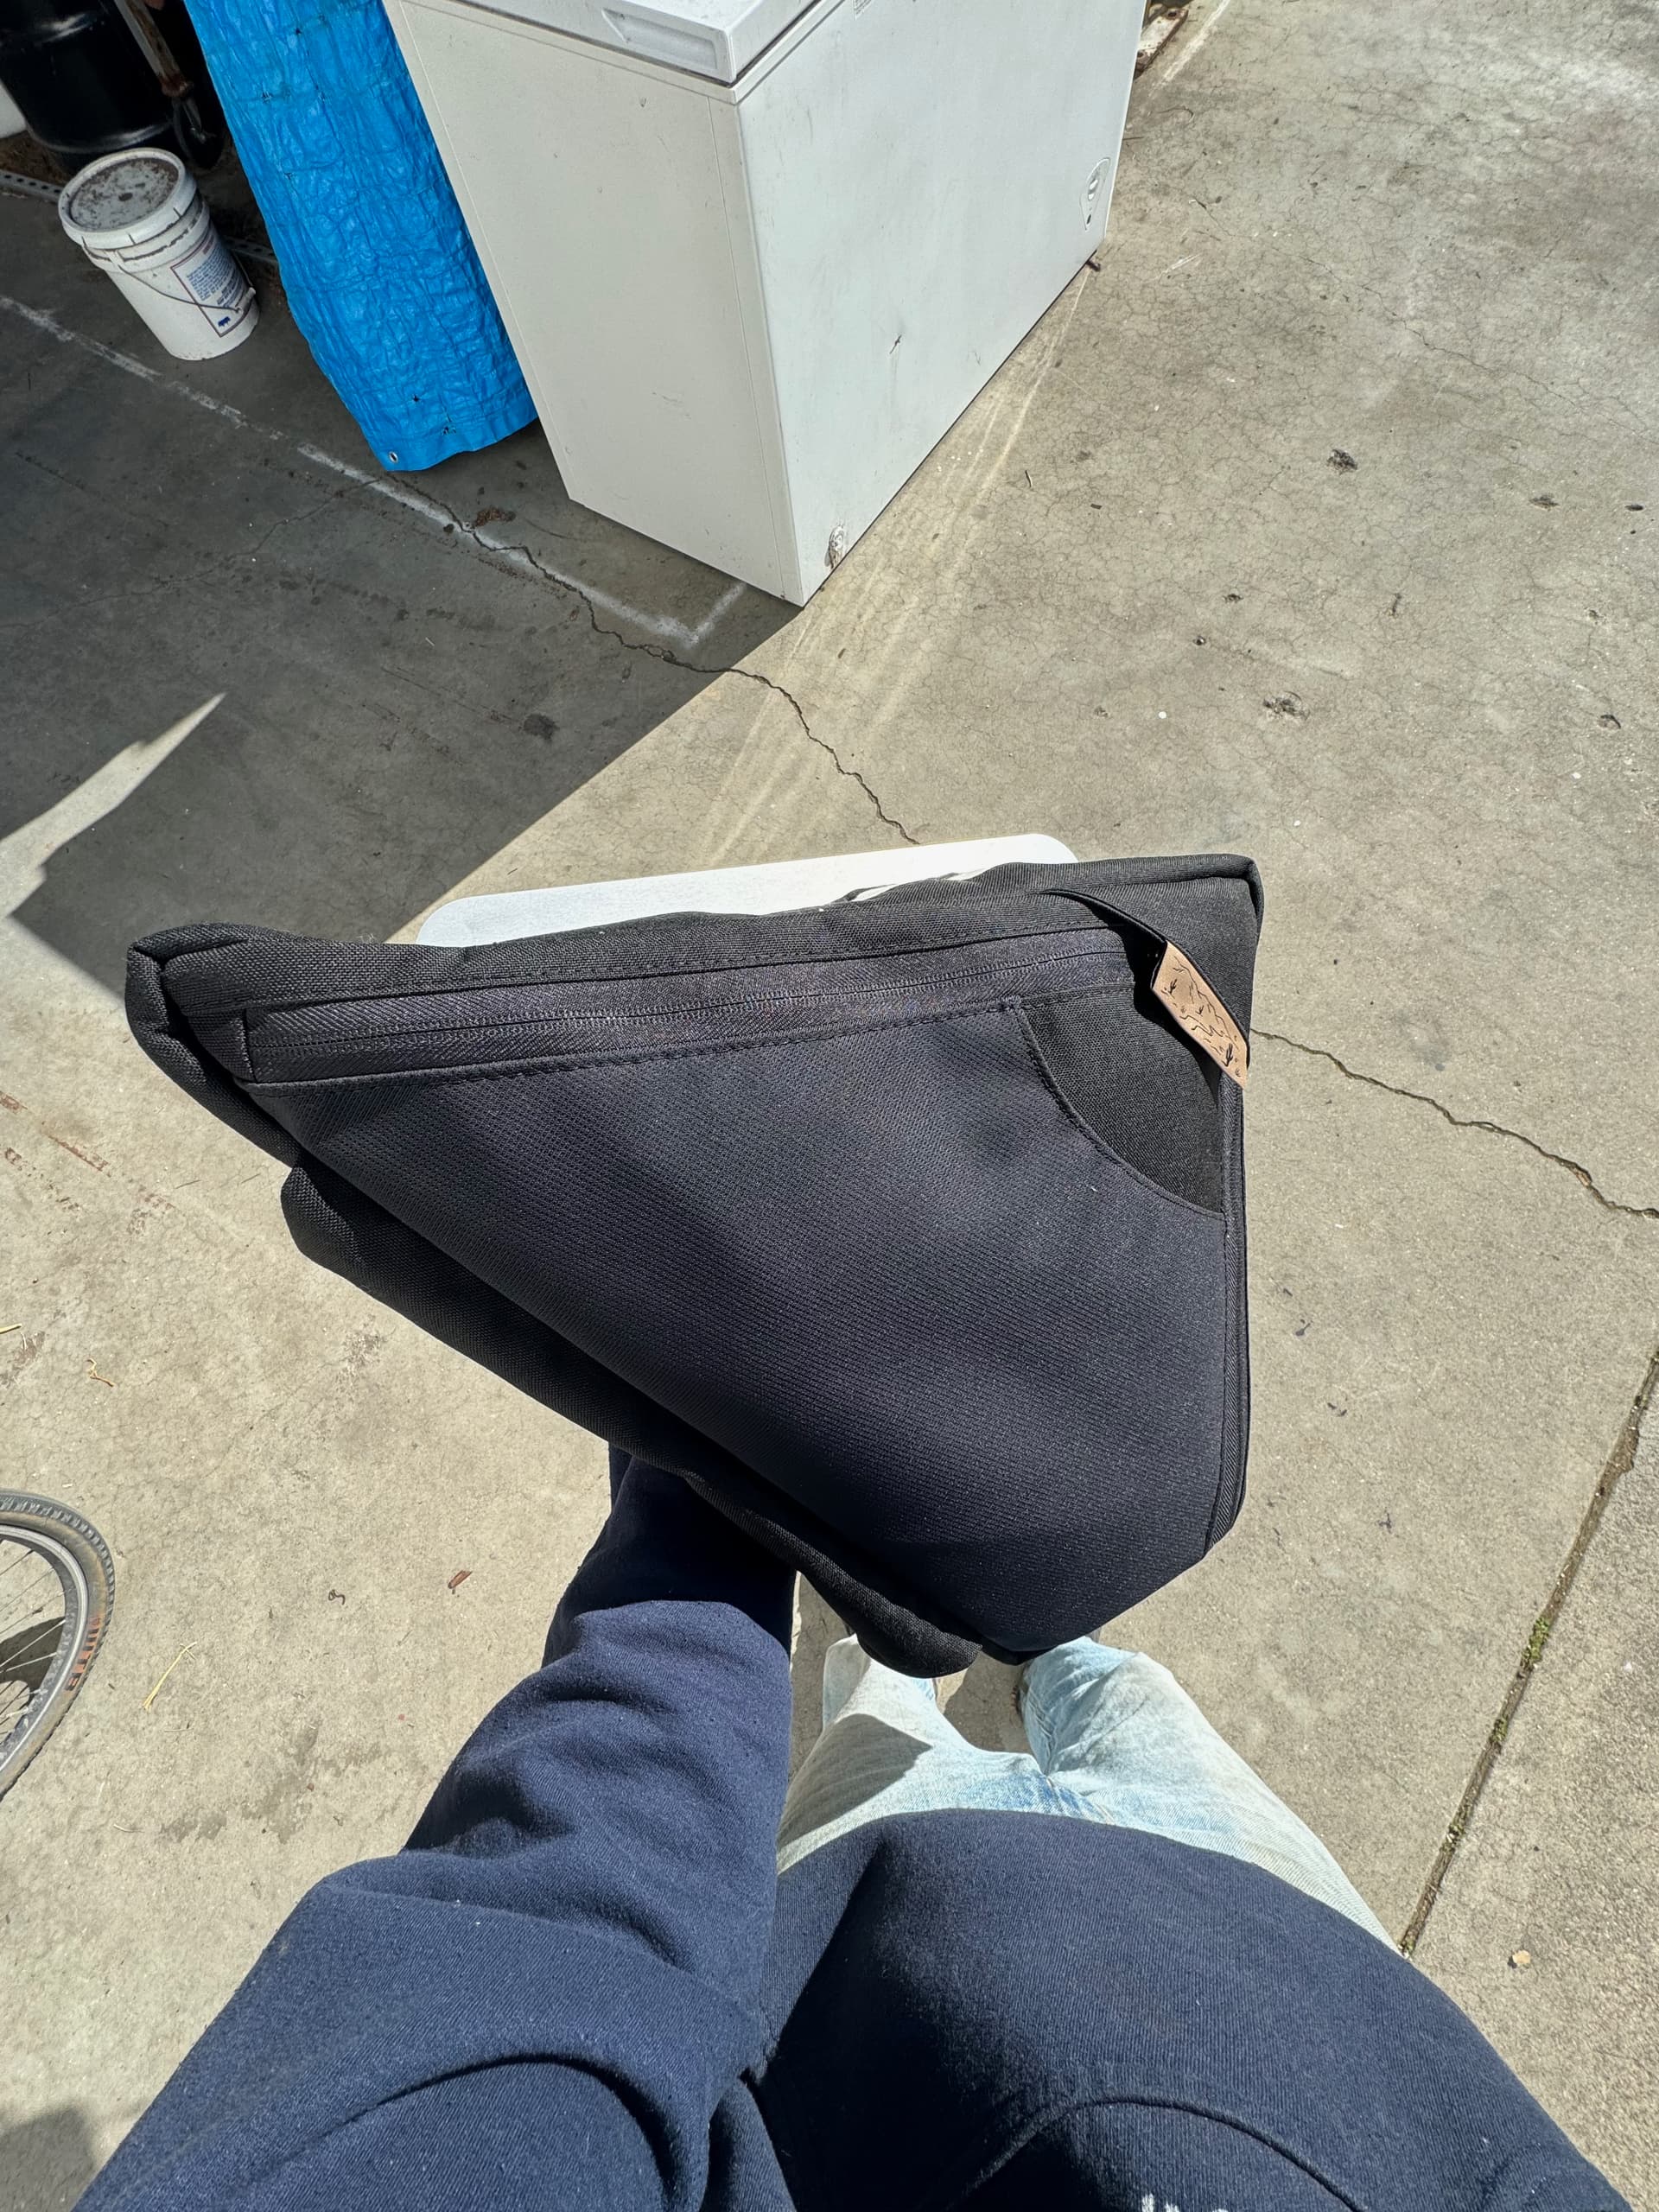
![]() Custom VRNCLR Frame Bags
Custom VRNCLR Frame Bags
I hit up Tom at VRNCLR Sewn Storage with a pitch to collab on a custom bag design that would be accessible from both the interior and exterior of the camper for the new build. He was down to give it a shot, reviewed my mockups (below), got to work, and absolutely nailed the assignment.

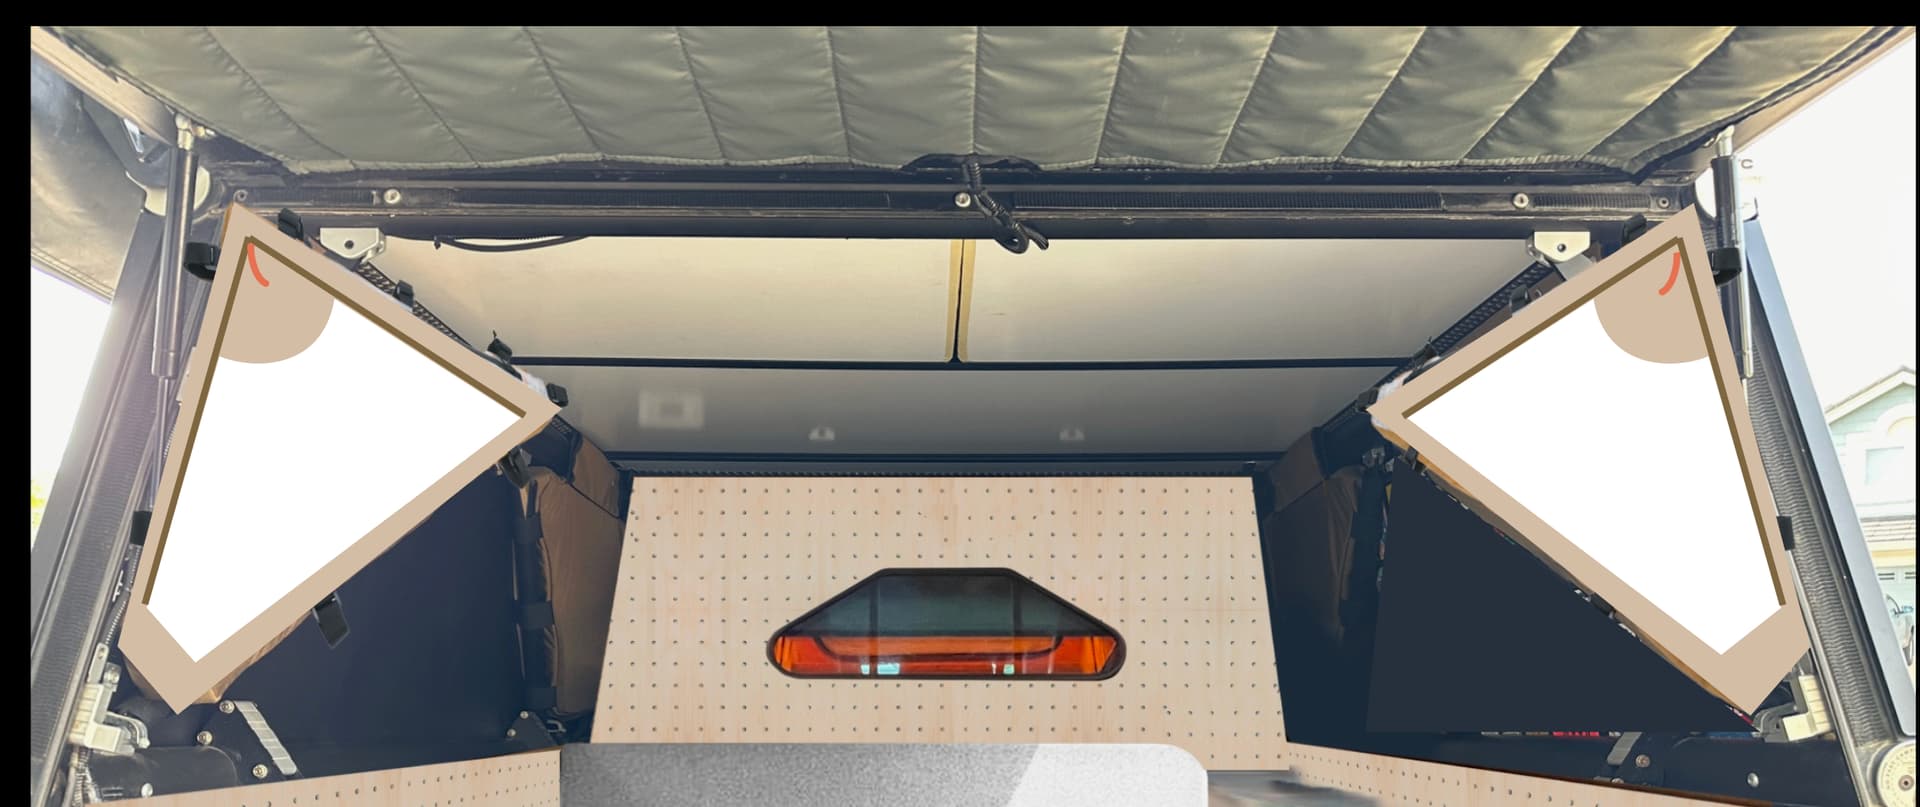
(note: we ran out of time to build out the peg board on the bulkhead pictured here in my mockup but still something we’re interested in tackling in the future)


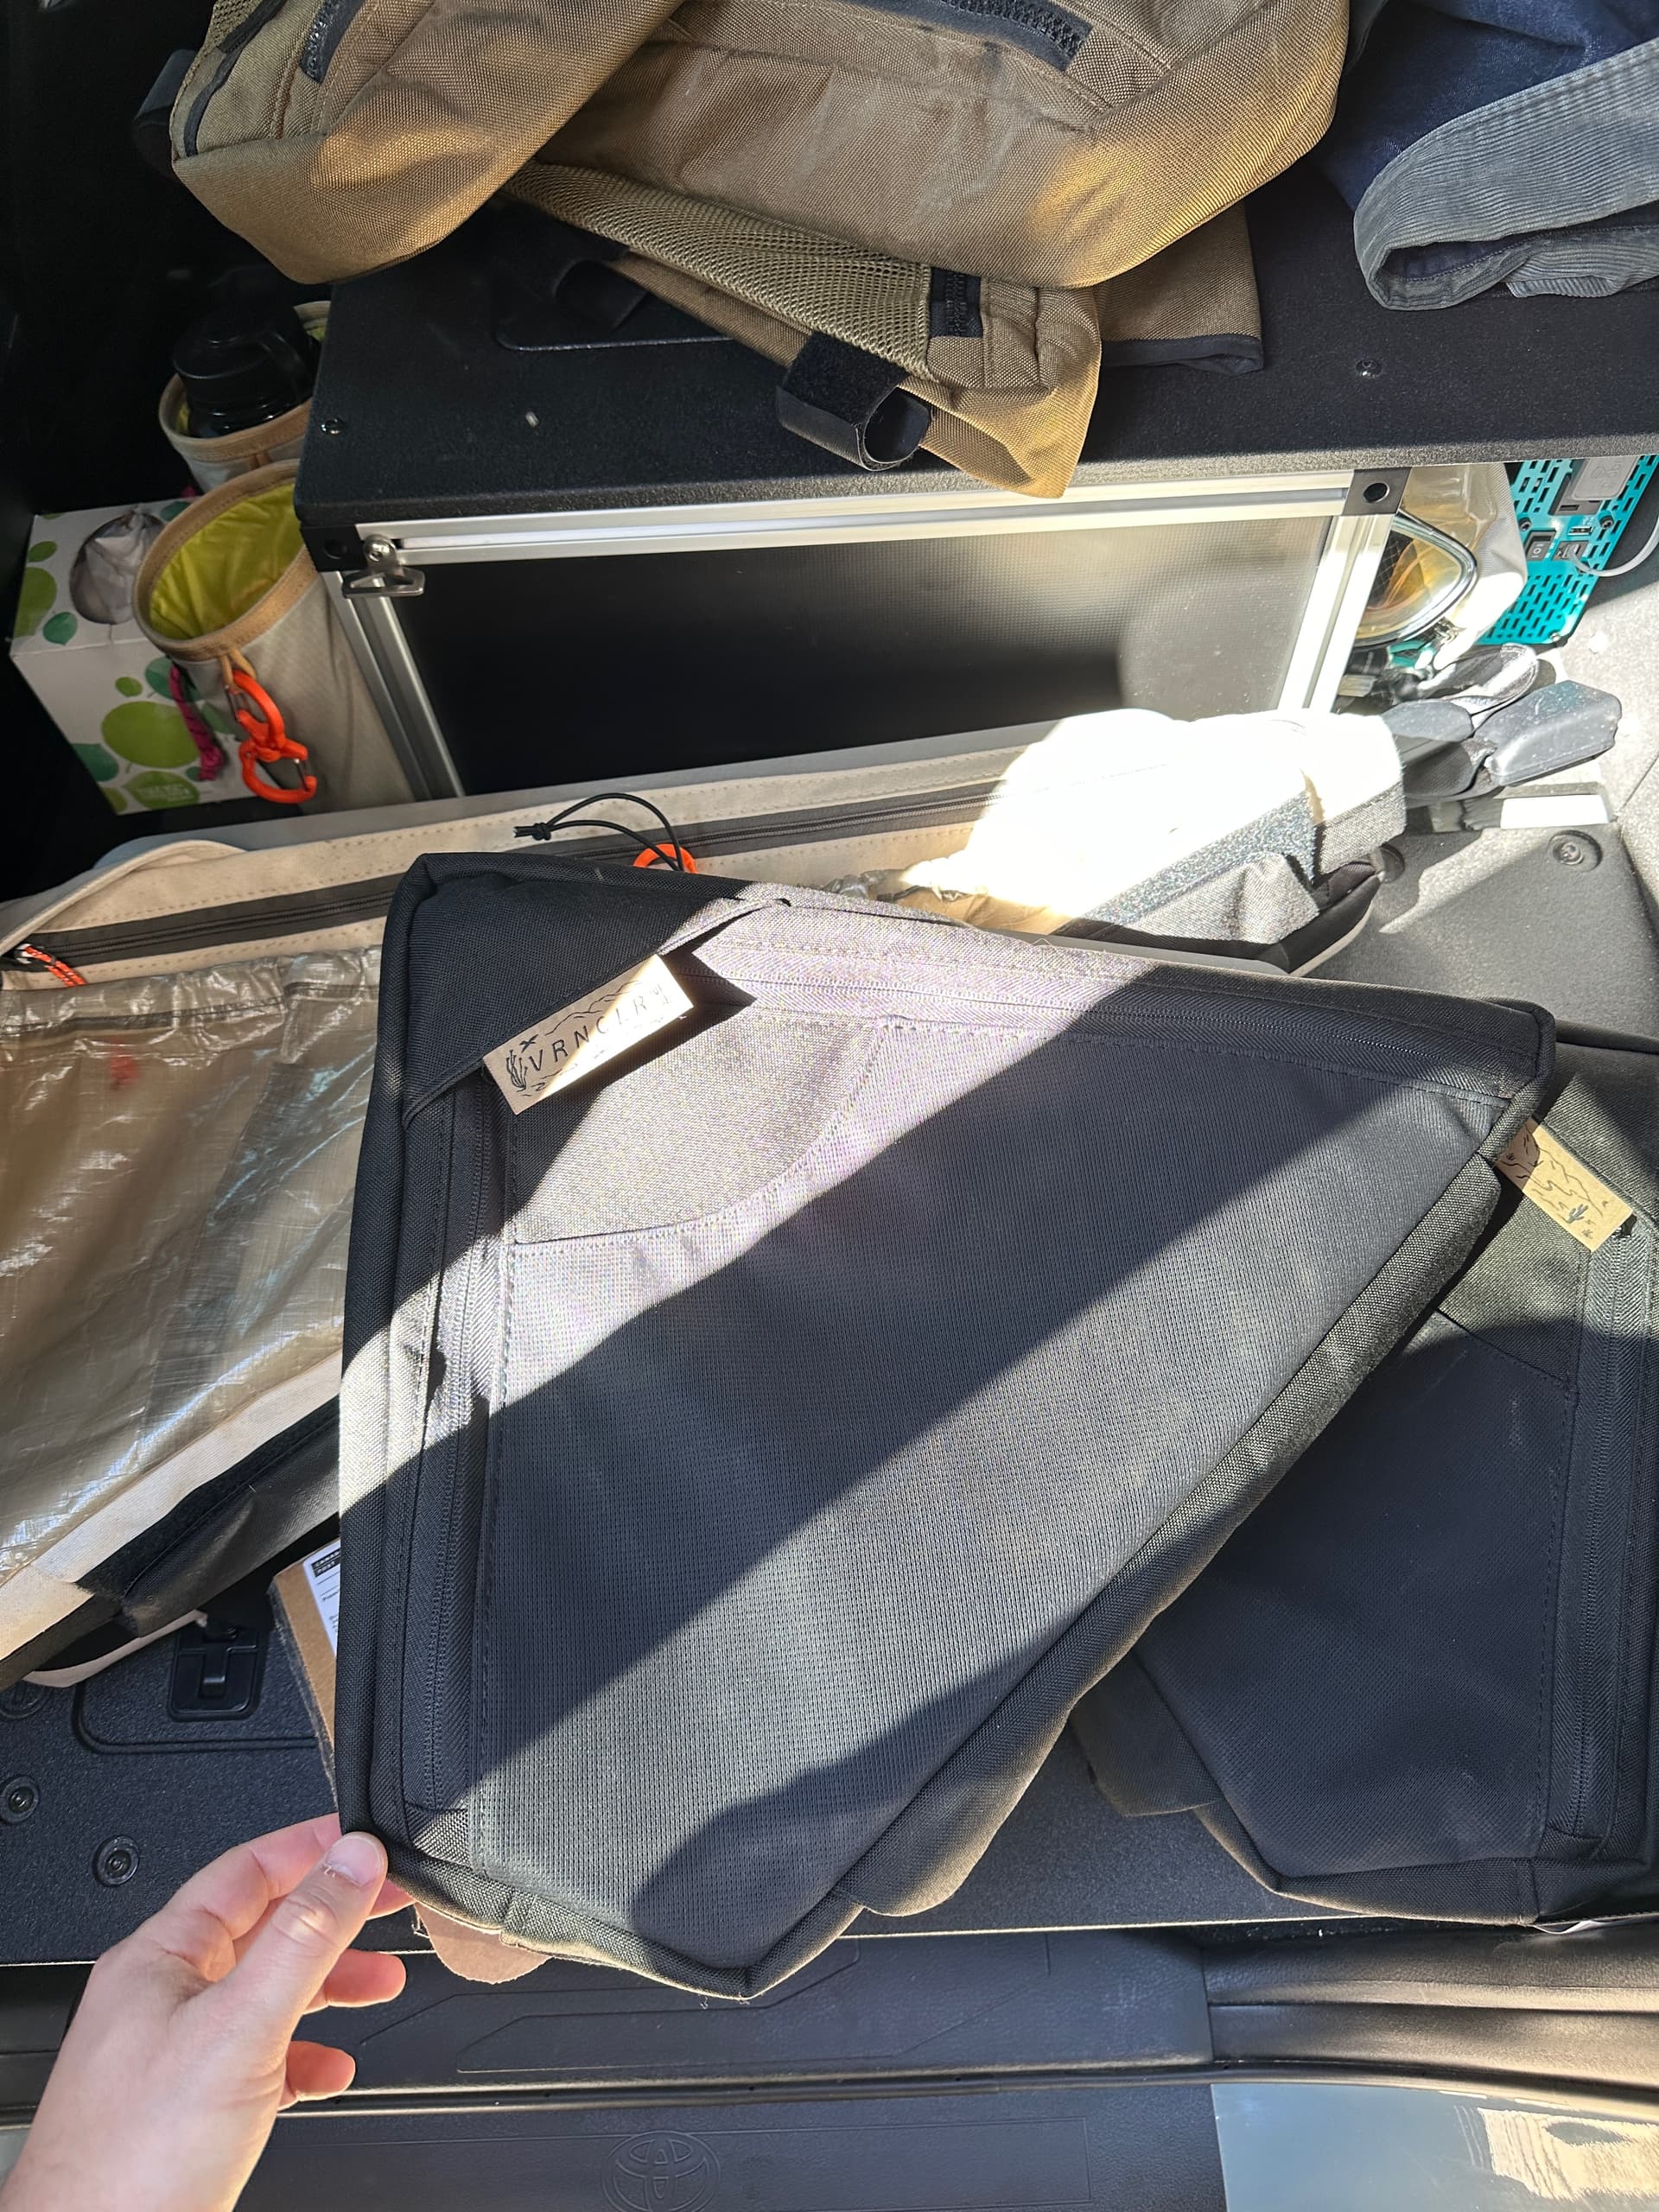

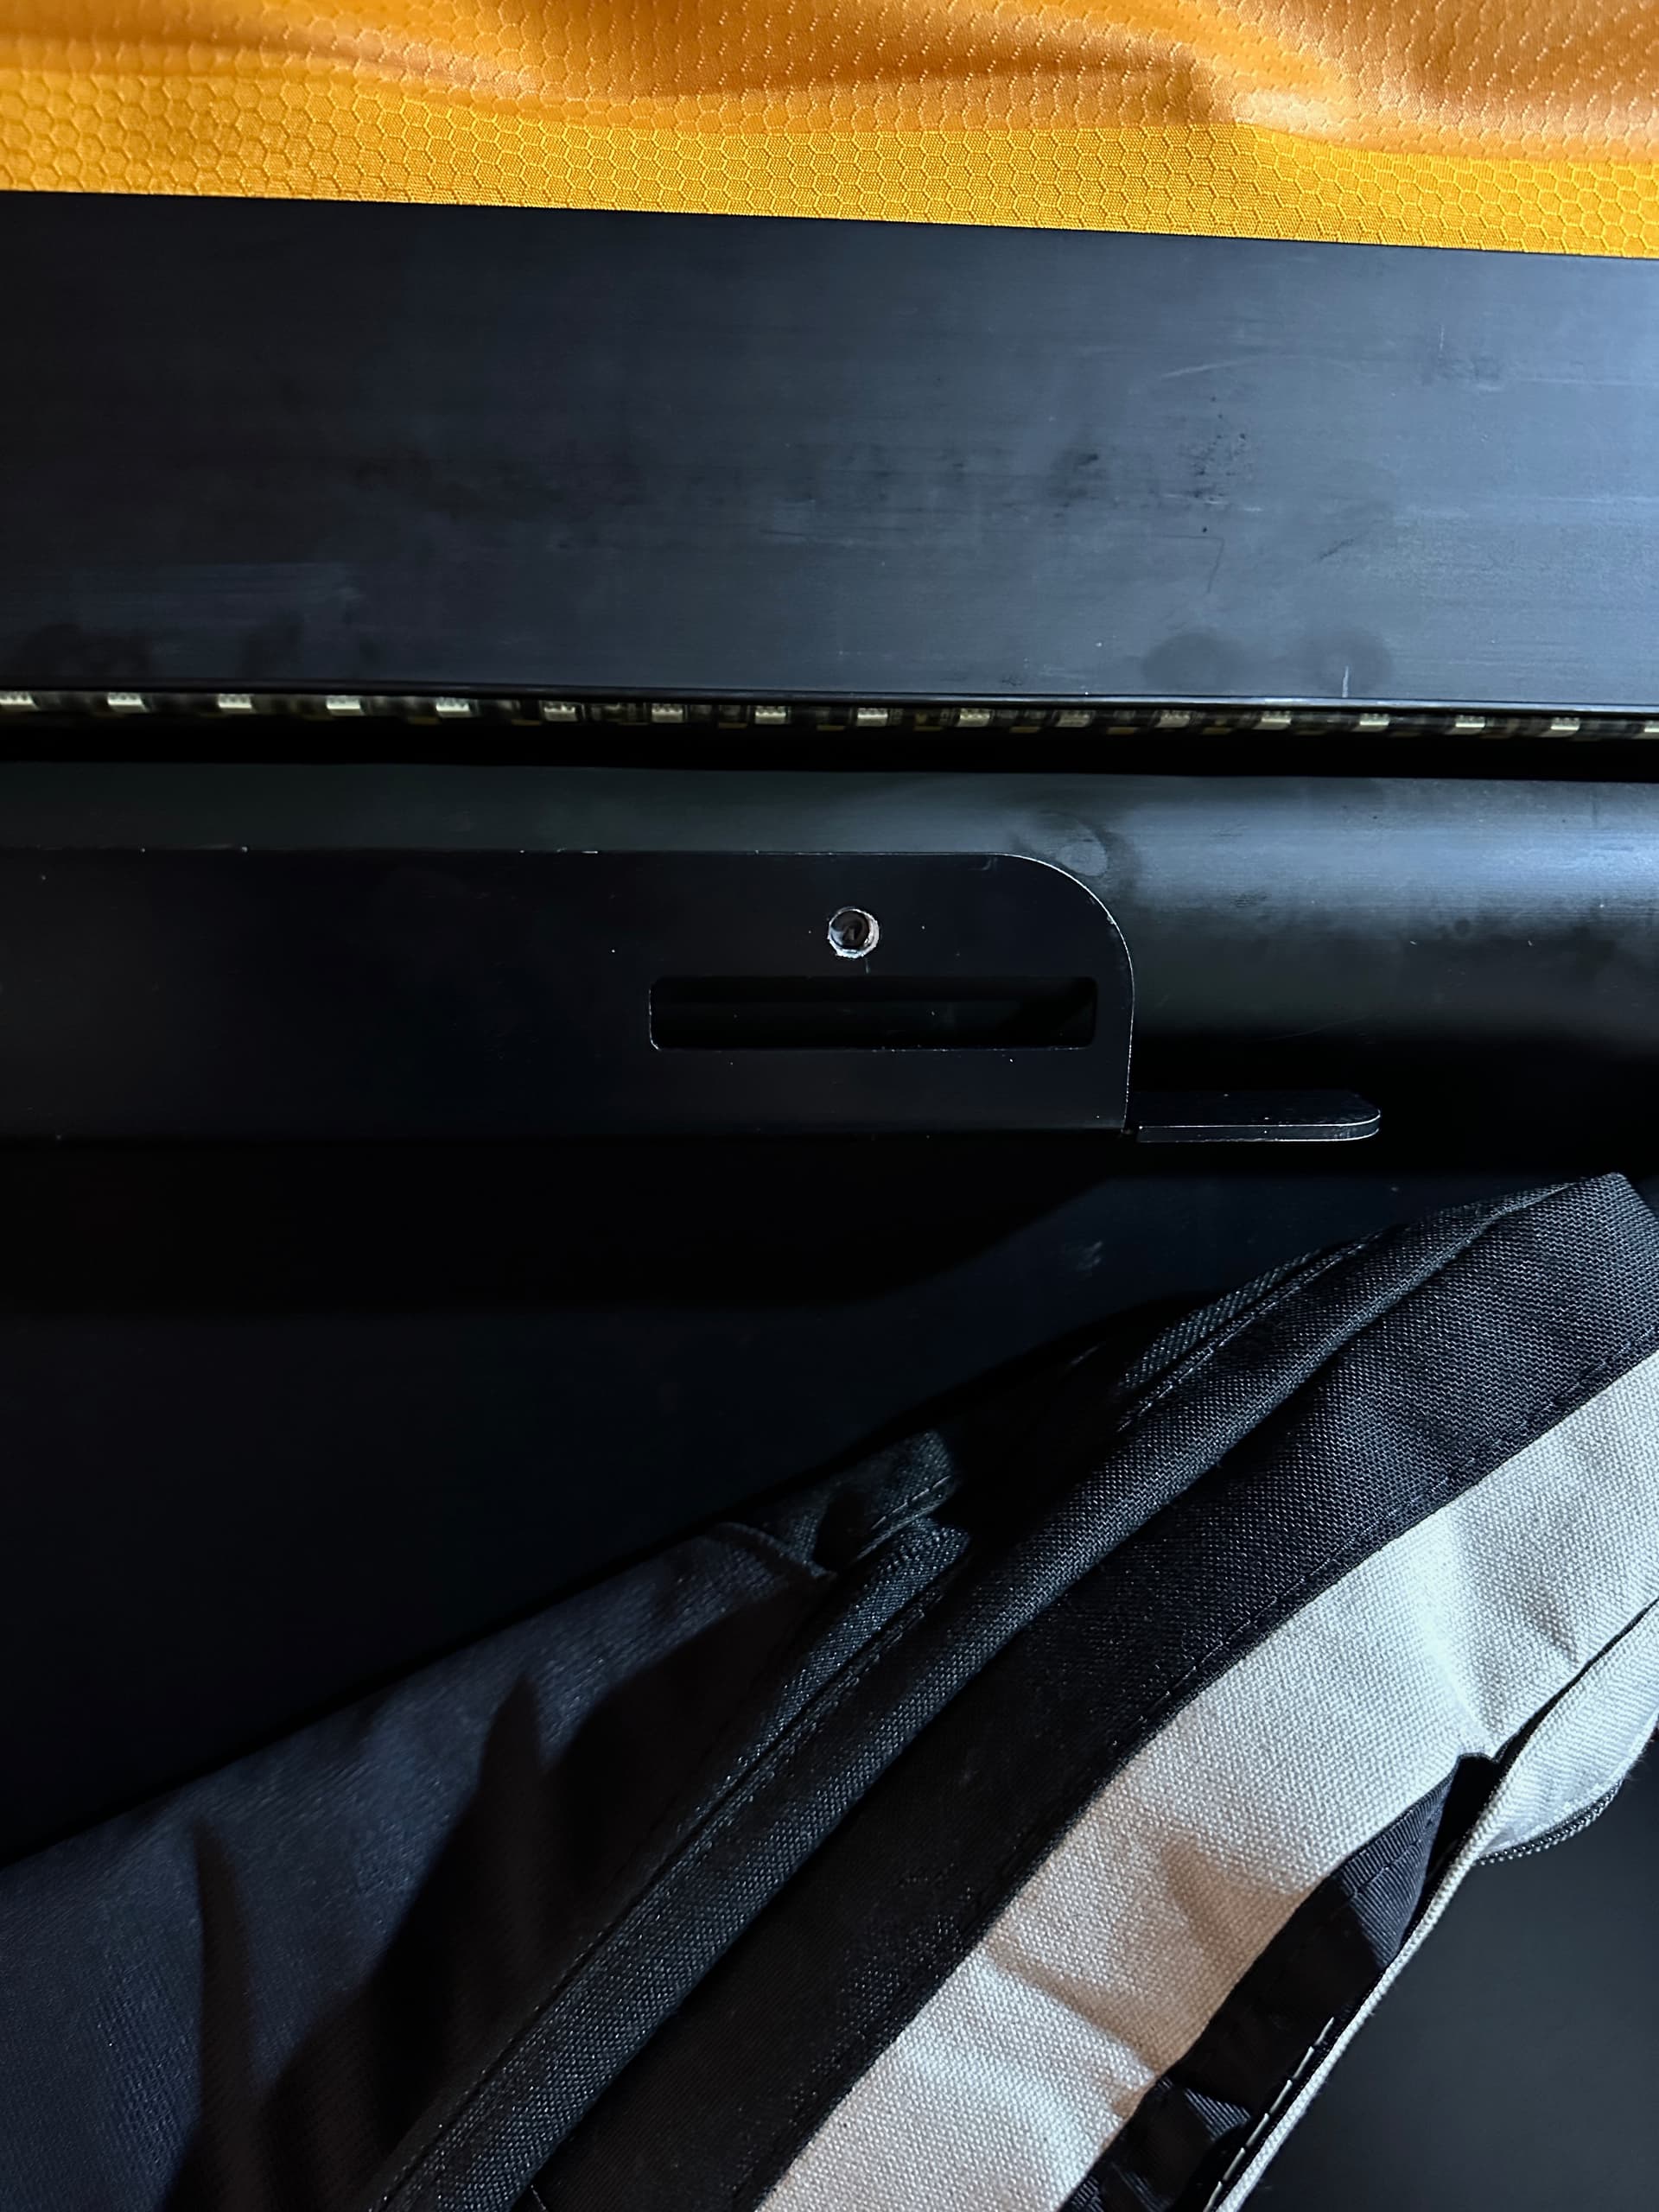
Tom’s GFC frame bags utilize a rigid board within the bag to ensure it keeps shape under load due to GFC only threading one 1 accessory bolt in the space frame. With the two-sided concept the board would not be feasible as it would limit access from the interior of the camper.
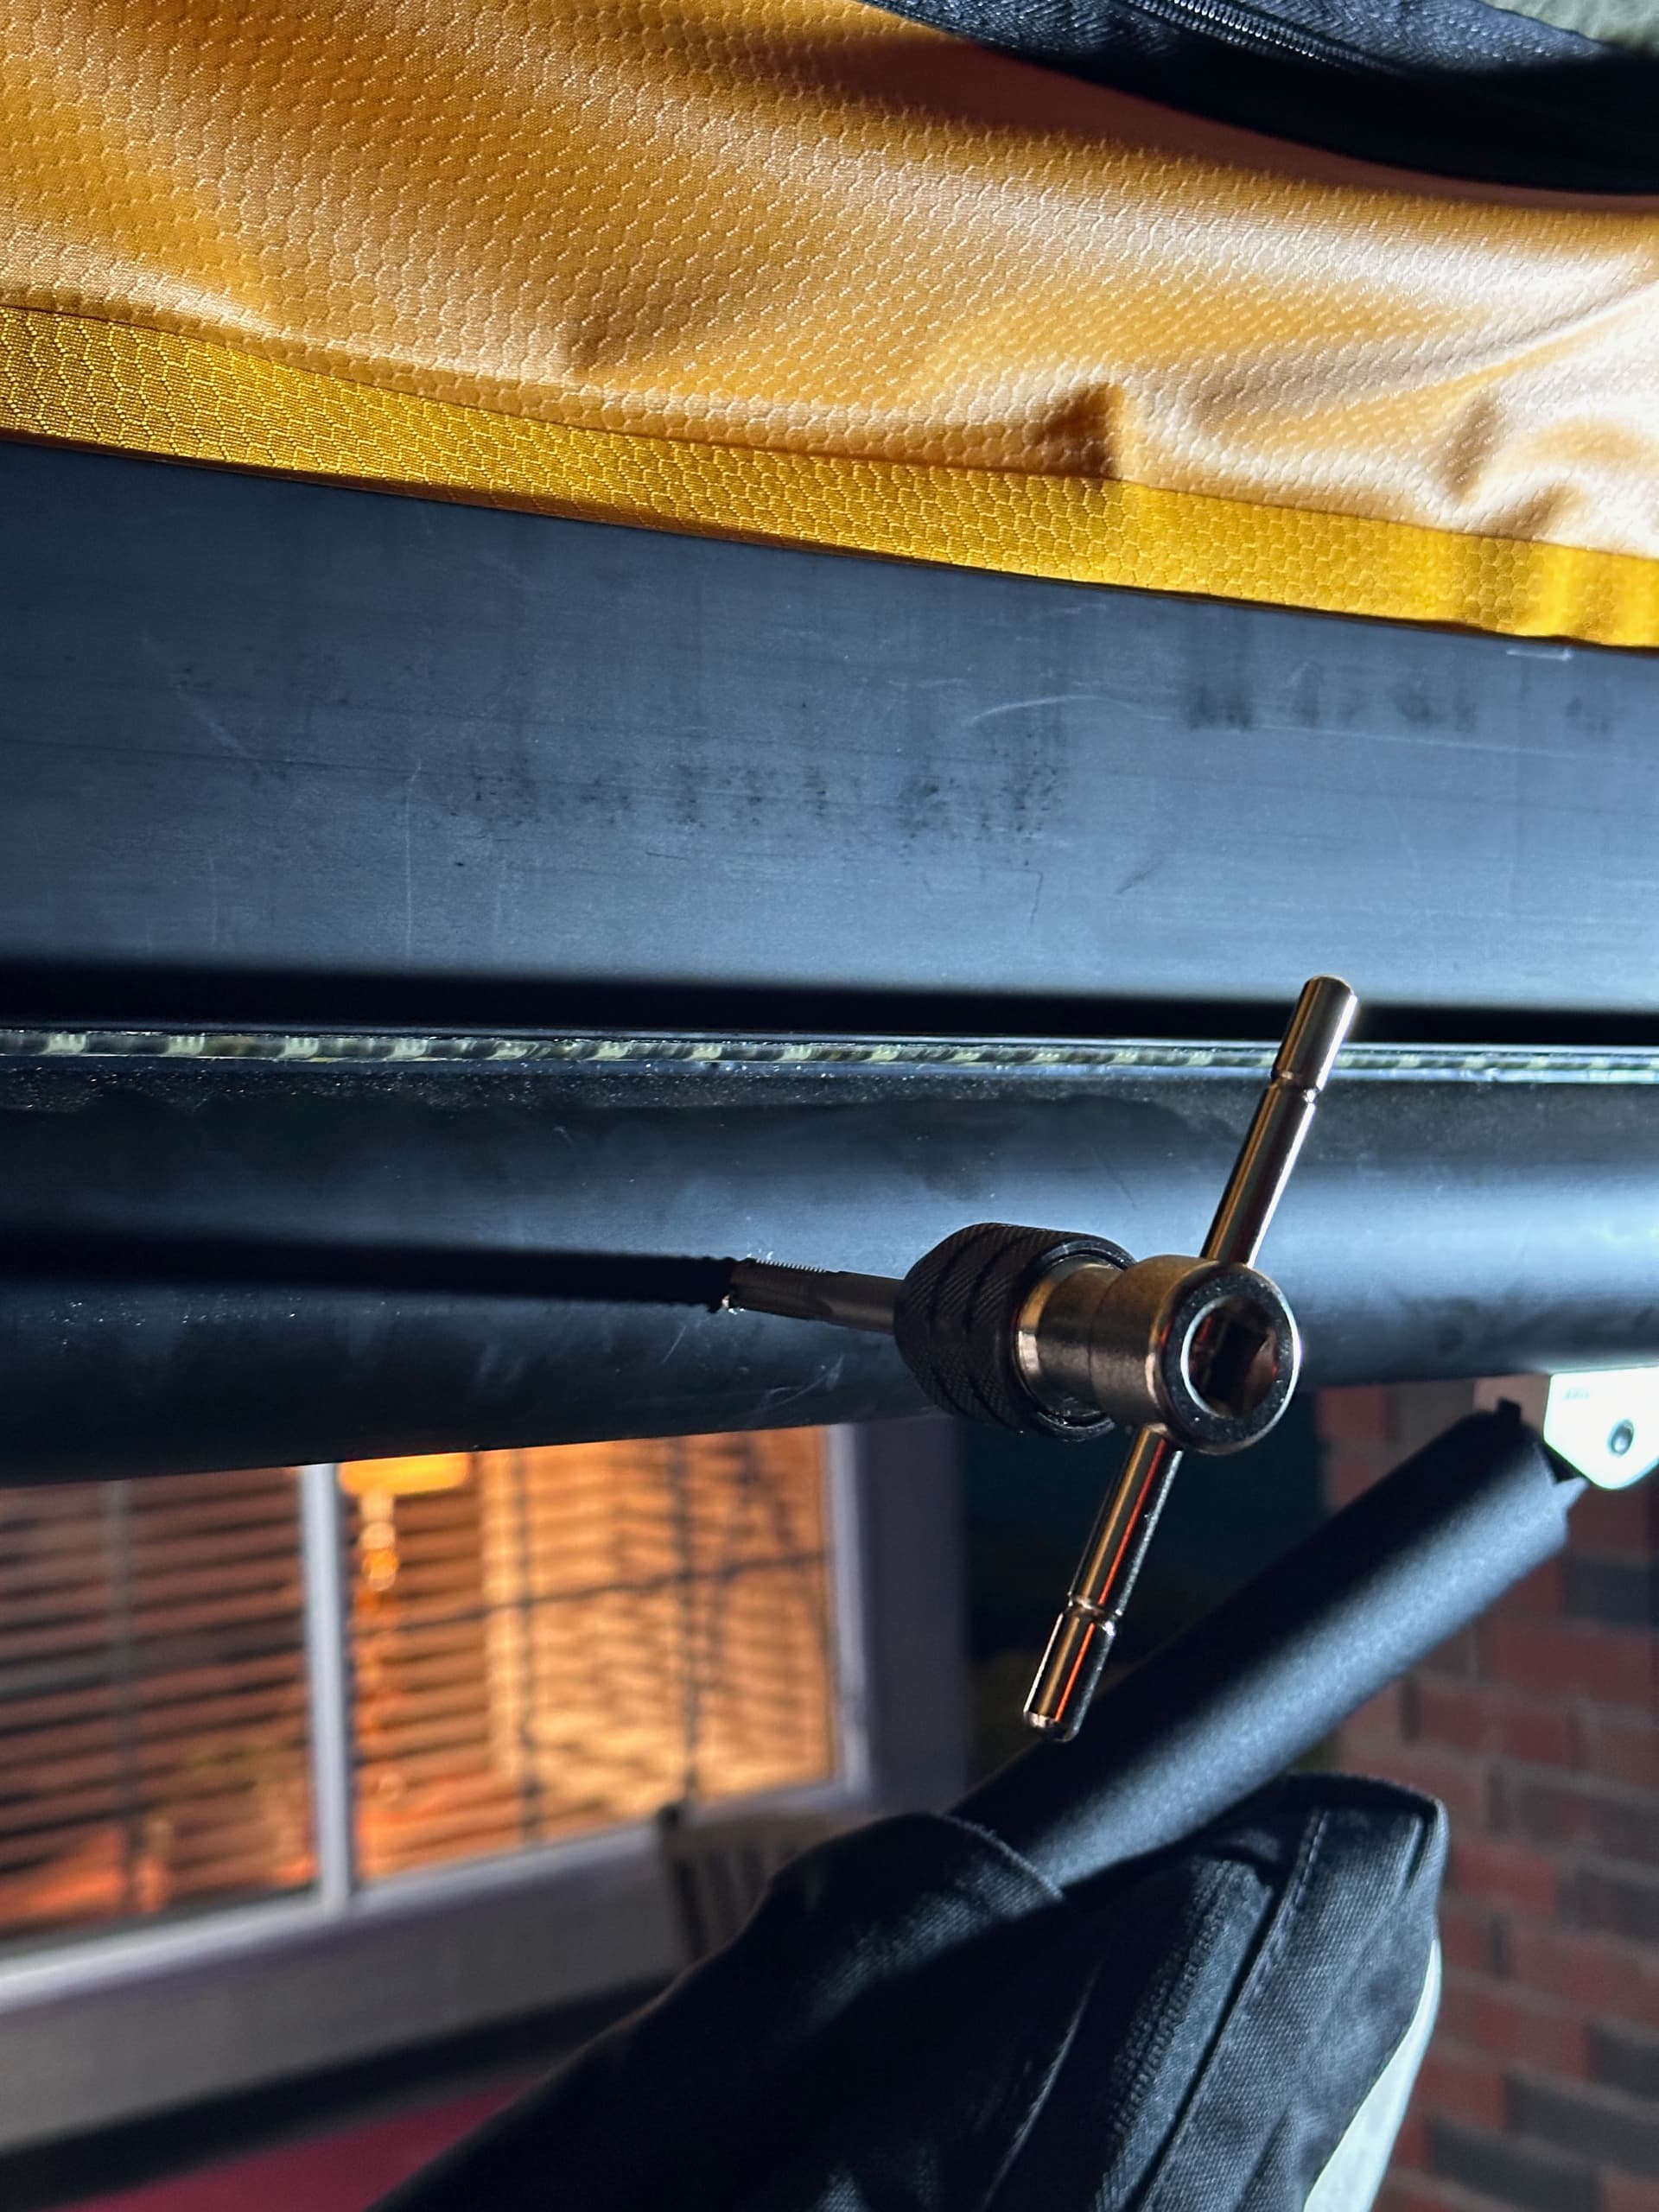
To solve for this, Tom mocked up and ordered aluminum brackets online and I taped out additional threaded holes in the space frame. (@ GFC Warranty team, close your eyes)
We had to drill out holes in the bracket as this was the very first prototype that was designed and ordered under an insanely tight timeline and going off crude measurements. They are totally fine as they are, but we may replace 'em with a revised bracket design now that we have a better understanding of the measurements.

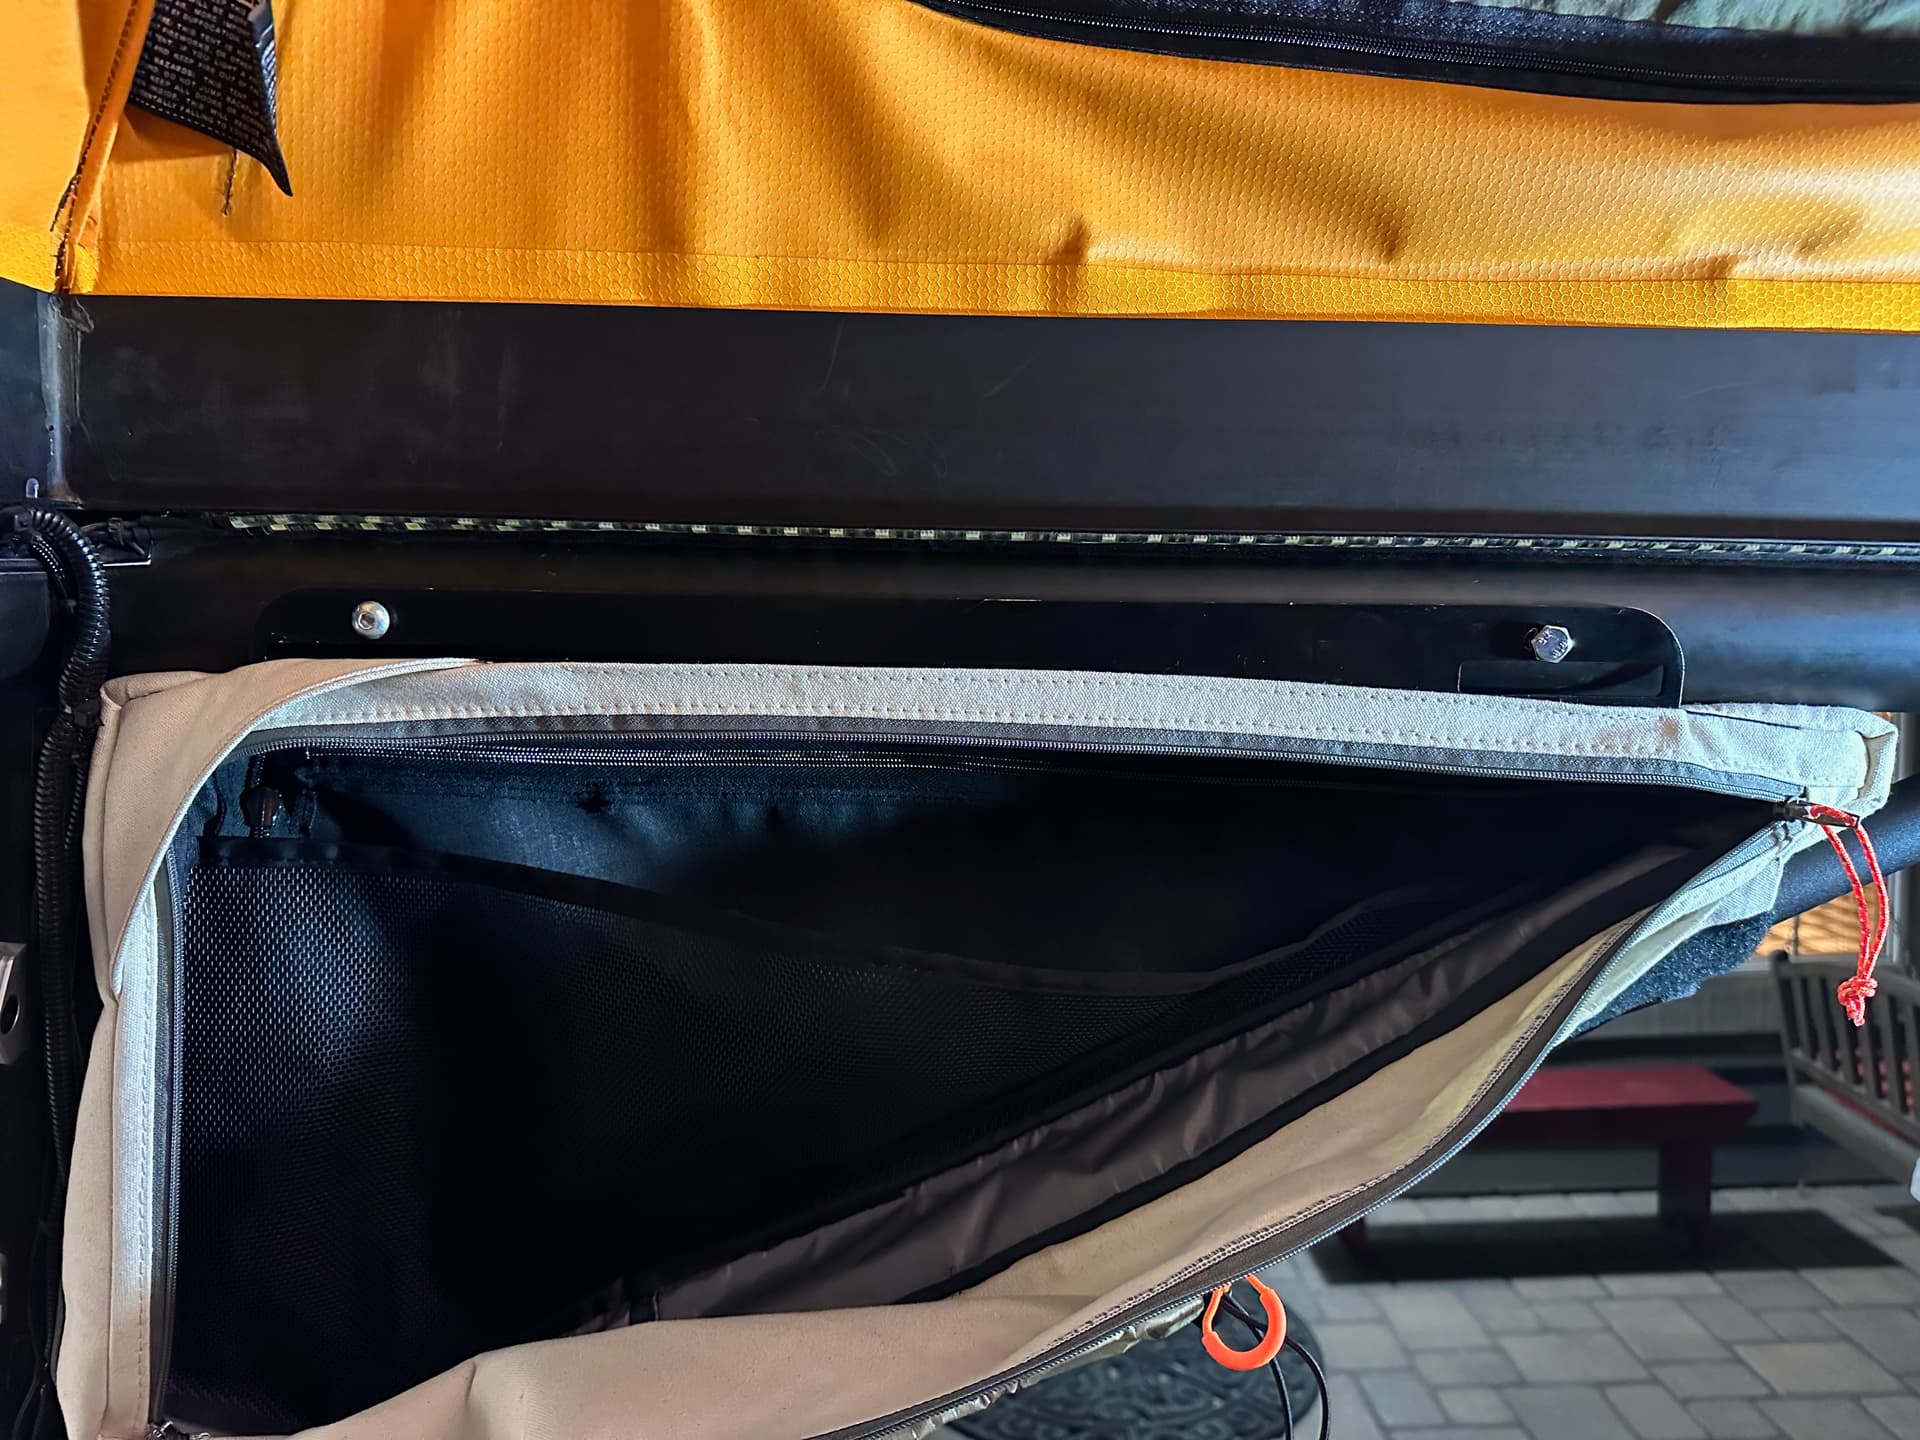

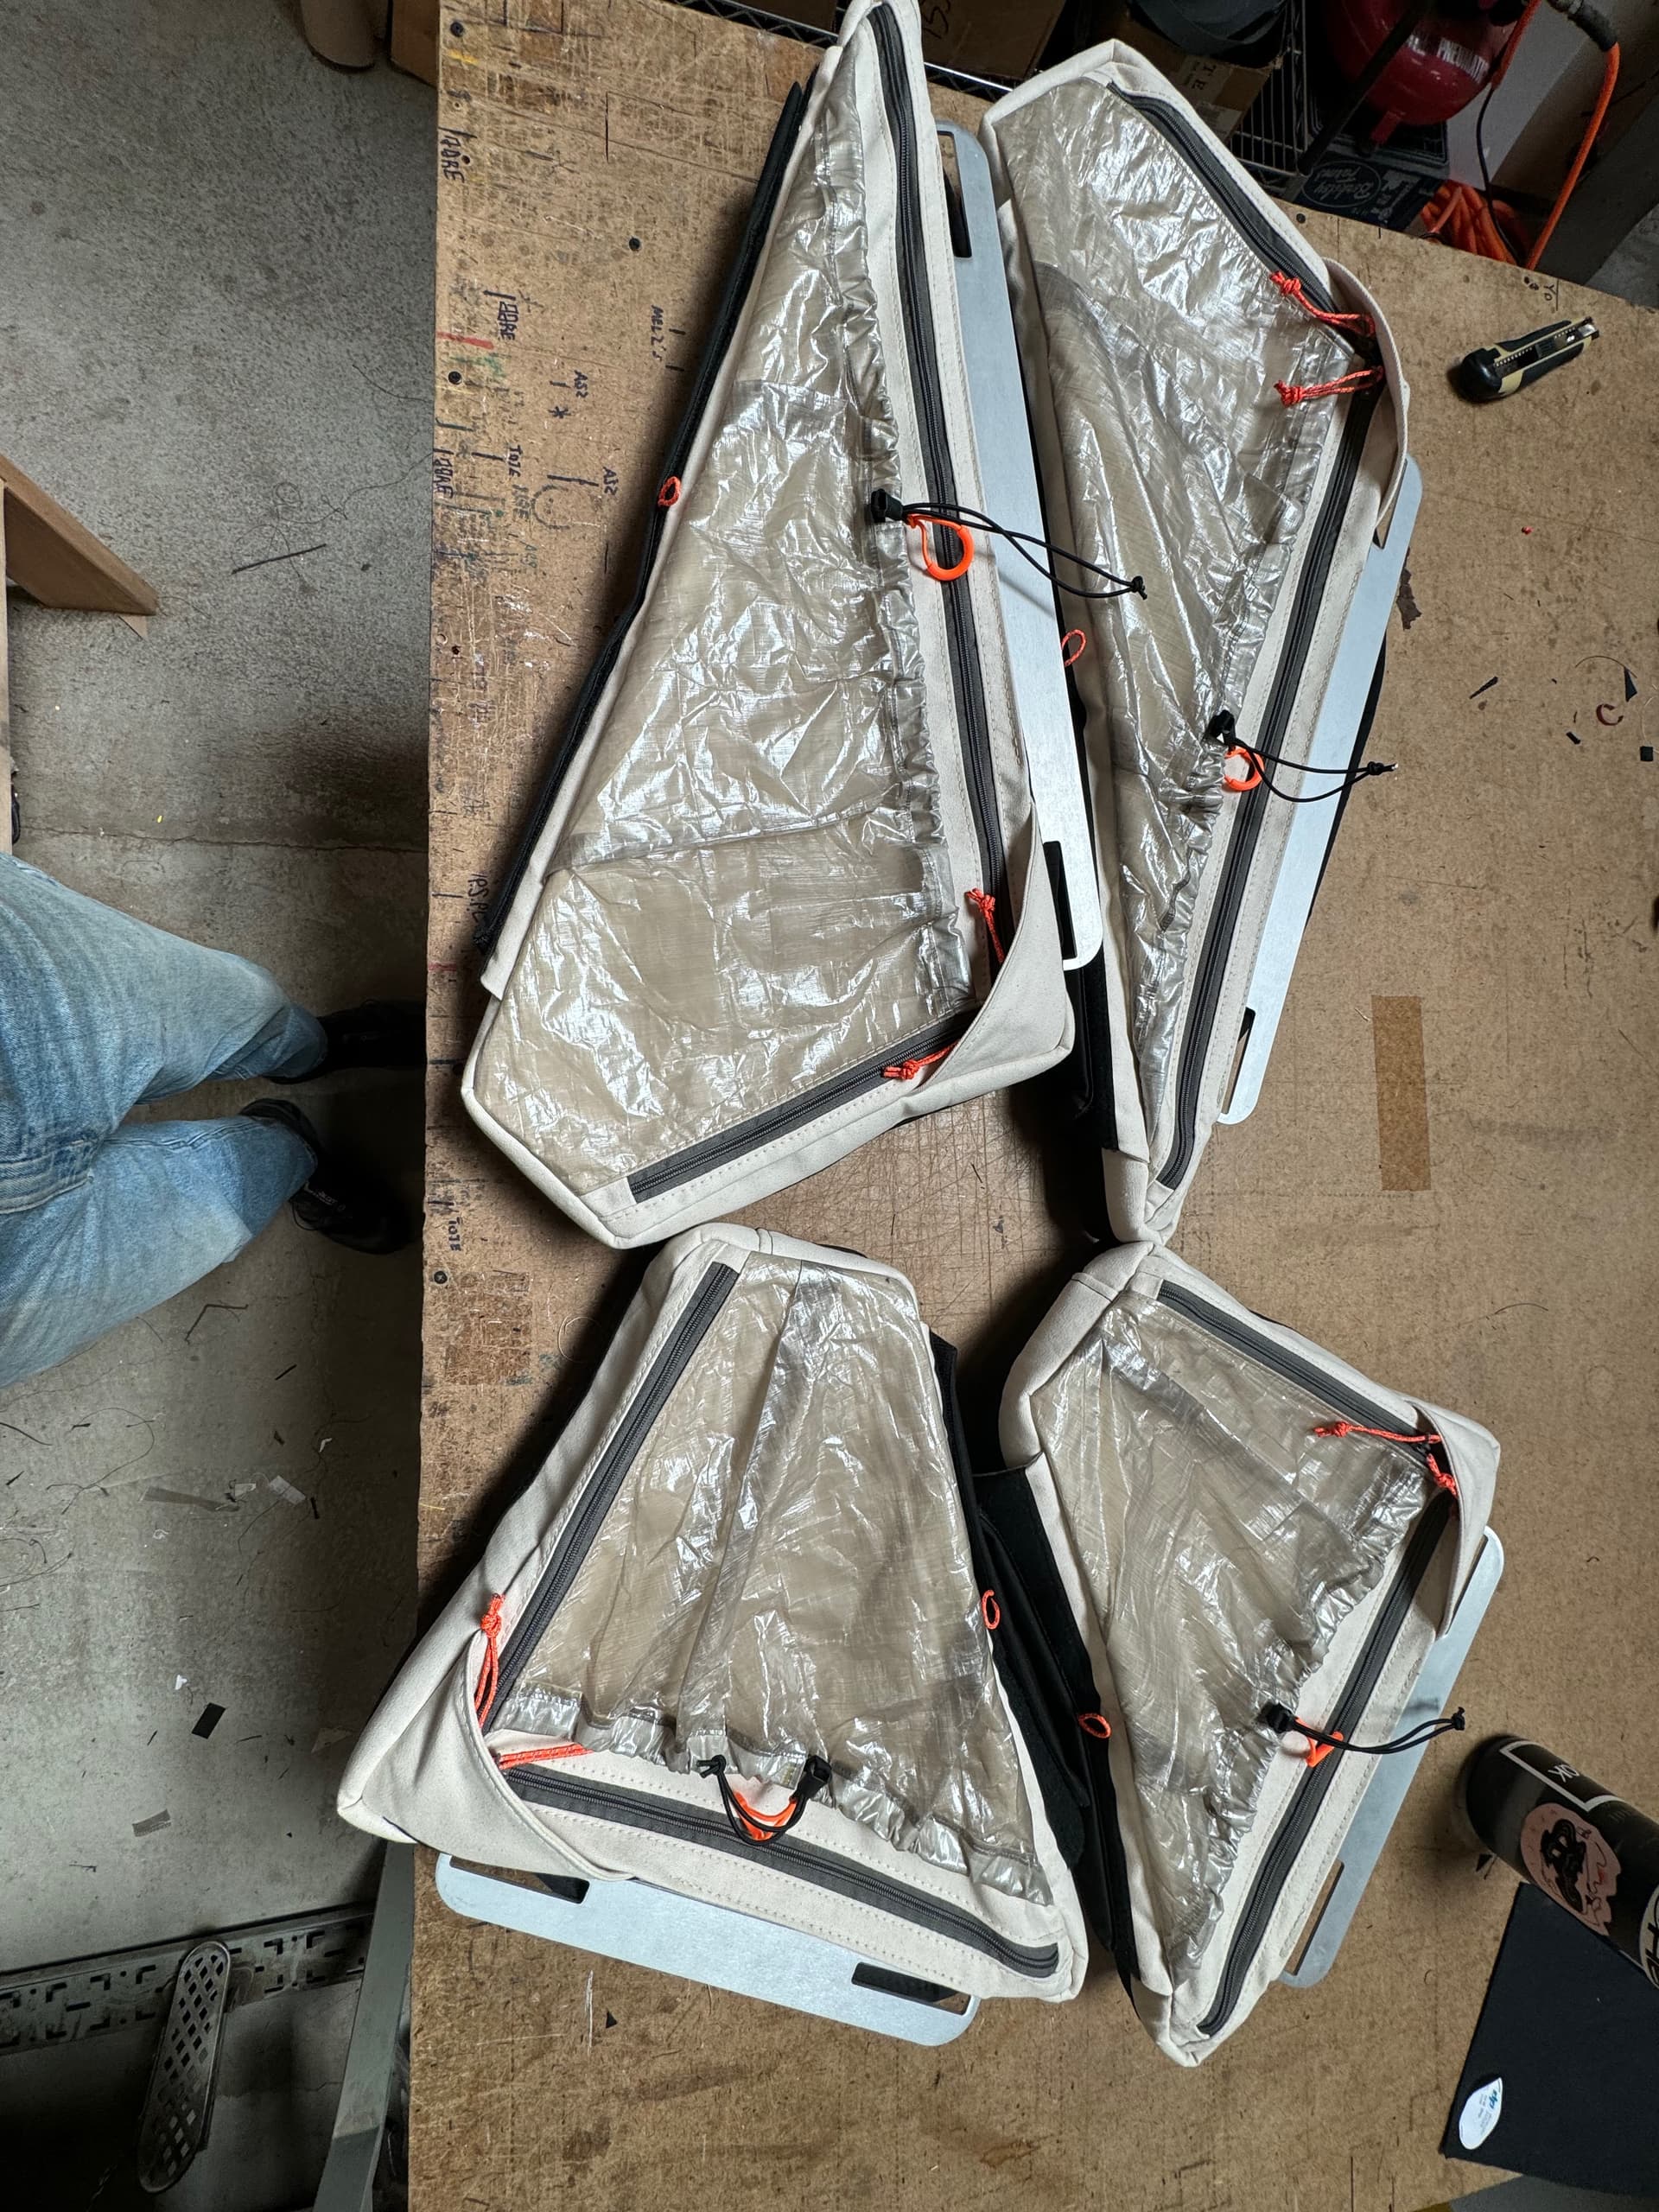
I am so so so thrilled with how these turned out. We’re utilizing the smaller bags for our toiletries and the larger bags are still housing gear as the previous bags were (Fly fishing stuff, nets, hiking poles, etc.) The interior dyneema pockets keep cables and change of clothes tidy and out of sight.
Tom’s frame bags are so solid. If you’re able to, I would not consider any other amazon/etsy/over-seas options over his dialed in goods. Tom is a master craftsman, the quality is top-notch, and you’re supporting a small batch made in USA business.
A note: These bags are strictly proof of concepts and not yet a design that Tom has rolled into his core lineup. As seen here, we still had to trouble shoot a few things, including (probably?) voiding my warranty on the parts I drilled into. If you would be down to mess with your space frame and/or are interested in a two-sided bag drop a like on this post or a comment to help gauge interest.
![]() Appendix / Few small details building on the above post that I spaced on:
Appendix / Few small details building on the above post that I spaced on:
• We placed cork down inside the bulkhead bench and the kitchen drawer for a finished look and to (maybe?) help limit items from sliding around.

• I mounted a RuuviTag Pro in the garage by the Starlink System (just for fun to have the data)
8 Likes
Wow dude. This is a next level build. Great job! You should join me in my finish carpentry job. ![]()
3 Likes
So stoked we contributed a small element to this masterpiece. Super excited to see this in person soon ![]()
1 Like
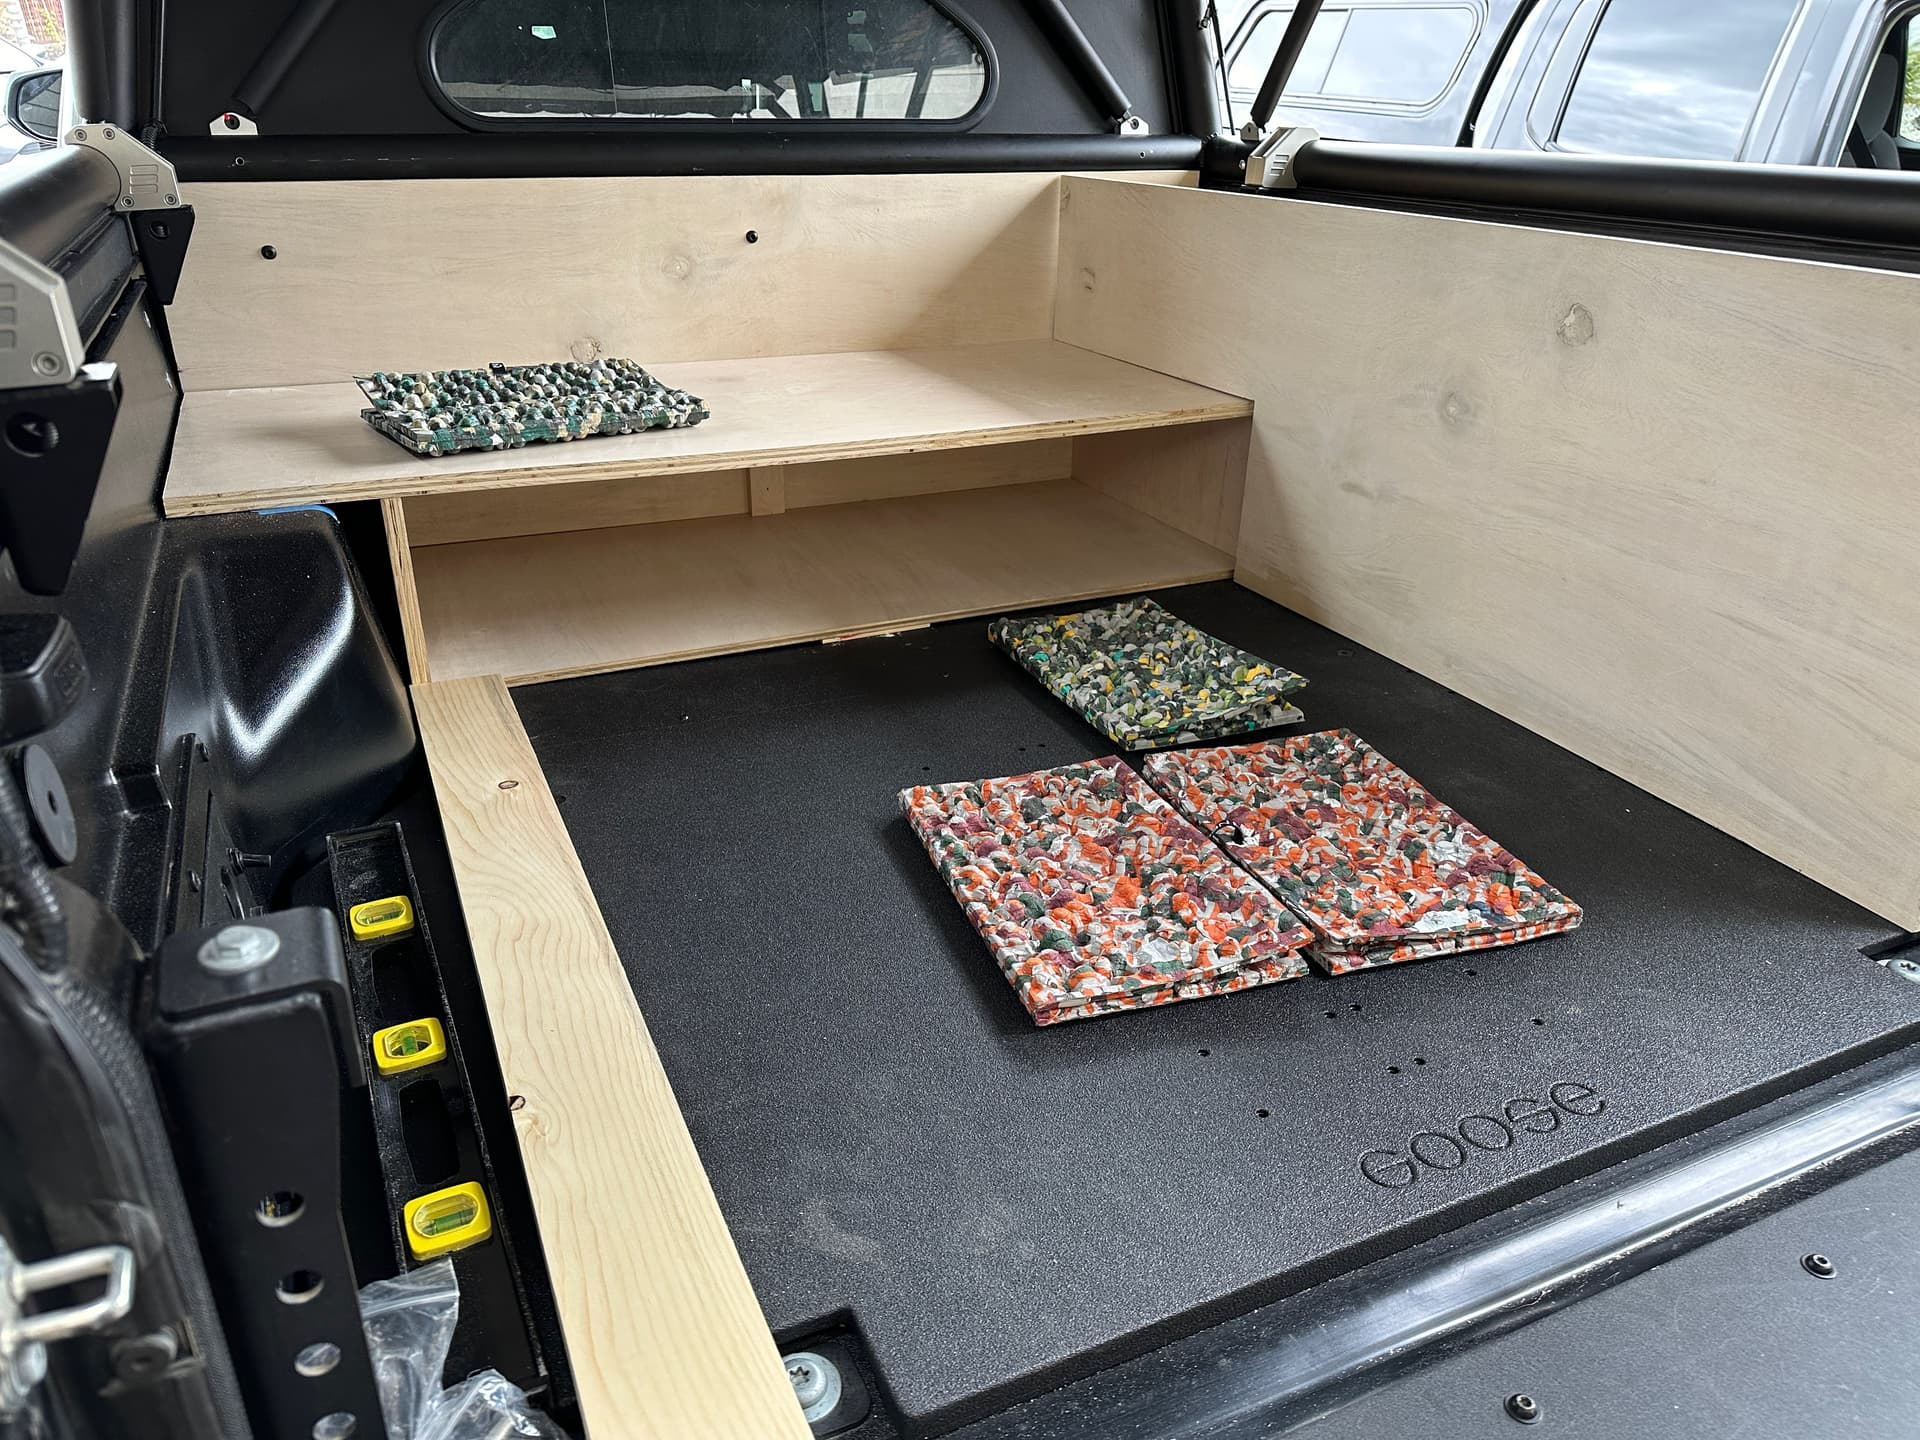
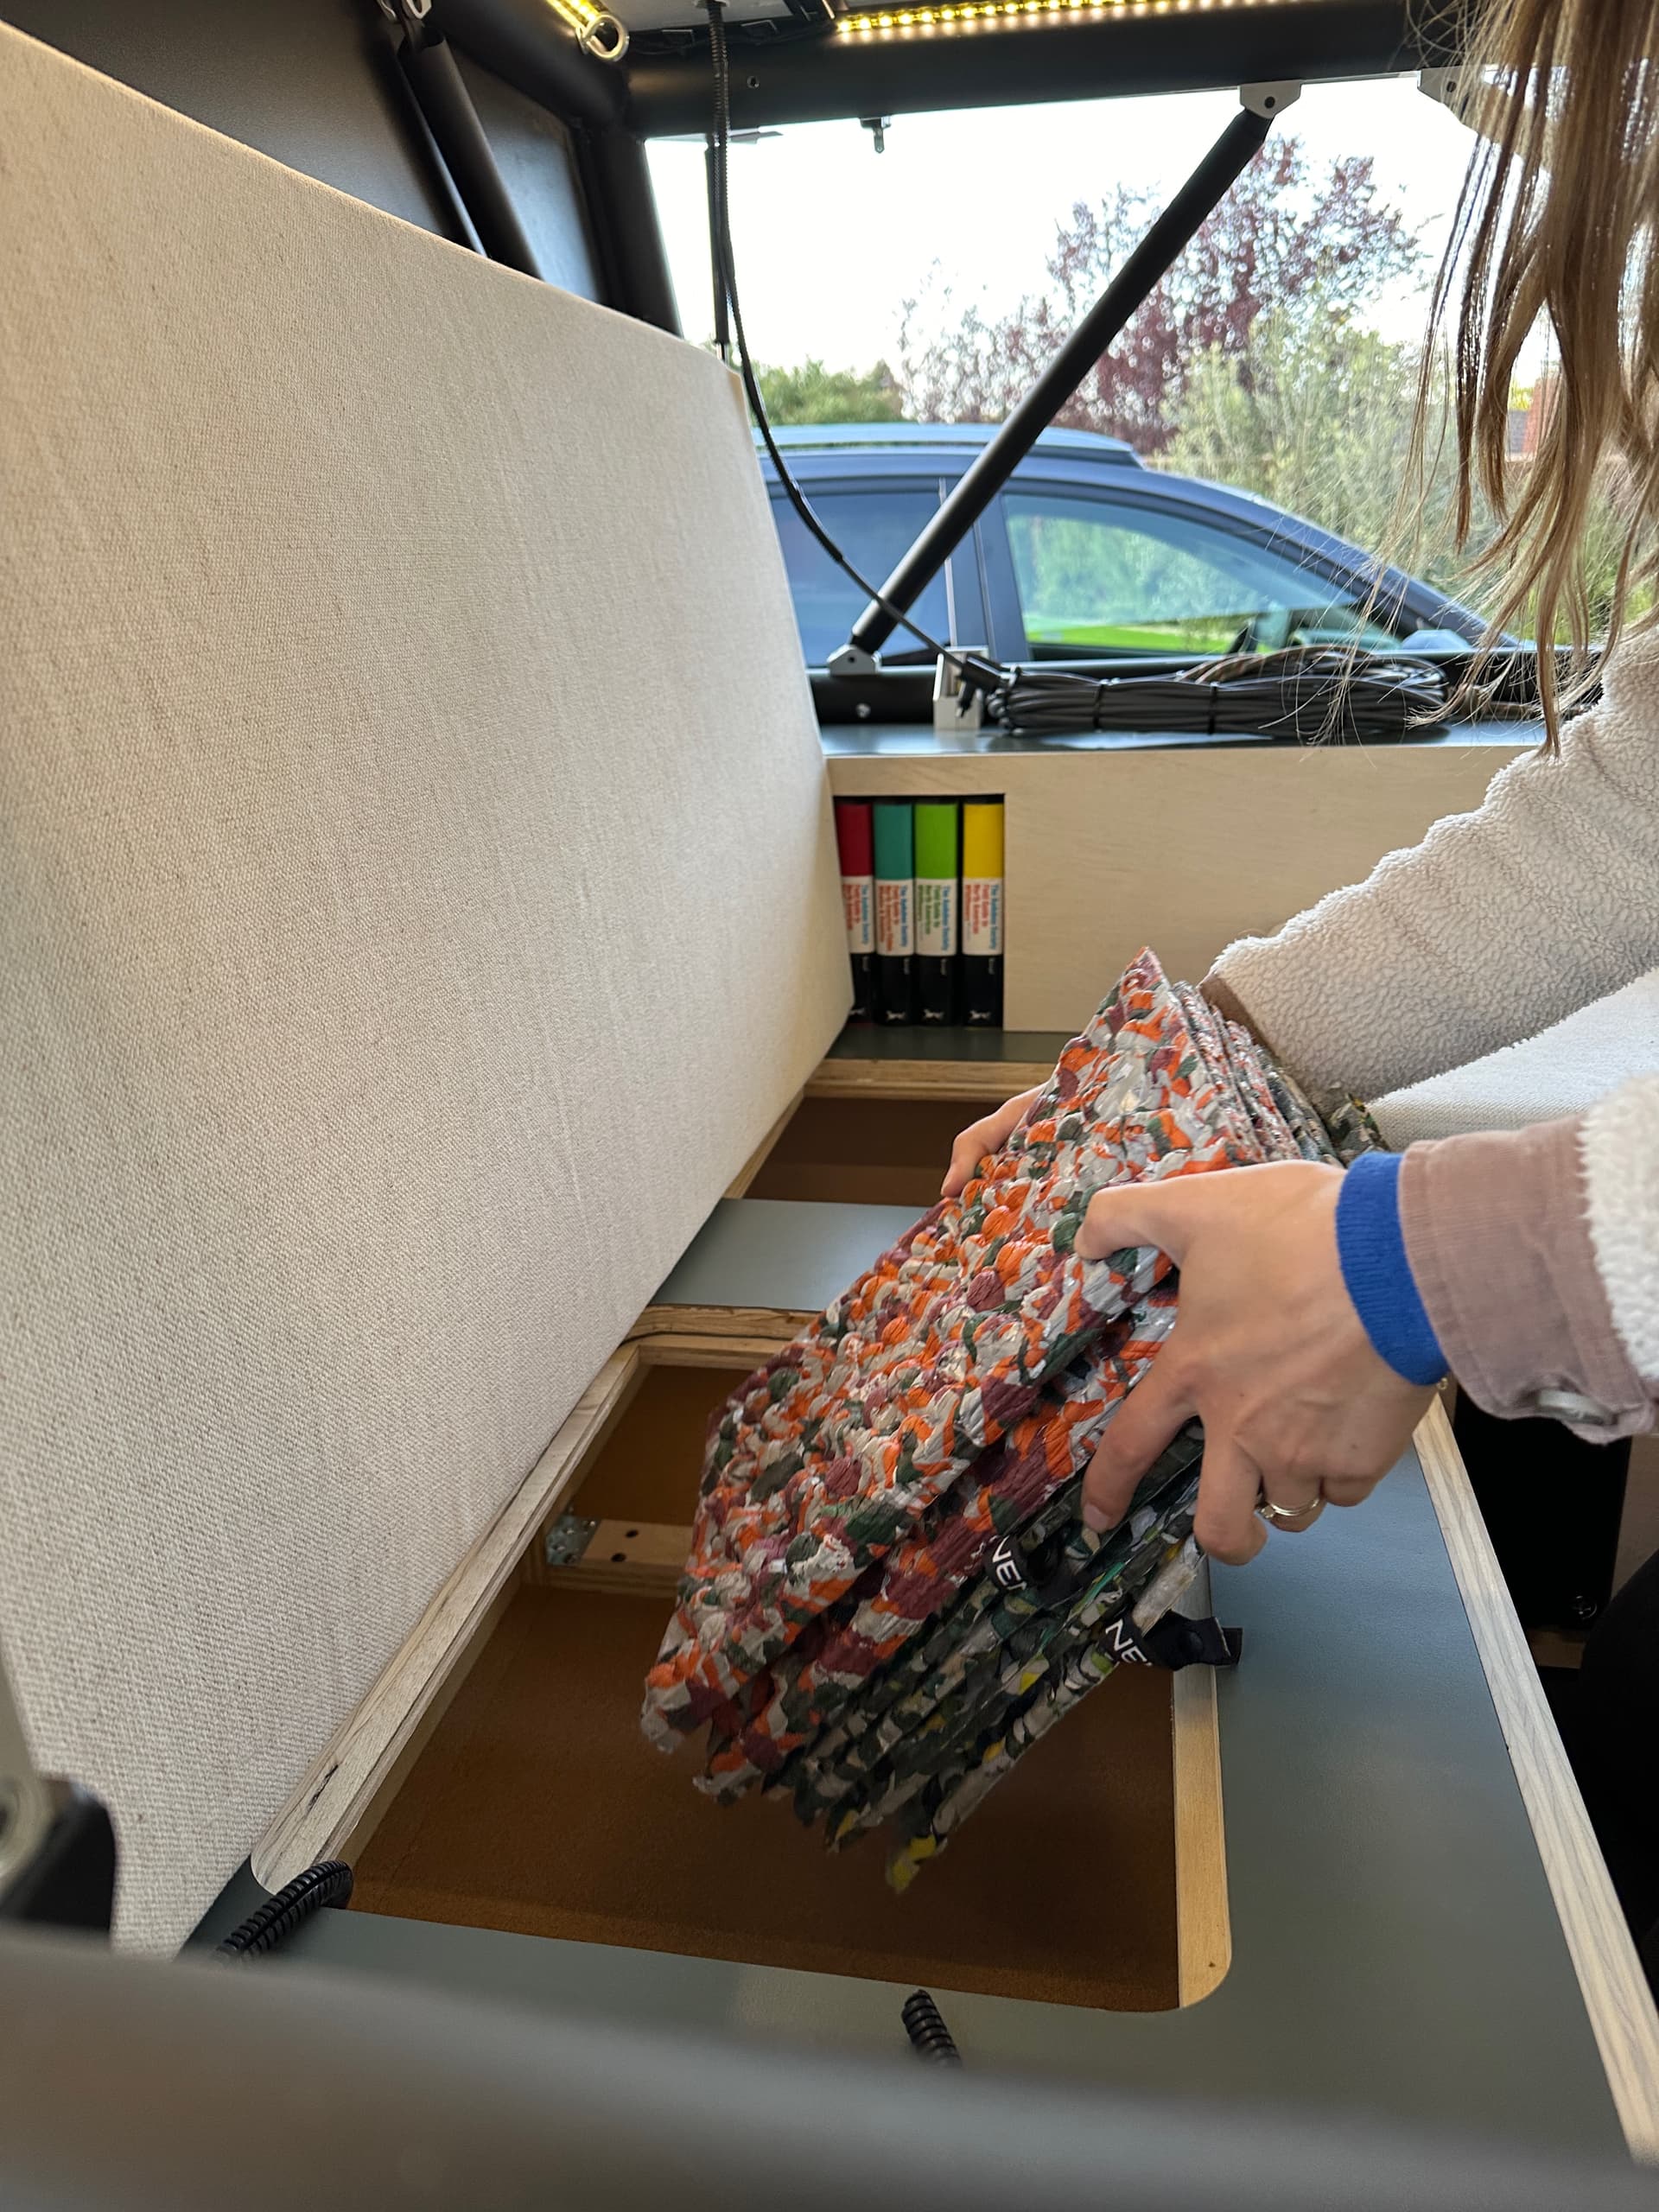
Whats those colorful pads that keep showing up in most of the pictures?
One of my all-time favorite pieces of outdoor gear: NEMO Chipper pads! Great knee pads when climbing in-and-out of the truck bed, as seat cushion at picnic tables, safe surface for cameras and laptops on the ground, etc. I own four but only travel with two at time.
1 Like