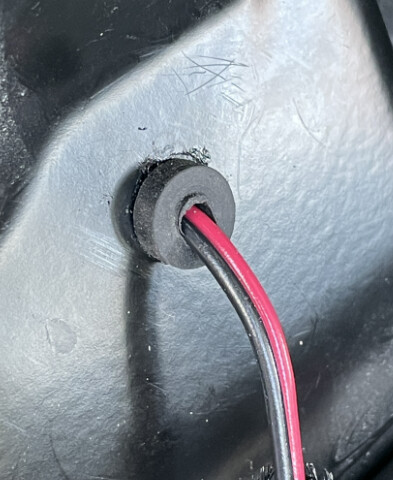
@julian awesome. What is the little circle plug used to pass thru the wire?
Great question! I happened upon 3/4 PVC risers in the sprinkler parts aisle at home depot and thought it would be the perfect part for the pass through. (the proprietary starlink cable is super bulky—it just barely fits)
I used locking nuts on either end to secure it in place and found a removable hose cap to seal when not in use.
Here are some photos of everything!*

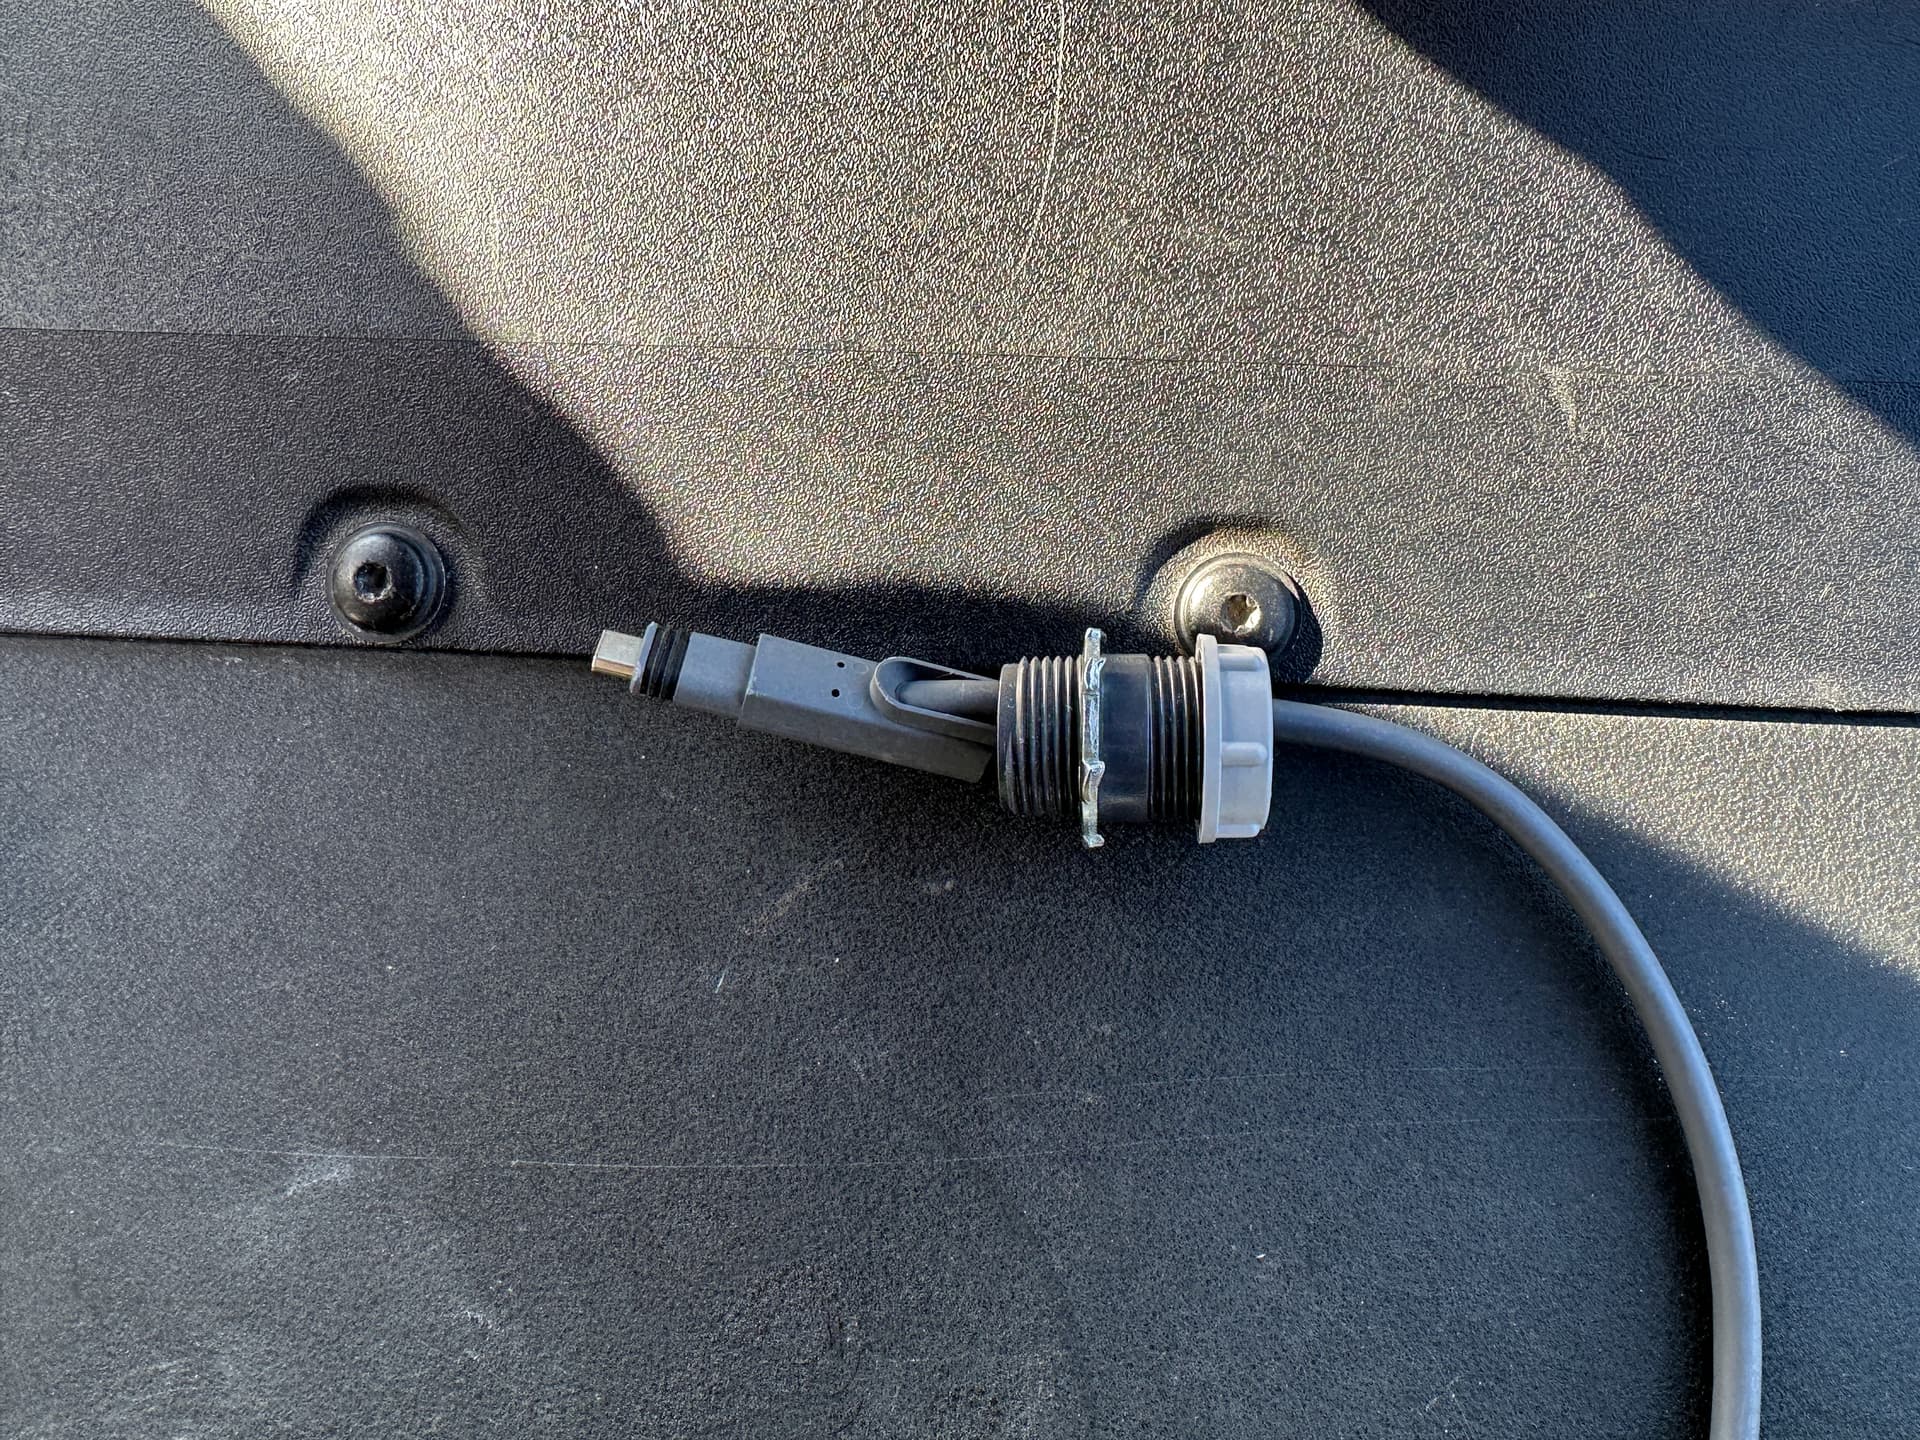
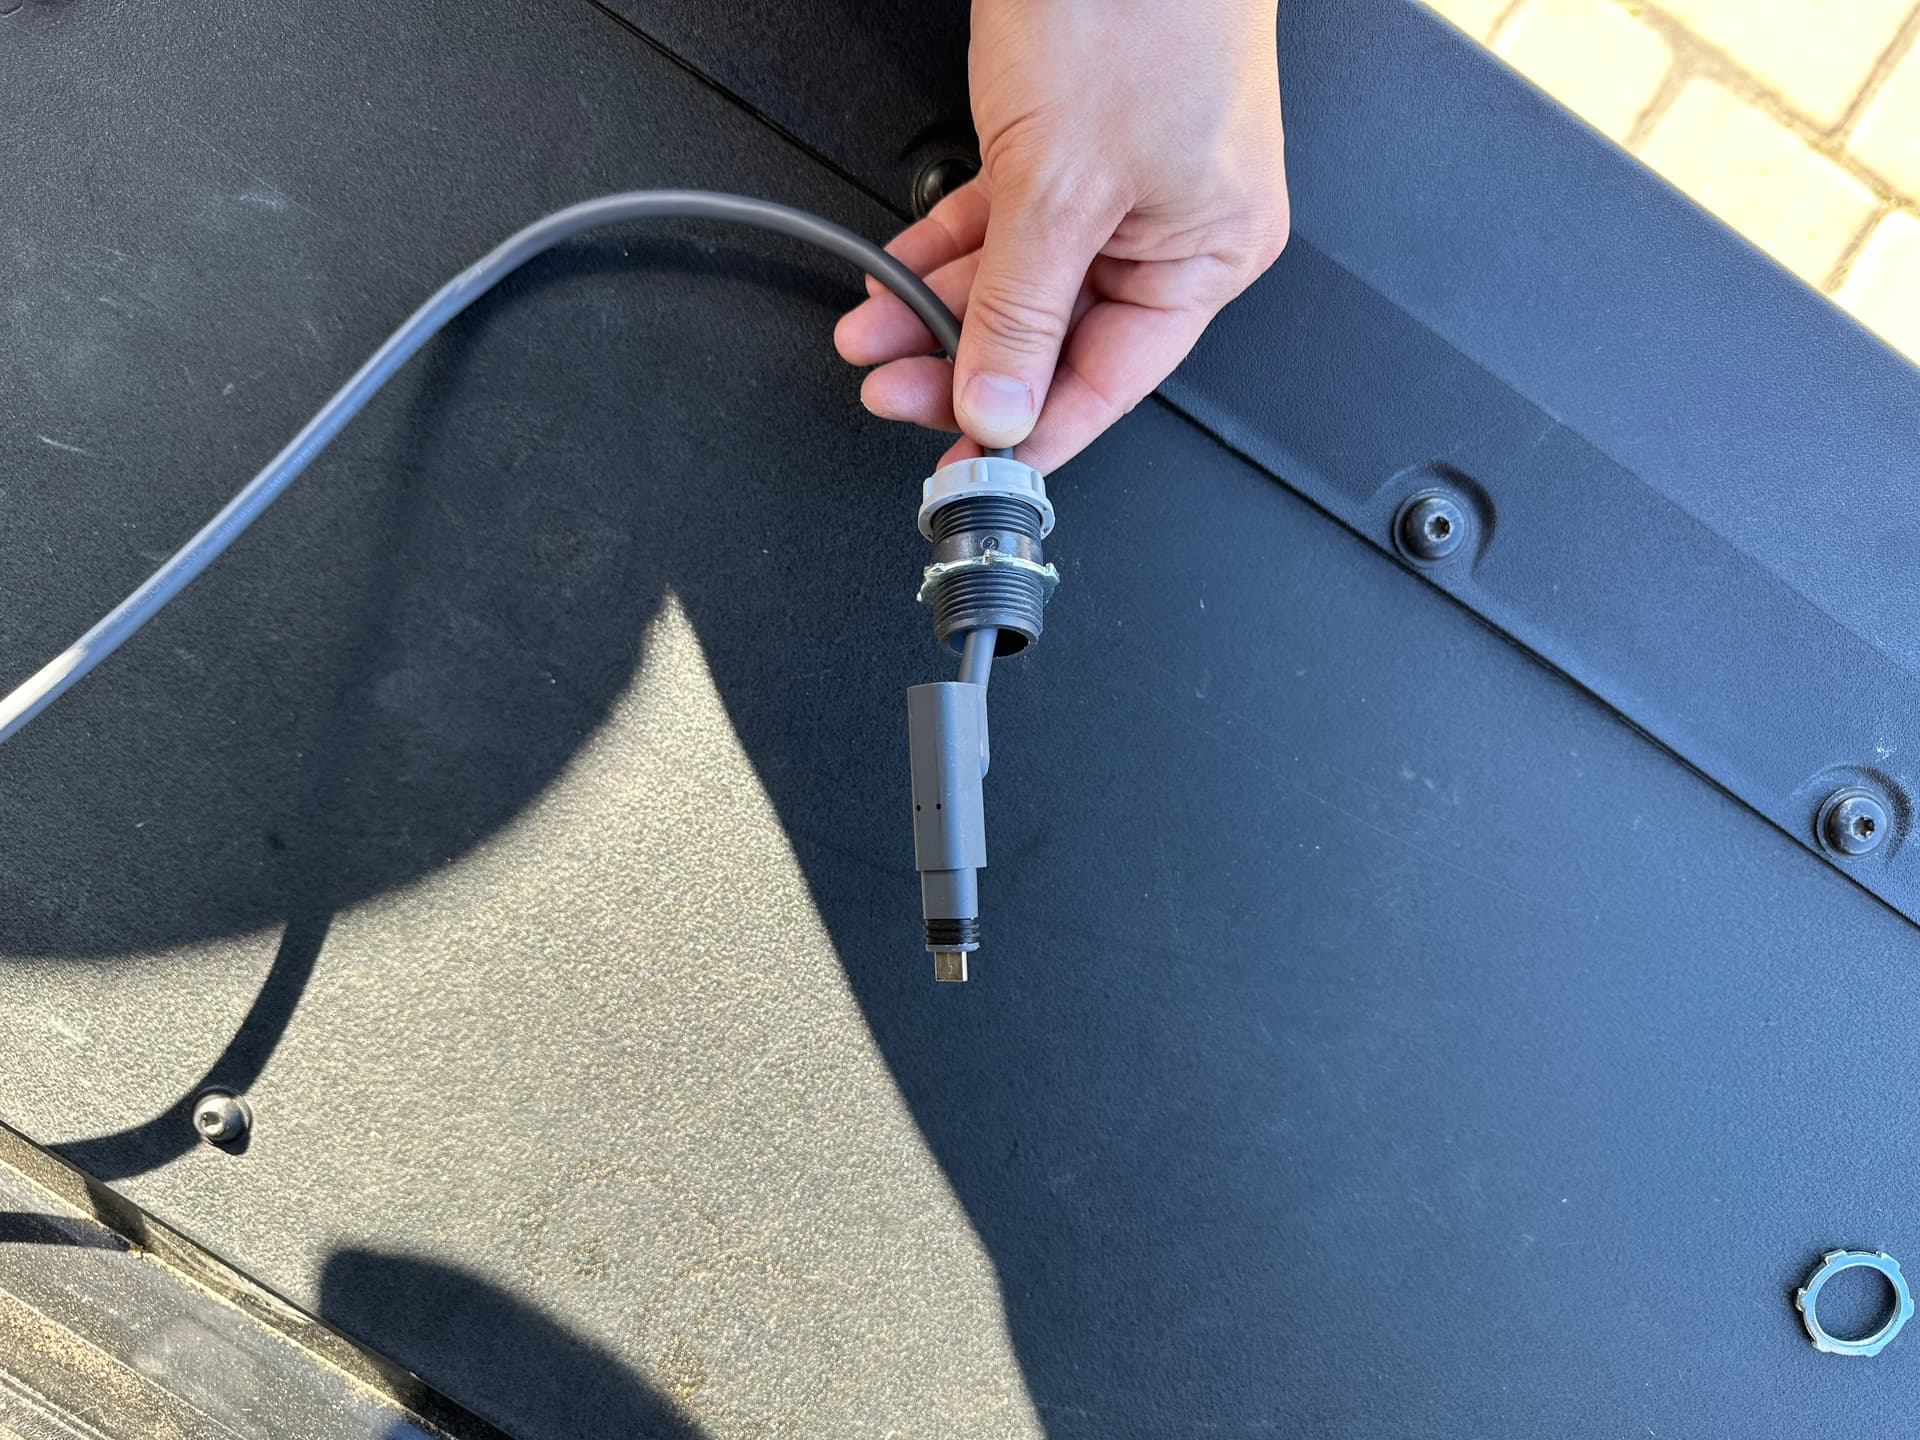
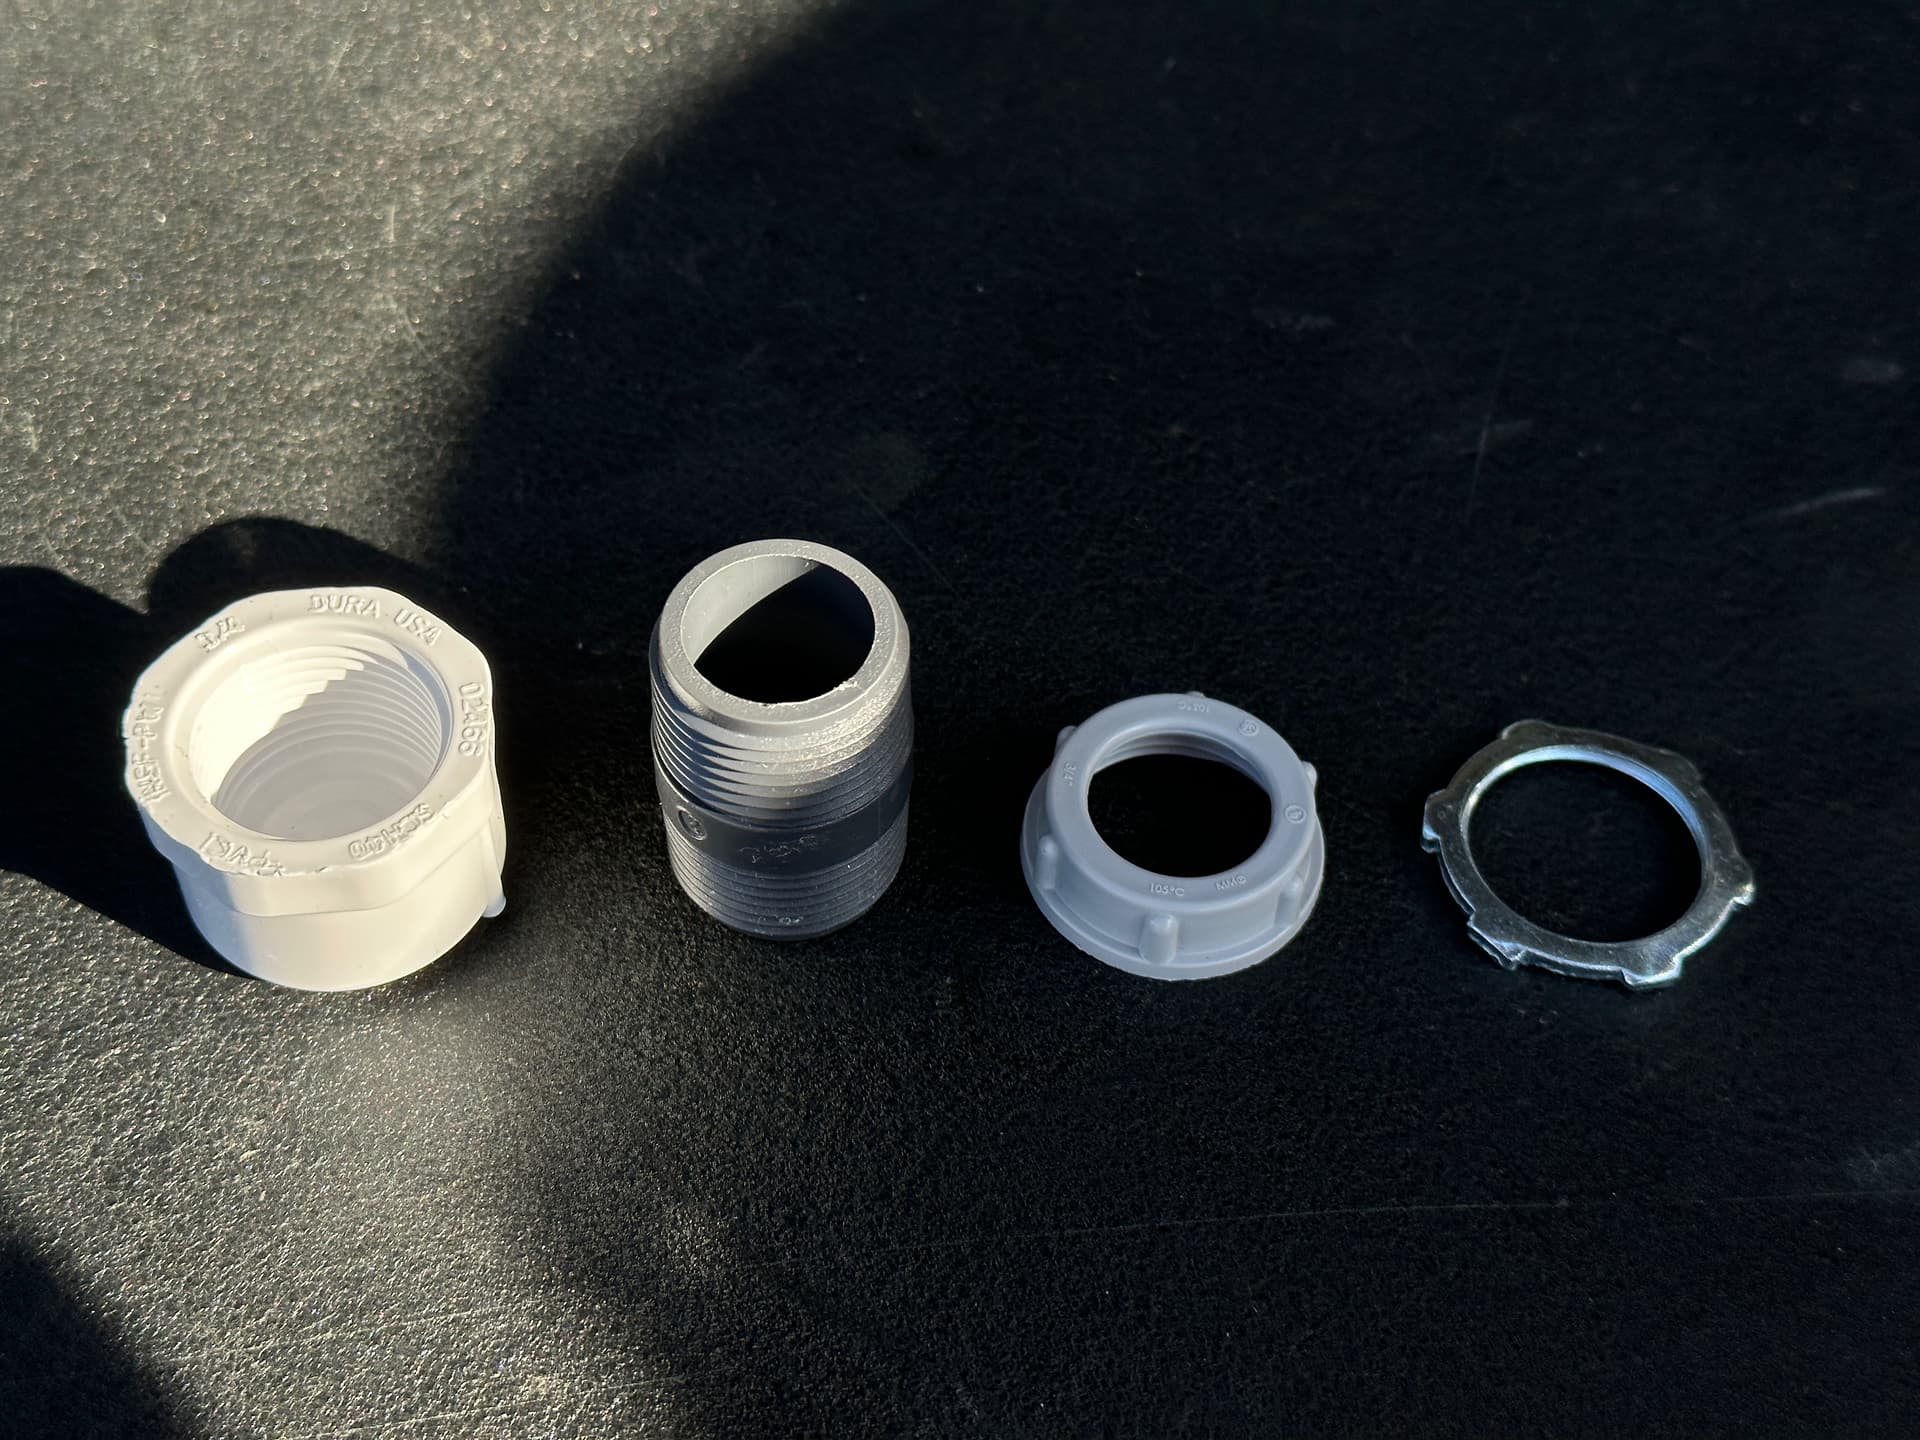
*Note: I ended up swapping out the metal locking nuts with plastic ones before installing—as they were flush and weather resistant—I also replaced the bulky white cap with a thiner red one. Finally, the end cap on interior is purely aesthetic to hide the thread.
2 Likes
Honestly great idea and intuitive!!!
Thanks. Nice setup!
1 Like
Nice cable gland idea! ![]() That is such a strange proprietary connector on the Starlink.
That is such a strange proprietary connector on the Starlink.
How’s your experience been with the Starlink?
1 Like
Thanks @78westy and @Ronmastas! Starlink has been incredible out in the wilderness / LTE dead zones. Has completely transformed how I think about travel / where I can work.
In areas where cell service is readily available we’ll still prioritize tethering from phones (just easier) ![]()
4 Likes
YEAR IN REVIEW 2022
Thank you @GFC for keeping us comfortable on the road—all 25,000km of it.
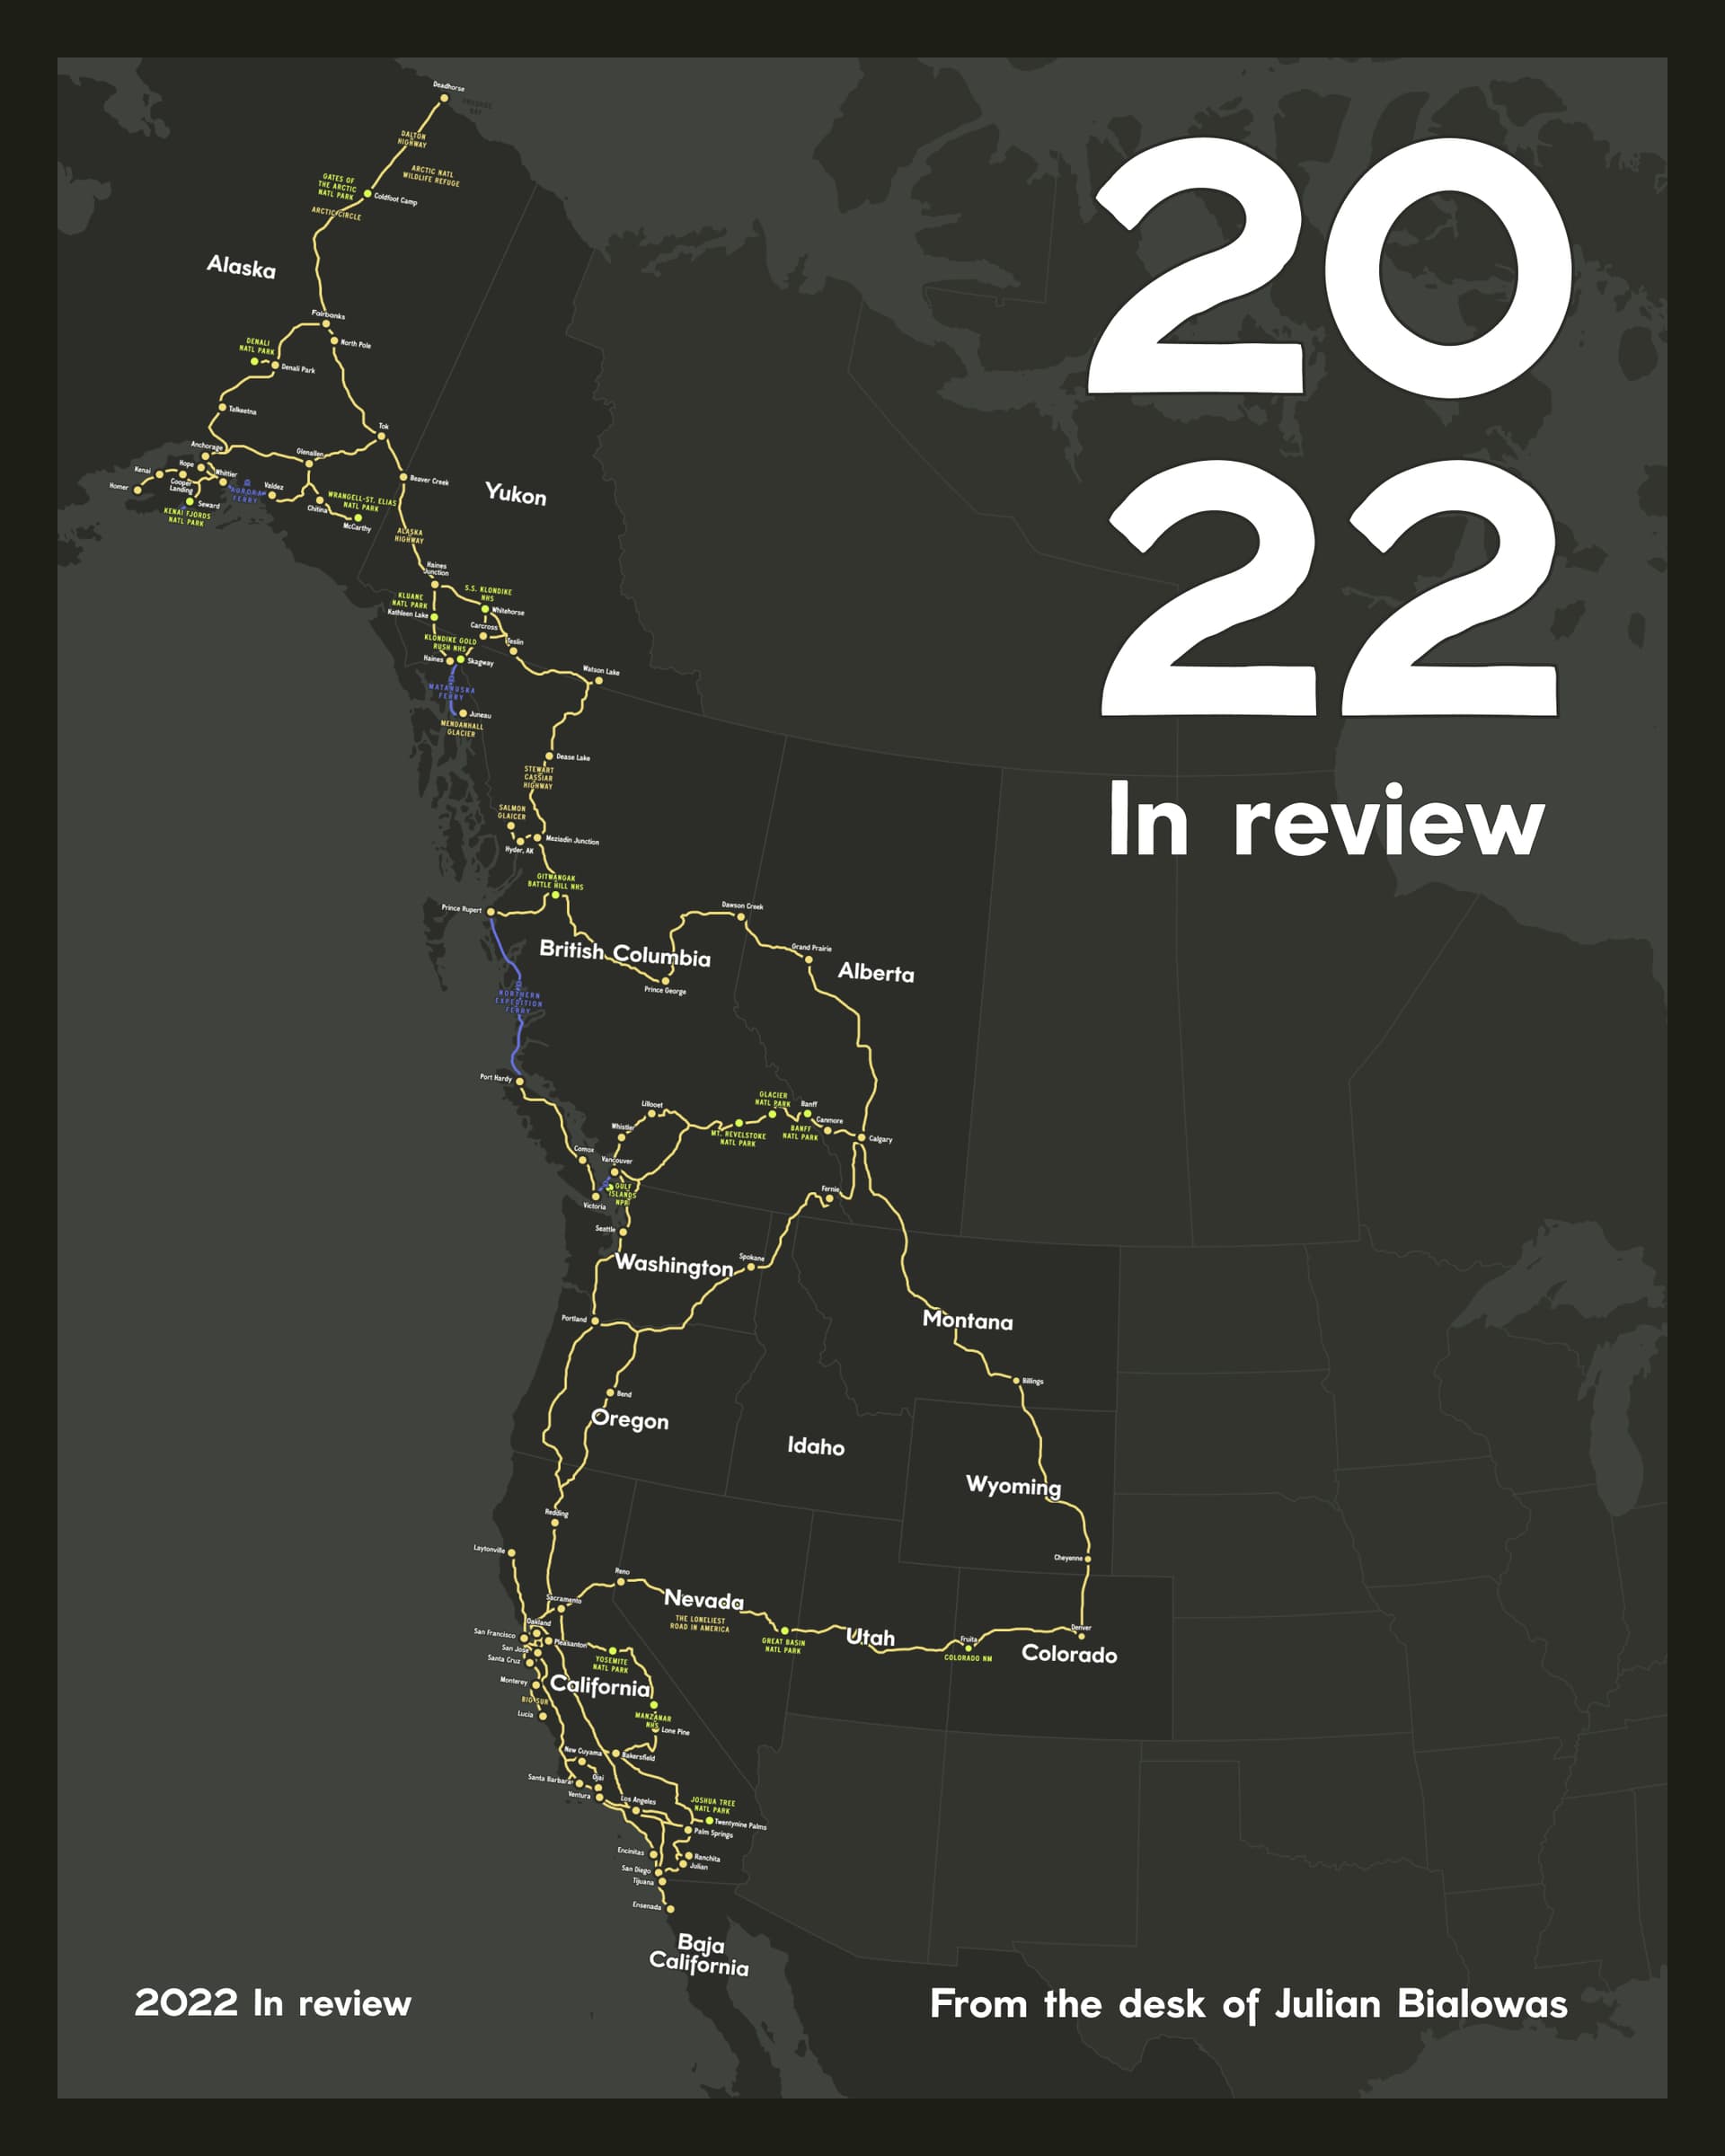
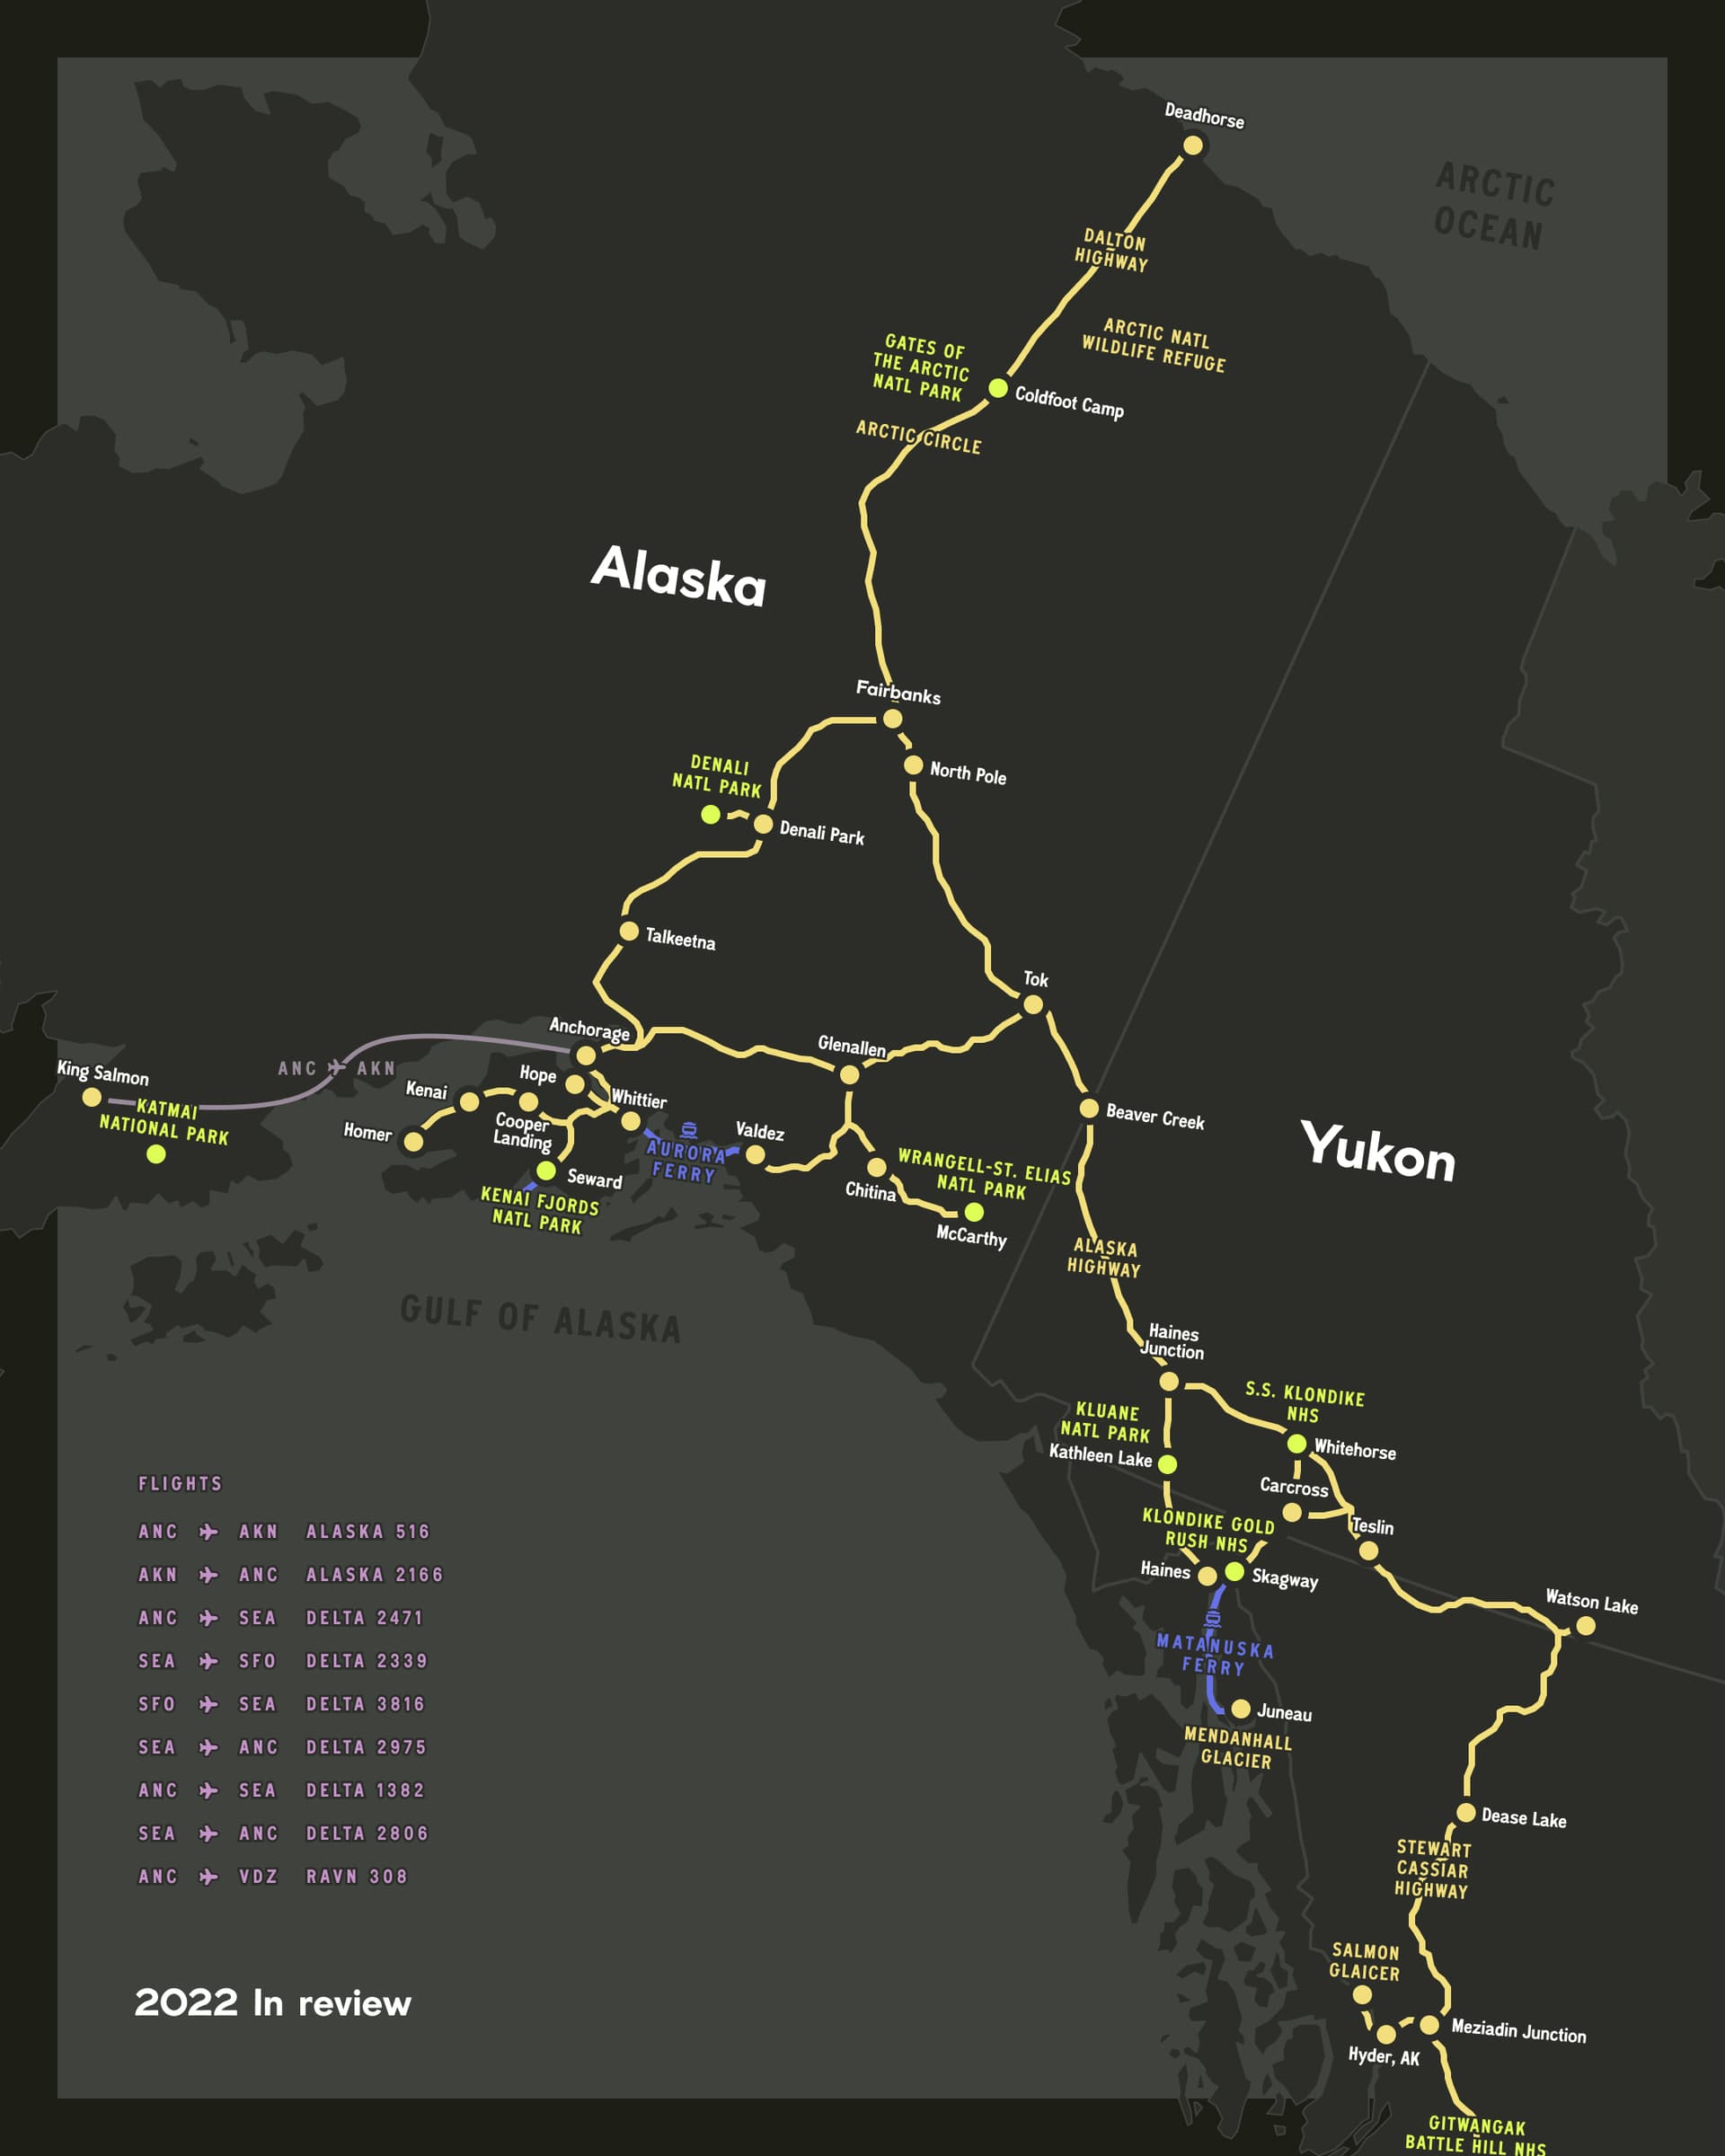
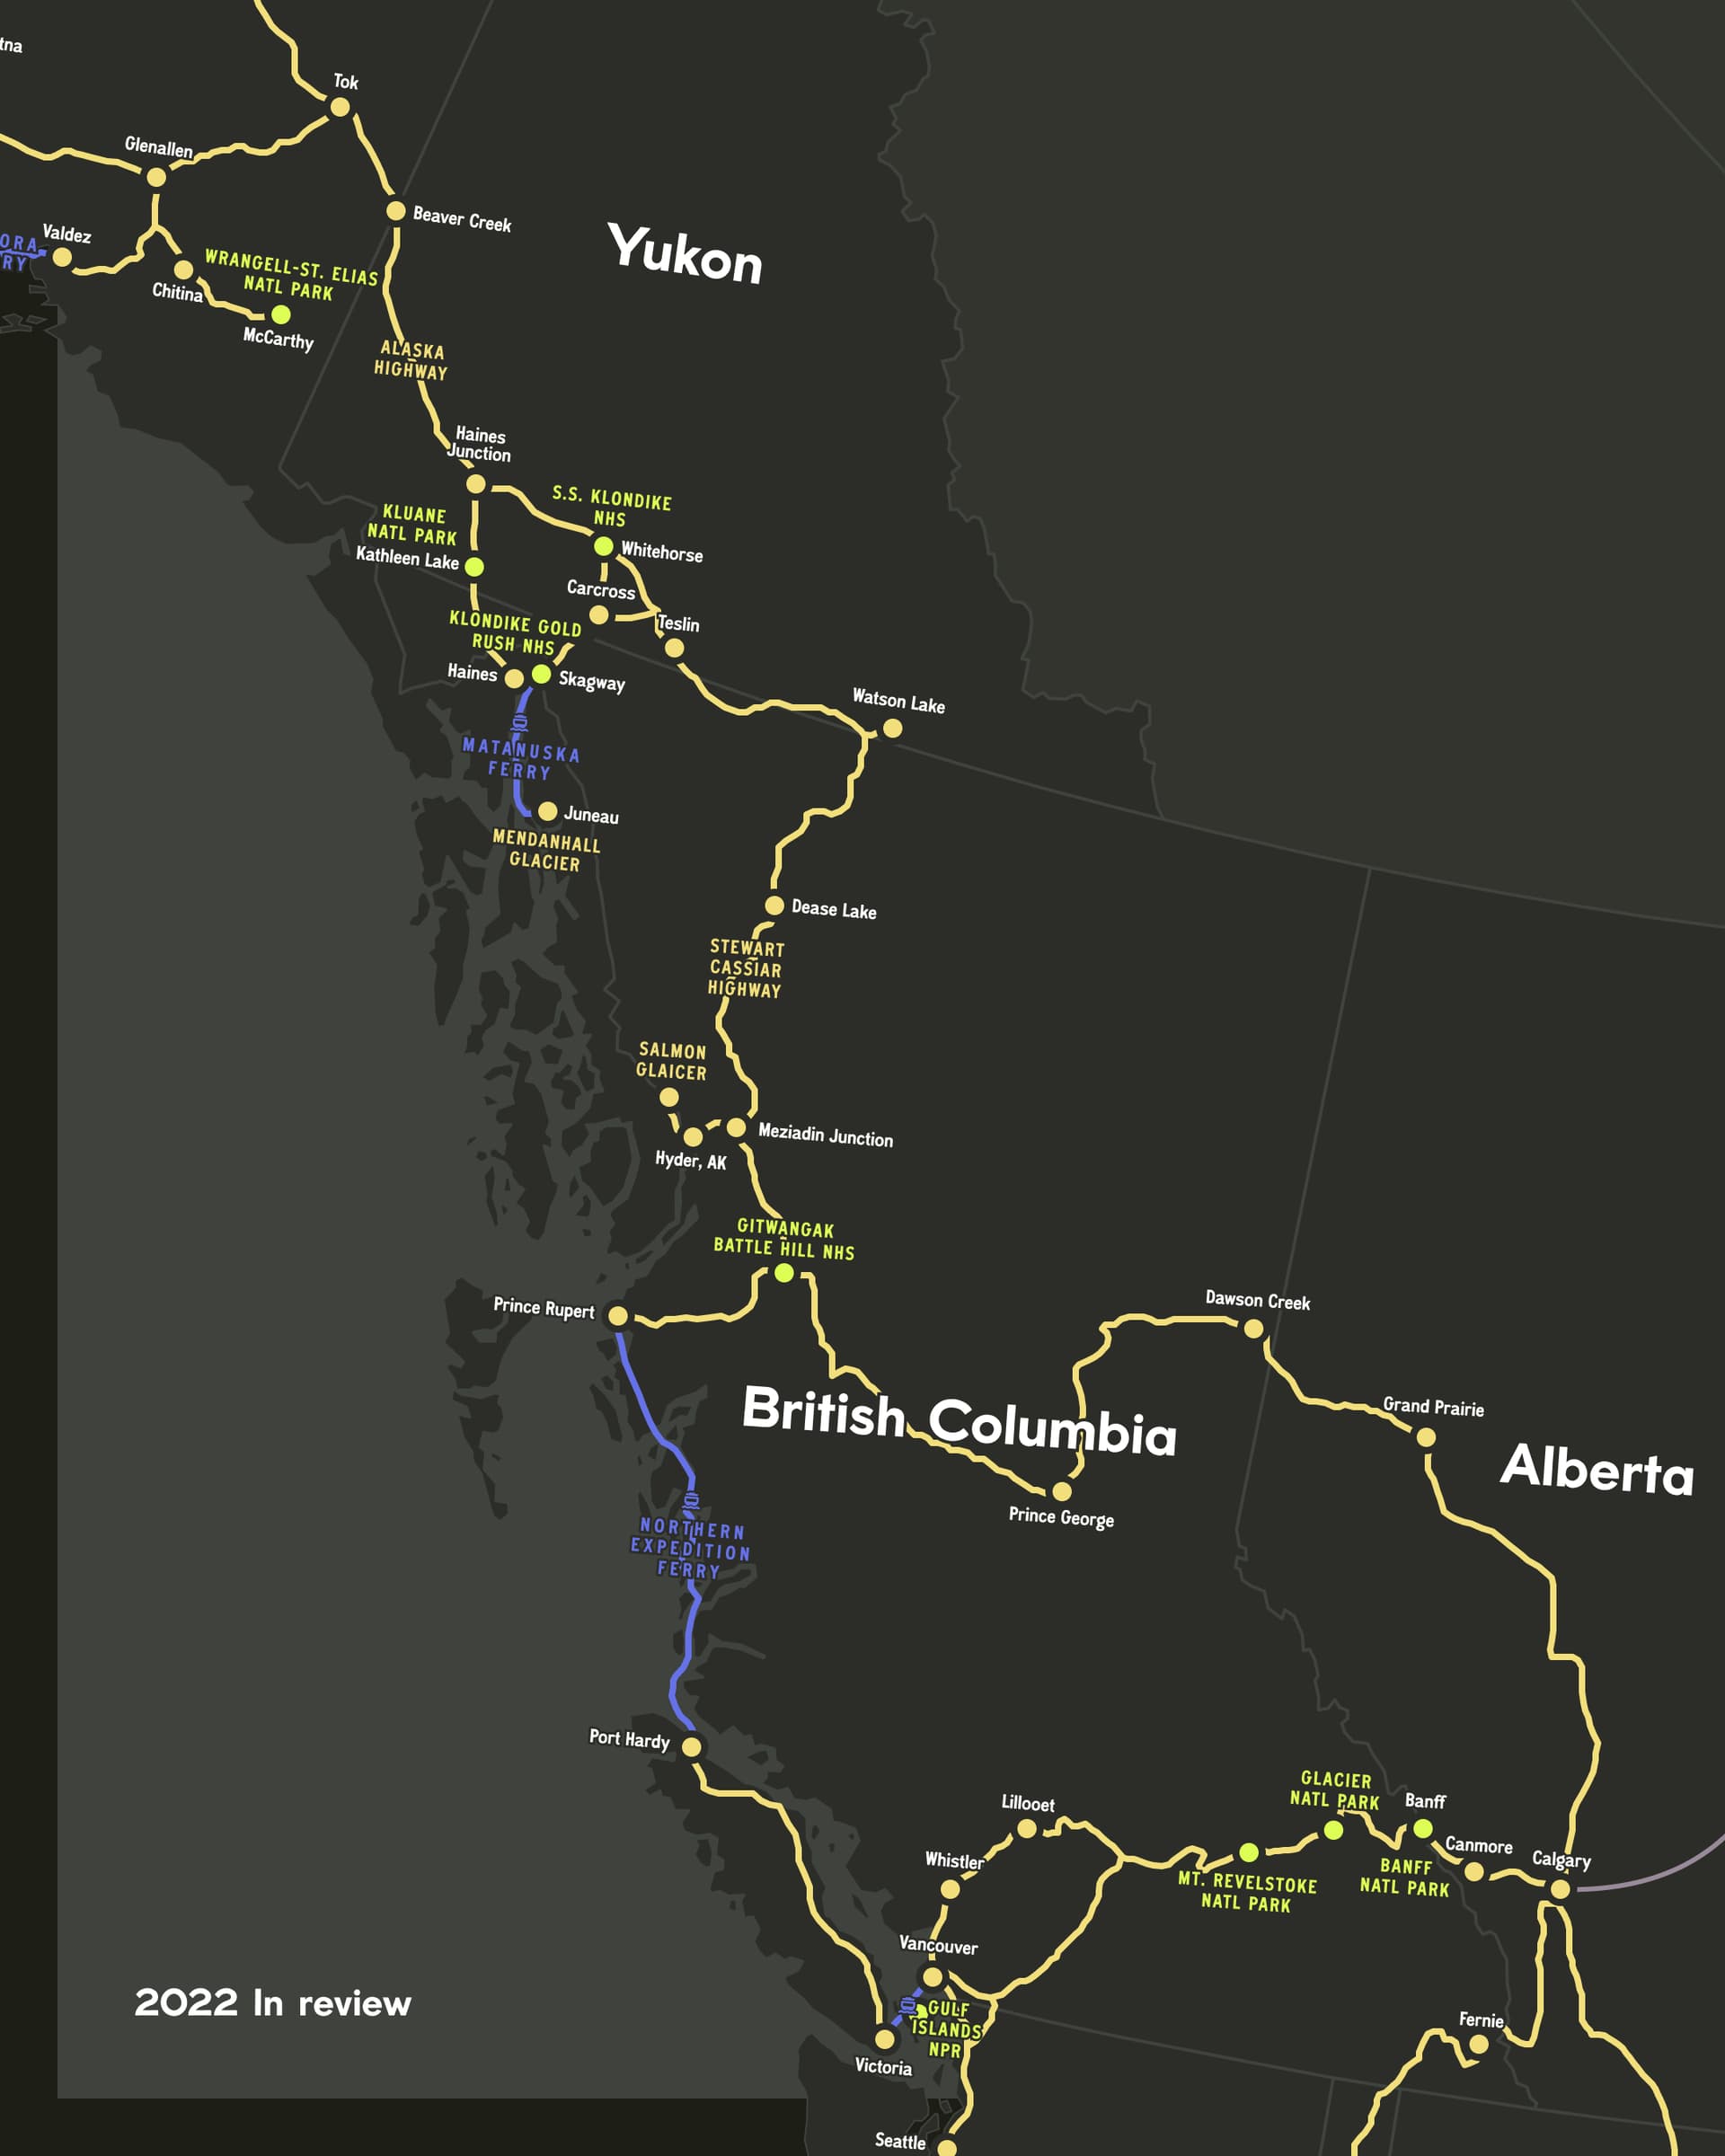
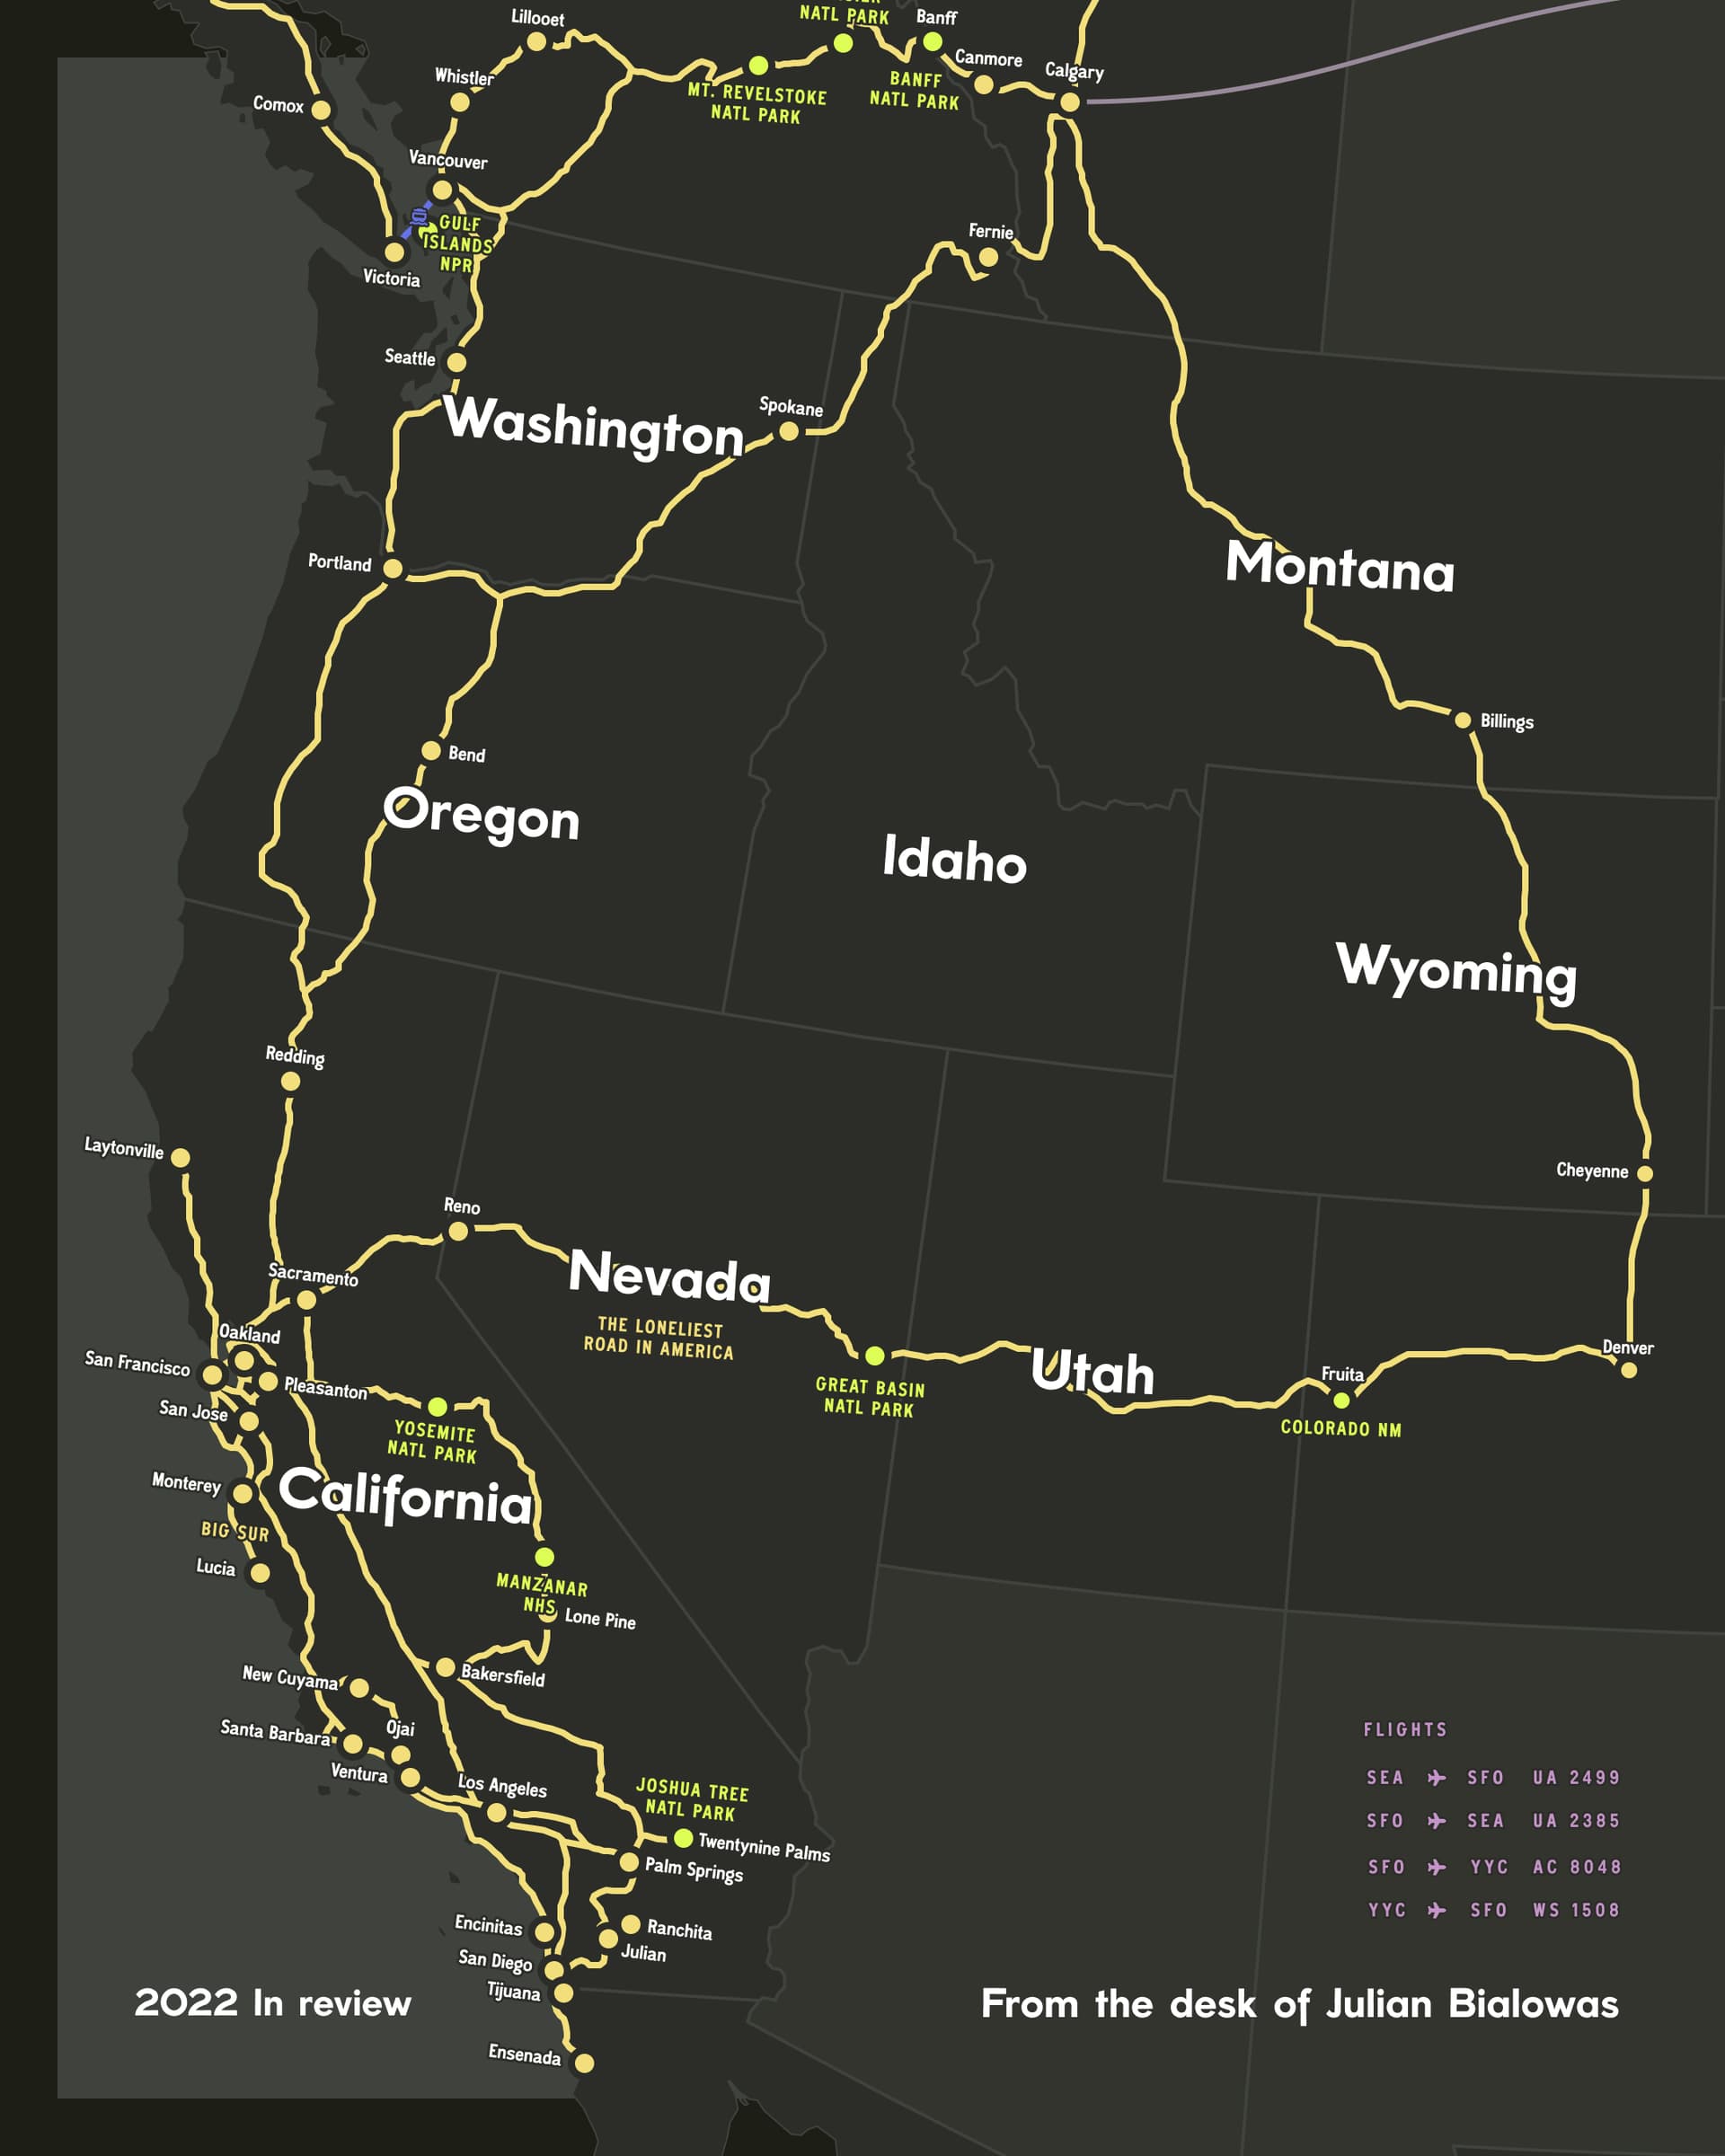
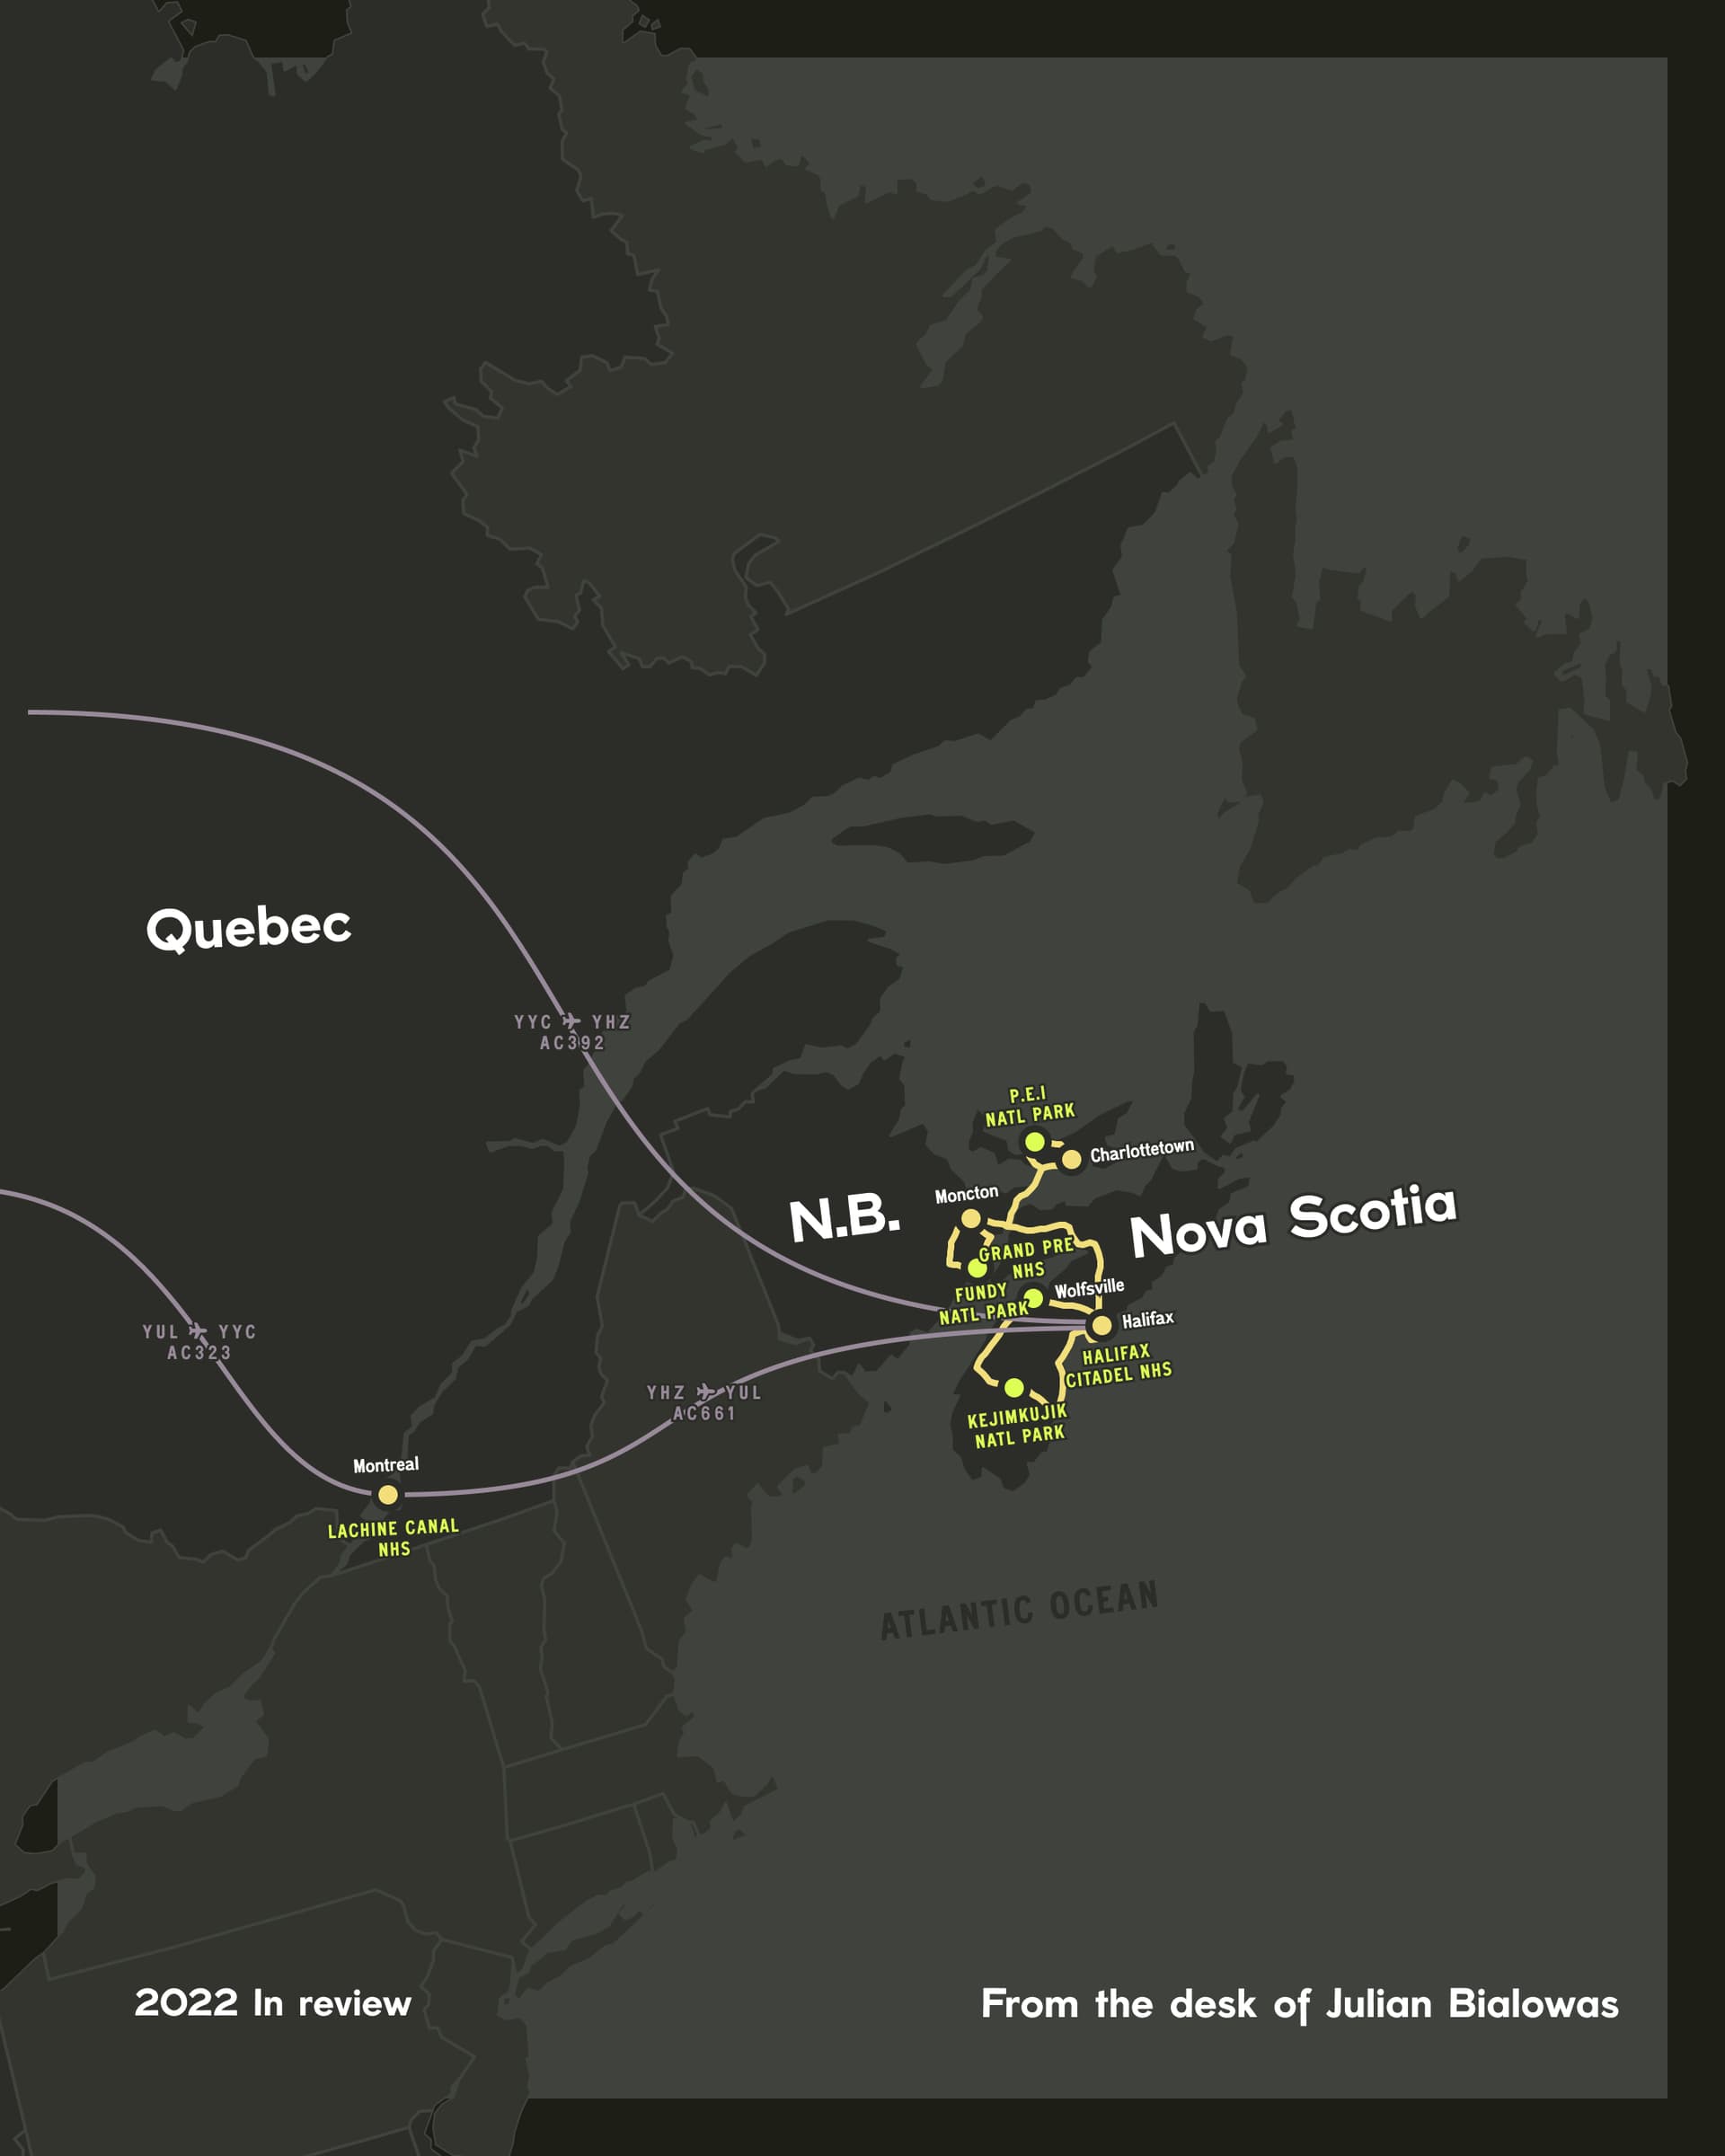
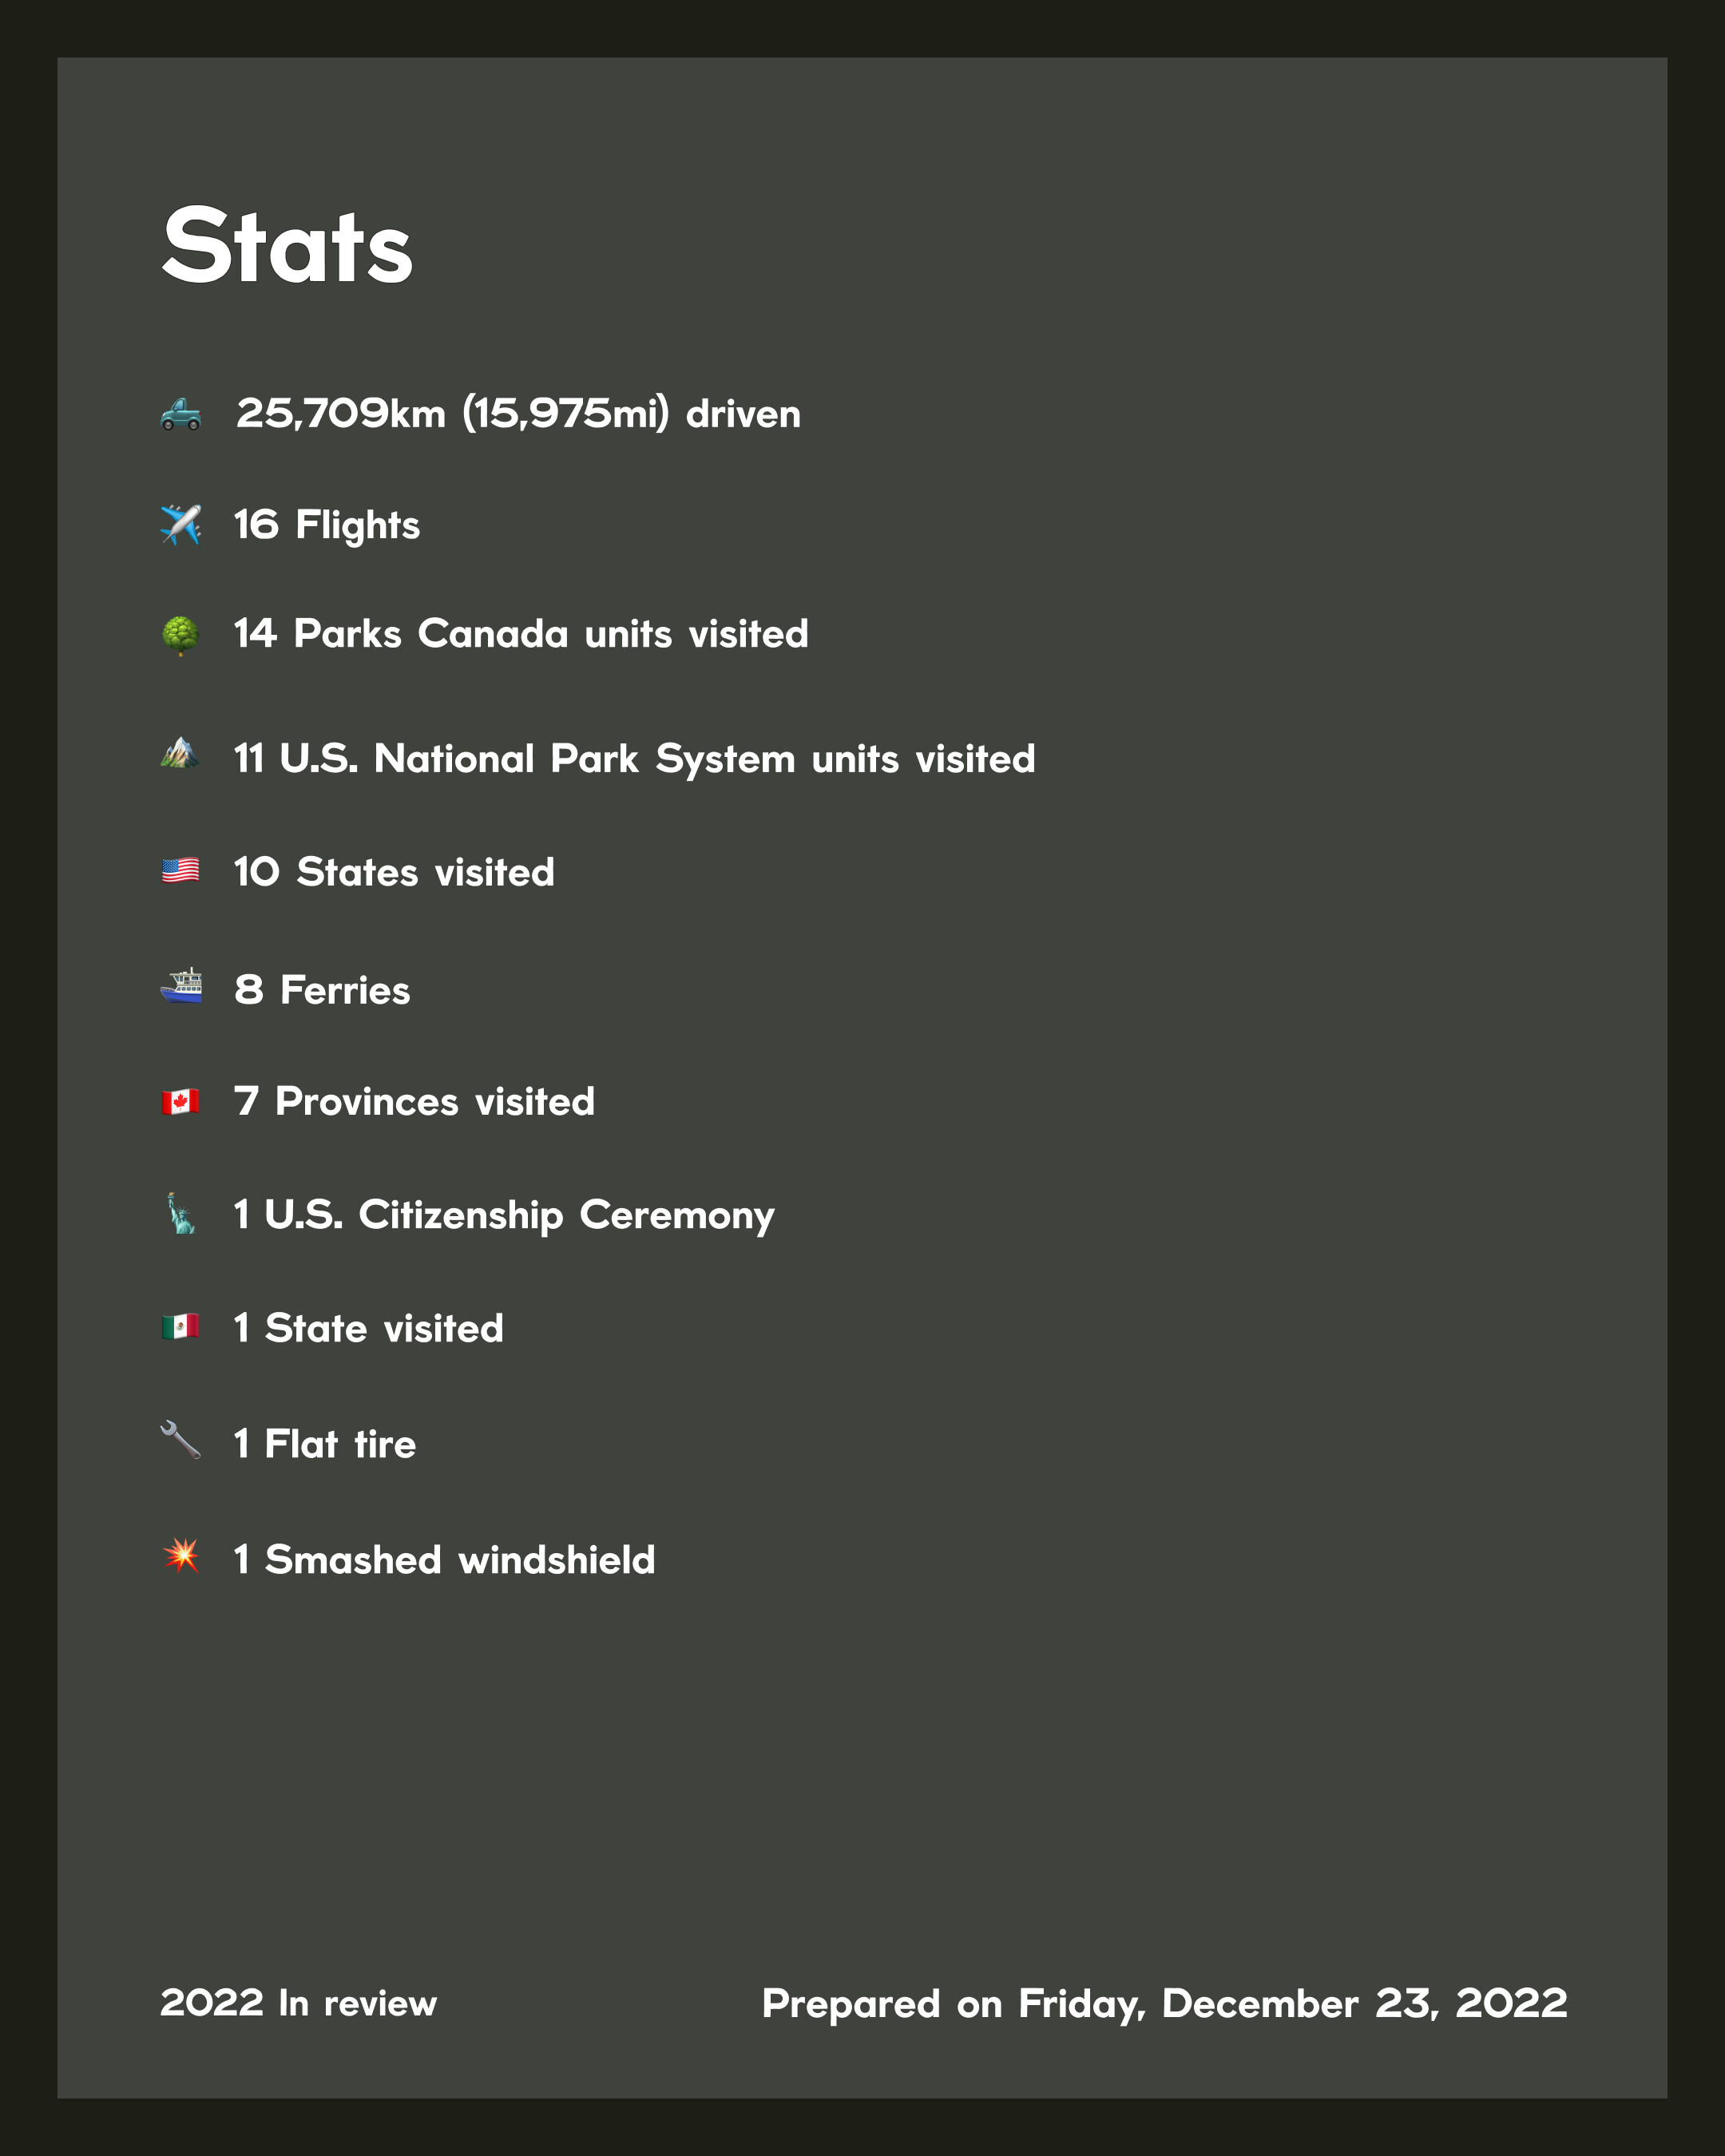
Here’s to an adventurous 2023 y’all ![]()
18 Likes
What did you use to make this? Looks frickin awesome!
Is it an app? If not you should make one that tracks this kind of stuff ![]()
1 Like
Thanks @benawheeler! I made this graphic by “hand” in Figma utilizing exported Google Maps KML data. This process requires a ton of manual adjustment and retracing as the raw data rarely lines up with the projection and scale of the base map graphic. I try to get it as close as possible but like to think of these as more of diagrams vs. true to scale maps. ![]()
4 Likes
That is awesome Julian, what a year. Was it your citizenship ceremony? If so, big congratulations to you.
Sam
1 Like
Dear God this is incredible. Well done
3 Likes
Holy crap!!! These things are amazing!!!
1 Like
Absolutely brilliant build. Thanks for documenting everything here. I found a ton of inspiration in this thread!
1 Like
@julian I’m looking at RV Starlink for my very spartan “mobile office”.
How much power does your Starlink draw while you’re using it?
You still using the Overland Equipped setup? It looks like it been taken out in later photos. Curious as to why? Also, this page has been super helpful in planning out my build. Super clean installs and gear choices!
@Vice_Chief Thanks so much! After booting up in the morning the Starlink holds steady with a constant draw of around 40 – 60 watts. Our 200w solar panel keeps our battery near full during the day and easily replenishes any overnight use once the sun is out again. We kill power to the dish and router before going to bed, too.
@Coastal Nice catch! So I ended up heavily pairing back my “front of house” accessory plans. I was definitely stuck in the “let’s find anything and everything to bolt to truck” part of the build journey at that moment in time. Learned quickly I would not need any of that stuff I quoted so sold the part. I’ll probably ditch the aux lights I have on the truck too to simplify further as they get so little use.
4 Likes
Custom GFC Tailgate Bug Screen
How did you attach the top of the bug screen to the GFC topper?
1 Like
Hey @Cybercat I go into a decent level of detail on this thread. Rare Earth Magnets and 3M Velcro strips were used. If you scroll up you’ll find detailed photos and write up.
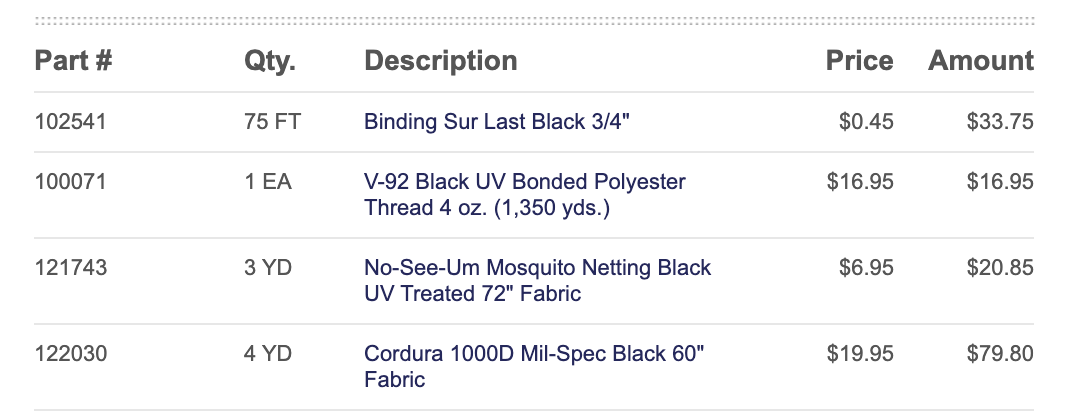
For everyone else who has been watching this thread for specific material list and some crude measurements, you can find some of that below. Measurements should follow if we can find the piece of paper where we wrote 'em down.
Most of the material for screens:
Magnets on truck:

Magnets sewn into screen:

6 Likes
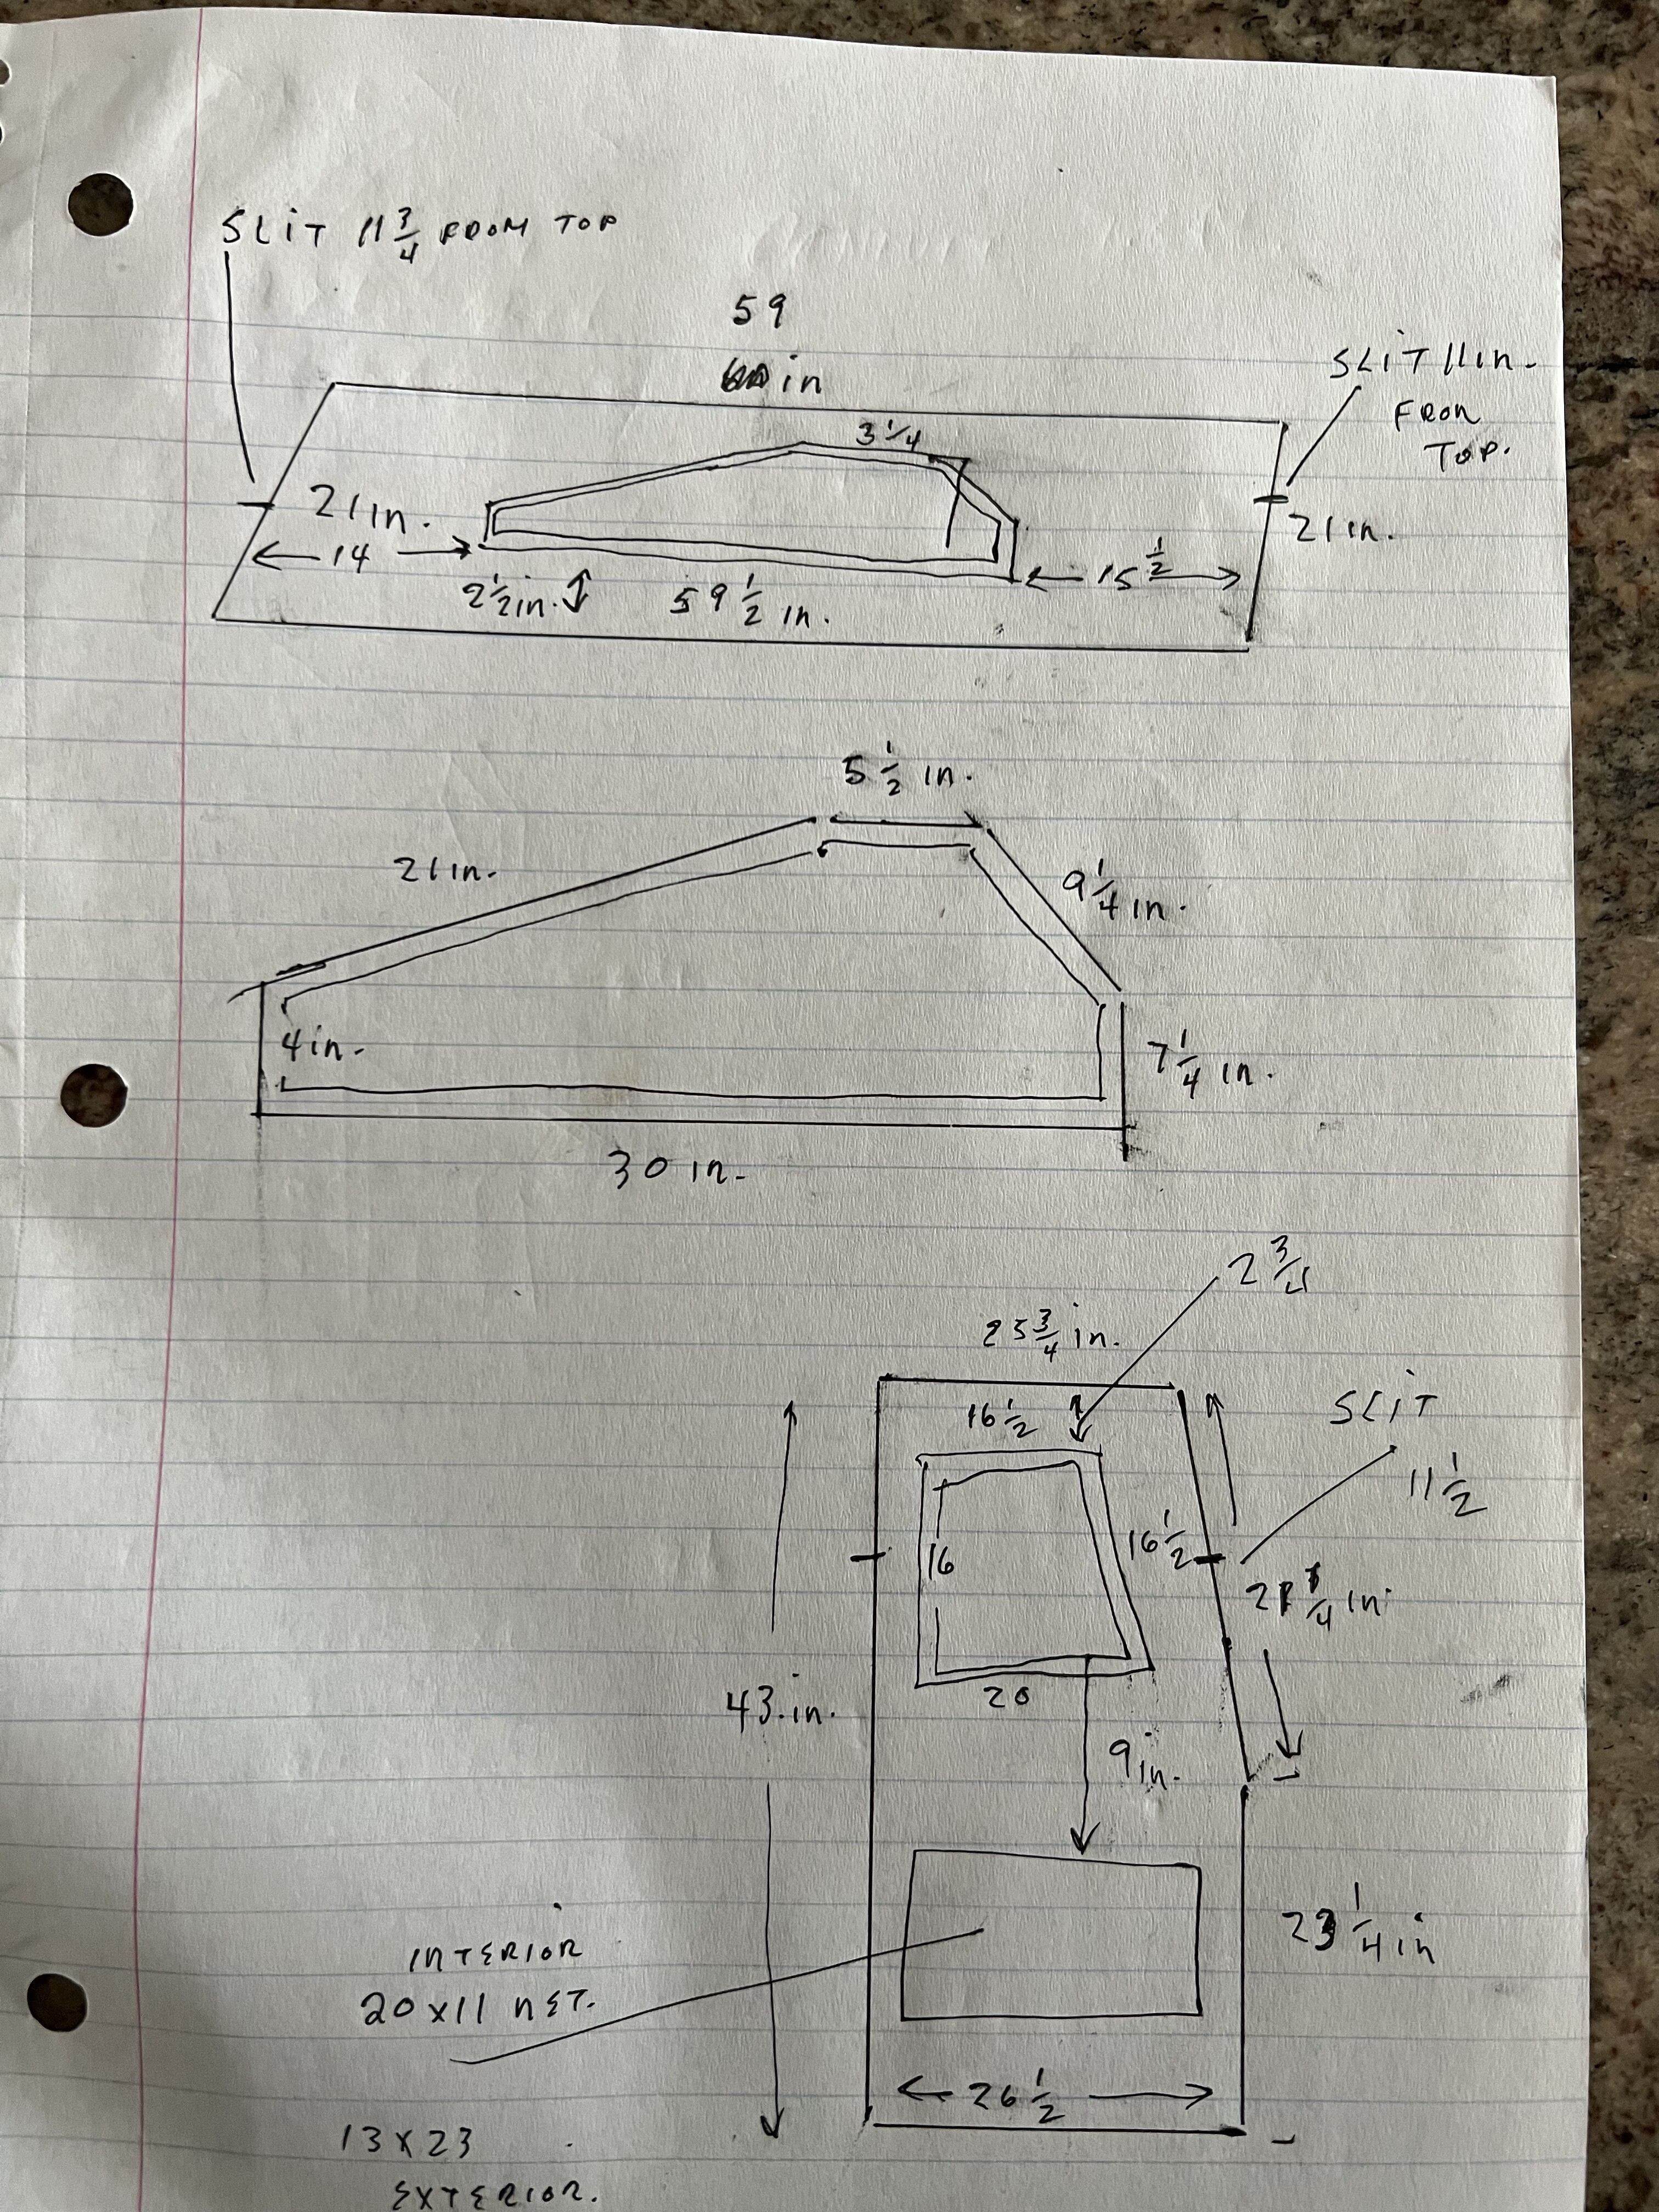
I’m still out on the road but my father-in-law was able to find these original measurements we took. We can’t recall if these accounted for seams but should be a good starting place to get you going!
First diagram: Full side screen
Second diagram: Bug mesh/window detail
Third diagram: Half of tail gate
Stoked to see what y’all make from this.
9 Likes
Such a great detailed build!
Any chance you remember where you picked up these grommets?
1 Like
Awesome build Julian! Incredible how detailed this thread is. Thank you!
2 Likes