Awesome setup, thank you for sharing. What is the black device in the middle of the packout? Do you have a pic of the fan for the dcdc charger?
@ashley868 the black thing is just a plastic cover I made to hide where the wires exit the case. The blue buttons turn on a 12v cigarette plug and case lights (not used too often)
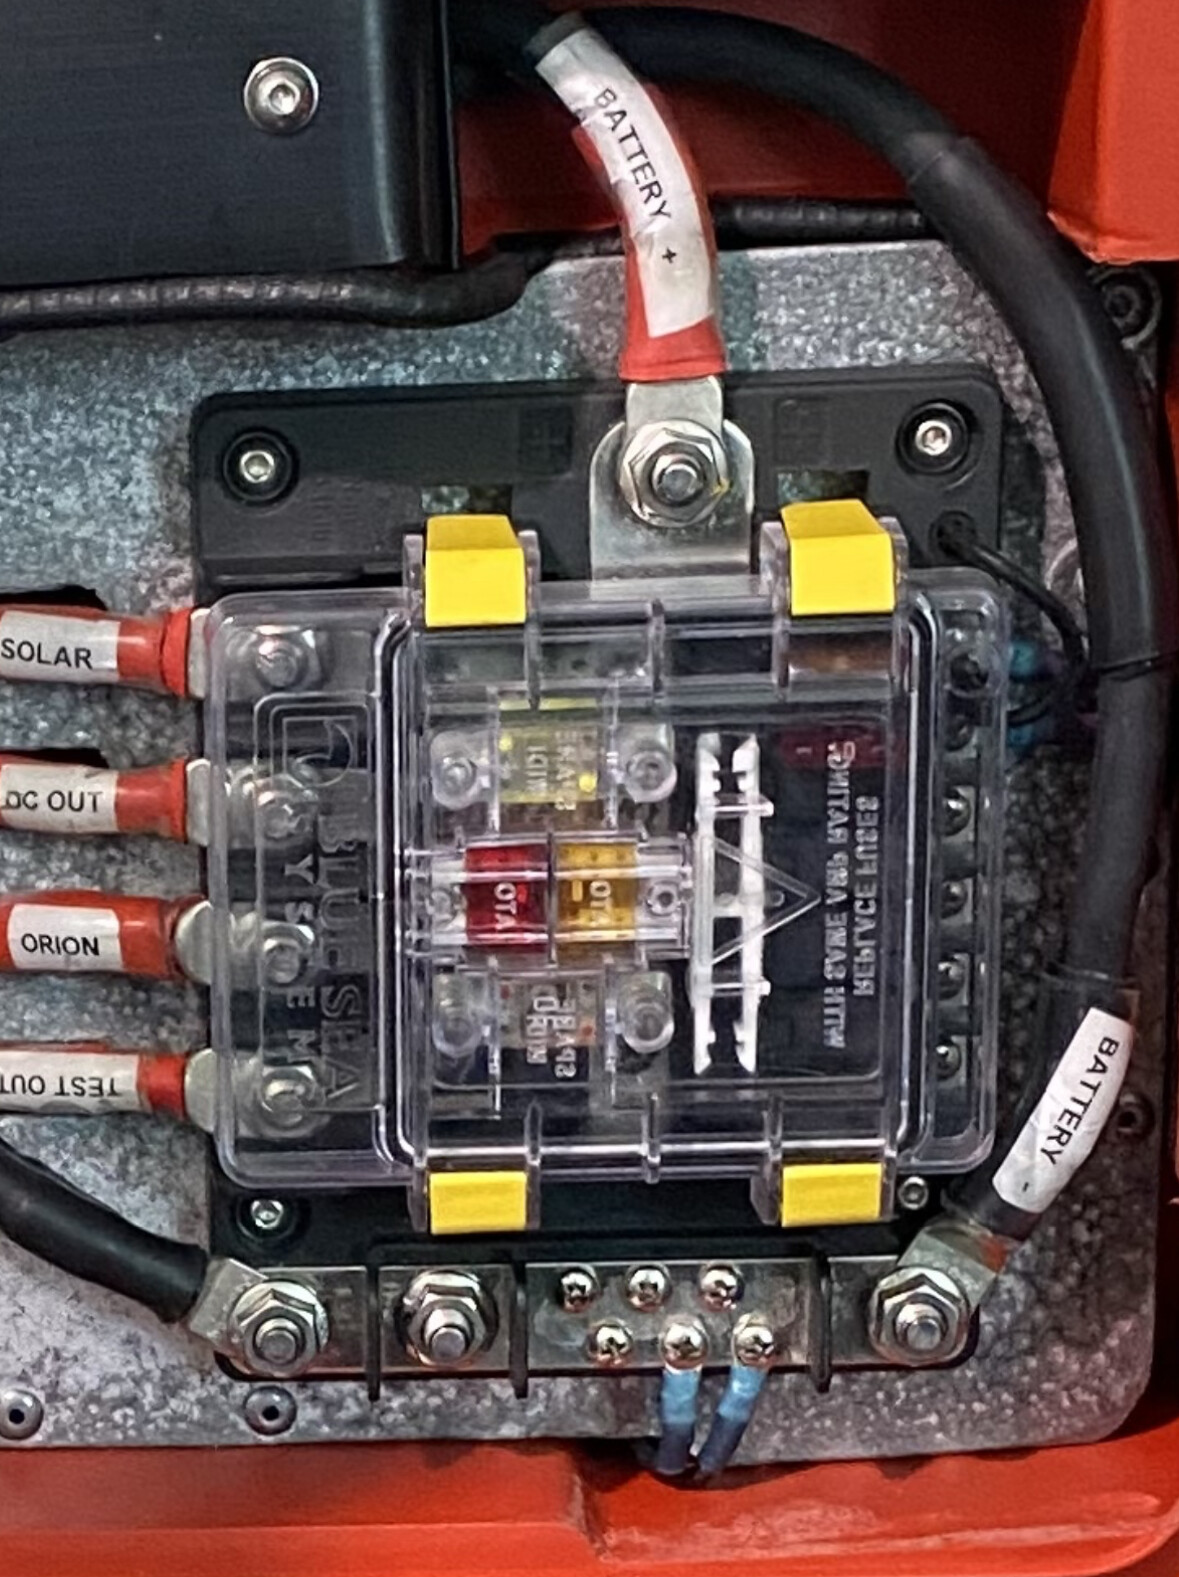
Unless your mean the BlueSea Safety Hub 150? I use that as a fuse block/busbar. It contains all the high and low amp fuses and Negative bus bar for the system. Saves a bunch of wiring.
As for a fan, I never ended up needing it. I cut the back out of the case behind the DC/DC and solar controller to get airflow over the cooling fins. It seems when it’s hot, it’s also sunny (duh!) so the solar controller does most of the charging. When it’s colder I need the DC/DC more and it does fine without a fan. (2 year and lots of desert ![]() charging)
charging)
1 Like
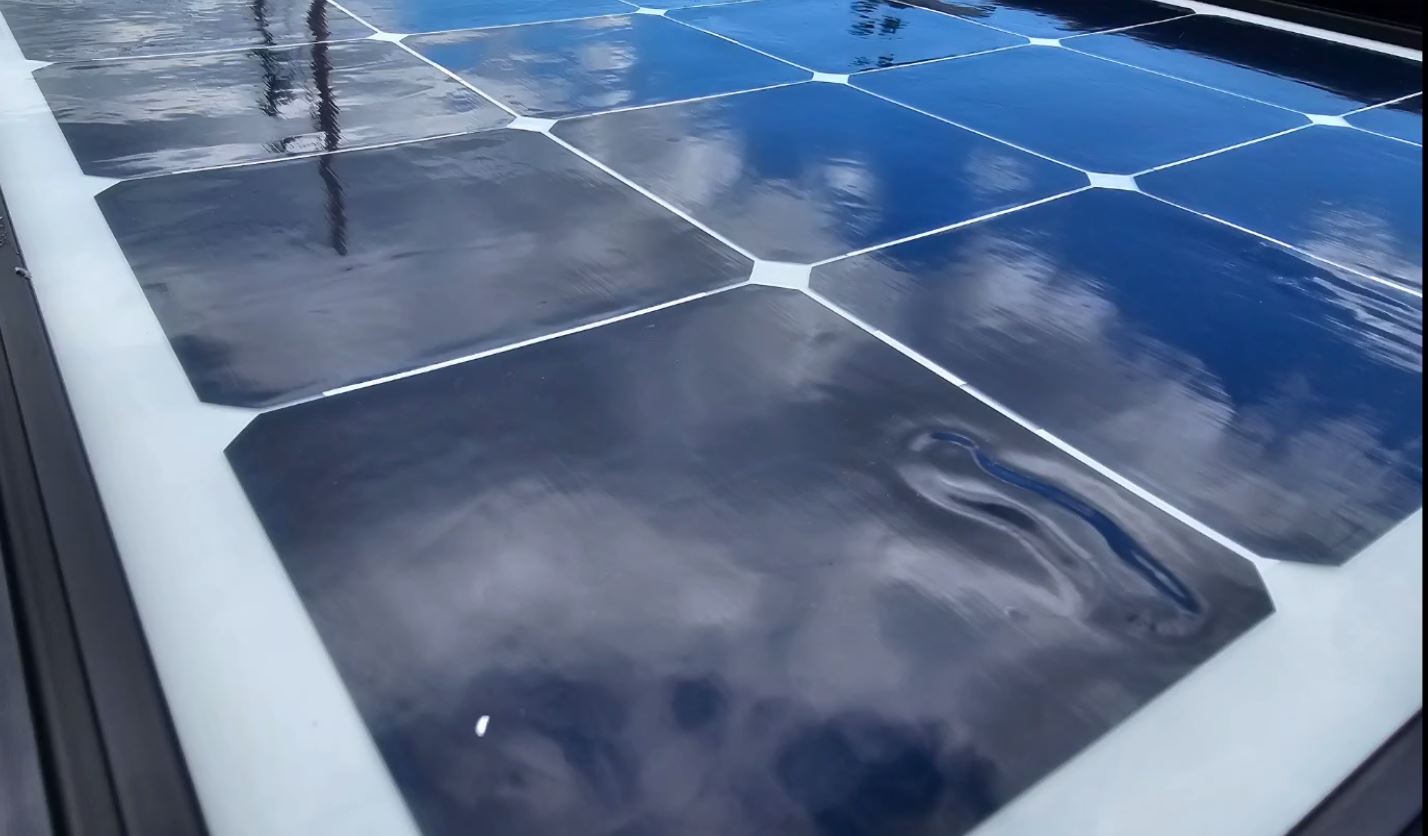
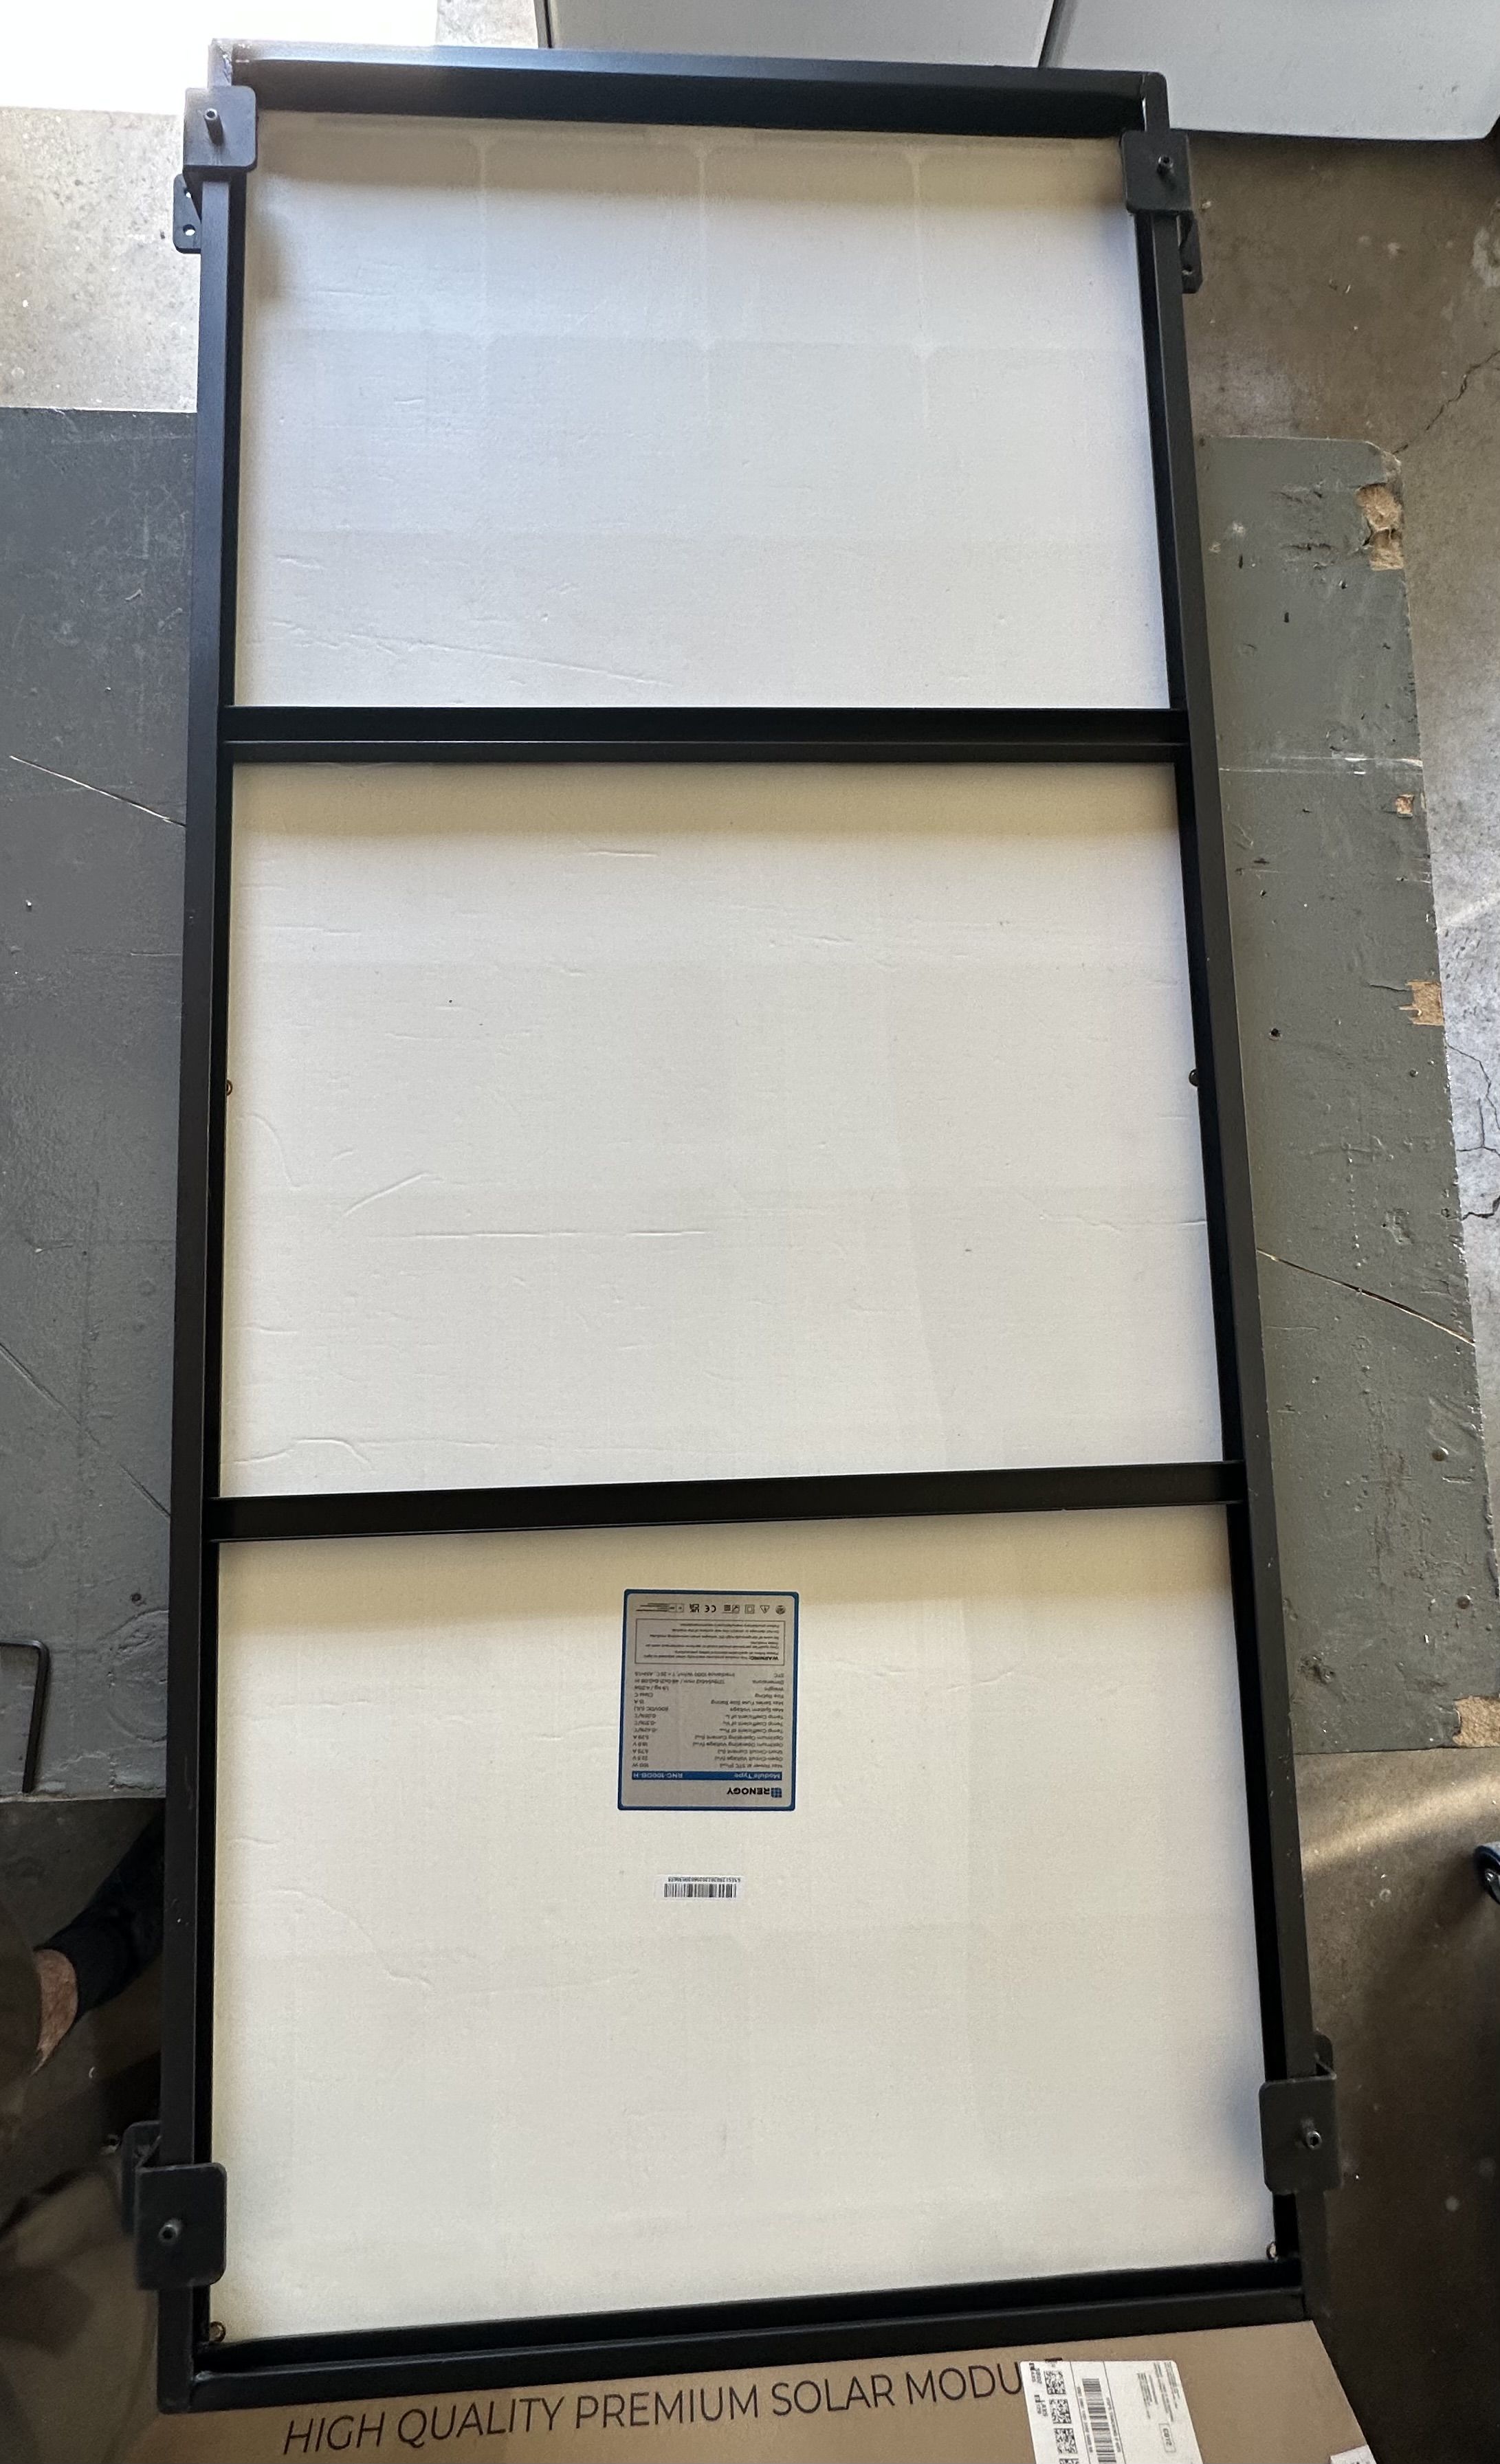
I just got a solar panel in and noticed some of the squares are discolored. Any idea if this will affect the panel and what it’s pulling in?
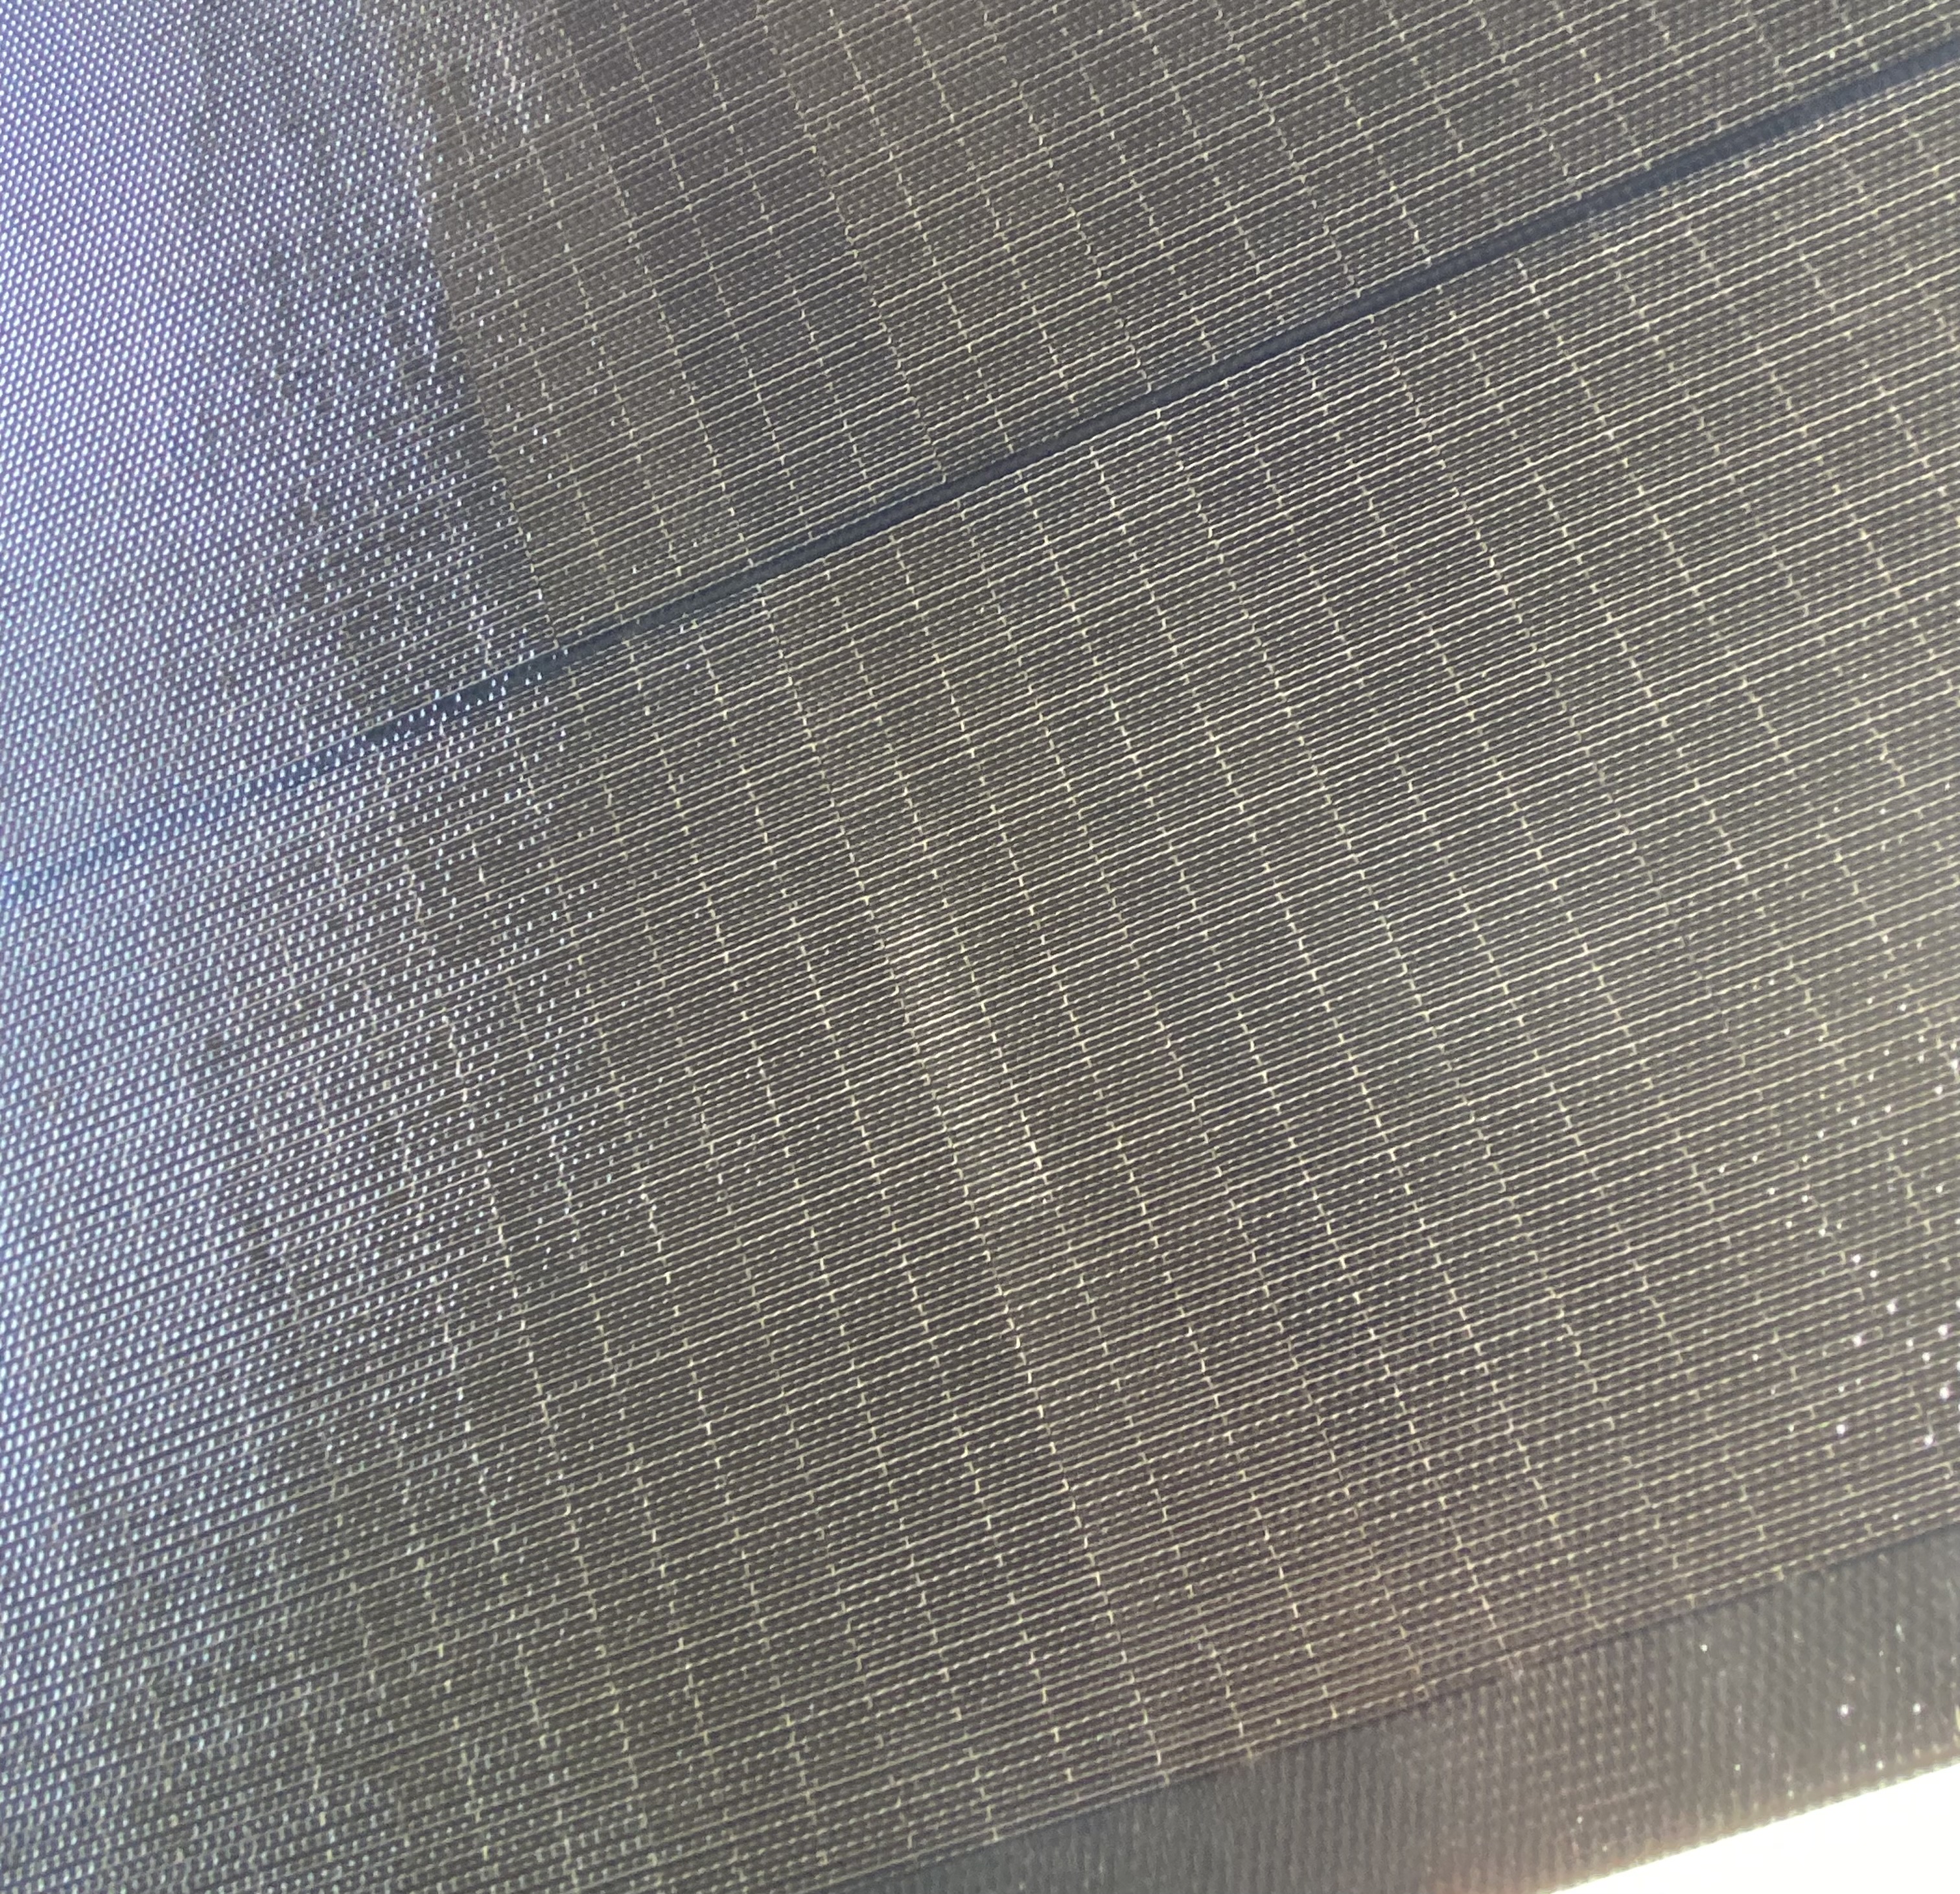
I have a different panel type - the flexible Sunpower panels - but they’re absolutely covered in various defects and it doesn’t seem to affect performance at all. If you can, I’d say plug the panel in and see how it performs. Good is good.
Are those ecoflow panels?
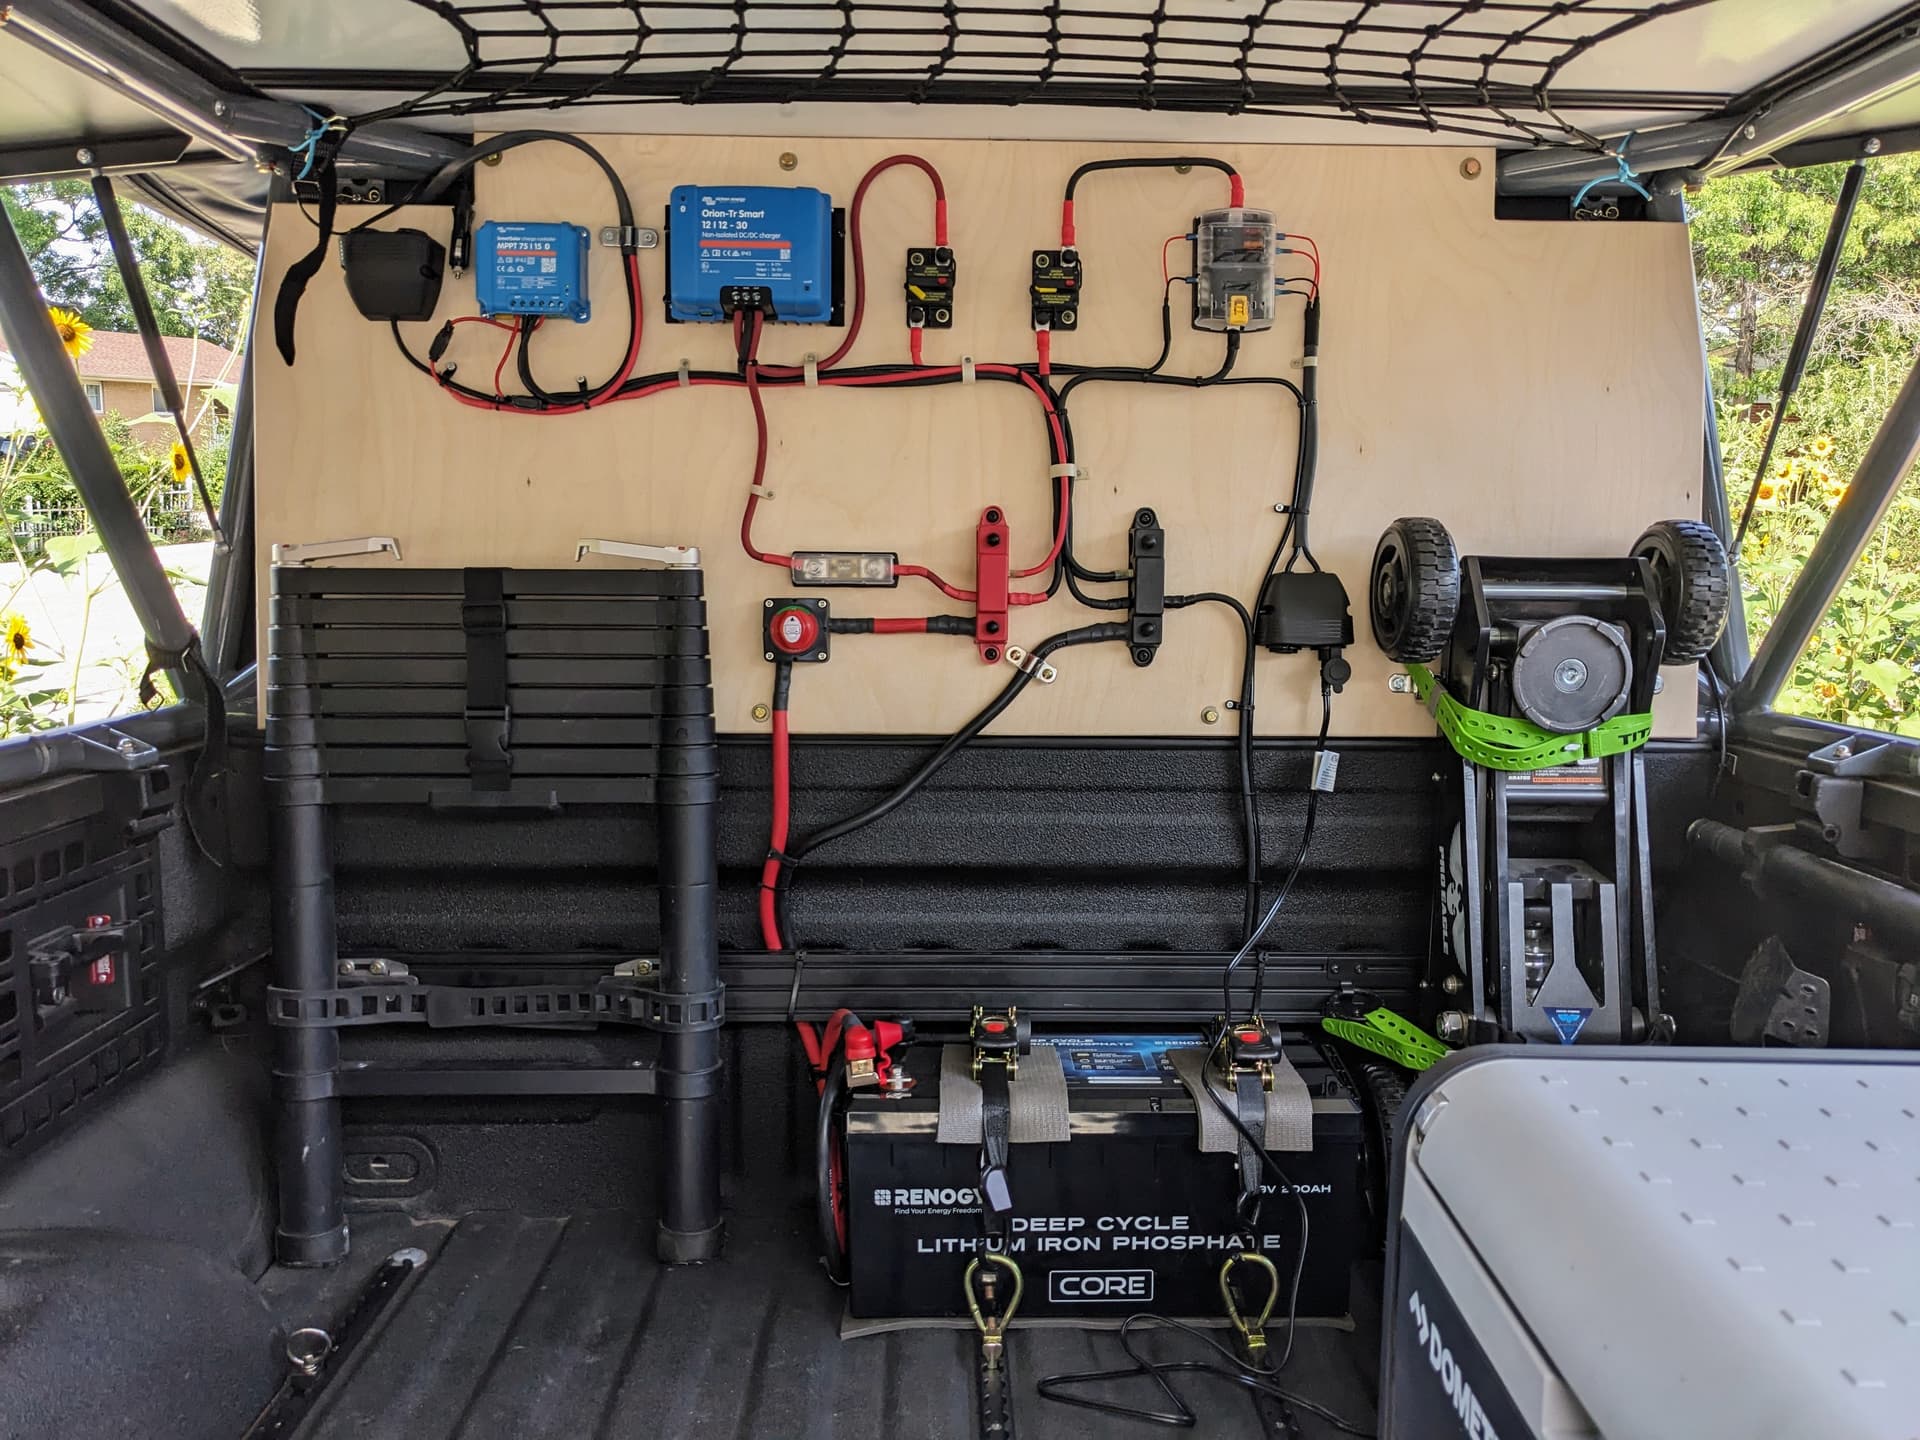
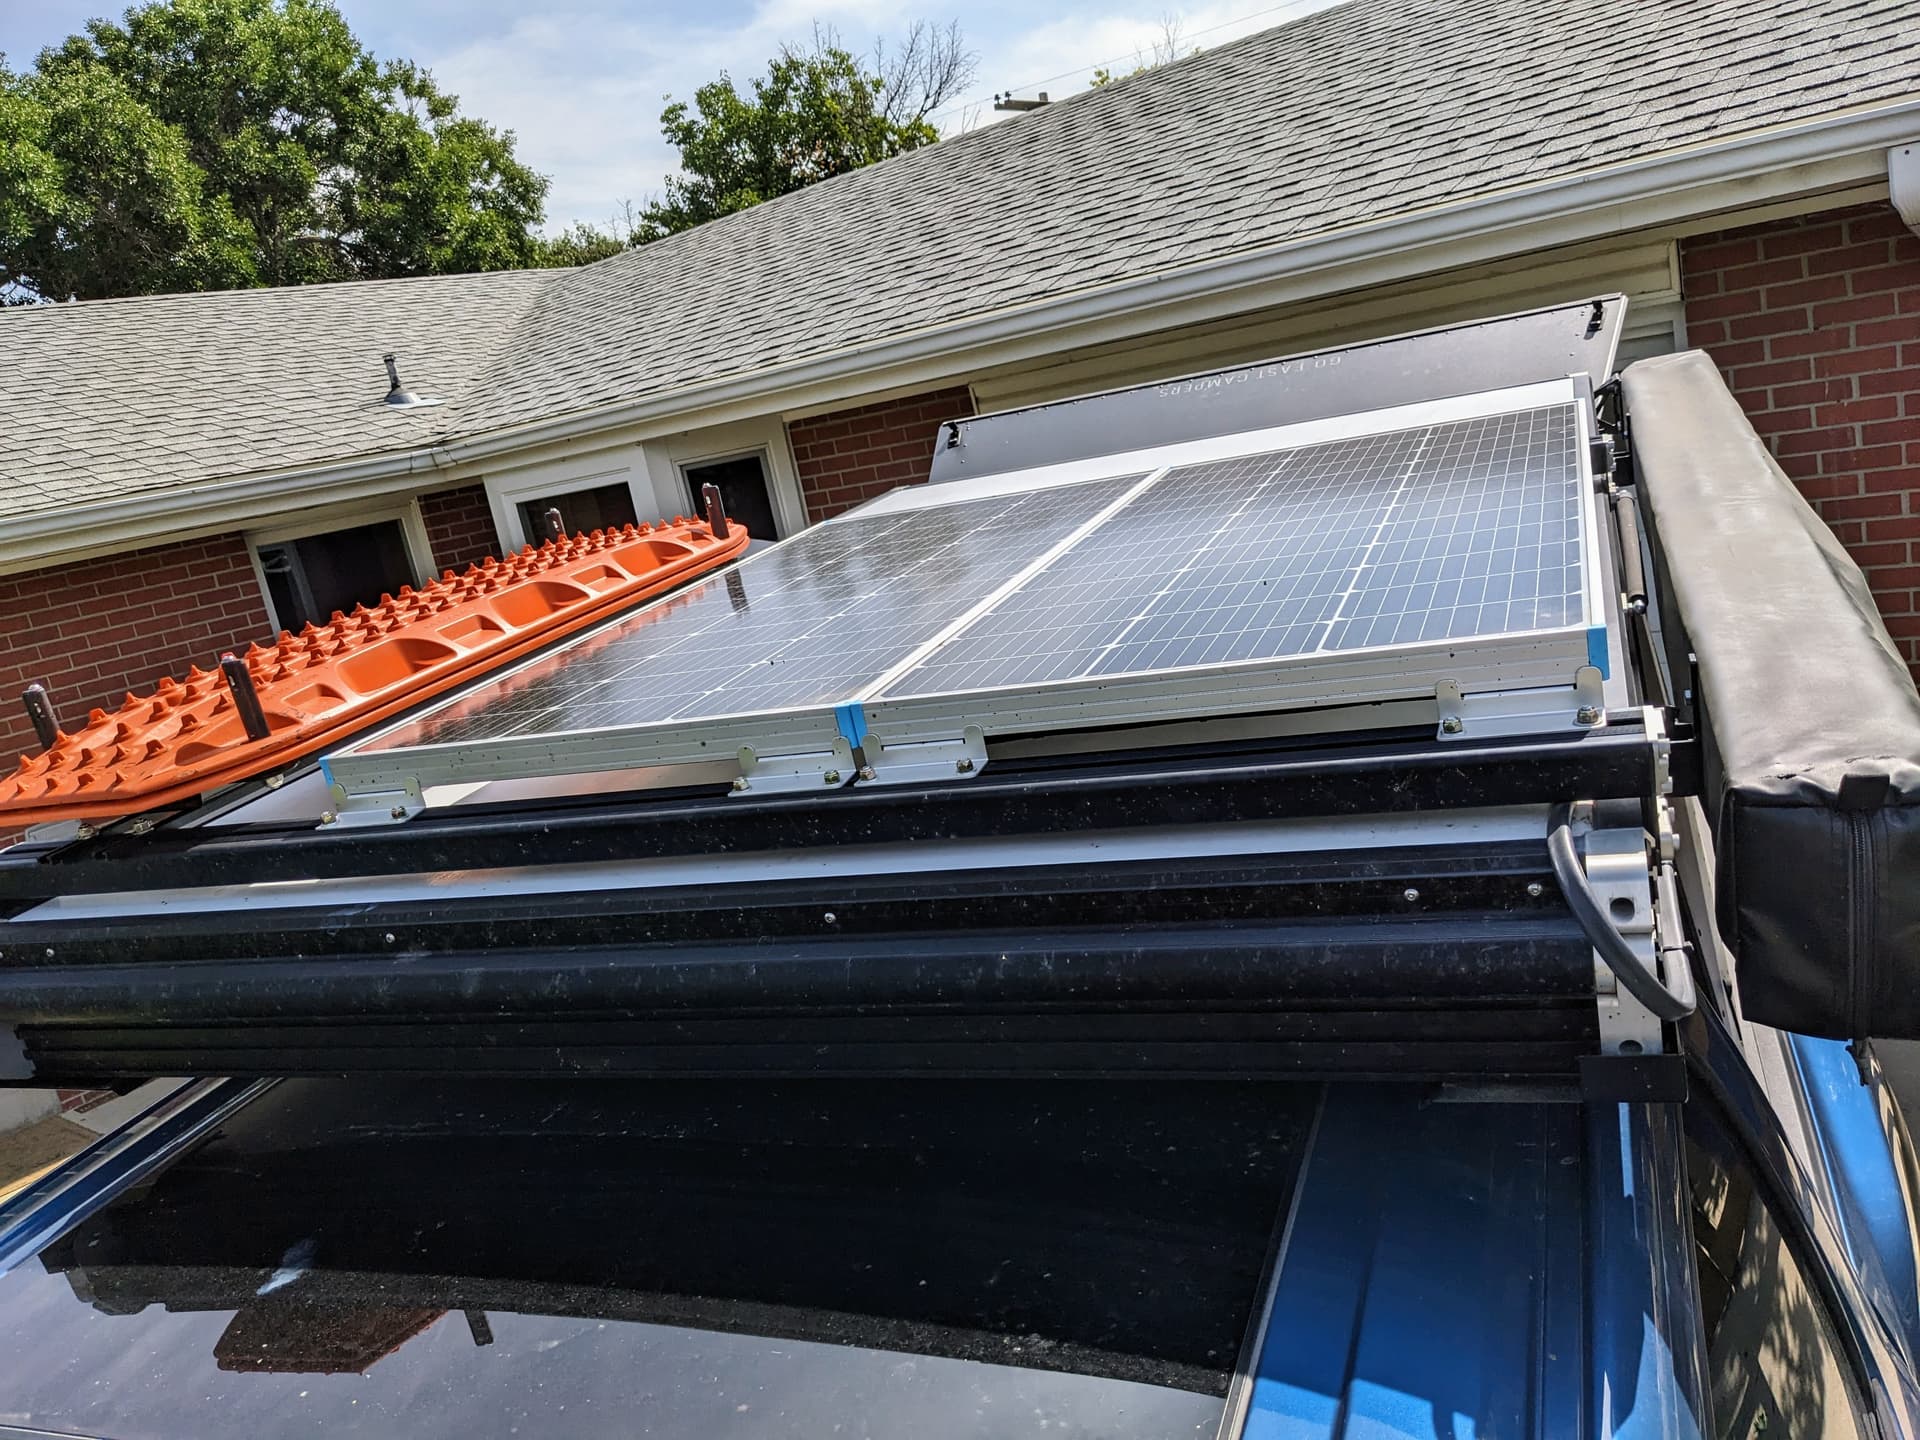
Solar system installed. Designed for fridge and electric blanket as primary loads.
Renogy 2 - 100W solar panels mounted on beef bars. I want to find z brackets to recess/drop the panels below the bars.
Renogy 200ah lifepo battery
Victron 75/15 solar controller
Victron 30ah DC-DC charger
Bluesea breakers, fuses, and fusebox
scavenged wire
mounted on birch ply
Thank you for sharing your builds, suggestions here influenced my design.
8 Likes
You don’t need z brackets to mount the panels below the bars. A piece of sheet metal is all you need. I just used some scrap I had around. See my post (~225-227 can never tell what it is for sure) above.
1 Like
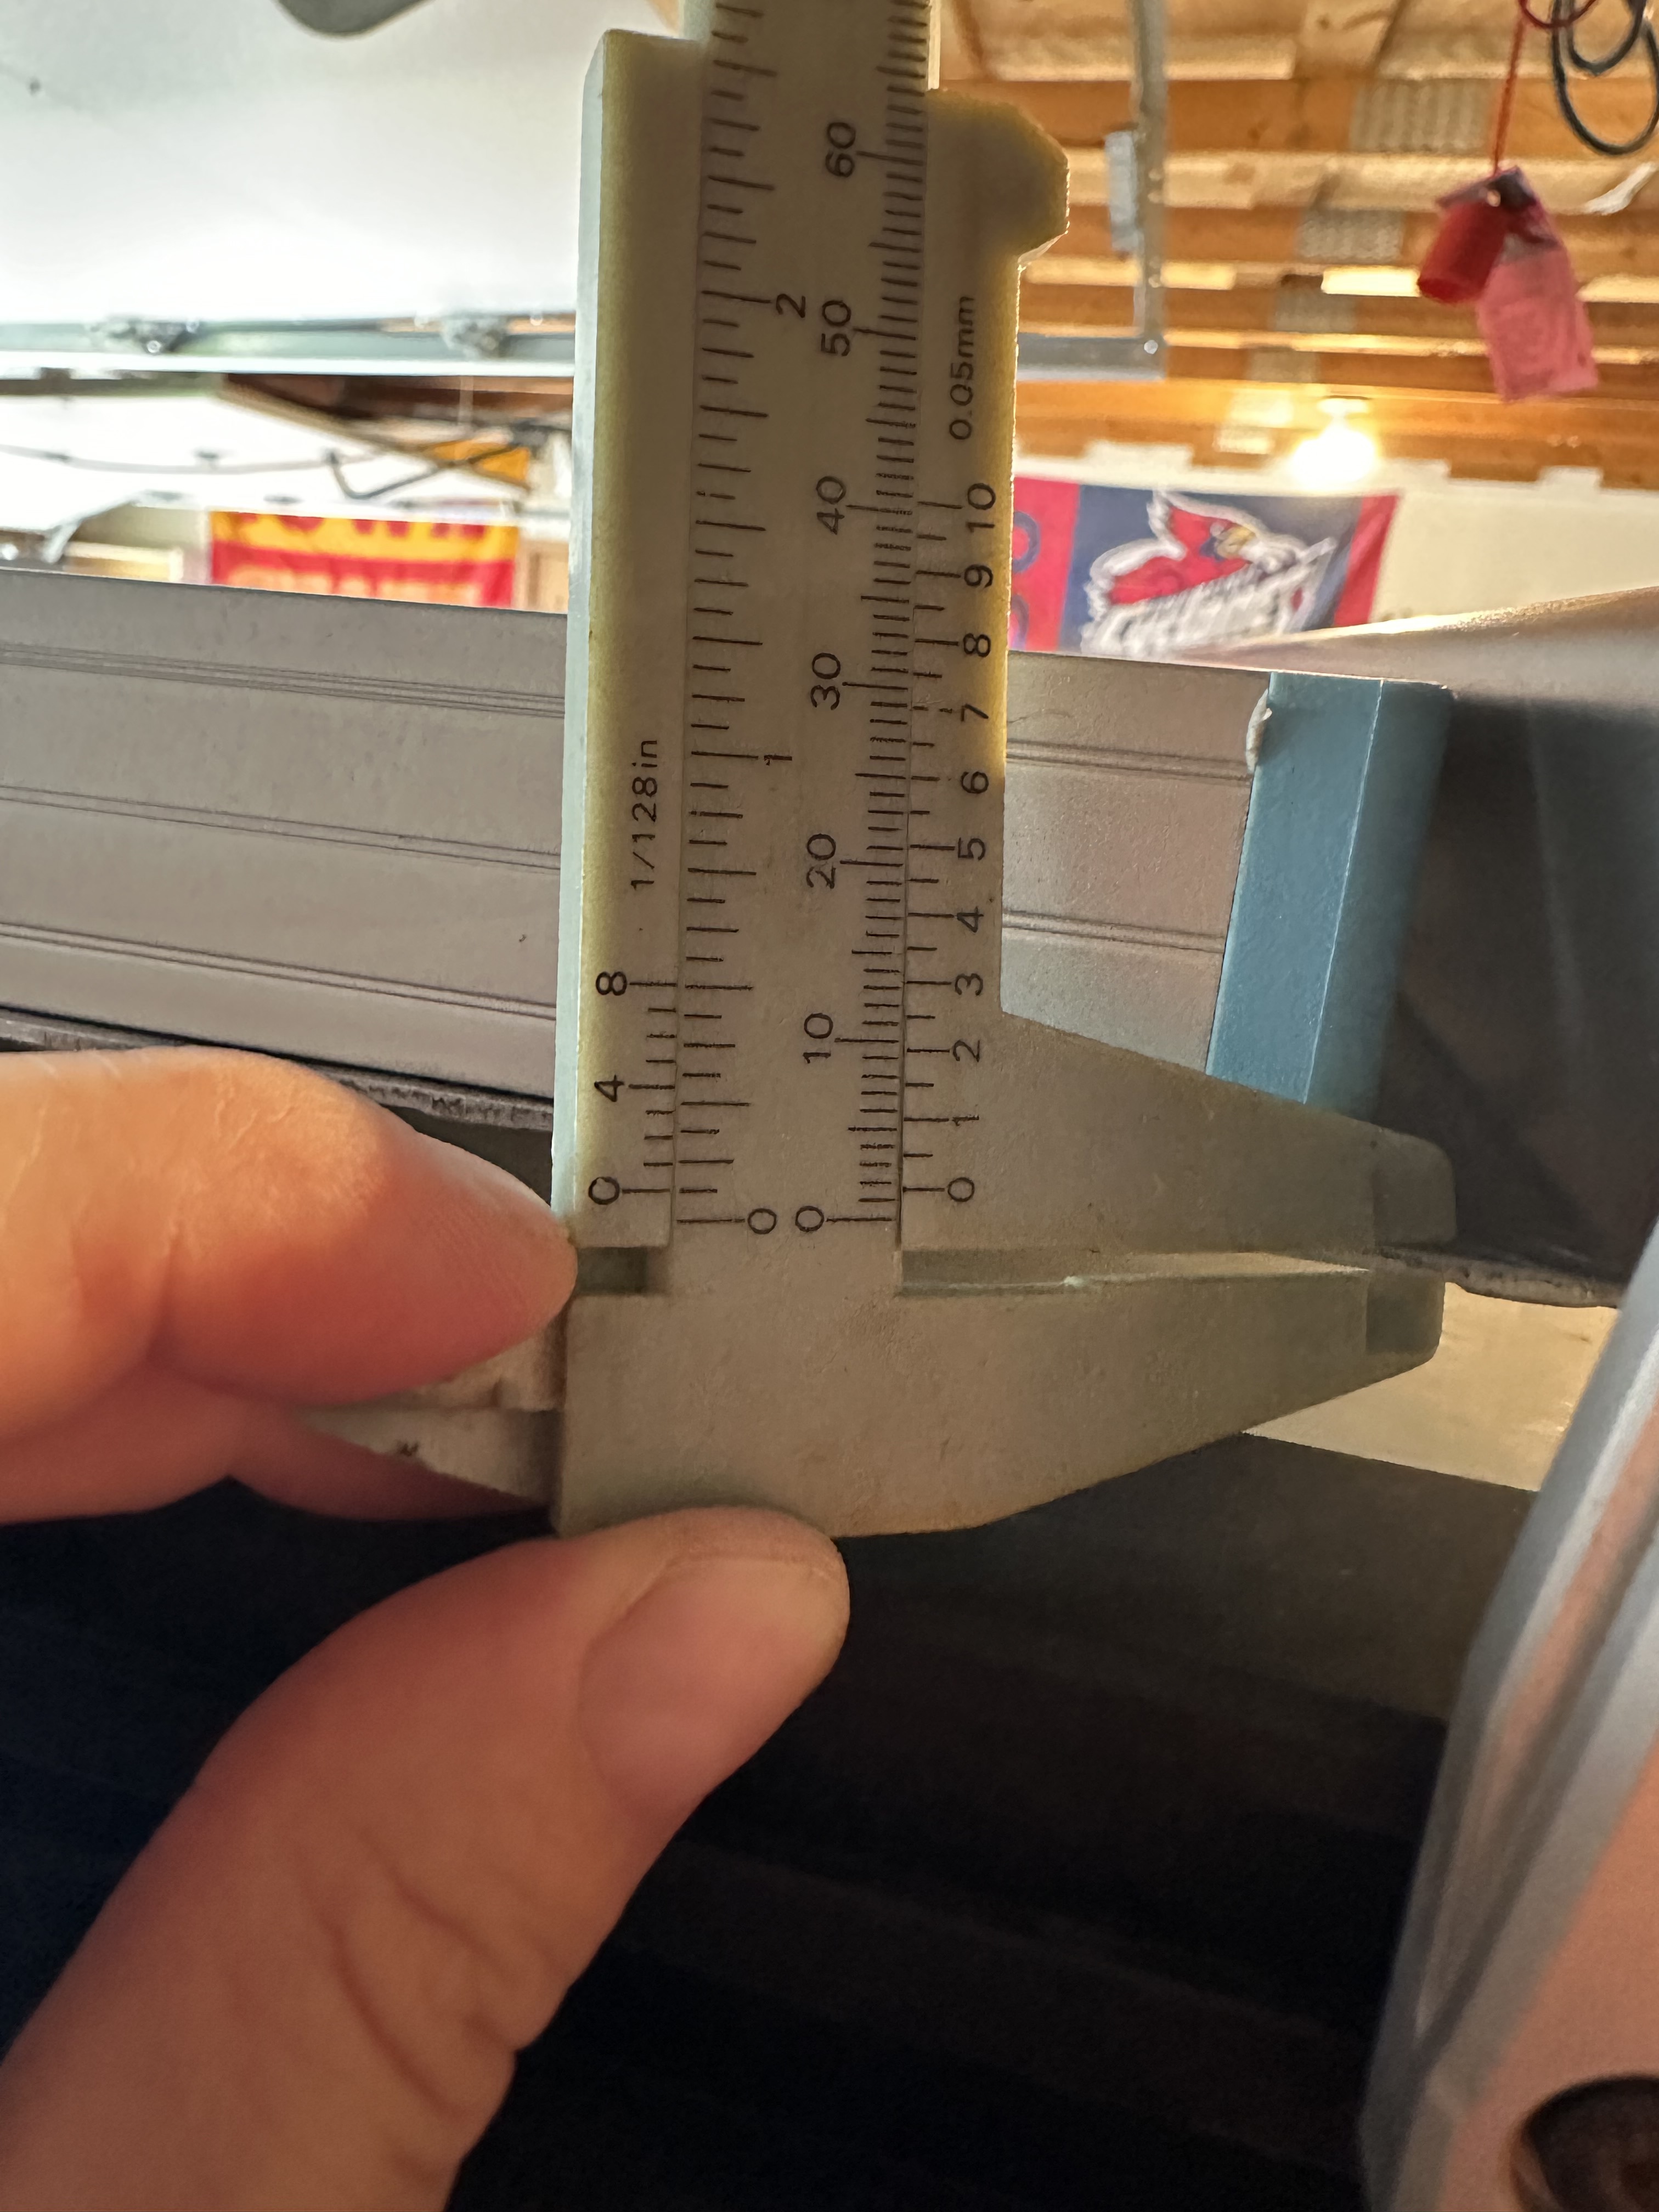
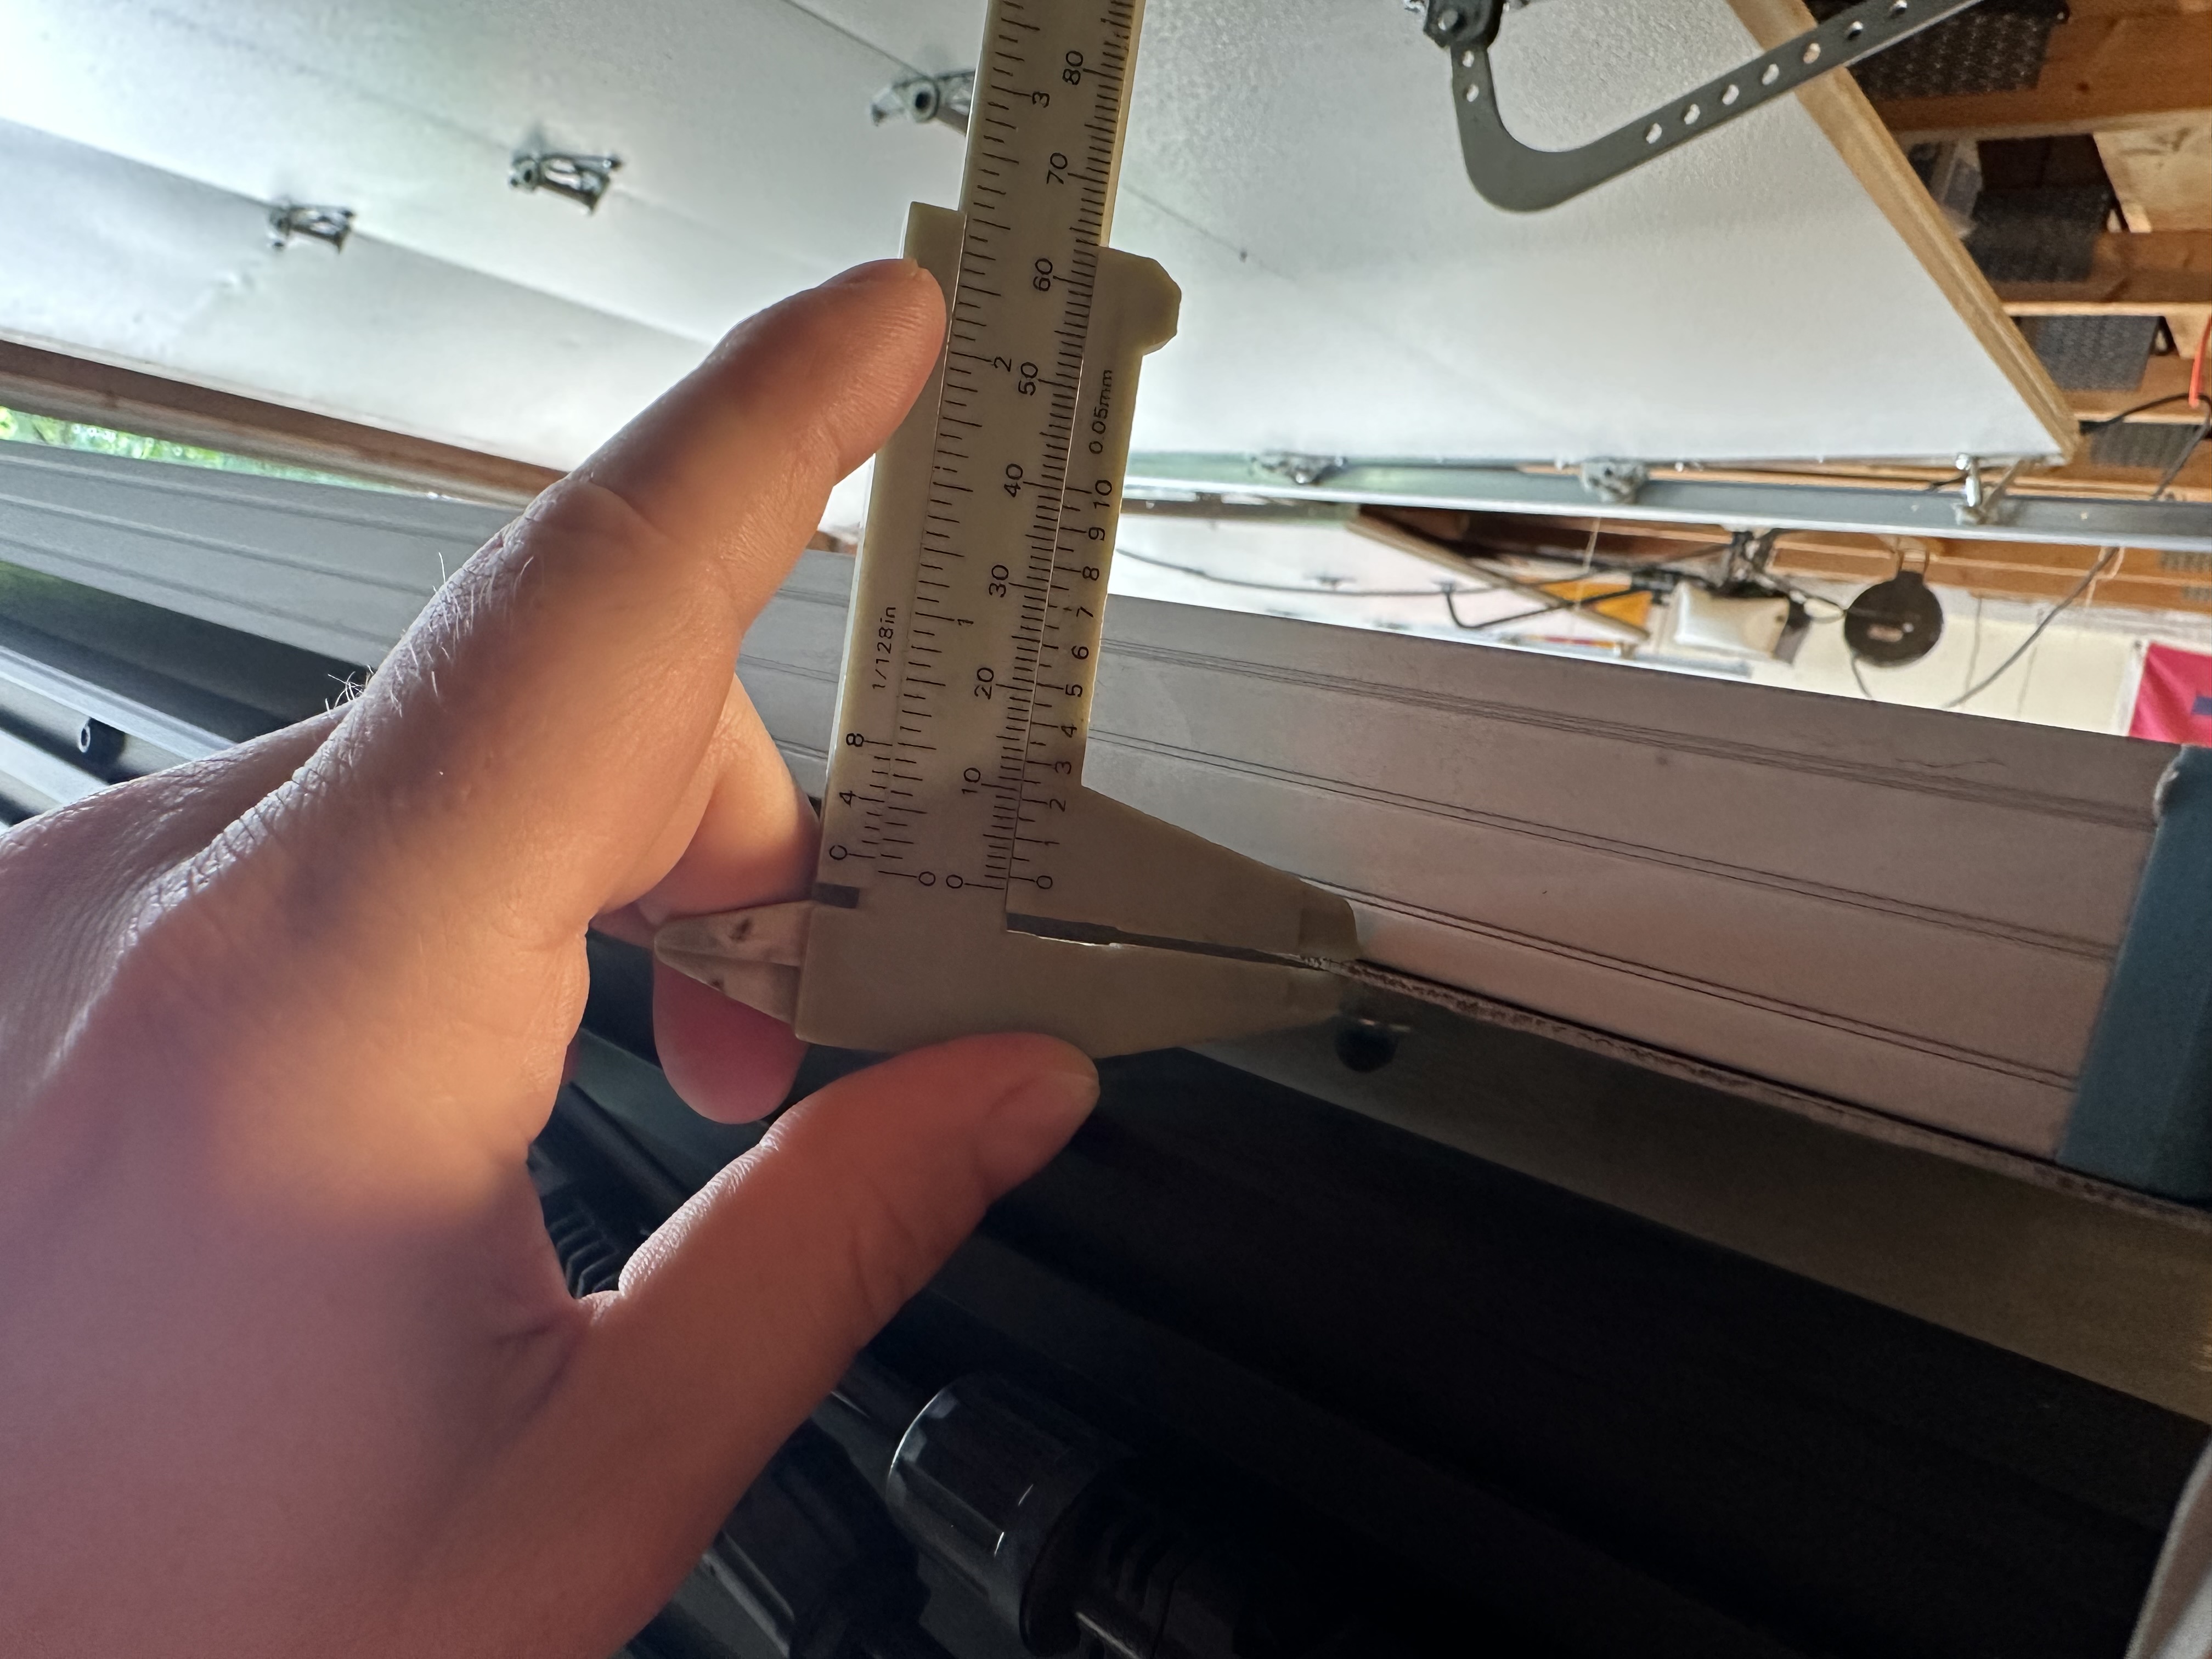
Do you know how thick the sheet metal you used? I’m going to order 4 pieces (4"x6") of aluminum from SendCutSend. I’m not sure if .125" is too thick. .08" might be more ideal.
For what it’s worth, either of those thicknesses will be fine.
But there’s a good maxim here. “When it doubt, make it stout, out of stuff you know about”. Go thick.
I recently built a beef bar based solar rack and I used 1/8"/3mm aluminum as the bracket material. It felt about right - it definitely wasn’t too thin.
3 Likes
Thanks!! Nice setup!
1 Like
This tool from them is really helpful if you are having them make the bends too. Lets you get really precise.
1 Like
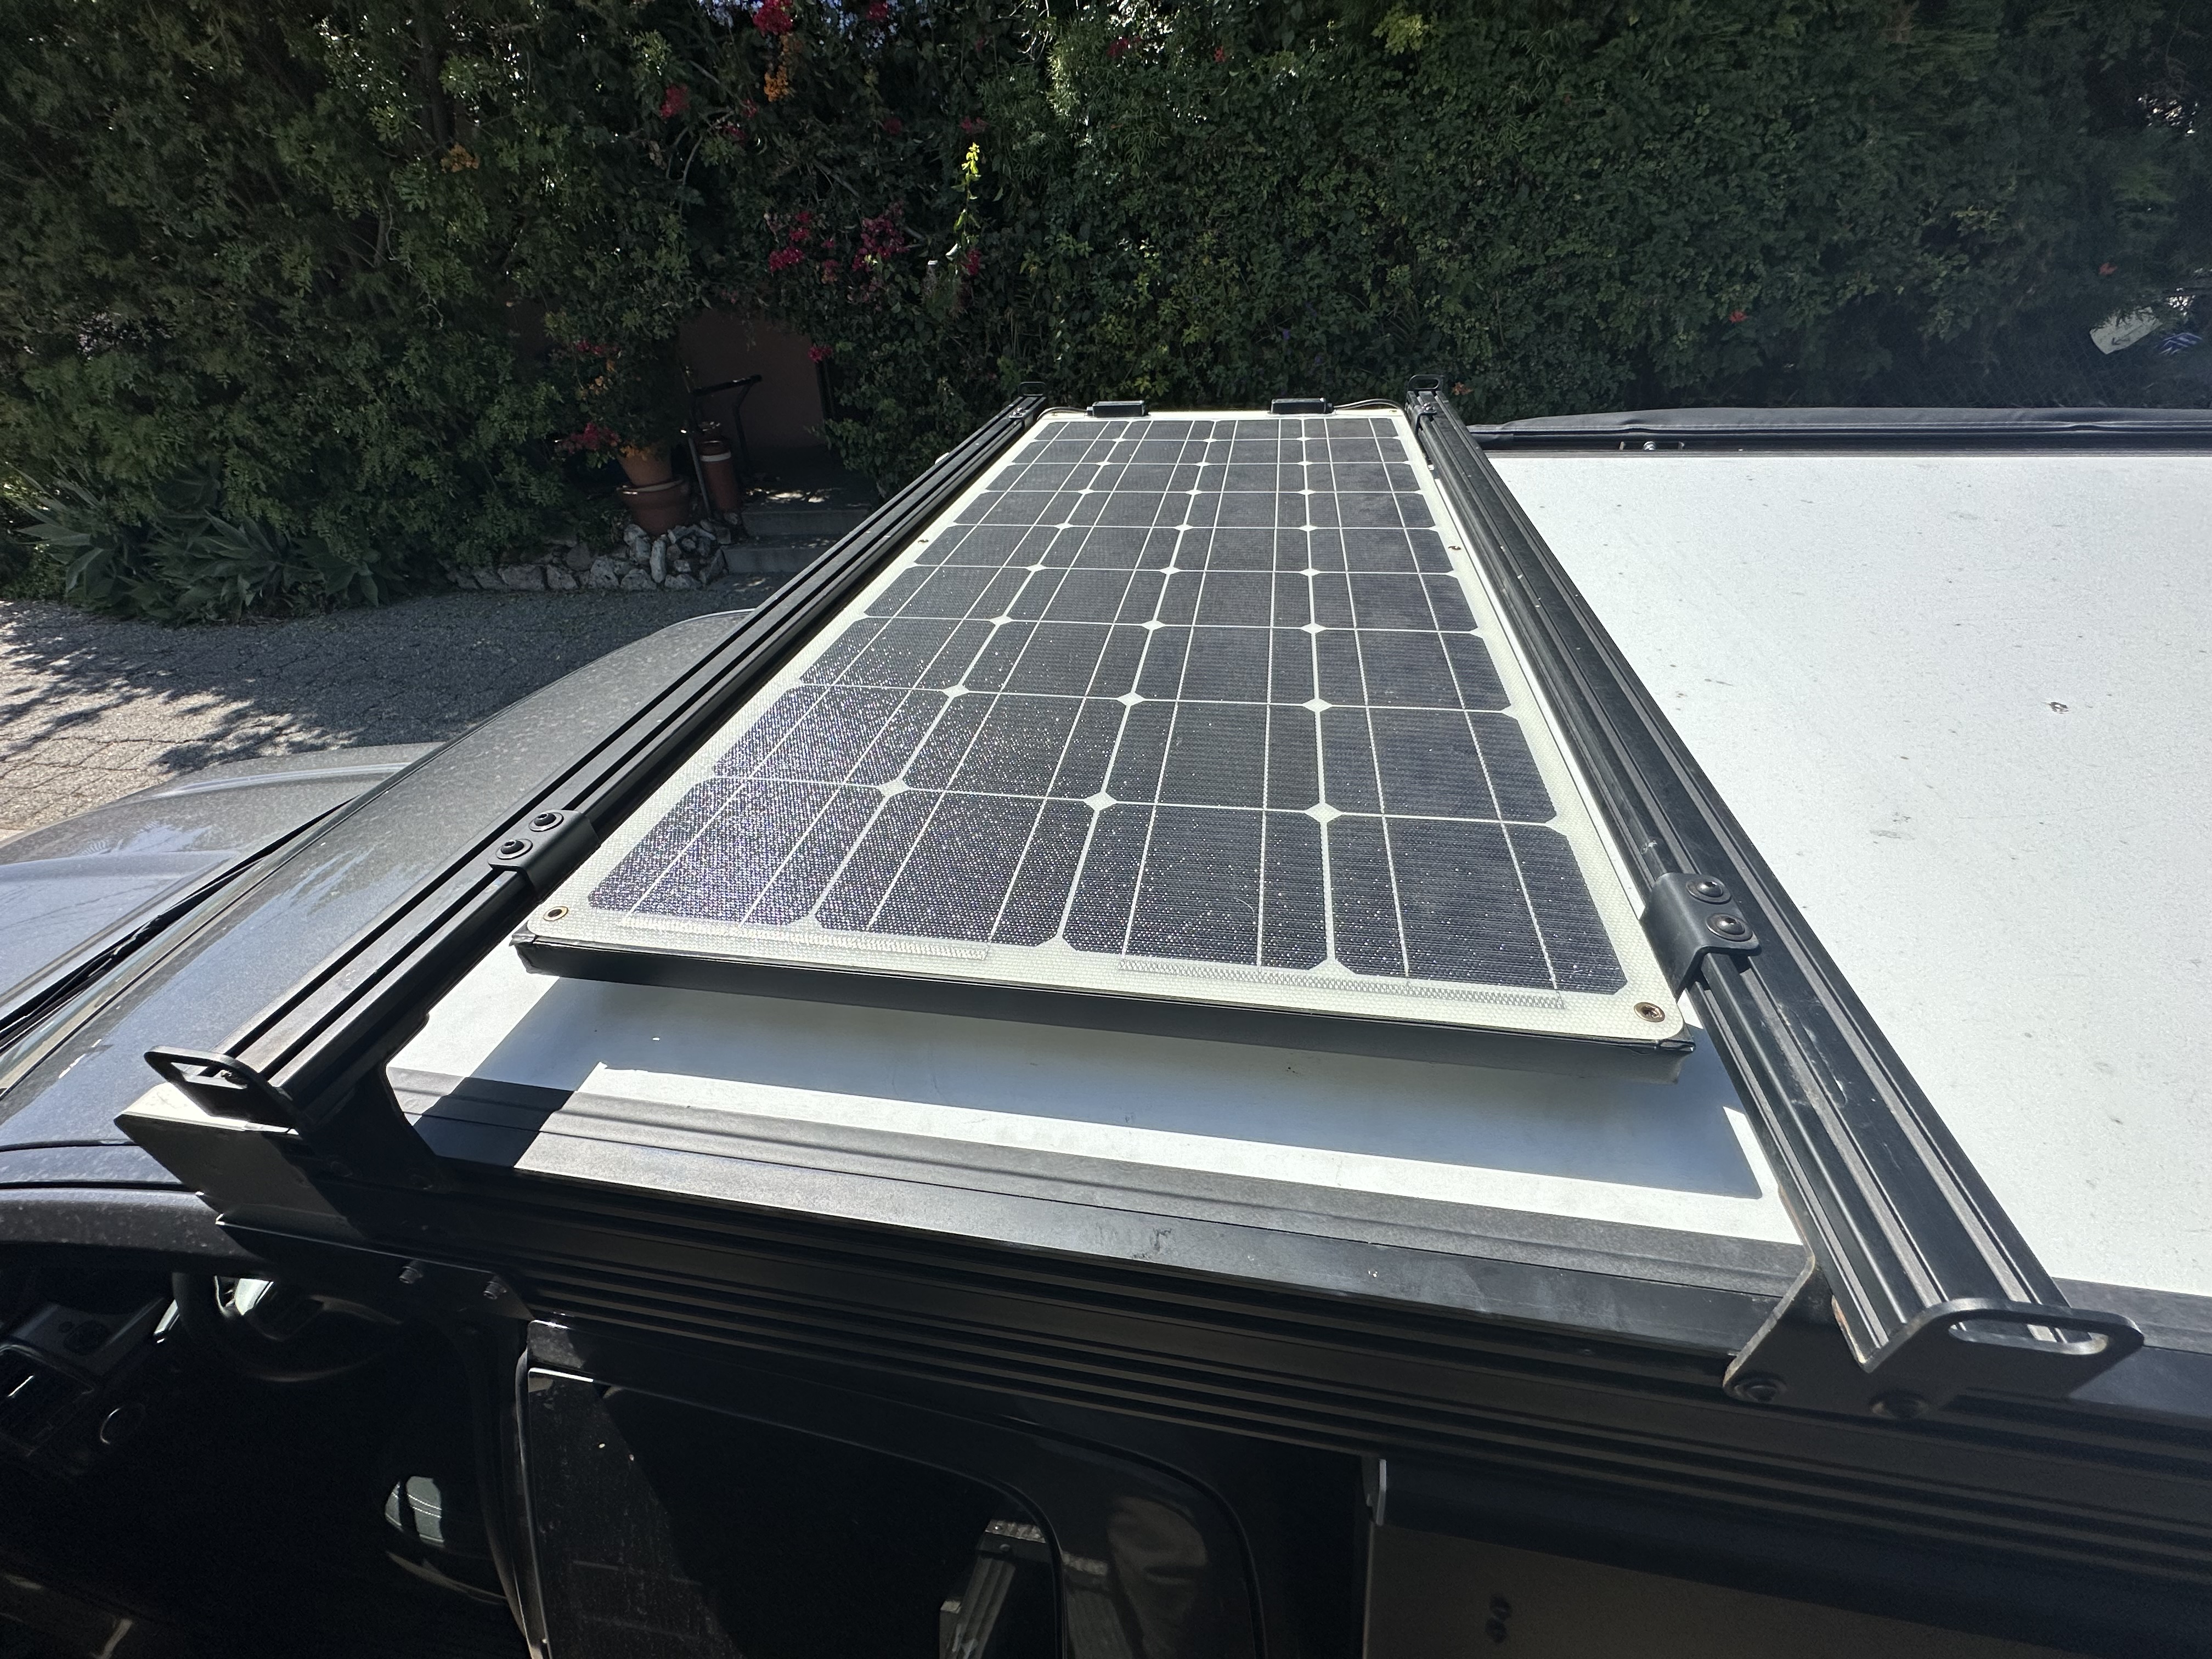
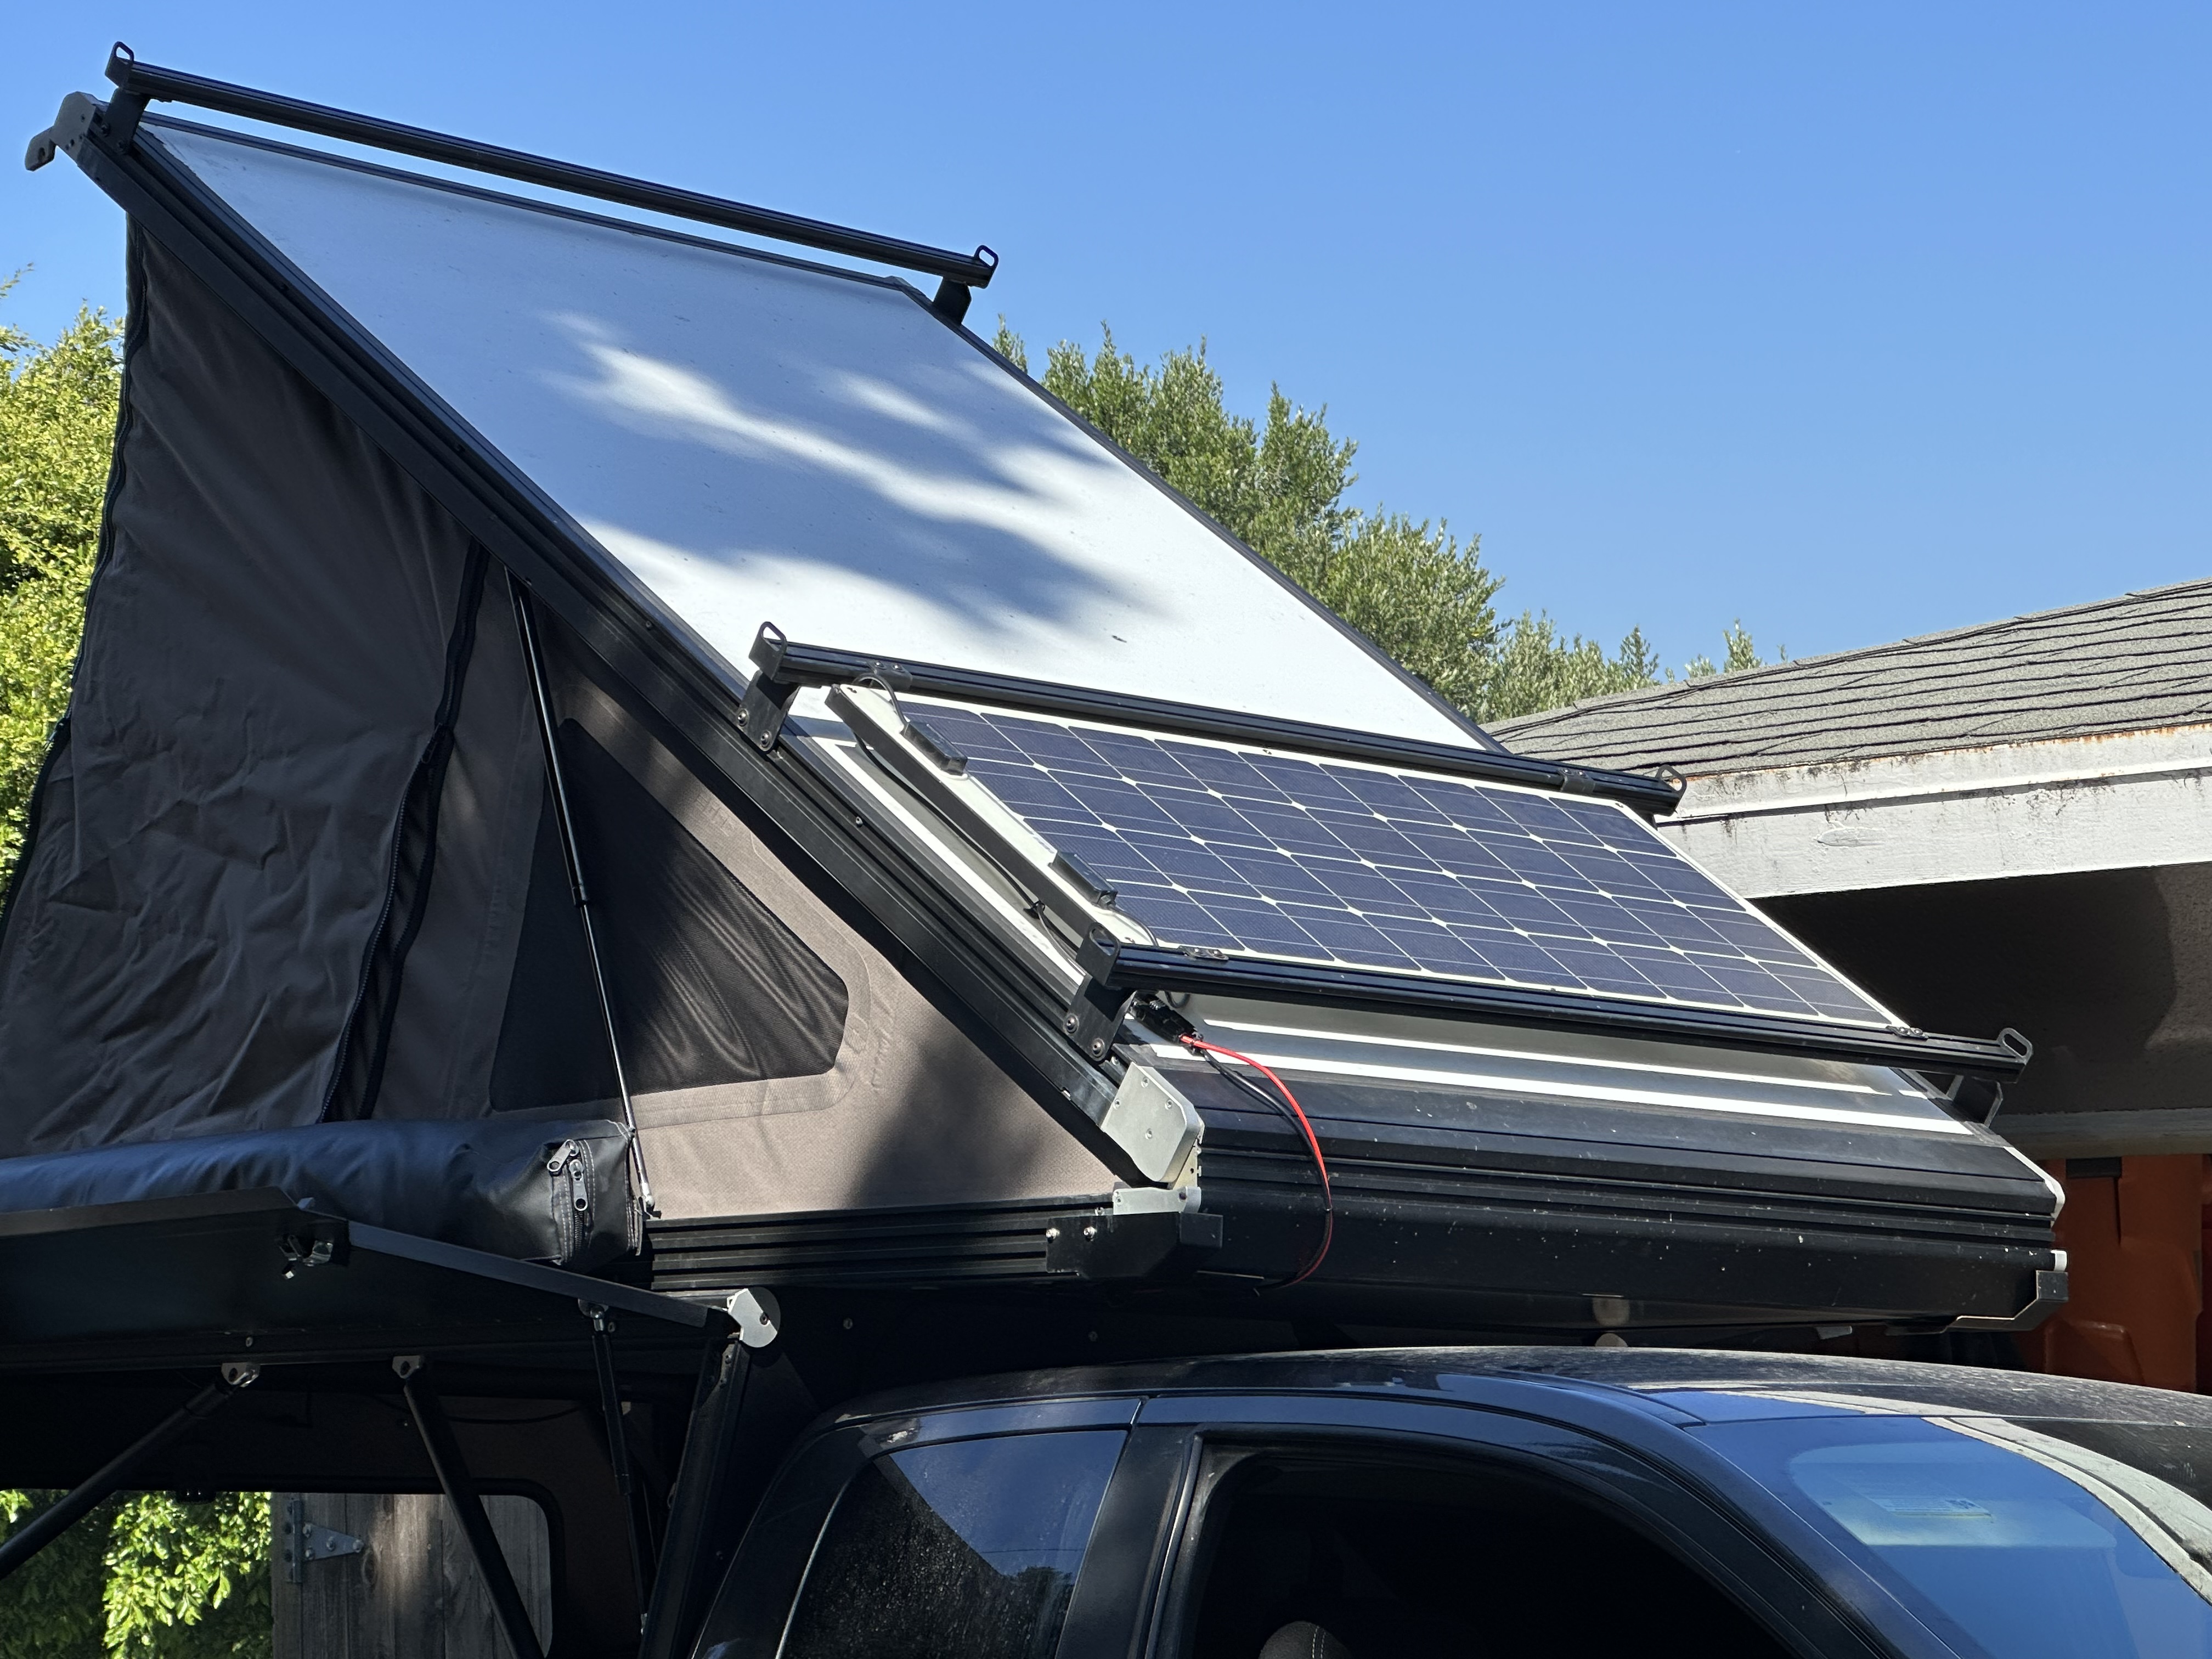
I have these 2 100w Ecoflow solar panels that I made brackets for and mounted to the beef bars. But for the rear I decided to go with 180w flex panel and mounted it to the roof with heavy duty velcro. Made a trip from Louisiana to Colorado and back. Hwy speeds, rain… it held up great!

5 Likes
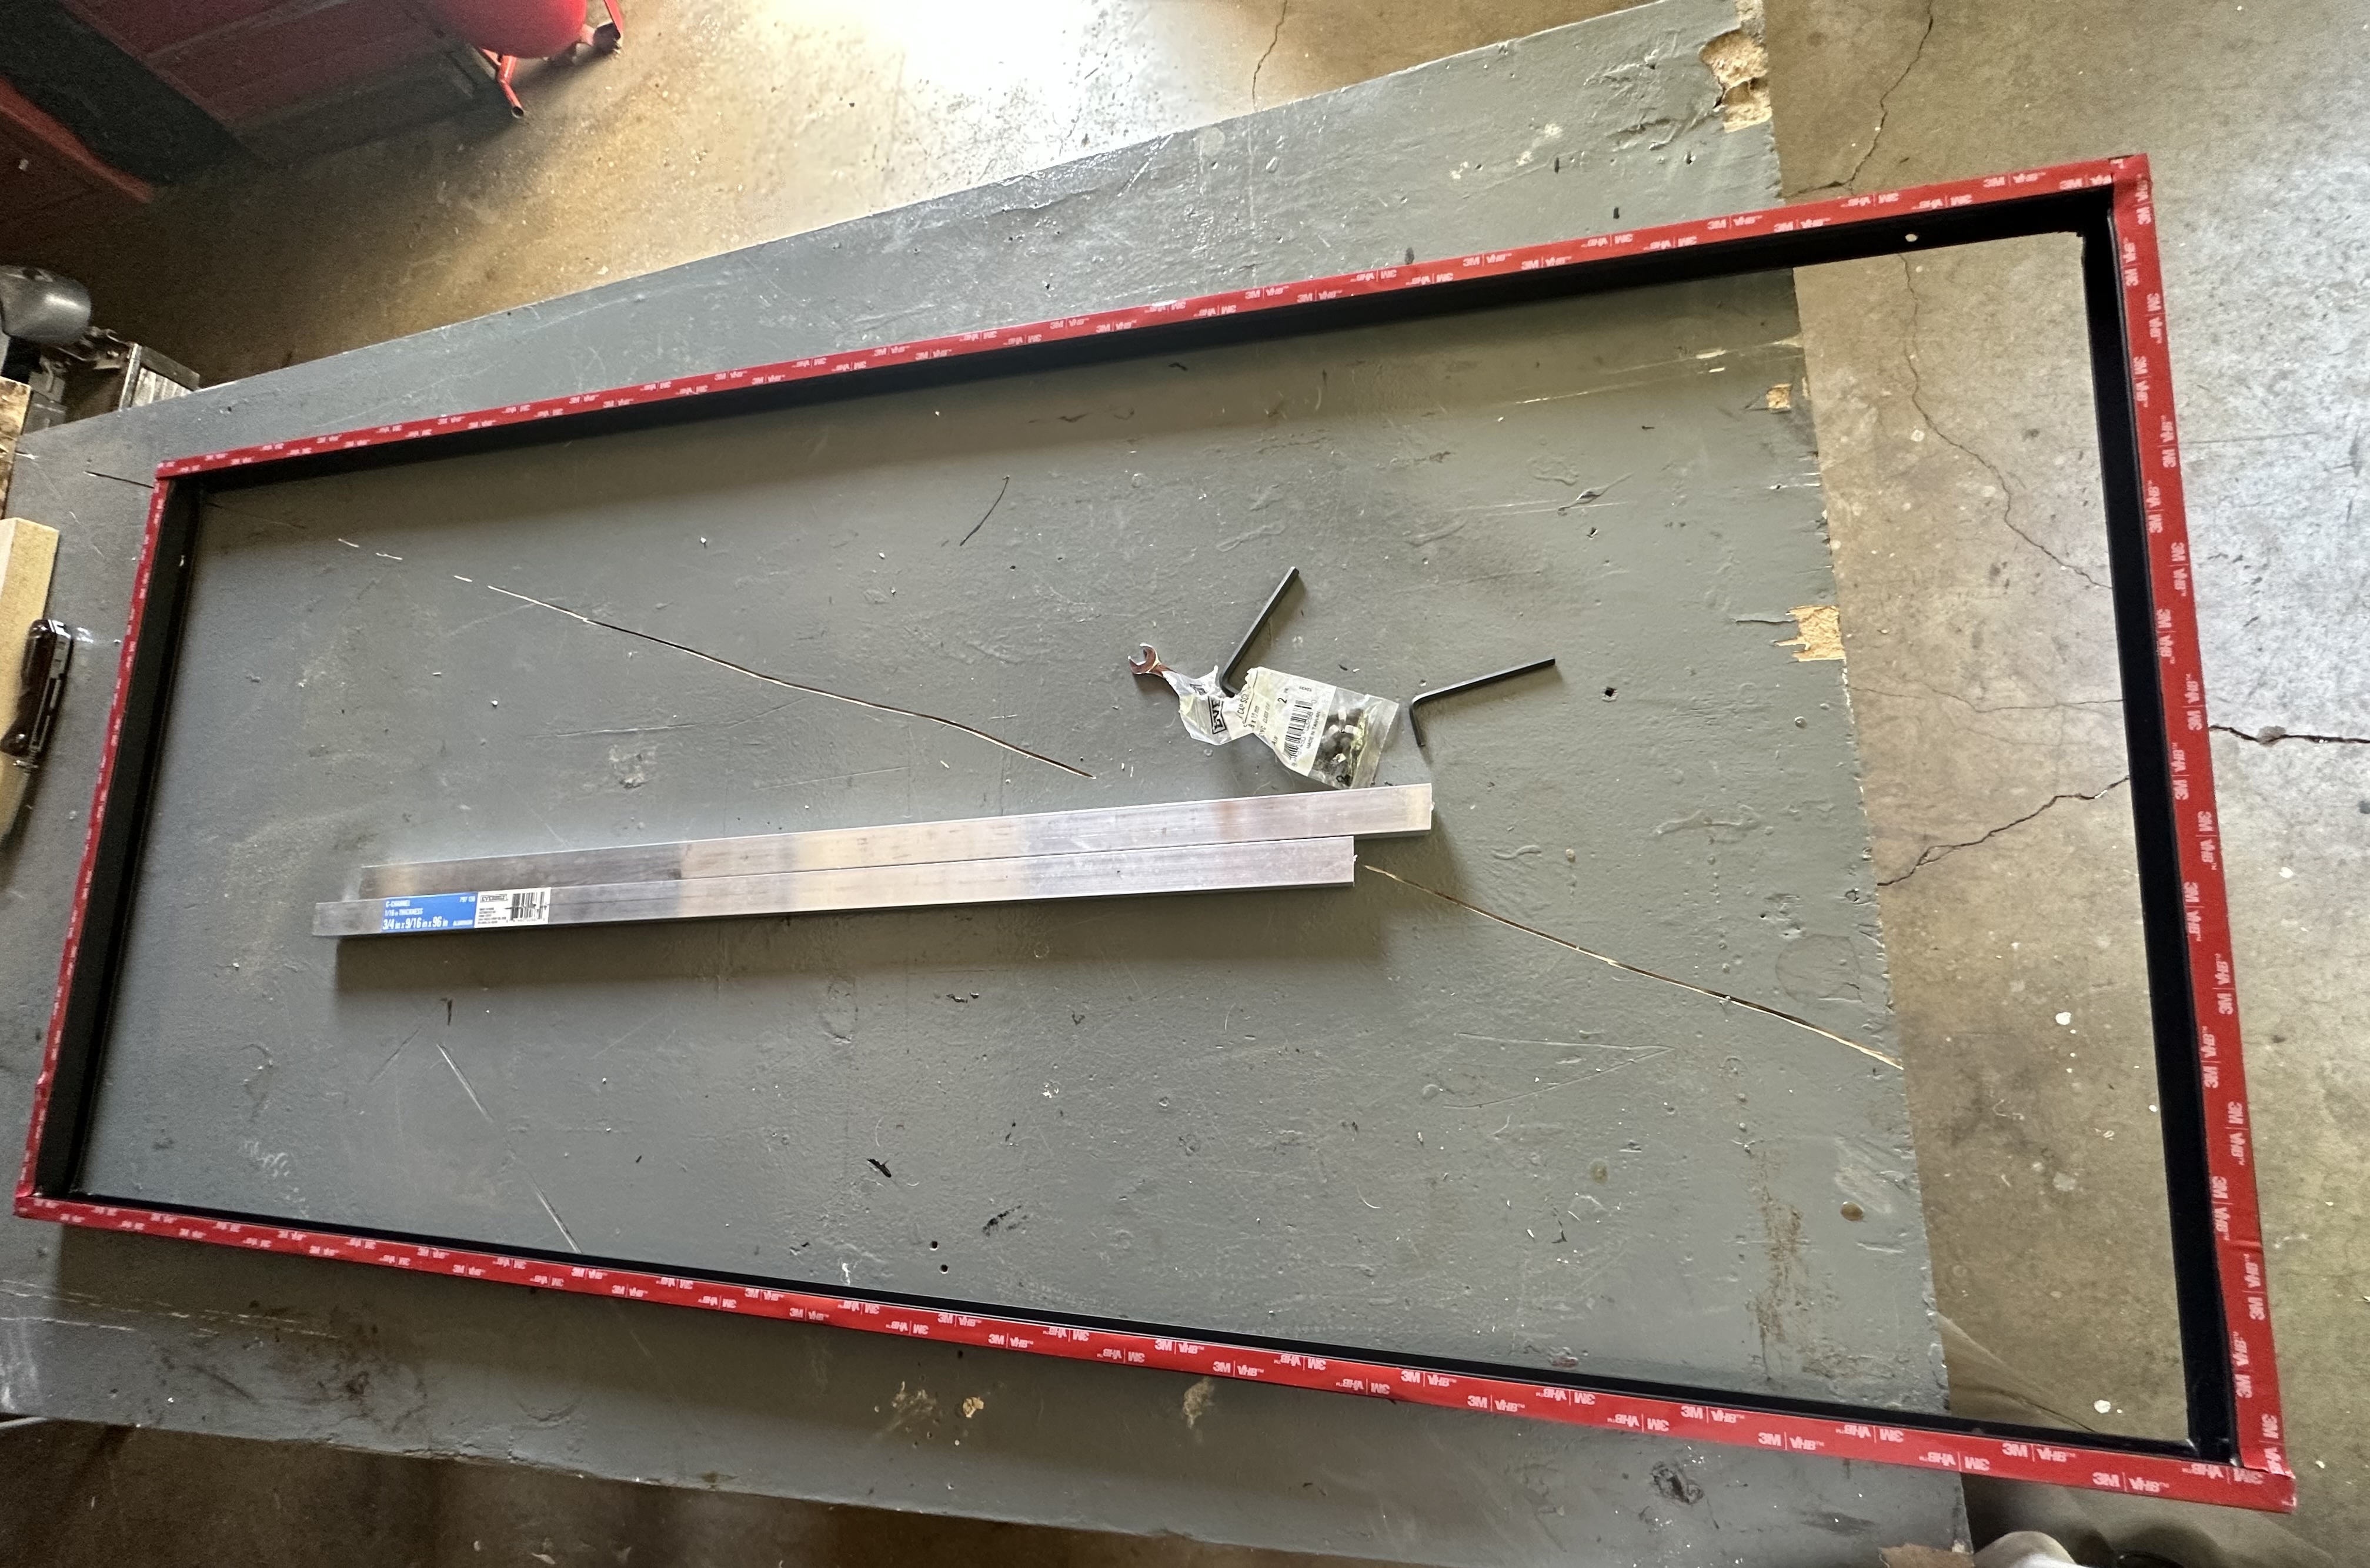
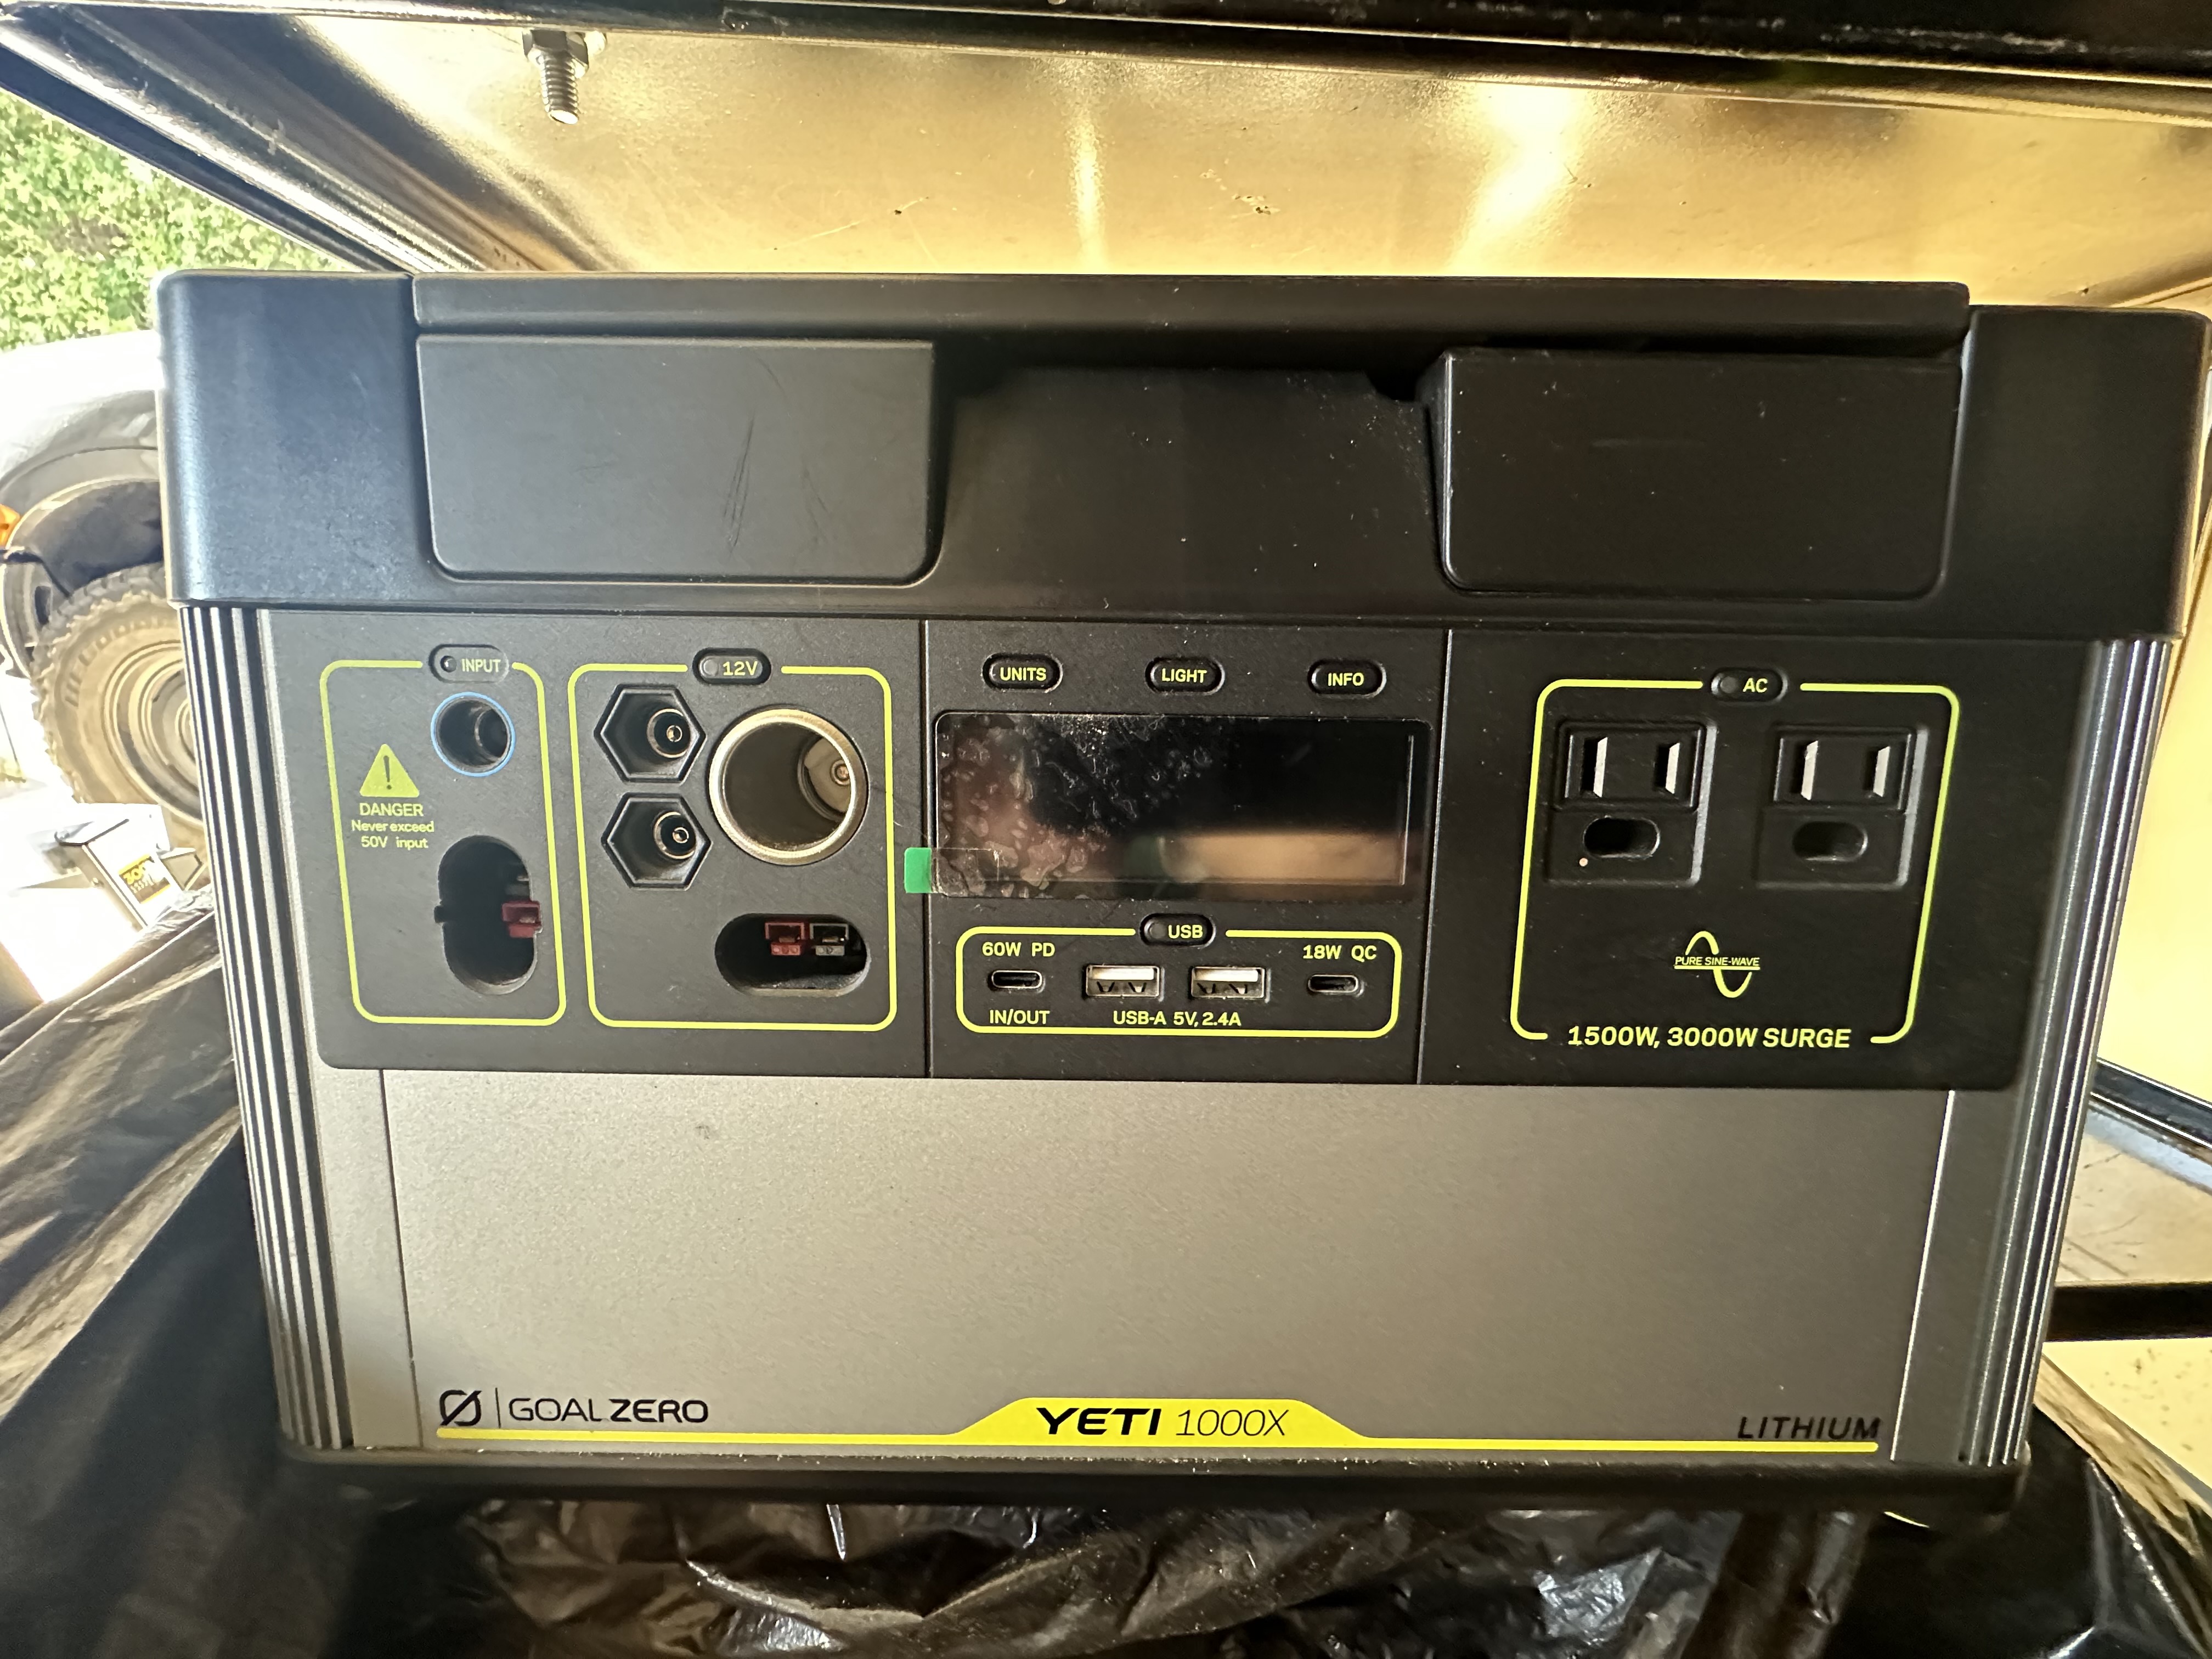
Goal Zero 1500X
Renogy Flexible 100W Solar Panel
Made an Aluminum Frame using 3/4 C-Channel and JB Weld and fastened the Panel 3M VHB Double Sided Adhesive Tape.
I also installed 12Volt in the Bed for back up so to charge while driving at Night and Overcast Conditions.
Hoping I don’t have to add a 2ND Solar Panel and the one works out to be enough. ![]()
4 Likes
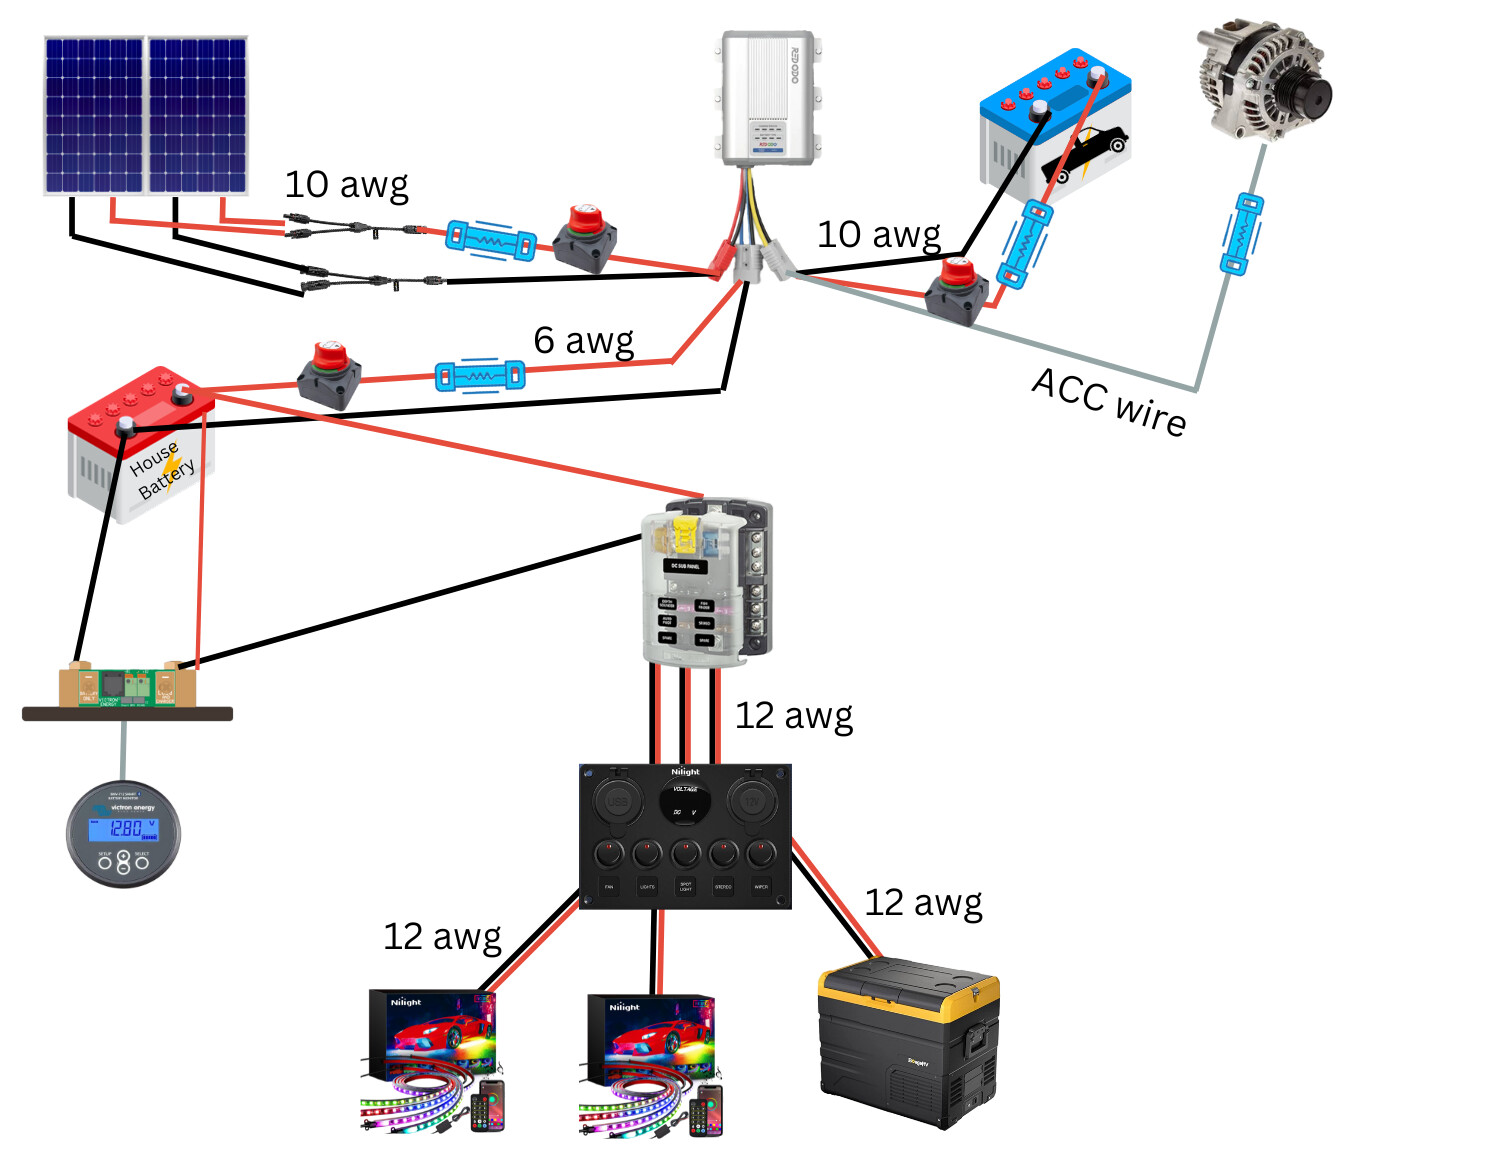
In the process of diagramming out my electrical set-up and would appreciate some input from folks more electronically savvy than myself.
Questions:
- What gauge wire is appropriate?
- What size should the inline fuses be?
- What am I missing from a safety perspective?
Link to Wiring Diagram & Component List (hi-res - no sign-in required):
https://www.canva.com/design/DAFuuLXAX1Q/LoepxOya1pGCURKfDP_jDQ/edit?utm_content=DAFuuLXAX1Q
Wiring Diagram (as of 1307, 18 Sep 23):
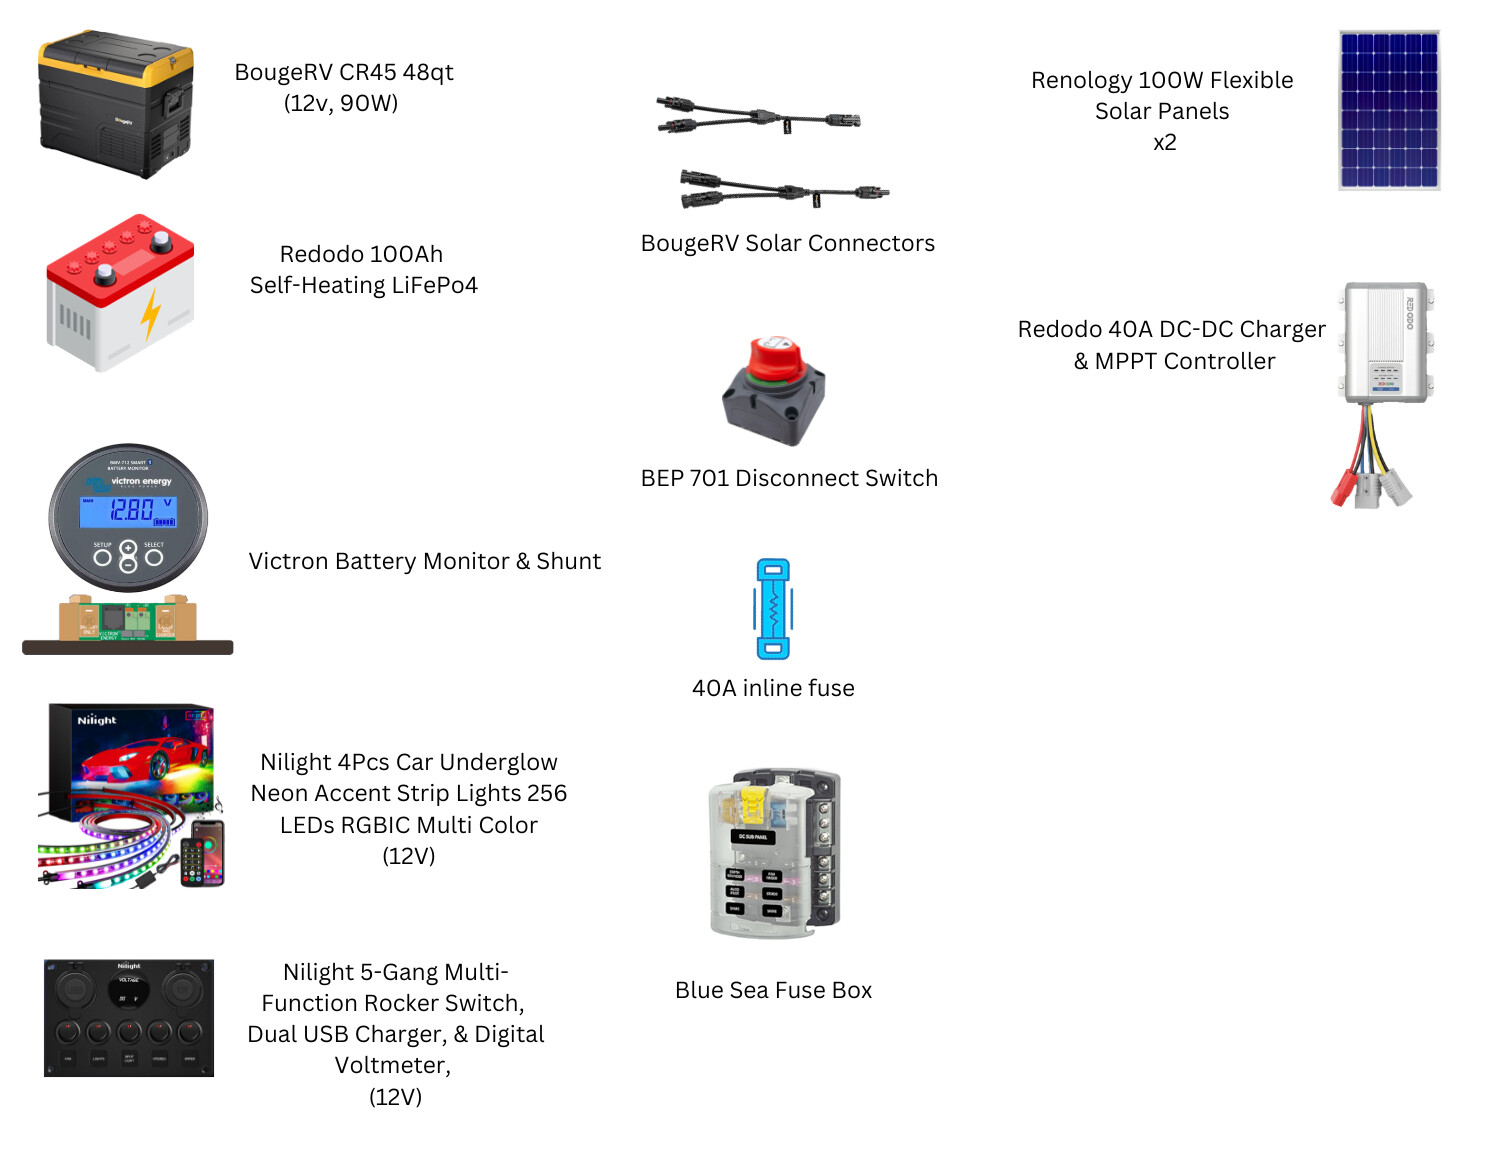
Component List (as of 1307, 18 Sep 23):
1 Like
Check out “explorist.life”; they have some great tools like fuse and wire size calculators along with some wiring diagrams. The diagrams are mostly for vans list I checked but has some great info that correlates to general 12v.
Only thing I might change is getting a higher end switch panel, like a blue sea, and a quality fridge. Doesn’t have to be a crazy expensive dometic but make sure to check the specs. A lot of the lower end fridges will end up being less efficient compared to nicer ones.
1 Like
Thanks - I’ve already have the fridge and taken it out a couple of times. No complaints so far, other than weight. I’ll look into the Blue Sea switch and check out Explorist.
1 Like
I ran three 100W Sunpower solar panels in parallel to keep the voltage low enough for the high power input port on the Goal Zero Yeti 1000x.
After one panel cooked itself, I learned that when you run panels in parallel, it’s a good idea to include diodes. This prevents a panel receiving full sun from feeding current back into a panel that’s shaded. I used these diodes (20A). They plug inline - easy.
I also use a solar cutoff switch so I’m not plugging/unplugging the panels from the Goal Zero when there’s a lot of power on the terminal.
1 Like
Thanks, @Vice_Chief - my plan is to run my panels in parallel too, primarily because of the potential shading issue but hadn’t heard of including an inline diode. Definitely adding them to my build-out.
Concur on the solar cutoff switch being necessary - I have cut-off switches for each of the batteries and the solar panels.
1 Like
- You can save some space and wiring by going with a switch panel with integrated fuses, replace both the switches and fuse block with one part. Check out Bluesea Weatherdeck or similar.
-
For the solar you can get an MC4 inline fuse that can replace your fuse block.
-
Personally, I would not even bother with the disconnect switches. Just pull the SB50 Anderson plugs instead (As long as they are accessible).They are rated for hot plugging up to 50a.
1 Like