1994 RWD Single Cab Toyota Pickup Build

Looking at color options for a set of fitted sheets. Goal is to neutralize the yellow ceiling and mauve walls you get inside a Stone Grey tent.


Quick look with the spectrometer at noon in SoCal. The honeycomb roof absorbs/blocks most UV and most of the blue energy. The highest energy ends up around 600nm(ish) so it appears yellow. No surprises here but it backs up what I’m seeing.

SPECTRA

1 Like

This project was a success.

I chose a blue flannel for my fitted sheets (Benartex 9618). I chose blue because blue is what is missing after light passes through the Plascore roof panel.

My mom sewed up this set of fitted sheets. The fit is excellent. Thanks Mom.

In these pictures, all the camera settings are the same. They closely match what I perceive with my eyes.

This is the untreated GFC. Windows closed, stock cushions. A very yellow environment.

This is the GFC with the door and windows closed. Said loosely you can see how the blue fabric actually looks green because of the low blue and high yellow content of the light in the camper.

The real magic happens when you open one of the windows. Light coming in reflects off the blue sheets, restoring blue to the overall lighting in the camper. Things appear much more neutral, skin natural, etc. I immediately felt more comfortable inside.

Another look at how the light in the camper influences color perception. These two cushions are the same color.

5 Likes

This is fascinating! I’m totally going to do this when I can afford the fabric! It’s great that blue happens to be my favorite colour. :joy:

1 Like

I added a thin ripstop nylon tarp to the bed. Hides the contents and can cover the back window. It’s held on by velcro on the spaceframe.


It’s so hot here that all the adhesives failed.

I bought some replacement high-temp velcro/hook and loop from McMaster Carr. Should arrive today. We’ll see how well it survives the heat.

Due to the insane heat problems mentioned up thread, I removed my flexible solar panels and scraped off all the old VHB. If you choose to mount flexible panels, I recommend using less VHB than I did. :

Designed a new beef-bar based roof mount. I used 2020 extrusion to keep things light. The flexible panels have a single layer of coroplast underneath to help stiffen them. I really didn’t want to use the beef bars, but when I found they were only like 7lbs each and I already had them, I changed my mind.

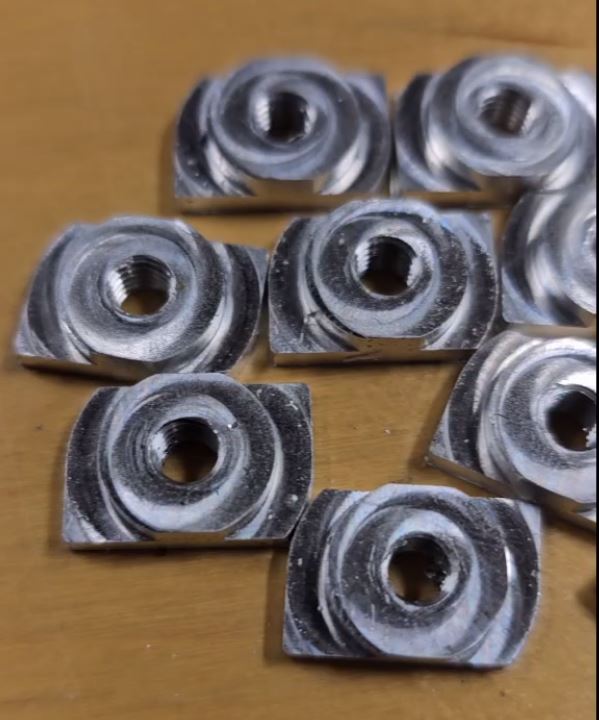
Made all the brackets and mounts and some custom metric track nuts. Special thanks to a couple special people here for helping out with info.

Here’s the rack flipped upside-down.

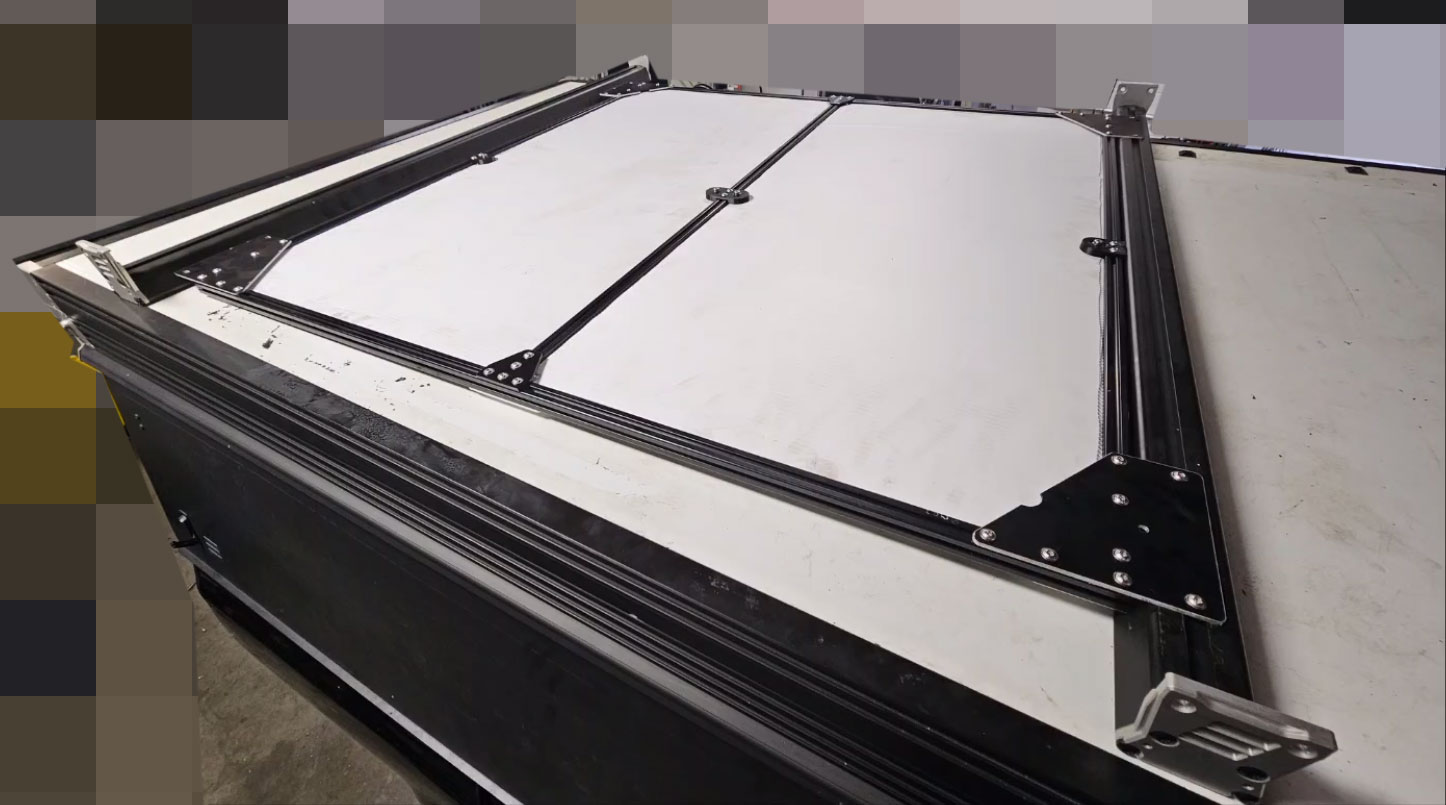
Took way longer than it should have, but I managed to build and mount the same panels rigid-style.

I’ll post some more pics and detail some other time.

2 Likes

Much better. About 4 deg F difference.

Had to unload the camper yesterday.

Took the opportunity to weigh the entire contents. Looks like I’m at a pretty reasonable 190lbs, so about 460 with the camper. Probably add another 60 pounds of food, firewood, and water for an actual camp.

image

EDIT: forgot the rubber bed mat. That’s 40lbs, so basically 500lbs even. Wow.

Weighed everything in camper.


Dremeled corners.

Used 1" 3m Deburring wheels on a Dremel tool.
RoundedCorners
Tested out Couch Mode. Highly recommended.

Mounted my solar switch.
Bar_Solar_Mount
Spent some time enjoying the Pacific.

1 Like

Printed up a crude battery and switch mount for my Milwaukee lighting battery. Similar to @hota lighting build.

Milwawwwkeee2
Milwawwwkeee

Previously I just had this stuff hanging loose. I’ve decided I like this solution, so I’m slowly making it more permanent.

3 Likes

Mine is all bobbling around one of the pockets on my drawers. I have some 1/4 starboard HDPE Im going to organize everything onto, battery, diodes, ground bus, led driver, some connectors.

Im really into that switch and housing :wink:

1 Like

Would you be willing to share the STLs for the enclosure? I’m going to try your setup.

I modified it a bit after. It is designed for a Buckpuck, 12V barrel jacks, and an MXR switch.

I can’t offer much in the way of support but I threw a .step file in there so you can modify the geometry as needed. Good luck!

https://www.vicechief.com/temp/stl/LED%20Enclosure.zip

I see the message was deleted, but to the other 94 owner, I love my GFC (out using it right now), my gears are stock, and you’ll need to remove your 3rd brake light/taxi light on the truck. Hope you post your build here eventually.

Lol i posted that before i was able to go thru all of your other posts. Thanks for responding even though i had deleted. I was already looking into some air ride options for the rear when i was restoring my truck so looks like that will be a good add. Your set up is awesome and has given me some great ideas…

What did you do to cover up your 3rd brake light?

1 Like

Its been a work in progess… cant wait to get my white GFC Camper on it… looking forward to following your build till then!

2 Likes

Holy shit, I am so jealous of the 4WD and quarter windows on that beauty!

I’m actually still working on a custom cover. Had to remove the first one to mount the camper, and I taped over the 3 holes. Thought I’d fix it quick, but it’s been 10mos now. At some point when I have to take my camper in for service and it gets removed, I’ll put my custom cover on there.

Going back, I’d just hack the plug off, stuff the wires inside the cab/headliner, and silicone over the holes.

Working on an updated rack to get the GoalZero off the floor. I end up sleeping in the bed more often than the tent so a clear floor is worth a lot to me. Also needed to make room for my new water system which is based on a Cornelius Keg.

Modeling the GFC with its compound angles was a hassle, took hours. But I got everything within a few mm without using my 3D scanner.


7 Likes

Some nice 3D printed details.


3 Likes

This is why I love the GFC community. Out here designing and tinkering with new stuff. So sick.

1 Like