Inspired by (and shot for shot ripping off) @atsah, I added one of my old snowboards as a wind deflector


24 Likes

Added led strips in some aluminum mounting channels with lite diffuser that snap into the channel. I think I’m all in for about 75.00 dollars. That is for a 4’ strip up top and strips that run the perimeter on the bottom and a strip on the rear door for cooking. I had wiring and switches. They donot dim or change color, but give off pleasant lite that isn’t blinding.

ady.


18 Likes
Installed a 12v wash down pump and water system. It uses dual military water jugs with quick connections. 40L total.


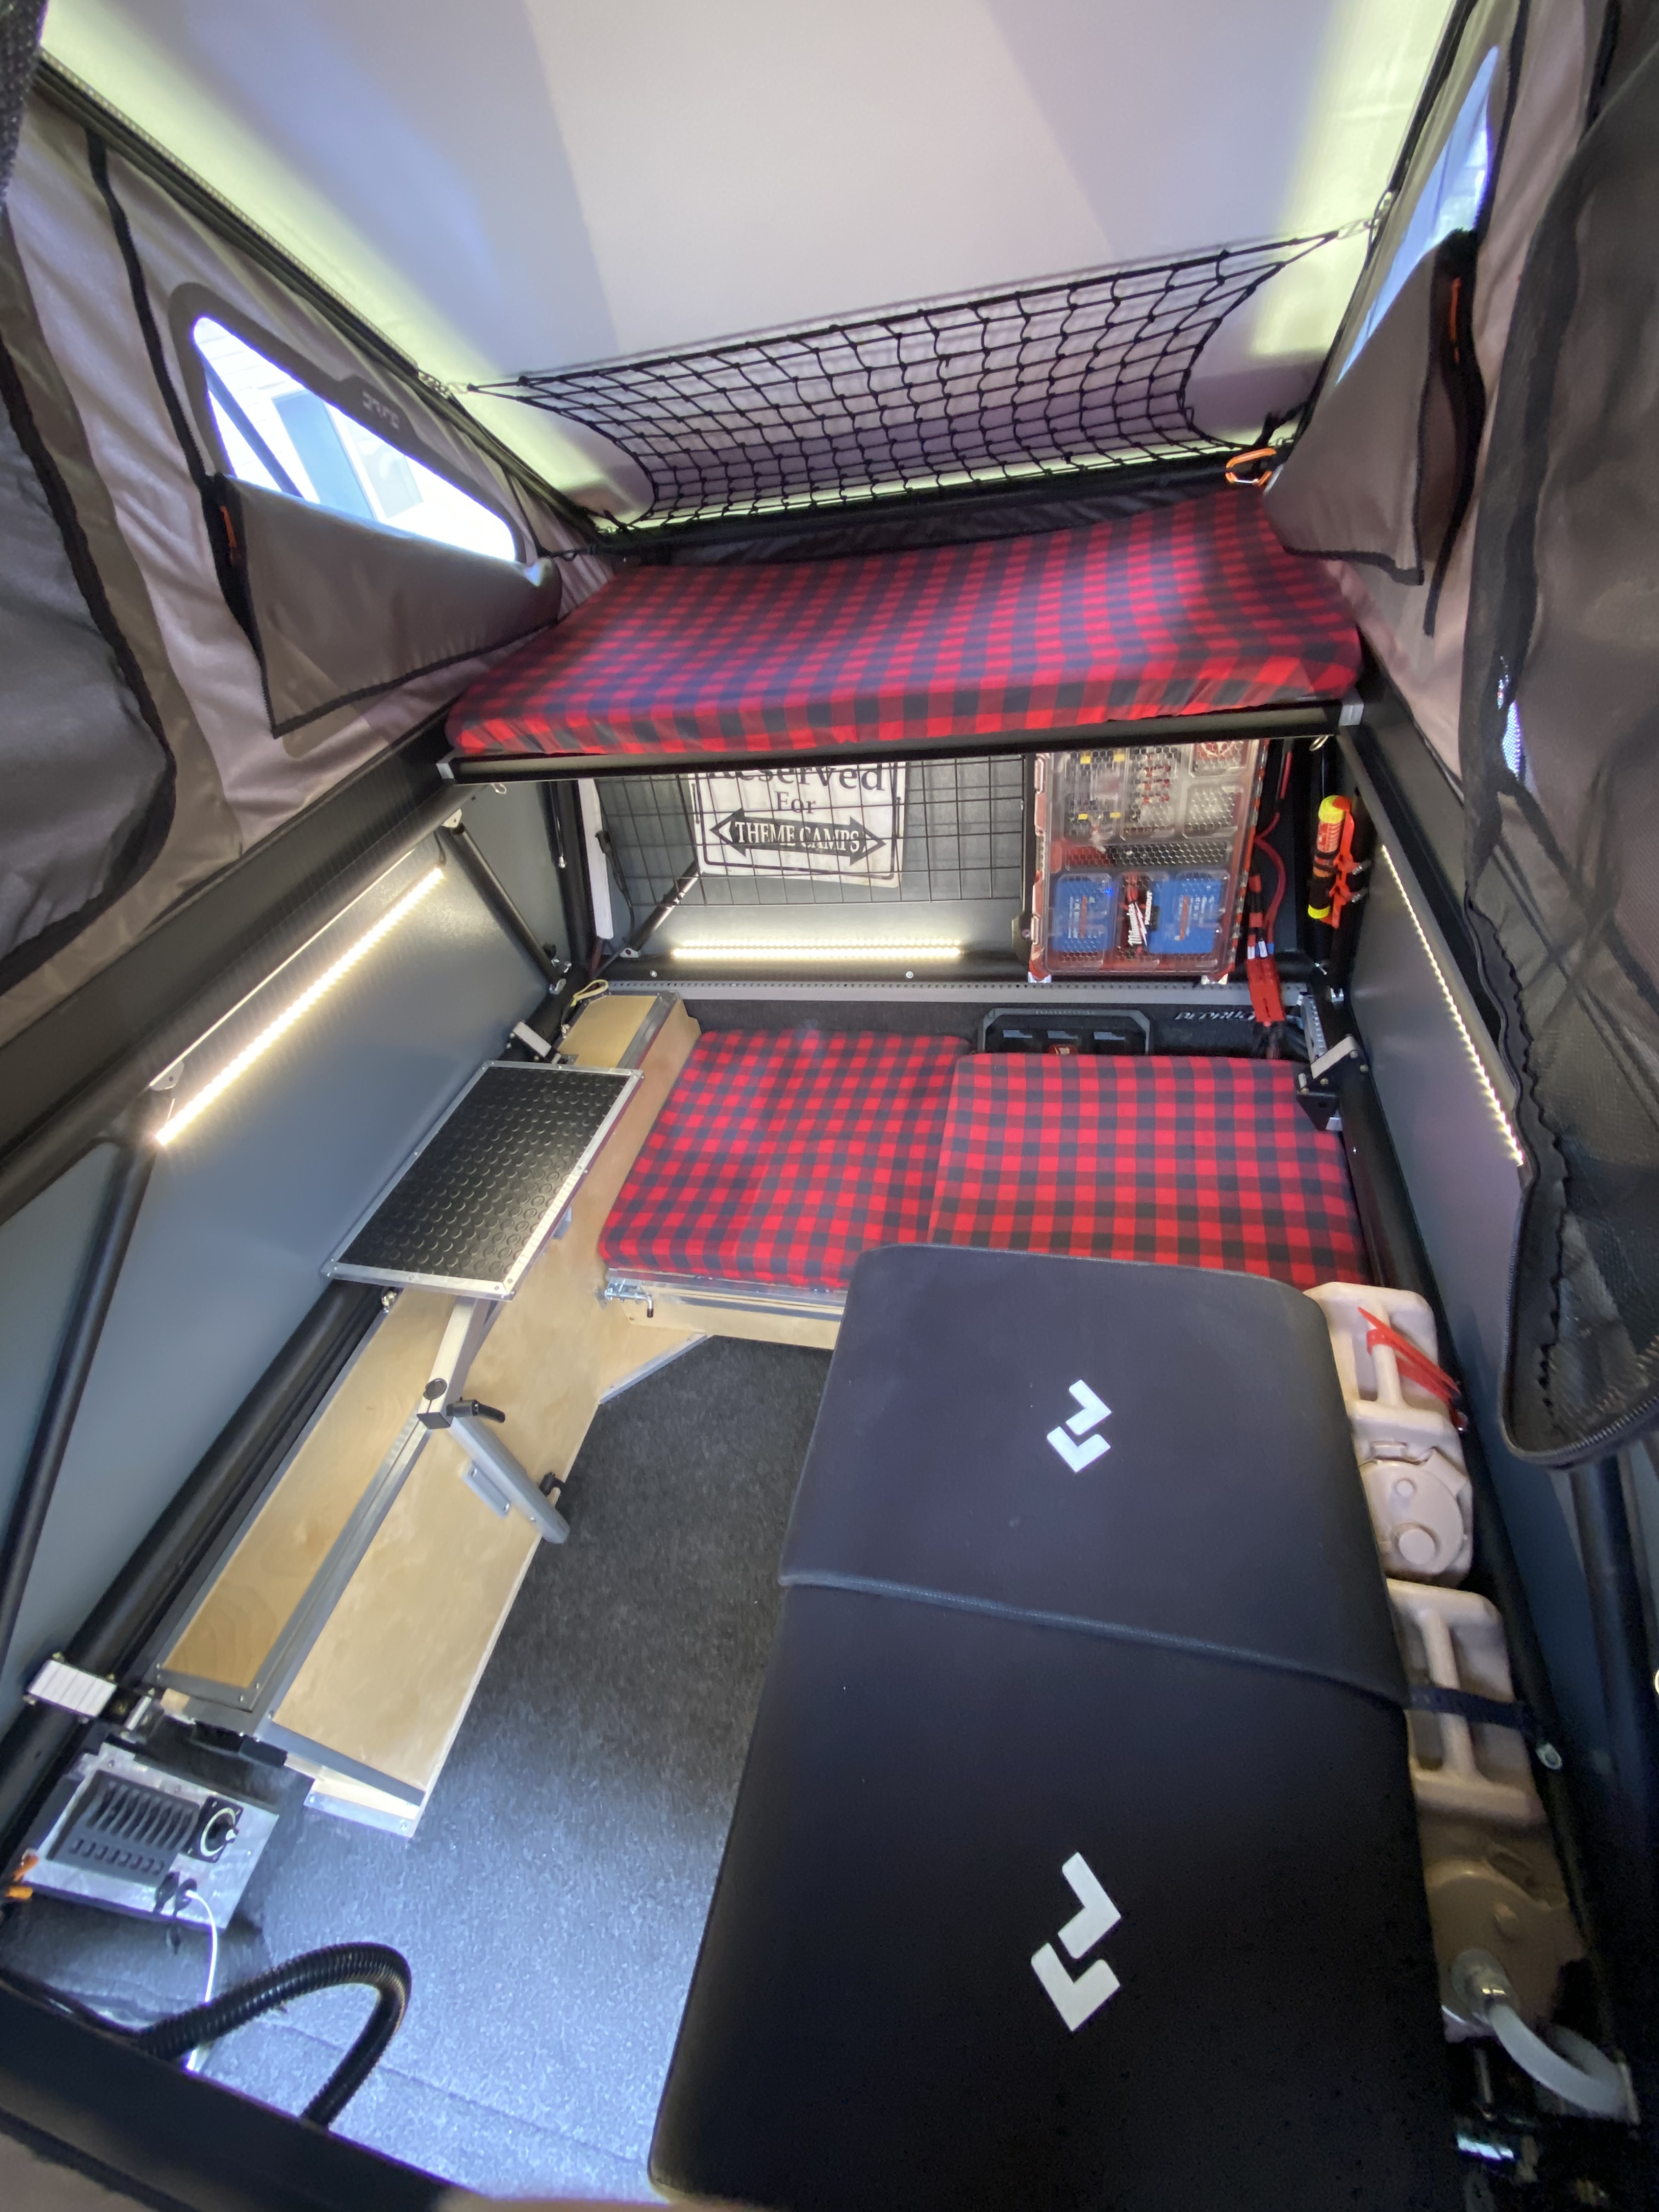
I also added two storage compartments over the wheel well. This will hold bike wheels or lawn chairs. The lids can lock open to hold oversized items. I added TPO coin rubber floor onto the table and cabinets tops but never took a photo.


19 Likes
That’s really cool. Can you elaborate on the quick connect on the jug side? How do you switch from one the empty jug to the full one? I use those same jugs and wouldn’t mind something like this. Also what pump did you use?
I added a CPC bulkhead quick connector into the lid with a food safe hose for a siphon tube. It disconnects to remove or swap. They are drip free so it works great and doesn’t loose it’s prime or get water anywhere.
I just swap the lid between the jugs for now but I will modify the other one too now that I know it works!


7 Likes

I took my DIY 1020 roof racks for a test drive with the canoe. So far so good at 100km/hr. Going to add the third strap for piece of mind. Next wait for the ice to come off the lakes 
13 Likes
Trucks lookin good! You’ve been busy 
1 Like
Have you thought about doing a Y or T fitting to run both water jugs so you don’t have to switch when one runs dry? That’s a pretty awesome concept though. I like it.

Hoping this roof wrap will block most if not all sunlight inside the tent. The white translucent material was kind of annoying to me because I like sleeping in. 3M multicam black vinyl at 300% scale for reference.
17 Likes
I actually have a tee, valves and a pressure reducer to make a tap for a sink but I decided it just was too complicated for what it needs to be.
The one hose can reach both jugs and it’s a quick swap. I will use just one most of the time anyways.
1 Like
@Liv2Bike Why not use the t-slots in the frame to mount a fairing versus buying the load bars and adding something to your roof?
Getting more mobile and starting to ramp up fishing/camping/ski zone hunting season.

2 Likes
Cleaned up, reorganized and installed some tie downs in preparation for a summer long trip as I seek employment…… basically becoming a full timer in this thing

9 Likes
Did the same exact thing with the blue sea panel in my RTT.
Added Matt Gecko LEDs at the same time that are wired out the back of the same box.


7 Likes
This is really nice setup. Does the switch on the box now serve to turn the LED strips on and off? Have the same light setup and hopefully will work on it this coming week or two but really like the combination.
1 Like
The switch on the box is a 15 amp circuit breaker. Turning it on/off controls power to both the lights and the outlets. There is a separate switch for just the lights you can see in the pic on the ceiling of the tent just inside the side entry on the left. This is the side the ladder for the RTT goes. I put the switch there to make it easy to turn on the lights when climbing up the ladder and into the tent. The box for the blue sea panel is 3d printed from solvefunction.
2 Likes
Hey man. I already had the bits collecting dust in my garage. So I figured I’d put it all to use. Cheers.
Guy
I had my rear window pop out completely a couple days ago. I didn’t even realize it till the next day. I was driving down a rough dirt road with the rear panel open cuz my kayak was back there. I’ve been doing this for a long time but was probably driving way too fast. I drove back the same road today and found it completely intact. Can’t believe it didn’t break when it fell out. Now I’m trying to decide whether to just remove the rear panel because I drive with it open so often or maybe just leave the glass out.

6 Likes

