Awesome setup! Love how open everything is.
Where did you get the bungee net / overhead storage that holds your bedding?
Awesome setup! Love how open everything is.
Where did you get the bungee net / overhead storage that holds your bedding?
What thickness wood did you use for the shelf/box? Looks like 3/4" or 1" ? What size fridge is that?
I may have to borrow some of your ideas
Thanks @mtb-sam The netting is VRNCLR’s V2 Bedding Catch!
@fatfurious2 We used 1/2" plywood and the Dometic is a dual compartment CFX3 95DZ.
Great build and detail.
Do the self-tapping screws for the Fan-Tastic poke out into the ceiling of the roof? Are they sharp? Did you clip them off? Use the supplied ones? New ones?
Any structural sag in the roof post install?
Looks great! I was wondering since you oriented the frig that way, was it for accessibility purposes when hanging out in the camper? Are you able to reach in the fridge from the outside?
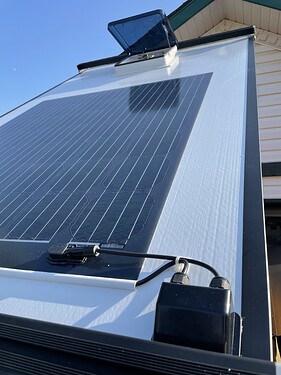
Build Update 07/17/21 – Solar Panel Install
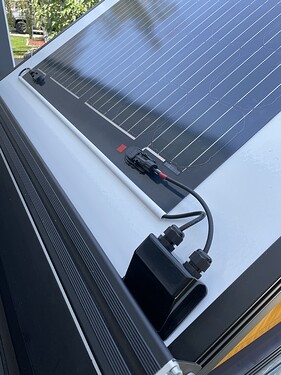
Today’s goal was to mount my Sunflare Xplor 126W Solar Panel and run the wiring to the engine bay in the most inconspicuous way possible.
We started the day by adding some additional 3M VHB Tape alongside the stock adhesive, mounted the panel to the roof and ran a bead of silicone around the panel.
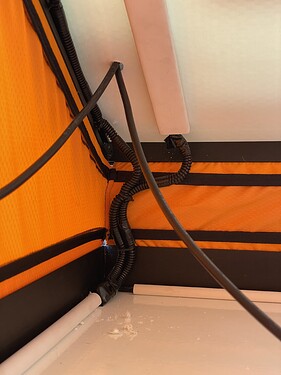
Next step was to add some conduit for the Renogy Wiring, pass the wires through a Renogy Cable Housing Entry and drill into the roof of the GFC to get the wires inside the camper.
From here we passed the wiring through some conduit under the mattress and continued through to another hole (heavily siliconed) to exit the camper and make our way down between the cab and bed of truck (Once again through conduit, spray painted black.)
Once under the truck we followed the same path of the previous harness we ran for the electrical cubby and made our way to my REDARC BCDC1225D. Once again, wrapping our wiring in automative loom and heat resistant tape for the length that passes through the engine bay.
Really stoked on how clean this turned out! Essentially zero wires are visible from the exterior or interior of camper and solar is always on and ready to go
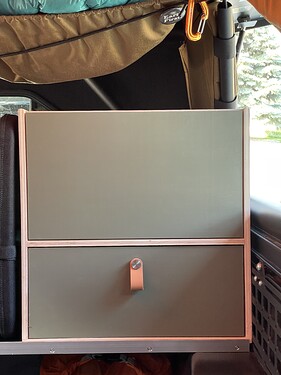
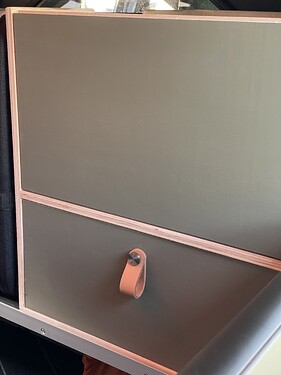
Other small update — finally added some leather pull hardware to the drawer face.
Find this build’s Master Parts List here.
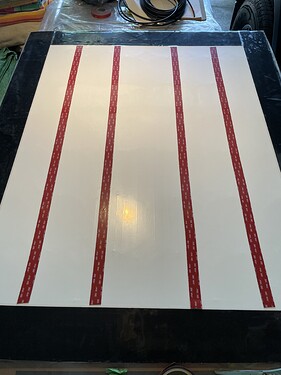
Thanks @bigskydu! No screws poke through the roof, used supplied ones without issue or modification. It’s a very clean install. No structural sag, no…
Thanks @FUJIMOGOAT! Main purpose of orienting the fridge this way was to keep the bed of truck as empty/uncluttered as possible. Left compartment is easily accessible from the outside of camper since elevated, and quick to jump into bed when needed.
Find the Master Parts List here.
Build Update 08/08/21 — Shore Power Install
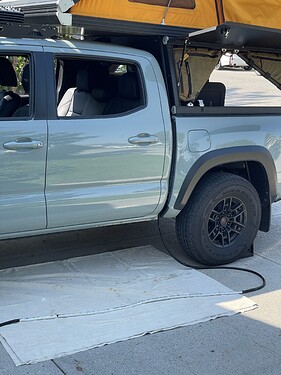
Dropped in the last piece of the electrical system puzzle today—shore power. The house battery is now set up to receive a charge from the alternator when running, solar when available, and shore power via campsite hookups as redundancy when solar is not available.
I bolted the NOCO Genius GENPRO10X1 atop the fuse box and placed the NOCO AC Port Plug in the front bumper.
Pretty easy install—only gotcha was having to cut away a very small part of one of the interior bumpers to accommodate the AC Port (As seen in the third photo).
Stoked on how clean this one turned out!
Find the Master Parts List here.
great idea on the shore power.
Your solar set up is great! Ive been struggling with the idea of visable wires and this is the first build I’ve seen that avoids it. Looks great!
@TearingOut55 Thanks so much, Tarin! I was in the same boat and not a fan of the aesthetic or function of having solar harnesses hanging off the side of the camper—which is why I went straight through.
ps. Stoked to see you got your camper! Congrats!
Just wanted to say that the build out of your GFC is probably my favorite. Very clean and well thought out. I’ll likely model my interior build out very similar to yours.
I appreciate you sharing your build!
Julian,
I’ve been eyeing up your build since day 1 and am in love as well. I’ll never have 1/2 the truck you have here but you have inspired many ideas for my rig as well as many things I’ll be copying
Well done!
Thanks, Tristian! Stoked to hear this thread has been helpful and excited to see what you build! Feel free to DM me with any questions as you get into the thick of it. And hey, all that matters is that that you love it and you get out in it! More than 1/2 the stuff bolted onto this build were “wants” and not “needs” so you’ll be set
Build Update 09/22/21 — Update from the road
I’ve been on the road for just about over a month now and have put numerous nights and thousands of miles on the truck. I made my way across Canada to the Maritimes and have since popped down into the Northeast. Still have another 1.5 months to go before returning to California. Wanted to take a moment to share a few findings:
*I’ve arrived at camp after dark in the pouring rain many times over now on this trip and the ease of popping up the GFC has been a godsend. With that being said, I’m feeling the need to add a wrap around awning to limit the amount of mud and rain that get brought into the truck bed (“hang out”) area from getting in and out. I’m not a huge fan of awnings, and have never wanted one, but would have made these nights much more enjoyable to create a buffer zone for shoe removal, etc. Just a thought for now.
*While on the topic of rain: I’ve found that since the rain fly on the smaller windows is on the inside of the camper (with a bottom seam) water tends to really pool up in it and inevitably overflow and drip onto your mattress. Whereas the larger doors the fly is on the outside (with no bottom seam) so it flows off This only happens when the camper side is perpendicular to the rain/storm so have made efforts to align the front of the truck to the incoming storm when applicable. This has been the only rain failure. Everything else, including my bed only sees the occasional drips. No pooling, flowing water, or damp gear.
*Onboard air compressor has already saved us once to get into a shop after a nail puncture in the middle of nowhere. So happy I put this in.
*Second battery, solar, lights, fridge, monitors have all been perfect and maintenance/worry free. I can flip the breaker and forget it. Haven’t had to worry about charging or remaining capacity once. Battery rarely dips below 12v. I wouldn’t change a thing here.
*The GFC attracts a ton of attention — every time I’m getting gas, at a grocery store, waiting for a ferry, at camp, etc. someone will come over and ask about it. Has been fun meeting people along the way! GFC needs to make us referral cards. (@GFC )
Does this work? If so, which device are you using? I found a 65w USB-C 12v adapter on Amazon but my laptop is higher than that.
I can confirm the Satechi 72W Type-C PD Car Charger works great and has kept my Macbook Pro running on the road.
The Satechi one is what I have had good luck with also.
where can I buy it? sold out online.
Hey @the_philxx! Thanks! And great question.
I placed the 12 circuit fuse box as close to the rear of the cubby as possible while still leaving just enough space for a lug to be placed on the back side to retain access to all 12 circuits. I will admit it’s a bit of a pain to work on the circuits in the back (need an incredibly small ratcheting screwdriver and patience) but it works!
I can post some photos here as part of my next build update if helpful. Feel free to hit me up with any additional questions as you get into this too!